March is hogging all the holidays in a manner that would make Rich Uncle Pennybags from Monopoly proud, so sharp shifting of gears from all things green to all things yellow and pastel for Easter here on the blog. I’ve been known to indulge in the occasional Peep or multiple handfuls of Cadbury mini eggs (the eggs-citement is real)…so I decided I wanted to attempt to make cupcakes in the shape of chicks to celebrate the sneezing spring season.
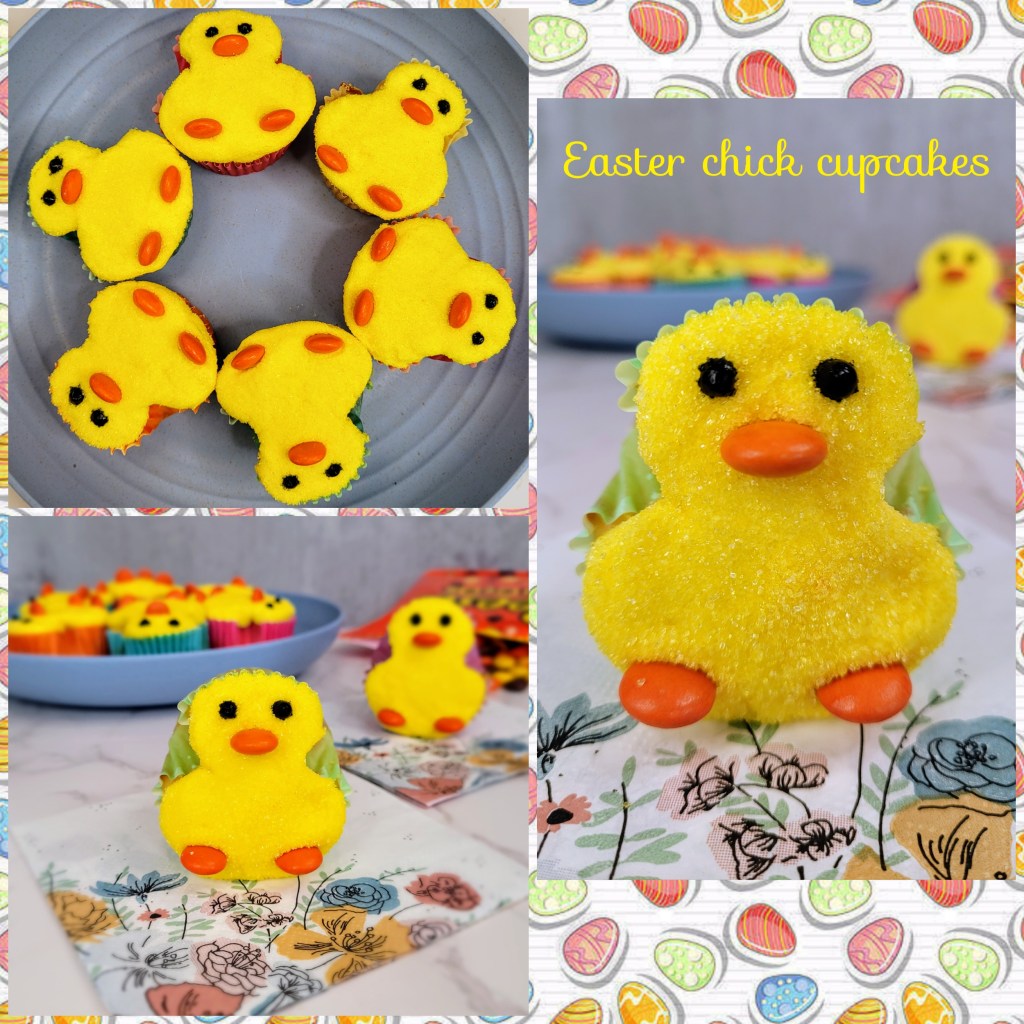
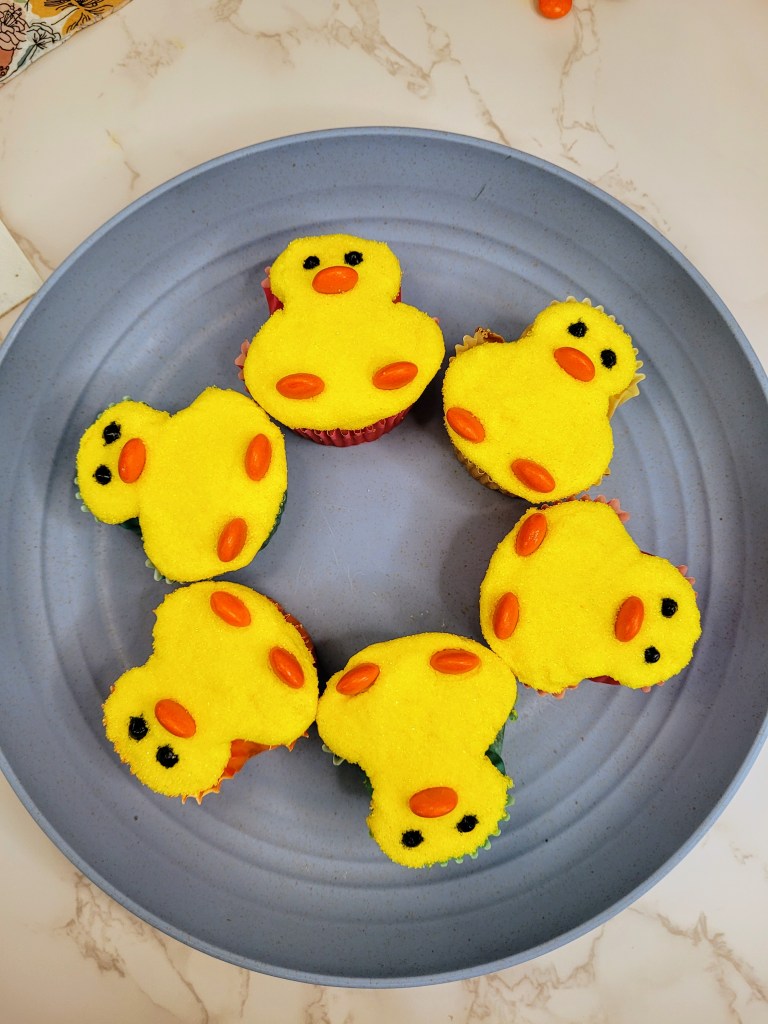
Pollen allergies aside, spring has definitely sprung in my kitchen. Since I consider myself somewhat of a baking eggs-pert, I wanted to try making shaped cupcakes again after my first attempt to make ghost cupcakes failed big time back in October (you know, fall, the season where everything doesn’t make you sneeze and the temperature is perfect). I’m eggs-tremely happy to report these: 1. Look like chicks and not shapeless blobs (also known as ghosts, October’s mascot), 2. Are so cute they make me give less of a cluck about how hot it’s getting outside, and 3. Are designed in such a manner that they have inspired a basket full of terrible Easter-related puns…it’s not even bunny how many I’ve got. I apologize for nothing.
To make these, just use your favorite cupcake and frosting recipe (I’ve included my recipe below for yellow cupcakes with a Swiss meringue buttercream). Alright, no fowl play here, let’s hop to it!

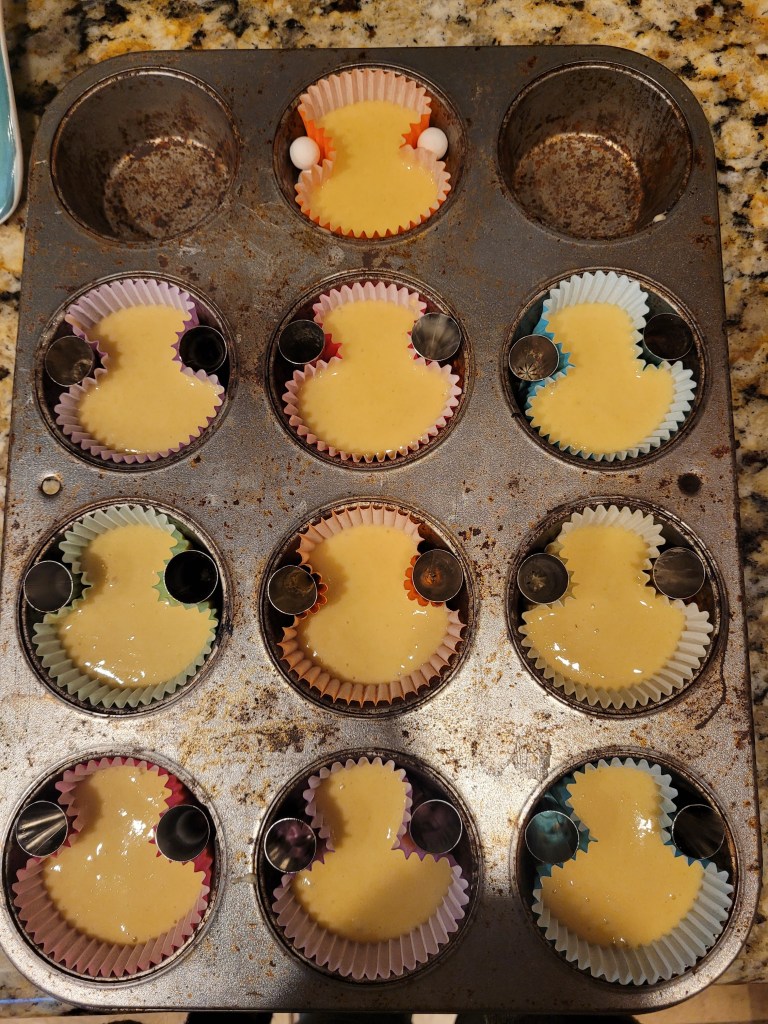
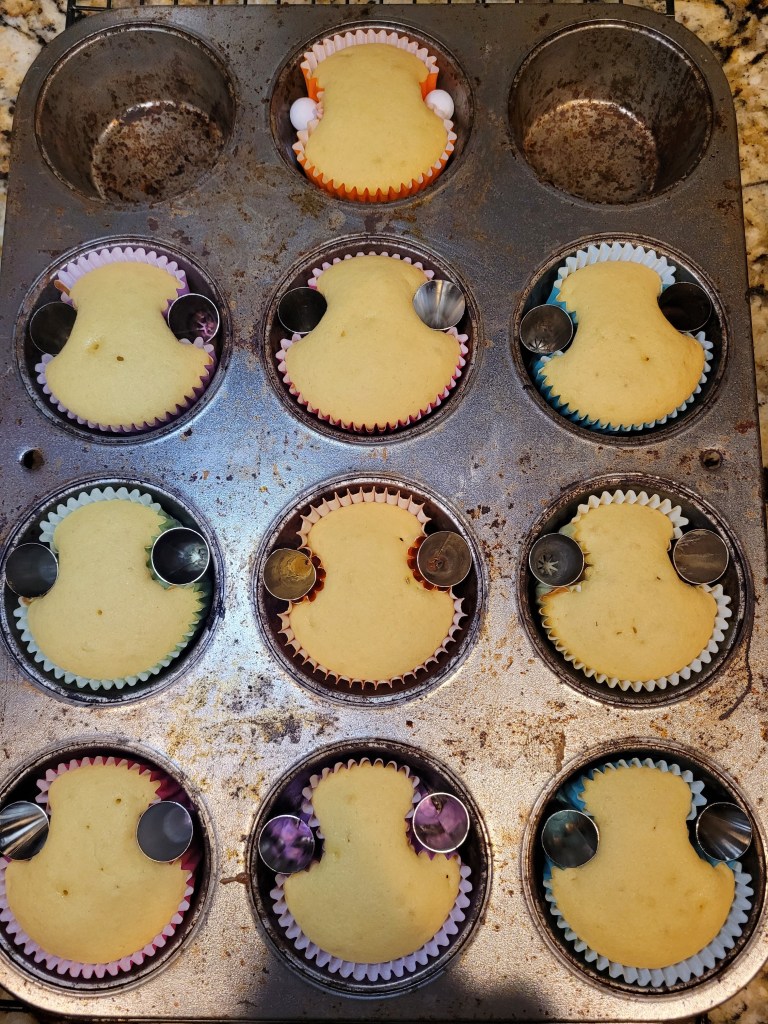
Once you’ve got your cake batter ready to roll, place cupcake liners in a muffin tin–the key here is to fill them only halfway full. Then take either marbles, pie weights, or piping tips, and place them about 2/3 of the way up on each side of the cupcake liners like above. I tried one with pie weights and the rest with upside down piping tips, both yielded the same results- cupcakes that kept their shape and mostly looked like mushrooms when you turned them upside down (Earth Day cupcake idea unlocked). Make sure these chickadees cool completely before you frost them.
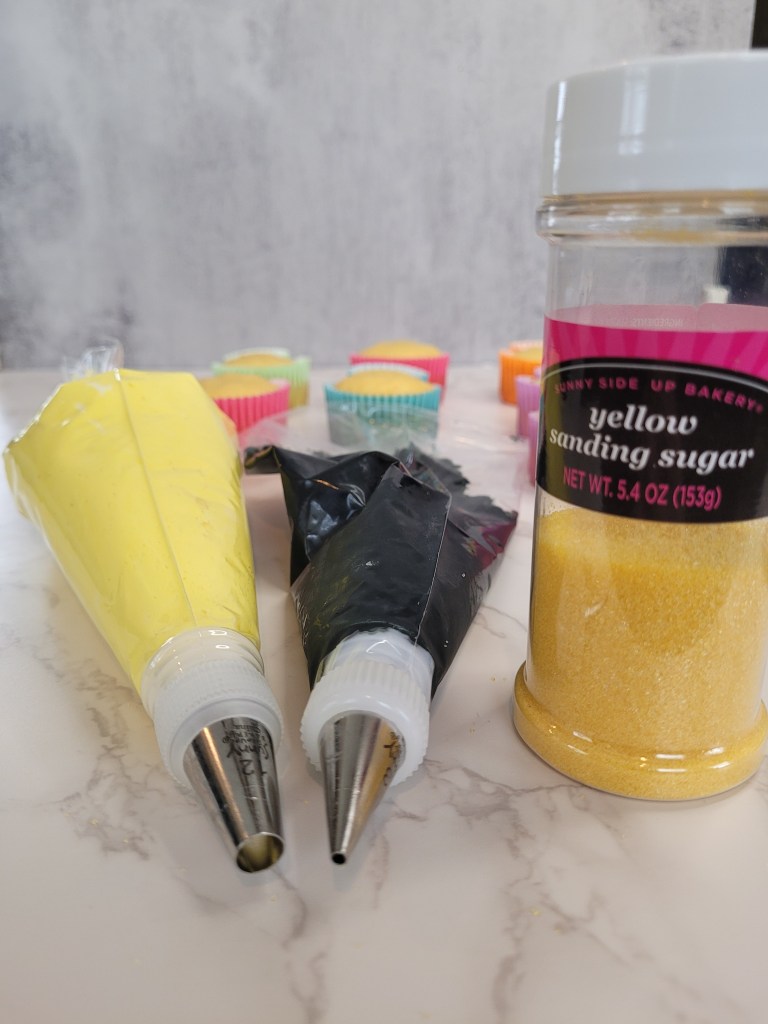
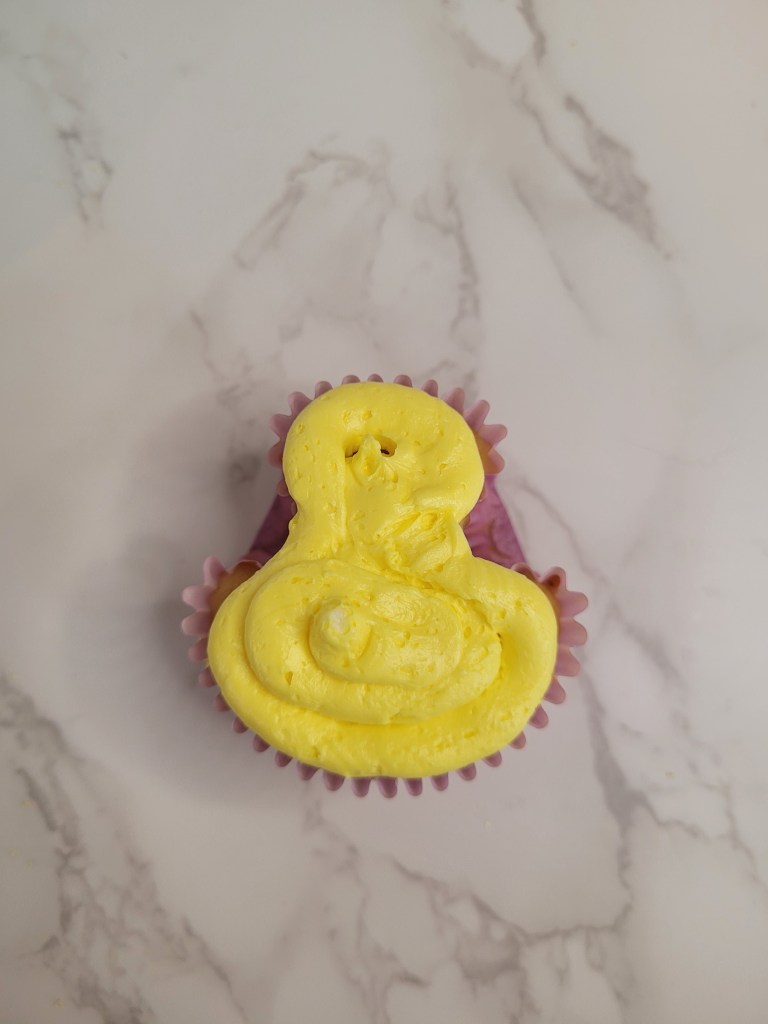
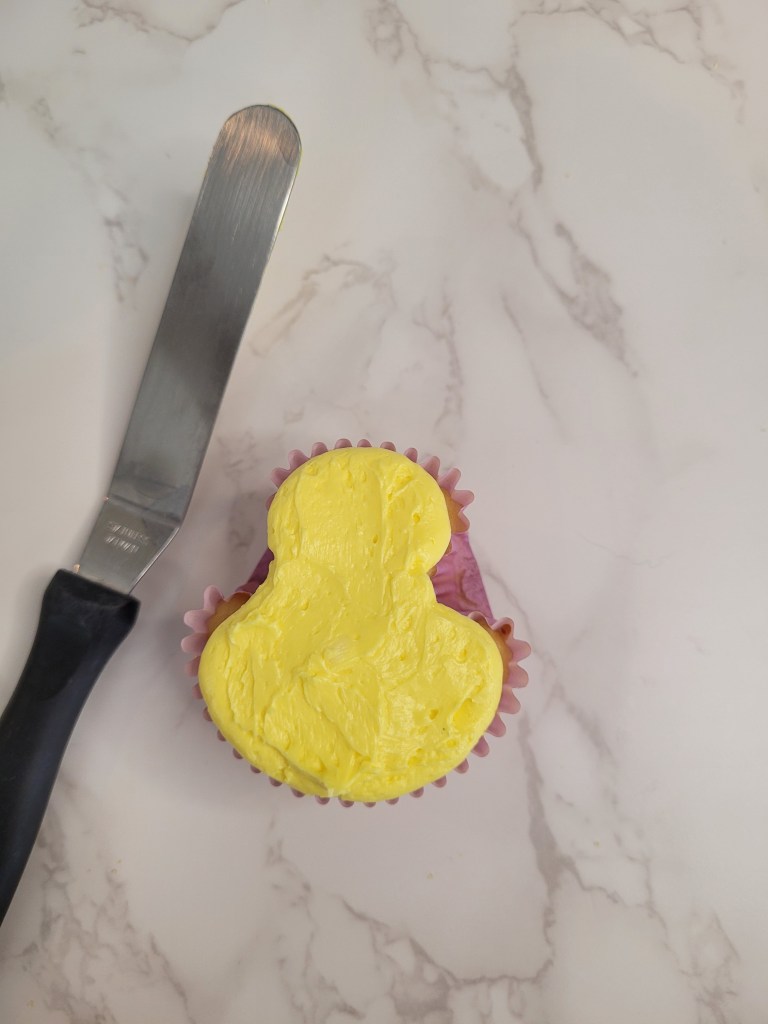
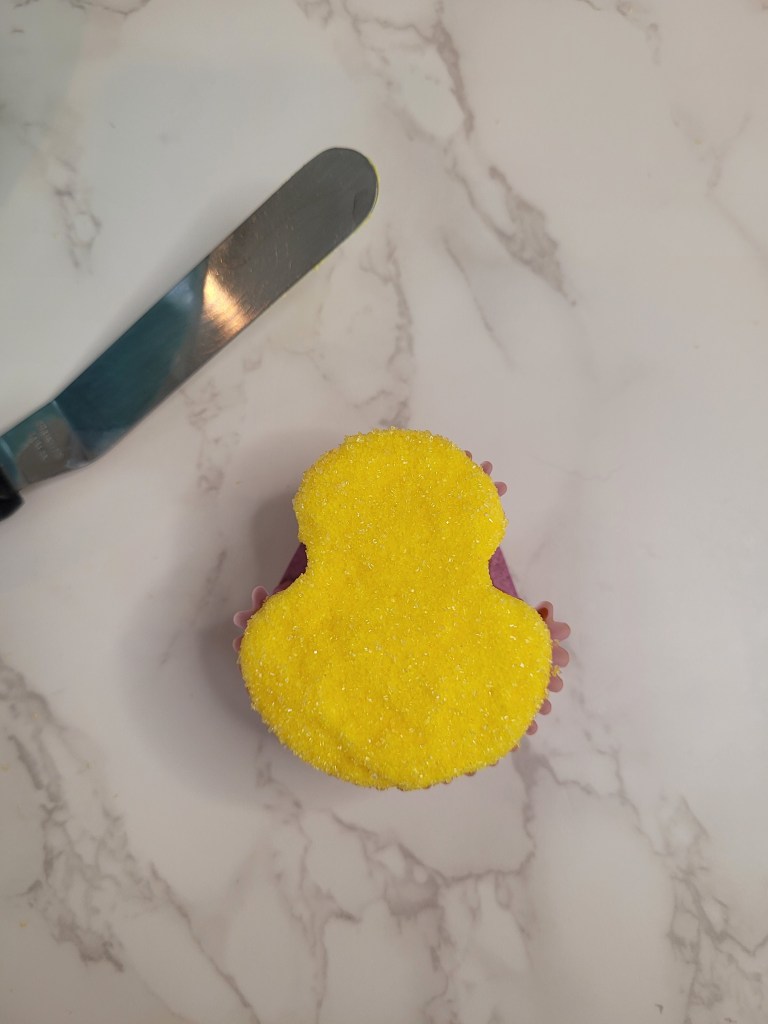
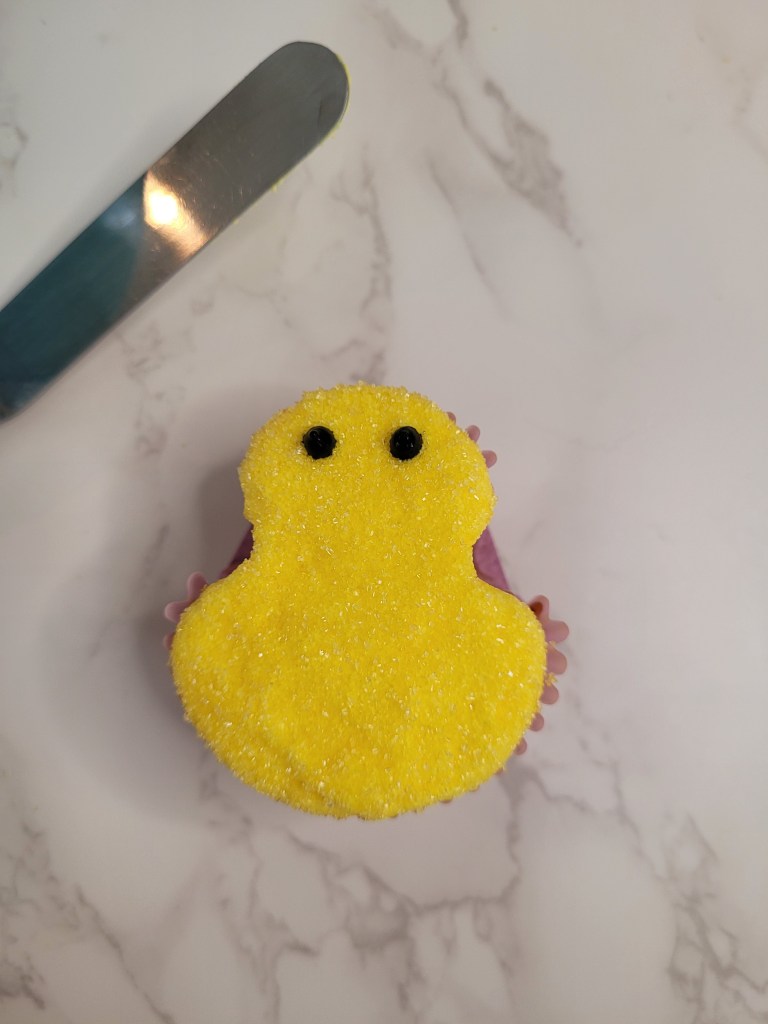
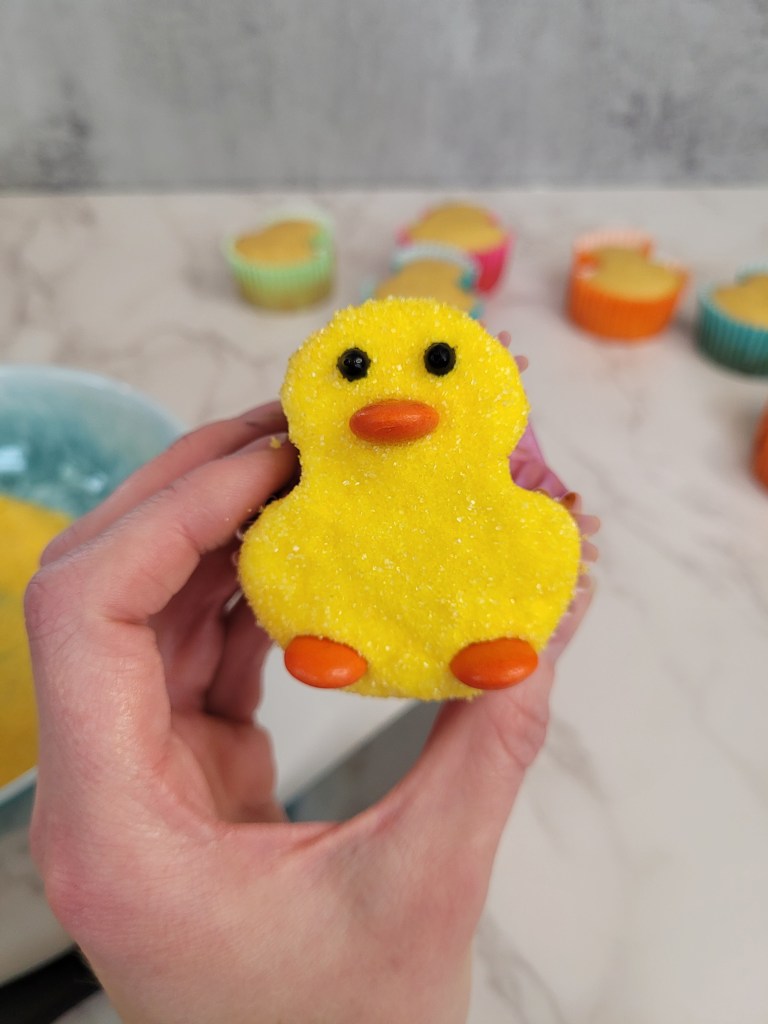
Now, the plot chickens…time to get decorating! Once you have your frosting made, take a very small portion aside and dye it black for the eyes. You can also use black sprinkles if you have them (consider the shock I felt when I realized that was literally the only type of sprinkle not in my massive collection; some bunny hold me). Dye the rest yellow, and load a piping bag with a large round tip (I used a #12) and pipe the yellow all over the cupcake before smoothing with an angled spatula. Pour yellow sanding sugar into a bowl, and plop your cupcake into it while gently swirling around to coat. Load your black frosting into a bag with a small round tip (I used a #3) and pipe little dots for the eyes. To finish, you can use orange M&M’s, orange Reese’s, or whatever other orange circular candy you want (I’m sure there are many, but I am only a connoisseur of chocolate candy). Place the beak below the eyes and two of the cutest lil’ feetsies at the bottom. Peep the video tutorial to see the process in action:
Truly, this would be a hoppy family decorating activity, and these are really sinchy to make and super cute (as well as delicious to eat). No need to go off the peep end when you’ve got a batch of these chicks to take to your Easter feast! I hope everyone has an eggs-ceptional Easter Sunday this week. Don’t worry, be hoppy…you almost make it to the end of the most massive terrible pun dump I’ve ever done in a blog (I saved the best for last below). ‘Til next time, my fellow eaters!
Recipe and Instructions
Gluten free yellow cupcakes with Swiss meringue buttercream
A fluffy yellow cupcake with buttery meringue frosting
Ingredients
CAKE*Half box of gluten free yellow cake mix (I used Whole Foods GF mix)
*56 grams (1/4 c) unsweetened applesauce
*1/4 cup plus 3 TBS fat free or skim milk
*1 egg
FROSTING
*3 egg whites (~85-90 g)
*1 cup (192 g) allulose
*1 cup (224 g) butter, slightly softened (if you press on it firmly with a finger, it will give a little but not let your finger smush it all the way)
*1 tsp vanilla
*1 tsp almond extract (lemon would also be lovely for spring)
Directions
- Preheat oven to 350 and place cupake liners in muffin tin.
- Whisk cake ingredients together in a stand mixer on low for 30 seconds before switching to medium-high for two minutes.
- Fill each cupcake liner half full before placing pie weights, marbles, or upside down piping tips about 2/3 the way up on each side of the cupcake liner to shape into chicks.
- Bake for 20 minutes, and allow cupcakes to cool fully before frosting.
- To make frosting, first wipe everything (whisk, paddle attachment, whisk for mixer, small bowl, and mixing both) with lemon juice to degrease, or your frosting can fail.
- In a small bowl, crack eggs one at a time, separating the whites from the yolks; if any yolk gets in, start over–the frosting WILL NOT whip up if any yolk is in it. Dump each egg white into your stand mixing bowl.
- Fill a medium-sized sauce pan with 1 1/4 cup of water and bring to a boil before lowering to a simmer.
- Put your mixing bowl on top of this (should not touch the water) and pour allulose on top of the egg whites, whisking for 8-10 minutes until a thermometer reads 160 degrees when inserted to the mix (you should be able to roll a tiny bit of this mix between your fingers and feel no grit).
- With the whisk attachment, place bowl back on your mixer and whisk on the highest setting for 8-10 minutes, until a stiff meringue has formed.
- Now, switch to the paddle attachment and on medium speed, add the butter one tablespoon at a time, mixing it in fully before adding another tablespoon (things will start to look curdled, but don’t worry, it will mix out okay).
- Once all the butter has been added, add in your extracts before mixing on medium-high for 2-3 minutes.
- At this point, take a small amount out to dye black, and dye the rest of the frosting in the bowl yellow.
- To pipe the chicks, follow the photo or video tutorial above.
- You will probably have a large amount of frosting leftover (I only used half for my cupcakes); you can 100% put this in an air tight container and freeze.
- Keep cupcakes covered and in the fridge. They are best served at room temp, so remove from fridge 30 minutes before eating. Enjoy!
Nutrition
Macros10 servings
152 cal/22.4 c/5.8 f/2.4 p per slice