-
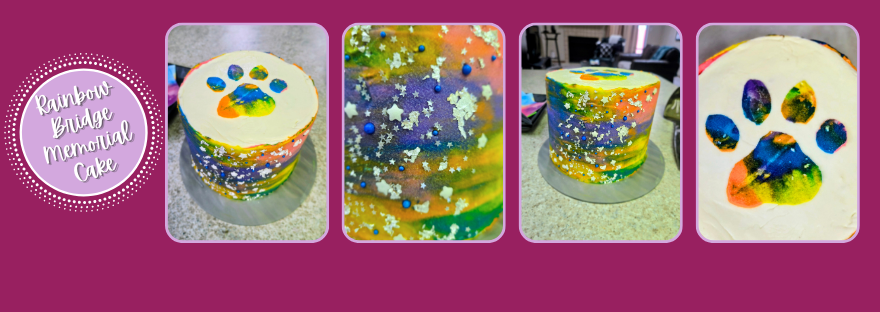
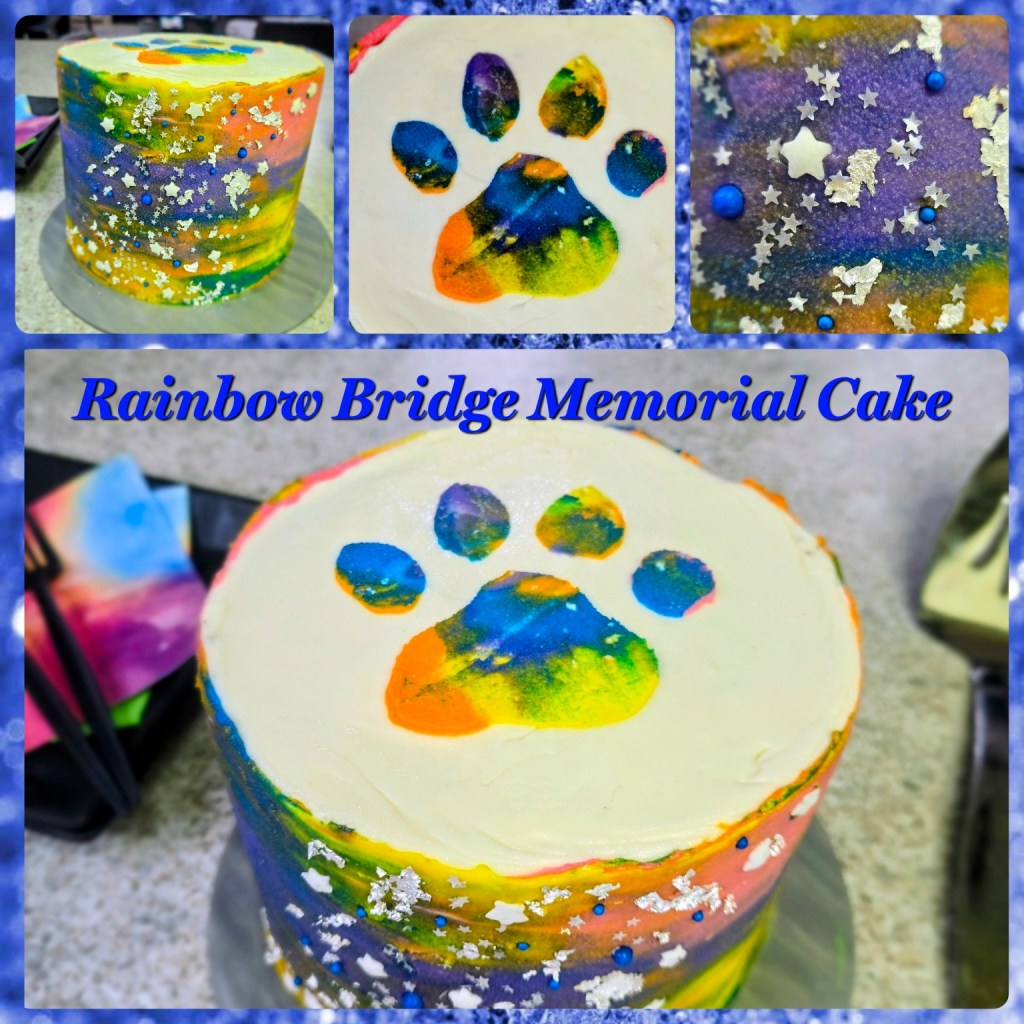
Rainbow Bridge Memorial Cake
This isn’t the kind of cake I ever wanted to make. Last week, I said goodbye to Hank, my best friend, shadow, and soulmutt. If you’ve ever loved a dog, you know there are no words big enough for the hole they leave behind. They spend years weaving themselves into every part of your life…the routines, the quiet moments, the memories, and somehow become family in the truest sense of the word. Then one day, all that’s left is the love they gave you and the memories you carry forward.
So this Rainbow Bridge Memorial Cake is for Hank. It’s a small tribute to the very best buddy who filled my life with a loyalty that will forever be unmatched, the endless laughter he provided in his silly moments, and the comfort he brought to me every day of his almost 15 years. Because of him, I know what it means to love and be loved unconditionally, and I can think of no greater gift he could have given me. Making this cake was a reminder that love doesn’t end when a life does. It stays with us, in our stories, in our hearts, and sometimes in the little ways we choose to remember them.
This one is for the dogs who leave paw prints on our floors, fur on our clothes, and permanent marks on our hearts. Most of all, it’s for Hank. For the privilege of loving you, I will bear the burden of missing you, little dude.
“How lucky I am to have had something that makes saying goodbye so hard.” The cake & frosting recipe is below. You’ll need gel dye in your preferred colors (I used blue, purple, pink, orange, and yellow), silver leaf, silver star sprinkles, white star sprinkles, and blue pearl sprinkles if desired.
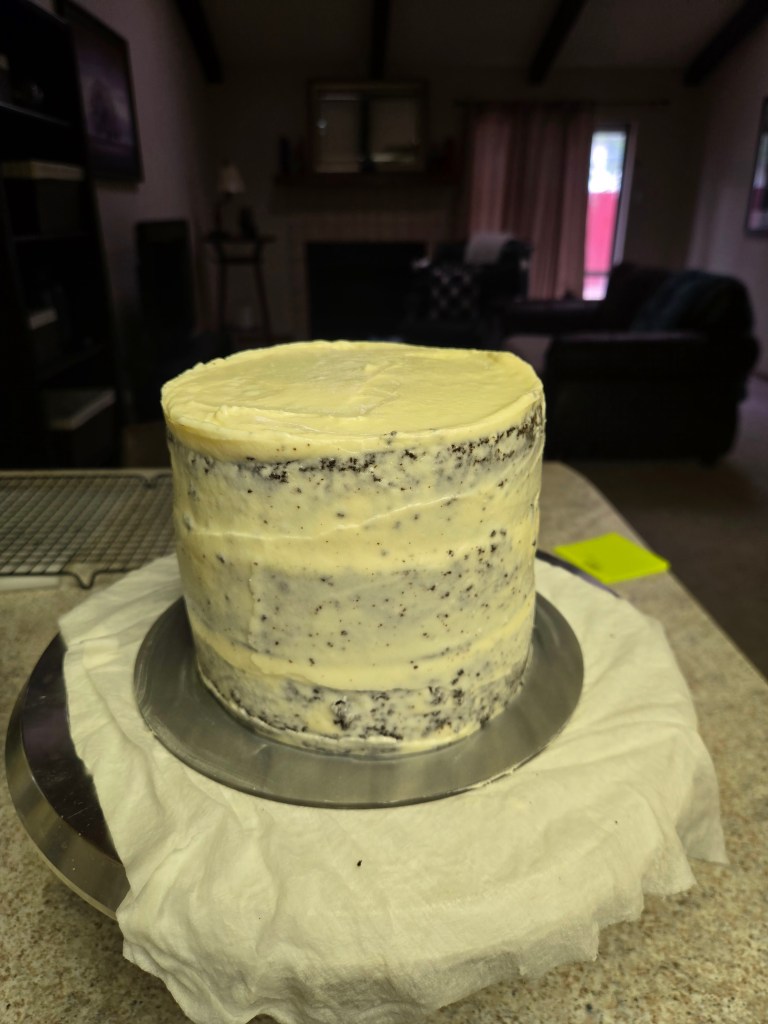
Use a small amount of plain frosting to crumb coat your cake & freeze 30 min. 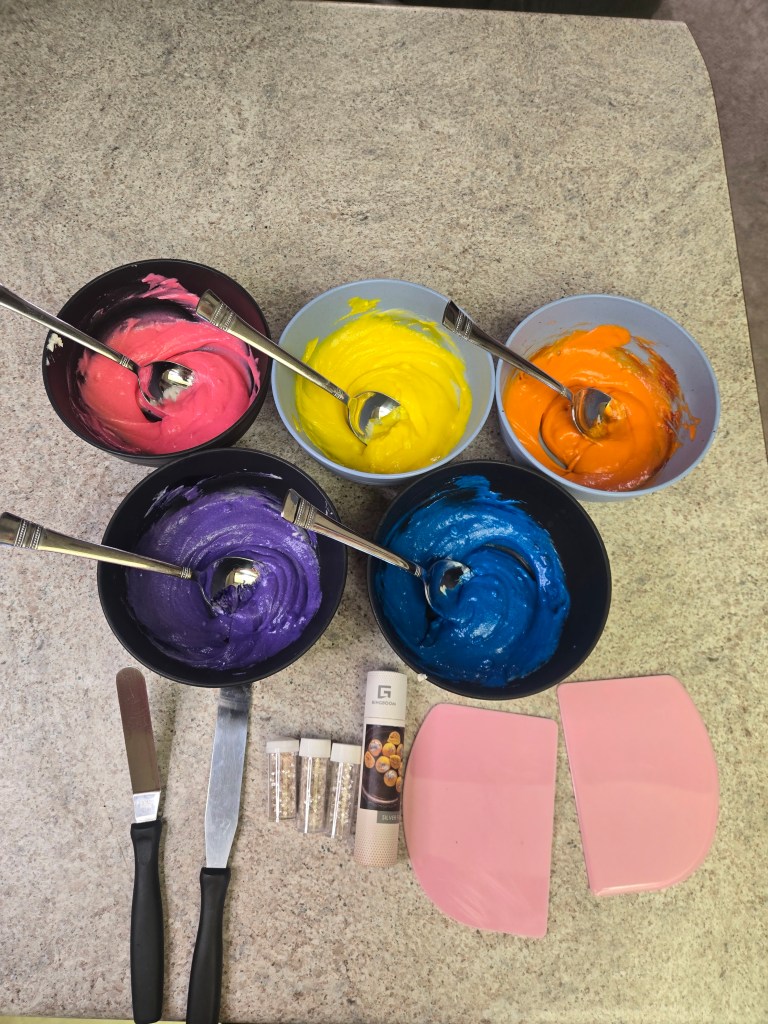
Divide remaining frosting & dye while cake chills. 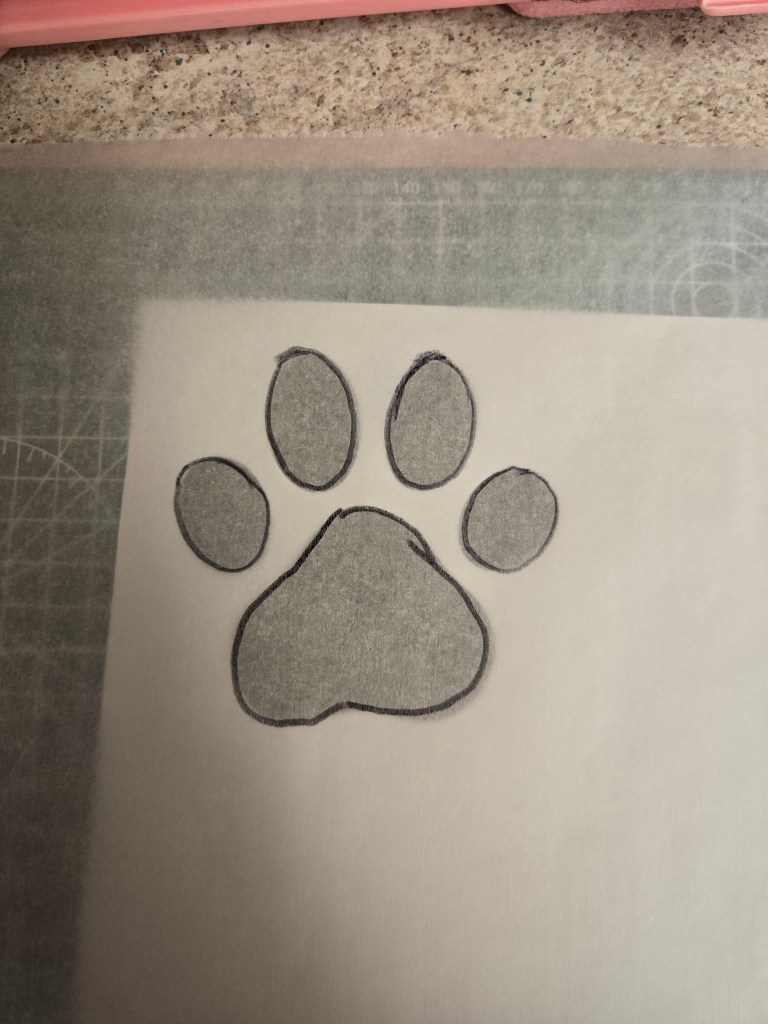
Either draw or print out and resize a paw print, tracing on Parchment paper. 
Use an X-acto knife to trim out the paw print pieces carefully. 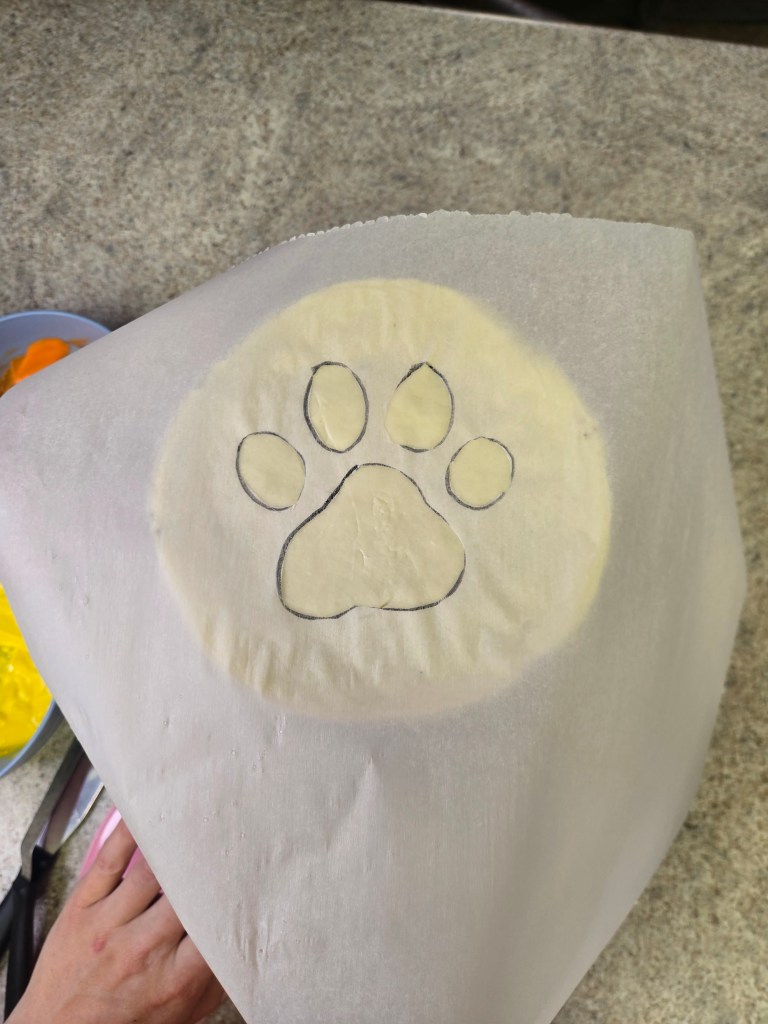
Lay your Parchment paper on top of the cake & gently press in so there are no gaps. 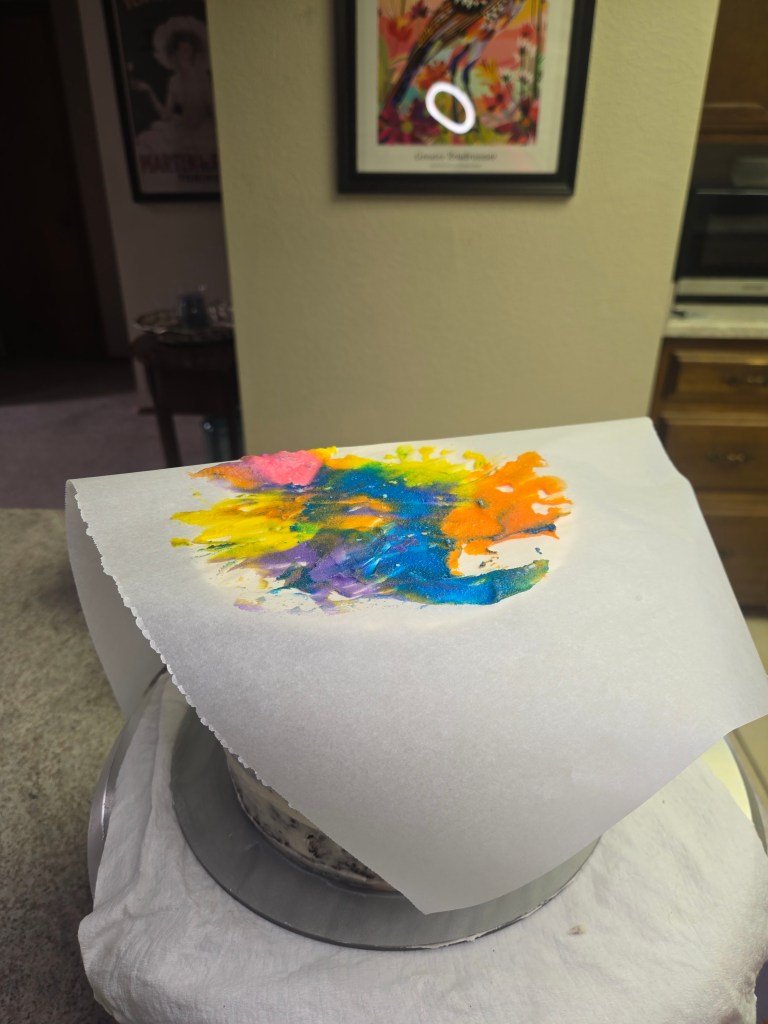
Smatter a bit of color all over the top & swipe a few times to blend the colors with an angled spatula. 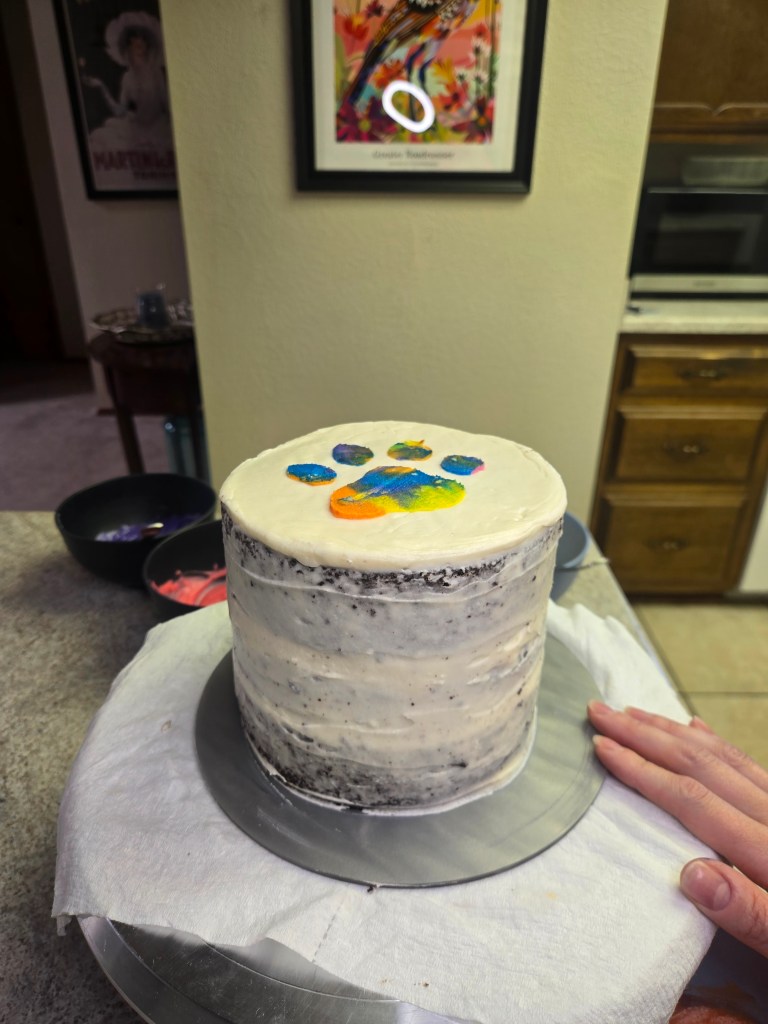
Gently remove to reveal the pawprint. 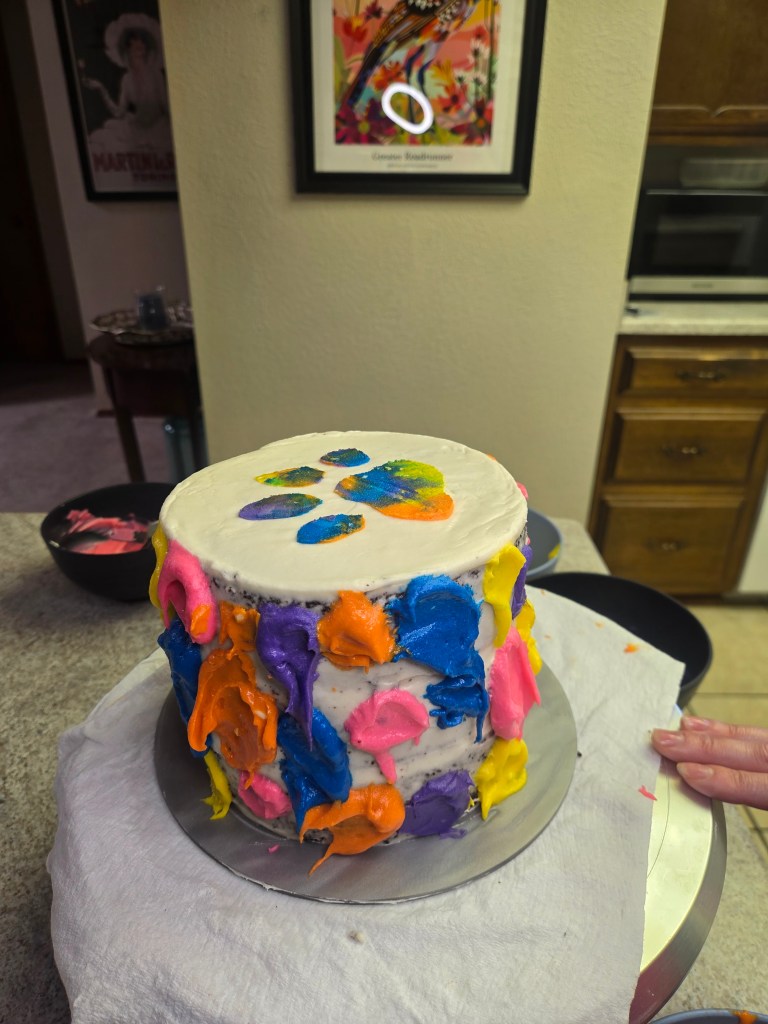
Now place dollops of color all over the side of the cake. 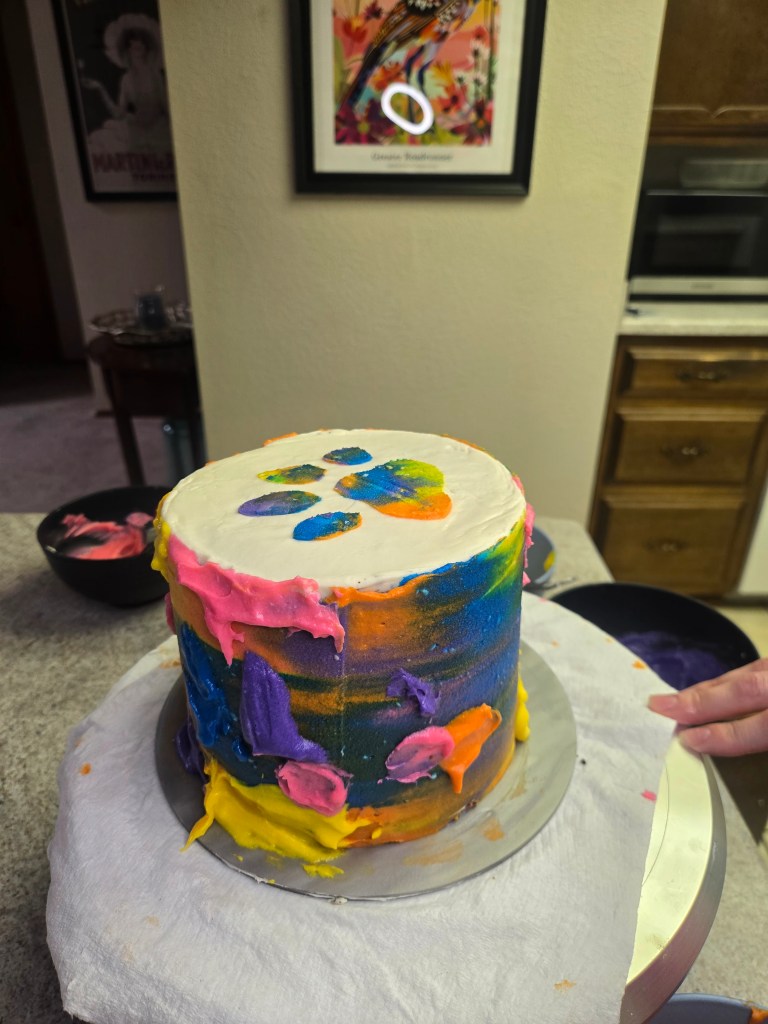
Pass over with an scraper, and fill in color where there are any gaps.Take another pass with a CLEAN scraper until smooth. 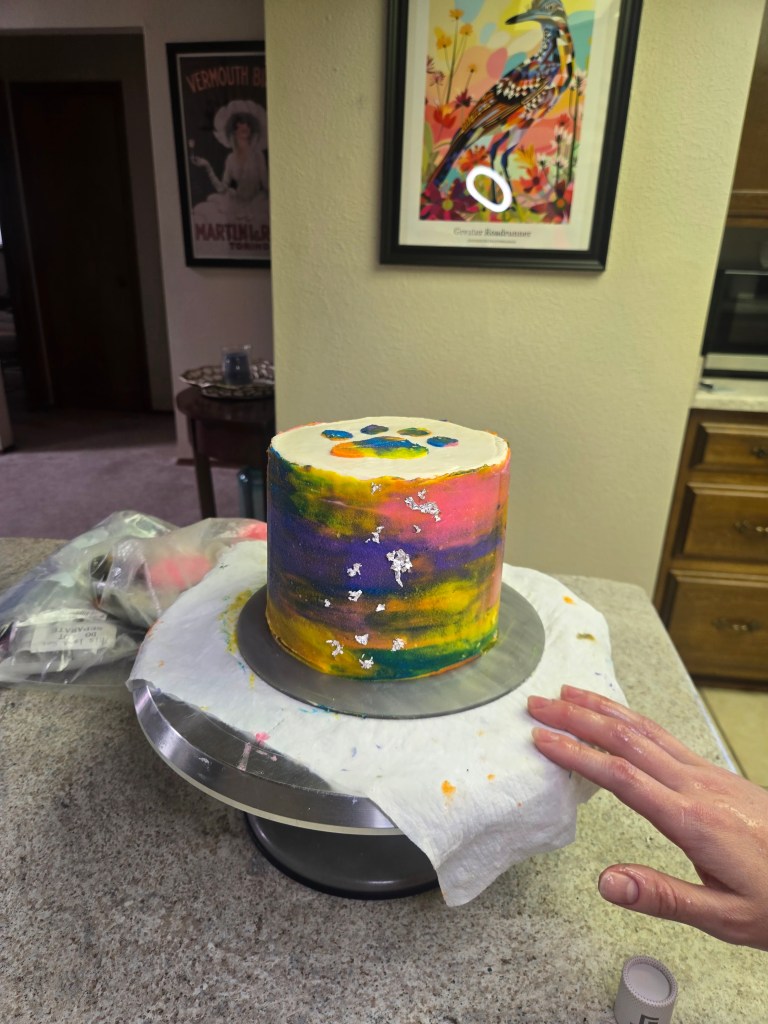
Use tweezers to add silver leaf and remaining sprinkles. 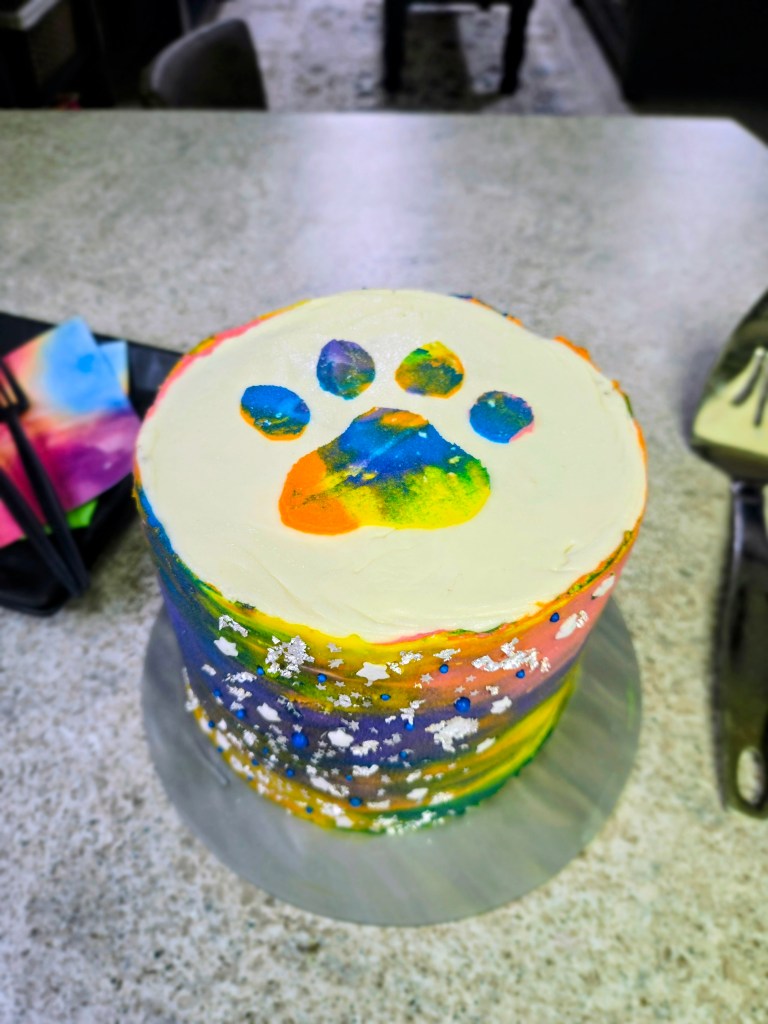
I wanted it to feel very celestial, so I added a lot of stars. Recipe and Instructions
Gluten free chocolate orange cake with cream cheese frosting
A rainbow bridge cake to celebrate the life of our furbabies.
If not gluten free, use any kind of cake mix. Monkfruit can also be replaced with regular powdered sugar for frosting. Protein powder can also be replaced with additional monkfruit or regular powdered sugar; note: you will need WAY less liquid in the frosting without protein powder.
Ingredients
CAKE
*1 box of gluten free chocolate cake mix (I used King Arthur GF)
*1 1/3 cup fat free or skim milk
*152 g (2/3 cup) fat free Greek yogurt
*4 eggs
*1 tsp orange extract
FROSTING
*112 g (1/2 cup) butter, softened
*226 g (8 ounces) 1/3 the fat cream cheese, softened
*12 ounces Lakanto powdered monkfruit
*4 ounces Quest vanilla milkshake protein powder (cuts the sweetness of the monkfruit and makes a nice, stiff, spreadable frosting; omit and use all monkfruit if desired)
*1 TBS clear vanilla
*1/4 tsp orange extract
*1/2 cup plus 2 TBS milk
*1/4 tsp citric acid if you like less sweet frosting
Directions
- Preheat oven to 350 and grease three 6-inch pans.
- Whisk cake ingredients together in a stand mixer on low for 30 seconds before switching to medium-high for two minutes.
- Pour batter evenly into pan and bake for 35-38 minutes, or until a toothpick comes out mostly clean from the center.
- Allow cake to cool fully before frosting.
- To make frosting, whisk butter and cram cheese for 3 minutes before adding in half the powdered monkfruit, protein powder, vanilla, orange, citric acid if using, and milk.
- Add in remaining monkfruit mix fully.
- Once fully cooled, frost your cake and use the gallery above to decorate.
- Keep cake covered and in the fridge. It is best served at room temp, so remove from fridge 30 minutes before eating. Enjoy!
Nutrition
Macros
10 servings
344 cal/42.2 c/13.2 f/14.1 p per slice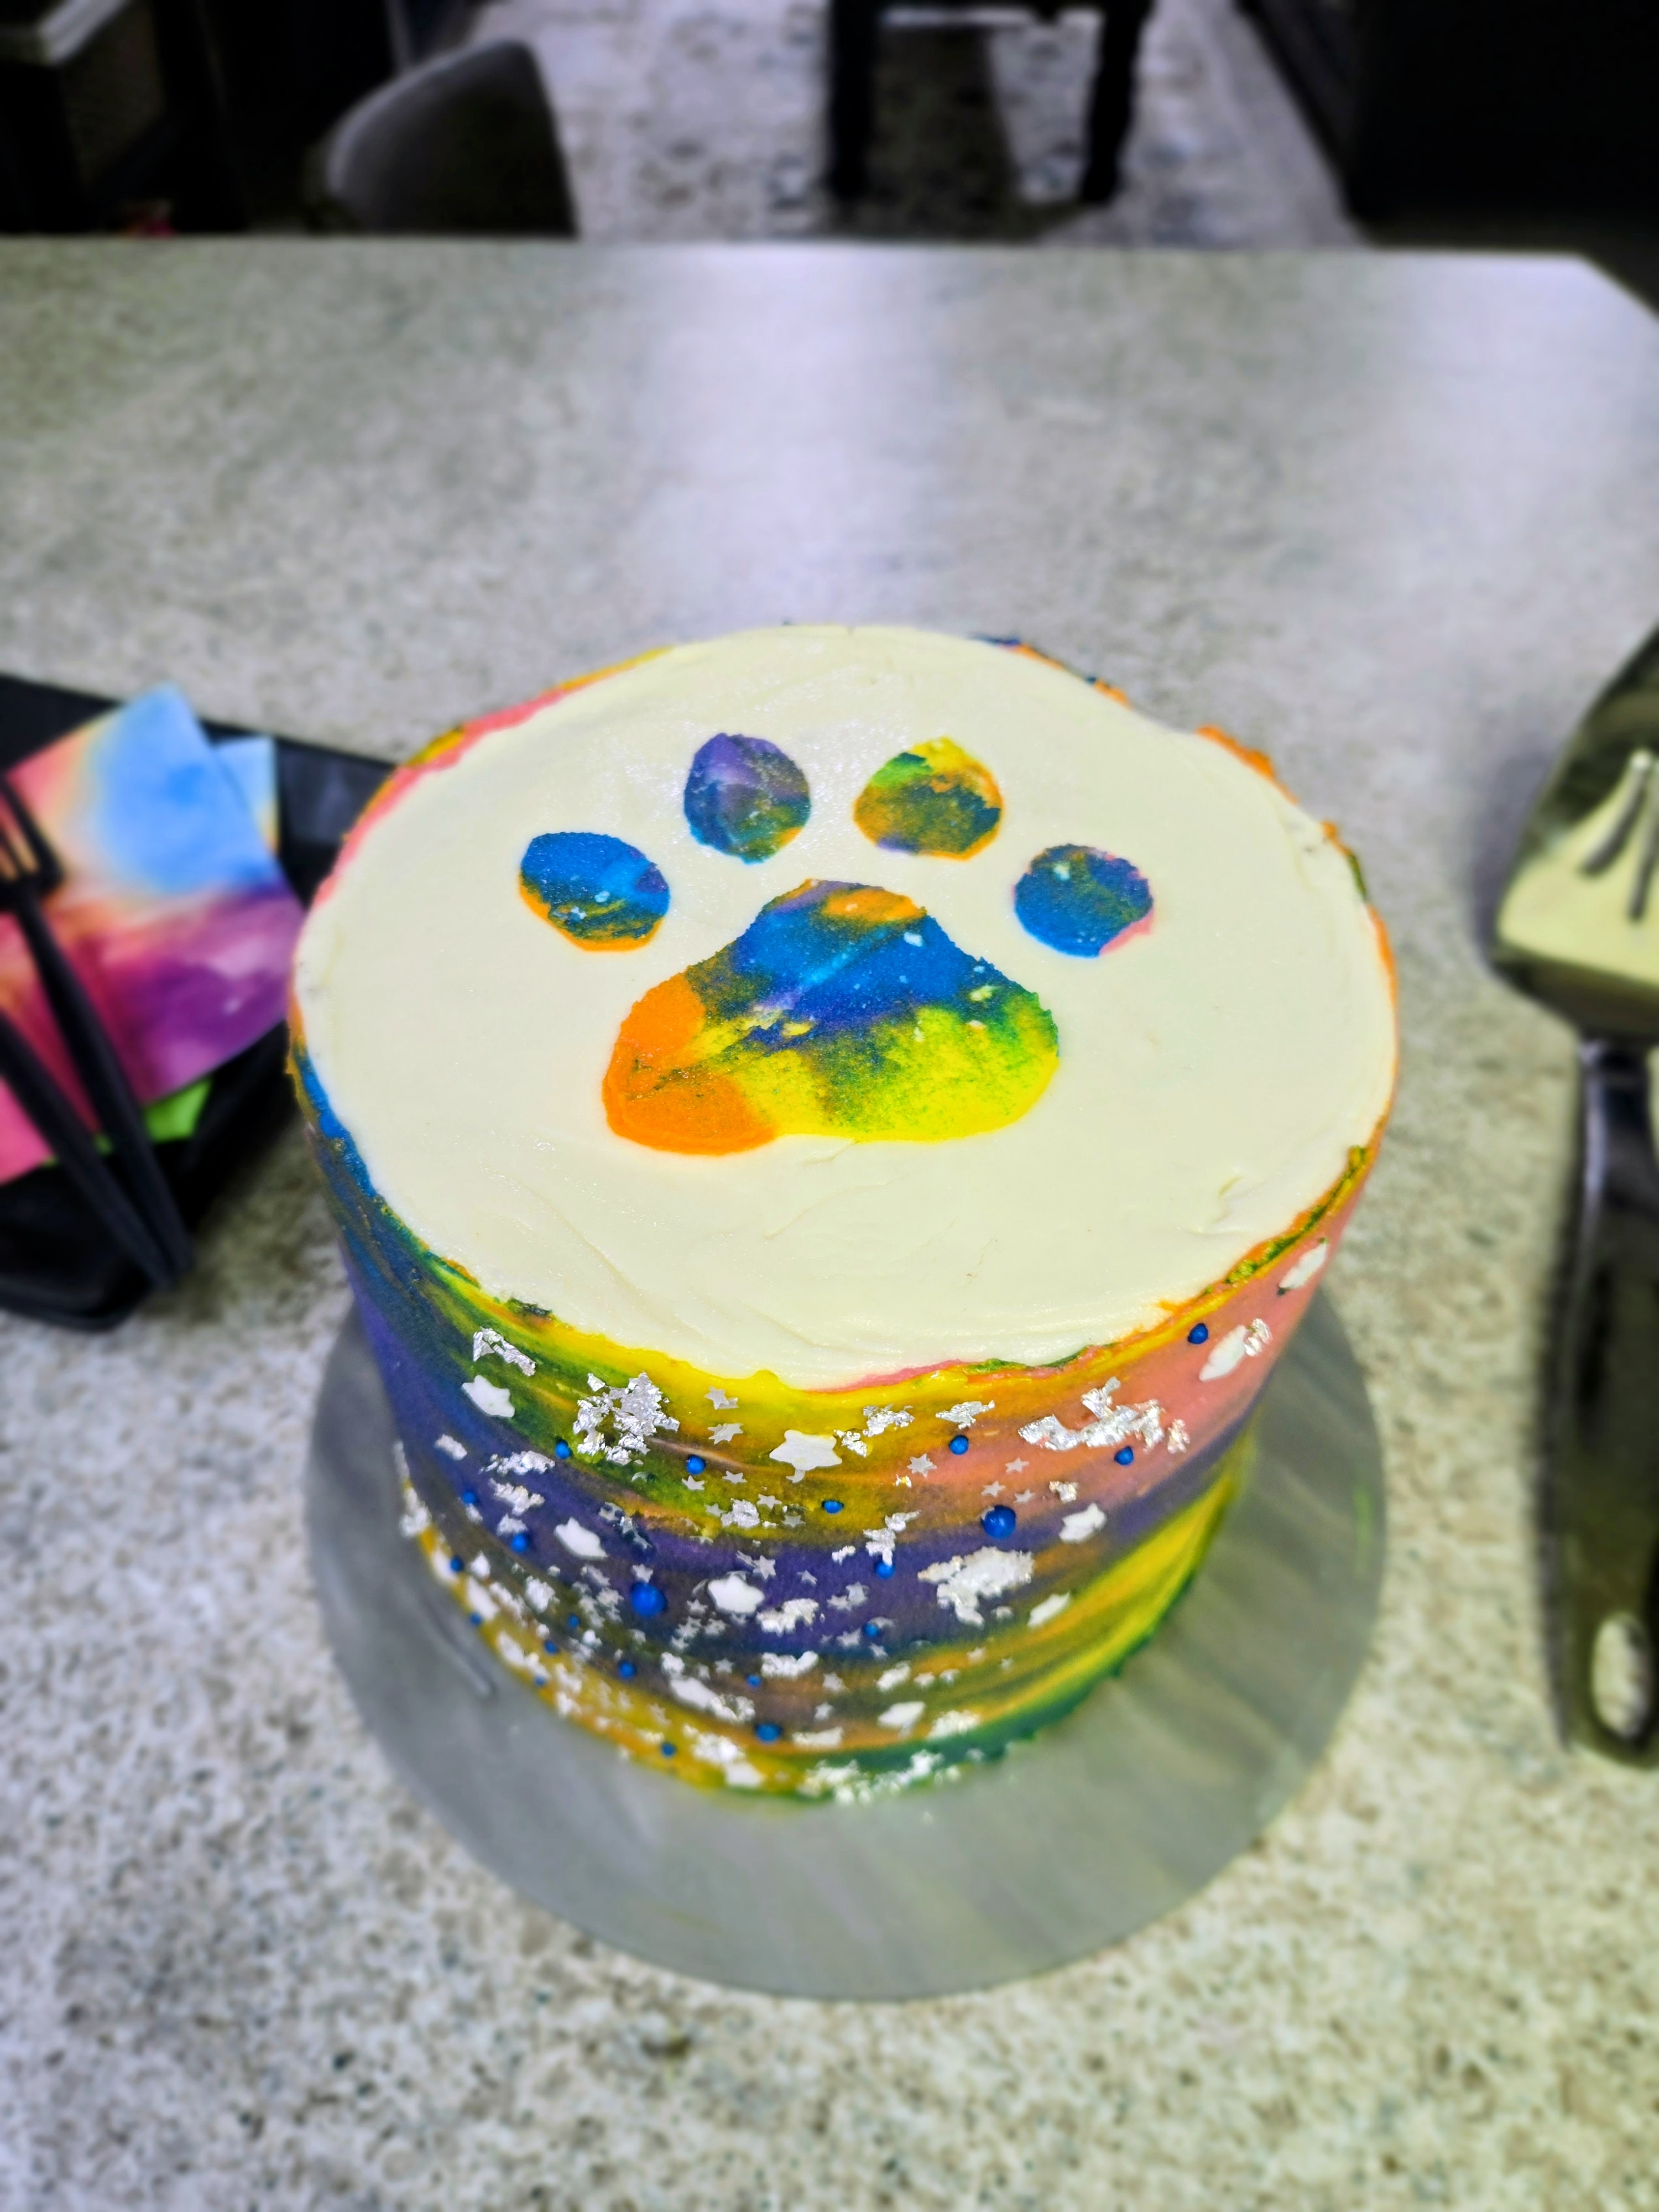
To live in hearts we leave behind is not to die. 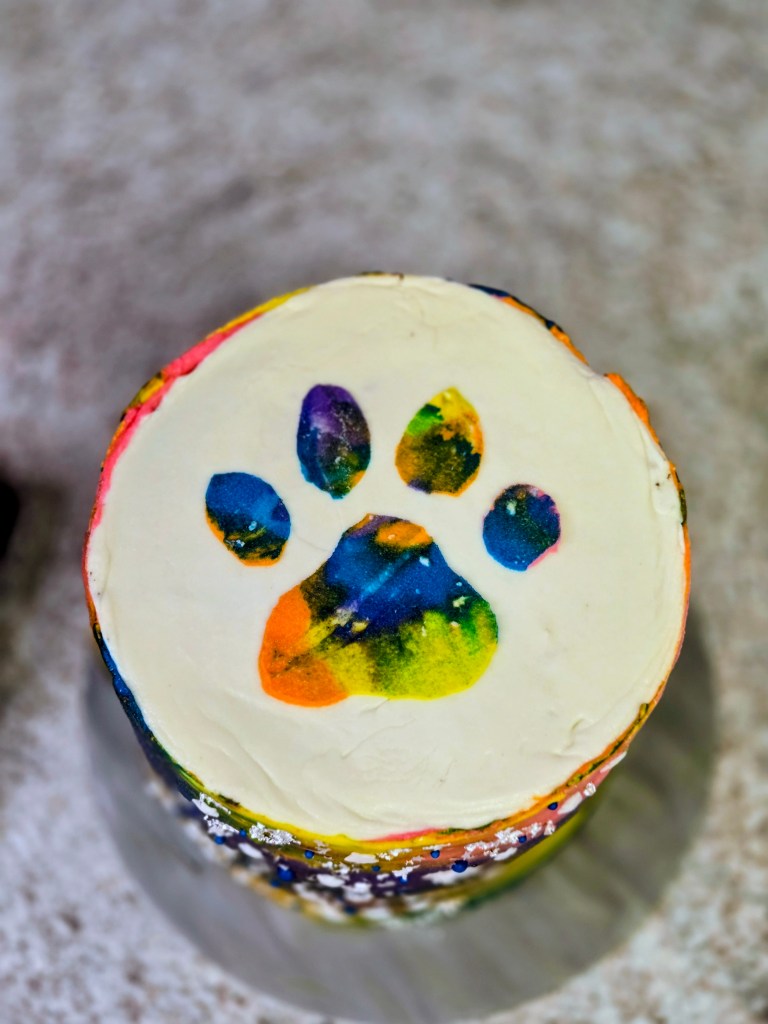
I know you’ll find me again one day, Bubba. - Preheat oven to 350 and grease three 6-inch pans.
-
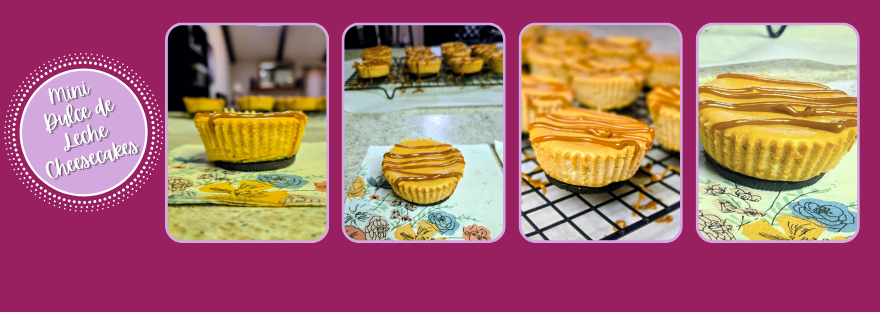
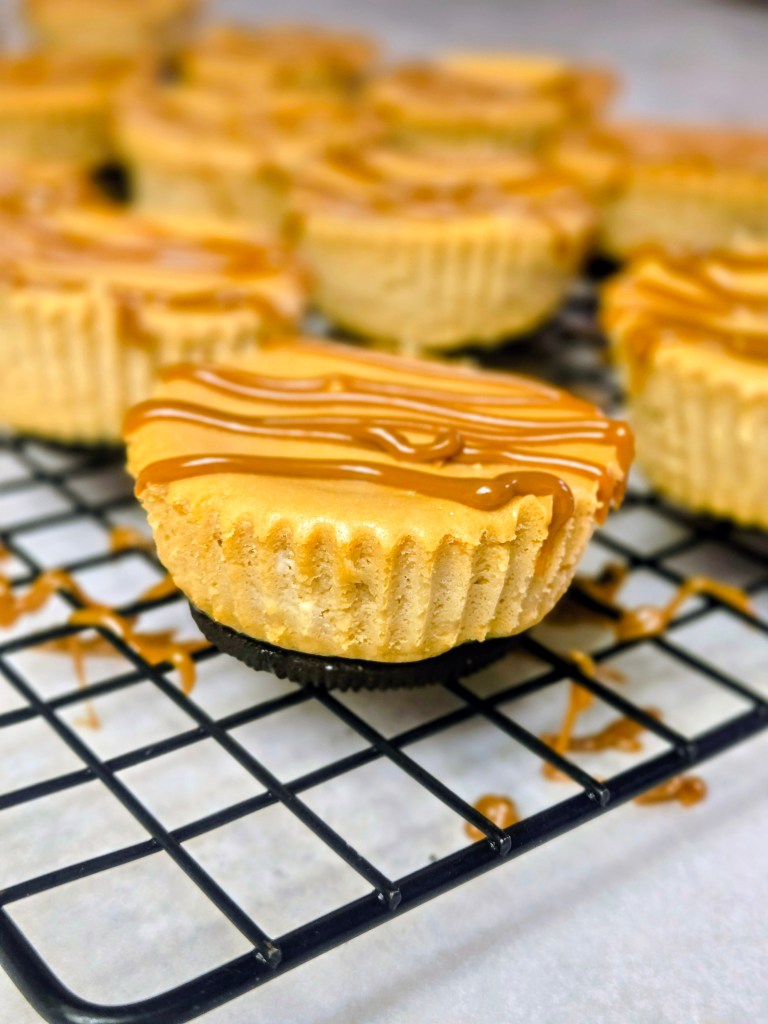
Dulce de Leche Mini Cheesecakes
These little cheesecakes are what happens when dulce de leche decides to absolutely show off. Creamy, rich, and loaded with caramel goodness in every bite, these mini gluten-free cheesecakes are sitting on a chocolatey Oreo crust while somehow also managing to have dulce de leche swirled right into the batter and drizzled all over the top like the dessert equivalent of “more is more.” Tiny? Yes. Subtle? Absolutely not.
They’re smooth, sweet, and completely caramel-ized in the best possible way—basically proof that cheesecake and dulce de leche are soulmates with excellent taste. Honestly, this recipe is feeling a little extra ordin-dairy and I fully support it. One bite in and you’ll be cheesecake-ing your head, wondering why all desserts aren’t this gooey, creamy, and outrageously good. If loving caramel this much is wrong, I dulce de-leche-dly don’t want to be right.
Cheesecake so good it’s practically flan-ting. Mini Dulce de Leche Cheesecakes
Lush, creamy, caramel cheesecake with gf Oreo crust
Allulose can also be replaced with regular sugar, but this will change the macros. Feel free to use regular Oreos if not gluten free.
Ingredients
CRUST
*16 gluten free Oreos
CHEESECAKE
*16 ounces 1/3 the fat cream cheese at room temp
*1 tsp vanilla extract
*96 g (1/2 cup) allulose sweetener
*2 eggs
*1/2 cup dulce de leche
TOPPING
*Additional dulce de leche
Directions
- Line two muffin tins with 16 silicone cupcake liners and preheat oven to 325.
- Plop whole Oreos into each liner
- Whisk the cream cheese, vanilla, and allulose on high for 2-3 minutes before adding the dulce de leche.
- Switch to a paddle attachment and add the eggs, one at a time, blending on low speed until completely mixed in.
- Gently drop spoonfuls of batter on top of the Oreos until liners are mostly full.
- Bake at 325 for 20-24 minutes, until cheesecakes are mostly set.
- Then turn off the oven and crack the door, leaving the cheesecakes in the oven for an additional 10 minutes to finish baking (centers should have barely any jiggle).
- Place cheesecakes on a cooling rack (to speed up, place this in the fridge for 1 hour or freezer for 30 minutes).
- Once the cheesecakes are totally cool and set, remove from silicone liners.
- To finish, heat up remaining dulce de leche in a microwave safe container before putting into a piping bag or plastic baggy with the corner snipped, and drizzle on top.
- Keep leftovers in fridge in an airtight container, and enjoy!
A little dulce de leche goes a long way… so naturally I used a lot. 
An Oreo crust is my love language, honestly. 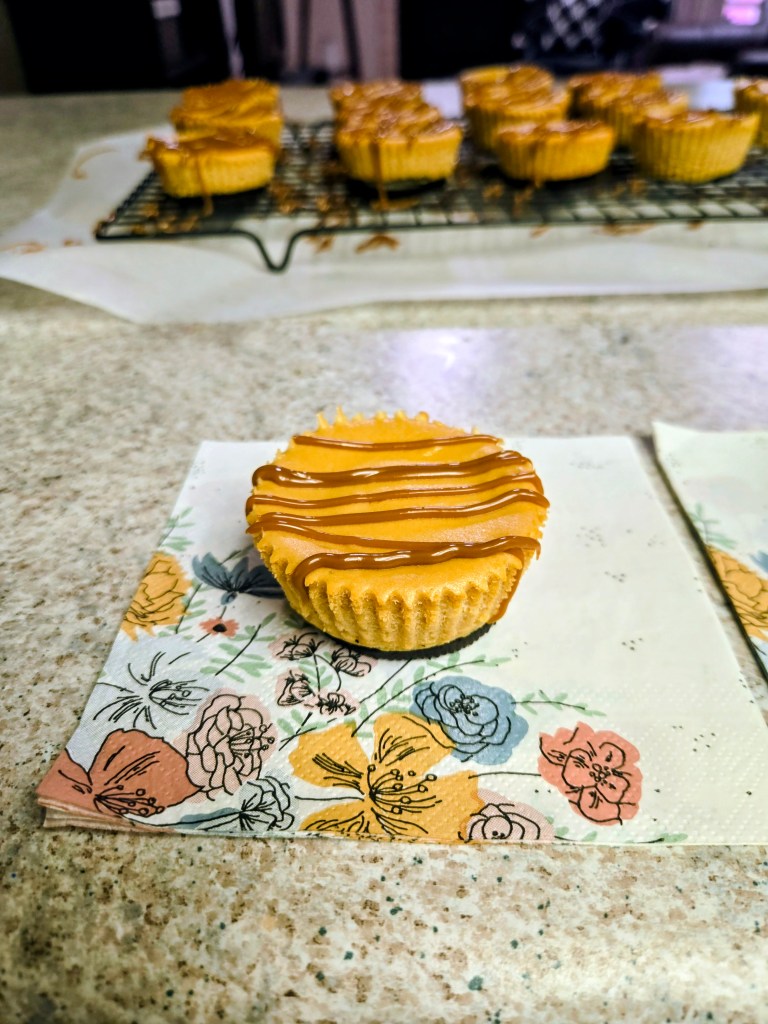
These cheesecakes are dulce de-lovely. - Line two muffin tins with 16 silicone cupcake liners and preheat oven to 325.
-
Gluten Free “Carrot” Cake
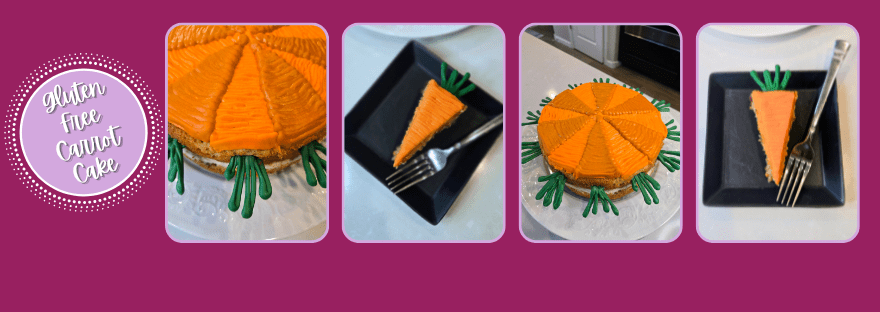
If you thought carrot cake couldn’t get any cuter, allow me to respectfully prove you wrong. This gluten-free carrot cake said, “Why be subtle?” and fully committed to the bit…each slice is decorated like its own little carrot, because apparently we’re not doing anything halfway this Easter. It’s soft, perfectly spiced, layered with creamy frosting, and dressed up like the most overachieving bunny in the room (both Easter & Energizer are jealous). It’s festive, it’s a little ridiculous, and it’s exactly the kind of dessert that makes people stop mid-conversation and say, “Wait… are those all carrots?” Yes. Yes they are. And you’re about to eat one. Whether you’re hosting lunch or dinner this aster, you’ve got a cake that looks like it came straight out of a Pinterest fever dream…cute, clever, and carrot-ing way too hard.
This is what happens when I take a theme too seriously. I carrot way too much. To bring this carrot patch to life, you’ll just need a few key players: a petal piping tip (I used a 103, 102 or 104 would also work), green chocolate melts for those leafy little tops, orange and brown gel food coloring to give each “carrot” its perfectly imperfect, garden-fresh vibe, and of course the carrot cake and cream cheese frosting recipe featured below (the real MVPs here). That’s it: no complicated tools, no Judy Hopps bunny-level skills required. Just a little mixing, piping, and a willingness to fully commit to the carrot aesthetic. Before you know it, you’ll have a whole crop of cake that looks like it was harvested straight from the dessert garden… and trust me, these are the only vegetables people will be fighting over.
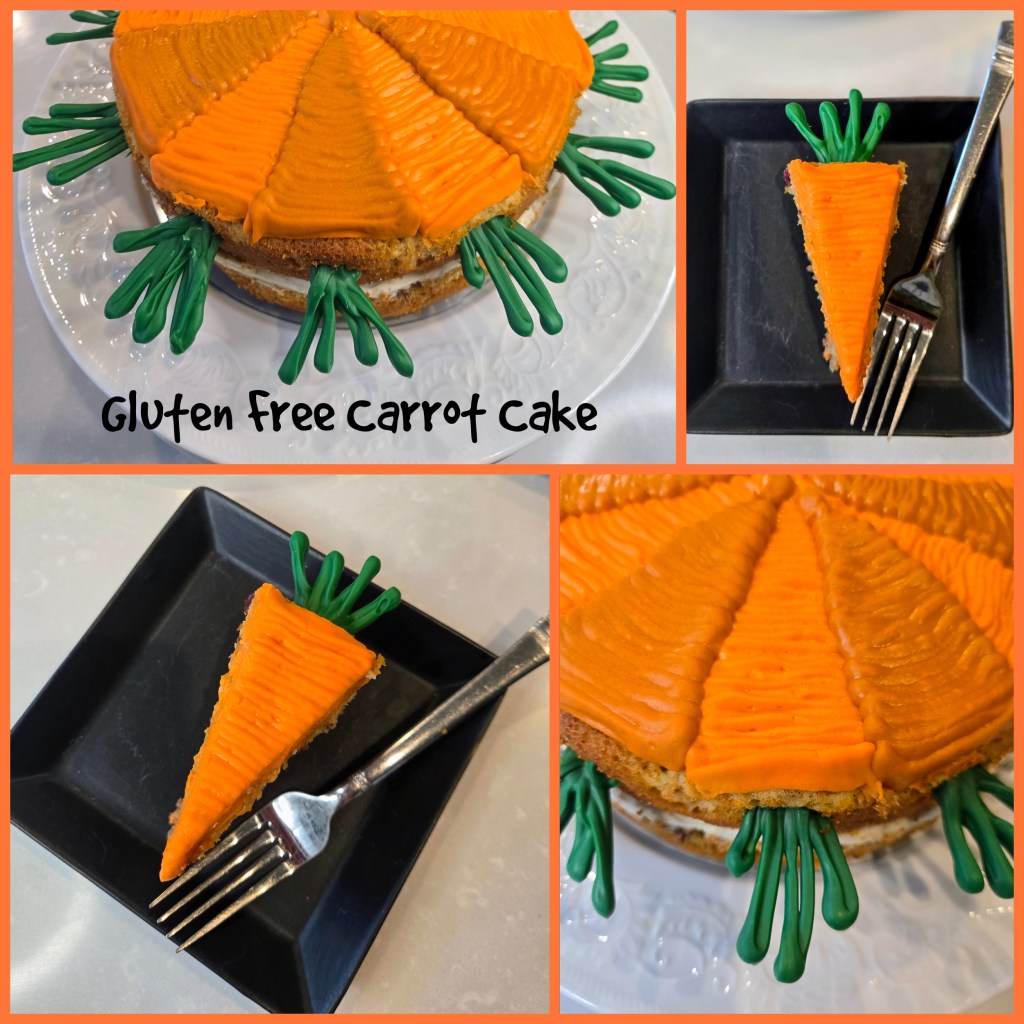
I did not frost the sides, instead leaving them bare, but there is a plain layer of cream cheese frosting between my two 8″ cakes. I then dyed the rest of my frosting bright orange. Hop on down to the photo and video tutorials below for the rest!
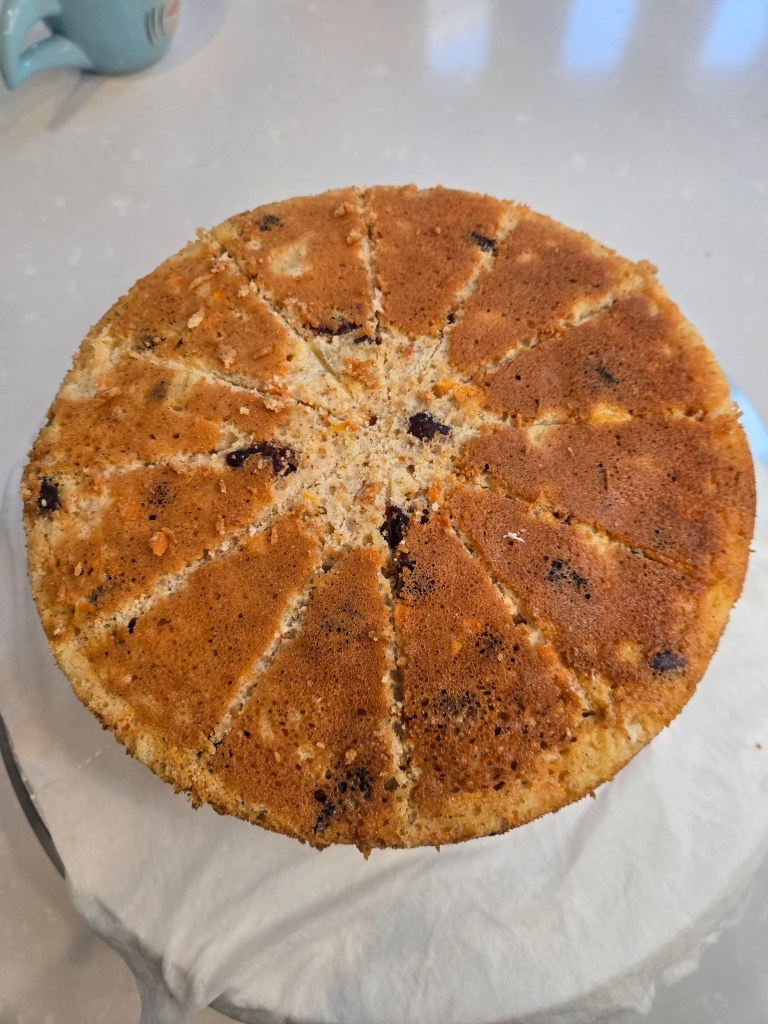
Start by using a sharp knife to divide your cake into 12 even slices. 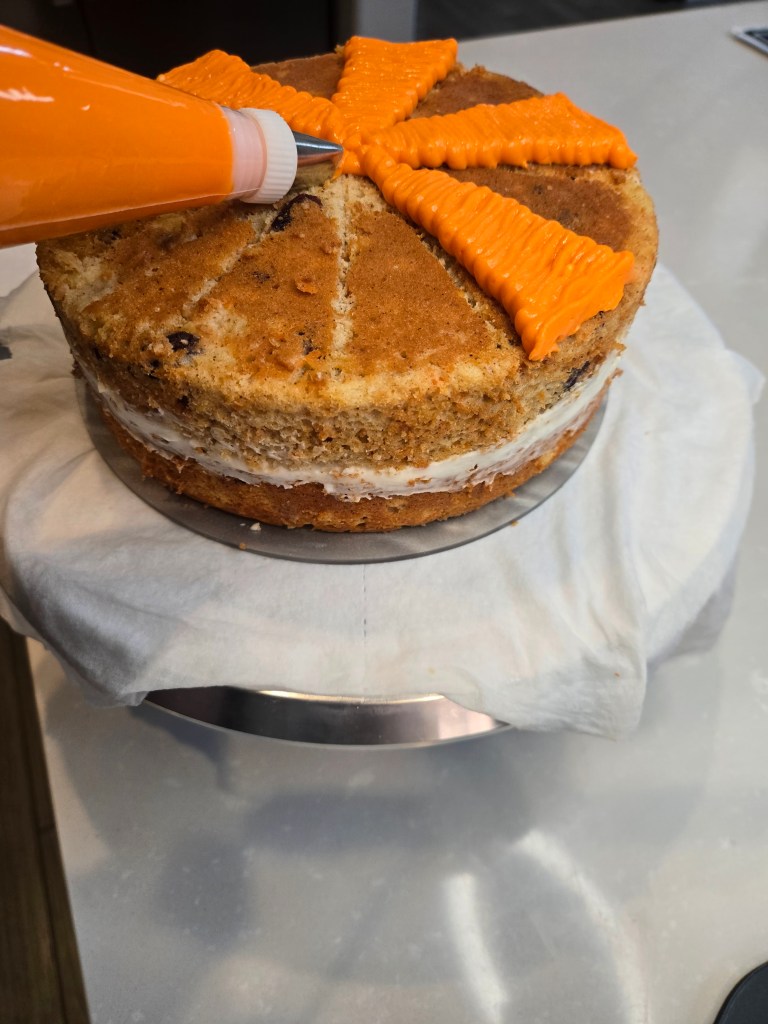
Load orange frosting into a piping bag with a 103 tip; make sure the small end of the tip is facing down, touching the cake. 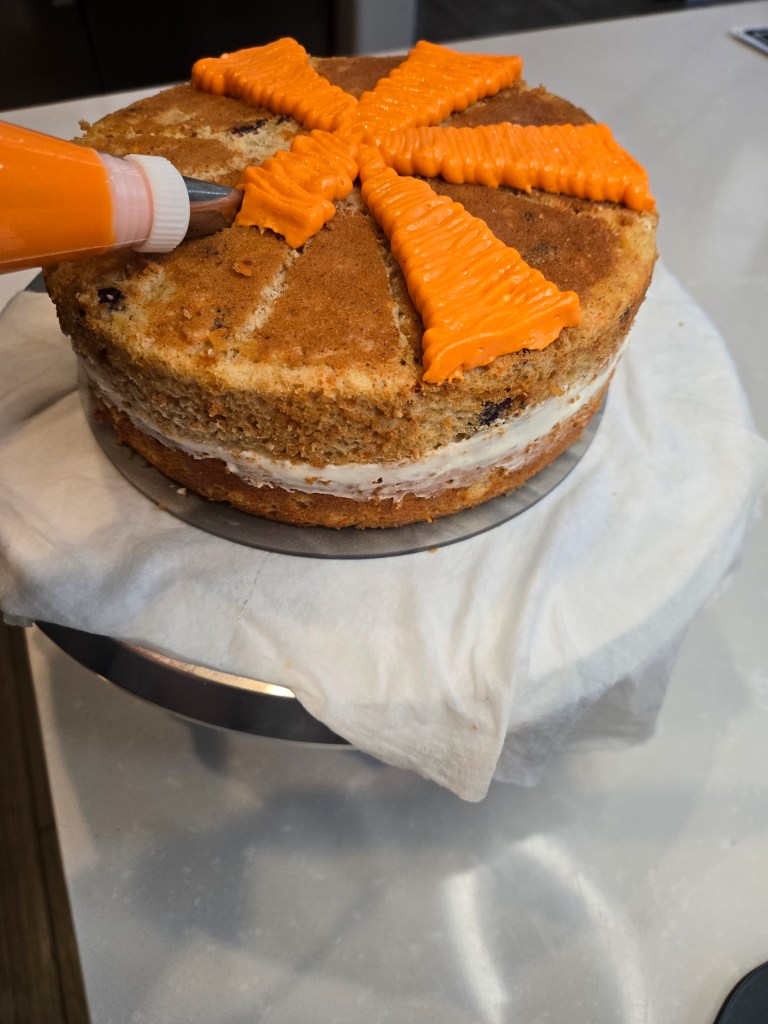
Then slowly pipe ribbons back and forth, making each pass a bit wider while staying inside the lines we drew earlier to divide each section. 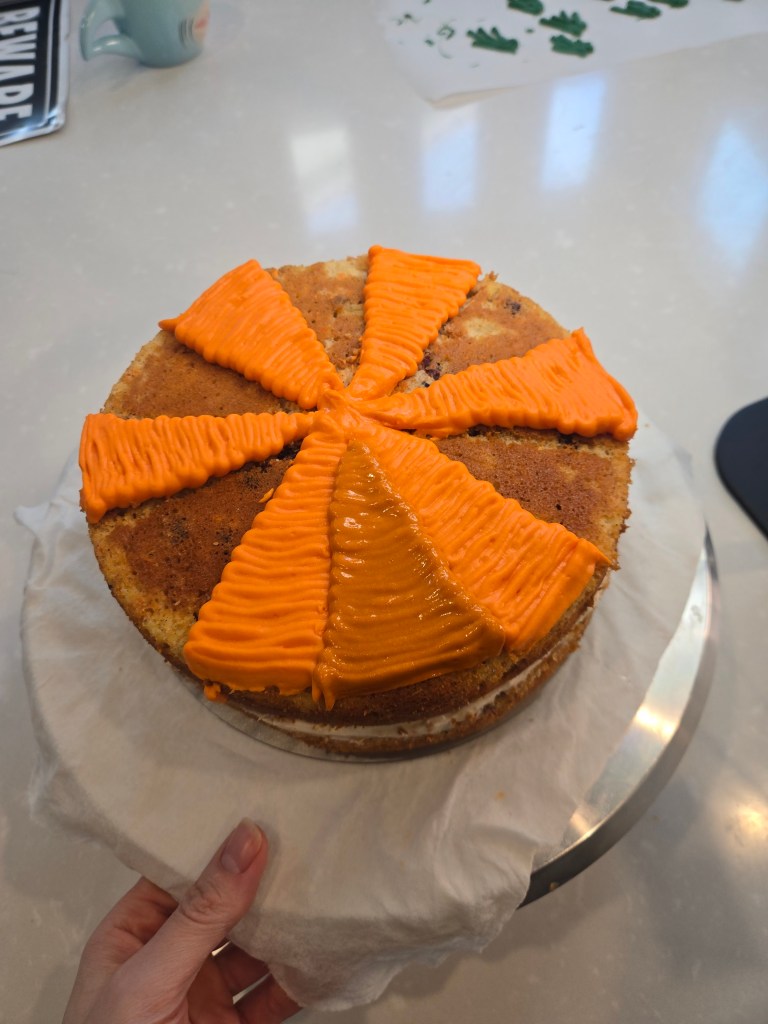
Pipe EVERY OTHER slice space with bright orange; once finished, add ONE DROP of brown gel dye to your remaining frosting, mix well, load into a new piping bag, and repeat piping carrots in the remaining spaces. 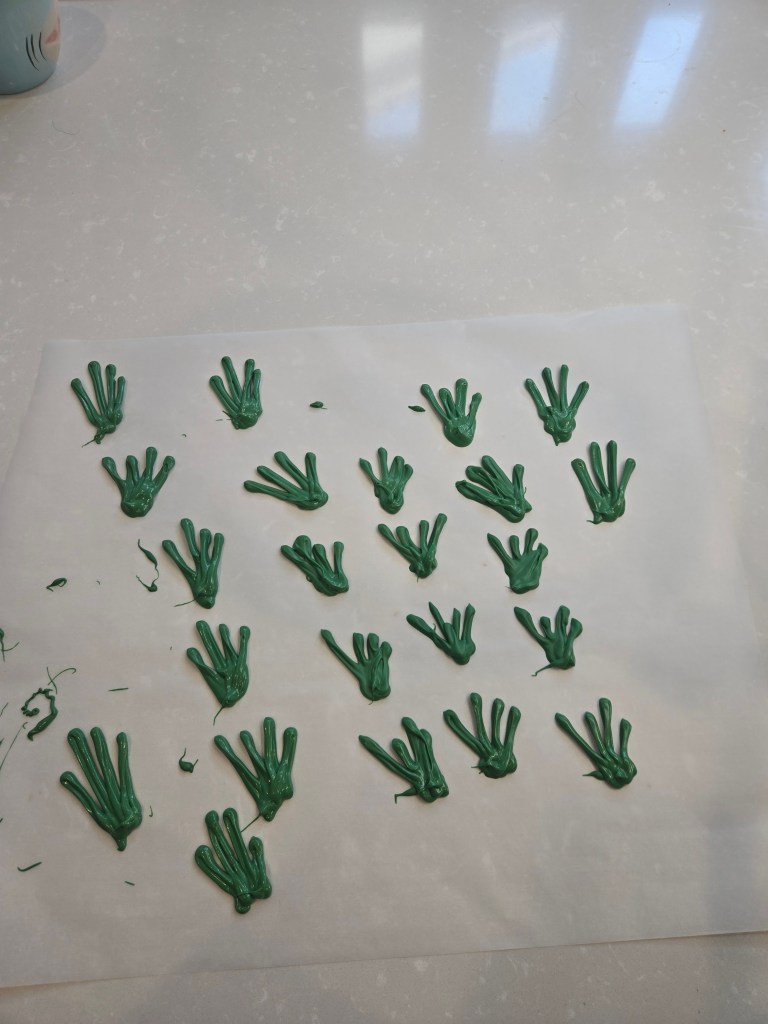
Melt chocolate melts according to package directions, load into a piping bag, snip the tip, and just draw carrot toppers freehand, they can and should be messy! 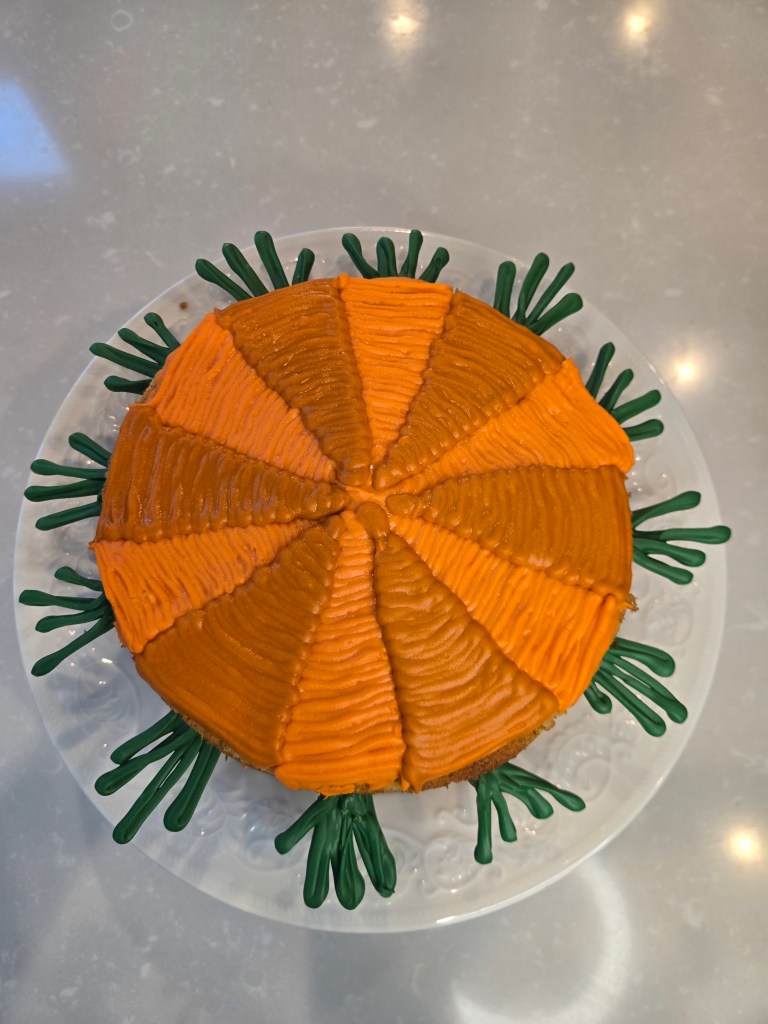
Finish by gently inserting the carrot tops either into the top layer of the cake or the cream cheese frosting layer. Follow along to make your own bunny-approved cake…I’m ~rooting~ for you. Recipe and Instructions
Gluten free carrot cake with cream cheese frosting
A fun option for Easter and spring celebrations
If not gluten free, use any kind of white or yellow cake mix. Monkfruit can also be replaced with regular powdered sugar for frosting. Protein powder can also be replaced with additional monkfruit or regular powdered sugar; note: you will need WAY less liquid in the frosting without protein powder.
Ingredients
CAKE
*1 box of gluten free yellow cake mix (I used King Arthur GF)
*2/3 cup fat free or skim milk
*113 g (1/2 cup) fat free Greek yogurt
*4 eggs
*38 g (2 TBS) no sugar added applesauce
*75 g grated carrots, processed to small pieces in a food processor
*80 g raisins or dried cranberries
*226 g (8 ounce tin) crushes pineapple with juices
*1.5 tsp cinnamon
*1 tsp ground ginger
*1/4 tsp nutmeg
*1/4 tsp cloves
FROSTING
*112 g (1/2 cup) butter, softened
*226 g (8 ounces) 1/3 the fat cream cheese, softened
*12 ounces Lakanto powdered monkfruit
*4 ounces Quest vanilla milkshake protein powder (cuts the sweetness of the monkfruit and makes a nice, stiff, spreadable frosting; omit and use all monkfruit if desired)
*1 TBS clear vanilla
*1/2 cup plus 2 TBS milk
*1/4 tsp citric acid if you like less sweet frosting
Directions
- Preheat oven to 350 and grease two 8-inch pans.
- Whisk cake ingredients together in a stand mixer on low for 30 seconds before switching to medium-high for two minutes.
- Pour batter evenly into pan and bake for 35-38 minutes, or until a toothpick comes out mostly clean from the center.
- Allow cake to cool fully before frosting.
- To make frosting, whisk butter and cram cheese for 3 minutes before adding in half the powdered monkfruit, protein powder, vanilla, citric acid if using, and milk.
- Add in remaining monkfruit mix fully.
- Once fully cooled, frost your cake and use the video and galleries above to decorate.
- Keep cake covered and in the fridge. It is best served at room temp, so remove from fridge 30 minutes before eating. Enjoy!
Nutrition
Macros
12 servings
324 cal/55.4 c/7.2 f/9.5 p per slice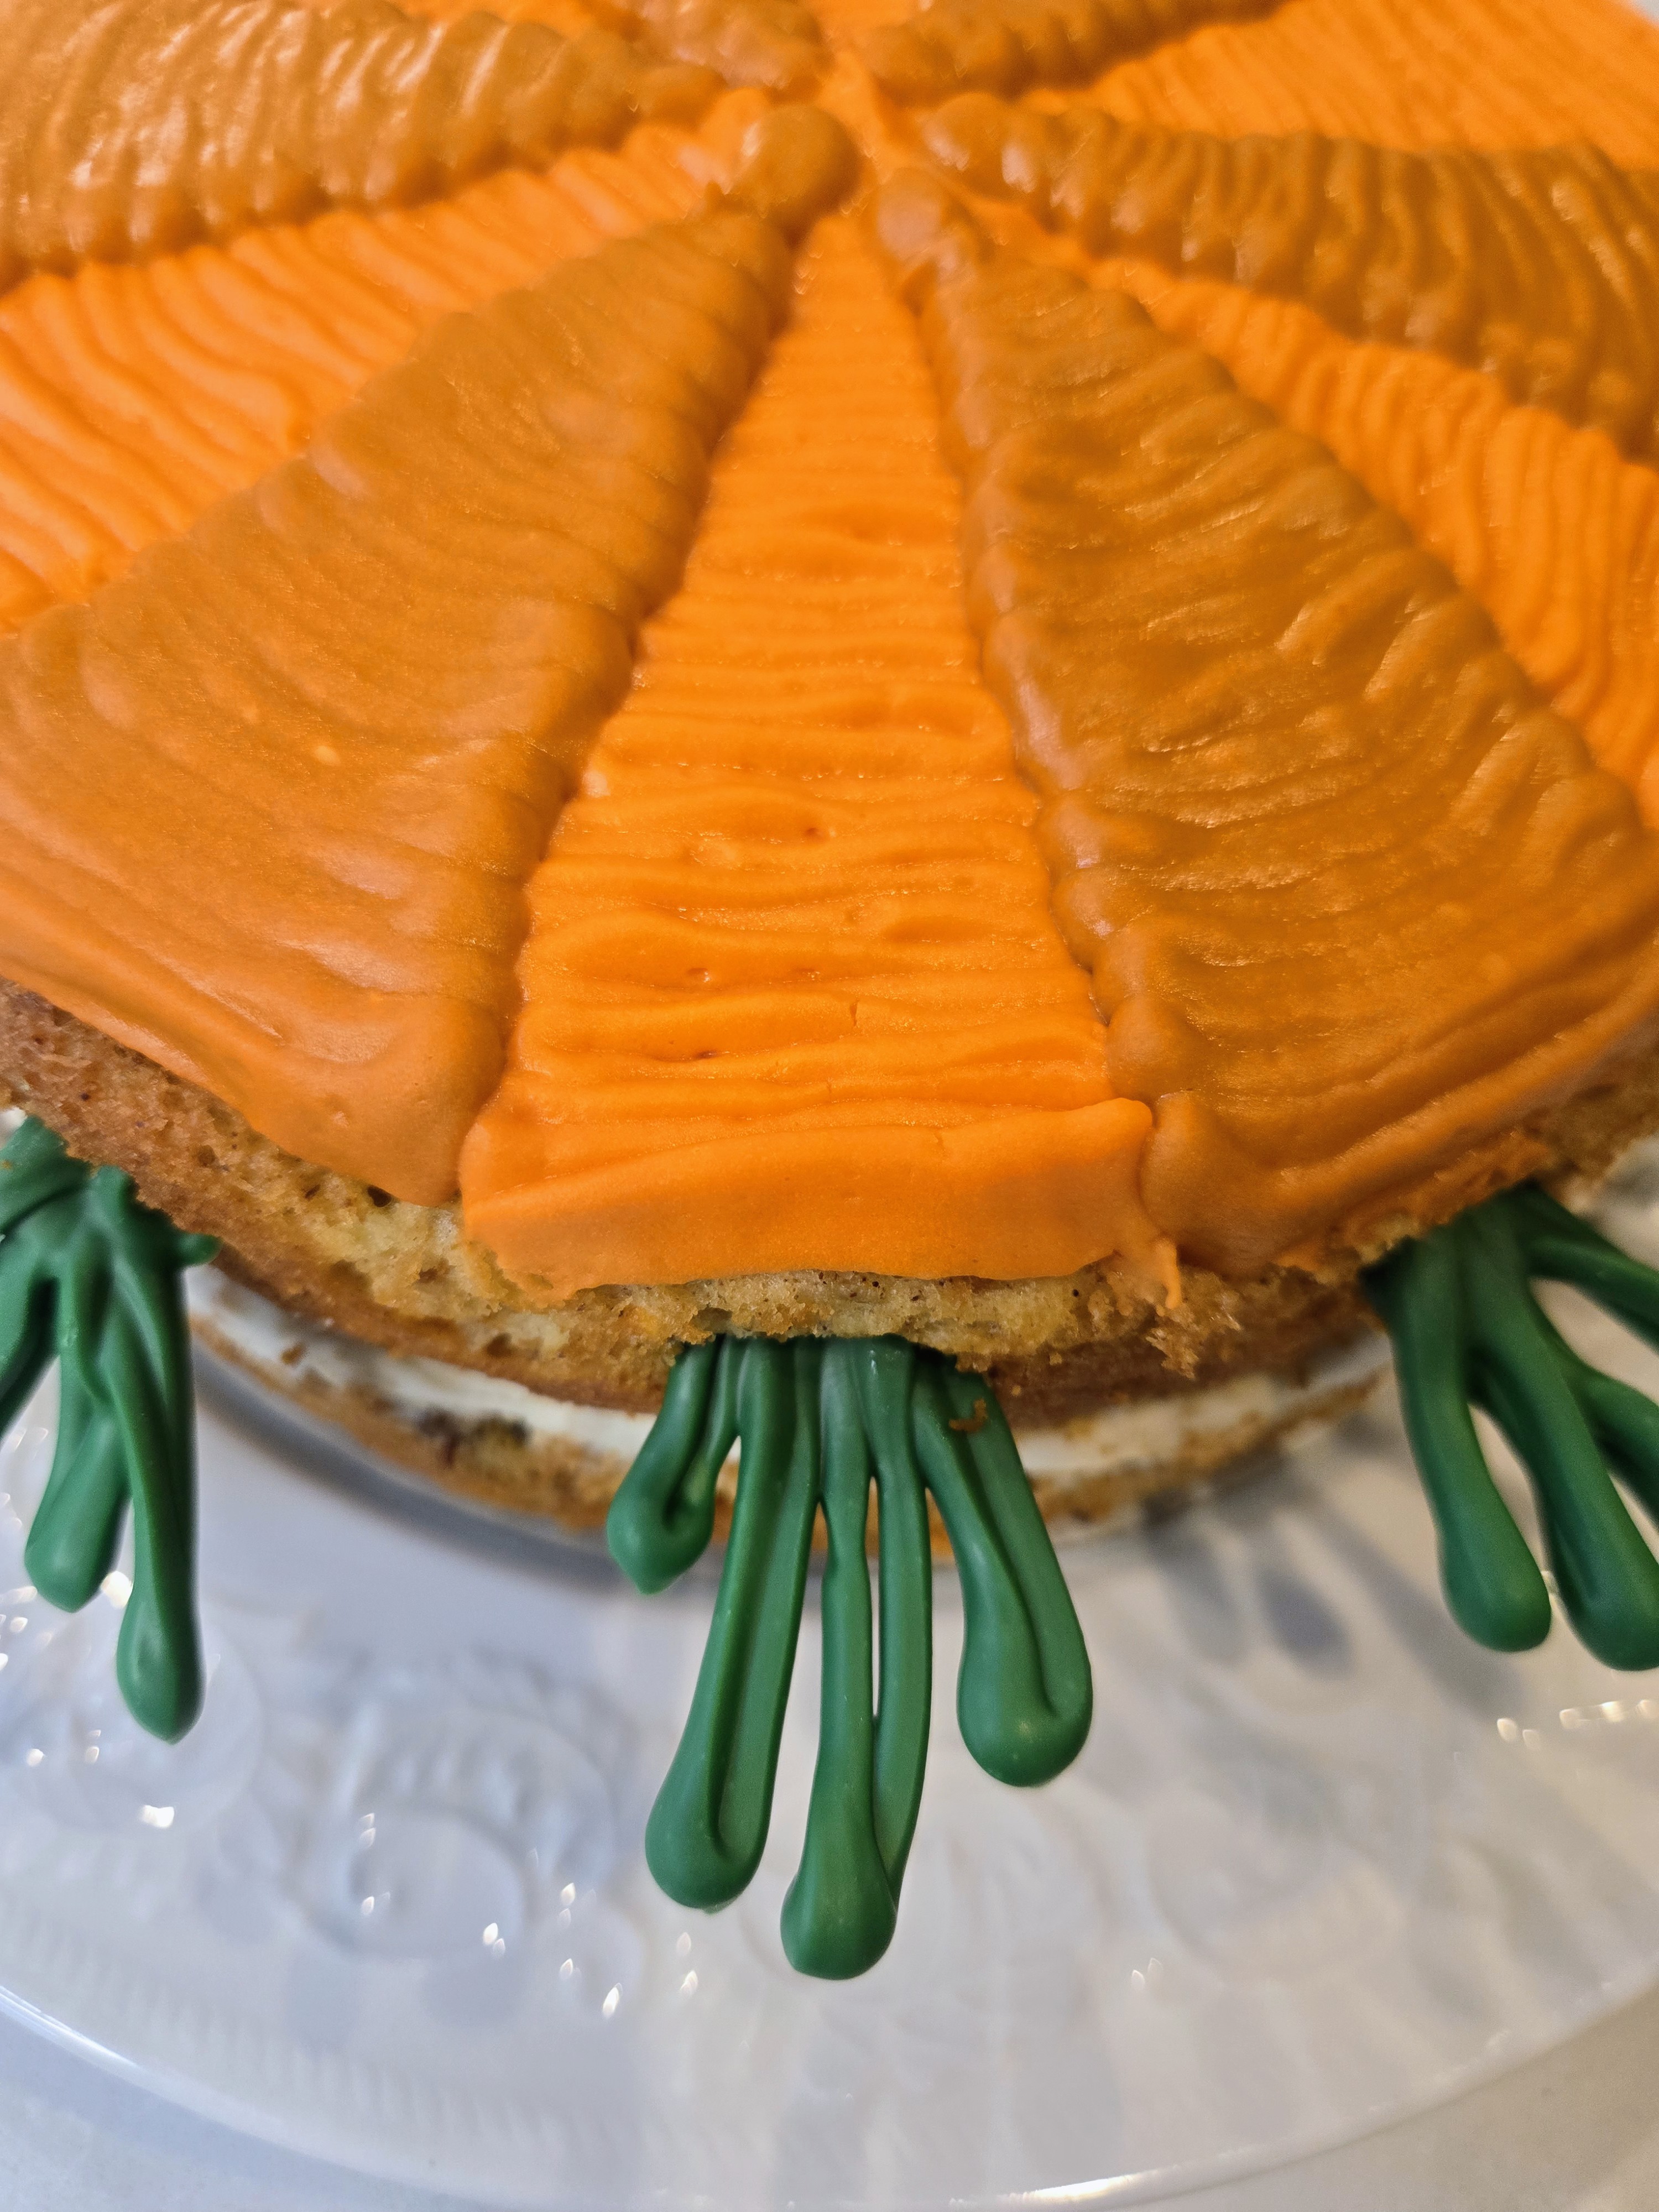
Locally sourced from my kitchen. 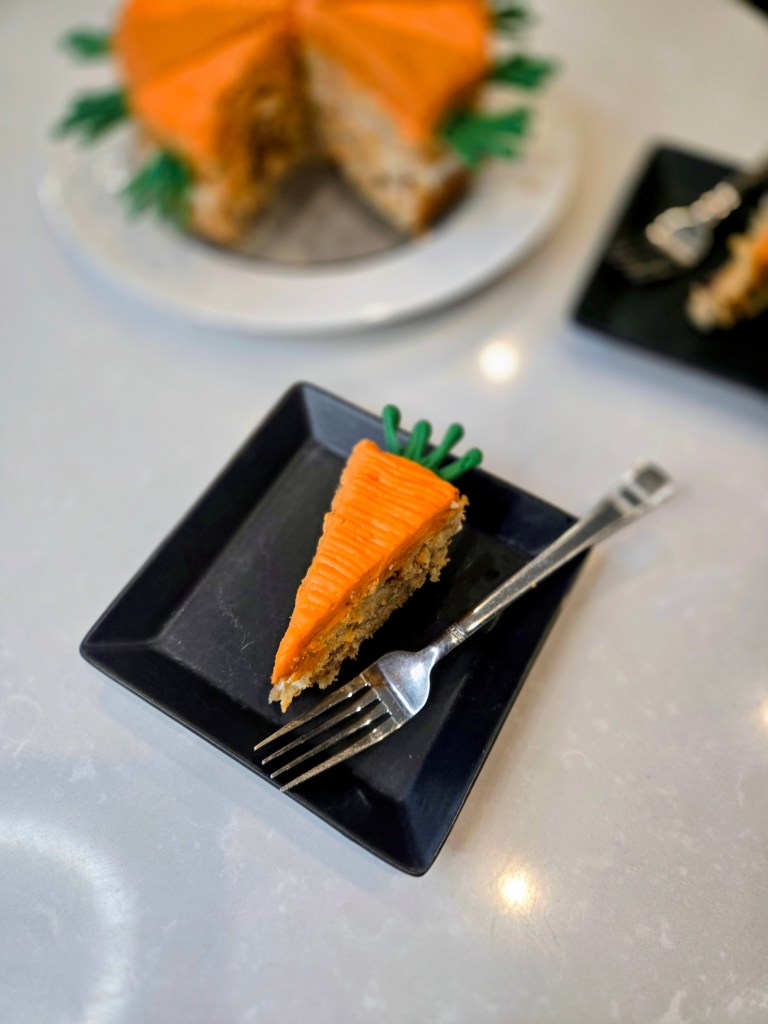
Eating your vegetables has never been more delicious. - Preheat oven to 350 and grease two 8-inch pans.
-
Baileys Shamrock Cookies
If you’re looking for a dessert that screams St. Patrick’s Day without requiring a full baking marathon, these gluten free Baileys shamrock cookies are about to shamrock your world. Soft cookies get a splash of Baileys (for the Irish spirit, obviously), then take a dramatic dip in white chocolate and a generous shower of green sprinkles because subtlety is not invited to this party. The best part? They’re ridiculously easy to make, which means you can whip up a whole batch faster than a leprechaun can guard his pot of gold. Translation: if you suddenly remembered you promised to bring dessert to a St. Patrick’s gathering… congratulations, you just got lucky. These cookies come together quickly, look ridiculously cute, and deliver just enough Baileys flavor to make people think you tried harder than you did. So grab the sprinkles, pour yourself a little “baker’s tasting” Baileys, and get ready to serve up a treat so good you’d find it at the end of the rainbow.
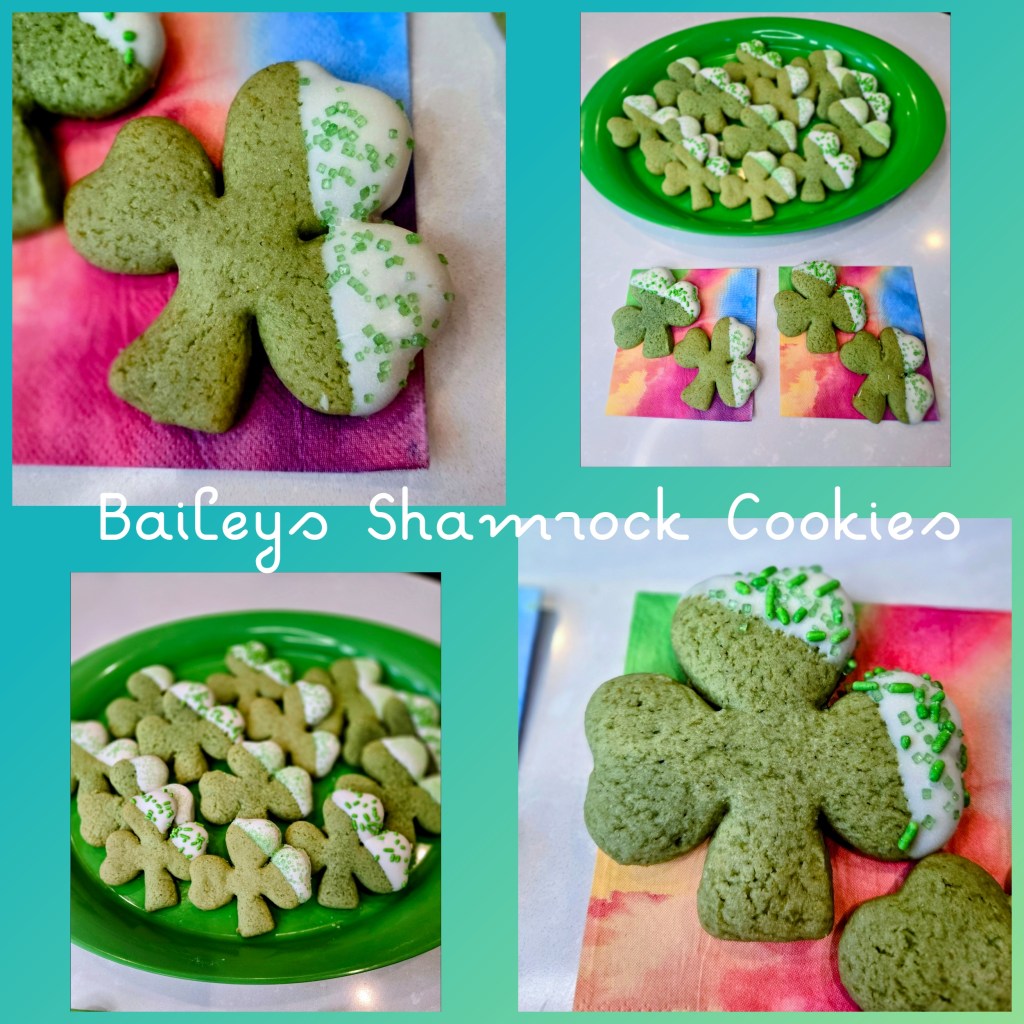
White chocolate + Baileys = pot of gold energy. Grab your sprinkles and a (another) splash of Baileys (because why not) and follow along with the step-by-step photo tutorial and recipe below to bake up your own batch of lucky little shamrocks. You’ve got the luck of the Irish in the kitchen! You need:
- Shamrock cookie cutter
- Various green sprinkles
- Cookie recipe below
- White chocolate melts
- Rolling pin
- Parchment paper
- Cooling rack
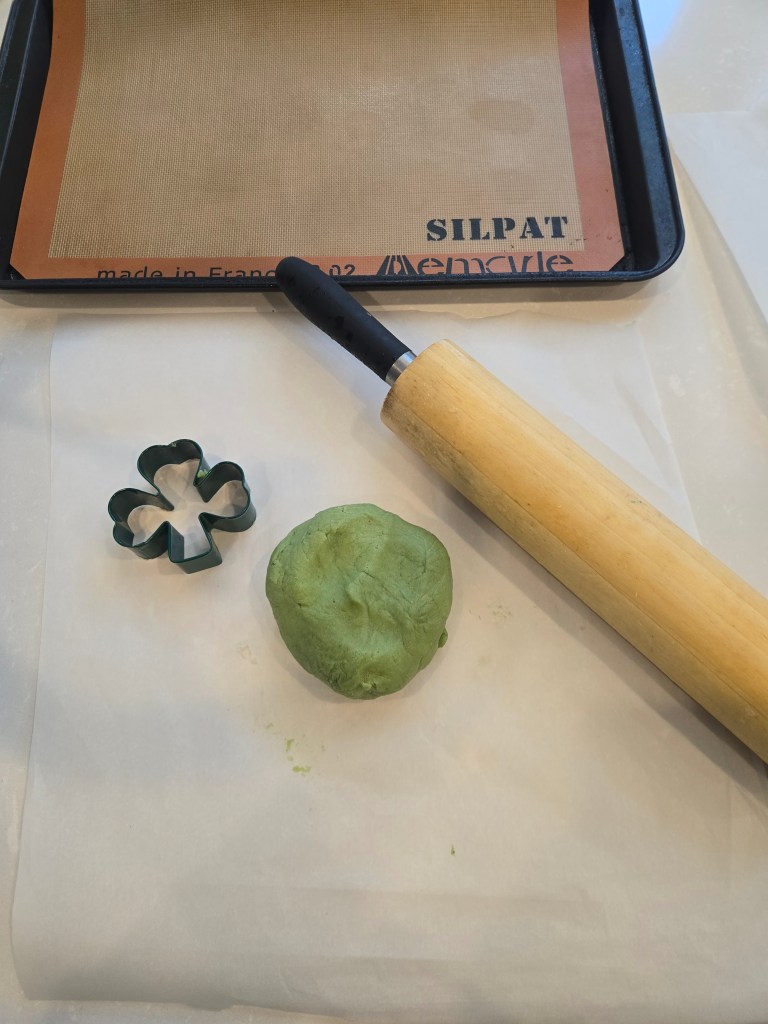
Make dough recipe below. Place a sheet of parchment paper down, and add half your chilled dough on top. 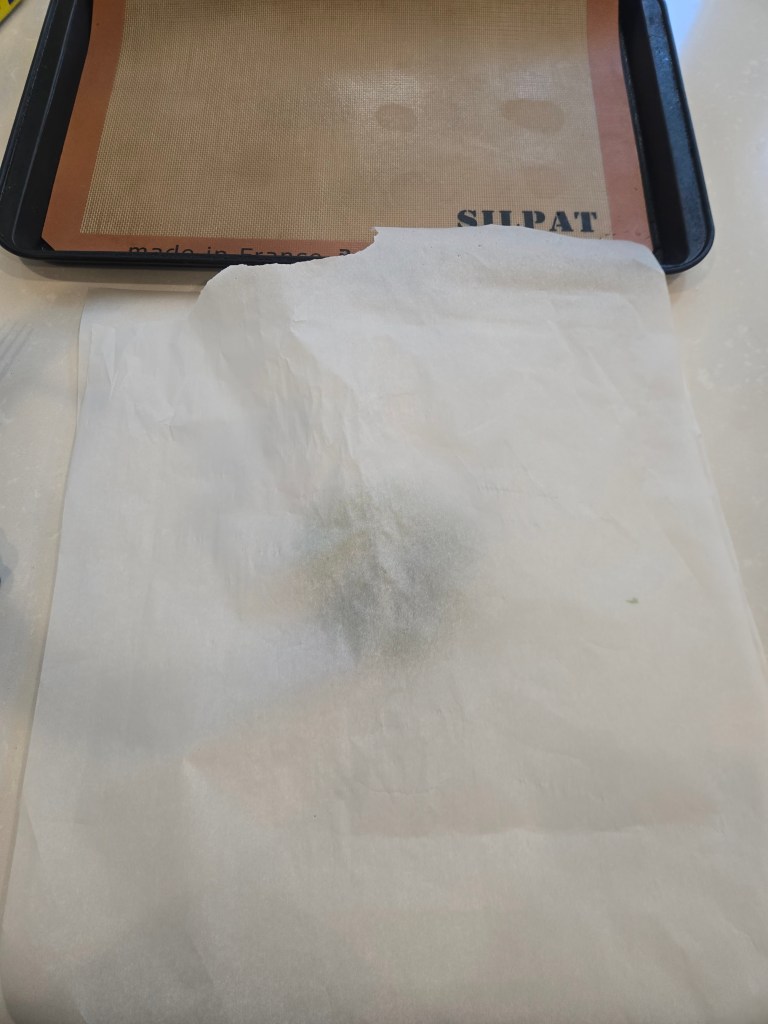
Cover this with another sheet of Parchment (no messy flour dusting this way), and then roll out to 1/4″ thickness. 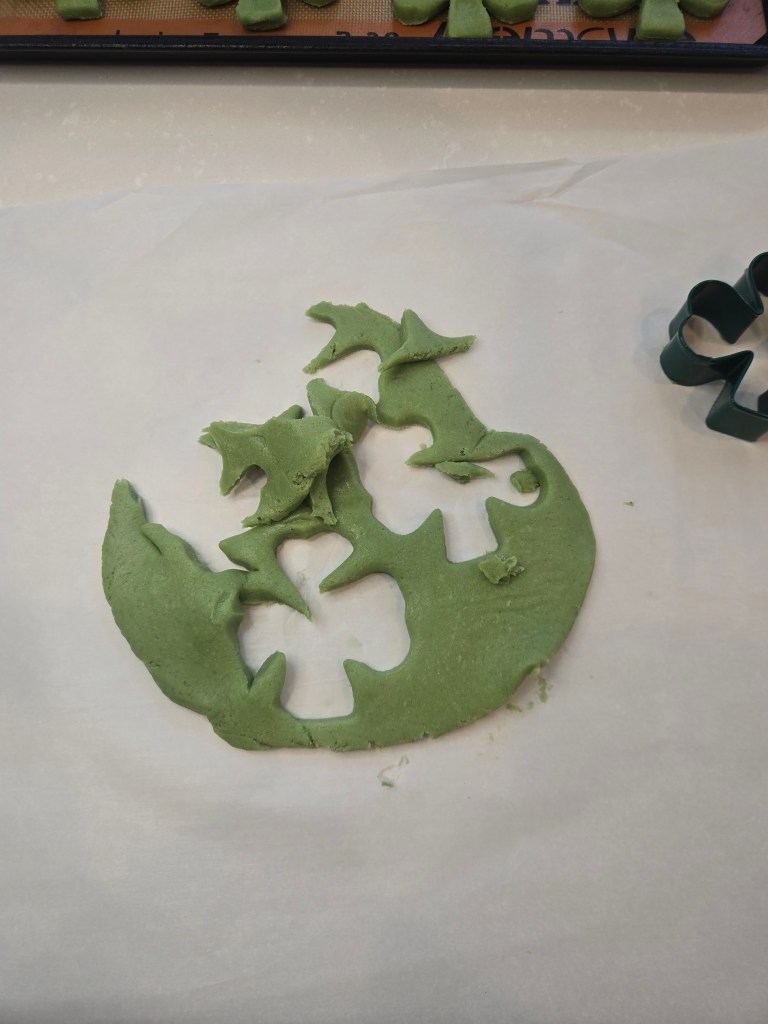
Cut out as many shamrocks as you can, then re-roll the leftover dough, and cut out more. Grab the second half of your dough. Repeat until you have 24 shamrocks. If your dough gets too warm, just pop back into the freezer. 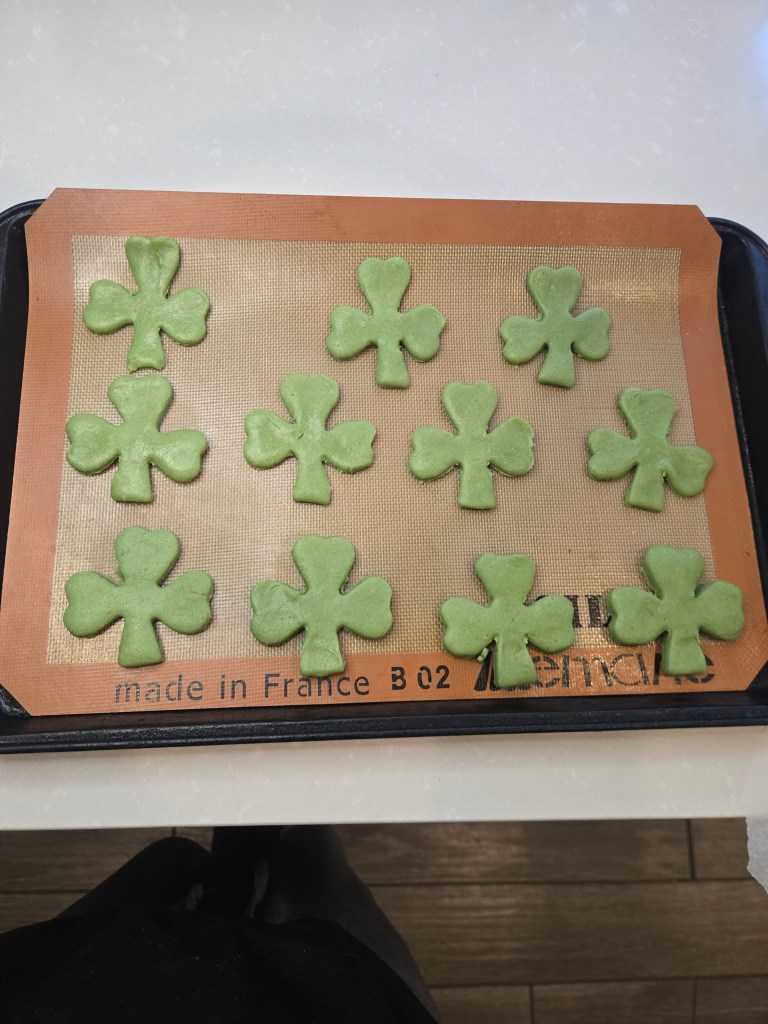
Add 10-12 shamrocks to a cookie sheet with Parchment or a Silpat liner. Place in the freezer for 10-15 minutes so the cookies retain their shape. DO NOT SKIP THIS STEP. 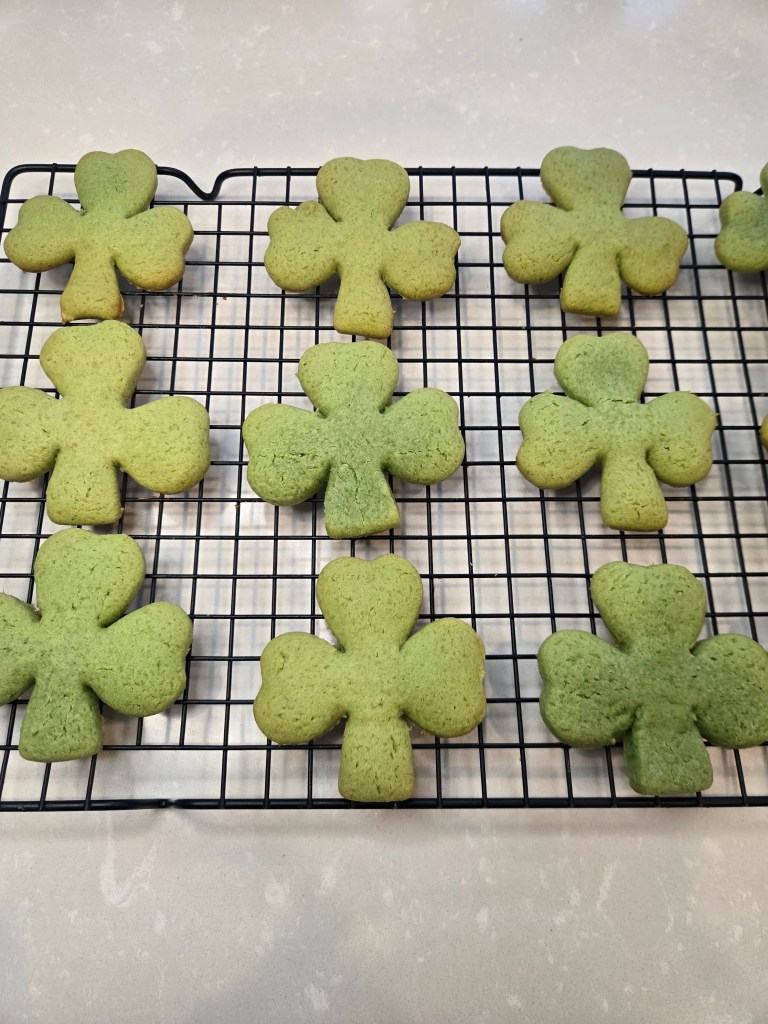
I like “underdone” cookies, so after chilling, I baked for 10 min @ 350 degrees. Let cool FULLY on a cooling rack before adding chocolate. 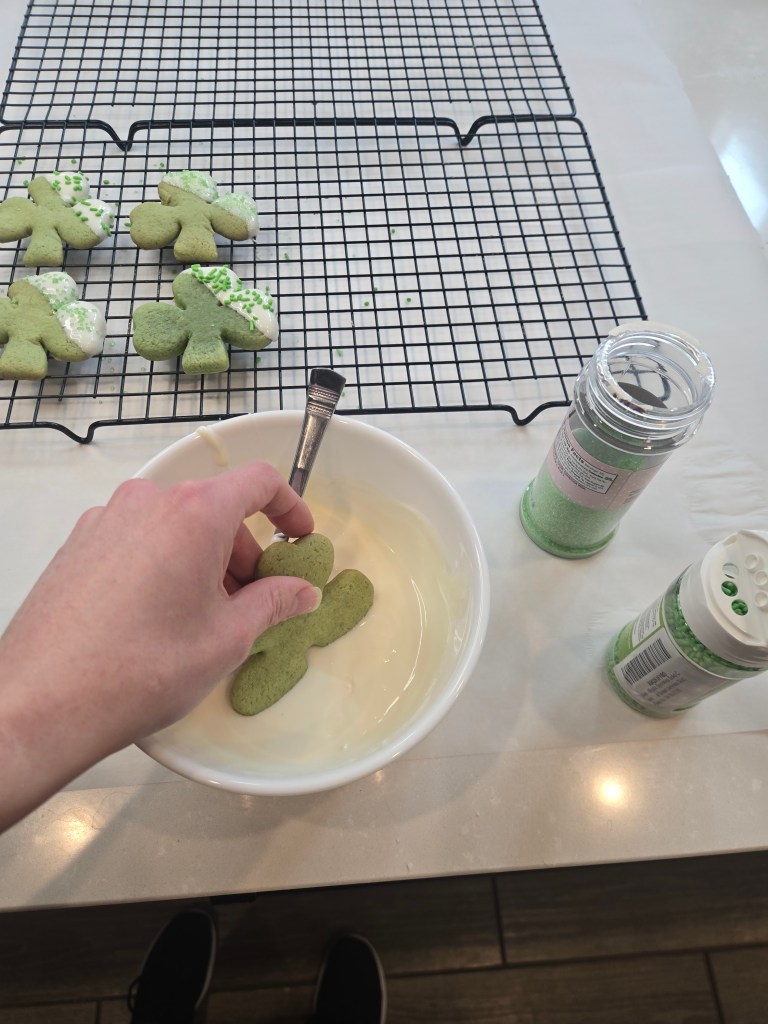
Melt chocolate in a bowl according to package directions, then dip the edge of a cookie into the bowl at an angle. 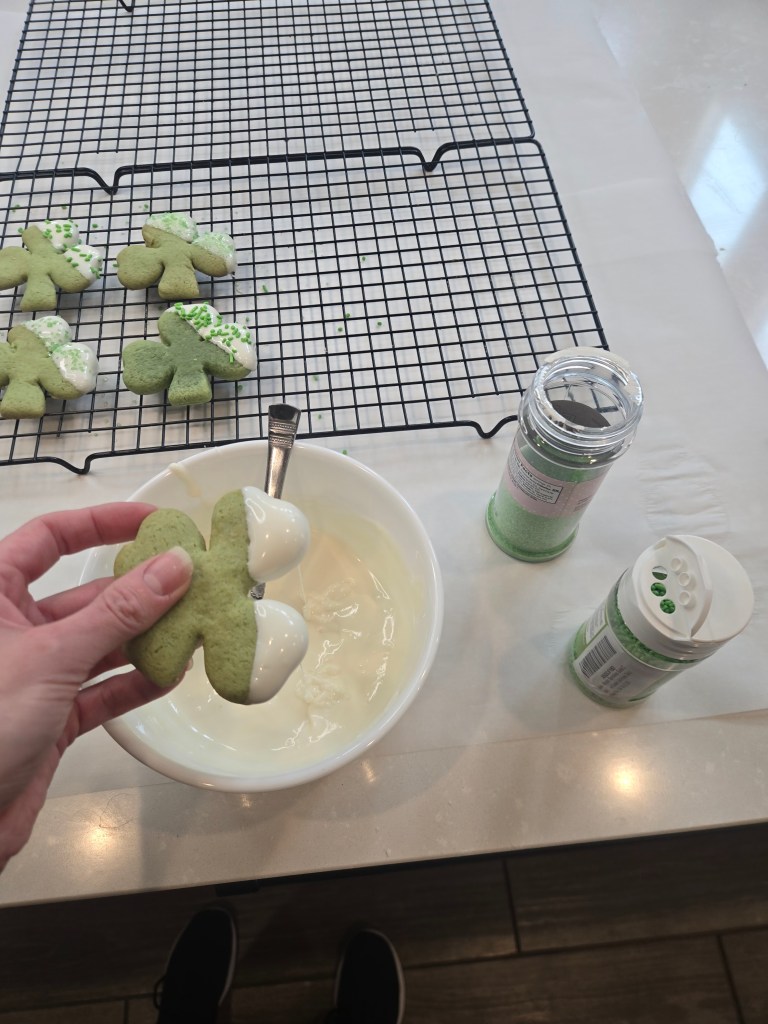
Pull up and out quickly, swiping the bottom of the cookie on the side of the bowl to get off excess chocolate. 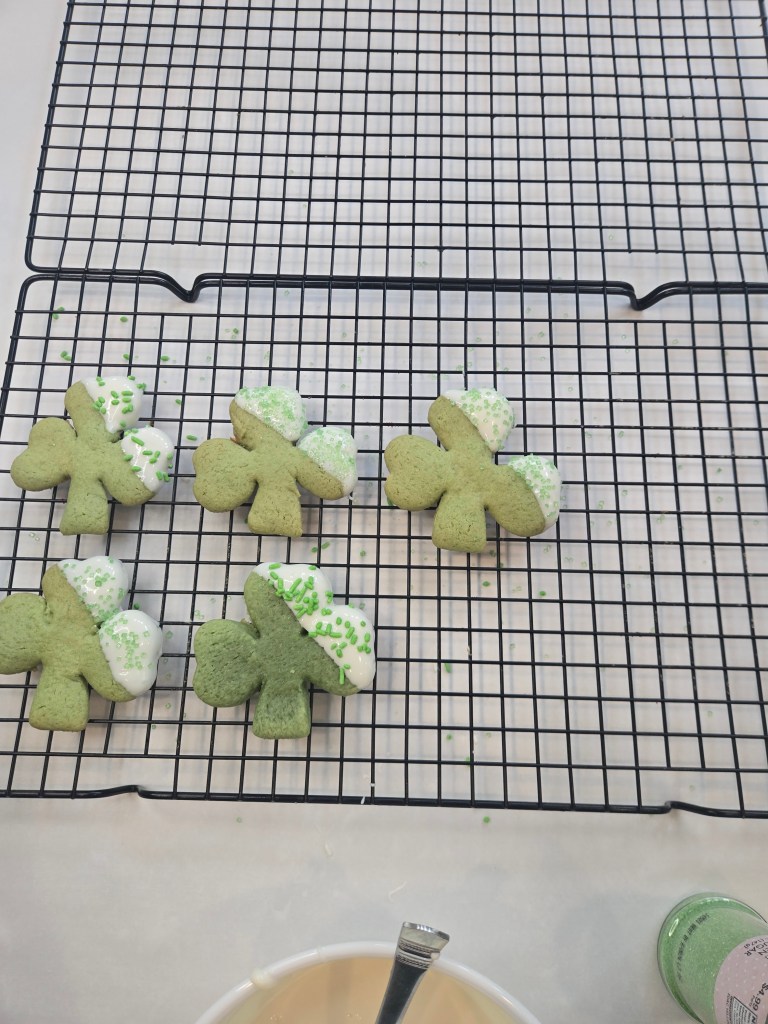
Place on a cooling rack and add sprinkles immediately before chocolate sets. Let these rest for 30 minutes before moving. 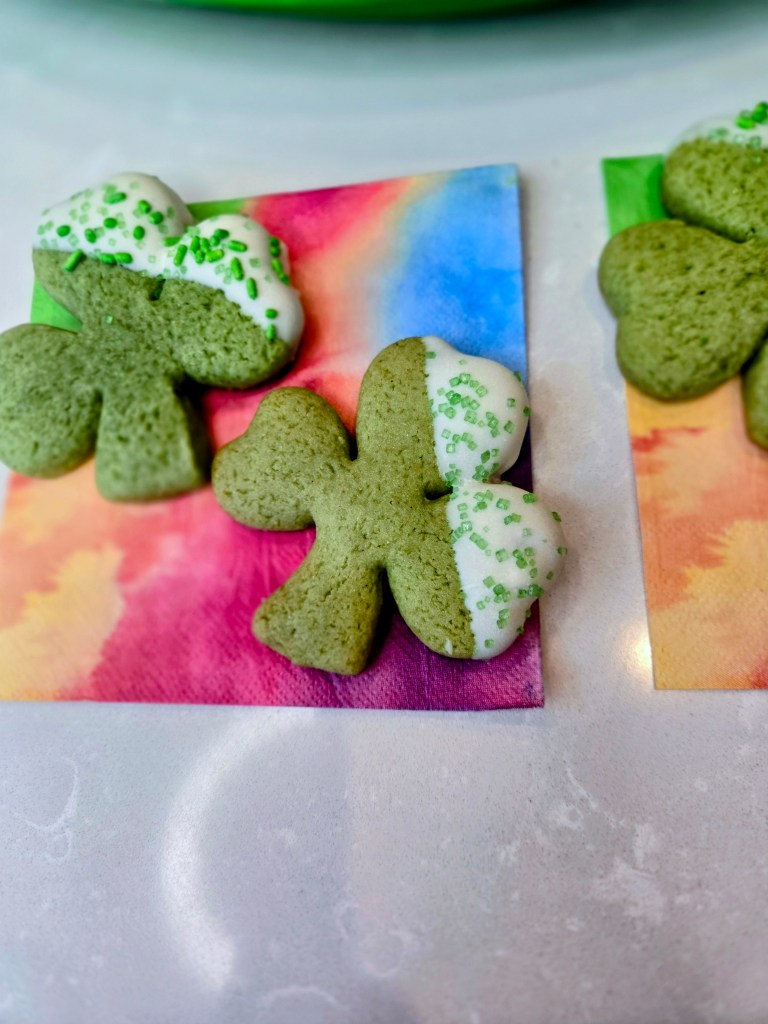
You might need to “pop” each cookie off the rack if the chocolate has stuck it to the rack. Just use your fingers to gently pop each cookie up from the BOTTOM of the rack. Recipe and Instructions
Baileys shamrock cookies
Adult sugar cookies perfect for St. Patrick's parties
You can definitely use all purpose flour if not gluten free. You can also substitute alcohol with the flavor of your choosing; to make kid-friendly, swap the booze for milk.
Ingredients
- FOR COOKIES
- 3/4 cup of butter at room temp
- 1 1/2 cups of Lakanto golden monkfruit sweetener (regular brown sugar also works just fine)
- 2 large eggs at room temp
- 3 TBS Baileys flavor of choice (I used their light flavor with 40% less sugar in it)
- 2 tsp vanilla extract
- 3 1/3 cups gluten free measure-for-measure flour
- 1 tsp baking powder
- 1/2 tsp baking soda
- Mint or green gel dye
- Shamrock cookie cutter
- 1 bag of white chocolate melts (I used about 2/3 bag)
Directions
- Mix butter and sugar until light and fluffy.
- Add eggs, extract, Baileys, and mint or green gel dye mixing well.
- Add baking soda, baking powder, and 1/3 of the flour, mixing well.
- Add remaining flour in 1/3s, mixing well (add more orange dye if you need to).
- Roll dough into a large ball, wrap with cling wrap, and place in freezer for 30 minutes.
- Once chilled, roll out half of the dough with a rolling pin dusted with flour, or cover the ball with two sheets of Parchment paper (my preferred method). Roll to about 1/4″ thickness.
- Cut out shamrocks with cookie cutter; repeat with remaining dough.
- Place Parchment paper or silicone mats on large baking trays. Put 12 cookies on each tray, placing in the freezer to firm for 10-15 minutes before baking.
- Preheat oven to 350 while dough chills.
- Bake one sheet of cookies at a time to desired doneness. For softer cookies, bake 8 minutes. For crunchier cookies, bake 10 minutes.
- Let cookies cool on the sheet for 5 minutes before removing to a cooling rack to cool completely.
- Once all cookies have cooled, melt white chocolate in a microwave safe bowl. I used 50% power for 1 minute, stirred, and heated again for 30 seconds at 50% power to get things smooth and melty.
- Dip the outer edge of the shamrock at an angle to coat two out of the three clover sides.
- Place on Parchment or a cooling rack with Parchment underneath and IMMEDIATELY dust with sprinkles before chocolate sets.
- Let all cookies harden for 30 minutes before placing in airtight container to save.
Nutrition
Per Serving: 125.5 calories per cookie
6.3 fat/16.3 carbs/0.9 protein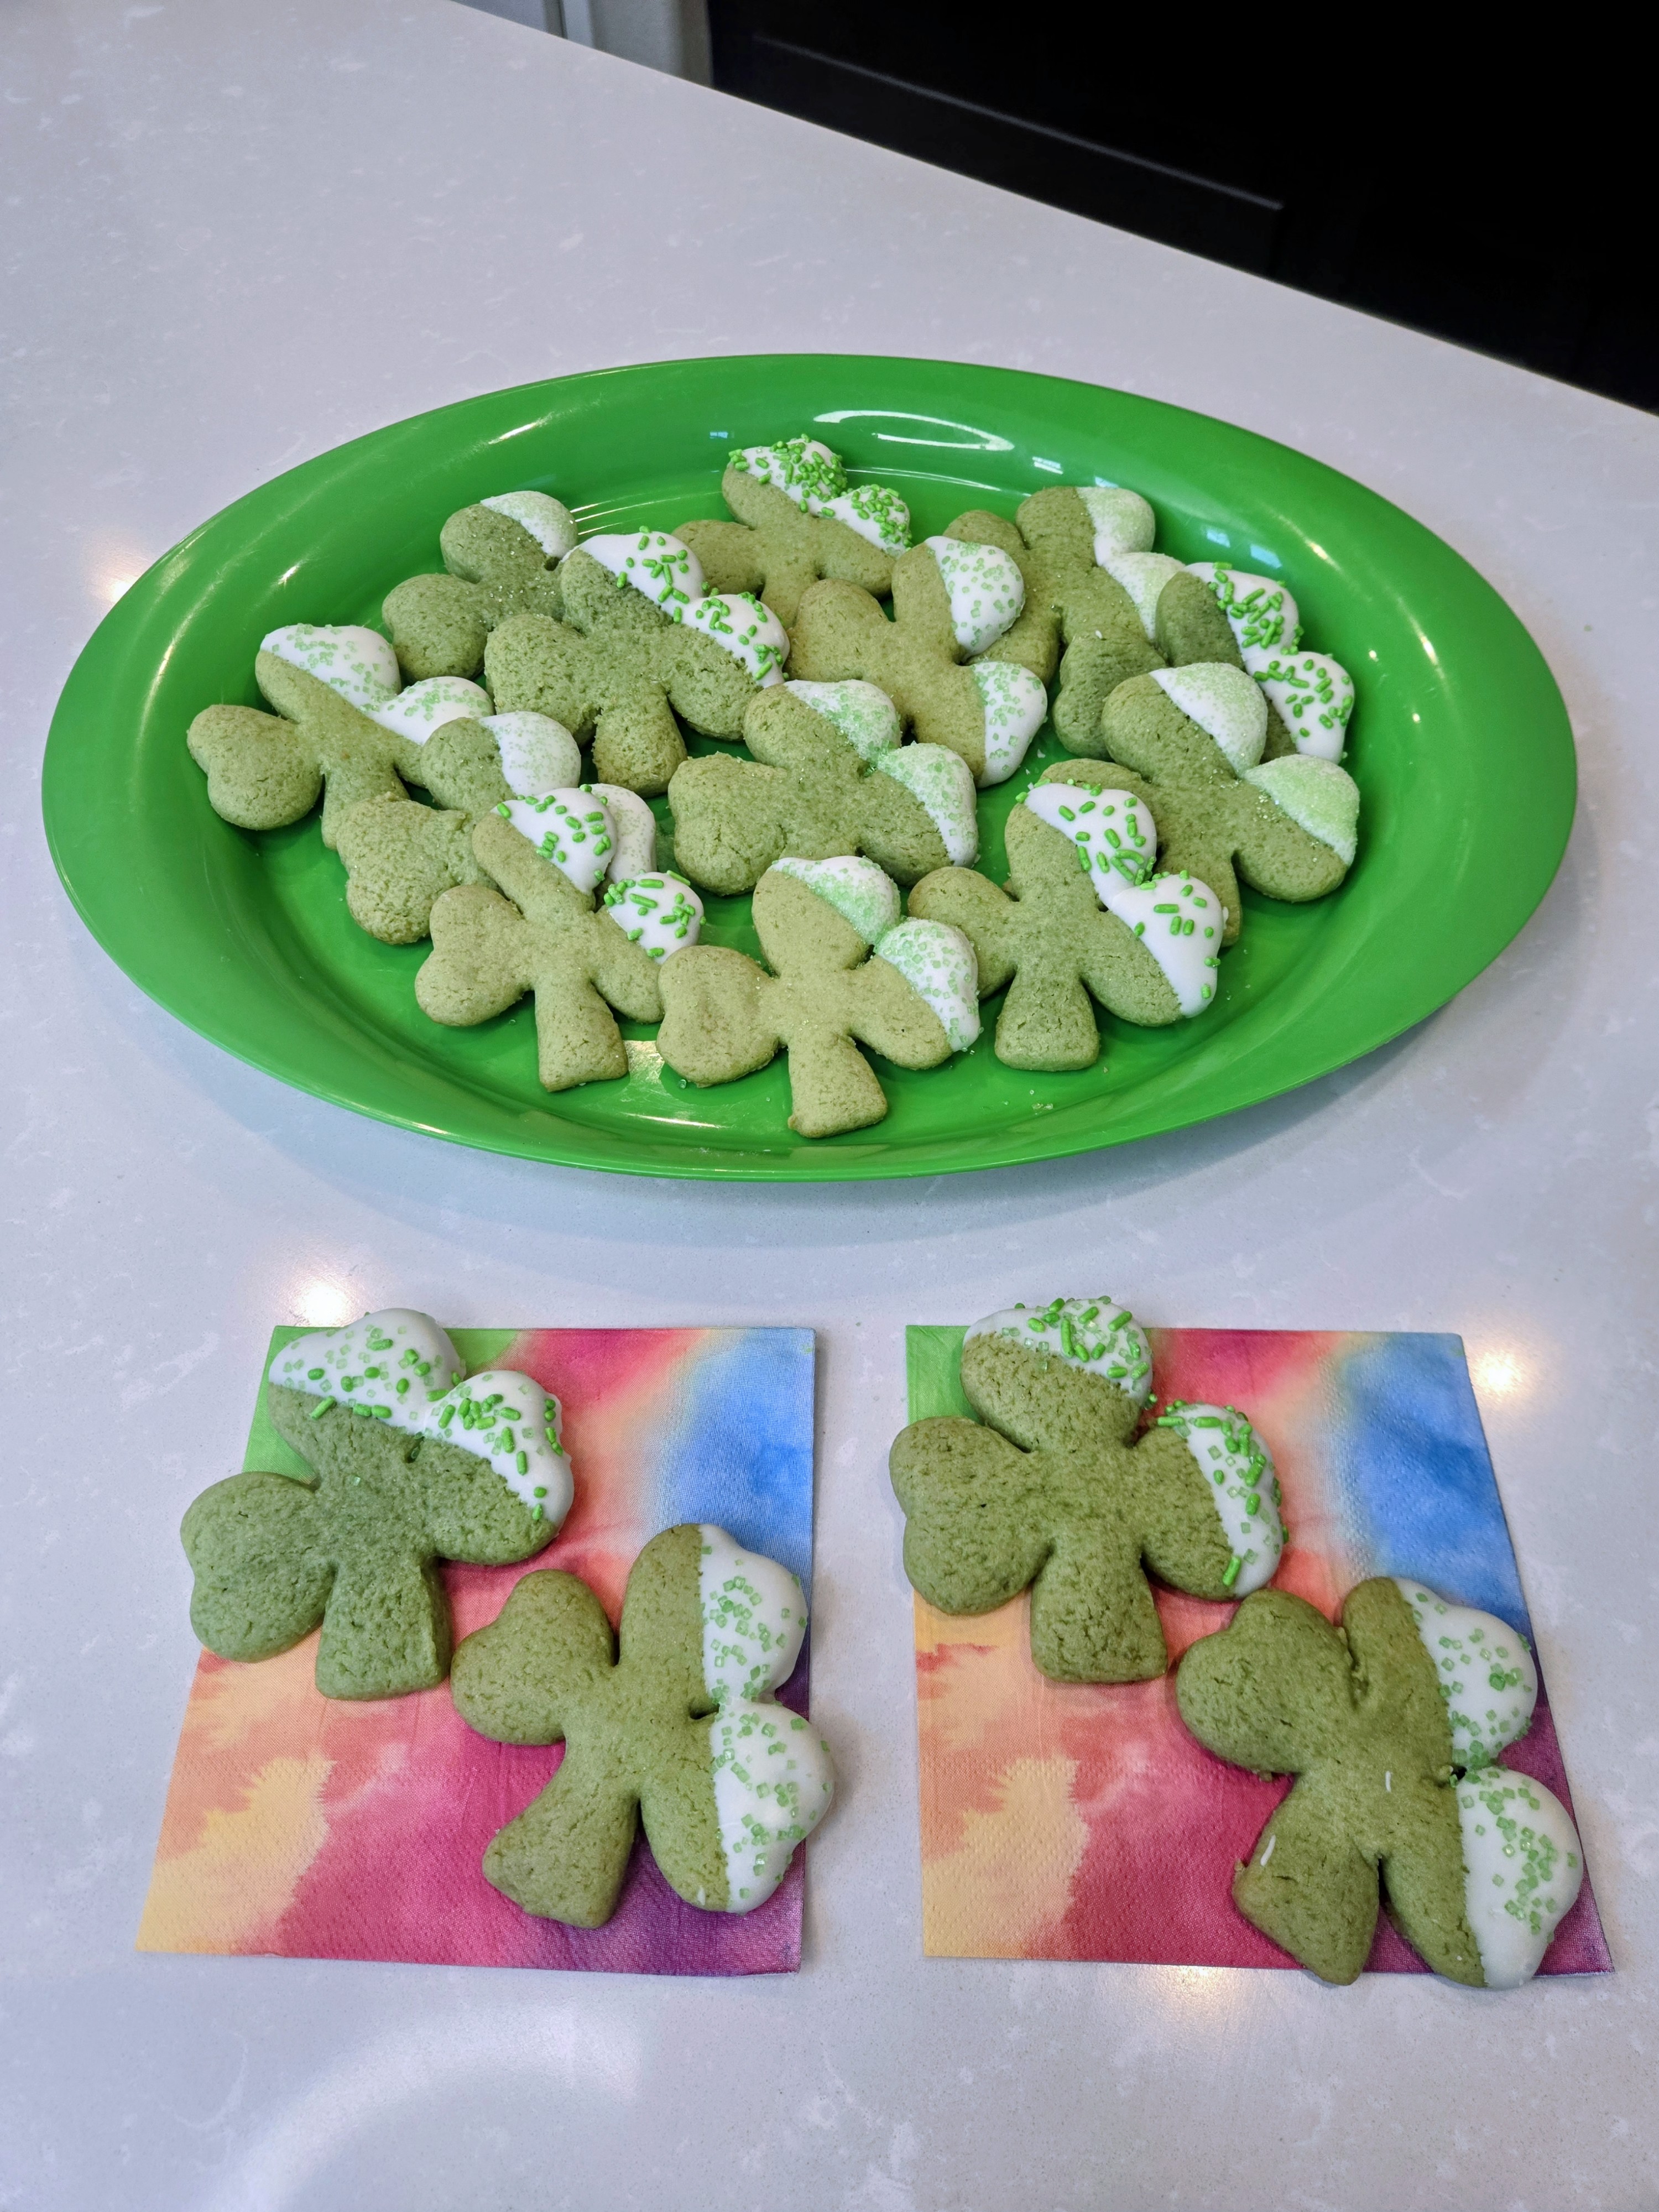
The only shamrocks I’m interested in finding. 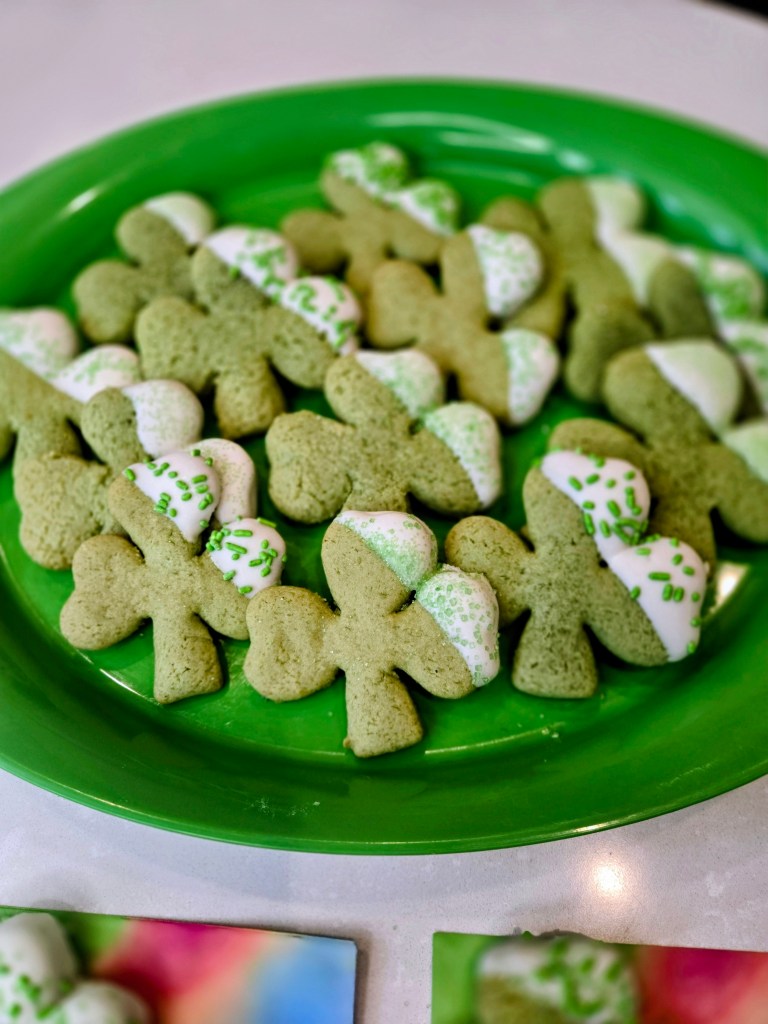
Just here for the Baileys because it isn’t over til it’s clover, baby. -
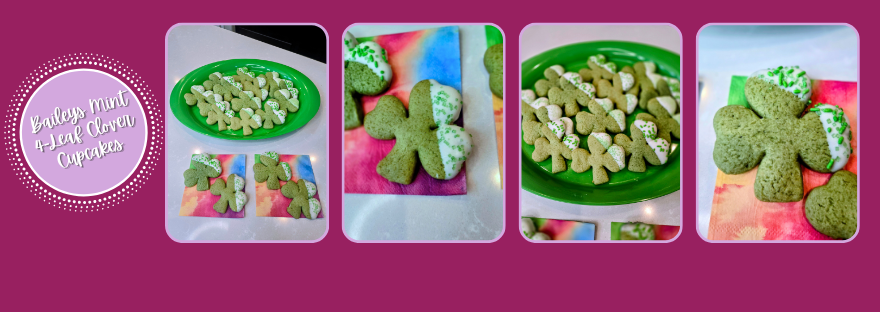
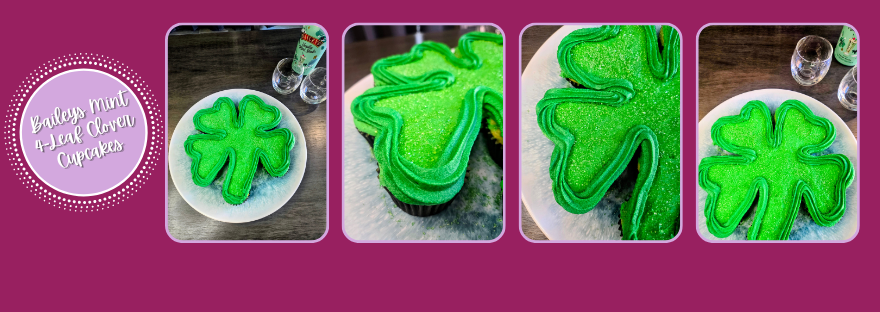
Pull Apart 4-Leaf Clover Cupcakes
Jump to recipe and instructions
The last few days have been a collective blur of checking the clock and thinking, there’s no way that’s the correct time. Nothing wrecks your circadian rhythm quite like daylight saving time. At this point, I’ve decided the only real perk of having no clue what time it is is that it’s technically never the wrong time for cake. Is it breakfast or 12:30? No idea: have cake. Am I getting ready for dinner or accidentally preparing for bed at 7 p.m.? Couldn’t tell you: have cake. Mild existential confusion about the concept of time itself? You guessed it: have cake. I’m also convinced DST lands suspiciously close to St. Patrick’s Day so we’re all slightly delirious and extremely open to the idea of a stiff drink by the time the holiday arrives. Coincidence? Or Big Liquor pulling the same seasonal marketing stunt the chocolate and flower industries do for Valentine’s Day? Hard to say. What I do know is that if you’re going to lean into the chaos, you might as well do it properly…with boozy cupcakes. And that’s exactly where these Baileys Vanilla Mint Shake cupcakes come in.
Minty, boozy, and clover-the-top. If you’re going to celebrate St. Patrick’s Day, you might as well do it the lucky way: with cupcakes, Baileys, and a shamrock that’s ready to be pulled apart and devoured. These Baileys Vanilla Mint Shake cupcakes are inspired by that iconic minty shake everyone loses their minds over every March, but this version comes with frosting, cake, and a generous splash of Irish cheer. Arranged into a four-leaf clover pull-apart, they’re basically edible good luck… except instead of finding a lucky charm in the grass, you’re finding it in boozy buttercream.
Each soft, minty cupcake is frosted and nestled into the clover shape so everyone can just grab a piece and go…no slicing, no ceremony, just sweet St. Paddy’s chaos. They’re festive, a little extra, and exactly the kind of dessert that makes people say, “Well aren’t you the lucky one?” And honestly, if Baileys, mint, and cupcakes in the shape of a four-leaf clover don’t count as hitting the dessert jackpot, I don’t know what does. Here’s what you need to make your own pull-apart lucky charm:
- 15 cupcakes & Baileys cream cheese recipe (below)
- Green gel dye
- 1M piping tip
- Green sanding sugar and sprinkles
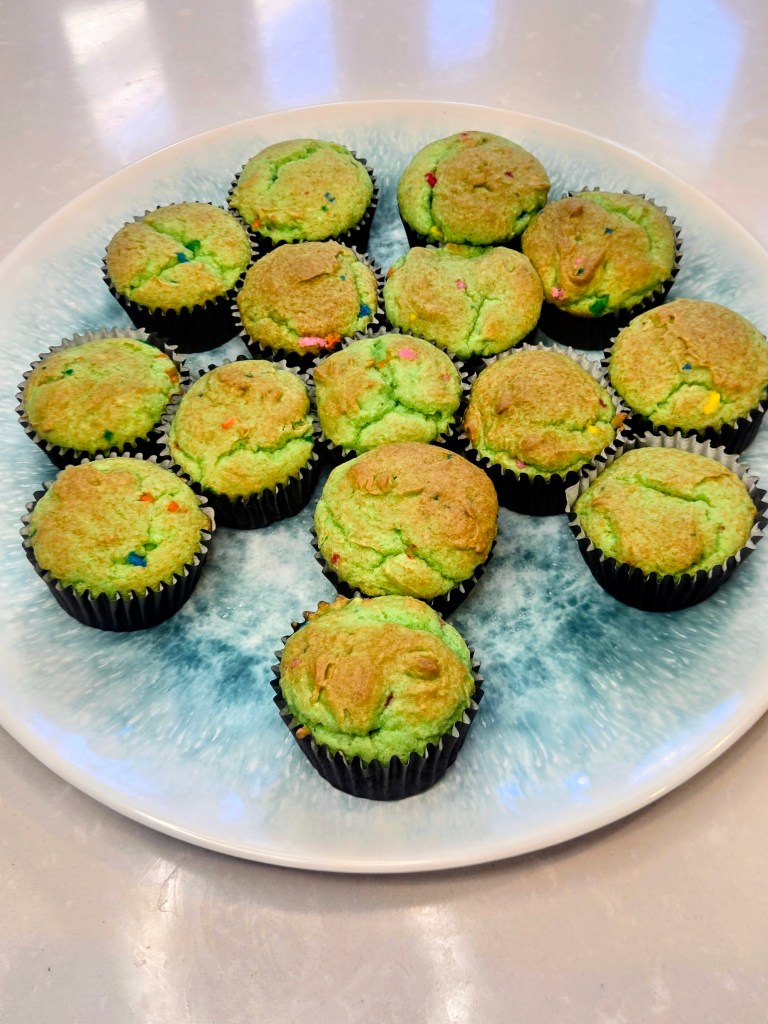
Start by shaping your clover: place three cupcakes together to form an inverted triangle, repeat 3 more times, then use 3 additional cupcakes as the stem. 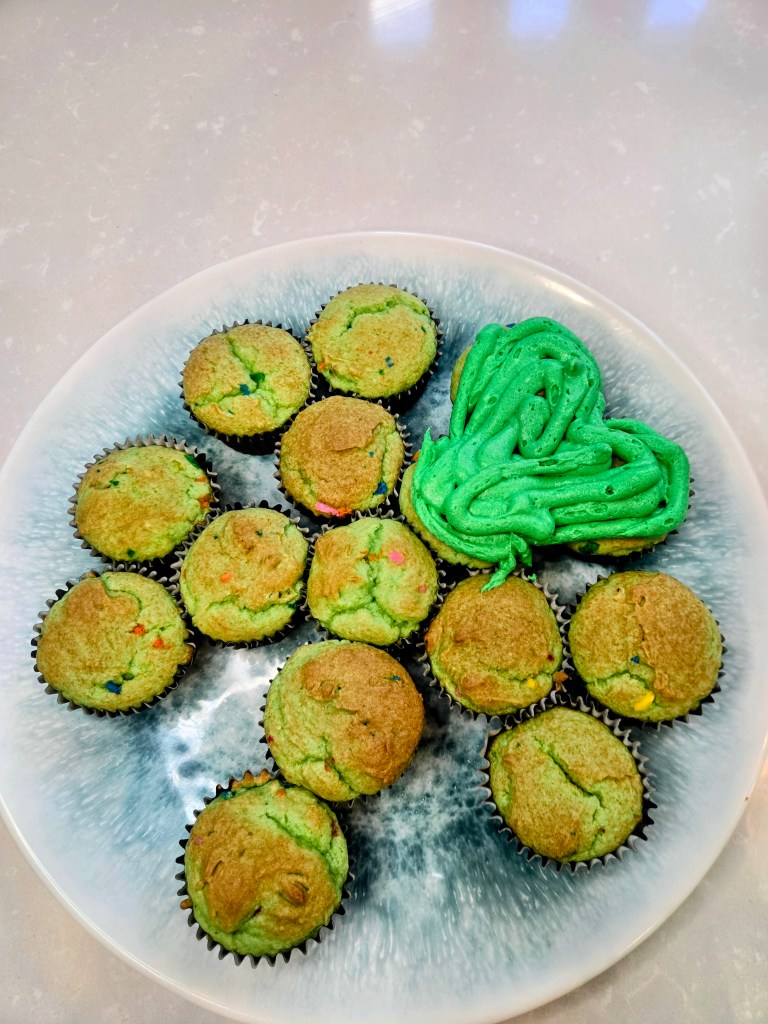
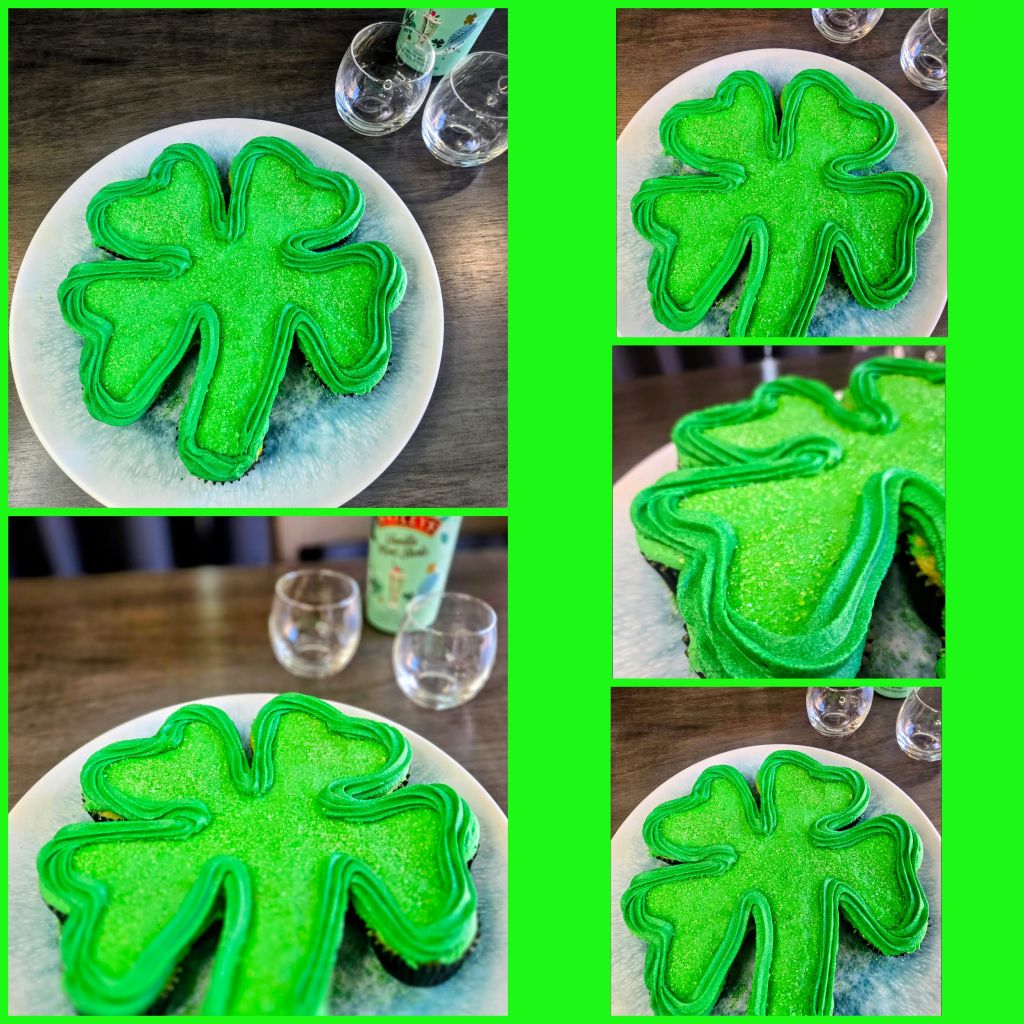
Load your green frosting into a piping bag, snip the tip and essentially outline a heart shape around each section of 3 cupcakes to make the clover leaves. 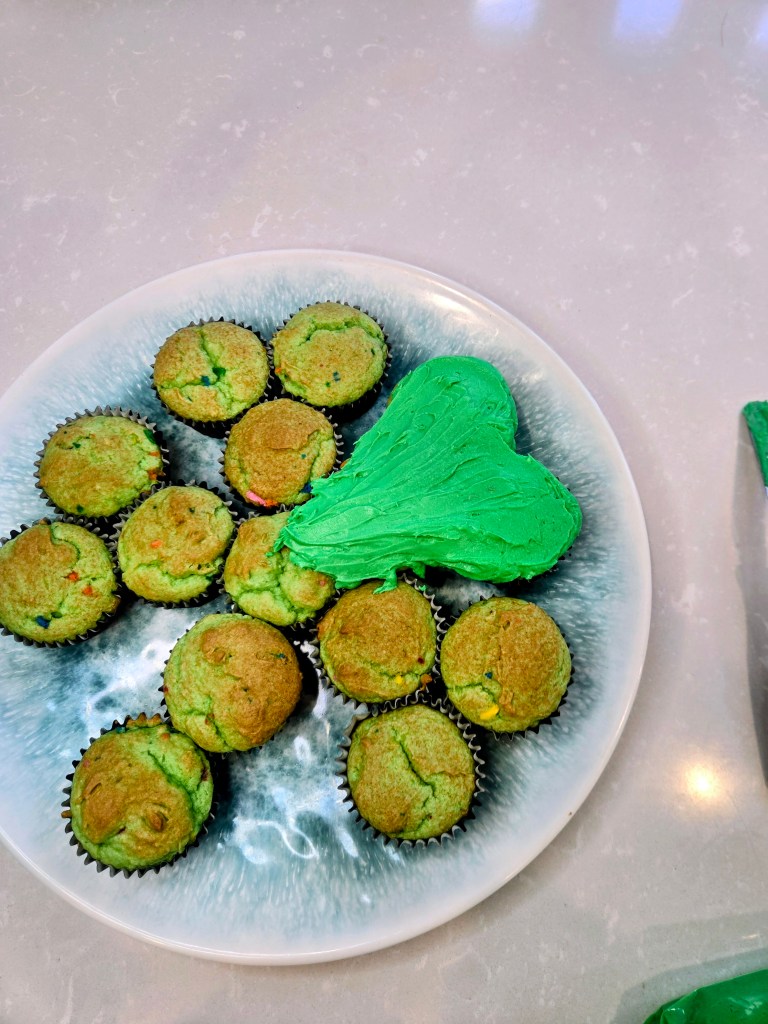
Once you’ve filled in your outline, smooth gently with an angled spatula; we’re covering with sprinkles, so it doesn’t have to be perfectly smooth! 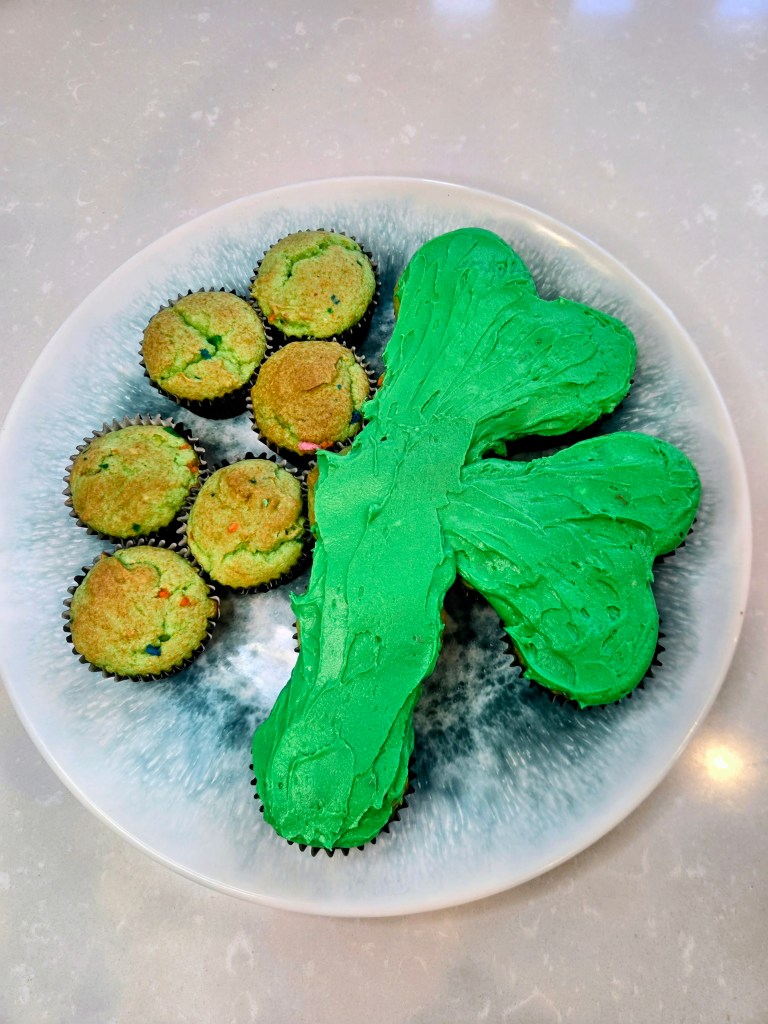
Keep outlining, filling the outlines, and smoothing! 
Again, you just want to make sure everything is nice and covered, frosting relatively evenly spread, doesn’t have to be smooth. 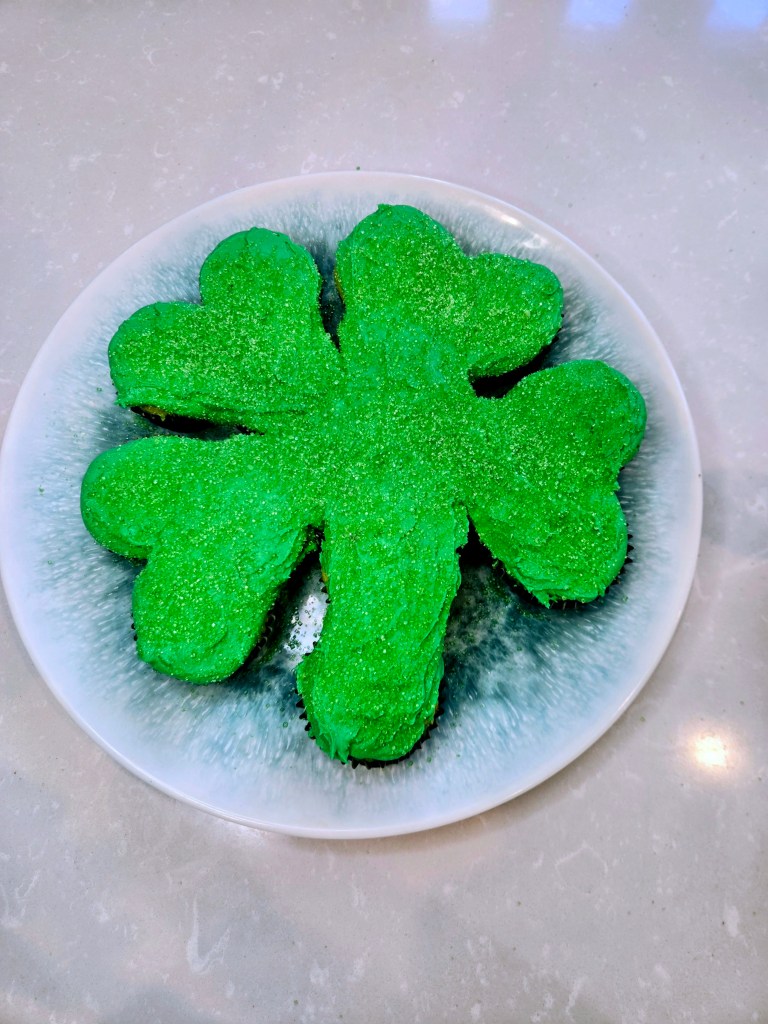
Because we’re adding SPRINKLES! Like the concealer of the cake world. It will cover all your frosting blemishes, I swear. 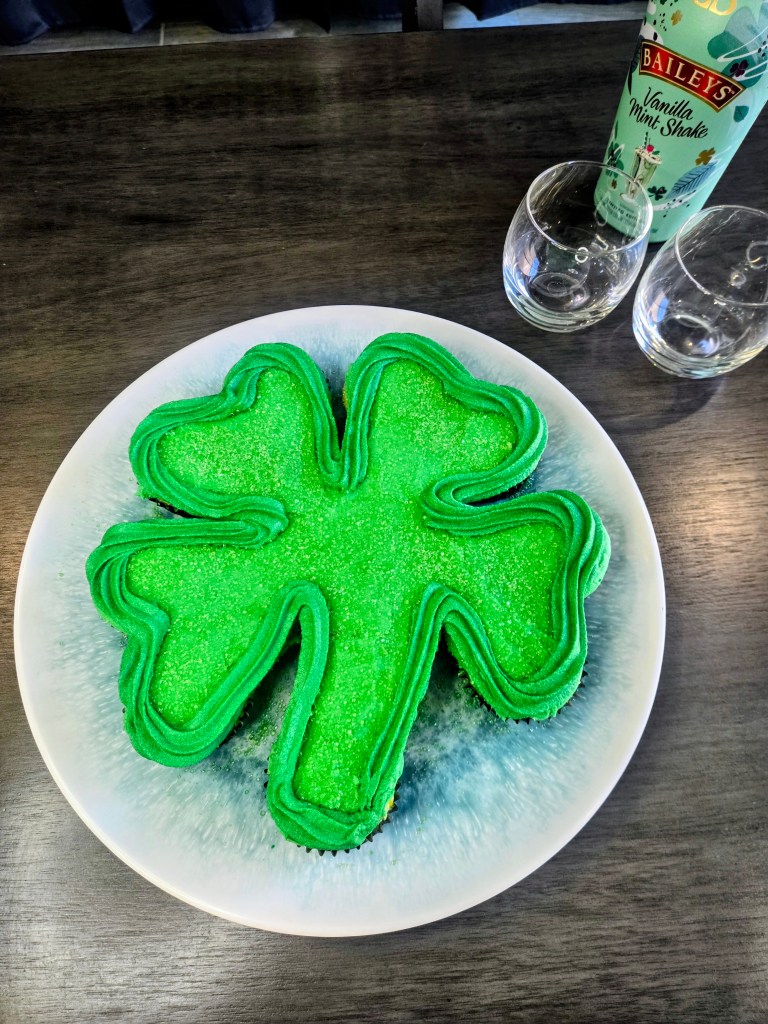
Found the four-leaf clover… turns out it’s made of cupcakes. To finish, place more frosting into a piping bag with a 1M tip and simply outline the clover! Recipes & Instructions
Baileys Vanilla Mint Milkhake Cupcakes
Cupcakes bursting with Baileys flavor and delicious frosting
If not gluten free, use any kind of yellow cake mix. Monkfruit can also be replaced with regular powdered sugar, and protein powder can be replaced with either. This recipe makes 24 cupcakes with enough frosting for all, but you only need 14-15 cupcakes to make the shamrock.
Ingredients
CAKE
*One box of gluten free yellow cake mix
*83 grams (1/3 c) unsweetened applesauce
*1/2 cup fat free or skim milk
*3 eggs
*1/2 cup Baileys Vanilla Mint Shake
FROSTING
*224 grams (8 ounces) of 1/3 the fat cream cheese, softened
*110 grams (1/2 cup) of butter, softened
*12 ounces (4 cups) Lakanto powdered monkfruit
*6 ounces Quest vanilla milkshake protein powder
*1 TBS vanilla extract
*1/4 tsp citric acid
*1/4 cup + 2 TBS Baileys Vanilla Mint Shake
*1/4 cup fat free or skim milk
Directions
- Preheat oven to 350 and line 2 muffin tins with 24 cupcake liners (you only need 15 cupcakes to make the shamrock, so freeze or frost the rest as desired).
- Mix all cake ingredients together in a stand mixer on low for 60 seconds before turning to medium-high for two minutes.
- Pour batter evenly into liners and bake for 14-18 minutes, until a toothpick comes out cleanly from the center.
- Allow cupcakes to cool fully before frosting.
- To make frosting, whisk cream cheese and butter for 3 minutes before adding in half the powdered monkfruit, 1/4 cup Baileys, and the vanilla extract, mixing well.
- Add in remaining monkfruit, protein powder, 1/4 cup milk, and 2 TBS Baileys, mixing well. If making the clover cupcakes, be sure to dye your frosting with green gel dye at this point.
- Frost the cooled cupcakes as desired; to make the pull-apart clover, please see detailed decorating instructions above.
- Keep leftovers covered and in the fridge. Best served at room temp, so remove and slice 30-45 minutes before eating. Enjoy!
Nutrition
Macros
15 servings
146 cal/16.7 c/6.5 f/5.2 p per cupcake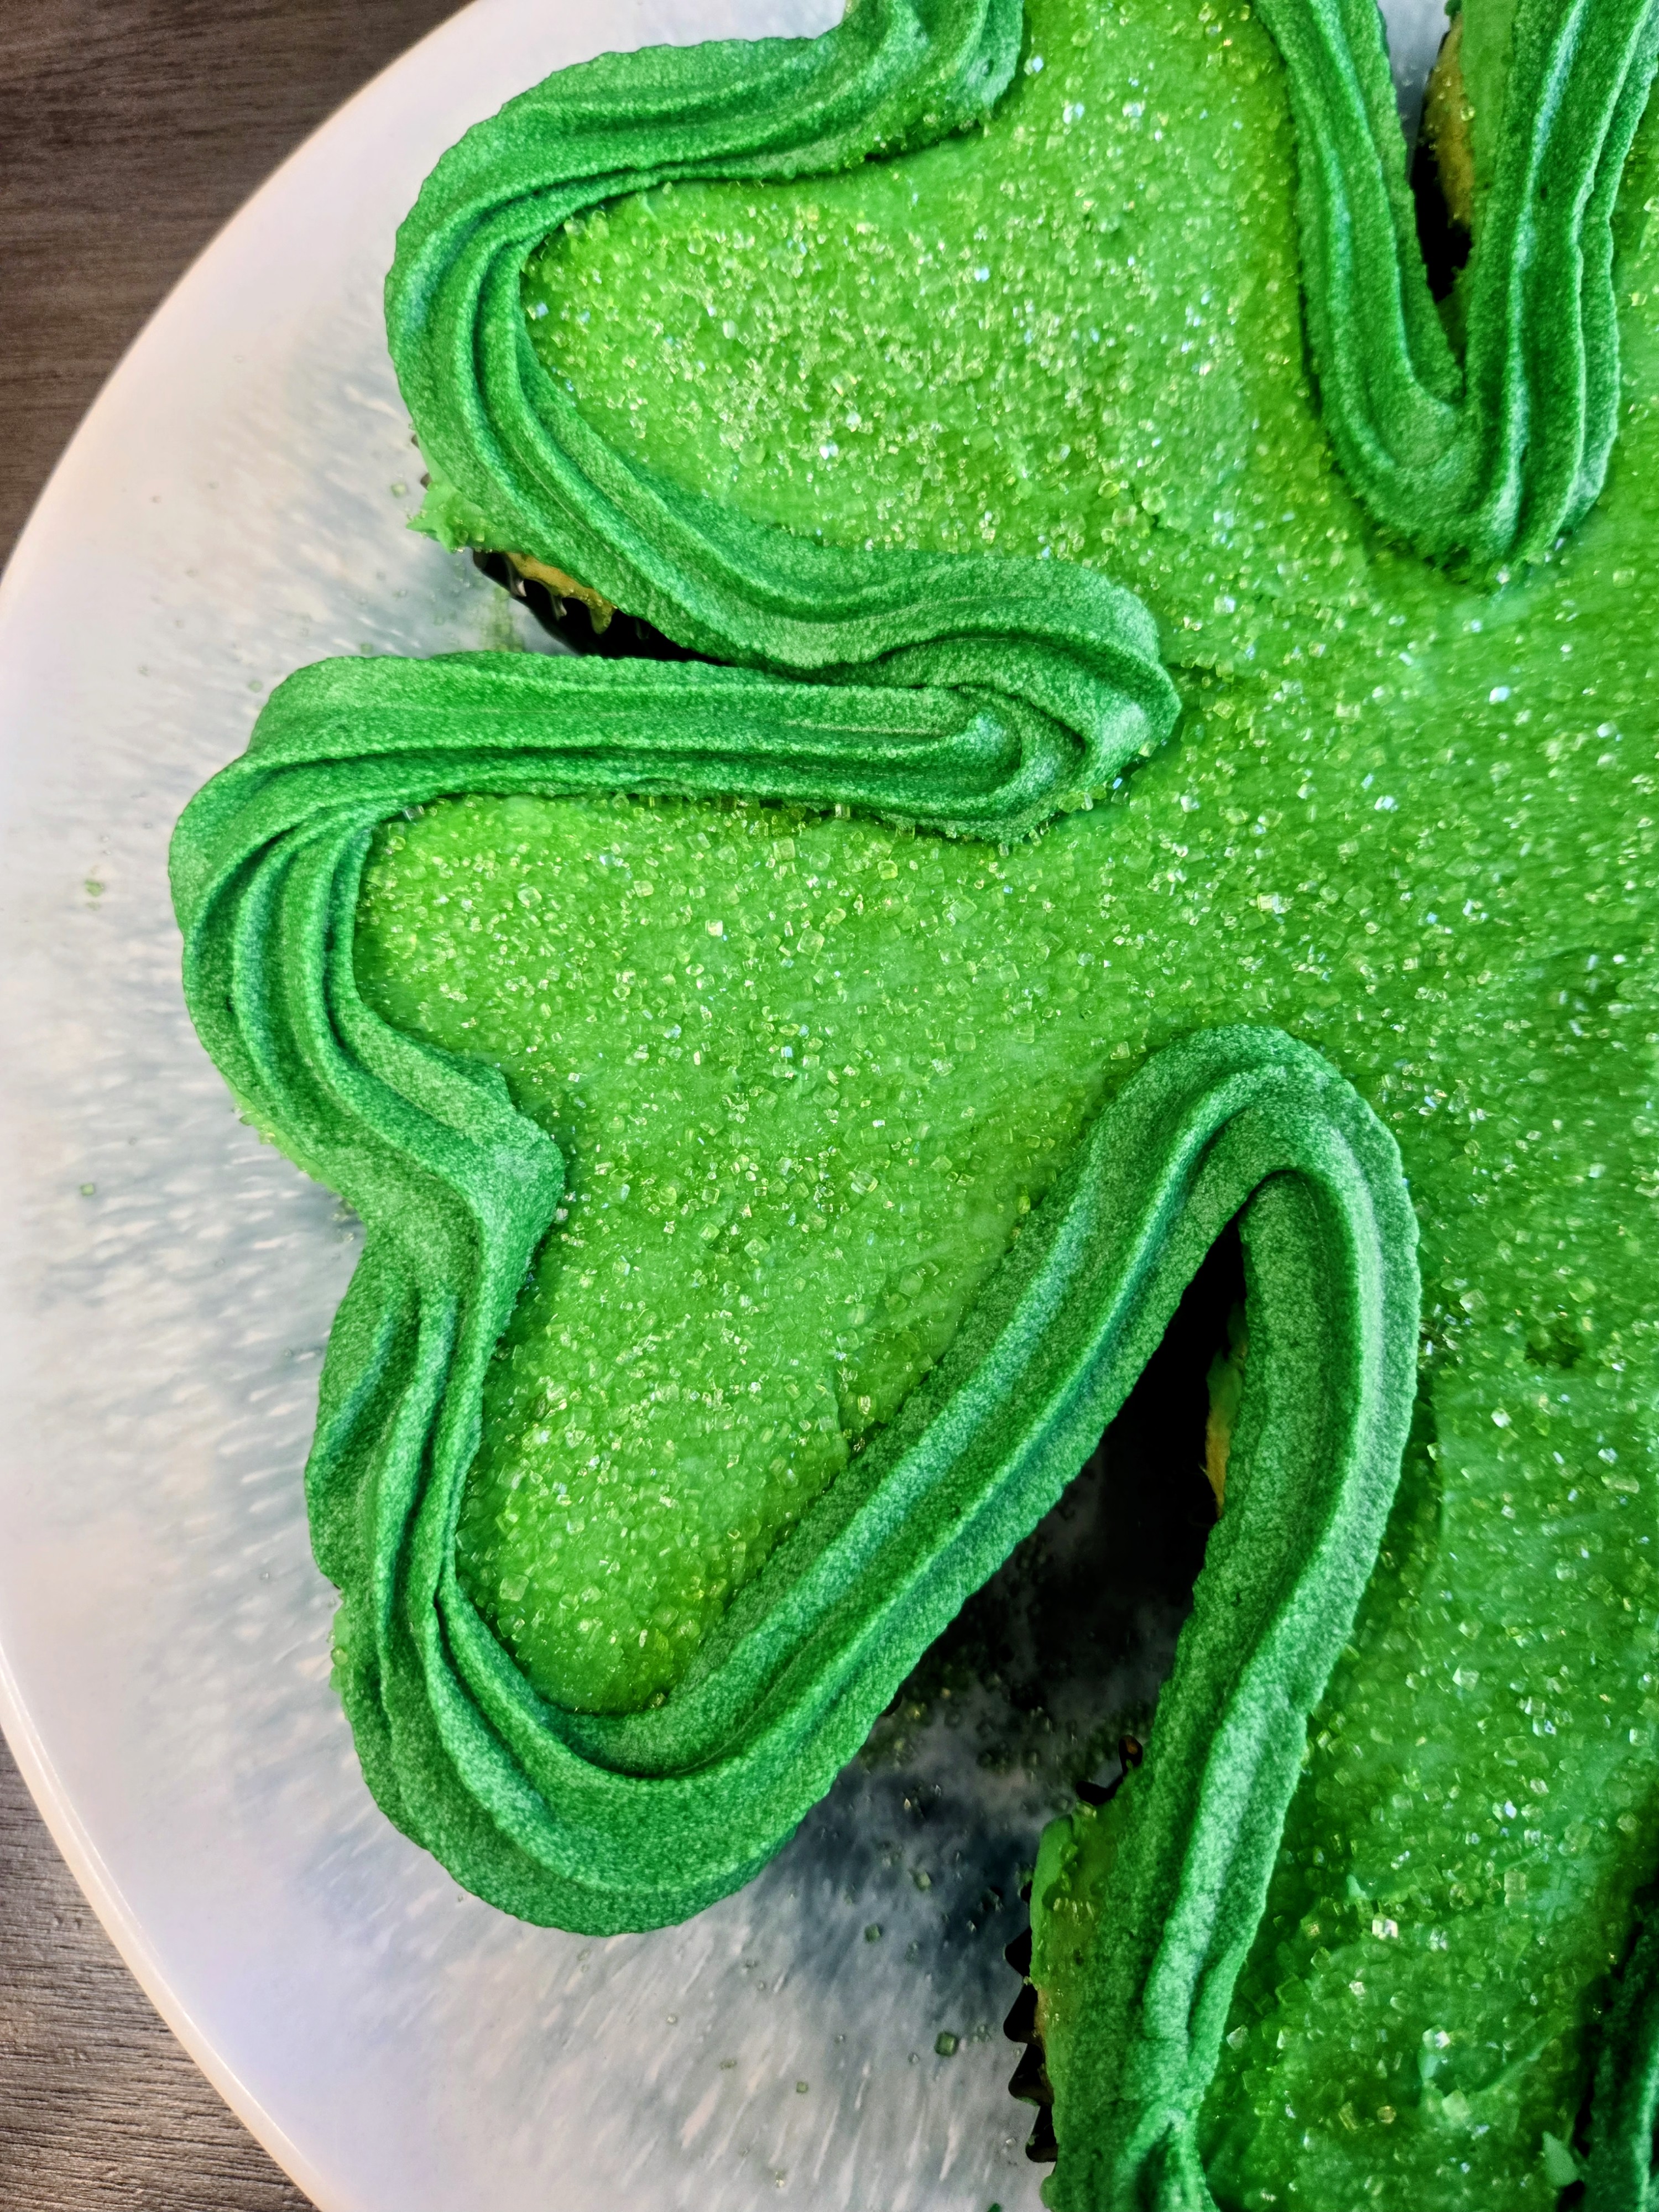
Who needs a pot of gold when there’s Baileys and sprinkles?! 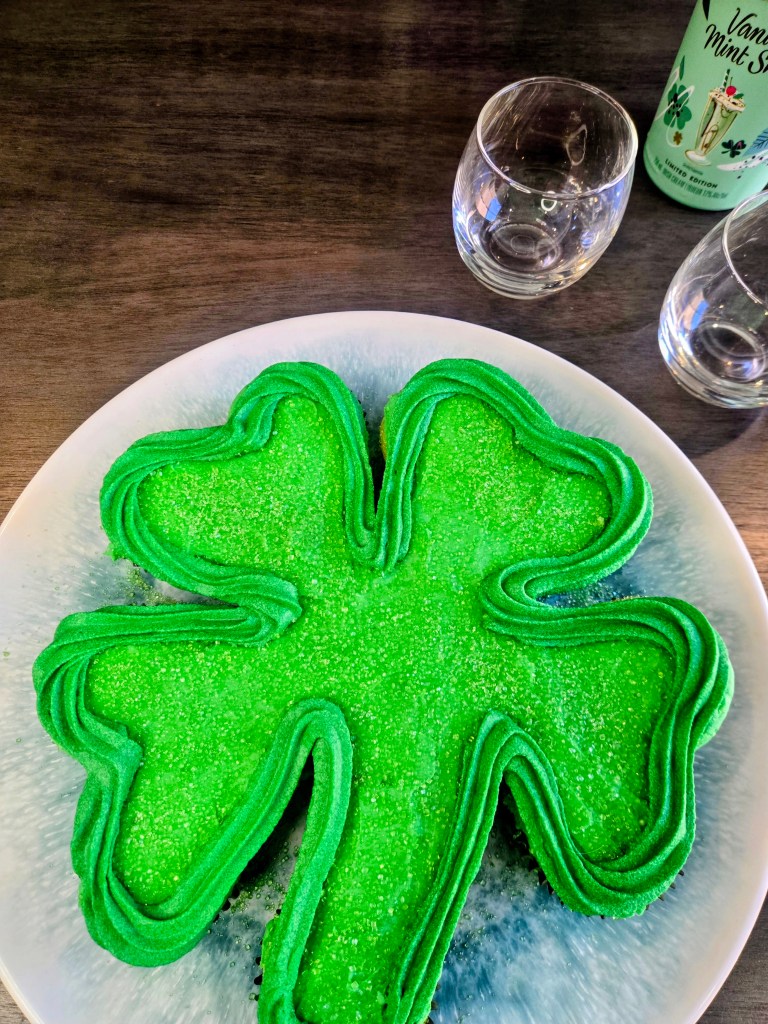
Shamrockin’ the dessert table. -
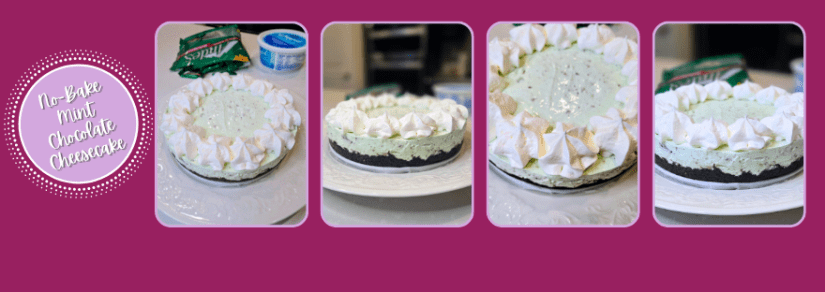
No-Bake Mint Chocolate Cheesecake
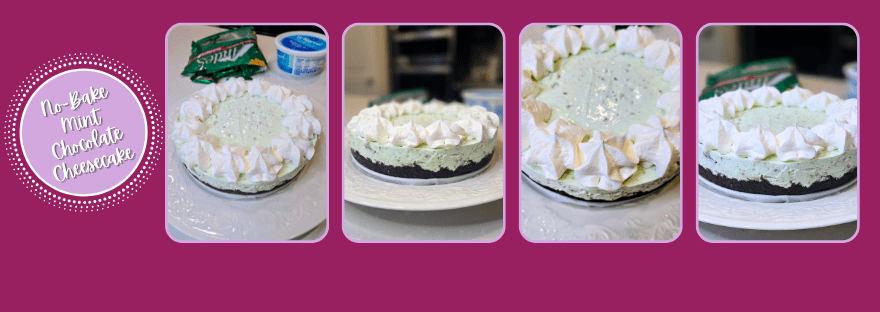
This no-bake, gluten free mint chocolate cheesecake is here to shamrock your world. With a gluten-free mint Oreo crust and a creamy, dreamy filling loaded with crushed Andes mints, it’s basically a pot of gold at the end of the dessert rainbow. Cool, chocolatey, and perfectly minty, it comes together so easily it almost feels like a little kitchen leprechaun did the work for you. No oven, no stress: just pure green goodness ready to steal the spotlight on St. Patrick’s Day.
And if you’re one of those people who claims you “don’t like chocolate and mint together,” I regret to inform you that you may simply not like joy. Because this combo? It’s clover-the-top in the best way. One bite and you’ll be feeling lucky, blessed, and maybe even a little green with dessert envy.
If loving mint + chocolate is wrong, I don’t want to be right. Recipe and Instructions
No-bake Mint Chocolate Cheesecake
A mint chocolate cheesecake perfect for St. Patrick's Day
If not gluten free, use regular mint Oreos for the crust. Greek yogurt can be replaced with an additional 8 ounces of cream cheese, and allulose can also be replaced with regular sugar.
Ingredients
CRUST
*264 g gluten free mint Oreos (about 22 Oreos)
*12 g (1 TBS) allulose
*42 g (3 TBS) melted butter
CHEESECAKE FILLING
*224 g (8 ounces) 1/3 the fat cream cheese at room temp
*96 g (1/4 cup) allulose
*226 g (1 cup) nonfat Greek yogurt, strained overnight (so approximately double the amount initially to strain overnight)
*8 ounces Cool Whip free
*1 tsp mint extract
*1 TBS vanilla extract
*1 TBS lemon juice
*Green gel dye or food coloring
*128 g (~18) Andes mints, chopped
TOPPING
*Cool Whip Free (I used 77 g)
Directions
- Line an 8″ springform pan with Parchment paper.
- Dump the Oreos in a food processor and grind until smooth before adding melted butter and allulose.
- Place crust mix into prepared pan and smooth to the edges (I use cooking spray on my hands to make this easier).
- Set in freezer for 15-30 minutes while making filling.
- Mix the cream cheese and allulose in a stand mixer on medium high for 2-3 minutes until fluffy and smooth.
- Add in the yogurt, extracts, and lemon juice.
- Add a drop of food coloring or gel dye, until you get the color you want to achieve (I dipped a toothpick in green gel dye and then dipped this into my batter).
- Fold in Cool Whip and Andes mints with a spatula until everything comes together.
- Pour over prepared crust and refrigerate 4 hours or overnight til set, then remove from pan.
- Feel free to serve as is or top with more Cool Whip (I piped 2D stars on top).
- Keep cheesecake covered in fridge until serving.
Nutrition
Macros
10 servings
371.6 cal/35.2 c/22.8 f/4.6 p per slice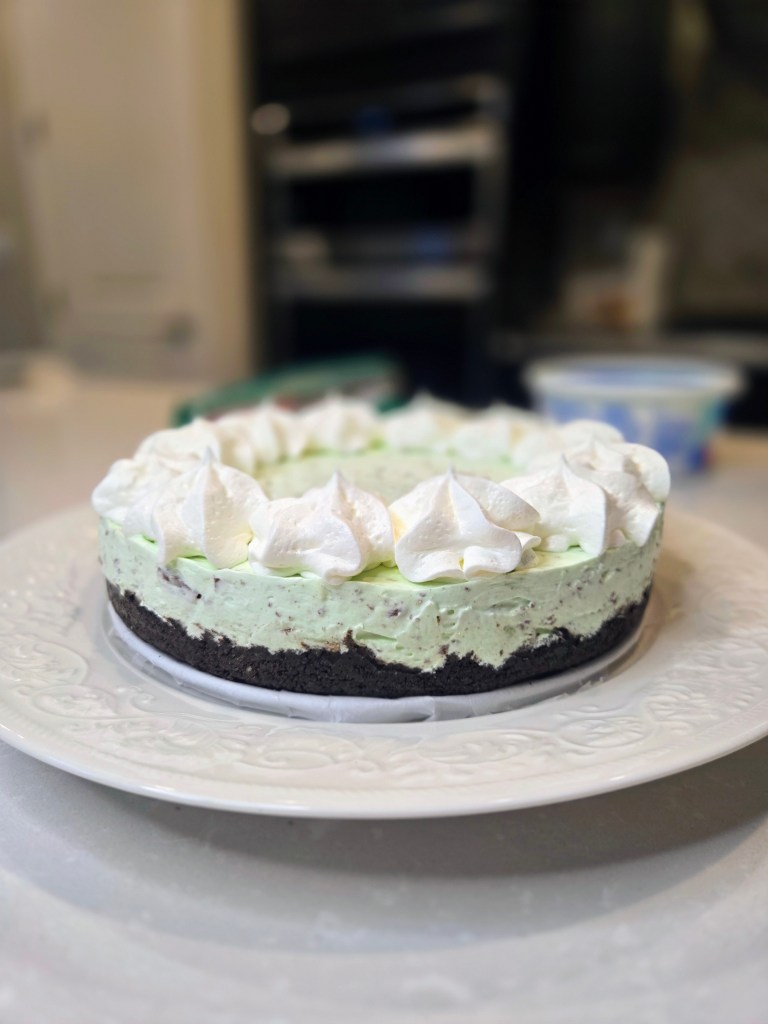
Serving pot-of-gold energy. 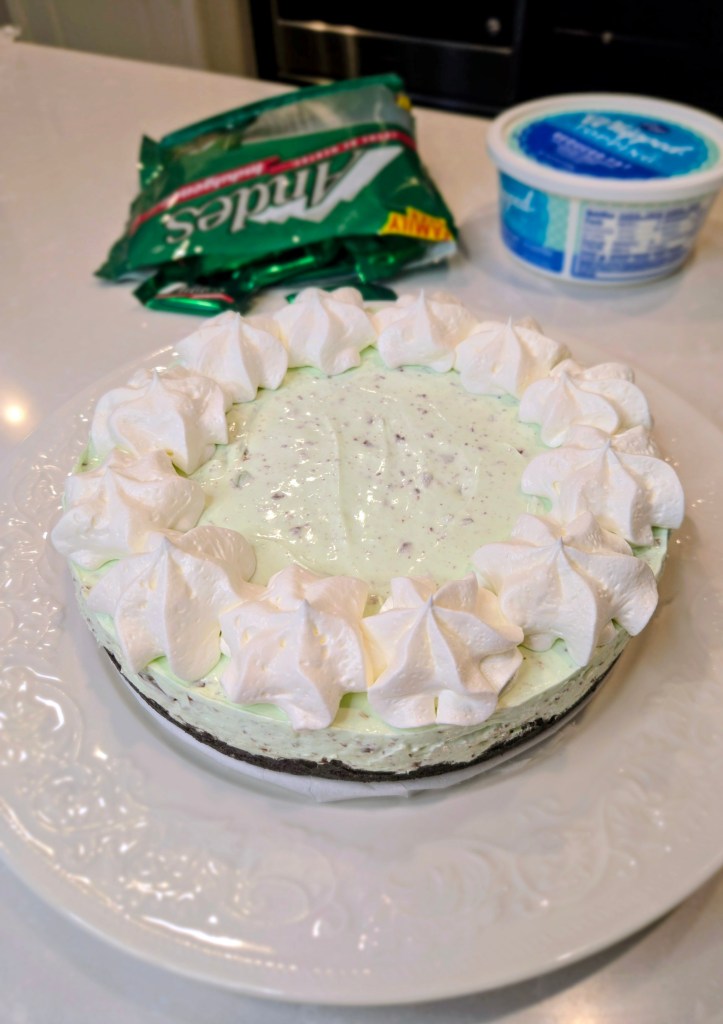
Zero oven. Maximum magic. 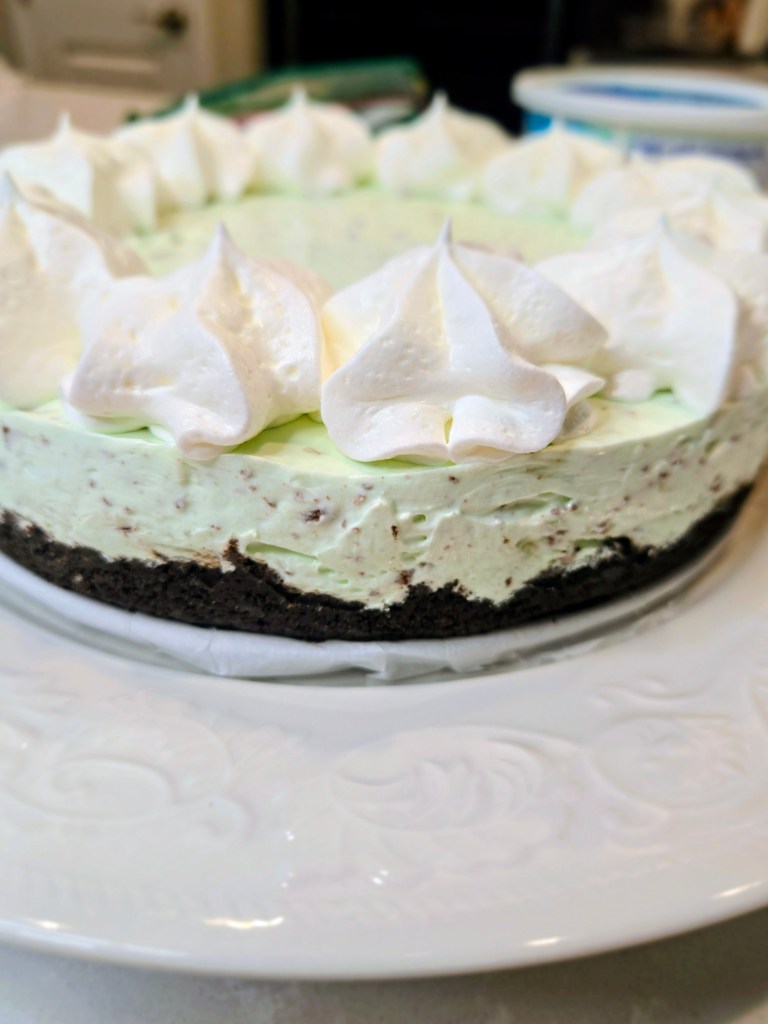
This cheesecake is my lucky charm. - Line an 8″ springform pan with Parchment paper.
-
Easy Heart-Shaped Cupcake Tutorial
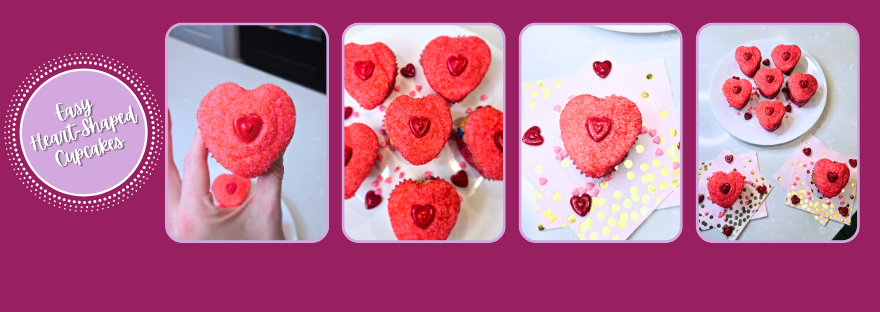
These heart-shaped cupcakes didn’t come to be subtle…they came to steal hearts and look cute doing it. Dressed up with pink and red sanding sugar and candy hearts, they’re the ultimate Valentine’s Day treat: flirty, festive, and ready in about an hour flat. They’re easy enough for last-minute baking but cute enough to pass for “I planned this,” which is really the dream. If you’re in the mood to spread a little love without committing to a full baking marathon, these cupcakes are here to do the most: with minimal effort and maximum heart eyes.
Love hurts. Cupcakes help. Ready to break some hearts (the dessert kind)? Follow along with the step-by-step photo and video tutorials below and you’ll be whipping up your own love-struck cupcakes in no time. I’ll walk you through every sweet step so nothing gets crushed—except expectations when people realize how easy these were to make. Grab your piping bag, embrace the sparkle, and get ready to serve up cupcakes so cute they’ll have everyone falling head over heels.
Here’s everything I used for these lil’ heart breakers:
- Foil
- Pie weights, marbles, or more foil rolled into a ball
- Hot pink gel dye
- Large red heart sprinkles (mine are from Wilton)
- Hot pink and red sanding sugar or larger flaked sugar (I used both, picked up from Michael’s)
- Cupcake and frosting recipe below
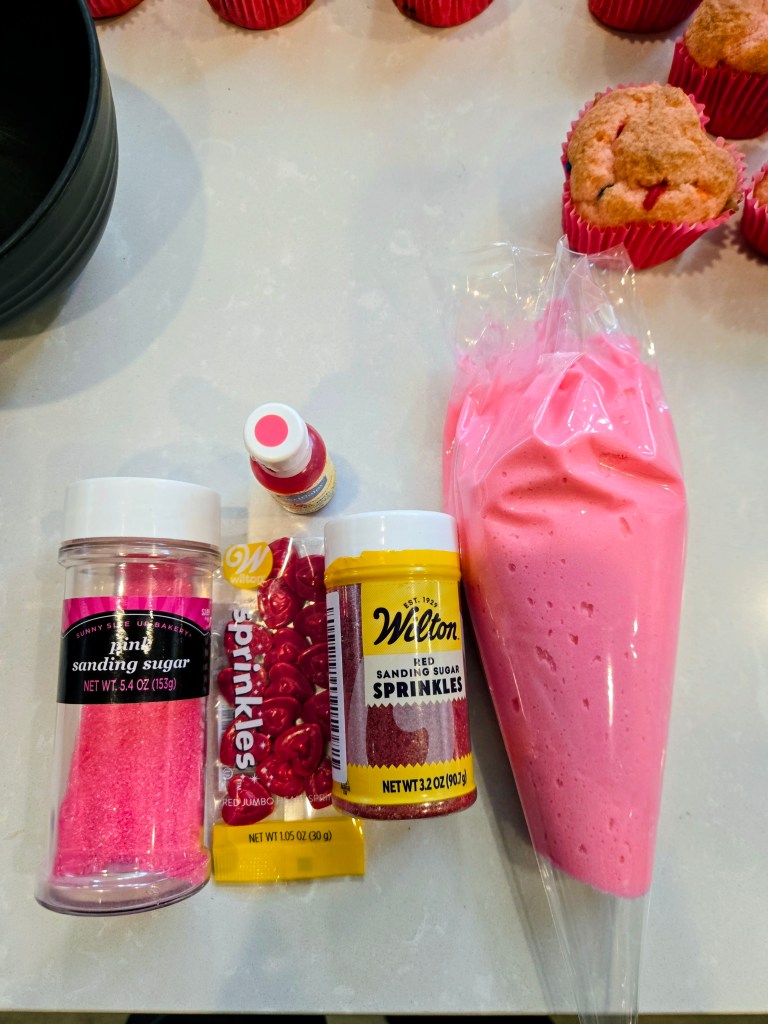
Almost all the tools you need! 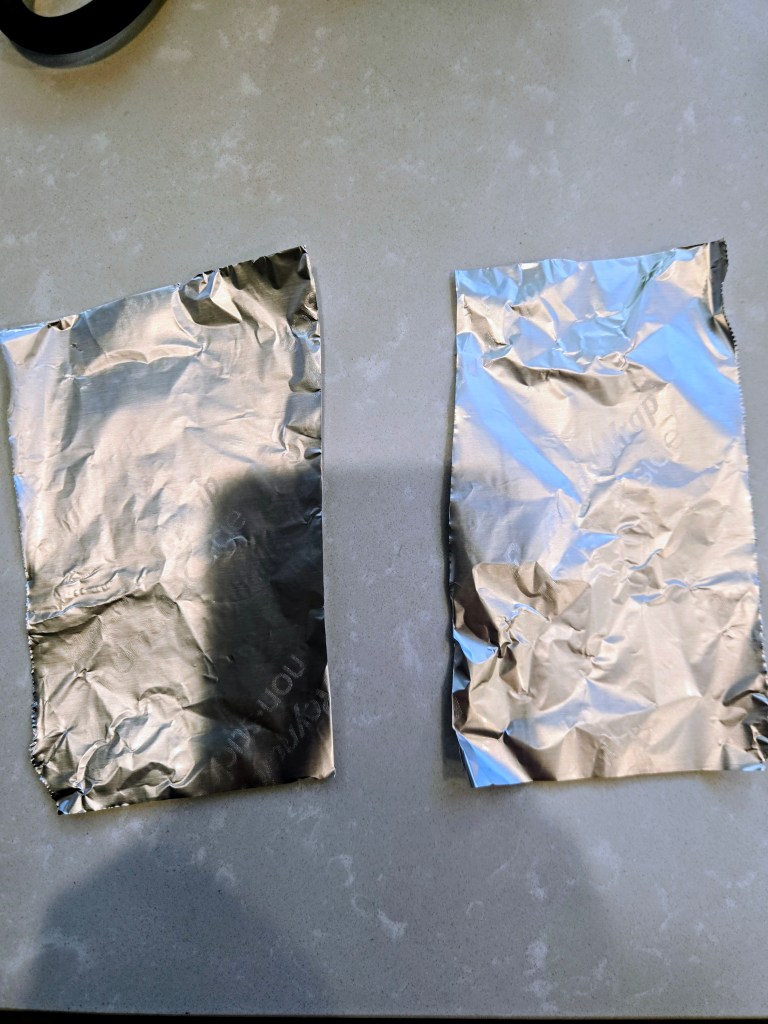
Take a sheet of foil, cut it in half, and cut that in half again. 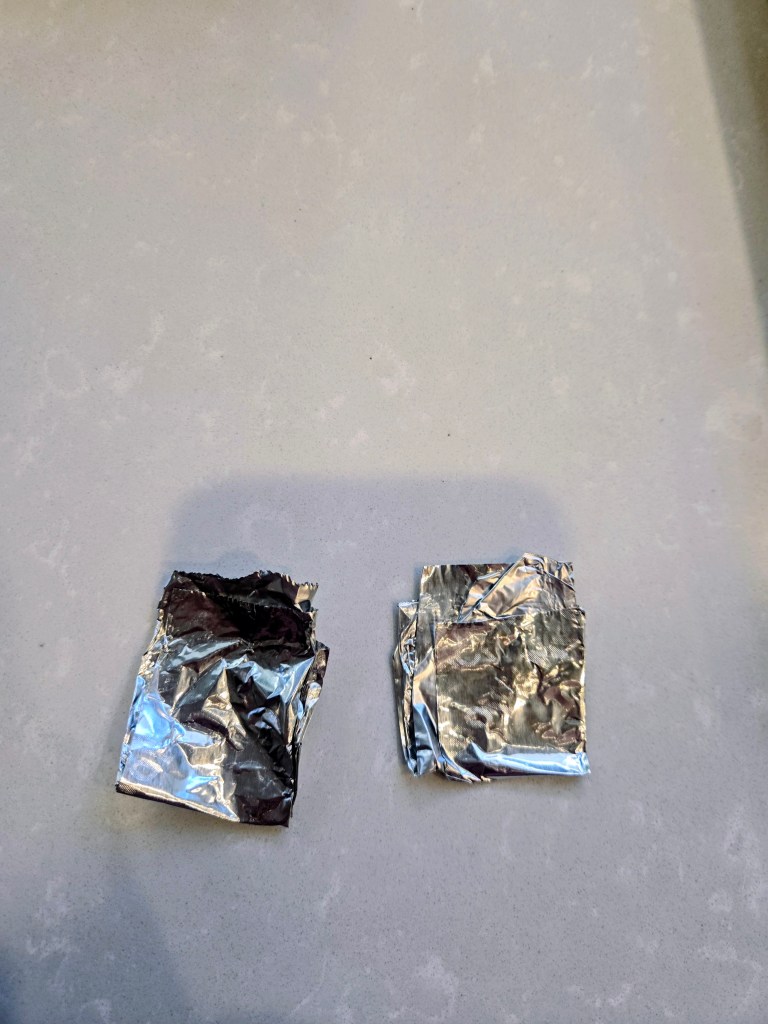
Fold into small rectangles 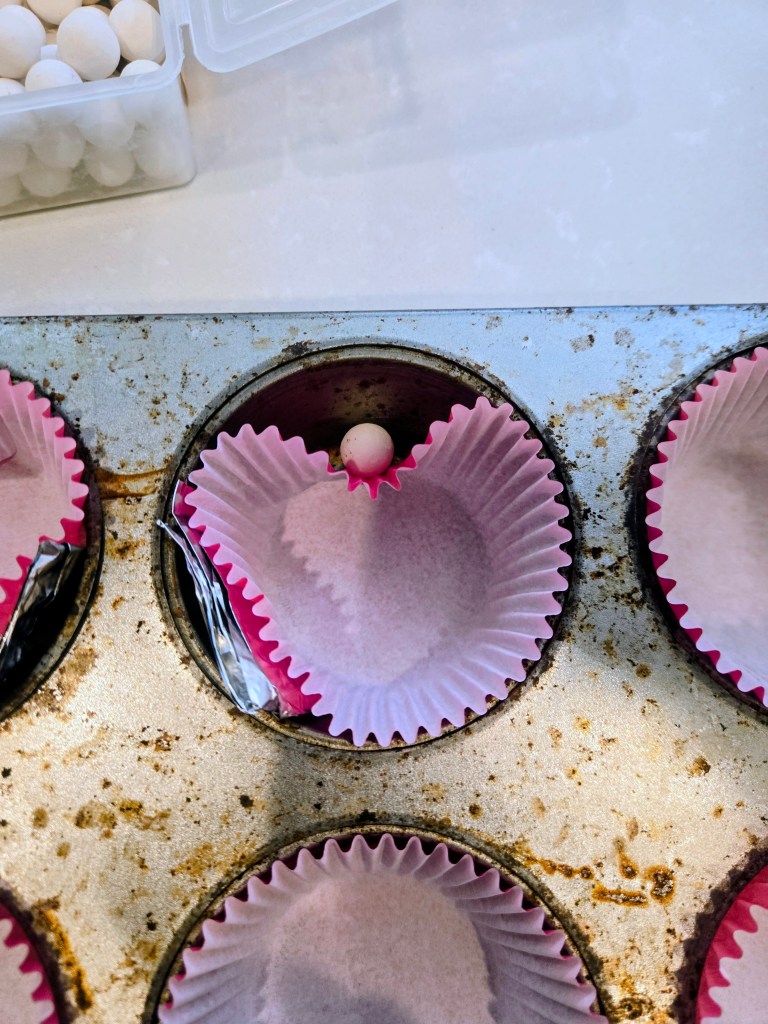
Add the pie weight up top to make the top of the heart. 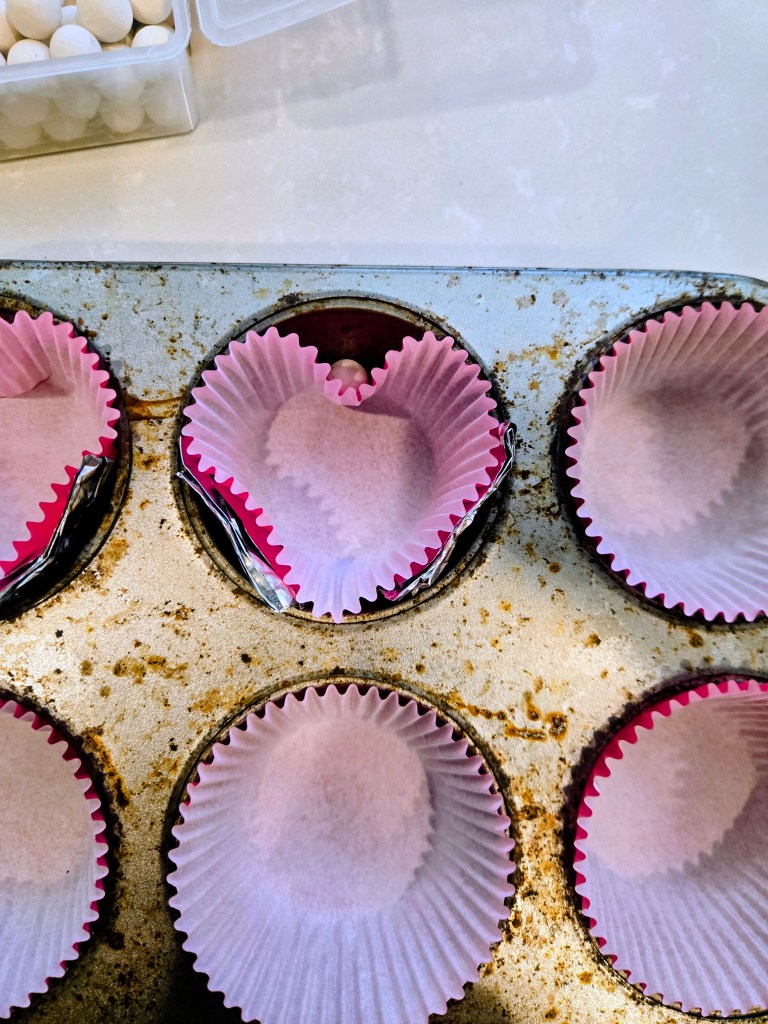
Slide the foil rectangles into the sides to give a heart shape to your cupcake liners. 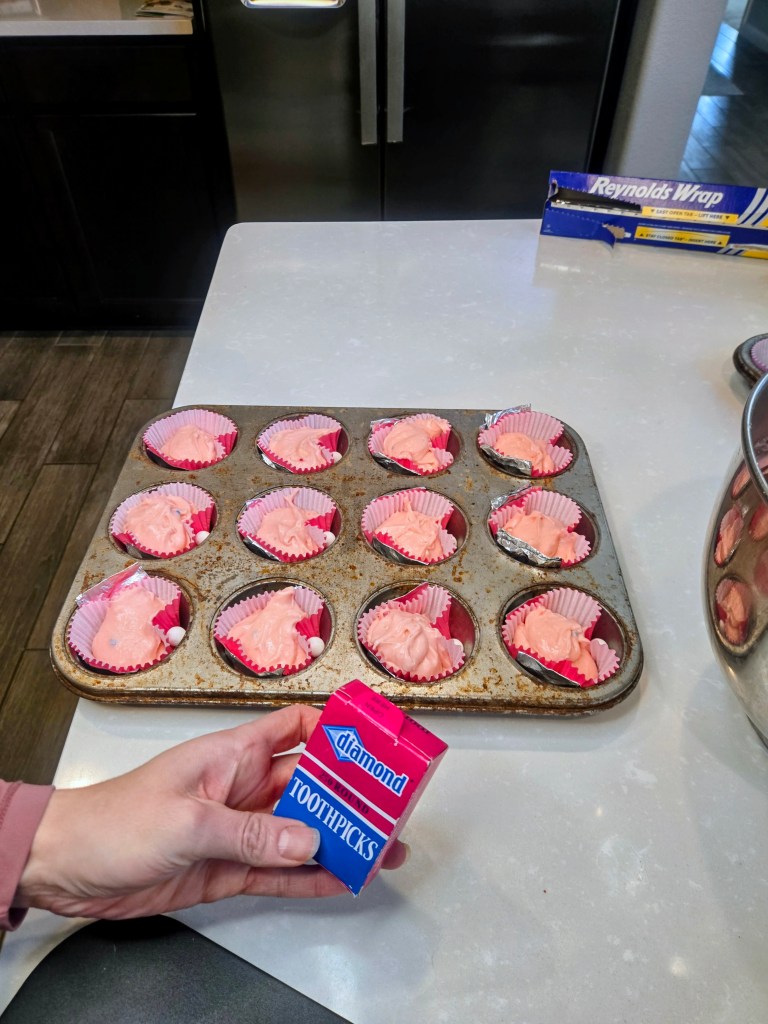
Add batter carefully, then use a toothpick to evenly distribute in the heart-shaped cups. 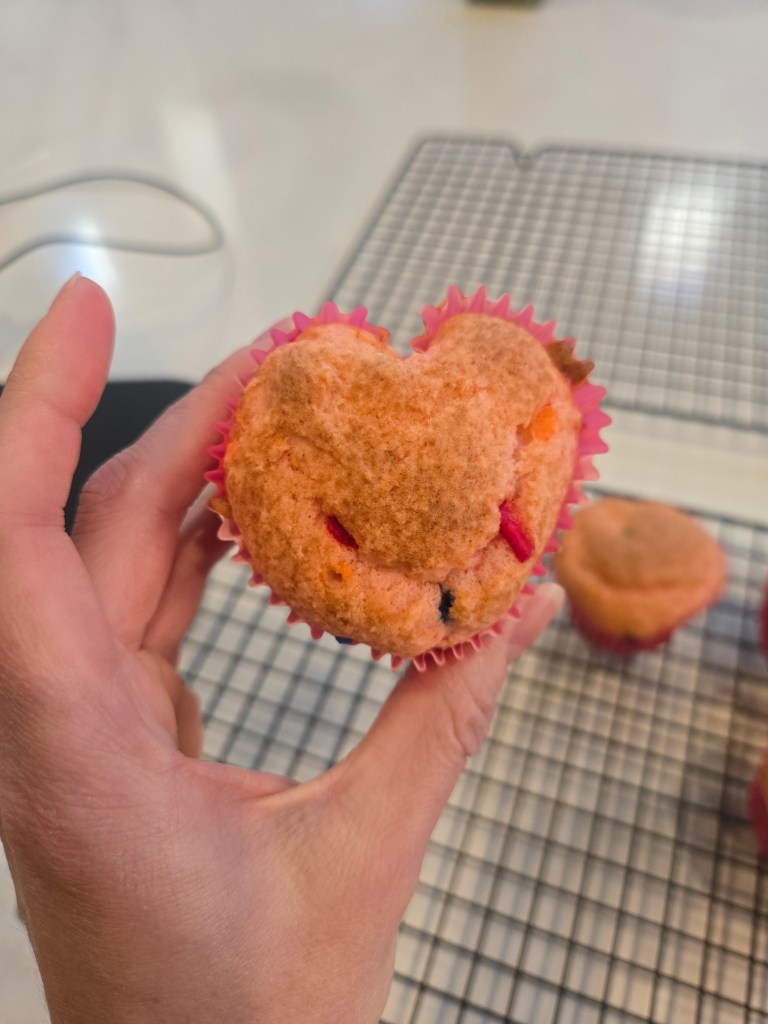
Bake according to directions! 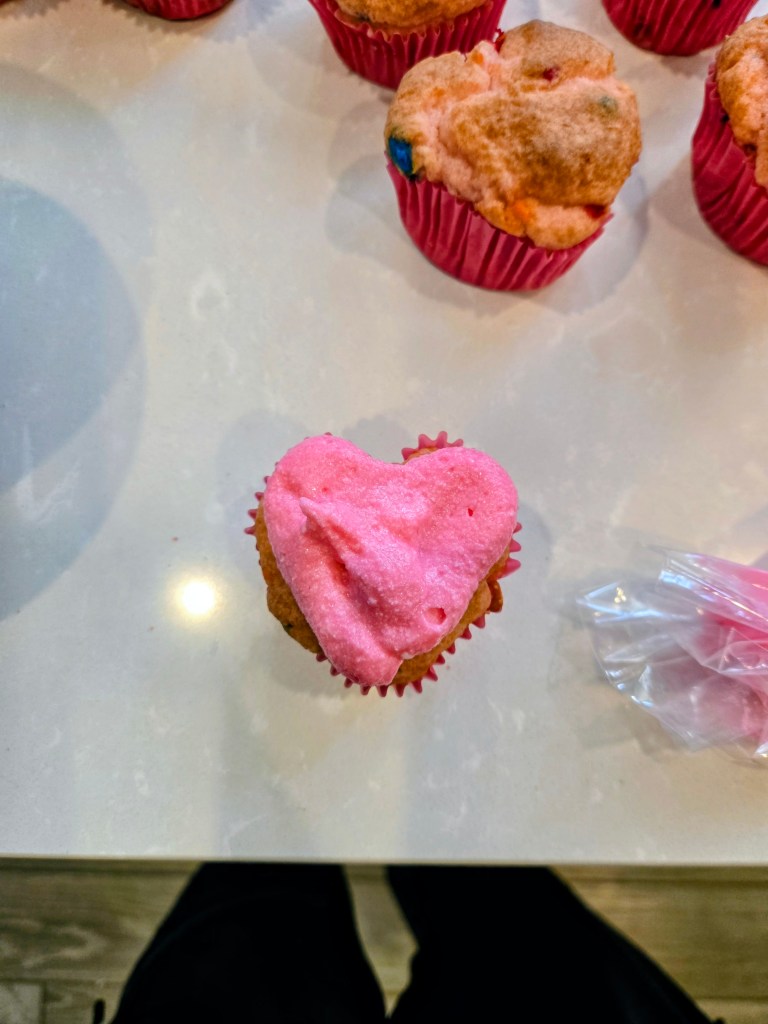
Pipe a bit of frosting on top, doesn’t need to be pretty! 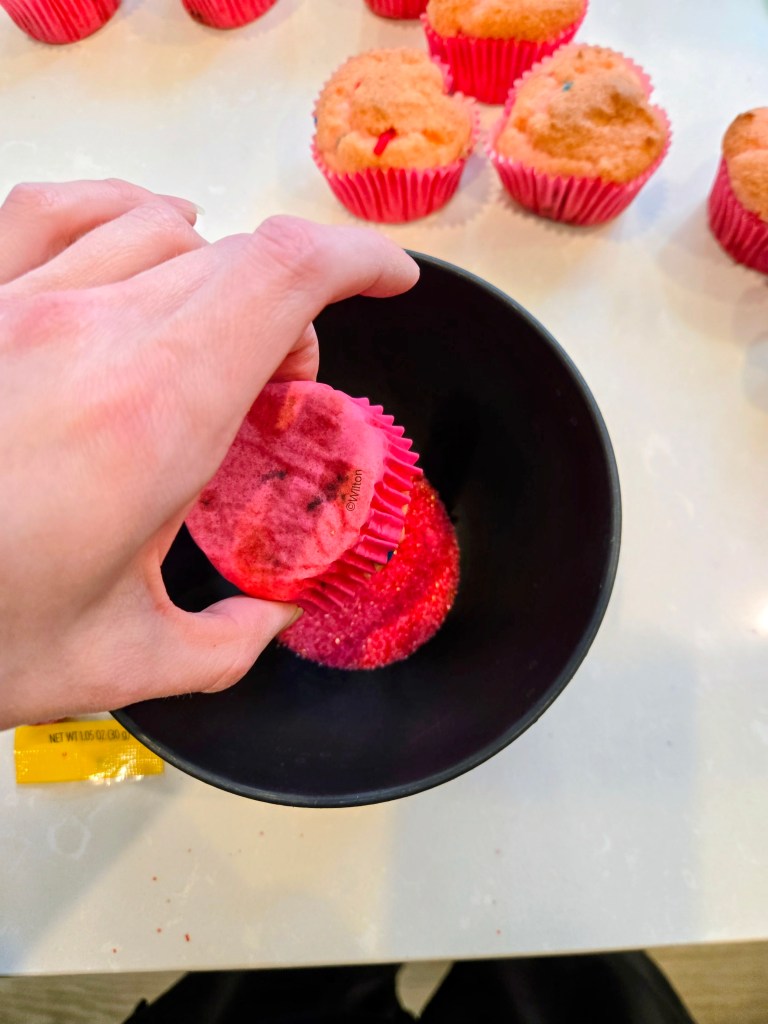
Gently smush the cupcake into a bowl with red & pink sanding sugar mixed together and swirl. 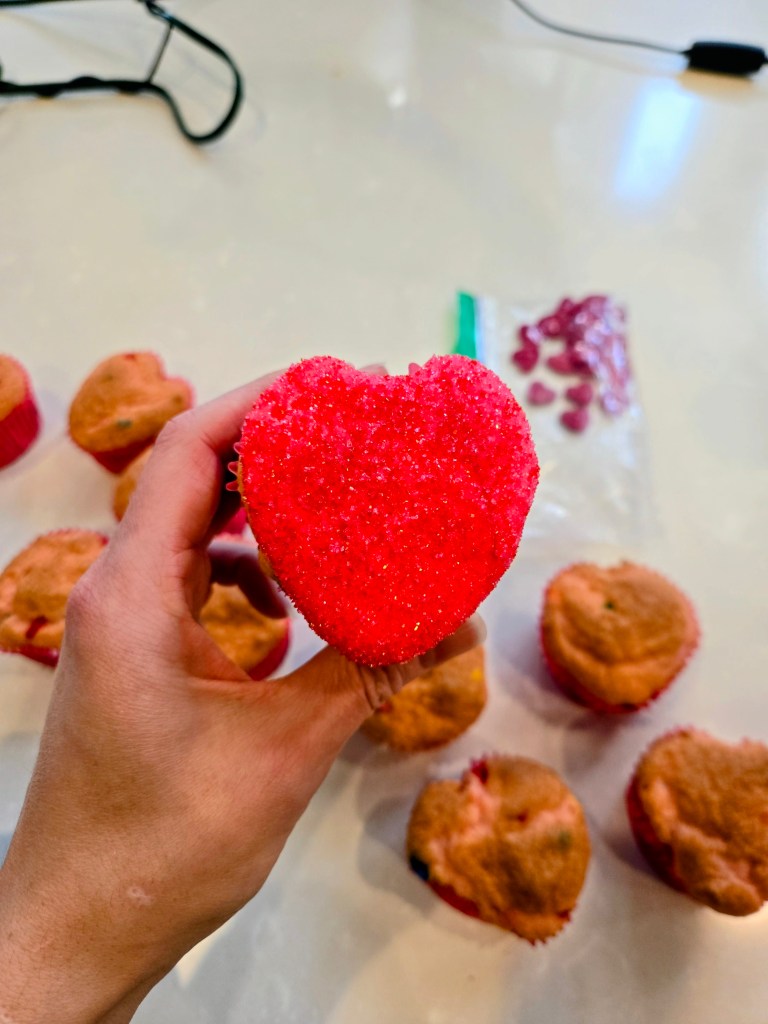
This will flatten out the frosting and give you a sparkly heart. 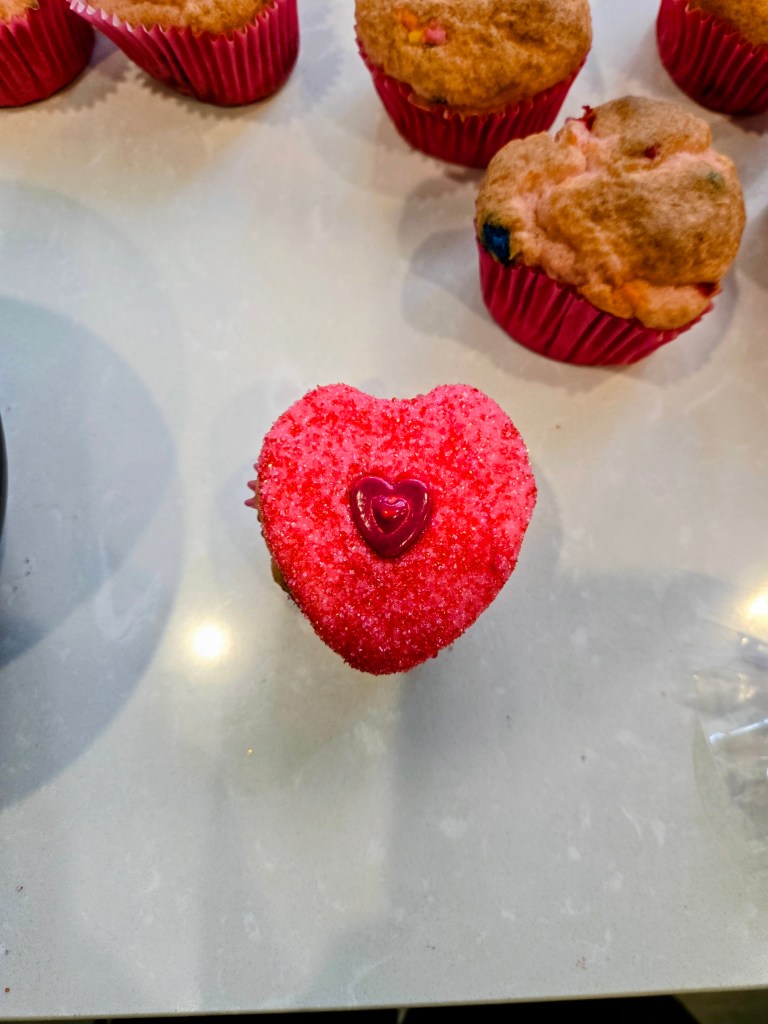
Finish by adding the big heart sprinkle to the middle. Breaking hearts, not a sweat. Recipe and Instructions
Gluten free strawberry cupcakes with strawberry buttercream frosting
Super cute cupcakes perfect for Valentine's Day!
If not gluten free, use any kind of white or yellow cake mix. Monkfruit can also be replaced with regular powdered sugar for frosting. Protein powder can also be replaced with additional monkfruit or regular powdered sugar; note: you will need WAY less liquid in the frosting without protein powder.
Ingredients
CUPCAKE
*1 box of gluten free yellow cake mix (I used Pillsbury Funfetti)
*1 tsp strawberry extract
*1 fat free or skim milk
*85 g (1/3 cup) unsweetened applesauce
*3 eggs
FROSTING
*225 g (1 cup) butter, softened
*12 ounces Lakanto powdered monkfruit
*4 ounces (112 g) Quest vanilla milkshake protein powder (cuts the sweetness of the monkfruit and makes a nice, stiff, spreadable frosting; omit and use all monkfruit if desired)
*1 TBS clear vanilla
*1 tsp strawberry extract
*1 cup plus 2 TBS milk
*1/4 tsp citric acid if you like less sweet frosting
Directions
- Preheat oven to 350 and line muffin tin with cupcake liners. SEE VIDEO OR PHOTO TUTORIAL TO MAKE HEART SHAPE BEFORE BAKING.
- Whisk cake ingredients together in a stand mixer on low for 30 seconds before switching to medium-high for two minutes.
- Pour batter evenly into prepared cupcake liners and bake fo16-1824 minutes, or until a toothpick comes out mostly clean from the center.
- Allow cupcakes to cool fully before frosting.
- To make frosting, whisk butter for 3 minutes before adding in half the powdered monkfruit, protein powder, vanilla, strawberry, and milk.
- Add in remaining monkfruit mix fully.
- Once fully cooled, frost your cupcakes and use the video and galleries above to decorate.
- Keep cupcakes covered and in the fridge. It is best served at room temp, so remove from fridge 30 minutes before eating. Enjoy!
Nutrition
Macros
22 servings
136 cal/16.4 c/5.9 f/4.3 p per slice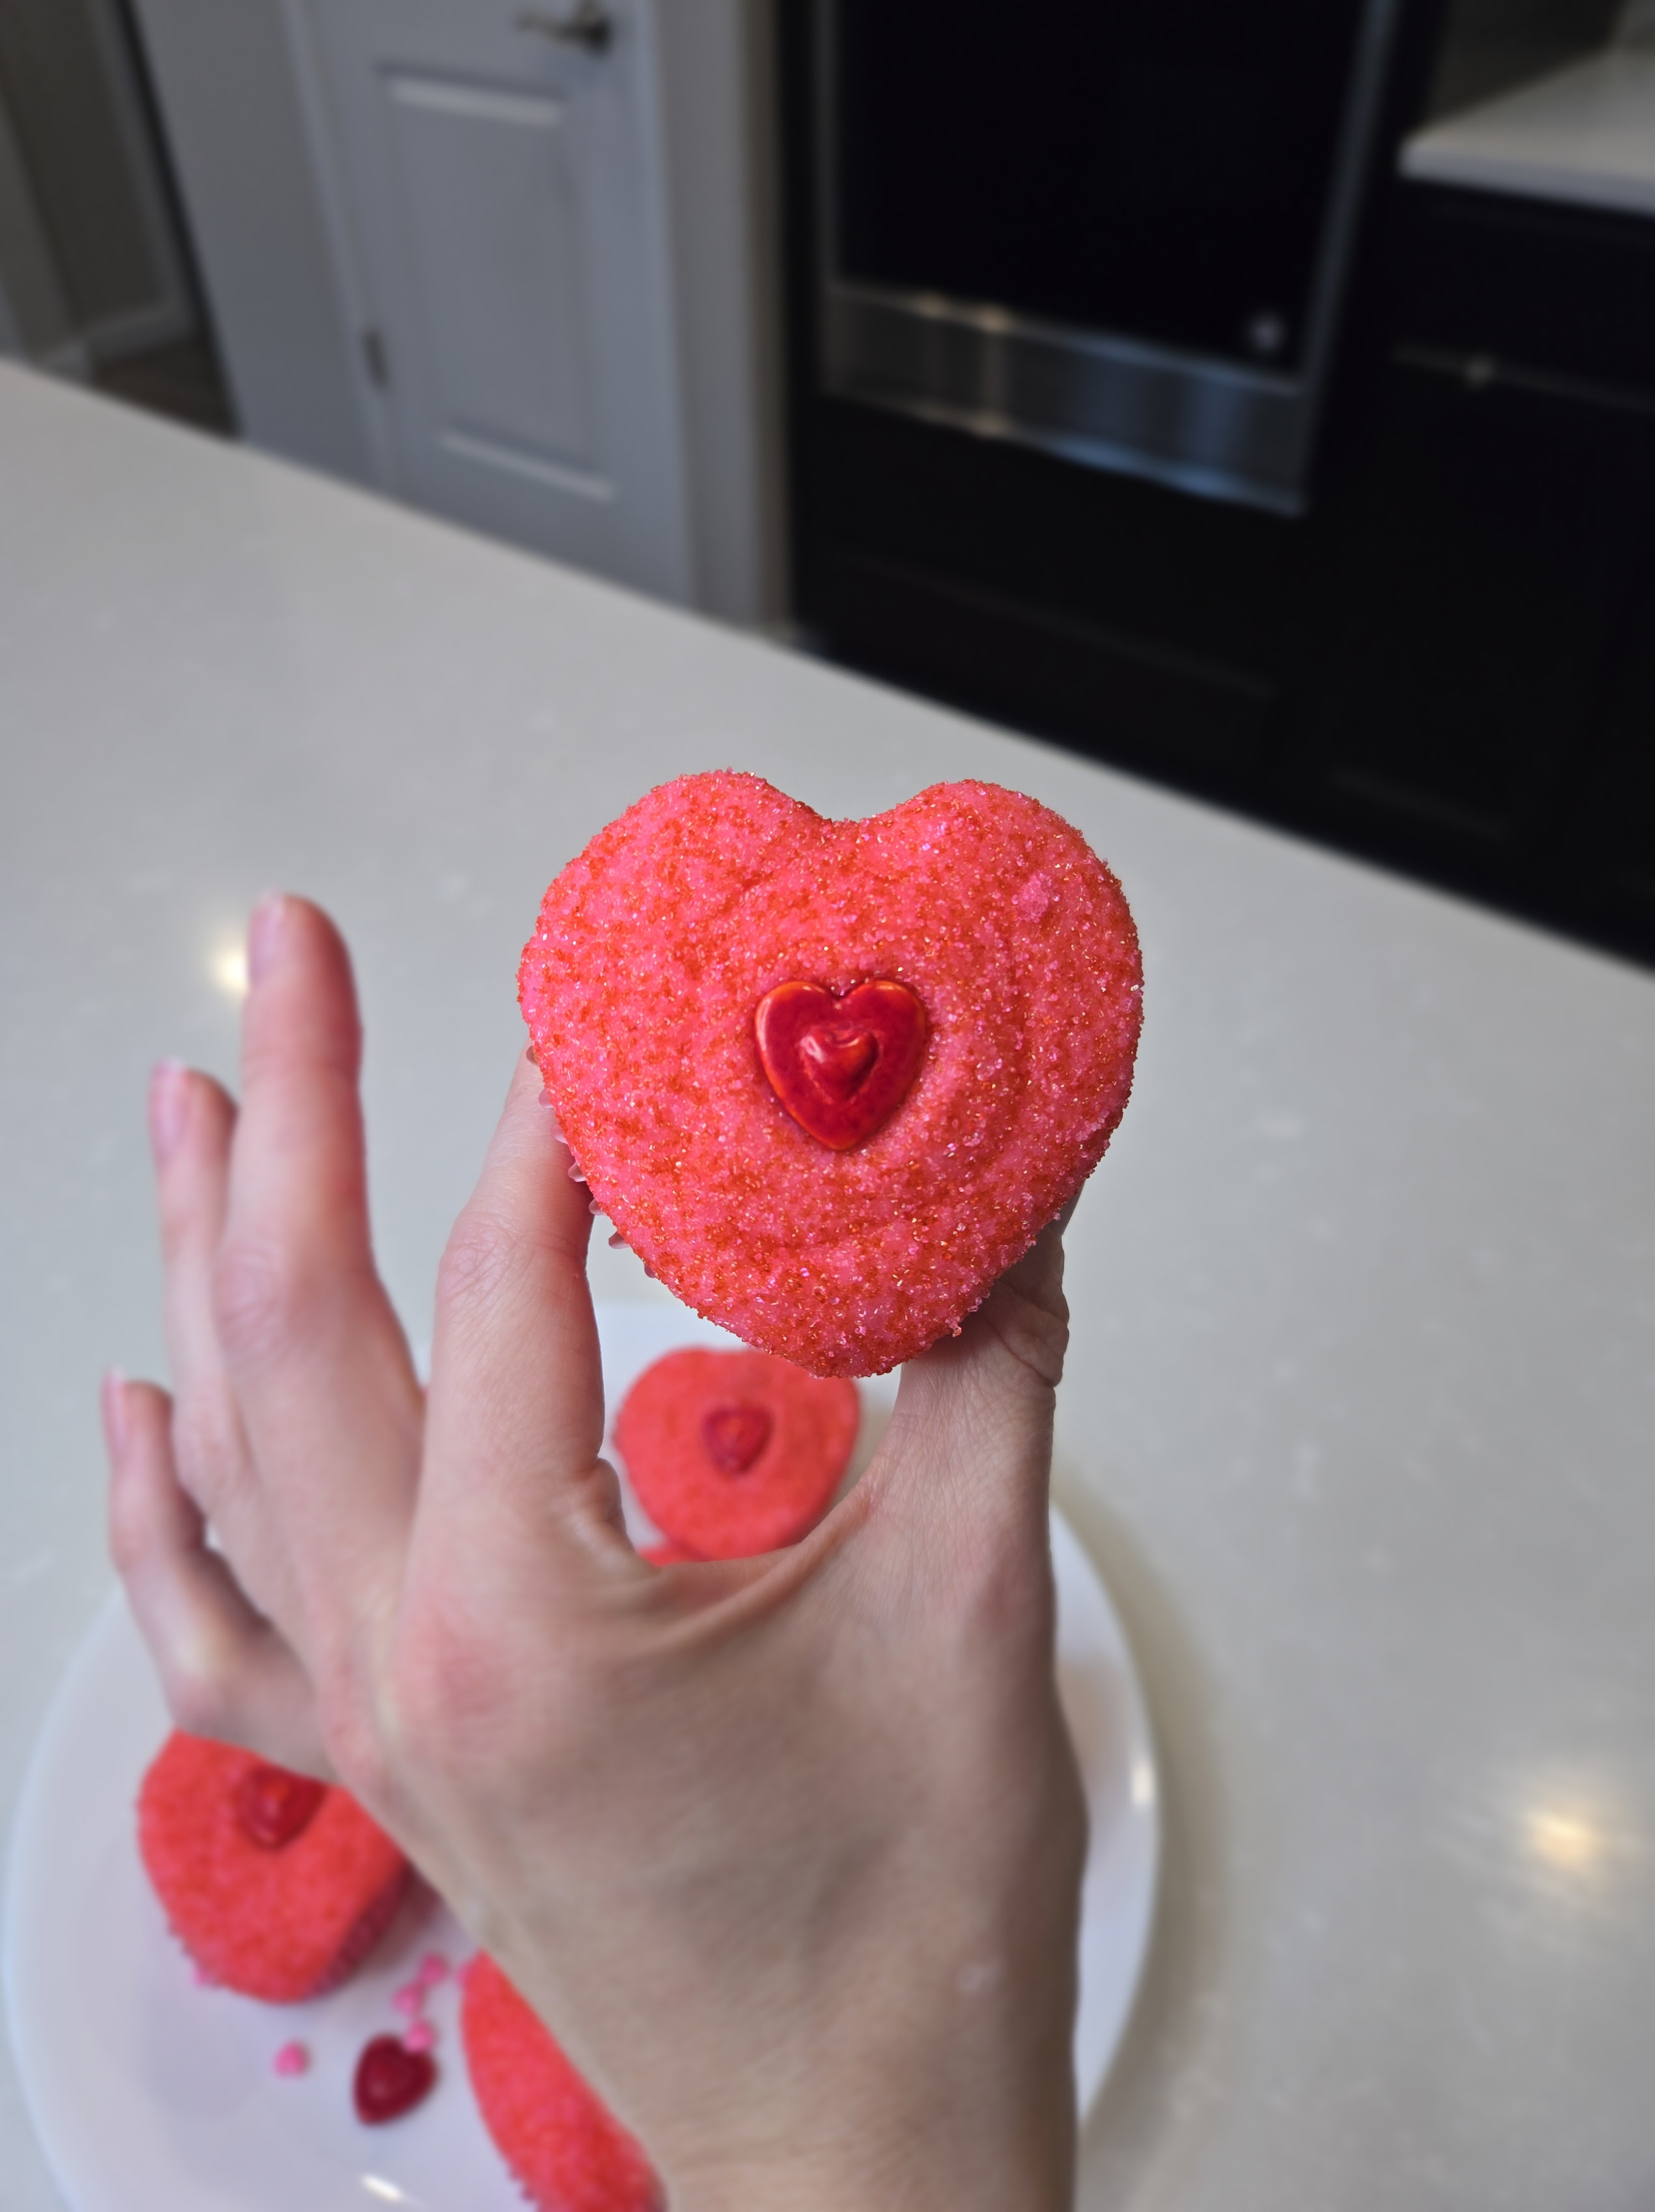
Love at first bite. 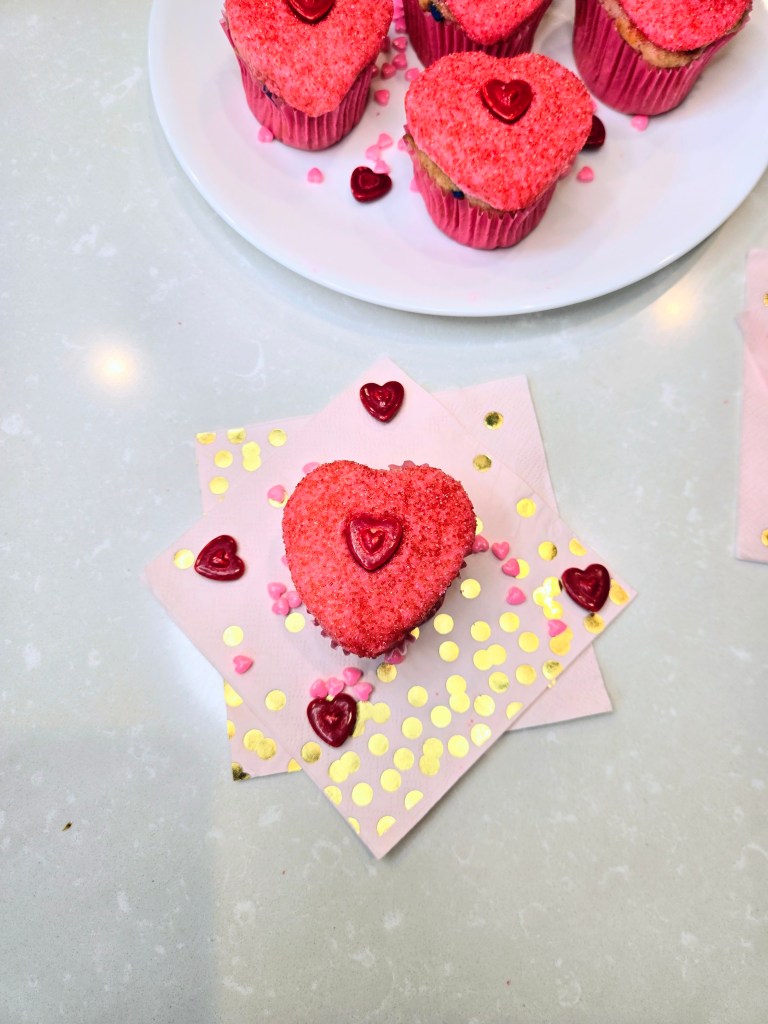
Sweet but dangerously delicious. -
Strawberry Kiss Cookies

These gluten free strawberry Kiss cookies are what happens when Valentine’s Day meets zero patience and maximum sparkle. Soft strawberry cookies get rolled in pink and red sanding sugar (because choosing just one felt wrong), then crowned with a strawberry crème heart-shaped Kiss…a.k.a., a chocolatey little love bomb. They’re cute, festive, and ready in under 30 minutes, which means you can absolutely make them last-minute and still look like you had your life together. Sweet, sparkly, and slightly dramatic… just how Valentine’s desserts should be. Whether you’re sharing with your favorite people or keeping them all to yourself (no judgment), these cookies are proof that love at first bite is very real.

Heart-shaped Kisses > emotional availability. Recipe and Instructions
Strawberry Kiss Cookies
A easy Valentine's Day dessert!
Gluten free flour can be replaced with regular All Purpose flour; any variety of Hershey’s Kisses can be used.
Ingredients
*112 g (1/2 cup) butter, softened
*192 g (1 cup) Allulose or granulated sugar
*1 egg
*1 tsp strawberry extract
*Light pink gel dye
*296 g (2 cups) Bob’s Red Mill cup-for-cup gluten free flour
*1/2 tsp baking powder
*1/4 tsp salt
*21 Hershey’s strawberry creme hearts
*Pink and red sanding sugar
Directions
- Preheat oven to 350 and line two 9×13 baking sheets with Silpat liners or Parchment paper misted with cooking spray.
- Cream butter and sugar in stand mixer until light and fluffy, around 3 minutes.
- Add in the egg, extract, and gel dye.
- Add in the salt, baking powder, and half the flour, mixing well.
- Add in remaining flour until everything is just combined.
- Use a cookie scoop to get evenly sized balls of dough.
- Place sanding sugar each in a separate bowl.
- Roll half of the dough balls in red, and the other in pink sanding sugar until coated.
- Bake one sheet at a time for 8-10 minutes.
- While baking, unwrap 21 creme heart Kisses.
- Once the first sheet is done baking, set on a cooling rack and immediately place a heart into the center of each cookie; to keep from TOTALLY melting, place this in the freezer to set.
- Bake remaining tray and repeat the previous step.
- Keep cookies in an air-tight container.
Nutrition
Macros
21 servings
139.5 cal/17.5 c/7.1 f/1.4 p per cookie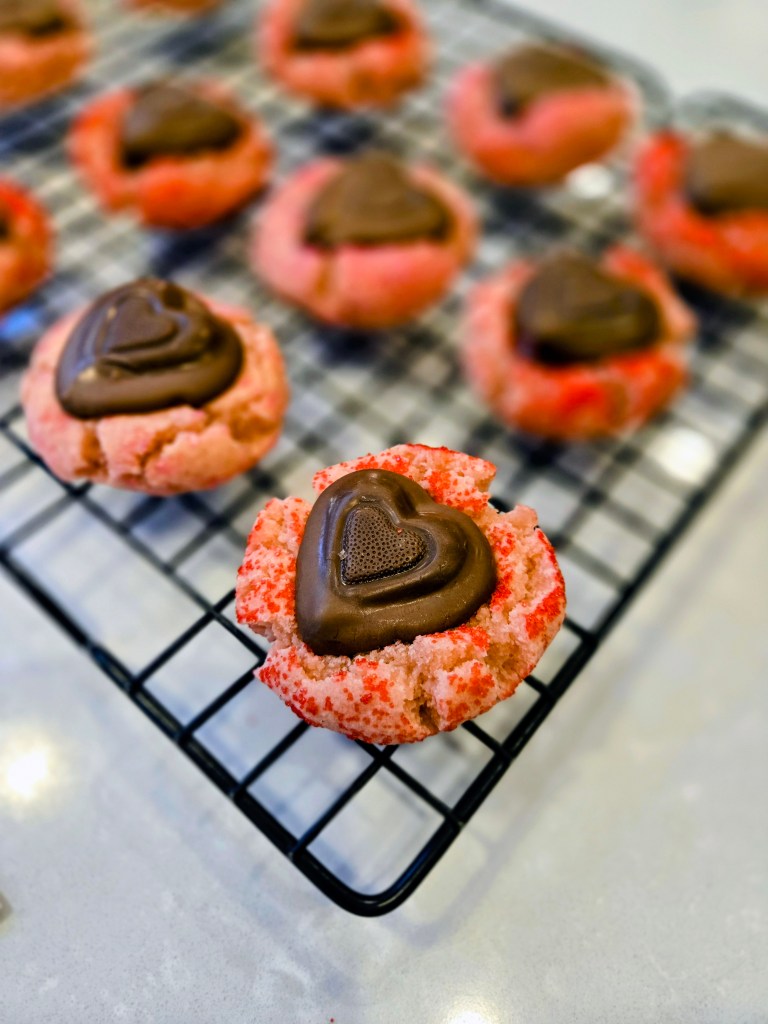
Ready in 30 minutes, gone in 5… 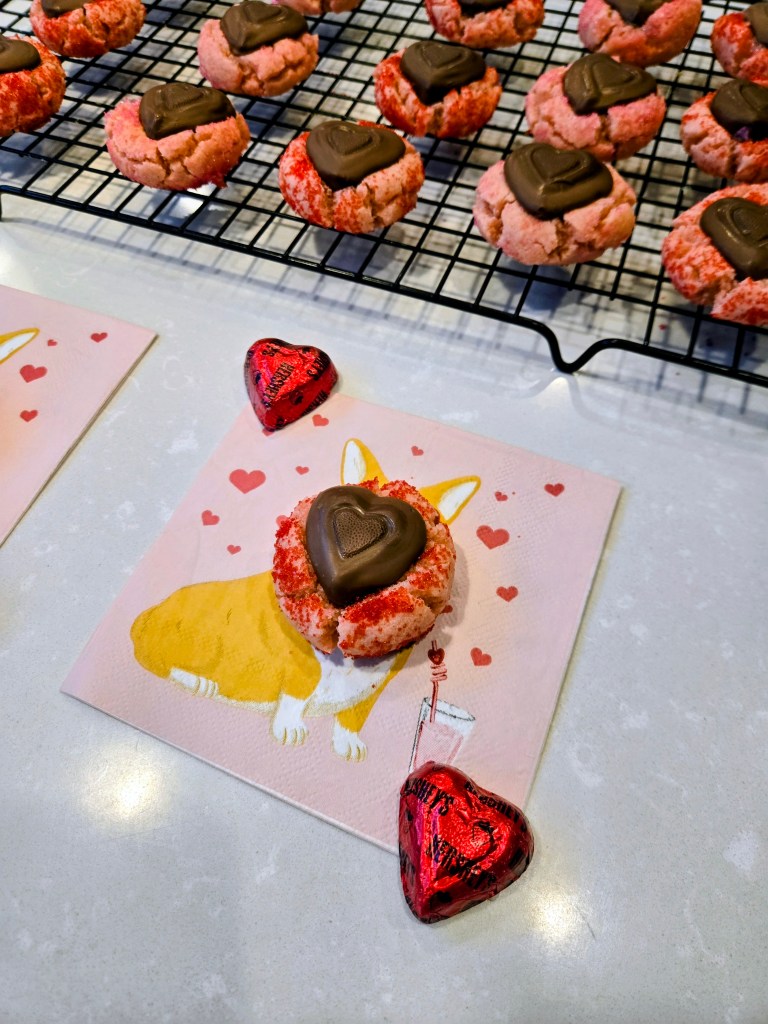
These cookies came to flirt. - Preheat oven to 350 and line two 9×13 baking sheets with Silpat liners or Parchment paper misted with cooking spray.
-
Raspberry Buttercream Valentine’s Heart Cake
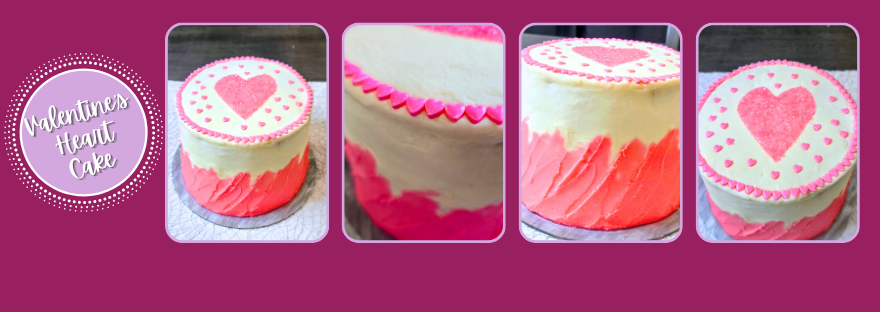
This raspberry cake is what happens when Valentine’s Day, a box of pink heart sprinkles, and a serious love for all things extra get together and feel their feelings. Layers of soft raspberry cake are smothered in raspberry buttercream, then dressed up with hot pink brushstrokes, a glittery heart on top, and a sprinkle heart border that’s basically shouting “XOXO.” It’s sweet, flirty, and unapologetically pink: like Barbie’s dream house, but edible and way more emotionally supportive. Consider this cake your official love letter to hearts, glitter, and desserts that wear their heart on their (frosted) sleeve.
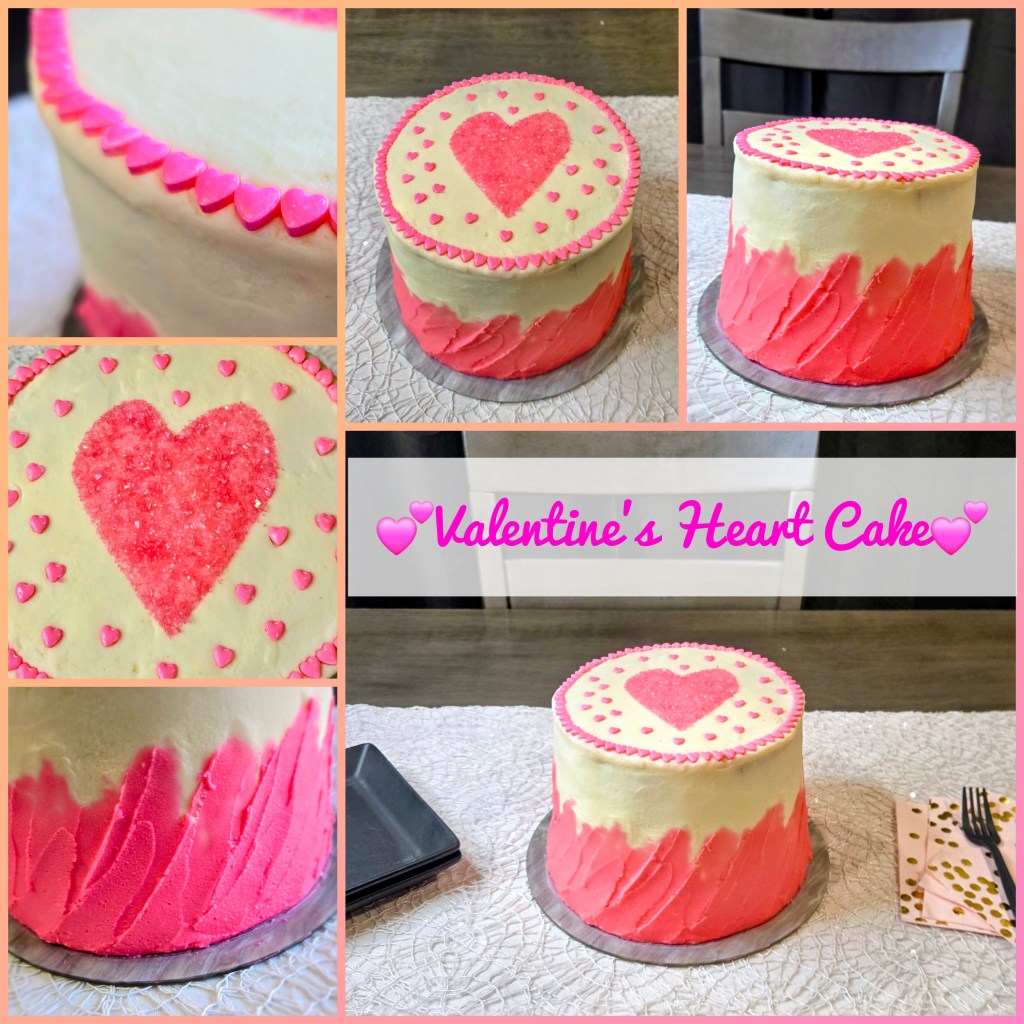
Barbie-core but emotionally stable. Ready to fall head over heels for your own version? You can follow along with the step-by-step photo and video tutorials below…because this cake may be dramatic, but the process is all heart, no heartbreak. I’ll walk you through every swirl, stroke, and sprinkle so you can spread the love (and the buttercream) with confidence. Grab your spatula, channel your inner Barbie baker, and let’s turn those heart eyes into a full-blown cake crush.
Here’s everything I used for this cake:
- Hot pink gel dye
- Hot pink heart sprinkles (mine are from Wilton)
- Hot pink sanding sugar or larger flaked sugar (I used both, picked up from Michael’s)
- Large angled spatula
- Parchment paper with a heart shape cut out in the center (I recommend laying on top of your unfrosted cake and outlining the heart with a marker so it’s the size and shape you want it, then cut out ONLY the heart shape, see 1st photo below)
- Cake and frosting recipe below, with a small amount of frosting dyed hot pink and put into a piping bag with the top snipped
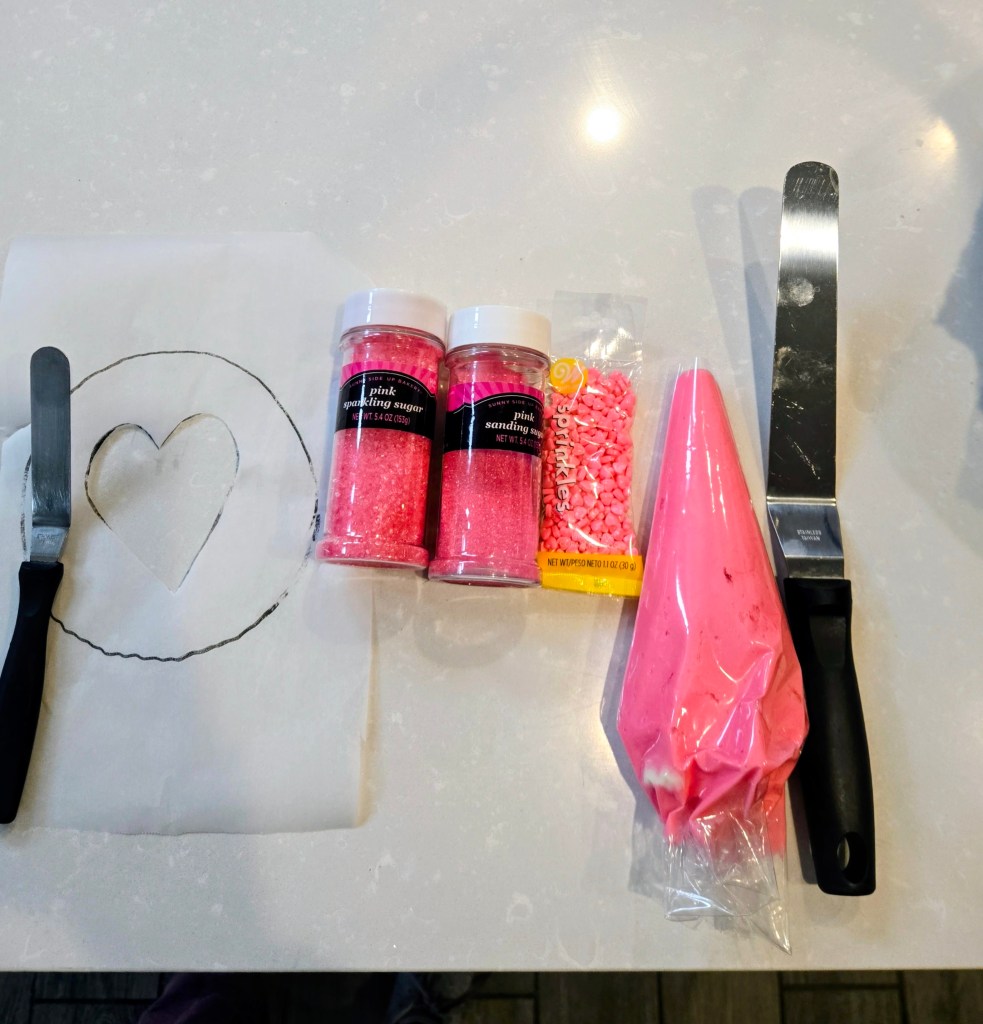
Everything you need to make Valentine’s magic! 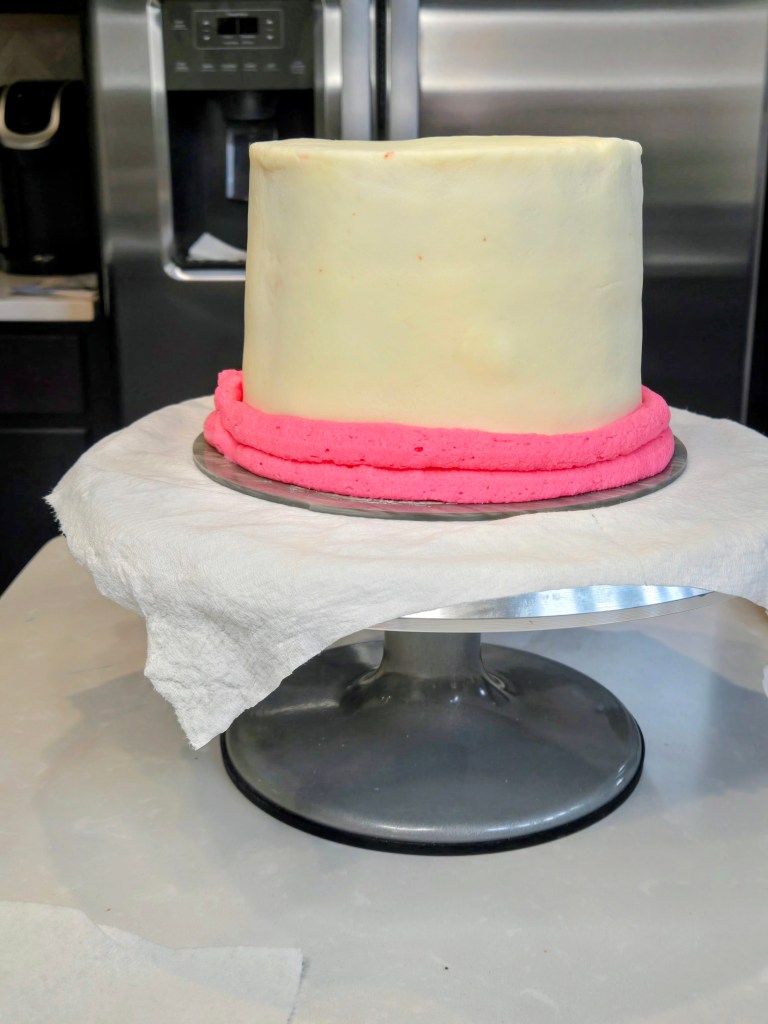
Once you’ve frosted your cake in plain white, pipe two layers of hot pink frosting on the bottom of the cake. 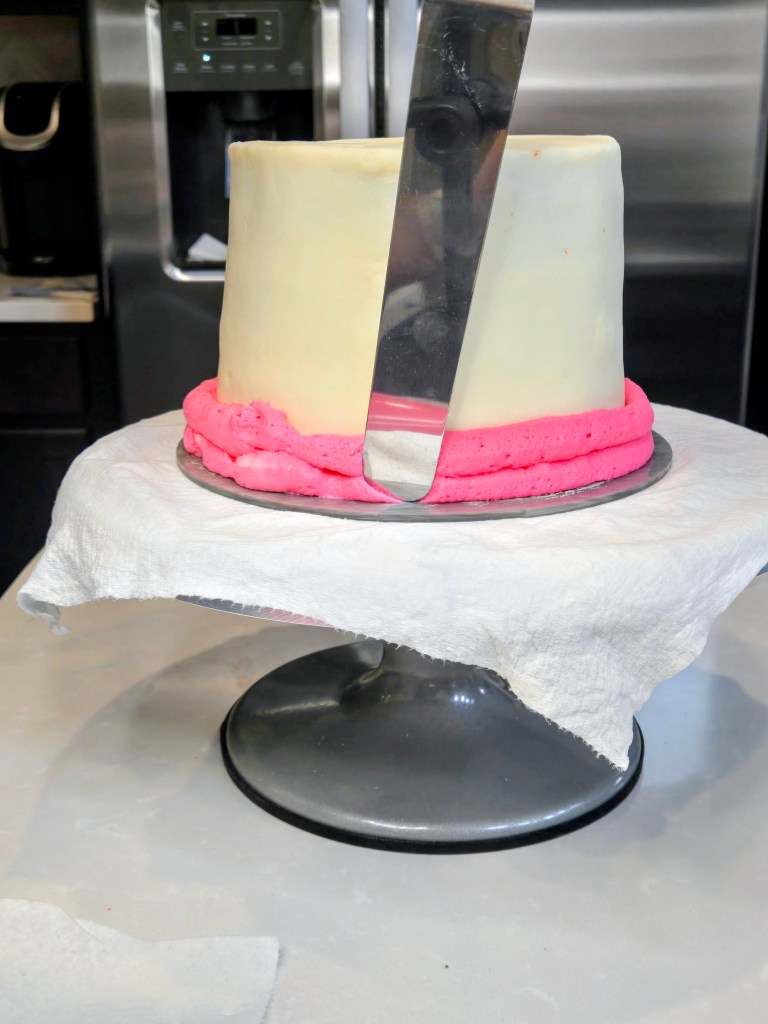
With the back of a LARGE angled spatula or back of a large spoon, press into the pink and pull up at a slight angle. 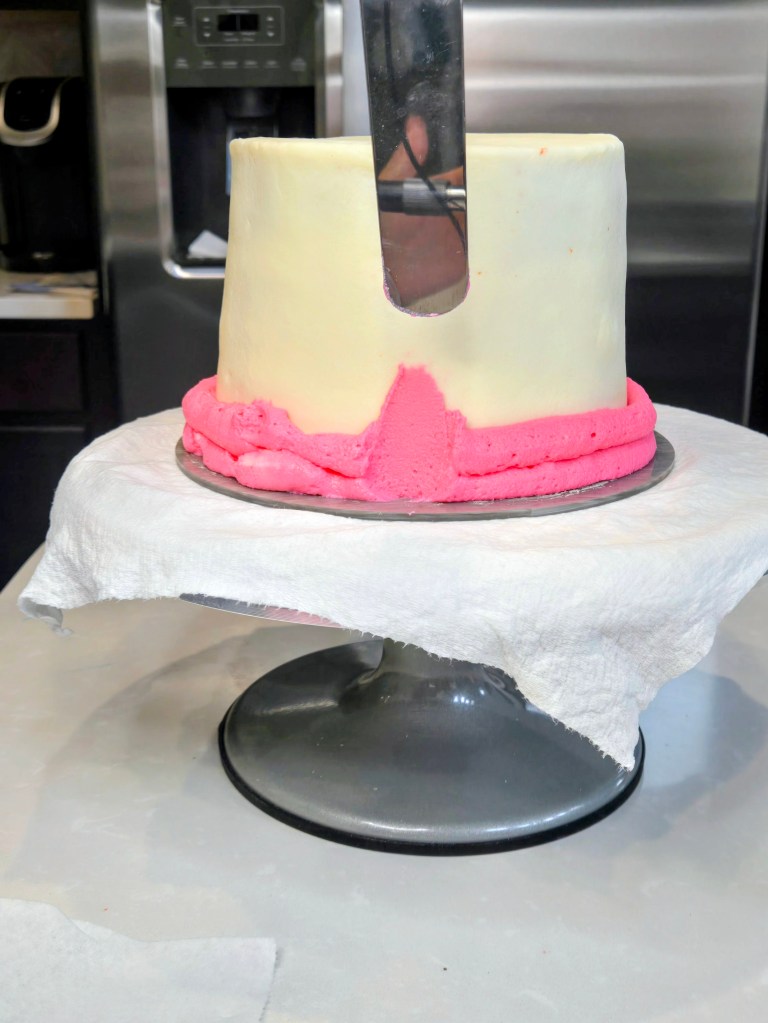
Be sure to clean off the spatula or spoon with a paper towel after each pass. 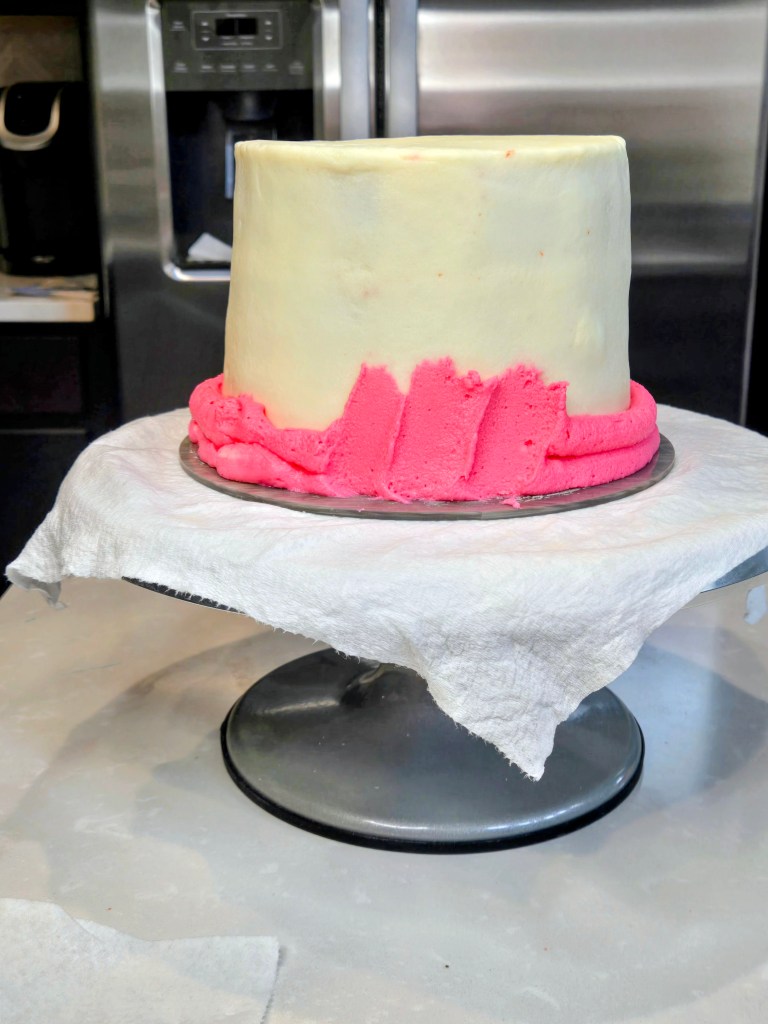
Continue swiping up and away around the entire cake. Swipe as high or low as you want. 
I went around the whole cake once, then came back around a second time to cover 2/3 of the cake in hot pink. 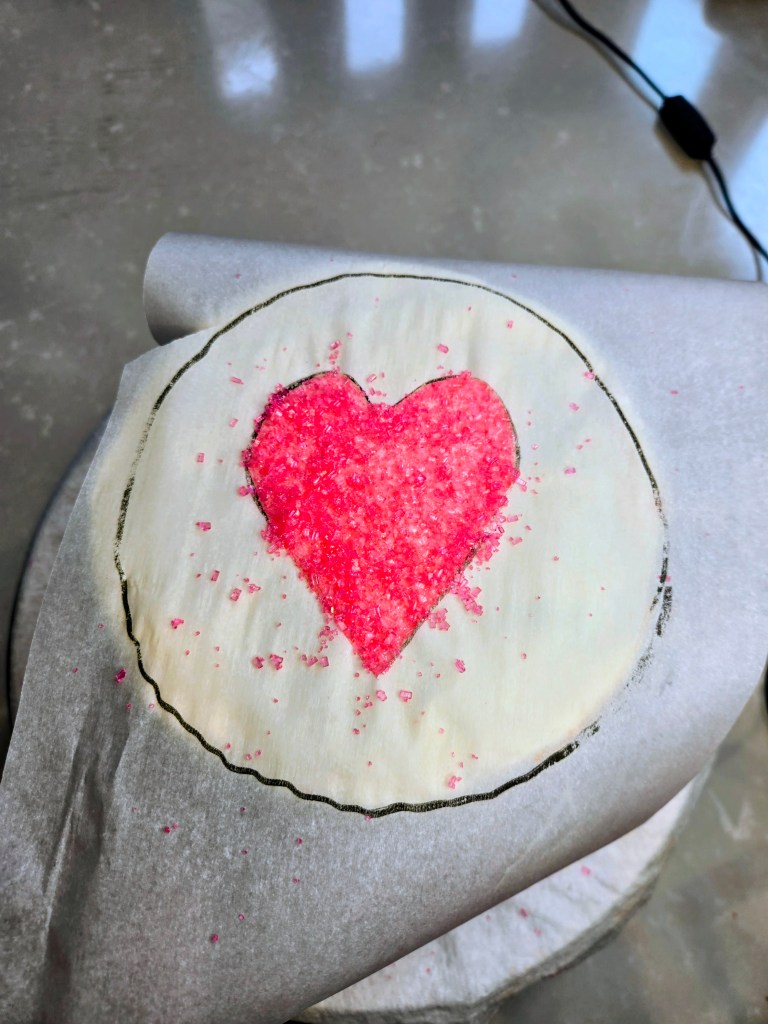
Place your heart template on top of the cake and gently but firmly press in so no sprinkles can get under the paper. Pour sprinkles on top and press in firmly. 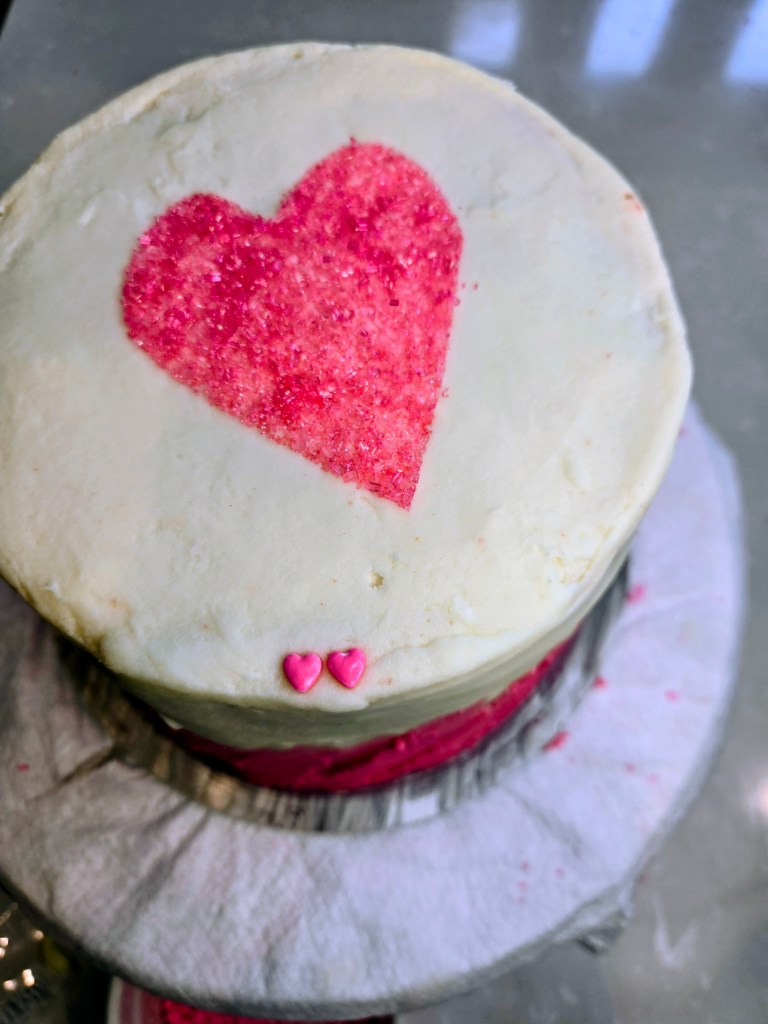
I dusted off the excess sprinkles on my Parchment before gently removing the paper. 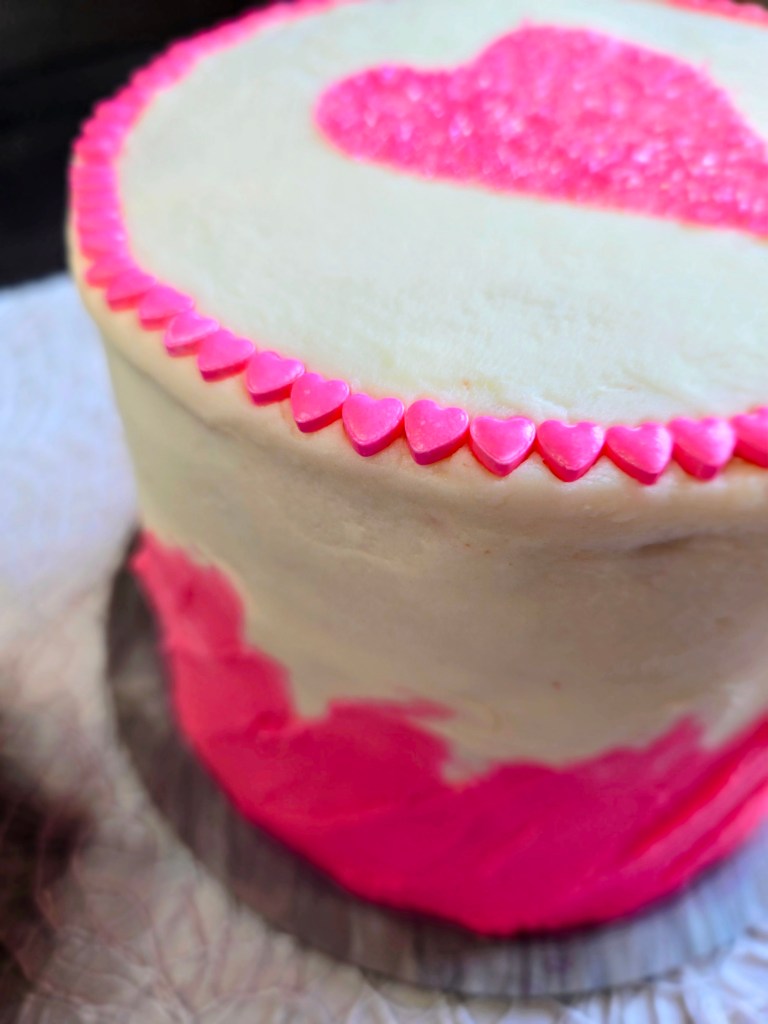
Finish by adding heart border and heart sprinkles on top where desired! Love at first slice…follow along! Recipe and Instructions
Gluten free raspberry cake with raspberry buttercream frosting
A lush raspberry cake perfect for Valentine's Day!
If not gluten free, use any kind of white or yellow cake mix. Monkfruit can also be replaced with regular powdered sugar for frosting. Protein powder can also be replaced with additional monkfruit or regular powdered sugar; note: you will need WAY less liquid in the frosting without protein powder.
Ingredients
CAKE
*1 box of gluten free yellow cake mix (I used Pillsbury Funfetti)
*1 1/2 tsp raspberry extract
*1 fat free or skim milk
*75 g (1/3 cup) fat free Greek yogurt (raspberry would definitely add the the flavor, plain is also fine)
*3 eggs
FROSTING
*225 g (1 cup) butter, softened
*12 ounces Lakanto powdered monkfruit
*4 ounces Quest vanilla milkshake protein powder (cuts the sweetness of the monkfruit and makes a nice, stiff, spreadable frosting; omit and use all monkfruit if desired)
*1 TBS clear vanilla
*1 tsp raspberry extract
*1 cup plus 2 TBS milk
*1/4 tsp citric acid if you like less sweet frosting
Directions
- Preheat oven to 350 and grease three 6-inch pans.
- Whisk cake ingredients together in a stand mixer on low for 30 seconds before switching to medium-high for two minutes.
- Pour batter evenly into pan and bake for 24 minutes, or until a toothpick comes out mostly clean from the center.
- Allow cake to cool fully before frosting.
- To make frosting, whisk butter for 3 minutes before adding in half the powdered monkfruit, protein powder, vanilla, raspberry, and milk.
- Add in remaining monkfruit mix fully.
- Once fully cooled, frost your cake and use the video and galleries above to decorate.
- Keep cake covered and in the fridge. It is best served at room temp, so remove from fridge 30 minutes before eating. Enjoy!
Nutrition
Macros
10 servings
337.5 cal/32.6 /17.1 f/13.3 p per slice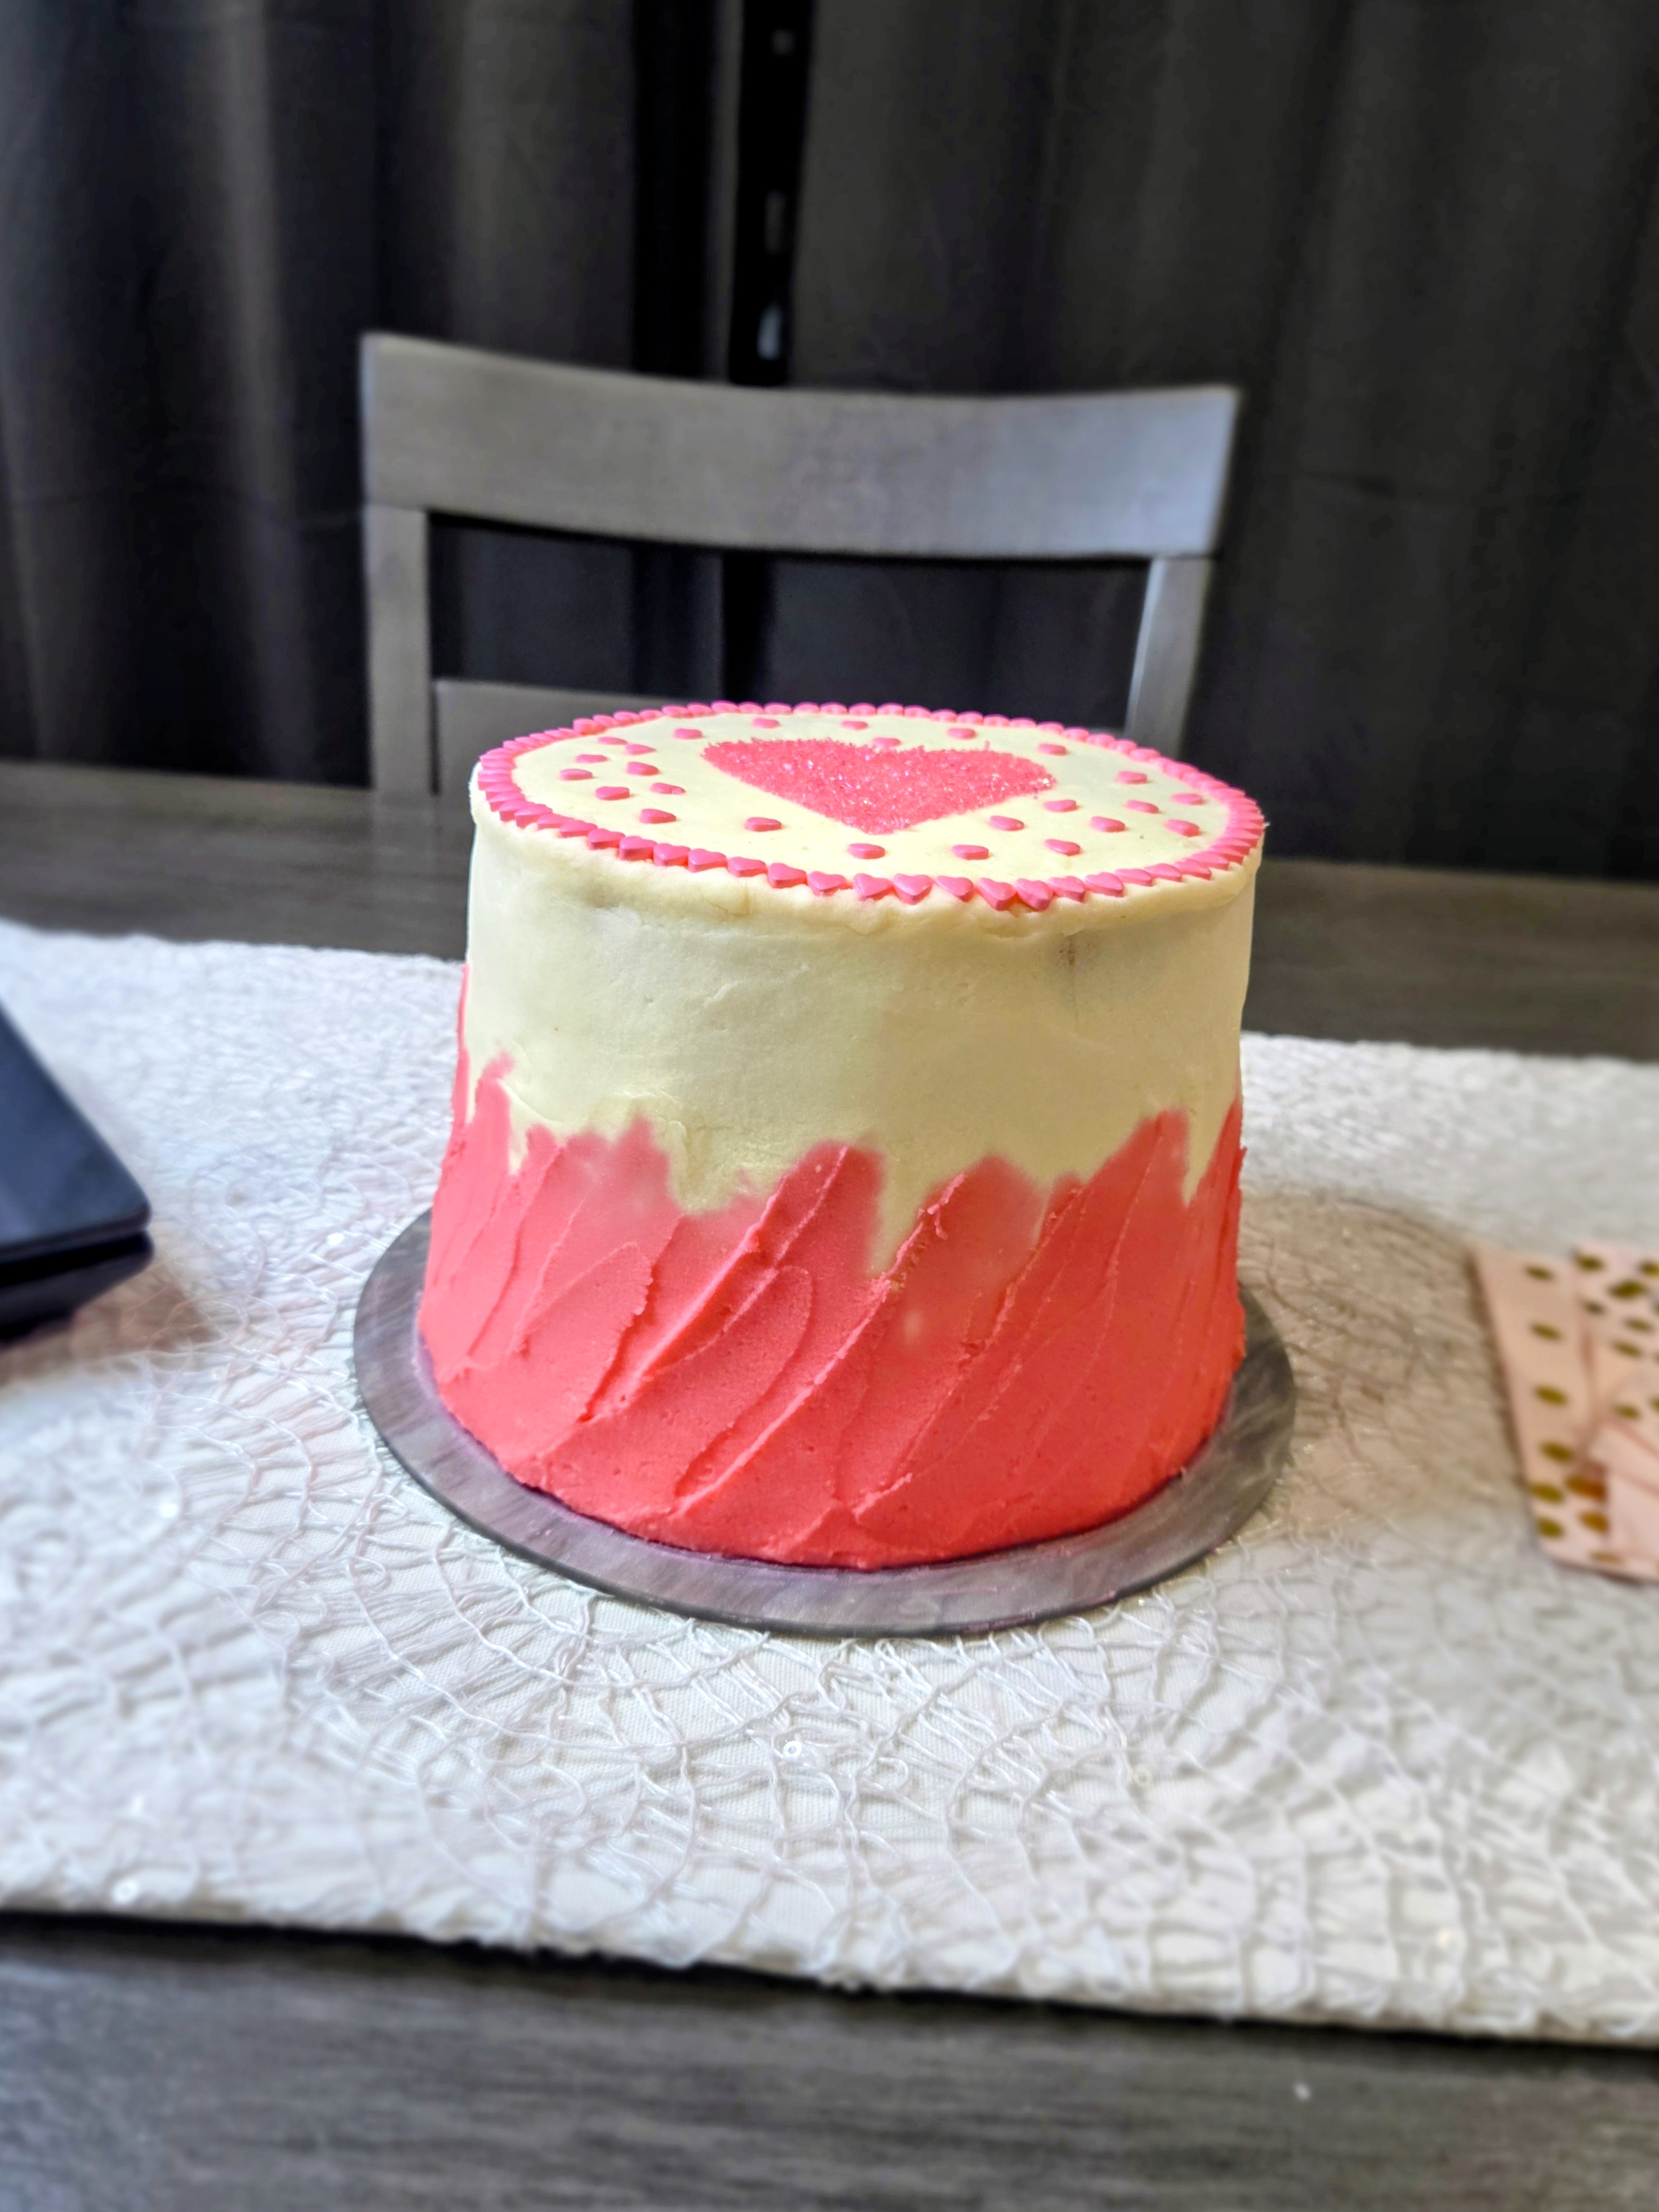
This cake is flirting with you. 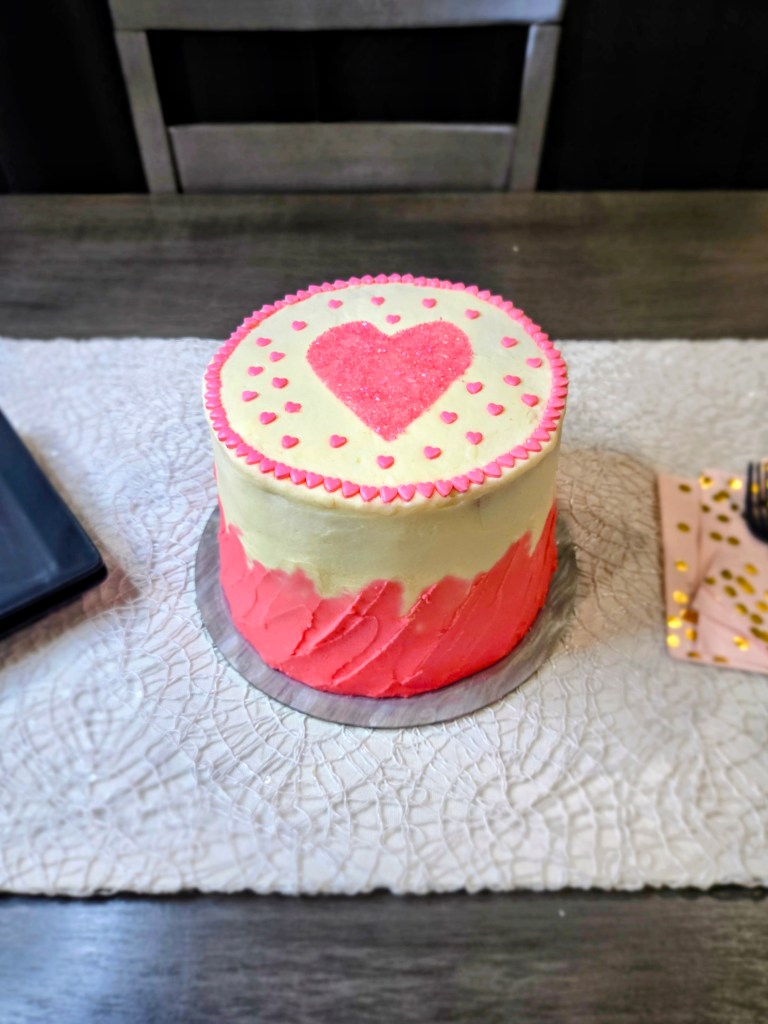
Zero subtlety, all heart. -
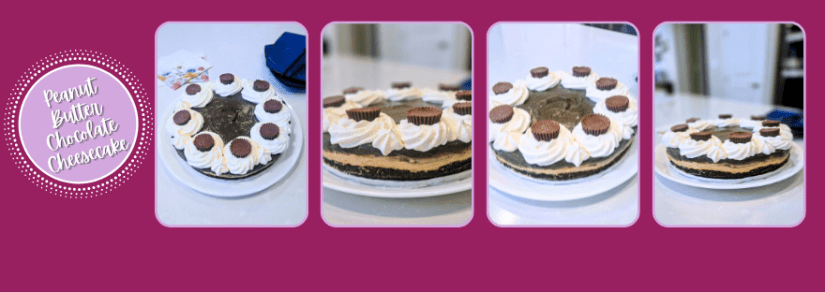
Peanut Butter Chocolate Cheesecake
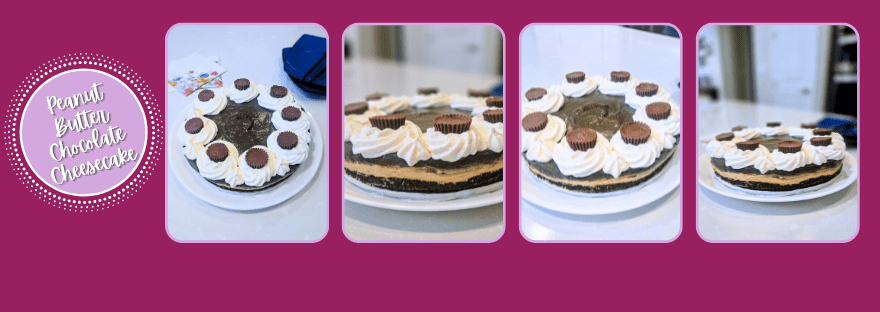
This gluten free peanut butter chocolate cheesecake is proof that sometimes the best things in life require zero baking and maximum peanut butter. It’s rich, chocolatey, unapologetically creamy, and so easy to throw together it practically makes itself (minus baking the crust…but gluten free Oreos ARE involved, so it’s worth it). If you’re here for a dessert that’s smooth, dreamy, and totally nuts about peanut butter, you’re in the right place. Consider this your sign to grab a spoon, embrace the no-bake life, and let chocolate and peanut butter do what they do best: stick together.
One slice for guests. Three slices for quality control… Recipe and Instructions
Peanut Butter Chocolate Cheesecake
A gluten free, rich and creamy peanut butter and chocolate cheesecake
If not gluten free, use any kind of Oreos for the crust. Greek yogurt can be replaced with an additional 8 ounces of cream cheese or sour cream, and allulose can also be replaced with regular sugar.
Ingredients
CRUST
*260 g gluten free Oreos (~22 Oreos)
*3 TBS sugar free syrup
CHEESECAKE FILLING
*224 g (8 ounces) 1/3 the fat cream cheese at room temp
*64 g (1/3 cup) allulose
*226 g (1 cup) nonfat Greek yogurt, strained overnight
*2 tsp vanilla extract
*8 ounces Cool Whip Free, and more for topping if desired
*1 TBS black cocoa power
*15 g (3 TBS) cocoa powder
*56 g (1.4 cup) peanut butter
*32 g (1/4 cup) PBFit powdered peanut butter
*30 g (1/4 cup) powdered monkfruit, divided
TOPPING
*Sugar free Reese’s
*Cool Whip Free (I used 100 g)
Directions
- Line an 8″ springform pan with Parchment paper and spray with cooking spray.
- Preheat oven to 325.
- Dump the Oreos and syrup in a food processor and grind until smooth (if mixture is too thick, add additional TBS of liquid).
- Place crust mix into prepared pan and smooth to the edges (I use cooking spray on my hands to make this easier).
- Bake for 10 minutes until golden; remove to cool while making filling; place in freezer to cool while you make the batter.
- Mix the cream cheese and allulose in a stand mixer on medium high for 2-3 minutes until fluffy and smooth.
- Add in the yogurt, vanilla, and blend until smooth, 2-3 minutes.
- Divide batter into two bowls.
- In one bowl, add the peanut butter, peanut butter powder, and 2 TBS powdered monkfruit.
- Spread this mixture on top of the cooled crust, and place back into the freezer.
- In the second bowl with batter, add black cocoa and regular cocoa along with remaining 2 TBS of monkfruit (you can omit the black cocoa and just use all regular cocoa, but this gives it an Oreo flavor).
- Gently smooth this layer on top of the peanut butter layer.
- Refrigerate cheesecake overnight or place in fridge for 4 hours before removing from springform.
- If desired, top with more Cool Whip and Reese’s for decoration.
- Keep cheesecake covered in fridge until serving.
Nutrition
Macros
10 servings
371.4 cal/41 c/19 f/9.1 p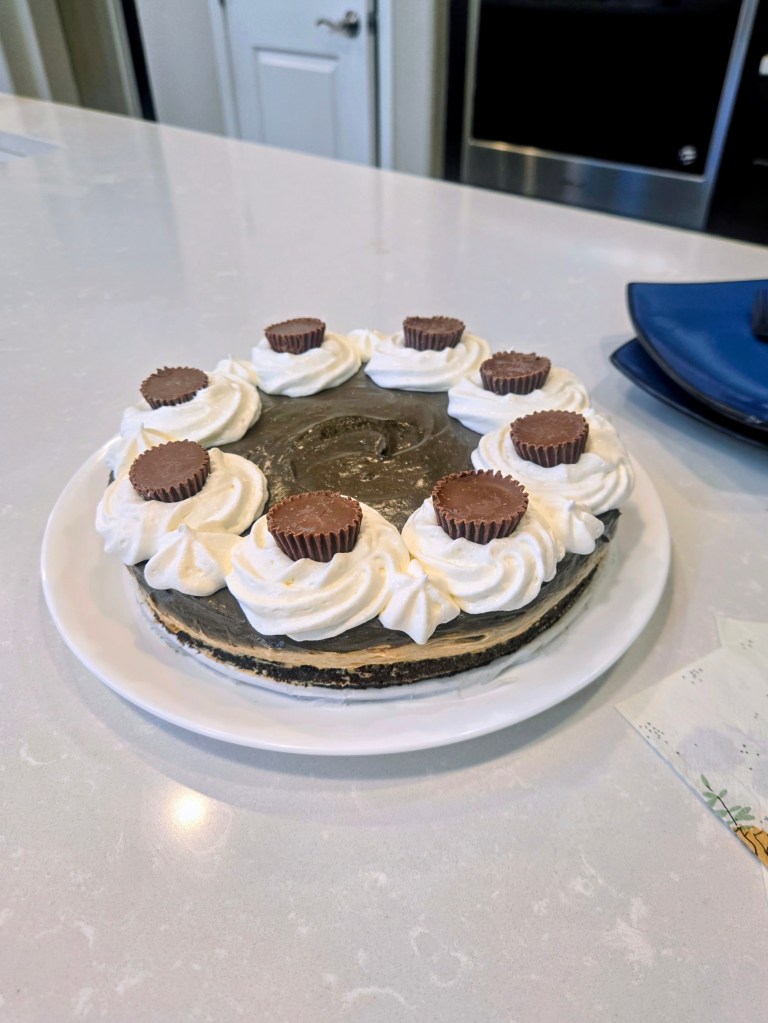
Chill time > bake time. 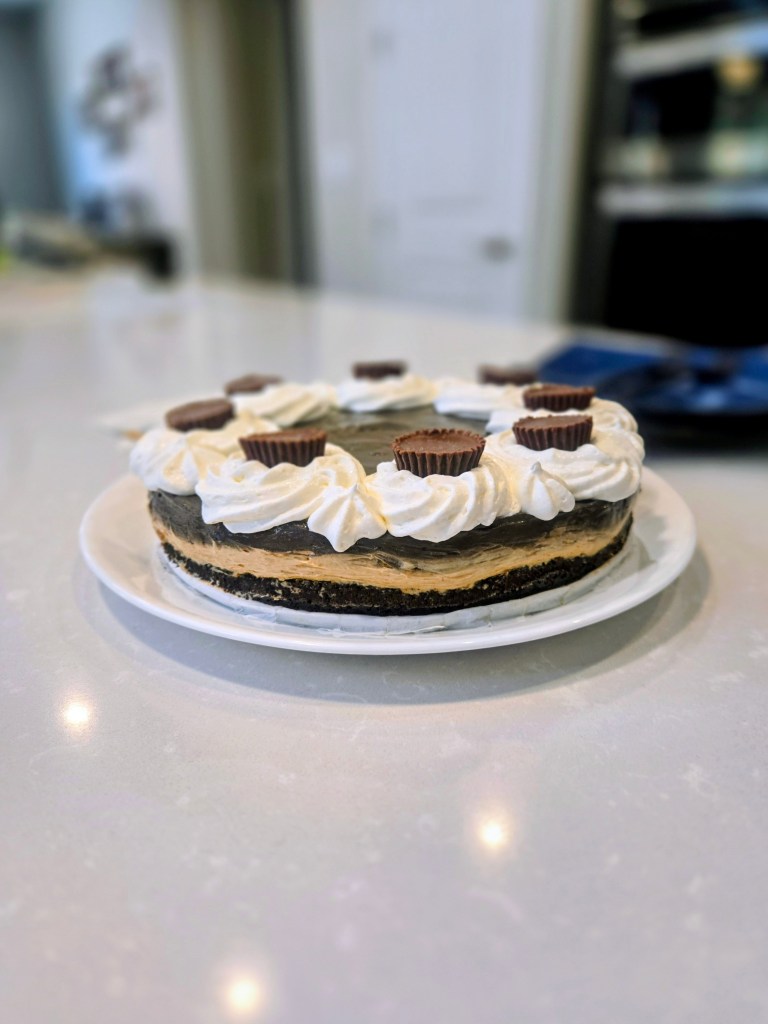
Dessert without preheating? Say less. 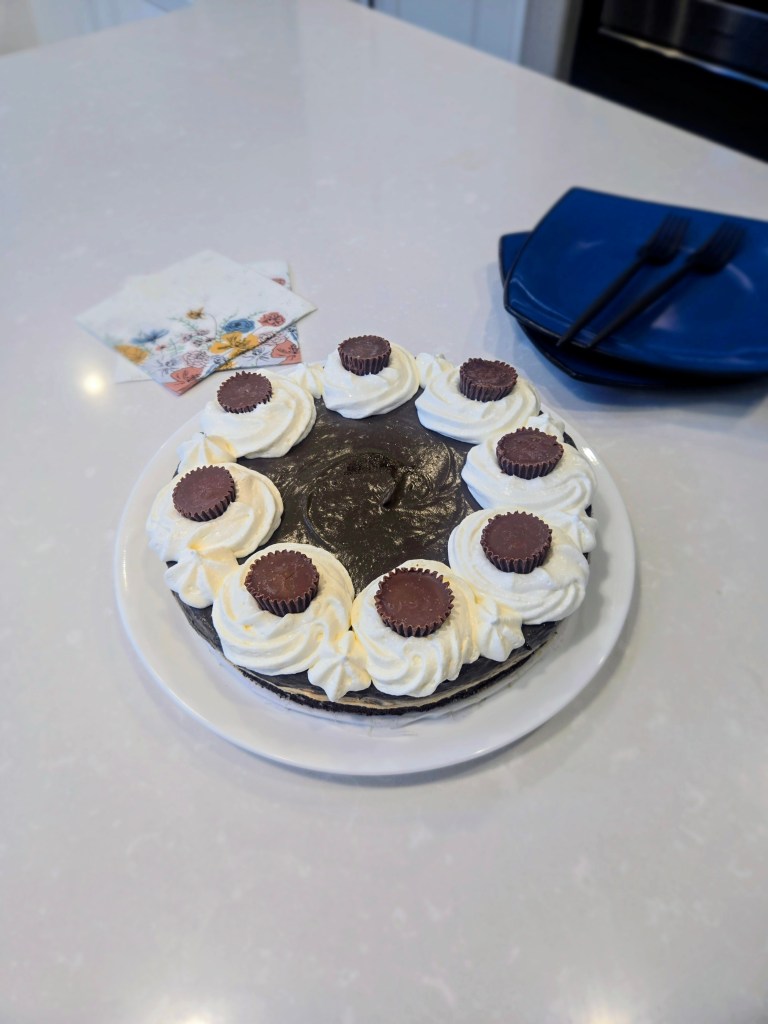
Smooth, rich, and doing the absolute most…just like me. - Line an 8″ springform pan with Parchment paper and spray with cooking spray.

Healthy-ish cake, cupcakes, pie, and cheesecake recipes and decorating tips
