-
Winter Birthday Cake

Since winter clearly forgot to show up this year (one sad snow sighting does not count), I took matters into my own frosting-covered hands and gave myself the only snowstorm I could rely on in the form of my 39th birthday cake. This icy showstopper is dripping in white-and-blue snowflakes, pearly sprinkles, and an irresponsible amount of opalescent edible glitter…because if I’m aging, I’m doing it loudly and sparkly. Consider this cake my official response to the weather, time itself, and anyone who thinks birthdays should be “low-key.” If Mother Nature won’t deliver snow, I’ll simply bake it instead. Somewhere between the snowflakes and the final dusting of glitter, I realized both myself and my kitchen were wearing more edible glitter than an exotic dancer…so subtlety was clearly not the goal.
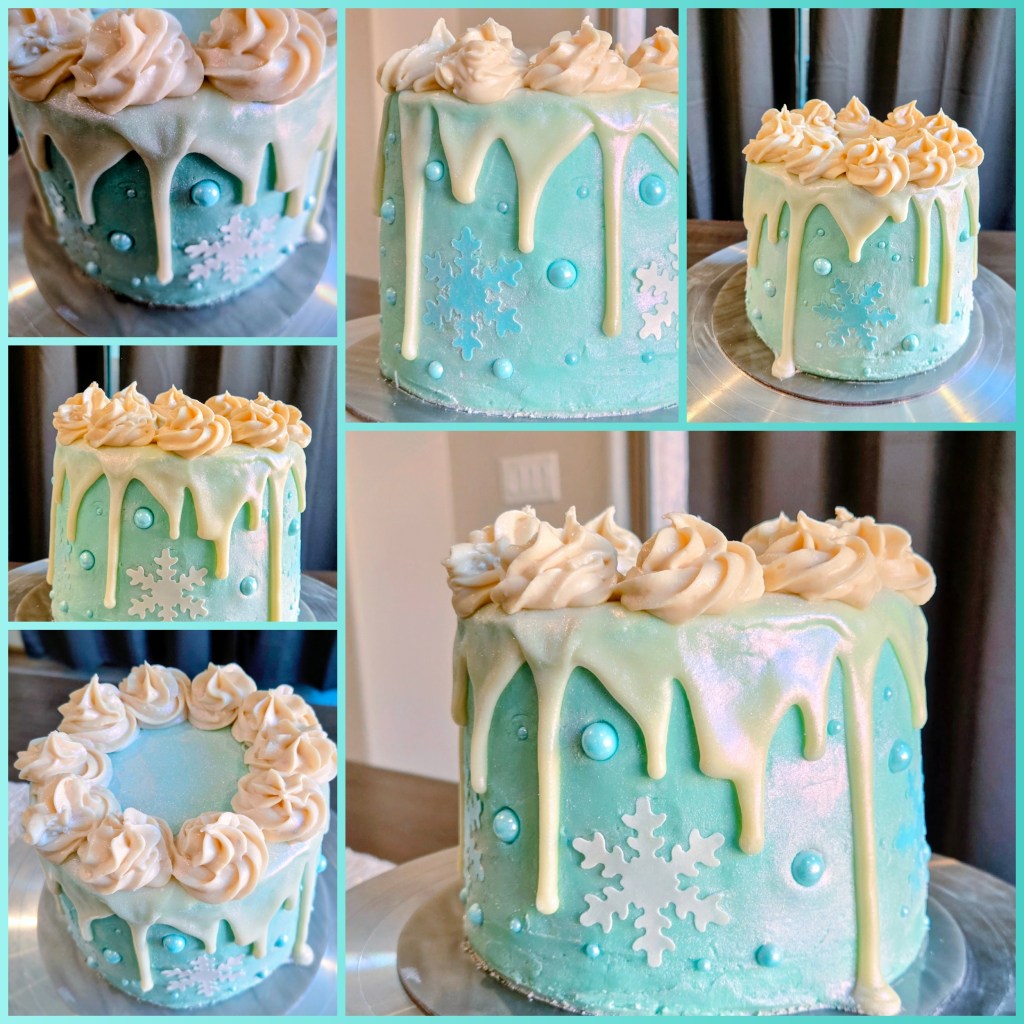
Proof that 39 comes with extra shine. Somewhere between adding “just one more” sprinkle and fully transforming myself into a sparkly human beacon visible from space, I completely forgot to document the process. No step-by-step photos. No satisfying decorating videos. Just vibes, glitter, and zero regrets. But fear not: below you’ll find a very thorough list of everything you need and clear, no-nonsense instructions so you can recreate this winter wonderland without also becoming part of the decor (unless you want to, which I fully support).
- Light blue gel dye
- White chocolate melts
- Food safe paint brush
- Piping bag
- 1M piping tip
- Scraper
- Opal edible shimmer
- Light blue pearl sprinkles
- Edible snowflakes
Recipe and Instructions
Almond cake with protein almond buttercream frosting
If not gluten free, use any kind of white or yellow cake mix. Monkfruit can also be replaced with regular powdered sugar for frosting. Protein powder can also be replaced with additional monkfruit or regular powdered sugar.
Ingredients
CAKE
*1 box of gluten free yellow cake mix (I used Pillsbury funfetti)
*1 cup fat free or skim milk
*75 g (1/3 cup) unsweetened applesauce
*3 eggs
*1 tsp almond extract
FROSTING
*225 g (1/2 cup) softened butter
*12 ounces Lakanto powdered monkfruit
*4 ounces Quest vanilla milkshake protein powder (cuts the sweetness of the monkfruit and makes a nice, stiff, spreadable frosting; omit and use all monkfruit if desired)
*1 TBS clear vanilla
*1/4 tsp almond extract
*1/2 cup + 2 TBS milk
*1/4 tsp citric acid if you like less sweet frosting
Directions
- Preheat oven to 350 and grease three 6-inch pans.
- Whisk cake ingredients together in a stand mixer on low for 60 seconds before switching to medium-high for two minutes.
- Pour batter evenly into pan and bake for 30 minutes, or until a toothpick comes out mostly clean from the center.
- Allow cake to cool fully before frosting.
- To make frosting, whip butter for 3 minutes before adding in half the powdered monkfruit, protein powder, vanilla, almond, and milk.
- Add in remaining monkfruit and 1-2 drops of light blue food coloring to make everything a wintry blue. Mix fully.
- Once fully cooled, frost your cake and smooth with a scraper; place in the freezer for 15 minutes while you work on melting the chocolate.
- Melt white chocolate melts according to package directions and let cool for a couple minutes. You don’t need a ton, just enough to go around the top edges of the cake.
- Use a spoon to drizzle the chocolate melts down the sides of the cake.
- While the chocolate melts set, you can alternate light blue and white edible snowflakes around the cake.
- Once snowflakes are placed, come in with varying sizes of the edible blue sprinkles and place where desired.
- Once chocolate has set, take a food-safe paint brush and dip into the opal shimmer, painting dust directly on the hardened white chocolate melts.
- To finish, sprinkle the top of the cake with the opal shimmer, then take a small amount in your palm and blow directly onto the sides of the cake.
- Keep cake covered and in the fridge. It is best served at room temp, so remove from fridge 30 minutes before eating. Enjoy!
Nutrition
Macros
12 servings
302 cal/26.2 c/17.2 f/10.7 p per slice
Sparkle level: absolutely unnecessary, completely intentional 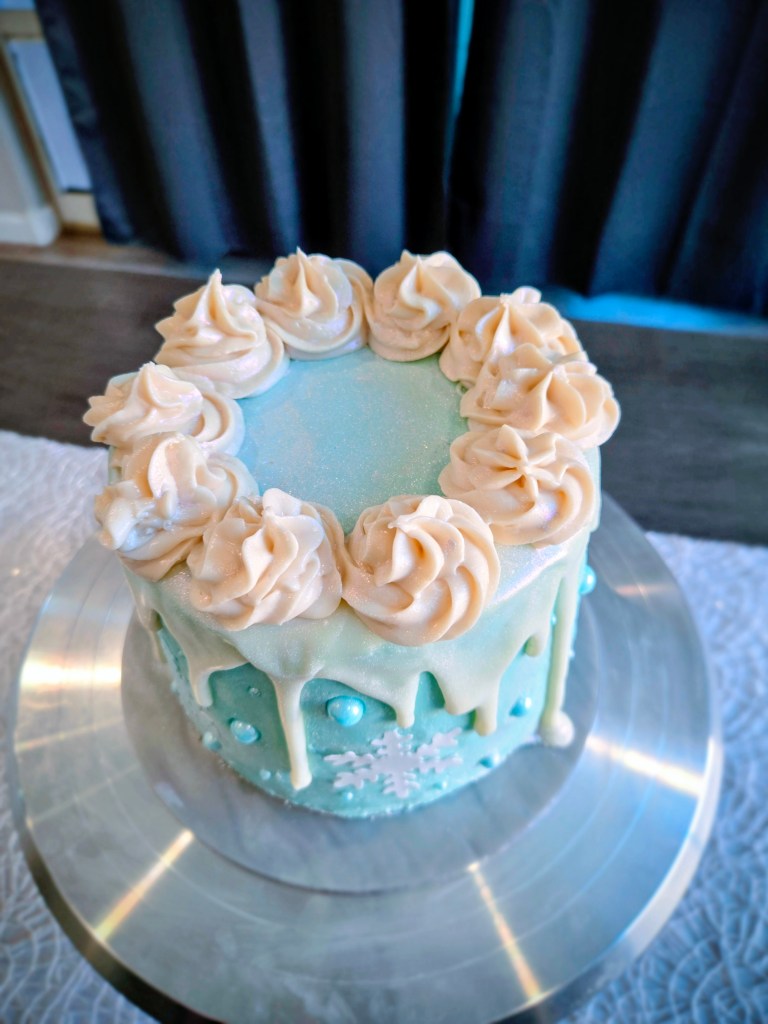
Age is just a number. Glitter is a lifestyle. 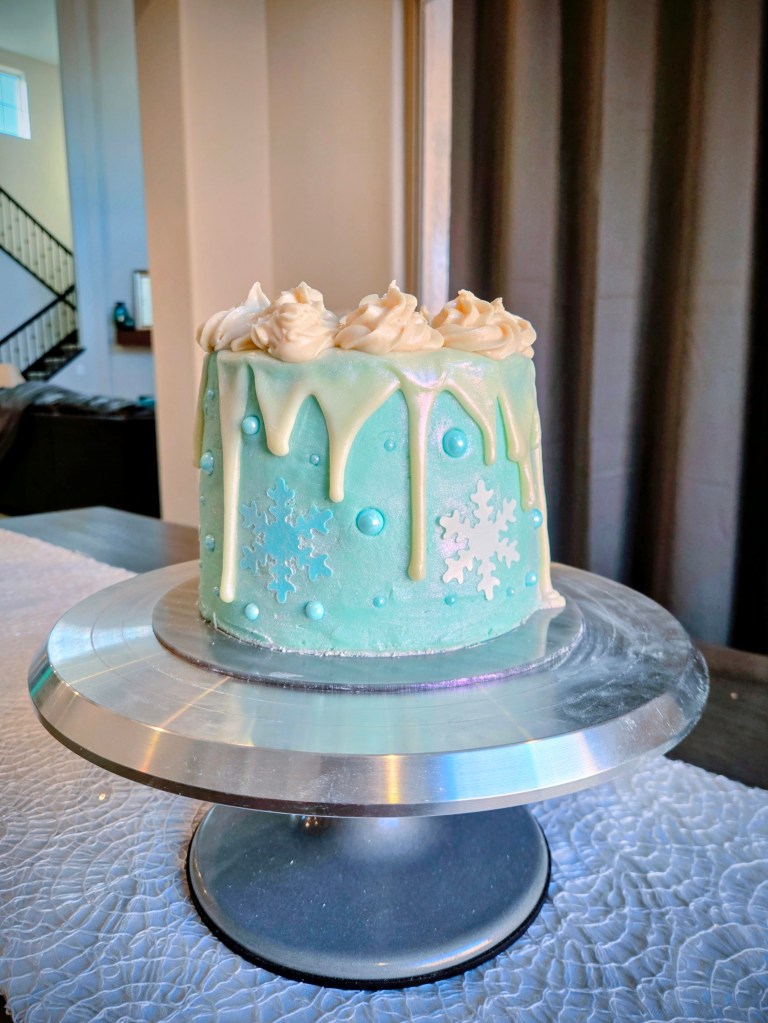
She’s icy. She’s shiny. She’s absolutely extra. 
If you’re not finding edible glitter three days later, did you even celebrate? -
Candy Cane Bark Cups
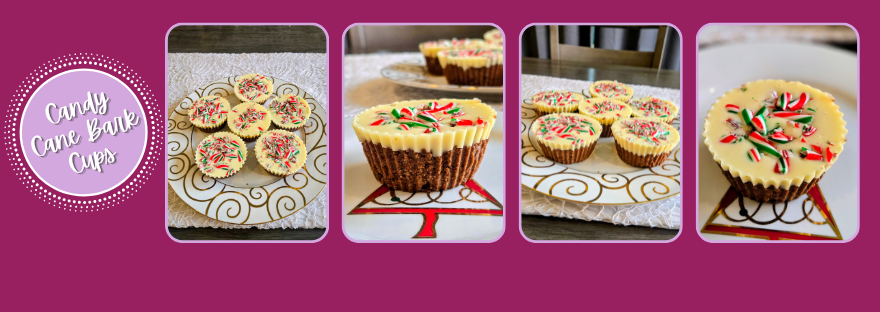
If you’re mint to make something sweet this season but don’t have time to turn your kitchen into a winter war zone, these No-Bake, Gluten-Free Candy Cane Bark Cups are here to work magic even Santa would be jealous of. So, if December has you running on vibes, caffeine, and sheer seasonal delusion, these babies are your peppermint-flavored lifeline. No oven. No mixer. No emotional stability required. Just a rich chocolate base, a snowy white-chocolate top, and crushed candy canes sprinkled on top: they look like you tried way harder than you actually did. They’re minty, festive, and come together faster than your holiday spirit disappears in a crowded parking lot. Essentially, they’re perfect for last-minute parties, surprise guests, or pretending you’re effortlessly festive.

When you need a dessert now but still want applause, may I present to you: Candy Cane Bark Cups. Recipe and Instructions
Candy Cane Bark Cups
A simple and stunning Christmas dessert for last-minute holiday plans.
You can sub any white chocolate chips if you don’t need them to be sugar free, and same with the golden monkfruit (brown sugar will work); this will drastically change the macros, though.
Ingredients
FOR THE BASE
*160 g (1 2/3 cups) GF oat flour
*20 g (1/4 cup) cocoa powder (I used regular, dark would also work!)
*1/4 tsp salt
*144 g (3/4 cup) Lakanto golden monkfruit
*1 tsp vanilla
*75 g (1/3 cup) slightly melted coconut oil
*1/2 cup skim or fat free milk
FOR THE TOPPING
*280 g (1 2/3 cups) Lily’s sugar free white chocolate chips
*4 tsp coconut oil
*14 crushed mini candy canes
Directions
- Line a muffin tin with 10 silicone cupcake wrappers (or regular wrappers)
- In a medium bowl, whisk together the oat flour, cocoa, and salt.
- Add in the golden monkfruit, vanilla, coconut oil, and milk, mixing until a dough forms.
- Evenly split your dough into the ten cups; it helps to spray your fingers with cooking spray to keep them from sticking to the dough as you press them into the cups.
- Place chocolate chips and 4 tsp of coconut oil in a microwave safe bowl.
- Melt on 60% power for one minute, stirring and repeating until your chocolate is completely melted.
- Use oven mits if your bowl is warm, and a large spoon to drop dollops of white chocolate on top of each cup, using the back of the spoon to smooth out the chocolate.
- You will need to work quickly and sprinkle candy canes on top before the chocolate sets.
- Place into the freezer for 15-30 minutes to harden chocolate before removing each cup from the silicone liners.
- Keep leftovers in fridge.
Nutrition
Macros for 1 cup
331.7 calories/34.4 c/19.7 f/4.2 p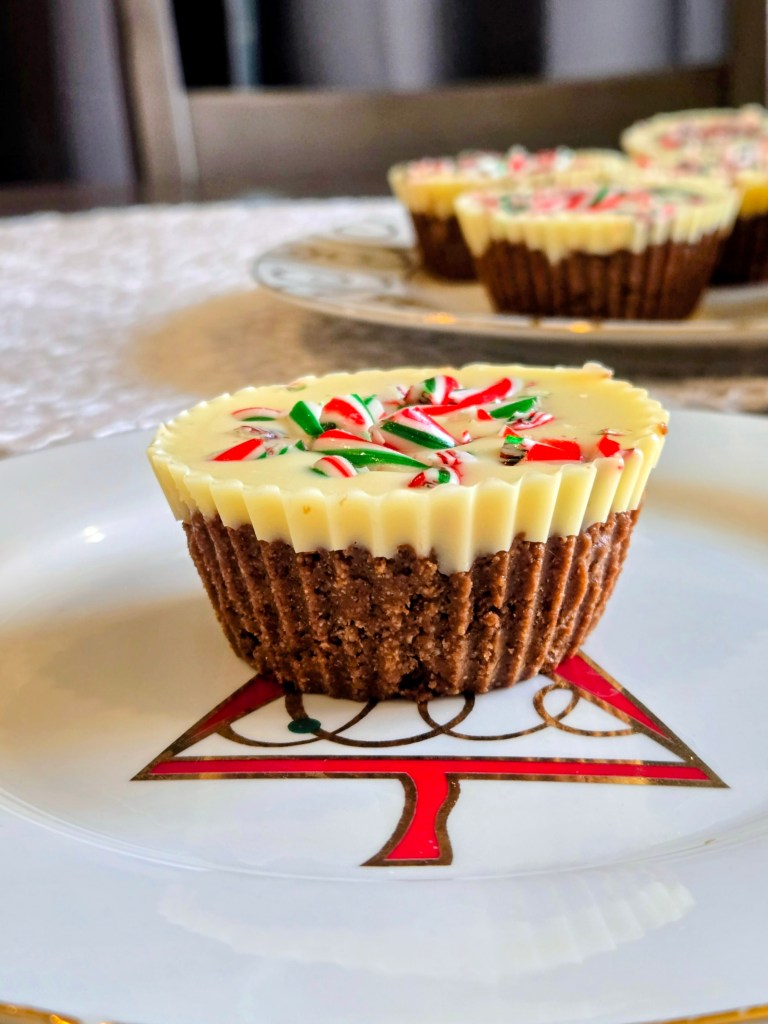
These cups required less effort than wrapping gifts! 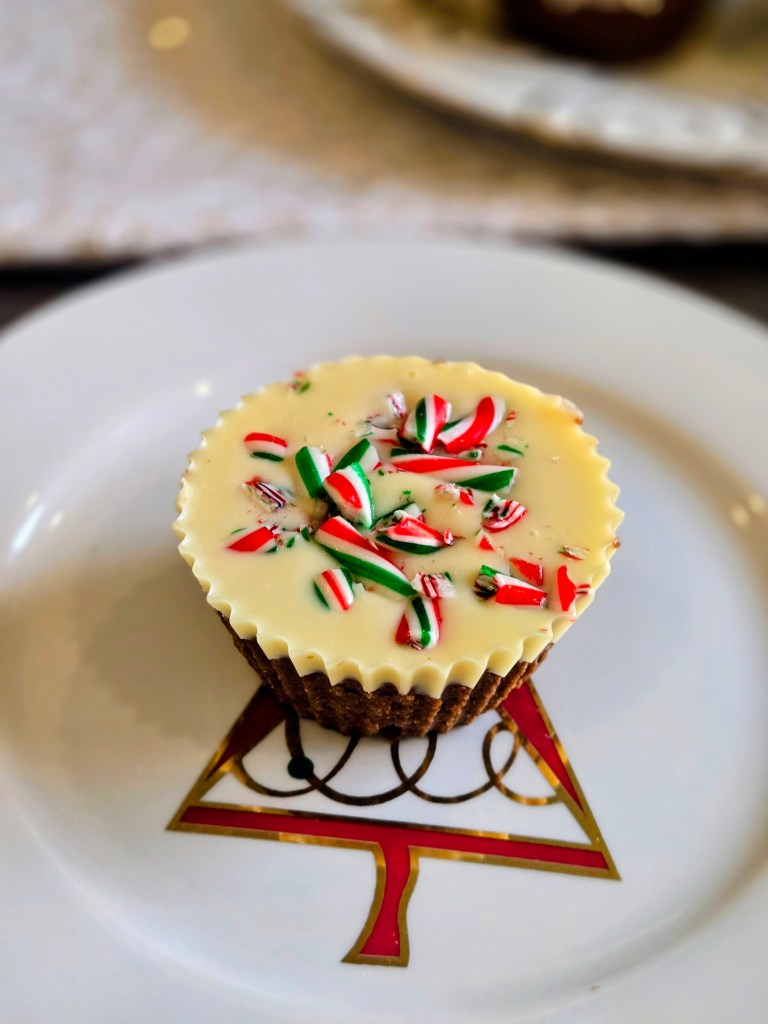
White chocolate snowfall with zero chance of frostbite. 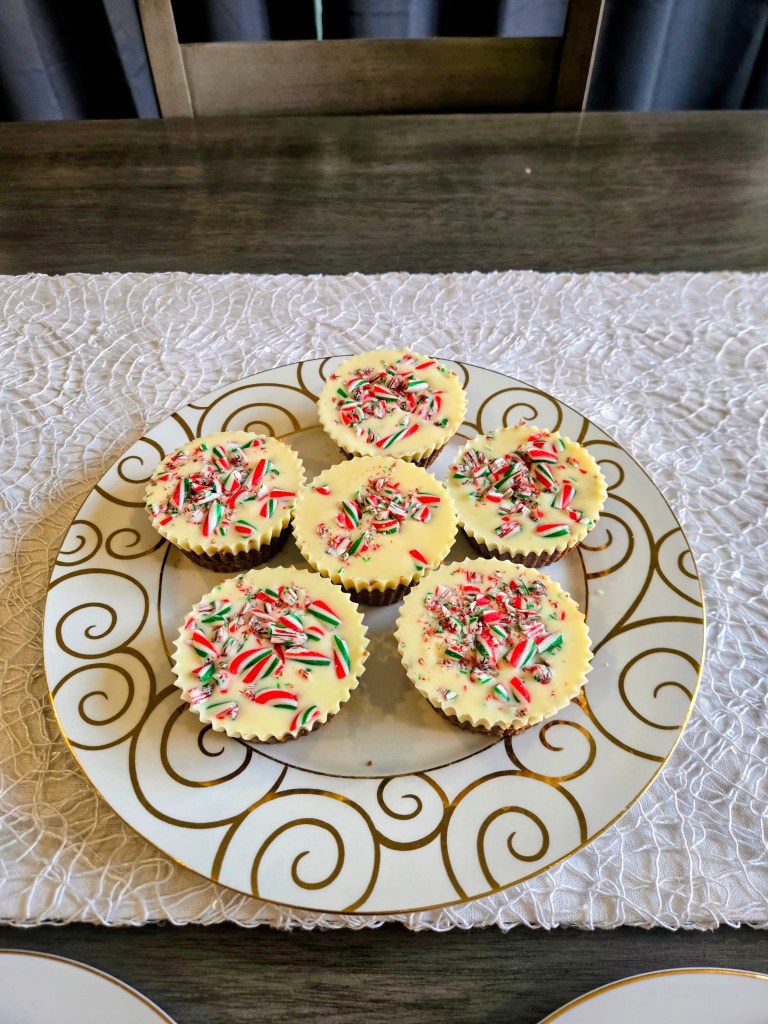
Festive enough to fool your relatives. - Line a muffin tin with 10 silicone cupcake wrappers (or regular wrappers)
-
Holly Christmas Cake

This two-toned white-and-red Christmas cake didn’t come to play: it came to sleigh. With a holly-jolly sprinkle surprise tucked right in the middle and swoops of green buttercream dancing across the top like tiny evergreen waves, this cake is basically wearing its holiday sweater loud and proud. It’s sweet, it’s merry, it’s serving serious North Pole vibes, and it’s ready to spread more cheer than a carol stuck on repeat. So pour the cocoa, pull on your comfiest sweater, and get ready to bake a little slice of classic holiday magic.
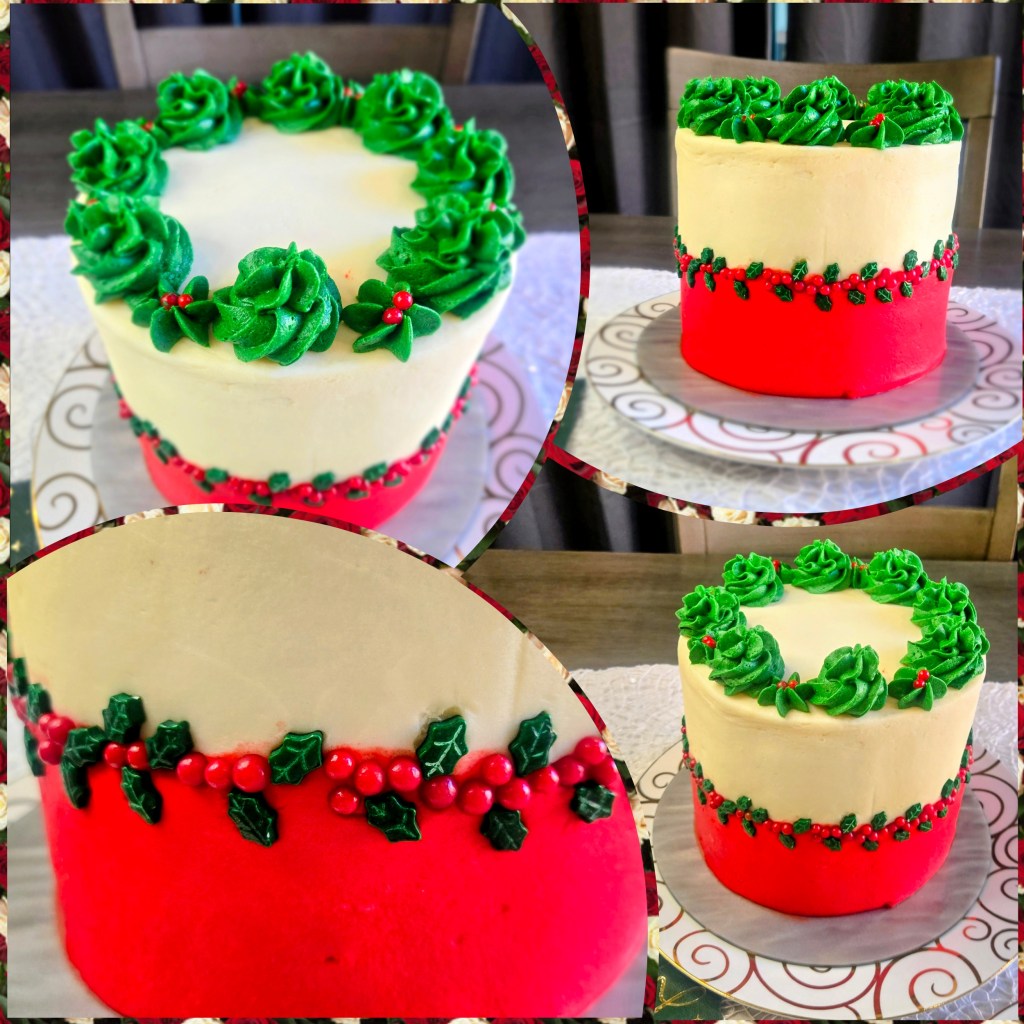
Proof that I can wrap things nicely–just not presents. If you’re ready to decorate your own, don’t worry…I’m not about to say “good luck” and vanish like Santa at sunrise. Like a good little elf, you can follow along with both the photo tutorial and the video, because holiday multitasking is hard enough without guessing what a buttercream swirl is supposed to look like. Pause it, rewind it, stare aggressively at the photos- no judgment here. I’ll walk you through every merry detail from snowy layers to holly-jolly drama, so you can deck your cake with confidence and maybe even feel like a frosting professional by the end. To make, you need:
- Green and red gel dye
- Piping bags
- 1M piping tip
- Scraper
- Holly sprinkles from Wilton
- Large amount of buttercream frosting divided into three bags: dye one red, another green, and leave the rest white. Load red and white into large piping bags with frosting tips or just snip the piping bag for the white and red frosting so the hole is larger; load green into a bag with 1M tip.
Follow along below with both the photo and video tutorials to learn how to decorate!
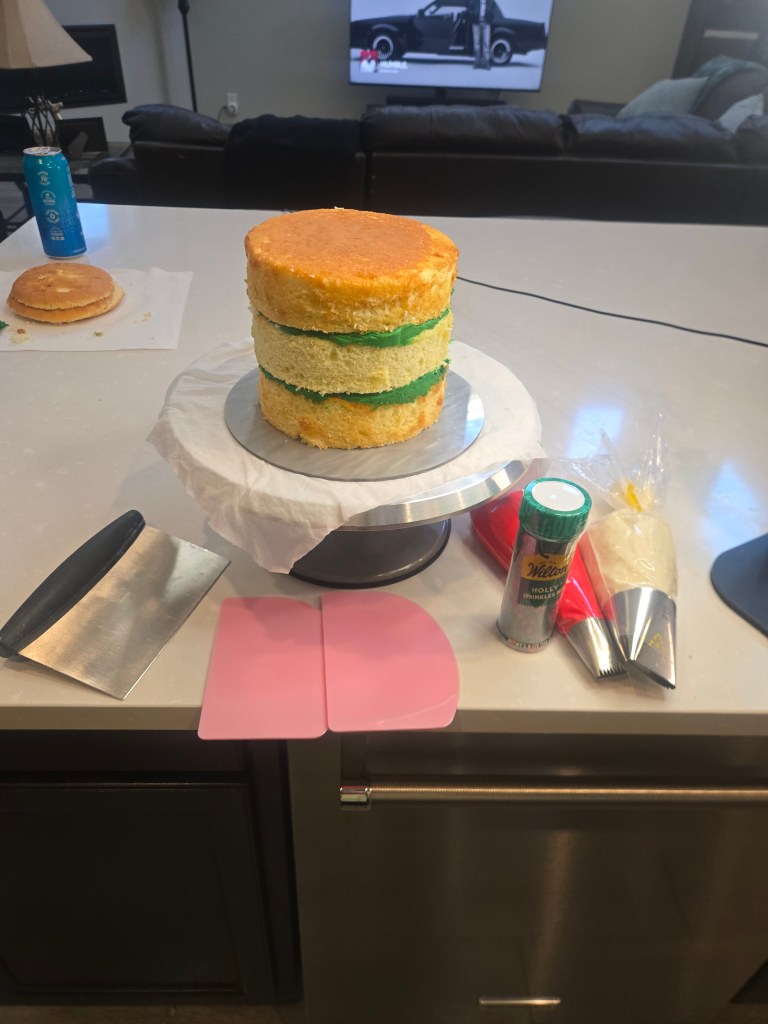
I have a variety of scrapers pictured here, all work well for this! 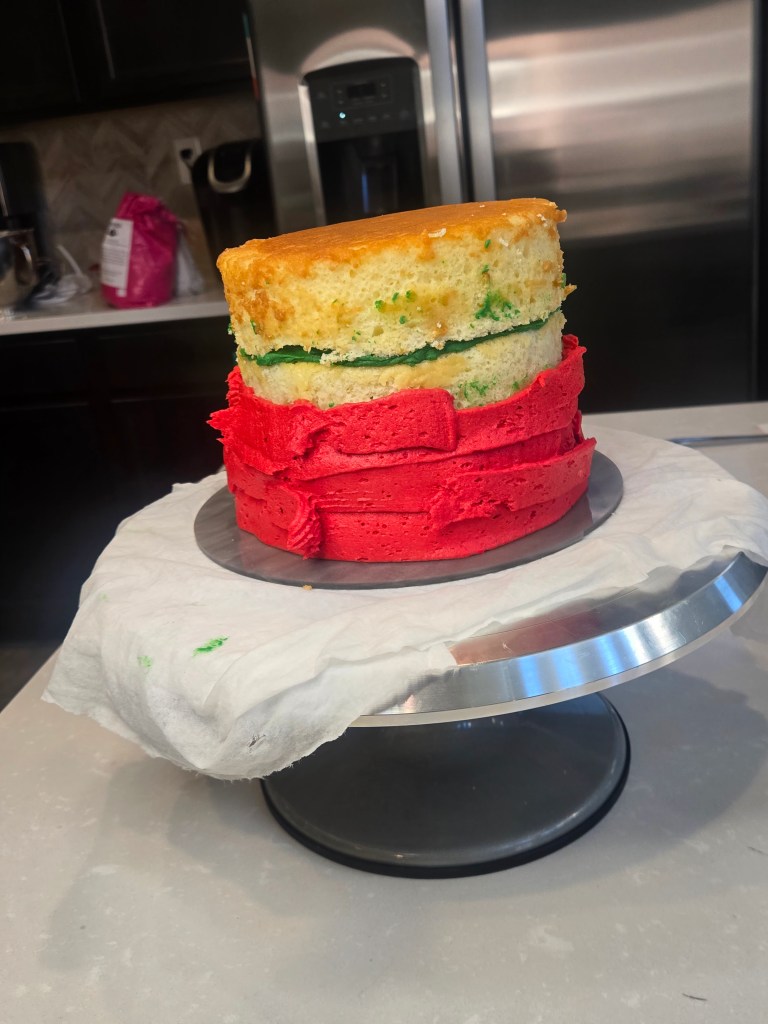
Start by piping red frosting halfway up the cake. 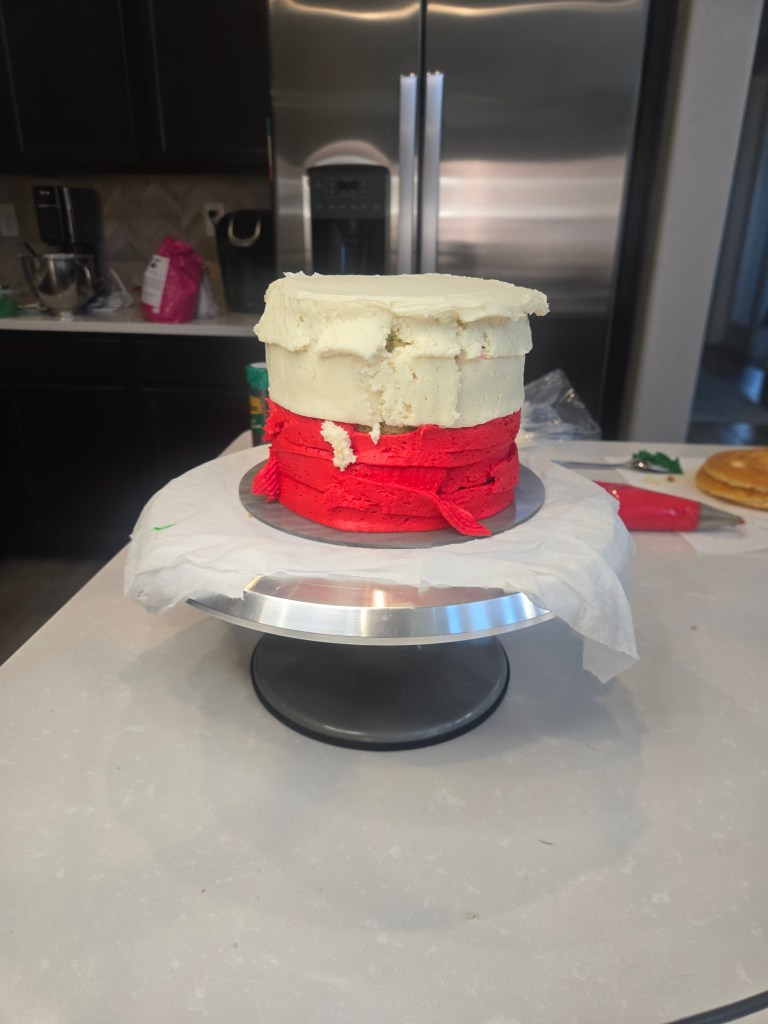
Then pipe the top half with the white frosting. 
Lay scraper mostly flat to cake and pass slowly as you turn the cake table. CLEAN OFF between each pass. 
If you see areas that look sparse, add more frosting and keep swiping. 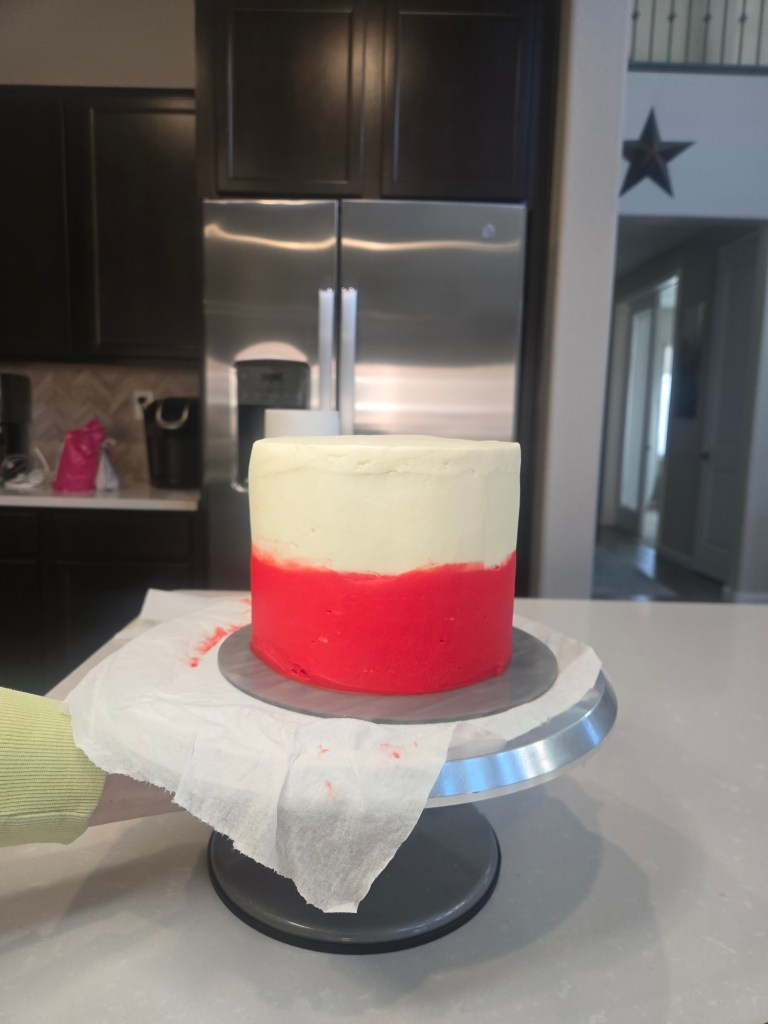
Once you’ve got your colors blended, freeze for 15 minutes and come back in with a Viva paper towel to gently smooth out any bumps. 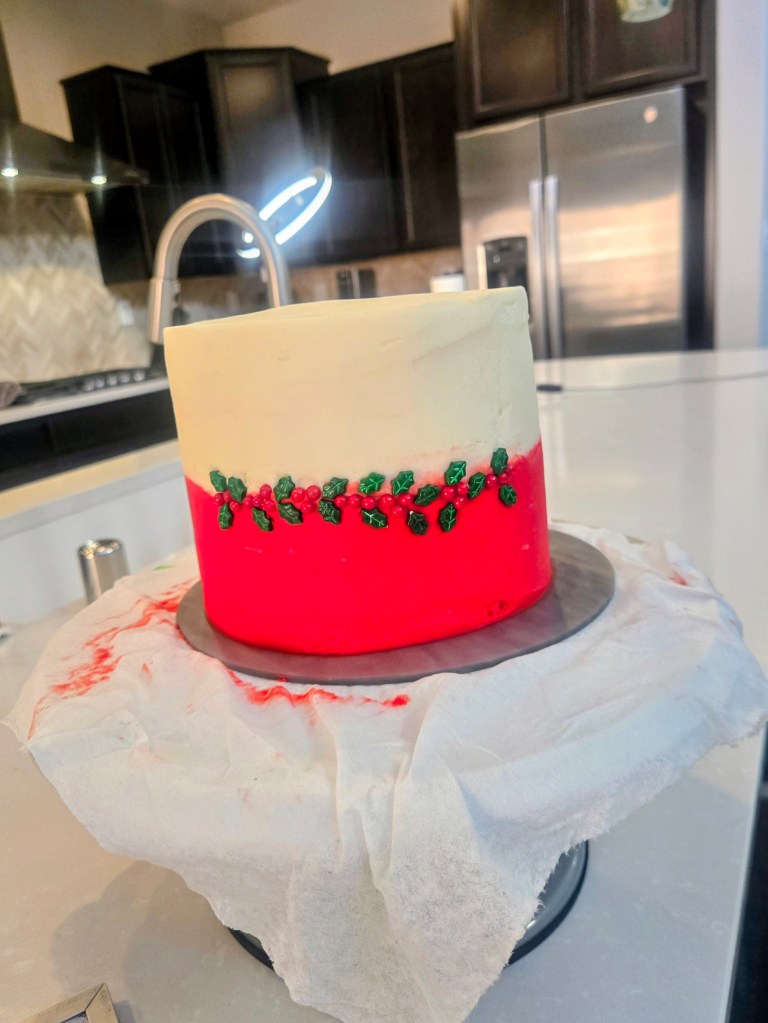
Now is the fun part! Add holly sprinkles where the red and white meet in any pattern you prefer. 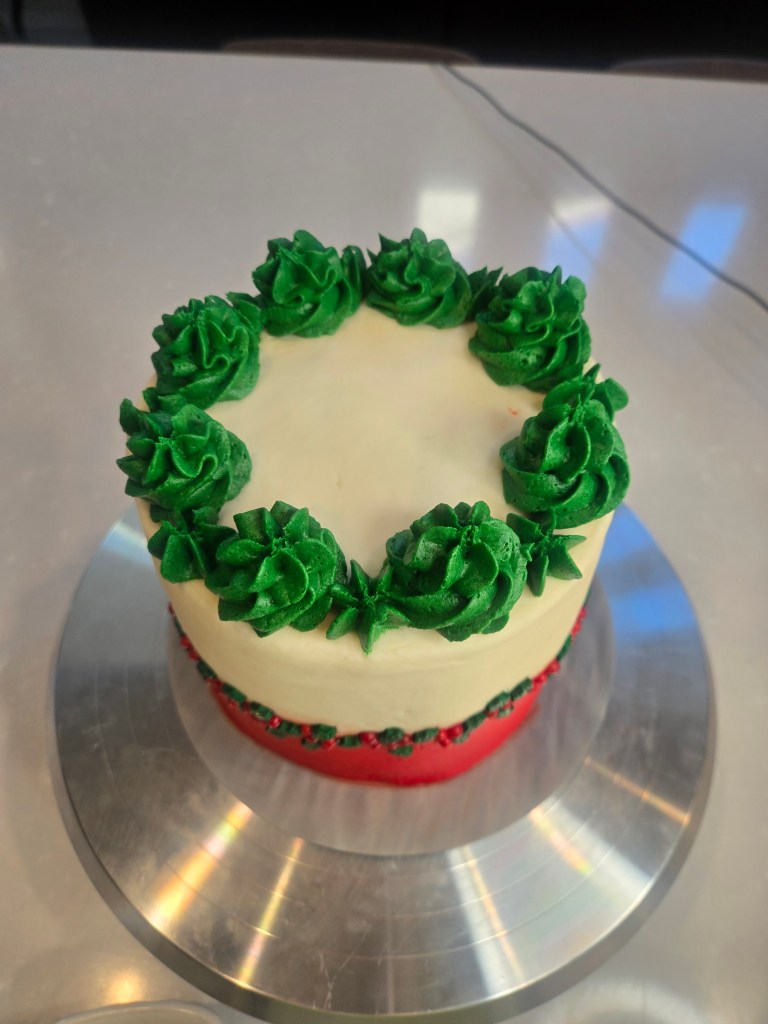
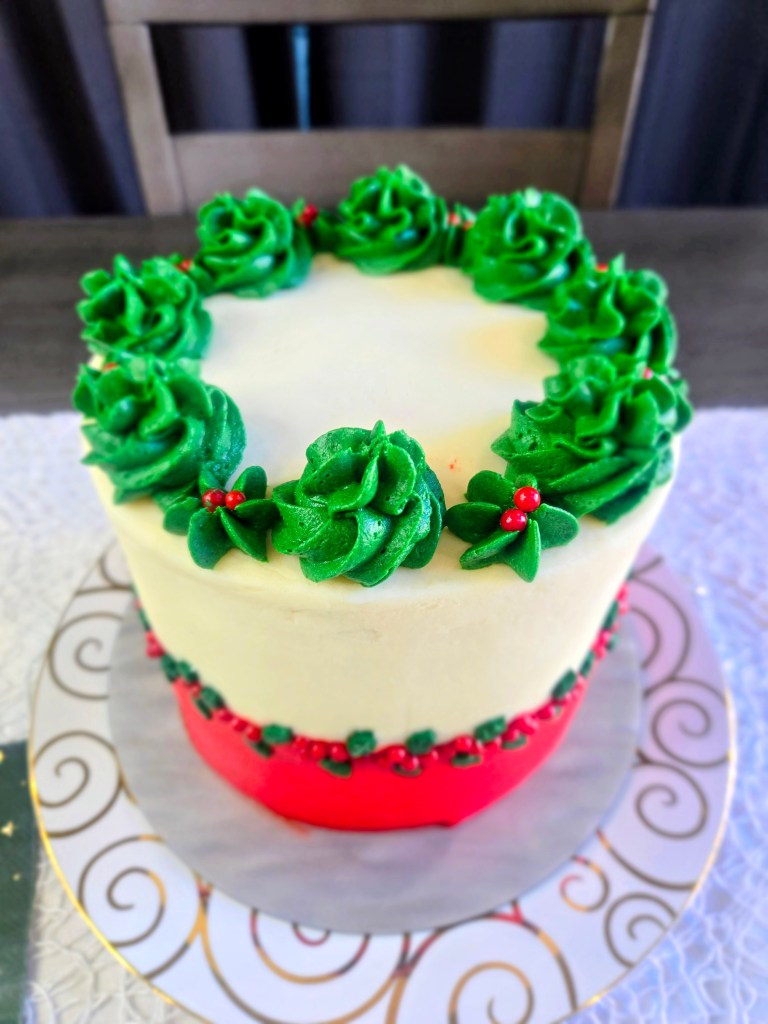
Use the 1M tip to make mounds around the cake, and fill in the blank spaces with stars. 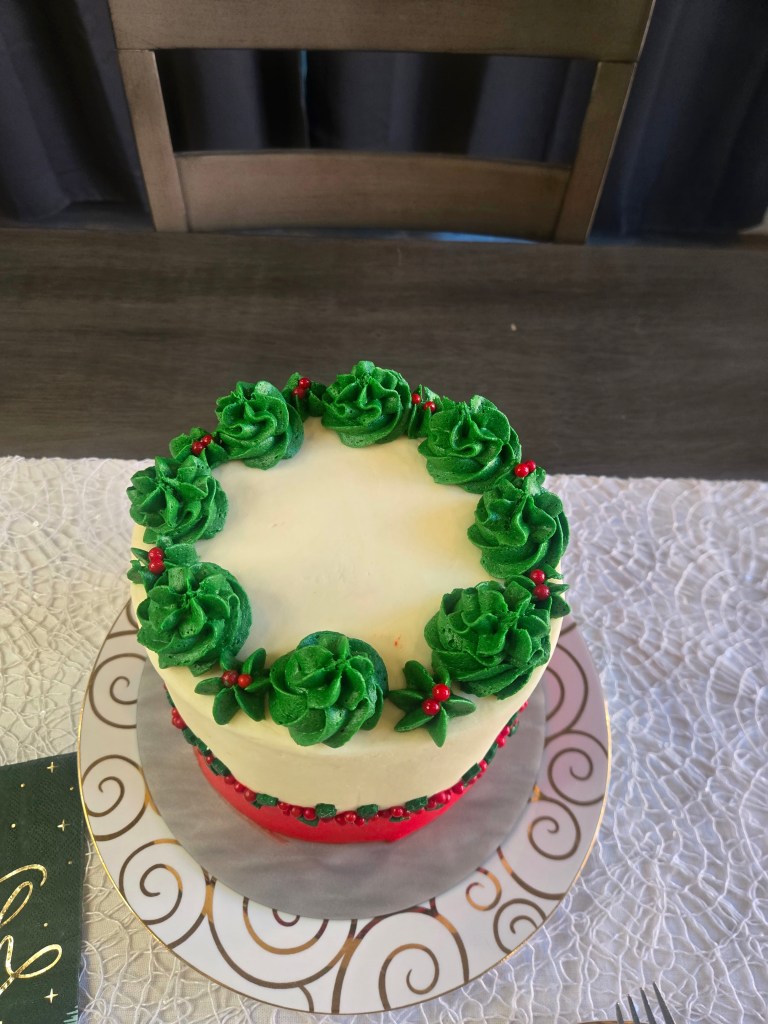
Add red pearls to the stars to finish! Consider this your official sign to bake something festive. Recipe and Instructions
If not gluten free, use any kind of white or yellow cake mix. Monkfruit can also be replaced with regular powdered sugar for frosting. Protein powder can also be replaced with additional monkfruit or regular powdered sugar.
Ingredients
CAKE
*1 box of gluten free yellow cake mix (I used King Arthur)
*2/3 cup fat free or skim milk
*38 g (2 TBS) unsweetened applesauce *4 eggs
*1/2 cup fat free Greek yogurt
FROSTING*225 g (1/2 cup) softened butter
*12 ounces Lakanto powdered monkfruit
*4 ounces Quest vanilla milkshake protein powder (cuts the sweetness of the monkfruit and makes a nice, stiff, spreadable frosting; omit and use all monkfruit if desired)
*1 TBS clear vanilla
*1/4 tsp almond extract
*1/2 cup + 2 TBS milk
*1/4 tsp citric acid if you like less sweet frosting
Directions
- Preheat oven to 350 and grease three 6-inch pans.
- Whisk cake ingredients together in a stand mixer on low for 60 seconds before switching to medium-high for two minutes.
- Pour batter evenly into pan and bake for 30 minutes, or until a toothpick comes out mostly clean from the center.
- Allow cake to cool fully before frosting.
- To make frosting, whip butter for 3 minutes before adding in half the powdered monkfruit, protein powder, vanilla, almond, and milk.
- Add in remaining monkfruit mix fully.
- Once fully cooled, frost your cake and use the gallery above to decorate.
- Keep cake covered and in the fridge. It is best served at room temp, so remove from fridge 30 minutes before eating. Enjoy!
Nutrition
Macros
12 servings
335 cal/35.8 c/16 f/11.9 p per slice
Santa saw this and added it to the Nice List. 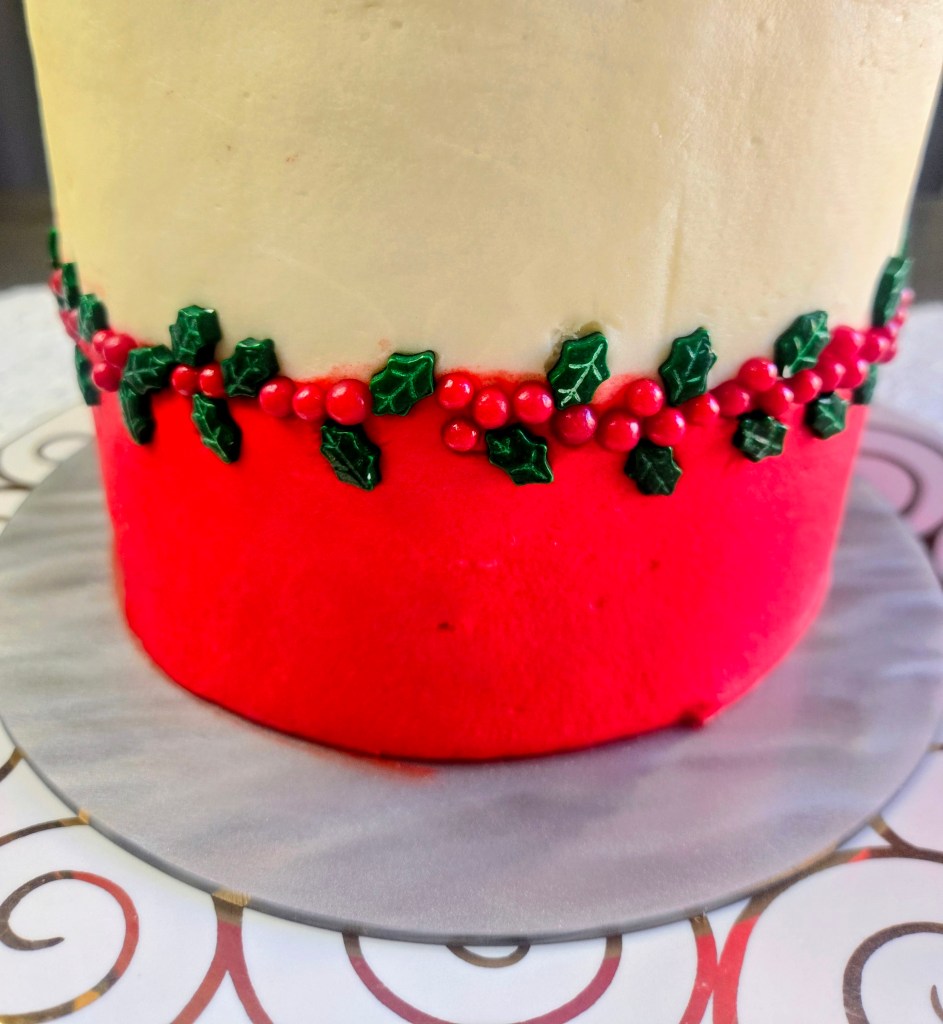
Holly, jolly, and absolutely not subtle. 
Too pretty to eat. Will eat anyway. -
Sleigh the Day with This Teal Winterscape Cake
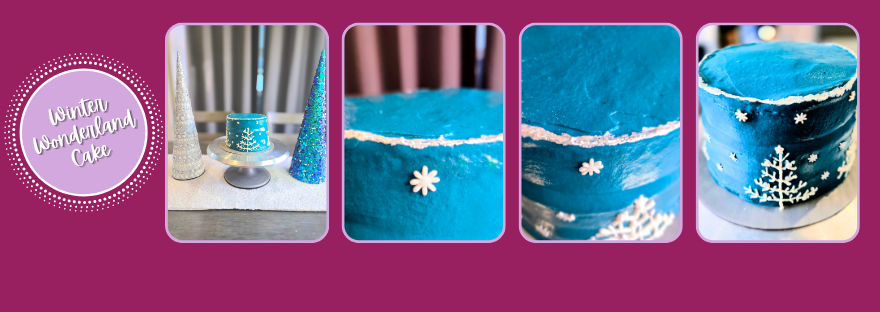
Step aside, Santa, this winterscape cake is sleigh-ing the whole season. Dressed in shimmering snowflakes and the tiniest ornament-studded trees, it’s basically the dessert version of stepping into a holiday snow globe. With silver accents that glisten like freshly fallen snow (but without the whole freezing your face off thing), this cake is here to chill, thrill, and sprinkle a little ice-olated magic on your winter celebrations. So bundle up, buttercup…it’s time to let it snow, let it glow, and let this cake steal the whole holiday show.
A whole blizzard of beauty, and the only shoveling required is a fork into your mouth. To bring this chilly masterpiece to life, you’ll need your favorite cake recipe, plenty of buttercream, a few piping tips, some sprinkles or mini ornaments, and a little edible silver paint for that frosty finishing touch. And since I absolutely did not take a single video like a responsible baking blogger, you’ll be following along with my extremely chaotic, but somehow still helpful, photo collage. Don’t worry: the pictures may be questionable, but the instructions will guide you through every snowy swirl and sparkly detail. Let’s frost this thing!
Here’s everything I used for this cake:
- Piping tips: #5 round, #2 round,
- Americolor black, navy, and teal gel dyes
- Small silver and white ball sprinkles
- Small silver and white snowflake sprinkles
- Silver luster dust
- Small food-safe paintbrush
- Cake and frosting recipe below
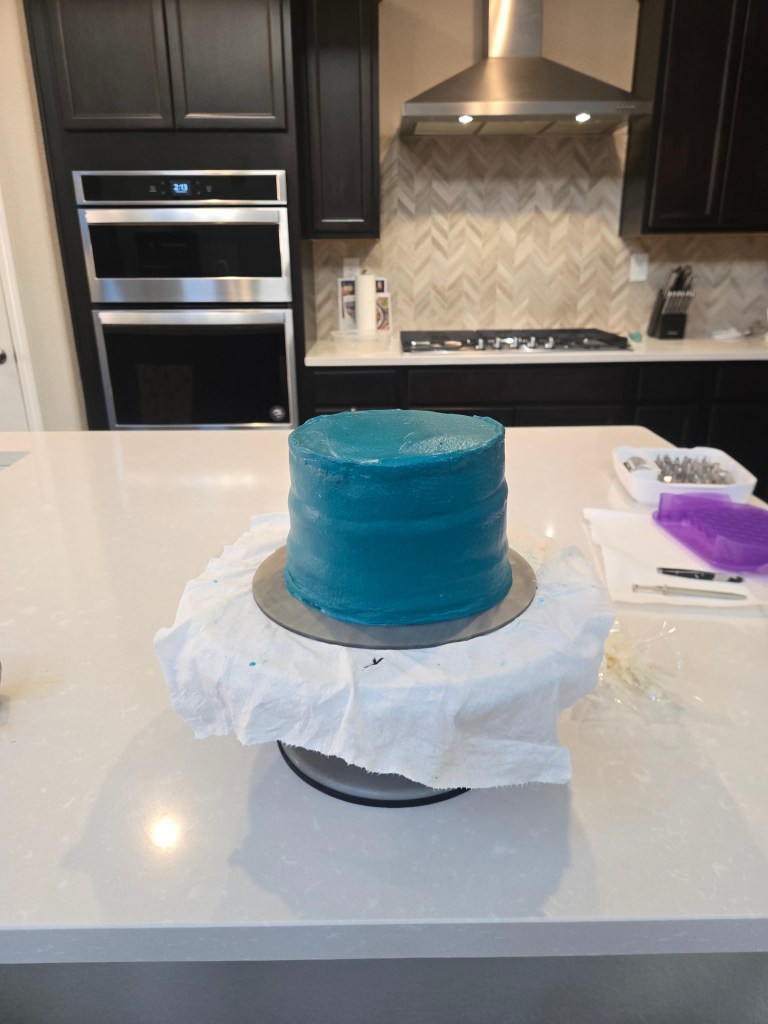
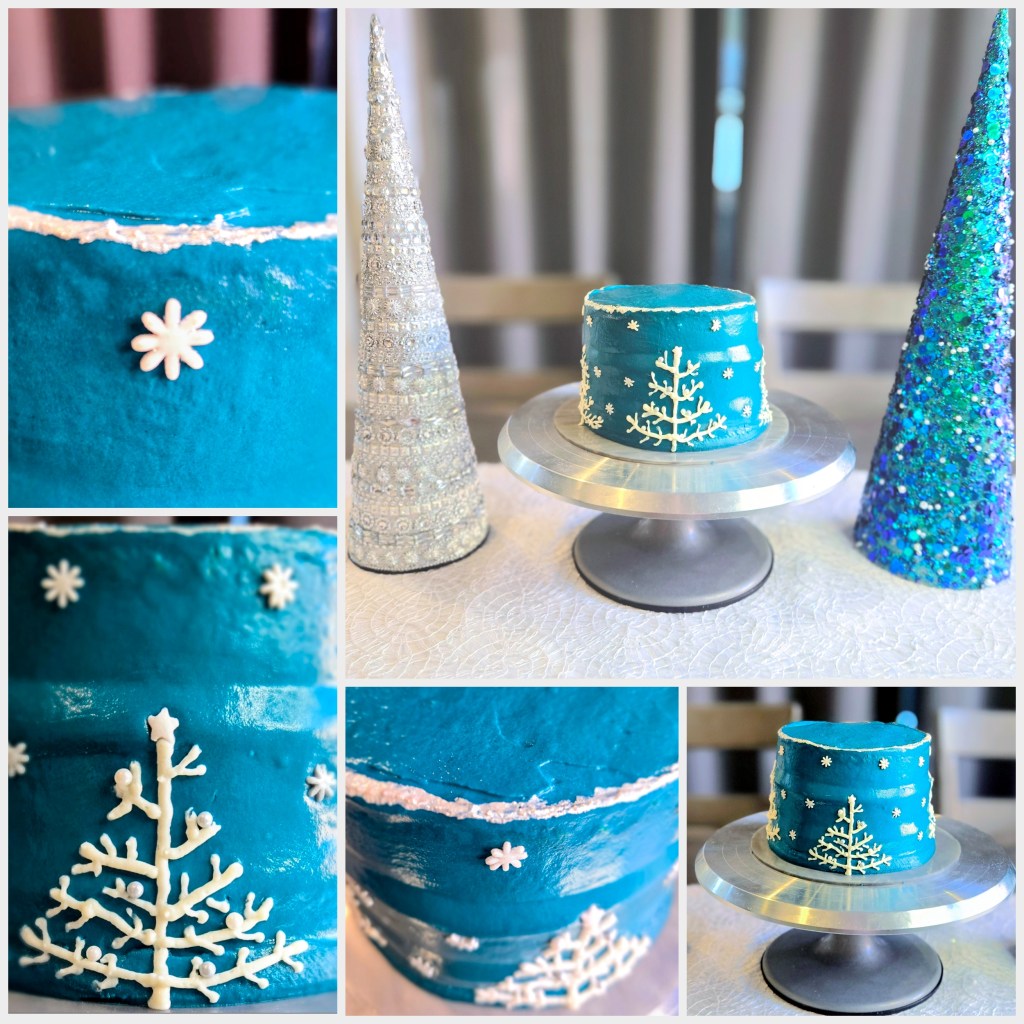
Start with a frosted and smoothed out cake; be sure to set aside some plain white frosting for the trees. 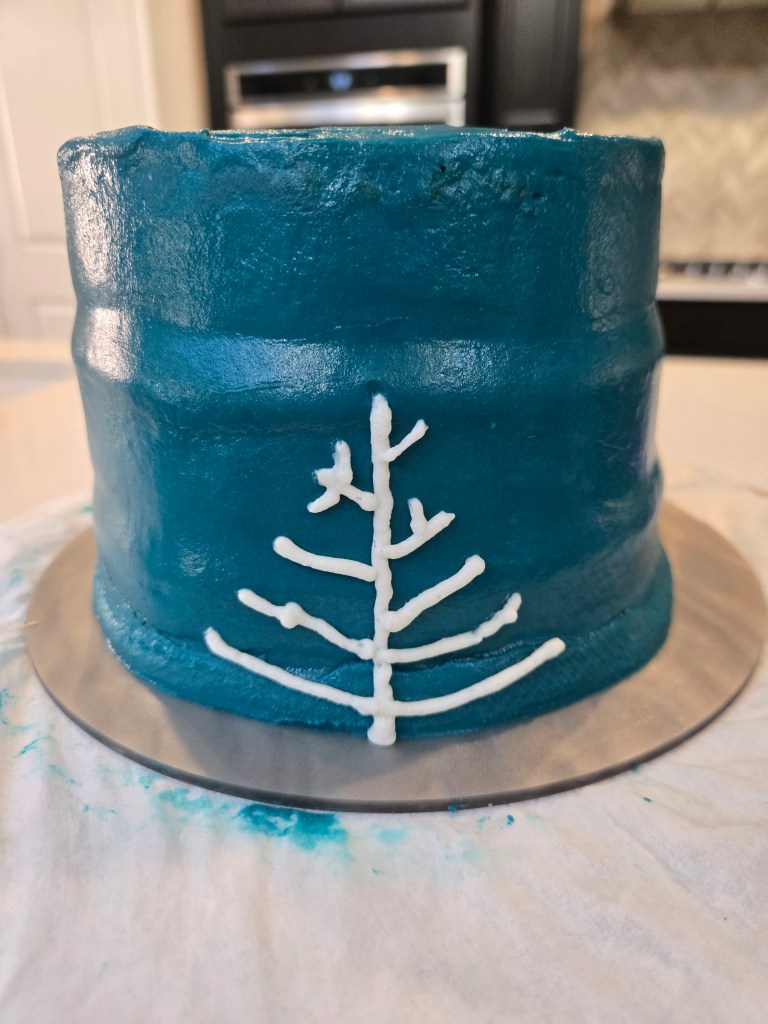
With the #5 tip, draw a straight line up, the draw branches out the side of the trunk in any order you’d like. 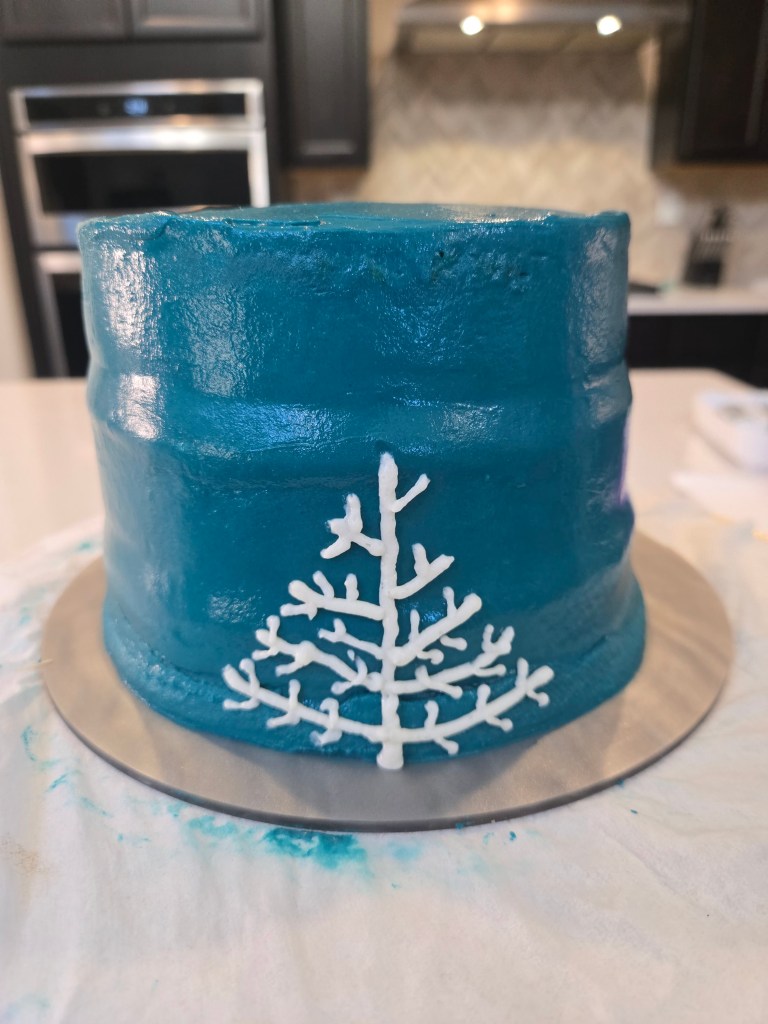
Switch to the #2 tip, and draw the smaller branches. Repeat 3 more times around the cake, evenly spacing the trees. 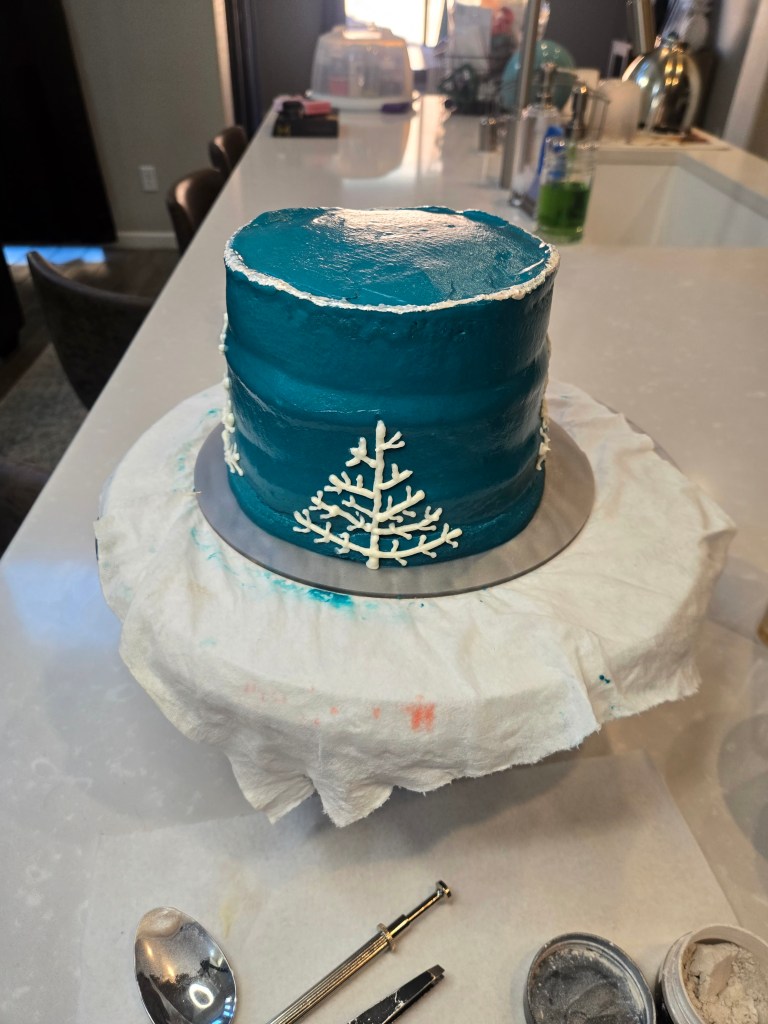
Mix luster dust with enough clear vanilla until you form a paint-like paste. Use the brush to gently swipe silver around the top of the cake. 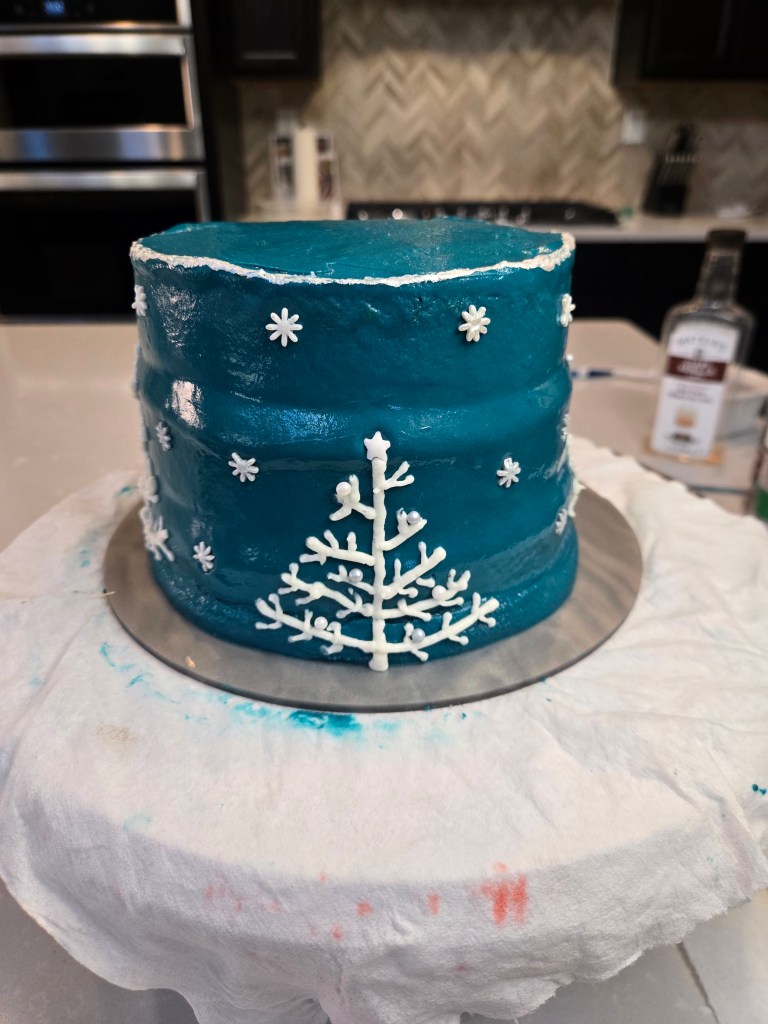
Use tweezers to gently place alternating silver and white ball ornaments on the trees. 
Finish by using tweezers to place white snowflakes evenly around the top of the cake, and then silver snowflakes in between each tree. Recipe and Instructions
Gluten free vanilla cake with protein peppermint cream cheese frosting
A lush vanilla cake with peppermint cream cheese frosting and the cutest winter trees ever!
If not gluten free, use any kind of white or yellow cake mix. Monkfruit can also be replaced with regular powdered sugar for frosting. Protein powder can also be replaced with additional monkfruit or regular powdered sugar.
Ingredients
CAKE
*1 box of gluten free yellow cake mix (I used Whole Foods 365 GF cake mix)
*3/4 cup + 2 TBS fat free or skim milk
*112 g (1/2 cup) unsweetened applesauce
*2 eggs
FROSTING
*226 g (1 cup) vanilla Greek yogurt, strained overnight
*8 ounces 1/3 the fat cream cheese at room temp
*12 ounces Lakanto powdered monkfruit
*4 ounces Quest vanilla milkshake protein powder (cuts the sweetness of the monkfruit and makes a nice, stiff, spreadable frosting; omit and use all monkfruit if desired)
*1 TBS clear vanilla
*1/4 tsp peppermint extract
*1/4 cup + 2 TBS milk
*1/4 tsp citric acid if you like less sweet frosting
Directions
- Preheat oven to 350 and grease three 6-inch pans.
- Whisk cake ingredients together in a stand mixer on low for 60 seconds before switching to medium-high for two minutes.
- Pour batter evenly into pan and bake for 30 minutes, or until a toothpick comes out mostly clean from the center.
- Allow cake to cool fully before frosting.
- To make frosting, whisk cream cheese and yogurt for 3 minutes before adding in half the powdered monkfruit, protein powder, vanilla, peppermint, and milk.
- Add in remaining monkfruit mix fully.
- While your cakes cool, you can split your frosting up so you have a small amount of white for the trees; and dye the rest dark teal by using 1 drop of black gel dye, 4 drops of navy, and a ridiculous amount of bright teal.
- Once fully cooled, frost your cake and use the gallery above to decorate those trees and snowflakes.
- Keep cake covered and in the fridge. It is best served at room temp, so remove from fridge 30 minutes before eating. Enjoy!
Nutrition
Macros
10 servings
256 cal/43 c/4.2 f/11.6 p per slice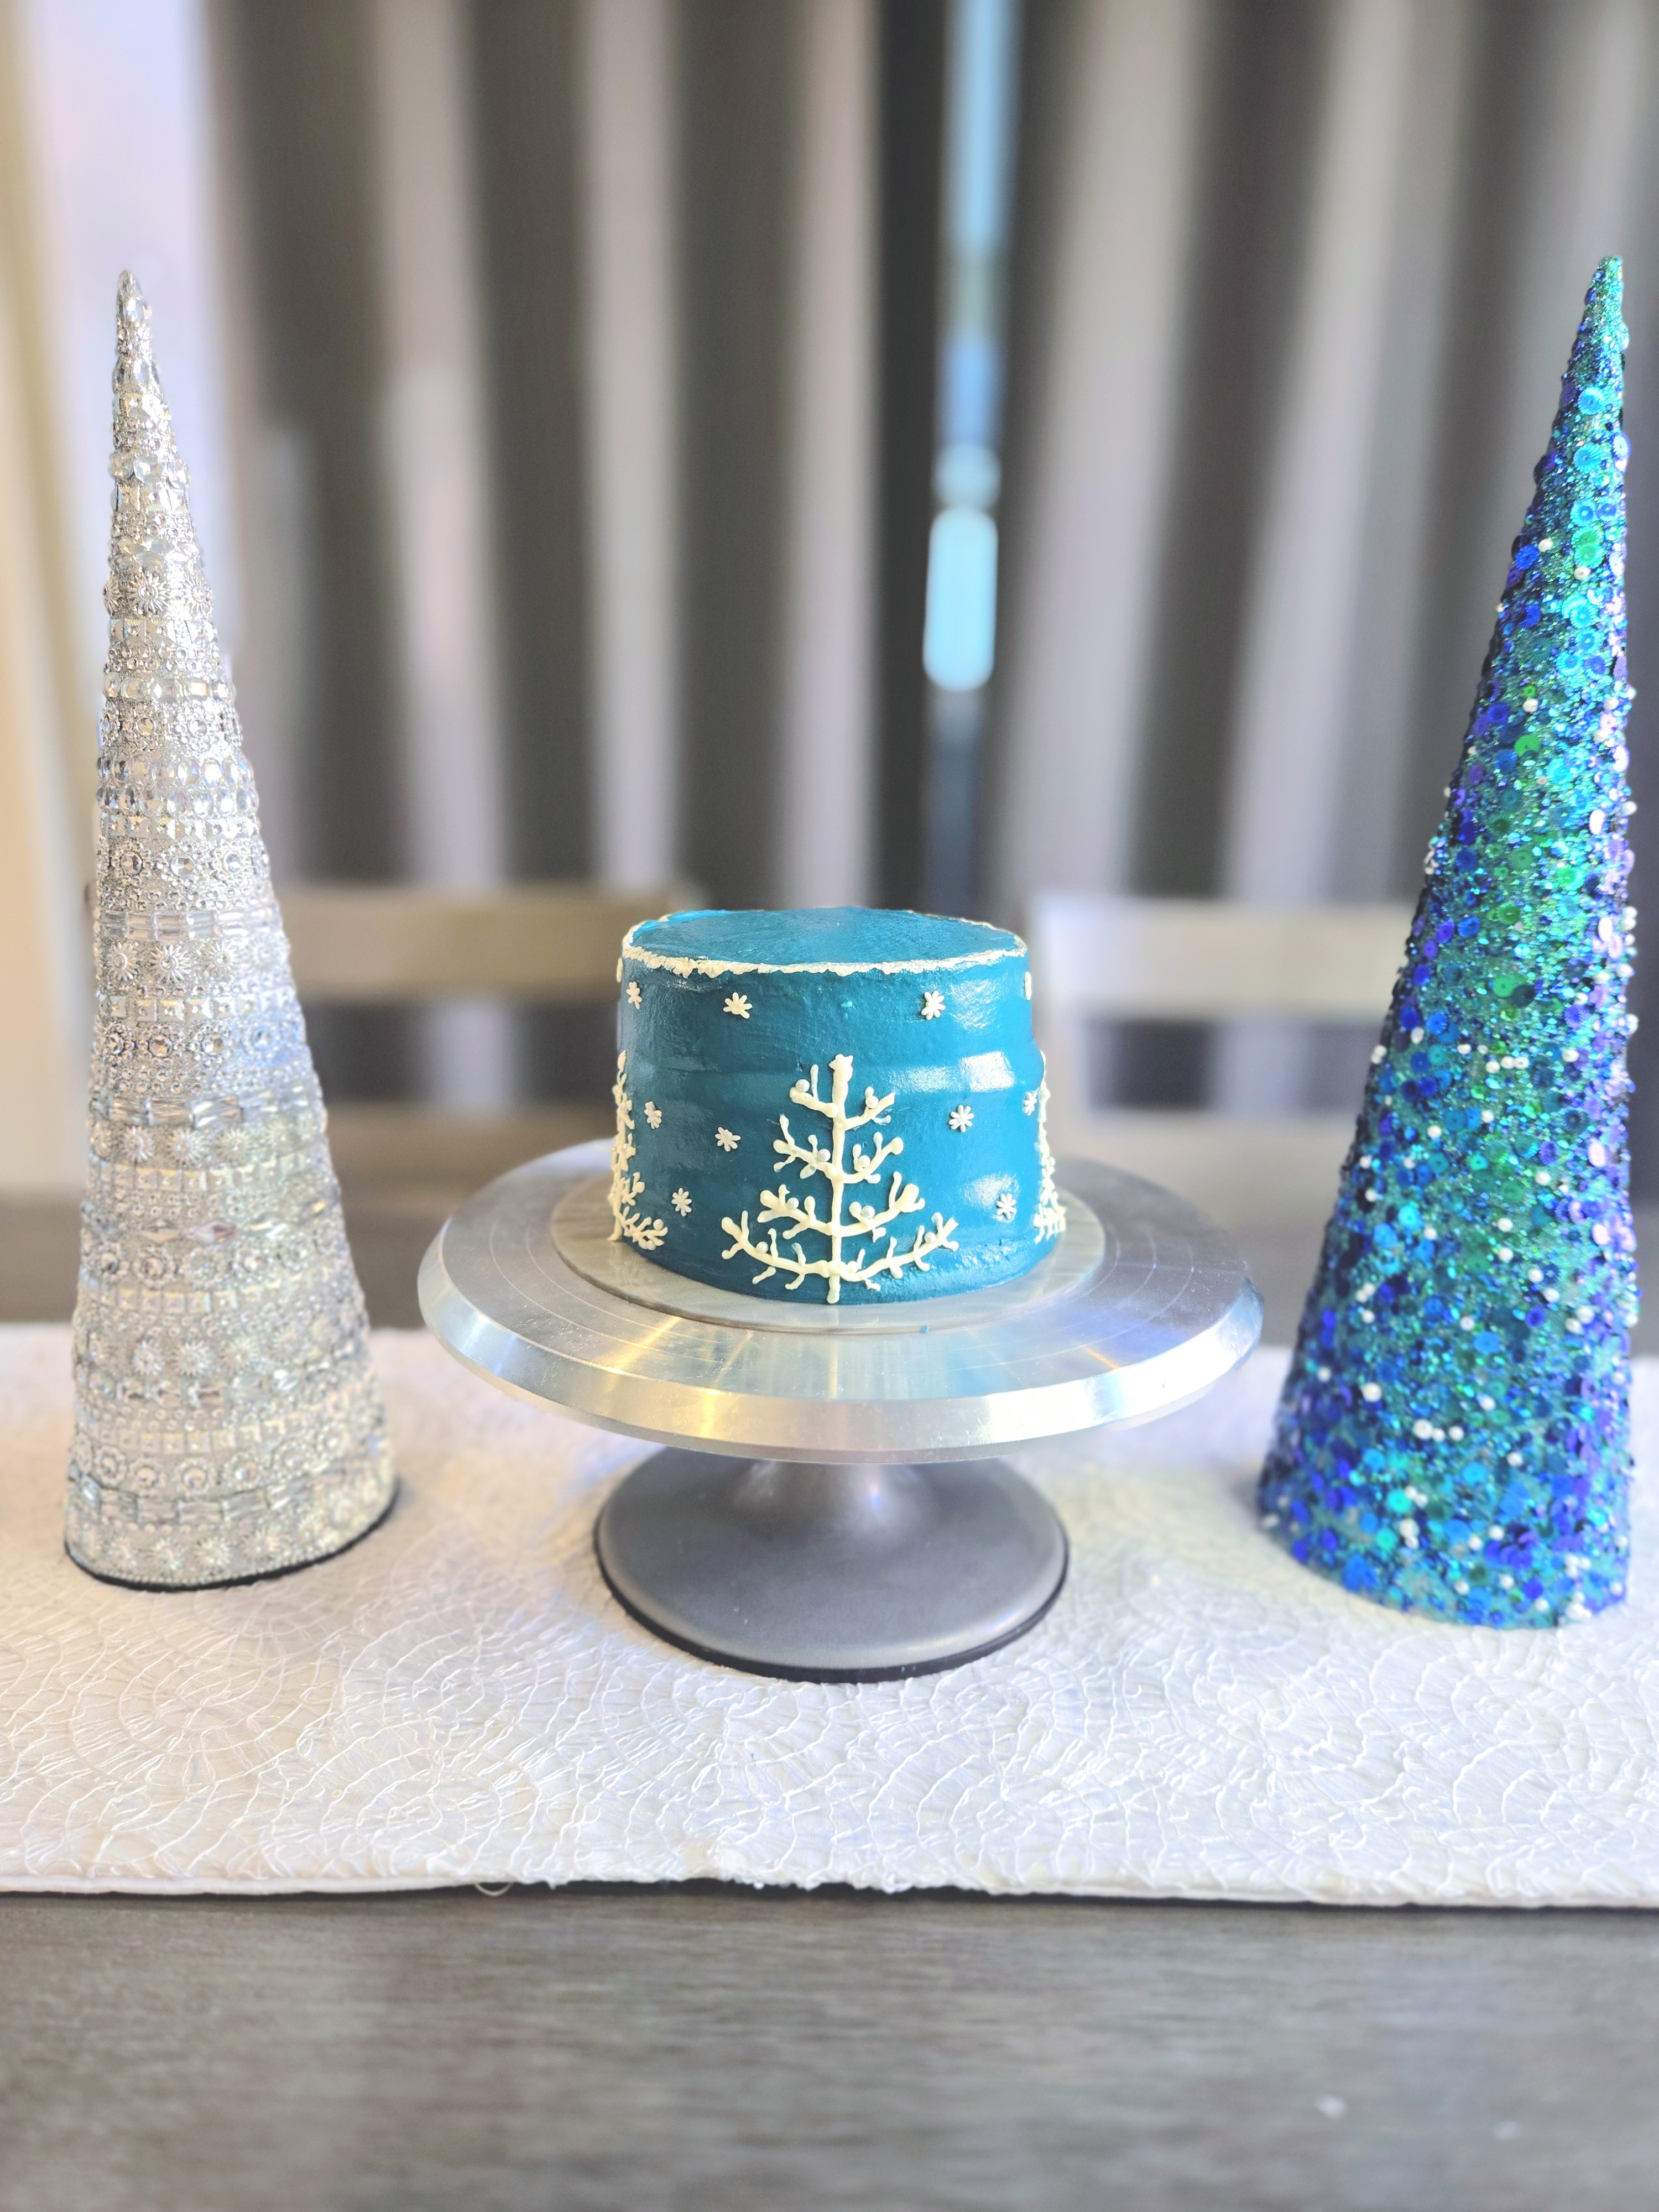
Because nothing says ‘relaxing holiday season’ like decorating microscopic trees. 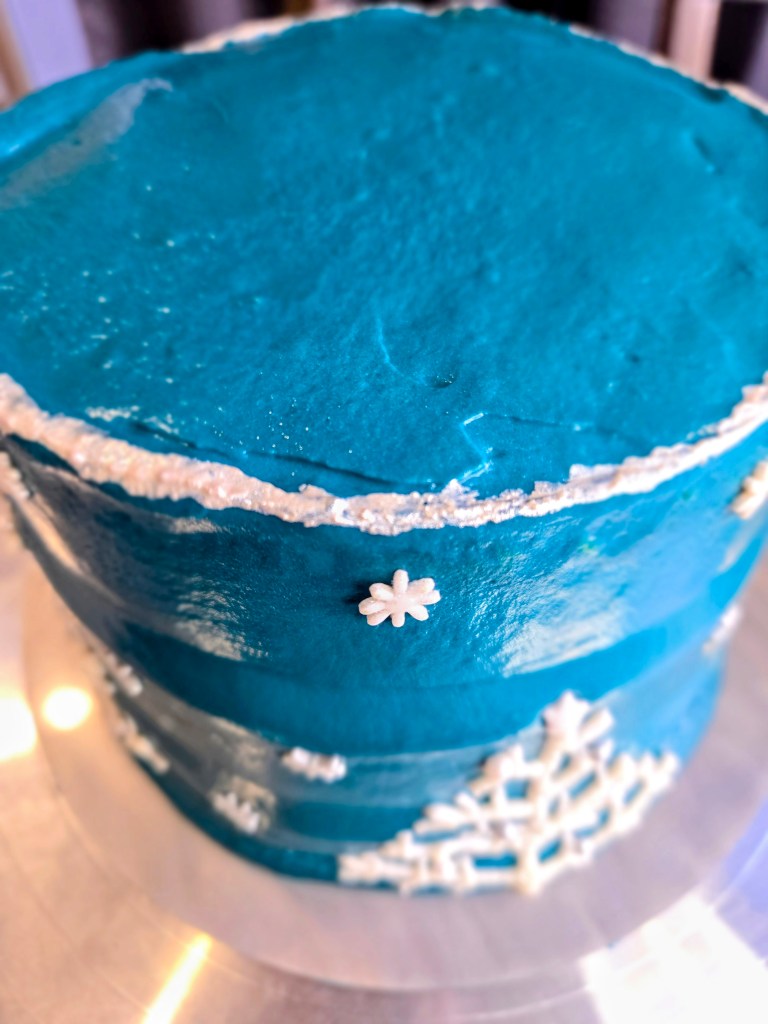
The cake is chill. I, however, am not. -
Glazed Walnut Pumpkin Protein Loaf

If loving pumpkin spice makes me a basic white girl, then call me the Grand High Priestess of Fall because the moment November hits, I transform into an oversized-sweater wearing menace to society. So obviously I conjured up this glazed walnut protein pumpkin loaf: a quick bread so dangerously delicious it should come with a warning label and a venti PSL. We’re talking 12 grams of protein per slice, only 3 grams of sugar, and enough pumpkin spice power to revive my entire personality. It’s moist (fight me), nutty, gloriously glazed, and packed with so much fall flavor it practically kicks down your door wearing fuzzy socks.
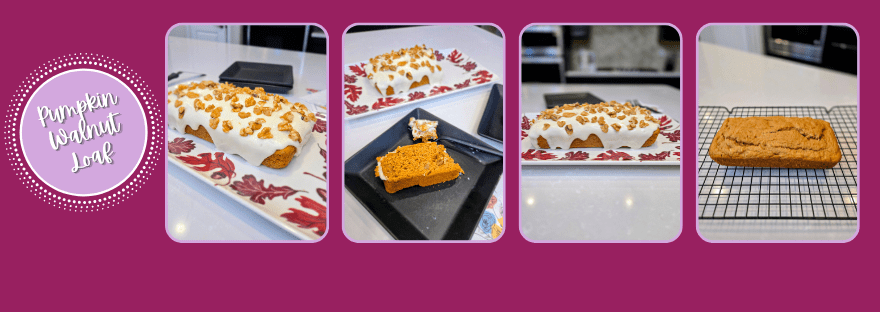
Living that basic-girl autumn dream, one loaf at a time. Recipe and Instructions
Glazed Walnut Protein Pumpkin Loaf
A simple quick bread with perfect fall flavors.
You can sub any “just add water” pancake mix if you don’t need to be gluten free.
Ingredients
FOR THE BREAD
*126 grams (1 cup) Kodiak Cakes GF protein pancake mix
*1 tsp baking powder
*1 tsp pumpkin pie spice
*130 g (1/2 cup) pumpkin puree
*80 g (1/3 cup) sugar free syrup
*64 g (1/4 cup) peanut or almond butter (I used American Dream Nut Butter’s Breanne’s Blend for added protein)
*40 g (1/3 cup) crushed walnuts
FOR THE GLAZE
*50 grams vanilla protein powder (I used Quest)
*1/2 cup Lakanto powdered monkfruit or regular powdered sugar
*1/4 cup plus 2 TBS fat free or skim milk
*Additional walnuts if desired
Directions
- Preheat oven to 350 and spray an 8×4 (I used this size) or 9×5 loaf pan with cooking spray
- In a medium bowl, whisk together the pancake mix, baking powder, and pumpkin pie spice; set aside
- In a large bowl, whisk together the pumpkin, syrup, and nut butter until smooth
- Dump dry mix into the wet mix and whisk just until everything comes together
- Pour batter into prepared pan and smooth out
- Bake for 20-25 minutes, or until a toothpick comes out cleanly from the center of the loaf; if you use a 9×5 pan, it will cook faster
- Let loaf cool in pan for 10 minutes before turning out to a cooling rack to cool completely
- Once bread has cooled, mix the powdered monkfruit, protein powder, and milk to create a thick glaze
- Pour glaze on top of loaf and use the back of a spoon to force some of the glaze over the sides, top with additional walnuts (I used another 30 g or 1/3 cup)
- Slice into 8 servings; keep in fridge
- To warm, microwave for 15-30 seconds
Nutrition
Macros for 1 slice
196 calories/16.7 c/9.1 f/11.8 p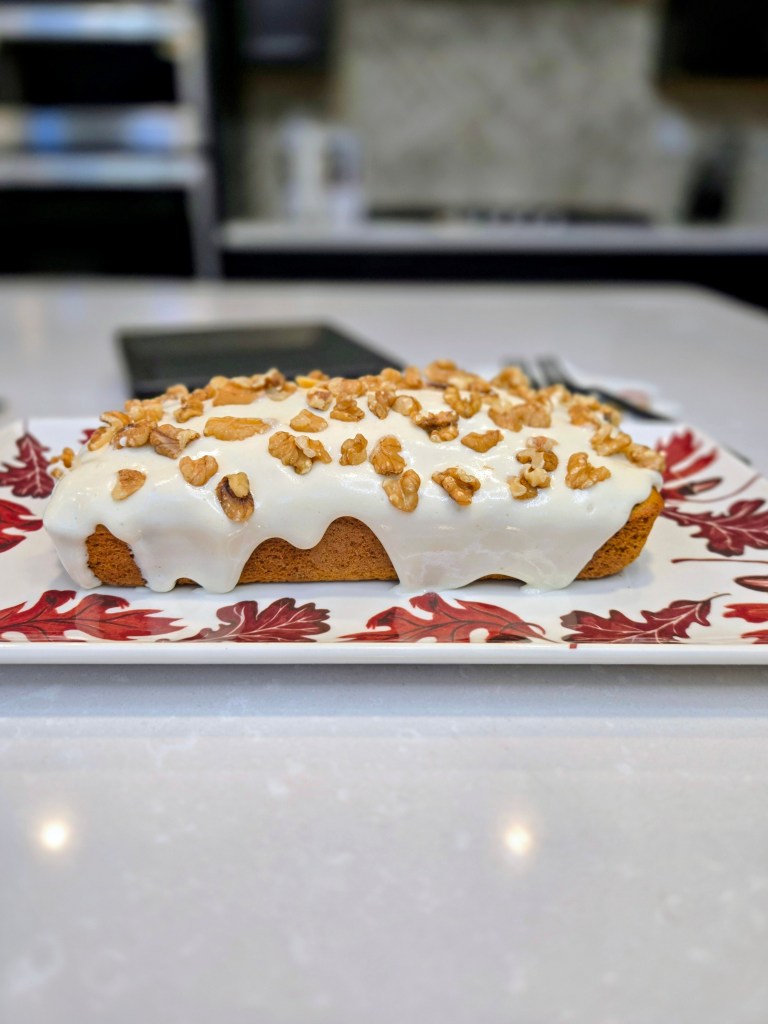
I made this loaf and immediately grew three new flannels. 
Warning: consuming may trigger uncontrollable urge to buy decorative gourds. - Preheat oven to 350 and spray an 8×4 (I used this size) or 9×5 loaf pan with cooking spray
-
Scream Ghostface Cake

“Do you like scary cakes?” Because I sure do. This Ghostface Scream cake is a total slice-tacular tribute to one of my favorite horror franchises and the most spooktacular time of year. Forget phone calls from creepy strangers (who still answers unknown calls?), the only thing you’ll be dialing up here is seconds because this cake is killer good in all the right ways.
I wanted something that screamed Halloween (pun 100% intended), and what better inspiration than the ultimate horror icon himself? Ghostface may be known for asking, “What’s your favorite scary movie?,” but after one bite, you’ll be saying, “What’s my favorite scary cake?” Whether you’re baking it for a Halloween party or just to stab your sweet tooth cravings, this one is to die for… literally. So grab your sharpest knife, mask up (optional but encouraged), and get ready to slash through this recipe like a pro. Just remember, in the kitchen, never say “I’ll be right back.”
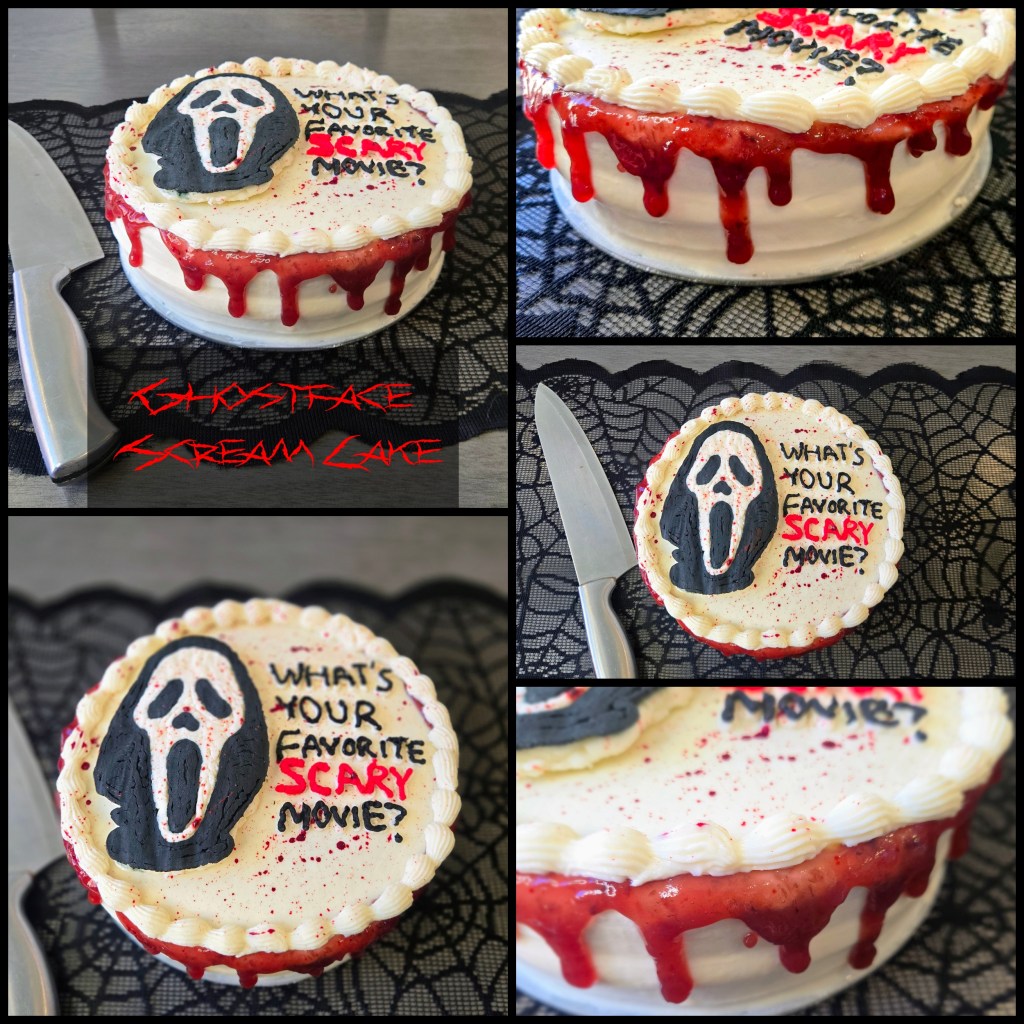
Ghostface called. He wants the recipe. This killer creation might look like it took a crime scene worth of effort, but it’s honestly scary simple to pull off. Ghostface himself was brought to life using a buttercream transfer, no need for a mask or movie magic, just a steady hand and a chill (literally, freeze that transfer!). The rest of the cake is frightfully easy: a dripping raspberry jam border for that perfectly bloody delicious bite, topped off with a few streaks of red gel dye for extra drama. It’s proof you don’t need to slice and dice your entire afternoon to make a show-stopping Halloween dessert that’ll have everyone screaming for seconds. To make, you need:
- Your favorite cake (two 8″ round layers) frosted with buttercream (the recipe below makes enough for this and the transfer)
- Black and red gel dye
- Buttercream frosting (1 C butter, 4 C powdered sugar or Lakanto, 1 tsp vanilla, 2 TBS milk, mixed/set aside a tiny portion to dye red/set aside another small portion, and to it: add black gel dye, 2 TBS black cocoa, and 2 TBS milk, mix well)
- Piping bags
- Food safe paintbrushes
- Parchment paper
- A clear cutting board (plastic or glass)
- Tape
- Small round tips (I used #3, #5, & #12)
- Small star tip (I used #28)
- Raspberry jam
Follow along below with both the photo and video tutorials to learn how to decorate!
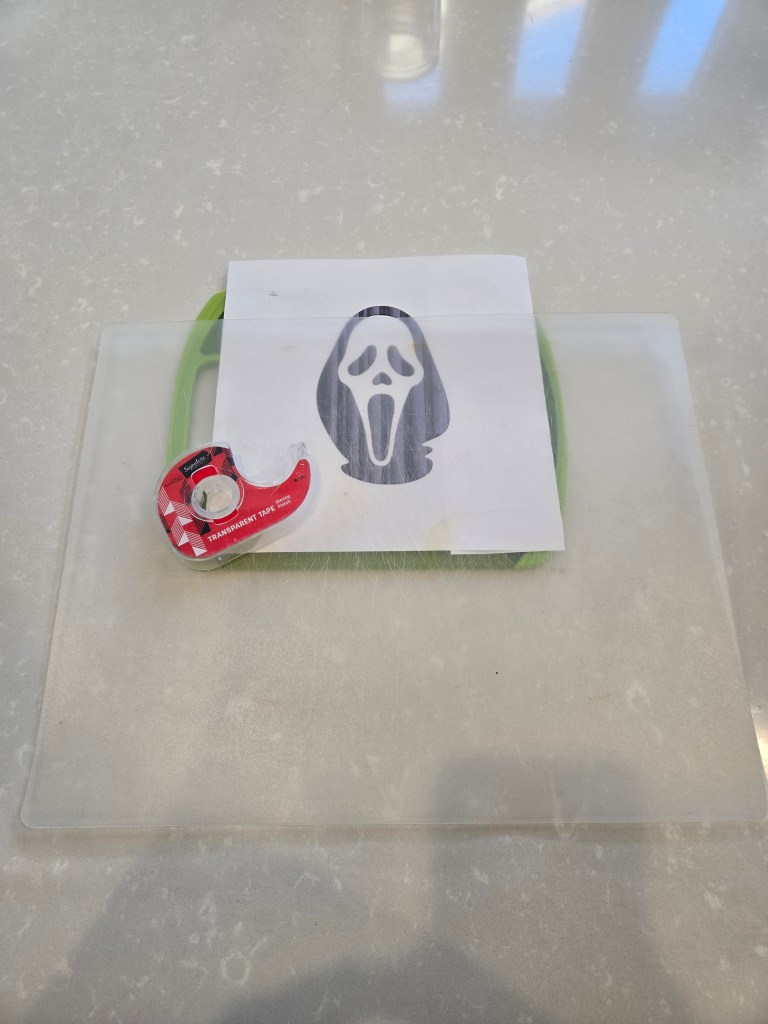
Print or draw Ghostface template, tape top behind cutting board and Parchment paper. Leave the bottom loose so you can view your transfer from underneath later. 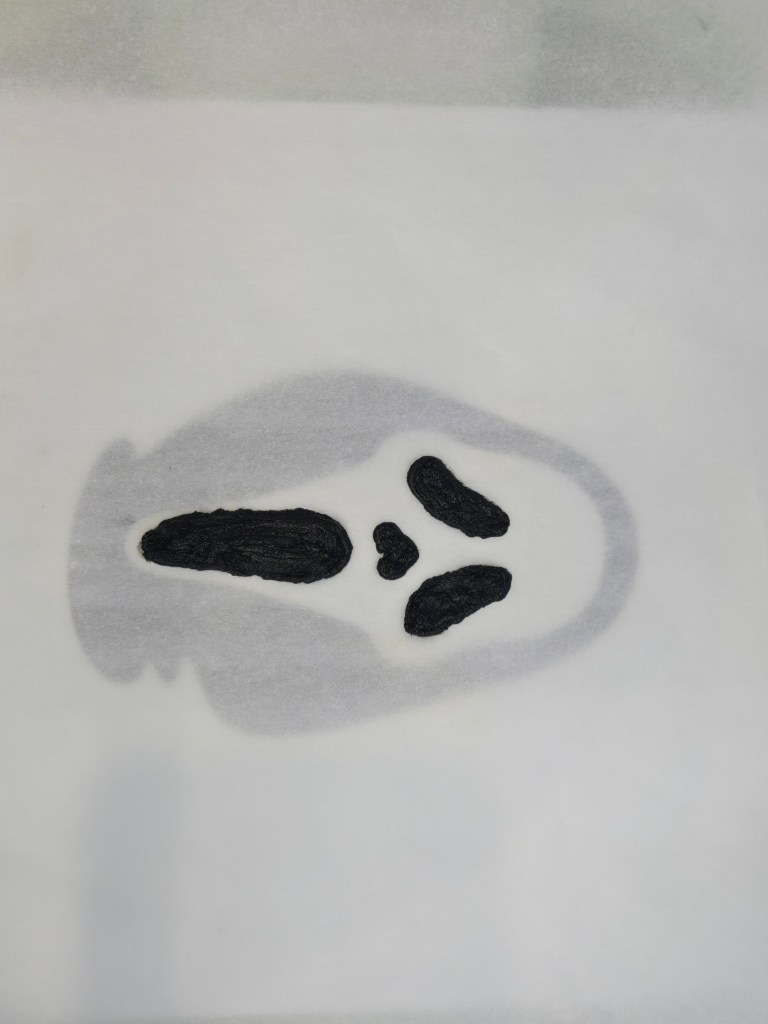
Use the black frosting in a piping bag with a #3 tip to fill in his eyes, nose, and mouth. 
Outline and fill in his cloak. Use the paintbrushes to smooth out and clean up around the edges of all black frosting. Things should be smooth but not perfect. 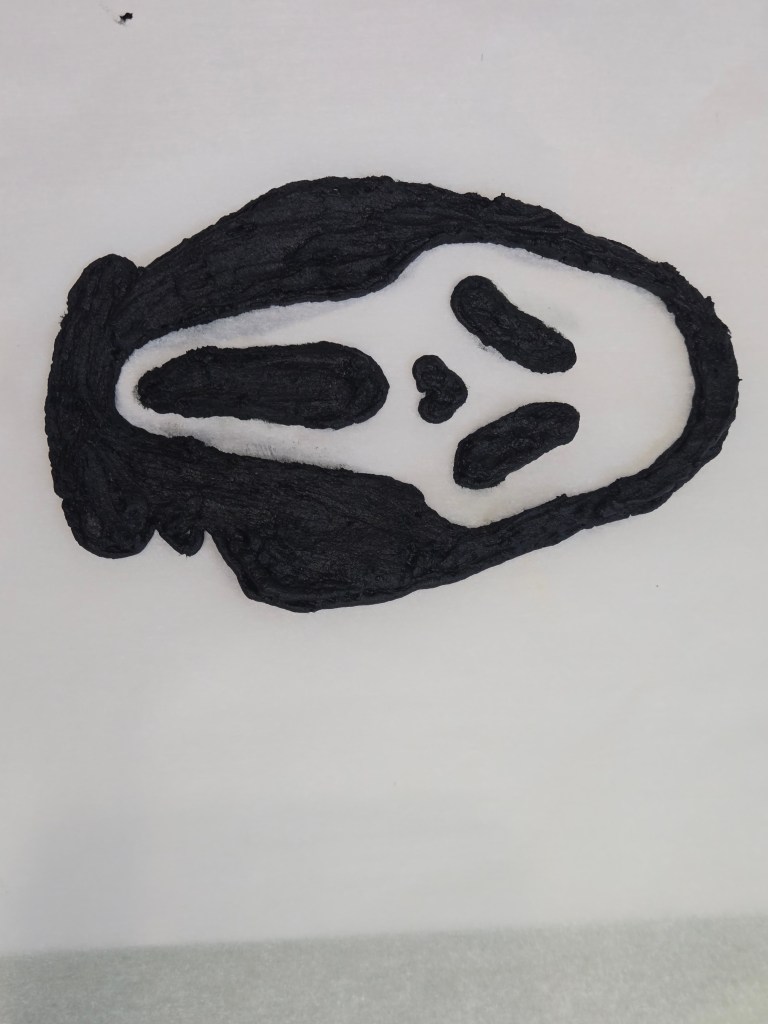
Gently lift up your cutting board so you can see if any light is poking through any of the black; add more frosting where needed. FREEZE AT LEAST 4 HOURS. 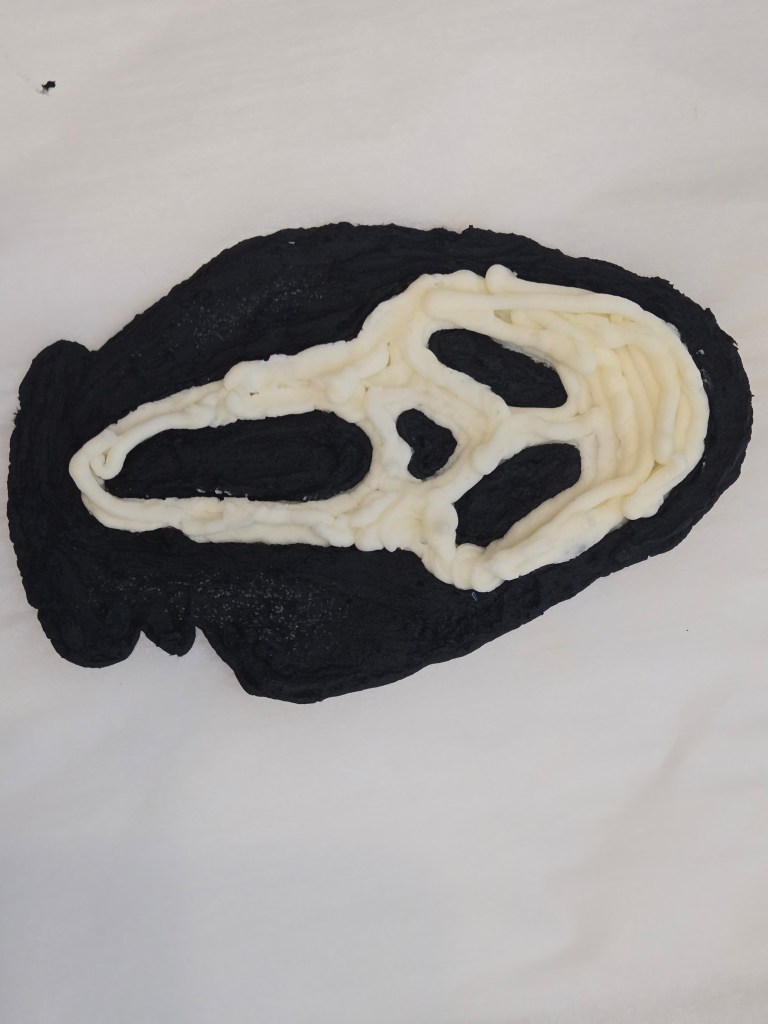
Once the black is TOTALLY frozen, come in with the white frosting in a piping bag with a #5 tip. Check for any gaps again. 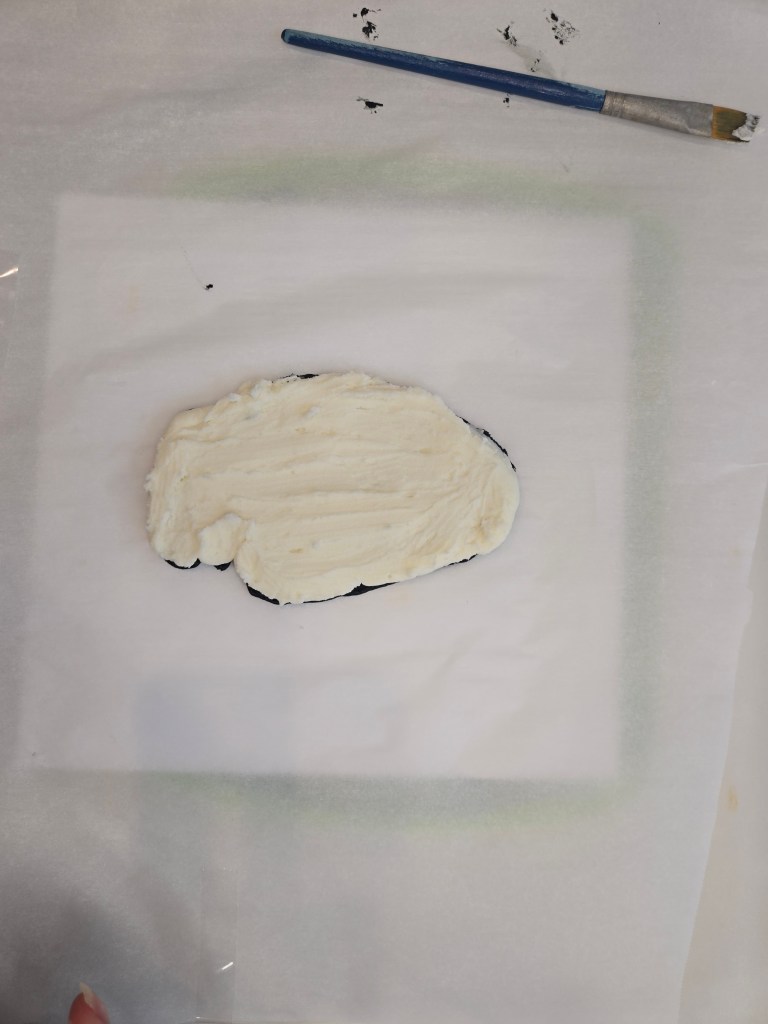
To make easier to move/sturdier, add a thick layer of white all over the transfer with a #12 tip and smooth out with a clean paintbrush. 
Let your transfer freeze overnight, then write out your message with a #5 tip in white to give a bordered look (can skip if desired). 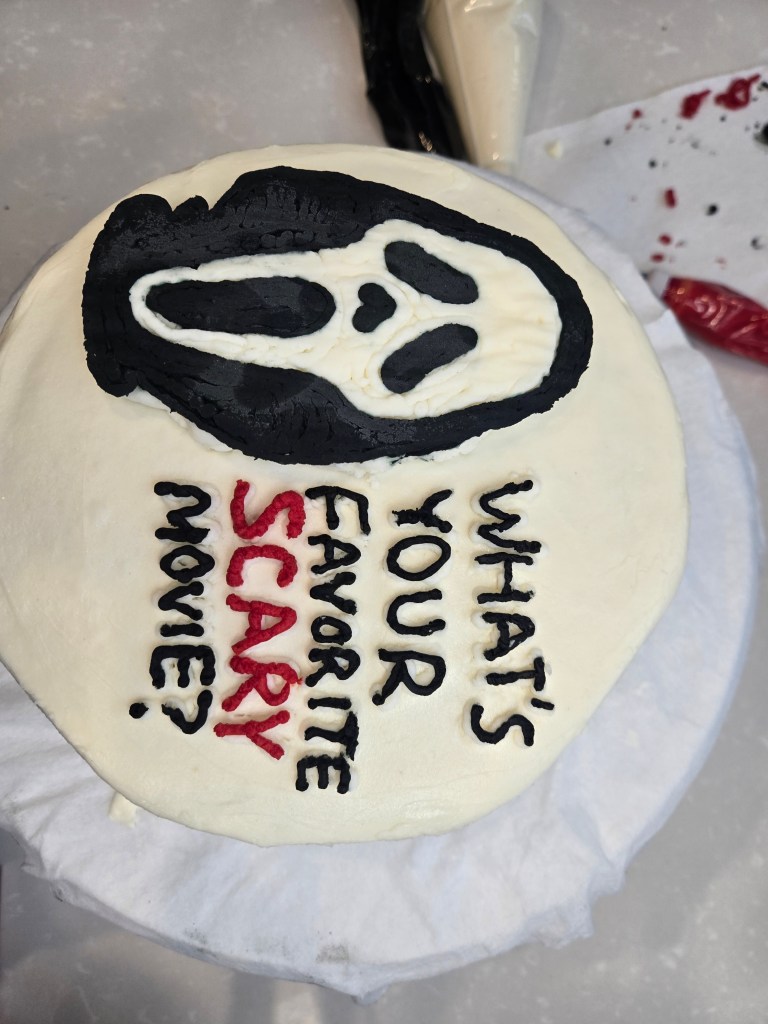
Finish writing on top of your outline with red and black frosting with #3 piping tips. Gently peel Parchment off your transfer and place on top of the cake. 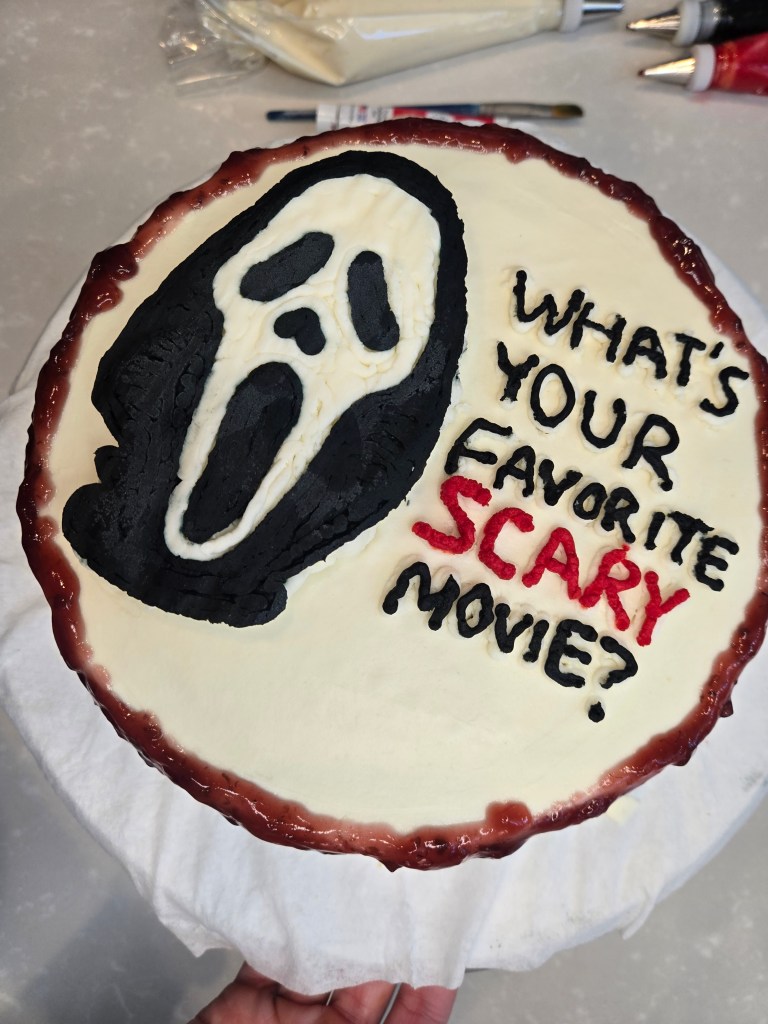
Melt 1/4 cup of jam for 30 seconds in a bowl, add to a piping bag, snip the tip, and drizzle all over the edges and down the side. 
Use the open star tip to pipe a shell border. PUT ON GLOVES, then squirt red dye into a small bowl. Run a paintbrush through this, then use your finger to flick red dye all over the cake off of the brush. 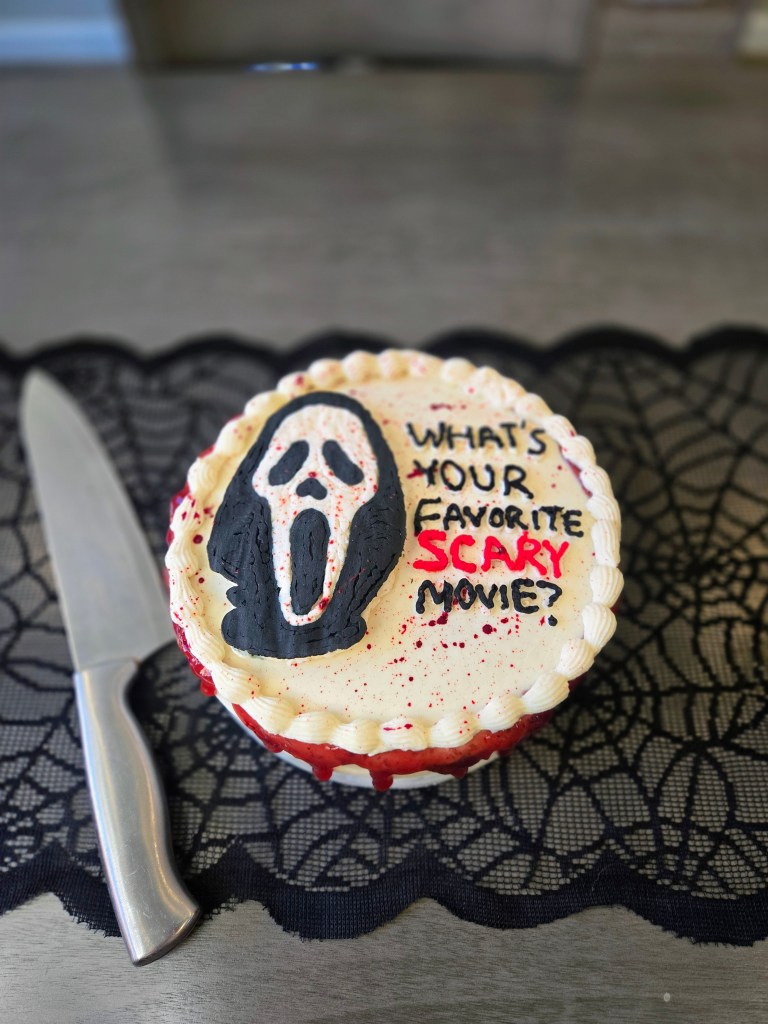
Now you’re ready to take a stab at a killer Halloween party… Bringing Ghostface to life one frozen buttercream layer at a time. It’s a cold-blooded decorating technique. 
No ghosting here…this cake slays. 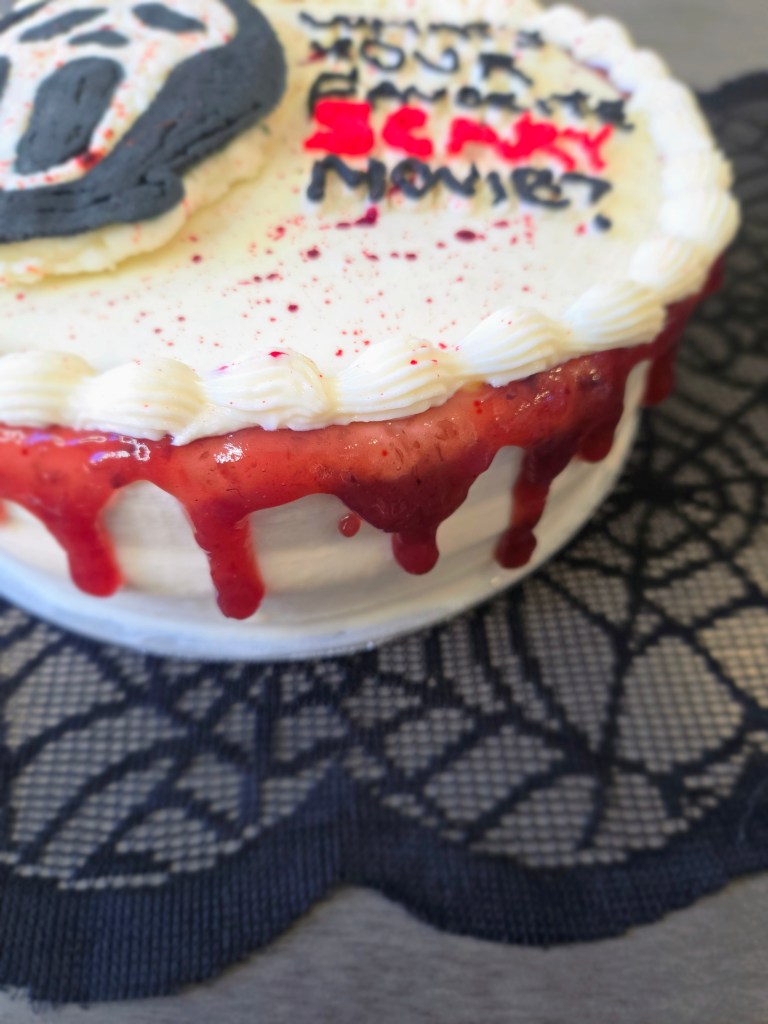
Just a slash of raspberry jam and a stab of creativity. 
Do you like scary movies? Because this dessert comes with a killer twist... -
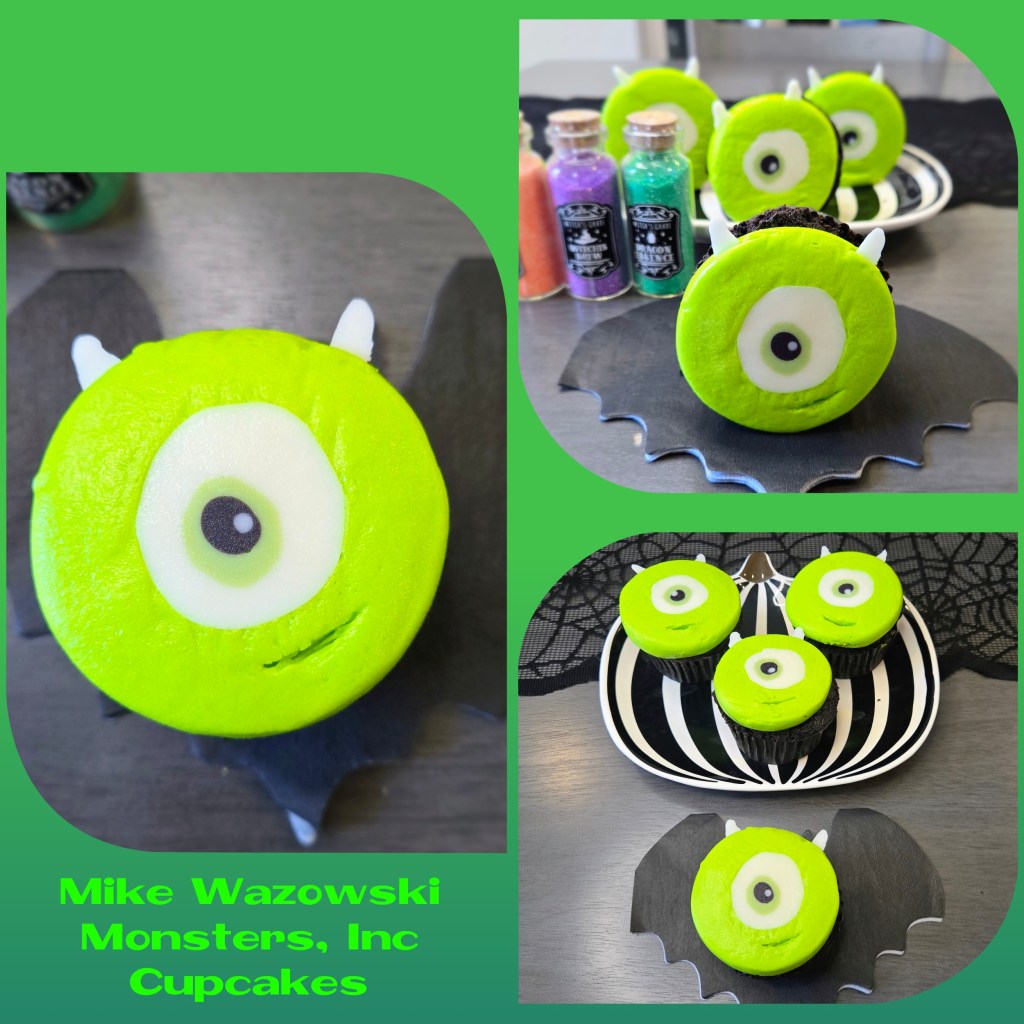
Mike Wazowski Cupcakes

“I’ve got my eye on you…” and by “you,” I mean these adorable Mike Wazowski cupcakes! Inspired by everyone’s favorite one-eyed wonder from Monsters, Inc., these gluten free goodies are equal parts spooky, silly, and sweet. With bright green frosting, a homemade eye worthy of the monster himself, and that signature goofy grin, they’re so cute it’s scare-y. Whether you’re baking for Halloween, a Pixar party, or just because you scream for buttercream, these cupcakes are monstrously easy to make and monstrously fun to eat. You could say they’re the eye-con of the dessert table. And let’s be honest: Mike would definitely call this the most eye-deal dessert for any celebration.
So grab your mixing bowl, channel your inner Scarer, and let’s make some treats that’ll have everyone shouting, “Mike Wazowski!” every time they open the fridge…which may or may not be what I’ve been doing since I made these.
Eye made these myself–no scream canister required. If you’re eye-nterested in making your own little green guys, you’re in luck because I’ve got both a video tutorial and a photo step-by-step ready to guide you through the monster madness. Just follow along, and you’ll be frosting like a pro Scarer in no time. Don’t worry, there’s no need for ‘2319’ level of panic…these cupcakes are way easier to assemble than sneaking a kid through Monstropolis. Whether you’re team Scare Floor or Laugh Power, this tutorial’s got all the tips you need to make cupcakes so cute, even Roz would crack a smile (probably while saying, “I’m watching you, Wazowski.”). You need:
- A batch of your favorite cupcakes and cupcake frosting dyed lime green (use something stiff like buttercream or cream cheese frosting)
- Piping bags
- Lime green, black, and white candy melts
- Toothpicks
- Parchment paper
- Palette knife, angled spatula, or wooden skewer
Follow along below with both the photo and video tutorials to learn how to decorate!
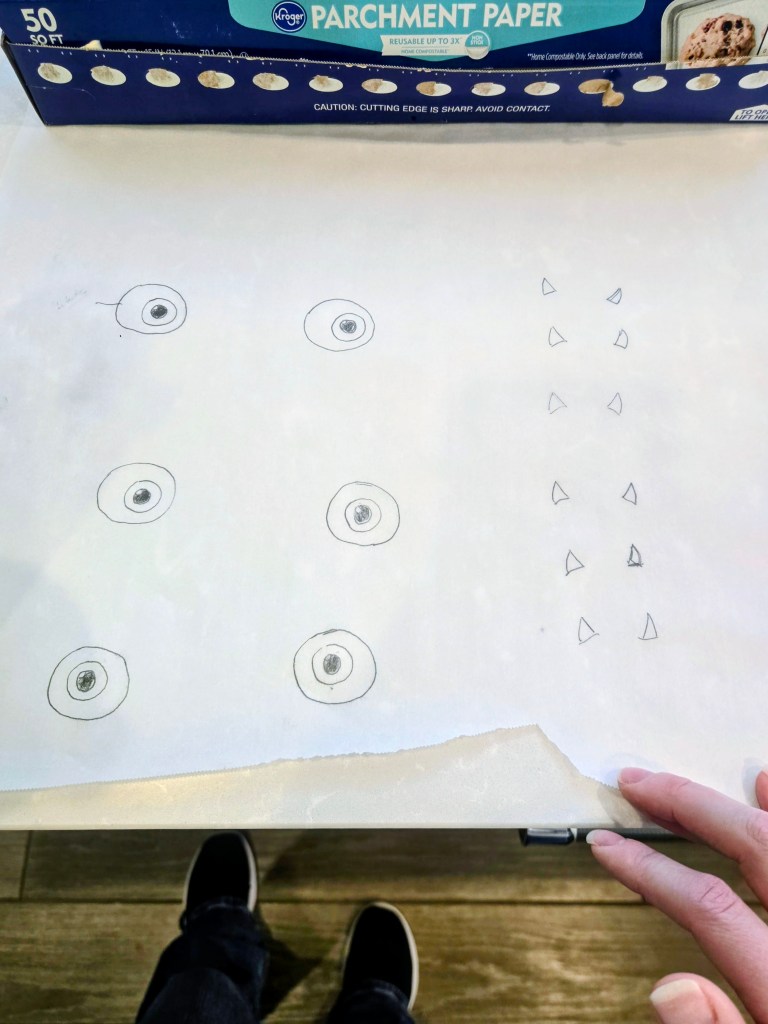
Start by drawing out your eyes and horns on Parchment paper, then flip over. 
Ease into things by melting your white chocolate first, then place in a piping bag and snip a tiny tip off of it to pipe the horns. 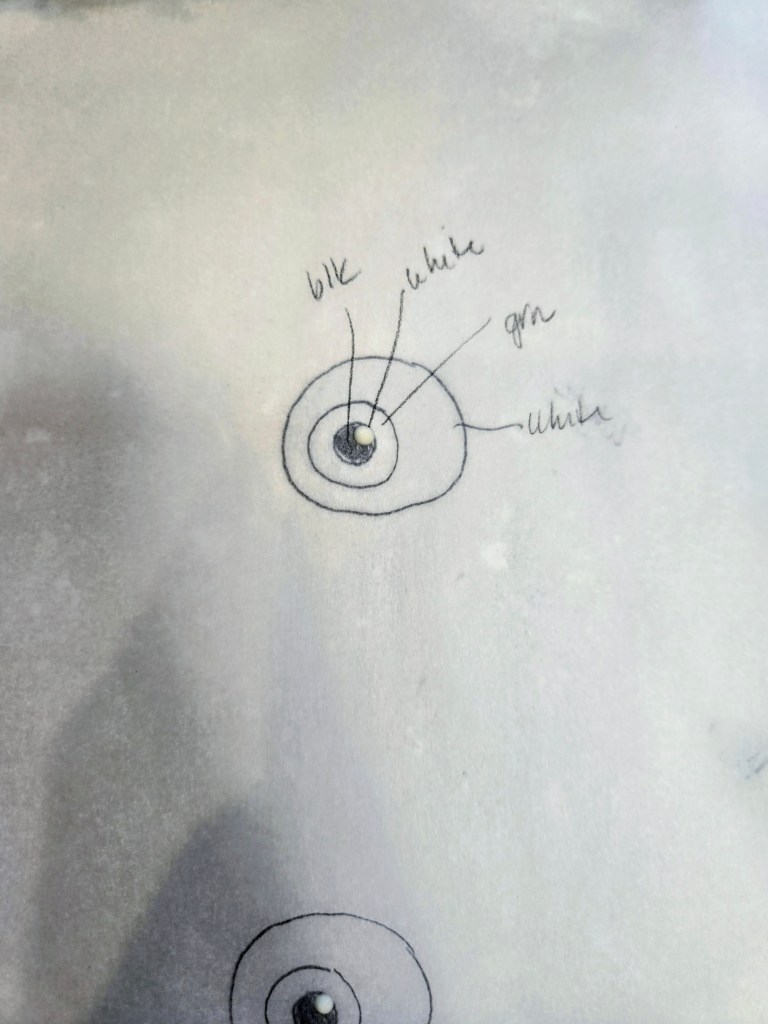
Mike’s always got a gleam in his eye, so add a small dot of white chocolate inside the pupil. LET DRY BEFORE ADDING ANYTHING ELSE! 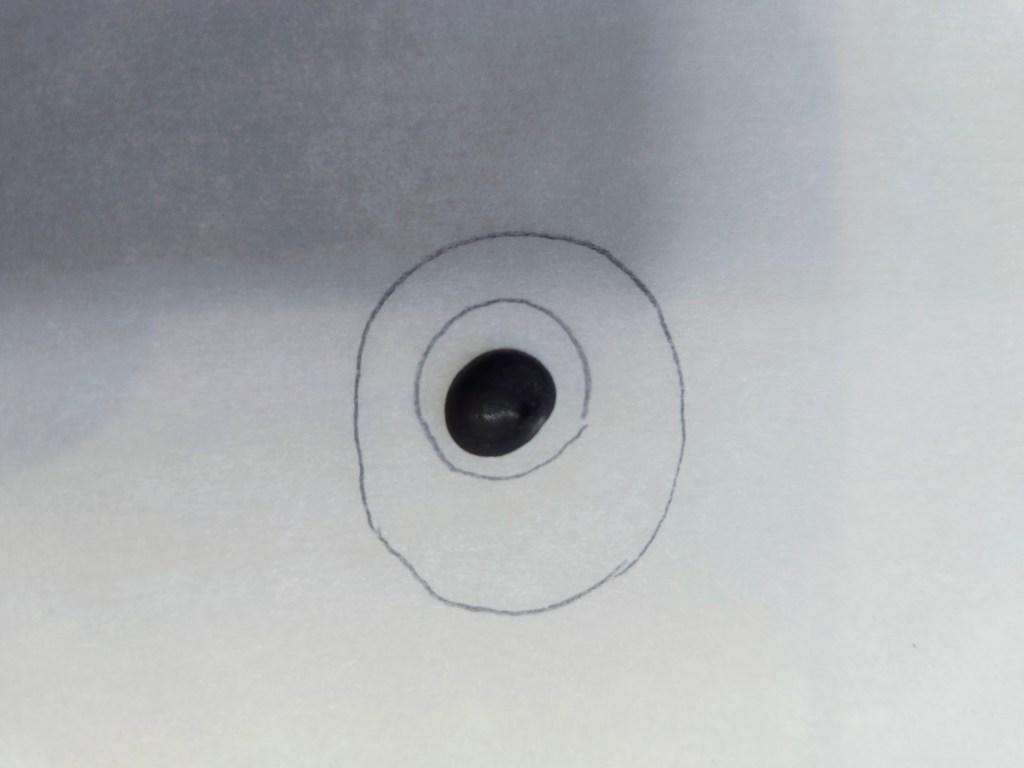
Draw over the white dot with some melted black chocolate in a piping bag to fill his pupil with black. LET DRY COMPLETELY. 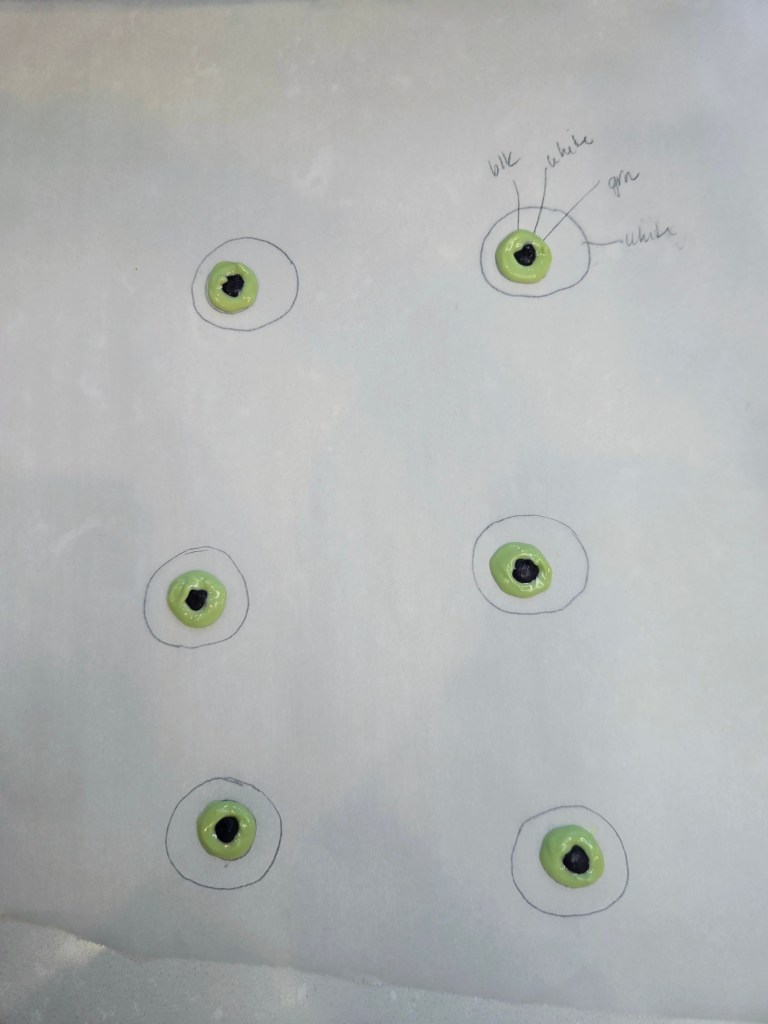
Now, add green or blue for his iris, using toothpicks as needed to even out the layer. LET DRY. 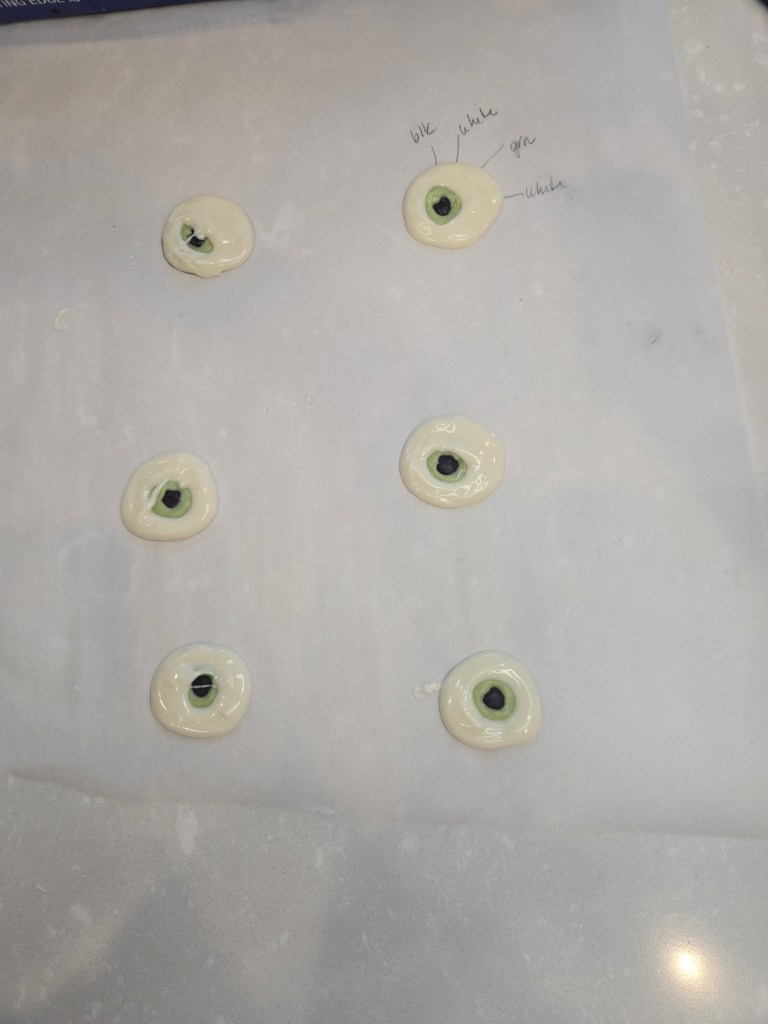
To finish the eye, reheat your white chocolate bag, then flood the rest of the eye with white (use toothpicks to even out). 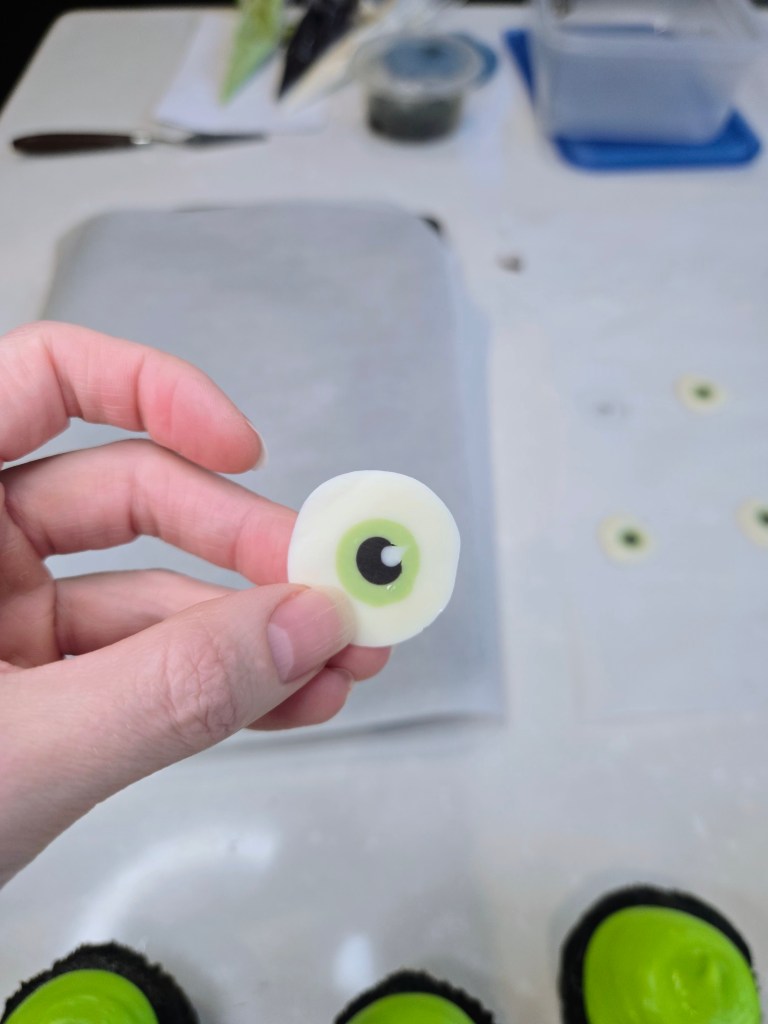
Give the eyes time to completely dry before adding to the cupcakes! 
Use a 1A tip to pipe a large mound of frosting onto each cupcake. 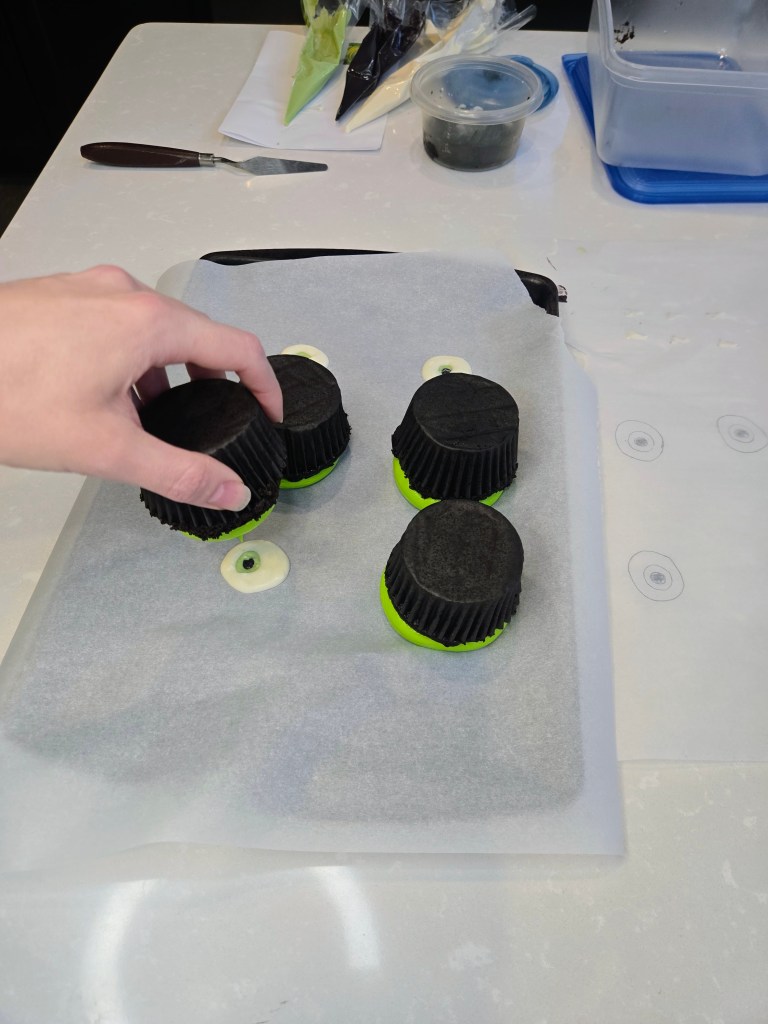
Make sure the eyes are facing down (so the back of the eye is looking face up at you), then gently press a cupcake on top. Freeze for 30 minutes. 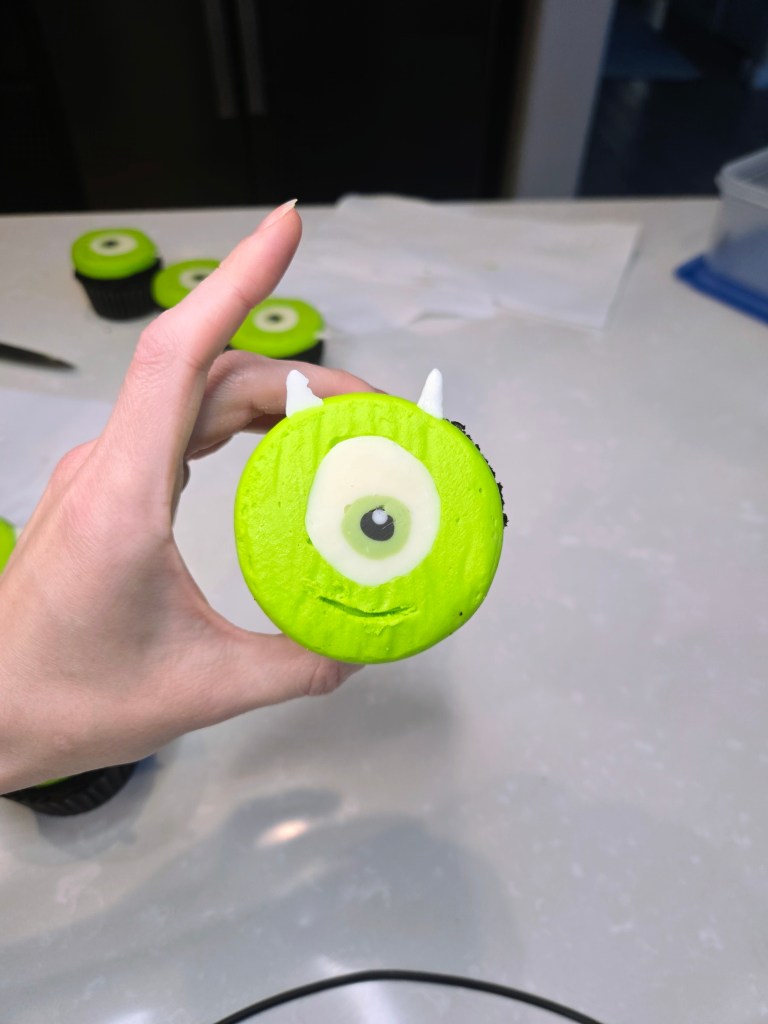
To finish, add his little horns and mouth. If you have an issue with the Parchment paper wrinkling your frosting at all, use a plain, texture-free Viva paper towel on top of the cupcake to gently smooth out any lumps or bumps with your fingers (this is show in the video below…the cupcake shown here has NOT been smoothed out yet). Then grab your palette knife, skewer, etc. to carve the smile into his face, and you’re done making a gaze so cut that it could melt even Randall’s cold reptile heart. Eye swear, this is easier than catching a door on the Laugh Floor. 
Eye scream, you scream, we all scream for cupcakes! 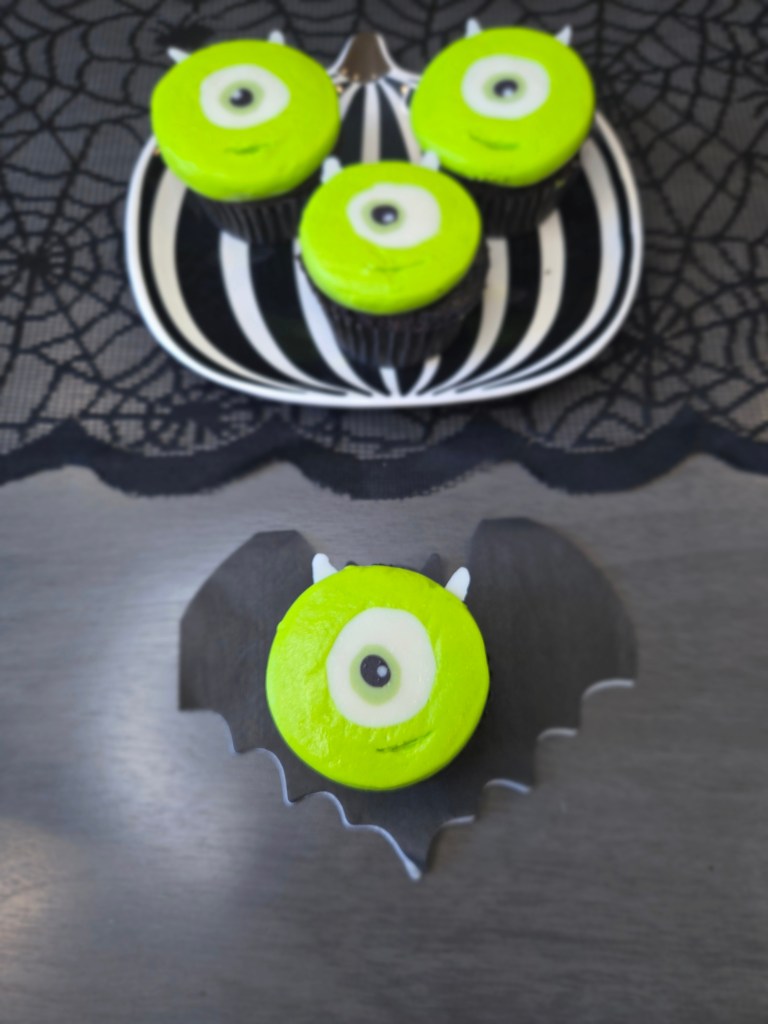
Mike drop. 🎤💚 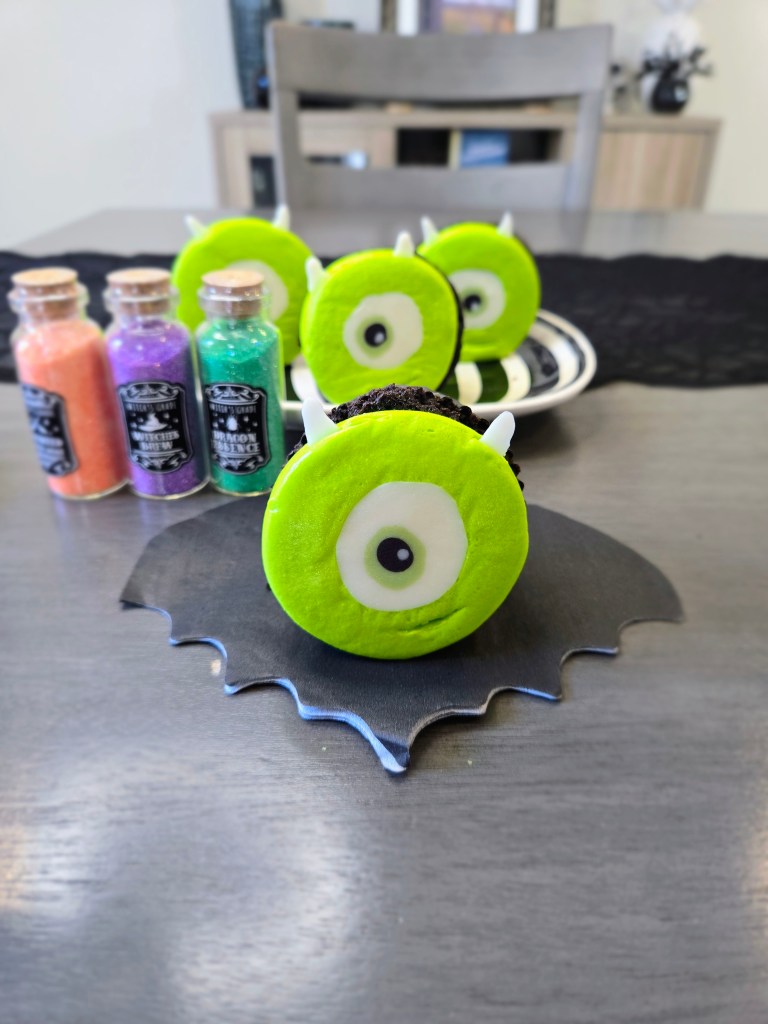
Naturally, I had to get one shot where we have Mike’s face obscured by something in front of him like the movie always did… -
Mini Candy Corn Cheesecakes
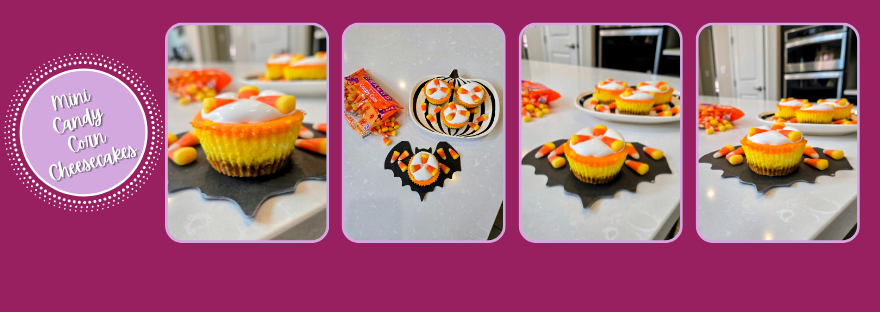
It’s the most boo-tiful time of the year: October is near! As a self-proclaimed spooky season superfan, I wait all year for the chance to whip up frightfully fun treats, and these gluten free mini candy corn cheesecakes are a real scream. With their festive layers of gold, orange, and white, they’re basically candy corn in cheesecake cosplay…no sticky teeth, just sweet, creamy, perfectly portioned bites of fall magic.
And let’s be honest: candy corn is the corn-troversial candy we all secretly love (don’t fight me on this: I will die on this candy-coated hill…the pumpkin-shaped candy corn is literally THE BEST). These cheesecakes are the ultimate trick-or-treat yourself moment: low calorie, bite-sized, and guaranteed to make your Halloween spread look spooktacular. Consider them my love letter to the holiday that makes my heart go bump in the night.
For the second cheesecake bake in a row, my tub of Cool Whip pulled a full-on trick instead of a treat. Instead of being light and fluffy, it was a sad, soggy puddle that definitely did not bring its A-game. So, my vision of topping these cuties with a perfect little candy corn “point” of white had to be shelved. Guess you could say the Cool Whip lost its cool, as did I. I’m just gonna have to get kitchen witchy and make my own!

The candy corn glow-up. Mini Candy Corn Cheesecakes
Lush, creamy layered cheesecake with gf crust and whipped topping with candy corn
Use can your preferred whey-casein blend protein powder; allulose can also be replaced with regular sugar, but this will change the macros. Feel free to use regular graham crackers or shortbread if not gluten free.
Ingredients
CRUST
*110 g gluten free graham crackers (this was about 8 Pamela’s graham crackers or 7 Kinnickinick grahams)
*30 mL (2 TBS) sugar free syrup
CHEESECAKE
*150 g (5.33 ounces) 1/3 the fat cream cheese at room temp
*150 g (5.33 ounces) nonfat Greek yogurt
*1 tsp vanilla extract
*20 g Quest vanilla milkshake protein powder
*96 g (1/2 cup) Madhava allulose sweetener
*1 egg
*1 TBS lemon juice
*Yellow and orange gel dye
TOPPING
*Sugar free whipped cream (I used 60g Cool Whip Free)
*Candy corn (I used 3 pieces for each)
Directions
- Line muffin tin with 8 silicone cupcake liners and preheat oven to 350.
- In a food processor, process grahams and syrup until sticky.
- Place about 2 tsp of crust into each liner and press to even out (it helps to spray your fingers with cooking spray).
- Bake for 5-6 minutes, until golden and puffy; place in freezer while you make filling.
- Whisk the cream cheese and yogurt on high for 2-3 minutes before adding the vanilla, pudding mix, protein powder, lemon juice, and allulose, mixing until smooth.
- Switch to a paddle attachment and add the egg, blending on low speed until completely mixed in.
- Split into two bowls, dying one orange and the other yellow.
- Distribute yellow batter evenly on top of each crust, until about half full.
- Gently drop spoonfuls of orange batter on top, careful not to mix into the yellow, until liners are completely full.
- Bake at 350 for 20-24 minutes, until cheesecakes are mostly set.
- Then turn off the oven and crack the door, leaving the cheesecakes in the oven for an additional 5-10 minutes to finish baking (centers should have barely any jiggle).
- Place cheesecakes on a cooling rack (to speed up, place this in the fridge for 1 hour or freezer for 30 minutes).
- Once the cheesecakes are totally cool and set, remove from silicone liners.
- To finish, pipe (if you can!) with a 1M swirl or dollop and smooth whipped cream on top, then place candy corn on top as desired.
- Keep leftovers in fridge in an airtight container, and enjoy!
Nutrition
Macros
8 servings
174.5 cal/7.3 f/21.6 c/5.6 p/9.5g sugar per cheesecake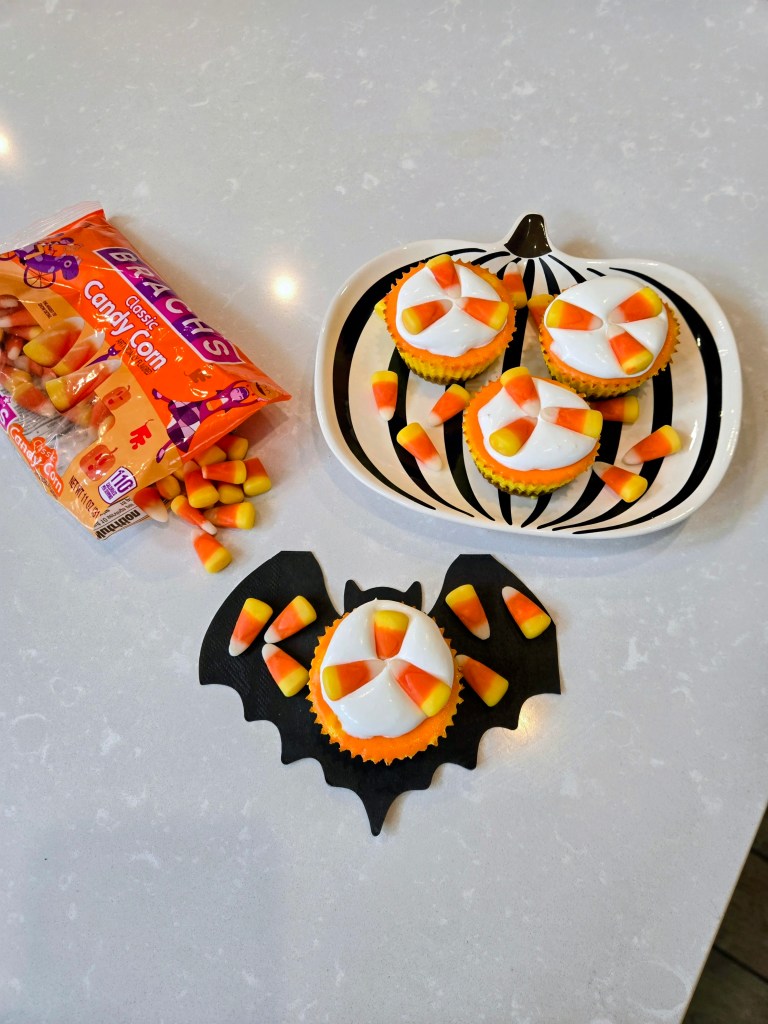
Corn you believe how cute these are? 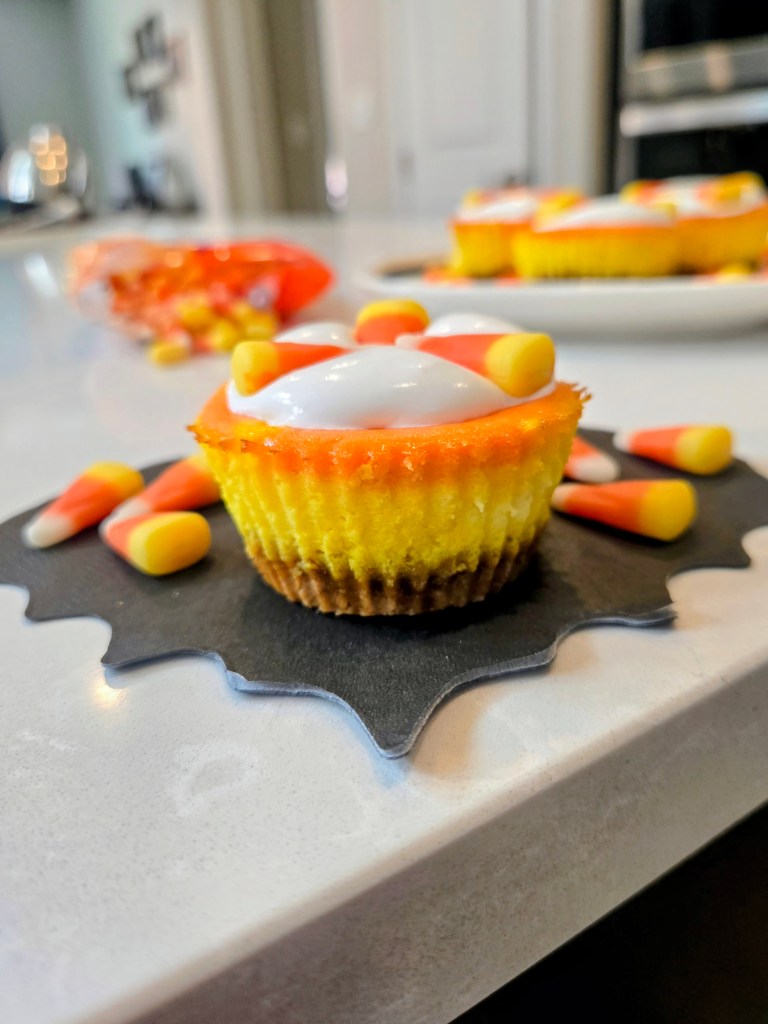
Those layers are un-BOO-lievable. 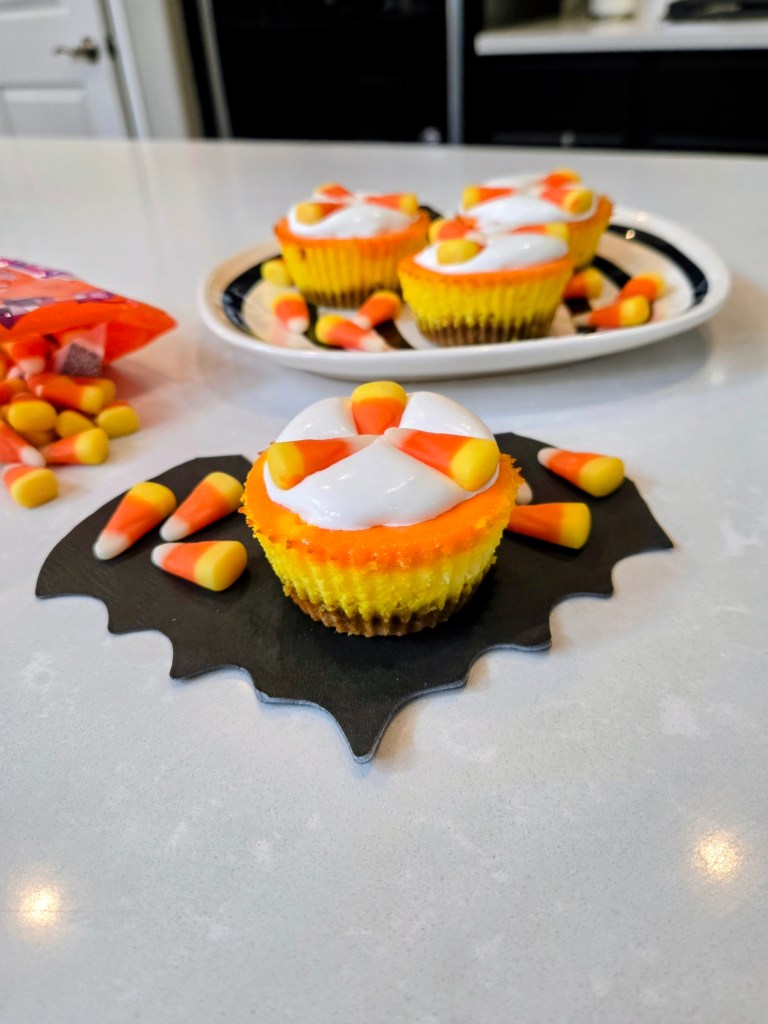
The only thing scary here is how fast these disappeared! - Line muffin tin with 8 silicone cupcake liners and preheat oven to 350.
-
Mini Banana Cream Cheesecakes
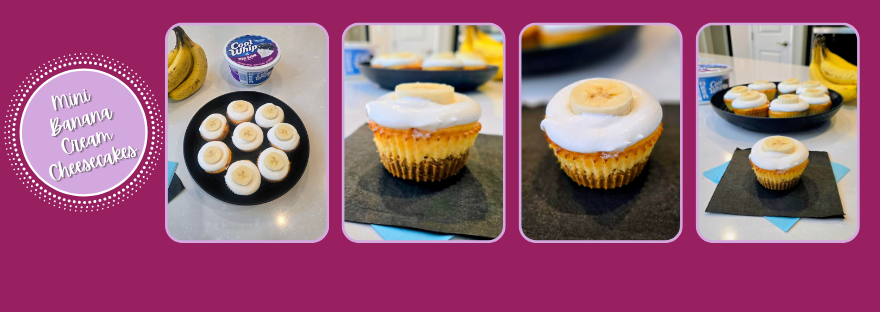
Some desserts are just a-peel-ing, and these gluten free mini banana cream cheesecakes take the (banana) cake. Topped with a cloud of Cool Whip and a slice of fresh banana, they’re proof that good things really do come in small packages, or, in this case, a muffin tin. And the best part? Each little bite is just low-cal, gluten free, and only 5 grams of sugar, so you can go bananas without going overboard.
These cuties are silky smooth, perfectly portioned, and dangerously snackable. Think of them as the ultimate mash-up (pun very much intended): creamy cheesecake + classic banana cream pie = dessert bliss. Whether you’re team “just one” or team “I accidentally ate three while standing by the fridge,” these minis will have you slipping into dessert heaven in no time!
Bananas about these mini cheesecakes! Mini Banana Cream Cheesecakes
Lush, creamy banana-flavored cheesecake with gf crust and whipped topping with bananas
Use can your preferred whey-casein blend protein powder; allulose can also be replaced with regular sugar, but this will change the macros. Feel free to use regular graham crackers or shortbread if not gluten free.
Ingredients
CRUST
*110 g gluten free graham crackers (this was about 8 Pamela’s graham crackers or 7 Kinnickinick grahams)
*30 mL (2 TBS) sugar free syrup
CHEESECAKE
*150 g (5.33 ounces) 1/3 the fat cream cheese at room temp
*150 g (5.33 ounces) nonfat Greek yogurt
*21 g (3/4 pkg) sugar free instant Jello banana cream pudding mix
*1 tsp vanilla extract
*20 g Quest vanilla milkshake protein powder
*96 g (1/2 cup) Madhava allulose sweetener
*2 eggs
*1 TBS lemon juice
TOPPING
*Sugar free whipped cream (I used 85g Cool Whip Free)
*Half a banana, sliced into coins
Directions
- Line muffin tin with 8 silicone cupcake liners and preheat oven to 350.
- In a food processor, process grahams and syrup until sticky.
- Place about 2 tsp of crust into each liner and press to even out (it helps to spray your fingers with cooking spray).
- Bake for 5-6 minutes, until golden and puffy; place in freezer while you make filling.
- Whisk the cream cheese and yogurt on high for 2-3 minutes before adding the vanilla, pudding mix, protein powder, lemon juice, and allulose, mixing until smooth.
- Switch to a paddle attachment and add the egg, blending on low speed until completely mixed in.
- Distribute batter evenly on top of each crust.
- Bake at 350 for 20-24 minutes, until cheesecakes are mostly set.
- Then turn off the oven and crack the door, leaving the cheesecakes in the oven for an additional 5-10 minutes to finish baking (centers should have barely any jiggle).
- Place cheesecakes on a cooling rack (to speed up, place this in the fridge for 1 hour or freezer for 30 minutes).
- Once the cheesecakes are totally cool and set, remove from silicone liners.
- To finish, dollop and smooth whipped cream on top, then place a piece of banana in the center.
- Keep leftovers in fridge in an airtight container, and enjoy!
Nutrition
Macros
8 servings
182.3 cal/8.3 f/19.8 c/7.1 p/5g sugar per cheesecake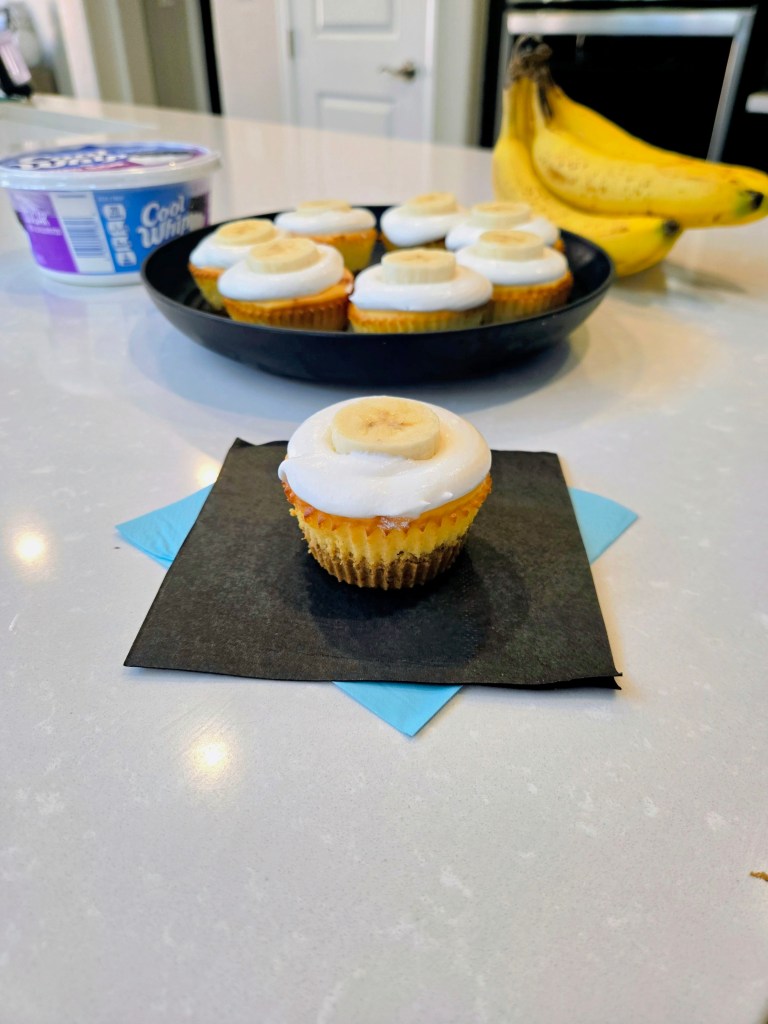
The cream of the crop with a banana on top! 
Cheesecake that’s bananas in the best way. 
Zoom in, drool out! - Line muffin tin with 8 silicone cupcake liners and preheat oven to 350.
-
Pumpkin Rum Cake (GF)
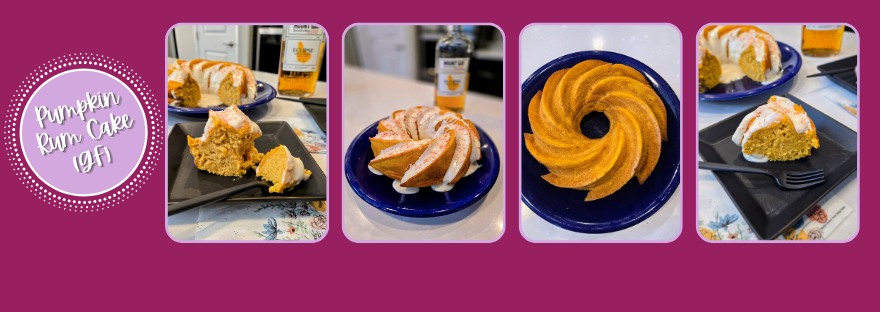
It’s not even sweater weather yet, but I’ve already fallen head over heels into pumpkin season, and I’m not sorry about it. Some people say it’s too soon, but when it comes to pumpkin desserts, my motto is gourd early, gourd often. The only snag? My husband starts giving me that look when I break out the pumpkin spice before the leaves even think about turning. So this time, I decided to spice things up with a splash of rum. Because nothing says, “trust me, I’m not crazy” quite like, “honey, it’s boozy.” The result? A gluten free pumpkin rum cake that’s rich, cozy, and just the right amount of tipsy…basically, the perfect excuse to start fall a little early. Think of it as a rum-com in cake form: sweet, spiced, and guaranteed to win over skeptics (and husbands) everywhere.
And let’s not forget the grand finale: the rum glaze. This glossy drizzle is the “liquid courage” your cake didn’t know it needed: sweet, smooth, and just boozy enough to make your taste buds do a little fall jig. It’s basically the pumpkin spice latte’s cooler, tipsier cousin, and trust me, once you pour it on, you’ll wonder how you ever lived without it.
Proof that pumpkin and rum are a match made in heaven, or at least in my kitchen. Recipe and Instructions
Gluten free pumpkin rum cake with rum glaze
A moist, pumpkin-spiced bunt with a hint of spiced rum.
If not gluten free, use any kind of yellow cake mix. Monkfruit can also be replaced with regular powdered sugar for frosting. Protein powder can also be replaced with more monkfruit or powdered sugar. Oil or applesauce can be used in place of yogurt.
Ingredients
CAKE
*1 box of gluten free Whole Foods 365 yellow cake mix
*75 grams (1/3 c) fat free Greek yogurt
*2 eggs
*260 g (1 cup) pumpkin puree
*1/2 cup water or milk
*1/2 cup spiced rum
*1/2 tsp pumpkin spice
RUM GLAZE
*120 g (1 cup) Lakanto powdered monkfruit
*40 g (1/3 cup) oz Quest vanilla milkshake protein powder
*1 TBS spiced rum
*5 TBS water or milk
*1 tsp vanilla extract
Directions
- Preheat oven to 325 and grease a bundt pan well.
- Whisk cake ingredients together in a stand mixer on low for 30 seconds before switching to medium-high for two minutes.
- Pour into prepared bundt pan and bake for 45-55 minutes, until a toothpick comes out mostly clean.
- Let cake cool in pan completely (speed this up by sticking it in the fridge).
- Use a butter knife or angled spatula to run around the edges of the pan to help the cake release before flipping onto a cake plate.
- Mix all glaze ingredients until smooth and use a spoon to drizzle on top. Add sprinkles if you’d like!
- Keep cake covered and in the fridge. It is best served at room temp, so remove from fridge 30 minutes before eating. Enjoy!
Nutrition
Macros
12 servings
173.2 cal/36.2 c/0.8 f/5.3 p per slice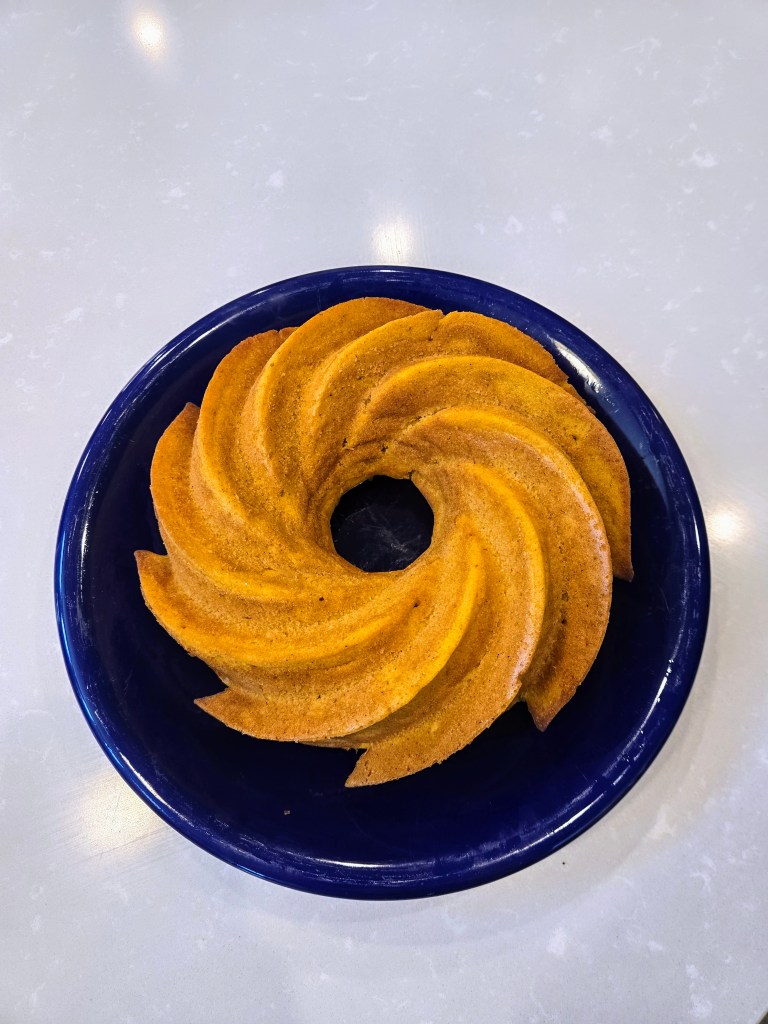
Who needs a PSL when you’ve got a PRC (Pumpkin Rum Cake)? 
Fall-ing for this cake, one boozy bite at a time. 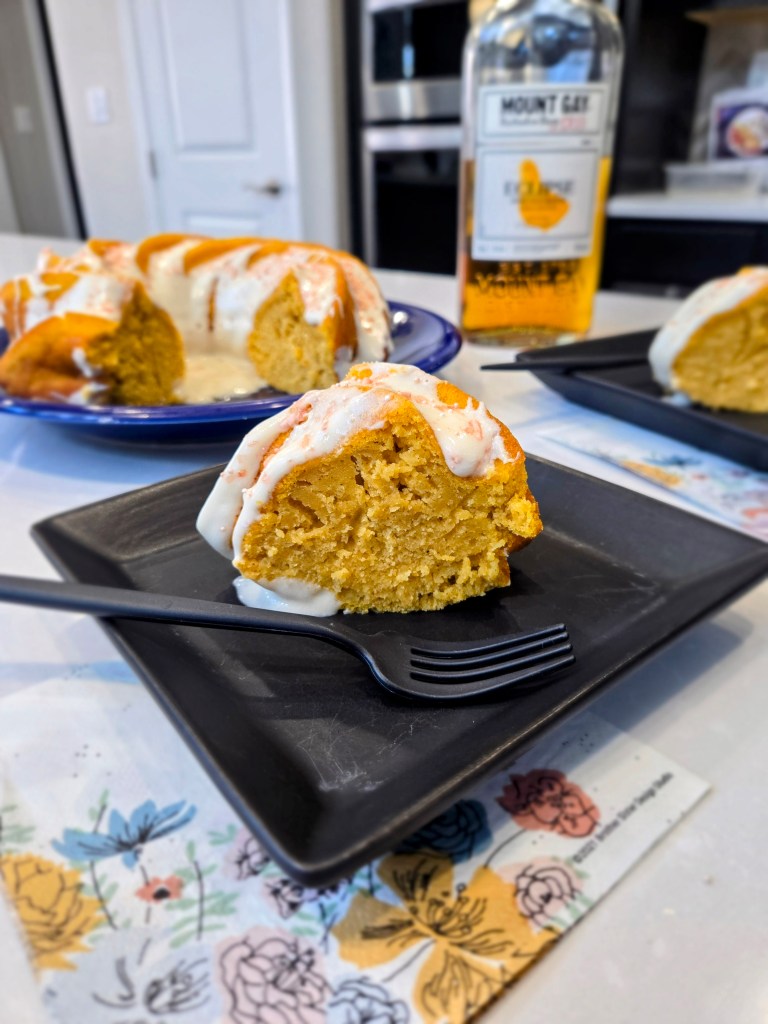
Up close and personal with my main squash. - Preheat oven to 325 and grease a bundt pan well.

Healthy-ish cake, cupcakes, pie, and cheesecake recipes and decorating tips
