-
Peanut Butter and Yummy.
Chocolate and peanut butter…I’m told it’s a flavor combination for the ages, like coffee and cigarettes or bacon and every meal ever. I know I’m in the minority, but I am not a fan. I avoid the chocolate and peanut butter flavor combo as much as most people avoid orange juice and toothpaste or Spam and every meal ever. I’m used to being the odd man out on popular favorites when it comes movies and music, but being the (obviously self-appointed) Queen of Desserts, it genuinely bothers me when I can’t seem to understand a food craze…like, can someone please explain quinoa to me? Is it supposed to taste like cardboard? But when our friends asked for chocolate cupcakes with peanut butter frosting as their third and final flavor of wedding cupcakes, I knew I had a hurdle to overcome. I could eat a PB&J for lunch every day, and I clearly eat chocolate with fervor and zest most people reserve for a 12-ounce Porterhouse, so why not together? To my knowledge as a young child, I never ate so many Reese’s peanut butter cups that I hurled or anything, so that wasn’t it. I mean, I am the girl who loves Whataburger so much I still eat it after it gave me food poisoning three times (Stick with burgers. Avoid chicken at all costs.), so it’s not like that would even contribute to my distaste for PB&C. I swear I’m no hipster, avoiding PB&C because it’s “too mainstream.” So I went to the grocery store, bought a bag of mini Reese’s cups, came home, and stared at them for a solid five minutes while trying to decide if I could somehow trick myself into ingesting one. When I realized that was in no way possible and I was behaving like my dogs do when I try to give them any medication by clenching their jaws shut and refusing to believe they’ll ever need to open their mouths again, I bucked up and popped a damn mini Reese’s into my mouth. My world…it was forever changed.
What else have I been wrong about?! Is Ryan Gosling actually a good actor? Are cats actually not Satan reincarnate? Is it actually acceptable to swim directly after eating? Clearly this moment I experienced between woman and Reese’s peanut butter cup was life-altering. I realize I was wrong to assume that just because I didn’t like PB&C when I was a kid and a teenager that I wouldn’t change my mind/tastes someday. Since I steadfastly oppose change and believe that rules were made to be followed, I don’t go outside of my comfort zone much in life. You’ll never catch me at the end of a bungee jumping experience or eating kale because some things in life are just big old fat NOPES, but I learned my lesson–always give desserts a second chance. And when you do give desserts a second chance, go big, baby. You stuff those chocolate cupcakes with mini Reese’s cups and you slather them with large globs of peanut butter buttercream (as delicious as it is redundant). Much like my stepdad has always said, no one’s last thought in life is ever going to be, “Boy am I glad I ate that salad today,” so make the cupcakes. Eat the cupcakes. Rediscover yourself in the process. Question everything you’ve ever disliked (while possibly eating a second cupcake). Become better through dessert! I mean, it is way cheaper than a therapist after all.

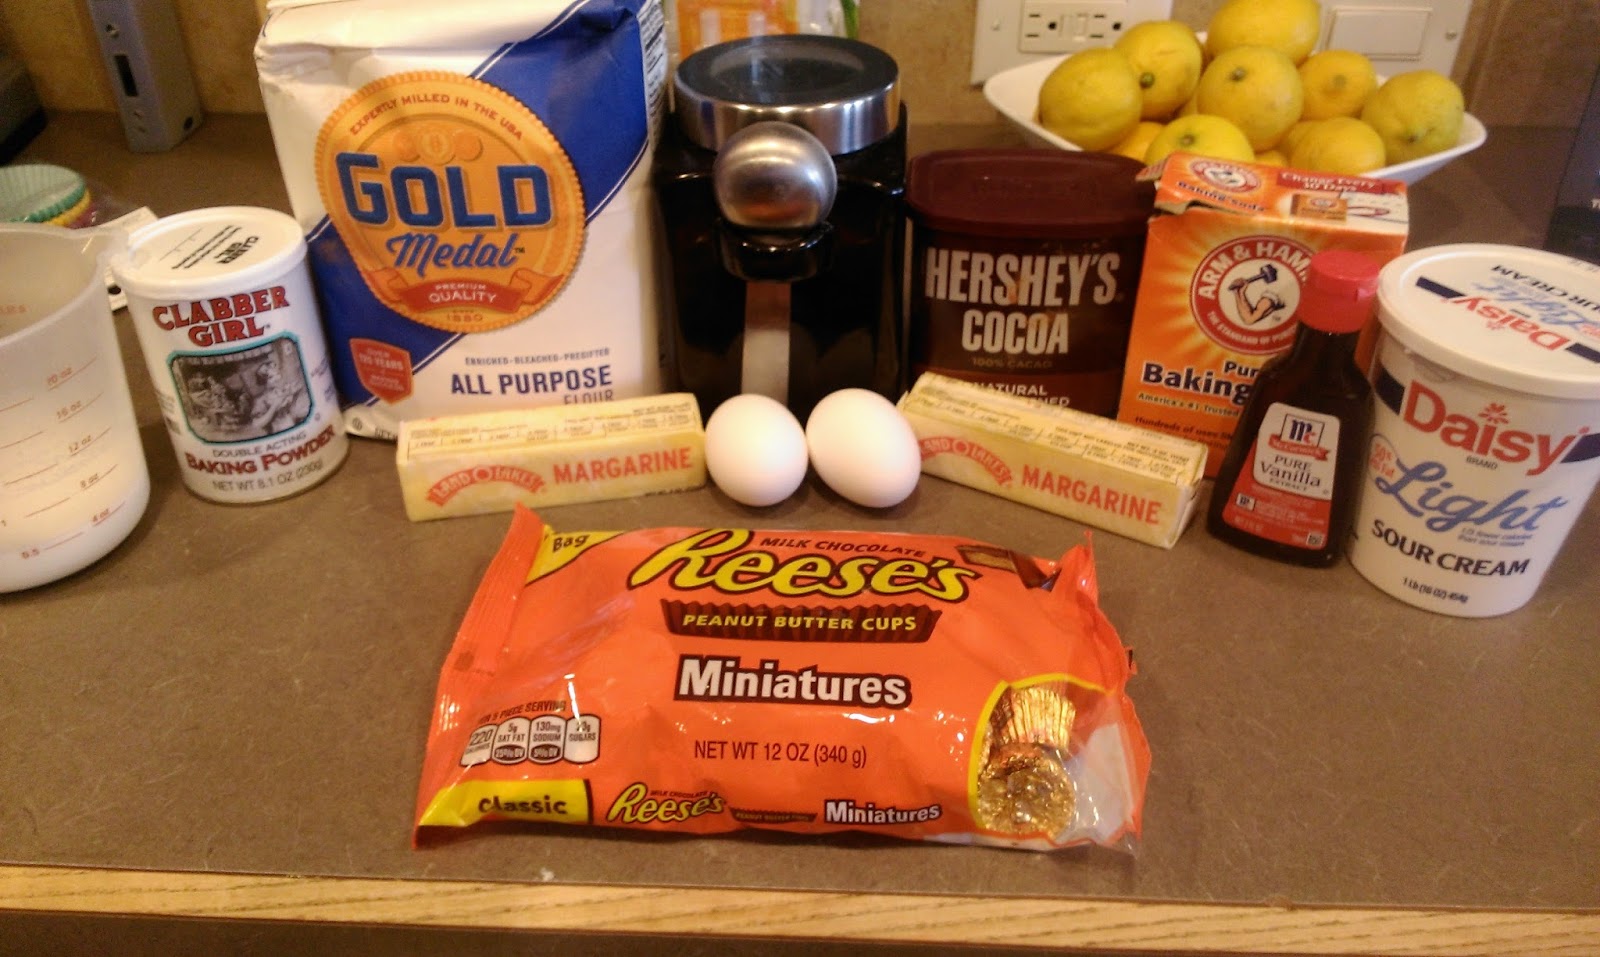
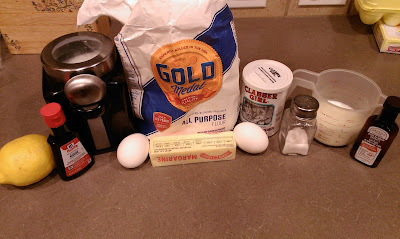
And no HMO is required! I’ve got two schools of thought here: make these from scratch because everything is better that way or don’t worry if you want to use box cake, I can help. So, if you want to make super moist cupcakes from scratch that yield 14 cupcakes, gather up:
- One bag of mini Reese’s
- 3/4 cup room temp butter
- 1 cup of sugar
- 1 1/3 cup of flour
- 1 tsp of baking powder
- 1/4 tsp baking soda
- 1/4 cup of cocoa powder
- 2 eggs at room temp
- 1 tsp vanilla
- 1/2 cup room temp sour cream
- 1/2 cup room temp milk
Preheat the oven to 350 and start by creaming the butter and sugar together until light and fluffy. While this is blending, mix together the flour, baking soda and powder, and cocoa in a medium bowl and set aside. Add the eggs, vanilla, and sour cream to the butter, mix, and blend well. Then add in half of the dry mix and half of the milk and blend well. Scrape the bowl and add in the rest of the dry mix and milk. Mix until just incorporated.
Conversely, find a chocolate box cake of your liking and cake jack it by adding an extra egg, sub milk for water, and sub butter for oil and double the amount. Going this route will make probably 24 cupcakes instead of just 14. So if you’ve got a party on your hands instead of self-grazing on desserts, this may be a wise choice.
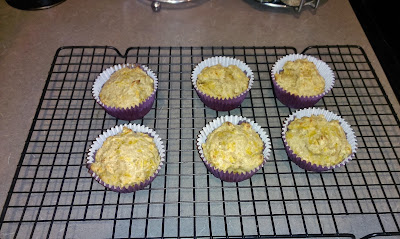
In either case, line a muffin tin with cupcake wrappers and fill a little less than 2/3 of the way full with the batter:
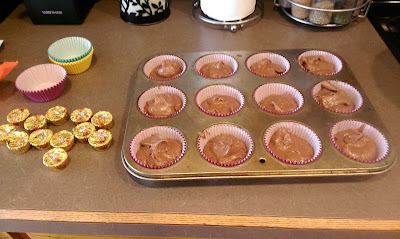
Like so. Then unwrap and add one mini Reese’s into each cupcake, pressing them down gently just a bit to get to the center of the batter:
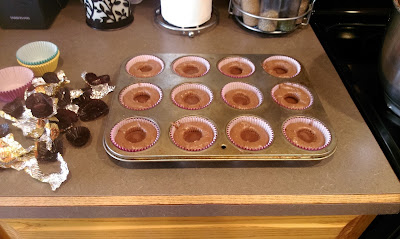
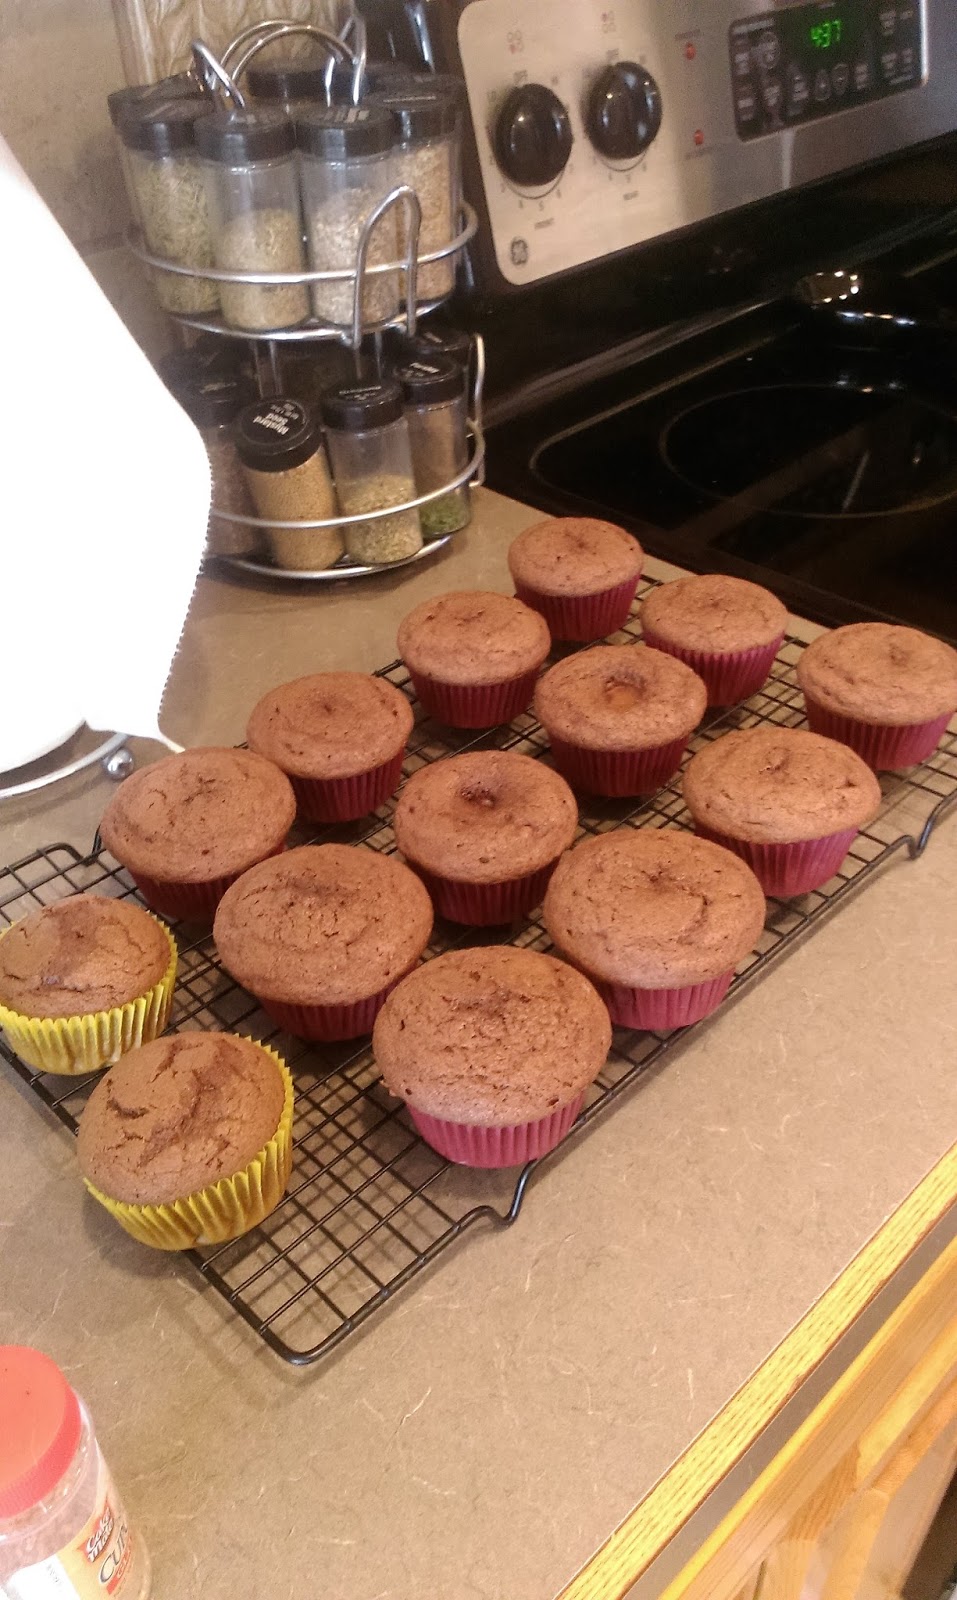
Also like so. Bake in the middle rack of your oven for 15-18 minutes or until a toothpick comes out of the sides (not the center where the Reese’s cups are) clean. Let cool in the tin for 5 minutes then remove to a cooling rack to finish cooling.

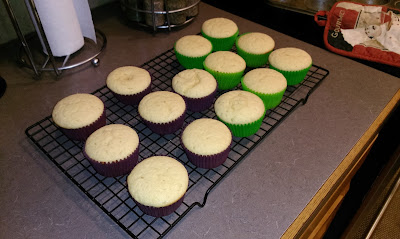
I wanted to eat them all right then and there. I have a lifetime of not eating PB&C to make up for!!! As you can see, the cupcakes on the far left in the yellow wrappers look different. This is because I did NOT place a Reese’s into these so they puffed up a bit more. I wanted the bride and groom to have plenty of choice to what the final products will be, so these two went to them for sampling. On occasion, I can be a really thoughtful and generous person. But since that day has passed, don’t ask me any favors until I’m feeling hospitable again (check back with me in three to five weeks).

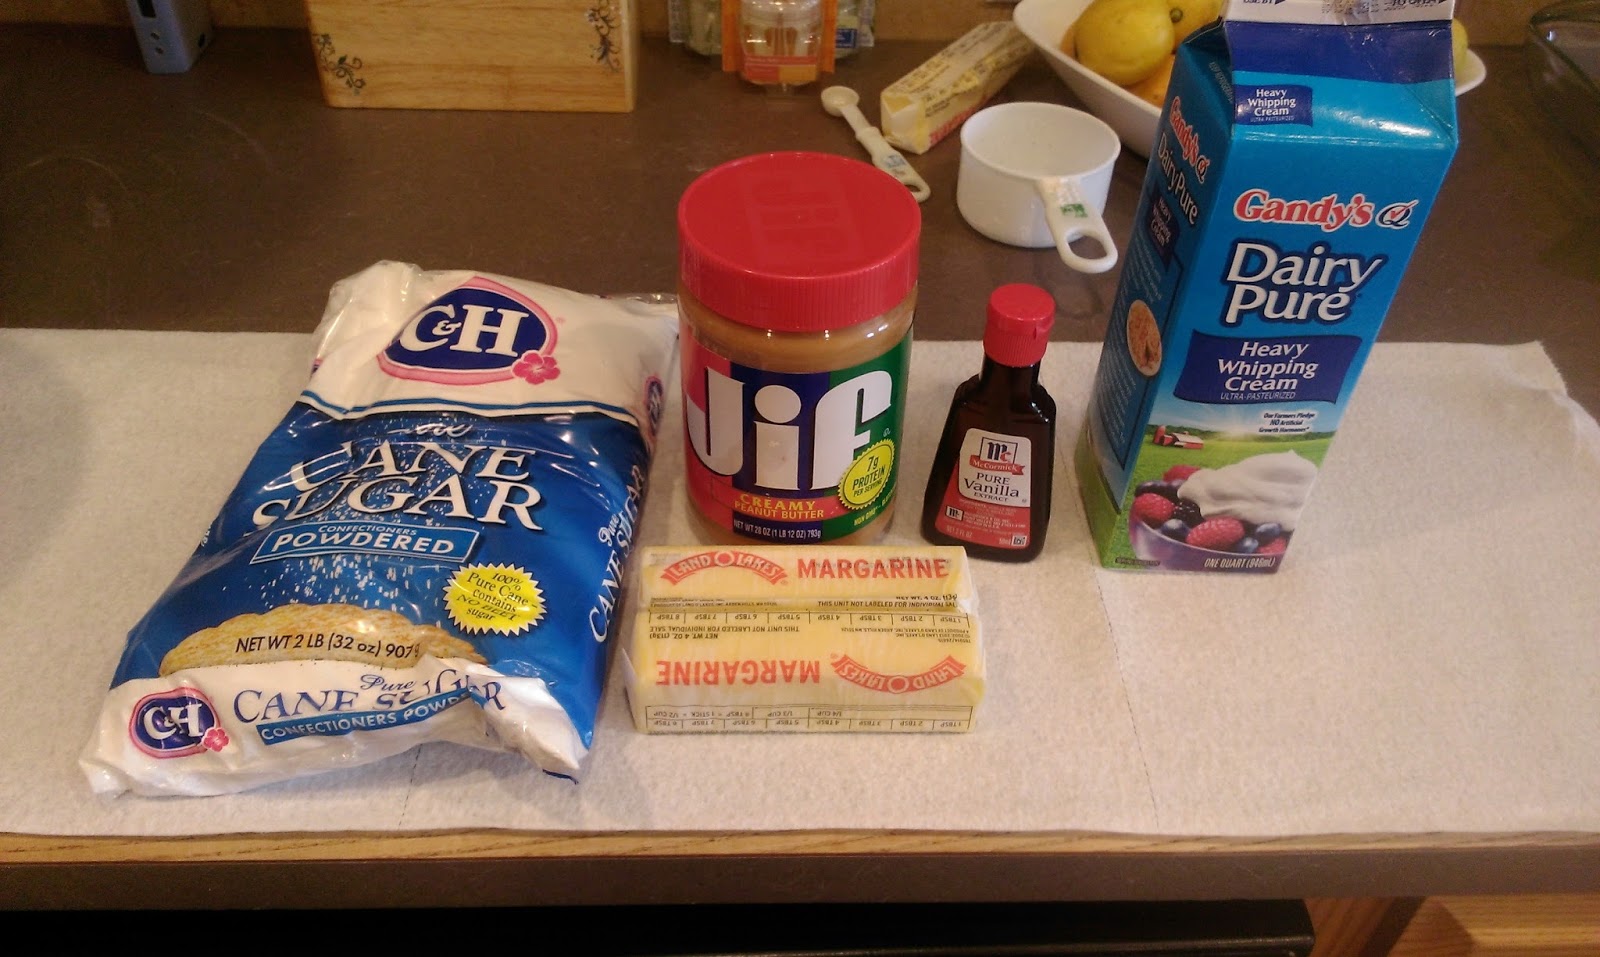
I mean, I’m already giving you this wonderful recipe. What more do you need?! So, my dogs know what the peanut butter jar is. They see the red lid and know it’s about to get real. When I started making frosting without giving them any, a coup was forming. I had to stop mid mix and get a spoon out and give them each a little frosting. This is also my advice to you if your dogs have an obsession with peanut butter (thanks, Kong toys). To make a decadent peanut butter buttercream that I honestly think would go great on a sandwich because I have a real problem, you’ll need:
- 1 cup of room temp butter
- 1 cup of peanut butter (I judge you harshly if it’s not Jif)
- 1 tsp of vanilla extract
- 4 cups of powdered sugar
- 4 tbs of heavy cream or milk
I know, there’s no booze in this frosting. I thought about it, but decided whipped vodka might be too much. I didn’t want to sully my newfound bliss with PB&C by getting drunk off my frosting…I’ve got plenty of time for that later when weddings aren’t involved. Cream the butter and peanut butter together until light and fluffy, then add in the vanilla extract, two cups of sugar, and two tablespoons of heavy cream. Blend on low and blend well. Scrape the bowl and add the remaining two cups of sugar and two tablespoons of heavy cream and mixing well.

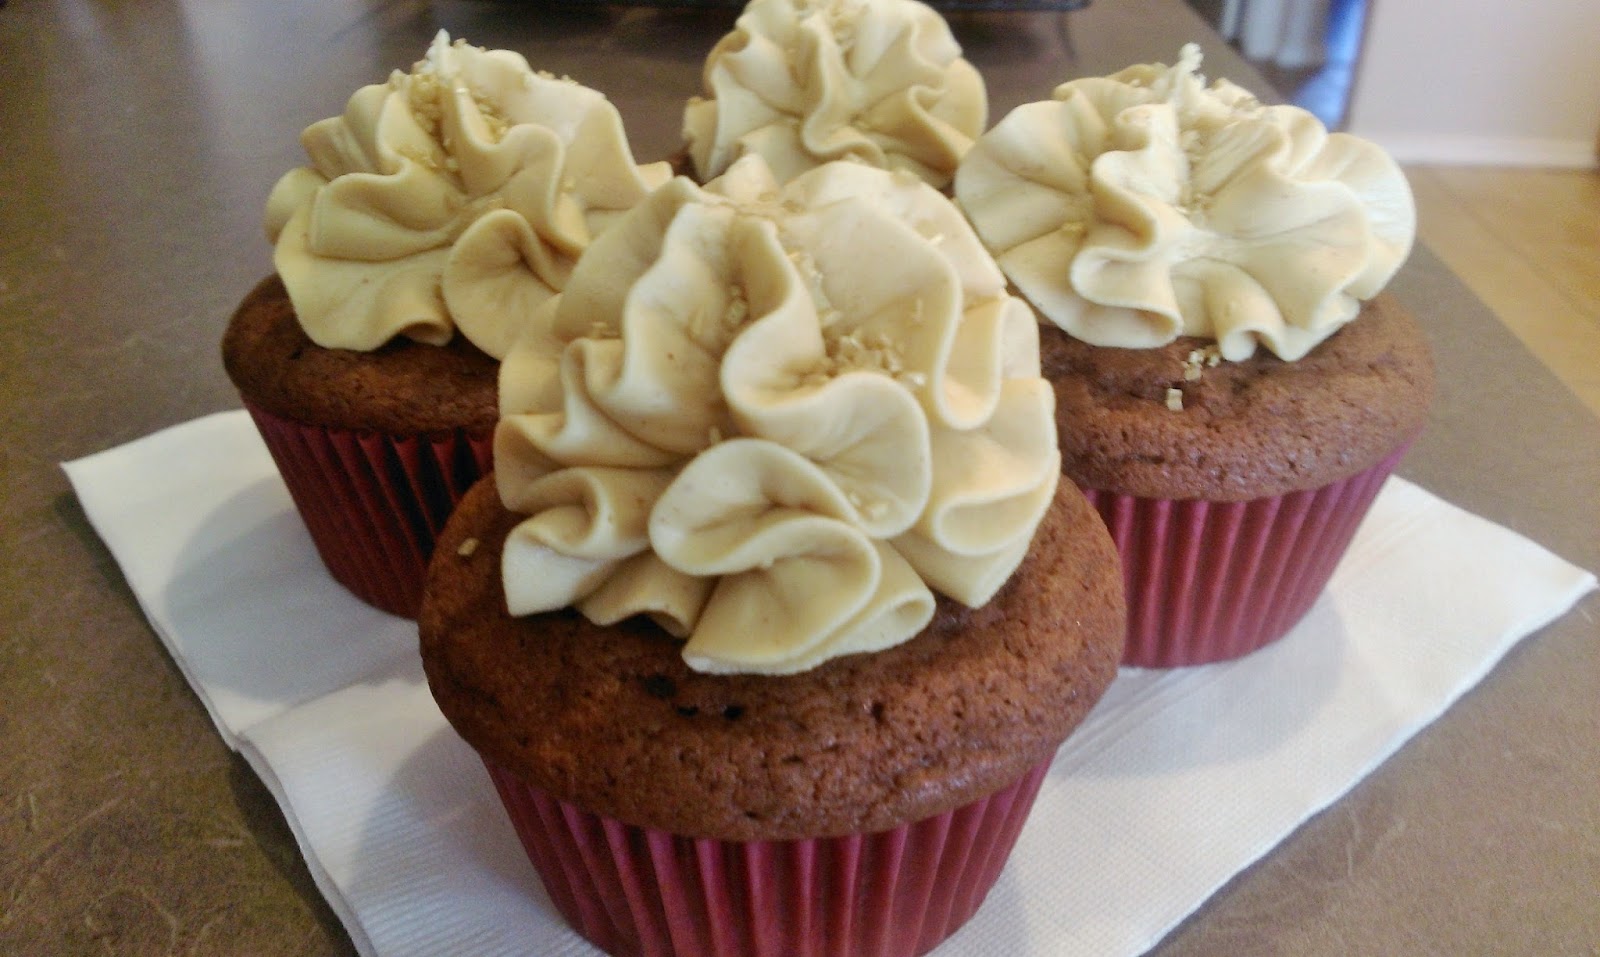
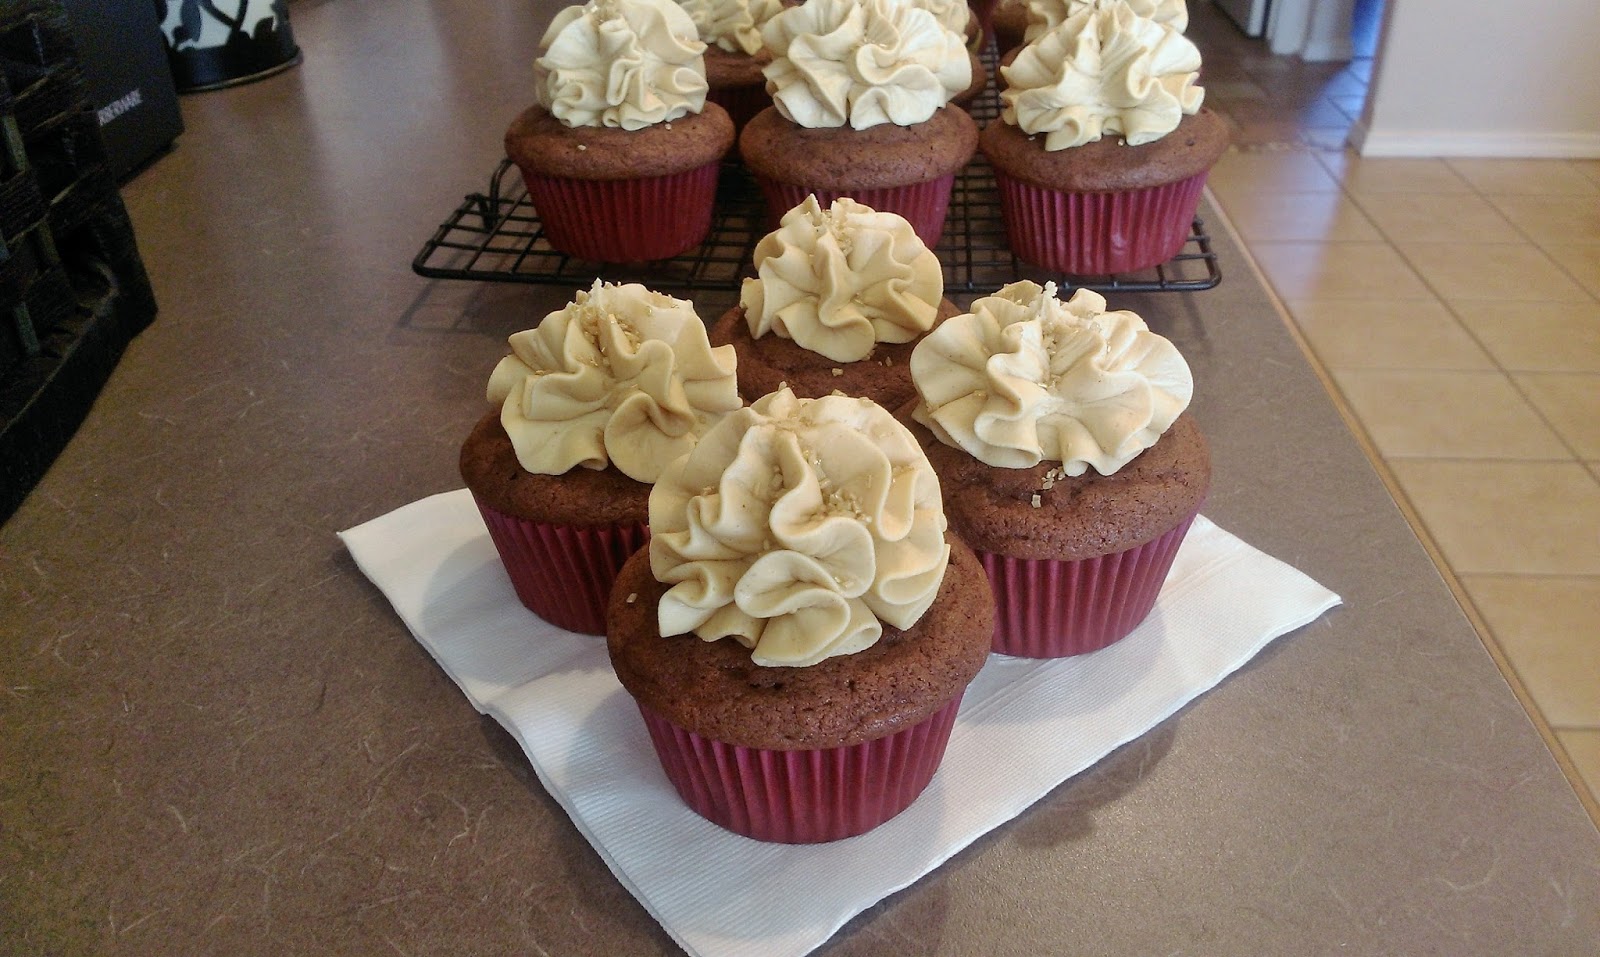
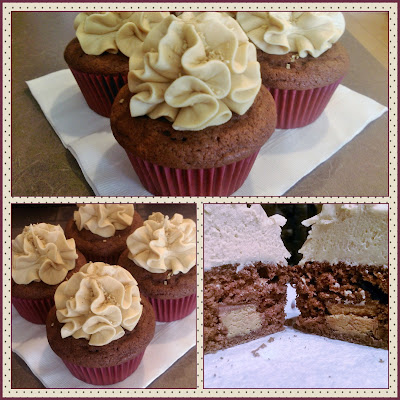
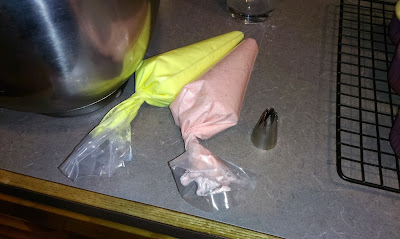
The drooling you’re currently experiencing brought to you by Kate Bakes Cakes. Once your cupcakes are fully cooled, load up a piping bag and frost away! I chose to create peanut butter clouds using a 1M tip and just gently applying pressure and allowing for ruffled mounds to build. I finished up by adding gold sprinkles because I’m an adult, and I will add sprinkles to whatever I so please. I actually had a decent amount of frosting leftover (would probably work for 24 cupcakes), so I put it in a Tupperware and placed it in the freezer to keep myself from sitting down and eating it all at once. Screw cookie butter, peanut butter buttercream is my new jam.
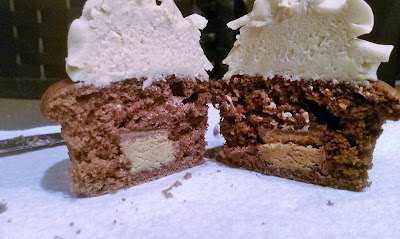
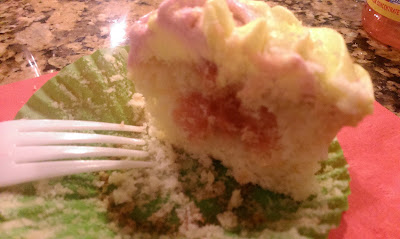
Can I eat each half in one bite? Gonna find out… So I’m pretty sure I’ve made it blatantly clear that these cupcakes are not something you want to miss out on. The Reese’s in the center is the perfect addition to moist chocolate cupcakes with subtle richness, and the peanut butter buttercream is what I imagine regular peanut butter tastes like to my dogs which would explain their infatuation with the stuff. So many years I wasted not eating PB&C and turning my nose up at the stuff. Oh, to be so simple to be humbled by a cupcake. Seriously, keep me fed, allow me nine hours to sleep, never play Taylor Swift music around me, and give me dogs to play with…I have but few needs, but now PB&C gets added to the list. Have I found an new addiction? Sorry, I can’t hear you over the sound of these cupcakes calling my name from the fridge… ‘Til next time, my fellow eaters!

“I will ruin you for other cupcakes.” -
Thar She Bakes!
My husband and I love pirates…you know, the Old World, swashbuckling kind. I’m not sure why we have such an affinity for the pillaging and thievery of the pirates of yore what with him being in the military and me being a
disgruntledhumble teacher. Maybe it’s the possibility of discovering treasure, sailing the open sea, making enemies walk the plank, or dying of scurvy because you didn’t eat enough citrus fruits? It was just a simpler time, I suppose. Perhaps it’s that my foul mouth would be lauded and probably reward me a pirate queenship? Wench be damned, clearly between my affinity for clever cursing, intelligence, and my hellbent desire for world domination I would be queen! In either case, we decided it was time to have a pirate-themed party. So we did just that last Saturday…had I known people were going to take the theme so literally though (things were set on fire…kitchens were pillaged), perhaps I would’ve hosted an English high tea party instead. Sit quietly in the dining room, discuss the dreary weather, and part ways in under an hour. My kind of party! But since my husband and our friends have a much wilder (read: normal) streak than I do, pirate action was bound to happen. Supply anyone with punch, copious amounts of rum, and a treasure chest full of beer and they’re going to go overboard in more ways than one. I wouldn’t call it a total failure though (rest in peace, patio furniture) because there was cake. Pretty much the only reason I ever go to a party is because I am looking for an excuse to bake, decorate, and share the fruits of my labor with my friends. Once the dessert has been eaten, I tend to sail the high seas back to my own humble estate in the Land of Introvertia. But I do really love a good costume party, so I went full speed ahead with both costume and cake. I had the biggest pirate hat at the party which naturally meant I was in charge. “(S)he who wears the largest hat commands the most men.” -Old Pirate Proverb I just made up. Clearly I had to let me mateys eat cake to keep any attempts at a mutiny at bay.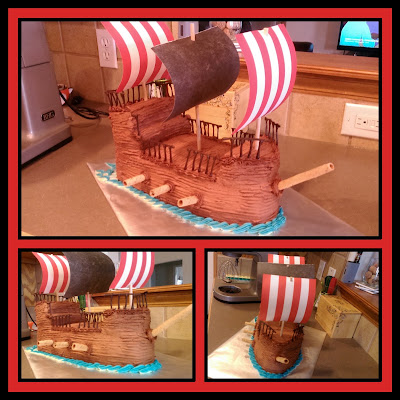
This is the pinnacle of my cake baking…my white whale, if you will. It took me seven hours to make this cake from start to finish, but a lot of that was waiting for various frosting layers to freeze before recoating. Either way, this was not a cake for the faint of heart. Even with several years (yes, all two of them) of baking and decorating under my belt I still wanted to jump ship (ha!) about halfway through. But like the most determined of pirates on a quest for whatever it was pirates quested for (I assume rum), I persevered and found me treasure (pirate slang for finishing the cake). Was it worth it? Well, I had decorated the house so well for this party some people thought this was another decoration and didn’t even realize it was a cake. The best of pirates are able to pull trickery and slight of hand, so I once again assume I’d make a great one. But if you’re up for a quest besieged with wit and cunning and dastardly skill, you can make this pirate cake, too. I will warn ye scurvy dog that this makes a ton ‘o cake. Seriously…enough to feed 25 drunk pirates with the bow leftover for you to eat the following day while you contemplate why your floors are so sticky and whether or not there will ever be enough swabbing the deck with a Swiffer to make it better. OCD introverts should never throw parties.
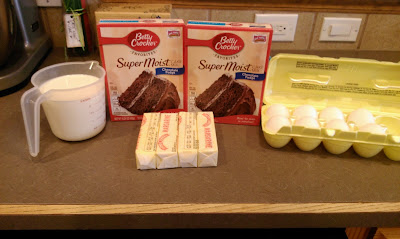
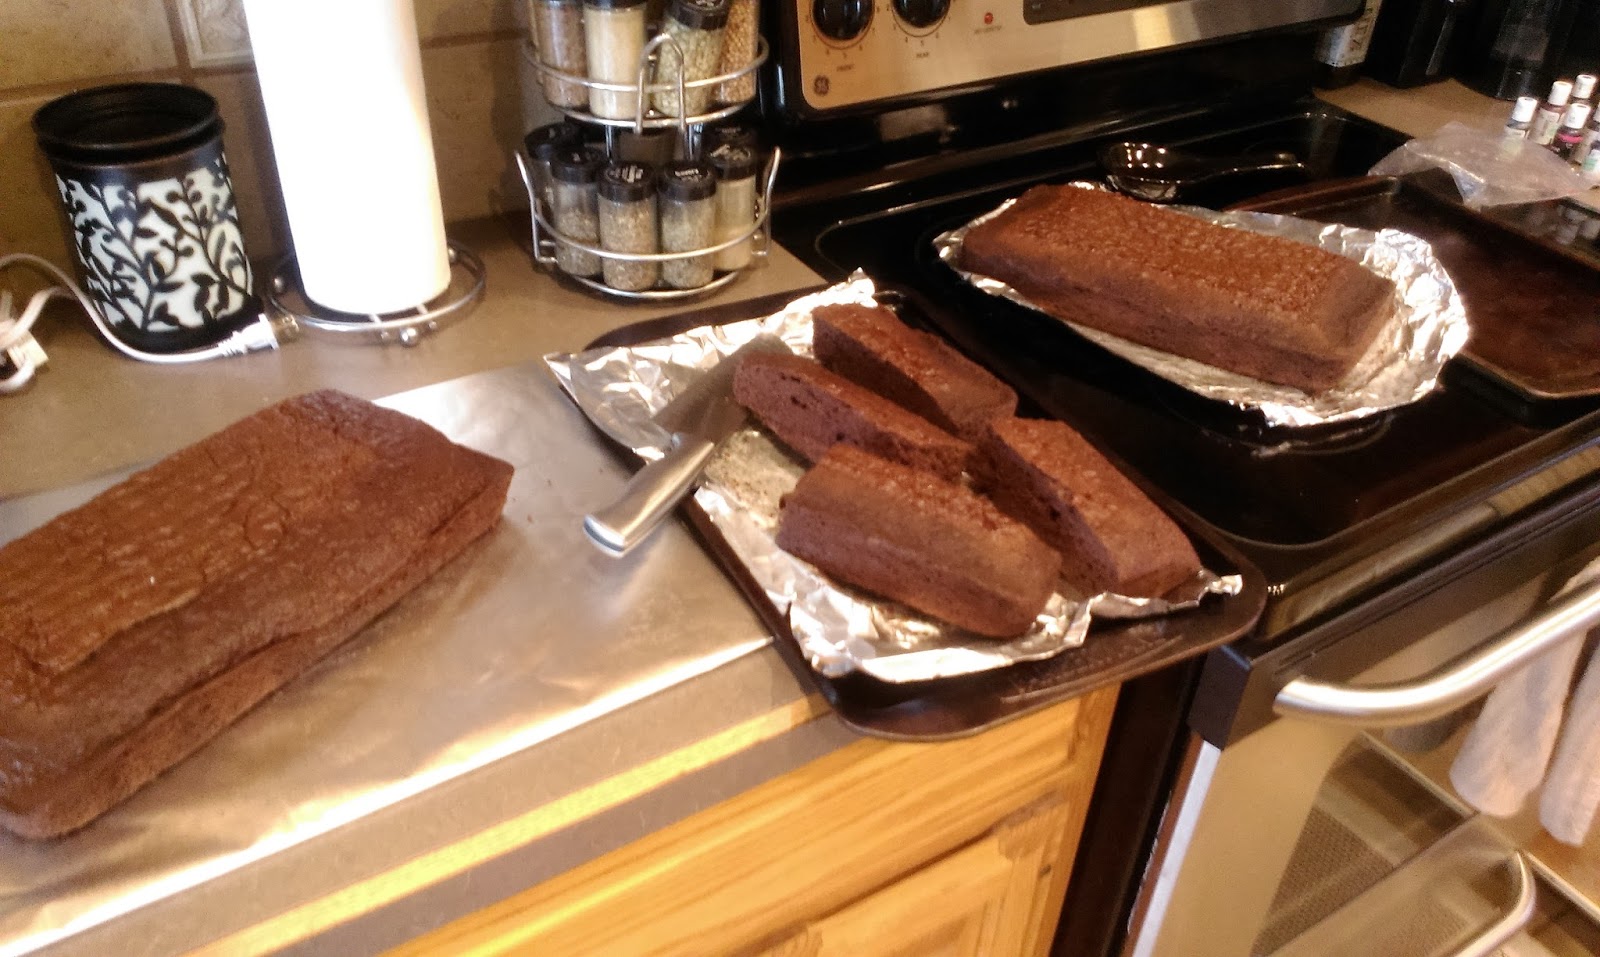
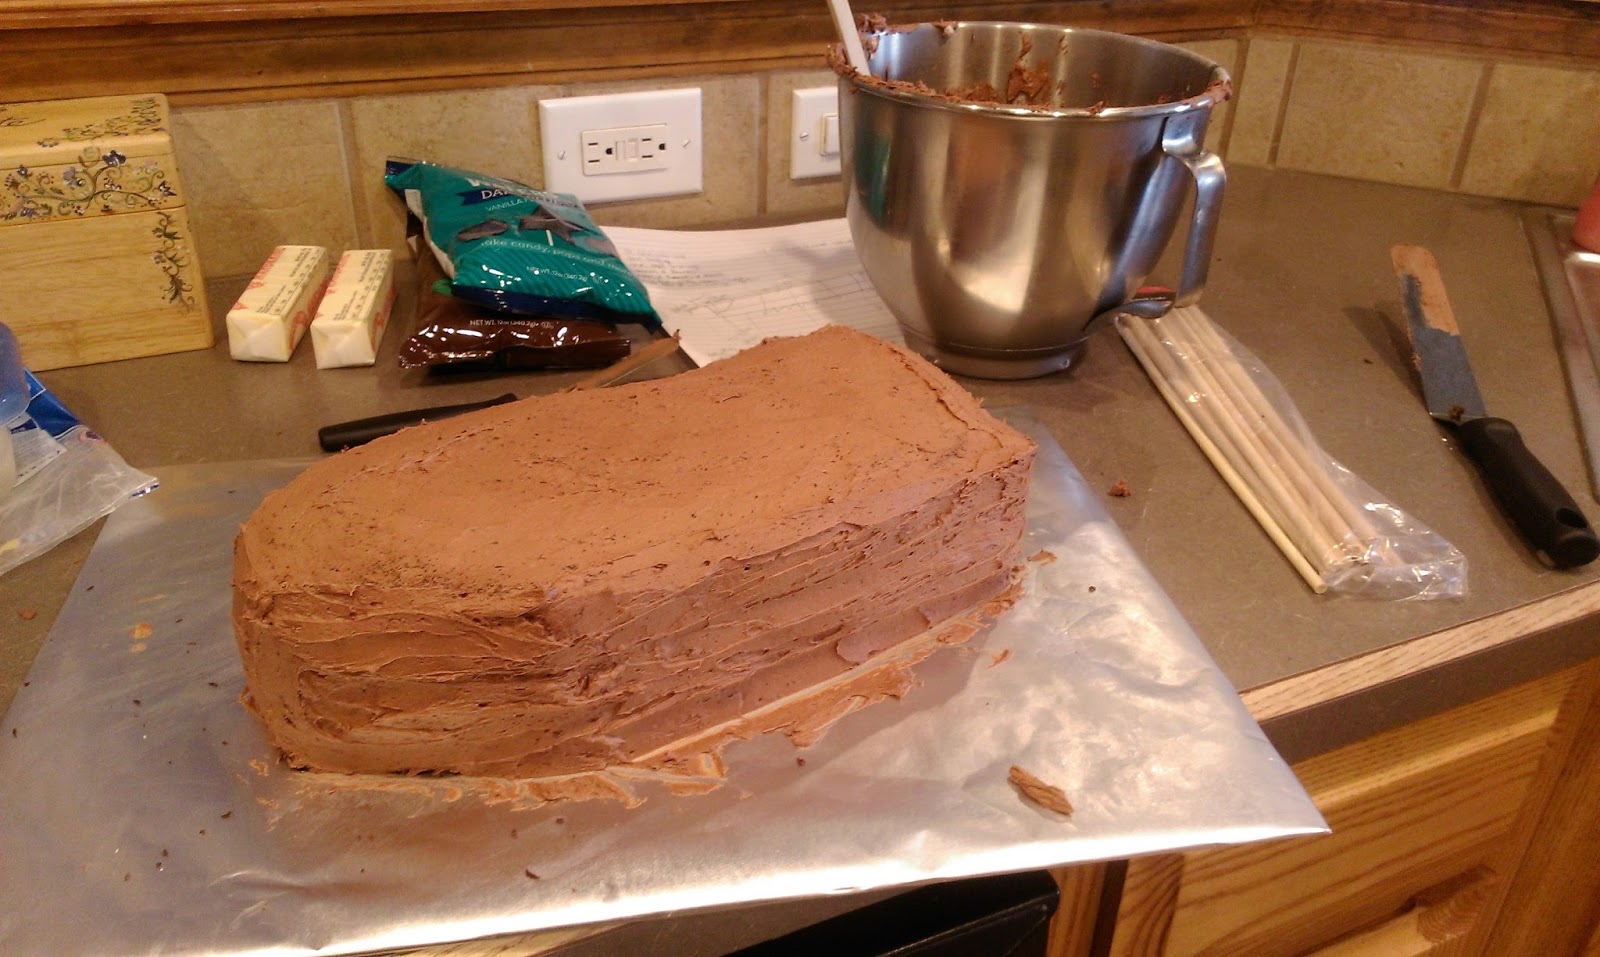
Just sit right back and you’ll hear a tale… Catchy theme song lyrics aside, really, follow me on this one–you’re gonna spend a literal boatload of time decorating this cake. You deserve to cheat and make it from the box. Especially since you need to make two cakes for the one ship. I have found in my multiple (still just two) years of serious baking that Betty Crocker is the best cake mix to doctor when you’re feeling lazy. This is going to be a very crummy (as in crumbs, not crappy) cake, so I recommend using chocolate with chocolate frosting to conceal a lot. I made one cake at a time using my cake jacking method: add an extra egg, sub milk for the water, and sub butter for the oil and double the amount. Make sure you are using all room temp ingredients for best blending! Follow box directions to blend. Place each cake into a greased 9×13 pan and bake in the middle of the oven for 30 minutes or until done. Let rest in the pan for 10 minutes before turning each cake onto its own pan lined with non-stick foil. Place in the freezer to cool and harden to make for easier cutting later.

You didn’t think this would be booze free, did you? A pirate’s cake requires a bit ‘o grog. In this case, Salted Caramel Baileys. I used my favorite chocolate buttercream recipe, but since this is a huge cake, I doubled the recipe and used almost ALL of the frosting. I also substituted the Baileys for the heavy cream; if serving to child pirates, I’d skip that step. If you want to create “waves” around your cake, add the cocoa powder LAST so you can take a decent glob of white frosting to do so before you turn it chocolate with the powder. Once your frosting is made and the cakes are mostly frozen, prepare ye knife fer stabbin’!

And prepare for a crappy photo montage! First, level each cake. Then cut each cake into a 6×13 rectangle. Be sure to save all your scraps as you’ll use most of them!

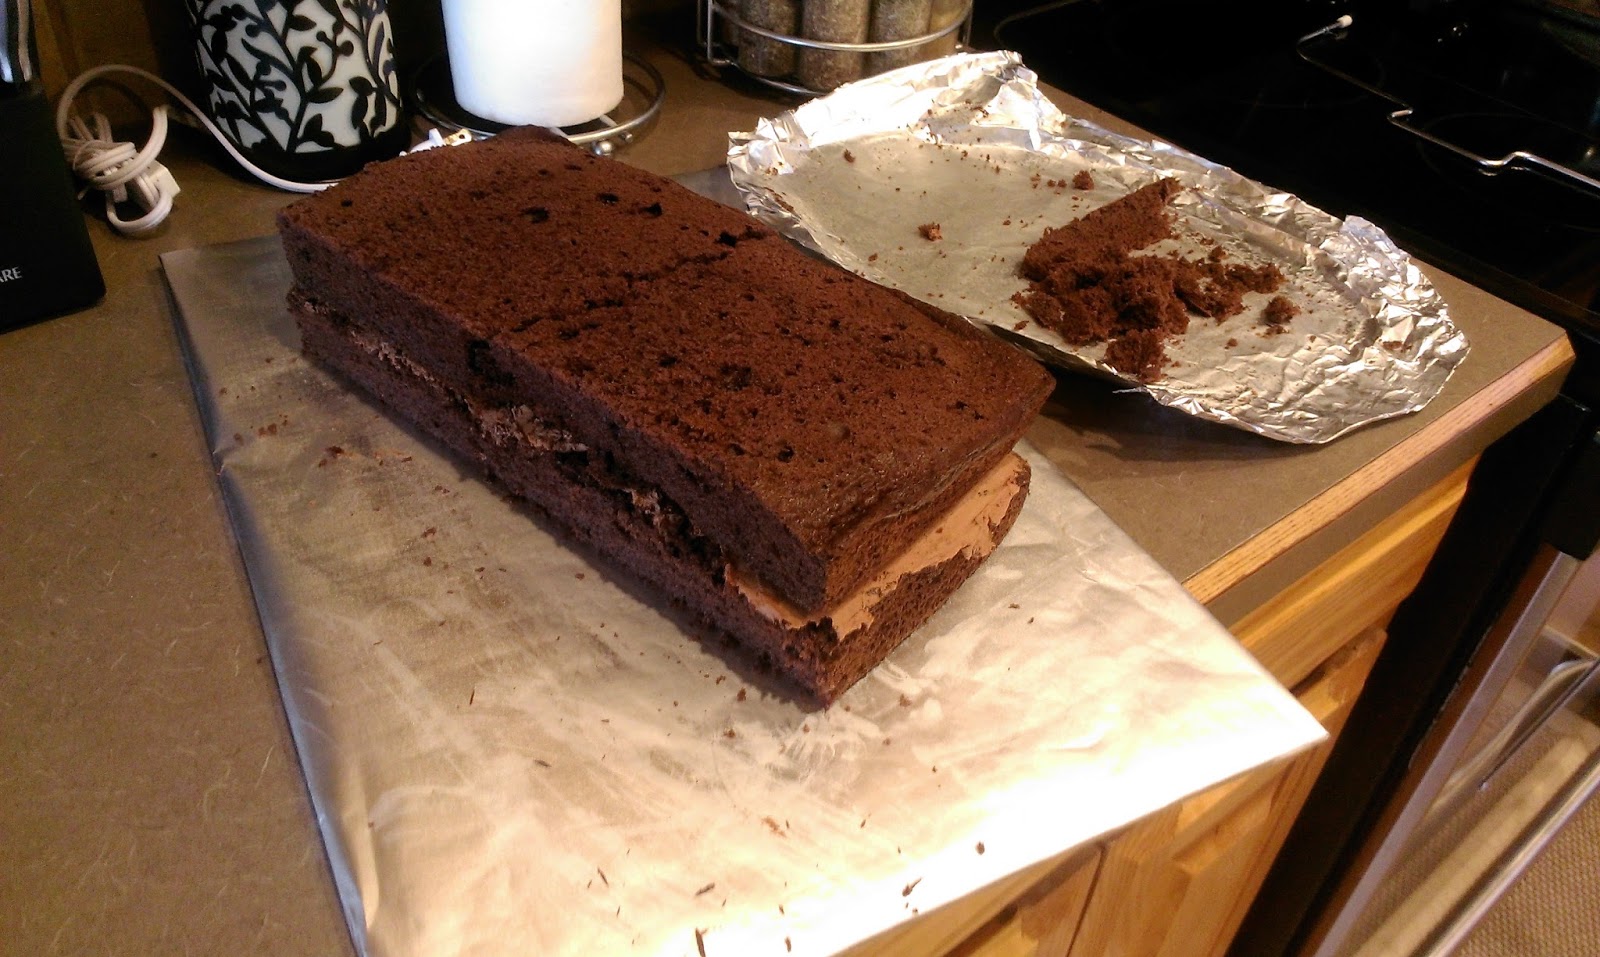
Place your first 6×13 rectangle onto a large cake board and place a glob of frosting on top. Adjust and center the other 6×13 rectangle on top of this. 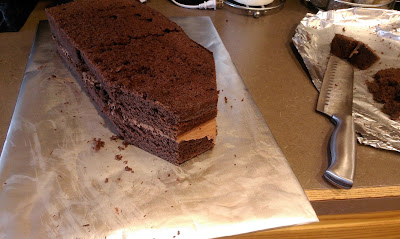
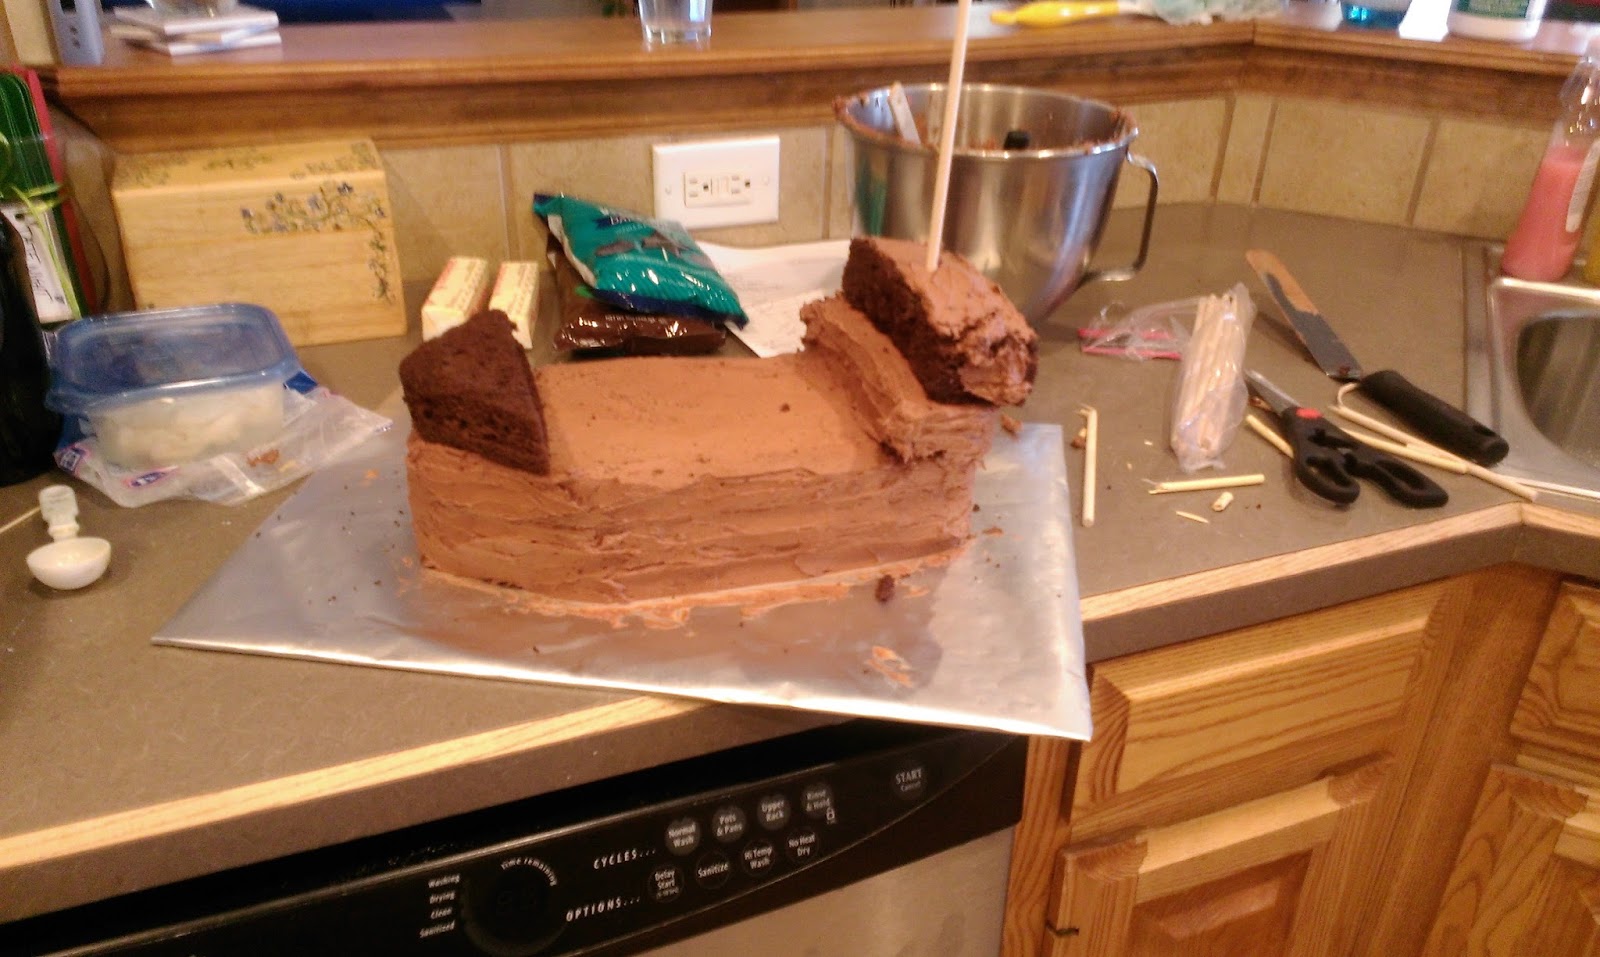
Then simply trim the front end of the ship (or bow as we pirates call it) to get a nice shape. 
There will be crumbs. So many crumbs. So don’t skip the crumb coat step. Place into the freezer to set along with all the other cake scraps (this will help when you need to frost them in a moment). Give this step about 30 minutes. 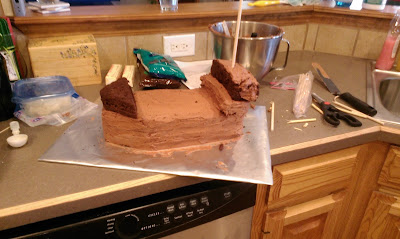
You’re going to need cake dowels for masts and to keep the cake from falling apart. Now take one scrap and place at the ship’s bow. Trim the sides to even it up with the rest of the front and then coat with a layer of frosting (not pictured). Here’s the tricky part: take a scrap and place it evenly with the back of the ship (stern, ye plebeian). Ensure the edges are even with the rest of the ship’s body/hull; now take another scrap and cut it so it is even with this piece. Place one of these scraps on the stern and frost all sides of this layer. Then take the other scrap you cut and place it slightly to the back of the piece you just frosted.This will create a ledge and cool overhang. Give this a layer of frosting. Trim down two dowels so they will fit flush with the top layer (I hadn’t trimmed mine yet in this picture). Place dowels in the left and right sides of this piece. 
Don’t worry, we’ll make it pretty later I promise. Put this in the fridge (my freezer was NOT tall enough for this) to set for a half hour. 
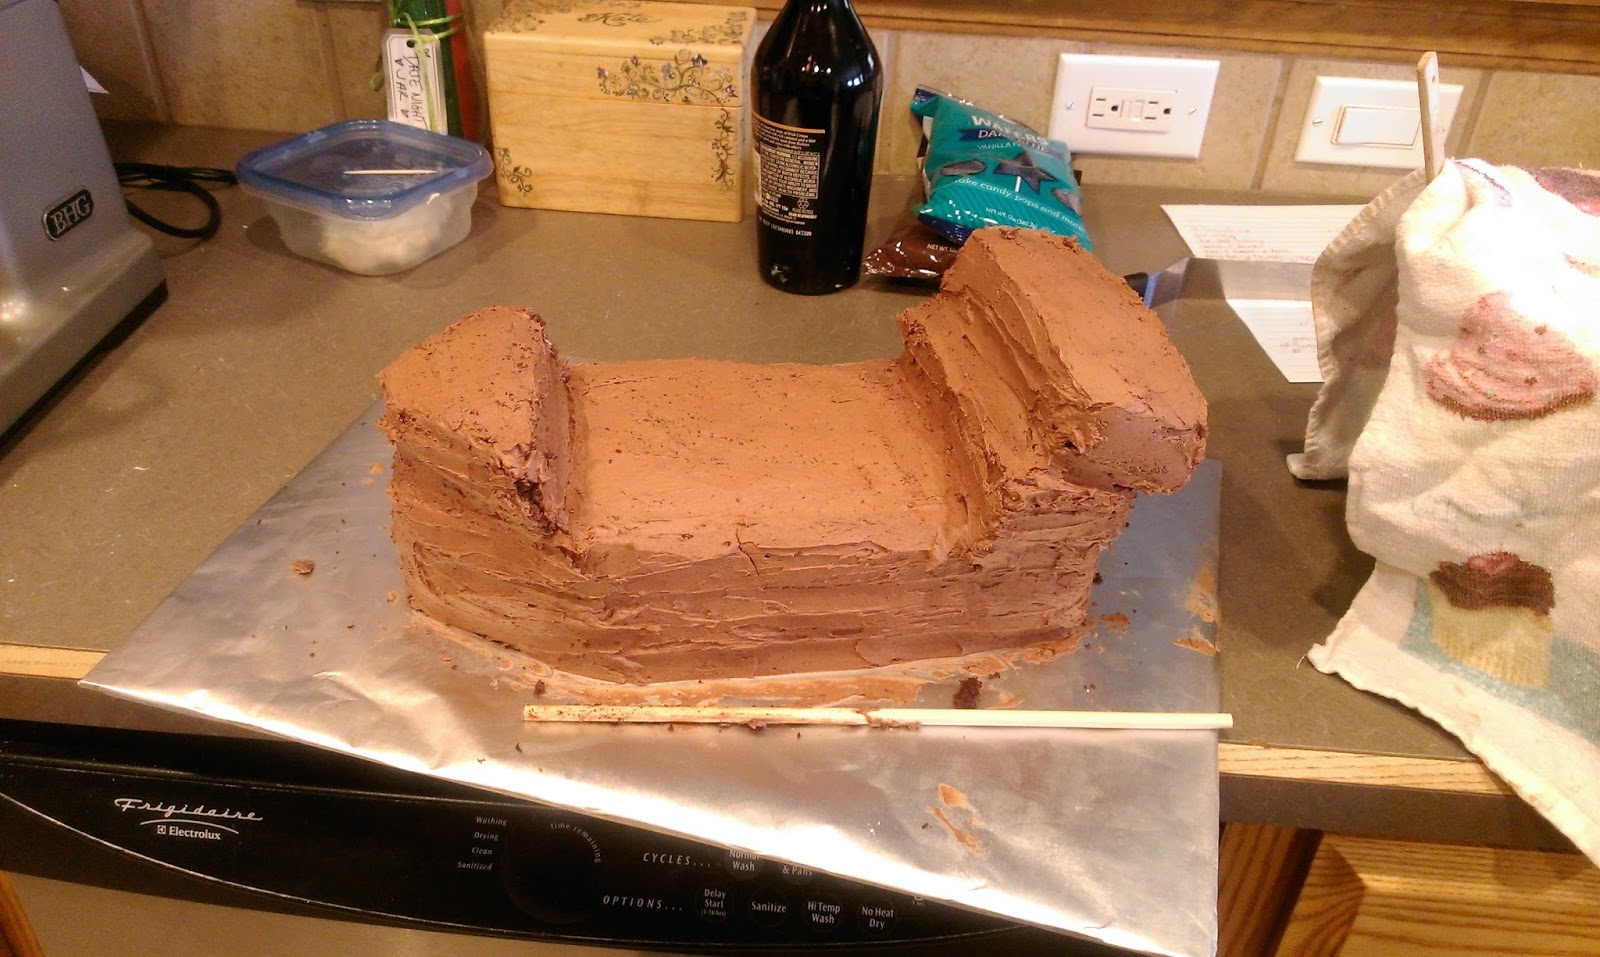
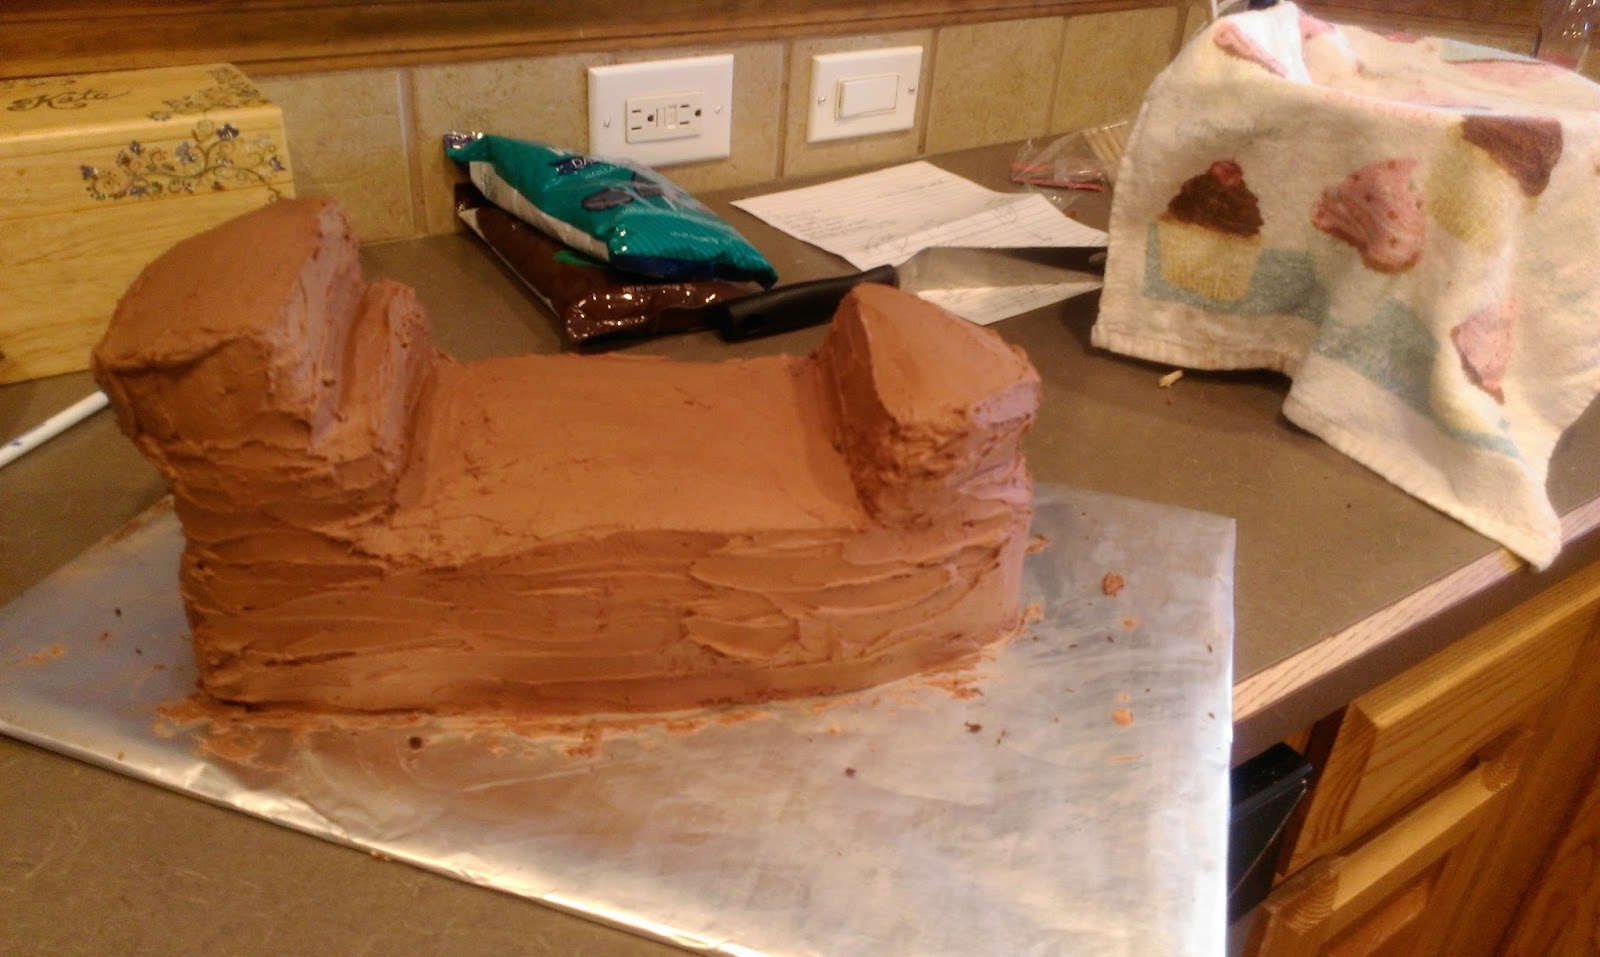
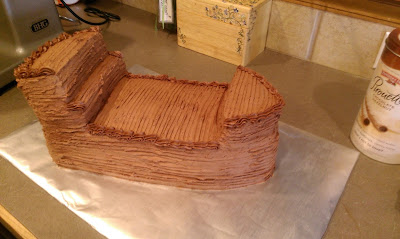
Add one final coat of frosting, but I promise this layer will be 10,000 times easier than the crumb coating of all those nooks and crannies. 
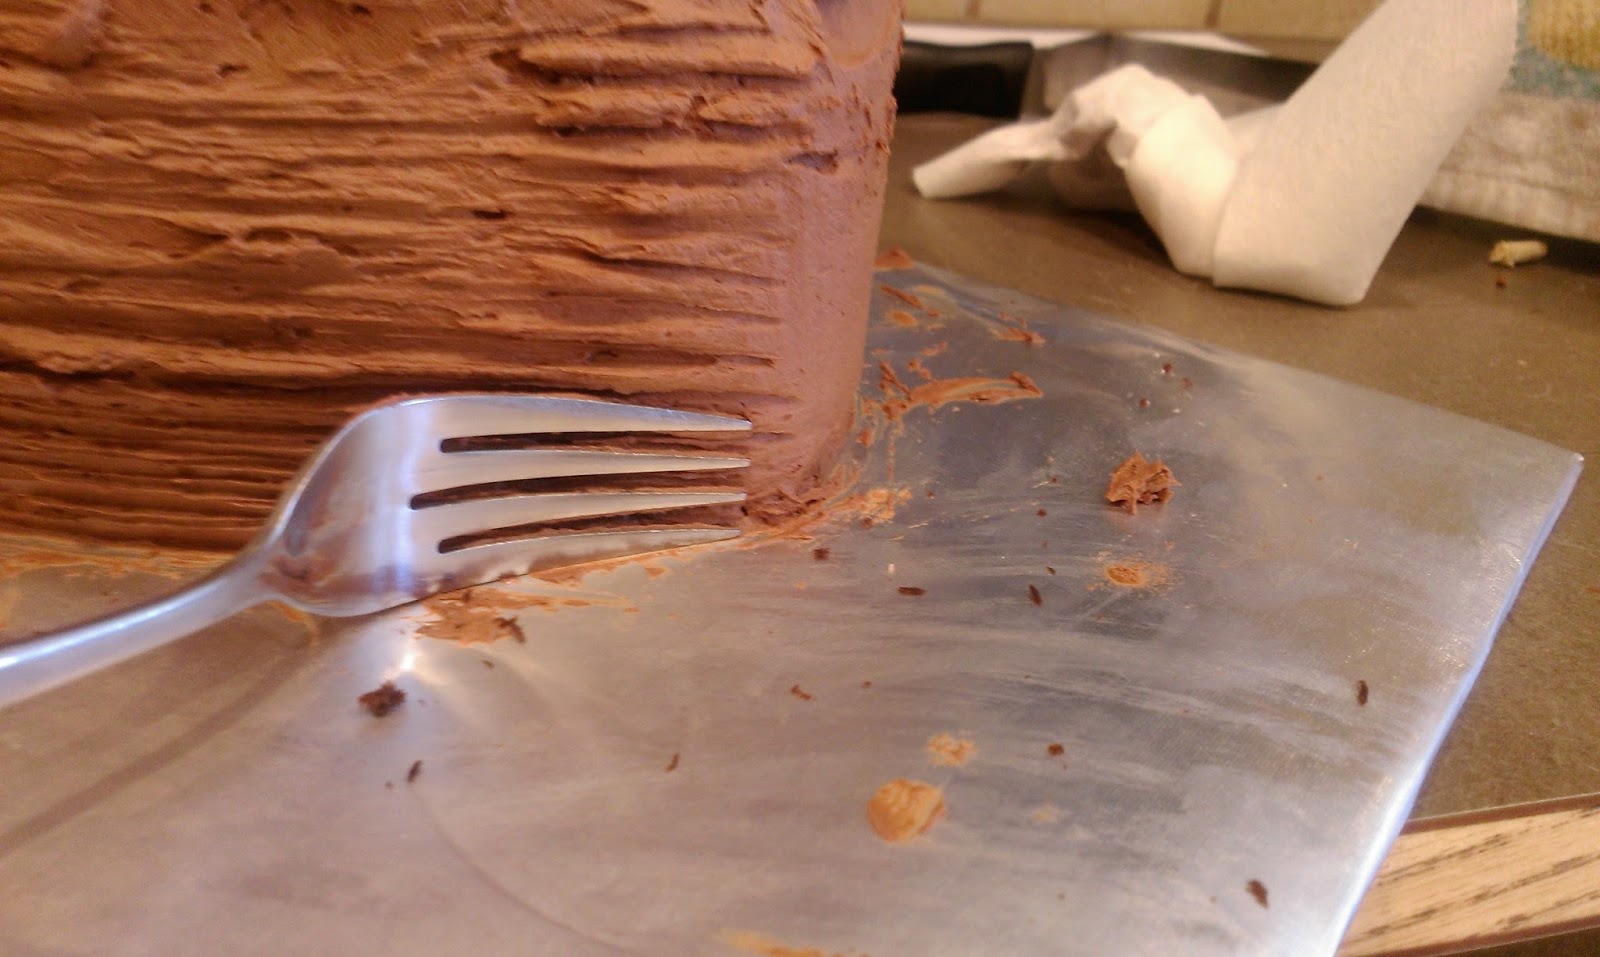
To create a wooden plank look, take a fork to the side of the cake immediately after you’ve added the final layer of frosting and slowly rake it down the length of the cake. Repeat all over. You can come back in and remove some of the larger chunks of frosting by hand. 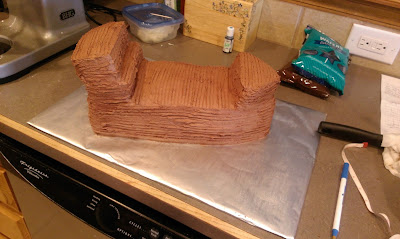
But this really gives off a cool effect, so don’t skip this step. It is probably the easiest part of the cake!! Place in the fridge while you make the masts! 
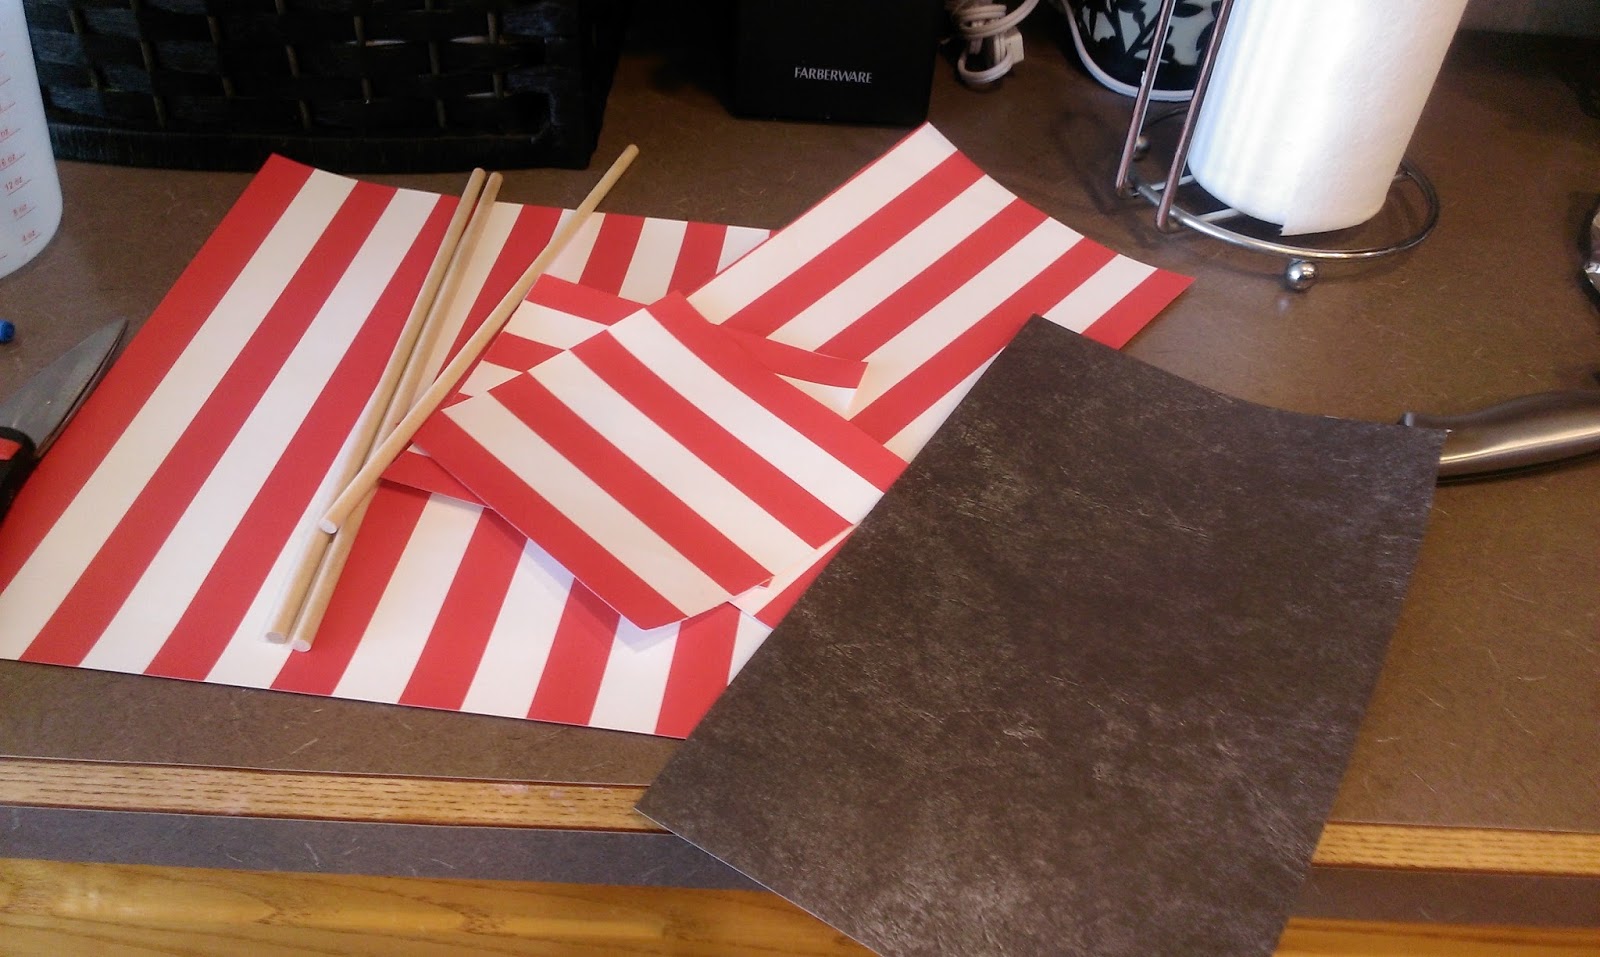
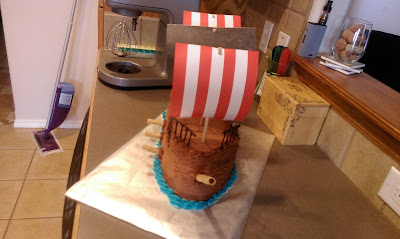
I grabbed a couple of sheets of scrapbook paper from Hobby Lobby for this. I trimmed them down to medium squares and punched one hole in the top and bottom of each piece. 
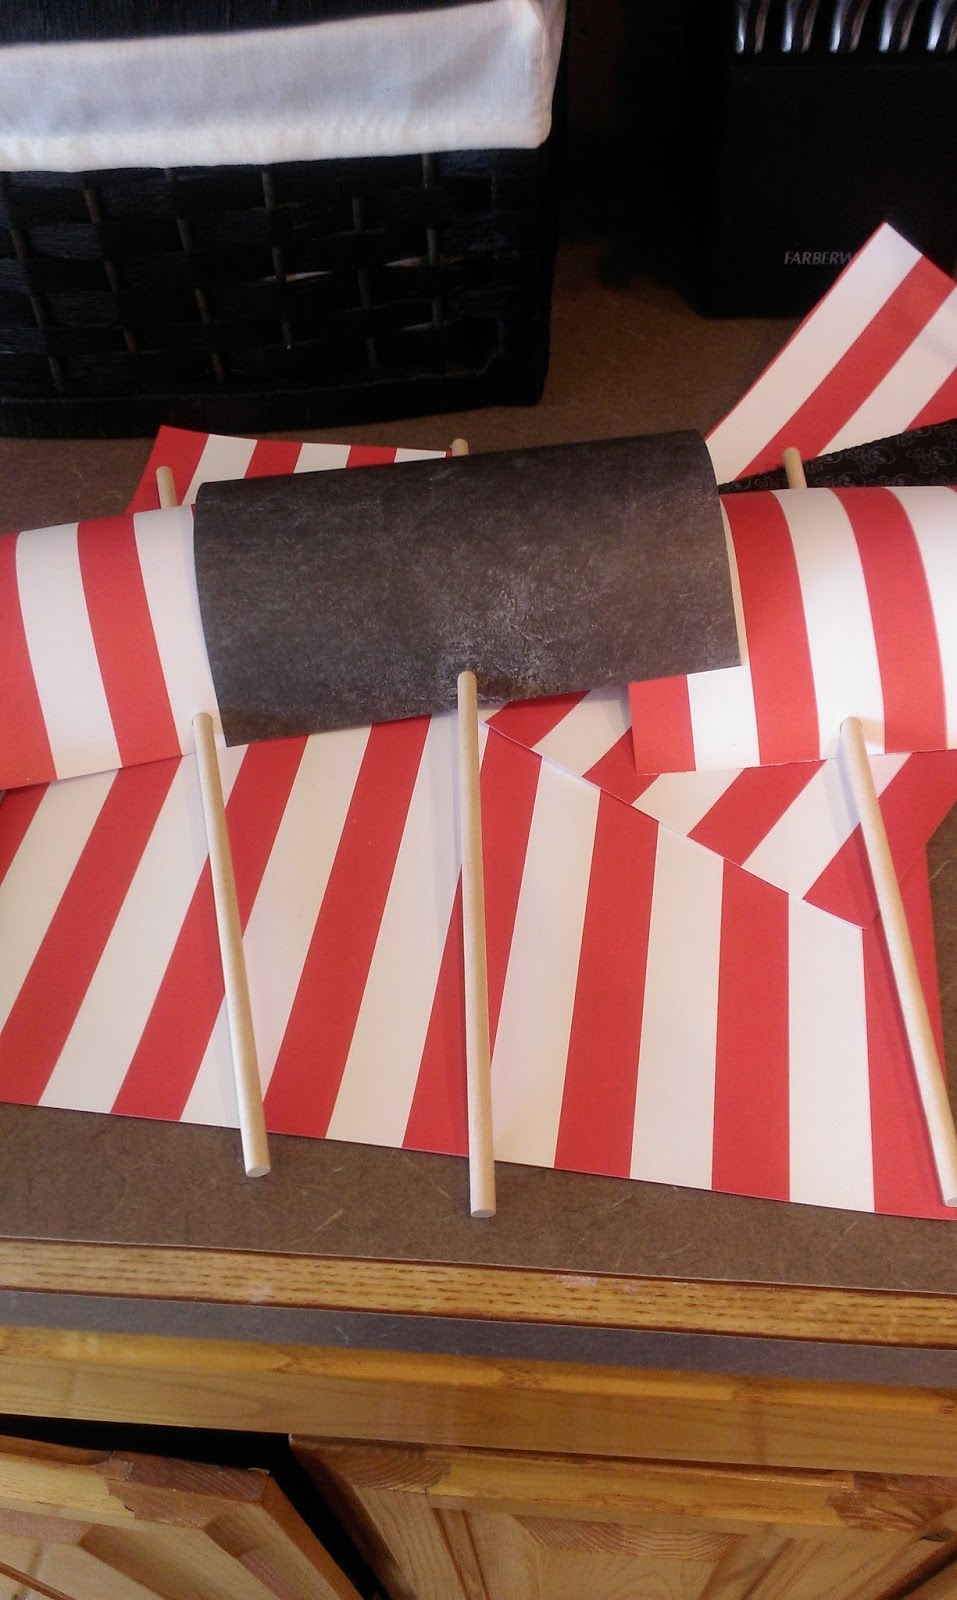
Then I slid them onto a cake dowel. The decorating gods were kind to me here–the hole punch was the exact same size as the dowels, so no crying or extra work was required here. 
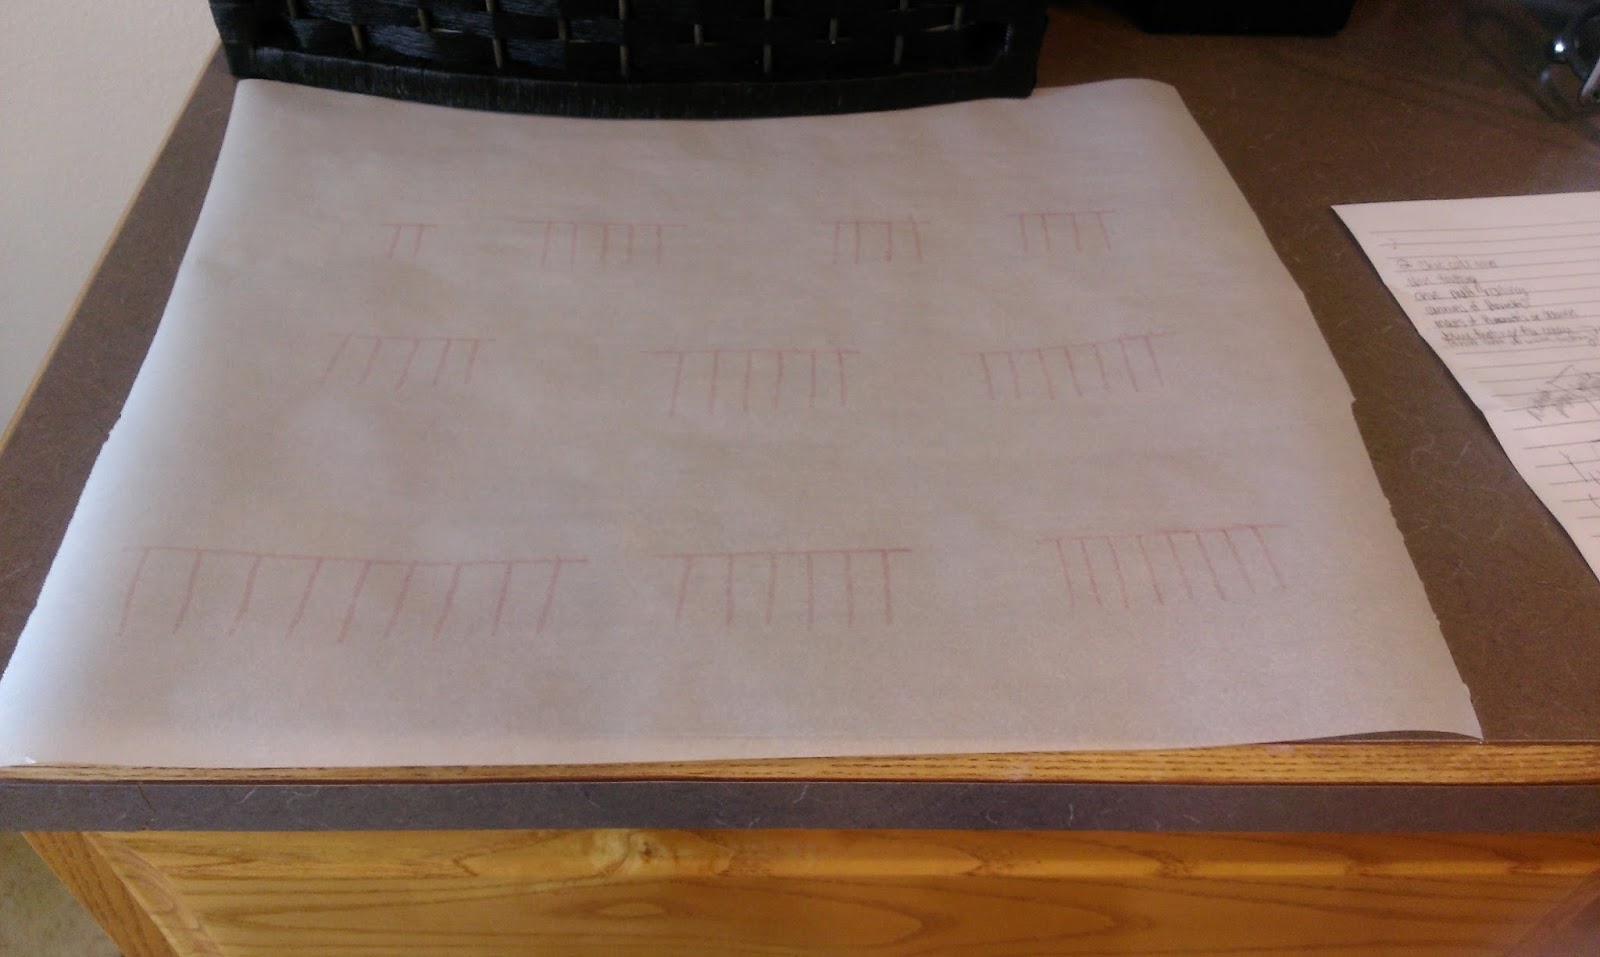
I then measured out all sides of my cake and came back in and drew the correct sizes of railings onto a sheet of Parchment paper. Don’t forget to flip this over! Don’t want people eating Sharpie marker with a side of frosting. Unless you’re trying to sneakily poison your guests like a true pirate. 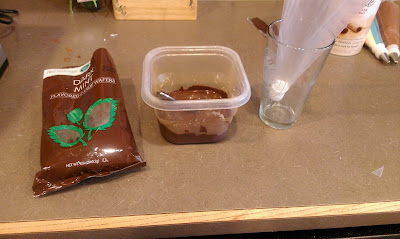
Melt half a bag of chocolate melts (I used mint, went great with the frosting). Place the melted chocolate into a piping bag fitted with a small round tip (I used a #3). Let this cool off for about 5 minutes to make piping manageable. 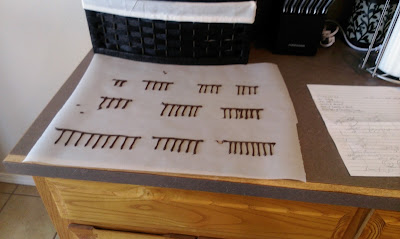
Then come back in and pipe over your lines! This is so easy when you’ve got something to trace, I promise. Let this set for about 15 minutes at room temp. 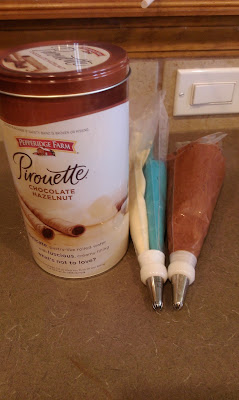
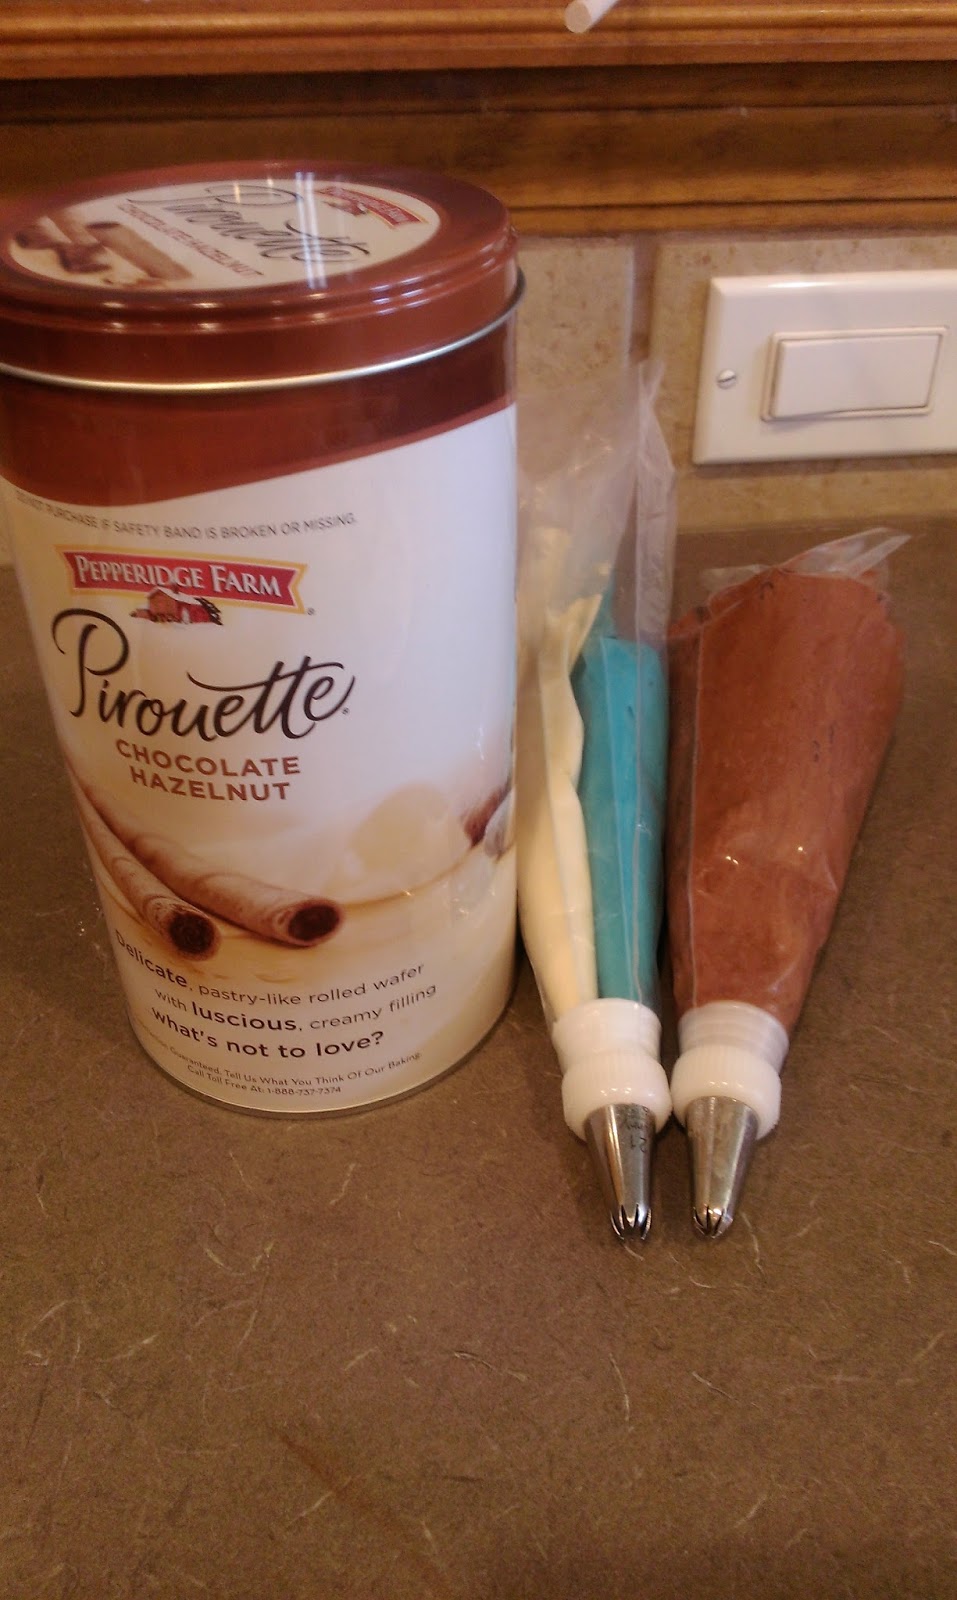
Finally, an excuse to use more Pirouettes. Remember at the beginning of this tutorial (yes, still the same blog post and everything) when I told you to save some frosting before you added cocoa powder? That’s finally where this comes in. I wanted a swirl of color, so I placed some of the plain white frosting into a piping bag and then dyed the rest blue before placing into another piping bag. Snip the tips and place both bags into a third bag with a #21 tip attached. Then take your remaining chocolate frosting and place into another bag with a #21 tip.
Take the cake out of the fridge and pipe a shell border on the edges like I did here. This creates a platform for your railings! And it makes things look pretty. I love a functioning twofer. 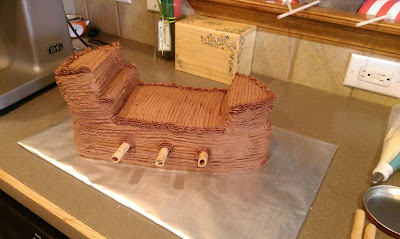
You can chop one Pirouette in half and place each one end-side-out in the side of the cake to create cannons. You’ll need one more half of a Pirouette to complete the trifecta. I piped a circle around them to keep them in place. 
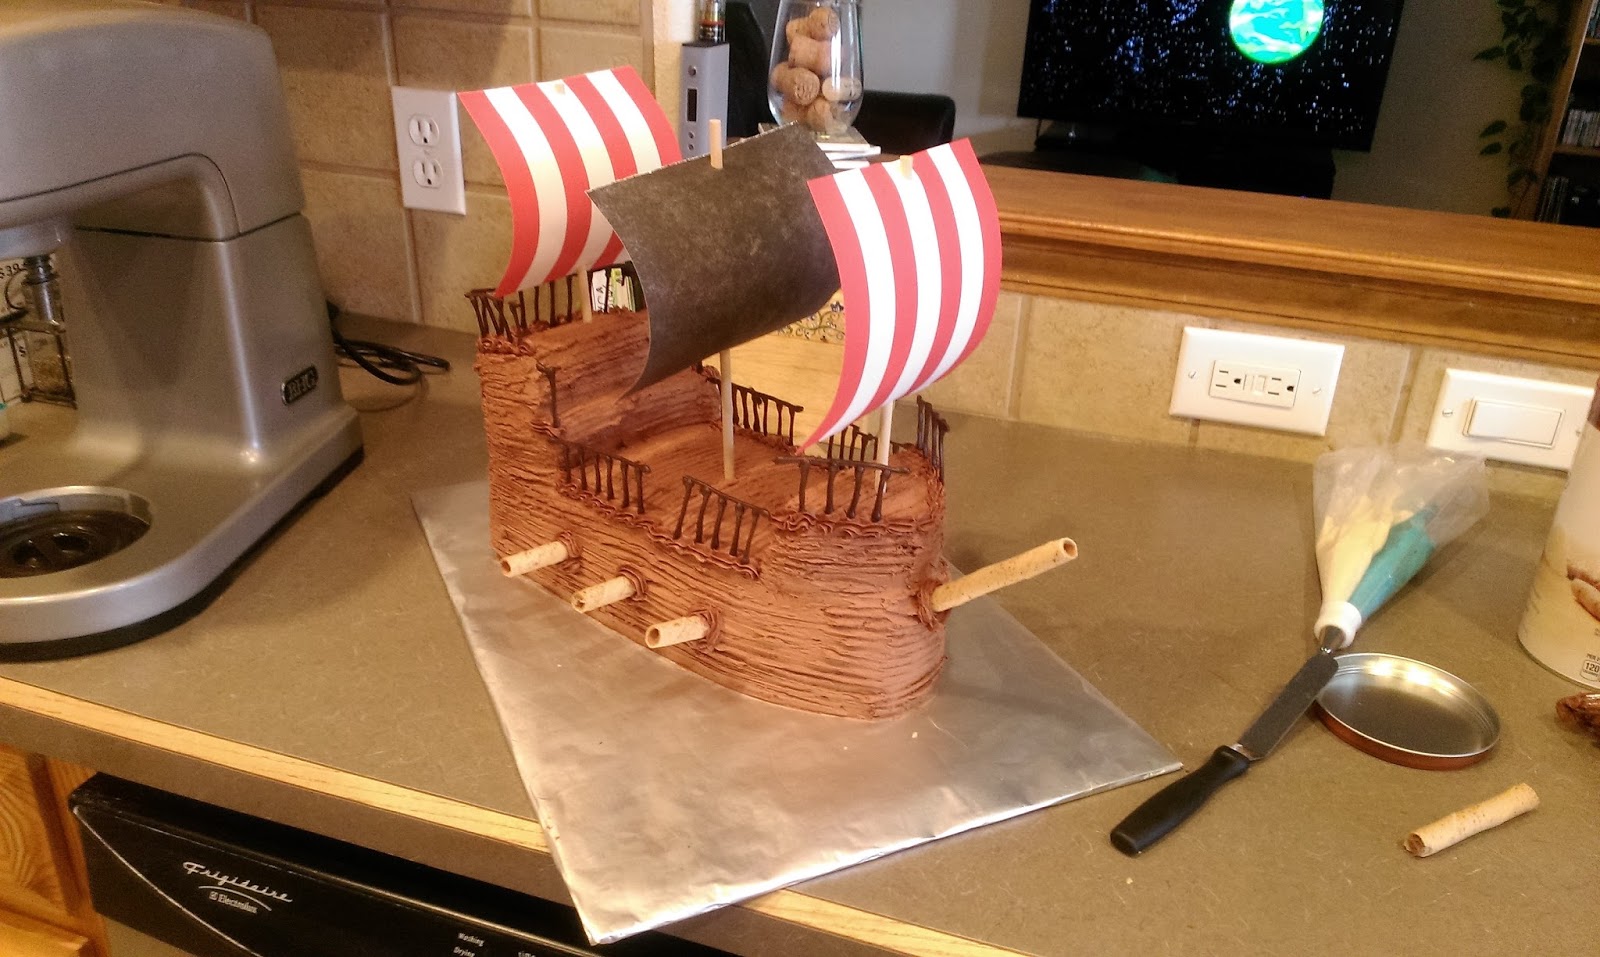
Add a final full Pirouette to the front of the cake and then add each mast in (wait to do this until you’re ready to serve unless you have a tall enough fridge to fit it). Gently add each railing into the piped shells, and you’ve got a completed pirate ship!! 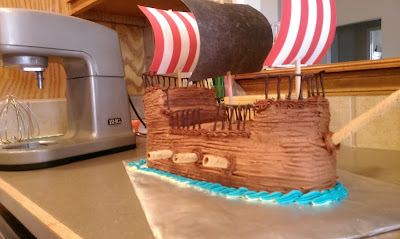
But I wanted cool waves. I just piped a trail of shells down the side and back of the cake. I used blue on top of the bag for most and white on top for the back to create a cool wake-like effect. Did I take pictures of that? No. Because I had been on my feet for seven hours and simply forgot. I now understand the phrase “being dead on your feet” quite well. So we lost a patio chair and I was reminded drunk people can’t be entrusted with nice things, but they will totally eat all your spread of crab dip, a veggie tray with a bell pepper octopus, deviled egg pirate ships, seaweed wraps, and other various piratey foods (including and not limited to a bowl full of lemons to prevent scurvy). They’ll also politely beg you to cut into your damn cake already because they might die if you don’t. And then a hush will fall over your entire house as a bevy of swashbuckling pirates fill their mouths o’ plenty with delicious cake. I will say this doctored Betty Crocker cake combined with the Salted Caramel Baileys was absolute nirvana. It was the “Calgon, take me away!” moment I so desperately needed thanks to the level of discomfort my pirate boots were causing me. I literally wanted to chop my feet off, so now I totally get the benefits of being a pirate with a peg leg (wooden leg, still more comfortable than 6-inch stiletto boots). ‘Til next time, my fellow eaters!
I would definitely walk the plank if cake was involved. -
When Life Hands You Lemons, Bake Them.
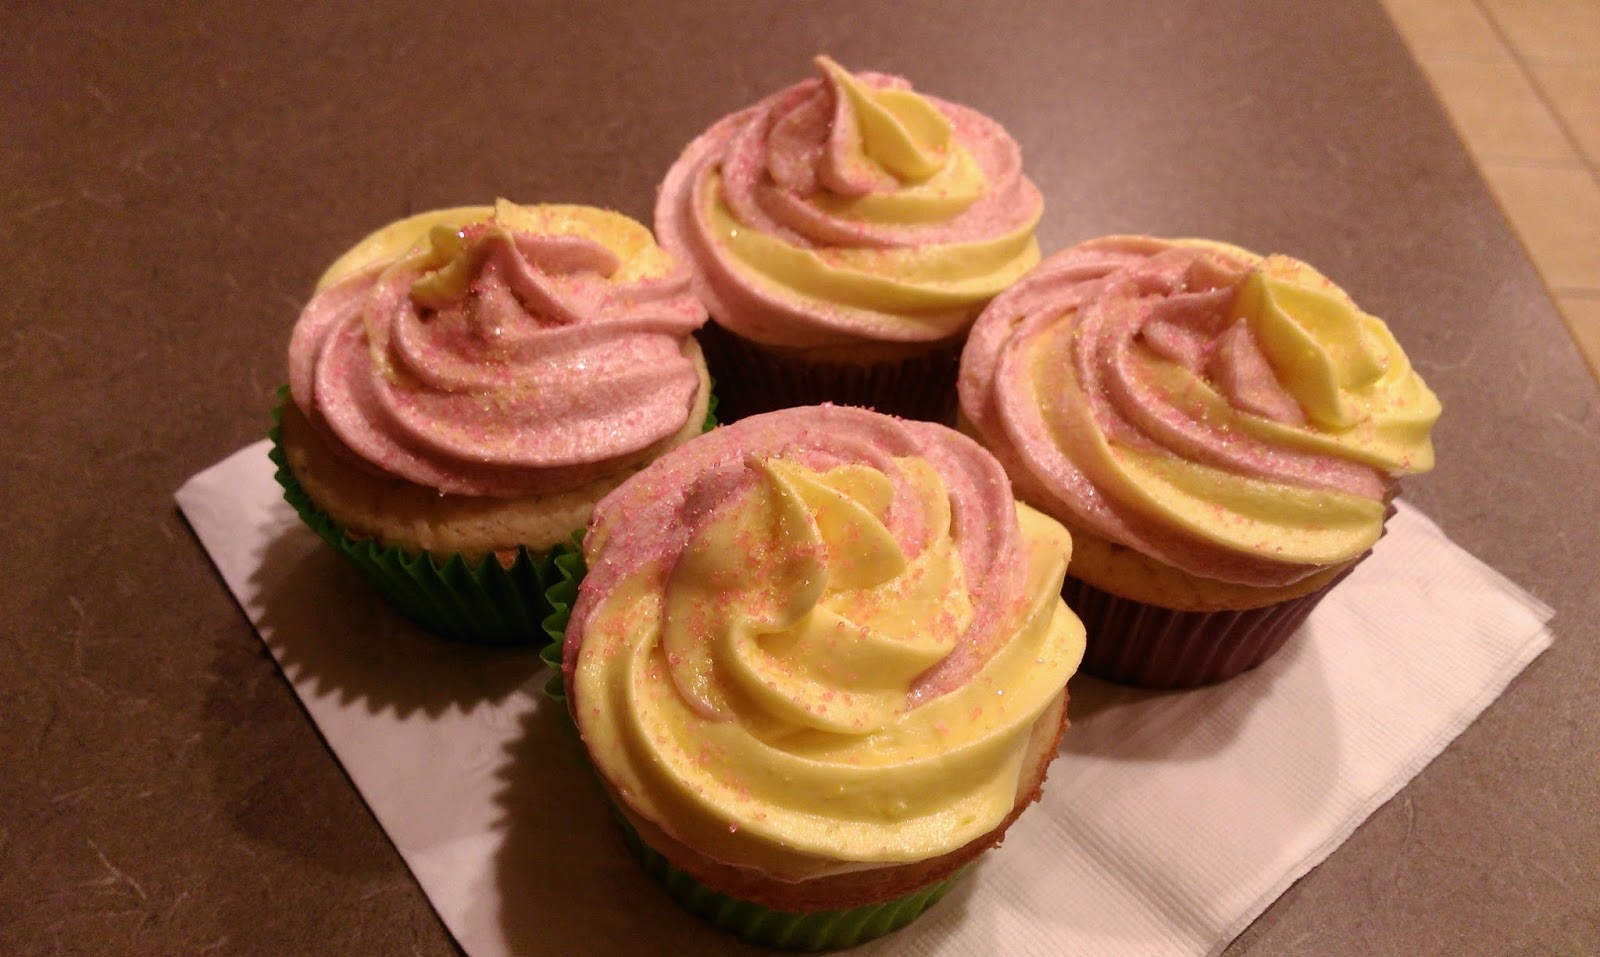
Lately, winter and spring seem to be having more back and forth fights for air time than presidential candidates at a debate. Last Sunday my husband and I spent the afternoon laying out in the yard soaking up the sun. This Sunday we’re hunkered down inside with the heater on. I wish I could just blame eastern New Mexico for this, but it seems to be a country-wide issue (again, just like those darn politicians! Who knew weather and politics held so many similarities? Lots of hot air and inaccurate predictions with both). I hope someday soon I don’t have to start my day in a parka and end it in shorts. I feel like that’s really not asking for much…but since my power of weather control seems to be nonexistent, the one thing I can do to trick myself into believing spring is really here to stick around is by baking. The power of food, people. So what food group says spring has sprung better than fruit? The day something other than seventy-five varieties of apples hits the produce section, I know to prepare myself for warmer weather. Thanks once again to the betrothed couple that asked me to bake cupcakes for their wedding, I was able to bring about taste bud-related climate change and provide further cupcake tasting samples with these lemon cupcakes with raspberry curd filling and raspberry lemon swirled buttercream frosting. Fortunately, the recipe is much less convoluted than the name.
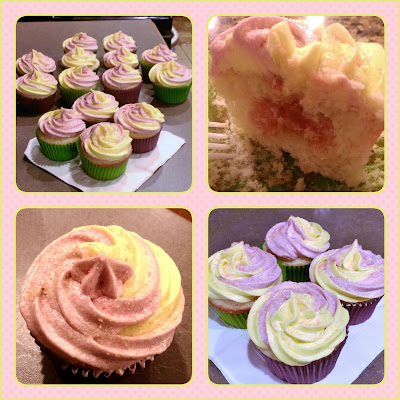
So bright and cheery that I’ve forgotten I’m freezing!! I took these bright and beautiful babies to a cookout last night…once the lid was removed from the cake safe, the smell of lemon and raspberry tickled my nose and immediately caused Pavlovian-style drooling (never has eating dessert before dinner been more tempting). I know lemon scent is usually reserved for cleaning products, but I promise this had a lovely saccharine scent and not one that makes you feel guilty about how long it’s been since you’ve even thought about scrubbing your kitchen cabinets. And the flavor. Wow. If you’re a fan of sweet and sour anything, these are perfect. And boy did they ever make me forget (or simply not care because they were so tasty) that it was quite cold out last night during the cookout…my jacket probably also helped out with that, but I can’t eat my jacket, so it is getting no credit here.
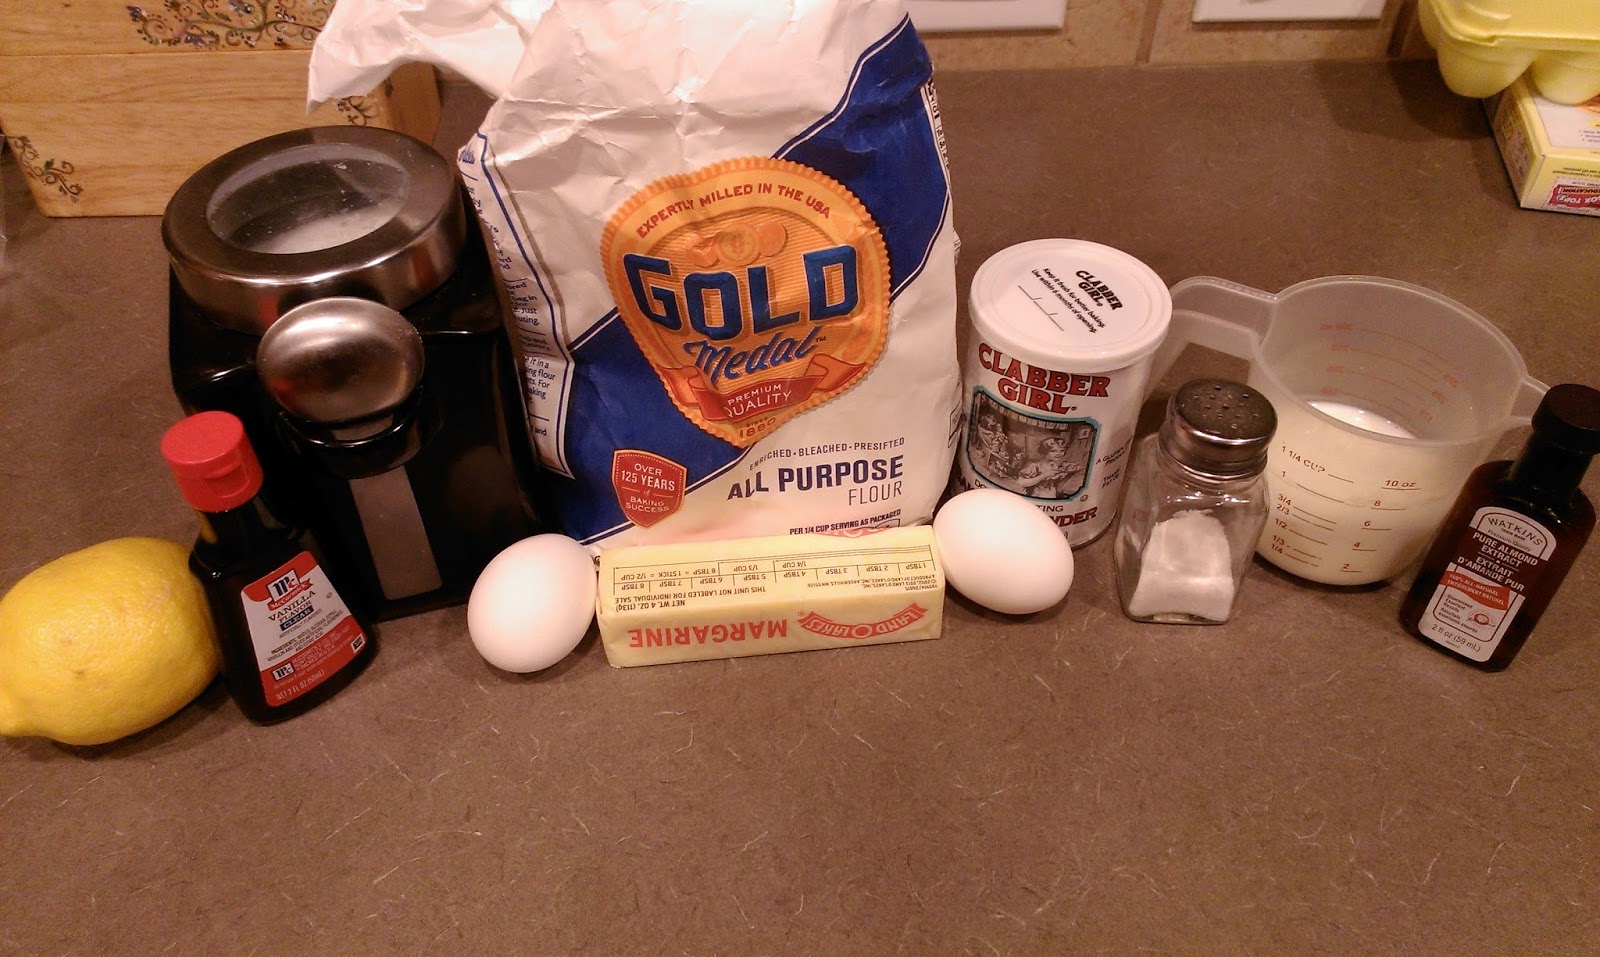
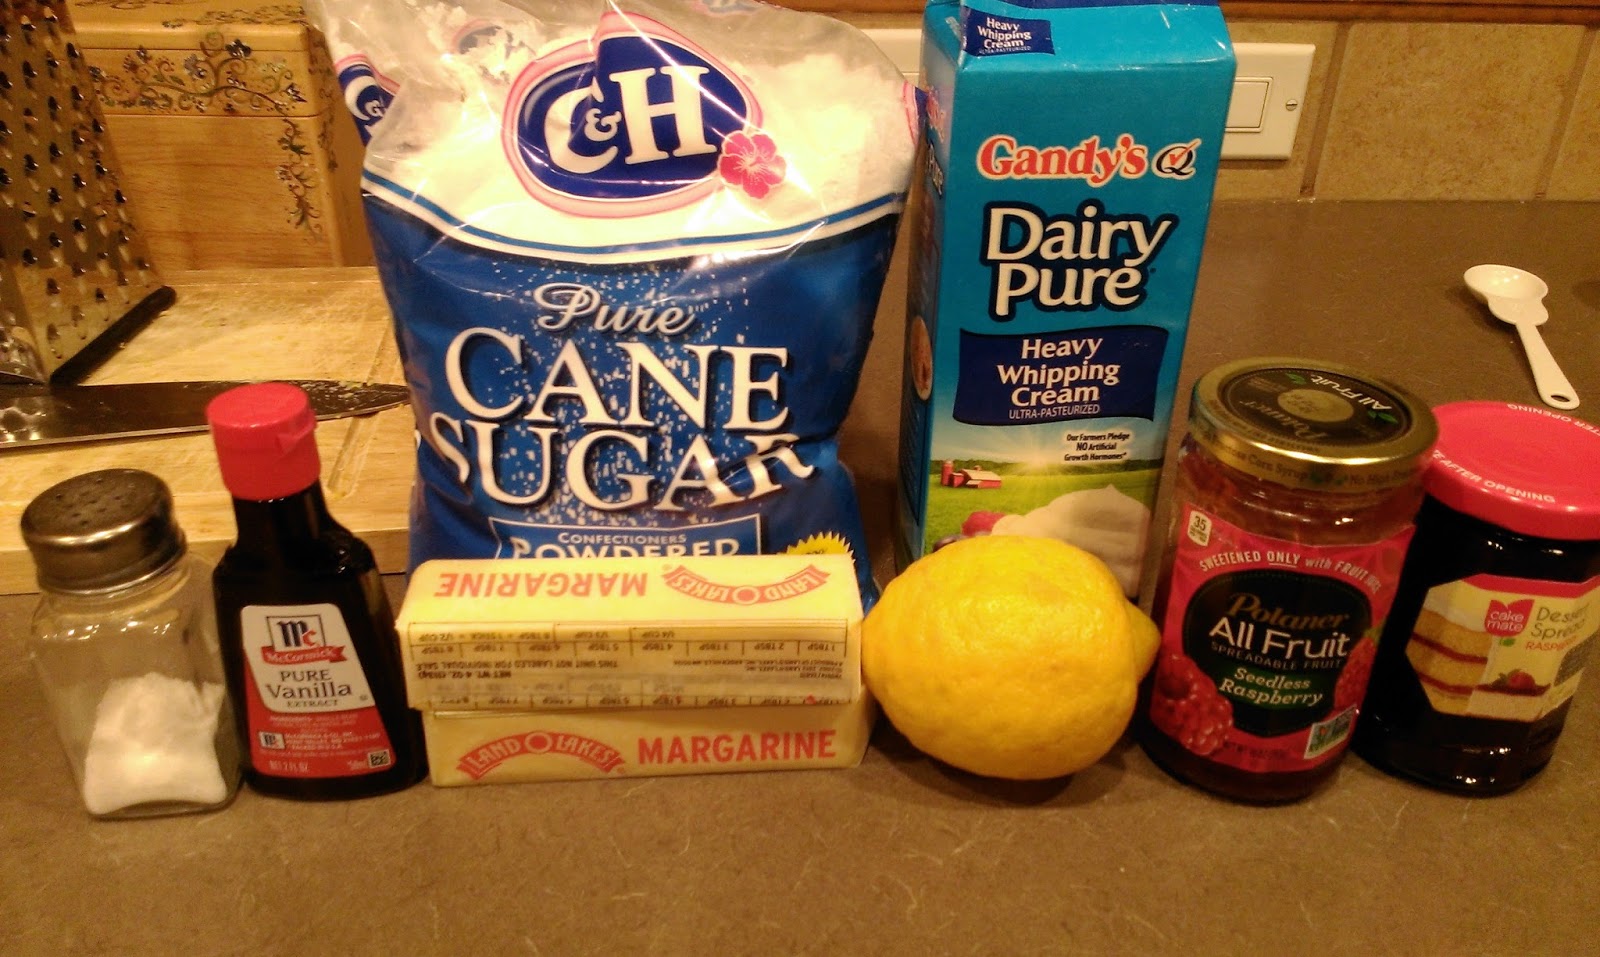
Prepare to zest lemon for days. I found this recipe after tons of searching for lemon raspberry cupcake recipes. Not lemon cupcakes with raspberry frosting or vice versa. I wanted a full on fruit storm in these cupcakes, and this recipe was easy to adapt and fit the bill. I went purely from scratch for these, but I’ve got corners to cut and tricks to share if you’re not being quite as Martha Stewarty as I like to be. Gather up:
- 1 1/2 cups of flour
- 1/2 TBS baking powder
- 1/4 tsp of salt
- 1 cup sugar
- 1 stick of butter at room temp
- 1 TBS of lemon zest from a fresh lemon (this is pretty much the whole lemon to get 1 TBS)
- 2 eggs at room temp
- 1 TBS of juice from said fresh lemon
- 1/2 tsp of vanilla extract
- 1/4-1/2 tsp of almond extract (I’m obsessed. I go for broke with almond extract)
- 1/2 cup of room temp buttermilk
A few notes here for quicker prep: you can use dried grated lemon peel in place of the fresh zest. This stuff is quite potent, so use one teaspoon in place of one tablespoon of fresh zest. I honestly prefer the dried stuff because it is smaller and less noticeable when it comes to texture but not taste…also, I don’t have to use a grater, so I save my knuckle skin! You can also use lemon juice from the bottle, but it won’t be quite as good as fresh. Use the same amount.
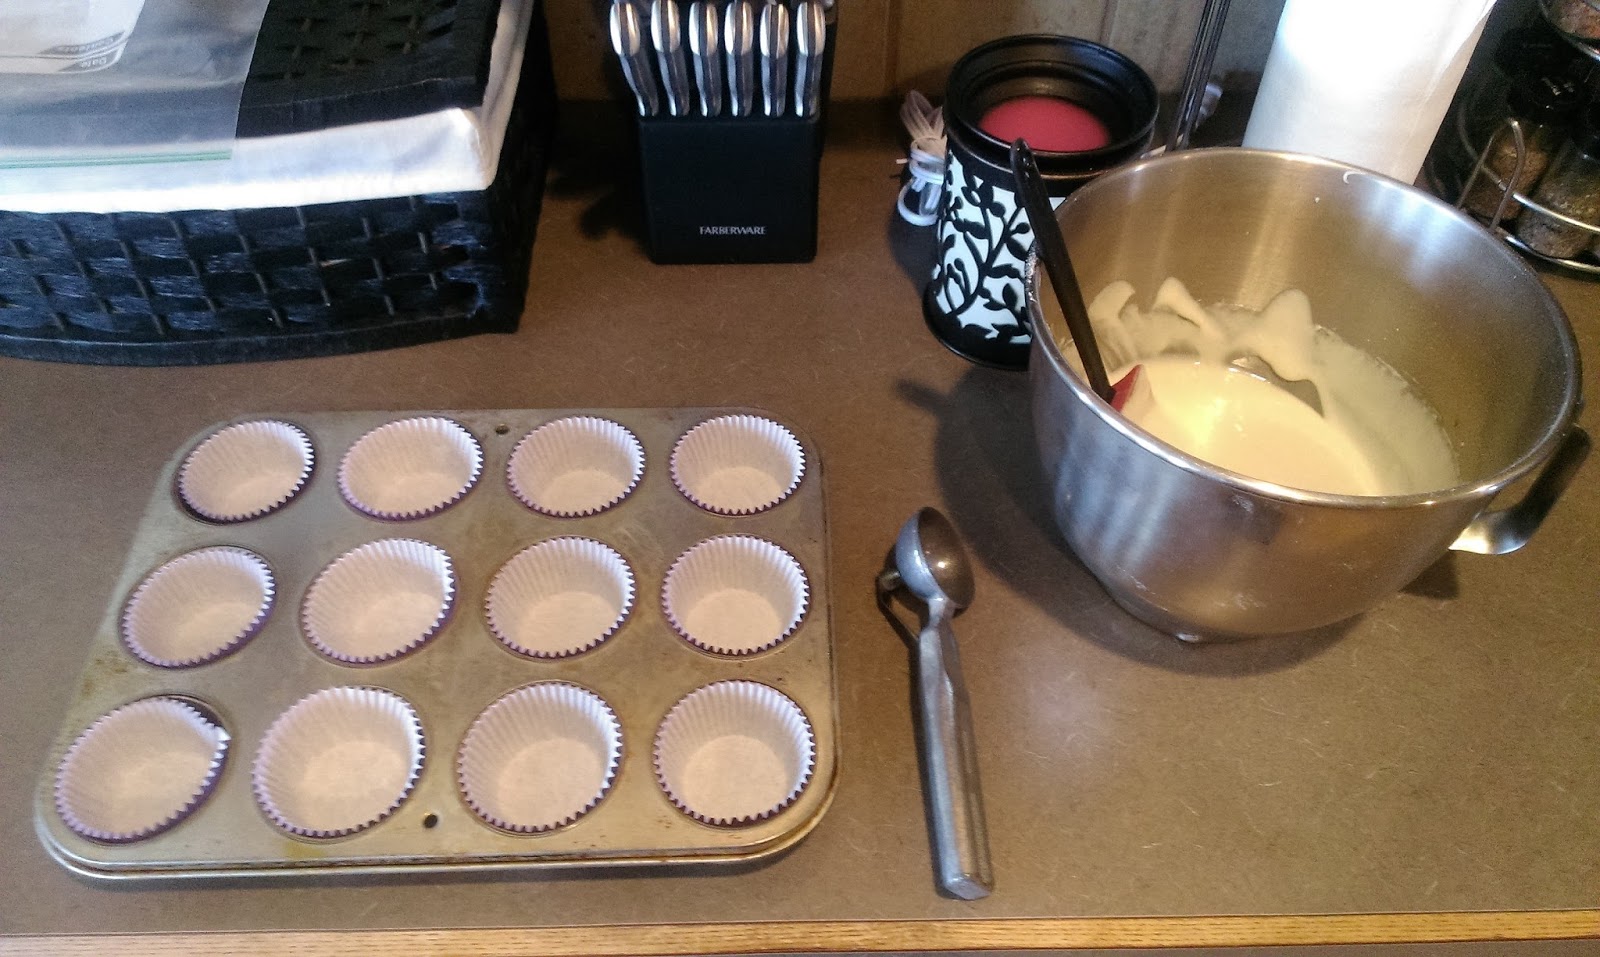
Preheat your oven to 350 and line a muffin tin…this recipe makes 14 cupcakes. In a medium bowl, mix the flour, baking powder, and salt and set aside. In your stand mixer, place the zest and sugar and use your hands to mix until the bowl is super fragrant; cream the butter in after this for a couple minutes. Then add in each egg, mix well, scrape the bowl, and add the juice and extract. Add in half of the dry mix and blend. Add in the buttermilk and blend before dumping in the rest of the dry mix. Blend well. This batter is nice and thick, so using the ice cream scoop trick I talked about in the last blog works perfectly. Fill your cupcake liners 2/3 of the way and bake for 16-20 minutes. The magic window for me was at 18 with the toothpick test.
So blonde! So zesty! Once cooked, let cool in the tin for 5 minutes on a cooling rack. Then remove from the tin and allow to cool completely on the rack. While cooling, you can make the raspberry curd filling! Few words are less appetizing than “curd,” but some of my favorite things involve it…cheese curds, for instance. Now I’m in sad, desperate need of poutine…

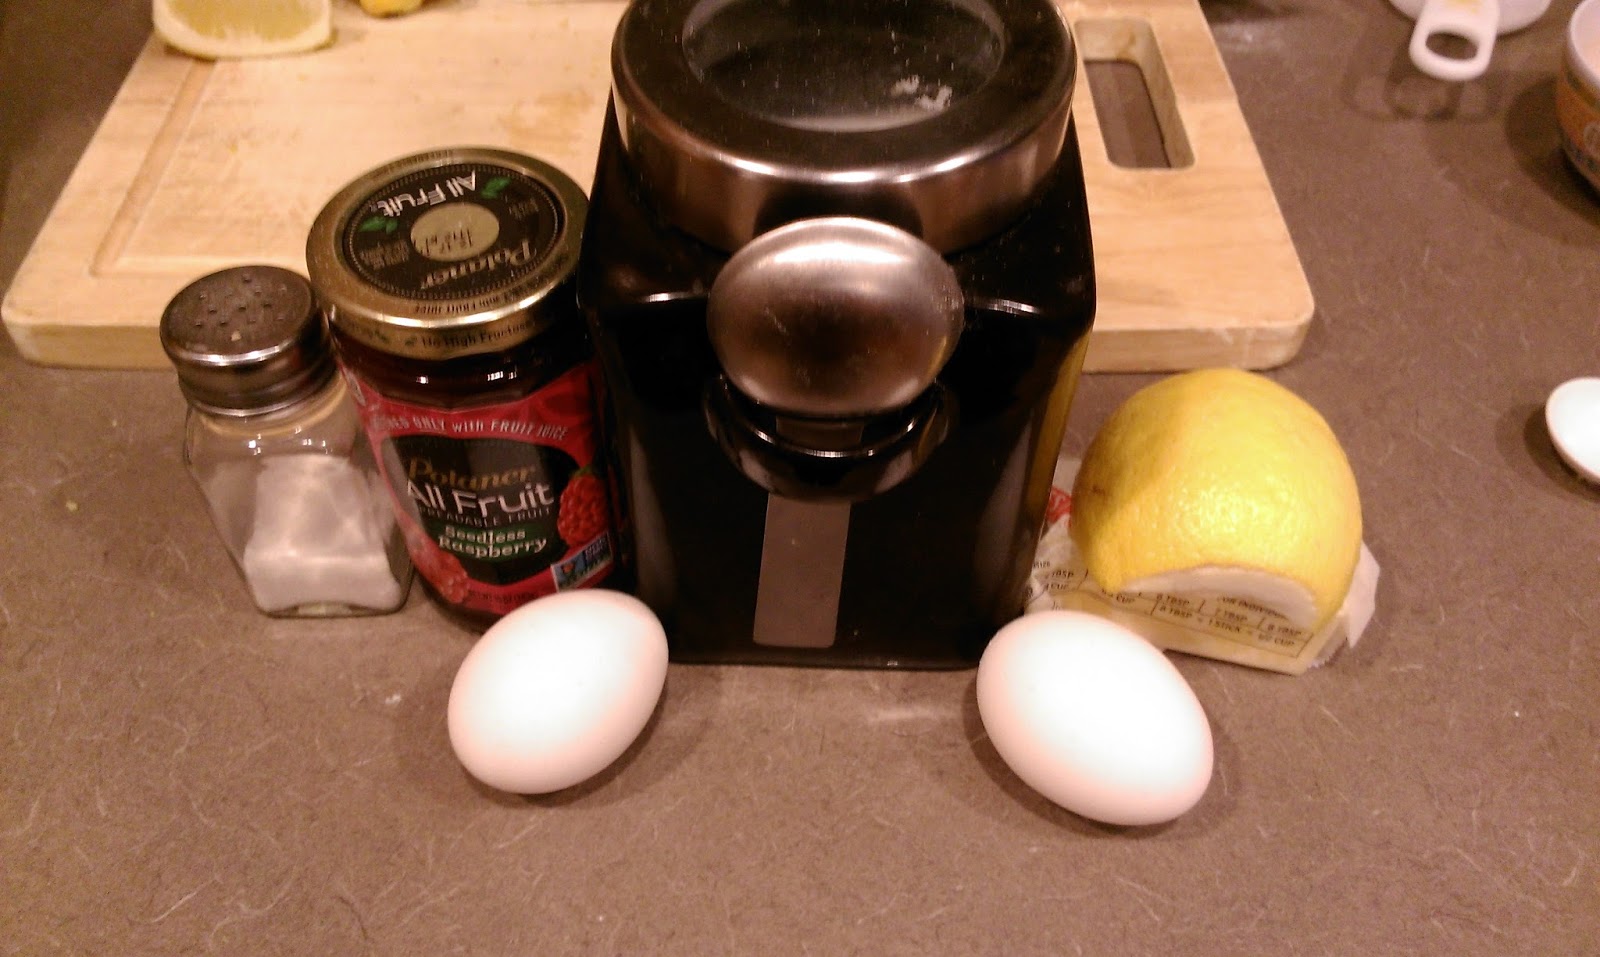
At this point, I had grated off most of my left thumb. The joys of baking. The curd recipe is quite simple, but again, I have more shortcuts:
- Two egg yolks
- 1/2 TBS of lemon zest
- Juice from half a lemon (about 1 1/2 TBS)
- 1/4 cup of sugar
- 2 drops red food coloring
- 2 TBS of cold butter cut into small pieces
- 1/2 cup of raspberry preserves/jelly/jam
To me, texture is as important as flavor. This is why I hate seeds, nuts, pulp, or coconut in my food. If my chocolate cake is randomly chunky, I die inside. I also believe coconut shreds work better as floss than at flavoring things. So what I also hate is regular preserves used in place of jelly. If you don’t mind chunks of seeds, go for the preserves for richer flavor. Also, go for the fresh lemon zest. I will say when I make these again, I’ll use the fresh zest in the cupcakes (not noticeable at all with texture) but not in the curd filling. So if you’ve got a tongue that trembles at the taste of twisty textures (say that five times fast), heed my advice!

I see you, lemon zest chunks… Start by whisking together the yolks, sugar, juice, and zest on medium high heat in a saucepan. You want to cook this until it gets nice and thick…probably around 5-10 minutes. You will need to stir constantly, so prepare for a small bicep workout. Turn off the burner one it has thickened and add in one small chunk of the cold butter at a time and stir until completely melted before adding more. I left my pan on the burner to use the residual heat to help melt things. Add in the food coloring and raspberry jam/jelly/preserves after this. Finally, pour this into a bowl, cover, and place in the freezer to set for 30 minutes.

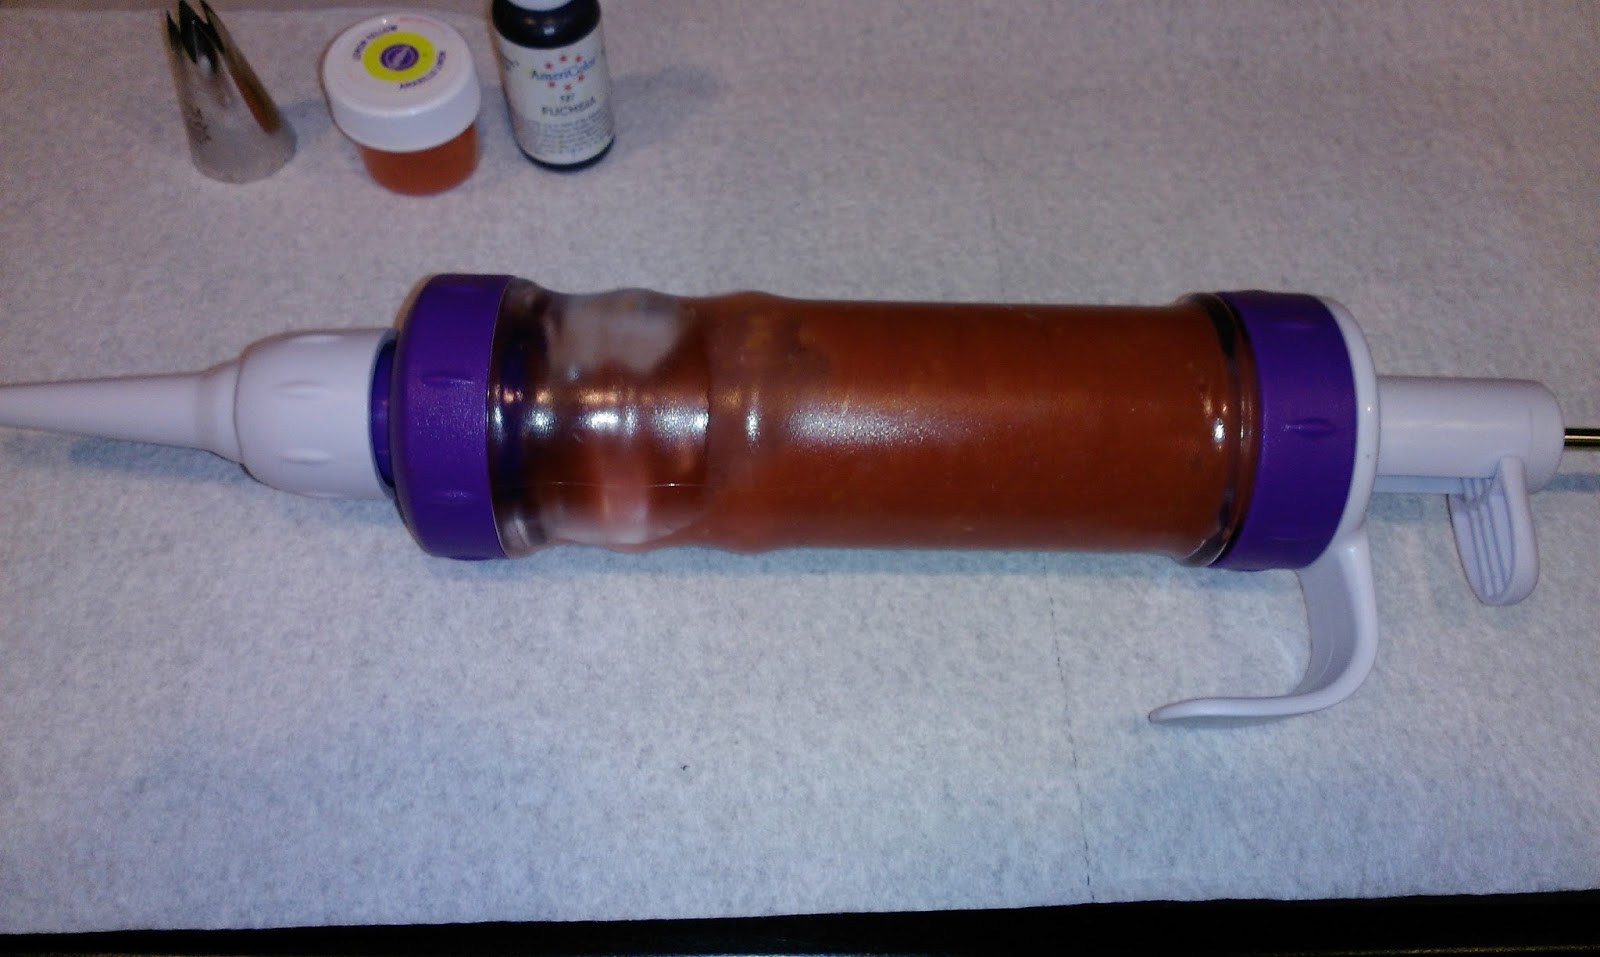
The Purple People Eater makes a rare appearance! I will say you could totally get away with filling your cupcakes by just piping in raspberry jelly or a jar of plain lemon curd if you’re really looking to cut corners, but this homemade curd…dear LORD. I wanted to sit down and just eat the entire bowl. Tart and sweet…much like salty and sweet, a taste combination for the ages. To pipe you can either load a piping bag with a long narrow tip or a frosting gun like I did.

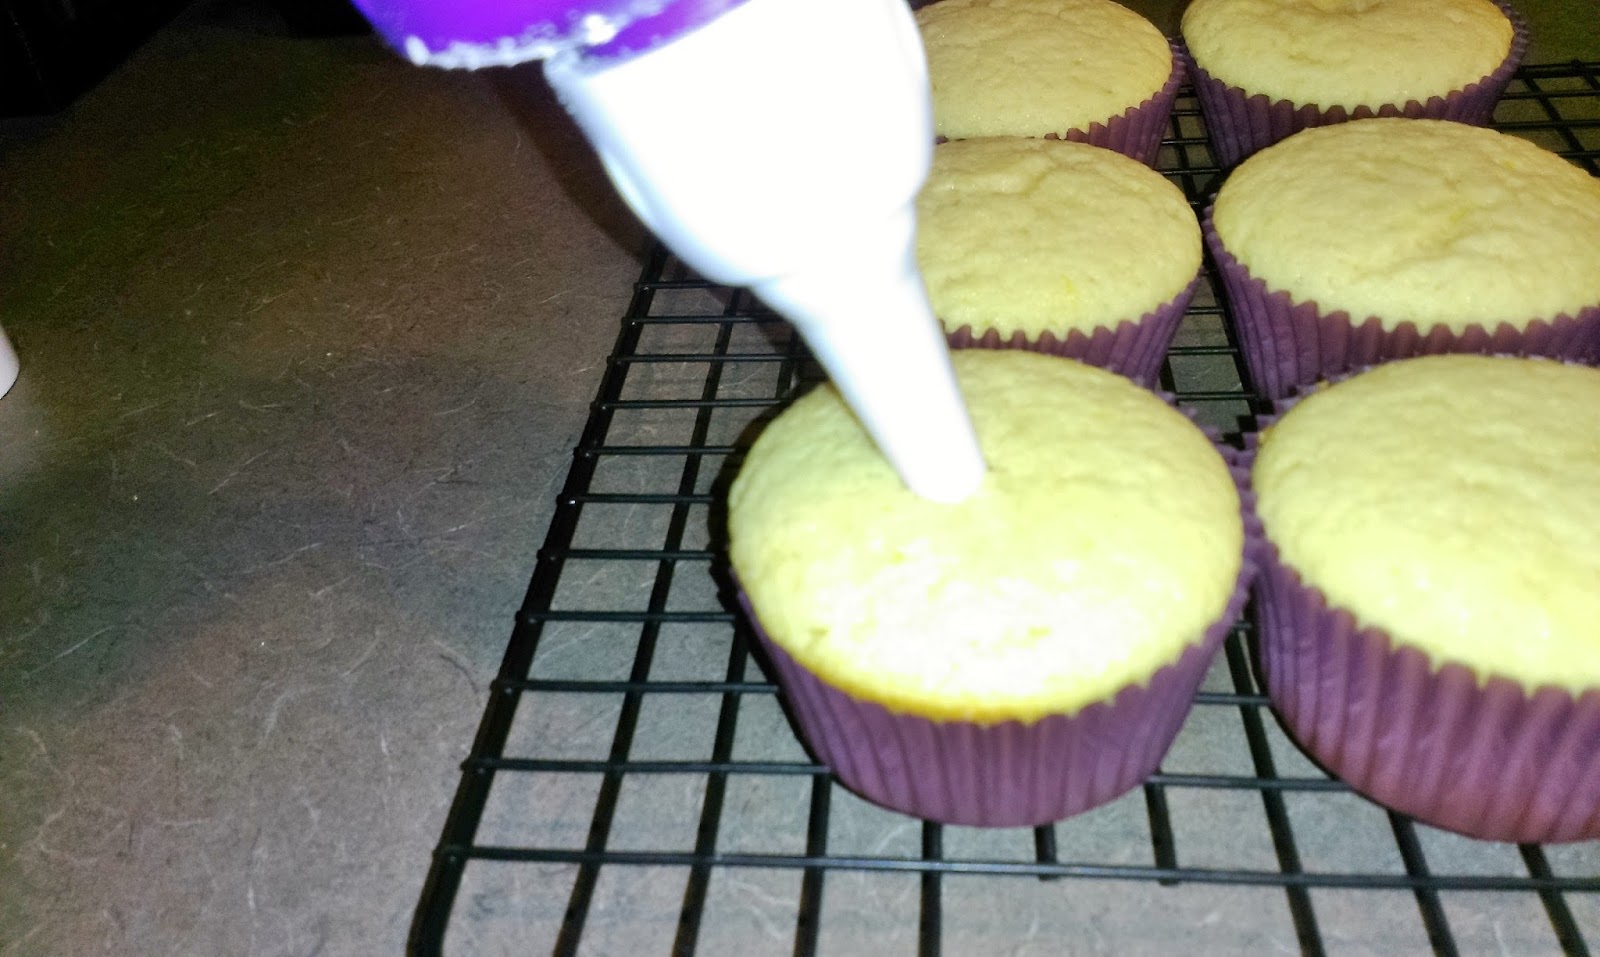
Simply insert about halfway in to the cupcake and pipe until you feel some resistance. There is plenty of curd for all 14 cupcakes, so don’t be shy! 
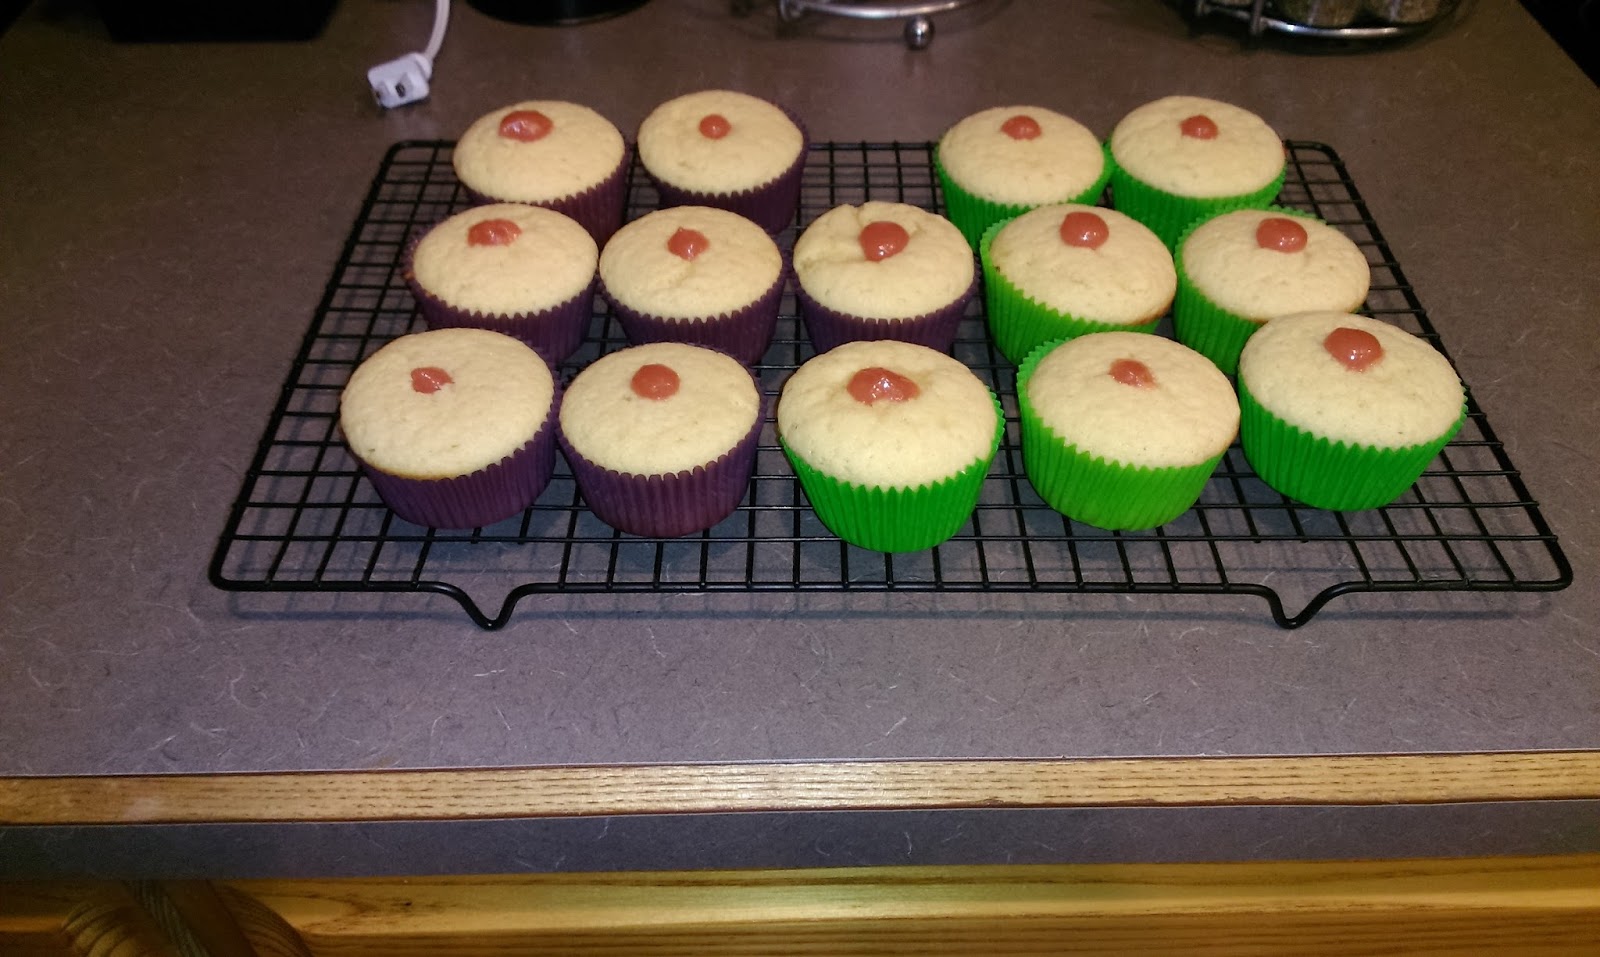
I’m going to refrain from making a joke about how these look like man nipples and move on to frosting. 
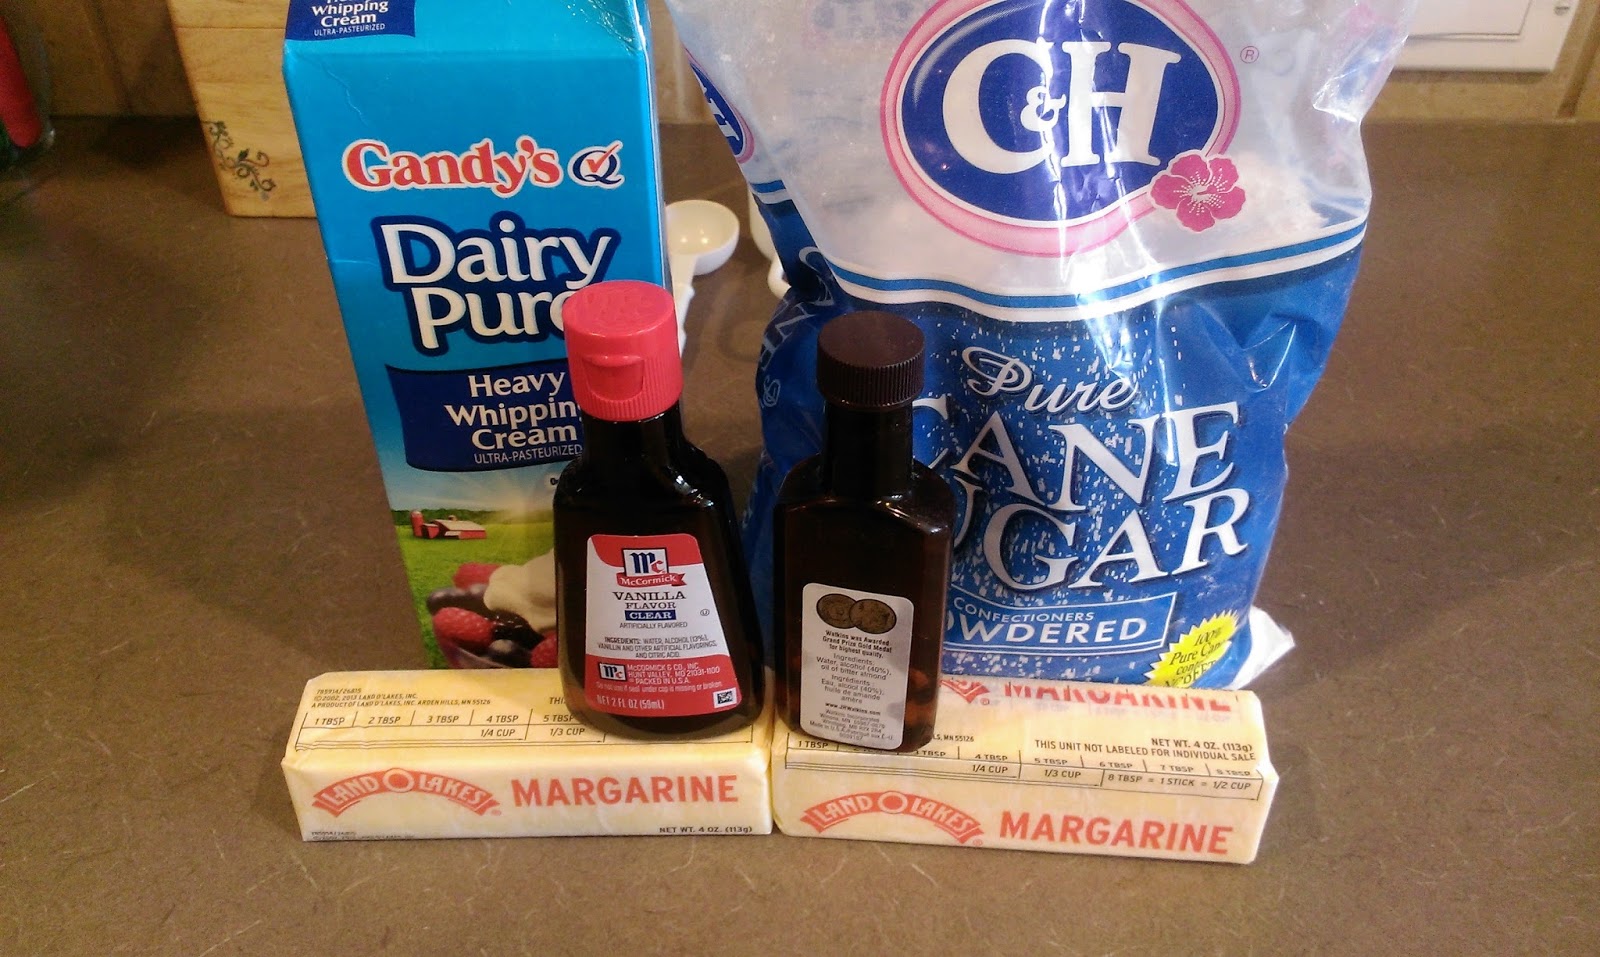
Whew. Mission accomplished. I went rogue with my frosting recipe. I knew I wanted a swirl of lemon mixed with a swirl of raspberry. You could easily do just one or the other, but I wanted a balance of flavors. So to do that, you’ll need:- 1 cup of room temp butter
- Initially 4 cups of powdered sugar plus 2-3 cups more for the raspberry frosting
- 1/2 tsp vanilla
- Juice of one lemon/2-3 TBS (Dear God we’ve killed so many lemons at this point)
- Zest of one lemon/1 TBS (or use 1 tsp of the dried lemon peel which is what I recommend)
- 1/2 tsp salt
- Initially 4 TBS of heavy cream plus 2 TBS more for the raspberry frosting
- 1/2 cup of raspberry jam/jelly/preserves (again, for smooth texture, use jelly or dessert spread)
- OPTIONAL: yellow and pink dyes
Cream the butter for a few minutes until fluffy and then add in 4 cups of sugar, the vanilla, lemon juice and peel, and salt, and blend on LOW. Once things are mixing together nicely, add in the 4 TBS of heavy cream. Once this is well mixed, take 2/3 of the frosting and place into a medium/large bowl. Add the yellow dye to this frosting and mix by hand. Set aside. Back in the stand mixer bowl, add two more cups of sugar and two more TBS of heavy cream and blend. Then add in the raspberry jelly and pink dye and mix. If things are still runny at this point, add in an additional cup of powdered sugar to get a consistency thick enough for piping.
To achieve the color swirl, you’ll need 3 piping bags and a 1M tip. Load a small amount of lemon frosting to a bag and snip the tip off of the bag. Then load a small amount of raspberry frosting to another bag and snip the tip. Gently smoosh one bag into the final piping bag that is fitted with a 1M tip. You want the snipped end to be as far down as possible. Then load the second bag of frosting in on top of the first, again smooshing gently to get the snipped tip as far down as possible. 
Like so. 
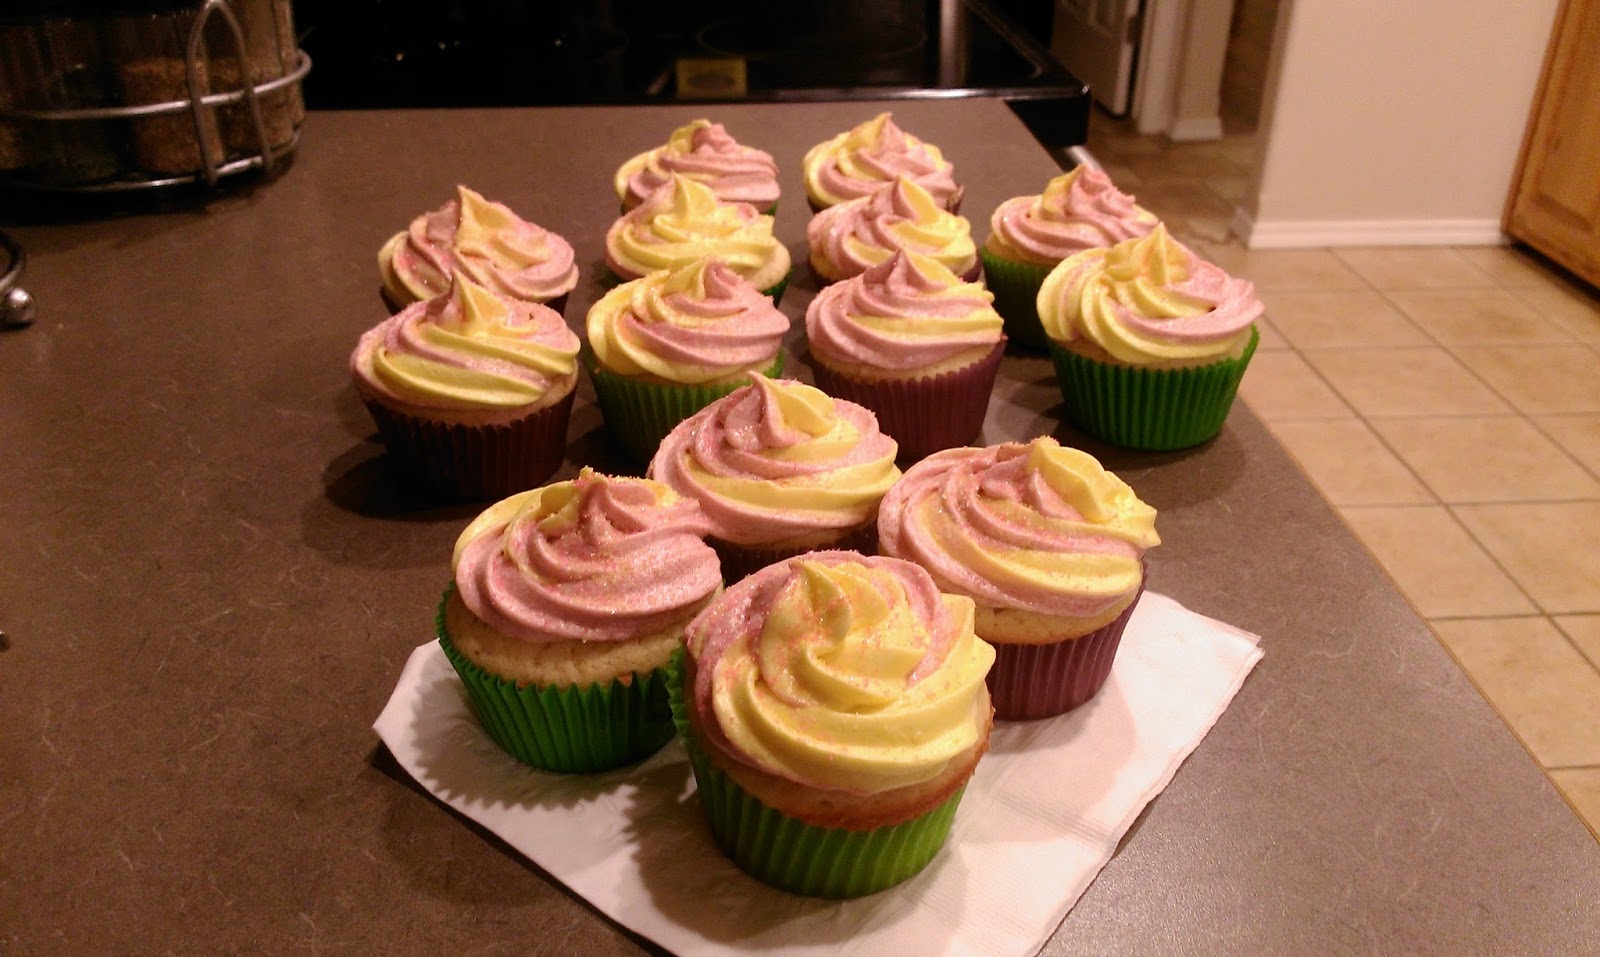
Admire your skills as needed. I simply piped a swirl onto each cupcake, alternating with lemon frosting on top for one and then flipping the bag so the raspberry side was on top for another. This is why you see some with more prominent lemon frosting and others with more prominent raspberry frosting. If you want to keep it uniform, don’t flip your frosting bag. I was able to frost half of the cupcakes before having to reload my frosting bags. As a firm believer that everything is better with sprinkles, I finished up by adding pink and yellow sprinkles on top.

Anyone for some sorbet? Dammit Pavlov, you knew what you were doing… I was told several times last night how much people liked the initially sour, mouthwatering flavor of the lemon that was followed by the decadent sweetness of the raspberry (okay, so not as many adjectives were used, but you get the gist). People marveled at the secret surprise filling and generally ate these in under three bites. If you see anyone slamming cupcakes in anything under four bites, get in on that immediately or you’re gonna miss out on something magical. These are perfect treats for people who like dessert but don’t want anything too sweet…you know, dessert commitmentphobes. Most definitely words I will not use to describe these at the actual wedding (totes inappropes). But if you’re looking for a cupcake that packs a scent strong enough to make your Scentsy warmer jealous while also tasting like a springtime miracle, these are the cupcakes for you. I only wish I had more to eat today to whisk me away to a warm paradise, but instead I’m going to roll myself up into a blanket like a human burrito and pray for warmth. ‘Til next time, my fellow eaters!
My only regret is that you all now know I like to eat cupcakes with a fork… -
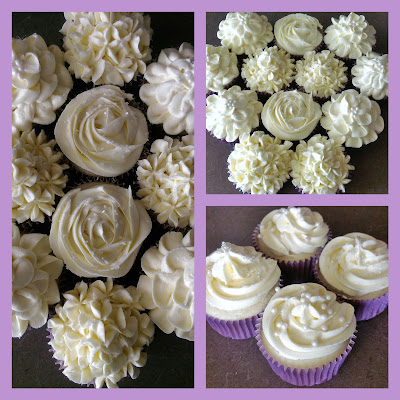
It's a Nice Day for a White Wedding (Cupcake)
Alright people, this is not a drill. I’ve been called up to the big leagues. That’s right: I’m the sole baker for a wedding. Does this fill me with joy and exuberance (and a tiny bit of nausea)? Damn right it does. Thankfully the bride has gone incredibly easy on me and requested cupcakes instead of some massive, five-tiered, stark white colossus of a cake with designs on world domination. This may be the big leagues, but baby steps are always appreciated (quite literally) when transporting any form of dessert from kitchen to vehicle to final destination (no, not my mouth). But since I’ll be making three flavors of cupcakes, I felt it only right to do a practice round for each. I realize for normal women the best part of wedding preparations is probably finding THE dress, selecting the perfect venue, or simply that awesome sparkly addition to the ring finger. Me? My favorite part was the cake tasting (I’ll give you a moment to digest this shocking information). My husband couldn’t make it to the tasting as he was currently embroiled in this lovely land called Clovis while I was still up in Detroit (the lesser of two evils!), so he’ll never know the wonderment that is the cake tasting until he trades me in for a younger, blonder model. But I wanted the future bride and groom to experience one of the easiest and most stress-free aspects of wedding planning. Think of me as a wedding therapist. Getting stressed about seating charts? Have this sample cupcake and be whisked away by flavor! I’m the Carl Jung of baking. I decided I wanted to start off the sampling of baked goods with the classic white wedding cake flavor. This was a two-fold decision as today happens to mark the four year anniversary of mine and Derek’s fancy church wedding. What’s a bride to do when her husband is deployed but bake and eat cupcakes to both soothe the pain and reminisce about one of the best days of her life? The actual Carl Jung might have something to say about this, but he’s dead, so he won’t be the one having his cake and eating it, too.
Well that got real dark real quick. I’m seriously not going to eat a dozen cupcakes by myself this close to bikini season. I may be crazy, but I’m definitely not stupid. The great thing about cupcakes is they freeze like a champ. So when my husband eventually gets home, we’ll have a belated celebration while these cupcakes thaw out (much like the thawing of my cold dead heart when my husband is around. D’awww.). The recipe I used made 16 cupcakes total, 4 of which I left with the bride for sampling purposes. I may or may not have told her about how I sampled my cake without my husband, but sharing is caring, I suppose.
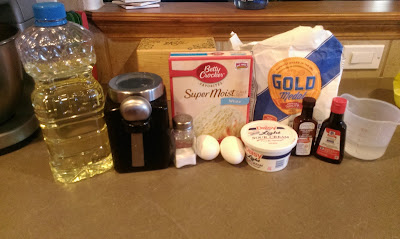
OK, it’s not really cheating. When the bride and I were discussing flavor options, classic white almond cake was at the top of the list. Naturally, I used Pinterest as my spirit guide like I always do to find a perfect recipe to adjust to my liking. When I searched for a recipe, I was shocked to find the same damn recipe everywhere, and it involved the use of a box cake. Dios mio! Sacrilege! But if 80 bajillion Pinterest users finally agreed on something, I figured I better give it a shot. So I found a recipe to adapt. I cut the original recipe in half to get my 16 cupcakes. You could easily double this for a full batch, but unless you’re baking for a small army (of brides?), 16 cupcakes is usually plenty for one household. Gather up:
- 1 cup plus 2 TBS of white cake mix
- 1/2 cup of sugar
- 1/2 cup of flour
- 1/4 heaping tsp of salt
- 2/3 cup of water
- 1 TBS of oil
- 1/2 cup of sour cream
- 1/2 tsp vanilla extract
- 1/2 tsp almond extract
- 2 egg whites
This is quite a low maintenance recipe which is fantastic. Preheat your oven to 325 and line a muffin tin with cupcake papers. In the bowl of your stand mixer, dump the cake mix, sugar, flour, and salt and give a quick blend on super low. Then add in the water, oil, sour cream, extracts, and whites. Blend on low for 30 seconds, then high for 2 minutes (what am I, the directions on the back of a cake box? …Wait…).

What’s with the really bitchin’ ice cream scoop, you ask? If you’re anything like me, you can create a mess in less than a nanosecond when trying to get batter into a cupcake liner. My kitchen goes from zero to “Why is everything so sticky?” at an alarming rate, so I decided to give the old ice cream scoop trick a try. Bakers swear by it, but as usual, I was a skeptic. I will say the ice cream scoop would probably be really helpful with a batter that was thicker, but this cake batter is quite thin, so I still managed to make a total mess of things…there was batter on the back of my bicep. I’m a talented girl. So scoop or spoon enough batter to fill your cups about 3/4 of the way full. These don’t expand much, so you’re safe. Pop into the oven for 16-20 minutes. My “sweet spot” for timing was 19 minutes.
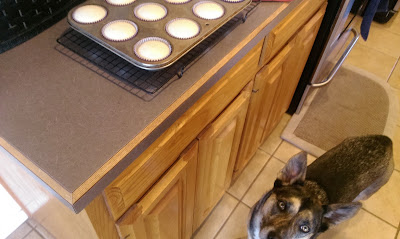
“Last time you made cupcakes, they were for me. These better be for me, too.” -Freyja Once cooked, let cool in the pan for 5 minutes on a rack before removing and allowing plenty of time to finish cooling before frosting. Speaking of frosting…
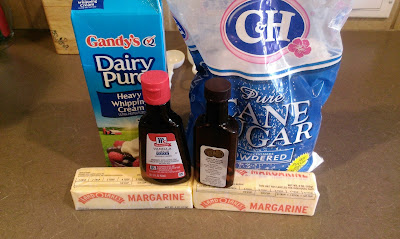
You’d be shocked by the amount of butter I possess in my fridge. A classic white almond wedding cupcake deserves a classic white almond frosting. I may be allergic to actual almonds, but thank God their extract doesn’t make me break out into eczema patches like their evil, delicious origins do. Almond flavoring is simply the best thing you could ever add to ANY flavor of cake as far as I’m concerned. So to put the icing on the cake, get:
- 1 cup of room temp butter
- 4-5 cups powdered sugar
- 4-5 TBS whipping cream
- 1 tsp vanilla extract
- 1 tsp almond extract
Start by creaming the butter and then adding in two cups of powdered sugar, two tablespoons of heavy cream, and the extracts. Blend until well mixed and add in two more cups of sugar and two more tablespoons of heavy cream. At this point you have enough frosting to frost all 16 cupcakes, but the butter will still give it a yellow tint. I wanted frosting pure as the driven snow…frosting so white, even Hitler would’ve liked it, essentially. This was both a terrible and accurate example. Don’t be a racist jerk, but if you want really white frosting, add in the additional cup of sugar and tablespoon of cream. As far as frosting techniques, I used a bunch of floral designs, so let me help you with those.

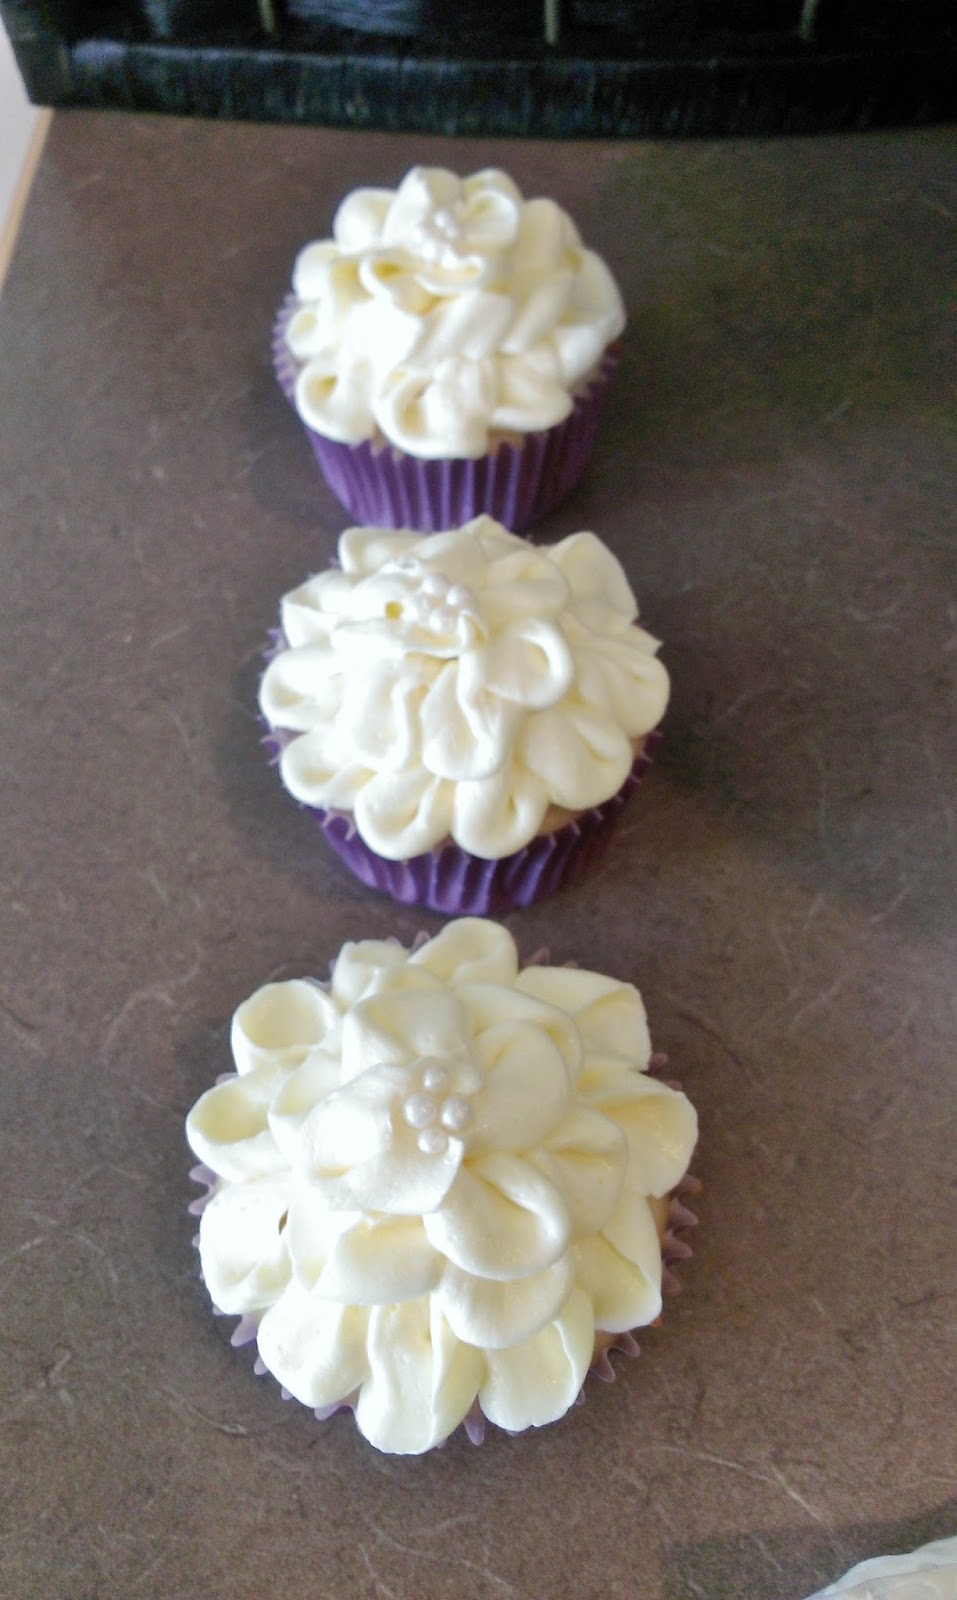
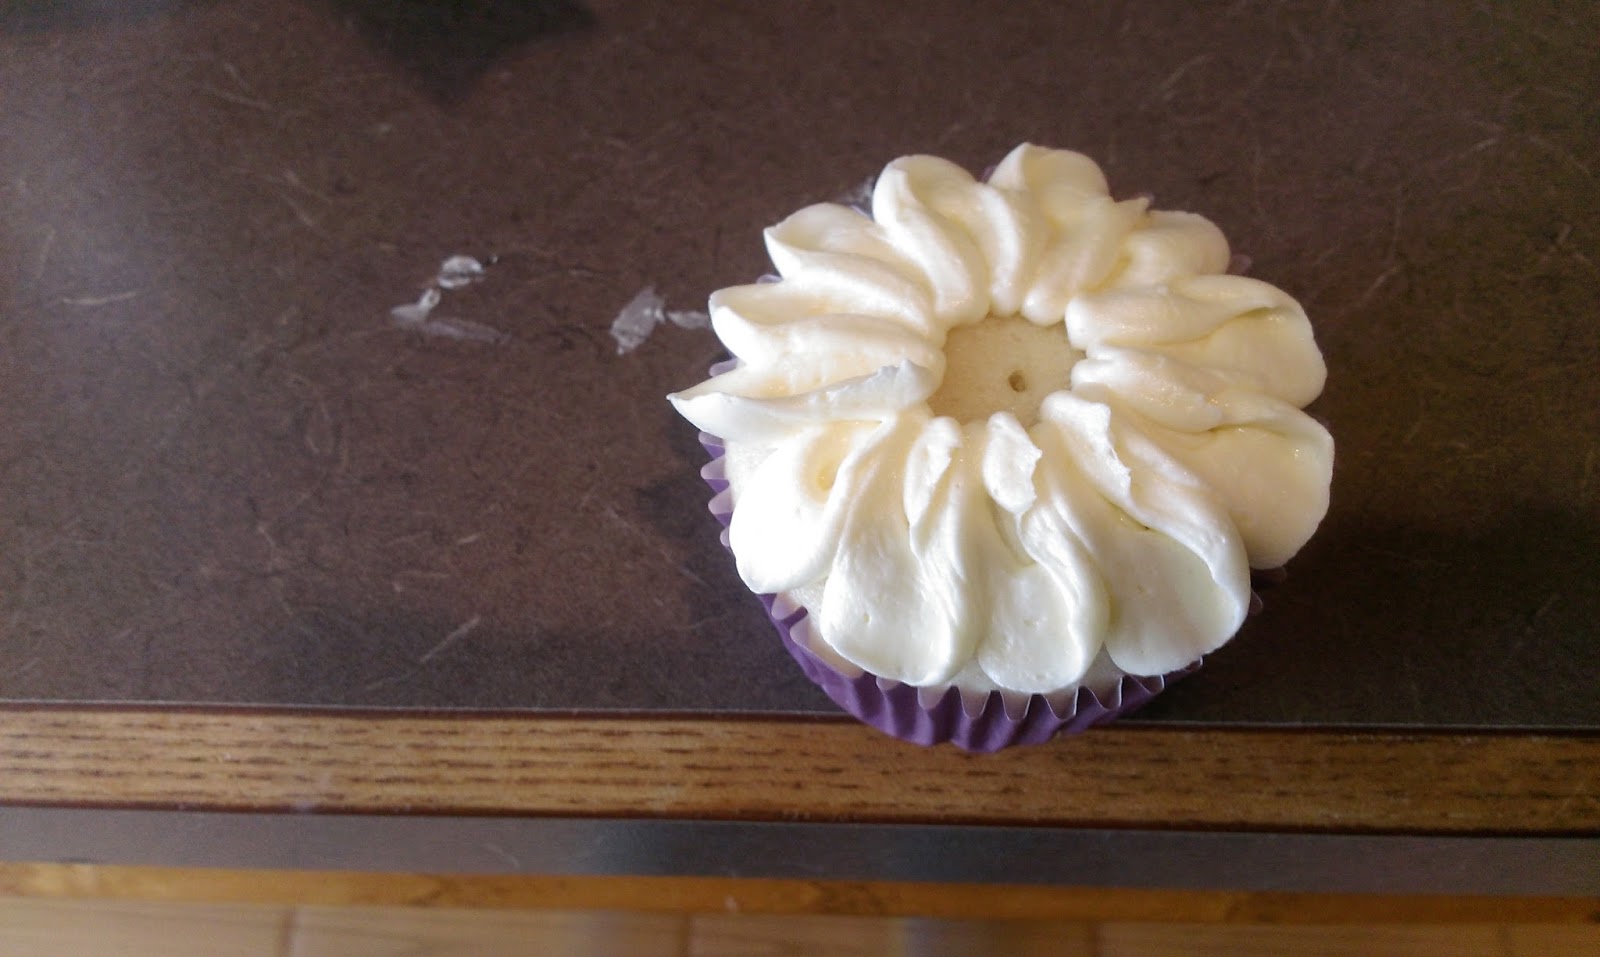
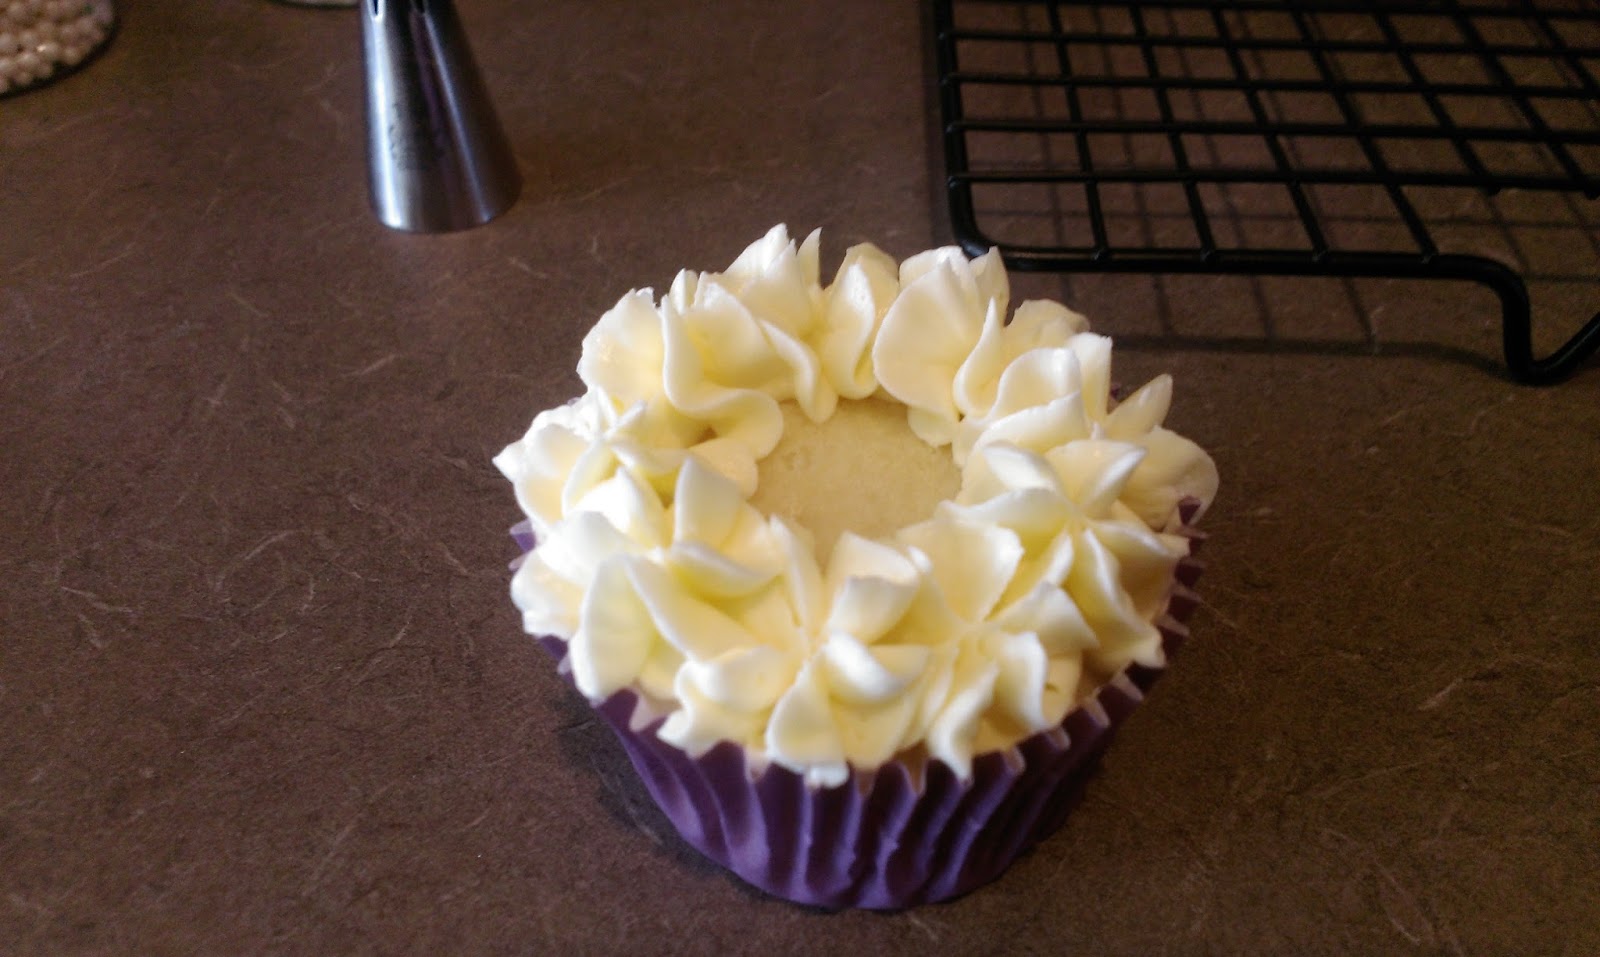
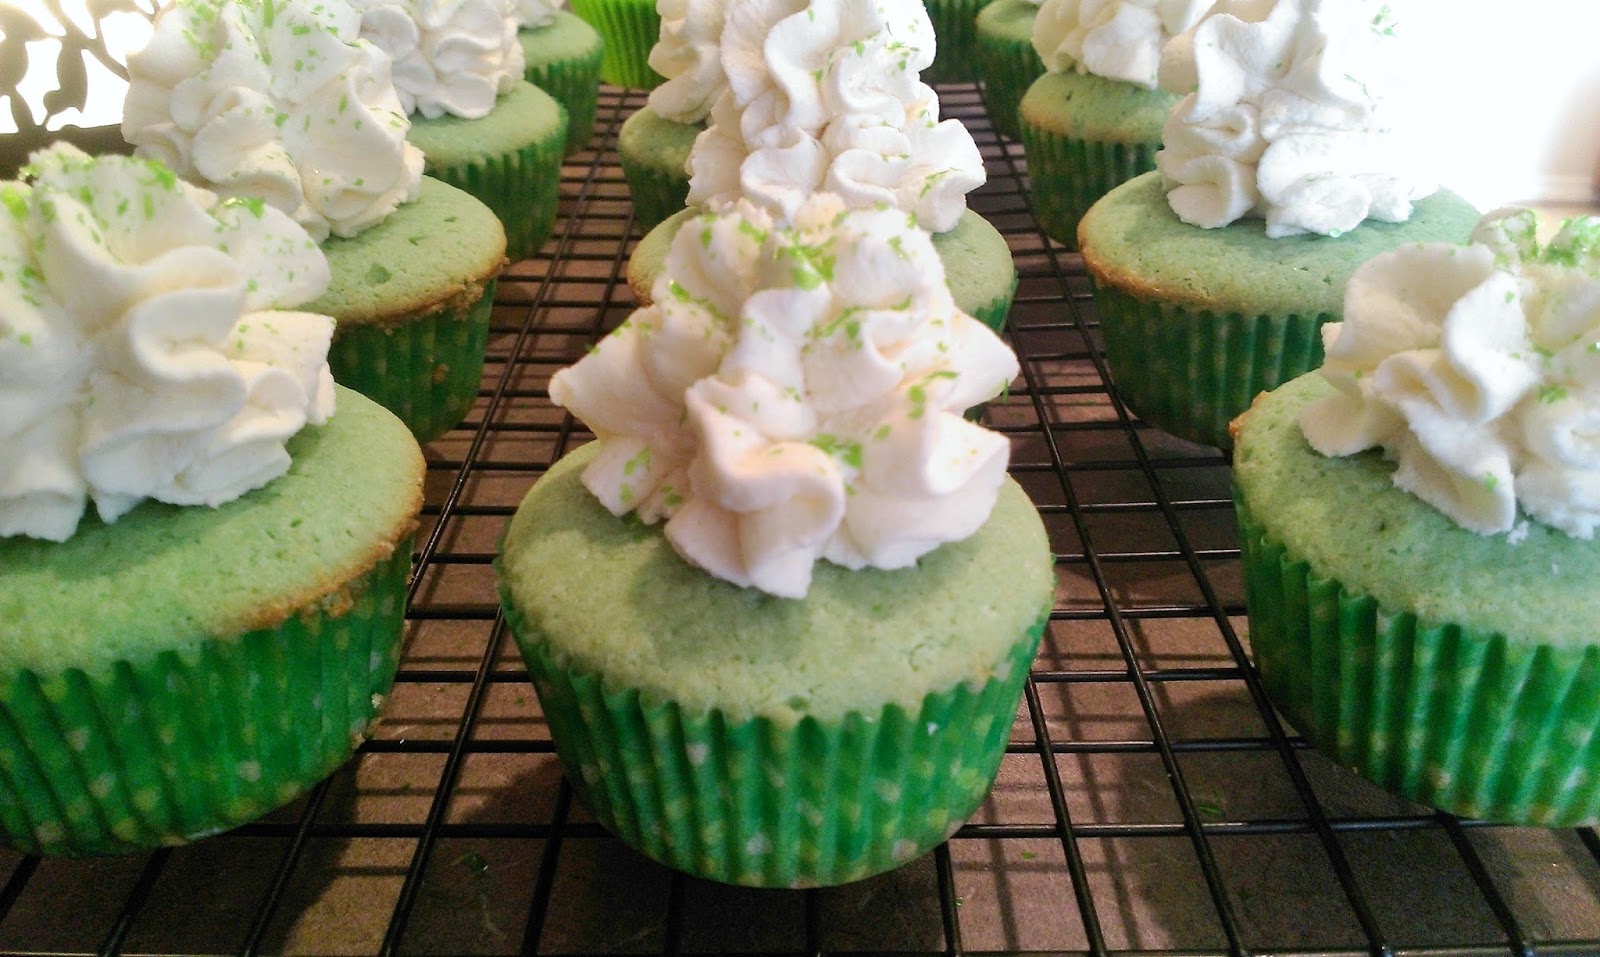
These adorable little flowers were created with a #104 tip. To get a really good tutorial, check this link out (starts a 1:07). 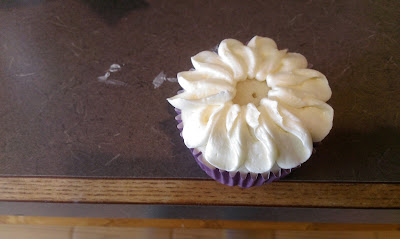
Essentially, you hold the tip down with narrow side facing out and pipe little petals. 
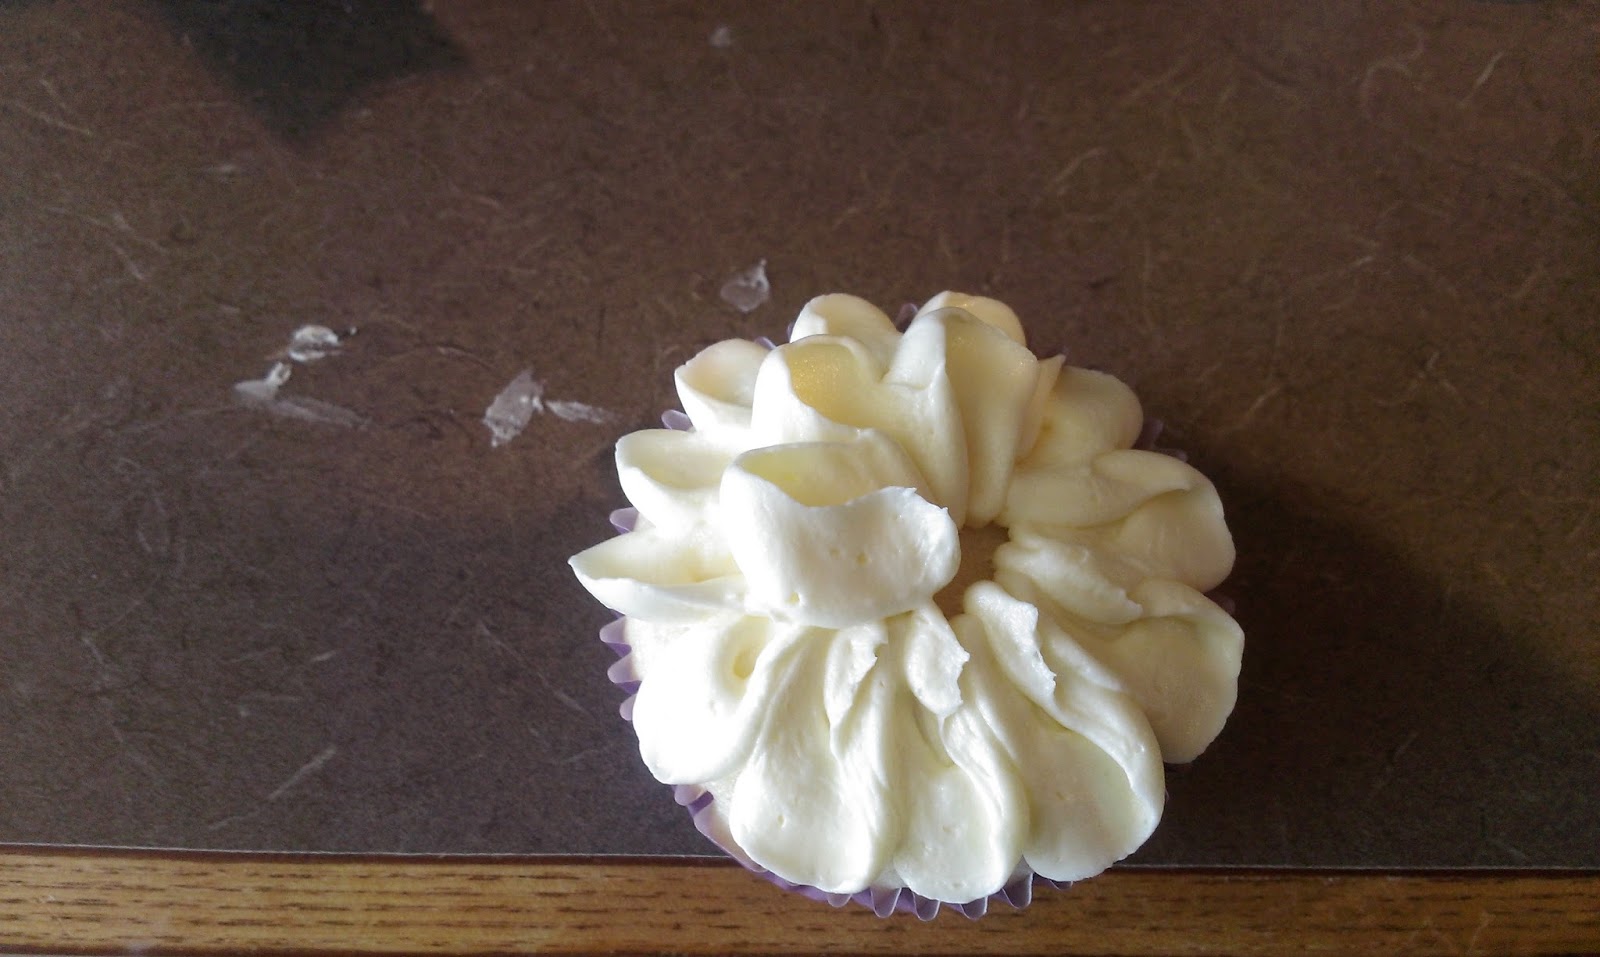
Then add a second layer. 
Finish up with a third and add some white or colored pearls to the middle. 
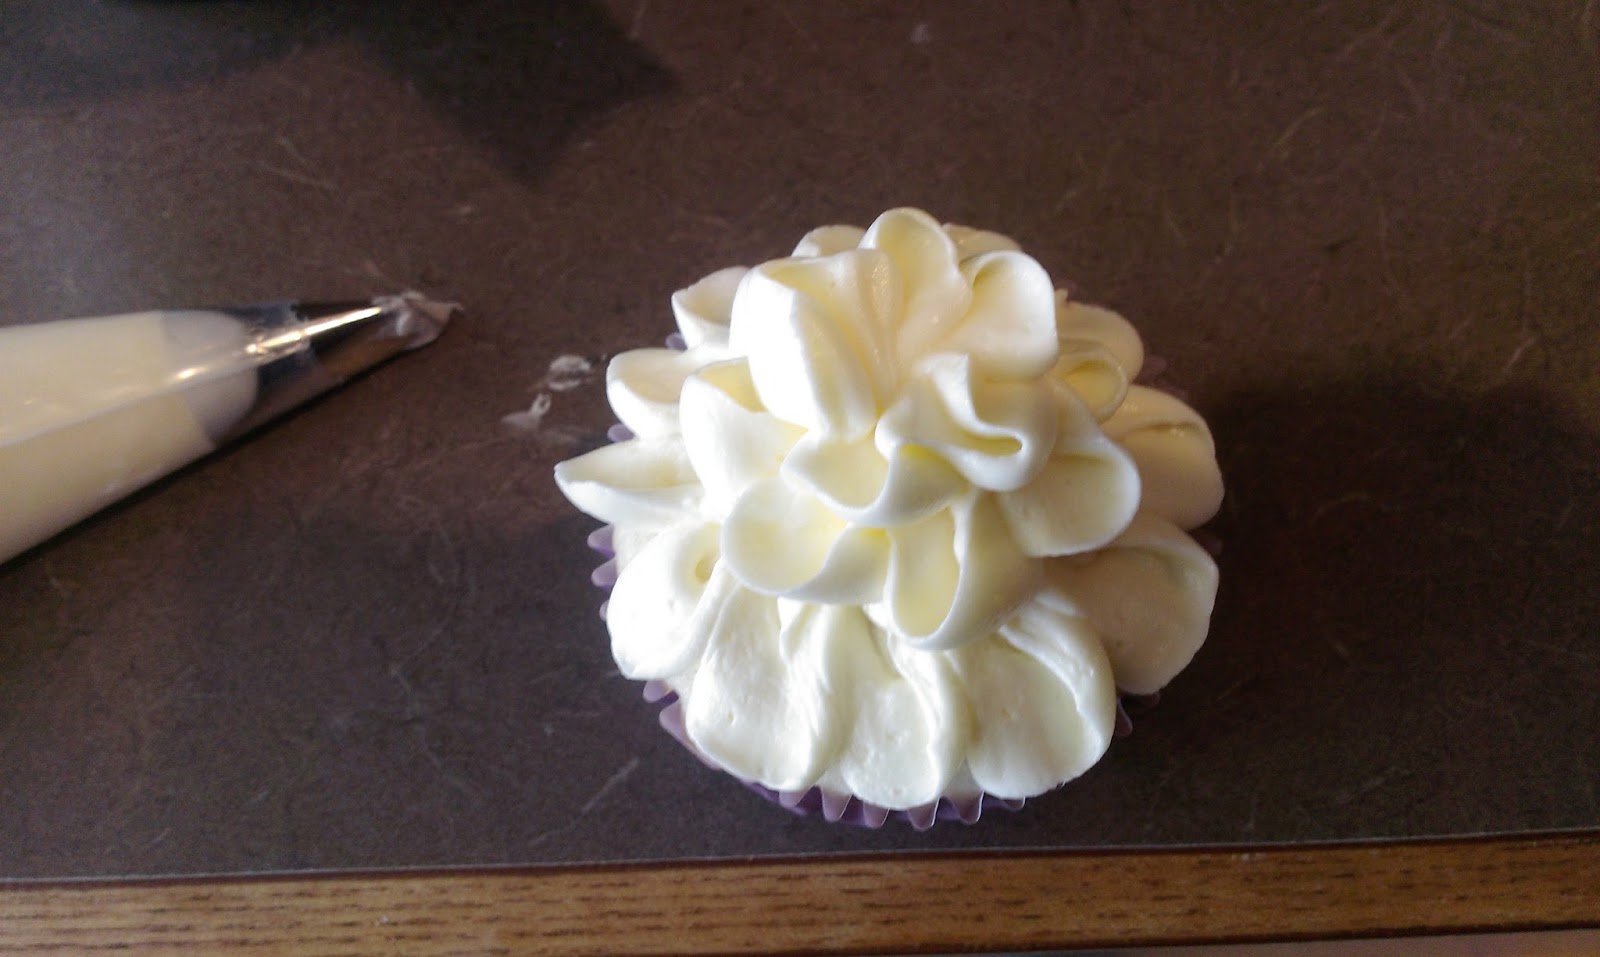
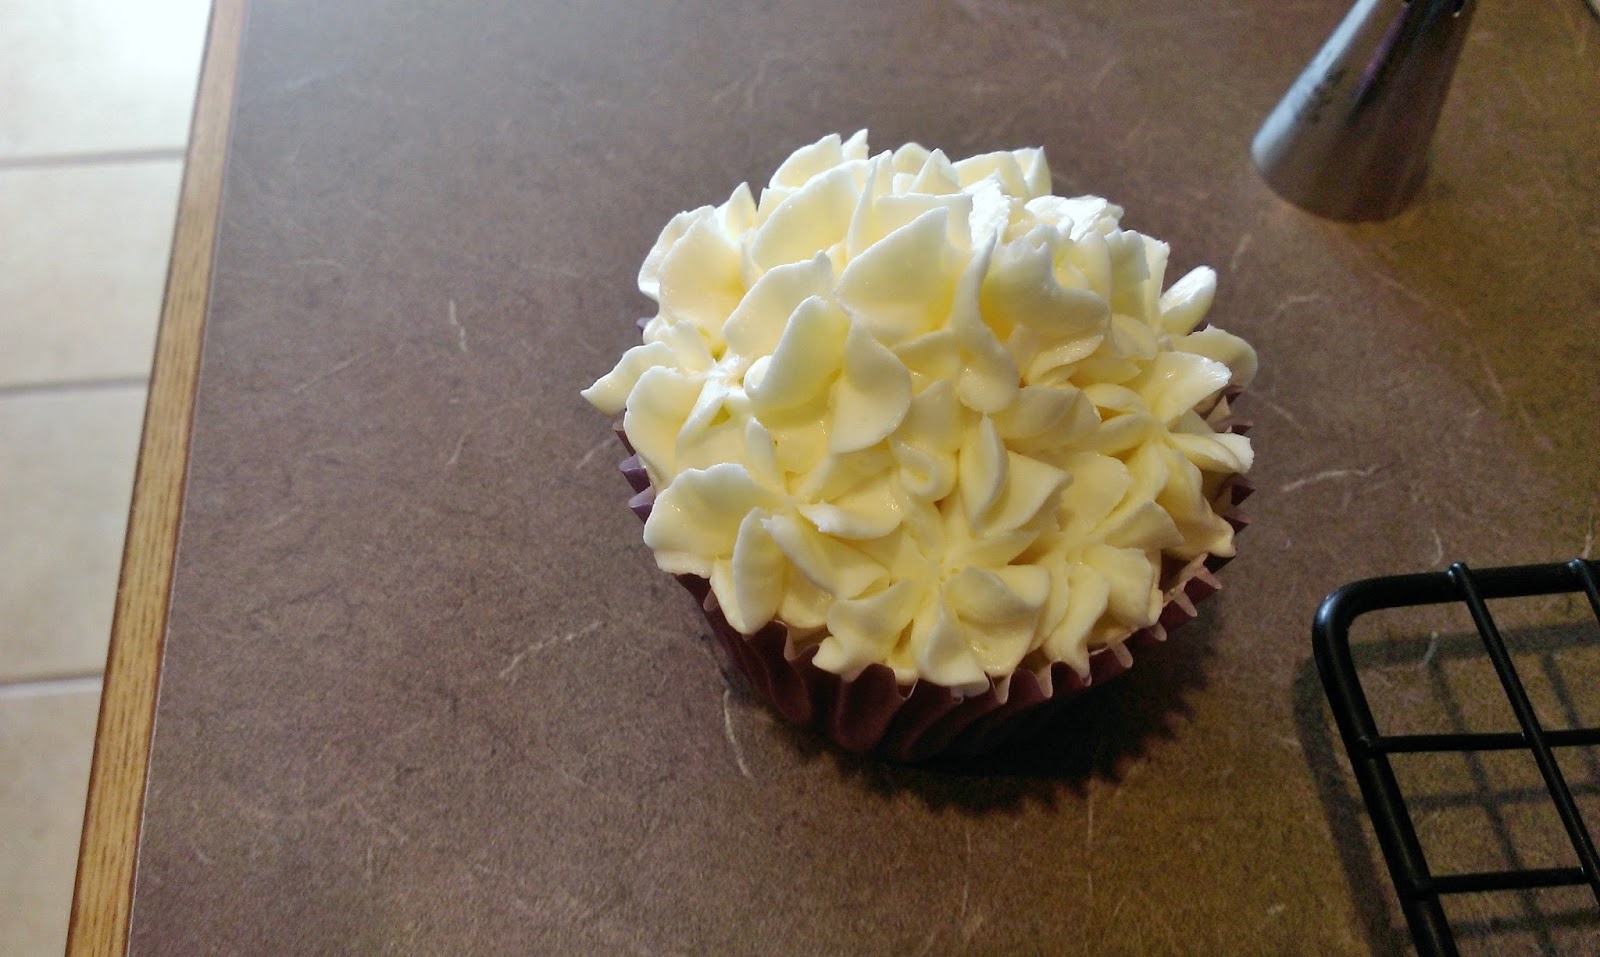
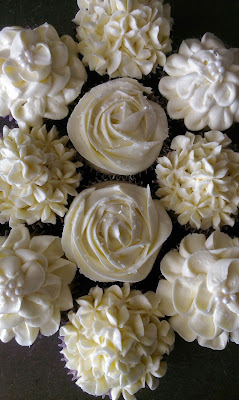
I created a hydrangea bouquet with a 2D open star tip. I piped a small mound and twisted while pulling the tip up and away. 
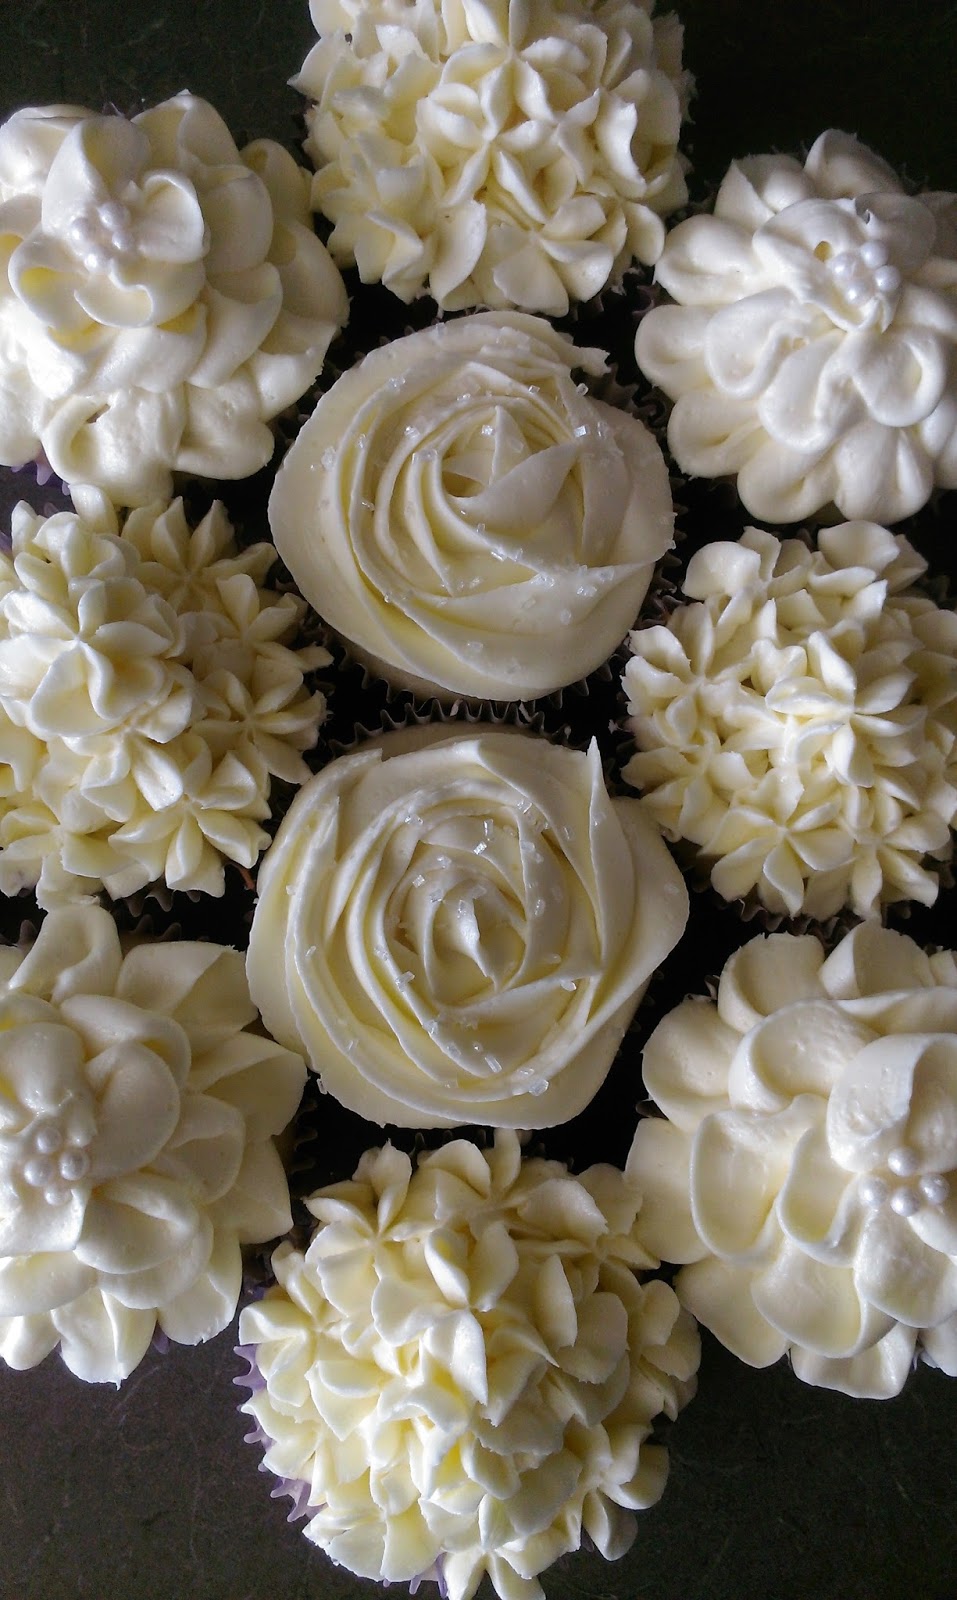
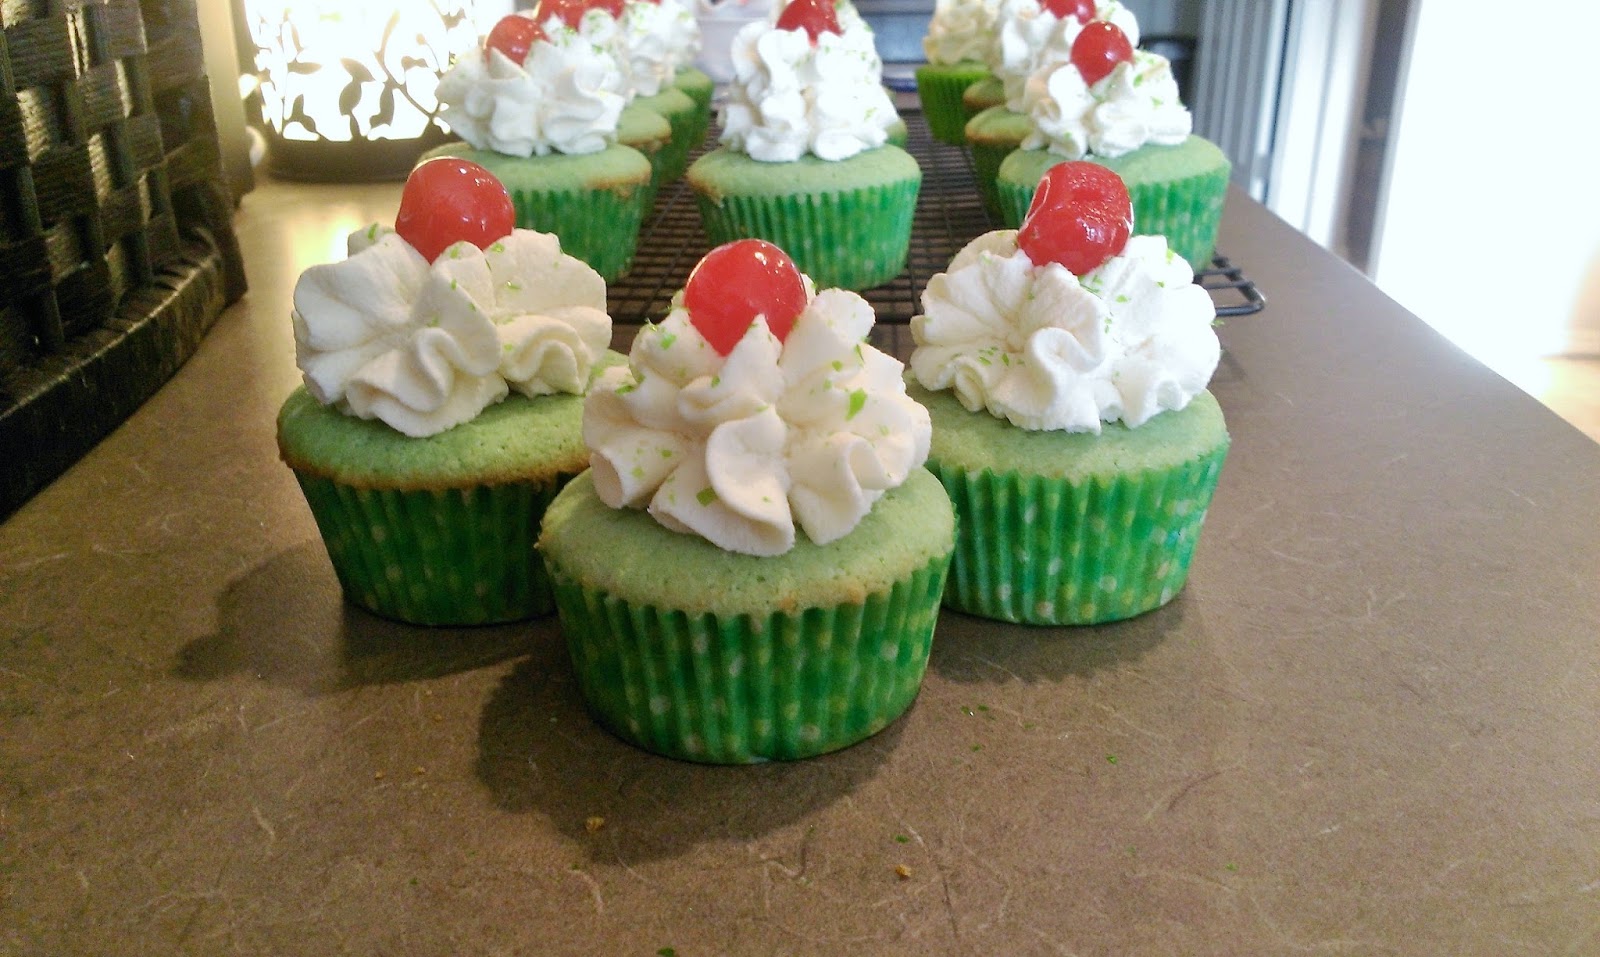
Fill in all over and create a second layer if you like! I also used the 2D tip to create a couple roses. Start in the middle of the cupcake and swirl outward and around for these. Top with white crystal sprinkles for a dewy look. 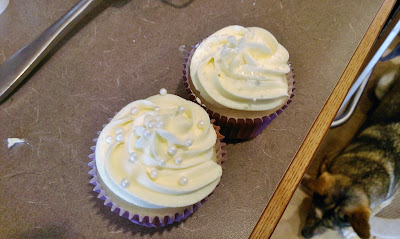
And for the classic favorite swirl, just use a 1M tip. Top with pearls or sprinkles, either way, your dogs will be waiting underfoot for something to be dropped. 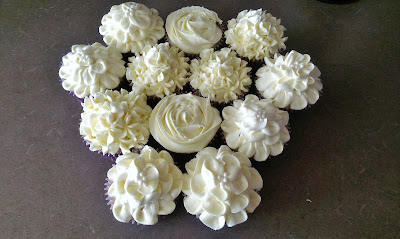
What girl doesn’t love a bouquet of flowers? Al-my-god. Classic white almond wedding cake, you made me second guess my decision to go rogue and have a chocolate wedding cake. I adore almond extract, so this flavor was just divine as far as I’m concerned. It was like eating saccharine manna from heaven. If you don’t want a super duper sweet cupcake, I’d recommend nixing the almond extract from either the cupcake OR the frosting, but definitely not from both. The flavoring is classic for a reason, after all. But even with a box cake in the mix, this recipe is a total keeper, and if you take the time to decorate the cupcakes like a pro, you don’t have to feel terrible about taking a little shortcut (Pinterest made you do it). I’m going to have one hell of a time trying not to eat all of these before my husband gets home, but anything for love, right? Apparently I do have willpower when it comes to dessert, who knew? I guess I can thank my husband for that, along with the one million other reasons I’m thankful for him. Any man that can put up with my level of Type A crazy deserves a cupcake for sure. That’s why he’s getting a whole damn bouquet of them. Apparently cupcakes are still good therapy well after the wedding. Never mind happy wife, happy life…feel free to use my trade secret as much as possible: cupcakes in the freezer, you’ll make it til you’re both geezers. ‘Til next time, my fellow eaters!
I know the husband usually gives the wife flowers for an anniversary (which he totally did), but this time, I’m literally taking the (cup)cake with these. -
Dulche de Yummy.
UPDATED: 5/7/18
Not that there’s anything wrong with the recipe below, but it’s like…750 calories for one slice of pie. I love dulce de leche more than the next guy (especially since we’re living in Floribama now where Mexican food and dessert doesn’t exist), but I wanted to lighten this pie up for Cinco de Mayo. The following updates take this down to only 262 calories a slice:
-Reduce the amount of dulce de leche to half a can, using 4 TBS in the pie filling, and another 2 TBS melted and plopped on top of pie mix (wait to do this until after you’ve put the pie filling in the pie shell. Use a knife to gently swirl the dulce de leche into the pie filling in a swirled pattern).
-Use 1/3 fat cream cheese at room temp
-Use 1/4 cup Swerve confectioner’s sugar in place of regular powdered sugar
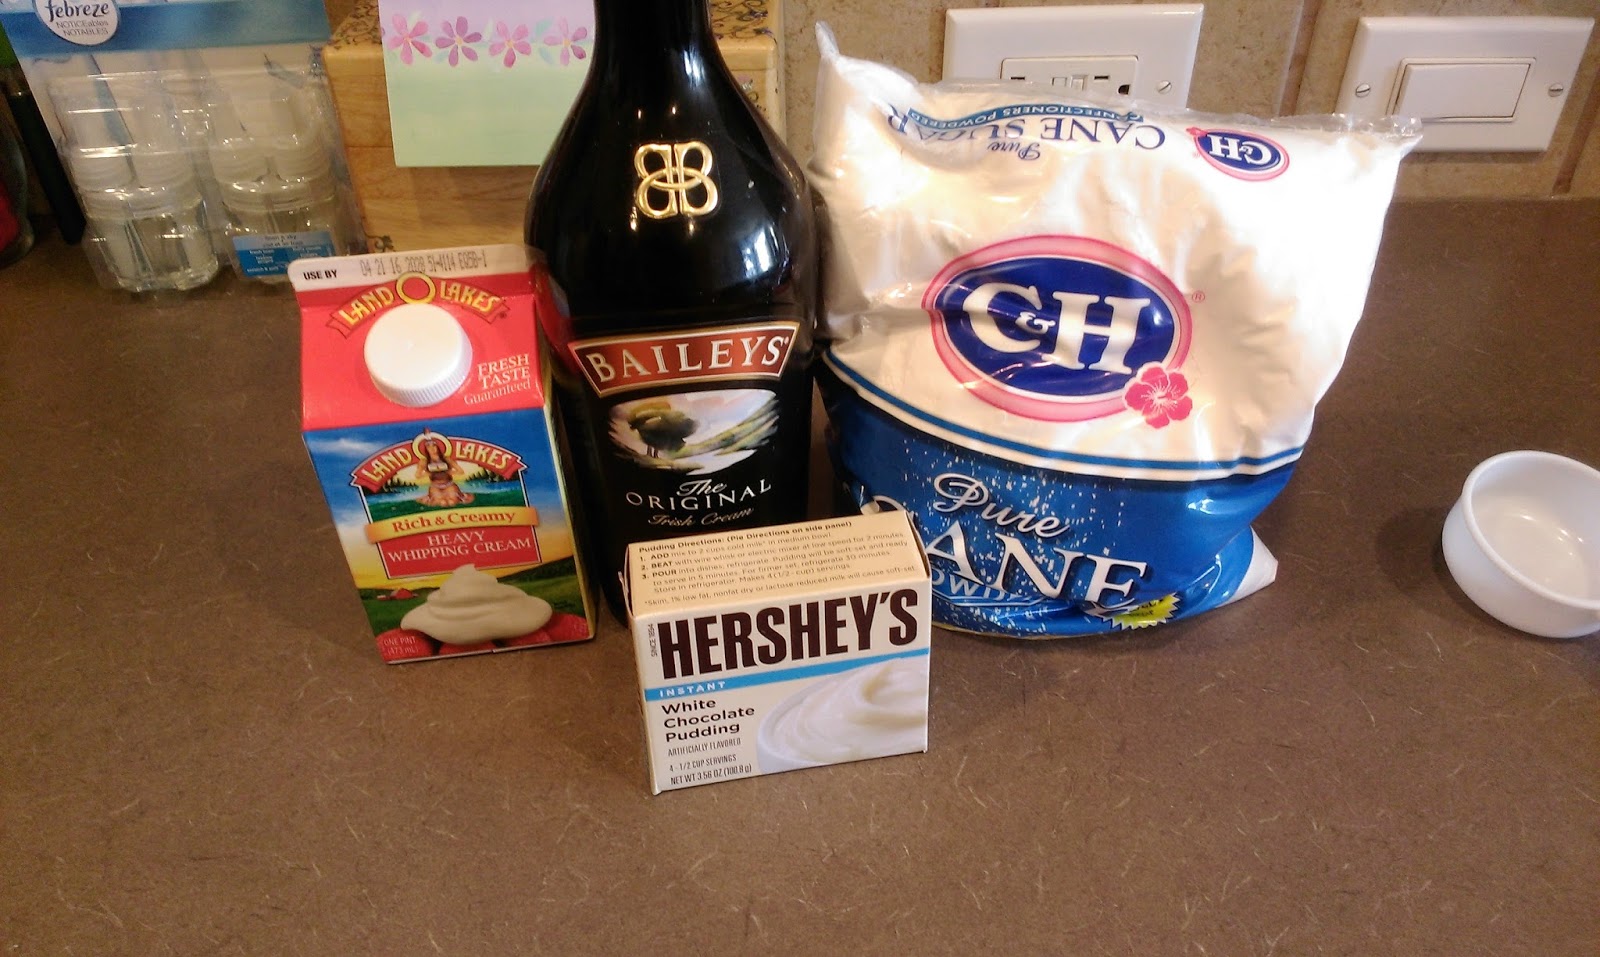
-Nix the heavy whipping cream and sugar, instead using 3 cups of Cool Whip Free in the pie filling, and another 1/2 cup to garnish/decorate—————————————————————————
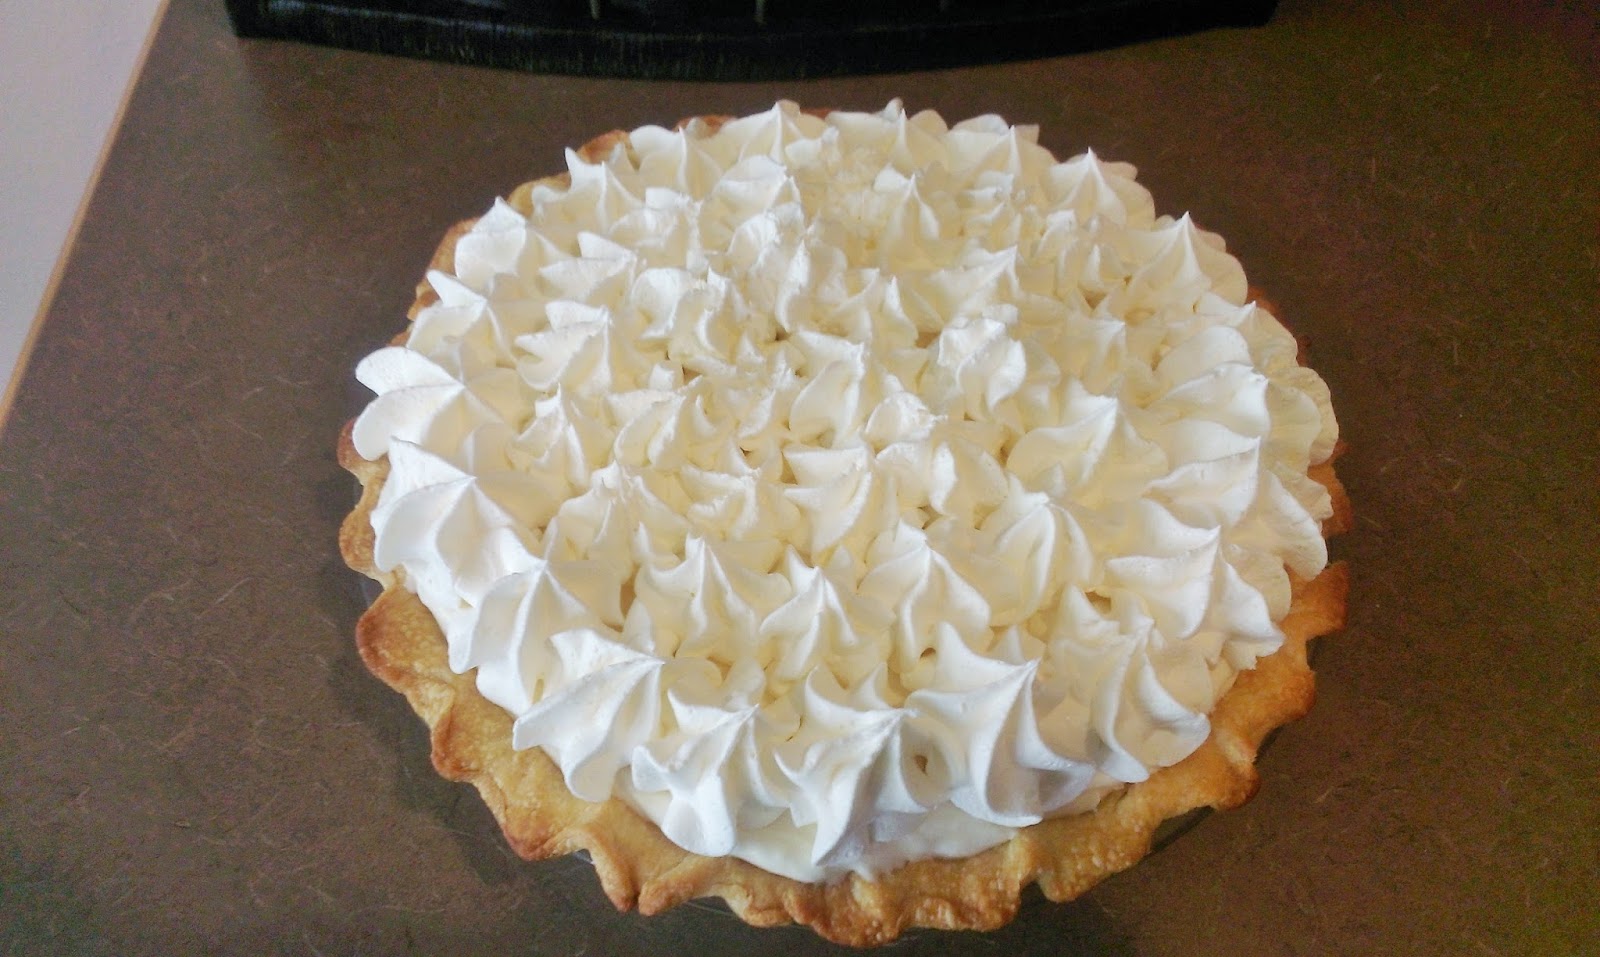
I live in an area of the country that once was aptly named the “Great American Desert.” I guess the powers that be decided a moniker like that wouldn’t exactly have people chomping at the bit to up and move there, so it is now called the “High Plains.” Conjures up lovely images of gentle breezes (of 40 mph) sweeping over green (brownish) plains (flatlands) doesn’t it? Yes, it is a giant lie. Deserts are not known for their accommodating weather, either. Google haboob, tumbleweed apocalypse, and Winter Storm Goliath if you’re interested in a play-by-play of the seasons here. It’s hot in the desert during the spring, summer, and fall. No kidding, the desert is hot, you say? The ocean is also wet and Britney Spears is also a national treasure…these are all just known facts. But with the heat comes a changing of the taste palette. Clearly I believe in seasonally appropriate desserts. Pumpkin spice belongs in the fall, peppermint in the winter, and mint in March. The only dessert I will eat year round is Blue Bell. My Texan heart wants what it wants. But since the cool temps are quickly vanishing and giving way to what I call “UV Level: Sunburn Inferno,” I wanted a dessert that was going to make me forget I live in the desert. Something light, something cool, something sweet (duh)…essentially, something that would give me brief reprieve and make me forget I live in the armpit of America. What dessert in the world could be that powerful? Pie. The answer is pie.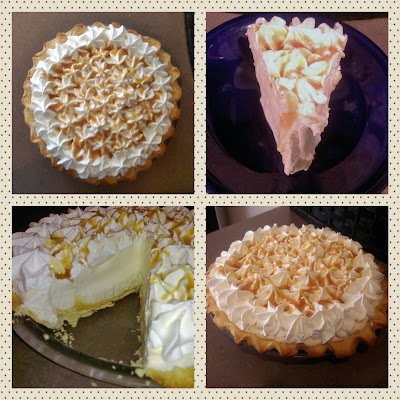
Of the cream variety. Doesn’t it look like a delicious caramel-y cloud? That’s because it is. Well, specifically, it is a dulce de leche cream pie. This pie would be insanely easy to make if you can get your hands on a can of dulce de leche. We’re about to take a turn into sob story territory here…I scoured the aisles at my commissary, but I can’t say I was all too surprised when I couldn’t find a can of dulce de leche, even when I live within walking distance to the Texas border. I could find La Lechera sweetened condensed milk, and a cursory Google search told me all I needed was a can of condensed milk to make my own dulce de leche. ‘How hard could that be?’ I thought to myself with a foolhardy, devil may care attitude. Anything not to have to go to our seventh circle of hell (Walmart) in town. So when it came time to make pie, I followed the instructions found here. This honestly wasn’t the worst process in the world, but three damn hours to make some caramel? I had caramel sauce in the fridge and nearly decided that would work when we entered hour two. Coincidentally, this is also when I decided I was done literally watching a pot of water simmer (still better than going to Walmart), so I removed my can of condensed milk and let it cool.

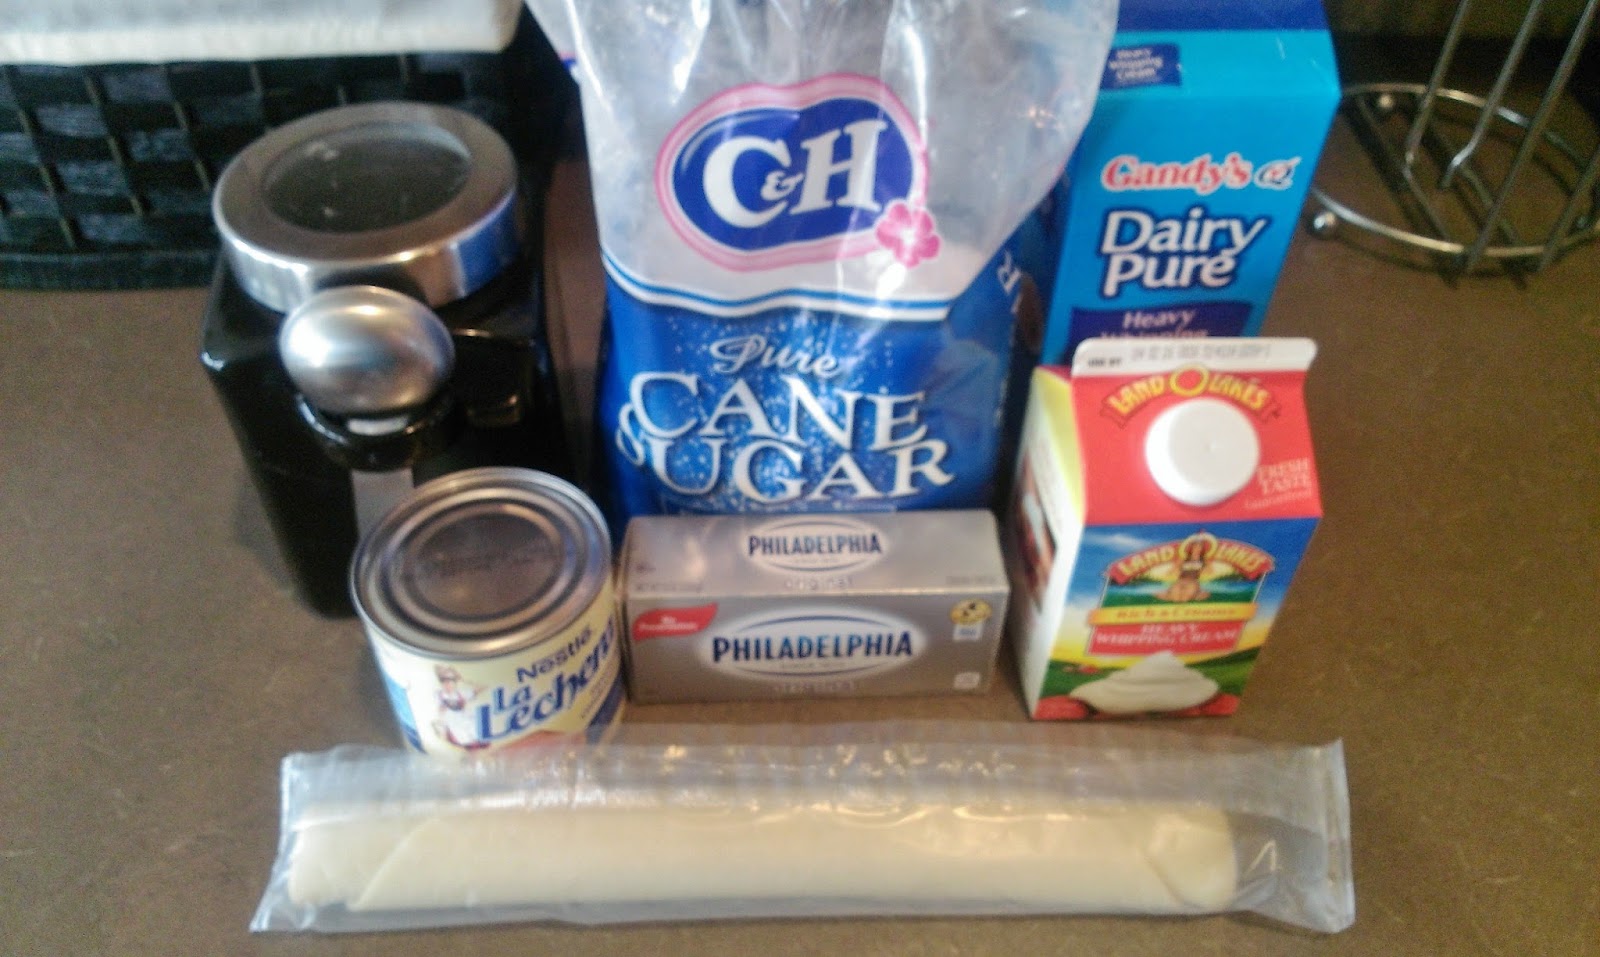
At least the rest of this is a piece of cake. Or pie, I suppose. While my science project was cooling, I got my ingredients together and my pie crust ready. I decided since I was making my own dulce de leche, I’d let the good folks at Pillsbury take care of my pie crust for me. Solid choice. Here’s the total breakdown for this recipe:
- 1 room temp pie crust
- 1 can of dulce de leche if the baking gods love you, or a can of sweetened condensed milk simmered for two hours
- 1 block of cream cheese at room temp
- 1/4 cup of powdered sugar
- 1 teaspoon of vanilla extract
- 1 pint of heavy whipping cream
- 1/4 cup of sugar
- Optional: a tub of Cool Whip for topping, additional caramel sauce for topping …and by optional, I really mean you want, nay, need these things for the best pie possible. This isn’t like the optional add ons every car salesman in the world will try to sell you. These final two ingredients are functional AND aesthetic.

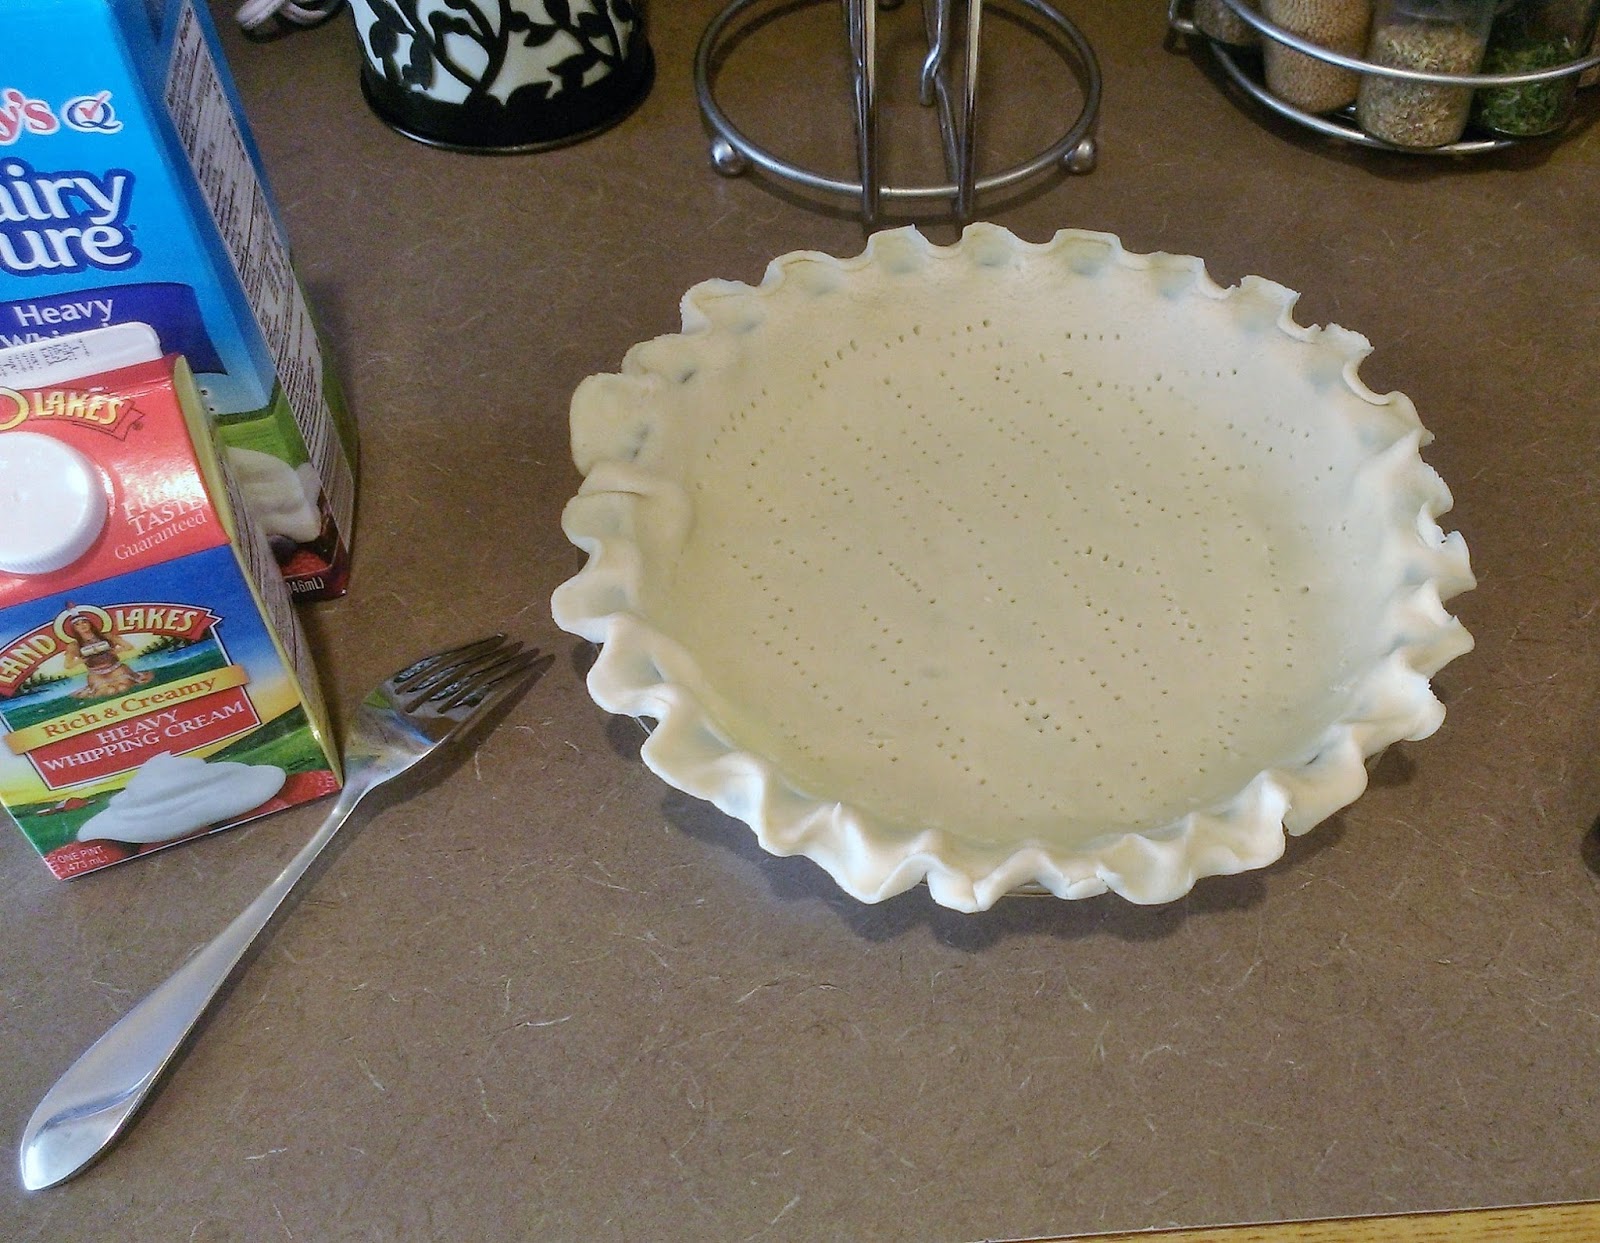
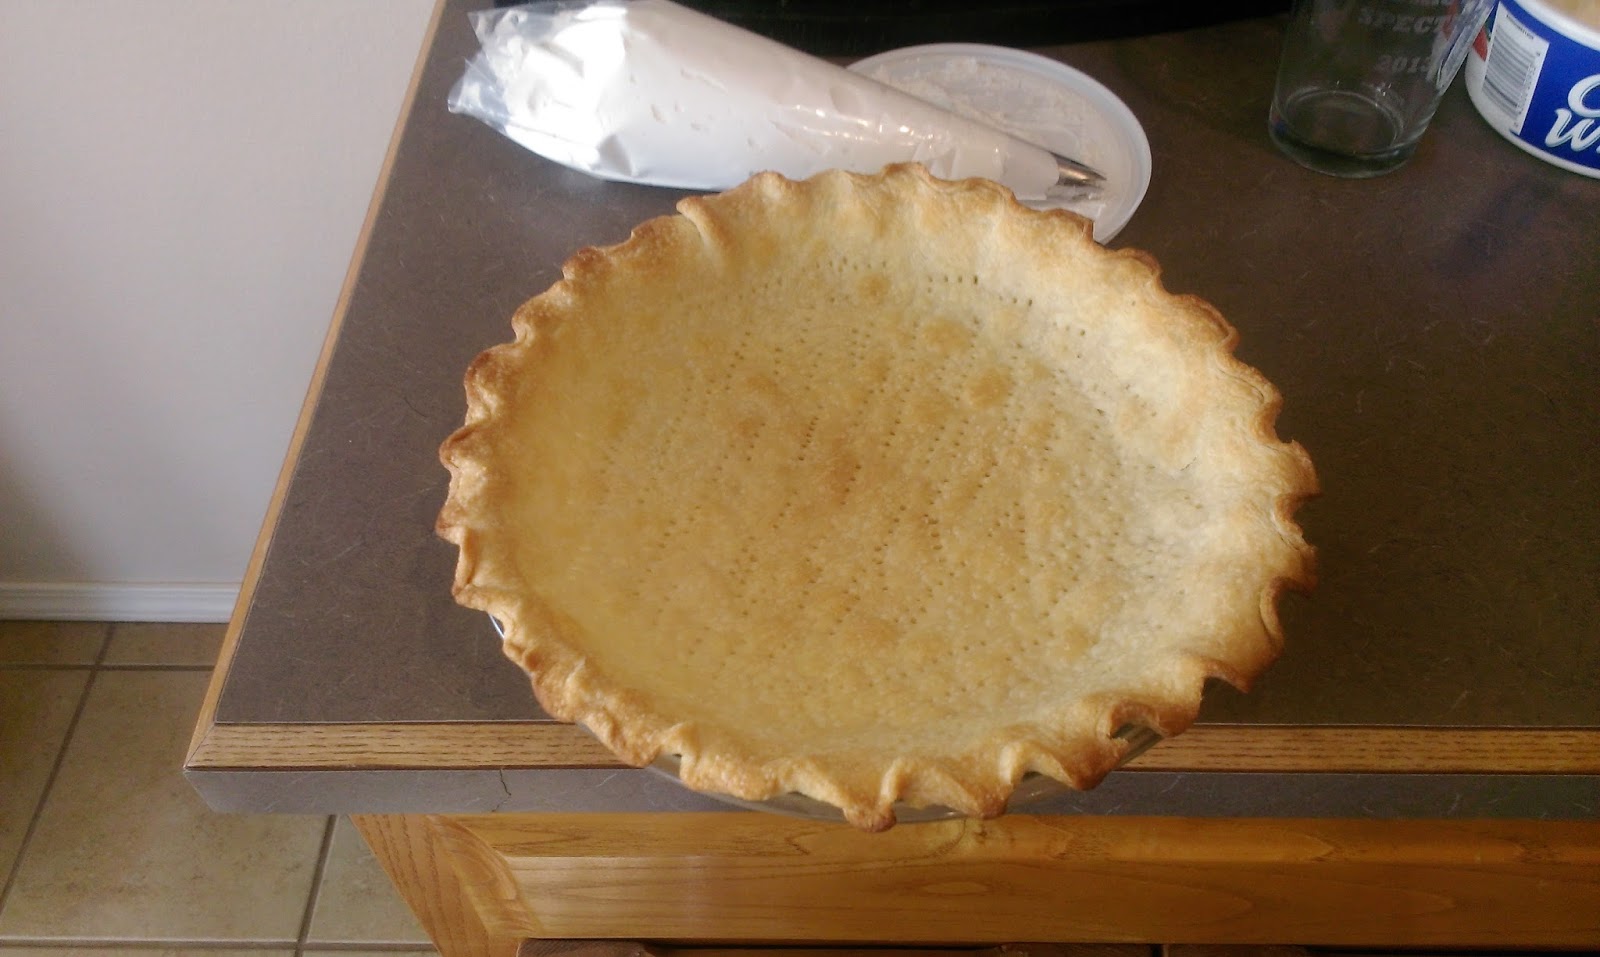
Fluted and hole-poked. Ready for action! Start by cooking the pie crust following package directions. Usually for a single-crust pie you want to bake it for 10-12 minutes at 450. Place the crust in the fridge to cool off after it is cooked. In your stand mixer, blend the cream cheese, half the can of dulce de leche, powdered sugar, and vanilla for a few minutes until fully incorporated. Scrape this out of the bowl into another bowl and cover up. Wash out the mixing bowl, dry it, and place it in the fridge to chill for a few minutes. Once it is cold to the touch, get it back out and dump in the heavy whipping cream. Start to blend on low for a minute until it thickens up, then blend on high for several minutes until the cream is nice and fluffy. Add in the sugar and give a final mix. Then dump in the bowl of cream cheese/dulce de leche mix you set aside earlier and give a good blend. Pie filling complete!

Ha! Tricked you into a photo montage. Take out the pie crust once cooled. 
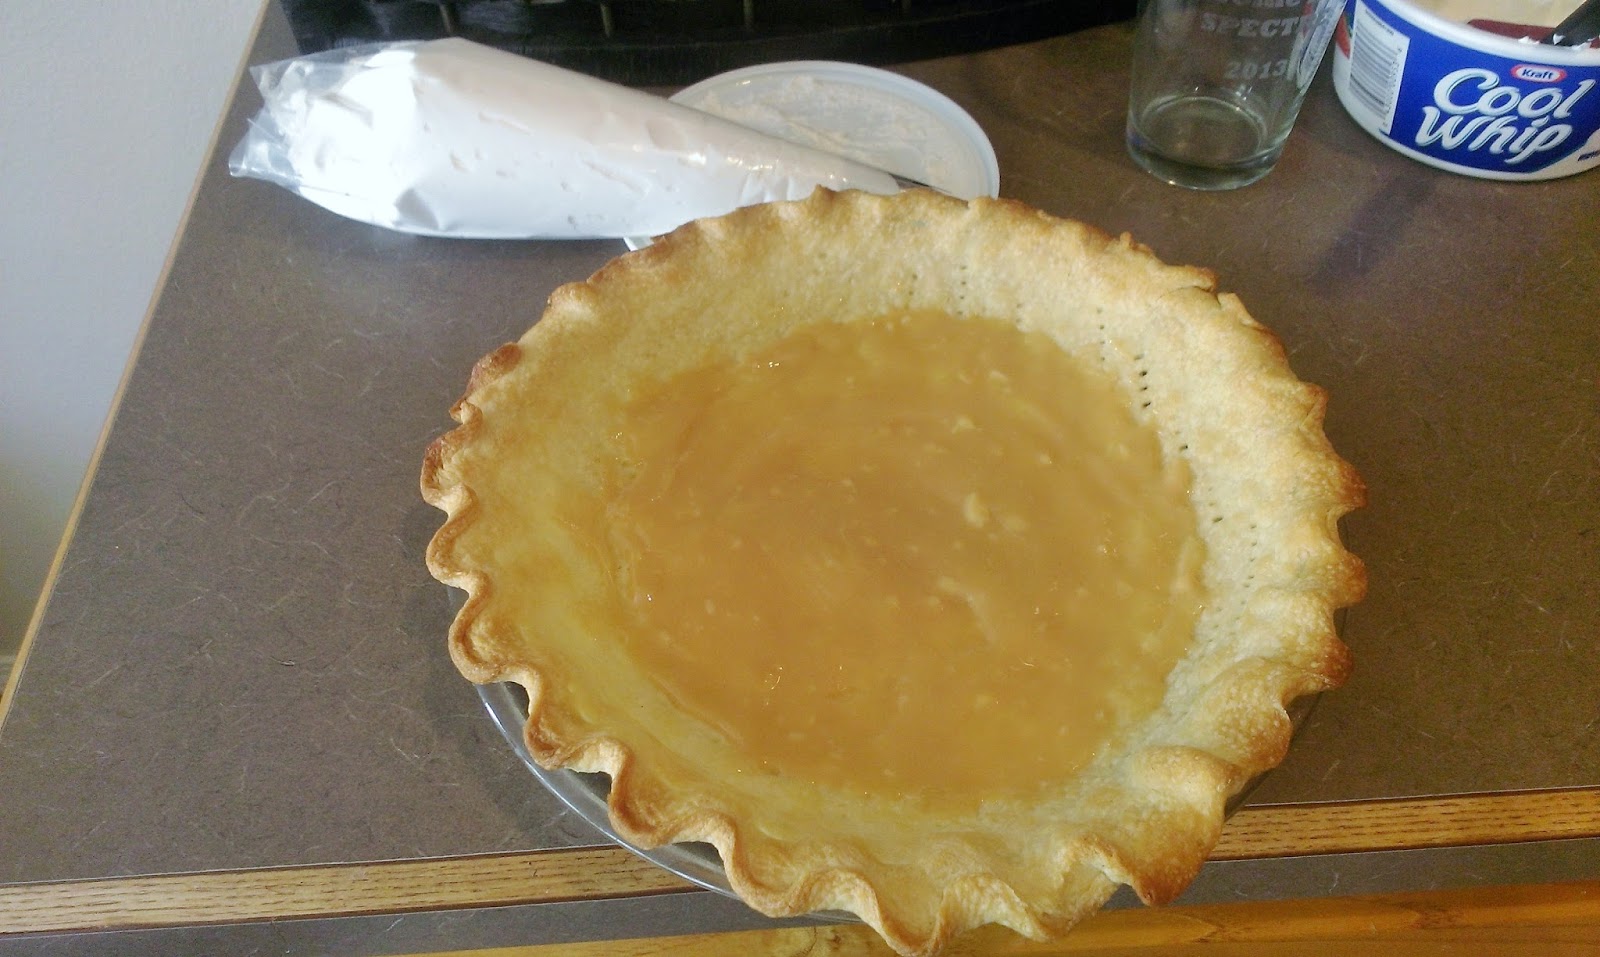
Then dump the remaining half a can of dulce de leche into the bottom of the pie crust. 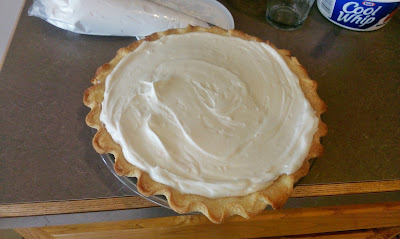
Then spread in the pie filling. No need to get pretty if you heeded my advice (smart cookie) and got Cool Whip for topping. 
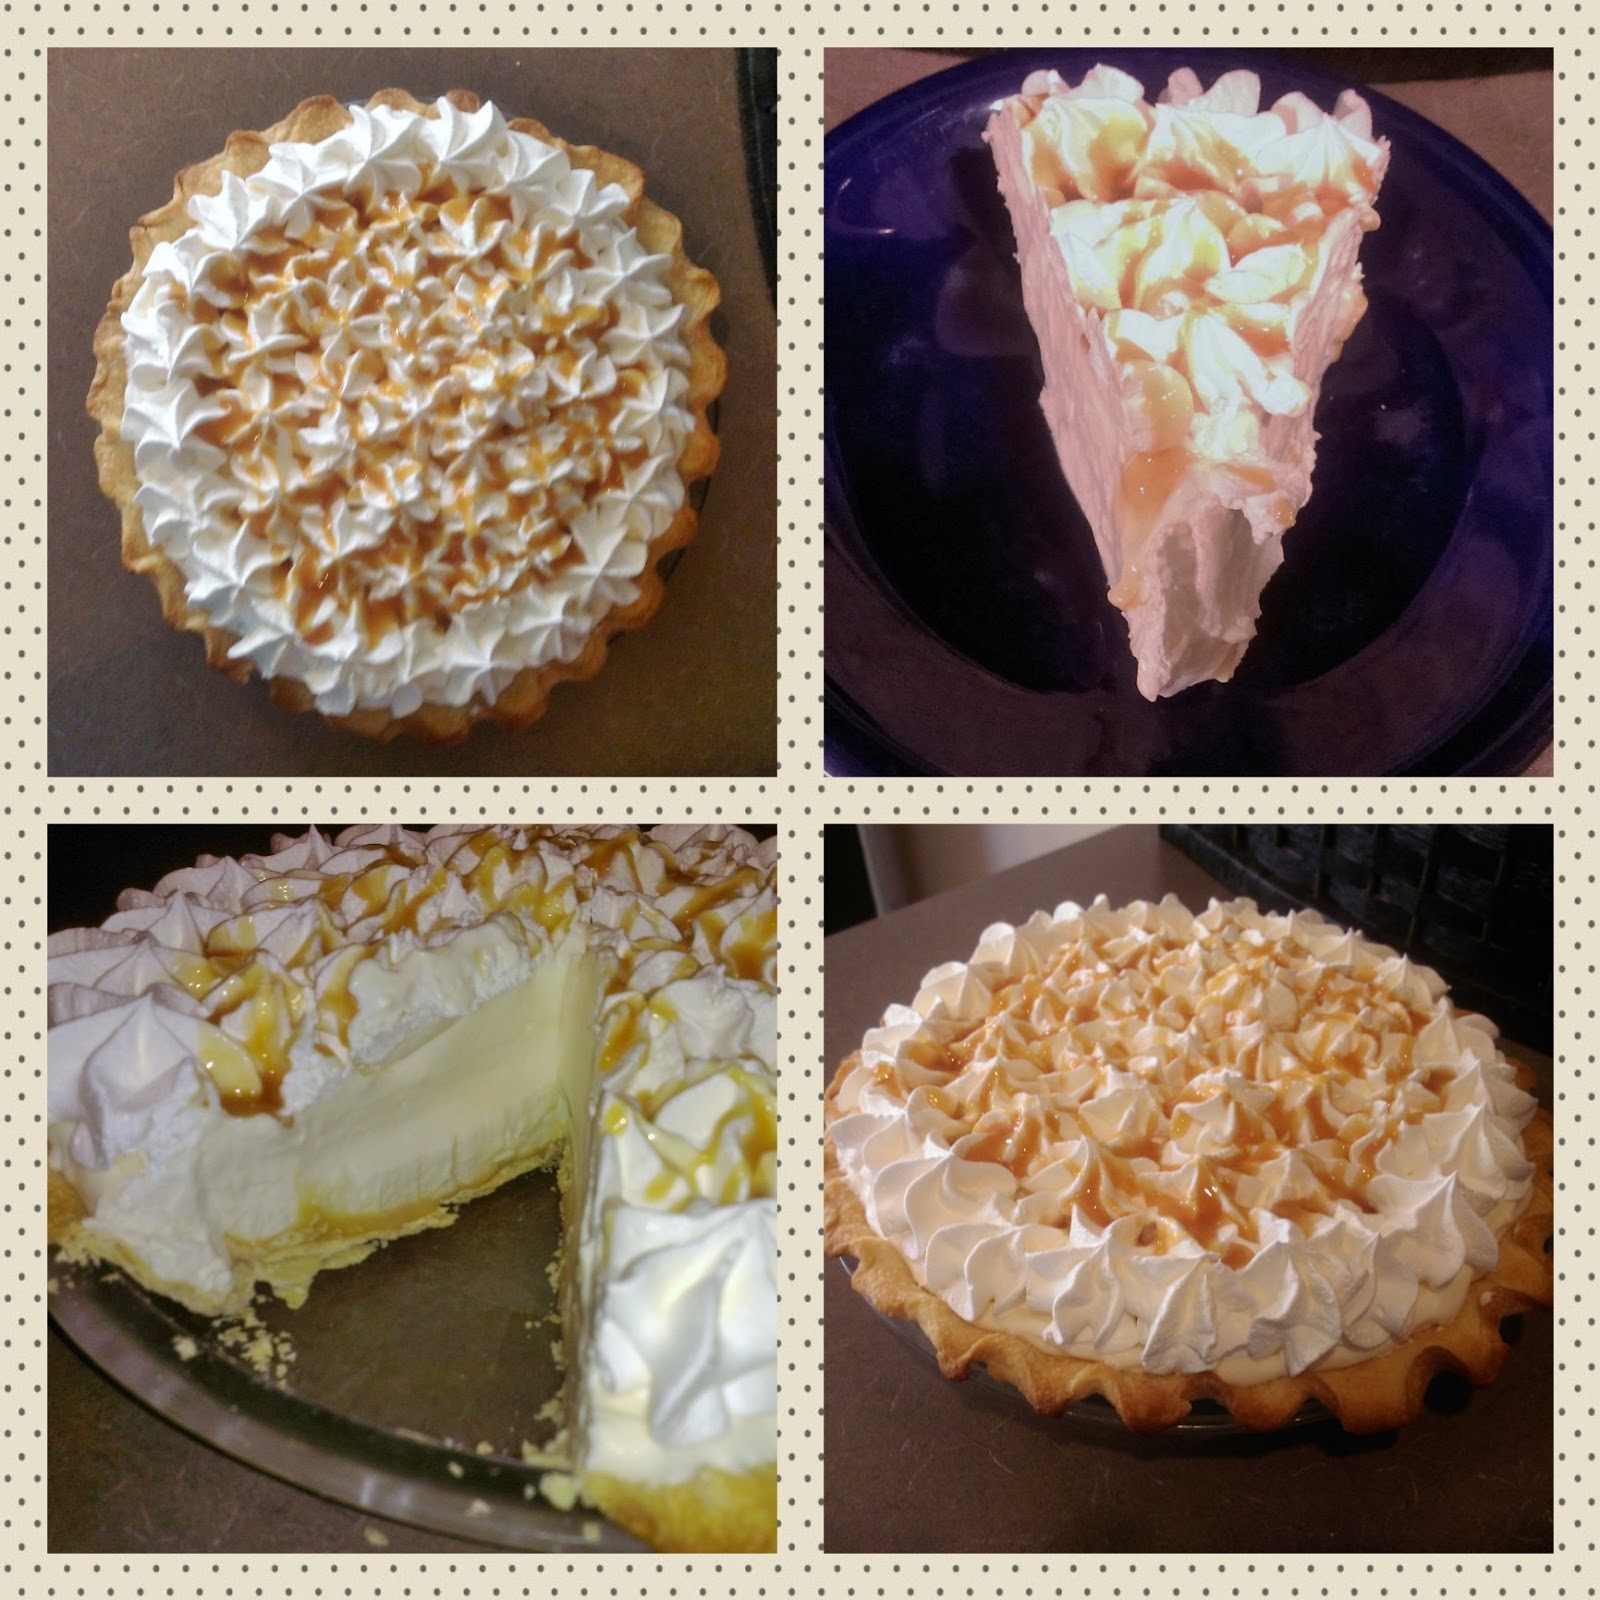
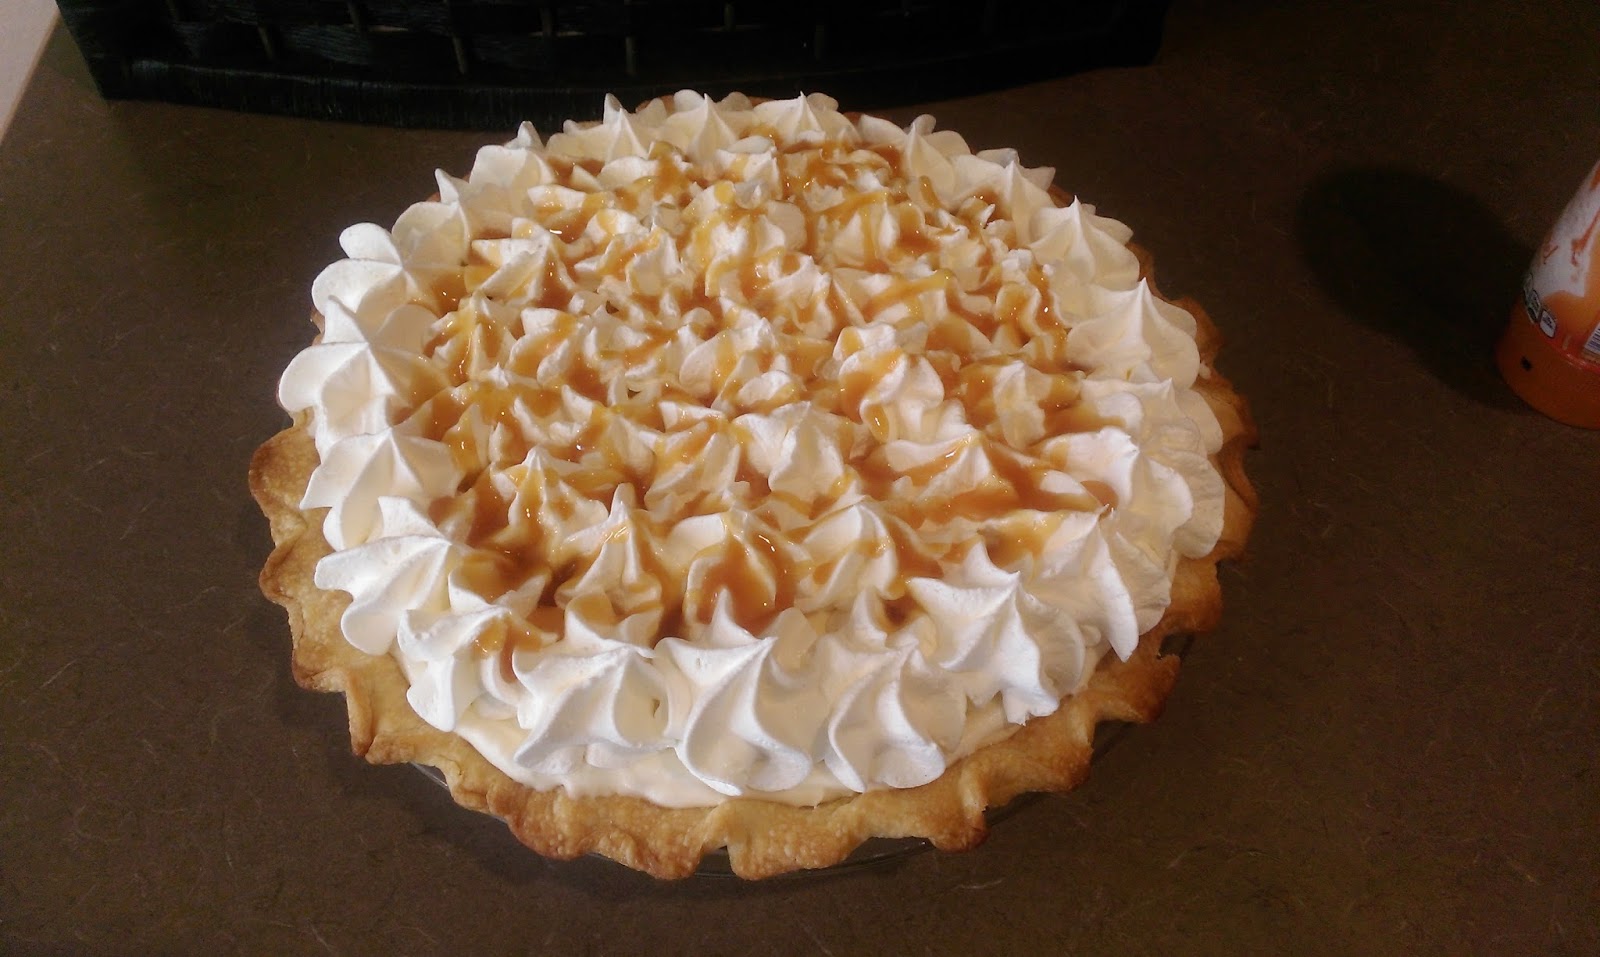
I put my Cool Whip into a piping bag fitted with a 1M tip…arguably the most versatile of decorating tips! I then just piped stars around the top of my pie. 
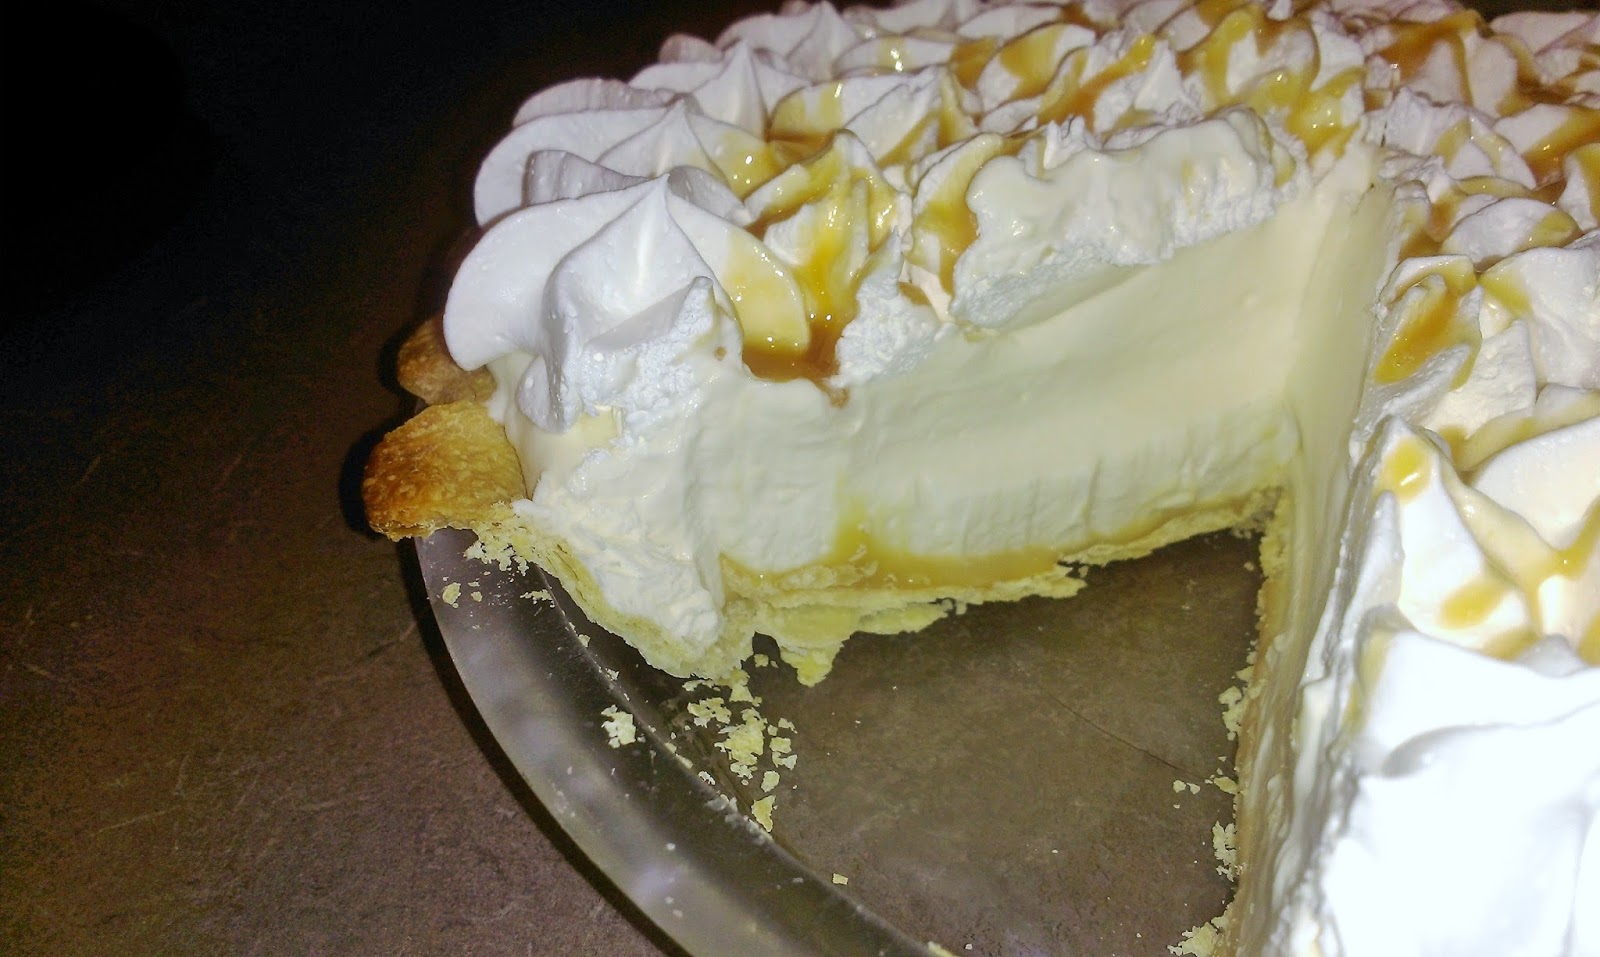
And I finished up by drizzling more caramel sauce on top. Once you’ve gotten to this step, now comes the hard part: put it in the freezer to set for two hours. So if you’re like me and had to make your own dulce de leche, you get to bookend this pie with two more hours of waiting and staring a wall, pretty much. Once I set it in the freezer, I literally told this pie it better be the best damn thing I eat all week or it was dead to me. I’m not in the habit of talking to desserts (really), but I’m glad this pie took my not-so-thinly veiled threat seriously. After doing demanding work around/on the house all day (Hi spring break, you were made for hard labor), getting all sweaty and gross, this pie was my ultimate reward for a long day of home improvements and exceedingly warm dog walks. I imagine eating a cloud would taste very similar to eating a slice of this dulce de leche cream pie…a cloud lined in caramel. It is so light but packs the perfect amount of sweetness thanks to the dulce de leche in the filling and the extra layer of it on the bottom of the pie (okay, it was worth the time). It’s like the cotton candy of pies, I guess. Melts on the tongue, but won’t ever make you feel uncomfortably full. This is an important quality I look for in a dessert because I pretty much eat them nonstop. I’ve got seven more slices of this pie left, and I’m gonna need them to fuel my remaining spring cleaning. Considering it’s so windy outside that everything is pretty much just getting re-covered in a thin film of dirt after I clean it, this pie is going to soothe my frustrations and lamentations. Pie: cheaper than therapy. ‘Til next time, my fellow eaters!

You make me happy when skies are brown… -
Cresting the Hill…
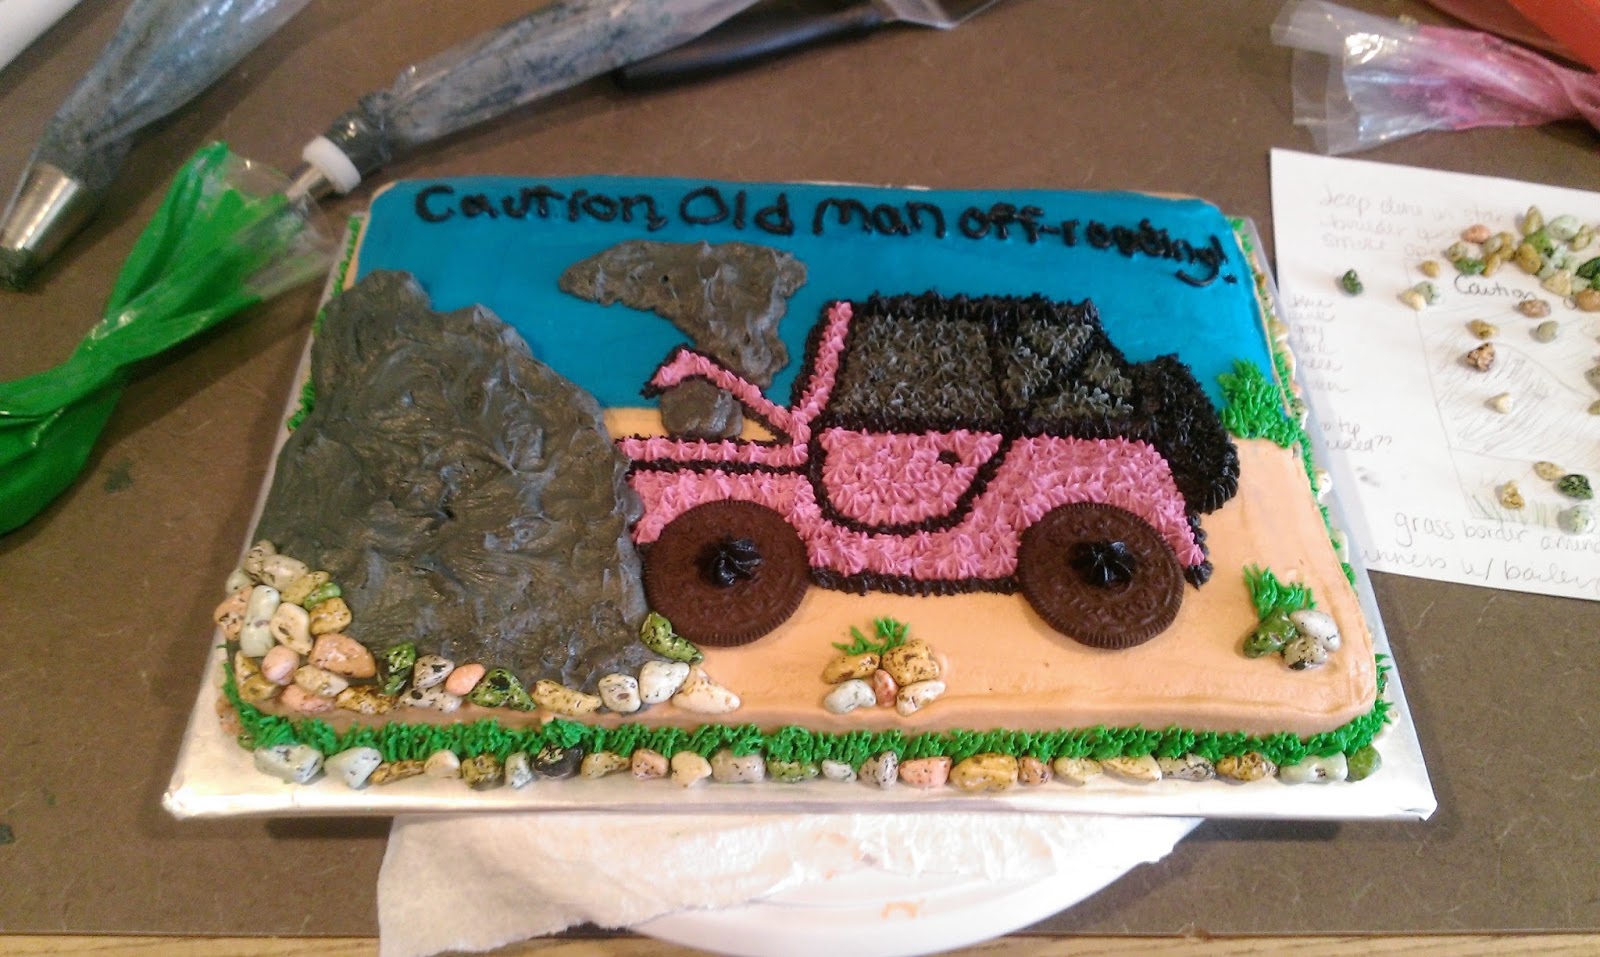
There’s nothing quite like trying to age gracefully (and quietly) while your loved ones refuse to let that happen. This is precisely why my 29th birthday was the final celebration to ever be held on record for the rest of my life (I refuse to acknowledge January 7th from here on out. Find me in the bottom of a wine cask when the next one rolls around). There does seem to be a bit of a double standard with age. Ladies, say goodbye to your looks, gravity-defying cleavage, and ability to wear leggings as pants (I would argue this isn’t acceptable past age 6 anyway). Gentlemen, say hello to becoming a silver fox, getting to wear suave suits, and having young hot blondes with daddy issues heading your way. If I can’t come back as a man in my next life, I’m at least going to aspire to break the standard and age a la Helen Mirren or Jessica Lange. Most birthdays are anticipated, especially the big ones: 16, 18, 21, 25 (what, being able to rent a car is legit). An inevitable ball starts rolling really freaking fast after 25 though. I’m now beginning to regularly celebrate all my friends turning 30. And here I am still thinking a decade ago is 1996. Since I can’t turn back time, I guess I’ll slather on the wrinkle cream, look up Botox costs, and continue to celebrate the slow decline to death with all my friends. You can take my wrinkle-free skin, but you can never take my cake.

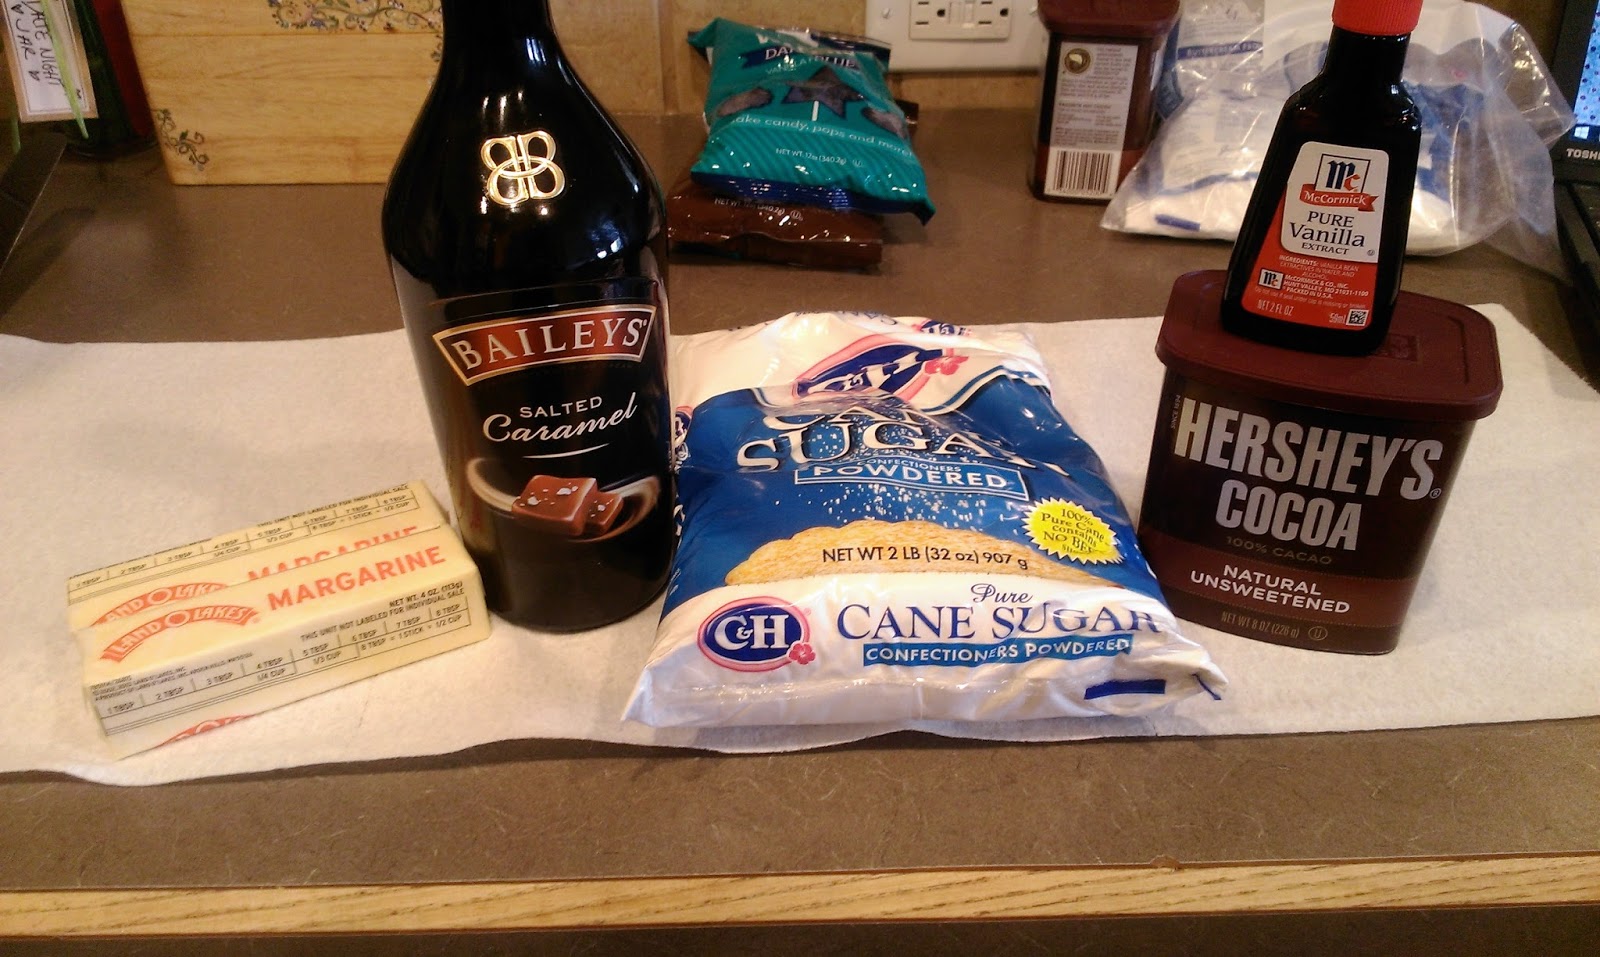
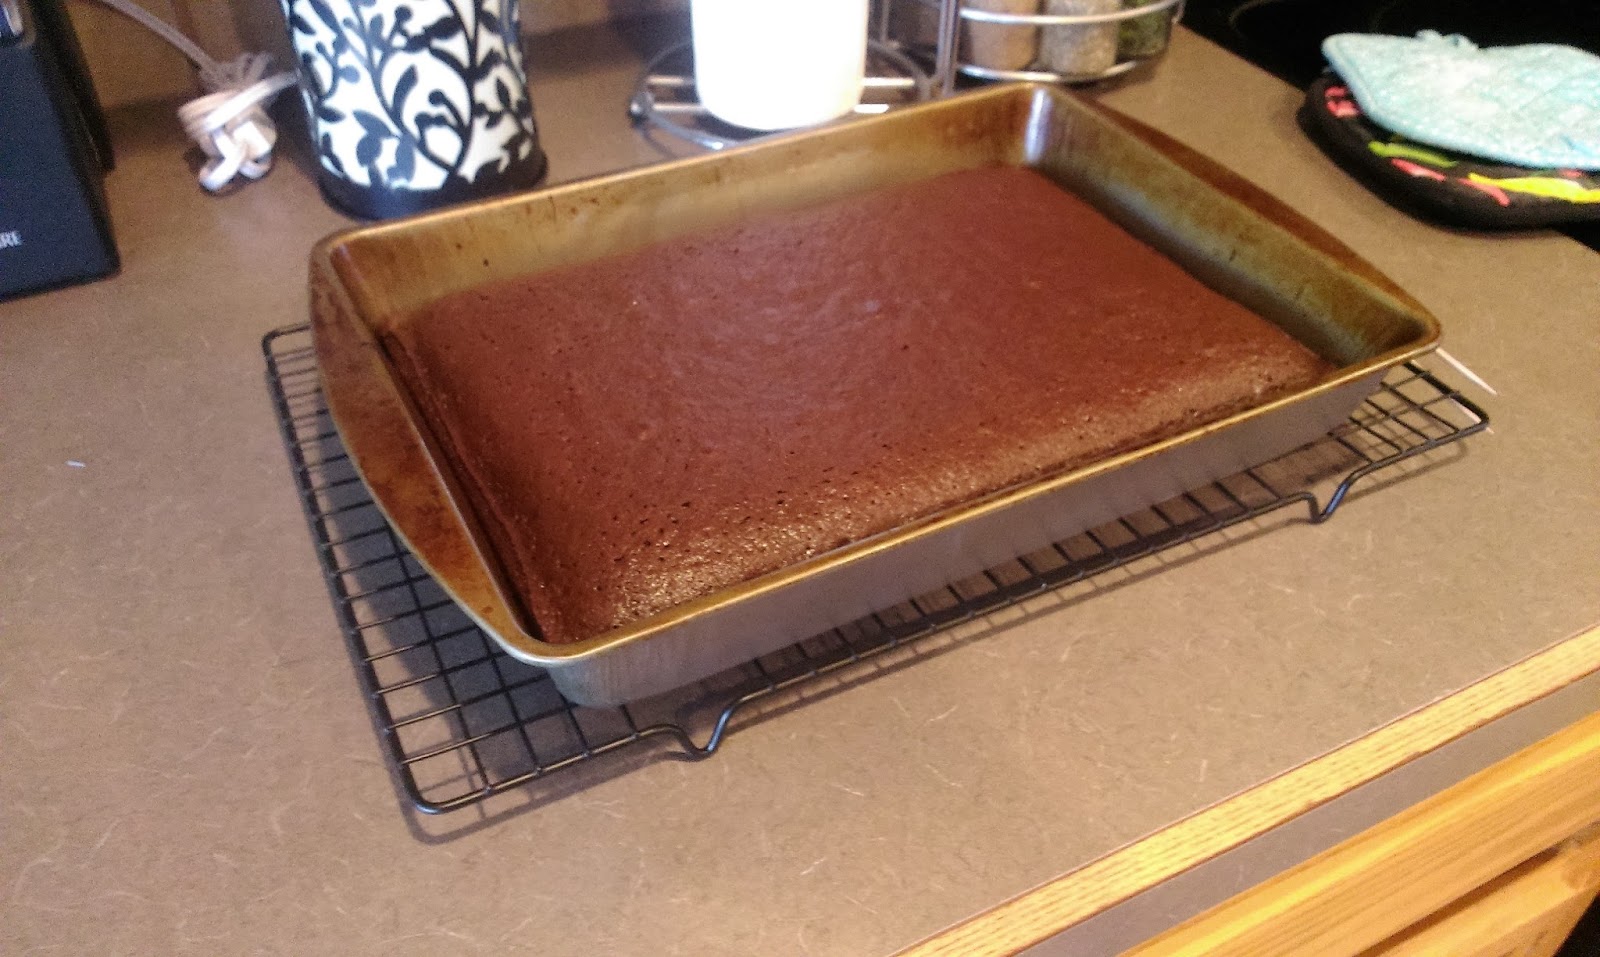
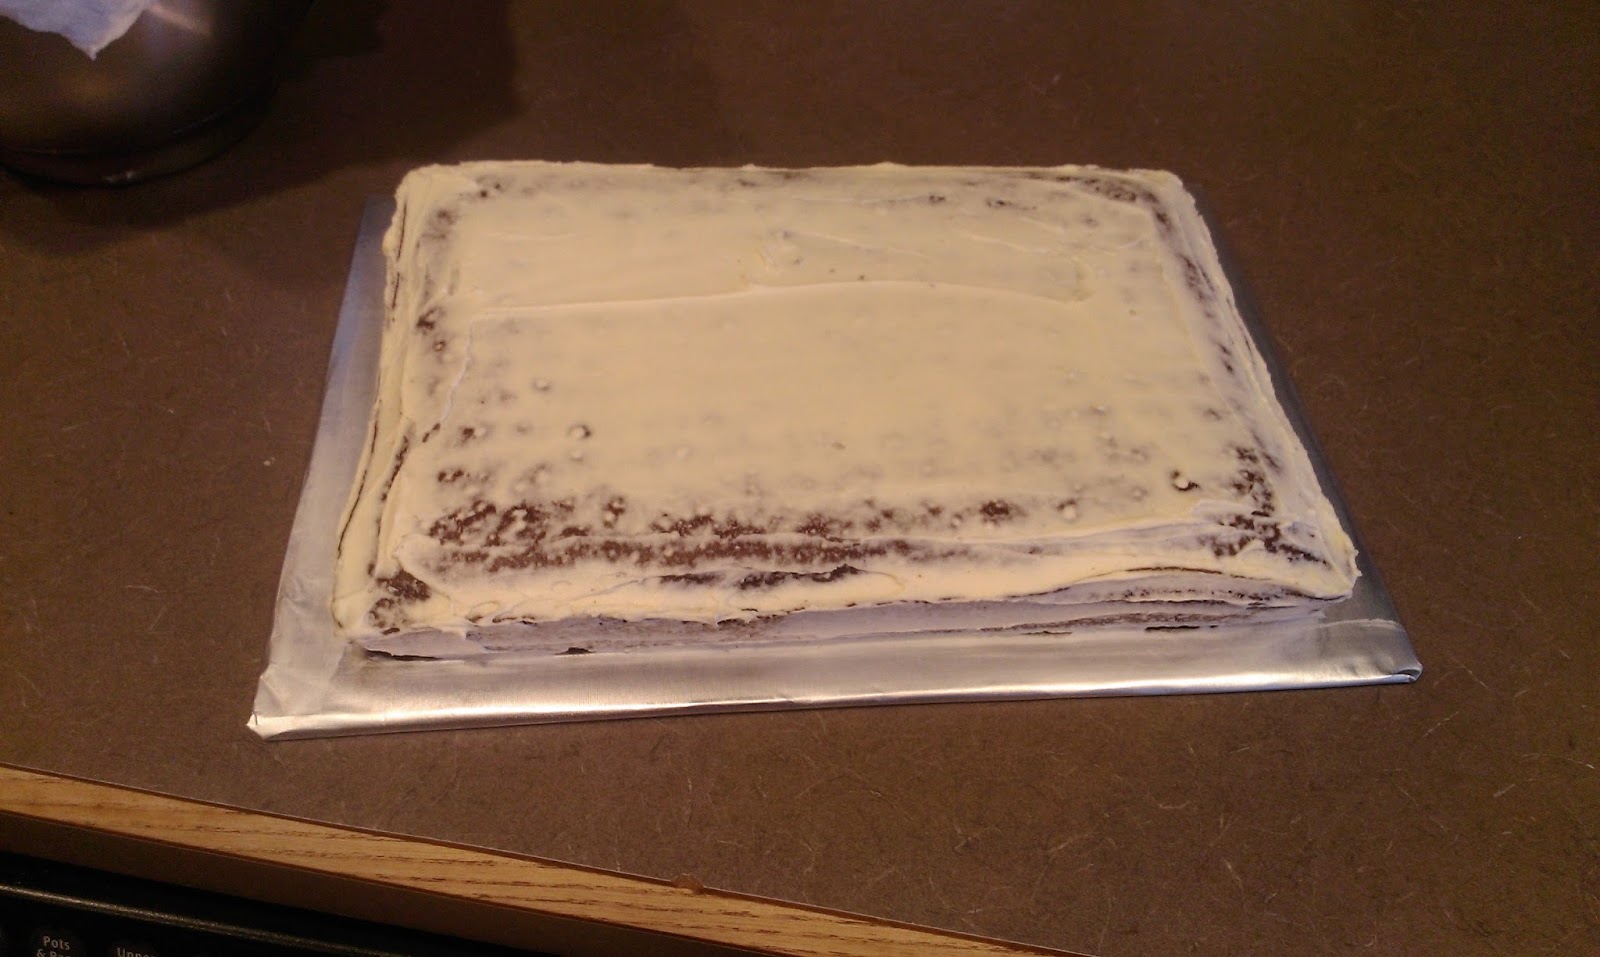
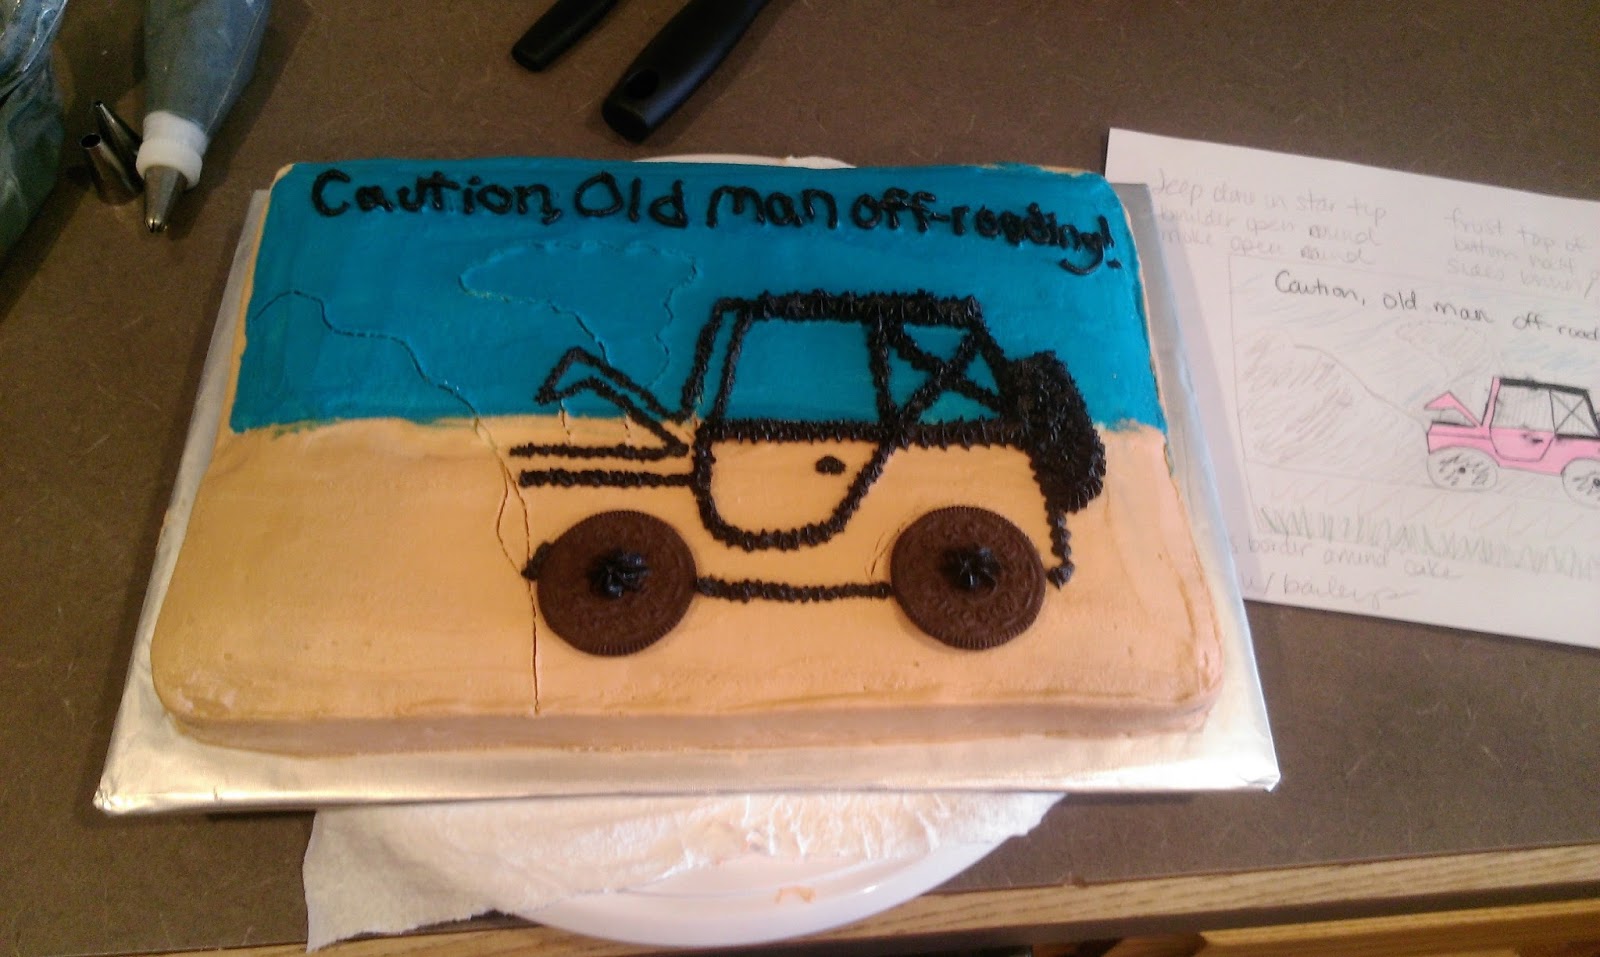
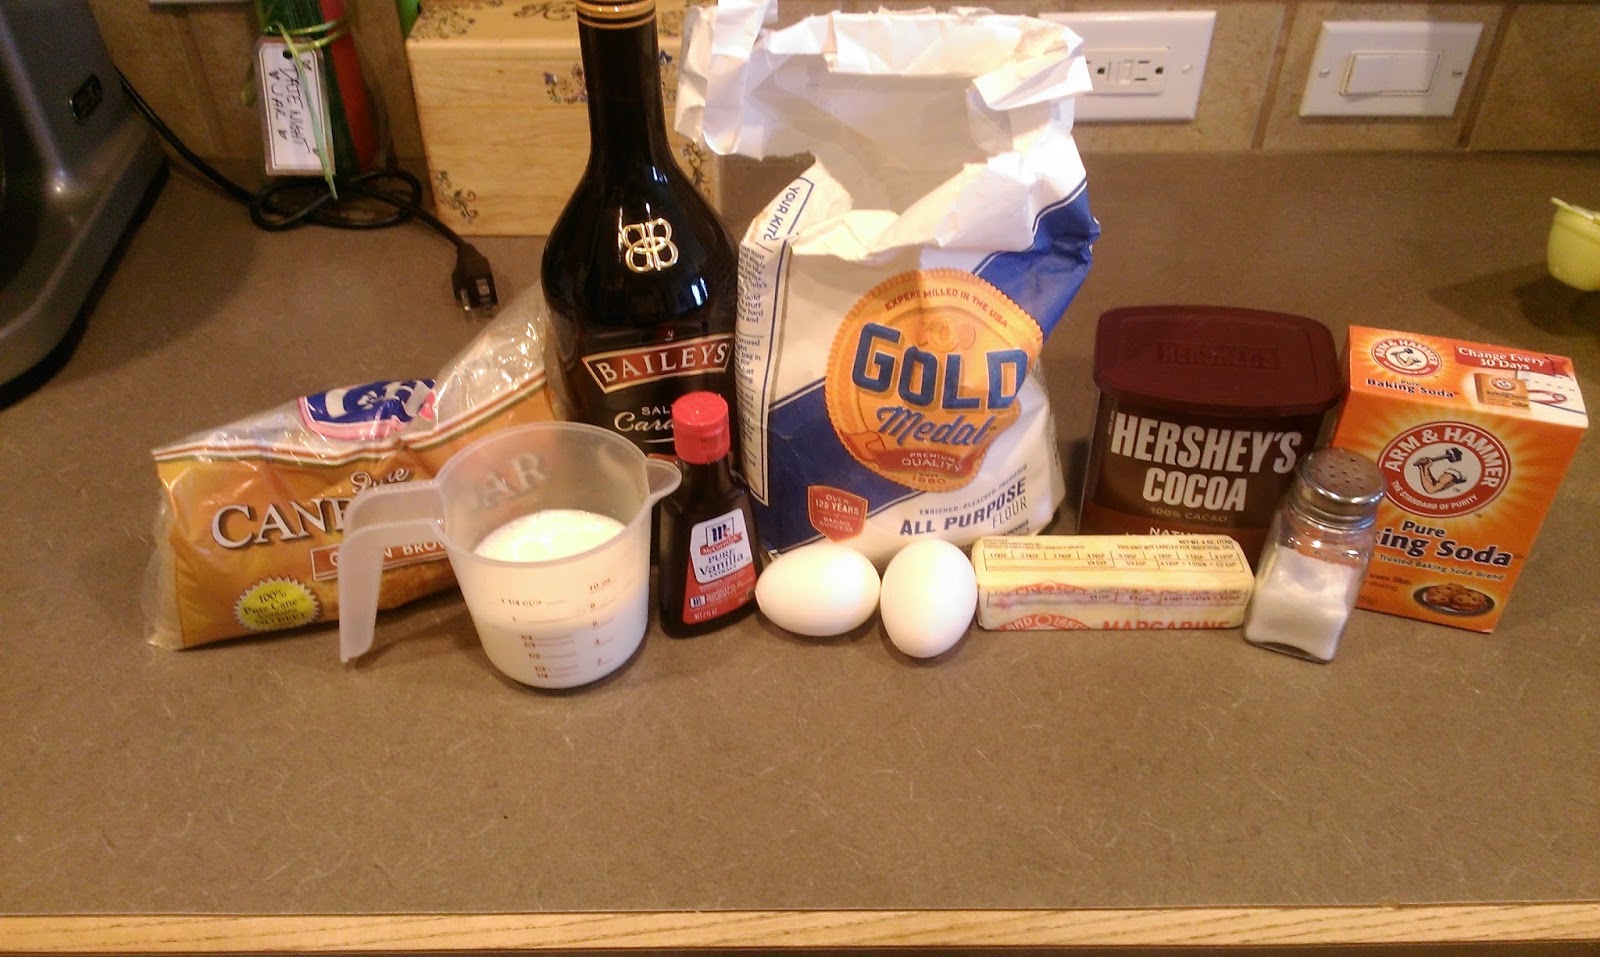
Caution, old man off-roading! So the first of many triple decade survival parties kicked off this past weekend, and I was commissioned to make the cake. This celebration was actually for my husband’s husband, who is quite jovial and young at heart (read: a pilot). I’d like to make note here that his girlfriend actually requested the hot pink Jeep. I’m a huge fan of sarcastic cakes, so naturally I jumped at the chance to make an off-roading-gone-wrong cake for an old man and Jeep enthusiast…but that’s probably a redundant descriptor. Of course I made the Guinness cake, but since everyone’s Irish around Saint Patrick’s Day, I couldn’t find regular Guinness anywhere. People really like chewing their beer this time of the year, I suppose. I had no choice but to try this cake out with what I assume is an even thicker, chewier (think taffy-like) Guinness: Guinness Extra Stout. I smelled this stuff and immediately did not regret the decision to skip drinking for Lent. But since cake is something you actually are supposed to chew, I was hoping for promising results.

Pictured: Ingredients. In their final form. I know, I always take a photo of my ingredients, and technically I have done just that. Follow the link above for the full recipe and instructions. Know to make a 9×13 cake that you will need to double the recipe for the cake and line your pan with Parchment paper sprayed with Pam (this is a heavy cake, and you want to remove it easily from the pan without breaking). In this case, I substituted the regular Guinness with the Stout Guinness. This COMPLETELY altered the taste of the cake. I honestly didn’t think such a small change would make such a big difference, but it really did. The regular Guinness yields a nice and milk chocolatey cake. The Stout Guinness yields a nice and DARK chocolatey cake. I have to go on record here and say dark chocolate is the most underrated of chocolates, and it is a damn shame. Milk chocolate is sweet and willing to please everyone like a doormat. White chocolate is a total imposter. Dark chocolate is suave and sophisticated like the James Bond of chocolates–he’s mysterious and sexy, but not for everyone. Everyone still ate the hell out of this cake whether they liked dark chocolate or not, so credit the complimenting and ever-so-sweet Baileys frosting for doing its job.

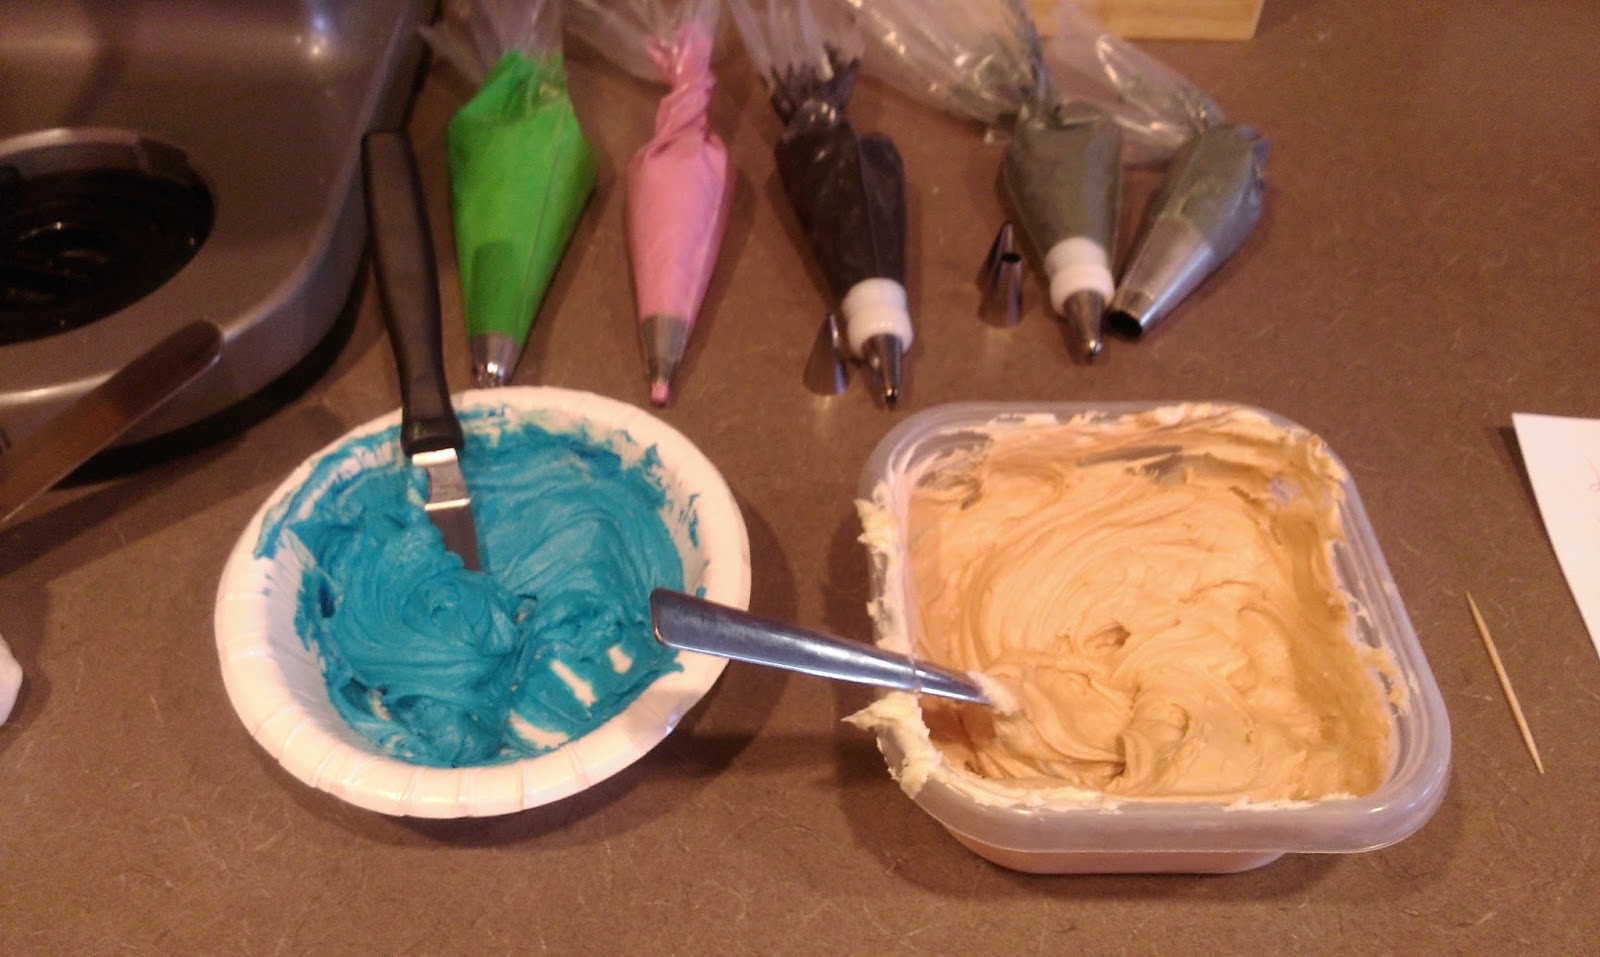
Speaking of frosting! I made a LARGE amount of frosting since I knew the cake was going to need several different frosting colors. If you’re also making a crashed Jeep cake to poke fun at your friend’s failing eyesight due to the aging process, gather up the following ingredients and laugh at what a strange and unlikely coincidence this is:
- 1 1/2 sticks of room temp butter
- 1 cup of Crisco
- 6 cups of powdered sugar
- 1 tablespoon of CLEAR vanilla extract
- 4 tablespoons of Baileys (either regular or caramel)
Once your cake is cooked and fully cooled, cream the butter and Crisco together for a few minutes. Then add in 3 cups of sugar, the extract, and 2 tablespoons of Baileys. Blend on low for a moment until the sugar mixes in and bump up the speed. Scrape the bowl then add in the remaining 3 cups of sugar and 2 tablespoons of Baileys. Crumb coat your cake and place in the freezer for 30 minutes. While that’s taking place, prepare for the crappiest of photo montages!!

I needed quite a few colors and tips for this cake. My friends better be glad there’s nothing I won’t do when it comes to cake. - I used open star tips to decorate my Jeep. I used a small amount of frosting dyed hot pink and placed in a bag with a #16 tip. I used a small amount of black dye and placed in a bag with a coupler and a #18 tip. You’ll also need a small round open tip to write which is why you need a coupler. I used a #3 tip for this.
- For my smoke and boulder, I dyed frosting gray using a small amount of black dye into the plain white frosting. The boulder frosting is on the far right. I used a 1A round tip for this and a #12 tip with a coupler for my smoke cloud. I used a #16 tip for the Jeep windows, so the coupler is needed here.
- I left a small amount of frosting dyed blue for my sky in a bowl and set aside.
- I left a larger amount of frosting dyed tan for my ground and sides of the cake in a bowl (Tupperware, whatevs) and set aside.
- I finished up by dying my remaining frosting green and placing in a bag with a grass tip. I believe mine is a #239.

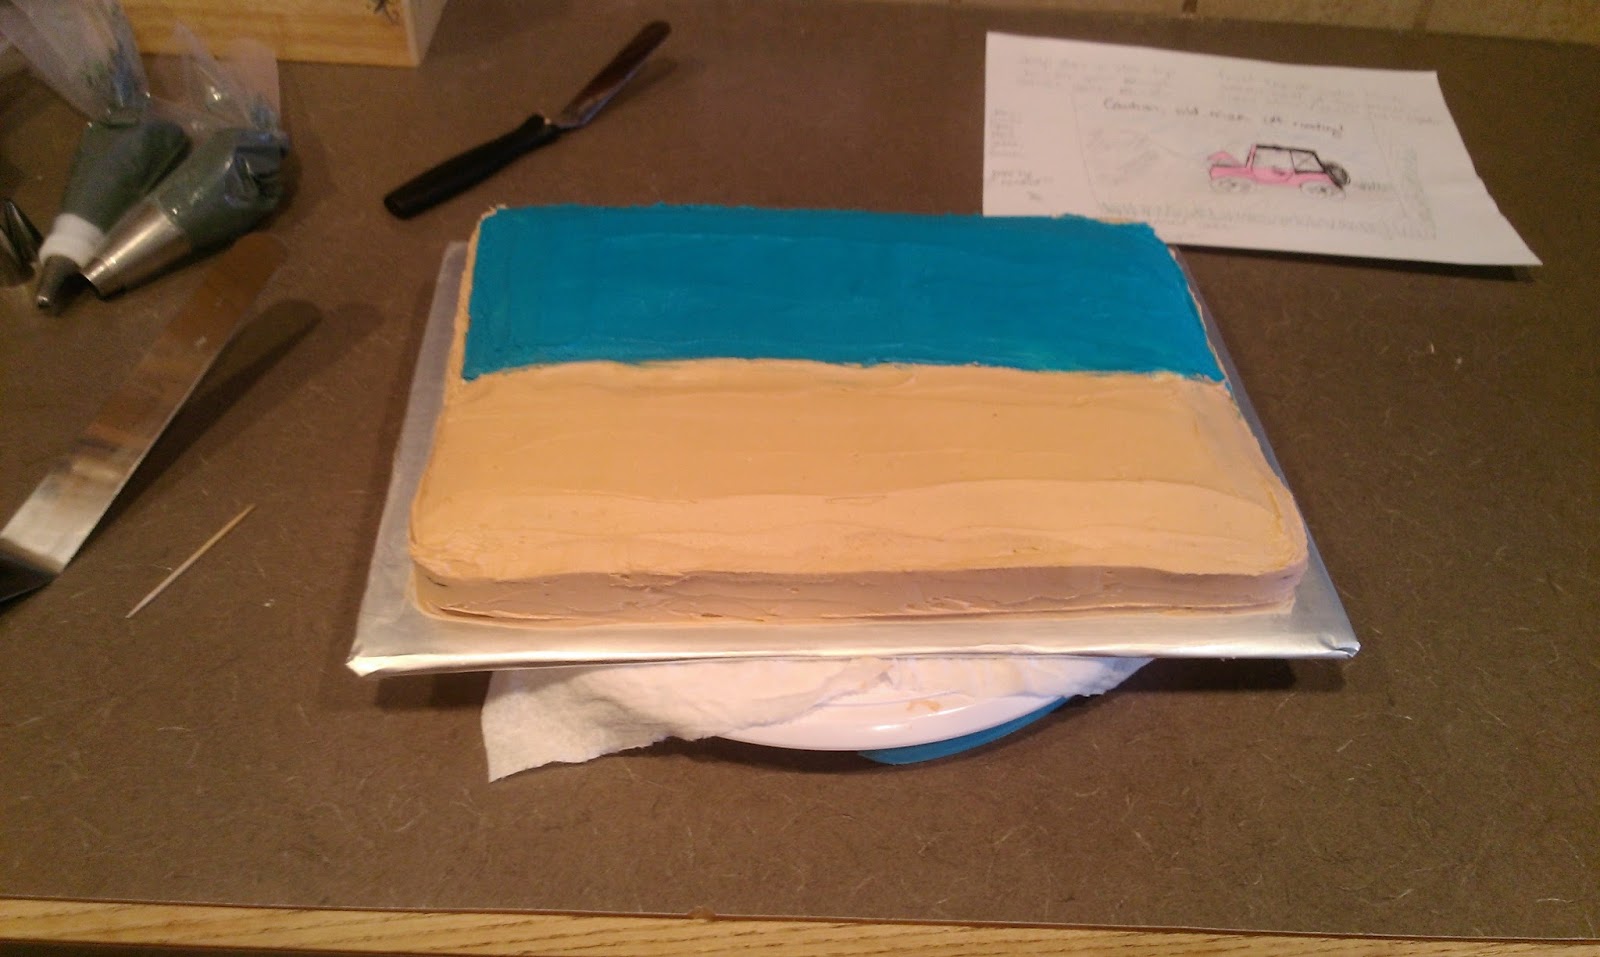
Once my crumb coat was frozen, I SLOWLY and carefully frosted my backdrop: blue sky on top, tan ground on bottom. I placed in the freezer for 30 more minutes to set. Then I used the paper towel trick to smooth out the tops and sides of the cake. Be careful when smoothing in the middle so the colors don’t bleed onto each other. 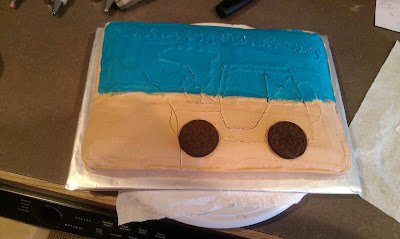
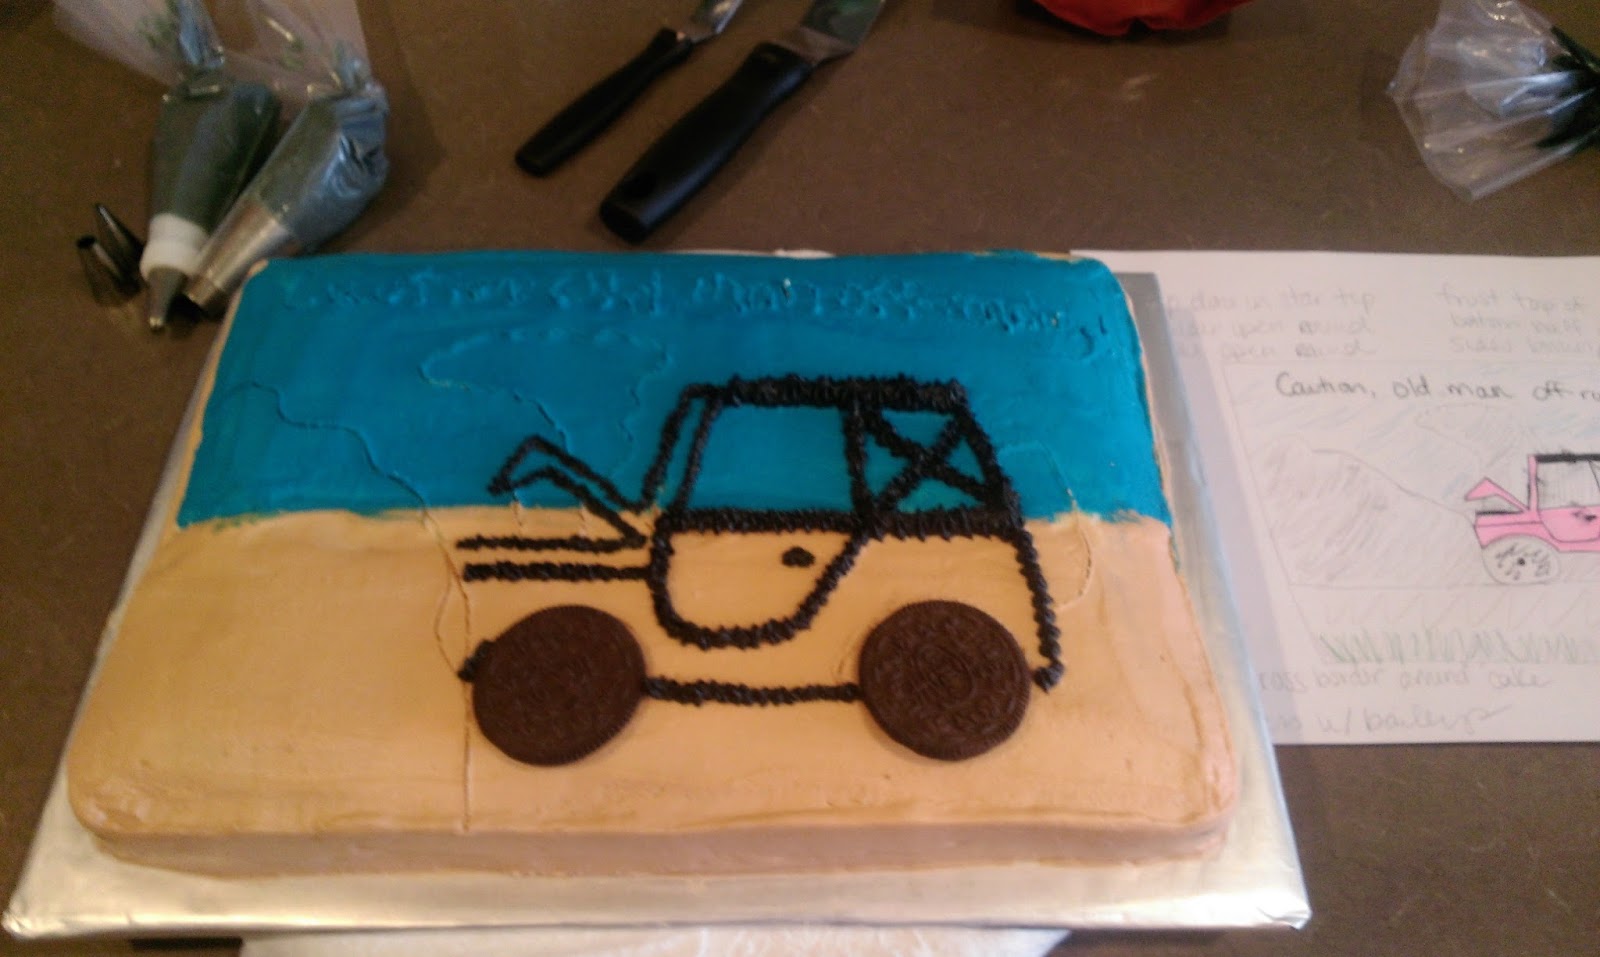
In all my years (two of them) of cake decorating, I have found the most versatile of cake decorating tools is the toothpick. I used one to draw out the grisly scene: hot pink Barbie jeep meets boulder. I also decided the wheels needed to be made of Oreos! I know, I’m brilliant. They’re nice and nubby and mimic a Jeep wheel while not wasting any of my limited black frosting. Kate Bakes Cakes: cutting corners since 2014. If ever I make business cards… 
You’ll notice I sketched this cake out in advance. Quite obvious I’m an English teacher by day now, isn’t it? I started off by piping the outline of my Jeep. I worked backwards since I’m a lefty and the world is against me. 
Which makes piping messages suck super hard! I traded my open star tip for my #3 tip for this. I also used the open star tip to give the Jeep some tiny rims. 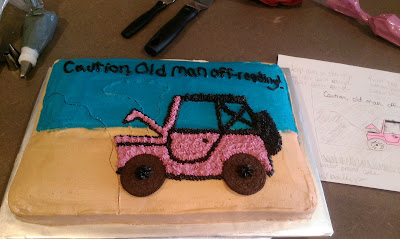
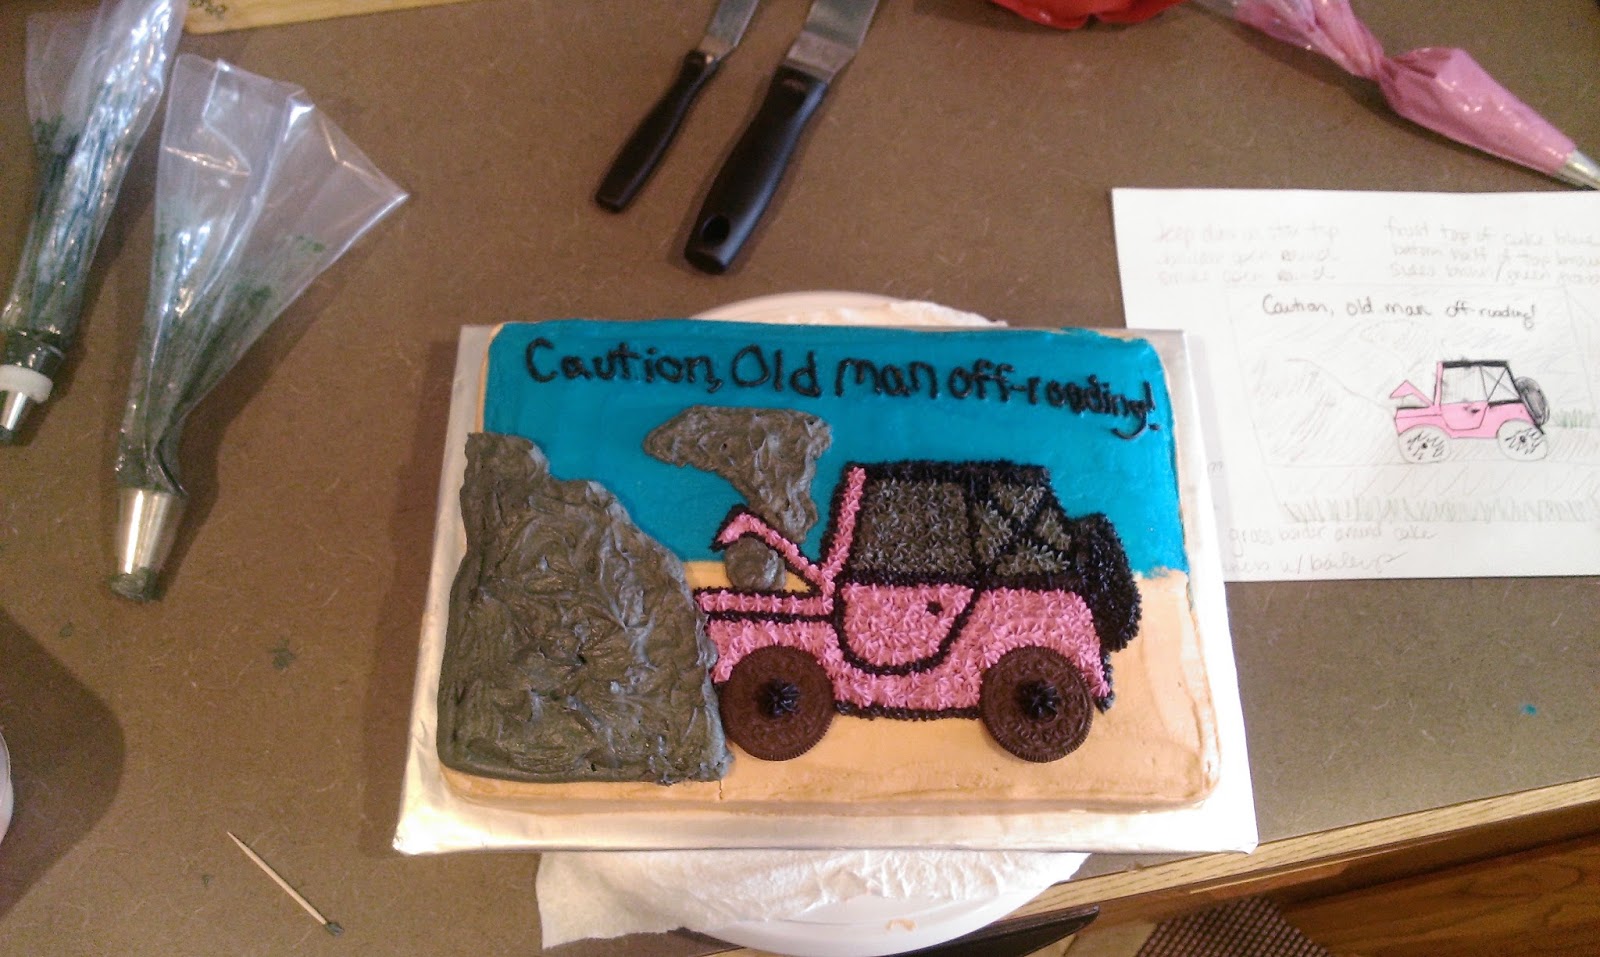
Then I filled in the fuschia! 
I finished up the Jeep by tinting the windows. This way Ken,Barbie, I mean the birthday boy, wouldn’t be seen crashing his beloved hot pink Jeep. The things we do for friends.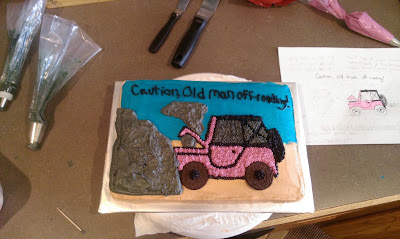
“I like that boulder. That is a nice boulder.” -Donkey, probably. To make the boulder and smoke clouds, outline the area and then go back in and pipe large mounds inside the outline. Come back in and use the round tips to blend and give texture by simply swirling them around. 
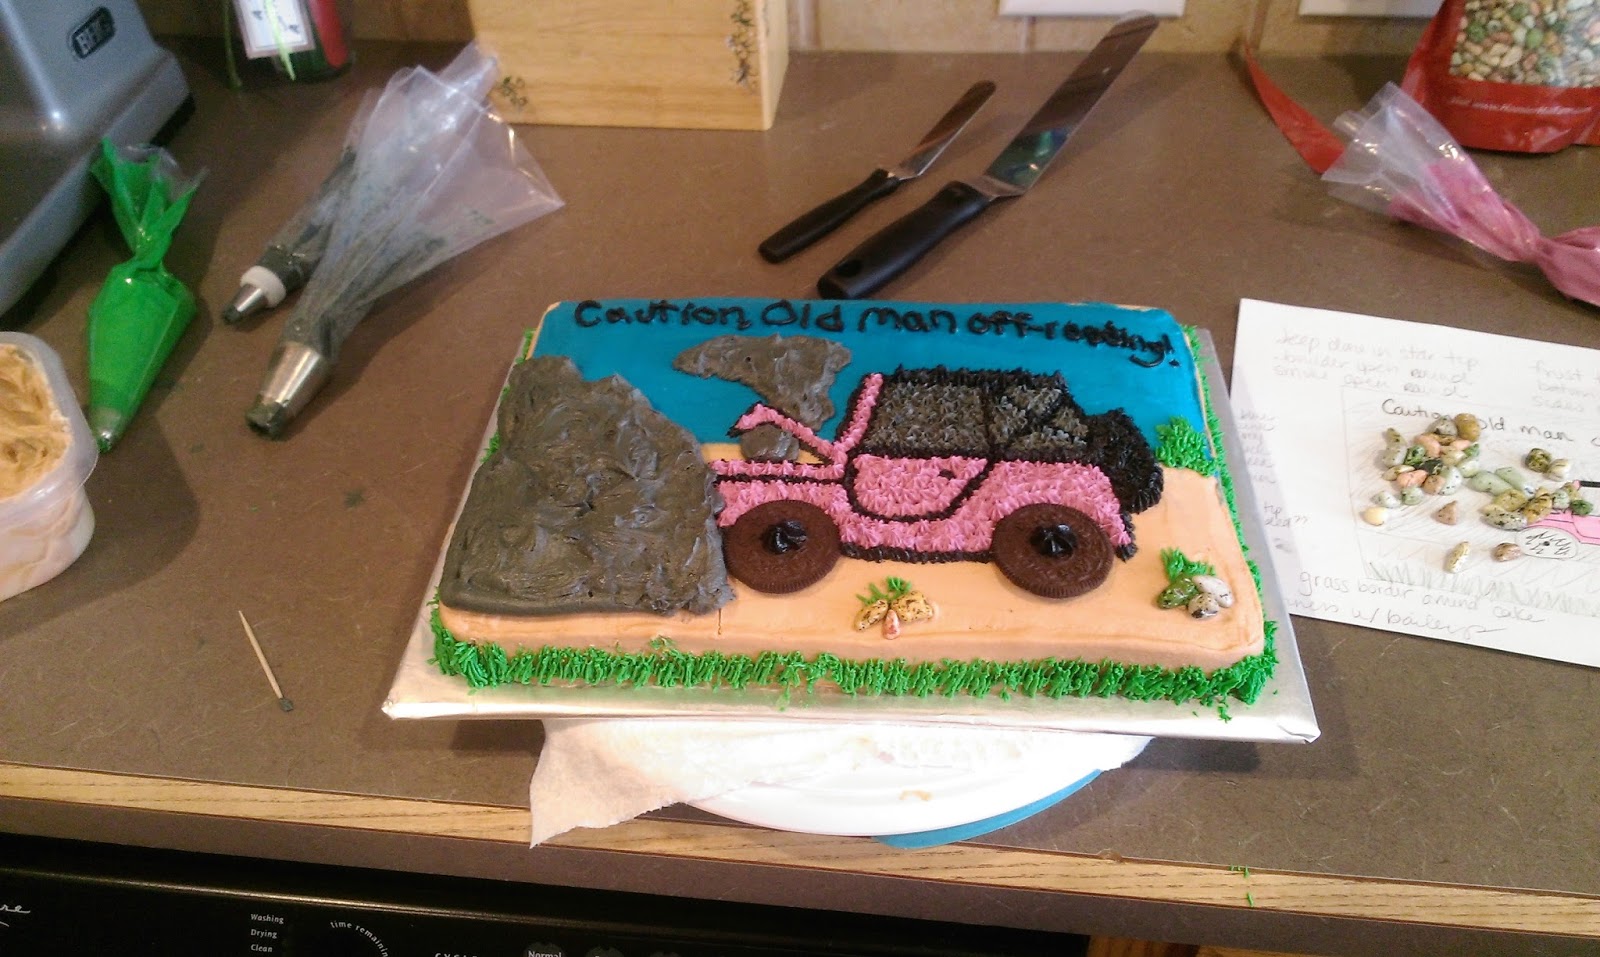
I piped a grass border around my entire cake with the grass tip. There’s really no right or wrong way to do this. I came back in and piped some random grassy patches on the top of the cake as well. I had a small color bleed between the blue and tan border, so this was effective in hiding a mistake! 
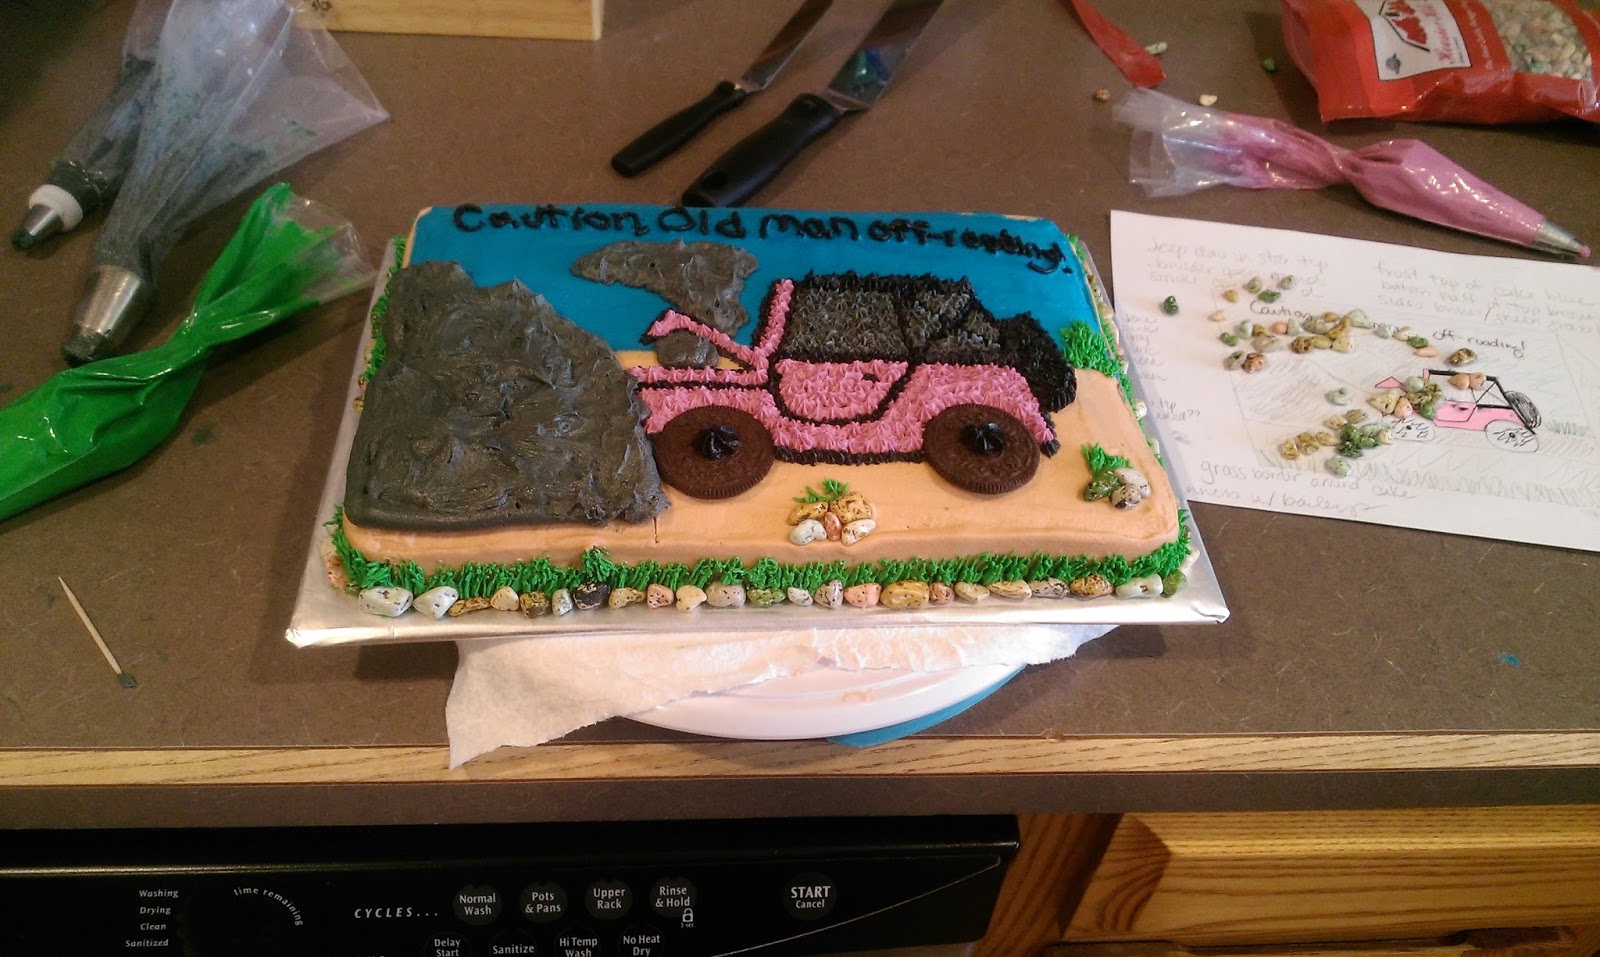
Okay, let’s talk rock candy. Negative, let’s talk candy rocks (this made a huge difference in my Amazon search for obvious reasons. Rock candy search results actually yielded Breaking Bad meth candy). These little dudes (the candy rocks, not the meth) are amazing! I bought a bag of these, and they are so tasty. Like an M&M in the shape of a rock! I don’t know why this is so groundbreaking to me, but it is. I used them to complete my border. 
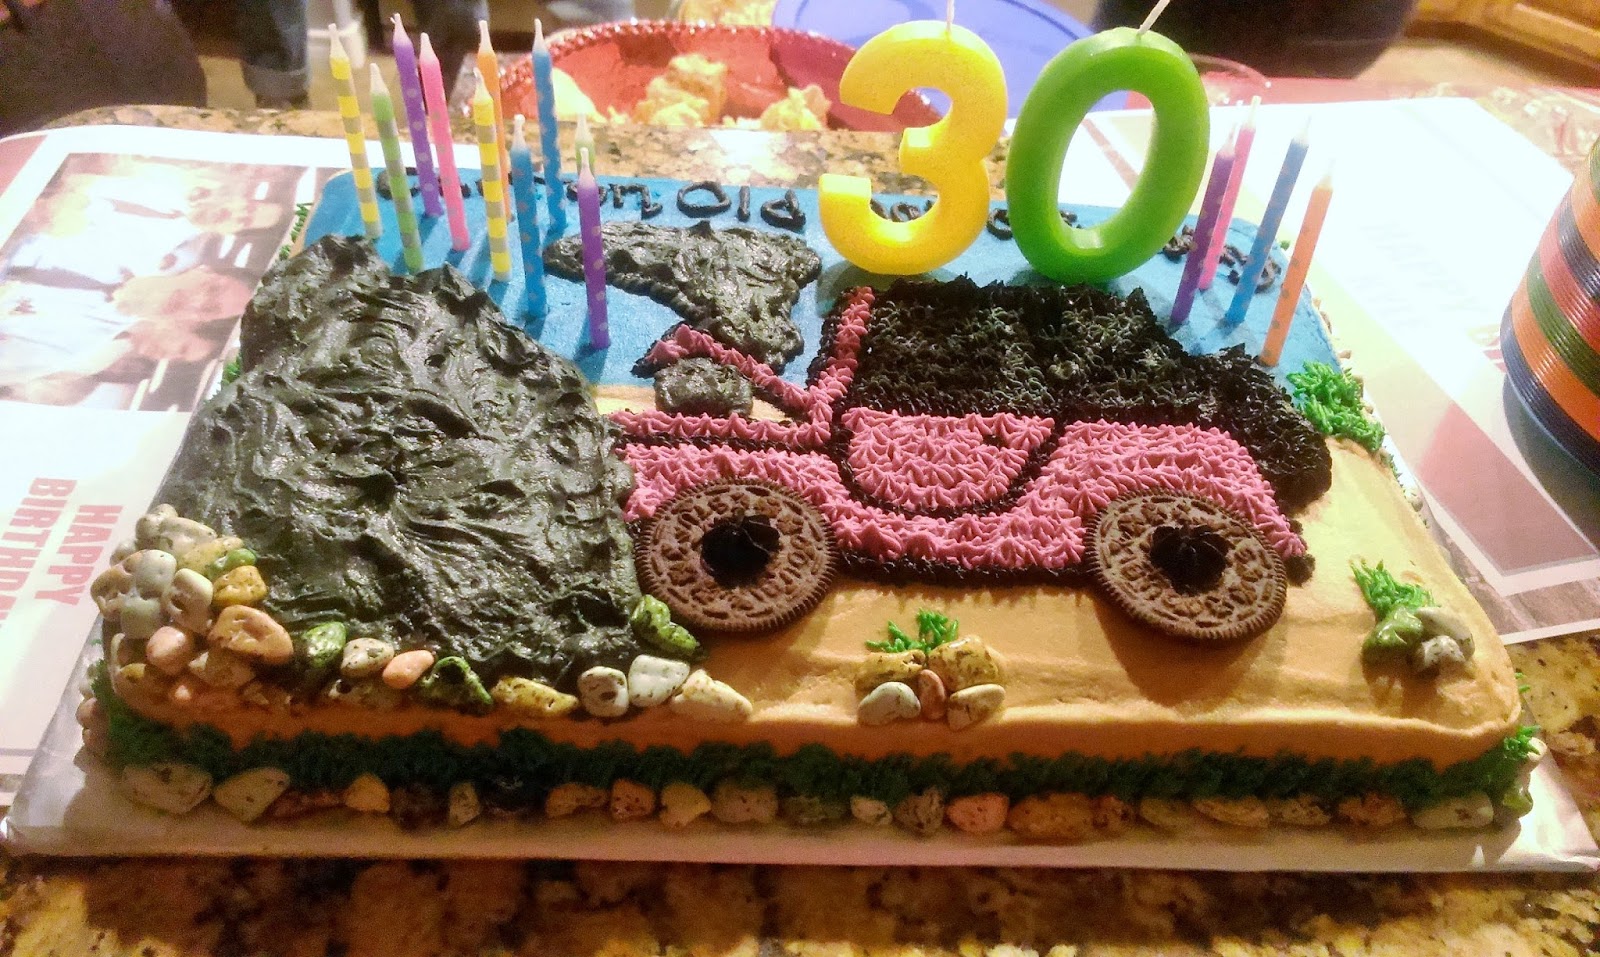
Like so! And there you have it: one snarky birthday cake made with a ton of love. Love meaning time and patience in this case. But the end result is always worth it to me when I see the face of the person receiving the cake. The moment the cake comes out of the box is pure gold to me and worth every hand cramp. Plus, I’m a compliment-gathering hussy, and a cake is a damn good way to garner some ego-boosting material. Because you know a cake is good when a room full of boisterous drunk people get really quiet while eating it. One party goer even waited until cake was served before he went home. Dedication! A few party goers discussed the regular vs. Stout Guinness cake varieties…there was a veritable debate for several minutes to decide which one was better. The ultimate verdict cannot be reached until I make a half Stout/half regular Guinness cake. I think my friends may be using me for my cake baking skills. It’s good to be needed. ‘Til next time, my fellow eaters!!

Even the candles scream Barbie Jeep. -
A Day for Frey!
I live my life in a constant state of being bookended by two dogs. Sitting down to watch TV? Thing 1 and Thing 2 are either by my side or at my feet. Taking a shower? Hank is sitting guard while Freyja licks the shower door glass (she’s special). Crawling into bed at night? You betcha, they’re there. Although they never leave me any leg room, so I’m starting to think they might believe I’m also a Corgi mix too, so clearly I don’t need any. I can’t even remember the last time I was awoken by an alarm clock and not a cold doggy nose or licks. I love my dogs as much as Kanye loves himself. Maybe even more. I mean, I treat my dogs better than a lot of people treat their children; they get regular exercise, plenty of playtime, togetherness, hell, I’d even make them little sack doggy lunches if I wasn’t convinced they’d eat the bag, too. Basically what I’m trying to say is I’m not a crazy dog lady, I am the crazy dog lady. And the crazy dog lady definitely celebrates furbaby birthdays. And today is a day all about Frey(ja)!
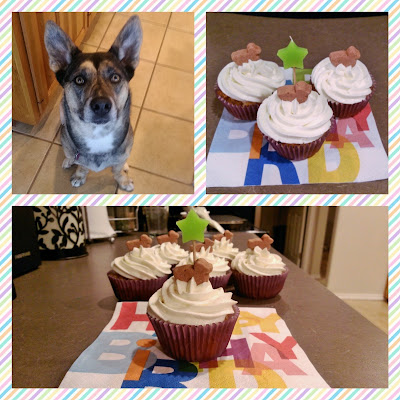
And with a face like that, she earned it. I swear she knows how to smile on cue. I have only two problems with my dogs. One: no matter how many times I ask them to live as long as I do, they have yet to verbally acquiesce to my demands. Two: since they’re both rescues, we really have no idea when they were born. But since I live my life by the adage that a dog need not be pure of breed to be pure of heart, this is something to be expected with the shelter pup. I know my dogs are eternally grateful for being rescued, and they love they show me is unconditional. I may have to ask them daily to get their crap together, but I would run into a burning building for my dogs. And although my kids may be furry and occasionally eat poop, I’m pretty sure that kind of love is what parenthood is all about. And what parent wouldn’t bake treats for their kid’s birthday?! I mean, aside from the poop eating thing, my dogs really love treats.
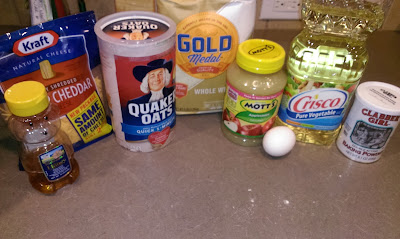
When did they stop making tiny applesauce cups?! So we decided that March 17 is Freyja’s designated birthday, and I was ready to celebrate with some super easy to make cheddar apple pupcakes. From start to finish, all you need is 40 minutes to ensure your dog loves you even more than they originally thought possible. Trust me, I make my own dog treats, they just know. To make these cheddar apple pupcakes, you need a few household ingredients and some extra “help” in the form of doggy Hoovers in case you “drop” some ingredients. This recipe makes six pupcakes. You could easily double to make more and have an entire puppy party, but even the crazy dog lady draws the line there. Gather up:
- 1 egg
- 2 TBS of veggie oil
- 1 TBS of honey
- 1/2 cup of cheddar
- 1/4 cup of applesauce
- 3/4 cup of whole wheat flour
- 1/2 tsp of baking powder
- 2 TBS of Quaker oats
Start by preheating the oven to 350 and lining your muffin tin. In your stand mixer, blend the egg, oil, honey, cheddar, and applesauce until well blended. While this is happening, get a medium bowl (I used a salad bowl) and combine the flour, oats, and baking powder. Dump this dry mix in with the wet stuff and mix until fully incorporated.
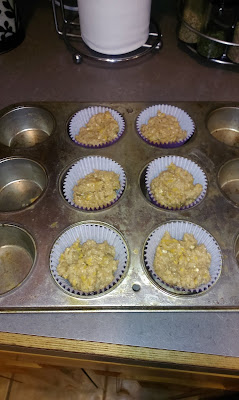
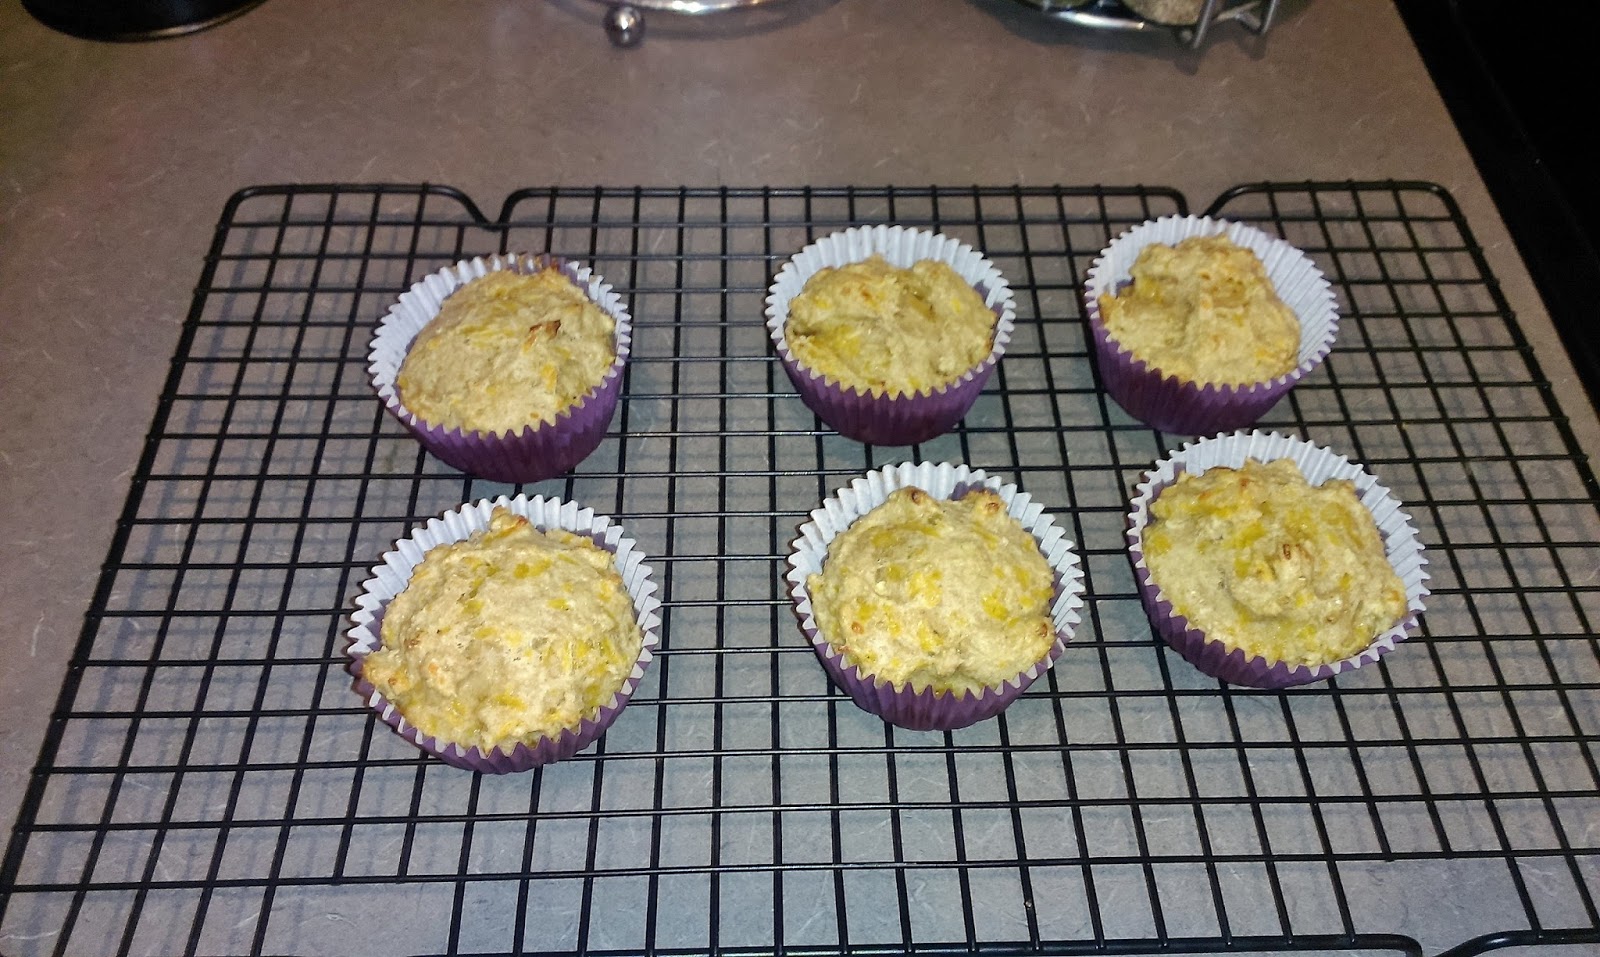
At this point, I’m really not jealous of the dogs. Drop the dough into your lined muffin tin. These don’t expand much, so you can fill them rather full. They don’t change shape a lot either, so if you want a smooth top, you’re going to need to take a knife to these and smooth them out (my condolences on having a dog with OCD if this step is necessary). Bake for 16 minutes or until things are firm and pass the toothpick test.
I have a sudden craving for Cheddar Bay Biscuits They smell good. They look like Red Lobster’s crowning achievement. I kinda wanted to try one…but I resisted the urge. The sacrifices we must make for our children…

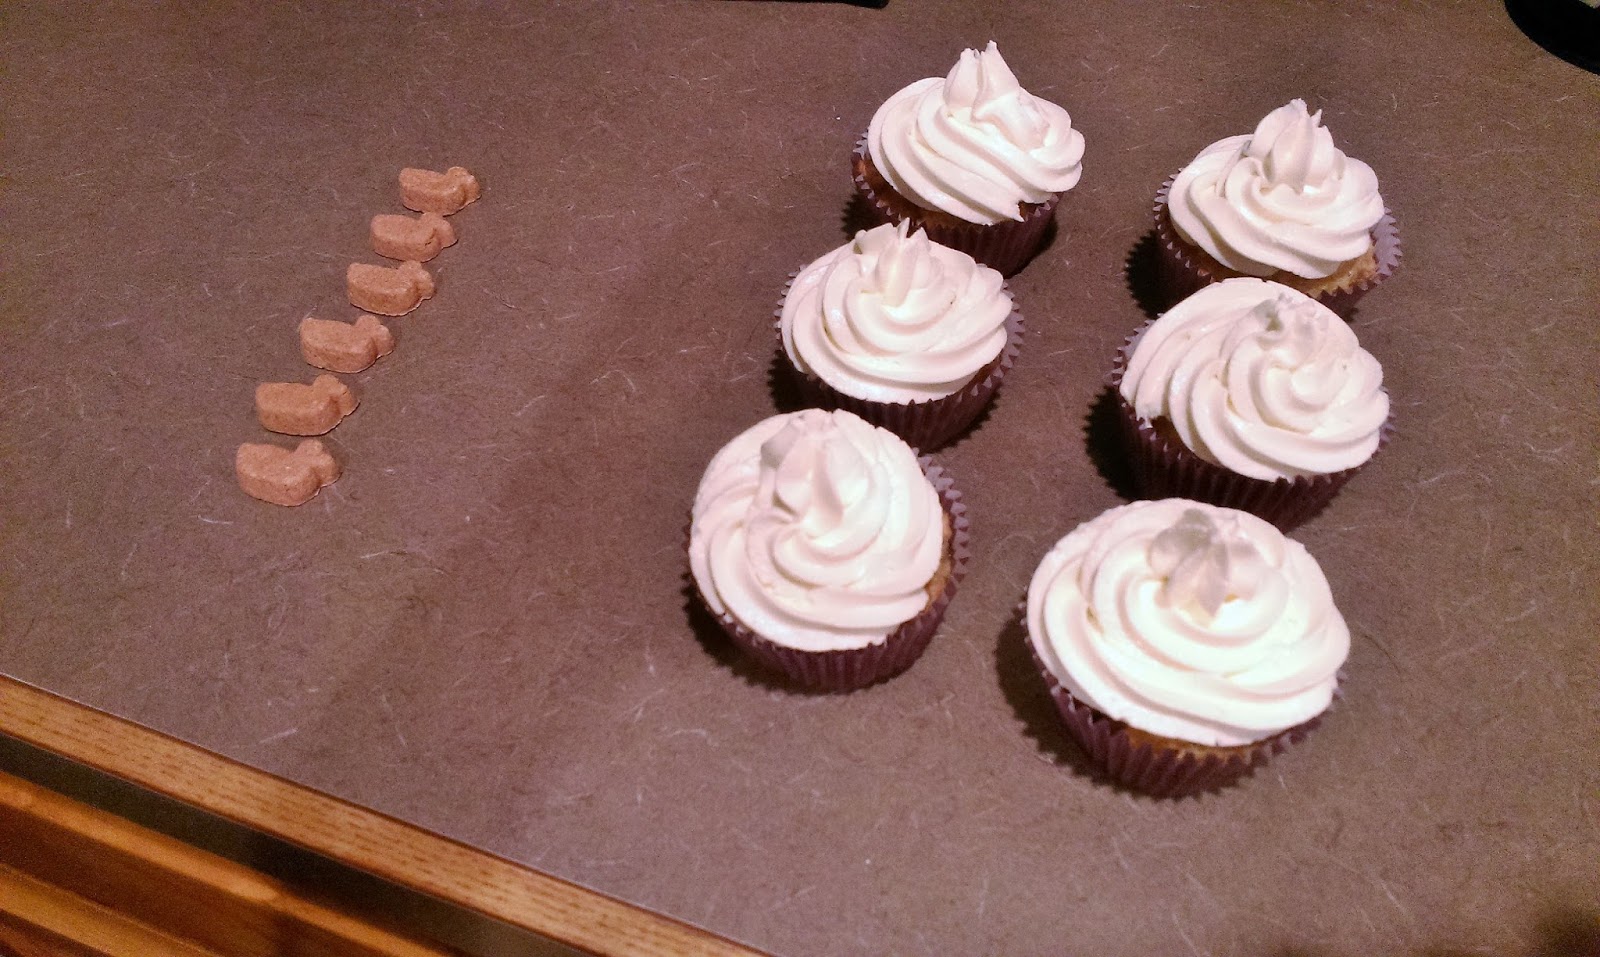
Like I’d let these go without frosting. So after Derek deployed, some really awesome friends of ours with their equally awesome pup sent our dogs a couple Bark Boxes to cheer them up. The last one came with some duck treats the dogs just cannot get enough of…and since I only make veggie-based treats like pumpkin biscuits I let them have these bagged treats. Every good parent has to draw the line somewhere, and I draw mine at grinding up a duck, nature’s most versatile of animals, to make my dogs’ treats. But I will top some pupcakes with adorable ducky-shaped treats. As far as “frosting” goes, my go-to is just a tub of whipped cream cheese. Sometimes I mix a little peanut butter in, but I didn’t want to make these too rich for those sensitive little doggy stomachs, so plain it was.

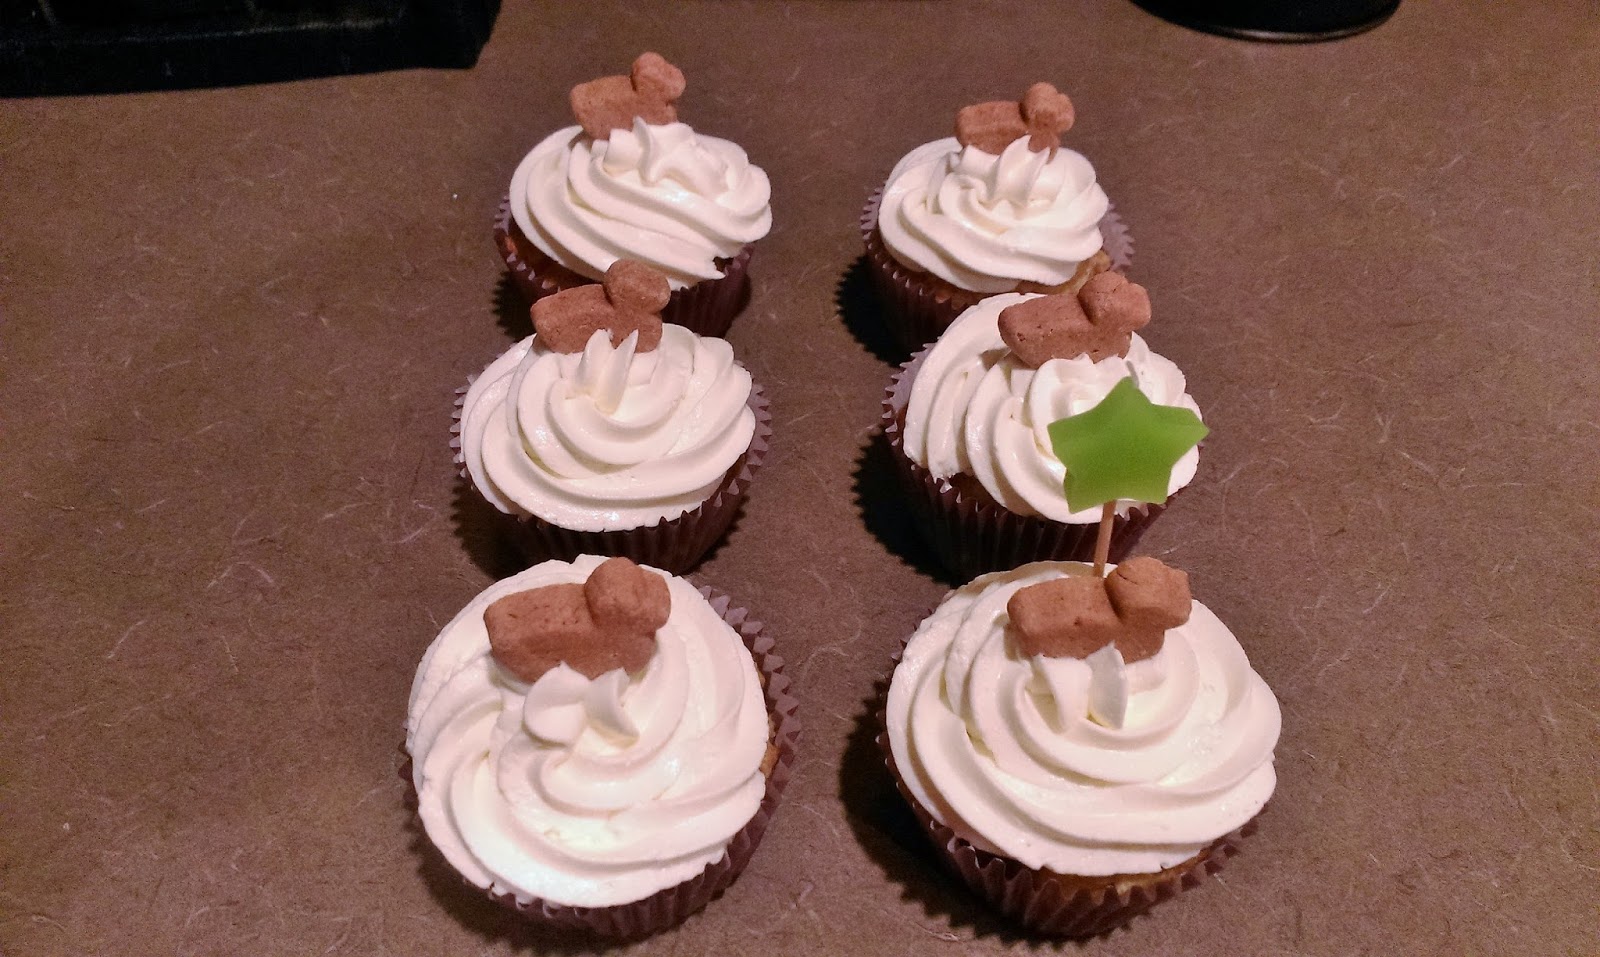
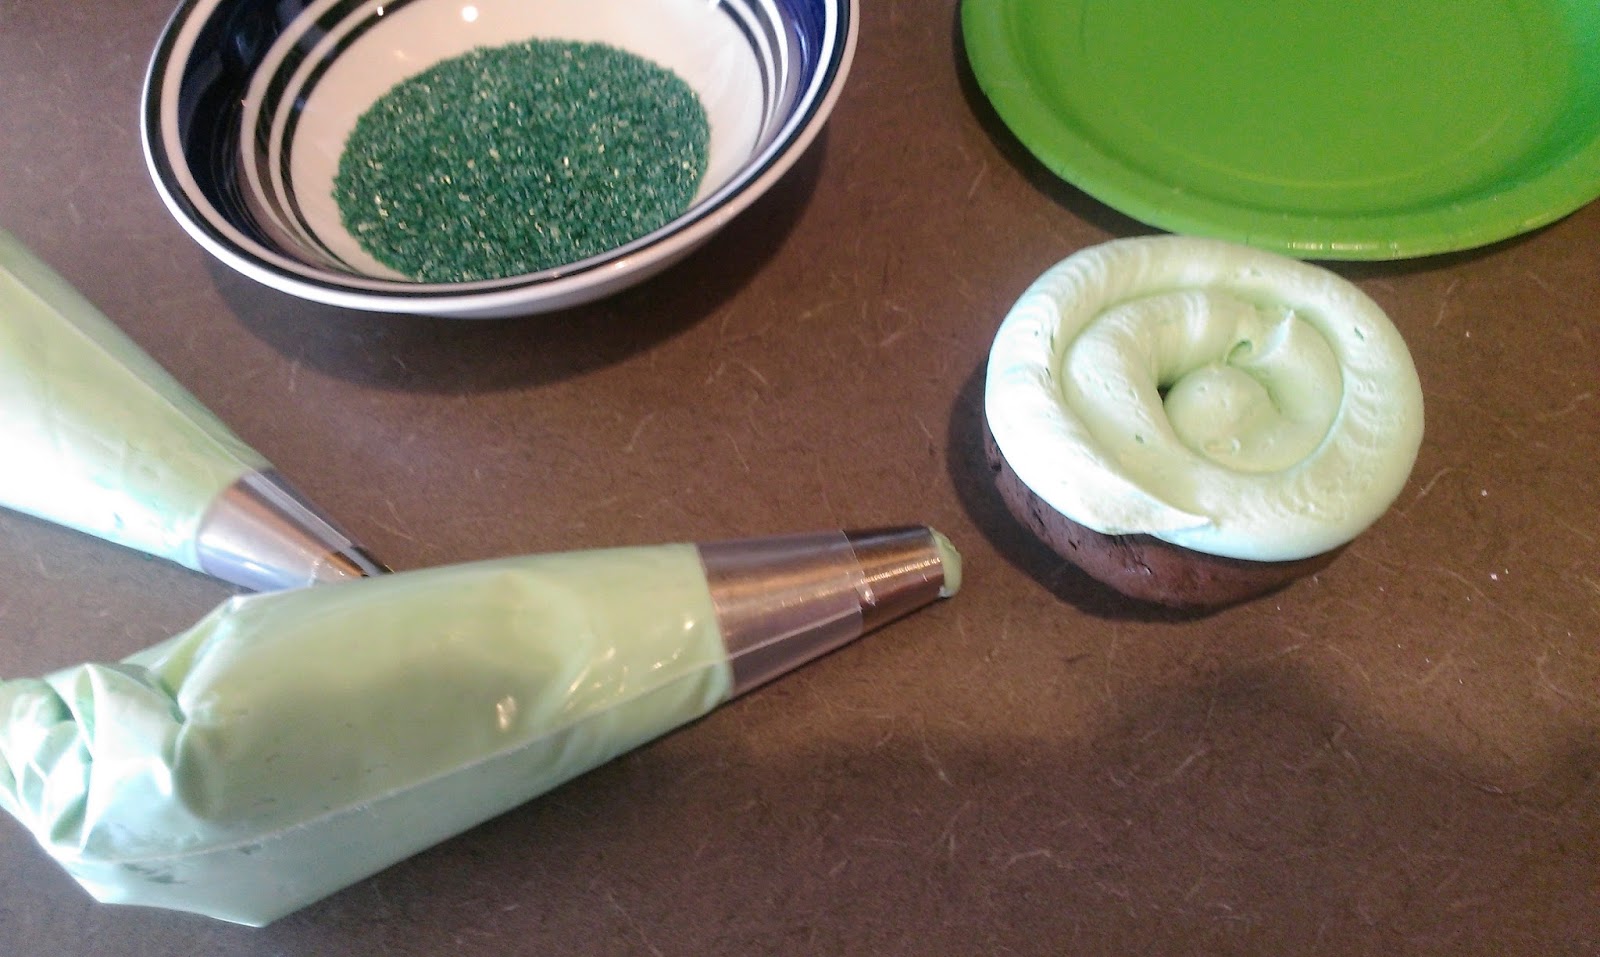
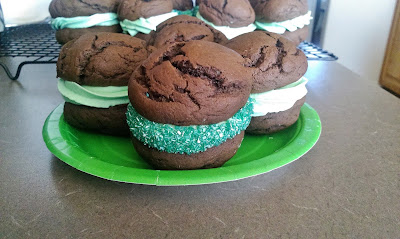
Look! I have my ducks in a row. …if that didn’t incite at least a small chuckle, know you’ve hurt me deeply. You can top these however you like really. But my 1M tip was already out since I just used it for my Baileys Salted Caramel and Mint Whoopie Pies I made a few delicious days ago, so I just loaded it into a piping bag and frosted with the standard swirl. You will want to refrigerate these so the frosting does not spoil. But I promise you, your dogs will be drooling the whole time you make these pupcakes. When you’re ready to serve them, be sure to unwrap and break up into bite-sized pieces for your pooches.

Candle purely for looks. I don’t generally allow my dogs around an open flame. Call me a helicopter parent when it comes to safety. How do I know my dogs loved the cheddar apple pupcakes? These were finished in easily under one minute; I’m not entirely sure they even chewed? But I’m happy to do anything that’s going to make my dogs understand their crazy, overly affectionate human mom wouldn’t last a day without them. I am also really hoping as we venture into Freyja’s next year of life that dogs don’t get the terrible twos. We had a terrible two times she ate the satellite TV remotes, but that’s been the extent of her devilish ways around here. I’m not sure if she was acting out against my choice in television programming or the buttons just tasted good, and we’ll never know. What I do know is on March 17, a day I’m already clearly very fond of, I get to celebrate a couple things I really love: my father’s birthday, an aunt’s birthday, Saint Patrick’s Day, and now Freyja Day. We chose to give Freyja a day to share with some really stellar and important people. She’s right up there with ’em. You really never know what you’re gonna get when you bring a shelter dog home, but we somehow managed to hit the jackpot twice with these dogs. Freyja came home near the end of March last year, and I had no idea how much she was missed until the moment she arrived. Hank has a little sister to boss around (and who he refuses to do just about anything without), and our complete little family is a ragtag bunch of really ridiculously good-looking creatures with some killer appetites. Thank God for pupcakes! ‘Til next time, my fellow eaters!

Haha…ducks in a row. Dammit I’m hilarious. -
One Last Chance at Mint Madness
Full disclosure: I’ve never made whoopie pies before. I’ve never even eaten a whoopie pie before. Mostly because every time I hear someone say the words “whoopie pie,” I think “whoopie cushion,” and the last thing I want to be reminded of when I’m trying to eat dessert are fart noises…just kinda brings the mood down. But I don’t know, maybe you’re in to that sort of thing, you wonderful weirdo. But let’s face it, my list of possible mint and chocolate coupled desserts is running pretty low considering the blogging madness that occurs here every March. I’ve already given you the Shamrock Shake formula, the solid Shamrock Shake in cupcakey form, Baileys mint cheesecakes, mint chip cookies, and one of my classic favorites: mint swirl brownies with mint buttercream frosting. So you see, I’ve exhausted all my possible avenues of mint and chocolate (there was some swirled fudge in there somewhere, but that was for Christmas, so it doesn’t technically count). I knew this week would be my last possible chance to mix one of my all time favorite flavor combinations for the calendar year (I really like theme desserts, what can I say), so I had to go out with a bang. Or in this case, a whoopie
cushionpie. Once my infantile giggling from using the word whoopie subsided, I then realized I also had one last chance to add Baileys to something without seeming like a total booze hound because hey, it’s Saint Patrick’s Day, and I’m told the Irish drink Baileys. See? Theme dessert to the rescue. And where there’s a will there’s a way. Or in this case, where there’s a Kate, there’s chocolate and Baileys.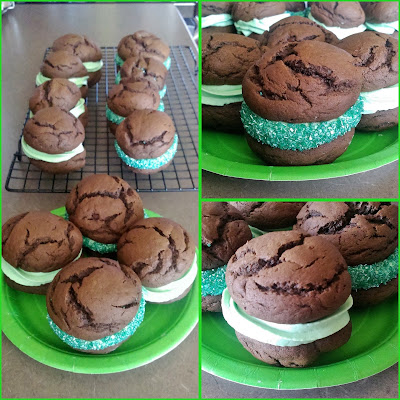
Don’t worry, this really is the last minty dessert for awhile, but isn’t it adorrraabbblllle? Ok…after making these, I have to say wow. Just wow. How can a cookie be so light? And yet so flavorful and the absolute perfect compliment to the caramel and mint buttercream filling? I can’t believe I’ve never eaten these before just because the name gives me the giggles. It makes me wonder what other things I haven’t tried because of the name. Dutch babies? Spotted dick? Spam?! Aside from desperately needing to immediately fire whoever named these things, they could all be delicious. I’m not hedging my bets with the Spam though. I also can’t believe I never actually combined mint and caramel before. Sure mint goes great with chocolate (that’s the reason we’re here afterall), and we all know caramel and chocolate are like the ketchup and mustard of the dessert world. But could a sweetness trifecta be achievable? I’m happy to report complete victory with these whoopie pies (teehee).

Okay, so I mainly just tried the Salted Caramel Baileys because I didn’t have enough regular Baileys, but happy accidents do occur. I found a relatively simple base whoopie pie recipe here and adapted it to fit my Saint Patrick’s Day needs. These are quick to throw together, even quicker to cook in the oven, and barely take any time to assemble. Yet they look so fancy and well put together! To make these Baileys Salted Caramel and mint whoopie pies, gather up:
- 1 stick of room temp butter
- 1 cup of brown sugar
- 1 room temp egg
- 1 tsp of vanilla extract
- 2 cups of flour
- 1/2 cup of unsweetened cocoa
- 1 tsp of salt
- 1 1/4 tsp of baking soda
- 3/4 cup of buttermilk
- 1/4 cup of Salted Caramel Baileys (mix this is with the buttermilk. Both should be near room temp)
Start by preheating the old oven to 350 and greasing a cookie sheet. Cream the sugar and butter together for 3-4 minutes until fluffy. While this is mixing, in a medium bowl blend the flour, cocoa, salt, and baking soda and set aside. Once the butter/sugar mix is done, add in the egg and vanilla extract and blend well. Scrape down the side of the mixing bowl and add a third of the dry mix and blend. Then add a third of the milk/Baileys mix and blend. Scrape the bowl and repeat this process two more times until the dry mix and Baileys mix is all used up and totally blended.

So, not really attractive at this point. Take the batter and use a cookie scoop or tablespoon and plop 12 globs onto the greased cookie sheet. Things will be quite sticky and totally uneven, but that’s okay, we’re gonna fix it! Also, these really puff up (much like a whoopie cushion), so leave plenty of space between each mound. I sprayed my hands with Pam and then rolled my globs into pretty and even little mounds. You really shouldn’t skip this step so that when you assemble them later things are nice and even. Let my OCD be your guide… Pop the tray into the oven and cook for 10-12 minutes. You want things soft and springy to the touch.

Whabam! Told you, they puff. Honestly, it really does look like a brown whoopie cushion, so I totally get the name now. Although they are originally from the Amish, and I doubt they had whoopie cushions, so who knows. It would be pretty damn funny if they did though, and you know it. They don’t have the internet, so I assume that’s one way to pass the time. Give these just a minute on the cookie sheet before removing to a cooling rack. Spray the cookie sheet again and repeat the dough and cooking process for another 12 pies. If you have two cookie sheets, you can prepare them all at the same time, but do not bake at the same time. Overloading the oven is a good way to get unevenly cooked pies.

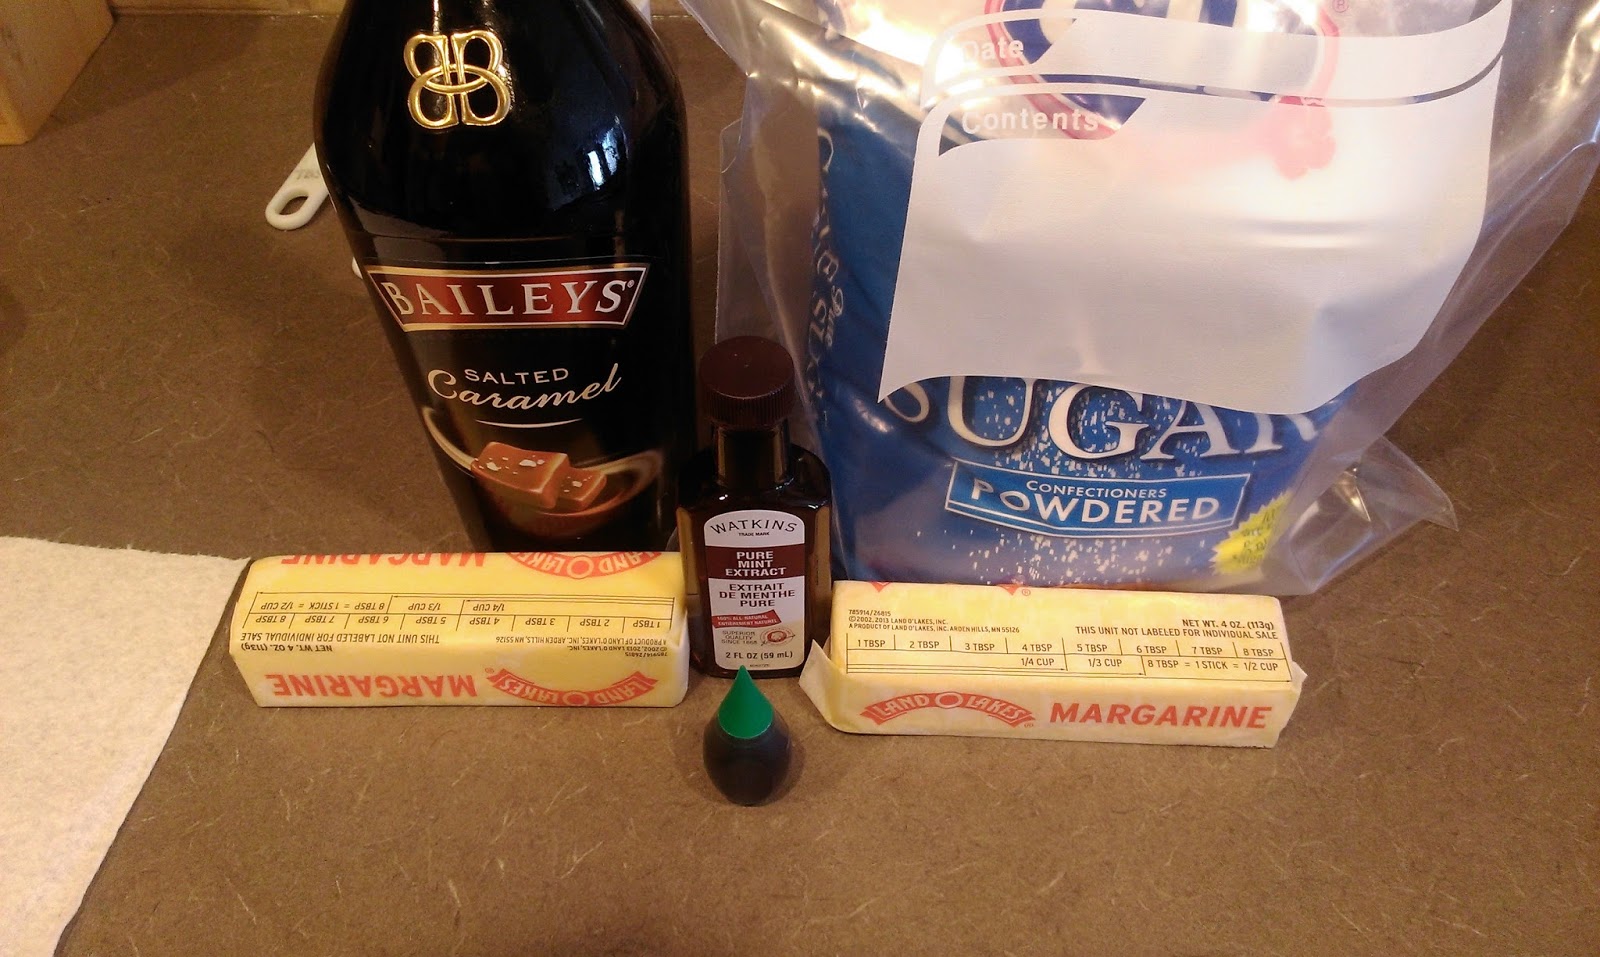
Yeah, I reupped my green dye stock. While the pies (I hate calling them that..they’re cookies, let’s be real here. Whoopie cookie even rhymes, so this is a gross injustice in the naming system) are cooling, make the filling. Gather up:
- 1 cup of room temp butter
- 1/2 tsp of mint extract
- 5 cups of powdered sugar
- 4 TBS Salted Caramel Baileys
- 12 drops of green food coloring
Cream the butter for a couple minutes before adding two cups of powdered sugar, the mint extract, and two tablespoons of Baileys. Blend well, scrape the bowl, and add two more cups of sugar and two more tablespoons of Baileys and blend. I like a stiffer piping consistency, so I added another cup of powdered sugar after this. Finish up by adding the green dye.
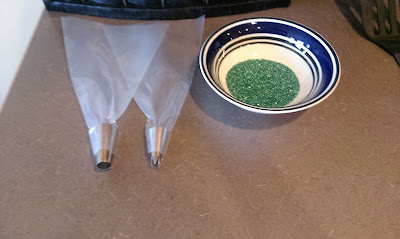
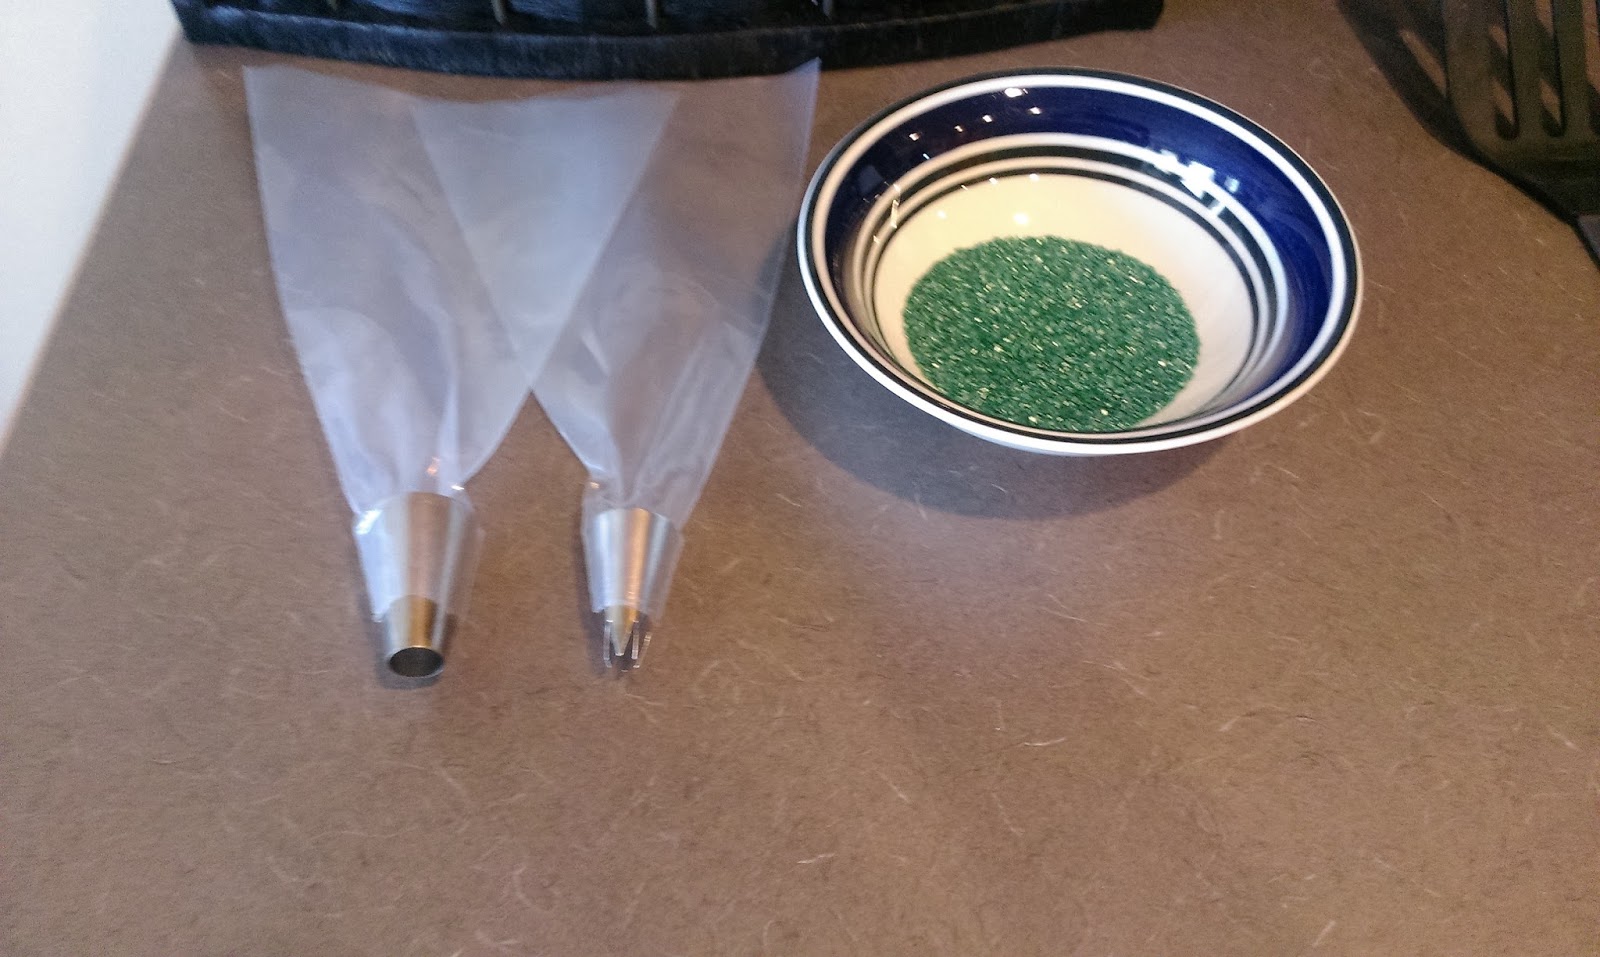
Then gather up two piping bags with tips of your choice and some green sprinkles if ya got ’em. I used a 1M tip and a 1A tip. You could also just spread the filling with a knife if you’re not worried about precision, but this would haunt my dreams so don’t tell me if you do. 
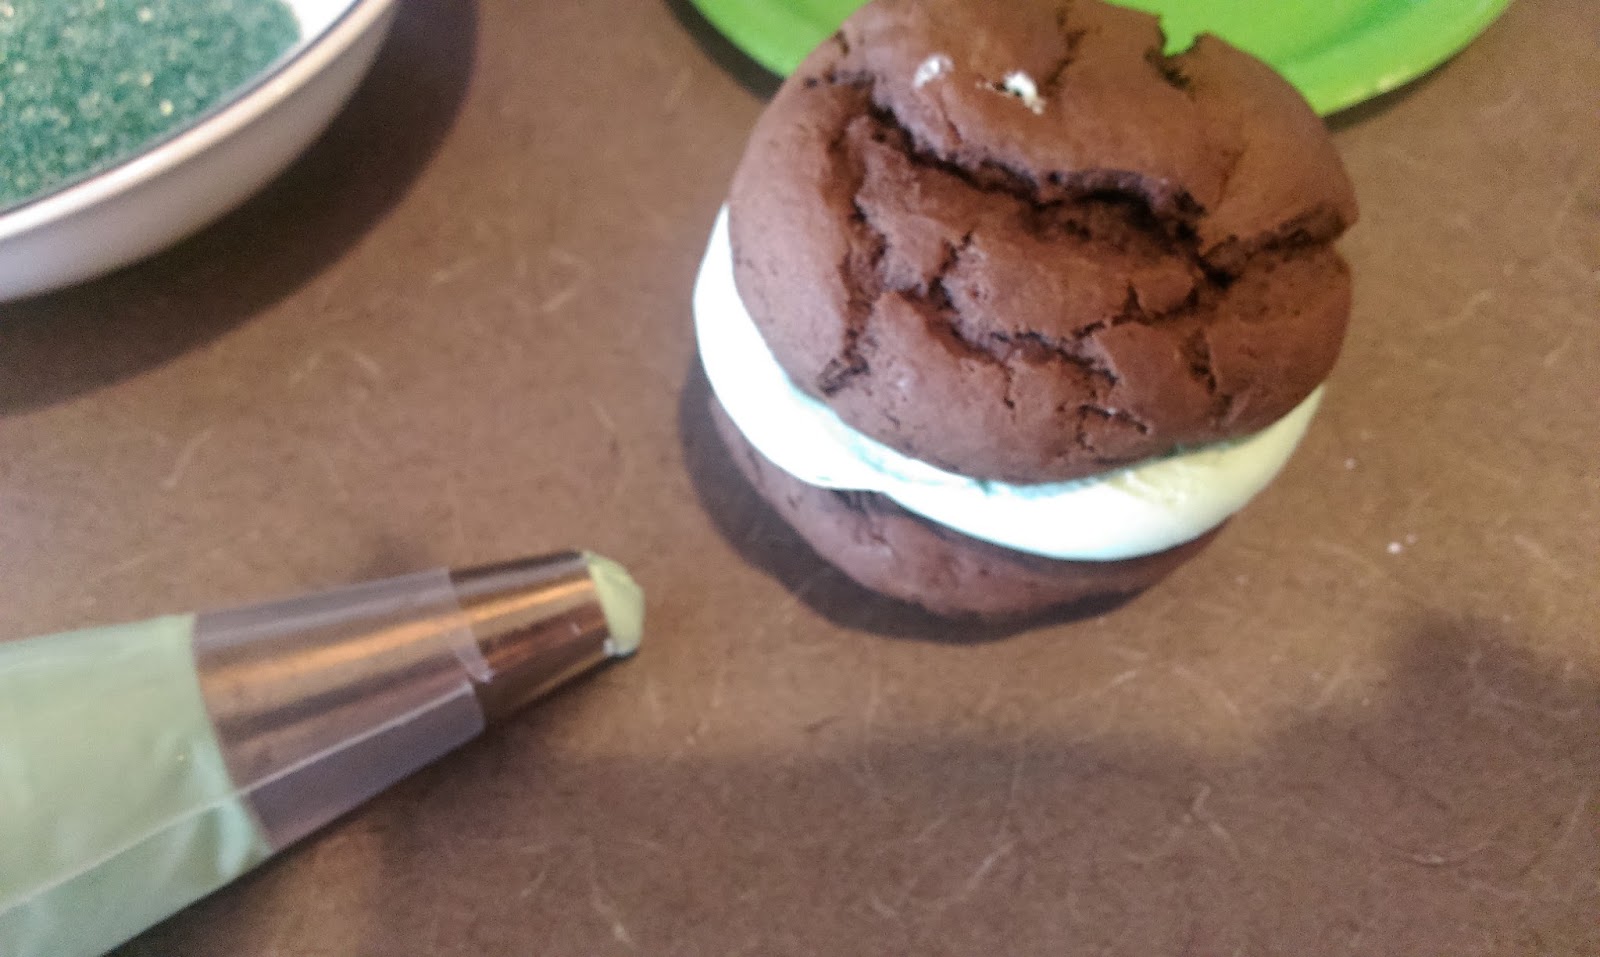
Filling using the 1A tip. Once the whoopie cookies are completely cooled, partner those babies up. Find mates that are relatively the same shape and size. This is where the dough rolling from earlier comes in handy–you will most likely have no trouble pairing these up since we made them uniform in shape (it pays to have debilitating mental issues sometimes). Grab one of your pairs, and take one cookie. Start by piping filling in the center of the cookie and swirl around until you have filling covering the entire top of the cookie.

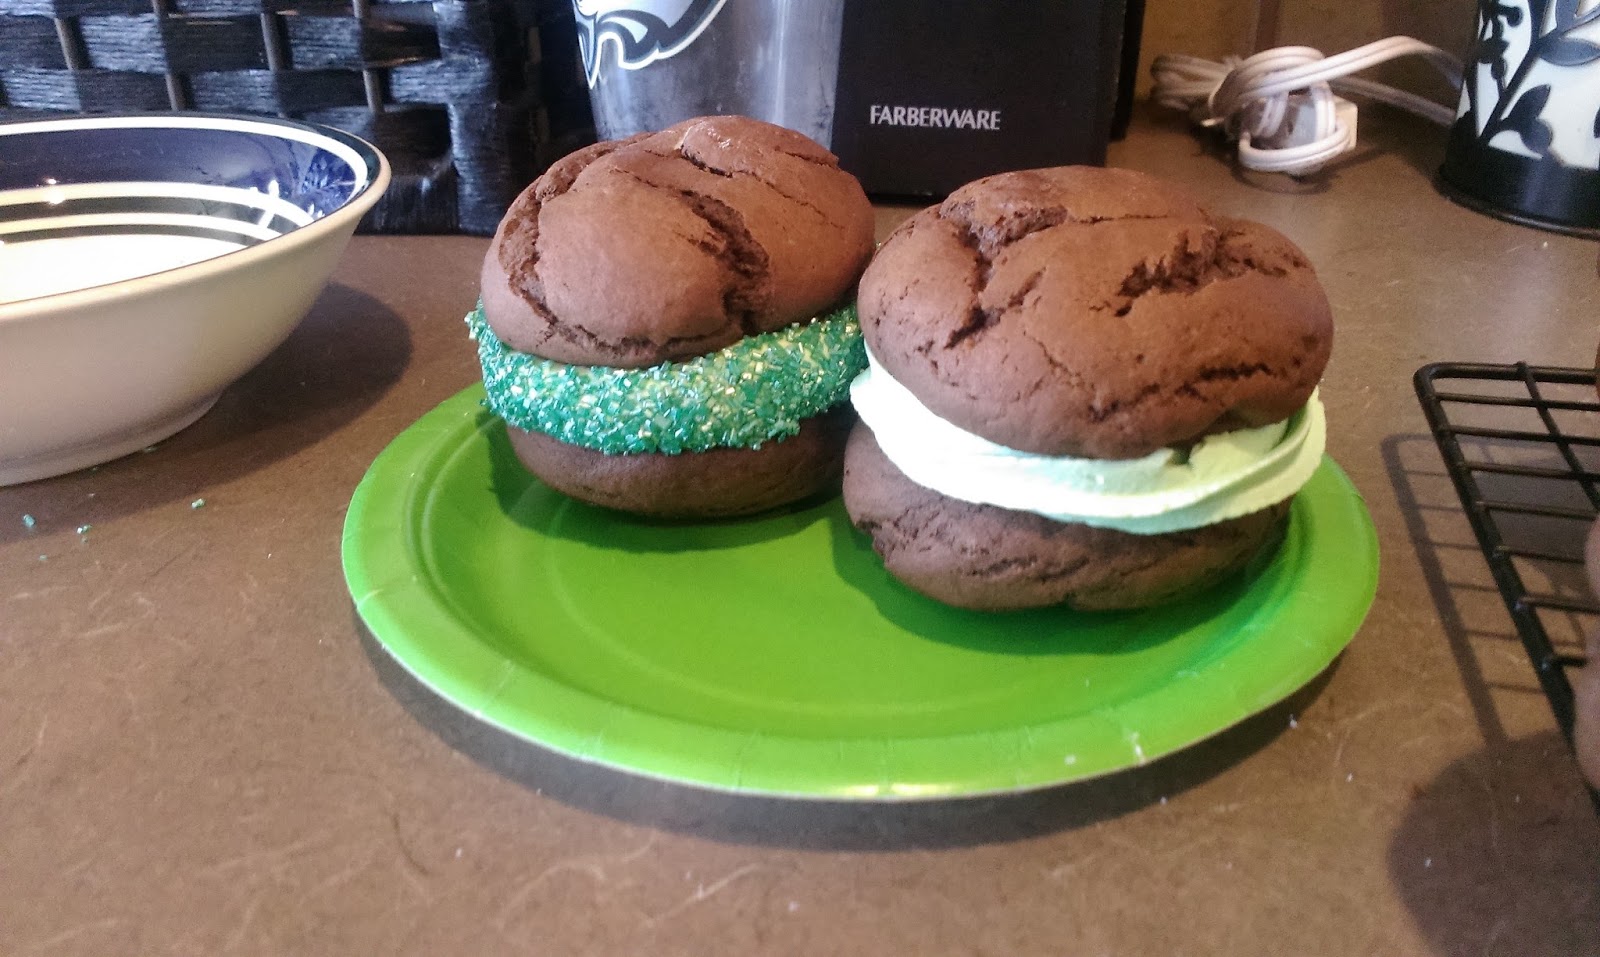
Hello, gorgeous. Then take the other cookie and gently place on top of the filling. You could leave things be here, but if you have green sprinkles, dump a bunch in a bowl and immediately after assembling a whoopie pie, roll the edges in the sprinkles to get a snazzy effect:

Feel free to “ohh and ahh” at my decorating prowess. This recipe makes 12 whoopie pies total, so I did 6 more with the 1A tip and sprinkles.
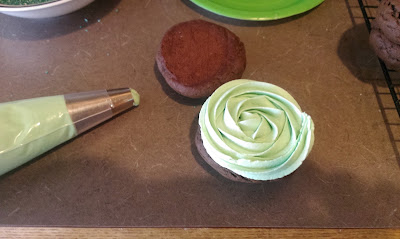
As for the other six… I used my 1M tip for the rest by starting with a glob of frosting in the middle of the bottom piece and swirling around outward. It does create a pretty rose that I hated having to cover up, but once assembled it looked really clean and precise with the swirled edge:

Like an ice cream sandwich minus the dripping. And there you have it! A perfect treat for the big day Thursday. And BONUS! You’ll probably have a half a cup or so of leftover filling. I put mine in an airtight container to save for later. I figured Baileys Salted Caramel and mint filling would go really well with the leftover Baileys hot fudge sauce from last week’s cheesecake shooters. Eating them together might also help me realize I’m simply trading one vice for another…good thing we’re getting near to Easter and the end of Lent, eh? But seriously, caramel and mint is one of those unexpectedly delicious treats like deep fried Twinkies or chocolate with bacon that sounds weird in theory but is delicious in practice. You get hit with caramel at first and end up with a cool mint aftertaste. And it’s all served on a chocolate platform, so there’s literally nothing to complain about with these whoopie pies other than their inappropriate name. I hope you all enjoy celebrating the Feast of Saint Patrick this week. Wear green, eat green, drink green, be green, and have fun. ‘Til next time, my fellow eaters!
Seriously, if we can all agree to start calling these whoopie cookies that’d be great. -
Saint Patrick's Day Is so Close I Can Taste It!
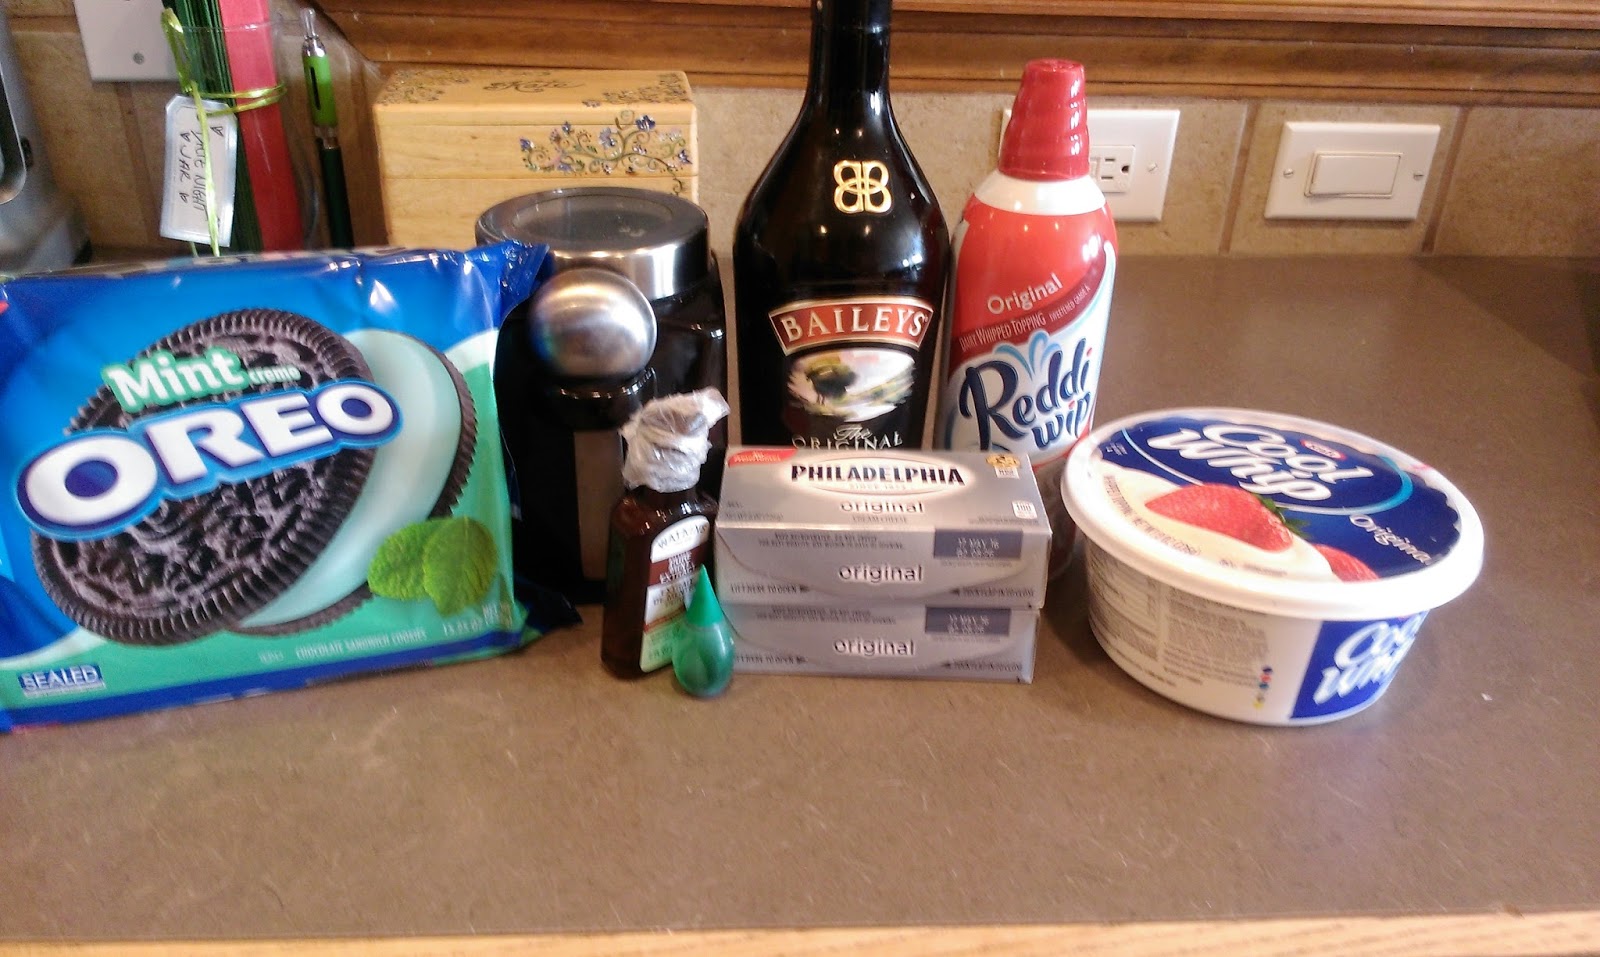
Clearly you all know by now that shots have been on my no fly list since the start of Lent. Naturally I’ve been looking into Lenten loopholes with all these boozy cupcake recipes and prefacing of not drinking booze for Lent because eating it is essentially the food equivalent of a near beer…it’s in there alright, but you’d have to consume an alarming and potentially heart-attack inducing amount to do anything. It’s easy to create dumb logic when you’re a Catholic that’s given up one of your favorite past times…don’t even get me started on the Lent I gave up Taco Bell. I used a packet of Taco Bell hot sauce with some homemade tacos and was almost certain I would burst into flames. Thankfully I did not, and I’ve continued to skirt around Lent with near flawless idiot mojo since. But it’s like reallyreallyreally close to Saint Patrick’s Day and I’m absolutely positive I might die if I don’t get to drink Baileys. How else am I supposed to pretend to be Irish like everyone else? I’m told it’s not appropriate to dress up like a drunk leprechaun (something about gross misrepresentation of Irish heritage blah blah), so I was running out of ideas. And then I remembered: if I add the Baileys to a food served in a shot glass, I would be both satisfying my craving and keeping true to my promise to abstain from drinking alcohol during Lent. Oh Catholicism, on print, you’re really quite the conundrum. Obviously this was a job for dessert shooters.

Delicious, alcohol-laden dessert shooters. But not just any dessert shooters…Baileys mint cheesecake with homemade Baileys hot fudge. What? Are you tired of mint desserts? Well too bad because this is my blog and this is my third favorite holiday, so I’m milking this mint theme for all it’s worth (for those of you wondering, Halloween and New Year’s Eve rank 1 and 2 respectively…I covet all major drinking holidays). I learned last week with the Baileys Shamrock shake cupcakes that Baileys + mint = get out of my way I want another cupcake. So I figured that I could recreate the magic with cheesecake as well. And boy was I right. Being right is also one of my other favorite past times, but don’t expect it to be one I give up for Lent anytime between now and my inevitable demise. I assume my death will be caused by either being sarcastic at precisely the wrong time (“What are you gonna do, stab me?”) or because my lifelong dream to spend a day rolling around with puppies comes true and causes me to die of sheer delight. Anywho, back to shot glasses full of cheesecake.

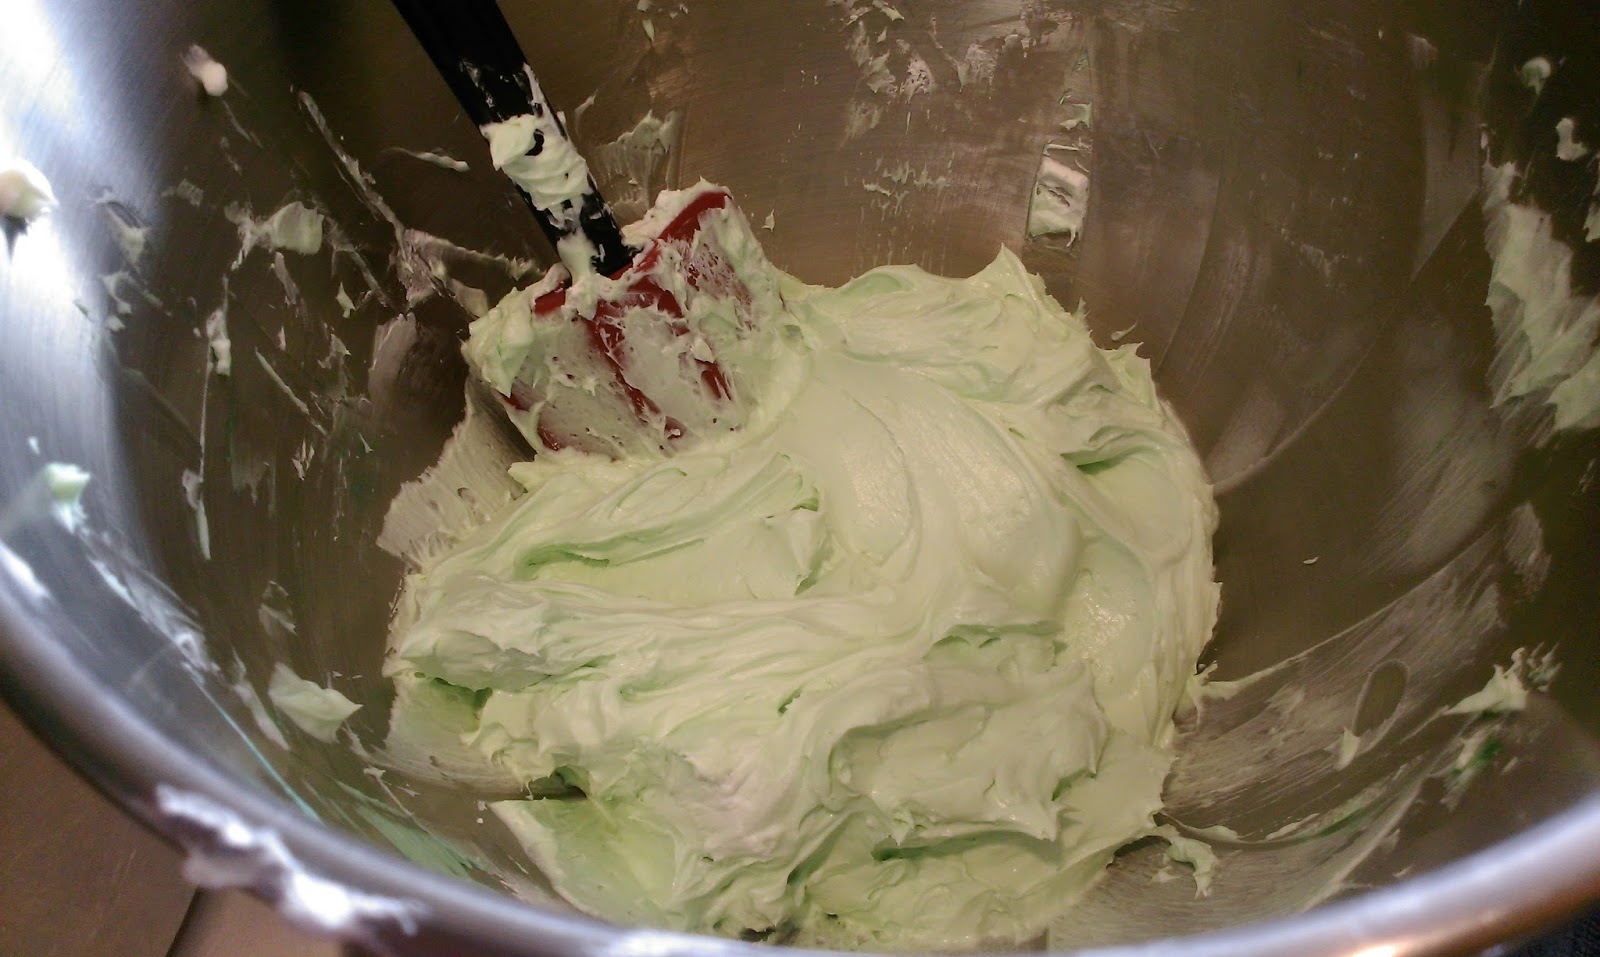
I ran out of green dye after this. But if you think this means I’m done with mint desserts, you’re dead wrong. This is a simple recipe that I found and made numerous adjustments to (namely, the addition of booze), but it is quick, easy, and tasty. Literally the hardest part of this process is deciding whether or not you’ve used the proper amount of green food coloring. So gather up:
- 12 ounces of cream cheese softened to room temp (you can use light, but I question your life choices)
- 3-4 TBS of sugar (I love SWEET cheesecake, so I used 4. Go for 3 if you’re not interested in early onset heart attack symptoms)
- Half a tub of Cool Whip
- 1 TBS of vanilla extract
- 1 TBS of Baileys
- 1/2-3/4 tsp of mint extract (go for 3/4 tsp if you’re obsessed with mint flavor like me)
- Several drops of green food coloring
- Several mint Oreos
- Homemade Baileys hot fudge (recipe below)
- Reddiwhip for when you run out of Cool Whip for topping
Start by creaming together the cream cheese and sugar for 3-4 minutes in a stand mixer until nice and fluffy. While this is happening, crush up 9 or 10 mint Oreos. You can use a blender, food processor, or if you’re like me and have had a particularly rough week, smash the crap out of them with a rolling pin. You will feel better instantly. Set this aside. Add the Cool Whip, vanilla, Baileys, mint extract, and green food coloring to the bowl and blend until well mixed. Cover and place in the fridge while you make the hot fudge sauce.

No judgement if you just sit down with a spoon and go for it at this point. 
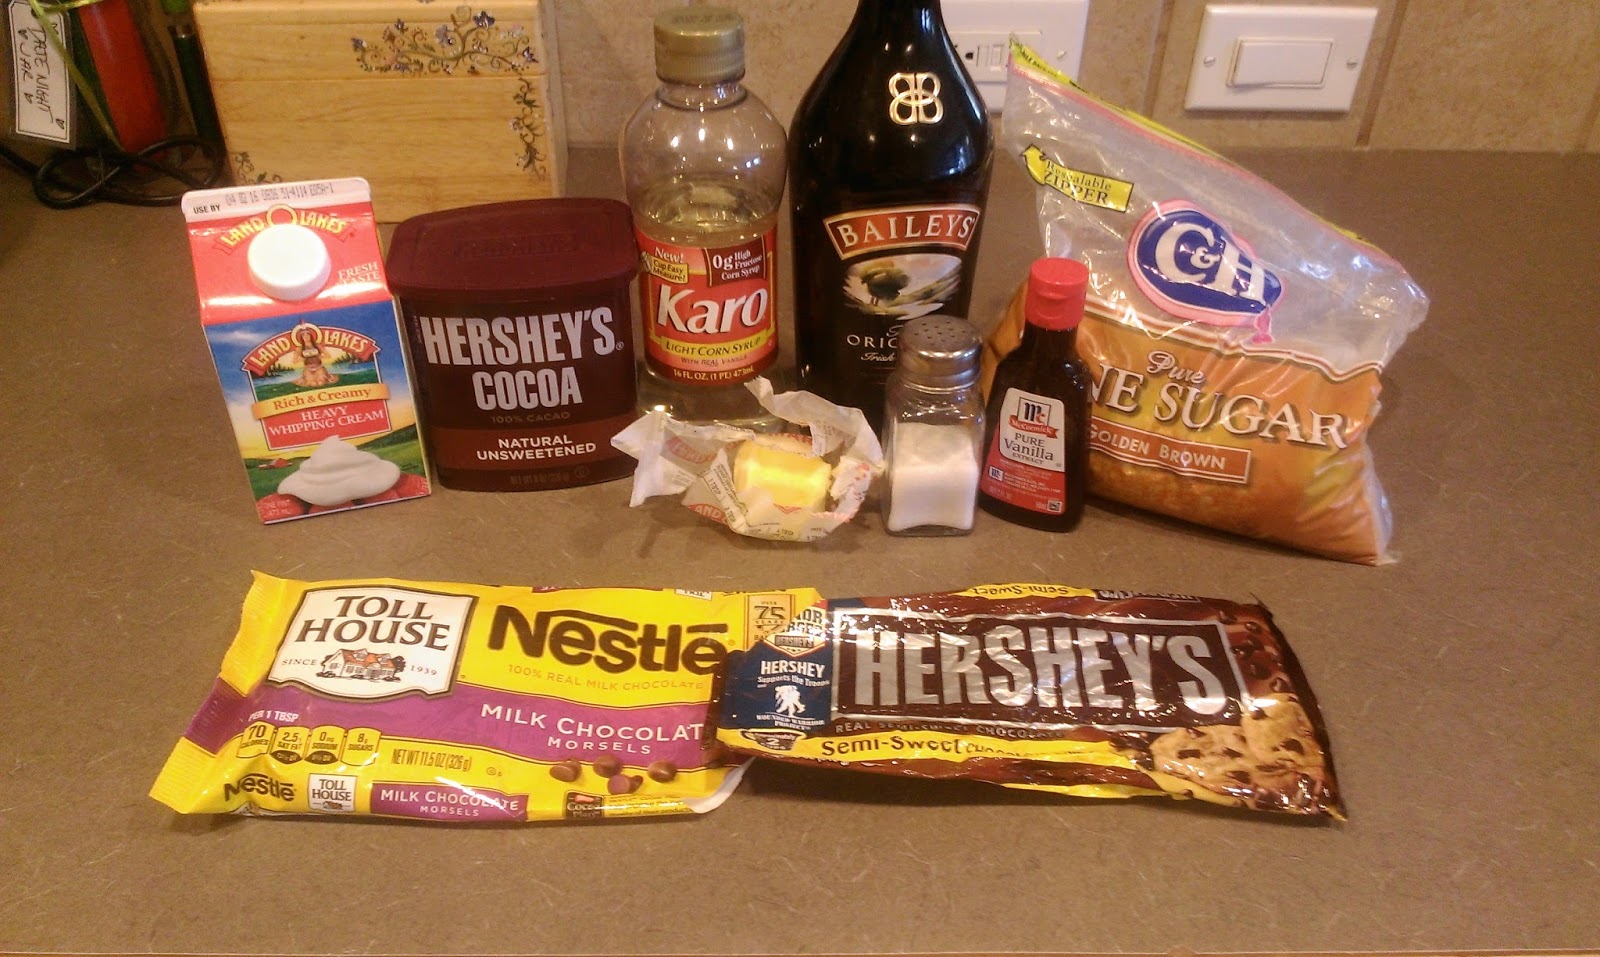
Just save some cheesecake filling, we’ve still got boozy chocolate sauce to make! Totally didn’t think chocolate sauce could get any better than the store bought kind. This is one of those rare instances when I was completely in the wrong but not too proud to not admit it. For life-altering chocolate fudge sauce (with Baileys of course) gather up:
- 2/3 cup heavy cream
- 1/2 cup light corn syrup
- 1/3 cup brown sugar
- 1/4 cup cocoa powder
- 1/4 tsp salt
- 1 cup of chocolate chips
- 2 TBS butter
- 1/2 tsp vanilla extract
- 3 TBS Bailey’s Irish Cream
In a medium sauce pan, mix together the heavy cream, syrup, sugar, salt, cocoa, and half a cup of the chocolate chips. Bring this to a boil over medium-high heat while stirring frequently to avoid scorching the chocolate. Burnt chocolate tastes like coffee to me, and that’s disgusting. Once boiling, turn down to low heat and stir constantly for three minutes or until the sauce thickens up a bit. Turn the burner off and add in the butter, vanilla, Baileys, and other half of the chocolate chips. Stir until completely mixed. Set this aside to cool for 20-25 minutes and finish thickening. Once it has set up, now comes the real fun…mostly because you’re getting super close to eating the booziest of cheesecake shooters.

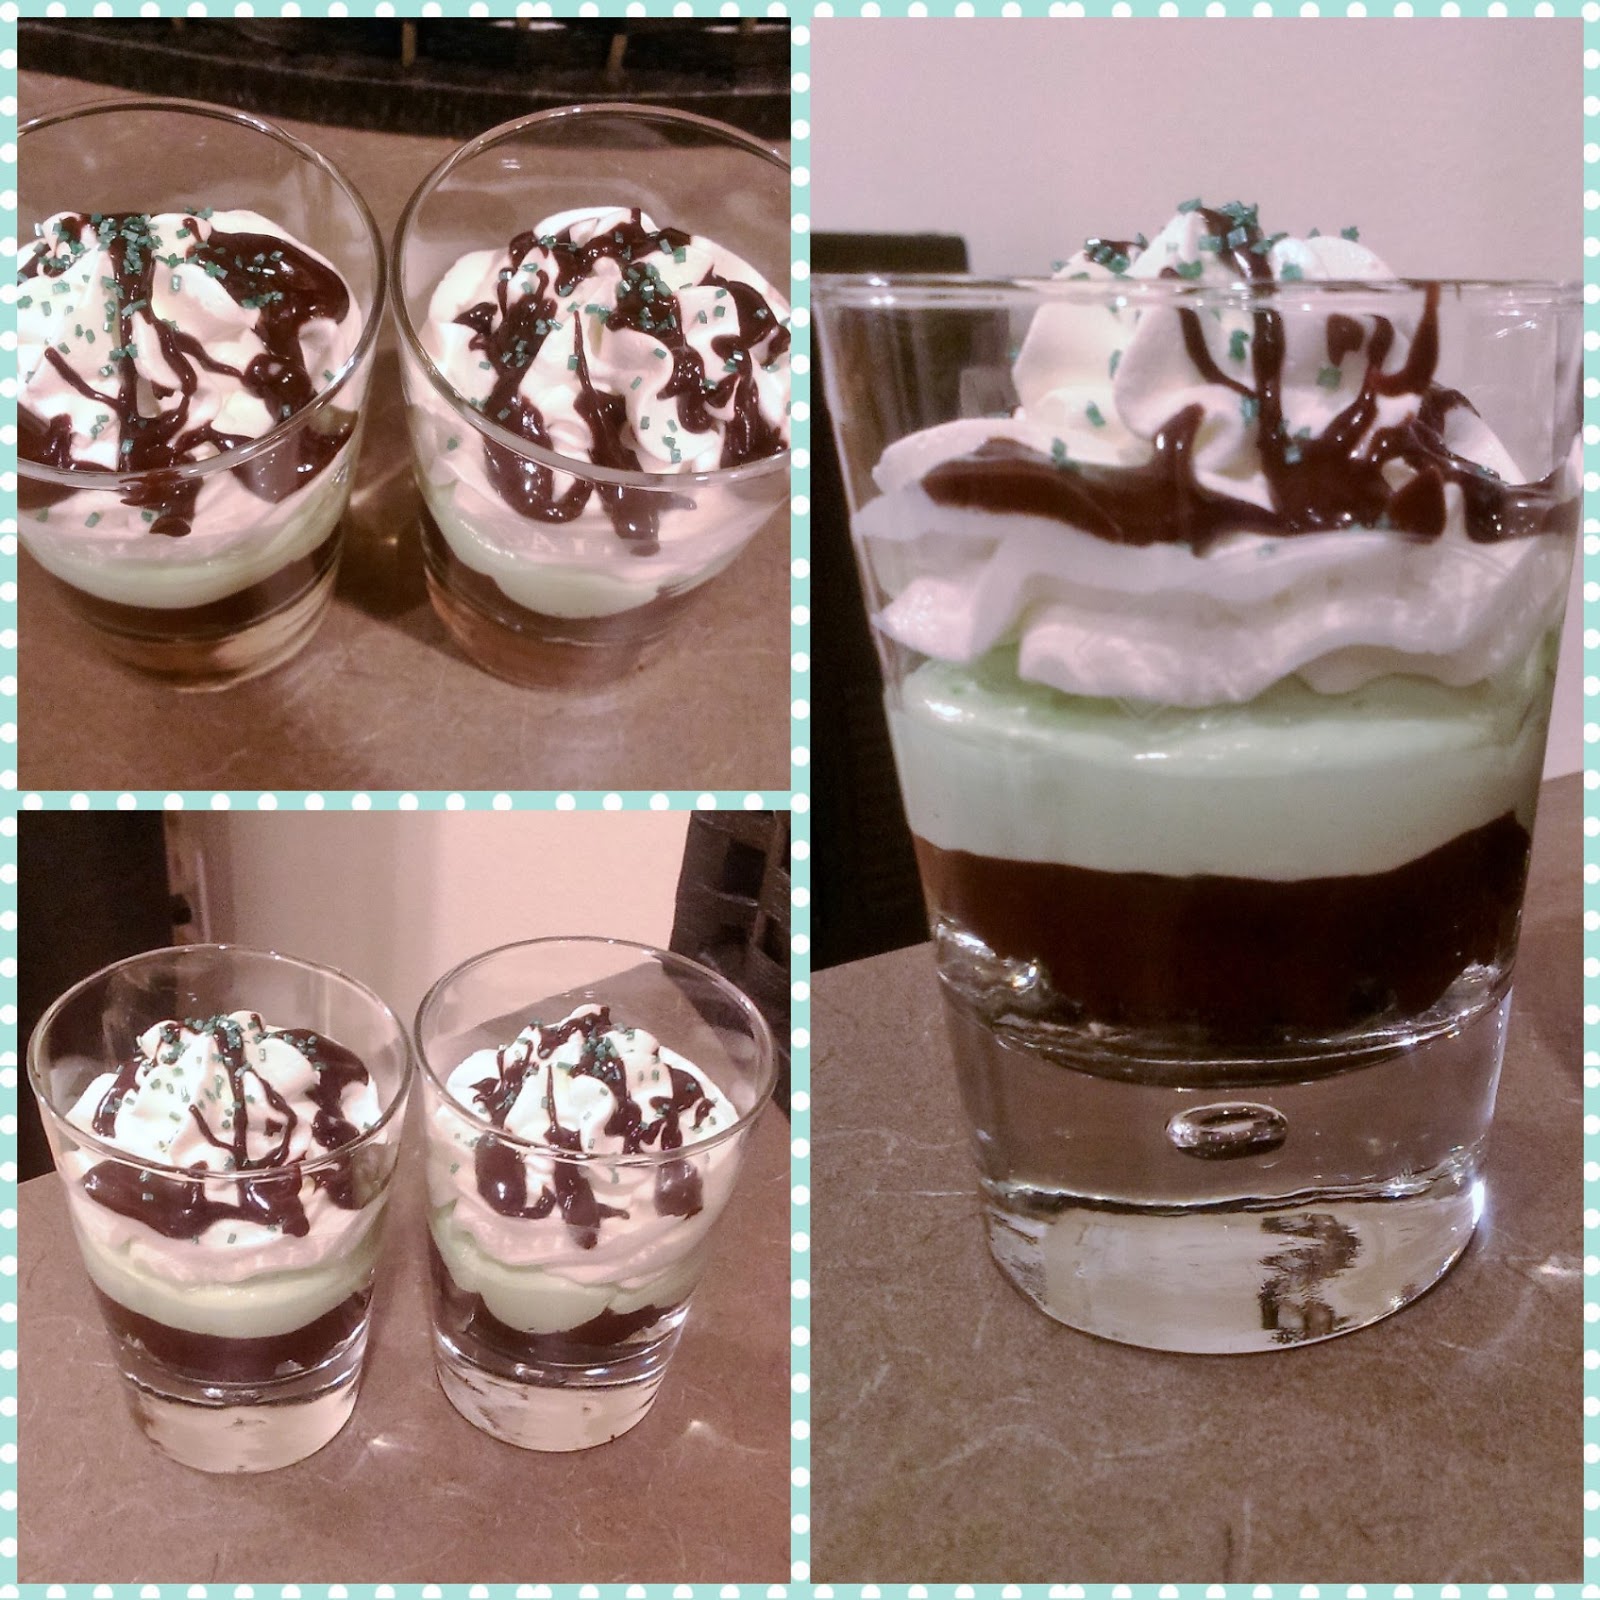
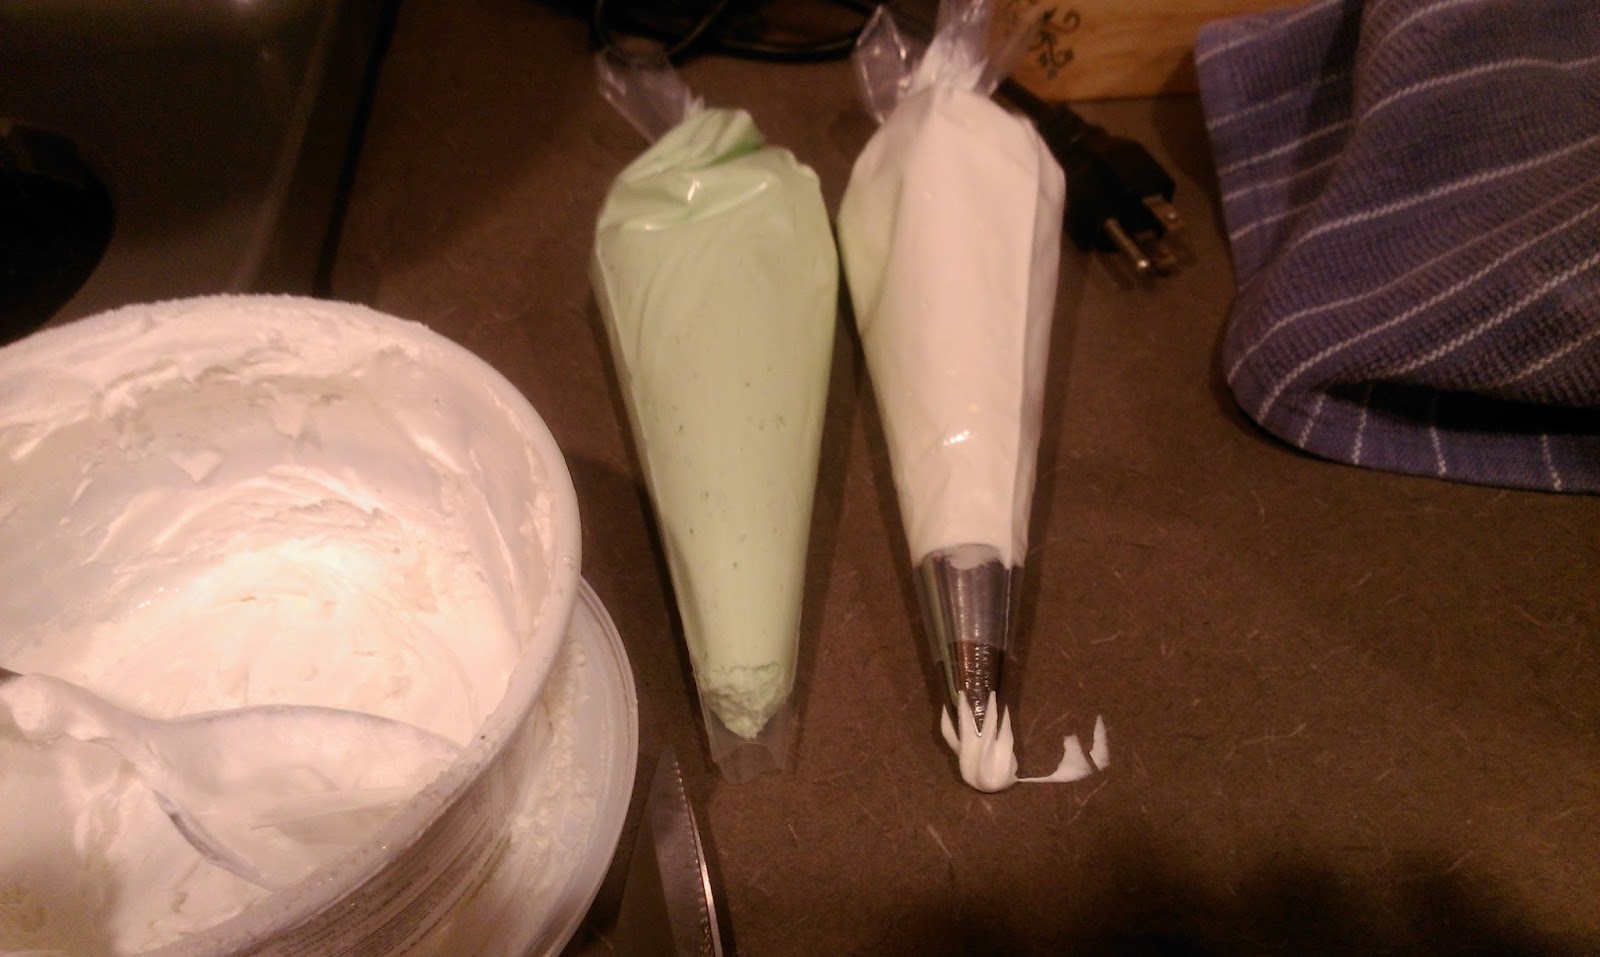
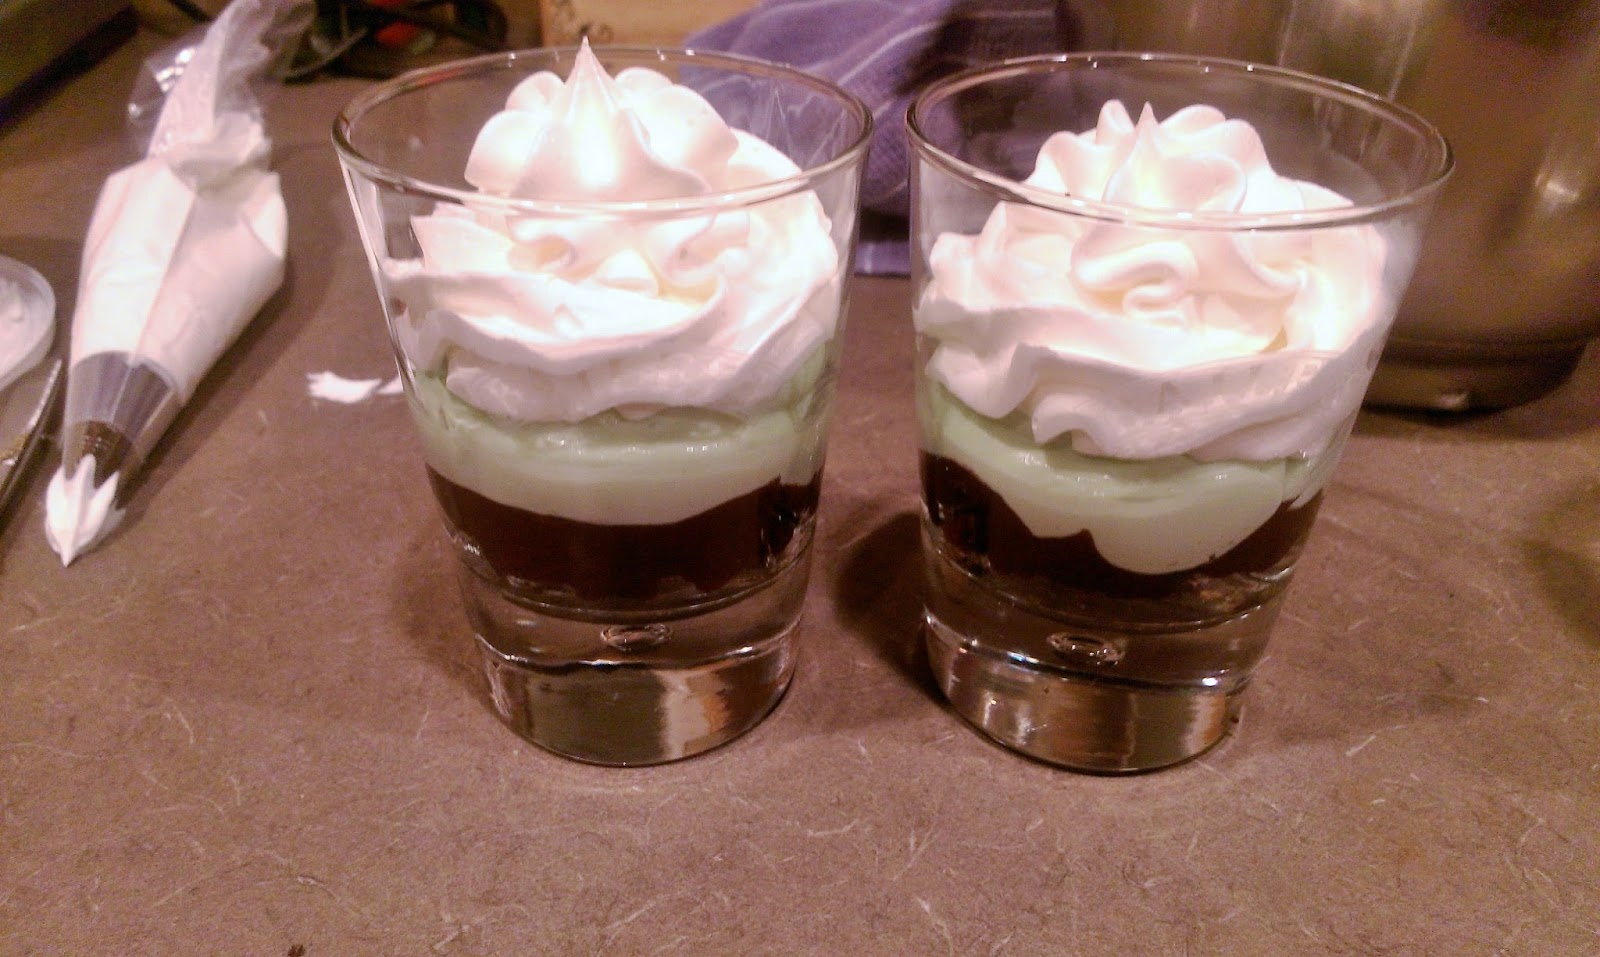
Start by adding as much filling as you deem necessary for one or two cheesecake shooters into a piping bag. Add the remaining half of Cool Whip to a piping bag as well. If you want to get fancy, use a 1M tip for a pretty swirl. You can also just spoon the cheesecake filling into the glasses, but since it has set a bit in the fridge, piping it is just easier. 
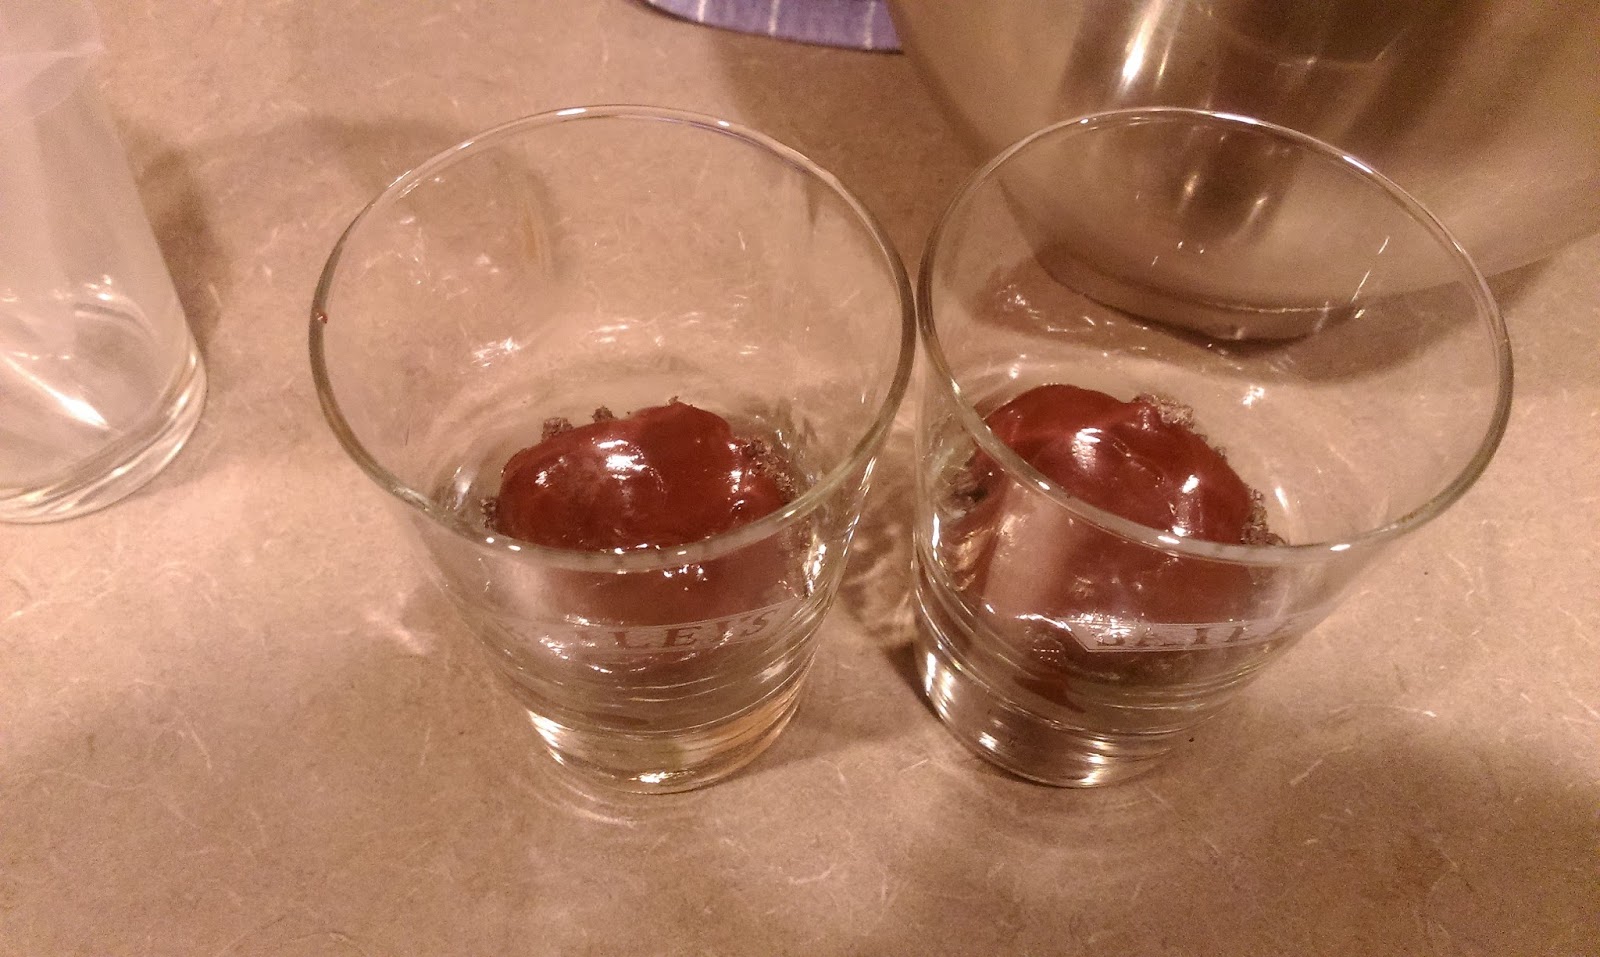
Baileys…Baileys did not sponsor this post. But they should have. It should come as no surprise someone that uses Baileys for just about everything except medicinal purposes has Baileys low ball glasses. Gather up a couple low ball or small wine glasses (hahaha..those don’t exist). Remember those crushed Oreos from a million years ago? Sprinkle a thick layer on the bottom of the glass. 
Then use a spoon and some precision to pour a small ocean’s worth of Baileys hot fudge over the Oreos. 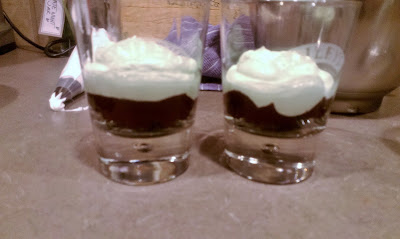
Then pipe or spoon a hearty amount of cheesecake filling on top of the fudge. 
Pipe away with the Cool Whip…you could also use Reddiwhip here. I have an extra can for future shooters. 
Then add more chocolate fudge because you’re an adult dammit, and this is what adults do. 
Of course, don’t forget to add sprinkles for extra festiveness. This in no way alters the alcohol content, I promise. I’m gonna warn you about the Baileys fudge sauce. Once you have one spoonful, you’re gonna want to put it on everything. Got a donut? Needs Baileys fudge. Got fried chicken? Adds some Baileys fudge. Got a glass full of Baileys? Don’t even play, just add the damn fudge. It has been so long since I’ve had booze that I actually got the hiccups for a minute after sampling this fudge/cheesecake combo. There are no words for how good these two are together. It’s like Brad and Angelina…they look pretty together and you know there’s a lot of alcohol involved. But in all seriousness, mint cheesecake can only be further improved with the addition of Baileys fudge sauce. The sauce is rich and decadent while the cheesecake is light and minty. And everything has that delicious Baileys aftertaste we’ve all grown to love after all my Baileys-laced blogs. Just call me the Boozy Baker. One day I hope to open a bakery for ages 21 and up (don’t lie, you’d love to spend an hour in a child-free restaurant), where all the treats are full of life’s most wonderful ingredients: sugar, love, and lots of alcohol. ‘Til next time my fellow eaters!

If only every shot tasted this good. -
The Shamrock Shake Takes Solid Form
We all know that McDonald’s Shamrock Shake is legit. It’s one of my all time favorite (non-Blue Bell) ice cream desserts. I found when I moved here that everyone else in Clovis was already in the know about the amazingness that is this shake…so much so that most of our McD’s are sold out of the shake mix by March 1. This forced me to create my very own copycat recipe–with fantastic results. So what are we doing here today? Well you see, the problem with the Shamrock Shake is its consistency, or rather…its inconsistent consistency (head hurting yet?). If you come in too hot and try to drink the shake the second you get your grubby mitts on it, you’re gonna be met with a Level 5 brain freeze. Like a “I forgot my name and what colors are” kind of brain freeze. But on the other hand, if you take too long, you might as well be drinking ice cream sweat. No one wants that. The other issue I have with the Shamrock Shake’s consistency is its inability to be shared…people will see you with one, and they will want a drink. Maybe you don’t mind wheeling and dealing with other people’s germs, but I have always lived my life by one simple mantra when it comes to drink sharing: unless you’re served in a frosted glass, never come within four feet of my lips. That and I’m incredibly selfish…why would I want to share my Shamrock Shake with anyone? I knew I had to solve the problems facing the Shamrock Shake. I went searching for answers, and like most of my problems in life, the solution was cupcakes.
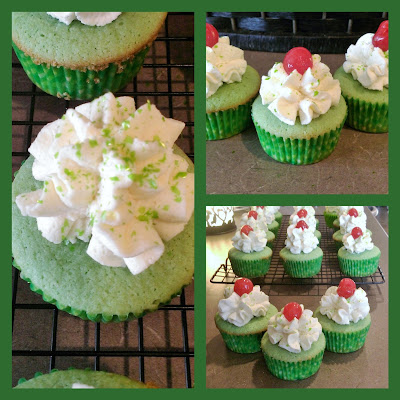
McDonald’s should pay me for this recipe. Say a yummy hello to the boozy Shamrock Shake cupcake with Baileys white chocolate whipped frosting. I suppose one might notice I added quite a bit of alcohol to these cupcakes…I just now realized that the third issue I have with the original Shamrock Shake is that McDonald’s doesn’t spike them for me. Problem solved. This is where that “I gave up drinking but not eating booze thing for Lent” comes into play. In hindsight, wording is everything, and boy do I know my way around words…probably would’ve made a great used car salesman or lawyer, but instead we’re here and I’m not getting paid to regale you with my expertise in poetic wording. That’s not at all depressing or anything. Better
drinkeat a cupcake to soothe my feelings.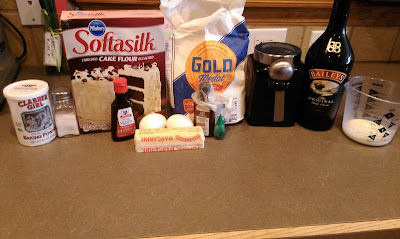
Look, baking booze has returned! Okay, I browsed Pinterest for DAYS and couldn’t find a recipe I liked enough to adapt. None of them really seemed like they would actually taste like a Shamrock Shake in solid form, so I was left to my own devices and had to ponder what might work. I had a box of white cake mix on hand in case things went horribly awry since I needed these for a party, but thankfully it remains unopened in my pantry waiting for some other inevitable screw up. My perfect recipe is as follows:
- 1/2 cup of room temp butter
- 2 room temp eggs
- 1/3 cup of slightly chilled milk (remember, stuff mixes together better when it is all the same uniform temp)
- 1/4 cup of Baileys (I used original but salted would work)
- 1 tsp vanilla extract
- 2 tsp mint (not peppermint) extract
- 12 drops green food coloring
- 1 cup of cake flour (use the scoop and swoop method–do not hard pack the cake flour)
- 1 cup of sugar
- 3/4 cup of regular flour (softly packed–not hard)
- 1 1/2 tsp of baking powder
- 1/2 tsp of salt
I know, it seems like a lot of ingredients, but this recipe is super simple and quick. Preheat your oven to 350 and line a muffin tin with cupcake papers. Cream the butter in stand mixer until it’s a little fluffy. Then add in the rest of the wet ingredients and mix on low. Things will look weird, green, and sloshy at this point. No worries. While that is mixing, in another bowl, blend together the flours, sugar, baking powder, and salt. Add half of this dry mix to the wet stuff in the stand mixer and blend on low for a minute. Scrape the bowl down, add the rest of the dry mix, and blend until incorporated.

I’m nothing if not festive. This recipe yields 14 cupcakes which seems like an odd (even) amount until you remember you need to save two for taste testing and blogging purposes. Kismet, really. Fill the cupcake liners 2/3 of the way full and tap the pan on the counter a couple times to release any air bubbles. Bake in the middle rack for 18-20 minutes or until a toothpick comes out clean. When finished, place the tray on top of a baking rack and let cool for 5 minutes before removing the cupcakes to the rack to finish cooling.

They’re literally the most perfect, non-domed in or out cupcakes I’ve ever seen. I didn’t realize such a thing could exist. 
More baking booze? Once the cupcakes are almost cooled, it’s frosting time. Now, usually I absolutely HATE whipped frosting, but a cupcake-shake hybrid needs a cupcake-shake hybrid frosting. Shamrock Shakes aren’t served with a large dollop of buttercream on top. Although, maybe they should be; note to self- try this when you’re prepared for the inevitable diabetes diagnosis immediately following consumption. But while this frosting is light and whipped, it’s actually really dense on flavor and overall taste, so it’s perfect, really. You will need:
- 1 pint of heavy whipping cream, cold out of the fridge
- 1/3 cup of powdered sugar
- 1 package of white chocolate instant pudding
- 2 TBS of Baileys (again, salted Baileys would work great, too)
Start by whipping the cream in your stand mixer for a minute on low before turning to high. Stop mixing when you’ve reached near whipped cream consistency. Dump in the sugar, pudding mix, and Baileys. Finish blending on high for another 30 or so seconds.
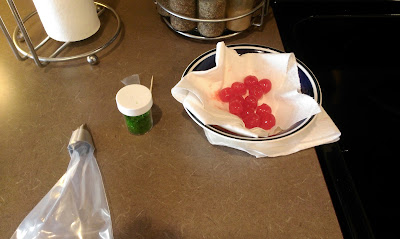
Other awesome things you’ll need: cherries, green sprinkles, and a piping bag loaded with a 1M tip. 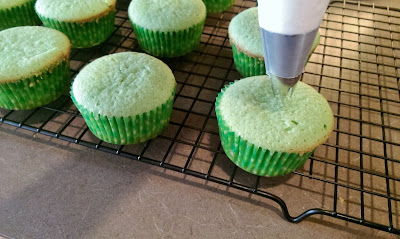
It just keeps getting better from here… Now, I didn’t want to cover up how pretty and green these cupcakes are with a ton of boring, white frosting. So I took my bag and held it straight over the middle of each cupcake and piped a large mound of frosting.
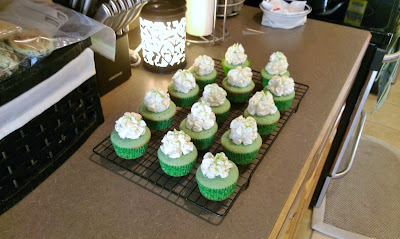
Like so. Things will get squished down and spread out a bit if you put cherries on top. I had enough leftover frosting that if you wanted to do a traditional swirl on each cupcake, you’d totally have enough. I then added some pretty green sprinkles because we’re obviously going for a theme here. I think these were actually leftover sprinkles from last year’s batch of actual Shamrock Shakes, so this worked well.
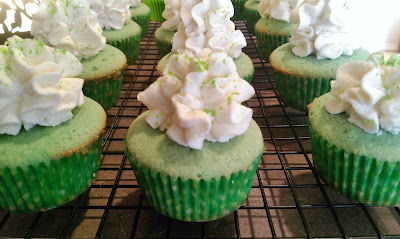
I…I just want to lick them all. Just a little. 
Finish by adding a cherry on top! If cherries aren’t your thing (weirdo), add some type of Saint Patrick’s Day themed cupcake topper like a clover or pot of gold or something else that’s not edible because you want to watch the world burn. Cherry hater. I went with cherries because A) That’s how the real Shamrock Shake comes and B) Clovis doesn’t do drunken holidays, so there weren’t any St. Patrick’s Day themed cupcake toppers anywhere. Guys…when I ate one of my taste test cupcakes it was a divine experience. Much like a real Shamrock Shake, the second I tasted these cupcakes I felt like I got punched in the mouth by a tube of mint toothpaste, and it was awesome. After the mint flavor overpowered my taste buds, two seconds later I was met with the creamy, perfectly whipped frosting to match it, and it was like I was actually drinking an honest to goodness Shamrock Shake with the added bonus of no brain freeze and no having to share. There’s a nice, resonating aftertaste of Baileys (especially in the frosting) that just puts these right over the top. Shamrock Shakes in individual, handheld (and boozy) form are the perfect way to go. If you ever wondered if you could drink a cupcake, the answer is surprisingly yes. Now I’m off to go find a list of all Irish holidays so I can find more excuses to make these bad boys year round. ‘Til next time, my fellow eaters!

Let’s hope there’s a major holiday at least every other month.

Healthy-ish cake, cupcakes, pie, and cheesecake recipes and decorating tips