-
Strawberry Bars Forever
I often get asked how my husband and I stay in such great shape what with all the baking I regularly do. My secret is that much like a shark, I never stop moving. “But Kate, you’re sitting down to blog right now,” you say? I’m tapping my foot at about a 50 mile an hour rate. Like a bumblebee on crack, I fidget. I assume fidgeting, along with intense workouts and dogs that will riot if not walked, helps me stay in shape. I enjoy really rich desserts, but every once in a while, I just want something light and low-cal. But usually when I hear the words “healthy dessert,” I either assume it’s actually cardboard or that whoever is trying to pitch it lives in a magical fairy-tale land full of whimsy and is completely insane. But as it turns out, that magical fairy-tale land happened to look quite a bit like my own kitchen this week. And while I may be heavy on the crazy, I’ve been told I’m not certifiably insane, so just go with me on this. What if I told you that you could eat a warm, sweet, glazed dessert for under 250 calories, AND I promise it isn’t cardboard? No gimmicks! I’m starting to feel a lot like a used car salesman though, so let me wrap up the pitch and show you the damn dessert already. The low-cal dessert of your sweet-tooth-loving dreams has arrived:
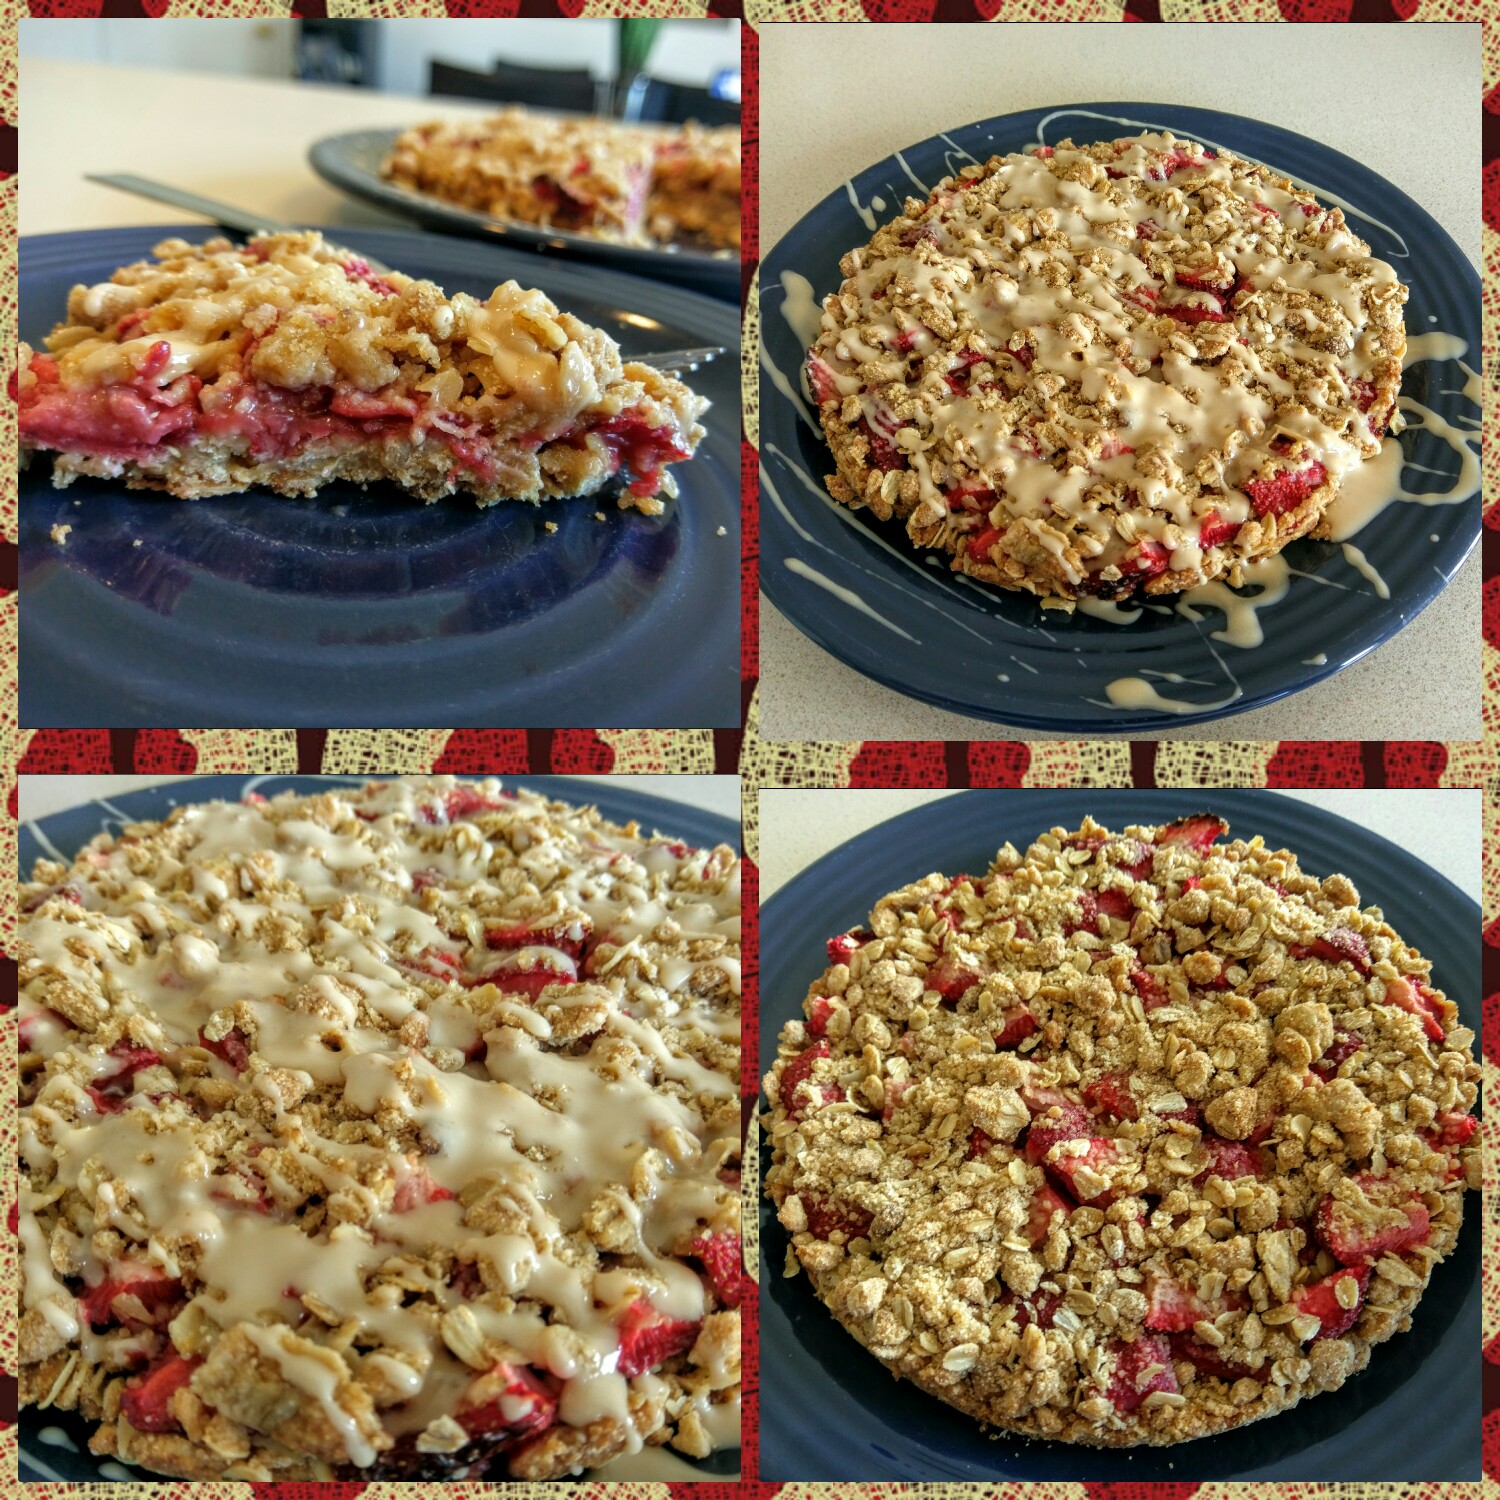
I’ll take five. Dripping, yes, dripping with vanilla glaze, these strawberry oat bars are next-level goodness. Very rarely does a person get to eat a delicious dessert and not hate themselves immediately following (this can’t just be me, but I am crazy, so who knows). Upon consumption, you have to remind yourself that feeling like a worthless sack of empty calories with lost Olympiad dreams simply isn’t necessary! What I also love in a dessert is when it can double as breakfast (I am but a simple human). I’ve shared the merits of breakfast pie and breakfast cake before, but this is actually an acceptable breakfast because it has oatmeal in it. Although I will always argue the line between pie and turnover is thin and should be crossed, oatmeal is pretty damn normal where breakfast is concerned. Think of this as fully-constructed overnight oats. Baked for your taste buds’ pleasure.

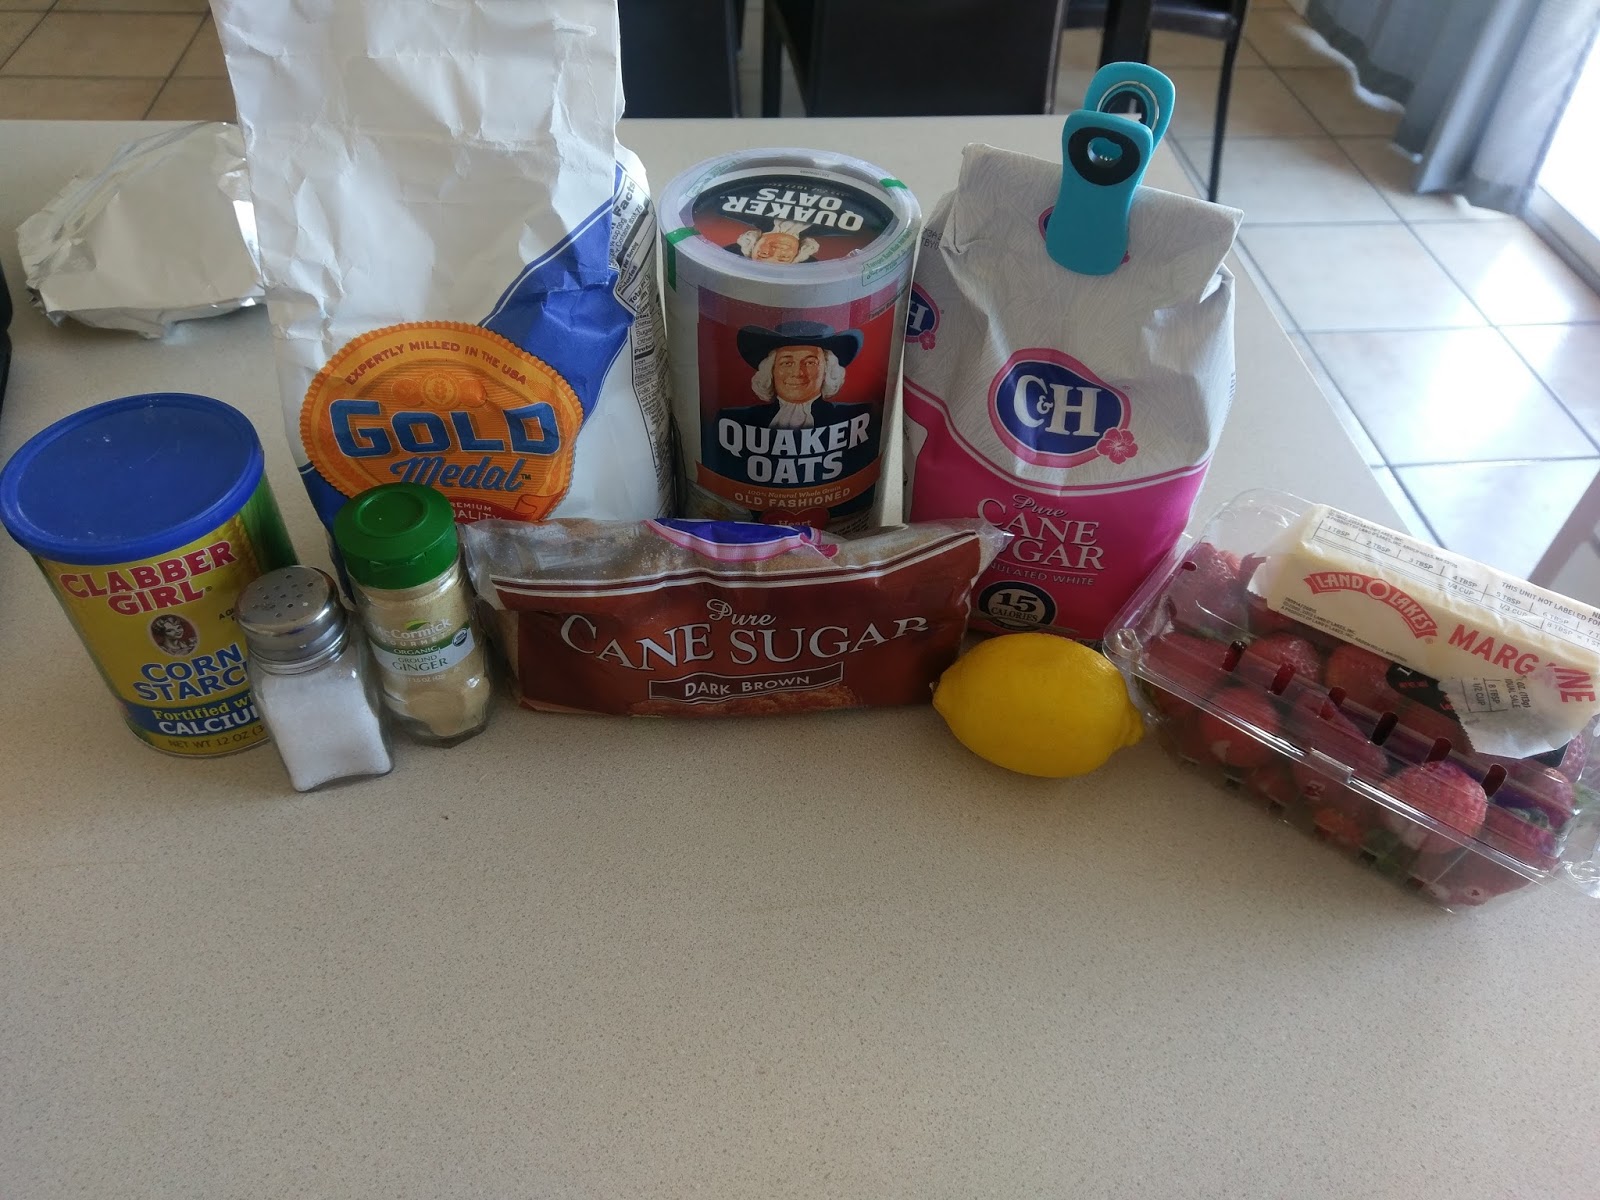
I have so much leftover oatmeal. I guess I could eat it for breakfast…but bacon exists, so yeah… If you’re not totally sold on the idea of a healthy dessert that’s actually delicious, one, you’re really hard to please and I feel sorry for the people that love you, and two, what if I told you that you already have everything you need to make these in your kitchen? Because I did. And I go through strawberries like, well, someone who really likes strawberries. A lot. So give your pantry a peruse and gather up:
- 1 cup Quaker Old Fashioned Oats (not the mushy quick-cook kind)
- 3/4 cup All Purpose flour
- 1/3 cup dark brown sugar
- 1/4 tsp salt
- 1/4 tsp ground ginger
- 6-7 tablespoons melted butter
- 1 teaspoon cornstarch
- 1 tablespoon lemon juice
- 1 tablespoon sugar
- 16 strawberries, diced into quarters
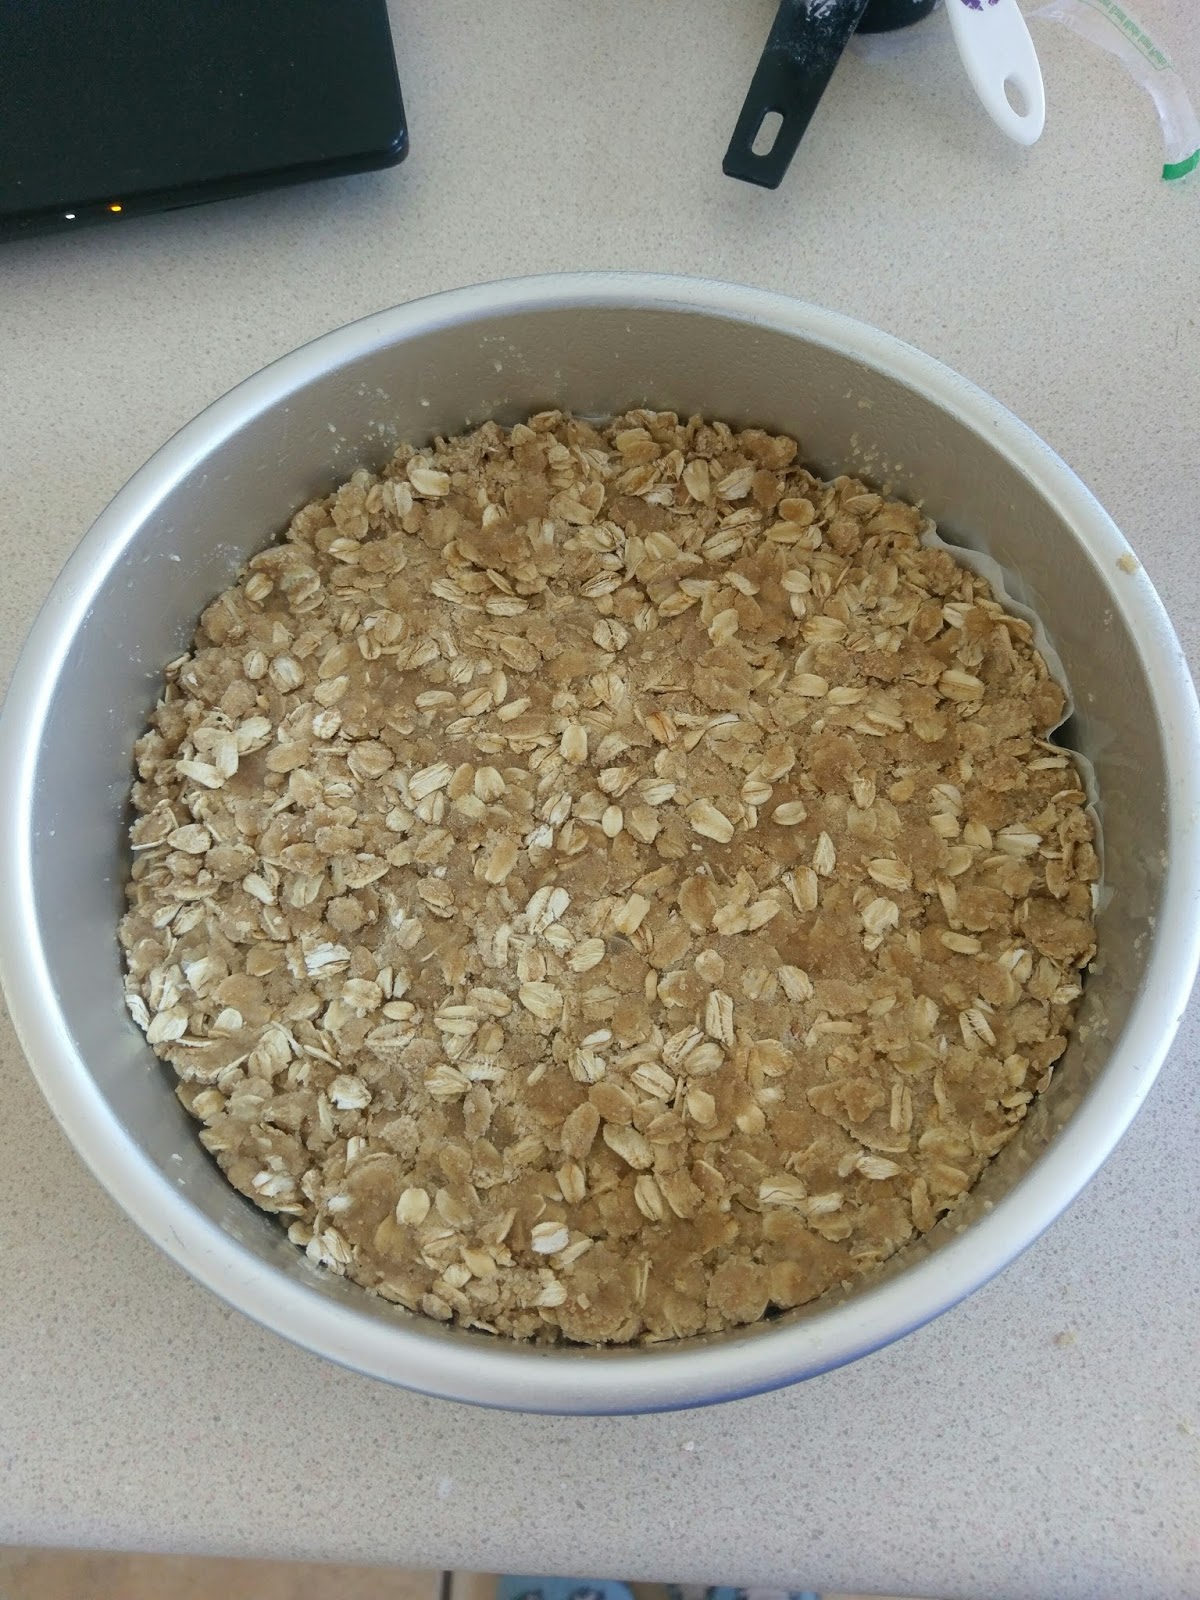
Start by preheating the oven to 375 and line an 8×8 round or square pan with Parchment paper and spray with cooking spray. In a large bowl, mix the oats, flour, brown sugar, salt, and ginger together. Once combined, add in the melted butter and mix until all ingredients are damp. In a small, separate bowl, mix together the cornstarch, lemon juice, and sugar and set aside.

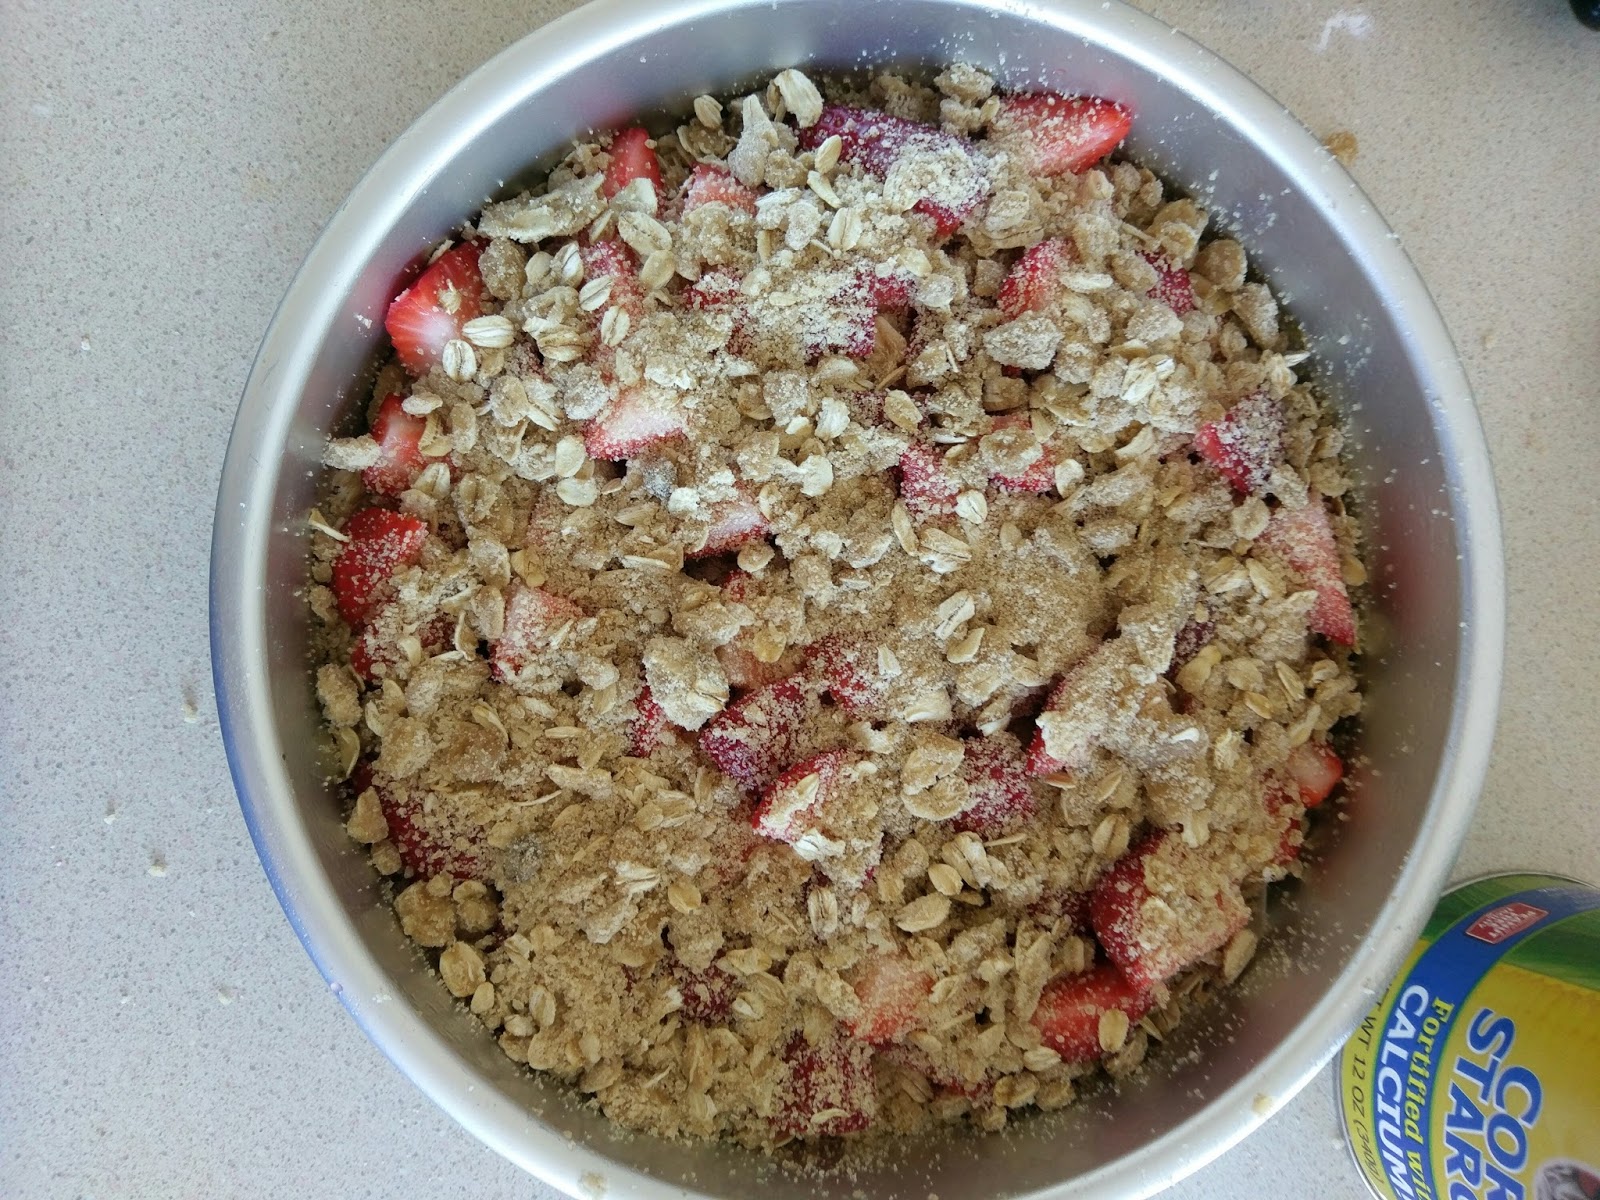
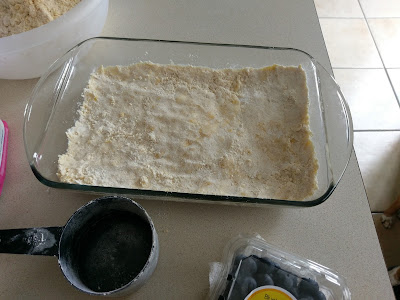
Press half of the crumb mixture into your prepared pan. 
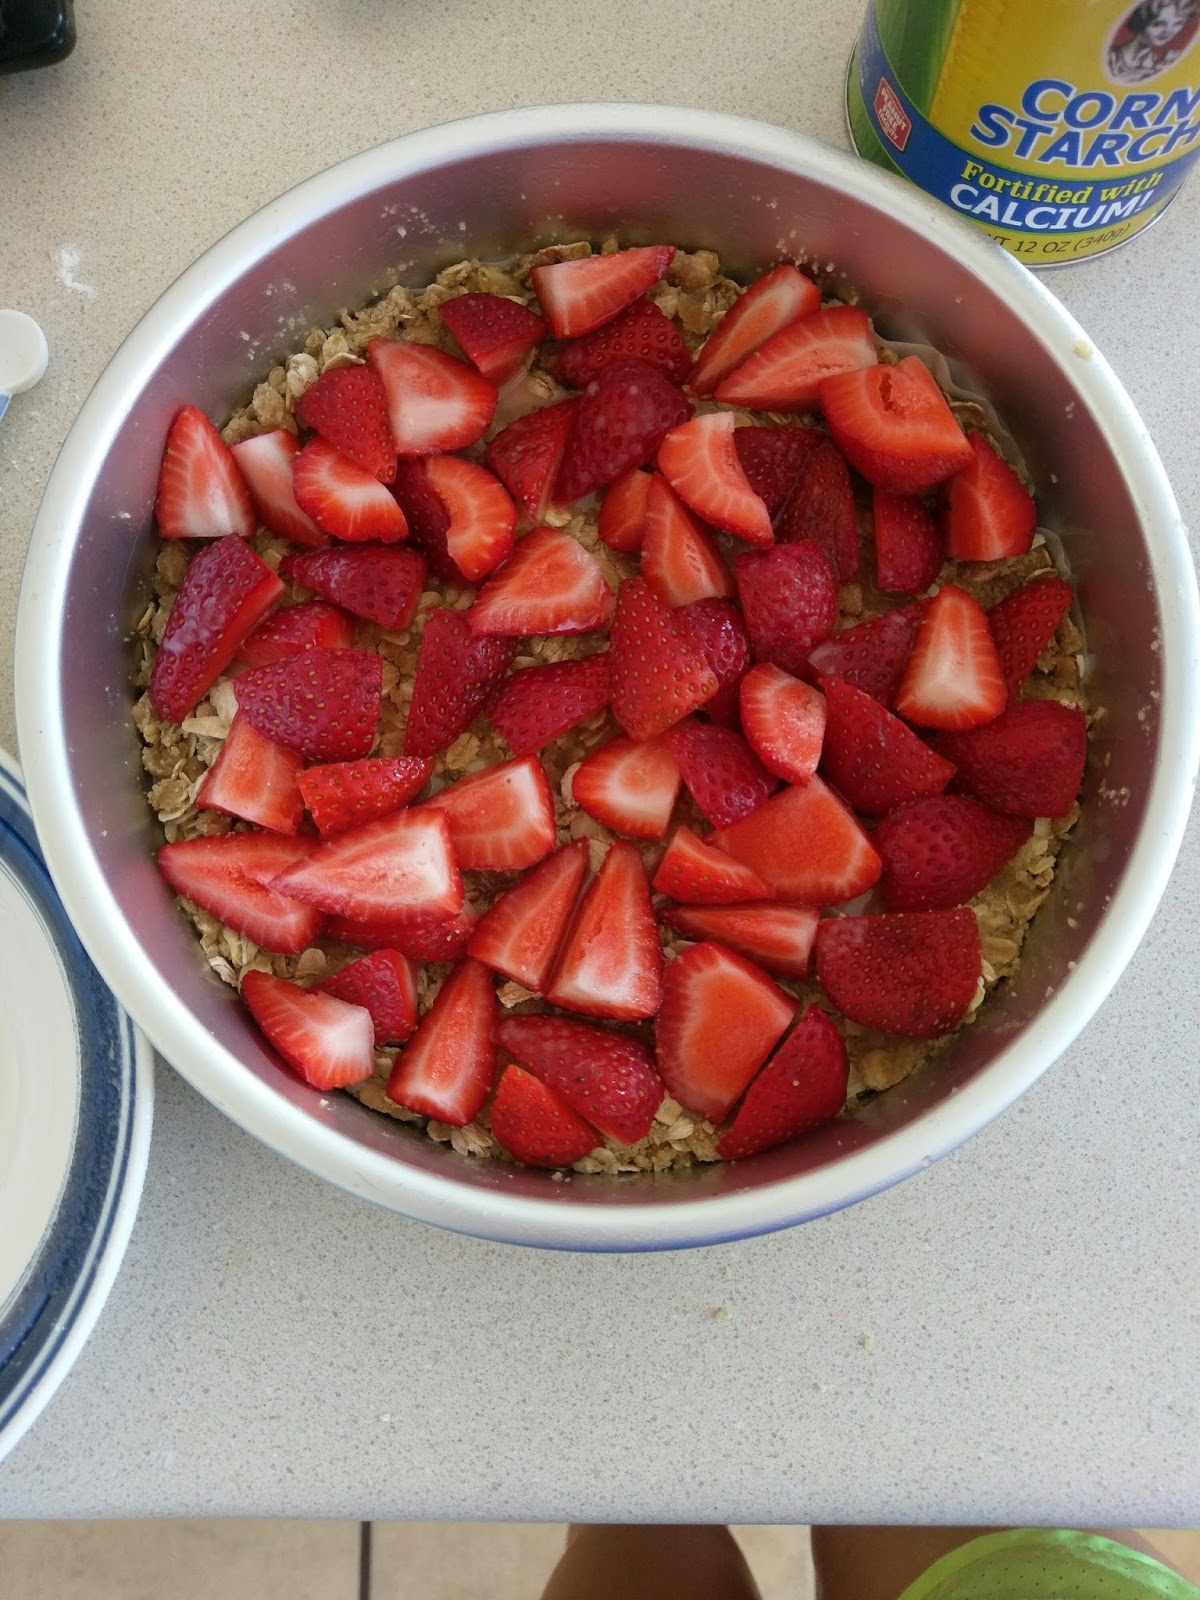
Top with the chopped strawberries. Then take the bowl of lemony sugar and pour over all the berries. 
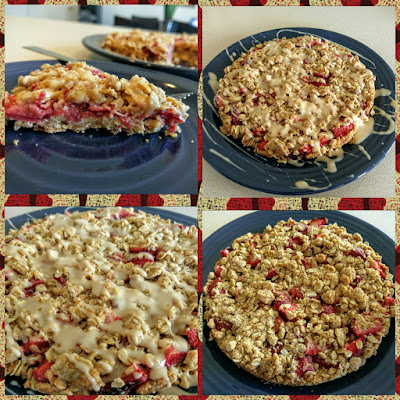
And finish off by sprinkling the rest of the crumb mix on top. Bake for 40 minutes, until the top layer is golden brown and your house smells like brown sugar heaven. I was nearly drooling by the time these were done…Pavlov would’ve had a field day with me. Let cool on a rack for 10-20 minutes before placing (while still in the pan) into the fridge or freezer to fully cool and set. I placed into the freezer for a half an hour.

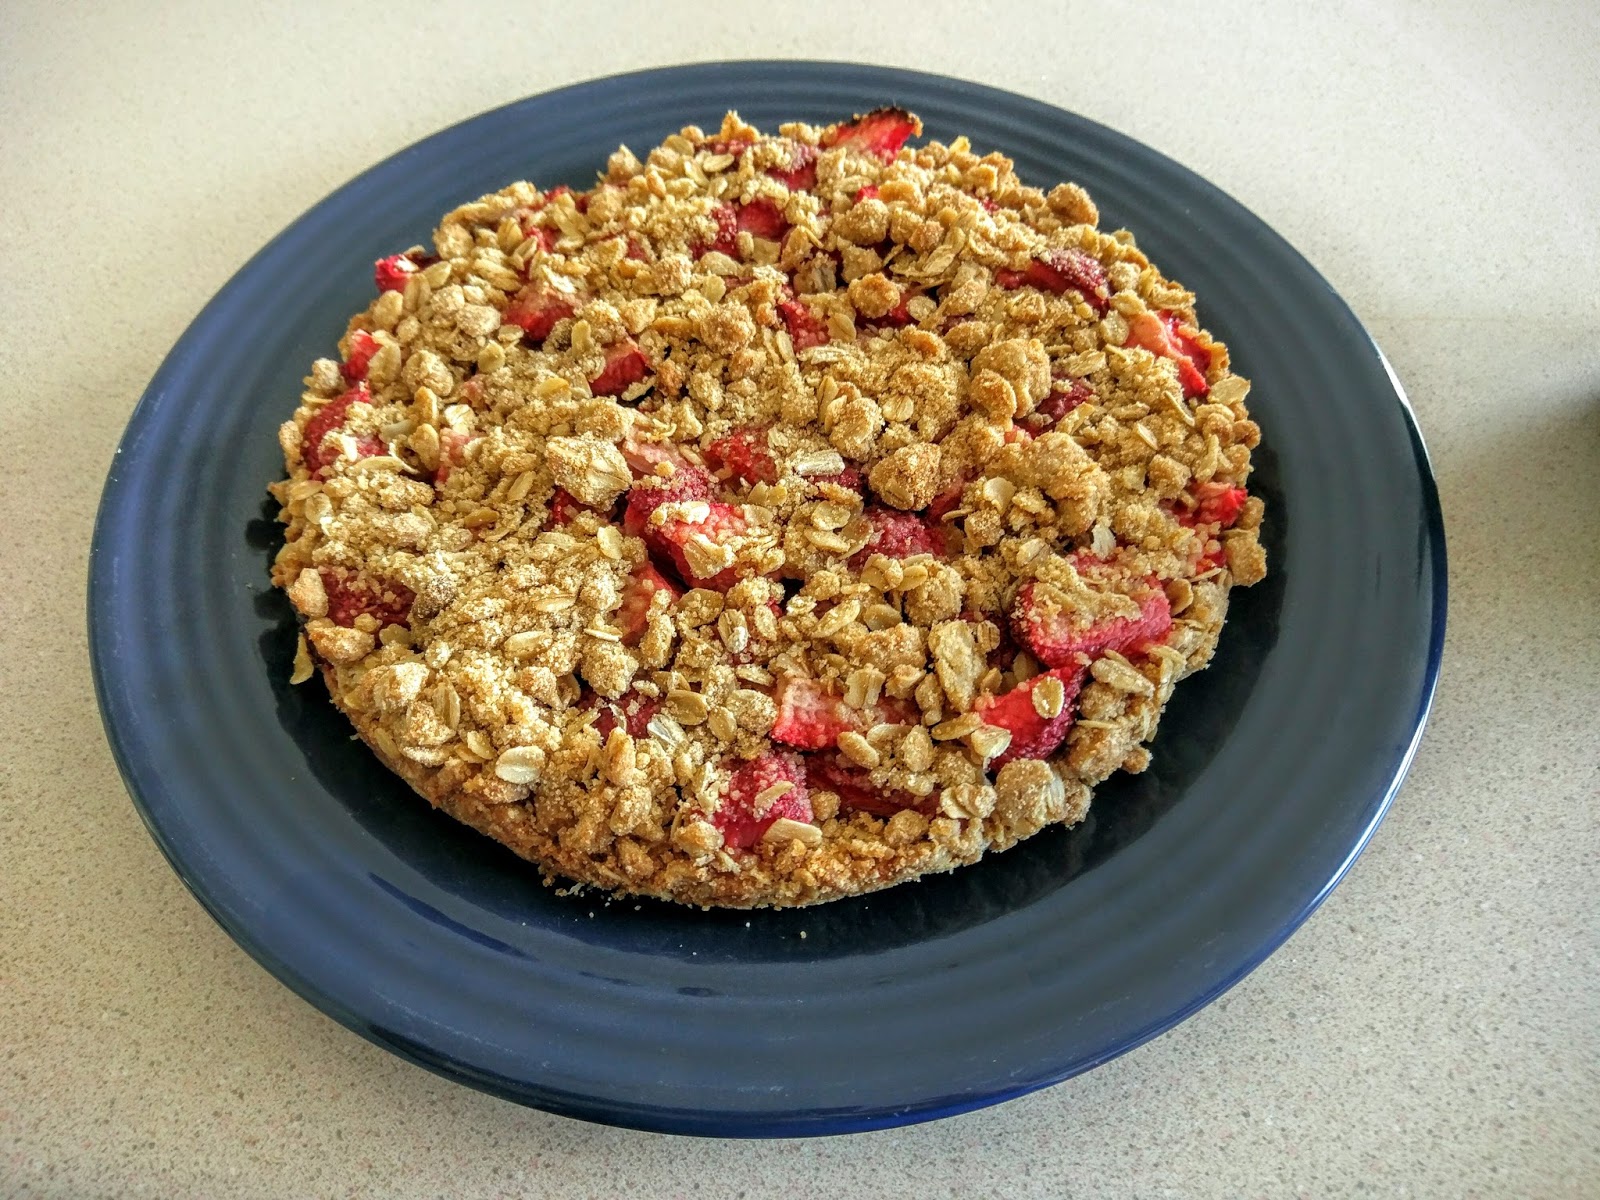
Which was really hard because, loooook at how yummy and golden. 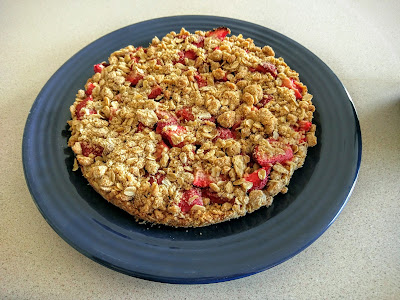
I mean really, now you’re just showing off, oat bars. You’re not allowed to look as delicious and drool worthy as a cake. Carefully, very, very carefully, remove your fully cooled strawberry oat bars from the pan (if you care about presentation). Clearly, I do because ugly photos means no likes on Facebook, and that makes me a sad panda. I found it best to take a sharp knife around the edge of the pan to separate any sticky areas, and then used the knife to lift out one corner so I could grab on to the Parchment paper and just slide it out on to a plate. It sounds complicated because it is. There was a lot of low, hushed cursing at this point and prayers to several deities, but the dessert made it in one piece since it was a little frozen. Had I not needed presentation photos for some greedy jerks that read my blog…have I told you thanks for reading lately? My heart, much like my strawberry bars, is slightly frozen, so I’m not great with the gratitude.

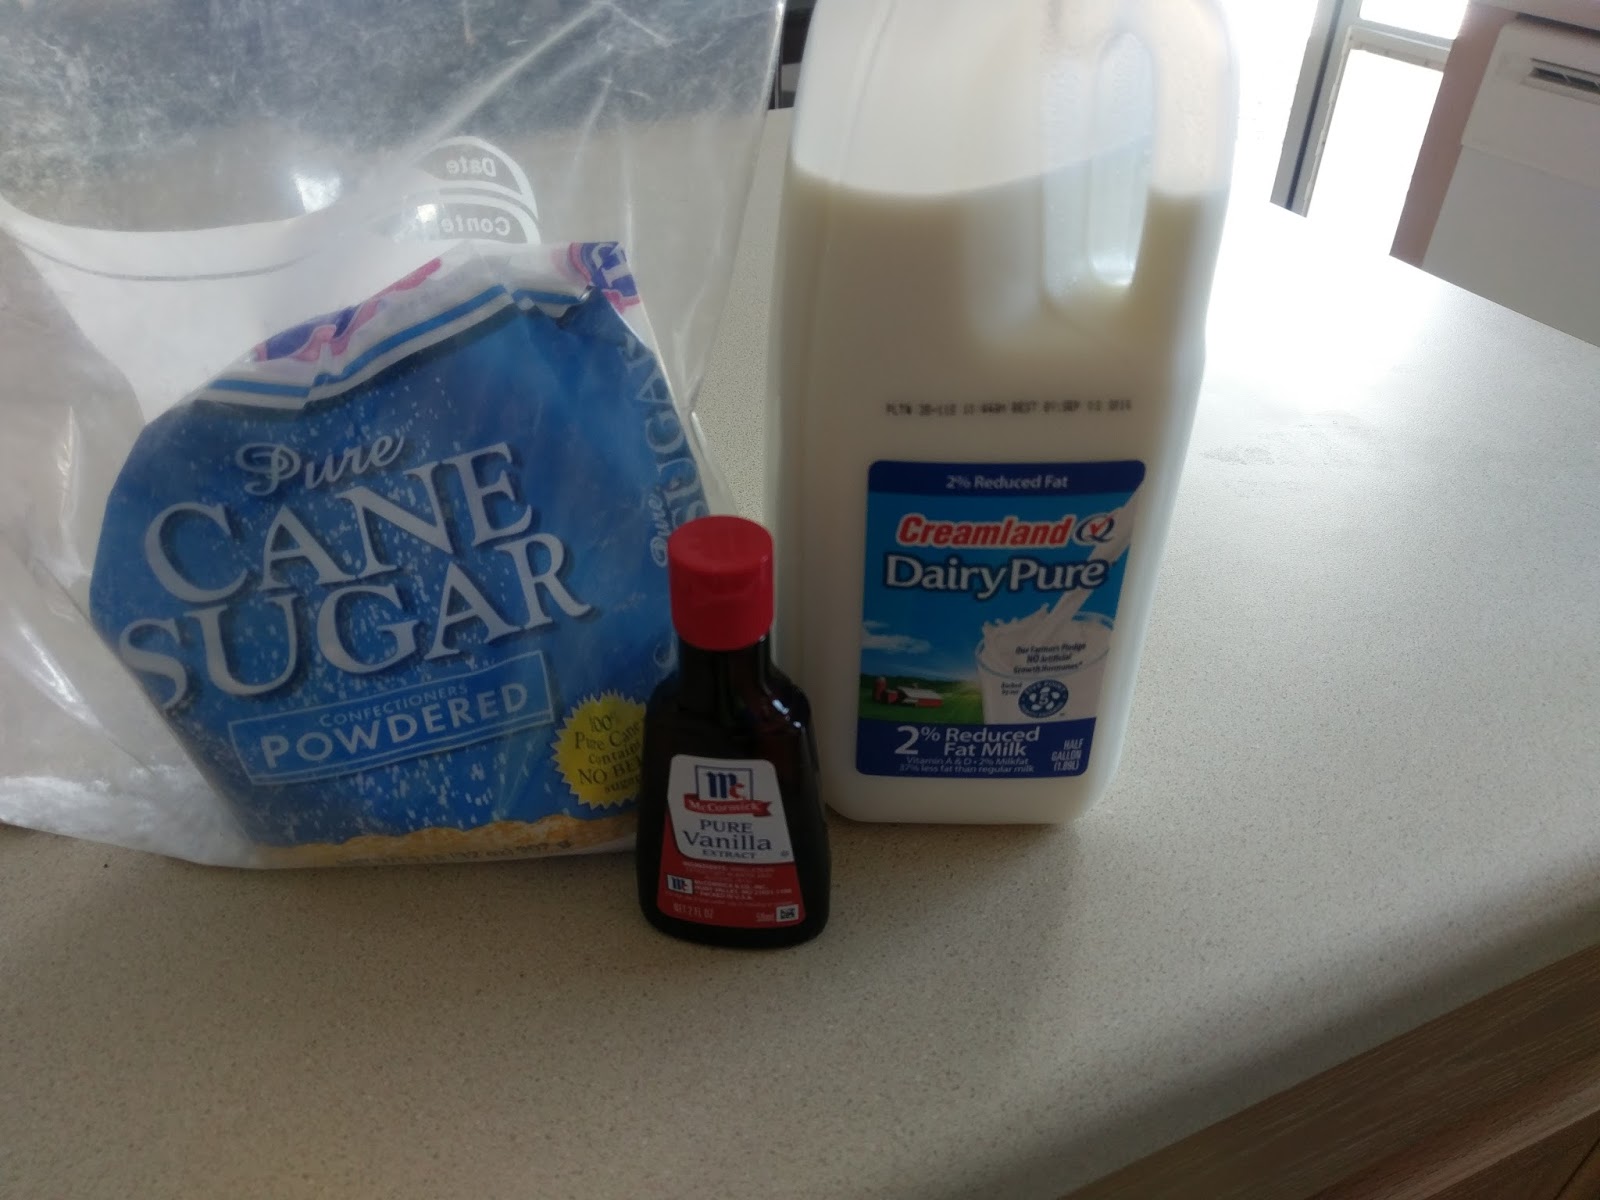
Because without glaze, this is just breakfast food. Glaze. There are few things in life that glaze can’t make better. Bad day? Put some glaze on your pie. Put some glaze on your carrots. Put some glaze on your rolls. I’d put glaze on top of frosting if I wasn’t positive it would give me diabetes. Simply gather up a small bowl, half a cup of powdered sugar, one teaspoon of vanilla extract, and one tablespoon of milk. Mix your ingredients together and get ready to drizzle, baby.

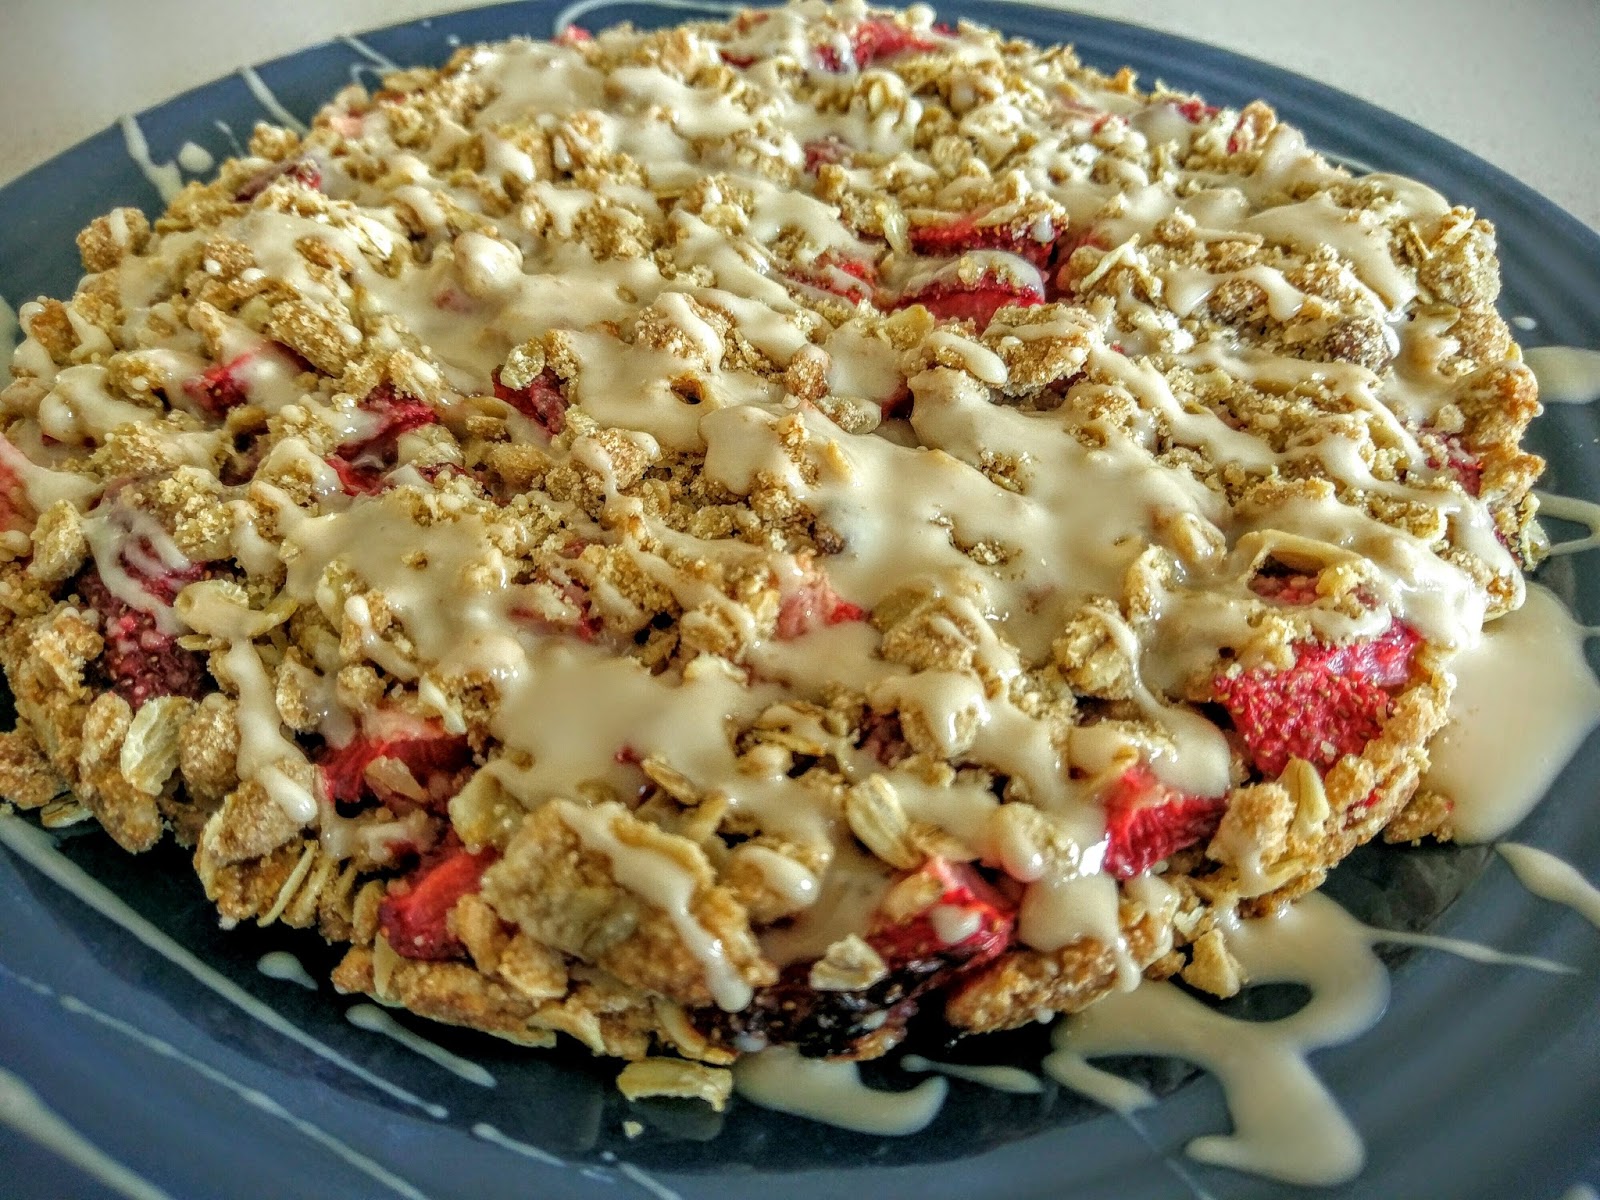
Pretty sure this is the definition of food porn. At this point, you’re ready to eat. Sliced into 8 larger bars, that’s only 230 calories per bar. I know. Seems too good to be true. Certainly you’re about to eat some cardboard with glaze on top of it. But on a scale of one to Ryan Lochte, I’m not even lying a little, not even lying a Lochte. Heat up your bar in the microwave so things are ooey gooey warm, and you will not be disappointed. The strawberry is a very versatile fruit. So versatile, in fact, you forget you’re basically eating oatmeal for dessert because paired with the berries, glaze, and wonderful brown sugar, you’ve got guilt-free sweets for days! Or for a few days if you have to share…which is unfortunate. Because I promise you once you get a bite of these bars with their tart crunch and silky vanilla glaze, you’re gonna want to keep these gems hidden. But I find if you tell people it’s a low-cal, healthy dessert, they really do look at you like you’re crazy and reach for the ice cream over your magical fantasy treat that only exists in fairy-tale land. They don’t have to know it’s real, but I can guarantee you one look at these bars and the only thing they won’t believe is that they actually have redeeming nutritional value. But I’m okay with people thinking I’m insane if it means I get more dessert to myself. ‘Til next time, my fellow eaters!

It’s…berry…delicious. Second blog in a row ended on a terrible pun. How oat-terly terrible. -
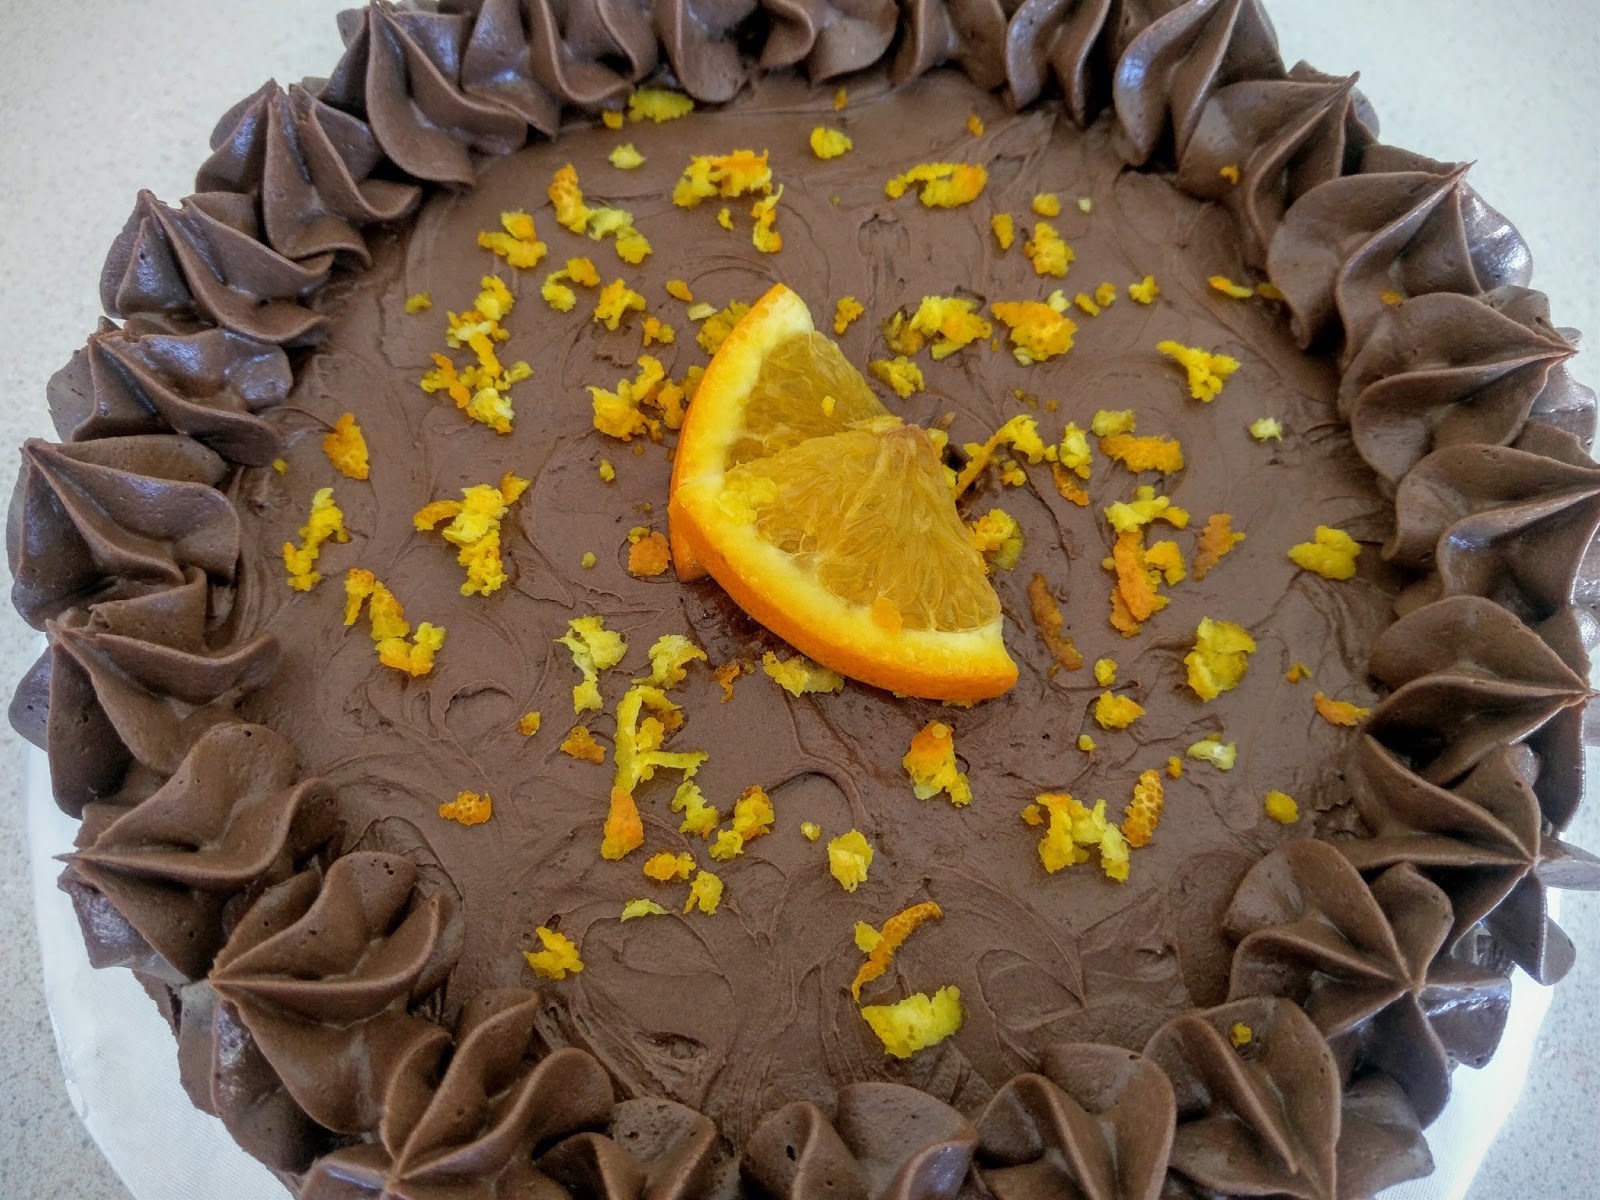
Orange You Glad I Bake?
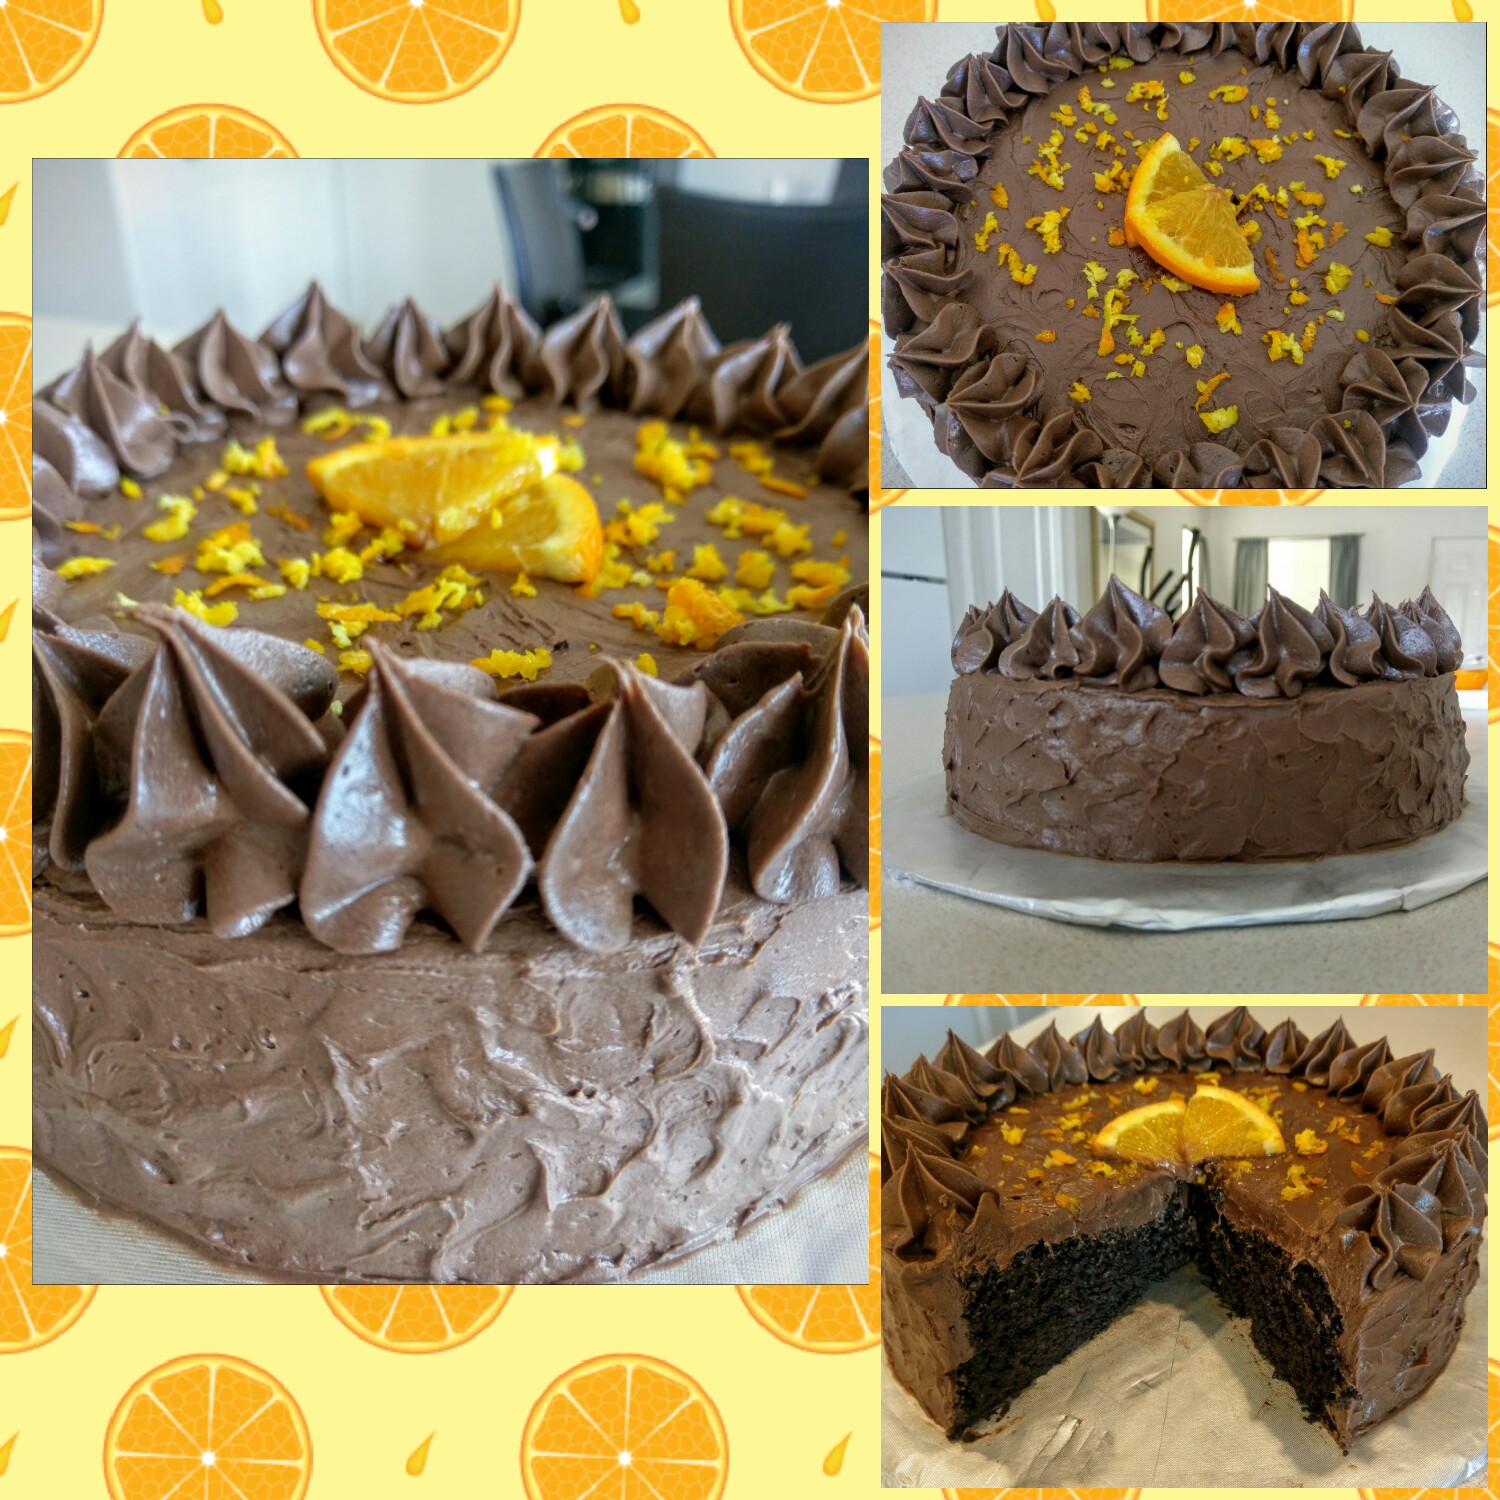
When I was a wee child, I played soccer. I didn’t so much play as I did sign up to get free orange slices at halftime. I mean, clearly I didn’t join because I have a natural inclination for the sport. I have the coordination of a baby giraffe and a drunk toddler all wrapped up in one wobbly package. But damn if I didn’t love those orange slices. I’ve always been a fan of fruit, seeing as it is the natural dessert of the food world. Bless the person who came up with fruit and dessert fondue. I remember in my youth my mom used to melt chocolate Symphony bars and dip strawberries in them to get us to eat anything other than McDonald’s apple pies for dessert. Although, looking back, she probably also made this dessert because children drive you crazy, and every once in awhile you need to indulge in some really good chocolate to cope. She has also always been a fan of chocolate and orange combined together. I was introduced to the orange Milano cookie by my mother. I don’t care who you are, when you bite into an orange Milano you get the distinct impression of what it must have felt like to be Italian nobility: “Servant–tell chef I require a dessert that has both chocolate and cream, but I must be able to eat it with my fingers without making any mess at all.” Talk about the good life. I’m still a huge fan of any flavor Milano cookie, but the orange will always reign supreme. I decided I needed to take this love to the next level, so naturally that means baking it into cake form. Say ciao! to the orange chocolate Milano cake, named as such for its shockingly identical taste…

Brown and orange, not just for the five remaining Cleveland Browns fans. Like most of you, I’ve spent the last week and half living and breathing all things Olympics. I wonder how long synchronized swimming routines take to master and what it must feel like to be able to get your entire body perfectly inline with someone else’s. I’ve yet to even master synchronized walking with my own two legs, so things like diving, swimming, and gymnastics leave me feeling relatively underwhelmed by my existence and generally concerned I may well step off a curb wrong and simply fall over dead one day. I was not blessed with a streamlined physique and proclivity for athletics. I was blessed with the ability to bake my ass off though, and I feel like this is worthy of a medal of some sort. Or at least a hearty thumbs up. And I can guarantee you that if you make this orange chocolate Milano cake, people will want to laud you with medals, well wishes, and for two seconds forget people with superhuman abilities exist (looking at you, Ledecky. There’s only room for one Katy in this blog).

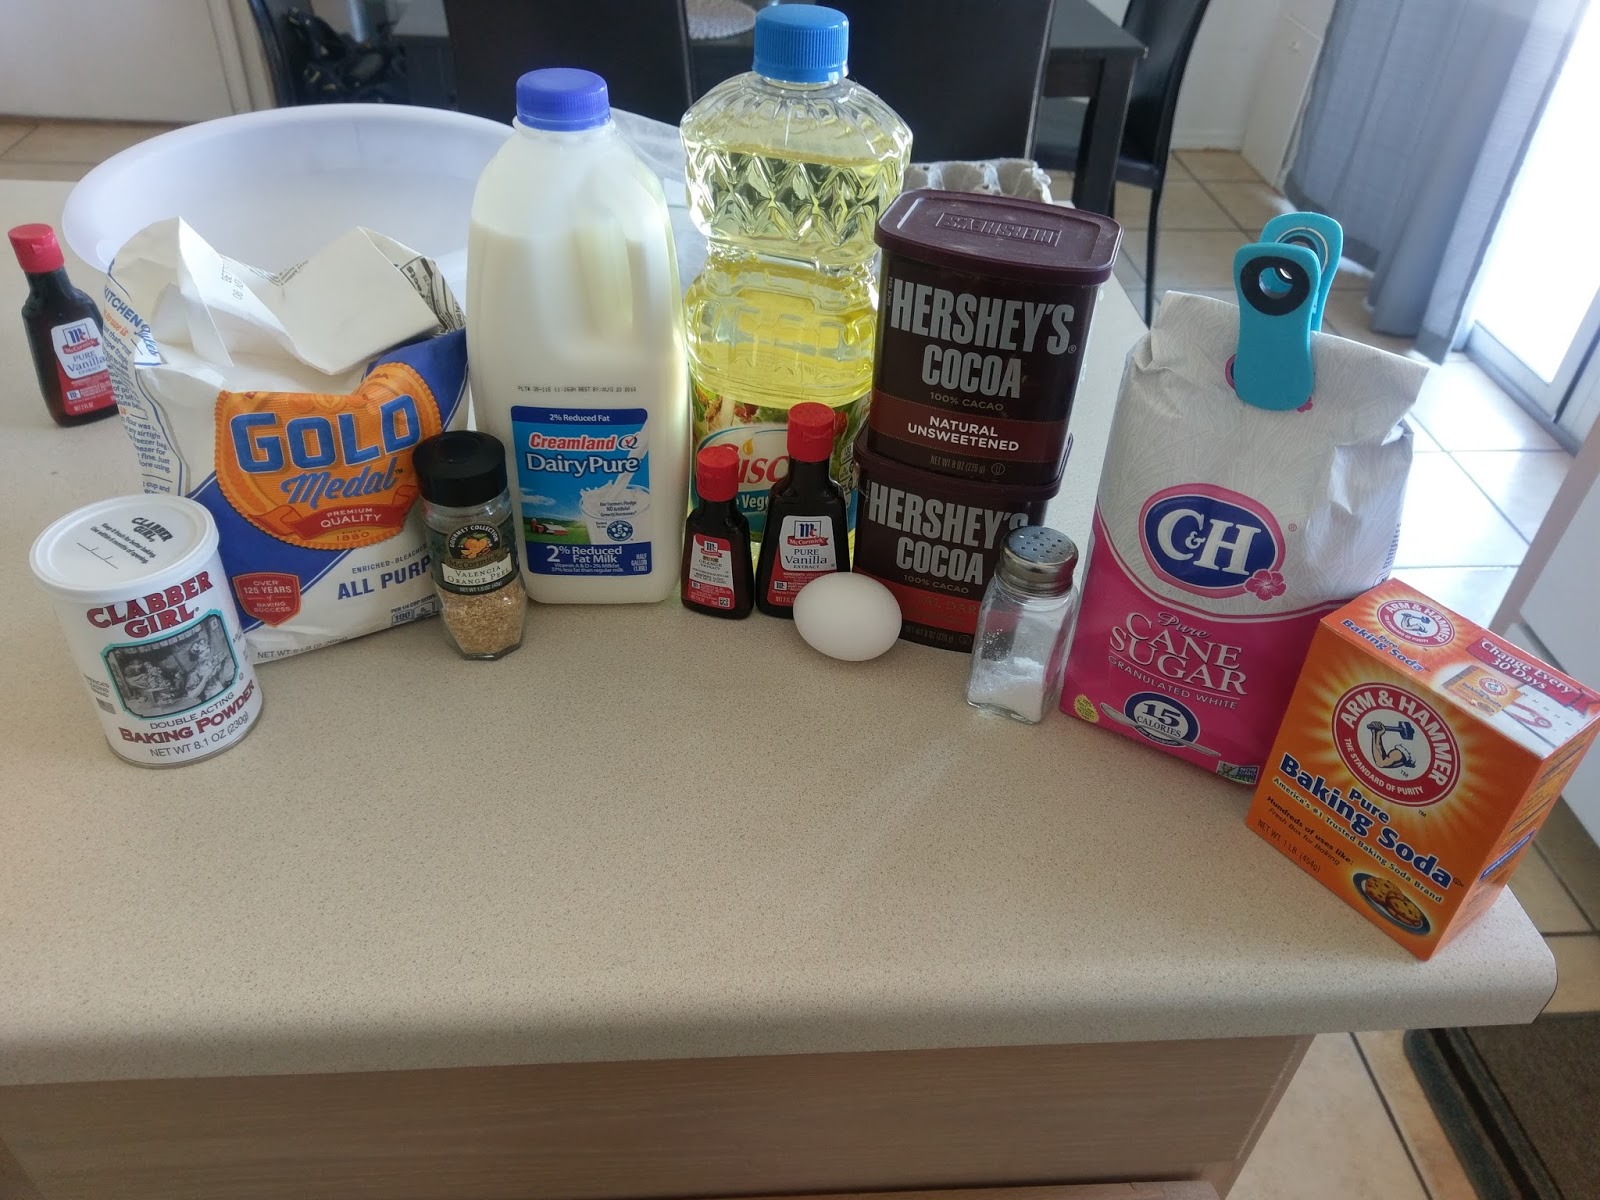
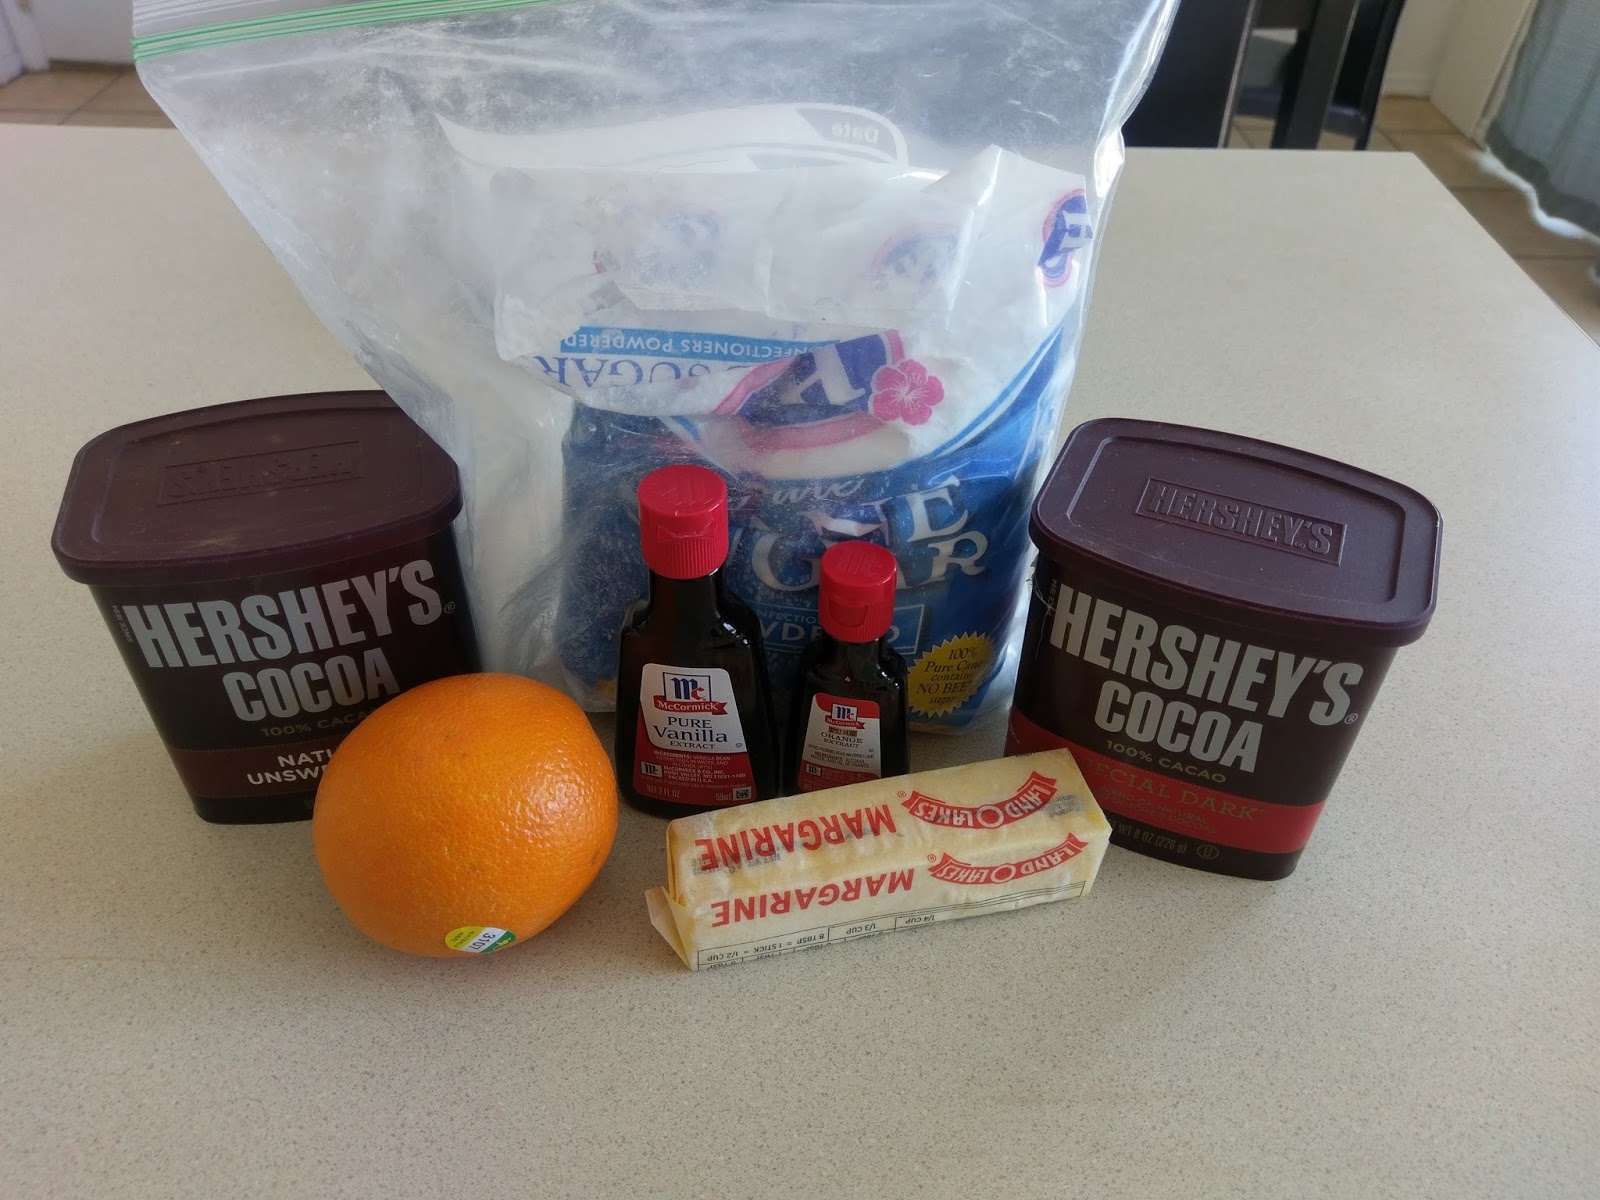
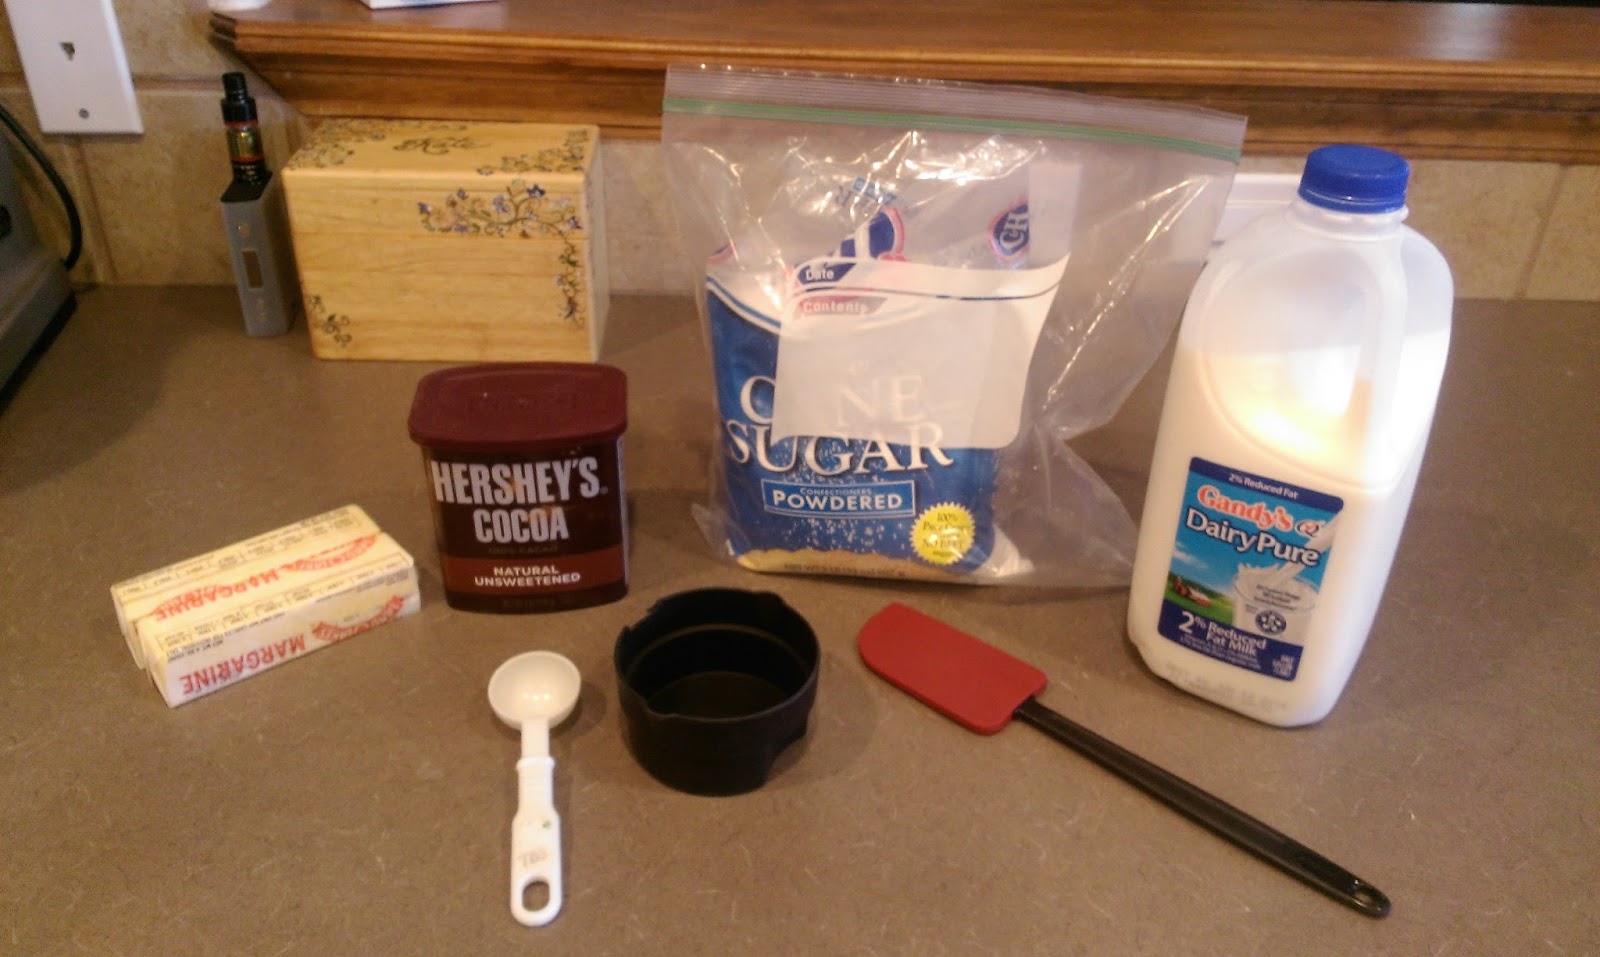
This is what a medal podium looks like in the baking world. I searched high and low for the perfect orange chocolate cake recipe, and I was relatively shocked that Pinterest offered me nary a recipe up to my standards. It’s like one of those moments when you Google something relatively simple and yield no results. I managed to quell the confusion and decided to go full Martha on this cake and just do it my damned self. Insider trading aside, she’s a pretty big baking inspiration. To make my orange chocolate Milano cake, you’ll need:
- 1 cup sugar
- 3/4 cup flour, plus 2 TBS
- 4 TBS Hershey’s unsweetened cocoa powder
- 2 TBS Hershey’s unsweetened dark cocoa powder
- 3/4 tsp baking soda
- 3/4 tsp baking powder
- 1/2 tsp salt
- 1 large egg at room temp
- 1/2 cup of milk at room temp
- 1/4 cup veggie or canola oil
- 1 tsp vanilla extract
- 1 TBS pure orange extract
- 1/2 cup nearly boiling water
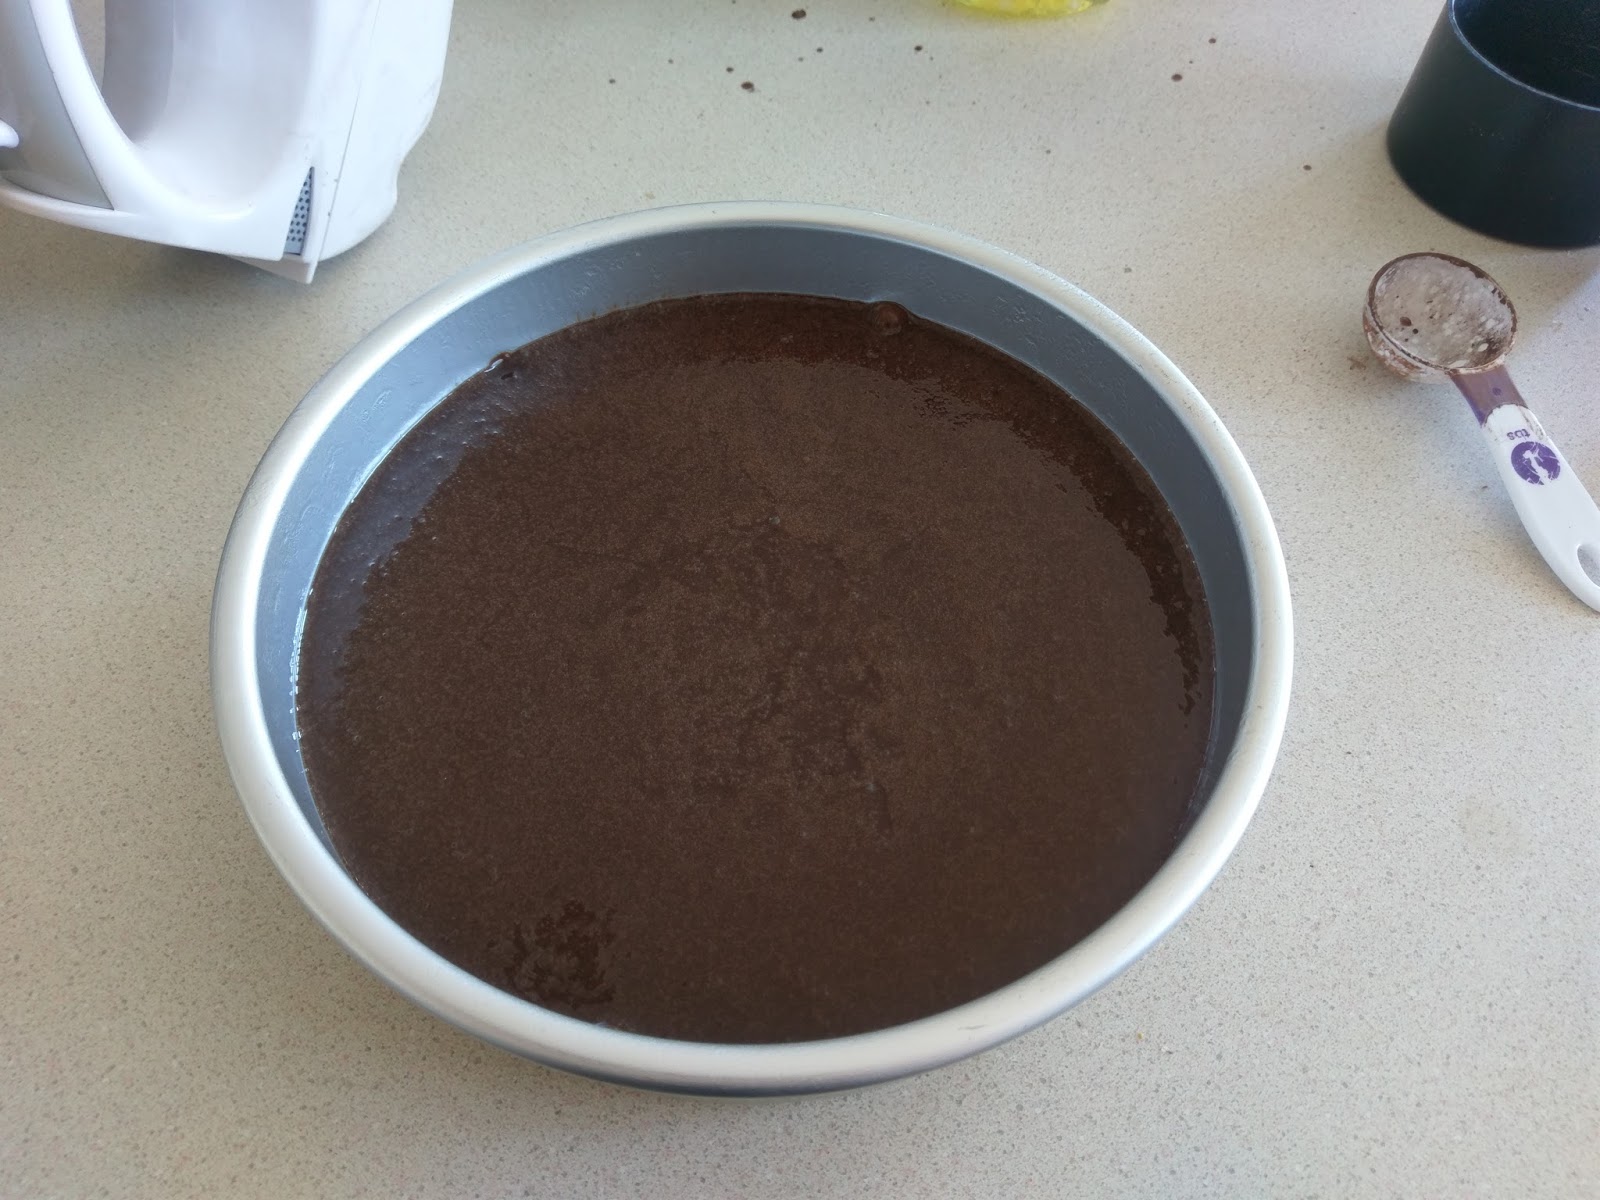
While it’s a lot of ingredients, everything falls together with nice ease. You can use a 9×9 or 8×8 circular or square pan for this recipe. Just be sure to grease the hell out of the pan. I even put down Parchment paper first and greased that since this is a very dense cake.
Preheat the oven to 350. I only have one giant mixing bowl in our what I call “somewhat” furnished condo (seriously, what furnished kitchen doesn’t come with a pasta strainer), so make do with what ya got. Dump all the dry ingredients together and whisk until well incorporated. Then add in the egg, milk, veggie oil, and extracts and blend well. Finish off by adding in the hot water (carefully) and mixing.

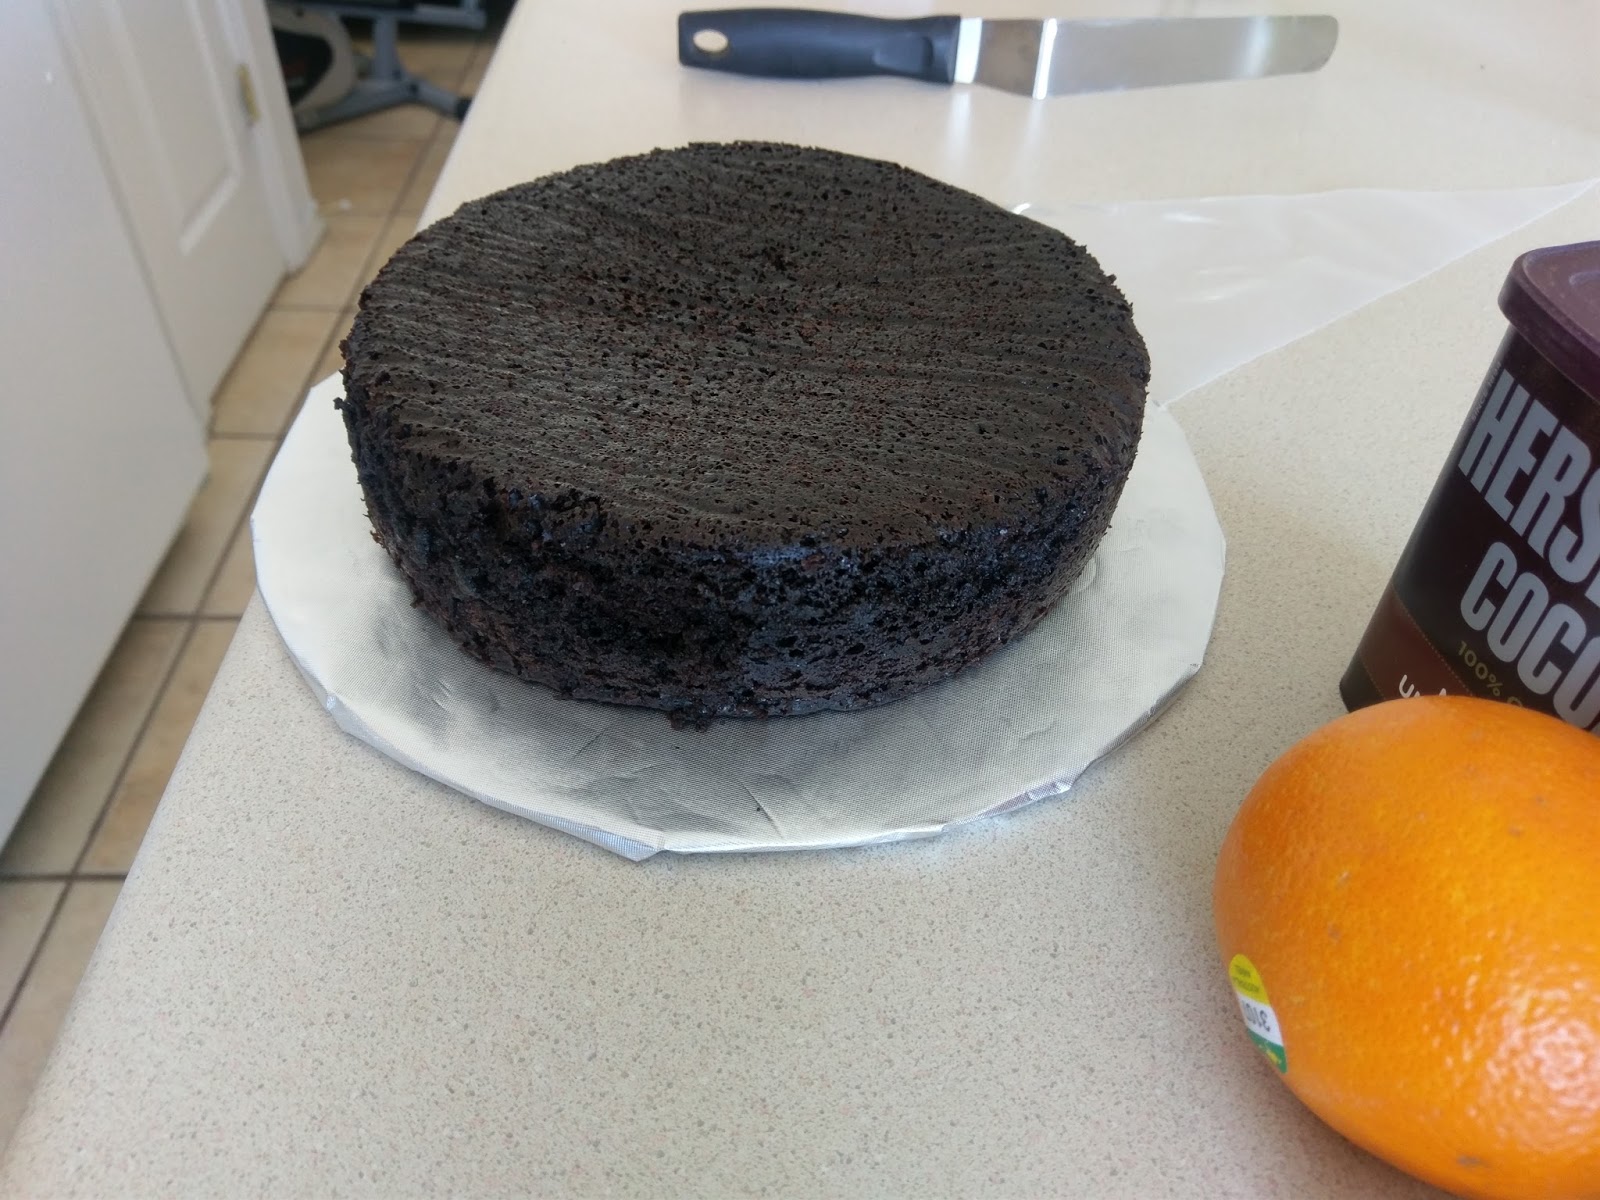
So smooth. So dreamy. Like the Ryan Lochte of cakes. Pour into your prepared baking pan. This cake will rise a bit, but it will not spill out of an 8×8 pan, I promise. It took my cake 30 minutes to finish baking throughout, but if you use a 9×9 pan, it will probably take less, so start checking for doneness (spell check doesn’t believe this is a word) around 25-28 minutes. Let cool in the pan for 10 minutes before using an angled spatula to ensure your edges are not sticking to the pan before removing to a cooling rack to finish cooling.

I am also sans cooling rack, so this went on my cake round and directly into the freezer for 45 minutes. I do recommend freezing before crumb coating. When we finally get to Florida and I can unpack my entire kitchen, you’ll hear my sobs of happiness from a ten mile radius…especially when I’m reunited with my stand mixer. I apologize profusely to any of you who have tried to make my buttercream frosting with a bowl and hand mixer; it is not for the faint of heart.

But you’re gonna have to do it again.. This makes a large enough amount of frosting that you could get fancy and torte your cake and fill the layers with frosting. I thought about it, but since I’m trying to have some semblance of healthy desserts in my life, I opted to skip the inch-thick additional layer of frosting in the middle of the cake. Trust me, it is still delicious enough without it. So to make enough frosting for the cake and for you to shamelessly shovel several spoonfuls into your mouth for taste testing purposes, you need:
- 1/2 cup of softened butter (1 stick)
- 1/4 cup of Hershey’s Cocoa Powder
- 1/4 cup of Hershey’s Special Dark Cocoa Powder (if you want an even lighter chocolate flavor, omit this and use 1/2 cup of the regular powder instead, but trust me when I say you want the dark cocoa powder)
- 1 tsp vanilla extract
- 1 tsp pure orange extract
- 4 cups of powdered sugar
- 5 tablespoons of milk
Cream the butter until fluffy, then add in the cocoa powders, extracts, two cups of powdered sugar, and two tablespoons of milk. Blend well, make a huge mess with your hand mixer, curse the life you took for granted that had a stand mixer in it, scrape the bowl, add in the remaining two cups of sugar and three tablespoons of milk, and realize cake baking can get pretty emotionally draining outside your normal kitchen.

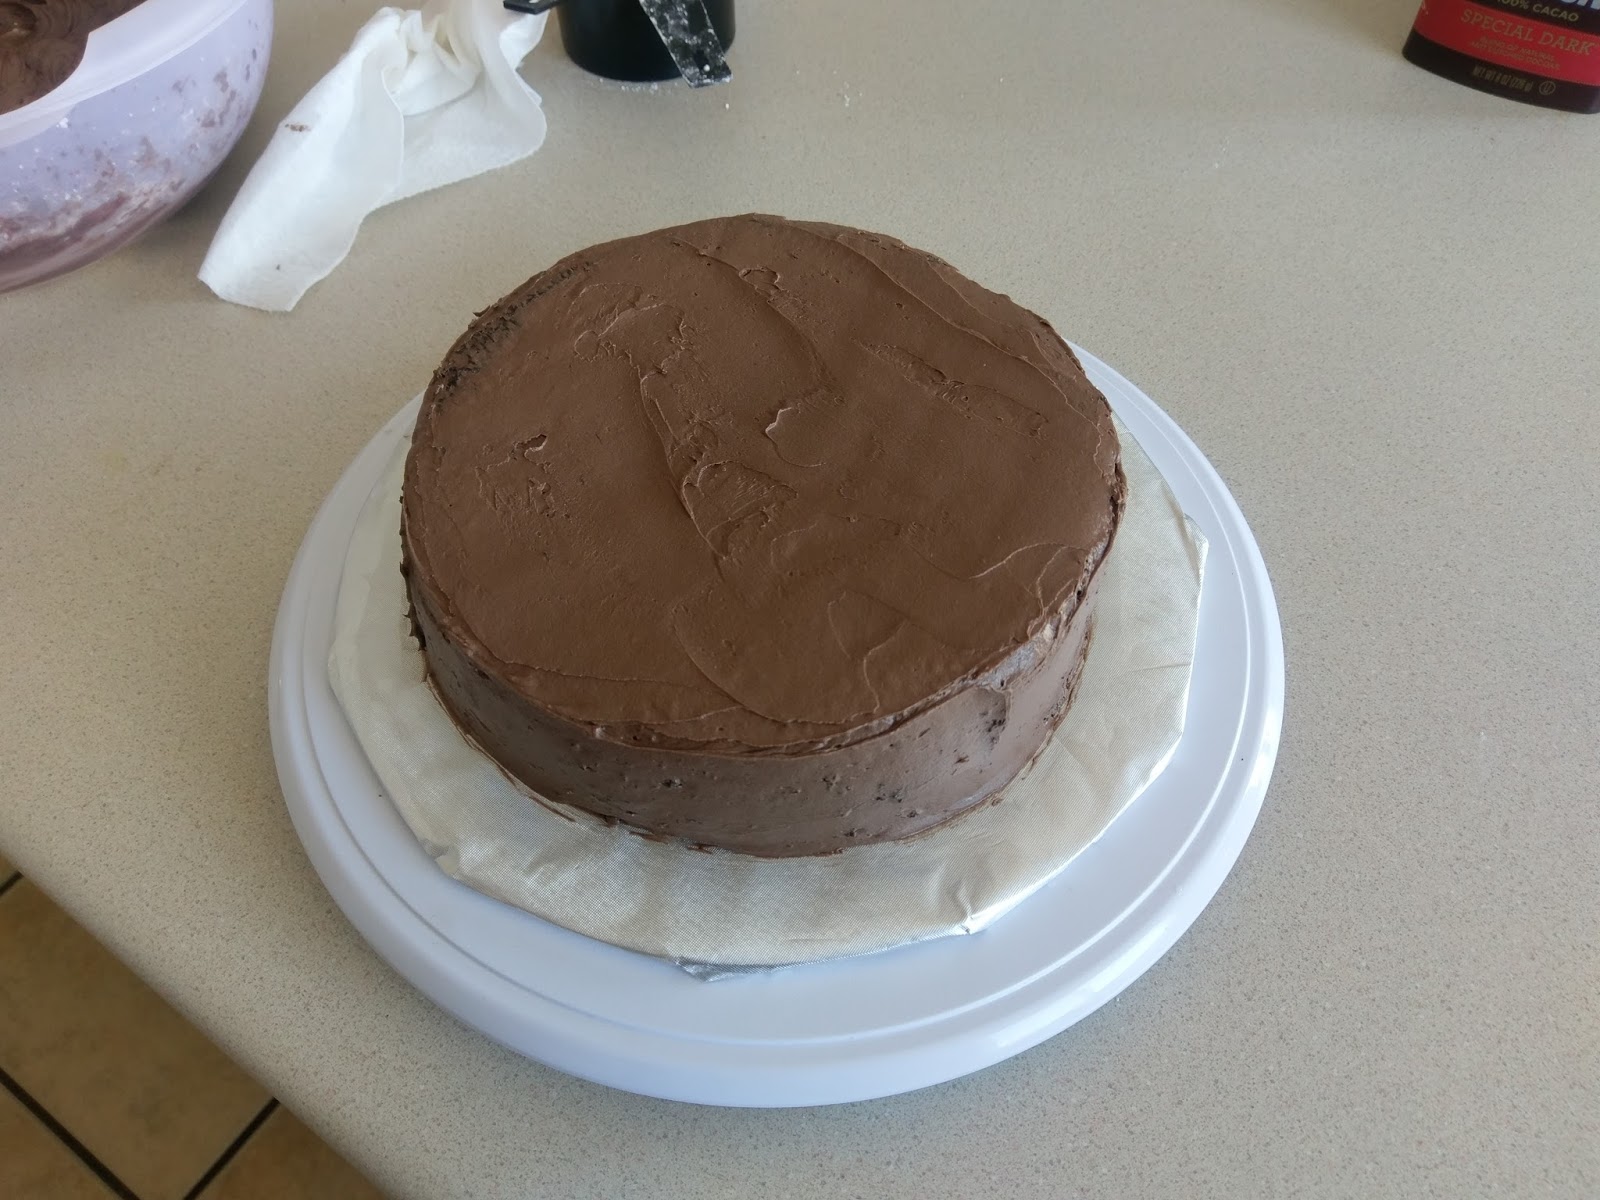
Also realize you’ve been tricked into a crappy photo montage. Crumb coat your cake once it is fully cooled; once again, I do recommend freezing this cake because it is extremely moist, so even frosting a crumb coat might be tricky. Slather a nice layer of crumb coat on your cake, throw back into the freezer for thirty minutes, and longingly gaze upon the bowl of frosting.

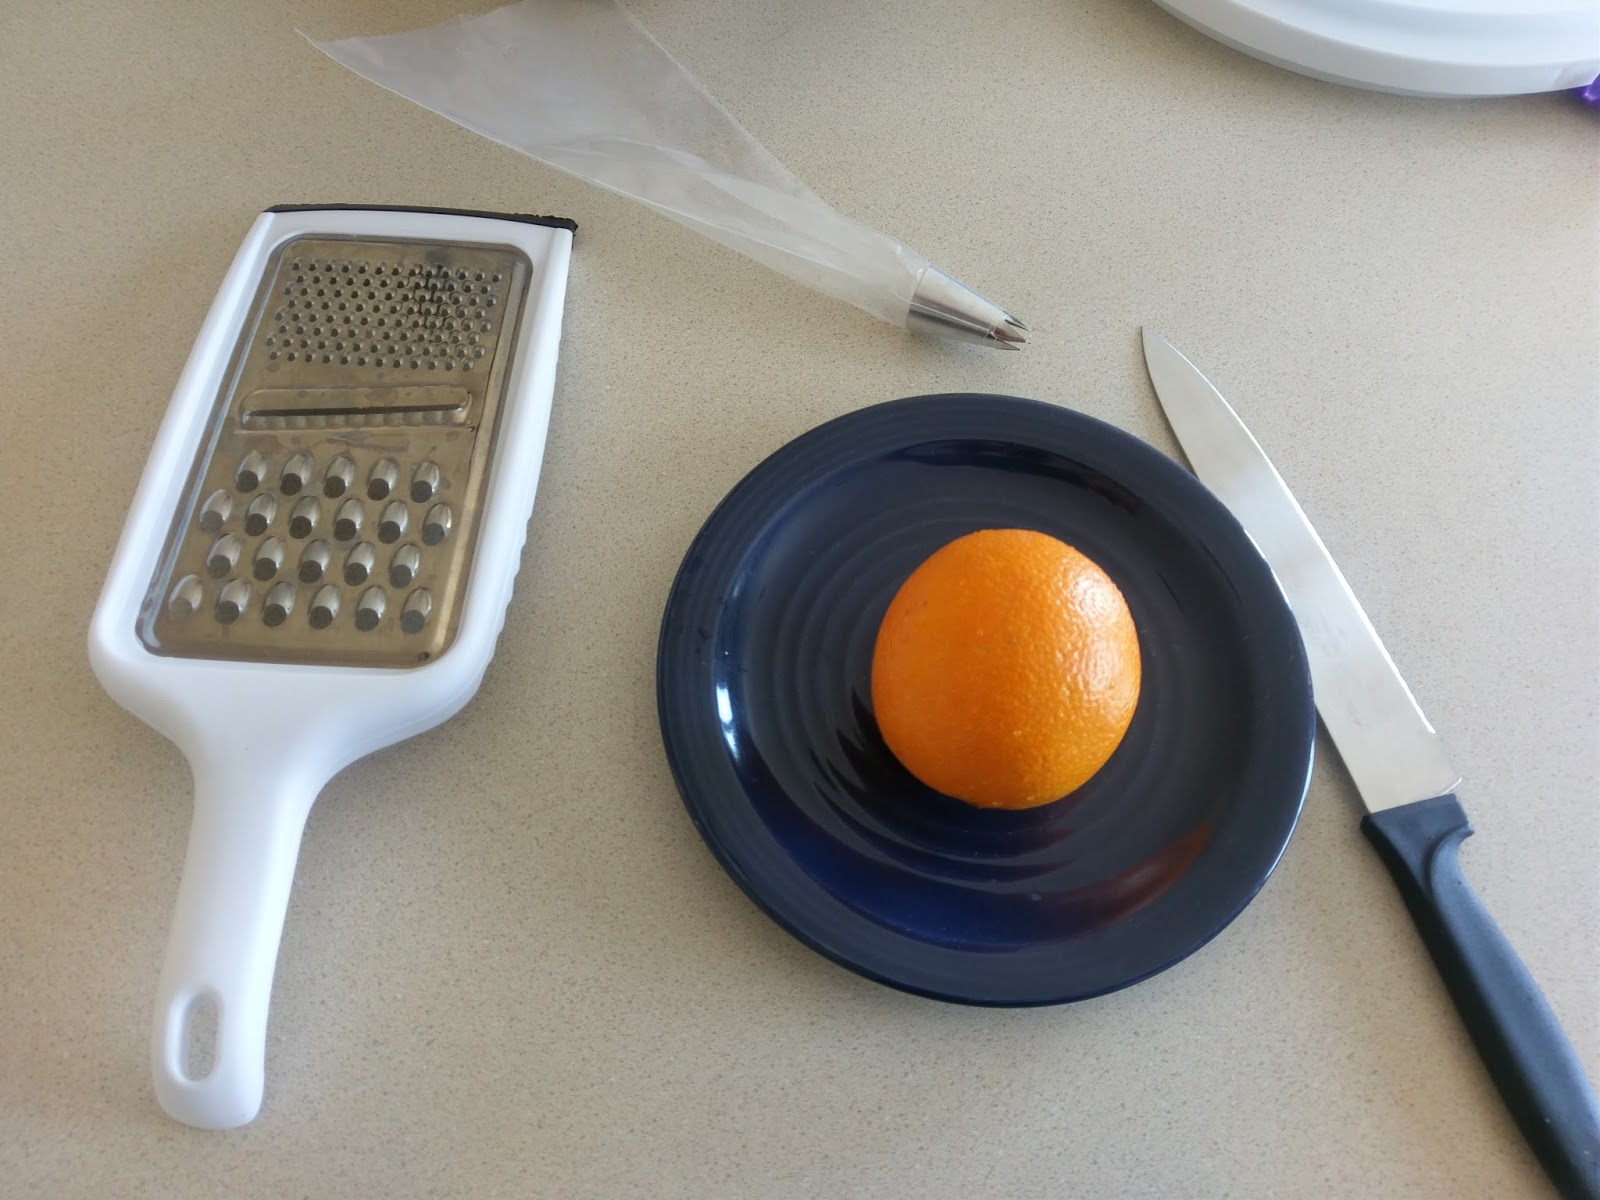
Or you could be more productive, gathering an orange, zester, knife, and fitting a piping bag with a 1M tip. Zest a bit of the orange before cutting it for garnish. Let the zest sit out to air dry for easier handling later. 
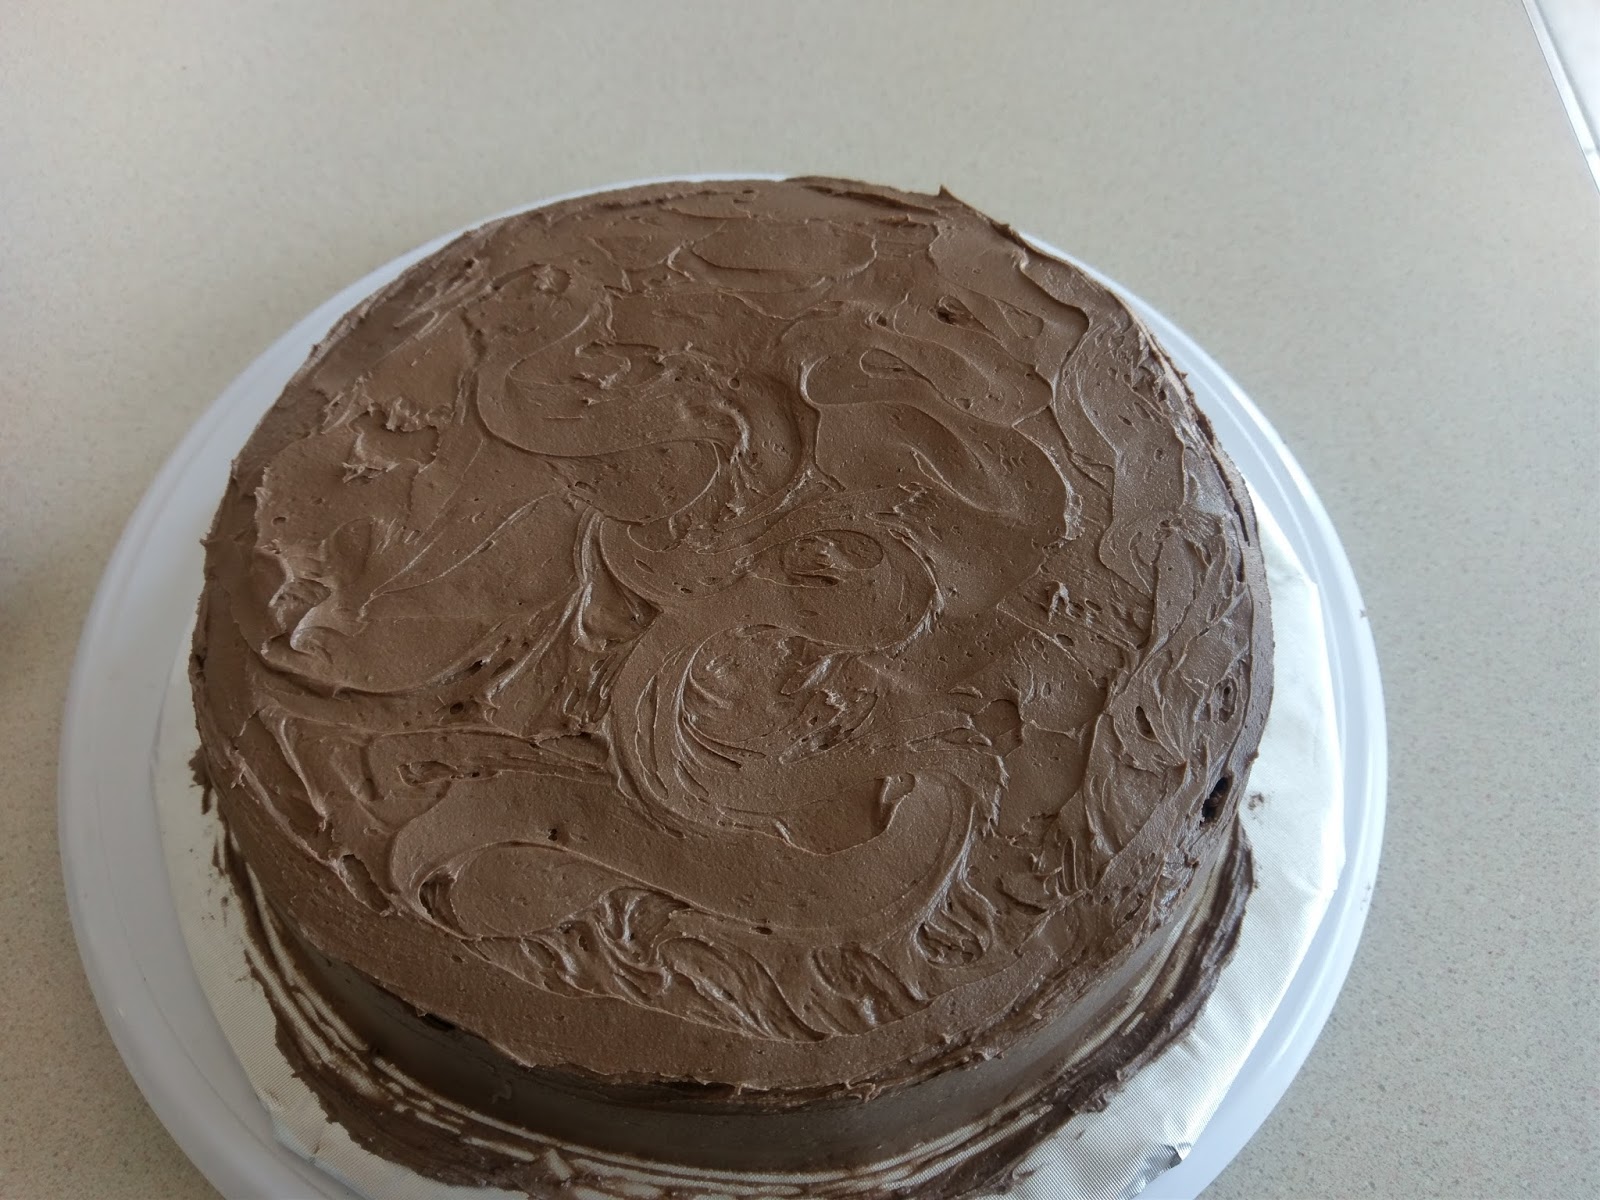
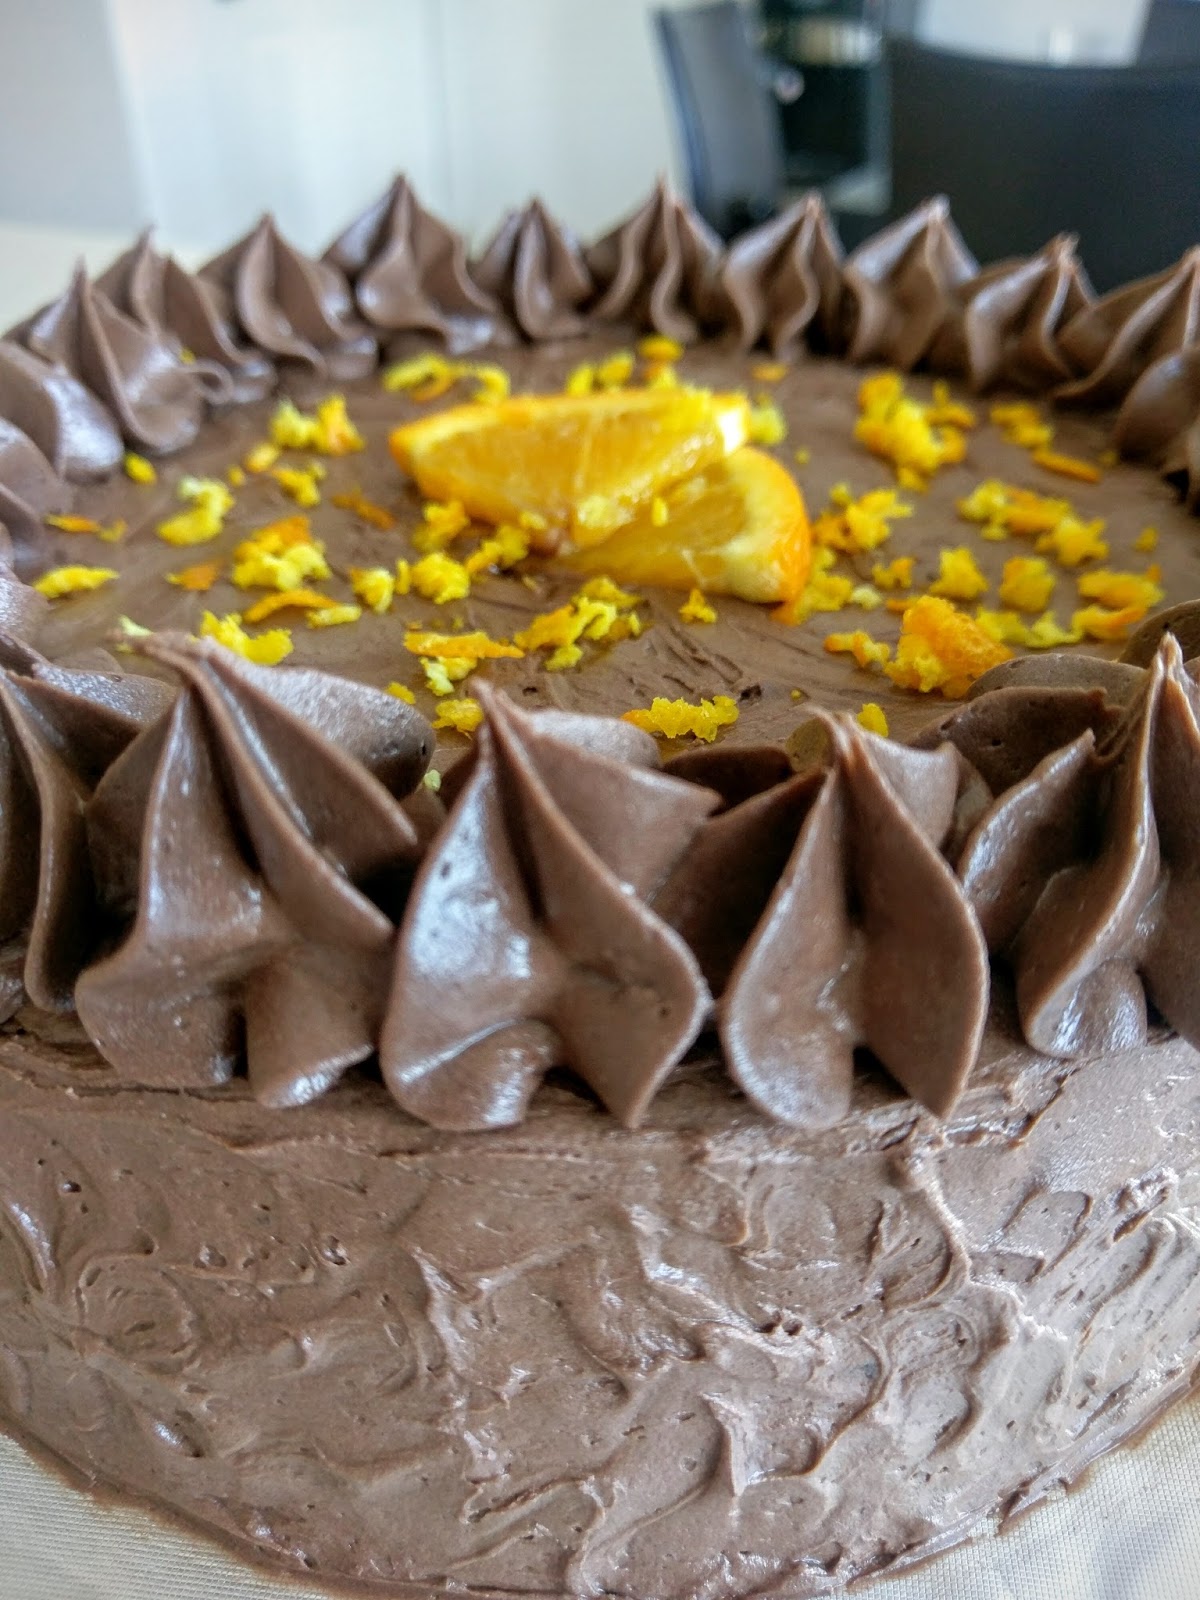
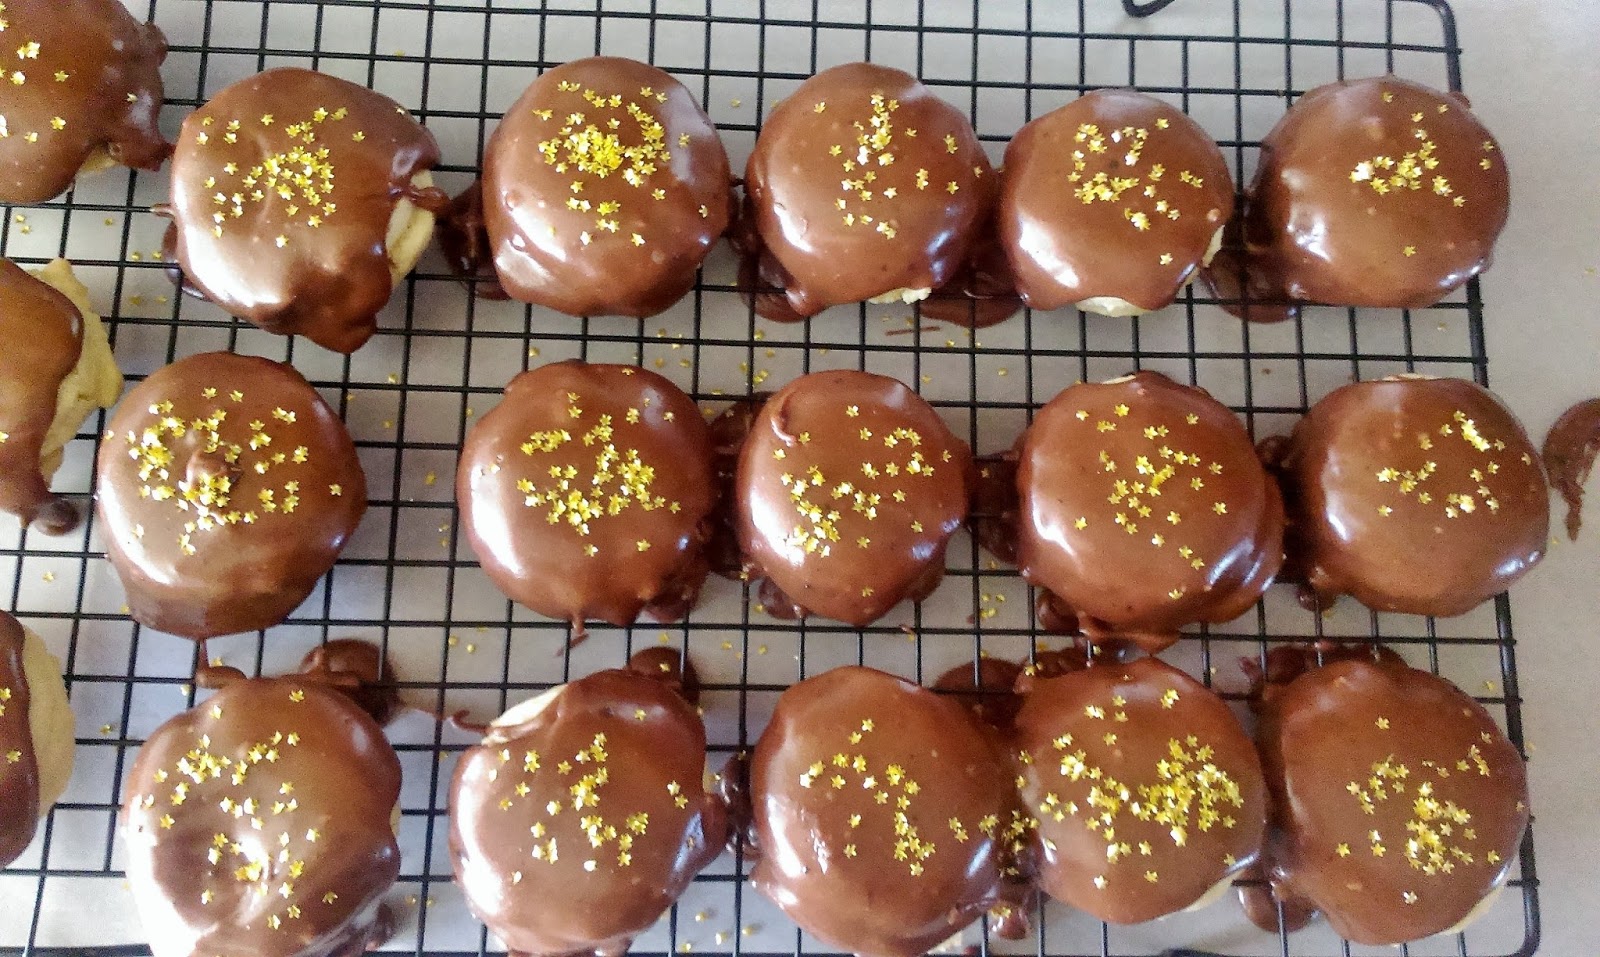
Messy, rustic, chic, all the same. You can smooth this frosting using the Viva paper towel trick, but I wanted to make it swirly since it was so nice and creamy. I applied my second layer of frosting over the entire cake with a small angled spatula and then came back over every inch of cake with it while swirling the spatula in wavy S patterns. I then took my remaining frosting and loaded it into the piping bag. I simply topped the cake with large, mounded stars, but you could do large shells or rosettes as well. Any of them would be pretty!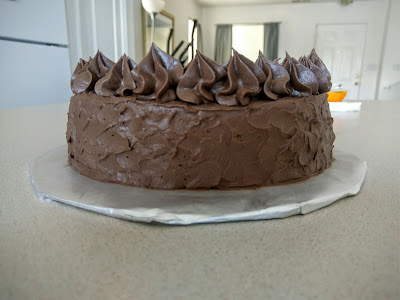
But much like me in high heels, these large, mounded stars make this single-layer cake look even taller. 
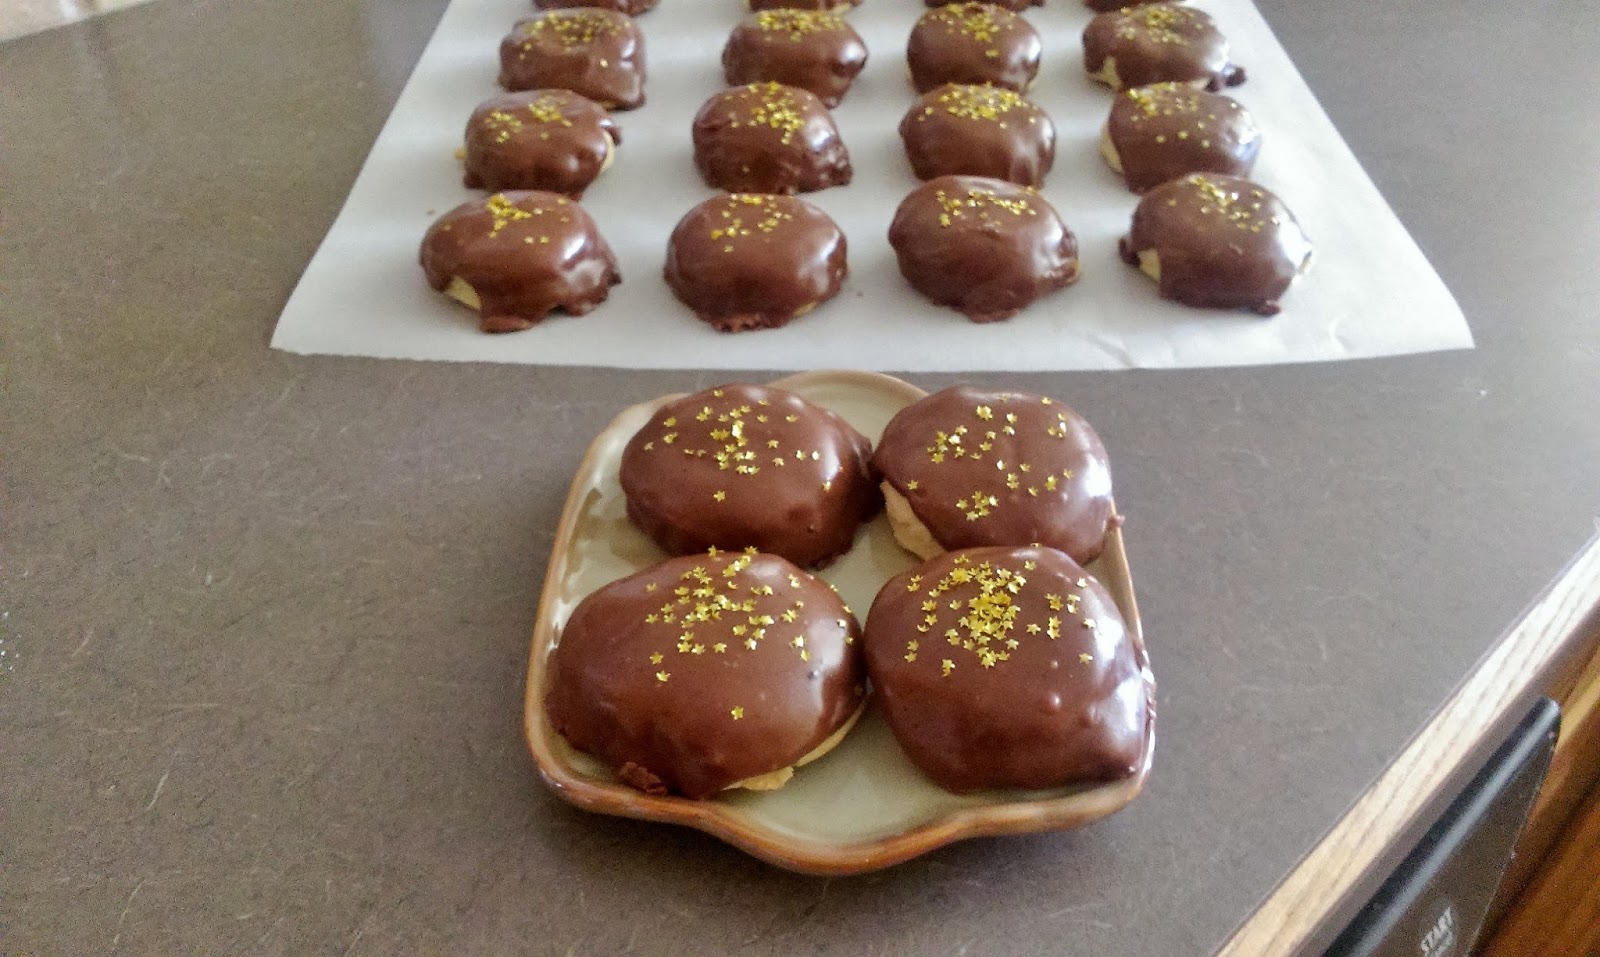
I finished up my decorating by dusting the top of the cake with orange zest and a couple small slices of oranges. You could get really fancy and candy orange slices to top the cake with, but that takes two hours, and I was busy wondering what the actual rules for Olympic men’s field hockey were and why everyone that plays this sport is ridiculously attractive, so I already had a full day. This. cake. Orange my God (surprisingly kept the orange puns to a minimum in this blog. What anavelnovel idea). It is rich. It is moist. It tastes exactly like an orange Milano cookie. So to answer the question, yes, it is possible to make an orange Milano even better because you can turn it into cake. You could even garnish this cake with orange Milanos to have some sort of cake-cookie inception situation happening. This yields 10 slices of cake with each slice ringing in at just under 450 calories. I know, not light or healthy by any means, but I really did feel like an Italian noble while I ate it, so my waistline is just going to have to deal with it. After feeling so inferior while watching the Olympics, I deserved five minutes of feeling better than everyone who doesn’t eat cake. I may not know the sweet taste of athletic victory, but I do know exactly how good it feels to devour chocolate orange Milano cake, so in your face, coordinated people of the world. If competitive cake eating ever becomes a thing, I’m bringing home the gold. ‘Til next time, my fellow eaters!
Not trying this cake would be a pith-y. Get it? What an a-peeling pun. Okay, I’m done, I swear. -
Dessert and Brunch Are Essentially the Same Thing Anyway.
So it’s been awhile. Ever since Bakefest 2016 at the beginning of July, we had to play the “we’re moving, so everything in the pantry must GO” game and I had nothing to bake. I’ve literally never had so much ramen in so many different ways before in my life. I cringe every time I hear a crinkle wrapper opening. Too soon. But now that we’ve settled into our long-term temporary abode (this is not an oxymoron if you’re in the military) in the actual Land of Enchantment portion of New Mexico, I finally had the chance to go grocery shopping and NOT at a Walmart. You know you’ve been outside of civilization for too long when entering a real grocery store makes you so happy you almost cry. I’ve gone from no Targets to THREE. I’ve gone from no Chickfila to one that is two minutes away. I’ve gone from cow poo smell and desolate wasteland (think Mad Max) to mid afternoon rain and mountains. I’m, dare I say, happy. Aside from the soul-crushing fact that Blue Bell ice cream is absent from Albuquerque. Call me Icarus, thinking I could fly that close to the sun and have it all. Well, I may not be able to have Blue Bell until November, but dammit, I can still bake.

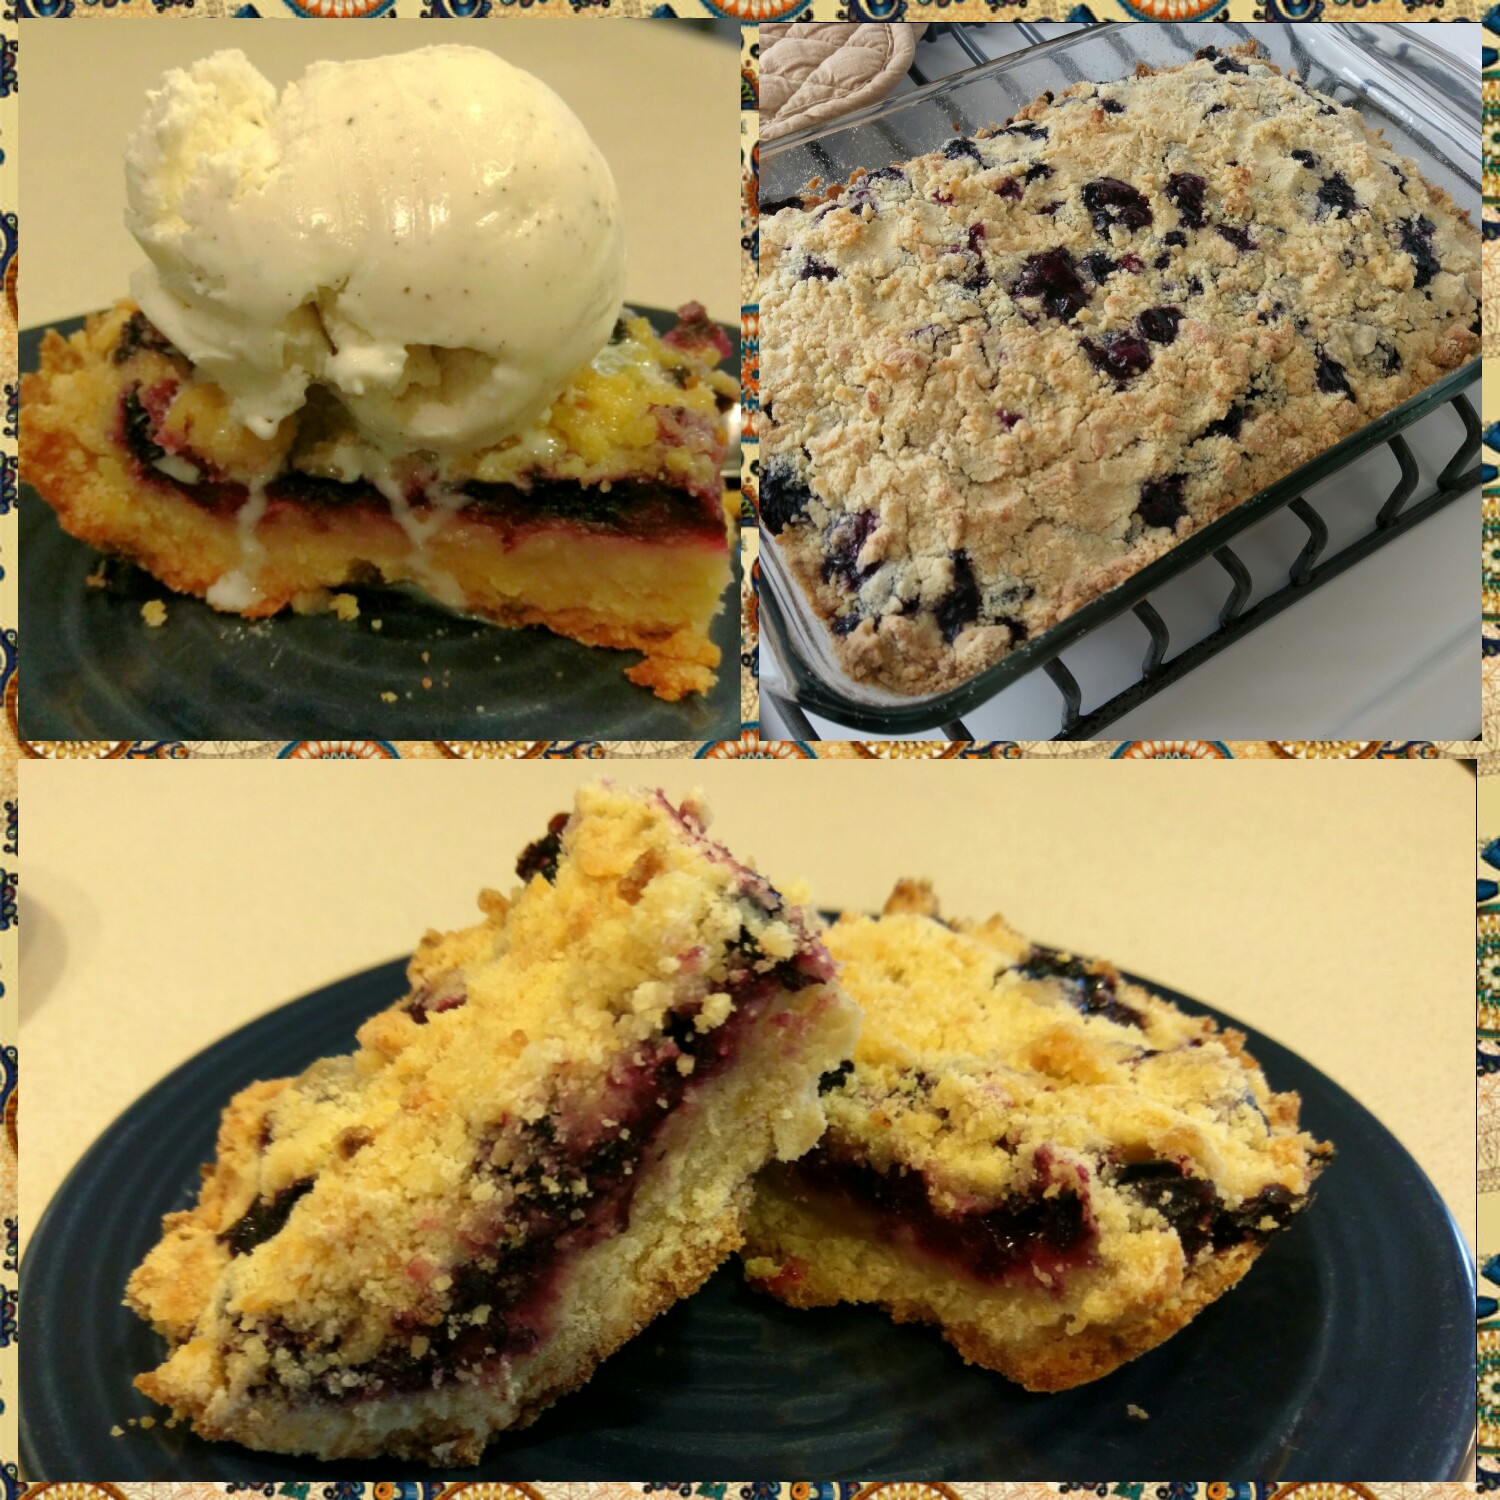
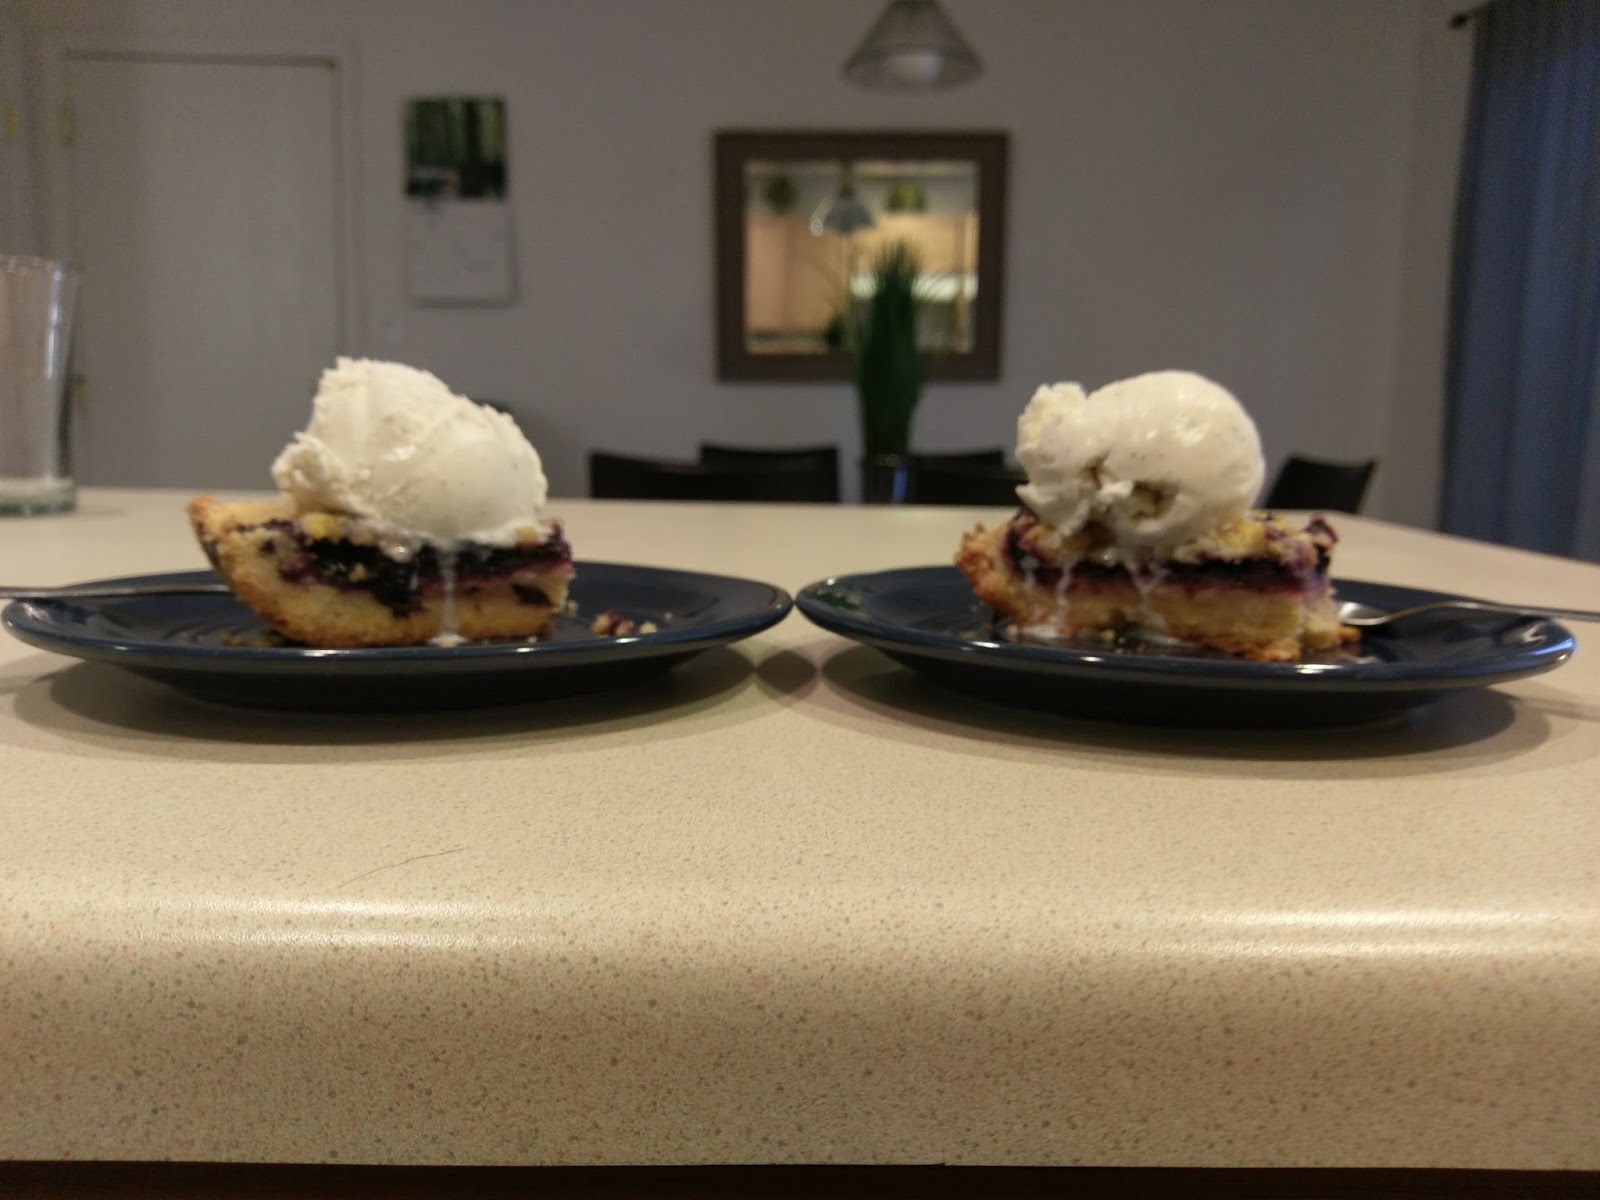
Where there’s an oven, there’s a Kate. These little beauties are blueberry crumble bars. Not to be confused with blueberry cobbler because blueberry crumble bars are a handheld item. This is really one of the only differences, I suppose. But I’ve always wondered if there was any way to have cobbler like everywhere and anywhere I go, so I’ve solved a longstanding personal problem with this recipe. These can work excellently for brunch or as a dessert. You can top them with ice cream to make them absolutely divine, but people might judge you if you starting eating ice cream at 10:30 a.m. …and yet they’re perfectly okay with you getting loaded on champagne. It’s a fickle world we live in, people.
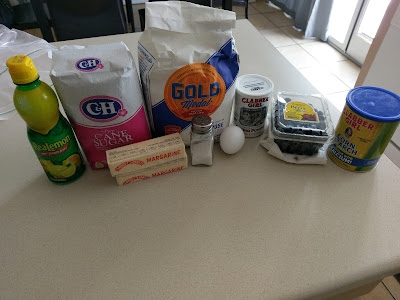
New kitchen, same crappy photos! It takes longer for these bars to bake than it does to pretty much quite literally throw them together. I actually had to go out and buy most of my ingredients since we showed up to our townhouse with a box full of cereal and pretty much nothing else in the way of food, but you’ve probably got most of what you need. Gather up:
- 3 cups of flour
- 1 1/2 cups of sugar, divided
- 1 tsp of baking powder
- 1/2 tsp of salt
- 1 cup of butter (COLD)
- 1 egg
- Fresh blueberries (I used 1 lb, feel free to use 2 for extra goodness)
- 1 heaping tablespoon of cornstarch
- 3 tablespoons of lemon juice
Start by greasing an 8×11 or 9×13 pan and preheating the oven to 375. Fun fact! Our new place has a gas oven/stove, and I forgot that it always smells like the house might explode when you cook with them. Good times.
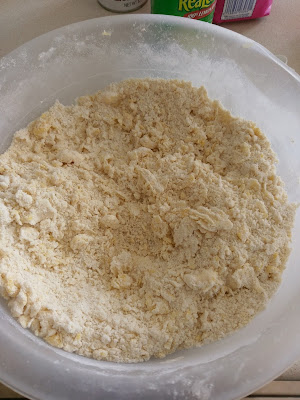
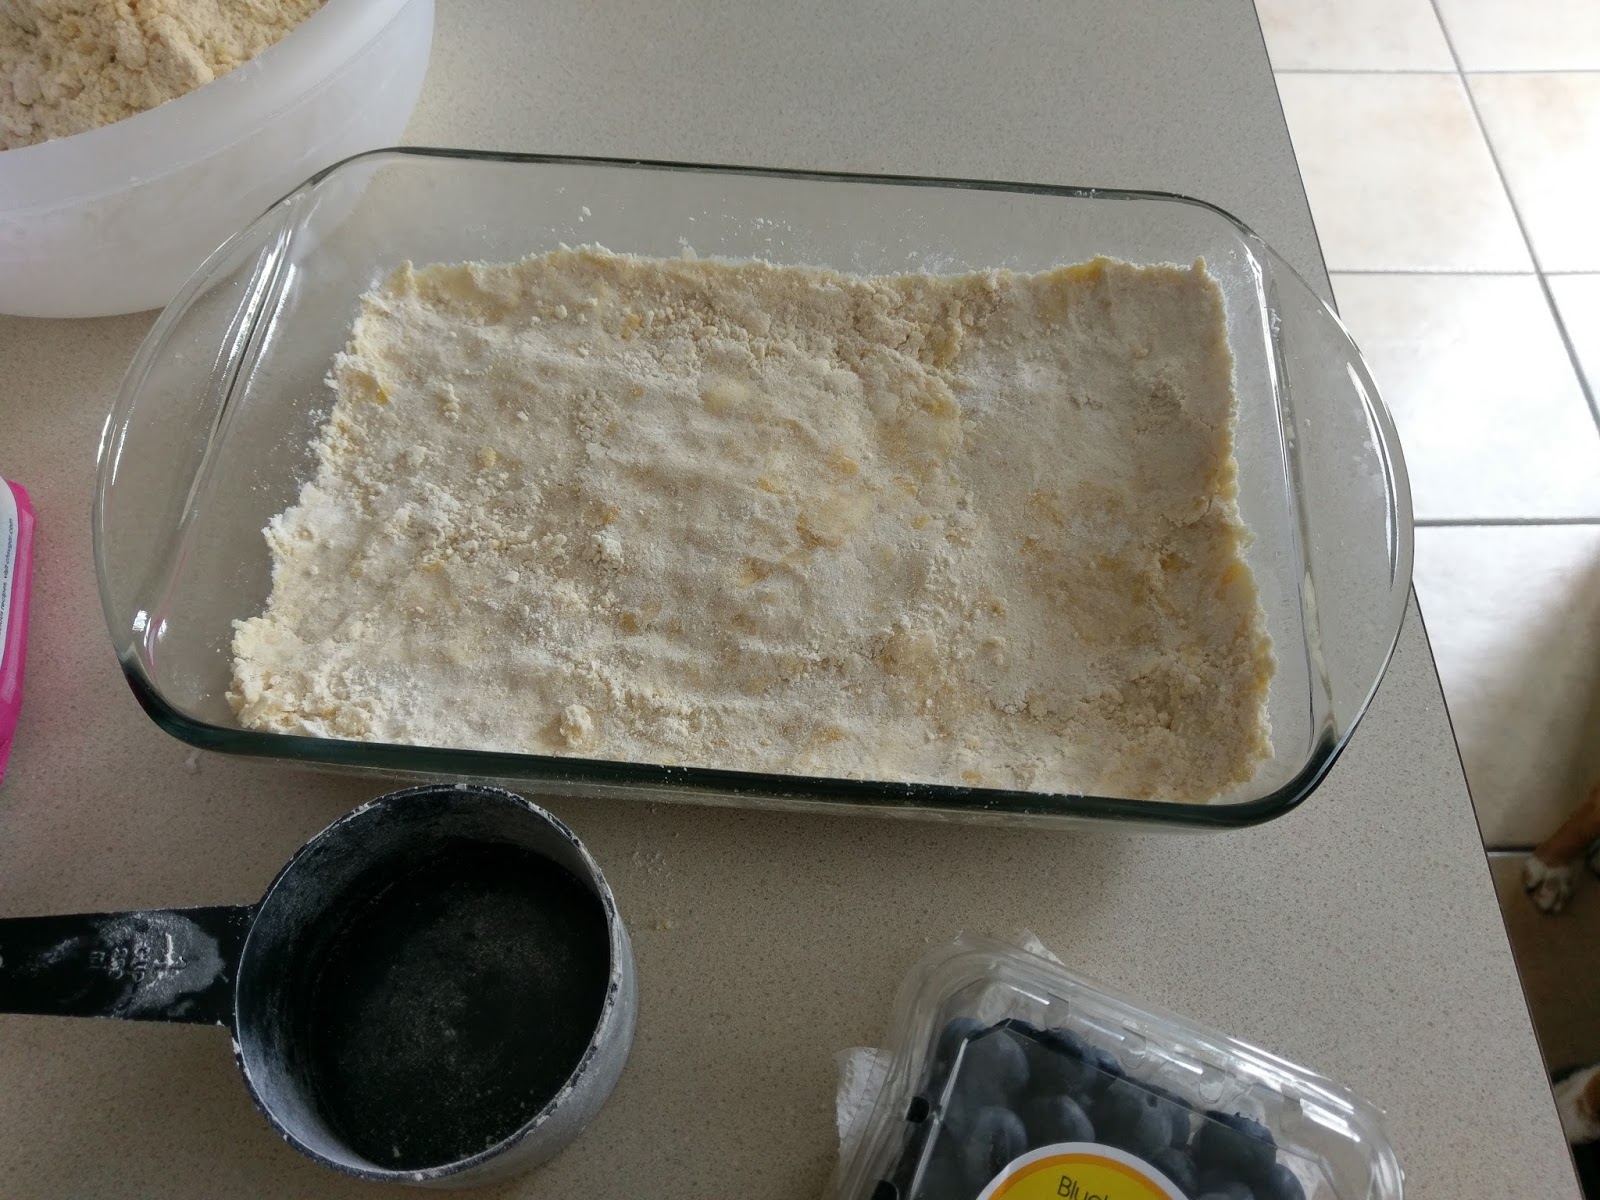
It kind of looks like cornbread at this point. In one bowl, mix the flour, 1 cup of sugar, baking powder, and salt together. Cut the butter into small pieces and then use two forks to incorporate the butter. This is a really obnoxious process, but our furnished place didn’t come with a pastry cutter (I know, right? Don’t they know who I am?). Add in the egg and blend…things will be very thick and kinda crumbly…hence the name “crumble” bar.
You missed my smartassery. Press half the batter into the bottom of your greased dish. I used an 8×11 dish (because it was all our house came with. Recurring themes…). But this yields really thick bars, and I like more dessert for the punch. If you use a 9×13 pan, you’ll probably need to use 3/4 of the batter but the bars will be thinner.

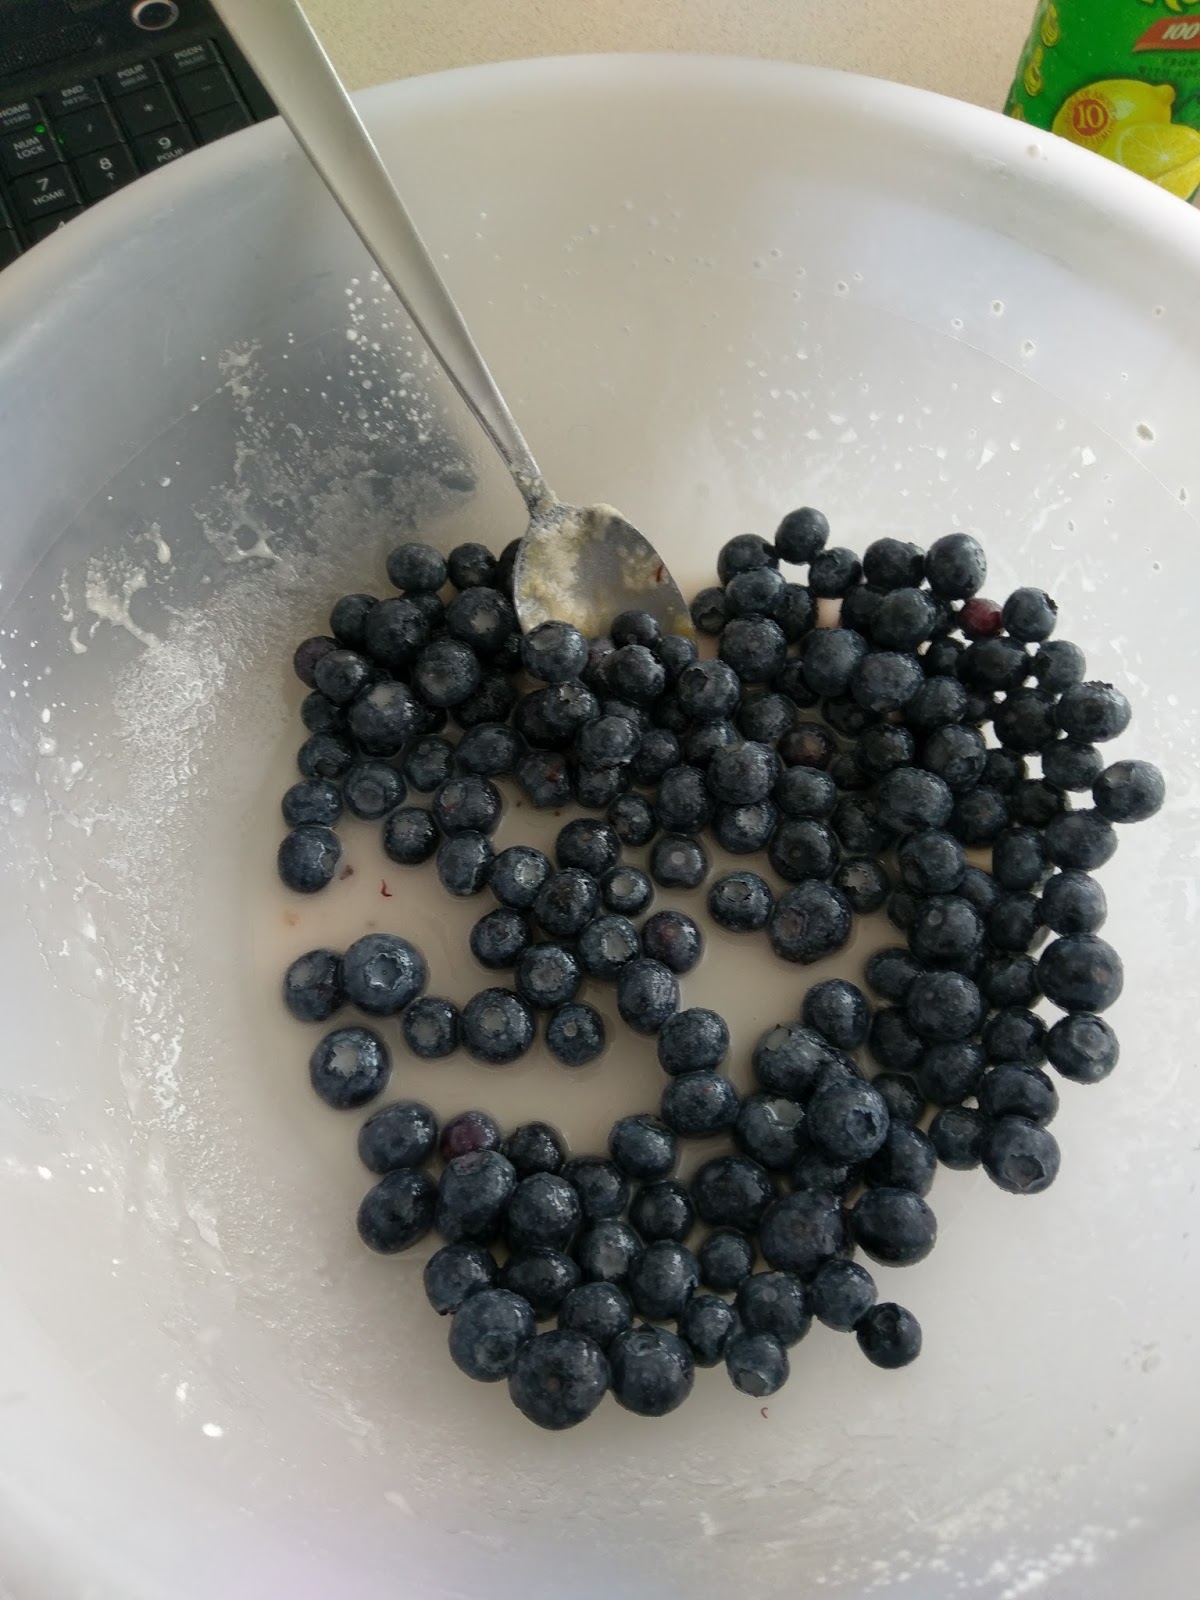
If you eat enough blueberries, will your skin turn blue? These are my deep thoughts. Take your remaining half a cup of sugar, the cornstarch, and the lemon juice and whip into a thick paste. Fold in the blueberries and really make sure they all get coated.
But like, how many blueberries would it actually take to turn your skin blue? Dump your blueberry mix on top of the batter mix. Use a spoon to even out the blueberries. You’re gonna want an even distribution of crust to berry. Trust me. I’m a professional. Or something.

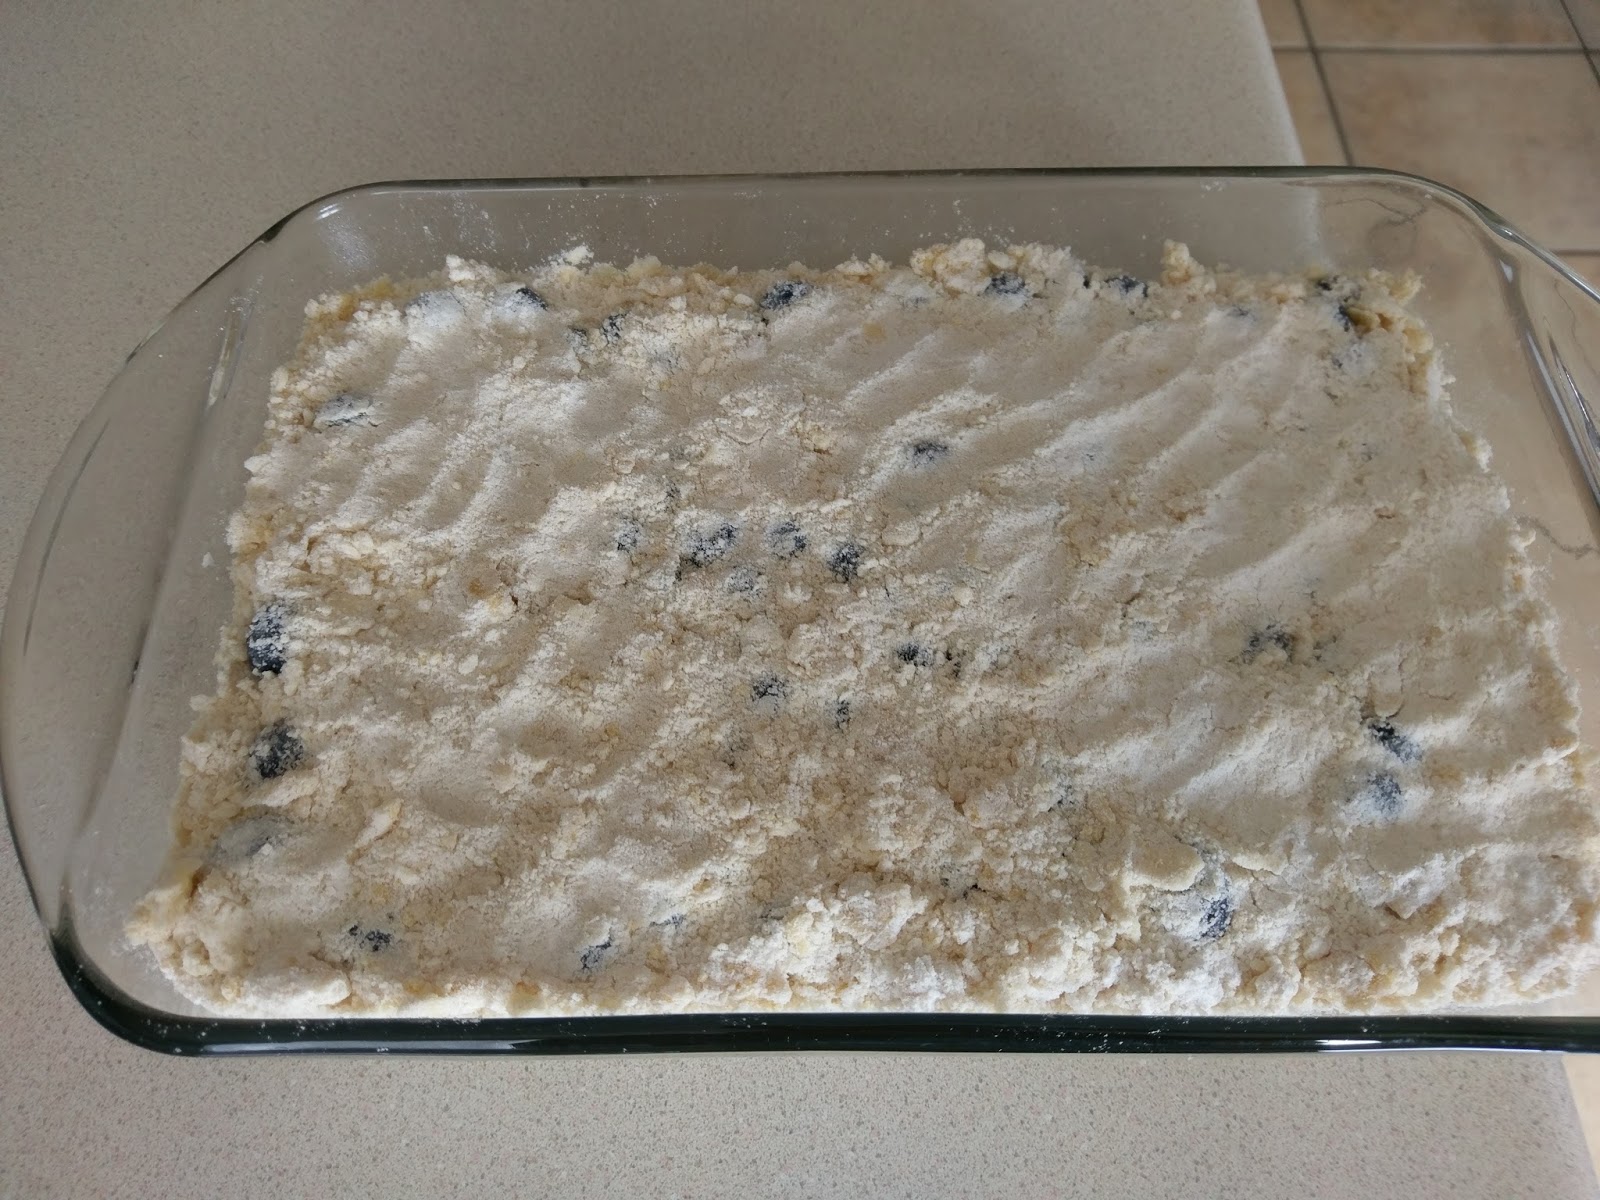
Can you get blueberry poisoning? Because that would probably happen before your skin turned blue. Take the remaining batter mix and press it on top of the blueberry layer. I honestly had a handful or two leftover. You want enough to cover the berries but not so thick a layer that it won’t brown up on top without burning the bottom crust layer.

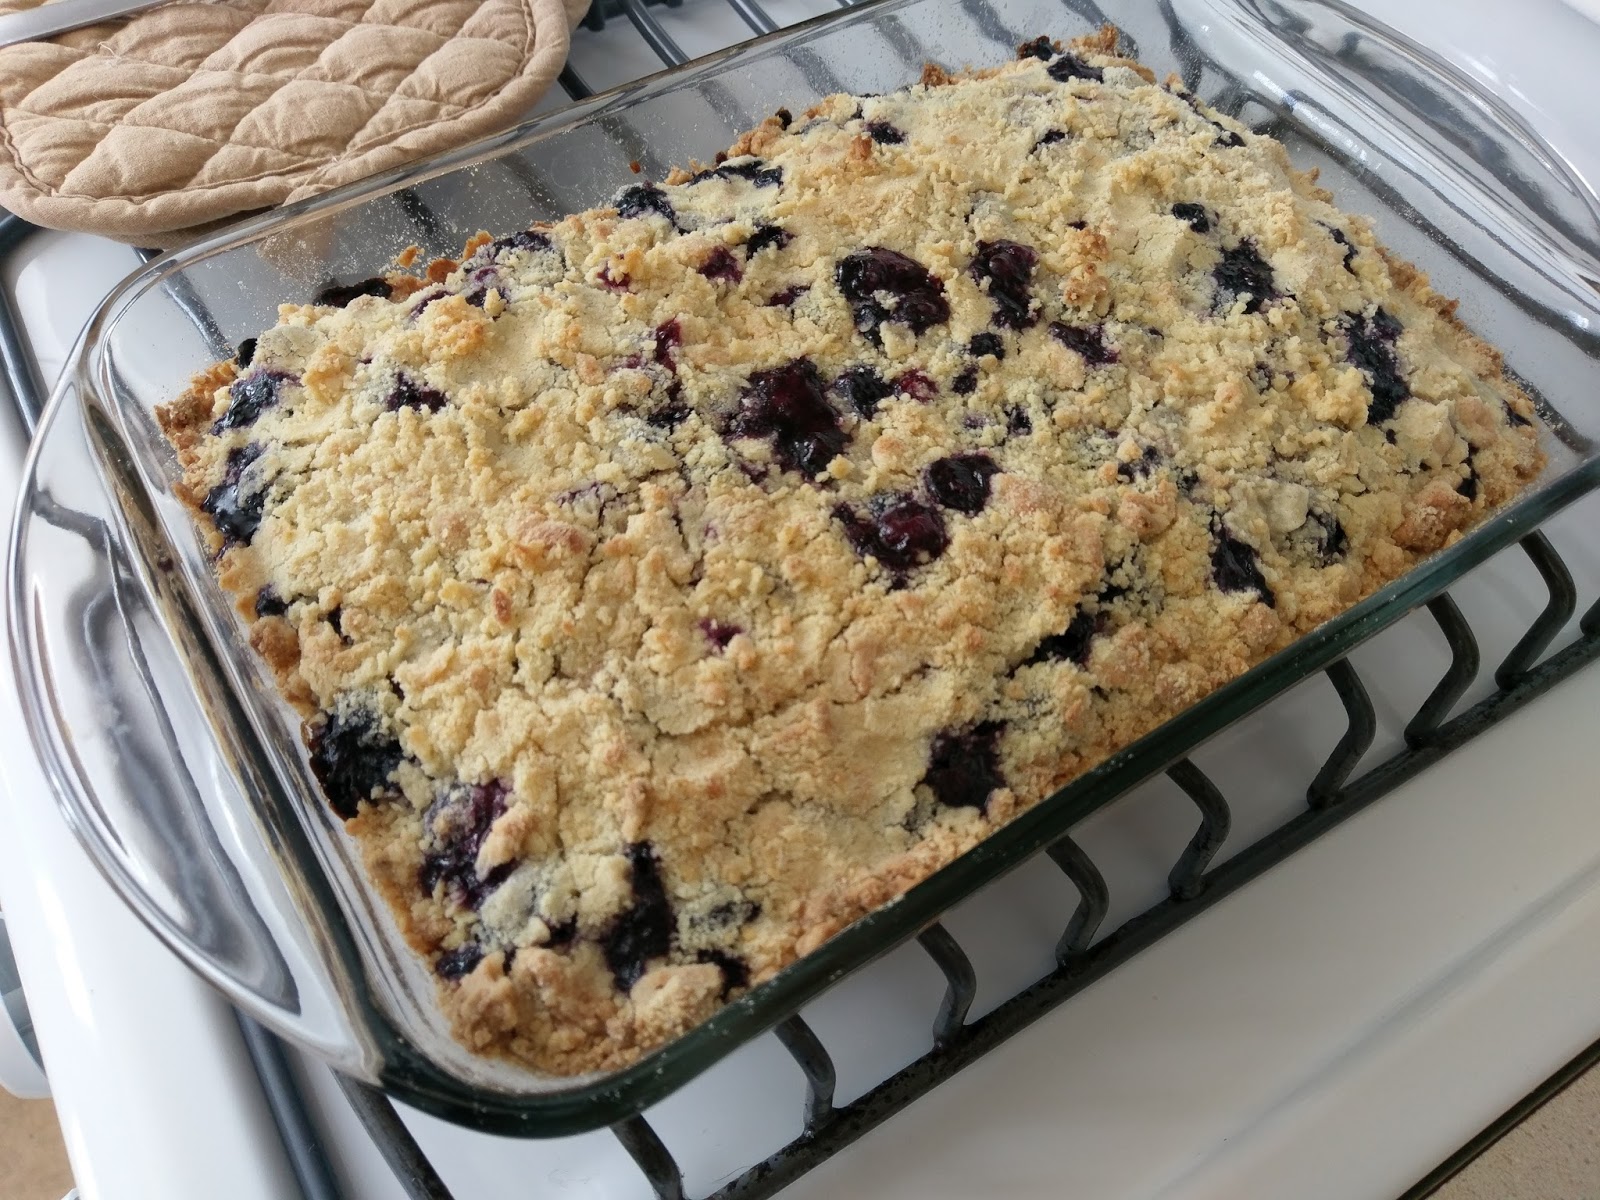
Because daaaamn it looks good all nice and browned. Baking time will vary depending on the size of the pan you use. With the 8×11, I baked for 45 minutes and broiled for 5 to brown the top crust. You’d probably need to reduce baking time 5-10 minutes in a 9×13, but still broil to get the crust golden. Now, the hard part: put in the fridge for several hours to cool. I wanted dessert and fast after going for so long without baked goods, so this went into the freezer for two hours to set.

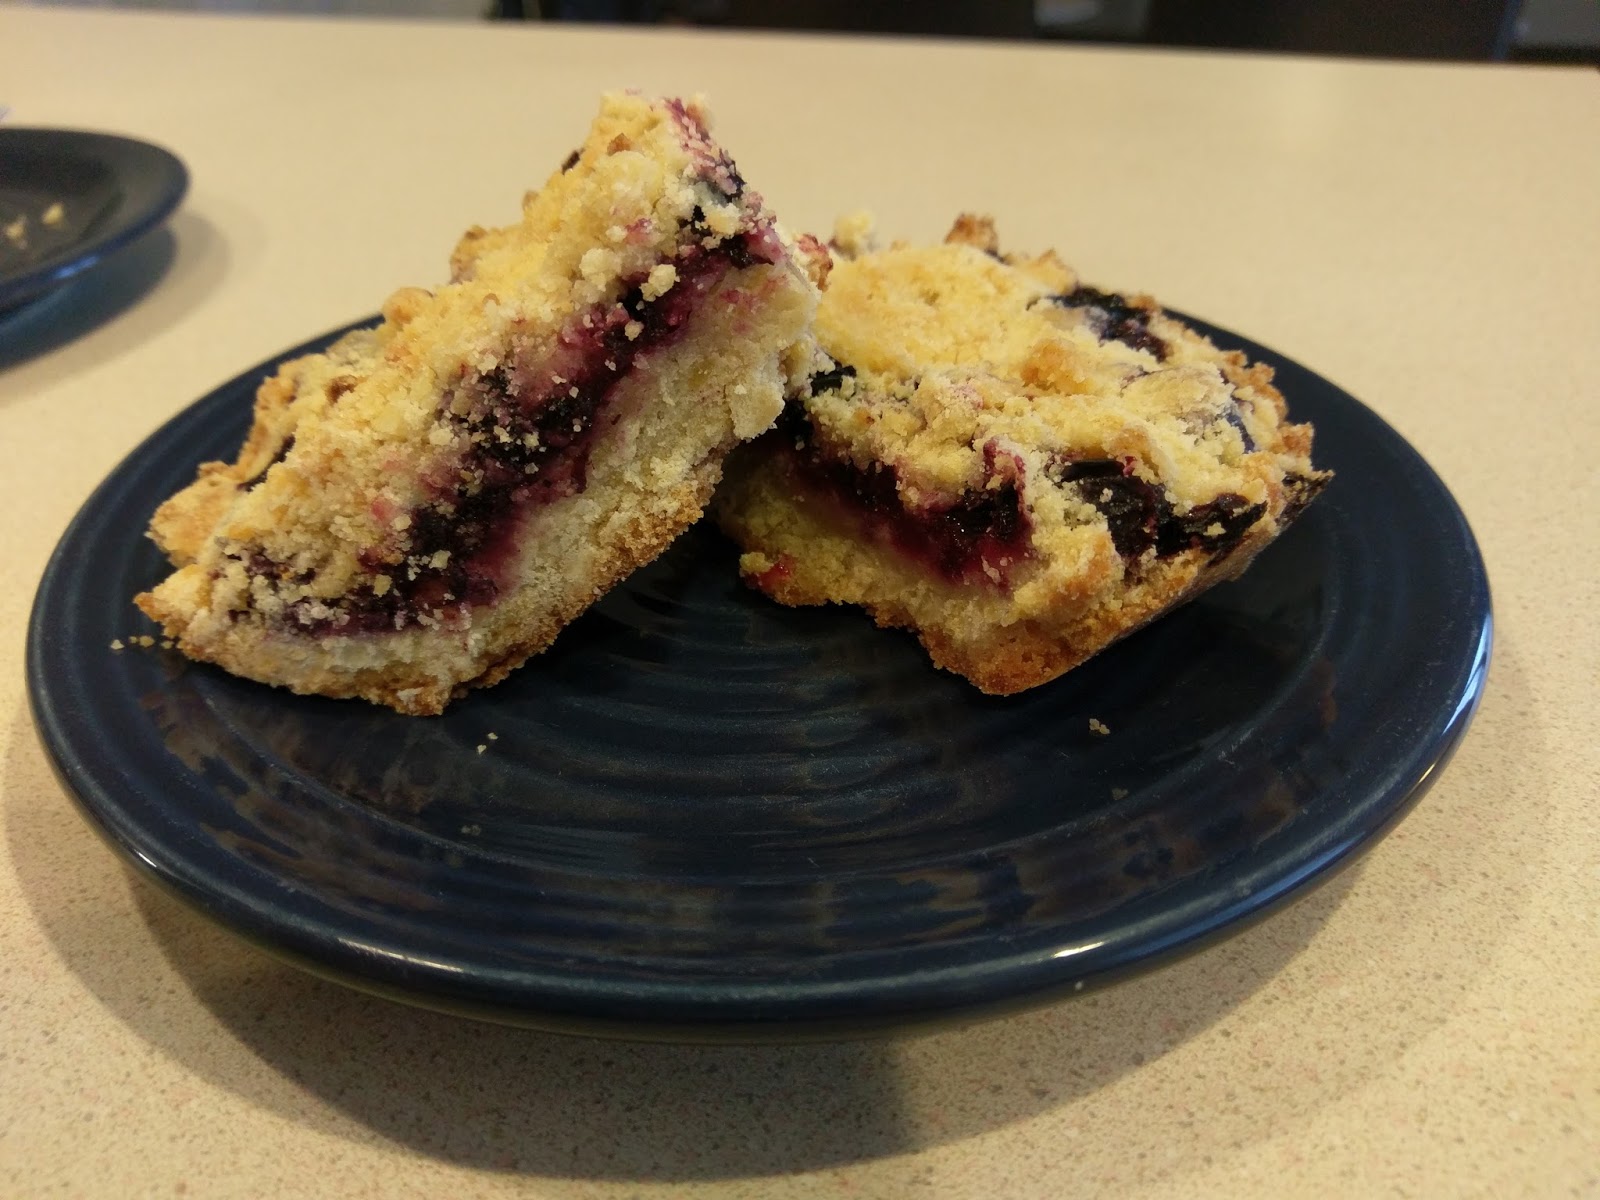
Totally worth it. Now, here’s the shocking part: one of these little bars will ring in at only 300 calories. Not terrible in the realm of dessert, especially since I know ways of making one slice of cake run you nearly 900. Gluttony, thy name is Kate. But with Florida really looming on our horizon now, I must unfortunately actually reel in the old sweet tooth. The great thing about these bars is that they are nice and sweet while not breaking the old calorie bank. Until you “Kate them up” and add ice cream, anyway. The first night we had these, we decided that for future consumption to warm them up in the microwave for 30 seconds to make them ooey gooey in the middle, which was a total win. But then we also decided a scoop of homemade vanilla from Blue Bell would make these taste absolutely heavenly. Subsequently, I spent the following day running around every store I could think of frantically searching for Blue Bell. I got really twitchy. And then really sad when the cashier at the commissary told me Blue Bell isn’t sold out here anymore. I died a little when I placed a carton of Breyers in my cart. It made do, and I was reminded with each scrumptious bite that complaining about ice cream is a problem I’ll gladly take after living for over five years in an area that sanctimoniously crushed souls and enjoyed it. Now excuse me while I go enjoy that mountain view some more while bopping up and down like an overeager toddler on sugar because I’ve earned it. ‘Til next time my fellow eaters!

Ultimately, still delicious. But you better believe we’re trying this recipe again when we return to the promised land with Blue Bell. Why yes, I am so Texan it hurts. How did you know? -
A Cake United…
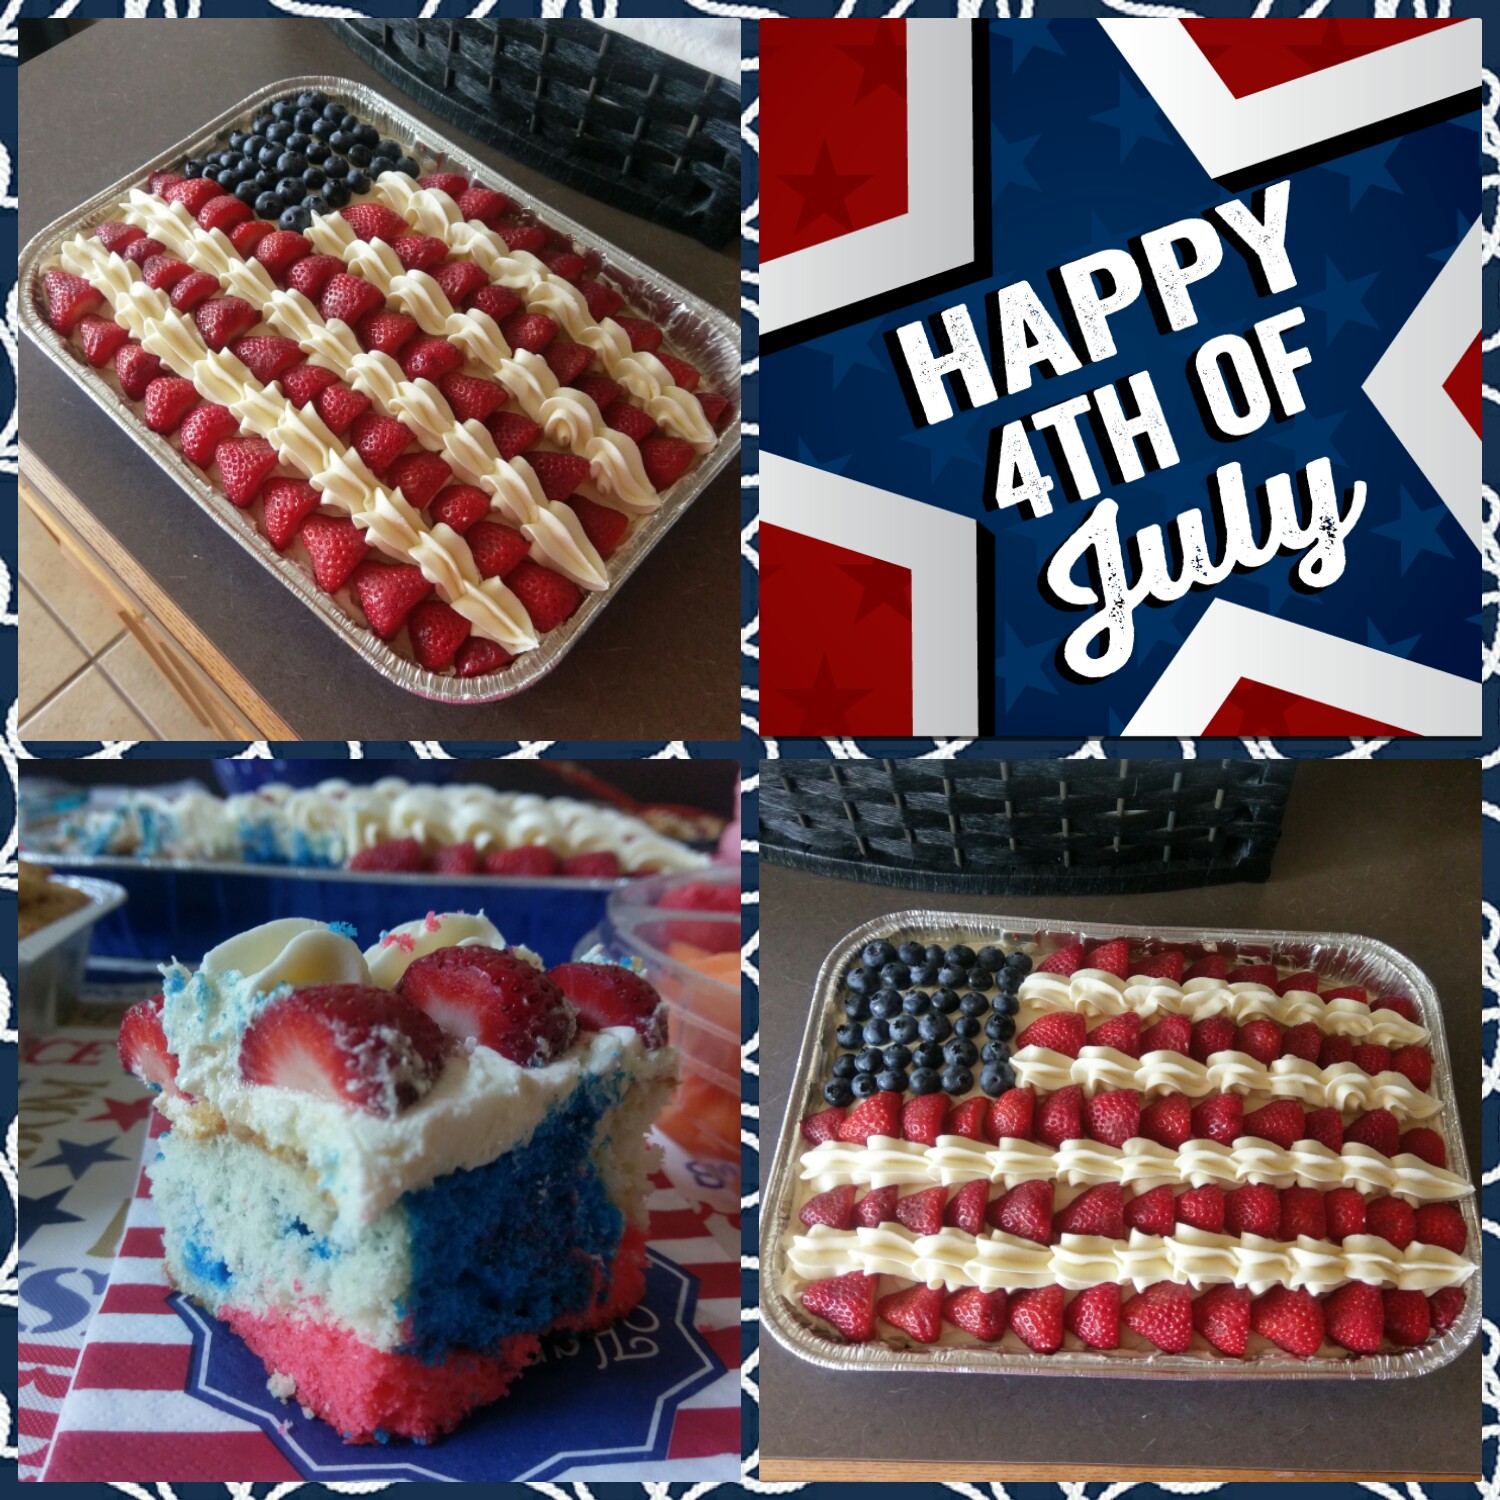
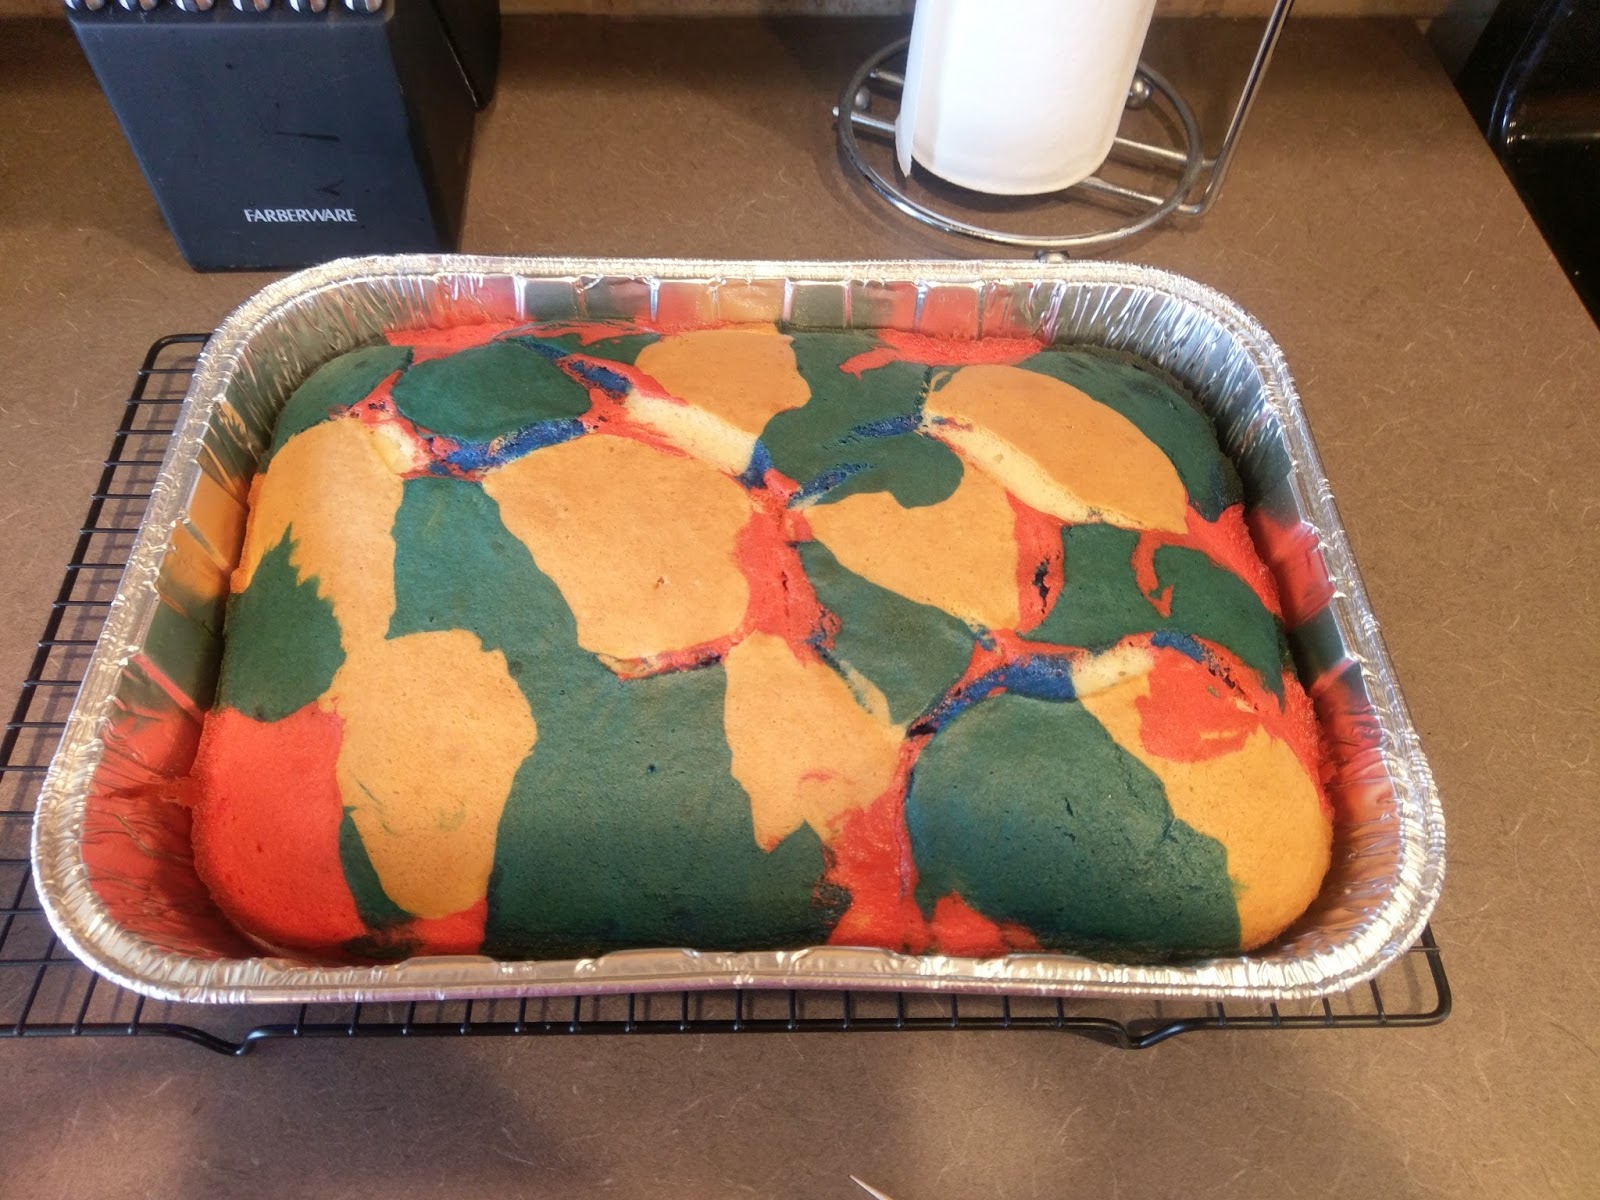
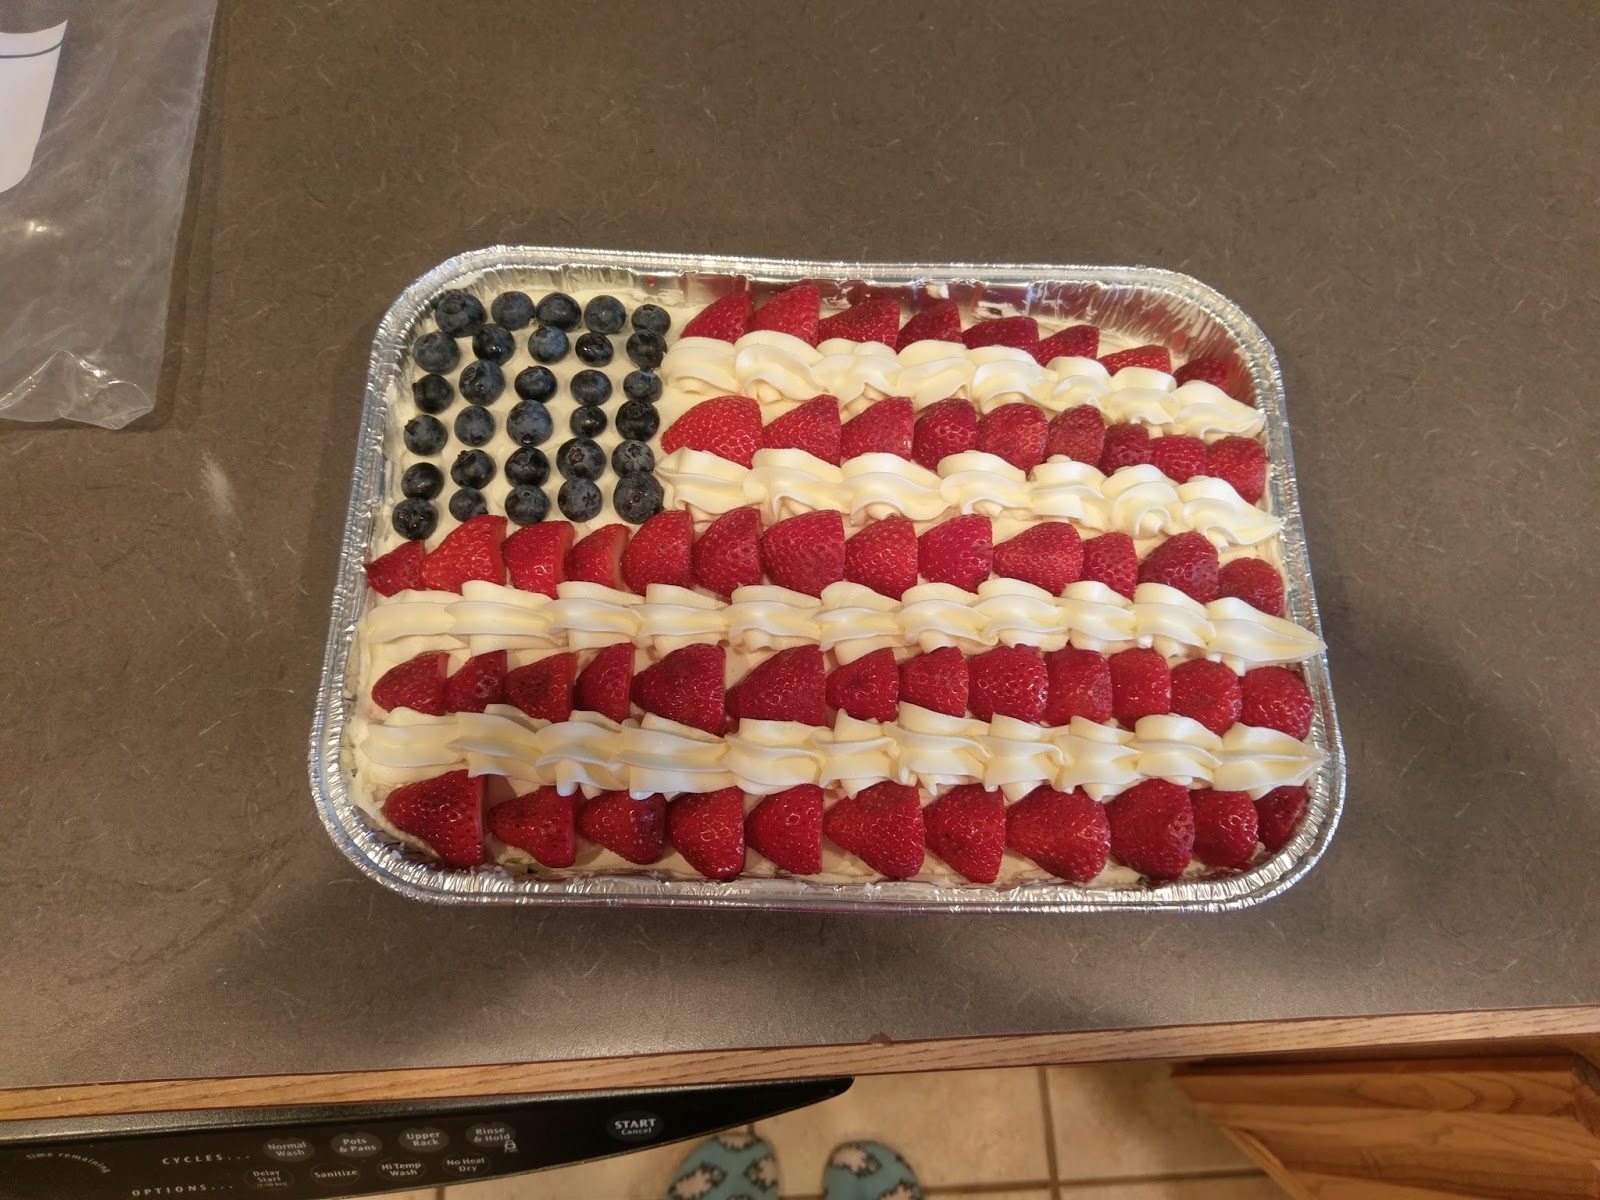
Between my husband’s birthday, Shark Week, and the holiday weekend, it’s been a pretty banner couple of days for us. Those of you that know me well know my absolute obsession with Shark Week. A misunderstood creature that looks mean and likes food, like, a lot? This speaks to me on so many levels. Plus, truly nothing feels more American to me than a one-ton eating machine springing from the ocean to devour its food. Perhaps the only way it could get any more American is if the scientists recording these beasts shot off a flare every time a shark jumped out of the water at impressive speed and height. The only downside to Fourth of July weekend is that one of our dogs, Hank, is insanely terrified of fireworks. For about two-three weeks around this time of year, neighbors are shooting off fireworks and poor Hank is hiding under the bed, certain the world is coming to an end and I’m doing nothing to stop it. Since we had a party to attend yesterday evening, we decided to dose him with melatonin to ease his anxiety. Because nothing says, “I care,” quite like sedating your loved ones. My only other problem with the Fourth of July weekend is coming up with a dessert that screams ‘True American Patriot.’ I outdid myself the very first year I got into baking, so it was an inevitable slow decline in effort on my part in the year following. I decided to bake something this year so full of red, white, and blue it looks like an American flag threw up. That’s right, I made a red, white, and blue tie-dye berry American flag cake. Because there are three things that are truly important to me: Freedom. ‘Merica. And cake.

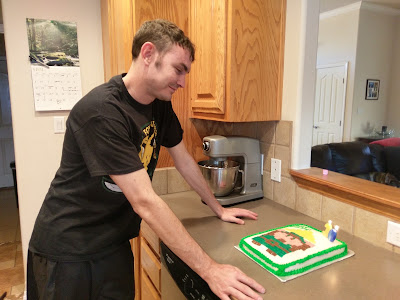
So much freedom. I showed up at this party with an insanely American dessert and an equally insanely American husband. He loves this country, and he has amassed a wardrobe that shows it. From American flag bandana, tank top, sunglasses, board shorts, and USA face shield, the only thing he was missing was red, white, and blue flip flops…next year. But I’m pretty sure all of the Founding Fathers were impressed with his outfit, as were the party goers. On a scale of one to America, my husband really loves his freedom. I’ll admit it was a great conversation starter (the outfit, not the cake), and being the wife of the most American to ever America did fill me with a lot of pride. It may look difficult to assemble, but I had this bad boy ready to go in under two hours (the cake, not my husband). Minus wait time for the cake to cool, this was so insanely quick to assemble. I recommend bringing this to all your celebratory barbecues tonight and tomorrow if you’re in need of a dessert. If he could, Ben Franklin would totally high five you for making a dessert this patriotic, and you know it.
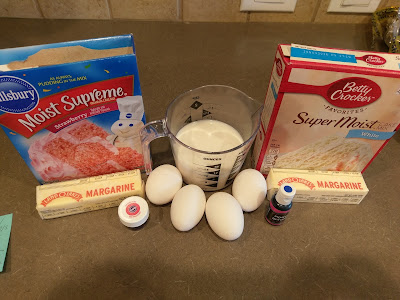
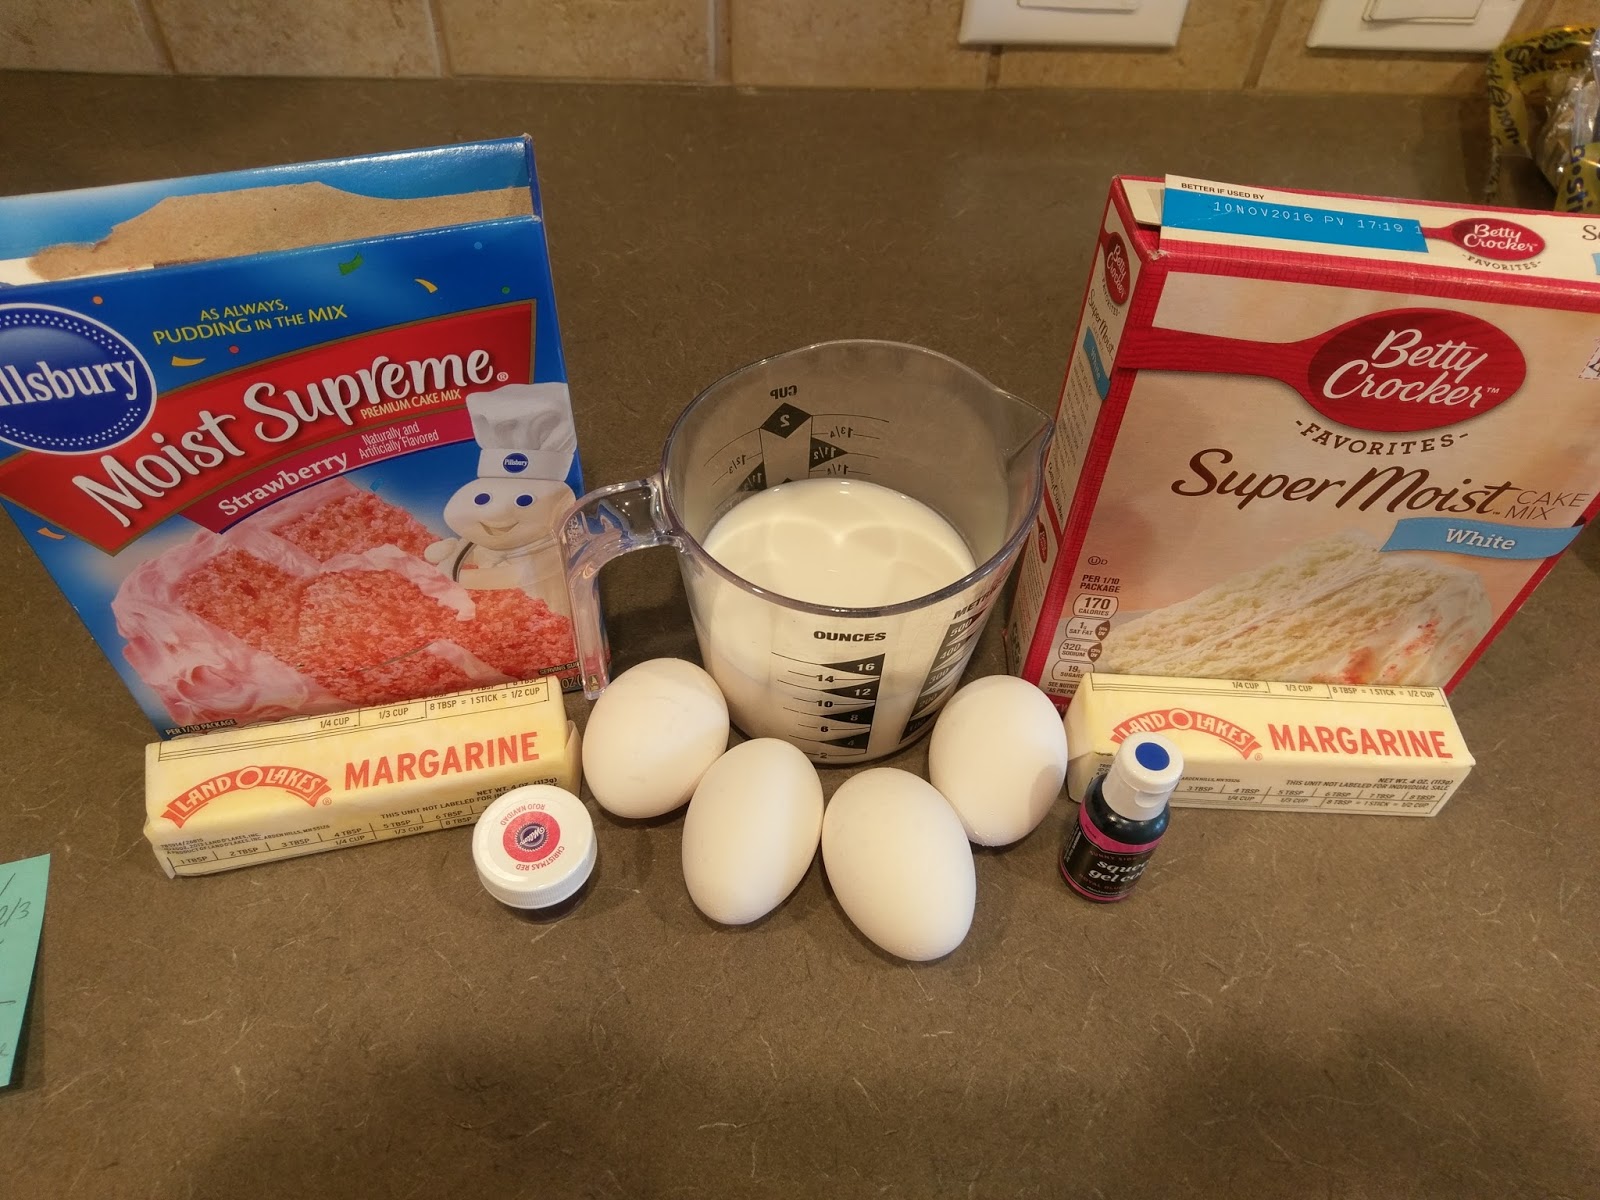
This is, once again, a part of the “We’re moving soon” collection. You probably don’t randomly have half a strawberry cake mix and half a white cake mix in your pantry. I do because this is a problem only a lazy baker could have. If by some strange coincidence, you’re in my boat, just be sure to half the ingredients needed for each cake and keep the strawberry cake totally separate from the white cake (dye the strawberry cake red, split the white cake in half and dye one half blue). If you’re a normal human being, you need:
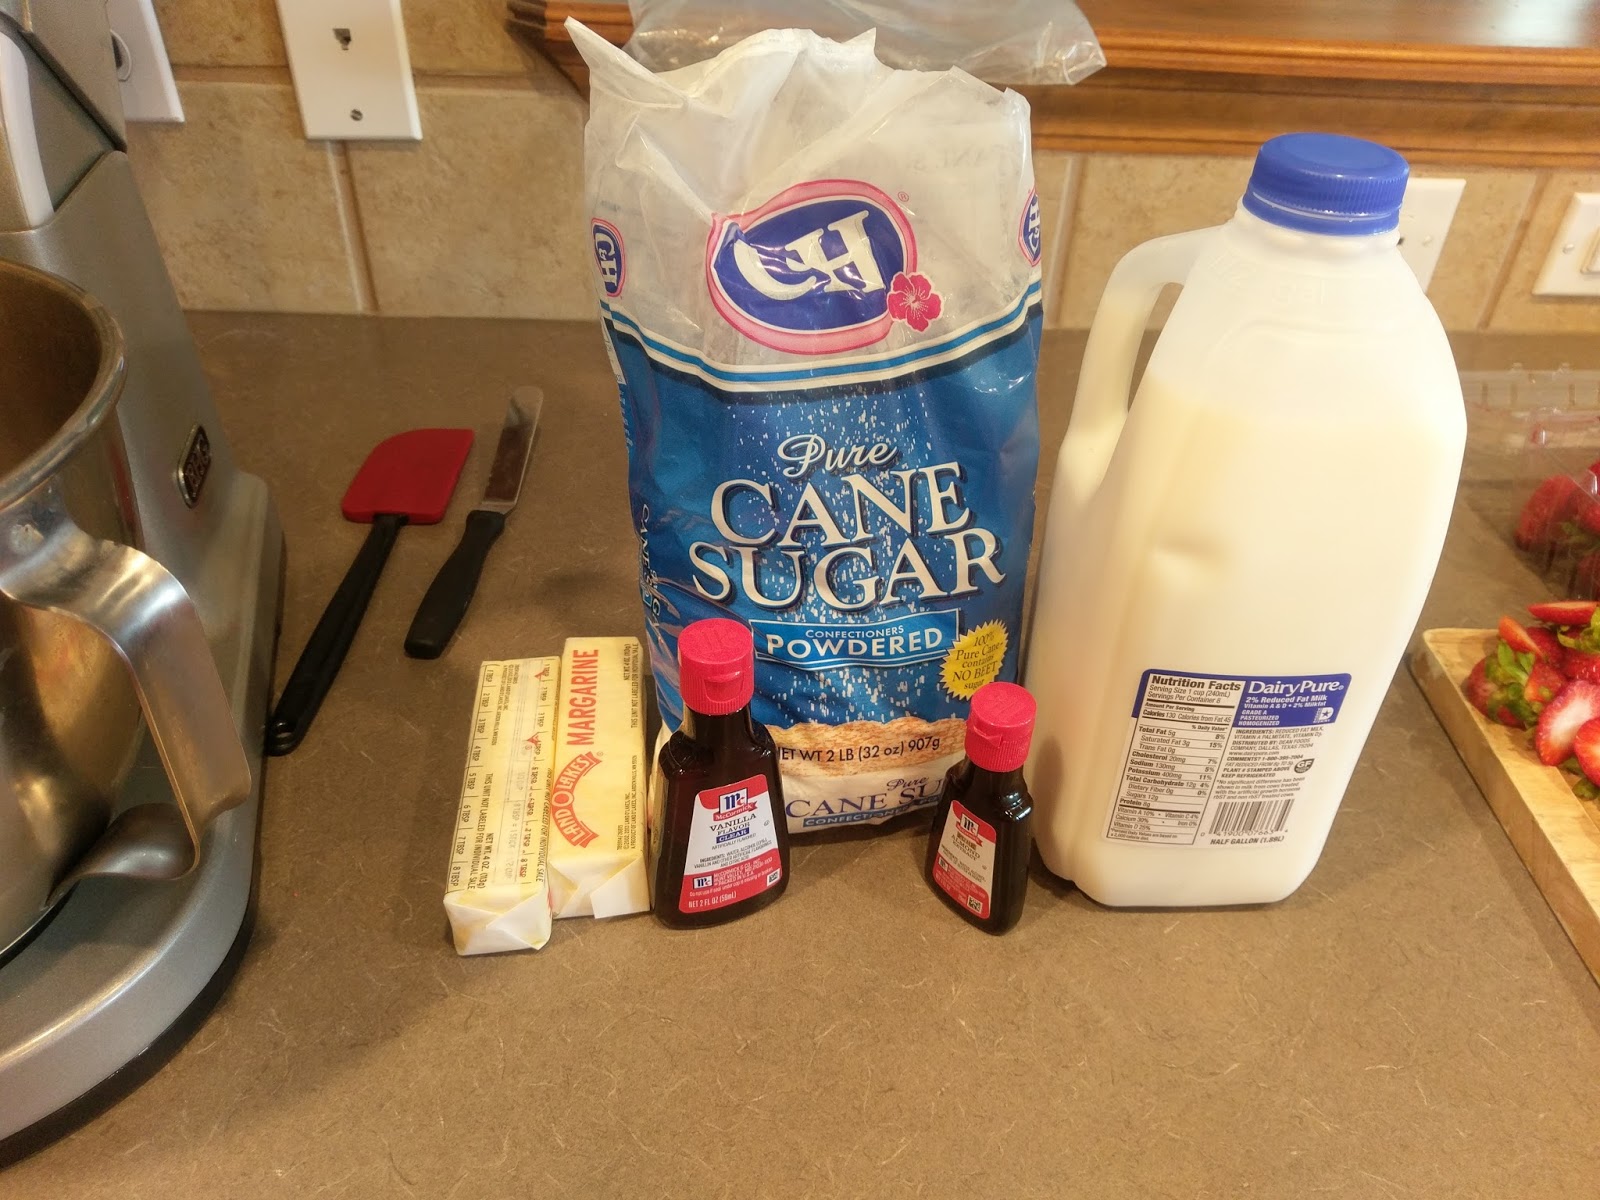
- 1 white cake mix
- 4 room temp egg whites
- 2/3 cup of room temp butter
- 1 1/4 cups of room temp milk
- Red and blue gel dye
- 1-2 lbs fresh strawberries
- 1 cup fresh blueberries
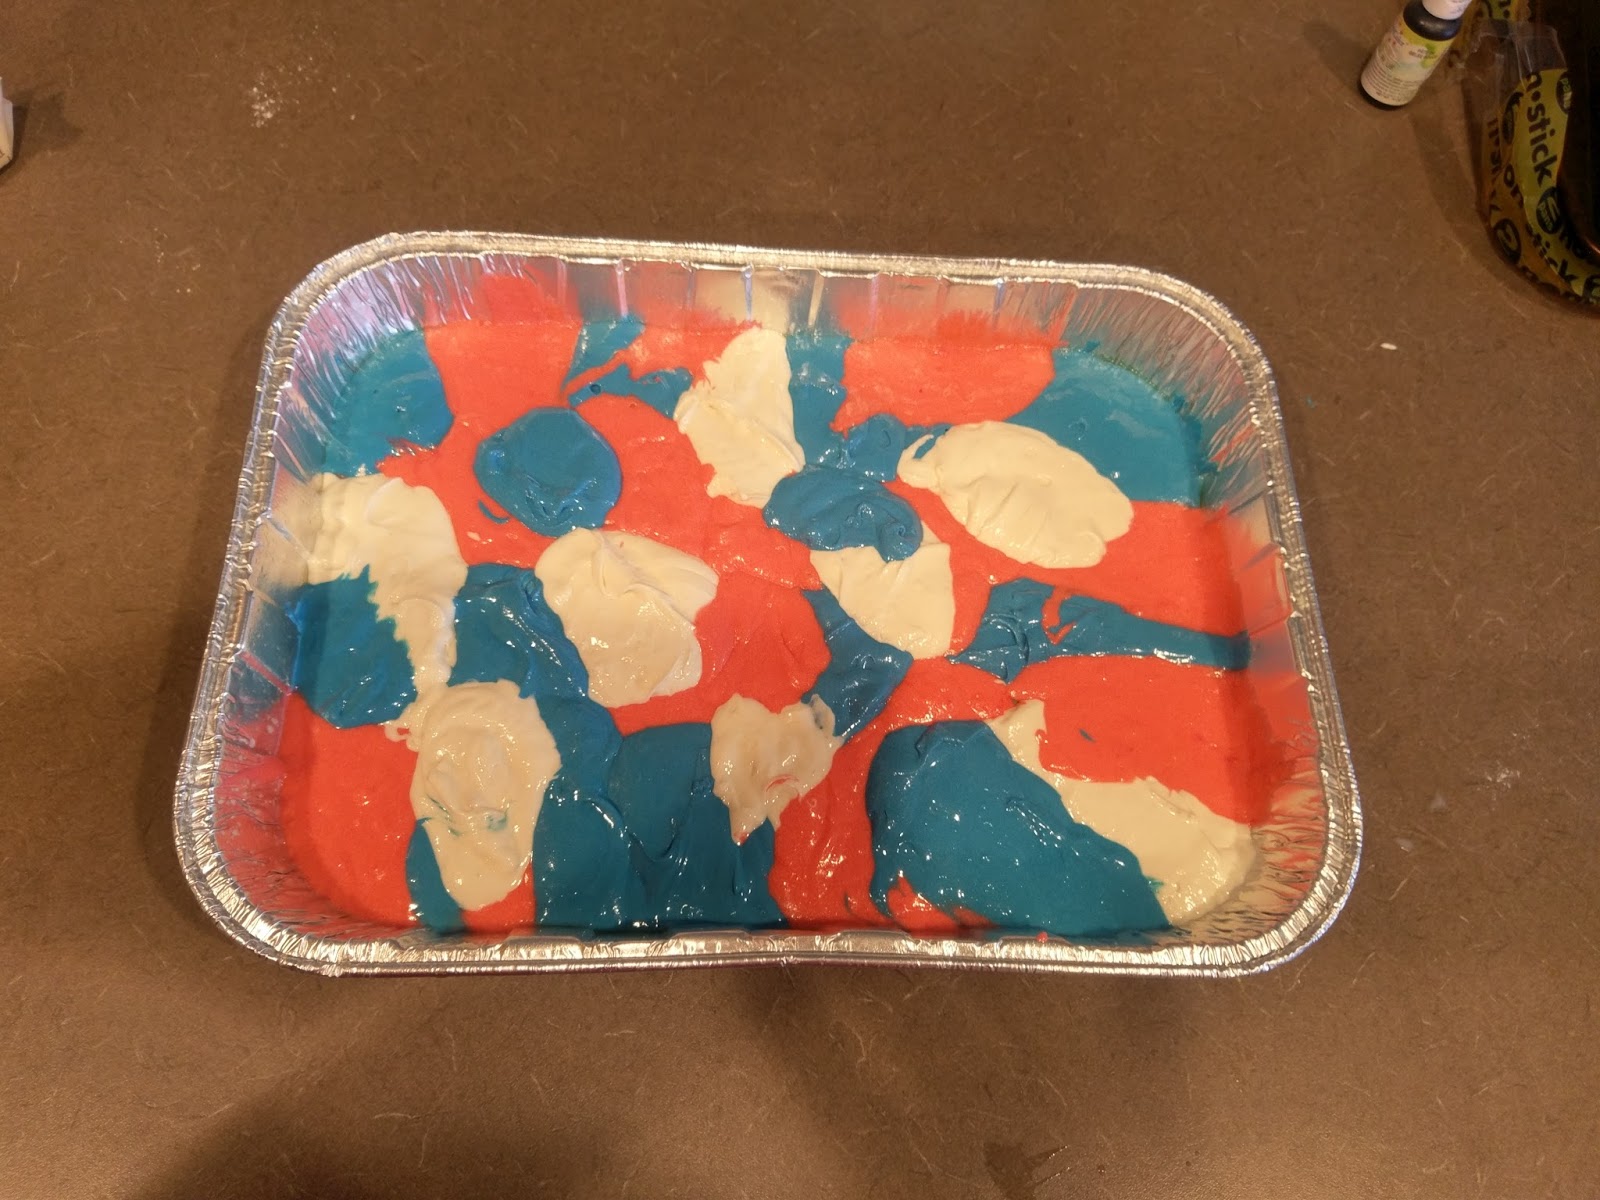
Grease a 9×13 pan (mine was disposable, so when baking, I placed it on a cookie sheet) and preheat your oven to 350. Dump all ingredients except the dyes and fruits into your stand mixer and blend on medium-high for two minutes. Divide up the cake batter into three bowls:
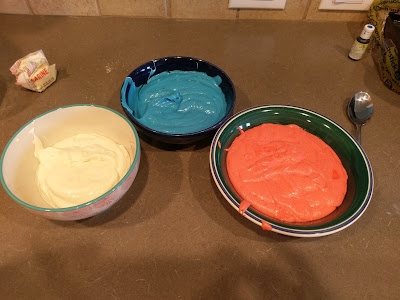
Leave one bowl white and dye the other two red and blue. 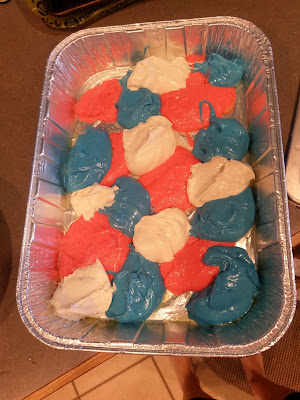
Then gather up three spoons and plop a spoonful of each color into the pan in random order. 
Do this until you’ve run out of colors. Doesn’t need to be pretty, it will look awesome after it has baked. Don’t swirl the batter, just tap your pan on the counter to even things out. Bake as directed for about 25-30 minutes or until a toothpick comes out clean. Let rest on a cooling rack for 10 minutes before removing from the pan (unless you’re using a disposable pan, then leave that sucker in there). If you want to speed things up, place in the freezer for a half hour.

It looks even better on the inside! Promise. Got a drab camouflage happening here. 
What, no vodka? Full disclosure, the party we went to was with members of a different squadron…so, people not indoctrinated to my need to add booze to every dessert I make. I decided to make this cake sans alcohol and went with my standard buttercream recipe:
- 1 cup of room temp butter
- 1 TBS clear vanilla extract
- 1/2 tsp almond extract
- 6 cups powdered sugar
- 4-5 TBS milk or heavy cream
Cream the butter until fluffy, then add in the extracts, three cups of sugar, and two tablespoons of milk. Blend well, scrape the bowl, and add in the remaining three cups of sugar and two tablespoons of milk. If frosting is still too thick, add in one more tablespoon of milk.

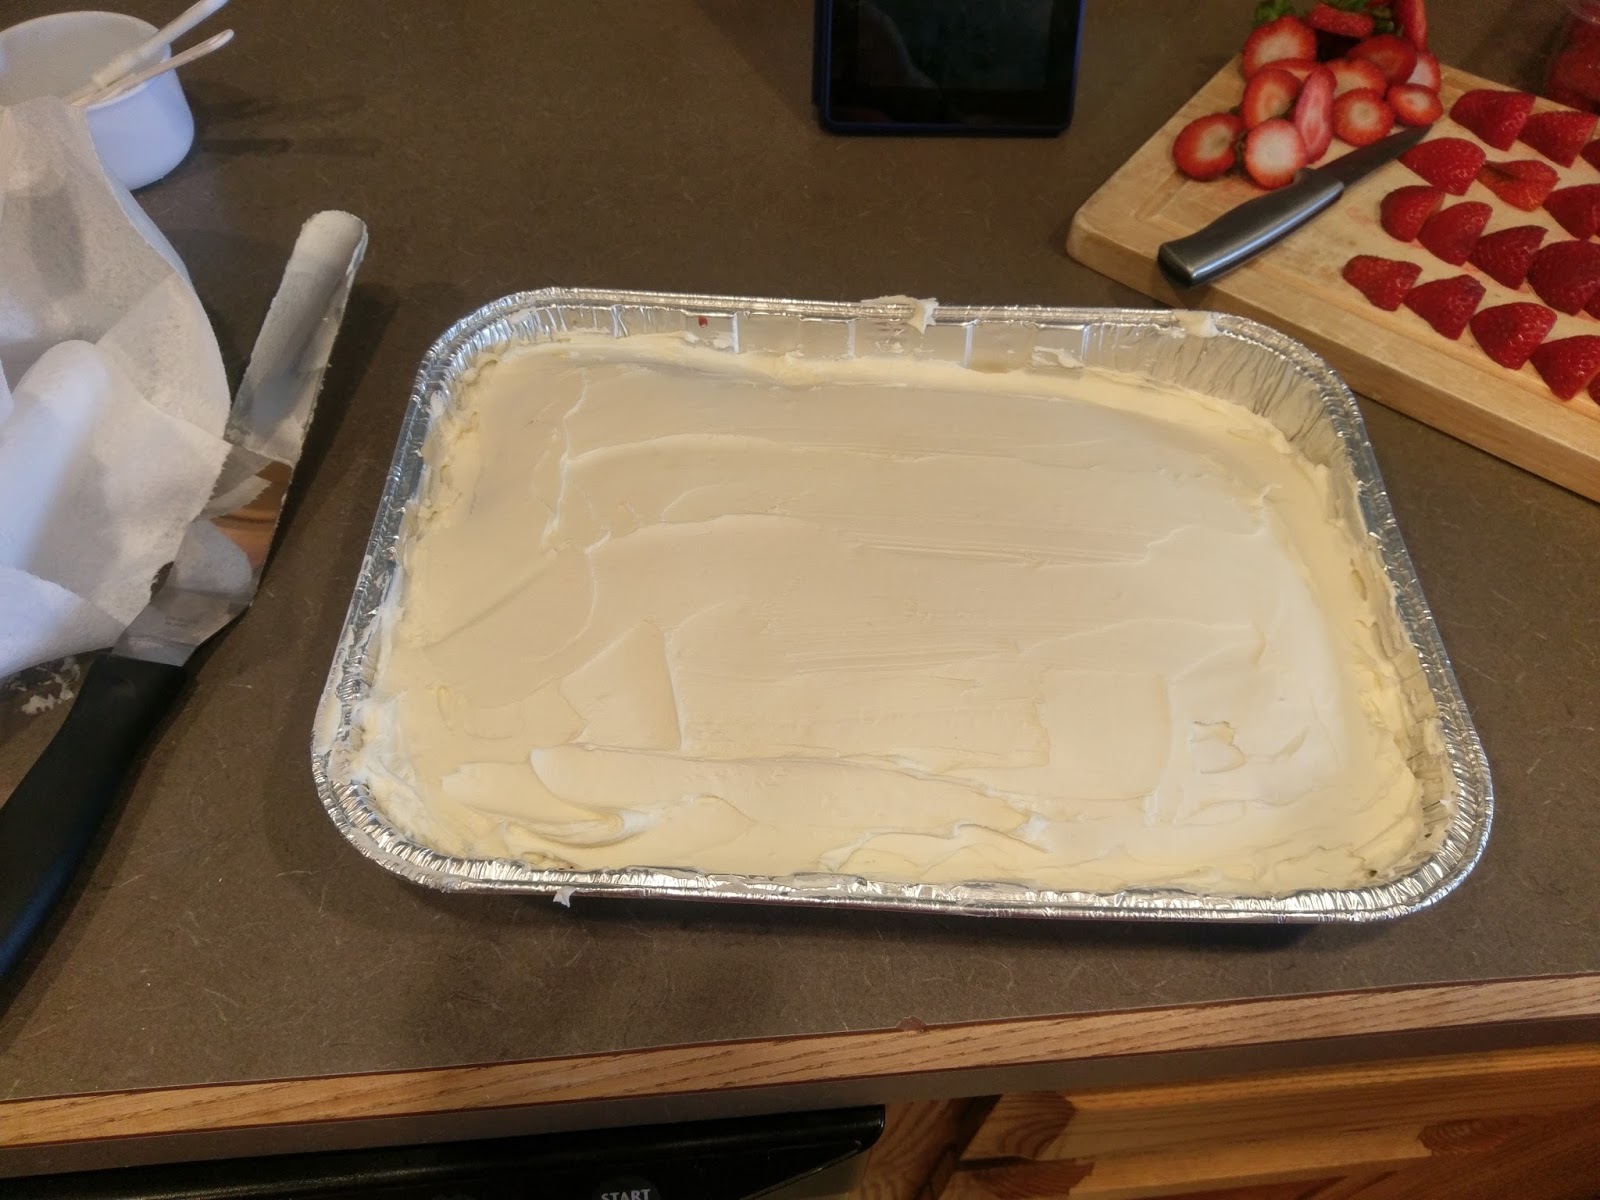
Remove your cooled cake from the freezer or wherever you’ve stashed it and give it a solid crumb coat. Banish it back to the depths of the freezer for 15-30 minutes until completely crusted. 
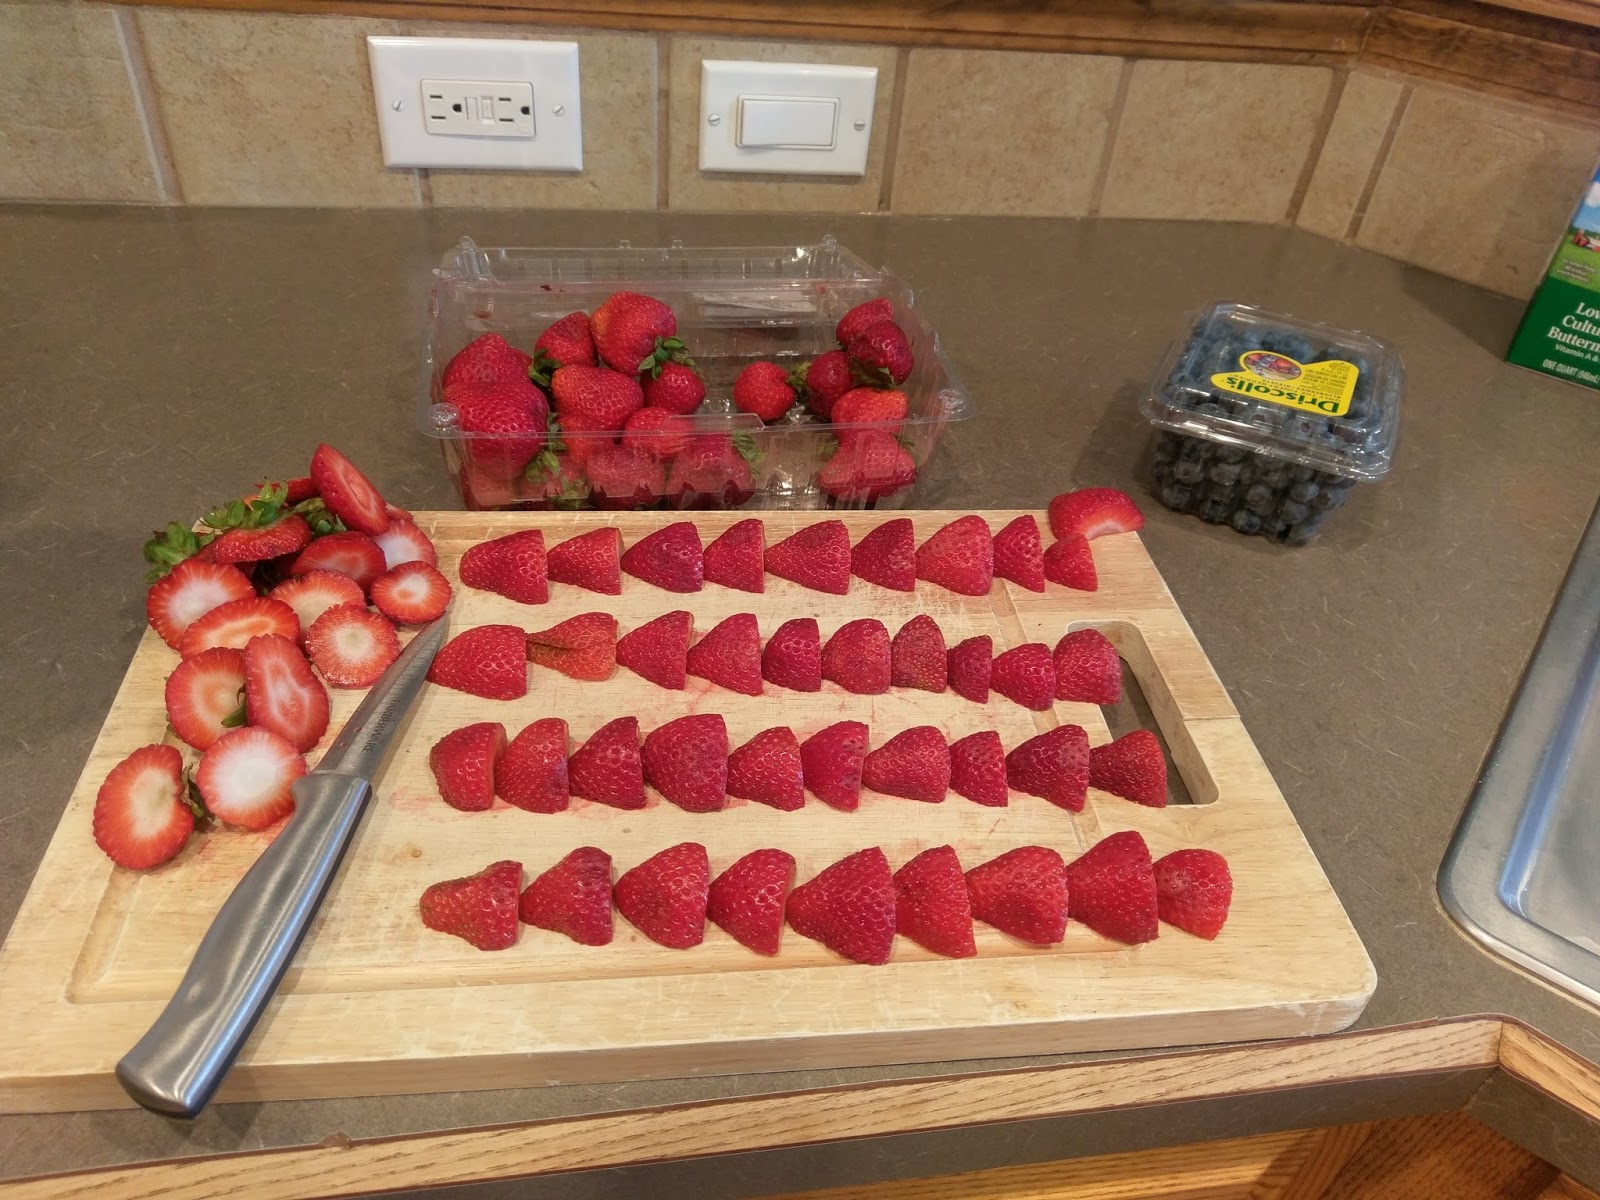
While this is taking place, go ahead and cut a bunch of strawberries in half. I ended up using 3/4 of a 2 lb container. 
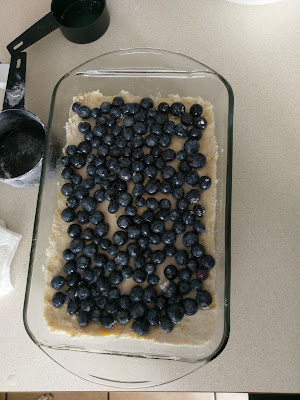
Add a final coat of frosting to the cake; you should have a generous amount of frosting leftover in the bowl to pipe stripes later. Don’t freeze! Arrange your fruit into a flag shape while the frosting is still soft to help adhere the fruit in place. 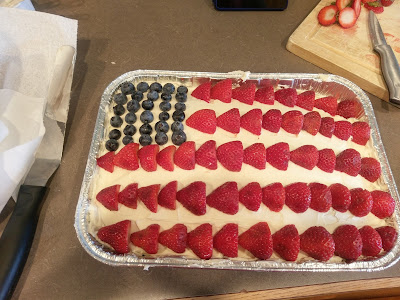
Like so. I eventually moved and added more blueberries because I had a ton of them leftover. 
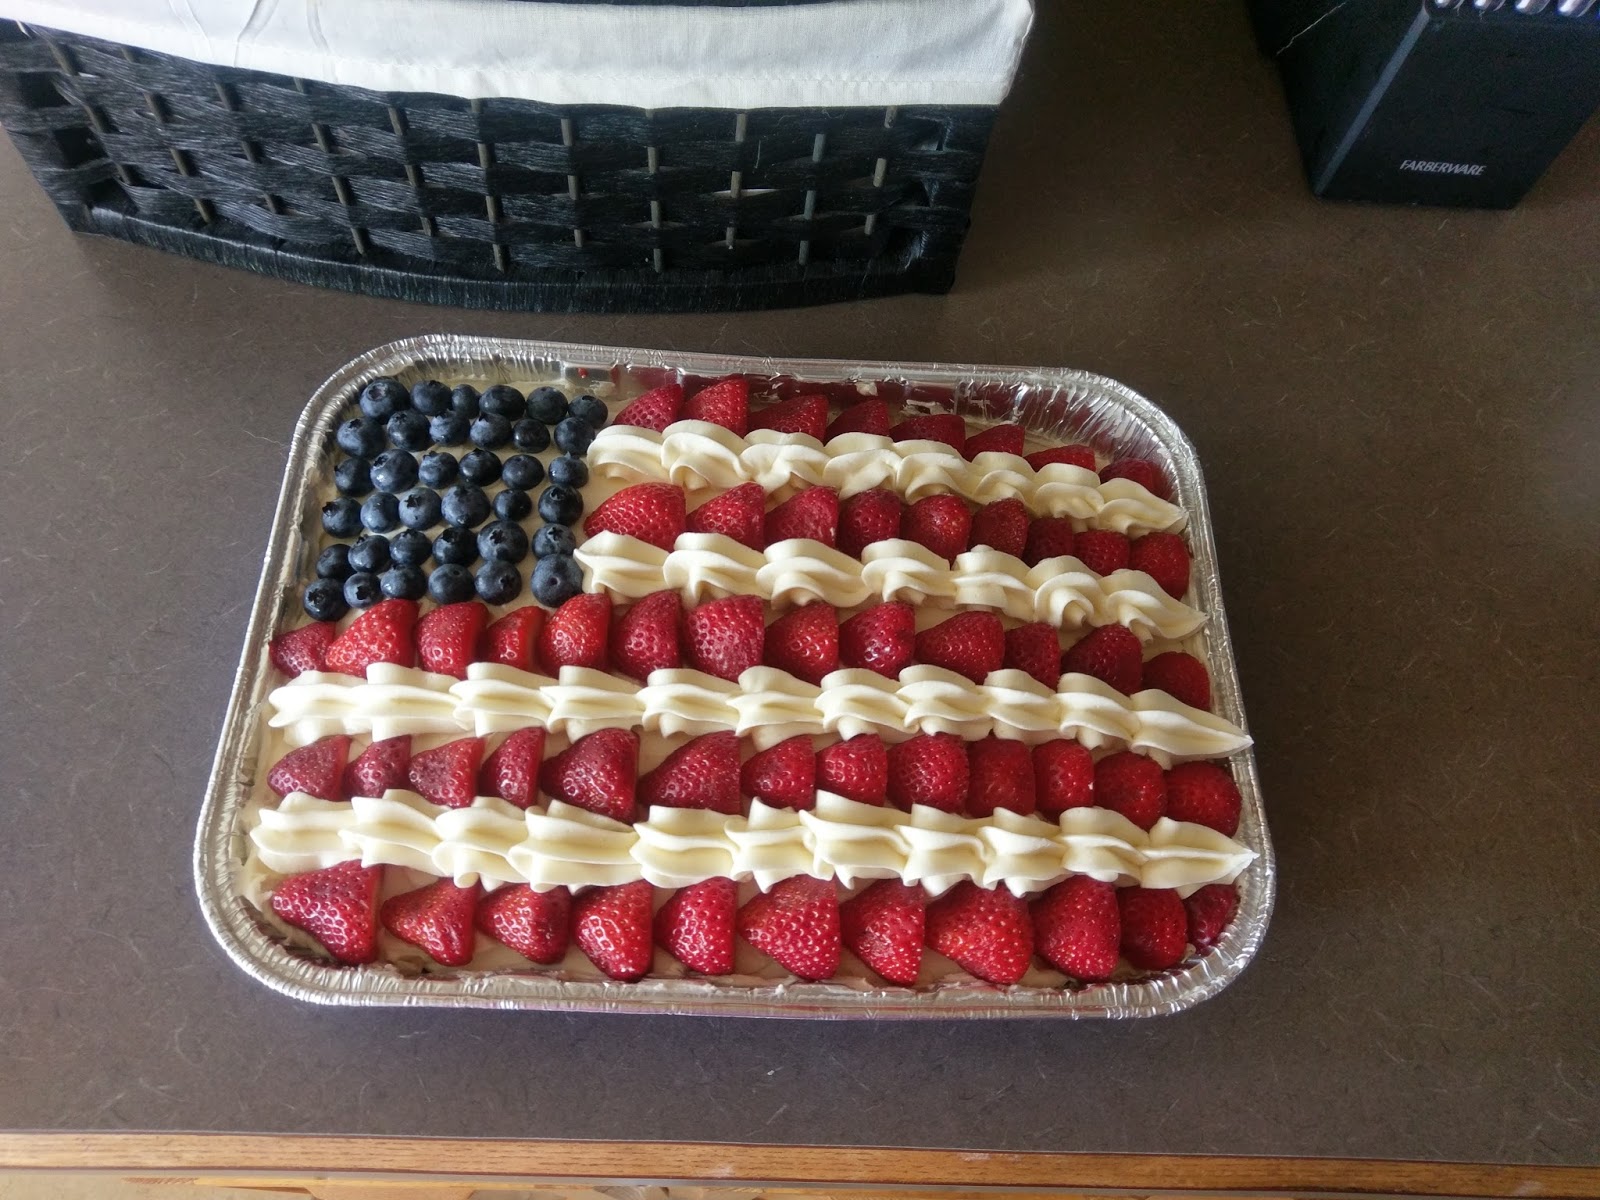
Then fit a piping bag with a 1M tip and pipe large shells in between each row of strawberries to create a nice, polished finishing look. 
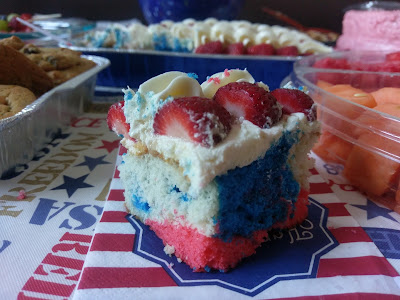
Here it is with the additional blueberries. Much prettier. 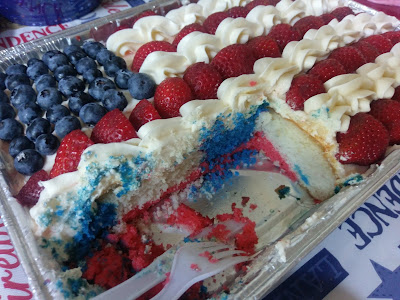
And it did look super vibrant once we cut into it! The tie-dye pattern varies with each slice which is really a cool touch. As far as cakes go, I never think to add fruit on top of them. Make cake healthy? What? You can do that? But strawberries on top of my almond buttercream…perfection. I’m not ashamed to say I wanted to sit down in a corner and just eat three or four slices of cake. It’s my right as an American, after all. I definitely play by the “go big or go home” adage of America, and this cake was no exception. I think it would look really cool if you did take a knife to the batter and swirl an ‘S’ shape into it…then it would be a really trippy tie-dye. I may try that in the future with other cakes. As far as eating the first cake in months not made from a handle of rum or vodka goes, it was actually quite refreshing. I love being the boozy baker, but going back to basics is nice sometimes. Plus, there were booze-soaked cherries at the party, so I got my fix. I love the right to bare boozy foods, what can I say. I hope you all have a fantastic Independence Day. Blow stuff up, eat meat in tube form, drink cheap, watery beer, and gorge on dessert. Be as American as possible (preferably while clad in every article of American flag clothing you own)! Just make sure your pets are safely in hiding and you don’t set yourself on fire or lose a toe to a rogue roman candle. No amount of cake in the world can fix that. ‘Til next time, my fellow eaters!
I like to celebrate my freedom with a side of frosting and a boatload of calories. -
Dirty 30: Part Deux
So today we continue what has been termed “Derekpalooza” at our house. But today also marks the actual birthday of my husband, so it carries extra importance. The week-long celebration of Derekpalooza started last Saturday with the big 3-0 birthday cake, and will end on 4th of July weekend…which is fitting because my husband is real-life Captain America. If you don’t believe me, just wait until the Instagram pics get posted from the 4th of July BBQ we’ll be at Saturday to see what he’s got planned. Tonight we’re going out to a nice dinner with friends, so I knew we’d be too full for cake. I decided to do cake and presents last night, mostly because I could no longer contain the excitement over the gift I purchased him. When my husband opened up his thirtieth birthday present from me to find it was a Super-freakin-Nintendo, I think the last time I saw him that blissfully overjoyed with happiness was the day we were married (little did he know…I kid). A few weeks ago after I had hunted one down, he casually mentioned in conversation about needing to find a Super Nintendo. In my head, the voice was screaming “PANIC MODE, ENGAGE!,” but outside I maintained composure and responded as only a wife can with steely poker face, “But we already have a Nintendo 64 you never play.” I should probably be a politician. While the N64 has been neglected as of late, we’re a bit busy trying to sell our stupid house. I mean, trying to sell our luxurious three-bedroom/two-bathroom home that you should totally tell your friends about. So that and getting ready to move has taken total control of our lives. But I knew we needed a break, and no matter what birthday a man is celebrating, cake and video games are an excellent way to relax. I wanted a birthday cake that went along with the Nintendo theme. I know my husband’s favorite old school Nintendo game, and I was still trying desperately to clear out our bar before the move, so what came to fruition was this, the Svedka strawberry lemonade, 8-bit Legend of Zelda cake:
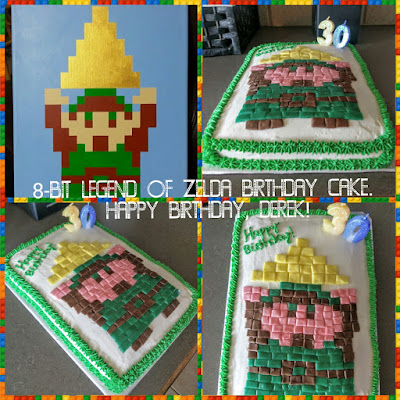
I will always believe the original Nintendo has the most bitchin’ graphics. I never played Zelda. I know. I had to do a little research before making this…Zelda is the princess, but the main character is Link? To me, this makes as much sense as calling Super Mario World “Princess Peach World,” but no one asked me. And besides, my husband loved it, so all’s well that ends well. And sweet baby Jesus was this cake delicious. Svedka strawberry lemonade vodka, from what I remember, always made the best summer cocktails. This translated perfectly into the best summer cake. It is oh-so-fluffy, sweet, and has a hint of lemon, which goes great with a base strawberry cake. And the frosting. Oh the frosting. I’m telling you, the only way I ever want to consume vodka again is via buttercream frosting. This has such a nice zing, but without the burning sensation usually accompanied by drinking the stuff. And it’s honestly probably got the same calorie count as a vodka punch, but without the awful headache. Small miracles.

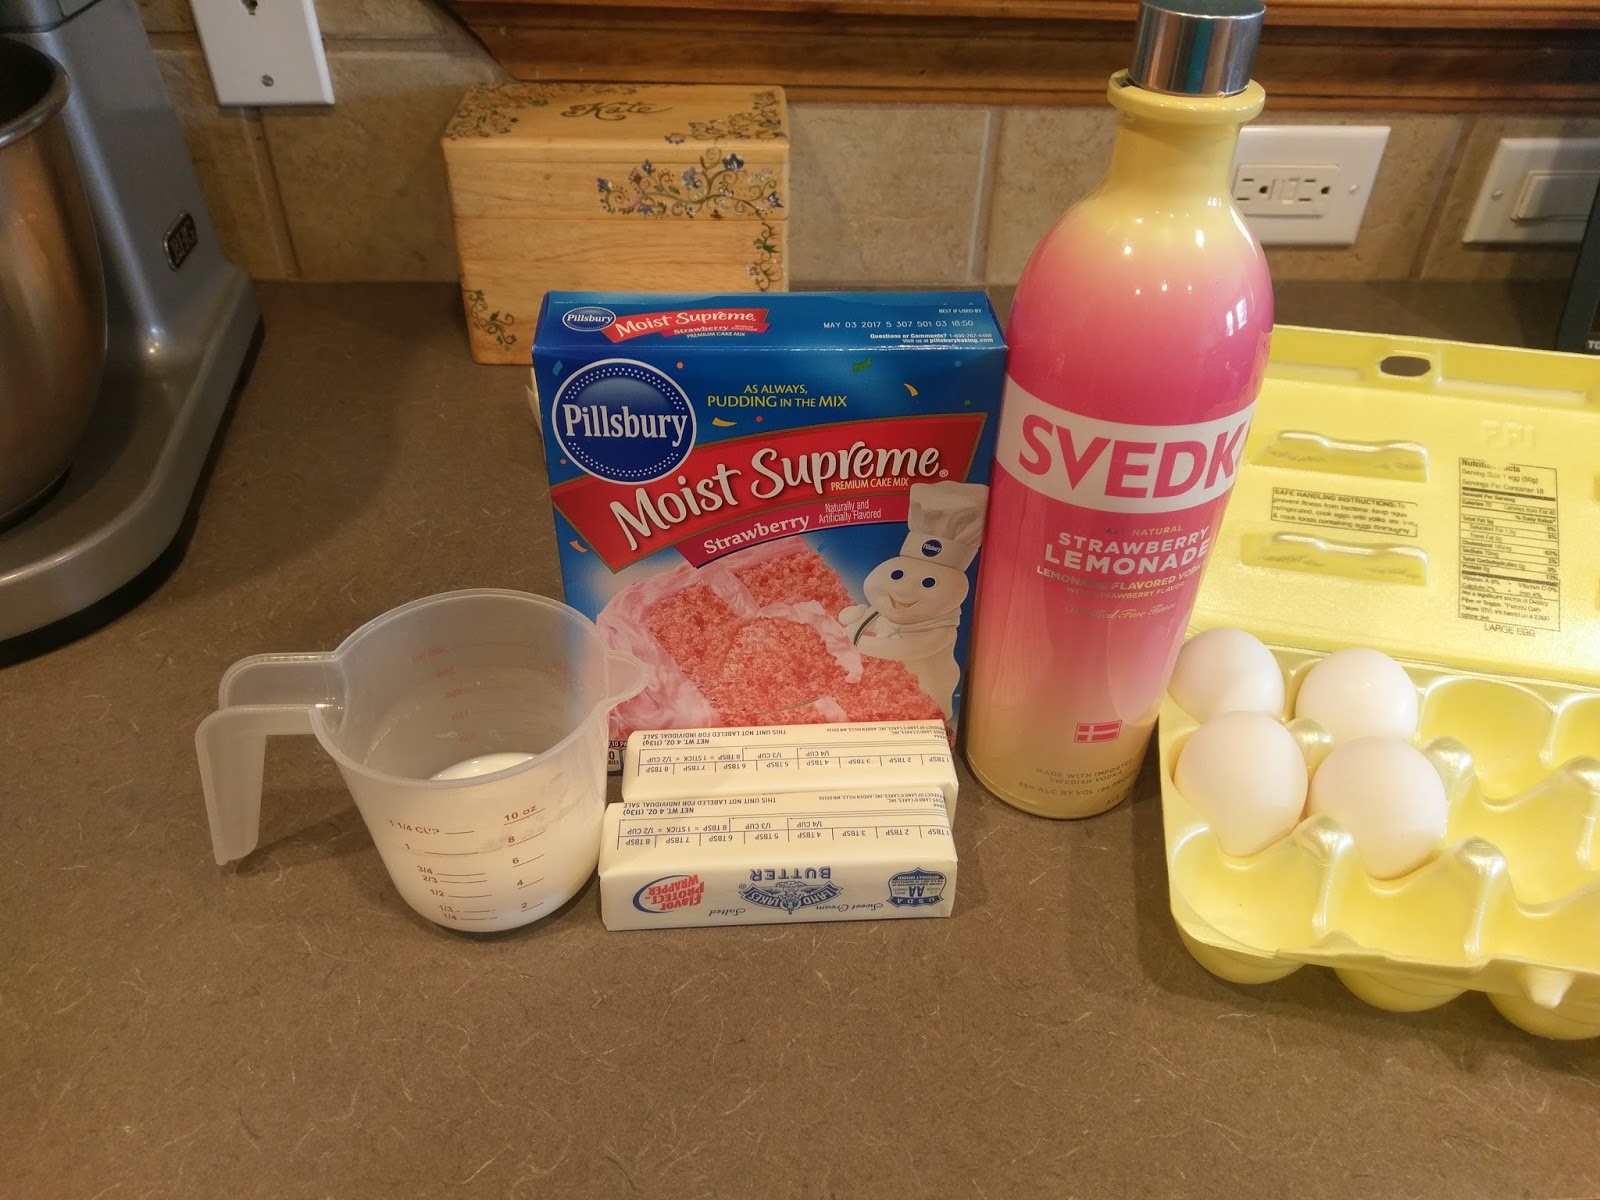
Even the bottle is pretty. Once again, going the lazy baker route. I don’t have a homemade strawberry cake recipe…yet. I promise that one day I will, but until then, if it ain’t broke…
- One box strawberry cake mix
- One cup of room temp butter
- Four room temp eggs
- 3/4 cup of room temp strawberry lemonade vodka (I swear by Svedka, best cheap vodka out there, and I would know)
- 1/4 cup room temp milk
I know, I upped the ante with the amount of booze in this recipe. I think I may go full scale for my next recipe because this turned out amazing. All you need to do is grease a 9×13 pan, preheat the oven according to box directions, and dump everything in your stand mixer and blend on medium-high for two minutes. Pour the batter into the pan and bake…watch carefully for time. I think the amount of alcohol in the cake and how it bakes out in the oven causes the cake to bake faster. A typical 9×13 cake is done in the 30-35 minute window. This finished at 22 minutes. So it’s either that or my oven is getting ready to break, which would make perfect sense since we’re trying to sell our house. Someone knock on some wood for me.

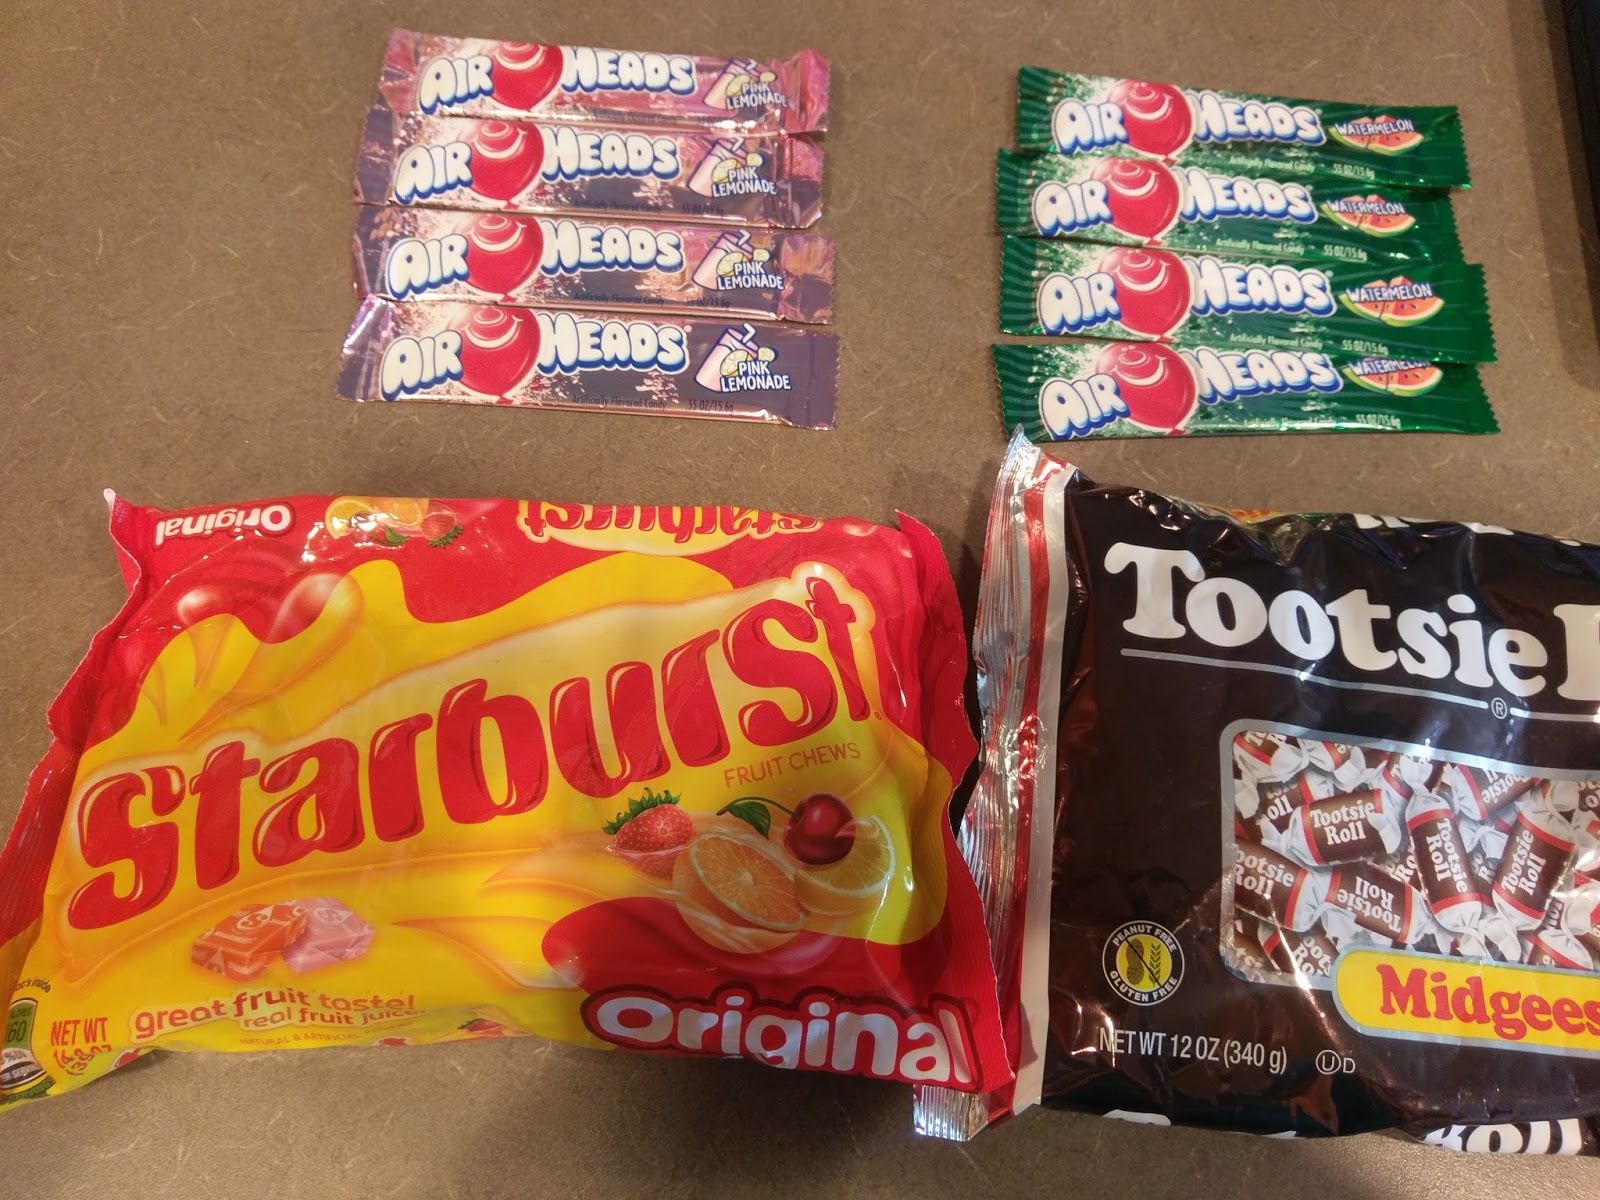
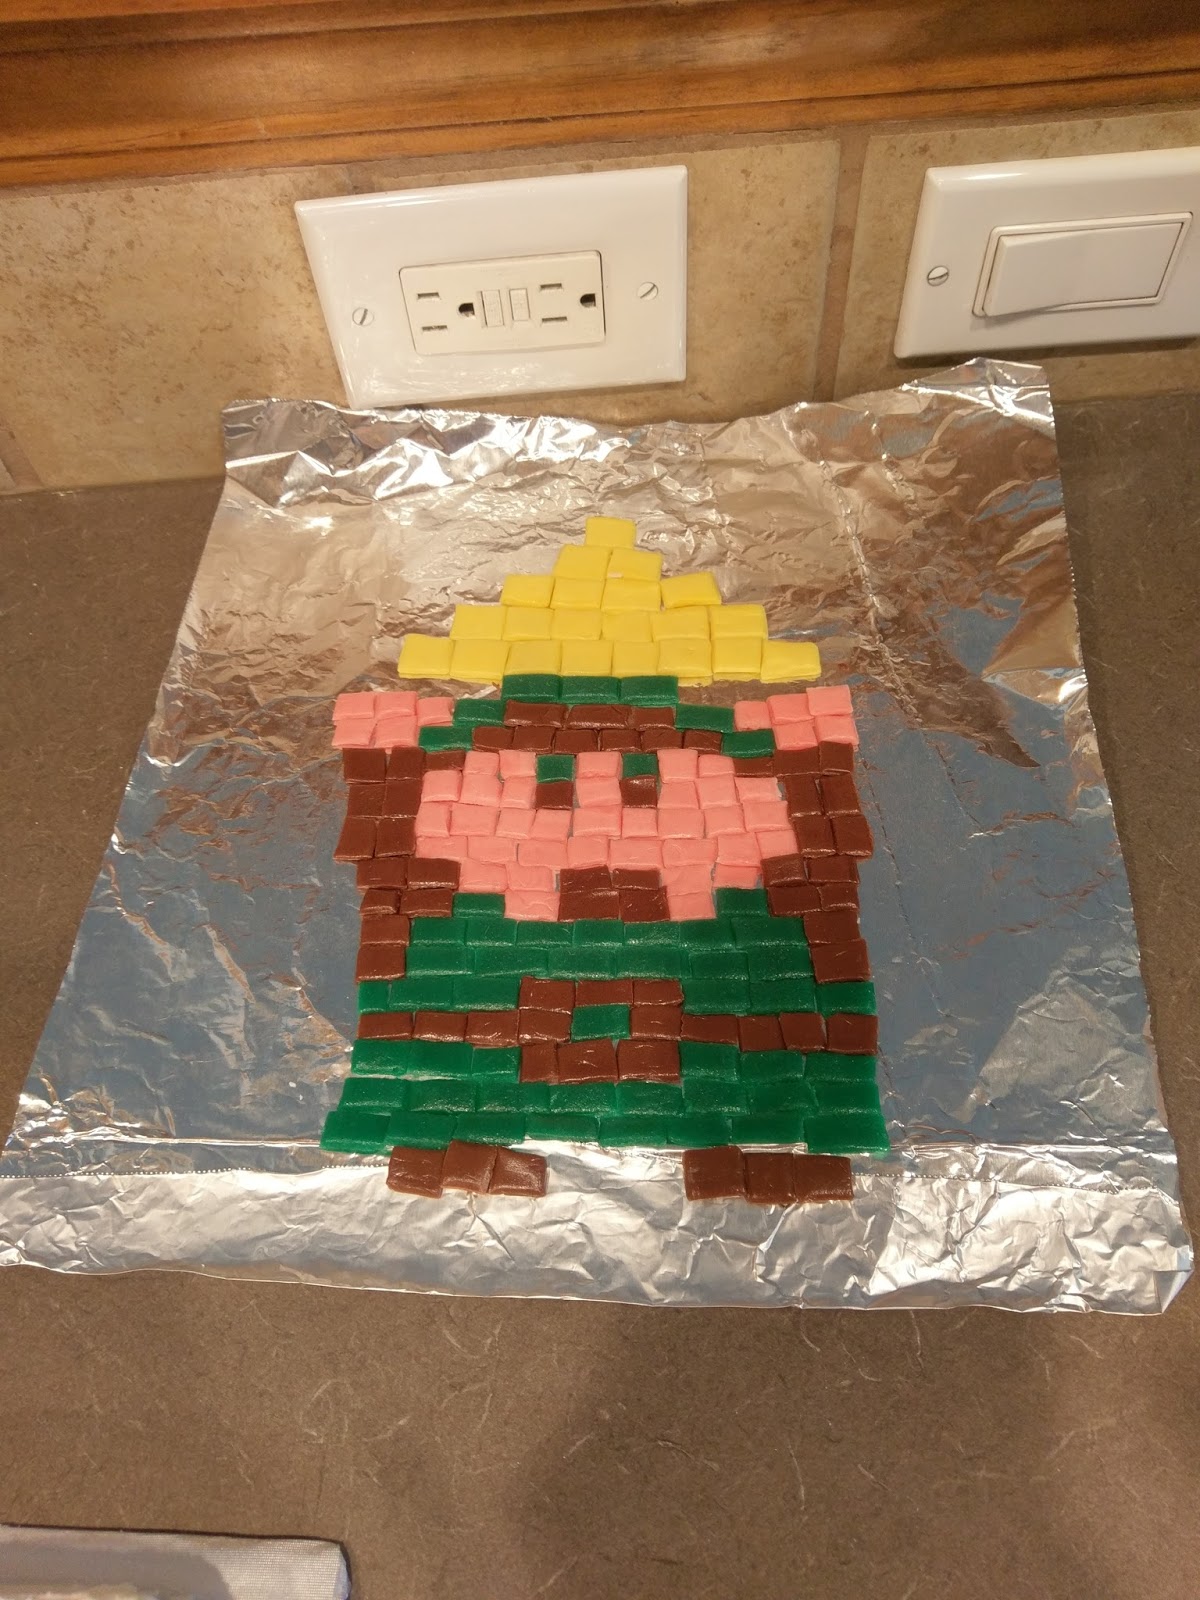
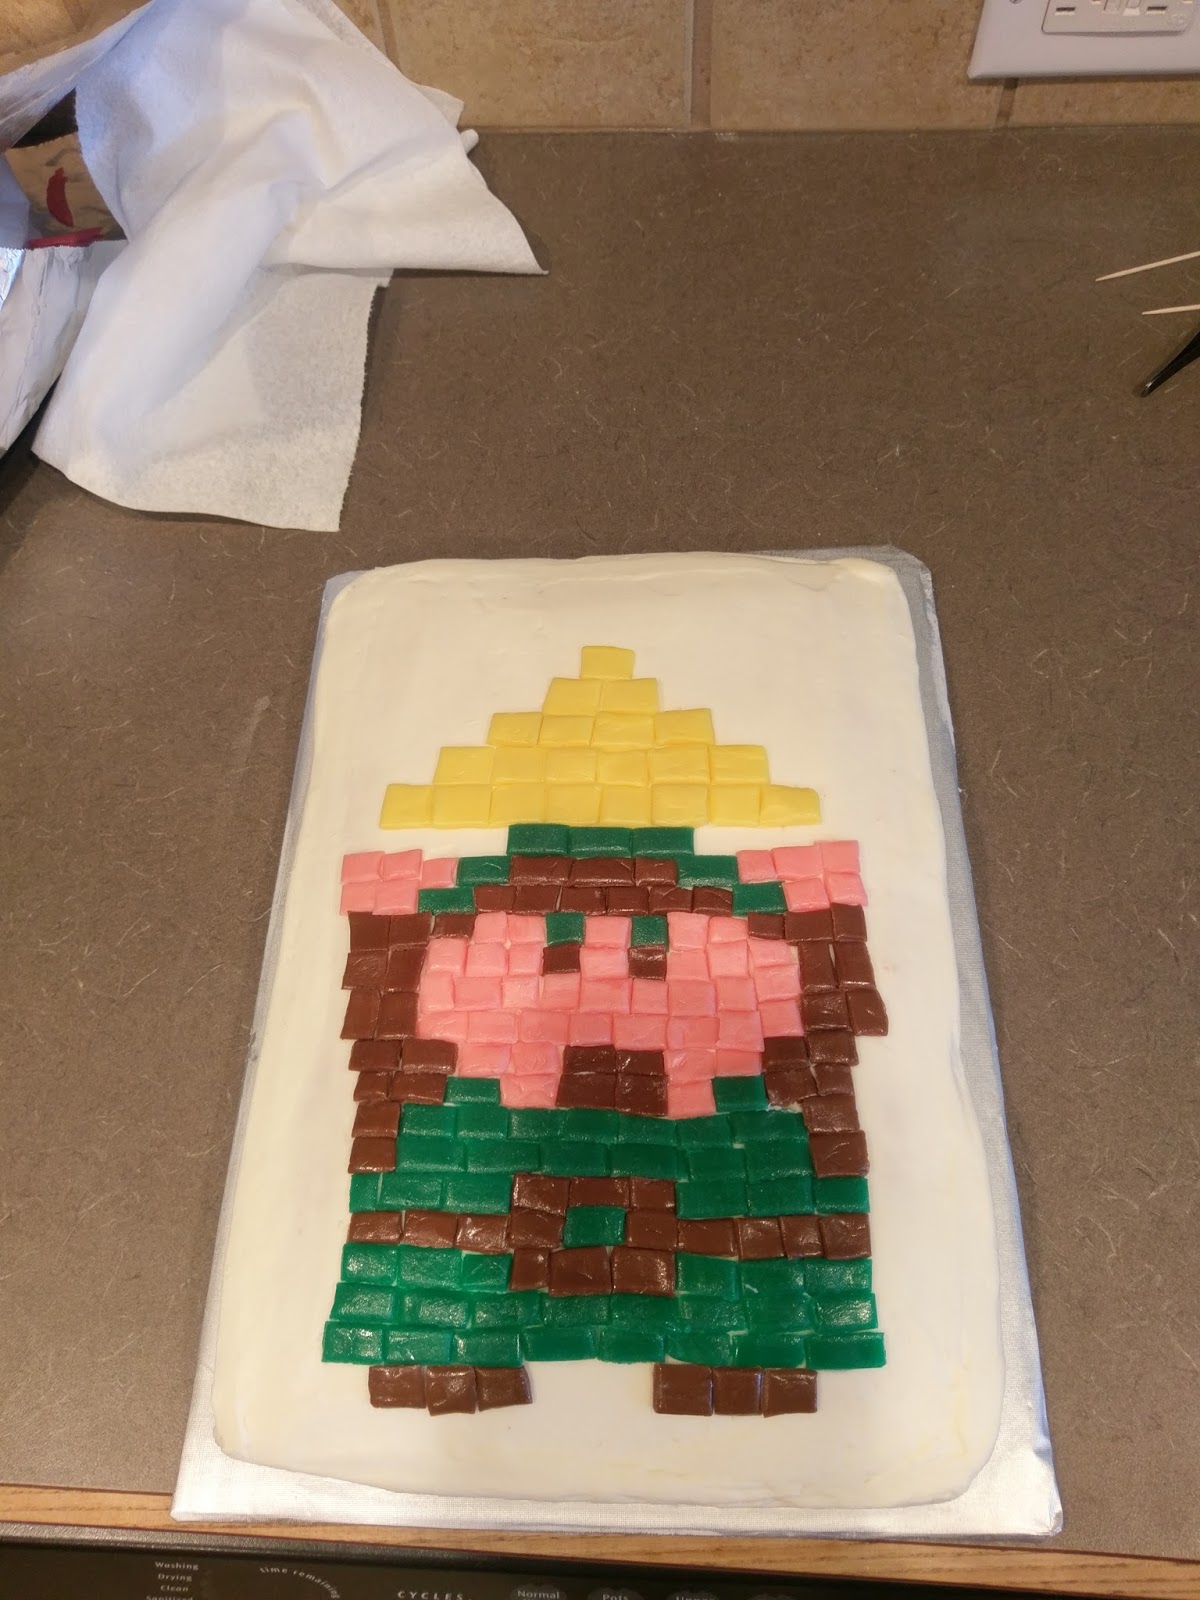
Pictured: Supreme 90s kid candies I won’t lie to you. While your cake cools on a cooling rack, you’re gonna spend about three hours chopping candies to make an 8-bit cake of any variety: Mario, Zelda, Donkey Kong, you name it. You will be so sick of Starbursts that you swear you’ll never eat one again, only to realize you still have half a bag and no choice. The things we do for the people we love. But here’s the exact amount of candies you need to create Link, the dude from Zelda who was robbed of getting a game named after him.
- 8 yellow Starbursts (I’m told people hate these; they are my favorite. This tells you everything you need to know about me.)
- 2 packages of watermelon Airheads (I bought 4 and only used half)
- 6 pink Starbursts (I was going to use pink lemonade Airheads, but they were pink pink)
- 4 Tootsie Rolls
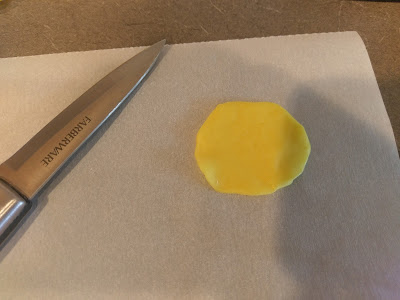
Throw in a few extra for taste tests. Couple of tips:
- Work with one color at a time.
- Heat for about 8 seconds in the microwave to make more malleable.
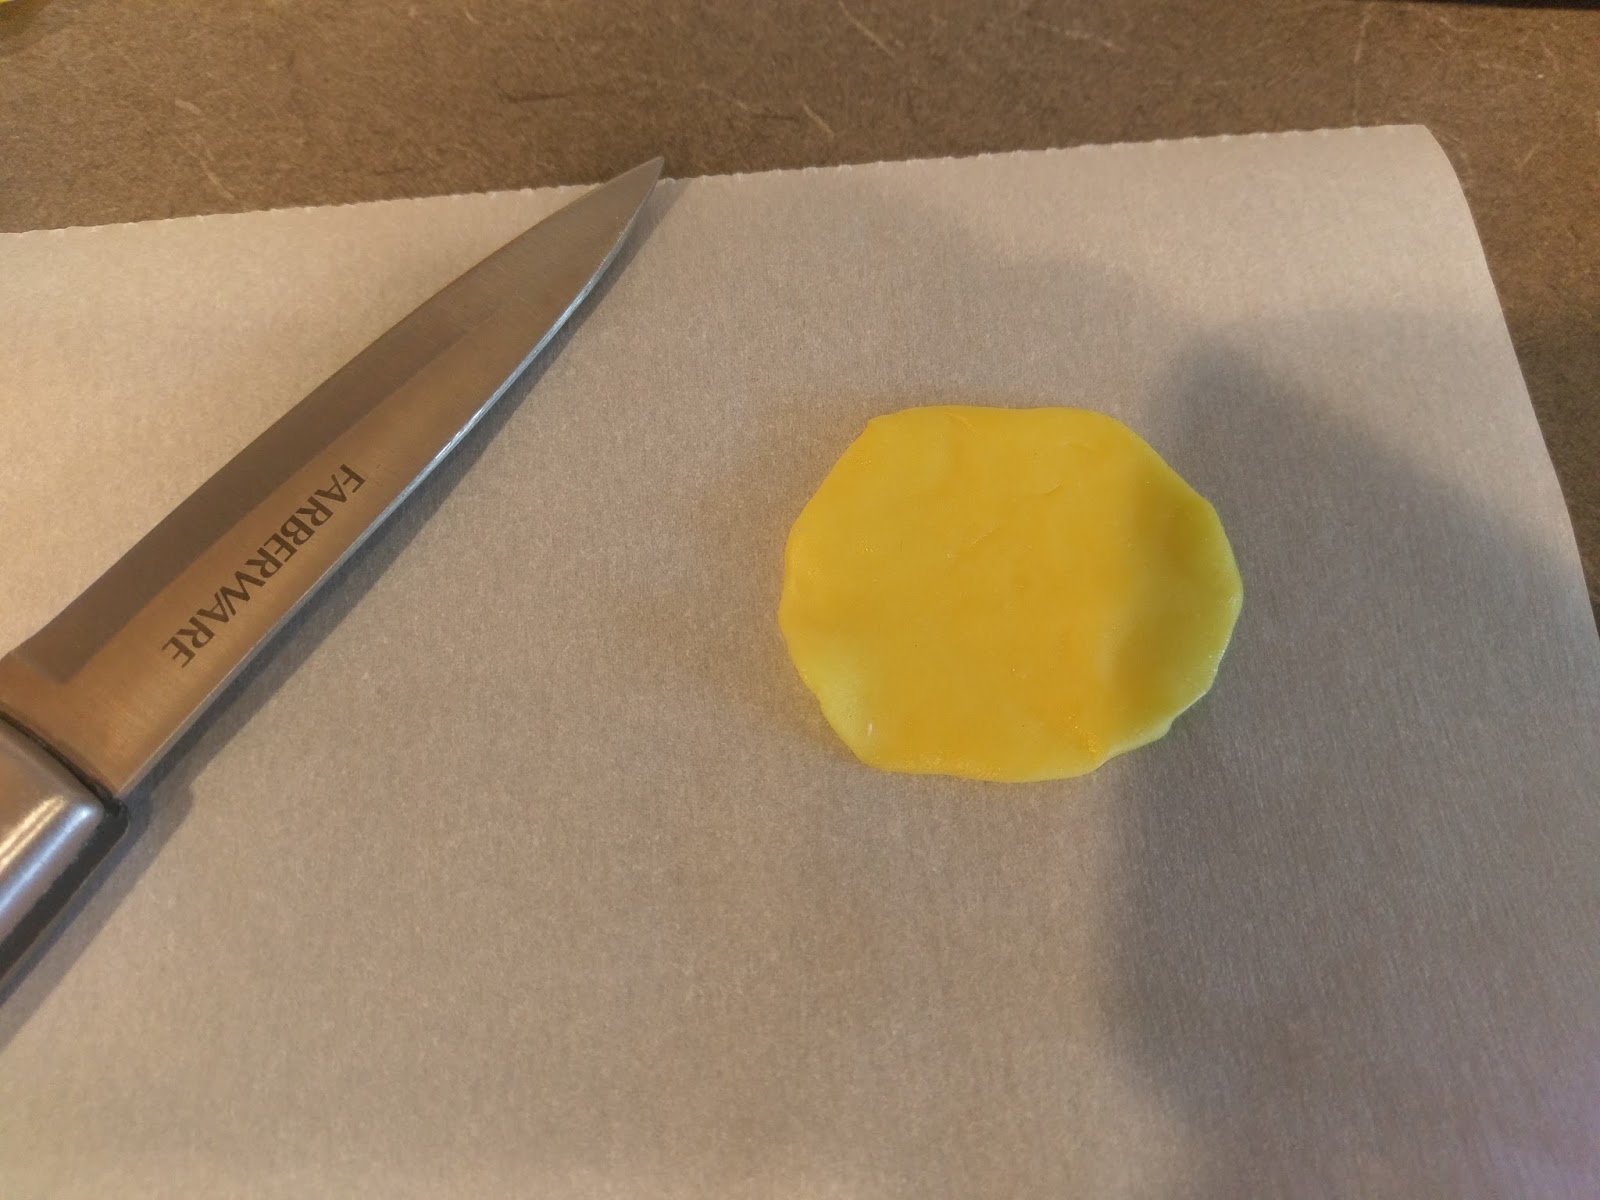
- Roll out each candy with a sturdy glass (rolling pins are too large).
- Use a very sharp knife, and clean candy residue off after each candy.
- Assemble a mock up on a sheet of foil or Parchment paper before you even think about assembling on a cake. I redid my candies quite a bit.

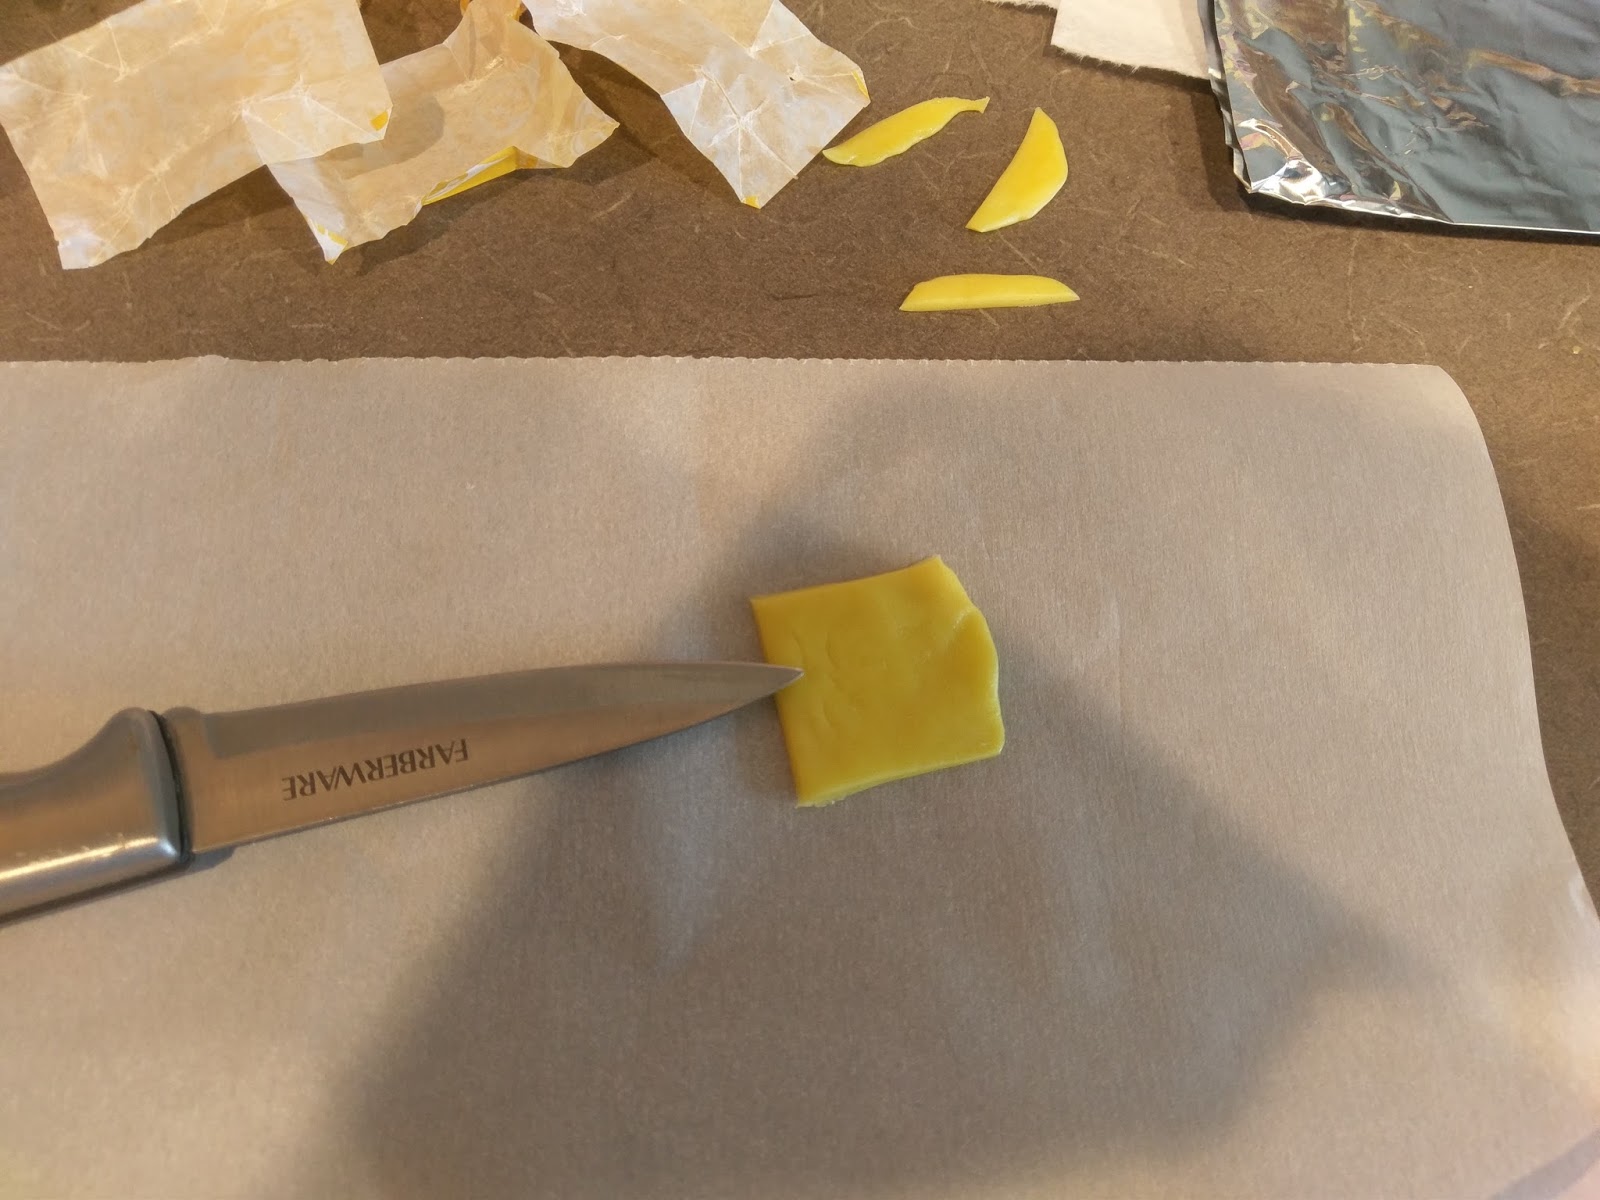
Once rolled out, trim edges of each piece into a nice square. 
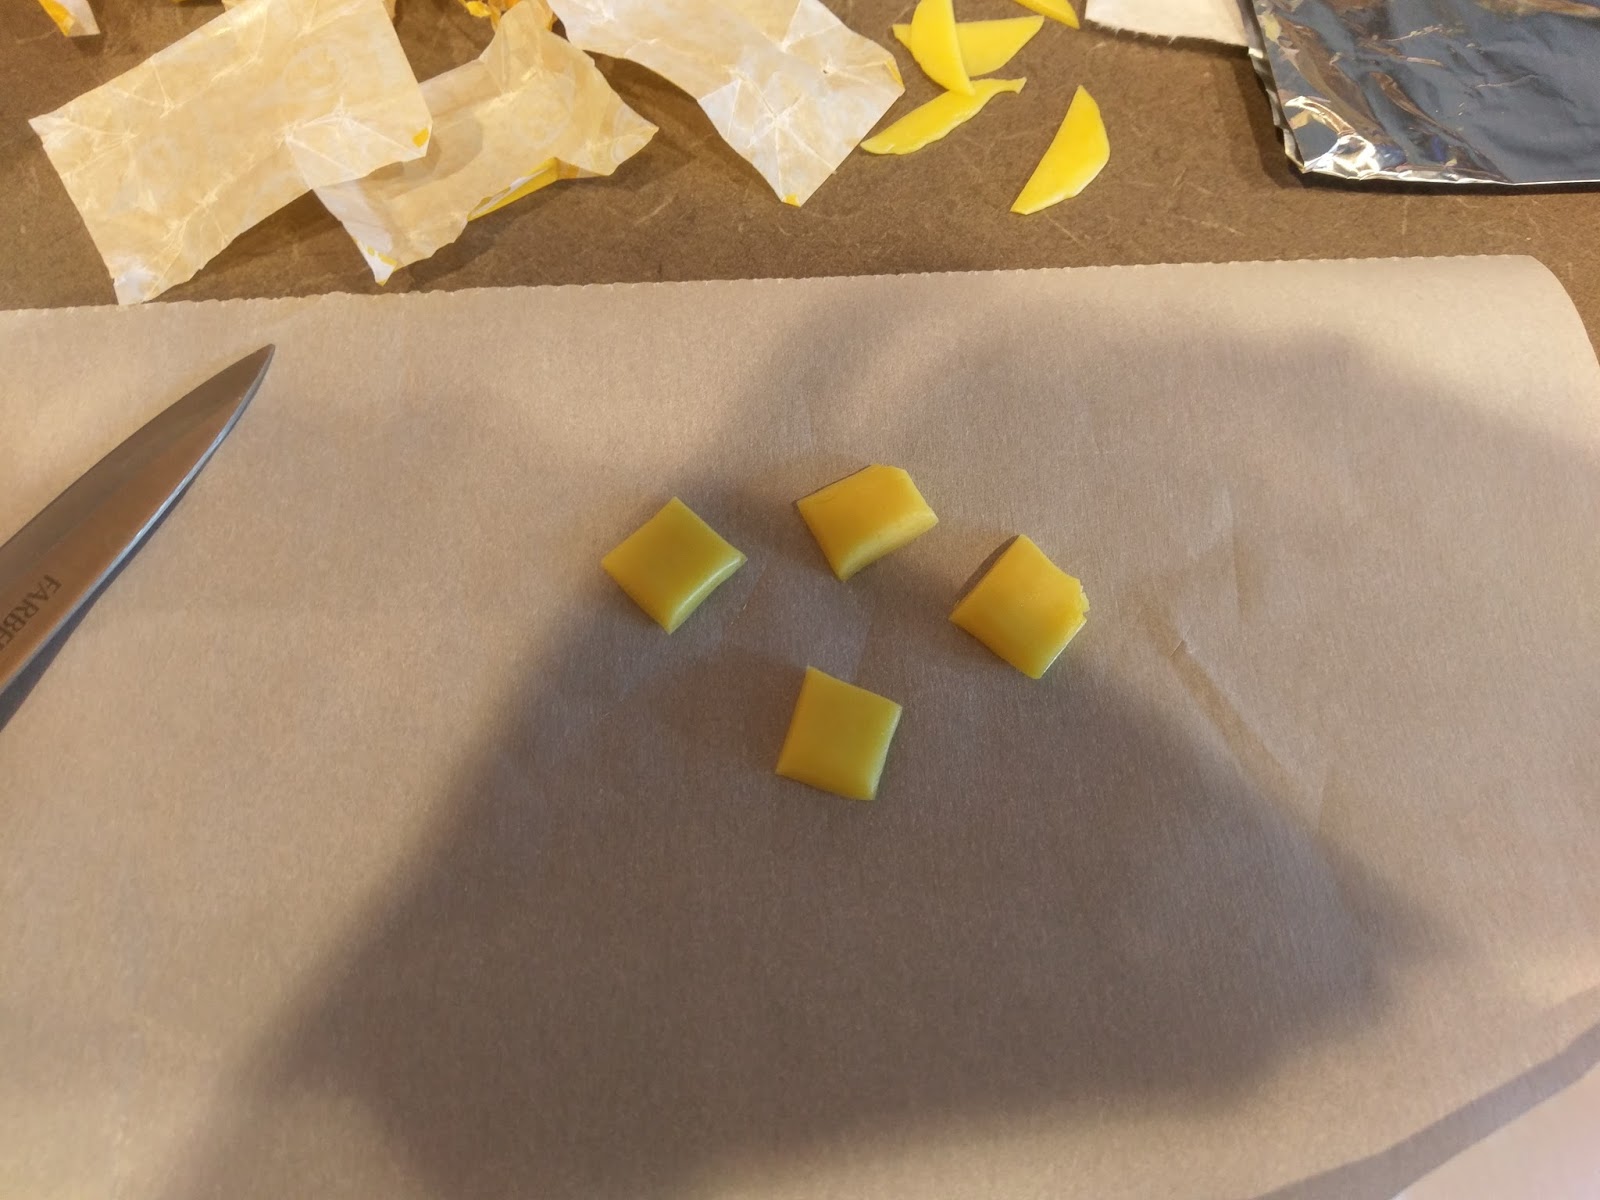
And cut each candy into quarters. 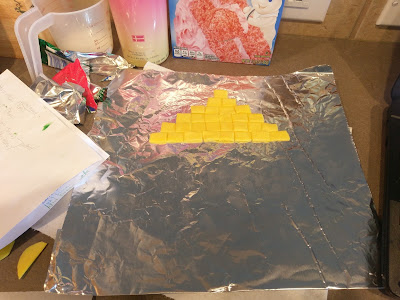
Slowly but surely, things will come along! 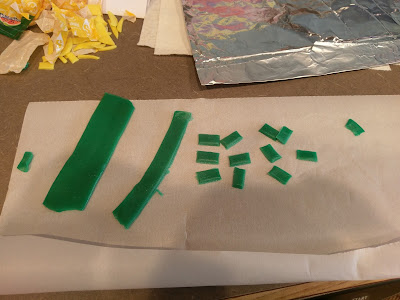
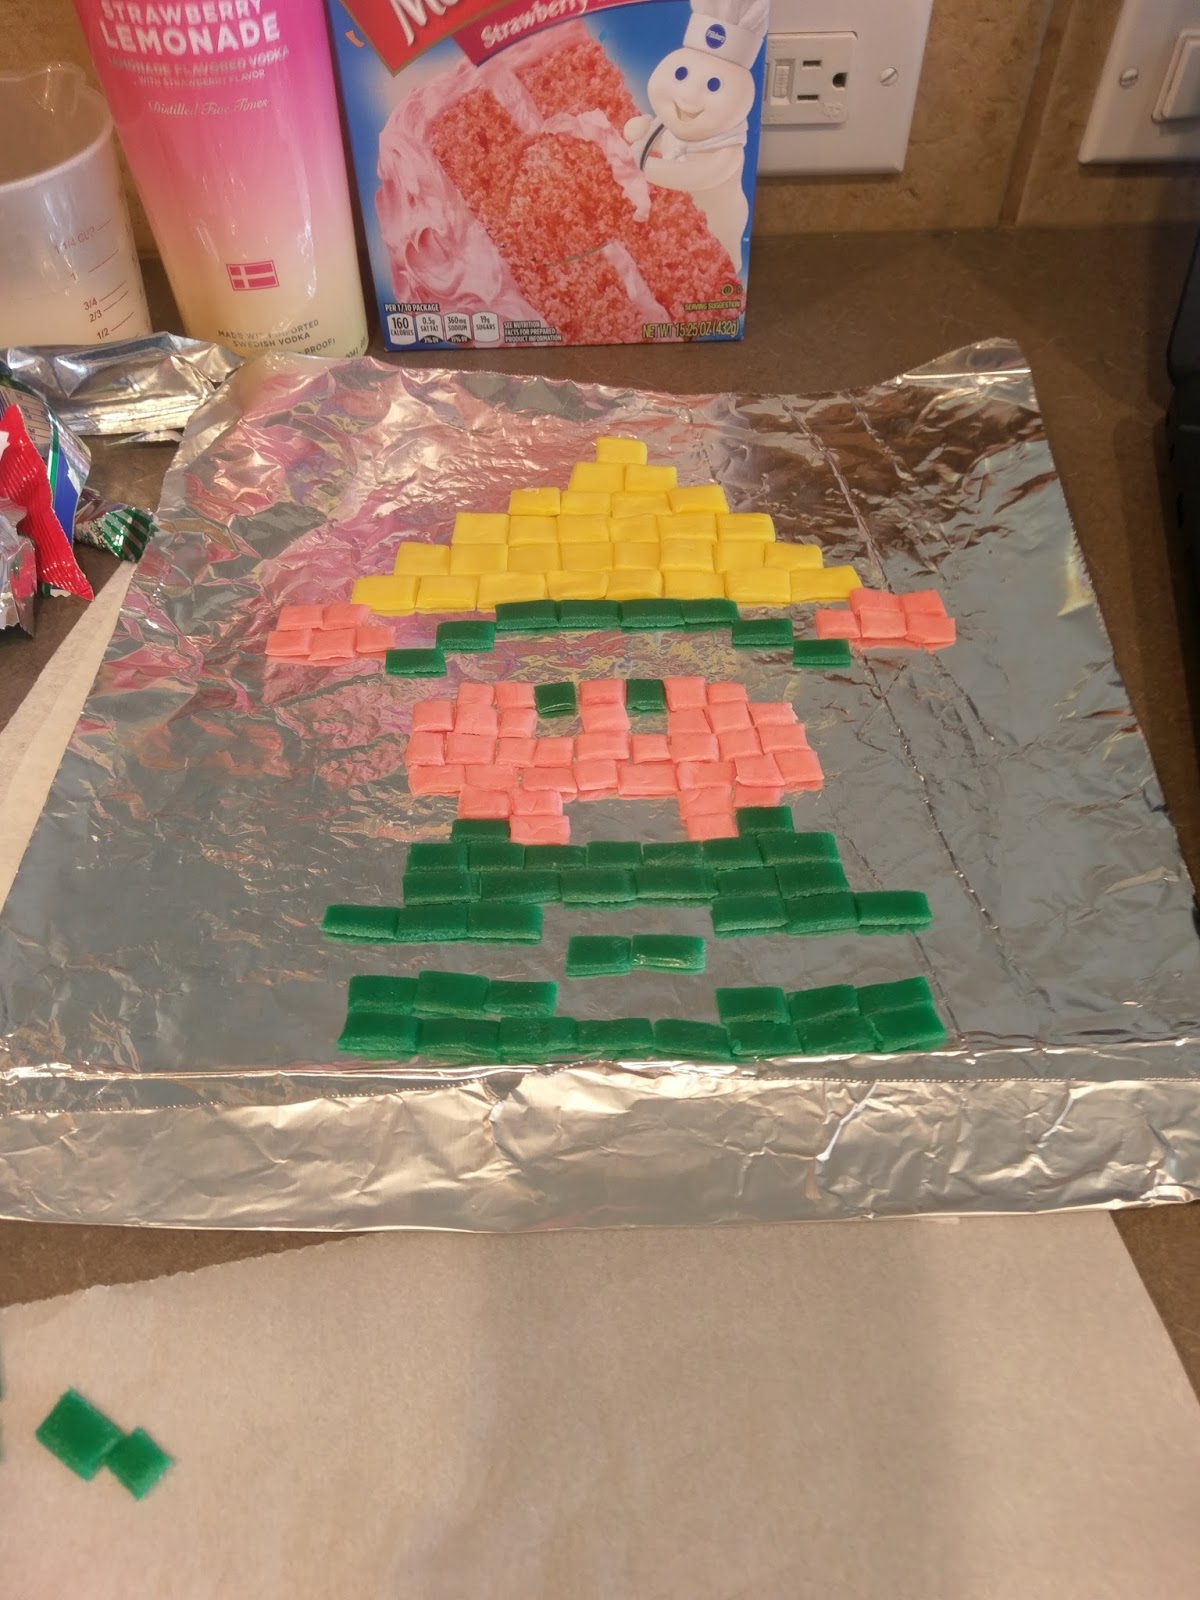
I didn’t need to roll out my Airheads, so I heated and cut them up in the manner you see here. 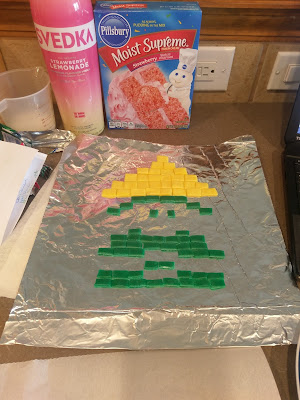
Like the world’s tastiest cross stitch pattern. 
I also recommend using tweezers to help you assemble things. Starbursts are ridiculously sticky. 
I did the Tootsie Rolls last because I simply believe they are an inferior chocolate and deserve to be treated as such. If I could’ve found a way to use Godiva for this, I would have. I placed my Link rendering into the fridge while I worked on making my frosting and crumb coating my cake. I wondered to myself what the hell he was holding, but every 8-bit Link Google image search showed it, so I figured the internet wasn’t playing a cruel trick on me for once.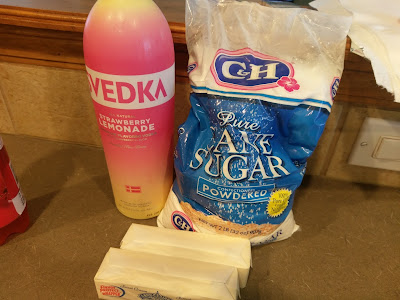
This frosting will change you. Three simple ingredients to make the best frosting I’ve ever had in my life. Well, tied with Baileys frosting. Nothing could ever be better than Baileys frosting. That’s just crazy talk. You need:
- 1 cup of room temp butter
- 6 cups of powdered sugar
- 4-5 tablespoons of Svedka strawberry lemonade vodka
Cream the butter until fluffy then add in three cups of sugar and two tablespoons of vodka. Mix until well incorporated. Dump in the remaining three cups of sugar and two tablespoons of vodka. Blend well. If too stiff, use the extra tablespoon of vodka. The icing will smell like a stiff drink, but it tastes divine and not like a shot of vodka, I promise. This recipe will give you enough frosting for a crumb coat, final coat, and piped border.

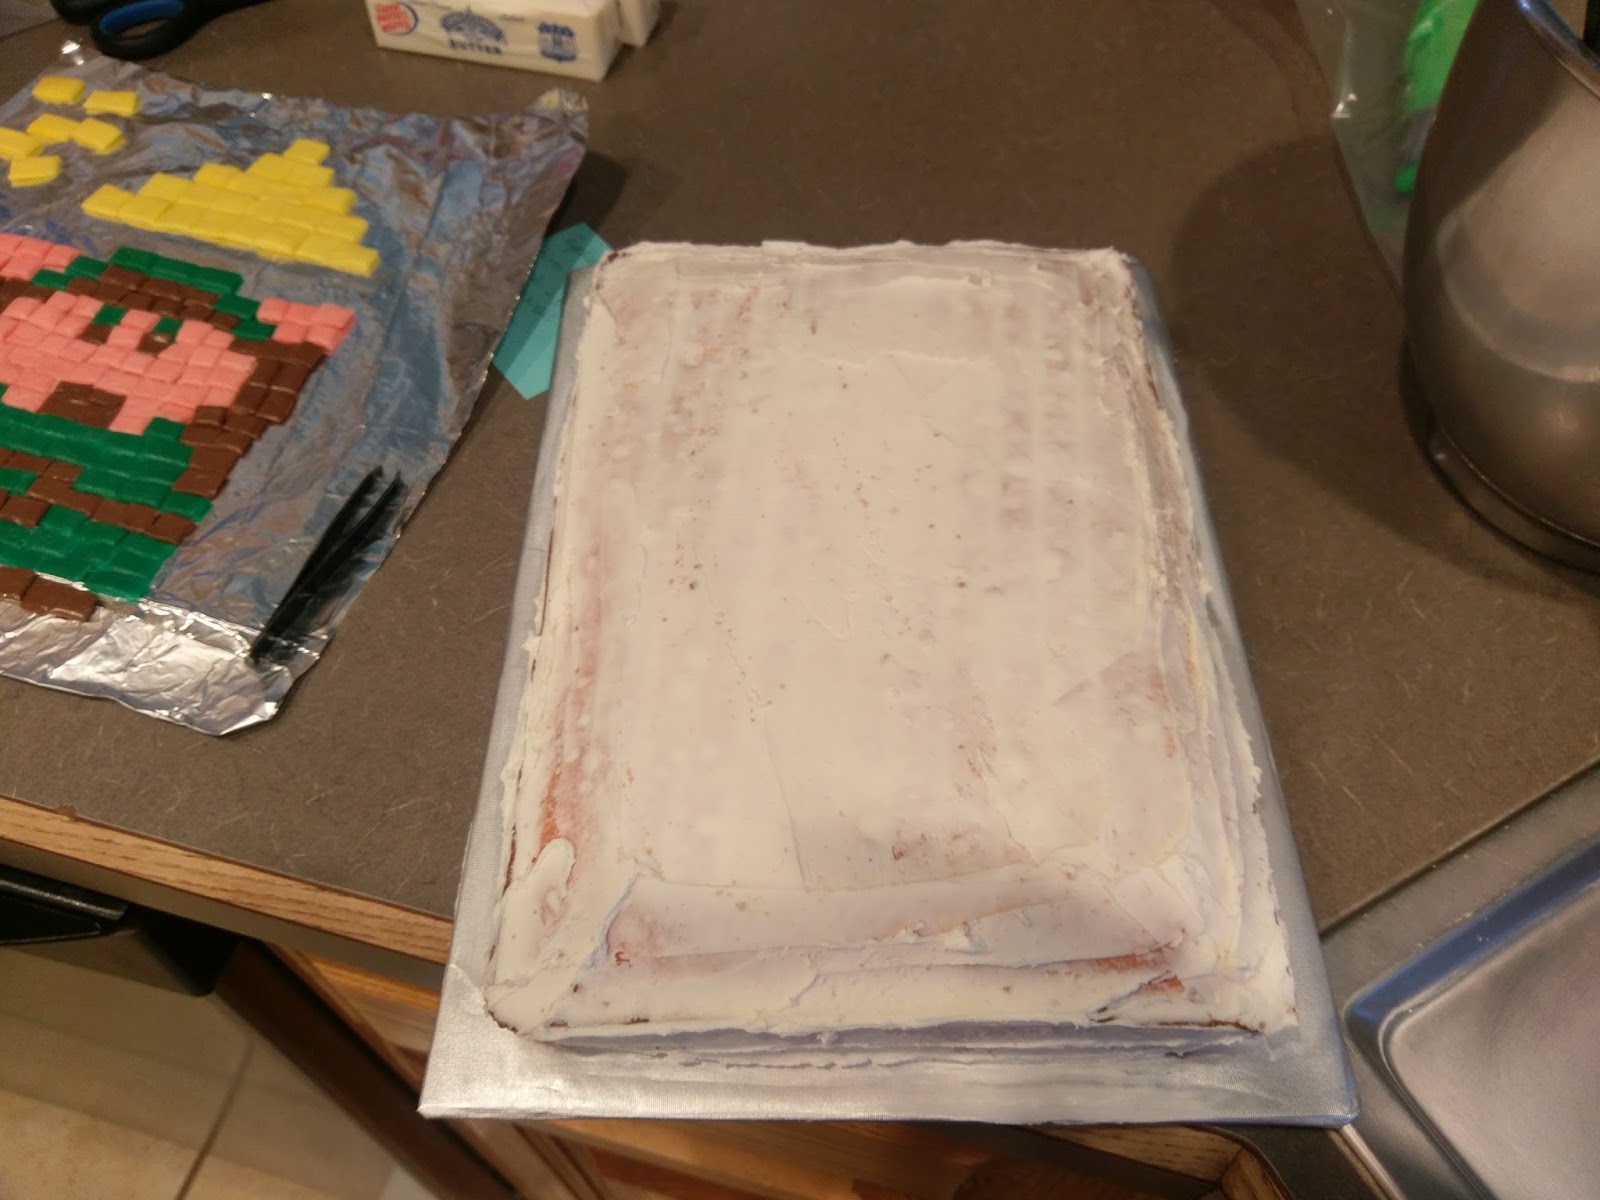
I got out my Link rendering to make sure he would fit on my cake. I needed to make him just a bit shorter, so I took off a row of whatever that yellow thing is. Someone help me, I know nothing about Zelda. But I cold spend six hours telling you the merits of playing as Luigi in Mario World. Crumb coat your cake and stick in the freezer for 15-30 minutes. 
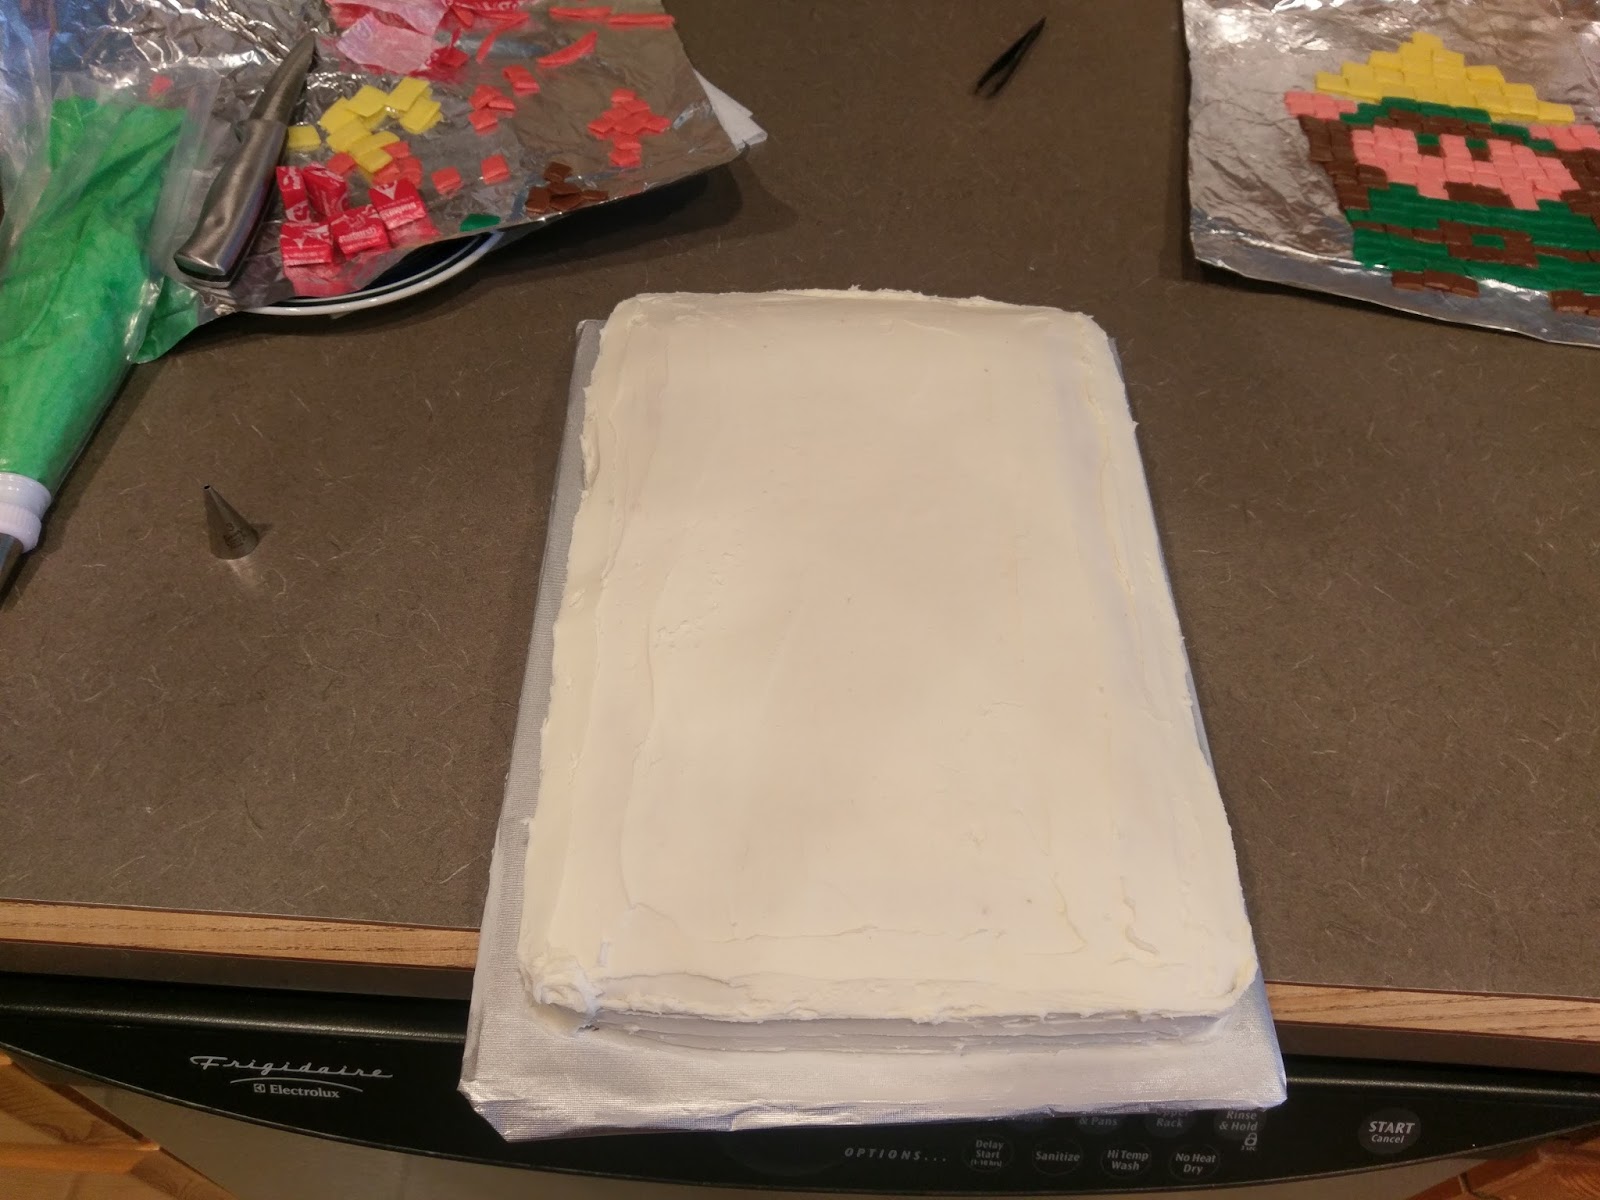
Then add the final layer of frosting. Doesn’t have to be too pretty, we’ll smooth it out later. Place back in the freezer for 15-30 minutes. 
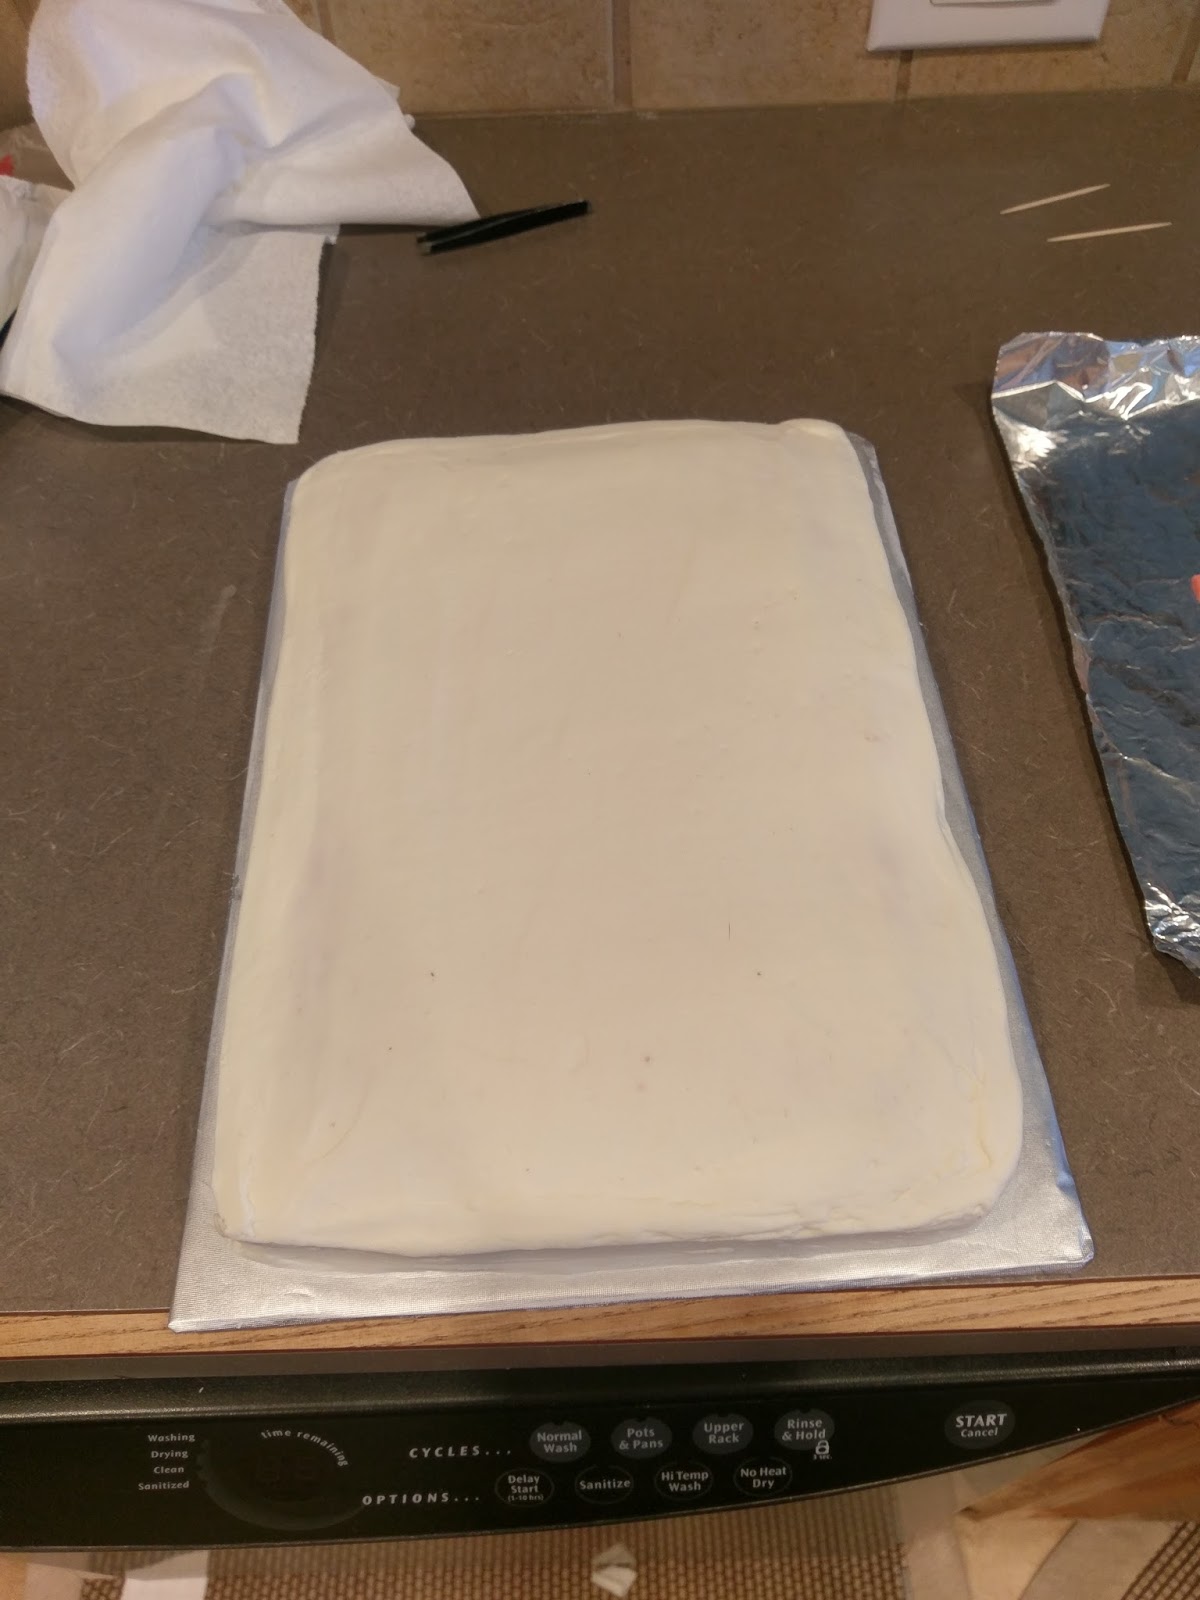
Then you can use the Viva paper towel trick to get things smoothed out. 
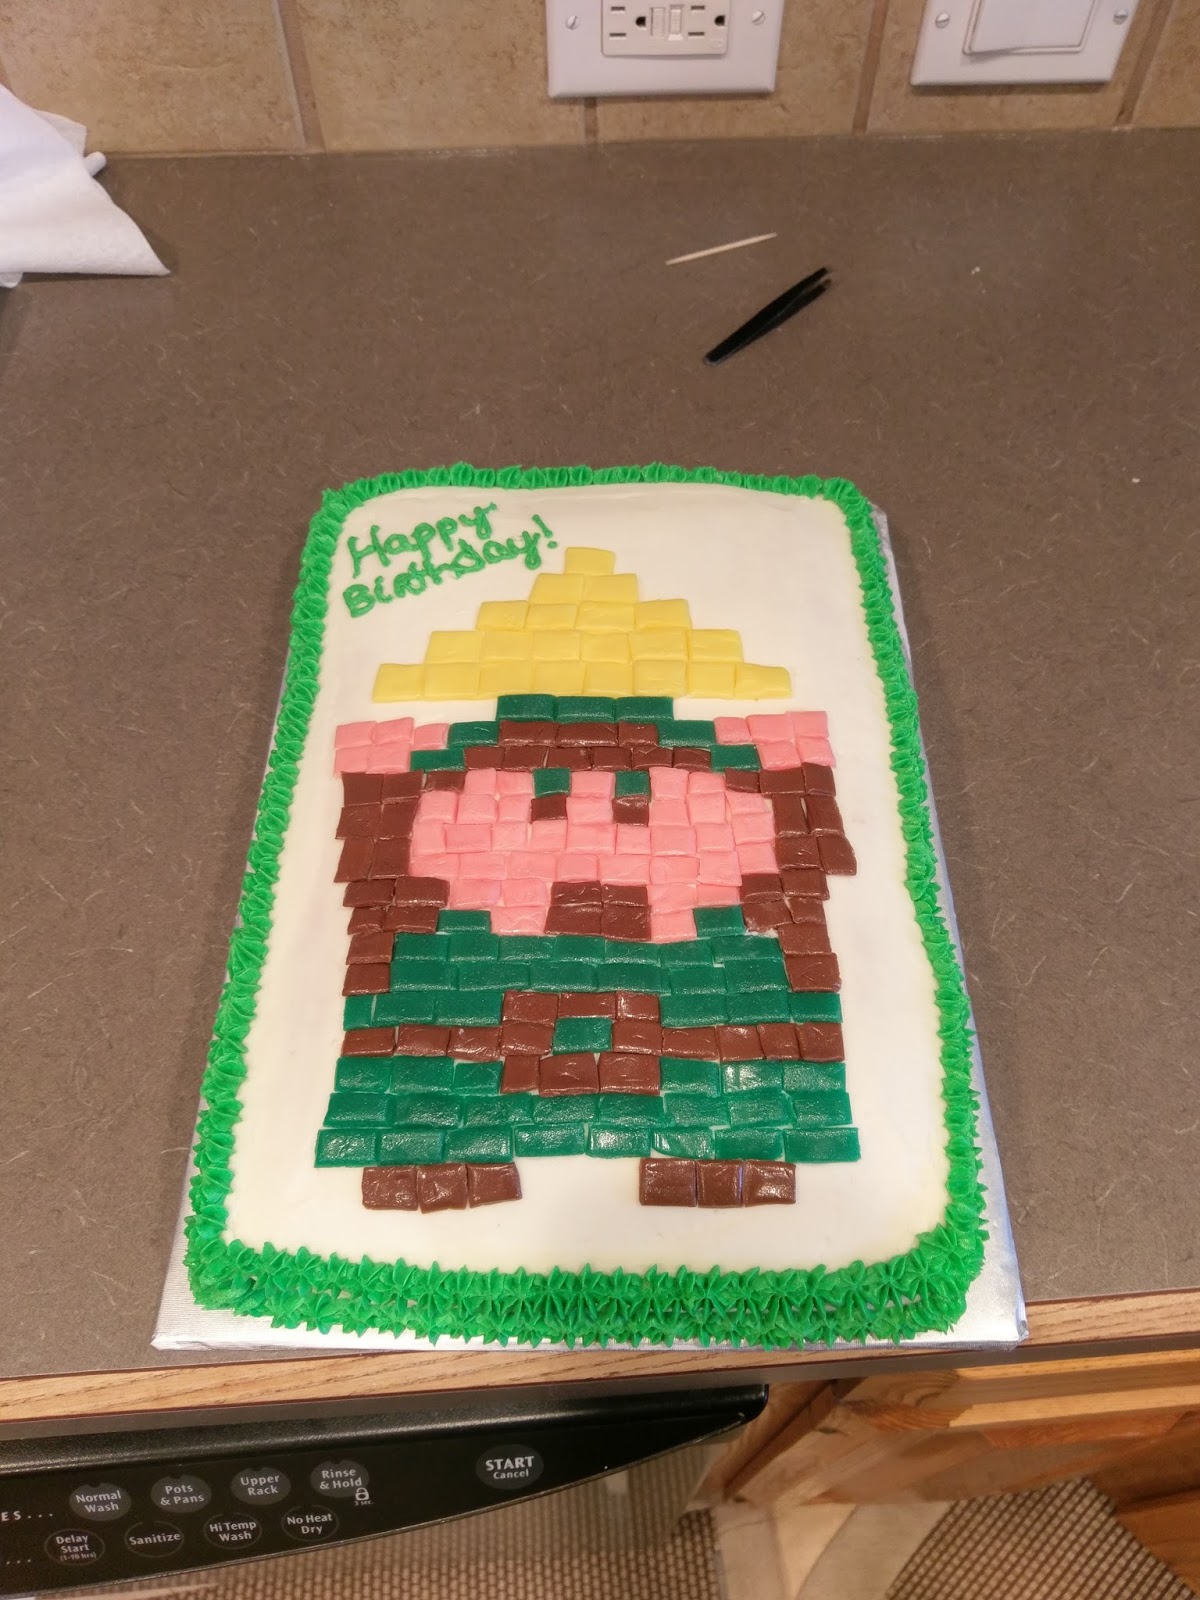
Then I used my tweezers to transfer Link on to the actual cake. He looks relatively surprised by this turn of events. 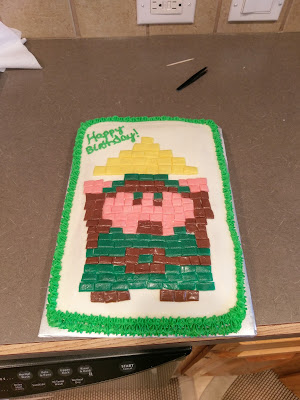
I actually had 3/4 of a piping bag full of green frosting leftover from Derek’s first 30th birthday cake last Saturday, so I used that to pipe a star border around the entire cake using a #21 tip. I wrote out the birthday message with a #3 tip. I had enough of the new frosting leftover to make a border though, so no worries if you aren’t like me and don’t have random stockpiles of frosting in your freezer. But lucky me, I just got to sit down and eat some by itself. It’s like strawberry lemon heaven. Sweet, packs a zing, and just leaves you wanting a whole glass. Or in this case, spoon. 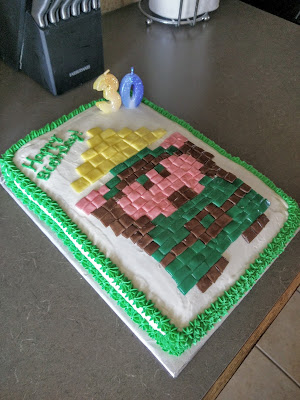
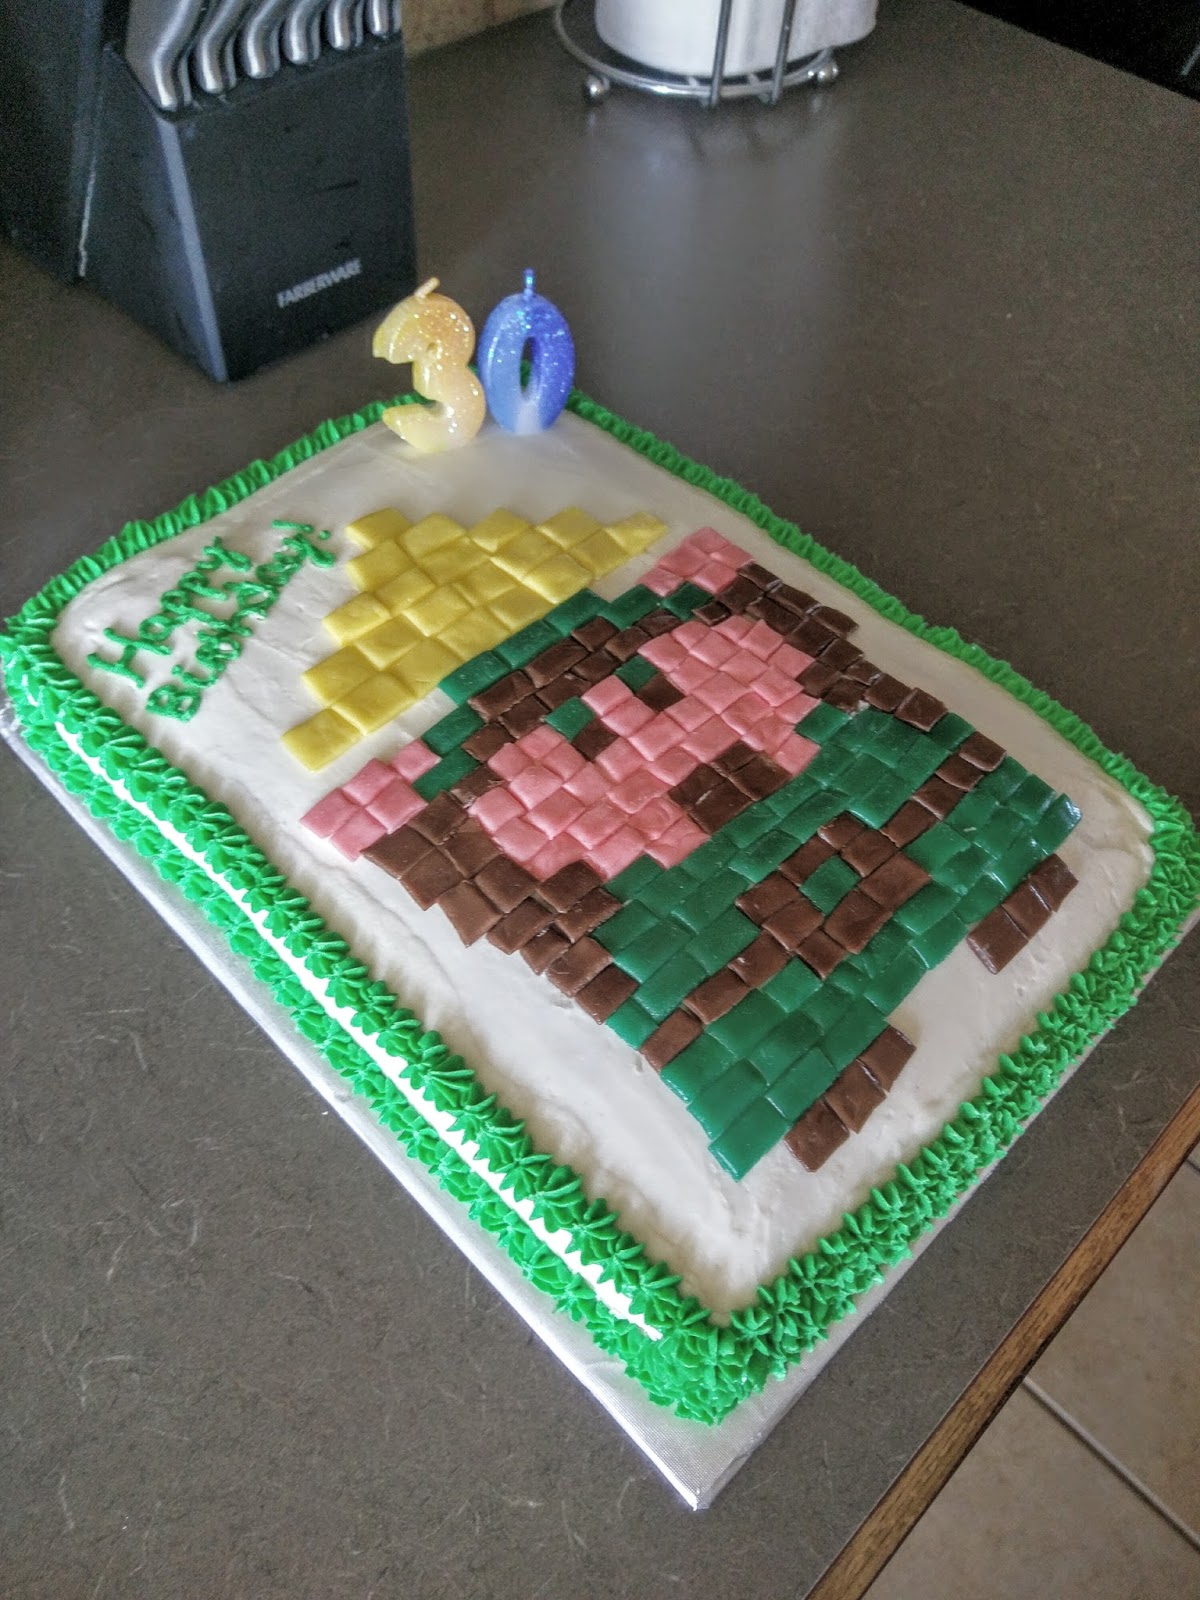
Then I added in some very festive and sparkly candles because every dessert should have sparkle. As excited as I was for Derek to open his birthday present, I was absolutely dying for him to see the cake. Clearly my baking is the best present I can give anyone since it requires so much time, patience, and effort to create something tailored specifically to one person. But a Super Nintendo is a very close second. I am proud to report he loved it. He thought it was insanely cool and had to take several pictures on his own phone (this is how I know it was a winner). I can’t say enough about how light and fluffy vodka makes a cake…it’s crazy, especially since it has the exact opposite effect on most people. Try making a flavored vodka cake, you will be impressed. All in all, baking, frosting, and piping border on to the cake took barely any time which helps make up for the tedium of chopping tiny 8-bit squares. No matter how much time it takes, this is a really clever way to decorate a cake, and I’m totally saving this for more ideas later. And anything that makes my husband happy is worth the time and effort. Now that you’re ready to gag and/or barf, I’ll take my leave. ‘Til next time, my fellow eaters!
I promise to make you only the raddest of cakes from now until the time I have really terrible arthritis from cake decorating. Happy Birthday, Derek! I am so happy we get to celebrate you! Derekpalooza!!! -
Milestones Worth Celebrating
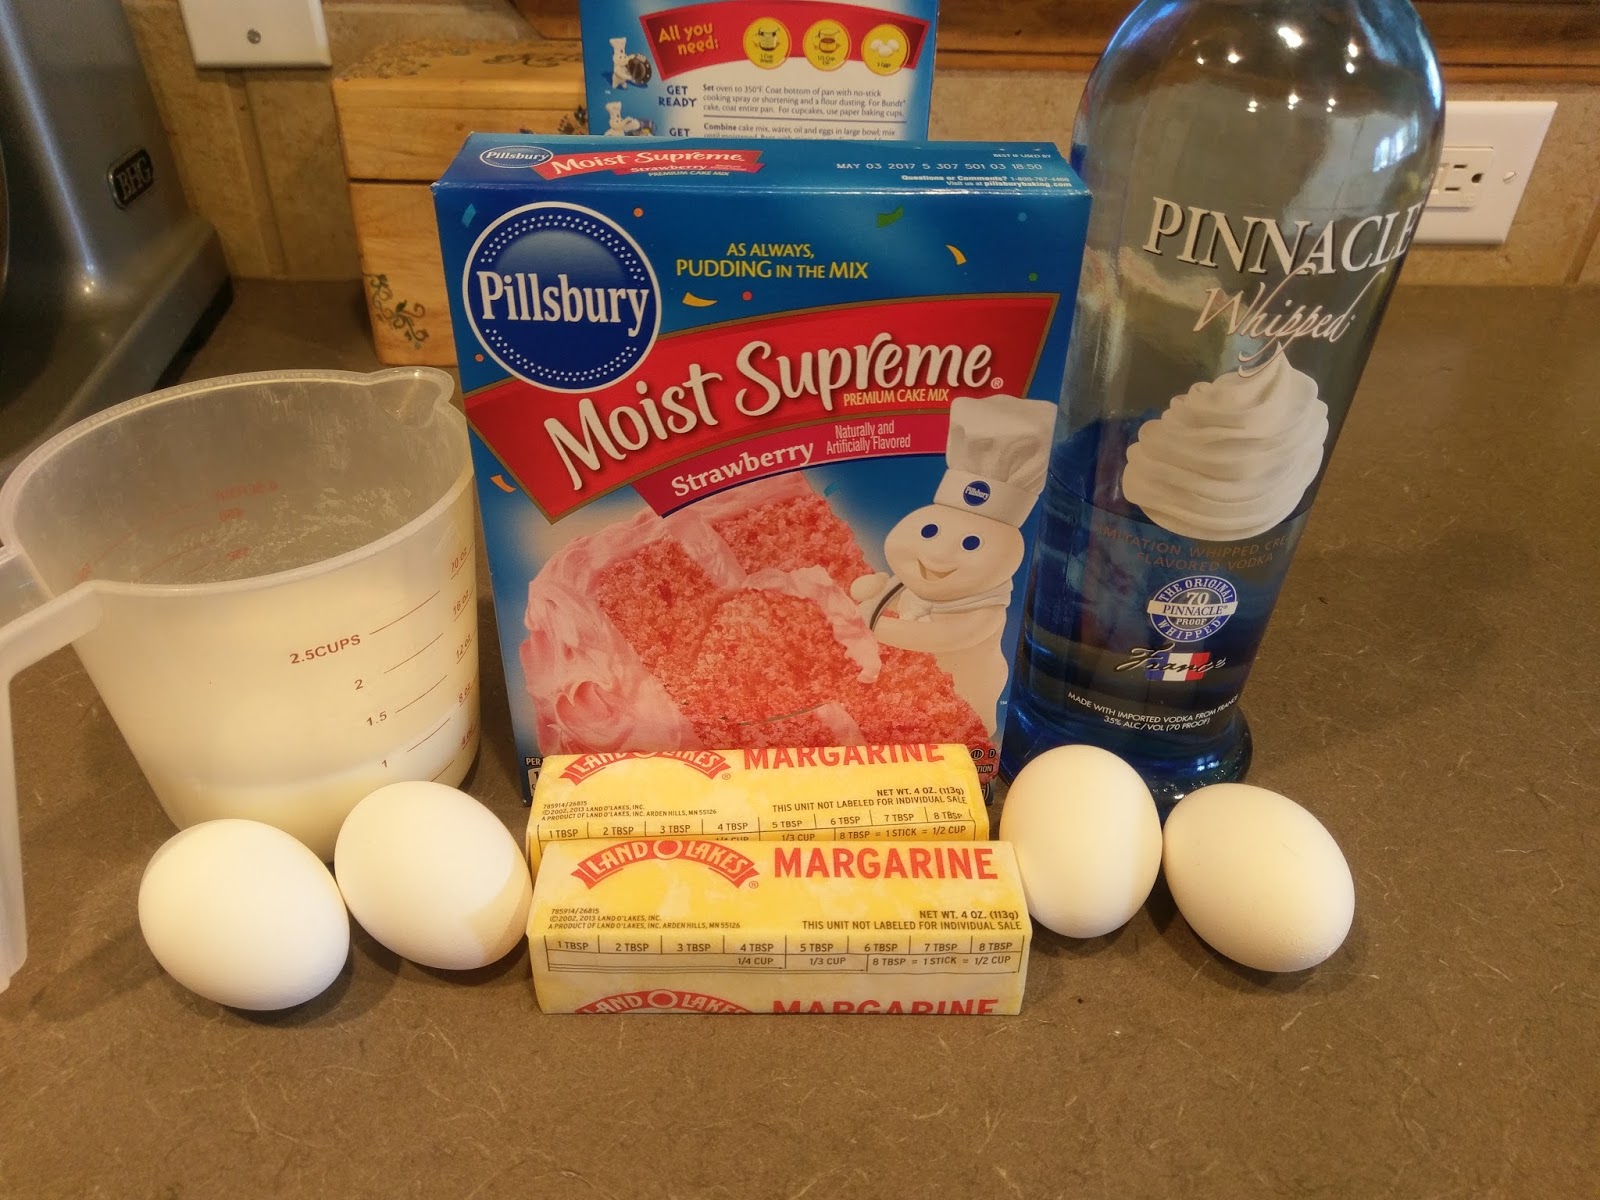
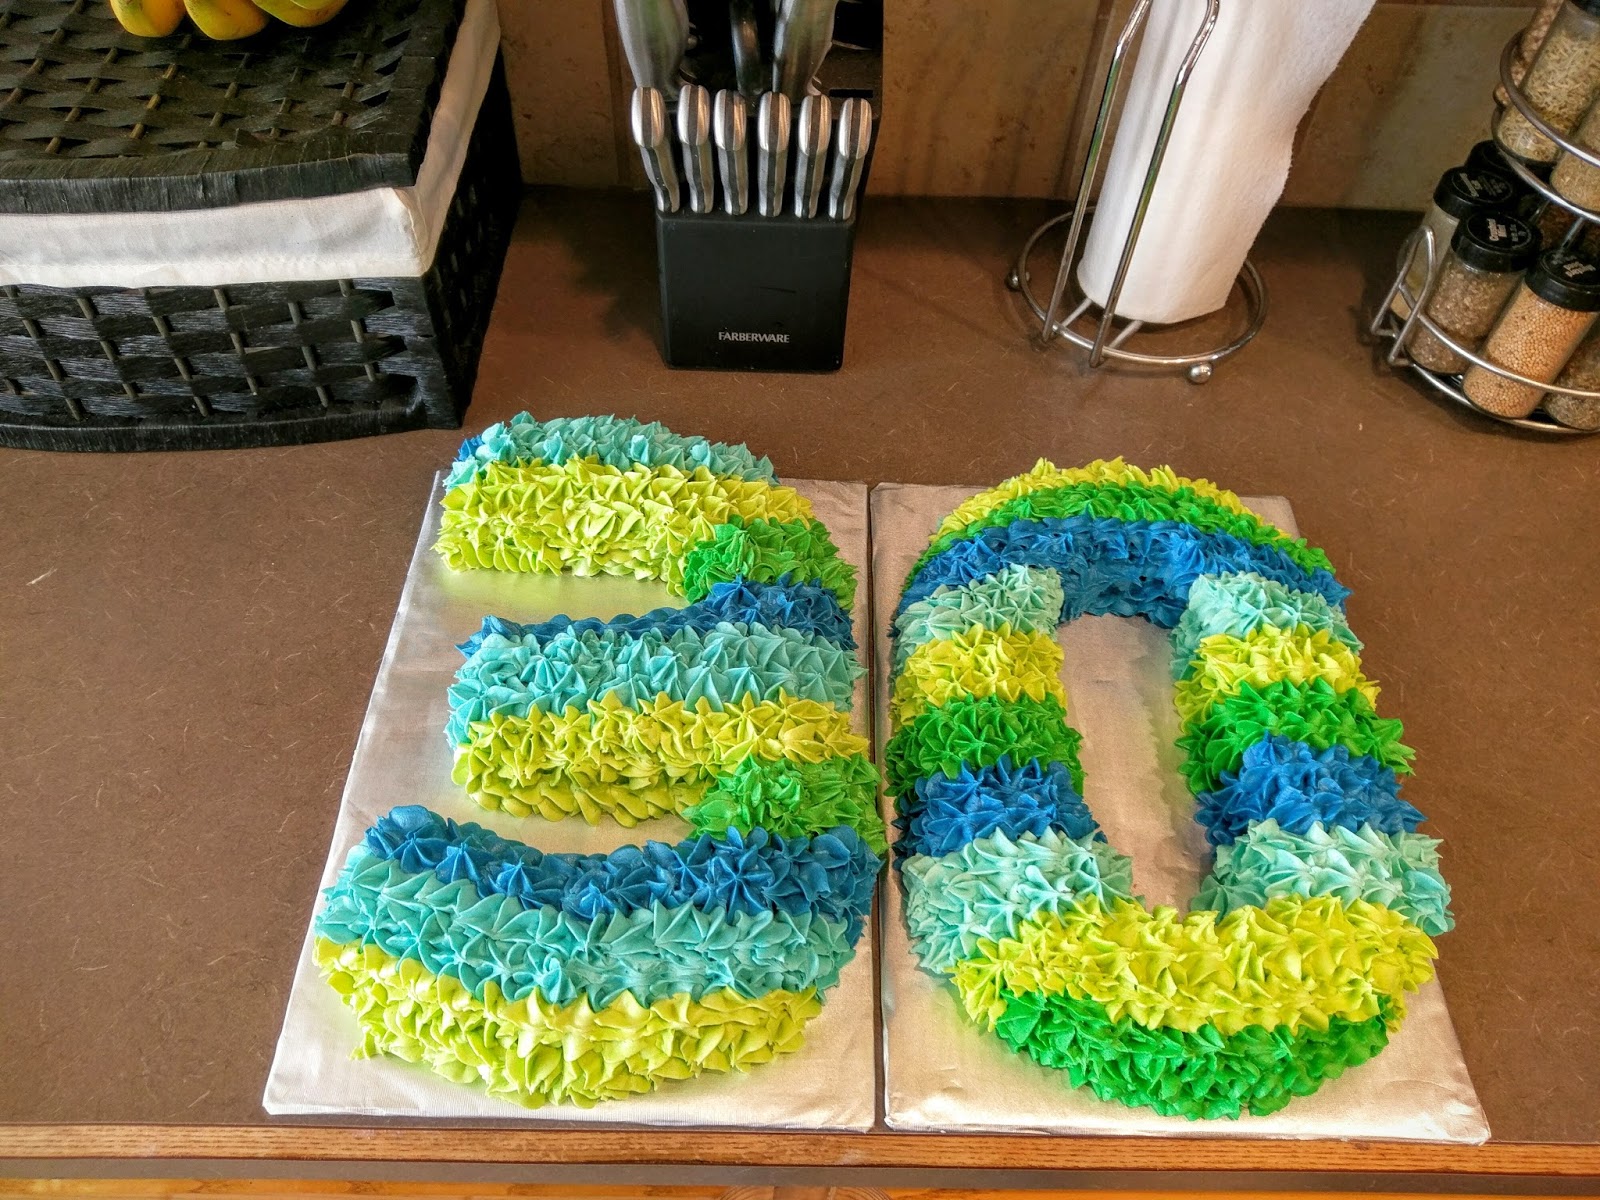
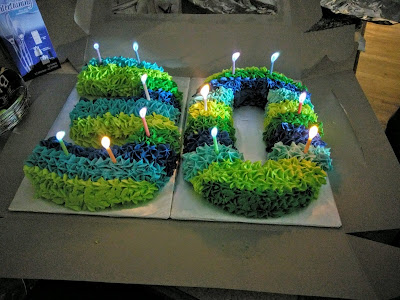
To me, there are several milestone birthdays worth celebrating: 16, 18, and 21. After 21, you inevitably sit and wait for death. But not my husband. He is so blissfully optimistic about age and birthdays, that even me with my heart made of what I assume is 75 percent ice and 25 percent cake at this point find it charming. I know my thirtieth birthday will consist of me sitting alone in a dark room, covered in blankets (both a literal one and one metaphorically made of sadness), listening to Sinead O’Connor’s “Nothing Compares 2 U” while I scroll through old photos of my youth on Myspace. My husband took his thirtieth birthday party in a completely opposite direction; something to be said for those optimists. He’s proud he made it to 30 and wanted everyone to celebrate with him, so we did. Of course, if a celebration takes place without cake, was it really even a celebration at all? Much like if you didn’t Instagram/Snapchat/Facebook your every move of the day, do you even exist at all? The answer is a seemingly firm no. He only had one request: strawberry cake. Since this is also my favorite flavor of cake, it was rather easy to acquiesce to his request. But just plain strawberry cake would not suffice for such an important event. No. This cake needed flair! By the way, flair is what I’m calling booze now. Since I happen to be trying to clear out our bar and it’s 75 assorted flavors of vodka before we move next month (which is surprisingly difficult to do when you no longer drink said vodka), it worked twofold. I found the perfect flavor to complement strawberry cake: Pinnacle whipped cream vodka–the puffy cloud flavor of vodkas. I’ve made a smaller scale thirtieth number cake for my sister’s birthday 15 years ago (kidding, it was only two), but this time I actually had someone who was happy about turning 30 on my hands, so I did the whole go big or go home thing:

Like, really big. It’s like a giant piñata. Full of booze and cake. The only kind of piñata an adult could ever want, really. Most of our friends expect by now that I am going to bring some sort of crazy cake with me to a party, but this was a grand scale even for me. This is actually one and a half cakes to make up the big 3-0 (ha, get it?!). When I told everyone there was vodka in the cake, they looked at me like I was crazy (I mean, I am, but for totally different reasons). When I clarified it was Pinnacle whipped vodka and strawberry cake with Pinnacle whipped buttercream frosting, people understood much better and immediately asked for a serving. This was yet another case of adjectives and descriptors once again saving the day. If you tell someone it’s a vodka cake, they probably assume you accidentally knocked over a bottle of McCormick’s into your cake batter. Not a good time for anyone. But Pinnacle whipped vodka…dear lord: light, fluffy strawberry met with even lighter and fluffier whipped cream flavor. The vodka bite bakes out of the cake entirely leaving you with a cake that really does taste like a cloud. Or how I imagine clouds would taste. If they were filled with whipped vodka.

Yep, even out of the box. Doctored, of course. So here’s what you need to make the actual cake (just one, not one and a half):
- One box strawberry cake mix
- Two sticks of butter at room temp
- Four eggs at room temp
- 1/2 cup of milk at room temp
- 1/2 cup Pinnacle whipped vodka at room temp
Dump everything in your stand mixer and blend on medium-high for two minutes. Pour into a greased cake pan of your choice. To make a 30th birthday cake, you need either one 6″ round and one 6″ square pan or one 8″ round and one 8″ square pan. This handy little chart here breaks things down for you. Just make sure your pan sizes are equal regardless of whatever numbers you need for your cake. I used 8″ pans and baked in the middle of my oven at 350 for 20 minutes. I then later used half of another box of cake mix, two eggs, one stick of butter, 1/4 cup milk, and 1/4 cup vodka to make one more 8″ round cake to finish the number 3 cake.
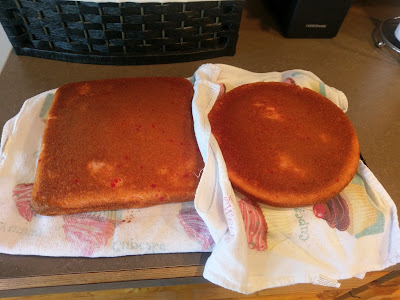
And your house will smell delicious. Let the cakes cool in the pan on a cooling rack for 10 minutes before removing and placing back on the cooling rack. Set in the freezer for an hour (at least 30 min, but longer is better for cutting). At this point, make the half a cake in a greased 8″ round by following my baking times and temps above. Follow the cooling and freezing process for this as well.

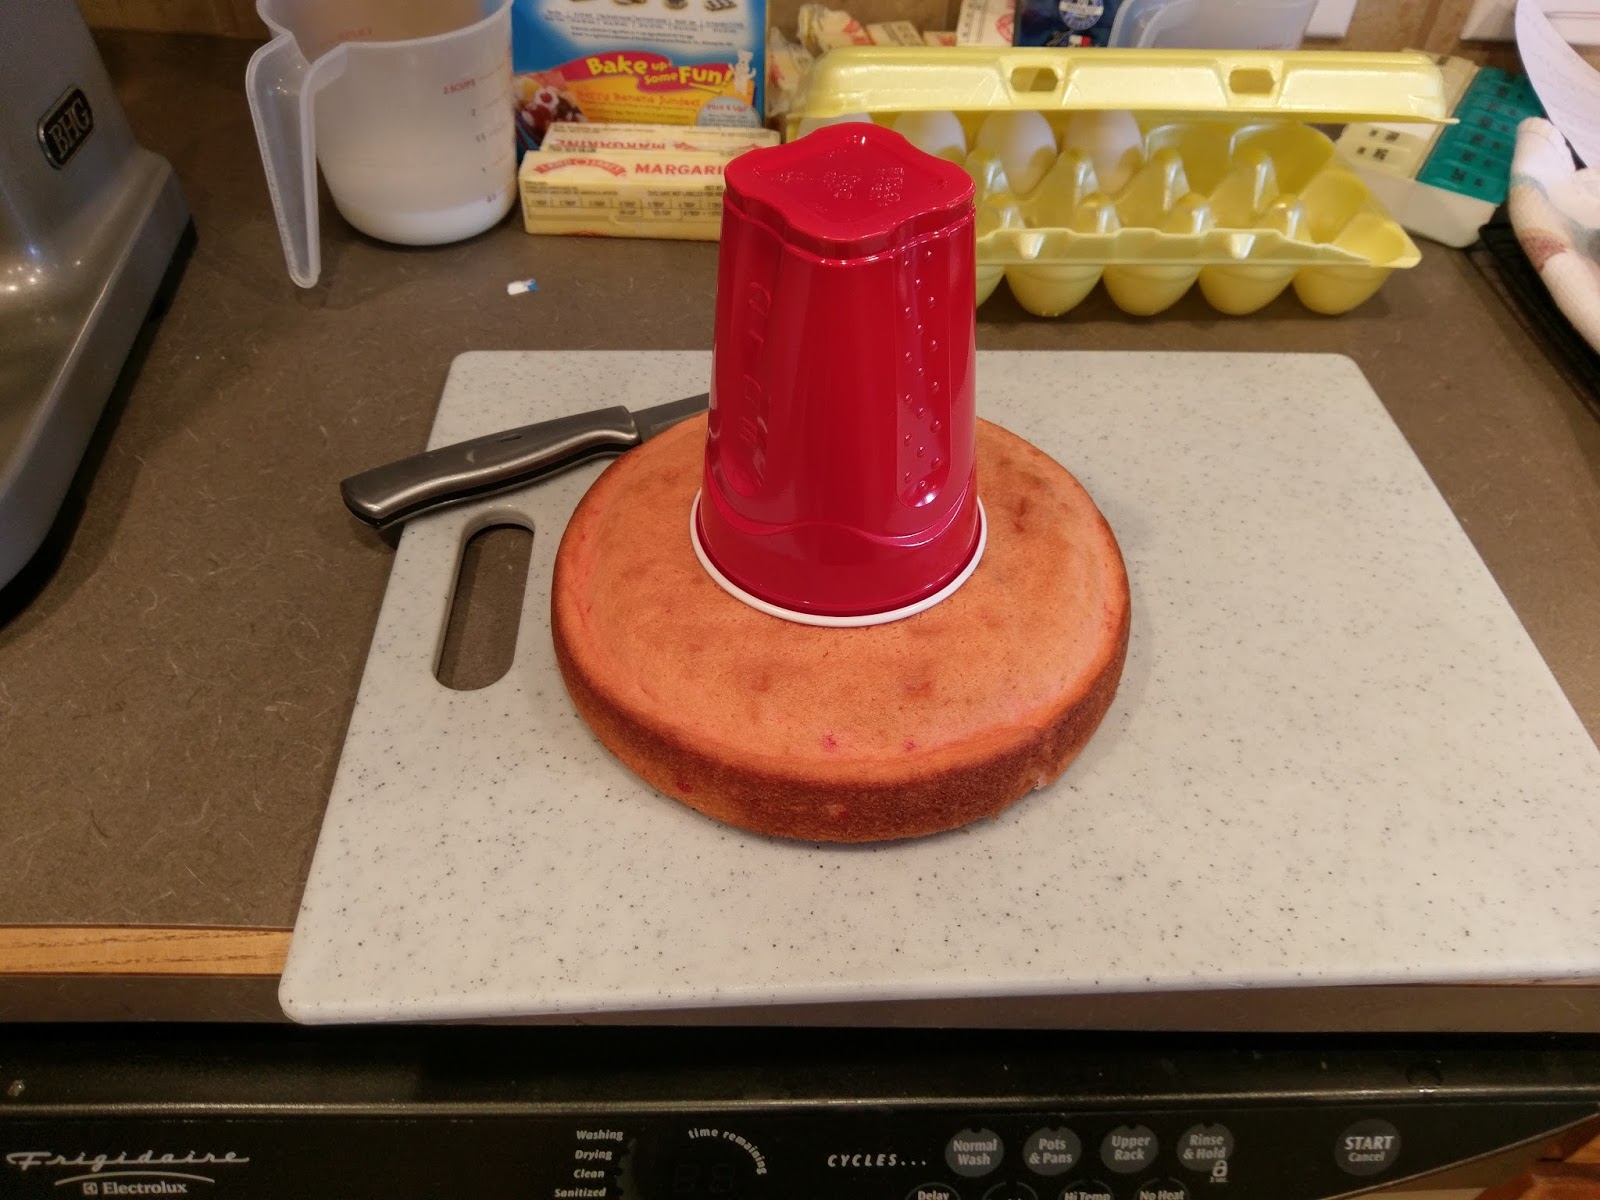
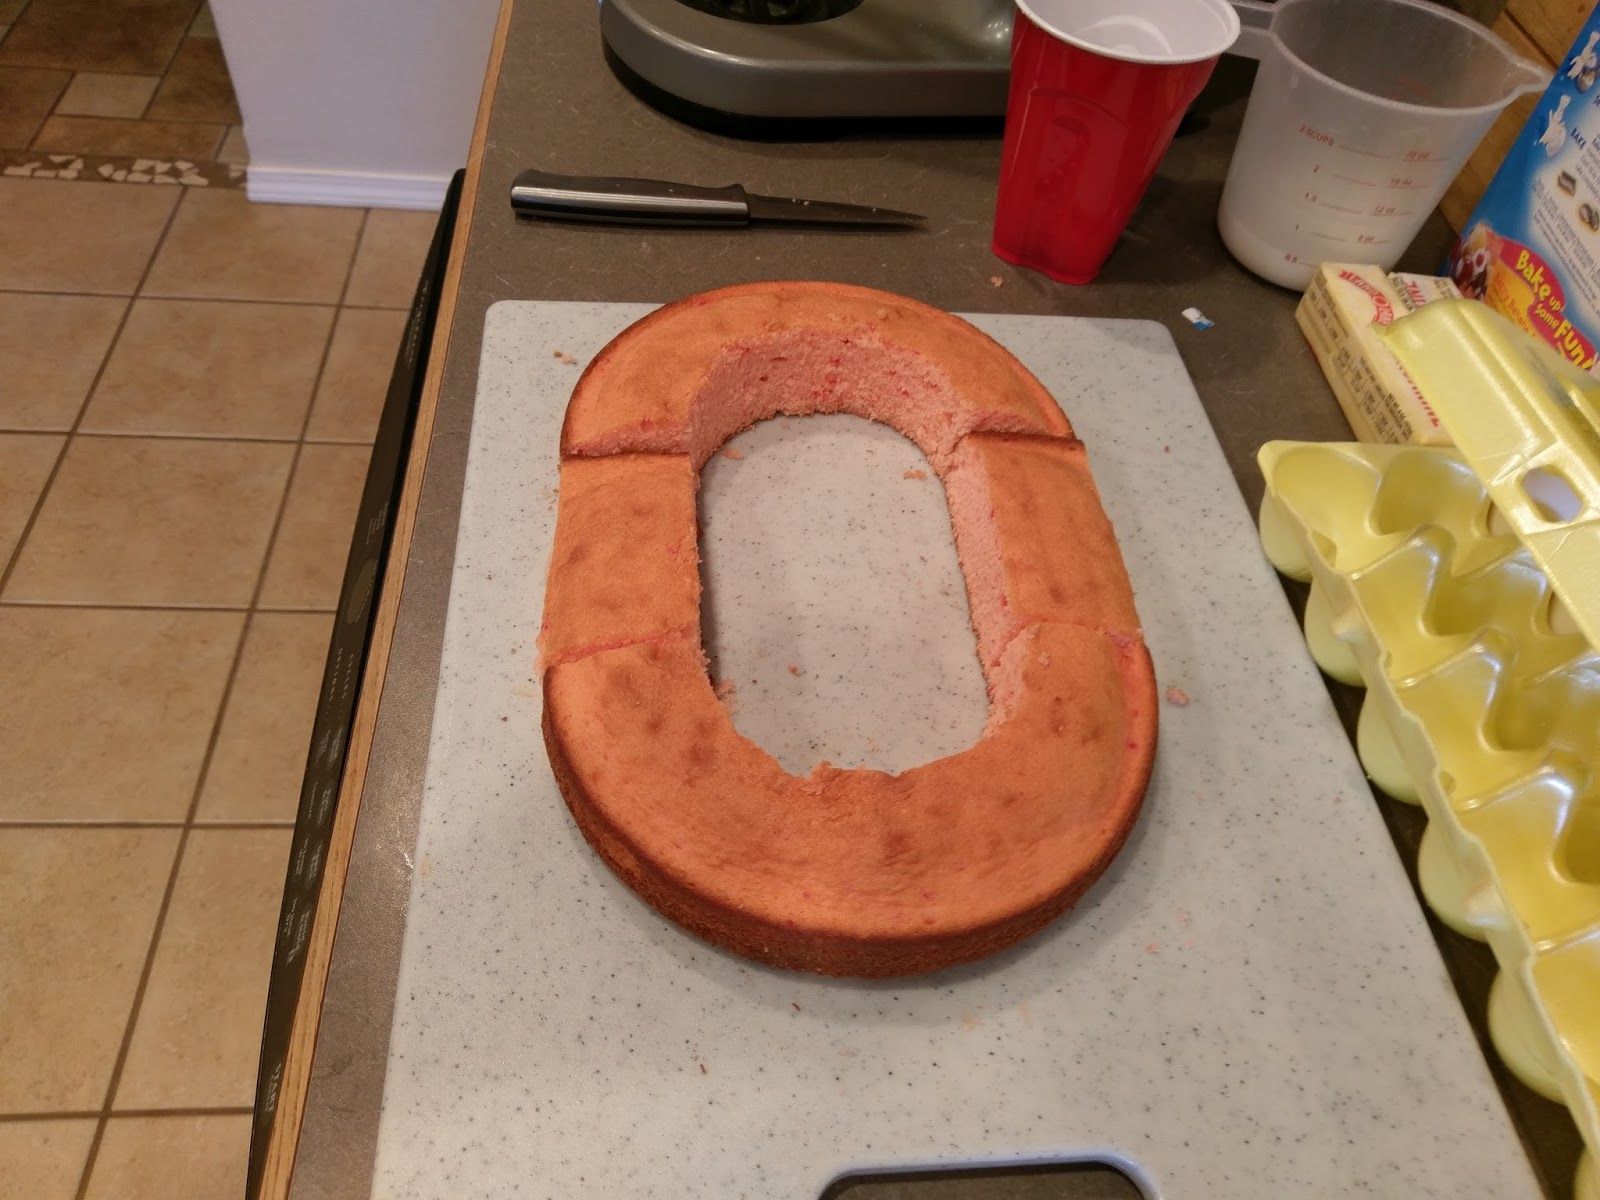
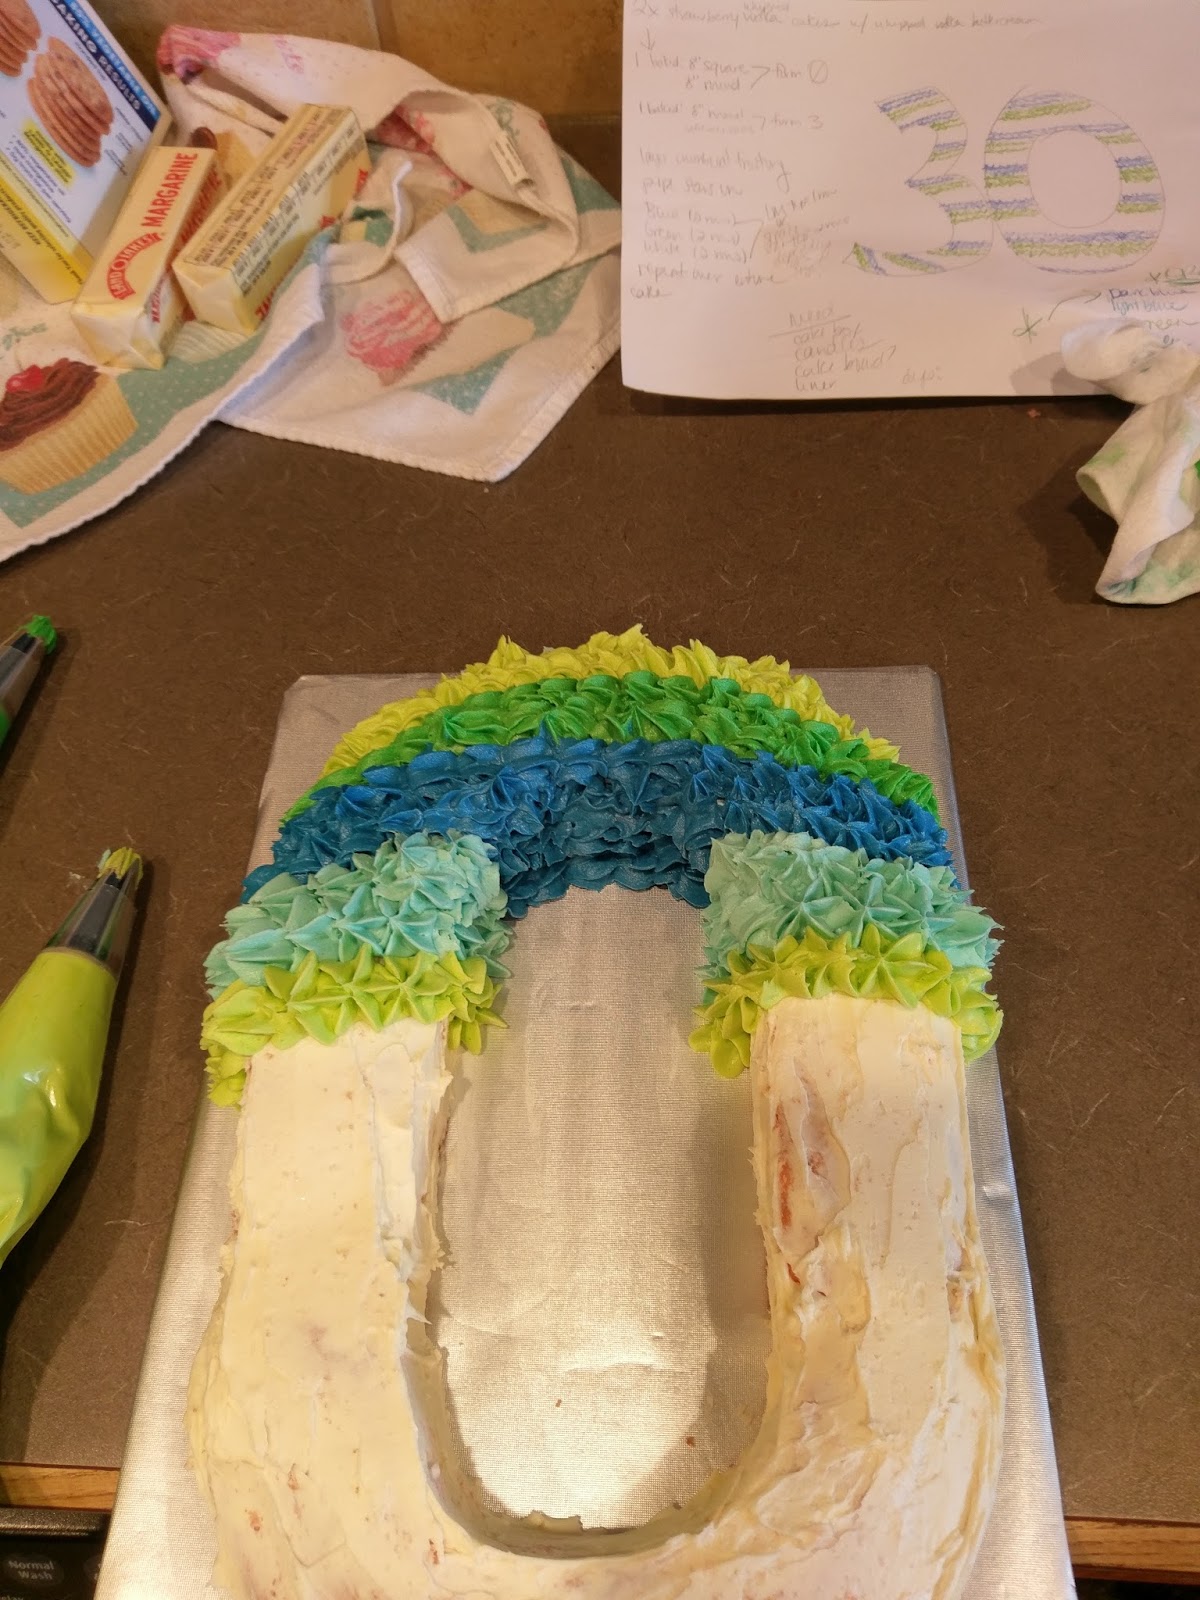
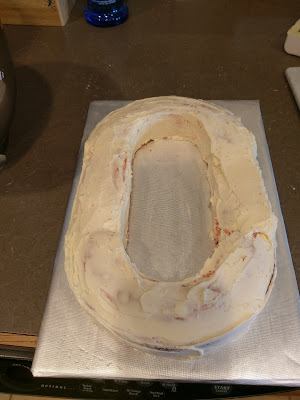
Ahh, the versatility of a Solo cup. I started by making the zero first because it looked infinitely easier to do. Sometimes I have to psych myself up for the more difficult aspects of a baking project. No shame, yo! I took a frozen 8″ round and placed a Solo cup in the center. Why do I have Solo cups lying around my kitchen cabinets? Valid question, I suppose…but why do you not? You never know when an impromptu party might kick up, and let’s face it, if it’s impromptu, the fine china will not be making an appearance.

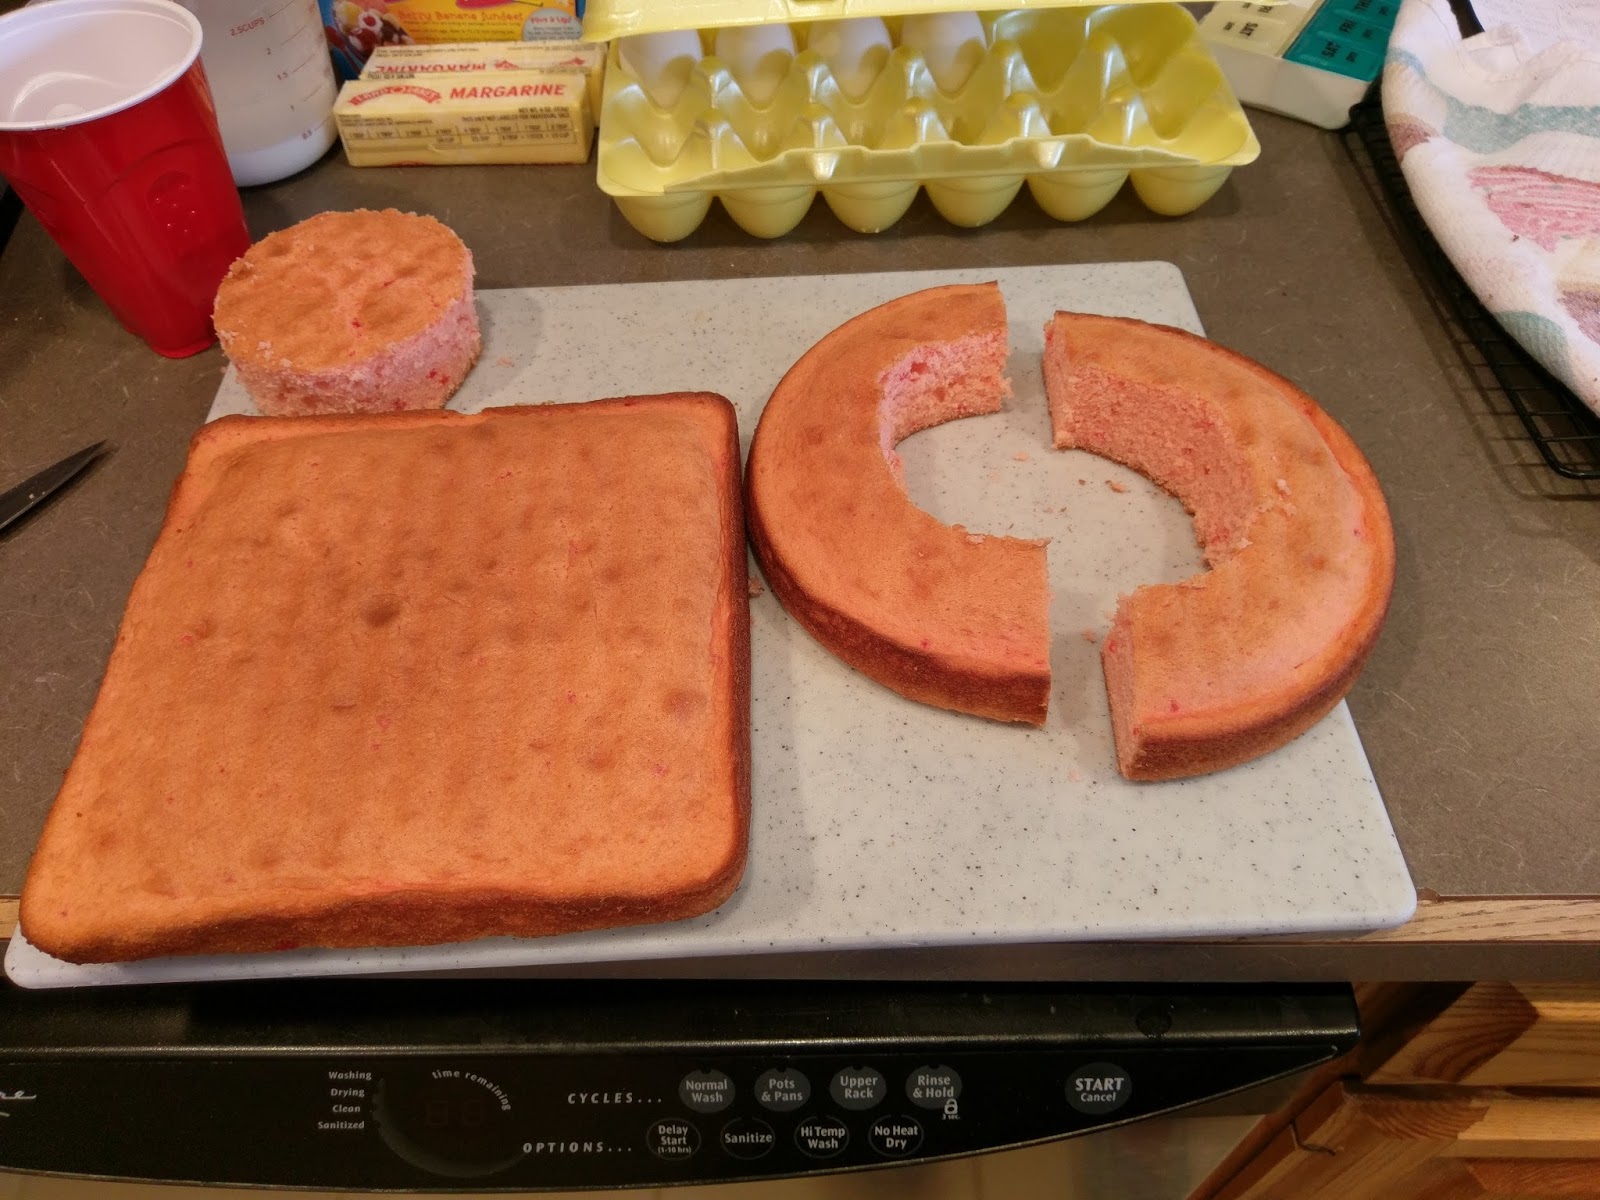
Save your scraps! For one, you need some for the three, and also because plain cake makes for great breakfast. Unless you’re into like whole wheat bagels and just wanting to watch the world burn. Strange hobbies, but okay. Take the 8″ square and cut it into thirds. You’ll need all of these pieces, so unfortunately, no snacking yet.

Sudden urge to play snake on an old Nokia arising… Take one of the thirds you just cut and cut it again into halves, and then assemble your zero:

Like so. Things may not have baked completely evenly, so trim as needed to get your edges flush. Place this back in the freezer. Ready two 10×14 cake boards so you can place your assembled pieces on them for frosting later. I trimmed mine down to fit into a large cake box and covered them in decorative foil.
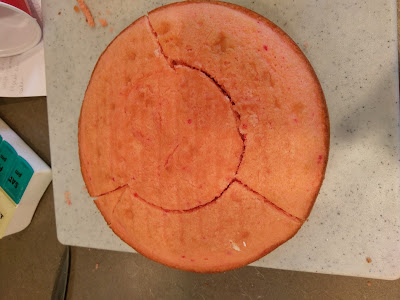
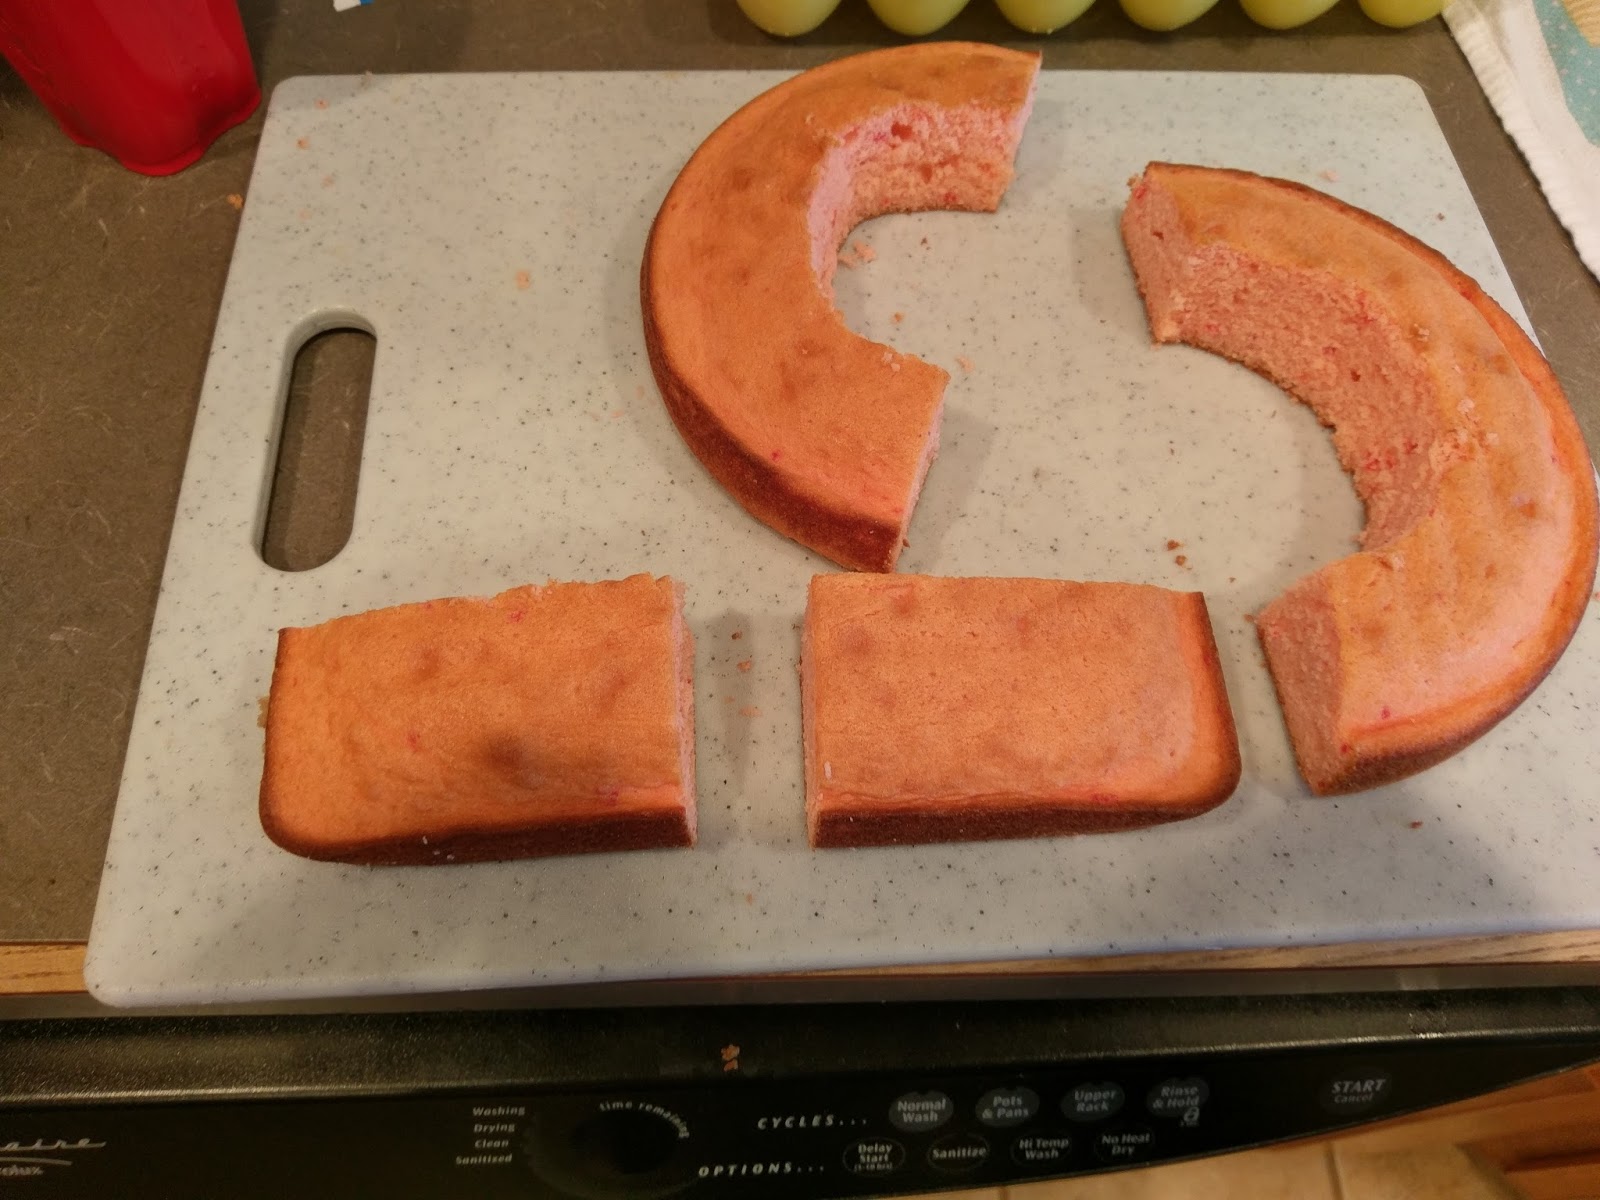
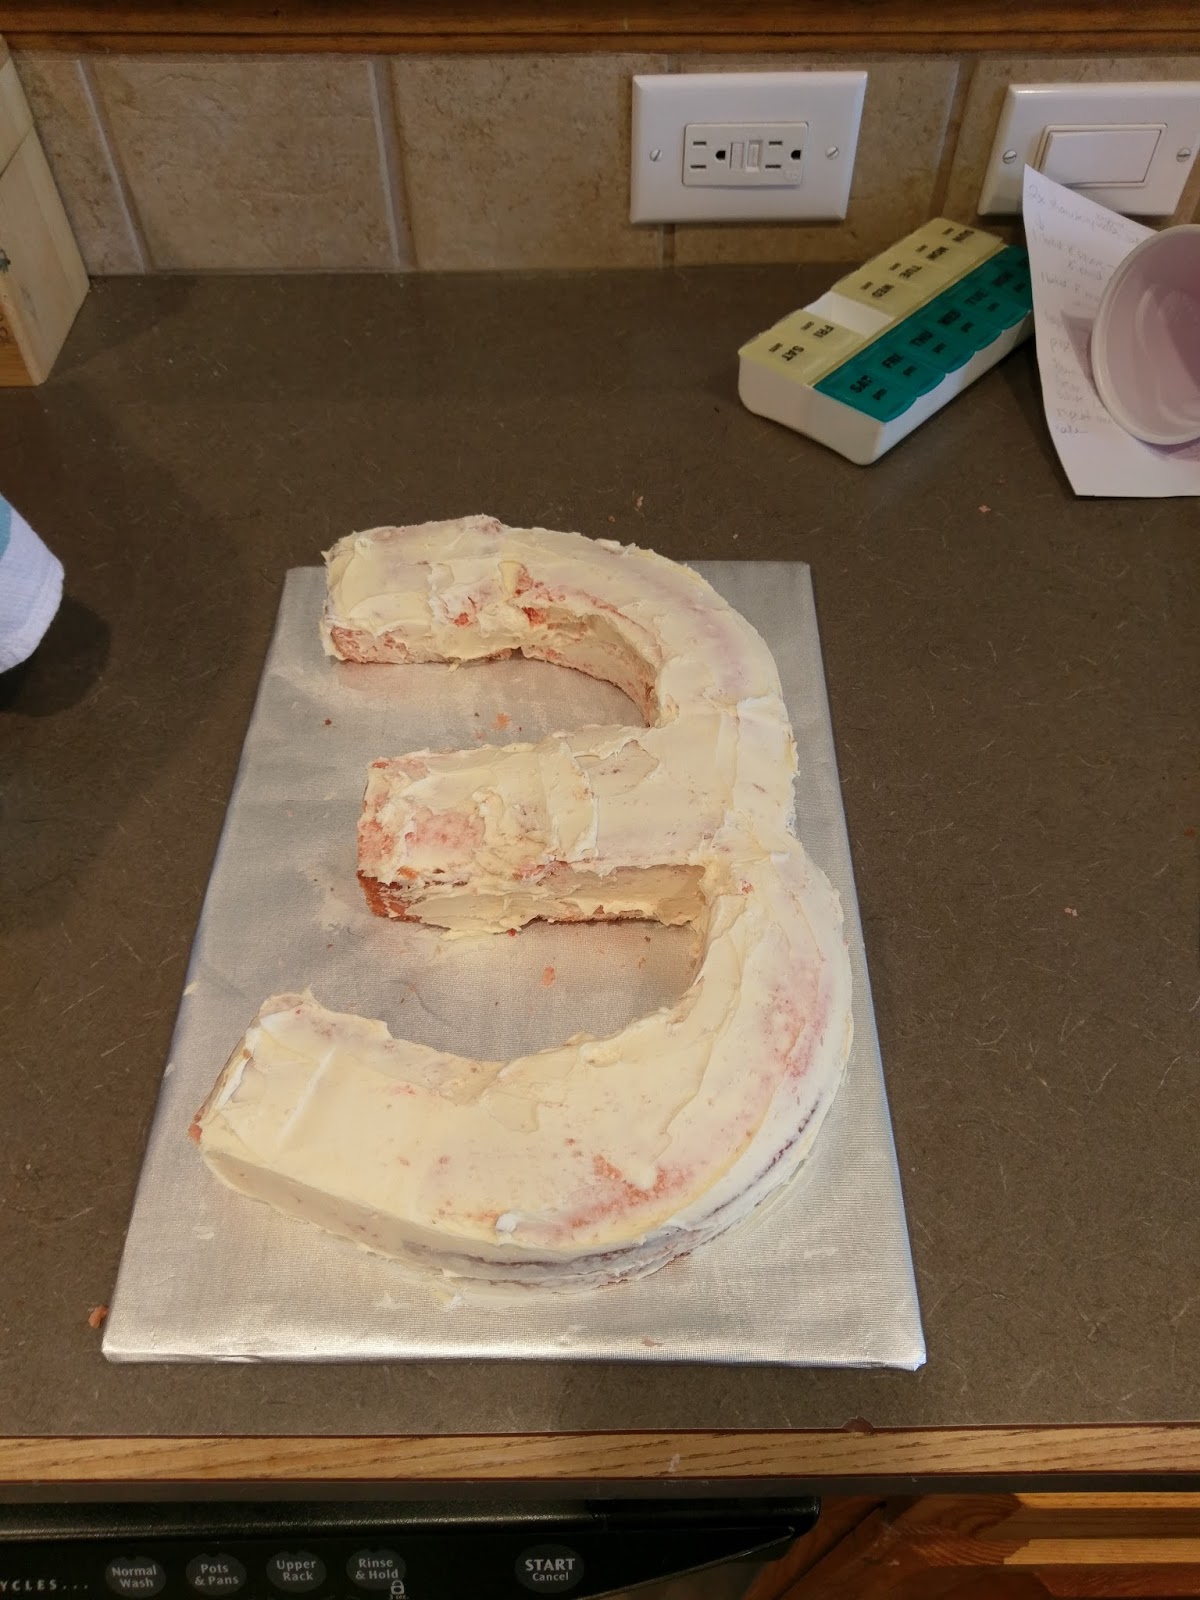
Kinda looks like a sigil of some sort… Keep out the other two 1/3 strip of cake to assemble the three. Cut one of them into two equal pieces. Trim only one end off the other down to make a point (see below). Then take the round cake you baked second and cut two long pieces out from the edges (see above), using a Solo cup (see, totally practical kitchen tool) in the center to keep things even.
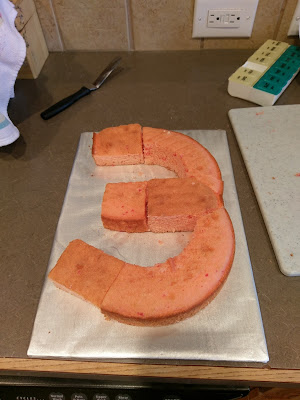
If you look at the number three long enough, it stops making sense. My first attempt at the pointed/arrow shaped piece you see in the middle of the three did not turn out long enough because someone (me) cut off the other end because someone (me) thought it was totally safe to snack on. Learn from me. Wait to snack until after you’ve assembled and frosted. The 1/3 slice from the 8″ square cake is long enough to make the piece in the middle if you’re not a greedy glutton. Take the two pieces you cut from the round cake and lay them around the pointed/arrow shaped piece. Take the other 1/3 piece you cut into halves and lay them at the end of the round pieces. Trim as needed to get all the edges flush. Place back into the freezer.

There’s not even enough vodka for drinking here, so have a beer to celebrate your work thus far. Haha, boy did I think that one batch of frosting would be totally more than enough! For one and a half cakes. With a thick crumb coat. With multiple colors. Why? I wasn’t drinking the vodka. I swear. I had 3/4 of a bottle (like, in my possession, not in my drinking cup) when I began, and by the end of baking all the cakes and making TWO batches of frosting, there was literally not a drop left. So if you’re going full-scale design, ensure you’ve got enough ingredients on hand to make a double batch. This recipe is for a SINGLE batch, so simply double all the amounts if needed:
- 2 cups of room temp butter
- 8 cups of powdered sugar
- 6 TBS Pinnacle whipped vodka
Cream the butter until fluffy, then add four cups of sugar, three tablespoons of vodka, and mix. Scrape the bowl, repeat with the remaining four cups of sugar and three tablespoons of vodka.
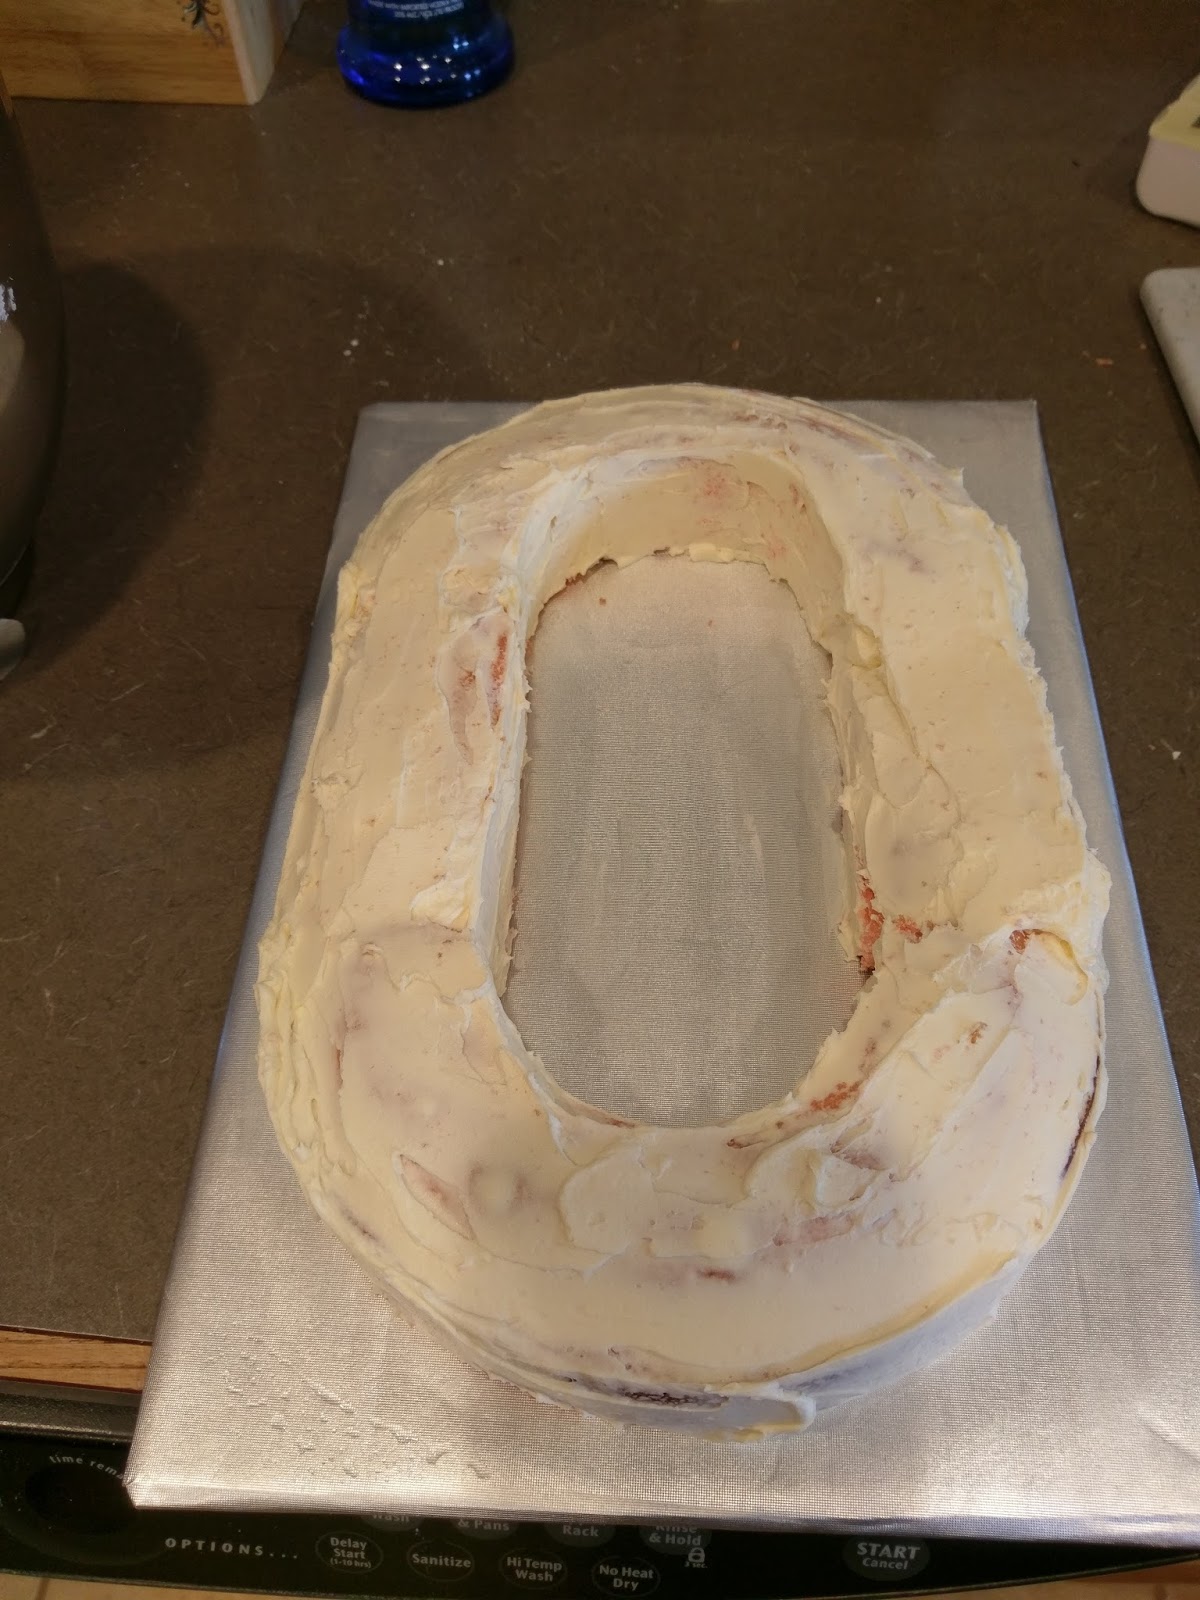
And slather on the crumb coats… 
You’re gonna get frosted a little yourself. I picked up each individual piece and frosted it, ensuring the ends that were going to be sandwiched to another piece had a very hefty glob to glue them together. Be sure to let your crumb coat freeze to ensure pieces don’t shift during decoration.
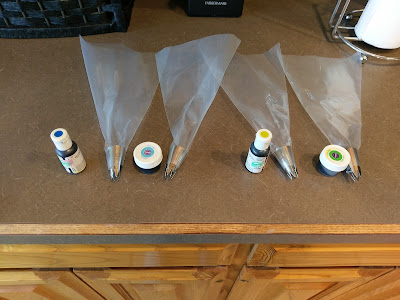
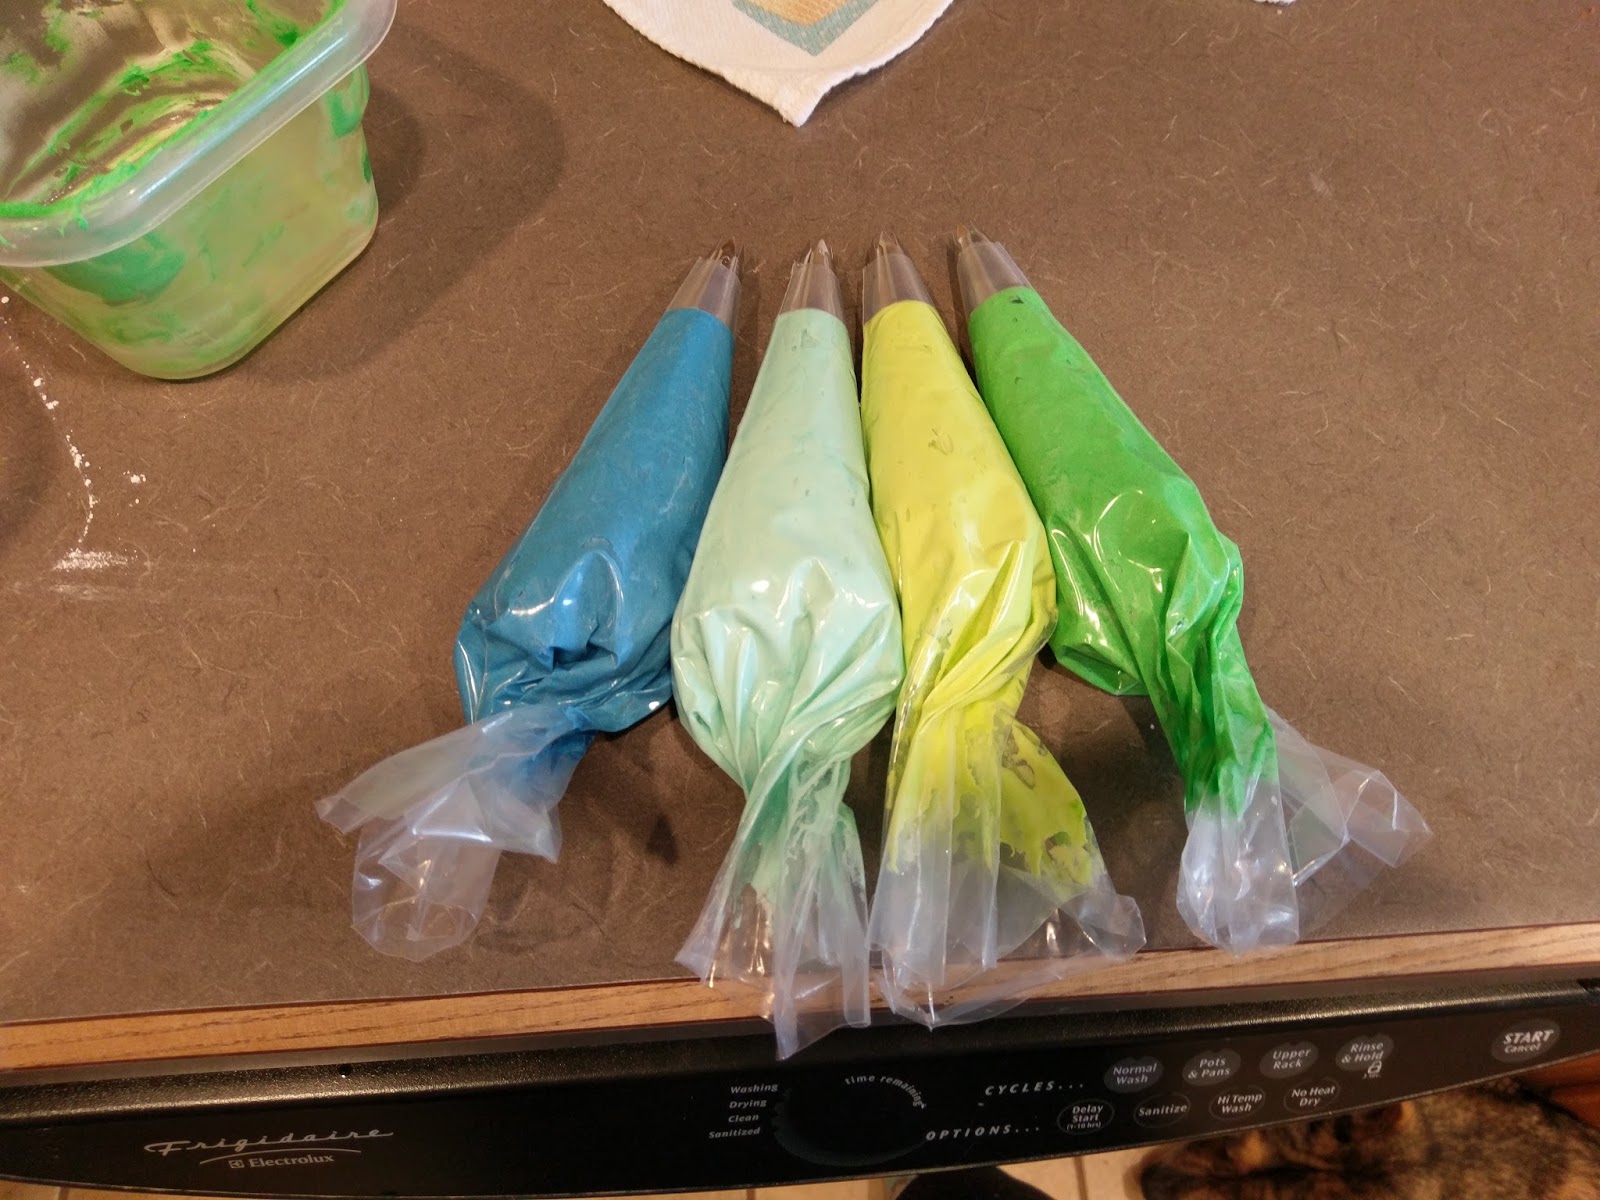
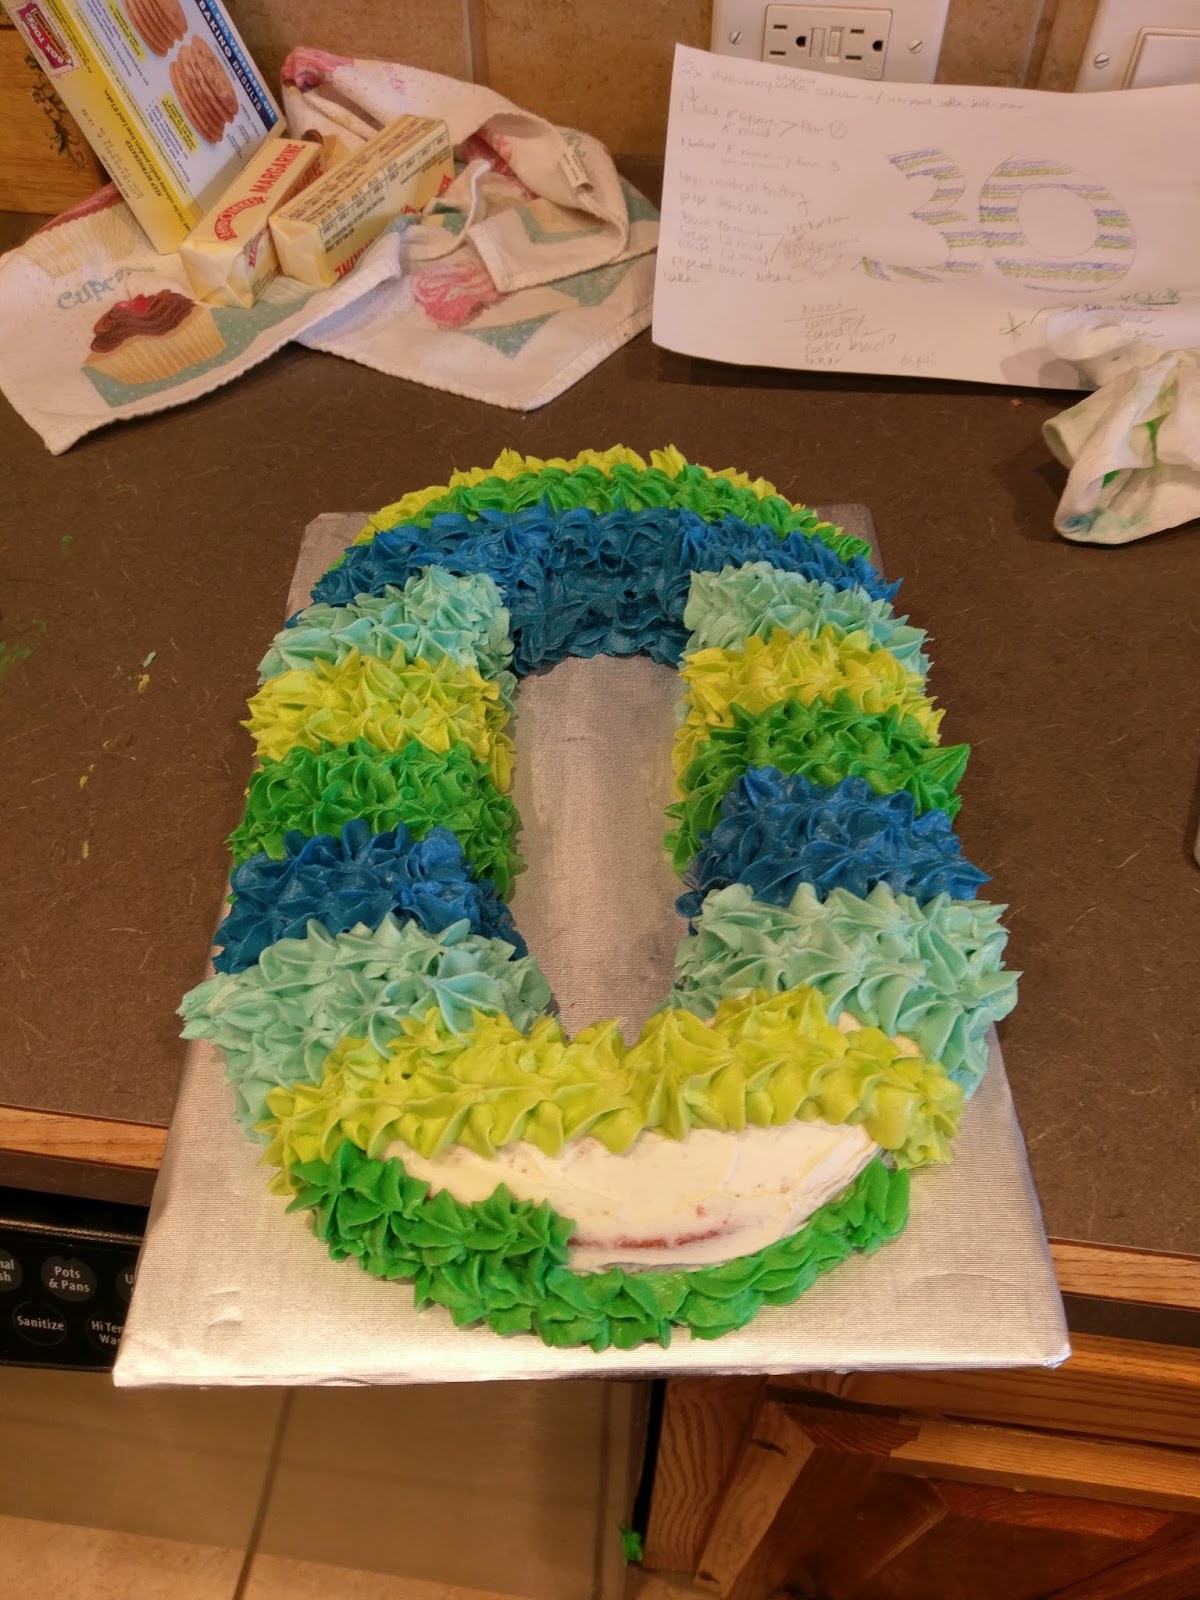
Green and blue, best color combo ever. I wanted a fun and summery cake, and my husband’s favorite color is green. Mine is blue. This is the scientific process I used for selecting colors. I used four Tupperware to divide up even amounts of frosting. I dyed them light blue, blue, light green, and green.
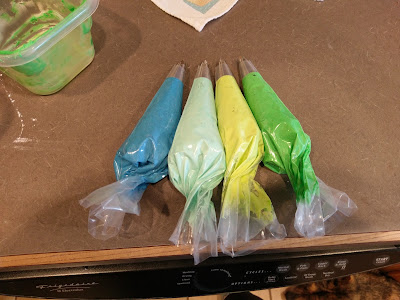
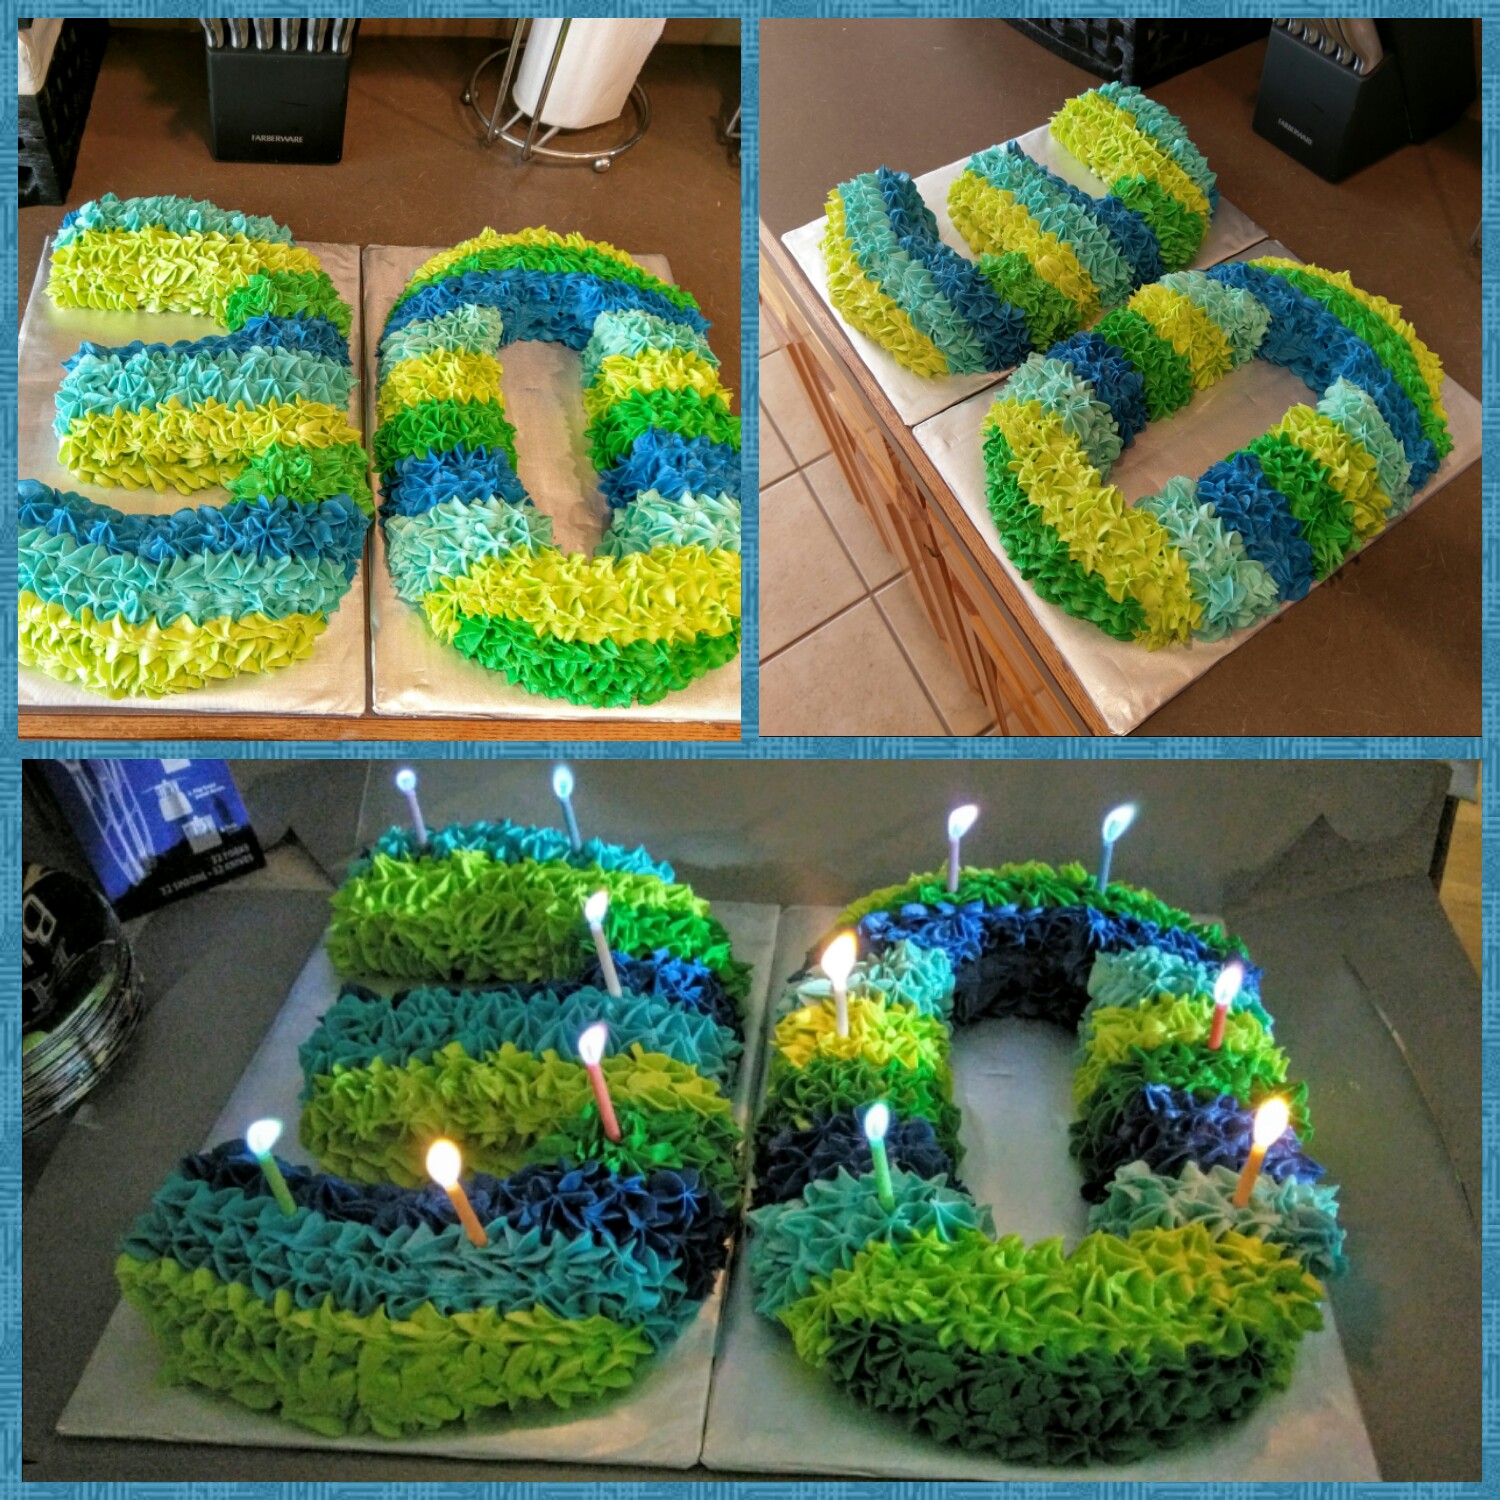
This makes me want to go to the beach or make snow cones. I placed my dyed frosting into four piping bags, each fitted with a 1M tip. Once my crumb coats had frozen, I moved the 0 to my counter and the 3 to my fridge.

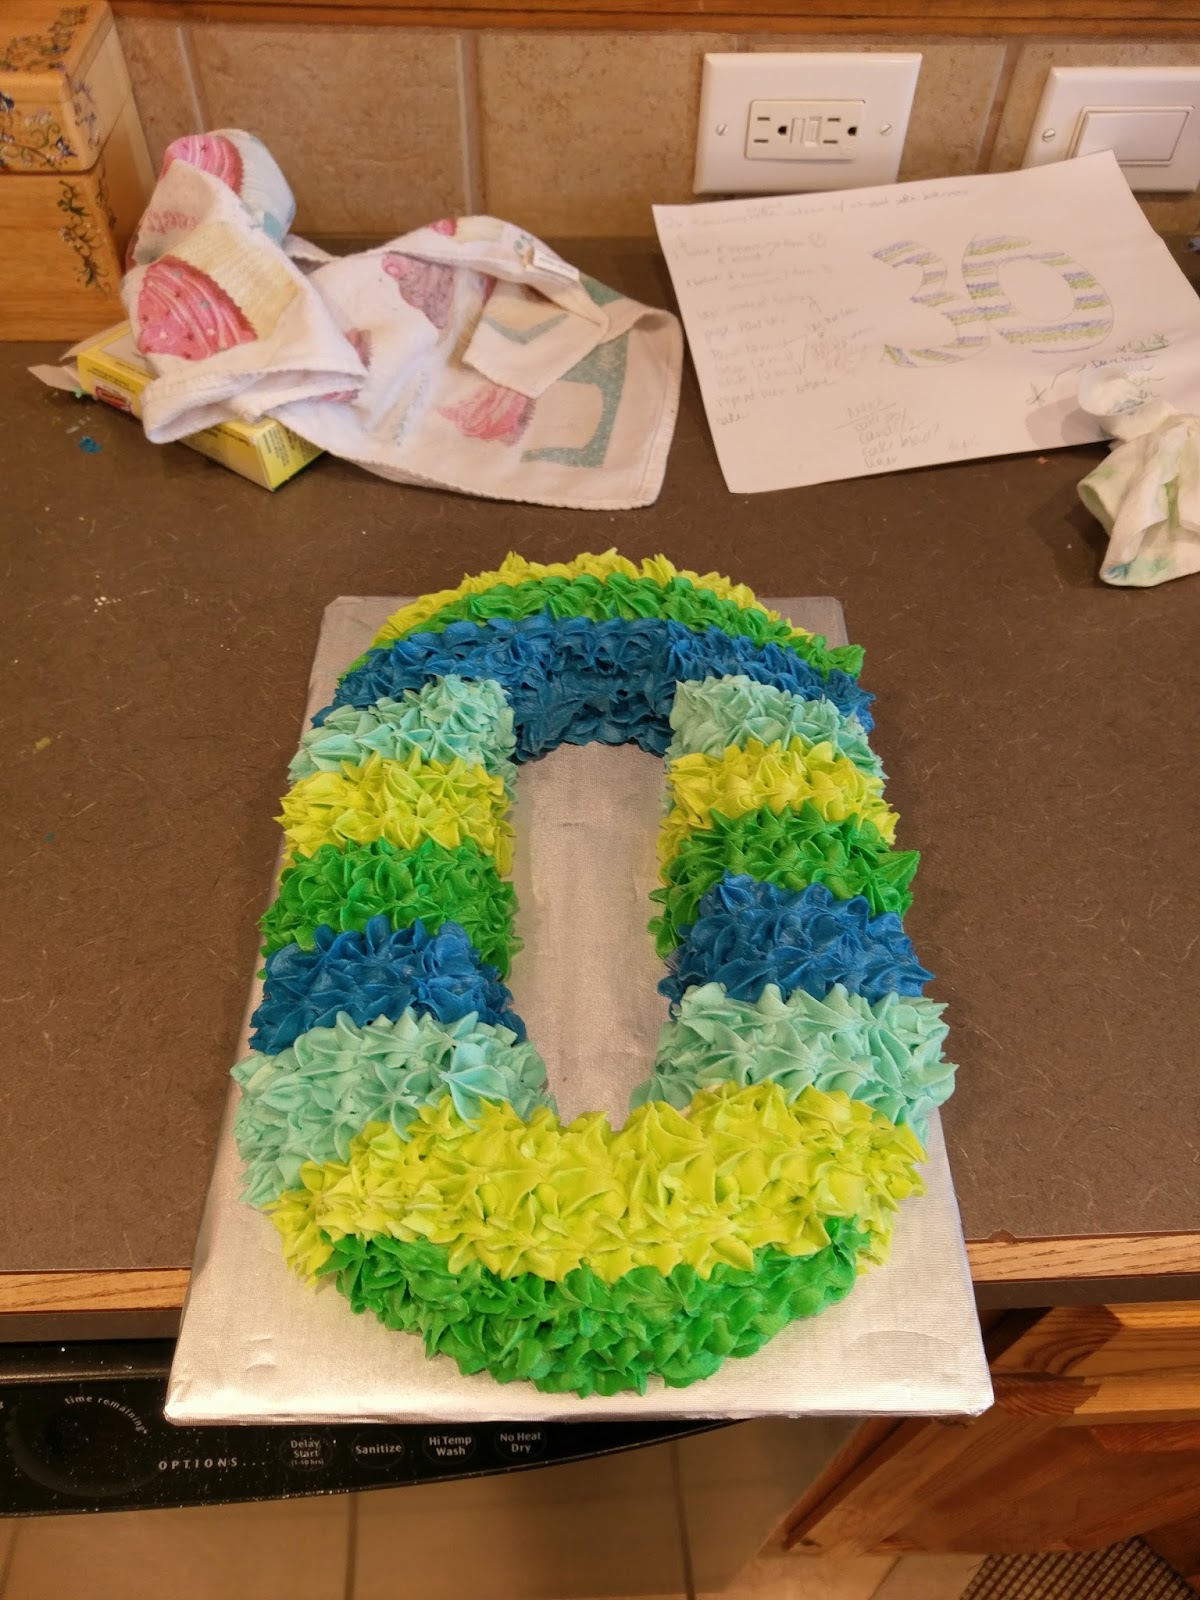
I simply piped twp rows of stars in one color before alternating to the next: blue/light blue/light green/green. 
This right here? Precisely where I ran out of frosting. Maybe because half of it ended up on my dishwasher below. Whatever the case, I was really upset to be so close to finishing one number when I ran out that I ate some cake scraps and smelled the empty vodka bottle. It functioned more like smelling salts, so I was renewed. 
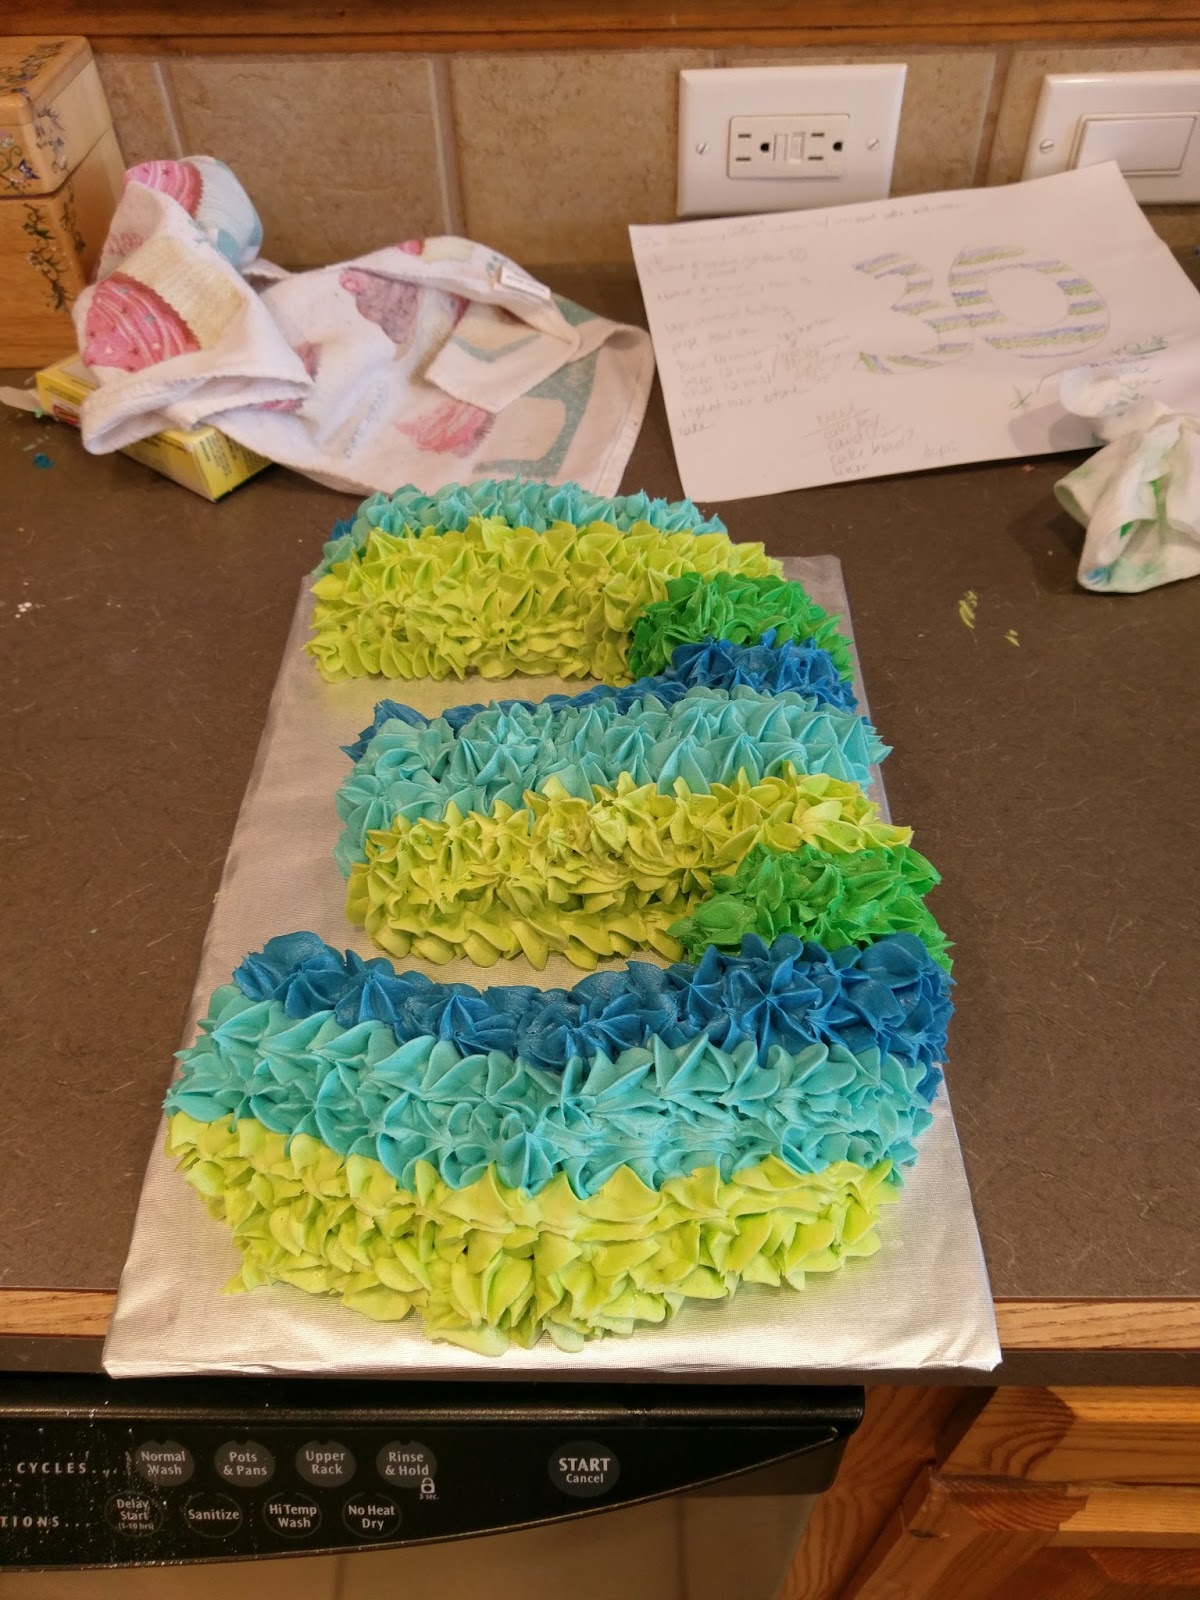
I soldiered on, finished my 0, and worked on my 3: 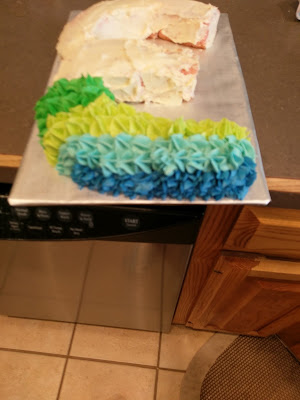
Well, it’s an E here, but you get the point. 
I ran out of everything but the dark green…which works out perfectly because I need it for my husband’s other birthday cake he’s getting on his actual birthday in a couple days. Small victories, people. 
Side by side, I’m no longer vexed by the shape of the number three. I thought I might need to be evaluated psychologically for a bit there. The party was a smashing success. The cake was a huge hit. The frosting had a nice zing from the vodka, but not so much so that it disrupted the harmony of the cake. Look at me, sounding like a pretentious baker! I was really happy with how this turned out. My husband was impressed, and he thanked me approximately five times because he loved it that much. Many people had seconds. On cake. That’s when you know it’s a good recipe. It kind of gives off a strawberry delight vibe when it comes to taste, but still with the consistency of cake and delicious buttercream (don’t you come at me with that weak whipped topping–I am a true cake connoisseur). I loved it so much that I’m going to try another flavored vodka strawberry cake for my husband’s actual birthday birthday cake. Because when you’re unable to properly express your affection verbally thanks to your 75/25 ice/cake heart, you show your husband you love him by baking him all the cake in the damn world. Blog to follow in several days. But until then, I will continue to take my cues from my amazing husband and learn how to embrace a new decade of living. ‘Til next time, my fellow eaters!
I would do anything for my husband, including going temporarily insane from how weird the number three looks when you have to stare at it for five hours straight. Love is strange and wonderful. -
Just Add Baileys
There are certain things in life that just don’t get a fair shake, like Thanksgiving, non-athletically inclined college students in West Texas, and brownies. But somehow, if you add booze to all three, people really seem to enjoy them so much more. Well, I can’t speak for the rest of my fellow West Texas klutzes that never made football or cheerleading because both of their feet refuse to function at the same time, but it worked for me. We may not know the glow of Friday night lights and football mania, but we certainly do get a nice glow ourselves after a glass of wine. Anywho, back to my point. Brownies seem to be one of those desserts that function better as a part of something bigger than themselves: hot fudge brownie sundaes and chocolate chip cookie dough brownies for instance. Brownies are usually more of a serving platter in the dessert world, but I wanted to make brownies that would stand tall above the rest. Brownies with wow factor. And if there’s one thing I’ve learned as the boozy baker, it’s that Baileys makes everything better. Guinness doesn’t hurt, either. Enter the Baileys brownie with Guinness ganache:

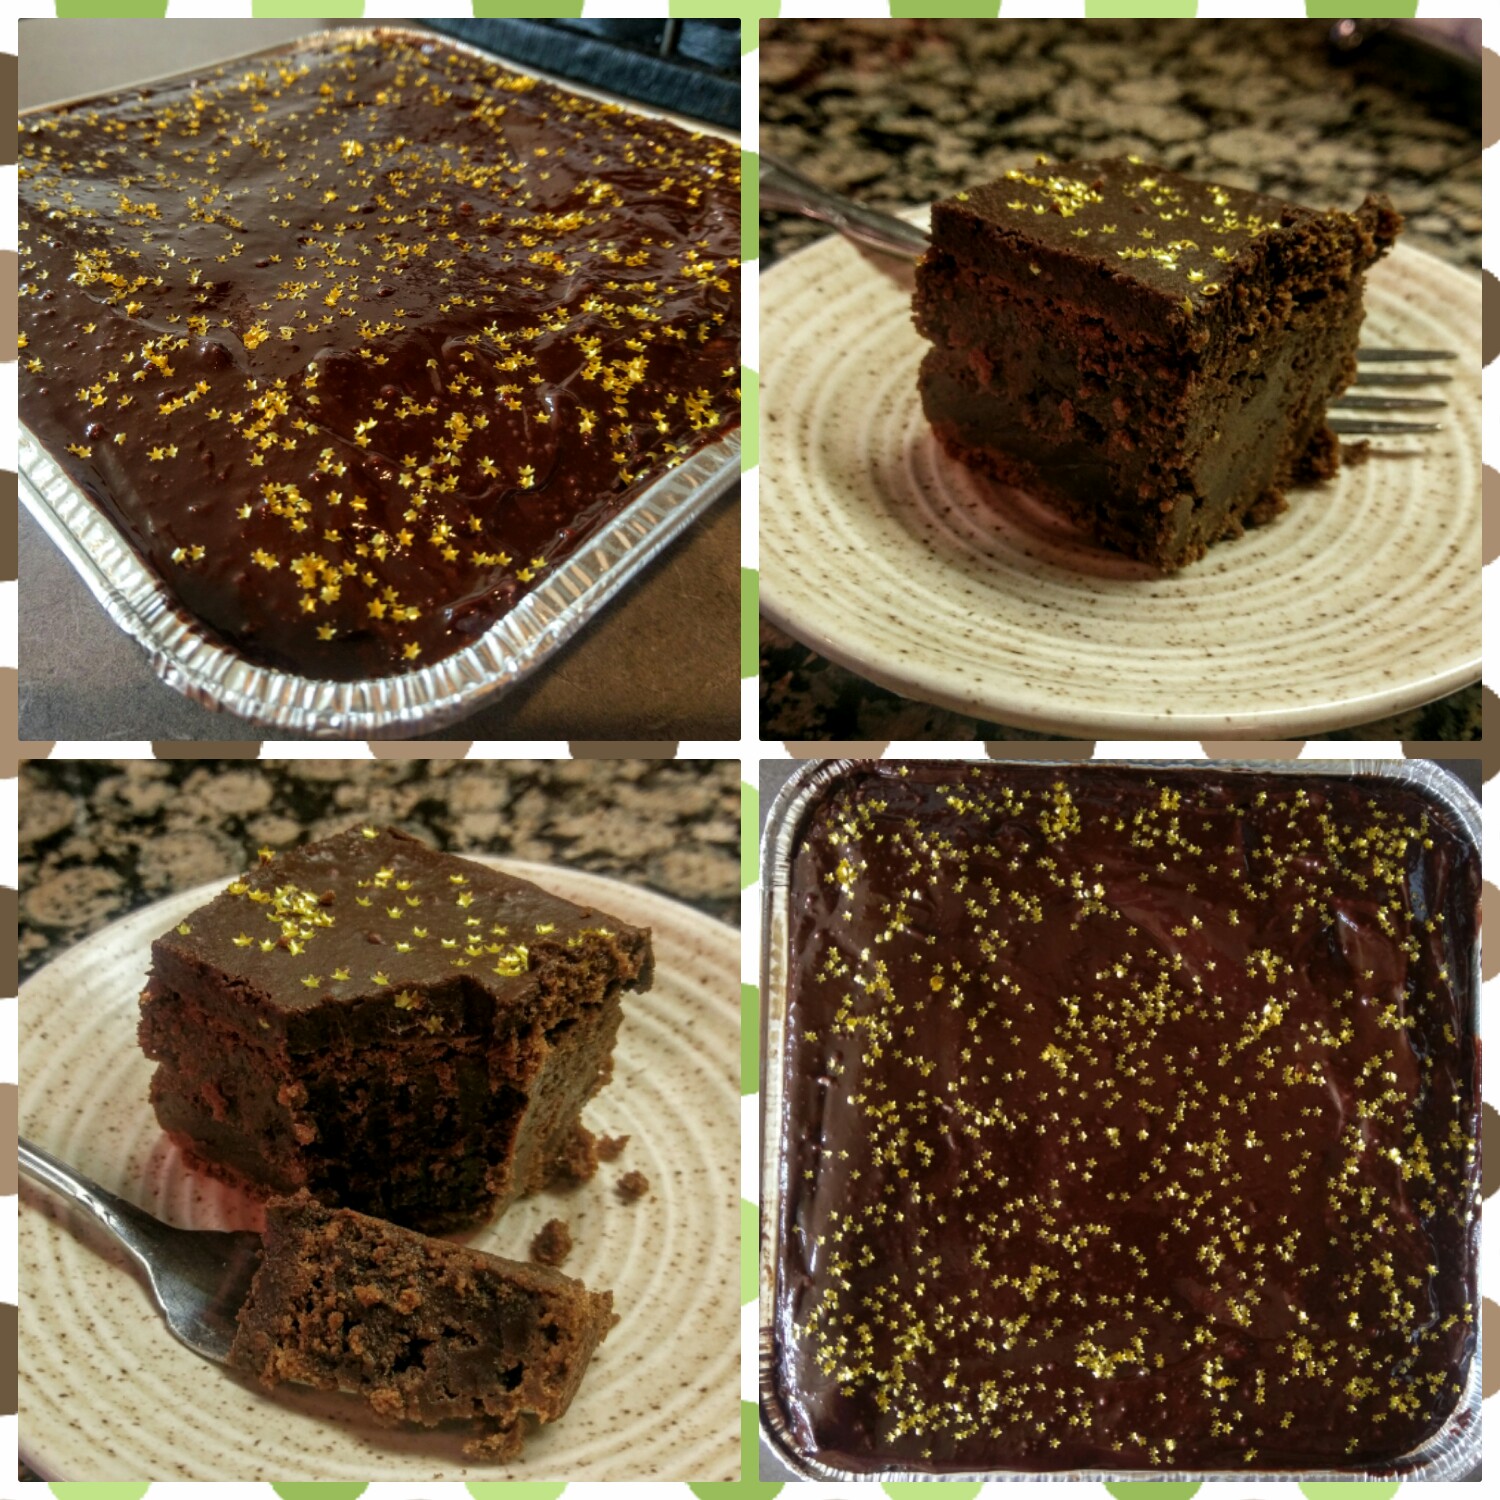
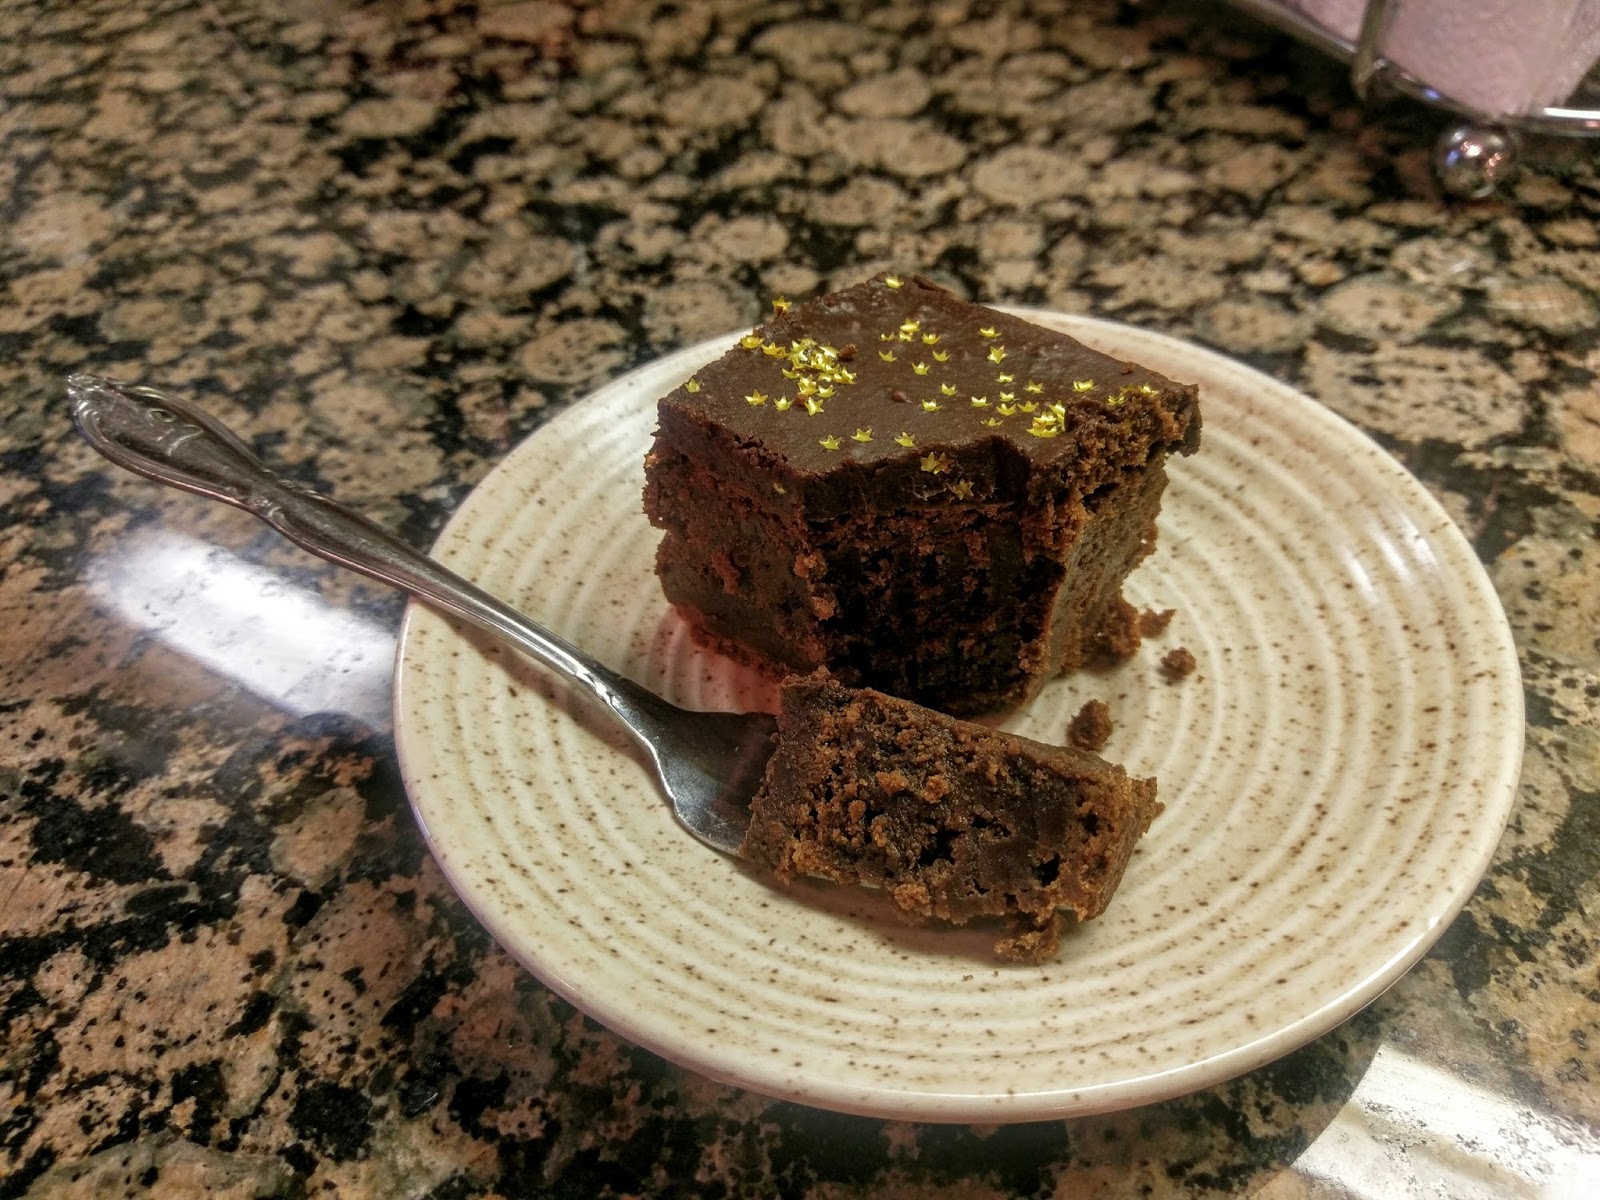
Are you drooling? Because it’s totally acceptable if you are. I love fudgy brownies. I only eat brownies that are so dense that TSA wouldn’t let a pan through airport security because it could also function as a hefty weapon. They may weigh five pounds, but these melt on your tongue. They also travel well. We took this batch on a seven-hour drive to San Antonio to visit my in-law’s for Father’s Day and my mother-in-law’s birthday. I couldn’t very well show up without a dessert for such an occasion! These made the trip without getting weird or melty or eaten by the dogs (or more realistically, me). So if you’ve got a trip coming up and you want to remind people why they should enjoy your presence so much, bring a pan of these bad boys. It works! You also get the added bonus of being able to throw these together with a few simple ingredients in a short amount of time, but things still look bakery quality without the added fuss (and cussing) that usually comes along with it!

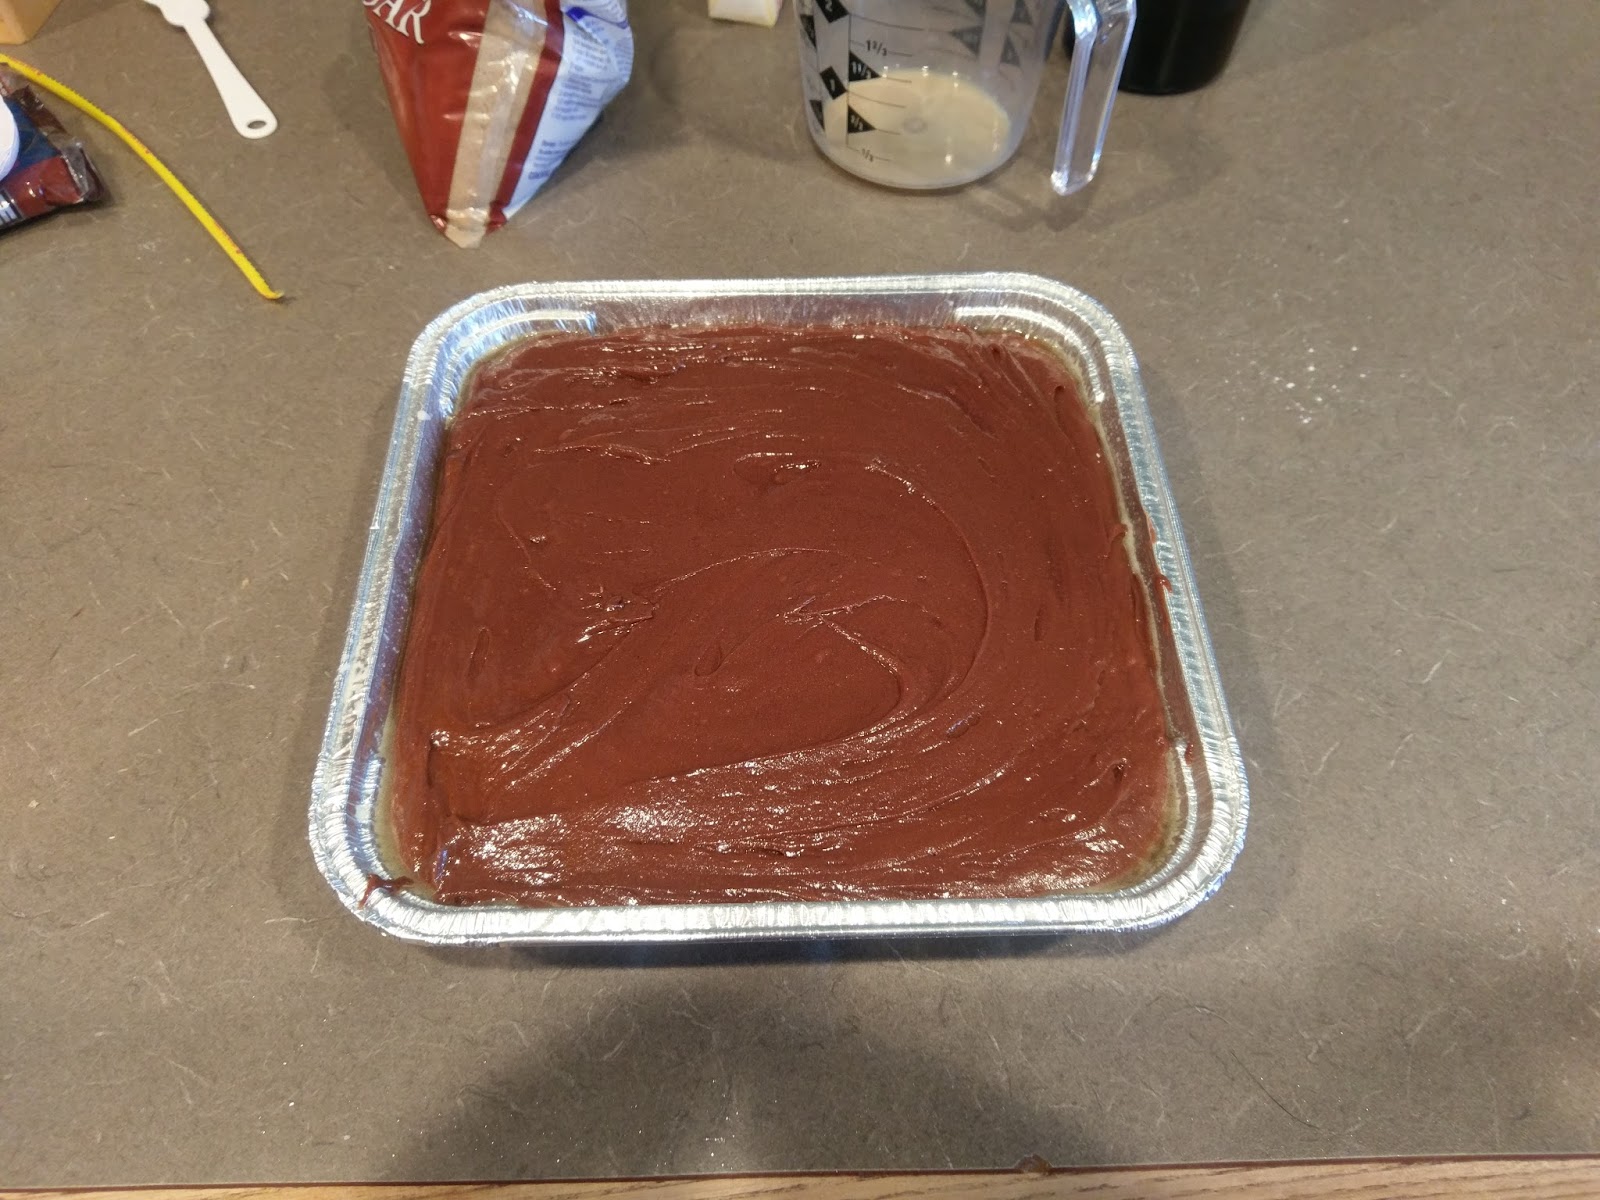
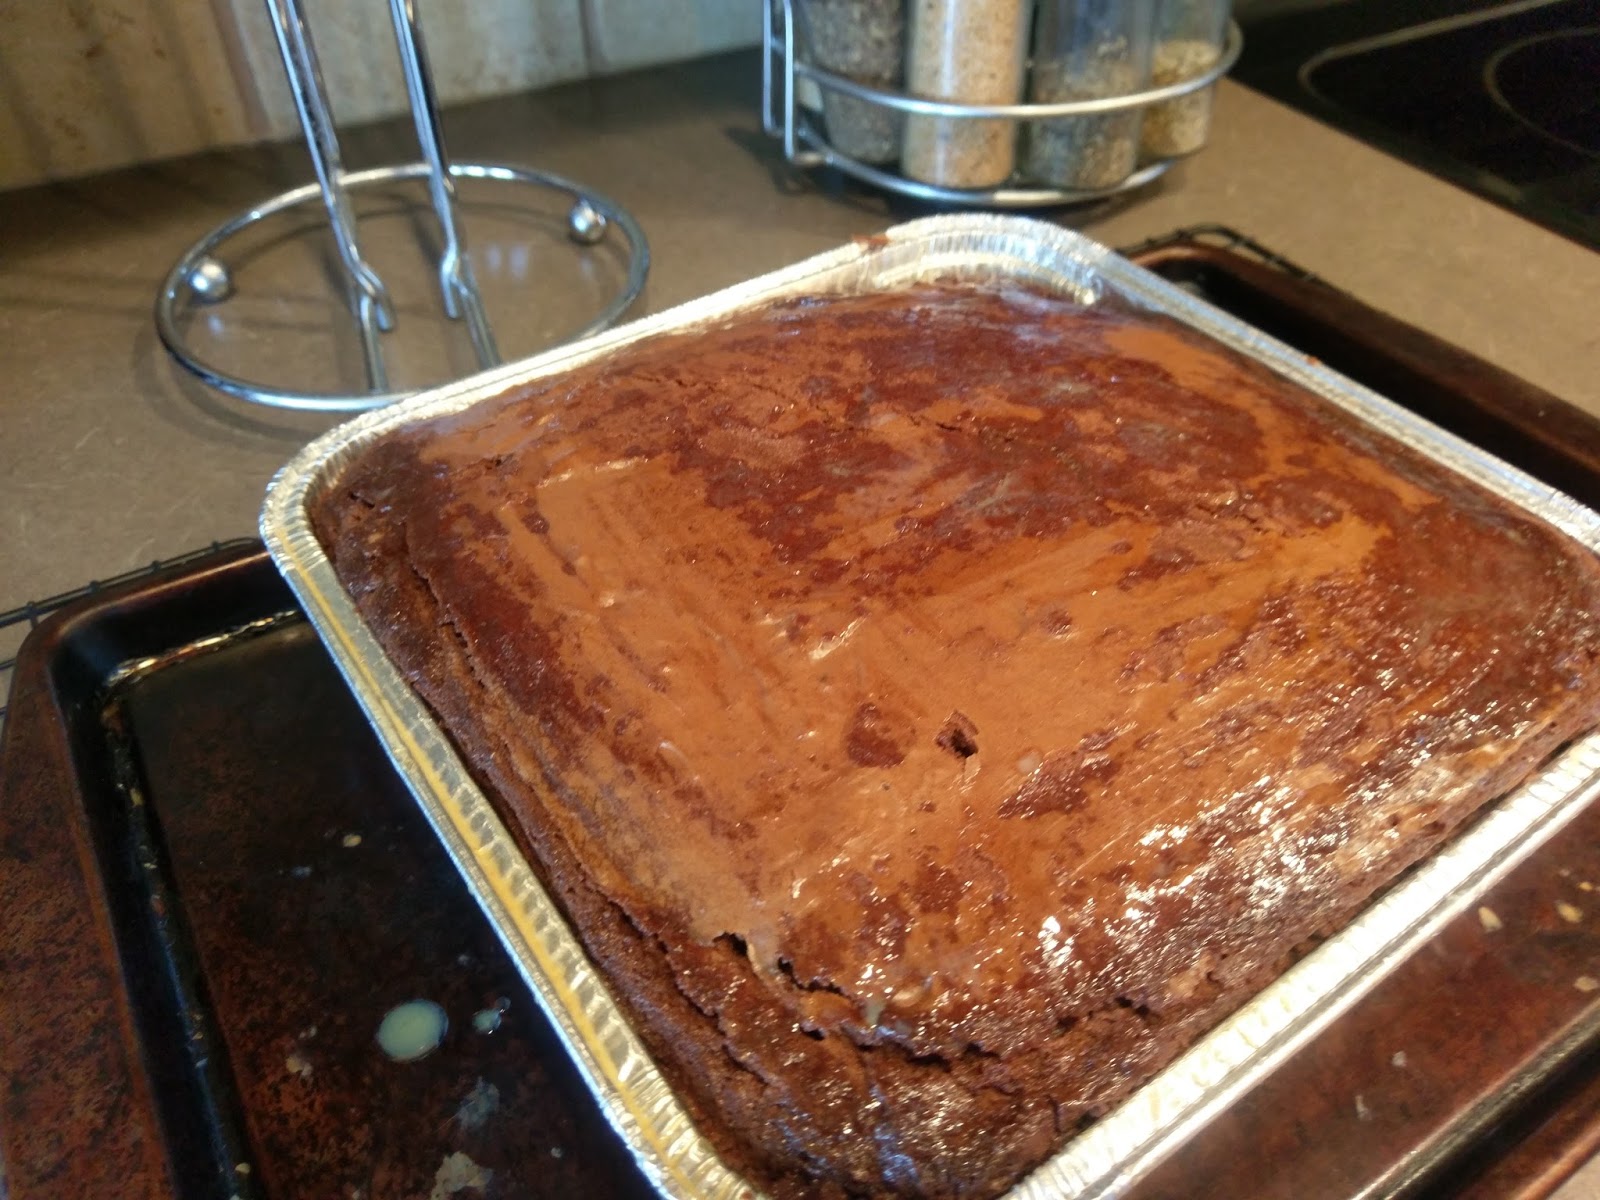
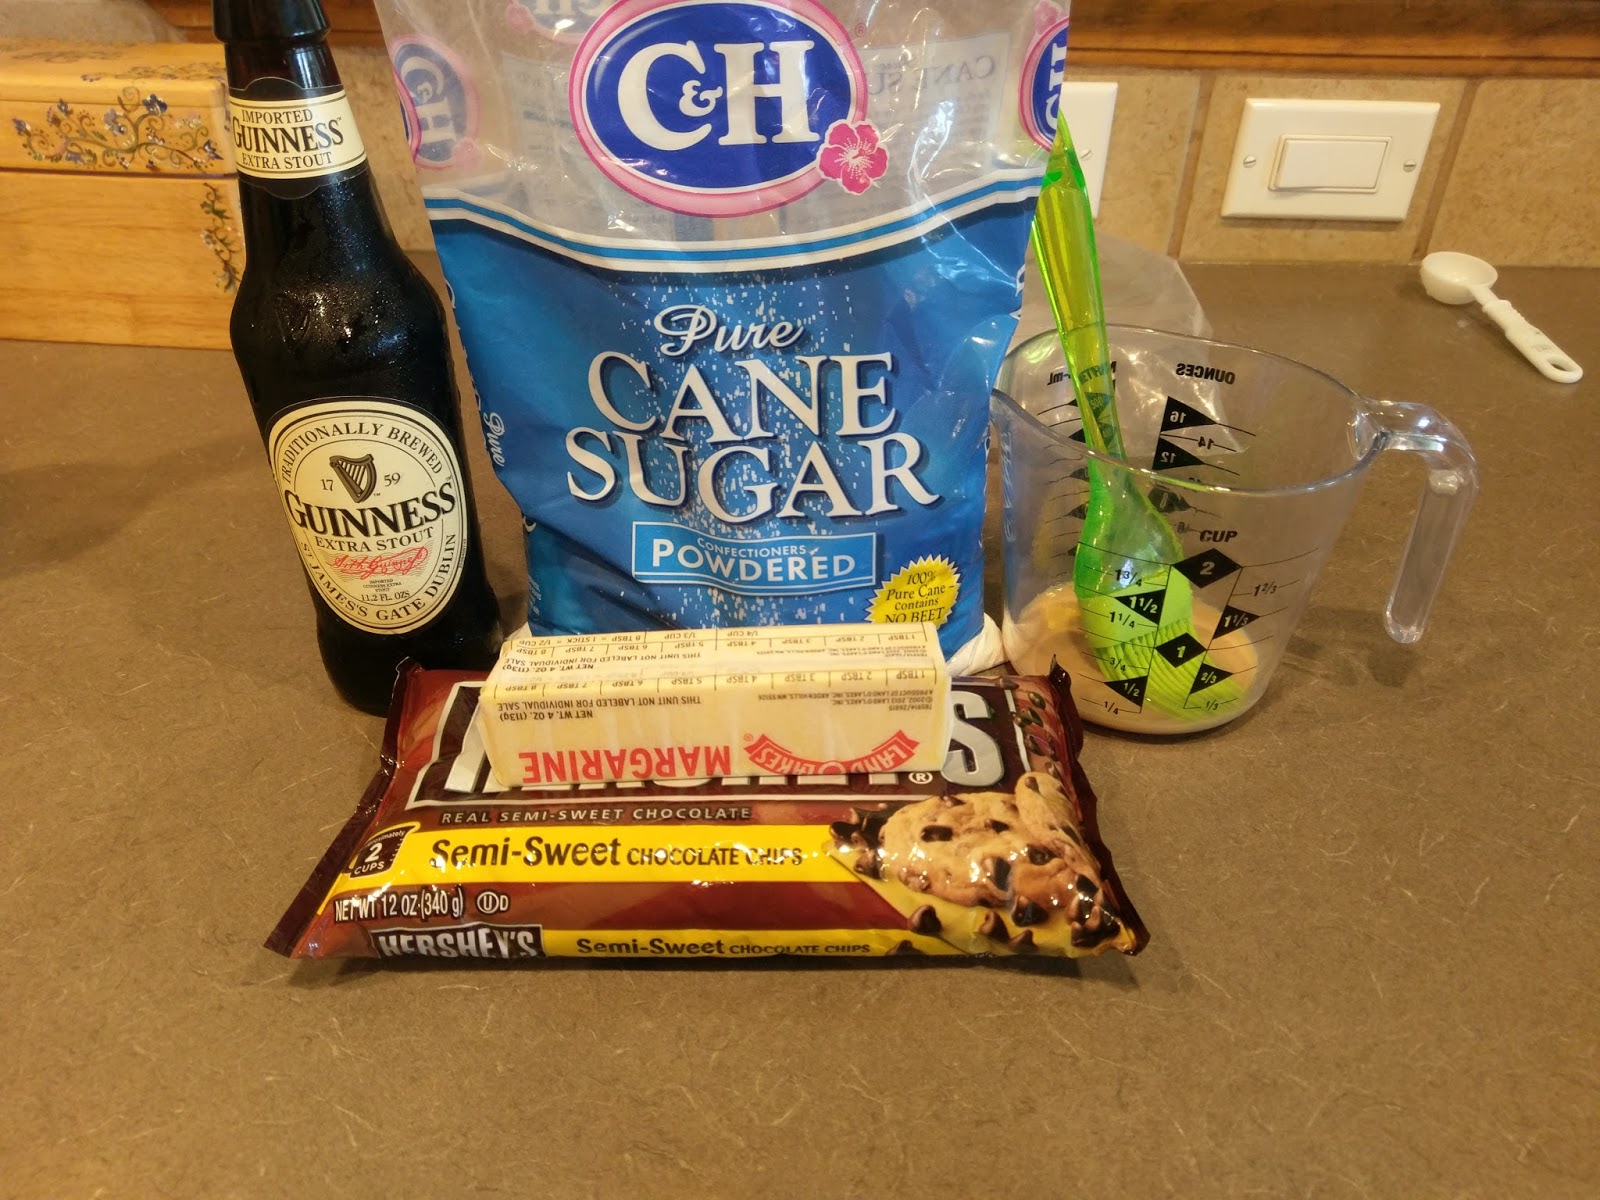
See, I wasn’t lying. Since these brownies were traveling, I placed them in an 8×8 foil pan that was greased very heavily. You can go this route or spray an 8×8 pan with a borderline ridiculous amount of Baker’s Joy and/or Pam. Preheat your oven to 350 and gather up:
- 1 cup of butter
- 2 cups of semi sweet chocolate chips
- 2 1/2 cups of flour
- 1 tsp of salt
- 1/2 tsp baking powder
- 1 1/2 cups of brown sugar (I used dark for added richness)
- 2 eggs (preferably at room temp for easier blending)
- 1/2 cup of Baileys (I used original, but salted caramel would probably take these to a whole new level)
Start by dumping the butter and chocolate chips into a medium bowl and melting in the microwave for a minute. Stir until everything is evenly melted. If you need more time in the microwave, only go in 20-30 second intervals, stirring between each one. Set this aside to cool off. In a medium bowl, mix the flour, salt, and baking powder. In your stand mixer bowl, mix the sugar, eggs, and Baileys on low until well incorporated. Add in half the dry mix, blend, and then add in half the butter/chocolate mix and blend. Scrape the bowl before adding in the rest of the dry mix blending, and the rest of the chocolate mix. Blend until things are nicely mixed.

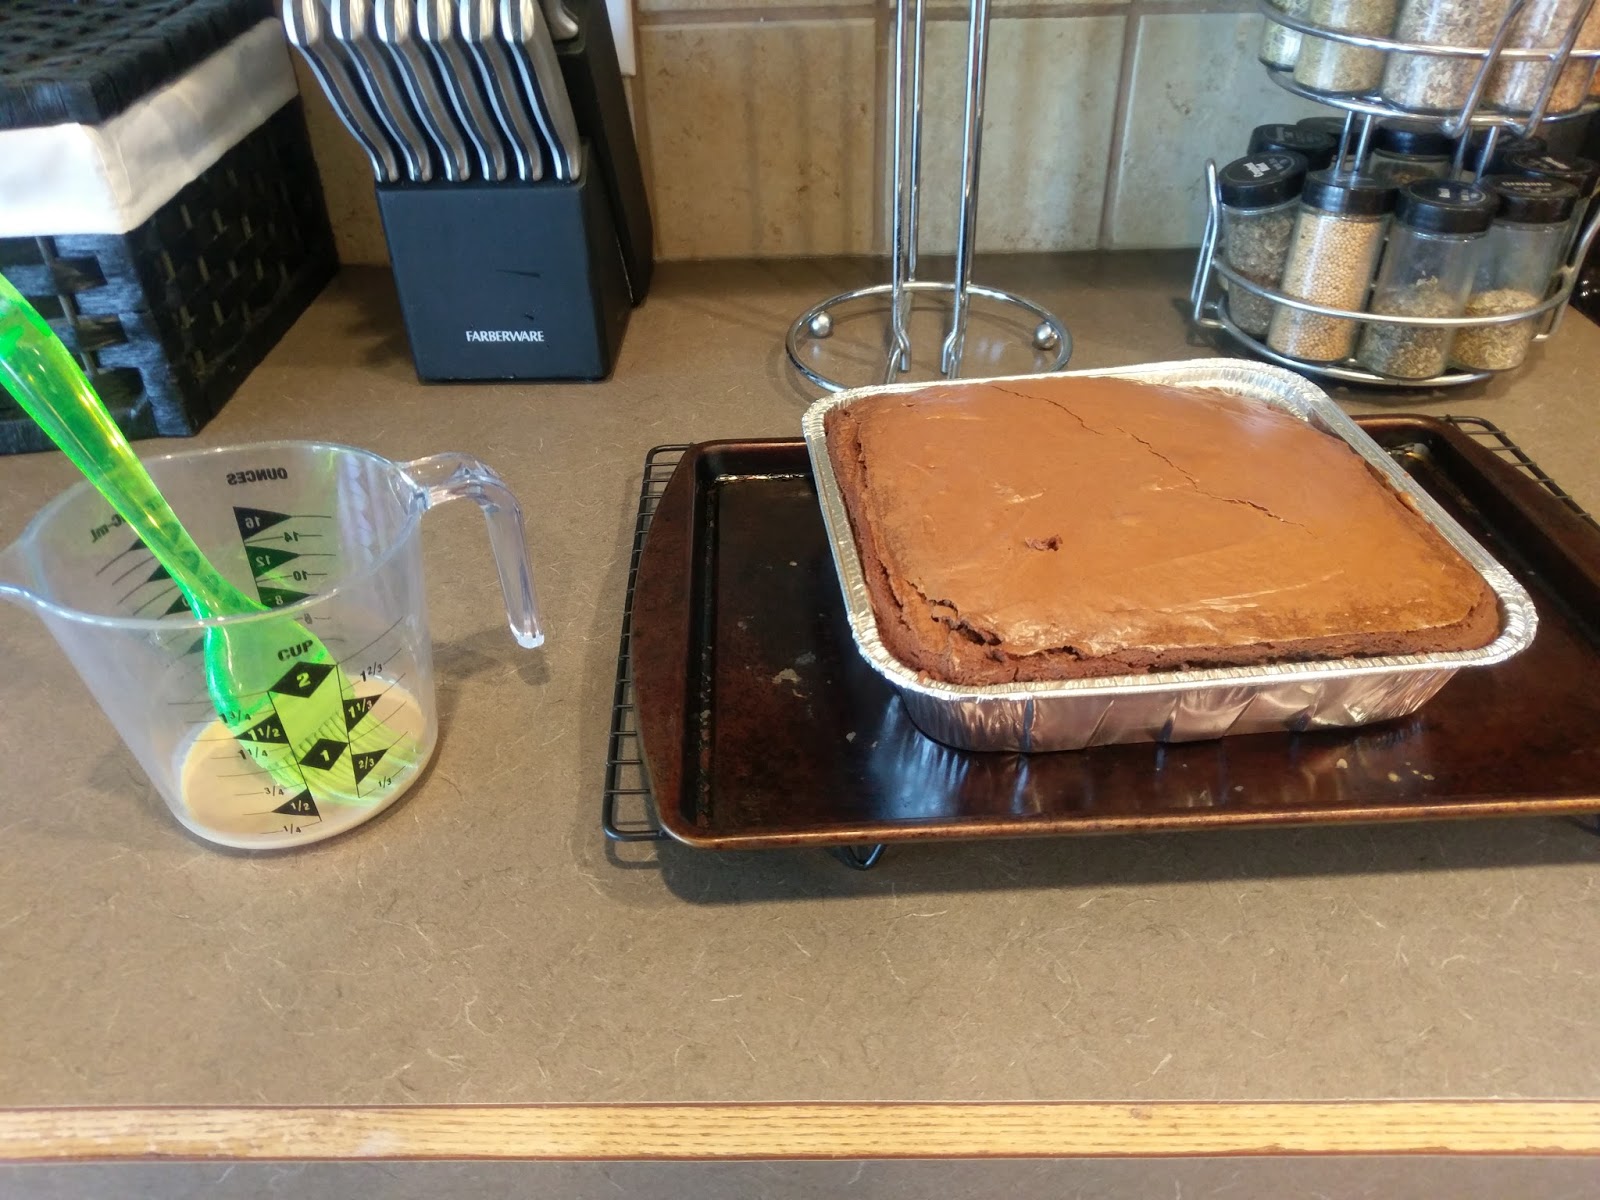
Do I have to bake them? Mmm, brownie batter. Dump the brownie mix into your greased pan. If using a flimsy foil pan, place your pan on top of a cookie sheet before baking. A regular pan will be fine without the extra support. Bake in the middle rack of your oven for 45 minutes or until a toothpick comes out mostly clean.

Here’s where the real magic happens. Once cooked, remove and place on a cooling rack. Take a 1/4 of a cup of Baileys or a little less if you’re not as obsessed as I am with the stuff. Brush the Baileys on top of the warm brownies until they achieve this look:

I call this the “drowning in booze” look. At this point, move the brownies to the fridge to cool for an hour or to the freezer for 30 minutes. Wait until they are fully cooled to top with the ganache.

I bought so many bags of chocolate chips for this recipe. Wildly over compensated. Okay, I’ve had this one bottle of Guinness in the fridge for months waiting to bake these brownies. I even had to label it so my husband wouldn’t drink it. Don’t worry, he got to drink the remainder of what was left which was about 3/4 of a Guinness. He didn’t have to suffer. And he got some boozy brownies out of it, too, so don’t feel too badly for him. To make your own ganache you need:
- 2 TBS Guinness stout or regular
- 2 TBS of butter
- 3/4 cup of chocolate chips
- 1/4 cup of powdered sugar
This is super difficult. Reread these steps at least ten times before trying to make the ganache. Are you ready? Can you handle it? Here we go…
Dump the Guinness, butter, and chocolate chips in a bowl. Microwave for a minute, stir until everything is melted, and whisk in the powdered sugar.
Still with me? Told you. Super difficult. I apologize for how hard that must have been for you.

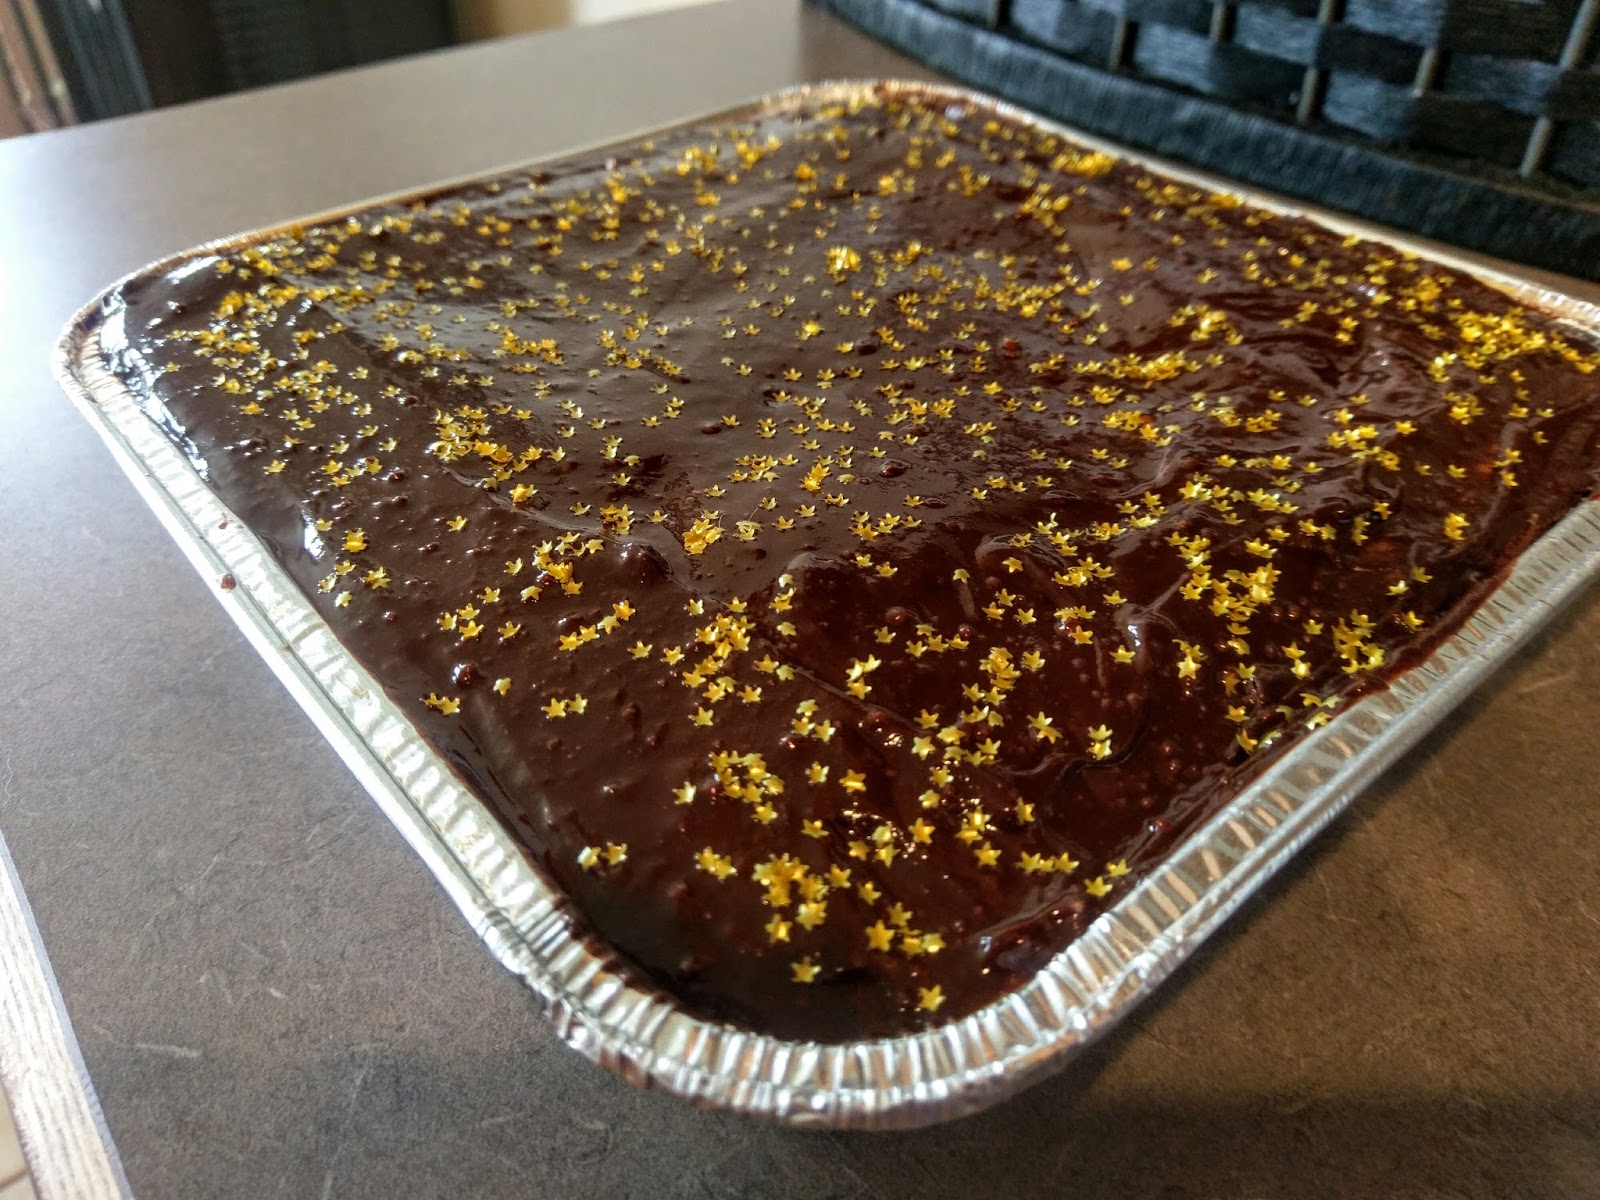
Dump your ganache on top of the brownies and use a rubber spatula to smooth out. You could be done at this point, but nothing says festive like glitter sprinkles, so I highly advise throwing some on top of your ganache before it sets.
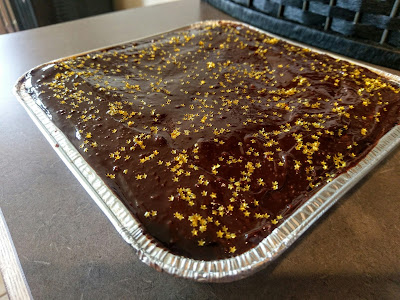
I’m really into the wow factor this week, what can I say. When baking for your in-law’s, you really want to prove to them their child has not married some heathen, so use glitter sprinkles as a gentle reminder that their son or daughter is in good hands. Anyone who takes the time to work with glitter sprinkles must be a fun and loving spirit, right? That’s what I’m going with, anyway. Plus, pretty! These made the brownies look that much more decadent because they literally got stamped with gold stars for approval:

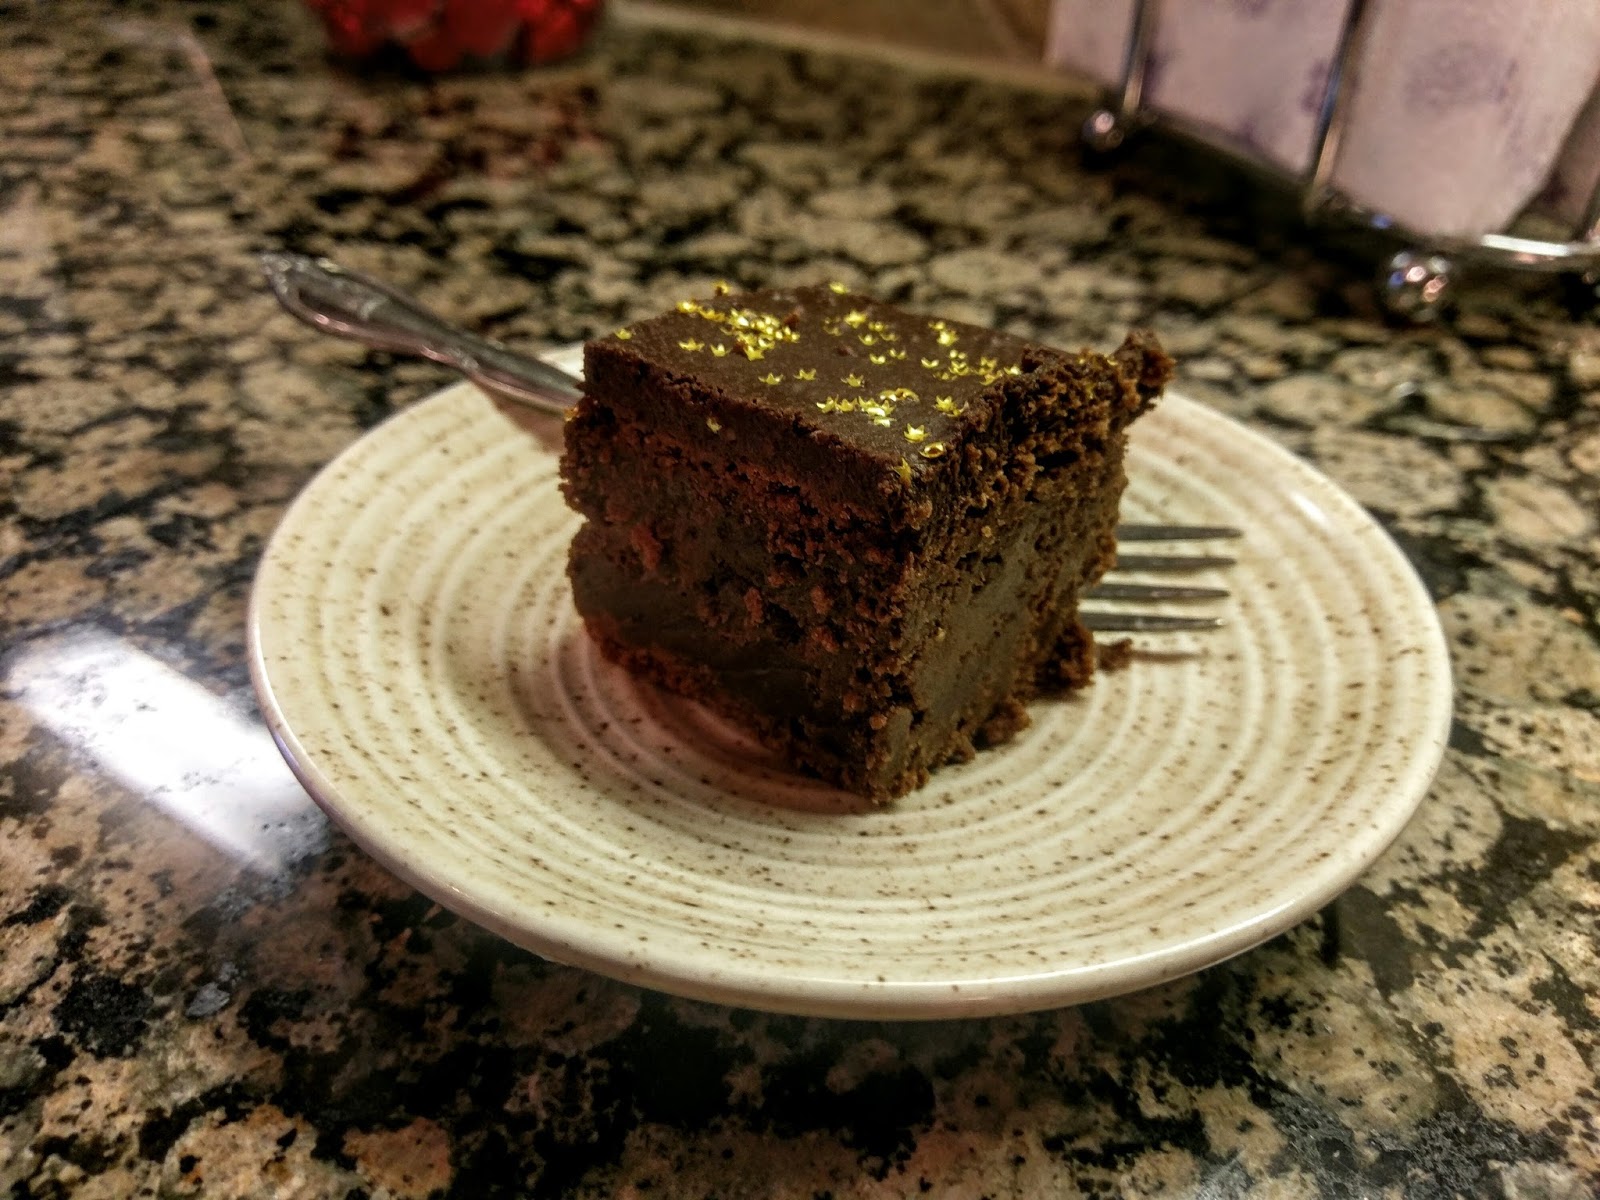
Can thin, wimpy, non-fudgy brownies say the same? No. No they cannot. But Texas sheet cake cookies certainly can, too. I died a little when I ate these. They’re just that good. I couldn’t believe I went all my life without thinking to add Baileys to brownies and topping them with Guinness-laden ganache. Luckily, I had these brownies to comfort me in my time of sadness. My grief over waiting almost 30 years to eat brownies this good lasted literally a millisecond until the next bite. I wanted to sit down and eat them four at a time, but that probably would’ve given me a terrible gut bomb and made a less-than-thrilling impression on my in-law’s. “So she’s not a heathen, just a glutton.” I was more than happy to share. I thoroughly enjoy hearing the “yum” noises people make when they bite into my desserts. I feel this is an involuntary noise people make without even being aware of it, so it’s a good method of judging how things turned out. This, immediately followed by silence until plates are cleaned equals a winner. Needless to say, I will be using this recipe as my staple brownie formula from now until the end of time. There’s no overwhelming alcohol taste–Baileys is so perfect for complementing the flavor of chocolate that it’s simply amazing. The Baileys also helps to keep things nice and moist, cause let’s face it, brownies this fudgy and rich will take a few days to devour. And that grueling, time consuming ganache? We all know the only way you can improve a Baileys/chocolate combo is by adding Guinness somewhere into the mix, too. Move over cakes, varsity players of the dessert world, brownies have finally come into their own! ‘Til next time, my fellow eaters!

Finally, a brownie that won’t leave you wondering what else is at the dessert table! -
Key Lime Pie with a Twist.
I’m assuming the first person that ever made a key lime pie was from the Florida Keys. And when I think Florida Keys, I think key lime pie, rum, and mosquitoes. Hey, two out of three ain’t bad. But I feel like an opportunity was seriously missed here–back in the rum-running days of yore down in Florida, why was no one interested in smuggling booze via food? I mean, not that I’m complaining, NASCAR came about because of all of this after all, and me in all my Texan redneck glory can’t live without hot, nasty, badass speed, but it just seems like circumventing Prohibition would’ve been a lot less risky if Auntie Ruth was just selling boozy pies at the church bake sale every Sunday instead. Then you could have your rum and eat it, too. These are the thoughts that plague me but inevitably lead to some really great ideas in the kitchen. So when my husband asked me to make a key lime pie, I knew if I was going to spend all that time juicing limes, there better be some rum involved. Coincidentally, I knew I needed to practice making key lime pies because we’re moving to Florida. And when in Rome, do as the Romans do. Or in this case, bake like their rum-running ancestors. May I present to you, the Malibu key lime pie.

Literally mixing lime and the coconut. No innuendos here. For once. Why has no one else tried this? I mean, I guess since no one has this means I get to toot my own horn and revel in my greatness, so this is really a win-win for me and my future clientele in Florida. And it’s hot outside. Super hot. Like someone left the oven on at 1,000 degrees hot. So when summer decides to slap me in the face, all I really want is a cool beverage that consists mostly of sugar, rum, and one tiny umbrella. But since I try to only drink on the most special of occasions (unfortunately, “it’s hot” isn’t good enough to qualify), I needed to try to satisfy this rum craving in a more adult and less “Woo Girl on spring break” manner. I’m simply too old and tired to deal with the day-after-Woo-Girl-celebration hangover anymore, so I’ll eat my booze instead. I hope my mother is proud of how grown up I am. It only took almost 30 years..

But much like any former Woo Girl, I still buy my rum in bulk sizes. Pre-made pie crust? Yep, I know juicing limes doesn’t seem like a terrible job, but once you’ve juiced a thousand tiny key limes, you’re gonna be really satisfied with your decision to not also make a pie crust from scratch. However, aside from juicing limes to the point that even your hangnails have gone numb, this is an insanely quick recipe to throw together. You need:
- One pie crust (I used a low fat pre-made crust to cut some calories. Those bikinis don’t wear themselves, folks). You can make your favorite homemade crust, but this is just so much quicker.
- 1/2 cup of key lime juice (*see note below)
- 2 tablespoons of key lime zest
- 1/4 cup Caribbean coconut rum like Malibu
- 2 14 ounce cans of sweetened condensed milk (again, I opted for the low fat version)
- 1/2 cup of light sour cream
- One husband or significant other to juice all your limes. I cut so many corners with this pie.
In all seriousness, juicing tiny key limes didn’t seem like it would be that much of a pain, but my darling husband volunteered to do it since he requested the dessert. I know, how did someone so evil land someone so nice, you ask? It may or may not have something to do with how I look in that bikini. I kid.
*Key limes are quite small, so you’ll probably juice 10 of them to get a half a cup of lime juice. You can use regular limes, but if you live in Florida it’s probably illegal to make a key lime pie with plebeian limes. I had several leftover key limes which I used to decorate my pie with. More on that later! Now, on to making the filling!
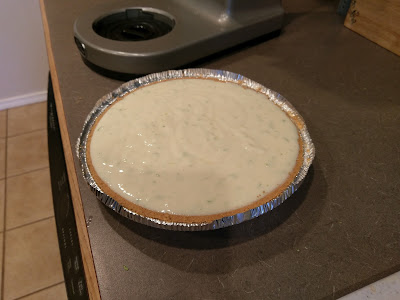
You will smell like limes for days by this point. If you want to brown your pre-made crust, go right ahead following package instructions. Make sure your crust is TOTALLY cooled before you add in the filling! To make the filling, dump the lime juice, lime zest, rum, condensed milk, and sour cream in a blender with a whisk attachment. Blend for a minute or two until everything it well mixed. Dump your filling into the pie crust, place the crust on a baking sheet, and bake at 350 for ten minutes. Let rest on a cooling rack for another 10 minutes before chilling. I chilled my pie in the freezer for 1 hour before adding whipped cream.
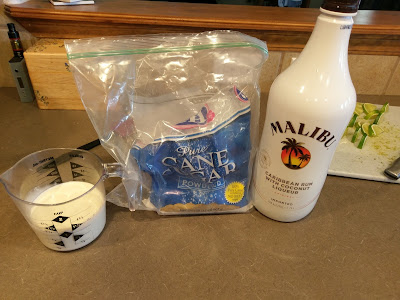
You’re gonna love me for this… No key lime pie is complete without whipped cream. No Malibu key lime pie is complete without Malibu whipped cream. Whipped cream is so easy to make, but you could always grab a tub of Cool Whip and mix in a tablespoon of rum if you’re looking for an even easier fix. But to make the real, genuine good stuff that would make rum-runners and pirates proud, get:
- 1 cup of heavy cream
- 3/4 cup of powdered sugar
- 1 tablespoon of rum
- Leftover limes for decoration
Chill your mixing bowl in the freezer for a few minutes, then add in the cup of heavy cream and mix on low for 30 seconds before upping the power to medium-high. Mix until the cream is forming peaks, around 2-3 minutes. Then add in the sugar and rum and mix on high for another 30 seconds. Transfer to a piping bag fitted with the tip of your choice. I used a 2D tip.
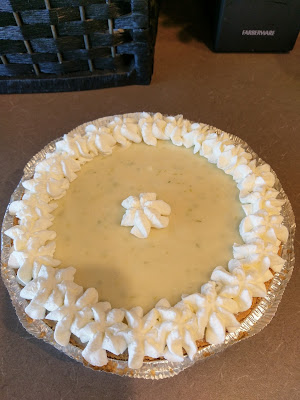
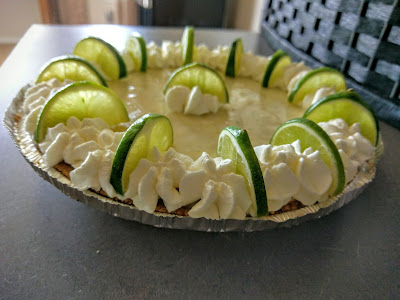
I simply piped drop flowers onto the pie. Apply pressure to the bag, let a small mound of whipped cream to come out, then twist your wrist and continue piping for another moment to achieve this. 
Then I cut my leftover limes into small slivers and placed them onto my whipped cream. Beautiful finishing touches are kinda my thing. NBD… We had this pie after playing a round of bocce ball in the backyard. I know bocce ball doesn’t seem like a physically demanding sport, but I still worked up a good thirst by the time we were done. Instead of grabbing that sugary rum drink, I opted for a slice of pie. It was an excellent decision. This pie is cool, light, tart, and has a nice, subtle hint of coconut thanks to the rum. I simply loved it and how refreshing it was on a hot day. Unlike heavier desserts, this didn’t leave me grasping for a huge glass of water. And you can really taste the Malibu in the whipped cream; it gives your tongue that nice little tingle an umbrella drink would to satisfy those summer booze cravings. I may or may not have emitted a small “woo” upon taking the first bite. Hey, I suppose no Woo Girl can ever truly be reformed. Let’s just say I’m really happy there’s leftover Malibu whipped cream for me to put on all my breakfast fruits for the remaining week. Start the day off with some alcohol-laden calcium, and end it with some delicious Malibu key lime pie, baby! Seriously, this recipe will blow away all your friends and family at your next outdoor gathering this summer. Make the juicing of key limes seem tedious and everyone will thank you for all your efforts, but you and I can keep the secret between us that making this pie is, well, a piece of cake. Or in this case a piece of pie. Really tasty, rum-y pie. ‘Til next time, my fellow eaters!
You’re my new favorite thing about summer. -
Take a Bite of Summer!
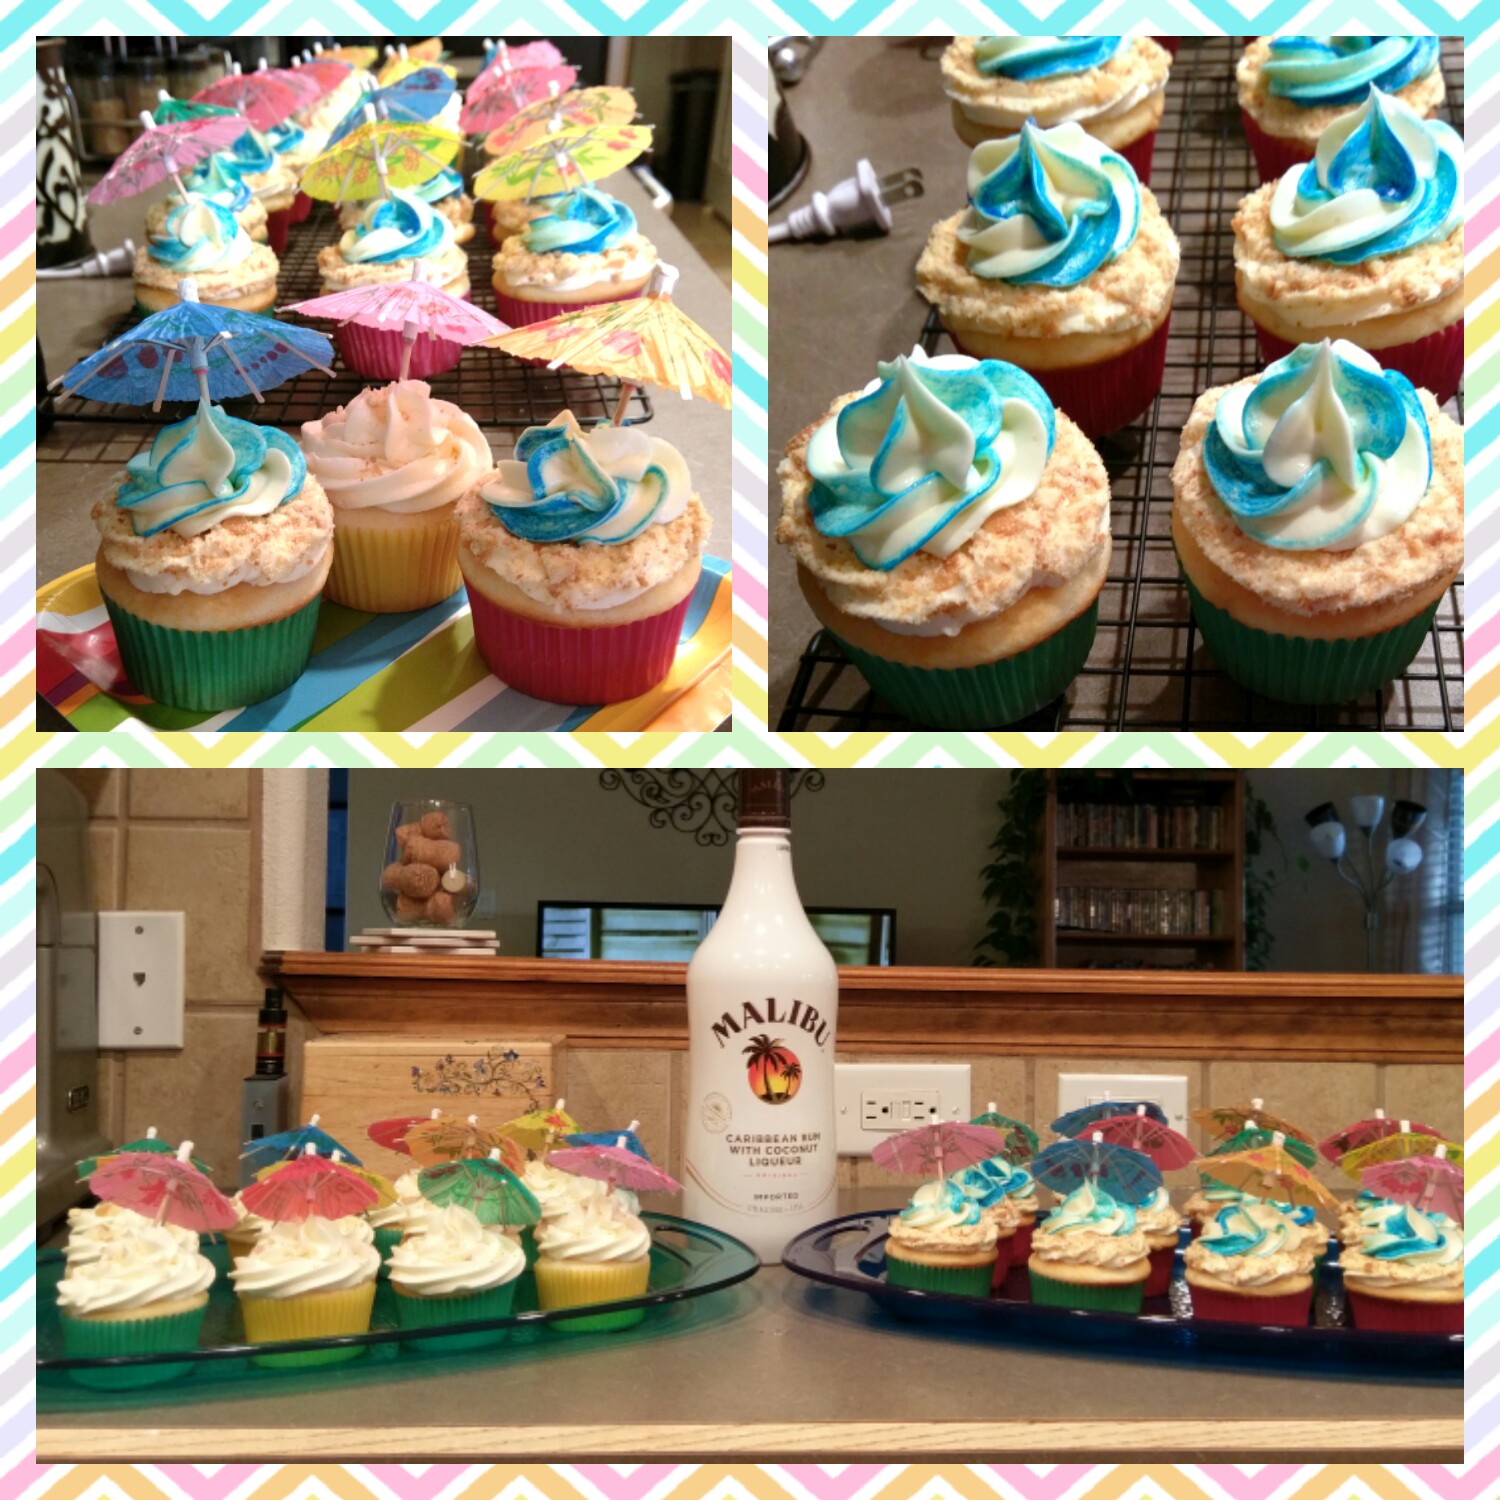
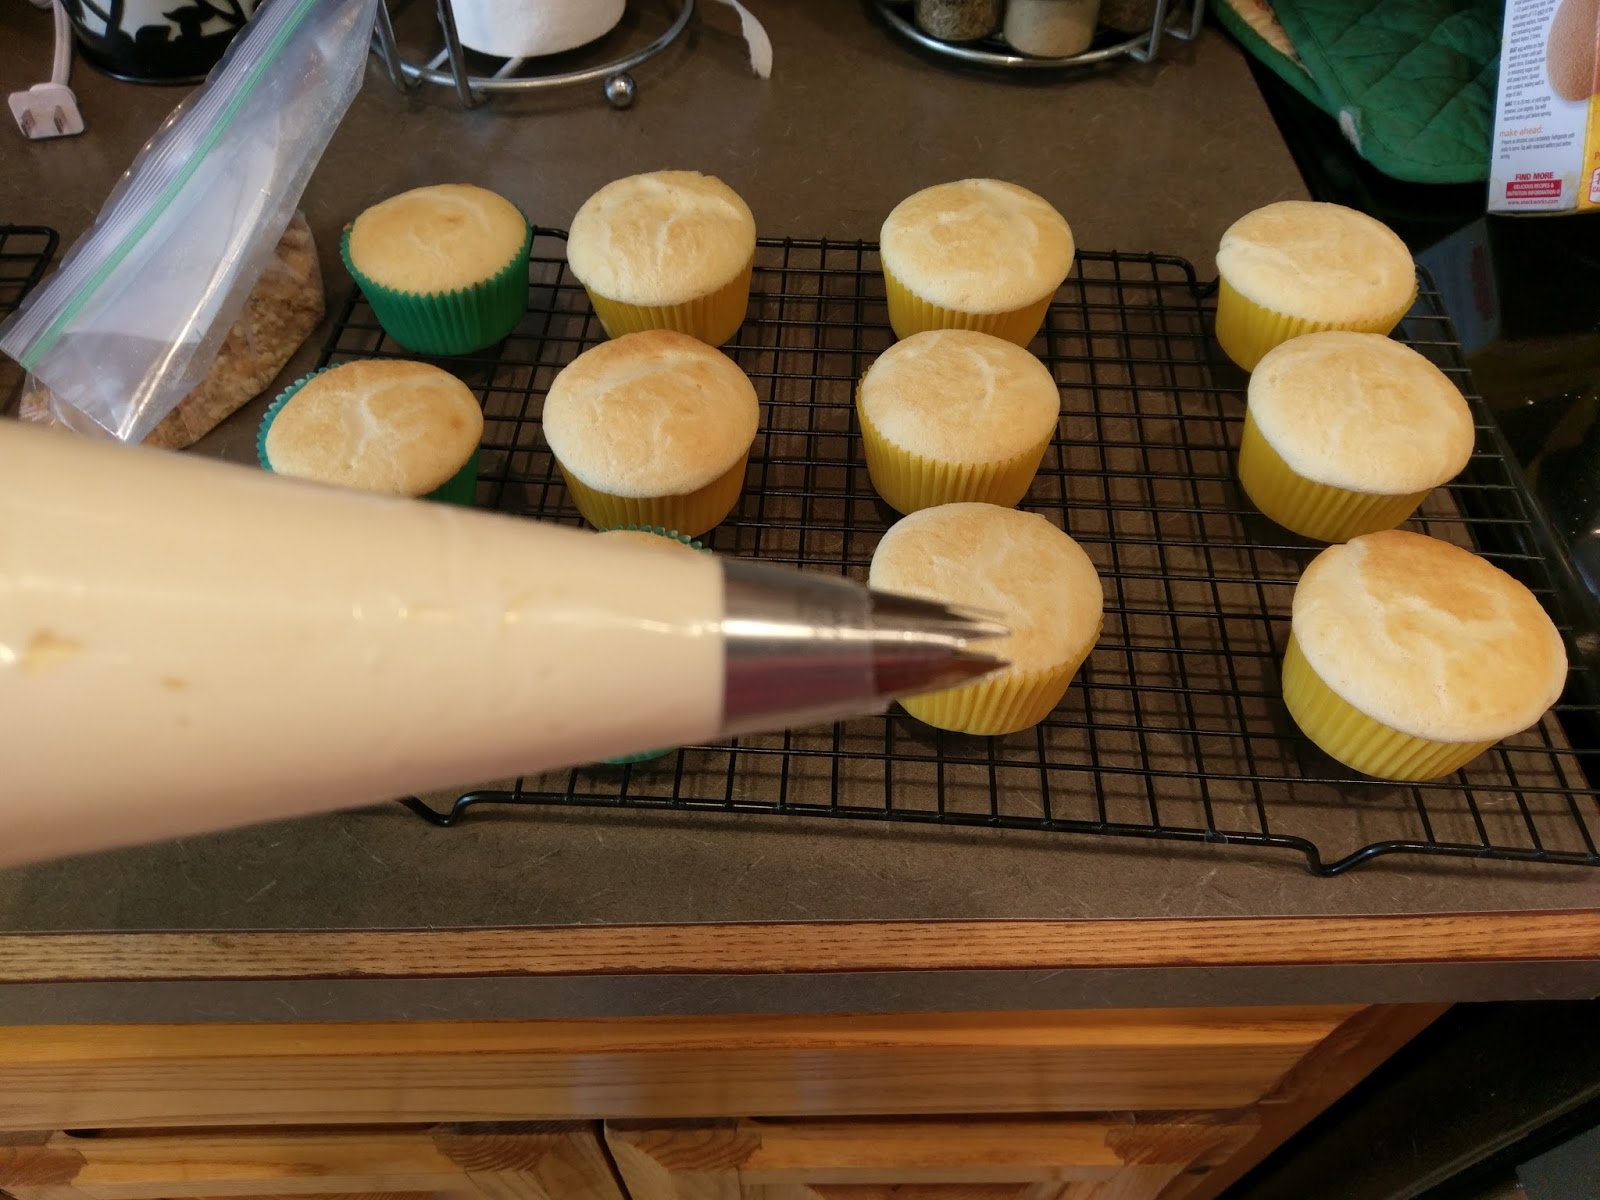
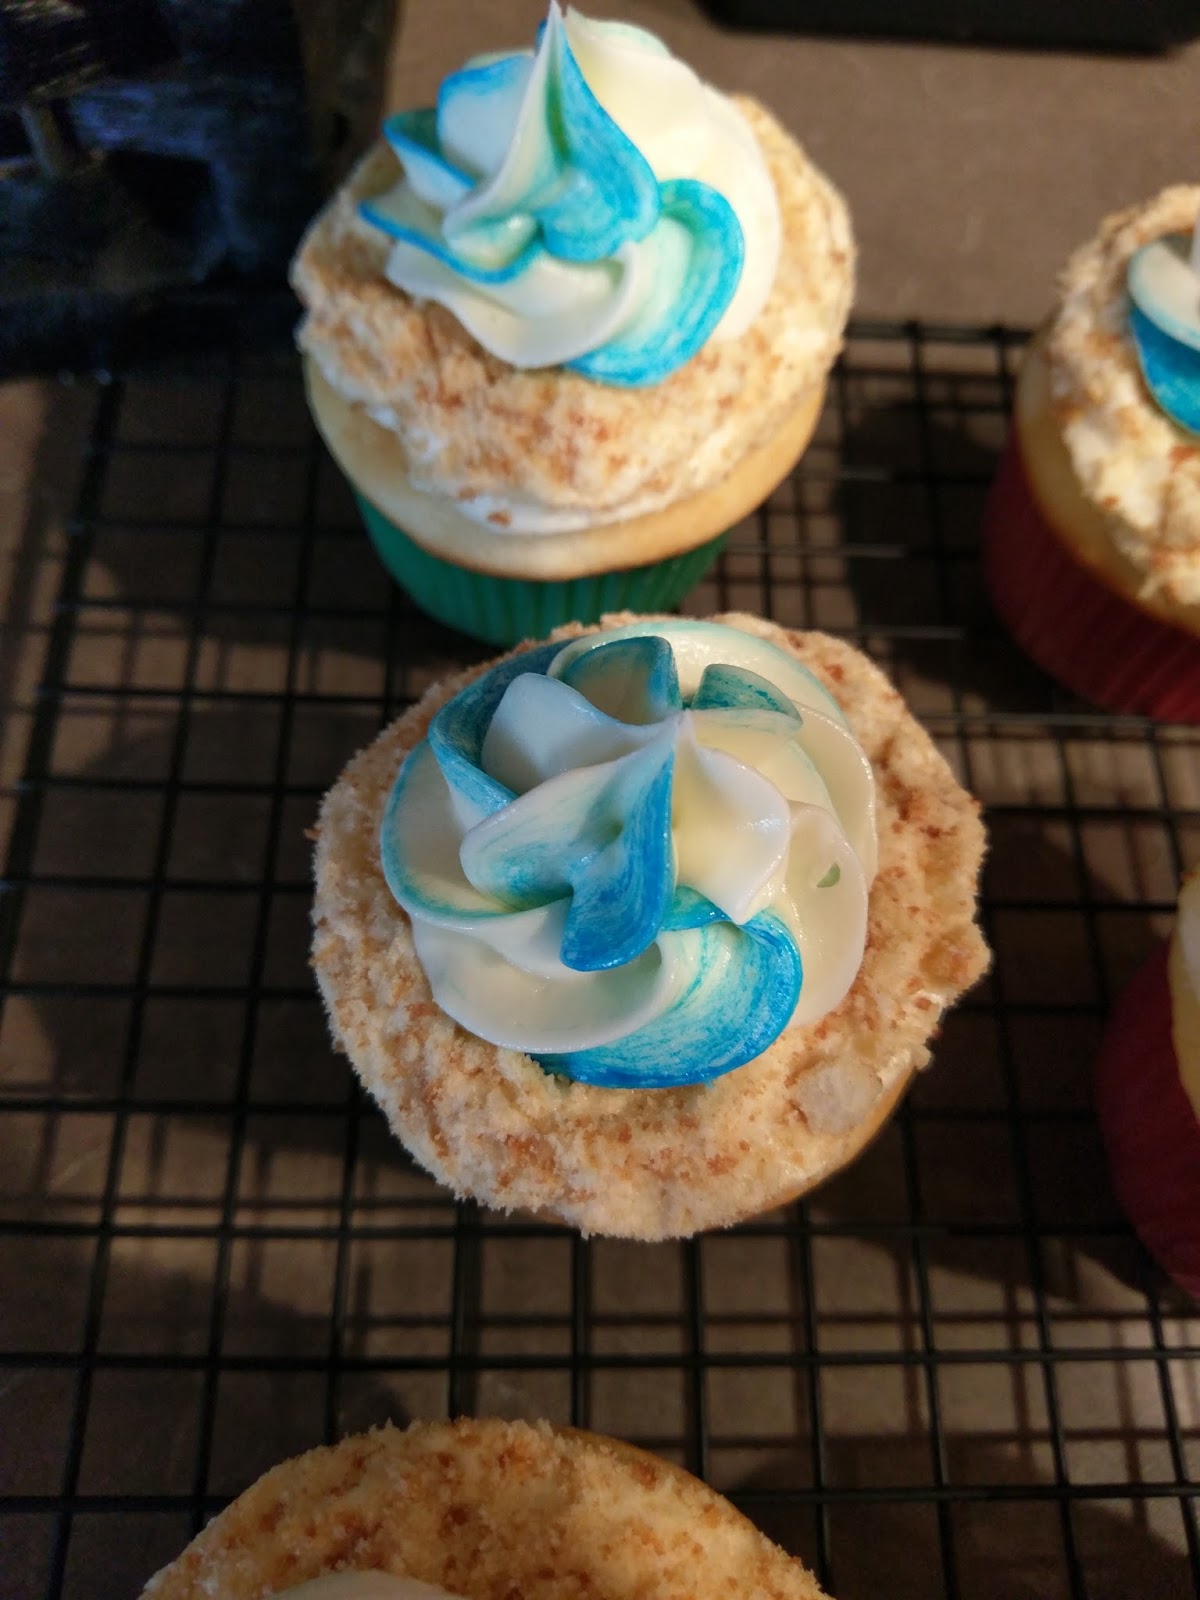
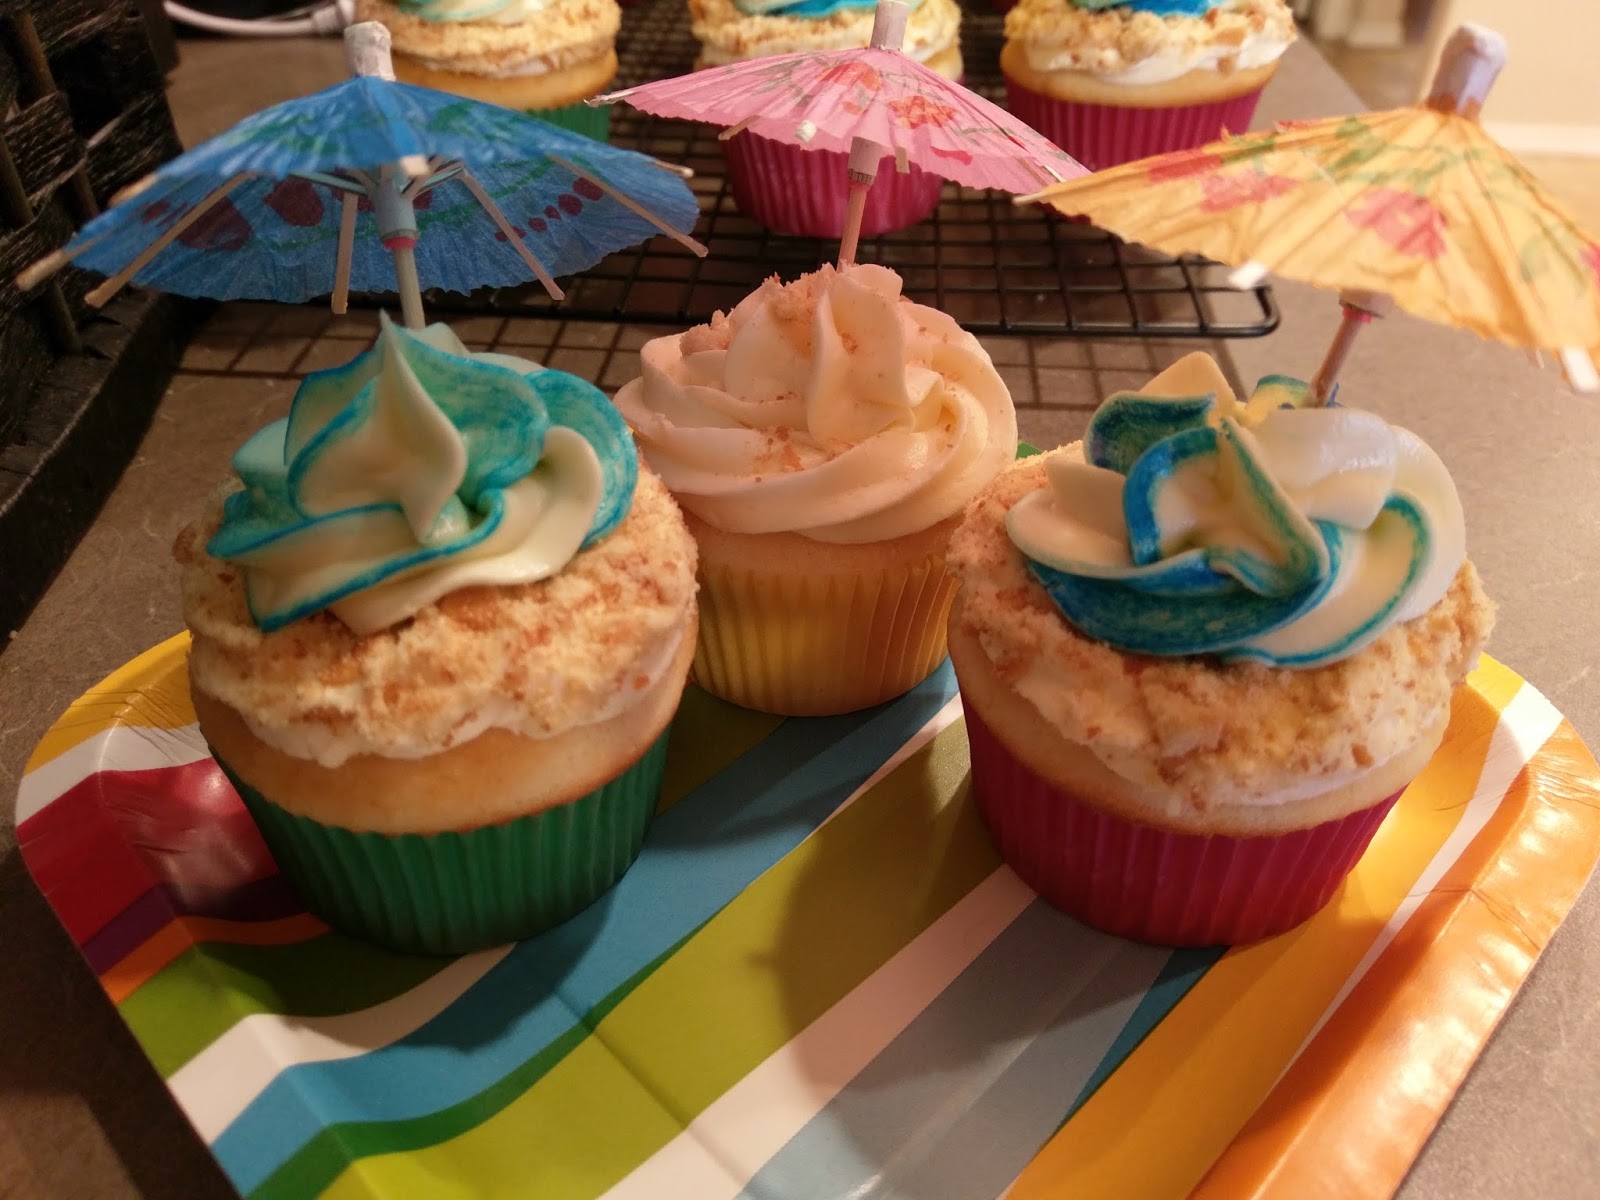
It never fails around here: it’ll be freezing outside, so I’ll make an appropriate dessert to warm my insides, and later that day, the outside world will have turned into a sauna. Or it will be nearing 100, I will buy all the ice cream, and then a cold front will move in for a week. As if living in Clovis itself wasn’t a big enough joke, Mother Nature always like to throw in a one-two punch just to remind me Clovis can always find a way to be worse. Case in point: last weekend I was in a swimsuit eating grilled brats and cupcakes (more on those in a minute, obviously). Today I am curled into a tiny blanket burrito wondering why June 1st feels as rainy and cold as February 1st, and if I’m actually turning into a real barometer and not just a human one…hello old age, I can literally feel you in my bones. Needless to say, my summertime cupcakes have been carefully, albeit angrily, placed into the freezer for the time being. Because summer conjures up images of sand, sun, and rum, not huddling for warmth, sadness, and well, still some rum. I’m closing my eyes to imagine the deluge of rain pouring down outside is the ocean, but all that’s happening is that I might have to pee now. I suppose now would be the time to look forward–after all, how many 50 degree days does anyone get in June–in a week I’ll literally be burning to death under the desert sun, but at least my cupcakes will be appropriate again. As a seasonal eater, I simply believe certain foods need to be consumed certain times of the year. Case in point: Have you ever seen anyone eat a S’more in December? Exactly. So what would prevent me from eating these cupcakes just because a few feet of rain has fallen in the last twelve hours along with the temp? Well, these cupcakes are the epitome of summer. These cupcakes beg to be eaten under a hot sun with a cold one in the other hand. These cupcakes are Malibu rum cupcakes with Malibu rum buttercream (so technically, you’re double fisting it).

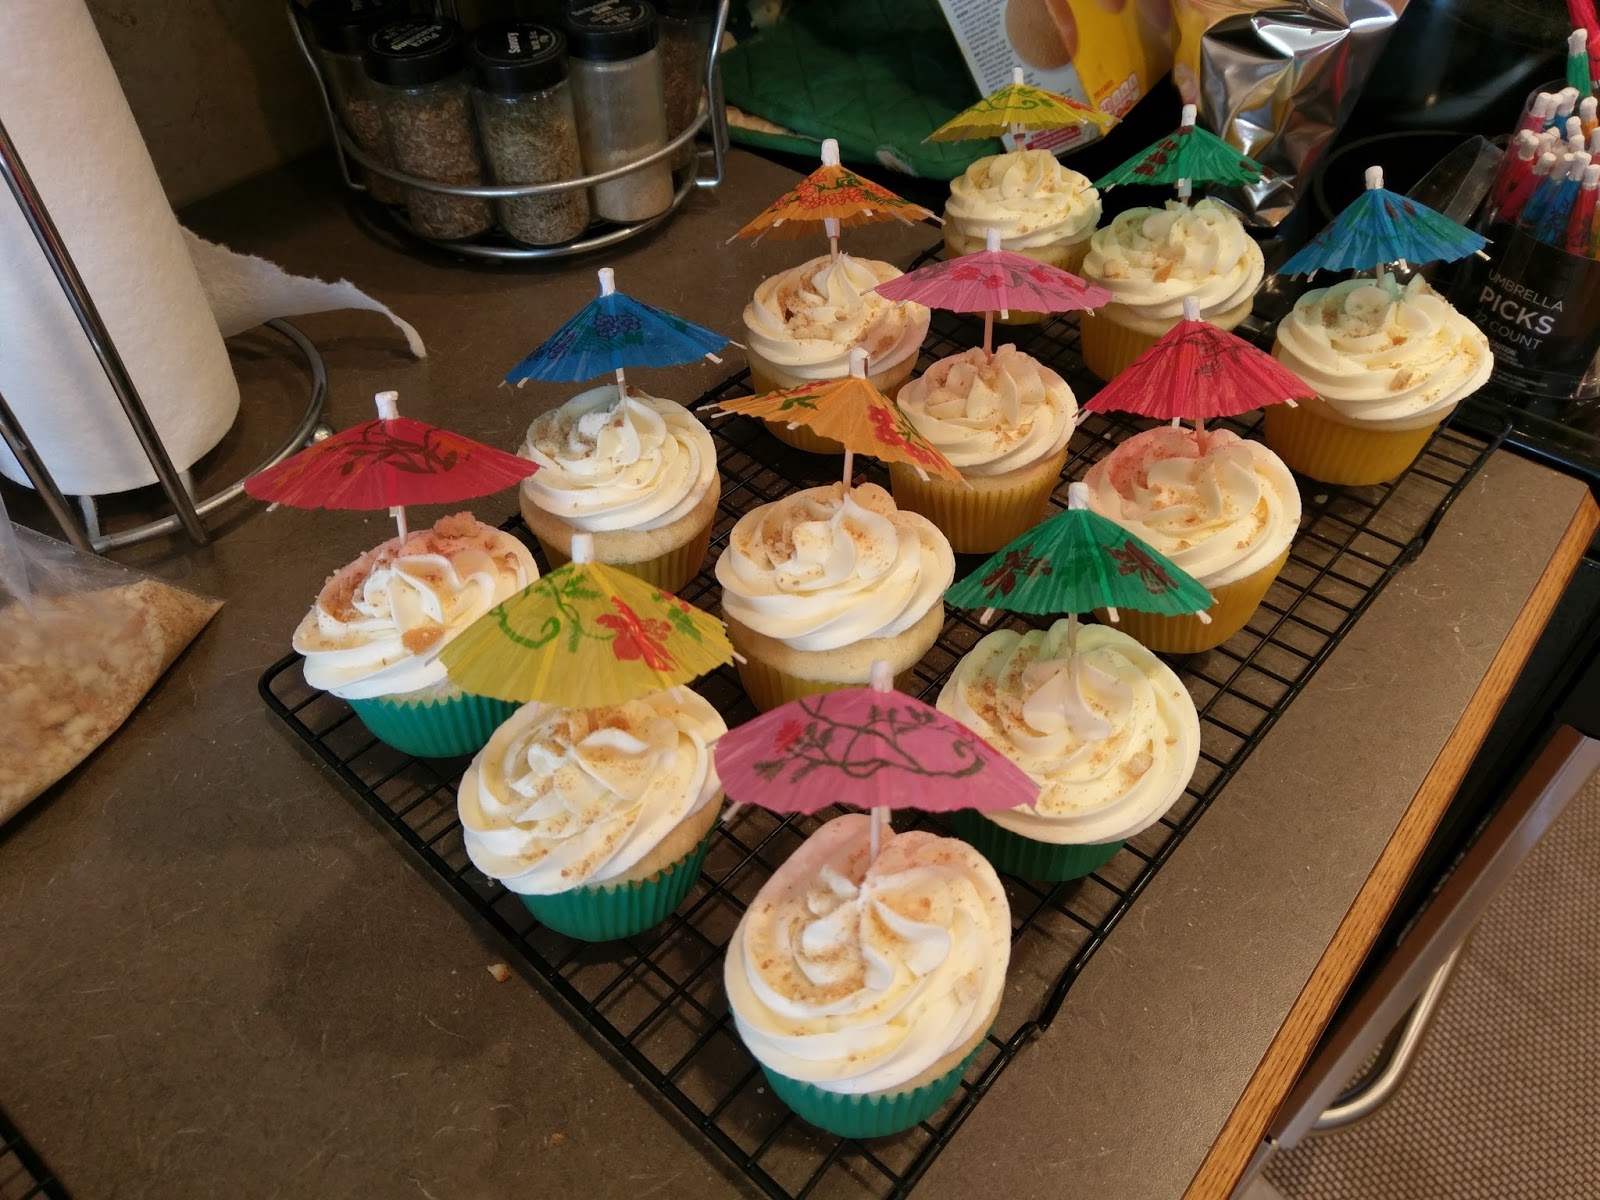
They’re so ready for summer, they even come with their own umbrella! I tried to embody the beach as best as I could with these cupcakes. I had a limited amount of time to throw these together or I probably would’ve found a way to make these even more summery by adding shark fins to them. Literally the best thing about summer is undoubtedly Shark Week. Getting people to take huge bites out of these cupcakes was as close as I was gonna get, but it works. Maybe Shark Week speaks to me because much like the shark, I’ll eat anything that fits in my mouth and I prefer solitude? People are often a little scared of me and marvel at my weirdness, so I’ve got that going for me, too. I’ll have to petition the Discovery Channel for a Kate Week. My mom would probably be the only person that watched, save for a few enemies looking for my mortal weakness.

Yep, that easy. These are so QUICK to make. Seriously, make these for your next Fourth of Ju-luau party to celebrate America the best way possible: with cupcakes chock-full of booze! “My country tis of the, sweet land of boozy treats!”
I’ve got some recommendations for you here:
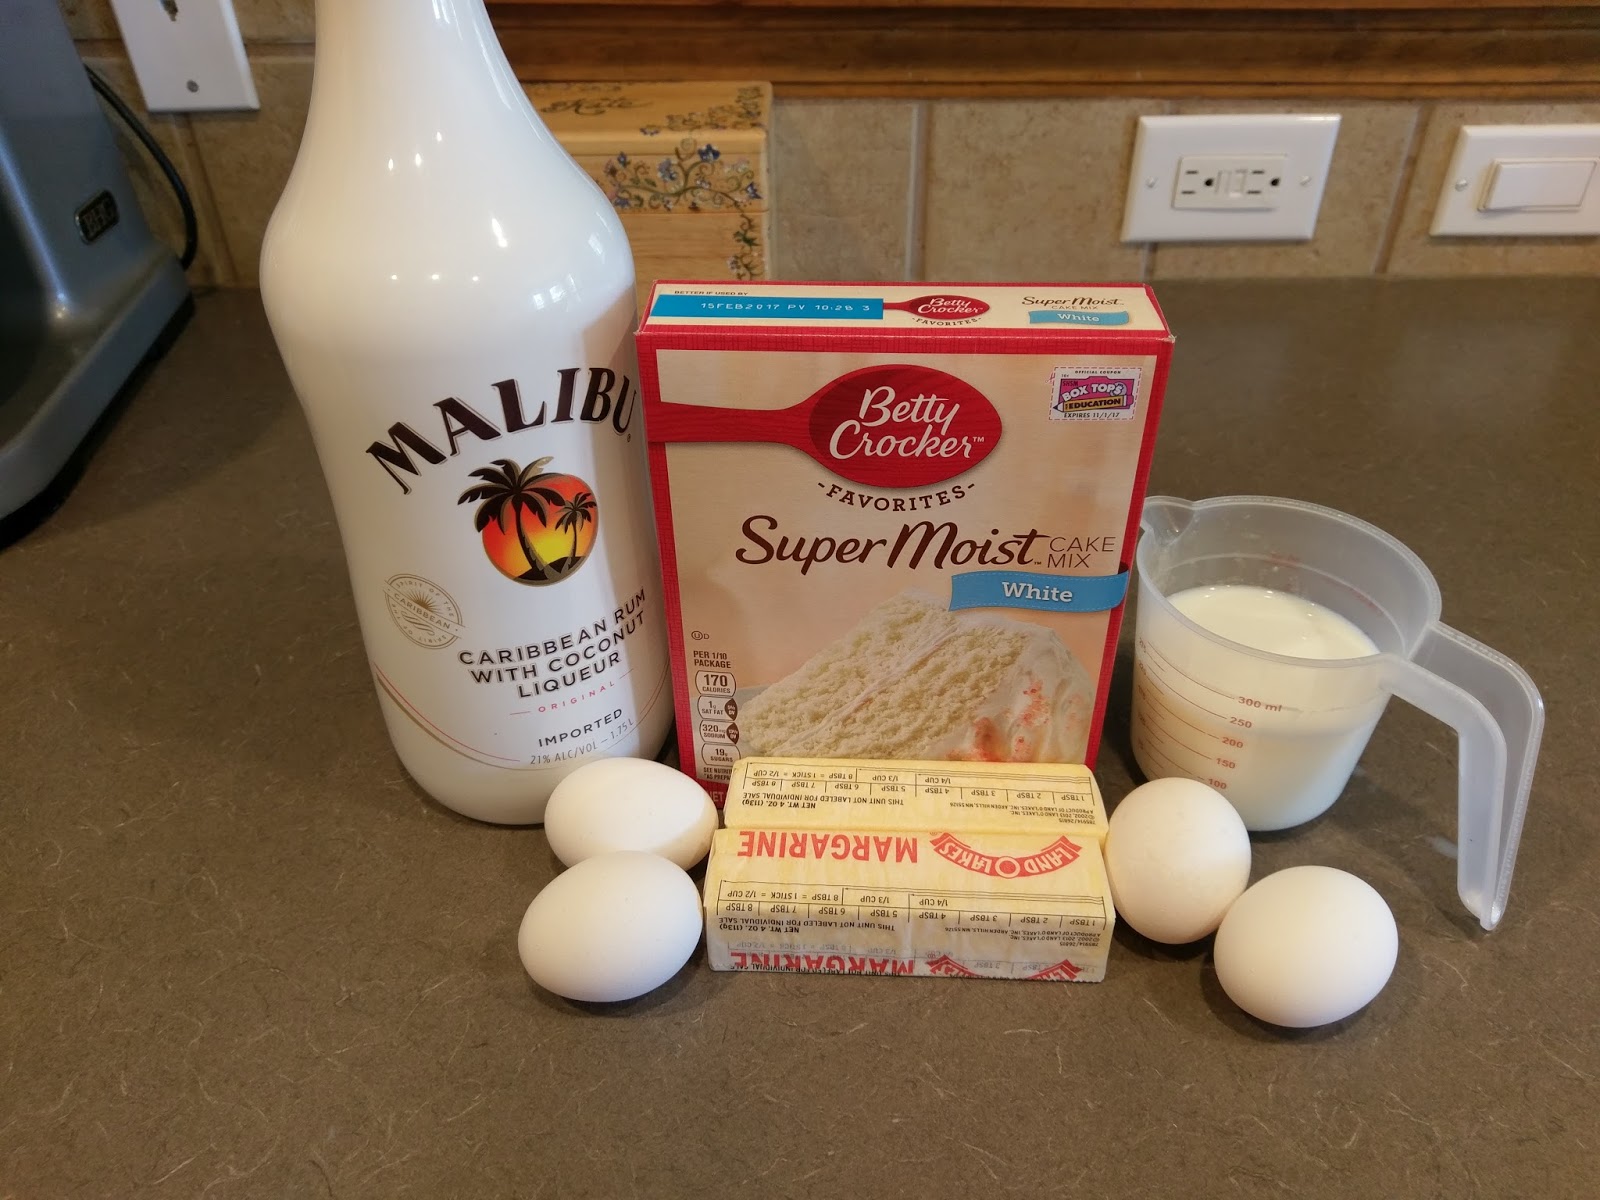
- Use a white cake mix, as it has the least amount of natural flavor to allow the rum to shine through.
- Doctor the box mix by adding an additional egg white, using butter instead of oil and doubling the amount, and replace water with milk and rum.
- This box recipe called for 1 1/4 cups of water. You could go for really rummy cupcakes and use 1/2 cup of rum and 3/4 cup of milk (I wish I would’ve done this!). Or if you’re testing out a crazy genius idea and don’t want to end up accidentally drunk while trying to operate a stand mixer, you can use 1/4 cup of rum and 1 cup of milk. I did this, but the rum taste in the cupcakes was very faint. Live and learn!
- Optional: add in a tiny (like 1/4 tsp) splash of vanilla and almond extract. If you use the 1/2 cup of rum, this should be an excellent addition for taste. I only used 1/4 cup of rum, so the vanilla and almond overpowered the rum taste. People still ate them, all was not lost.
- I also recommend using a coconut rum and not a spiced rum. Malibu has that perfect summertime flavor, like tanning oil in digestible form.
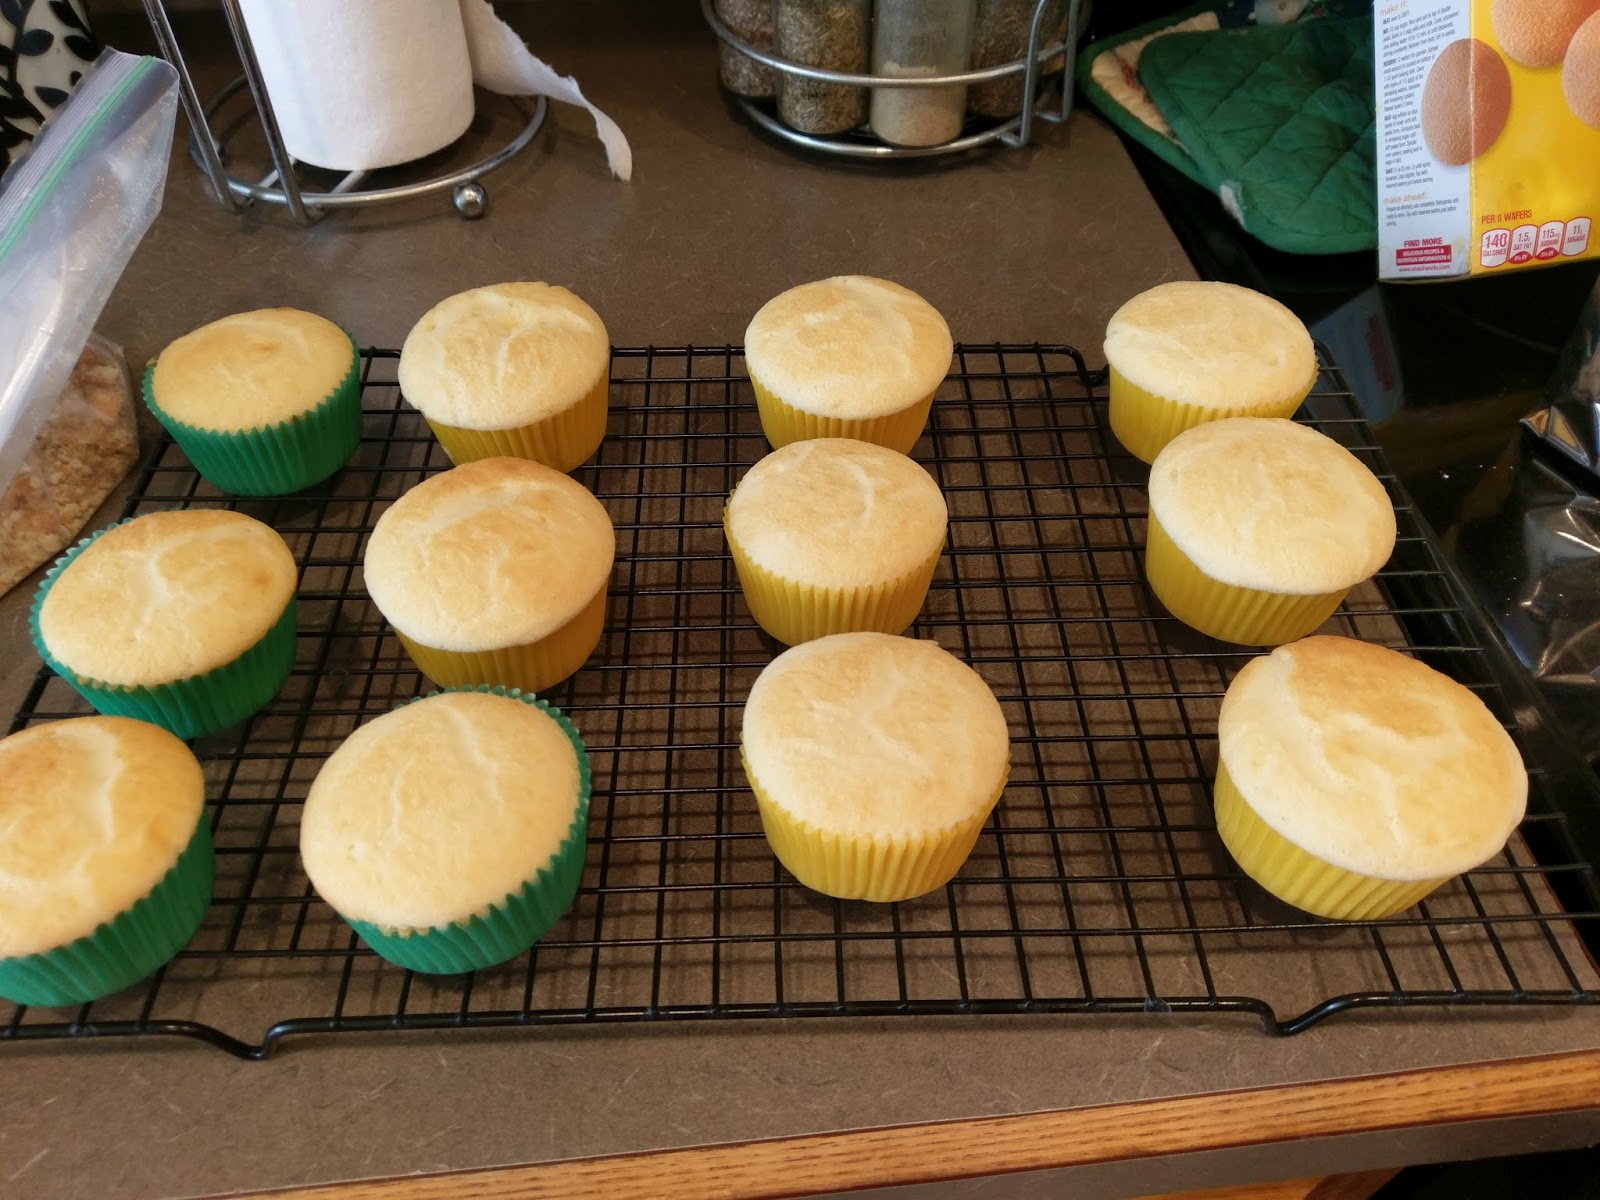
- Bake according to package temp and time.

Let cool in the pan for 5 minutes, then remove to finish cooling on a rack. While the cupcakes are cooling, make your rum buttercream. I made a very large amount because I wanted to get wild and crazy with the frosting. And, taste testing reasons… You need:
- 1 1/2 cups of butter at room temp
- 7-8 cups of powdered sugar
- 1/2 tsp vanilla
- 6-7 TBS Malibu Rum
- Optional: crushed Nilla Wafers for “sand” and cocktail umbrellas for decorating
Cream the butter until nice and fluffy, then add in the vanilla, two cups of sugar, and two tablespoons of rum. Mix well, scrape the bowl, and then add in two more cups of sugar and two more tablespoons of rum. Repeat this process until you have enough frosting to decorate your cupcakes. I used 8 cups of sugar and 7 TBS of rum for 24 cupcakes. This is not too rummy by any means. You can taste the Malibu last…it lingers on your tongue with each bite, but it is not so powerful you’ll fail a breathalyzer, promise.

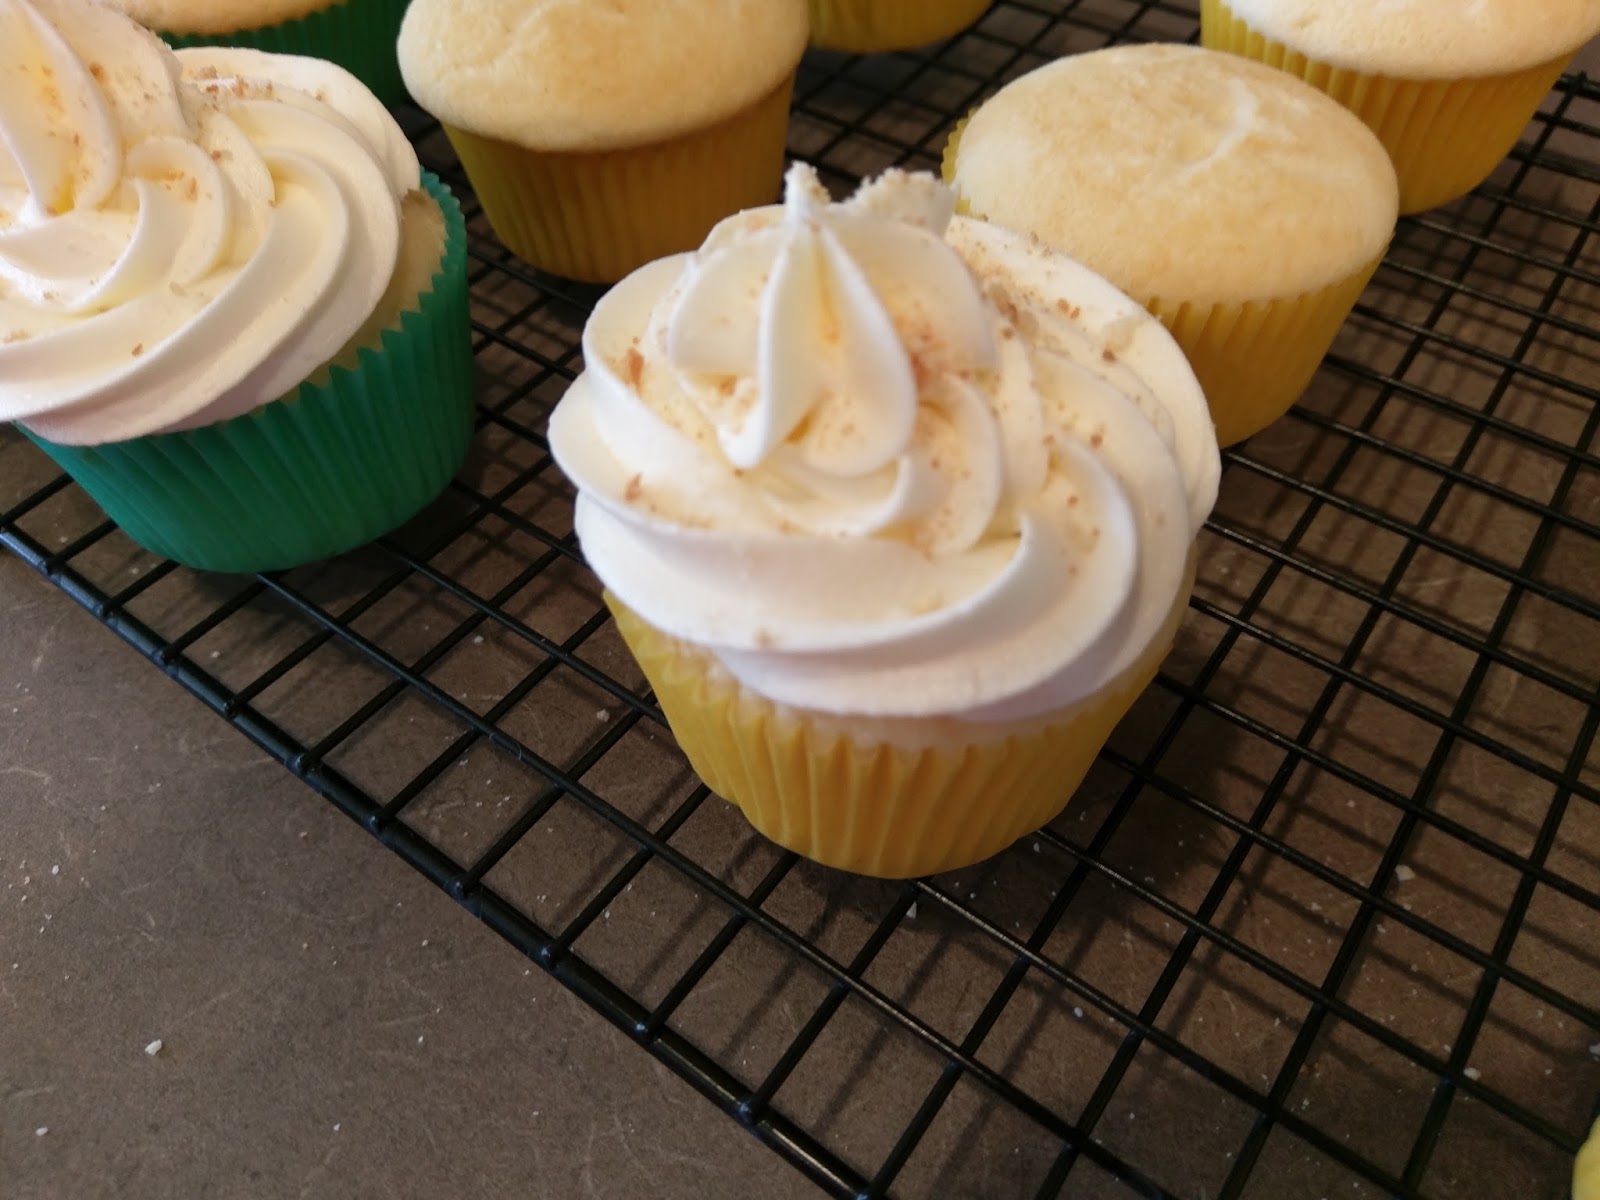
For a simple swirl, use a 1M tip. 
Like so. Finish off with a sprinkling of crushed Nilla Wafers. This right here looks like the perfect soft serve ice cream cone. Dammit rain, go away, you’re harshing my food vibe! 
Complete the look by angling a cocktail umbrella into the top! 
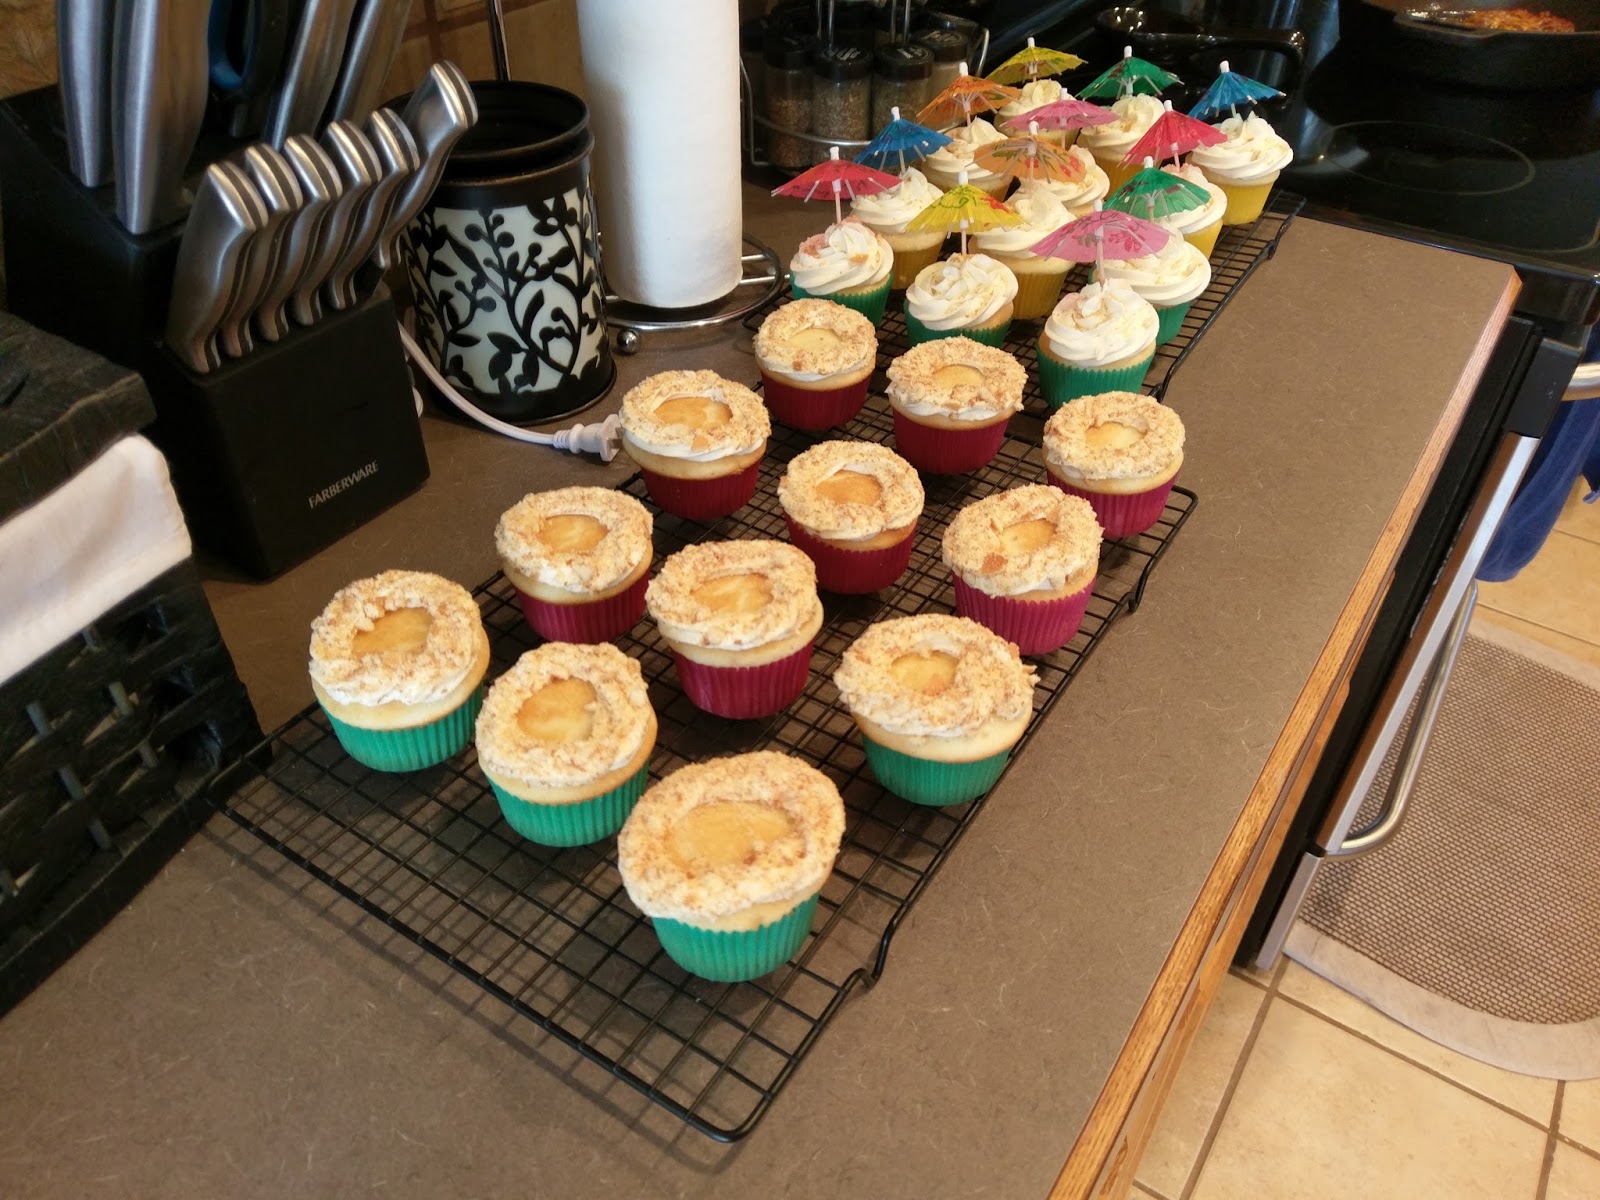
With the other dozen, I wanted to create a mini beach. I took a bowl of crushed of Nilla Wafers to place next to my cupcakes. Then I used my 1M tip and created a ring around the outside edge of the cupcake. 
Then I gently rolled it in the “sand.” 
And repeated on all 12. 
Then I got out a new piping bag fitted with another 1M tip and painted gel dye on the inside edges of the bag. 
And I filled it with the remaining frosting, doing my best not to get blue dye all over myself and failing miserably, of course. 
Then just pipe little swirls into the middle of the “sand.” Presto! A wave of blue and white “ocean,” we shall say. I repeated on all 12 and also added umbrellas to these, but they are cute without, too. But I have literally no use for 60 leftover cocktail umbrellas, so I was using 12 more come hell or high water. While this may be a white cake base, the addition of the rum and extra egg white make these cupcakes as light and fluffy as little individual Angel food cake servings, but without all the extra work and swearing that comes with making them! Seriously, these will melt on your tongue like any good summertime rum-based drink should. And they’ll last about as long as a pitcher of cold piña coladas, so be sure to grab one fast, or in the case of our party hosts, take and hide some for later (rum smuggling, essentially). Next time I will add in the extra rum to the batter, but the buttercream icing…I could honestly sit down with a spoon and just eat this alone. I absolutely hate the texture of coconut but love the flavor (refer again to the weirdness I mentioned in paragraph two of this blog), so this frosting is perfect for anyone into coconut. Plus eating them just transports you away to white sandy beaches, warm sun, and a magical land where calories don’t exist. Maybe I’ll be digging these out of the freezer tonight to wash away today’s rainy blues. ‘Til next time, my fellow eaters!

Life’s a beach, after all. -
Texans Bake Best.
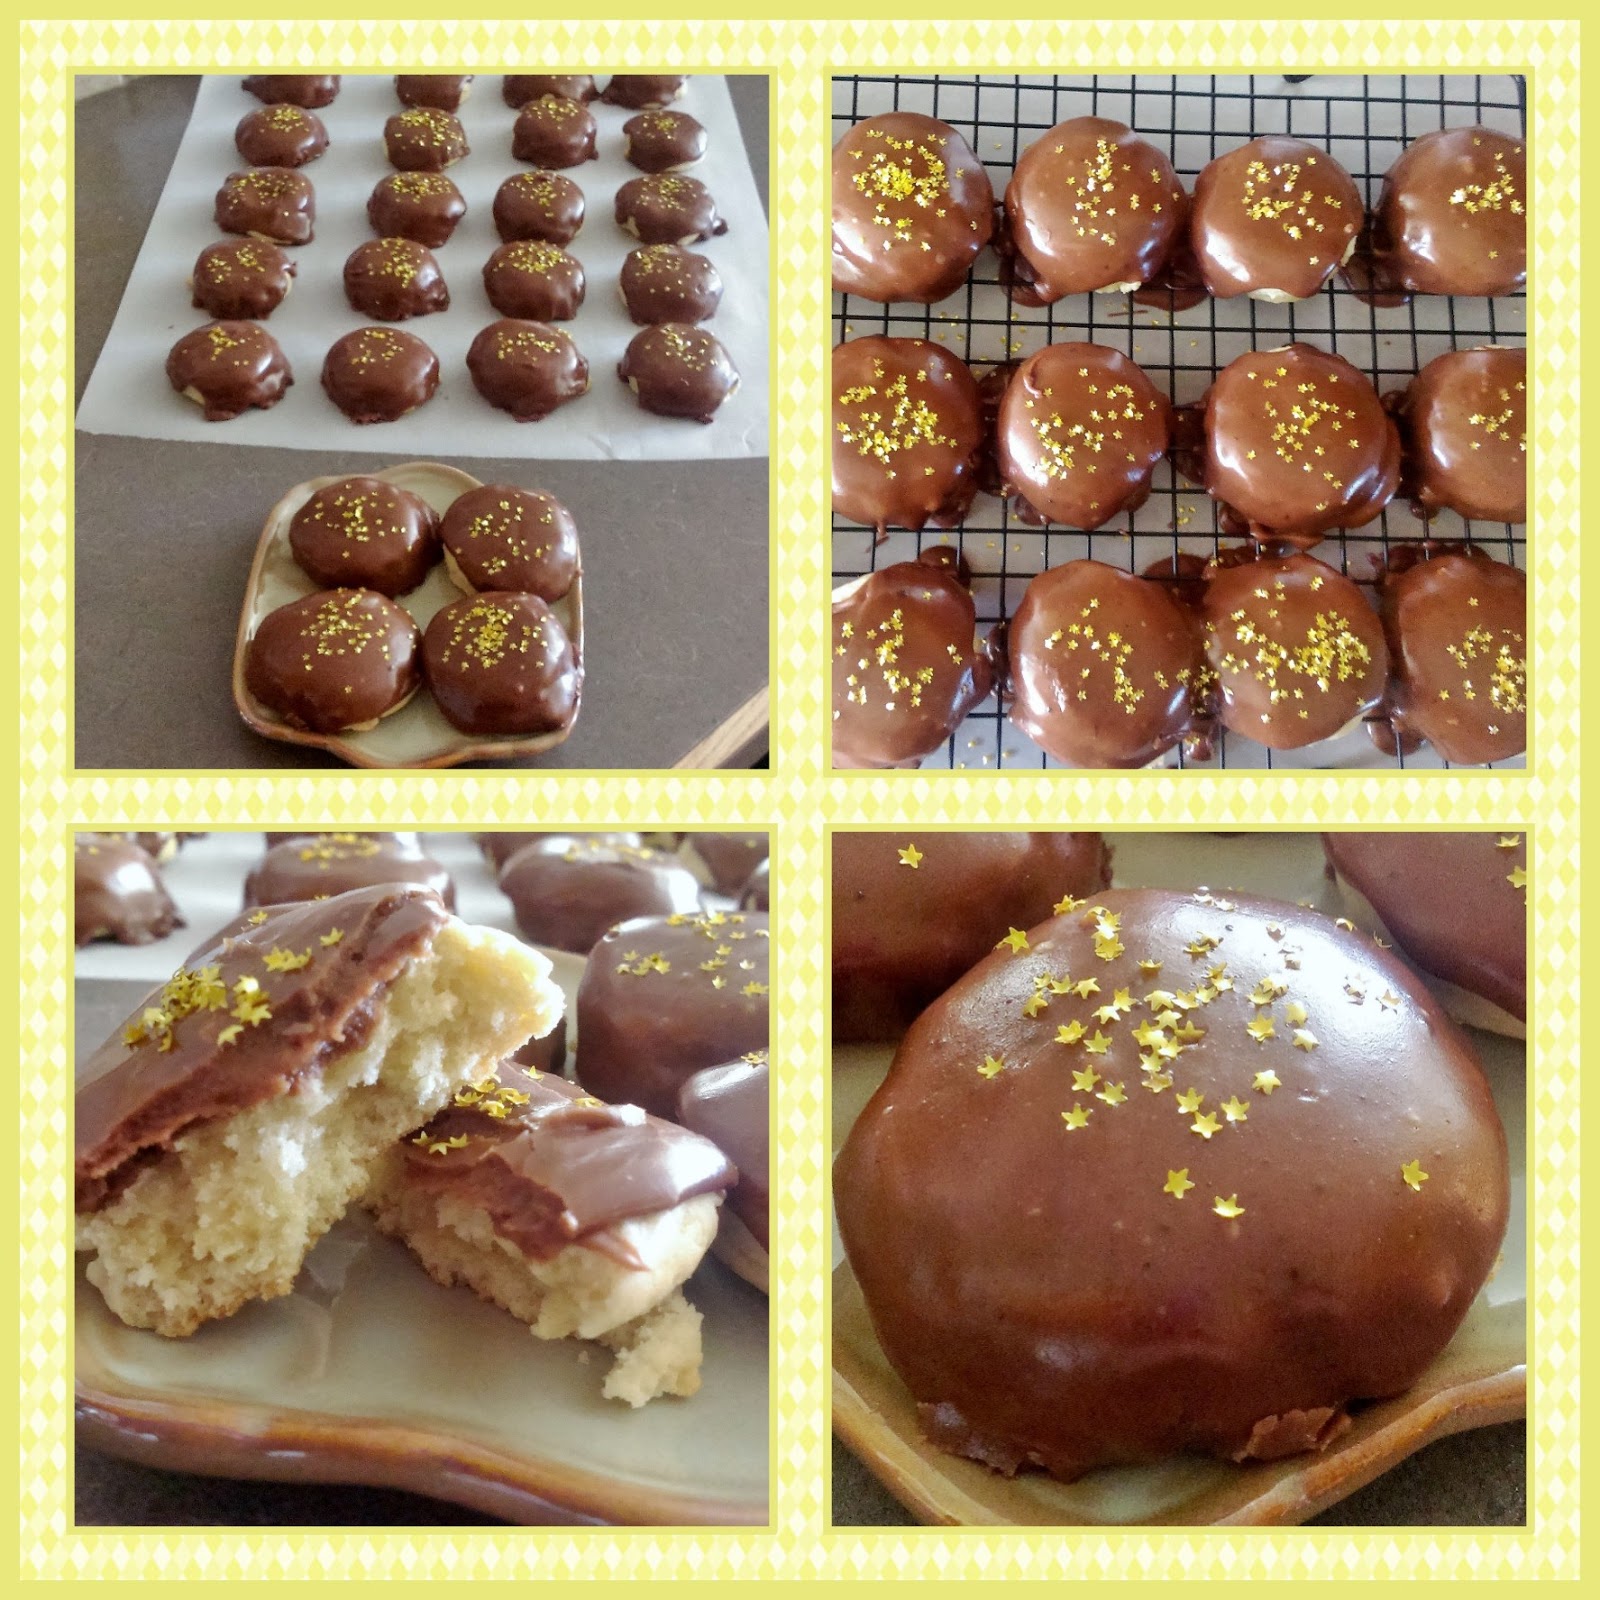
Texas has given way to some of my favorite creations: Blue Bell ice cream, Shiner beers, the best damn BBQ, and H-E-B…I know it seems silly, food, beer, and a chain of grocery stores (throwing shade your way, Walmart/Arkansas), and I realize that most people are inclined to adore the gifts of their home state, but Texas is clearly ranking superior in a lot of categories. I can’t begin to explain to you why all of us Texans are so boastfully proud of our home state..John Steinbeck probably summed it up best when he said Texas was a state of mind. You have to be there to see it, feel it, experience it, and it is unlike anywhere else in the world. We’ve got rolling hills, gorgeous deserts, and some days we even experience all four seasons at once! We’re also pretty damn proud of the fact that it can take an entire day to drive out of our state. We like things big in Texas–big trucks, big hair (‘Tease it to Jesus,’ we always say), big smiles; if you’re looking for something big, chances are we have it, Texas-size. Take our cakes for instance. We have Texas sheet cakes because regular cakes simply weren’t large enough, so we made sure to make them in a size so large they could only appropriately be named by comparing them to the size of bed linens. This is actually not true, but it would be pretty awesome if it was. Texas sheet cakes are supposedly called such because the cakes are cooked in a sheath pan and are only about an inch thick. Because Texans are geniuses, someone decided the cake-to-frosting ratio of normal cakes simply wasn’t cutting it and perfected the sheet cake so you pretty much get a 1:1 ratio of cake and frosting. I would worship at the feet of whoever it was that took the initiative to make this happen. We all know we only eat cake for the frosting, unless you’re one of those weird people who peels their frosting off…in which case, know there’s a special circle in hell for your deviant behavior. I have never made a traditional Texas sheet cake (although I’ve probably eaten at least 100 of them), and surprisingly, today is still not that day. Today is the day I took the mad-Texas science a step further. Today is the day that Kate Bakes Cakes makes yellow Texas sheet cake with chocolate frosting cookies. So when the time comes that someone is searching through the annals of history to figure out what brilliant Texan created such a concoction, let my blog do the talking!

Can you eat a dream? The answer is yes. Yes you can. These provide all the flavor of a yellow Texas sheet cake, but in handheld form you can take with you literally everywhere you go. See, cake severely limits your ability to eat on the go. Who has time for plates and utensils in this day and age? This is starting to sound like an infomercial. I digress. Texas sheet cake icing is literally a gift from, well, some unknown Texan I talked about earlier who may or may not have either been some sort of diety or witch because this stuff is pure magic. It’s like Magic Shell but for cake/cookies–hardened on the outside yet somehow ridiculously soft on the tongue. And the actual cookie? Proud to report the conversion from cake to cookie turned out ridiculously well. The outside is nice and crisp, but the inside is literally a piece of cake. This may be the crowning achievement of my original recipes. Did I peak before 30? Yes, but are we really that surprised a blonde narcissist with an over-inflated ego and real-life Disney villain qualities peaked before 30? No. No we are not.

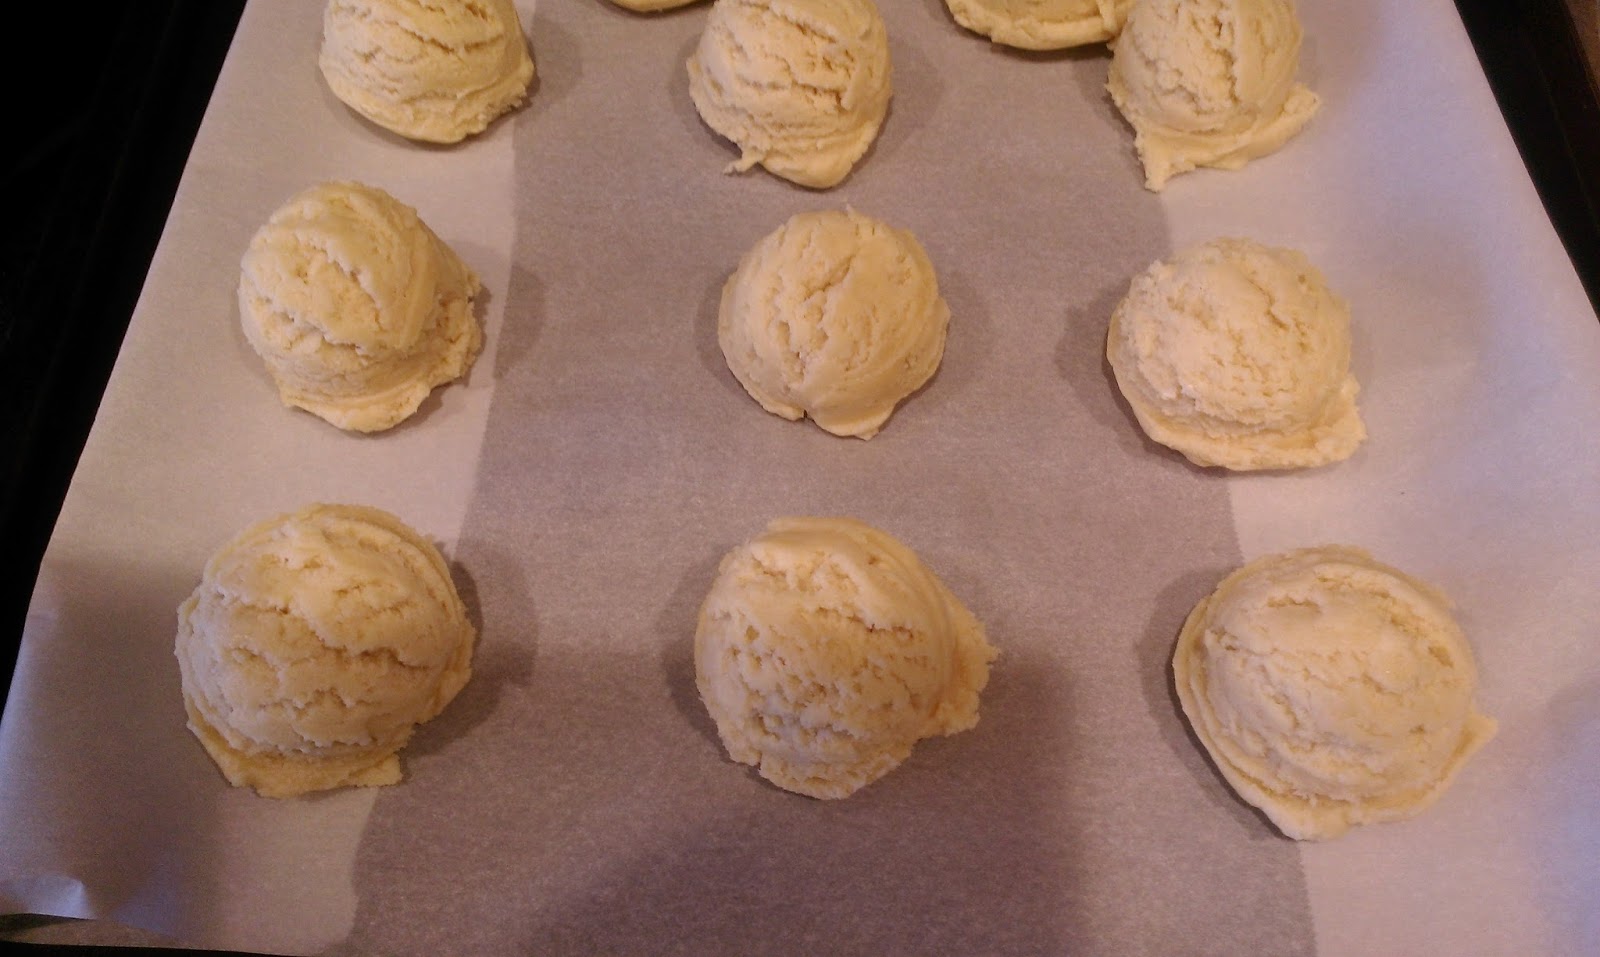
So we’ll carry on, business as usual. I looked at the various recipes for traditional chocolate Texas sheet cakes, white Texas sheet cakes, caramel Texas sheet cakes, seriously, we go big or go home when it comes to the sheet cakes. I researched the science behind converting a cake batter to cookie batter. And by research, I mean a cursory search that had this whole cake to cookie thing figured out in under 30 seconds. So I’d like to pretend this was an arduous process resulting in my genius, but like most of life’s confusing situations, it was solved with the help of Google. To make your very own batch of melt in your mouth, not in your hands yellow Texas sheet cake cookies, gather up:
- 2 2/3 cup of flour
- 1/2 tsp salt
- 1 TBS baking powder
- 1 cup of room temp butter
- 1 cup sugar
- 1 TBS vanilla extract
- 1/2 tsp almond extract
- 2 eggs at room temp
Start by preheating the oven to 350 and blending the flour, salt, and baking powder together in a medium bowl. In a stand mixer, cream the butter and sugar for a few minutes until light and fluffy. Then add in each egg, one at a time, scraping down the bowl each time. Add in the vanilla and almond and blend. Then add in half of the dry mix, blend, scrape the bowl, and add the rest of the dry mix, blending until well incorporated.

Like little ice cream scoops of happiness. Once your dough is made, line two trays with Parchment paper or spray with cooking spray. Use a cookie scoop and scoop away! This makes 32 cookies…or in my case and the name of science, 31 because I needed to sample dough to ensure the taste was alright (Come and get me, raw eggs in cookie dough. This is my house!!). Now, I don’t like thin cookies…I like cookies thick like a slab of steak from H-E-B’s butcher. I swear they’re not paying me in anyway, I just love the store that much. So to keep my cookies from going totally flat and thin in the oven, I stick them in the fridge for 10-15 minutes to help keep a puffy form. These should bake for about 8-10 minutes, or until bottoms are turning golden and tops are firm.
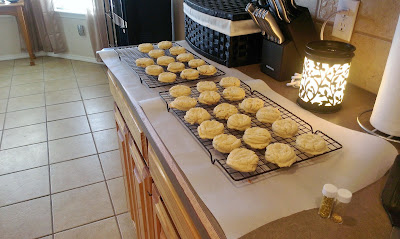
Like a blonde field of dreams. I baked these 12 at a time, one tray at a time with no issues. Let them cool fully before making your icing! Otherwise the icing won’t harden, and that is simply not sheet cake icing then. It’s just a puddle of delicious melted sugar. Still good, but not what we’re looking for. FUTURE HELPFUL TIP: icing is messy. With or without a cooling rack, ensure you have Parchment paper underneath your cookies to save yourself a counter top disaster later.

What, still no booze in these? Whose blog is this?! While I suppose you could add some Baileys in place of milk, since this was all still in the name of science, I did not. I feel like this is a really good excuse for anything, really… Didn’t wear a bra anywhere you went today? In the name of science. Wanted to see what happened when you left a child near an angry cat? In the name of science. In the name of science, to make this icing, you need:
- 1 cup of butter (room temp will help it melt faster)
- 1/4 cup cocoa powder
- 1/2 cup of milk (or 1/4 cup milk and 1/4 cup Baileys if you’re feeling frisky)
- 6 cups of powdered sugar
Start by melting the butter, cocoa, and milk in a medium sauce pan on medium-high heat. Once melted, turn off the burner and add in one cup of powdered sugar at a time. You will get an arm workout here; you’re gonna need to whisk like crazy to get out any lumps. Lumpy frosting = some other state’s problem (Oklahoma, most likely), not Texas’s.
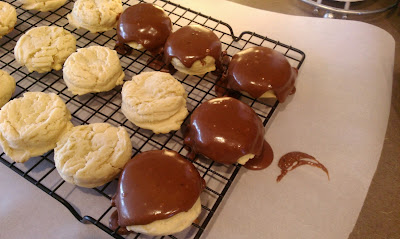
Now get ready to pour some frosting on me. I mean the cookies. I was having a Def Leppard moment. To ice, simply spoon a large spoonful of icing on top of each cookie, doing your best to make sure you get it on all sides as well. I wanted to make these even more Texas-y, so what did I do?

The stars at night, are big and bright… Deep in the heart of Texas! Sorry, not finishing that line ends with a lifetime prison sentence for any Texan. Probably a true fact. I iced four cookies at a time and then quickly dusted each one with star sprinkles. Mostly because they’re for the Lone Star State, but also because we’re moving soon and I don’t think my husband is going to appreciate me taking up an entire box worth’s of space in a U-haul for my decorative sprinkles collection. Once all your cookies have been frosted, back away slowly. Resist temptation. DO NOT TOUCH until the frosting has set after about an hour. I suppose you could place these in the fridge or freezer to speed up the process. I ate an orange and contemplated the impressive amount of sheer willpower I’ve grown since starting to record my daily food intake. I also may have cried a little, but I’m not sure the two were related (I’m positive they were).

You were worth the calories this close to swimsuit season, Texas sheet cake cookies. Y’all…a blog about Texas and my first y’all wasn’t until the end, clearly I need to brush up on my Texan…these cake cookies are the best thing to happen to Texas since Stephen F. Austin or Schlitterbahn. That good. Start to finish I was done in about 45 minutes, and that’s including 15 minutes of staring longingly at my fridge while the dough chilled. The hardest part about making these cookie cakes was the hour wait to let the frosting set. I was a good little girl and waited until after dinner to eat one. I was proud. Proud of how damn good these are. The frosting is able to be handled without getting all over the place but still soft and melty when eating. The cookies are firm on the outside and smooth like buttah on the inside. Yellow cake/chocolate frosting is always a winner in my book, but these little fellas took it up a notch. Try these, you won’t regret it. It’s easy as pie and as Texas as sheet cake cookies! Like I said, everything’s bigger in Texas, especially flavor. ‘Til next time, my fellow eaters!
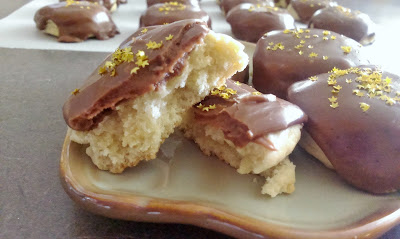
And just like any true Texan, you’ll be sad when they’re gone.

Healthy-ish cake, cupcakes, pie, and cheesecake recipes and decorating tips