-
Cookies: Perhaps the Most Versatile of Treats
Don’t get me wrong- as far as I’m concerned, cake will always be the tastiest dessert to ever exist, but cookies certainly can give them a run for their money: Cookie dough truffles, ice cream sandwiches, giant skillet cookies…don’t even get me started on Oreo’s…we’ll be here all night. It had been awhile since I made cookies, so this week I went back to an oldie but a goodie: M&M cookie pie. Yes, cookies truly are a dessert that is delectable in absolutely any form. Find me a person who doesn’t like cookies, and I’ll show you someone who’s clearly lost their mind. But I suppose in the end that just means more cookies for us. So keep on winning with this cookie pie recipe!

Plus, cookies also pair well with sprinkles, and you all know how much I love those! I was obviously still coming off a colorful dessert high after that sugar skull cake from last week when I decorated my cookie pie a few days ago. True to form, I’m still finding nonpareils and star sprinkles practically all over my house. When I sprinkle, I do so with some serious gusto. It would probably behoove me to throw down a painter’s tarp before ever engaging in kitchen activity. The mess was worth it though because this M&M cookie pie practically melts on the tongue..you know, in your mouth, not in your hands as M&M’s are supposed to. No false advertising there!

What? You don’t buy your M&M’s by the pound, too? I like how they call this the “party size” bag of M&M’s, like I’m ever going to share them with a damn soul. Pfft. How presumptuous. The ingredients for this pie are mostly items you probably already have stored in your pantry, minus the 35-pound bag of M&M’s. And, yes, of course there’s butter. Always with the butter. It is the foundation for practically everything that has ever tasted good in the history of cooking.

I love you, butter. Start by mixing together half a cup of brown sugar with 3/4 cup of butter at room temp, or in my case, slightly melty because I didn’t want to wait that long and nuked my sticks for 30 seconds in the microwave. Make sure to scrape down the sides of your mixing bowl as it blends so you can lick your spatula after. You’re welcome.

I haven’t forgotten about you either, vanilla extract. Once your glorious butter-sugar paste is mixed, throw in an egg and one teaspoon of vanilla extract. Mix together for about a minute until things are a little frothy from the egg yolk.

Where would we be without flour… In a rather odd measurement, add in one cup and one tablespoon of flour (the All Purpose variety, as it is the most multifaceted of the flours) and 1/4 teaspoon of baking soda. You’ve now got the cookie dough all put together, minus the piece de resistance…the one, the only, M&M’s.

I had a bit of a flour mishap, don’t judge me. Finally, add in one heaping cup of M&M’s. I could’ve just stopped myself right there and eaten the whole cup, but I persevered knowing one of the greatest parts of making this cookie pie was on the horizon: The eating of the leftover cookie dough in the mixing bowl. It has been a few days, and I never did die of salmonella, so this only furthers my belief that raw cookie dough is too pure and delicious to ever make a living soul ill. It lives to serve your taste buds.

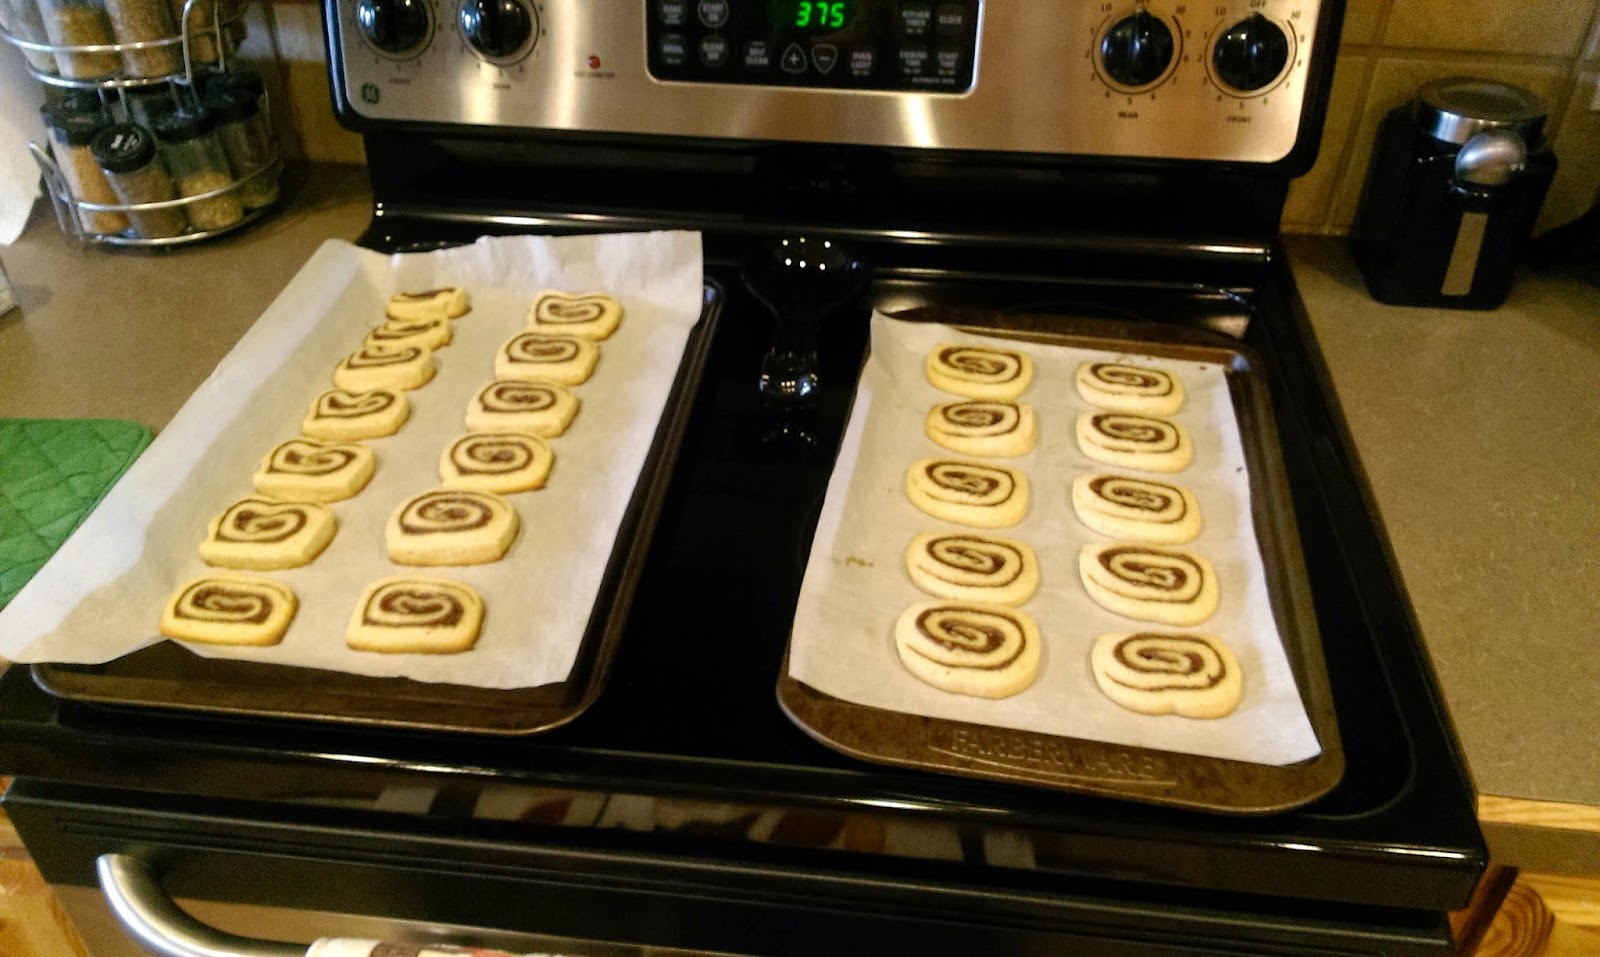
I had not licked this particular spatula yet. Yet being the keyword there. Hank was also helping at this point. Preheat the oven to 325 if you don’t plan on eating this whole pie raw (no judgement if you do, you’re my hero), and grease a pie tin. Simply plop all your dough into the pie tin and use a spatula to smooth things out. I find it easiest to start in the middle and work outward in a spiral/circle direction to flatten everything out. I love perfection and an evenly-baked cookie pie, so that’s how I got mine to behave itself. Fortunately for me, this spiraling left a lovely deposit of cookie dough on the spatula. Once done licking my spatula, I moved on to “cleaning” out the inside of my mixing bowl before actually cleaning out the inside of my mixing bowl with soap and water. This pie finishes baking around the 25 minute mark. It will need some time alone to settle and cool off before you frost it. While I usually advocate shoving things into the freezer or fridge to quicken the process, this smelled way too good to place behind closed doors, so I left it to cool for about 90 minutes. Those were the longest 90 minutes of my life. Those were like, DMV minutes or something. Painfully slow and full of massive anxiety.

Nothing, not even cookies, are complete without frosting. I suppose you could call it a day and eat the cookie pie without any icing, but we’ve come this far, and what dessert isn’t benefited by a nice frosting layer? None, that’s what. I simply used chocolate decorator frosting so my stars would retain their shape, but any of your favorite tub icing would work here, really. I loaded up a piping bag with a 1M tip and got to work.

Simply hover the tip above the pie and pipe out a mound of stars.
Yes, very technical, I realize that…
But it looks so pretty when you’re done!! Again, you could stop here and call it a day, but what dessert isn’t also benefited by a nice frosting layer WITH NONPAREILS? I mean, we’re actually probably about 50/50 at this point because not everything in the world actually needs sprinkles (looking at you, regular pie), but cookie pie certainly is one of those desserts that just keeps getting funner and funner with each sprinkle added.

I started with a base coat of regular nonpareils.
The dog almost lost it because tiny sprinkles were flying EVERYWHERE,
but they’re so tiny he couldn’t find them. Poor Hank.
And I finished off the colorful confection with some stars.
If I had hearts, clovers, horseshoes, and balloons,
I probably would’ve added those for good measure, too.There you have it! This is such an easy dessert to make, and I feel like I earned it after kicking ass and taking names with my Halloween desserts, yes, plural, last week. I realize that not every dessert has to be crazy complicated, but everything about me is crazy complicated so most of my desserts reflect that as I am the struggling artist in charge. Its been awhile, but I’m fairly certain this is another one of those “red flag” moments. Roll your eyes at my crazy all you want- but you can’t deny you’d be all over this cookie pie if you were in my house right now! I mean, we’ve already polished half of this sucker off!

Can you blame us? As I reel in the aftermath of Halloween (I’m already bothered by the startling amount of Christmas commercials on TV), this cookie pie is helping me transition from spooky, delectable desserts back to neutral, delicious ones. I still believe in a month called “November,” so you won’t catch me showing you how to bake any Christmas treats until December. I mean, we’ve got a whole other holiday to cover first! So leave it to me to come up with something to help you survive Thanksgiving and add to the dessert table with next week’s blog. ‘Til next time, my fellow eaters!
-
Covering the Creepy Holiday Spectrum in an Entire Day- Kate Baked Her Ass off!
Yesterday I spent the day in the kitchen- literally. From making cranberry muffins for brunch to beer-battered fish ‘n’ chips for dinner, I never left. This was because I was making the fanciest of cakes while also making my foray into the cake pop world. So when it came time to run errands today, I slicked back my hair, slapped on a coat of Spackle (or makeup, not sure which), and muttered to the mirror, “This is as good as its gonna get today.” My husband overheard this and managed to coddle me in a manner that involved an analogy about cake (he really knows how to handle my crazy). He told me when I put on makeup and fix my hair, its like he’s getting really, really fancy cake; but even when I don’t get all done up, he’s still getting cake either way, and cake is awesome. Sigh, managing to intertwine my love of cake and my love of my own reflection all in one fell swoop- what a guy. He’s going to be getting so much cake its ridiculous…

This is Halloween, everybody make a scene! Pulling double duty in the kitchen this week turned out just as I had hoped. One awesome sugar skull cake for Dia de Los Muertos (Day of the Dead for those of you who do not habla the Español), and Jack O’Lantern and Jack Skellington cake pops! While the cake was somewhat time consuming because I mixed about ten thousand different dyes to make the cake colorful, the hardest part of the cake pops was waiting for them to set in the freezer. If you want to be the hit of your Halloween party next weekend, let me give you a step-by-step tutorial on how to make both of these spooktacularly tasty treats. I’ll start with the beginner-level stuff for those of you who don’t want a terrible challenge, but still want to look like a creative genius with these cake pops. Just don’t tell anyone how easy it is like I’m doing now, or people won’t be quite as impressed. The things I do for you all…

Surprisingly, not dressing for turkey. All you need for cake pops is a tub of your favorite flavored frosting, decorative sticks, chocolate melts in your preferred colors (orange and white in this case), a food-safe marker, and one cake- made and cooled. I actually made two cakes for my sugar skull cake, and realized I only needed one (first-world problems are still pretty awesome). I still had a ton of scraps from cutting out the skull shape, so I used these scraps to make my cake pops. Simply crumble up your cake into fine little bits. This is where I realized a food processor would be a worthwhile investment, but if I bought one, it would have to come with its own house because I have nowhere to put one in my kitchen as it is currently bursting at the seams. These are the kind of first-world problems that are not so awesome.

Also, not mayonnaise. Once you’ve crumbled your cake, throw half a tub of icing into it. Things get messy here, but there’s no turning back at this point…unless taking a spoon and just eating a bowl of cakey icing is your thing. I’m not judging you; it sounds like a really great idea. Mix together the frosting and crumbs. I found the easiest way to do this was by hand. And once I was done, you better believed I licked a finger or two.

I also won’t judge you for eating the cake pops in this form, either. Take a cookie scoop or a tablespoon, and go to town. You’ll have to finish forming the balls by hand, but they should stick together nicely in consistency. If you want to add more frosting because you feel like they’re not sticking together well enough or want a really sweet cake pop, go for it. Place your shaped cake pops onto a Parchment-lined baking sheet, and throw them in the freezer for a couple hours and go about your life. Watch a movie, eat the remaining icing, whatever. This is the chill dessert for multiple reasons. Once your time is up, empty a bag of melts into a deep microwave-safe dish. Heat for 30 seconds, mix, and repeat three times.

Take your fancy stick and dip it into the melted chocolate.
Wonder if people will judge you for your slippers.
Then skewer your pops. Give it a few minutes,
and let the chocolate harden so it glues the stick in place.I made the mistake of not waiting long enough, and some of my pops kept falling off while I was trying to dip them into the melted chocolate. I don’t blame them- I’d hang out in a giant dish of melted chocolate for as long as acceptable, too. One day…

Ahhh, serenity. Once your sticks are in place, dip the cake pop into the melted chocolate, completely submerging it; I used a small spoon to run more chocolate on the top of my pops. I found it easiest to pull the pop straight up and out quickly, so I did not get any weird, runny action from the melted chocolate. I swept off excess chocolate by wiping the bottom of the pop on the edge of my Tupperware. This is somewhat challenging, but after a couple, you will get the hang of it and be making professional-looking pops, while eating the two wonky-ass pops for yourself. You know, to make sure they’re acceptable for sharing.

Repeat the process with the other colored chocolate melts, and set everything back on the Parchment-lined tray. Let these bad boys dry for awhile (I ate dinner and then came back to them- so I can’t give you a scientific allotment of time- just enough for me to stuff my face and need looser pants). Then finish them off by drawing faces on to the pops with your food-safe pen! So easy, a child can do it! Or a grown woman on her fifth wind. Whatevs.

Spoooooky. Okay, more like, cuuuutttte. 
“What’s this? What’s this? There’s color everywhere!” (You’re welcome for getting that song stuck in your head- now go watch Nightmare Before Christmas...but not until after you finish reading my blog, dammit.) Keep these refrigerated because they are way better cold. They can keep for up to two weeks in there- which is totally unnecessary because they won’t last that long. I need to find some sort of container to house these in, as they will be traveling into the great state of Texas when we go visit Derek’s family next week. I imagine their simply being in Texas will make them taste even better than they already were. Now, onto the advanced portion of today’s blog… I realize this is hilarious because we’re starting out with box cake and a pre-made decoration, but just go with me on this.
As previously mentioned, you only need one cake for this.
Also, depending on how you decorate your skull, pre-made roses are an awesome addition to the ojos.
You will need a stupid amount of brightly-colored gel dye, multiple #3 tips, and one #6 tip. Make your cake in a 9×13 pan, and then let it cool. While cooling, make your life supremely easier by finding a sugar skull template online, printing it on heavy-stock paper, and cutting it out. I even colored in how I envisioned my skull. This makes the decorating process about one thousand times easier because you’re not going in blind (This comes from a woman who plans her week several days in advance in a planner, and gets frustrated when things do not unfold as I told them to when I wrote them down. Life, what a rude jerk.).
I realize it looks more like a Terminator right now, but just go with me here. Place your template on the cake, and carefully cut around it. Even if you don’t plan on making cake pops at this very instant because you’re not a crazy glutton for punishment and cake in many forms, I recommend saving your scraps in the fridge in case you change your mind or just want to eat them for breakfast. Word.

I may not be able to color inside the lines, but I can cut anything like a pro. CAREFULLY transfer your skull to a decorating board. I used a large spatula and a whole lot of prayer to get this part done. Thank you, 5 pound 6 ounce baby Jesus. Whip together a batch of white frosting. For this batch with the funfetti cake, I added lemon extract instead of almond and it was ah-mazing. I recommend placing your cake in the freezer while you make your frosting so that the crumbs aren’t absolutely out of control when you try to frost the sides of the cake. A few extra minutes in the freezer will save you from a crumble-addled breakdown later. Firsthand knowledge is my gift to you.
Post-breakdown, and many sighs of relief later. Be sure to give this cake a solid crumb coat, freeze again for 20, and then put on a final frosting coat. Put it back into the freezer to let it set, and then use that handy paper towel trick to smooth out your skull. No one likes a bumpy skull in real life, or on cake. You can mix your frosting dyes while your final coat is setting in the freezer. I just used canned decorator frosting.

Yea, I ran out of couplers, so the last bag I just snipped a tiny corner off of. Ghetto, but effective. Fit the black frosting with a #6 tip because you need it to be thicker to fill in the eyes and nose. Place a #3 tip on everything else. Now comes the fun part. I sincerely enjoy decorating this cake more than anything else I’ve done to this point because it allows for so much creativity and color. I have always loved the vibrancy of Dia de Los Muertos and the fact that it is a celebration of passed loved ones, so it was absolute kismet that Derek (I keep him around for infinite reasons!) suggested I make a sugar skull cake when I was contemplating what treat to make for Halloween. If you don’t know much about the Day of the Dead, I recommend doing some reading over it because I feel like Mexico is doing their passed loved ones way better justice than we do with this holiday. It is simply amazing. PSA over, now back to making the sugar skull. You really can start with whatever part of the skull you like, but I went for the basics first- eyes, mouth, nose.
Oh, you’re welcome for not rotating this picture. 
Yes, my sugar skull does have a bitchin’ uni-brow. 
Fill in the eyes and nose by just tracing them in and smoothing the frosting out with a small spatula. 
Then come back in and start adding details! The more color, the better. Rarely does life present me an opportunity to say that. This mantra still does not apply to fashion- keep that shit simple, people. Don’t go all clowny on me. 
Don’t mind me, still laughing at my Terminator template. What? I find me hilarious. 
Once you’ve finished with your frosting, simply smoosh (very technical term) the roses into the eye sockets. 
I wanted to spruce up the sides of the cake, so I added S-shaped designs with dots on to the sides. And there you have it! The hardest part of this cake really is probably mixing all the frosting. Scratch that- the hardest part of this cake is having to cut into it. I wouldn’t let us touch the cake for a full 24 hours because I wanted to revel in its beauty before devouring it whole. That’s the sad paradox with fancy cakes- I want to eat you because I know you will be delicious, but I don’t want to eat you because you’re so damned pretty. I think we all know which side of the paradox played out in this household.
You are so beautiful, to meeeee. Until I literally cut your head off. I still have an extra skull cake in my freezer, whose face will be decorated at a date to be later determined by yours truly. I sincerely recommend making this skull cake to wow people and then make them feel bad about eating your work of art so they’ll let you drink their booze for free at their party. Cake guilt. Its a thing now. This will wrap up my blogs for Foxtober (yes, that’s also a thing). I’ll be back with more tasty treats in early November, I promise! For now, we will be off enjoying a trip to Tejas and time with Derek’s family. Enjoy your Halloween because it is the greatest holiday ever! Try not to steal any candy from kids, and be sure to dress up like an unabashed giant child. ‘Til next time, my fellow eaters! -
Painted Pumpkins 101
I know, I know..first it was pumpkin bundt cake, then it was pumpkin dog treats, and now its spray painted faux pumpkins (or faumpkins as I call them. Or just started calling them right here in this moment. Whatever.). I really wasn’t kidding when I said I’m absolutely obsessed with fall. On a scale of things I could be addicted to, it is a pretty mild issue really, falling somewhere in between Netflix binging and wine fervor. In fact, everyone only seems to benefit from my hardcore seasonal enthusiasm. I spray painted two pumpkins last year for Halloween, and absolutely loved them. Since Derek was home this year, I decided it would be fun for us to make a few more. Derek begrudgingly agreed to my unrelenting arts and crafts session (he secretly enjoyed it), and thus, these faumpkins were born:

I bet its pretty clear who chose to do what pumpkin. A few Halloween’s ago, I carved a Mike Wazowski jack o’lantern. It was in this moment that my arthritis was born. But since we live in a magical land where it is 80 degrees one day in October, and 50 the next before repeating the cycle, jack o’lanterns rot in about a night or two and turn into something reminiscent of Renee Zellweger’s new face. Its rough, y’all. So last year, I took the time to churn out a few painted pumpkins from Hobby Lobby, and love that I can reuse them year after year without worrying about melty face.

Mike in cooler, happier times. My fingers get all crampy just thinking about it. 
Last year’s faumpkins for an NFL house divided.
At least one of these pumpkins isn’t dying from embarrassment this season.These pumpkins are insanely easy to do, and if you live somewhere with bipolar weather, you will find it is nice not to have to worry about your hard work withering and dying before your very eyes. Or if you live somewhere normal, its just awesome to have pumpkins you can use year after year. So let’s get to the nitty gritty! Sorry, the fall obsession makes me say very strange things like “nitty gritty.”

You’ll need spray paint depending on what type of pumpkin you want to make. Get a can for your base color, and if you have large accents, get those colors in spray paint as well. For smaller accents, Sharpie makes paint pens in just about every color imaginable. 
Then head to your local craft store (Michaels, Hobby Lobby, etc.) and look for fake pumpkins in the seasonal area. Grab however many you need! They usually come in standard orange, white, and black. The only downside about the fake pumpkins is that they can be kind of pricey, around 25 bucks. This why I get them from HobLob, because they are 40 percent off. Well, I also have to get them from HobLob because Michaels does not exist out here, unfortunately. Once you’ve gathered all your paint and pumpkins, get yourself set up outside. Naturally, the weather went to complete shit when I wanted to do these, so we had to work quickly and bring the pumpkins in to the laundry room to dry.
Look, I got me a handsome model to help with the step-by-step photos! Spray your faumpkin with a base coat of spray paint. Allow it to dry for about a half an hour before hitting it with a final coat. On a nice, sunshiny day, you could leave them outside to dry even quicker between coats. Thanks, Clovis. While drying, create a template for your pumpkin. I simply Googled “Mike Wazowski pumpkin template” and “Grim Reaper pumpkin template” and printed out what I found on sturdy card stock after working my MSPaint mojo and resizing the templates to fit properly on the pumpkins. Yes, MSPaint mojo is a real thing. No, I cannot tell you why I’m too cheap to buy a better image editing software. Anywho… If you have to spray paint an accent color instead of using the paint pens, the card stock will keep the paint from soaking through to the rest of the pumpkin while you use it as a stencil/guide.
Yeah, my printer stopped working halfway through the reaper, so I had to freehand. 
You want to reverse-image cut the stencil if you plan on spray painting. Again, this is so that you don’t end up accidentally painting the already painted base coat a different color. You’d want to use double-stick tape to secure it to the pumpkin so no holes would cause a leak. I just needed guides to draw on my pumpkin, so that is a lot easier to do. Once the base paint is dry, it is time to get all super artsy (by super artsy, I mean tracing with a pencil). My pumpkin did not require anymore spray paint, so I just needed to draw on Mike’s eyes, mouth, and horns.

I simply traced around his ojo and drew in a pupil and an iris. 
“Put that thing back where it came from, or so help me!” 
Now we get to practice coloring inside the lines.
Something I have always failed at miserably. Damn these dysfunctional hands!
Derek decided it would be easier to trace the reaper and color him in with my giant Sharpie.
Think markers for three year olds, just toxic.
How ghastly! He has more artistic talent when it comes to drawing than me
because he has real, working hands. Lucky.Derek started by working his way from the outside to the inside. As a lefty, this made no sense to me, so I did things the exact opposite way. I now see that probably would have been beneficial working outside to inside because then I would have had a better chance at not coloring like a simple-minded idiot (*waves hands*) or a toddler.

Derek’s reaper was outlined in black, and his scythe colored in silver. 
Once he colored in the reaper, he used the silver paint pent to add a creepy moon, stars, and tombstones.
At this point, I think he was finally enjoying himself. At least I only make him do arts and crafts time once a year.I started by working on Mike’s beautiful, large, oblong eyeball. Can we just talk about how much I love Monster’s Inc.? Seriously. It has to be one of my all time faves. Children are so scary even monsters don’t want to touch them. This speaks to me on so many levels. I’m also a fan of any story with a good bromance. Mike and Sully, Turk and J.D., Affleck and Damon…I’m probably just jealous because relationships like that don’t exist with women. We get Regina George and Cady Heron, Paris and Kim, that one annoying chick from Glee and that other annoying chick from Glee. Sigh. I digress.

In my own way, I did start working from outside to inside.
Just in a fashion more befitting a scatterbrained chicken.
I used the paint pen to color in Mike’s white (he only has the one),
and only dripped paint all over him, me, and my redone kitchen table once! Progress, y’all!
While letting his eye dry, I drew in his horns and colored in his teeth. No drips this time. Little victories. 
I then took my industrial-sized Sharpie to color in his pupil. Still, just has the one. 
I finished up by coloring in his baby blue (just the one), and painting in his horns before outlining everything last.
Unconventional, but it worked!From start to finish, including drying time, it took us the same amount of time to make these pumpkins as it would have to cut open a real one, not puke while scooping out the guts, and build on to the preexisting carpal tunnel and arthritis by carving them. And bonus- we get to reuse these again next year. Perhaps Sully might come out to play for Halloween 2015. Who knows…
Each year I add to our Halloween decoration collection. This year I finally had the wherewithal to film all our decorations at dusk (see above). From our Batcave (where I park my Batmobile) to our Murder House windows to our graveyard and swirling vortex of doom, we are really ready for Halloween! Minus the fact that I abhor children and make Derek answer the door. Last year I had to do candy by myself as he was deployed. After one hour and a possible brain aneurism from listening to high-pitched child noises, I quit, turned off all the lights, and ate a bunch of candy in bed. It ended up being a really great night. Back to Halloween treats next week. ‘Til next time, my fellow eaters!
-
Pumpkin for the Pooch
Aside from being obsessed with pumpkin-flavored everything for myself, I decided this week it was time to get Hank addicted, too. My version of a trickle down effect, if you will. Canned pure pumpkin is extremely good for a dog with an upset tummy, and Hank has this uncanny resemblance to a garbage disposal on our walks. If I take my eye off of him for one second, he somehow always manages to find something to eat: Oh, wow, that house has really amazing landsca-oh my God what are you eating? This is exactly what happened on our Monday walk when Derek and I were discussing a house across the street, and the dog somehow managed to find what appeared to be some sort of bone or bone-like morsel in some grass. Fairly certain it could’ve just been bone-scented garbage and the dog still would’ve tried to eat it. After prying open his mouth and realizing my poor timing had struck yet again, I was happy to know we had canned pumpkin at home to help him digest his poor life choices.

I know the dog can’t tell that these are Halloween themed, but it matters to me. While most people would be worried the dog would die after eating a bone, I, however, was not quite so anxious, as Hankopotamus is clearly part goat. If the dog had a punch card for finding random bones in people’s yards and eating them with the speed of a cheetah pouncing on some unsuspecting gazelle, this probably would’ve been his third or fourth punch. Hank’s well on his way to that free t-bone left out in someone’s yard who clearly doesn’t understand how garbage bags and trashcans work. Oh Clovis…you never stop amazing me for all the wrong reasons.

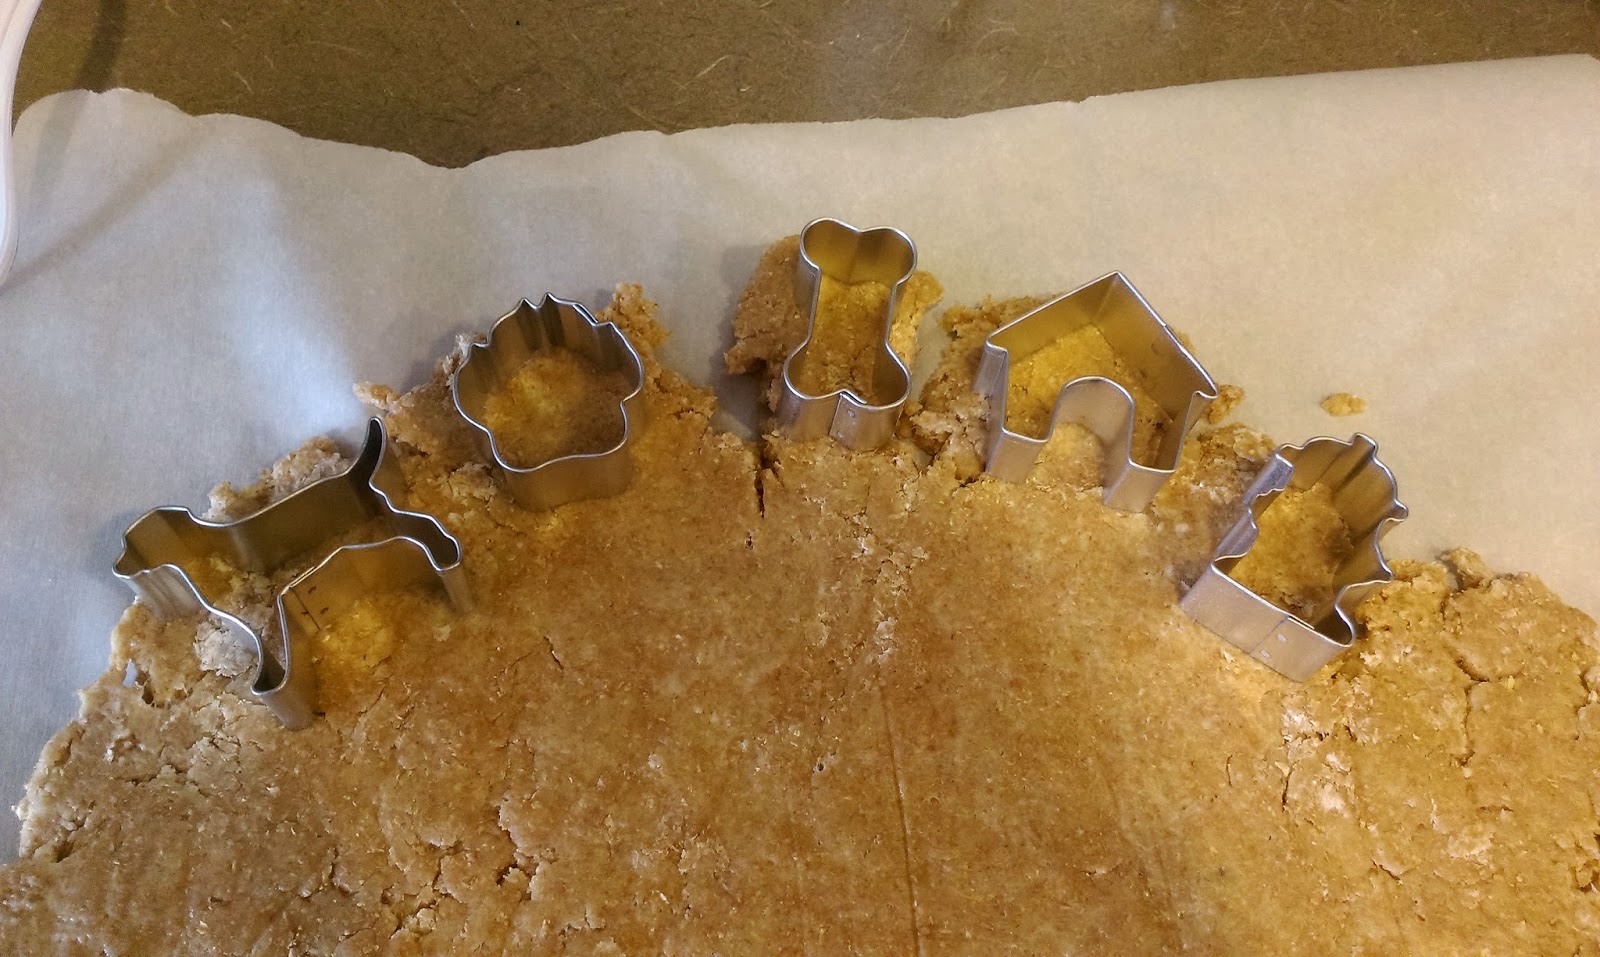
This time I realized the merits of mini cookie cutters for dog treats,
unlike my dismay with the last batch of milk bones I made him.I knew I wanted to make pumpkin dog treats for the puppers, so it just happened to be fortuitous that the dog decided to cram his gullet with garbage and be in need of some soothing pumpkin after I had already gathered the necessary accoutrements. If you asked him, I’m sure he’d say he was just trying to do me a favor. But if my dog ever did gain the ability to form coherent human sentences, this would probably be the last thing we’d care about. He’d be asking me for his own squirrel- or cat-filled cupcakes without a doubt. I digress. Wilton has a 12-piece set of mini Halloween cookie cutters on Amazon Prime for like nine bucks…winnnn.

It really doesn’t get much easier than this. The ingredients for these treats are so simplistic it makes my last batch of dog cookies feel like a five-course meal. One can of pure pumpkin, one chicken embryo, a teaspoon of cinnamon, and two and a half cups of flour. I used wheat flour so it is easier for his doggy digestive system to process. I was already keenly aware of how rank the house was going to smell thanks to his proclivities for snacking on trash, and did not want to add to his future fervor for room clearing. Have I mentioned how this dog follows me everywhere I go, like a shadow? Yeah, always bake with the wheat flour for your dogs. You’re welcome.

I sampled the pure pumpkin, what of it? In a stand mixer, blend together the egg, cinnamon, and can of pumpkin until well mixed. At this point, you’re going to start to wonder if these treats could also be fit for human consumption. This is perfectly normal, I assure you.

Thanks for having my back, wheat flour. Slowly add in a little of the flour at a time, mixing well after each addition until you’ve got a nice consistency of dough with all two and a half cups mixed in. My mixer is not an extremely expensive Kitchen-aid mixer, so I knew my dough was mixed and ready when the bowl started to knock around like it was a washing machine full of nothing but loose change. It may not be pretty, but it works for my penny-pinching ass.

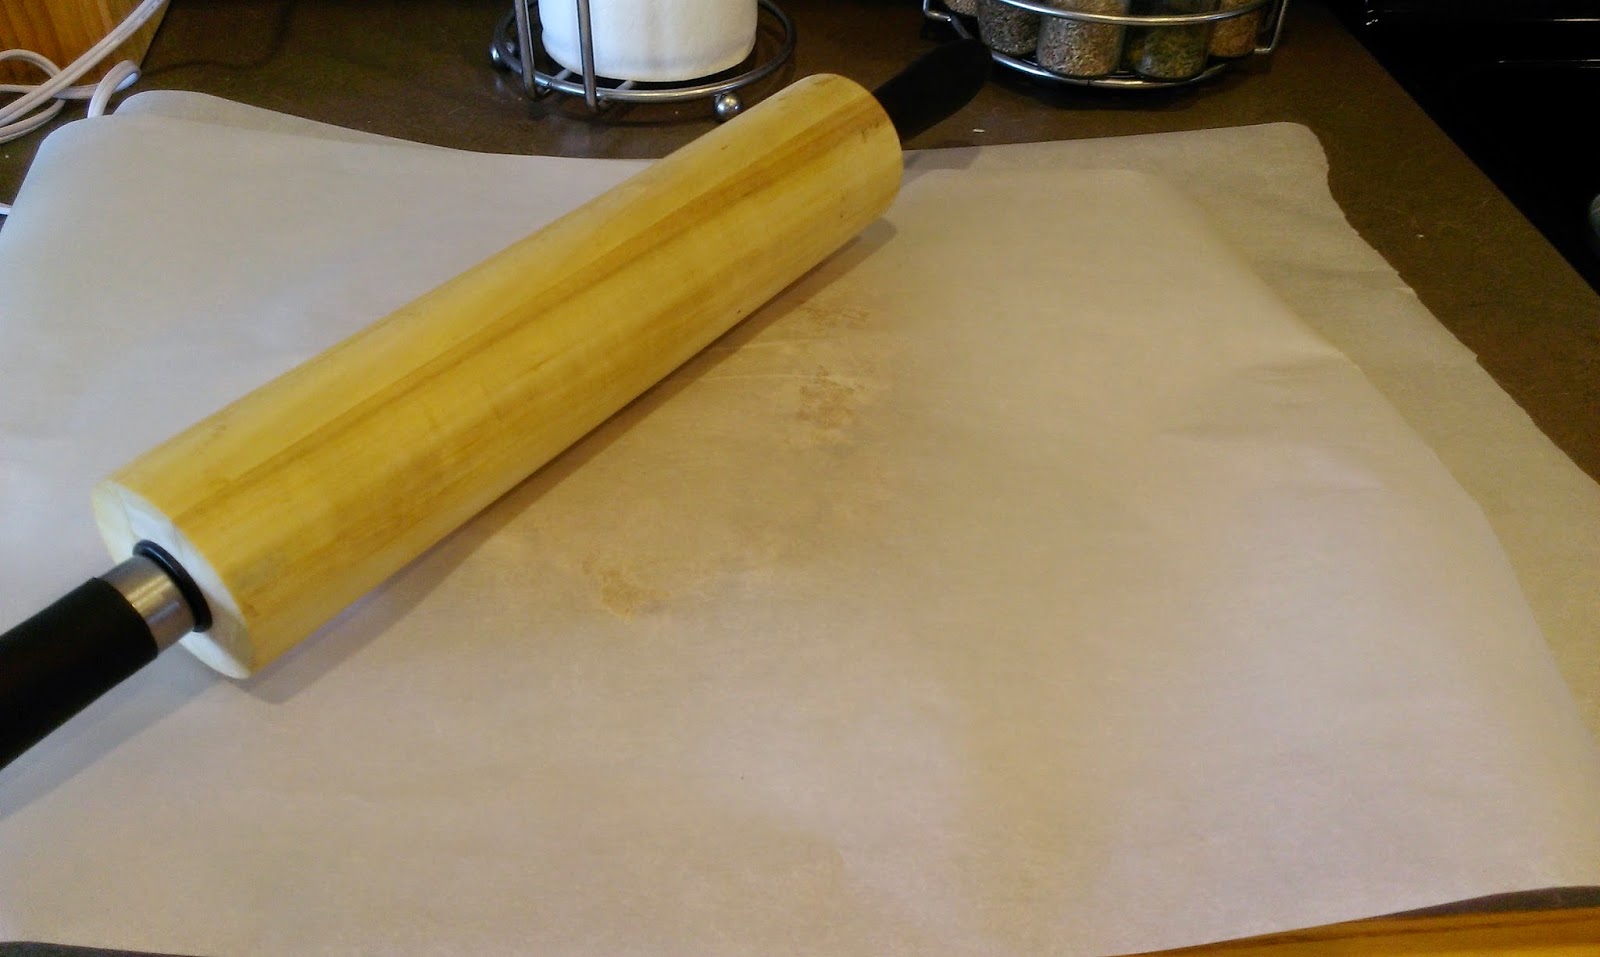
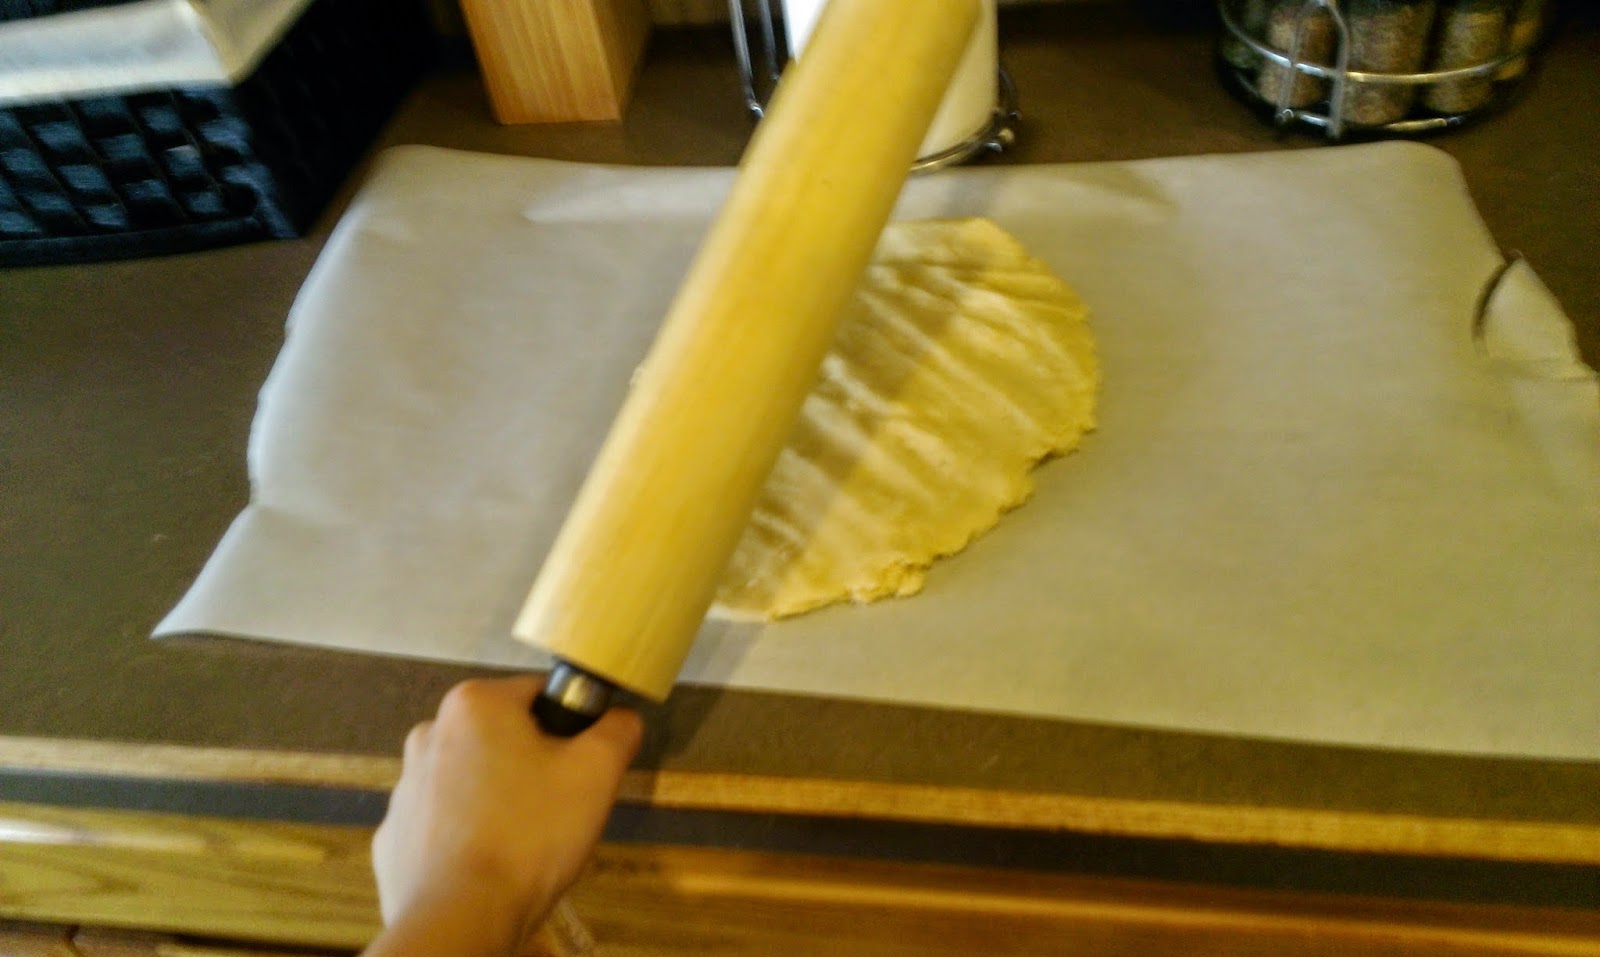
Time to bust out the kitchen weaponry!! This dough was stickier than I expected, so I recommend spraying a little cooking spray or dusting some parchment paper with flour before you roll it out. I also placed parchment paper on top of my dough mound before rolling it out. I forgot to take pictures of this process because I was enjoying roughing up the dough and relieving my Monday stress. Sue me. Or try to, anyway, just not when I’ve got a rolling pin in my hand because I will end you. Once I rolled my dough out to about a half-inch thickness, I used my
cuteterrifyingly haunting Halloween cookie cutters to cut out my dough and placed theseadorablenightmare-inducing shapes onto a lightly greased cookie sheet.
Aren’t they just the scariest?! I cooked my tombstones, pumpkins, leaves, skulls, moons, witch’s hat, ghosts, bats, and cats at 350 for a half an hour. I then let them cool completely while on the tray so they’d get a little crunchy. If it isn’t crunchy like day-old garbage, Hank may not want it.

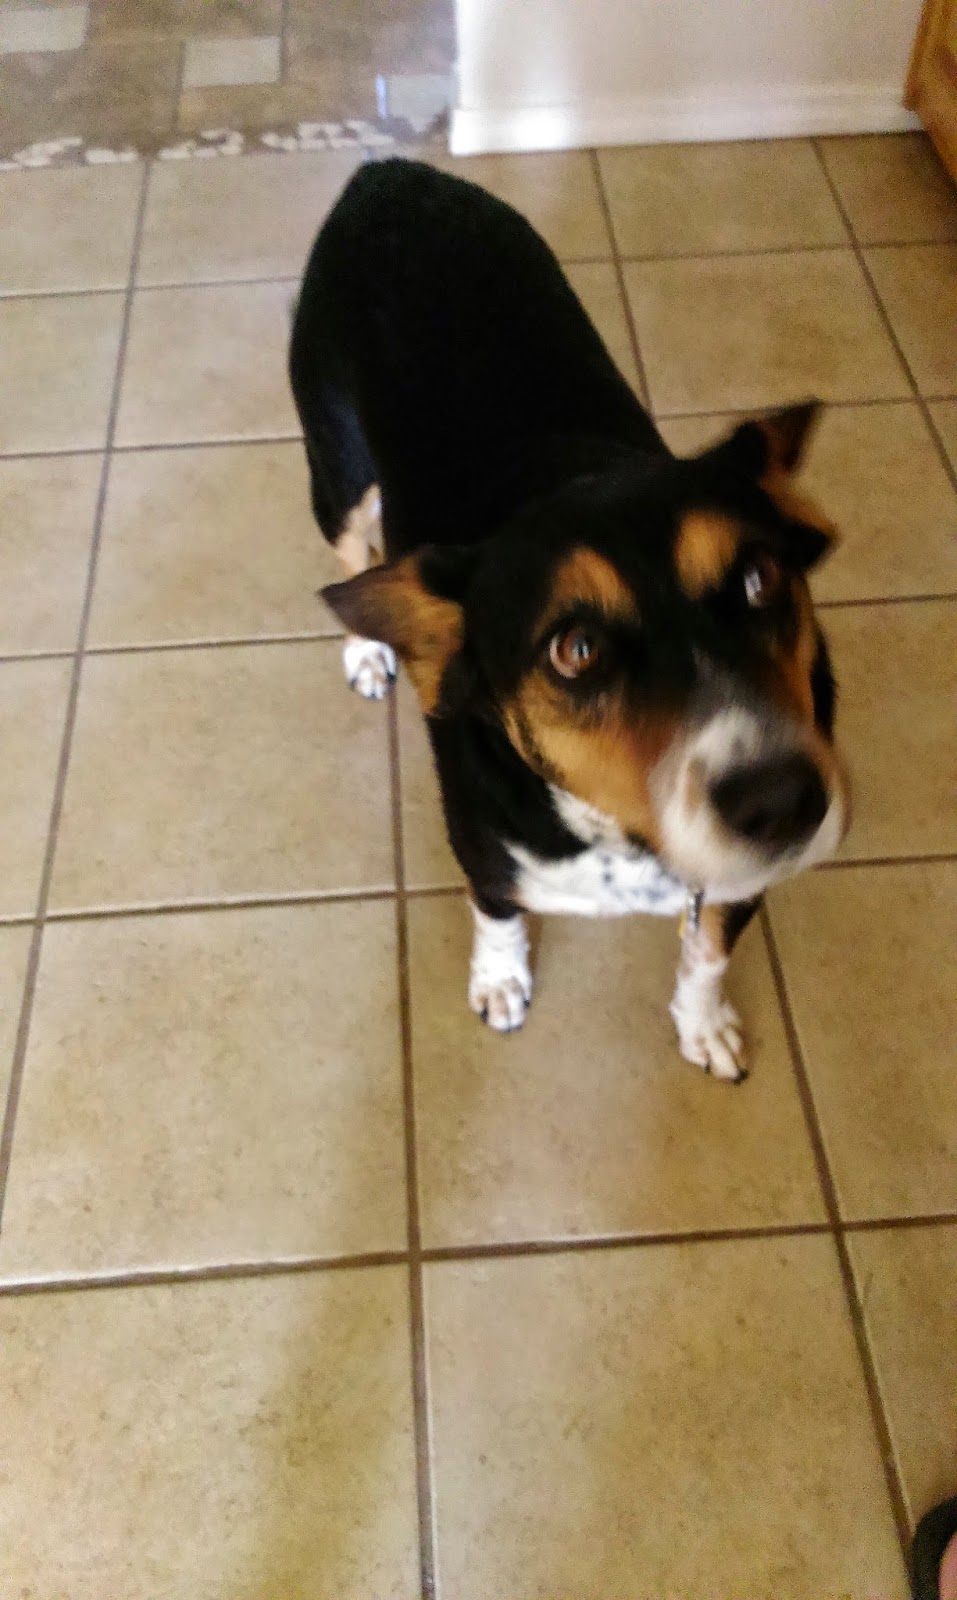
The face that says, ‘I know I don’t need the garbage, but I just can’t resist it.
Also, when is this woman going to stop inner-monologuing for me? I mean, really.‘Of course, I had to take it a step further and decorate these bad boys once they cooled off. All you need for dog-friendly icing is fat free plain yogurt, or fat free cream cheese. I went with some yogurt, and placed it into a piping bag fitted with a tiny number two tip. Remember to use the cup trick to fill your piping bags so you don’t end up wearing most of your decorations.

Even our cups are terrifying. Then, just have fun and go to town decorating your dog treats however you’d like. Remember, this step really makes no friggin’ difference to your dog, other than they have to wait even longer to eat what they know you’ve most certainly just made for them. Call this my passive aggressive way of letting the dog know I wasn’t rewarding him for dumpster diving.

At this point, these cookies made the house smell SO GOOD I was almost positive I had to eat one, as was Derek.
As of this blog, we still have not eaten any. I make no future guarantees.
With such a small piping tip and such an easy work surface,
you can pretty much do whatever you want. Me gusta.While these may not be the prettiest, they don’t have to be. And not just because they are dog treats, but because they are HALLOWEEN dog treats, and should be both menacing and a little rough around the edges. As far as I know, Casper was the only friendly ghost and cats are definitely evil, so I wasn’t too worried about perfection here. No offense to anyone who likes ghosts. If you’re a cat person, I’m not sure why you’re reading a dog blog unless you wanted to make these for yourself. I’m only judging you for liking cats, bro.Of course, Hankenstein was thrilled that I finally baked for him again, and ate these right up. Happy to report the pumpkin did its job, and he wasn’t chasing me out of any rooms later that evening, nor did he have any digestive issues due to his version of go hide and seek garbage. Now I can say with certainty that my baking can save lives. Til next time, my fellow eaters! -
Blue Velvet is the Best Velvet
Today, Derek and I celebrate what we call our “nananiversary.” This just so happens to be our third nananiversary. This is similar to an unbirthday, but with much more importance. Three years ago, Derek and I went to the Justice of the Peace and married six months before our big wedding. This will come as a shock to no one who understands military life. There was a large chance Derek would be deploying before our big wedding in April, so he wanted to make sure we were legally wed in the event the worst case scenario happened when he was at war, and that I would be provided for if this occurred. This is the reality that we live in, and I have an absolutely amazing husband that does everything in his power to ensure I am content and have a life that I consider to be an absolute dream. I am still not sure someone as cranky and uppity as I can be deserves such a devoted partner! I consider myself very fortunate, and I baked a blue velvet cake to celebrate our big “non-aversary” (I also bought us some bitchin’ games for the Nintendo64 Derek got me). I think this is how we ended up coining it as our nananiversary…because we didn’t truly become husband and wife until we took our vows in front of God, our family, and our friends on April 7, 2012 in Oak Arbor Church, nestled in the woods in Rochester, Michigan. Cue the slideshow…

My creation: Abstract meets organization- the cake version of D and me, pretty much. 
Celebrating our J.P. ceremony with friends at one of Clovis’s “finest,” a.k.a, “most expensive” restaurants. 
We like each other so much, we married each other twice. As you can see, cake has always played an important part in our relationship… I literally start drooling when I think about how good our wedding cake was. Chocolate with a chocolate ganache and butter cream icing with cornelli lace decoration. I mean, not that the rest of the wedding wasn’t absolutely spectacular- because it was– but cake tasting and cake eating were probably some of my favorite parts of the whole experience. Also, my wonderful stepdad (who also shares his birthday with our nananiversary so selflessly), made the coolest groom’s cake to ever exist:

Yes, that IS an AC130H Spectre Gunship cake, complete with working lights and props. Again, cake is really important to my entire family. So I wanted to learn how to do cornelli lace to make a tribute to the greatest cake in the world (the cake of destiny, if you will). When I found out how easy it was, I nearly kicked myself for not saving a couple hundred bucks and making the wedding cake my damn self. I am clearly in the wrong line of work with this whole noble college instructor business, trying to teach adults how to write proficiently. Let them eat cake, and let me show you how to let them! Let me also fail at brevity!

Yeah, its a box cake…but we’re gonna make it taste like a bakery cake! Really! I know, I know, I’m usually on an “everything from scratch” kick, but Duncan Hines really got their stuff together with this blue velvet box cake. Just make a few changes, and you’ll have a much richer-tasting cake. Use milk instead of water, double the amount of butter, and add an extra egg. I am a huge fan of blue velvet cake. It is not NEARLY as heavy as red velvet, and frankly, I like to be able to eat what some may call an absurdly large piece of cake without feeling like I may sink if knocked into a puddle of water. They say absurd, I say shut up. So we’ll be skipping the mixing of ingredients and baking info here because they’re totes magotes on the box. On to the frosting!!

Ahh, Crisco sandwiched between extract, a baker’s dream. I did use homemade frosting for this cake because I wanted to be able to use the paper towel trick to smooth things out. This frosting is super easy to whip up, minus the fact that you and everything you own will be covered with powdered sugar after you make it. Just combine one cup of Crisco with a teaspoon of vanilla and half a teaspoon of almond extracts. Once these have blended nicely, add in one cup of powdered sugar, and mix. Then add another cup of powdered sugar, and mix. Then add two tablespoons of milk, and mix. Repeat the sugar/sugar/milk/duck/duck/goose business one more time. If you want to dye your frosting, use gel frosting and do it at the very end. Since I was going for more of an angelic/romantic (yeah, on purpose, whataboutit?) look, I wanted plain white frosting.

Stack your cakes, frosting in between the two levels, of course. 
Do not forget the all-important crumb coat!! Then place in the freezer for 20 minutes so it can harden,
like most things do when you place them in the freezer for 20 minutes.
Then use the remainder of the frosting to frost the cake, and place back in the freezer for 20 minutes.
Once you remove it, take your Viva paper towel and use it to smooth out any lumps or bumps.While my cake was freezing, I went ahead and whipped up another half a batch of the homemade frosting. This is for the cornelli lace, so it needs to be super thin. So, half a cup of Crisco, half a teaspoon of vanilla, a dash of almond, two cups of powdered sugar, but keep the four tablespoons of milk to thin things out. The thing about cornelli lace, you gotta use a lot of pressure while doing it, so unless you enjoy having claw hands and forcing arthritis on yourself, thin that icing out, yo! But man alive, it is so much fun and so EASY to do. Place your icing into a piping bag with a number 1 or number 2 Wilton tip. Then you just go crazy with the swirly lines! I call this the amoeba effect. Never have single-celled organisms looked so tasty.

You just don’t want the lace to intersect or touch at any point.
Start at the very bottom of the cake, and swirl around making various “s” shapes.
I later added a border at the bottom of the cake,
so this is why I worked my way from bottom to top with my squiggly lines.
You don’t want to be able to tell where the cornelli lace starts or ends, either.
Once I added my top and bottom borders, I filled in more lace at the top.Why? Why did I not know how easy this was? It is one of those things that when executed properly, makes you look like a friggin’ cake genius. And I think we all know how much I like looking like ANY kind of genius, so this is right up my alley. I now must resist the urge to cornelli lace all the things. I also tried a new border technique for this cake, and its success has made my head so large it is hard to fit through normal, non-genius sized doorways. Let me teach you my ways, oh normal-headed one.

Start by fitting tip 21 to a piping bag, and add in decorator-consistency frosting.
I wanted a color that nicely accented the cake’s white frosting,
so I went with the same blue of the cake itself.
Now, make an S shape on the bottom of your cake,
ensuring you have space under the first “hump.”
Then, bury your tip in the hump, and draw another S shape.
This will cross OVER the top of your first S.
Repeat this S-hump filling (teehee, that sounds naughty) around the entire border. 
Now you can see why this is called a rope technique. I simply repeated the same process on the top of the cake, and it really does look like a braided rope. Man, I love it when things work according to plan. Surprise, surprise, I added sprinkles. They will never go out of cake fashion! This. This is my masterpiece. My tasty, tasty masterpiece. I mentioned this was for my husband, right? I waited for him to come home to eat any, I SWEAR. This is another one of the few instances when my husband doesn’t lose the battle with my insane OCD tendencies. Also, the fact that I made sure our wedding anniversaries are exactly six months apart to the day- I made things super easy for him with my uberorganization. Did I mention my birthday is on January 7th as well? He pretty much just has to check the calendar on the 7th of each month to make sure nothing important is going on. Why yes, I do think this makes me sound like a good wife and not someone who is in desperate need of a padded cell.
Get in mah bellay! Yeah, we totally cut the cake Sunday evening after I finished decorating it. Wait two whole days? I think I’ve made it vehemently clear it was hard enough just to wait for him to come home from watching football, let alone wait TWO WHOLE DAYS? Pfft…we all know I have literally no will power when it comes to cake. She is my mistress. Always tempting me and later filling me with regret (and calories). At least we indulge as a married couple, right? If eating a lot of cake together is the worst thing we’re doing, I think we’re solid. My husband seems to have a tapeworm that keeps him in impossibly good shape (we call him Tommy Tapes…seriously), and I have Jillian Michaels to kick my uppity, cake-eating ass.

This cake also paired nicely with the bouquet Derek bought me!
A Fox family win!We’re going to enjoy eating this cake for the next few days, until our insides are completely dyed blue (this gives me the opportunity to say ‘I blue myself’ at least five times). After a romantic trip, or my idea of a romantic trip, to go watch hockey and drink in a real bar, I’ll be back next week to blog about making more treats for your pampered pooch! Til next time, my fellow eaters!
-
I Excel at Eating My Feelings: A Story About Pie and Peebs.

We’ll get to the Autumn tree cherry pie eventually, I promise. I spend most days with my feelings switched to the “sarcastic apathy” position. When something comes along and causes me to step outside my comfort zone, I usually try to stay busy cooking, cleaning, baking, decorating, whatever, until the catalyst for change has receded and I can go back to feeling better about myself and my unwavering witticism. On occasion, something can happen that causes me to actually have to stop all those robotic, repetitive motions that help me cope with change and deal with what’s going on.
It comes as no secret to anyone that people aren’t my cup of tea; my heart was made to love and nurture animals. The word “pet” simply does not justify what the animals that past or present make up my home mean to me. They are my family, my children, and last week we lost the world’s spikiest daughter to a congenital heart defect. We took Peebs into the vet thinking she had pneumonia due to her lack of appetite and labored breathing that happened in a matter of one night. It came as a huge gut punch when the vet and tech took her back to X-ray and her heart failed; after the vet’s many attempts to revive her, she died on the table in X-ray alone, without her people by her side. Nothing any of us could have done would’ve prevented this from happening. It was simply her time, but this never makes things any easier.

The face that starts a million “Awwws.” I have always been so unbelievably fascinated by Peeberton: how something could be so small and delicate, yet strong-willed and so tough was incredible. She was pretty much the animal version of me, and I was her person. I was one of two people in this entire world who she would actually let give her belly rubs and the occasional butt scratch (we all love them). I made it my mission to give her the best life a hedgehog could ever have from the instant she became ours. My favorite moments were spent watching her chow down on fruits, eggs, chicken, etc., and when we had time alone, to stretch out on the couch and wrap her in her blanket before laying down and placing her on my chest. Feeling her little feet shuffle around on me until she found the perfect spot and plopped down (with more oomph than any other one pound creature, might I add) made my heart burst. It it odd to think that such a small, bristly creature could bring such a large, much needed softness into my heart. I am rendered with an unbelievable crushing guilt that her life was cut so short. Every time I go into her room in the morning to open the blinds, my heart feels so very empty now that she is not there to help me greet the day and generally be cranky about having to be awake in the first place…like I said, we got each other. Until we leave this house, I will forever tell her goodnight when I close the blinds at night, too.
I am not good at expressing my feelings outside of the written word. I could never fight back the pain and tell people how even though she is gone, she is still in my soul- in my introverted and quiet ways, in my devotion to my “people,” in my perseverance to keep fighting no matter how big the problem is compared to me- she is my ‘spirit hedge’ now. And how lucky I am to have loved and cared for a creature so much that saying goodbye to her is so hard.

My hedge, my heart. In the days following her passing, I spent a lot of time baking up a storm to help me sort out my emotions, so that I could subsequently eat my feelings. I may or may not have wanted to just have ice cream for dinner one night. What can I say…its better than driving to the nearest Costco to obtain their entire supply of Pinot Grigio to drink my feelings. I’ve never had an ice cream hangover before, and I refuse to believe that a food so good could ever cause pain beyond a brain freeze (and if you’re mixing the proper ratio of ice cream to hot fudge to Andes mint chips- this never happens). Along with cinnamon caramel pull-apart rolls I made for brunch this weekend, I also made my mother’s homemade cherry pie recipe. This is the next best thing to getting an actual hug from my mother when I’m feeling down in the dumps.

Because it is absolutely delicious and fall-themed. This ain’t canned-filling pie, oh no. Way better than that. I mean, there is a can with fruit involved, but not that simple fruit cobbler stuff. While I initially wanted to carve a hedgehog into the pie, I decided that unbelievable cuteness would’ve rendered me unwilling to ever cut and actually eat the pie, so instead I carved a tree losing its leaves into the top of the pie. I will explain how to do that in just a moment, but first let me show you how simple this delish pie is to make!

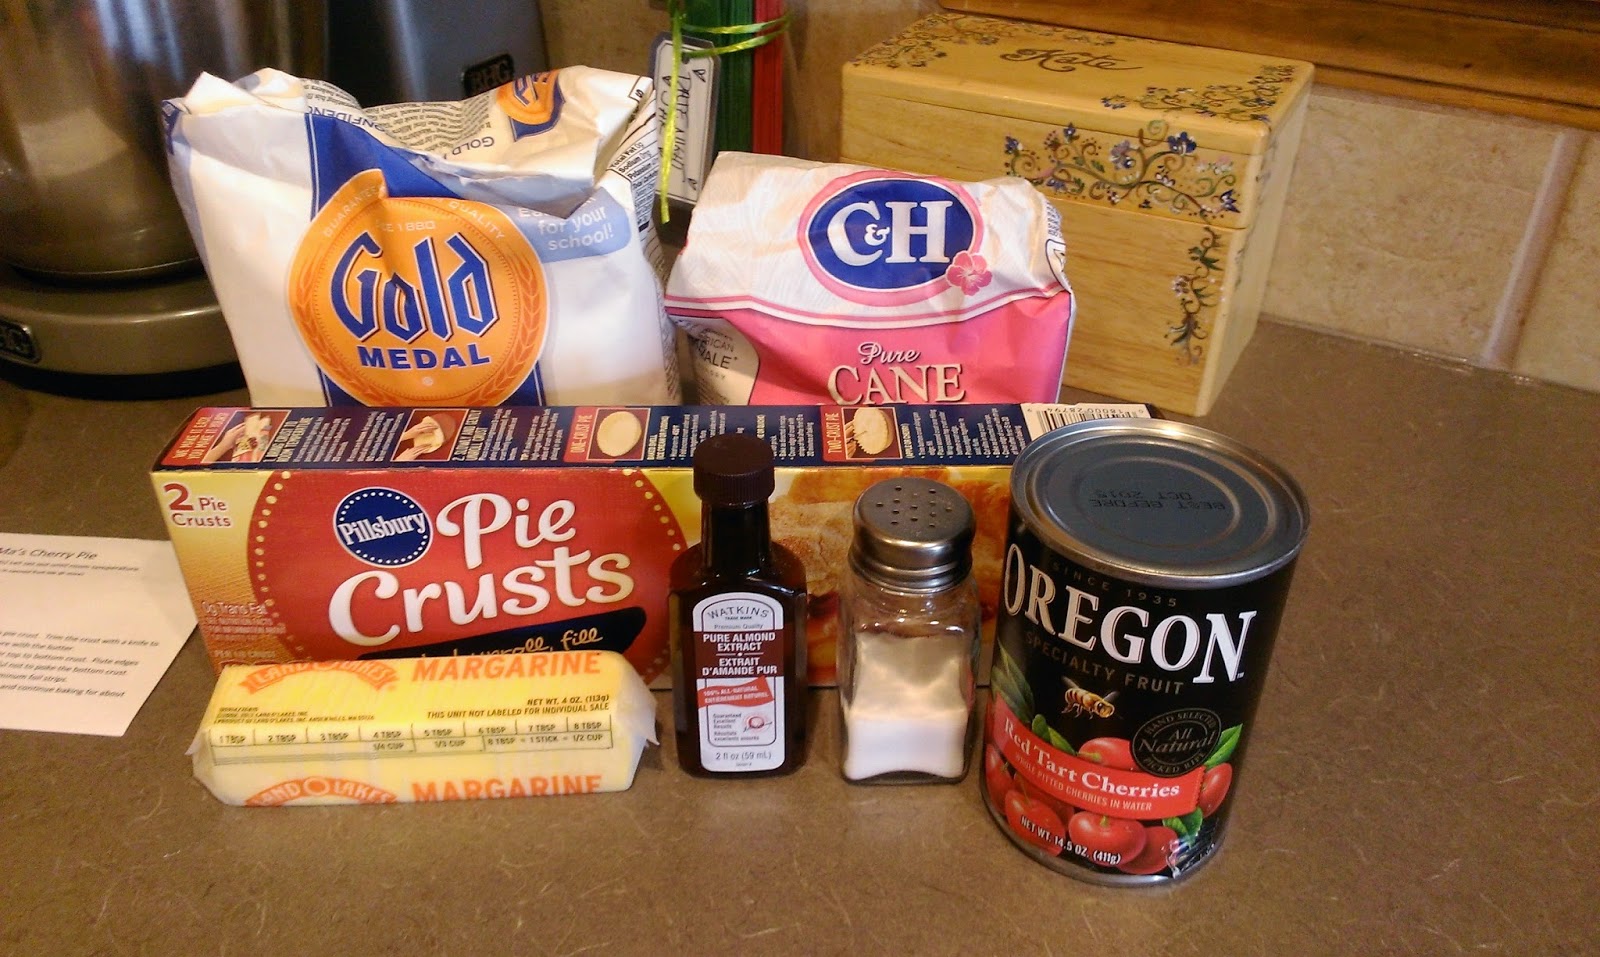
So I used pre-made pie crust, gimme a break, its been a tough week. You could make your very own pie crust if you like. I’ve done so before, but find the pre-made Pillsbury pie crusts are simply the greatest thing ever when you want a pie that works excellently as a serving dish for vanilla ice cream- golden brown and crisped to perfection. So here’s what you need for the ultimate comfort food pie:
- Two pie crusts @ room temperature (the Pillsbury stuff comes with two, yet another reason to cut corners!)
- 1 can TART cherries in their juice- not cherry pie filling- just Oregon canned tart cherries that even I can find at my shitty Walmart in the fruit aisle next to cereal
- 3/4 C sugar
- 1/4 tsp of almond extract (the only extract better than vanilla)
- 1/8 tsp of salt
- 3 TBS of flour
- 2 TBS of butter- that’s where the nice “hugging” feeling from Mom comes from. Thanks, butter.

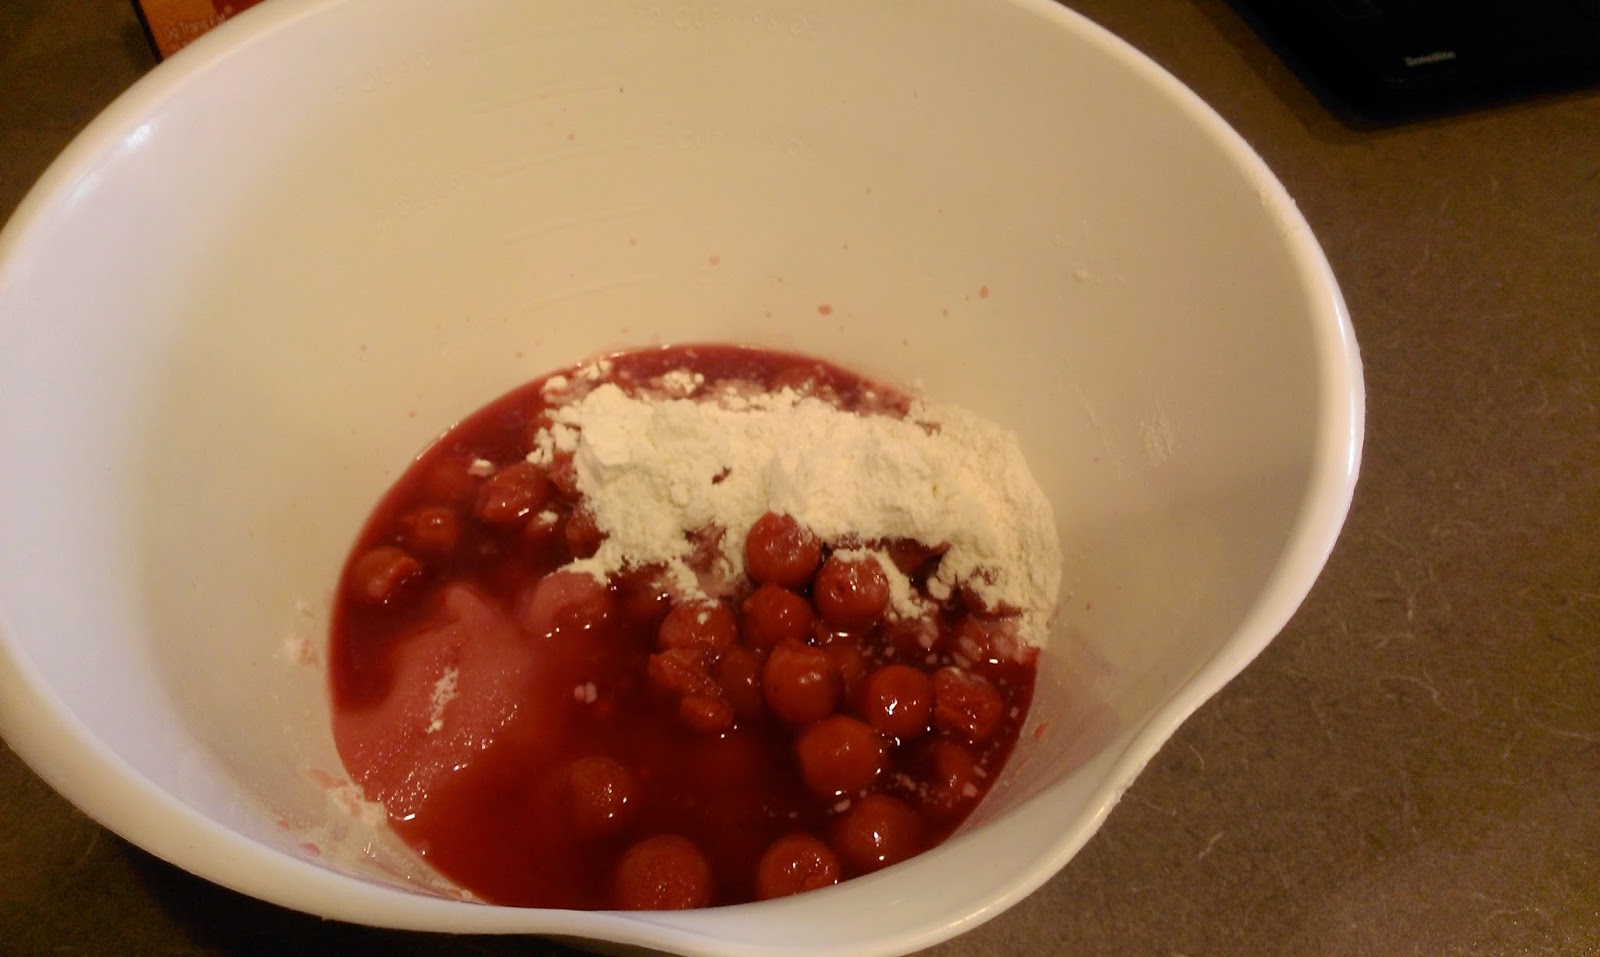
Yeah, I occasionally eat a cherry or two during this process. Dump all of the ingredients except butter (and the crust, obviously) together in a bowl and mix. Boom- there’s your pie filling. I know, right? So easy, but so good! Take one pie crust and gently place it into a pie tin.

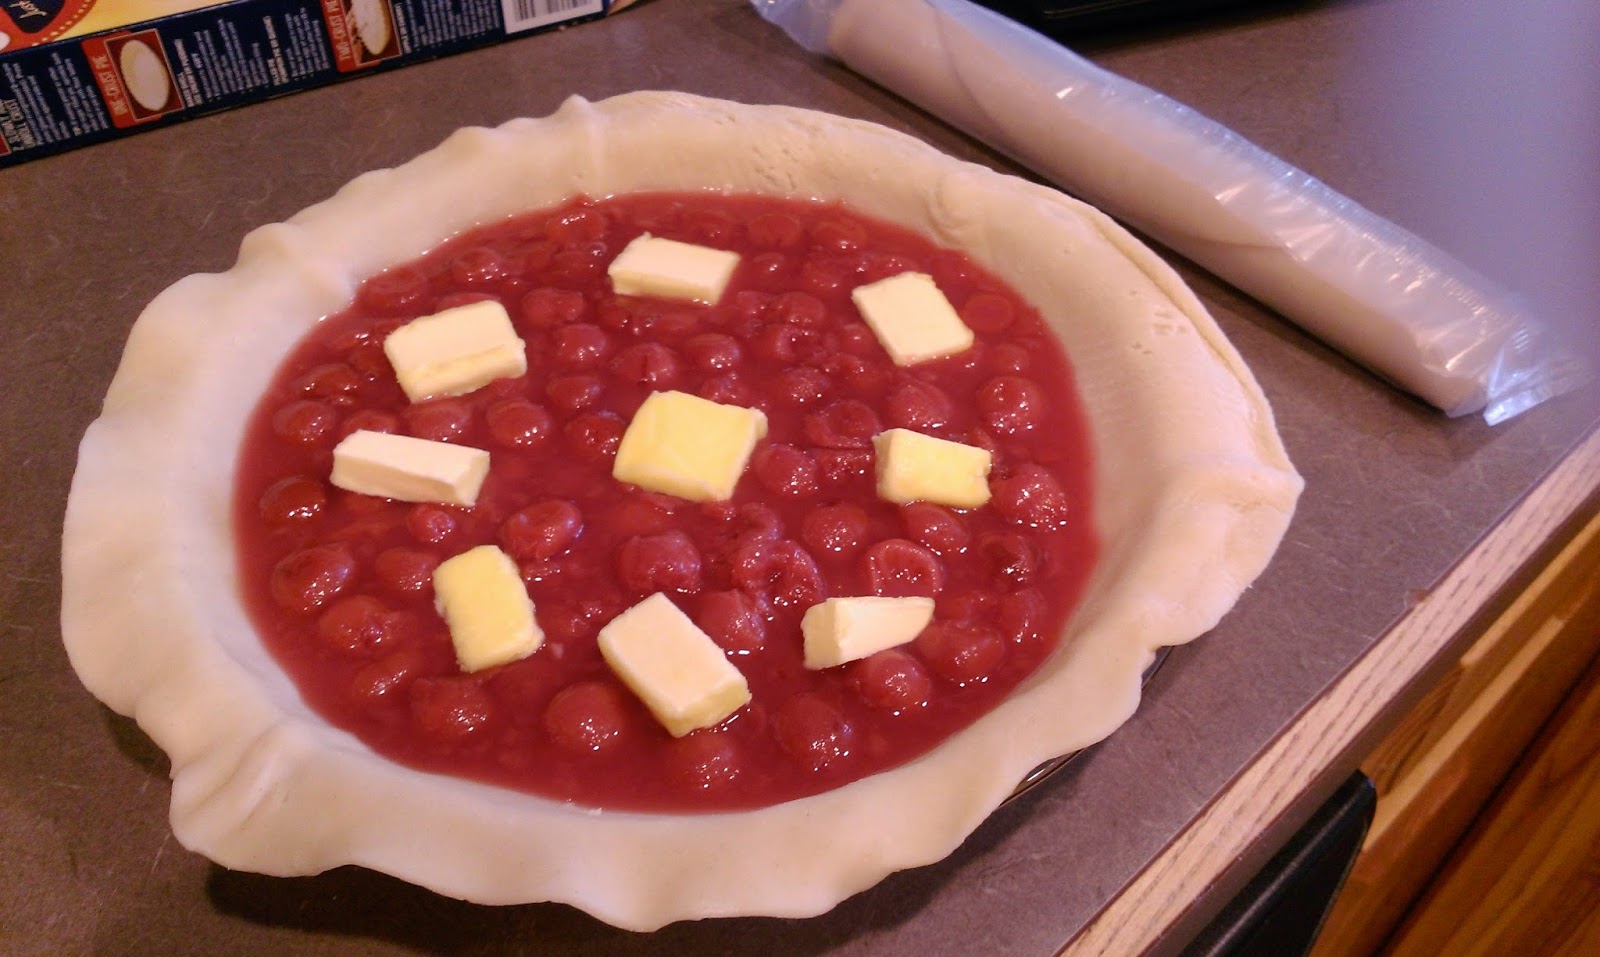
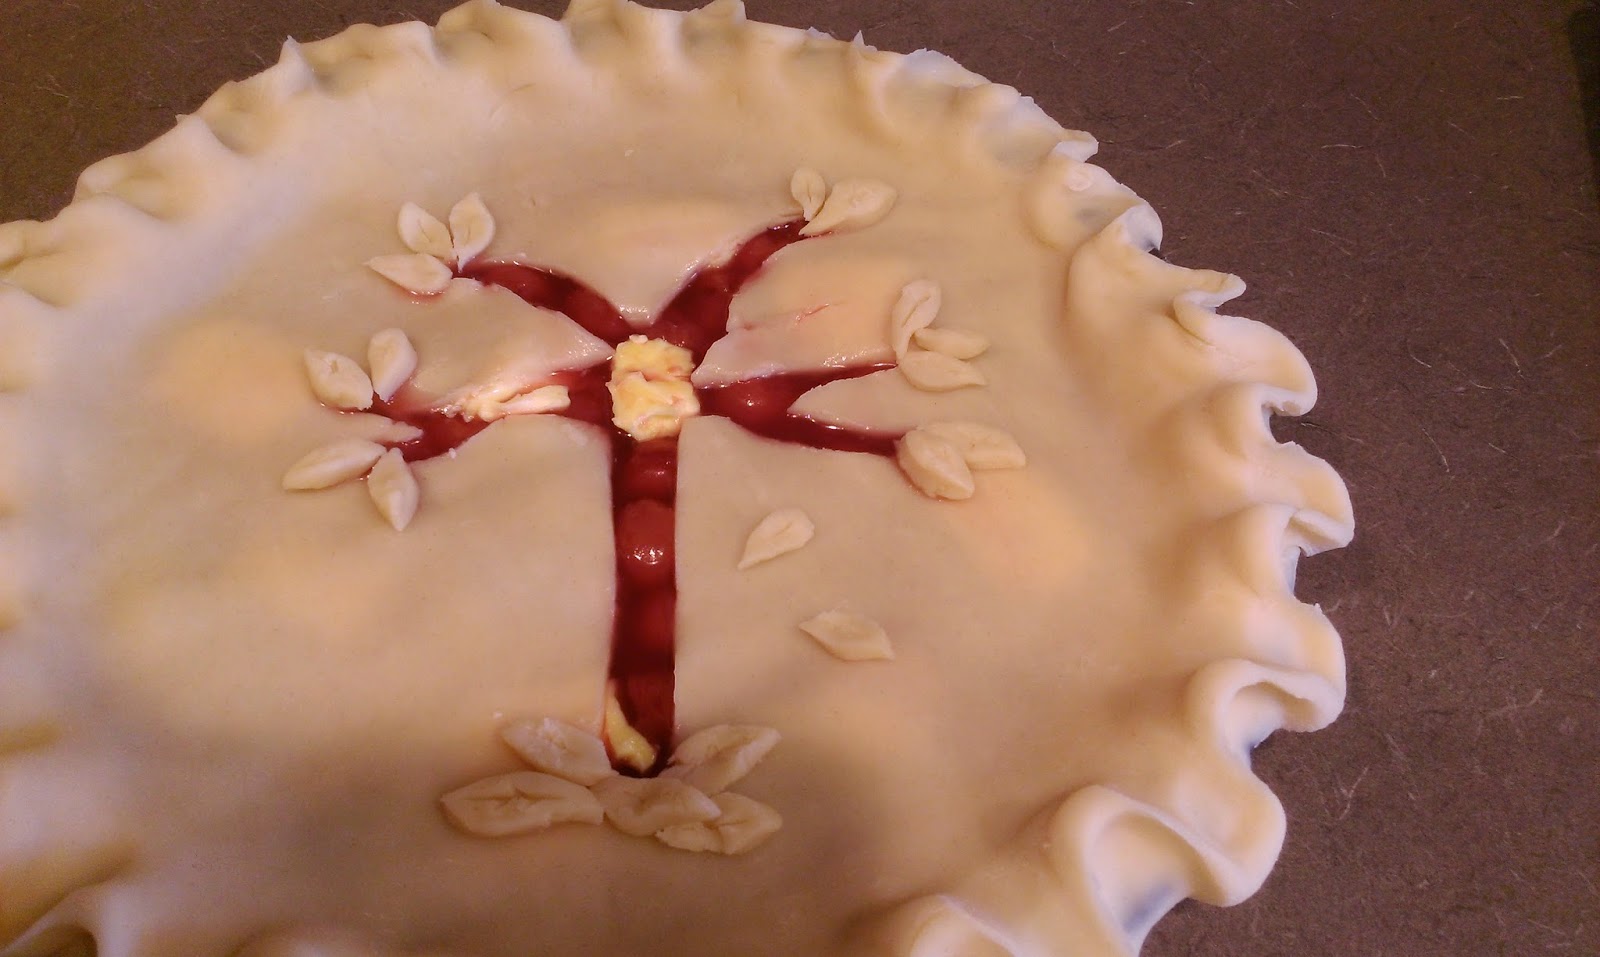
Yeah, don’t just take a spoon to this and start eating…resistance is key. Throw the pie filling into your dish lined with the bottom crust, and then take your butter and cut it into little slices and dot the top of the pie with it. You don’t need to be as OCD as me and make sure all butter is evenly spaced, as I sincerely hope you’re nowhere near as bat-shit crazy as I am.

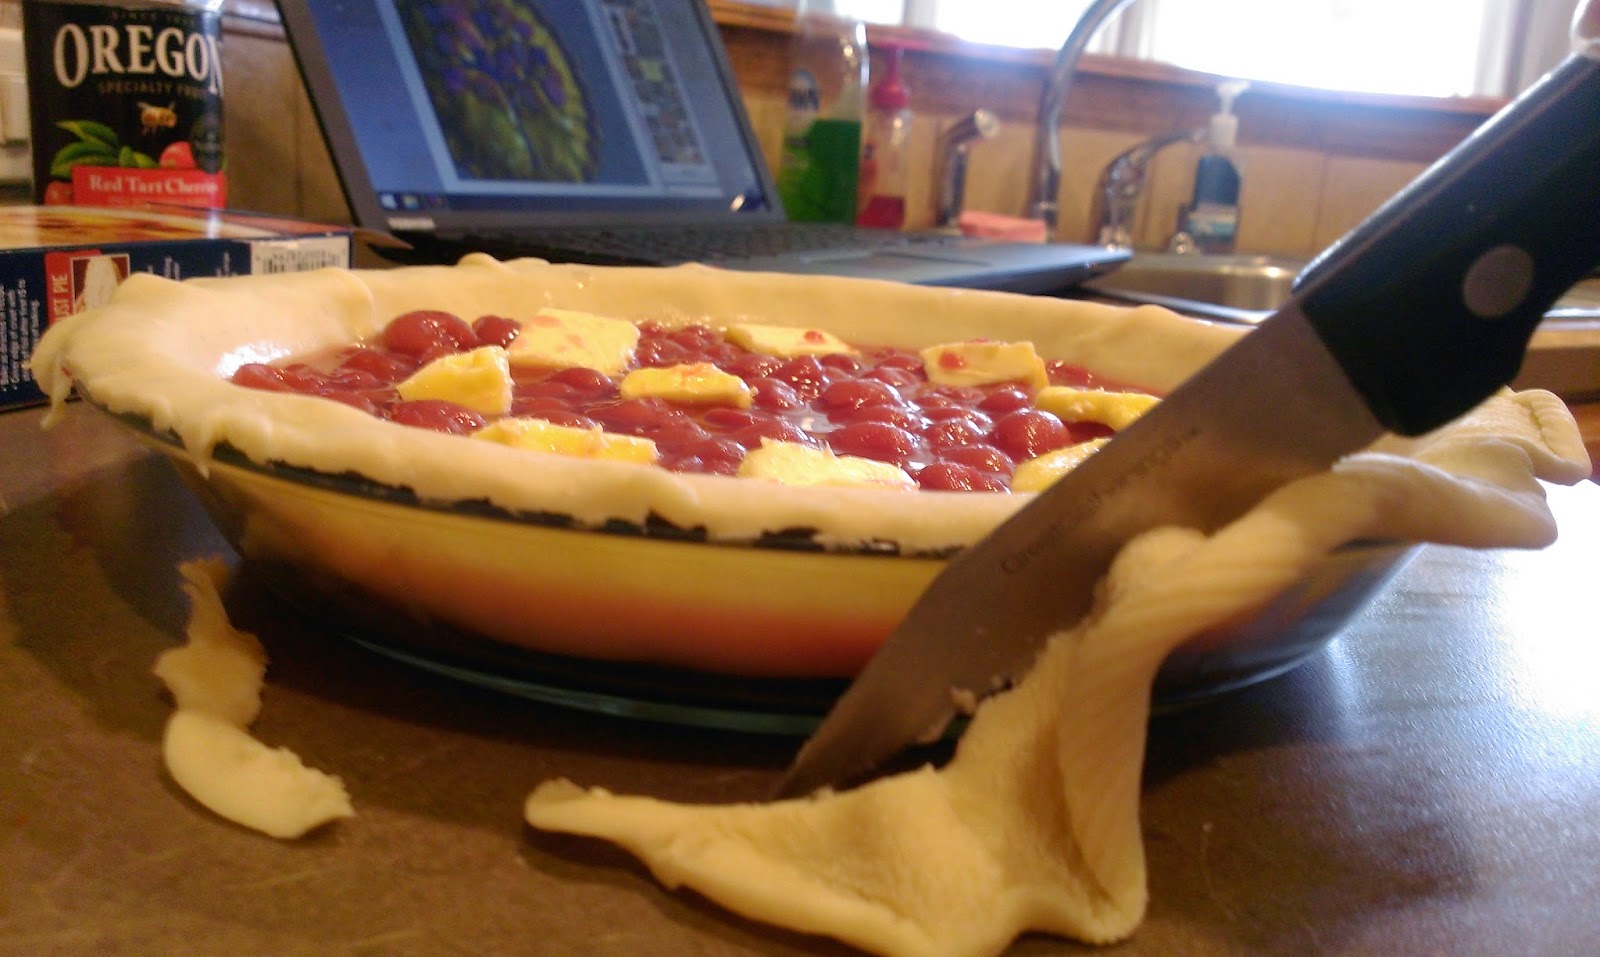
I will cut you. Take a small paring knife and trim the excess bottom crust around the entire pie, like so. Once the bottom edge has been trimmed flush with the pie tin, top your pie with a zebra. Just making sure you’re paying attention. Top it with the remaining pie crust, and get ready to flute the edges so your pie is sealed and you can make it look next-level awesome.

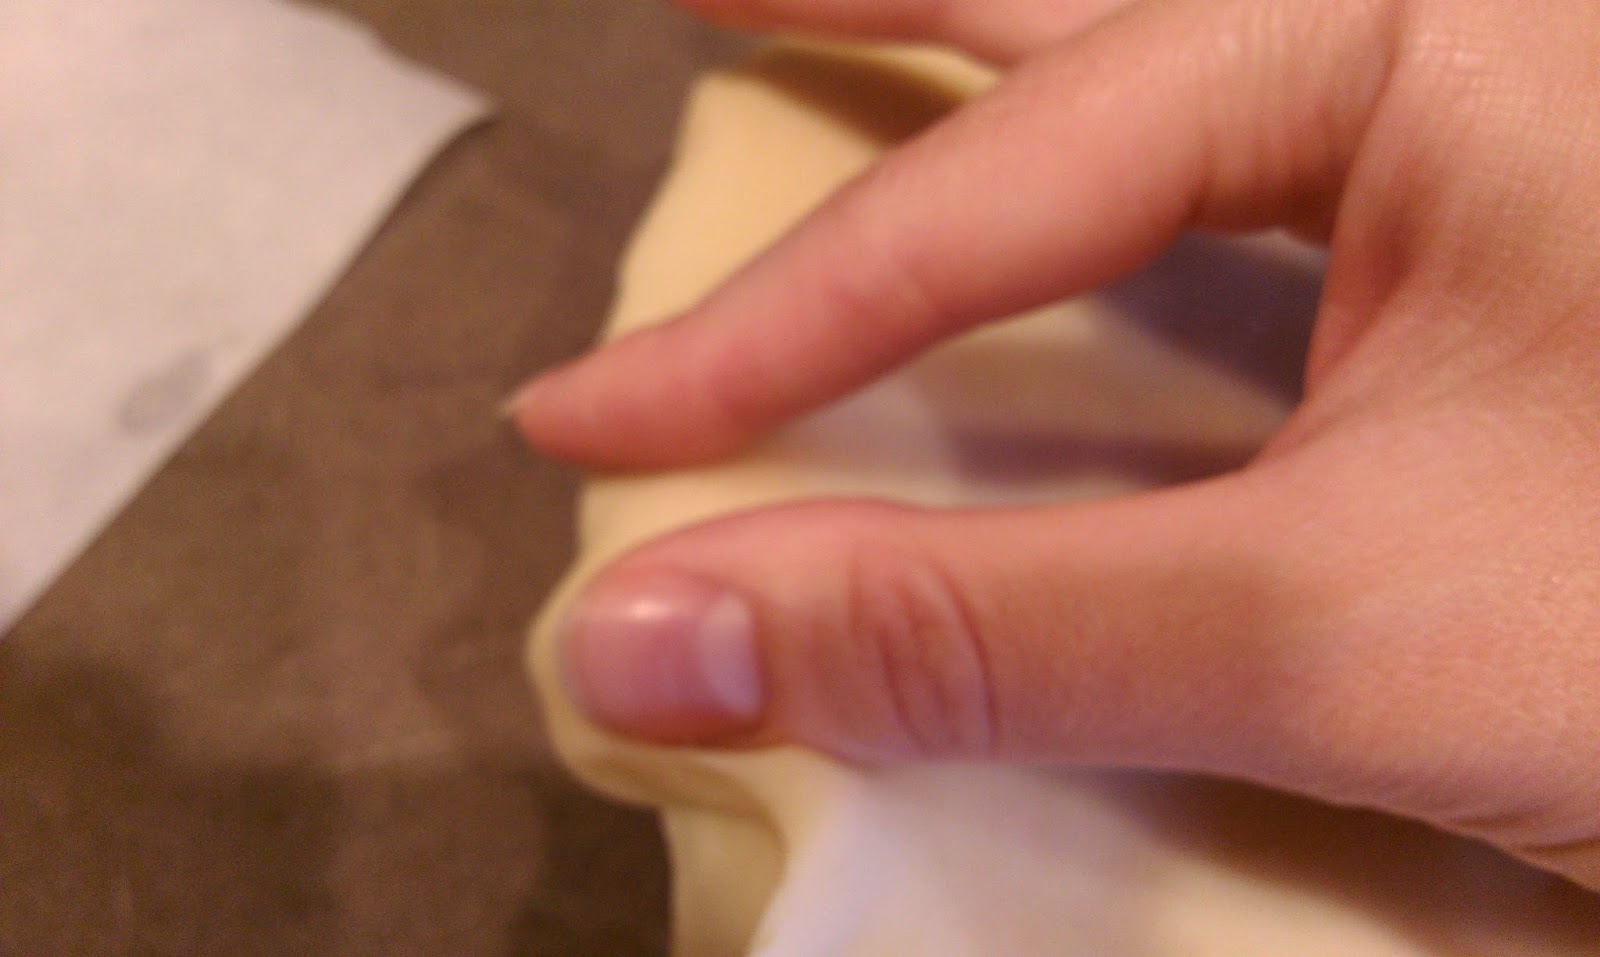
To flute: Take your thumb and index finger, and press them into the edge of your pie.
This will create a nice indentation.
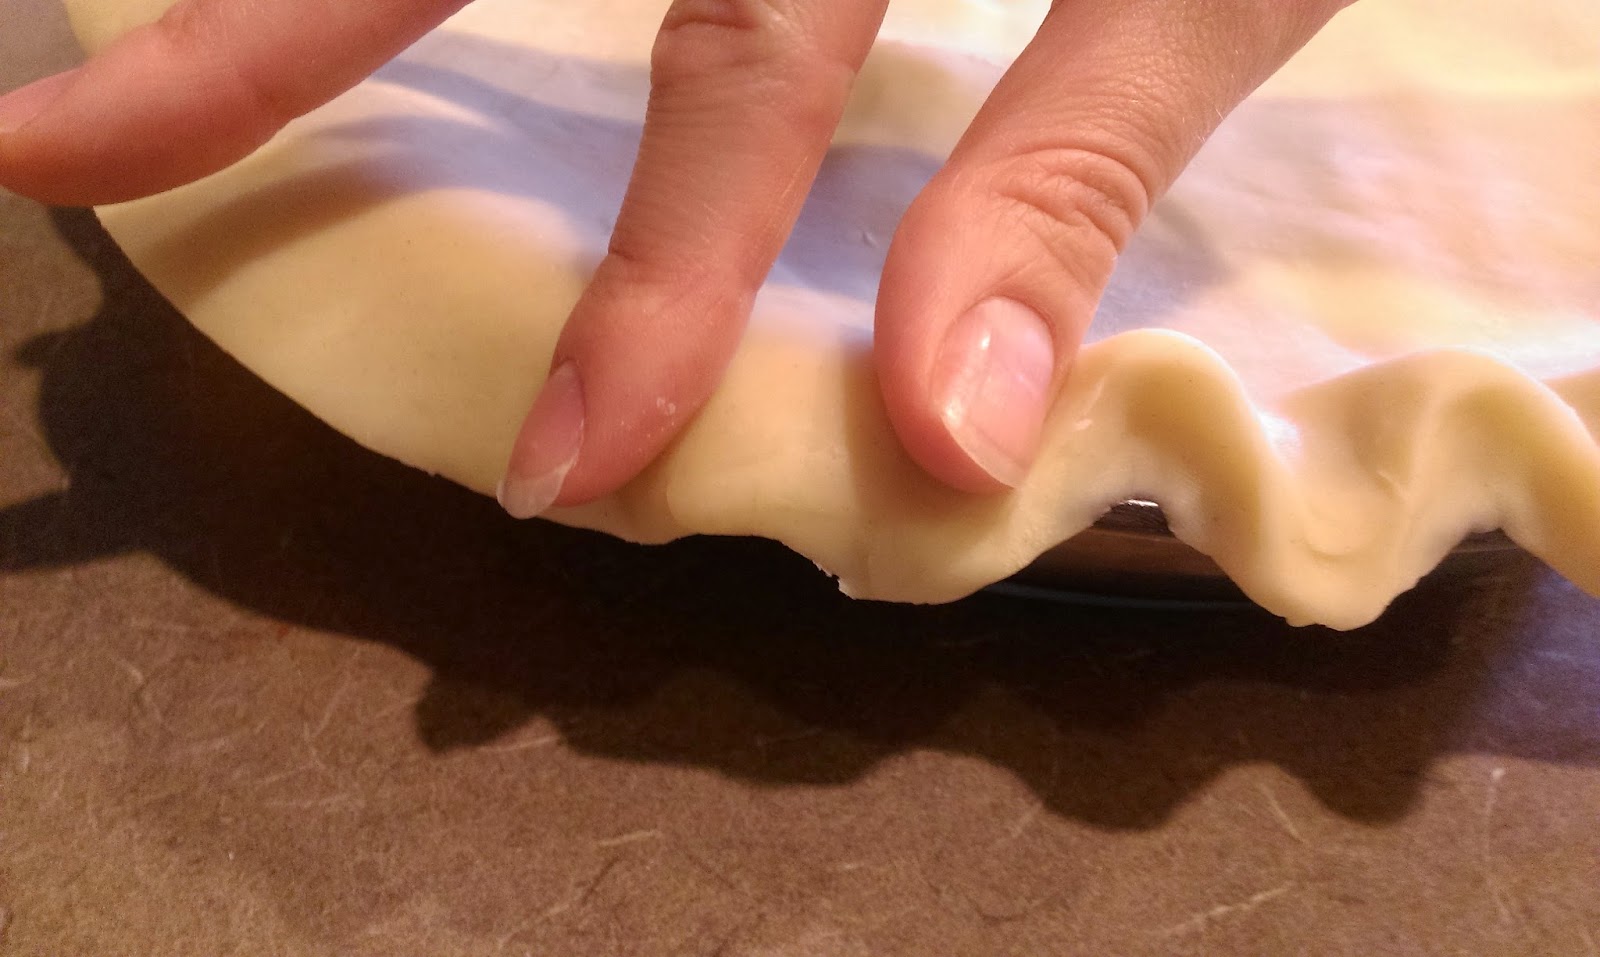
While keeping your index finger and thumb on the crust, place your other thumb into the indentation and push in,
pressing your thumb into the indentation. Repeat, moving your “original” thumb into the new indentation
while your index finger creates a new dent, and your other thumb presses firmly and kind of pushes in the crust again.
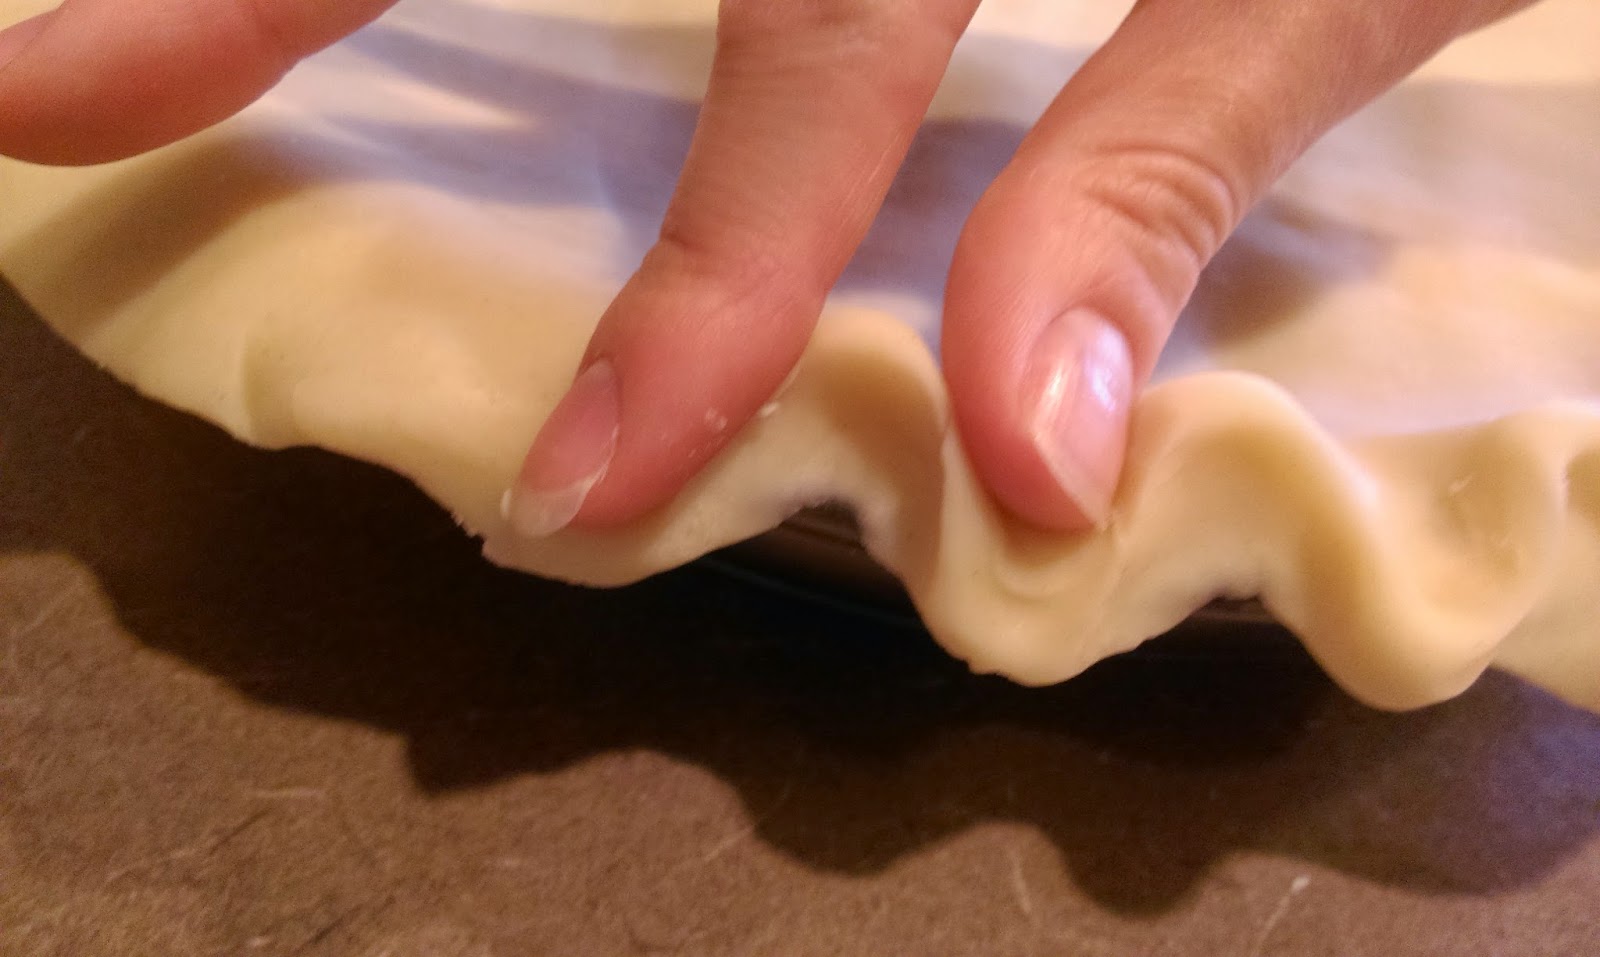
Pushing in creates those pretty little waves your see here alongside my horribly
unmanicured fingernails. Whomp, whomp. The space in between these fingers is where
my other thumb was pressing in. Can’t take a picture of that as I do not have three arms. Yet.
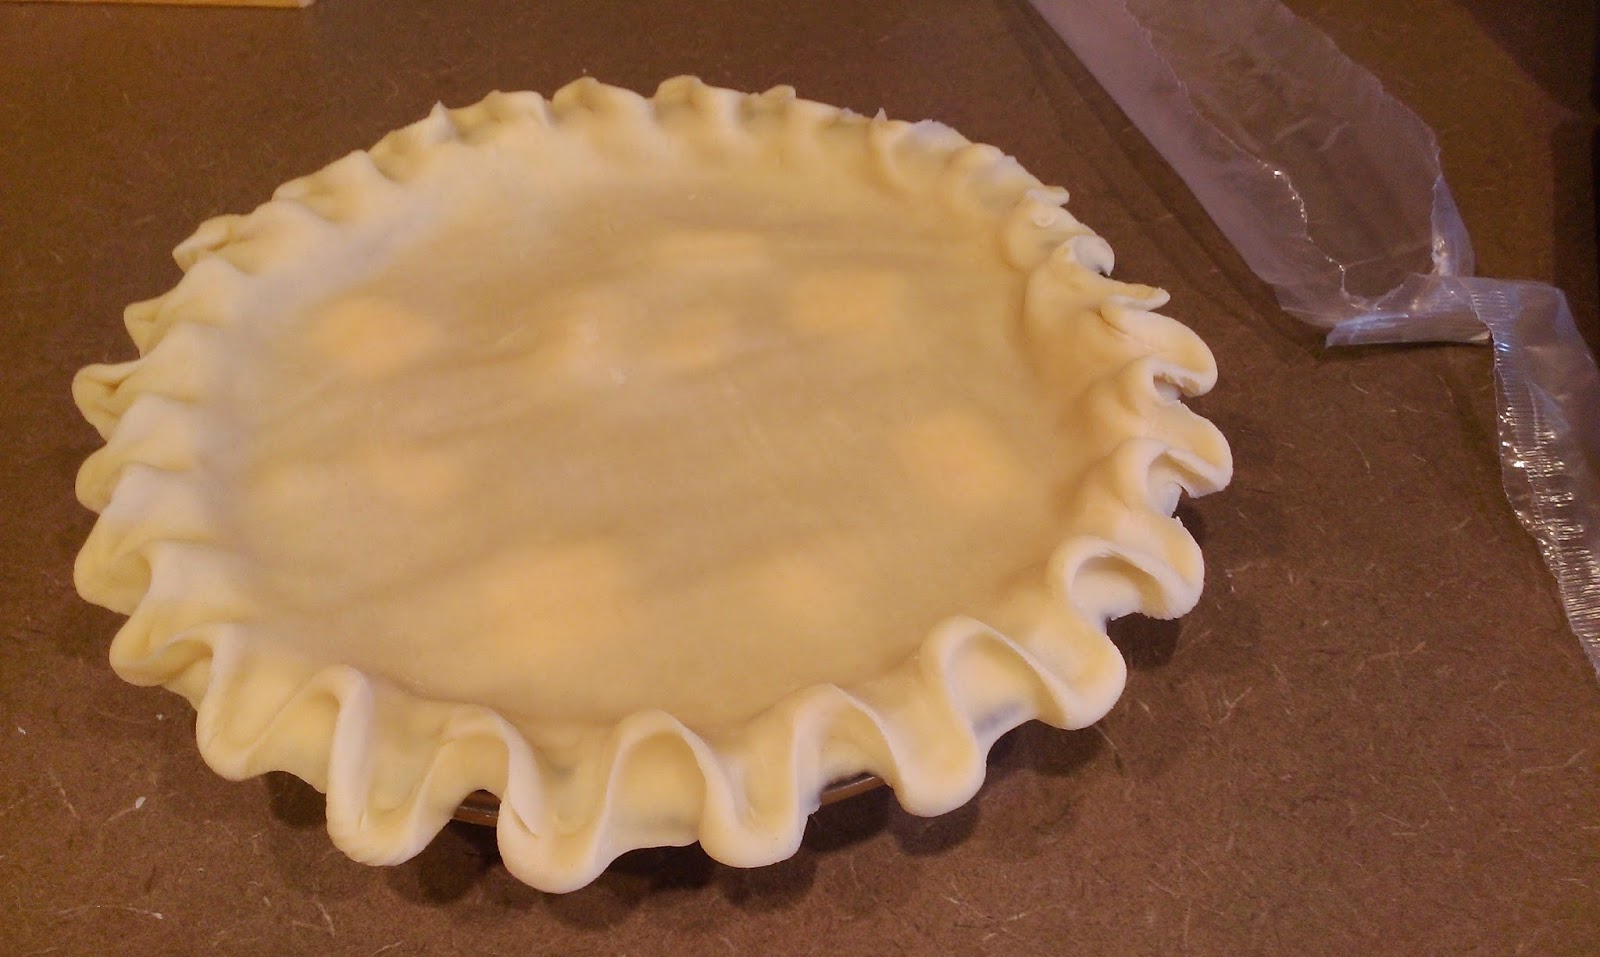
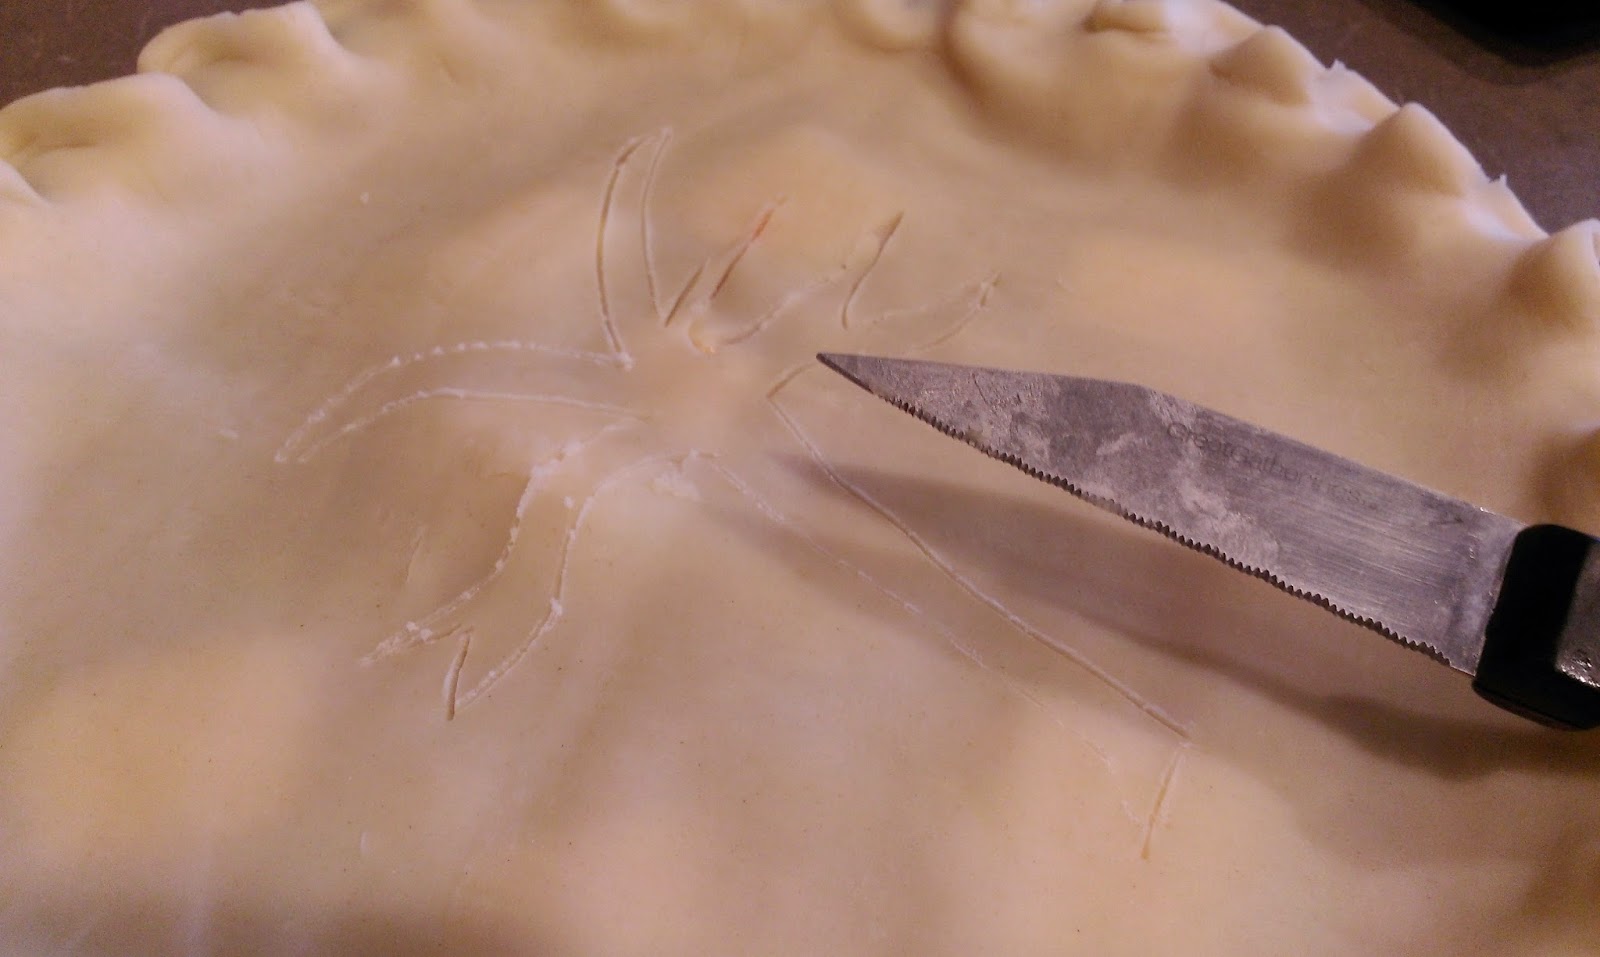
Repeat around all edges of the pie until you’re left with a gorgeous fluted crust! Now, you could be a lazy bum and simply cut slits in the top crust to vent, or you could go the extra mile and decorate your pie like a decent human being. Anything goes here, really- I’ve done hearts, a turkey for Thanksgiving, an airplane because why not, etc. I chose to do a tree losing its leaves because it is officially fall, and I think everything baked during this fine season should have something to do with either pumpkins or trees or you’re totally missing the point.

Free hand, take a paring knife and lightly outline a tree into the top pie crust. 
Carefully cut out your outline, being sure not to pierce the bottom crust.
It will leave you with a strange Pagan-esque looking symbol on top of your pie-
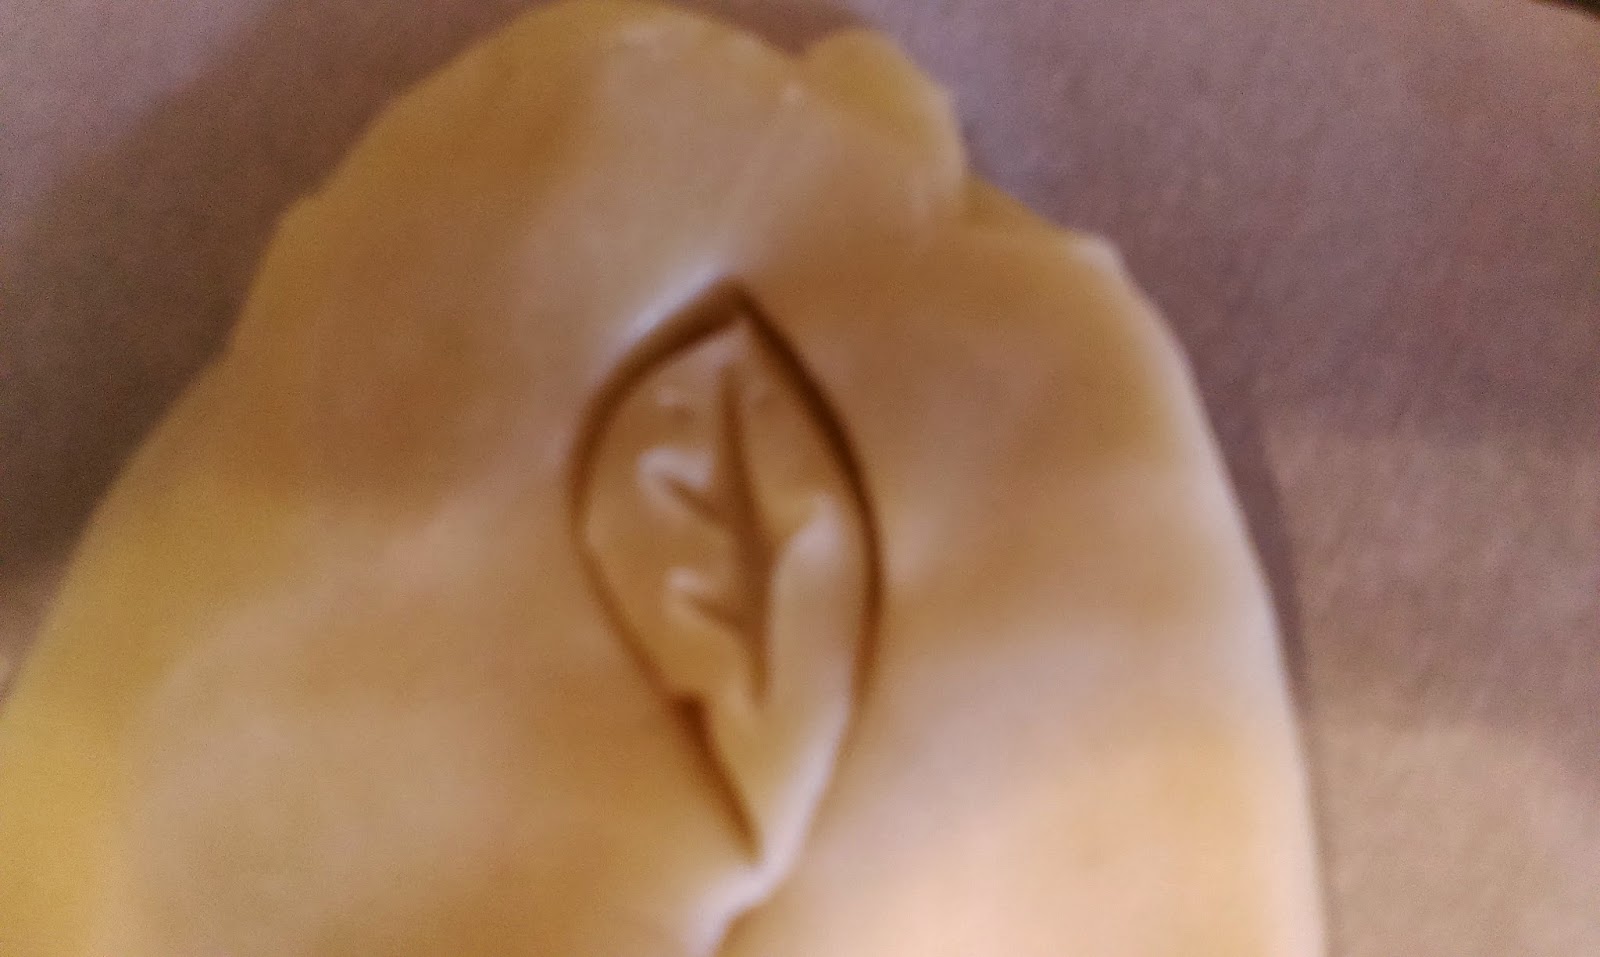
Dean Winchester would be proud. Plus one if you love Supernatural and got that reference.Now comes time to make the leaves. Take the scraps from your tree outline, roll them together, and then flatten them out on top of a piece of parchment paper.

Use the paring knife to draw a curved line into your dough. 
Draw an oppositely curved line on the other side, and you’ve got a leaf! 
Take it a step further, and lightly draw in veins on the leaf with your knife. 
Then lightly place the leaves around your branches,
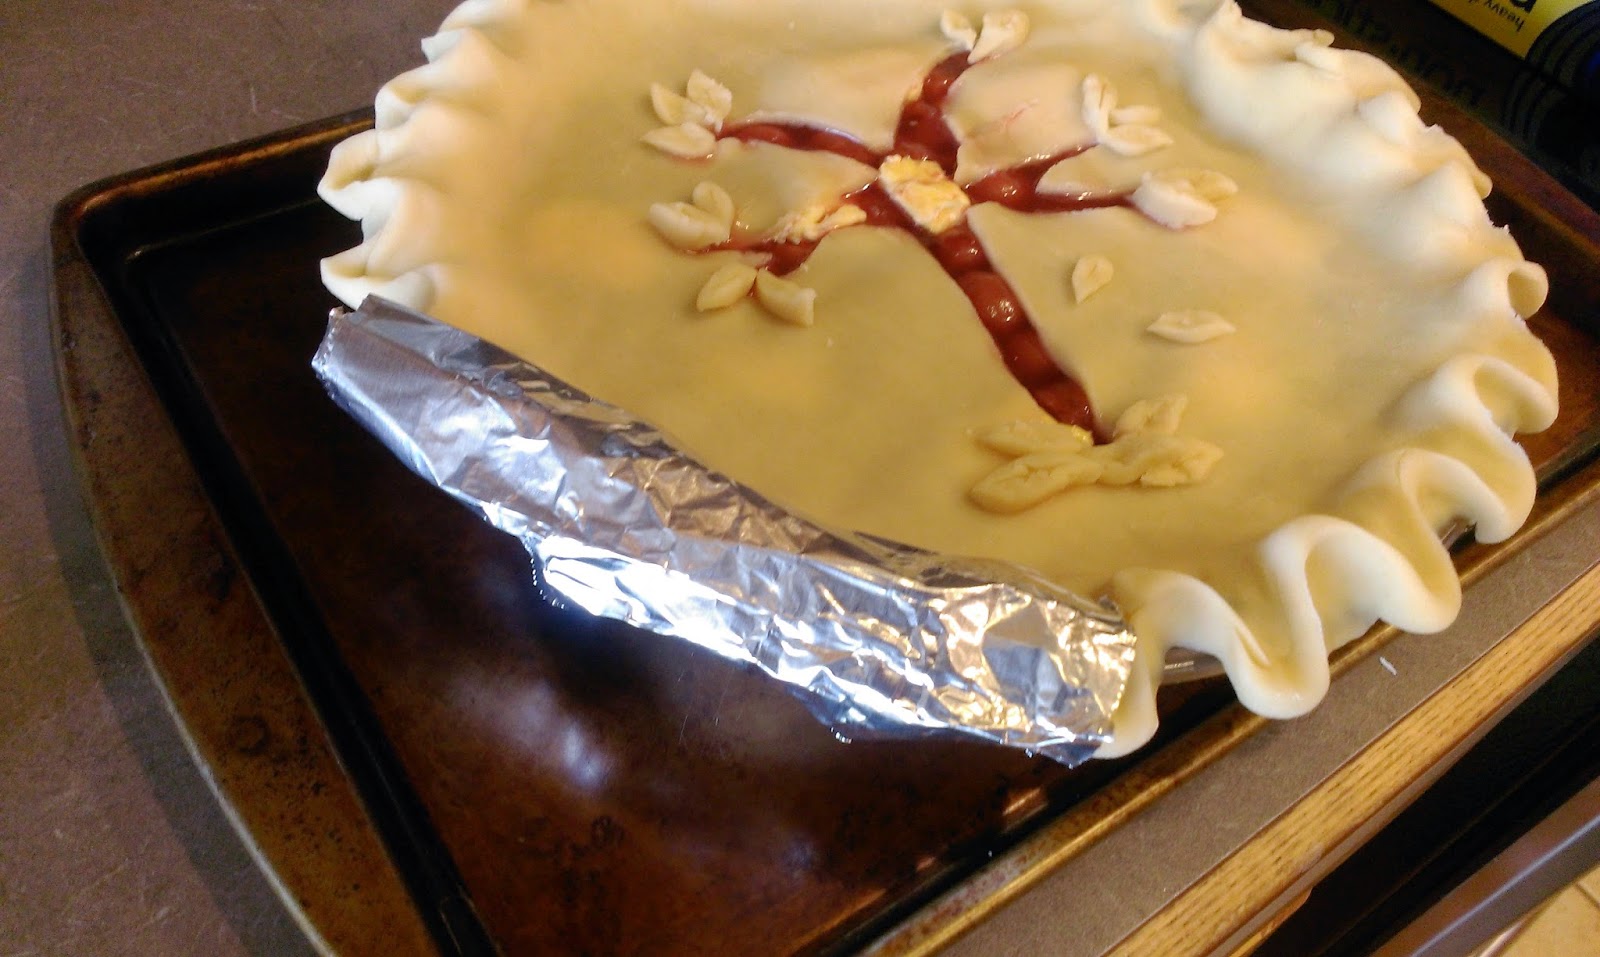
and you can make some that are “falling” into another leaf pile on the ground.Now, I recommend placing your pie in the fridge for at least a half an hour so that your crust can settle in and decide not to completely crumble apart in the oven. Crust is a wicked, feeble mistress. Once your settling time is up, take small sheets of foil and line the edges of your crust while the oven preheats to 425.

I find this to be the most maddening part of making pie.
One side goes on, the other side falls off..grumble, grumble.Once your oven is ready for action, bake your pie at 425 for 40 minutes. Once the 40 minutes are up, remove those pain in the ass foil shields and let your edges brown for an additional 10-15 minutes in the oven. Remove and let sit:

C’mon, I JUST want to eat you… I won’t lie to you…the hardest part about making a good pie is waiting for it to cool off so it isn’t liquid hot magma and you can eat it. I try to make my pies after lunch so they are ready for eating for dinner. I mean, after dinner. You can’t have pie for dinner! You can, however, have it for breakfast because it is a fruit- and pastry-based meal…turnovers-schmurnovers.
Baking pie will make most of life’s horrible experiences at least somewhat tolerable because you can’t be 100 percent depressed while eating a good dessert- this is simply a fact. I want to thank everyone for their unbelievable outpouring of support over the past week. I am reminded at times like these that there are decent, loving people out there in this world who understand loss and how hard it can be to lose a loved one, and I am very fortunate that these are the people I call my friends and family. You all are simply wonderful, so thank you for letting me pour my heart and pie out to you this week, and any other should I need to. Til next time, my fellow eaters!

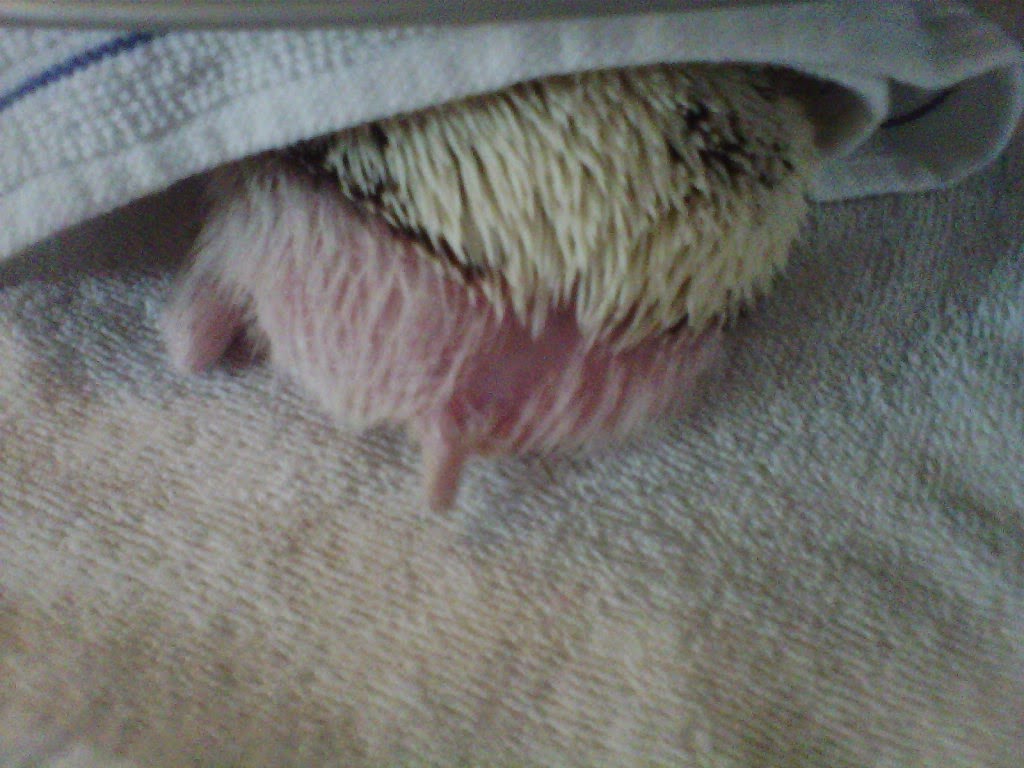
That’s all, nothing left to see here folks…just an adorable hedge tush. -
Tis the Season for Pumpkin EVERYTHING.
Ahhh fall is in the air here in Clovis…and the cow poop smell is noticeably absent from it, making it even more wonderful! Autumn is my absolute favorite time of the year- yelling at the TV during football games, going insane with Halloween decorations, and of course, eating anything and everything that involves pumpkin flavoring. Except pumpkin pie. As far as pies go, pumpkin is definitely my least favorite…it lacks a certain charm provided by fruit pies, and the texture makes me feel like I’m eating old, mushy, rotting pumpkin insides. Lovely, right? So instead of baking pumpkin pie to celebrate fall’s greatly appreciated arrival, I made a pumpkin bundt cake with cinnamon glaze. I did it all from scratch because I had a fervent desire to not only eat everything pumpkin this week and end up with an Autumn hangover, but also make sure my house smelled like how I imagine Heaven or an actual bakery smells, too. I also love this recipe because it is low calorie, and I can come up with any number of excuses to eat cake with each meal: “It’s PUMPKIN- so healthy you CAN have it for breakfast,” “It’s lunch, I need a semisweet palate cleanser,” or “It’s dinner, why are you still so surprised I am going for thirds with this cake? How long have we been married again?”

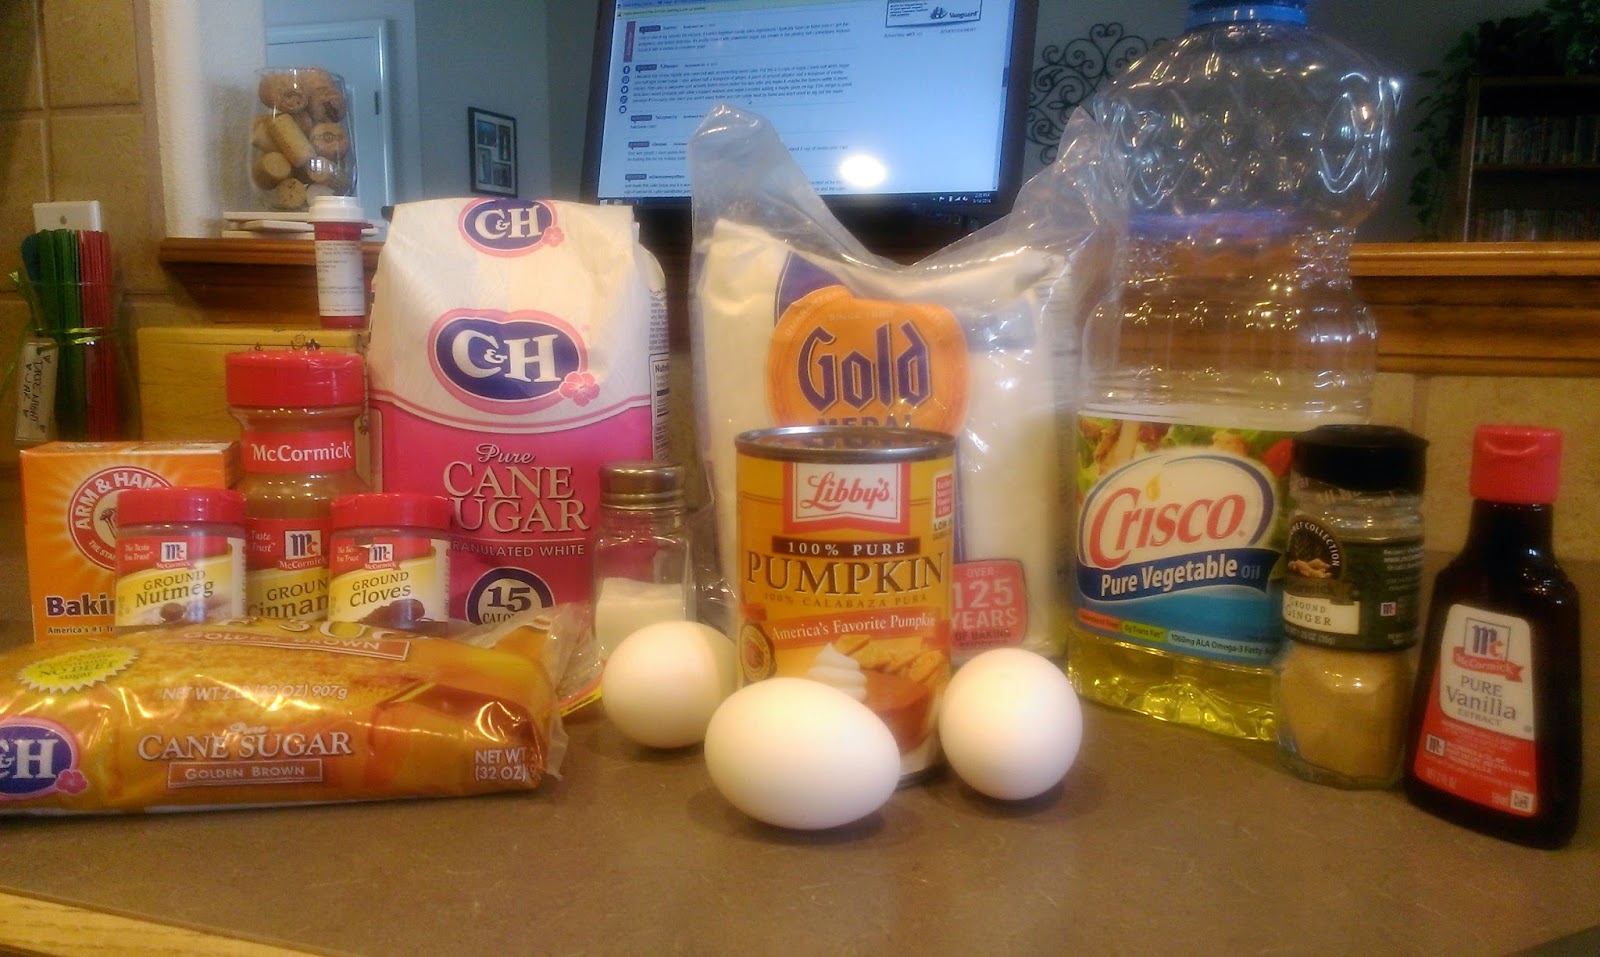
It contains your daily recommended servings of pumpkin and deliciousness. For being homemade, this cake did not take an entire day away from me to make, and the ingredients were all already in my pantry save for the canned pumpkin because I never want to prematurely believe it is fall only for an Indian Summer to ruin things for me. Mother Nature and I have never been on good terms- every summer she threatens to mow me down, and that one time she almost made me miss my own wedding (I’d offer her some cake to smooth things over if I could). I found the recipe at Taste of Home and made many adjustments to take it up a notch so that with each bite I can actually taste fall and subsequently fall into a delightfully induced food coma. So let me break down this simply tasty recipe for you so that you too can be the bearer of Autumn for your own family, thus earning you a solid opportunity to ask plenty of favors from your loved ones (I mean, my husband helped me clean the house today...just saying, it may have been because of the cake).

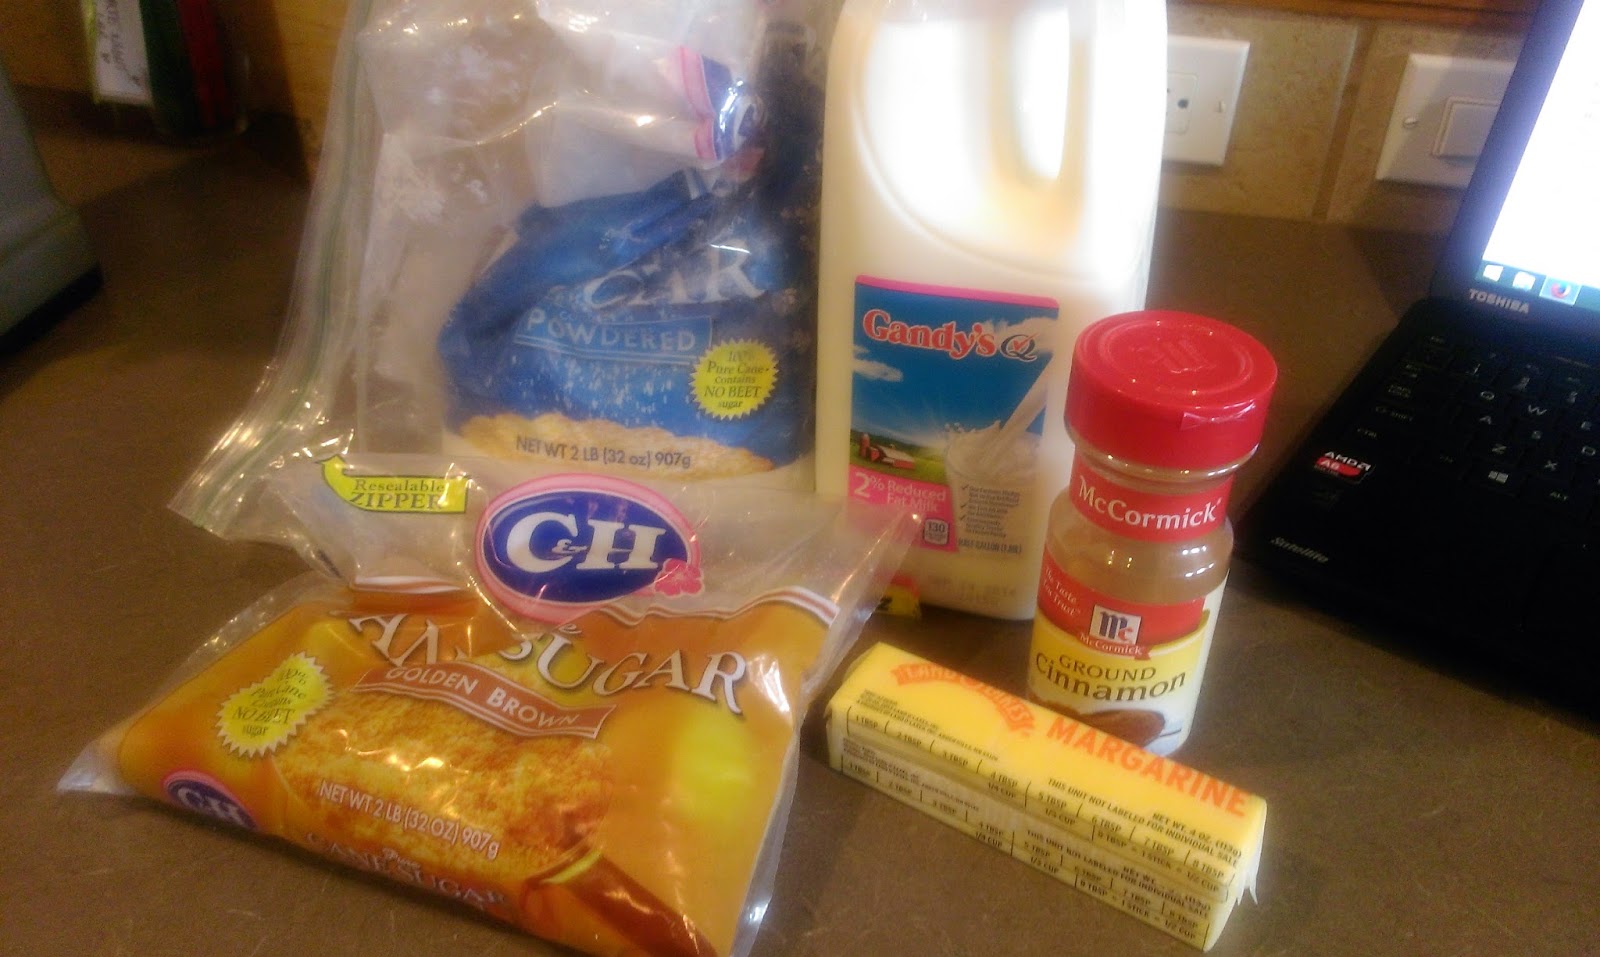
Clearly the canned pumpkin deserved to be center stage…it has been waiting a year after all. I happen to have amassed an amazing collection of herbs and spices over the years thanks to the enjoyment I find from baking and cooking, so you may or may not need to grab some spices from your local hell pit (commonly called “Walmart”). Here’s the breakdown:
- 2 cups of white sugar
- 1/2 cup of brown sugar
- 1 tsp cinnamon
- 1 tsp ground nutmeg
- 1 tsp ground ginger
- 1/4 tsp ground cloves
- 1/2 tsp salt
- 1 tsp vanilla extract
- 2 tsp baking soda
- 3 cups flour
- 1 cup oil
- 3 eggs
- 1 15 oz. can pure pumpkin
See, super simple for a list with thirteen different ingredients! Don’t you roll your eyes at me…you should have ground ginger in your pantry because it is the greatest thing ever. Making Asian food? Add ground ginger. Making spice cakes? Add ground ginger. Trying not to throw up? Drink a Gingerale. You get the idea. Ginger also happened to be my favorite Spice Girl, so the fascination goes back to the early 90s. If you wanna be my lover, you gotta get with ground ginge!

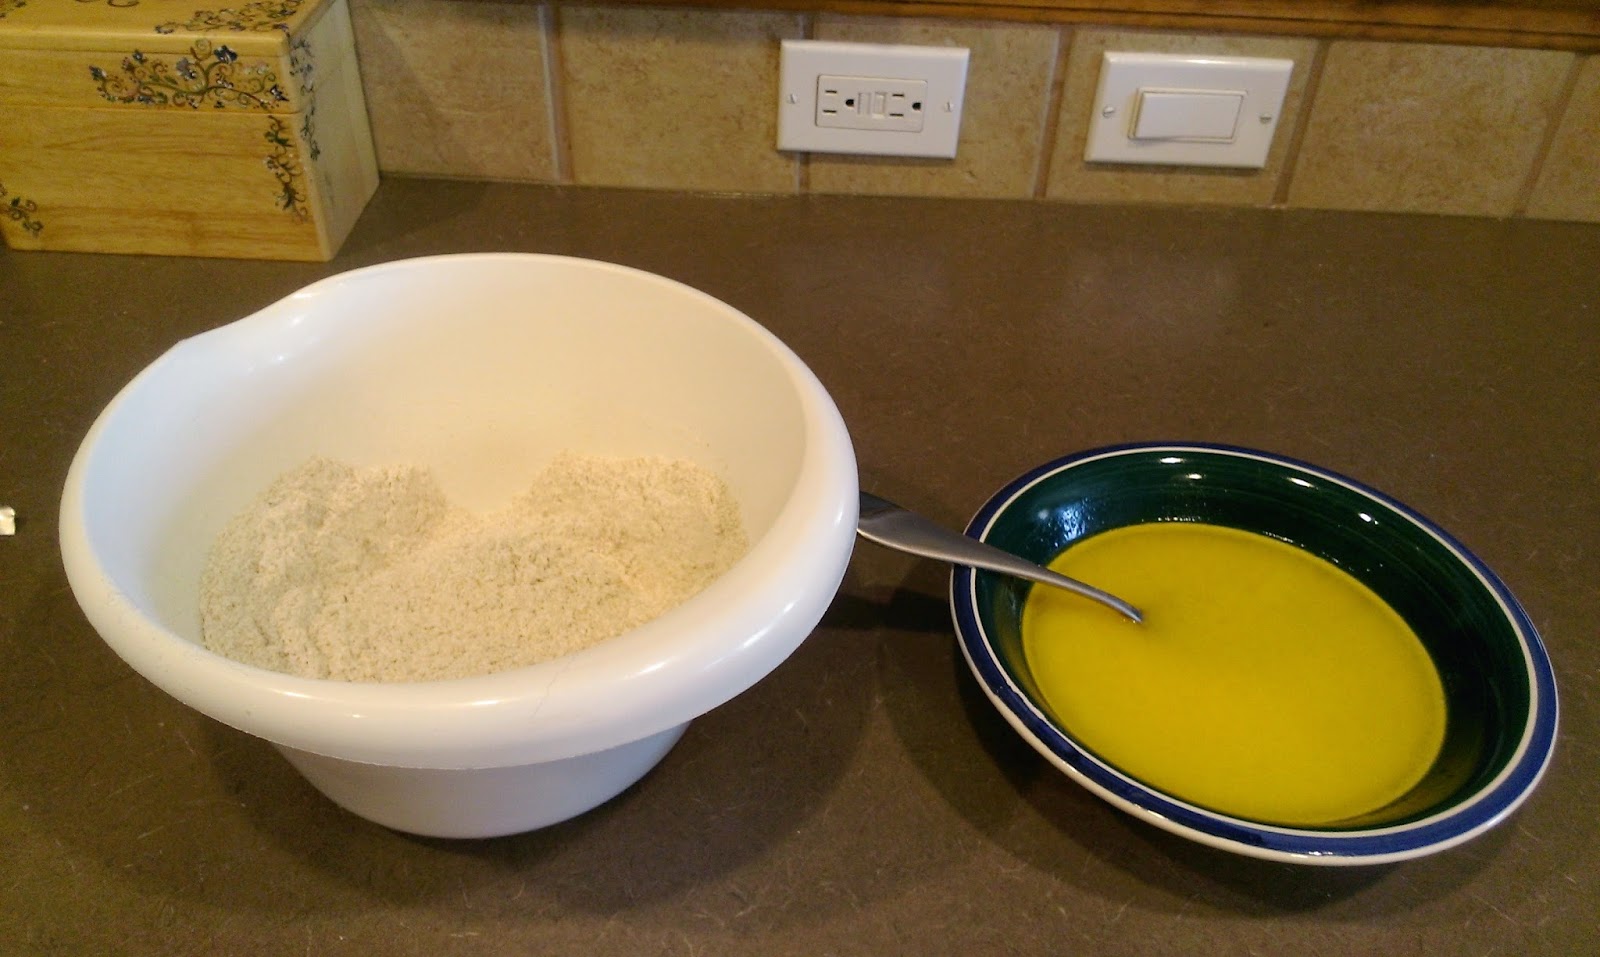
I kinda wanted to stop at this point and just eat the bowl and call it a day. First things first, mix together the sugars, extract, and oil. This will form a crumbly paste that tastes like the dreams of unicorns. Try not to eat it all, and then add the eggs (one at a time) and beat well. You could still eat some of the paste at this point if you’re not scared of salmonella (I too live dangerously).

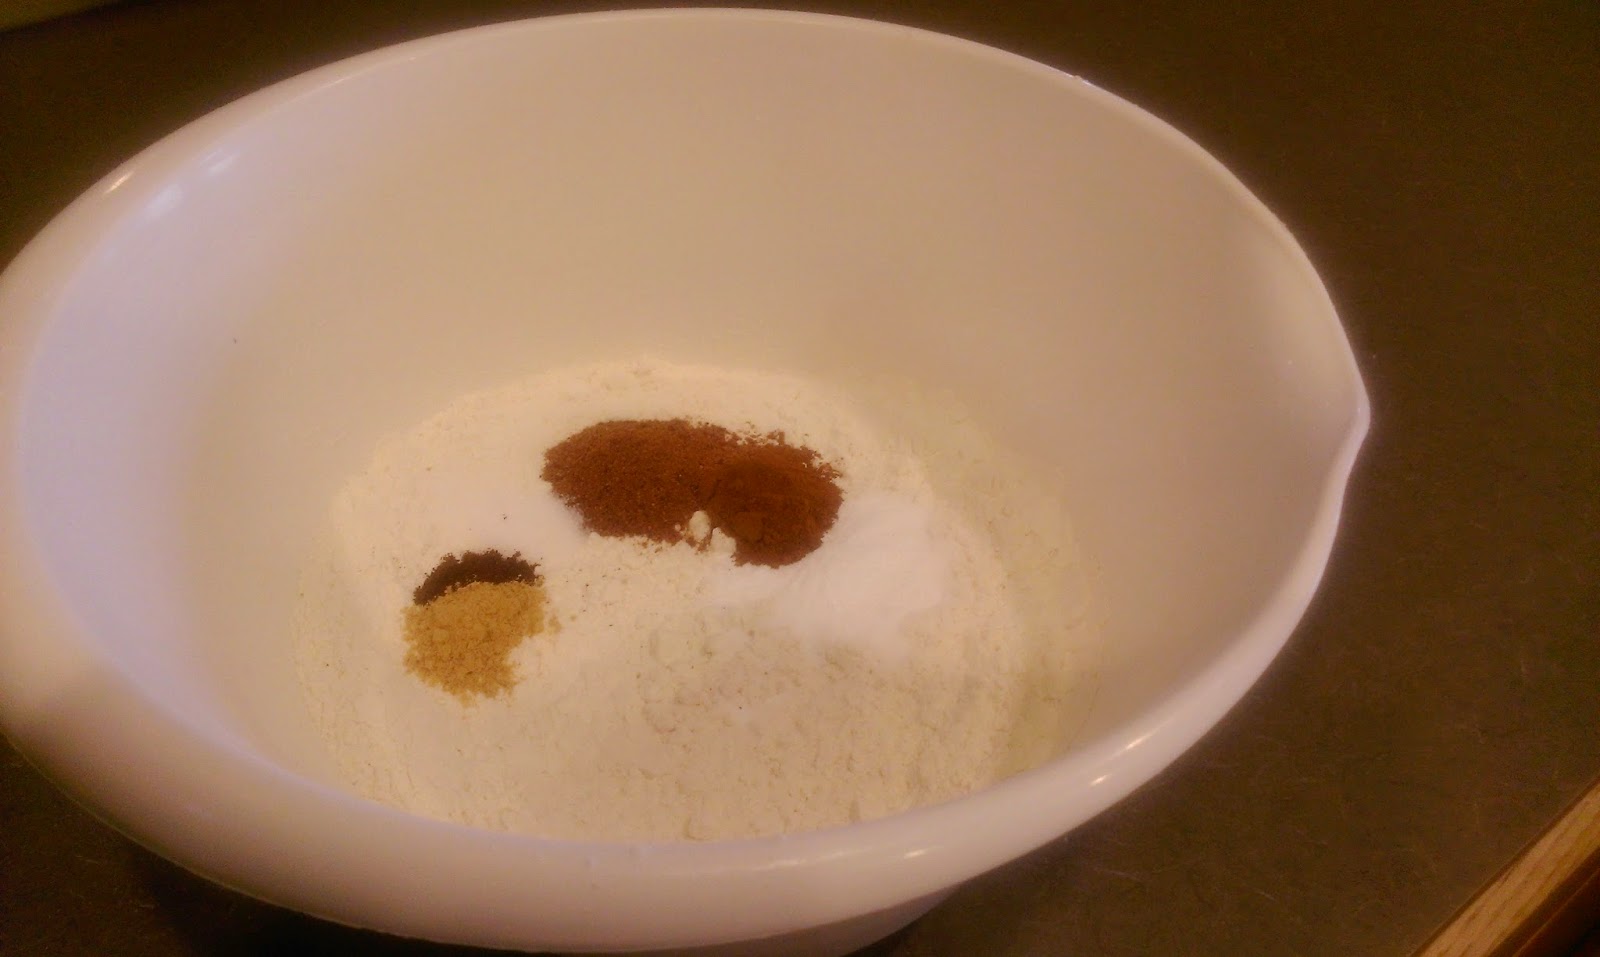
However, I do not recommend eating the bowl of dry mix. As the bowl of sugar/egg/oil awesomeness mixes, throw together the spices, baking soda, and flour in another bowl. Blend well, and open your can of pumpkin, and set aside. This will be infinitely easier if you’re right-handed. I almost always require two tries or a tetanus shot after using a can opener, but the cake is totally worth being reminded of my left-handed shortcomings.

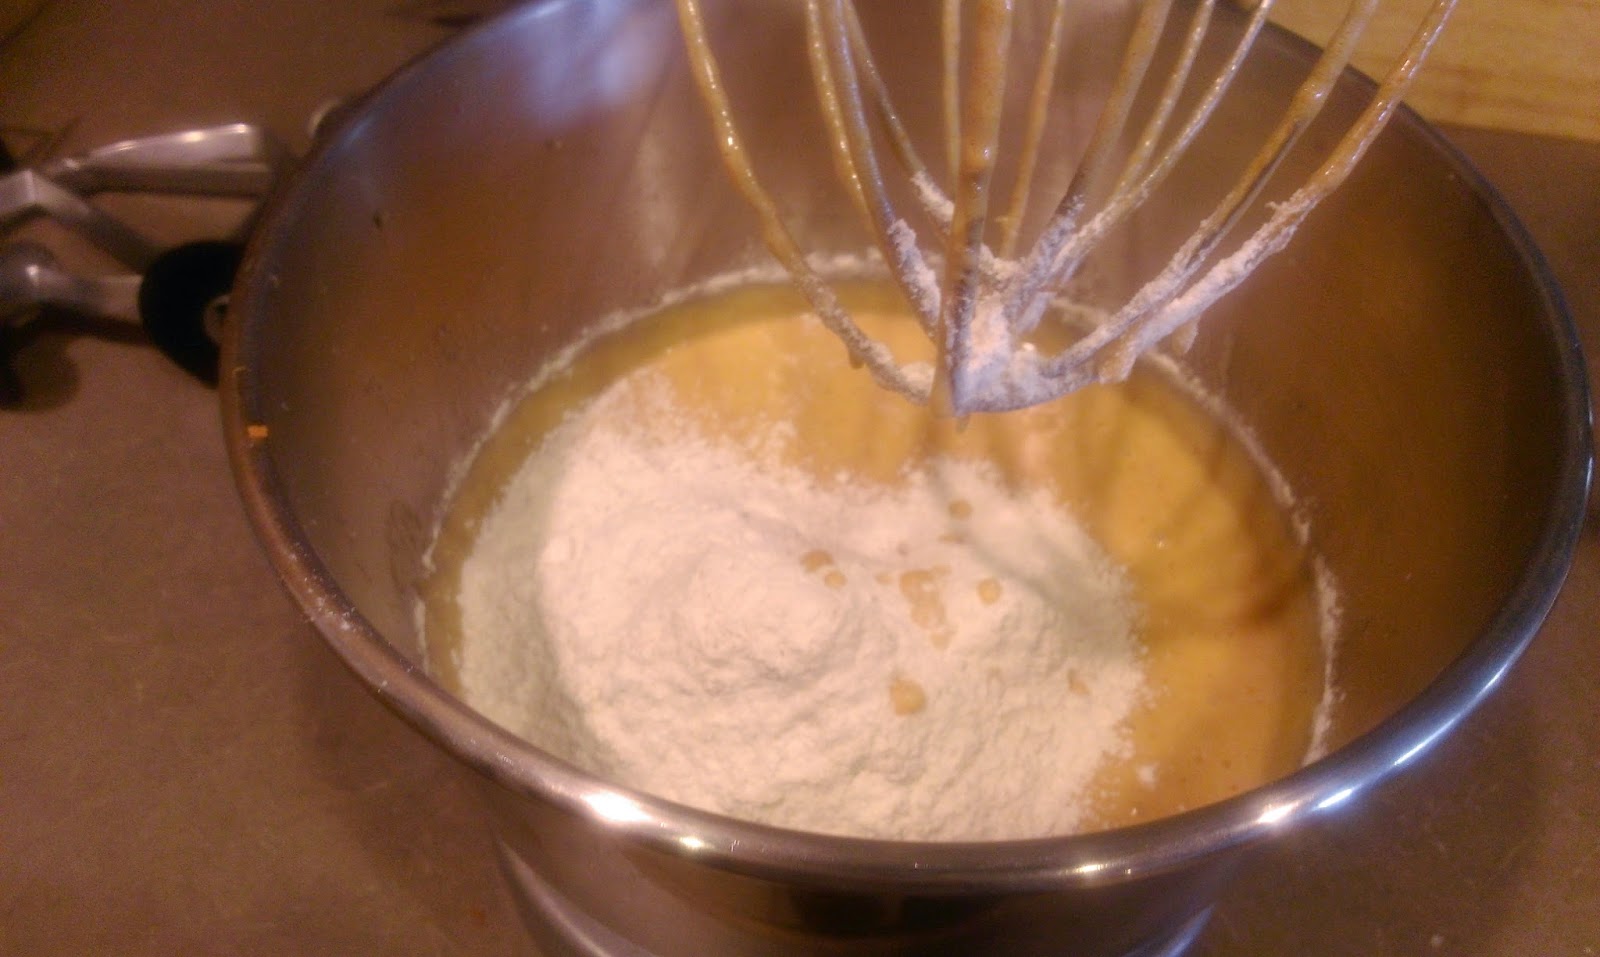
Add a cup or so of the dry mix to the sugar paste, and mix away.
Low speed at first unless making kitchen messes it totally your thing like it is mine.
Then mix in a third of the canned pumpkin. Blend well! You’ll repeat the dry mix/blend/pumpkin/blend process probably two more times until you’ve used all of your ingredients and have a huge bowl of cake, ready to be poured into only your finest of bundt pans. Just make sure you’ve greased up your pan thoroughly so the cake comes out easily later, and you don’t leave a huge mess for yourself to clean up when trying to scrub your pan and all its damn intricate nooks and crannies. Let your cake bake at 350 until it smells done. The accurate, scientific timing is approximately 50 minutes for those of you not blessed with a kitchen-timer schnauz (I imagine IKEA will make these eventually).

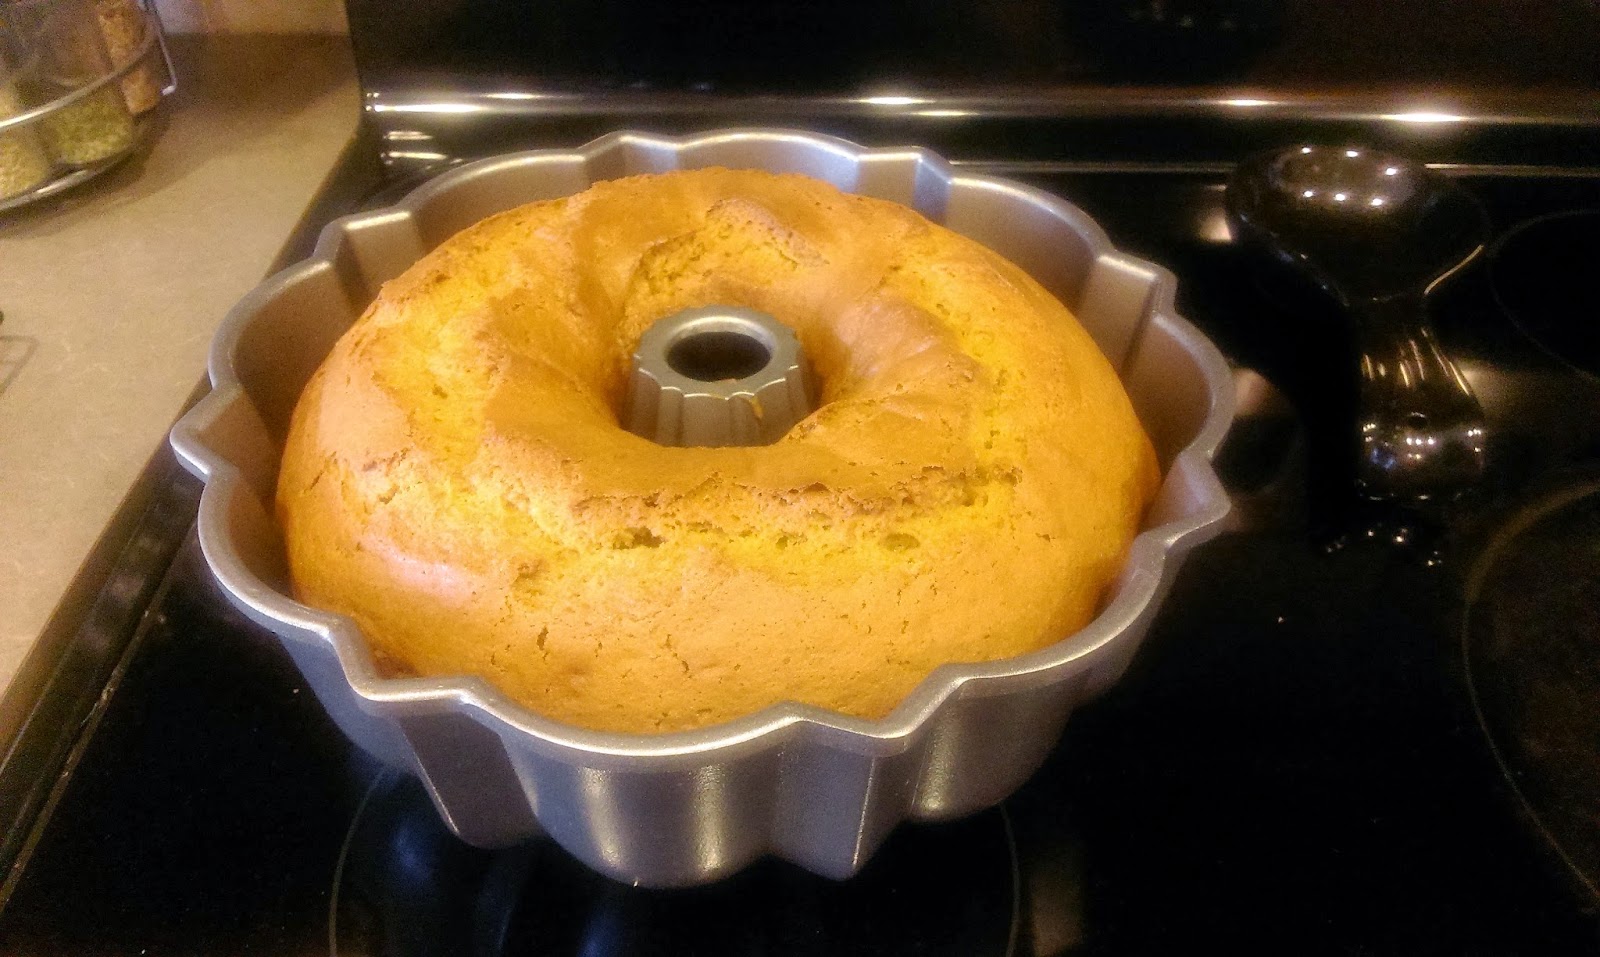
Once a toothpick comes out clean, you’re good to go. Let the cake rest for ten minutes. 
After a tantalizingly long ten minutes, remove the cake from the pan to cool on a rack. Doesn’t it look scrumptious??! Yeah, you’re damn right it does. It will make your whole house smell like the memory of your favorite Thanksgiving. For me, that happens just about every year when the Cowboys lose their Turkey Day game, but it still makes me giddy with delight (both the smell and the losses). At this point, you could dust the cake with powdered sugar, but I recommend going one step further and making my also very simple cinnamon glaze to drizzle on your cake.
Yeah, never a recipe without butter…you should be used to that by now. You’ll need:
- 2 TBS milk
- 1 TBS butter
- 1/2 tsp cinnamon
- 1/3 cup brown sugar
- 1/2 cup powdered sugar
See, you know you have all this in your pantry, too! Don’t make me go on about why you should also always have a pound of pure cut
cocainepowdered sugar in your pantry like I did for dear old ground ginger. All you need to do here is melt the butter, mix in the milk, then mix in the sugars and cinnamon.
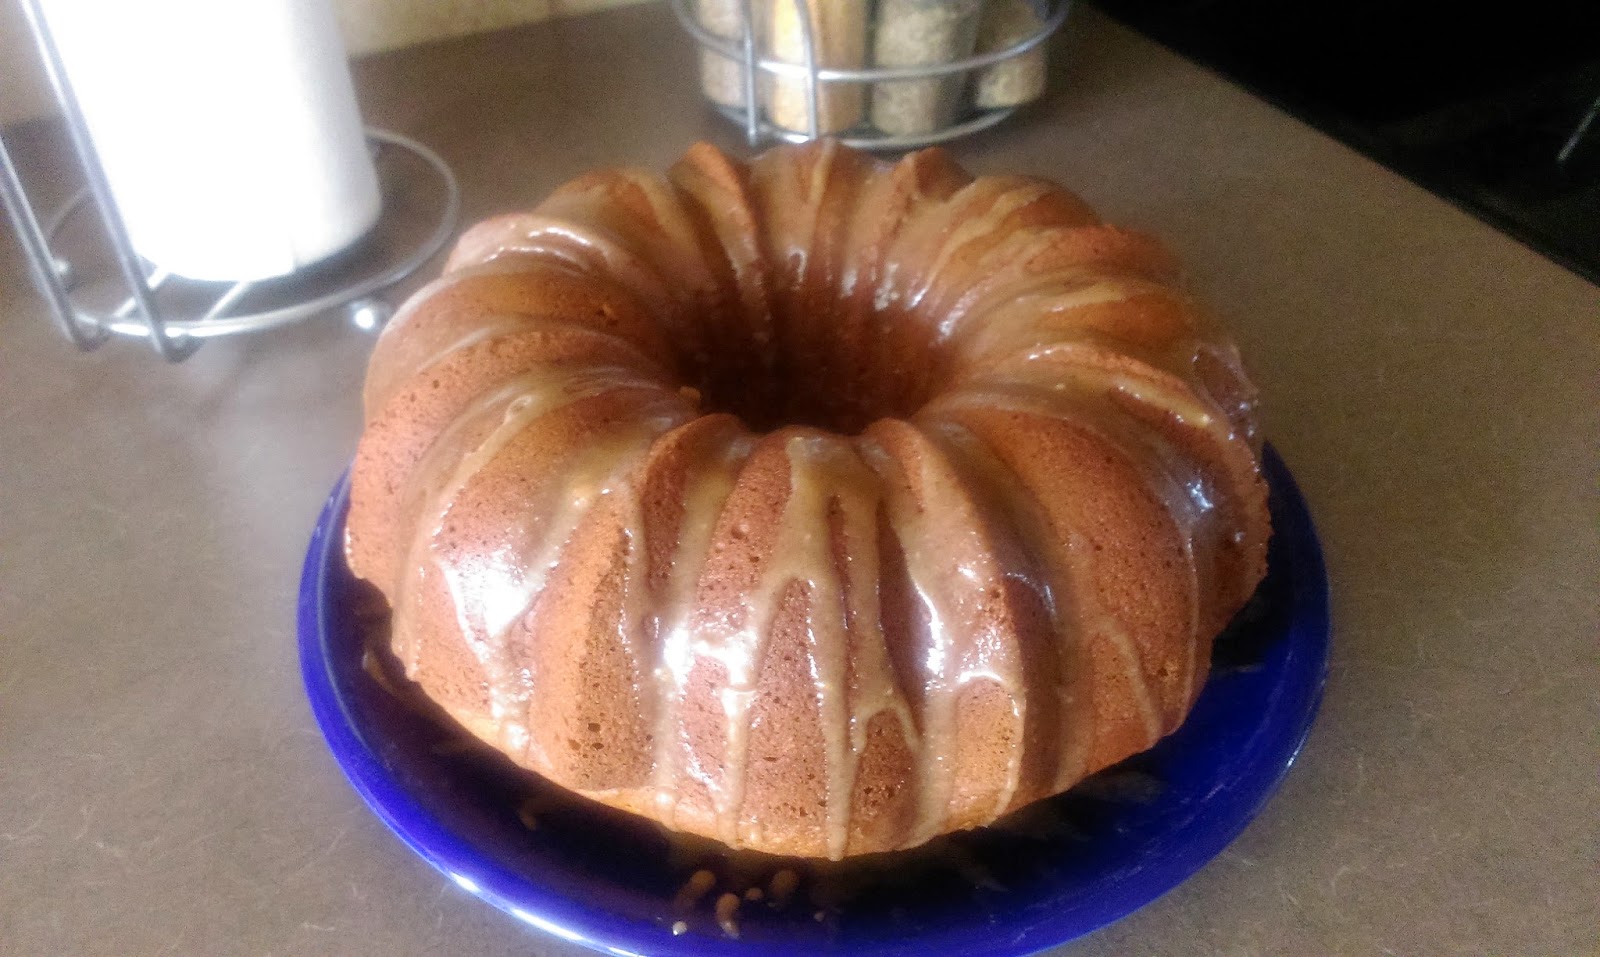
The hardest part about making this is not eating it by the spoonful. Once your cake has cooled, take a large spoon and slowly drizzle the glaze back and forth over the top of your cake. The best part is this doesn’t require a ton of effort to make it look gorgeous and delicious at the same time:

Oh my glazed greatness… I had to take it up a notch and make this look even more like the cake embodiment of fall and added red sprinkles to the top as a nice finishing touch. Gold would have also worked like a charm, too. Just add what you like until you feel you’ve sufficiently allowed fall into your home and had it take over your entire life and made you its prisoner (tastiest form of Stockholm Syndrome, ever).

You complete me. This cake is by no means light…yet it is still somehow healthy. I attribute this to the magic of the pumpkin. It really is the great pumpkin, Charlie Brown. This cake marks the beginning of fall baking in the Fox house. Get ready to be overwhelmed by pie and other pumpkiny goodness where the blog is concerned for the next few weeks. I am going to make you so sick of fall you’ll be praying for winter…when I can divulge you in the greatness that is “Christmas baking.” I can keep you fed with the finest of baked goods 24/7/365, never you fear. Til next time, my fellow eaters!
-
Cookies for the Cow Dog.
Just about every week I bake something that makes our house smell like an absolute dream. While I am known for having amazing olfactory senses thanks to my large nostrils (in their defense, they are just trying to fit in with my big nose), I can only imagine how tantalizing these smells are for dear old Hank the Cow Dog. So I decided to throw him a literal frickin’ bone this week and make him some homemade doggy biscuits. I like making him treats myself because alongside really loving to gloat and feel superior, homemade stuff means I can make them much healthier than the various processed crap from the pet aisle at Walmart. I mean, I somehow don’t even think their fresh vegetables are actually healthy, let alone their puppy treats.

Sadly, not for human consumption. Thanks to the internet and Amazon Prime’s amazing ability to let me experience buyer’s remorse for much cheaper than a regular department store, I found myself stumbling around the virtual aisles looking for cookie cutters because the 52-piece set I bought over the summer simply wasn’t “cute” enough or remotely dog-themed. I managed to find a set, but made the mistake of not reading the fine print. Hank is a medium sized boy, so I was looking for cookie cutters that would yield treats fitting of his stature (read: average, but refined and adorable). Little did Hank know while barking at the UPS man like the guy just tried to knife me or something that the gifts he bore were for Hankenstein himself. Although I think we were both collectively disappointed to open the box and find cookie cutters that looked like they were made for treats better fitting a small chihuahua/large rat (I am told there is a difference between the two, but I cannot manage to discern it).

I should’ve included a banana for scale. The other fun thing about these cookie cutters? The first time you take them out of their equally tiny tin, you will spend a solid ten minutes trying to get them to all fit back in. Upon completion of this miracle, you will take a place-marker photo so that you never feel bested by a tin of kitchen accoutrements ever again. Or at least for the rest of the week. Once I got over the initial size shock, I found these to be quite adorable- a tiny bone, a miniscule fire hydrant capable of putting out equally as miniscule fires, a wee paw print, a dog house big enough for fleas, and the world’s smallest dog. Variety is the spice of life, they say.

Yeah, I didn’t realize powdered milk was a real thing. Where have I been? Middle-class paradise, apparently. The ingredients for these treats are relatively simple:
- 3 C whole wheat flour because the regular stuff is good enough for you, but not your yuppy puppy.
- 1/2 C powdered milk…it smells surprisingly good. I wanted to lick some but resisted my urges.
- 1/3 C melted butter because even dogs can’t live without the stuff.
- 1 large egg (I honestly have nothing clever to say about this. Just get the damn egg.)
- 3/4 broth of your choosing. Although, if you choose vegetable broth, I think you could be fined for animal abuse. Stick with chicken or beef so as not to break your dog’s heart.

I somehow managed to use way more dishes than I needed for this. Don’t be like me and create an unnecessary mess because you think you can take a shortcut when, in fact, you just need to pay attention. Place your wet ingredients into your mixer’s bowl. Congratulations if you guessed the next step- turn on the mixer and beat things together. While your wet ingredients blend, mix the dry stuff together in another bowl. Gradually add this a cup at a time into the mixer until you’ve got dough:

I’m really glad this doesn’t have to look pretty. 
Take your favorite bludgeoning tool, and get ready to relieve some stress. I mentioned the merits of beating out dough like it owes you money when I made the cinnamon roll cookies, and it still stands true. Once you’ve placed your dough onto parchment paper, throw another sheet on top of it. Then flatten it out by first just repeatedly hitting the dough lump with your rolling pin. Eventually you’ll have to use the rolling pin like a normal person and flatten out the dough to about 1/4″ thickness…but be sure to enjoy yourself at first.

Then line up your tiny cookie cutters and have at it! I evenly rotated through the cookie cutters, and only had to reshape a dough ball and rough it up again once to make sure I wasn’t wasting ingredients. Place your cutouts on a foil or parchment paper lined baking tray- I needed two because I excessively bake in a small kitchen and don’t have space for giant trays. One day…

One of these things is not like the other…one of these things was moved for spaaaace. The original recipe called for these to bake at 350 for 40 minutes. Since other recipes have burned me in the past, and I didn’t want to literally burn Hankasaurus Rex’s treats, I watched these like a hawk. I lowered my temp to 325 since my trays are dark metal, and they were still done after about 20 minutes. The bottoms were browning and the tops were golden- this is what we’re going for. Dogs love the satisfying crunch that we humans find repulsive when it comes to cookies. Gotta love our less picky sidekicks.

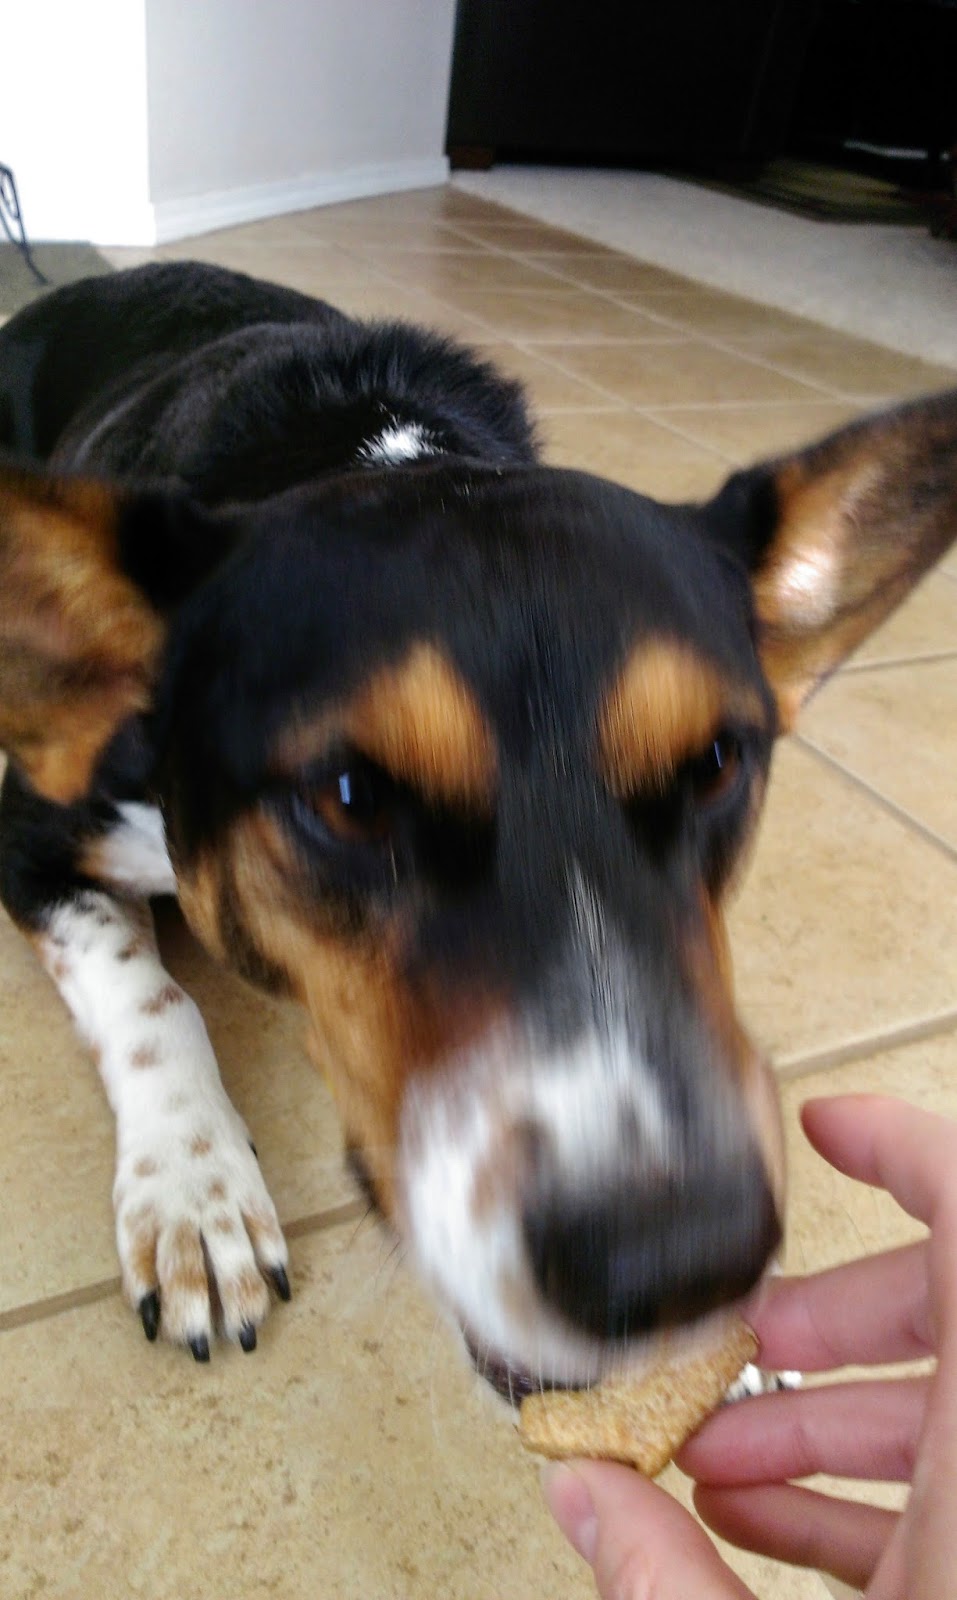
“You bake and you bake…but never for Hank…” I am pretty sure the dog knew these were for him because he’s either quite perceptive and realized these treats were in the shapes of some of his favorite things, or because he was just really hoping he’d have his day thanks to the adorable cuteness he regularly emits to get things. Either way, once these were completely cool, I put them into a small Tupperware. I had to give him a few and spoil his dinner (as if) so I could close the lid.

His ears are too big and magnificent for close ups. I could’ve given him anything (as long as it wasn’t salad) and he would’ve eaten it, but I received several dog licks and a sigh of general content after he finished chomping down a few homemade dog treats. Knowing I have a happy dogchild makes me a happy dogparent. I highly recommend if you have a spare fifteen minutes to throw these together for your dog that you do so; he or she will reward you with an even higher outpouring of love than usual, so in other words, it is totally worth it. They go the extra mile for us every day, so it is the least we can do in return. Back to baking human homemade treats next week, but my waistline needed to recover from last week’s cupcakes first! Til next time, my fellow eaters!
-
Nothing Says 'I Love You' Quite like Cupcakes from Scratch
When it comes to things like “feelings” and “emotions,” I usually tend to either “have none” or “react inappropriately” to whatever the situation might be…like, I know I probably shouldn’t laugh when I see a kid fall off of his bike, but does that ever stop me? Nope. Does that make me evil? Maybe. But I own up to it because being honest to a fault is probably the one thing I do excel at when it comes to being a person-robot hybrid. Since I often have issues computing and emoting your feeble human emotions, I often let my actions speak louder than my words. Sure, I can say I love my husband, but by baking him cupcakes from scratch down to the icing, I am showing him this is the gospel truth without getting all sappy and gaggy about it. Emotions: As messy as homemade baked goods…but you don’t get to eat your feelings now, do you?

Well, I suppose you could, but don’t the cupcakes look like they’d taste better? See? These carefully crafted, meticulously decorated tasty little bundles of love say it all without any awkward pauses or mild horror on my part that I’m being way too mushy. So now that my husband is safely home from deployment, every time he opens the fridge he is constantly reminded that I love him so much I spent hours and hours laboring to get these bad boys just right. Did you just learn a lesson from me? You’re damn right you did. I’m the antithesis to every chick flick you’ve ever seen, and I have a very fruitful partnership because of it. This will probably be the one time I ever use myself as a successful example for anything, so just go with me here while I give you the run down on this recipe I found and adapted to my liking from here.

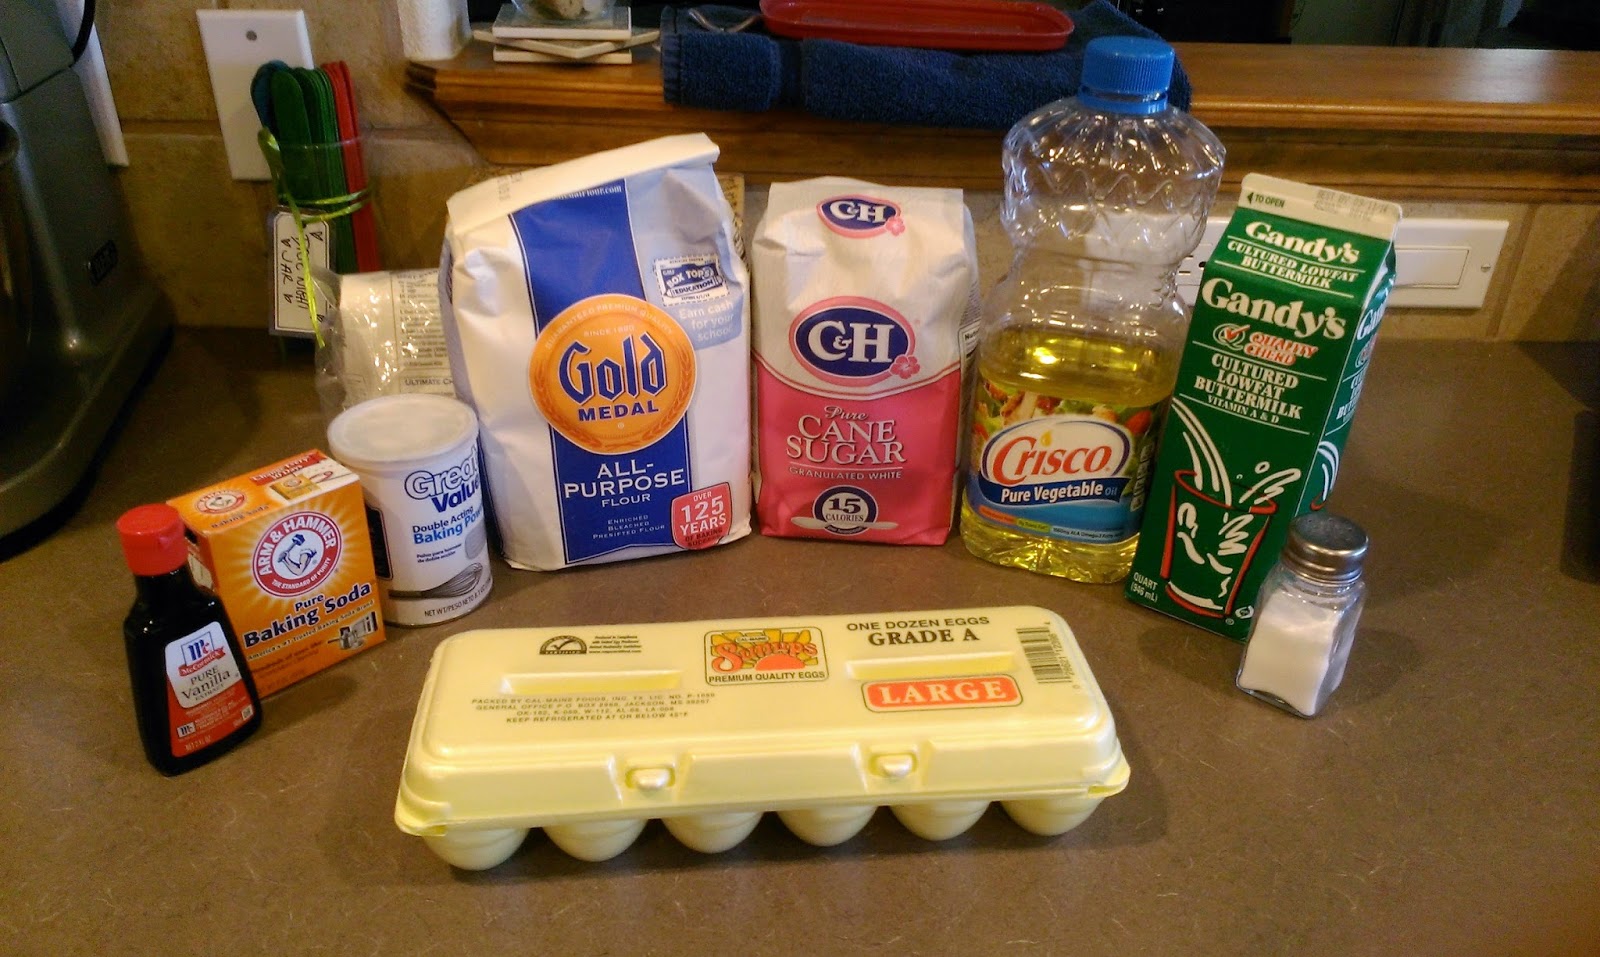
I know, I am absolutely horrified there’s no butter in the ingredients list, too. Minus the buttermilk, you probably have everything you need for these cupcakes in your pantry anyway. Once I picked my jaw up off the floor over the fact that these vanilla cupcakes didn’t call for any stick butter whatsoever, I decided maybe it was time for me to inch away from my butter safety net and try something new, and boy am I glad I did.

I swear this is only pure cut flour. Start by mixing together your dry ingredients in a mediumish (new favorite made up word- it sounds so fun and carefree) bowl- 2.5 C flour, 1 tsp baking soda, 1 tsp salt, and 2.5 tsp baking powder.

There may not be stick butter, but we’re not lacking in the sugar department, no sir. Then in your stand mixer bowl, dump in four eggs and beat those suckers like they stole your favorite pair of pumps. If you’re a man baking these, beat those suckers like they stole your last beer- seriously, but not for an extended amount of time because you can always go get more. Once your eggs are light and fluffy, admire their tenacity at taking a beating so well and add in one cup of sugar. Mix that well, and then add in one final cup of sugar. Don’t try to do it all at once or you’re going to end up with sugar crystal coated counters…the mess alone would be a pain in the ass, but try saying that five times fast. Once these have blended well, add in 3 tsp of the great elixir known as vanilla extract and 1 C of veggie oil. Now, take a cup or so of your flour mixture from way back when this whole ordeal started, and mix it in. Pour in half a cup of buttermilk, and mix together. Then pour another cup or so of the flour mixture in, and another half a cup of buttermilk. Finish this game of cat and mouse off by dumping whatever flour mix you have left in until everything is nicely blended together.

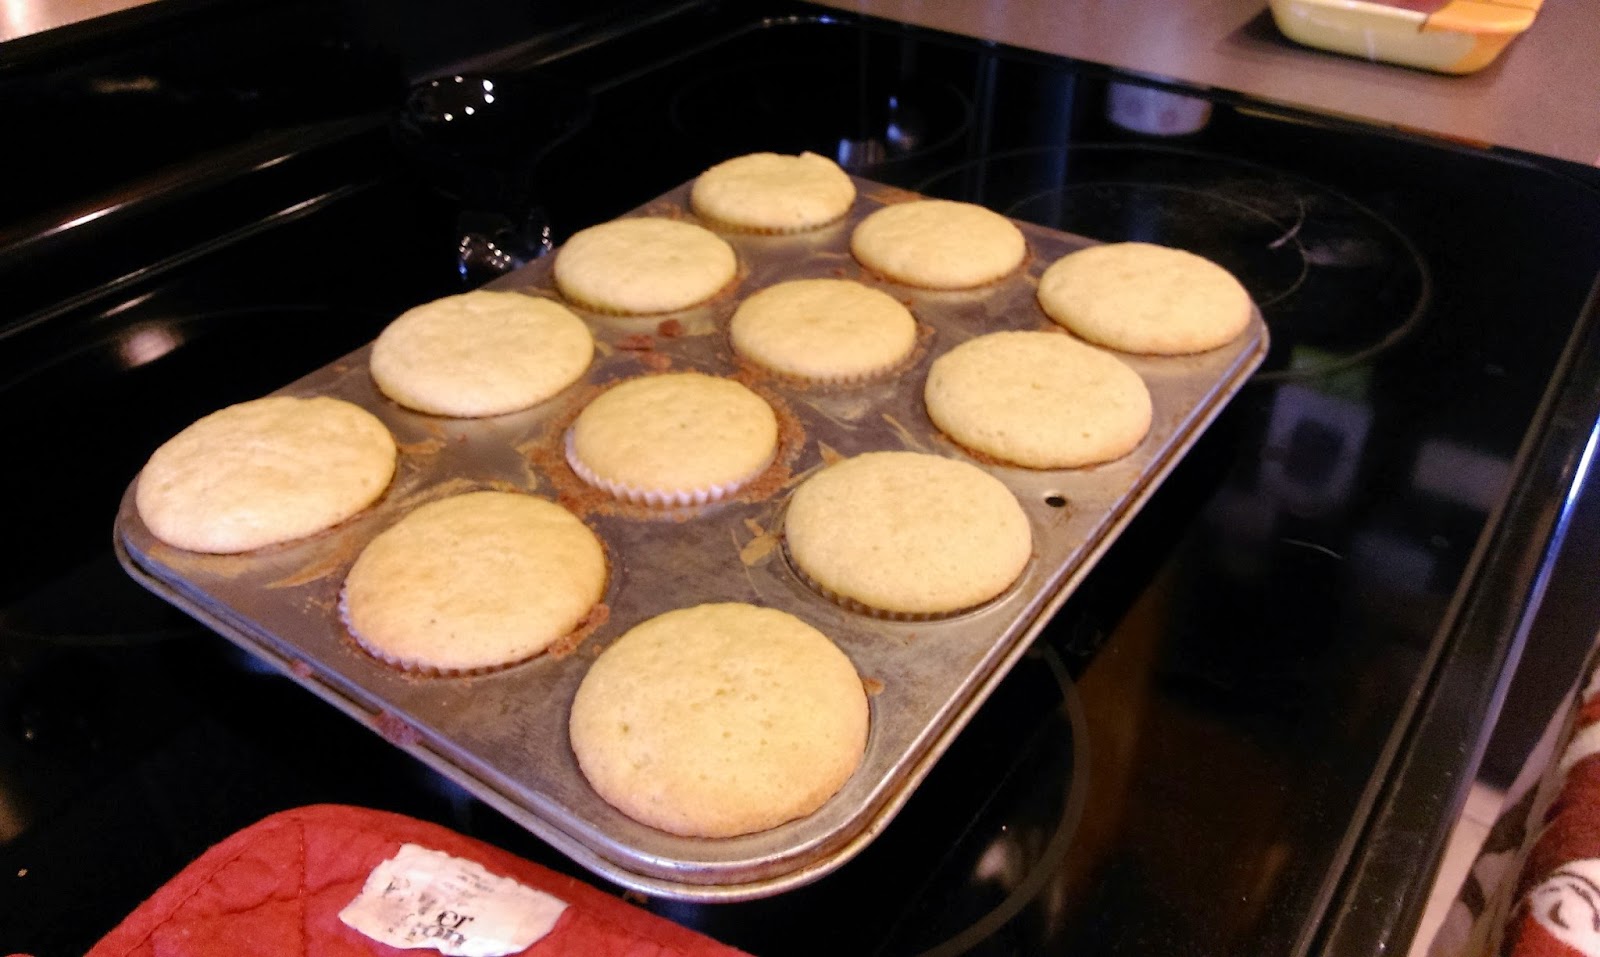
Naturally, you want to fill your muffin tins at this point, but not too full. I put a heaping spoonful into each cup. 
And after baking at 350 for 20 minutes, these gorgeous blondes were born. This recipe makes 24 cupcakes, so you’ll get plenty of batter on you and your muffin tin while filling the cups. That’s fine. You should go for this route because then you get to eat some batter, salmonella be damned…the taste alone would’ve been worth it as far as I am concerned. Now, since my husband’s trip back home got pushed back a day, I had enough time to call it a day at this point and let my cupcakes cool in the fridge overnight so I had a firm surface to work on in the morning. Sad fact of life, the more cupcakes I make and subsequently eat mean my surface is less than firm, but these are the things we do for love: Quiet suffering. Wait, that really was supposed to be romantic. Now you see why I bake instead.

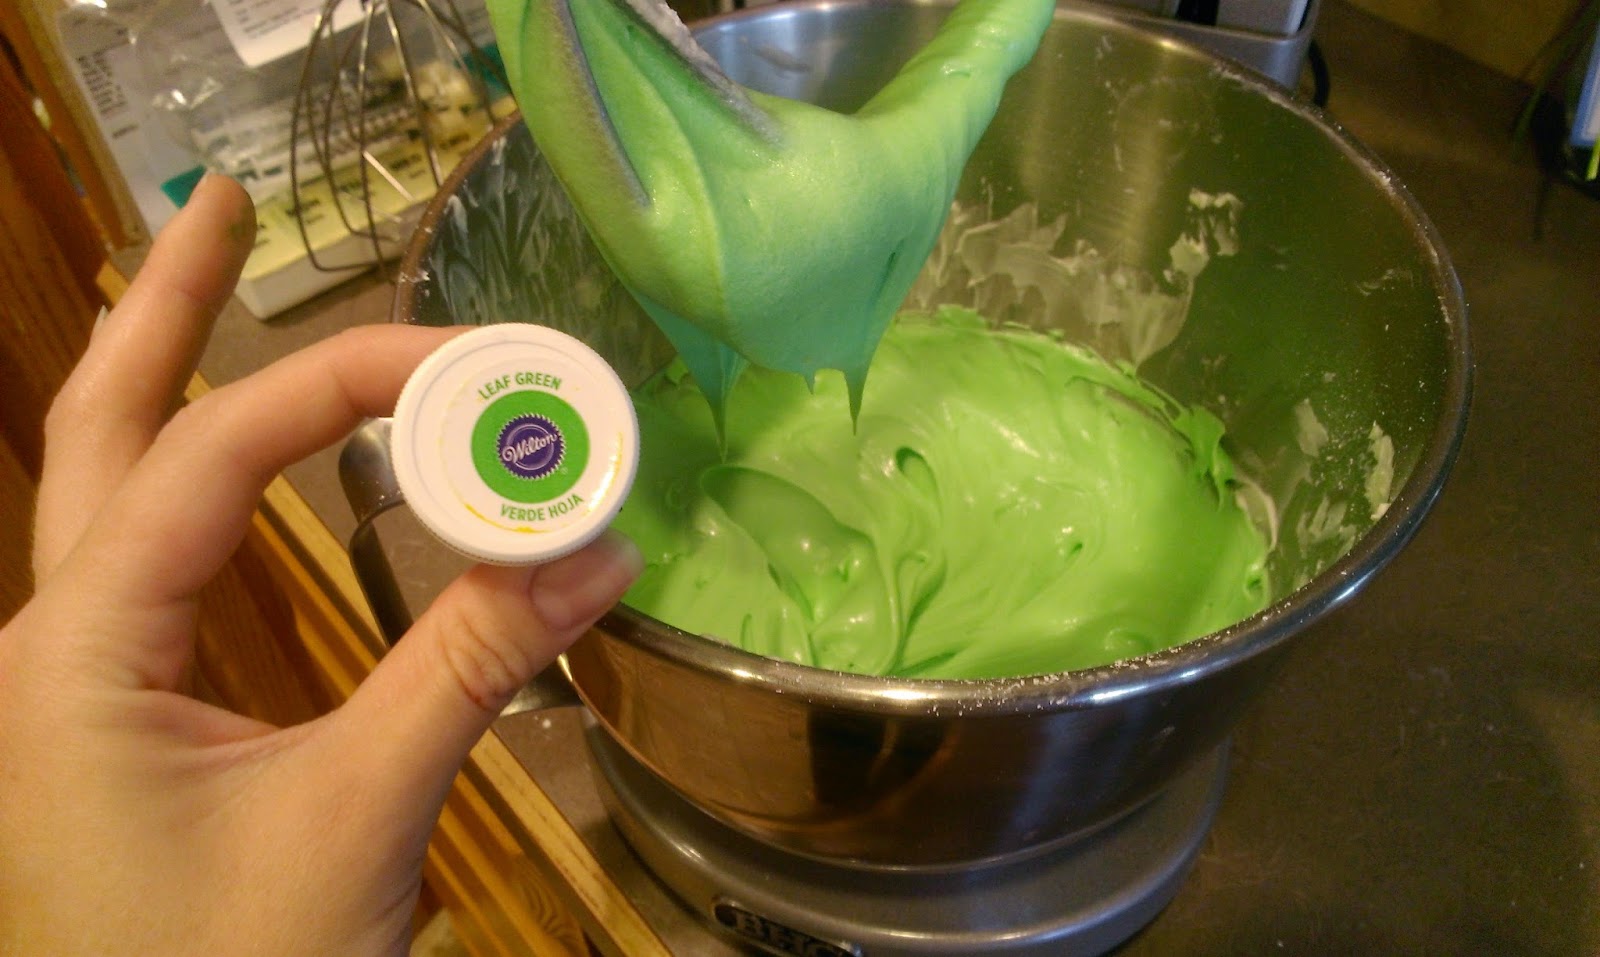
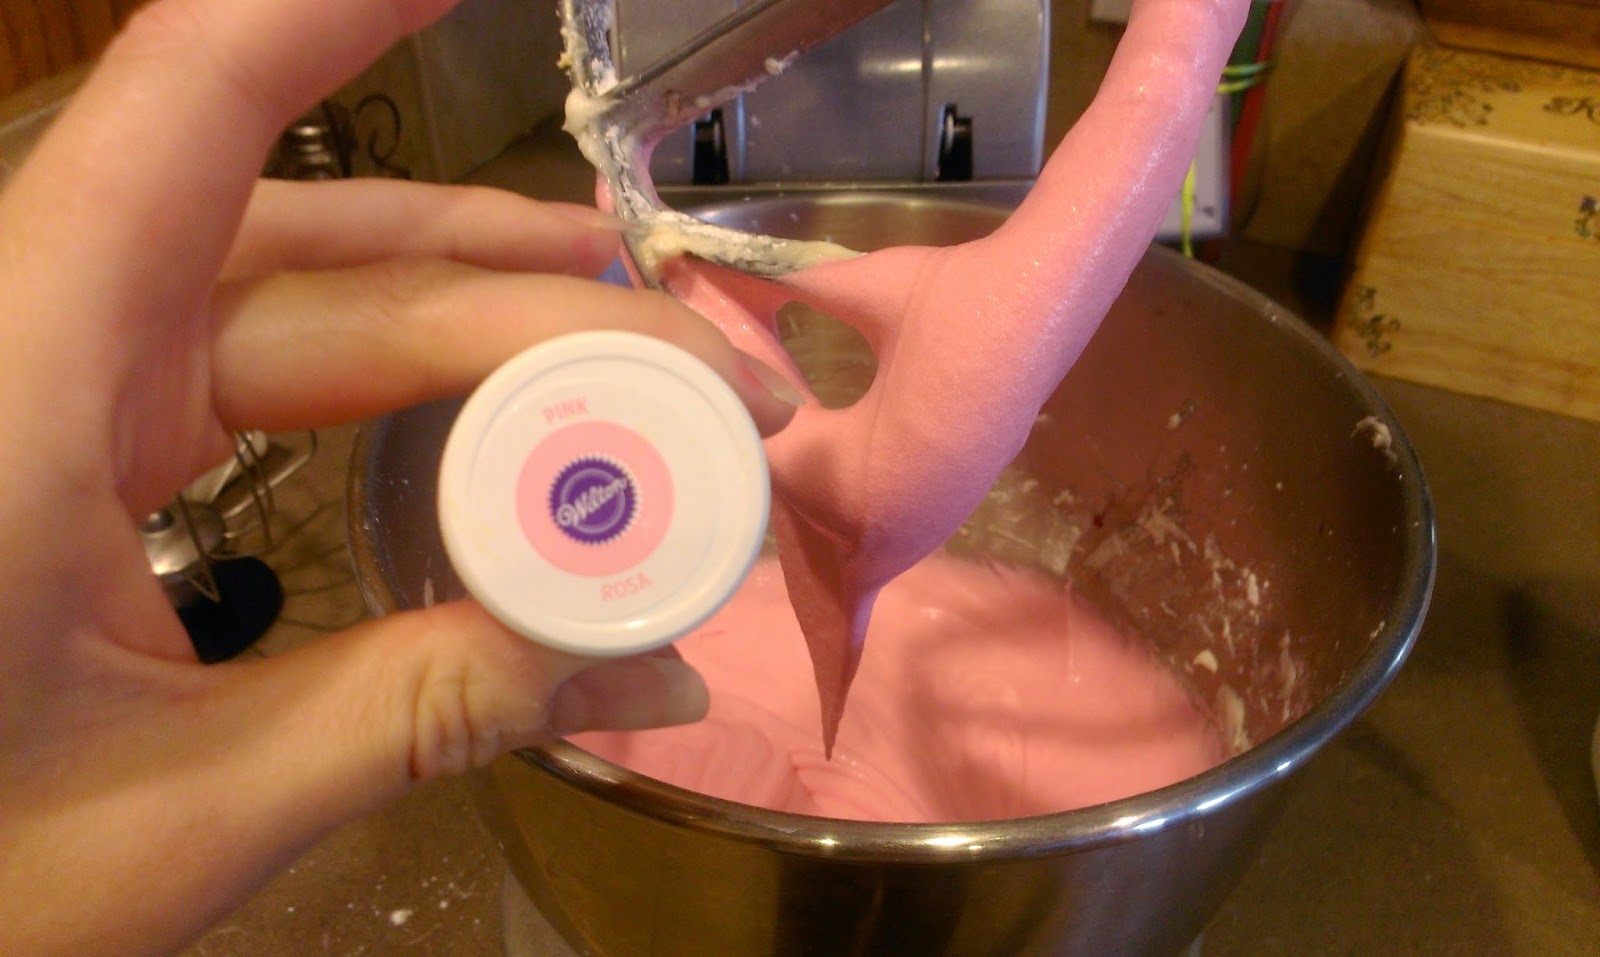
Get ready to be AMAZED at my trial and error response. Now that the cupcakes are cooked and cooled, it is time to get to the part before the fun part- making the icing. Now, I tried a regular cream cheese icing recipe to frost the outside edges of my cupcakes, but it ended up being way too runny to maintain shape even after adding in more powdered sugar and sitting in the freezer for 30 minutes. So I had to scrape that icing off and put the rest in a Tupperware for the next time I actually do feel like eating my feelings since we’ve decided that is possible. I then went with my old standby plain white frosting, dyed green.

Grab a 2D drop flower tip and fit it to a piping bag. You’re a better person than I if you get to this point and don’t have green dye all over your hands like I did. 
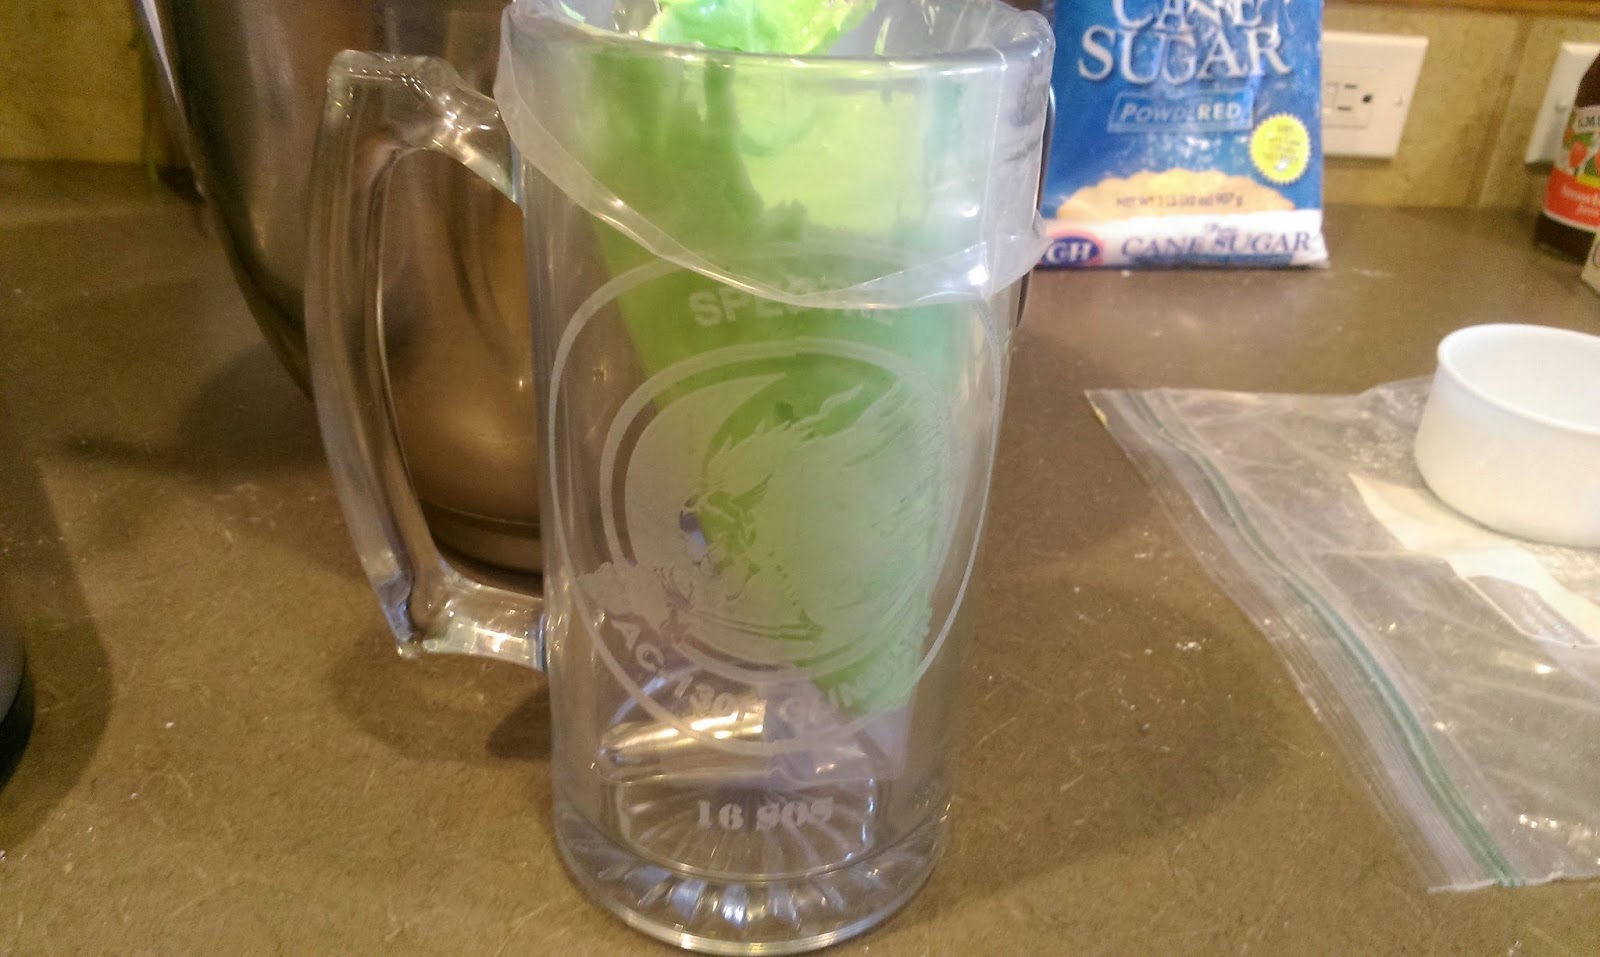
To load up your bag, find a large glass to place your piping bag in, and fold the top of it over the lip of the cup. I found it appropriate that our old squadron’s bad ass beer mugs worked best for this. If you ain’t Spectre… 
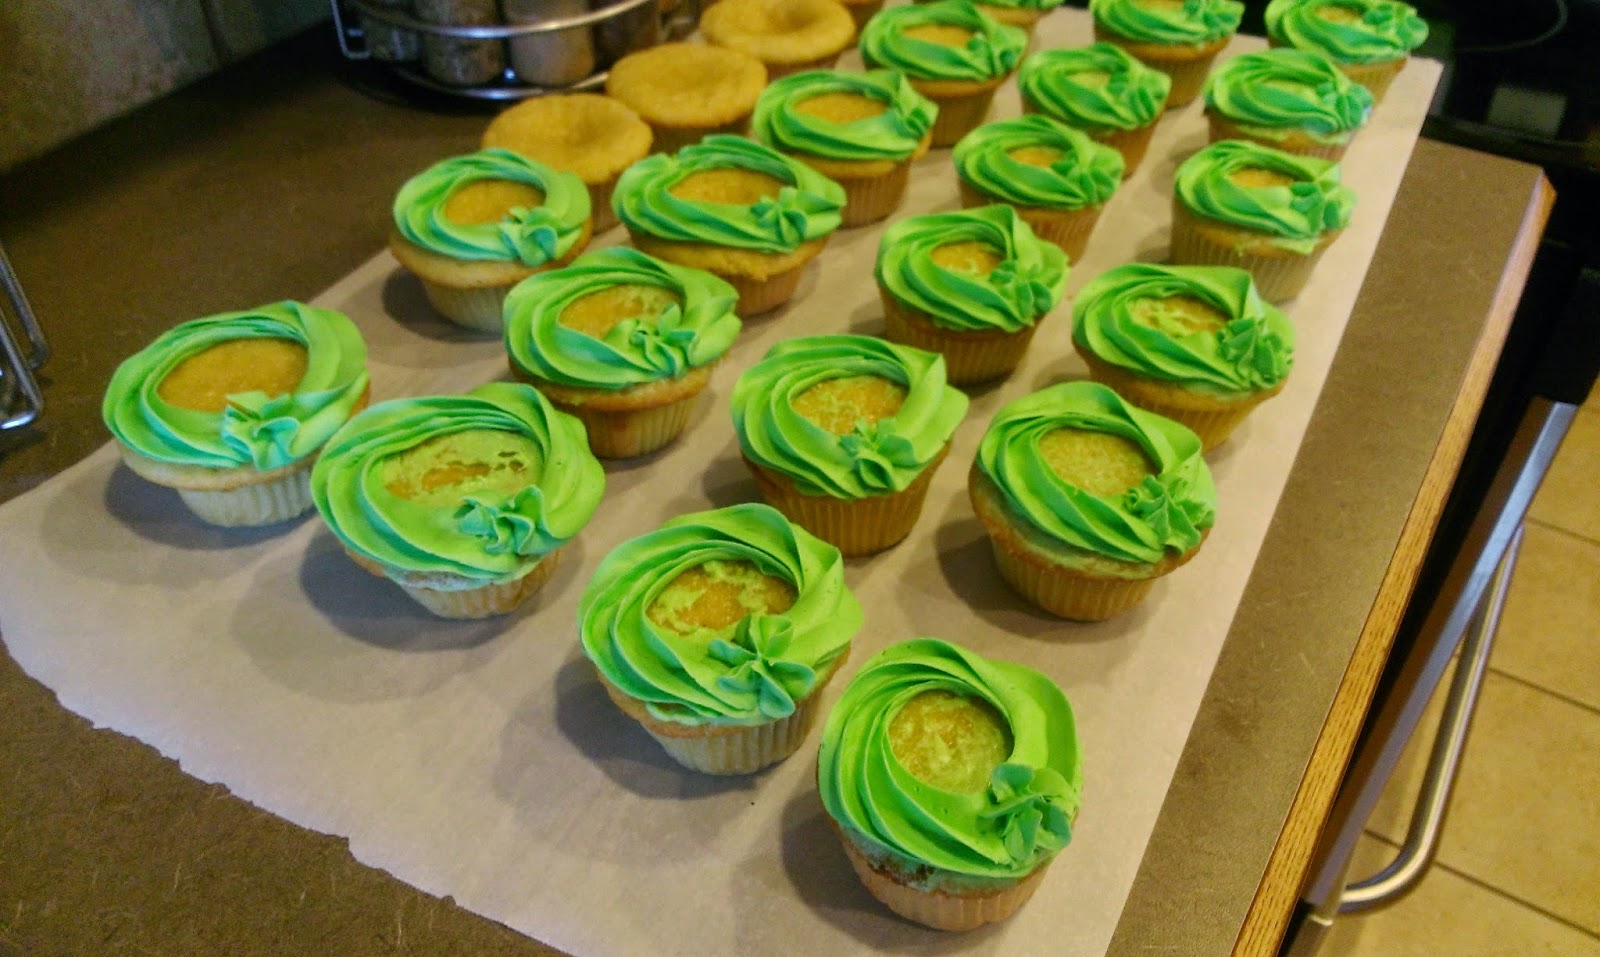
Now, take your piping bag and slowly, very slowly, draw a line around the outside of your cupcakes.
You’ll find that as you naturally curve around the cupcakes, the tip will make an awesomely crafted design.
End by burying your tip a bit when you reach where you started, and pipe until you’ve formed a nice little green flower,
and pull up and away a bit.Once you’ve made your outside design, place the cupcakes back in the fridge and get ready to make the best strawberry cream cheese frosting EVER.

Ahh, stick butter- nothing is ever truly whole without you. Clean out the cupcake mess from your mixing bowl, and once you’ve dried that, get ready to undo that hard work by making a mess again. Mix together one stick (half a cup) of BUTTTTTEEEERRRRR that has been softened with one brick of cream cheese. I went with reduced fat, but I think the real deal would work better because it would be firmer overall. Since I needed a frosting with a thicker consistency, I slowly blended in five cups of powdered sugar, and 1.5 tsp of vanilla extract because I had shaky hands and dumped in about half a tsp more than I needed, but this stuff tastes good no matter what. I finished up by dumping in 3 tablespoons of strawberry jam. If you’re not a huge fan of strawberry flavoring, you’re weird, but you could do 2 tablespoons instead. Or if strawberry flavor is your jam (see what I did there), go for 4 tablespoons. I did not end up adding in any milk so my frosting would be thick enough.

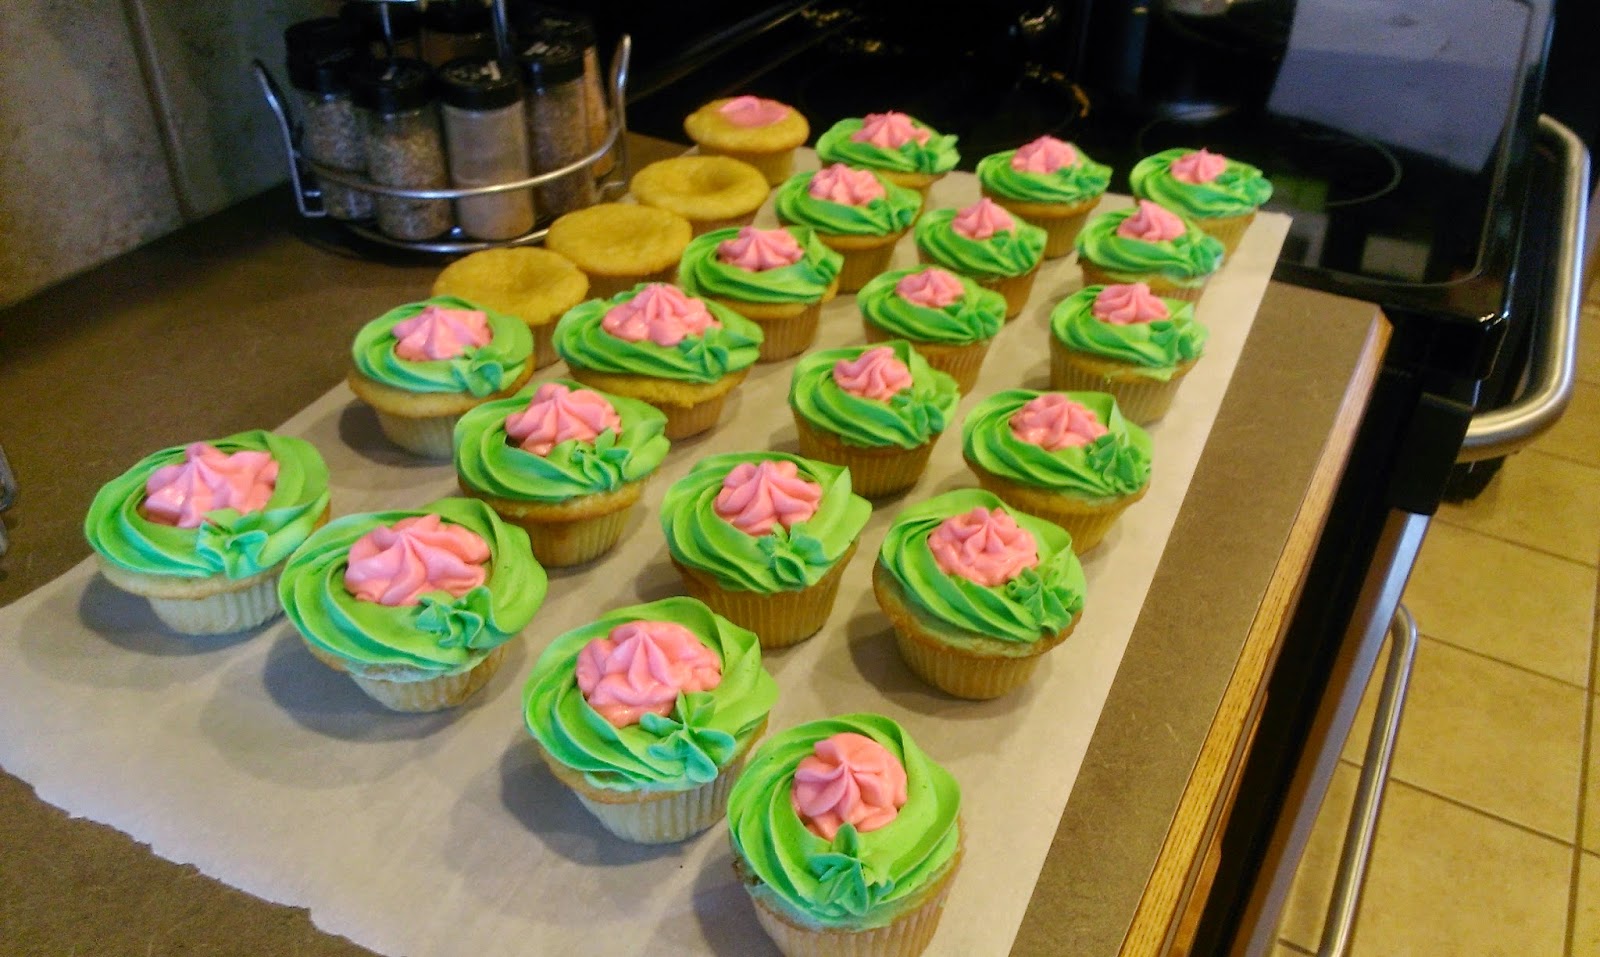
This frosting yields a soft pink color, but I wanted to amp it up and get more dye all over myself. After placing in the freezer for a half an hour, get your 2D drop flower tip fitting to another piping bag and fill with the strawberry frosting. Here comes the insanely easy part- hover the tip above the center of the cupcake that is unfrosted, and just pipe with frosting until you’ve filled in the space and built up a cute little tip, then pull the bag up and away:

As you’ll notice, I ran out of green frosting before I could finish, so I got another lesson in trial and error. 
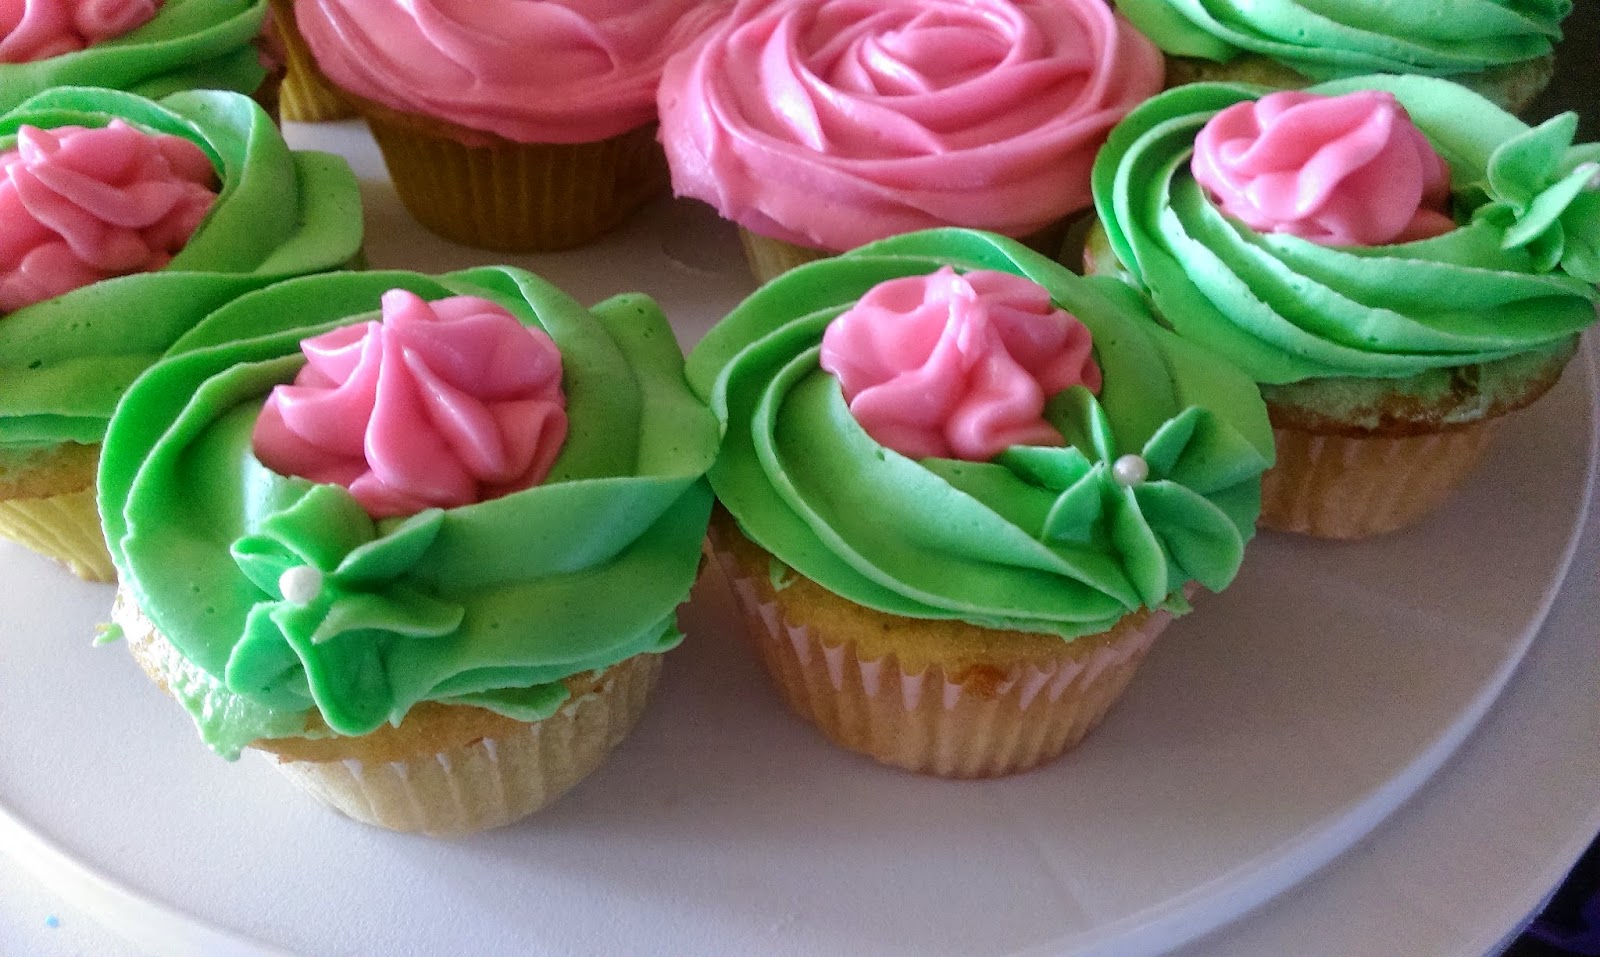
But this actually worked out well because I ended up being able to pipe roses with my drop flower tip like I did many weeks prior with the S’mores cupcakes. 
To finish things off, I found my cake tweezers and placed a small pearl in the middle of each flower piped in green. This was THE perfect finishing touch. …had it remained summer here, anyway. I chose to frost in these colors because summer was unrelenting and refusing to go away after Labor Day (how unfashionable), so I embraced it and went for bright colors. Apparently this pissed off autumn, because the following morning when my husband came in it was cold and rainy and has stayed that way ever since. Not that I’m complaining- this is perfect football watching weather. I think my combination of Vikings shirt, Vikings socks, and drinking out of a Vikings tumbler lead to our victory today, as well.
These cupcakes are now a favorite and mine and my husband, so all the work was worth it. All jokes aside, he knows I’m not just an unfeeling fembot, but I will take any opportunity to bake and run with it. So should you find yourself as socially awkward as I, just let these cupcakes do the talking for you. Til next time, my fellow eaters!
-
Cinnamon Rolls Aren't Just for Breakfast If You Try Hard Enough…
I believe in things like breakfast cake and breakfast pie. So if I can have dessert for breakfast, why can’t I have breakfast for dessert? These are truly deep thoughts I consider on an almost daily basis. I realize I am slightly ahead of (or completely perpendicular to) my time when it comes to things like this. But I did finally solve that problem about breakfast for dessert, and you are reaping the benefits, my loyal readers…

Cinnamon rolls and cookies all in one? You say madness, I say yumminess. This all came about because of that scent burner I bought before cleaning my oven last week. I was finally able to acquire a non-broken light bulb to fit in the burner (how such a simple task could turn into returned orders to Amazon and lots of disappointment in my local Lowe’s, I’ll never fully grasp), and along with that, vanilla sugar scent cubes that once melted, smell exactly like cinnamon rolls. Much like Pavlov’s poor dog and that damn bell, about a half hour after I would turn on the scent burner my mouth would get all watery and all I wanted was a friggin cinnamon roll. Specifically, a Cinnabon, because when I dream of calories, I dream big. My overachieving truly has no limits. So I did a little Pinteresting and found a recipe for Cinnabon cookies. The mouthwatering started again shortly after reading the recipe, so apparently I’ve classically conditioned myself into a corner…thanks, Pavlov.
I won’t lie to you, these cookies are as time consuming as they are hard not to eat during the baking process. Muster up that willpower, and start by mixing together your dough:
- Cup of love/butter, all nice ‘n soft
- 1/3 C of my other favorite ingredient, sugar
- 2 1/4 C flour
- 3/4 C
cocainepowdered sugar - Tsp of “the good stuff,” a.k.a., vanilla extract
- 2 Tsp orange zest (I am lazy and used the kind from a jar)
- 1/2 Tsp of artery clogger (salt, as if you had your doubts)
- 1 Chicken embryo (I am told these are commonly referred to as “eggs”)
Mix everything except the egg and flour together until well combined. My mixer was being extremely temperamental after months of neglect, so this took turning it off and scraping down the sides of the bowl once or twice. Since this recipe goes against everything I believe in and you don’t add the chicken embryo first, I still recommend cracking it open into a bowl first to make sure you’ve got a “good egg.” If it hasn’t gone bad (in the spoiled sense, not the crime spree sense), dump it in and mix well. Slowly add in your flour until you’ve got a nicely mixed dough. Now comes the fun part…

Kitchen utensil brutality. I put down parchment paper and then plopped my dough in the middle before beating it repeatedly to start to flatten it out. If you choose to slowly roll out your dough to flatten it first, you’re really missing out on a legal way to let out your frustrations. Phone company spray painted a section of your white fence red? KAPOW! Work sucking the youthful spirit and hopefulness of educating a new generation out of you? WHAMMY! Hedgehog feeling under the weather and being unable to help her making you realize you’re not as all-powerful as you thought? SPLAT! I mean, it has been a pretty shitty week around here, so this rolling pin may have saved me a trip to jail. I digress…you pretty much want to beat/roll out a large square-like shape. I beat/rolled mine out to a 16″ square-like shape. Square-like is really a generous term for how my dough ended up looking. But you want it to be very large so you get the pretty spiral effect from your filling. To make that cinnamon-y goodness you need:
- 6 TBS of love/butter (also soft and squishy)
- 2 TBS flour
- 1 TBS cinnamon
- 1/4 C brown sugar
- 1 1/2 Tsp of light corn syrup (I couldn’t unscrew the lid and had to stab my way in)
- 1/2 Tsp of the good stuff/vanilla extract
- 1/2 Tsp of artery clogger/salt
Just mix that together until it gets blended thoroughly after a few minutes. I then took my large angled spatula and spread out the filling to the edges of my dough:

I hadn’t licked the spatula at this point…I swear. 
At this point, I thought about just making it a cinnamon roll pizza. You better believe I licked my spatula clean, and I did not have one single regret other than my large angled spatula couldn’t be an even larger angled spatula. Now, if you choose not to go the cinnamon roll pizza route, it is time to start rolling
inup the dough.
Start by picking up your wax paper
and rolling the edge of the dough down very slowly.
Once you’ve got the rolling started,
pull your parchment paper down in the same direction you’ve started rolling.
Like water off a duck’s back, gravity,
the magic of boy bands, or other things that are infallible,
you’ll find the roll will naturally fall where it needs to.
See, told you so. Now just repeat this until you’re at the end of your log. 
Ugh, now I wanted to cook it like this because it looked like a giant cinnamon roll burrito. 
But instead I rolled it around a few more times in my paper so there weren’t any air bubbles (no farting cinnamon rolls, if you will), and then folded up my edges and smooshed them up a bit so they weren’t so flat they couldn’t yield a cookie when cut. Keep your dough wrapped up and put it in the freezer for a half hour. I had a flat edge on my dough log (almost ate that “as is” before stopping myself with will power I didn’t know I had) since it was placed on to a baking sheet when it was in the freezer. I was totally fine with this; I just wanted to hurry up and get to the good part. I suppose you could rotate it while in the freezer if you’re craving a perfect circle over quicker oven-to-mouth time. I had my virgin-clean oven preheated to 375 and cut my log into individual cookies. Thickness is up to you. I like a thicker cookie, so I went for about a half inch per slice and threw them in the oven for 6 minutes, rotated, and cooked for 7 more minutes. The result, you ask?

Glad I stuck with cinnamon roll cookies and not cinnamon roll burrito or pizza. The cookies will be blonde, but the cinnamon roll goop will bubble up and out a bit once done. These cookies were surprisingly not overly sweet, so I may or may not have had one (read: three or four) before I even realized how many I had crammed down my gullet. Like Spritz cookies during Christmas season- all love (read: butter) and a sprinkling of sweetness. Once these bad boys have cooled off, it is time to frost with the cinnamon roll icing, which will add just the perfect amount of sweet to finish them off. Mix together:
- 1 Tsp of agua (water, you non-bilingual soul)
- 1 Tsp of the good stuff/vanilla extract
- 2 TBS of light corn syrup
- 1/2 C
cocainepowdered sugar
Mix all this together and wait for your cookies to cool to room temperature. Now you can see why I accidentally ate a few of these before frosting them…I am impatient and I don’t care if you’re judging me right now…I’m the one with the cookies; therefore, I am the one with all the power. I chose to just take a spoonful at a time and drizzle my cookies. To completely glaze, I suppose you could put the goop into a piping bag or dip them in the goop, but you’d need to make a lot of goop for this to happen. I may double my goop recipe next time just to have goop to dip my cookies in to. Goop is a really unappetizing word now that I think about it. Apologizes, the term ‘goop’ does not do this sweet frosting justice. Dripping sugar crack? That’s more like it.

There goes the mouth watering… I finally ended up having to replace my vanilla sugar scent wax cubes with something less edible…plumeria blossom. House smells good, and I manage to make it through the kitchen without eating ten of these cookies. I am trying to ration them out, but I’m not sure I really understand the definition of the word “ration” so well because somehow justifying eating these three at a time just doesn’t seem that “rational.” Til next time, my fellow eaters!

Healthy-ish cake, cupcakes, pie, and cheesecake recipes and decorating tips
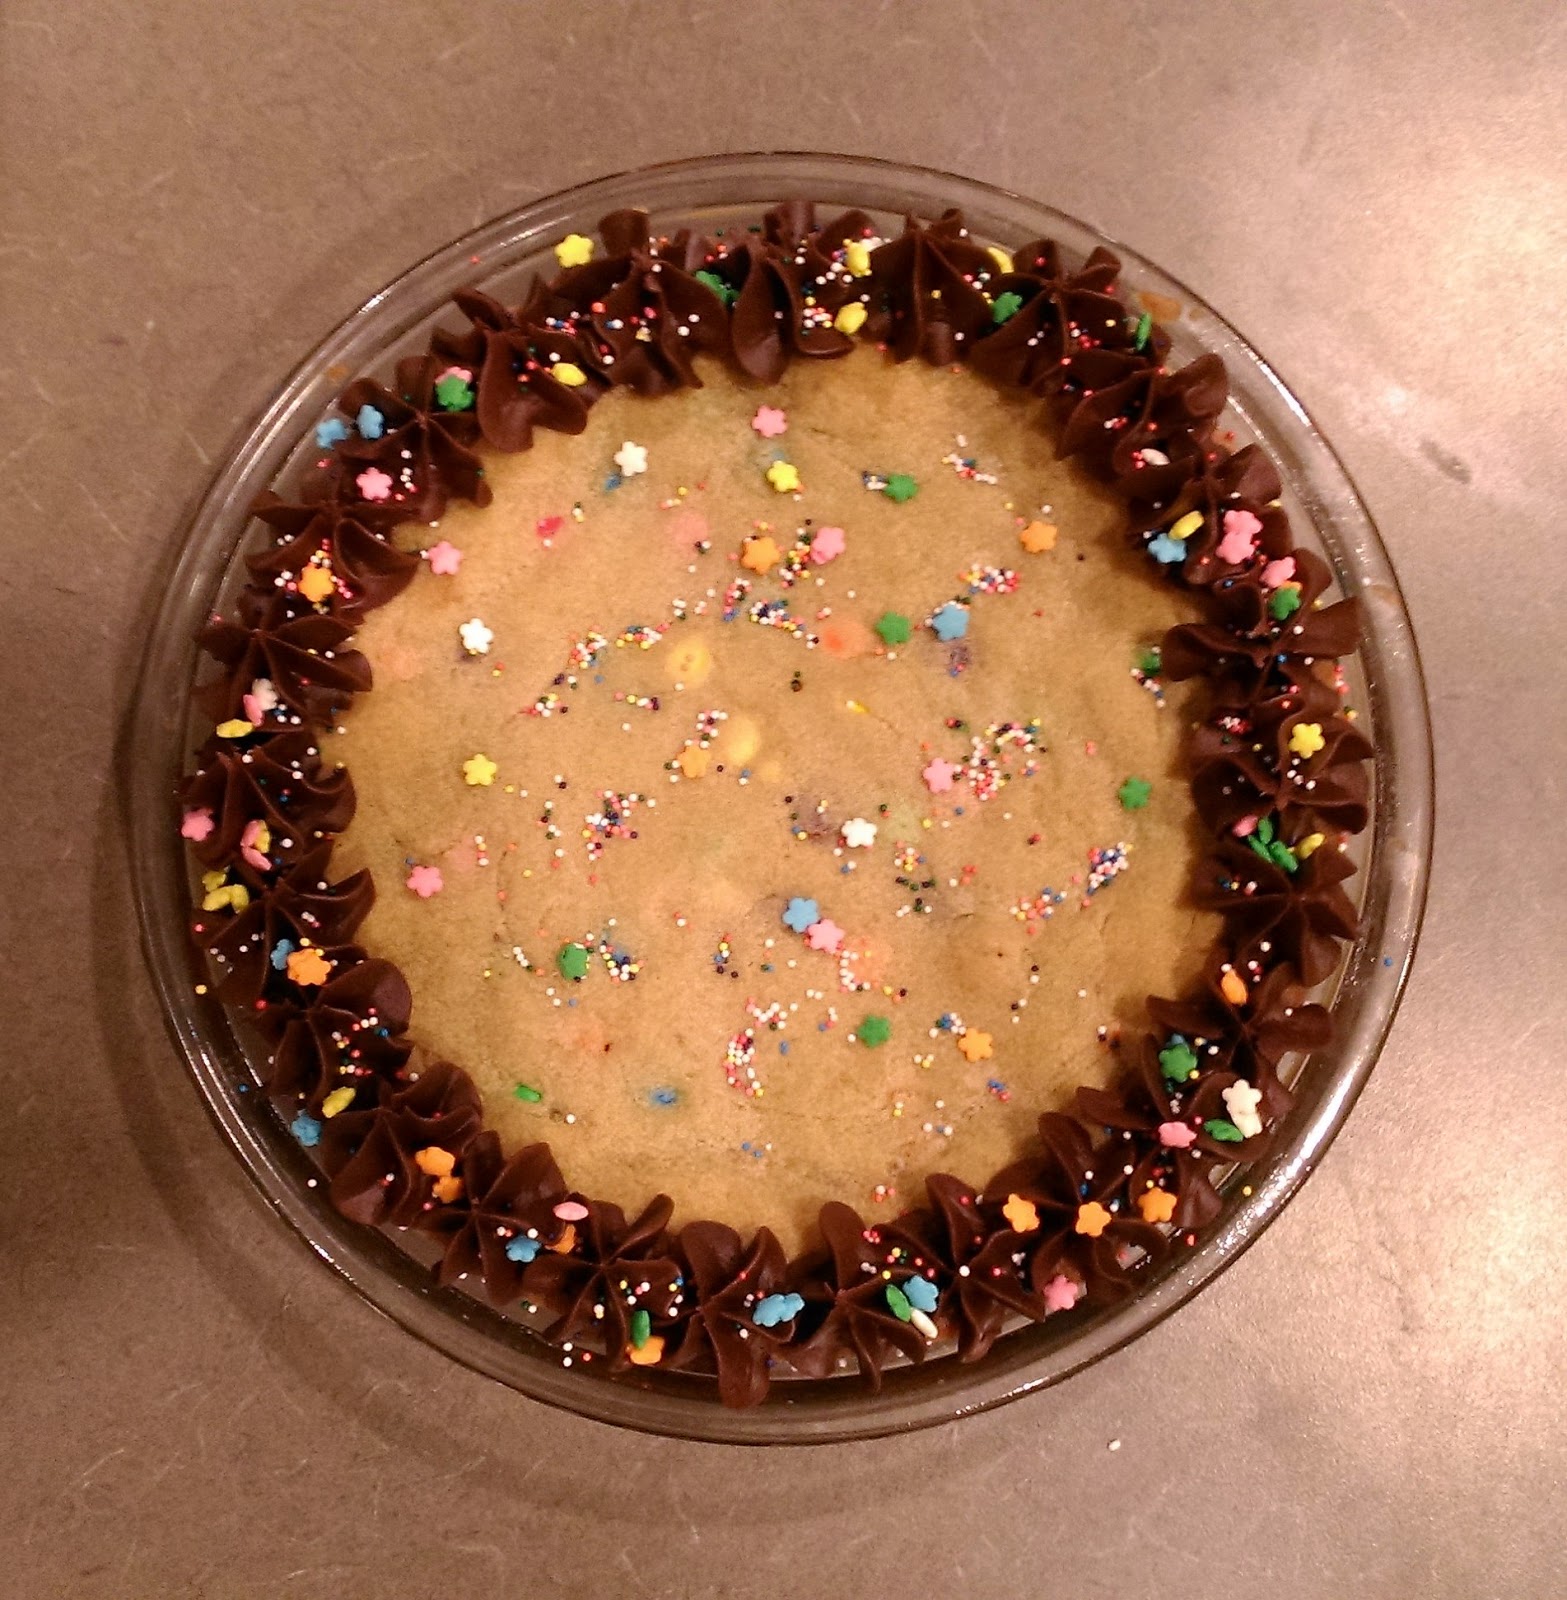
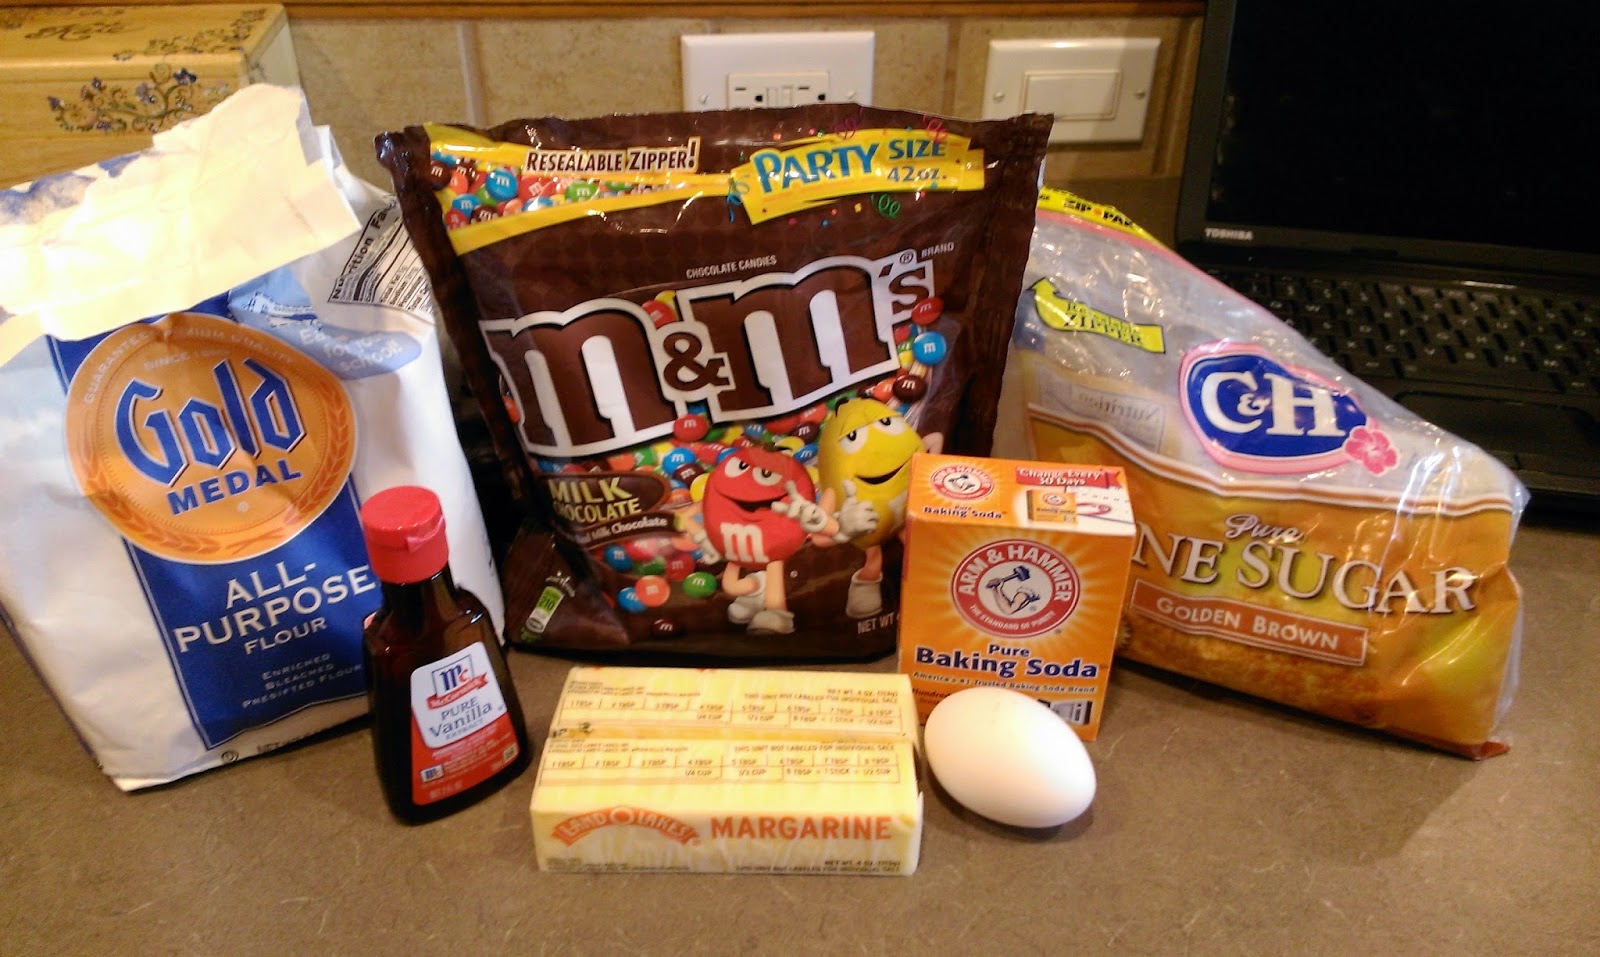
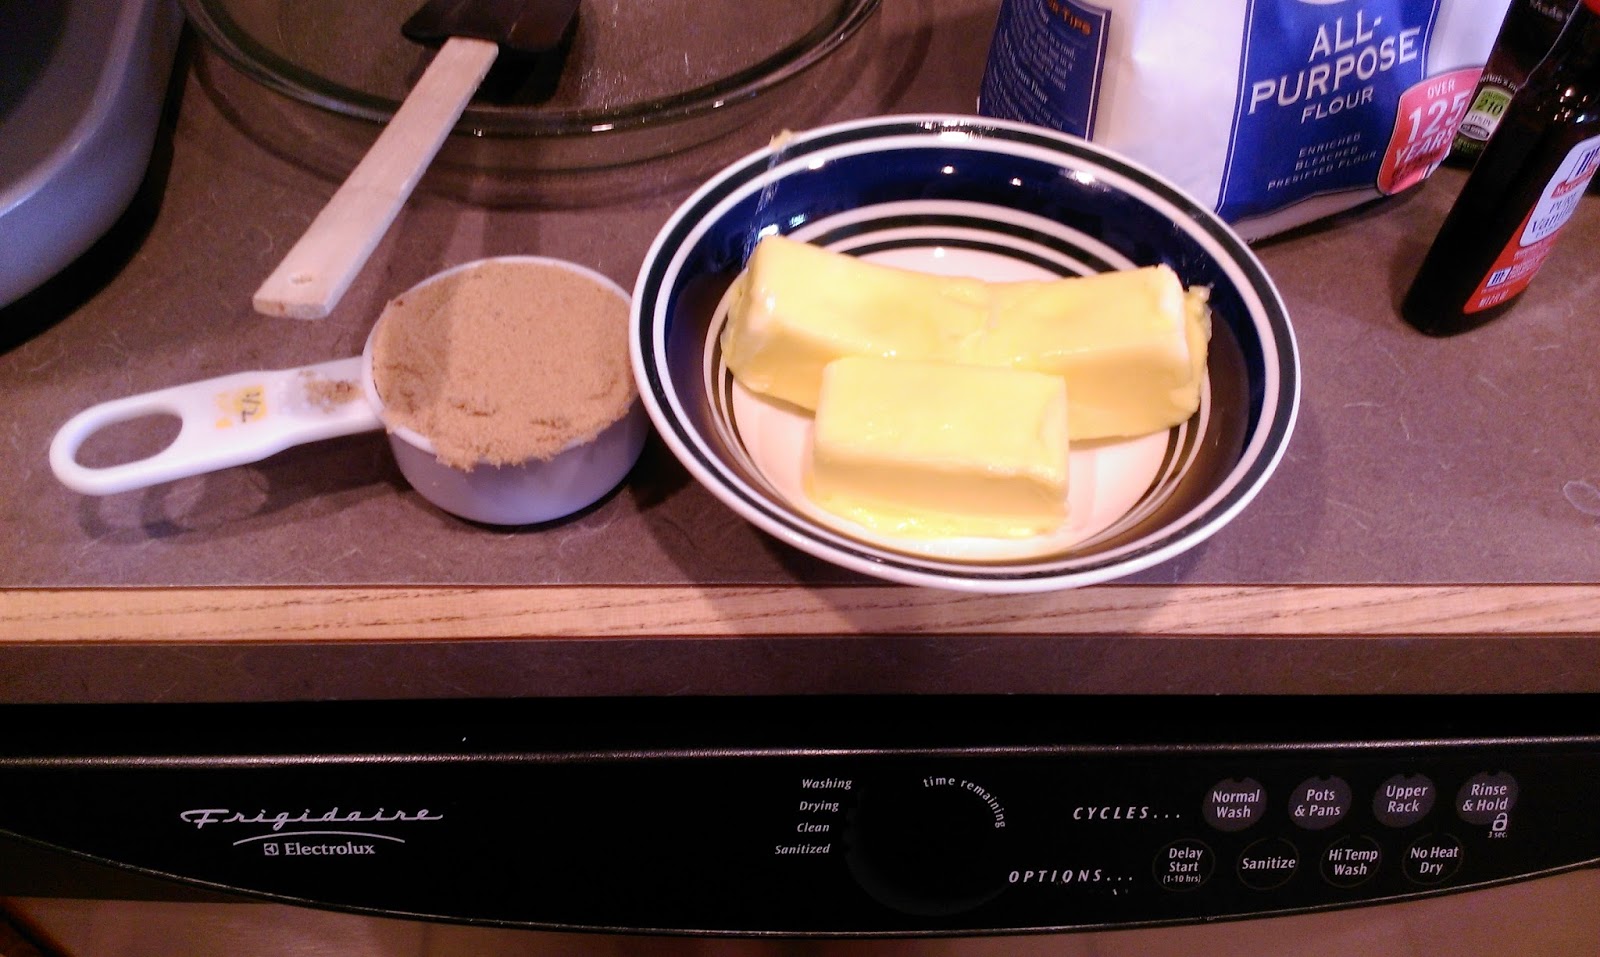

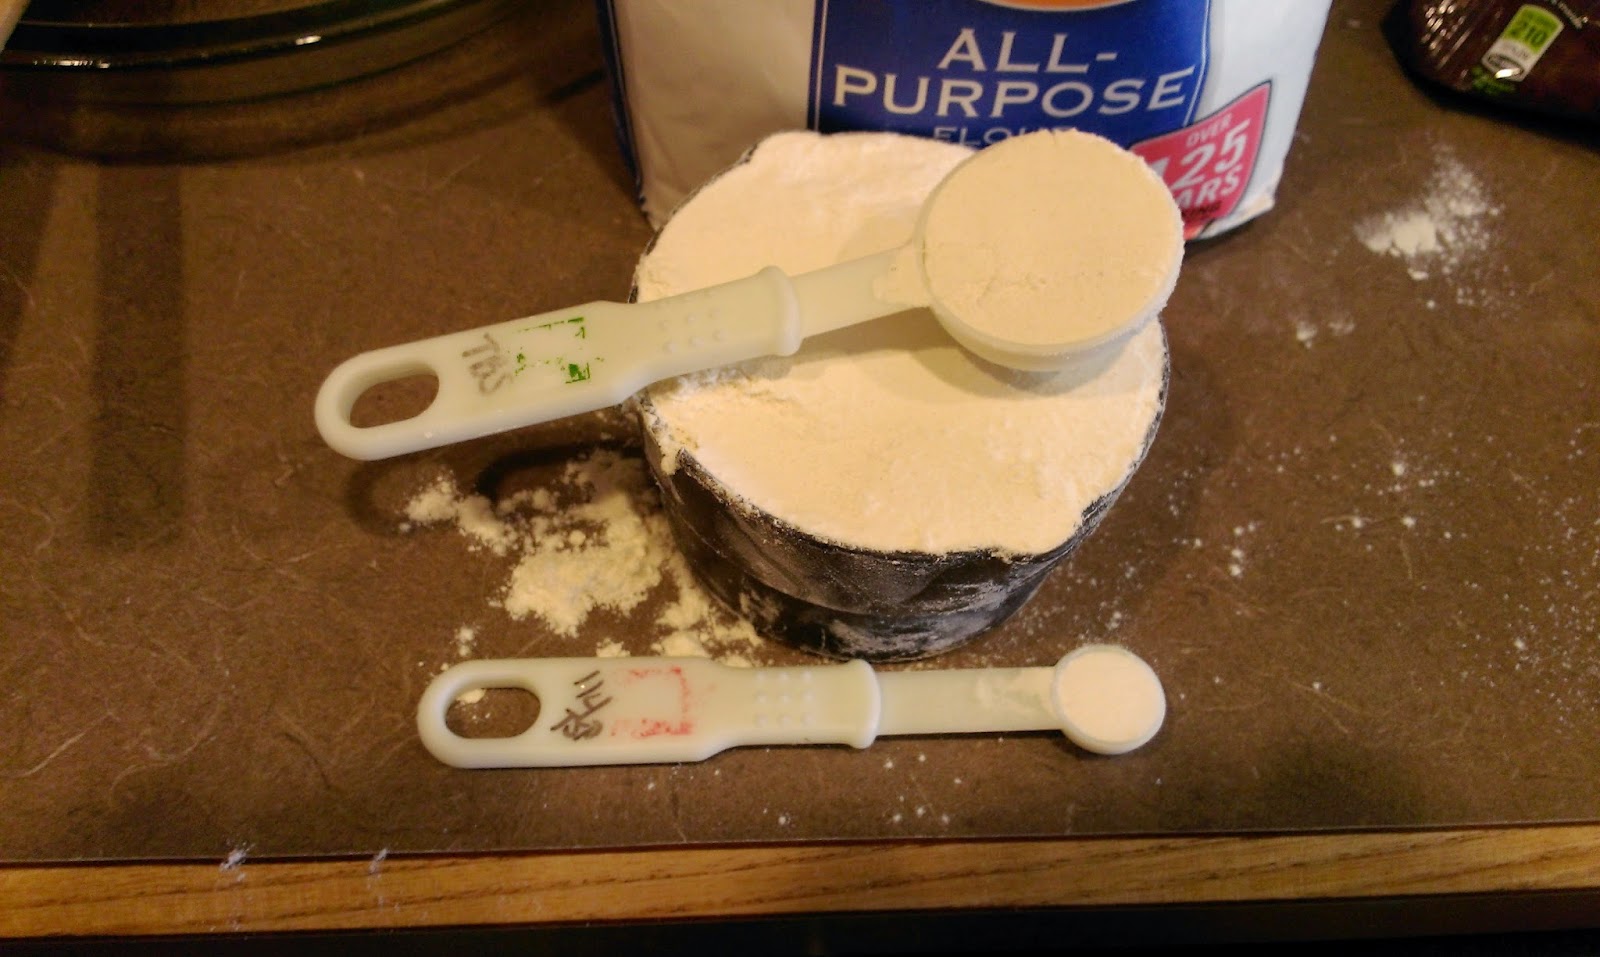


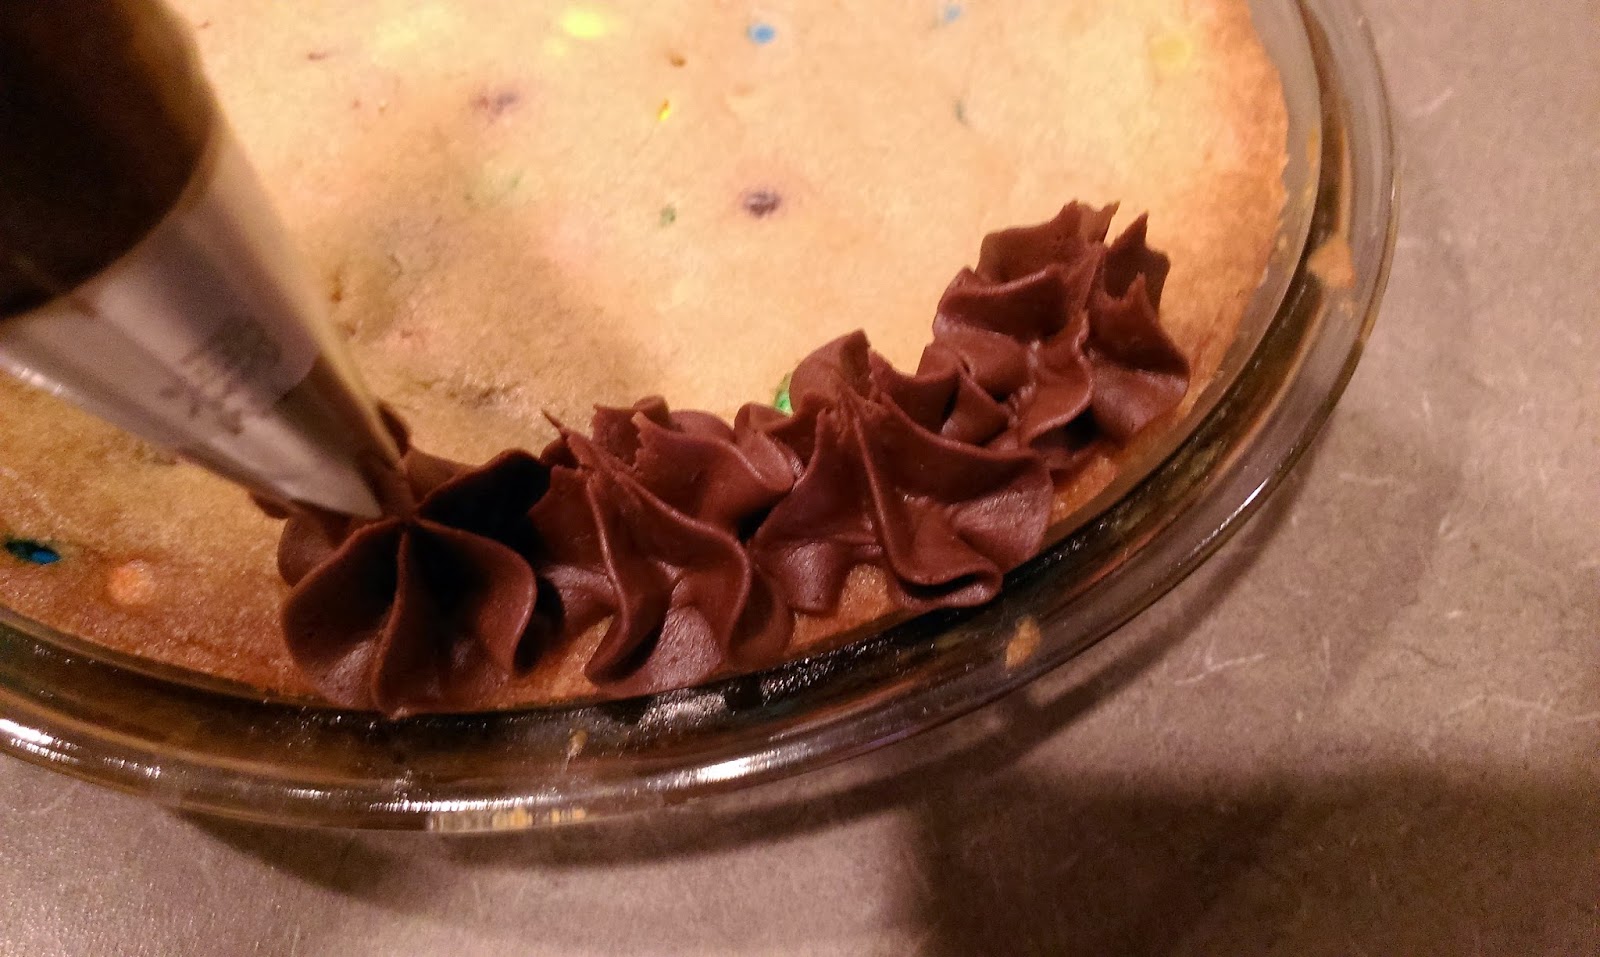
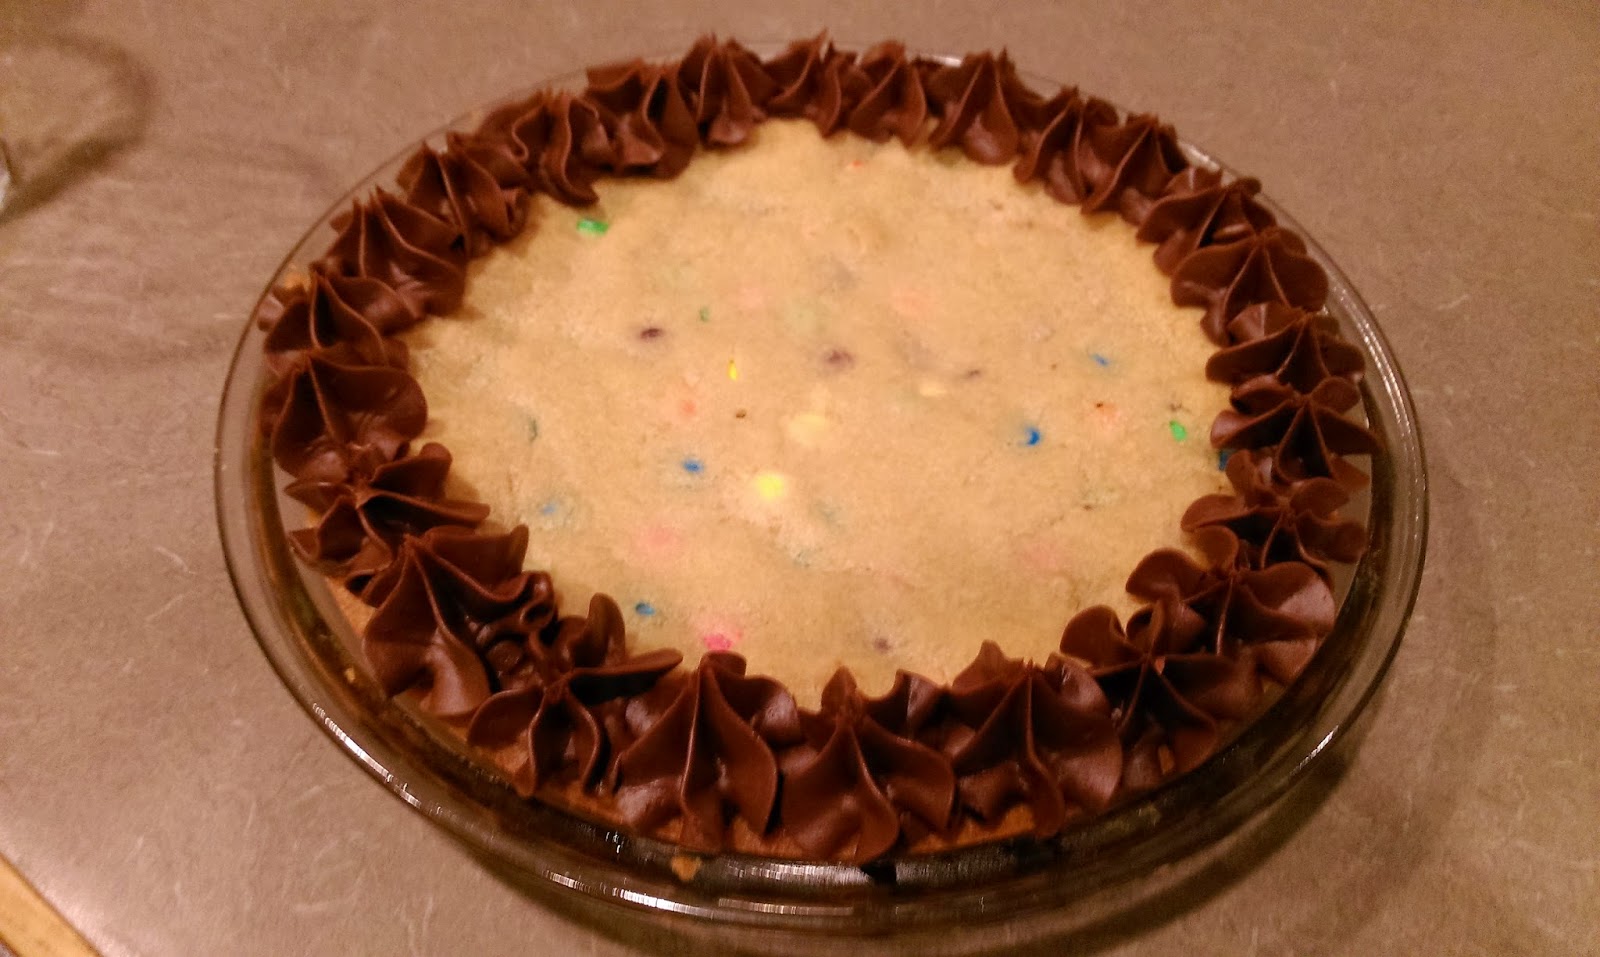
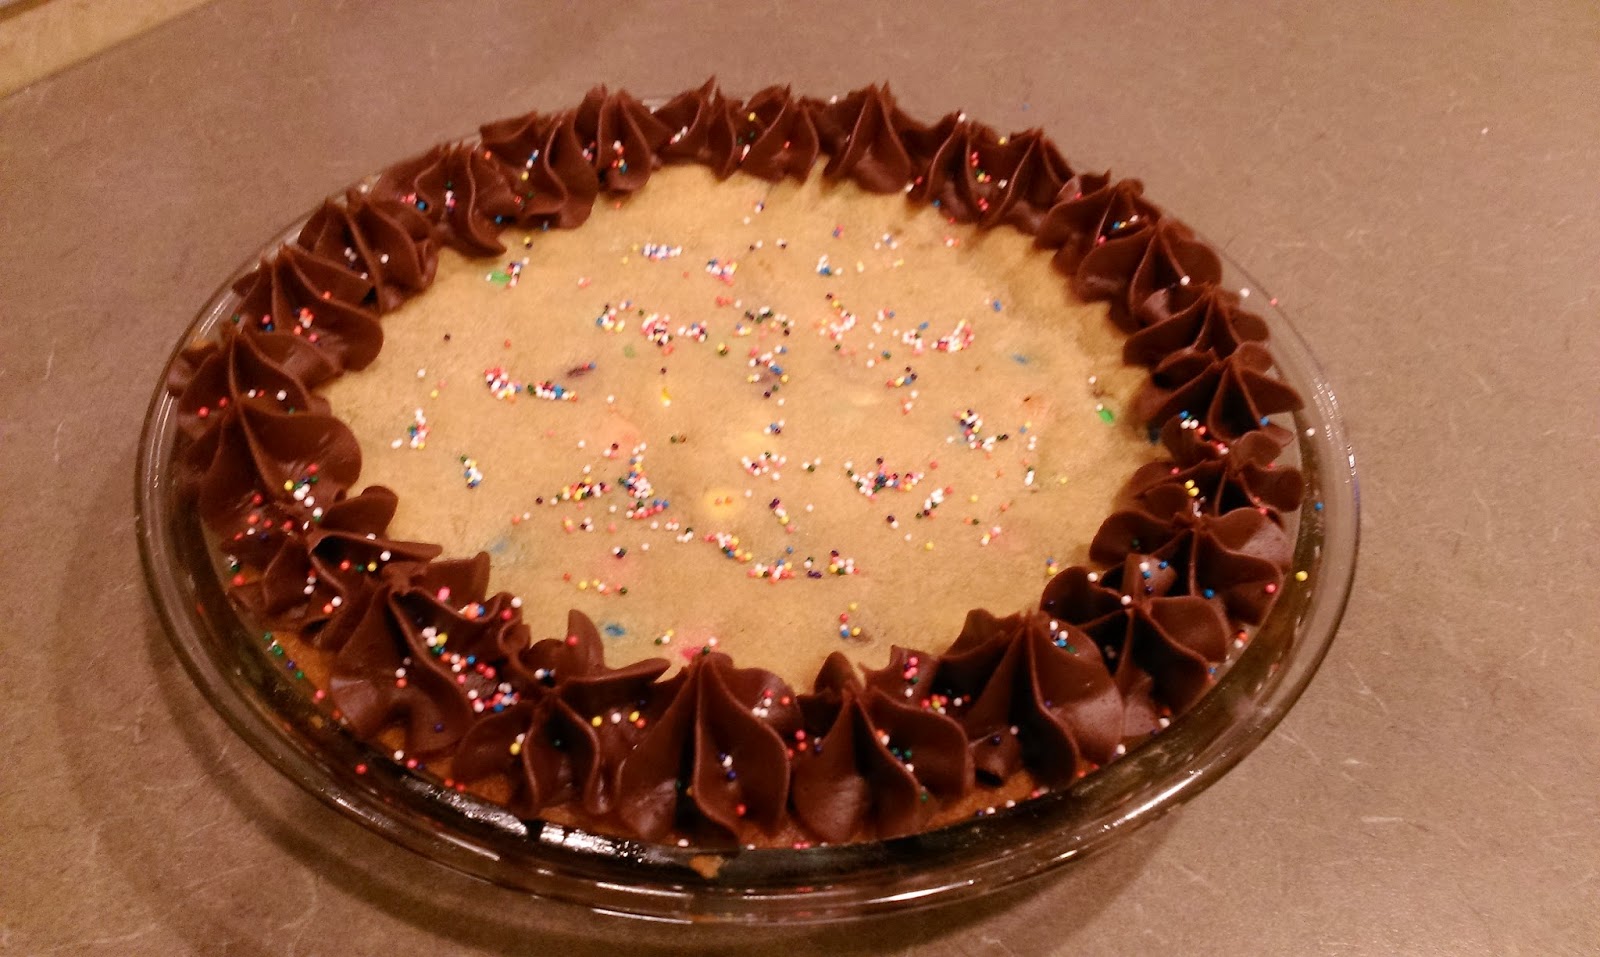


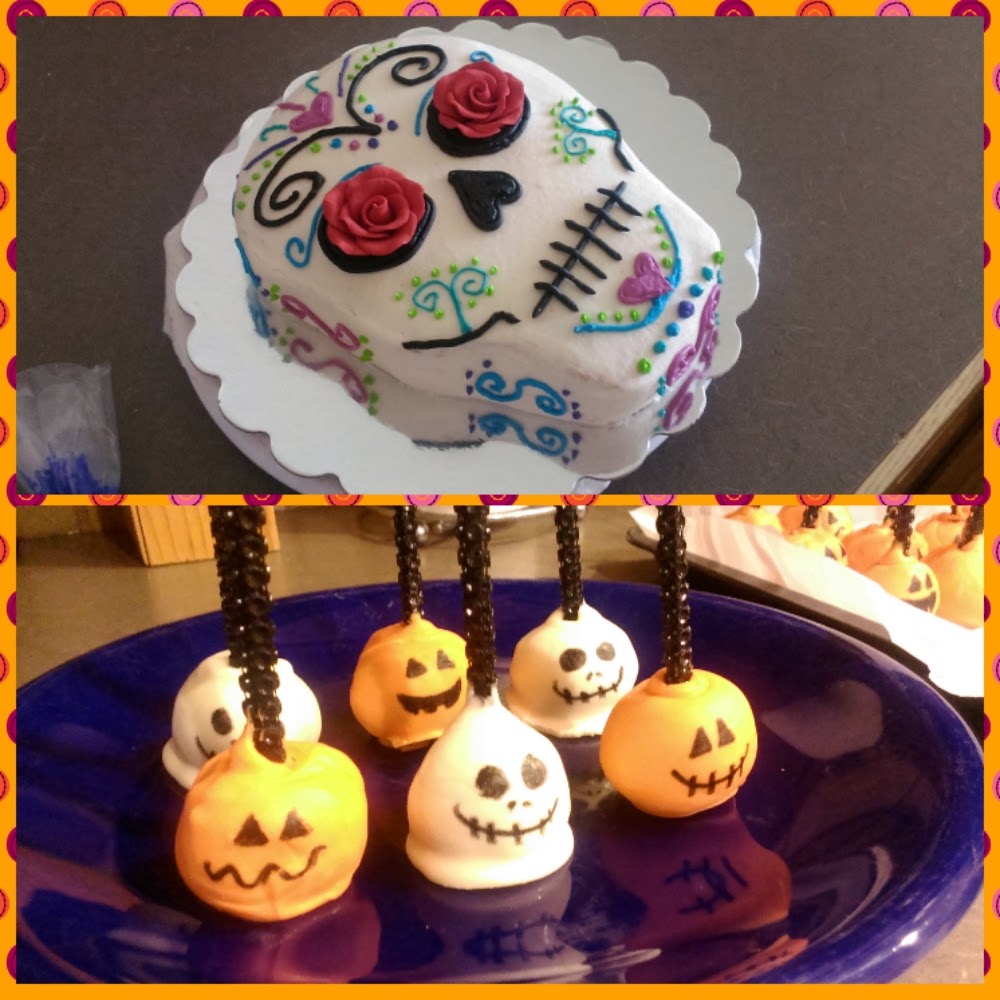
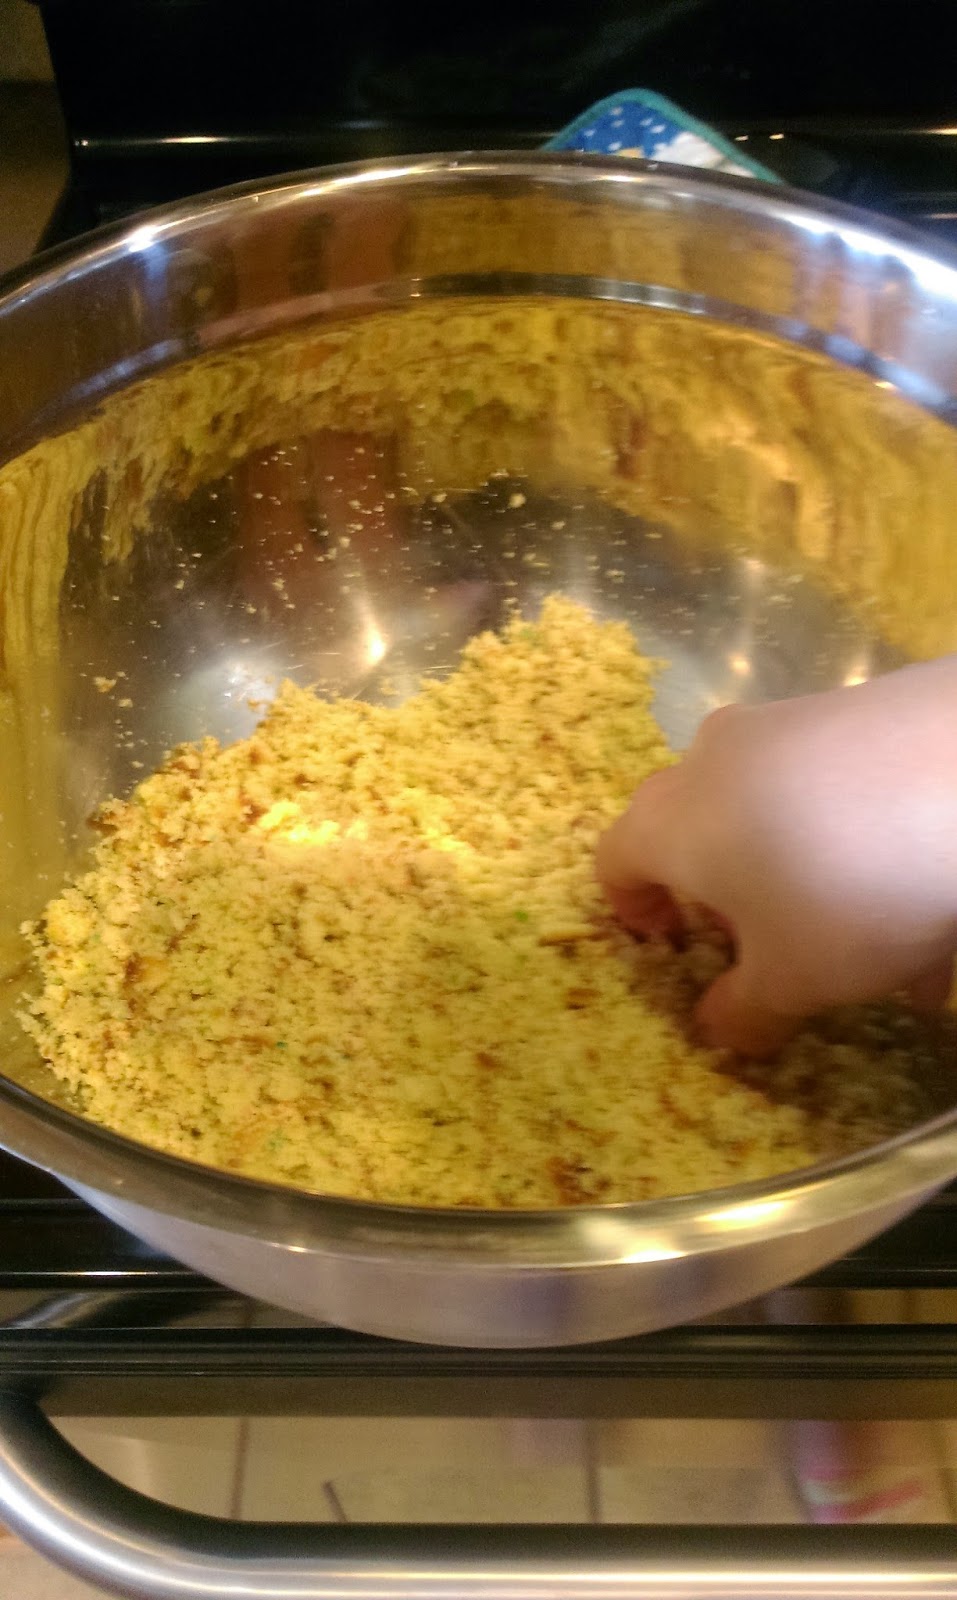
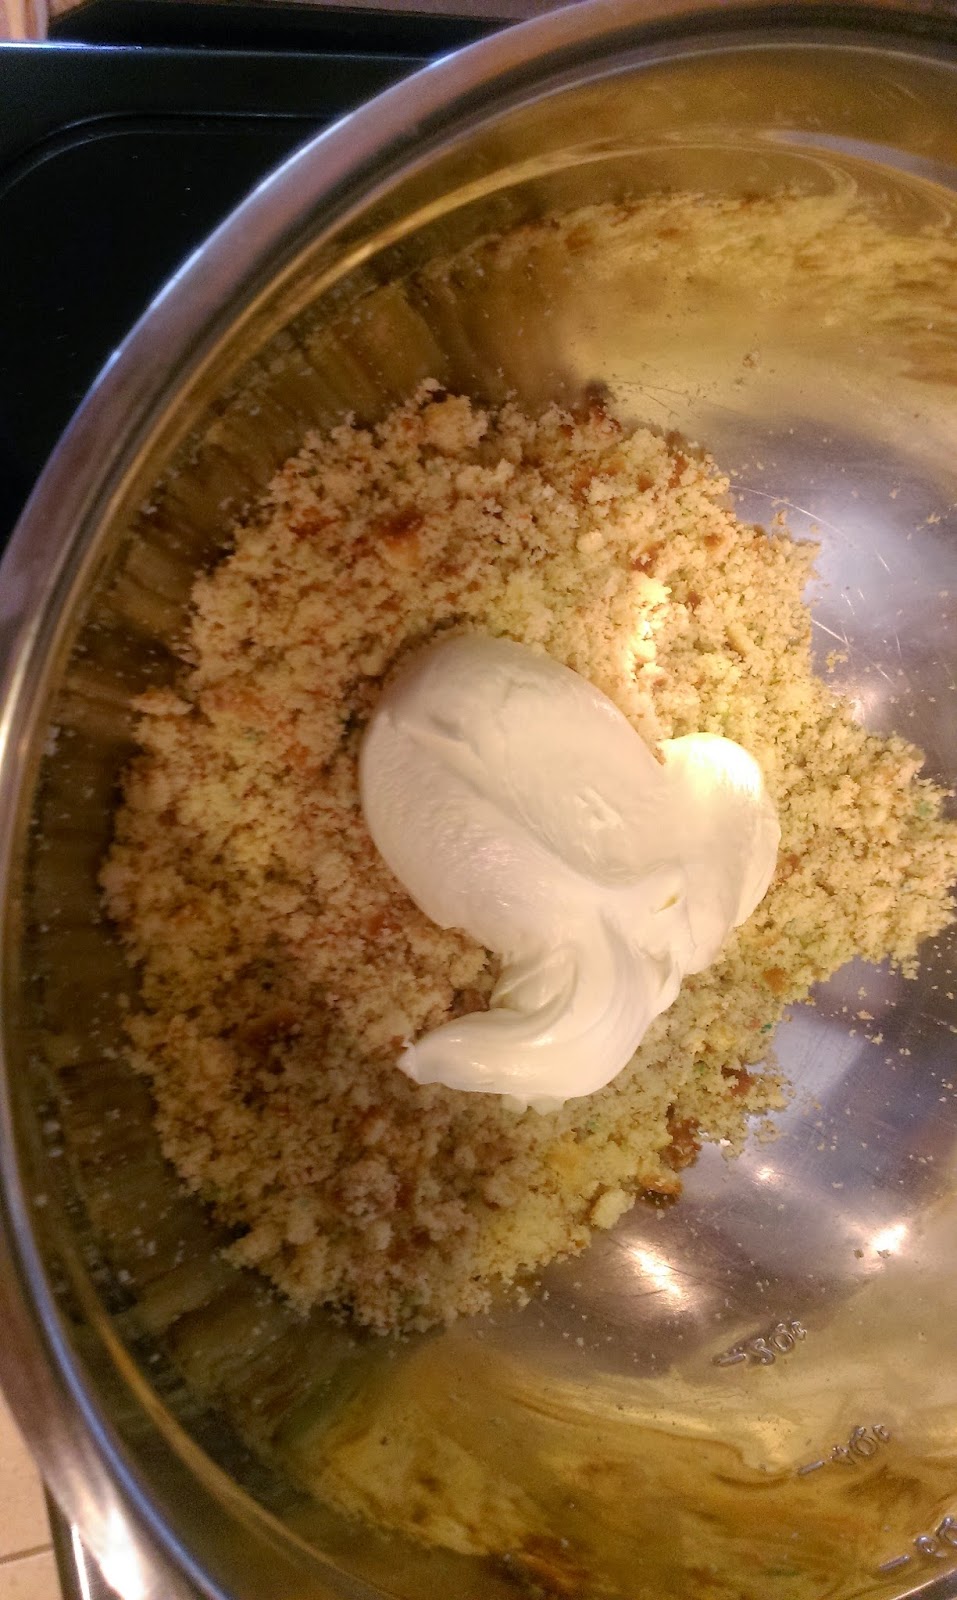
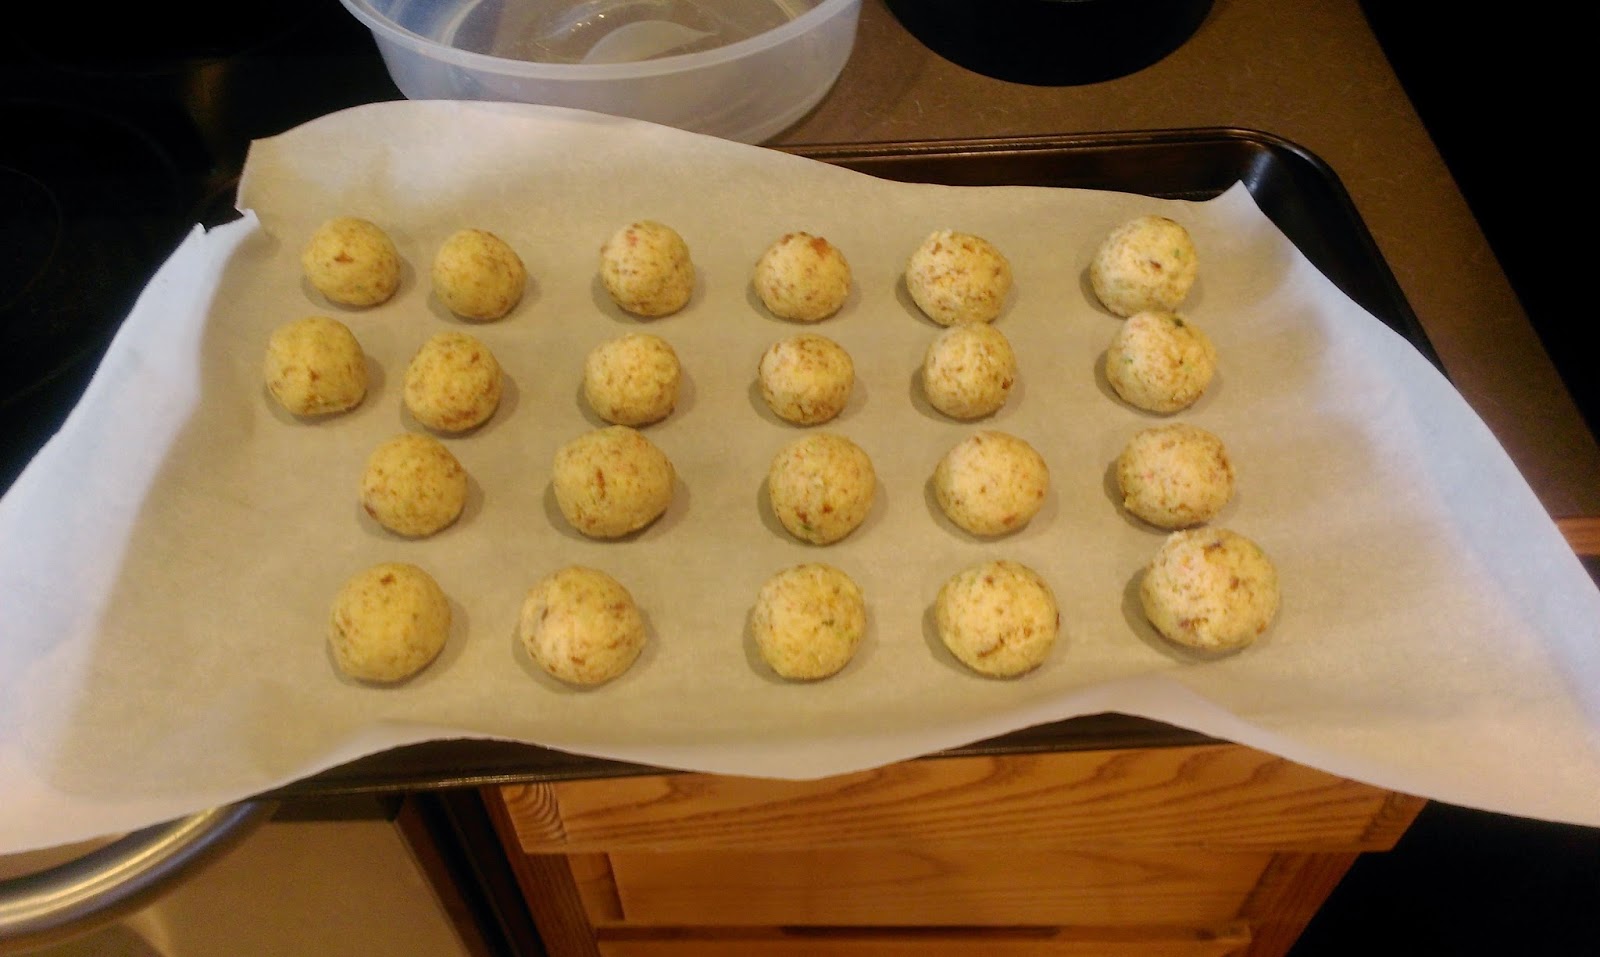
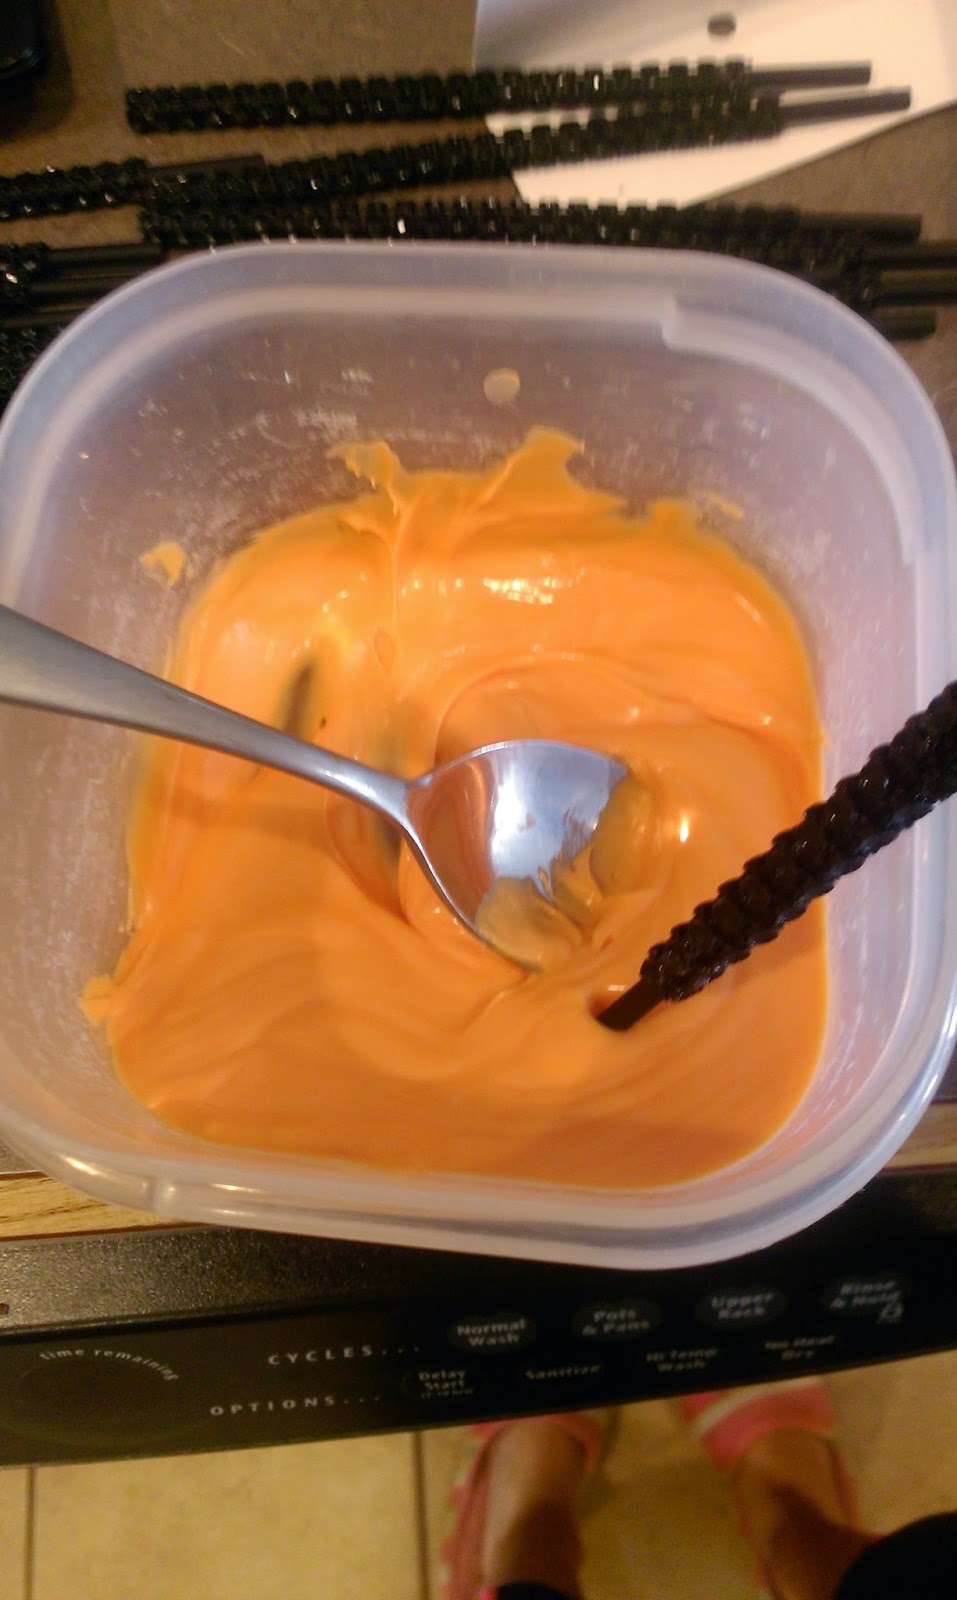
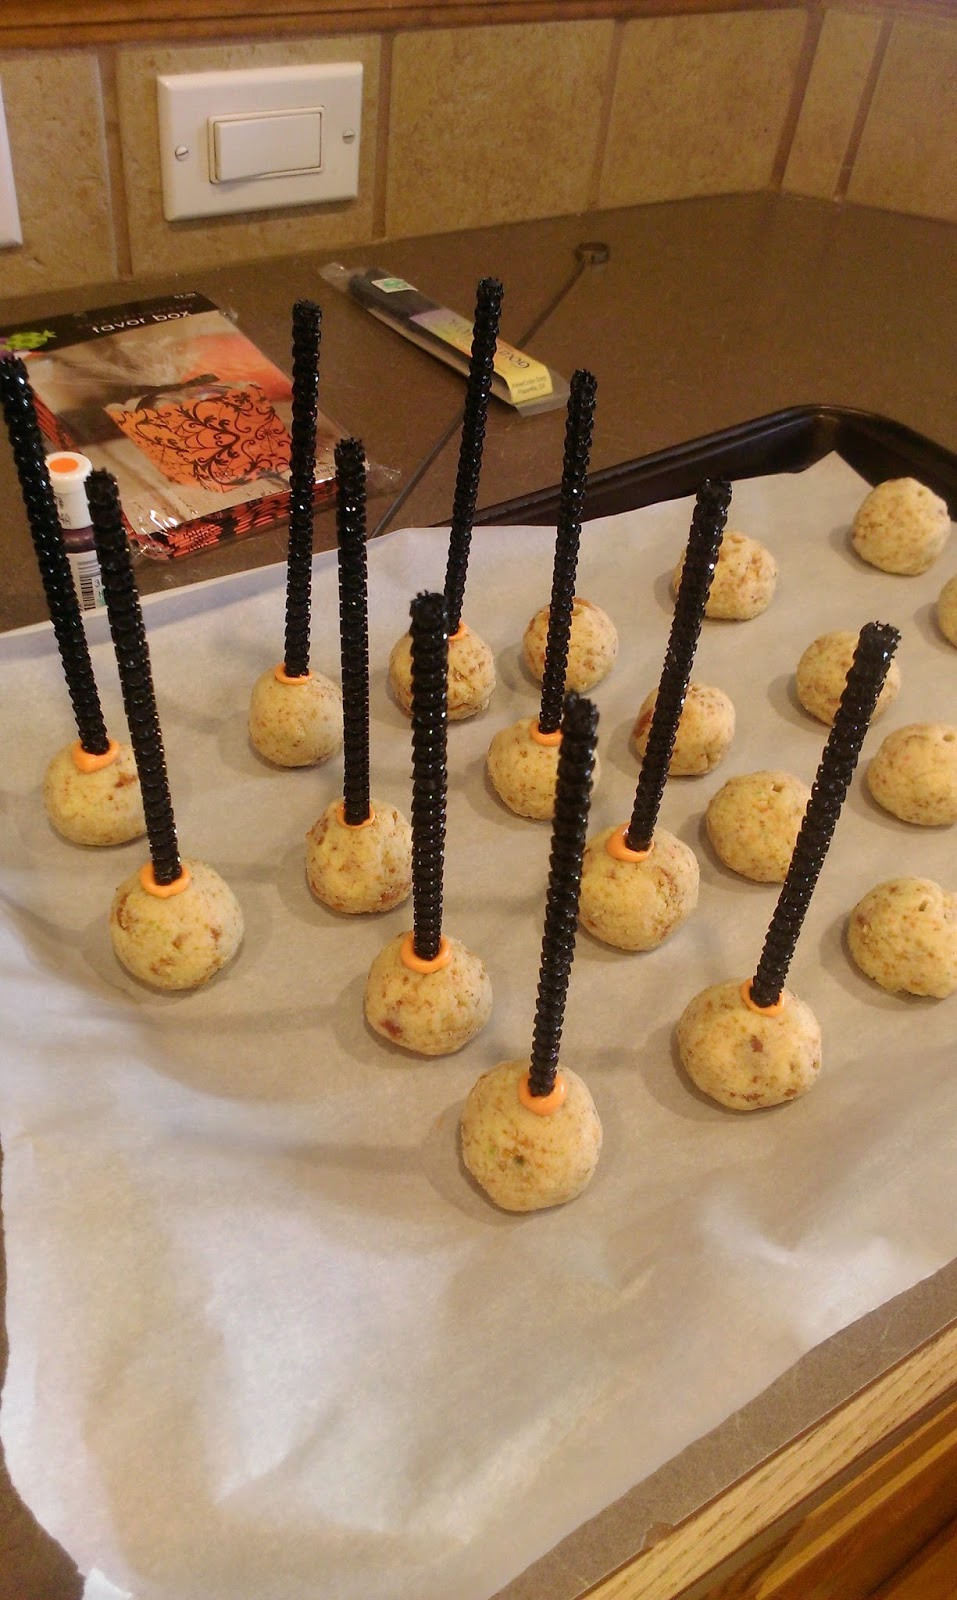
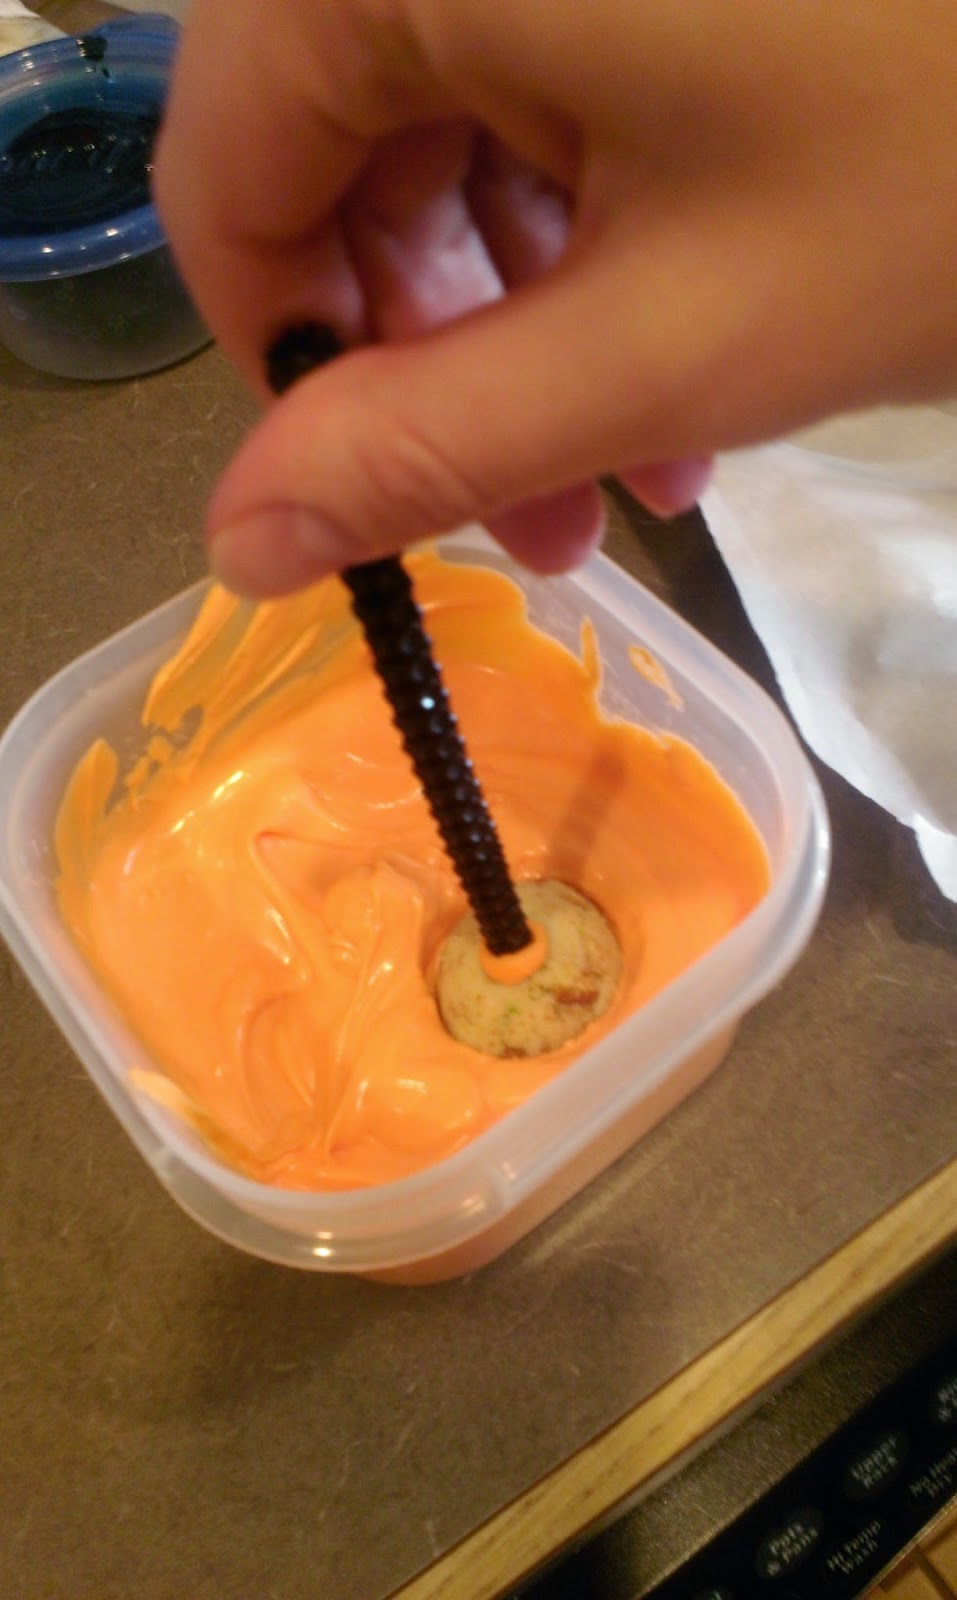
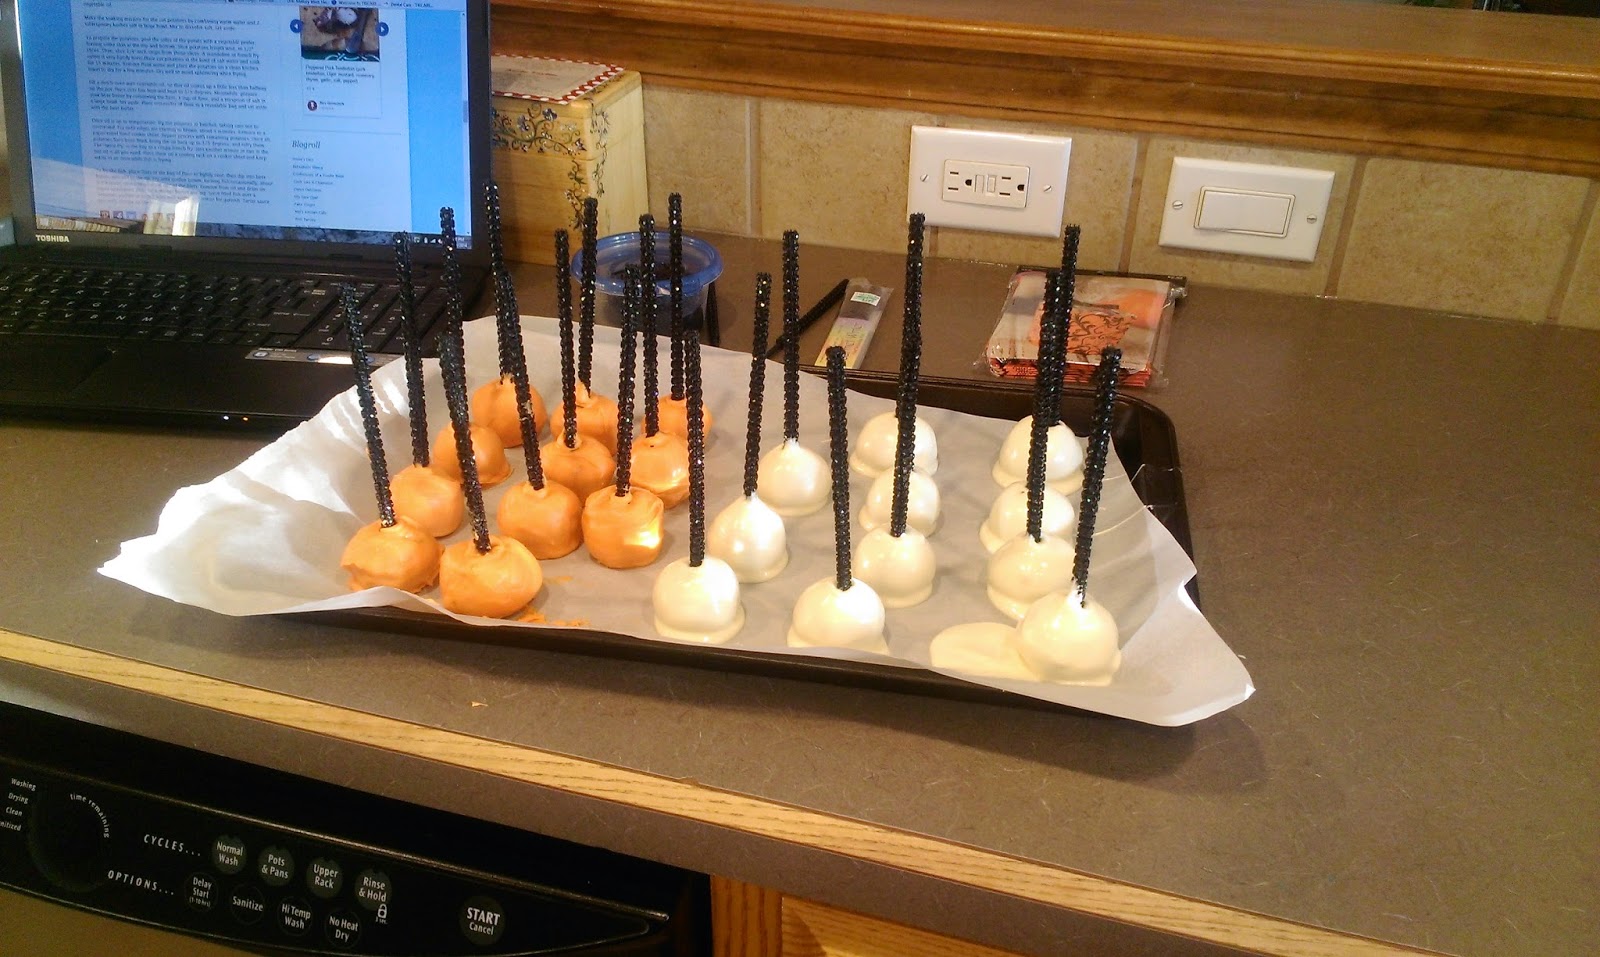

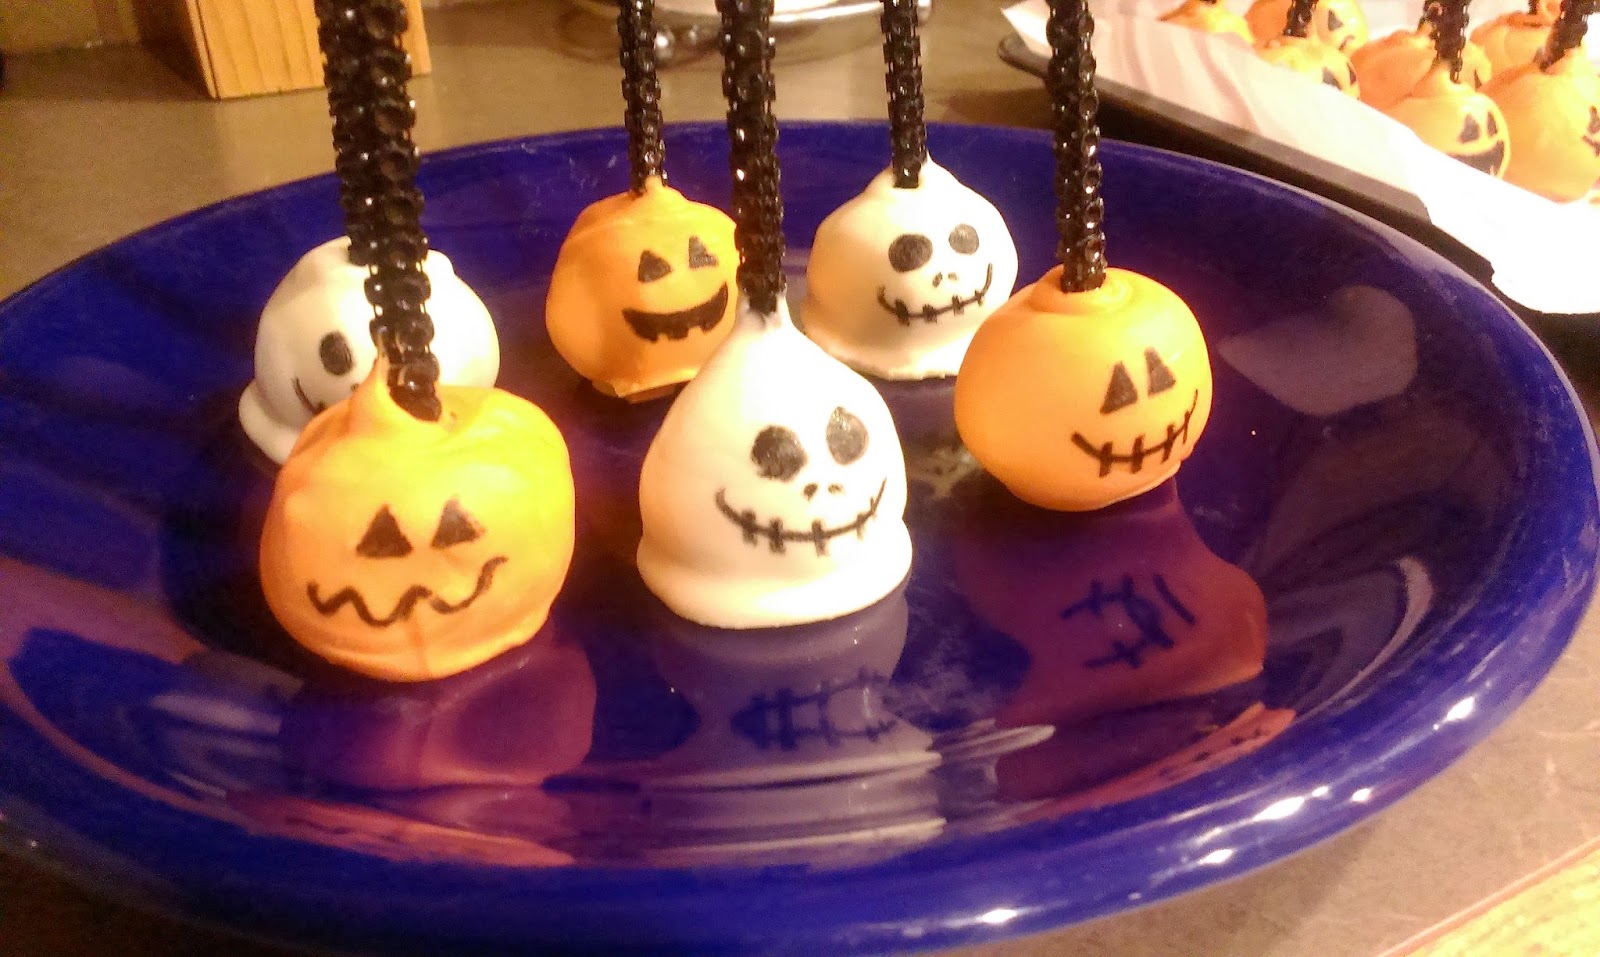
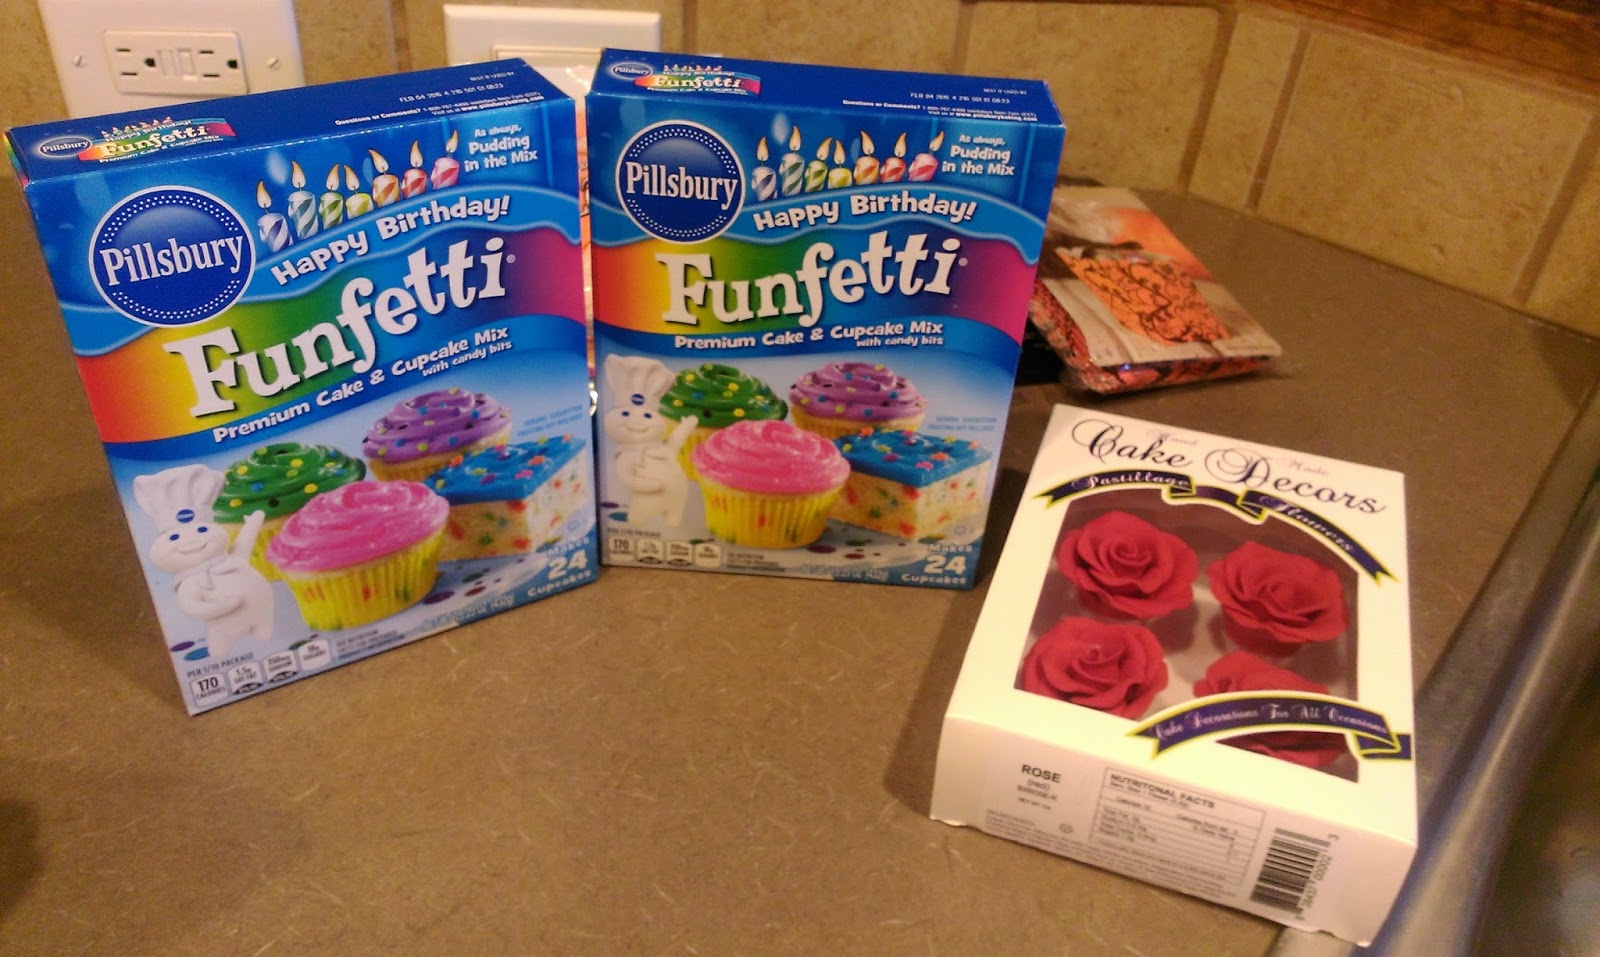
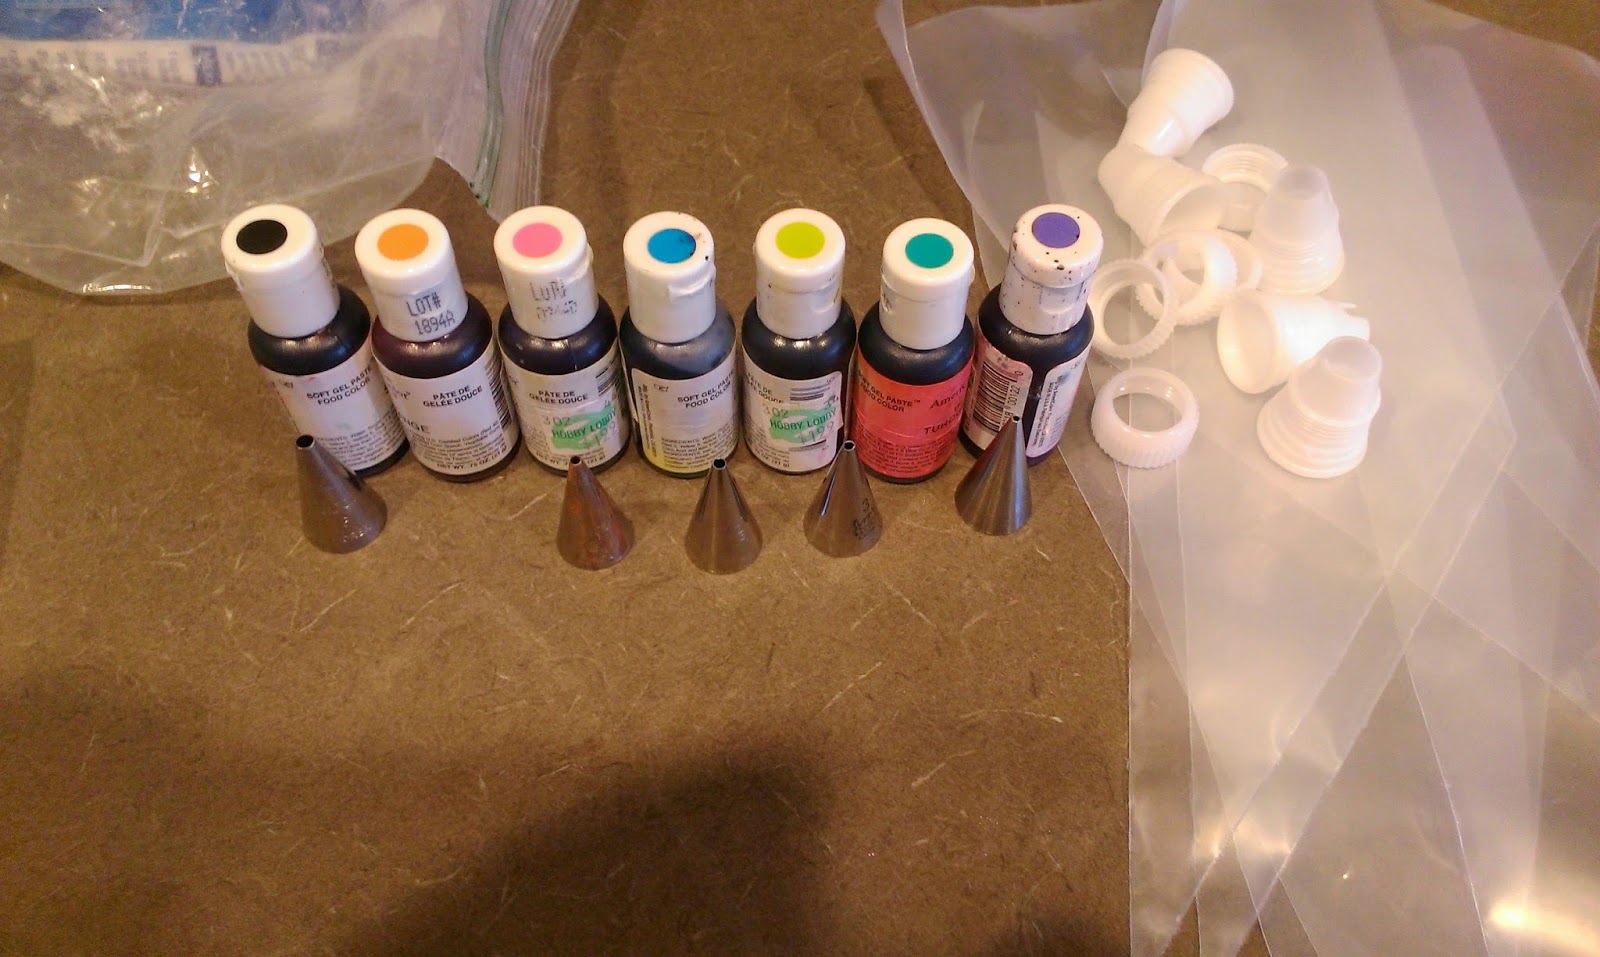
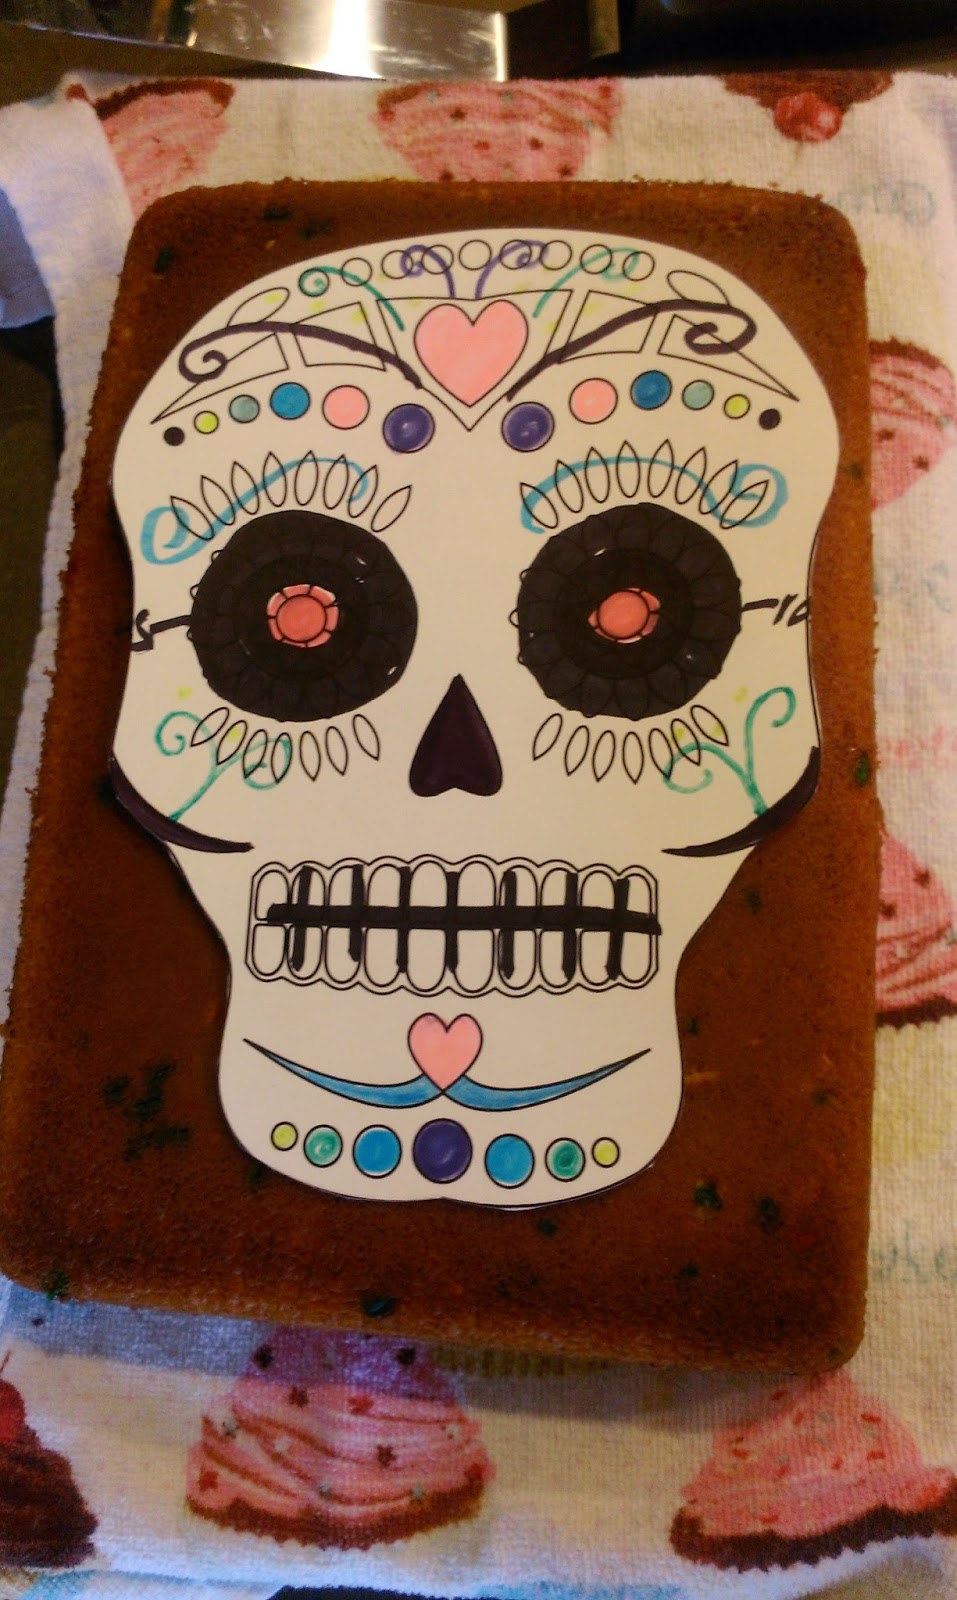


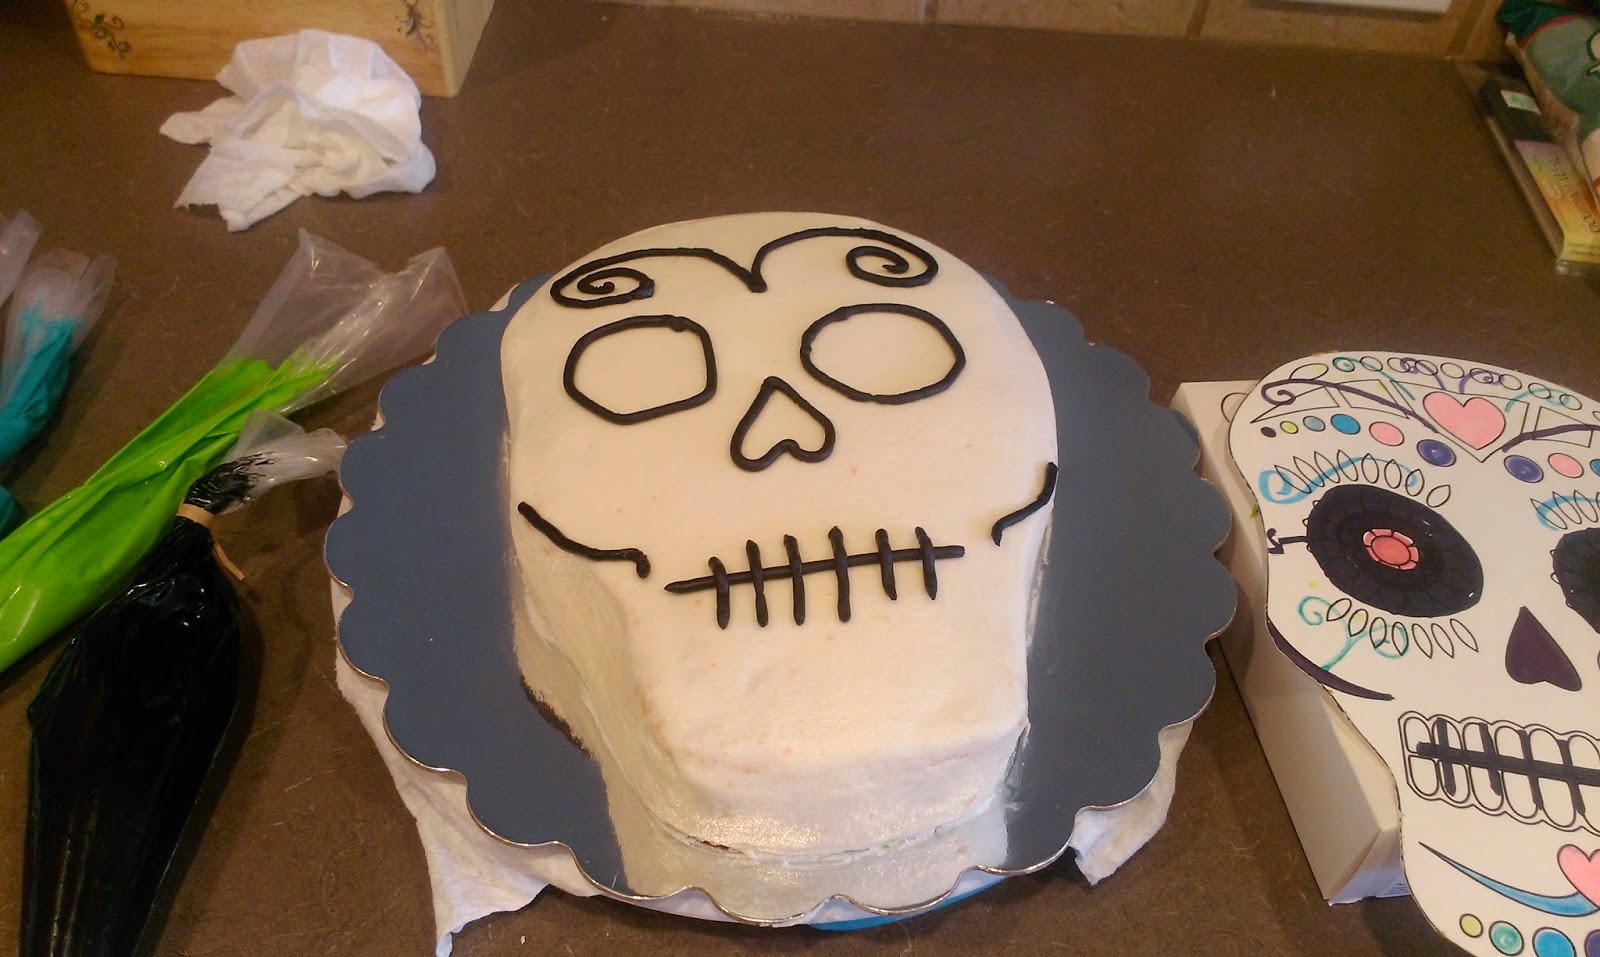

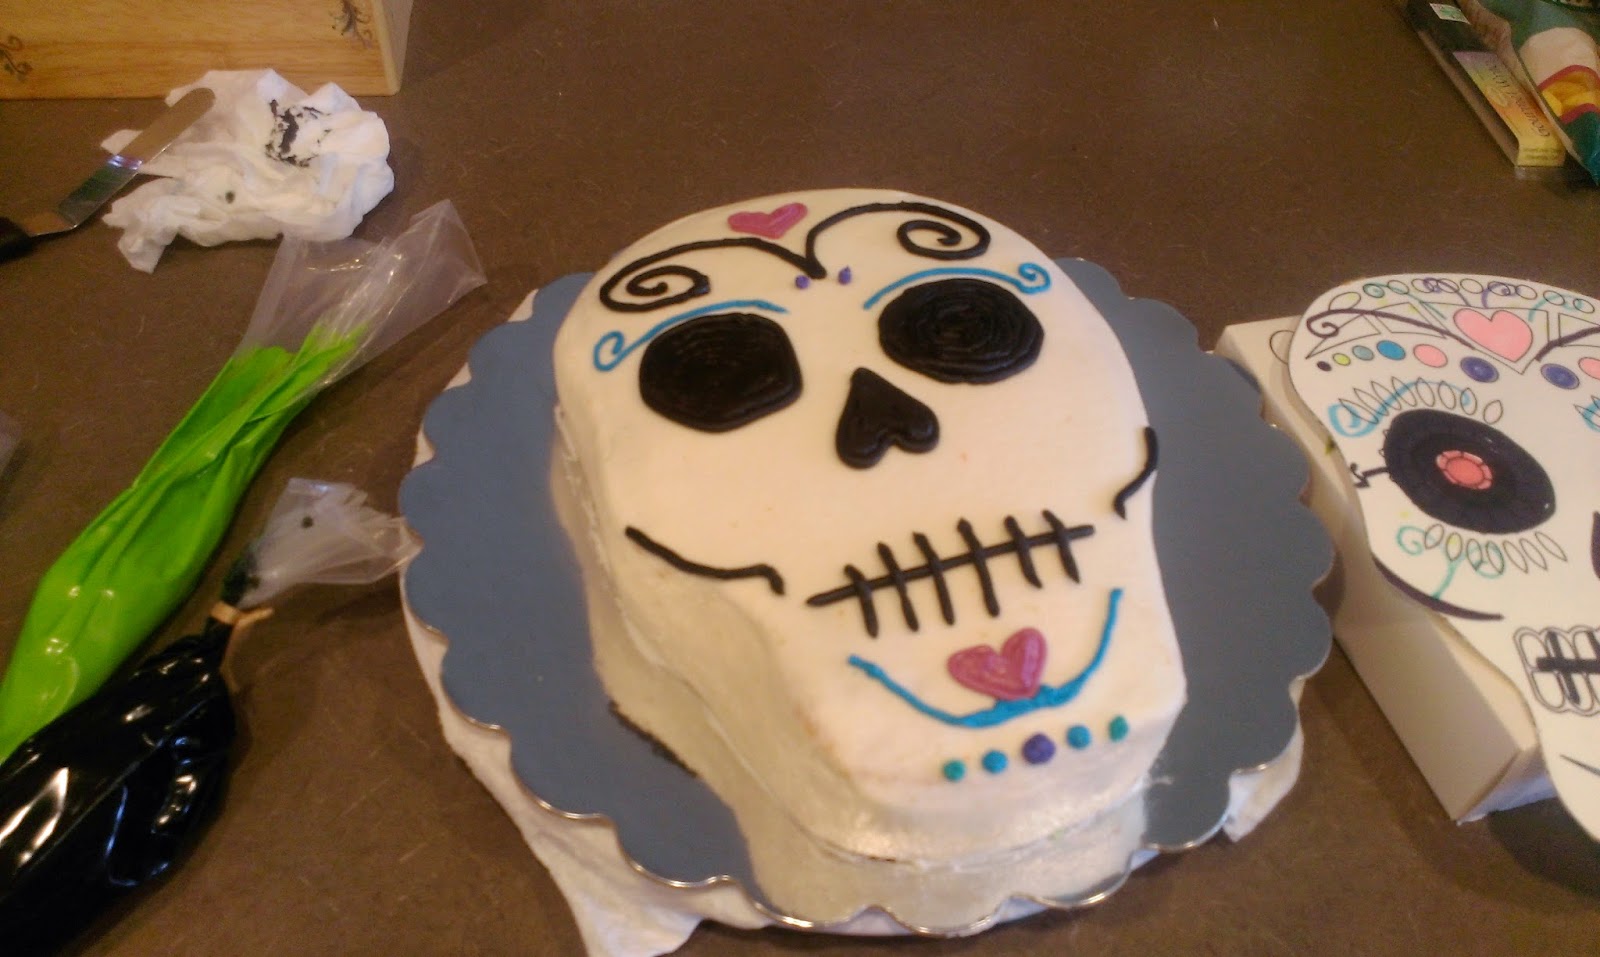


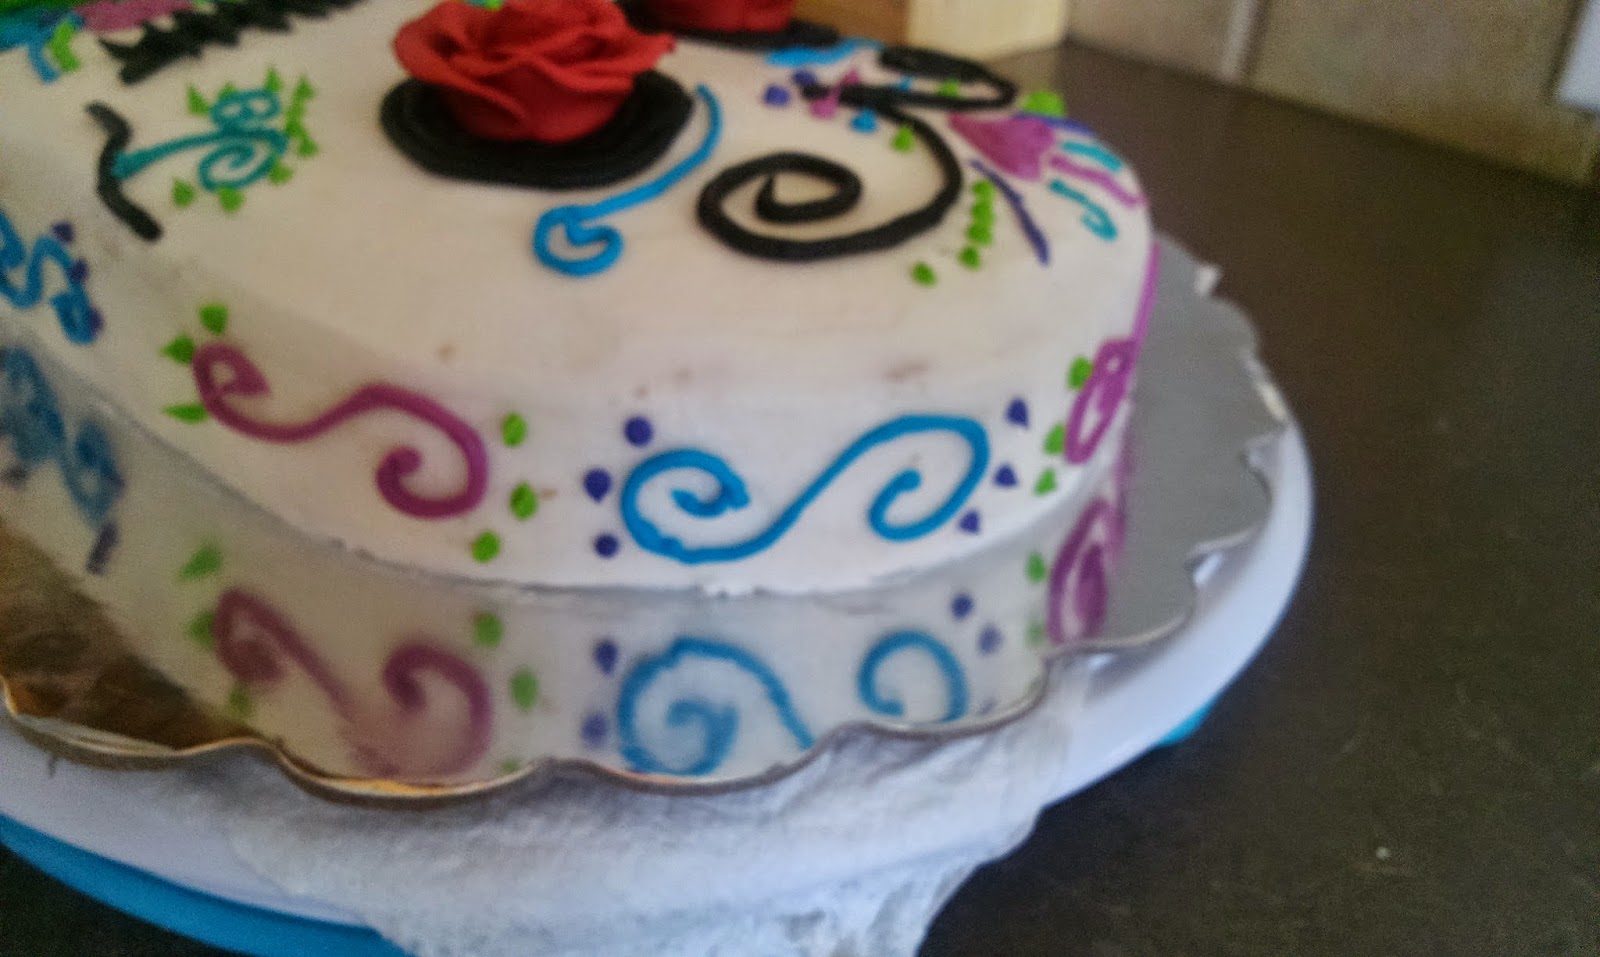
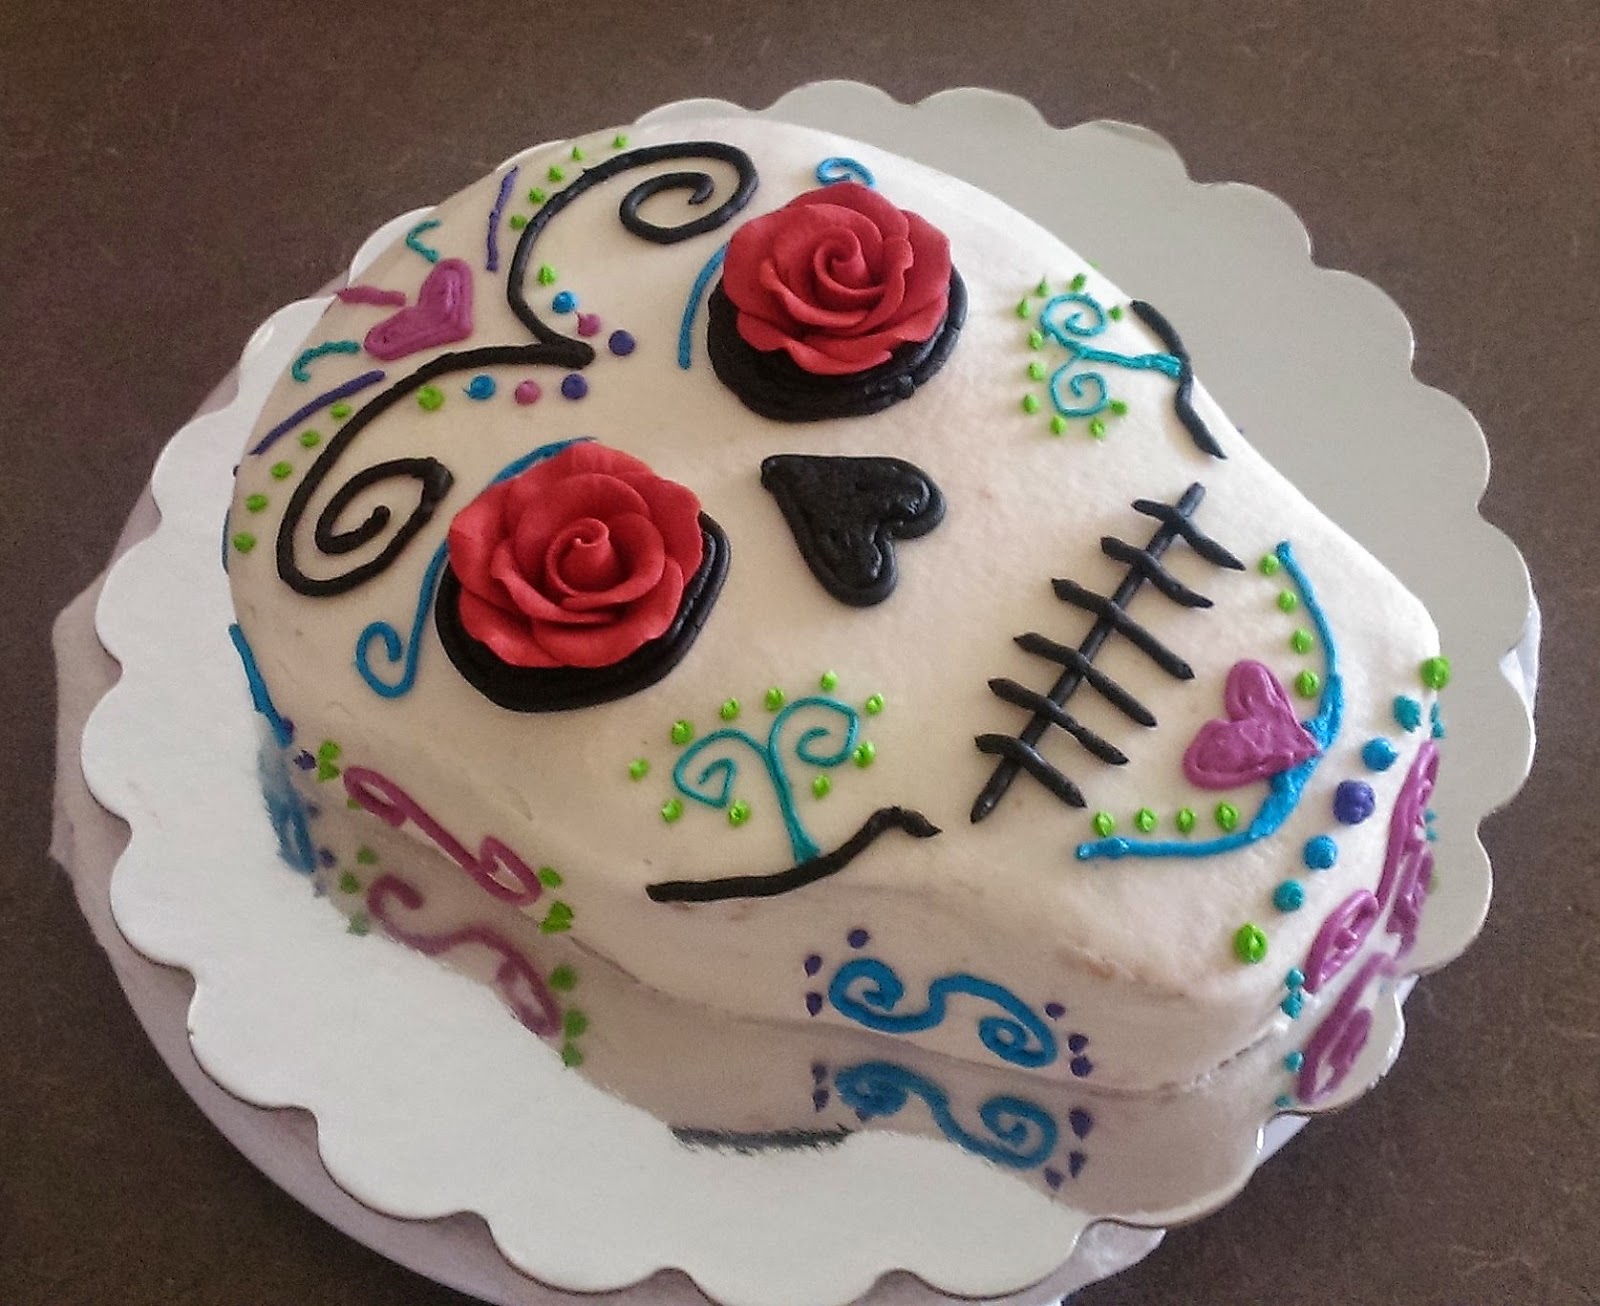
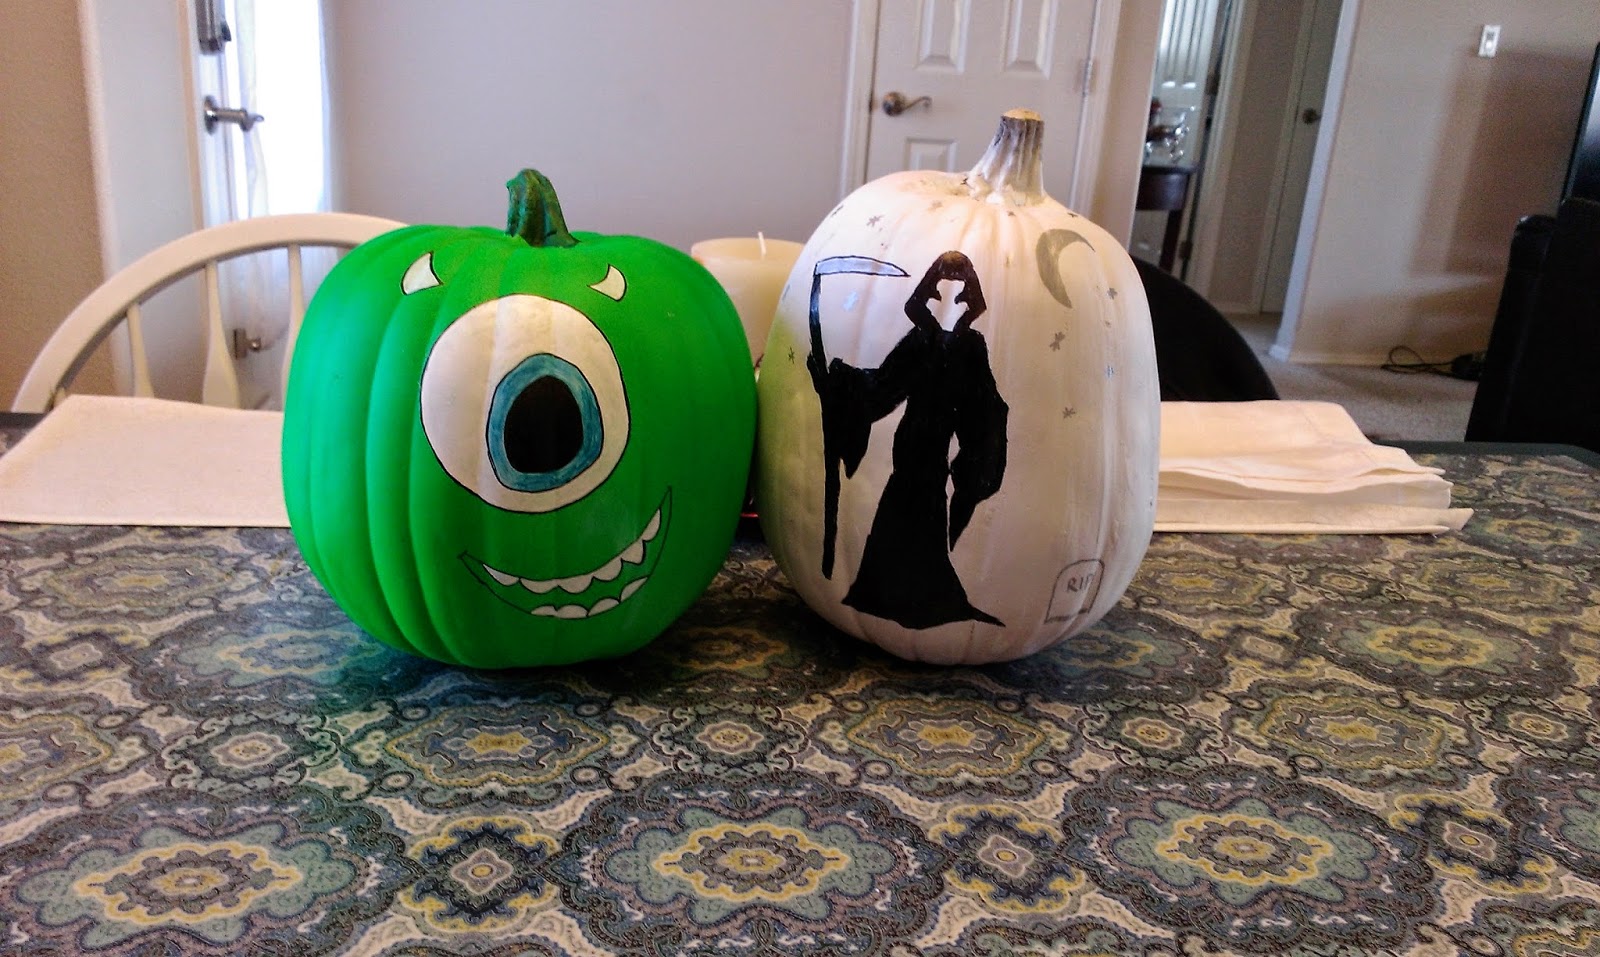


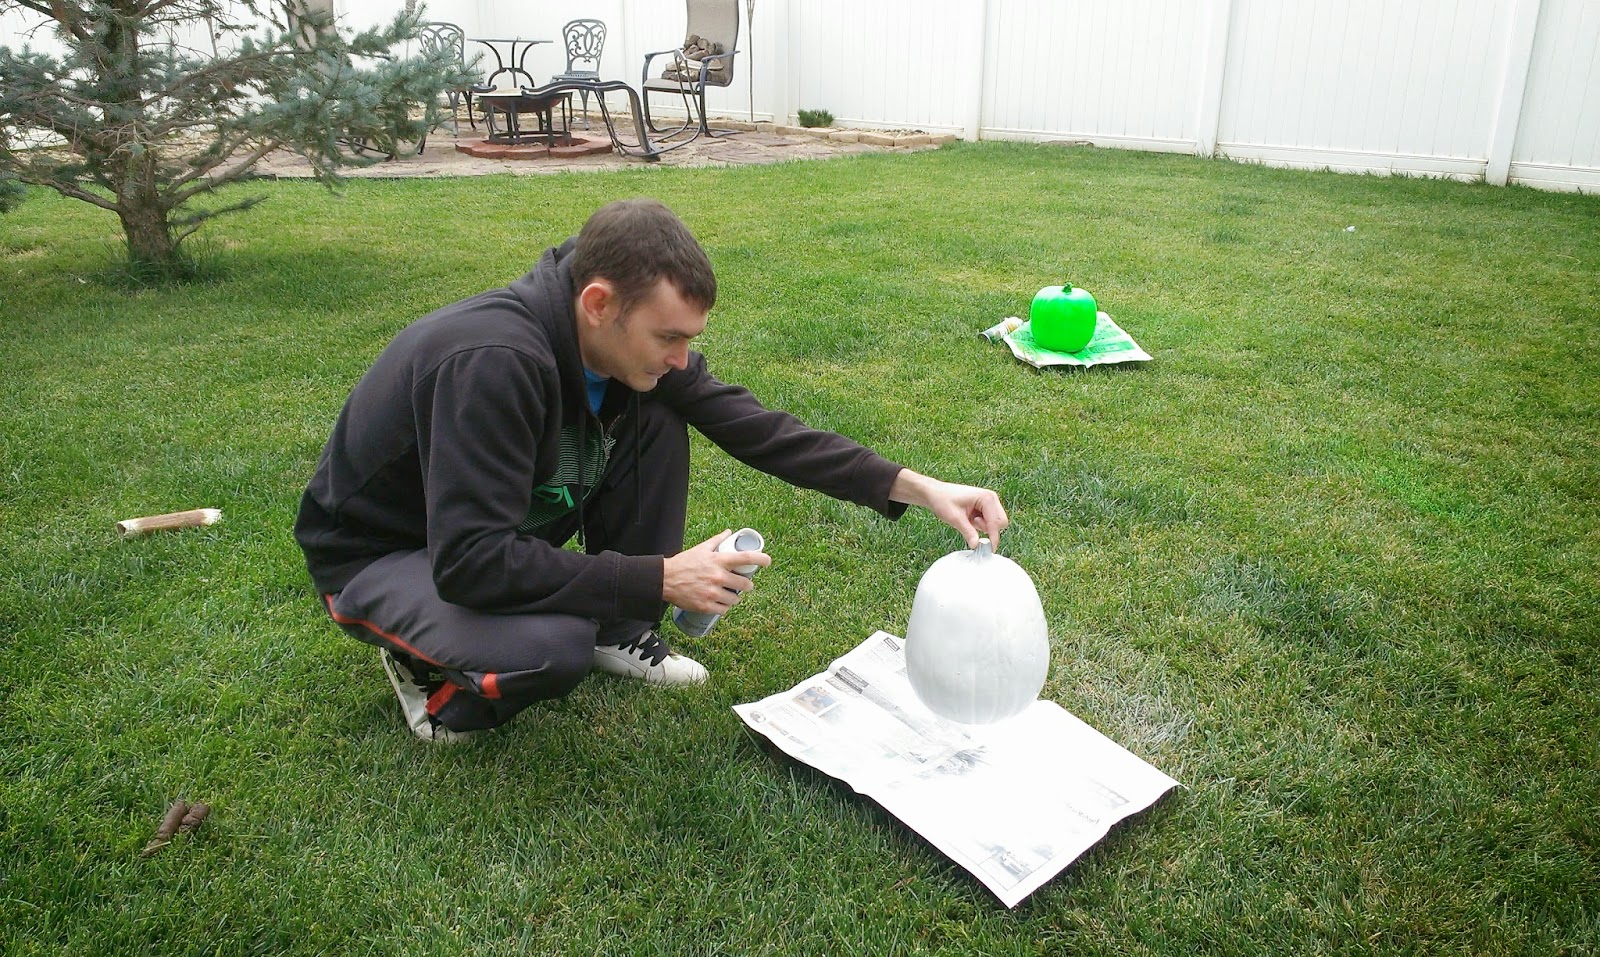


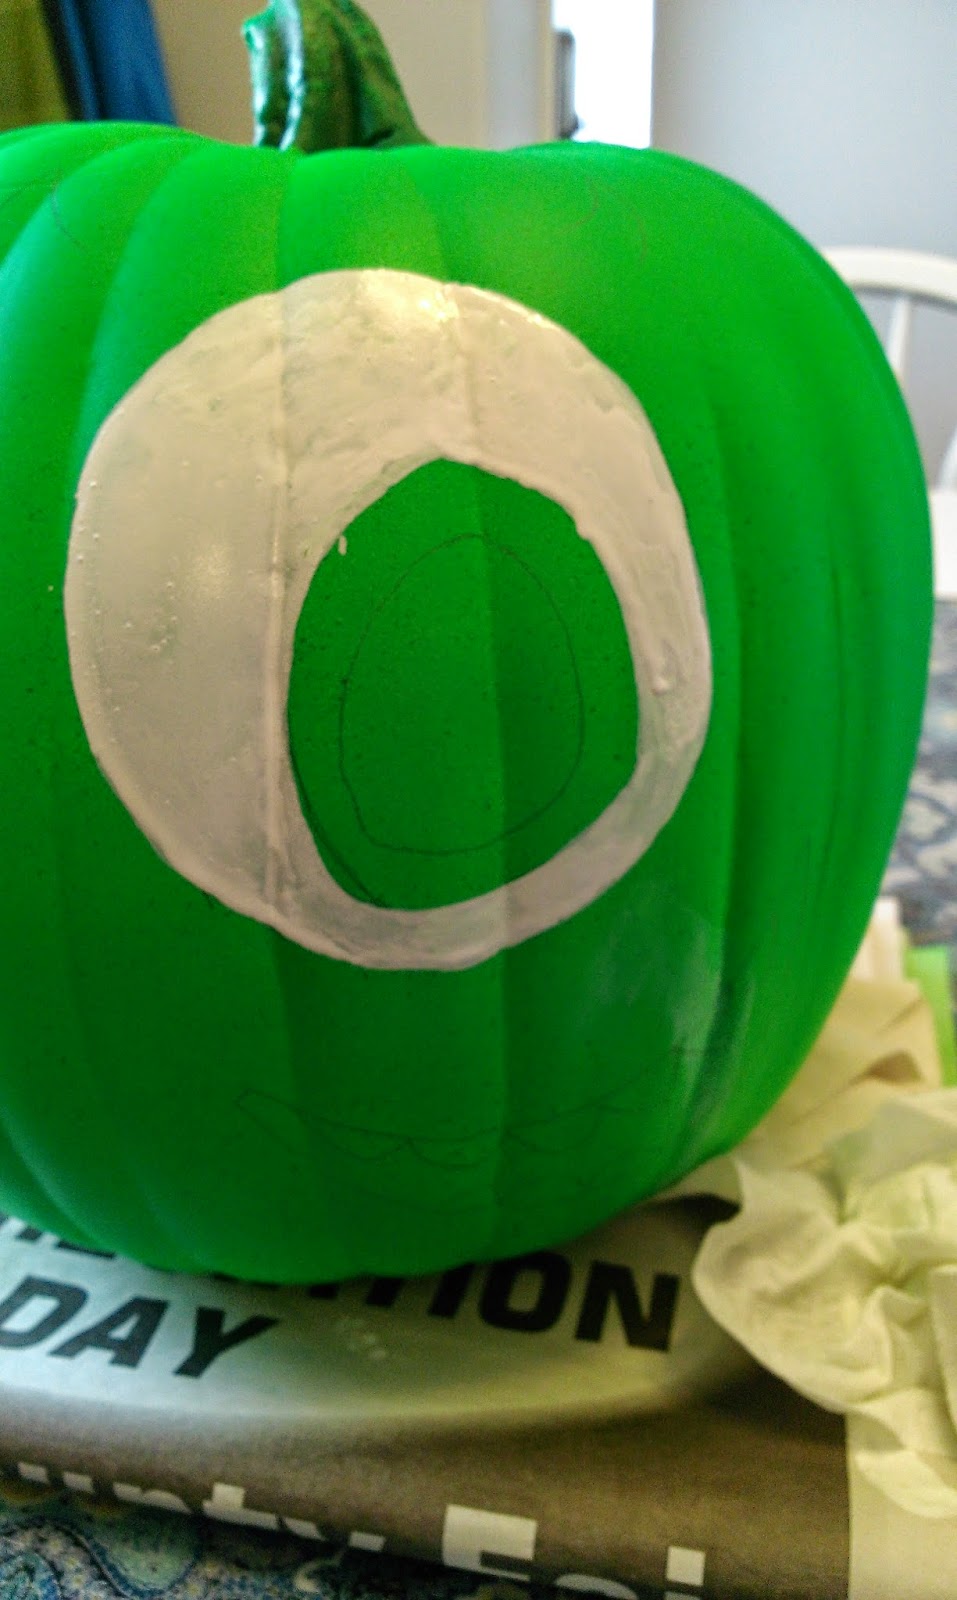


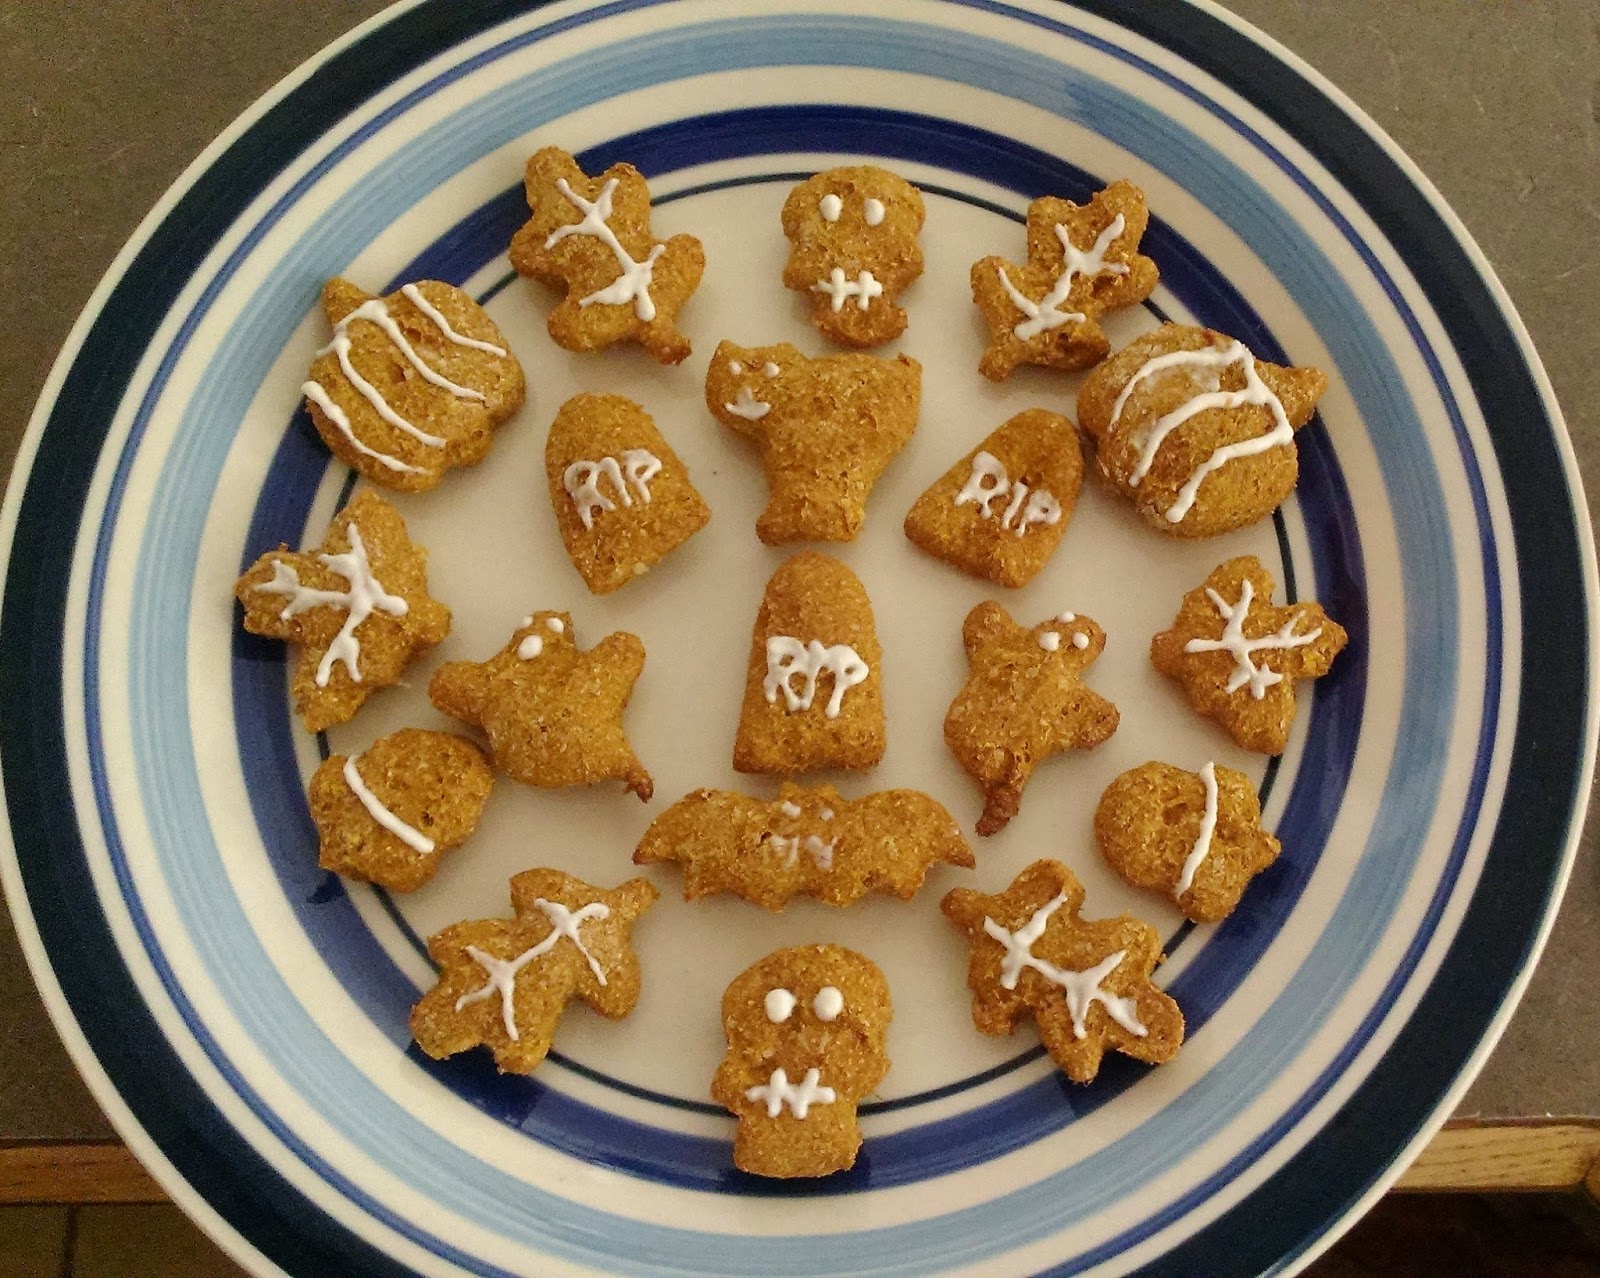

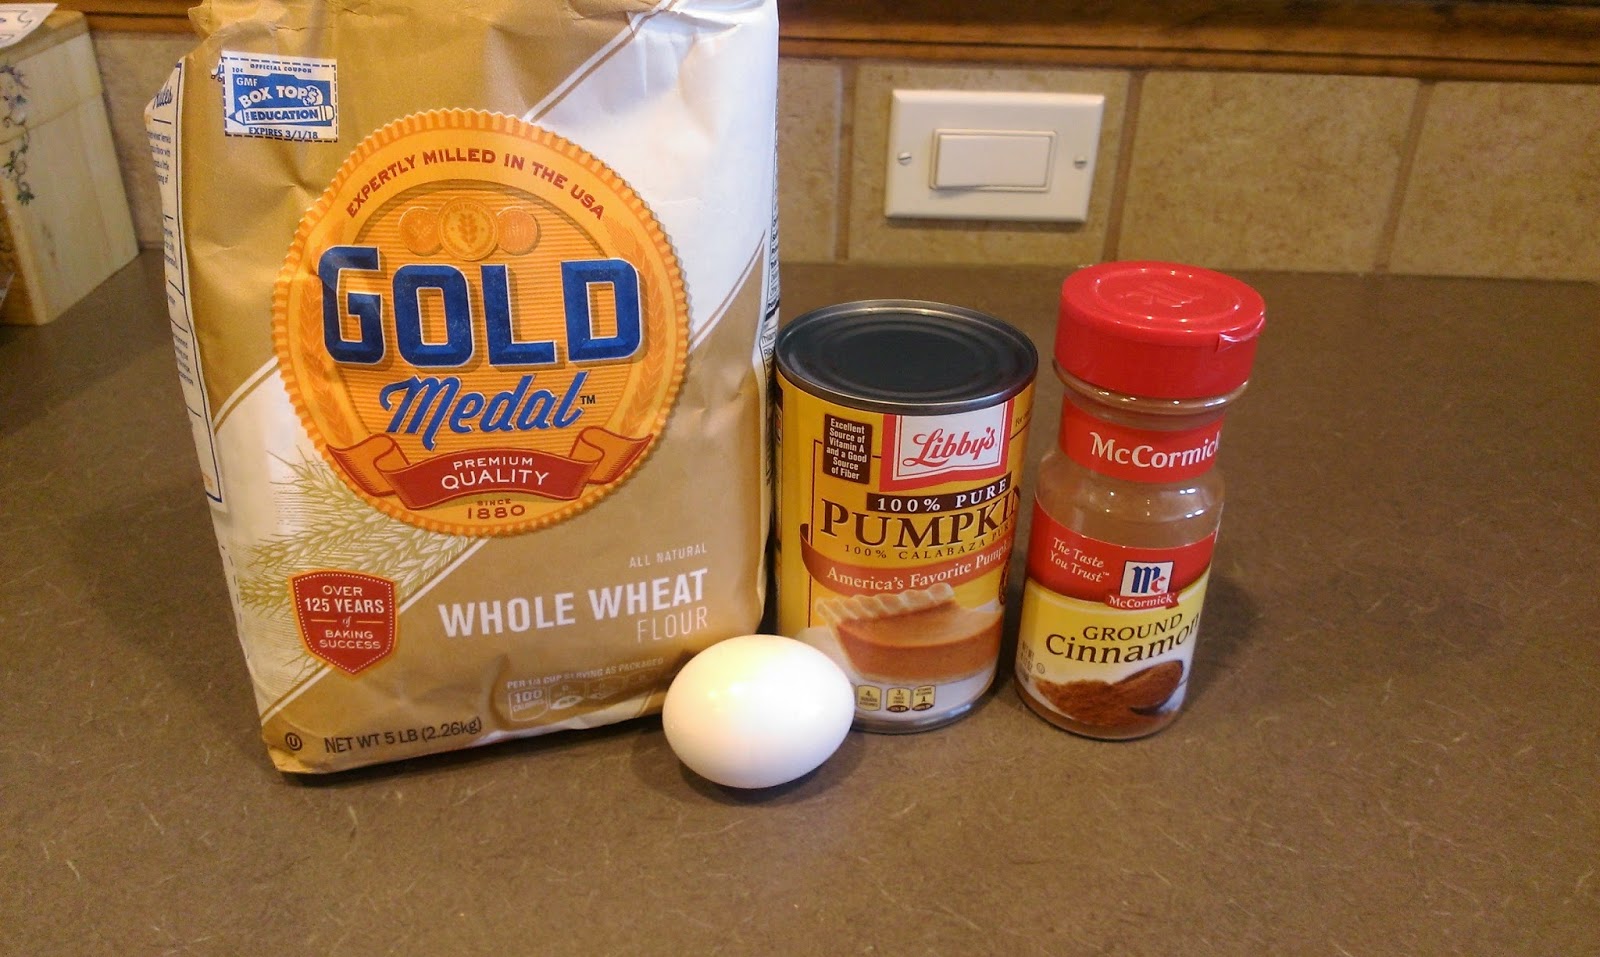

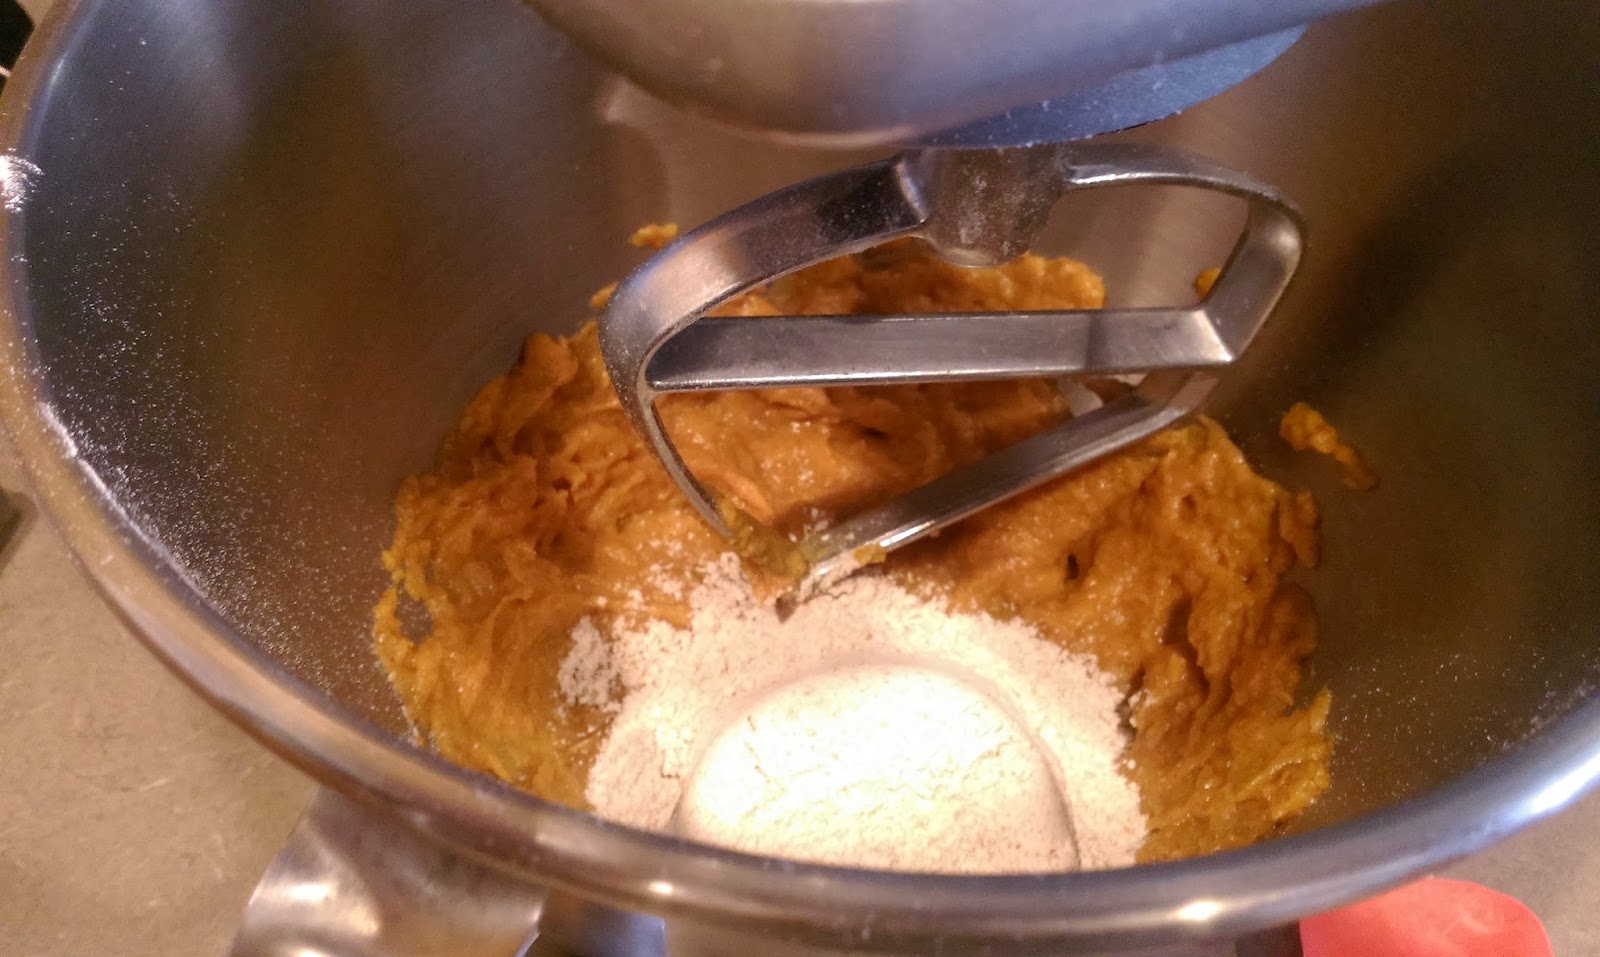
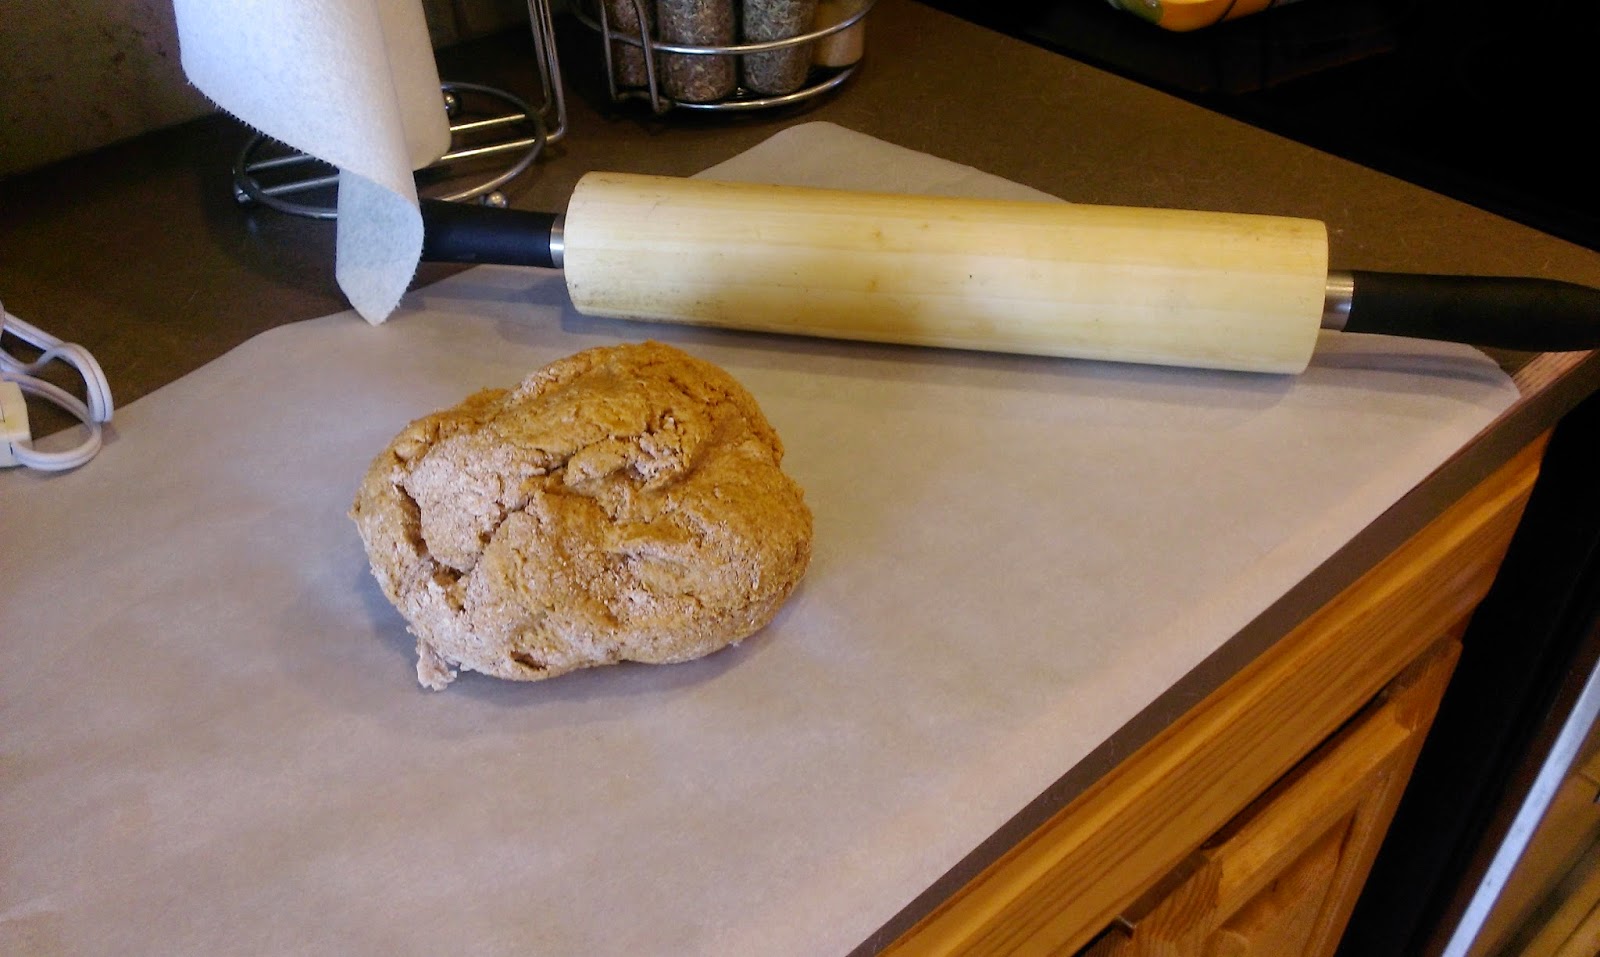


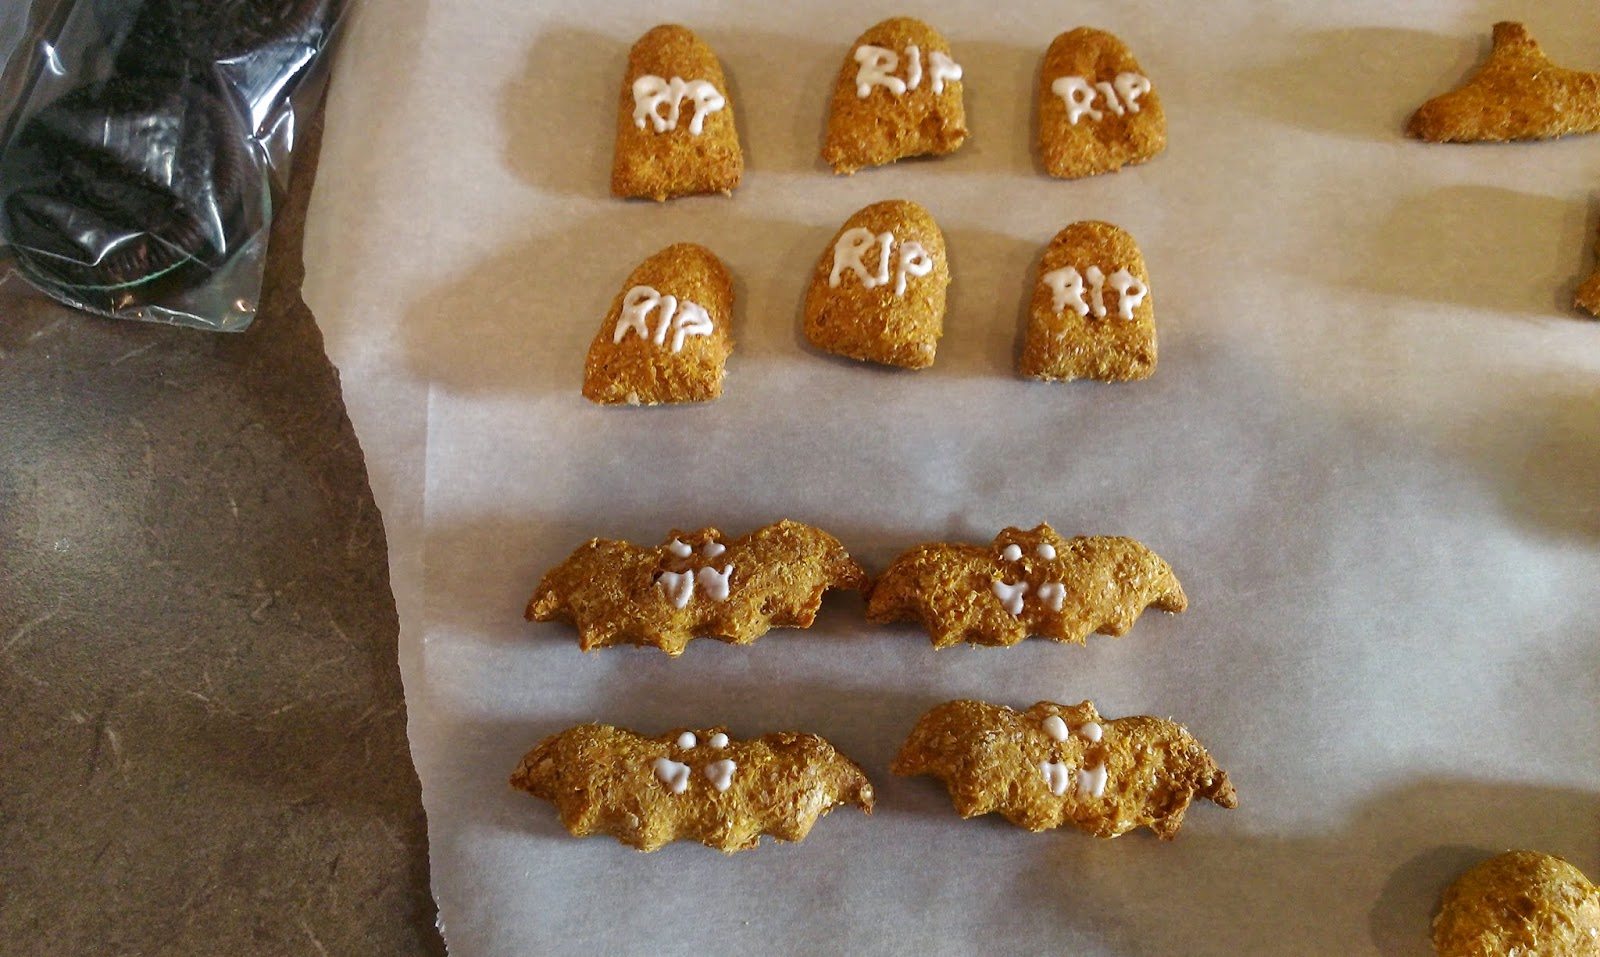

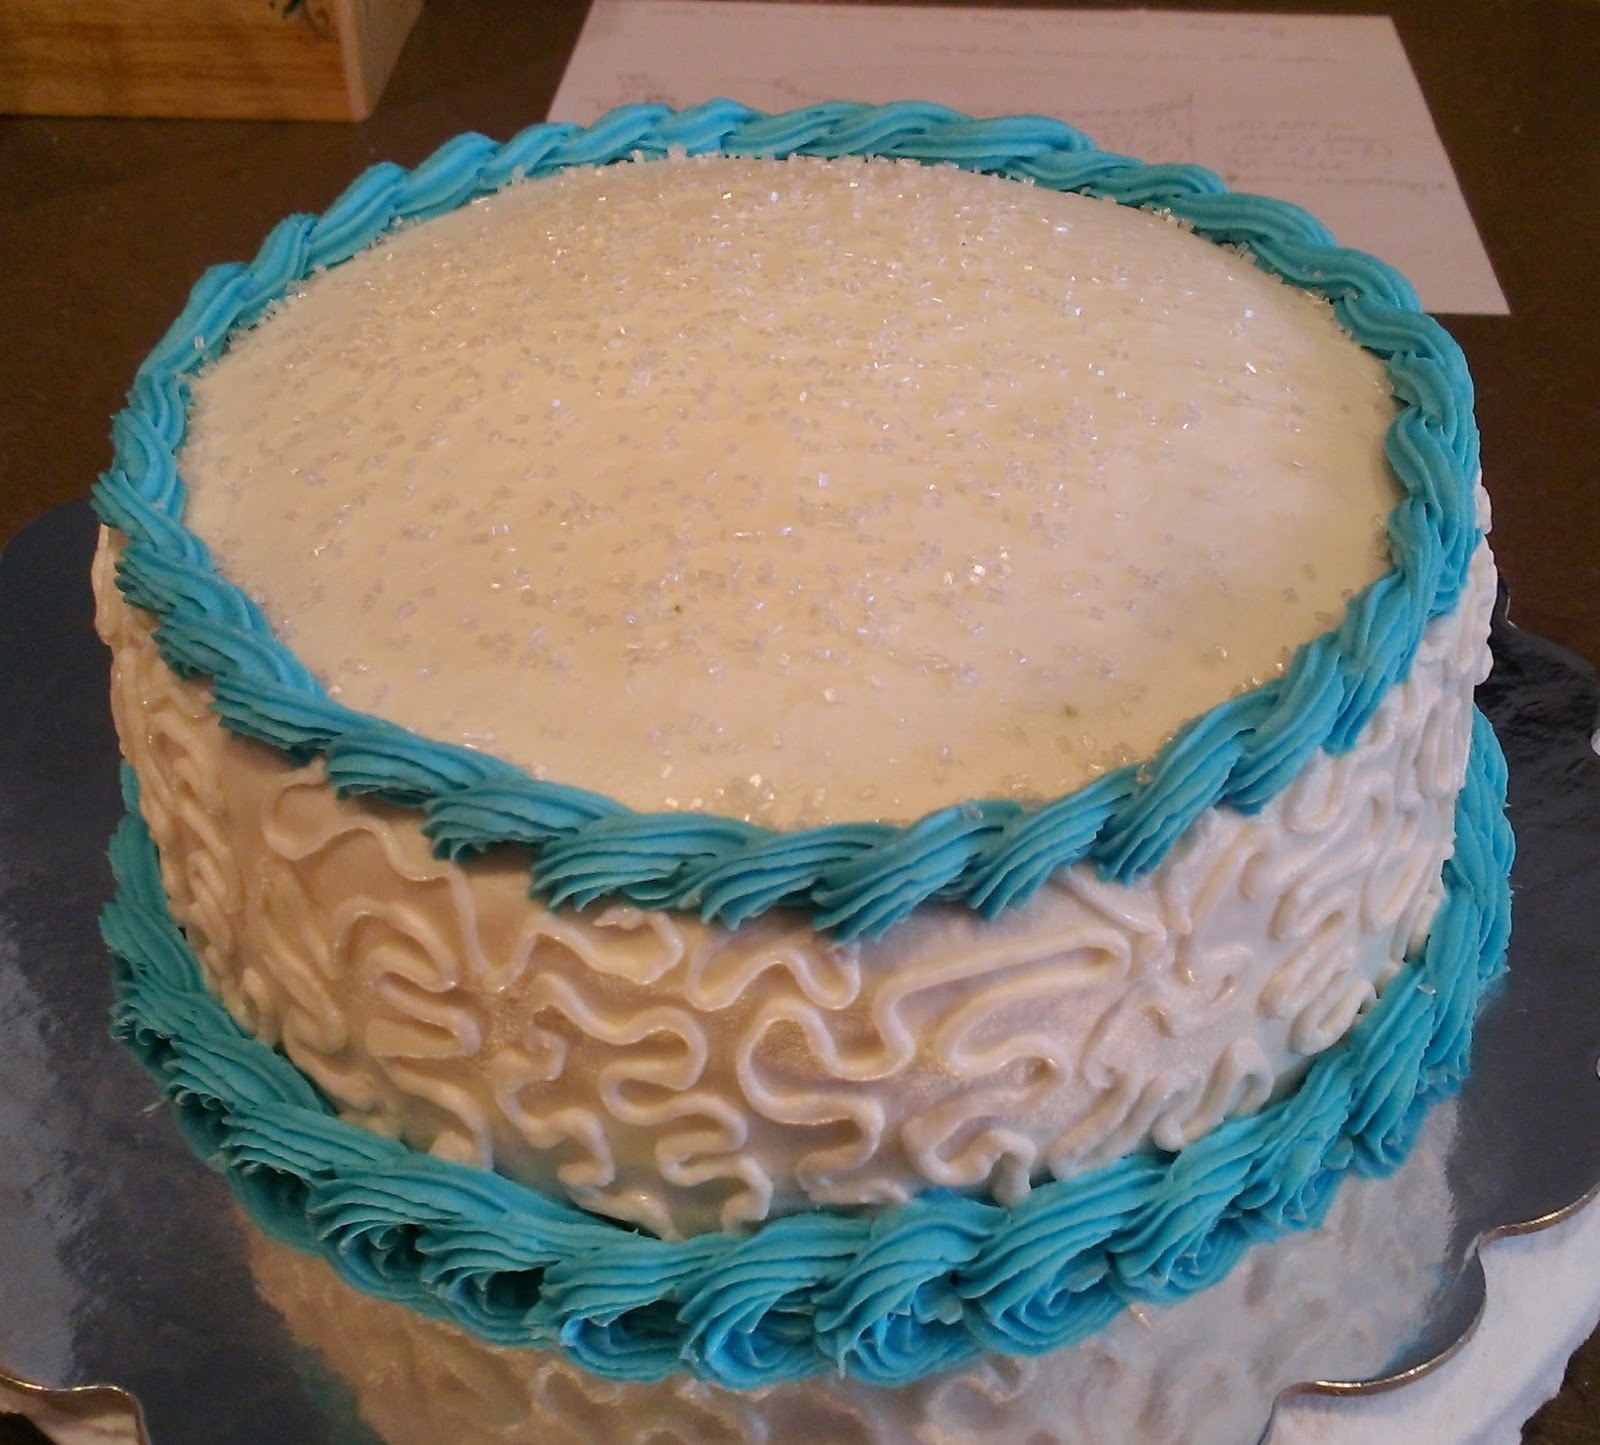

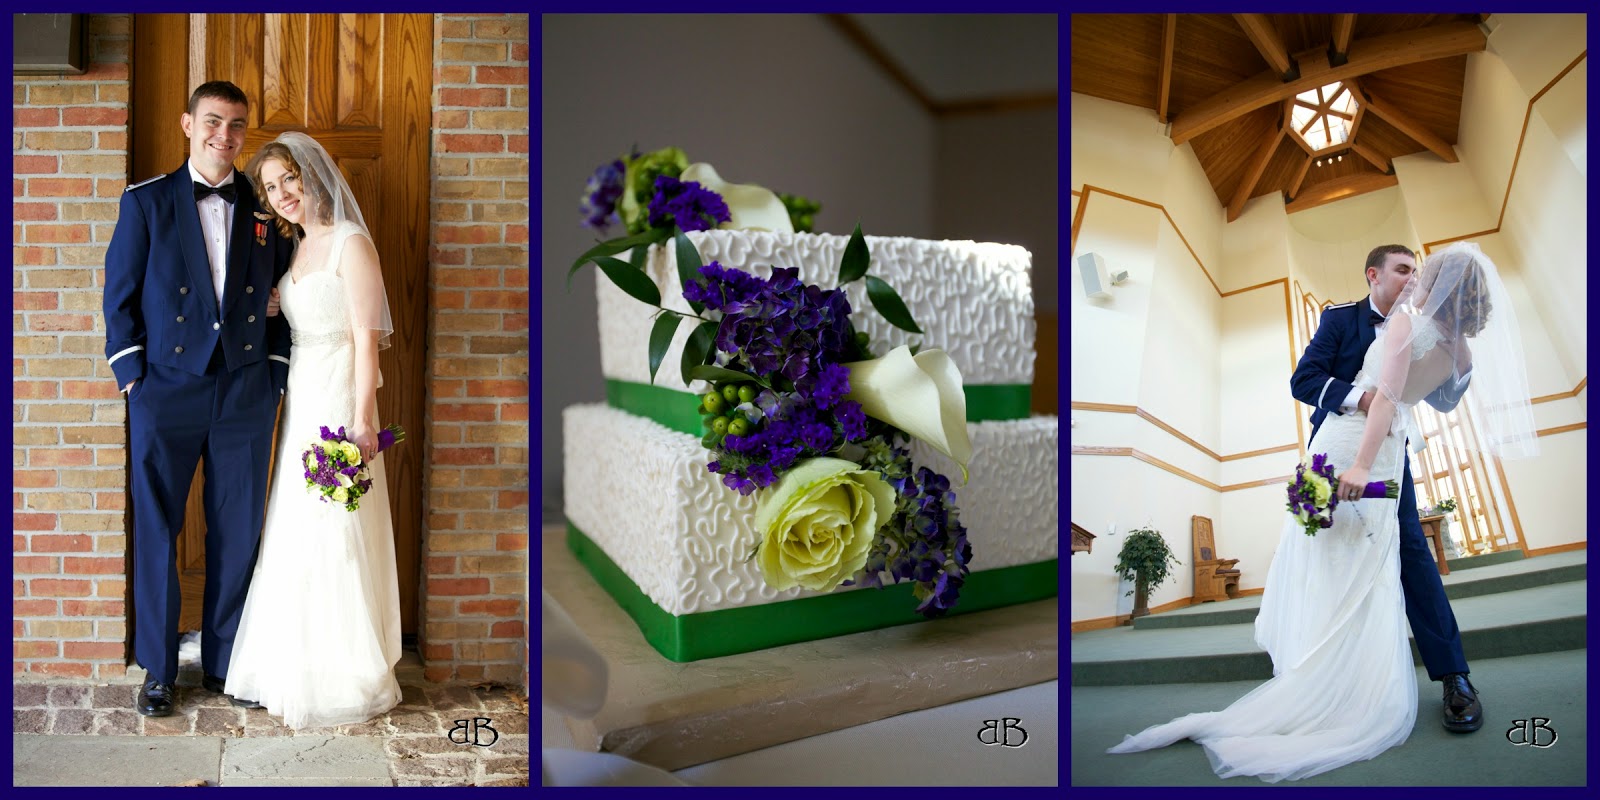
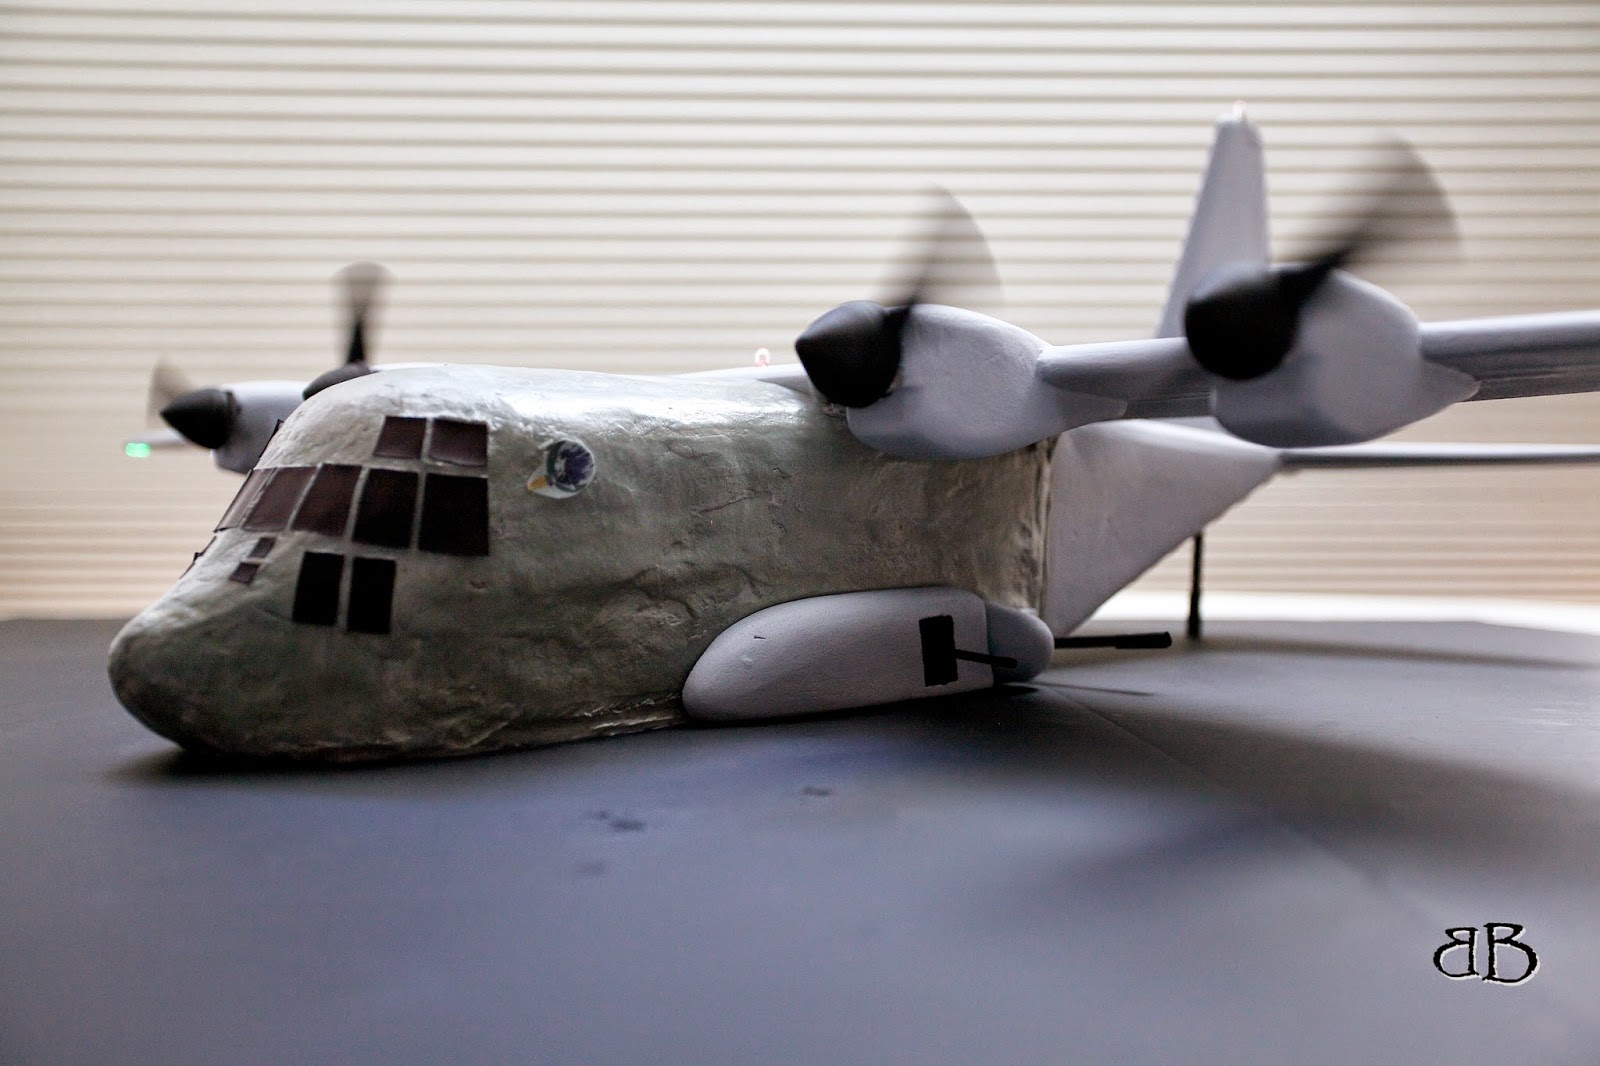
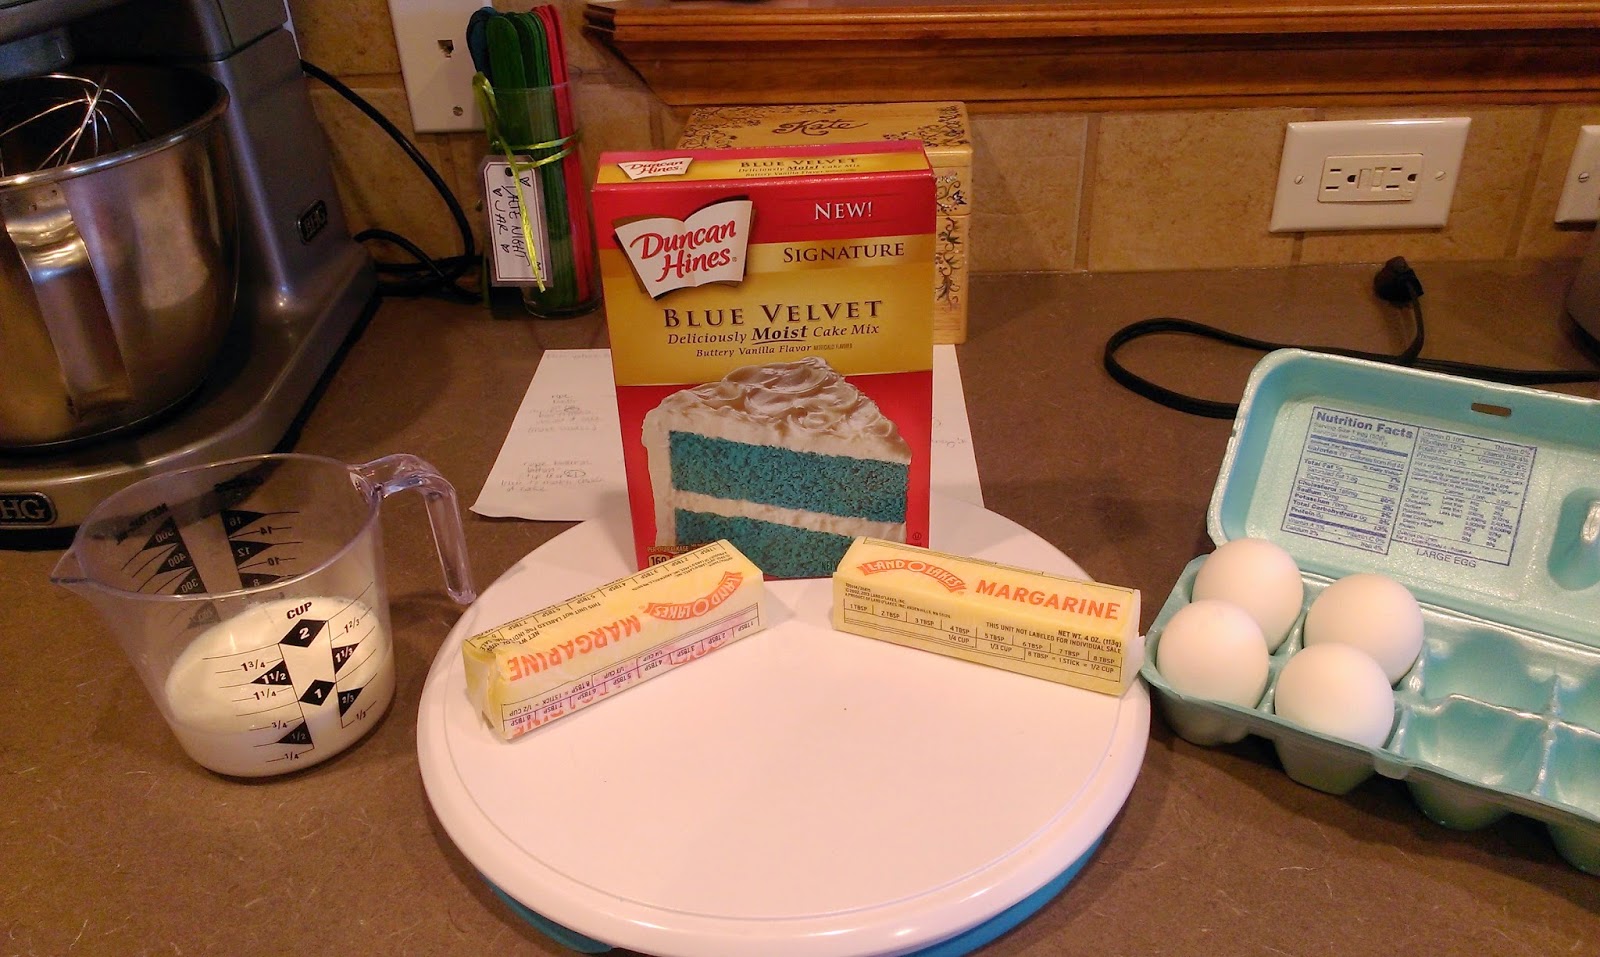
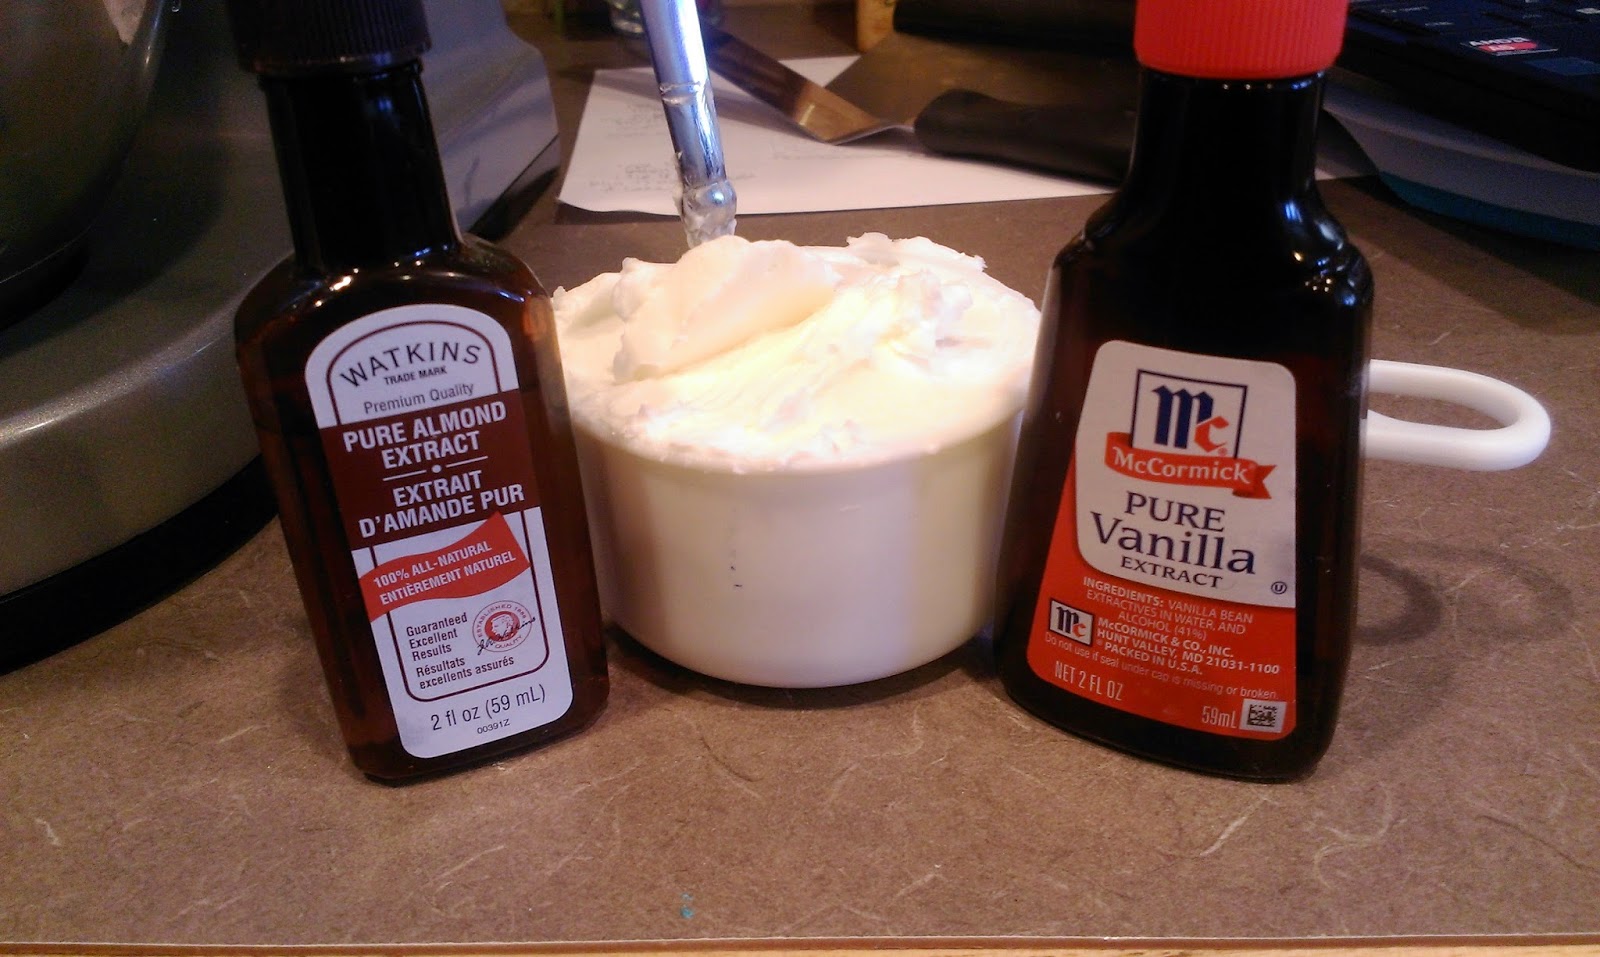

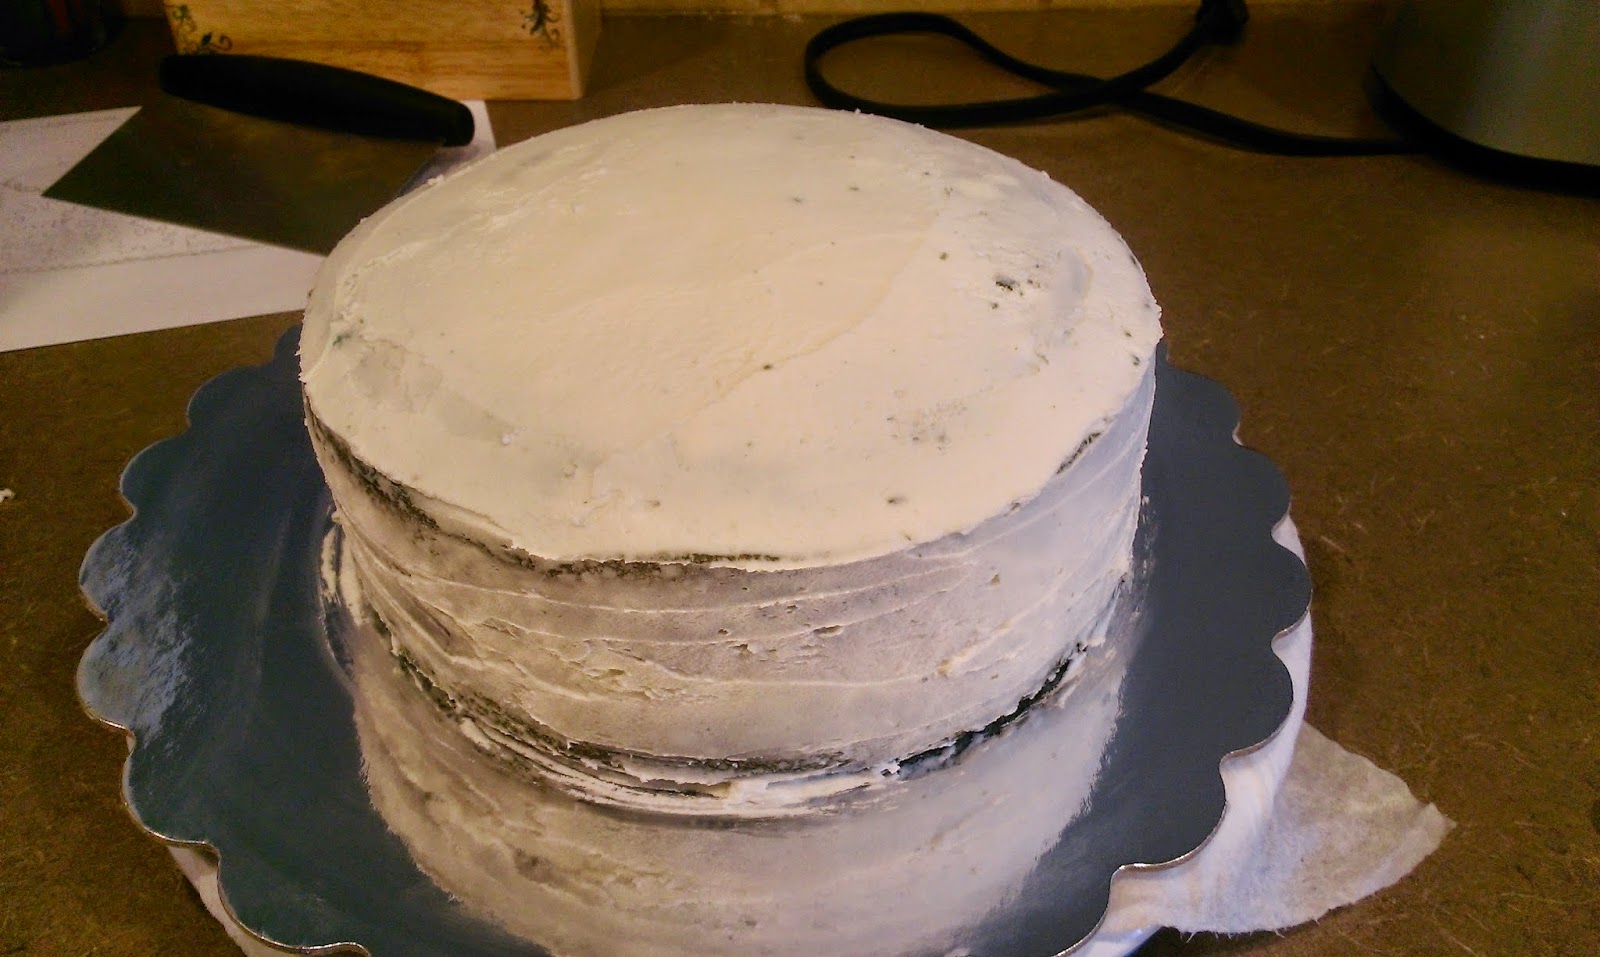
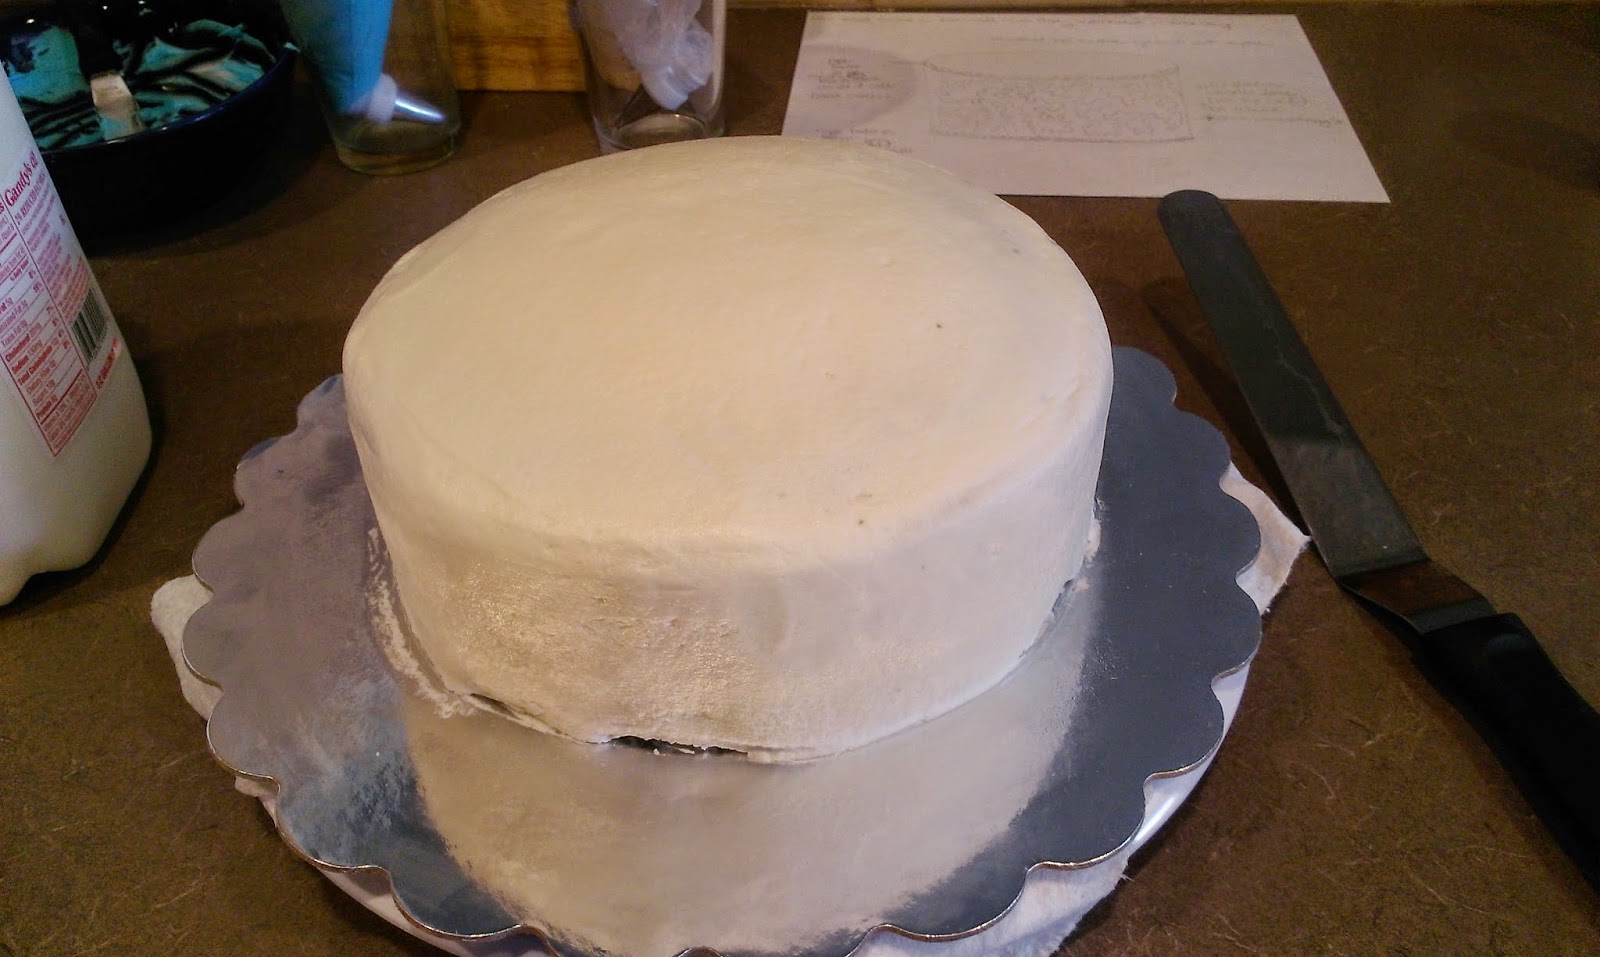

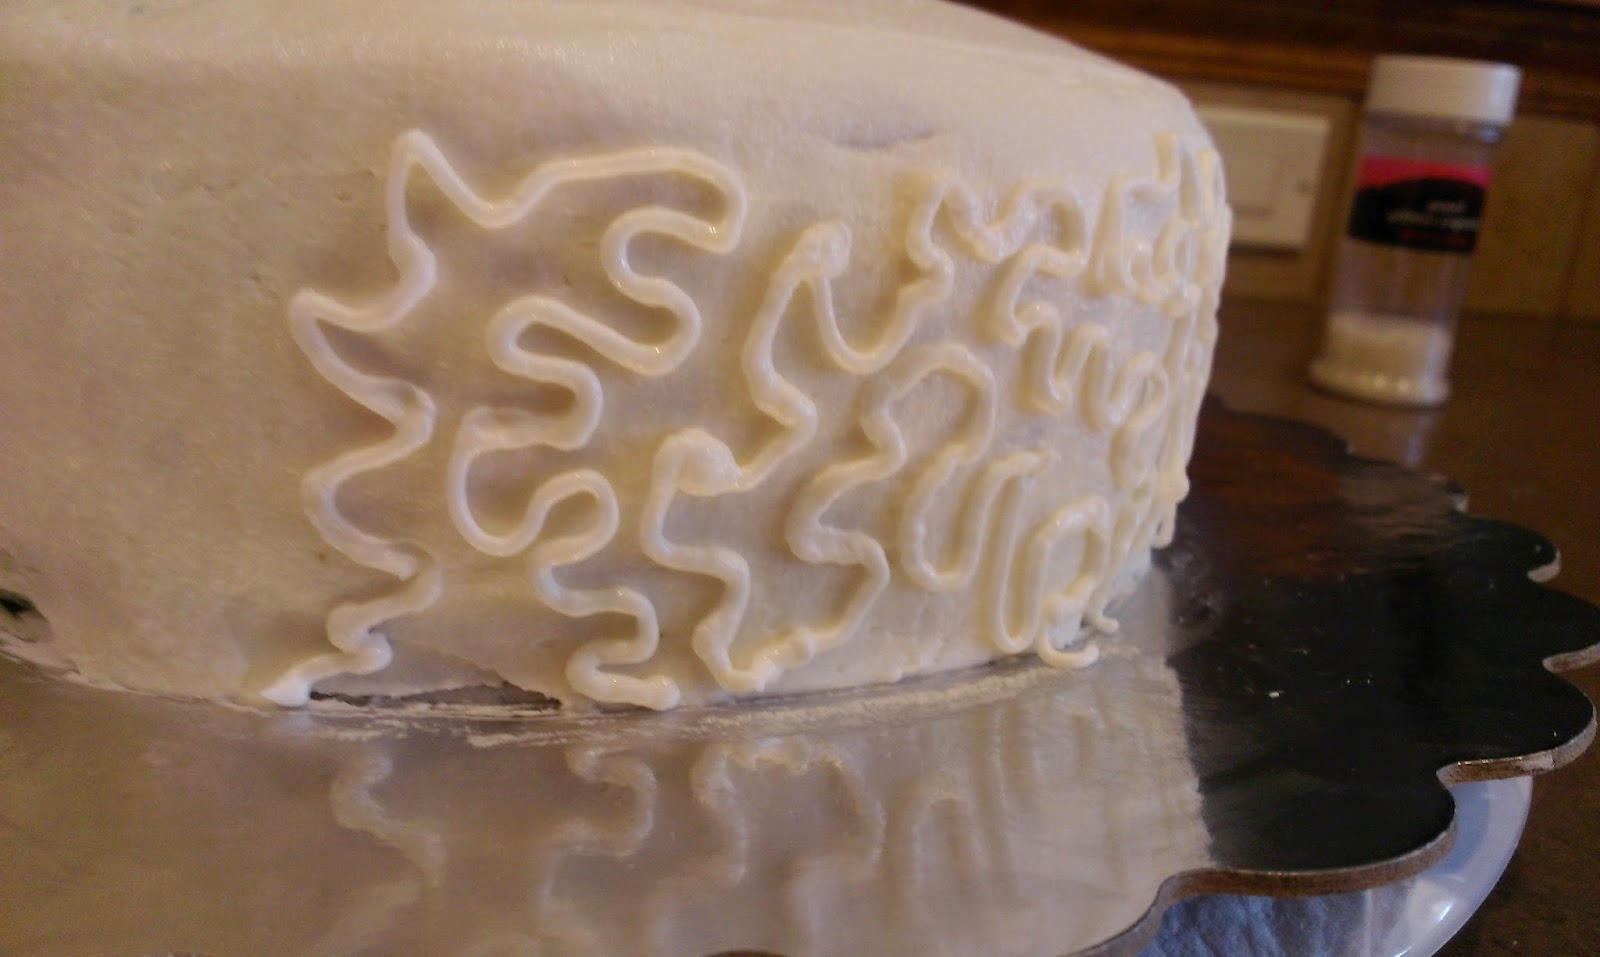


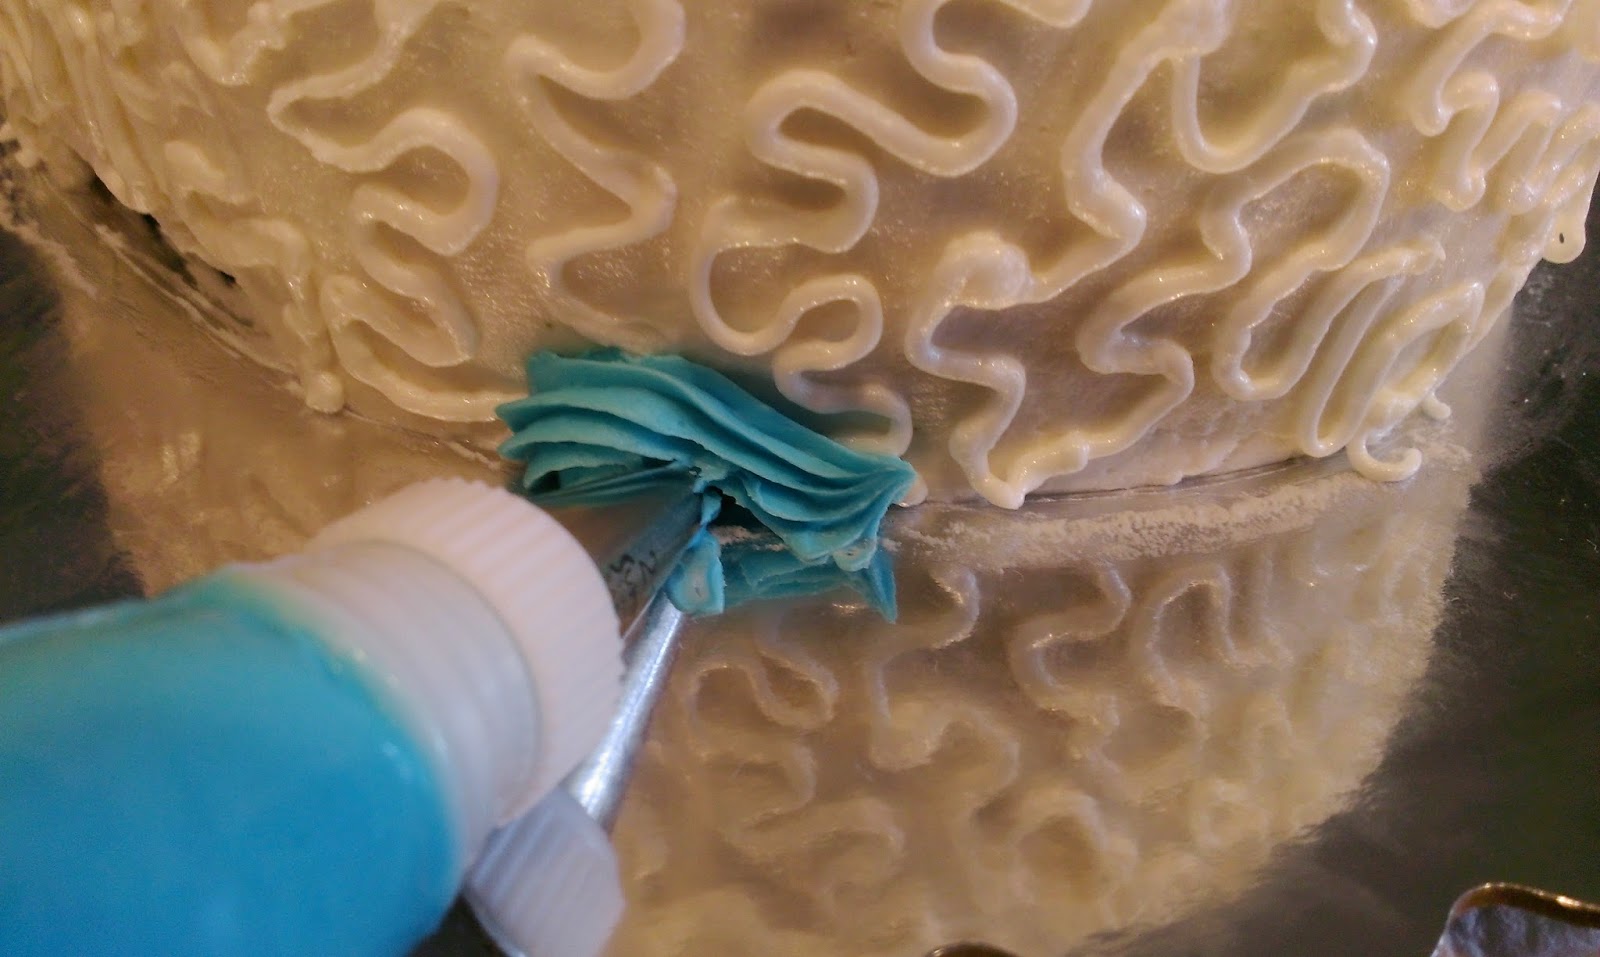


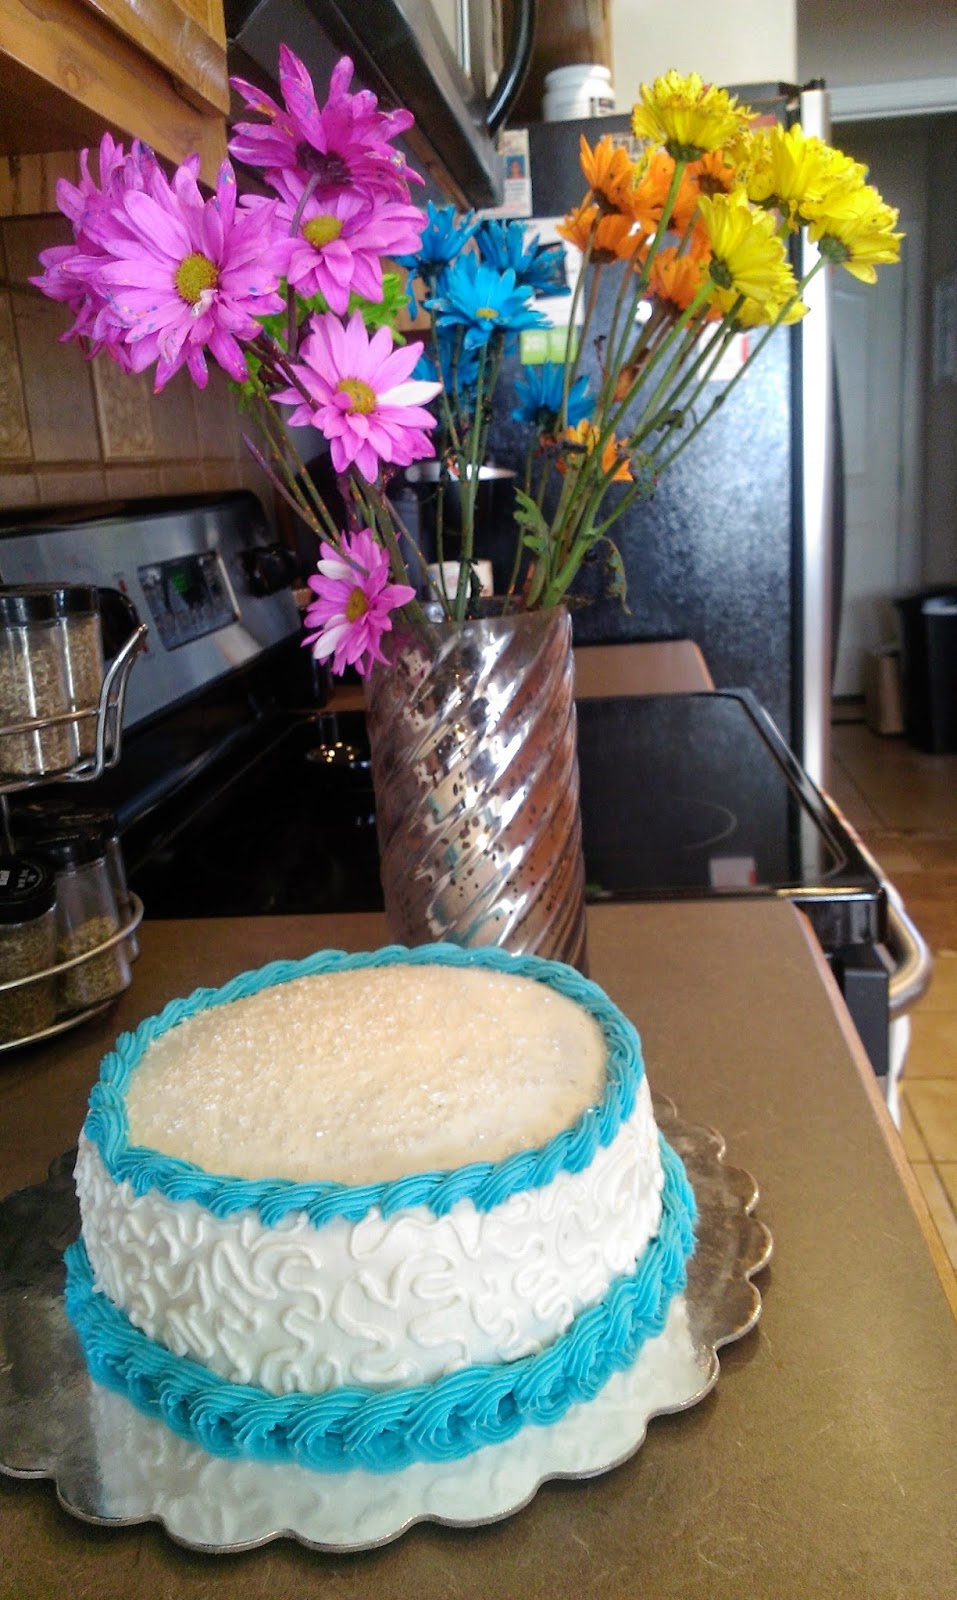


.jpg)