-
A Formation so Tasty, It Should Be Illegal. But Let's Be Thankful It's Not.
Like most red-blooded Americans, I’m going to be spending the day swigging Pepto like water after deciding that eating like a 16-year-old boy was a really good idea for the cheat day of all cheat days- Super Bowl Sunday. I’ve also spent most of the day wondering if I screwed up as colossally badly as Pete Carroll and Seattle’s offensive coach did whether I’d still get to keep my job or not (short answer: No.). At least the game went down to the wire, because the commercials certainly weren’t all that entertaining. Especially the “I See Dead People” accident-prone child ghost commercial from Nationwide. This left the people at our viewing party all collectively asking what in the actual hell we just witnessed. Super Bowl commercials are supposed to be fun and uplifting, not 30-second spots that try to leave you in an existential crisis. I’m hoping next year everyone leaves the “I’m not crying, I just have something in my eye” ads to those who do it best- the adorable puppies and Clydesdales of Anheuser-Busch.
I also can’t possibly be the only person who noticed that at one point during the half-time show, Katy Perry was dressed exactly like Chazz Michael Michaels in Blades of Glory, and I think we can all agree Missy Elliot should’ve performed the whole damn show. I’m hoping that both she and Dr. Dre release new albums this year, especially since I’m starting to worry people actually have forgotten about Dre at this point. While there were some gems amongst plays (Jermaine Kearse!!) and commercials (Liam Neeson and Bryan Cranston, anyone?!), the stars of the Super Bowl at our party were these adorable little football cake balls…

Based on my collage color scheme, I bet you can realize what team I wasn’t rooting for to win… The footballs in our house may not be under inflated, but they are most definitely full of cake and won the party. Some guests had thirds and fourths of these little babies (and by guests I really do mean other people and not just me). I had an absolute blast making these…way easier than cake pops for sure. I learned a few new techniques in my research that made the process of dipping about one thousand times more streamlined, so let me regale you with my underdog tale ending in a heartwarming victory, or something like that.

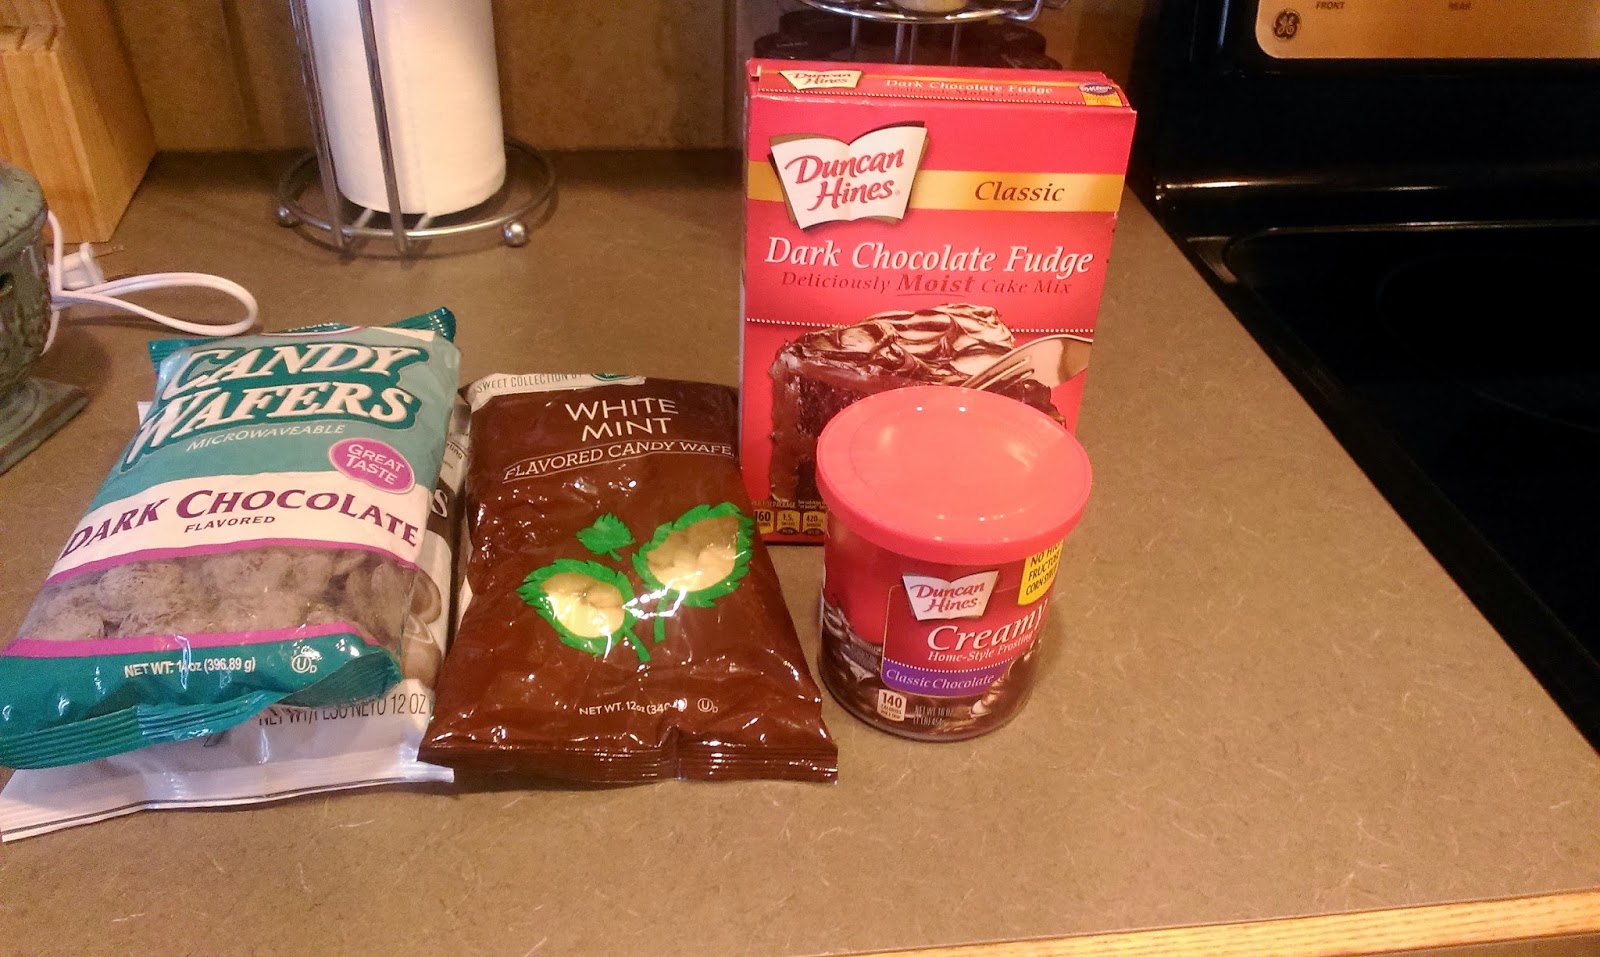
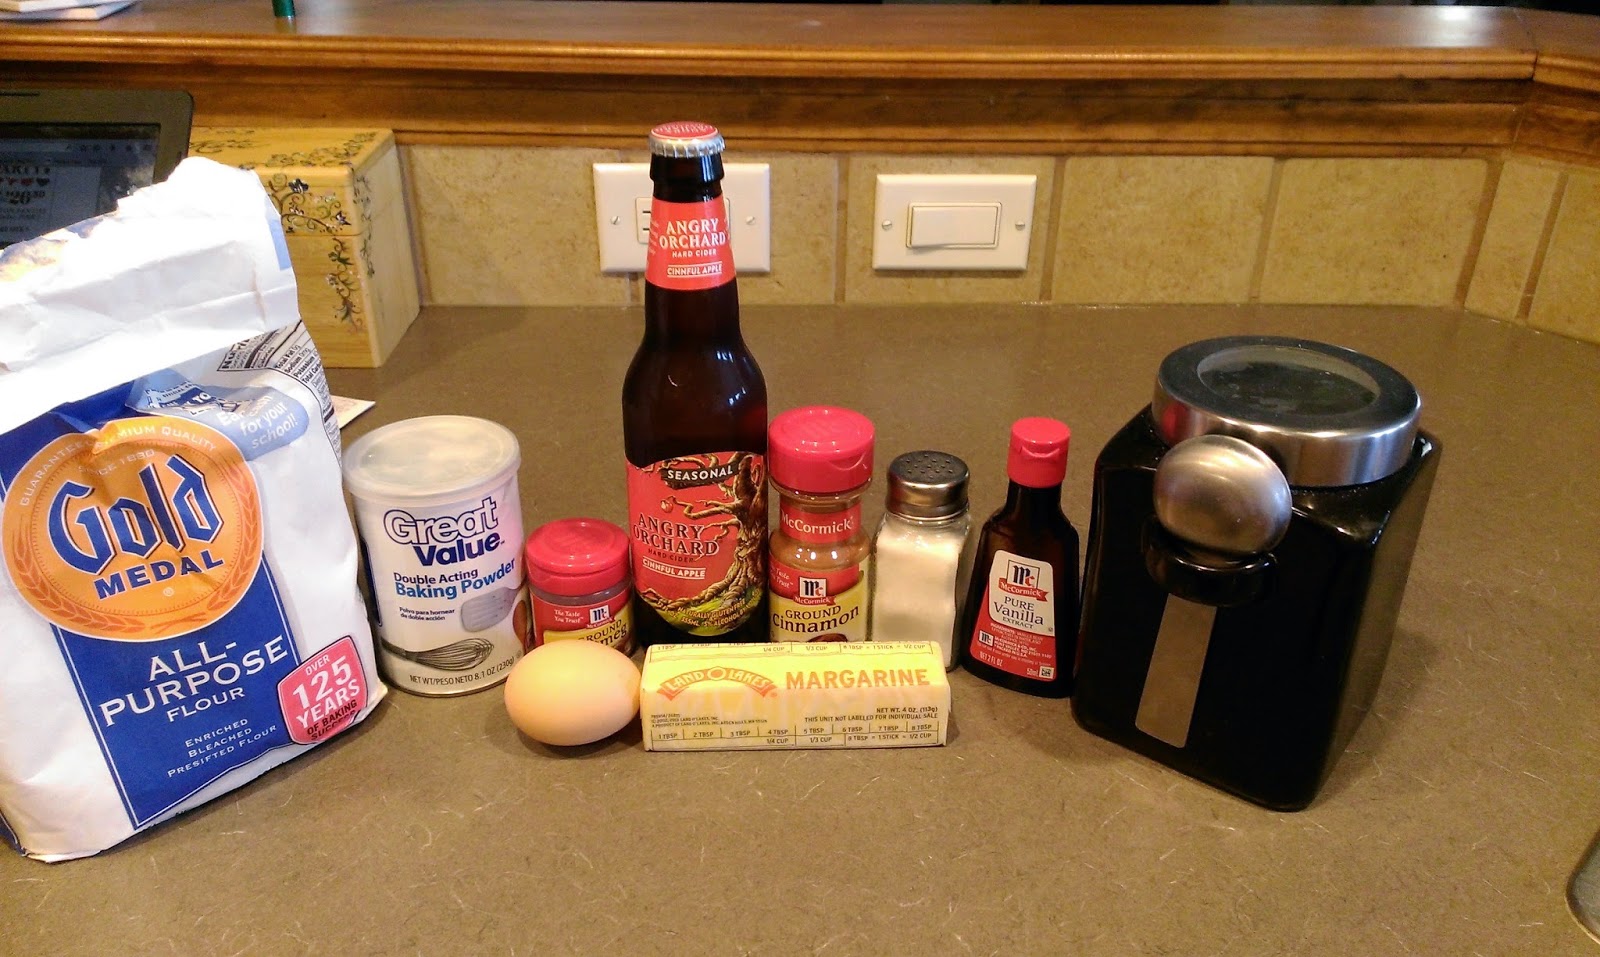
No crazy ingredients required! If you want to make edible footballs or basketballs, I think it only fitting for them to be made of chocolate cake on the inside. Leave the vanilla for baseballs (as it is the most vanilla of all our sports, not just because the ball is white). So grab your favorite chocolate cake mix and a tub of chocolate frosting. You will also need two bags of dark or milk chocolate melts for the football coating, and a bag of white mint melts for the laces. I live for dark chocolate- it is the most underrated of the chocolates, and this speaks to me on many levels. Black jelly beans are also my favorite of the jelly bean family for similar reasons. I will take your rejects, your losers. They have a home here in mah belly. My taste buds do not discriminate! …I have a feeling being raised a Minnesota Vikings fan has affected my life in more ways than meets the eye.
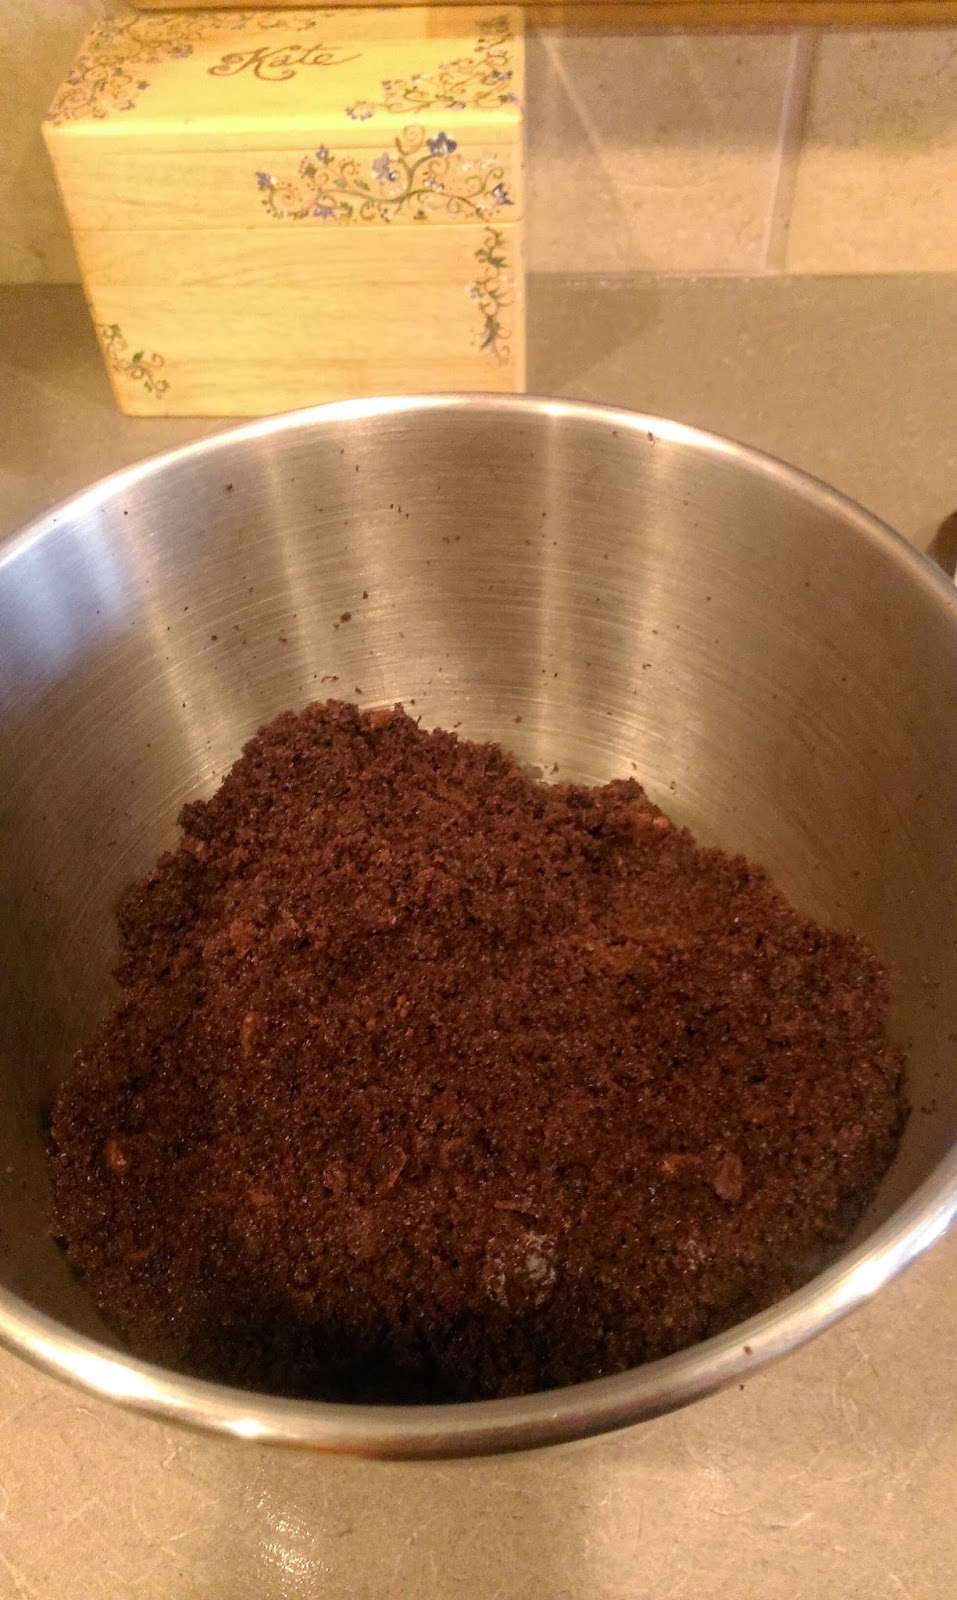
Bake your box cake, but use the substitutions I’ve been preaching for almost a year- add an extra egg, sub milk for the water, and use butter instead of oil and double the amount. If you haven’t started doing this by now, I realize you’re only reading this blog because I’m undeniably hilarious or you’re off sweets and just come here to look at pictures of cake and remember what once was. Anyway, let the cake cool completely (I threw mine in the fridge for 30), and then crumble into tiny little pieces. If you have a food processor, feel free to use that. I crumble by hand because then pieces can somehow make their way into my mouth. Magically.

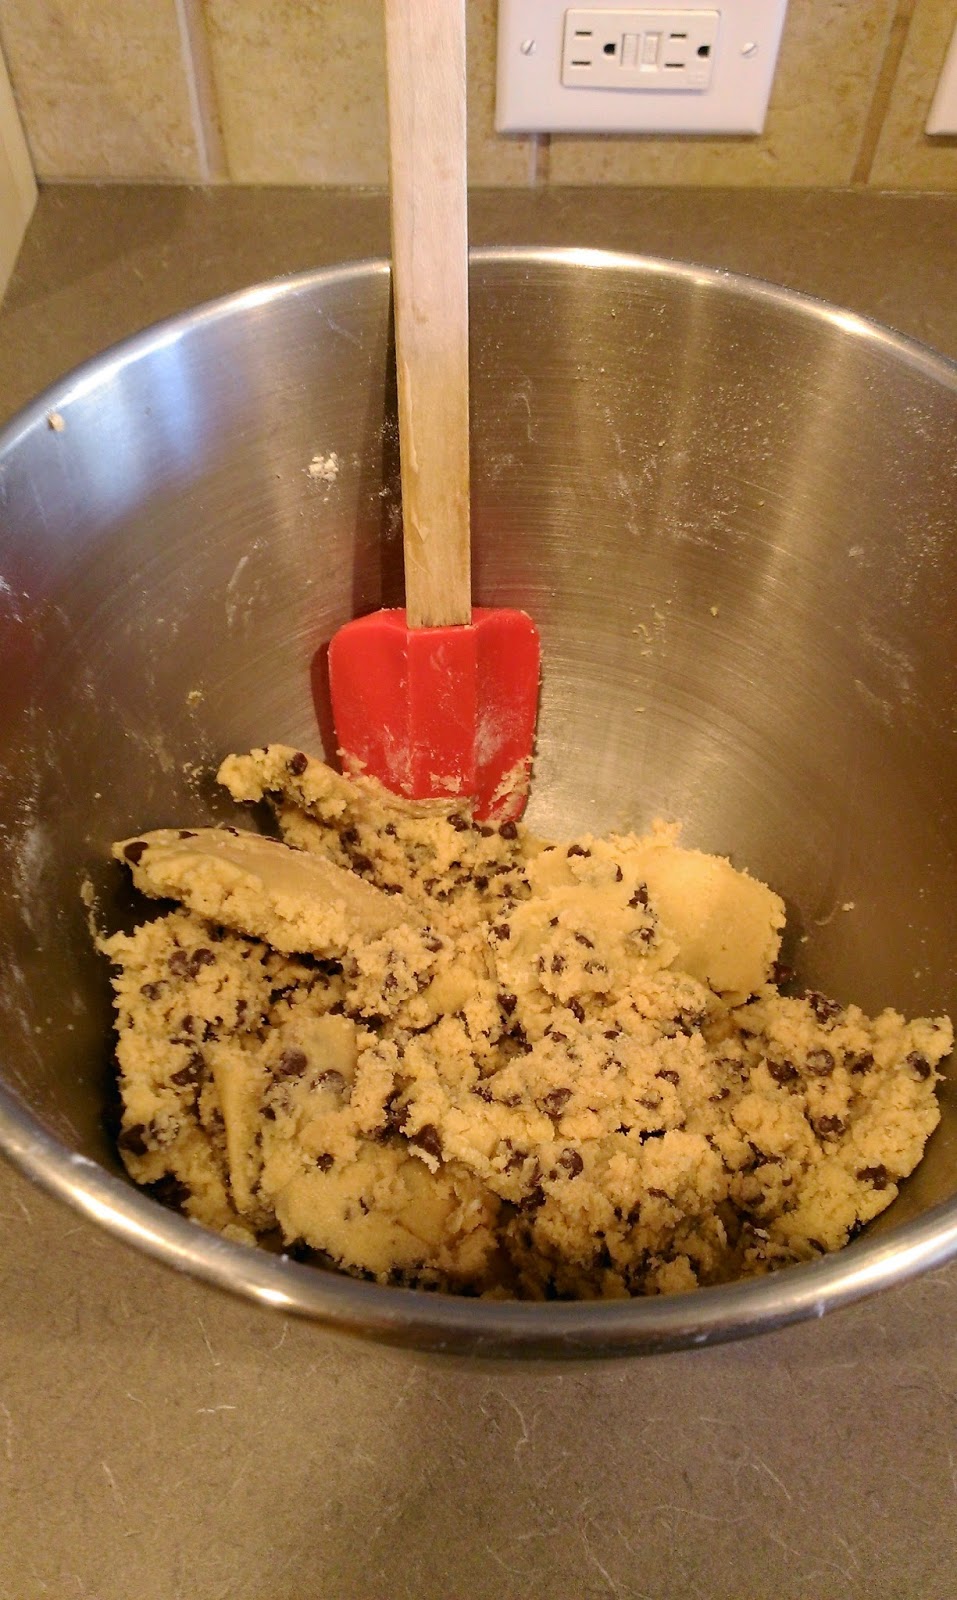
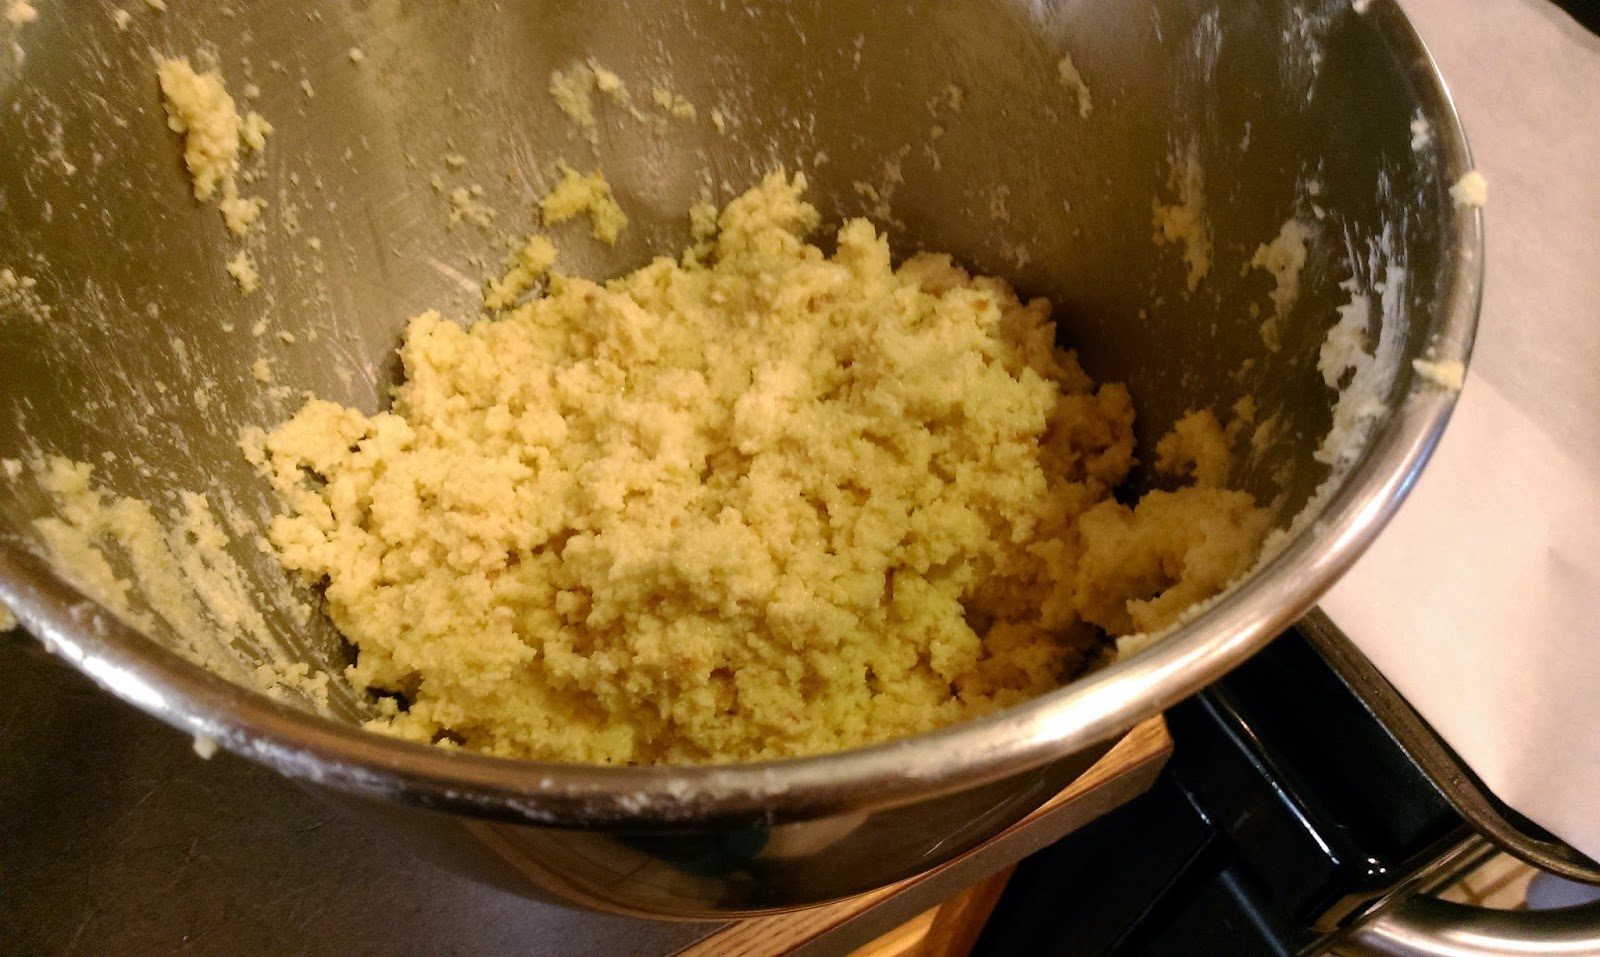
Hello chocolate my old friend. Once you’ve crumbled the cake, mix in the can of frosting. You will have to do this by hand, but when everything has been nicely folded together, you then have hands covered in chocolate, and this is what I like to call a win/win situation. Even Pete Carroll could see the beauty of this play- simple and perfect in execution.

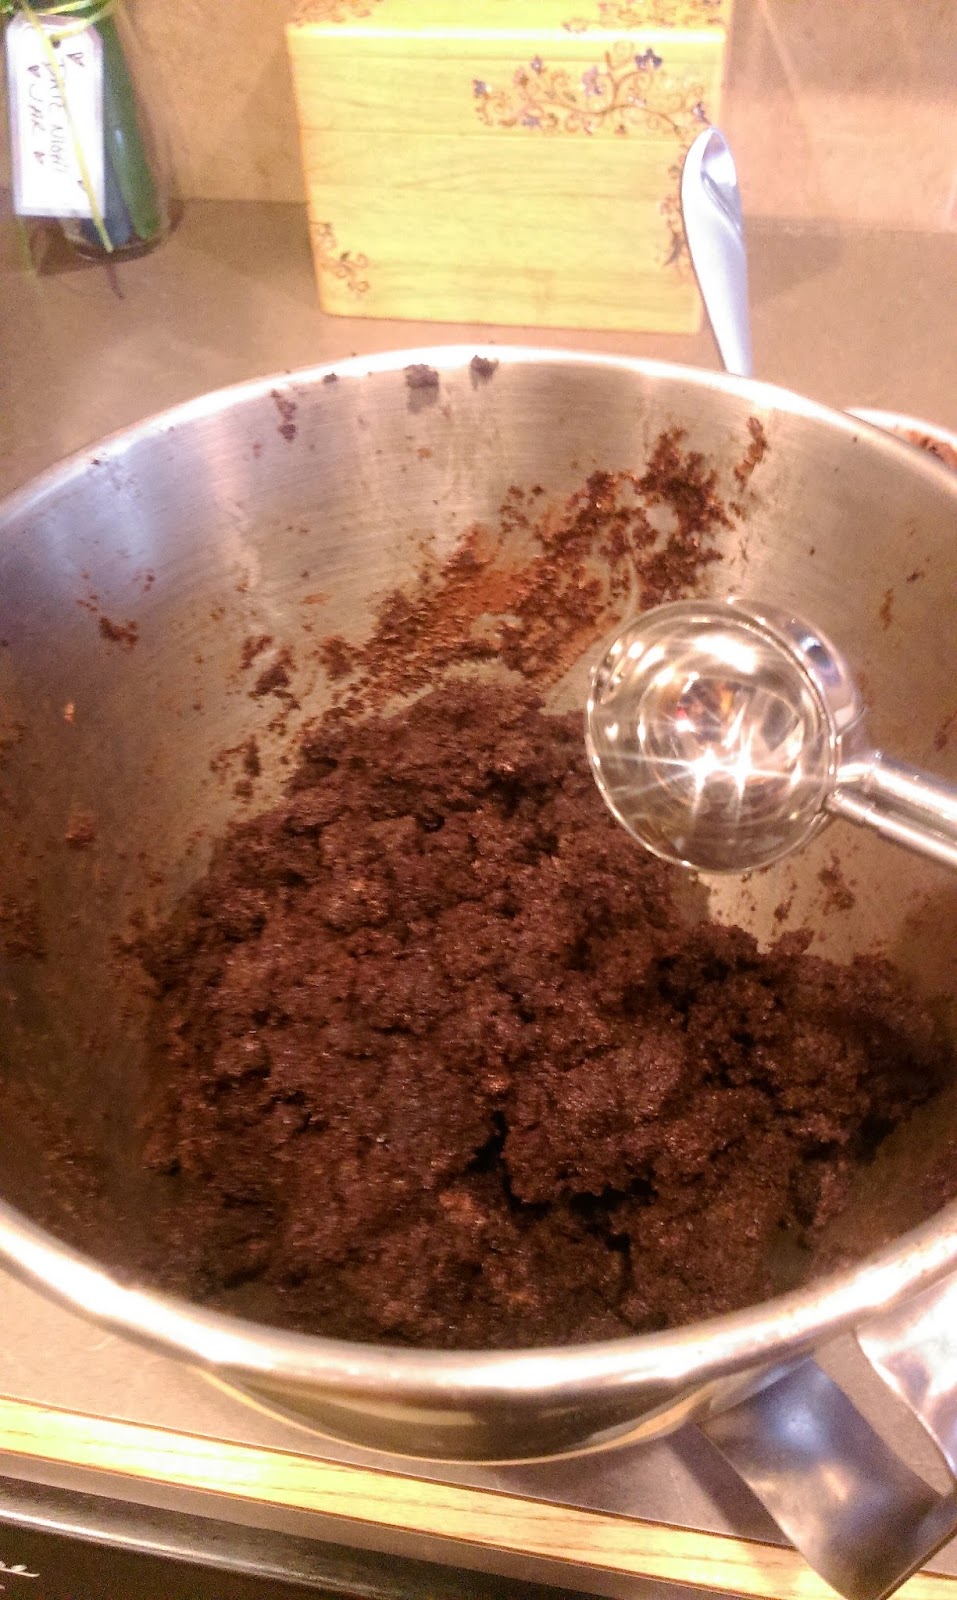
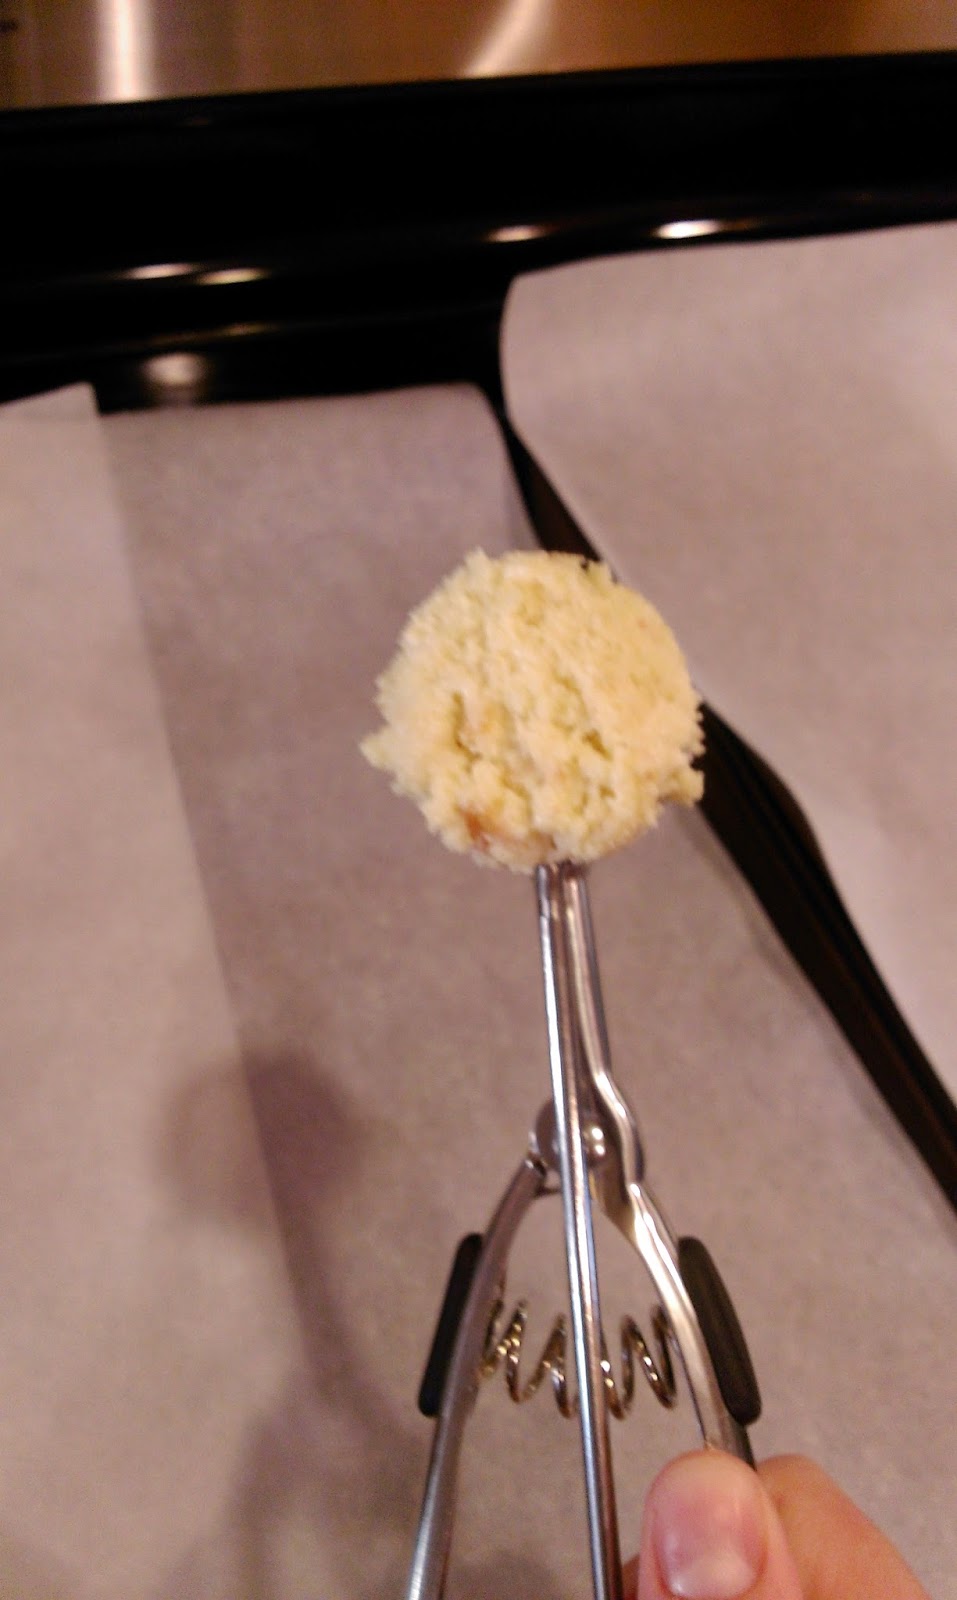
This is a horrible photo. If anything, it may turn you off chocolate cake. I’m including it for those who’ve gone off sugar to jolt them back to reality and keep fighting the good, low-cal fight. Get a cookie scoop handy at this point, and two baking trays lined with Parchment paper. Scoop a ball of cake out, and then plop it into your hands. I really hope you washed after licking your fingers clean earlier, as this is not an appropriate time to use licking as a strategy to claim things as your own. Save it for ice cream. In order to form footballs, after rounding out the cake balls, I cupped my hands and smooshed the balls down to form an oval shape, and used my fingers to pinch the corners.

It took me a few tries, but by the third football, I was tossing these bad boys out like a Manning: Cautiously and with a silly-looking concentration face. 
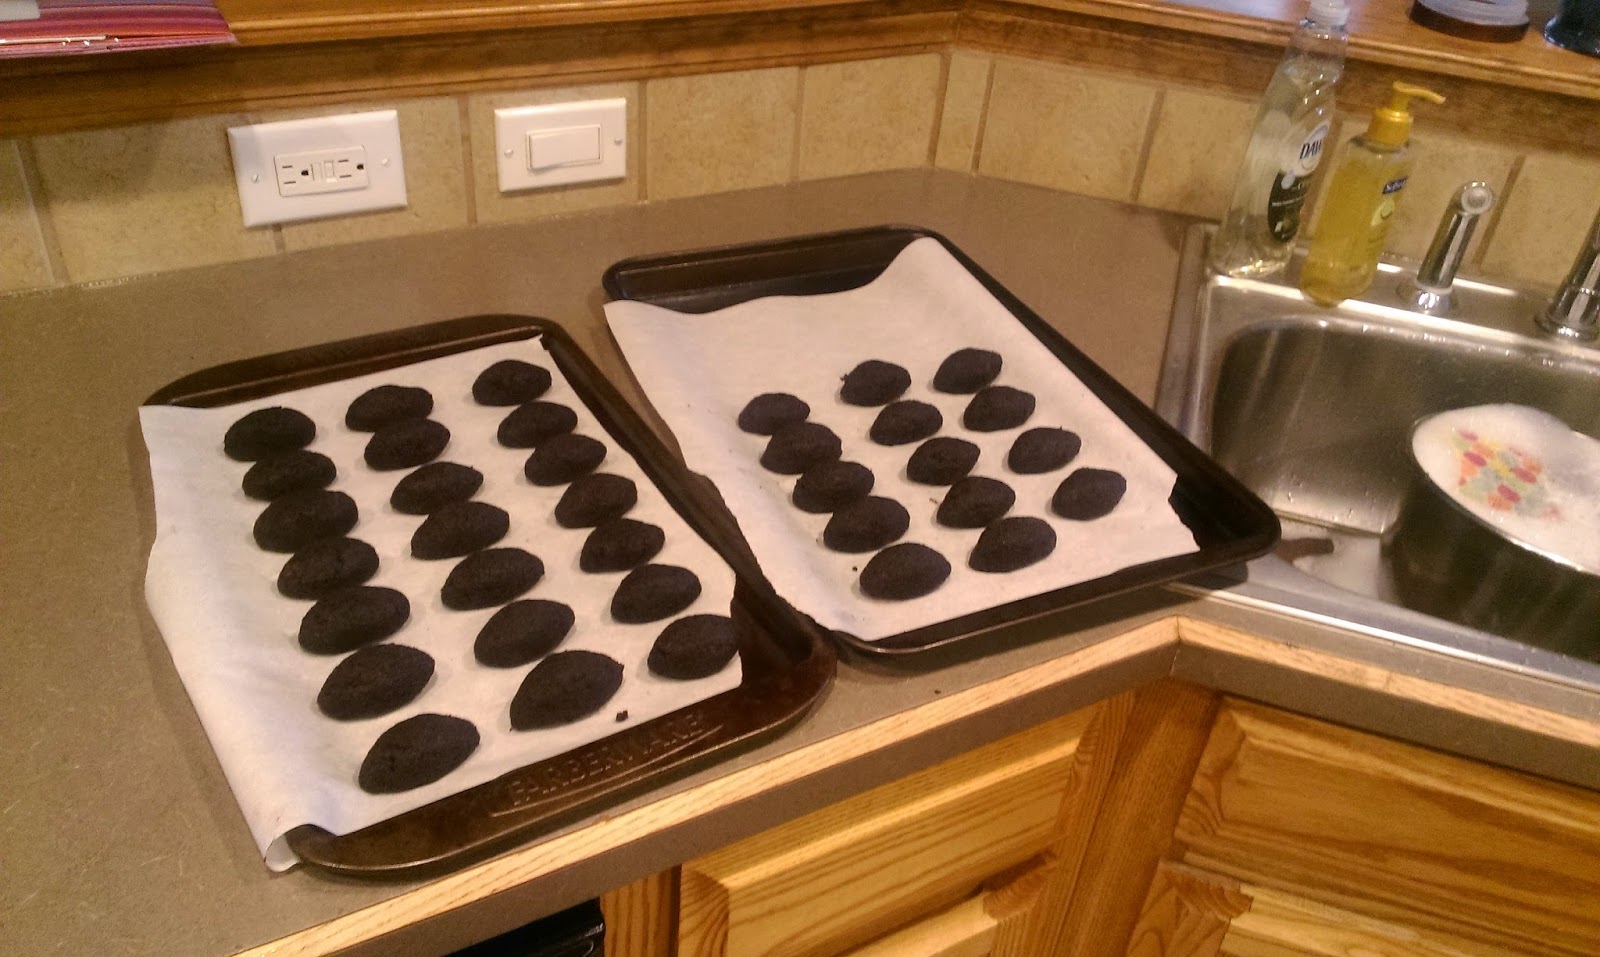
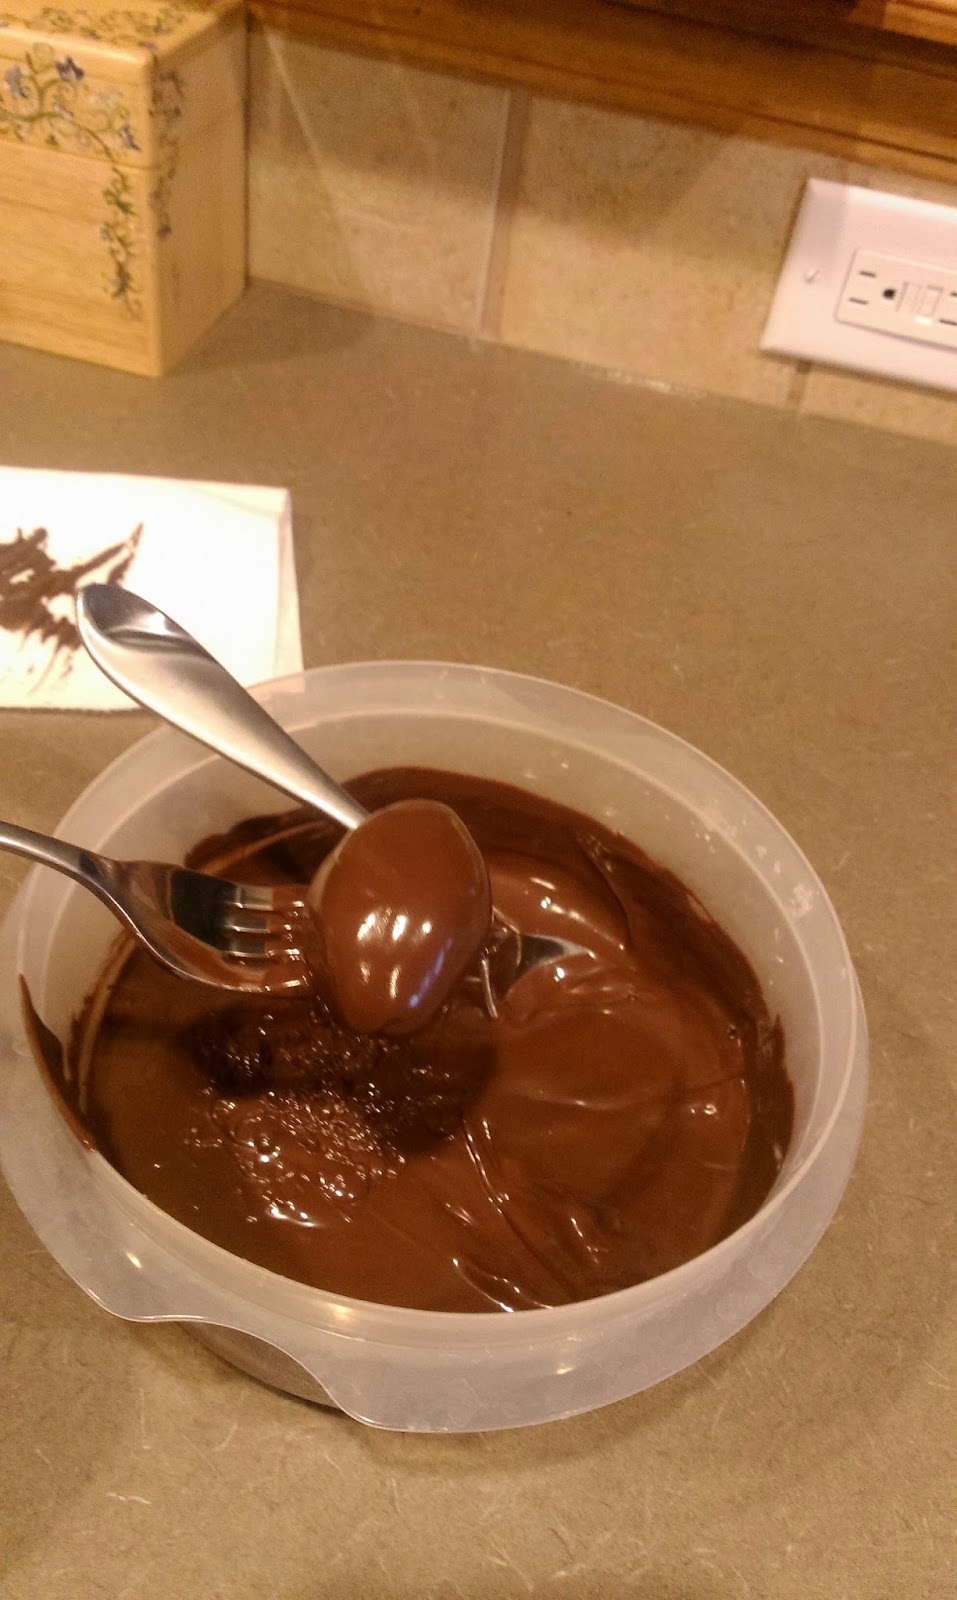
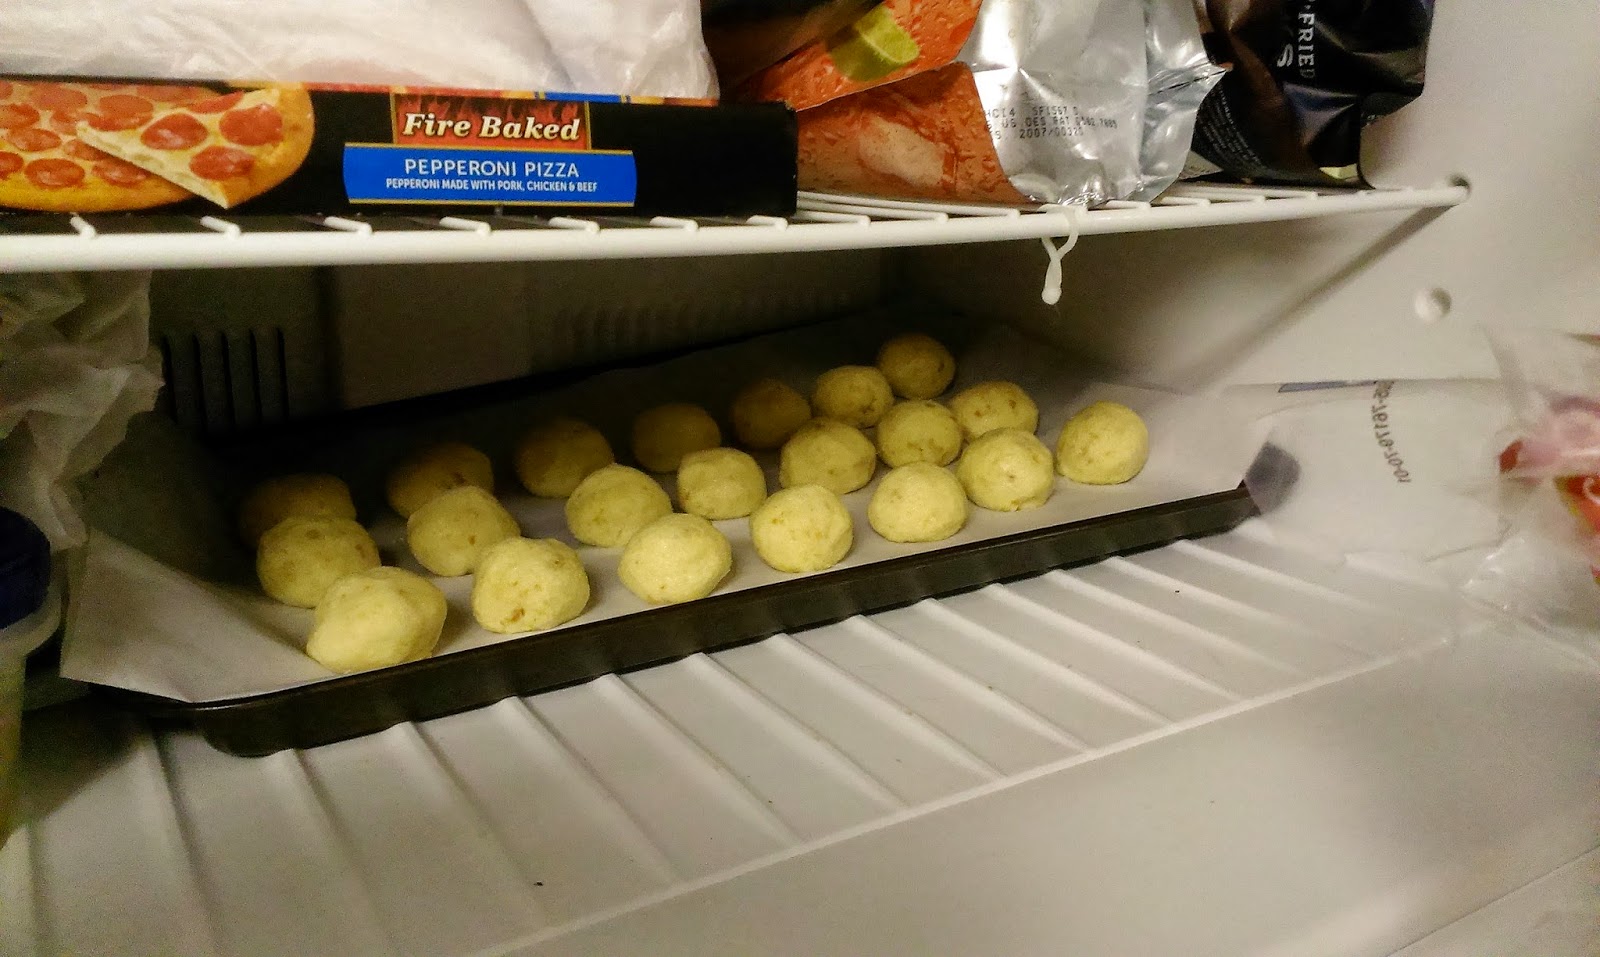
This will make 33 footballs. At this point, they could be mistaken for charcoal brickettes. Once done forming all your footballs, place in the fridge for an hour or freezer for 30 minutes. You want these to be nice and solidly cooled before you dip into melted chocolate, or your footballs really will look like the balls from Deflate Gate 2015. When the balls are almost done cooling, melt your chocolate melts using the directions on the package (I used one bag at a time, but did use both bags). Melt in a Tupperware that is nice and deep if you’re going the microwave route. I do not have a double boiler, so this is how I do things. Now, have a stack of paper towels, a large spoon, a large fork, and some toothpicks handy, cause things are about to get tasty.
Start by remembering to rotate your photos for your blog, and plop one football into the melted chocolate. Use your spoon to drop chocolate on top of the football. 
Then scoop the ball out with your fork. Instead of tapping your fork to get the excess chocolate off- use your free hand to tap the wrist holding the fork about four times. This is a GENIUS move. The football won’t get tossed off the fork this way, and the chocolate gets evenly distributed. This is how I will do all cake balls and cake pops from here on out. Makes a huge difference. No dropping the pop back into the chocolate or uneven weirdness. I have enough uneven weirdness in my daily life, thank you. 
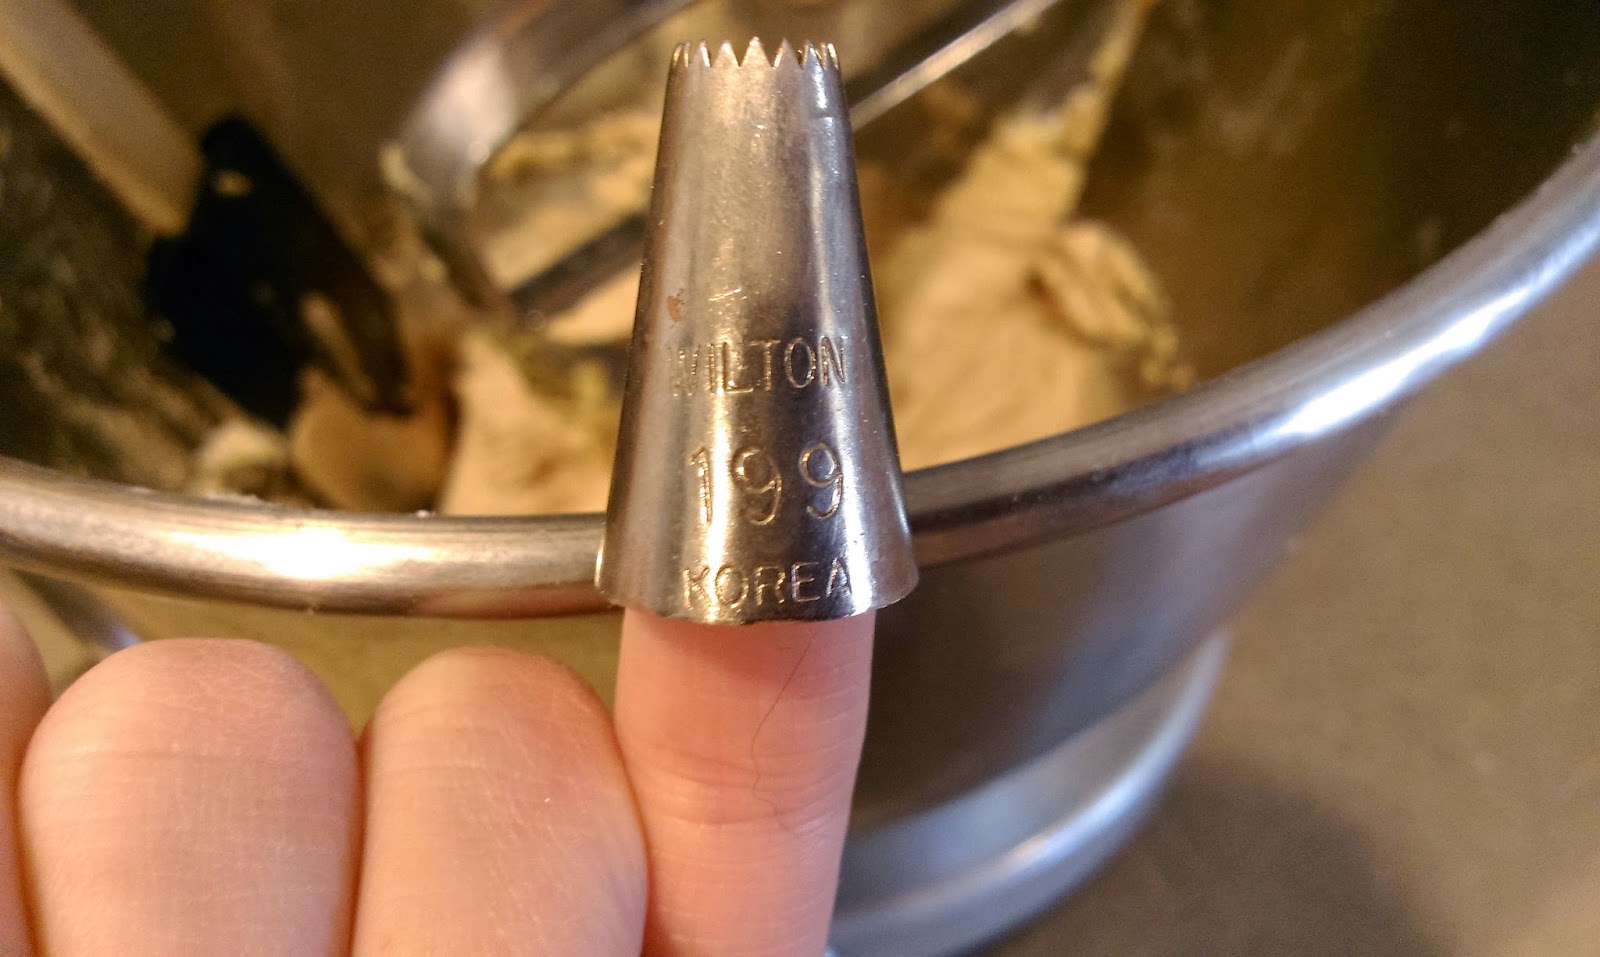
Once you’ve tapped your wrist about four times, wipe the fork on the edge of the Tupperware, and tap your wrist again another four or so times. Finish up with another wipe of the fork. Now, place the fork down on your Parchment-lined trays, and use the toothpick to lightly swipe the football off the fork. If it becomes difficult to swipe the football off, reheat the chocolate for 30 seconds on 50 percent power. This is another genius play call. A Hail Mary pass that works every time…as long as you remember to wipe your fork off on the paper towel between each football, and your toothpick as well. Once you’ve dipped, dunked, tapped, and swiped all your footballs, let the chocolate harden for about 10-15 minutes.While they are firming up, melt the mint chocolate melts according to package directions. Since this is only my third foray into the cake ball/pop world, I am still trying to find my golden window of opportunity when it comes to piping with melted chocolate in the too melty-too solidified spectrum. I had excellent luck this time putting my white mint melts into the fridge for 3 minutes after melting, and then putting into a piping bag fitted with a Wilton #2 tip. I was able to get the laces on half of my footballs before the chocolate got too hard and I had to remove the tip and nuke for 5 seconds at 50 percent power. The laces are simple- draw a horizontal line down the football, and then come back in and pipe three little vertical lines on top of the long line. The white mint laces add just a subtle hint of amazingness to the dark chocolate in what is one of the best flavor combos in the known universe. Verifiable truth.
It’s a football field! GET IT?!! Let the laces dry for about 10-15 minutes and then you can plate these however you like! Put them back in the fridge until you’re ready to serve. You can play your very own football game with these little tasty nuggets. Everyone’s mouth is the winner! Just don’t engage in unsportsmanlike conduct and try to intercept one of these from someone else’s mouth. There’s plenty to go around. Now if you’ll excuse me, I’m off to go troll the IMDB message board for The Interview to see if anyone else was secretly hoping James Franco was going to join Katy Perry in singing “Firework” during the half-time show. Oh the possibilities…here’s to hoping next year I get to make a Skol Vikings Super Bowl cake. If you’re gonna dream, dream impossibly! ‘Til next time, my fellow eaters!
-
Shots, Shots, Shots, Shots, Shots, Shots! …Made of Cheesecake!
Some of my favorite things come in shot glasses (because some of my favorite things are booze). So a couple of years ago when Chili’s, Applebee’s, or TGIFriday’s came out with dessert shooters, I foresaw untold possibilities. I’m honestly not sure which was the originator, and I’m also not sure it really matters since all three restaurants are practically identical aside from their queso recipes. But God bless the restaurant that wants to try to assist me in portion controlling my dessert when the first thing I am offered after sitting down is the ‘Leaning Tower of Onion Rings’ with a bottomless tortilla chip front and a fried pickle back. Did I mention the tower itself is constructed completely out of extra crispy bacon in this case? It totally is. If this isn’t already a thing, it should be…because I would eat the hell out of it. I digress. What were we talking about? SHOTS! That’s right. Upon eating my first dessert shooter, I was a bit saddened. When I want dessert, I don’t just want alittlebit of dessert- I want alottabit of dessert, so I abandoned the shooter…why just have a thimble full of Molten Lava Cake when you can have the whole thing? But since we’re both still feeling a bit heavy from eating multiple pounds of chocolate chip cookie dough fudge brownies, I opted to give the dessert shooter another chance, and I’m glad I did (as is my cholesterol level).

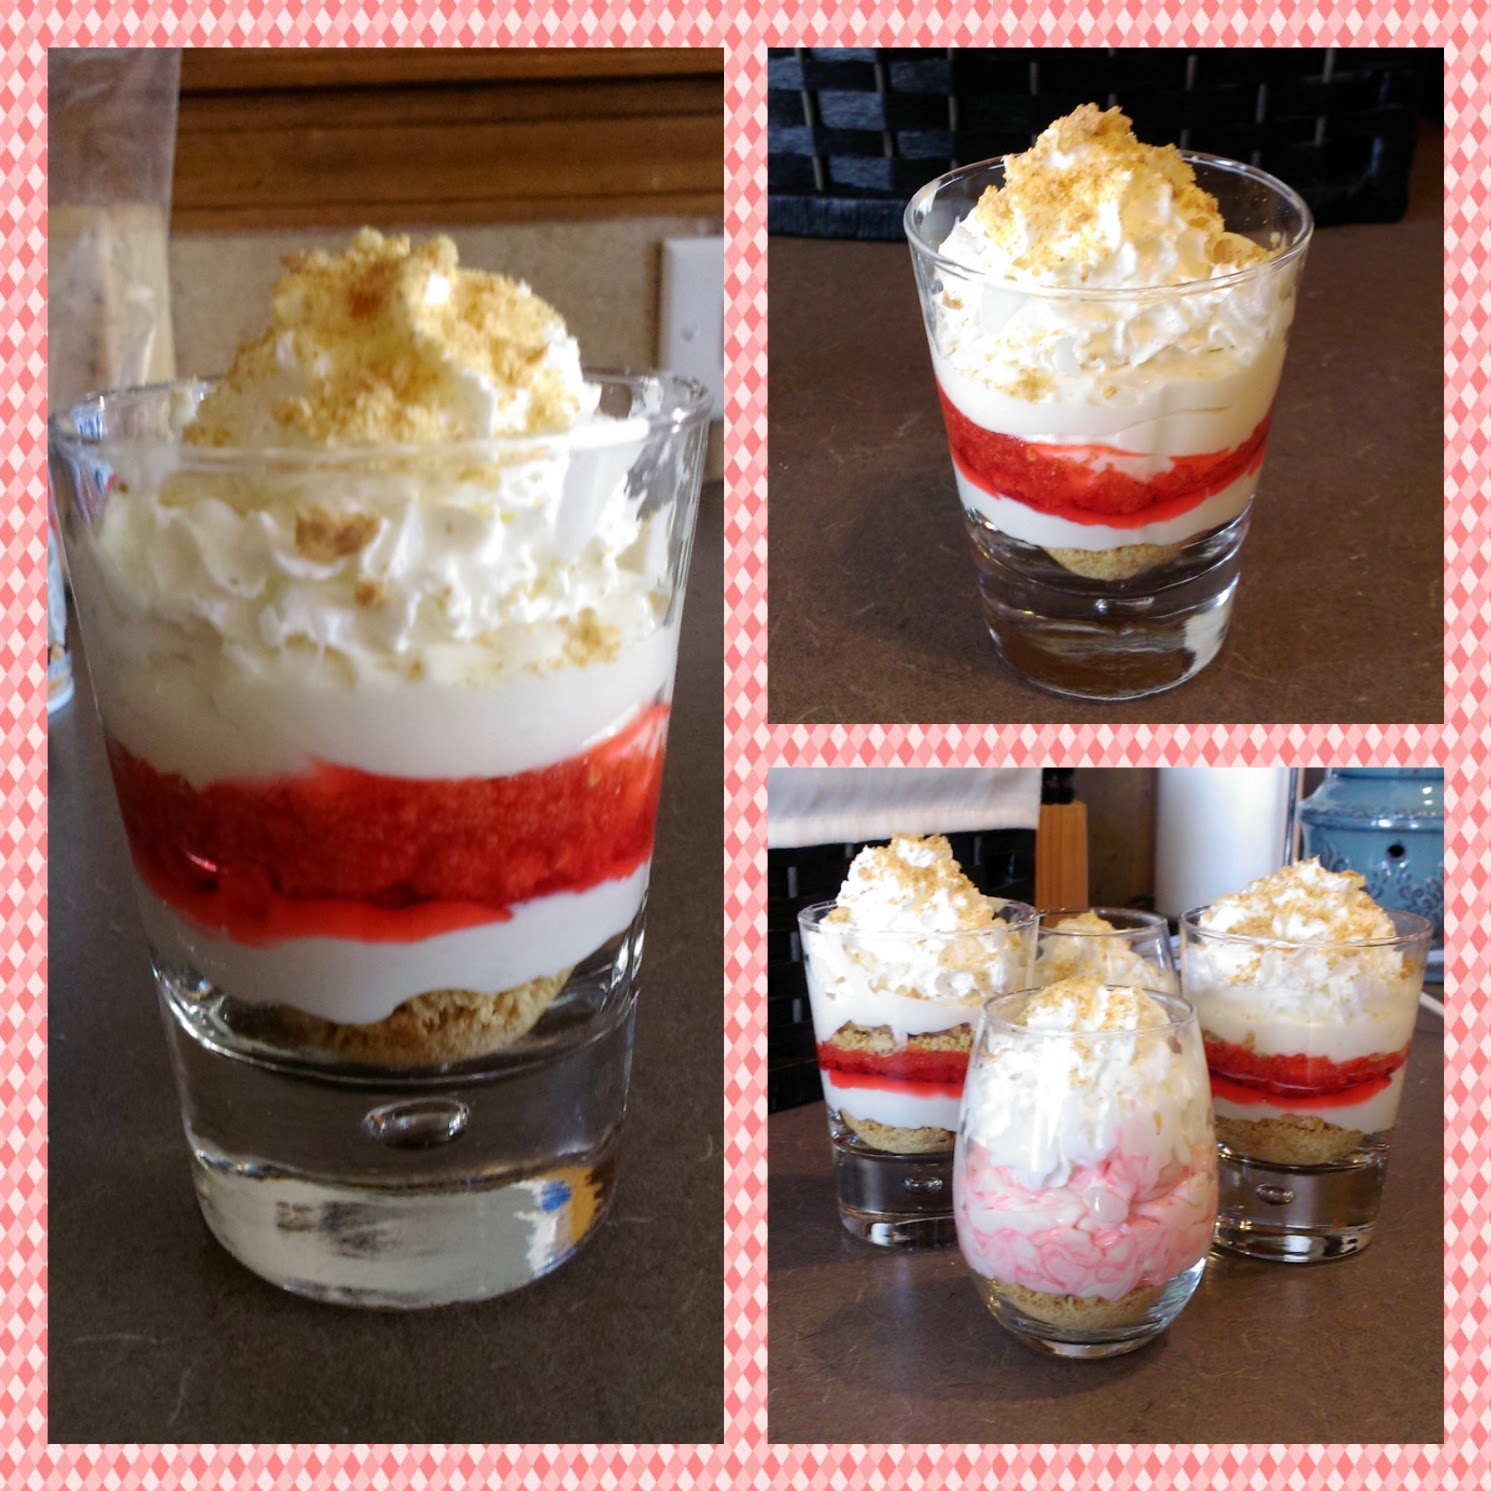
So I used a low ball glass and not a shot glass for amediumbit of dessert. I’ll allow you a moment to stop drooling before we get down to business. I am a lover of both cheese and cake. Putting them together is a marriage made in Heaven as far as I’m concerned. The only reason I don’t make cheesecake more often is because I have yet to figure out a way to decorate cheesecake to make it an art form and not simply a form for eating with a fork. I know, things don’t ALWAYS have to be a work of beauty, but just ask the nearest blonde if being pretty has ever hurt her chances at life (hint: It hasn’t). Vanity thy name is cheesekate. cake. cheesecake.

I’m trying to make my photos jazzier for your viewing. Again with the perfection… I have a wicked tasty no bake cheesecake recipe for the lazy hungry beast that resides inside of all of us. I did adapt the recipe a bit to make for a stiffer filling, so here’s what you need for the shooters:
- Two blocks cream cheese (reduced fat will work, but it will not taste as good knowing you’re eating a healthy dessert)
- One can of sweetened condensed milk (14 ounces)
- Three tablespoons of lemon juice (could be fresh, but once the cutting board comes out, the lazy beast inside of you will get angry)
- One tablespoon of vanilla extract
- One sleeve of graham crackers
- Optional: Rediwhip, strawberry syrup, or canned pie filling fruit
- Recipe makes probably about 8-12 shooters depending on the size of your glassware.

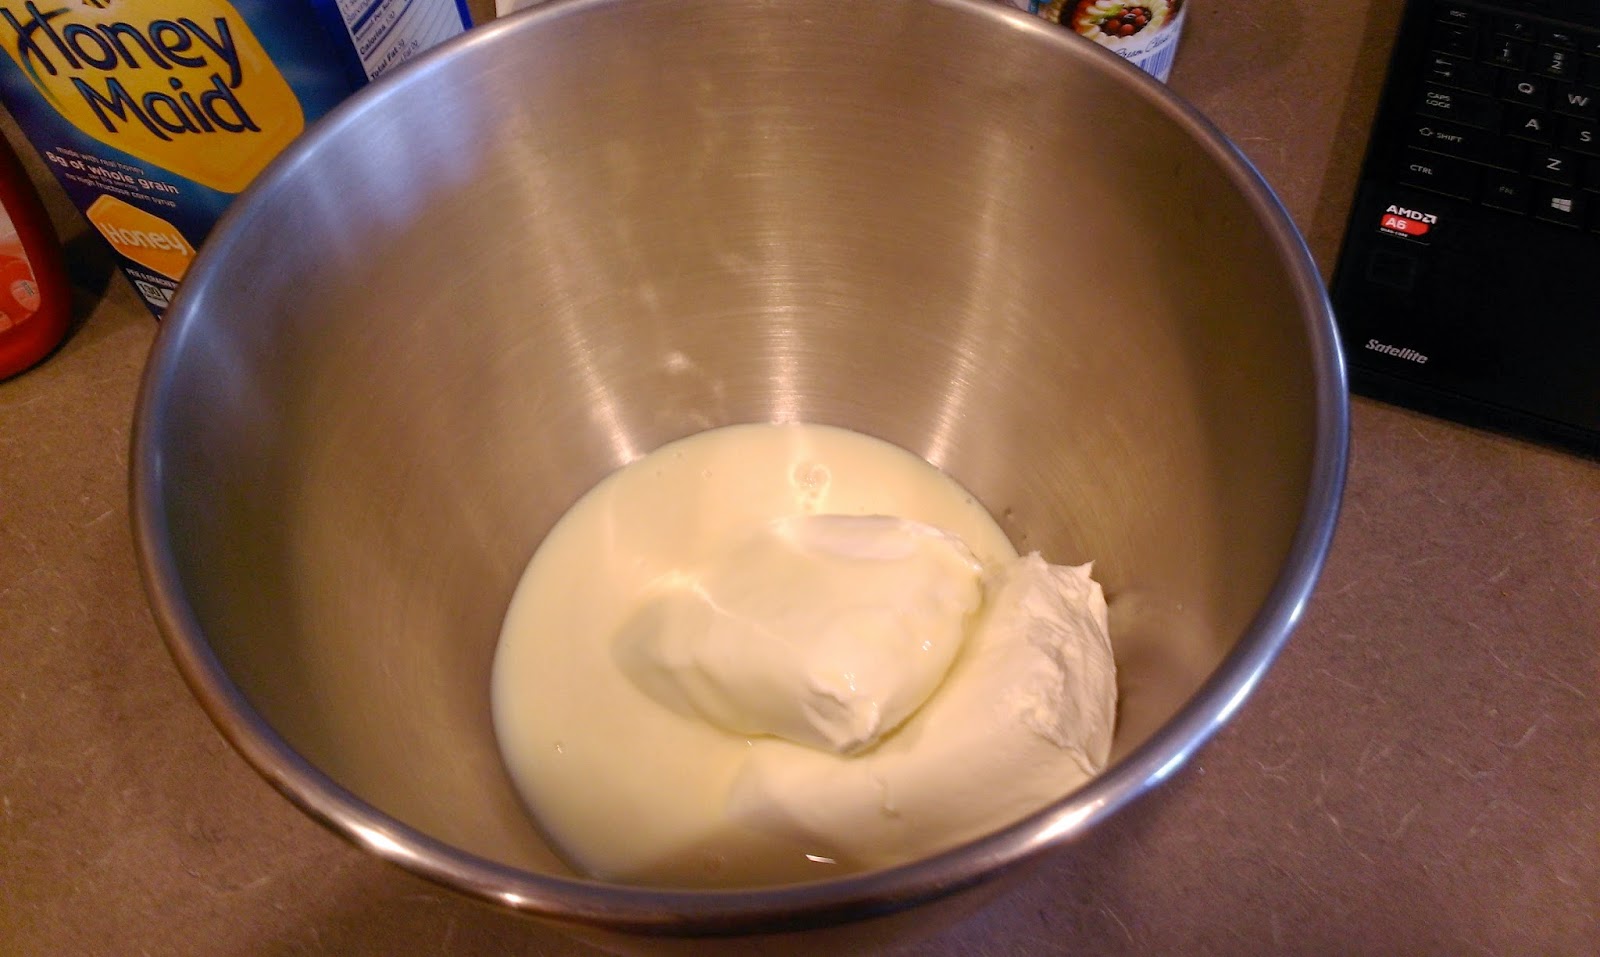
Start by mixing together the milk and softened cream cheese. Realize the basic components of cheesecake are kinda gross. Opt against licking the beaters for now. 
Blend in the vanilla and lemon, and note the miracles that extract can work. At this point, depending on how you’re going to “decorate” your shooters, place the cheesecake filling into the freezer to start to harden up a bit for at least an hour if you plan on piping. If you’re just going for the ladling layers strategy, it’s fine left out.

I so enjoy a good beating. Place an entire sleeve of graham crackers into a large baggie and pummel them with your rolling pin. 
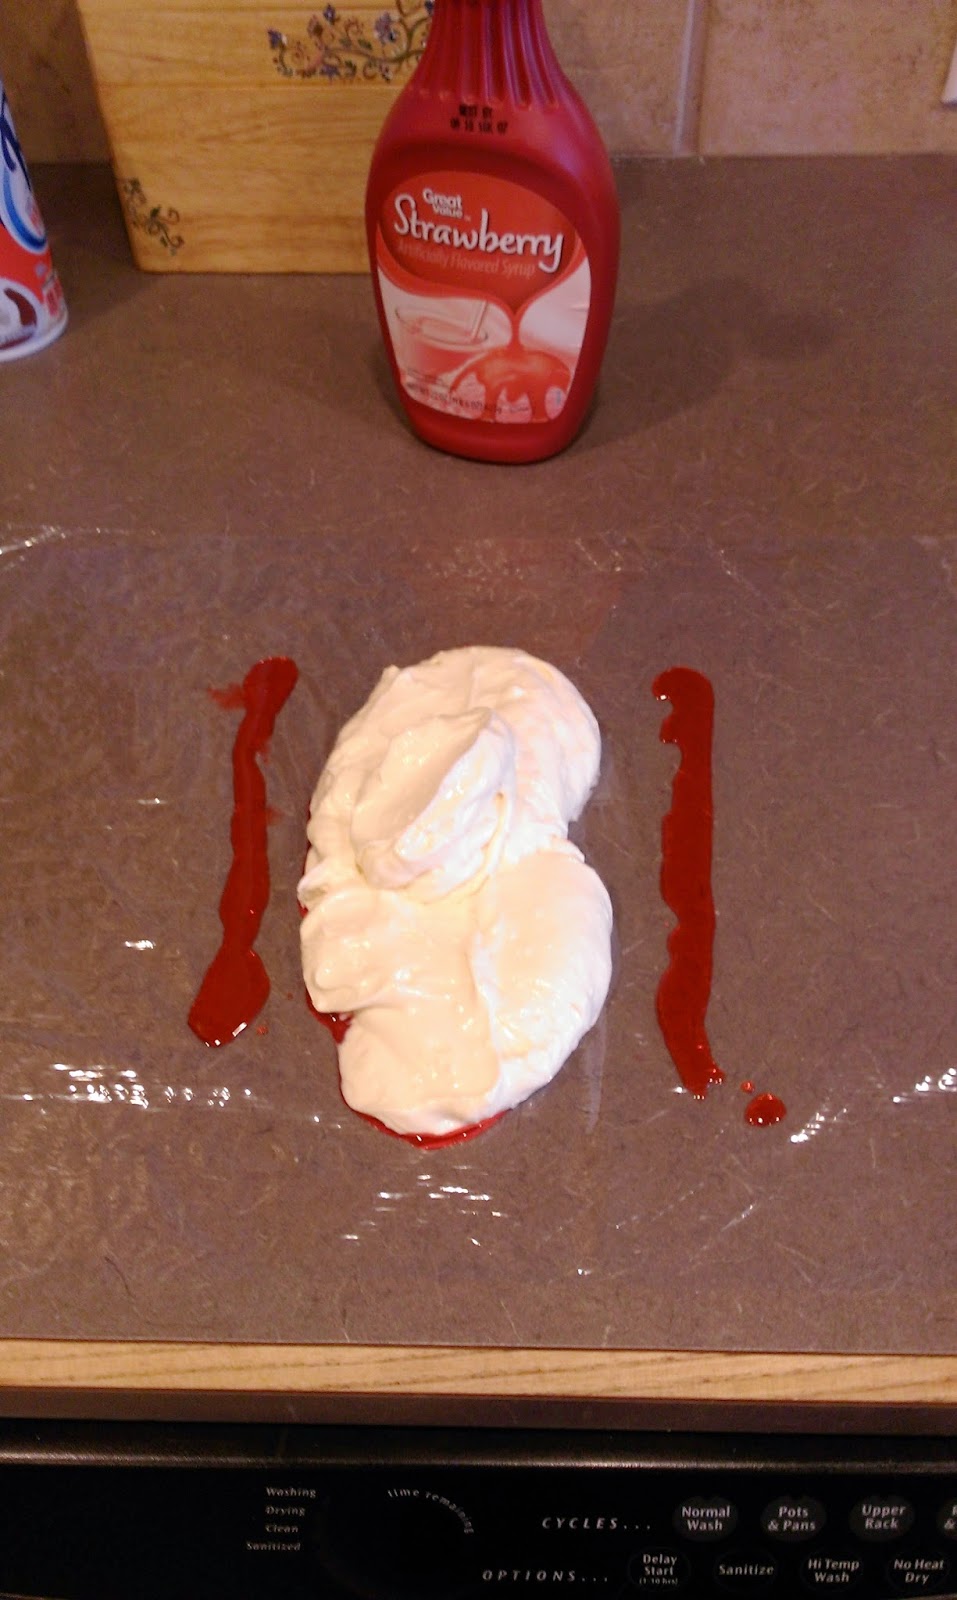
…until they look like the sand that most of us wish was between our toes. Sadly, you won’t be eating cheesecake shooters in Fiji, but you will still be eating cheesecake shooters, so it isn’t a total crapshoot. Now, how you go about assembling your shooters is totally up to you. I tried two methods, one with utter failure and the other with total success. We have shot glasses, but they’re all boxed up behind the bar and I just wasn’t down for that adventure, so I used two small stemless wine glasses and two low ball glasses to attempt my shooters. And if you want a dessert that doesn’t just leave you wanting more dessert (first world problems are still pretty great), use a wine glass for these shooters, as it is the perfect amount of dessert. I’ll start off by telling you the amazingly hopeful dream I had for the failure round of shooters…
No matter how you go about it, start by scooping a spoonful and a half of crumbs into your glasses. 
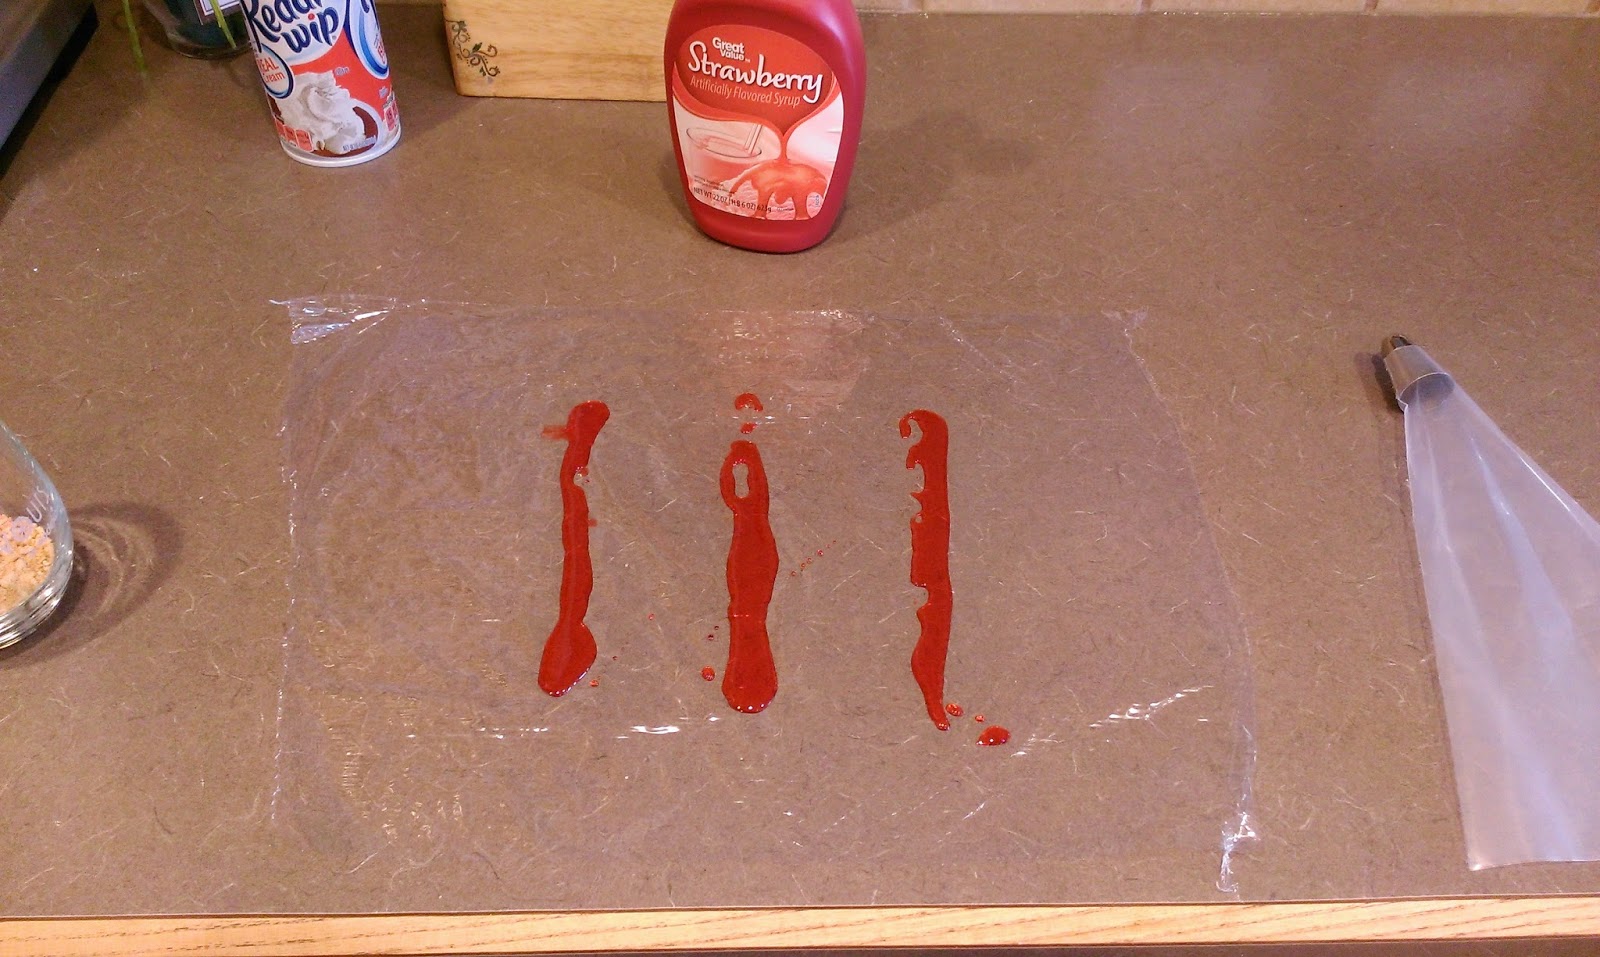
I had dreams of making these shooters spiraled with strawberry sauce, which did work, but didn’t pipe anywhere nearly as prettily as I had hoped…because I didn’t heed my own advice and allow my cheesecake filling to firm up long enough. Let me be your cautionary tale. If you let it set in the freezer for an hour, you’ll be able to pipe and have the filling keep form. 
To get the spiral effect, throw down a few lines of strawberry sauce onto some Saran wrap, then put a few heaping spoonfuls of cheesecake filling on top of that. Tie up both ends, and then put the tube into a piping bag fitted with a 1M or 2D tip. Unroll the end of Saran wrap sticking out of the piping bag and you’re set. 
The spiral tie-dye effect is real, people! 
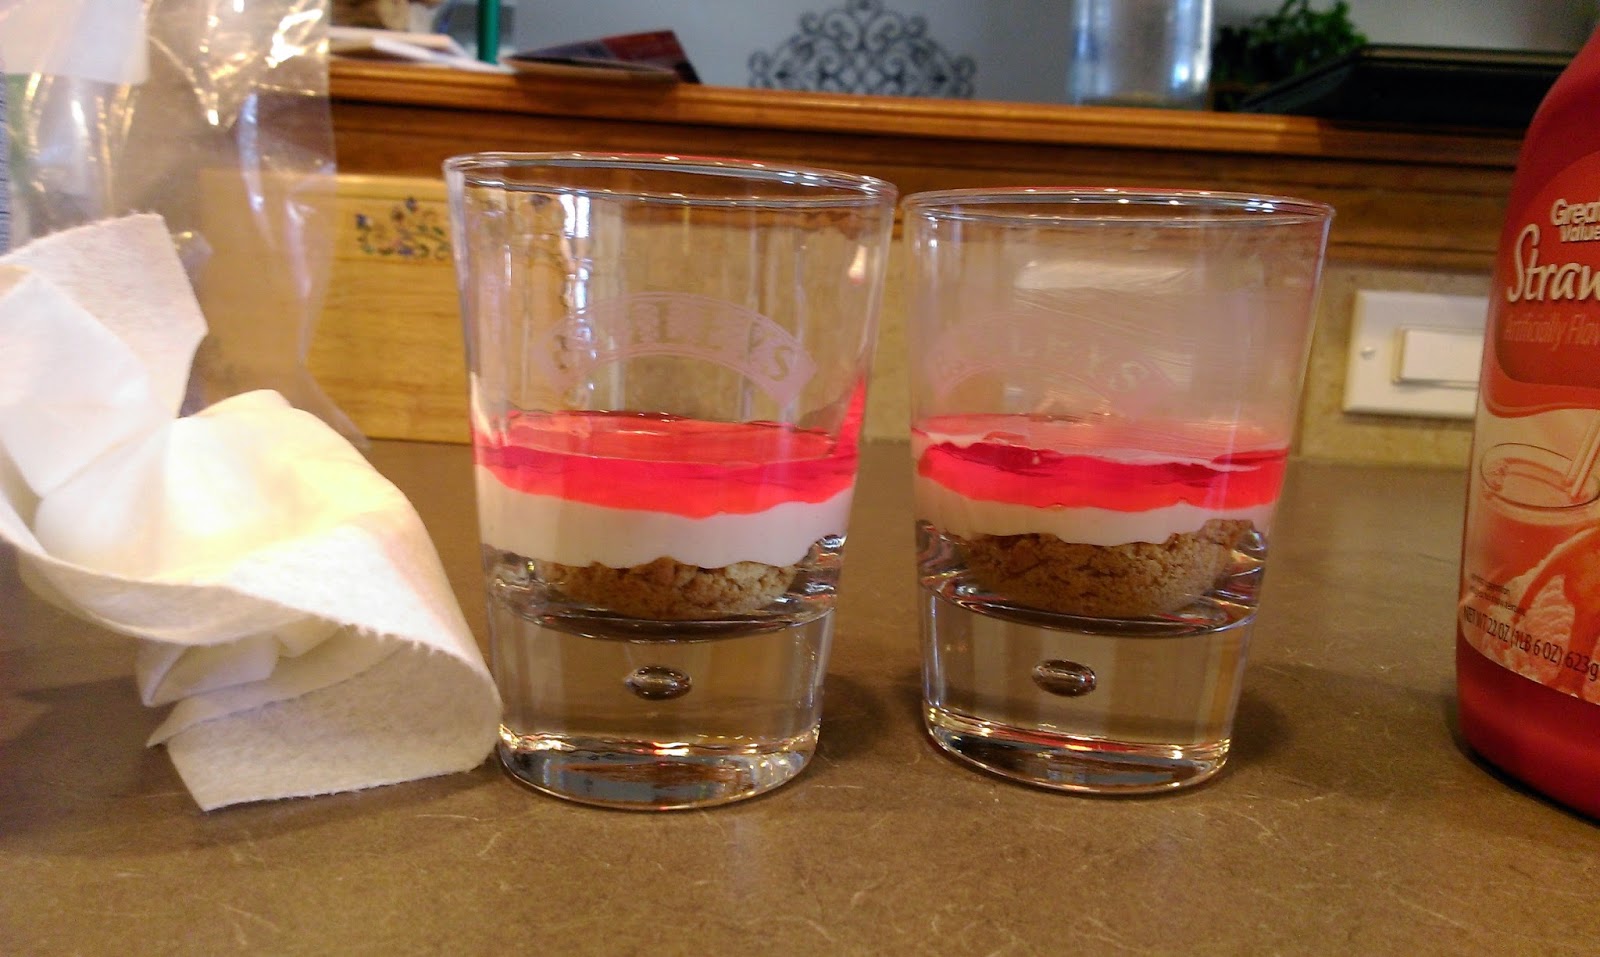
Annnnd here’s where things went to hell in a wine glass. As you can see, the strawberry is nice and lightly spiraled throughout the cheesecake filling (as I had envisioned), however, my cheesecake was too mushy, and the piping shape itself turned out more like brains than nice, kinky twists (why yes, the exact opposite of how I envisioned). 
But cheesecake is cheesecake, so I topped these brains with Rediwhip and crushed graham crackers. Brains or not, still insanely delicious. I may have a go at this again for next Halloween. I’m never not planning some kind of party in my head. If there’s a way to bring dessert into the equation, I’m all over that like…well, me all over dessert. So the first attempt didn’t work for me, but if you freeze the filling long enough, you could make a gorgeous cheesecake shooter that you will have a hard time deciding whether to frame or eat, so it’s a good thing Instagram exists. The second attempt went flawlessly, thank goodness, or this would be a very sad (albeit still tasty) blog.

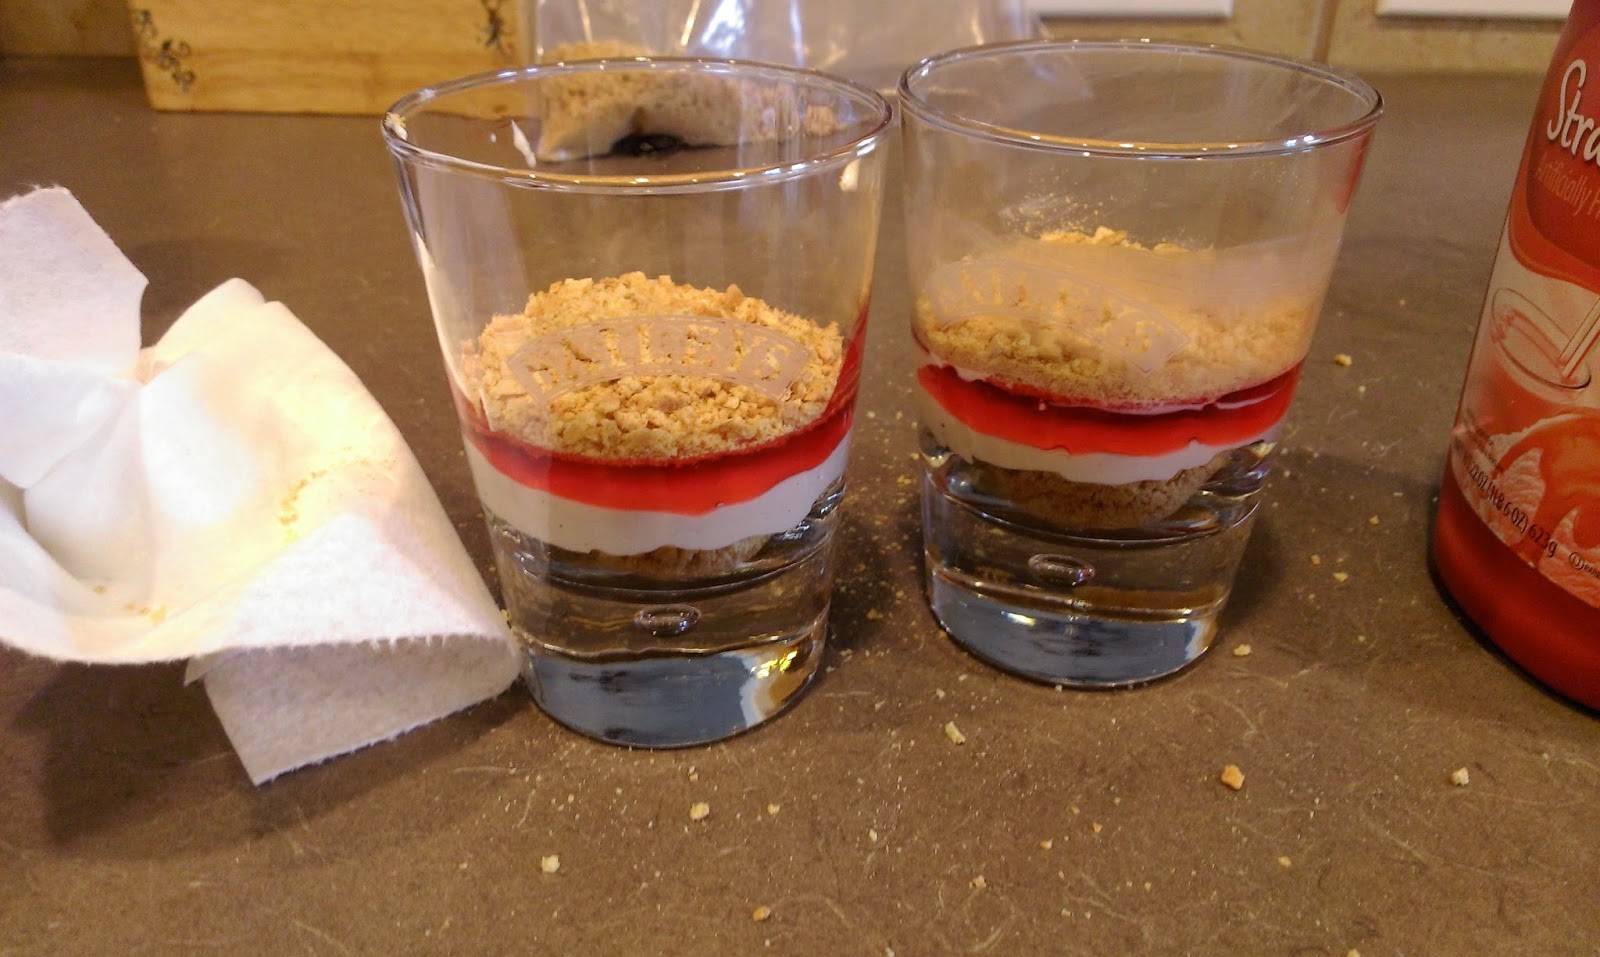
Once you’ve put down the crust, add a heaping spoonful of filling to your glass. Try not to get it on the sides so the layering is more noticeable. 
Next add a thick layer of strawberry sauce. If you wanted to use pie filling, this would be a great alternative, too. I will make these with a layer of blueberry in the near future! Just waiting for another party/excuse… 
Then add another layer of graham cracker crumbs. This is turning into the lasagna of desserts: Layered and FABULOUS. 
Add another heaping spoonful of fulling. This is where I became immediately grateful I had a Plan B. 
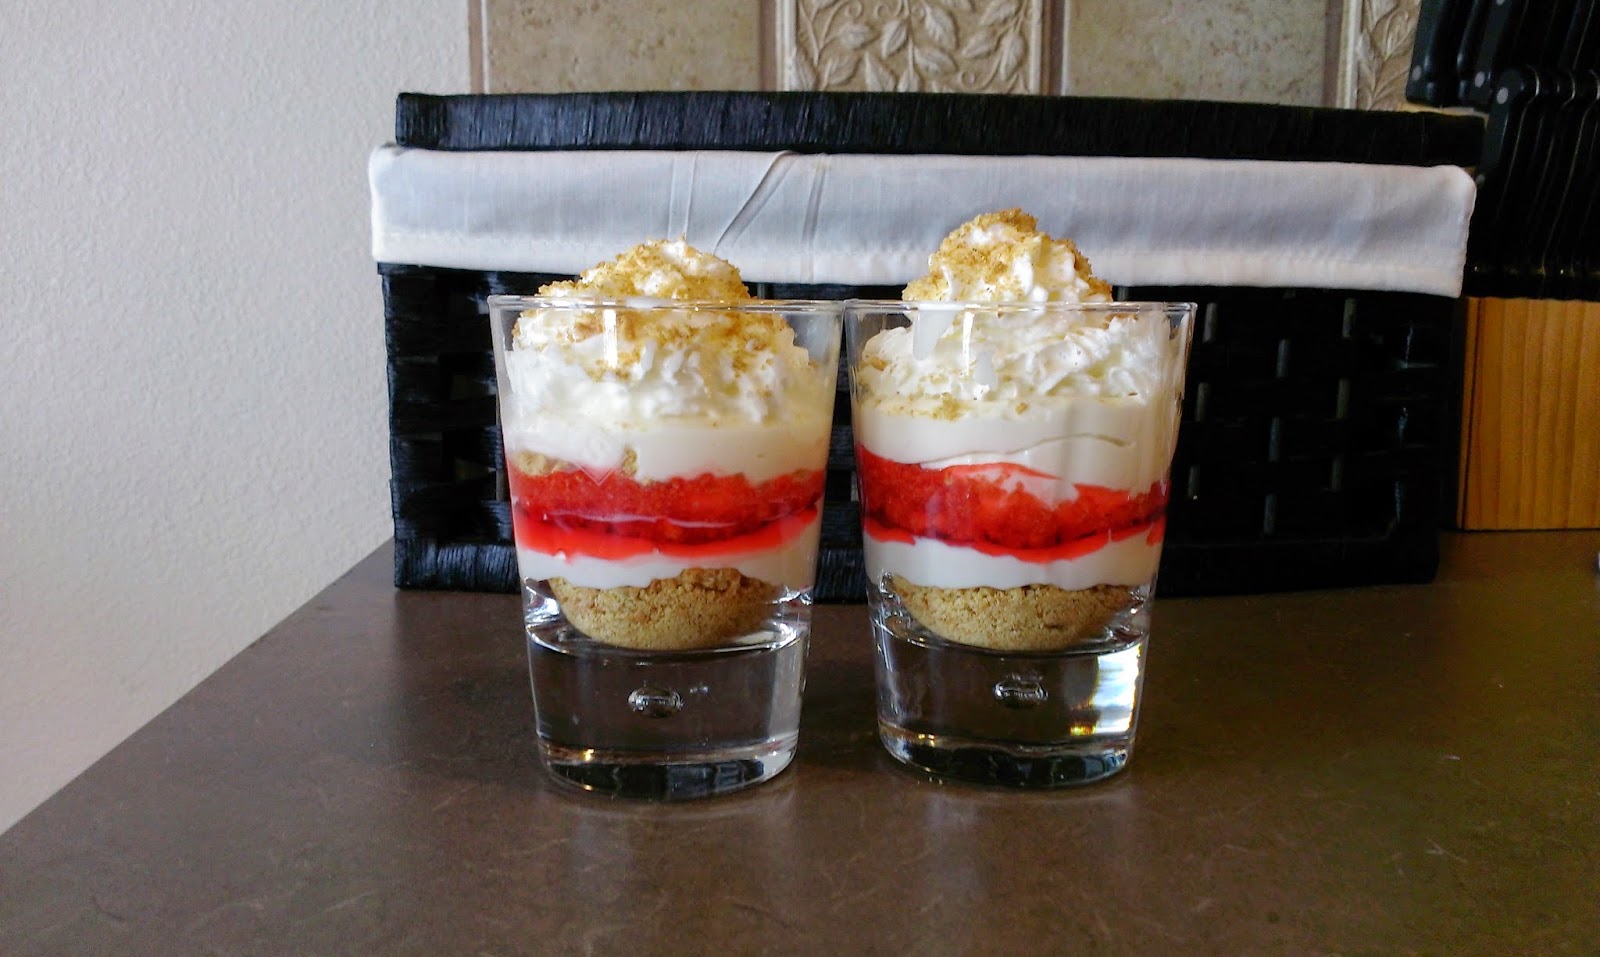
Finish off by topping with a decent amount of Rediwhip and sprinkle with cracker crumbs. Enjoy how beautiful Plan B turned out. I’m told all the greats always have a Plan B. Since I’m a Type A, you can imagine how having a Plan B, C, D, E, F, etc. is right up my alley, but the frustration with having to use it (and the extraordinary amount of letters in the alphabet in this paragraph) drives the OCD in me a little crazy. At least now instead of reaching for a stiff drink in my low ball or wine glasses, I can reach for a nice helping of strawberry cheesecake shooter. I consider this to be an exceptional alternative as eating one or two of them won’t render me hungover the following morning. Thank you, ChilapplebeeFriday’s, for making this dream a reality. Now pass me the Leaning Tower made of bacon, because I am positive that has to be a real thing. ‘Til next time, my fellow eaters!
-
Heaven in a Pan
I honestly didn’t think anything in the world could be more divine than eggless cookie dough. I could (and have…and will) eat it by the spoonful when I make cookie dough truffles. As a kid, I would sit down with a small shovel and go to town on a bucket of premade cookie dough (may or may not have been eggless- we weren’t wusses, us children in the 90s). Chocolate chip cookie dough is clearly the superior ice cream flavor over the rest; it just allows all others to exist as it is a gentle, omnipotent ice cream. Also, cookie dough bites may actually be a frontrunner in the changing tide for world peace. However, it turns out when you place a giant layer of eggless cookie dough on top of a giant fudge brownie, you can actually hear angels singing with each bite. Heavenly.

Halllllllllelujah! Hallelujah, hallleeeelllujaaaahhh! I know, the photo above is probably NSFW as it is most definitely food porn. If the United States of America ever decides on an official food to represent both its power and lust for more (read: nice way of saying gluttony), I’m fairly certain the cookie dough fudge brownie would be a top contender. Move over double cheeseburger, you’ve met your match. Actually, maybe I should be marketing these at America’s
cornerstonefavorite fast food join, McDonald’s. A treat this indulgent and this easy to make is right up their greasy alley. I made both the fudge brownie and eggless cookie dough from scratch for this recipe, and it really is quite simple. The hardest part is not eating all your dough before putting it on the brownie, so patience and/or a mouth guard are key. Let’s get down to delicious business, shall we?
Fair warning, never eat Baker’s chocolate squares…they’re deceptively sweet-looking, when in all actuality are quite bitter. My spirit food! I found this brownie recipe here, and made some changes to speed up the process and make things insanely simple…you’re welcome. Add that to my list of straight up ‘Merican traits: corner cutting. So here’s what you need:
- 2/3 cup all-purpose flour
- 1/2 teaspoon salt
- 1/2 teaspoon baking powder
- 2 ounces unsweetened Hershey’s cocoa (It says Hershey’s on it, so you’d think this would be sweet, too, but don’t even go there.)
- 4 ounces bittersweet Baker’s chocolate (Do. Not. Eat. Unless you wondered what your bitter beer face looks like.)
- 10 tablespoons butter
- 1 1/4 cups sugar
- 2 teaspoons vanilla extract
- 3 large eggs
Aside from the chocolates, you probably already have everything you need for these brownies. They could stand alone without the cookie dough and probably be the best brownies I’ve ever eaten, and I’m not just saying that because I made them myself (really!!). Cue the crappy photo montage!

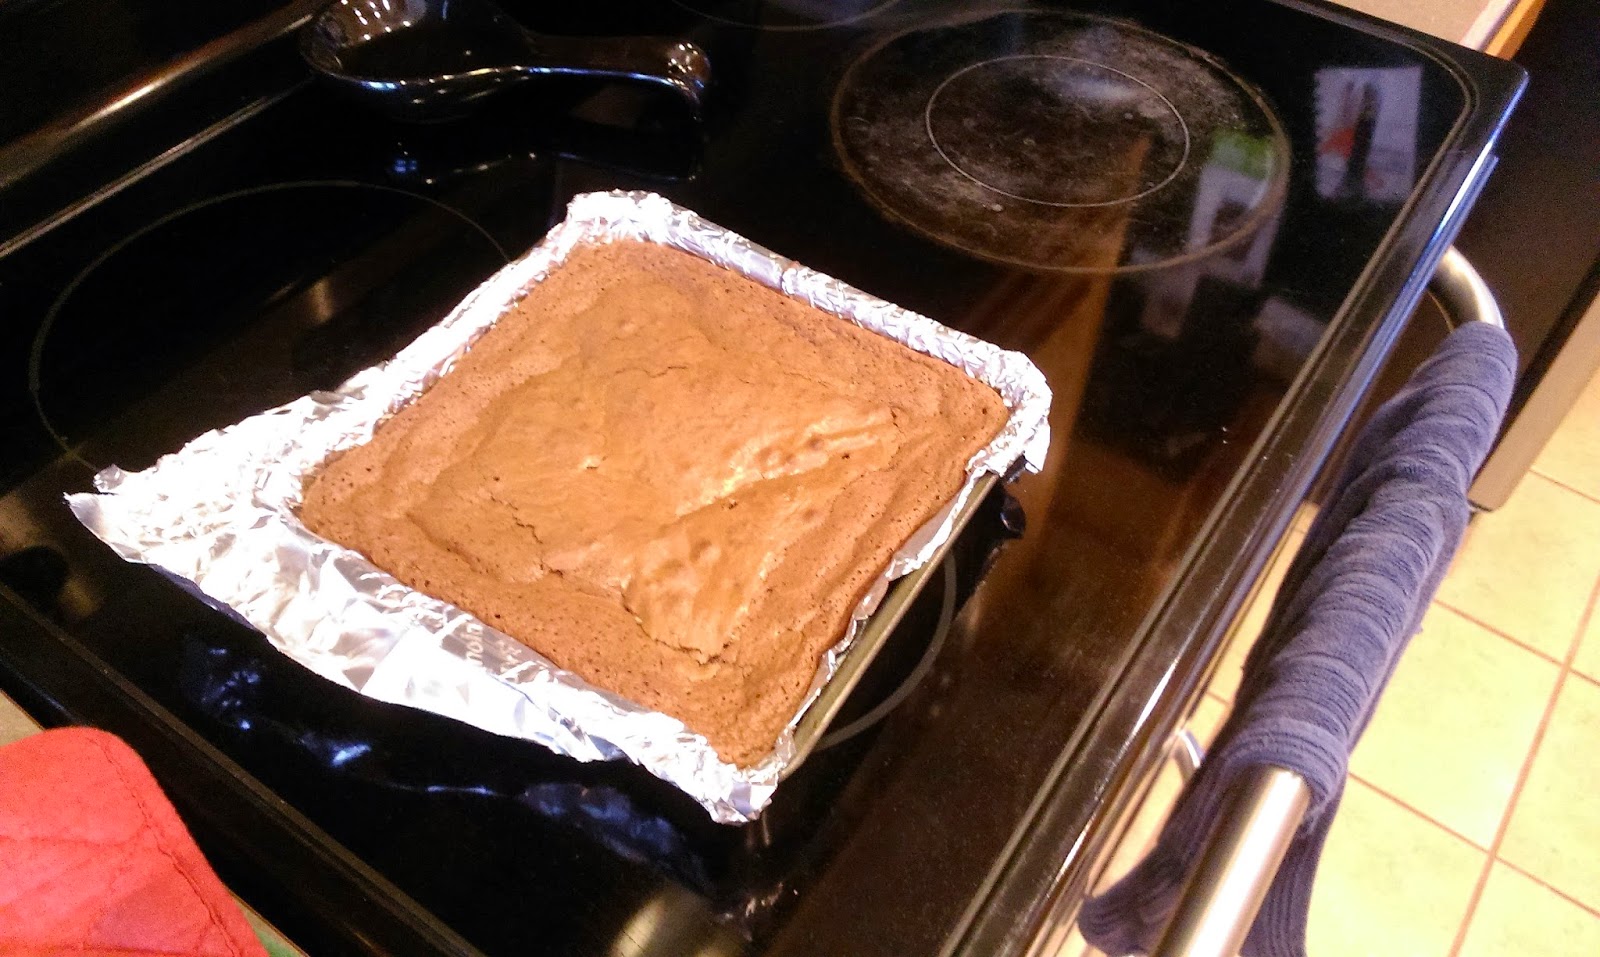
To make slicing the bars easier later, as they are hella thick so this is easier to do outside of the pan, line an 8×8 pan with nonstick foil. Preheat your oven to 325. 
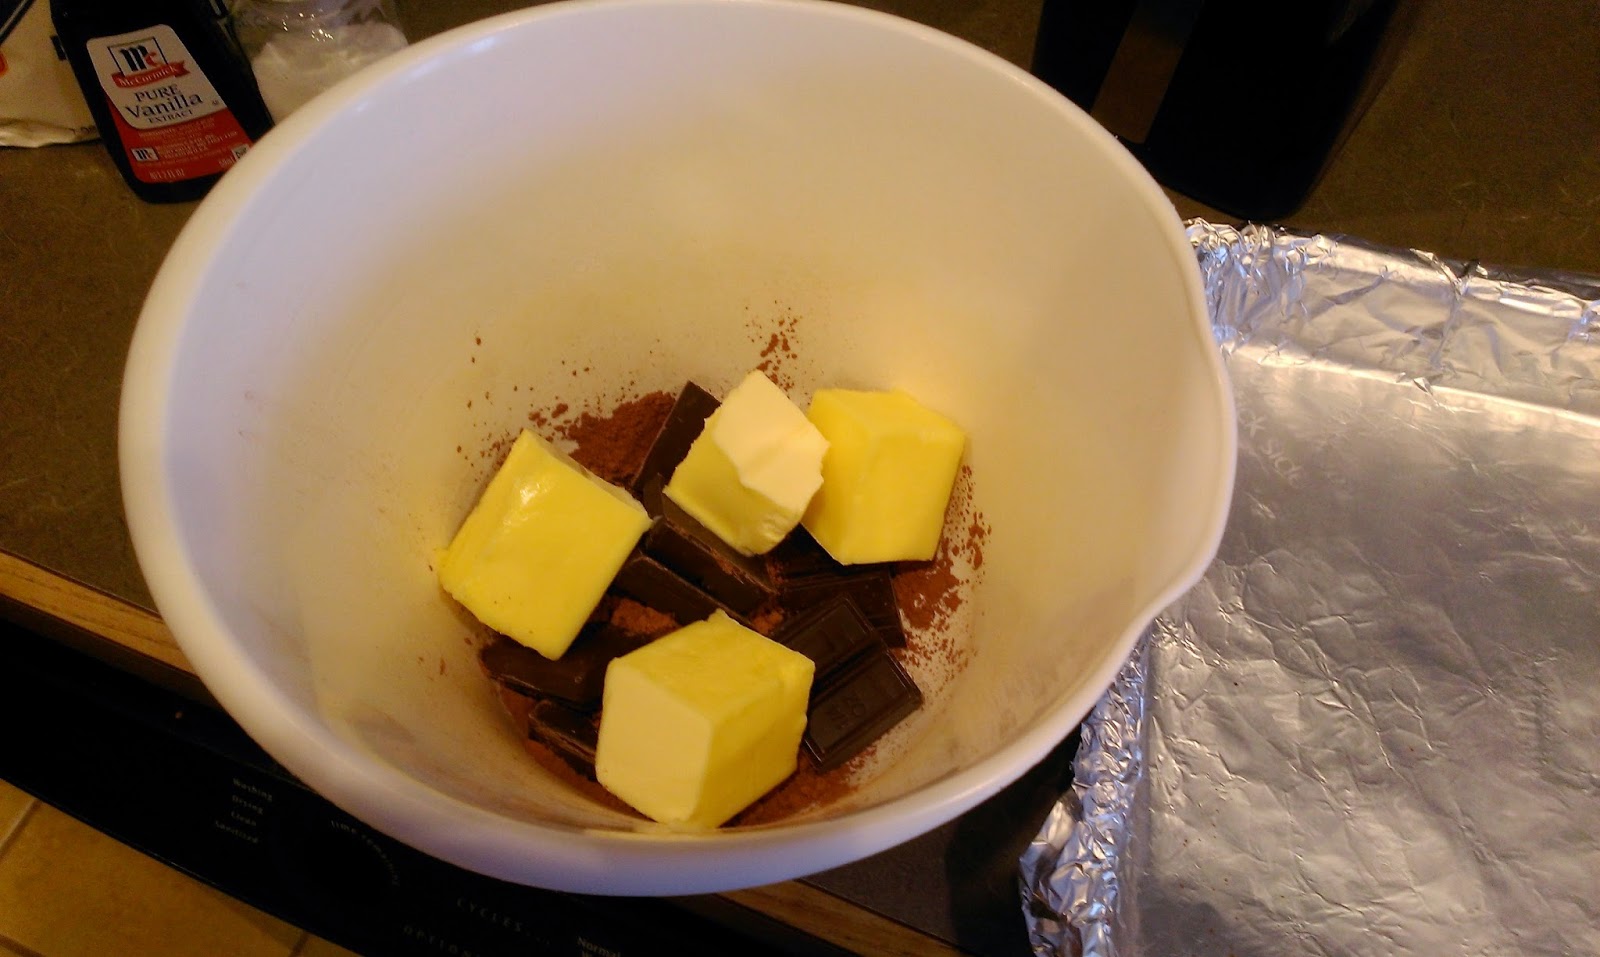
While the oven is getting nice and toasty, cut up your butter into manageable chunks and break apart the Baker’s bar into sections. Dump the cocoa powder in a microwave safe, medium-sized bowl. Throw the butter and Baker’s chocolate on top of this, and nuke for 30 seconds on high power. Stir, and nuke for another 30 seconds, and then your chocolate base should be nicely blended together without any scorching or burning. Burning chocolate should be a cardinal sin. 
So, so smooth. But still deceptively bitter, so don’t be fooled by its enticing appearance. Just like a mermaid trying to lure sailor’s to their death, unsweetened chocolate probably can kill you. Maybe. Perhaps. 
While your chocolate is cooling just a touch, mix together the dry ingredients. Creating a flour mess on the counter is optional (mandatory in my clumsy case, as seen here). 
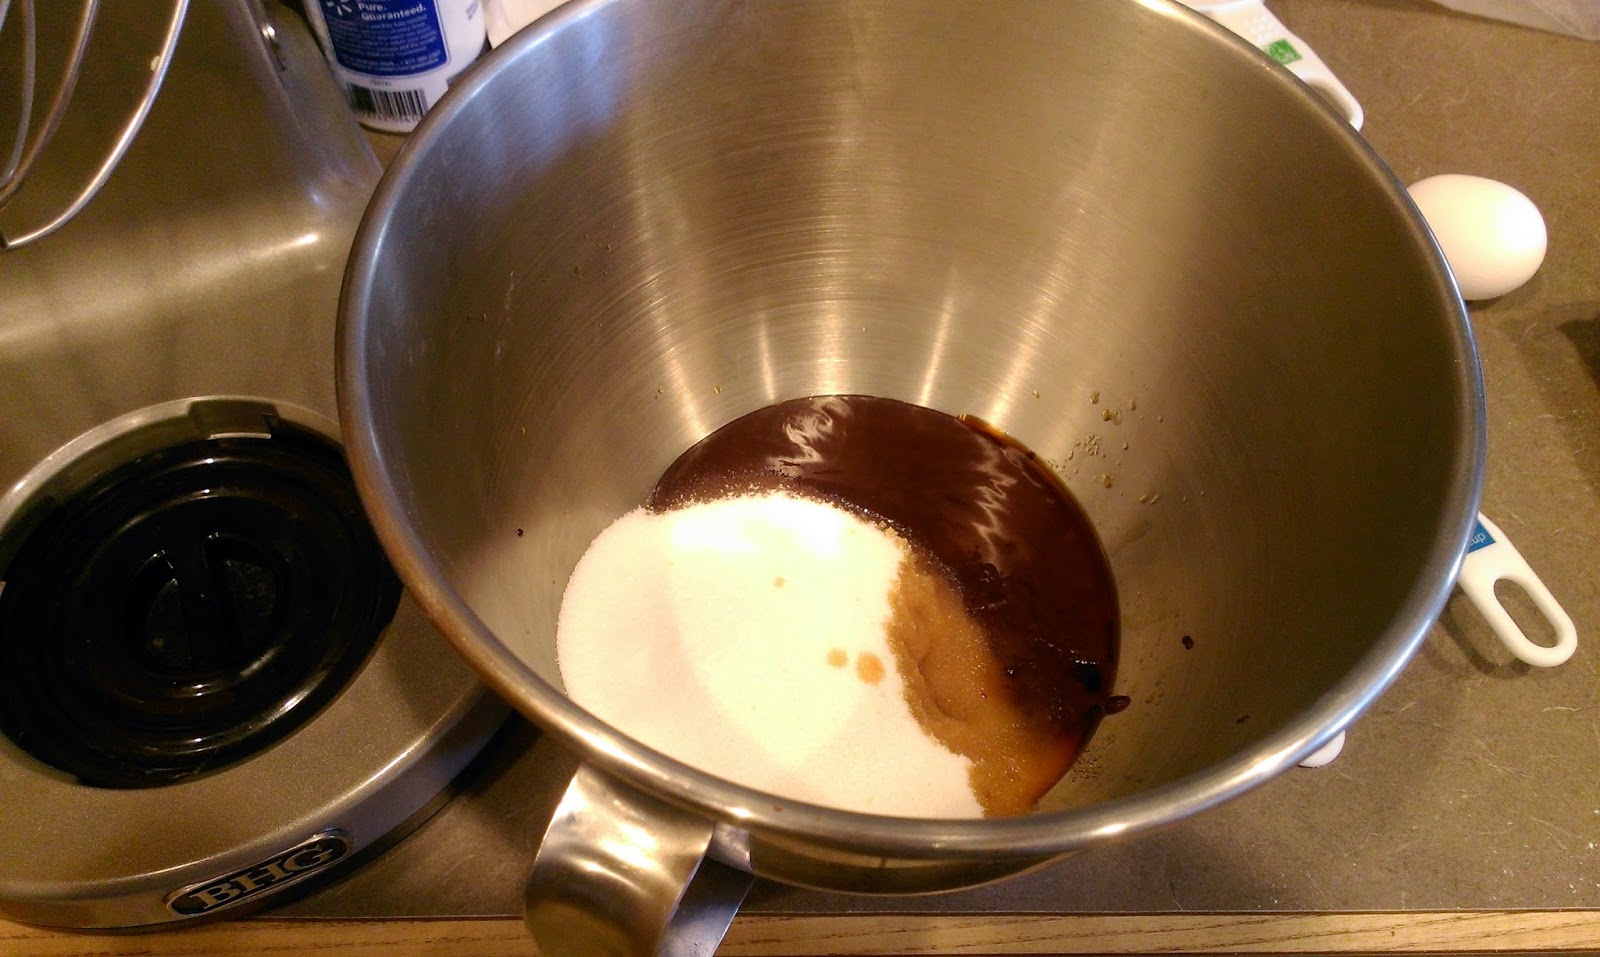
Now, to create an even bigger clean up, take your chocolate from it’s current bowl and put it in your stand mixing bowl. Or you could use a hand mixer to keep the dish disaster in line. I just so enjoy wasting water, so I opted for my stand mixer. Mix this chocolate with the sugar and vanilla. Blend until smooth (and safe to finally eat, thank God). 
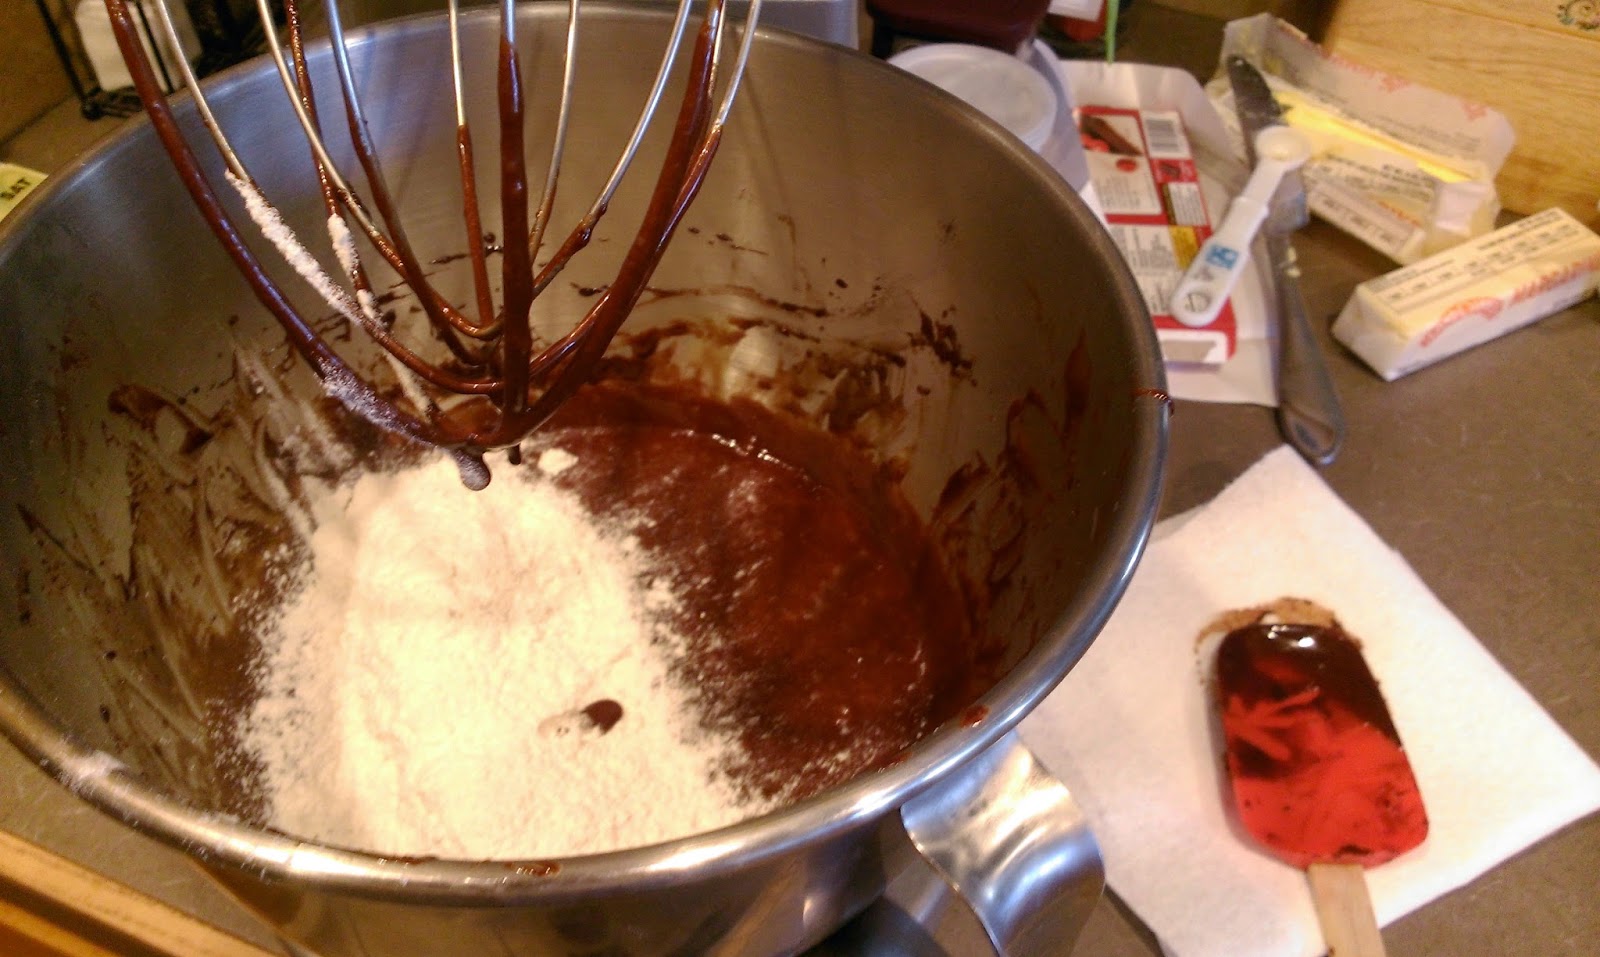
Now dump in your dry ingredients and mix well. Then add in your eggs (I cracked mine into the empty bowl left by my dry mix and whipped, but you could just individually add the eggs into the mix. I just really like pretending to be an omelet chef). 
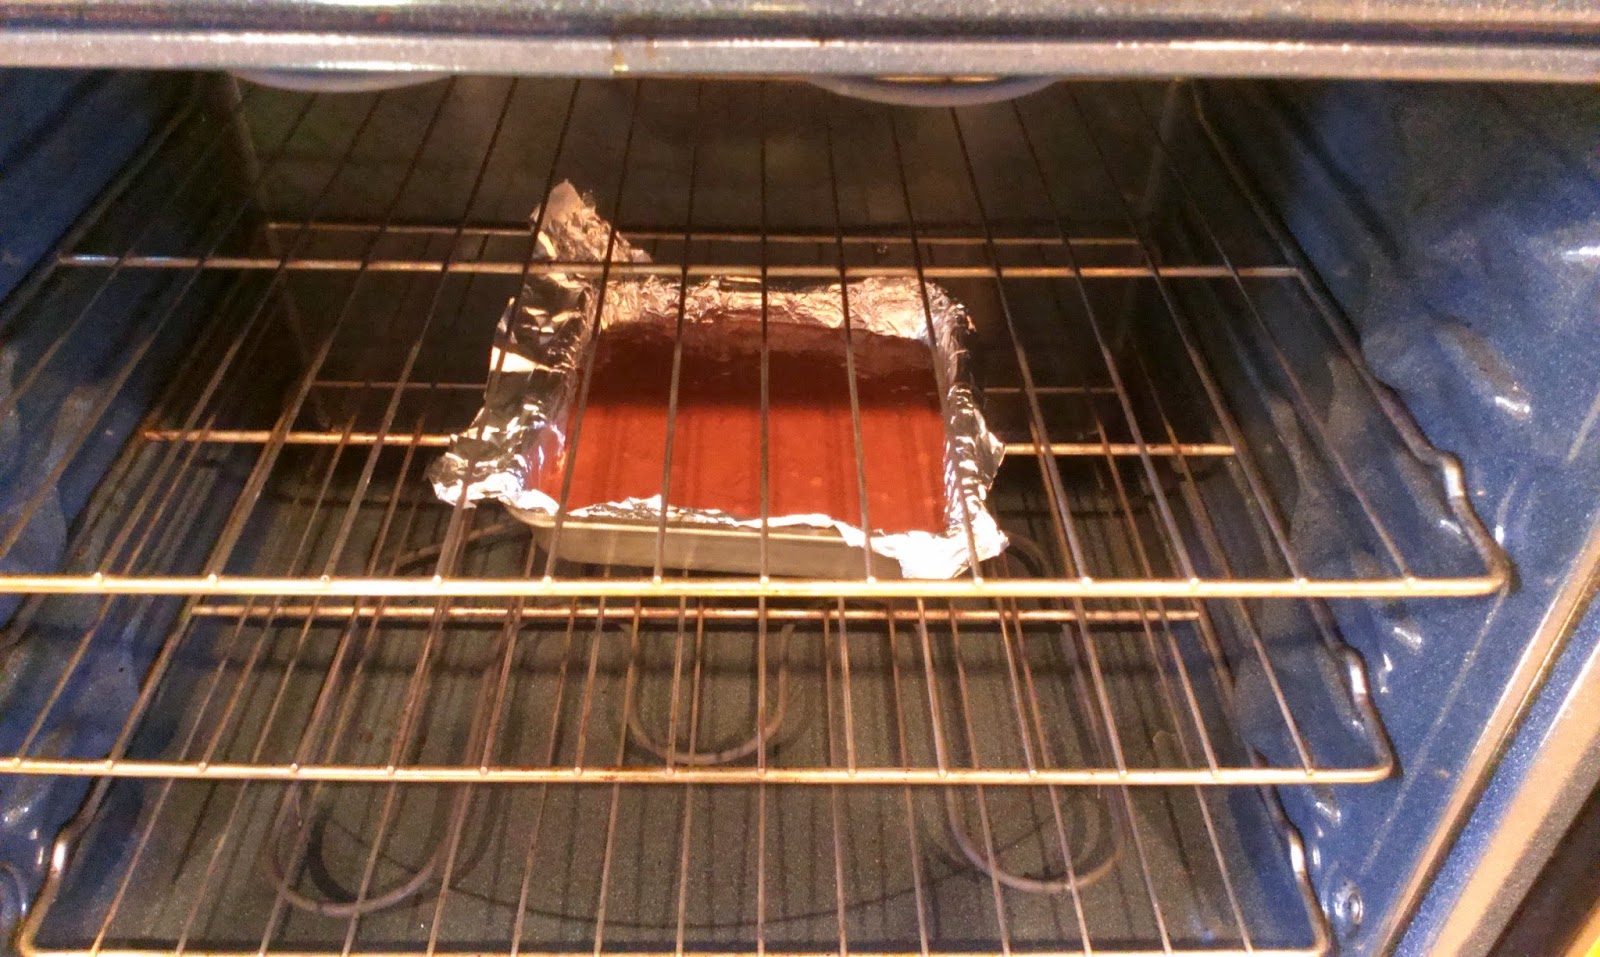
Now you’re ready to shove your pan into your immaculately clean oven and bake for about 30-35 minutes. 
The brownies are done when you look at them and have the Pavlovian response of instantaneous mouth watering, or when you insert a toothpick and it comes out crummy, but not dripping. These are meant to be moist, so you don’t want to overcook and dry them out. I cooked mine for 32 minutes. I mean, you really could call it quits here and still have a perfect platform for cookie dough ice cream (Blue Bell, of course), but making the cookie dough is even easier than making the brownies, so instead of quitting halfway through, be a true American (you know, from before the “participation ribbon” days), and make the damn dough. Put your brownies in the freezer for about an hour and a half to let them cool and set. They will be easier to work with when you apply the dough this way.

Nestle mini chocolate chips are safe to eat from the bag, FYI. Here’s what you need for the dough:
- 3/4 cup butter, softened (or nuked) to room temp
- 1 cup sugar
- 3/4 cup packed light brown sugar
- 1/4 teaspoon salt
- 2 tablespoons milk
- 1 1/2 teaspoons vanilla
- 1 1/2 cup all-purpose flour
- 1 cup mini chocolate chips
- Cue the next crappy photo montage!

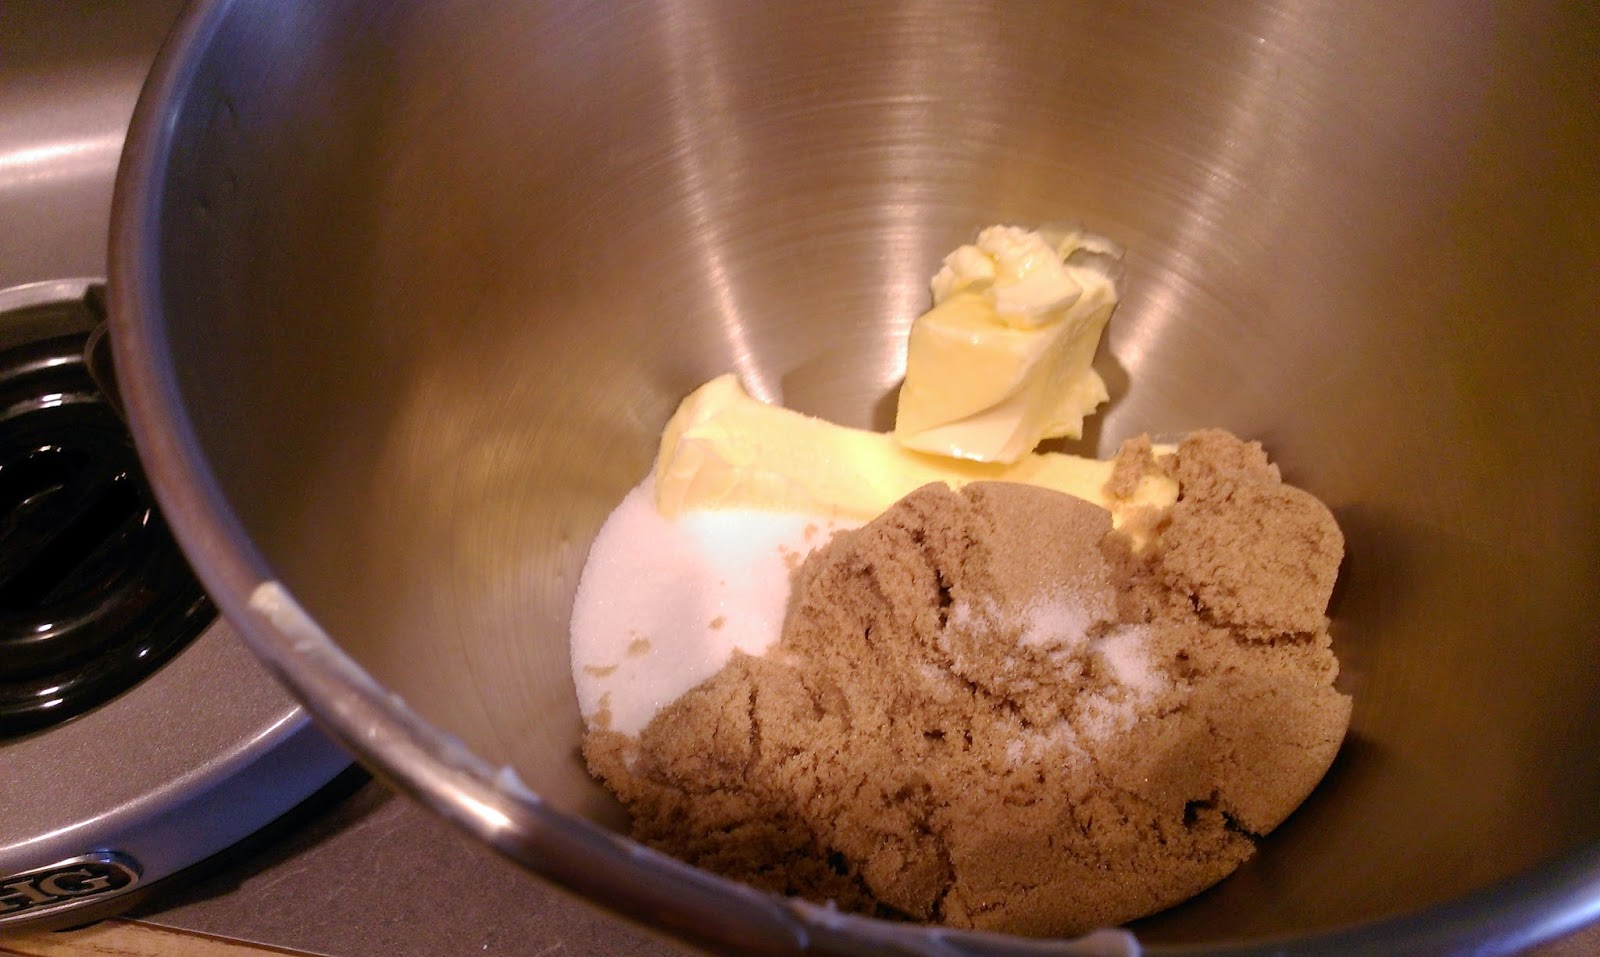
Cream together the butter, vanilla, salt, and both sugars until delicious. 
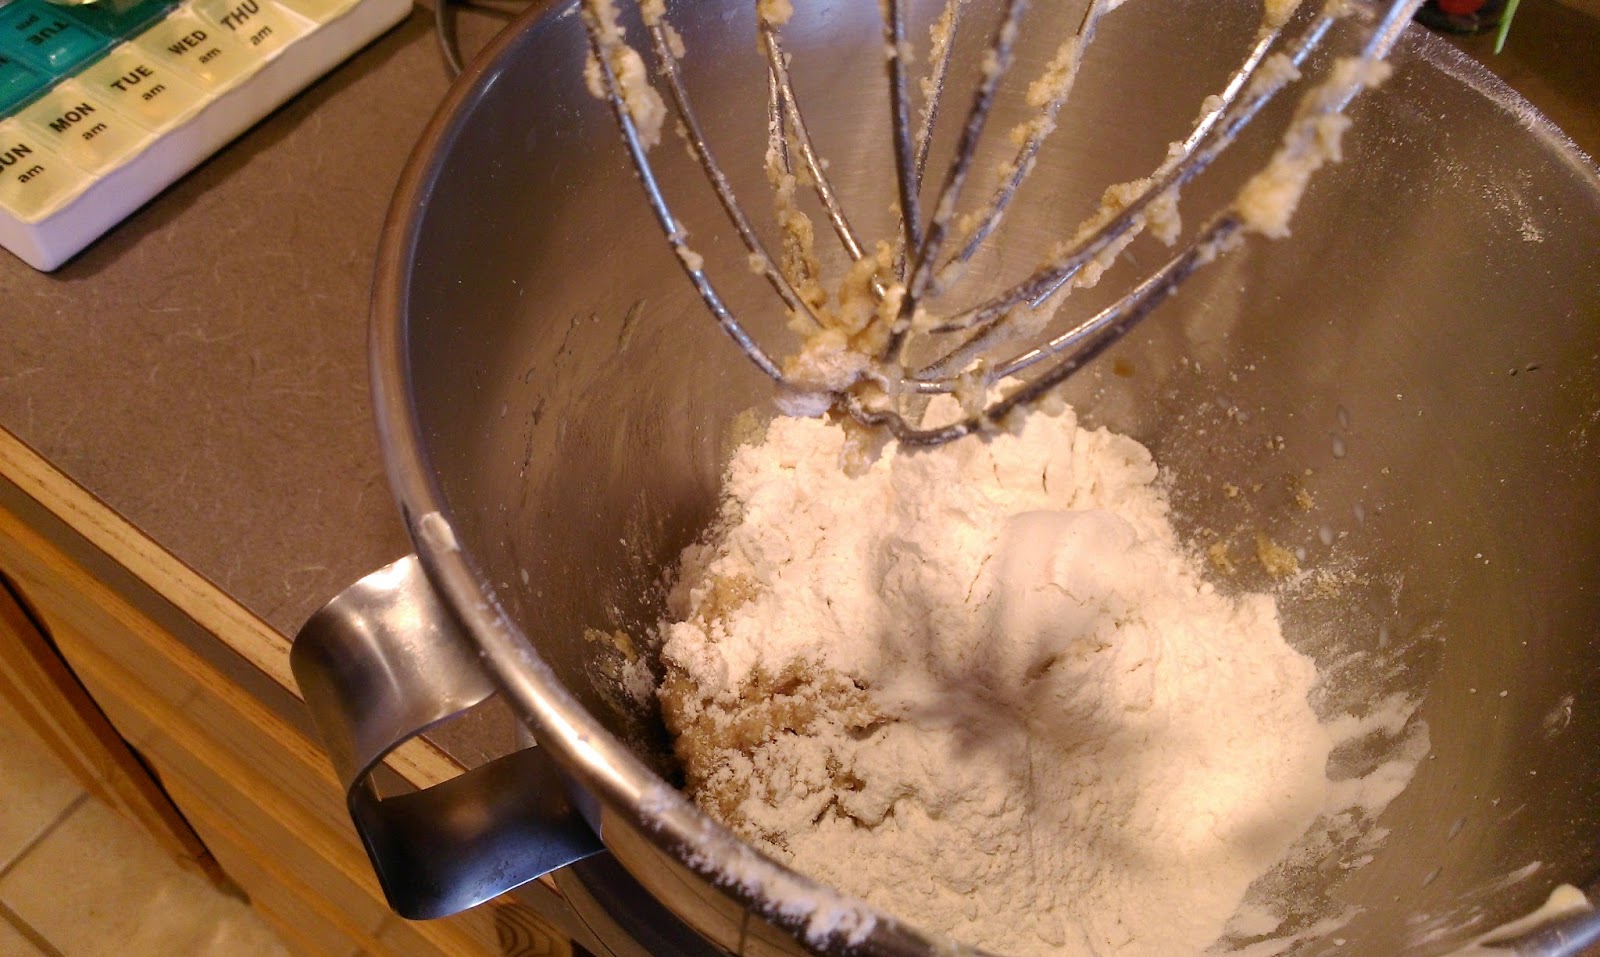
Then add in the flour, and mix until incorporated. Stop to scrape the bowl here (free sample!), and then add in the milk. 
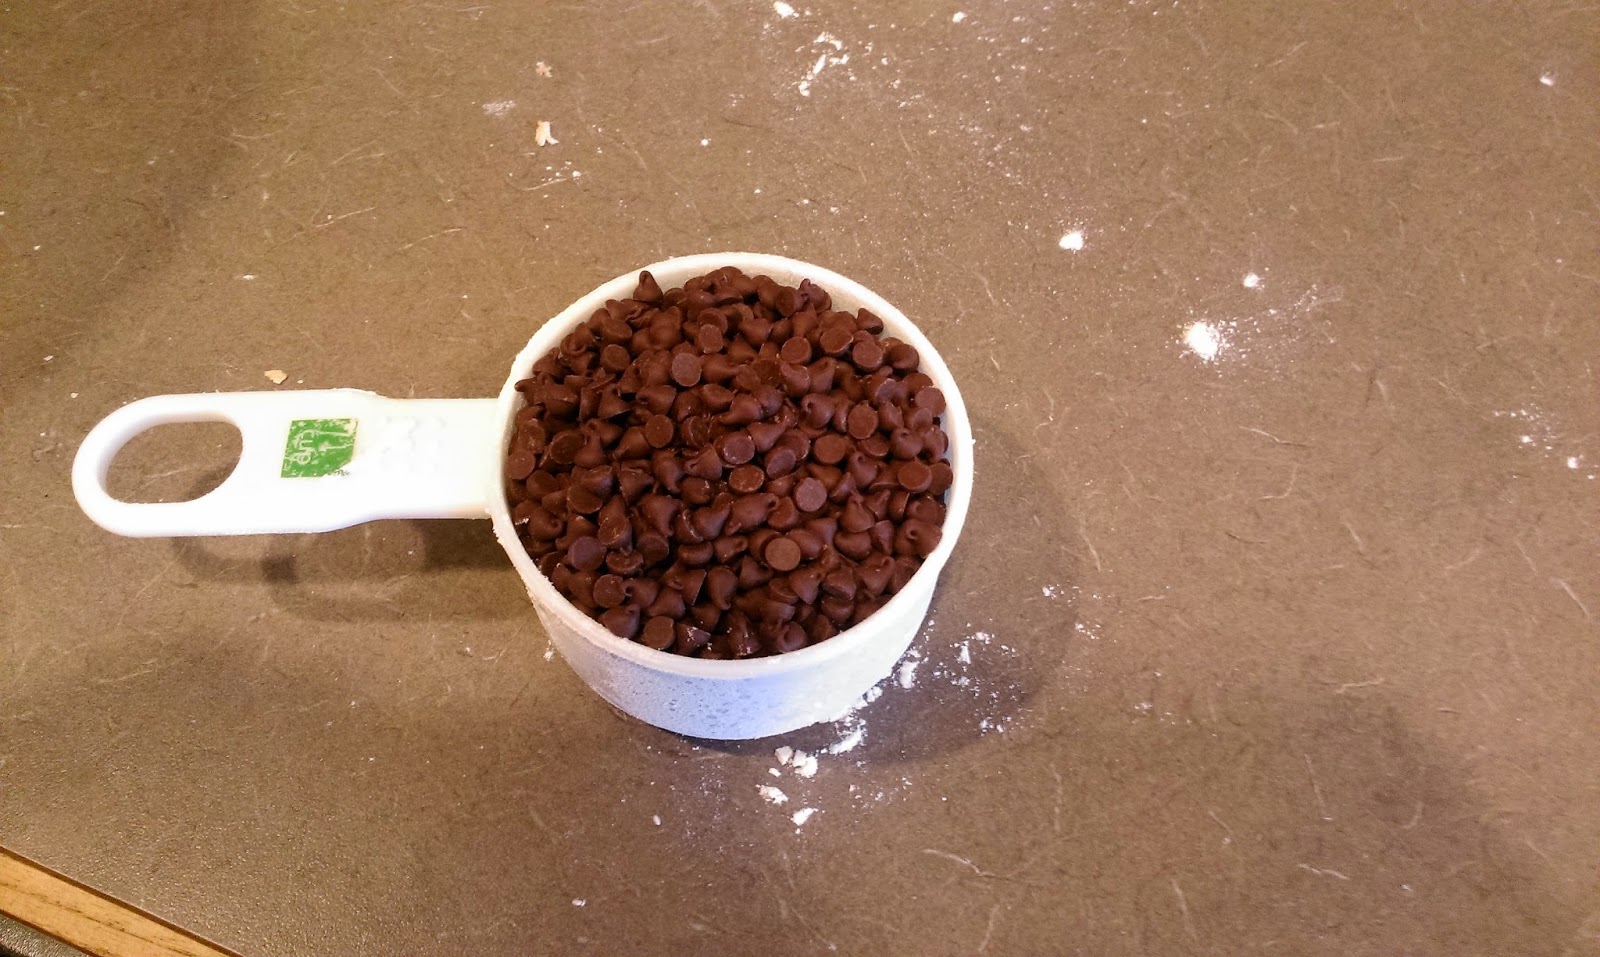
Finally, mix in a glorious cup of non-sheisty, un-tricky, delicious milk chocolate chips. 
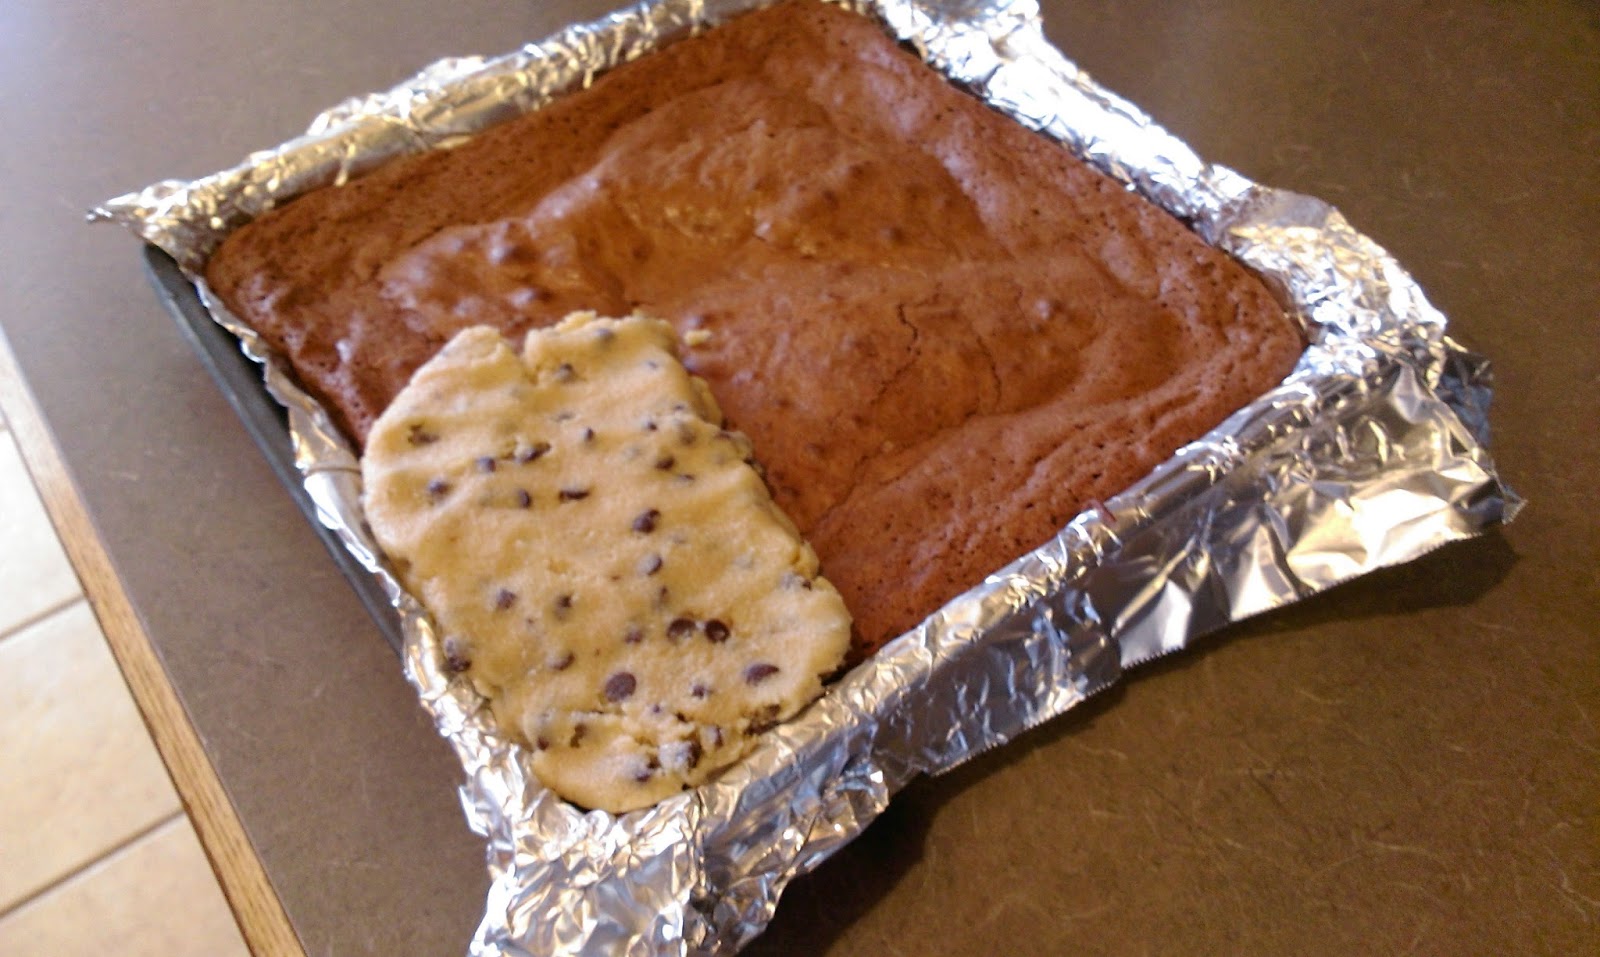
And proceed to put in the mouth guard before you eat the entire bowl. This is my go-to dough recipe. You could probably freeze this recipe and just keep on hand for when the cookie craving strikes. This is what the Cookie Monster should do instead of just talking about cookies all the time. Self-enabling. The American way. Now remove your brownies from the freezer once totally cooled, you know, before you eat all the cookie dough. Take a decent-sized chunk of dough, and flatten it out in your palms a bit before pressing on to the brownie.

Like so! Magical, really. 
Continue to flatten and press the dough firmly onto the brownie until covered completely. If you have some dough leftover, you could either save it to eat later or find any thin places on your cookie layer and beef them up, if you will. 
Then use your palms to flatten things out so it looks pretty and smooth, because this is extremely important to me. 
Finish off by removing the foil/brownies from the pan and sprinkling more chocolate chips on top, and then press them into the dough layer a bit so they don’t just fall off and create a mess for small children or dogs to clean up. Once you’ve done this, you can either put the magical, Heavenly creation into the freezer for 30 minutes if you’re like, super duper jonesing for a sugar rush, or place into the fridge for a couple hours. Surprisingly, I went for option two since I still needed to make and eat a dinner that consisted of more than just chocolate. Being an adult is no fun.

You were worth the wait. When you’re ready, take these sweet little deities out and cut into squares. You can see how fudgy the brownie is, and it’s deliciousness is complemented completely by the eggless cookie dough. Its a match made in Food Heaven (hence the chorus of angels I mentioned earlier). Sadly, I can only eat these one at a time because they are so sweet I may go into a coma if I eat two or more. Would it be worth it? Yes, I think it would. But then I wouldn’t be around to come up with other delectable desserts and witticism for you each week. That might make the angels cry, and we simply can’t have that. ‘Til next time, my fellow eaters!
-
Minions are a Girl's Best Friend
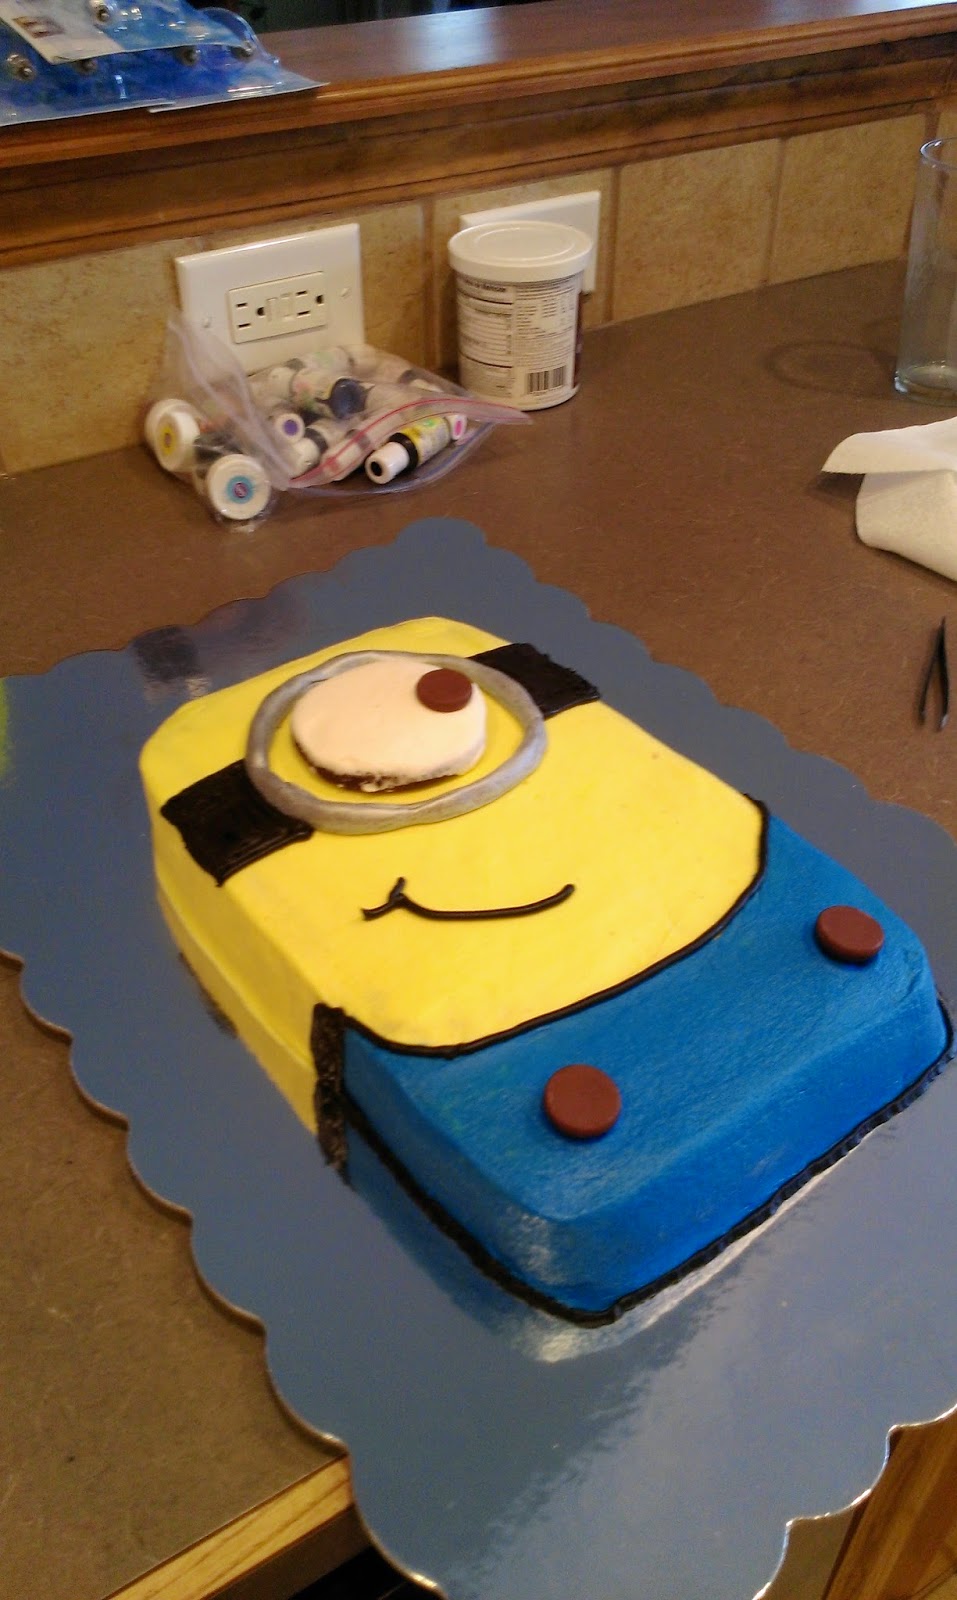
Somewhere along the way in my never-ending quest for world domination, I realized things would be a lot easier if I had others to do my bidding for me. If these creatures happened to be small, Twinkie-shaped beings with a rudimentary understanding of the English language, so be it. Sadly, the minions I wanted to help me usher in total control don’t really exist…so as my birthday present to myself, I created my very own…

“Hahaha…bottom.” Look guys, its Kevin! Okay, so when the first Despicable Me movie came out a few years ago, I fell in love with these tiny, adorable, and mostly harmless minions. I think we can all agree they’re the only reason any of us went to see Despicable Me 2, and why we’re all ready for it to hurry up and be summer so the minion flick will come out in theaters. A few weeks ago as I pondered what in the world to make for my birthday cake, a minion was the natural winner. I know none of you are remotely surprised I made my own birthday cake…its what I do. If any of you are related or married to another Type A-er, you understand my alacrity for creating my own cake. I promise I didn’t light my own candles. Even I admit that’s taking it too far. But I was happy to start 2015 off with the most important cake of all…mine. Muahahaha. Ahem. Sorry, world domination is just my bread and butter. Let me show you how to create your very own minion! But it can’t be Kevin..he’s my minion. You can make Steve or Carl. Don’t look at me like that- the minions do have names ya know.

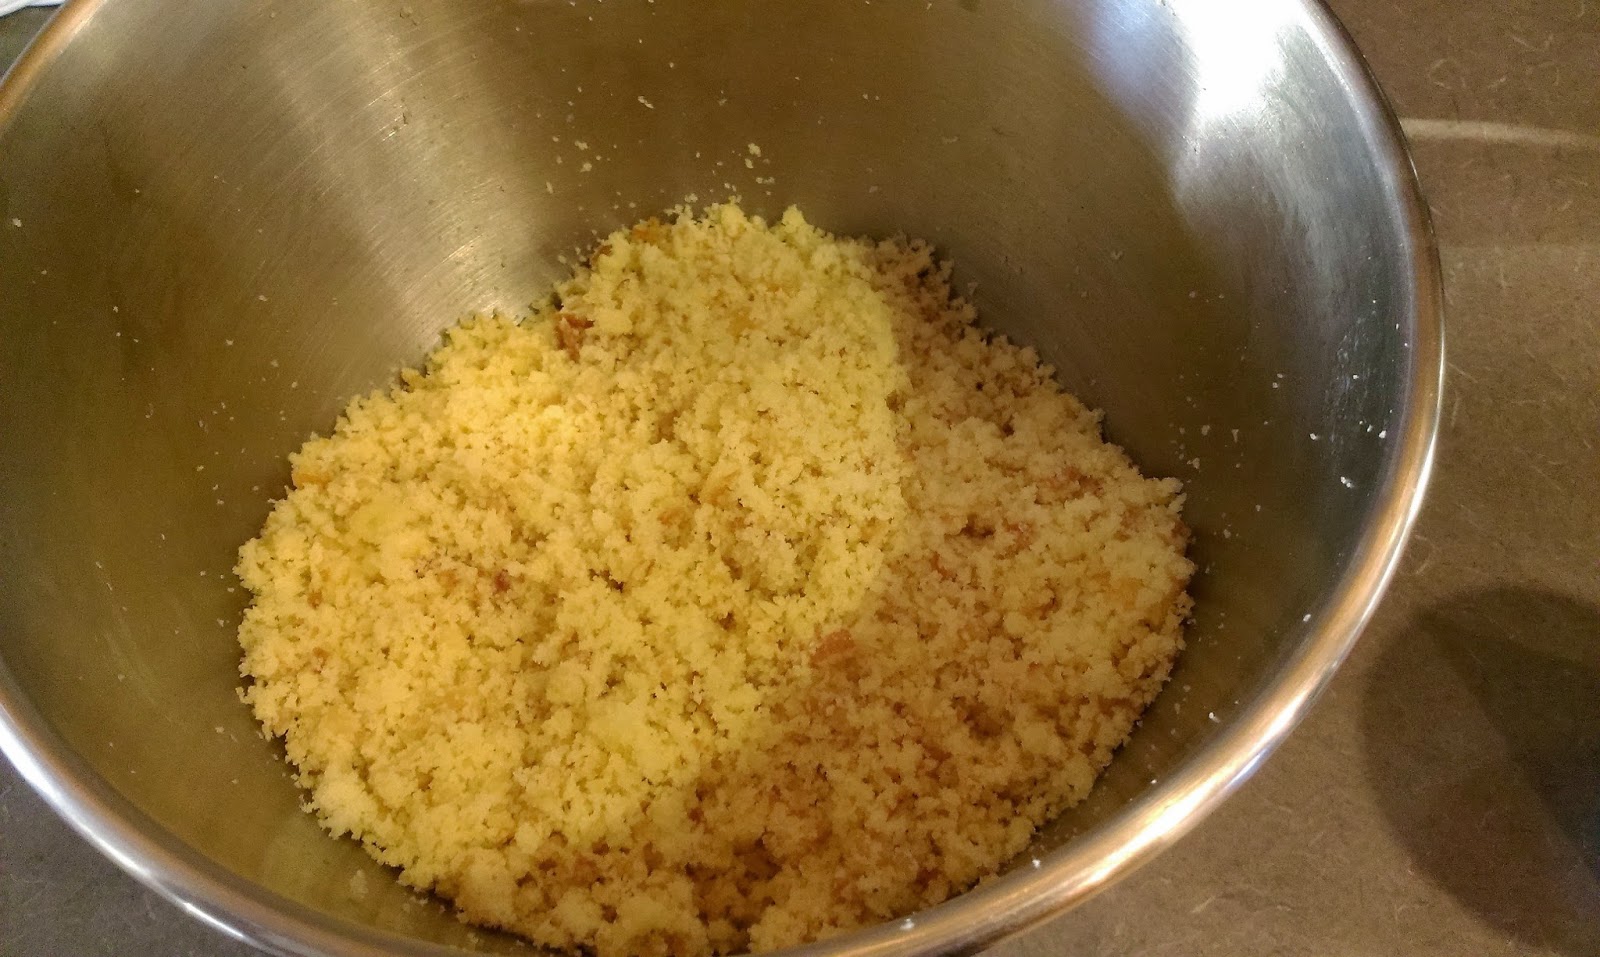
It has been too long, cake. Start off by making a 9×13 cake in any flavor you’d like. Personally, I’ve been having strawberry birthday cake since I was probably about 13. On my list of favorite cakes, strawberry is head and shoulders above the rest- even blue velvet or triple chocolate. The love is real, and it is deep. If you’re truly an aspiring evil genius, make a red velvet cake so when you’re carving up your minion, his insides run red like the blood of your enemies. Or something like that. Does anyone know when Game of Thrones comes back on? I need to quell this thirst for destruction.

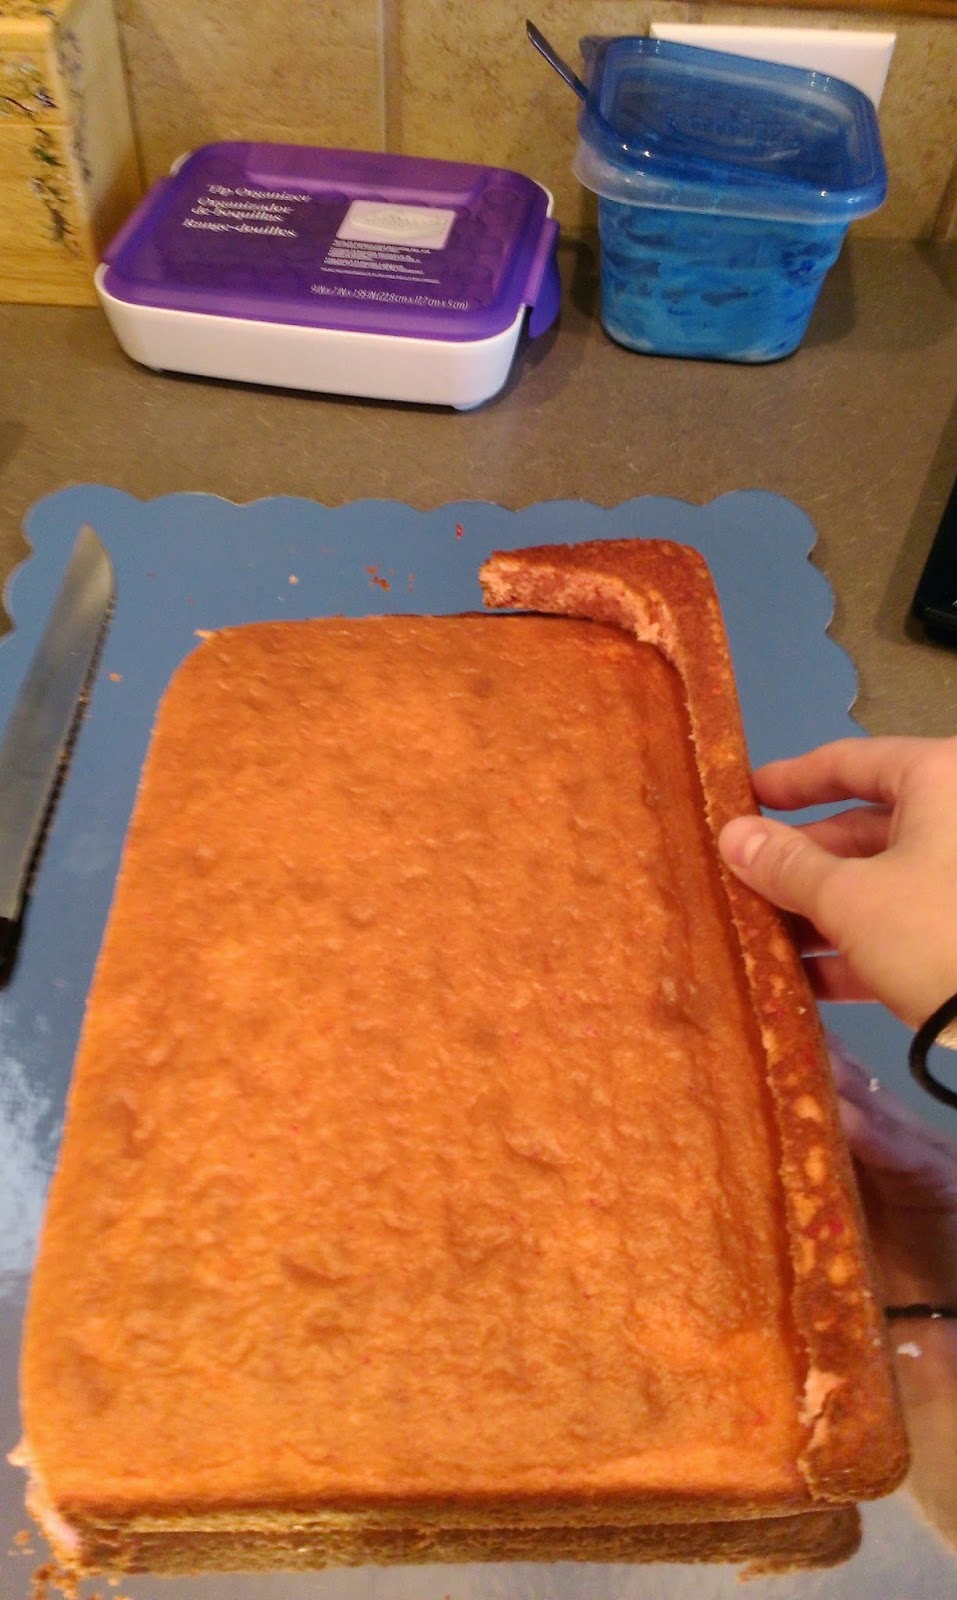
I do so love it when there are scraps. Once your cake is completely cooled, take a sharp knife and round the top of your cake. I cut off just about an inch from the top of the cake and the sides. I used the scrap piece to cut along the other side of the cake so things were even. I find it is easiest to shape a cake when the cake is COLD. This will also help when you put on….

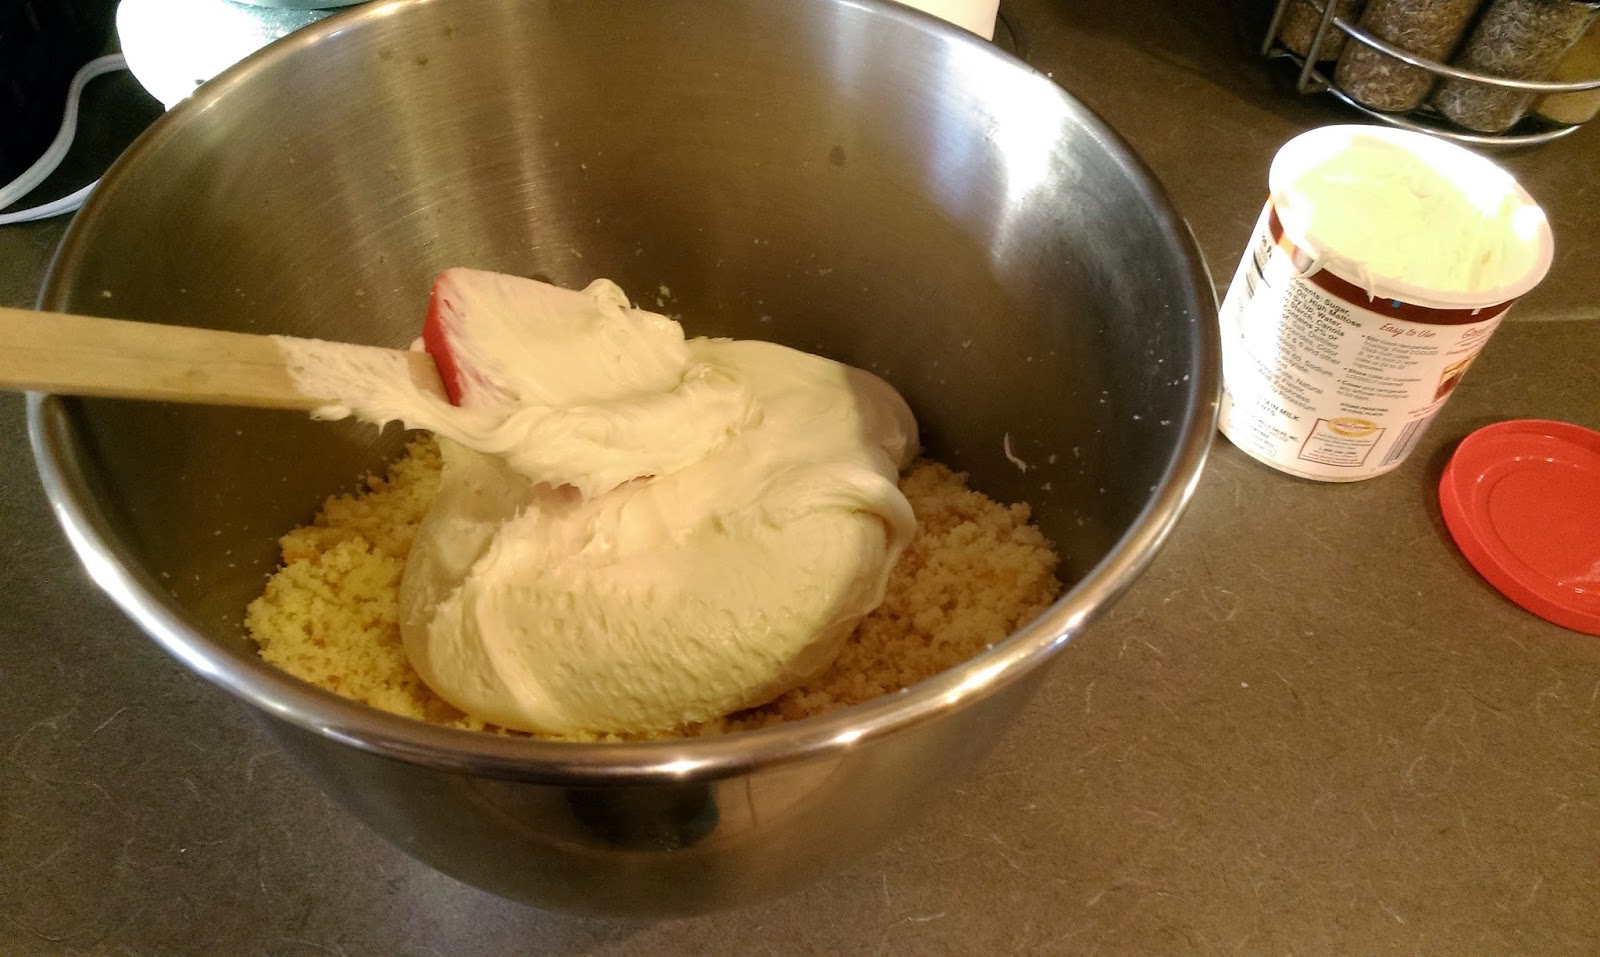
Dammit Spongebob, not now. The crumb coat! I made a lemon frosting for this cake, following the usual recipe for white frosting (cup of Crisco, 1 1/2 tsp of vanilla, 1/2 tsp of lemon extract, 4 cups powdered sugar, 4 tbsp milk) and adding in the lemon extract to make it lemon frosting (der…). This amount of frosting will frost the whole cake, but here’s how it breaks down:
- Take about one large spatula full of frosting while it is still white, and set aside in a small container and keep covered
- Take about a cup of frosting while it is still white, and set aside in a medium container. Dye this portion of frosting blue for the minion’s coveralls; keep covered.
- With the remaining frosting, dye it all yellow. Use this frosting to crumb coat the ENTIRE cake, as cutting off the sides will cause major crumbage if you don’t; keep the rest covered so it doesn’t get hard to spread while you wait for your crumb coat to set.
We came back from our Caribbean cruise to 10 inches of snow and a garage that has a real feel of negative 12. So my garage freezer hasn’t kicked on in days, and that is my go-to place for storing all my extra desserts and letting crumb coats stick quickly. Needless to say, I had a moment of panic, yelling, and immediate sadness when I realized that all my belongings had to have thawed out over the past week. Bye bye, other skull cake from Dia de los Muertos, homemade cupcakes from Derek’s return from deployment, and delicious Digiorno…I always knew you weren’t delivery. So in my case, I had to clear space in the house fridge to allow my crumb coat to set for 30 minutes. If fate doesn’t hate you and you have freezer space, 15 minutes will do. As the crumb coat works it’s magic, it is time to assemble that adorable goggled eye all minions possess.

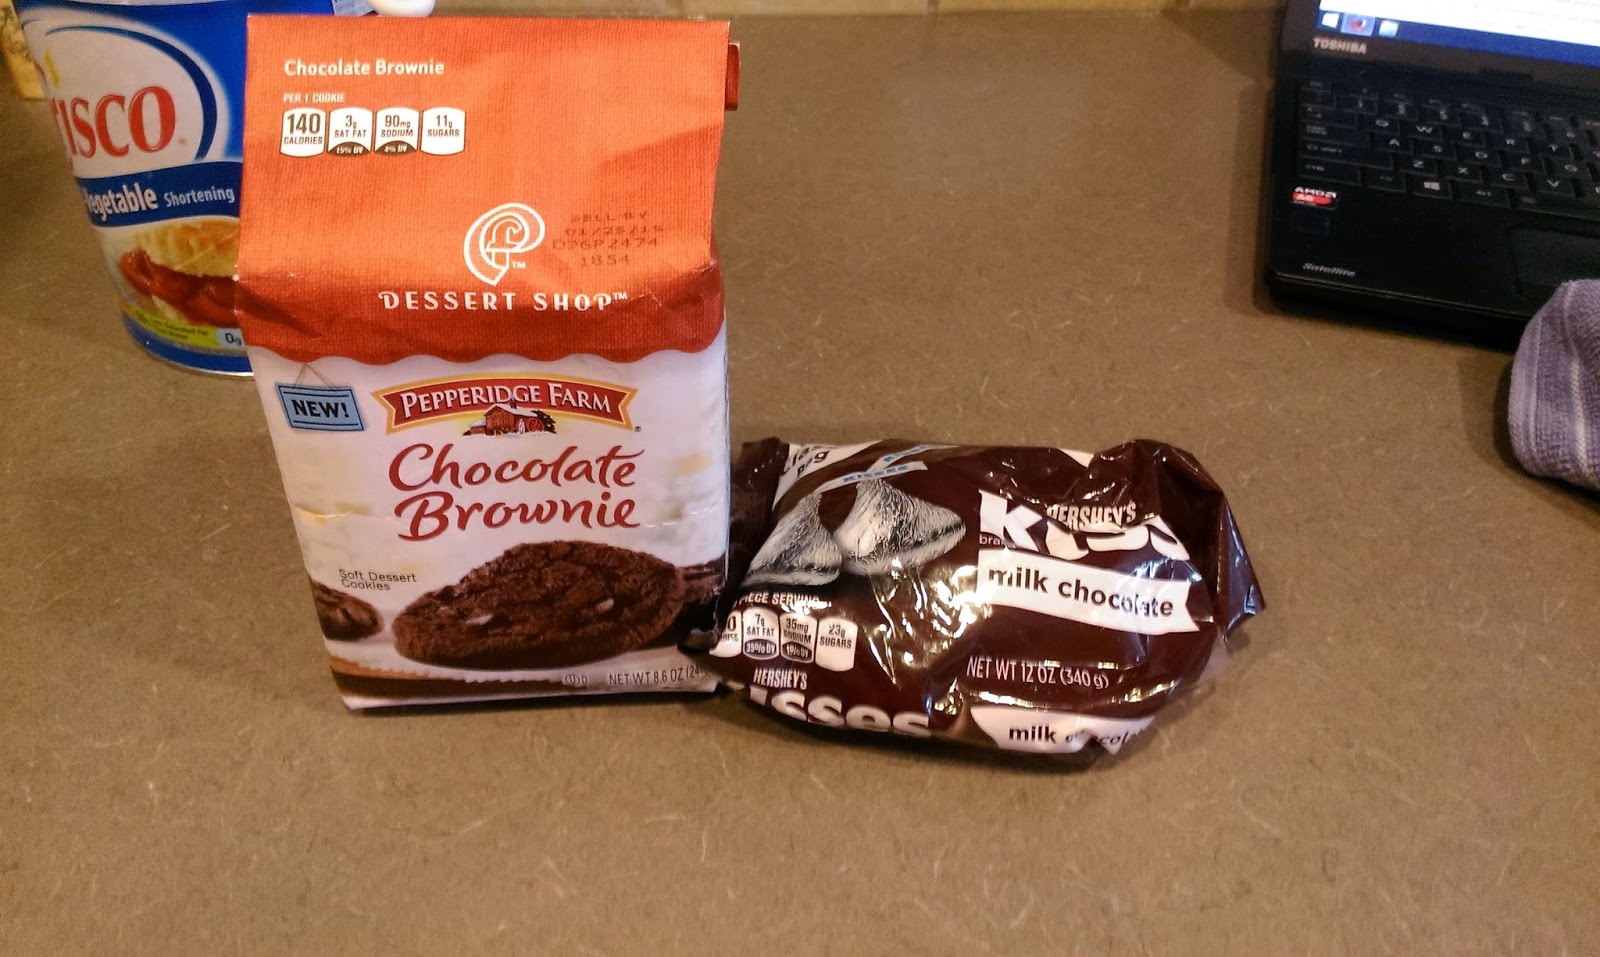
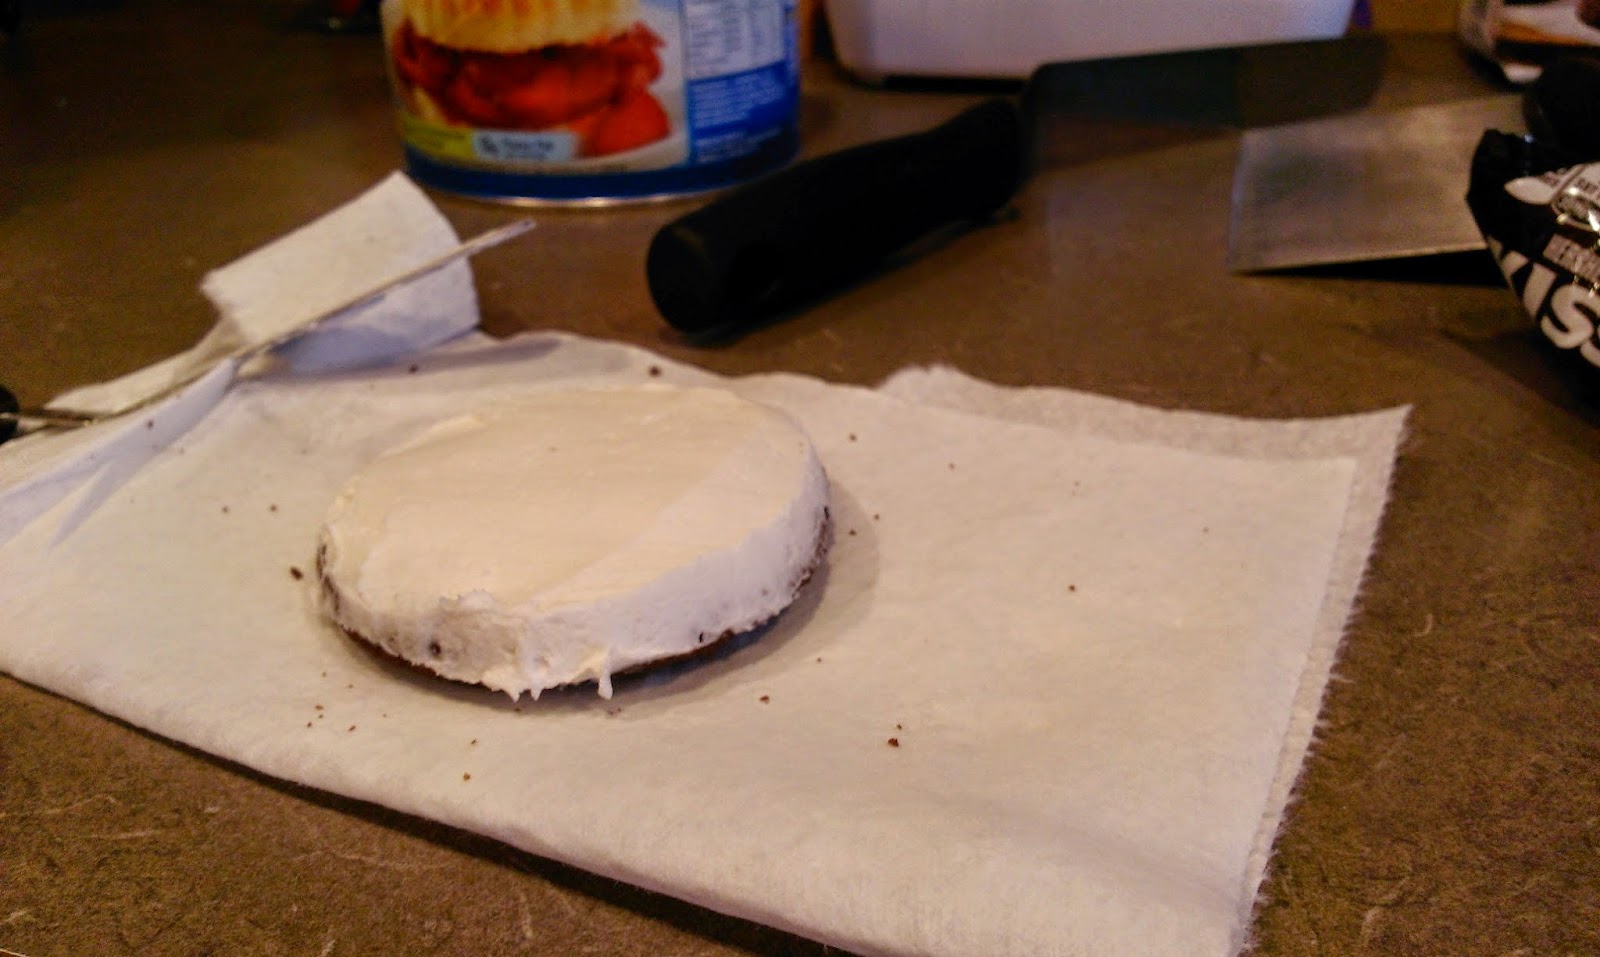
Real talk: I had to hide these cookies from myself so I wouldn’t eat them all. To start, assemble the actual eye. You need a large, circular platform to do this. I find giant cookies are an excellent large, circular platform. Get a flavor you like, but Pepperidge Farm cookies are the perfect size. You will also need a grand total of three Hershey’s kisses for the minion, just one for the eye.

Looking at this, if they make giant Oreos, that would suffice…but I really love those Pepperidge Farm cookies. Take that plain white frosting you set aside earlier and spread it on the giant cookie. DO NOT EAT. You don’t want a blind minion, do you? You want about a half inch worth of thickness on the cookie. Get it as smooth as possible with a small spatula, and put it in the fridge. You can do the paper towel trick with this once it has set to smooth it all out. On to the goggles!

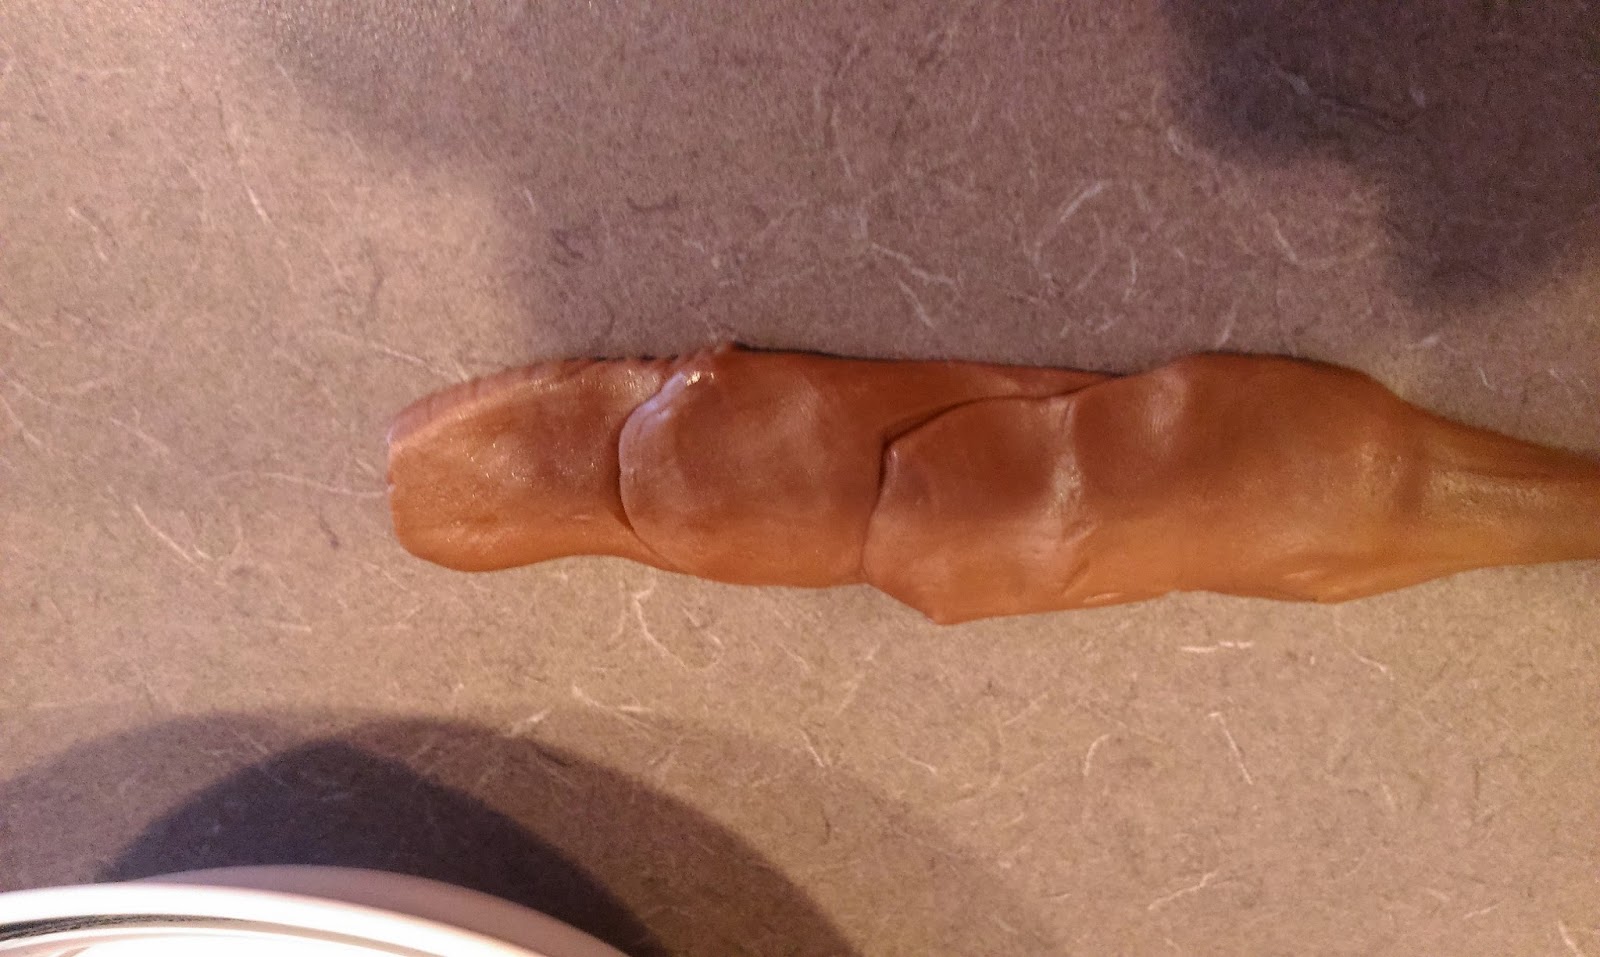
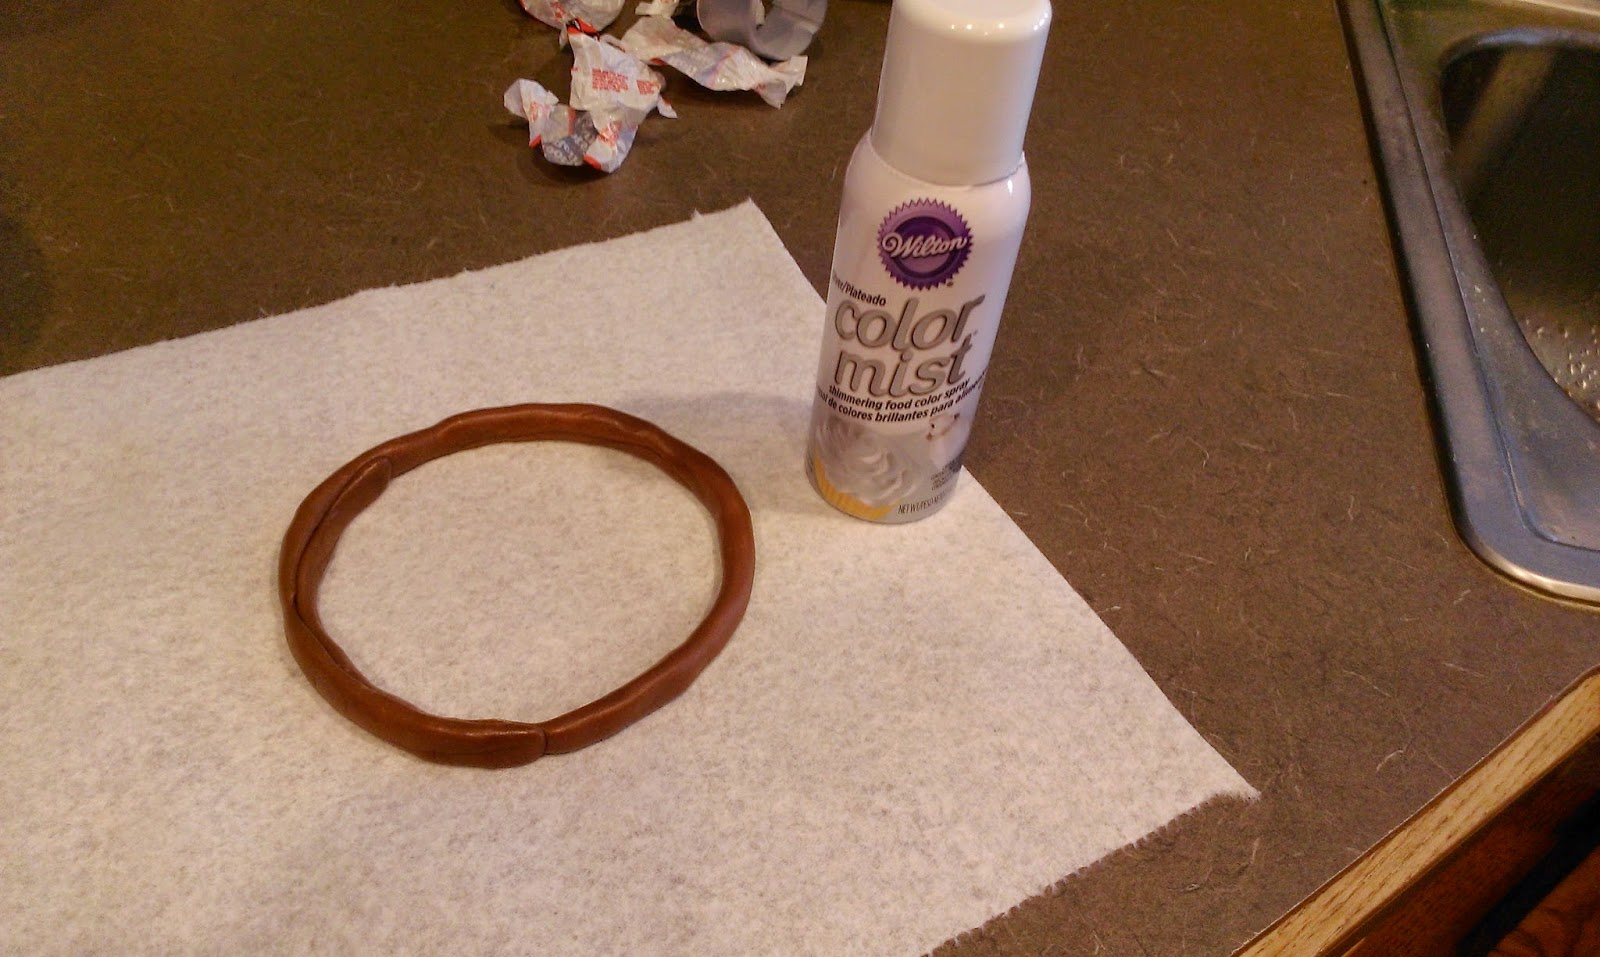
You need Tootsie Rolls and either silver sanding sugar or silver color mist. Tootsie Rolls…the world’s least favorite candy for a reason. However, they work for what you need them for here, but I will probably have the remaining bag of Tootsies hanging out in my pantry for the next fifteen years, or God willing if we move, leave them behind for the next family to find in the world’s cruelest joke. You need four or five rolls to make the goggles. I melted mine for ten seconds so they were malleable.

Press all of your rolls together, and crack a crude joke involving toilet humor or Mr. Hanky from Southpark. 
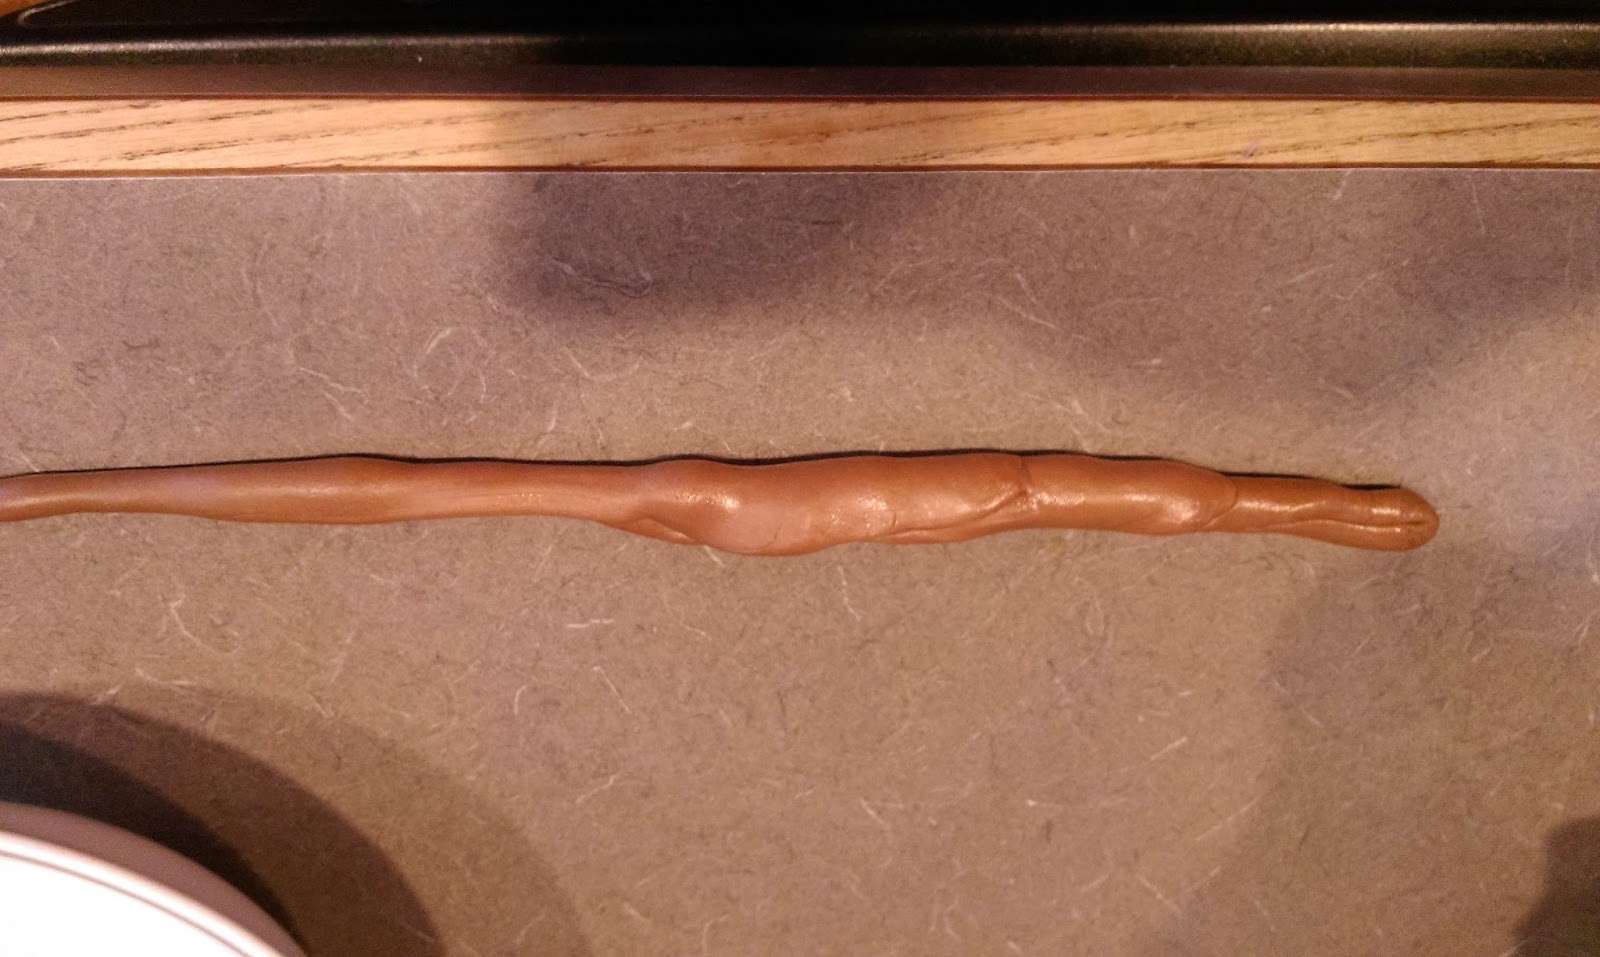
Then roll them out to form a long, skinny rope. I just rolled them between my palms. 
Once your rope is formed, take your eyeball out of the fridge so you can see how big of a circle you need to form, and then press those ends together when you’ve got your sizing correct..don’t forget to put the eye back in the fridge! 
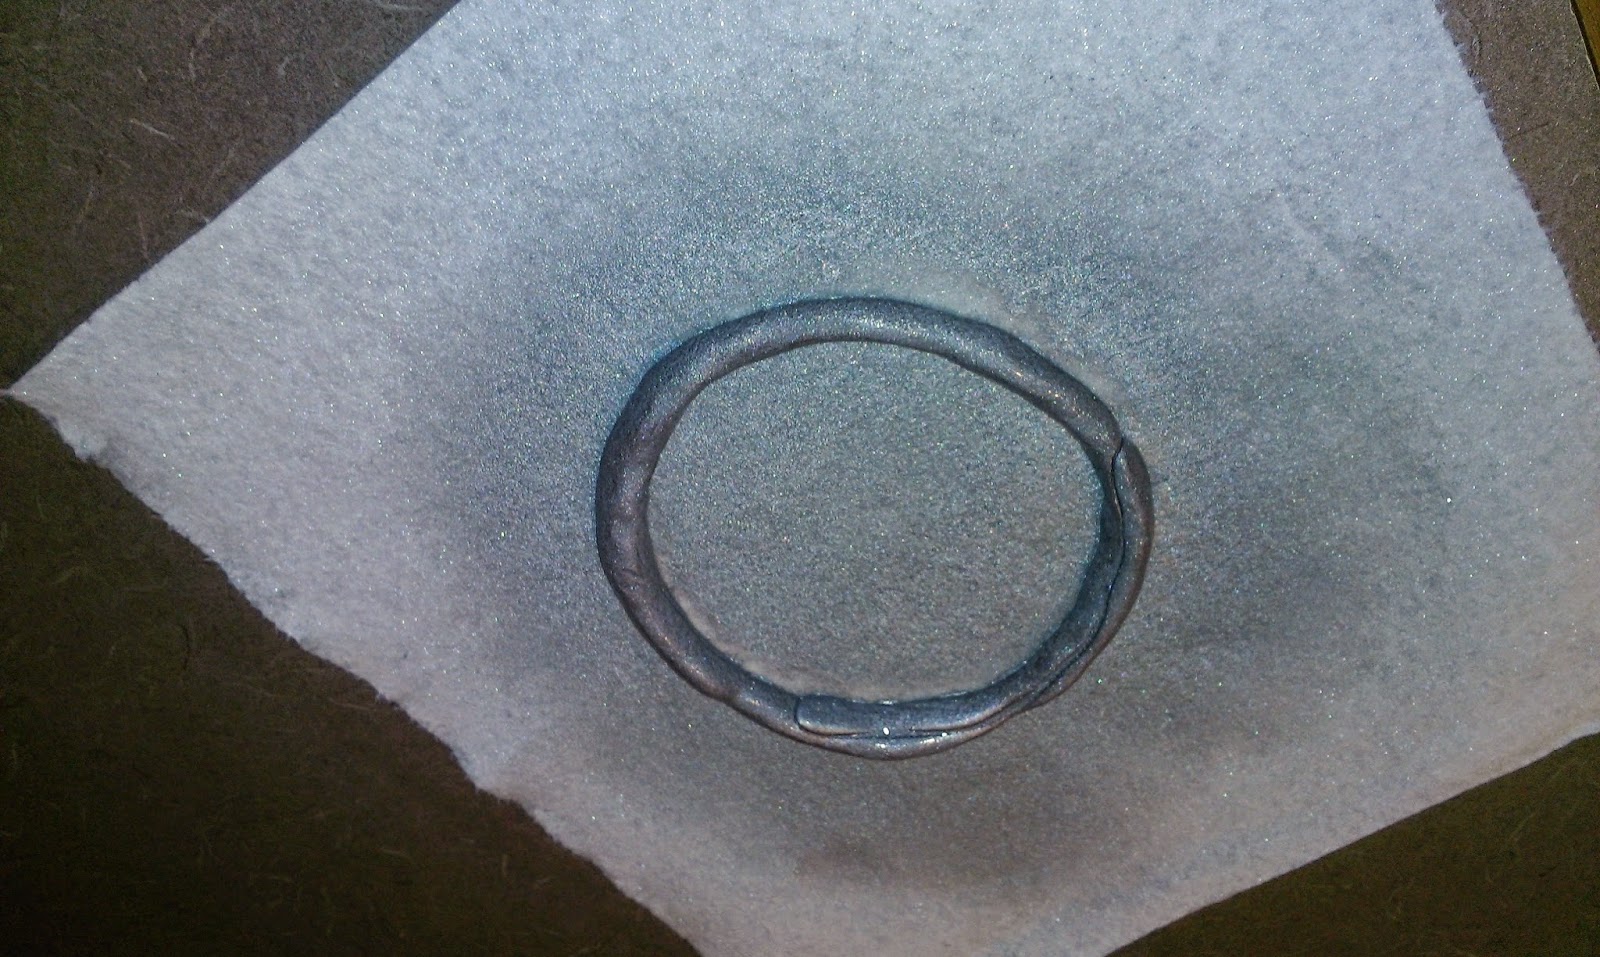
Then spray with the color mist! This stuff really doesn’t smell edible, but let’s face it, I’m sure Tootsie Pops without edible color mist will still give you cancer. If you want to use sanding sugar instead, you need to get the circle damp and roll in the sugar. But what a waste of sanding sugar!!
I see all!! Including your thumb… Set aside the goggle to dry, and remove the eye from the fridge again. Smooth it out using the paper towel trick, and put an upside down Kiss into the frosting so you have a pupil. Now that your crumb coat is dry, get that cake back out!
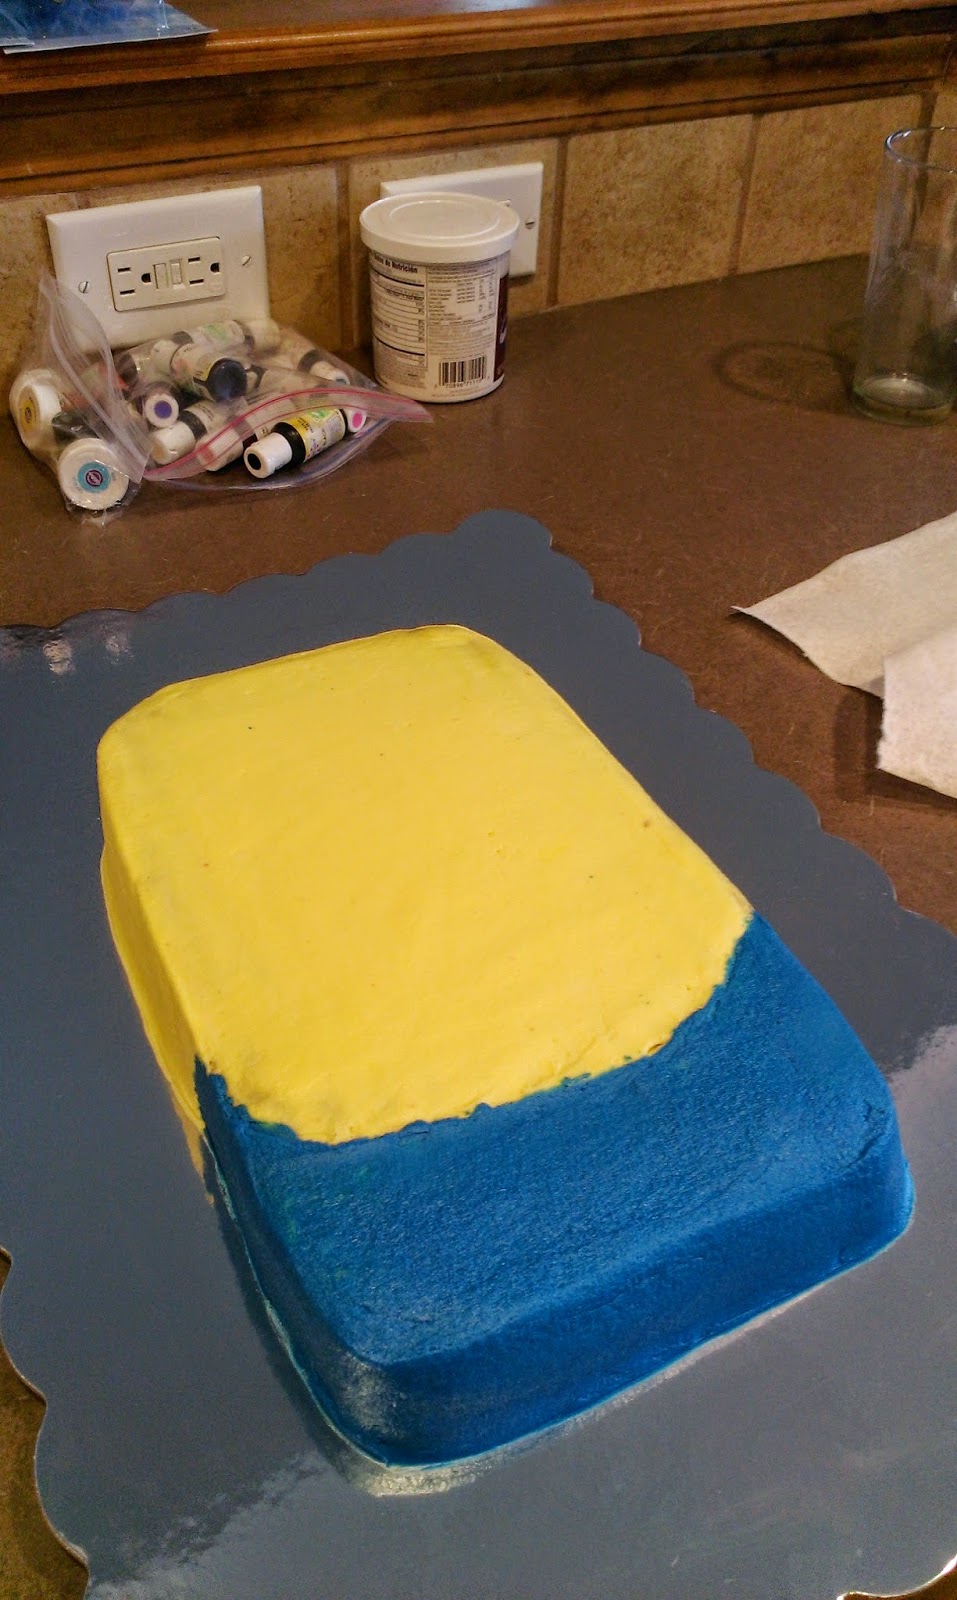
Using the small spatula, carve a line into the bottom of the cake where you will separate the minion from his coveralls. The hardest part of this cake is making sure you keep the yellow and blue frostings away from each other because even in the second movie, the minions did not turn green. So take your yellow frosting and use a large spatula to slather on the minion’s…skin? Use a small spatula to cover the sides. Try to smooth as best you can before moving on to frost the coveralls. I just used a small spatula to frost the coveralls so I could ensure I wouldn’t get blue everywhere (just on myself).

As you can see, I didn’t make things incredibly smooth because I was worried about the evil color wheel blending my primary colors together to create a lame secondary color. 
But no worries! As you can see above, this is precisely what the paper towel trick is for!! Smooth like buttah. Once you’ve frosted your entire minion, put it in the fridge or freezer again for a decent amount of time. I gave it the equivalent of lunch and half an episode of Grey’s Anatomy..it was the one where Denny dies, so I got lost in a box of Kleenex and wasn’t watching the clock. Then take out your cake and smooth it out using the paper towel trick; add your eyeball and your goggles any time after this. You will have some blue and yellow unevenness after smoothing, but don’t worry, I will show you how to fix that with some piping.
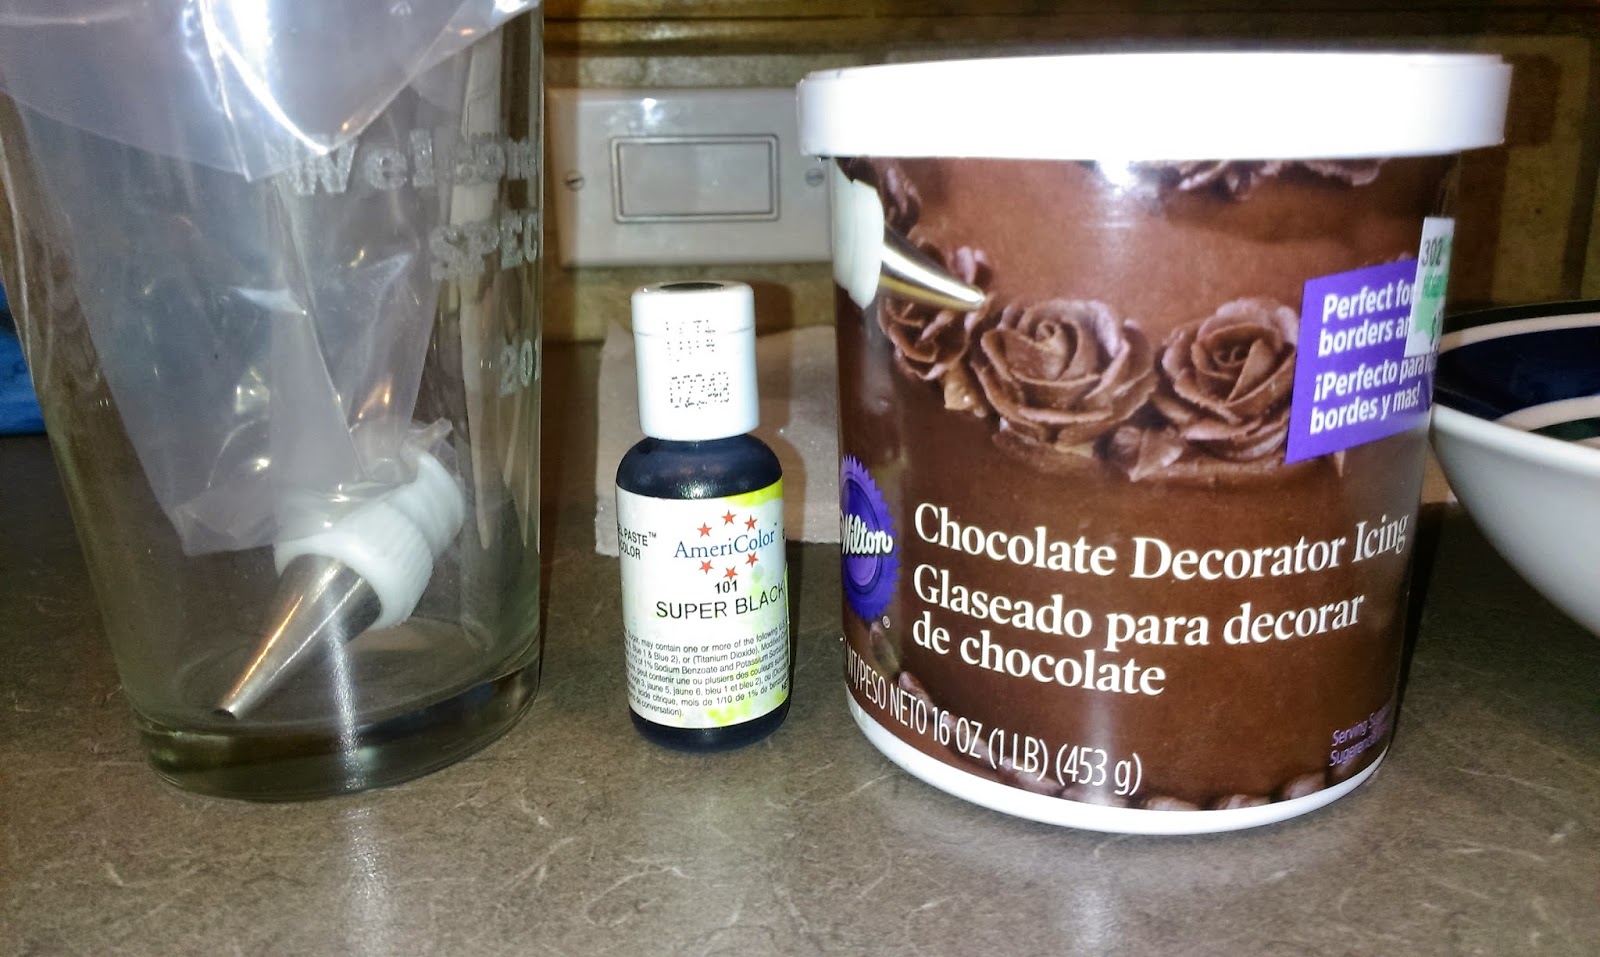
I could totally eat a tub of this with my giant cookies and be content for days. Fit a piping bag with a large round tip..I used a #6. Then mix about a quarter of a cup of chocolate decorator frosting and some black dye. I know that lemon frosting and chocolate frosting do not mix, but to get a decent black coloring, you need a darker frosting.

A minion without a mouth is slightly terrifying. Take your piping bag and just draw a line to separate the minion from his coveralls. Add two Kisses as buttons to up the ante on the “awww” factor.

Kevin, you give great side eye. Then draw an outline for the strap of the goggles. Go back in and fill with the black frosting. You could probably get away with using the can frosting that comes in black with a few decorator tips for this part to make it a bit easier. Just smooth everything out with a small spatula when you’re done.

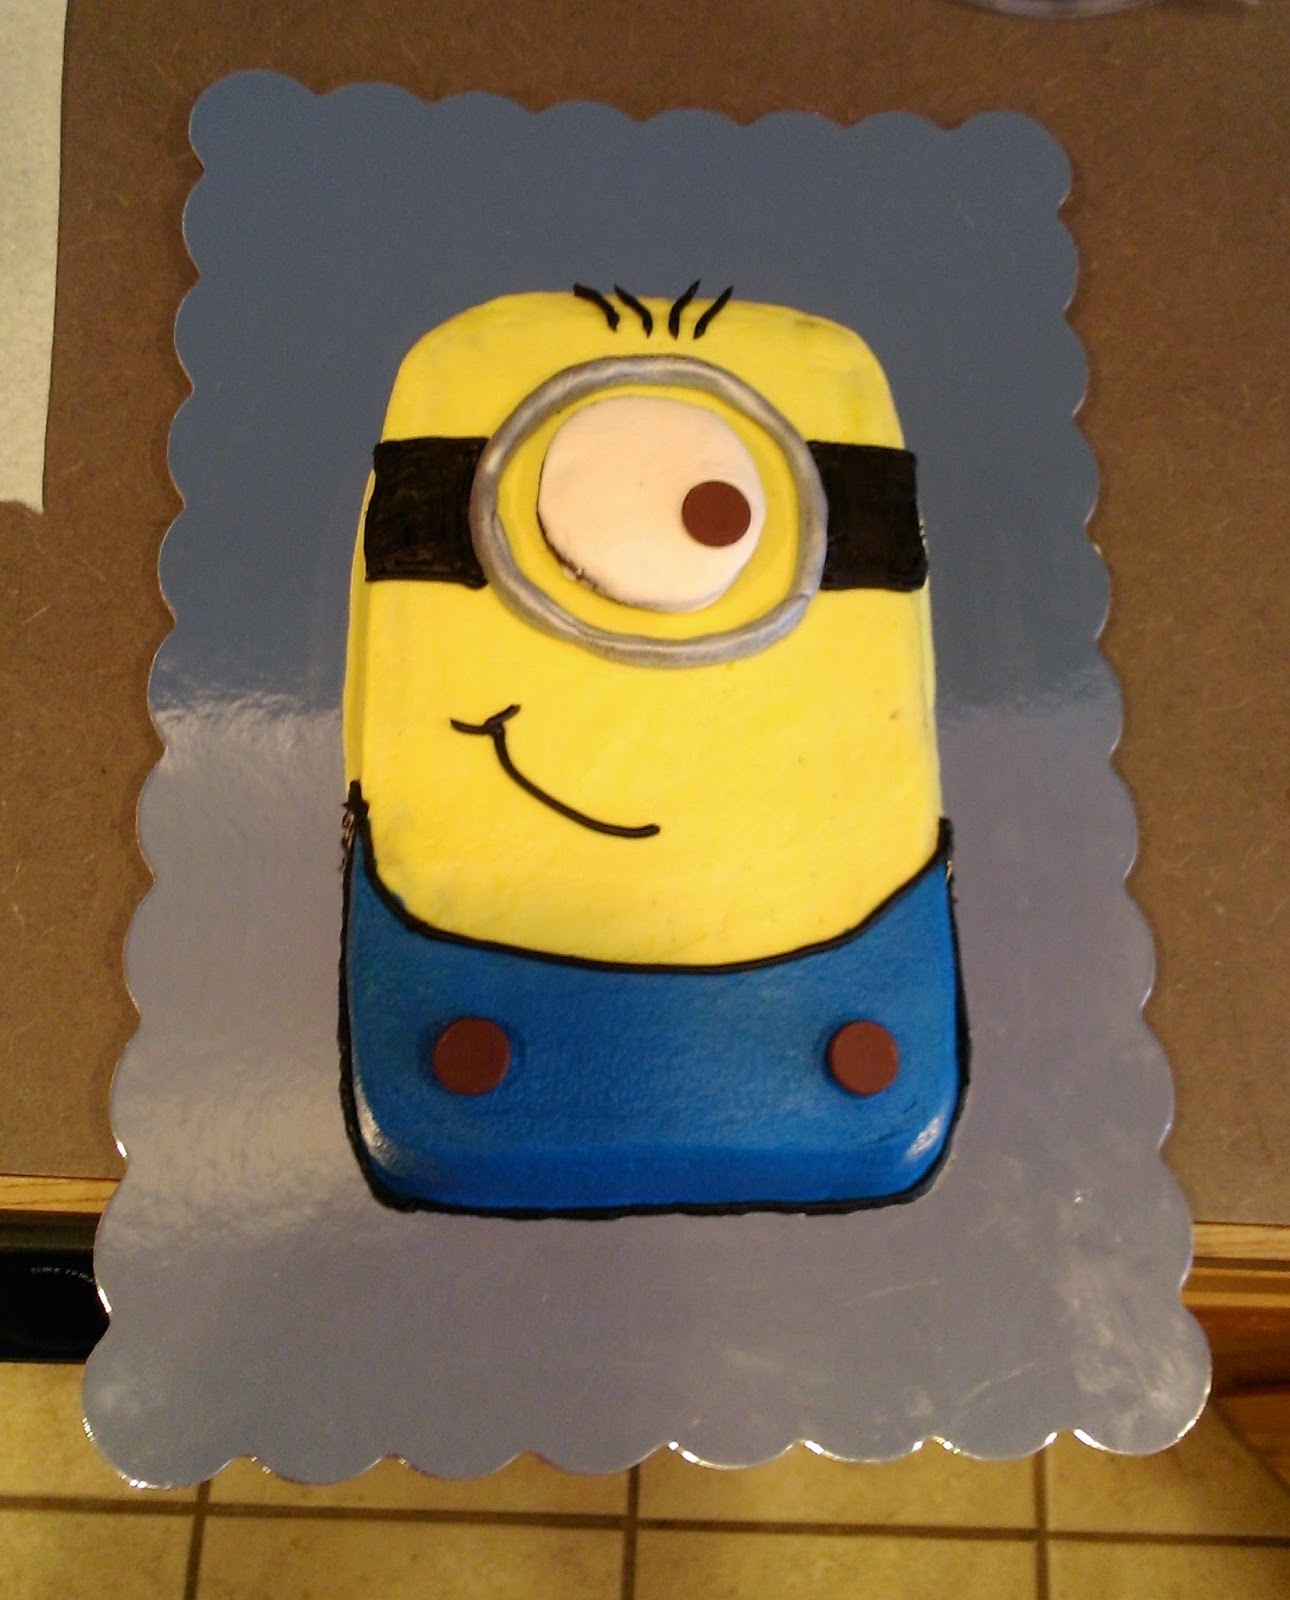
It’s so cute, I’m gonna die! Then I added the trademark minion smirk and outlined the coveralls for a finishing touch. Again, a can of the frosting with the right included tip would probably work fine, but I prefer working with a piping bag because it makes me feel more official. Now you’re ready to name your minion and realize you’ve created something that’s almost too adorable to eat. Almost.

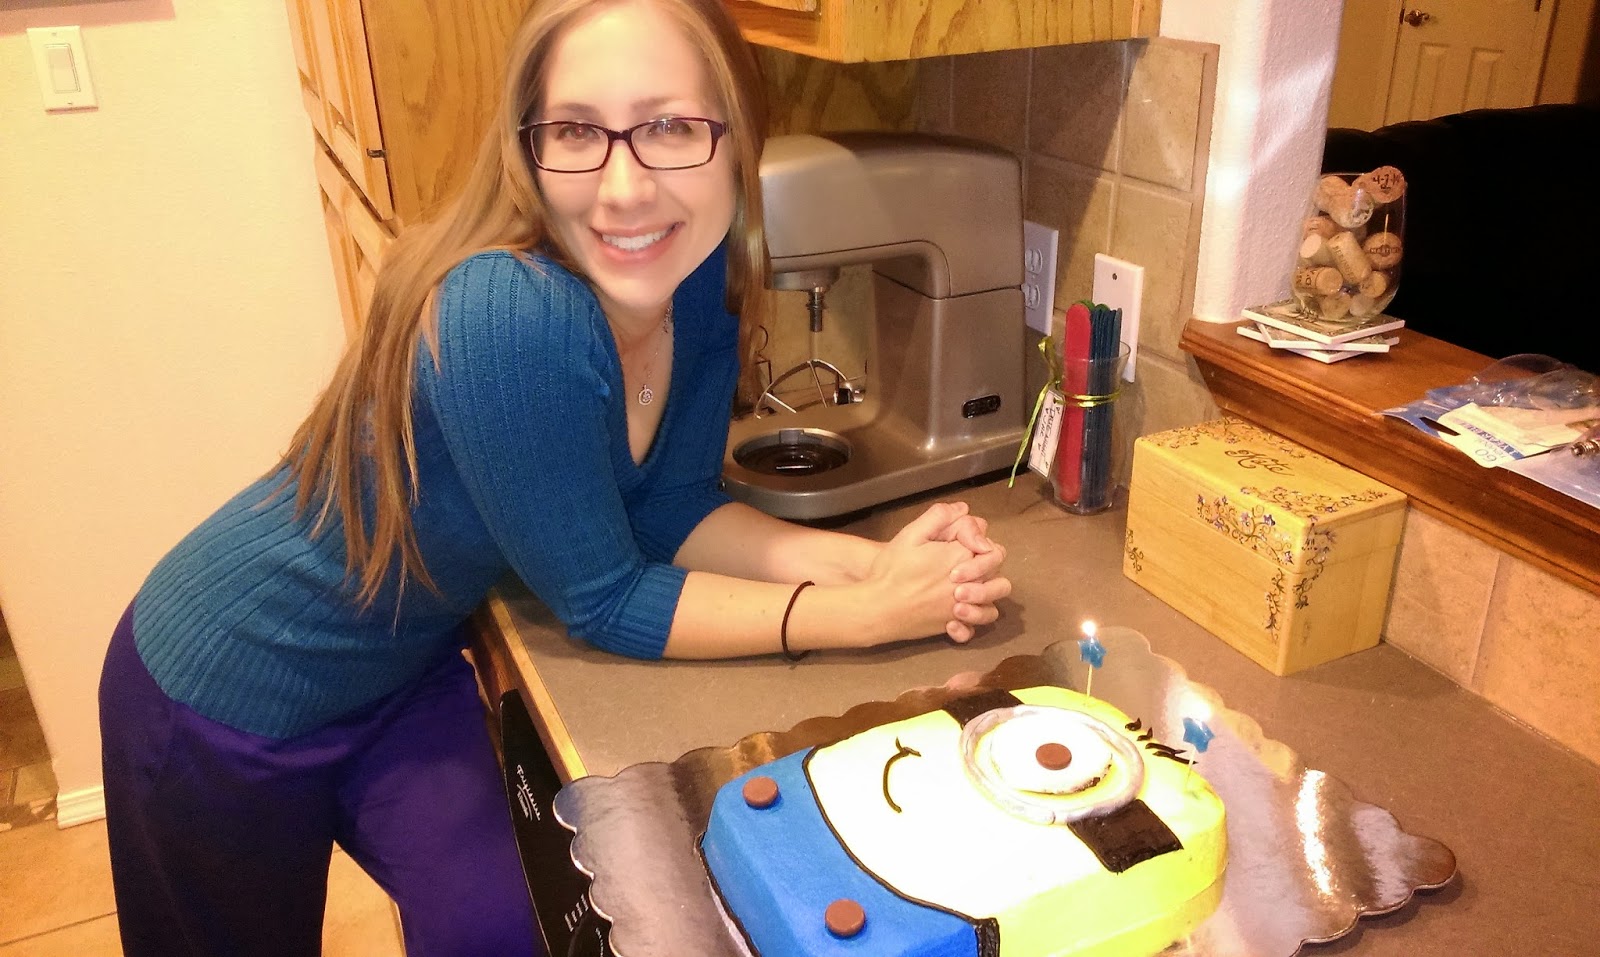
I mean, just *LOOK* at Kevin. The candles made it even better! 
And then Derek set him on fire. 
And I gleefully reveled in my stretchy cake pants that I was about to get some dessert. Kevin was really tasty. The only problem was I don’t have a cake safe big enough for him, so he’s sitting–now bottomless mind you–in the fridge with a piece of foil covering his missing coveralls as to hide either his shame or our carnage. Or both. But I had an absolutely wonderful birthday full of well wishes from friends, amazing food and fun with my husband, and lively conversations with family while I made my minion just to destroy him later. The downfall of being an evil baking genius, I suppose. ‘Til next time, my fellow eaters!
-
Have Yourself a Merry Little Cake Pop
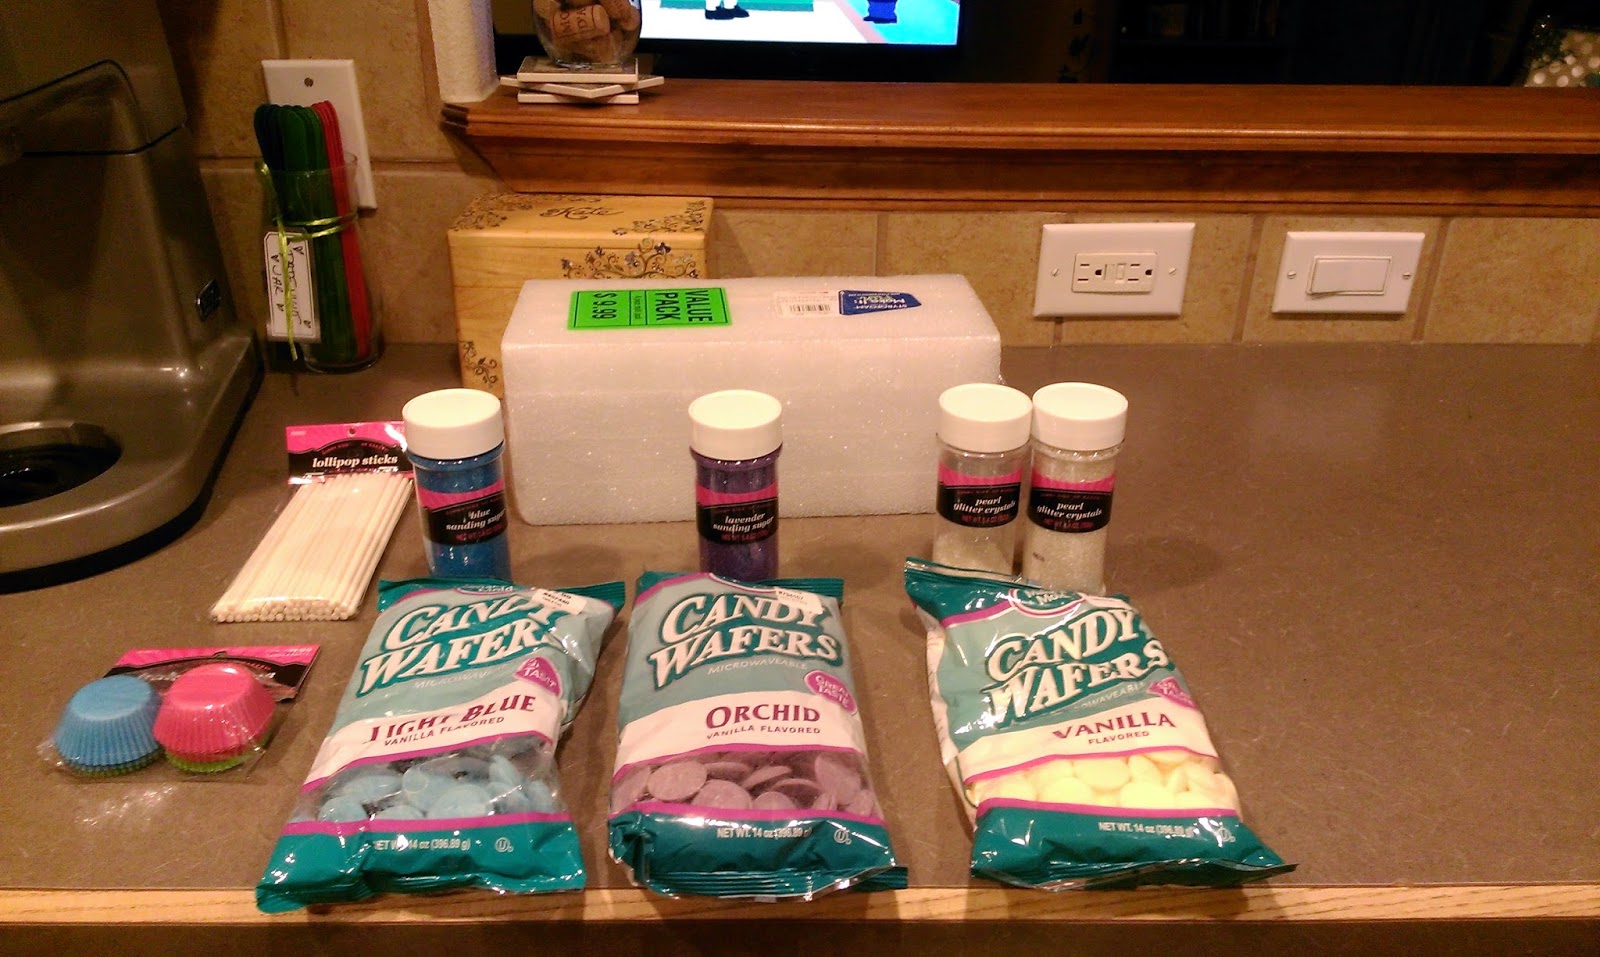
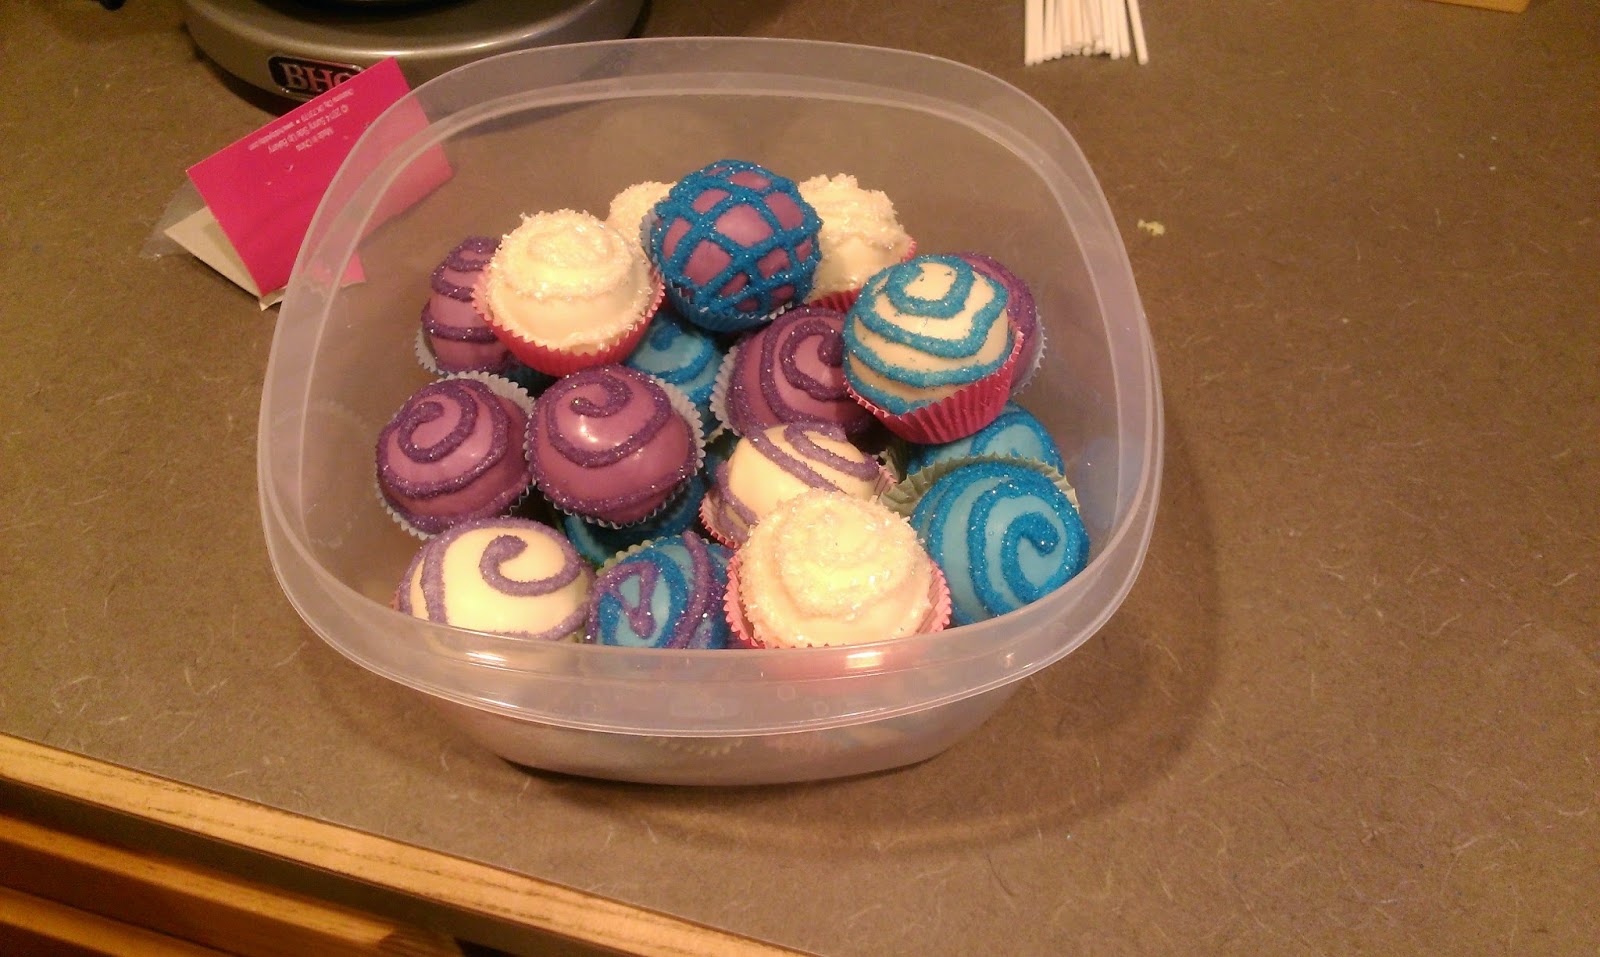
A trillion years ago when I was a child (or so it seems), Pier One came out with some of my favorite Christmas ornaments…they were just simple spherical-shaped ornaments in bright, shiny colors like blues or purples or silvers, but they were all lined in pretty glitter lines or swirls. Much like the caramel bars and various treats were a part of Christmas tradition, each year we all also bought a new ornament to put on the tree, too. I noticed once I received all my ornaments from my mother a few years ago that I was absolutely obsessed with those Pier One ornaments, as they comprised about 90 percent of the ornaments I had acquired since my youth, and since that was a trillion years ago, that’s a lot of freakin’ glittery ornaments. So much so that unpacking Christmas here leaves trace amounts of glitter on things until sometime in March. Apparently I share many commonalities with crows and other creatures that are as equally attracted to shiny objects as I am. Since we were having early Christmas with my mom, stepdad, sister, brother-in-law, and niece last weekend, I decided to make cake pops that were all glittery and fantastic (glitztastic, anyone?) to mirror those ornaments and reach an almost catastrophic level of glitter spill in my kitchen.

That’s about seventy-five gallons of sanding sugar you’re looking at right now. I wish I could lie to you and tell you these didn’t take me two days, but then I’d be lying to you and telling you these didn’t take me two days…maybe I just wanted to lie to myself because I’m still picking sanding sugar out of various crevices on my kitchen counters and kitchen floors and wondering what the factories at Pier One looked like when they made all those glitter ornaments. Did they have to swim in and out of glitter each day to get to their workstations? Were snorkels involved? How can something so seemingly innocent and sparkly become so evil and unstoppable? I may never know. But I can tell you how to make these glitter swirl cake balls– and if you heed my warnings– you may have more success at being less of a mess. Honestly, these do require a level of patience that exceeded my grasp (there was some yelling), but if you work well under pressure, you’ll show that sanding sugar who’s boss.
Start by making a cake of your desired flavor, let it cool completely, and then crumble it up into tiny little pieces. I broke my French Vanilla cake up into chunks and rubbed a couple chunks together at a time, think like grating cheese, but even more delicious and without the cheese grater. So nothing at all like grating cheese, really. 
In keeping with my vanilla theme, I plopped a tub of Pillsbury vanilla icing into my cake crumbles. I figured what with all the chocolate-based desserts we’d be eating over the weekend, these cake pops would pair nicely with my stepdad’s lemon bars. My assumptions were correct. They also tasted really great with Pinot Grigio, FYI. 
You will eventually have to use your hands to mix everything together, so wash up and keep from really ruining your family’s Christmas with a round of food poisoning. Wait to ruin it in some other way that doesn’t leave your family with a bathroom shortage situation, like drinking the last of the wine and not telling anyone about it. 
Once your mix is…mixed…use a cookie scoop to…scoop…and then roll your cake into little balls. I will refrain from making tiny testes jokes after last week’s blog. I promise. One cake should make around 33 cake balls. 
Place these all on Parchment-lined cookie sheets. Freeze for a half hour or so. I ended up breaking this up into two days, so once my pops were done, I actually decided just to put them in the fridge overnight, but didn’t take a picture of that. So here’s what my garage freezer looks like. Much like it’s attached fridge, it is also full of booze and poor life choices. If you have the time to do these all in one day, I highly recommend it. Either leave in the freezer for 30 minutes to 1 hour or in the fridge for 2 hours. I didn’t have the time to start on these until about 5 p.m., so I threw in the towel to make dinner; otherwise I was going to feast on uncoated cake pops, and this would have been a very sad, very eye-opening blog. On to day two…
Hobby Lobby, for all your clean-house-ruining dreams. Depending on what color you want your faux-glitztastic ornaments, buy a bag of melts for each. You should get enough melts out of one bag to decorate 10-12 pops, so I recommend selecting three bags of melts. I knew I didn’t want these to stay actual cake pops since pops are much harder to travel with, so I bought mini cupcake papers to place them into…I know, I’m a genius. I bought sanding sugar in colors to match, and Styrofoam blocks to places the pops in to dry.

We meet again… I inadvertently did myself a huge favor by leaving these in the fridge all night because I gave myself a chance to re-roll each ball into a smoother, less lopsided…blob. The nine on the left are re-rolled, so you can see how much nicer and actually spherical they are. I recommend a re-roll after you have cooled your pops regardless. But you will need to stick these back in the fridge for just a few (10-20 minutes) after re-rolling so they can maintain their shape.
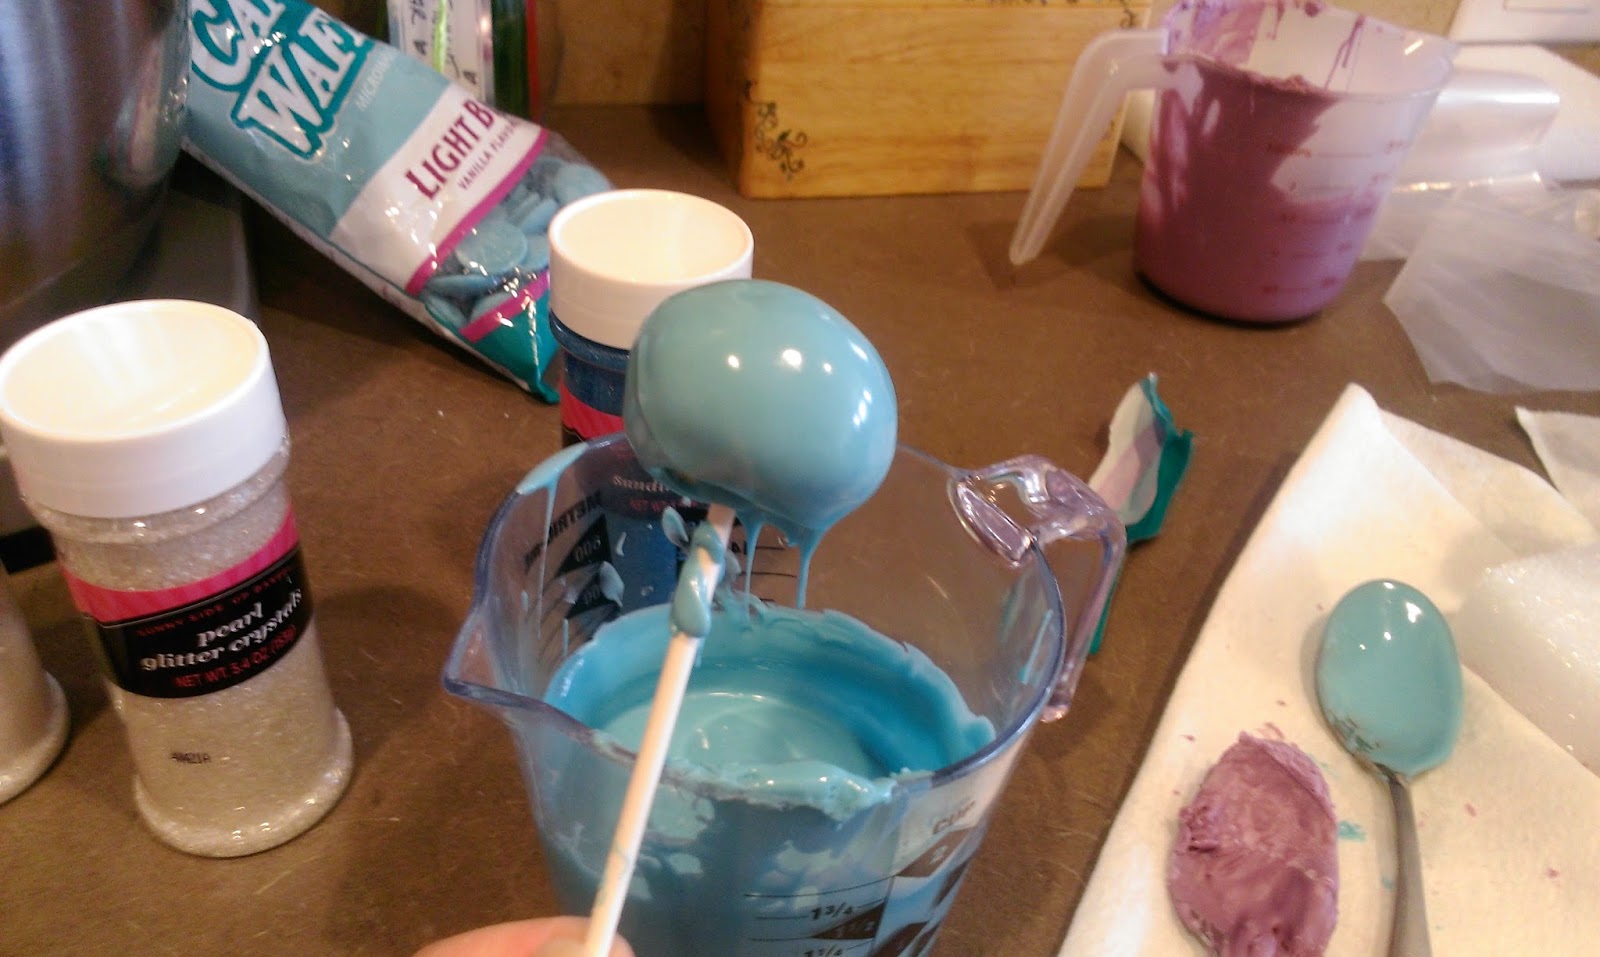
Use about 2/3 of a bag of melts, and melt away, baby! Then place your stick into the chocolate… 
And stab each pop through the heart. 
Then display your trophies as a warning to other cake balls in a Styrofoam block. This was only my second time making cake pops, and I learned a few things I want to pass on to you to make this process easier. When I made the purple pops, I left them out while the melts hardened around the stick. This meant that my pops sat out at room temperature for too long, so when I wanted to actually coat the whole pop into the melted chocolate, things got very slippery, very fast. The pops were too warm and wanted to just break apart or slide right off the stick. They were crumbling faster than me watching an emotional episode of Supernatural…I just want Dean to be happy, okay? So I learned my lesson, and HEED MY WARNING! Place your pops BACK into the fridge after you spear them to death. Let them cool back off for about 10 minutes, preferably 20.So remember:
Stab, THEN cool. Since you’re working in color groups, you can do one color, let cool, and while they’re cooling, start the process on another color…stab, then cool, stab, then cool. Repeat until you’ve run out of objects to skewer. 
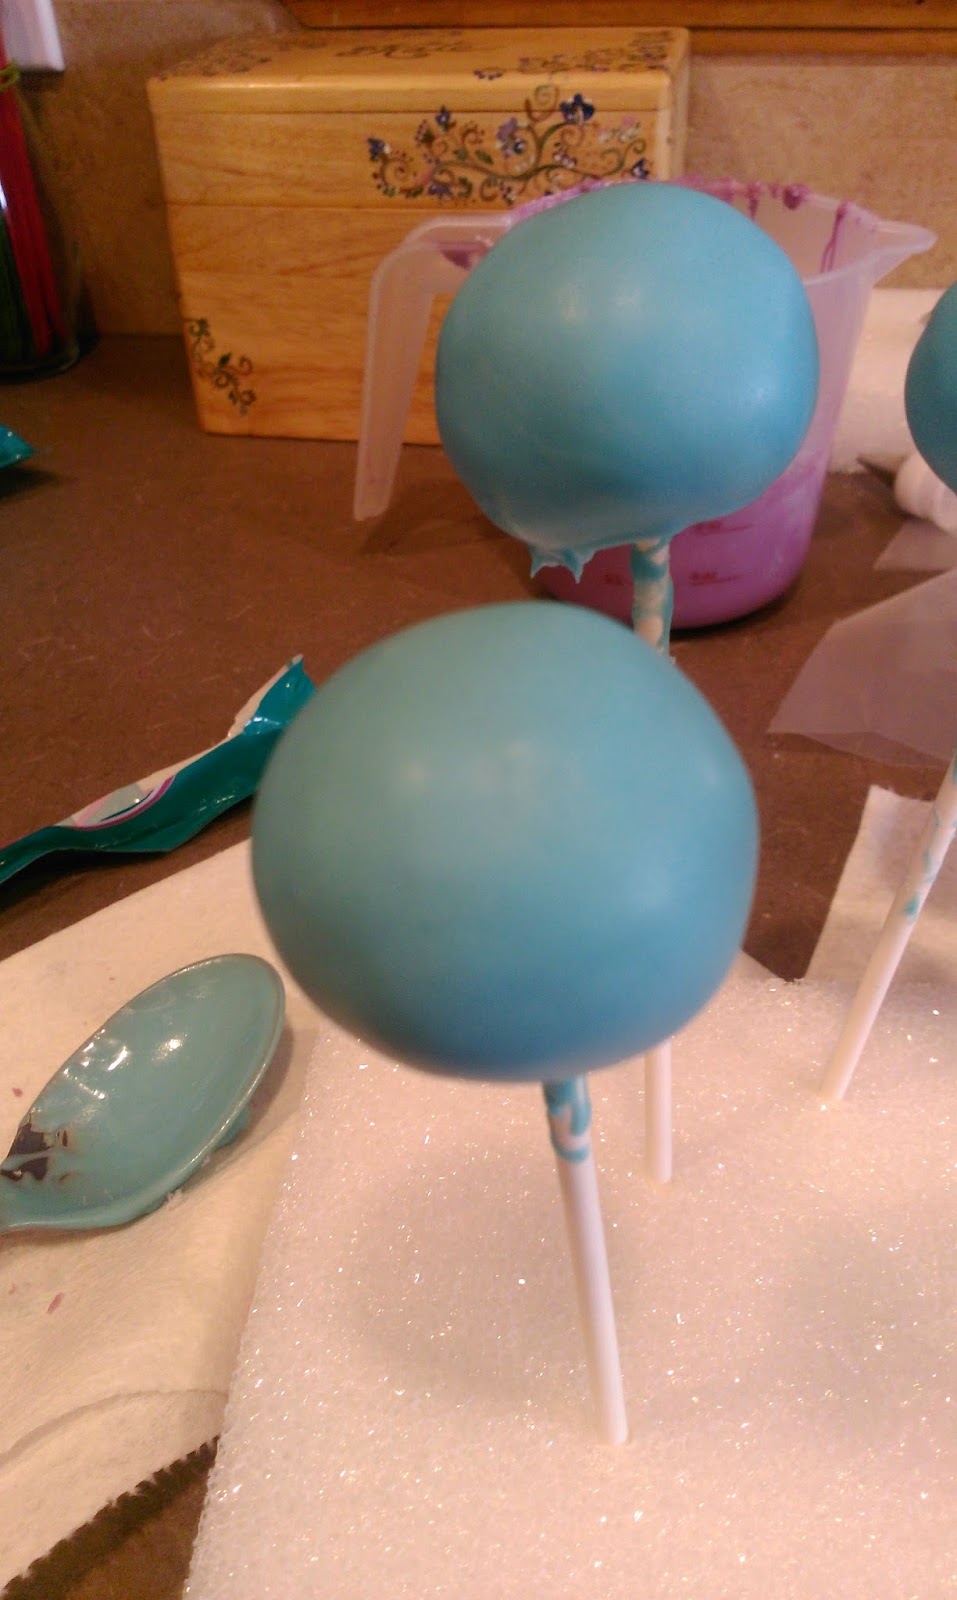
Once the pops are cooled back down and the sticks firmly cemented in place, dip each pop into the color of your choice. Pull out of the melts, and get to tapping. 
You want to tap it a few times up against your dish, then turn, tap a few times, then turn…keep doing this until you have evenly distributed the melts and things look nice and smooth. 
I was so proud of how smooth the blue pops turned out, my faith had been restored. My purple pops turned out horrid since I was too impatient and hadn’t yet learned my lesson, so it should come as no surprise that I have no pictures of those. Time is really a factor here. The melts cool fast, so you’ll want to spend about a minute dipping and tapping each pop into a perfect sphere. You will lose your mind if you try to do all 33 of these at once, so give yourself a break. After the purple pop fiasco, I took a breather while considering if art is punishment or vice versa before getting back at it. I also wondered how many pops I could fit into my mouth at once, but decided against going for it since I’m not sure whether my dog knows the Heimlich maneuver.
Now, get ready to make a mess and possible disaster area. 
You’ll also want to raid your spice cabinet for a lid to fit the top of your sanding sugar to maintain some semblance of control. Once you’ve dipped all your pops and they have sat out to harden for about 15-30 minutes, you’re ready to get down to decorating. You will want to take the remaining 1/3 of your bag of melts, and melt according to package instructions. Let that cool off for a bit while you fit three piping bags with small round tips…Wilton 2, 3, or 4 tips will work for these designs. The thing about decorating with chocolate melts…its messy. There is this perfect 5-minute window where the chocolate is not so hot that it is spewing everywhere like a bleeding limb (think the Black Night from Monty Python), or not so cold that has hardened into what more resembles cement than an edible material. This is where patience comes in handy. Even if you aren’t the most patient person, realize that just about any ugly incidents can be covered up with a proper amount of glitter. Sparkles fix EVERYTHING. So, using my ugly purple pops (why didn’t I think to do this with my beautiful blues…), let me show you some mock techniques on decorating…
Since I don’t have a third arm, I couldn’t really show the technique while actually piping, but you get the gist. Have fun with it, really. Make messy lines instead of swirls, or make tons of little swirls, or write your name on a few to claim them as your own, whatever you like. Just remember to do ONE POP at a time. Once you have decorated ONE POP the way you want, hold it over a bowl, and top it with your sanding sugar. Those melts dry fast, so you need to get the sanding sugar on while they are still wet.
Not pictured, the sanding sugar inside of my shirt. 
You can come back over your pops with more piped lines and even do sanding sugar in another color. I started to really mix up my glitter colors and designs with the white pops, so of course I forgot to take pictures of that. If you buy melts and sanding sugars that all look nice together, you can really come up with a ton of color combinations when you add sanding sugar to the pops. I do wish I had been more adventurous with my pops, but live and learn. They still tasted delicious either way. But dear God…I took too long decorating a few of my purple pops, and the chocolate hardened up in the decorating tip. This led to me pushing really hard on the decorator bag and the decorating tip flew off the bag, and chocolate spewed EVERYWHERE. Its like candle wax, and it hardened completely as soon as it was out of the bag and exposed to air. Lesson learned- find the magical Goldilocks window where its not too hot and not too cold. This happens approximately 8 minutes after heating the remaining melts to decorate with.
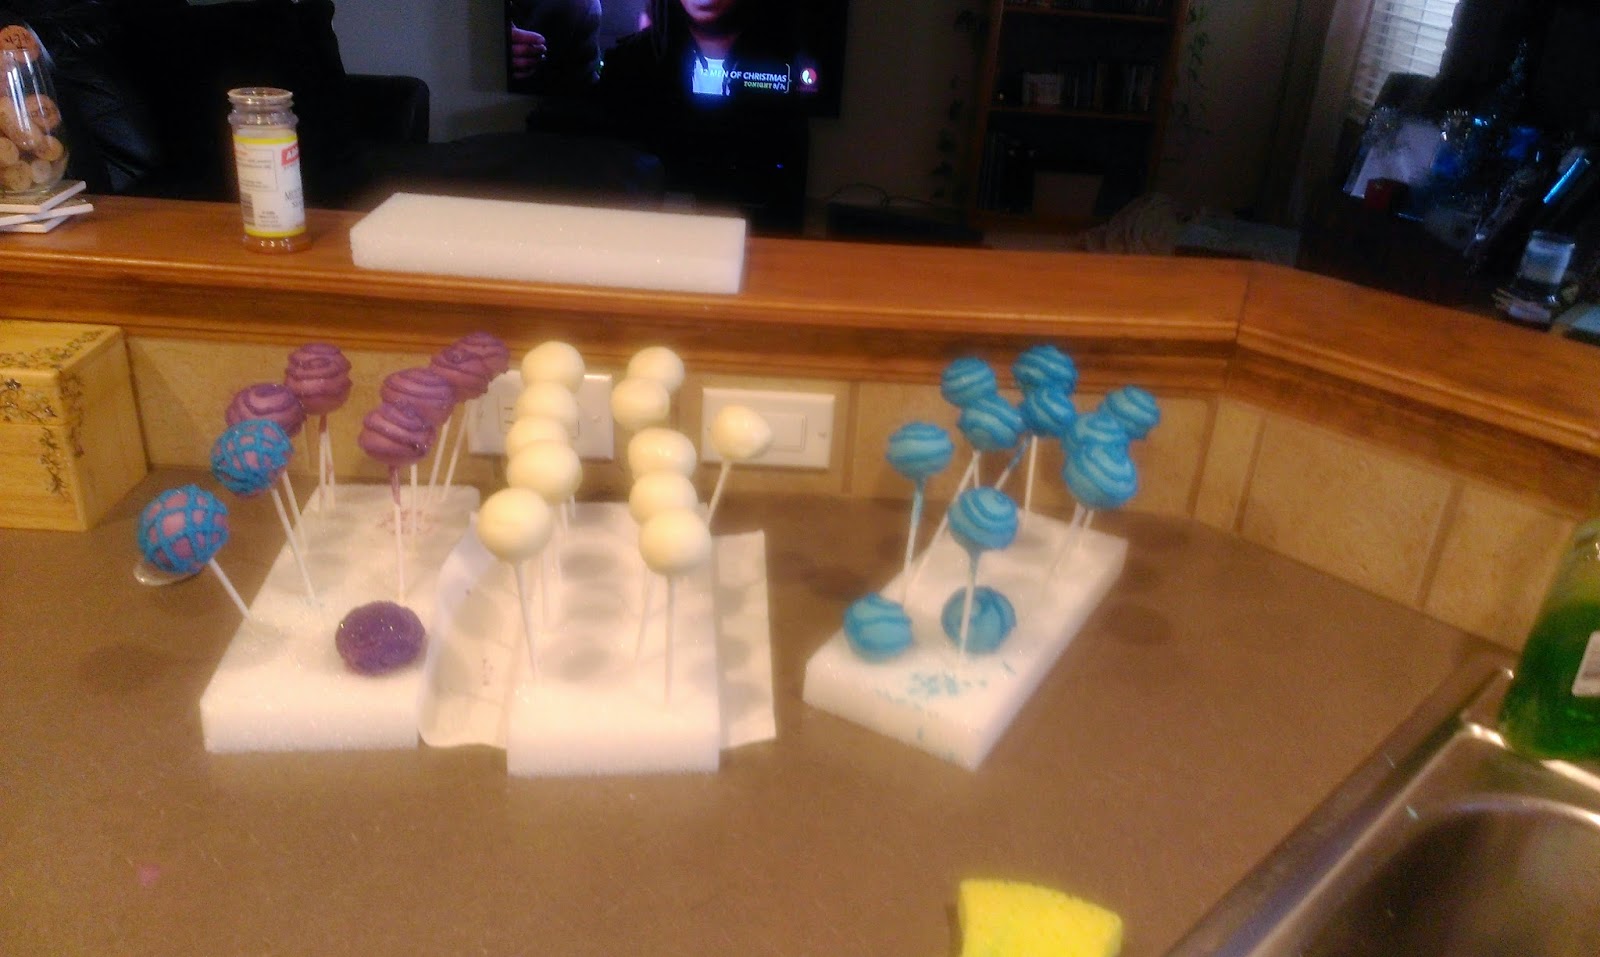
It’s beginning to look a lot like cake pops! God, I have tons of these… As for the sanding sugar mess, be sure to keep a LARGE bowl under your pop as you dust it with glitter, and keep wet paper towels to mop up whatever spills outside of the bowl. I used a small bowl, and by the end of it, I had purple, blue, and white sanding sugar covering my kitchen floor with such intense volume that I felt like I was standing on a real beach. Not exactly what I had in mind as far as tropical vacations go. Once my pops were totally dry (another 10 minutes), I simply wiggled the sticks out of the bottom and placed each pop into a cupcake paper, as seen above.
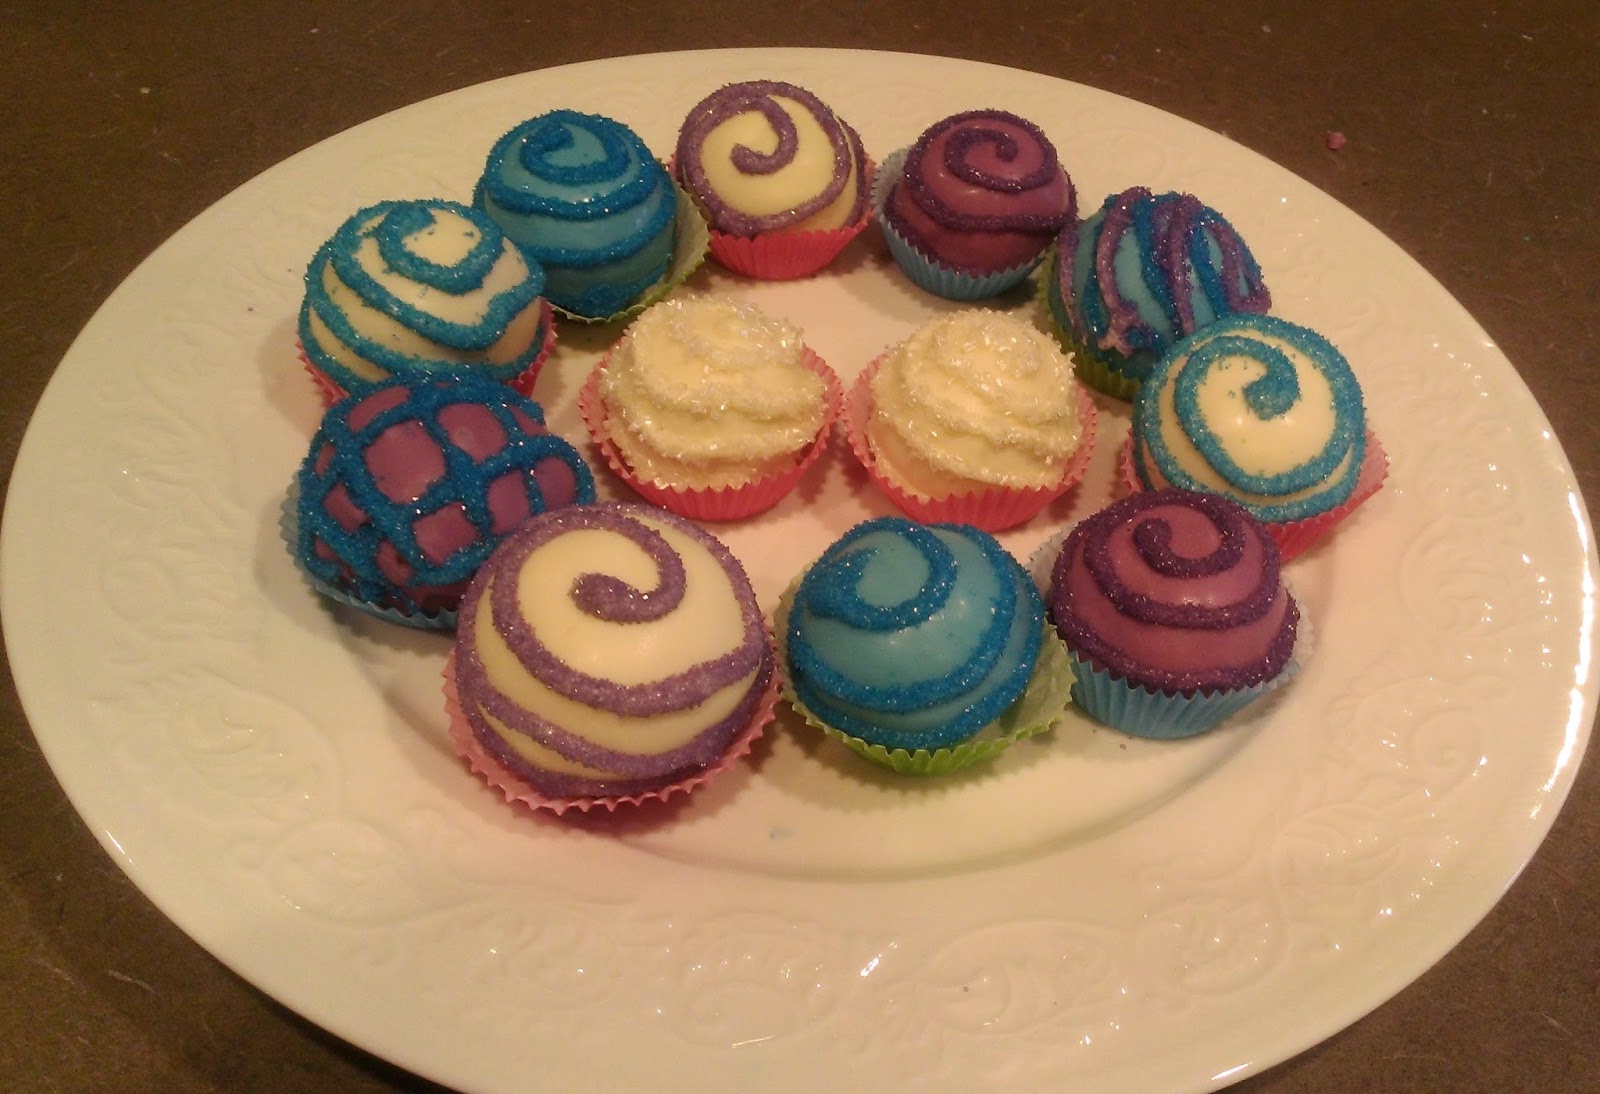
You look good enough to stare at for a minute, then eat. I gently placed all my pops, now just balls (no joking here), into a large Tupperware to make them travel safe. I put them into a hot/cold bag on top of a bag of ice so they would stay cool for my travels. I’m glad I did, too, because I was slowed down a bit… …by this Silent Hill fog that had rolled into Texas. Literally the moment I crossed state lines, I was met with low visibility and a sneaking suspicion that Pyramid Head was waiting just out of sight to ruin my Christmas. This was the second year in a row I’ve had to drive through pea-soup fog to get to Denton…but I’ll take that over the year I was stranded on I-20 for 18 hours in a snowstorm in a line of 20 miles worth of other traffic. Fa la la la la la la la, dammit. Maybe I should just stay home next Christmas.
But my sister has way better serving dishes for photography purposes. Early Christmas was a success, and Derek was finally able to join us all for a major holiday and is now home. For the time being. Don’t want to jinx it. Knock on lots of wood. So if you want to bring in the wow factor this Christmas, start on these pops tomorrow and by Christmas day, you and your family can be eating decadent little cake balls that look like ornaments that tested every last bit of the sanity you had left for 2014. Thank God you get to go on a cruise soon. Wait, that’s not you…that’s me. So I’ll be back, Terminator style, in 2015 with hopeful tales of wonder and excitement from the Caribbean. Have yourself a Merry Christmas and a Happy New Year- all filled with treats! And tell me how delicious they are, because I couldn’t have picked a worse time of year to have to wear a bikini. ‘Til next time, my fellow eaters! -
Christmas Traditions You Can Really Sink Your Teeth into!
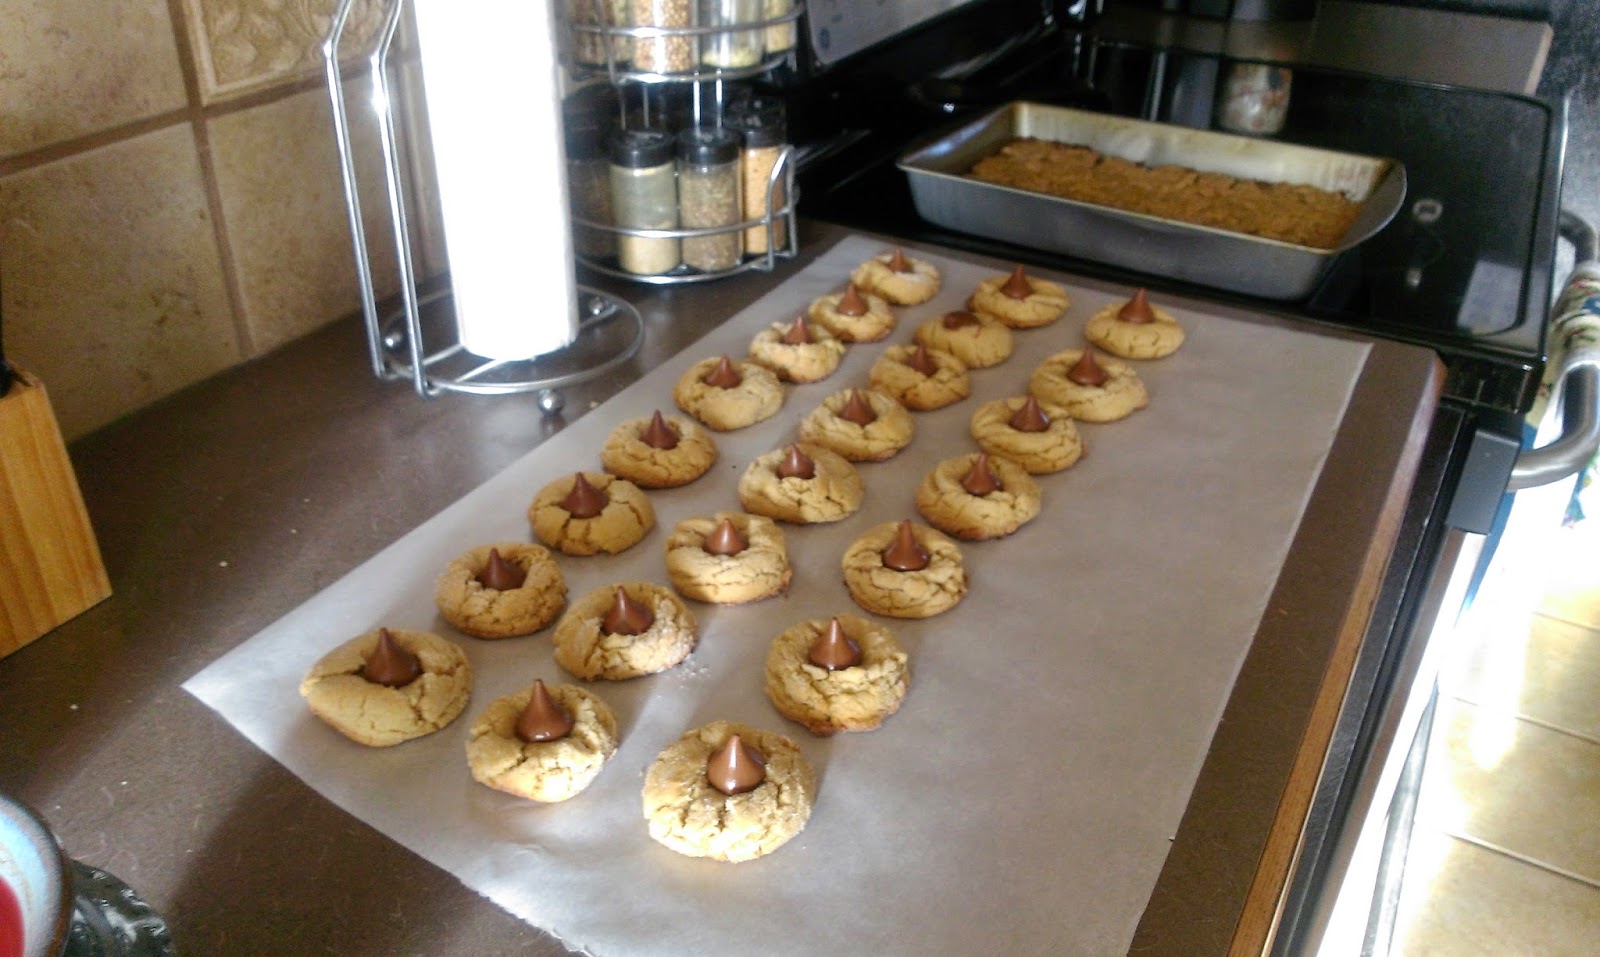
For all major holidays, every family in the world as a different tradition when it comes to proper celebration. Maybe your drunk Uncle Larry likes to fall asleep under the Christmas tree every Christmas Eve, or perhaps your grandmother makes a mean spiked ‘nog…whatever it may be, if you took it away a piece of that holiday would be missing. I am fortunate enough to have inherited my mother’s ability to bake (and also her awesome sense of style), so I can carry on the tradition that reaches back as far as I can remember each Christmas: Spending a ridiculous amount of time slaving over a hot oven to make treats for the family. Every year growing up, my mother would make fields of Spritz cookies, peanut butter Kiss cookies, caramel bars, chocolate fudge– hell, my stepdad even makes a lemon bar that would make you salivate upon first whiff from the oven. At this point you may be asking yourself if I got Type 2 Diabetes for my 11th Christmas, but my mother has eyes in the back of her head and hearing that is best described as a combination of echolocation meets librarian. If I so much as thought about gliding through the kitchen in one pass to open a Tupperware lid and wait a solid 15 minutes before returning through the kitchen to grab a treat from that Tupperware, she would know. She would be there…waiting. It was something akin to a storyline from all the Ocean’s 11 movies. There was no pulling one over on her.

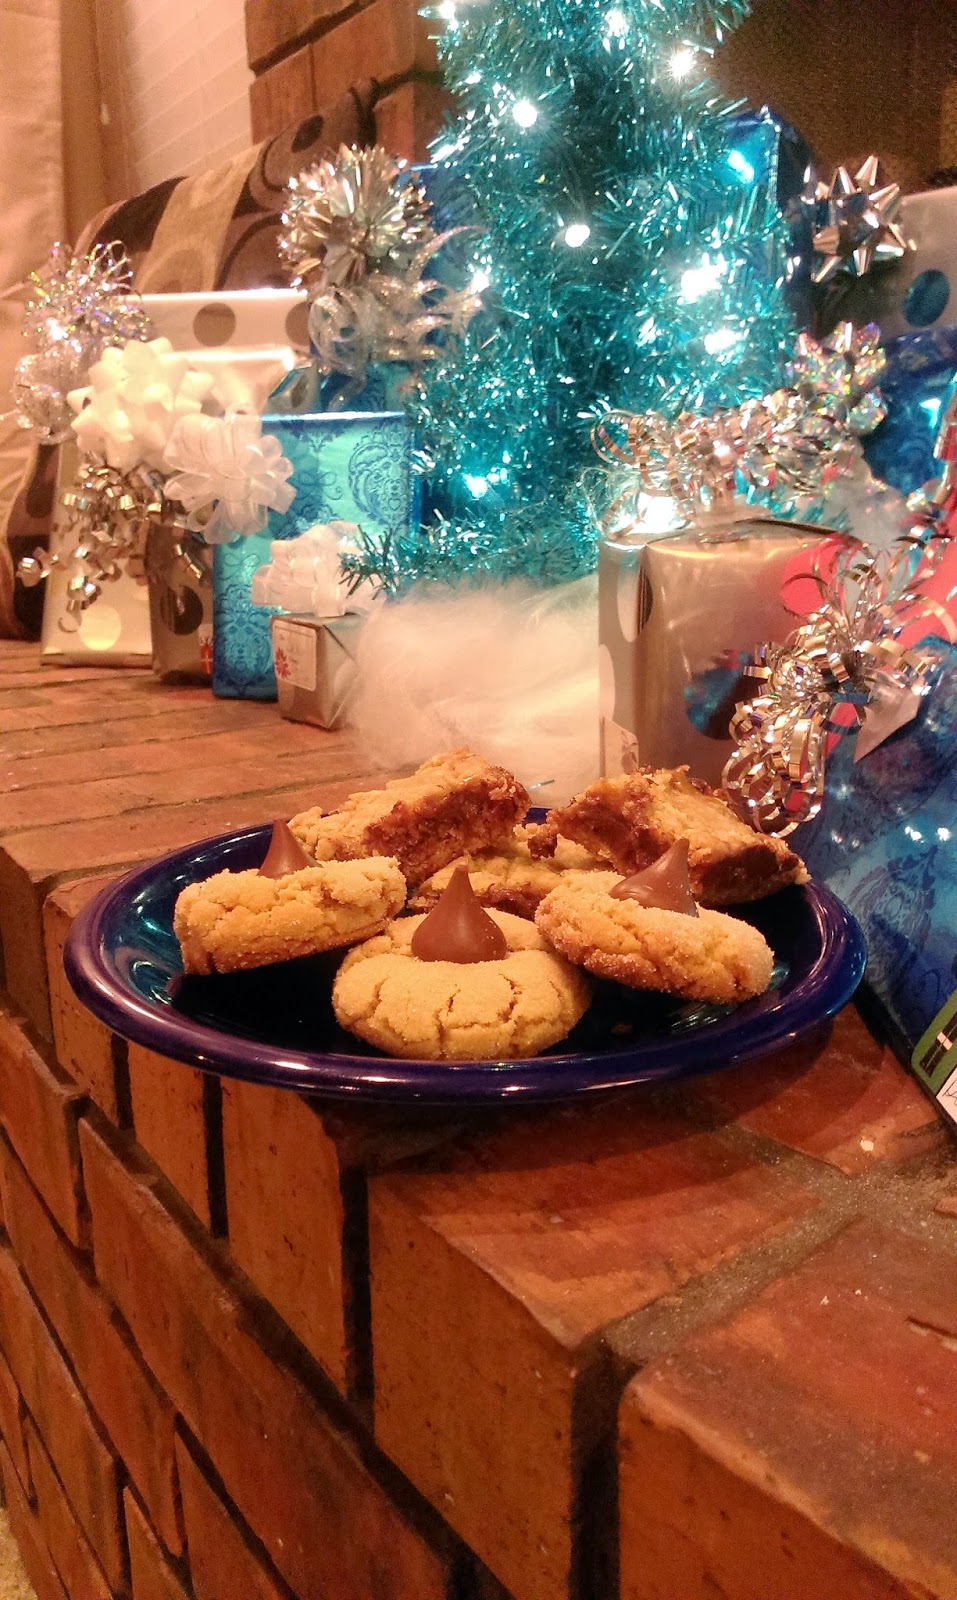
But you can see why I still tried anyway. 2014 is the year of celebrating Christmas early in my family, so I made these treats last week so I could indulge my dad and stepmom with peanut butter Kiss cookies and caramel bars when they began Christmasapolooza ’14: The visiting of the family. The cookies are so insanely easy to make, so I’ll start with them and work my way to the caramel bars. I thought about making fudge, but the greatest fudge in the world can be mailed to me from Frankenmuth, Michigan, so I decided to pass on that…plus, Derek is still not home, so I cannot be trusted with that mass quantity of dessert.

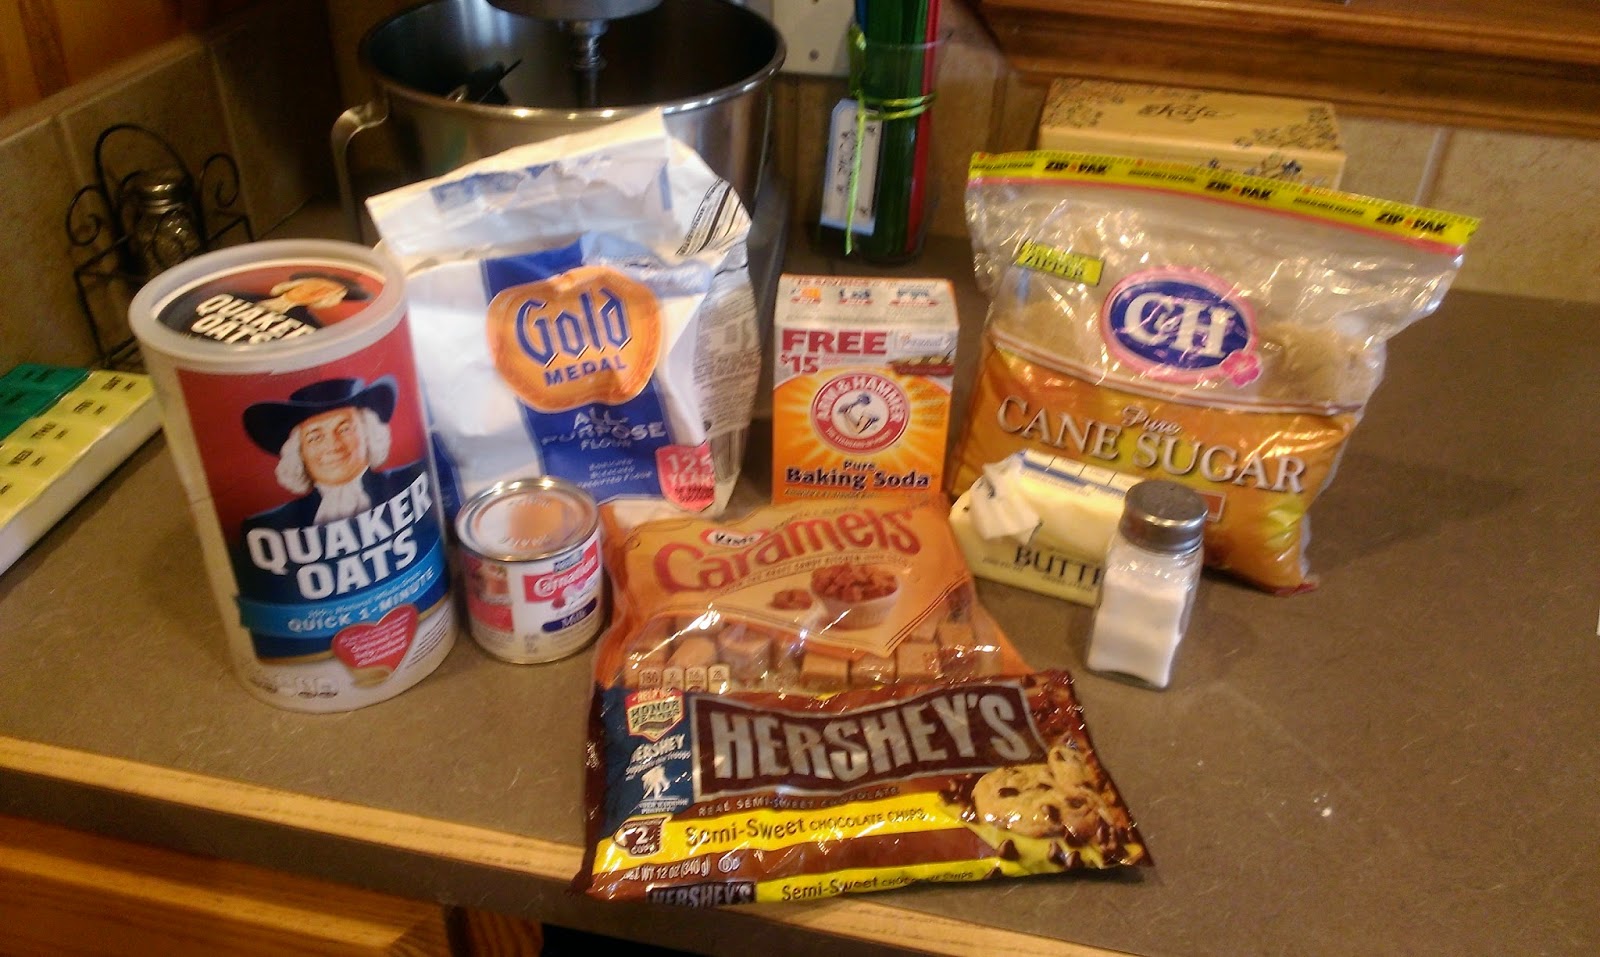
Standard ingredients- check. Peanut Butter Kiss Cookies:
- 1/2 C butter
- 1/2 C sugar
- 1/2 C brown sugar
- 1/2 C peanut butter- Jif, unless you hate your family.
- 1 egg
- 1 tsp vanilla (not pictured, was being shy)
- 1 3/4 C flour
- 1 tsp baking soda
- 1/2 tsp salt
- 1 bag of Hershey Kisses

Oh yay, a crappy picture tutorial! You’re welcome, reader. Start by creaming together the butter and both sugars. Resist eating bowl of sugar-butter paste. 
Add in the egg, peanut butter, and vanilla extract and blend until combined. If you have no quality or zest for life, I suppose you could use Skippy peanut butter, but you’re then the one responsible for ruining Christmas. 
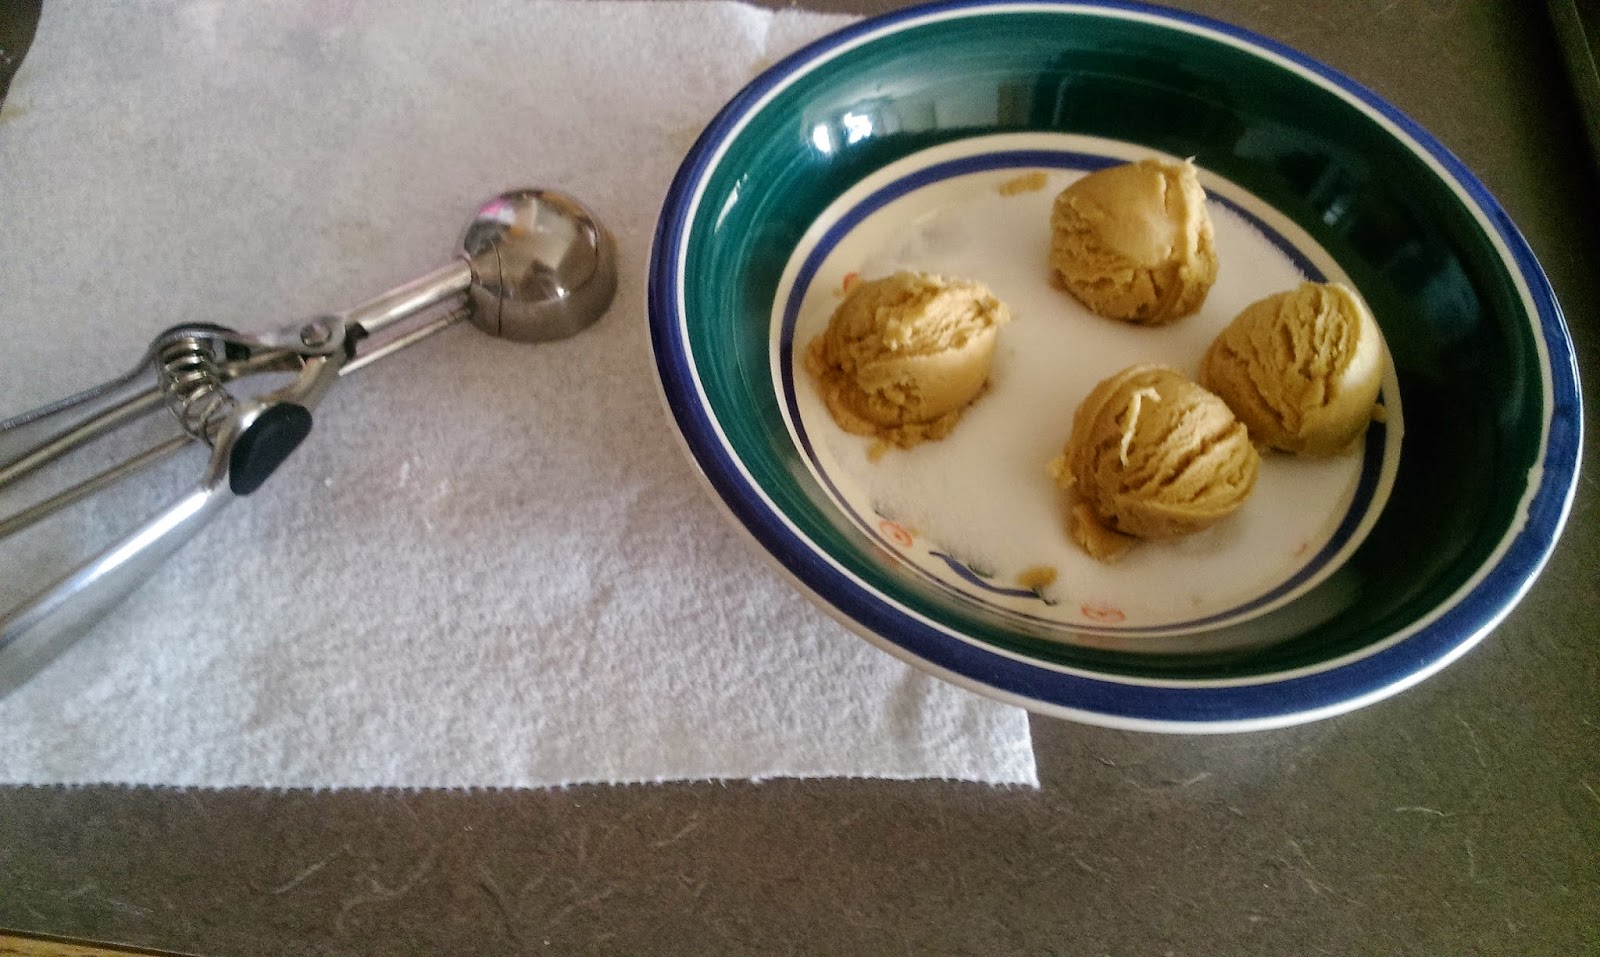
Once your cookie dough is mixed, you can either shape into little balls (haha) with your hand, or use a cookie scoop. I always opt for the scoop to keep my hands clean. Then take your little balls (haha) and roll them around in a dish of plain white sugar..good name for a crappy Indie cover band. You know they’d be from Dayton or Toledo. At this point, I forgot to take a photo, but you’re going to need to have your oven preheated to 350, and place the little balls..pause for chuckle…onto a baking sheet. You will need two sheets because depending on the size of your balls (c’mon, its funny), this makes 24+ cookies. Bake your cookies for 8-10 minutes depending on the size.
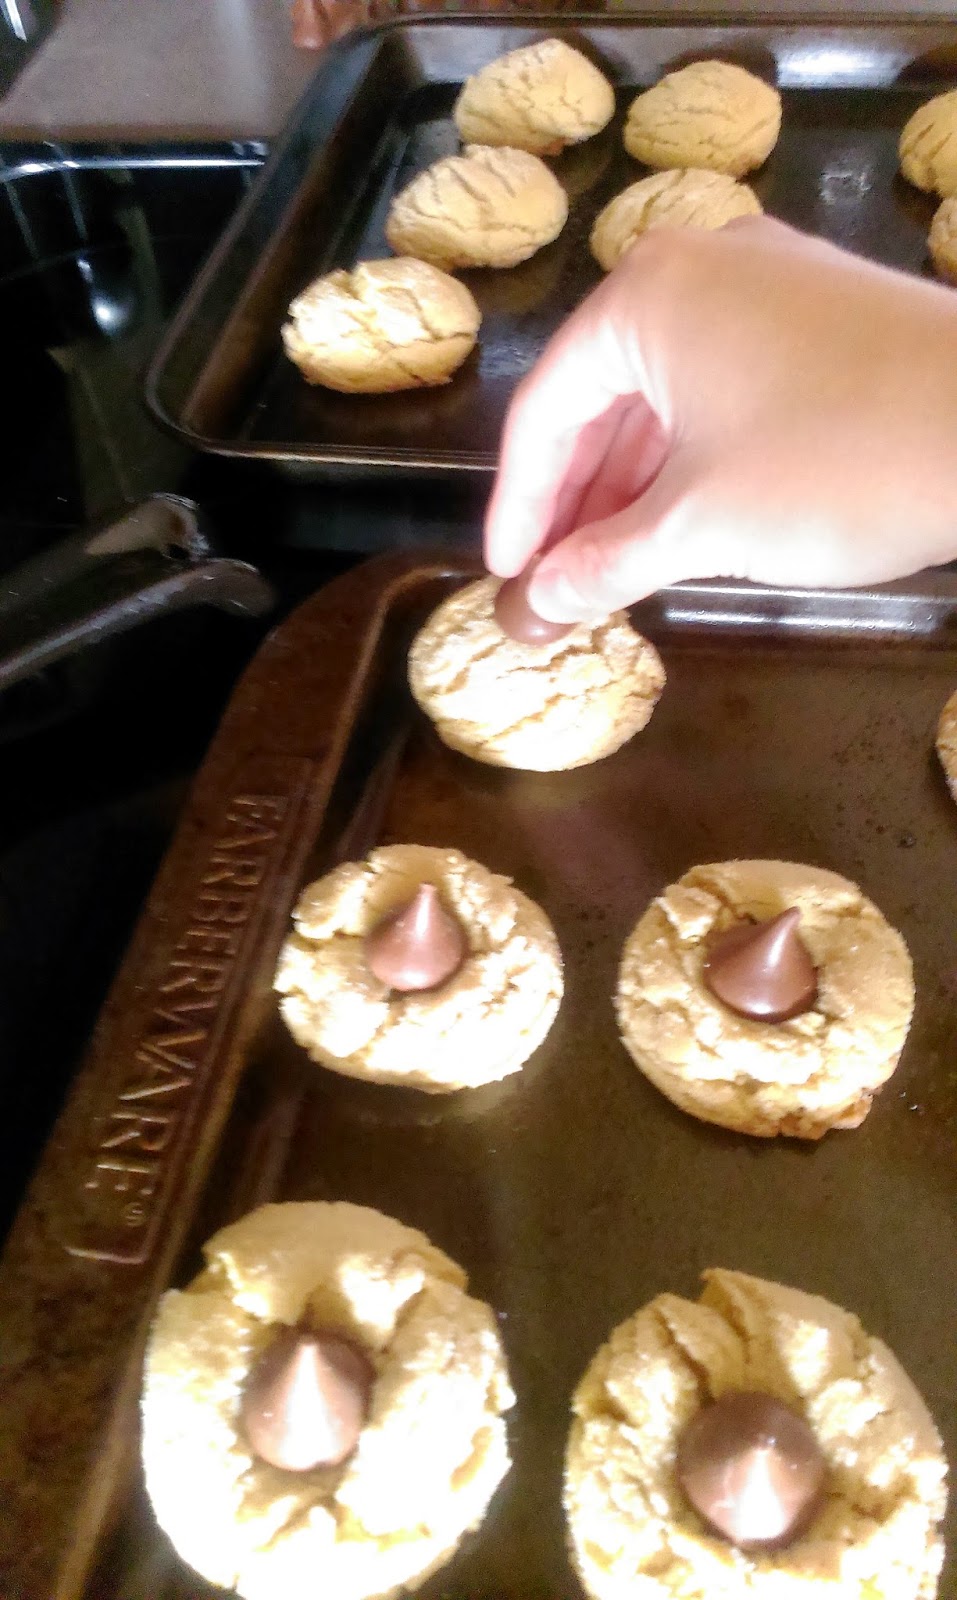
While baking, unwrap however many Kisses there are cookies. Pull out of the oven after 8-10 minutes and smoosh a Kiss into the top of each cookie. This gives me an insane sense of satisfaction, like popping bubble wrap or peeling the goo off the back of gift cards. I need serious psychological help. Stick back in the oven for 2-5 minutes so the Kiss doesn’t completely melt, but gets all gooey and yummy. 
Let rest on the cookie sheet for a few minutes, then move to parchment paper to finish cooling. These are absolutely amazing fresh out of the oven, but even better after a day or so when the cookie part gets a hint of crunch while the Kiss stays soft. Such a winning combination!! Easy enough? Right? I mean, you even get to eat a few Kisses while you’re waiting because you simply deserve it. Now, I want to introduce you to a dessert that will CHANGE YOUR LIFE. I suppose you could even consider it somewhat healthy because it contains oatmeal. Its a stretch, but I’ll take it. Ladies and gents, here’s how to make my mother’s awesome caramel bar recipe…drum roll, please…

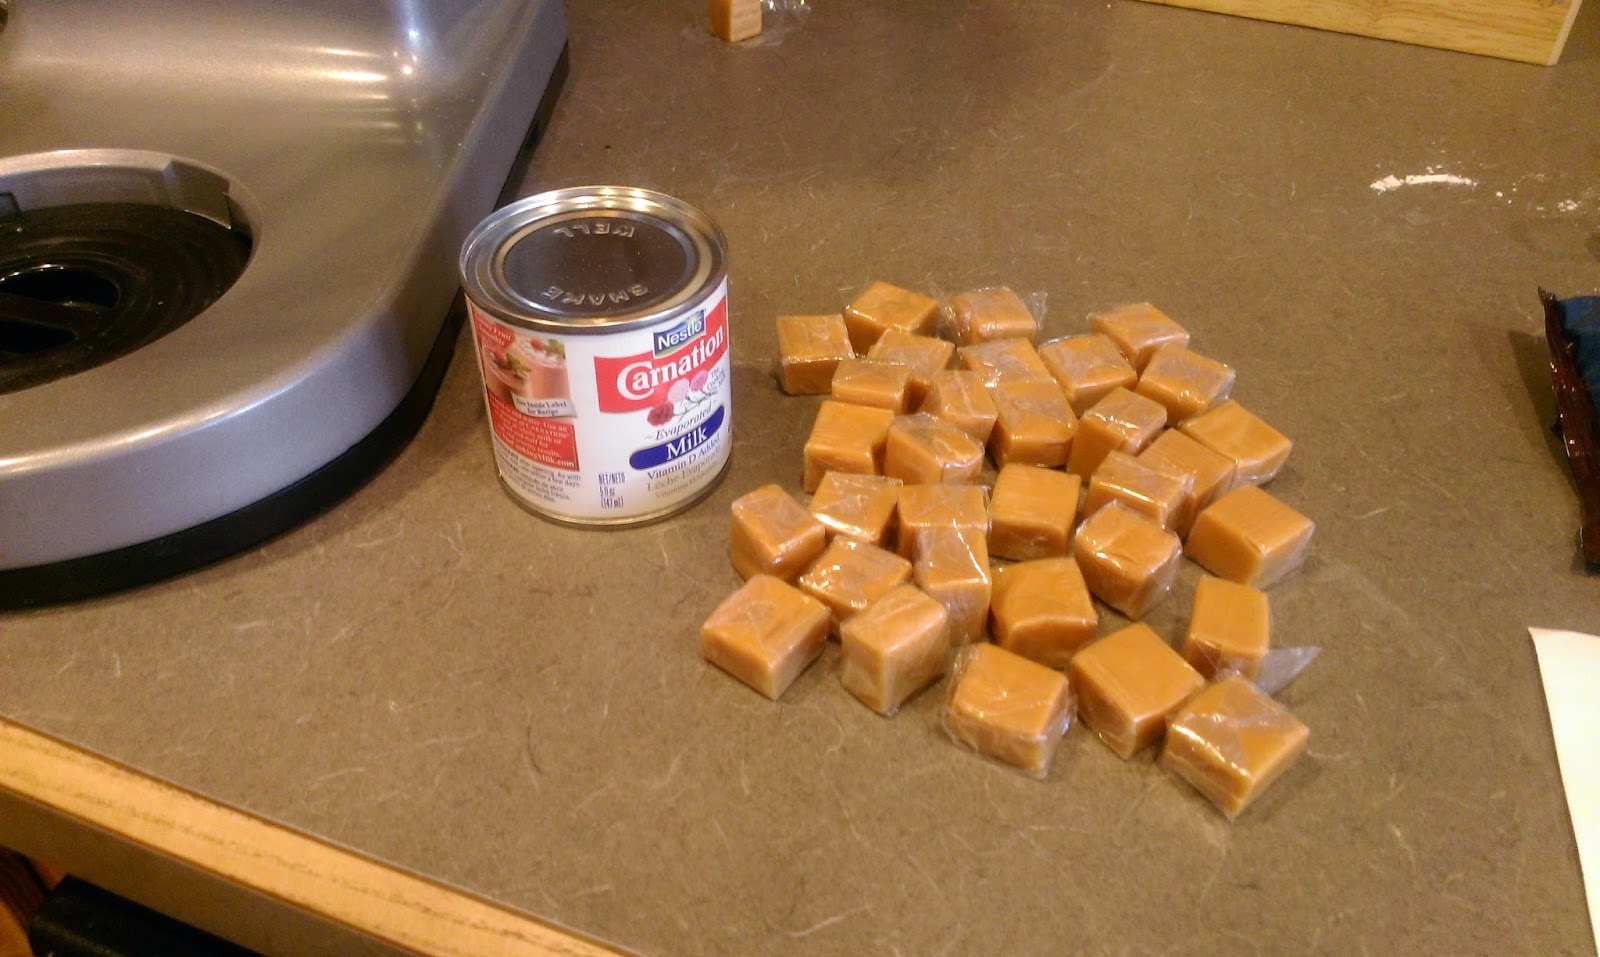
So much goodness, so few mouths. Caramel Bars:
- One bag of Kraft caramels
- 5 ounce can evaporated milk
- 1 C flour
- 1 C quick cook oatmeal…is there other oatmeal besides Quaker? I mean, this is like the whole peanut butter discussion all over again.
- 1/2 tsp baking soda
- 1/4 tsp salt
- 3/4 C butter
- 3/4 C brown sugar
- 12 ounce bag of semi-sweet chocolate chips
- Prepare yourself for yet another crappy photo tutorial!!

Start by mixing the flour, oatmeal (uncooked), brown sugar, baking soda, salt, and butter together. 
All ingredients should be blended nicely together, but it looks like cornmeal to me at this point. 
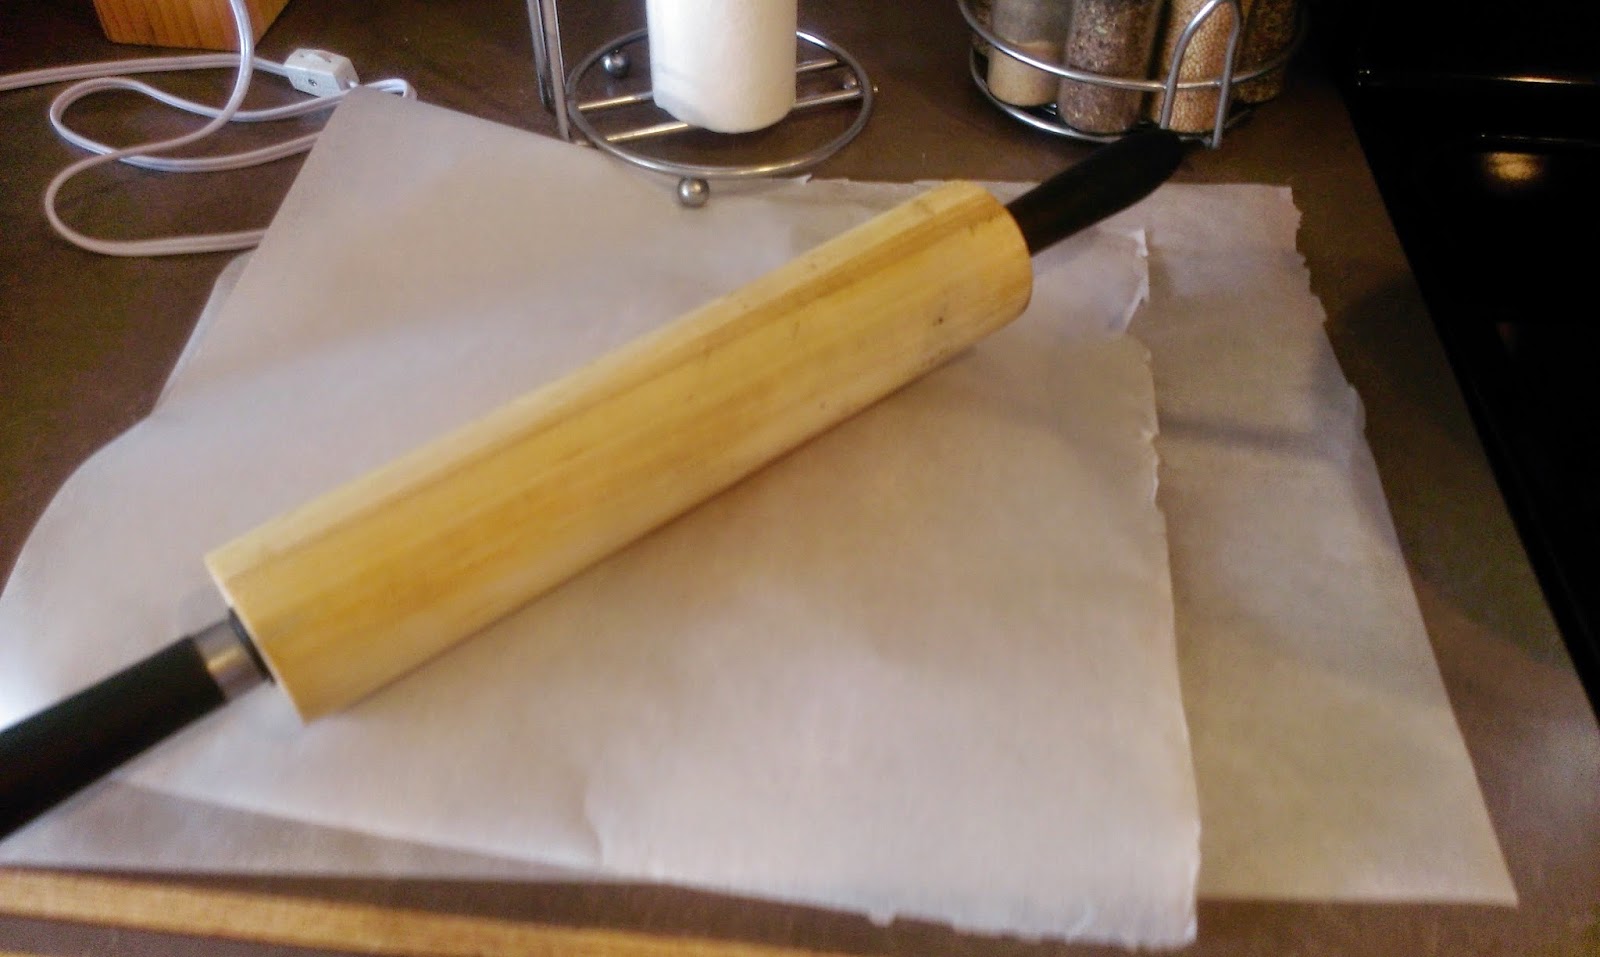
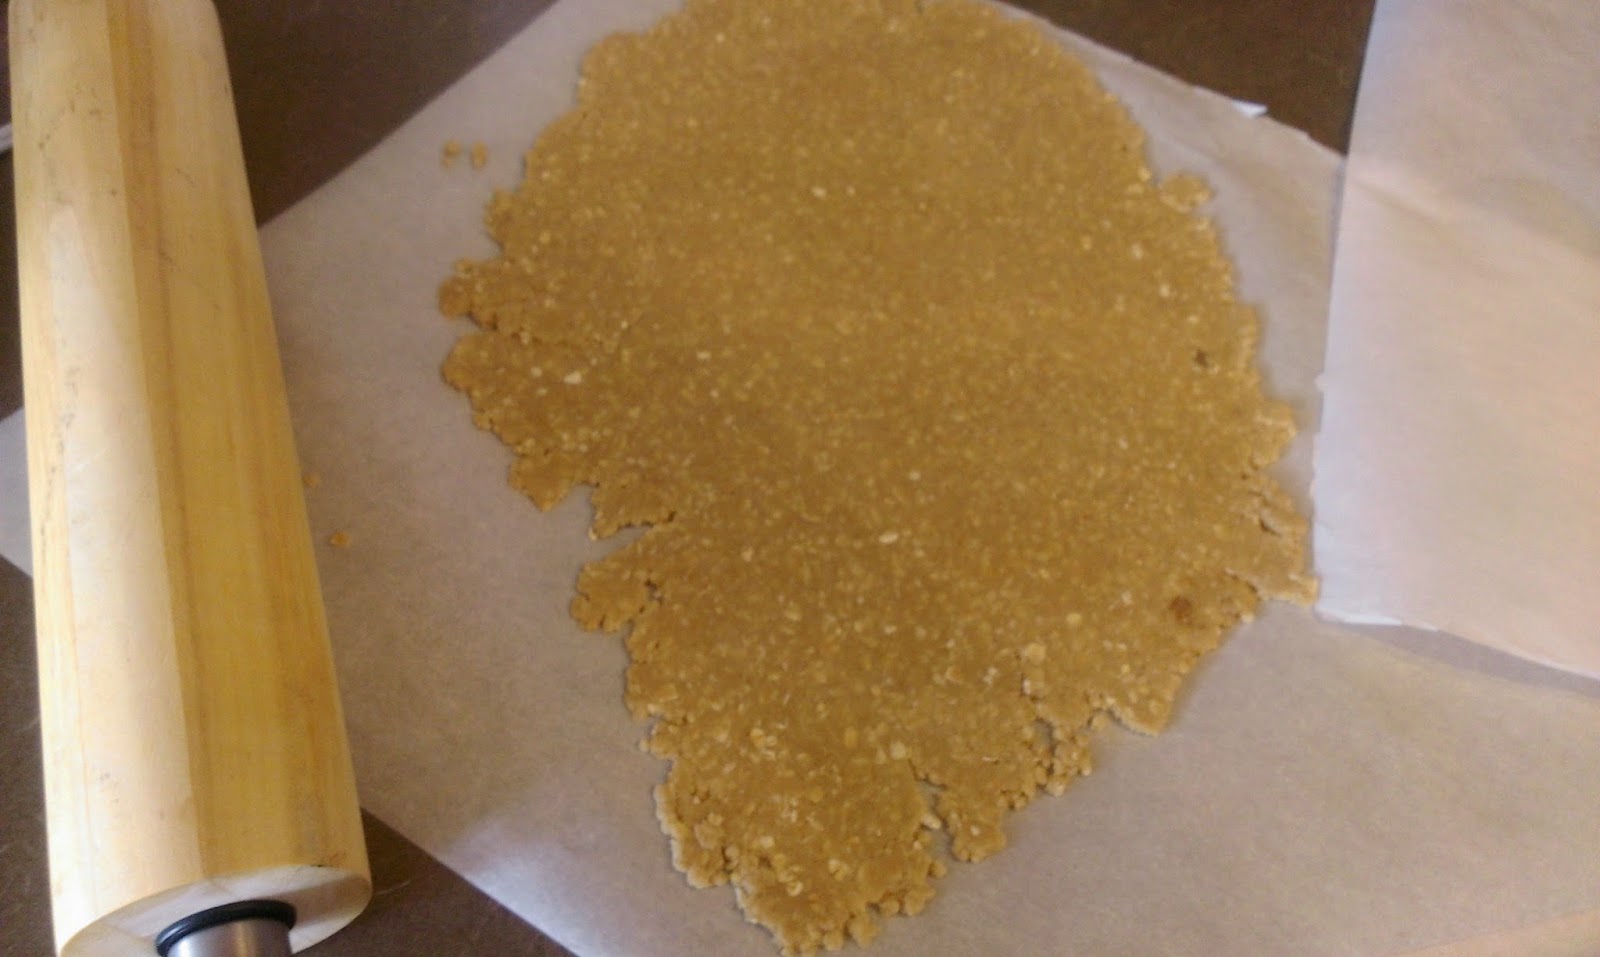
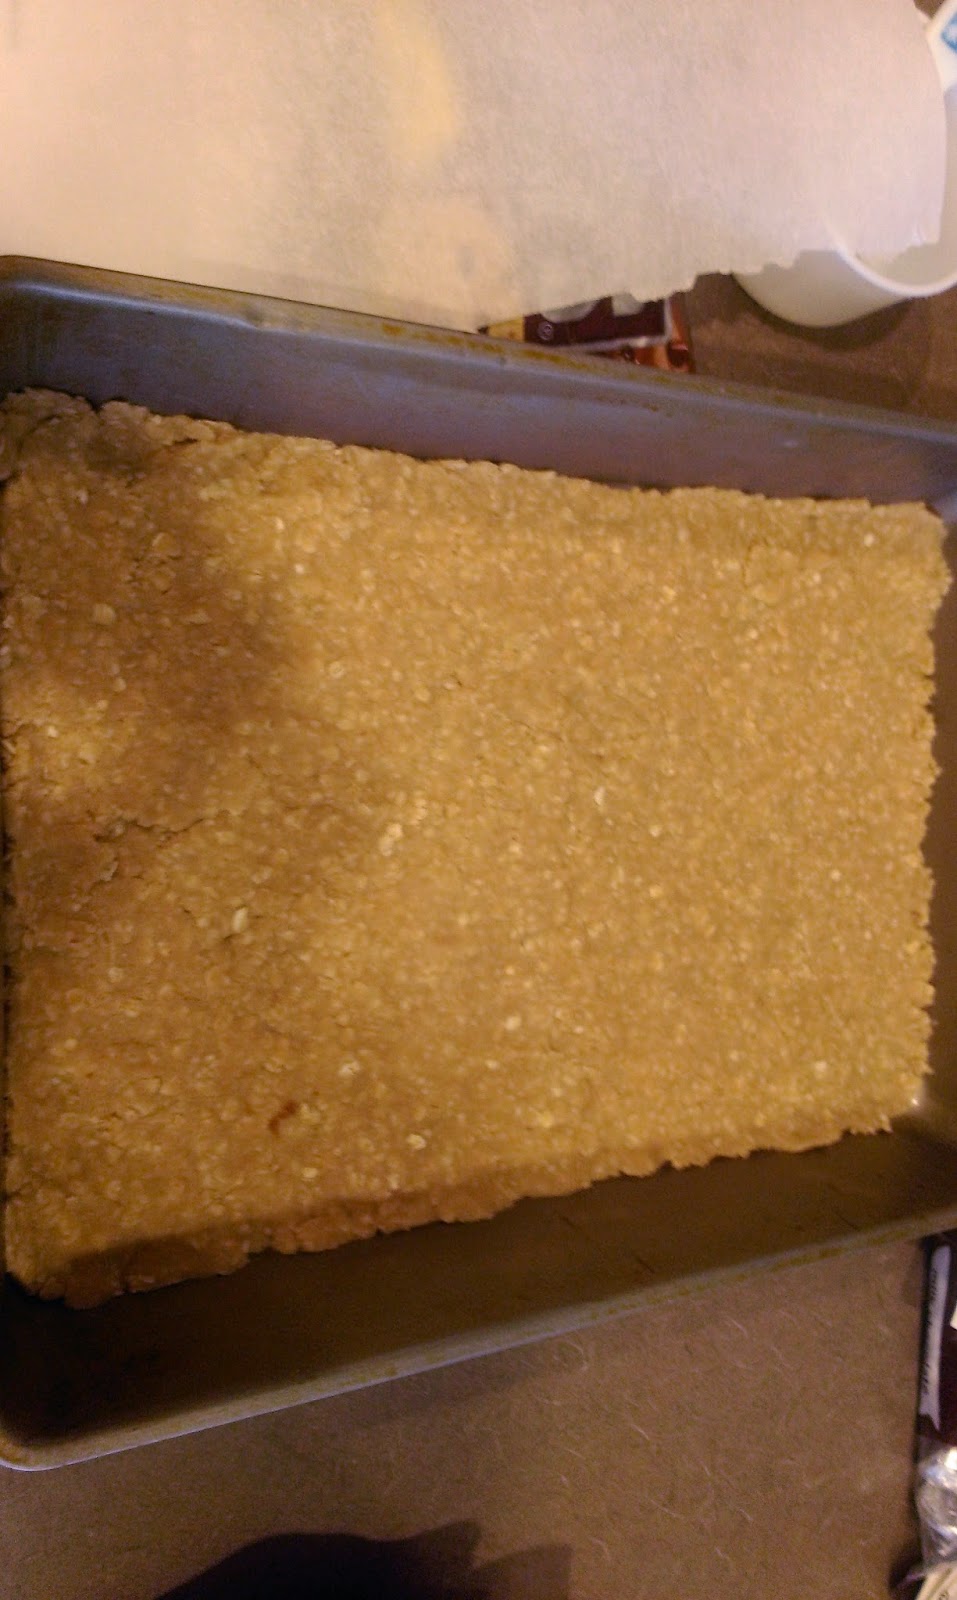
Oh yes, you get to use the rolling pin for this!!! Take the dough and flatten it out with your rolling pin, or even by hand…you may have had a bad enough week to punch some unassuming dough flat, I’m not judging. Reserve a 1/3 of the dough for later. 
In either case, you want it to be thin but not too thin. Like, crust thickness…yes, crust thickness. That’s a new measure of thickness you heard hear first. 
Again with the pivoting…now, take sections of dough and press them into a greased 9×13 pan… 
Until you’ve covered the whole bottom of the pan. I had some seams in there that I just smooshed together with my fingers. You just don’t want stuff to leak through later. Now toss this in your already preheated oven leftover from round 1: the cookies, and bake at 350 for 12-15 minutes until golden. 
While your crust is golden..ing, unwrap all of the caramels and dump them into a microwave safe dish. Pour the evaporated milk on top, and microwave together. Try one and a half minutes, then stir, and another one and a half minutes, then stir, and you should have well-mixed milky caramely goodness. 
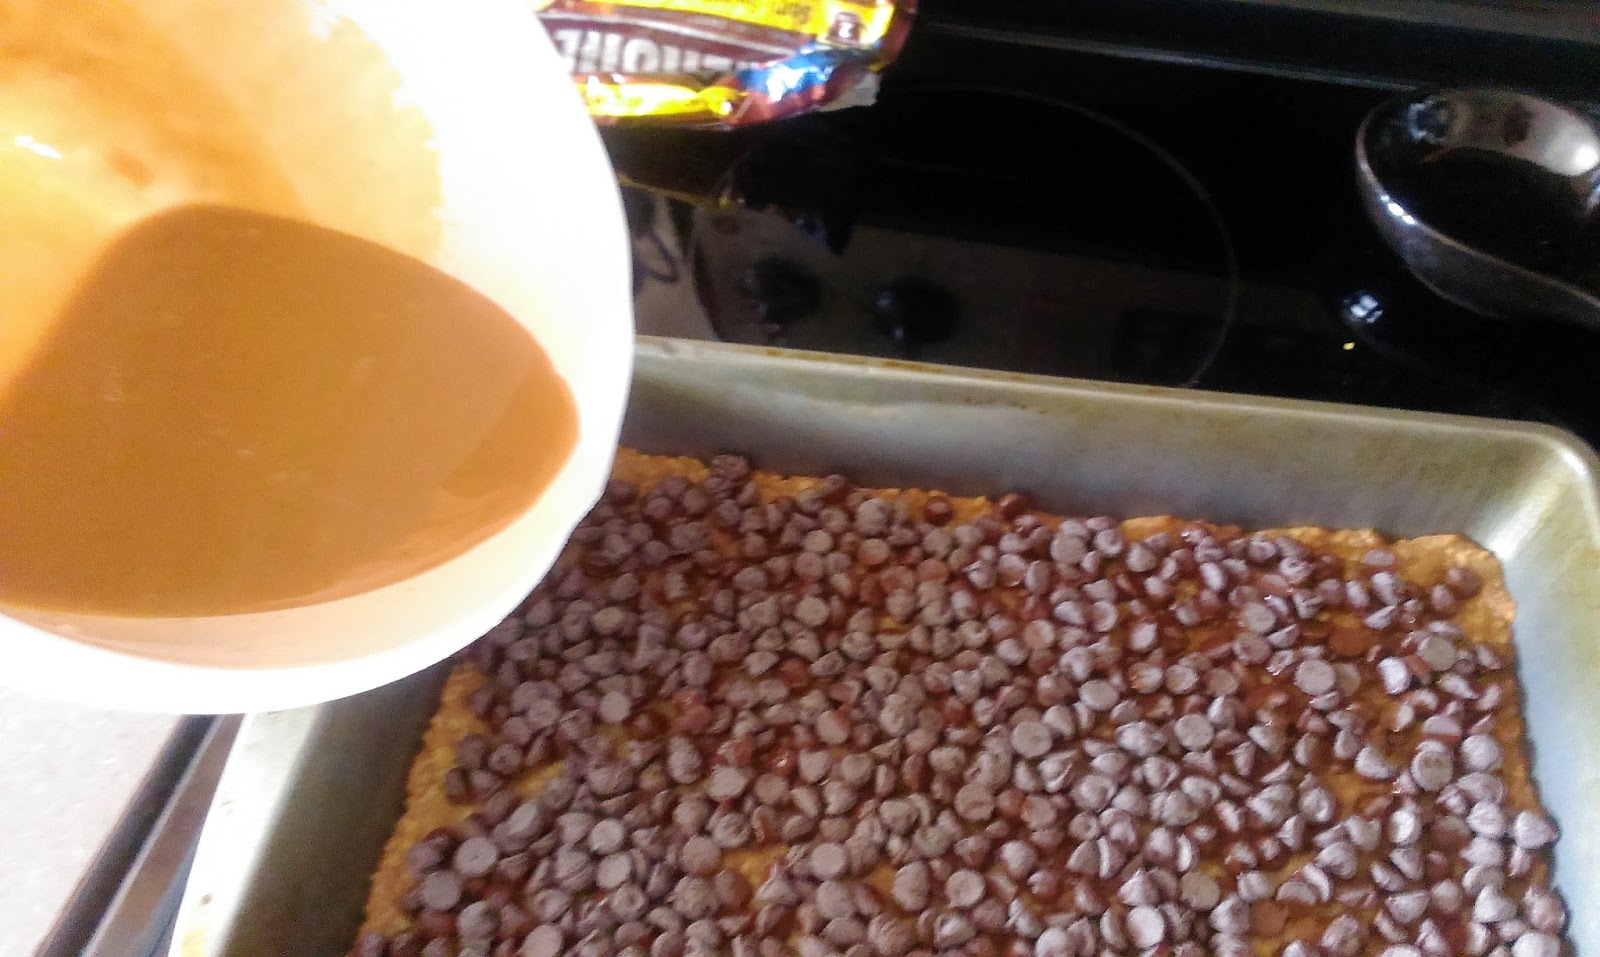
Once the time is up on your crust, remove it from the oven and then sprinkle the whole thing evenly with the bag of chocolate chips. Sorry, no leftovers here. Work quickly to evenly distribute the chips since they melt like an albino on a hot day over that crust. 
Pour the caramel mixture evenly over the chips. 
I realize that looks like nacho cheese, but trust me, its not. 
Now, take the remaining 1/3 of crust, and top the mixture with it. It doesn’t have to be perfect or cover every inch, as it will expand a bit in the oven, and having some caramel seeping through the top makes it look pretty. True fact. Place back in to the oven and bake another 10-15 minutes until nice and golden..y. And there you have it! These bars aren’t the most gorgeous dessert in the world, but my God are they delicious. I would go so far as to say “life-altering” would be an appropriate way to describe them. I mean, my parents have been divorced since I was like 4, and my dad still goes on about these babies. He was more than happy to help finish off half a pan of these in two days. That’s a dessert, right there. Since my poor husband is still MIA until Thursday, I took half the cookies and half the bars and froze them. This is the season of giving, after all. I give the gift of calorie-laden treats from my family to yours this year. ‘Til next time, my fellow eaters!
That Santa sure is one lucky bastard when he comes down my chimney… -
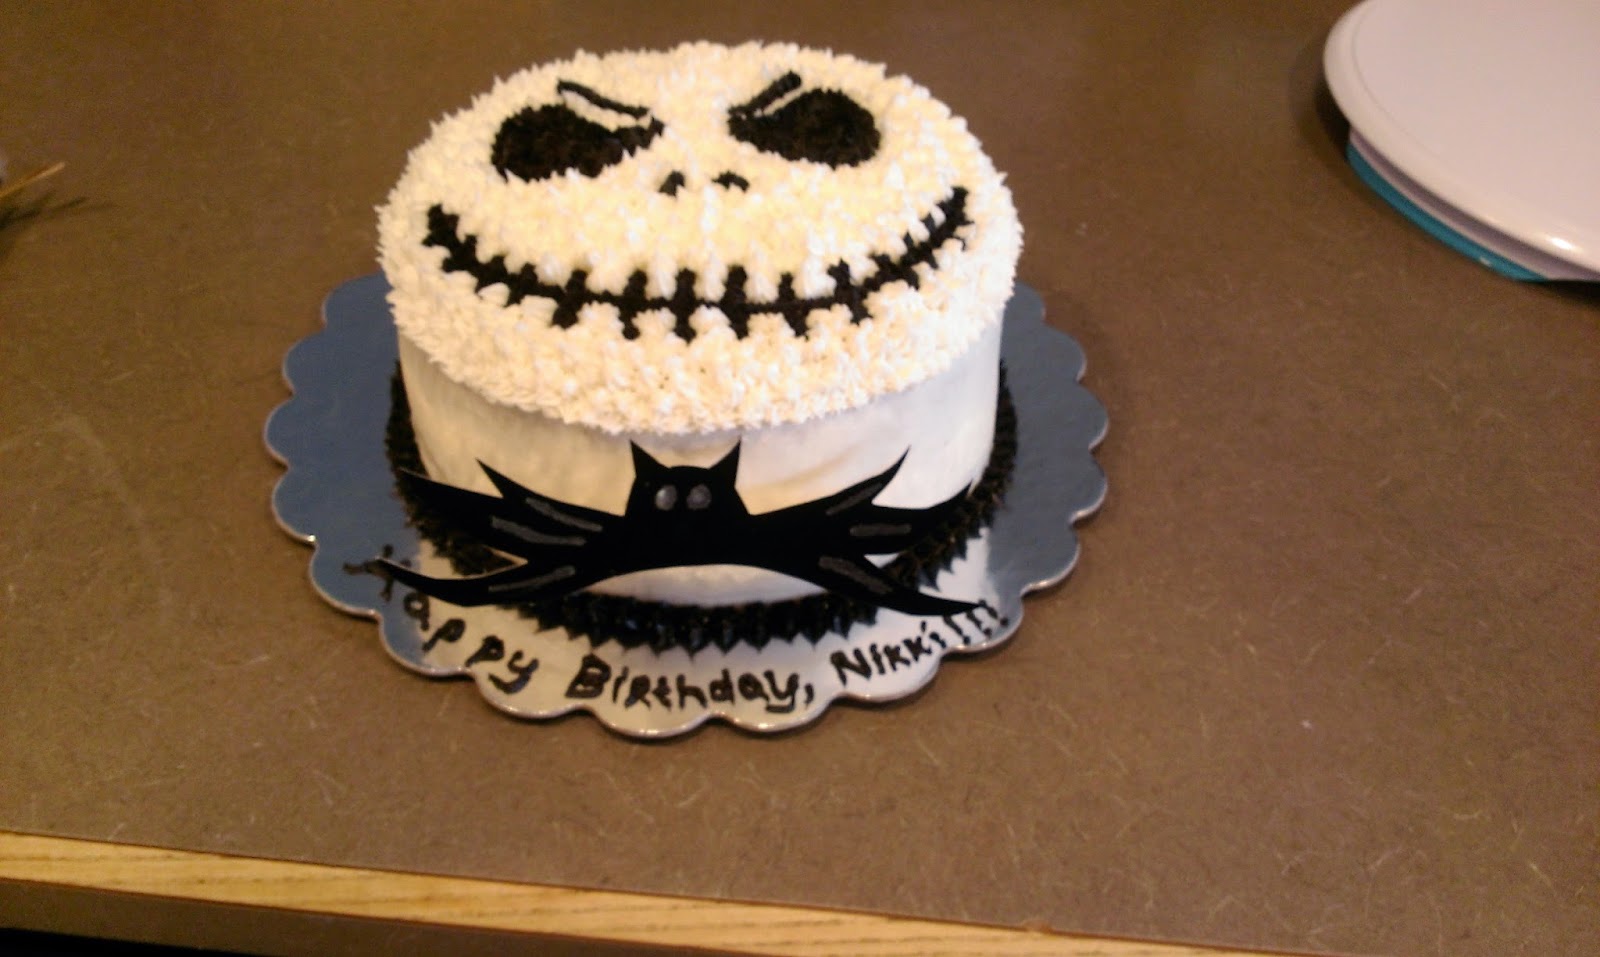
Its Beginning to Look a Lot like (The Nightmare Before) Christmas
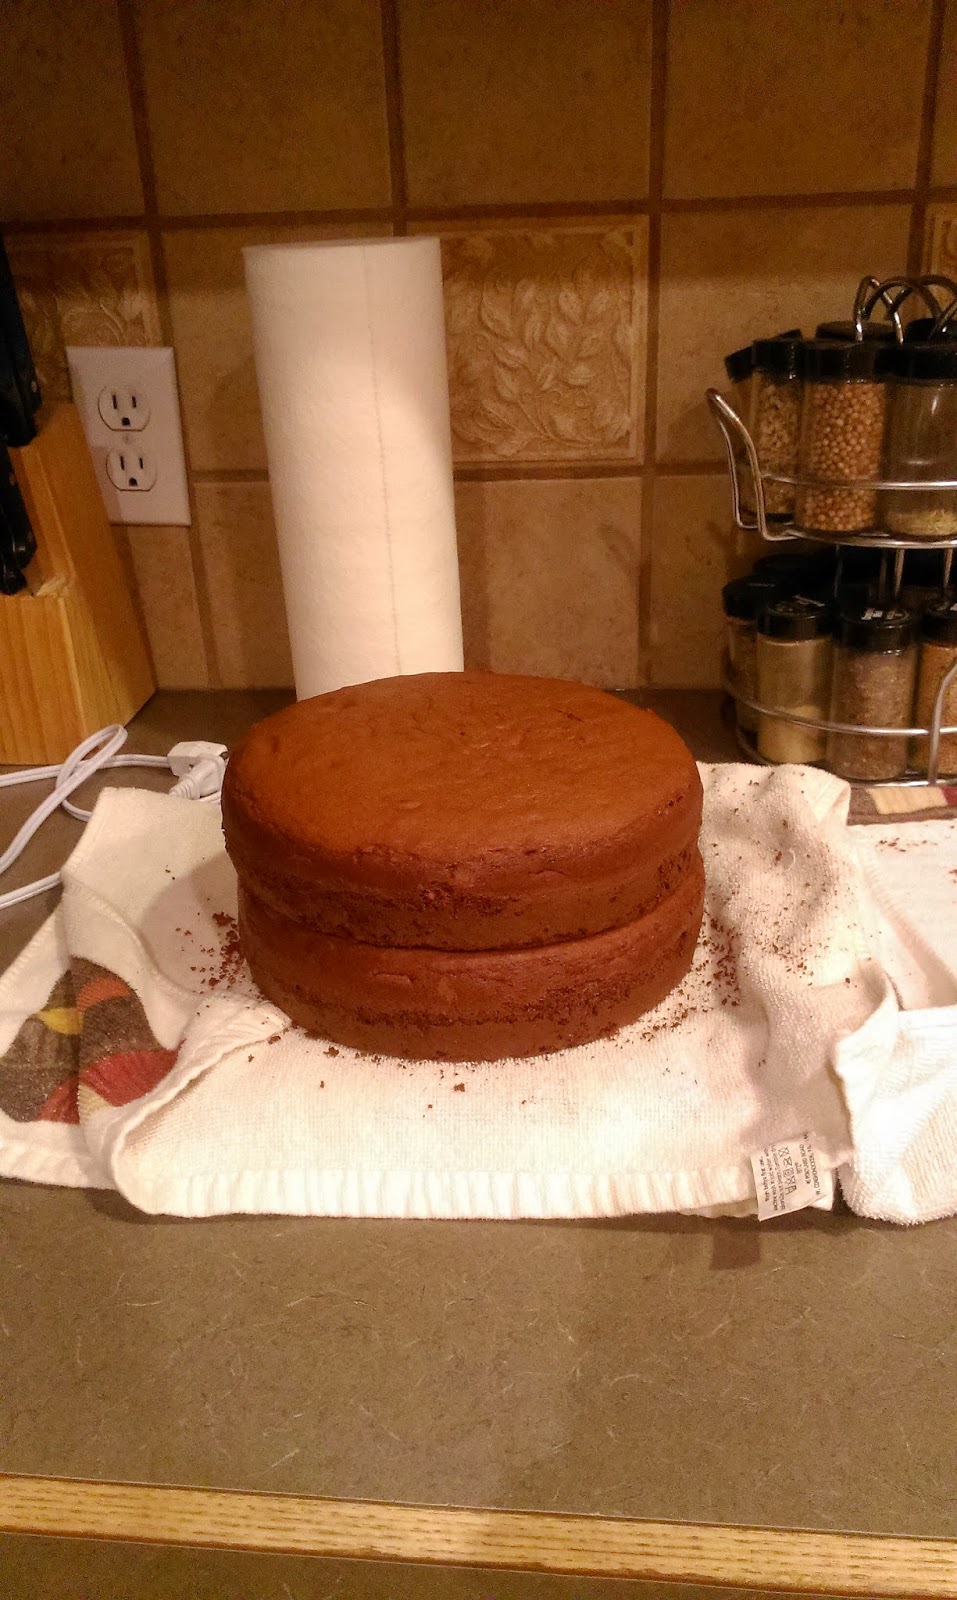
I’ve been fortunate enough to make quite a few “milestone” birthday cakes this year…my niece’s first, a friend’s 40th, my sister’s 30th, and last weekend, another friend’s 30th. Had you told me all this would occur this past April when I started baking, I would’ve laughed at you. I mean, I still laugh (nervously) now because every time I am asked or volunteer to make a cake for an event, I am filled with dread that things will go terribly wrong and I will be forced to beg Walmart to give me a cake at the last minute, and then Walmart wins. I cannot ever let Walmart win. They already have stripped away tiny chunks of my soul every week when I am forced to finish my grocery shopping there without committing vehicular manslaughter via shopping cart- they cannot have my pride, too. And my pride was definitely on the line because this birthday cake was my first honest to goodness paid job as a caker. A lot was riding on the line. *Cue the Rocky theme music…*

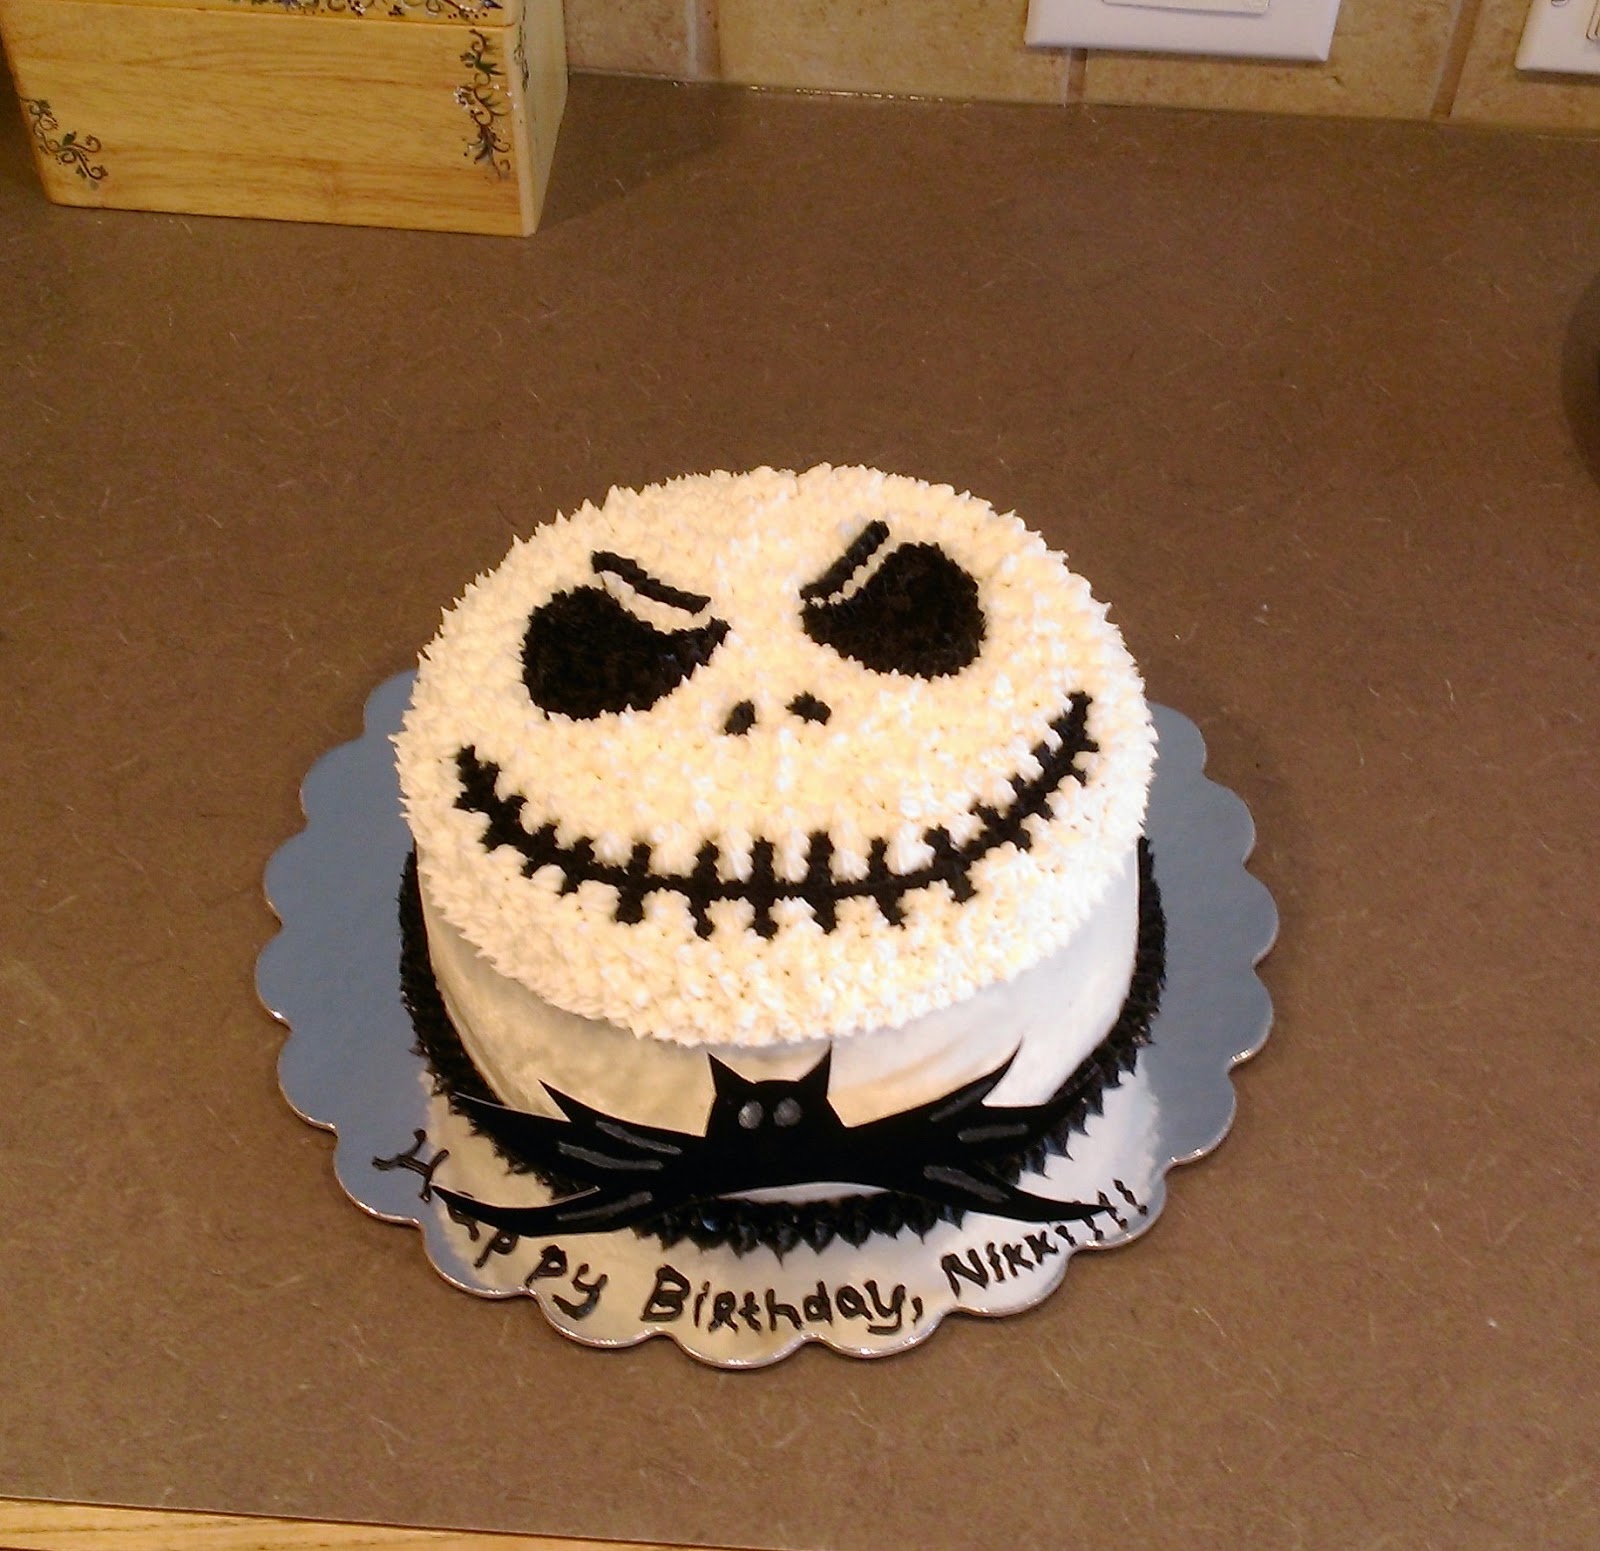
Hello, Jack. Whew. I think I stopped breathing for a combined total of about thirty-five minutes while making this cake. My lung capacity is apparently way more impressive than I thought it was. I am happy to report that minus several snafus on the birthday girl’s night (like the restaurant saying the reservation was cancelled), the cake was exactly what her husband was hoping for, and she truly enjoyed it. My cake very well could have saved the night and fed us all if need be, but thankfully that was not the case, and we all got to savor a slice later in the evening.

I thought Devil’s Food would’ve been Jack Skellington’s first choice, for obvious reasons. Since it was finals week, I had spent Monday-Thursday grading final essays, final portfolios, final exams, and calculating final averages. My eye still twitches a little every time I hear, see, or type the word “final.” Cringe. This meant come Friday after running errands, grocery shopping, and failing to avoid Walmart, I did not have enough time to make EVERYTHING from scratch, so I had to cake-jack a box cake mix to get that fresh bakery taste. Remember, add an extra egg, use milk instead of water, and use softened butter instead of oil and double the amount. The more you know…

“I’m in need of a layer of clothing.” Once my cakes had cooled off long enough, I made the standard white frosting so I could crumb coat and then add another coat to smooth out the sides…and guess who actually made a short video clip to show this process to you? Yeah, about friggin’ time, amiright?

This only works with non-textured paper towels, like Viva brand. 
I first smooth side to side, then top to bottom for the most part. You don’t have to apply much pressure to get this done. Freeze the cake after you’ve put on your final layer of frosting for about 30 minutes, and to smooth it just be firm and gentle, like scolding a toddler. I’d imagine anyway, since I clearly don’t have any toddlers as I have time to make cakes for fun. I also get to sleep in on a regular basis, but I don’t want to make those of you with toddlers long for your past, so let’s move on.
He’s toddler adjacent, and usually also somehow covered in a sticky mess. However, I do encourage him to lick the floors when I drop food, which I sincerely hope you don’t allow your toddler to do. 
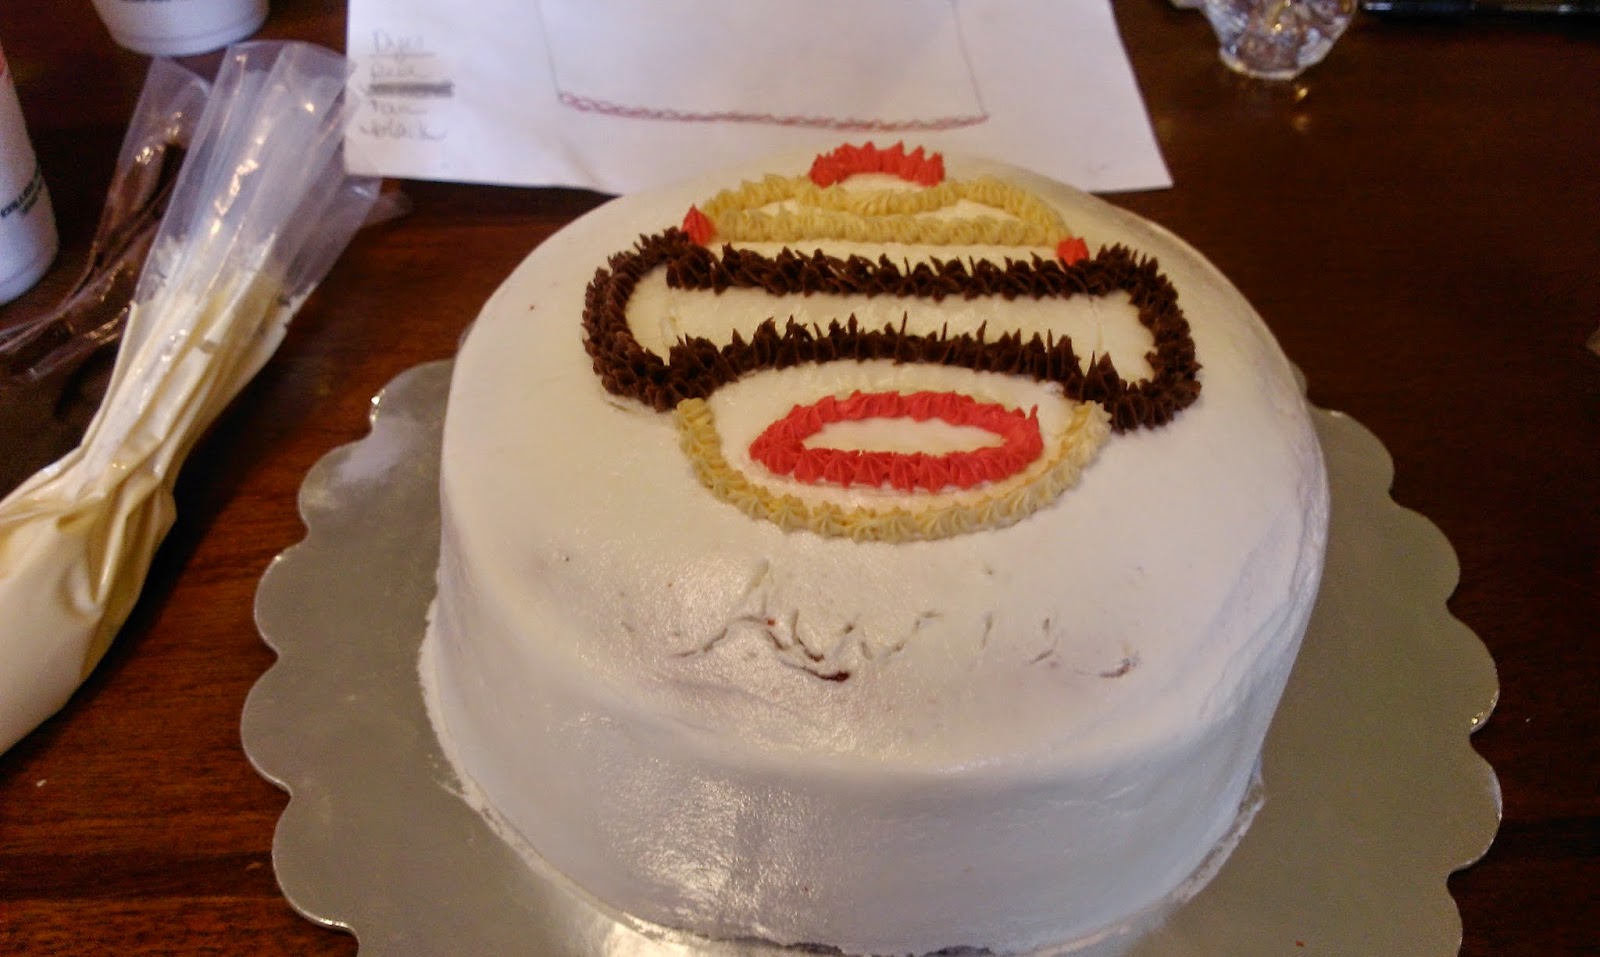
I loved only having to dye one bag of frosting. It is literally my least favorite part about caking. To decorate, I used open star tips again, like I did with Aurie’s sock monkey cake. I put plain white decorator frosting into two bags, one fitted with a triple star tip, and one with a Wilton 18 tip. I mixed chocolate decorator frosting with black dye, and fitted that bag with another 18 tip.

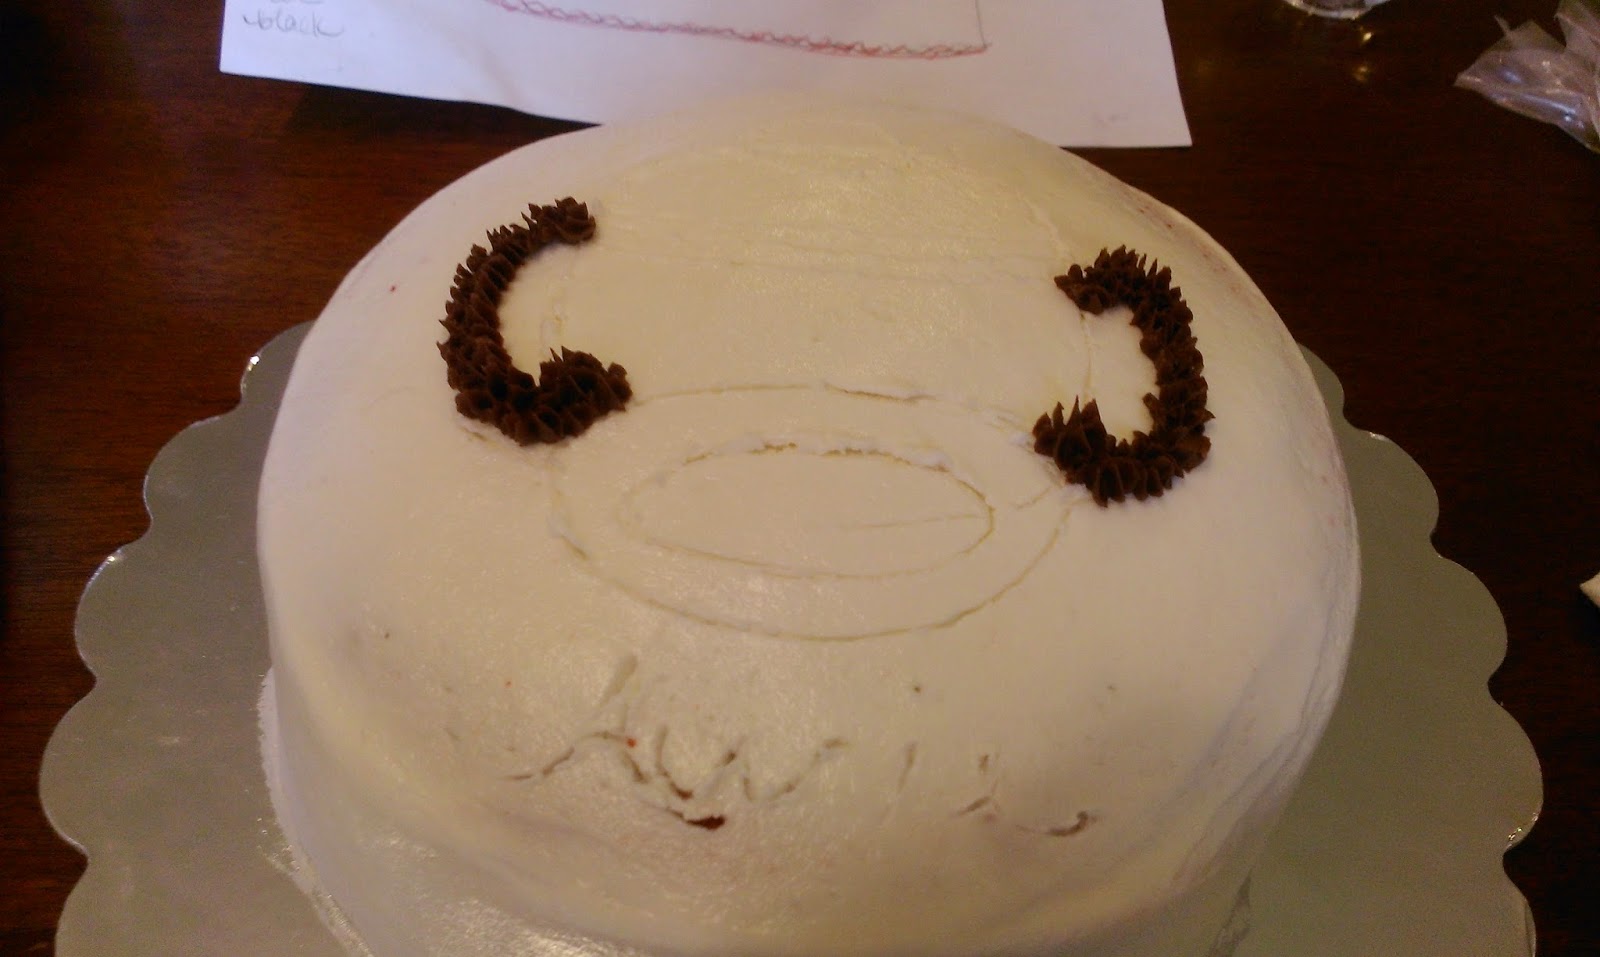
Baby steps, I tell ya. To make Jack’s trademark mouth and fantastic resting bitch face (totally on point), I outlined everything with a toothpick. Since I was piping on his…bone structure? Let’s go with that, I did not bother to cover the top of the cake with a layer of thick frosting to smooth.I started by working my way in…

I used the triple star tip to cover more ground in the bigger areas away from his eyes, nose, and mouth. I then came back in and filled in empty spaces with the 18 tip, and decorated around the eyes, nose, and mouth. 
I then used my black frosting to outline the eyes and fill them in.Side note- getting a demented Spiderman vibe here. 
“PIVOT! PIVOT!” – Ross Gellar
His nostrils each took two black stars a piece.
The eyebrows were done with one line of black stars each.
For the mouth, I filled in the grin with a single, long line of black stars, and then for the stitches, single columns of black stars. I then CAREFULLY, so as not to smudge the black everywhere, came back in and filled in the rest of the mouth with my white single star tip. I became so unbelievably still I wasn’t sure I was even moving while doing this. There was still time to screw up elsewhere, but this is what I worried about most! 
A rope or shell border seemed too dainty or girlie for Jack- so he got a row of spikes from my 18 tip. Just pipe stars, and pull up and away quickly to create a point. Now, I suppose you could pipe Jack’s signature bow tie on to the side of the cake, but I did one further and made a bow tie out of felt paper and a dowel. My middle name is Overachiever.
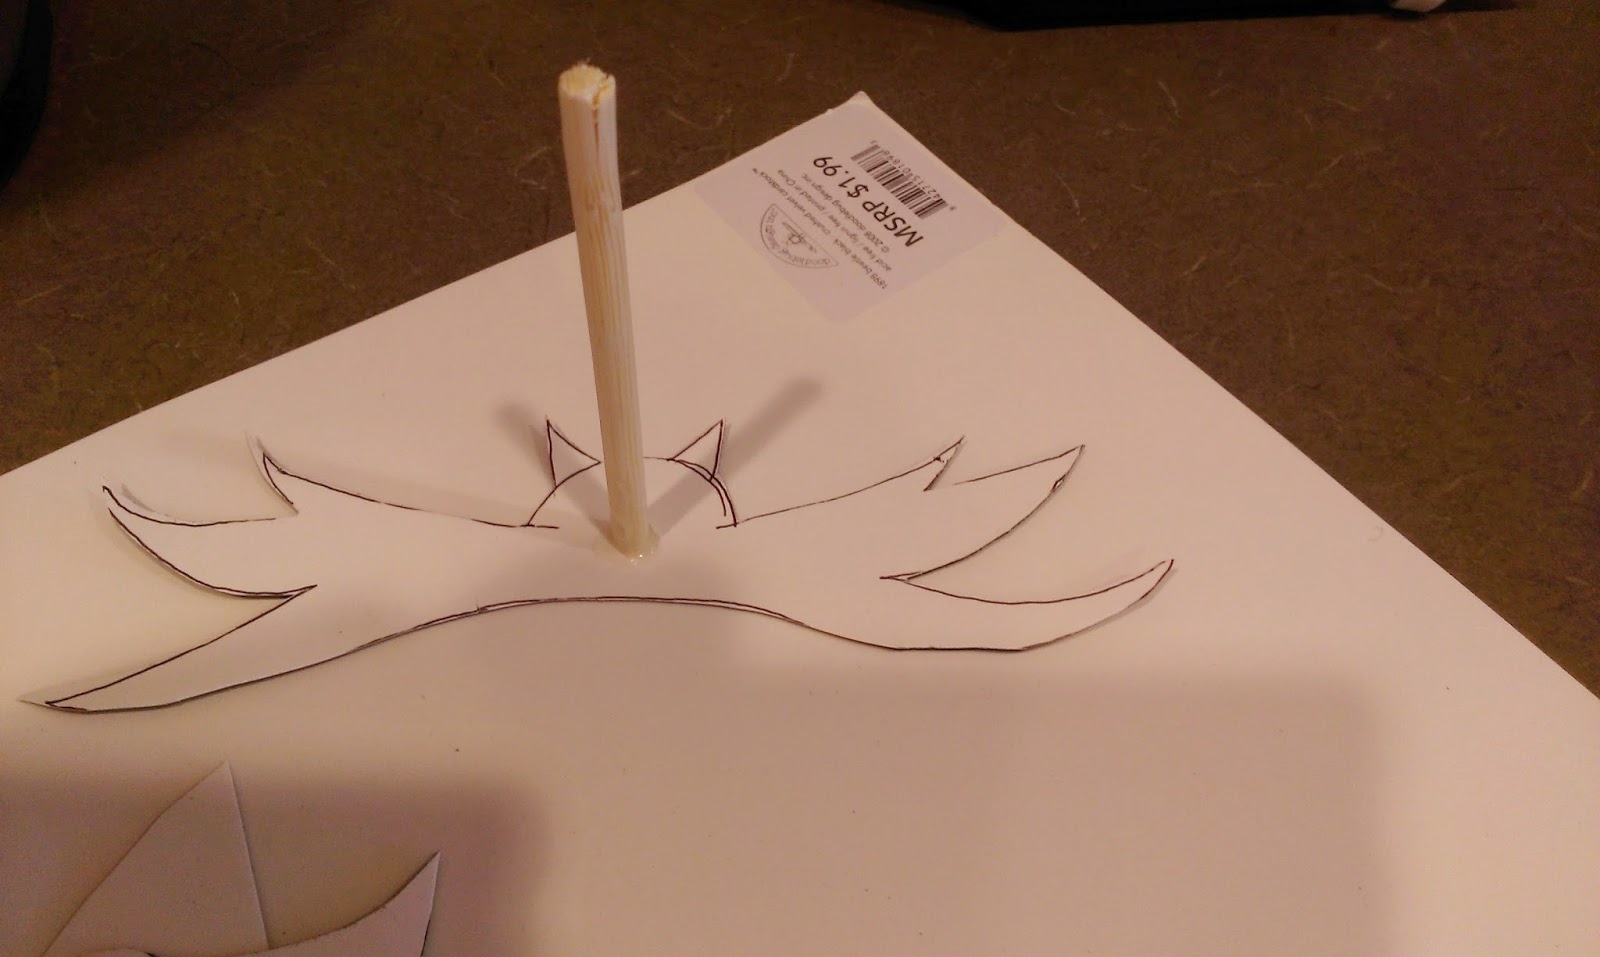
I snapped a dowel that would usually be used to hold together tall or odd-shaped cakes in half, and found the felt paper in HobLob’s specialty paper aisle where the crazy scrapbookers live. Not to start a crafter vs. crafter war, but who gets that excited about paper? You can’t even eat it… 
I fail at remembering to rotate my photos…so, I free-handed a bat on the back of the paper. 
And simply cut it out! Naturally, that would be the next step. 
Then I got a dab of Gorilla Glue and firmly pressed the dowel on to the paper until it could stand on its own. I had a Leaning Tower of Pisa thing happening to me for awhile, so patience is your friend for this step. I could hear the dowel keep toppling over as I was plugging away at laundry, so I gave in and just held it in place for two minutes. 
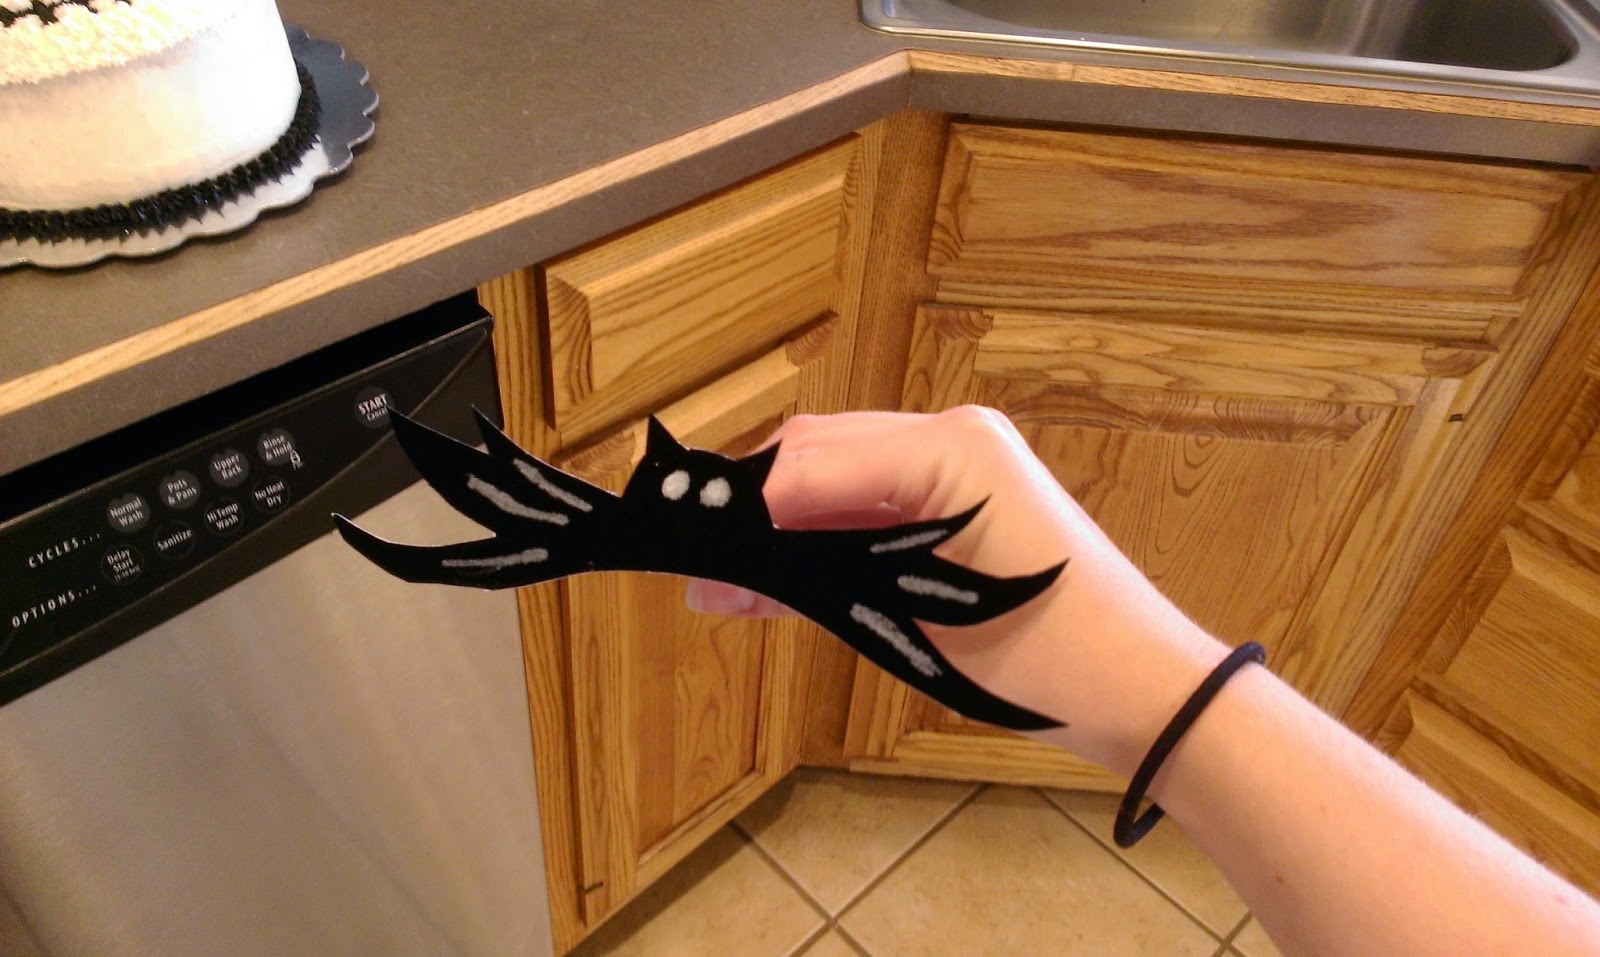
I couldn’t get frosting to stick to the felt, but luckily I had paint pens leftover from our painted pumpkins, so I drew on the details before plunging the dowel into the side of the cake. 
And walla, Jack is ready to party! I then took a 2 tip and drew on the birthday message in my black frosting (obvs.). 
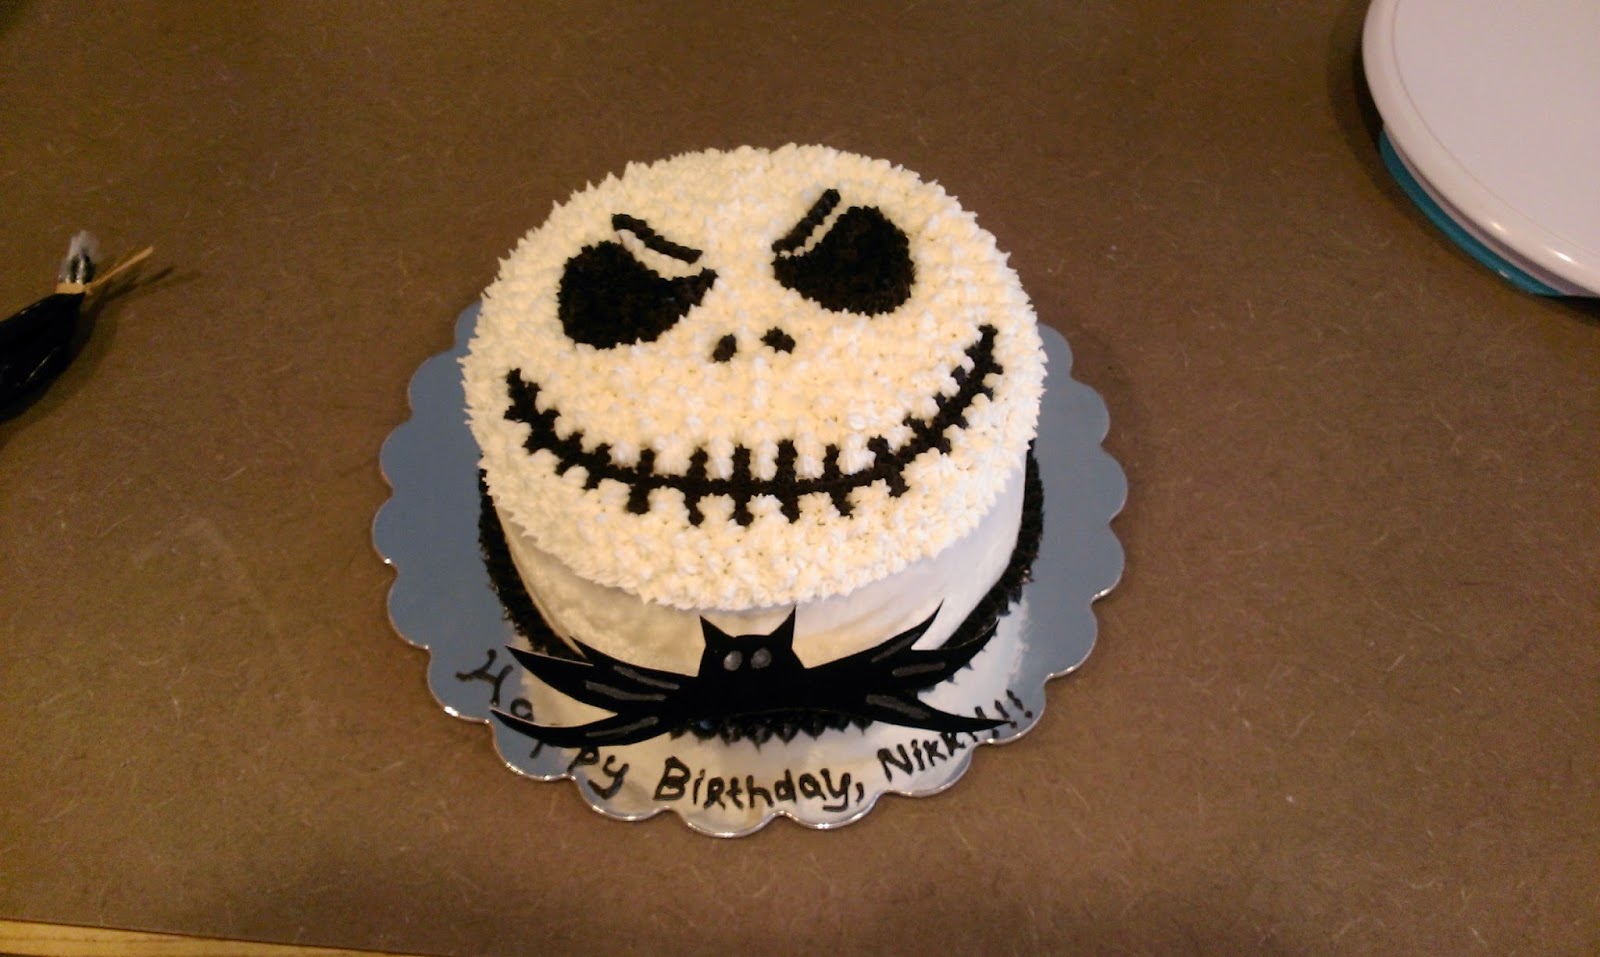
Yeah, I’m super proud of this cake, so here’s another picture from a slightly different angle. In all, this cake took 5 hours from baking to final touches to make. This seems like a lot, but there is waiting in there for cakes to cool, frosting to set, etc. The actual decorating and bow tie took 2 hours. I was only making my “customer” (that sounds cooler than “buddy”) pay for ingredients, but he threw in a fat tip because I’m such an awesome cake maker..or he’s just nice, whatever, let me have my moment. I had done a sample cake for them many moons ago, so I was thrilled to have a “repeat customer” for the first time. The tricky part was transporting this from Clovis to Portales while sitting in their back seat with a cake on my lap.

“The job I have for you is top secret. It requires skill, craft, cunning…” …seriously, Jack, just don’t fall off on to the floorboards. We ended up taking the cake BACK to Clovis to devour at their house..mostly because I refused to hand my cake over to strangers to put in a fridge at a restaurant that “lost” our reservations. If they “lost” my cake, I’d be blogging from a jail cell. Happy to report that did not happen, cake was had by all, and the night(mare Before Christmas…sorry couldn’t resist) was good. ‘Til next time, my fellow eaters! -
Life Doesn't Truly Begin until That First Taste of Cake
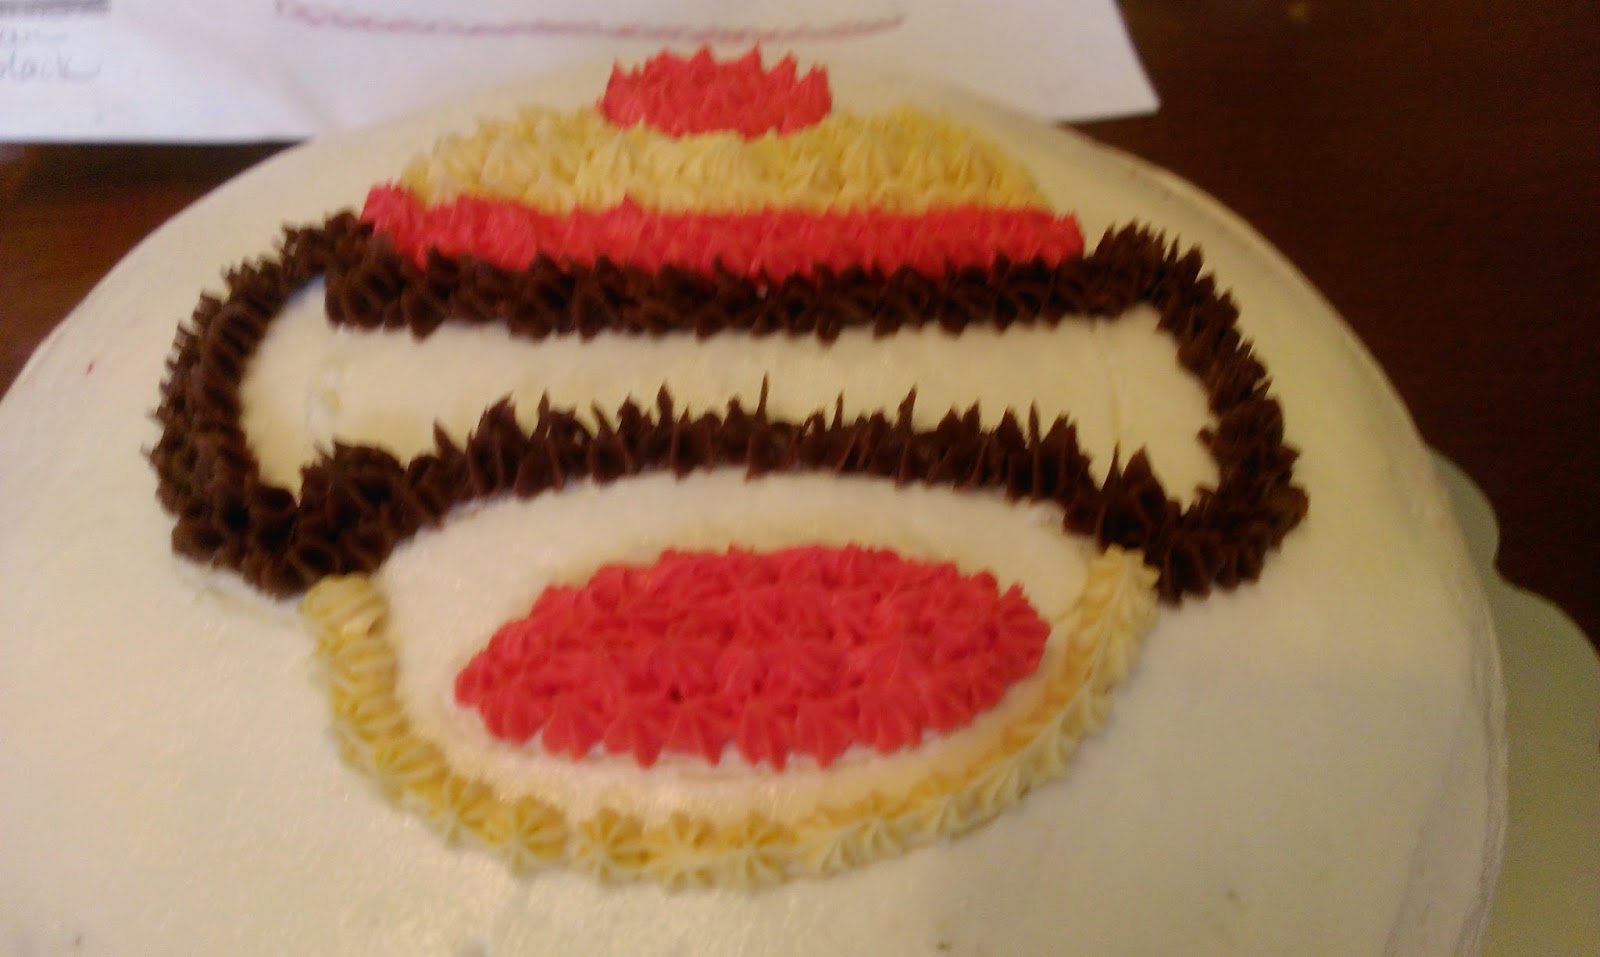
Is there anything greater than your very first taste of cake? I mean, I’m gonna go out on a limb here and venture a yes, because before that occurs, most of us are eating flavorless mush for the majority of our existence. But then, something magical happens. A first birthday, full of presents and a whole bunch of other stuff you won’t remember until you’re old enough for your parents to embarrass you with the video of said party. But I can guarantee the look on your face when you’re given that first bite of cake is spectacular. So when my sister asked me to bake and decorate my niece’s first birthday cake, I couldn’t deny her that moment. I saw Aurie get to try a lot of firsts over the weekend, like eggs, cow milk, and ham. She was not a fan of ham. I think if she had been offered ham’s gateway drug–bacon–things would’ve gone down a little differently. I’m happy to report that she was, however, a fan of her red velvet sock monkey birthday cake.

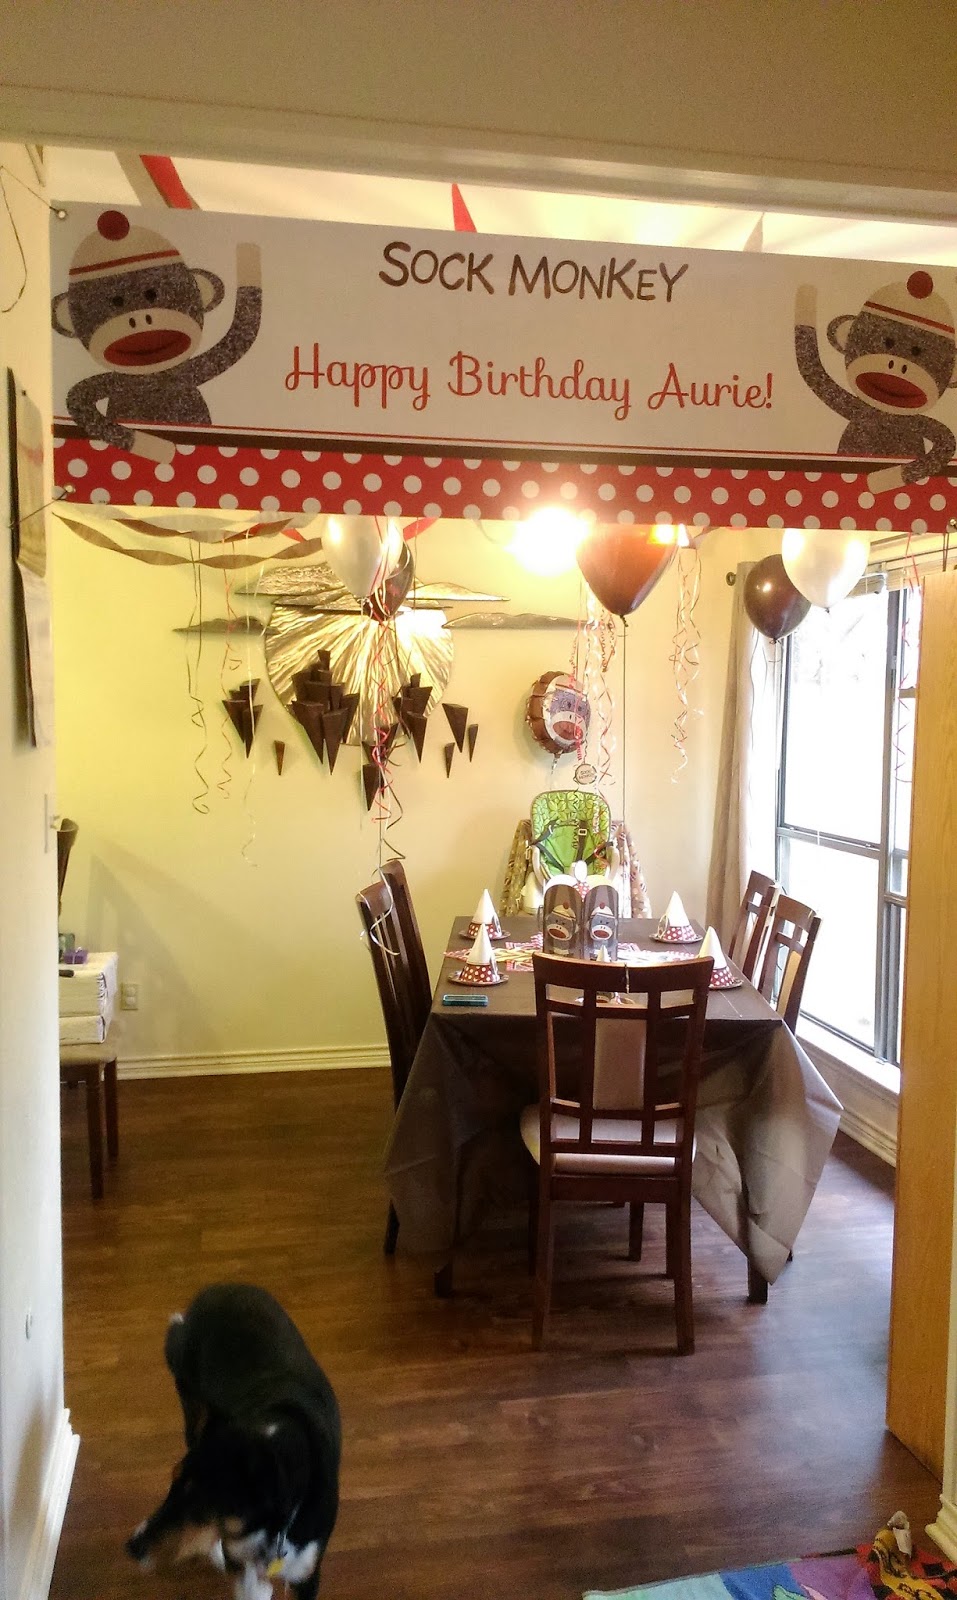
Oh the places you’ll go..wait..that’s not right. I was looking for a Curious George reference. Aurie’s party was a sock monkey party. Somewhere along the way, my mom started associating sock monkeys with my sister, Sarah. No one is really sure why, so, in turn, Sarah decided sock monkeys were going to start being Aurie’s thing. The perks of motherhood, right? I, for one, find monkeys absolutely terrifying, so I had to remind myself a few times that I was completely in control of this sock monkey, and at no point was it going to come to life and try to chew my face off. Maybe its just the Great Ape family I’m scared of…I would totally keep a Lemur on my shoulder at all times if it was 1. Appropriate and 2. Cost effective. Instead, let me show you how to bake a sock monkey red velvet cake this actually is 1. Appropriate and 2.Cost effective.

I was cooking in someone else’s kitchen, and forgot to take pictures before this while I was looking for stuff. Since I was driving in from Clovis to Dallas, I did not have enough days to make a red velvet from scratch, which is a shame, because my mother has a sinfully delish recipe. So this is just from the box, but I used milk instead of water, an extra egg, and butter instead of oil, with the amount doubled. This yields an absolutely radiant red color that water and oil simply could not. I baked- at sea level, thankyouverymuch– at 350 for about 35 minutes. Other people’s ovens…I’ve mastered my own oven’s temper tantrums, so cooking in another kitchen is always both a little exciting and terrifying. If the cake had sucked, I totally could’ve just blamed it on this conundrum.

I never claimed to be a master drawer, but a plan of attack is always helpful. For most of my cakes, I draw a really simple sketch of what’s bouncing around in my head. I tell my students never to start an essay without doing prewriting to figure out what’s going where, so I think this is life imitating art. I actually bough map pencils for this sketch. Map pencils were arguably my favorite school supply of all time, aside from the super fat crayons you had in kindergarten. I made my classic white frosting with almond extract while the cakes cooled.

So red. So slightly overcooked. So not my oven. Make sure to put a thick layer of frosting between your rounds, and do a heavier crumb coat. This is a red cake, and red will show through layer upon layer of white frosting. I forgot to take a picture of my crumb coat because I was distracted by gift opening in the other room. When I hear the sound of rustling wrapping paper, its like a moth to a flame.

Get back in the kitchen and make my cake, Aunt Kate. While my crumb coat was freezing for a half an hour (or longer would be even better to settle the red crumbs), I made my dyed decorator frostings. I used open-star tips for the decoration- Wilton 18 and 21 tips. For the writing, I used a Wilton 6, which is just a large, open round tip.

Mixing dyed frosting is the bane of my existence. Once my crumb coat was done, I slathered on a hearty amount of frosting to try to cover all the red crumbs. I wish I could tell you this was a complete success, but there were still a few crumbs here and there. Thankfully one year olds aren’t the world’s toughest critics. I mean, everything she eats gets pureed and looks like cat puke. I froze my cake again for thirty minutes. Then I used the paper towel trick to smooth out my frosting. I brought my trusty Viva paper towels all the way from home. I can’t live without the paper towel trick. I finally got to show my mom the witchcraft that is the paper towel trick. It is so easy, I’m pretty sure I will always refuse to learn fondant. Smooth and it tastes like a dream? Done and done! Now, let’s get to that funky monkey. Sock monkey. Whatever.

I started by drawing my monkey’s face and Aurie’s name into the top with a toothpick. Be sure to clean it after each line so things don’t get boogered up…you’ve got plenty of time to ruin things later. 
I started on the outside, and worked on outlining the monkey. Open star tips are so easy to use, just place straight up and down and pipe little stars onto the cake in your monkey outline. Make monkey noises where appropriate. 
At this point, the face, mouth, and hat have been outlined…daily observations by Kate Fox. 
Then I just tried not to let my left-handedness screw everything up. My brother-in-law mentioned that my cakes are even more impressive considering my physical handicap. Right-handed people… 
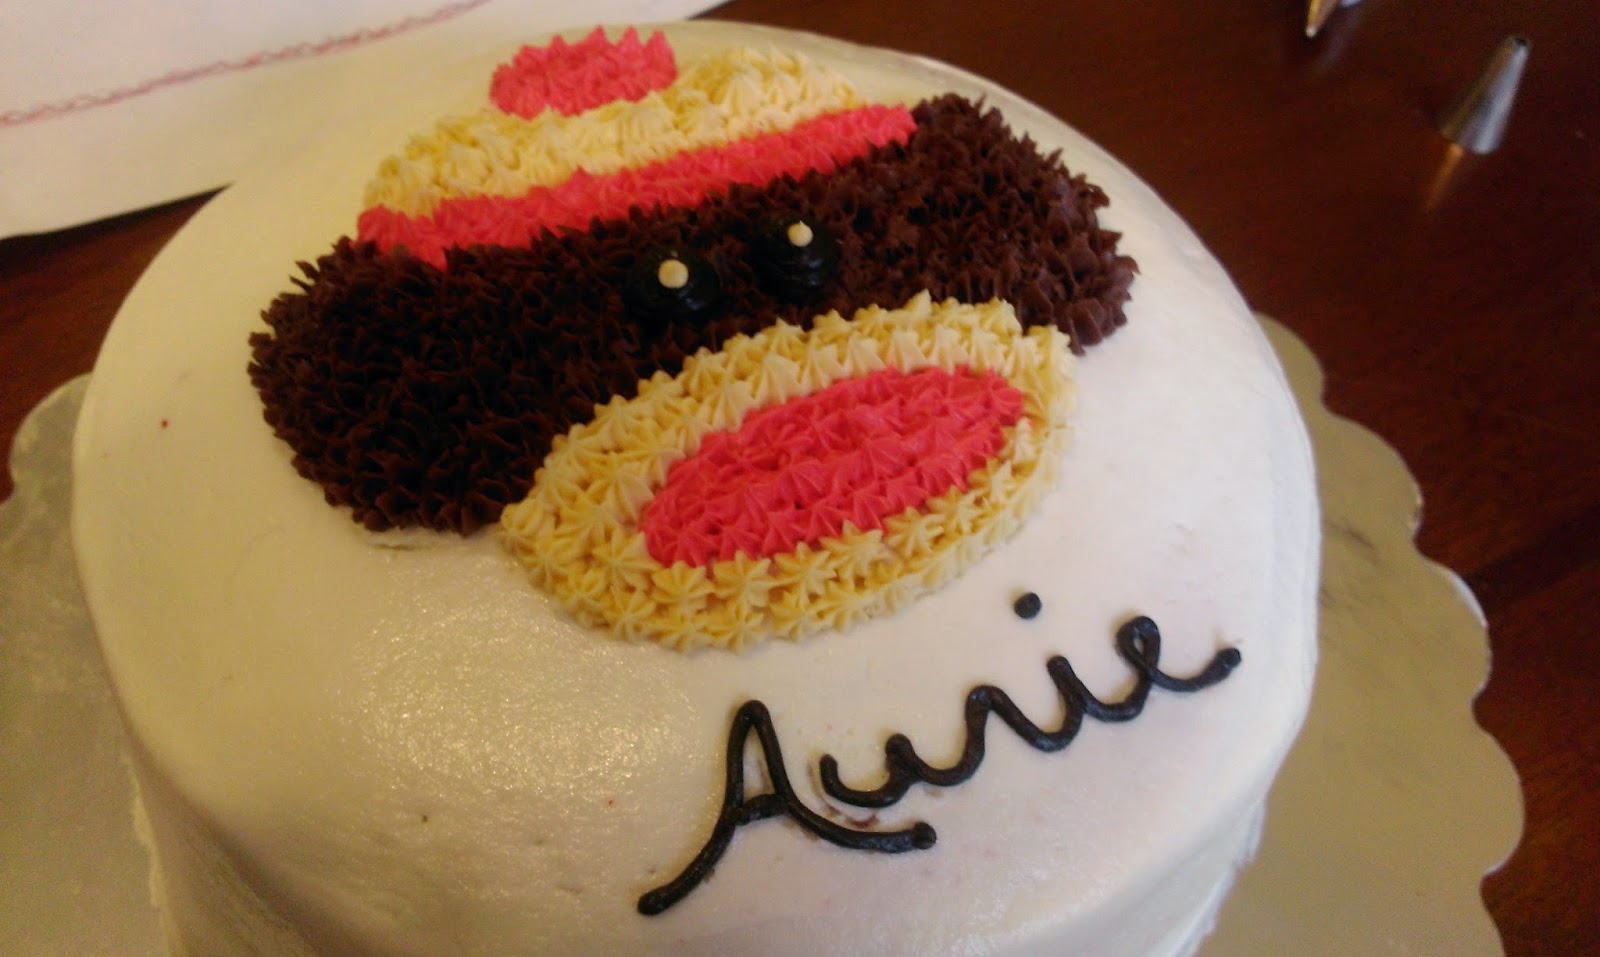
At this point, he kinda looks like someone in Daft Punk. 
The beauty about this type of tip is that you can go back in and fill in any white space by burying the tip in it and making another star. This really helps make the monkey look more like a sock/cloth anyway. 
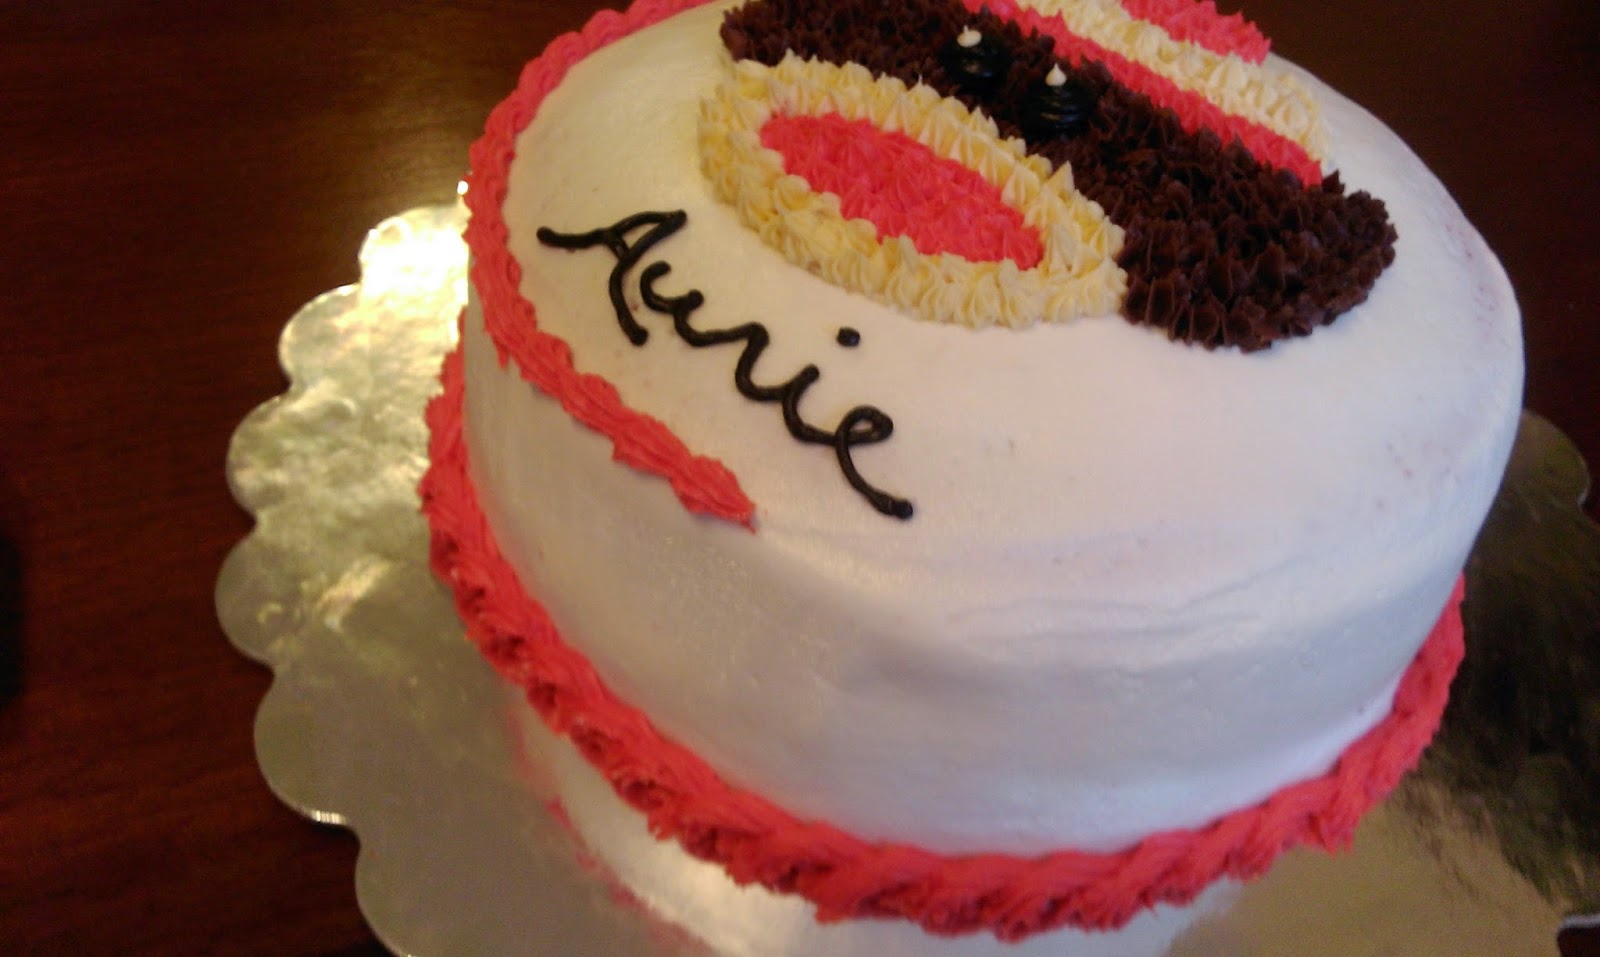
I missed a couple photos in here because my hand was close to falling off. Chocolate decorator frosting is a real a-hole. I used the #6 tip, buried it in his face, and made eye balls. Then I wrote Aurie’s name using the same tip. I added “button pupils” to his eyes to make them pop, as the black was hard to see against the dark brown. I just put the cleaned 6 tip on my bag of cream frosting. I took a snack break and finished my Chick-fil-a lemonade (product plug- they should pay me with all the free advertising I give them) before I worked on my border. This was surprisingly not because of my wimpy, dainty girl hand, but because my red frosting had gotten so warm thanks to the Dallas humidity that it would not pipe correctly. So if you happen to live in a tropical jungle, too, just stick it in the fridge for ten to fifteen minutes and try again. I have no advice for how to tame your hair in that jungle though..sorry.
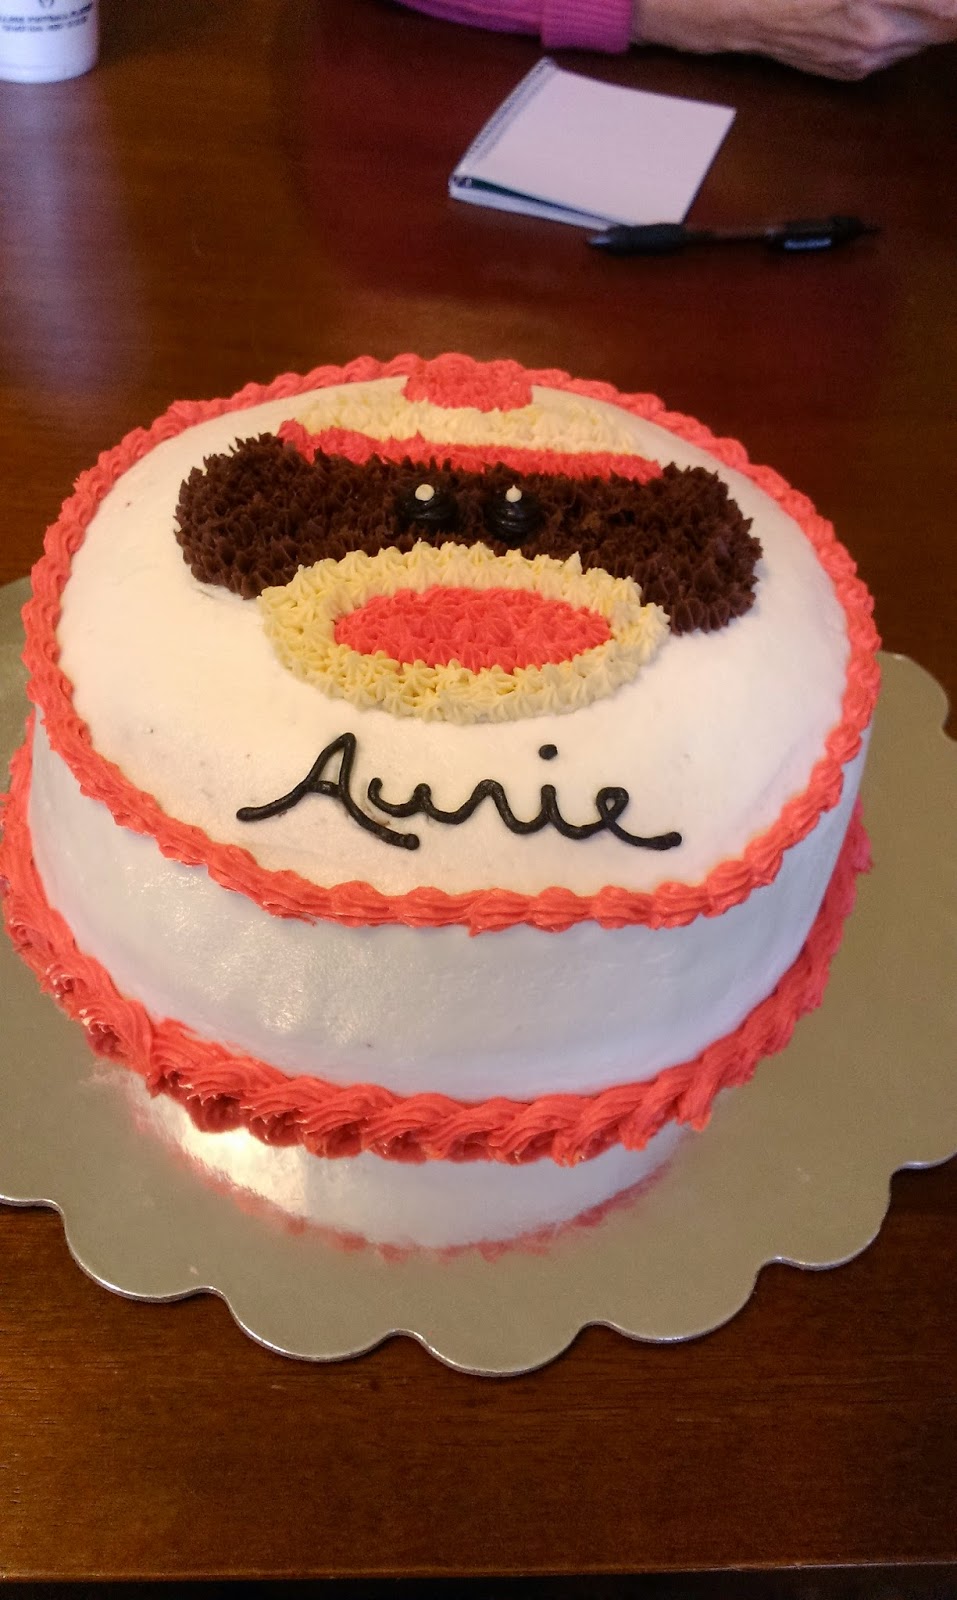
I used the number 21 tip to create my rope border, and a number 18 tip to create small shells on top. I thought about doing rope on top, too, but didn’t want the focus to pull from the sock monkey himself. I would’ve named him, if I knew I wasn’t going to be eating him later. Never name the things you plan on eating. 
Looking back on this, he looks like he knows he’s going to be eaten. I’m pretty proud of this cute little guy, as he fit in delightfully with the rest of the decorations:
Like a circus tent! Complete with sock monkey centerpiece! 
And kick ass, grammatically incorrect banner! Get it together, Party Express…you need a comma!! Hank was clearly on the move in that photo trying to find the next person to drop food on the floor while preparing for the party. He never leaves Aurie’s side for that reason. He absolutely loves the way that baby’s face tastes…always food on her somewhere! I am happy to report that my tiny namesake Aurie Kate found cake to be as delightful as I do.
What form of pure magic is this? Is it..solid? I’m fairly certain she would’ve eaten that whole piece if her father hadn’t saved her from herself. Cake addiction is a slippery slope, after all. I knew she would like the frosting since she was my official taste tester, but the cake itself was anyone’s guess. About thirty seconds after this photo was taken, she went from being a clean baby to a cake baby. I honestly wish I could go at a cake with that much fervor and have it be socially acceptable, but alas.
Even the dog had a party hangover. Hank looks like we all felt after that party, full, tired, and in need of a long sugar coma. I was quite honored by everyone’s compliments…no matter how many cakes I make, I am always super critical of my work, so being reminded that I don’t suck at this is always nice! That’s what happens when you’re theCakeKate Boss. I am happy to report that I get to go see my husband for Thanksgiving, so this concludes blogging for the MONTH of NOVEMBER, as I will be spending time enjoying civilization and not baking because his lodging has no oven. Its an honest to God vacation! Thank you all for continuing to believe in November and Thanksgiving like I do. I can only imagine how unbelievably obnoxious TV commercials are going to be once it is officially December and the Christmas monster is breathing down everyone’s neck like an IRS auditor or, well, a Yeti. If I hear “Frosty the Snowman” ONE TIME….’Til next time, my fellow eaters! -
Mini Apple Pies Are Here to Save Your Thanksgiving
Is there anything worse than having to feign idle chit chat with relatives you’re not even sure how you’re related to over Thanksgiving dinner? Yeah, to me, that is a pure form of torture. While my go-to move is usually the post-turkey Tryptophan nap in the recliner (use it- no one will blame you), I’m here to help rescue you by bringing you a simple recipe for mini pies. Great Aunt Judy or third cousin Doug (twice removed) interrupting your football viewing with inane questions like, “Who are you again?” or “What do you do for a living?” …simply pop one of the mini pies in your mouth and you’ve taken an automatic timeout to any and all conversations. Dessert game goes hard on Thanksgiving, so no one will come between a person and their pie. You’re welcome.

You’ve saved me time and time again, pie. I suppose you could go the extremely simple route and just make the pies using canned apple or cherry pie filling and premade crust, but I feel like when making an apple pie, you’re really only going to get the best pie if you make it from fresh apples. The one exception to this rule is a McDonald’s apple pie because those are sprinkled with crack.

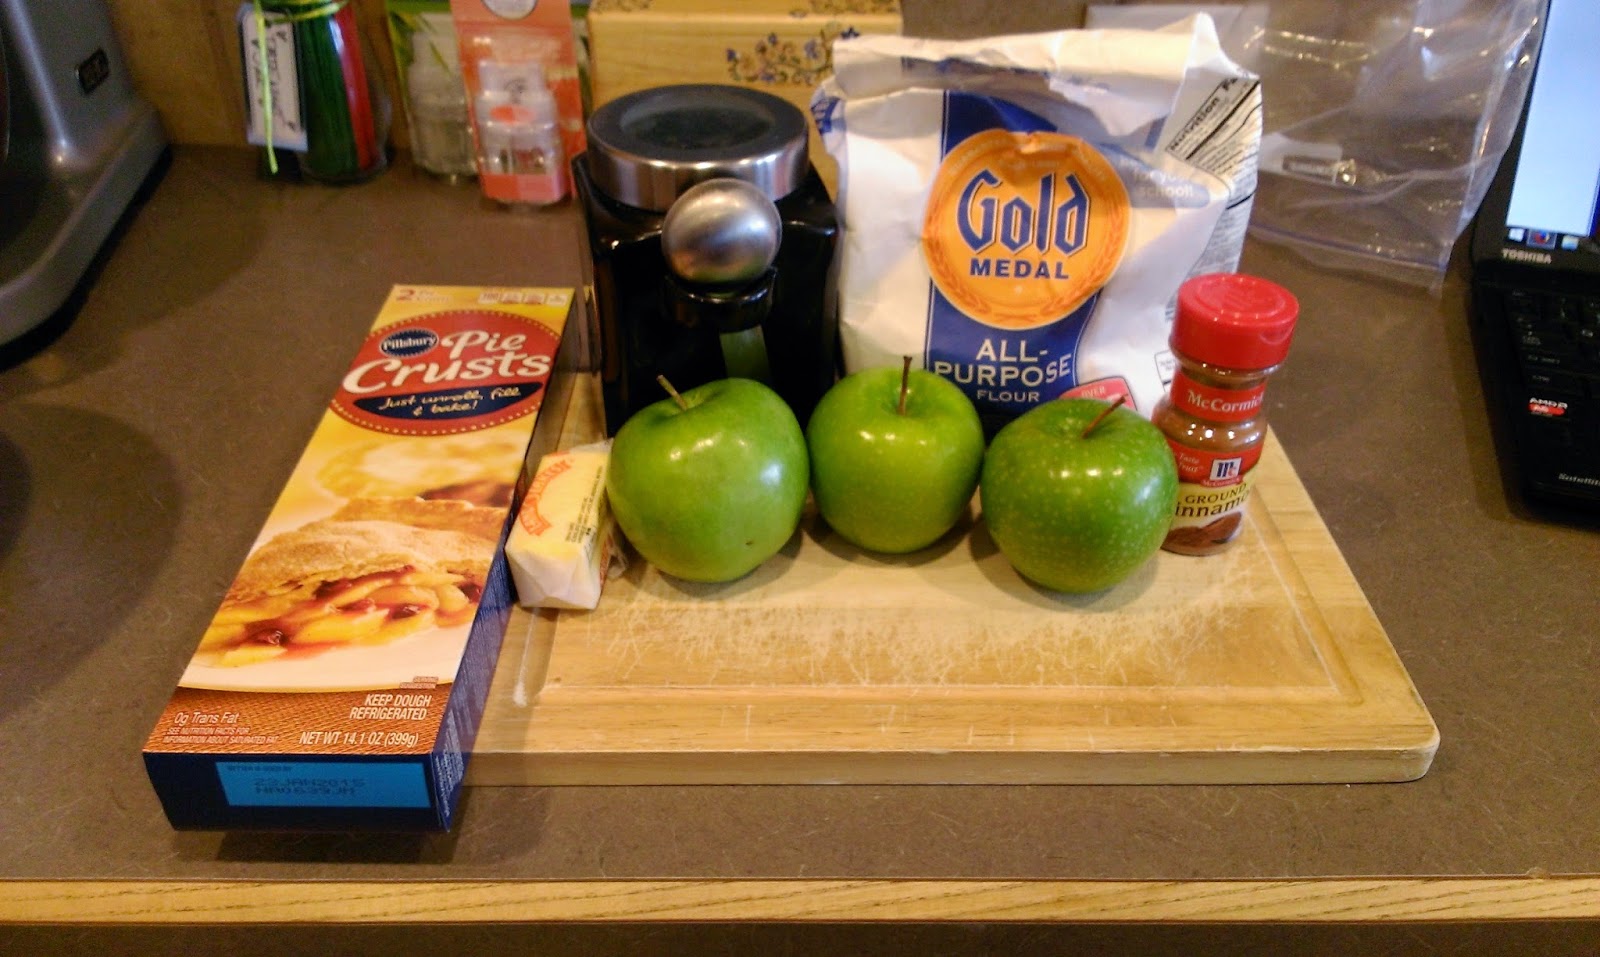
Any kind of apple will do ya, but Granny Smith owns my taste buds. It should come as literally no surprise that you’re going to need apples (and butter) for this recipe. Since I’m baking for one while Derek is gone, I only wanted to have a few of these mini pies on hand and not an entire bushel. Three apples will make enough filling for ten mini pies, so it would be extremely easy to double the recipe and make 20 for your turkey day. Here is how the recipe breaks down:
- Three apples of your choice
- One box of Pilsbury pie crust (comes with two premade crusts)
- Three tablespoons of flour
- Six tablespoons of sugar (this is 1/4 cup plus two TBS)
- Teaspoon of cinnamon
- A few tablespoons of butter
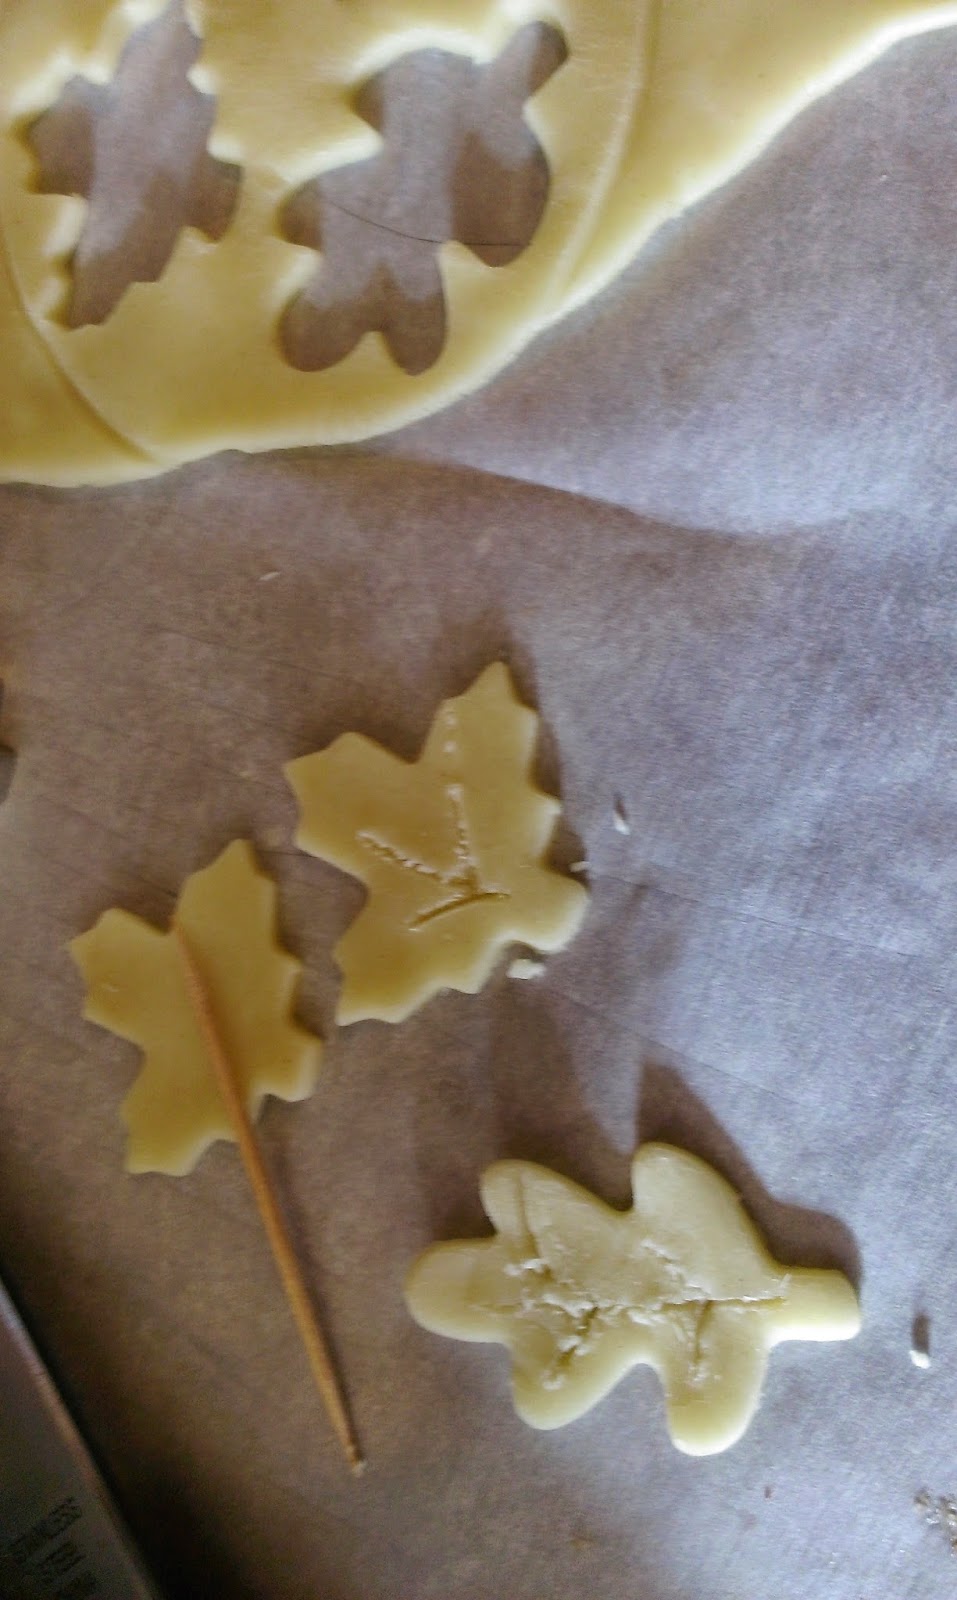
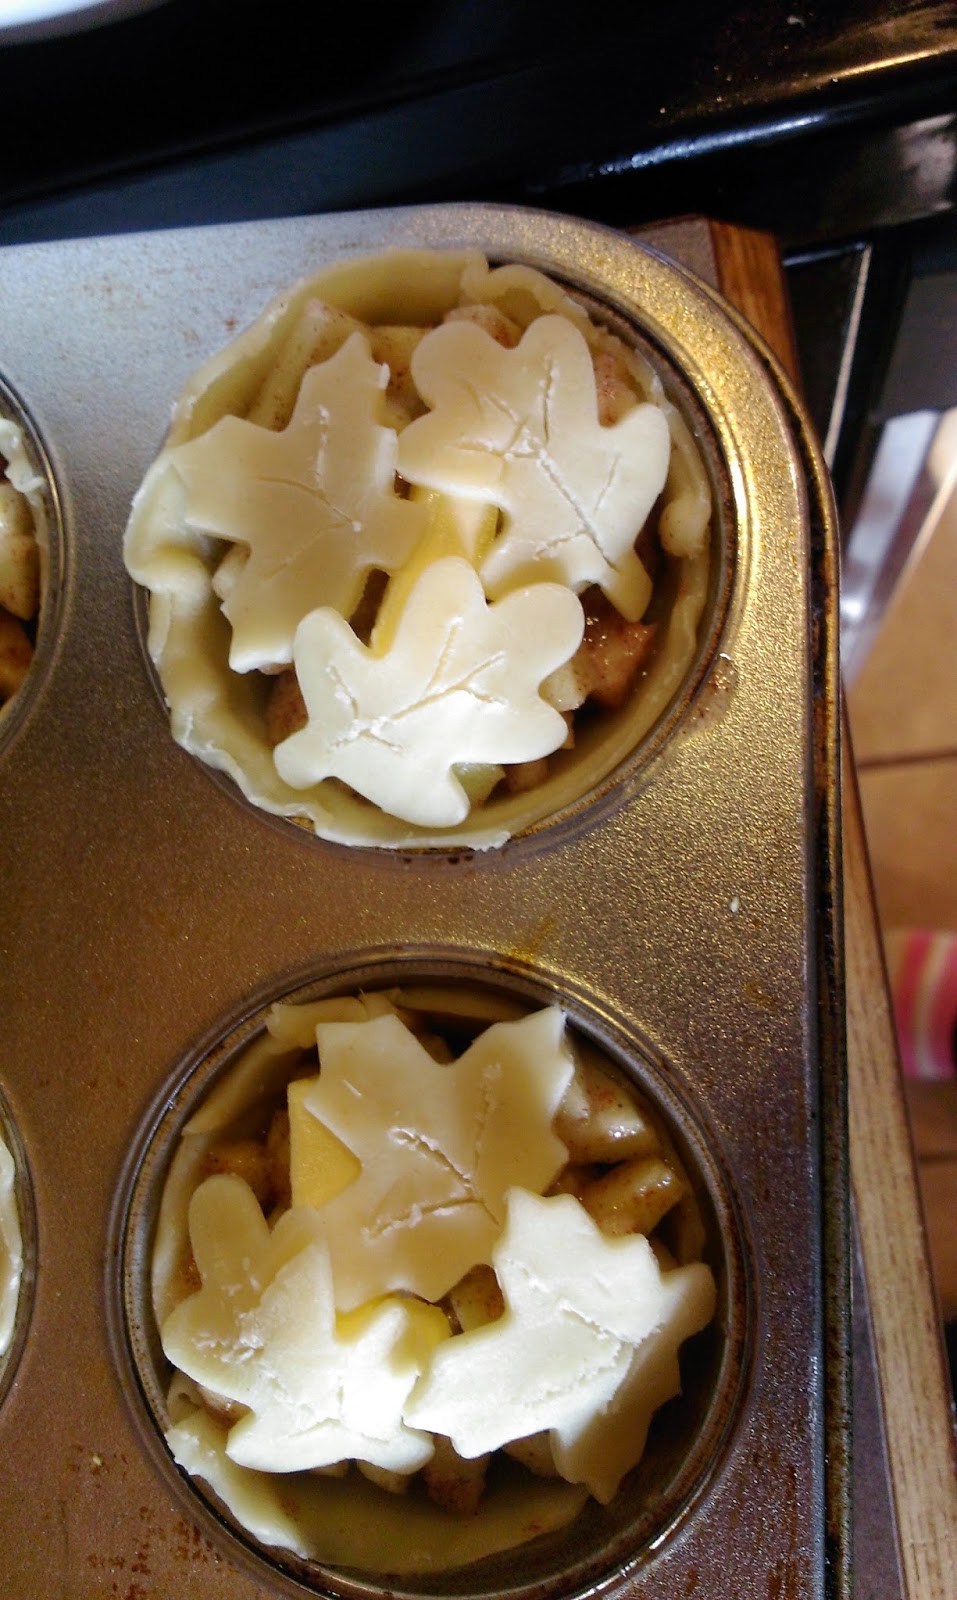
- Optional: Mini cookie cutters in the shapes of leaves to top your pies

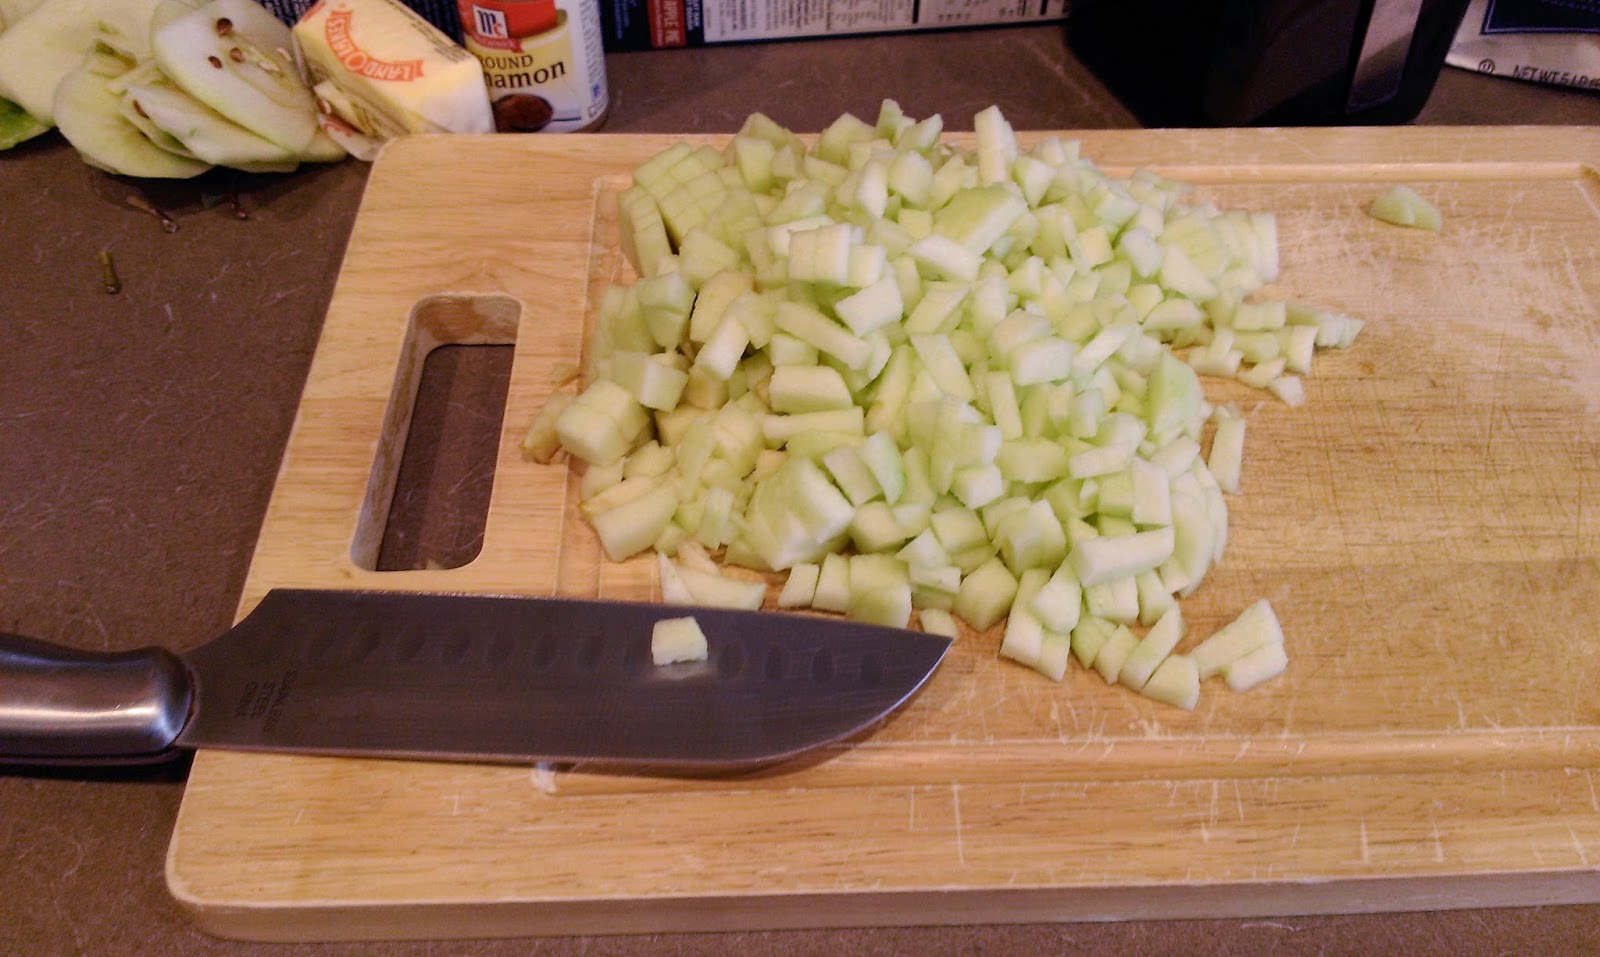
This part makes your kitchen smell AH-mazing. Start by peeling your apples and then chop them into smaller than bite-sized pieces. Congratulate yourself if you can do this without accidentally skinning a knuckle or two. I know my way around a potato peeler, but what usually happens to me is I somehow manage to get a fingernail caught in there and da svidaniya, fingernail! Fortunately, this did not happen to me this time as I was alone and without adult supervision when making my mini pies. I don’t care how old I am, I am constantly in need of an adult. You can ask my best friend, Manders…our relationship is forged from the fact that neither of us can properly function without some form of guidance from the other.

The makings of your Thanksgiving miracle. Dump your apples into a bowl with the flour, sugar, and cinnamon. Mix together until the apples are all nicely coated. Now, onto the crust! You’re going to need to let the crust sit out for at least 15 minutes to thaw out from being in the fridge. Then unroll it, and start looking for circular objects to help you cut your crusts.

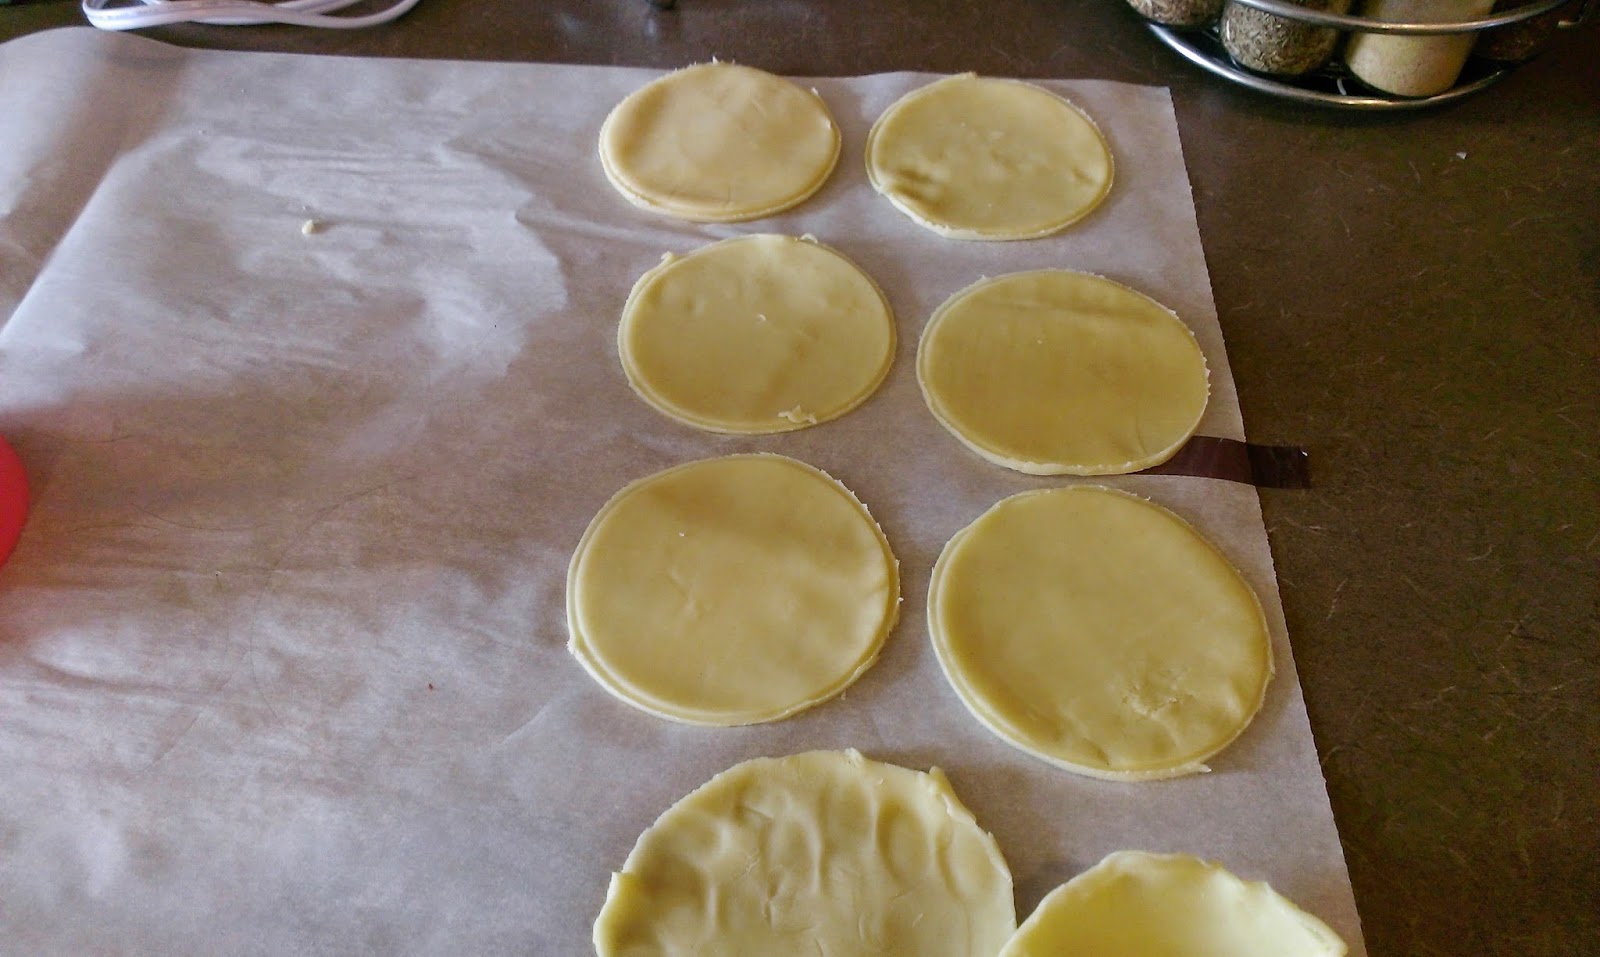
Keeping it really classy. I found you want a crust that is about 3 1/2 to 4 inches in diameter, so true to my OCD, I busted out my mini measuring tape and dug through my kitchen cabinets until I found a small bowl and that fantastically snazzy pink cup. The bowl was too large, but this was just right…proving that sometimes the second time is a charm- eat it, Goldilocks. I am queen of efficiency!

Up for a round of mini Frisbee, anyone? From one crust, you can yield ten of these little bad boys. I had to reroll the dough and flatten it out once to get the last two…waste not, want not, people. Grease your muffin tin and start preheating the oven to 425. You’ll have to mold these into a bit of a bowl shape and then press them gently into your muffin tin. The edges should come up just to the top of the tin.

This was before I made the extra two pies with the leftover filling and crust.
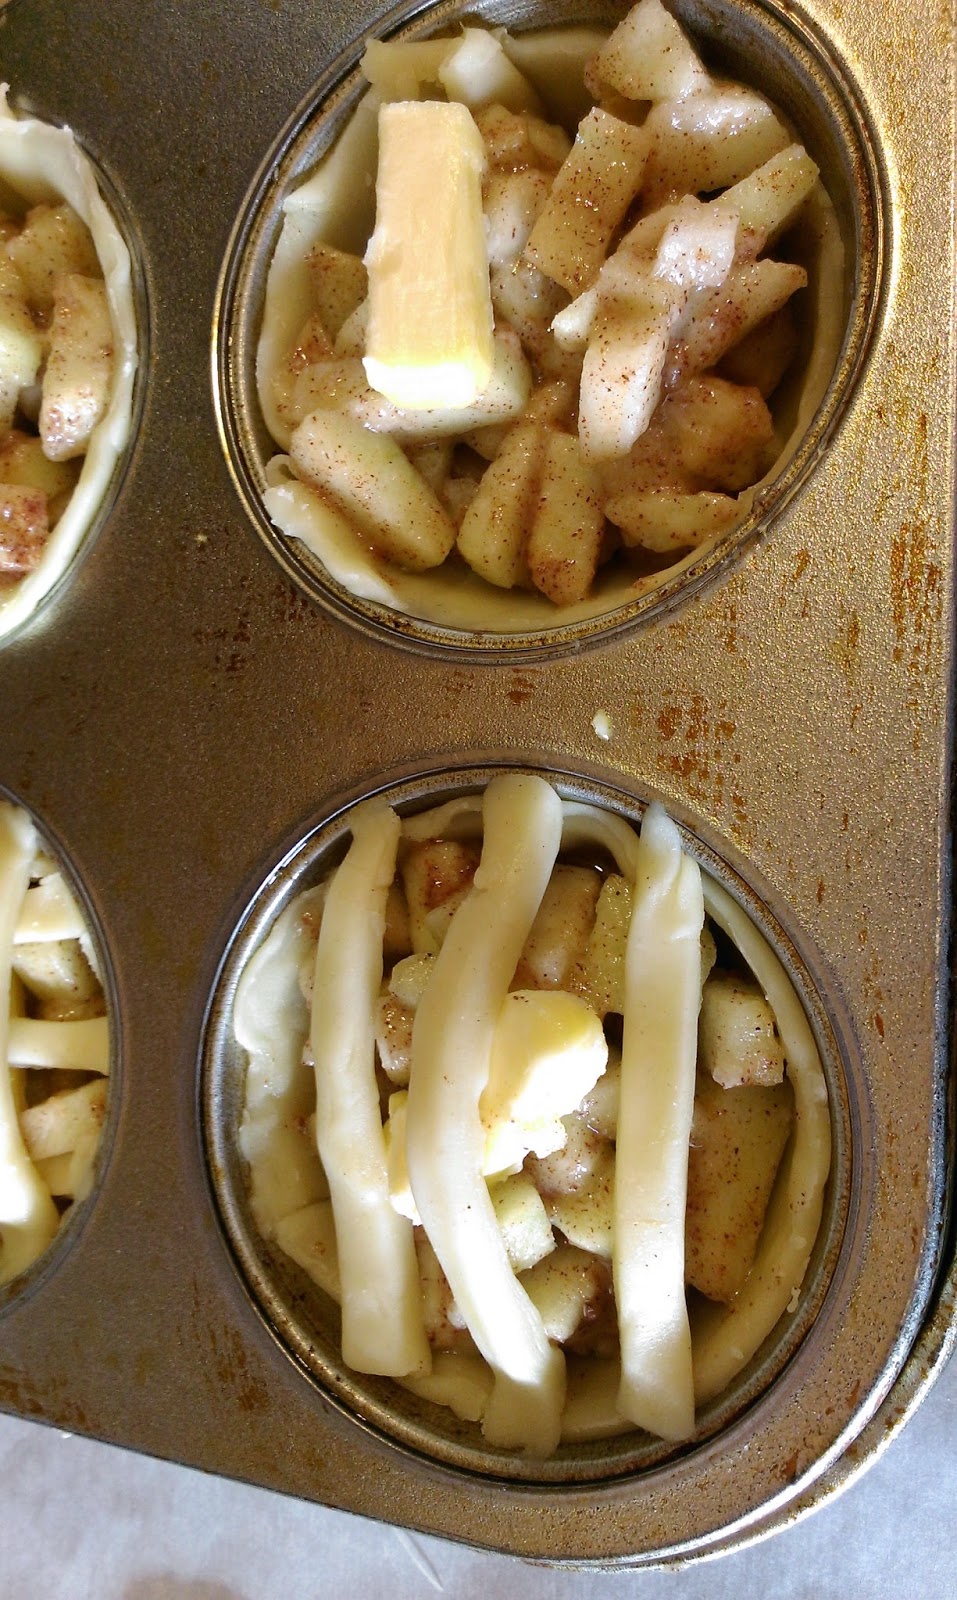
I SWEAR I did not eat two of these raw.Take a spoon, and fill each of your pie crusts up so the filling is slightly less than brimming from the edges. I found two scoops per pie worked out perfectly. Then dot each pie with butter. You could simply cover the mini pies with the other roll of crust and slit the tops to vent, but that is so not this kind of blog. I bet if you do it that way, you’re probably using the canned pie filling, too, you lazy glutton. I made half of my pies with lattice tops, so let me show you how to do that in an installment of shitty photos because the lighting in my kitchen is SHAMEFUL. I’ve got a bulb out, and for the life of me I cannot ever remember to change it…I really need an adult. A tall one.

I realize this looks like shredded mozzarella, but it will make sense in a minute. Start by layering three strips of pie crust on top of your pie. These can be thin or thick depending on your style preference. 
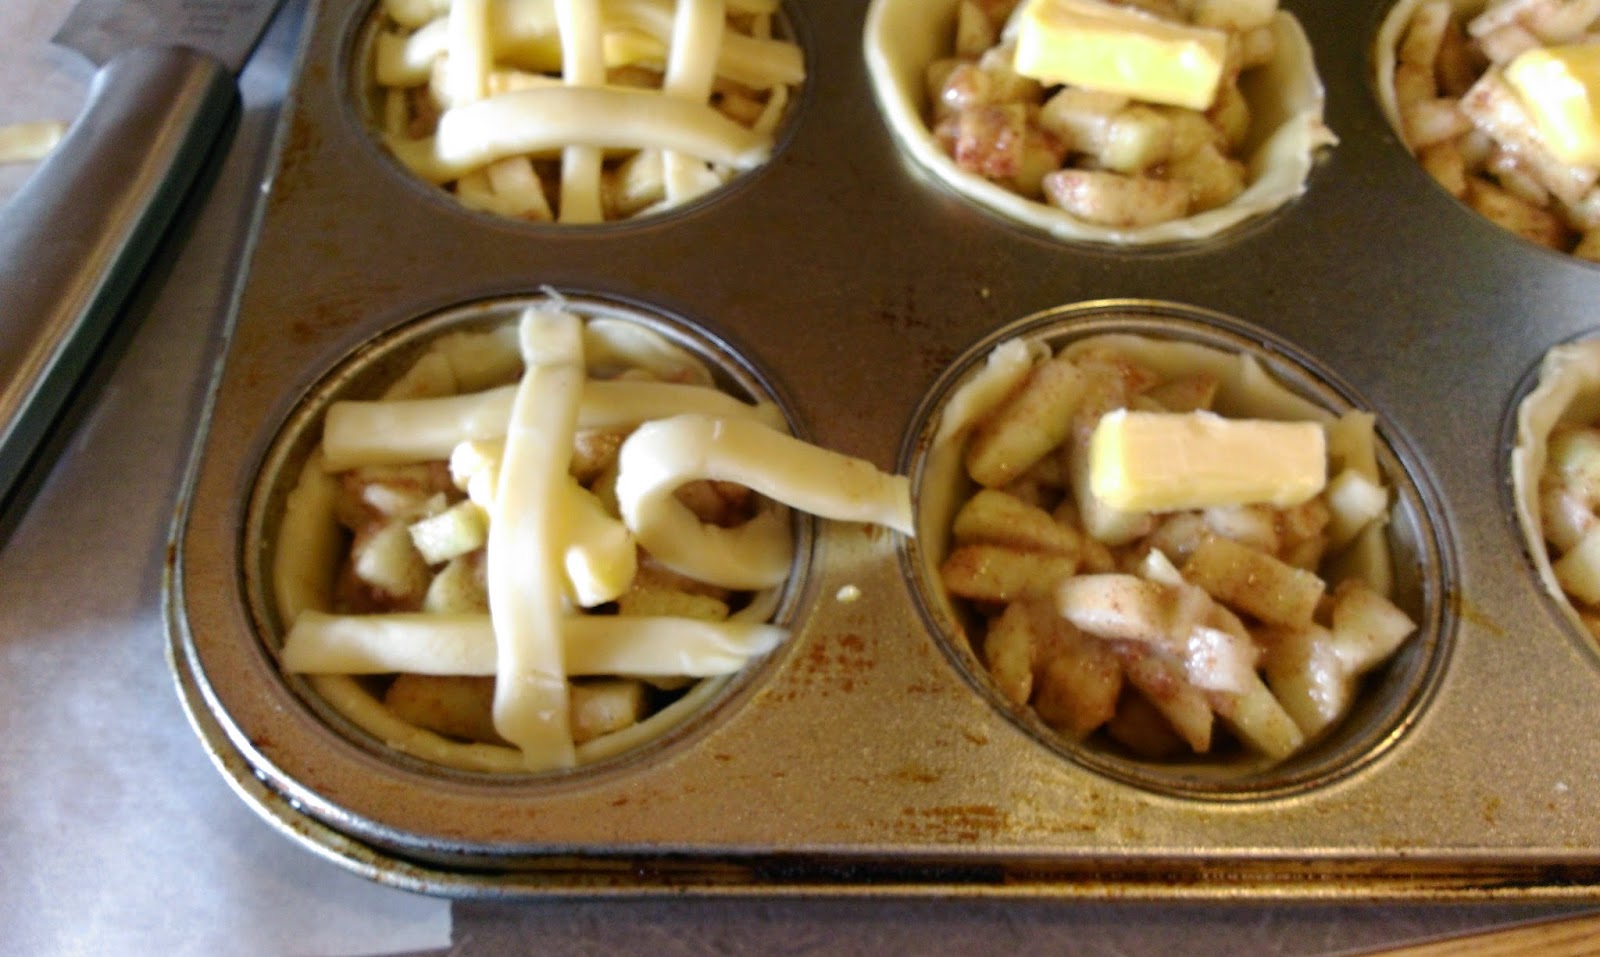
Then, take your middle strip and fold it back. Place another strip of pie crust down the middle, then fold the middle strip back over on top. 
Now it looks like string cheese! Take and fold back the top and bottom strips. Then lay down another thin strip of cheesecrust on the left-hand side of the pie. Fold the top and bottom strips back over this portion.
Take the top and bottom strip again, and this time fold back the other sides of the crust. Put a strip of crust down on the right-hand side of the pie, and fold the top and bottom pieces back over this portion. 
At this point, you can just smoosh the edges of the lattice onto the edge of the bottom pie crust. Walla! I had to do a practice pie, and hated the way it looked, so I scrapped it and made the strips thin like they are above. I gotta be able to see that gorgeous apple, baby. For the rest of my pies, I took my mini cookie cutters from Hank’s pumpkin treats and cut out leaves. Prepare yourself for another craptacular photo tutorial in 3, 2, 1…

I pressed down my trusty pink cup on the dough so I could see how many leaves would nicely fit on a pie. Turns out the third time is the charm in this instance. Tie game for me and Goldilocks. 
I then used a toothpick to etch veins into my leaves. 
And topped my remaining pies with the leaves in a nice, slightly overlapping cluster. You’re good to bake at this point, but I wanted to take the pies up a notch and add an egg wash to nicely tan my top crust and to give me a glue to adhere more cinnamon and sugar to the top of my pies.

Mix one egg and a tablespoon of milk together, and some sugar and cinnamon in a separate bowl. 
Brush the pies with the egg wash, then sprinkle with cinnamon sugar. Pop them in the oven for 20-22 minutes until a nice golden-brown and your house smells like the thing dreams are made of. 
Droooollliiinnnnngggg….but not in the pies. Just near them. Once cooked, give these little pieces of pure happiness plenty of time to cool. If you’re overzealous and try to remove them from the tin before totally cool, they will completely fall apart on you, and there goes your excuse to get out of talking to people on Thanksgiving. I’m just trying to help you live up to your full antisocial potential. I waited a full hour until my pan was completely cool, and then used a knife to remove them after tracing around the outside edge of each pie to ensure it wasn’t stuck to the pan. These are spectacular on their own, but I recommend heating them up in the microwave for 30 seconds before eating, and topping with Bluebell’s homemade vanilla, as it is the best vanilla, and if you live somewhere that doesn’t have Bluebell, you’ve got way bigger problems than trying to up your dessert game on turkey day.
Yeah, this was my dinner yesterday. See why I need an adult? I’ve taken to calling them ice cream apple boats in this form, and the name sticks. They are simply decadent a la mode, and will also take you longer to savor this way which means less talky, more eaty for you. Now that I’ve supplied you with two really awesome apple-based desserts for Thanksgiving, use the power wisely! If there’s never enough booze to get you through the holiday, go for the hard cider cupcakes. If its your talking game you want to avoid, go for these bite-sized pies. In either case, your taste buds will be quite pleased with you. So reward yourself after a hard day of marathon eating and take a nap, you crazy, food-obsessed American. God speed! ‘Til next time, my fellow eaters! -
Booze: Not Just for Beverages!
Yesterday I walked the dog in shorts and a tee. Over the course of one evening, we experienced a
shitstormwindstorm that took us from summer, to fall, to full on winter. Today I walked the dog in an outfit befitting Nanook of the North: Three (yes, three) layers on top, the thickest pants I own, fuzzy socks (always with the fuzzy socks), leather gloves, a beanie, and a scarf wrapped around my neck and half of my face (Mortal Kombat style). What changed, you ask? Well, remember back in May when I told you every time Derek deploys during summer, it rains almost the entire time he’s gone? Yeah, guess who just left for training for the next several weeks and apparently also controls the weather. As Derek crossed state lines into Alabama (I assume “Dueling Banjos” start up the second that occurs), he told me it was a balmy 73 degrees there. I might have died right then if I hadn’t had the wherewithal to make some boozy hard cider cupcakes this past weekend to keep me warm on these cold winter nights. Good job thinking ahead and checking the forecast, past Kate…you’re so smart…and bt-dubs, your hair looked great last week.
The tastes of fall! One of my favorite parts of fall when I lived in Michigan was when it became cool enough for hot apple cider and fresh cinnamon-sugar donuts from Yates Cider Mill. I die. Seriously, its the best. So I somehow managed to find a recipe that combined the cinnamon-sugary goodness from the donuts with the crisp taste of cider into one of my other favorite treats: cupcakes. You know, with the added bonus of making them boozy, too. I’ve never made a boozy dessert before, but if you can have booze for breakfast (looking at you, mimosas), then why not booze for dessert, too? Its this line of thinking that is sure to make me either a buttload of money one day or land me in the looney bin. It really could go either way at this point. If anyone knows of any entrepreneurs with a screw loose, send them my way.

One of these things is not like the other, one of these things is super boozy! This recipe (originally found here) is completely from scratch, and when something from scratch turns out perfectly, I really do feel superior to just about everyone on the planet for at least a solid five minutes (seven if I thought of it myself). While most people have way more important things to do with their time than perfect gluttony, I do not. Let me have my moment in the sun! If you’re a social alchy like me, you will already have everything you need on hand for these cupcakes:
- One stick of softened butter (duh)
- One and a half cups of hard cider. I used Angry Orchard’s Cinnful Apple (get it! Hah..)
- One cup of sugar…I realize this seems like a lot, but its sweetness tempers out, trust me.
- Two cups of AP flour
- Two teaspoons of baking powder
- 1/2 teaspoon of salt
- 1/2 teaspoon cinnamon (this kind isn’t so cinnful…puns for days)
- 1/4 teaspoon of nutmeg
- One lonely egg
- One teaspoon of vanilla extract
The way you slap these together is pretty effortless as well. Just mix the butter and sugar together until it is nicely whipped (around three minutes on medium-high), then pour in the vanilla and egg (it will no longer be lonely once you’ve done this). Now comes the interesting part. You know when two girls don’t like each other but they’re forced into a social situation where they have to spend time with one another? This is pretty much what happens when you add in the hard cider to the buttery mix. It allows itself to get close to the butter, but since they’re apparently mortal enemies (she like, totally stole that chick’s boyfriend), they never fully agree to mix. So don’t hurt yourself (or the innocent bystander- the mixer) by trying to spend ages getting these two things to agree with one another and fully socialize. You need a buffer. And that buffer comes in the form of your remaining dry ingredients.
In a separate bowl, mix together the flour, salt, cinnamon, nutmeg, and baking powder. Then, about a cup at a time, add it in to the cat fight happening in your mixing bowl. Mix well, then scrape down the sides of the bowl before adding the remaining dry mix. The dry ingredients act as a wonderful buffer between your dueling cider and butter, so everything should blend together nicely like the end of the movie Mean Girls. Once well mixed, preheat the oven to 350 and line your muffin tin with liners. I chose festive fall colors, because I still believe in a full-term fall before Christmas. Apparently the weather does not agree with me, but I will continue to fight the good fight.
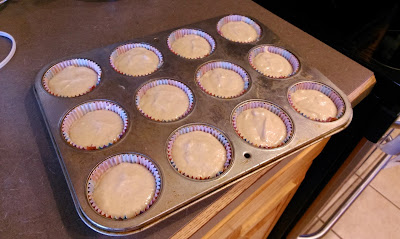
See, cupcakes getting along in perfect harmony, filled 3/4 of the way full. The original recipe called for the cupcakes to cook for 16 minutes, but mine were still super goopy at this point. I cooked my cupcakes for 22 minutes until a toothpick inserted into the center came out clean. The tops will look somewhat sticky and perhaps a little undercooked, but I think this is a side effect from the booze. I mean, I know I get greasy when the stuff is seeping out of my pores, too, so there’s that.

They will be a nice, tipsy golden-blonde when finished. Did I mention the frosting also contains booze? I probably should’ve led with that. This recipe ends up using an entire bottle of cider, so no victory sips are allowed. Sorry.

Sugar and booze? How could this go wrong! Don’t answer that, it was rhetorical. You only need to mix together another stick of softened butter (shock!), a teaspoon of cinnamon, and 3/4 cup of brown sugar together before adding in 3/4 cup of powdered sugar, mixing well. Scrape down the sides of the bowl (or maybe its just my mixer that sucks), and add in a tablespoon of hard cider. Repeat that last part, adding another 3/4 cup of powdered sugar and one tablespoon of hard cider. The cider will be all gone at this point, but you can totally lick the beaters if you need to.

You better believe I put a bunch of various tips on my fingers while I was trying to figure out which to use for decorating purposes, like witch’s fingers. Place your frosting into a piping bag with the tip of your choice. For a classic swirl, use a 1M. For a nice, clean rose, use a 2D tip. I wanted a French tip, so I went with Wilton’s closest equivalent, the 199 tip.
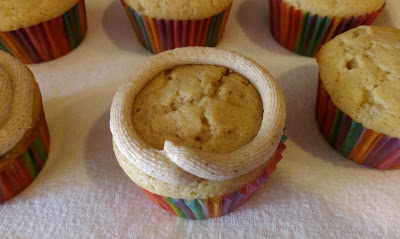
I just wanted a simple swirl, so I started on the outside, and worked my way clockwise around the cupcake. I continued looping in and around… 
Until I completeled my swirl by piping up a bit of excess frosting to make the tip stick up. 
But nothing is ever complete without sprinkles. This recipe yields twelve cupcakes, which is the perfect amount for two people. Or in this case, one person. Derek was able to have a fresh cupcake, and I sent one on the road with him for his journey. He made it without a “driving while intoxicated- by cupcake” citation, if you were wondering. But the other ten cupcakes are mine for the taking. It will come as no surprise that there’s way less than ten left at the time of this blog. I don’t care if it is so cold out I have to eat all of these in a parka in the comfort of my living room- they are just that damn tasty. I’m happy my first foray into boozecakes (possible copyright) was a success, and I’m thinking I will somehow find a way to sneak more booze into my future baking endeavors. Rum sauce apple pie? Chocolate Peppermint Schnapps cake? Yeah, the world is my drunk oyster, baby. ‘Til next time, my fellow eaters!
So warm and fall-themed, I almost forgot its so cold I can’t feel my face.

Healthy-ish cake, cupcakes, pie, and cheesecake recipes and decorating tips