-
We're All Nuts Here…Really.
I was never a big fan of nuts until I met my husband (take that as you will). His snacking habits usually involved almonds or cashews and such, so gradually I came around to making the bold life choice to actually try something other than a heavily-salted peanut. Enter the pistachio. I remember the very first time I tried them was mine and D’s first Thanksgiving together. He had a family tradition of making something called “green stuff” that consisted of loads of Cool Whip, pineapple, mini marshmallows, and pistachio pudding mix, and it was Heavenly. Only just two days ago when I picked up a packet of pistachio pudding mix did I see this same recipe on the side of the Jello box dubbing it “Watergate salad.” I have legitimately no idea why it is named this because the thought of Richard Nixon is one of the least appetizing things I can think of…so we shall continue to call it green stuff in this house. Anyway, I was jonesing for some cake like no other while simultaneously desiring pistachios (I’m a very complicated woman), so since green stuff wouldn’t cut it in this case, I decided to kill two birds with one dessert. Enter the pistachio cake.

Kate bakes…wedding cakes? I know, supes fancy, huh? It had been so long (literally months, since Valentine’s Day) that I had made and entirely frosted cakes. Although there was that delicious Guinness chocolate cake in there for St. Patrick’s Day, it wasn’t fully frosted so I’m not counting it…only in deliciousness. I was really starting to go through cake decorating withdrawals and had been toying around with the idea of making a hydrangea cake for awhile now, and I also found a new technique for piping two-toned flowers, so I figured I should finally take the plunge. If I failed miserably, we’d still have an entire pistachio cake to eat (leave no evidence behind), and if I managed to make it work out, well, I’d look like a total cake decorating badass. I’m happy the latter worked out, especially since I needed something to blog about this week, and I also really like feeling superior. Again, killing two birds with one dessert. Love it when a plan comes together. I guess I should divulge my secrets now…especially if you even slightly like pistachios, then you need this cake in your life and mouth. It is rich, moist, and has that lingering pistachio flavor mixed with luscious buttercream that melts on your tongue. Food porn at it’s finest.

Yeah, I used a box cake…sue me. You need a good white cake for the base of this recipe, so you could make something from scratch, but I was in the mood for cutting corners, so here’s my breakdown:
- One box of white cake mix
- One 3.4 ounce box of Jello pistachio pudding mix
- 1 1/4 cups of milk**
- 1/3 cup of oil…I know…I ALWAYS tell you to use butter and double the recipe, but trust me here. This cake is already going to be very dense from the addition of the pudding, so adding in too much butter would make the cake fall flat in the middle, and no one wants that.
- 4 egg whites…only use the egg whites. You don’t want the cake tasting more like a yellow cake because of the yolk. It will mask the pistachio flavor.
- Optional: a few drops of green food coloring. I used three.
**You can experiment with liquids here. You could just use water, and you would probably get a stronger pistachio flavoring, but I love the richness milk adds to a cake. I think the next time I make this cake, I am actually going to use Sprite or Gingerale to add a little extra kick to the flavor. Watch out, we got a rebel on our hands.
Simply mix all the ingredients together on low for 30 seconds, and then scrape the bowl and mix on medium for 2 minutes. Pour into greased cake pans (I used two 8-inch rounds). Bake at 350 for 25 minutes or until a toothpick comes out clean. Let the cakes cool in the pans on a cooling rack for 10 minutes, then remove and continue to cool on a towel on top of the baking rack until room temp. I actually put my cakes into the freezer because frosting a frozen cake helps to keep the crumbage down. Damned crumbage.

Aha, I finally figured out how to keep the powdered sugar demons from taking over every surface in my kitchen. Thank you, paper towels. I’d be lost (and very messy) without you. I also did some experimenting on creating a crusting buttercream that would work with the paper towel trick. Most butter-based frosting is obviously rather sticky, so the paper towel trick doesn’t work well…there was a lot of breath holding during this process, but I’m happy to report that this..sort of kinda worked out? Yeah…more on that, but the recipe itself is so unbelievably tasty:
- One cup of Crisco/vegetable shortening
- One cup of softened butter
- Two teaspoons of vanilla extract
- Eight cups of powdered sugar
- Six tablespoons of milk
- Optional: an additional package of pistachio pudding mix, but know this will make your frosting chunky since the pistachio bits are in there. I couldn’t live with myself if my frosting was chunky, so I didn’t add this in. But I bet it would be extremely tasty, if only I wasn’t such a smooth frosting groupie…
Mix together the Crisco and butter until nice and fluffy, then add in the extract and two cups of sugar. Mix well, scrape the bowl, and add two tablespoons of milk. Repeat the sugar/scraping/milk process until you’ve used all your recipe requires. This does make a lot of frosting, but I needed a huge amount to decorate with my flowers. You could easily halve this recipe and have the perfect amount to crumb coat and frost and just be done with it. But I’m obviously not the “just be done with it” type. I’m obviously the “let’s make things ridiculously complicated” type. Oh Type A, you horribly wonderful personality trait.

Once you’ve cooled your cakes and made your frosting, put a glob of frosting on the middle of a cake board and set one round on top of it to sort of glue it down to the board. No one wants a slip and slide cake. A regular slip and slide is a different story. 
Apply a thick layer of frosting to the top of the round and add the other round on top. 
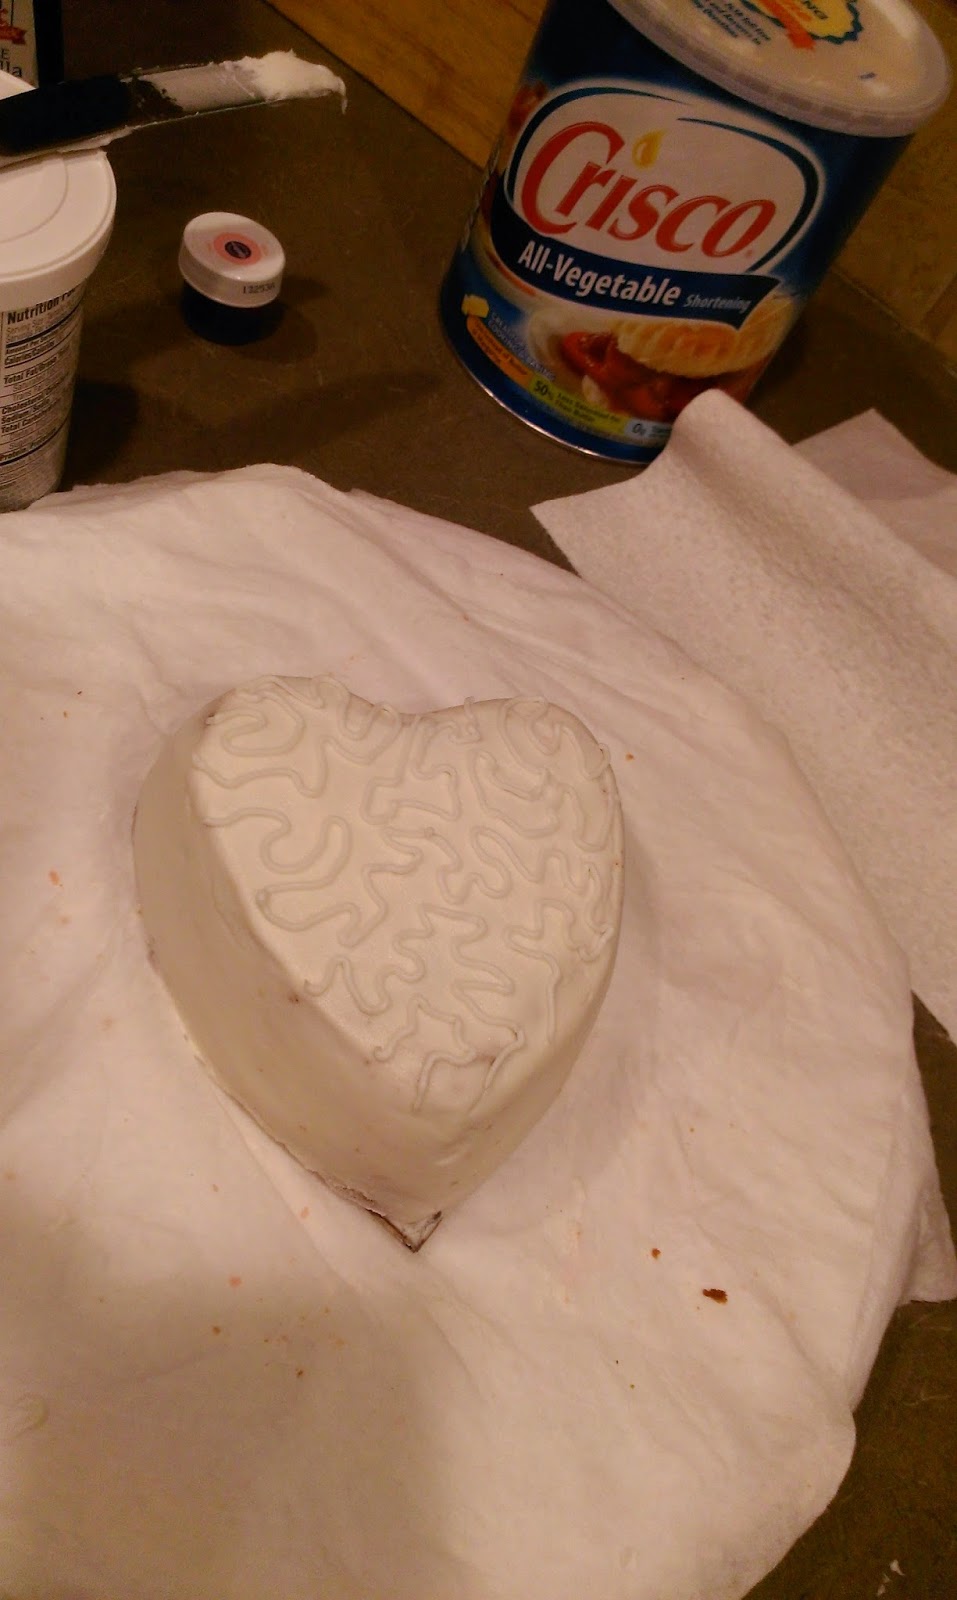
Take a big old heap of frosting and crumb coat that sucker. 
Clearly, this part doesn’t have to be smooth or beautiful. It’s like concealer for your cake, the crumb coat. Gotta love it. 
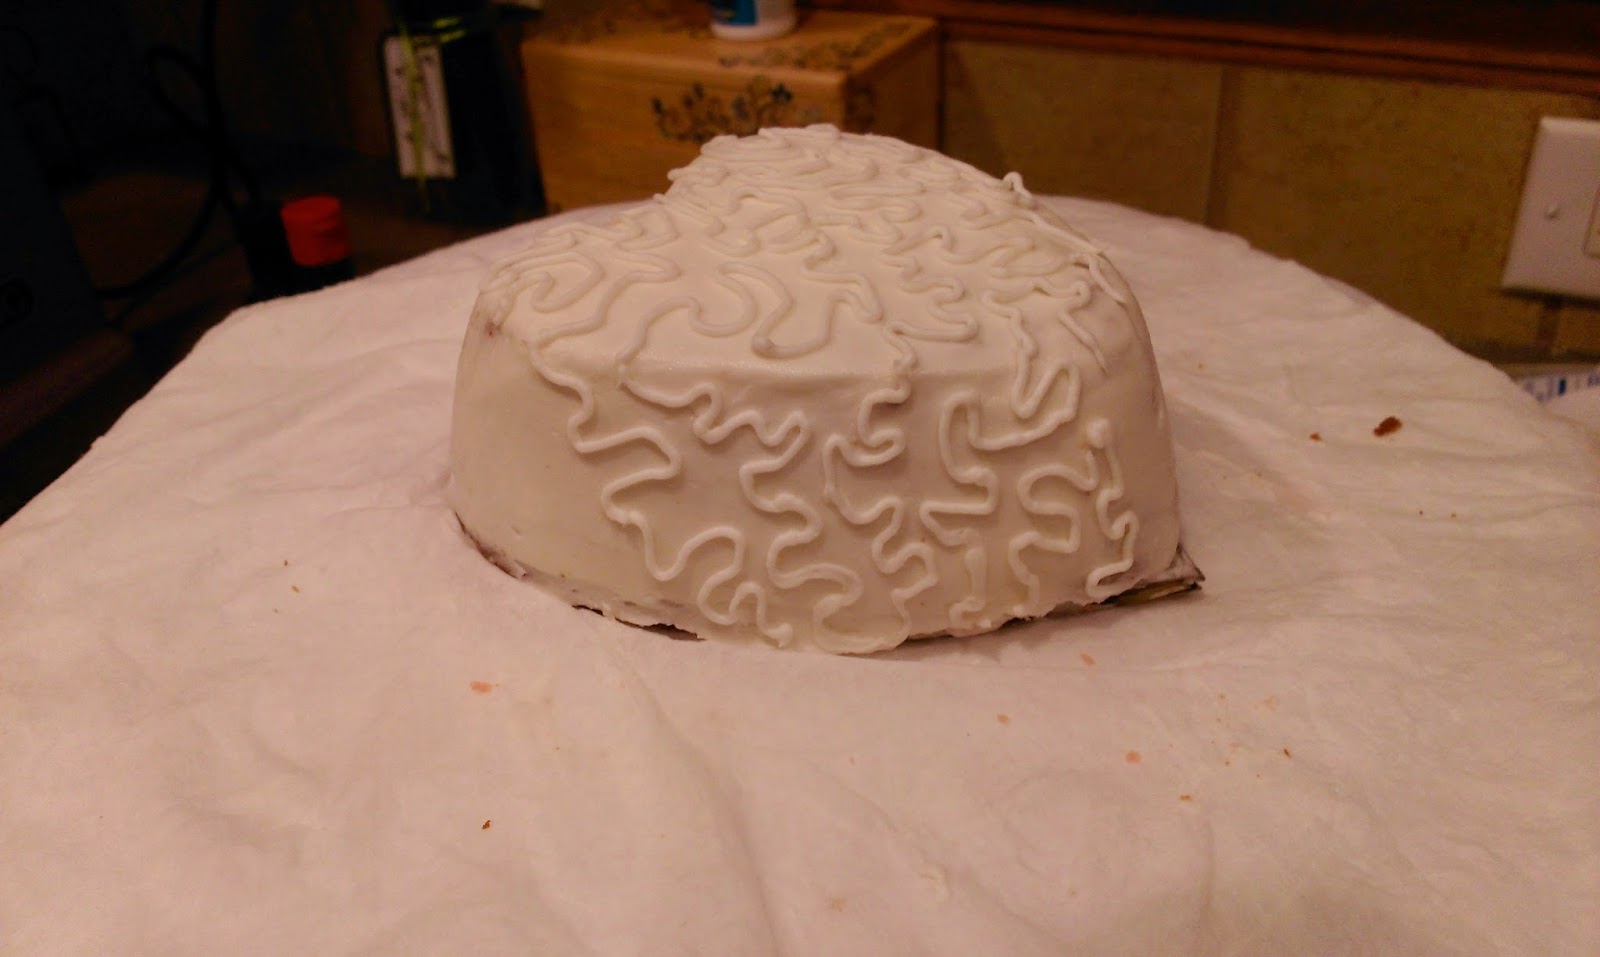
Put your crumb-coated cake into the freezer for 30 minutes and place a damp towel over your bowl of frosting to keep it from drying out. Now, once your crumb coat is set, go ahead and frost the final layer of the cake. Get it as smooth as you can using a large angled spatula and a bench scraper. You do want things to be as smooth as you can at this point because you cannot apply a ton of pressure with the paper towel trick because of the butter…it really likes to make a sticky mess, but I couldn’t live without it. It’s clearly superior to just Crisco-based frosting. Place your frosted cake into the freezer for another 30 minutes and cover your frosting back up. If you accidentally eat some of it when doing this, I won’t tell if you don’t.

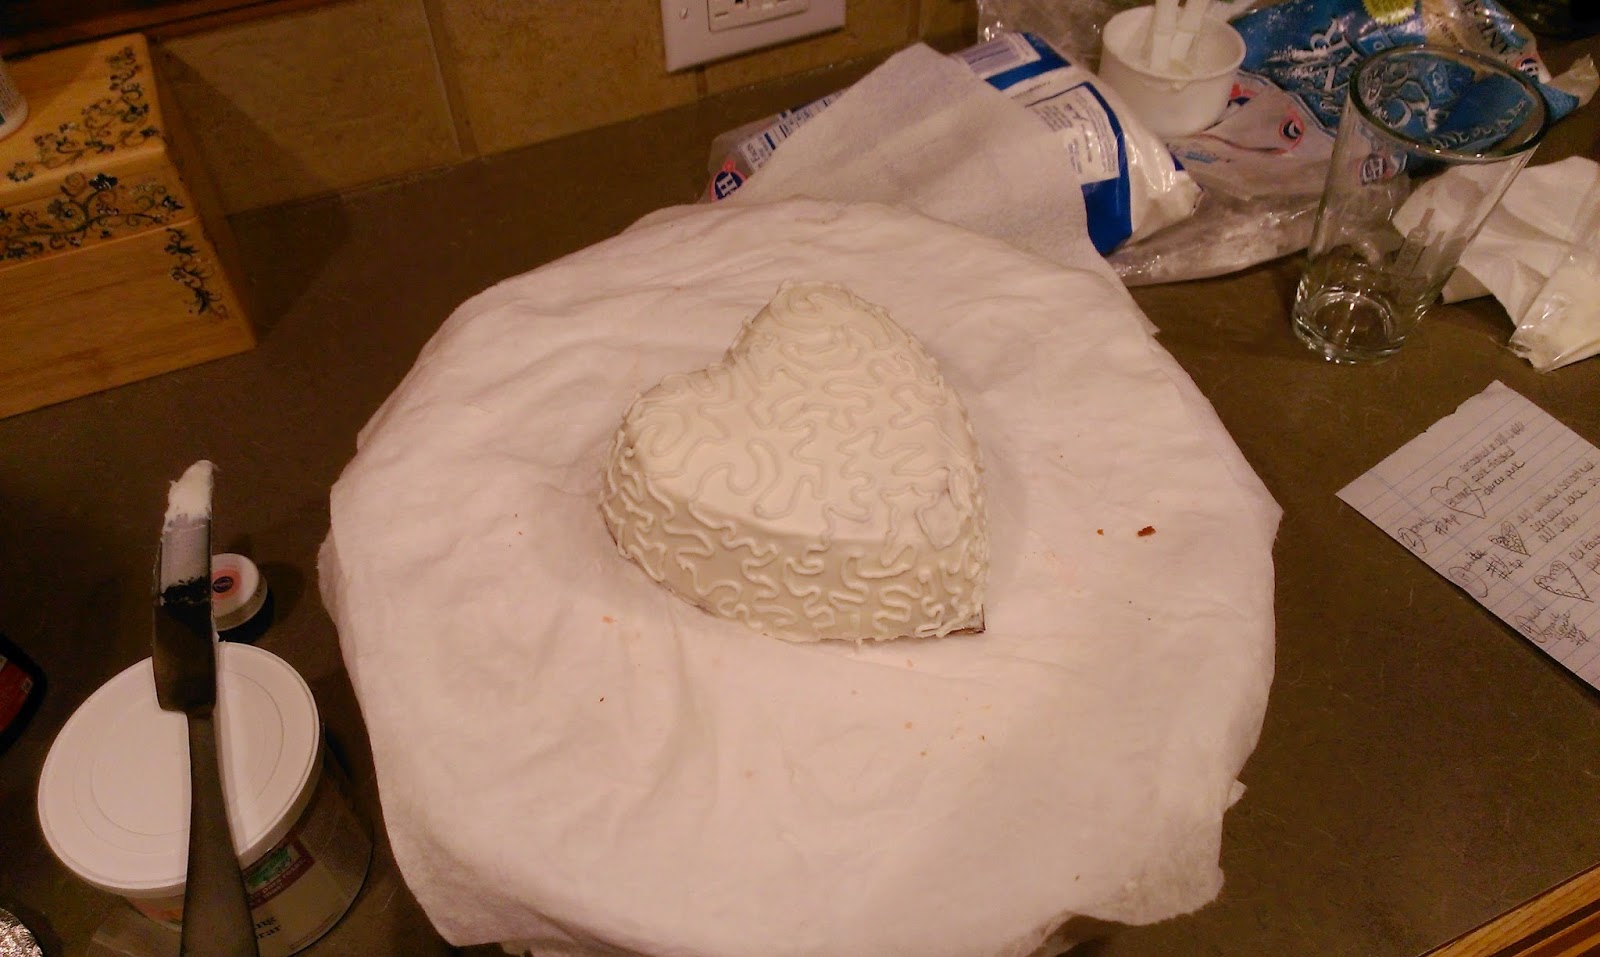
Damn girl, you smooth. Once your buttercream has crusted in the freezer, grab about 3-4 Viva paper towels and gently apply pressure to smooth out the cake using the paper towel trick. You want to use one paper towel for smoothing the top, and then use a new paper towel after one or two swipes at smoothing out the sides. The frosting will start to gum up on the paper towel if you don’t use a new one often, and this will ruin the frosting and make me really sad (I don’t like to feel things). If you use very light pressure and new paper towels, you can get a buttercream-based frosting to work with this trick. I’m not sure if you know this, but I pretty much just found the Holy Grail of buttercream frosting recipes. If you were a part of the caking community, you’d be lauding my efforts right now. Lauding I tell you. I’m like an Apple store Genius employee of the cake world- totally useless most of the time, but every now and then I really do make a difference.

Now, on to that frosting technique. I am en fuego with ideas this week, guys. Since the inside of the cake is green, I figured it made the most sense to use a light green frosting for my hydrangeas. To make this two-toned technique work, take a small bowl and a small amount of your frosting and dye it whatever color you want your flower petals to be.

Science experiments are totally fun when edible. Fit a piping bag with a 2D tip, and then turn the bag inside out. Use a small spatula and glob a little bit of green frosting inside your bag. It doesn’t have to be a lot, just enough to coat the piping bag. I turned things back around and pressed my frosting around until the bag was completely coated.

I’ll take one large glass of buttercream frosting, to go. Open your bag back up a little with the assistance from a glass. You can pull the bag down the sides of the glass to help you maneuver the frosting around without completely covering yourself in it. Then take a large glob of the plain white frosting, and plop it into the piping bag. Twist your bag shut, and pipe out a few practice flowers until they start coming out in two colors like this:

I feel pretty, oh so pretty, and witty, and tastyyyyyyyy. I simply piped flowers around the edge of my cake by applying gentle pressure and then pulling up and away quickly. Once I completed the border, I made another bag of two-toned frosting with a 2D tip. Why, you ask? Not simply to create extra work for myself (seriously), but because the more you handle the frosting, the warmer the butter in it gets, so it becomes difficult for the flowers to retain shape. Science (or something like that).

Delectable science. 
But the experiment worked- two-toned flowers that are totes adorbs. So totes adorbs that is actually acceptable to say totes adorbs in a sentence if you’re over the age of 14. 
Now, to really put the cherry on top, flowers on the side, whatever. I wanted to create a spilling effect of hydrangeas falling out and blooming down the side of the cake. To do this, I took my original bag of frosting back out of the fridge and put the alternate in to chill. I piped five flowers right below my border, three-four below that, two below that, and finally one flower at the bottom.

It’s always really nice when things turn out better than you had expected. As a realist, this very rarely happens. It’s worth celebrating for sure, so thank God there was cake lying around. I counted three piping tip spaces over and then repeated my clustering again until I had completely gone around the entire cake. I finished up by taking my alternate bag of frosting back out of the fridge and piping a row of flowers at the base of my cake.

This cake is so pretty, it even makes my photography skills look professional. This cake is special to me not just because it makes me look extremely bad ass and tastes AH-MAZING (yeah, my hand is getting tired from patting myself on the back with it, thanks for noticing), but because this cake also marks one year since I set off on this crazy adventure into the world of cake decorating. I remember a year ago- there I was standing in the aisle at Hobby Lobby wondering if I was wasting a crapton of money on supplies I’d never be able to properly use, or if I had finally found an artistic outlet that would help me express myself both creatively and tastily. I’ve really enjoyed learning and even coming up with my own recipes and techniques to make cakes, pies, cupcakes, etc. look as good as they taste while chronicling it with my own brand of sardonic, self-deprecating wit here on the blog. I also appreciate your readership, support, and dealing with my general sass. Here’s to another year and to buttloads of new desserts (I really have to keep exercising my ass off). ‘Til next time, my fellow eaters!

I’ve come a long, delicious way in one year. -
Anniversary…Pie?
In my family, we believe pie doesn’t get a fair shake. In my family, we believe in “breakfast pie” and “lunch pie” (these are exactly what they sound like). In my family, our crest reads: “Why, yes, I will have dessert with that.” In my family, surprisingly not a one of us is morbidly obese. This could be because we get so jazzed at the thought of dessert that our whole bodies vibrate with excitement, shedding pounds and making room. In my case specifically it is more likely the 25 total miles a week worth of dog walks saddled with Jillian Michaels workouts keep me trim, but this isn’t a fitness blog. This is a dessert blog dedicated to the lesser-appreciated of desserts: the pie. Derek and I celebrated our third fancy church wedding anniversary last Tuesday, and I wanted to make us a fantastic pie to celebrate (read: it simply took us so long to finish all those damn Easter egg pops that I didn’t bake until Monday). I’d be a big, not-so-fat (thanks, Jillian!) liar if I didn’t disclose that. However fortuitous that situation turned out to be, we’ve been dining on a delectable cookies and cream Oreo pie for the past few days. Yes, lunch pie was had- but I’ve yet to convince my husband pie is an acceptable replacement for pastries or donuts when it comes to breakfast. Give it another year.

He’ll come around. I mean, just look at this beauty. This pie was adapted from a Kraft recipe, and it is as easy to make as it is to eat, which I happen to really enjoy considering I’m still cleaning up sanding sugar from those Easter pops I made a week and a half ago. You could make it even easier by purchasing a premade Oreo pie crust, and just tell your family to deal with the fact that even you need to phone it in sometimes. We can’t all devote our lives to making desserts, sadly.

TWO tubs of Cool Whip? Yeah, you’re gonna like where this is headed. The ingredient list is pretty simple, and if you keep a bushel of Oreos around like I do, you’re already ahead of the game. Here’s the breakdown:
- One package of your favorite Oreo flavor (I did a mix of Double Stuff and Mint)
- One 8 ounce block of cream cheese (you could use light, but what’s the point, really?) at room temp
- 1/4 cup of melted butter
- Two 8 ounce tubs of Cool Whip
- 1/3 cup of sugar
Yeah, short, sweet, and to the delicious point. You’re going to start by making your crust if you’re not using a premade Oreo crust. I will tell you that making your own crust will be about a thousand times easier if you own a food processor. I do not own a food processor; what I do own is an amount of fury and sheer determination inside of me that could part the seas. And a rolling pin. An unstoppable combination.

Get ready to release the rage. Start by taking 26 Oreos (I used all Double Stuff for my crust) and plop them into a bag. Do not scrape out the filling- it works like a glue with the butter later. Beat this bag with your rolling pin until you’re left with mostly Oreo dust. I ended up puncturing a hole in my bag, and when I flipped it over to beat the other side, Oreo crumbs went flying, and Hank went ‘a huntin. I placed that bag into a second bag, but the same thing happened again. I wasn’t kidding about the fury and determination. The rage slowly builds when you live somewhere that regularly smells like poop.

Ziplocks aren’t what they used to be. 
Also, you don’t have to get very many dishes dirty to make this pie, which is the best gift of all. You may not be able to get the finest crumbs when you don’t have a food processor, but when the large chunks of “stuff” in your pie turn out to be Oreos, no one’s gonna complain. Mix your melted butter together with the Oreo crumbs in a bowl until everything is coated in buttery goodness. Then dump it in to a pie plate.
It may not be as pretty as a premade crust, but I did burn some more calories pummeling Oreos with a rolling pin for five minutes. To help smooth things out and break up any larger pieces of Oreos, use a small glass to roll out your crust into your pie pan. You do want the crust to come most of the way up the side of the pie pan. Refrigerate your pie crust while you mix together the pie filling. I left my crust in the fridge for about an hour because I was busy doing other important things like vacuuming my blinds and wondering if I should just Super Glue my windows shut to keep the dirt out.

Oreo dirt I’m okay with. To prepare your filling, take ten Oreos and chop each one into about six little pieces. I wanted a hint of mint in the pie, so I used five mint Oreos and five Double Stuff. One package of Oreos will yield enough to make your pie crust and pie filling, just FYI. I honestly wasn’t sure if it would AND have enough left over to decorate, which was another reason I went all mix and match with my cookies. Now I know I worried for nothing, but this is precisely how I live my entire life.

Nothing says love quite like not eating all the pie filling before you can share it with your spouse. While chopping Oreos, drop your block of cream cheese and the 1/3 cup of sugar into your mixer and whip it for about 4 minutes until everything looks super fluffy and wonderful. Then on very, very low or by hand, mix in one tub of Cool Whip and your chopped cookies. You’re almost done…delightfully quick, and with plenty of time to finish cleaning those pesky ass blinds.

Take your mix and spread it on to your pie crust. I used a large plastic spatula to meticulously smooth out the pie filling because I am a crazy person. This isn’t a necessary step unless you’re also OCD. I wiped off the edges of my pie dish also. Whew. Wish I would’ve taken a picture of that instead…Now, you don’t HAVE to decorate your pie, but you really should. Especially if you phoned it in with the crust. You owe it to your loved ones.

So take the other tub of Cool Whip and stir it with your spatula until smooth. Load it up into a piping bag fitted with a 1M tip. Have some extra Oreos standing by to garnish. 
I just swirled little rosey circles with my piping bag around the entire pie. Super simple- just start in the middle and swirl your way around til you form a complete circle. 
Then I came back in and piped little stars in between each rosey circle to cover up the space left outside each circle. Just press your tip in the empty space, fill, and quickly pull away. 
You can see the different between the empty space on the left and the star on the right. Much cuter. 
Add circles and stars (no room for hearts, clovers, horseshoes, or balloons, sorry, Lucky) around your entire pie. 
And finish off with some Oreo garnish! I chopped three Oreos in half and placed them in the center of my pie, and I finished by filling in the center with the last of my Cool Whip in my piping bag and cooling the pie in the fridge overnight (cool for at least two hours before serving so it can set). This pie ended up looking so fancy it could’ve come out of a box, and I had Oreos leftover to snack on- double win. D and I had an absolutely fantastic anniversary; we feasted like royalty on pie and ate so much dinner I was actually still full when I woke up the next day…I’ve never skipped breakfast in my life though, so I soldiered through it with thoughts of breakfast pie. While I may not be overtly romantic or gushy, I do know the way to a man’s heart is through delicious food, and my husband is reminded with each and every meal and dessert that his wife loves him and may or may not be trying to fatten him up so she can finally be the skinny one in the relationship. Lifelong relationship goals, people. ‘Til next time, my fellow eaters!
Pie- for those moments when words alone cannot express your love. -
Putting All My Eggs in One Basket
Easter is upon us- that magical time of the year when you scar your young children for life by taking them to your local mall to pose with a stranger dressed in a terrifying rabbit costume. I suppose there is also the Biblical significance of the holiday as well, and who knows, without Jesus and his resurrection, Marshmallow Peeps may not exist. Our heart valves would hate us a little less, but our souls would not rejoice in fluffy, sugary goodness. I’m still not entirely sure how a bunny became the official mascot of Easter…but I also don’t really question why I can’t eat meat on Fridays during Lent either; I’m not a rule breaker. I’m just looking forward to a time when tuna is not on my regular luncheon rotation again. Since I gave up caffeine for Lent and both of my dogs are sleep terrorists, I’m also looking forward to a time when I can slam a can of Red Bull like a 21 year old pounding a shot of apple pie vodka (kids these days..in my time, vodka tasted like shame and raw potatoes). Anyway, I was trying to come up with some clever ideas for Easter treats because next week is also my one year anniversary of becoming the dessert maven you all know and love or hate. I’m indifferent to how you feel about me as long as you like my desserts. I realized that Easter eggs are probably one of the most prominent Easter figures alongside the bunny (I will never understand), so I made some spectacularly sparkly Easter egg cake balls alongside some extremely cute Easter chick cake balls (somehow the whole chick thing does make total sense to me…just not that damned rabbit).

I’ll take four baskets of these, to go. So my chicks look a little bit like the ghosts from Pac-Man, I know…but these little guys came about as a last minute alternative to an idea I had that failed miserably; more on that later. Really my whole plan of attack was botched and I had to come at these with a Plan B. I wanted to luster dust the eggs to make them insanely sparkly and wonderful with a smooth texture unlike sanding sugar, but my Hobby Lobby did not have luster dust even though their website indicated they did. I don’t know why things like this continue to surprise me in Clovis; it’s like the movie Groundhogs Day here. I seek and search and always end up back at Amazon.com (if I die here, that should be on my tombstone). I did not have time to order the luster dust Friday to arrive Saturday for baking, so I improvised and used sanding sugar. Here’s a quick rundown on the pops if you missed my tutorial on cake balls or cake pops.

Select any box cake you like and a tub of frosting to go with it. I am committing some sort of cardinal sin here by mixing Betty Crocker and Pillsbury, but there are so many other things I could end up be smited (smote?) for. Bake the cake, but remember to sub milk for the water, butter for the oil and double the amount, and add an extra egg. This way you’re getting a much richer quality and flavor out of the box. Let your cake bake according to instructions and cool on a cooling rack until room temperature. I cut off my edges since they are a bit crisper and don’t crumble as well. 
Take your cooled cake and crumble it up into tiny cake grains in a large bowl. I take a chunk at a time and rub it together between my palms to do this, and I go back in at the end to break up any large chunks. After this, slop (seriously) your frosting into the bowl with the cake. I use about 3/4 of a can of frosting for my taste preferences. Then get your hands dirty (after you’ve washed them, of course) and mix everything together until the dry cake has been coated completely in frosting. Wash or lick your hands clean after you’ve done this. Not gonna lie, I’m a lick first, wash later kinda gal. Take a cookie scoop or tablespoon and fill it up with your mix. 
Drop the ball you’ve scooped up and roll it into an oblong shape. I rolled my ball of cake around like a ball of Play-Doh in between both palms, and I finished up by using the heel of my hand to press the dough into an oval. I did the same thing when making my football cake balls, but when I finished up this time, I made sure the top came to a slight point and lightly flattened the other end. 
Like so. Place each egg on a Parchment-lined tray. I had to reshape a few of these a couple times to get them looking a bit more eggy. I interrupted my husband’s video gaming several times to ask him what he thought these were supposed to be. Five times out of six, egg was the clear answer. The one in the middle row at the very back here looked more like a big toe. It was later reshaped. Put all your eggs into the freezer for an hour to solidify. 
This photo makes my OCD really happy. Now, since I couldn’t find luster dust, I opted for sanding sugar instead. I found three bags of candy melts in a variety of light pastels for Easter and sanding sugars to match. Can someone also tell me why the hell we dye eggs the colors of a nursery? The more I think about Easter traditions, the more my head hurts. I need an adult. Preferably one with a working knowledge of the history of the Easter bunny so I can put this all to rest. I digress. If you want to make actual cake pops, gather a Styrofoam block or two and some lollipop sticks. I got these because I was planning on decorating some of the pops with lines and such, and I needed to be able to spin them around. If you don’t want pops, get some mini-cupcake papers to place your finished eggs into.

And say goodbye to your clean kitchen. Pull out however many pops you want in one color. I made 30 pops, and I did ten in each color. Melt your first bag of candy according to package directions in a bowl or Tupperware. While doing this, gather a large fork, spoon, paper towels, toothpicks, another bowl, and sanding sugar. You have to work really fast with these since the chocolate candy melts harden quickly.

Once your melts are…melted….place once egg on your fork and dip into the bowl. Use the spoon to…spoon…the melts over the top of your egg. 
Pull your egg out once it is completely coated and use two fingers from your opposite, fork-free hand to tap your fork-holding hand gently. This will get excess melt off your egg and cause it coat more evenly. Tapping the fork itself on the bowl could cause the egg to fall off or to coat…weirdly. Once you’ve tapped a few times, drag the fork against the edge of the bowl to get the excess drip-age off, and then tap your wrists a few times more and swipe again for good measure. 
Now stand on your head and view this photo. I decided I wanted five eggs of each color completely coated with sanding sugar. To do this, IMMEDIATELY after you’ve swiped your fork the last time, hold your egg over the empty bowl and pour sanding sugar all over it evenly. Then place your fork (tilted slightly down) on the tray and use the toothpick to slide it off of the fork. I did this for my yellow and pink sparkly eggs, too, using the various matching sanding sugar colors with my melts.

Like little Robin’s eggs. Aww….I’m gonna eat you later. I left the other five eggs of each color plain with no sanding sugar because I had great, failtastic plans ahead of me coinciding with a minor meltdown. Just another normal Saturday!

But look, so sparkly! Also pictured, a husband happy his wife stopped bugging him when playing the new Battlefield game. Clearly they’re eggs. Clearly. 
‘Bout to get real desperate up in here. Now, about my shortcomings. Adding a design to cake pops with melted chocolate is ridiculously hard. There’s this golden moment of opportunity that lasts for about 4 minutes where the chocolate is the precise temperature to pipe without it going everywhere or hardening up and exploding out of your piping tip when you push too hard. I wanted to attempt to avoid this frustration, so I got out some light Karo syrup, a couple paintbrushes, and my sanding sugar. My plan: to paint lines and zigzags on the eggs with the syrup and coat the syrup with sanding sugar to make a decorated Easter egg. The end result: too ugly to post pictures. I needed better, smaller brushes and more patience for this to work. I will revisit it again one day, but in the meantime, I was ready to go throw these remaining eggs at my own car for my awful execution of them. However, I took a deep breath and came up with a new idea because I couldn’t bear to waste any cake. It hurts my soul when cake is wasted.
Thank God for sprinkles. They’ve saved me time and time again. 
This will come together, I promise. Fortunately I had a moment of pure brilliance and scoured my pantry for star sprinkles (like you’re surprised I have these just laying around). I pulled out enough orange sprinkles as I had plain eggs and found my food-safe pen. Once the plain eggs had completely dried, I took my paintbrush, dipped it into my small bowl of syrup, placed a small dab of syrup in the middle of the egg, and then pushed an orange star onto the syrup with a small bit of pressure to get it to stick. Walla- a beak!
He only looks sad because he knows I’m going to eat him. Then I took my pen and drew on tiny little eyeballs. I suppose if you had planned to make chicks originally, you could’ve added small wings to the sides by shaping a few little pieces of your cake mix into triangles and adding them to the sides of the eggs after you shaped them. Or you could find other sprinkles in an angled shape. I was winging it sans wings in this case. The irony is not lost on me.

But my Pac-Man ghost chicks are super adorbs. You can tell what I was going for here, and that’s really all that matters. That and the fact that they taste like little strawberry pieces of Heaven. The chocolate melts act like a straightjacket of sorts, keeping the crazy flavor from bursting out. They also keep these bad boys fresh for like, ever. I was going to make a joke about resurrecting cake flavor here, but I drew the line as clouds did appear to actually be gathering outside, and I didn’t want to be smited (smote? smoted? Jesu…geesh). Once finished, place your eggs into an airtight container and keep them in the fridge.

Happy Easter from Kate Bakes Pac-Man Ghost Pops. I hope you all have a wonderful Easter weekend next weekend, and if you want to experiment with dying eggs you can actually eat later instead of accidentally break just by looking at them too hard, go with the egg cake pops. While the cake pops do take a little bit of skill and patience, they’re not nearly as obnoxious as dying actual eggs or buying those crappy plastic ones and filling them with jelly beans that will inevitably be spilled out and strewn across lawns and living rooms everywhere. I’m not bitter; I just don’t want to have to share my jelly beans with anyone. ‘Til next time, my fellow eaters! -
Light as Air, Heavy on Taste
I realized a few days ago it had probably been about ten years since the last time I had an angel food cake. Perhaps this is due to the fact that when it comes to cake flavor, I want to get the full bang for my (fatty) buck. Angel food cakes require their very own pan that can’t be used for anything else, they’re finicky during the cooking and cooling process, and the results leave me with an overall feeling best described by the word “Meh.” Angel food cakes have certainly proven to be bland and boring, the Ann Veal’s of the cake world, if you will. I realize not every cake can be a bold, in-your-face rum cake (clearly the Lucille Bluth of cakes), so I wanted to try to give Ann (her?) another chance. I will always maintain that there is never a bad time for an Arrested Development reference. Also, you can figure out who is clearly superior in your group of friends and family by viewing their recently watched history on Netflix to see if A.D. is part of that line up. This way you’re clear on who is not ashamed but actually proud of the fact that they’re a part of your dysfunctional hodgepodge of a family. Good times. Back to the Ann-gel food cake. I wanted to prove that these cakes could be more than just a circular, tubish platform for Cool Whip and frozen strawberries.

They can also be Bundt cakes! With flowers! I am constantly trying to find new ways to not screw things up in the kitchen (at least I’m being honest), so I knew baking an angel food cake in a Bundt pan could turn out to be an absolutely tasteless disaster. Thankfully, both the cake and I survived this experiment, only for one of us to be eaten (Hint: clearly the blogger is still in tact). There’s also NO ROOM for Cool Whip when it comes to this angel food cake…it is topped in a decadent lemon cream cheese frosting and decorated with adorable gumdrop roses. So let me give you the rundown on Bundt strategies, frosting deets, and making spring come to life for your taste buds with my gumdrop rose tutorial. Onward to greatness!

A really hefty ingredients list thanks to Betty Crocker. I had planned on making my angel food cake completely from scratch, but then I noticed the recipe I found called for like 35 egg whites and not the kind from the carton, so I made the command decision that a box cake is DEFINITELY way cheaper than a dozen eggs. Priorities…it was the weekend after all, and all that egg money needed to be better spent on beer. I prepared my cake as directed on the package, and then I took a paper towel, folded it into quarters, and sprayed it heavily with cooking spray. I lightly wiped the paper towel all over my Bundt pan, coming back in a second time to grease up all the tiny crevices. I know, you’re never supposed to grease the pan so that the angel food cake can “climb” up the sides of it. But I realized that if I didn’t grease my Bundt pan, I’d end up with handfuls of cake instead of one whole cake after trying to remove it from the pan. I eat cake by the handful, but it would be pretty close to impossible to decorate that way.

At this point, I had eyes, fingers, and toes crossed that things would turn out well. I baked my cake for the full amount of time advised on the back of the box (47 minutes. Such an arbitrary amount of time, Betty), and set my pan on top of a cooling rack and left it alone for about an hour and a half to cool. Do not pass go, do not collect 200 dollars, do not invert your Bundt pan at all. I know this also seems weird because you might believe the cake will totally cave in on itself if you don’t flip the pan upside down. Trust me, it won’t budge thanks to all those grooves in your pan sucking it in place.

See, no cave ins! Once the pan is totally cool, take a small metal spatula and slowly work your way around the edge of the Bundt pan to loosen your cake. Don’t forget to loosen the inside edge. I realize this seems obvious, but I had a mild panic attack when I couldn’t get my cake to come out of the pan until I realized I had forgotten to loosen up the inside edge. Even the greatest and smartest of blondes still have their moments. I was able to place my cooling rack on top of the pan and flip it over with my cake coming out in tact after the minor meltdown I was having.

So, about that angel food cake being healthy… I realize a lot of people like to eat angel food cake to quell a sweet tooth without being totally fatty fat fat fat, but that really makes no sense to me as I am a have my cake and eat it, too, person. As my stepdad always says, right before you die you’re probably not going to be thinking to yourself, ‘Thank God I had that salad for lunch.’ So let’s leave the Cool Whip out of this equation and go full-on fatty fat fat fat and make this delicious lemon cream cheese frosting:
- 1.5 blocks of room temp cream cheese (you could use the reduced fat version here since a thinner consistency of frosting will work well for this cake)
- 1/2 stick of room temp butter
- 4 cups of powdered sugar
- 1/4 cup of lemon juice (not pictured because I am an idiot)
- 2 teaspoons of lemon zest (I am lazy and use the kind out of a jar. Using a zester/grater normally means losing knuckle skin in my world.)
You can use a fresh lemon for the juice and zest if you so choose. I am sure it would be fantastic, and you could feel just that much better than the baking blogger because you’re organic and blah, blah, blah. Damn hippie. Start by mixing your butter and cream cheese together until fluffy. Then mix in the lemon juice and zest. Finish up by adding one cup of sugar in at a time, scraping the bowl and mixing well between each cup.
I forgot to take a few pictures here because I kept eating frosting instead (again, I’ll say it:
skewedpriorities). Dude, organic or not, this stuff is legit. Anyway, you want to get your frosting melty so that you can pour it over your cooled off cake like a glaze. I scooped all my frosting into a LARGE liquid measuring cup. Seriously, the thing can hold almost five cups of liquid. A two and a half cup measuring cup would probably work, but I’m from Texas and everything has to be bigger. I melted my frosting for 40 seconds in the microwave, and then drizzled/poured over the entire cake. You can use as little or as much frosting as you want depending on your taste preferences. No surprises here, I used every last drop of frosting.
Because I’m an adult, and I can do that. I won’t lie, you’re gonna make a bit of a mess here, and you may have a moment of complete doubt in what I’ve just made you do, but we’re gonna make things look nice like they are in the photo above. At this point after dripping frosting all over your cake, you might want to kill me (please don’t, I need to bake Easter egg cake pops next weekend). Angel food cakes are obviously very spongy, so it will soak up a bit of frosting. Your cake won’t be completely covered by frosting, and cake will show through because of this. It’s okay. But you do want to clean up the mess a bit by taking a small angled spatula and swiping up from the base of the cake and then down into the hole in the middle of the cake. This will create the alternating ridge pattern shown above. Depending on your Bundt pan, you can just follow the natural grooves of the pan, which is what I did. I finished up by taking a damp paper towel and wiping the edge of my cake plate so that frosting wasn’t everywhere. You could call it a day here, but the gumdrop roses are both tasty and delightful, so keep on truckin’ through my crappy photo montage.

To make the roses, you need a bag of gumdrops, a cutting board sprinkled generously with sugar, a rolling pin/thick drinking glass, sharp knife, and a small bowl of warm water. 
There’s two ways of making roses. This first way is much quicker but will yield smaller roses with less detail. Start by rolling out a gumdrop to an oval about 1 1/2-2 inches long. Follow suit with two more gumdrops. Make sure you have plenty of sugar down because it will keep your gumdrop from sticking to the pin and the cutting board. 
Now take one flattened gumdrop and roll it up like a carpet. 
Moisten the end with a bit of warm water on your fingertip to seal the end 
Then take another flattened gumdrop and wrap it over the seam on the first part you rolled. Do this again with the third gumdrop, covering up the seam from the second gumdrop. Make sure you are pinching the ends each time so the gumdrops stick together. 
Then pull your “petals” out a bit and you’ve got a rose! 
Now, this next method of making gumdrops is more labor intensive, but as a result, it will yield much more beautiful, larger roses. Take four gumdrops and roll out to 2 inches (or one Kate-sized thumb). You don’t want them to get too thin, or your roses will be very droopy. No one likes droopy roses. 
Cut your flattened gumdrops in half horizontally. 
Take one piece and roll it up like a carpet (the cut side should be at the bottom). Moisten your finger and seal the bottom edge together. 
Now take another gumdrop half and cover the seam left from the edge of the first and wrap it around. Make sure it is nice and secured at the bottom. 
You want to continue covering the seams/edges left by the gumdrop halves you’ve secured. You will use all 8 pieces total, so your final layer will be three “petals” overlapping each other. 
You can see this a bit more clearly here. 
Now take each petal and bend it down a bit to open up your rose. 
No rose it complete without leaves, so flatten out a green gumdrop. 
Cut it into quarters. If you’ve rolled them too thin, you can always just fold the half in half again as I did above. 
Then simply secure to the bottom of your rose with a little bit of warm water and pressure. 
Use as many colors of gumdrops you like! You can even mush colors together or alternate gumdrop half colors to get the multicolor effect here. 
Or keep them all one color for a classic look. So pretty you won’t want to eat them. But you will eventually because hunger always wins out over beauty. Truth. I believe I created about 16 roses. This took about two hours, but it was worth it for the end result. Plus, when I was little, I used to help my mom make these gumdrop roses to put on the various cakes she would make, so it was a lovely and sentimental trip down memory lane now that I’m the adult (or at least adult adjacent). I can now see why she wanted my tiny, nimble fingers to help her out with these because good LORD it would cut the time in half. I still do not consider this a good enough reason to have children, but a minion or two would suffice. You can also freeze these for later use, so that’s a plus!

Cue Vivaldi’s “Spring”… 
Because these babies have sprung! Simply place each flower wherever you’d like to on your frosted cake. Press the flowers gently into the cake, and they will stick quite well thanks to the thick cream cheese icing. You could take the time to completely border the cake, but I’m going to say I went with a more minimalist look here, and not that I was lazy and got tired of rolling out petals. Yep. Could also argue that I was trying to remain “calorie conscious” and not obliterate the angel food with too much sugar.
Thanks for the advice, Lucille. Either way, I am happy my science experiment turned out almost as I had pictured it in my head (in my head I didn’t eat so many gumdrops during the rose making process). The angel food cake itself is still so simple and “it’s as Ann as the nose on Plain’s face,” but with the help of the rich frosting and delightful zing of the gumdrop roses, the overall flavor is as bold and tasteful as any other regular-consistency cake (the Michael Bluth of cakes, naturally). So if you’re looking for a way to add beauty and class up an angel food cake, this is the way to go. ‘Til next time, my fellow eaters!
-
Green is Good.
While I still maintain that blue velvet really is the best velvet, yesterday I had an enlightening moment in time when a glob of green velvet batter ended up on my arm, and I was left with no choice (or nearby paper towels) but to lick it off and continue scraping my mixing bowl. Tough times, I know. But the resounding rich, sweet, slightly chocolate-y tastes lingered on my tongue for a brief, fleeting moment in time before dissolving into a blissful memory. Poetic, right? What can I say…aside from managing to constantly find new methods and body parts to cover with cake batter, I have a way with words. I also have a really festive streak. I have adored bringing you almost four weeks’ worth of Saint Patrick’s Day dessert blogging, and I will be capping things off with these green velvet cupcakes with cream cheese frosting. Let’s not kid ourselves, the best part of red, blue, green, purple, or plaid velvet cakes is the cream cheese frosting. Case in point. Although I’m not sure plaid velvet is a thing, but it really should be.I know what you’re thinking: ‘This crazy broad is already back with another blog?! Didn’t she already bug the crap out of my Facebook news feed on Monday?’ Yes, yes I did. And although I am a firm believer in there being too much of a good thing, I’m also a firm believer in you needingthis recipe before any St. Patty’s Day parties. Also, we’re going “to the city” this weekend so Derek can run an inflatable 5k, so I won’t be able to bake or blog. While a good wife would either participate or cheer her husband on from the sidelines, I will recuse myself and cash in all my good wife points I have racked up (like frequent flyer miles, but the rewards usually end in diamonds in this case) so that I can go to such wonderful places like Target, Ulta, DSW, and other fantastic stores that exist when the ratio of humans to cattle is larger and normally proportionate in your city. I remember fondly what that’s like, and then I am jarred back to reality by that lovely “cow” smell wafting through the air here.
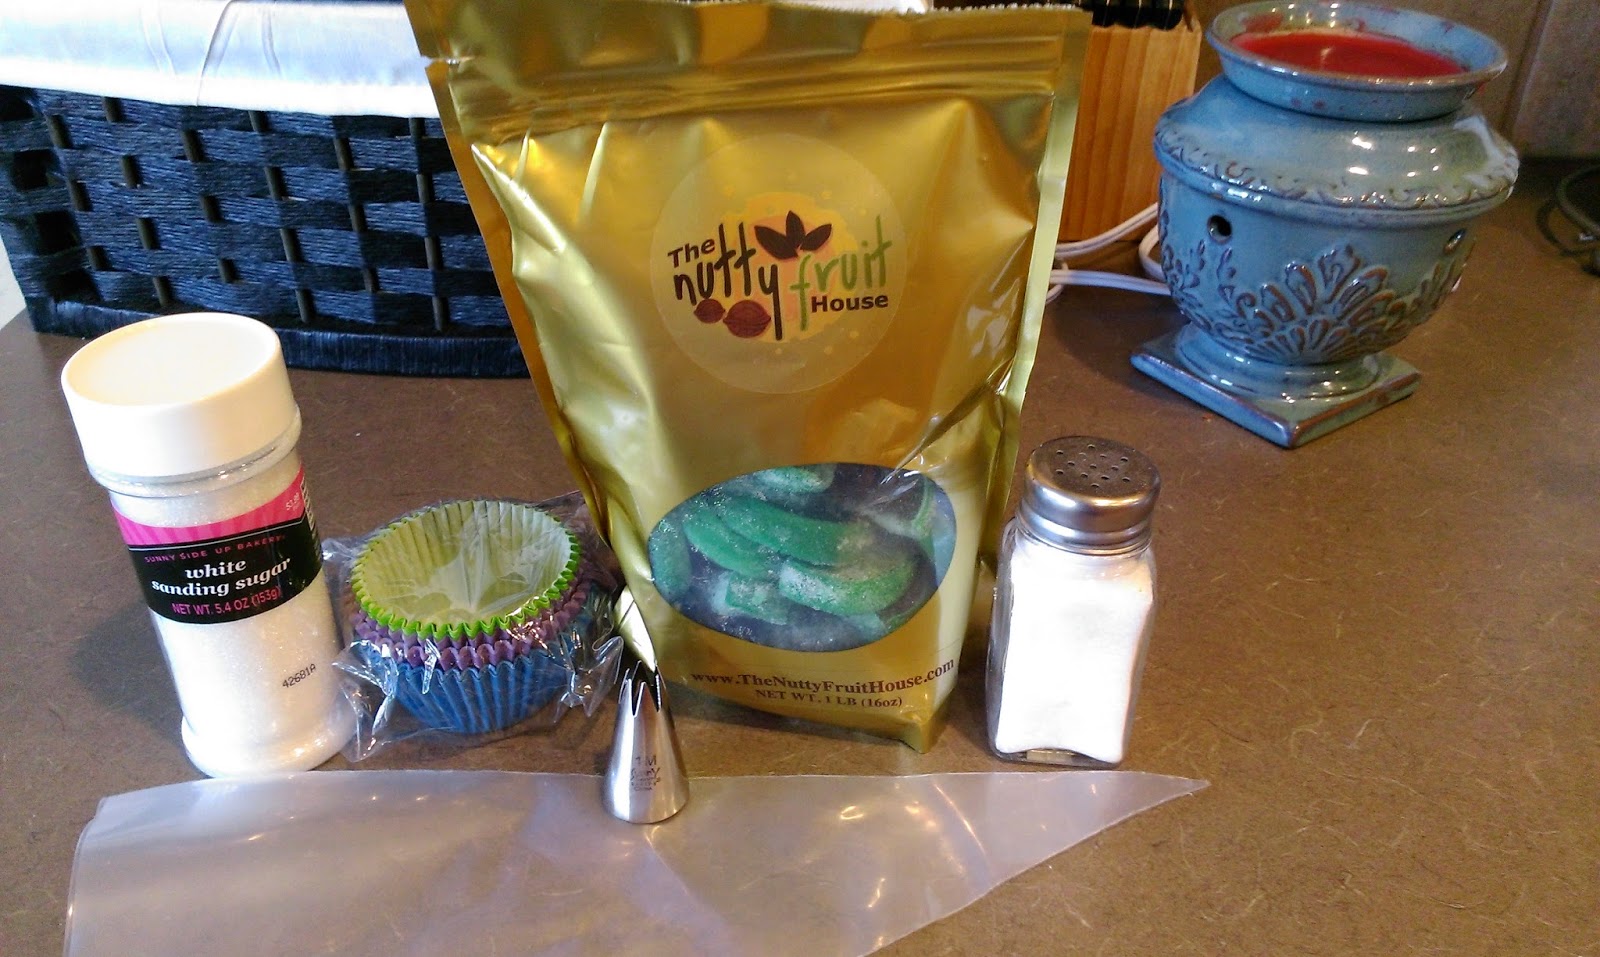
Four leaf clovers really do bring great tidings. I started searching for cute St. Patty’s Day cupcake stuff the first week in March, but apparently no one here knows such a holiday exists. I wonder if they do not realize the reasoning behind the Shamrock Shake they all crave so desperately. Anyway, Walmart’s décor aisles went straight from candy hearts to candy eggs, and nary could a stitch of Kelly green be found in my Hobby Lobby. I ended up ordering cupcake papers and toppers from Amazon, but if you have a Michael’s, Party City, or live in a town with more than five Irish families, you could probably find festive décor in town. Onward to (greatness) the recipe!
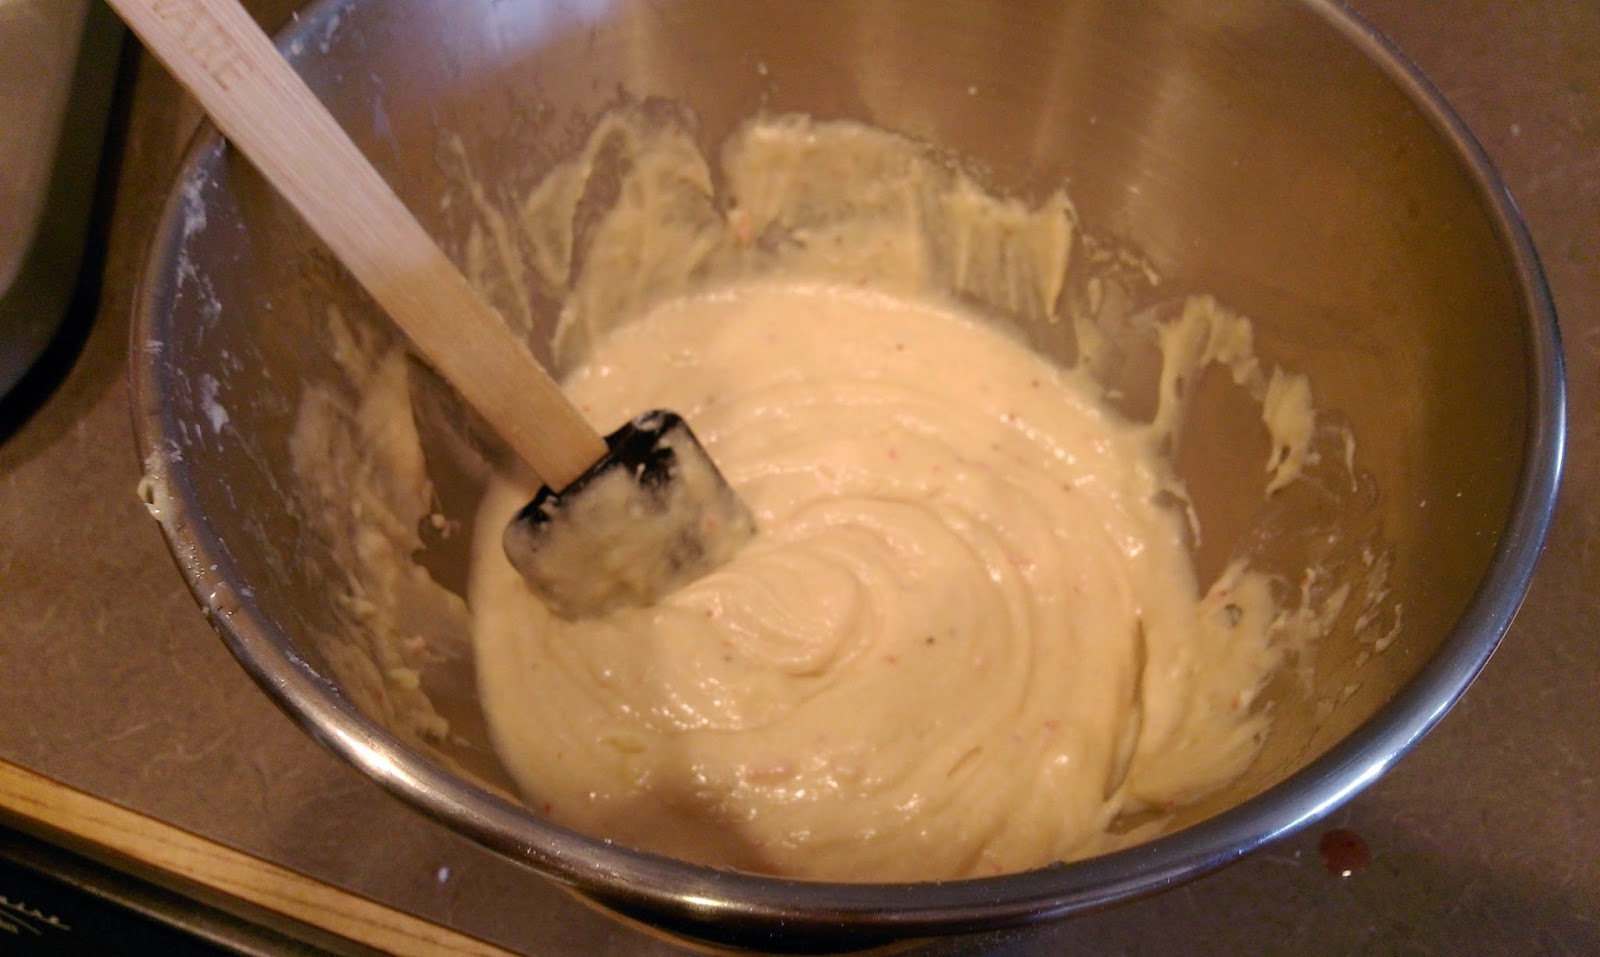
Yeah, more on that vinegar in a minute. · 1 egg, beaten into submission (or until fluffy)· ½ cup of vegetable oil· ½ cup of buttermilk· ½ tablespoon of white vinegar (I know, this really grosses me out, too, but it will work out in the end. I’m not trying to poison you. I ate these and lived to tell the tale.)· ½ teaspoon of vanilla· A buttload of green food coloring (more accurately, two tablespoons to make the color super rich)· 1 ¼ cup of flour· 1 cup of sugar· ½ tablespoon of Hershey’s cocoa powder· ½ teaspoon of salt· ½ teaspoon of baking sodaThis recipe makes 12 cupcakes, which is the perfect amount for two people, right? I do segregate my ingredients by dryness, thanks for noticing.While your oven is preheating to 350, get your cupcake liners ready to roll. Now get ready for how stupid easy this is: in your stand mixer bowl, dump all of your dry ingredients together and simply give them a swirl or two with a spatula until lightly mixed together. Super tricky, but you can handle it.
 Guess what happens next?Now, in a small bowl, mix together all your wet ingredients. Use a whisk; I happen to have thisbad ass whisk that makes life super easy and can be found, surprisingly, at Walmart.
How..oozy. And here is where things get downright cray. Dump your wet ingredients into the dry ones, and mix on medium for a minute total. Stop after 30 seconds and scrape your bowl, then continue to mix for another 30 seconds. Insert color here velvet batters are thick and can get super tough (think cabbie in the Bronx), so you don’t want to agitate them by roughing them up too much. Don’t over mix is what I’m saying. Sometimes my figurative language use just makes things more complicated. Poetically complicated, of course. Can I just eat these by the spoonful?Spooning the batter into your cupcake liners can be a bit tricky because as I mentioned, the batter is really thick. I found the most effective (read: best way to keep the batter in the liner and not on you) method to distributing batter was to scoop some into a ¼ measuring cup and use a spoon to slide off any excess before pouring into a liner. Fill these just a tad more than halfway because they will expand greatly. Bake for 17 minutes or until a toothpick comes out clean.
 It needs more…green.
I noticed my green velvet was more like pimento olive velvet, and yeah, it wasn’t the prettiest. I didn’t want to add and mix in more green dye because I didn’t want really tough cupcakes asking me if I had a problem in a New York accent. So heed my warning, you need A LOT OF DYE to make these a festive green. I seriously added a tablespoon of dye in thinking it would be enough, but yeah, olive drab it was and shall be. Once removed from the oven, let cool in the pan for 5-10 minutes before removing and placing on a cooling rack. Now shove your (hopefully) green velvet cupcakes in the freezer for 15 minutes to cool while you make the frosting.
 A few steps away from the literal icing on the cake.Here’s what is needed to frost 12 cupcakes with a large French tip:· 1 ½ blocks of cream cheese (12 ounces) at room temp· 1 ½ sticks of butter (12 tablespoons) at room temp· 1 ½ teaspoons of vanilla· 6 cups of powdered sugarStart by creaming together the cream cheese, butter, and vanilla. Then, one cup at a time, add in your powdered sugar. This will yield a sweet frosting that still has a distinct cream cheese flavor. If you just want to frost with a small tip or slather icing on the cupcakes, you could reduce this amount to one block of cream cheese, one stick of butter, one teaspoon of vanilla, and four cups of sugar. I, on the other hand, had plans.
 Really, really big plans.This monstrosity is known at the Ateco large star tip. Ateco is to Wilton like what the Great Value Walmart brand is to the actual name brand stuff. Not as popular, but essentially the exact same thing for a better value. I knew I wanted to use a large French tip to decorate these cupcakes, mostly because (to my knowledge) an Irish tip doesn’t exist (other than “Top o’ the morning to ya”), so I went with my own roots in lieu of this.
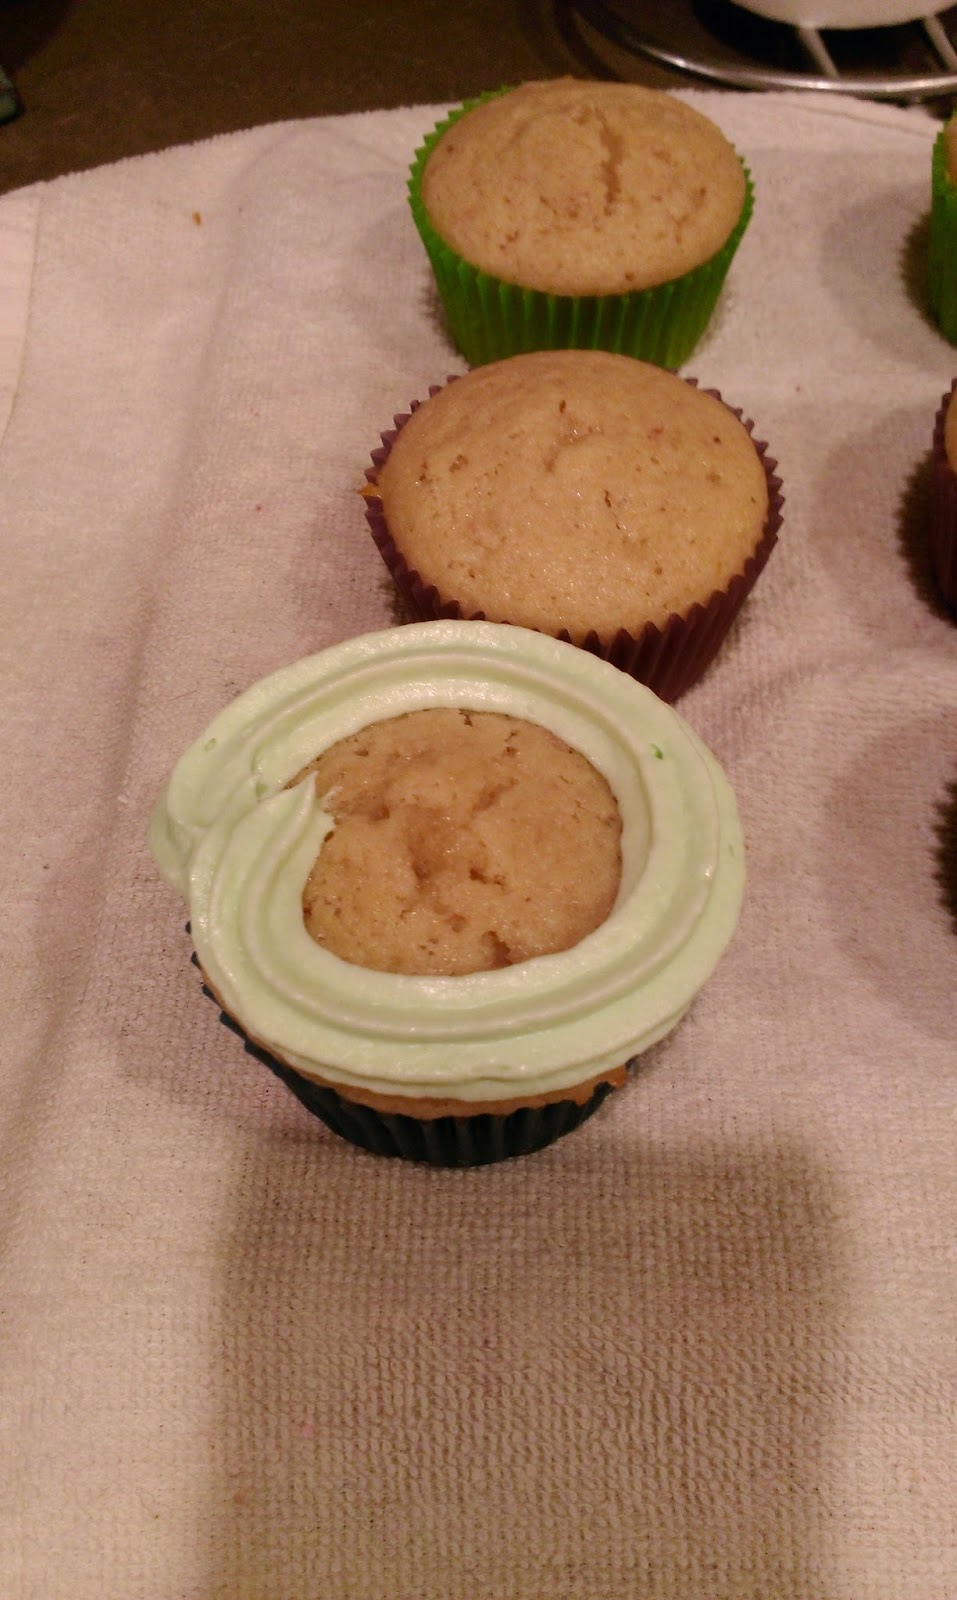
 This makes me want ice cream…I simply started piping on one side of the cupcake, making a circle around, and then lifting my piping tip a bit to cover my starting point when I came full circle, and finished by piping a small mound of frosting in the middle of the circle. I pushed my tip down and pulled up and away quickly to make the “Dairy Queen” tip you see here.
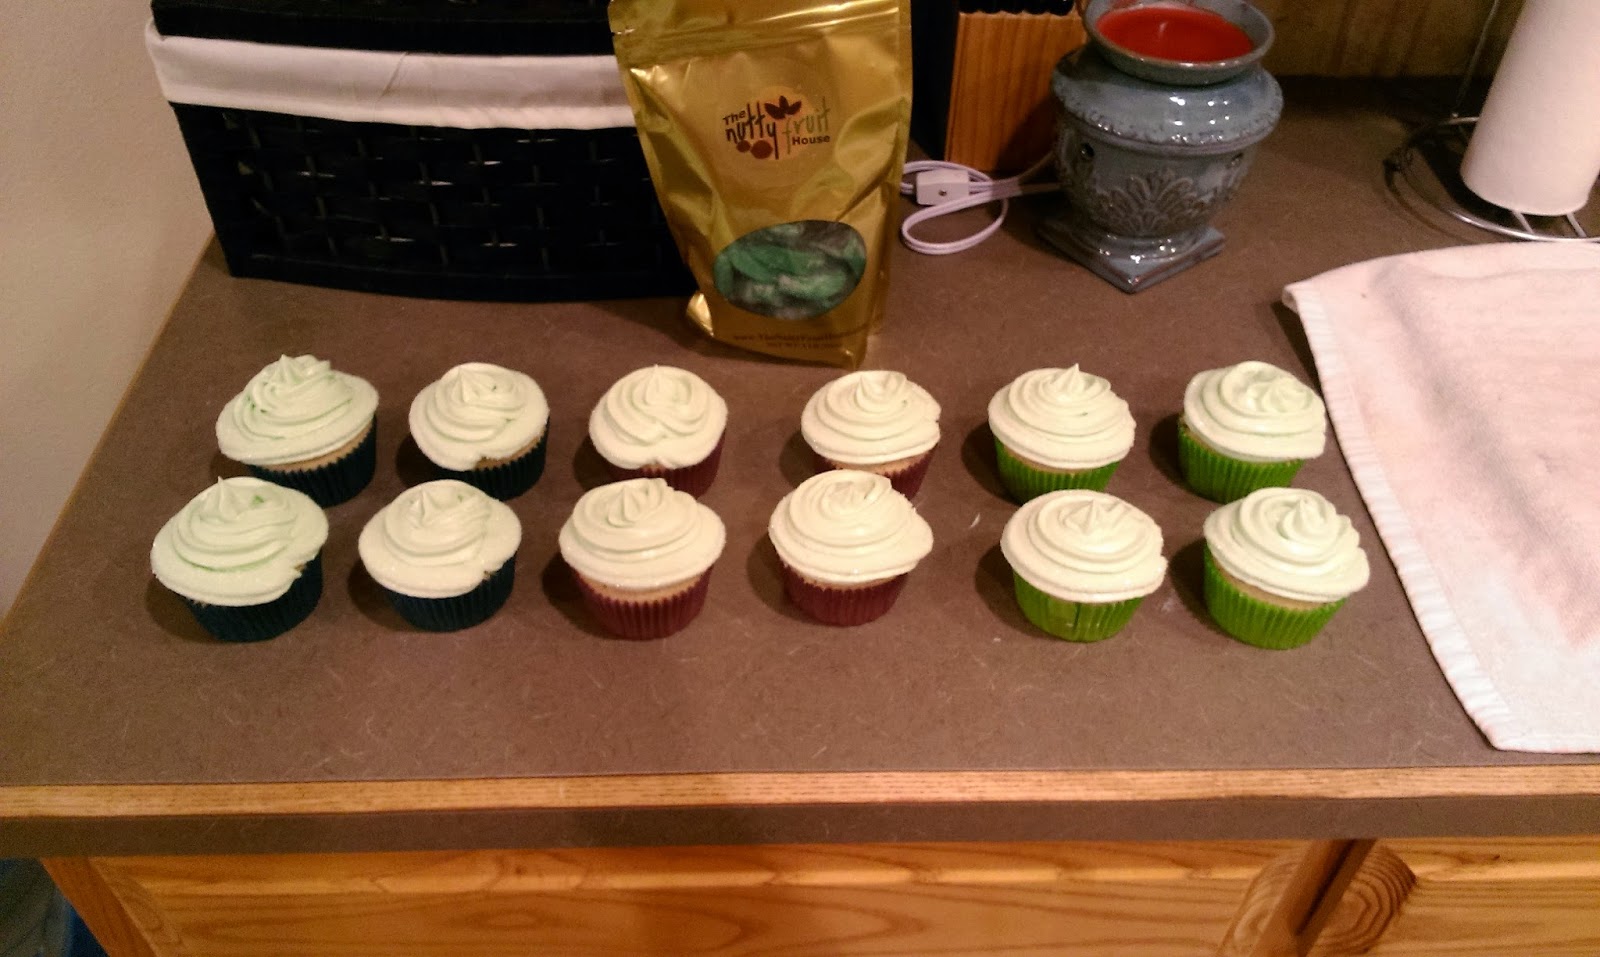
 Sprinkles. Everything is better with sprinkles.I wanted to add a real pop of actual, fun, bright, non-olive (grumble) green to the tops, so I dusted them with light green flakes I found at Hobby Lobby in the cake aisle. Of course, no Saint Patrick’s Day cupcake is complete without some clover or green flag toppers.
 So go to town.Dear Lord are these delicious. If you’re not into the amazingly deep, moist chocolate flavor from last week’s Guinness dark chocolate cake, these green velvet cupcakes are absolutely the perfect party favor for you. They are dense in consistency, but the flavoring is almost light and airy…what a wonderful paradox for your taste buds. The cream cheese frosting is absolute perfection. You could probably dye a bowl of it green and just hand out spoons if you’re really lazy. People will flock to it. Now go forth and conquer, my fellow Saint Patrick’s Day lovers! Eat (green desserts), drink (green beer), and be merry (while wearing green). It has been my distinct pleasure to remind you all that a holiday actually does exist after Valentine’s Day and before Easter. Walmart won’t tell you that because they’re bag-candy-loving jerks. ‘Til next time, my fellow eaters!
 -
Guinness: It's What's for Dessert.
I have always made this joke that a thick, heavy beer like Guinness should be served along with a fork and a knife. As I was scouring the web for boozy Irish treats, I came across a recipe that would finally put my money where my terrible cheesy joke was: dark chocolate Guinness cake. But it didn’t stop there. This dessert recipe became the most Irish thing to be created in America since Conan O’Brien with the addition of Baileys Irish Cream frosting atop its Guinness base. I’m clearly not one for drinking Guinness, but I could definitely agree with the merits of cooking with a beer that was so thick and rich. This is probably the best dark chocolate cake recipe I have ever had the pleasure of eating, and even if you’re not into dark chocolate (we can’t be friends anymore), the sweetness of the Baileys buttercream frosting perfectly balances with how decadent the cake is. Plus: booze! If you’re not getting a buzz off of your Saint Patrick’s Day desserts, you’re doing it wrong.

I just want to eat the whole thing at once. Is that too much to ask? Now, this cake recipe only makes one 8-inch round cake, but you could easily double both the cake and frosting recipes to create a 9×13 or two 8-rounds to be stacked on top of one another and decorated. Since I am also making green velvet cupcakes in a few days and it is just Derek and me, I didn’t want to be caught in my own form of personal hell I call “too many desserts, not enough mouths” and have to throw things away…needless to say, this recipe is the perfect size for two people either watching their portions or trying to conquer and share fantastic dessert recipes with friends and family (Hi, that’s me. You’re welcome.).

Sharing is caring, after all. Tasty, delicious caring. I’ll get to the two-toned cream and yellow rose decorating technique in just a moment, but first, how to make the cake! I found this recipe and made a few adaptions to streamline the baking process.

I may or may not have eaten the remaining ounce of dark chocolate. Here’s what you need:
- 1 cup of flour (I used all purpose)
- 2 tablespoons cocoa powder
- 1 teaspoon baking powder
- 1 teaspoon baking soda (adjust if at a higher elevation to about 1/2 a teaspoon)
- 1/2 teaspoon salt
- 4 tablespoons of buttah (or butter for those of you without an accent)
- 3 oz dark chocolate baking bar broken into small squares
- 1 cup of sugar
- 1 cup Guinness (the smallest amount you can buy Guinness in is a six pack, so your husband will be happy to help with the leftover beer)
- 1 teaspoon vanilla extract
- 1 large egg

I really need prettier mixing bowls if I’m gonna keep this up. Start by preheating the oven to 350 and greasing your cake pan. Gently spoon the amount of flour needed into a measuring cup. Don’t pack it in or you’ll end up with too much flour, not enough liquid, and a sinkhole for a cake. I mean, I’d still eat it, but it won’t be pretty. Mix together all the dry ingredients in a bowl, and set aside.

Anything with this much sugar will end up being delicious. True fact. Now, since I am extremely lazy, I simply melted together my butter and chocolate squares in a small bowl in the microwave, following the melting instructions on the sleeve of chocolate. Just be careful not to nuke for too long, or you’ll burn the chocolate and ruin Saint Patrick’s Day. Let the butter/chocolate mix cool off for a minute or two before dumping into your mixing bowl, and then pour the nearly ridiculous amount of sugar in and mix for about 4 minutes, stopping halfway through to scrape your bowl.

It should look like a glorious bowl of Heaven at this point. Because it is. 
You know what isn’t easy? Measuring Guinness. The foam just never goes away. It’s enough to drive you to drink out of your own measuring cup. Once the sugar/chocolate/butter mix is perfectly combined, add in the egg, Guinness, and vanilla extract. After these items have been fully incorporated, add in the dry mix you set aside earlier and pour in half. Then mix, scrape the bowl, add in the rest, mix, scrape, and mix for a few moments more until you’re left with this:
“Hmmmpppffffhh.” -Noise you will make upon taste testing batter. Bake in the middle rack of the oven for 25-30 minutes. I needed the full 30 before a toothpick came out of the cake clean. Rest your cake (still in the pan) for 10 minutes on a cooling rack. Then take a butter knife and free the edges of the cake from the pan before plopping (so technical) the cake out of the pan and onto a towel to cool on your cake rack. If you’re trying to speed things up, or simply feel you might die if you don’t get to eat this cake soon, place in the freezer for 15-30 minutes while you make the frosting.

I’m sure I could’ve found a smaller bottle of Baileys, but why? The icing is comprised of three very simple ingredients: butter, Baileys, and powdered sugar. It really is that easy sometimes. To make, simply cream the butter in your mixer until fluffy (3 minutes or so), then add in 3 tablespoons of Baileys. Let this mix together a bit, and then add in 3 cups of powdered sugar. Do this one at a time, or you will have a powdered sugar/Baileys explosion situation on your hands. Invite me over, I’m sure I can find a way to help clean that mess up. Presto- you’ve got really boozy frosting. If you want more booze, add in a teaspoon or two until you get the taste you prefer. I didn’t want to feel like I was taking a shot of straight Baileys while eating cake, so 3 tablespoons was the perfect amount. I’m told all things in moderation, and I suppose I sort of understand what that means now. Sort of being the operative words here. I guess I’ll share my two-toned rose secrets with you before you start judging my inability to function like a proper adult. Now that’s what I call a diversion!
Here’s what you need to make this magic happen:
- Piping bag fitted with 2D Wilton tip
- Small paintbrush
- Gel dye…must be gel. Regular dye would be too runny.
- All that delicious Baileys buttercream frosting
 Start by painting two stripes of dye on each side of the bag. I did this down the seam on each side of the bag. I painted a thick line on one side, and a thinner line on the other. I was trying a new strategy here, but if you’re interested in COMPLETELY dying your roses with two colors of dye for a swirled look instead of just a pop of color, here’s a tutorial on that. Once painted, put your piping bag into an empty glass and fold the excess siding over the lid of the cup. Plop a decent amount of frosting into the bag and twist shut. Twisting will not screw up how you’ve put the dye in the bag- I promise! Pipe out enough frosting until the dye starts coloring the edges of the frosting. Then start by piping a bit frosting to create a center and swirl around to form a circle; go around another time and complete your rose:
Like so! If you need a visual, this tutorial is awesome. 
Like an actual basket of gorgeous, creamy-yellow roses. I am really happy with the way these roses turned out- just a hint of color to really make them look natural. I did not frost the entire cake first, as I wasn’t sure I had enough frosting and really wanted to try this technique out. This did mean I had some chocolate peeking through in places, so I simply piped little stars into any areas I think looked blank or needed a bit of coverage. And that’s the best part about frosting 2D roses- the room for error is amazing. No matter what, you’re piping gorgeous roses, and that’s what people will see. It’s almost so pretty you won’t want to eat it. But when you catch a whiff of Baileys Irish Cream instead of actual florals, out come the forks!

Keep it classy, Guinness cake. If you want a more Irish-themed cake, you could always dye the frosting totally green and just pipe stars with a large 1M or 2D tip and add some green sprinkles to the entire cake, as this will make enough frosting to cover the whole thing, but I went avant-garde on this confection. Also, considering the cake is made of several types of Irish booze, I figured that was good enough for us. Plus, it is finally not snowing (nor is it in the forecast), so I felt like a bright yellow twist was a perfect welcome for spring, which is definitely here because I am dying of allergies. Past, cold, snow-riddled me should’ve reminded future, sniffly, tissue-riddled me that freezing weather means not having to pump myself full of Benadryl and Allegra every 12 hours. I need to go fall into a Benadryl coma for the next 24-48 hours, so I’ll be back with green velvet cupcakes in a couple days. ‘Til next time, my fellow eaters!
-
A Marriage of Mint and Chocolate
I’m not sure if it was an accident when the first person stumbled across the greatness that is the mint chocolate flavor combination..perhaps someone was once offered a piece of chocolate cake shortly after brushing their teeth, and the rest was history. Although that theory is probably highly unlikely (as are most of my theories, which is why I teach English and not science), mint chocolate is right up there with some of the other flavor combination greats like peanut butter and jelly, apple and cinnamon, chocolate cake and beer (you’re going to thank me for that one), or maple syrup and almost every breakfast food. A few years ago when I was trying my hand at becoming a solid baker, I ran across a mint cookie brownie recipe for Saint Patrick’s Day. I was unsure if I could handle the recipe at first because it called for making buttercream frosting from scratch. I laugh at my former naivety, and not just due to the fact that most of my baked goods are created from scratch now, but because I had yet to learn the greatest part about baking from scratch: taste testing ingredient amounts. For those of you that are unaware, buttercream is essentially just a ton of butter mixed with the crack cocaine of the baking world, powdered sugar. I liken it to cocaine because I assume it is equally as addictive, seeing as how since the first time I taste tested my homemade butter cream, I have not been able to put a spatula down and get a little twitchy if I go for more than a few days without it. I digress…continuing on in week 2 of my Saint Patrick’s Day treat sharing, may I present to you the mint swirl brownie with buttercream mint frosting:

Sweet baby Jesus. Shyeah, totally as good as they look, folks. It’s like a marriage of mint and chocolate (hey, that’s the name of the blog post!). You like Thin Mint Girl Scout Cookies? These mint swirl brownies are like the mother of every single one of those cookies. Bonus, they’re not at all hard to make as long as you have either a hand mixer or stand mixer! I ended up having to make my brownies from scratch because we had another snowpocalypse last Friday, and I was unable to get to the grocery store due to my insanely narcissistic vehicle choice. Chevy Camaro: Good in theory, great in speed, horrible in snow.

Usually I take solace in the snow, but guess who doesn’t plow roads like EVER? That’s right, the city of Clovis! As beautiful and Christmas card-y my pine trees look with a ton of snow on them, I’m over it. It’s March. This is not the kind of March Madness I had in mind. I should be working on tanning my legs on our dog walks, not covering myself in every available layering article I own. I’m told there’s another chance for snow on Wednesday, and that really makes me want to cry heavily. Into a bowl. Filled with mint swirl brownies and ice cream. So let me tell you how to make these delicious little monsters.

If weather prevents you from making a grocery store run, make the brownies from scratch. This brownie recipe is the same recipe from those ah-mazing cookie dough brownies I made a few weeks ago:
- 2/3 cup all-purpose flour
- 1/2 teaspoon salt
- 1/2 teaspoon baking powder
- 2 ounces unsweetened Hershey’s cocoa
- 4 ounces bittersweet Baker’s chocolate
- 10 tablespoons butter
- 1 1/4 cups sugar
- 2 teaspoons vanilla extract
- 3 large eggs
Now, you can TOTALLY use a box brownie mix for these mint brownies. It’s fine. I would’ve done it, too, if Mother Nature would’ve allowed it. But apparently she prefers me to make fudge brownies from scratch. So here’s the quick rundown:
- Preheat oven to 325 if baking from scratch. If using a box mix, heat to whatever is recommended.
- Mix together the butter and both chocolates by melting in a bowl in 30 second increments until you can fully blend them. Just reminder not to taste test this yet, or you will hate yourself and everything on this planet for a solid week.
- In a separate bowl, mix together the dry ingredients.
- Mix the chocolate and butter mix with the sugar and vanilla. NOW feel free to taste test.
- Mix in the dry ingredients with the chocolate mix, and one at a time, mix in each egg until fully blended.
- Pour into an 8×8 pan.

Box brownies or homemade brownies, you will need a can of marshmallow creme. More on this in a moment. If you’re going the box brownie route, I still recommend the 8×8 pan. These are really rich brownies, and making an entire 9×13 pan of them will take you forever to eat. I mean, I could see where you might wonder how in the hell this could be a problem, but things do go stale after awhile. Now, back to the marshmallow creme. I hate this stuff almost as much as I hate people who wear Uggs with shorts. Not the taste, the taste is amazing. But it is SO STICKY. As someone who prides herself on being extremely cleanly, sticky things make me squirm. The end result is worth it, so do as I did and power through. Hot water and soap are just a moment away.
Get a really hot spoon and mix in 1/4 teaspoon of mint extract with a few drops of green food coloring into the tub of marshmallow creme. You will curse the gods and wonder if marshmallow creme should be safe for human consumption since it feels like you’re mixing together Super Glue. Since I couldn’t get to the store, the jar I was using was an unopened jar leftover from last year’s round of mint swirl brownies I never needed. Yet it still had not passed its expiration date. If the zombie apocalypse is ever nigh, I am stocking a backpack full of this stuff to give me my sweets fix.

Now, take your Super Glue mix and drop a few spoonfuls into your brownie batter. This can be random and ugly. Much like how I put on my make up in the morning, I’ve got tricks to smooth things out. 
Take a knife, and draw lines back and forth nice and slowly into your batter. I drew lines back and forth horizontally and then again vertically to create a nice swirl pattern and distribute the marshmallow creme throughout the batter. Now you’re ready to bake! Follow times on your box if not baking from scratch. If baking from scratch, put into the oven for 30-32 minutes. IN EITHER CASE: Test with a toothpick; there should be some crumbs, but no soaking batter when finished cooking. 
Leave to cool on a cooling rack. Things will not look pretty, as the marshmallow creme kinda caves in when it cools. Doesn’t matter, we’re gonna spackle on a layer of frosting to hide this. Insert another metaphor about my make up use here. If you’re a bare-faced individual who doesn’t mind a little unevenness, you really could just eat the brownies without the mint frosting. But I could (read: have) eaten the mint frosting by the spoonful because it is just that good. 
Oh yes, more butter. Lots more butter. To make the frosting, you need the following:
- 1 stick of butter (1/2 cup)
- 3 cups of powdered sugar (get ready to start the addiction, folks!)
- 3 tablespoons of milk
- 1 cup of white baking chips (essential that they are white- you don’t want to try to mix in chocolate baking chips or your frosting will turn into a sickly green shade. Regardless if it tastes good, things also still need to look good)
- The rest of the marshmallow creme mix
- An additional 1/2 teaspoon of mint extract
- Additional green food coloring (I used 8 drops)
- Optional: Mint Oreos or mini chocolate chips for topping…I do half and half to please all crowds. Baker for the people!
Start by making the base buttercream. Put the whole stick of butter, one cup of sugar, and one tablespoon of milk into your stand mixer (Hi, yeah, you’re going to need this again. Just after you cleaned it out after making your brownies. Shameful.). Let this mix for a minute, scrape the bowl, and then add in another cup of sugar and another tablespoon of milk. Mix and repeat one more time.

Have a few chips, you know you want to. While your buttercream is mixing, melt a cup of baking chips according to package directions. 
Add the melted baking chips, the remaining marshmallow creme mix, the additional mint extract, and the green food coloring to your buttercream. Blend for a minute, scrape the bowl, and blend again. While your mixer is working its almighty magic, grab a plastic bag and shove a few Oreos in there and then smash with a spoon to get some solid crumbage (real thing). I used six Oreos in order to top half of my brownies. Now, find your favorite spatula and get ready to spread the
lovefrosting. Same thing.
Frost away! I use an excessively thick amount of frosting because I simply cannot get enough of it (I have real problems). You could use a thinner layer if preferred and just send me your leftover frosting to eat (Again, someone help me). Things don’t have to be perfectly smooth because you’re going to put your chocolate topping of choice over the frosting. 
I took my bag of crushed Oreos and uniformly sprinkled them on one side and mini chocolate chips on the other. Press the toppings into the frosting so they won’t just fall off and land on the floor near your drooling dog. Chocolate is bad for dogs, so you’re doing your pooch a real favor here. Place into the fridge for 30 minutes to let things set before cutting into squares. 
Tada! Check that mint swirl in the middle, yo. And now you’re done and ready to enjoy an amalgamation of all the mint and chocolate your taste buds can handle. You can thank me after you’re done rejoicing. These are one of those treats that will seriously impress anyone (who doesn’t like mint chocolate??!), and I usually take a tray of these to whatever St. Patty’s party we attend. Bogart a few for yourself because leftovers will be few and far between. Also bogart a few for yourself because you can make Cold Stone Creamery fear for its existence by adding one of these babies to a bowl of plain vanilla ice cream drizzled with chocolate sauce and mixed together:

America truly is a wonderful place. Full of freedom with a side of calories. Yeah, we had that for dessert last night, and not one single regret was had. Since it isn’t ever going to stop being winter here, who needs to be bikini ready? Amiright? Damn, even I can’t make myself really believe that, so I’m off to walk the dog whilst wearing five parkas. Get ready for parts three and four of the Saint Patrick’s Day dessert blogs next week, where I will surely make you faint from food porn hunger with Guinness cake frosted with Bailey’s and also green velvet cupcakes. ‘Til next time, my fellow eaters!
-
March Is Right around the Corner, and I Can Taste It.
From mid-February to mid-March is a wonderfully magical time of year when McDonald’s offers the ever-elusive Shamrock Shake in honor of Saint Patrick’s Day. Because what better way to celebrate the death of a saint than with frothy green milkshakes? I came to the Shamrock Shake party later in life around the age of 22, after one night of Saint Patrick’s Day shenanigans somehow ended me up at a McDonald’s in the wee morning hours (funny how that happens). I decided to fully commit myself to the holiday because if I was going to ralph, dammit, it better come out green, too. I’ve never looked back since. In San Angelo and Detroit I had no trouble obtaining a Shamrock Shake, but things took a dastardly turn when we moved here. In what I find a very hard thing to admit, I am on the same page with the locals when it comes to their love of McDonald’s limited-time green dessert. So much so that the first year we were here, all three McD’s had sold out of the shake mix by March 1. I only got my grubby little leprechaun-ish fingers on one shake that year. Tragic. Over the course of the next three or four or seventeen Shamrock Shake seasons we’ve lived in Clovis (time passes much differently when you’re living in Purgatory), I’ve been trying my damnedest to come up with a copycat recipe as delectable as the original. I just realized if I had been trying to perfect the Shamrock Shake recipe outside of just the post-Valentine’s to St. Patrick’s day range, I probably could’ve been enjoying really perfect, free shakes for the last 16 of the 17 Shamrock Shake seasons that have passed while living here in
PurgatoryClovis. Oh hindsight, you sneaky little bastard.
Helllooooooo Miss March.
There is not a drop of Irish blood in my veins, but my husband is Irish, and so is my stepdad. However, even before these two wonderful gents became a part of my life, March 17 has been a cause for celebration in my family as it is both my father’s and aunt’s birthday. As I grew up, I began to see St. Patty’s day was about more than eating green food, and it was actually a bonafide drinking holiday. Top three favorite holidays?
1. Halloween- you get to dress up in costume, eat spooky-shaped foods, and drink bewitching potions of the alcoholic variety.
2. New Year’s Eve- you get to dress up super fancy, eat insanely rich foods, and drink expensive sparkling champagne.
3. Saint Patrick’s Day- you get to dress up and pretend to be an entirely different nationality for one day, eat deliciously greasy foods (God Bless the potato), and drink lots of green beer.
I’ll give you a moment to connect the dots. I preface this blog with my love of Saint Patrick’s Day because it will be the first of many to come over the next few weeks featuring desserts that range in difficulty to make that you can bring to your very own debaucherous celebration, like green velvet cupcakes, Guinness chocolate cake with Bailey’s Irish Cream icing, and mint chocolate frosted brownies. But let’s start with the easiest recipe of them all: The Shamrock Shake, Kate Bakes Cakes style.
Just a few short steps from changing your entire life and pants size. What you see here is a long and tested recipe that finalllllyyyy has equated to perfection. I mean, all versions of this shake that I concocted before were still milkshakes and therefore still very tasty, but in essence I wanted to take one sip and be transported to my McDonald’s Drive Thru. I wanted my Shamrock Shake to be indecipherable from the original, like a really fancy knock-off purse that no one knows isn’t the real thing (not anything your like your old high school friend’s “Goochie” purse).
Gather your blender or smoothie maker (halve the recipe if you use a single-serve smoothie maker) and the following ingredients:
- 6-8 medium scoops of Dreyer’s Slow Churned Vanilla ice cream. My ice cream scoop is of a standard size, and I used 8 small to medium scoops to make two shakes total. If you’re less impatient, let the ice cream sit out for 10 minutes to soften so you can get large scoops (like on a proper ice cream cone). If you go this route, you get about a cup of ice cream per scoop, so shoot for 4 large scoops.
- 3/4 cup of heavy cream. If you want a thinner shake, use all milk. But the heavy cream gives the perfect consistency for this shake, so do yourself a favor and use it. I suppose you could try using all heavy cream if you want an extremely thick shake, but I went with half milk/half cream and it was perfect.
- 3/4 cup of skim milk
- 1/4-1/2 teaspoon of pure mint extract depending on how minty you like things. This extract is super strong, so I used 1/4 teaspoon.
- 1 teaspoon of vanilla extract
- 2-3 tablespoons of sugar depending on your sweetness preference. I sincerely adore sugar and cannot live without its sweet caress on my taste buds, so I used 3 tablespoons.
- 7-9 drops green food coloring.
- Optional but really, really recommended: Reddiwip for topping
I know what you’re saying if you live in Texas, “WHY would you not use Blue Bell ice cream for this?!?” I tried it once for my Shamrock Shake and it was good, but the richness of Blue Bell’s homemade vanilla overpowered the extracts almost entirely. The Dreyer’s vanilla almost has that soft-serve like flavor and consistency that mixes really well with the other ingredients so you can experience full Shamrocky goodness. So now what? Hold on to your hats people, things are about to get ridiculously hard…

When you piece apart ingredients to milkshakes, they look really questionable. Here goes: Dump everything into your blender and mix until everything is combined. That’s it. Done. Ready for eating. The hardest part about making these shakes is not eating all the ice cream beforehand.

Do I have to share? I like to class things up, so I poured our two shakes into milkshake glasses and topped with Reddiwip and green sprinkles. I also found lime green straws for this. I really need a more productive hobby. Help me. I’m drowning in my own Shamrock Shakes.

And upon first sip, the gods of indulgence parted the skies and angels sang. At least I’m pretty sure that’s what happened. Whether it really did or not is debatable, but the fact that these shakes taste exactly like McDonald’s is not. After all
sixteenfour years of trying, I finally got the recipe DOWN. Small victories are a really big deal to me. Especially considering once again, after a really warm week and dreams of a thirst-quenching milkshake (the cupcakes fixed my margarita craving), we were hit with a terrible cold front for the second weekend in a row. But this did not stop me from making us Shamrock Shakes while it was snowing outside. I bumped up the heat a few degrees and pretended I lived somewhere where it was over 11 degrees with a McDonald’s that never runs out of Shamrock Shake mix before Saint Patrick’s Day. Perhaps it is my overactive imagination that has gotten me this far in life. I will be sure to put it to use again for the next installment of St. Patty’s Day desserts here on the blog. For now, I’m off to wrap myself in five blankets and wonder whether people still die from pneumonia since my impervious-to-cold hairy Corgi mix always manages to goad me into dog walks when it’s 20 degrees and snowing outside. ‘Til next time, my fellow eaters! -
Margarita Madness!
I really love a good margarita…bring me a fishbowl, dump it full of tequila, ice, and strawberry mix, and it’s like giving a child a brand new toy to keep them quiet and occupied for the next while. Of course, after a fishbowl or two I am anything but quiet, but that’s beside the point. Up until yesterday afternoon, it has been unseasonably warm for February, and I kept having hankerings for margaritas because of it…after all, nothing says sunshine and warmth quite like Jose Cuervo. Instead of freezing both my body and brain on a frozen margarita (there are worse ways to die of hypothermia), I decided to venture into a territory I’m comfortable with: Adding booze to cupcakes. I think I’ve finally made up my mind that should I ever choose to actually grow up and really “adult,” I’m going to need to open a bakery that caters specifically to fusing alcohol into cakes, pastries, you name it. I realize the booze bakes out of these items, but it leaves the taste buds with a sense of sweet, sweet euphoria. If you’re still looking for a hangover, I suppose you could eat an entire box of mimosa mini-cakes (I promise I will figure out a way to make this happen) just so that you can wake up feeling like you might die the next day–head pounding from sugar withdrawal and belly rumbling from living the dream of eating an entire box of mini-cakes by yourself. For now you’re just going to have to drunk off the essence that is the strawberry margarita cupcake with lime frosting and a “salted” rim:

And by salt, I mean sanding sugar. And by strawberry margarita cupcake with lime frosting, I mean paradise. I don’t like piña coladas, or getting caught in the rain…I like lots of tequila, and getting drunk on cupcakes (you know you sang it in your head). I feel like prefacing this blog with a simple proclamation: I do not have a drinking problem. I have a location problem. I mean, this particular problem does lead me to do my fair share of imbibing, but when the local watering hole is located in the decrepit Days Inn Lounge and the mecca of shopping in your city is Wal-Mart, you’re left with few other choices to pass the time. Sitting outside and waiting for the “cow” smell to roll in isn’t exactly a favorite past time of mine (neither is dodging tumbleweeds on the reg.), so I bake. And I partake in the occasional glass of really cheap wine. Sue me. But don’t. I need the few pennies I have for my cheap wine. Instead of legal action, let me just show you how to make my margarita cupcakes! Olé!

Yes, I really staged the hell out of this photo, you’re welcome. Minus the buttermilk and frozen strawberries, you probably have most of these ingredients sitting around your house and wherever the place is you hide the good booze from your guests. I found and adapted this recipe (to allocate more tequila), but here’s the breakdown:
- 1.5 cups flour
- 1.5 tsp baking powder
- 1/4 tsp salt
- 1 stick of butter. Room temp, of course, so it’s smooth…like buttah.
- 1 cup sugar
- 2 eggs. Also at room temp. Don’t nuke your eggs. I mean, you’ll end up with a decent cooked egg, but that’s besides the point.
- 3 Tbsp of sweetened strawberries- get the kind that boasts it’s good for smoothies. I found mine in the freezer aisle at (you guessed it) Wal-Mart by the pie crusts and toppings.
- 1/4 cup strawberry margarita mix
- 1/4 cup of tequila. I know, there’s tequila in the margarita mix, but just trust me on this. Don’t skimp on the tequila either- you’re gonna have leftovers, obviously, and no one wants to drink cheap tequila. No one.
- 1/4 tsp vanilla extract
- 1/4 cup buttermilk

Your mixer is about to get druuuuunk. Start off by mixing the sugar and butter together in your stand mixer for 4-5 minutes. You want it to be fluffy, like a Marshmallow Peep. While that’s commingling, mix the three dry ingredients together in a medium-sized bowl and set aside. Swig tequila as needed.

Just add fluff, and now we know how Peeps are made. Once you’ve finished mixing the butter and sugar, add in your eggs and mix well. I added one, mixed, scraped my bowl, and repeated. My whisk attachment functions much like a T-rex–full of power but unable to reach many things with it’s tiny breadth of arm span.

I ate a few. I was ensuring their quality was up to my standards. You’re going to need to puree the three tablespoons of sweetened strawberries. I tried getting out my chopper, but it just wasn’t doing the trick. I was attempting to avoid getting out my blender because I feared I may accidentally make an entire pitcher of strawberry margaritas if I did. In case you’re wondering how that ended…

Ahem. While your berries are pureeing (that’s a fun one to spell), measure out the mix and tequila. Swig as needed. Make sure you have 1/4 cup of each.

I refuse to drink warm tequila, so this was an easy decision for me. Take the strawberry puree, tequila, mix, and vanilla extract and add in to your mixer until fully incorporated. A funny thing happens when you add booze to the other ingredients. It will curdle, and it will look like what happens to you the morning AFTER you’ve been out drinking tequila all night.

Just tell yourself this is normal, and eventually things will get better. Whatever you need to do to survive this moment. Now take a third of the dry mix, add it to your bowl, and mix. Then add in a splash of the buttermilk. Repeat this process until all your dry mix and buttermilk are folded in. This is when things will again look right with the cupcakes, and your world by proxy.

Thank God. Now you’re ready to divide up your batter into a muffin tin lined with cupcake papers of your choosing. I went with festive lime, cerulean, and purple liners because I’m a perfectionist and my margarita cupcakes weren’t going into just any old liner. I have a real problem with prioritizing things that actually matter versus things like fancy cupcake liners. This is why I need adult supervision. Bake your cupcakes for 25 minutes at 325 degrees. The mix in total will make 12 cupcakes.

I told you my papers were festive. Olé, dammit. Let your cupcakes rest on top of a cooling rack while still in the pan for about ten minutes. Then you can remove them from the pan and place on to a towel on top of the cooling rack so they don’t get weird divots in the bottom and you don’t get any crumbs anywhere. You could nix the towel if you don’t care about a lumpy bottom and crumbs, but know I will judge you for this. Harshly. While swirling a margarita in one hand. With an arched eyebrow aimed in your direction. Wondering if you just want crumbs everywhere. Because that’s how you get ants.

It’s pretty much going to look like this. Once your cupcakes are mostly cooled, you can start to prepare your frosting. There are a few ingredients, and a few bonus ingredients to make your decorations look fantastic:

The frosting is simply to die for. I tried some, died, and brought myself back just to eat some more. Since the cupcake recipe only yields 12 cupcakes, I made waaayyyy too much frosting. Here’s the full recipe, but I really recommend halving it unless you just want to eat a bunch of leftover icing with a shovel…this I will not judge you harshly for.
- 1 block of regular cream cheese at room temp
- 1 cup of butter at room temp
- 3 tablespoons of lime juice
- 4-5 cups of powdered sugar to get the consistency thick for piping
- 5-7 drops of green food coloring (I used 7)
Start by mixing together the butter and cream cheese (the amount of calories your mixer is about to see…). Cream these together for about 3-4 minutes. Then add in one cup of powdered sugar, mix well, scrape the bowl (thanks T-rex whisk), add one tablespoon of lime juice, and repeat this until you’ve used all 3 tablespoons of lime juice, and enough powdered sugar to get a stiff consistency for piping. If you’re just going to frost the cupcakes with a knife and call it a day, you probably won’t need as much sugar, but I went with 5 full cups. Finish off by adding in however much green dye you’d like to achieve a green you’re happy with.

Bonus ingredients are hella recommended. I really wanted to make these cupcakes look as much like the food version of a margarita as possible, so I added a few choice ingredients to make some final touches:
- A bag of fruit lime candy
- A small bowl of white sanding sugar mixed with a sprinkling of salt
- A piping bag fitted with a 1M tip
The decorating process itself is actually extremely simple. So easy I could do it after a frozen margarita with minimal error! Fill your piping bag with frosting, and set the bowl of salted sugar (this is a thing, yes?) close by.

Start by simply outlining the cupcake. I kept my piping bag still, and slowly moved the cupcake itself in a circular motion to achieve this. 
Take your cupcake, and veeeerrrryyy gently dip your face-down cupcake into the bowl of salted sugar. Swirl it around a bit, but do not apply pressure or you’ll smoosh the frosting. Now you have your margarita’s “salted” rim! 
Then starting where you left off while frosting, take your piping bag, hold it steady, and slowly move your cupcake in a circular motion while piping until you build up a nice mound. End by squeezing a bit of frosting on the top, and press the tip down a bit and pull away quickly to get that nice little star on top. 
Repeat this for all of your cupcakes. I was able to fully pipe 6 with 1 bag of frosting, and then had to reload. I made a bit of a mess, so I recommend just using a new piping bag for the second half unless you like licking frosting off your forearm. And I do. 
Take out six lime candies, and cut them in half. They are big and heavy, so a whole one will look a bit too comical on your little cupcake. 
Then place half a lime wedge into the top of each cupcake and you’re done! You will want to refrigerate these if you don’t eat the whole dozen at once to get cupcake wasted. I was honestly so tired and worn out from an extremely long day of essay grading and an accidental evening of margarita drinking while I made the cupcakes that I didn’t even have one of these until the very next day. When it was no longer 75 degrees, but dropping quickly to about 45. See, it’s really a location problem after all…this place will undoubtedly drive you to drink. Or eat alcohol-infused desserts. But oh dear Lord are these tasty. The hint of strawberry and tequila are the perfect pairing to the strong lime taste of the frosting, and the bit of salt in the sugared rim is just enough to keep your taste buds in check from going off the sweetness deep end. And in case you were wondering, these go ridiculously well with an actual strawberry margarita.
They even look great together. They’re like the Penelope Cruz and Javier Bardem of the cupcake world. I’m happy to report that you can have your booze in a cupcake, and eat it, too. ‘Til next time, my fellow eaters! -
The Heart Wants What It Wants…and That Is Usually Cake.
I know it may come as literally no shock, but I do not celebrate Valentine’s Day. Not just because I’m the exact opposite of a sappy romantic, but because I kind of always thought of it as a really clever scam from jewelry stores, flower shops, and greeting card companies everywhere. Real talk: I’d rather receive flowers from my husband ‘just because’ (or if he screwed up and erased my favorite TV show from the DVR), so contrived acts of romanticism are met with major side eye on my part. My idea of a romantic act is when my husband makes the bed for me in the morning. God, I really love that.
However, I realize the majority of the world finds it to be a happy-feel-good kind of day to celebrate with their partners. More real talk: That’s all Geoffrey Chaucer’s fault. If he wasn’t so highly regarded in the literary world, I’d be hella pissed with him. But enough of this English teacher/blogger’s lessons in literary history and greeting card scams, back to the day itself. When I was a wee lass in elementary school, Valentine’s Day was a pretty big deal in homeroom, and although I was still the world’s most cynical seven year old, I quickly made the connection between February 14 and boatloads of candy and desserts (a clever, cynical seven year old). So while I never could get on board with the overall idea of Valentine’s Day, I think we all know I’ll use any holiday as an excuse to bake things (really tried hard this year to come up with something for Groundhog’s Day. Legitimately.).

But a groundhog cake didn’t seem very visually appealing, so I went with heart cakes. I was inspired to make these mini-heart cakes when I remembered how my mother used to do the same thing for our family when I was a teen…proving that although I was still the world’s most clever, cynical teenager as well, I have a mind like it a steel trap when it comes to baked goods. And let’s face it, my mother is exactly who inspired me to start on the path to baking stardom (that’s a thing, right?) with all her wonderfully creative concoctions throughout the years. I may have been a disgruntled teenager, but my mother still loved (and tolerated) me enough to bake me cakes. So I figured I could pass on the love and do something ridiculously lovey-dovey (barf) for my husband, who is now the one that puts up with the clever, cynical, disgruntled adult I have turned into. Isn’t love grand?

Oh look, a hollow metal cavity where a heart should be… Aside from the fact that my husband will be gone snowboarding over the Valentine’s weekend (my gift to my husband: Cakes, a break from my cynicism, and a chance to fling himself down a mountainside), I also wanted to bake these cakes early so I could blog about them in the event any of you are looking for something special to do for your loved ones on Saturday. You could always bake a 9×13 cake and cut out hearts yourself, or you could go to Hobby Lobby, Michael’s, Walmart, etc. to look for heart pans like mine in the seasonal aisle. I bought mine on Amazon a while ago, and the prices have since SKYROCKETED up to about 40 bucks for this pan…yeah, I told you this holiday was a racket. So avoid Amazon (literally never said that in my life), and go to an actual store to look for these, or Wilton’s website. While shopping for your pans, pick a cake mix of your choice, sprinkles, tubes of decorator frosting in pinks and reds, etc., whatever you want for decorating your hearts. Let me give you the rundown on tips, flavors, and more if you’d like to mimic any of my cakes!

Am I the only person who willingly still eats candy hearts? I went with a strawberry cake mix (hijacked with all the extra butter, milk, and eggs) with strawberry filling (for that blood-pumping effect) and vanilla-almond frosting (my homemade stuff for the paper towel trick). I also purchased heart doilies because the Clovis Walmart had no heart-shaped trays…surprise, surprise…a bag of candy hearts, red sprinkles, white sprinkles, red dye, pink dye, and a can of white decorator frosting for borders. Preheat your oven to whatever the box says to, and make your cake batter. I figured the cupcake rule would work here, so I filled each heart 3/4 of the way full. The cupcake rule betrayed me. My hearts came out of the oven looking like something from an anime comic or a Katy Perry video, so I had to do some trimming. I suggest filling a tad over halfway and start checking for doneness around 20-25 minutes.

…so that thing on the right doesn’t happen to you. I’m (sadly) human, so mistakes are most definitely made in my kitchen on a regular basis, but fixing them is usually simple so long as the kitchen hasn’t caught fire. I took a long bread knife and simply placed it flush to the pan and gently sawed off the bursting tops of my hearts. I put all four cakes in the fridge to cool off while I made my filling.

Mmm..jelly. Mix together 2 ounces of softened cream cheese, one cup of strawberry jelly or preserves, and 1/4 cup of powdered sugar in your stand mixer. Once things are mostly mixed, either place into a piping bag fitted with a long, narrow tip or…bust out the frosting gun. That’s right, I finally used the Purple People Eater for the first time in ages.

I had forgotten the power of the frosting gun. I definitely could’ve used more filling. I only stabbed the hearts directly in the center, and then filled with my mix until the hearts started to ooze a bit. While the middles are nicely filled, the rest of the hearts are still just plain. So if you’re filling, stab the hearts all over the place while avoiding the edges. Once things feel “full” when you press the hearts with your palm, stop filling, and plug back up (taken out of context, this could be a really dark blog entry). I used some of the cake toppers I cut off to plug up the holes. I then let my cakes rest in the fridge while I cut out hearts from cardboard cake plates so I had somewhere to set my cakes down to decorate.

Things will get messy, I promise. Be sure to slop down a few globs of frosting on your cardboard hearts so the cakes will stay in place while you frost. These are really light, so they will move around A LOT if you don’t. I started by making my frosting and leaving it plain white to decorate my first cake. Don’t forget the crumb coat! I actually had a bit of frosting leftover at the end, so feel free to go heavy with the crumb coats. Once you’ve crumb coated, frozen the cake for 15-30 minutes, final coated, frozen the cake for 15-30 minutes, you’re ready to smooth out with the paper towel trick. I wanted to do cornelli lace for this first cake, so I left my decorator frosting plain white and fitted a piping bag with a Wilton #2 tip.

I have a better tutorial in the link above, but remember the whole idea here is to ensure you’re making little ribbons of frosting in S and squiggly shapes all over the cake. Just make sure they don’t intersect or cross over each other. 
Finished top! 
I dragged the edges down from the top so I could connect the sides and give a seamless look. I also had some crumbs that managed to peek through, so I also used the lace to cover these crumbs up. Frosting is forgiveness. 
Here you can see how I’ve connected the edges from the top down to the sides. 
Repeat on all sides, and you’ve got a cake fit for a bridal shower! Hmm…that’s not a bad idea. The wheels are turning. I then took my big bowl of frosting and added in a little bit of pink dye. I then took TWO of my cakes and crumb coated, froze for 15-30, final coated, froze for 15-30, and then completely smoothed with my versatile Viva paper towel. I’d like to thank Viva, without you, my cakes would still look like a two year old frosted them. I’d also like to thank Netflix for getting me through the 30-minute windows of wait time. Without you, I’d probably have a more productive social life. Shudder.
My next cake took all of five minutes to decorate, and after how crampy my damn hand was from that delightfully gorgeous cornelli lace I needed an easy cake. Ahh cornelli lace…like most gorgeous things, it will eventually cause you problems for some reason or another. My simple cake mimics a candy heart, so you could really put any message in there. Txt Me is by far my least favorite addition to the new candy heart messages. I’m surprised there wasn’t also a “Tinder Me” or “Binge Drink L8R?” heart in there, too.

I went for the classic, “Be Mine.” Not at all creepy in message, only in theory. I used a toothpick to draw out my message to make piping easier. 
I used a Wilton #6 tip to write my message in decorator frosting dyed hot pink, and honestly, I think it is too big. I think a #3 or even the #2 from the cornelli lace would work better, but live and learn and eat the cake anyway. 
I finished off the cake by adding a candy heart border along the bottom. Delightfully kitschy!! Easy as..well..pie I guess, just tastier. The next pink cake is my runner-up favorite of the four, edged out slightly by my cornelli lace cake that could possibly bring me loads of money at future bridal showers (“Cha-ching!” -my next candy heart message). It and the fourth cake just say “Valentine’s Day” like no other cake could. Mostly because cakes can’t talk, but you get the gist.

I started by dying a small amount of decorator frosting red, loading a piping bag with a #18 Wilton tip, and piping shells on to the other smoothed pink cake. I made my cardboard hearts a bit larger for this and the fourth cake to accommodate handling without ruining the border. 
Then I followed suit and piped the bottom of the cake. 
And you better believe I finished off by topping my cake with red sprinkles. Isn’t it just so joyously romantical? Jesus..who the hell typed that? While my pink cakes were cooling in the freezer with their final coats before I decorated them, I took the pink frosting, added a few drops of red dye, and mixed. Then I crumb coated my last cake red and set in the freezer while smoothing out both my pink cakes and then decorating the first one. Then I took the red cake out of the freezer and gave it a final coat and set it to rest in the freezer while I decorated the second pink cake. Head spinning yet? I did this so that I wasn’t up until 1 a.m. on a Saturday decorating cakes, as it was already 10 p.m., with no clear socialization in sight. Not that I mind missing an audience when it comes to frosting. I end up covered in the stuff, and that’s just embarrassing for everyone because I will still lick it off my arms whether you’re in the room or not.
For my last cake, I fitted another #18 tip to a piping bag filled with decorator frosting dyed light pink. Instead of piping shells this time, I went for a rope border on the top and bottom of the cake. 
Because one sappy candy heart message was enough, I finished this cake off with white sanding sugar on top. Honestly, the thing that took longest about these cakes was the crumb coat-wait-final coat-wait-smoothing process for three different colors of cakes. If you wanted, you could make all your cakes in the same color to speed this process up, but I really liked the variety.
Thanks, doilies, for being a completely acceptable stage for my cakes once a year. Or maybe at bridal showers, too…they did come in a pack of like 50… Since my cakes were filled with the cream cheese mix, I put them into a cake safe and left out in the garage fridge. My husband couldn’t find them since we usually reserve that fridge for booze and soda, and I’m pretty sure there was a fleeting moment he was worried I ate all four without him while he was out playing poker. What can I say, I really know how to keep the guy on his toes.
Don’t worry, I was just keeping them..safe. This was a really fun project, which in total took about 4 hours between baking, cooling, frosting, waiting, and decorating. I’d say 4 hours is a worthy amount of time to spend making someone a Valentine’s Day gift, but I literally know nothing about making homemade Valentine’s Day gifts, so who am I to talk? I’m just gonna shut up now and go figure out which of these cakes to sacrifice for dessert tonight. Because no matter how sappy people get about February 14, a cake is a cake, and I’ll be damned if I’m not gonna have my cake and eat it, too…with my loving husband who puts up with my self-deprecating wit without trying to throw me down that mountainside this weekend, too. Let’s all take a minute to be thankful my clumsiness works as an excellent precursor for avoiding winter sports while still allowing me to sit (carefully) at a computer to blog. ‘Til next time, my fellow eaters!

Healthy-ish cake, cupcakes, pie, and cheesecake recipes and decorating tips

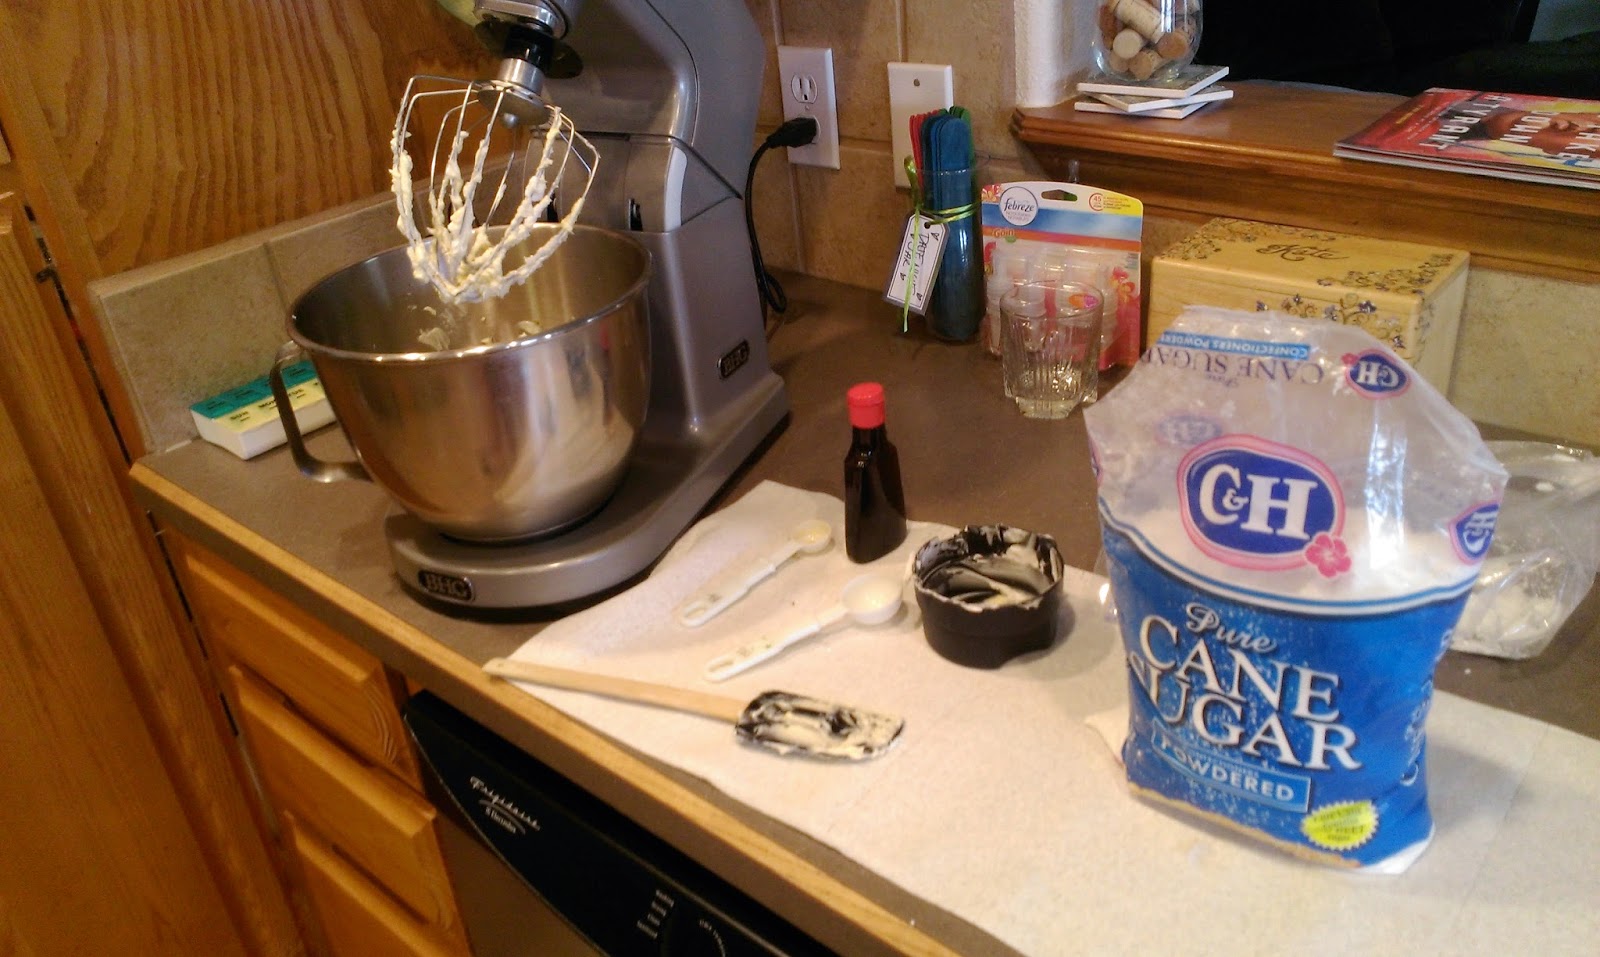


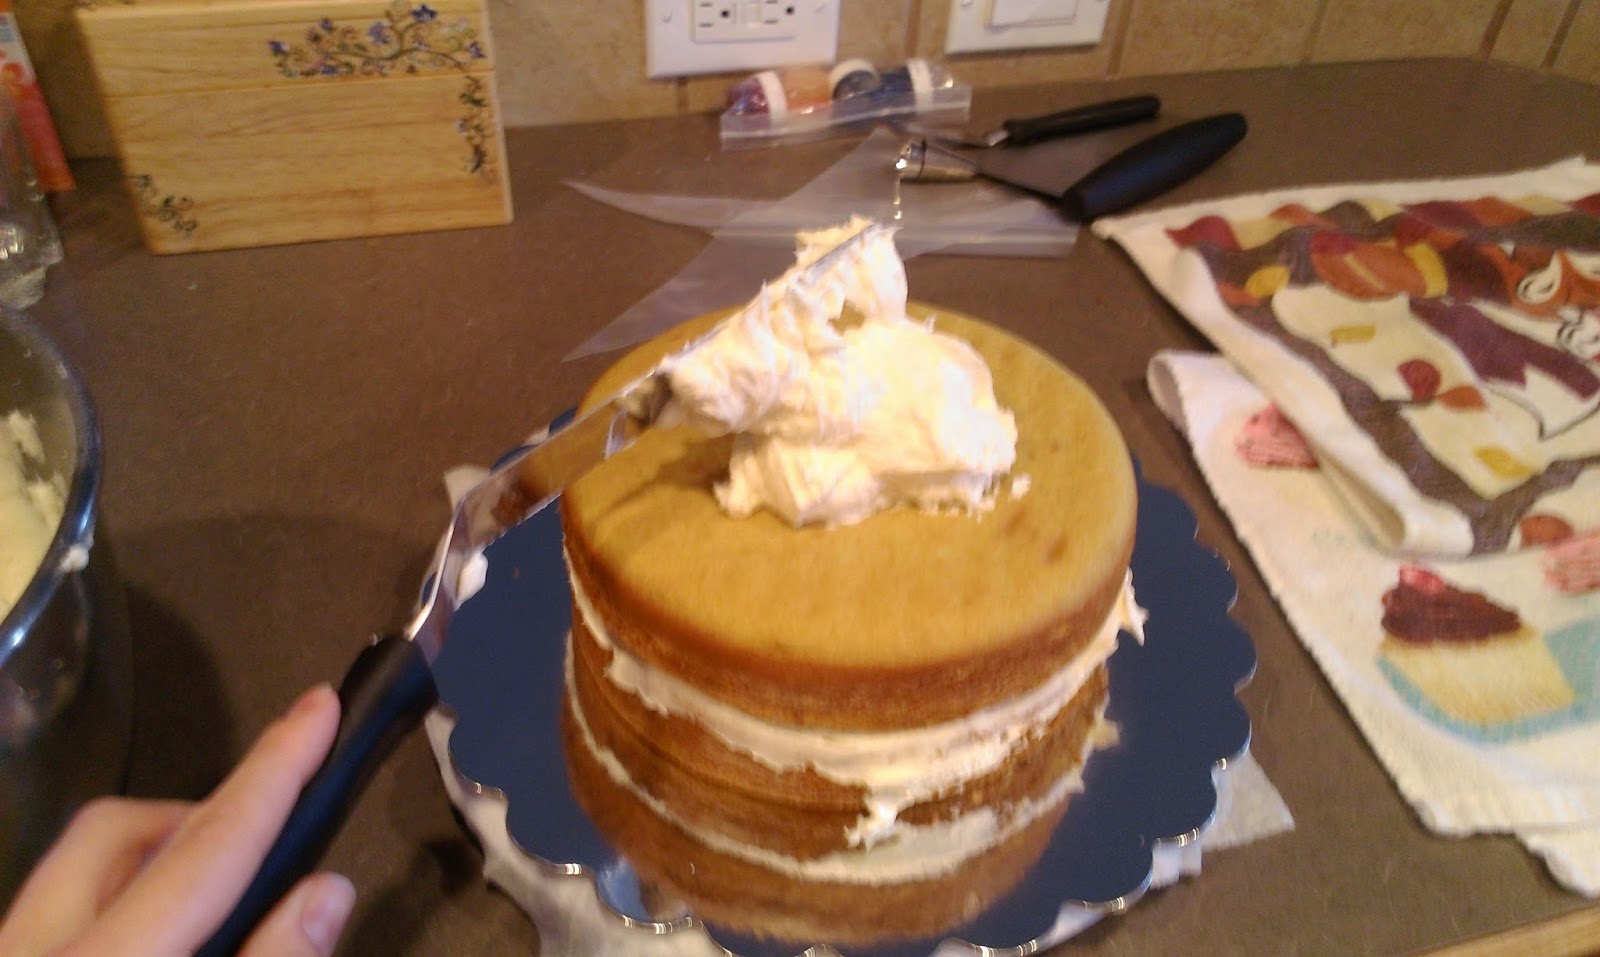
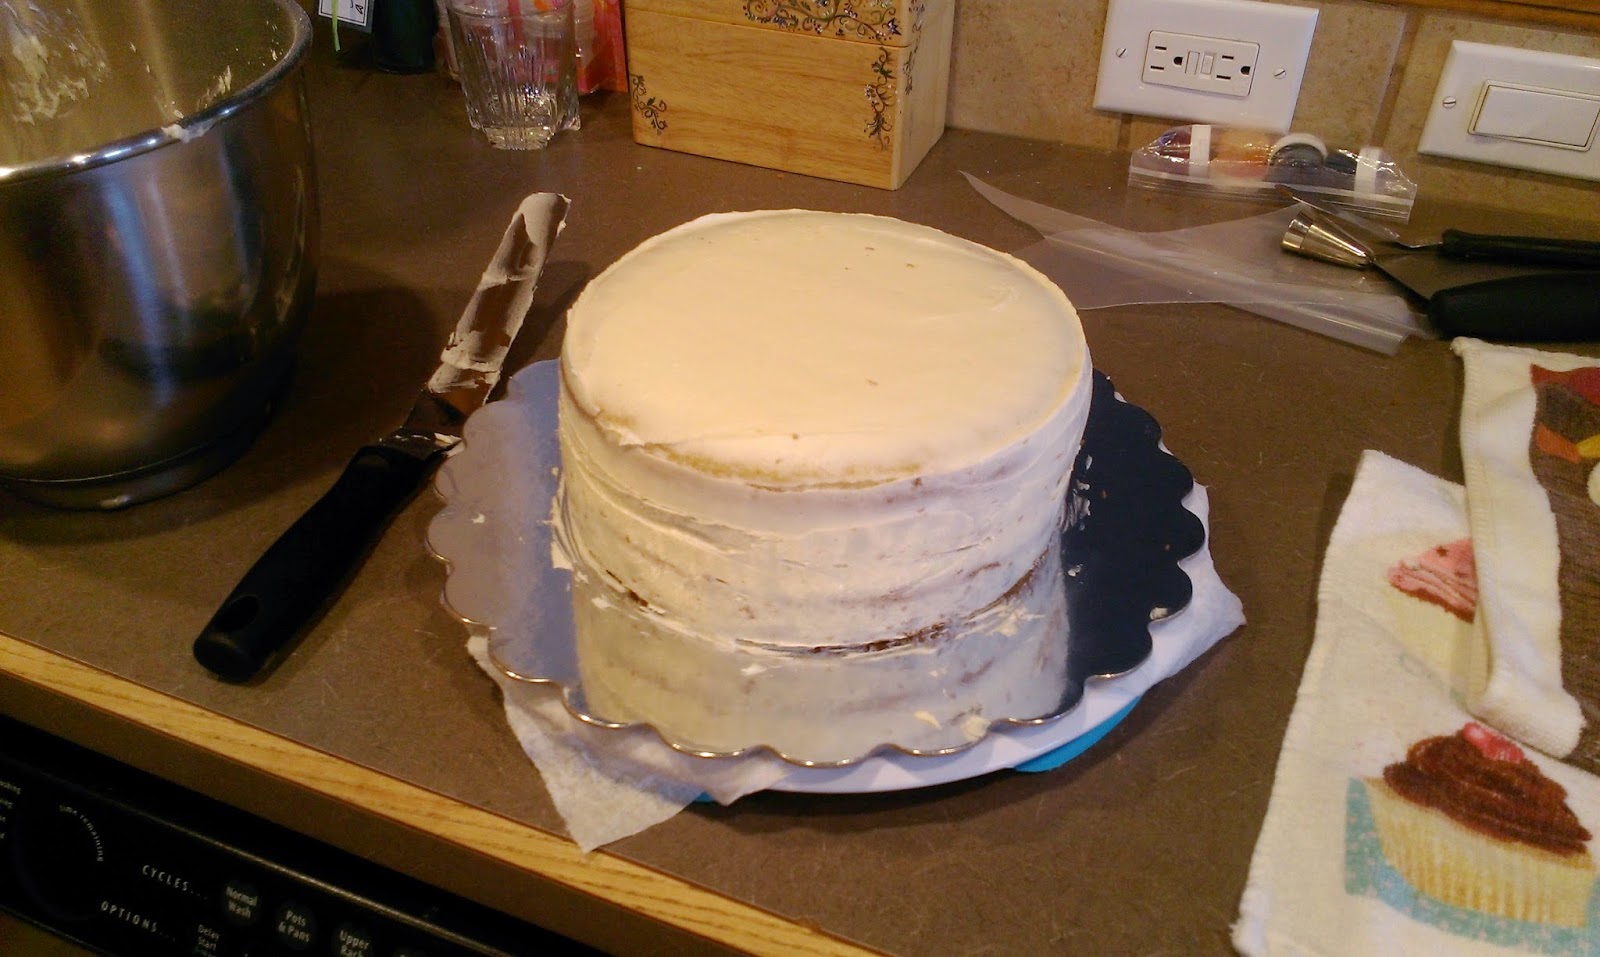
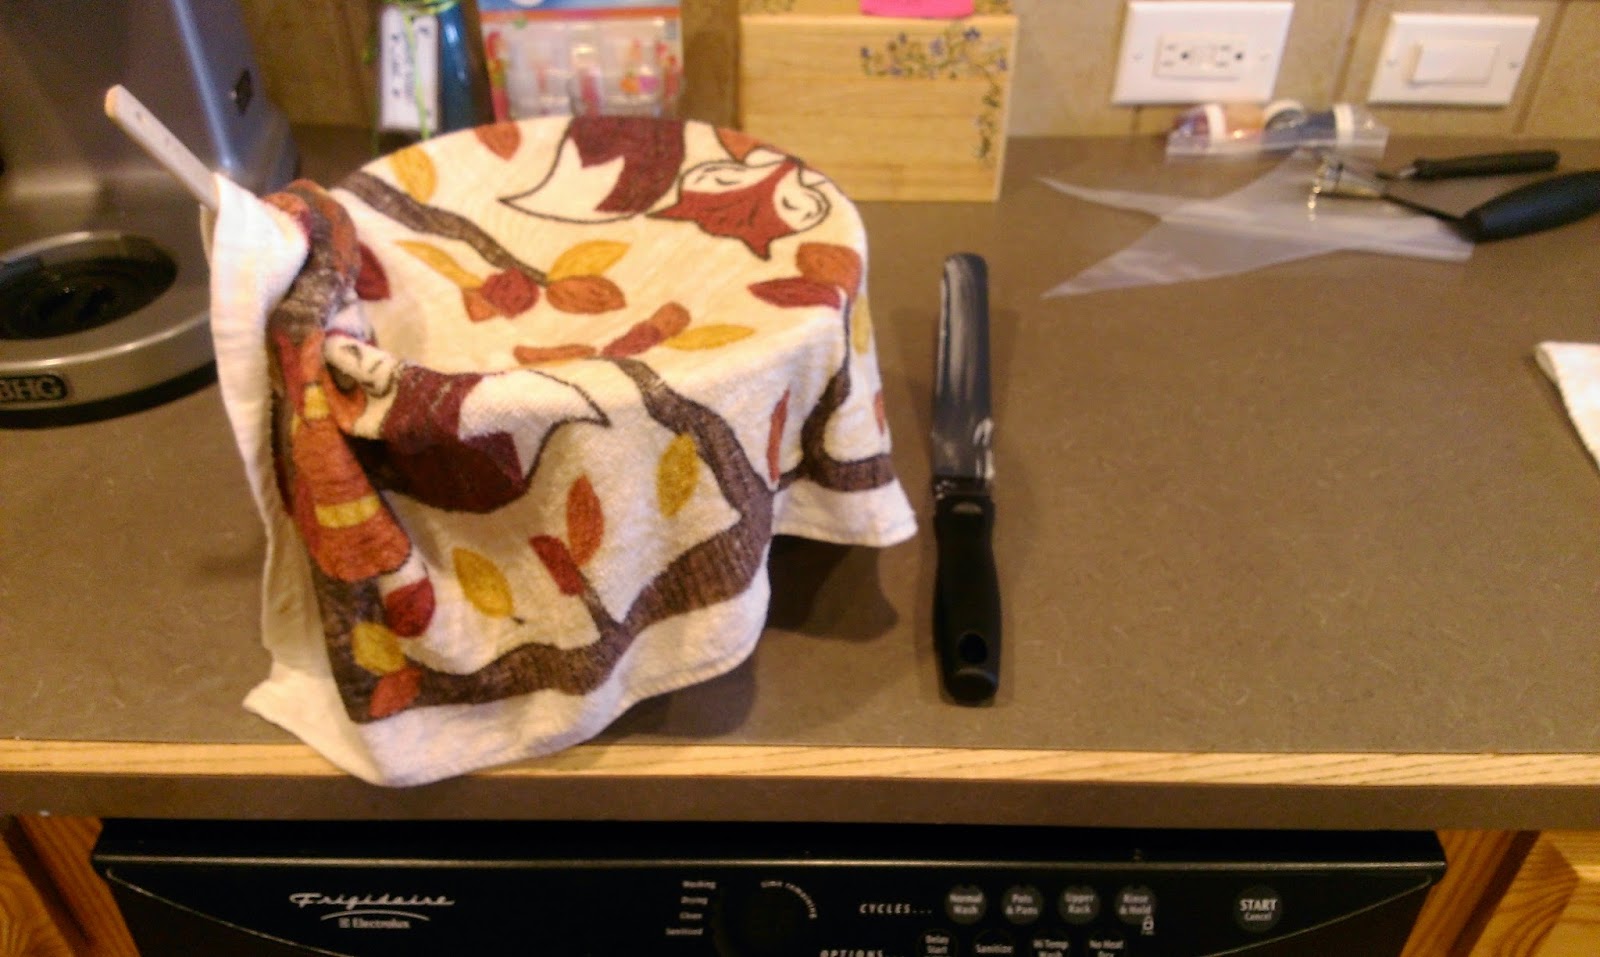

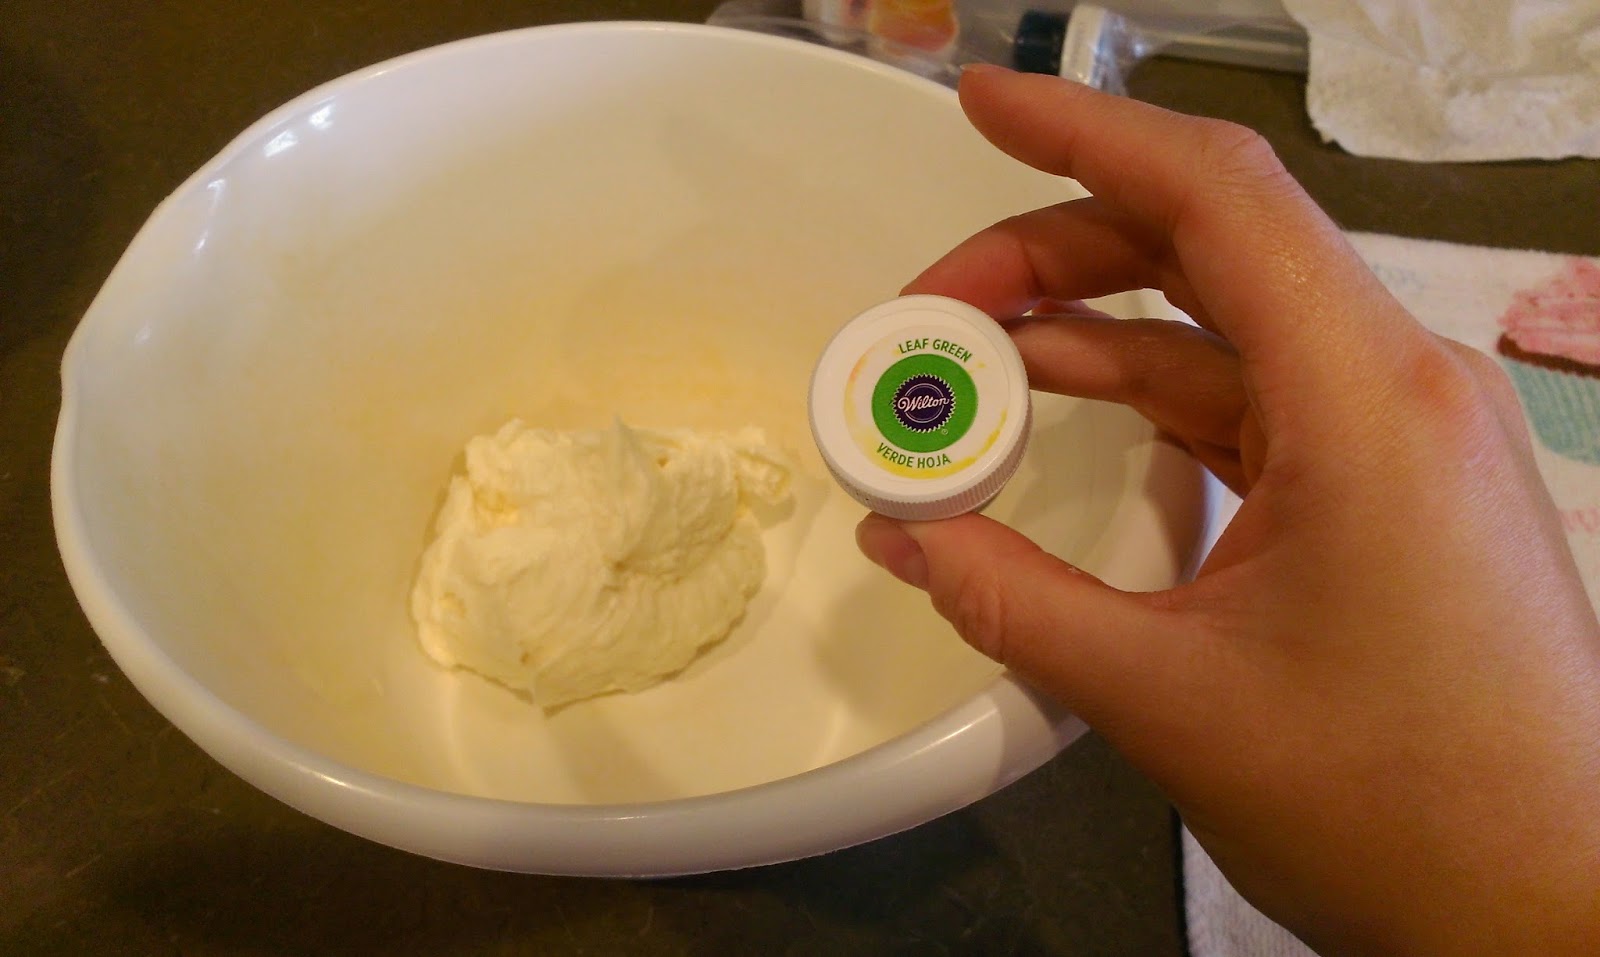
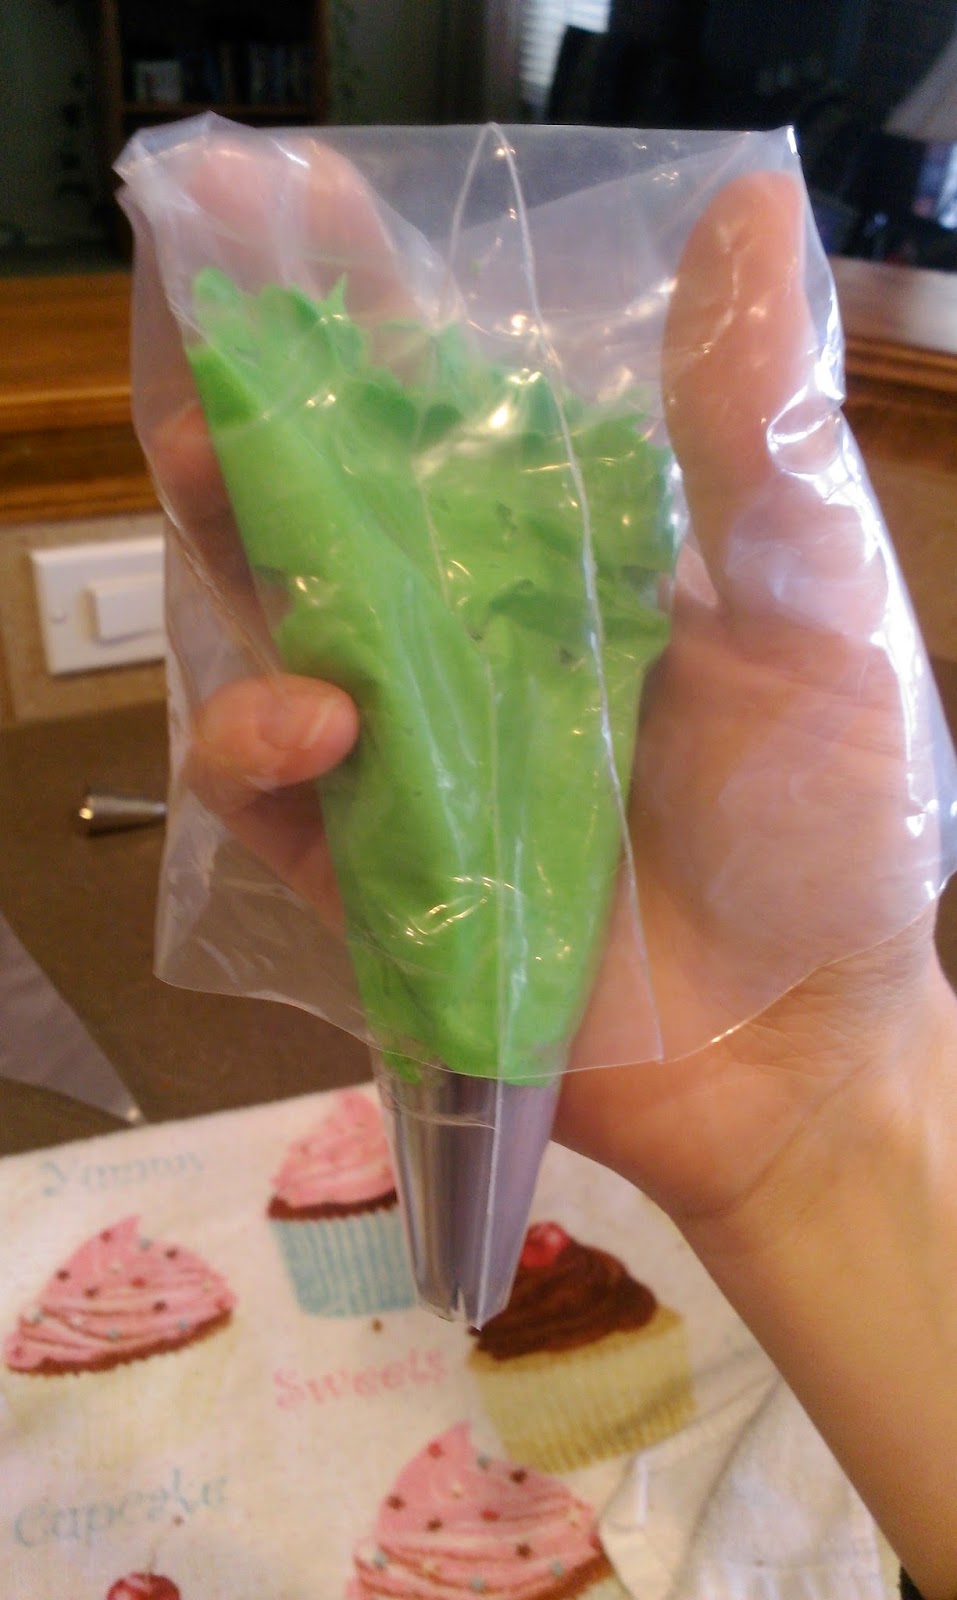

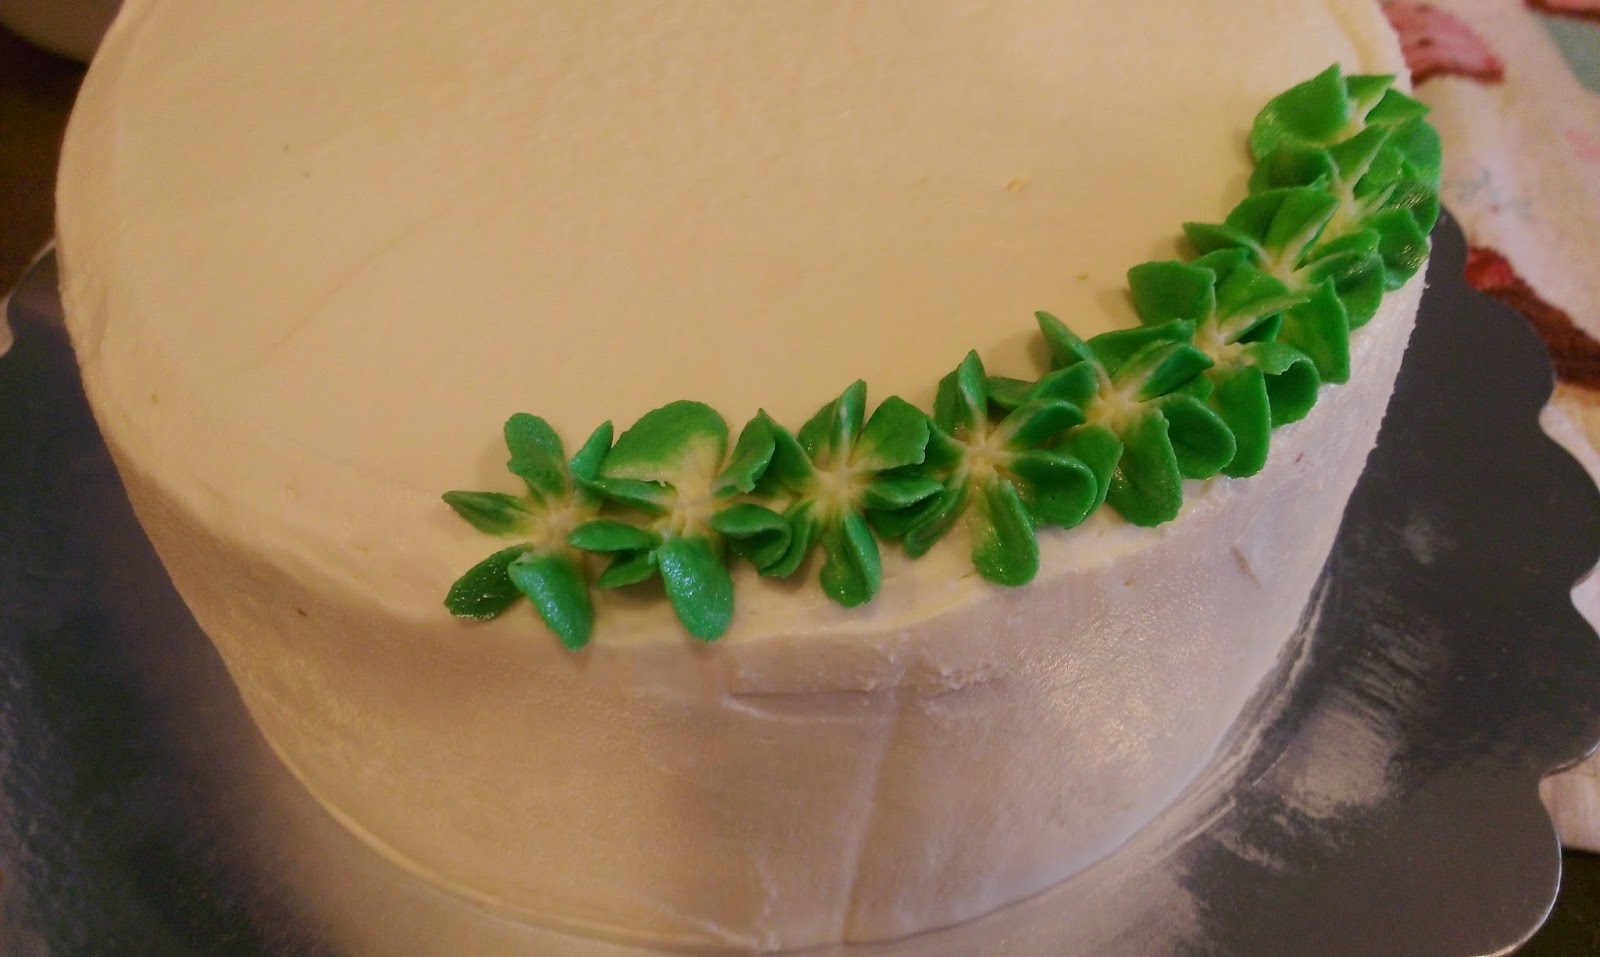

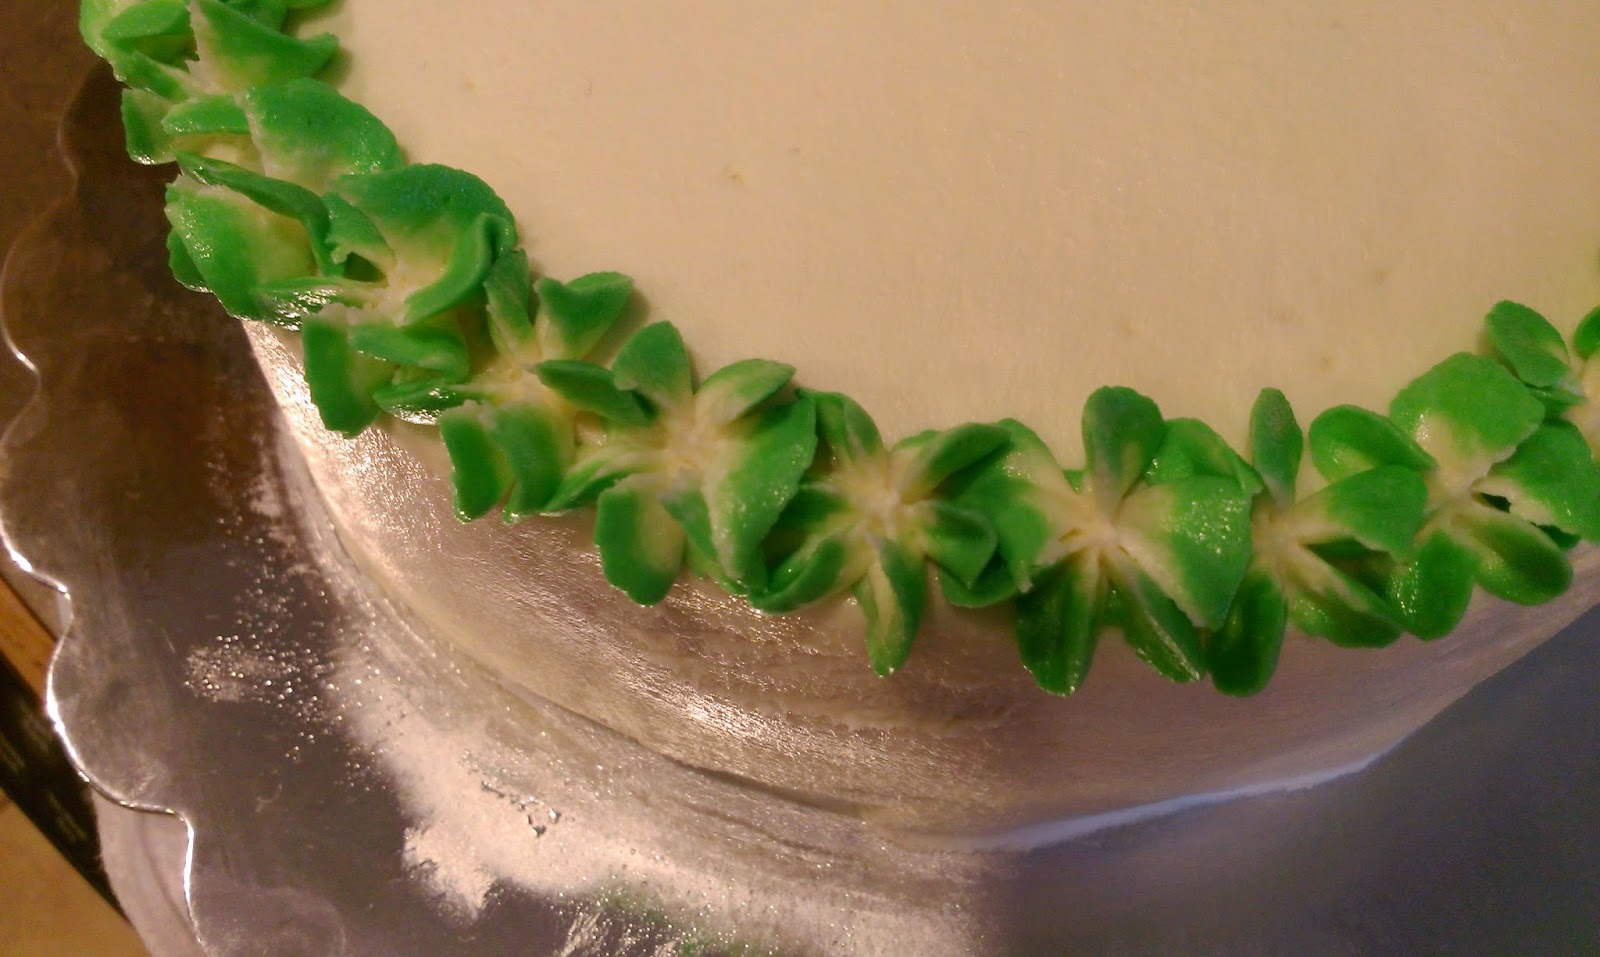

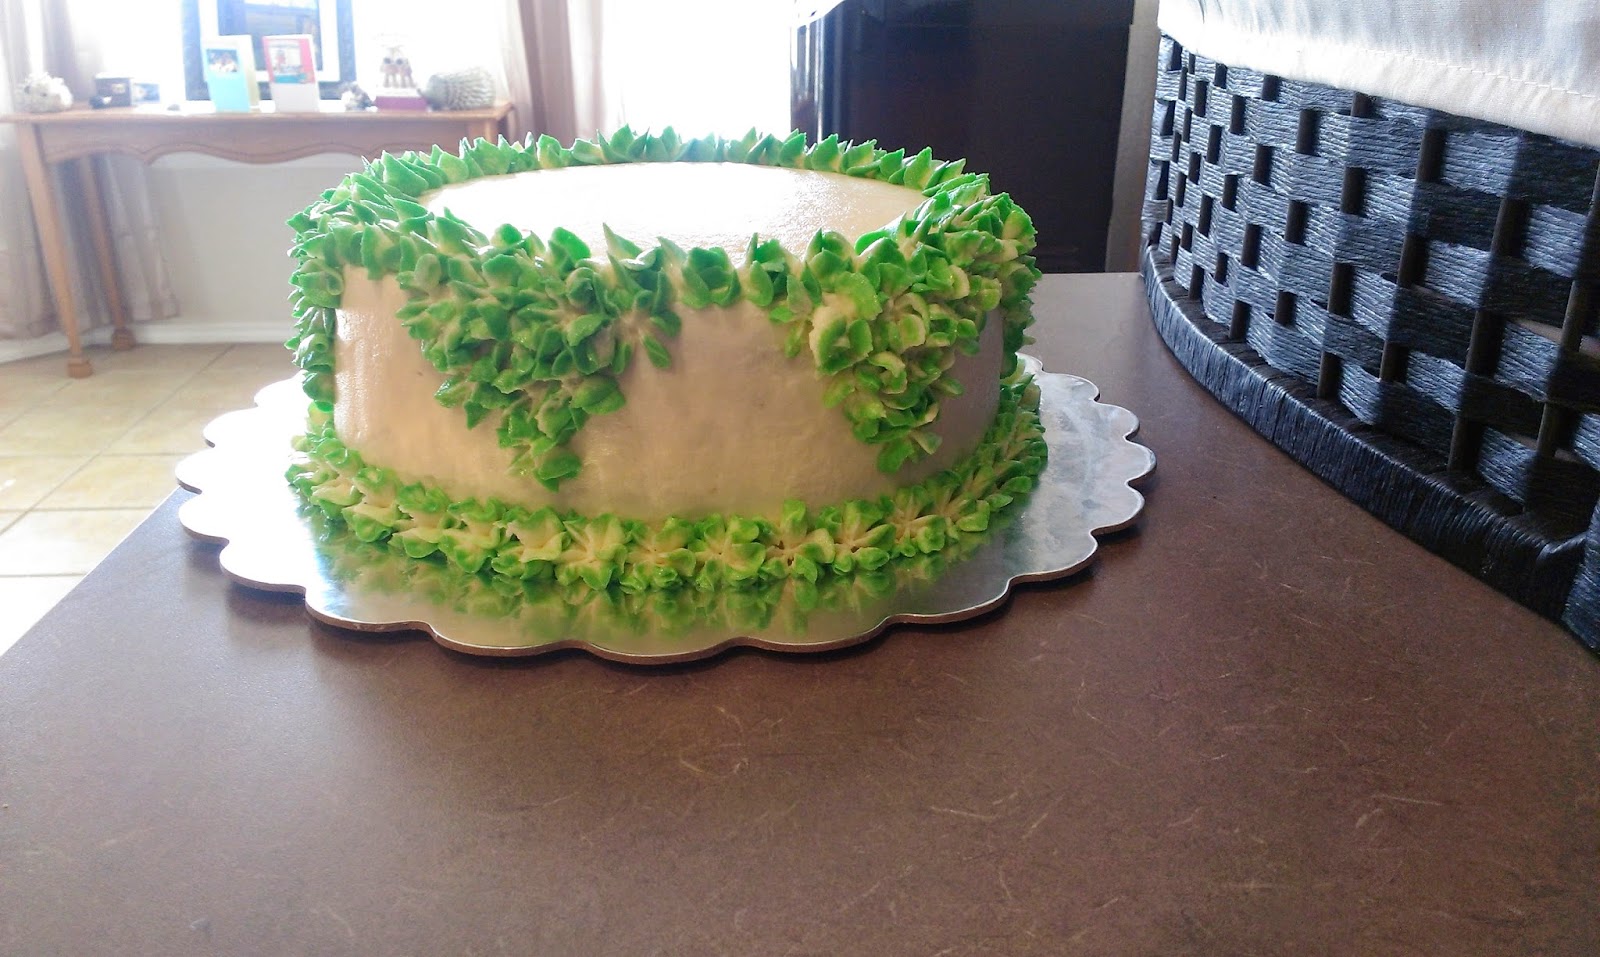

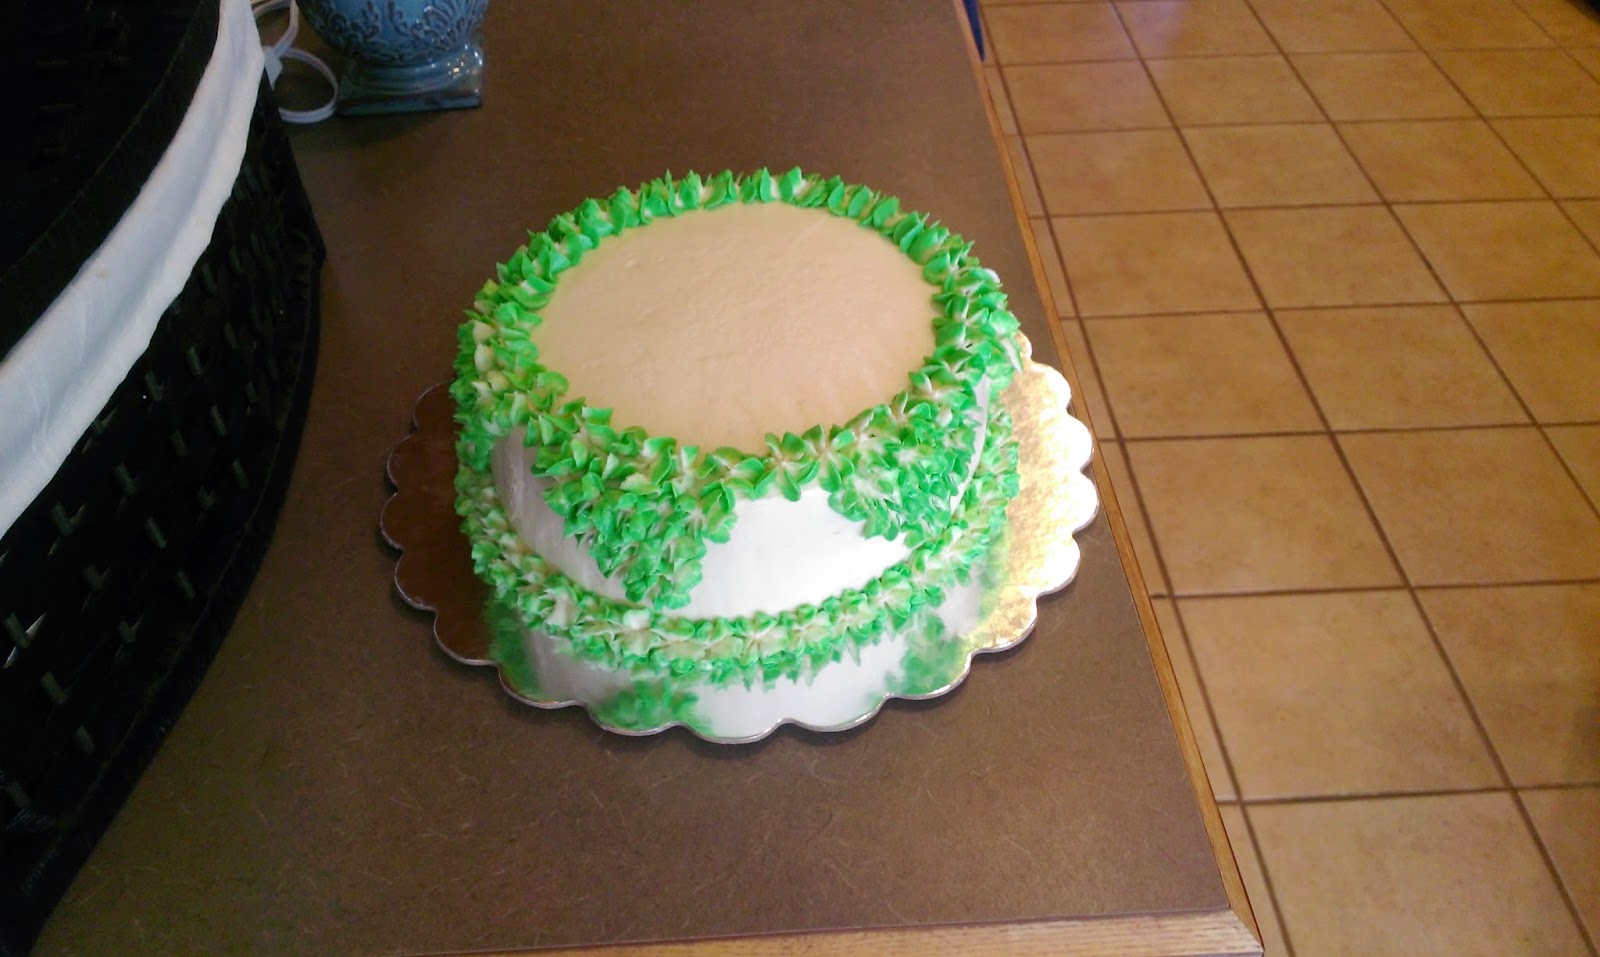

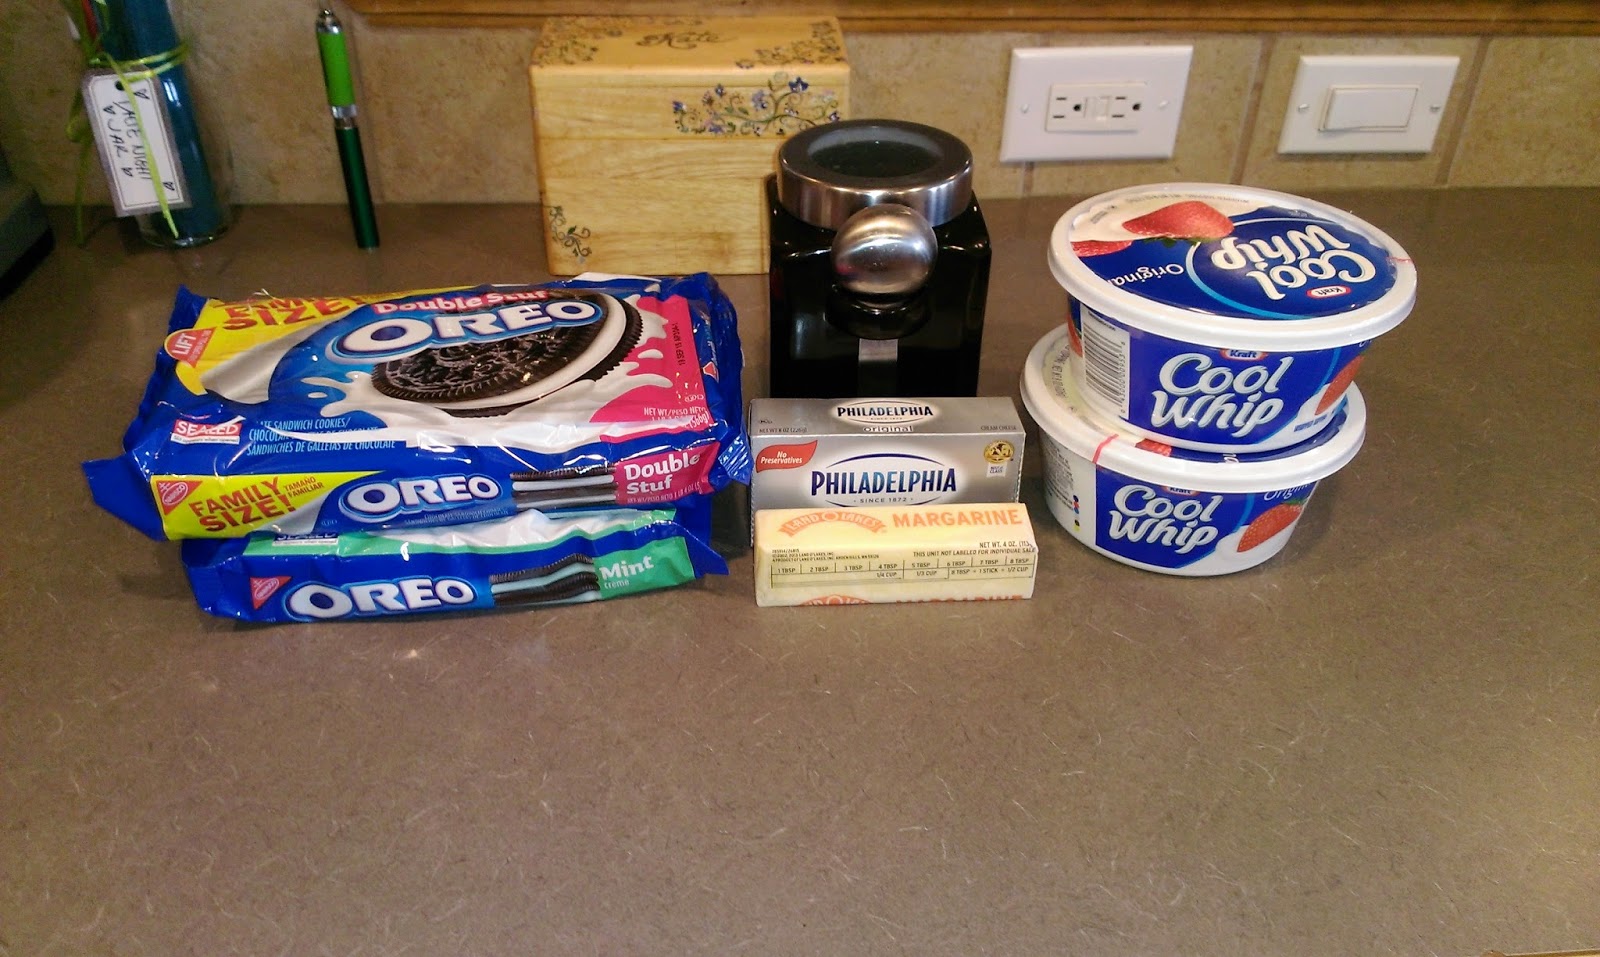


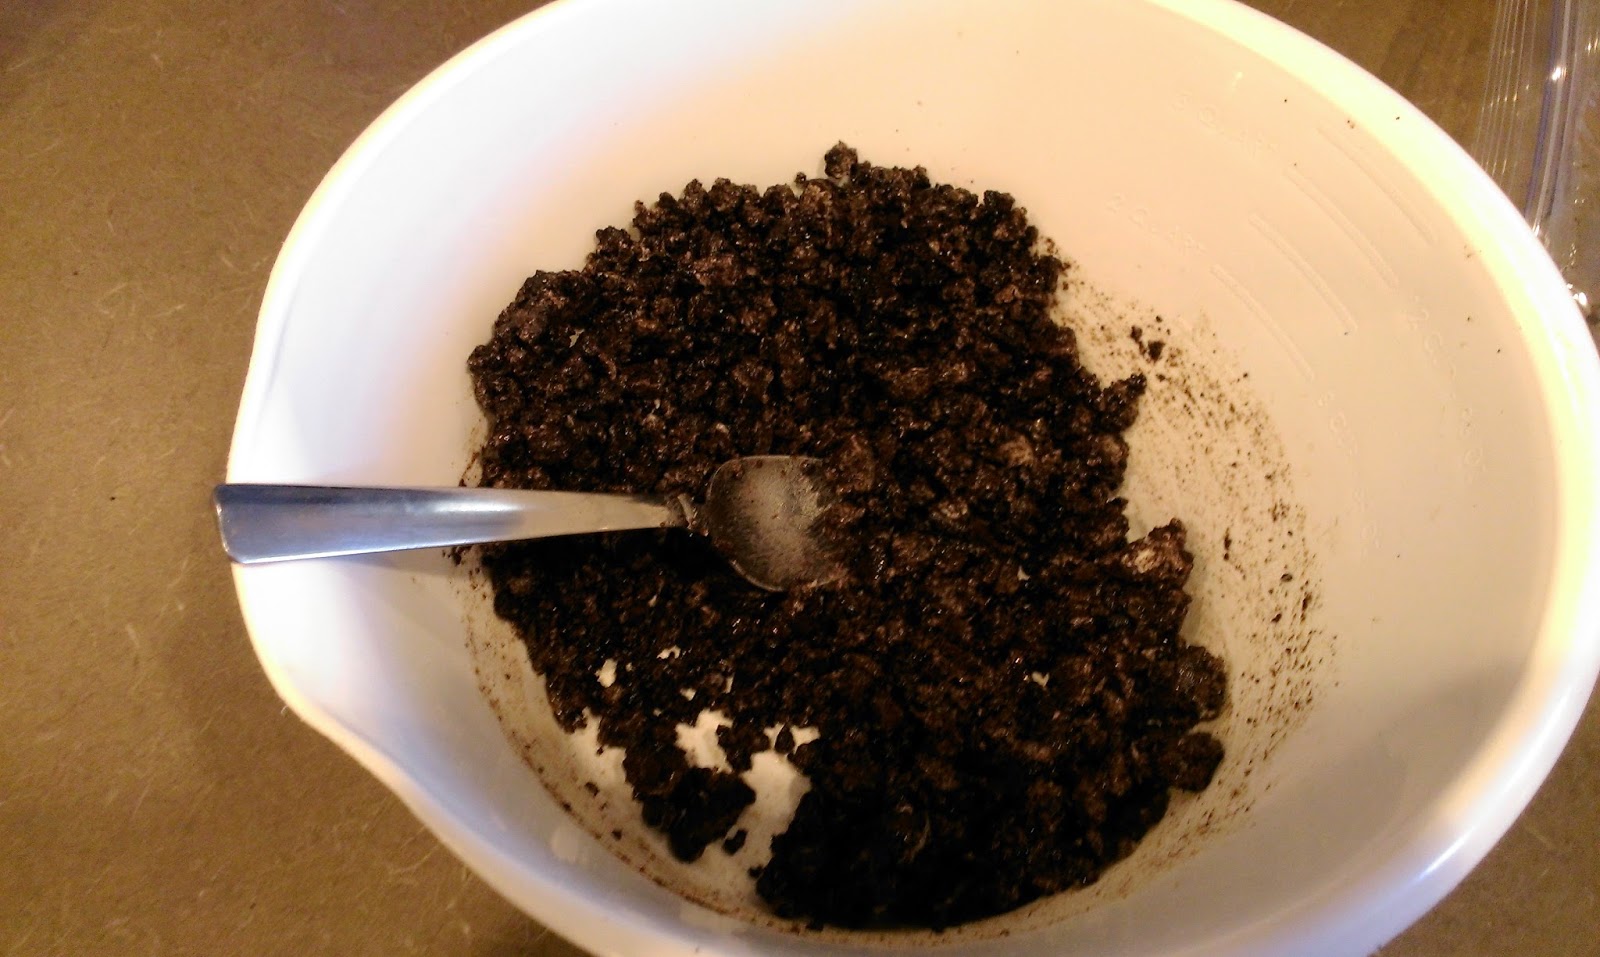


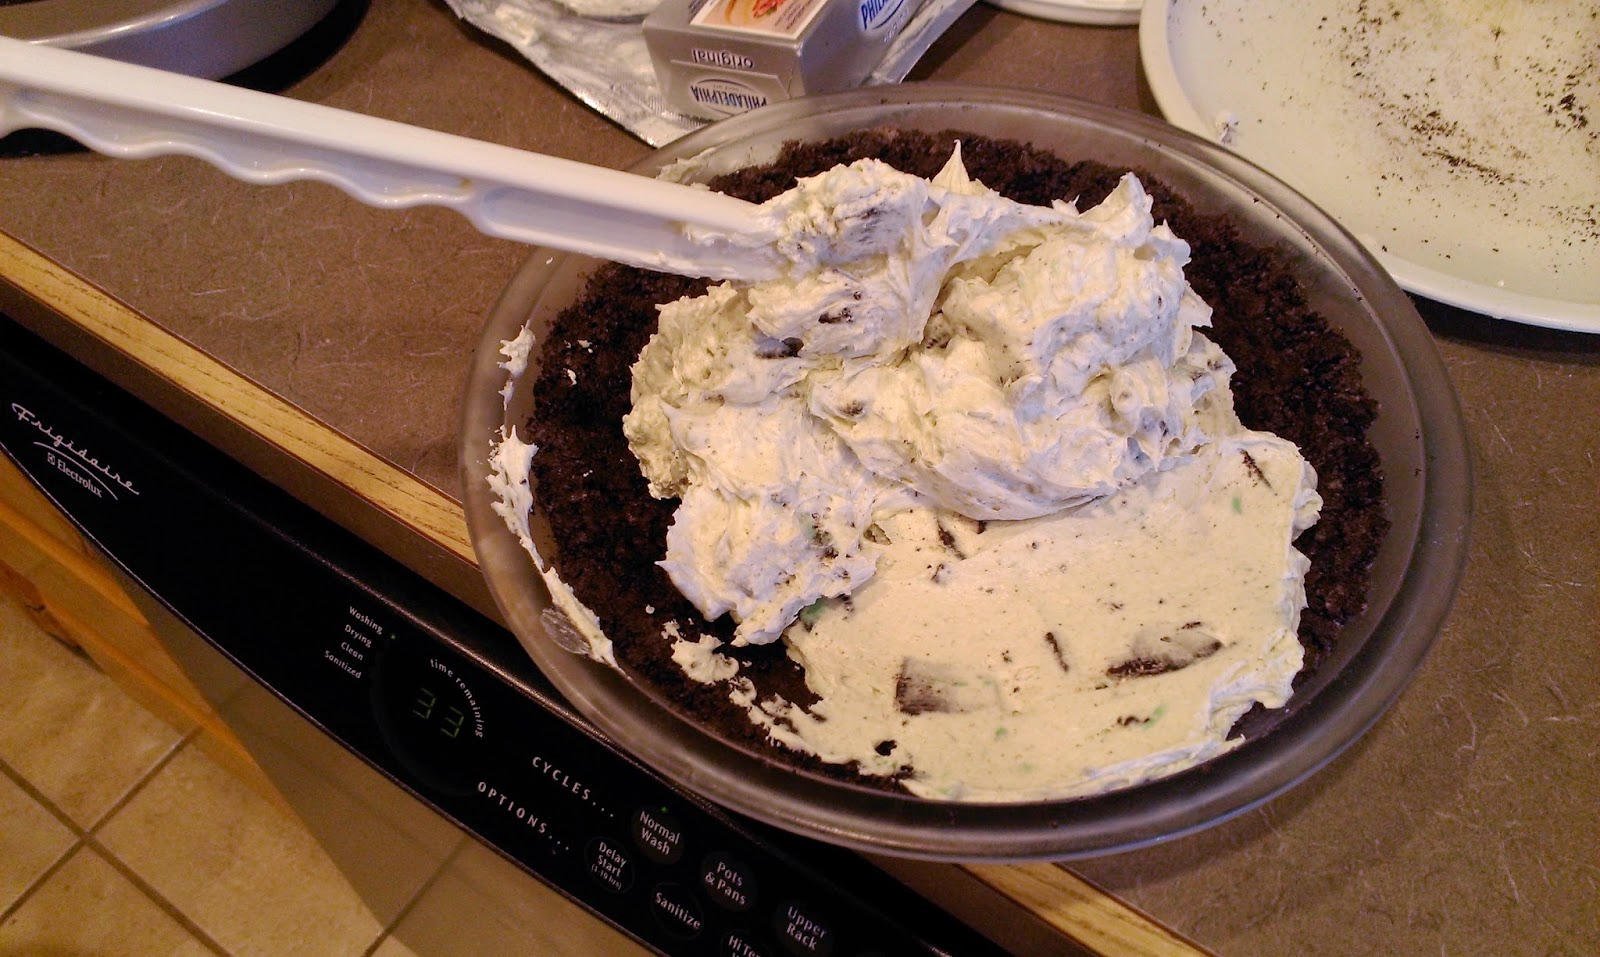

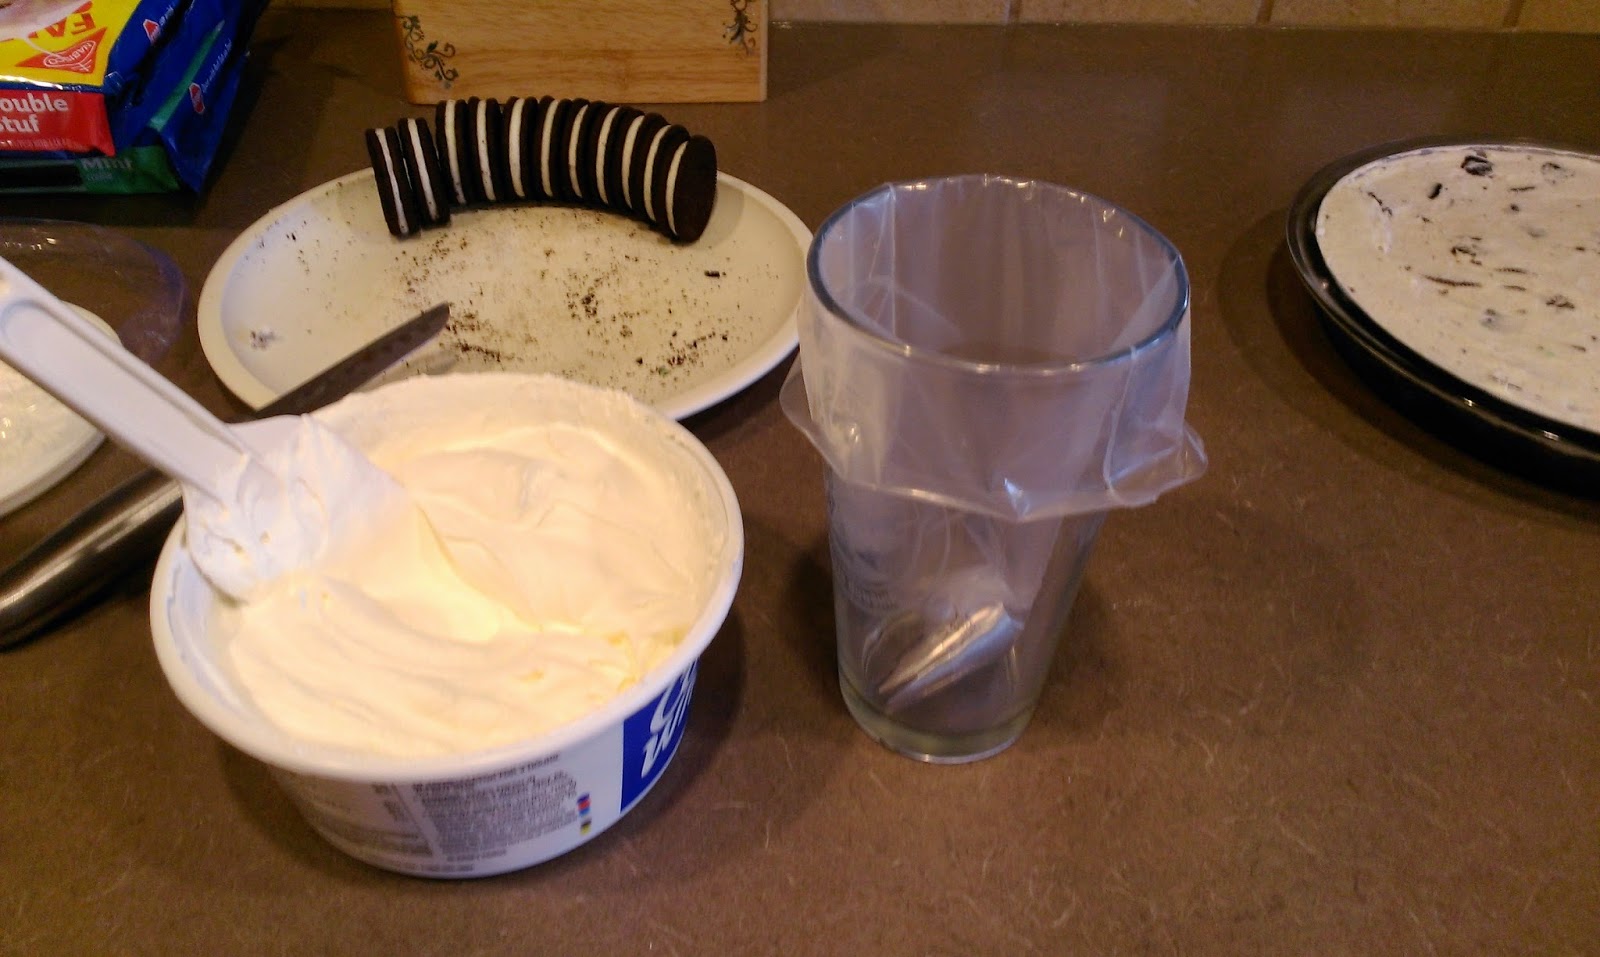
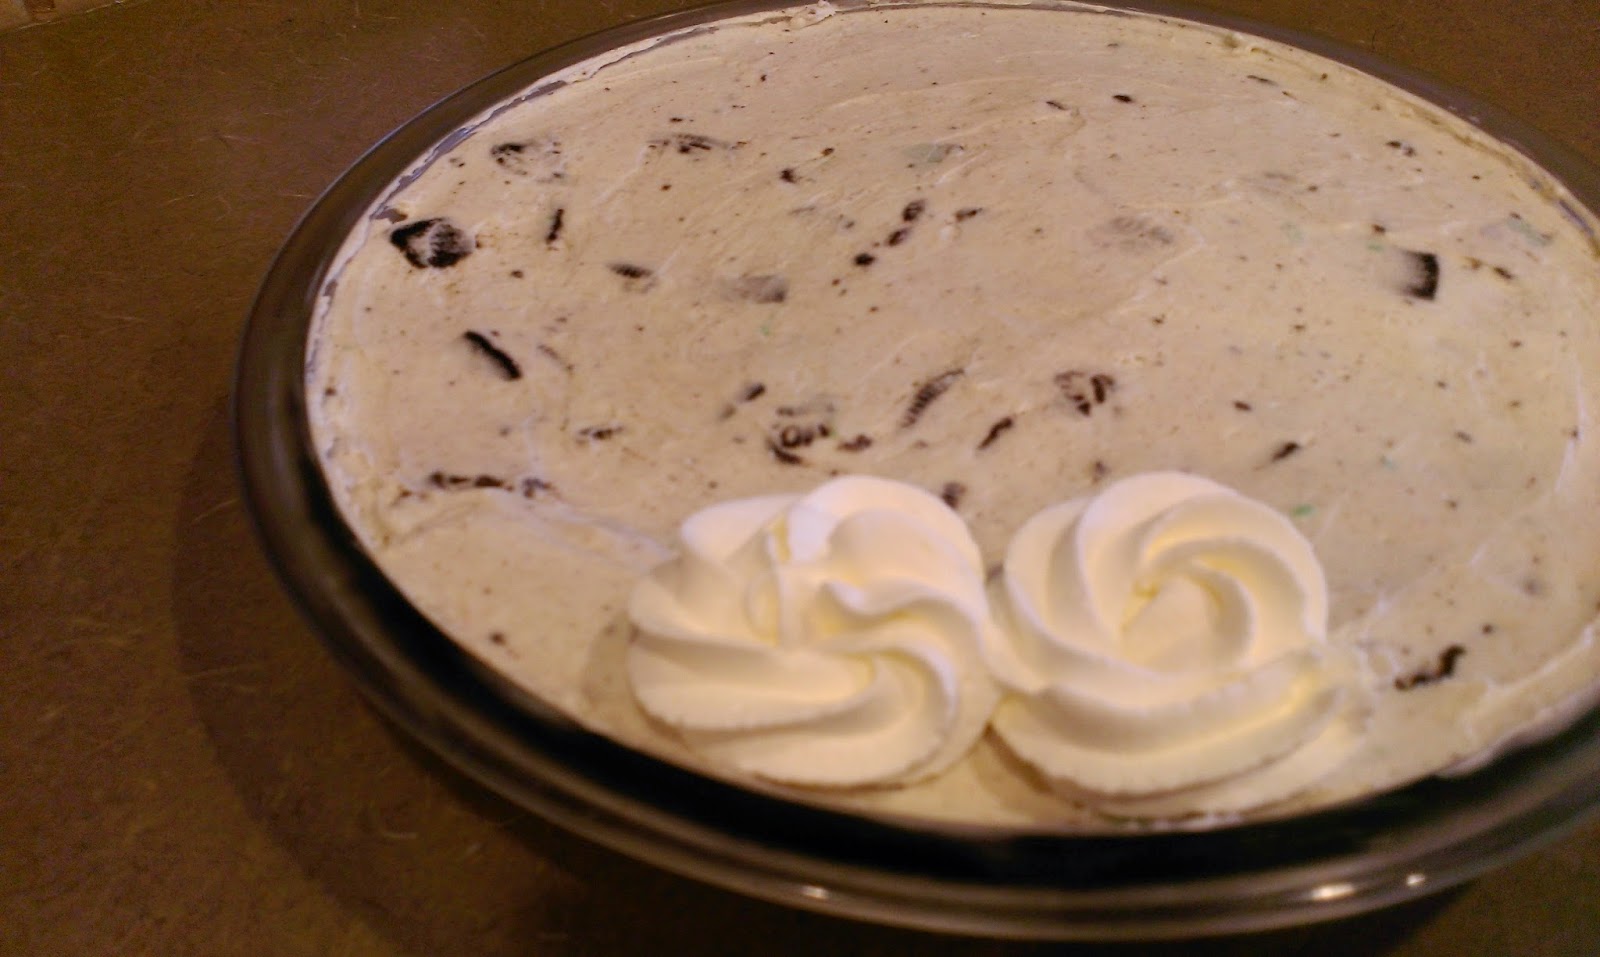

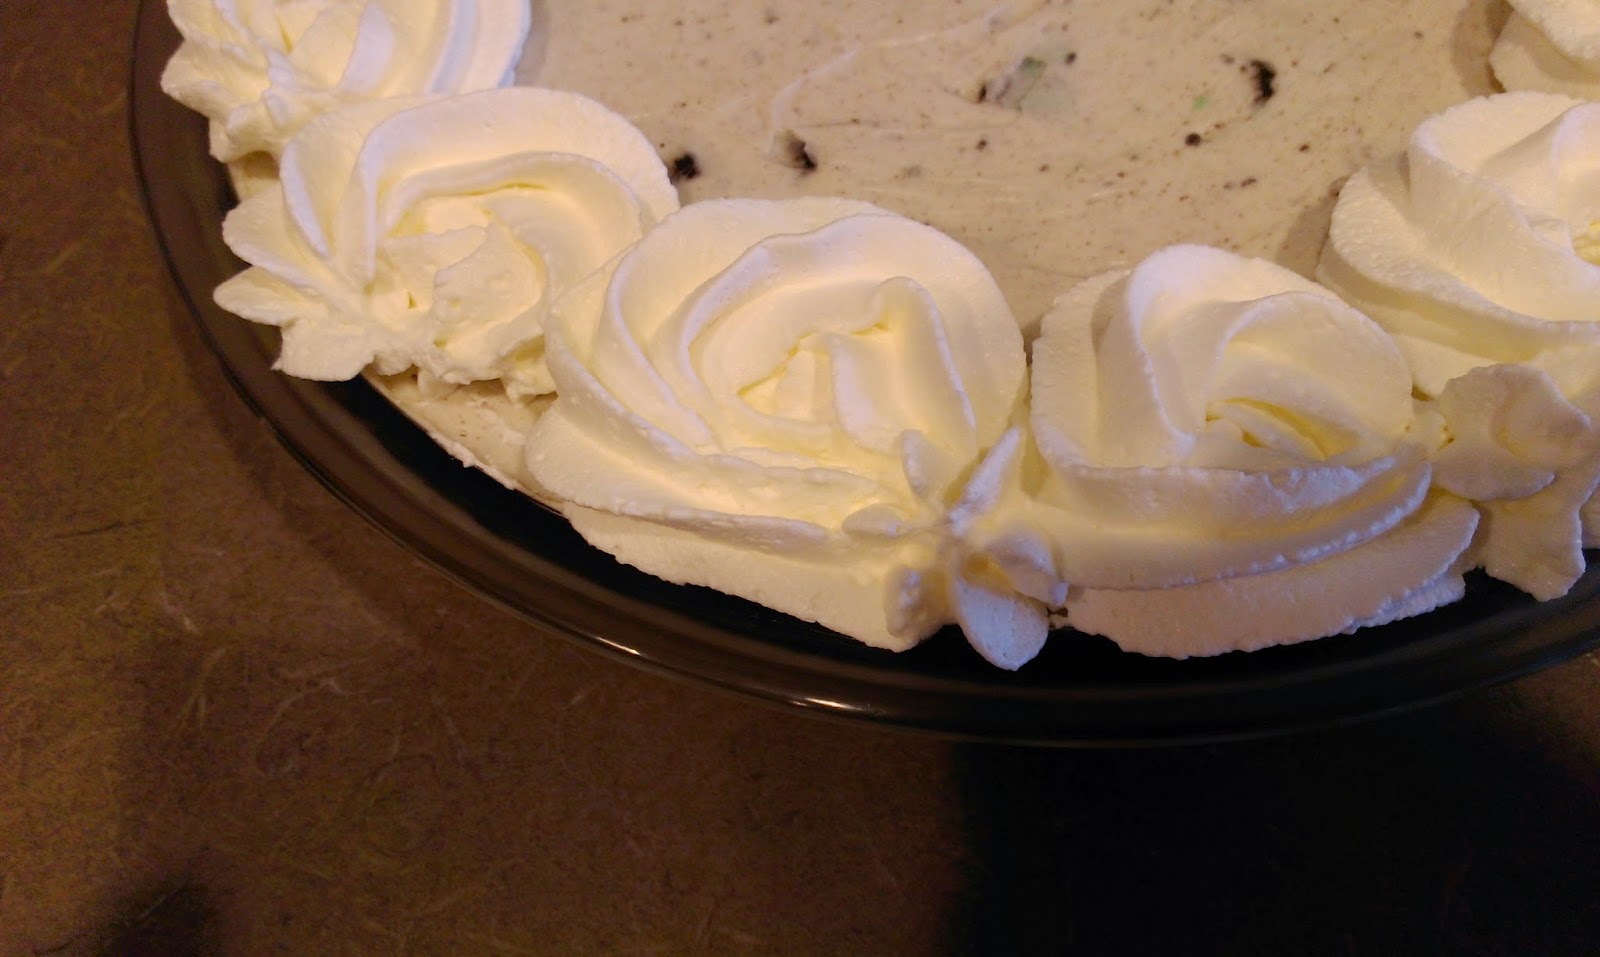
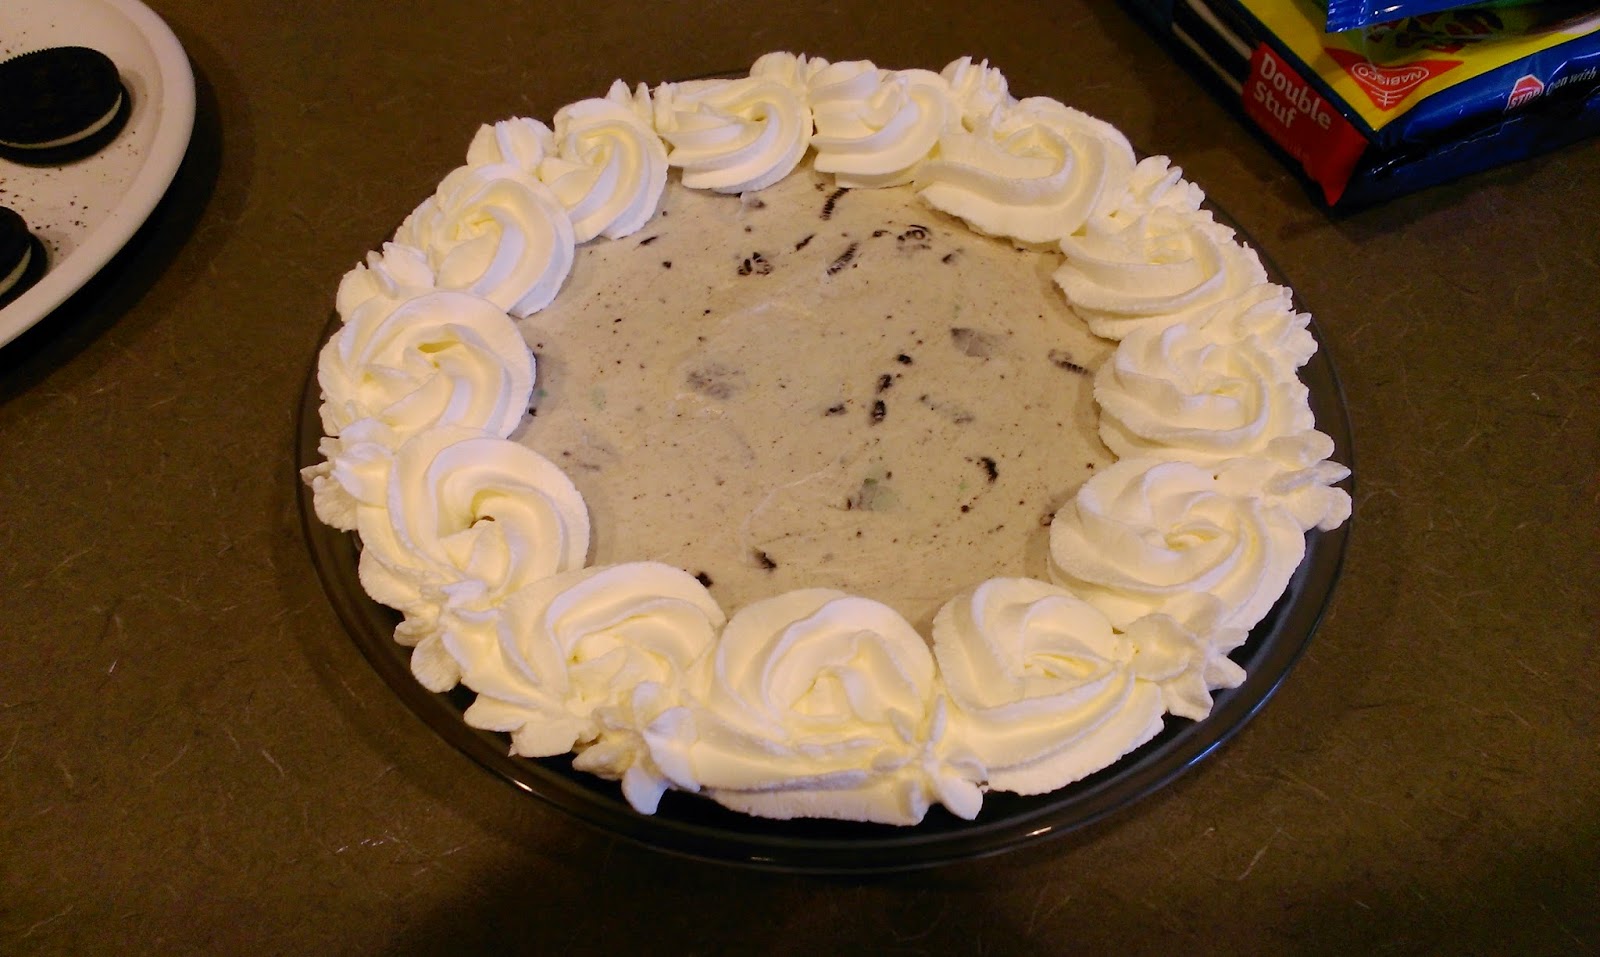
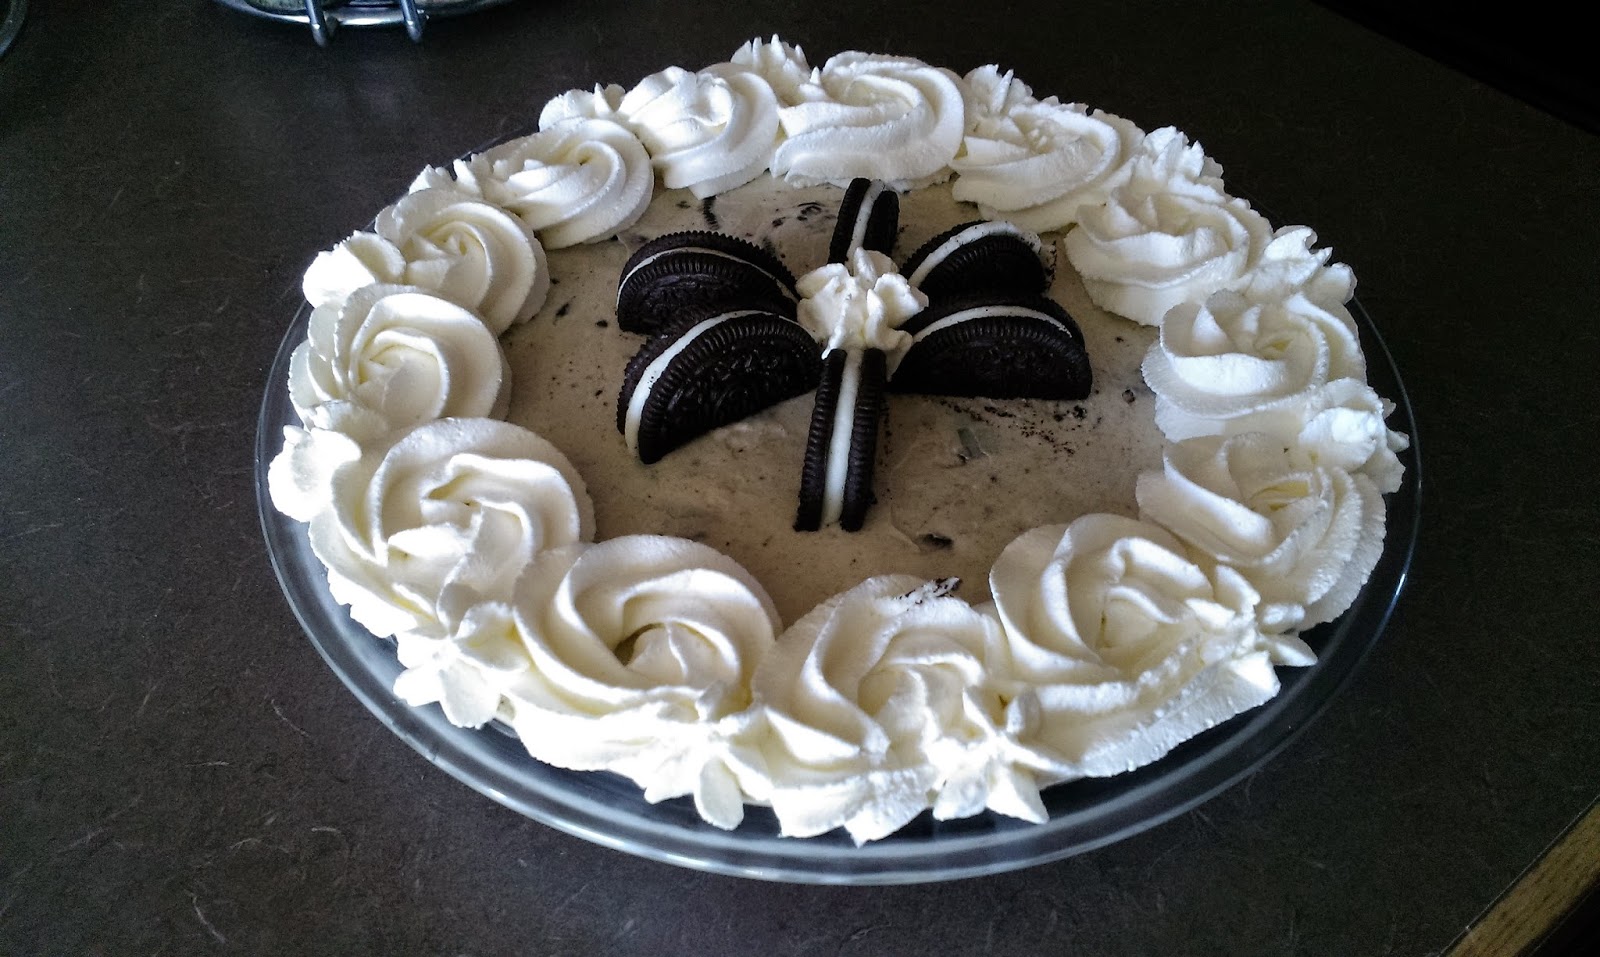
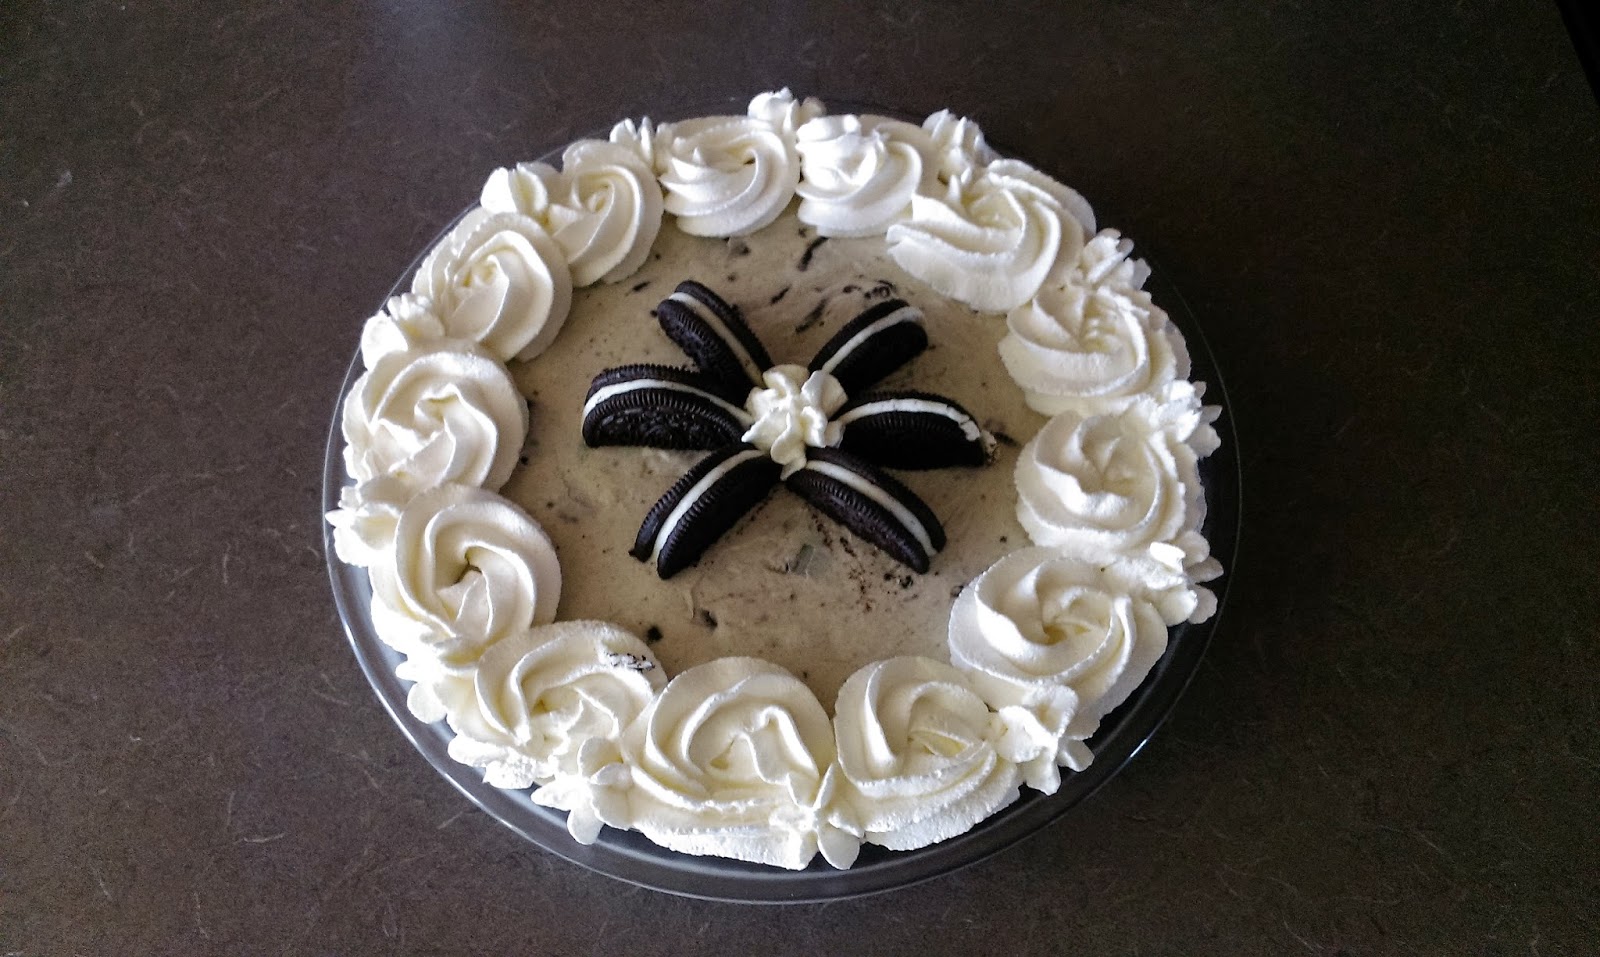
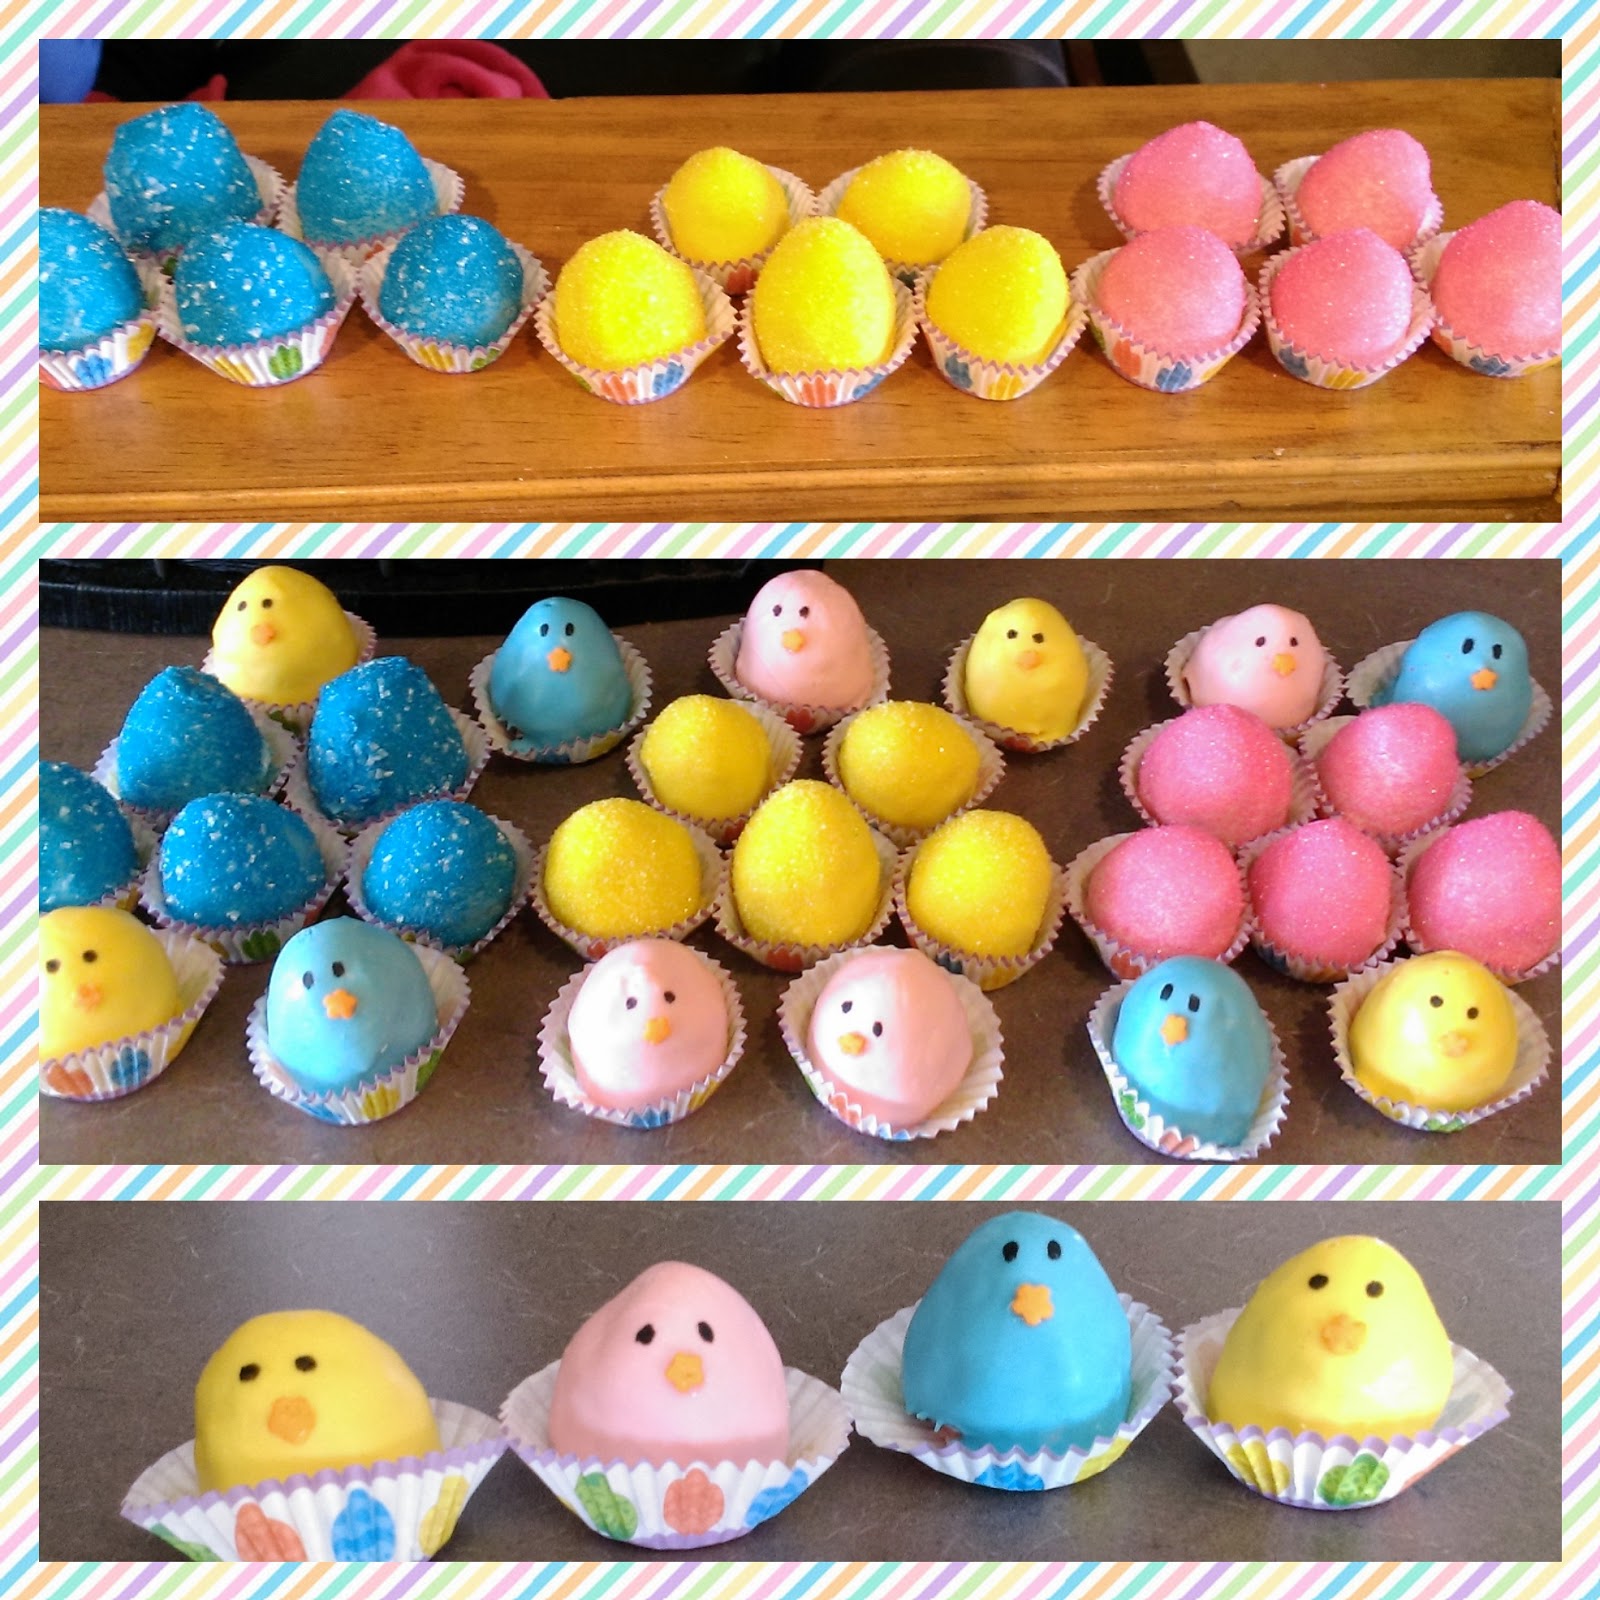

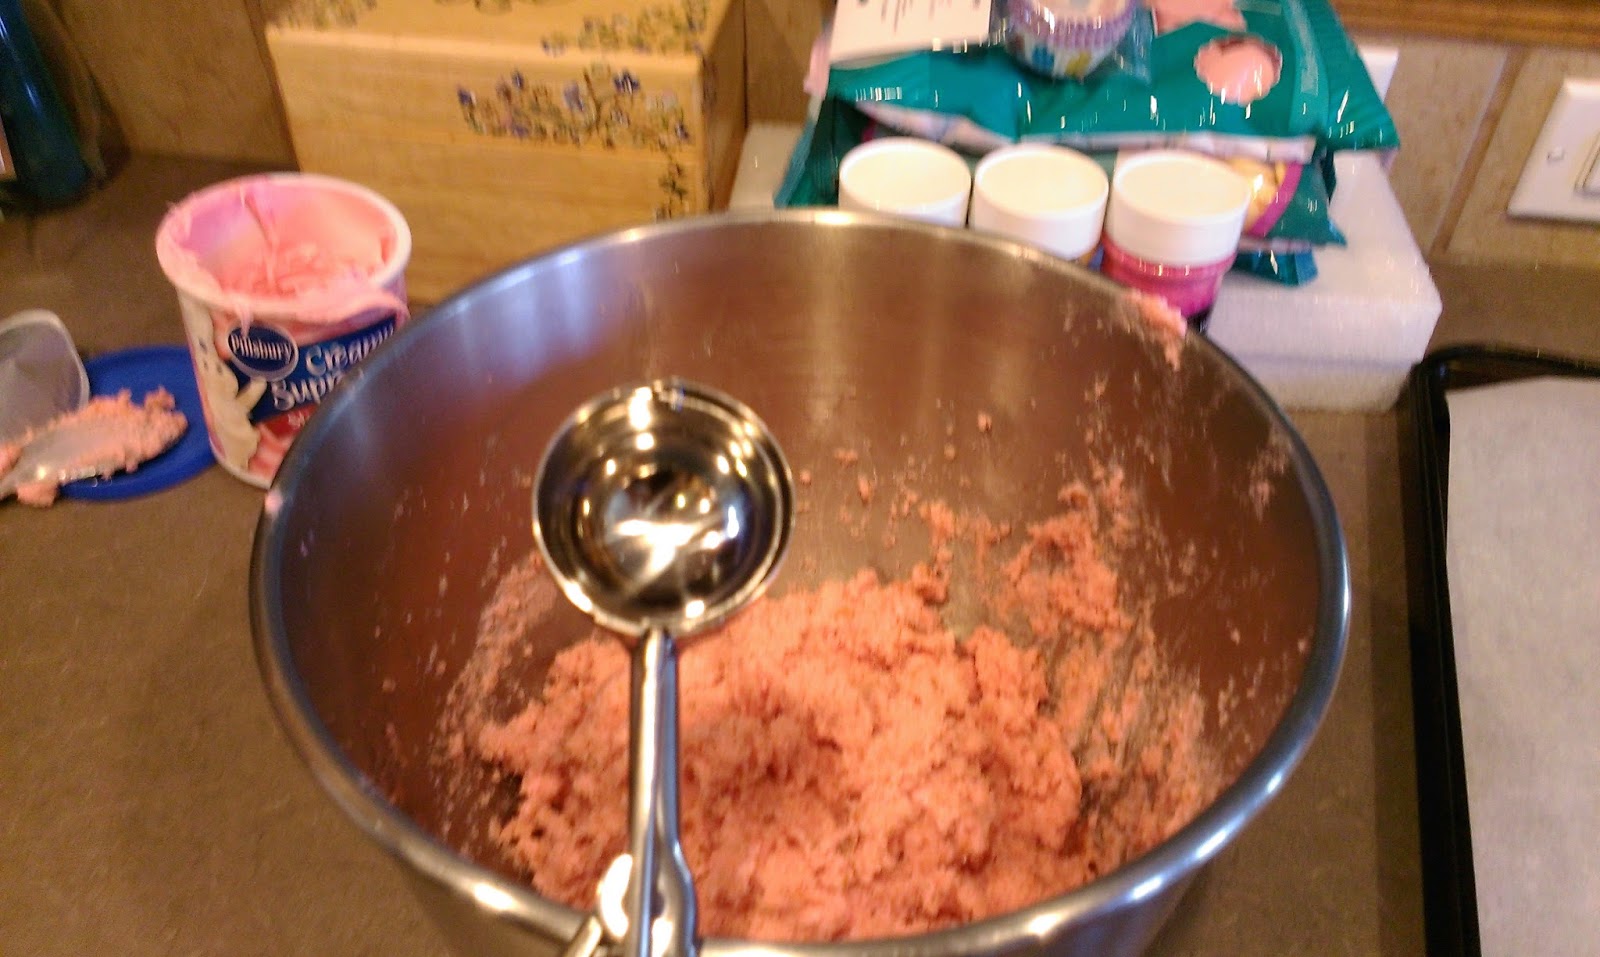


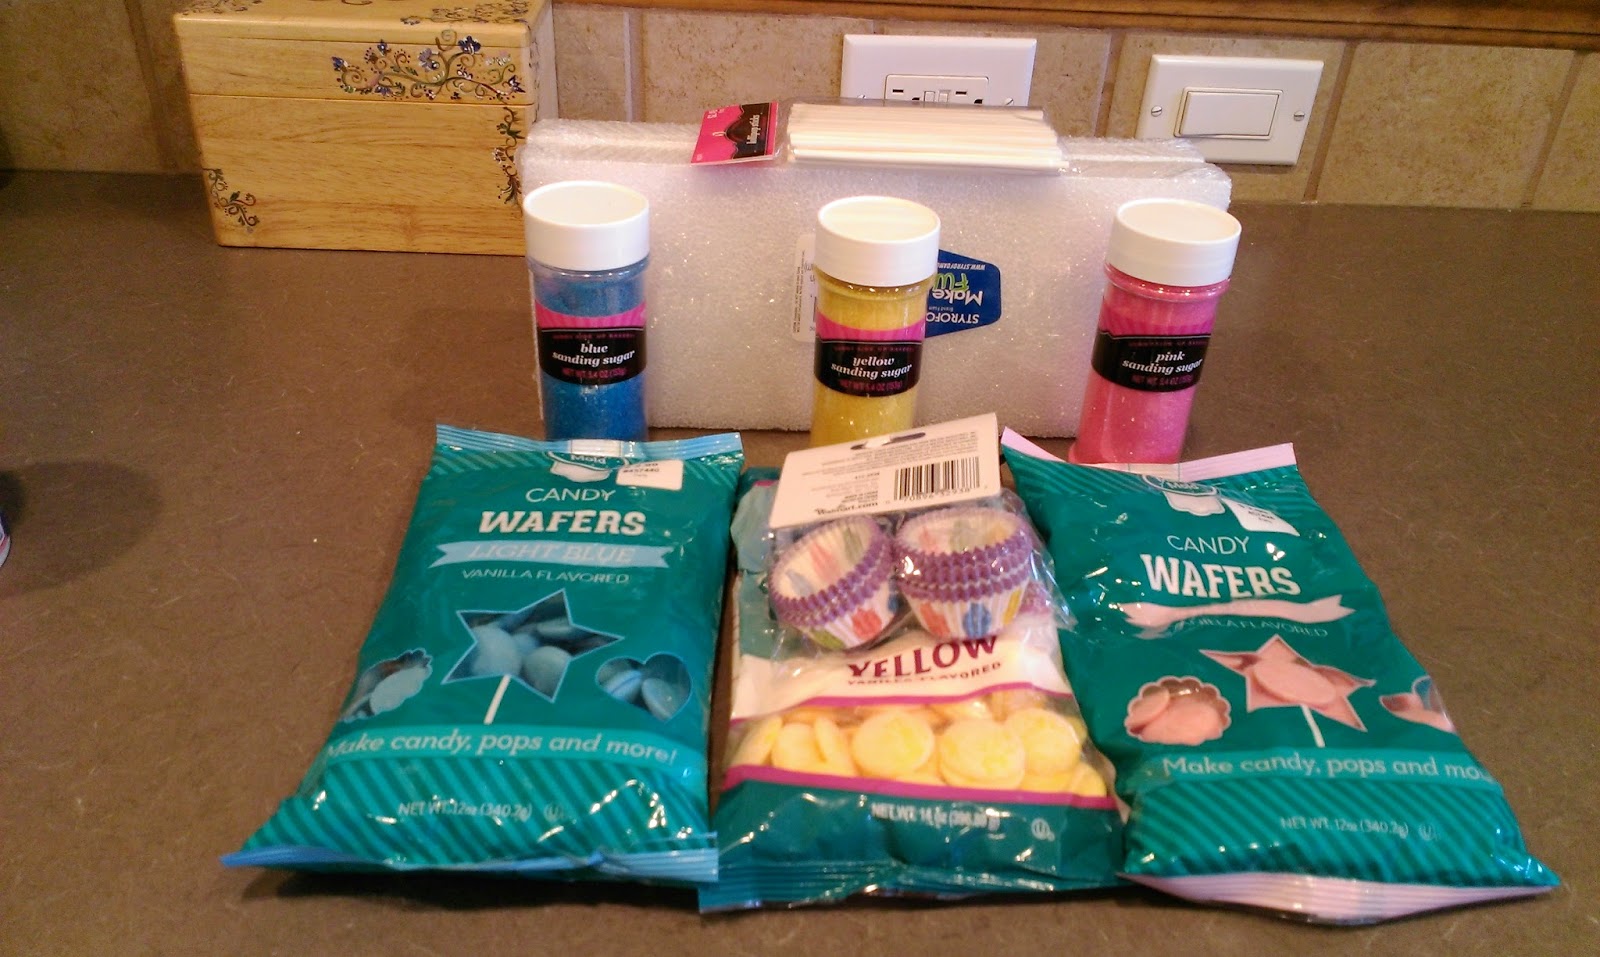
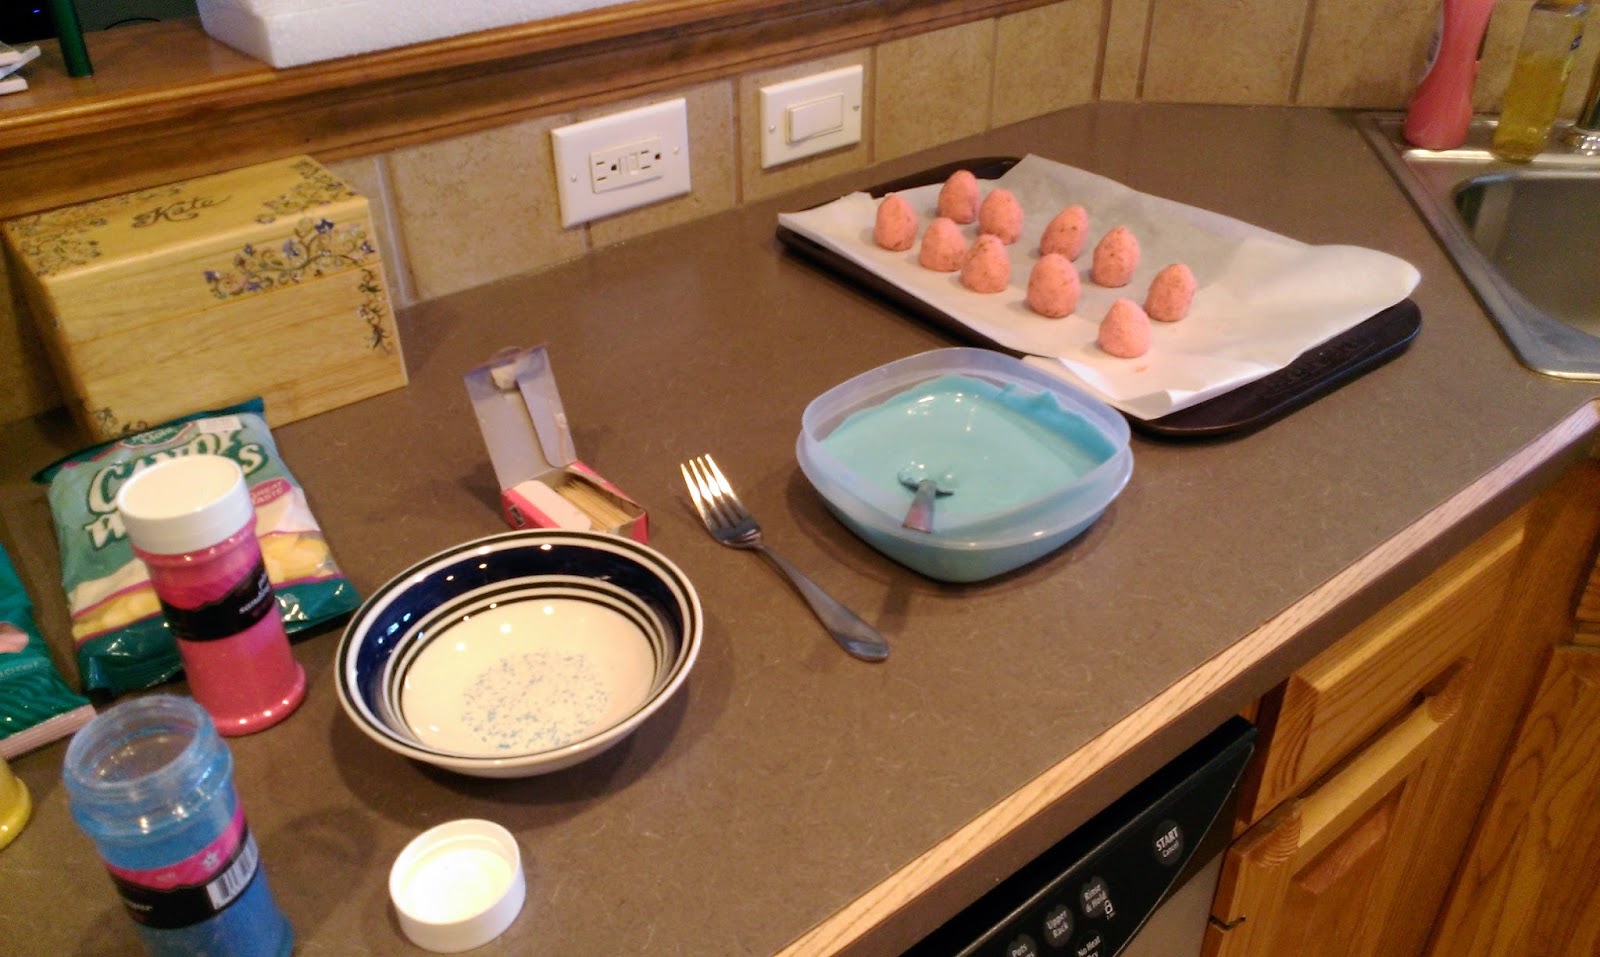
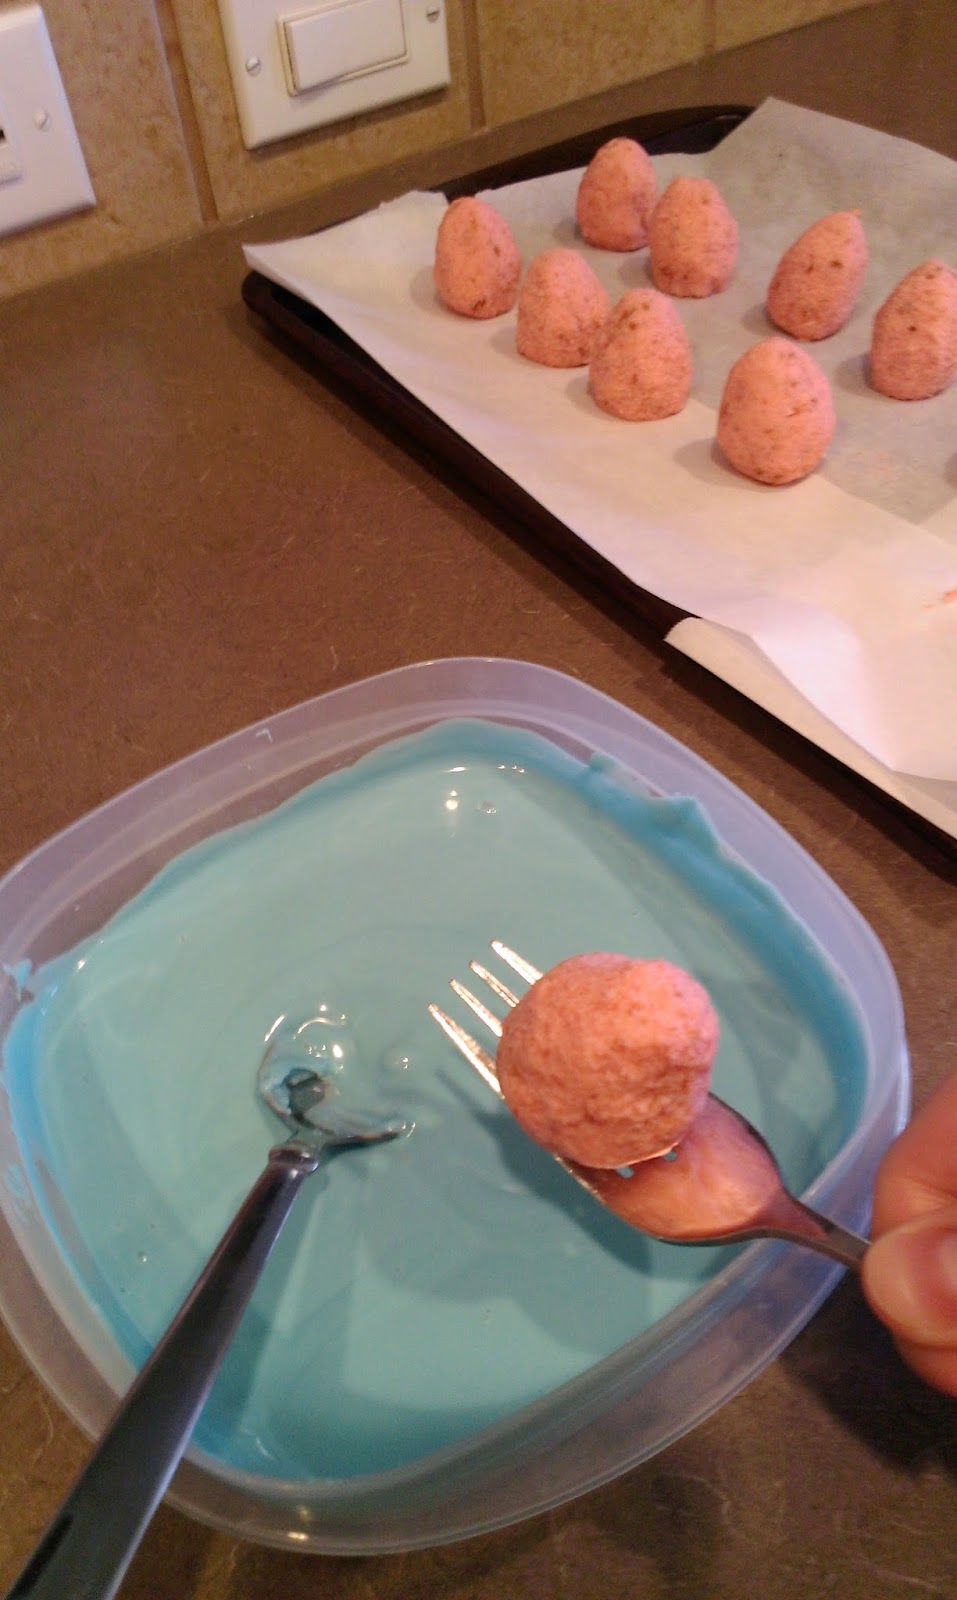

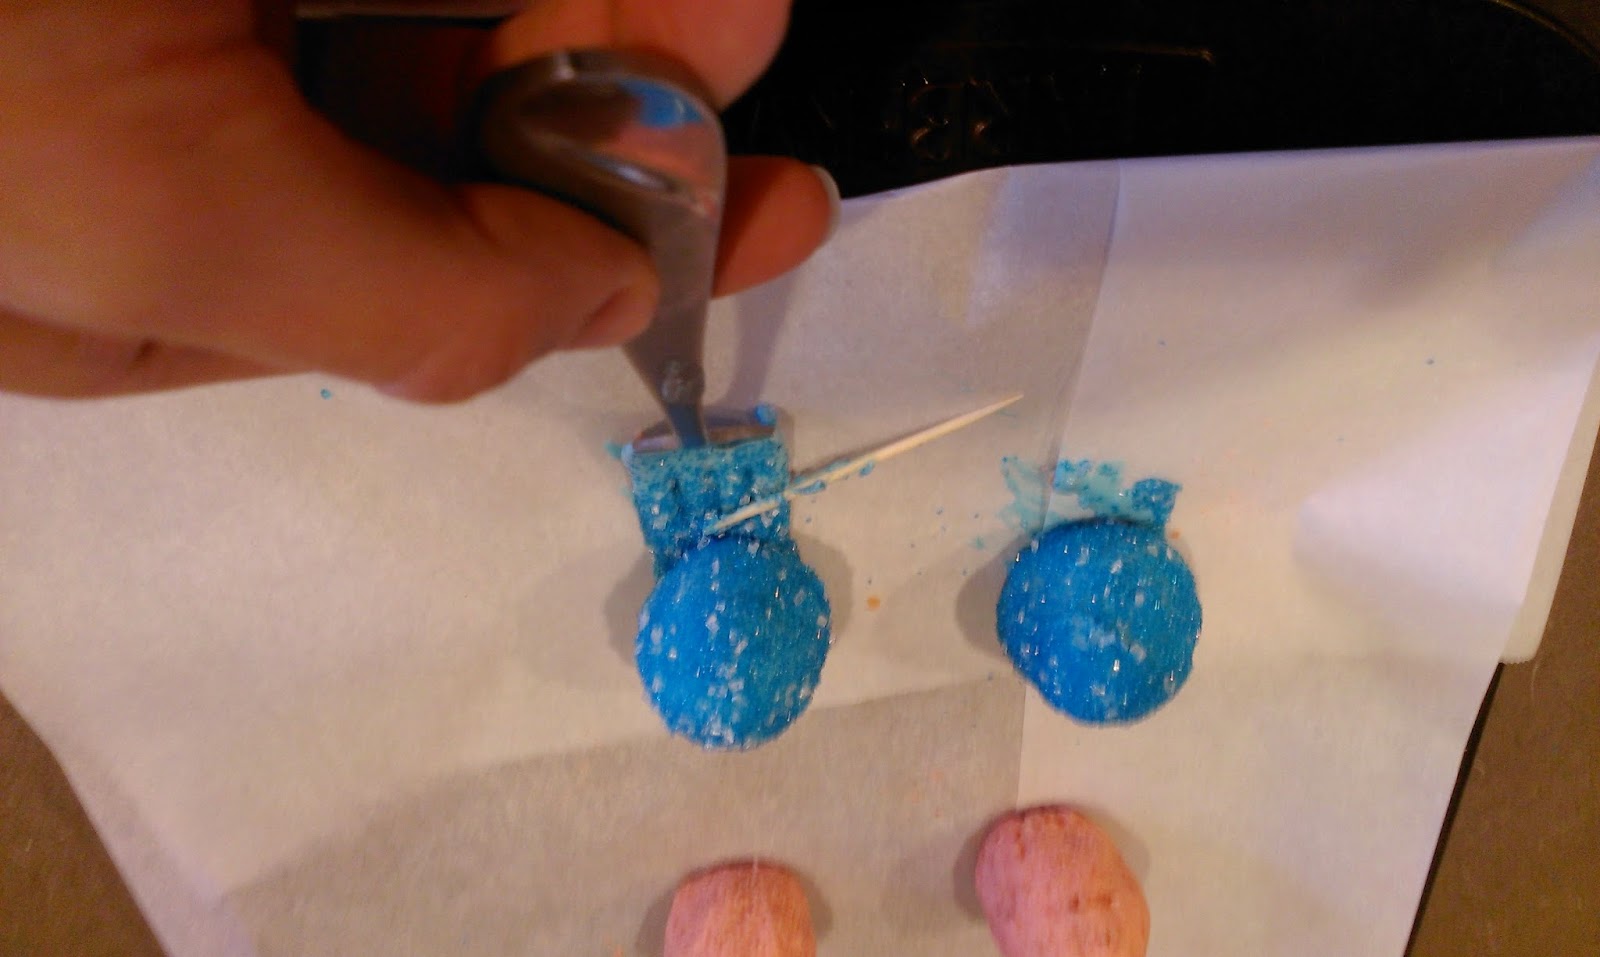


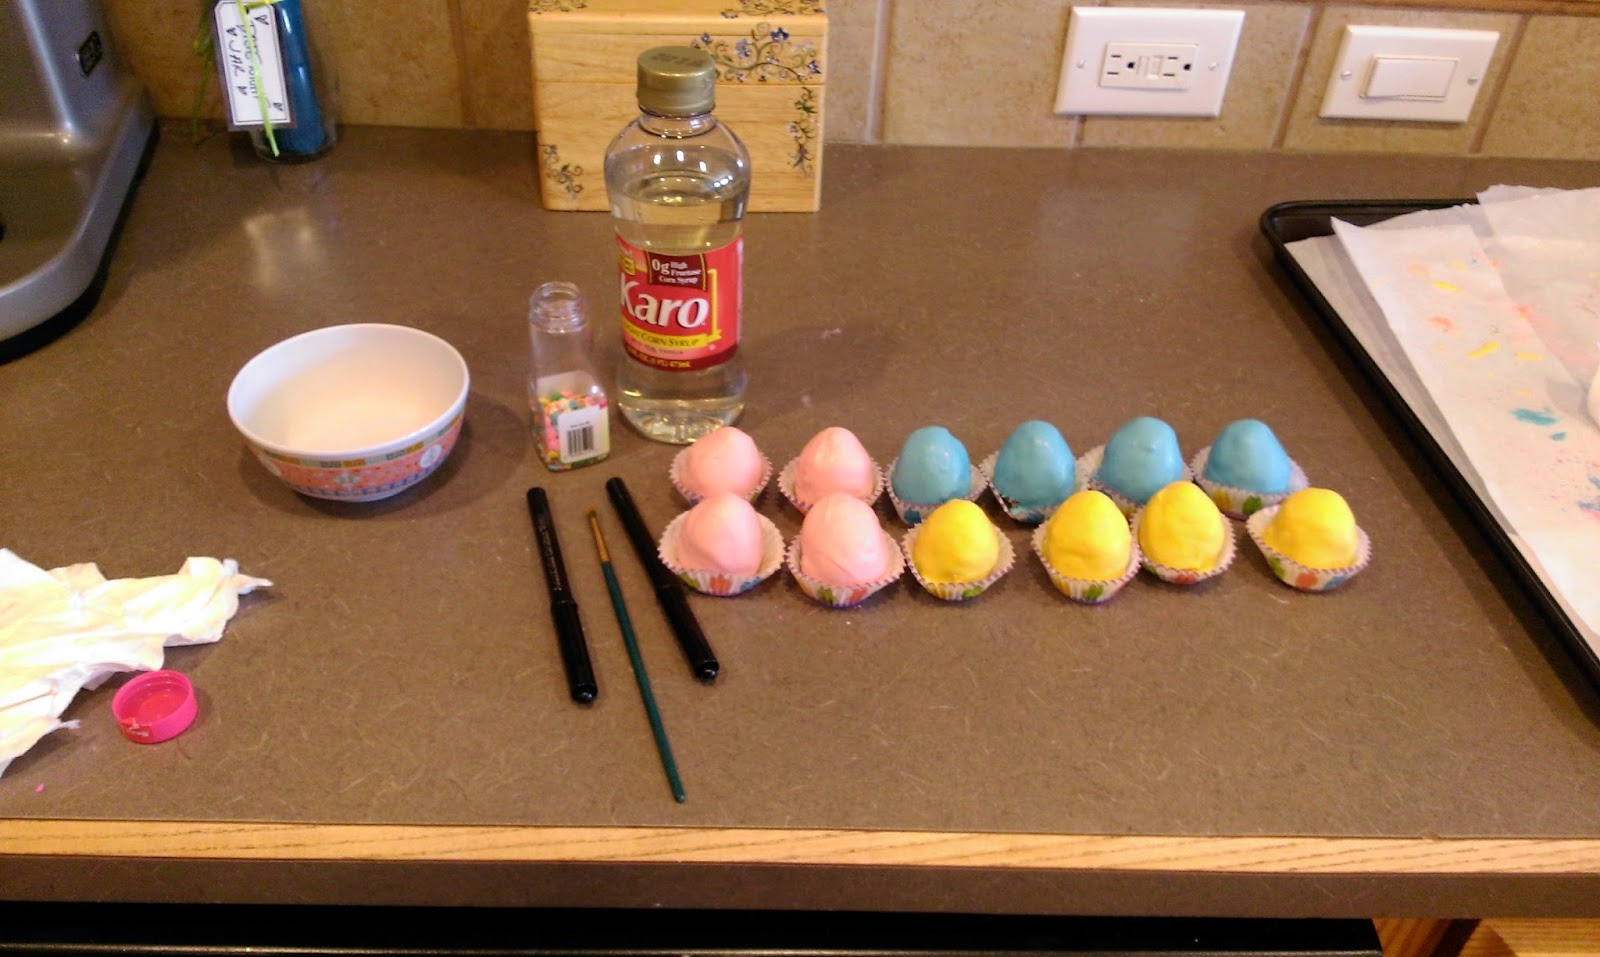


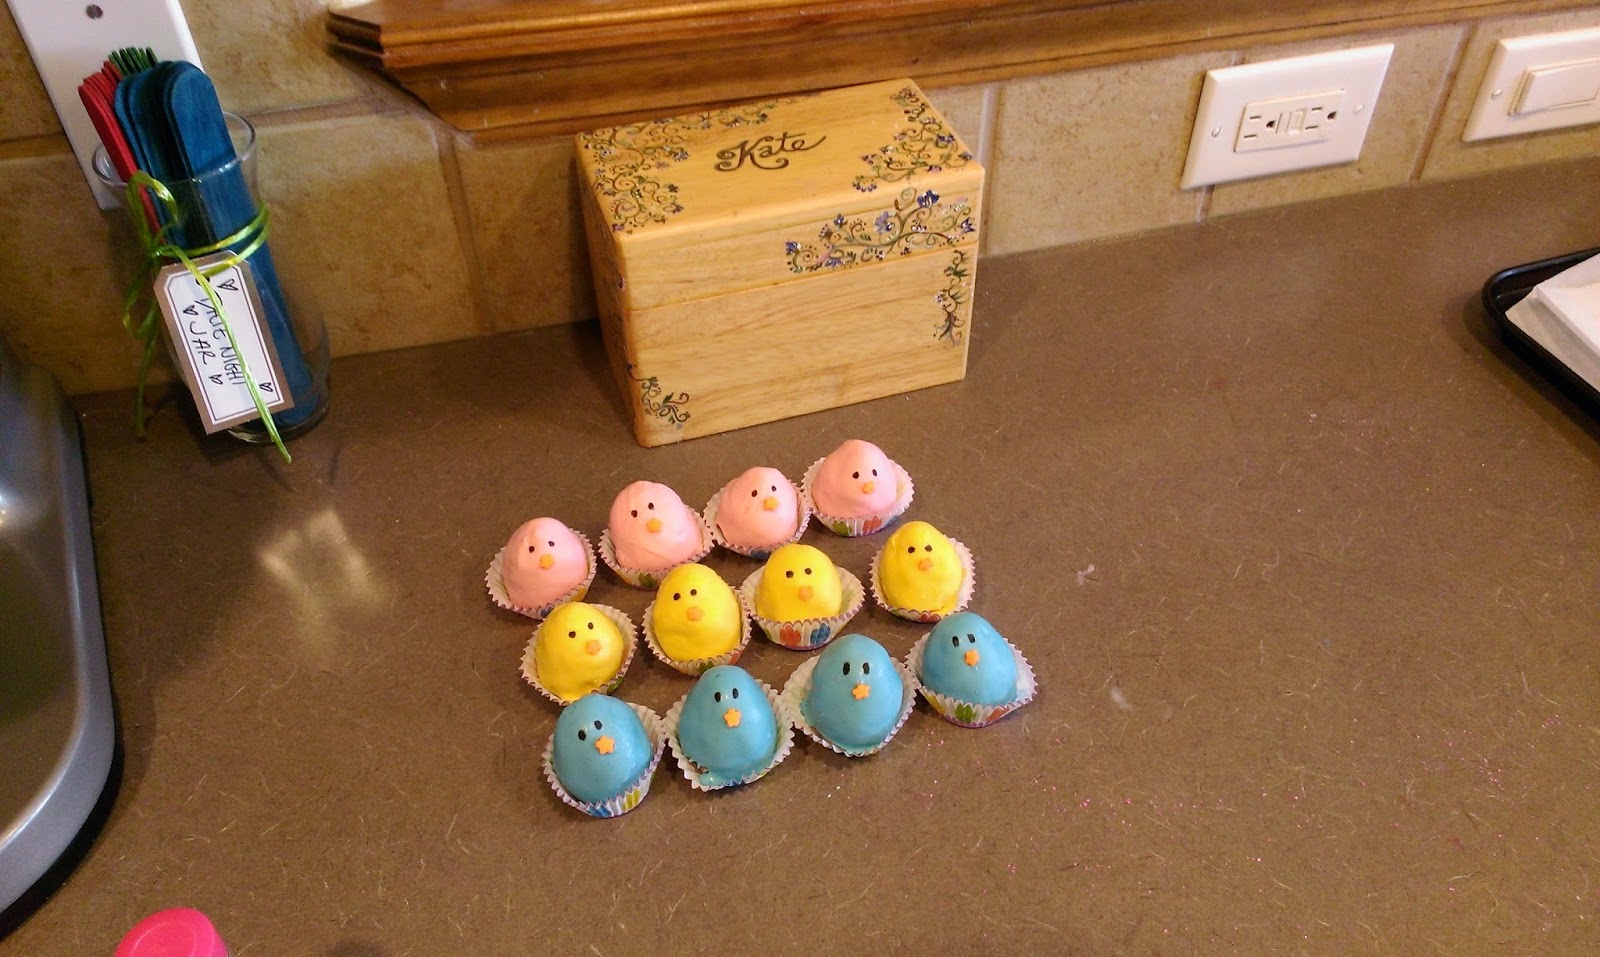


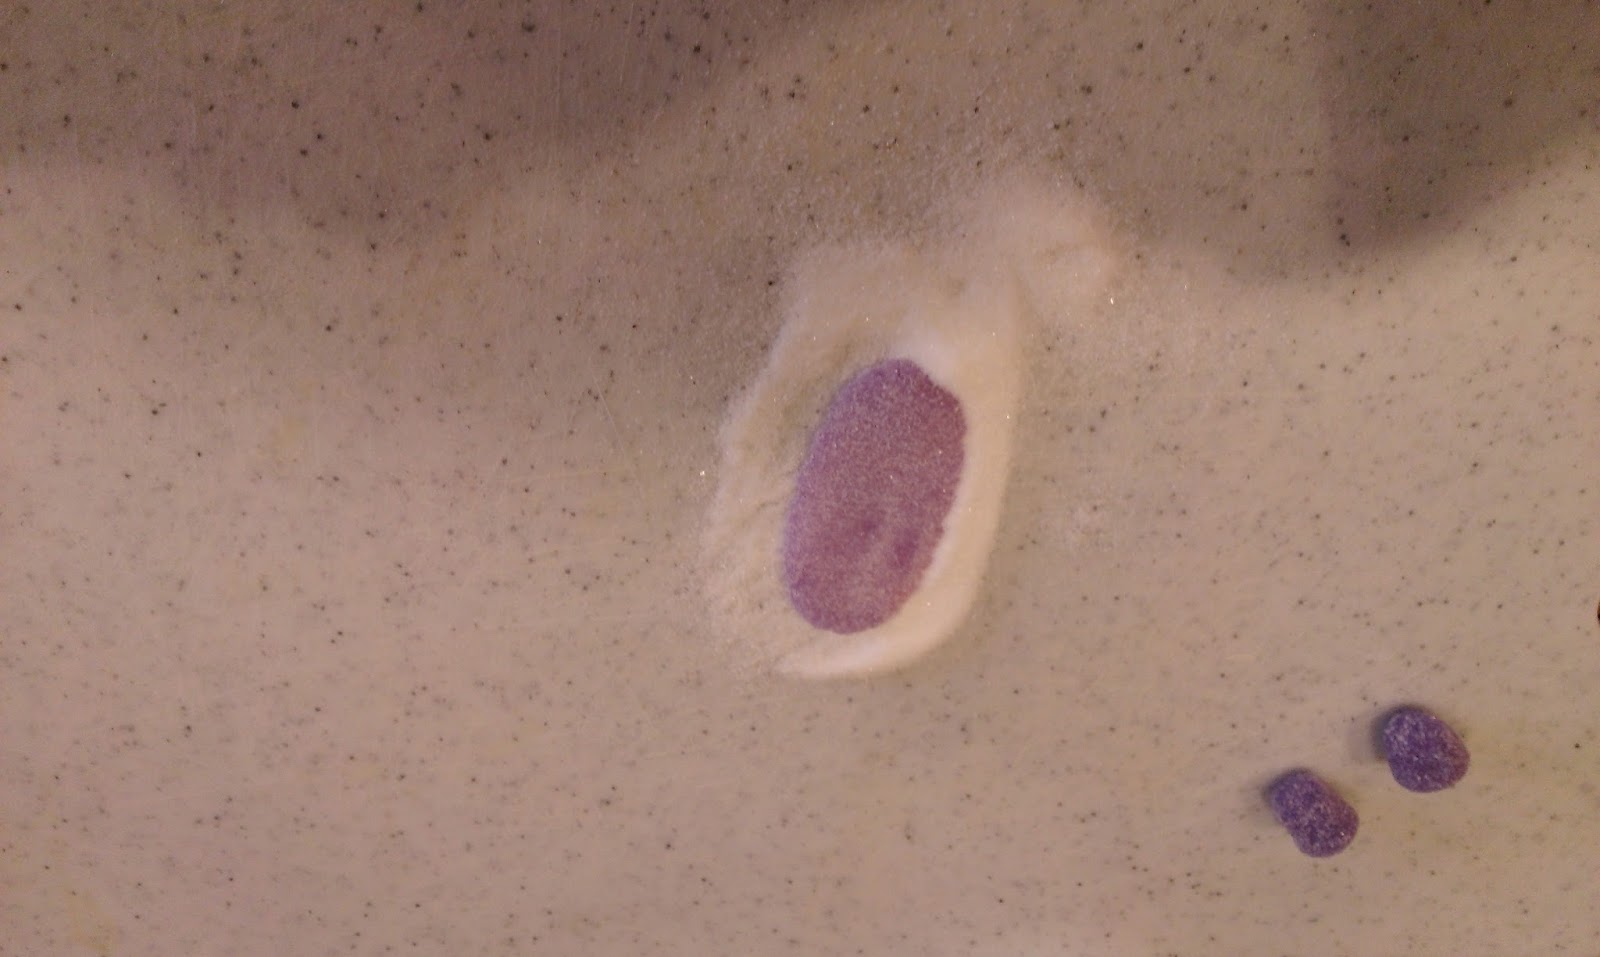

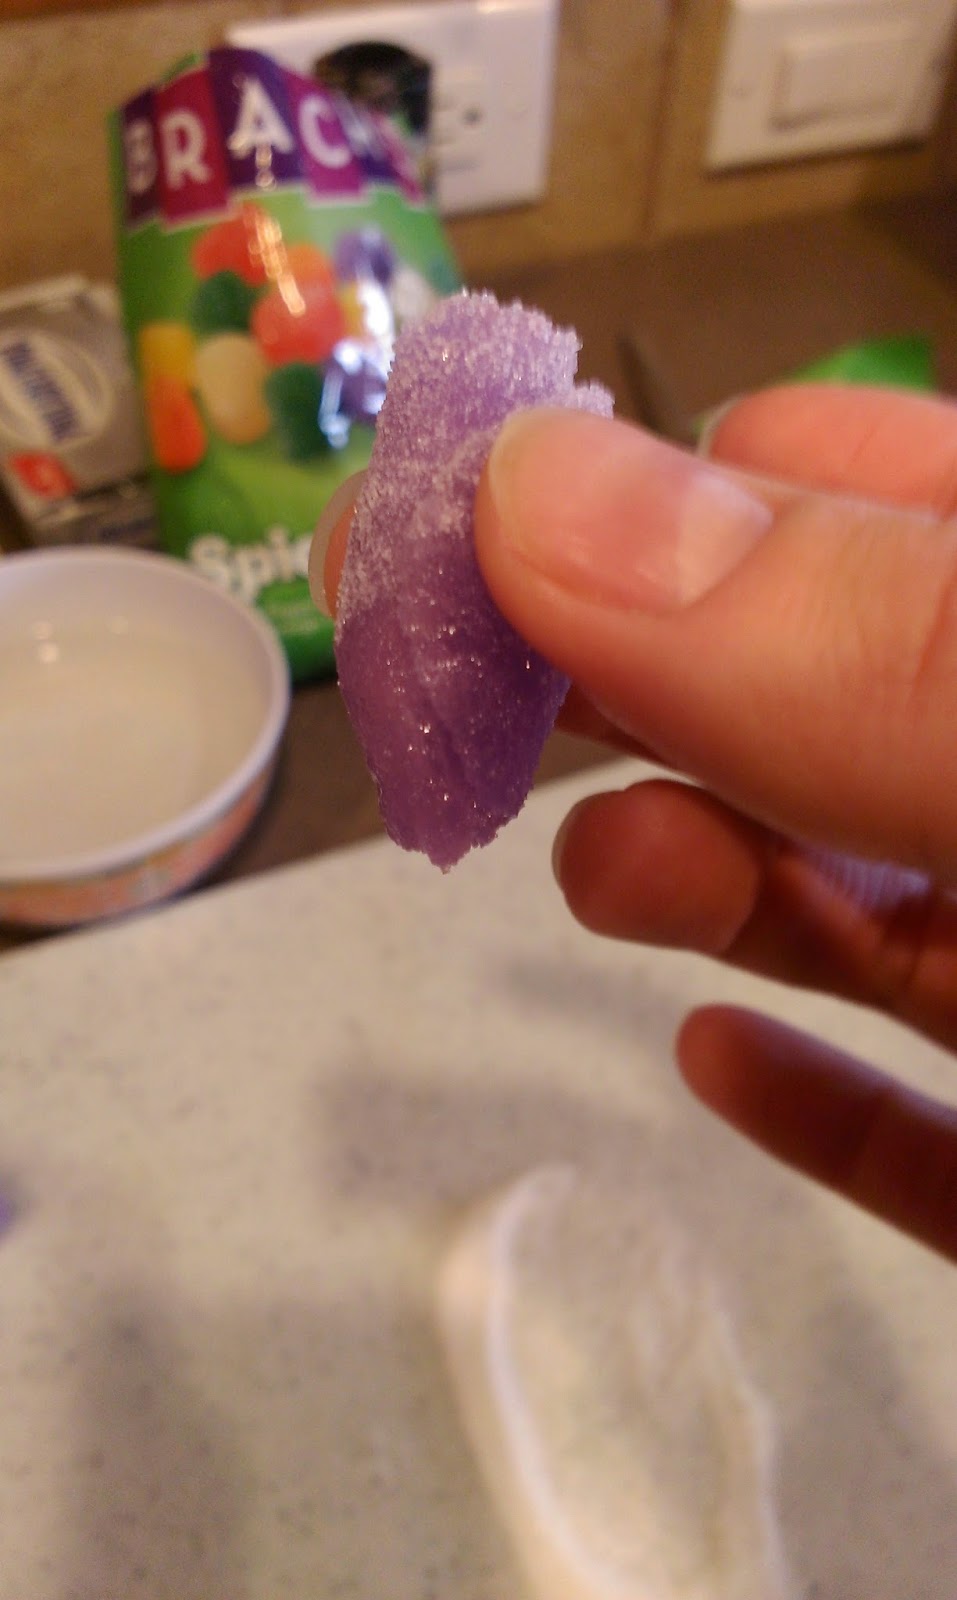


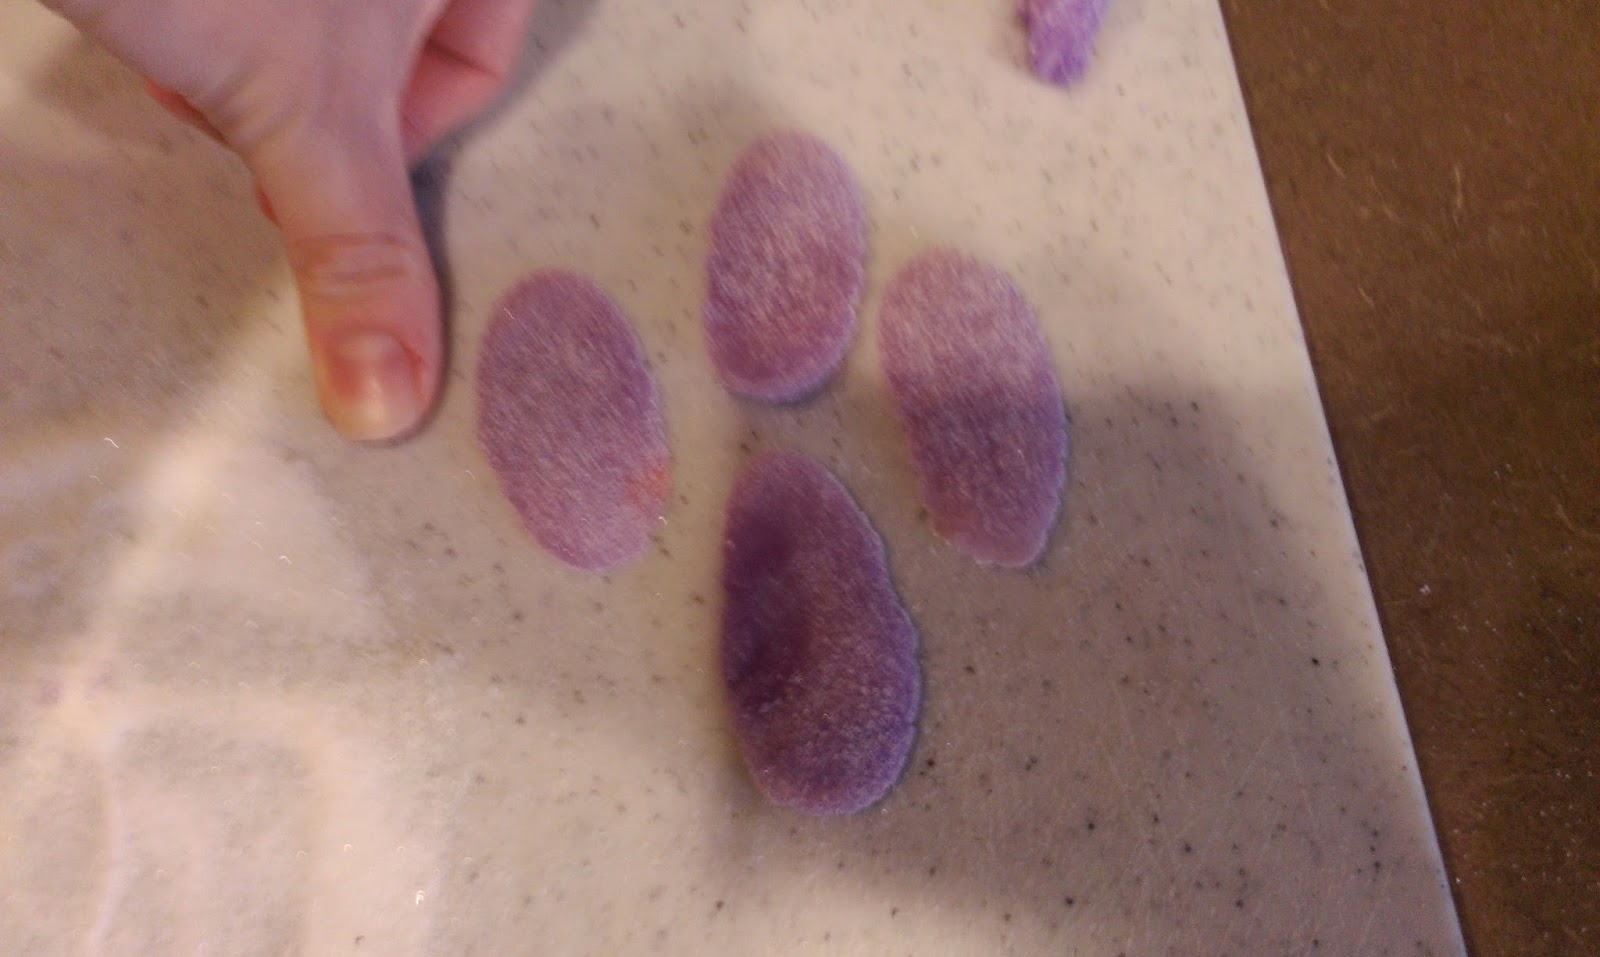

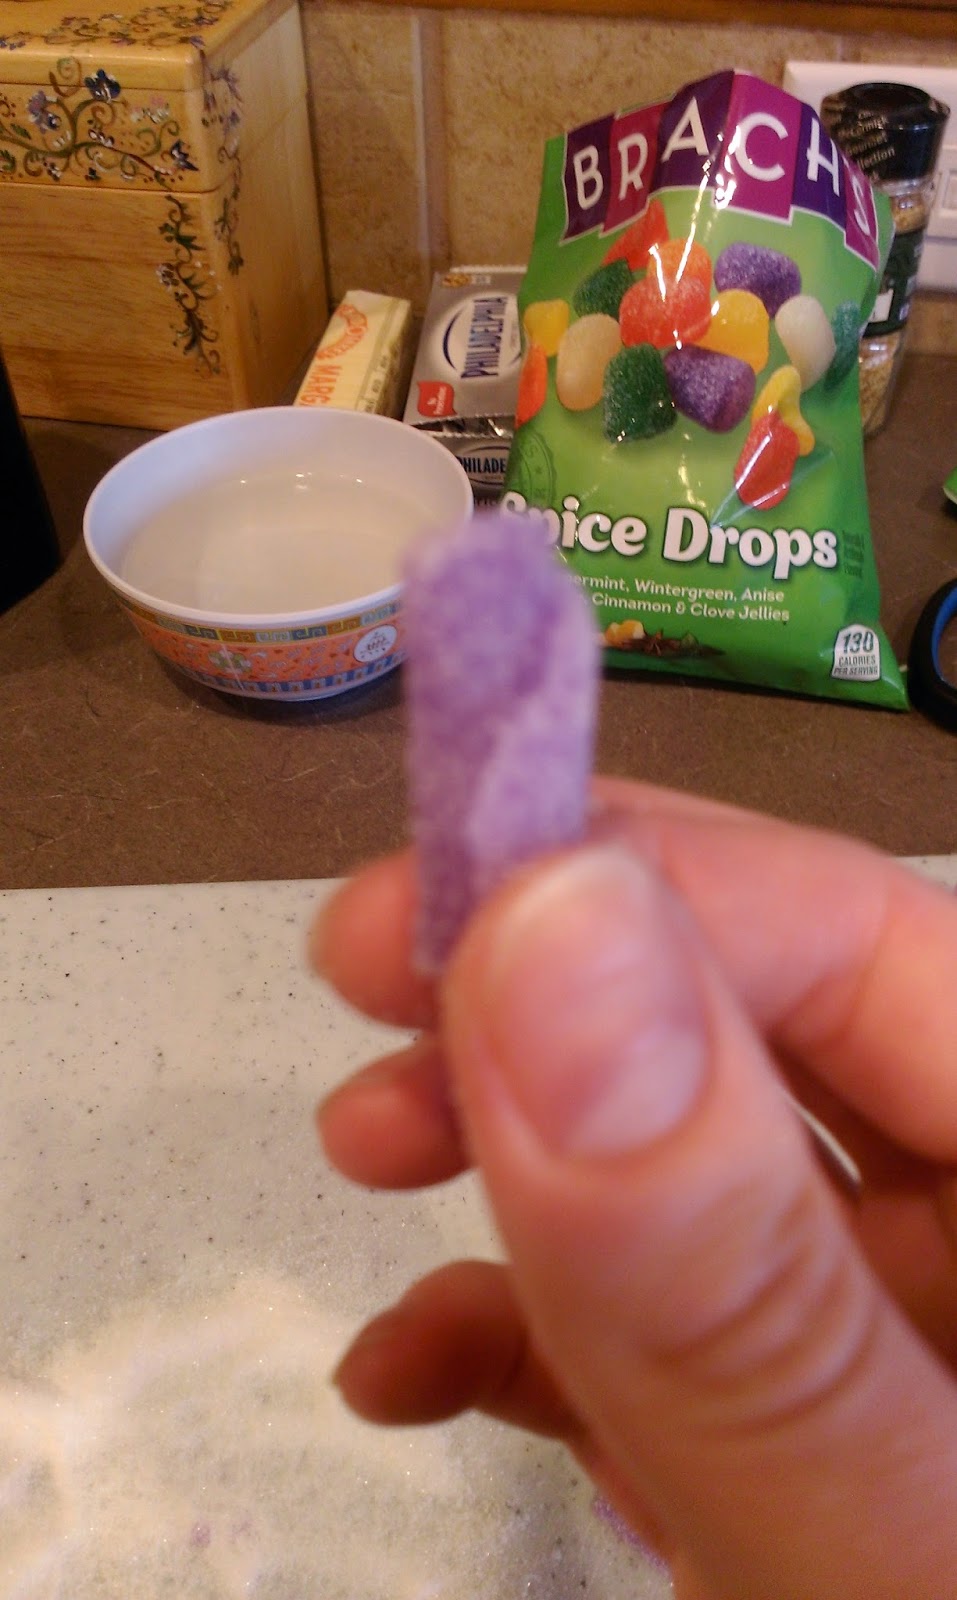

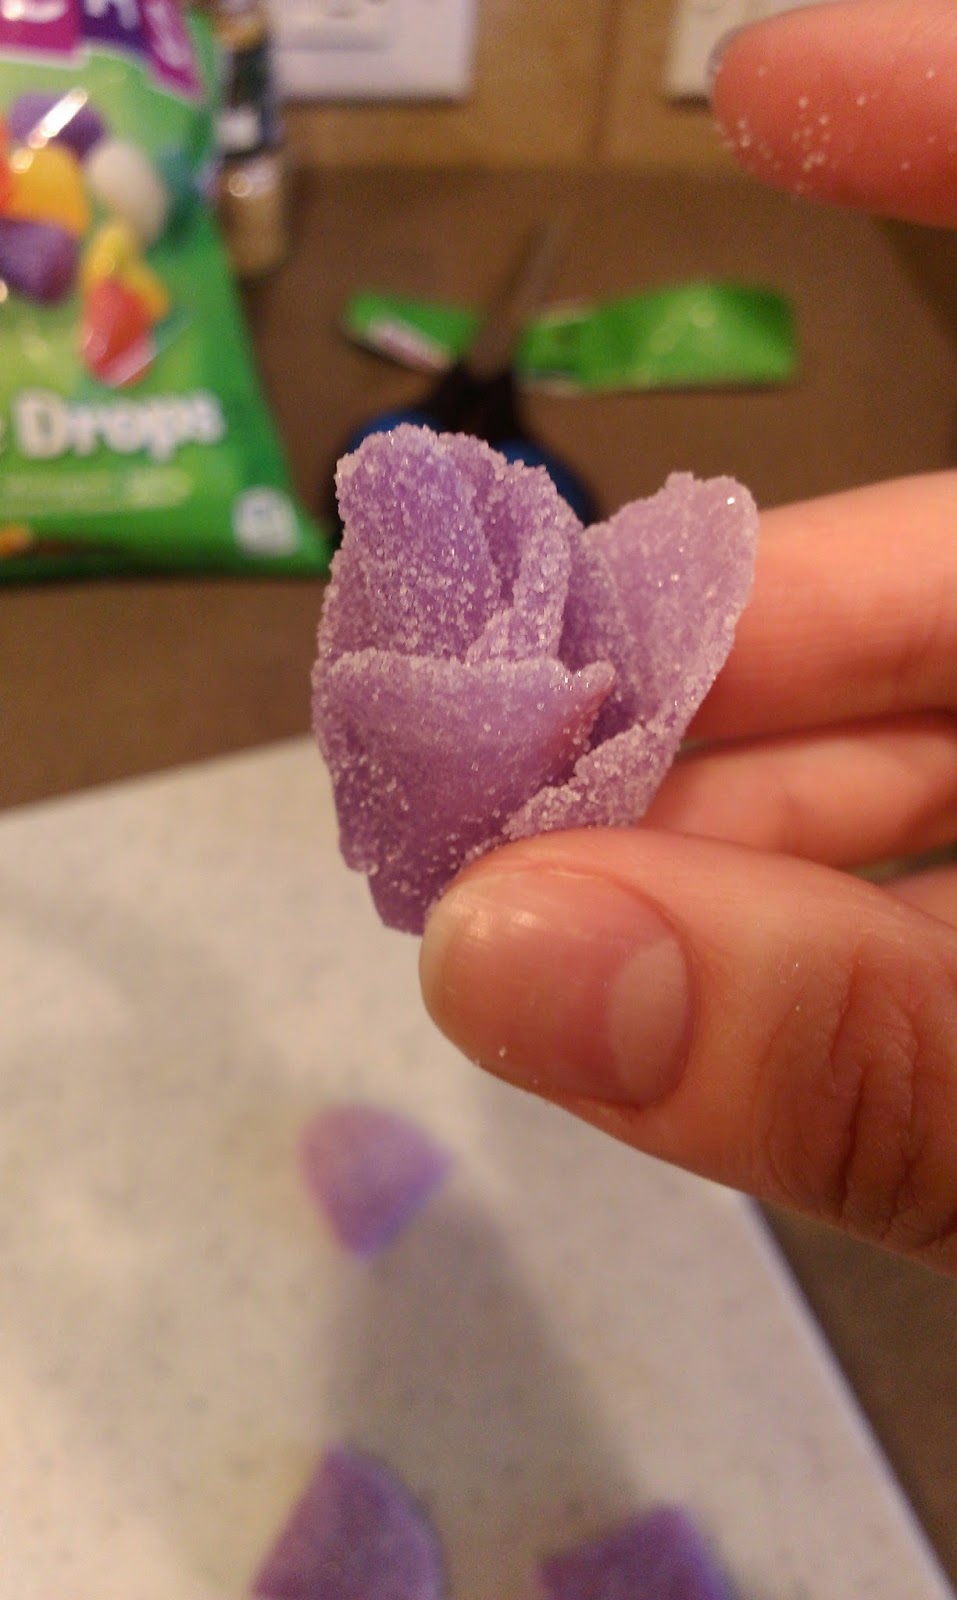
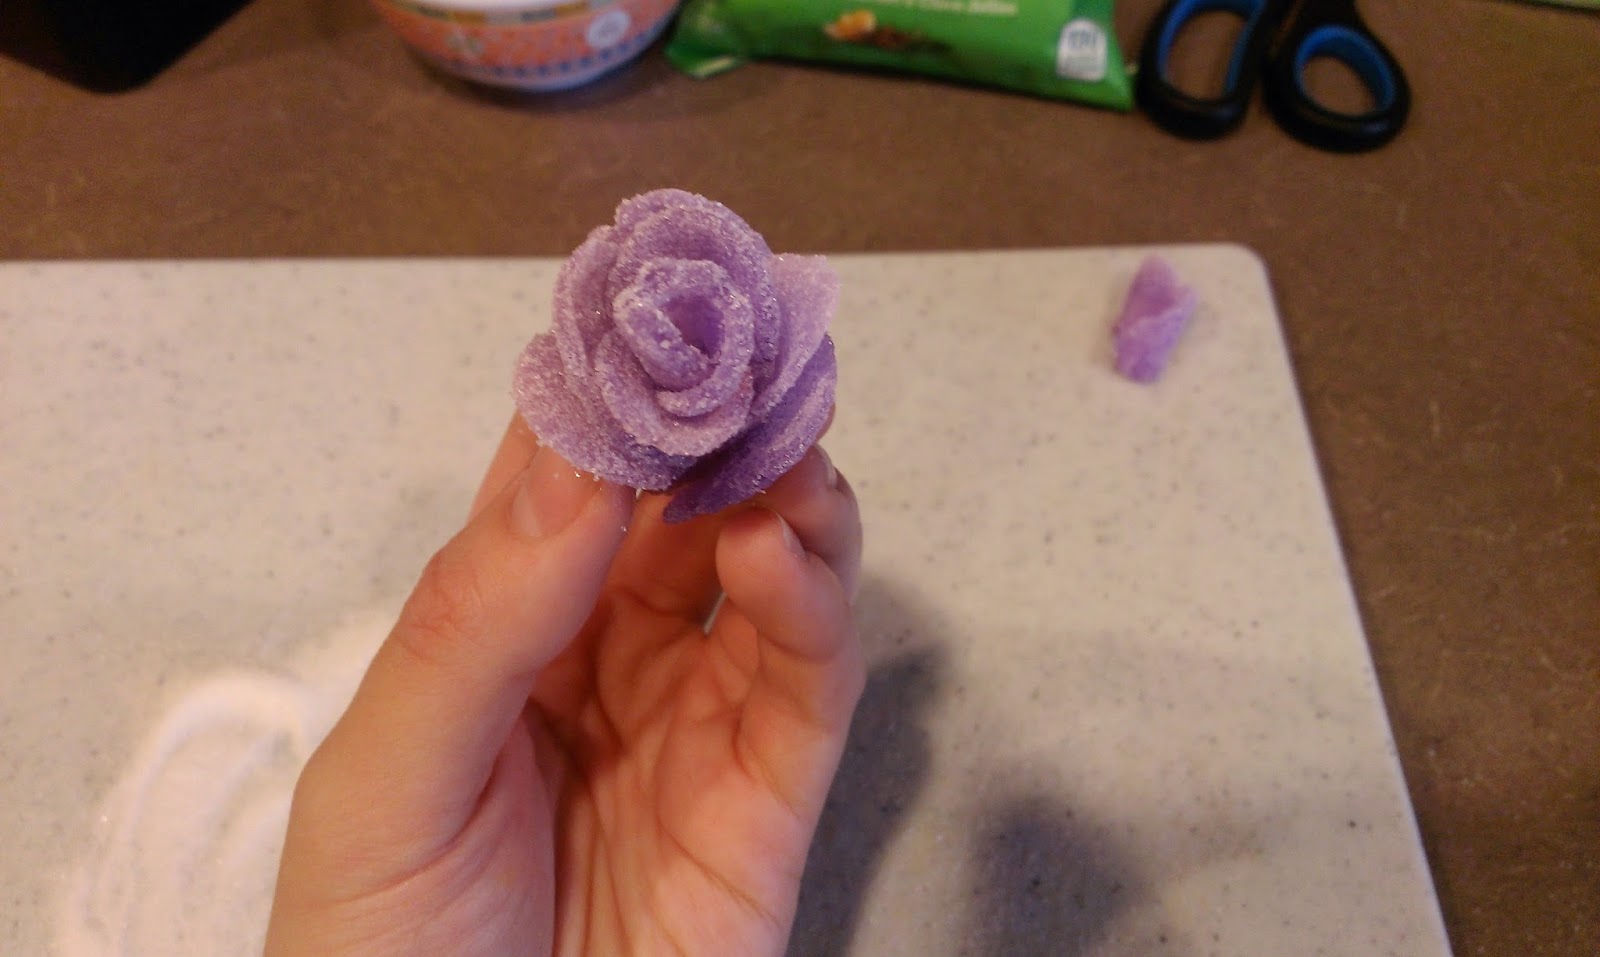
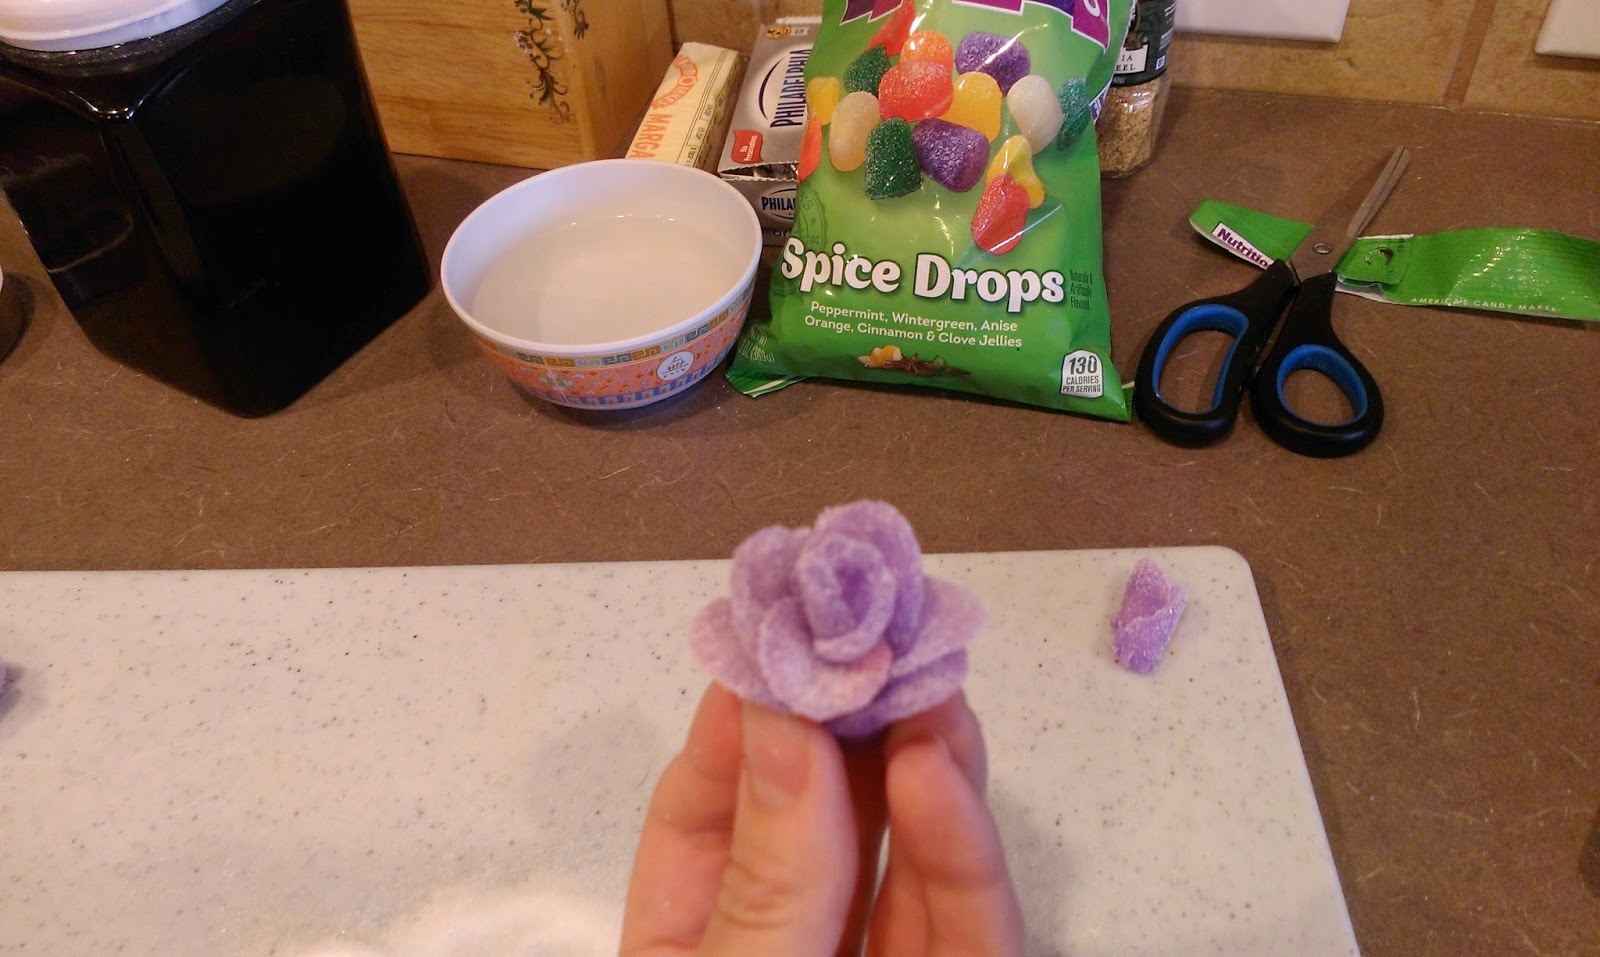

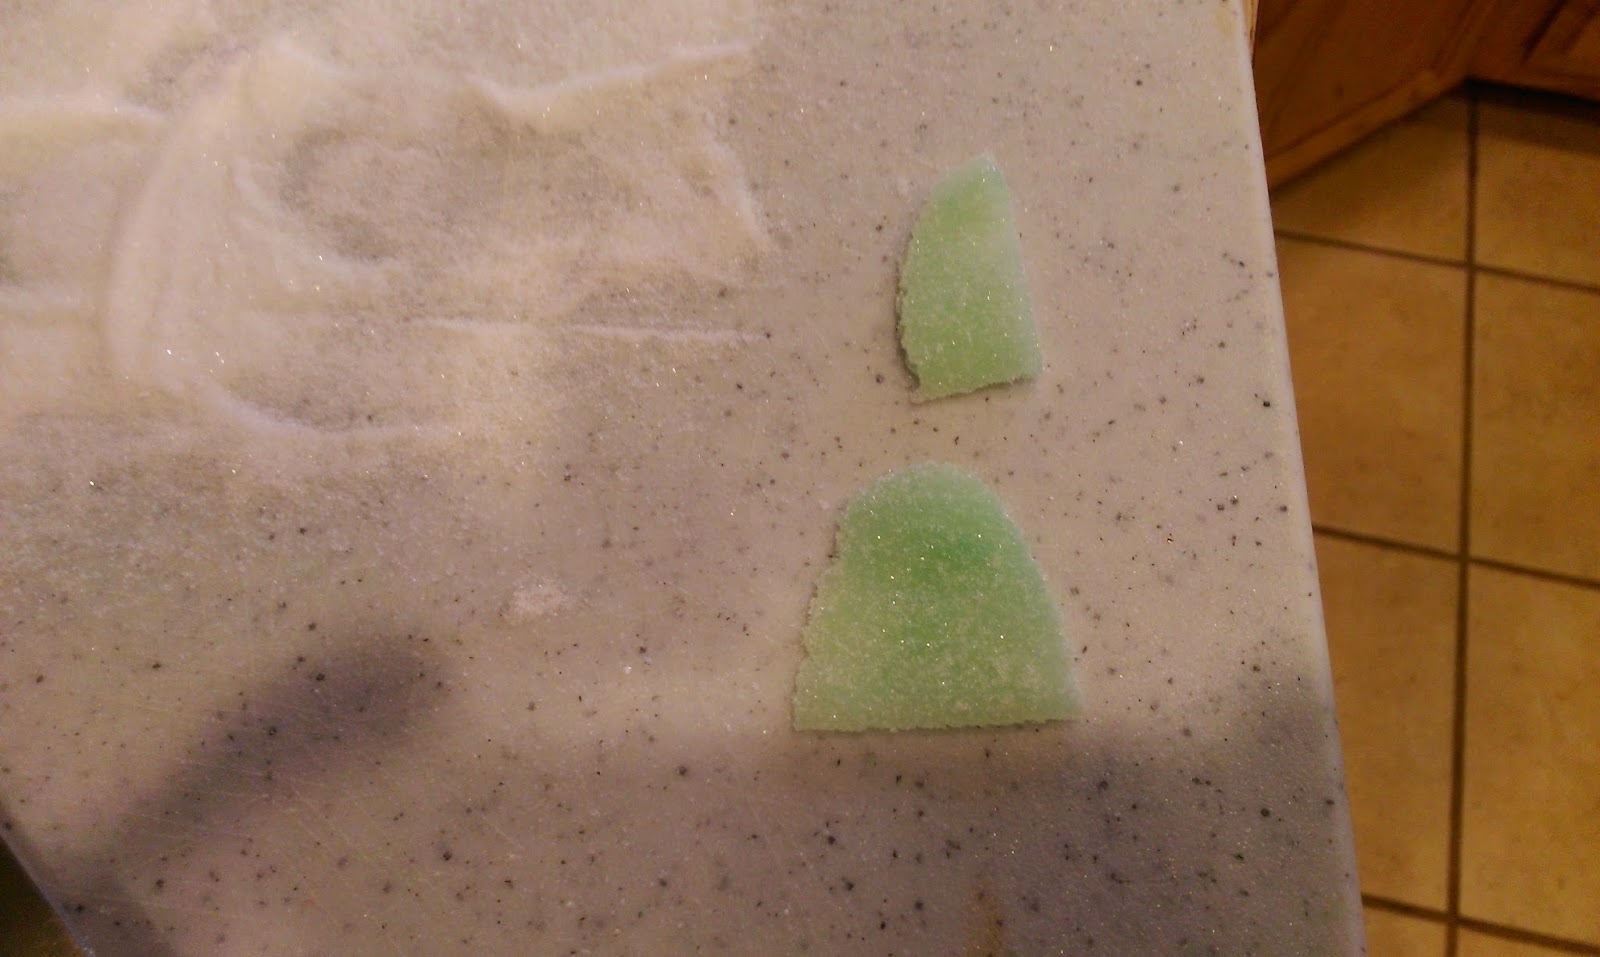
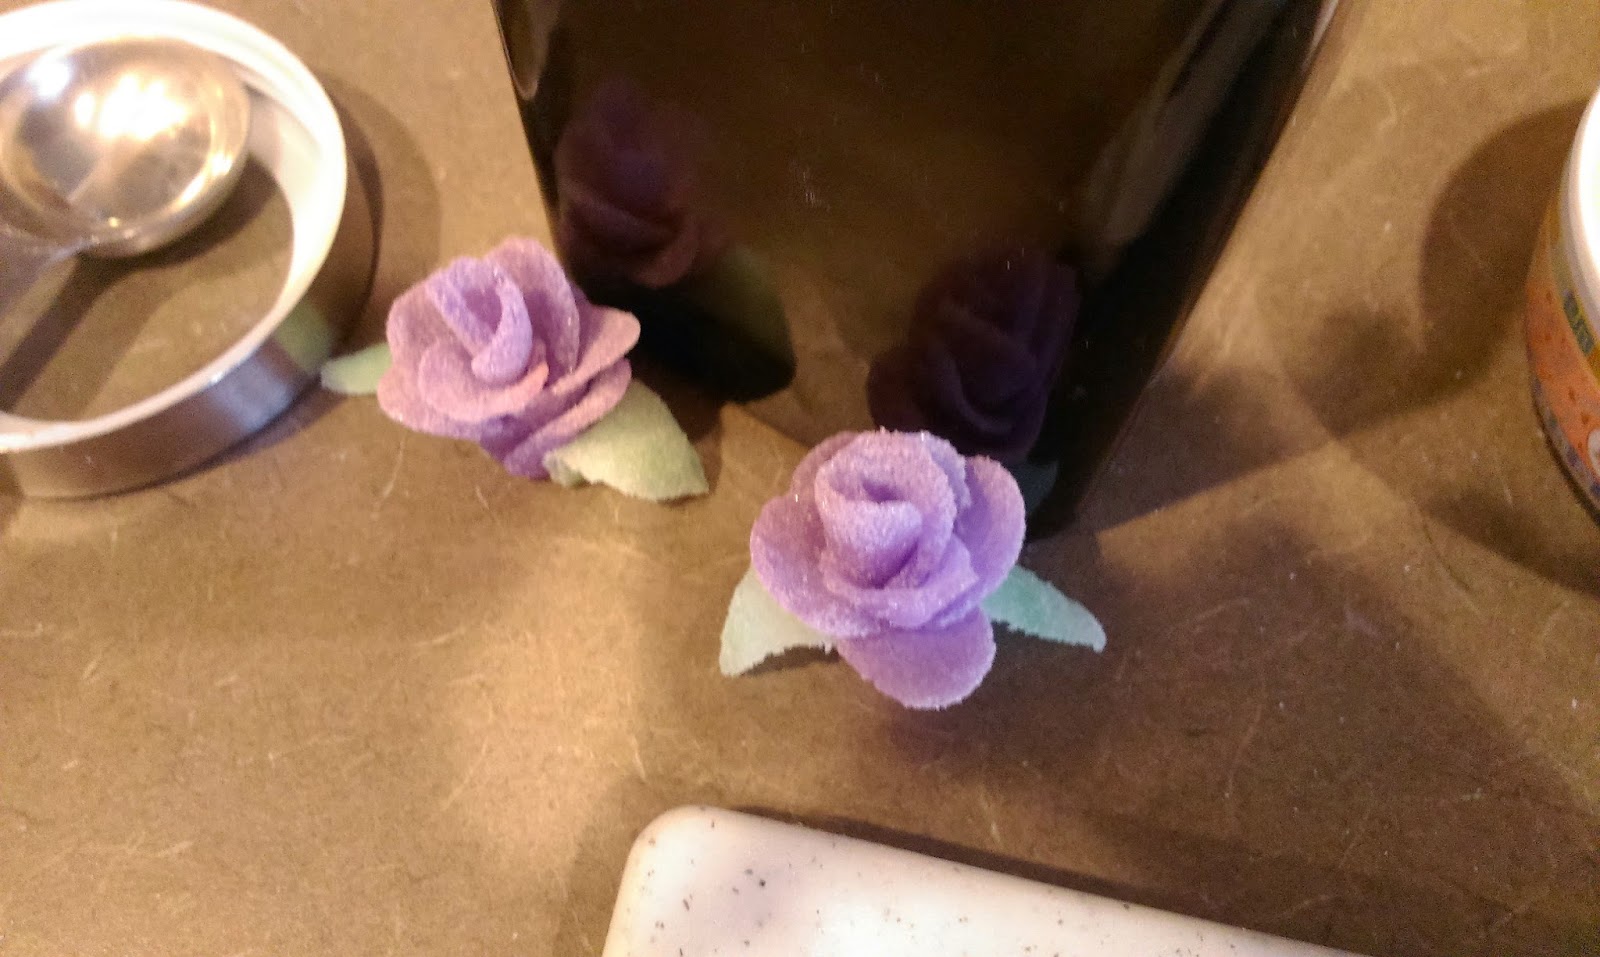
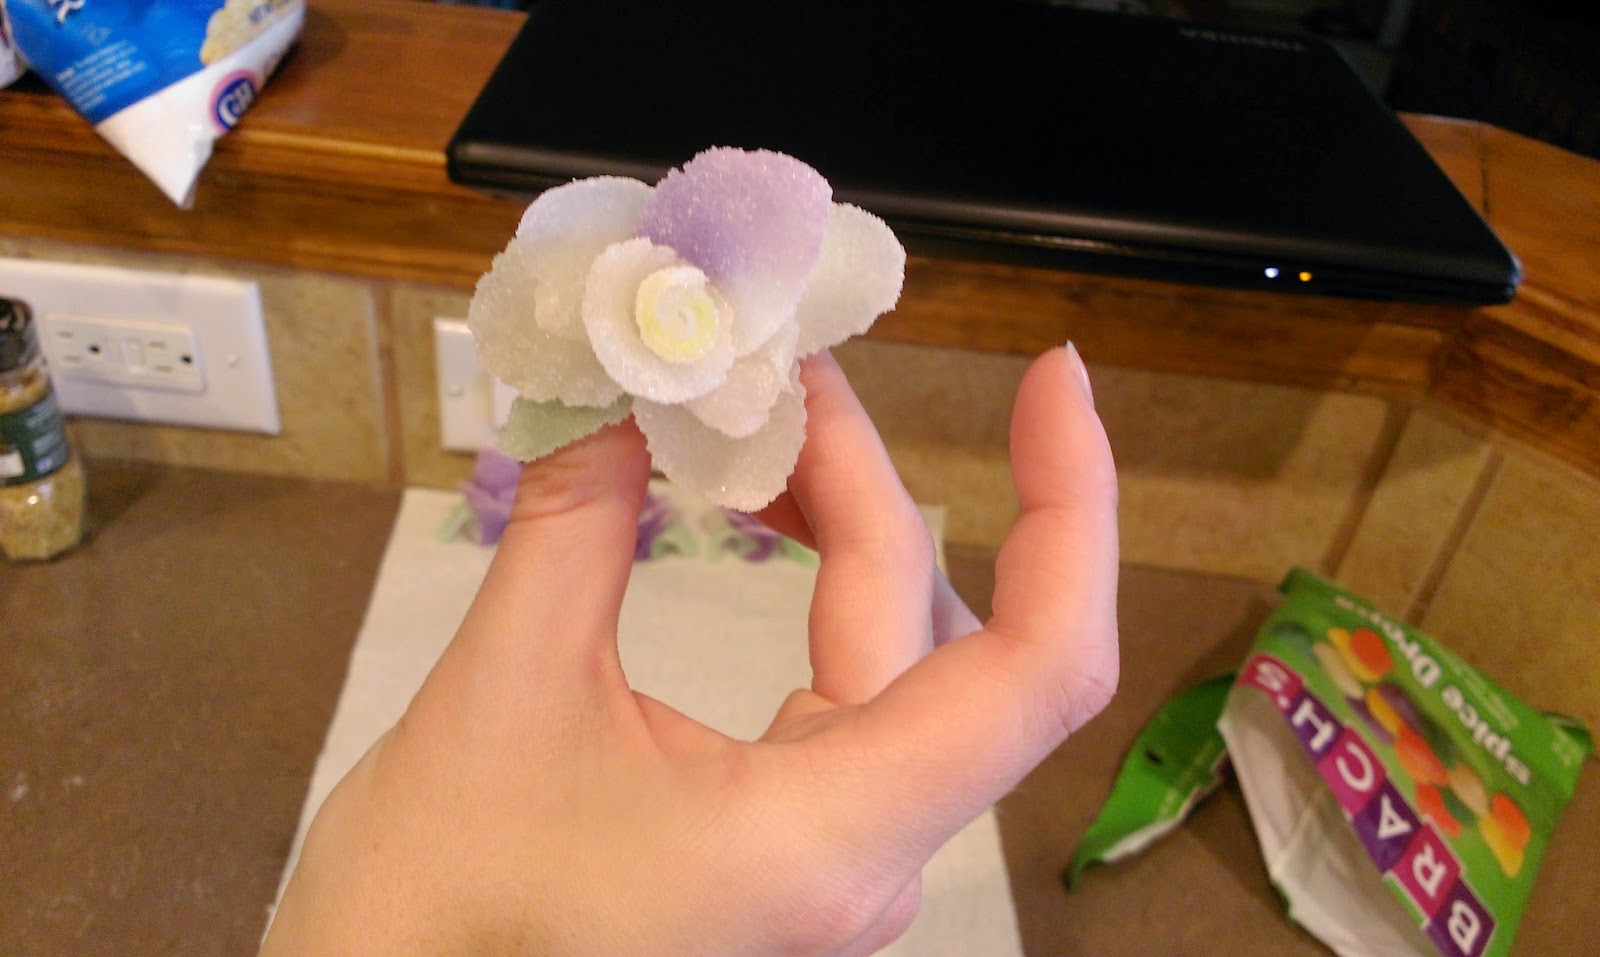

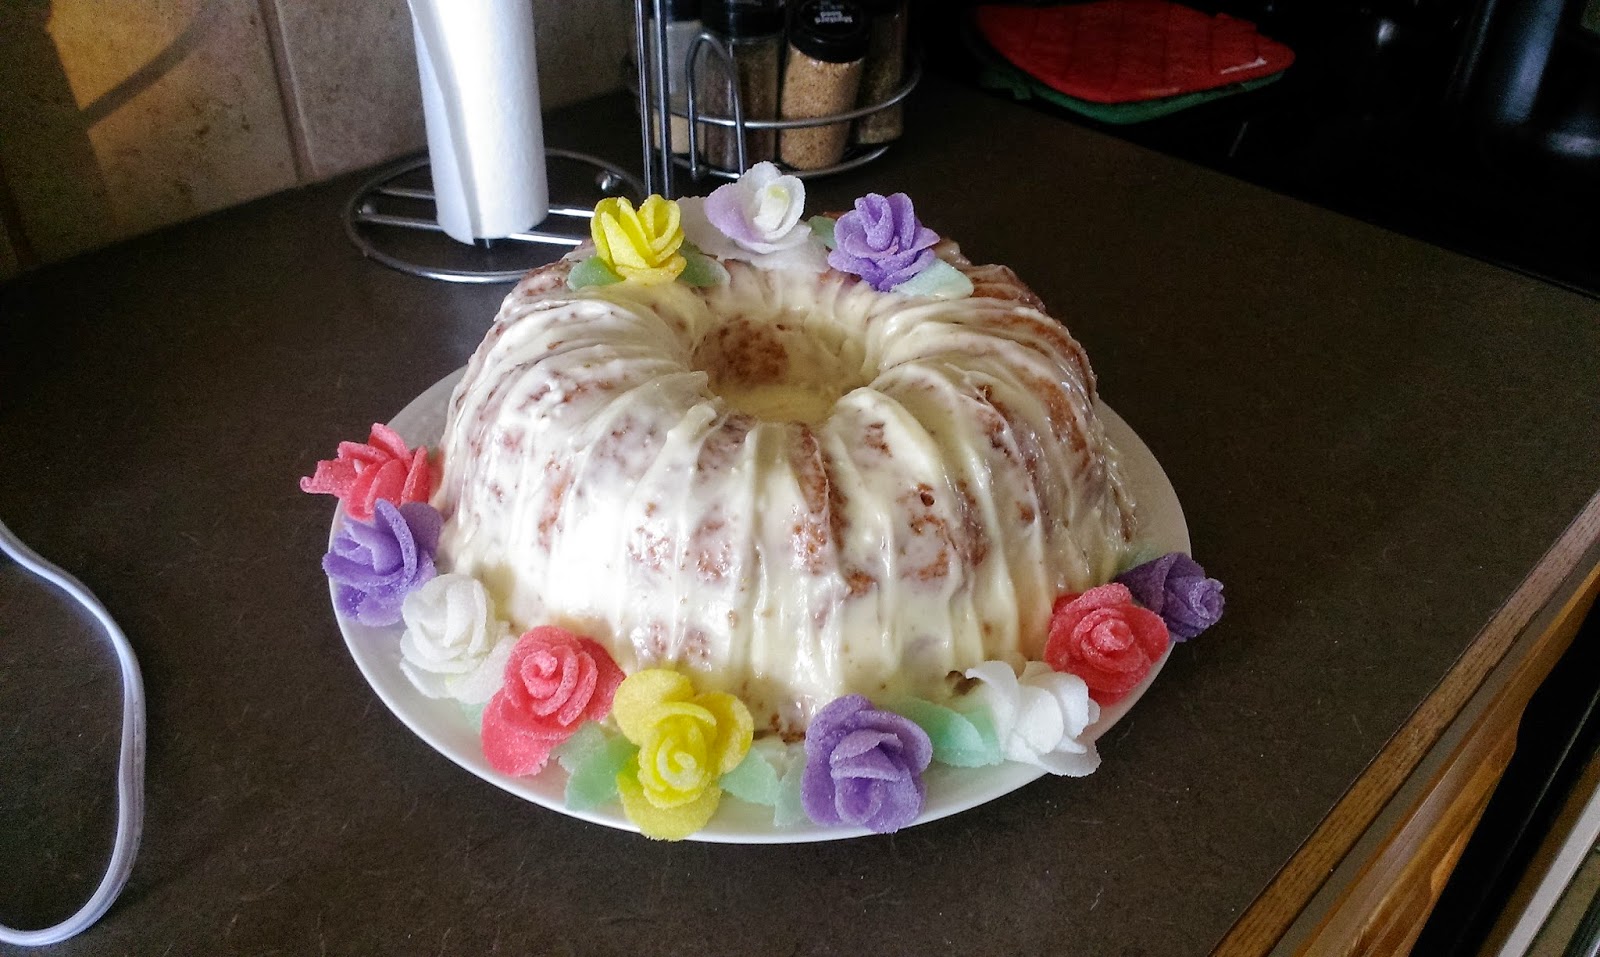
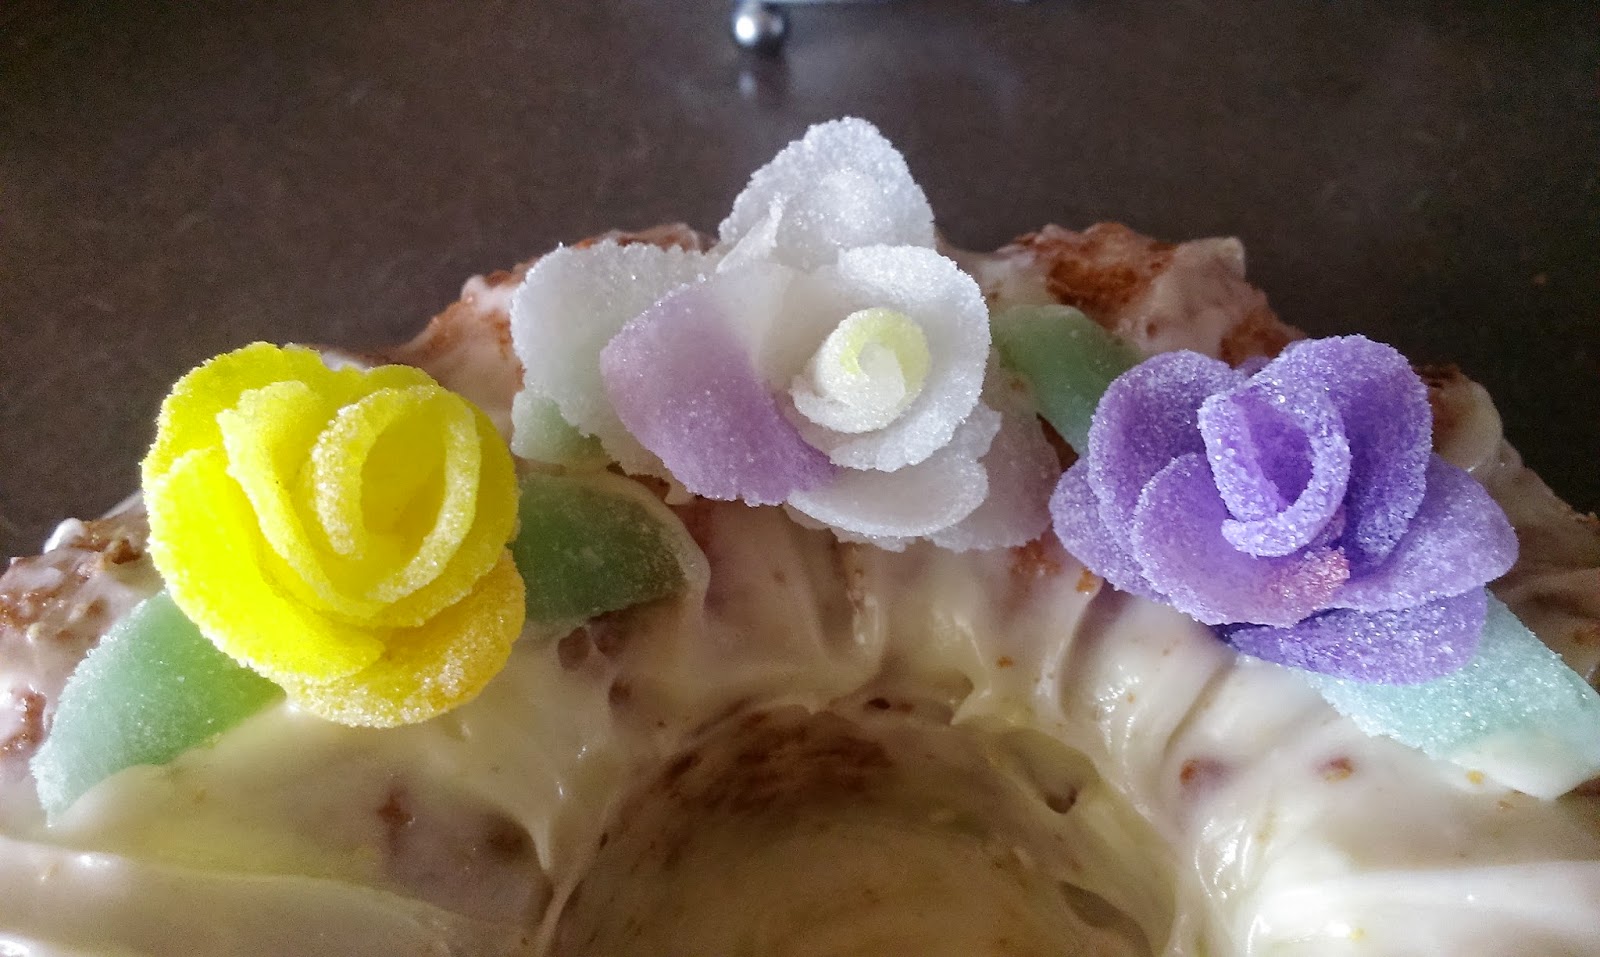


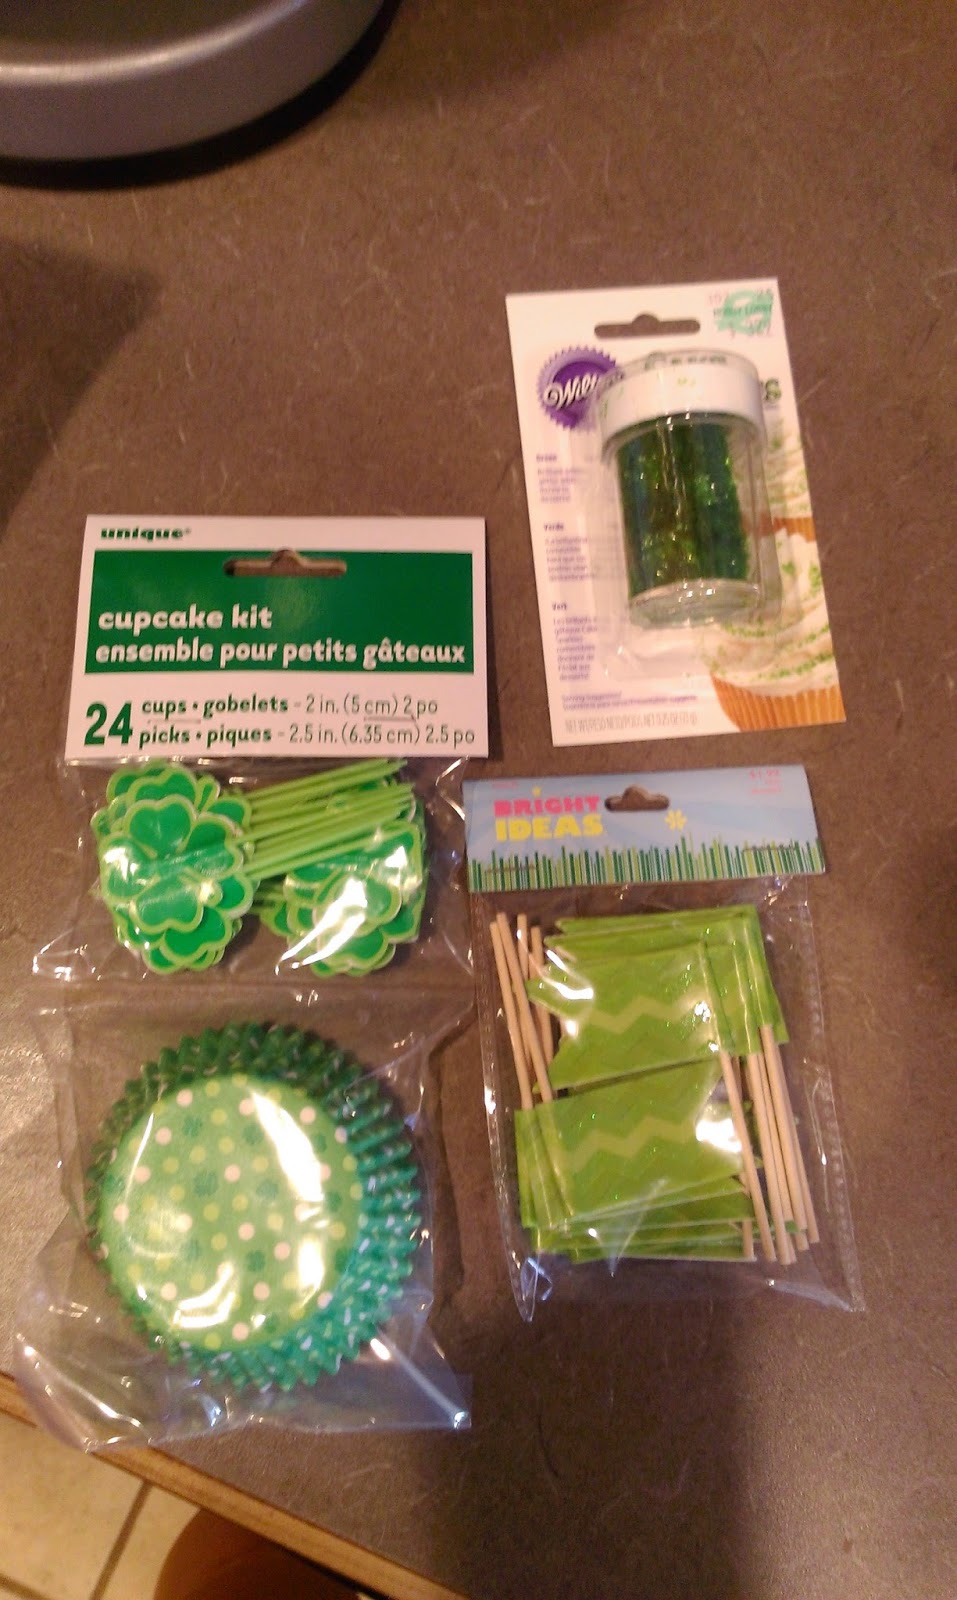
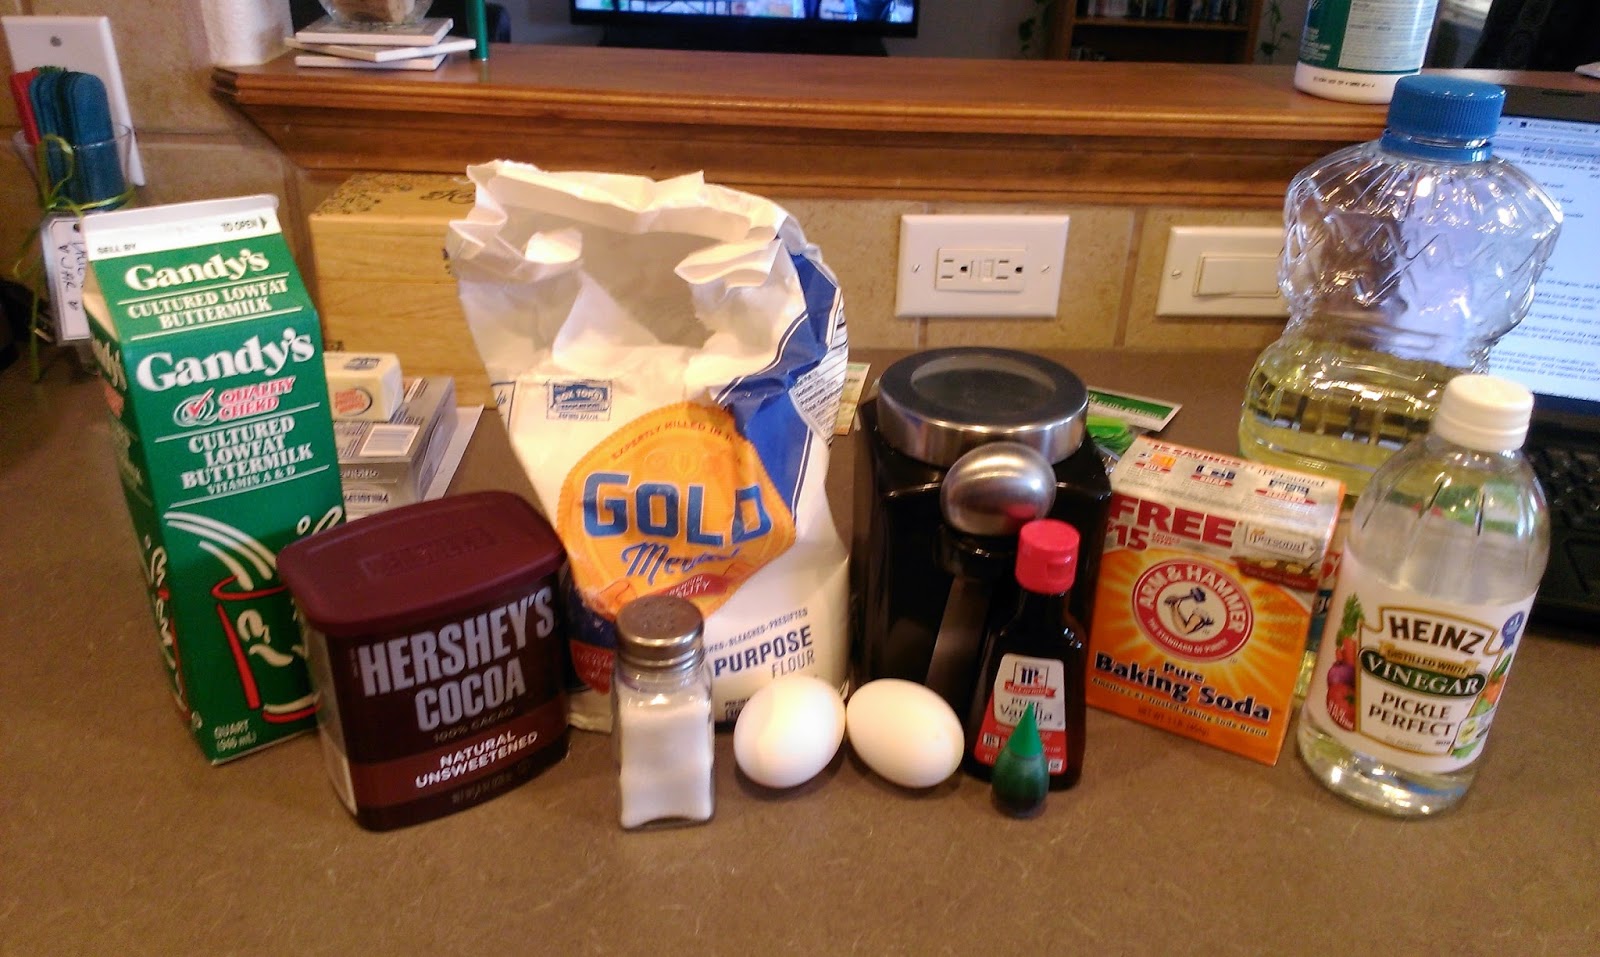
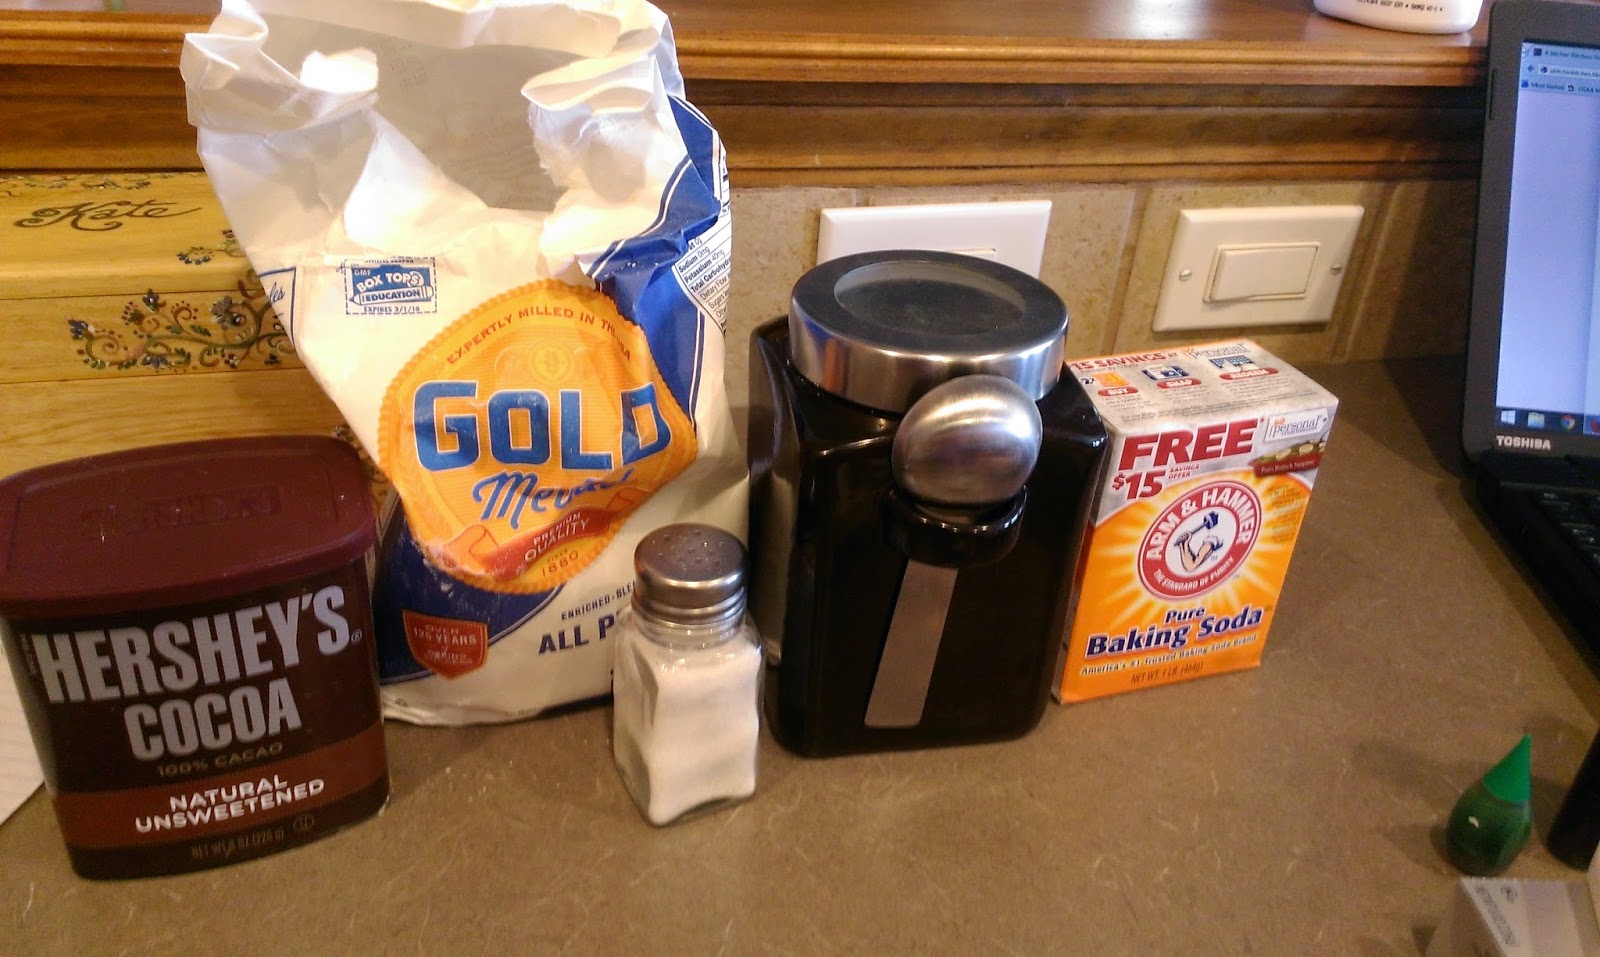


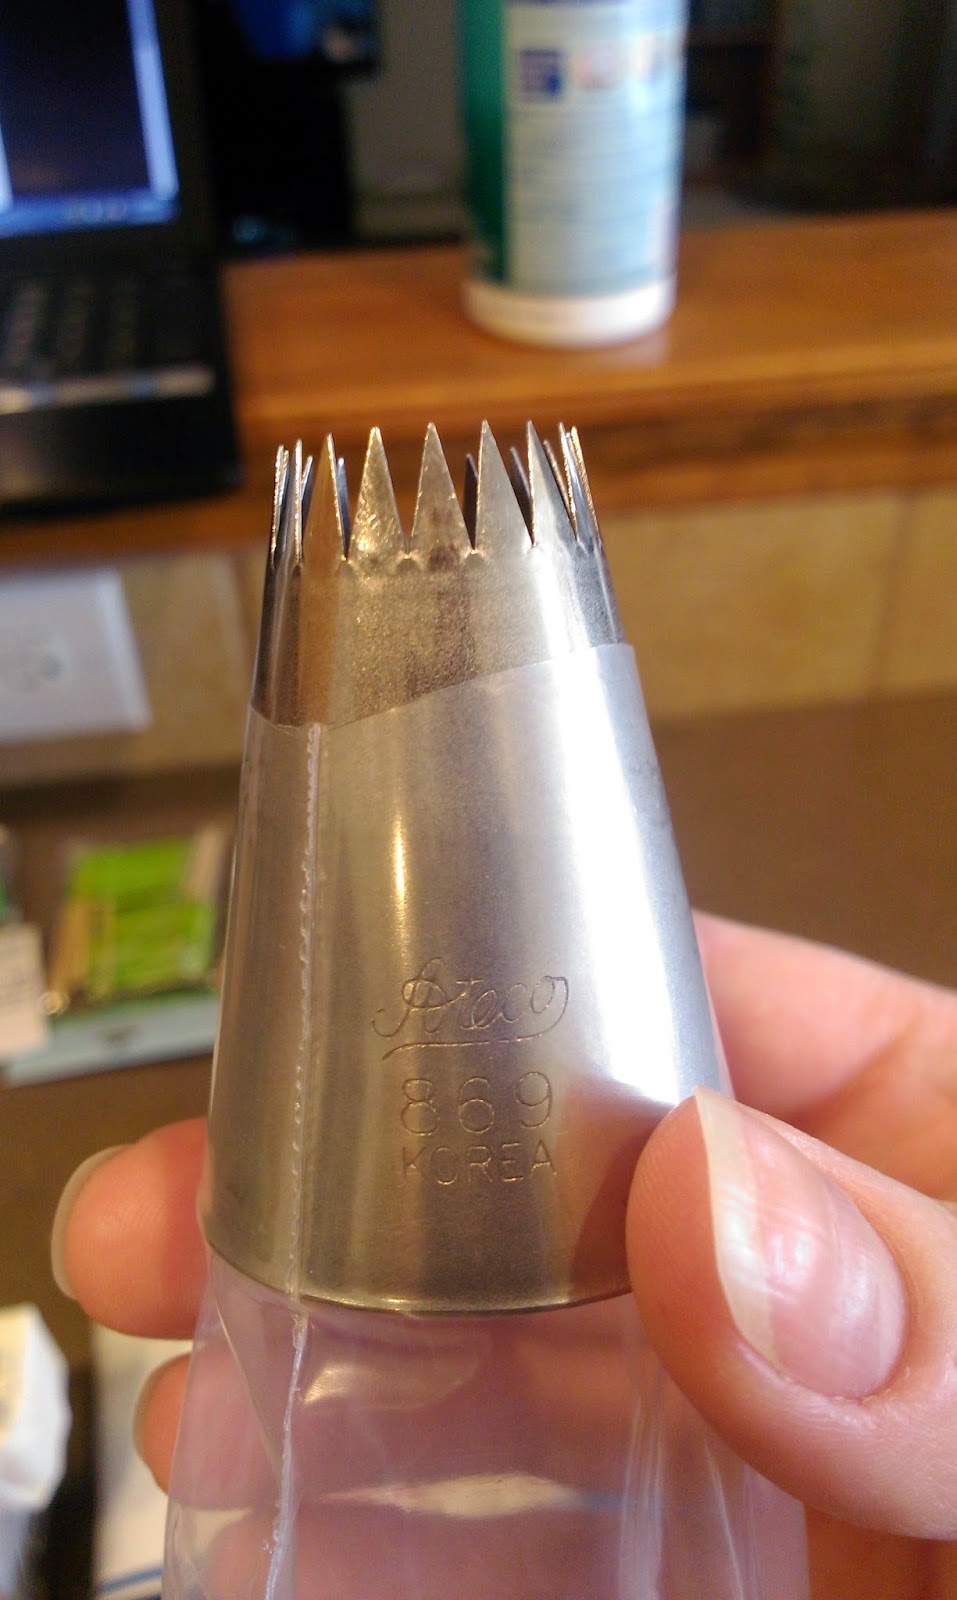
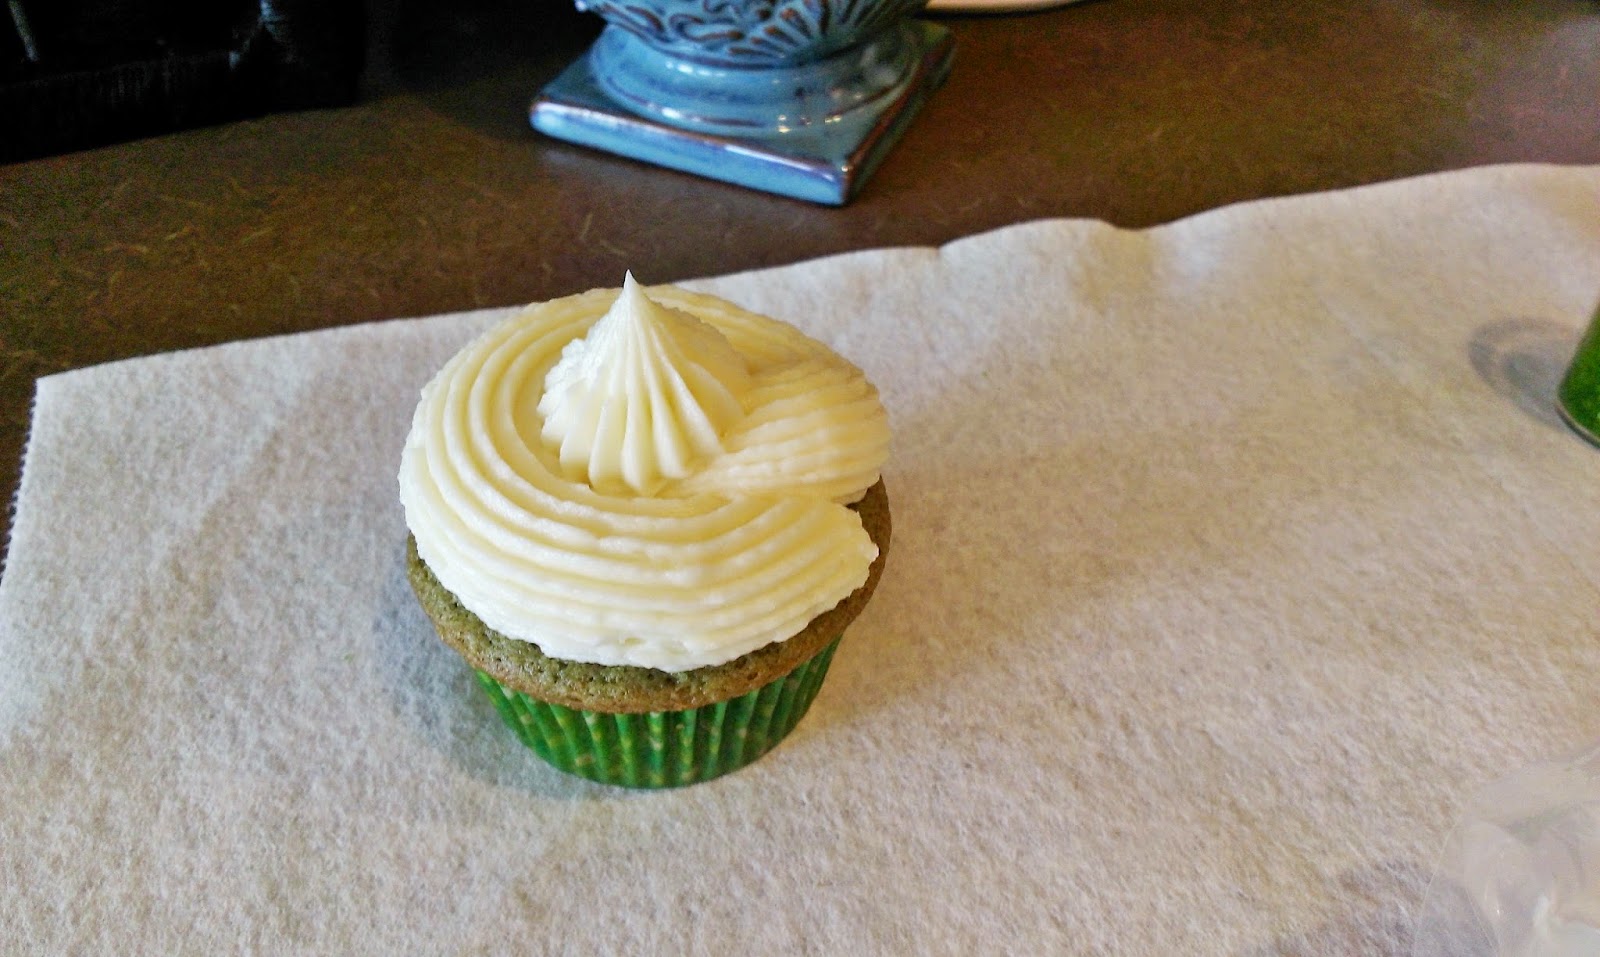
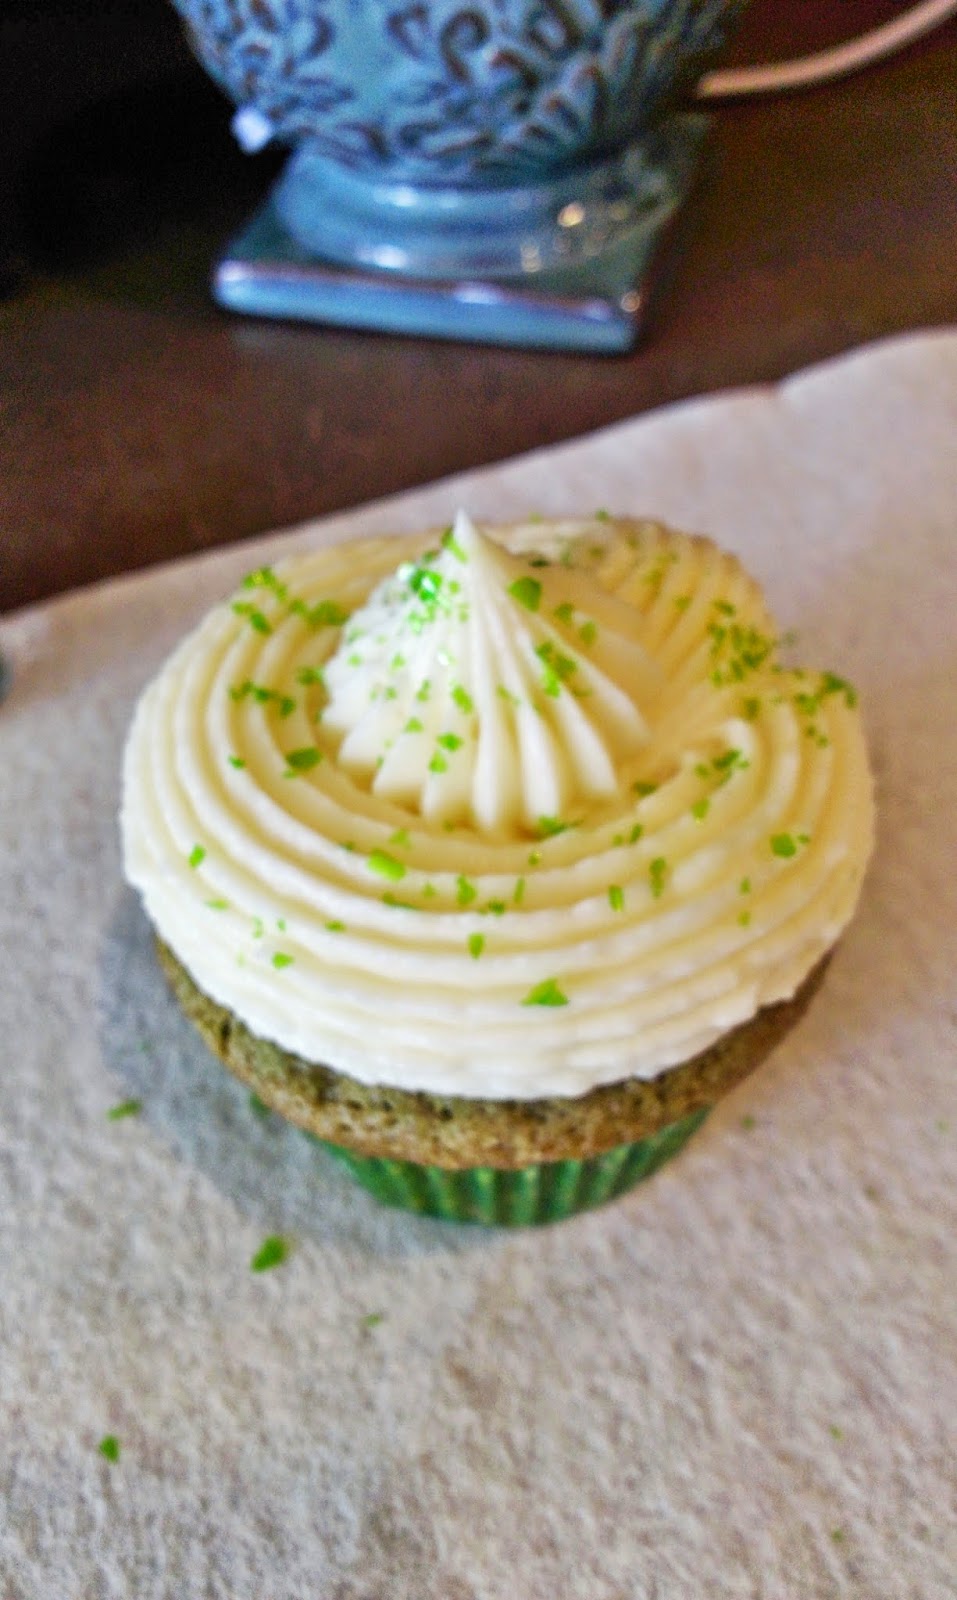
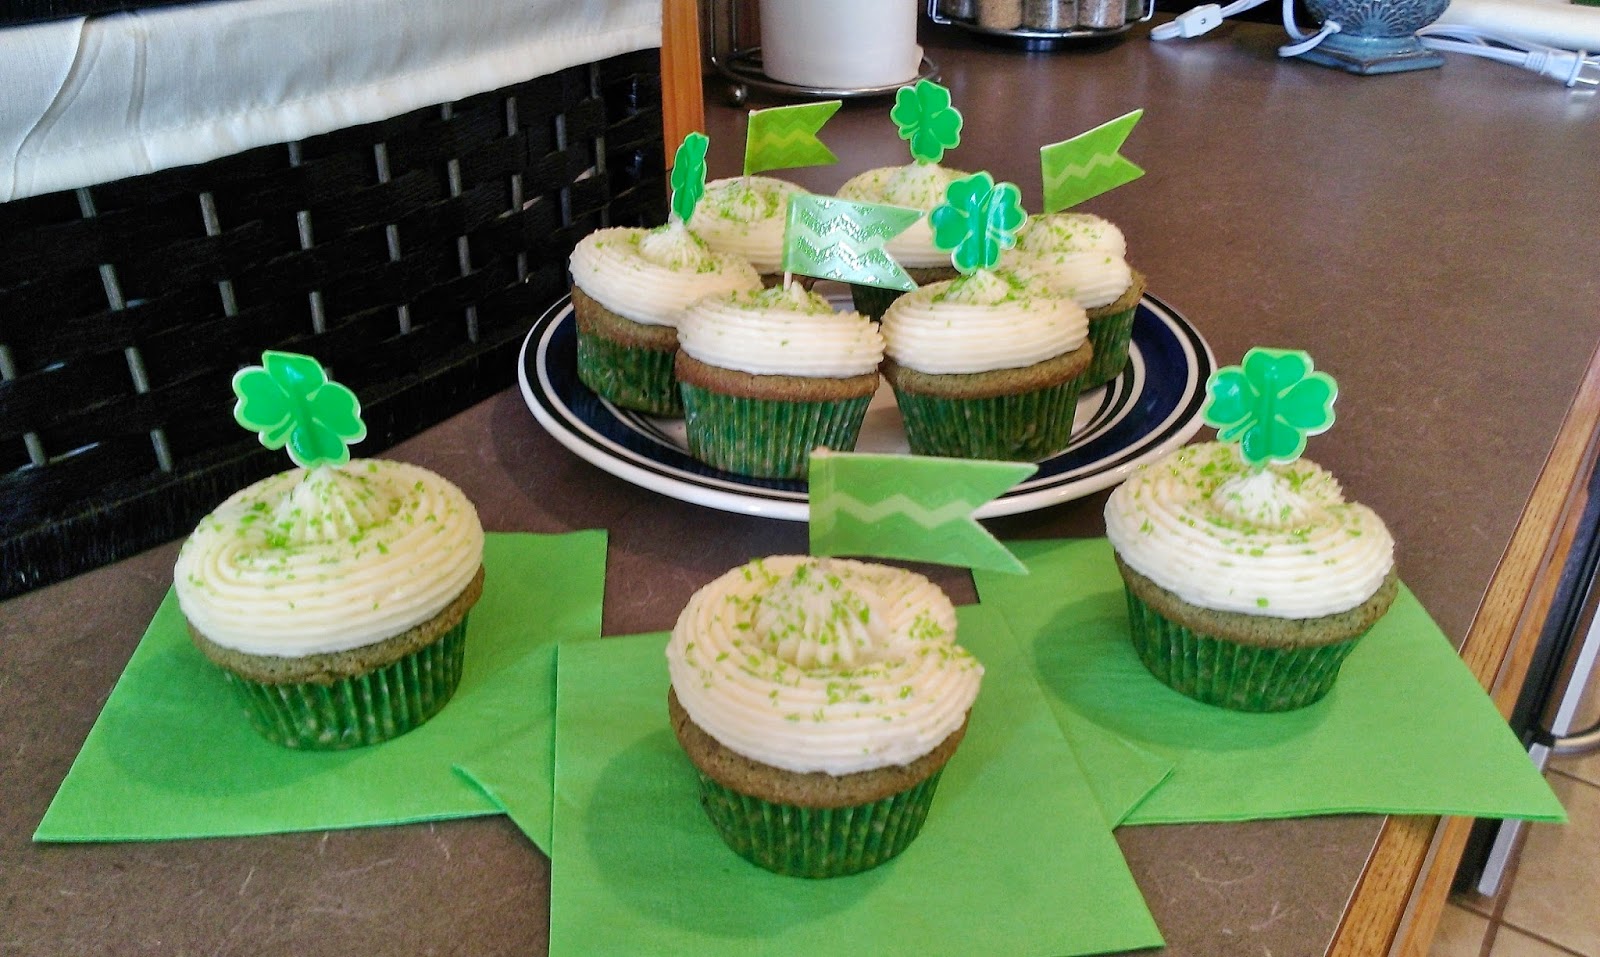
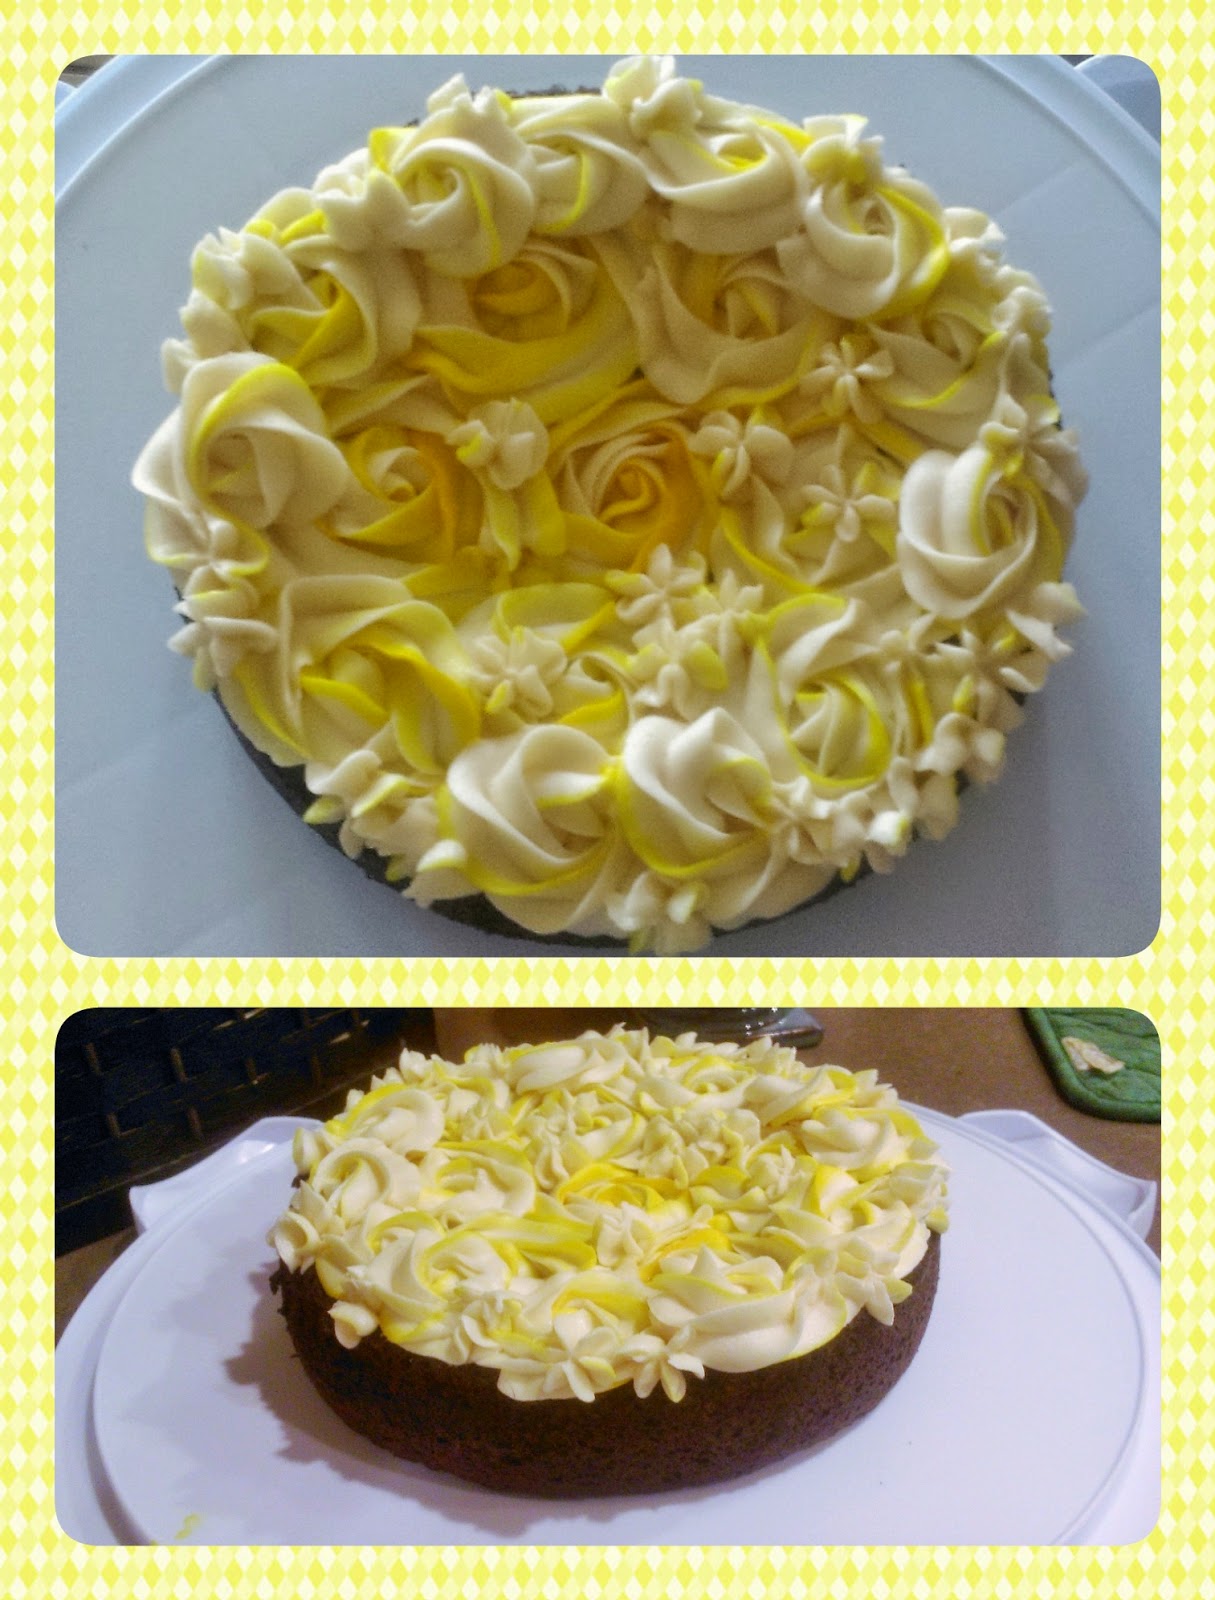
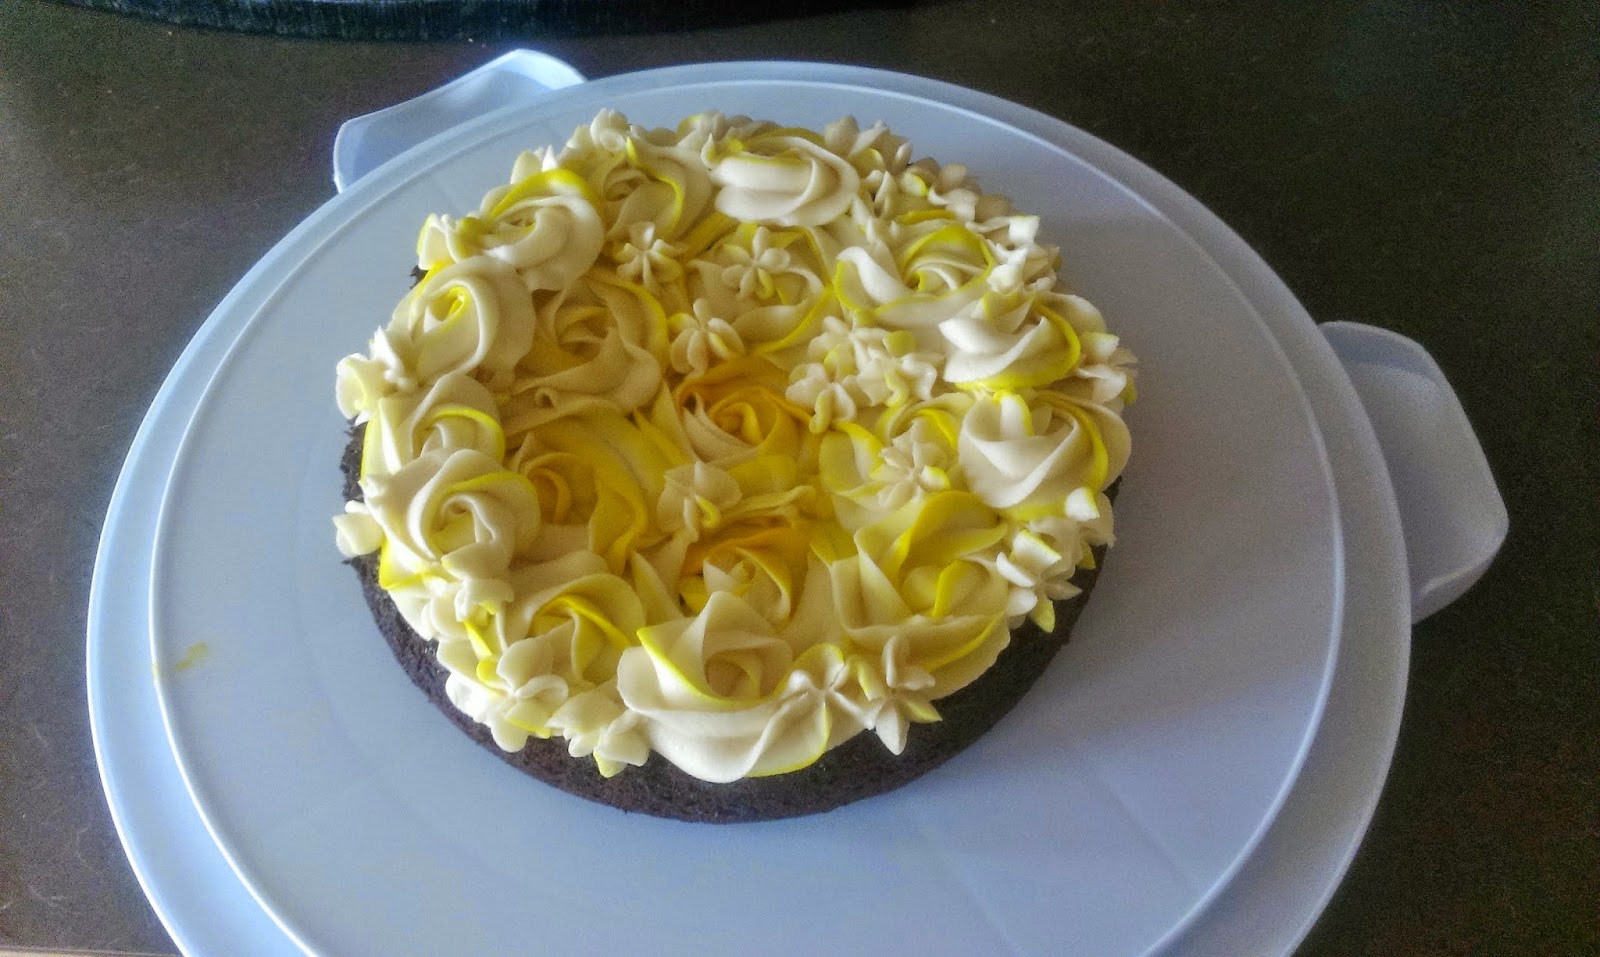
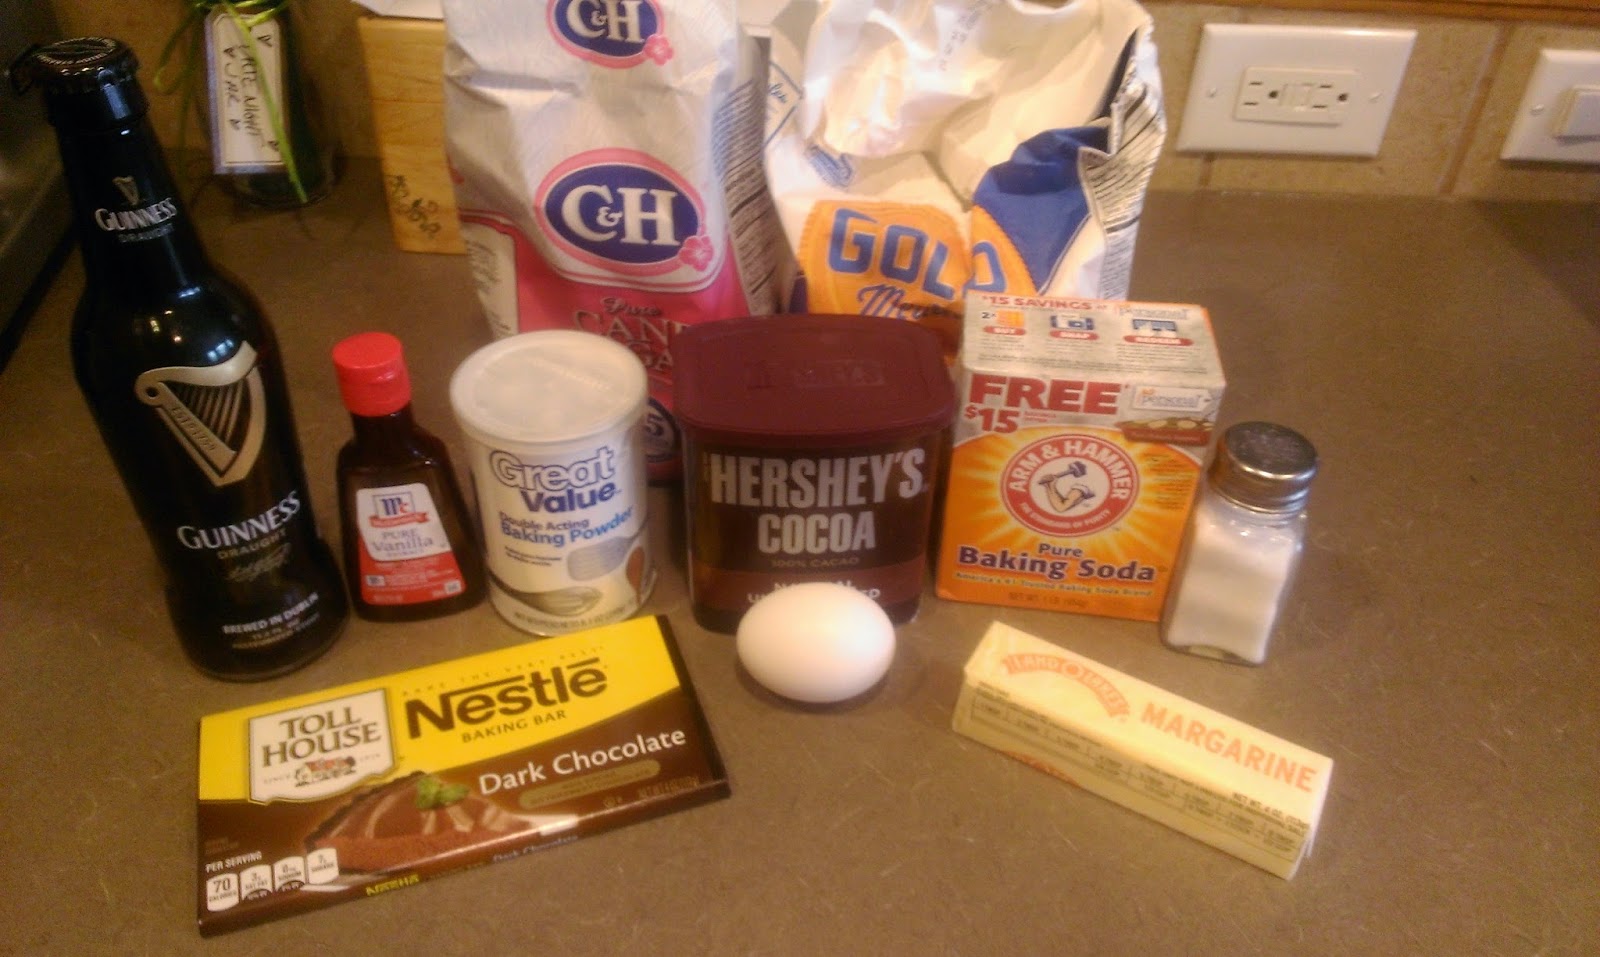

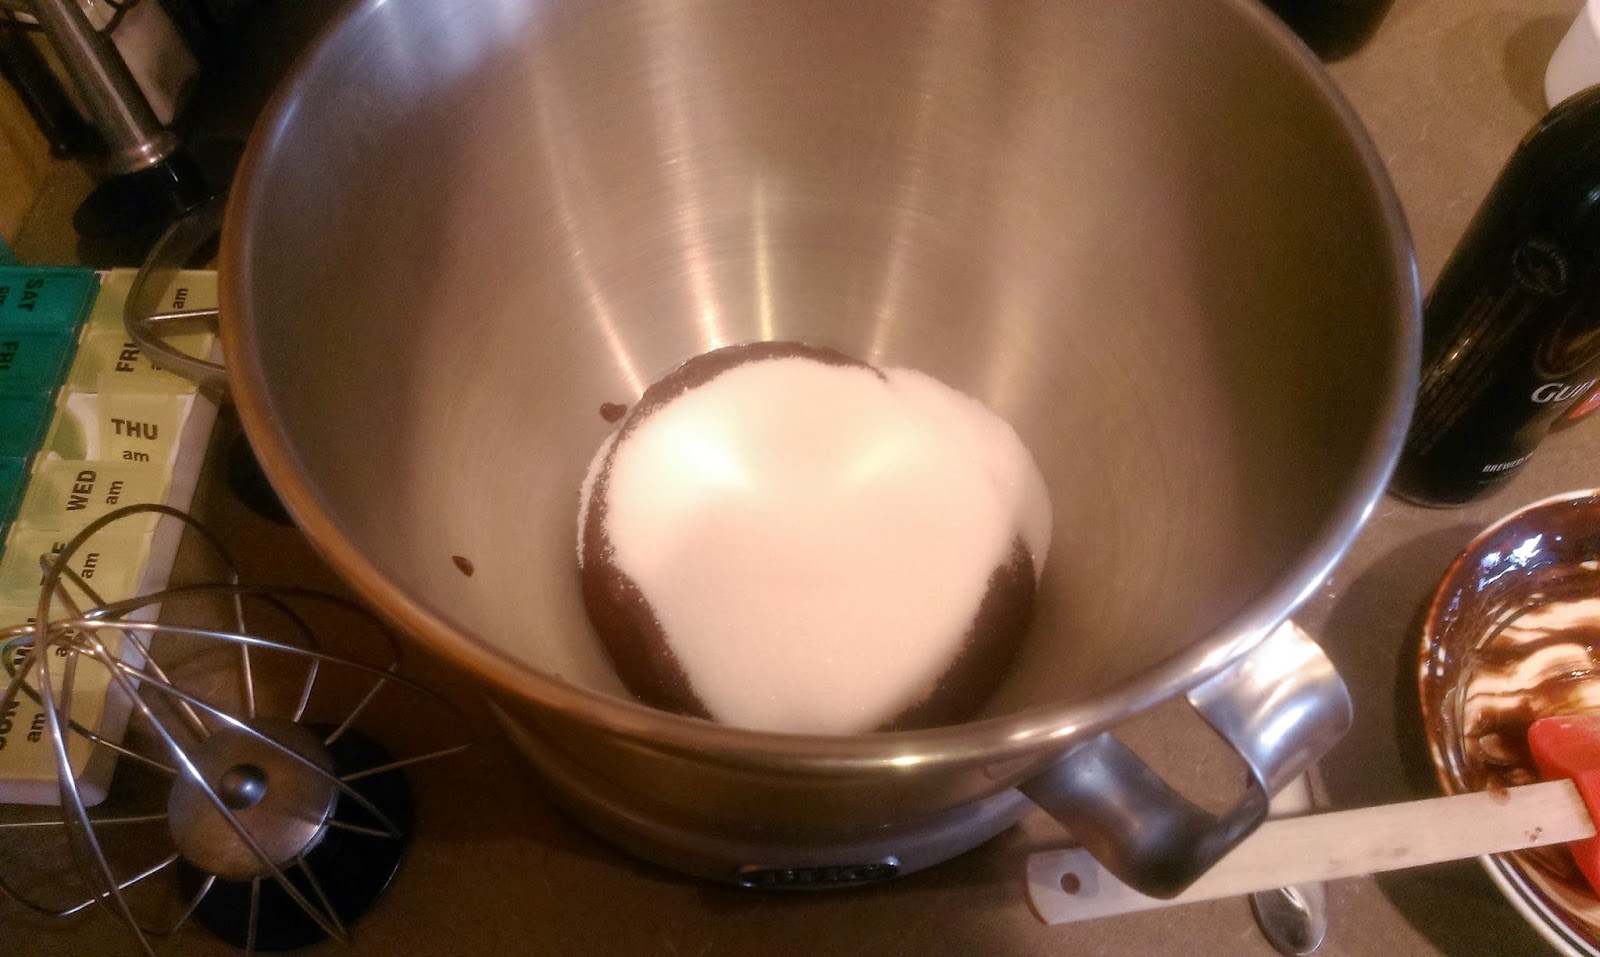
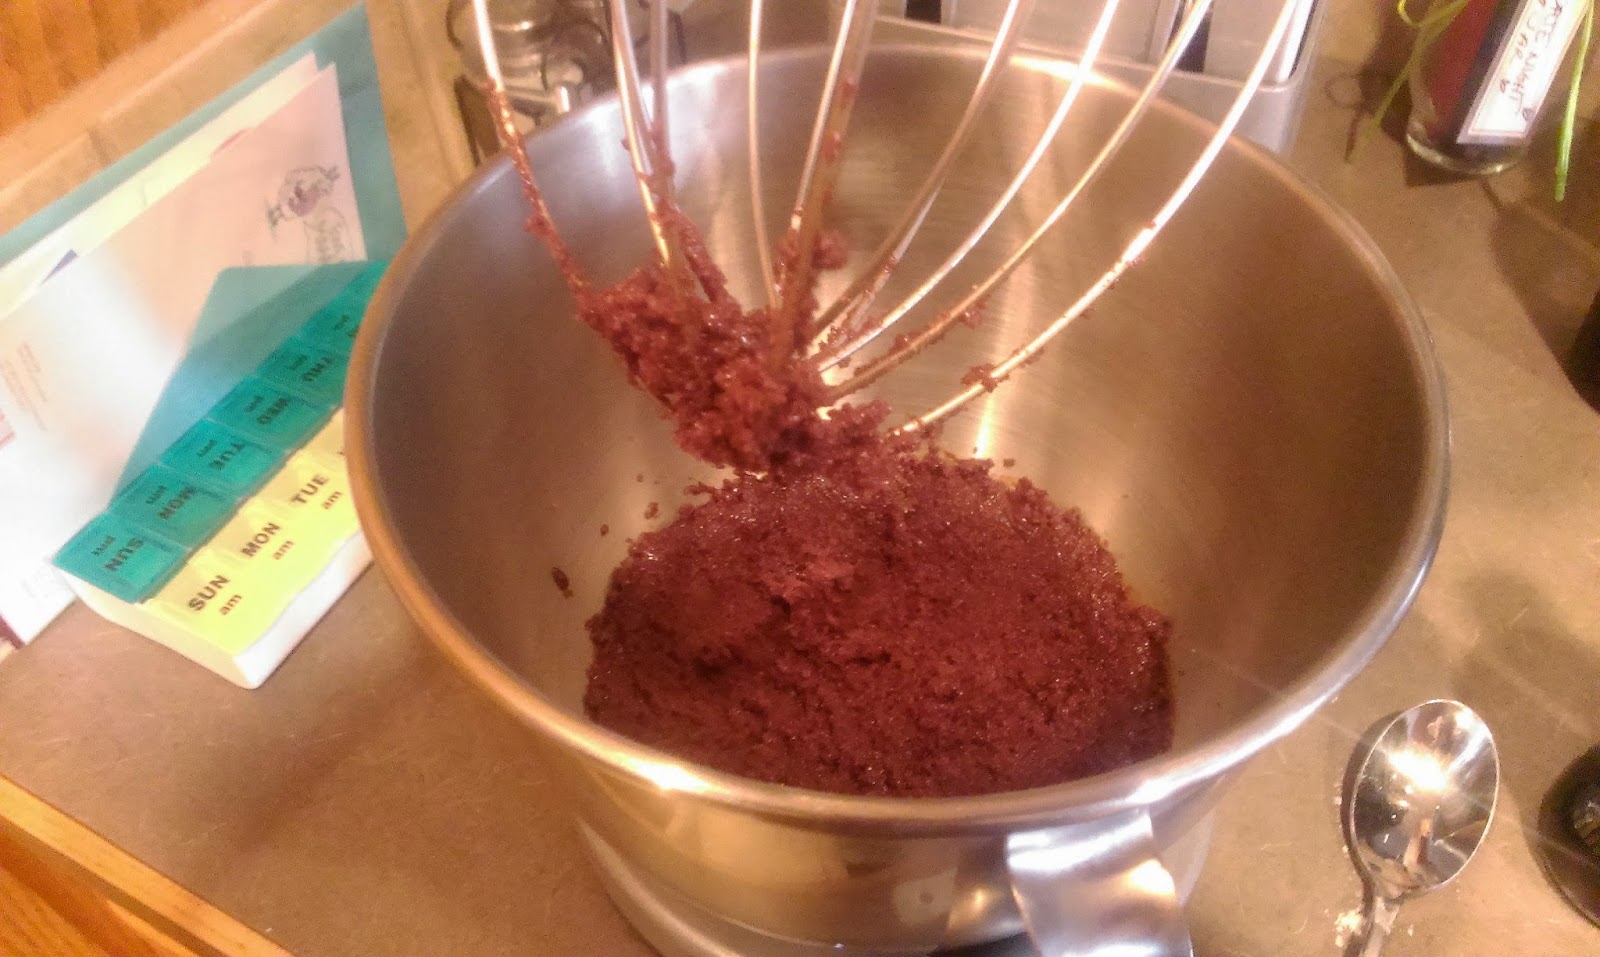
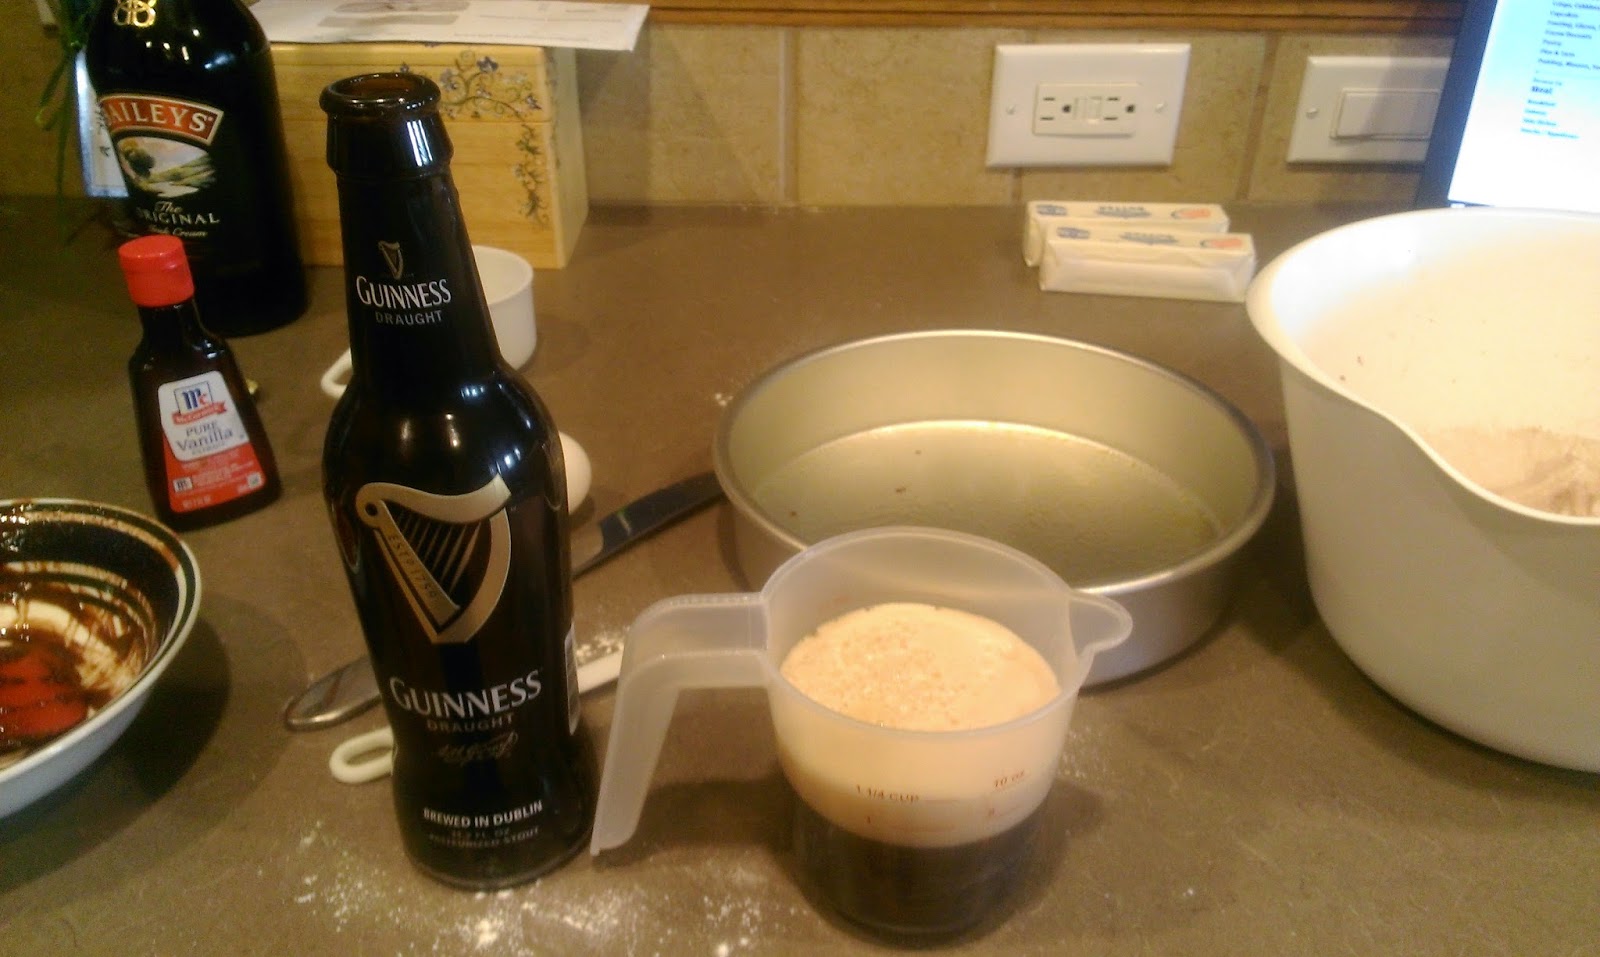

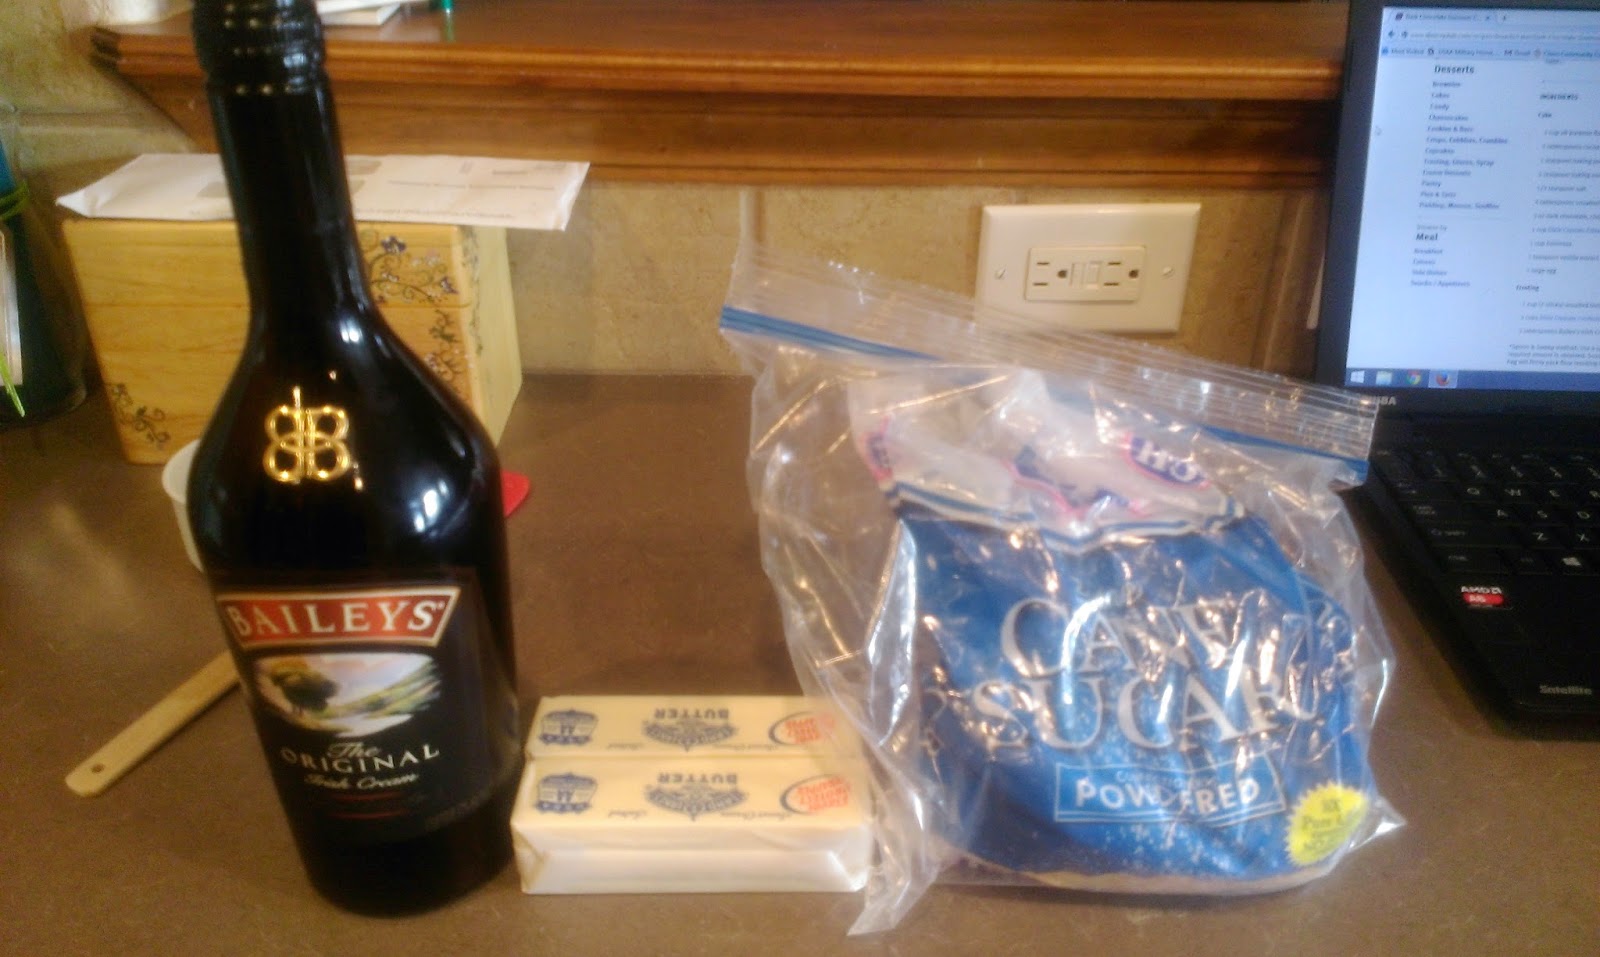
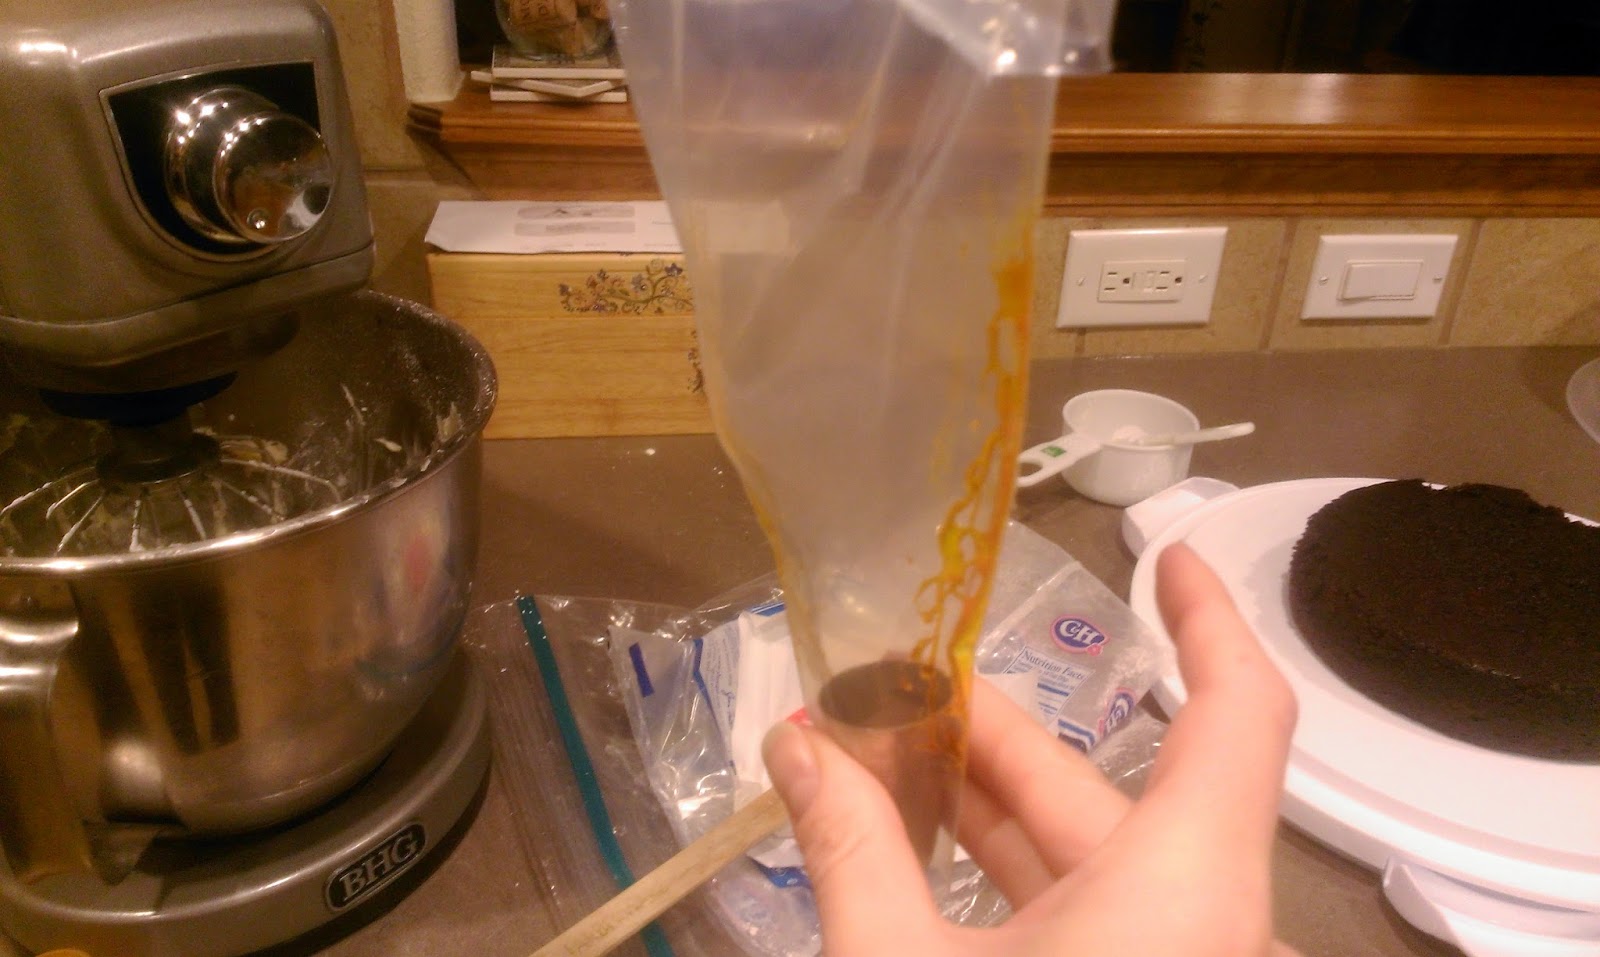
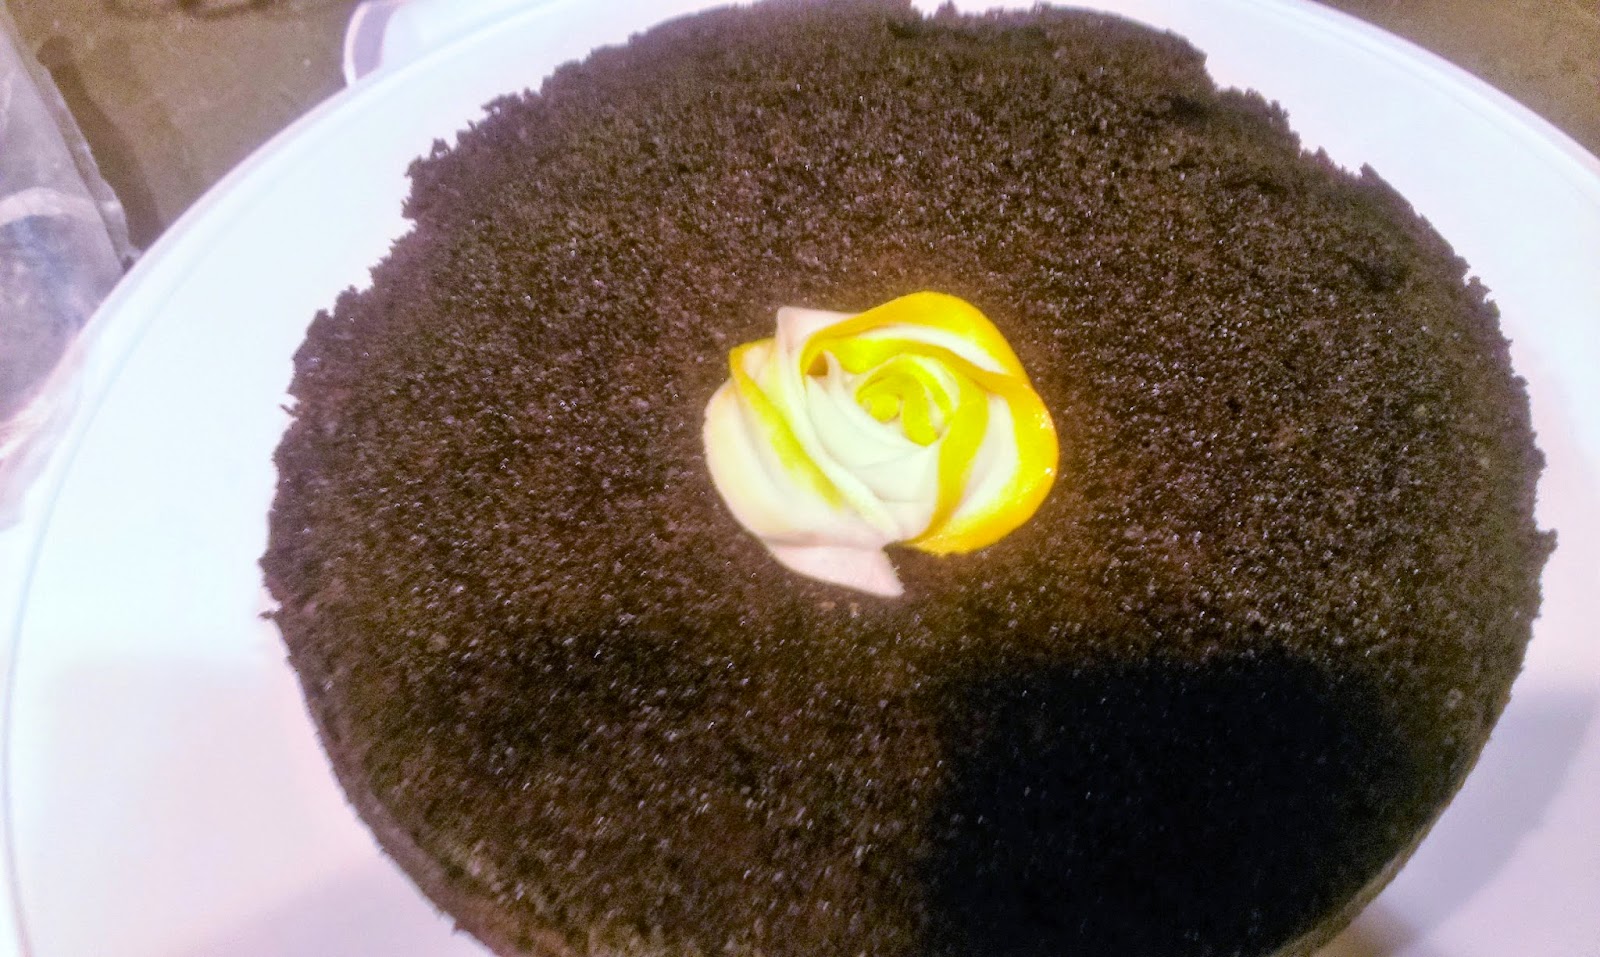

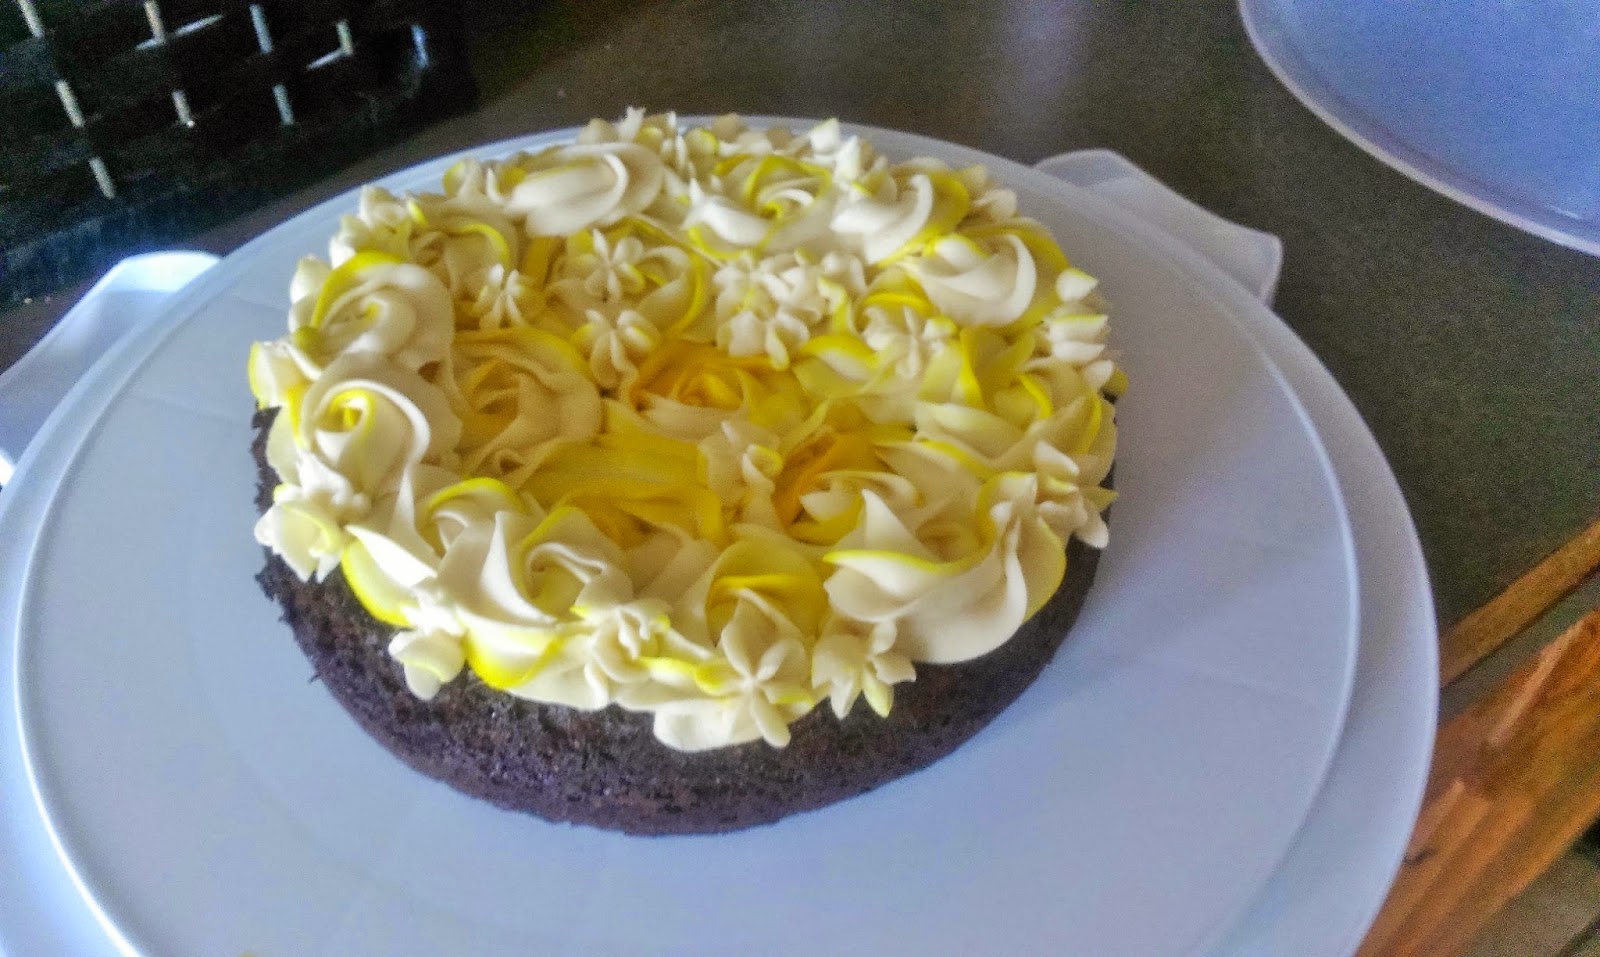


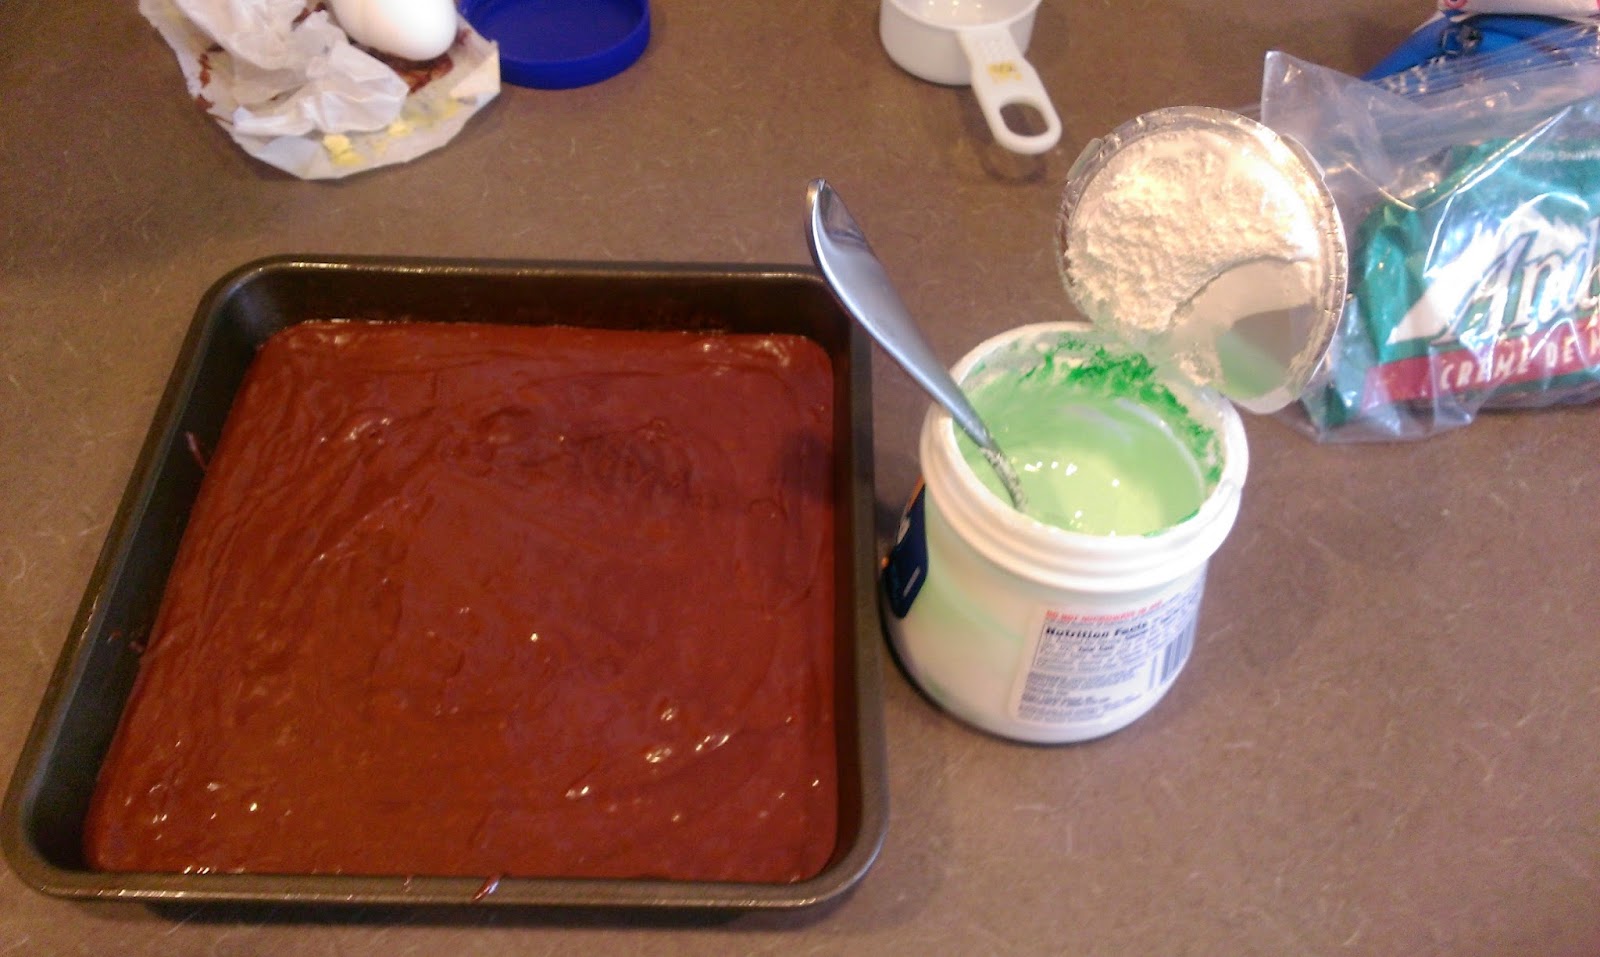
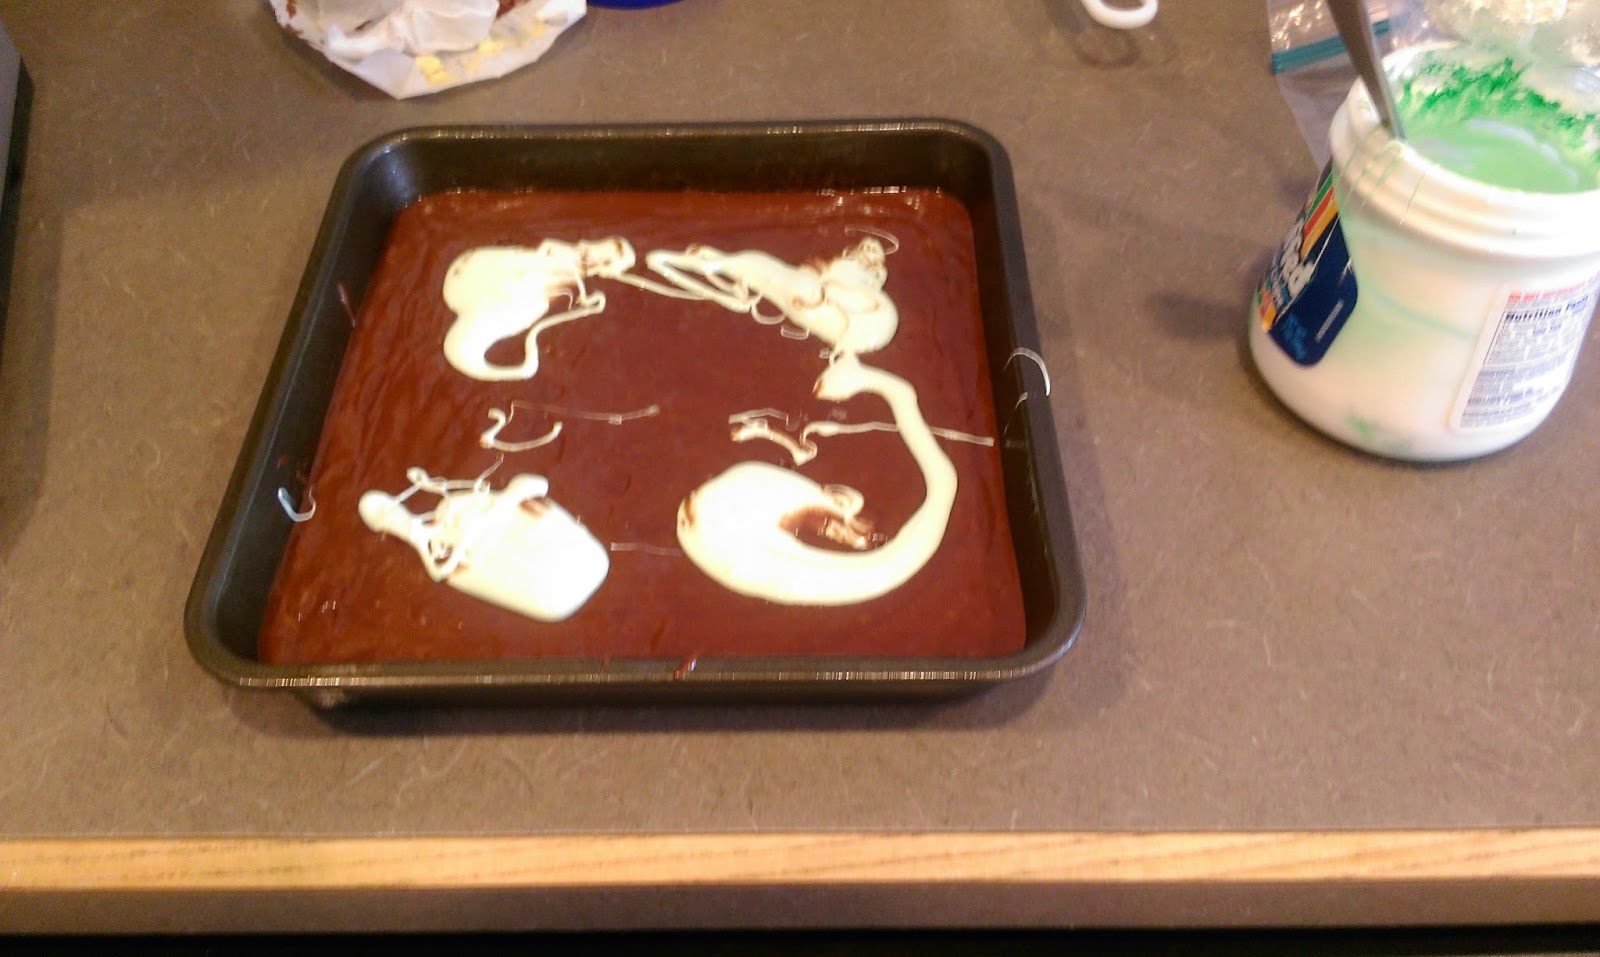


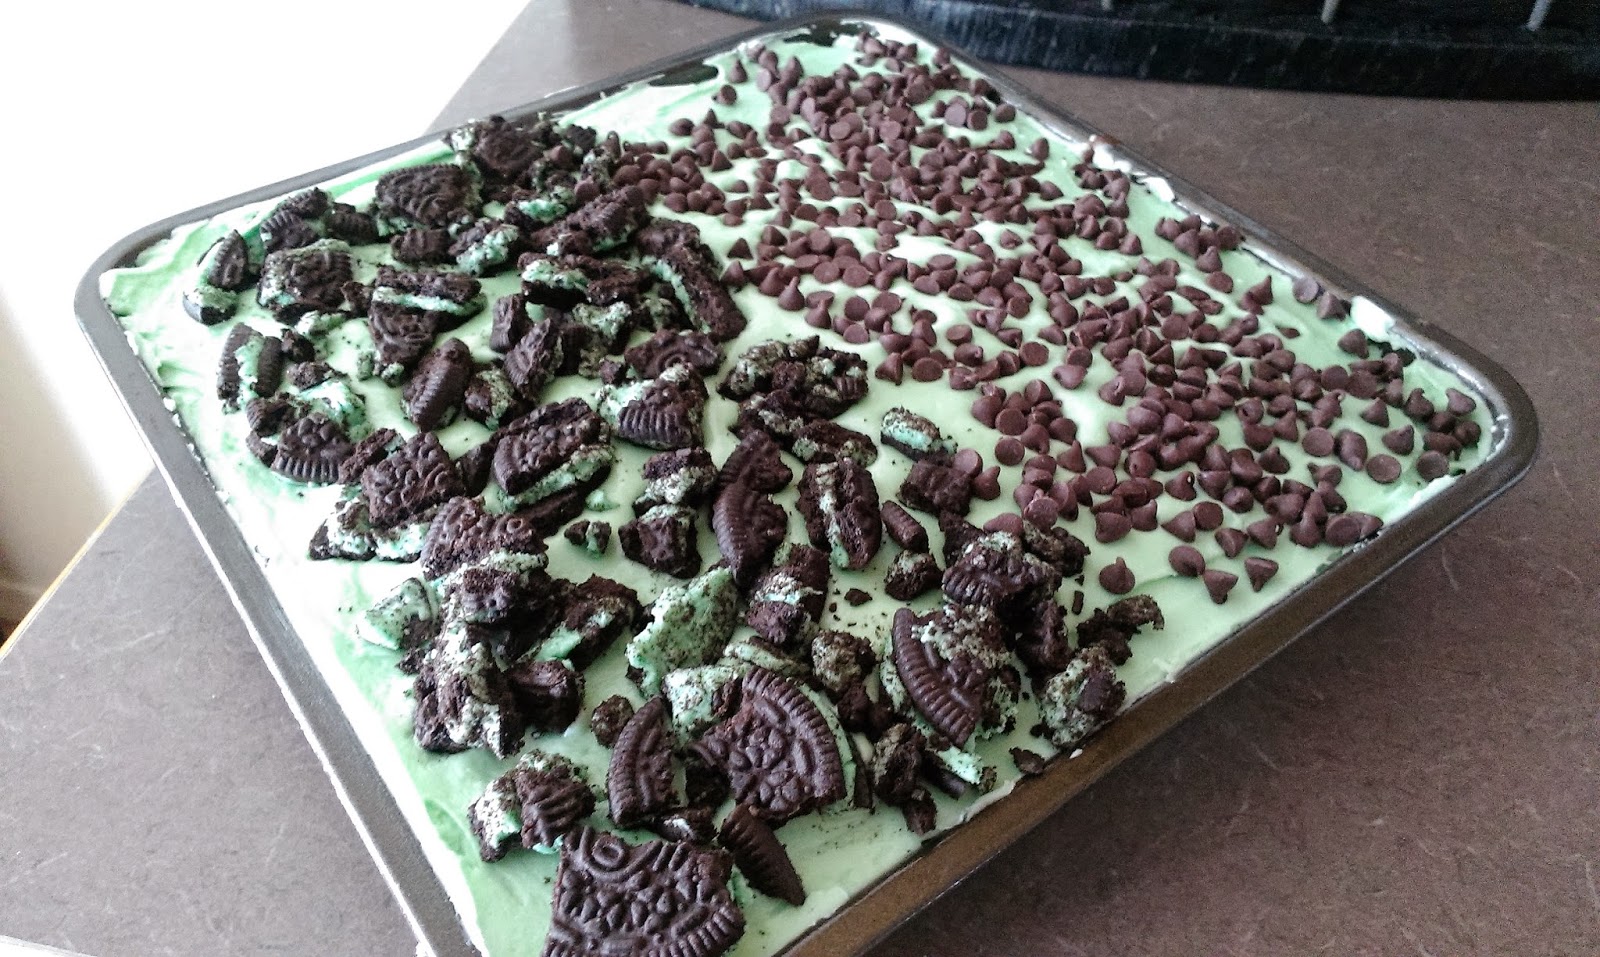
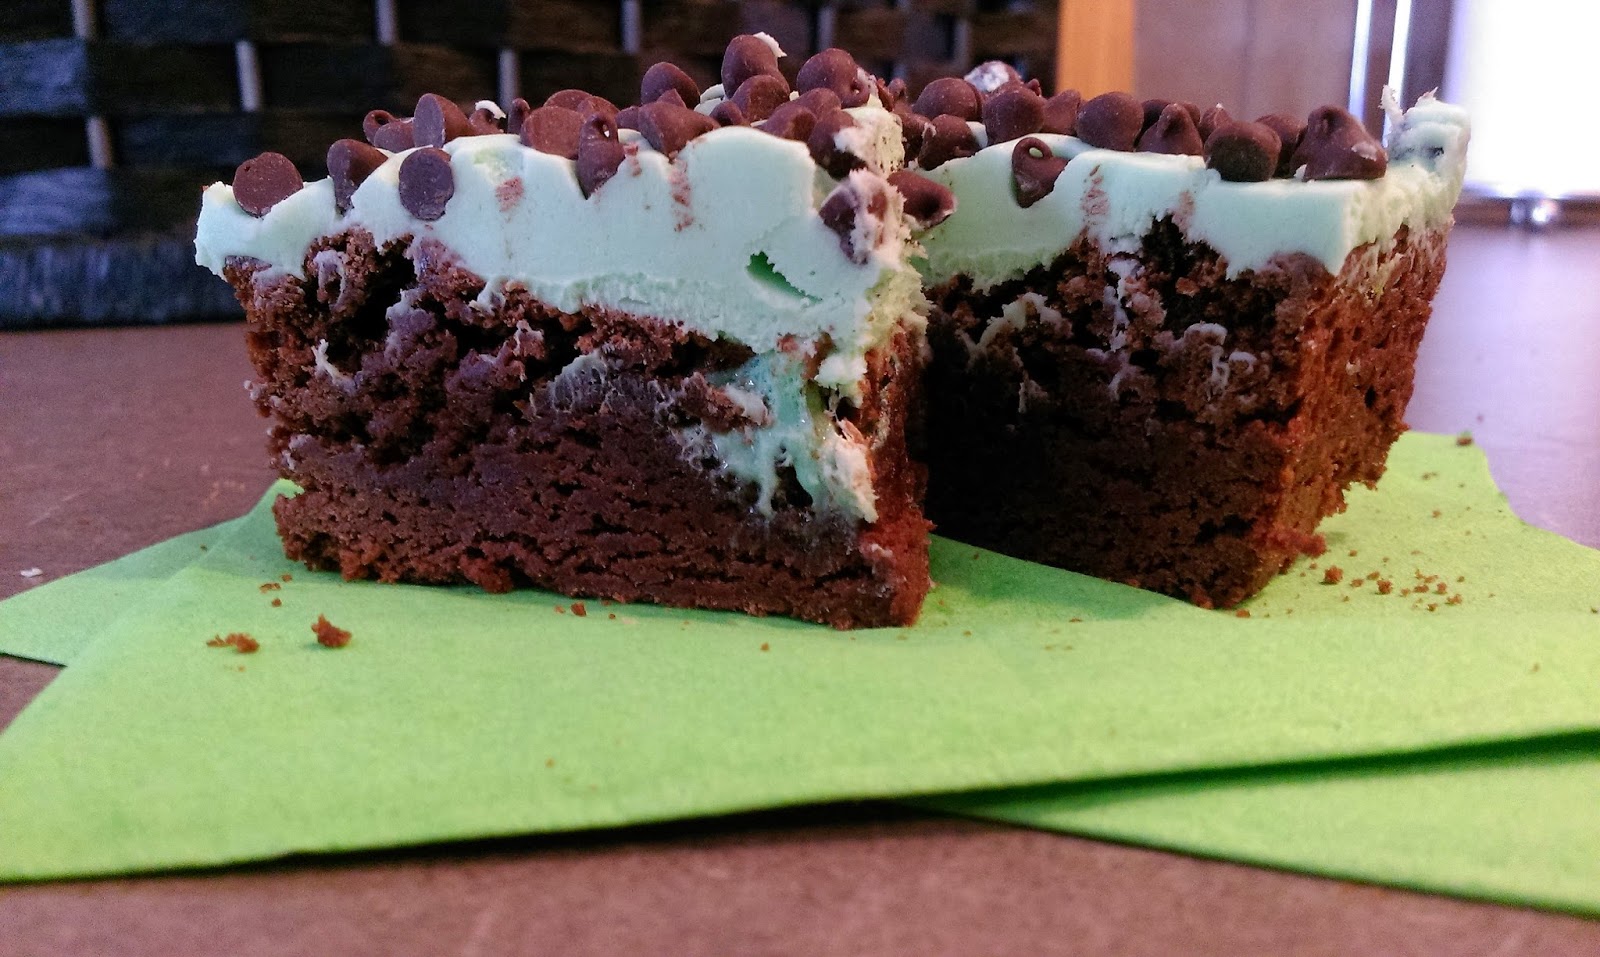
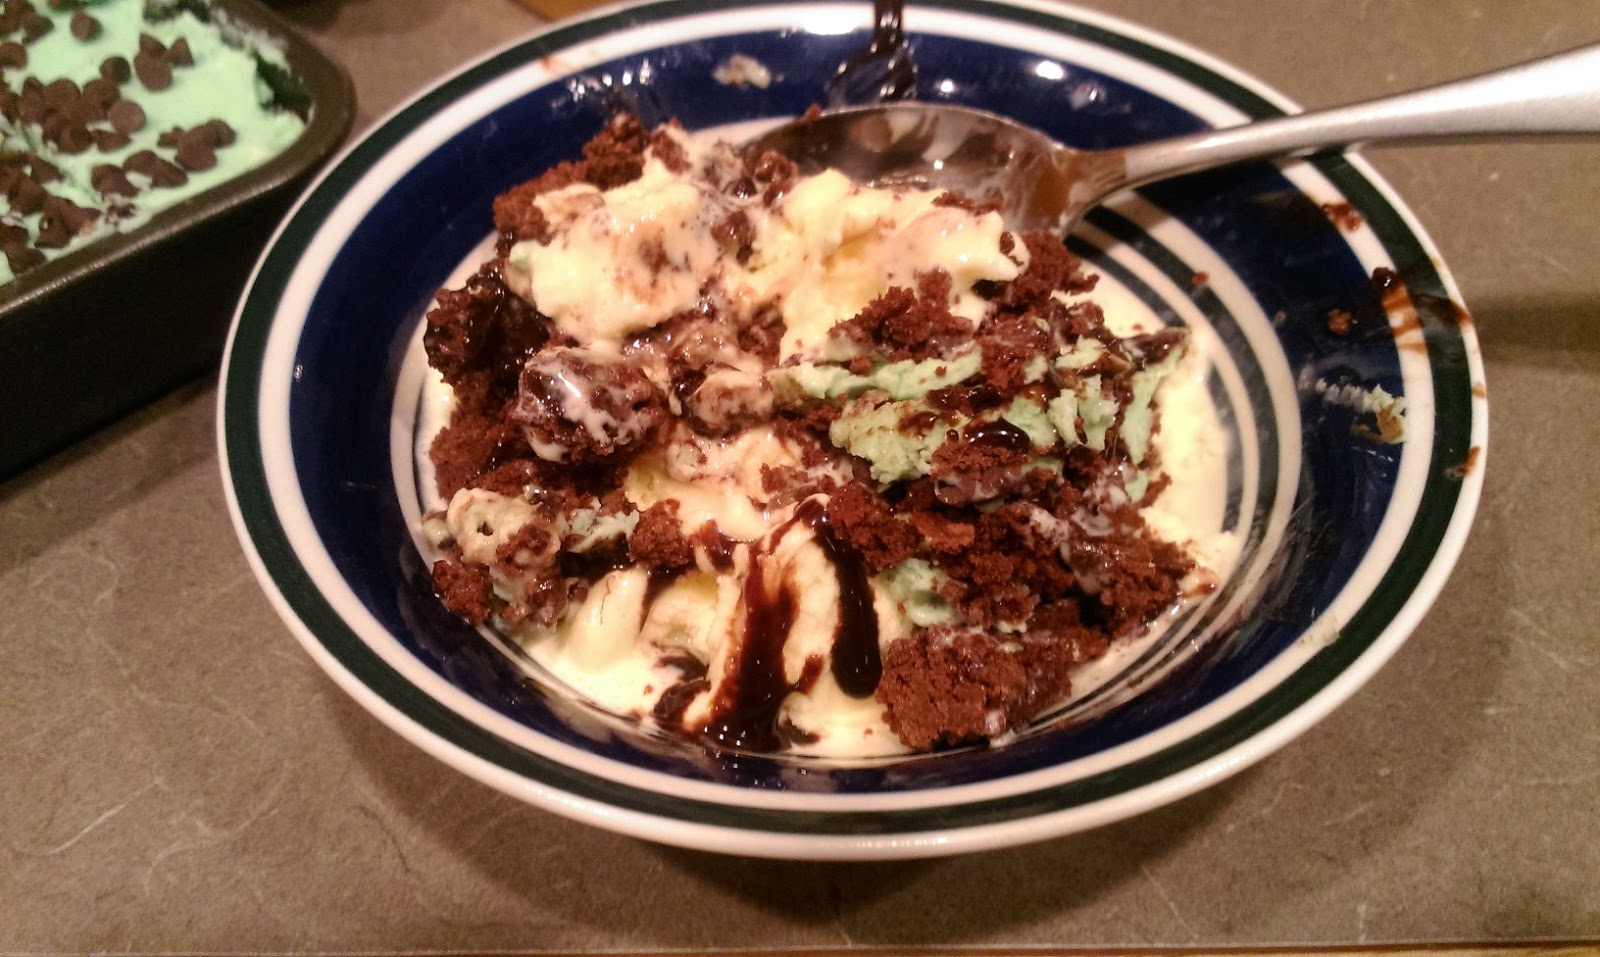
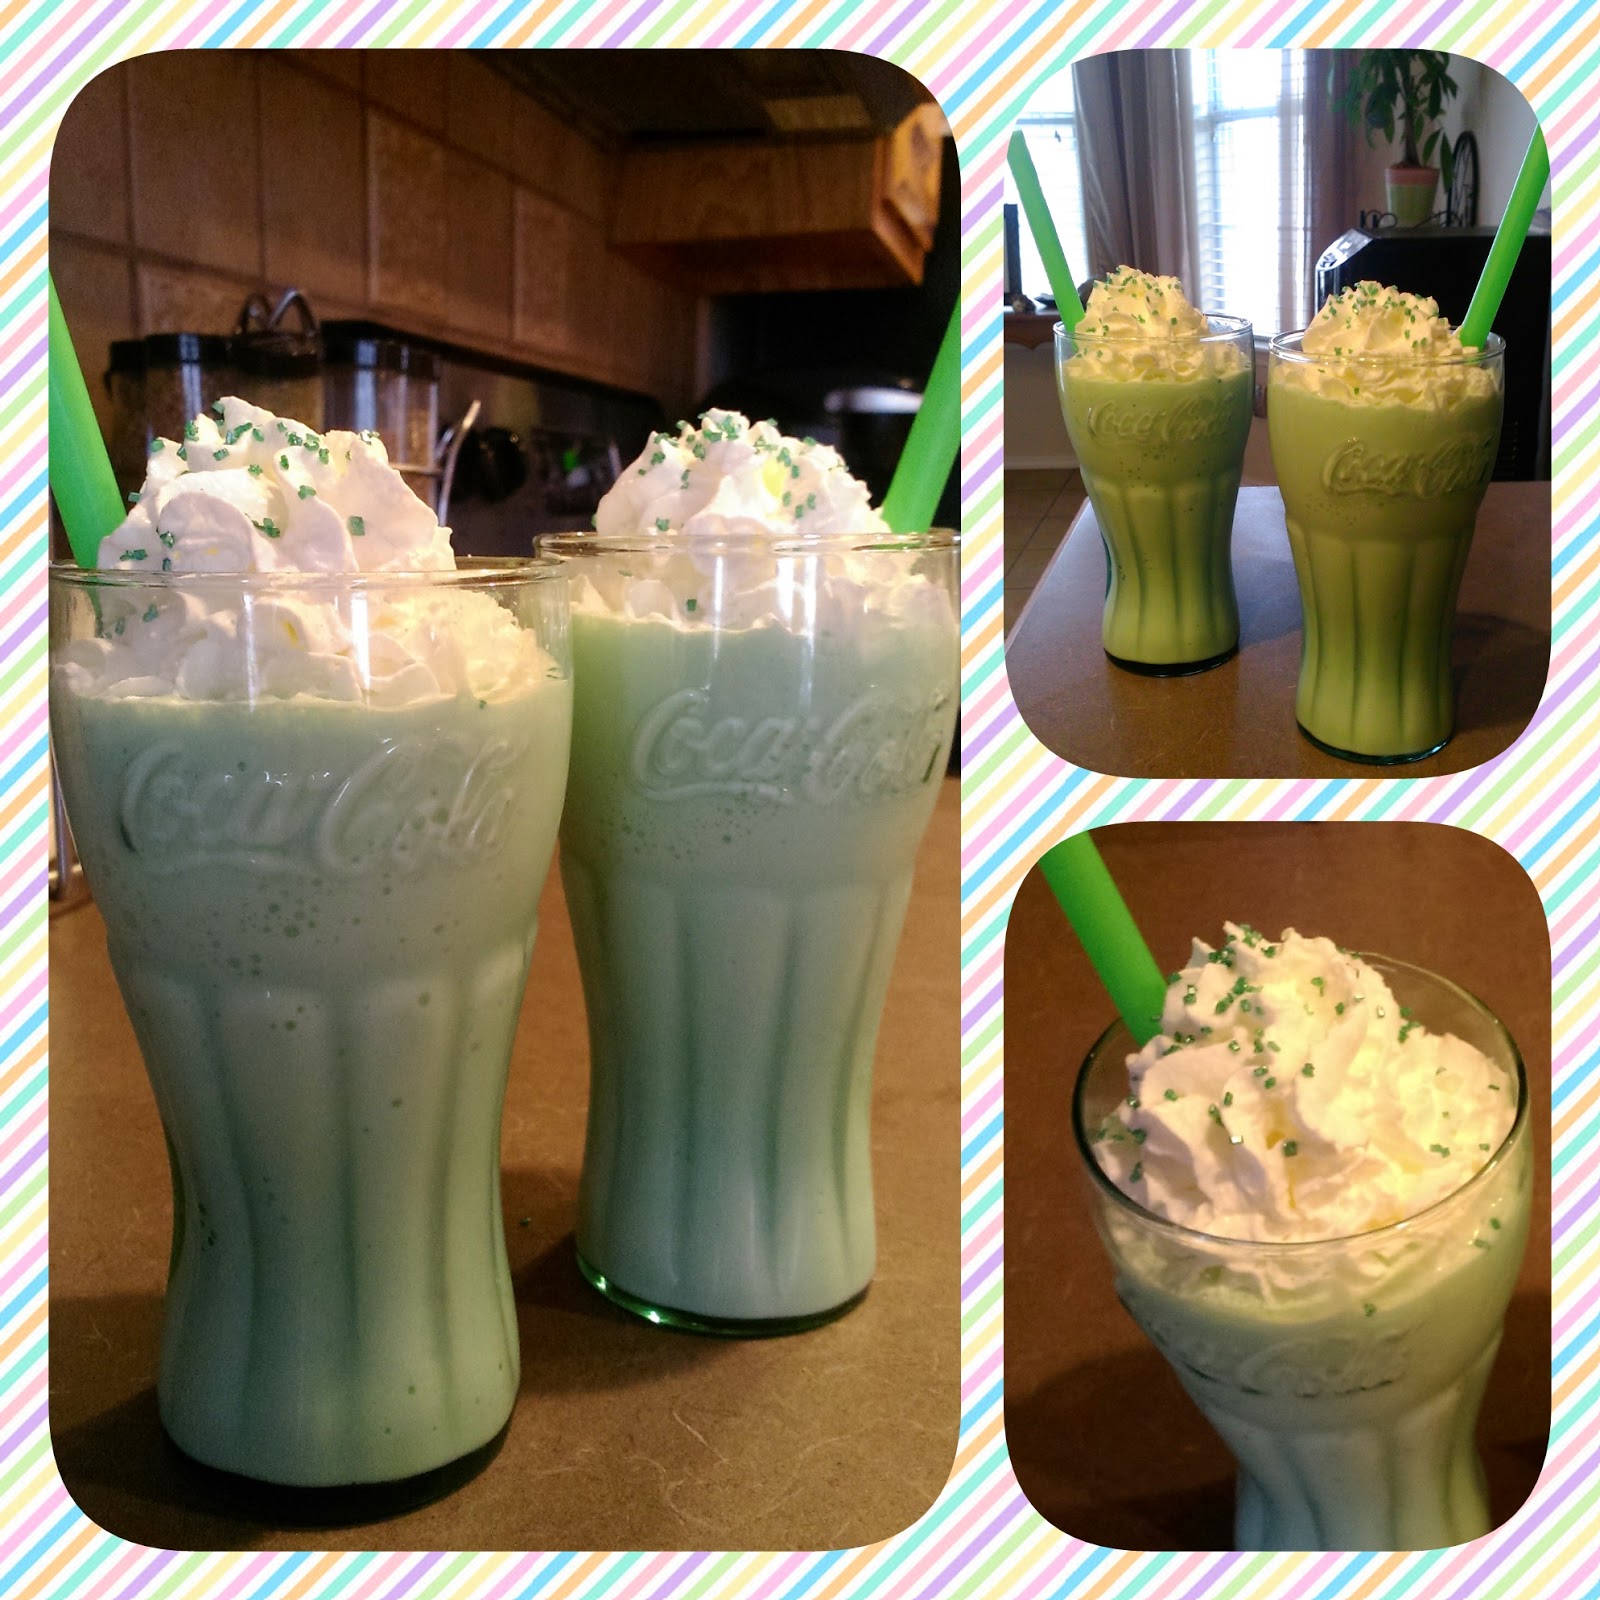

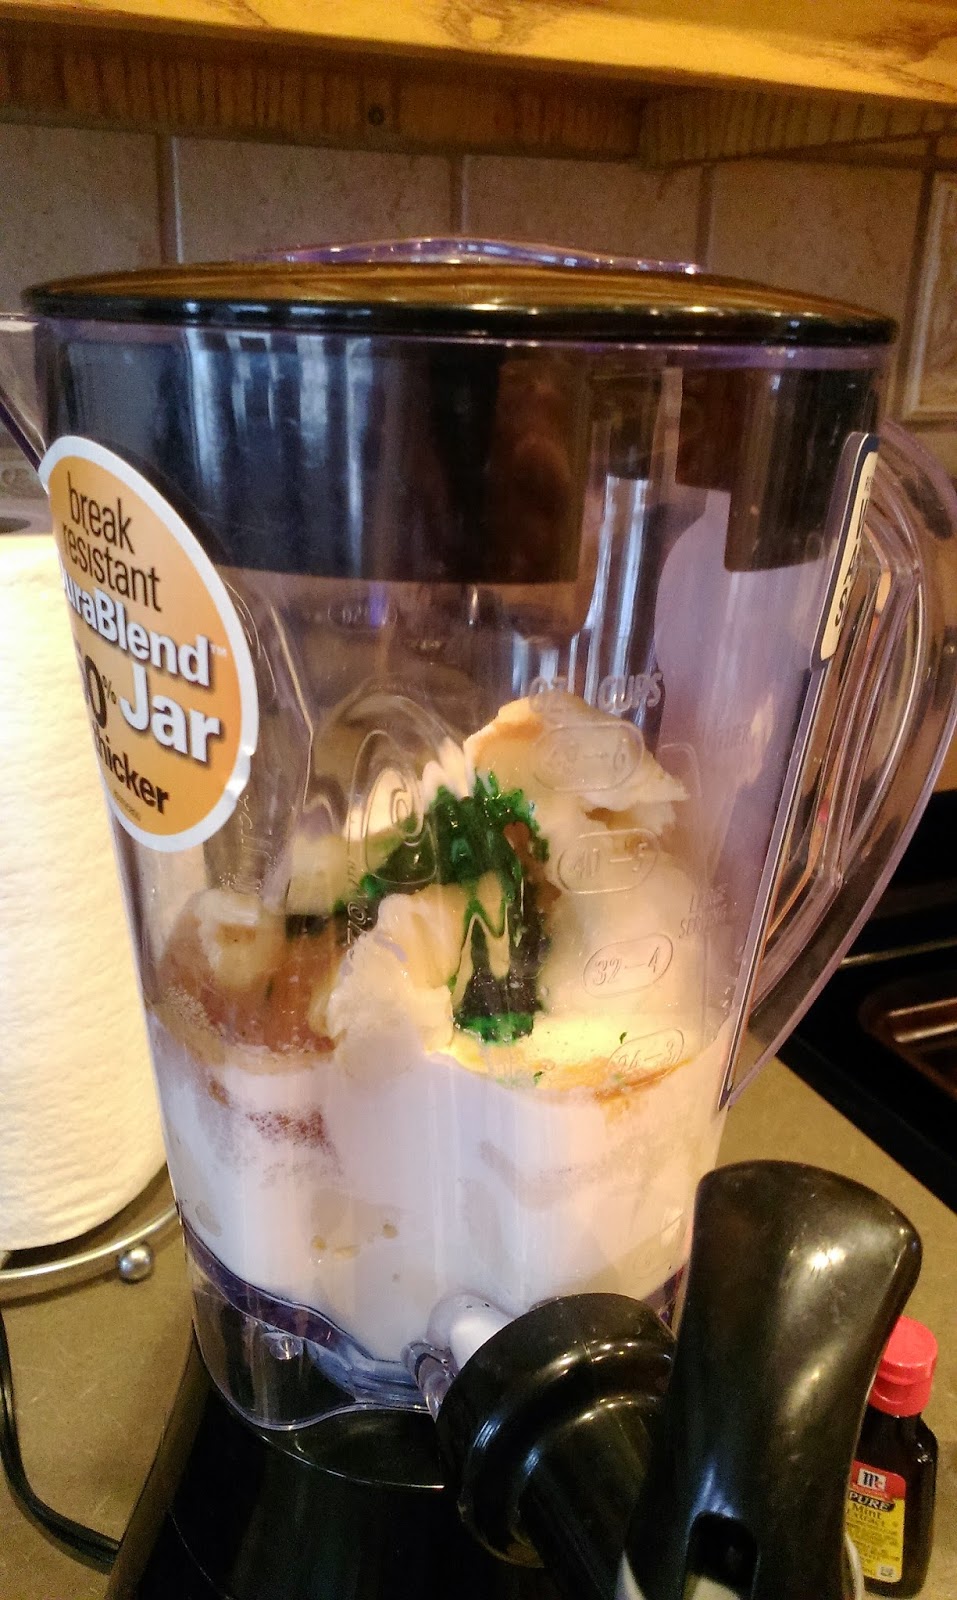
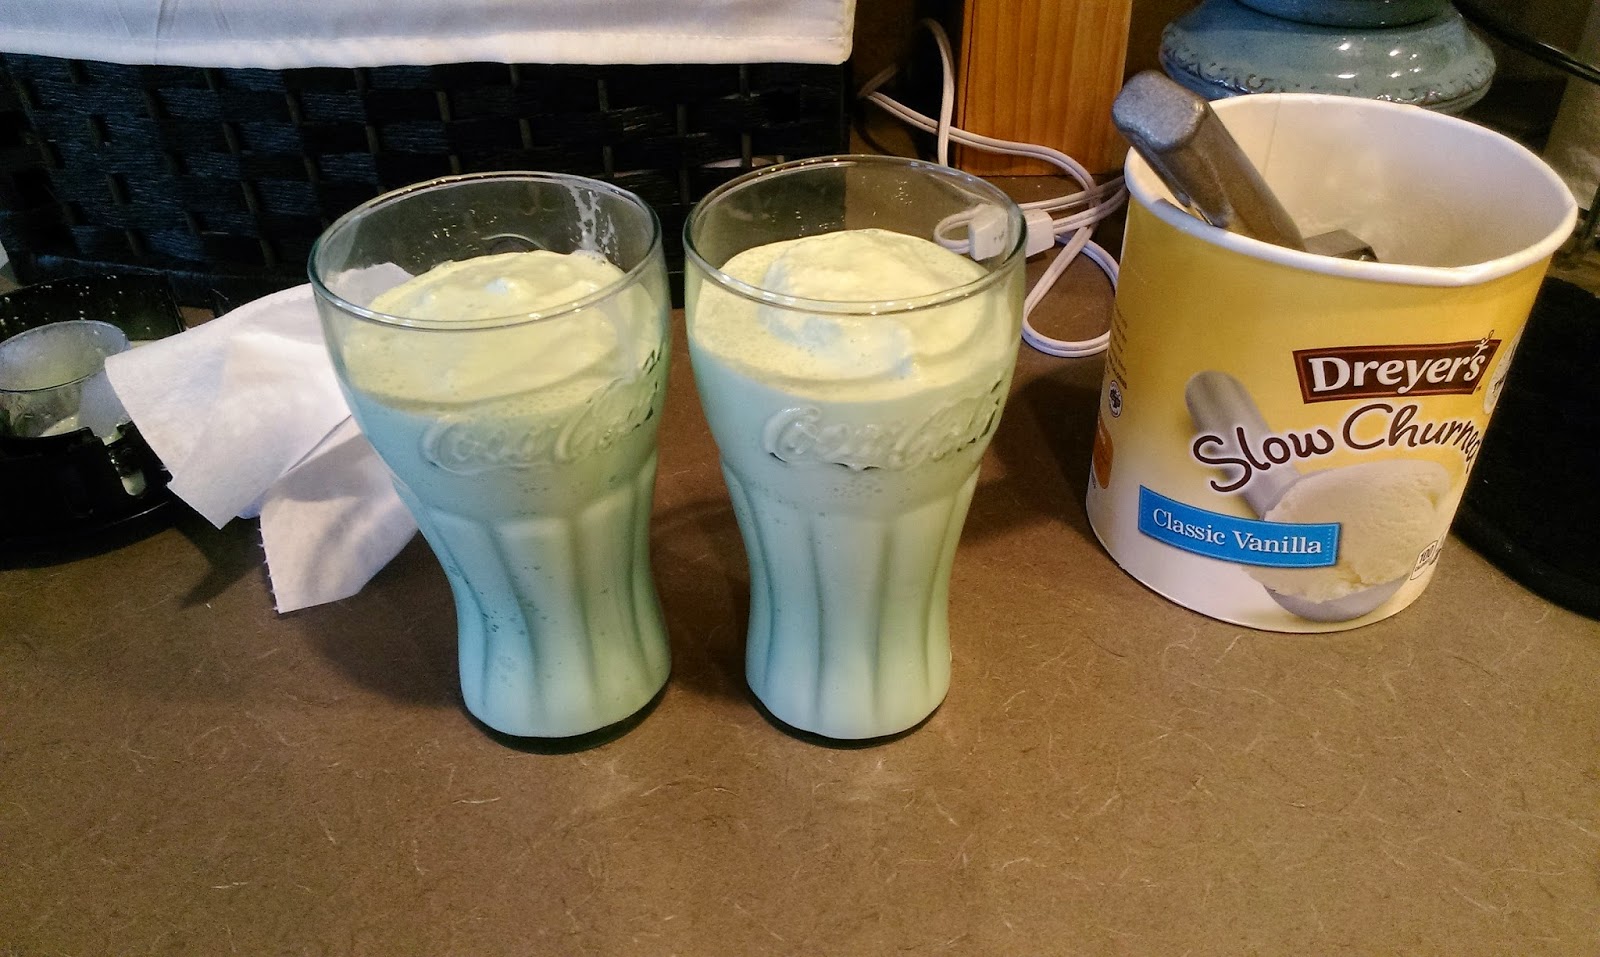

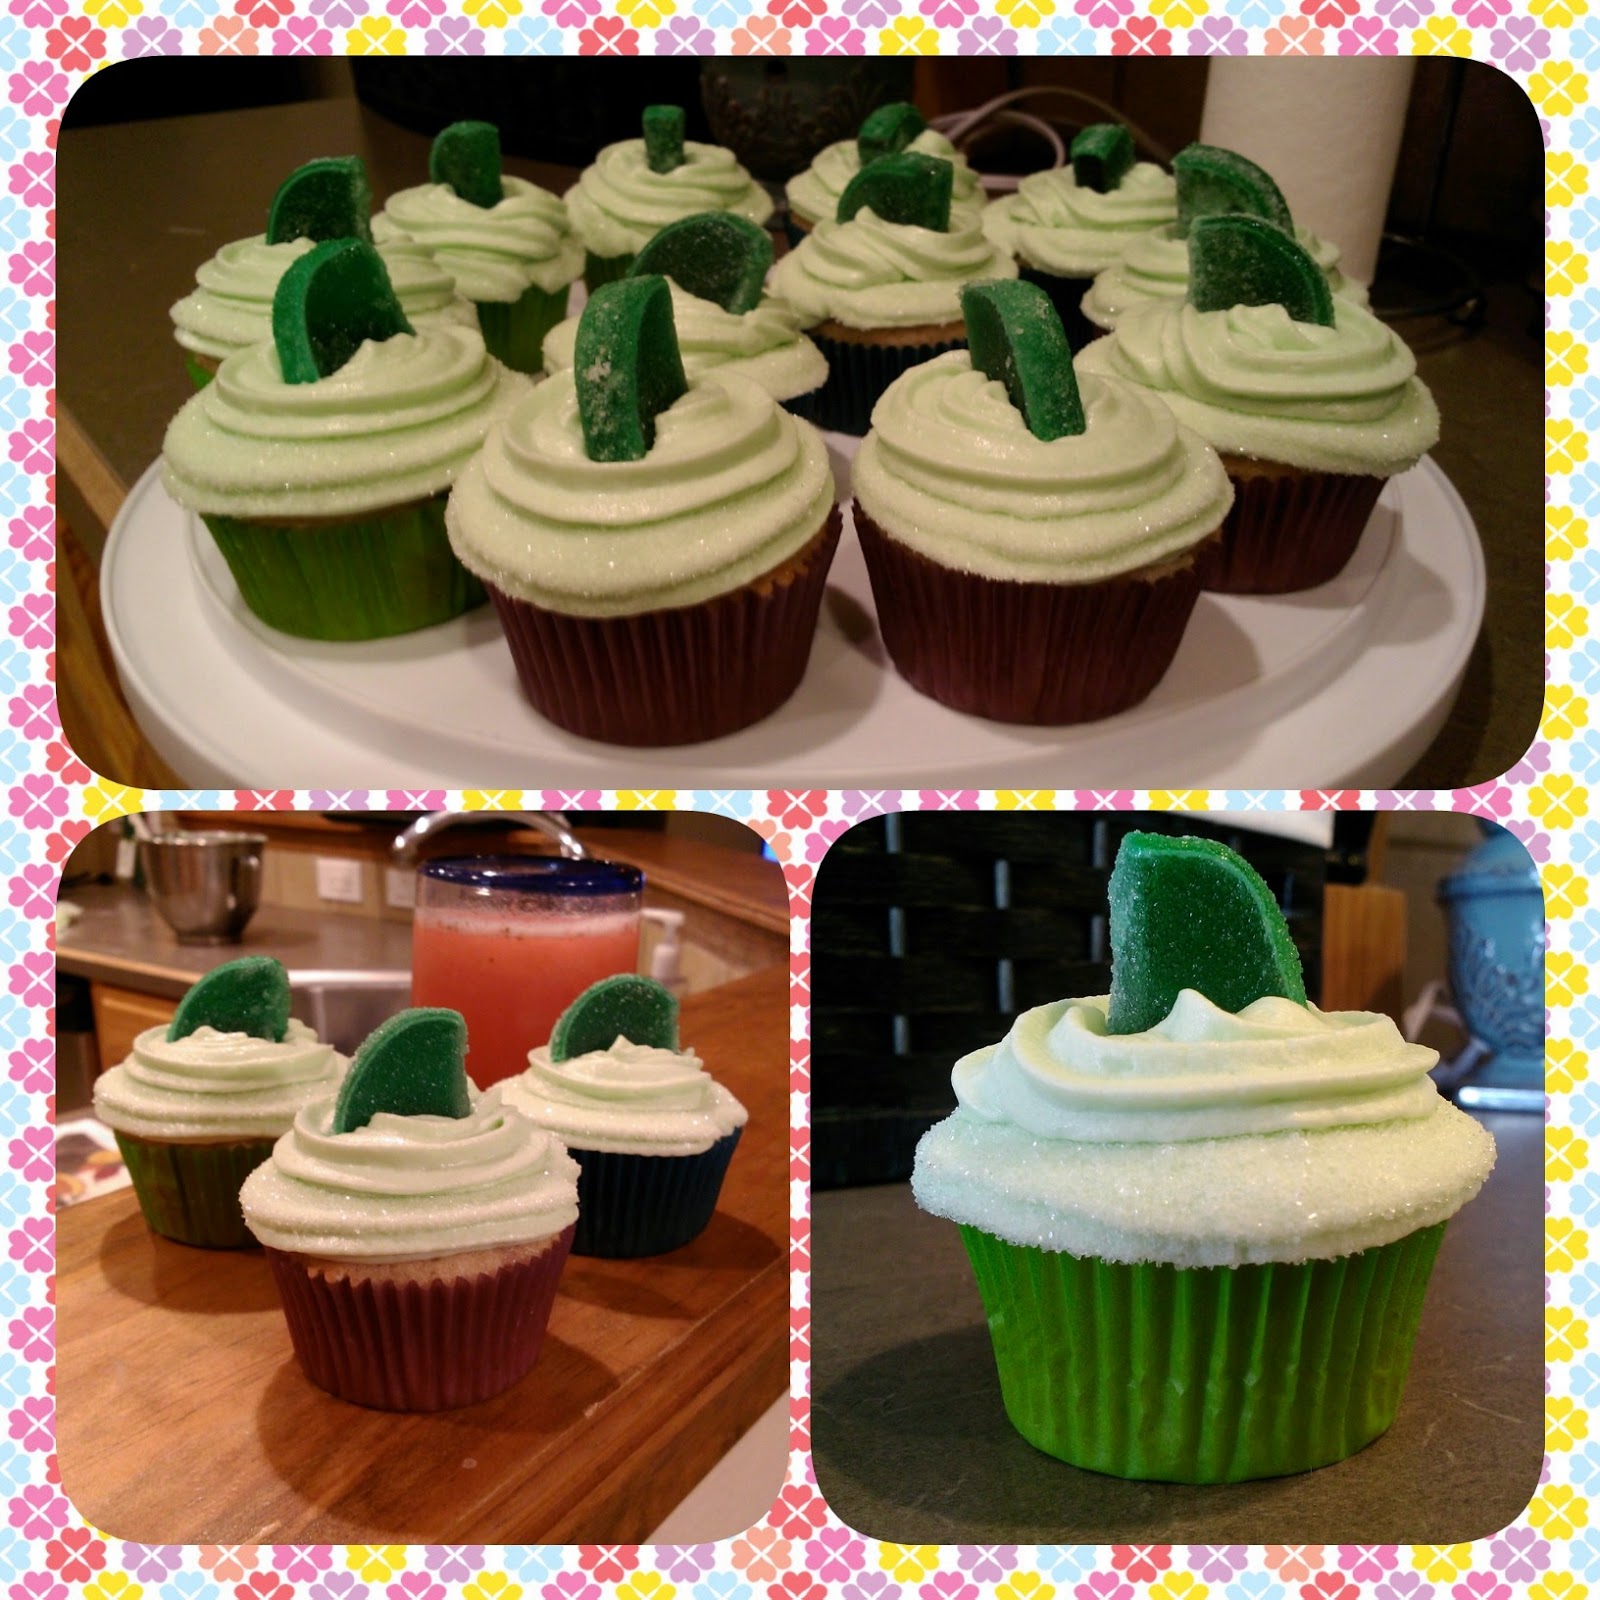

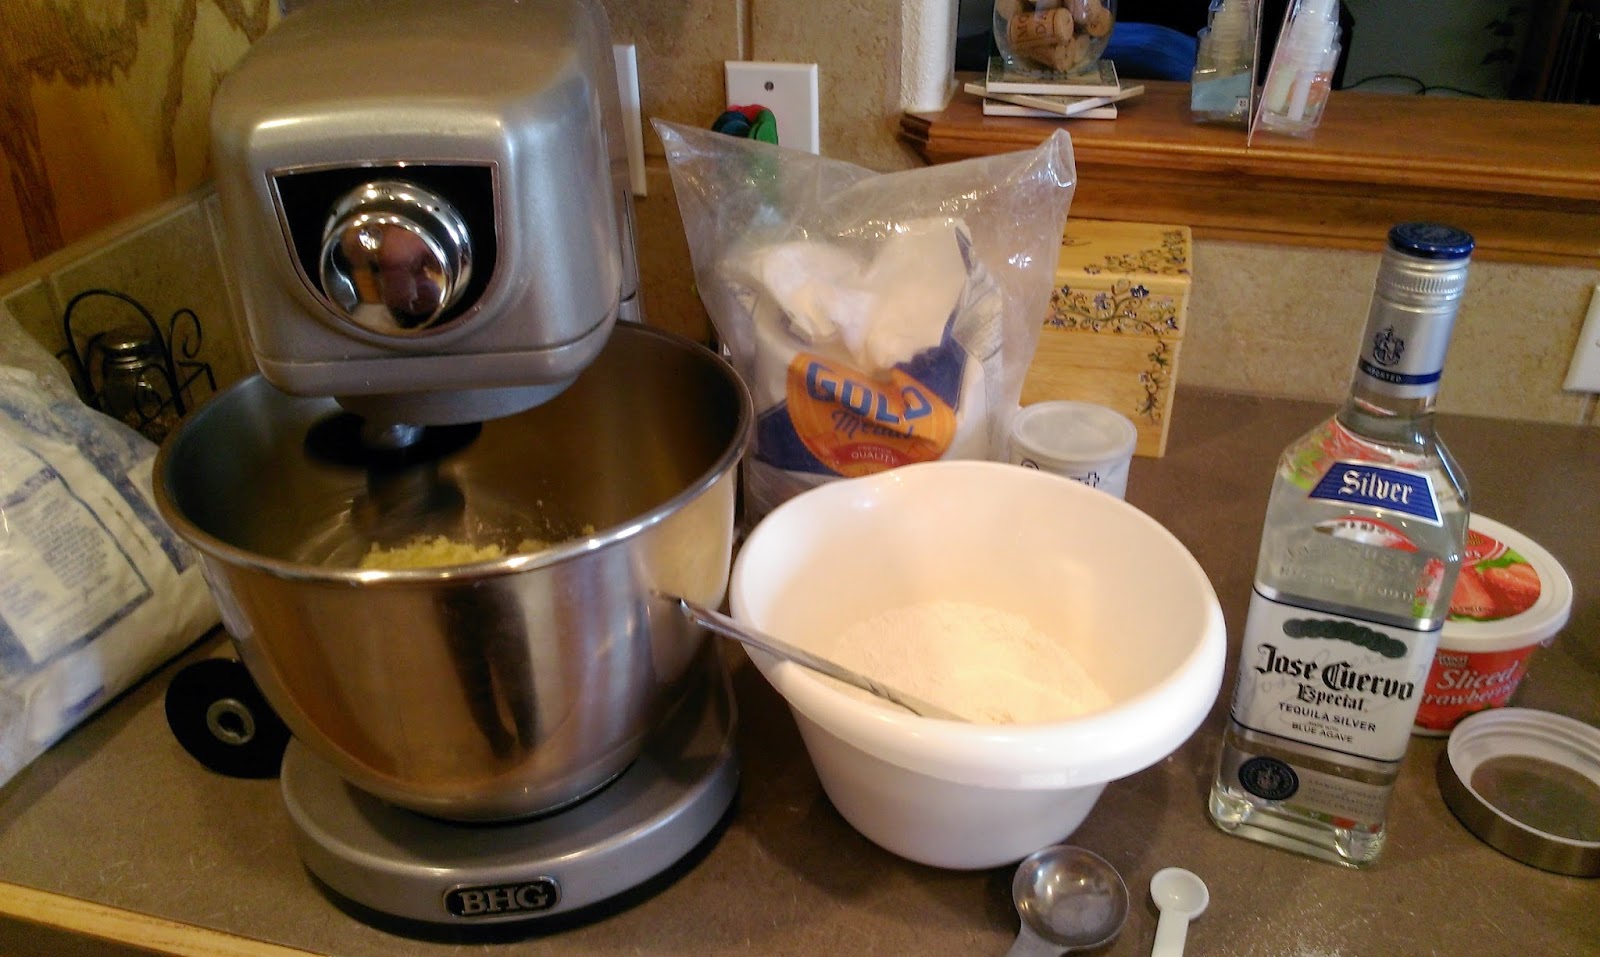
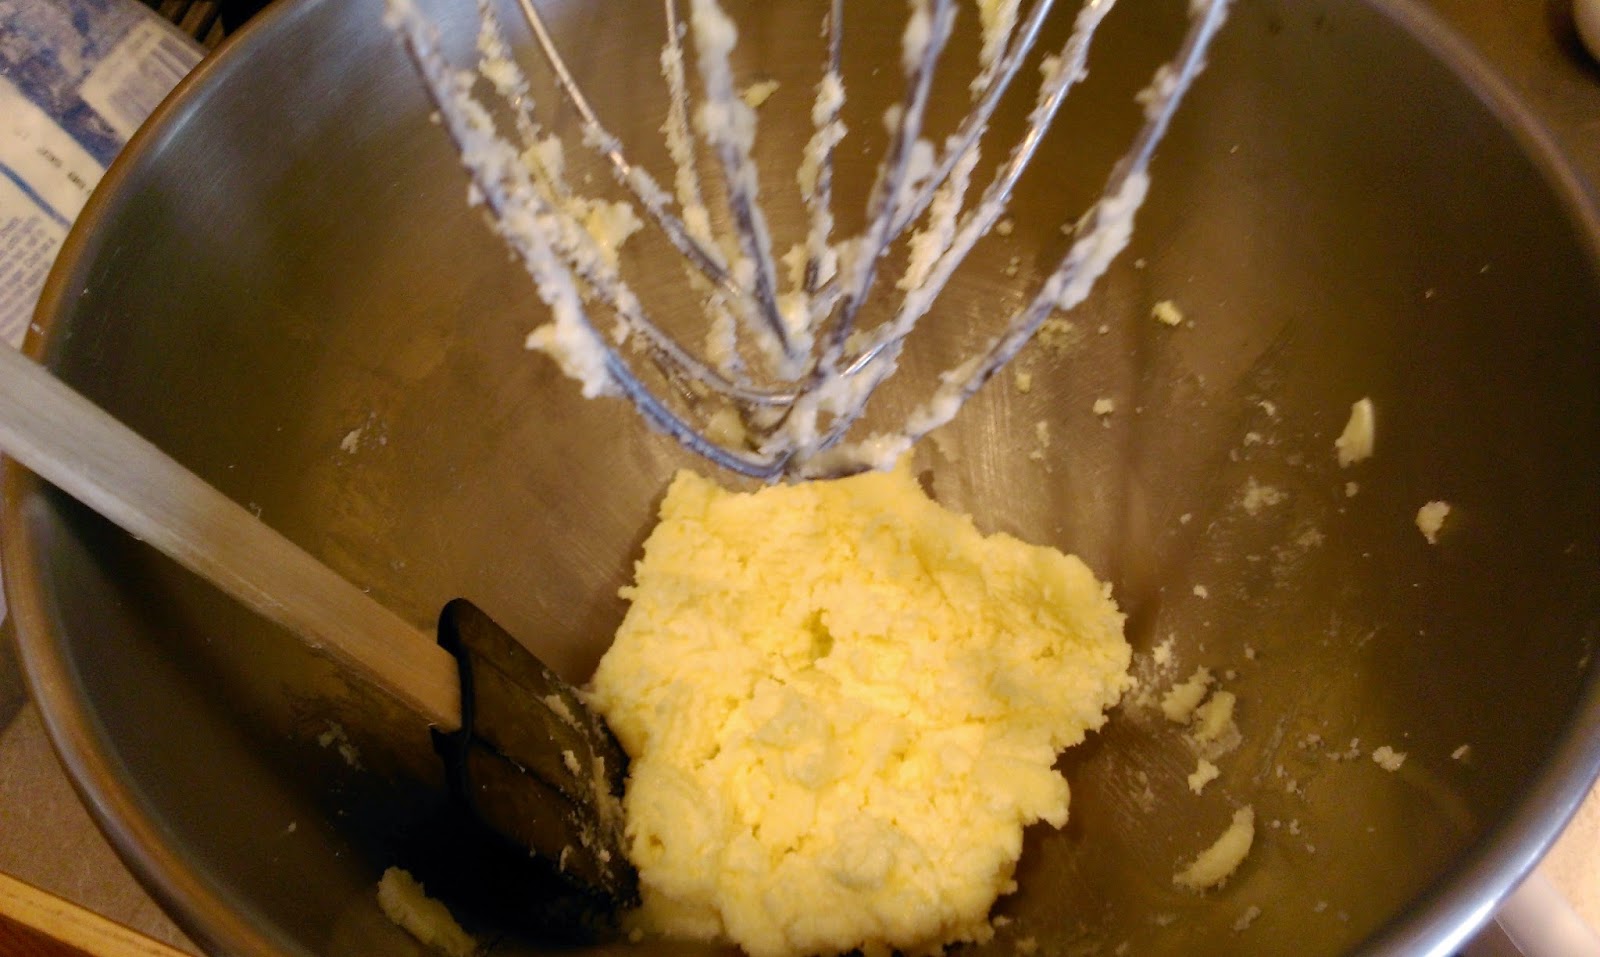


.jpg)