-
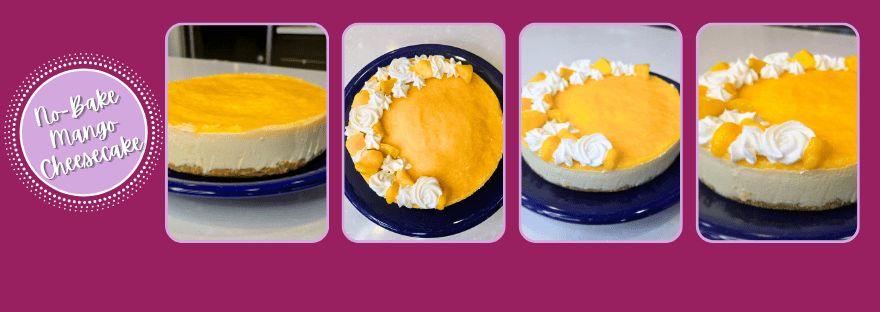
No-Bake Mango Cheesecake

Nope, we’re not living on the surface of the sun–it just feels like it. I’m still boycotting my oven until even just the mere thought of turning it on doesn’t make me breakout into a sweat. Since this heat is enough to make a man-go crazy, I decided to cool off with a no-bake mango cheesecake. I might still be sweaty, but it’s impossible to be grumpy when you’re eating a slice of creamy cheesecake swimming in mango flavor.
You could say I’m trying to mango with the flow. Recipe and Instructions
No-Bake Mango Cheesecake
Creamy mango cheesecake topped with mango puree layer.
If not gluten free, use any kind of graham cracker or cookie crumbs for the crust. Greek yogurt can be replaced with an additional 16 ounces of cream cheese, and monkfruit can also be replaced with regular powdered sugar. You can use fresh or frozen and thawed mango.
Ingredients
CRUST
*142 grams (9 crackers) Kinnikinnick gluten free graham crackers
*30 mL (2 TBS) sugar free syrup
CHEESECAKE FILLING
*224 g (8 ounces) 1/3 the fat cream cheese at room temp
*452 g (2 cups) nonfat Greek yogurt, strained overnight in cheesecloth to remove moisture
*113 g (4 ounces/1.5 cups) Cool Whip sugar free
*2 tsp vanilla extract
*1 TBS lemon juice
*120 g (1 cup) powdered monkfruit
*330 g (1 1/2 cups) frozen mango, thawed and pureed until smooth
*1 packet (~8 g) plain gelatin powder
*50 mL cold water
TOPPING
*1 packet (~8 g) of plain gelatin powder
*50 mL cold water
*165 g (3/4 cup) frozen mango, thawed and pureed until smooth
*1 TBS lemon juice
Directions
- Line an 8″ springform pan with Parchment paper and spray with cooking spray.
- Dump the graham crackers in a food processor and grind until smooth.
- Add in the syrup and mix everything together til a wet crumb is formed.
- Place crust mix into prepared pan and smooth to the edges (I use cooking spray on my hands to make this easier).
- Freeze the crust for 30 minutes, or if preferred, bake at 325 degrees for 10-12 minutes; let cool before adding cheesecake mix.
- Whip the cream cheese and yogurt in a stand mixer on medium high for 2-3 minutes until fluffy and smooth.
- Add in the vanilla, lemon juice, monkfruit, and mango puree, mixing well.
- Add in the Cool Whip and blend until smooth, 1-2 minutes.
- If your batter is too thin, whisk one packet of gelatin into a small bowl and let set for 10 minutes; heat in the microwave for 10 seconds and stir til smooth, then pour into cheesecake batter and gently mix on low.
- Pour cheesecake batter on top of the crust, making sure to smooth the batter out to the very edges of the springform pan, and freeze for 2 hours, until top is set.
- Make the mango gelatin by pouring 50 mL cold water into a small bowl and sprinkle the gelatin packet on top, stirring; set aside for 10 minutes.
- In a medium bowl, add the lemon juice and 1/2 cup mango puree.
- Heat the gelatin in the microwave for 10 seconds and stir until smooth, then add into the mango puree and mix well.
- Pour the mango gelatin on the frozen cheesecake and place in the freezer.
- Keep in springform pan for at least 2 more hours (preferably overnight) in fridge to set.
- To get incredibly clean slices for photos, freeze for at least 4 hours and then slice.
- Keep leftovers in fridge or freezer and enjoy!
Nutrition
Macros
8 servings
244 cal/10 f/30.8 c/7.7 p per slice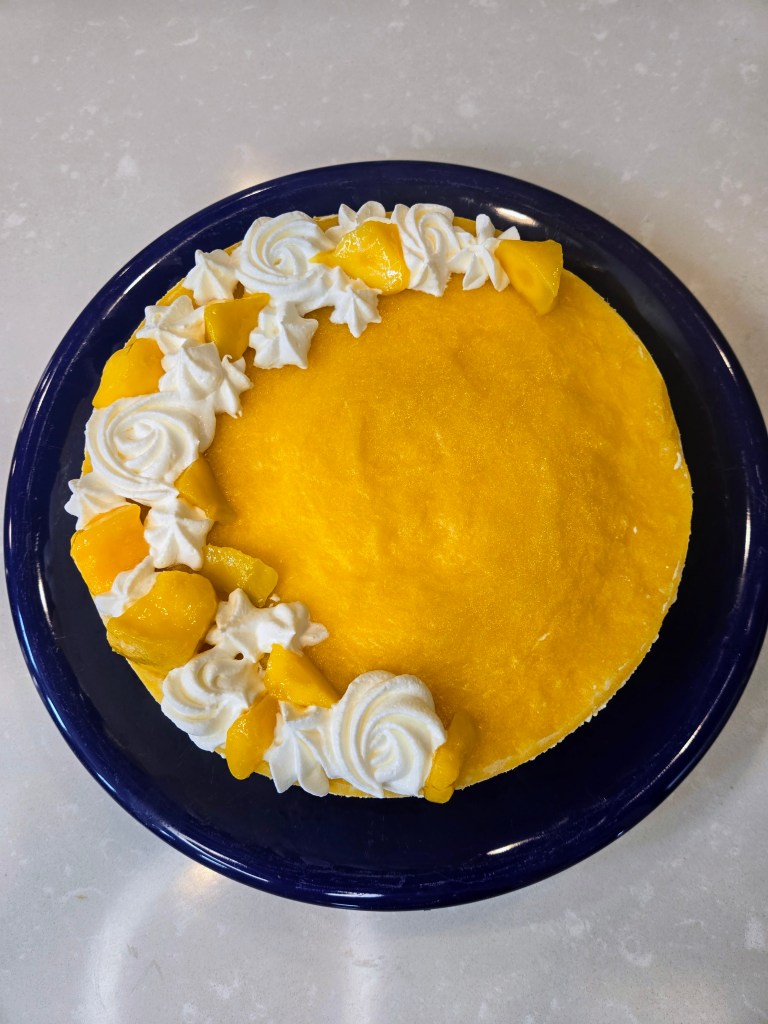
It takes two to mango…but I could definitely eat this entire cheesecake by myself. 
Every day that involves cheesecake is mango-nificent. - Line an 8″ springform pan with Parchment paper and spray with cooking spray.
-
Shark Cake Oh Ha Ha!
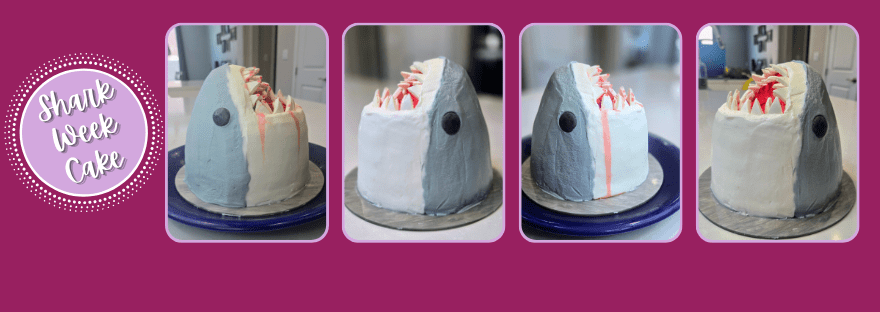
While most of you probably spent the 4th of July eating meat in tube form and blowing things up, I spent the day in preparation for my favorite holiday in July: SHARK WEEK! Look, sharks have been around WAY longer than America, so I’m gonna chews celebrating them every time because nofin compares to the awesomeness of sharks. I wanted to make my very own great white shark cake to launch the week off properly, so everyone, meet Bruce:

It’s simply the most fin-tastic week of the year. Would it have made more sense to make Bruce out of red velvet cake? Probably. But I have yet to find a box mix gluten free red velvet cake anywhere, and much like the great white, I prey on opportunity because I’m too lazy to go hunting about the pantry to find everything needed to make it from scratch, so, Bruce here is literally ready to party: he’s a gluten free funfetti cake with cream cheese frosting. I somehow managed to make him weigh in at 254 calories a slice for 8 slices total. Technically, I could try to eat him whole (I feel like he would appreciate this as a shark) and still not break the macro bank. I’m hooked. Follow along with the photo tutorial and video tutorials below to make your own so-fish-dicated shark cake, oh ha ha!
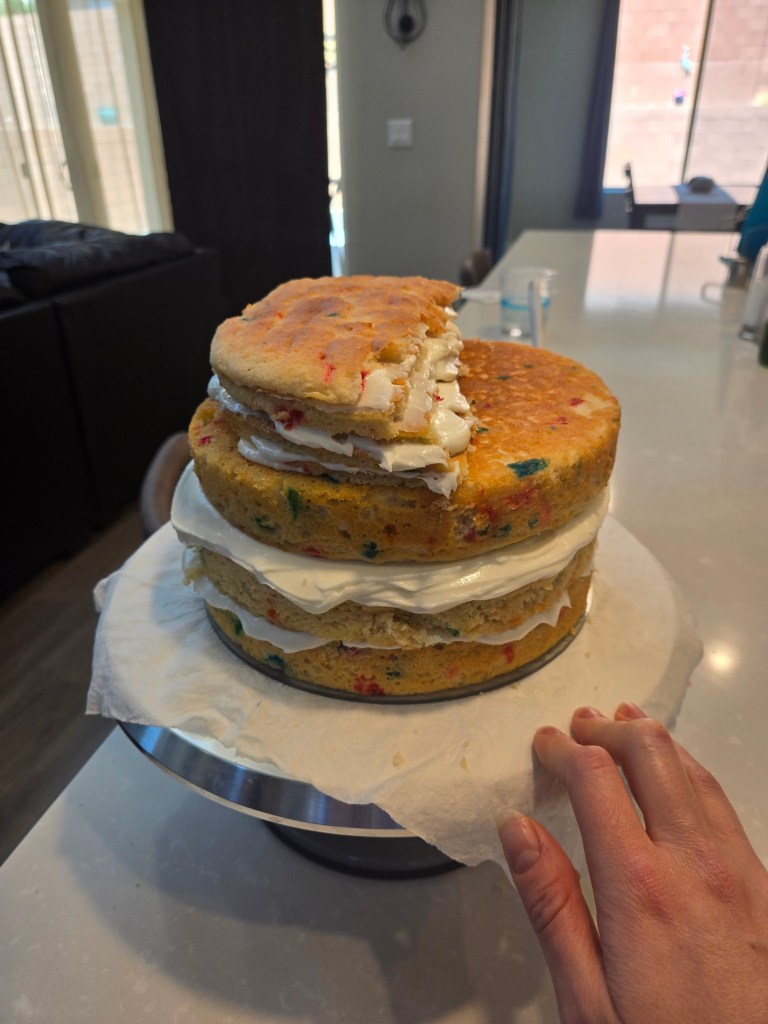
Level three 8″ round cakes and keep the pieces you cut off to add several layers of height for the nose. Freeze for 1 hour after layering. 
Carve away with a serrated knife to make a torpedo shape. I definitely needed to make him pointier but really stink at free carving. 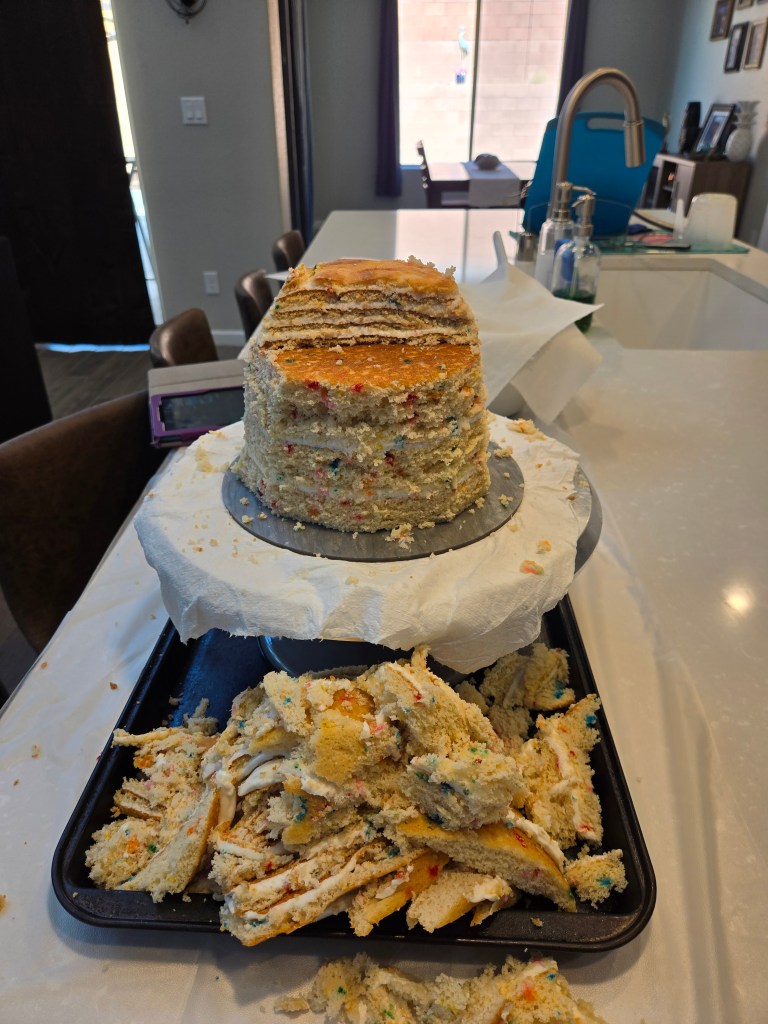
Things will get messy; I recommend carving on top of a large baking sheet to catch excess. You can make cake pops out of leftovers. 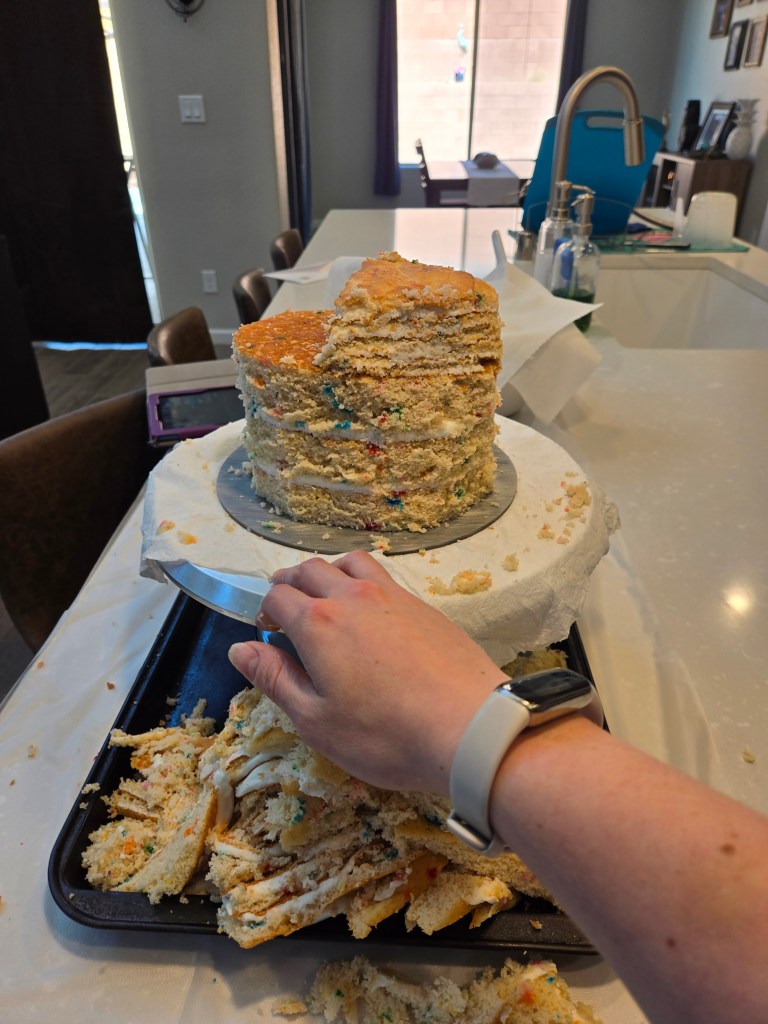
Once you’ve got things in the shape you want, add a few cake scraps the the top of the nose for a bit more height. 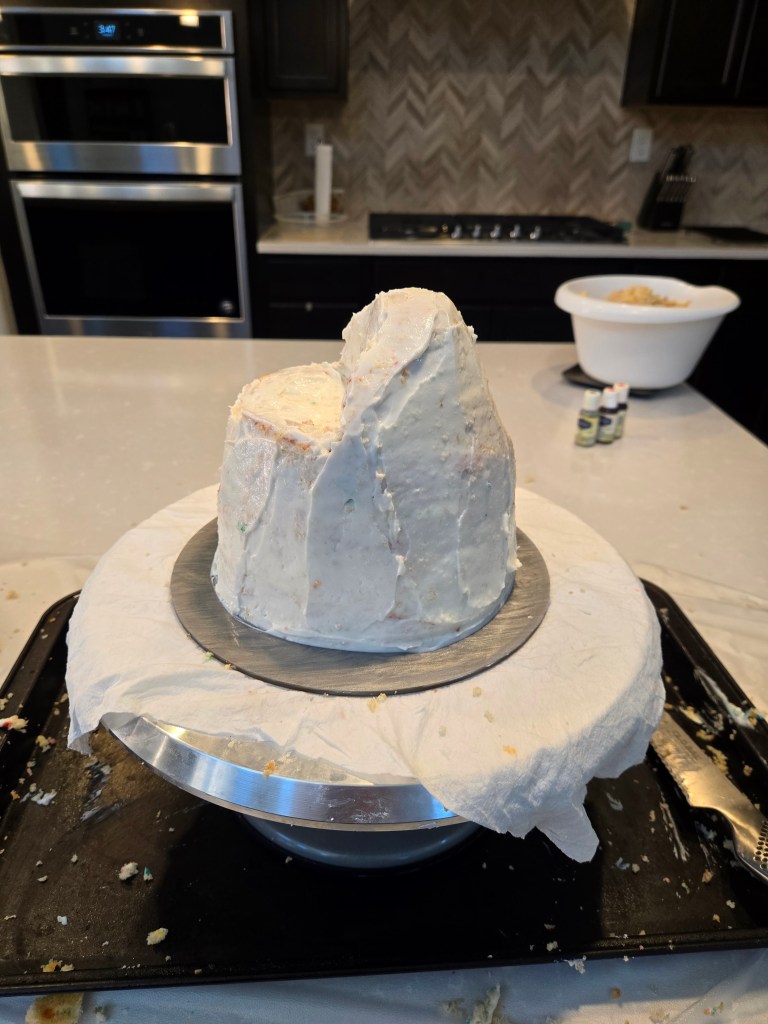
DEFINITELY CRUMB COAT! Freeze for at least 1 hour to ensure the crumbs stay put before adding the final layer. 
Paint the mouth first so if any red frosting bleeds, you can cover it up. We want the right Jaws and effect here, after all. 
Pipe around the mouth with a #12 round tip and white frosting. Then pipe his belly white. 
Dye remaining frosting gray and pipe all over his back. 
I used cut up acetate collars to make a flexible device to smooth the frosting all over since he’s so curvy. 
Once frosting was smoothed to my liking, I used candy melts cut into triangles for teeth and 2 black candy melts for those spectacularly creepy eyes. 
“Ready for my closeup. Consider this Air Jaws 2024.”
-Bruce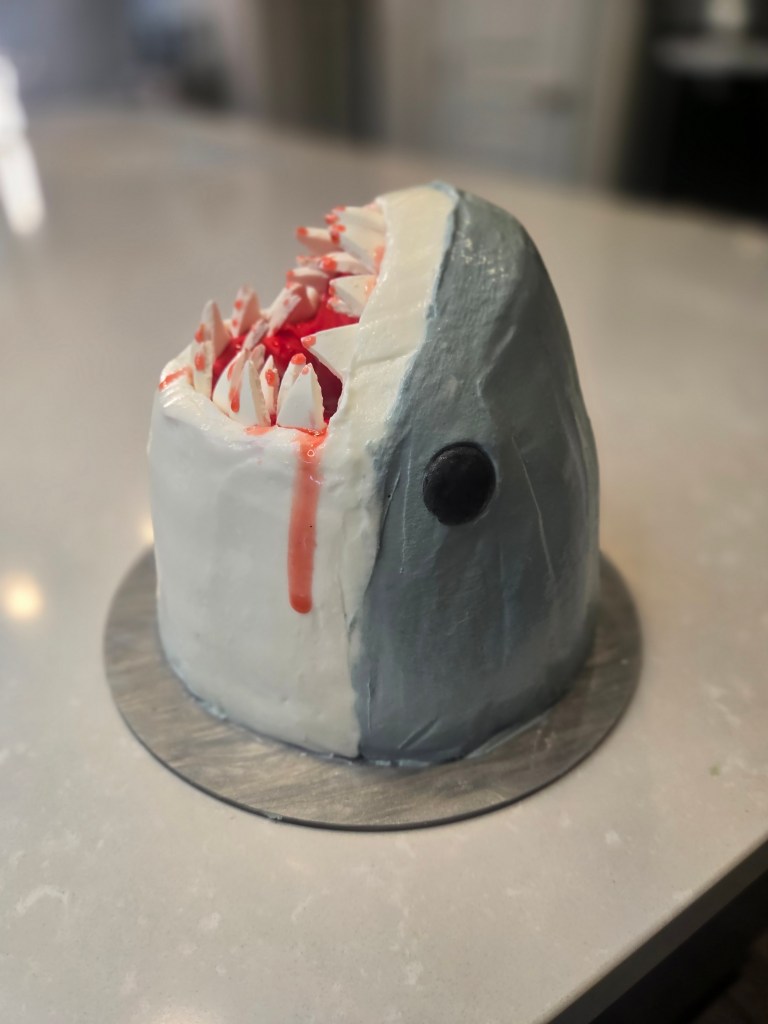
Since Halloween isn’t close enough, I used strawberry syrup and a paintbrush to add blood. 
He’s so beautiful. 
Do I cut into him, or does he cut into me?! 
Every time I open the fridge, it’s like looking into a mirror. Don’t get stuck between a rock and a shark place–watch the video tutorial to learn how to carve your own! I definitely recommend carving til your shark it a lot pointier on top than mine is. I followed along with this YouTube tutorial, and it was SO HELPFUL. My nose layers just felt really flimsy, so I was afraid to cut into them to make them more narrow. If I hadn’t been SO EXCITED to make this cake, I would’ve frozen him for a few hours and carved into him more. Either way, this is a cake I have been dreaming up for a few years, so I’m thankful he turned out okay (and that my favorite shark is a great white and not a hammerhead, because LORD that would’ve been difficult to make). He might look like a sandworm from Dune when you’re looking at his mouth head-on, and a few times during carving I had to ask myself if this was a shark cake or a cake, um, more appropriate for a bachelorette party, but in the end, he definitely looks like a shark and not something you need to shield your children’s eyes from. Unless your kids are scared of sharks. Then sit them in front of Discovery Channel all week so they can discover a healthy fascination for some of the longest surviving creatures on the planet. ‘Til next time, my fellow eaters!
Recipe and Instructions
Gluten free funfetti shark cake with cream cheese frosting
A great white shark cake that's bloody perfect for Shark Week
If not gluten free, use any kind of box cake mix. Monkfruit can also be replaced with regular powdered sugar for frosting.
I recommend making one box cake mix at a time unless you have a HUGE mixer and double ovens, so split the ingredients listed below in half. Do the same for the frosting to not overload the mixer there as well. You will have an extra cake layer leftover. You can keep this to use as carving pieces for the nose or freeze to use later. When carving, you will have lots of leftover scraps; you can turn these and the remaining cake layer into cake pops with the leftover frosting for less food waste.
Ingredients
CAKE
*2 boxes of gluten free yellow cake mix
*150 grams (2/3 c) unsweetened applesauce or fat free Greek yogurt
*2 cups fat free or skim milk
*6 eggs
*2 tbs vanilla extract
FROSTING
*448 grams (16 ounces) of 1/3 the fat cream cheese, softened
*452 grams (2 cups) fat free Greek yogurt, strained overnight
*Two 16 oz bags of Lakanto powdered monkfruit
*1/2 tsp citric acid
*2 tbs clear vanilla
*2 tbs milk
*1 Tsp vanilla
*Red and gray/stone gel dye
*2 #12 piping tips
*White and black candy melts
Directions
- Preheat oven to 350 and spray 4 8″ round pans with cooking spray.
- Whisk cake ingredients together in a stand mixer on low for 30 seconds before switching to medium-high for two minutes.
- Pour batter into prepared pans.
- Bake for 30 minutes and allow cakes to cool fully before frosting (can pop in the freezer to speed up).
- To make frosting, whisk cream cheese and yogurt for 3 minutes before adding in half the powdered monkfruit, extract, citric acid, and milk.
- Add in remaining monkfruit mix fully.
- Take a small amount of frosting out of the mixing bowl and put into a medium bowl; dye this red.
- Once cakes are cooled, level and keep scraps to use as nose pieces; I cut mine in half.
- Place a cake layer face down on a cake plate and add a thick layer of plain white frosting on top; repeat 2 more times until you have 3 layers.
- Add frosting to the backs of the level cake scraps and place so they’re an inch or two in to the edge of the cake (see 1st photo above); freeze for one hour.
- Use a serrated knife to carve in the shape of a torpedo and hollow out the mouth area.
- Crumb coat the entire cake in a thin layer of white frosting and freeze for at least one hour.
- Use an angled spatula to pipe red frosting in the mouth; use wavy smoothing patterns to give the mouth texture inside.
- Place some plain white frosting into a piping bag with a #12 round tip. Trace around the mouth to outline his lips.
- Pipe white frosting on the belly side of the shark.
- Dye remaining frosting gray and load into another piping bag with a #12 round tip. Pipe gray frosting all over the back of the shark.
- Smooth out all over, being careful while smoothing the white to gray borders. I found it easiest to use acetate collar/flexible plastic cut into small squares to smooth all over…you can leave some rough texture/lines to look like scars.
- Cut white candy melts in the shape of triangles and insert into the mouth for teeth.
- Use two black candy melts as eyes.
- If desired, use a food-safe paintbrush to add strawberry syrup to the teeth and mouth to make it look like blood.
- Keep your shark in the fridge until ready to devour!
Nutrition
Macros
8 servings
254 cal/28.1 c/11.1 f/10.4 p per slice
There’s some-fin special about this one. 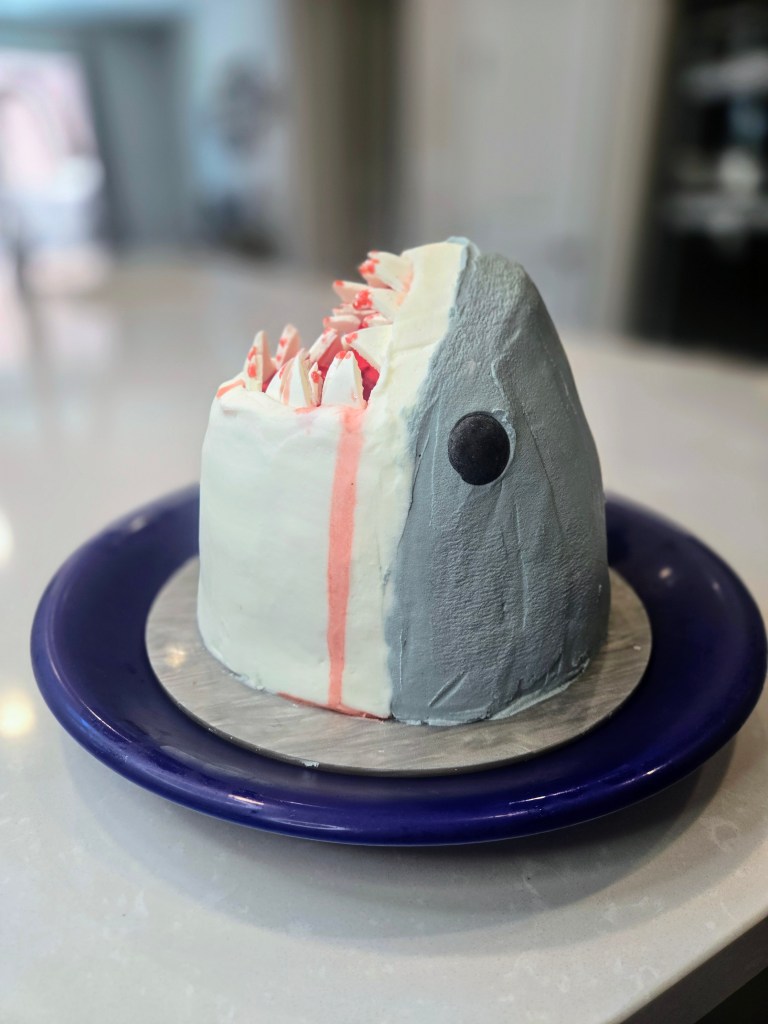
Stay Jawesome! - Preheat oven to 350 and spray 4 8″ round pans with cooking spray.
-
Boozy Peach Cobbler
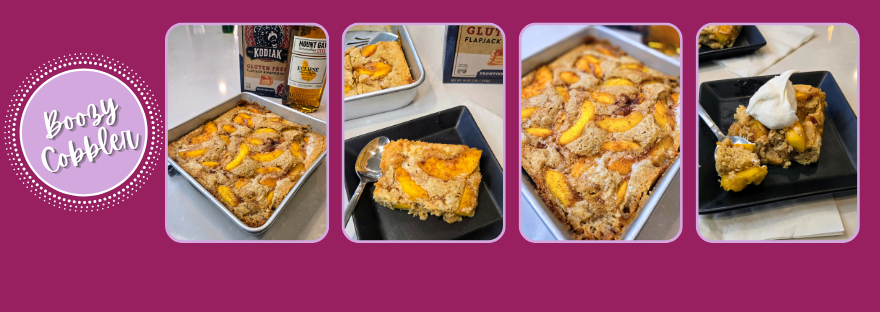
My husband is not a sweets guy (we realize the irony), but each year for his birthday, I ask him what kind of dessert he think he might tolerate in an effort to ensure I get to utilize my love language (acts of service with a specialty in baking). He requested a boozy peach cobbler this year, and since I ap-peach-iate him so much, of course I obliged. Since he owns a giant peach of my heart, I wanted to make sure his birthday celebration was wonderful. I ended up using entirely too much spiced rum, though, so this definitely got the party started for a rum-believable birthday. Unless you’re married to Captain Jack Sparrow, I suggest using the altered amount of booze to milk ratio I’ve included below.
Practice what you peach and all. Recipe and Instructions
Boozy peach cobbler
Spiced rum and sweet peach cobbler perfect for a quick dessert.
If not gluten free, use any kind of ‘just add water’ pancake mix. Rum can be replaced with all milk to make alcohol free; this would also be great with peach Schnapps, coconut rum, or a vanilla-flavored vodka as well. Try to start with 1/4 cup milk and 1/4 cup alcohol and taste batter to decide if you’d rather add more milk or alcohol–you will need 3/4 cup of liquid TOTAL.
Ingredients
COBBLER
*57 g (1/4 cup) cold butter
*126 g (1 cup) Kodiak Cakes gluten free flapjack and waffle mix
*96 g (1/2 cup) golden monkfruit or brown sugar *1/4-1/2 cup spice rum (see note above)
*1/4-1/2 cup fat free or skim milk (see note above)
*1 large egg
FRUIT
*425 g (2 1/2 cups) frozen peaches, thawed, or regular peaches, pitted and diced
*96 g (1/2 cup) allulose or granular sugar
*1 tsp cinnamon
*1/4 tsp nutmeg
Directions
- Preheat oven to 350, and spray an 8″ square or pie pan with cooking spray.
- Dump the butter into the pan and place into the oven to melt.
- In a large bowl, whisk flapjack mix and golden monkfruit/brown sugar together before adding in the liquor, milk, and egg, blending well.
- Carefully remove pan with melted butter from oven and pour batter on top.
- In the now empty bowl, dump fruit, allulose/sugar, cinnamon, nutmeg, and mix well.
- Distribute peach mixture on top of the cobbler batter as evenly as possible.
- Bake for 35-40 minutes, until a toothpick comes out with desired amount of batter crumb; less time if you like a gooier cobbler.
- Let cool on a cooling rack for 30 minutes before serving.
- Slice and top servings with ice cream or Cool Whip.
- Keep leftovers covered in fridge.
- Reheat cobbler leftovers in microwave for 30 seconds.
Nutrition
Macros
6 servings
242 cal/35.7 c/9.1 f/4.3 p per slice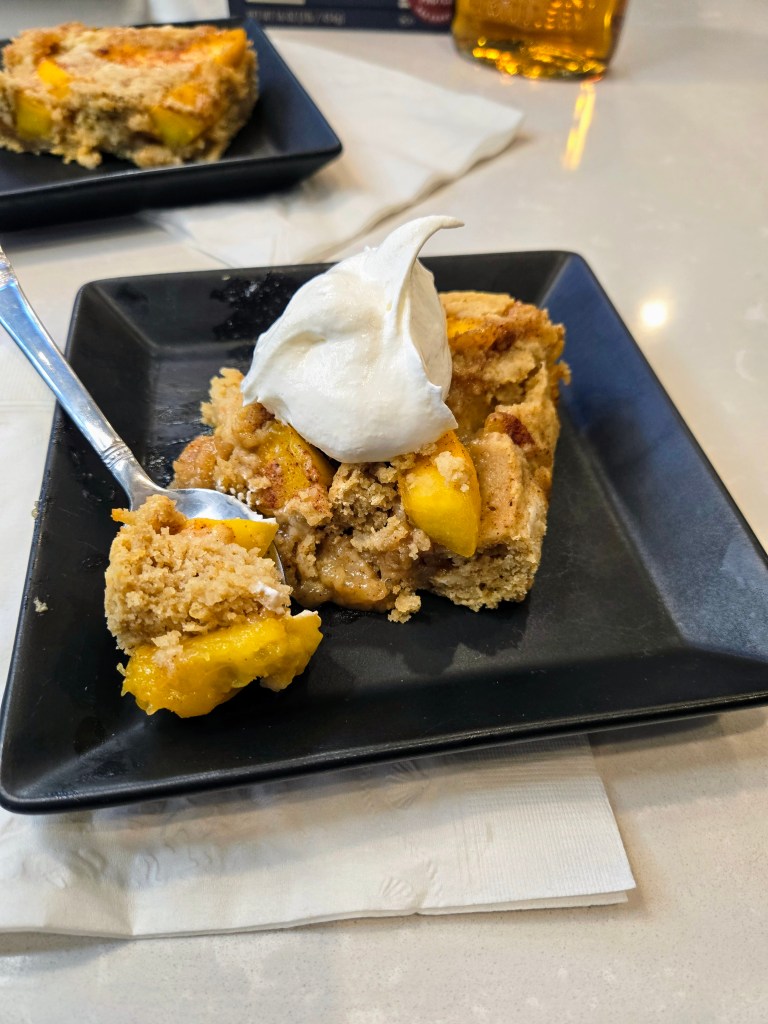
Can confirm there will be nothing but peach and quiet while everyone is eating this! 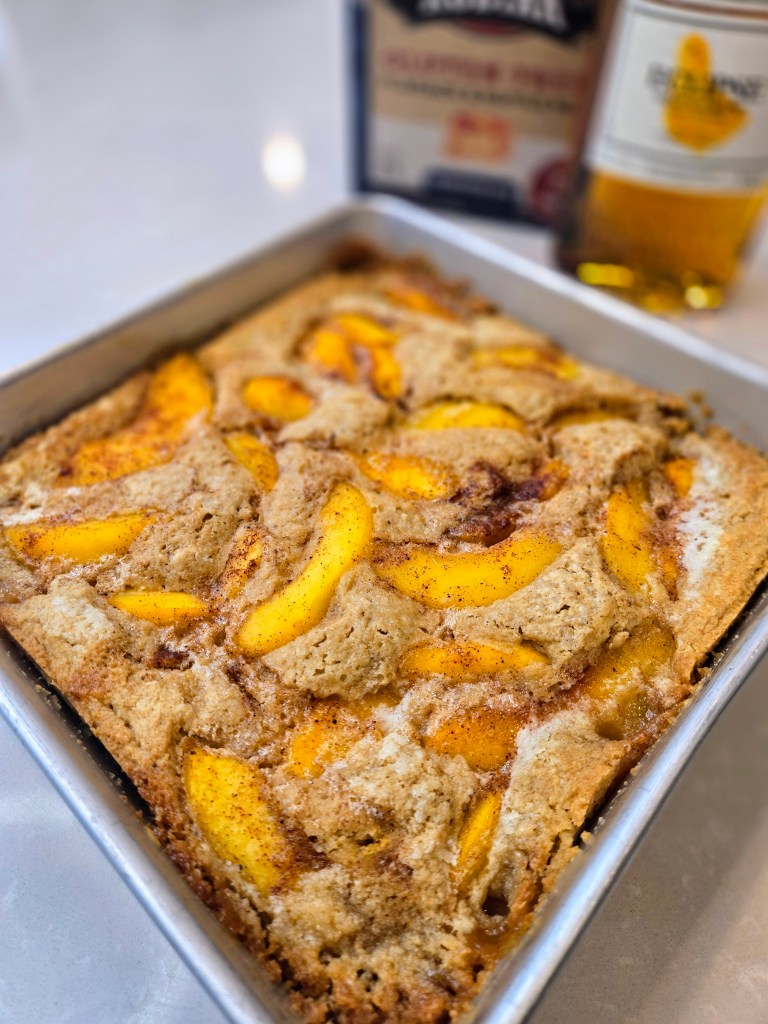
You know you wanna peach of this! - Preheat oven to 350, and spray an 8″ square or pie pan with cooking spray.
-
S’mores Pie
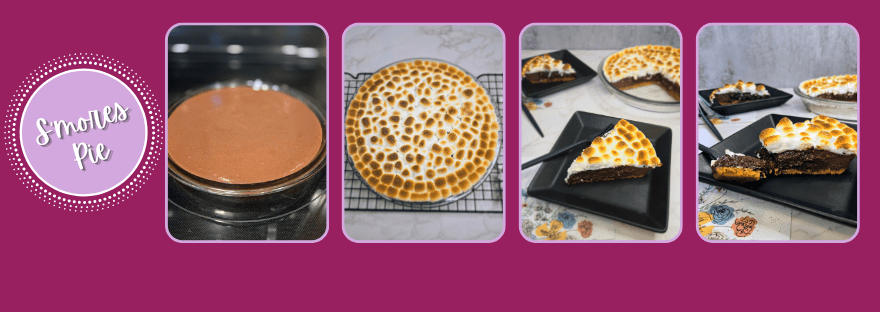
As the great Britney Spears once sang, “Gimme, gimme (s’)more…” Summer is here is all it’s sunburning glory, so I thought what better way to begrudgingly acknowledge its existence than with PIE. Specifically, one made with buttery graham cracker crust, silky chocolate filling, and toasty marshmallows on top. I may hate summer, but I can definitely cope by eating my way through it with traditional summer treats. I also might be a hot mess, but so are S’mores, so we go together quite well. Read up on the recipe below before making your very own s’mores pie.
Cause, ya know, the s’more, the merrier… Recipe and Instructions
S'mores pie
Buttery graham cracker crust, chocolate filling, and toasted marshmallows make for the perfect summer pie.
If not gluten free, use any kind of graham cracker crumbs for the crust. Recipe made with a whey-casein blend protein powder; vegan protein powder will likely need 1-2 TBS more milk added.
Ingredients
CRUST
*134 g (6 sheets) Pamela’s gluten free graham crackers
*24 g (2 TBS) granular sweetener (I used allulose; regular sugar also works fine)
*42 g (3 TBS) cold light butter
PIE FILLING
*120 g (1 cup) Quest chocolate milkshake protein powder
*30 g (1/4 c + 2 TBS) cocoa powder
*1.5 tsp vanilla extract
*3 eggs
*3/4 cup skim or fat free milk
*21 g (1.5 tbs) light butter, melted
*94 g (1/4 c + 2 TBS) unsweetened applesauce
TOPPING
*120 g mini marshmallows or large marshmallows cut in half
Directions
- Preheat oven to 350, and spray a 8-9″ pie pan with cooking spray.
- Dump the butter, 2 TBS allulose, and graham crackers in a food processor and grind until smooth.
- Place crust mix into prepared pan and smooth to the edges.
- Bake crust for 5-8 minutes, until golden and a little puffed.
- Let cool a bit on a cooling rack while you make the pie filling.
- Whisk protein powder and cocoa powder until blended.
- Add in the remaining filling ingredients, whisking just until everything comes together.
- Pour on top of crust and bake for 18 minutes; the center should still be jiggly, but edges set.
- Remove from oven and carefully top the pie with marshmallows.
- Place back into the oven and broil for 2-3 minutes, until marshmallows are as toasted as you prefer.
- Alternatively, bake pie for 20 minutes, top with marshmallows, then use a torch to toast.
- Let set in freezer for 2 hours or fridge for 4 hours before serving.
- Keep leftovers in fridge and enjoy!
Nutrition
Macros
8 servings
237 cal/29.5 c/7.4 f/13.1 p per slice
Don’t worry about burning calories in this heat, just burn marshmallows! 
Life’s s’more fun with pie anyway. - Preheat oven to 350, and spray a 8-9″ pie pan with cooking spray.
-
Mimosa Cupcakes with Floral Piping Tutorials

These un-peel-ievable floral cupcakes are mimosa-flavored with a mimosa buttercream frosting, and they are the best thing to happen to mimosas since, well, the first person decided they wanted champagne for breakfast without judgment, so they splashed a little OJ into the glass, too. I hadn’t piped a floral design in ages, and my allergies continually remind me that it is, in fact, spring, so floral cupcakes are 100% seasonally appropriate. Given the quantities of allergy meds I am on, I 100% forgot to take pictures of the piping process (citrusly?!), BUT, I did remember to film how I piped each, so you can find a video tutorial below along with the recipe. I adore how the two-toned frosting looks with this design, and it’s a relatively simple process to follow along with. Florals can 100% be messy and a little imperfect while still looking incredibly charming. You could say they’re ~Cuties~ in that way…I will Vitamin C myself out.
No need to be a ~mimosional~ wreck about those missing piping photos with these beauties. Orange you glad I at least remembered to film this?! Recipe and Instructions
Gluten free mimosa cupcakes with mimosa buttercream
A fluffy yellow cupcake with buttery meringue frosting
If not gluten free, use any kind of white or yellow cake mix. Monkfruit can also be replaced with regular powdered sugar for frosting.
Ingredients
CAKE
*1 box of gluten free yellow cake mix
*75 grams (1/3 c) unsweetened applesauce or fat free Greek yogurt
*6 oz preferred champage
*3 oz OJ
*3 eggs
*2 tsp orange extract
FROSTING
*224 grams (8 ounces) of 1/3 the fat cream cheese, softened
*112 grams (1/2 cup) of butter, softened
*16 oz Lakanto powdered monkfruit
*1/4 tsp citric acid
*2 oz champage
*1 tsp orange extract
*1 Tsp vanilla
*Yellow and peach or orange gel dye
*104 and 2D piping tips
*Large pearl sprinkles
Directions
- Preheat oven to 350 and place cupake liners in muffin tin.
- Whisk cake ingredients together in a stand mixer on low for 30 seconds before switching to medium-high for two minutes.
- Fill each cupcake liner 3/4 full.
- Bake for 18-20 minutes, and allow cupcakes to cool fully before frosting.
- To make frosting, whisk cream cheese and butter for 3 minutes before adding in half the powdered monkfruit, extract, citric acid, champagne, and OJ.
- Add in remaining monkfruit mix fully.
- Take a small amount of frosting out of the mixing bowl and put into a medium bowl; dye this yellow, and dye remaining frosting in the mixing bowl peach.
- Place each piping tip into a piping bag, then put the bag in a deep cup, folding the edges of the bag over the side of the cup.
- With an angled spatula, slather the yellow frosting all around the sides of the piping bag, evenly coating the sides of each bag.
- Dump the peach frosting into the middle of the piping bag; pipe some frosting out until you start seeing the yellow mix with the outer edges of the peach.
- To pipe the regular flowers, use the 104 tip with the skinny edge facing you to pipe semi circles, slightly overlapping the petal all around the cupcake.
- Repeat this process to form a second and third layer on top; place sprinkle pearls in the center of each flower.
- To pipe hydrangeas, use the 2D tip; pipe and gently twist in one direction before pulling away to make each hydrangea.
- You can overlap these to cover any blank spaces on the cupcake.
- Keep cupcakes covered and in the fridge. They are best served at room temp, so remove from fridge 30 minutes before eating. Enjoy!
Nutrition
Macros
20 servings
152 cal/20.9 c/6.5 f/2.5 p per slice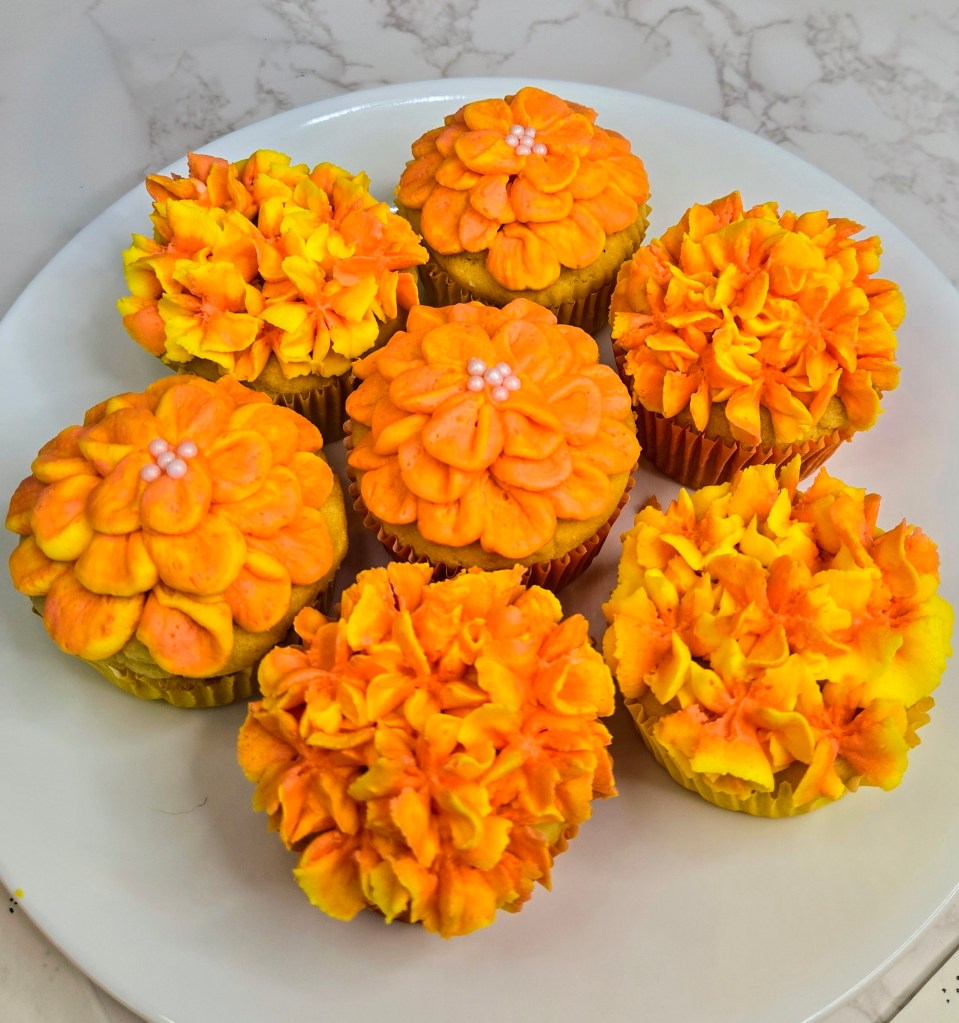
These are totally my main squeeze of the week. 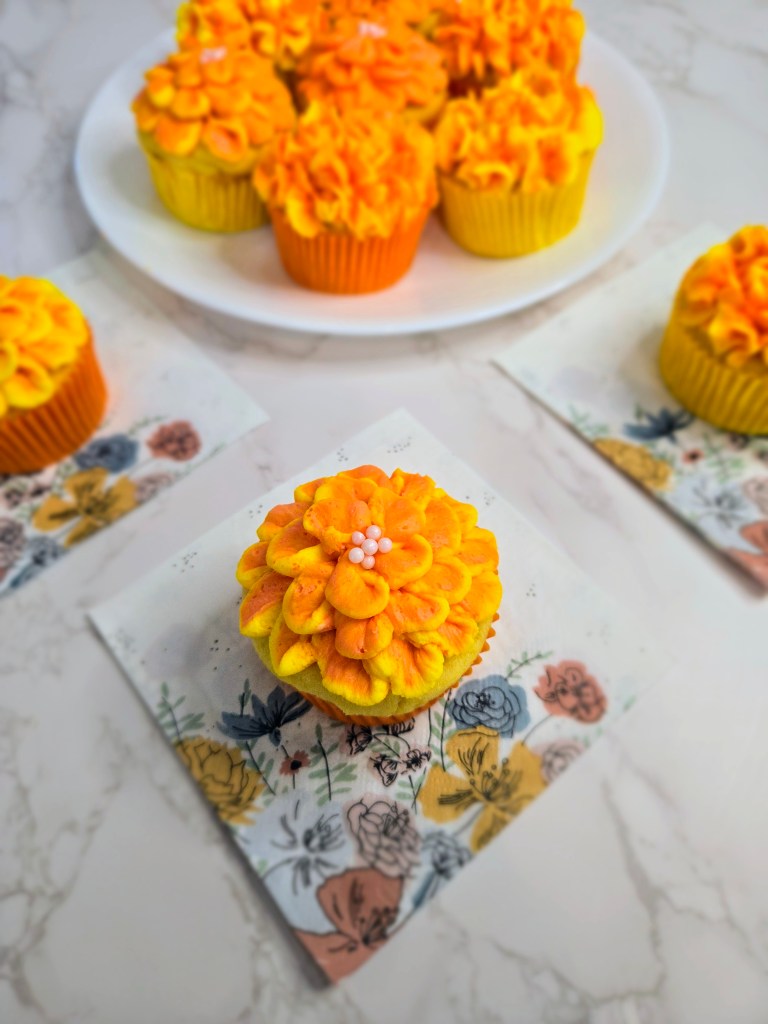
My love for these cupcakes is bottomless, much like the best mimosa brunches. - Preheat oven to 350 and place cupake liners in muffin tin.
-
Blue Spirulina Mini Cheesecakes
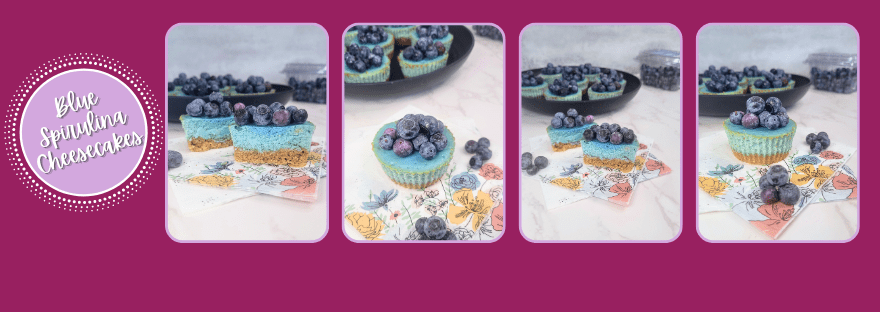
Feeling blue? Nothing a little cheesecake can’t fix! I ordered some blue spirulina powder to put into my protein smoothie bowls (find them + dozens of other protein smoothie bowl recipes on my Instagram), but I wanted to see if I could bake with the powder since it turns things the most b-e-a-utiful shade of light blue. Think blue Gatorade but better (Gatorade flavors are called only by their colors in this house, with the exception of lemon lime Gatorade for reasons unknown to us). Any-blue, thrilled to report that you 100% can bake with blue spirulina to make your wildest blue…da ba dee da ba daa…dreams come true.
All in blue time. Blue Spirulina Mini Protein Cheesecakes
Blue-hued mini cheesecakes with 7g protein each
Use can your preferred whey-casein blend protein powder; allulose can also be replaced with regular sugar, but this will change the macros. If not gluten free, you can use regular graham crackers or shortbread.
Ingredients
CRUST
*96 g gluten free graham crackers, pulsed to a fine powder
*30 mL (2 TBS) syrup
CHEESECAKE FILLING
*150 g (5.33 ounces) 1/3 the fat cream cheese at room temp
*150 g (5.33 ounces) nonfat Greek yogurt
*1 egg
*1 tsp vanilla extract
*1 TBS blue spirulina powder
*20 g Quest vanilla milkshake protein powder
*48 g (1/4 cup) Madhava allulose sweetener
*1 TBS fat free or skim milk
*1 TBS lemon juice (fresh squeezed is better, but bottled will work fine!)
Directions
- Line muffin tin with 8 silicone cupcake liners and preheat oven to 350.
- In a food processor or blender, combine all crust ingredients until sticky.
- Press about 2 teaspoons of the crust mix into each silicone liner and press until it begins to run up the edge of the liner.
- Bake for 5-8 minutes, until puffed up; then set aside on the counter to cool.
- Whisk the cream cheese and yogurt on high for 2-3 minutes before adding the vanilla, spirulina, protein powder, lemon juice, and allulose, mixing until smooth.
- Switch to a paddle attachment and add the egg, blending on low speed until completely mixed in.
- Distribute batter evenly on top of each crust.
- Bake at 350 for 15 minutes, until cheesecakes are mostly set.
- Then turn off the oven and crack the door, leaving the cheesecakes in the oven for an additional 5-10 minutes to finish baking (centers should have barely any jiggle).
- Place cheesecakes on a cooling rack (to speed up, place this in the fridge for 1 hour or freezer for 30 minutes).
- Once the cheesecakes are totally cool and set, remove from silicone liners.
- You can top with berries, kiwis, Cool Whip, whatever you’d like.
- Keep leftovers in fridge in an airtight container, and enjoy!
Nutrition
Macros
8 servings
130 cal/7.1 f/9.7 c/6.8 p per cheesecake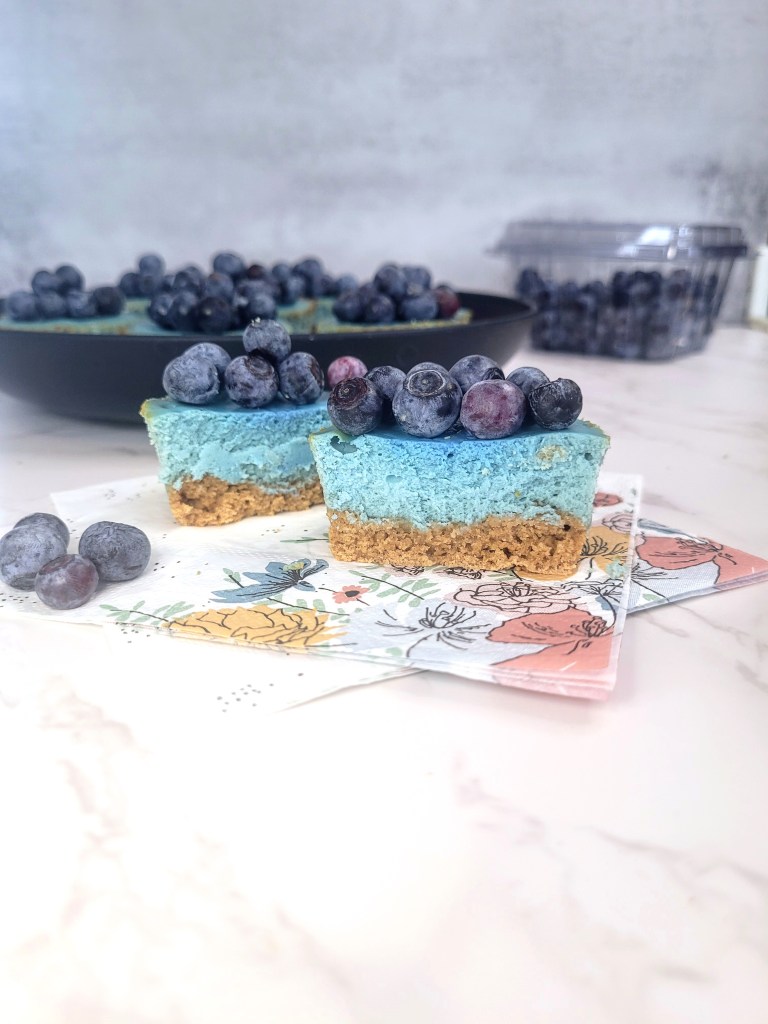
My, this is blue-tiful! 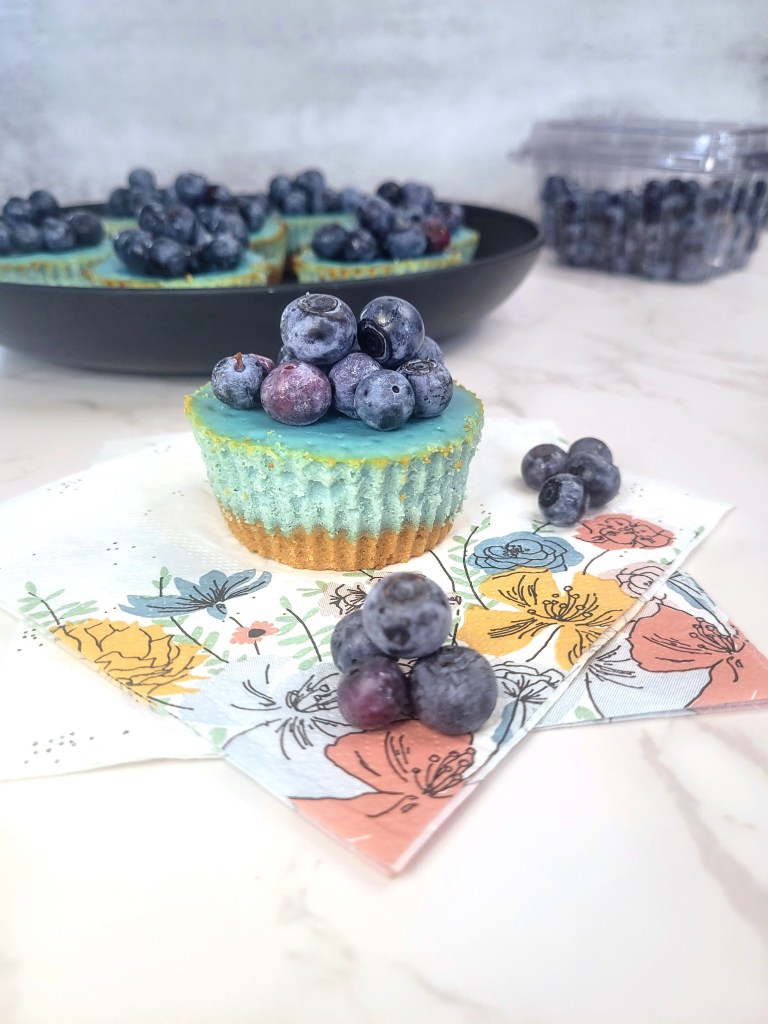
You goody blue shoes. - Line muffin tin with 8 silicone cupcake liners and preheat oven to 350.
-
Peepin’ It Real

March is hogging all the holidays in a manner that would make Rich Uncle Pennybags from Monopoly proud, so sharp shifting of gears from all things green to all things yellow and pastel for Easter here on the blog. I’ve been known to indulge in the occasional Peep or multiple handfuls of Cadbury mini eggs (the eggs-citement is real)…so I decided I wanted to attempt to make cupcakes in the shape of chicks to celebrate the
sneezingspring season.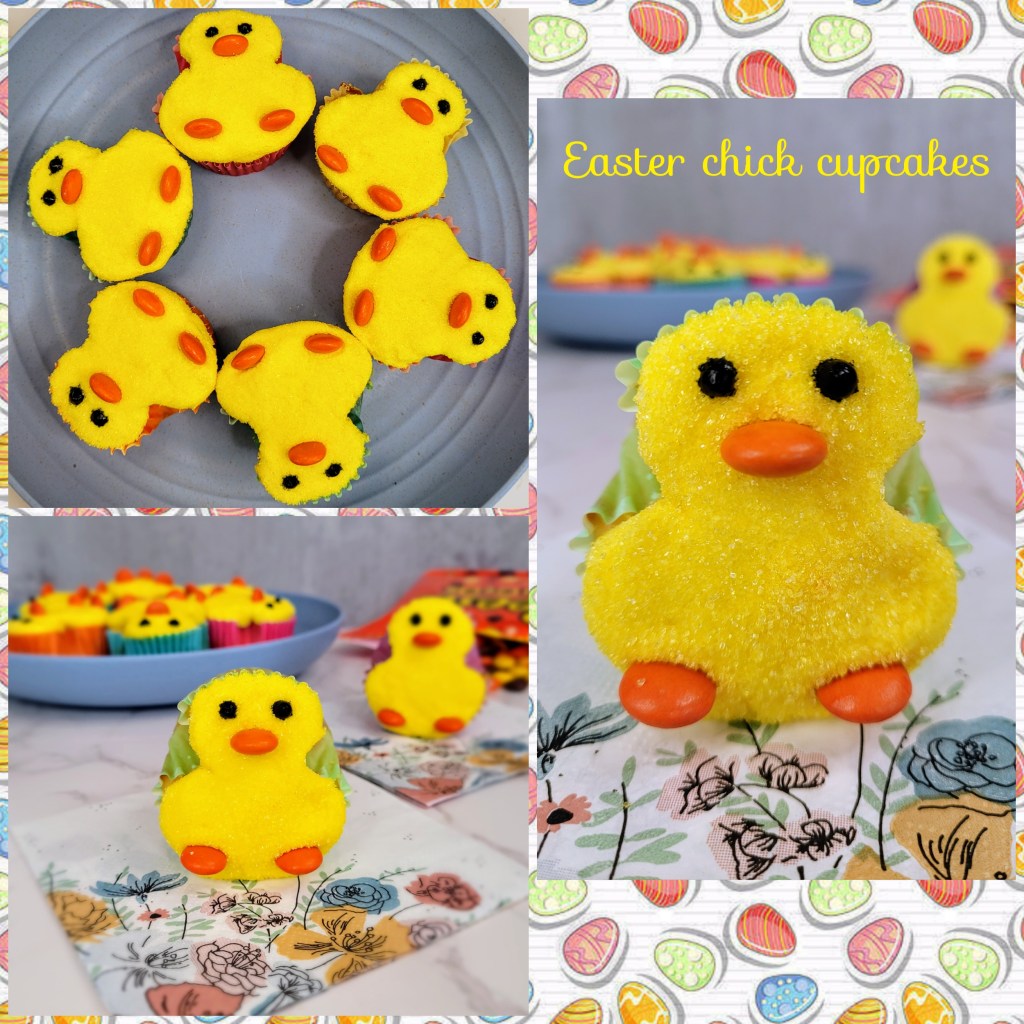
Peep these cuties! Pollen allergies aside, spring has definitely sprung in my kitchen. Since I consider myself somewhat of a baking eggs-pert, I wanted to try making shaped cupcakes again after my first attempt to make ghost cupcakes failed big time back in October (you know, fall, the season where everything doesn’t make you sneeze and the temperature is perfect). I’m eggs-tremely happy to report these: 1. Look like chicks and not shapeless blobs (also known as ghosts, October’s mascot), 2. Are so cute they make me give less of a cluck about how hot it’s getting outside, and 3. Are designed in such a manner that they have inspired a basket full of terrible Easter-related puns…it’s not even bunny how many I’ve got. I apologize for nothing.
To make these, just use your favorite cupcake and frosting recipe (I’ve included my recipe below for yellow cupcakes with a Swiss meringue buttercream). Alright, no fowl play here, let’s hop to it!

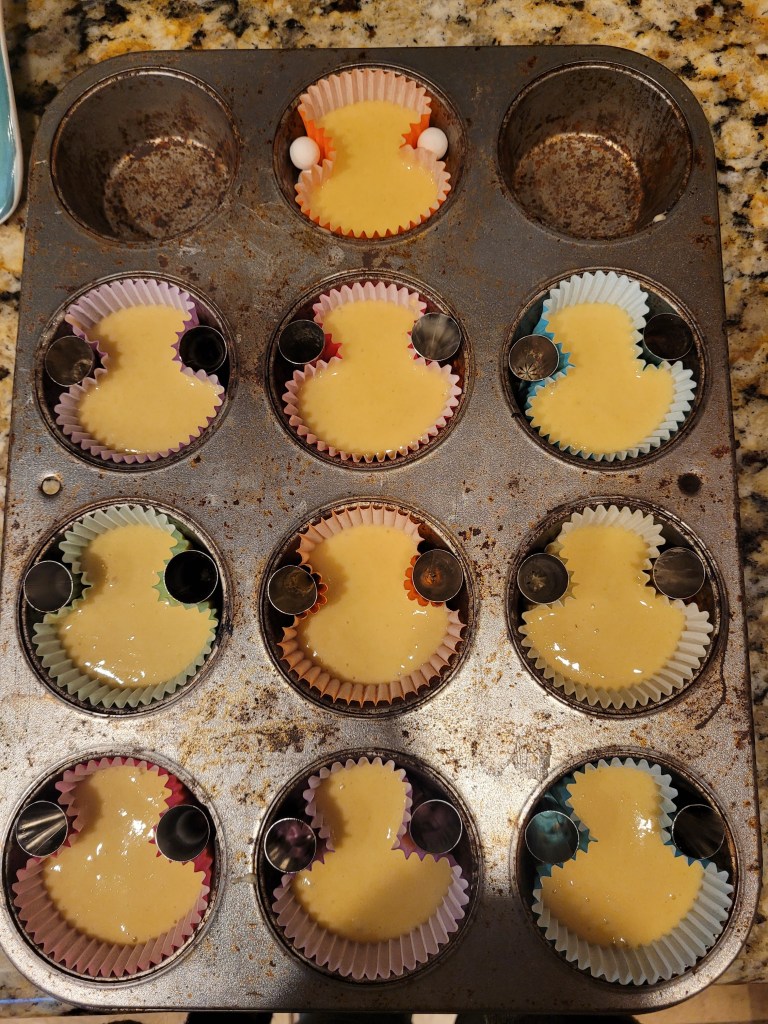
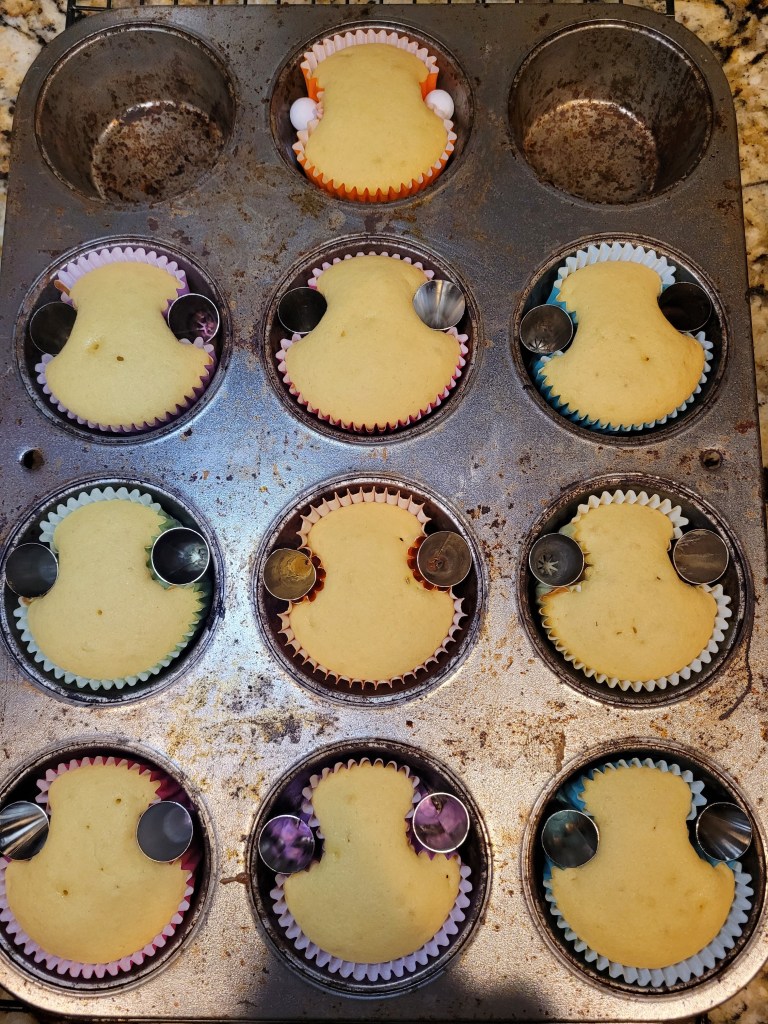
Once you’ve got your cake batter ready to roll, place cupcake liners in a muffin tin–the key here is to fill them only halfway full. Then take either marbles, pie weights, or piping tips, and place them about 2/3 of the way up on each side of the cupcake liners like above. I tried one with pie weights and the rest with upside down piping tips, both yielded the same results- cupcakes that kept their shape and mostly looked like mushrooms when you turned them upside down (Earth Day cupcake idea unlocked). Make sure these chickadees cool completely before you frost them.
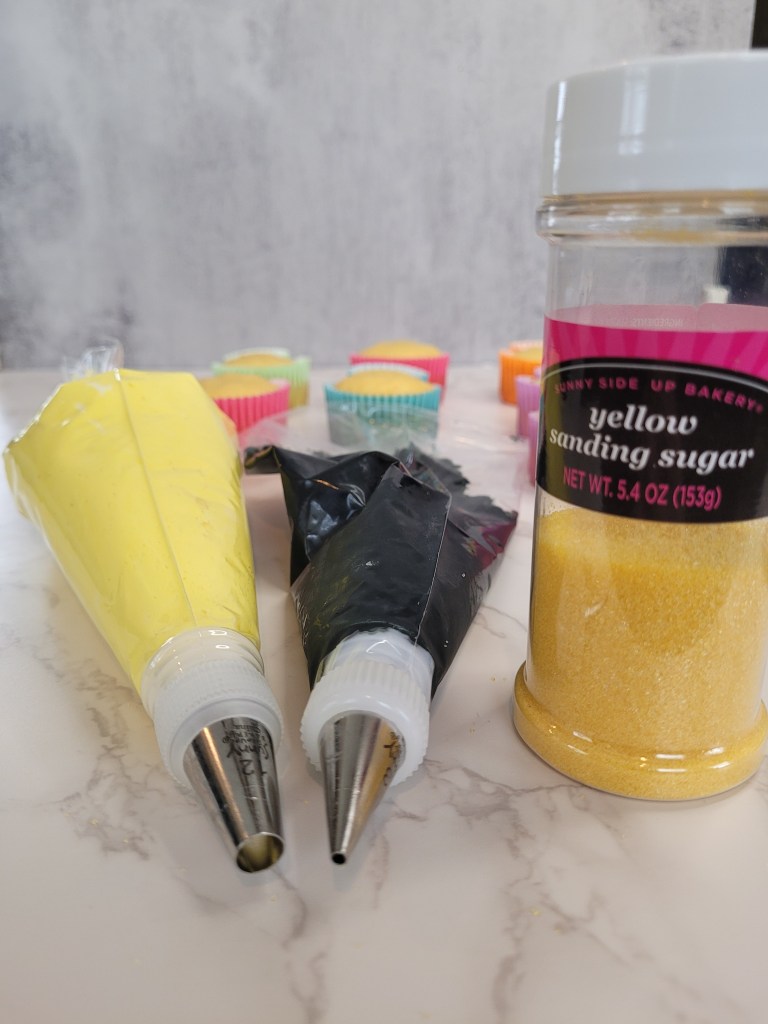
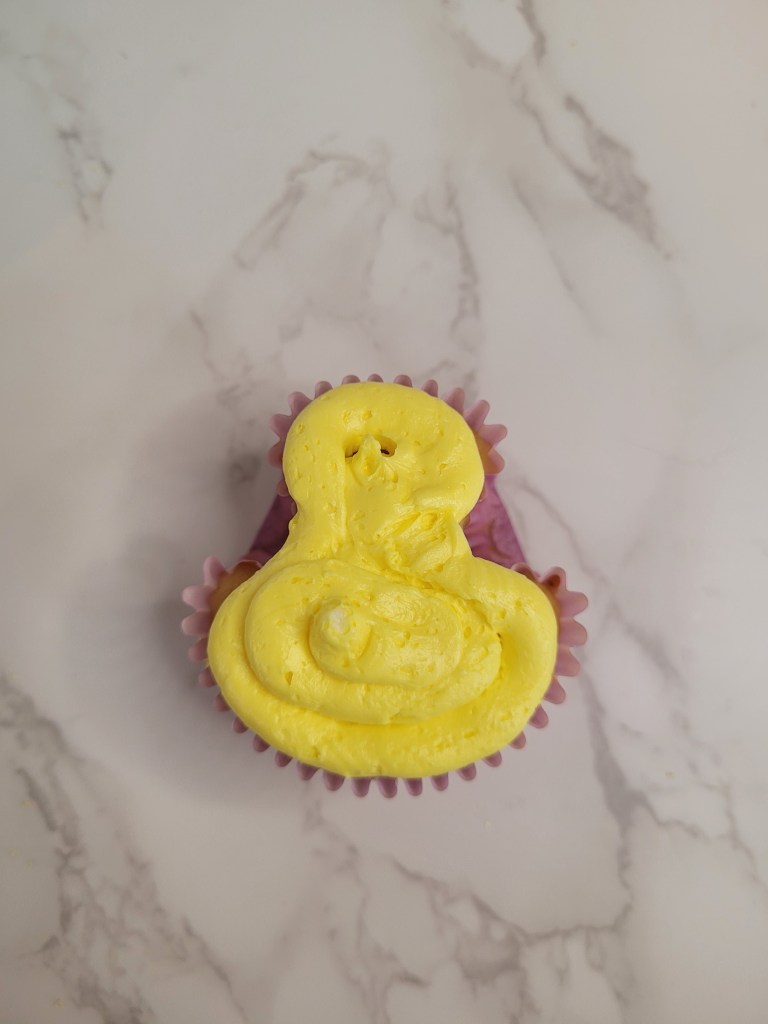
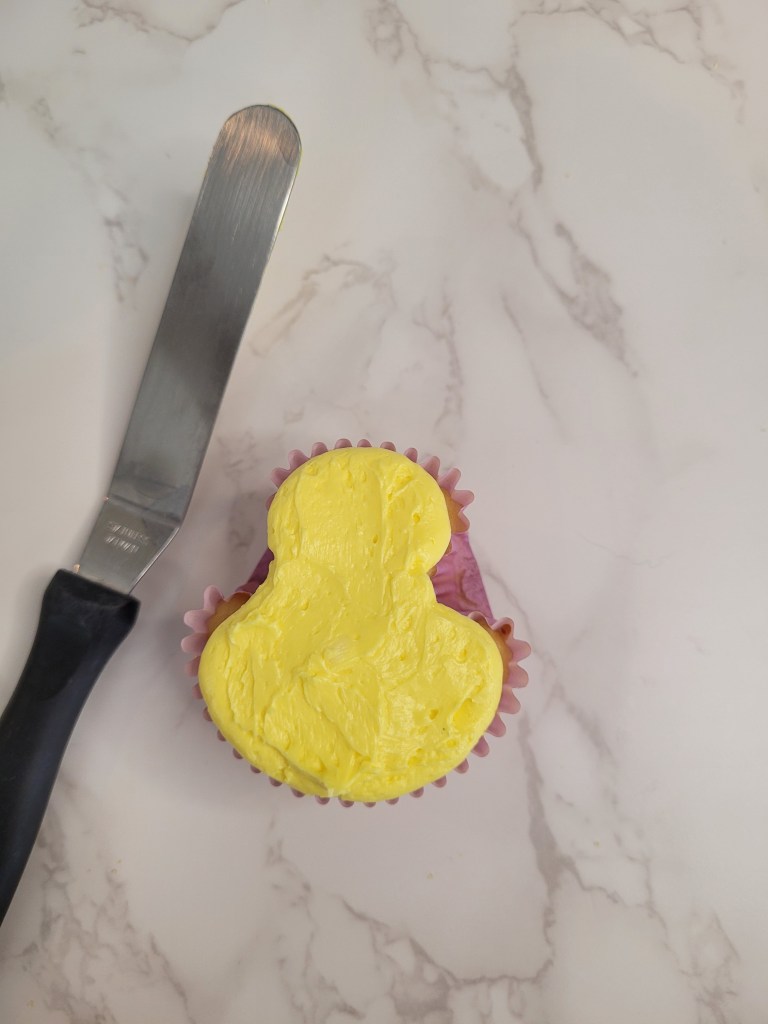
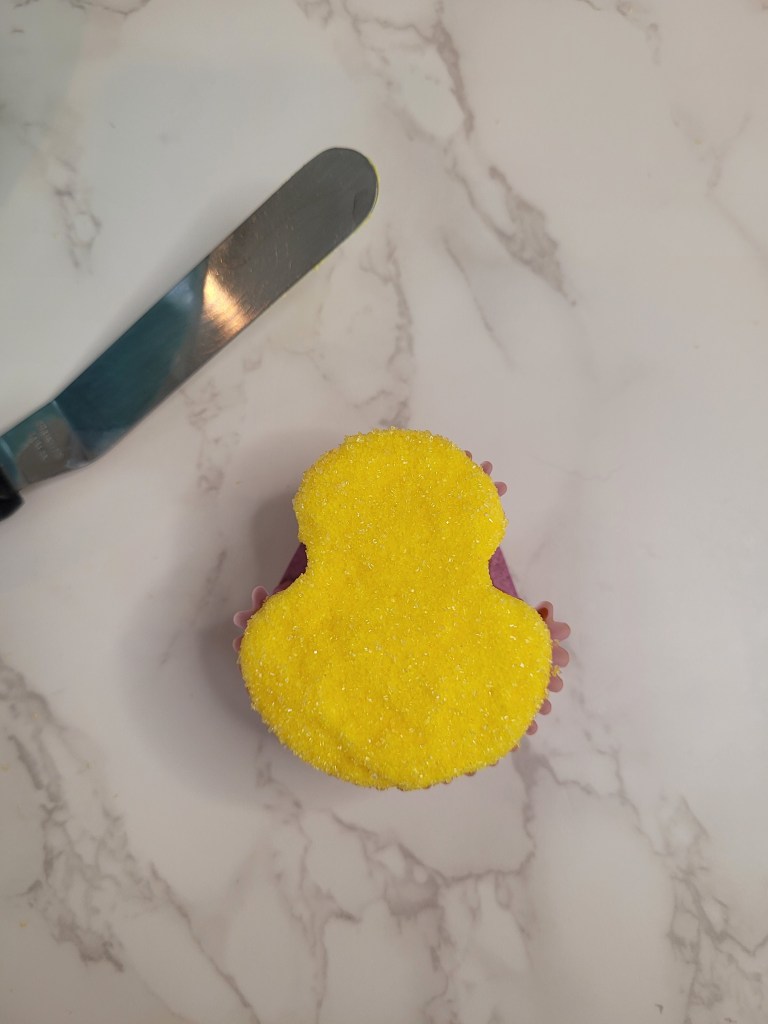
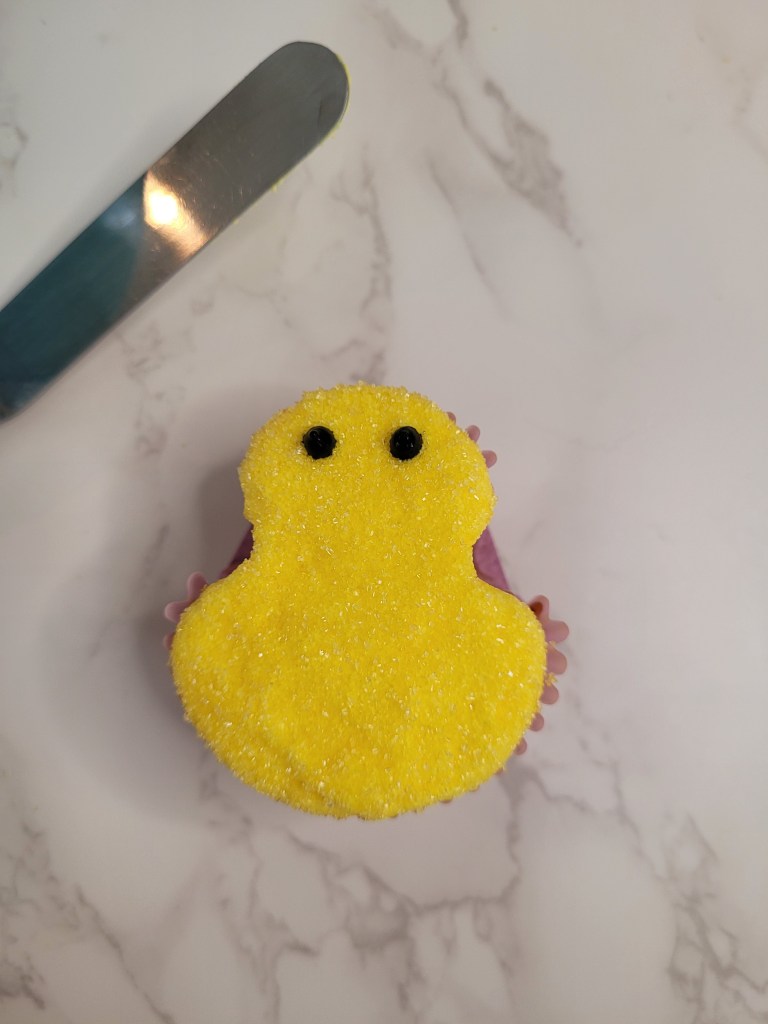
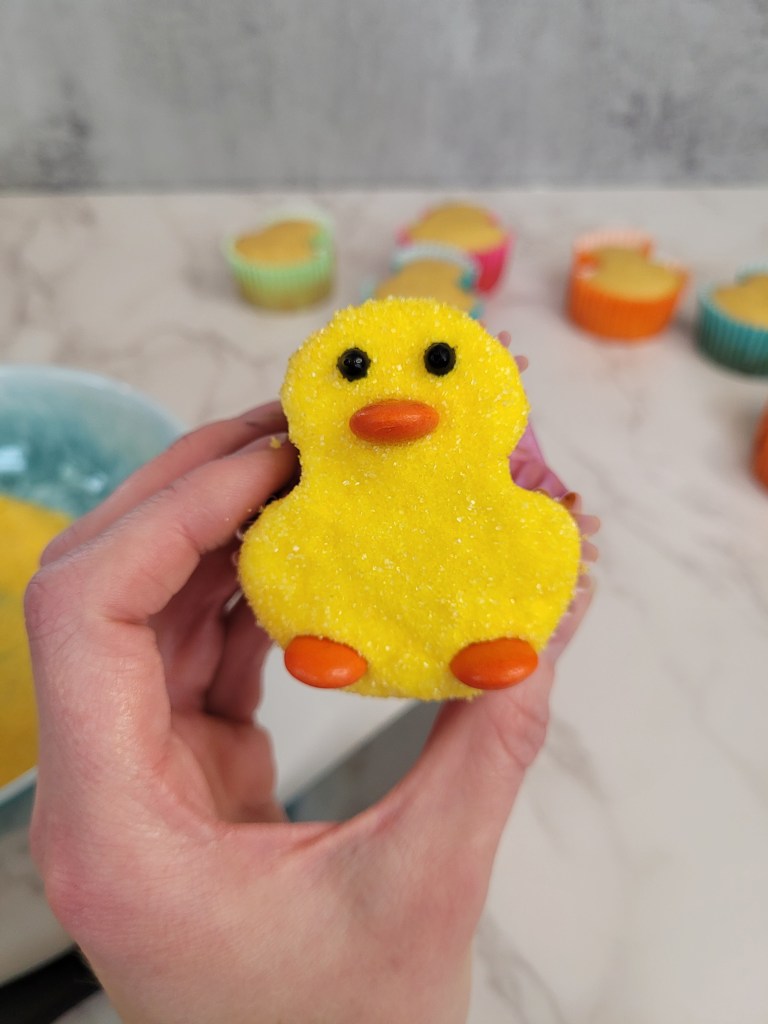
Now, the plot chickens…time to get decorating! Once you have your frosting made, take a very small portion aside and dye it black for the eyes. You can also use black sprinkles if you have them (consider the shock I felt when I realized that was literally the only type of sprinkle not in my massive collection; some bunny hold me). Dye the rest yellow, and load a piping bag with a large round tip (I used a #12) and pipe the yellow all over the cupcake before smoothing with an angled spatula. Pour yellow sanding sugar into a bowl, and plop your cupcake into it while gently swirling around to coat. Load your black frosting into a bag with a small round tip (I used a #3) and pipe little dots for the eyes. To finish, you can use orange M&M’s, orange Reese’s, or whatever other orange circular candy you want (I’m sure there are many, but I am only a connoisseur of chocolate candy). Place the beak below the eyes and two of the cutest lil’ feetsies at the bottom. Peep the video tutorial to see the process in action:
Hop to it! Truly, this would be a hoppy family decorating activity, and these are really sinchy to make and super cute (as well as delicious to eat). No need to go off the peep end when you’ve got a batch of these chicks to take to your Easter feast! I hope everyone has an eggs-ceptional Easter Sunday this week. Don’t worry, be hoppy…you almost make it to the end of the most massive terrible pun dump I’ve ever done in a blog (I saved the best for last below). ‘Til next time, my fellow eaters!
Recipe and Instructions
Gluten free yellow cupcakes with Swiss meringue buttercream
A fluffy yellow cupcake with buttery meringue frosting
If not gluten free, use any kind of white or yellow cake mix. Allulose can also be replaced with regular granaular sugar for frosting. You can double the cupcake recipe to make a full batch; the meringue buttercream makes enough to frost 24 cupcakes.
Ingredients
CAKE
*Half box of gluten free yellow cake mix (I used Whole Foods GF mix)
*56 grams (1/4 c) unsweetened applesauce
*1/4 cup plus 3 TBS fat free or skim milk
*1 egg
FROSTING
*3 egg whites (~85-90 g)
*1 cup (192 g) allulose
*1 cup (224 g) butter, slightly softened (if you press on it firmly with a finger, it will give a little but not let your finger smush it all the way)
*1 tsp vanilla
*1 tsp almond extract (lemon would also be lovely for spring)
Directions
- Preheat oven to 350 and place cupake liners in muffin tin.
- Whisk cake ingredients together in a stand mixer on low for 30 seconds before switching to medium-high for two minutes.
- Fill each cupcake liner half full before placing pie weights, marbles, or upside down piping tips about 2/3 the way up on each side of the cupcake liner to shape into chicks.
- Bake for 20 minutes, and allow cupcakes to cool fully before frosting.
- To make frosting, first wipe everything (whisk, paddle attachment, whisk for mixer, small bowl, and mixing both) with lemon juice to degrease, or your frosting can fail.
- In a small bowl, crack eggs one at a time, separating the whites from the yolks; if any yolk gets in, start over–the frosting WILL NOT whip up if any yolk is in it. Dump each egg white into your stand mixing bowl.
- Fill a medium-sized sauce pan with 1 1/4 cup of water and bring to a boil before lowering to a simmer.
- Put your mixing bowl on top of this (should not touch the water) and pour allulose on top of the egg whites, whisking for 8-10 minutes until a thermometer reads 160 degrees when inserted to the mix (you should be able to roll a tiny bit of this mix between your fingers and feel no grit).
- With the whisk attachment, place bowl back on your mixer and whisk on the highest setting for 8-10 minutes, until a stiff meringue has formed.
- Now, switch to the paddle attachment and on medium speed, add the butter one tablespoon at a time, mixing it in fully before adding another tablespoon (things will start to look curdled, but don’t worry, it will mix out okay).
- Once all the butter has been added, add in your extracts before mixing on medium-high for 2-3 minutes.
- At this point, take a small amount out to dye black, and dye the rest of the frosting in the bowl yellow.
- To pipe the chicks, follow the photo or video tutorial above.
- You will probably have a large amount of frosting leftover (I only used half for my cupcakes); you can 100% put this in an air tight container and freeze.
- Keep cupcakes covered and in the fridge. They are best served at room temp, so remove from fridge 30 minutes before eating. Enjoy!
Nutrition
Macros
10 servings
152 cal/22.4 c/5.8 f/2.4 p per slice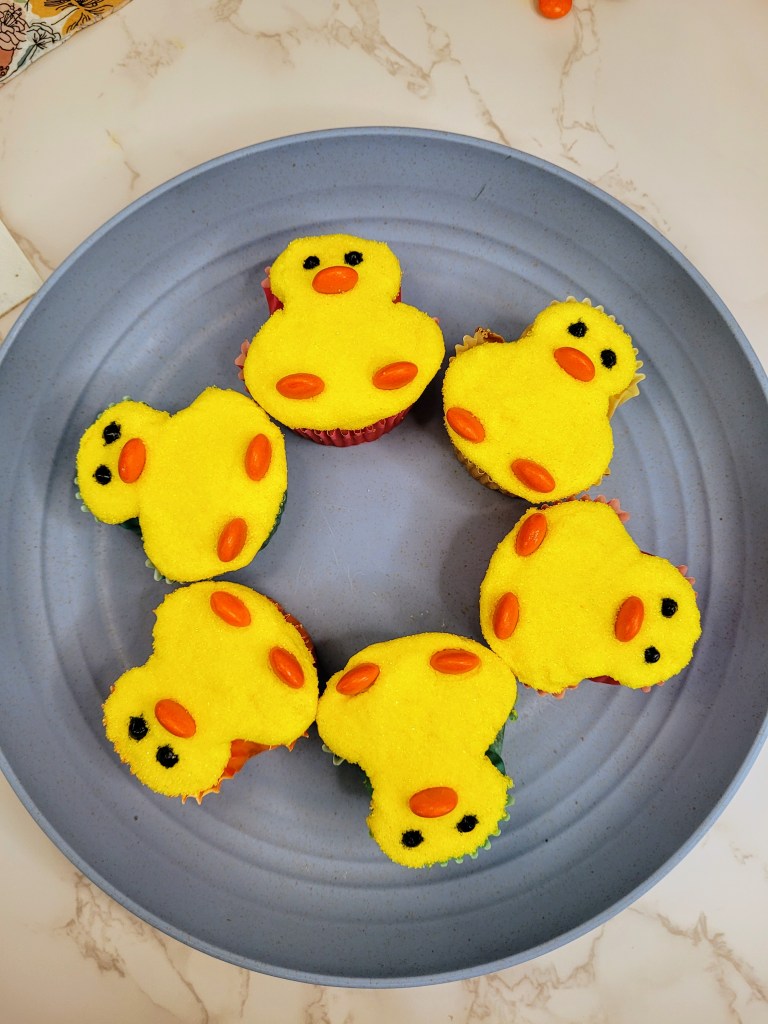
Test your cluck and try making a batch. 
That’s all, yolks! - Preheat oven to 350 and place cupake liners in muffin tin.
-
Peanut Butter Banana Pupcake
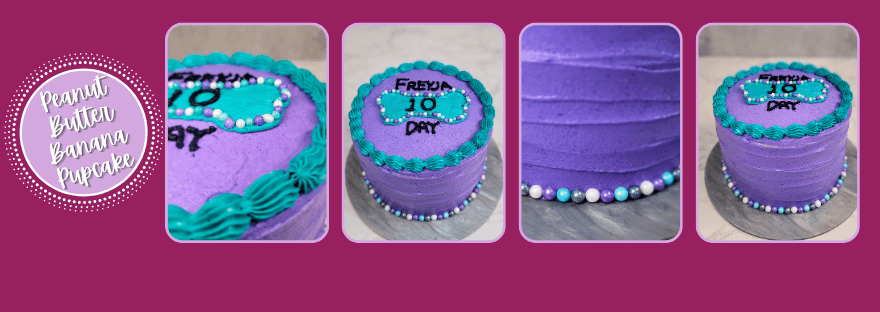
The one thing I wanted most of all my entire life was to rescue dogs that I could spoil relentlessly for the rest of their days to make up for their harsh start on life. Happy to say I have achieved this goal with our pups, Hank and Freyja. Just how spoiled are they? Well, Freyja turned ten on St. Patrick’s Day, so I made her her very own birthday cake…
I mean, we got her new toys, too, but cake is life in this house. Did I have a bite of this peanut butter banana pupcake? Obviously I had to make sure what I was feeding my children was safe for their consumption, so, yes, yes I did. And it was DELICIOUS. It’s essentially banana bread in cake form, so I’m not sure why I was worried they wouldn’t like it. I mean, I have to tell them not to eat cat poop on our dog walks every day, so they don’t have the most discerning taste buds…nonetheless, they were both members of the clean plate club after their first slice.

Did someone say CAKE?! 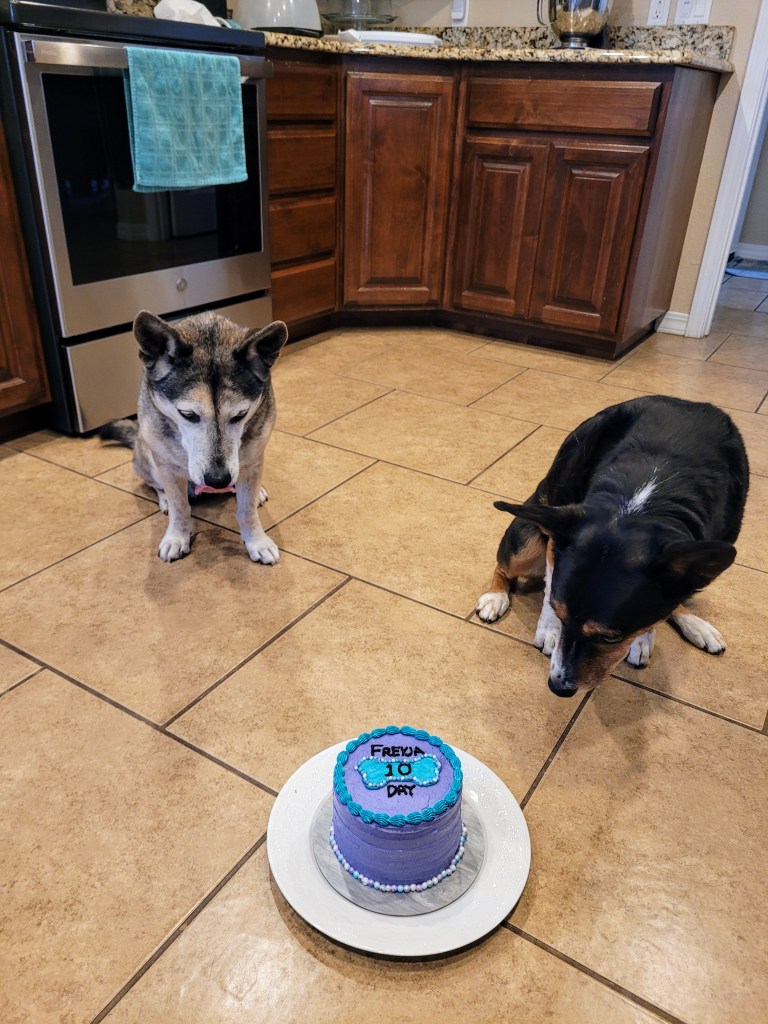
Their training really paid off here… 
Ready, set, cake! Recipe and Instructions
Peanut butter banana pupcake with yogurt frosting
A cake yummy enough for humans, but GREATLY appreciated by dogs.
You can use cream cheese in place of yogurt and honey in place of syrup to make the frosting. Honey can also be substituted with maple syrup in the cake. Be sure to check labels on any food coloring you use to make sure its safe for doggy consumption.
Ingredients
CAKE
*1 1/2 cups of oat flour (oats blended into a powder using a food processor or blender)
*2 tsp baking powder
*2 ripe bananas
*1/3 cup peanut butter (I used JIF; check labels to make sure there is no xylitol)
*1/4 cup honey
*1/2 cup unsweetened applesauce
*2 eggs
*3 TBS olive or vegetable oil
FROSTING
*2 1/2 cups of yogurt, strained overnight to remove moisture (I use a few layers of cheesecloth on top of strainer, place the yogurt on this, wrap the cloth on top, then put the strainer in a bowl left in the fridge overnight)
*1 1/2 TBS maple syrup
*Desired food coloring or gel dyeDirections
- Preheat oven to 350 and grease three 6-inch round or two 8-inch round pans and add bake even strips.
- Mash banana in a large bowl with a fork or potato masher and then add the peanut butter, honey, applesauce, eggs, and olive oil, whisking until mostly smooth.
- Add the oat flour and baking powder, mixing until everything has just come together.
- Pour batter evenly into pans and bake for 20 minutes, or until a toothpick comes out mostly clean from the center.
- Allow cakes to cool fully before frosting.
- To make frosting, mix the yogurt with maple syrup until smooth, then dye desired color; I split my dye into a large bowl of purple, a small bowl of teal, and a tiny bit of black.
- Place a layer of frosting in between each cake round and frost the entire cake, smoothing as best as you can with an angled spatula and bench scraper.
- Decorate cake as desired, ensuring any sprinkles or edible additions are safe for your pup (decorating tutorial to match this cake below).
- Keep cake covered and in the fridge until your dog is done enjoying each and every slice!
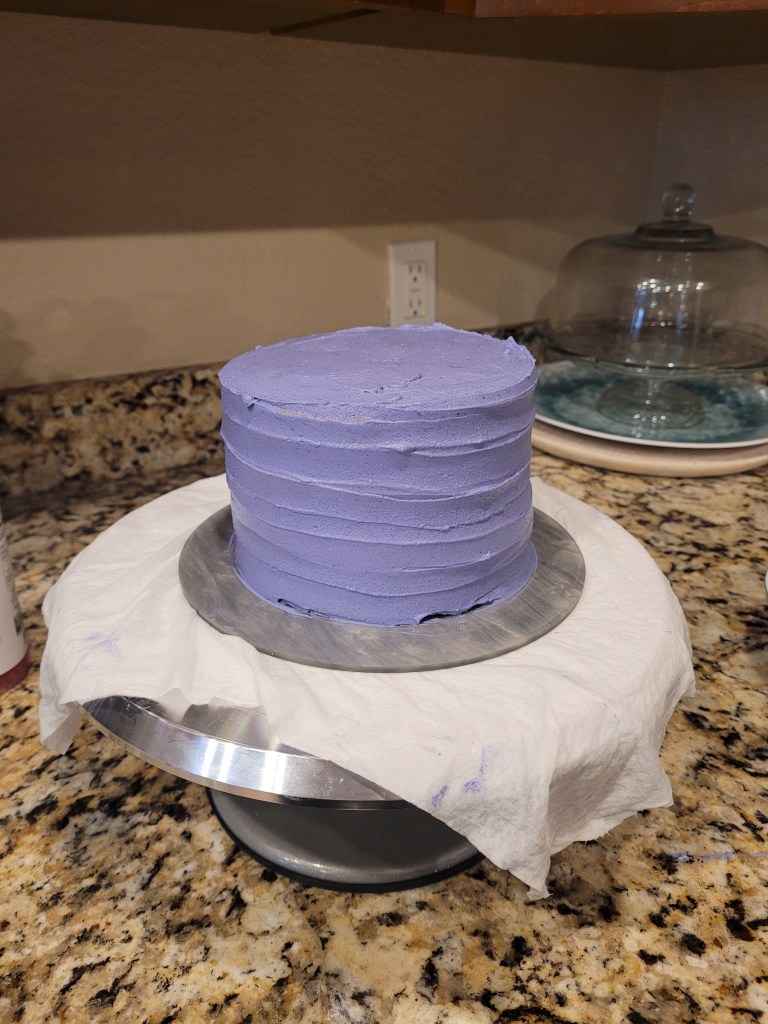
I pressed an angled spatula against the side of the cake while turning the cake table to make the pattern here. 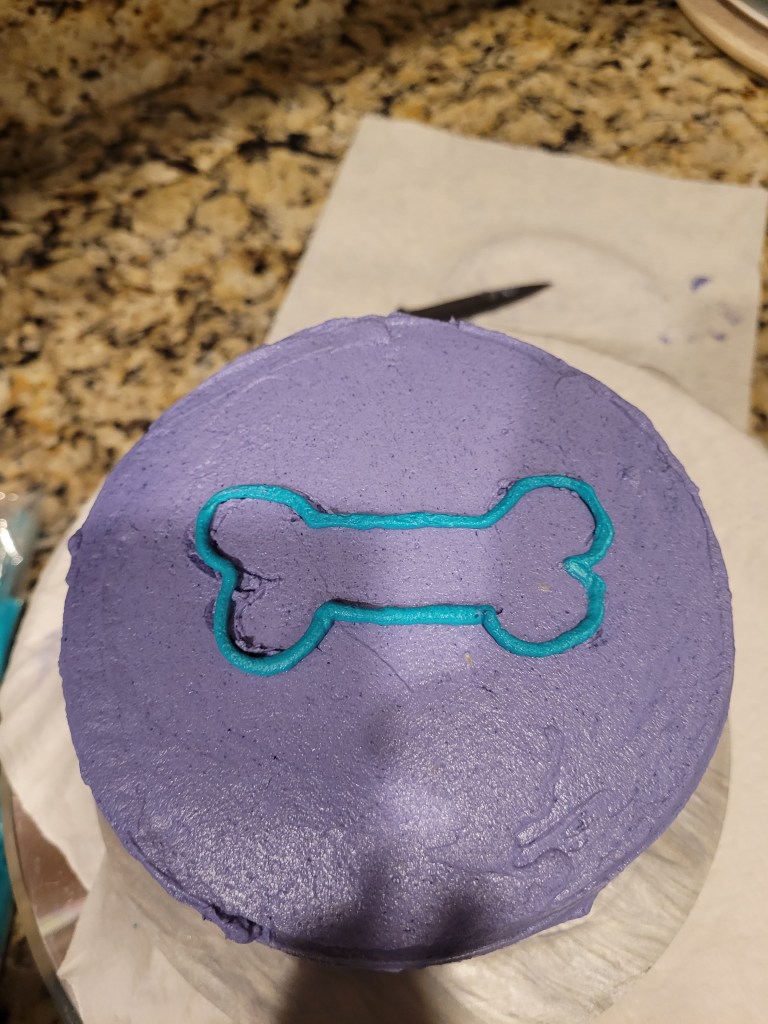
After freezing the cake for 20 minutes, I used a #5 tip to pipe the outline of the bone on top. 
Then I filled in and smoothed out the frosting, freezing for another 20 minutes. 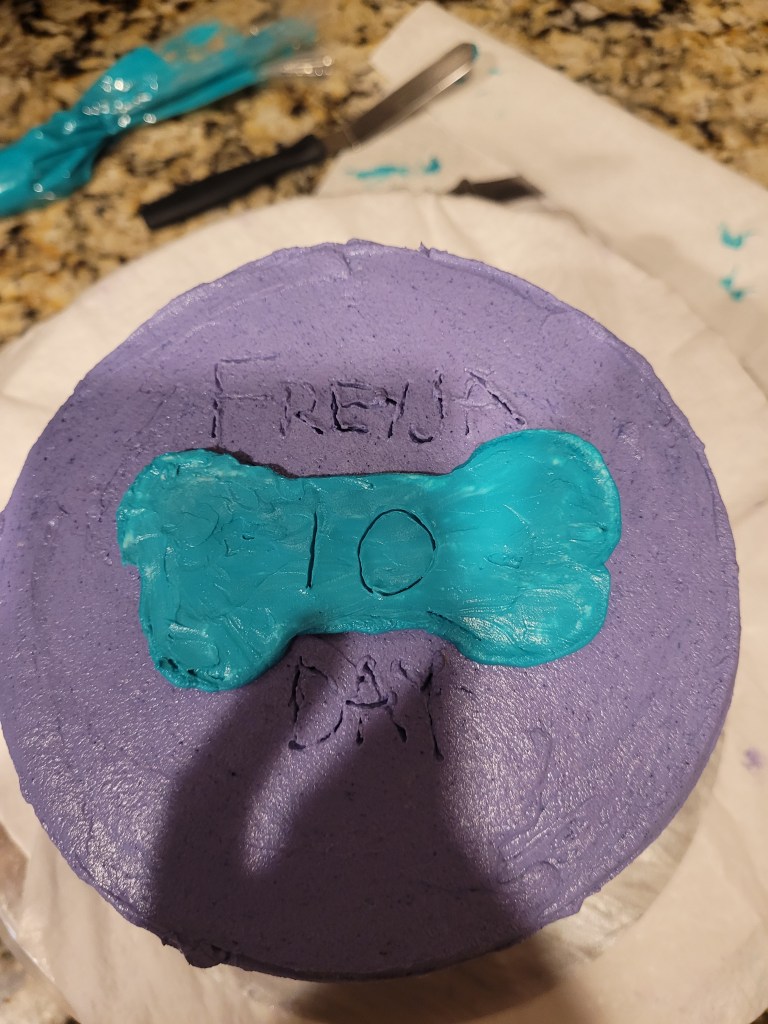
I used a toothpick to write out the lettering on top. 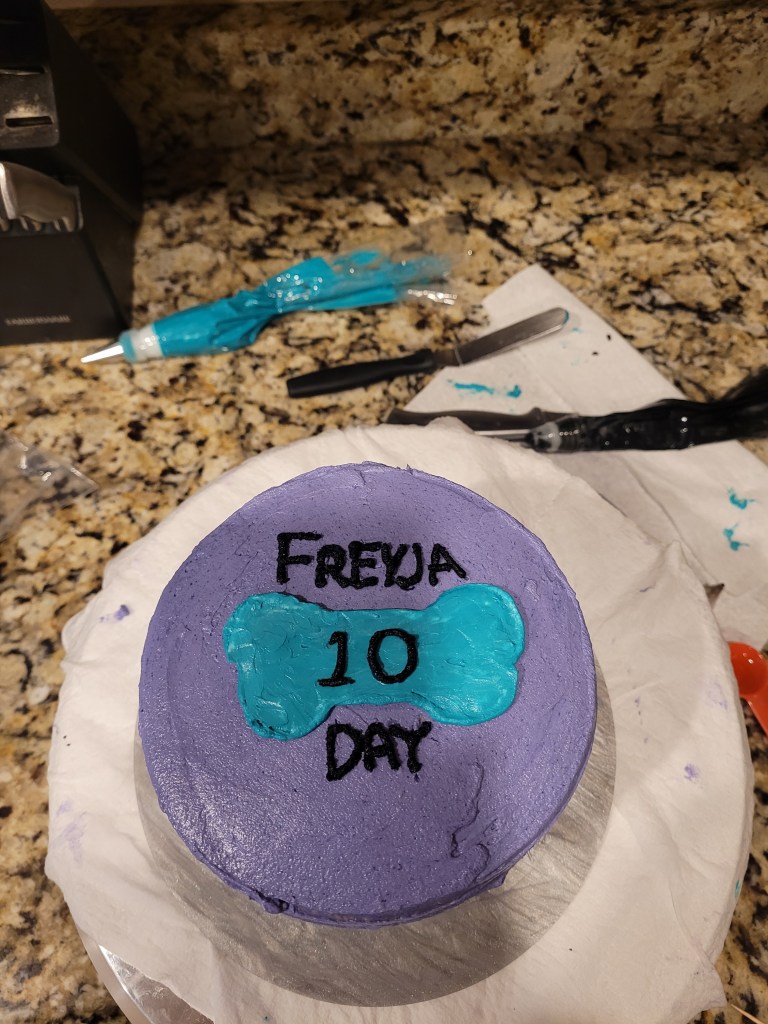
Then a #3 tip with my black frosting to write. 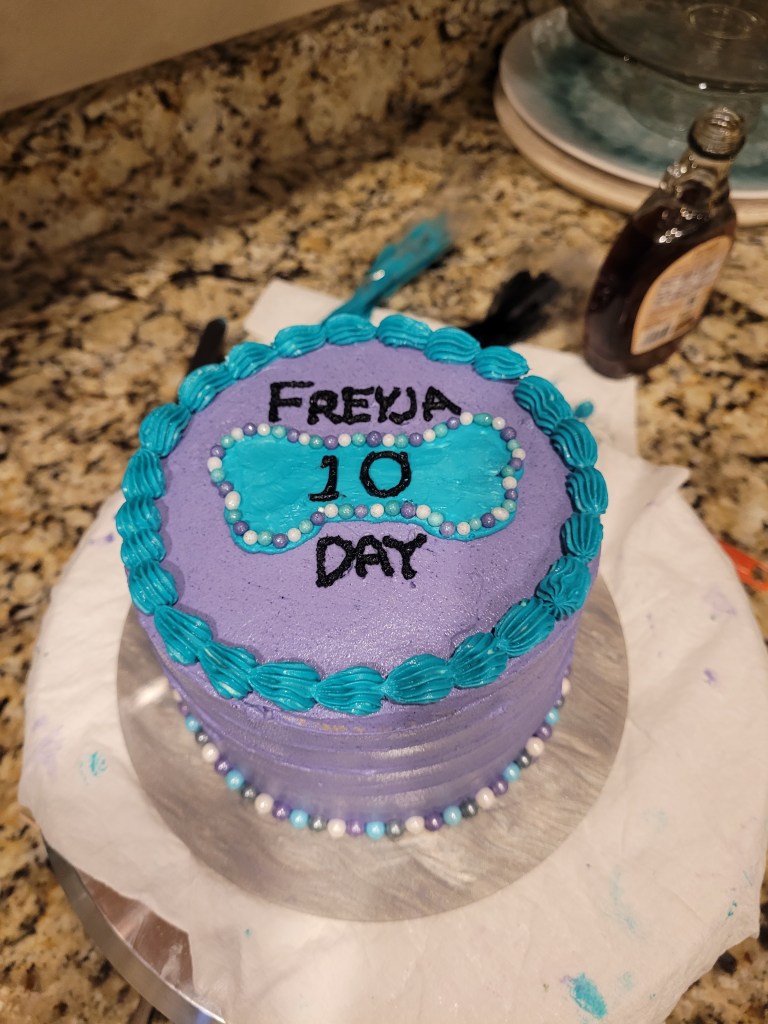
I swapped to a #21 tip with the teal frosting to make the shells on top. 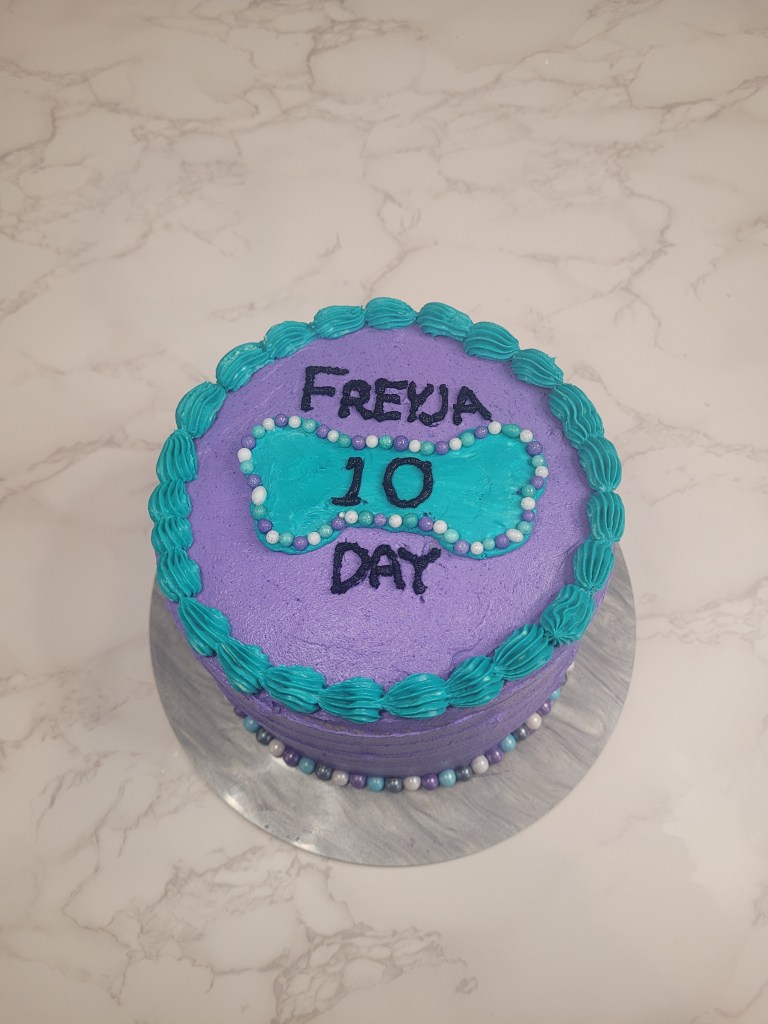
I used Sunny Side Up Bakery sprinkles in small around the bone. 
And large around the bottom of the cake, pressing in gently to adhere. 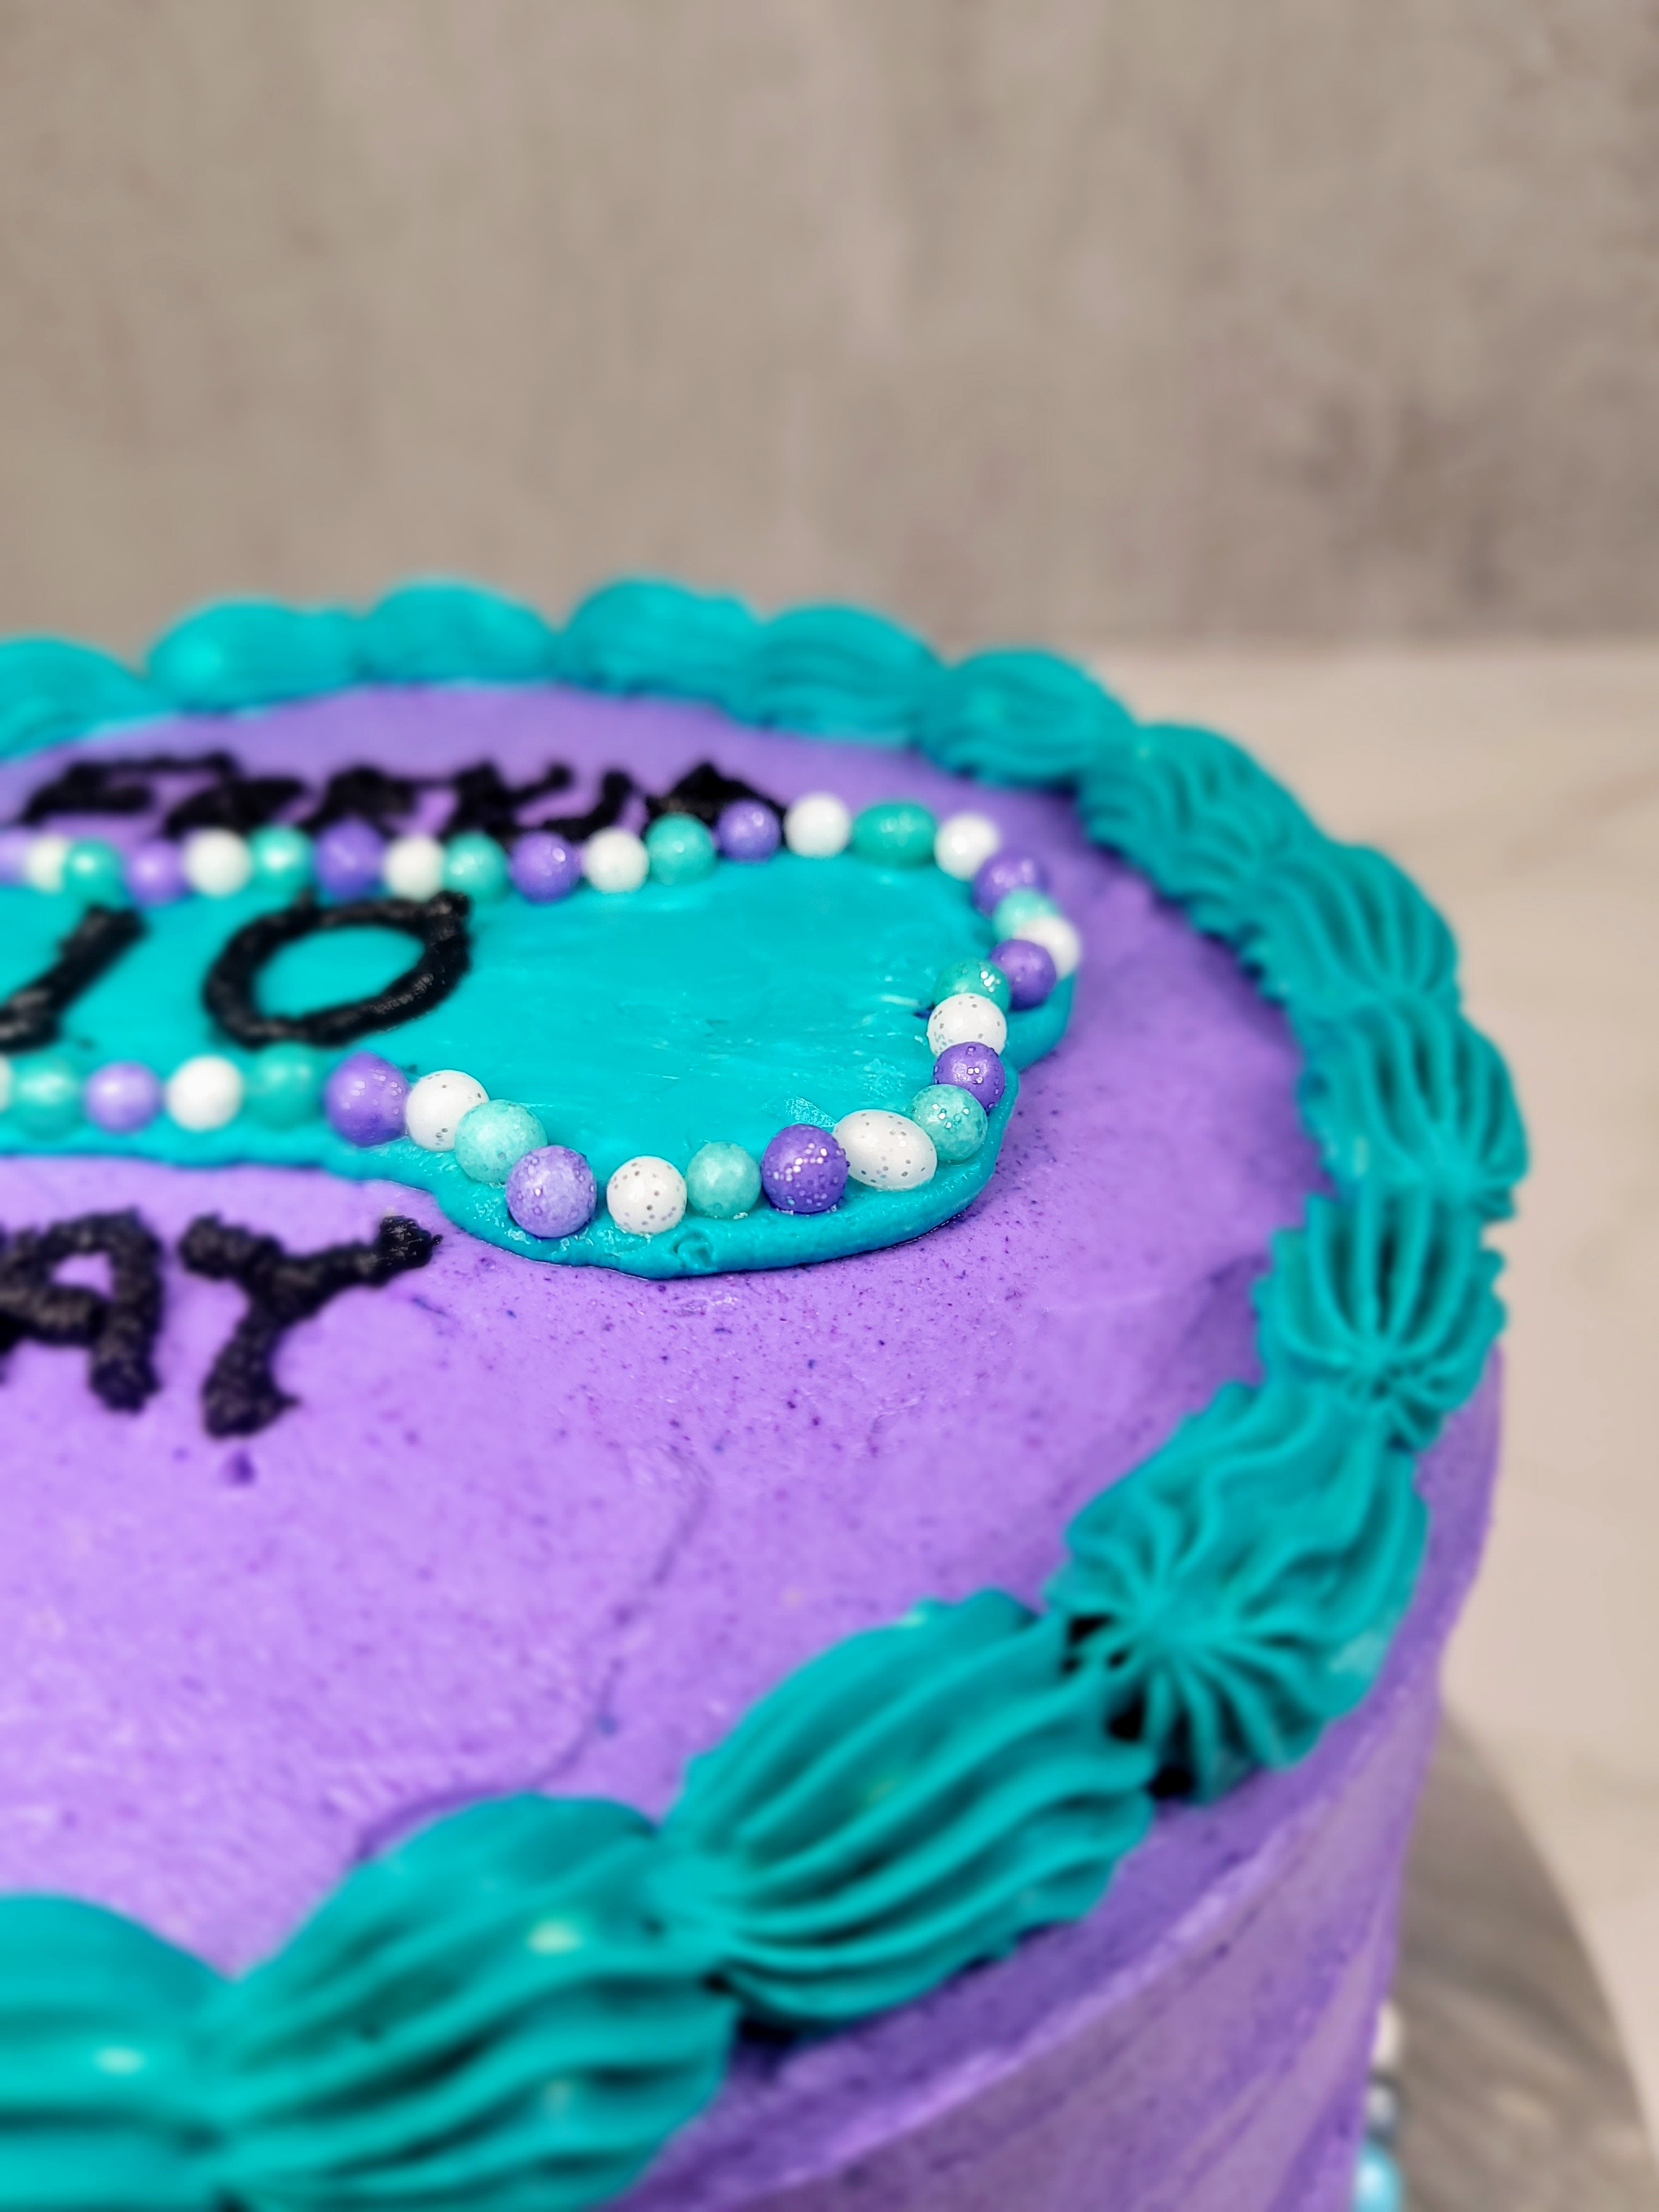
These are the colors on Freyja’s collar, so I used them as inspiration! 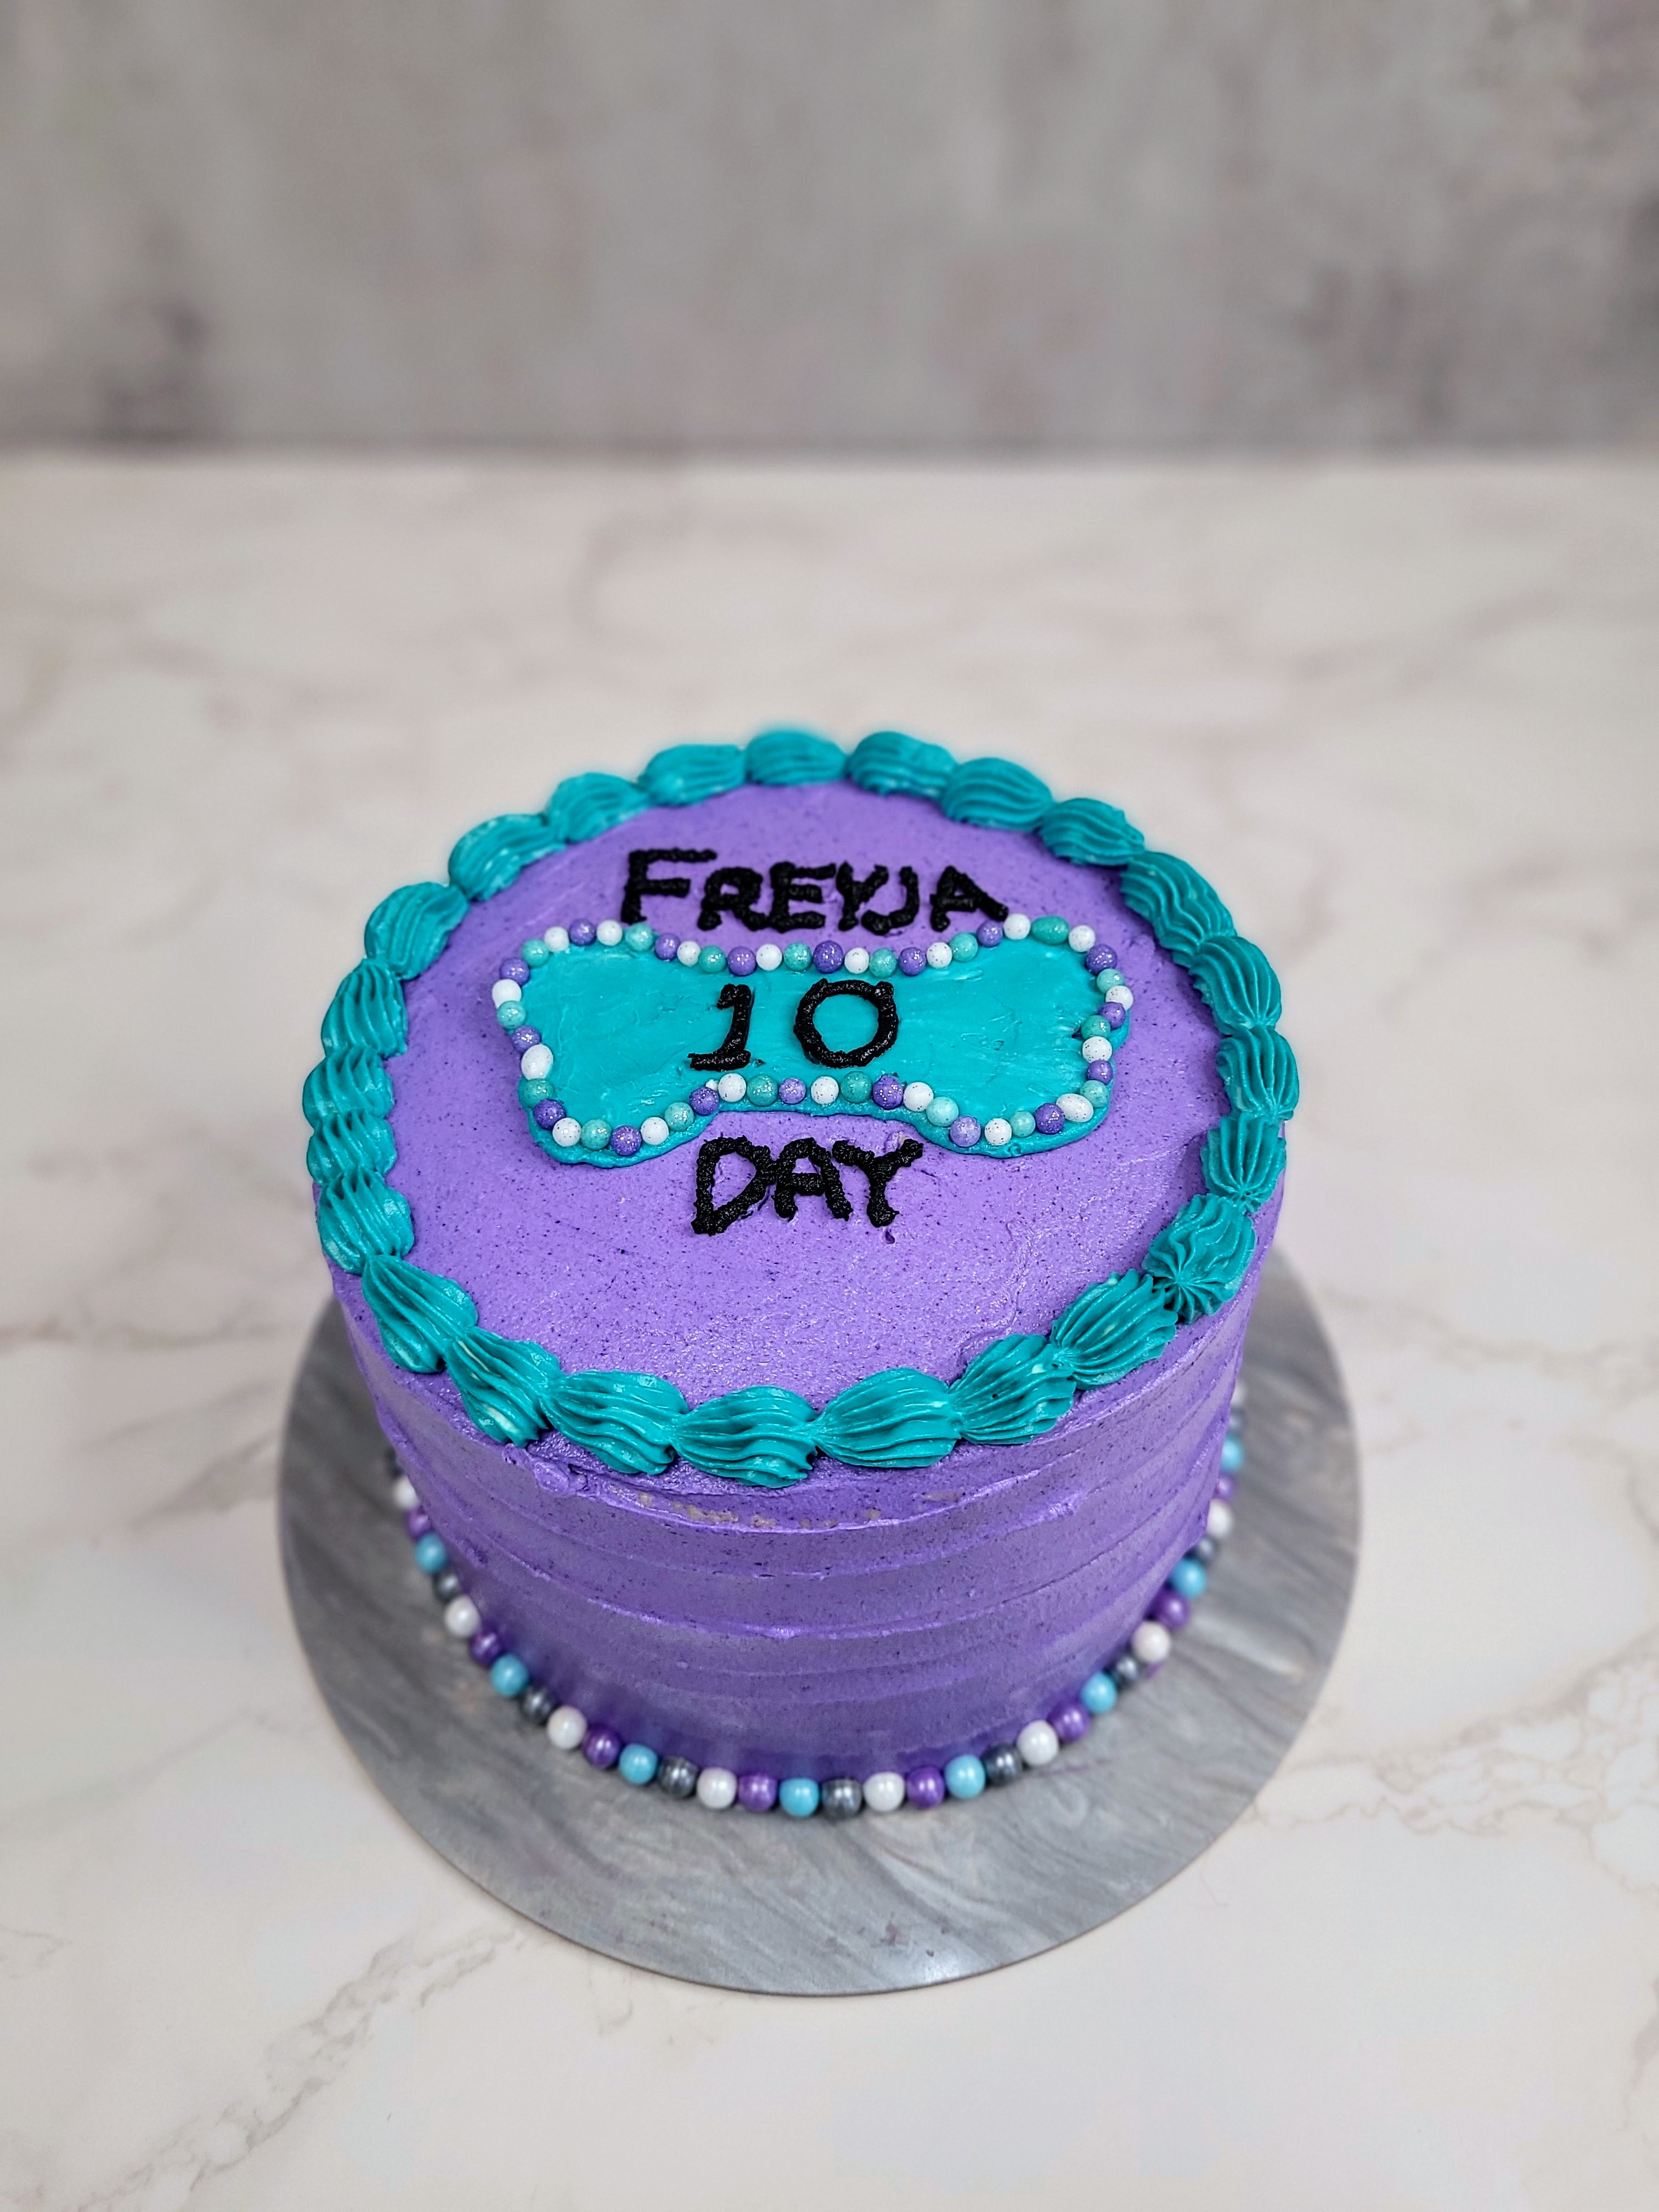
We let them eat cake, alright. I’m always reminded of a quote from Chelsea Handler when I think about how much I love my dogs– “You don’t own a dog, you HAVE a dog…and the dog has you.” And this is precisely why we celebrate every single day with our dogs…some days just involve more cake than others. ‘Til next time, my fellow eaters (and barkers!).
- Preheat oven to 350 and grease three 6-inch round or two 8-inch round pans and add bake even strips.
-
If It Ain’t Brogue, Don’t Fix It.
Jump to recipe and instructions
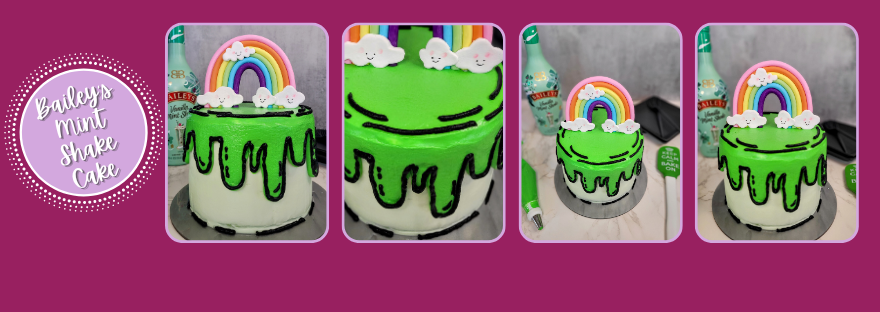
Alright, the time change yesterday has absolutely crushed my spirit…an hour of sleep stolen from us all even though no one asked for it…Irish I was back in bed right now, not gonna lie. Instead, I’m determined not to fall asleep on my keyboard and share with you this ultimate St. Patrick’s Day dessert: a Bailey’s Mint Shake cartoon cake! Aside from being ridiculously fun to say AND eat, this green baby was an absolute blast to decorate.
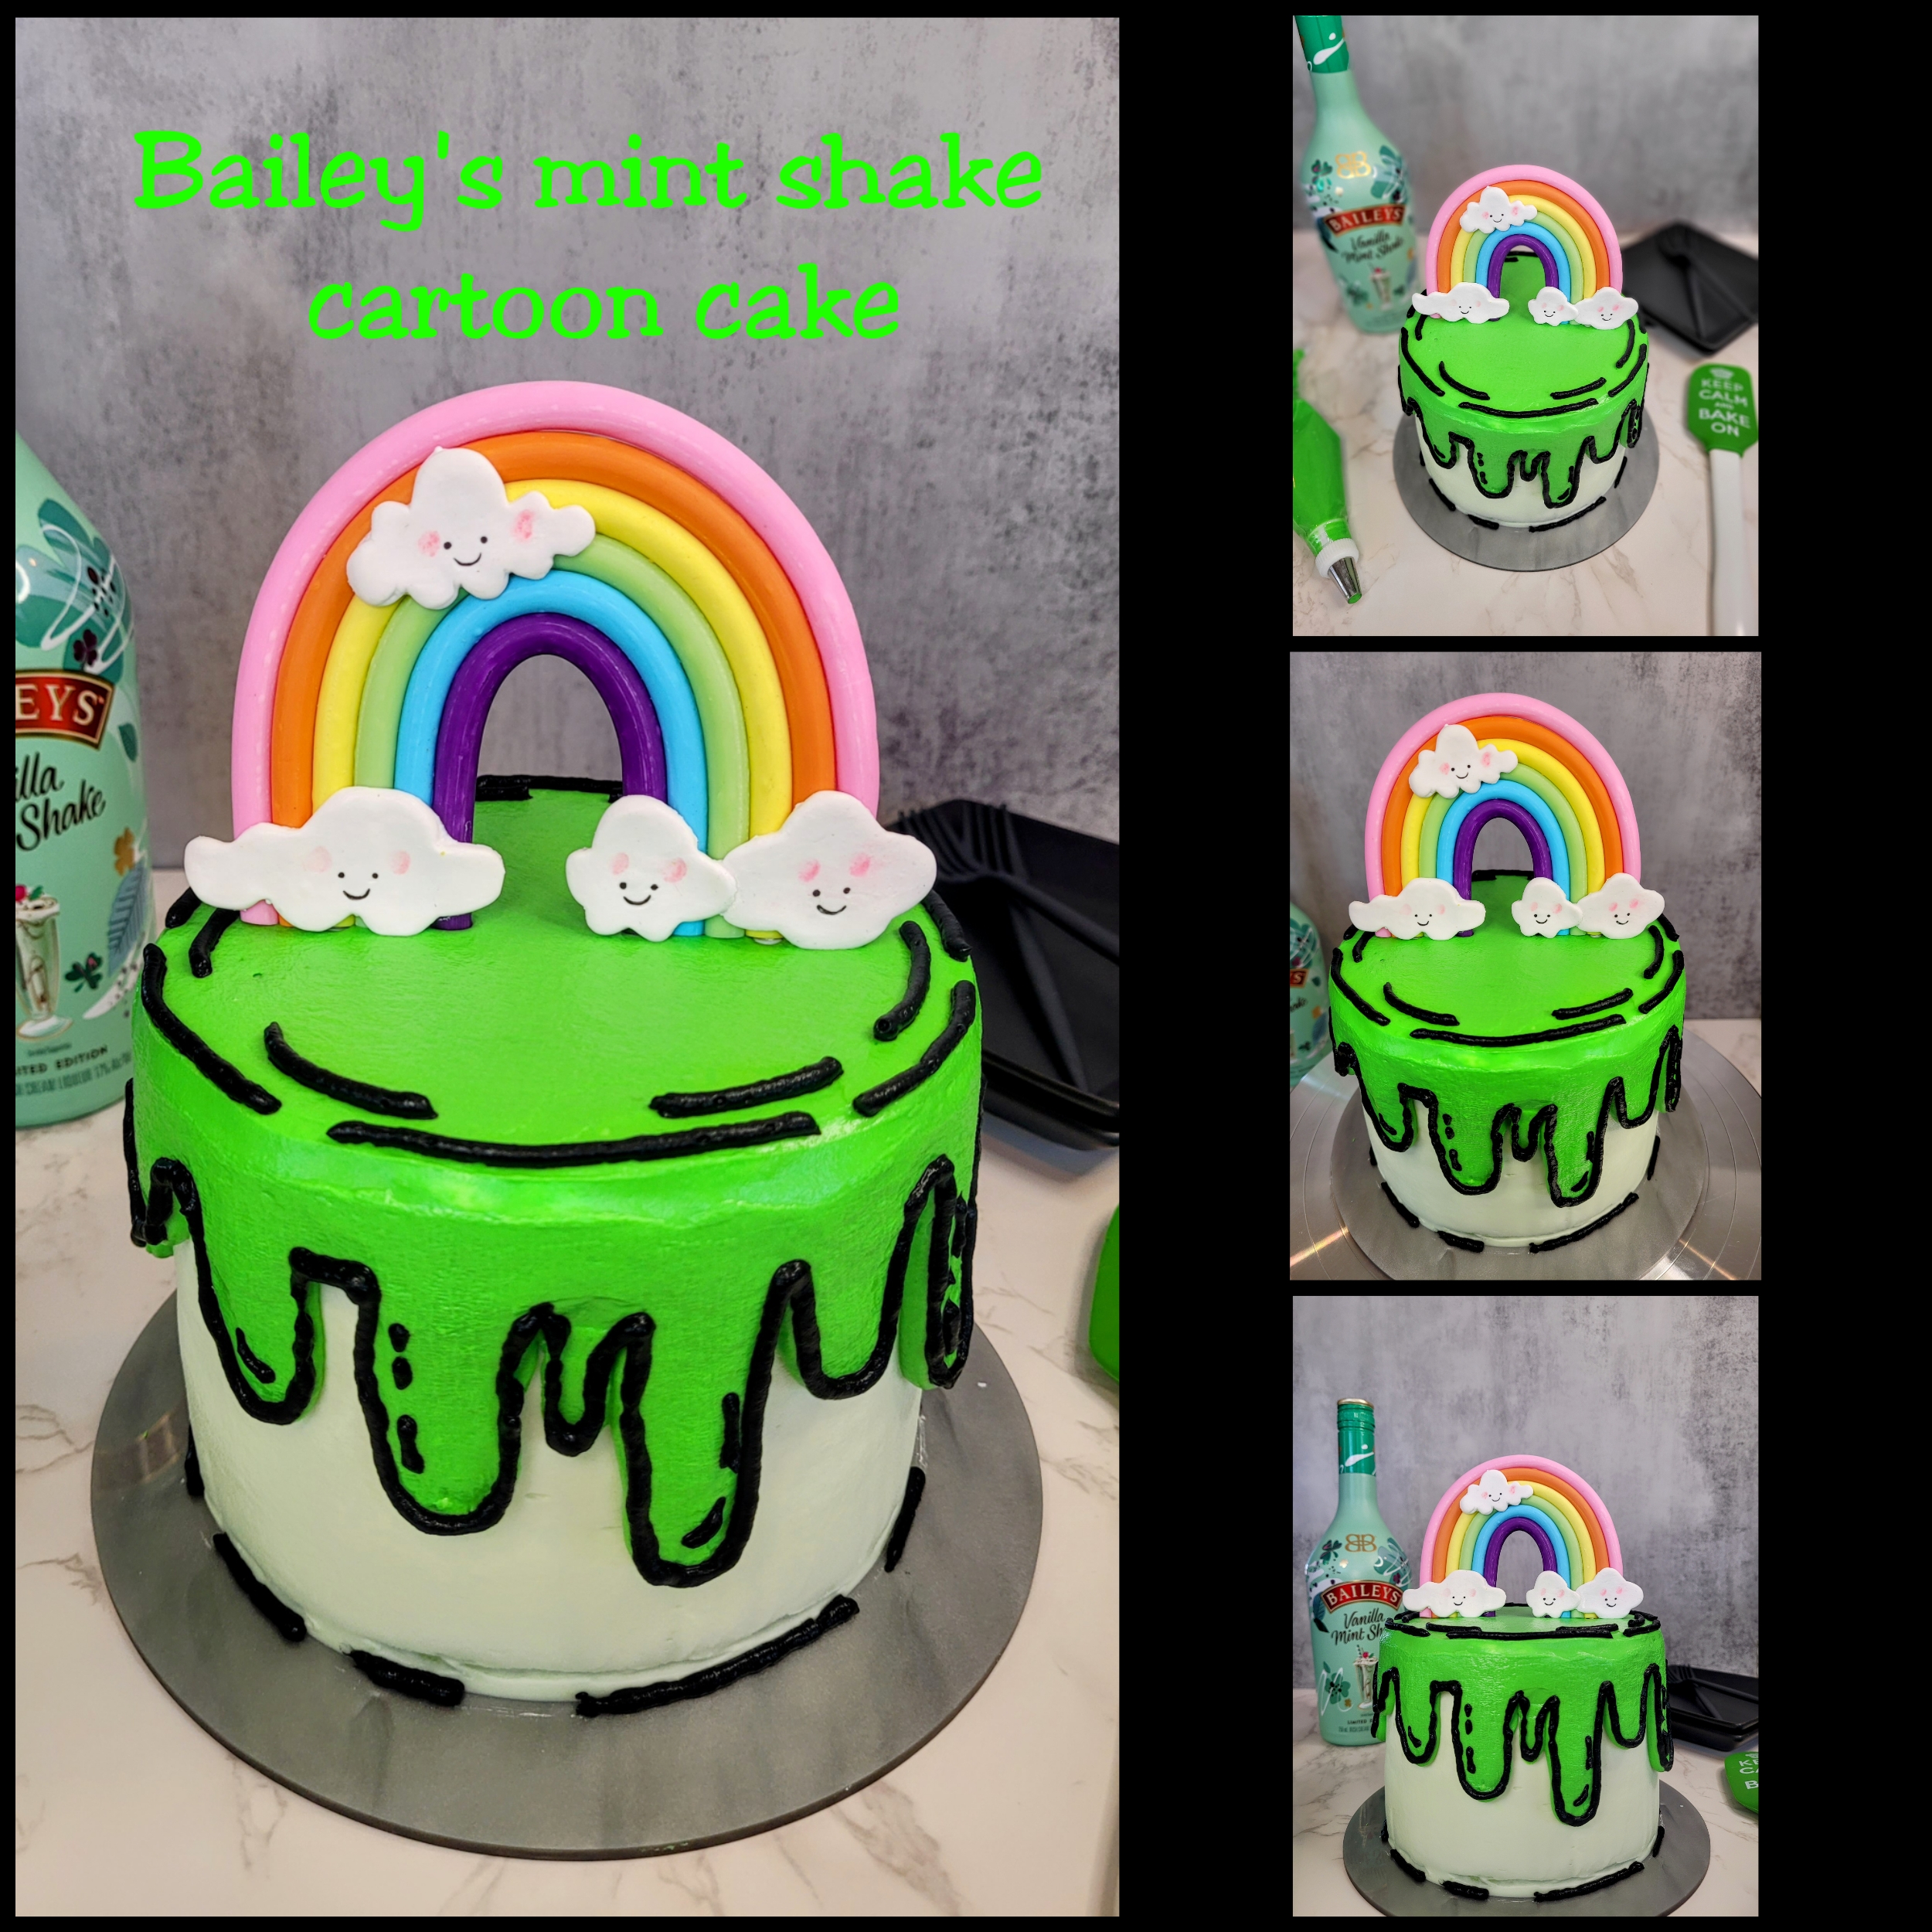
We’re Dublin down on the fun this time of year, anyway. Gluten free and coming in at a nice 299 calories per slice for 10 slices, that leaves plenty of room for some green beer or a Grasshopper come St. Patrick’s Day…because we’re here to Paddy, after all. St. Patrick’s Day is my second favorite holiday to bake for (my black little heart will always belong to Halloween), and I just love the vibrant greens, rainbows, and mint-flavored everything. Definitely head to my Instagram for about 97 other festive recipes ranging from Shamrock Shake oats, smoothie bowls, donuts, Lucky Charms protein bars, and more…kilt-y as charged when it comes to my obsession with anything adjacent to a Shamrock Shake.
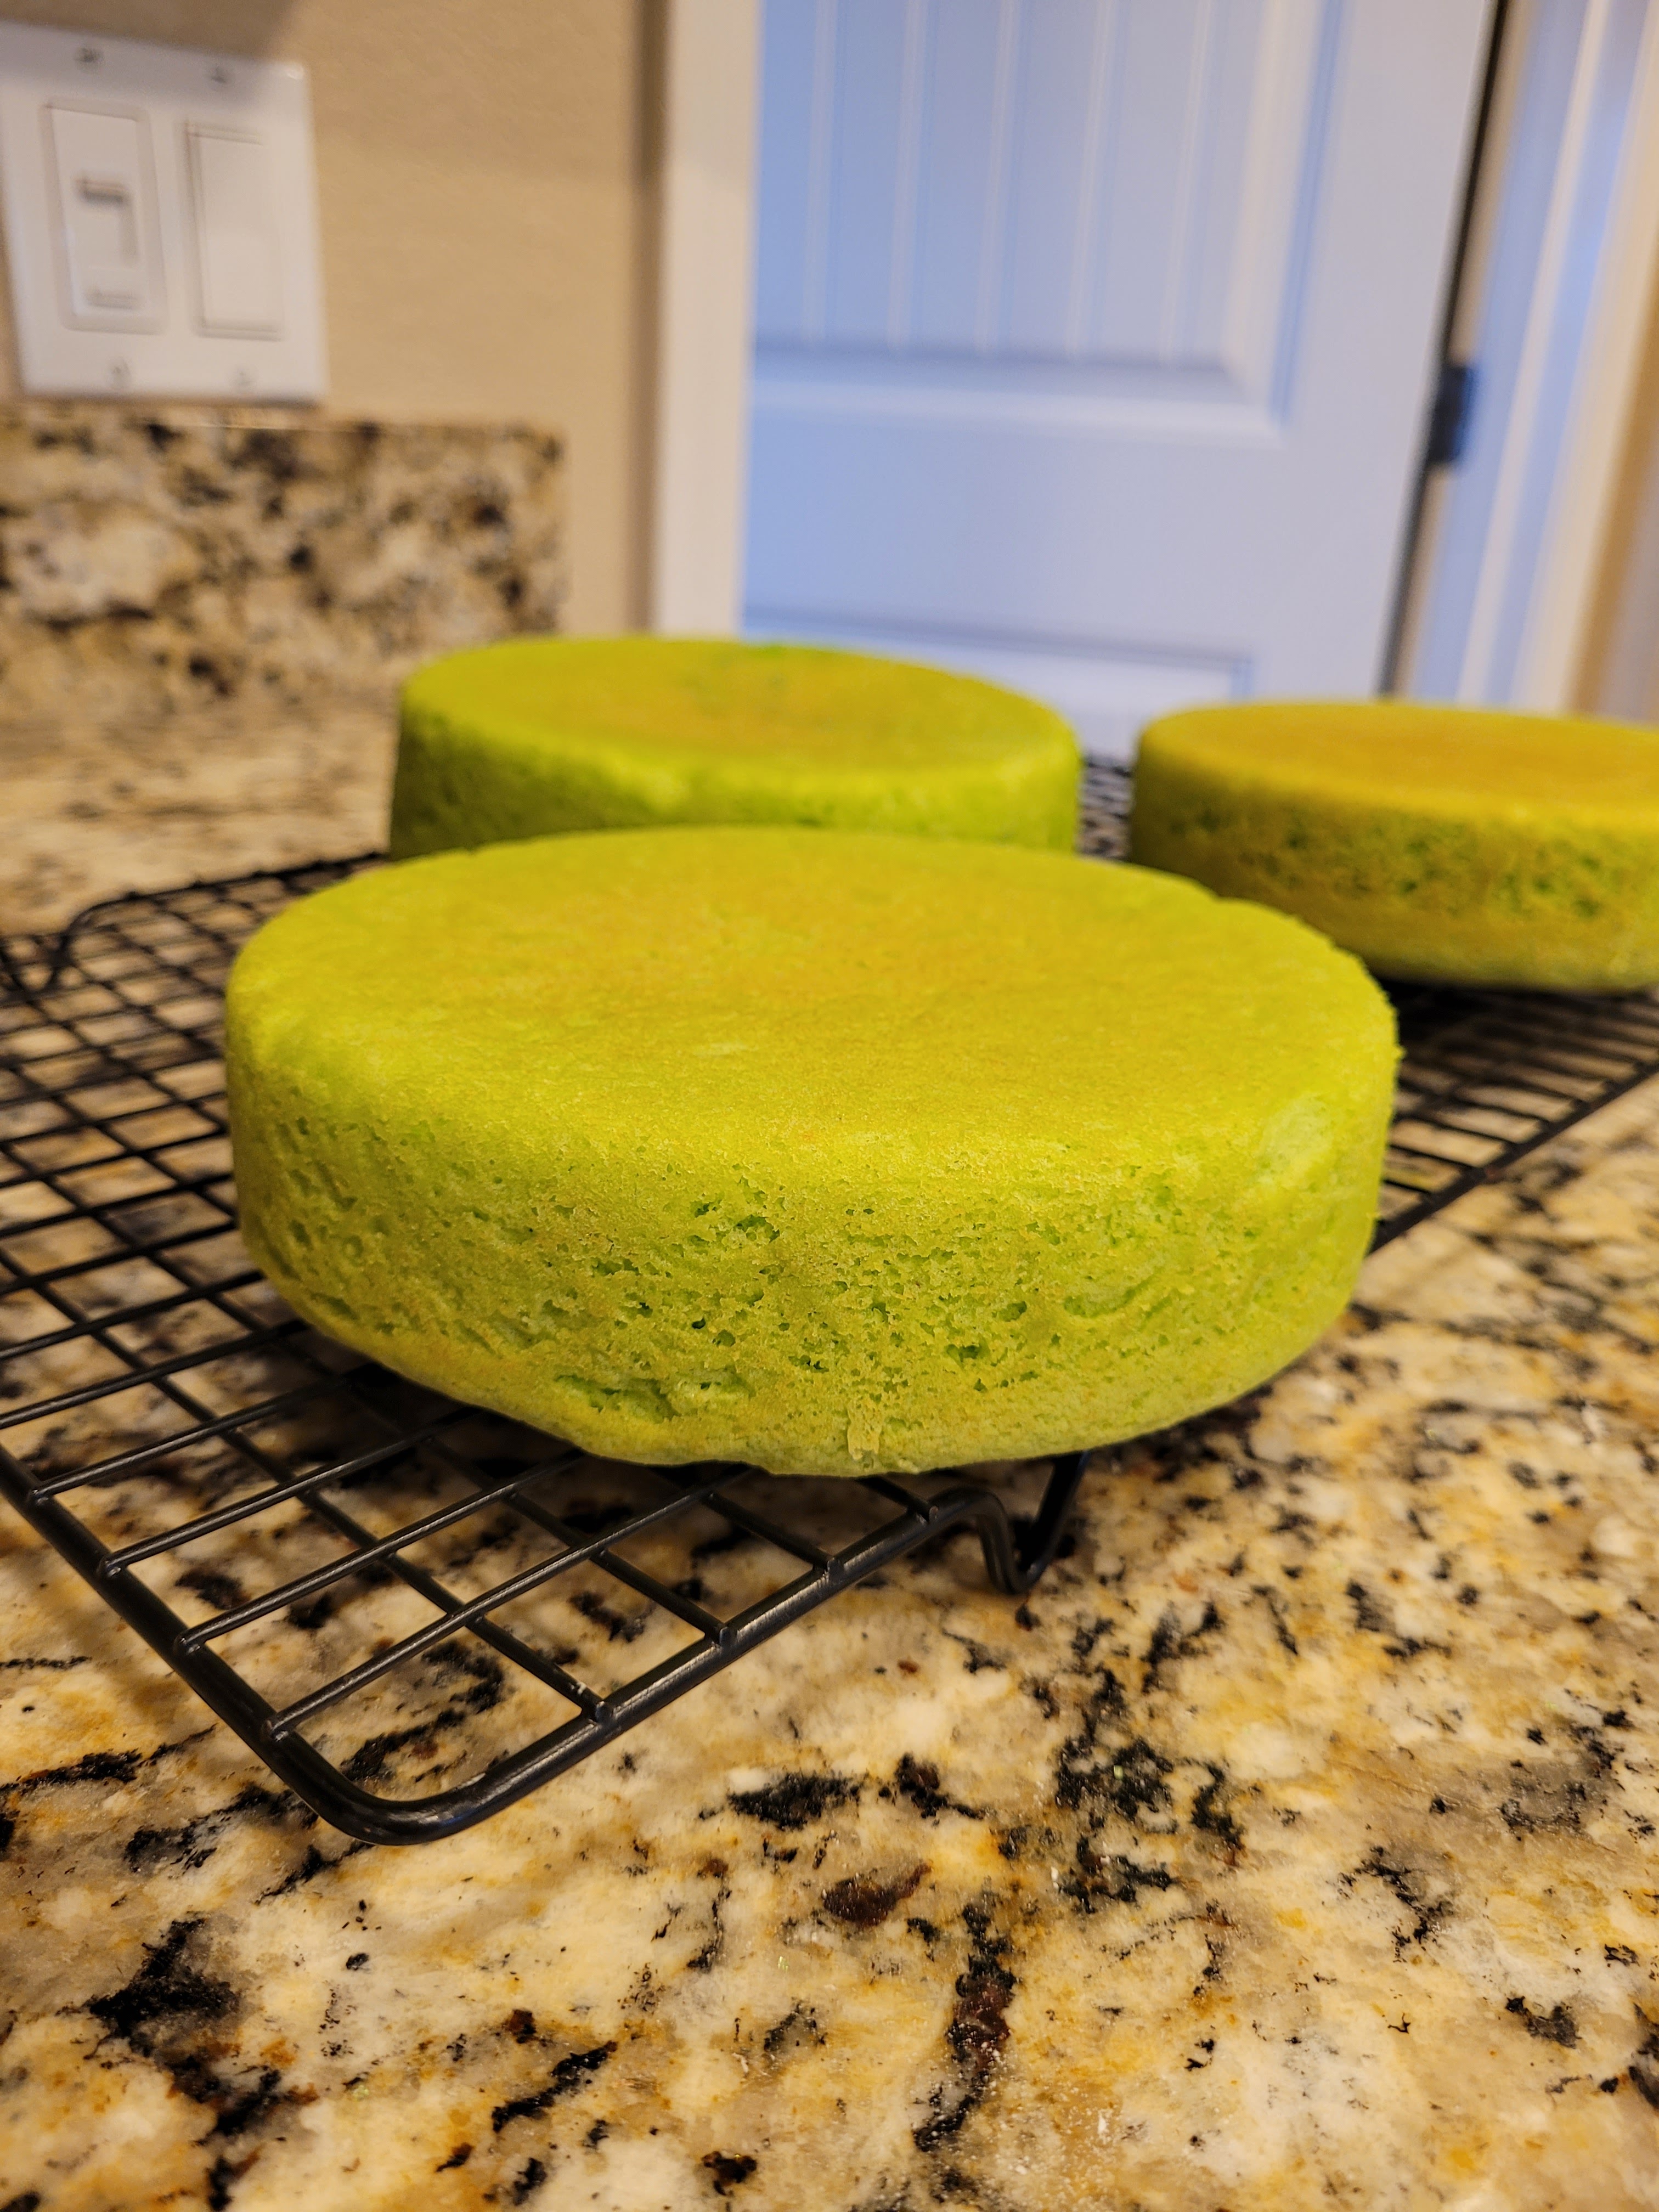
Green with envy. The cake is simple enough to make, and even the cartoon decorating style is easy to master. For the cake, you need:
- 1 box of gluten free yellow or white cake mix (or regular cake mix if not gluten free)
- 3 eggs
- 75 grams (1/3 cup) unsweetened applesauce
- 1/2 cup skim or fat free milk
- 1/2 cup Baileys vanilla mint shake
- 1/2 tsp mint extract
- A teeny tiny dollop of green food dye if desired (I didn’t use any; the Baileys is a gorgeous green)
Preheat your oven to 350 and prepare three 6-inch round cake pans with cooking spray and bake even strips. Add all cake ingredients into a stand mixer, blending on low for one minute before switching to medium high for two minutes. Pour batter evenly into each pan and bake for 25 minutes. A toothpick should come out of the center of the cake clean. Let rest in the pan for 10 minutes before turning out to cool completely on a cooling rack before frosting.
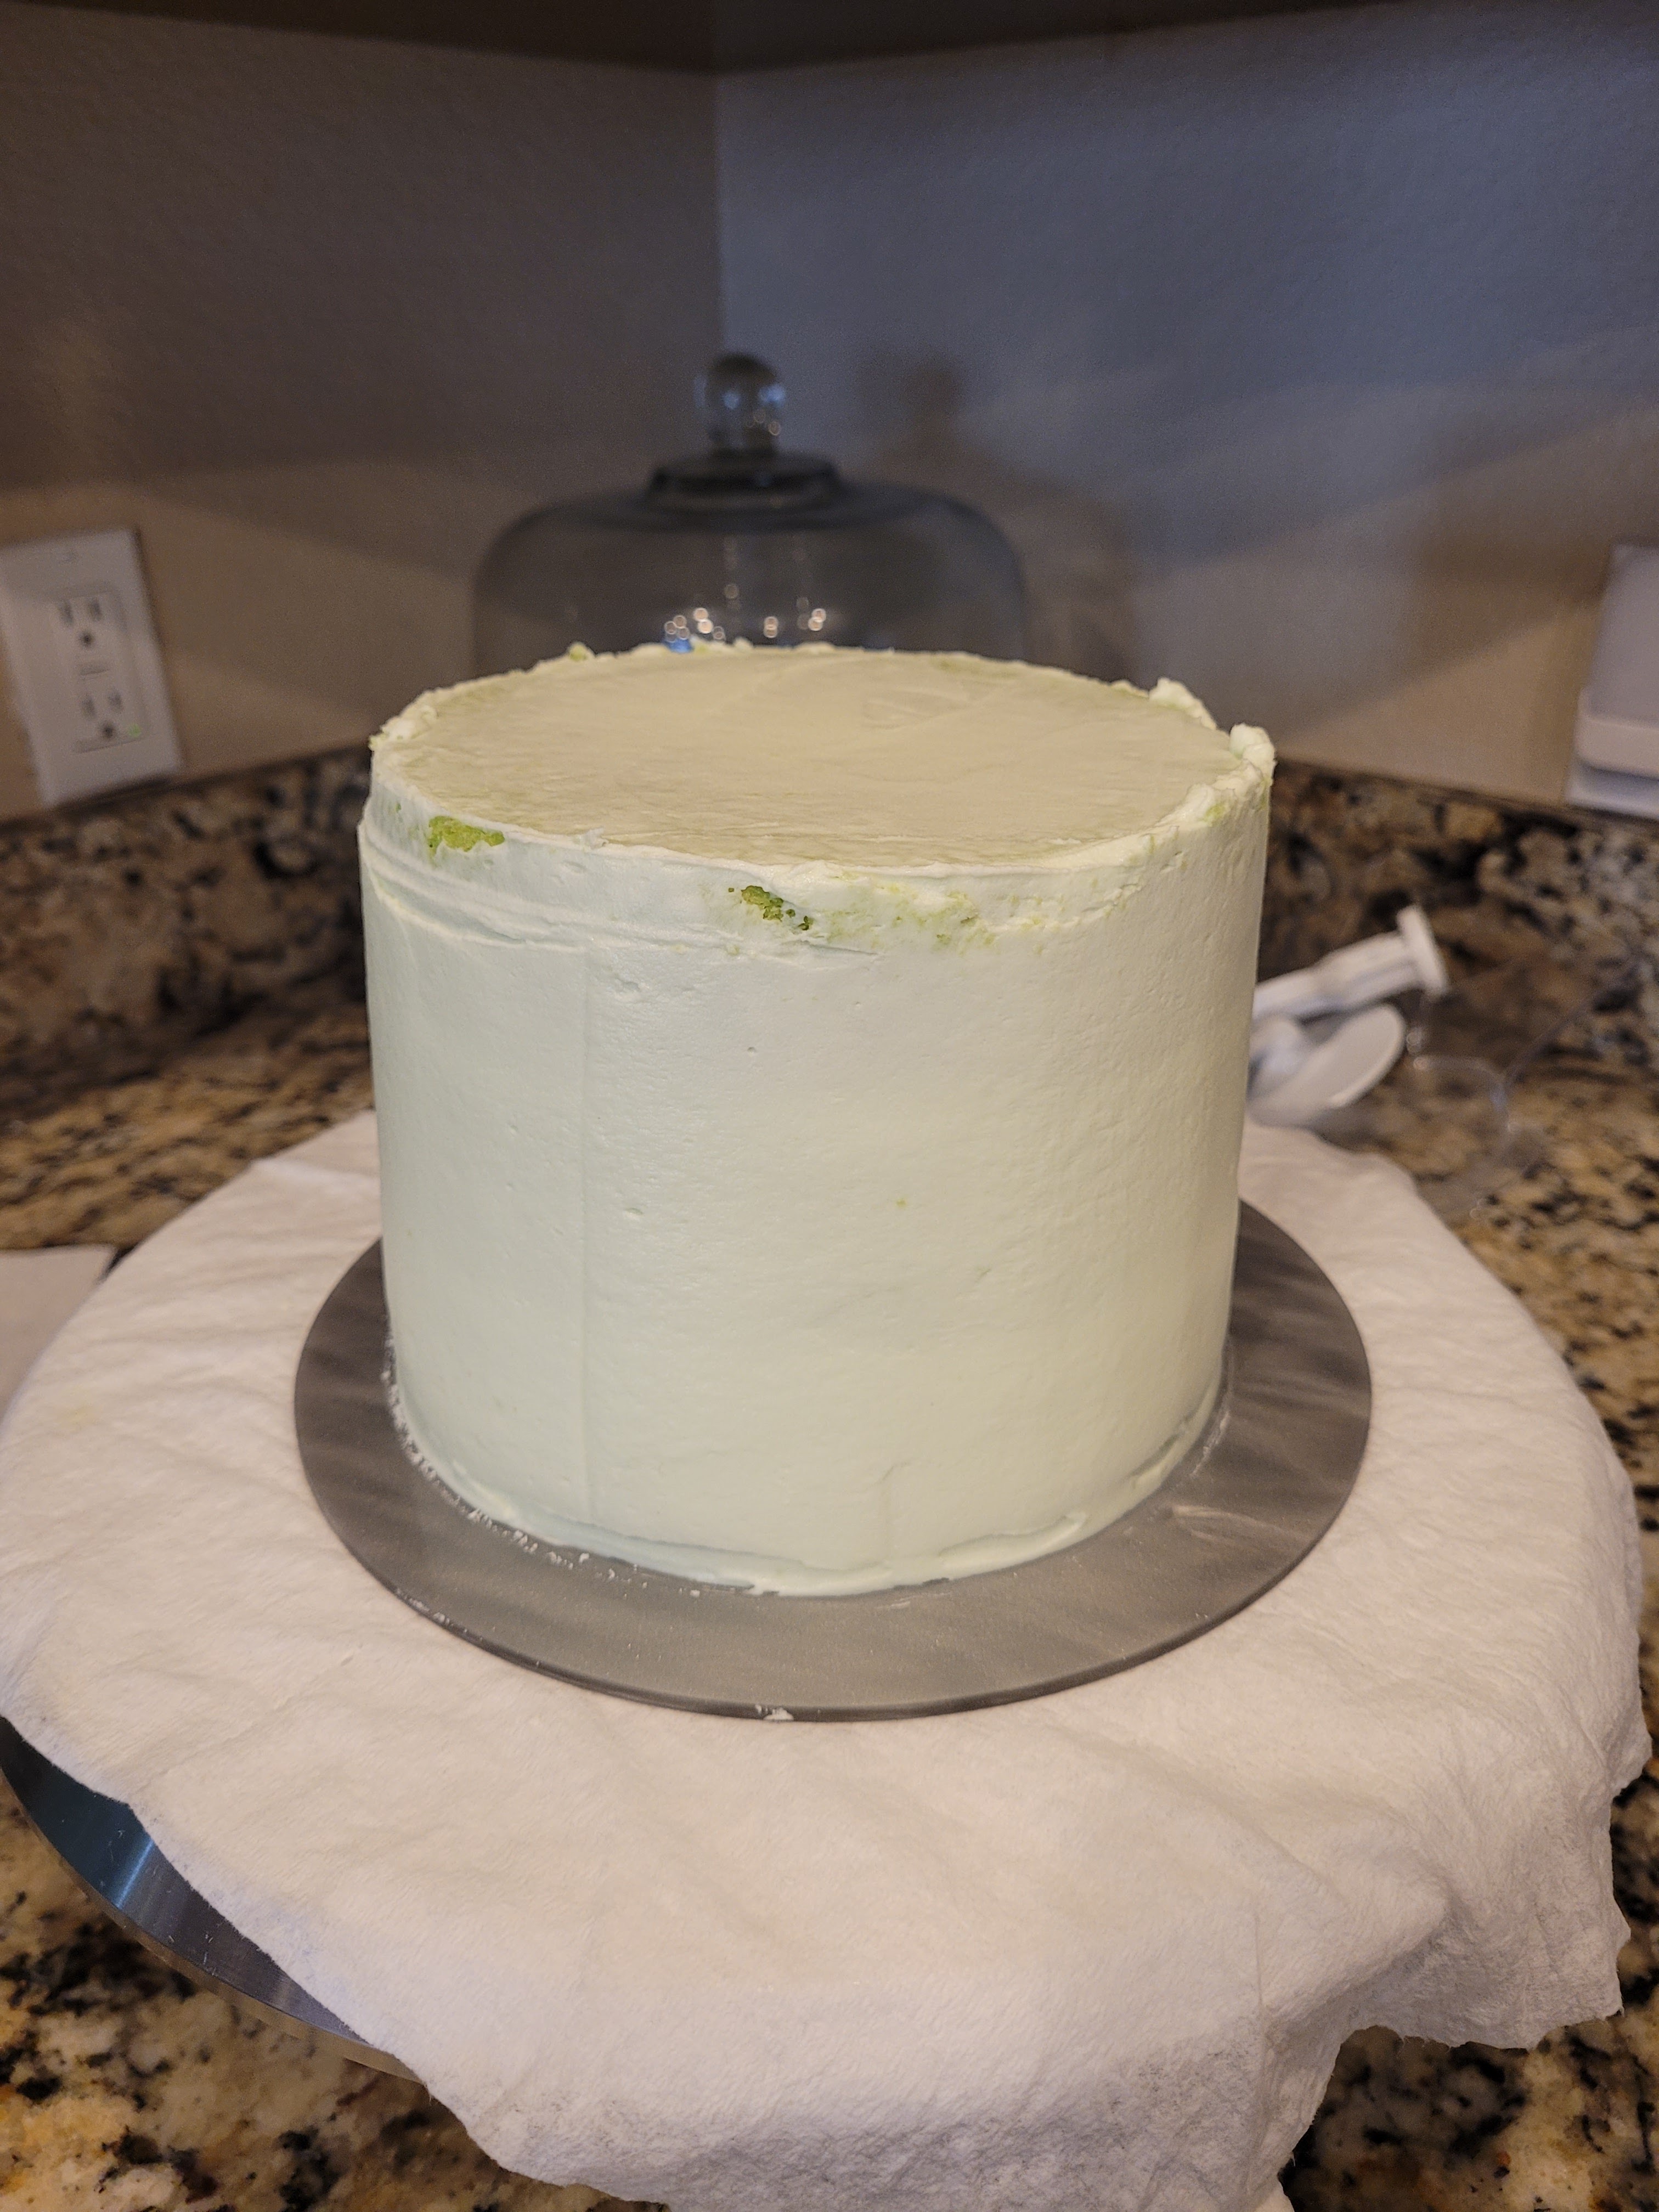
I know, it’s looking a little weird at this point, like a leprechaun without his hat. Do we need more Baileys for the frosting? YOU BET WE DO! Round up:
- 225 grams (8 ounces) of 1/3 the fat cream cheese, softened
- 226 grams (1 cup) of fat free Greek yogurt, strained overnight to remove moisture
- 480 grams (4 cups) Lakanto powdered monkfruit or regular powdered sugar
- 1/2 tsp mint extract
- 2 tsp vanilla extract
- 1/4 tsp citric acid (makes the frosting less sweet since monkfruit is very, very sweet)
- 3-4 TBS Baileys vanilla mint shake
- Green and black gel dye
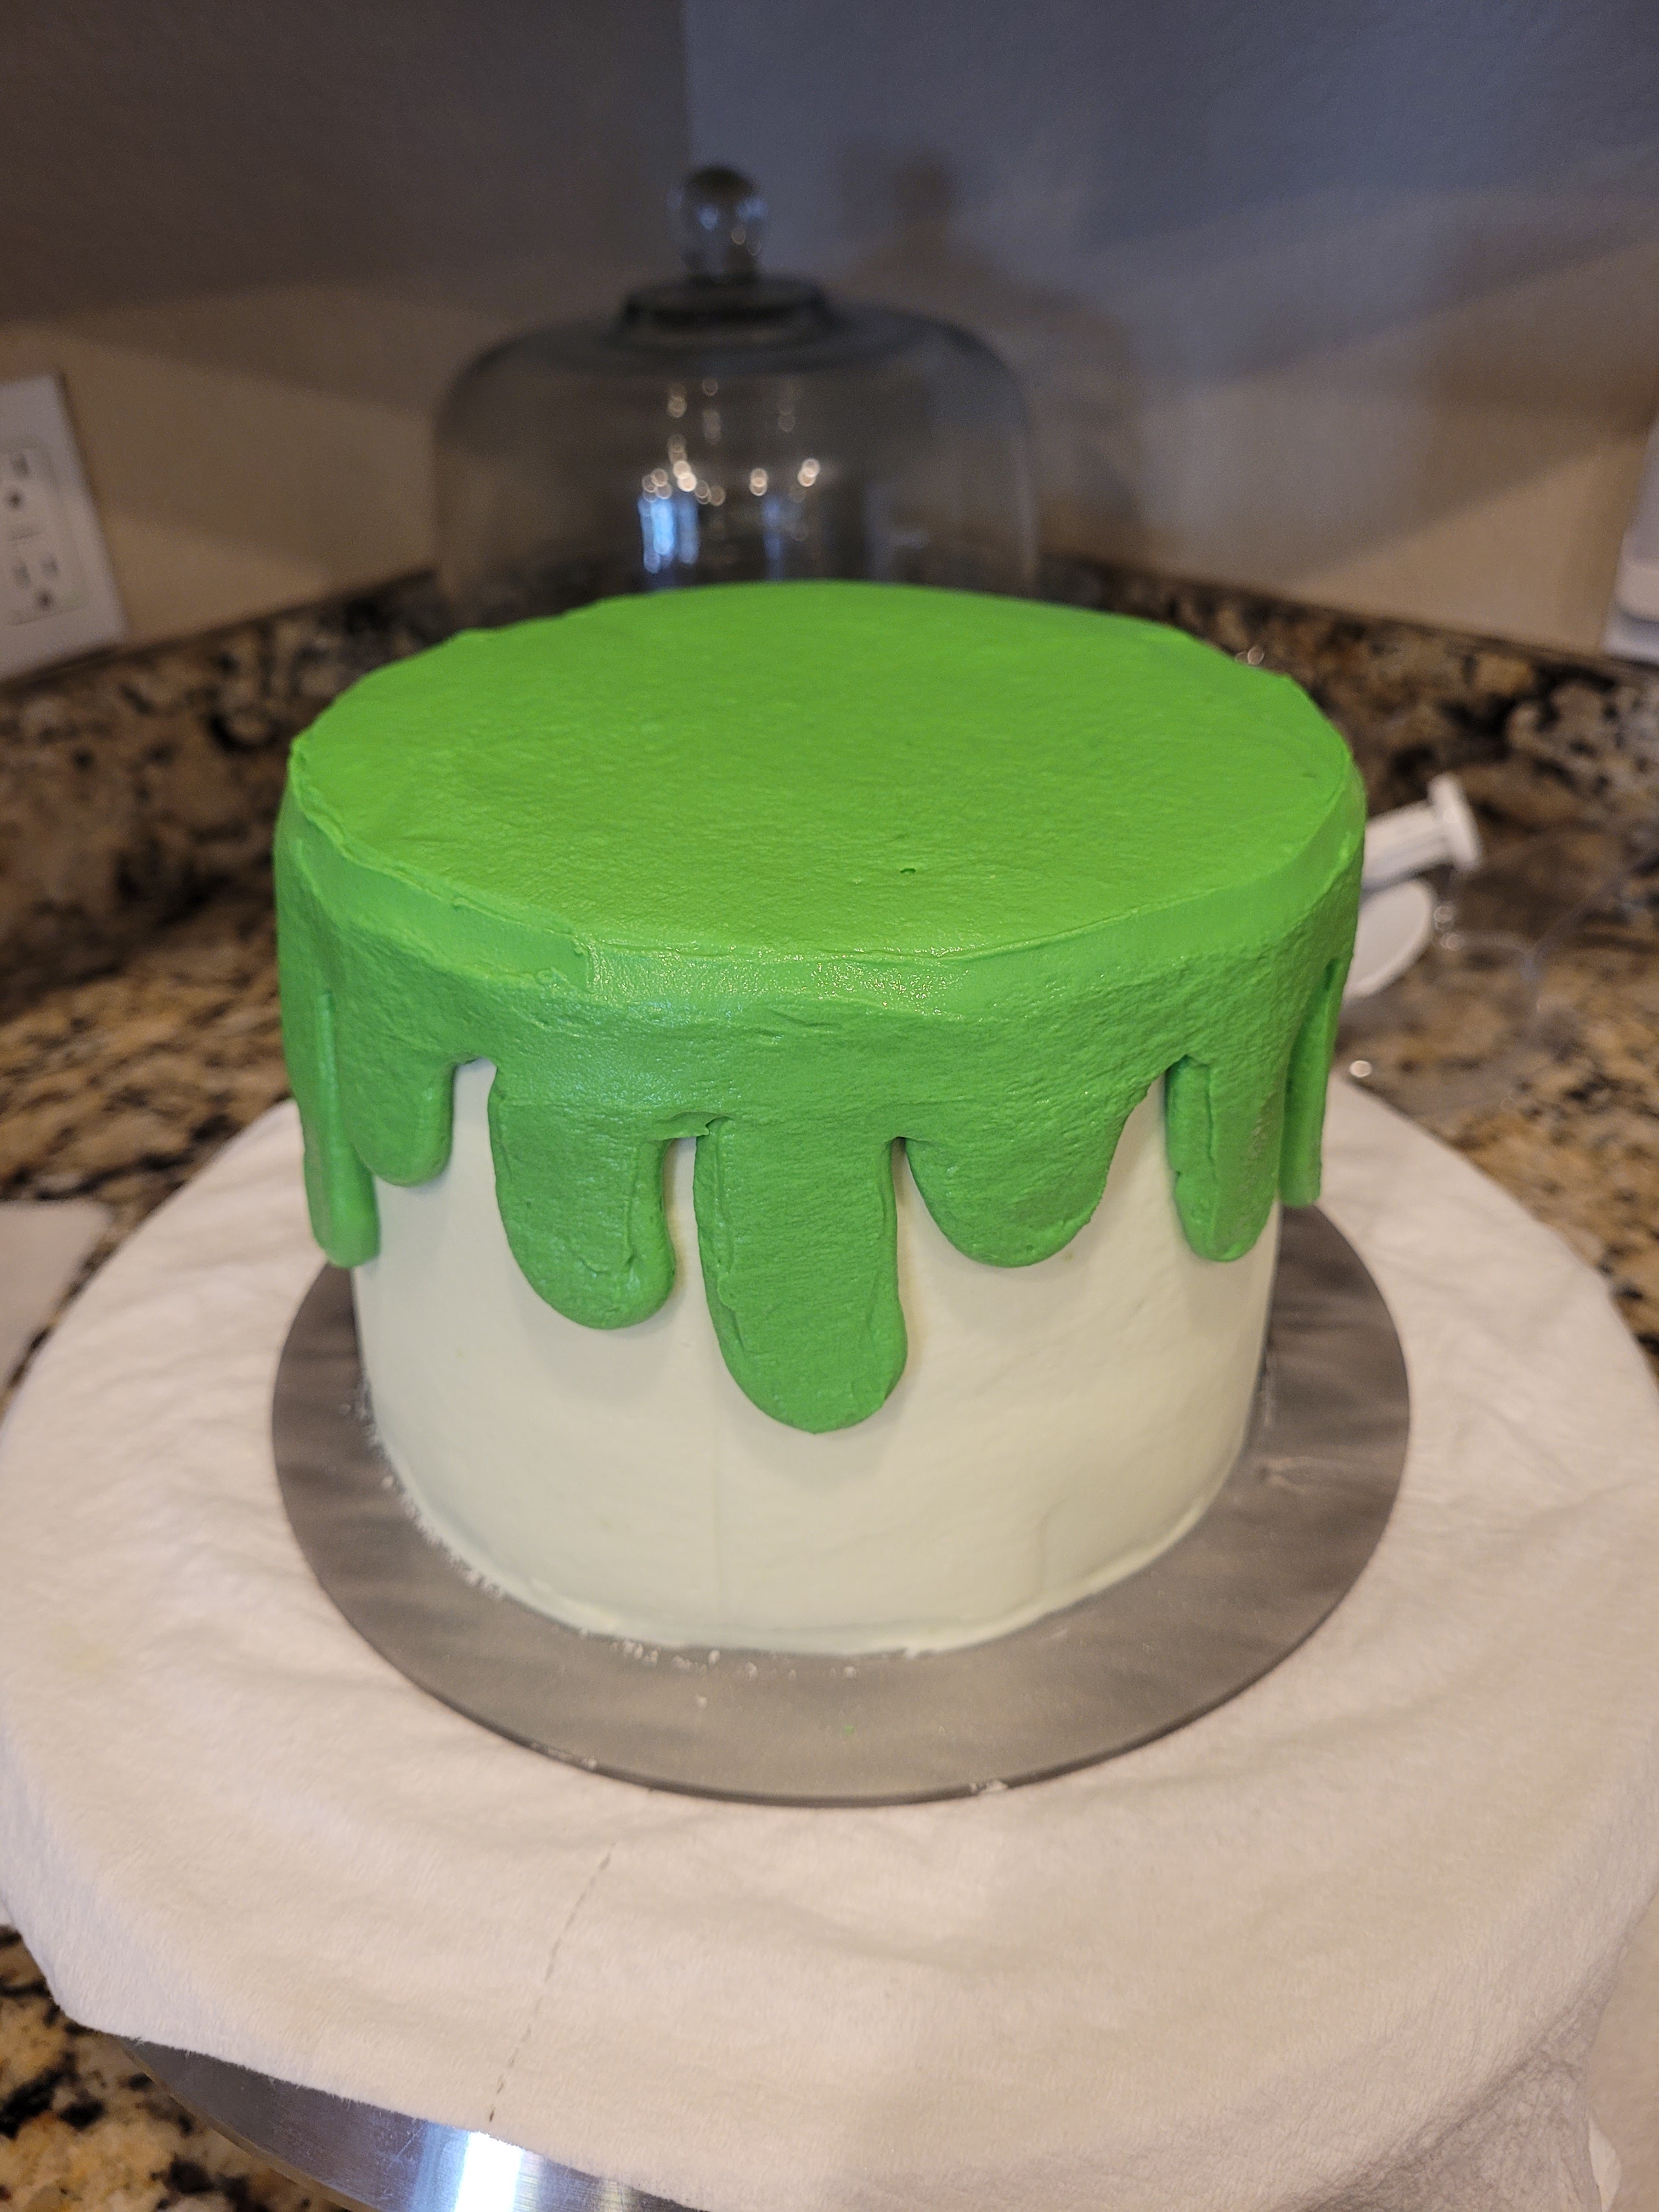
Whip the cream cheese and yogurt with a paddle attachment in your stand mixer until fluffy, about three minutes. Add in half the monkfruit, citric acid, and both extracts. Blend well, then scrape the bowl before adding the remaining monkfruit and 3 TBS Baileys; if the frosting is too stiff, add another TBS Baileys; add in a tiny amount of green gel dye at this point (we’ll make greener in a minute). To assemble, you just need to slather a layer of buttercream on top of a cooled cake layer, then add another layer (I always place them face down so the smooth surface on the bottom of the cake is now on top), then place the final layer on top. Then coat the side (you don’t have to coat the top yet) of the cake with light green frosting. Place this in the freezer for 15 minutes, then come back in with a Viva paper towel and smooth out any unevenness by gently smoothing your hand back and forth, up and down over the paper towel while it’s resting against the sides of the cake.
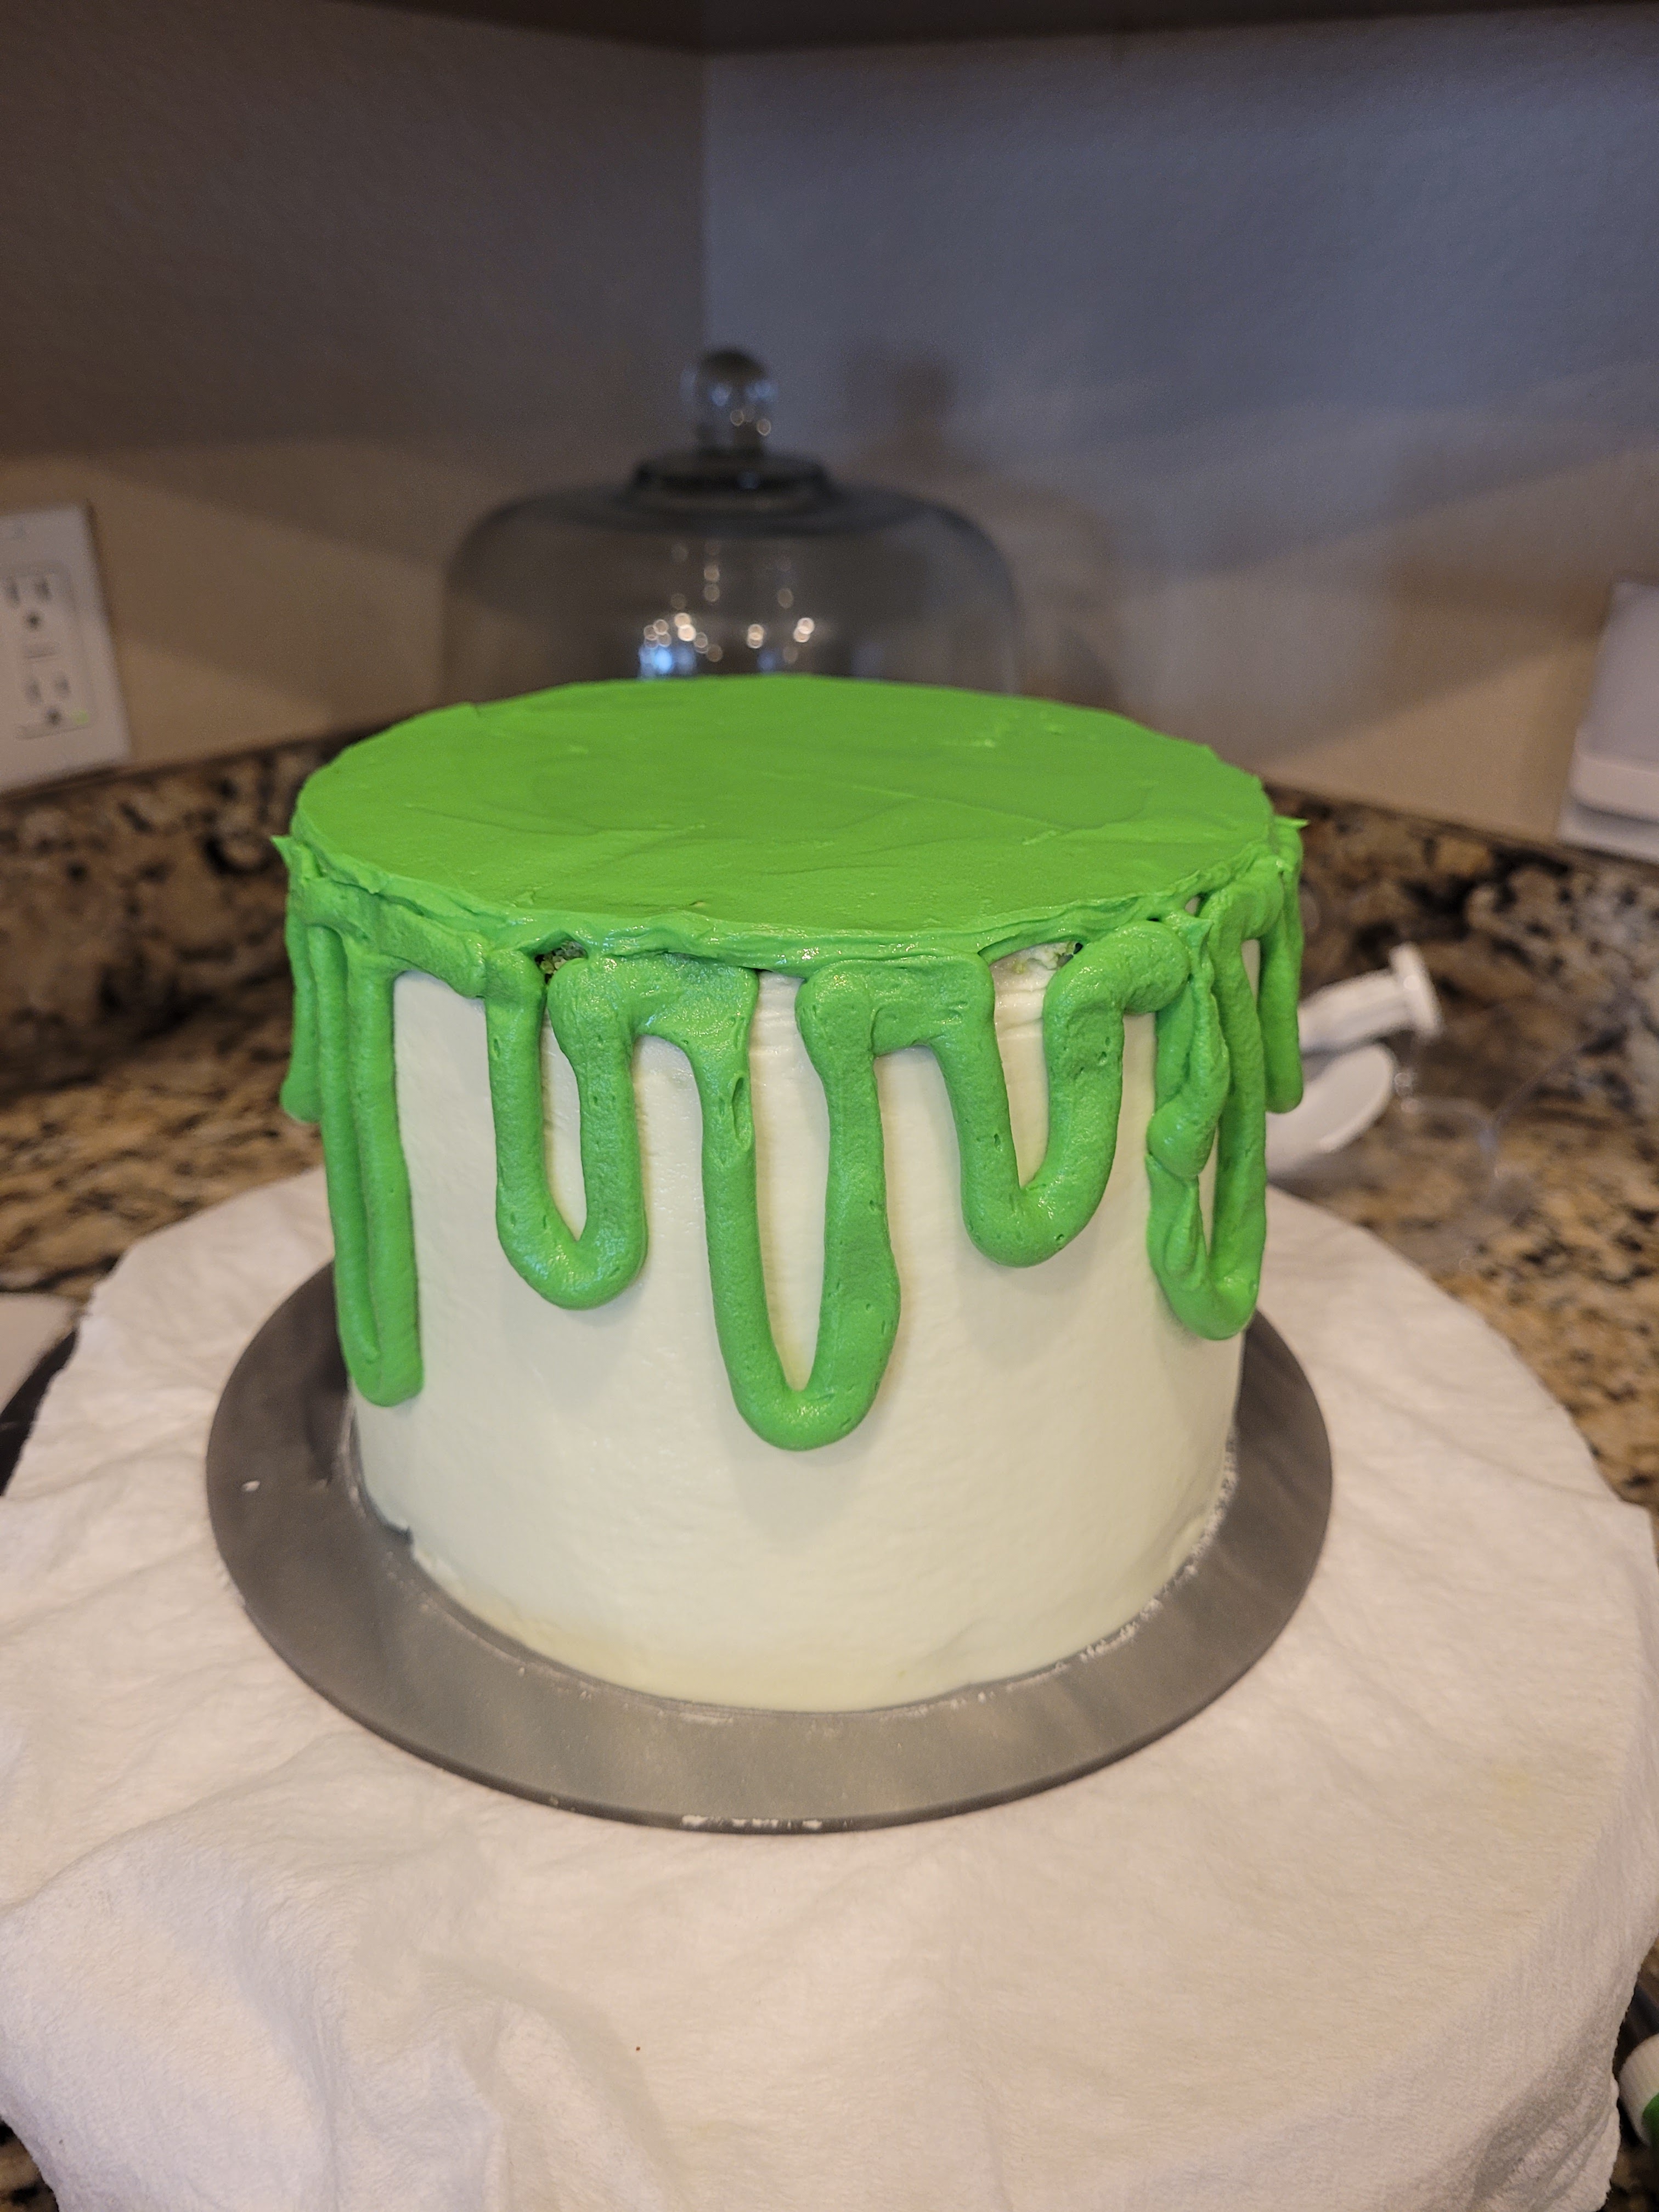
Get ready to shamrock and roll… Now, take the rest of your frosting and add more green dye to achieve the shade you’re looking for. Grab a #5, a #3, and a #12 tip. Load up a hearty amount of frosting into the bag with the #12 round tip. Pipe on top of the cake and then draw the outline of your “drips” around the sides of the cake.
Don’t worry, it ain’t over till it’s clover. Finish filling in the drips with the green frosting. Place back into the freezer for 15-20 minutes to crust.
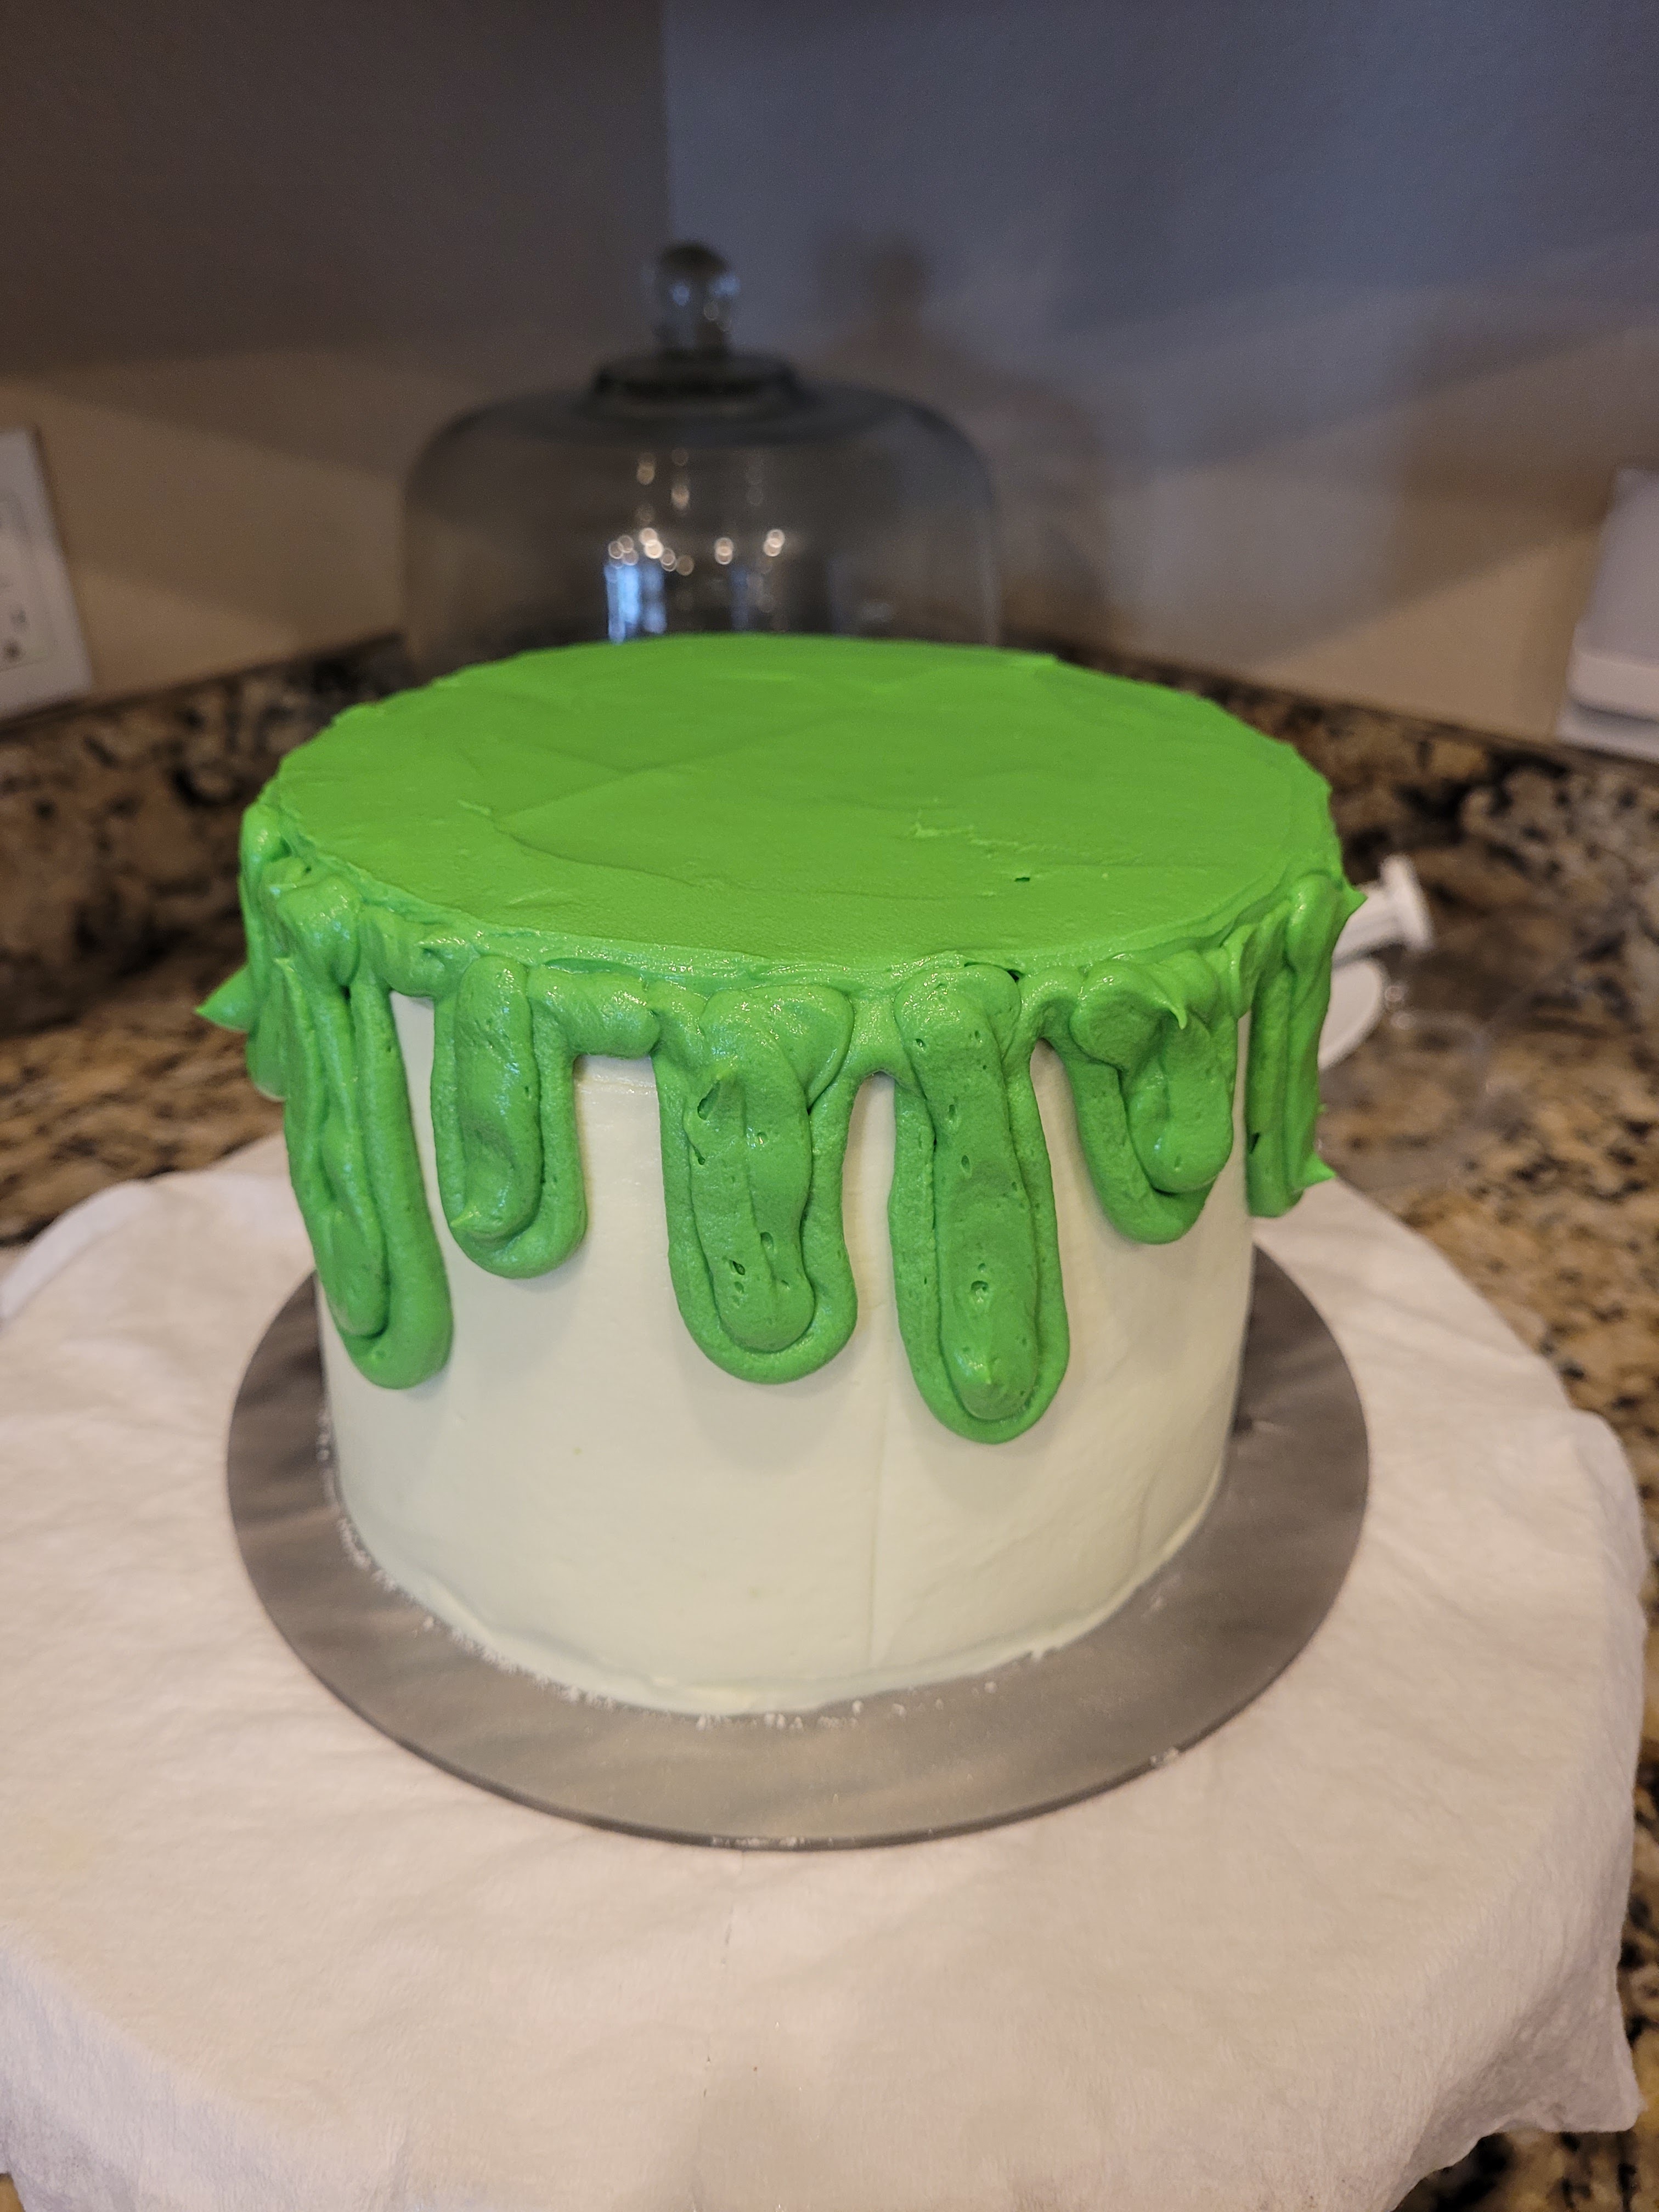
It’s giving Nickelodeon Slime… Use a Viva paper towel to smooth everything out again. Now, if you don’t want to use a rainbow topper on top of the cake (got mine here), load some more green frosting into a piping bag with a 1M or 2D tip to use on top later and set aside. Now, dye your remaining frosting black.
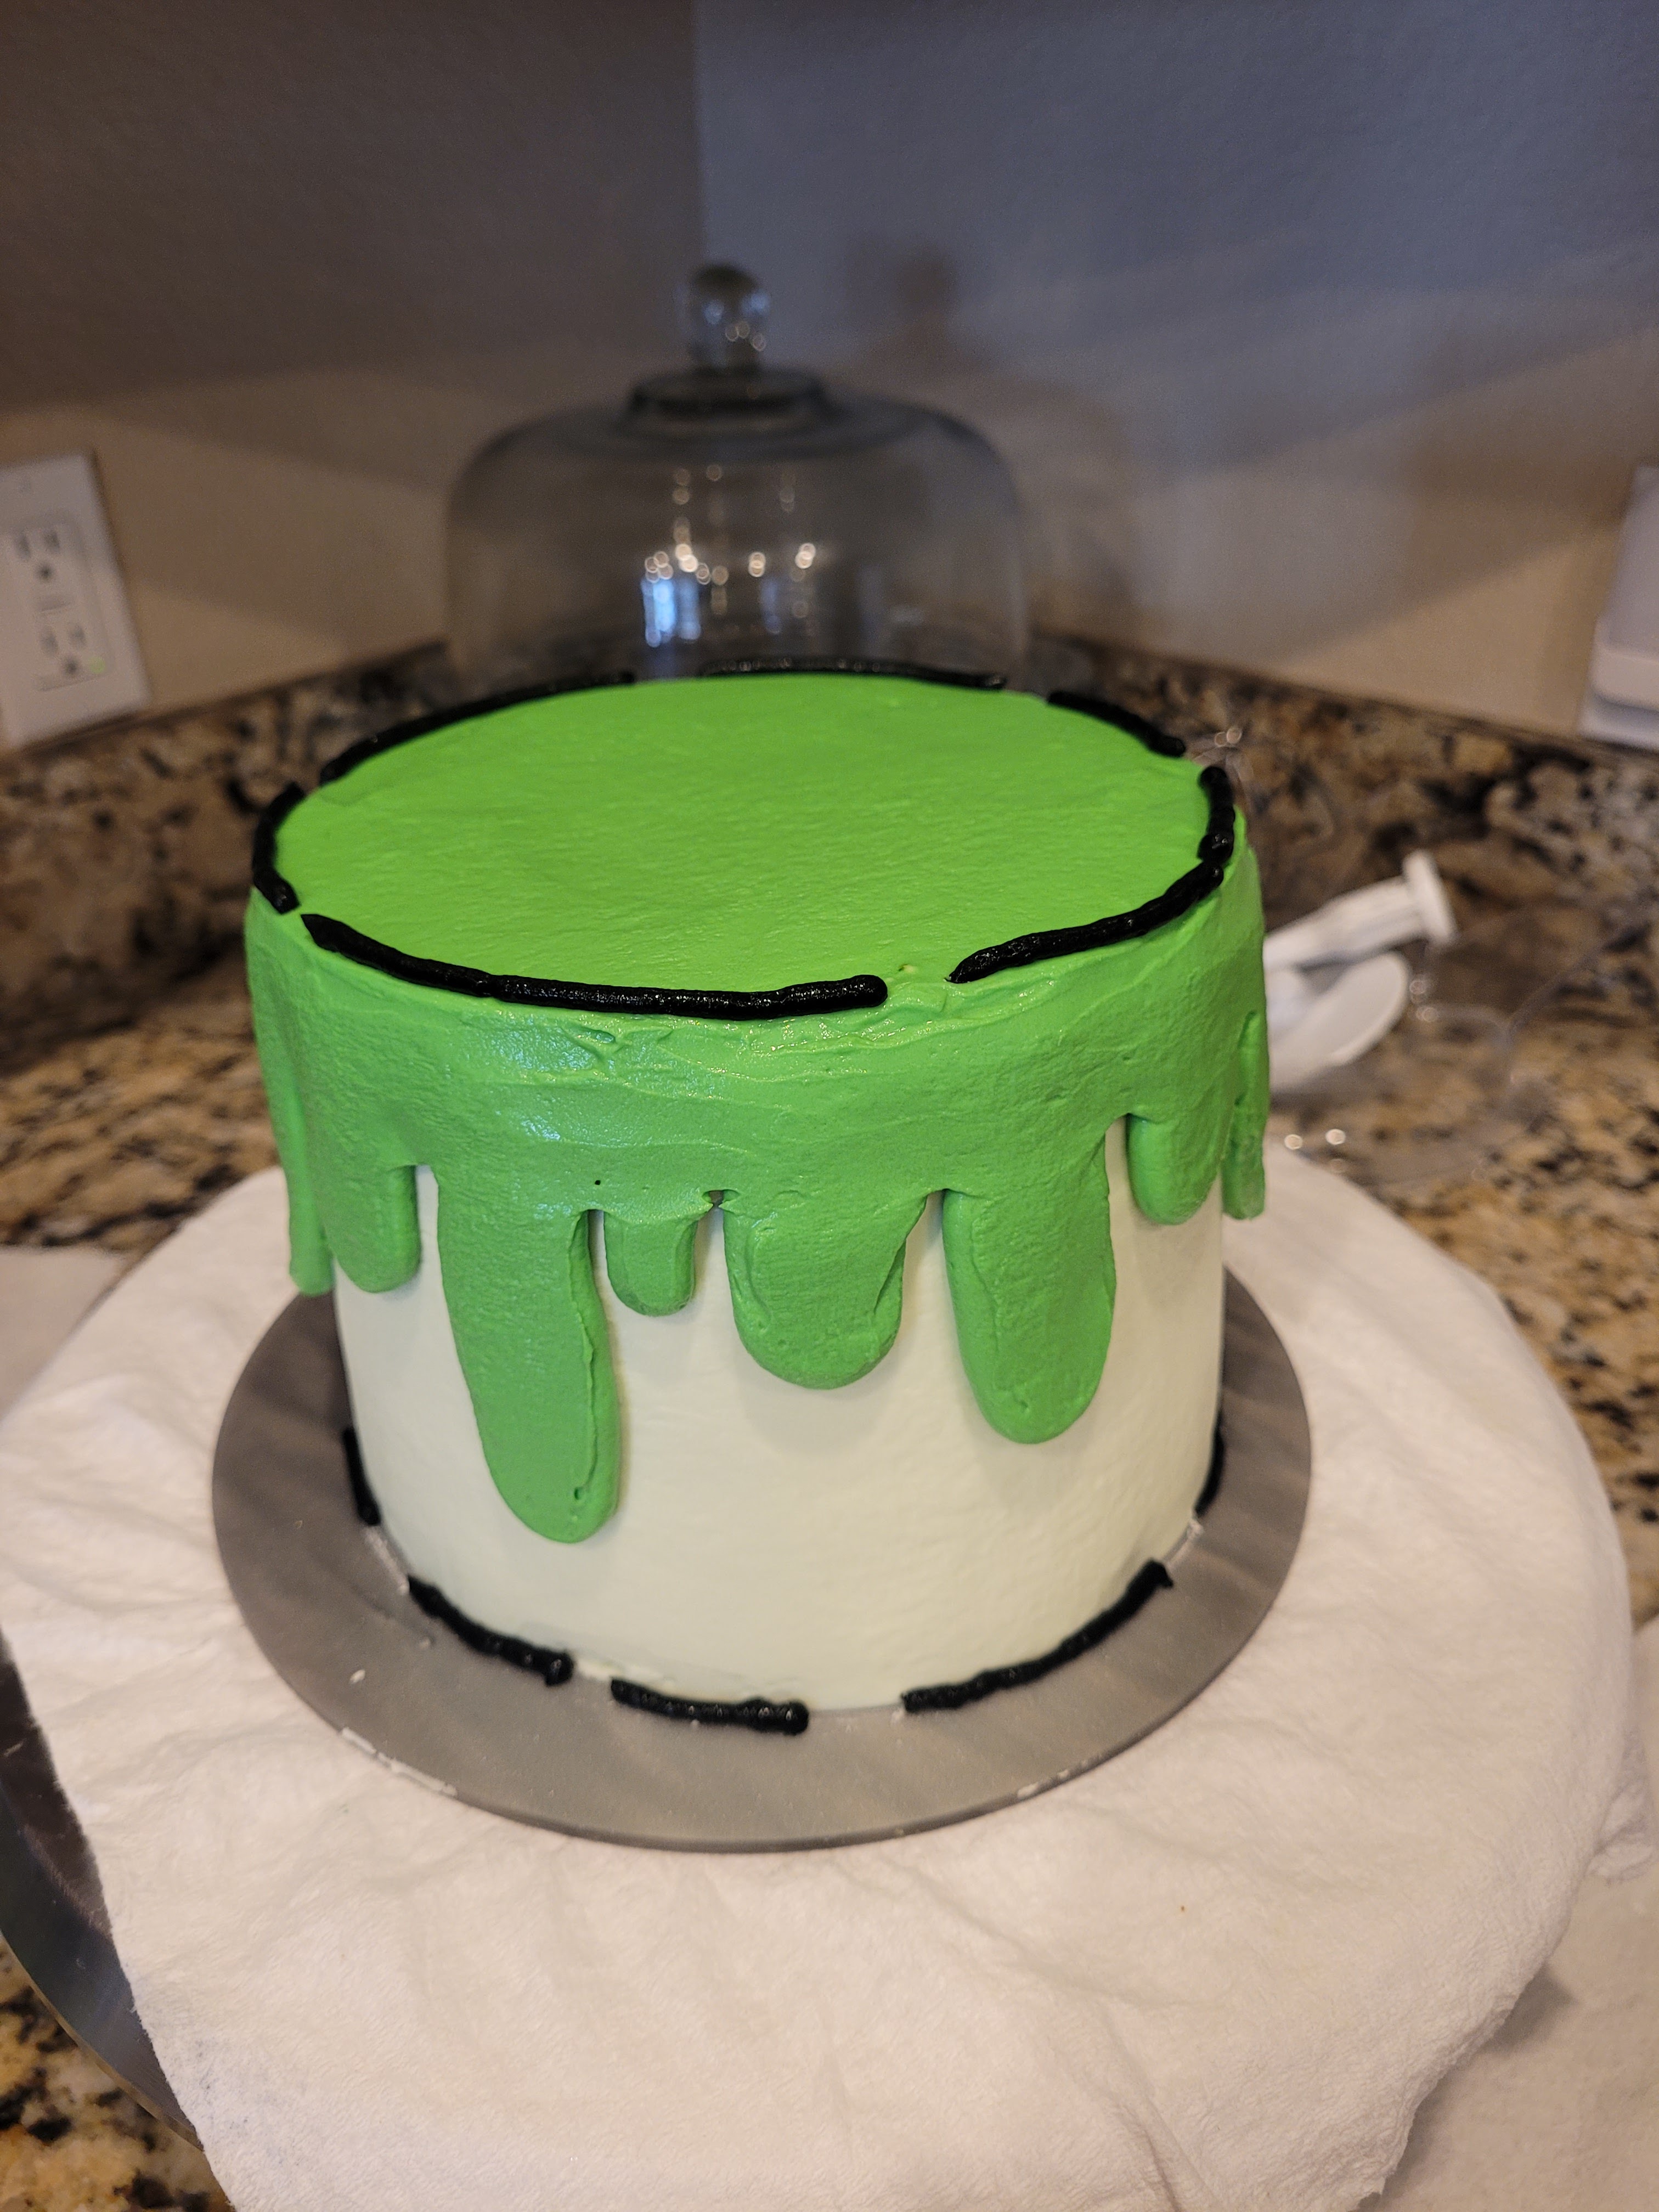
You lepre-can do this. Now, fill a piping bag with a #5 tip with the black frosting, and go around the cake creating an outline look with thin lines of black around the bottom and top, broken up in various places to give the cartoon effect.
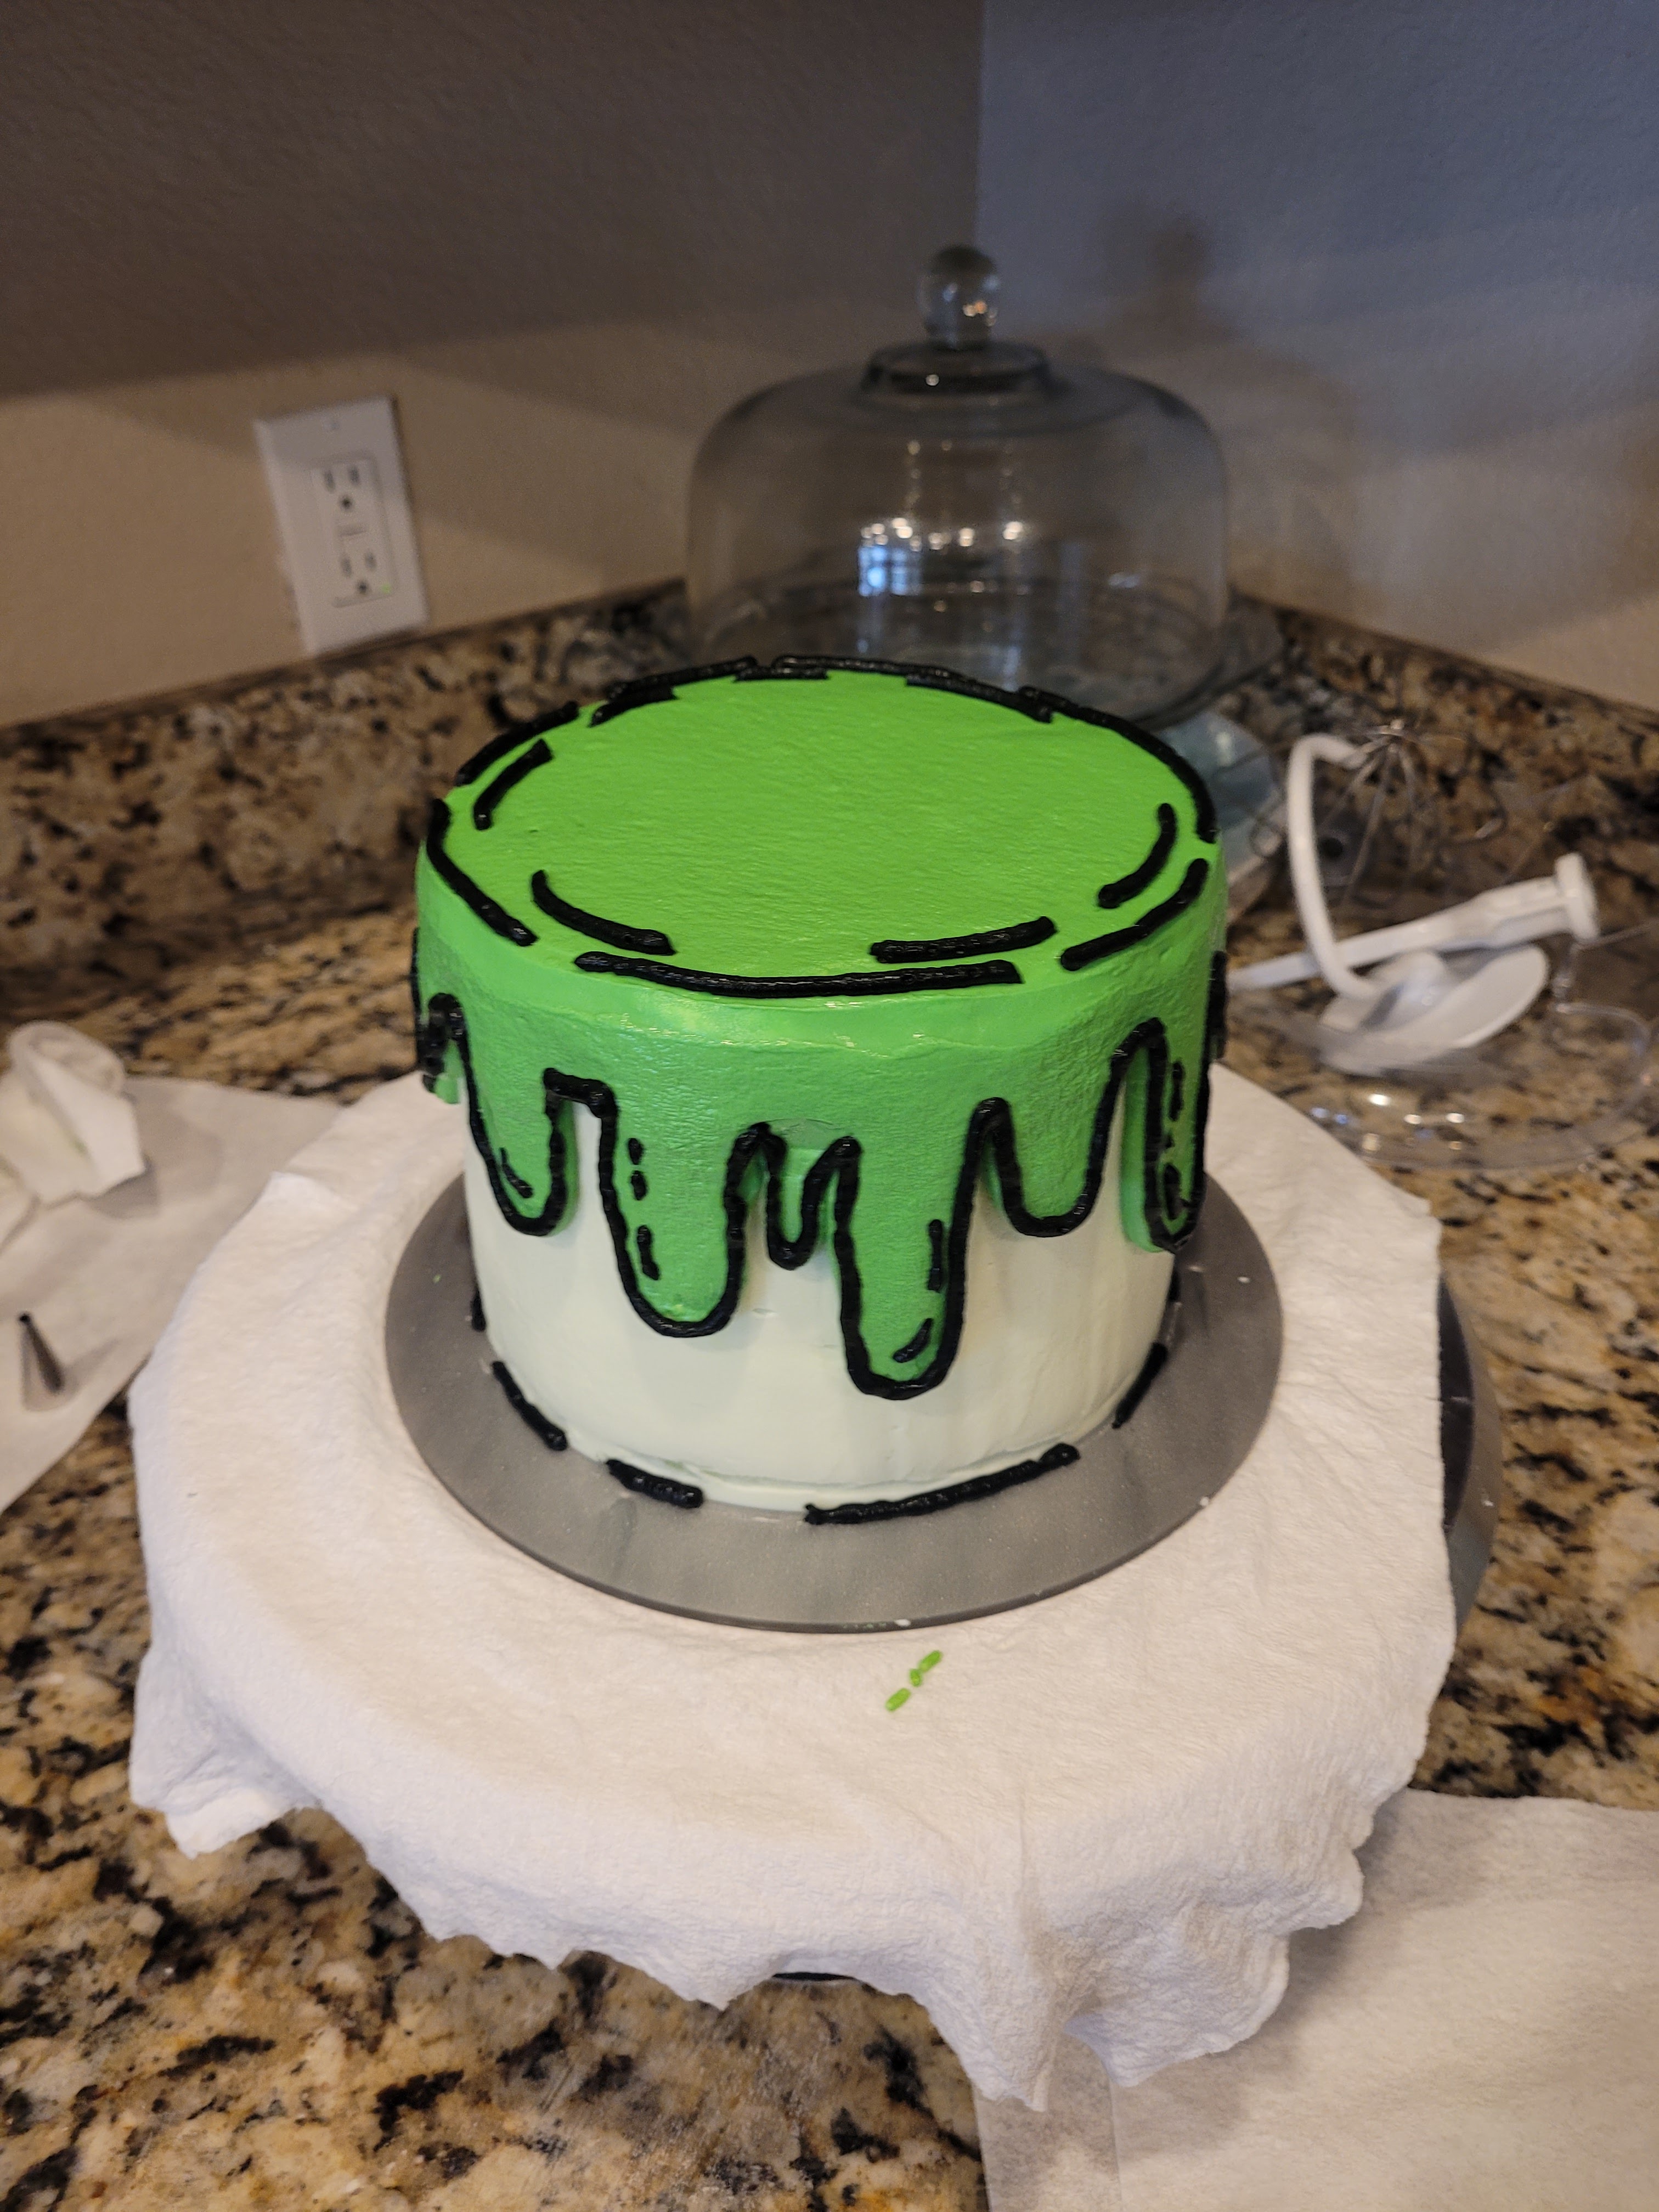
Oh, it’s all coming together now. Now, switch to a #3 tip and outline the drips with more black frosting. I added in a few “shadows” of overlapping black on the top and on the drips. If you’re not adding the rainbow topper, you can pipe little mounds of frosting with the green and outline some of the waves in black….adding a photo of a Valentine’s cartoon cake I did last year here for visual reference of how that might look:

The heart wants what it wants…and that is cake. Back to your regularly scheduled EVERGREEN content…
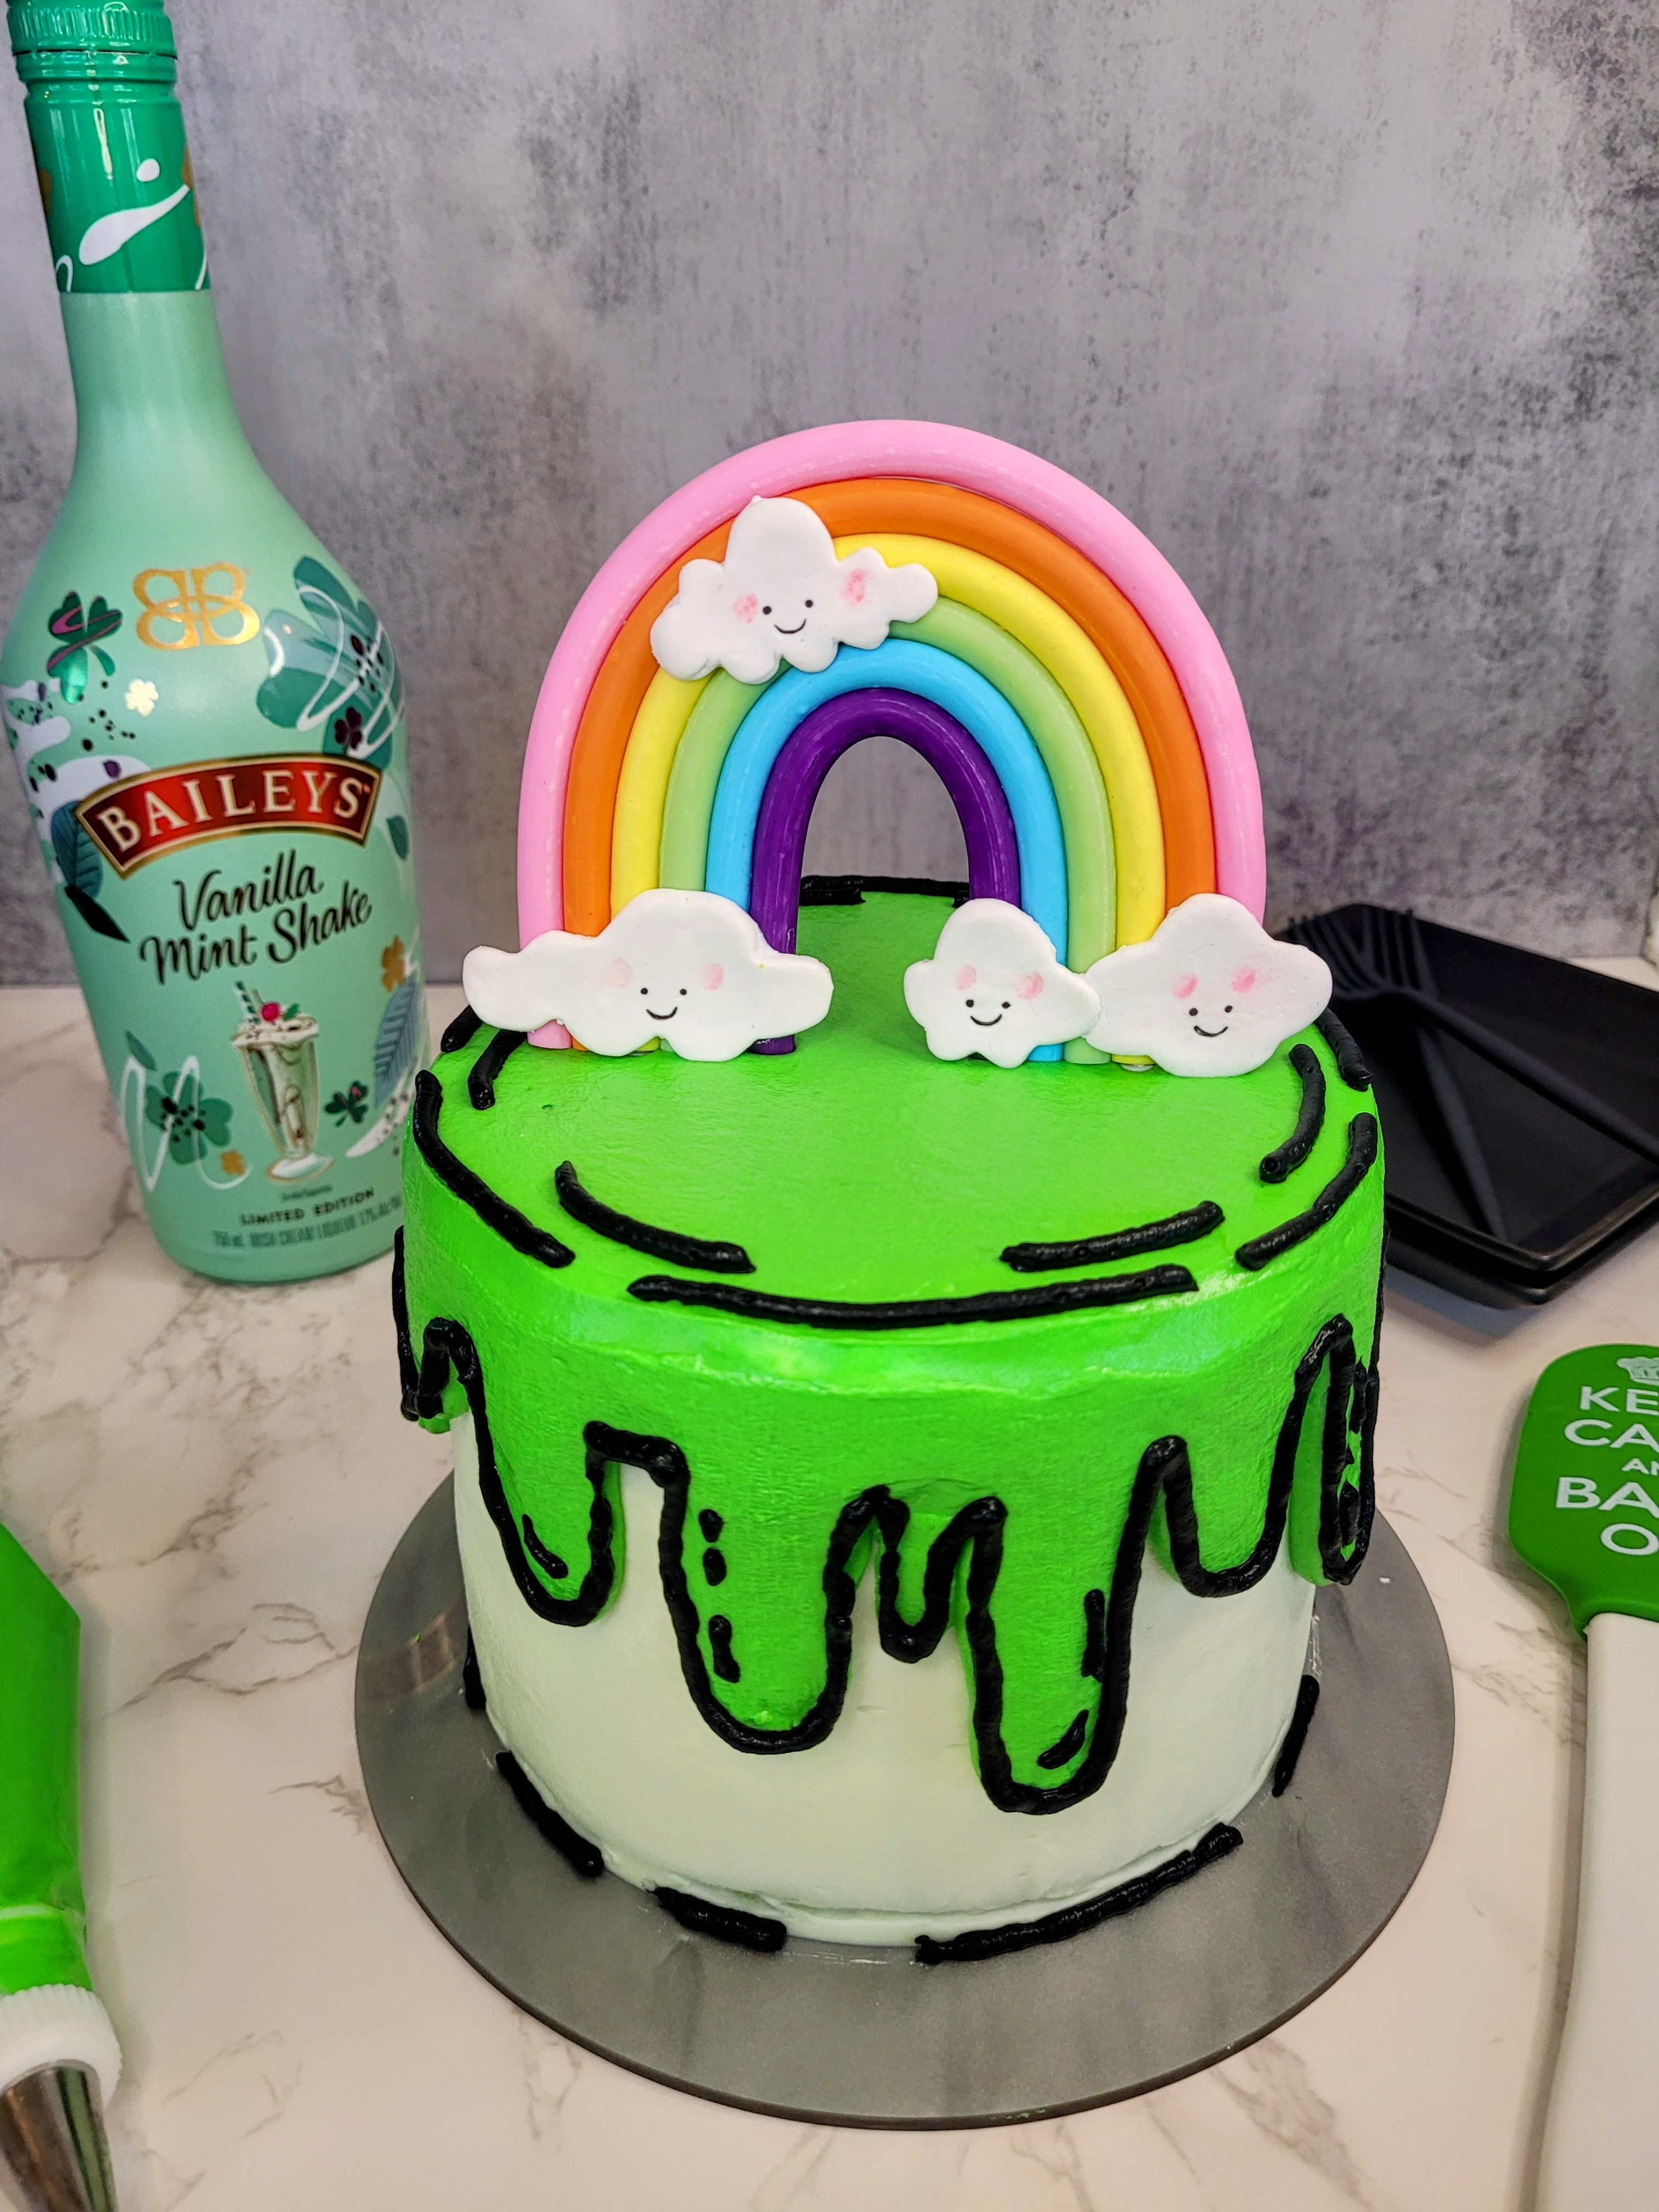
Add in your rainbow topper, and now you know what’s waiting with that pot of gold… 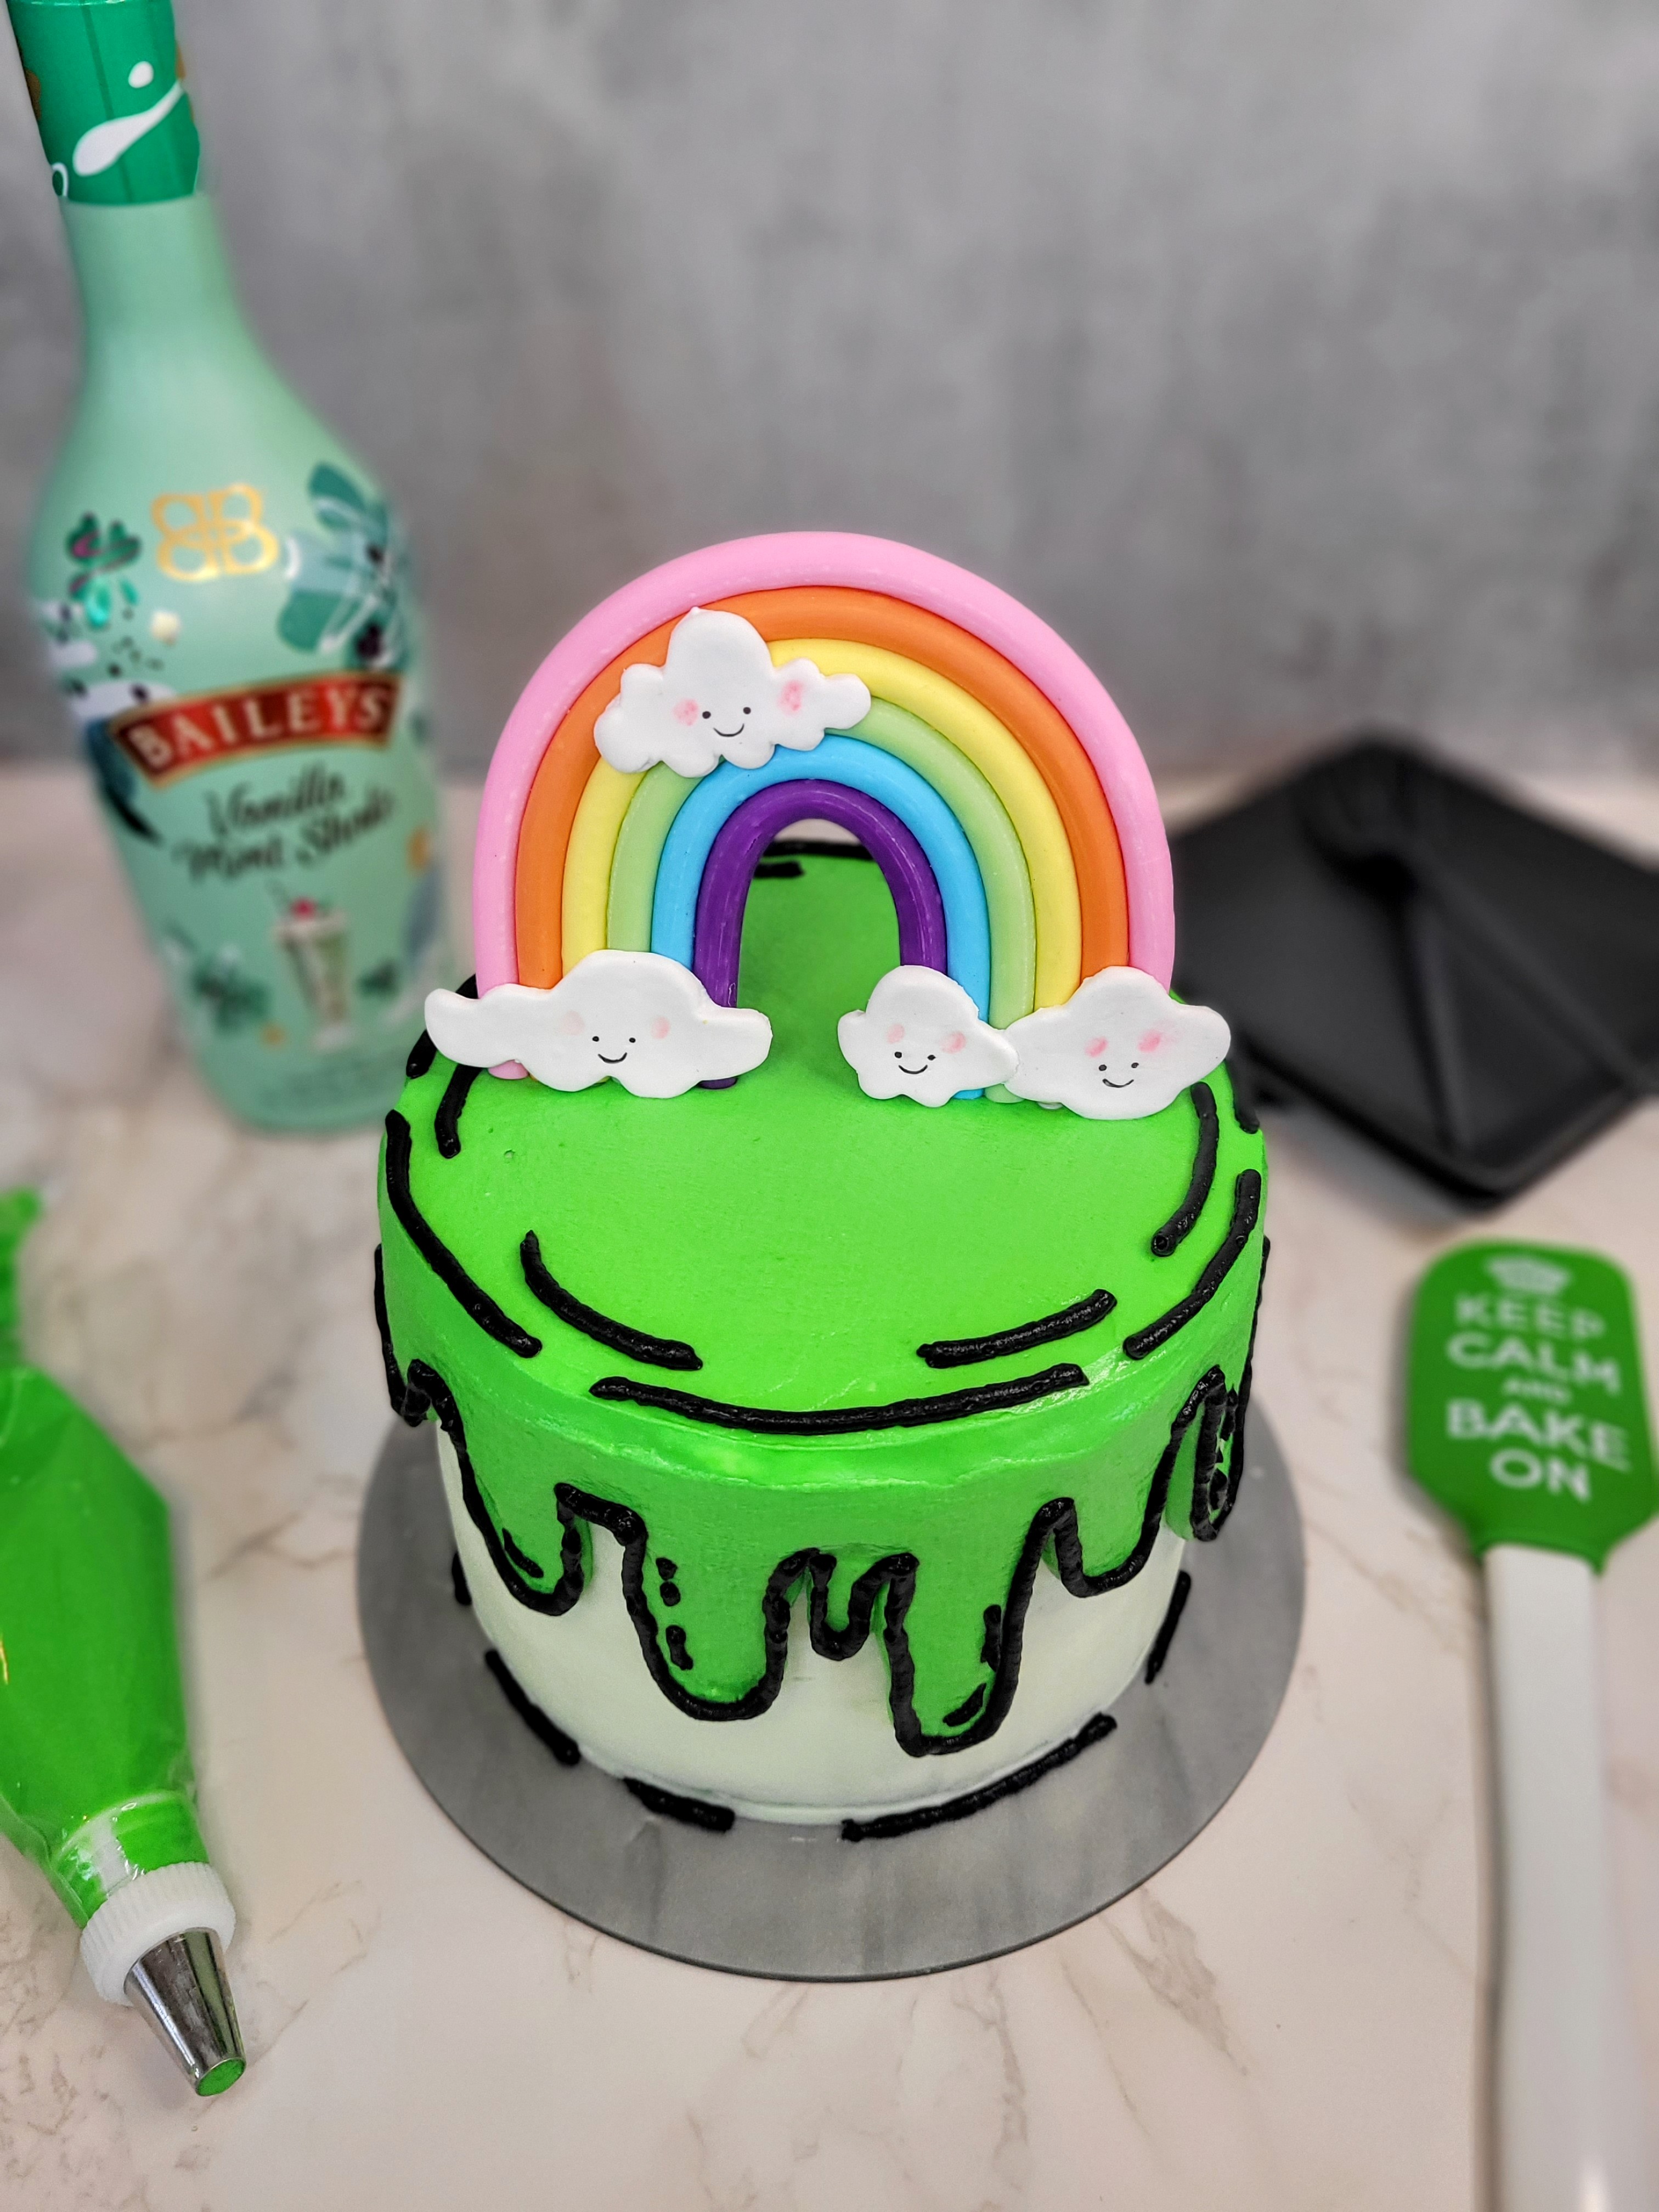
Ale in a day’s work. Go ahead, take her for a spin! Do I stop and stare at her everything I open the fridge? Yes, yes I do…it’s my own little lucky charm, what can I say. With St. Patrick’s less than a week away, I hope this recipe inspires you to whip up a little magic in the kitchen this weekend to celebrate. You’ll have the luck of the Irish on your side! Well, we’ve reached the pint of no return…Til next time, my fellow eaters!
Recipe and Instructions
Lemon Funfetti Cake
A boozy St. Patrick's Day cake bursting with minty flavor
If not gluten free, use any kind of yellow or white cake mix. Monkfruit can also be replaced with regular powdered sugar. If wanting to make alcohol free, replace Baileys with milk and add a full teaspoon of mint extract to the cake and frosting each.
Ingredients
CAKE
*One box of gluten free yellow cake mix
*75 grams (1/3 c) unsweetened applesauce
*1/2 cup fat free or skim milk
*1/2 cup Baileys vanilla mint shake flavor
*3 eggs
*1/2 tsp mint extract
FROSTING
*224 grams (1 cup) of 1/3 the fat cream cheese, softened
*225 grams (1 cup) of fat free Greek yogurt, strained overnight
*16 ounces (4 cups) Lakanto powdered monkfruit
*1/2 tsp mint extract
*2 tsp vanilla extract
*1/4 tsp citric acid
*3-4 TBS Baileys vanilla mint shake flavor
Directions
- Preheat oven to 350 and grease three 6-inch round pans and add bake even strips.
- Mix all cake ingredients together in a stand mixer on low for 60 seconds before turning to medium-high for two minutes.
- Pour batter evenly into pans and bake for 25 minutes, until a toothpick comes out cleanly from the center.
- Allow cakes to cool fully before frosting.
- To make frosting, whisk cream cheese and yogurt for 3 minutes before adding in half the powdered monkfruit and the extracts, mixing well.
- Add in remaining monkfruit and Baileys, mixing well. If frosting is too thick, add another TBS of Baileys.
- Frost the cooled cake as desired; to make a cartoon cake, please see detailed decorating instructions above.
- Keep leftovers covered and in the fridge. Cake slices best served at room temp, so remove and slice 30-45 minutes before eating. Enjoy!
Nutrition
Macros
10 servings
299 cal/45.7 c/9.4 f/7.9 p per slice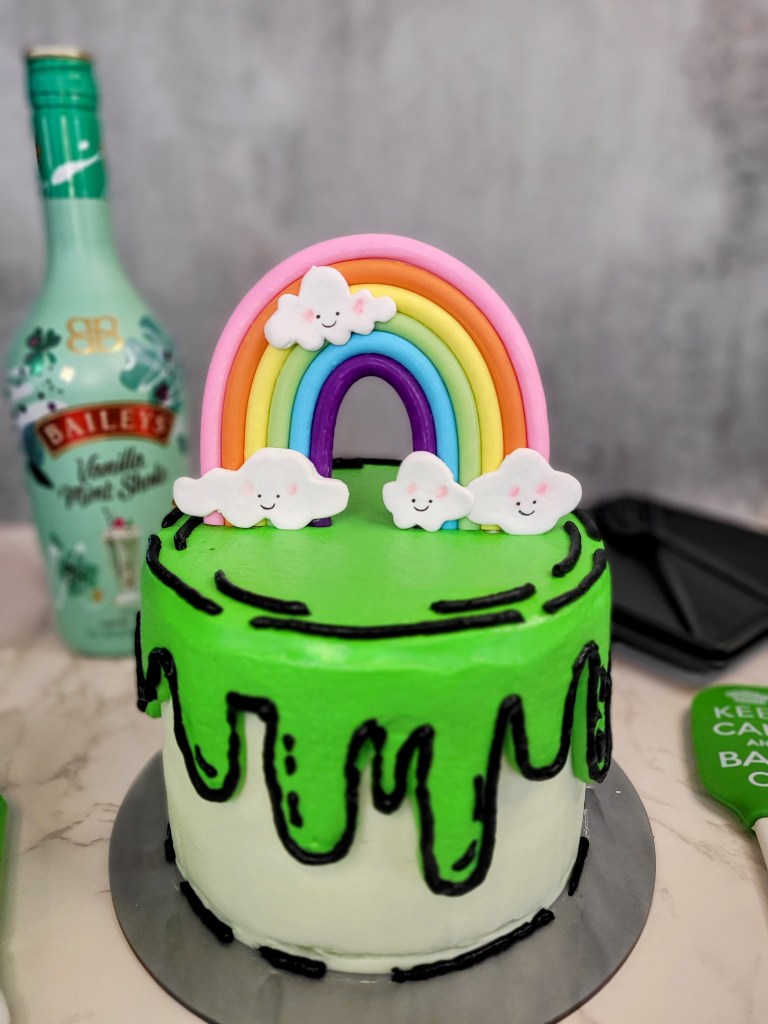
You’ve got me greening from ear to ear. -
Thin Mint Mini Cheesecakes
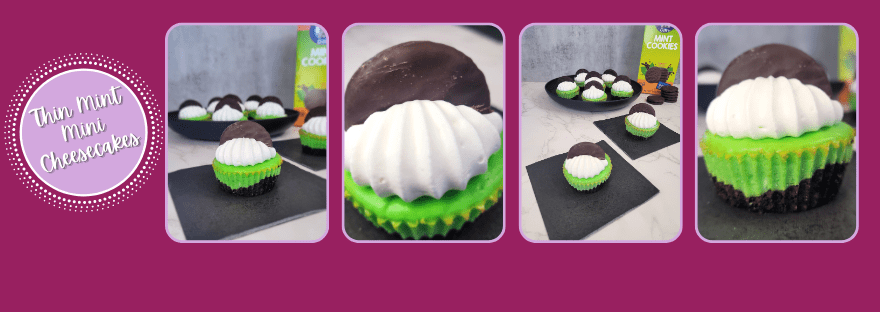
Girl Scout cookie season has arrived, but literally none of the good flavors are gluten free, which led me to the gluten free cookie section at my local Albertson’s…after having a brief, silent cry that there wasn’t even more than one row of gluten free cookies, my tears of sadness quickly turned to tears of joy upon seeing a box of thin mint cookies by Goodie Girl…the clouds parted, angels sung, I rejoiced…it was a whole thing (kinda jealous of anyone that got to witness me experiencing about 17 different emotions in under 15 seconds because it rarely happens). While my remaining gluten free thin mints are in the freezer where they belong (trust me on this one), I used 3/4 of the box to make mini thin mint cheesecakes…
Because it was mint to be. Thin Mint Mini Protein Cheesecakes
Minty cheesecake filling with lush mint chocolate chip crust
Use can your preferred whey-casein blend protein powder; Madhava can also be replaced with regular sugar, but this will change the macros. If not gluten free, you can use regular thin mint cookies, you lucky devil.
Ingredients
CRUST
*100 g (~12 cookies) Goodie Girl gluten free thin mints, pulsed to a fine powder
*30 mL (2 TBS) syrup
*15 g (half a scoop) Quest chocolate milkshake protein powder
CHEESECAKE FILLING
*150 g (5.33 ounces) 1/3 the fat cream cheese at room temp
*150 g (5.33 ounces) nonfat Greek yogurt
*1 egg
*1 tsp vanilla extract
*3/4 tsp mint extract
*20 g Quest vanilla milkshake protein powder
*48 g (1/4 cup) Madhava allulose sweetener
*1 TBS fat free or skim milk
*1 TBS lemon juice (fresh squeezed is better, but bottled will work)
TOPPING
*54 g (12 TBS) Cool Whip Free
*4 thin mints, split in half
Directions
- Line muffin tin with 8 silicone cupcake liners and preheat oven to 350.
- In a food processor or blender, combine all crust ingredients until sticky.
- Press about 2 teaspoons of the crust mix into each silicone liner and press until it begins to run up the edge of the liner.
- Bake for 5-8 minutes, until puffed up; then set aside on the counter to cool.
- Whisk all cheesecake ingredients except the egg together in a large bowl until smooth.
- Switch to a paddle attachment and add the egg, blending on low speed until completely mixed in.
- Distribute batter evenly on top of each crust.
- Bake at 350 for 15-20 minutes, until cheesecakes are mostly set.
- Then turn off the oven and crack the door, leaving the cheesecakes in the oven for an additional 10 minutes to finish baking.
- Place cheesecakes on a cooling rack (to speed up, place this in the fridge for 1 hour or freezer for 30 minutes).
- Once the cheesecakes are totally cool and set, remove from silicone liners.
- Top each cheesecake with 2 TBS of Cool Whip Free; I used an Ateco 869 tip to pipe a large mound of Cool Whip Free on top of each cheesecake.
- Split 4 cookies in half with a sharp knife, then place a cookie half into the middle of the Cool Whip Free.
- Keep leftovers in fridge in an airtight container, and enjoy!
Nutrition
Macros
8 servings
173 cal/8.6 f/15.8 c/8.1 p per cheesecake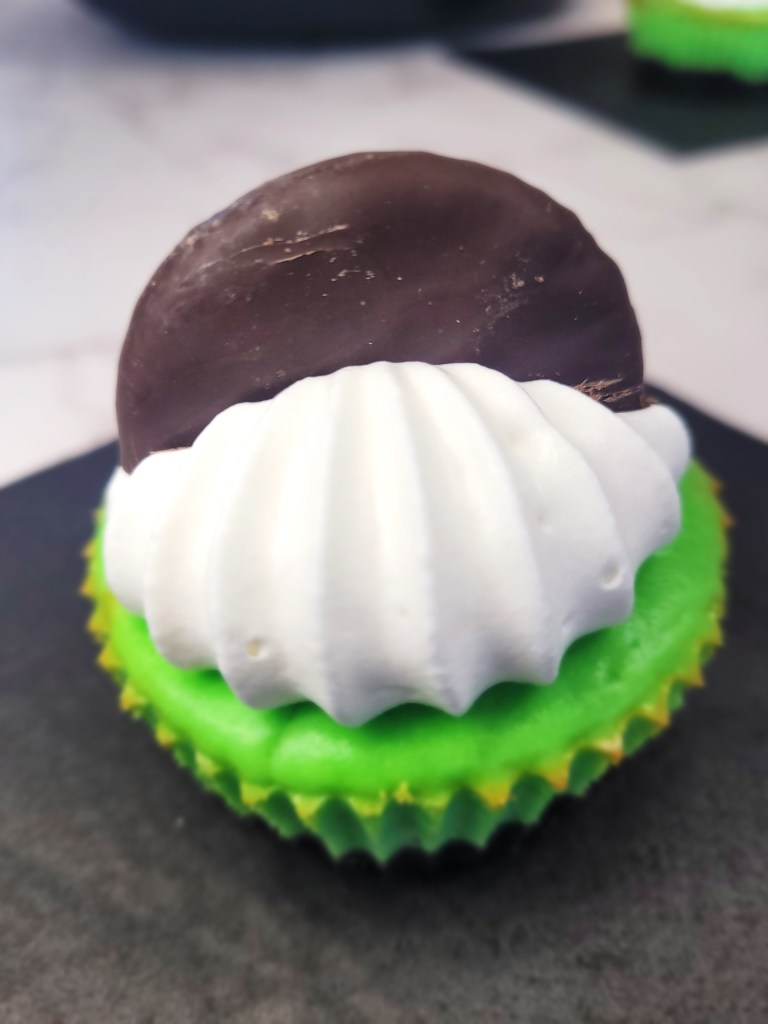
If you’re looking for a little encourage-mint to bake up some St. Patrick’s treats, this is it. 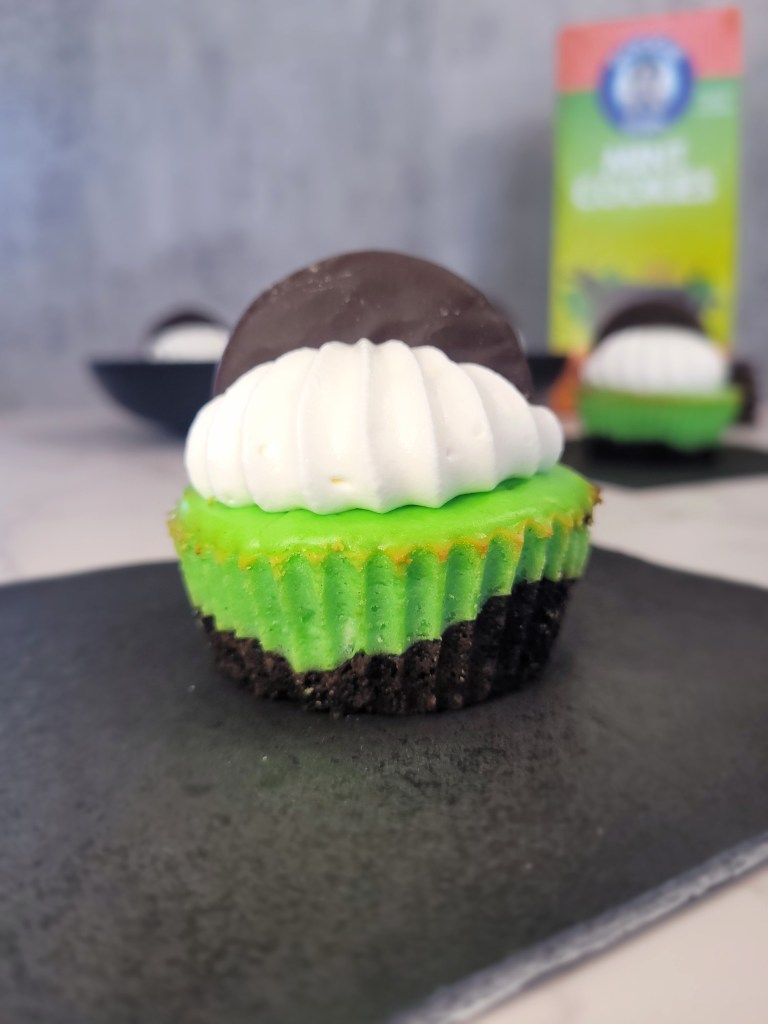
Bringing a whole new meaning to “mint condition,” alright. 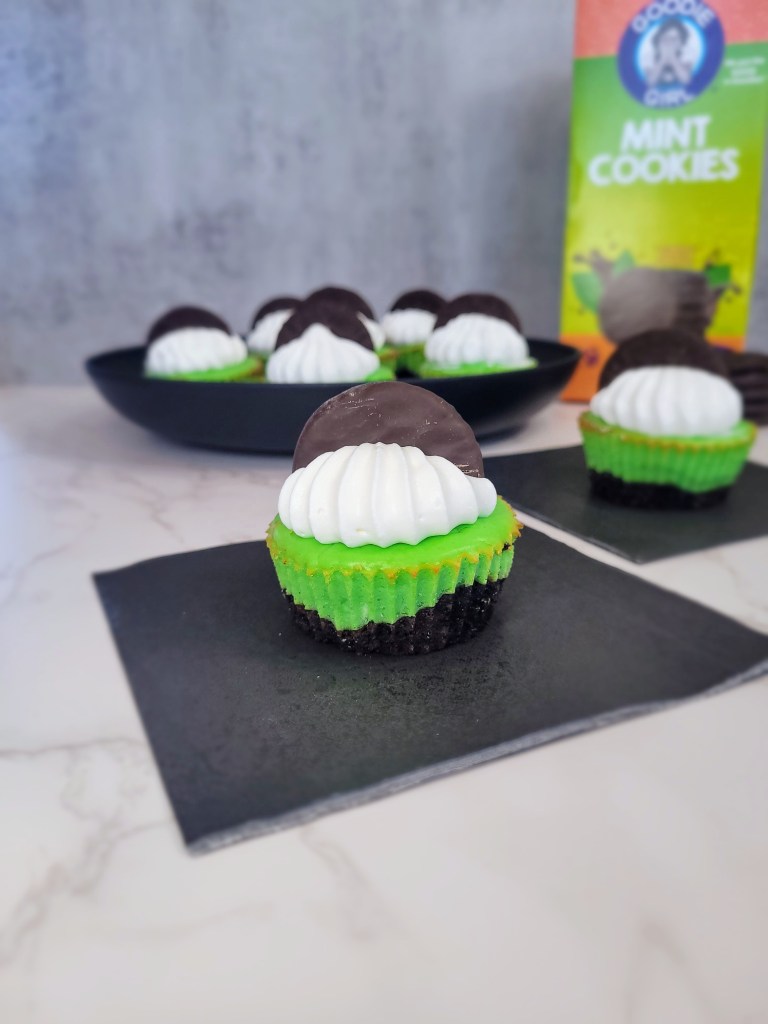
I promise you’ll have plenty of enjoy-mint with a batch of these babies for dessert. - Line muffin tin with 8 silicone cupcake liners and preheat oven to 350.

Healthy-ish cake, cupcakes, pie, and cheesecake recipes and decorating tips
