-
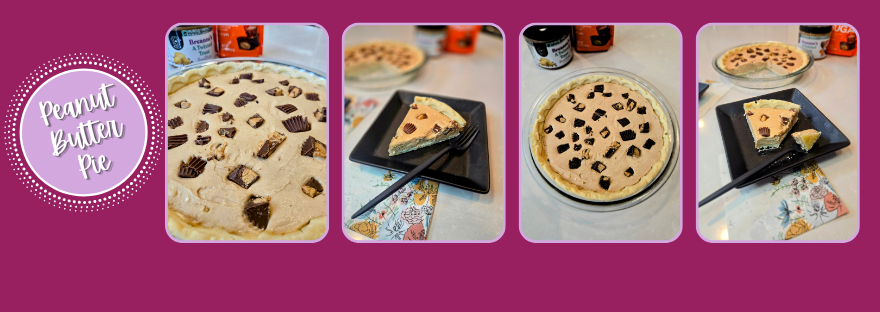
Peanut Butter Protein Pie

And now for a pie you can go nuts for…a peanut butter protein pie packing 15.2 grams of protein per slice and only 4.5 g of sugar. Don’t get peanut butter and jealous, just whip up your own! I promise this is about the easiest thing in the world you can make, and it’s even no bake if depending on what kind of pie crust you want to use. Reese-pect the power and deliciousness of a peanut butter cup!
No need to Reese-train yourself…this one is nut your average pie! Recipe and Instructions
Peanut butter protein pie
Buttery pie crust, peanut butter filling, and Reese's cups make for one nutty, delicious pie.
If not gluten free, use any kind of crust you’d like. Recipe made with a whey-casein blend protein powder; vegan protein powder will likely need 1-2 TBS more milk added. Allulose can be replaced with your preferred granular sweetener.
Ingredients
CRUST
*1 Gluten Free Nation pie crust
PIE FILLING
*170 g (3/4 cup) fat free Greek yogurt
*170 g (3/4 cup) 1/3 the fat cream cheese, softened
*32 g (1/4 cup) PBFit powder
*30 g (1/4 cup) Quest vanilla milkshake protein powder
*1 tsp vanilla extract
*48 g (1/4 cup) allulose
*56 g (1/4 cup) protein peanut butter (I like American Dream Nut Butter Breanne’s Blend)
*2 TBS skim or fat free milk
*44 g (~5) sugar free mini Reese’s Cups
Directions
- Preheat oven to 350 if baking pie crust.
- Bake crust for 10-12 minutes and let cool.
- Whisk cream cheese and yogurt together until smooth in a large bowl.
- Add all remaining filling ingredients except mini Reese’s cups and mix until smooth.
- Pour into pie crust and smooth.
- Top with Reese’s cups.
- Freeze for 1 hour before serving.
- Keep leftovers in fridge and enjoy!
Nutrition
Macros
8 servings
301.4 cal/21.9 c/17 f/15.2 p per slice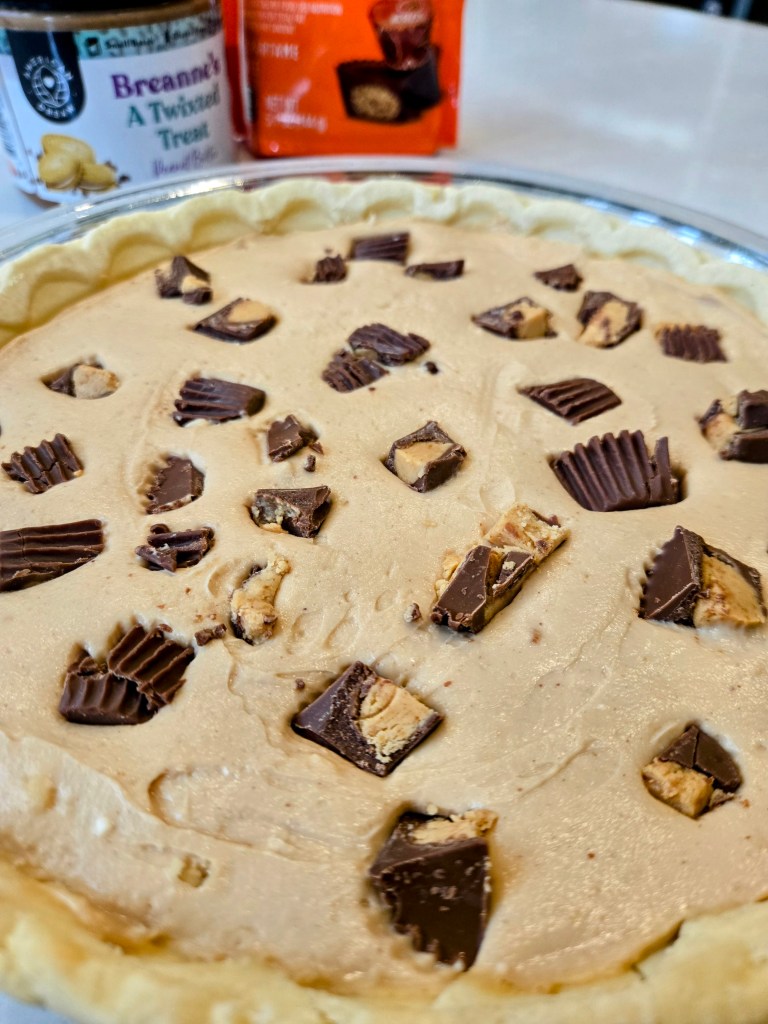
It’s peanut better than the rest. 
Butter be good to yourself and have a slice (or three). 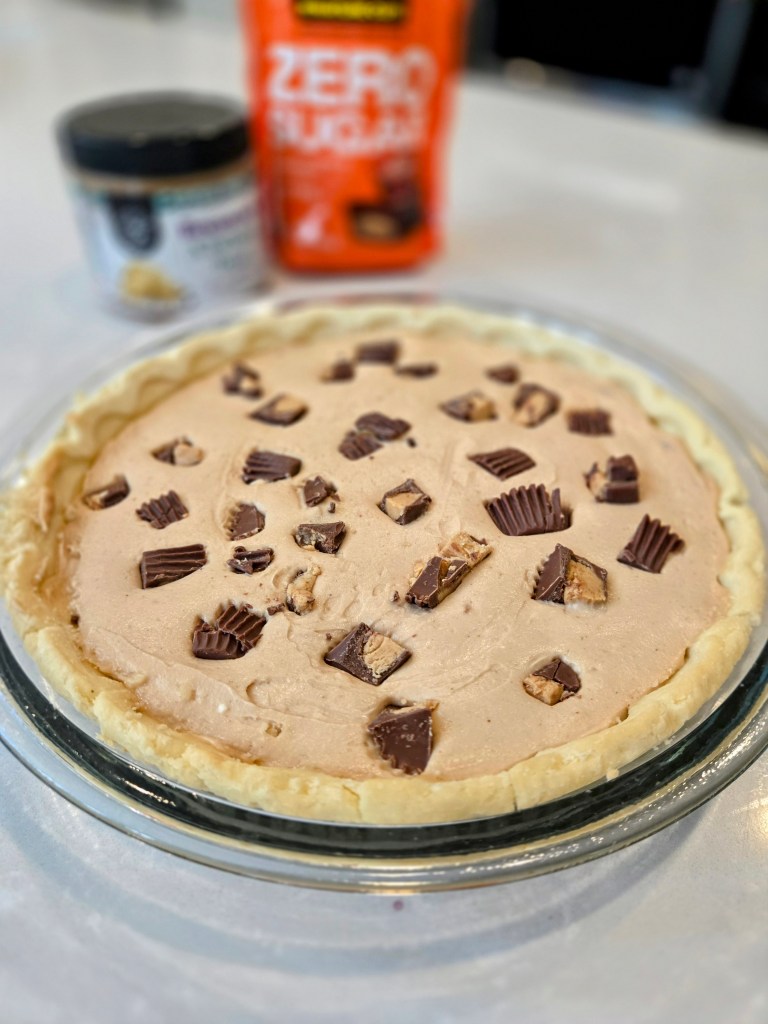
Everything happens for a Reese’s. - Preheat oven to 350 if baking pie crust.
-
A Polar Plunge
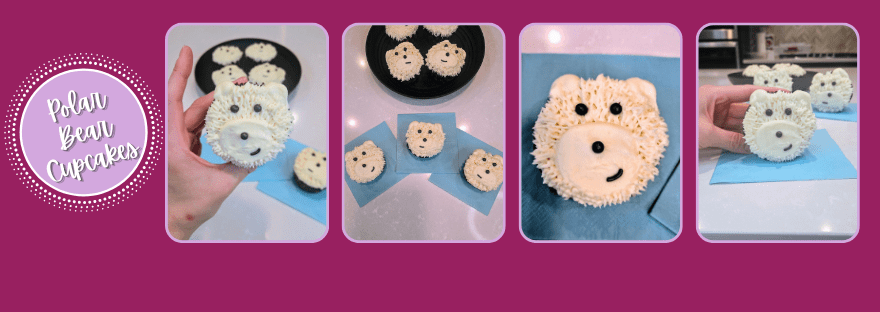
Winter is honestly my favorite time of year–the peace and stillness of a cloudy, snowy winter day is unmatched, and we’ve got the added benefit that everything is dead so it’s the only season I don’t have allergies….nothing but paws-itive vibes there. To celebrate the end of my birth month, I wanted to go out with a bake so adorable you can bear-ly stand it. Enter: polar bear cupcakes so cute they’re gonna run straight out of hibernation and right into your heart (or stomach). Bear with me, the puns are flowing faster than an iceberg.
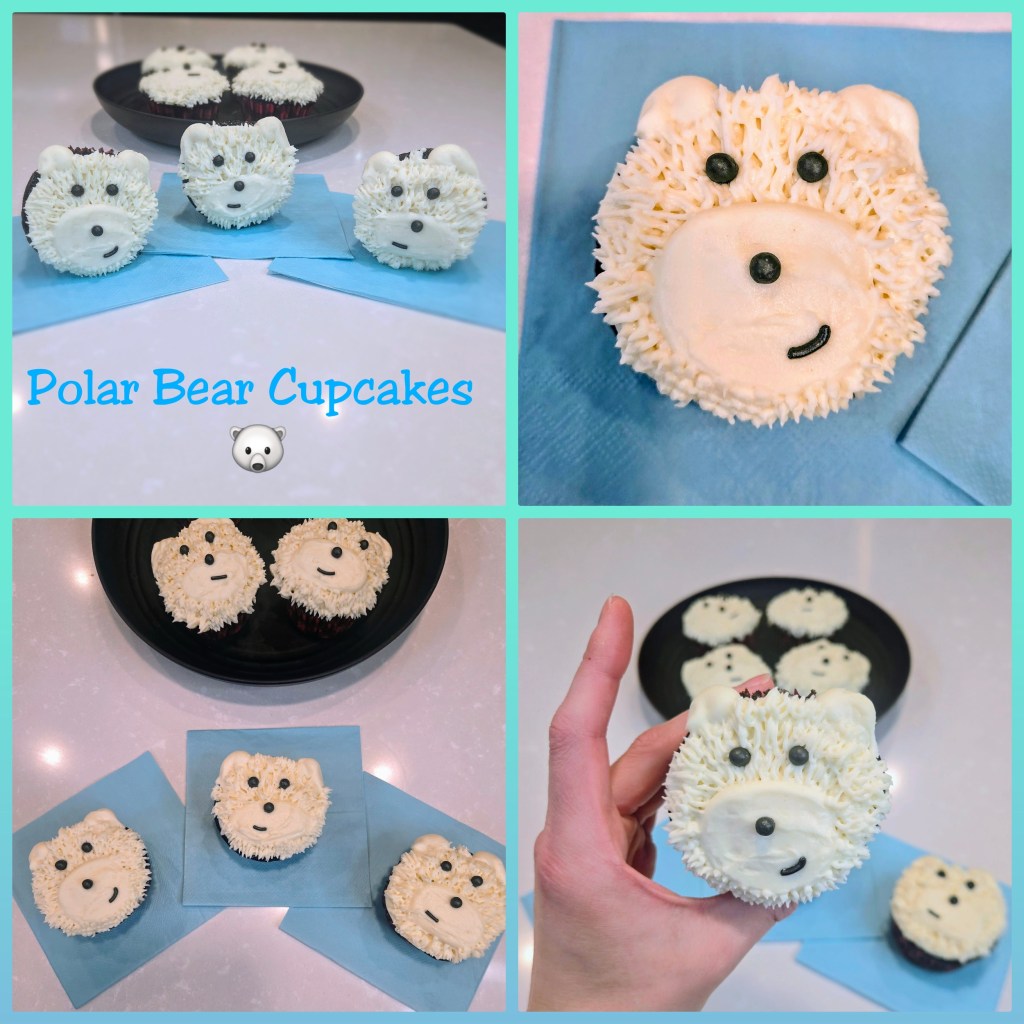
Ice to meet you, cuties! Snow surprise, these are super fun to make, and relatively sinchy! I made a chocolate orange cupcake with orange cream cheese protein frosting (recipe below); I figured chocolate was totes appropes because polar bears actually have black skin. Their fur is also translucent and colorless, but it appears white due to the reflection from the sun…which begs the question…at night, can you even see them at all? Because if you can’t, it’s probably too late. Ahem. THESE polar bears won’t eat you, you get to eat them! Which might be frowned upon by conservancy groups, but in attempt not to get too ~polar~izing, I’ll just stick with the tutorial.
Let me break the ice with everything you need:
- Large round black sprinkles and skinny black sprinkles
- A #12 round tip
- A grass or fur tip
- Angled spatula
I have a video tutorial below, but here is a step-by-step photo tutorial as well. No chilling experiences necessary when you’ve got both to back you up.
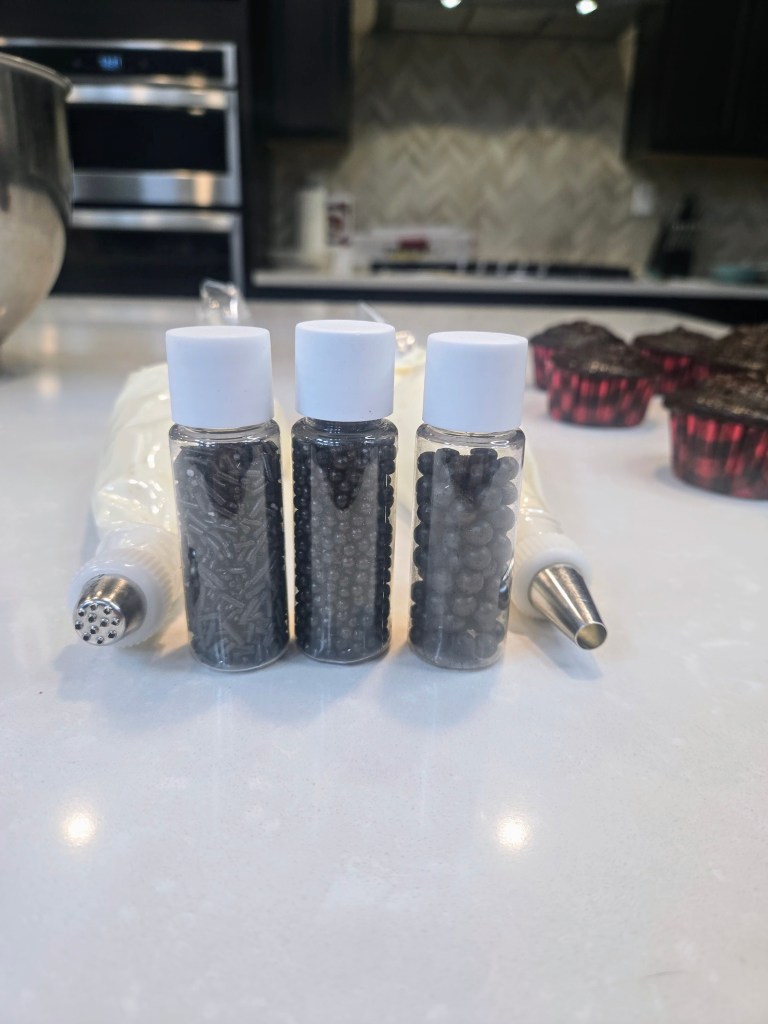
I found a cute sprinkle set on Amazon that had all I needed to decorate. 
Start with a plain frosted cupcake; doesn’t need to be pretty, it’ll get covered. 
Use the 12 tip to pipe the muzzle. 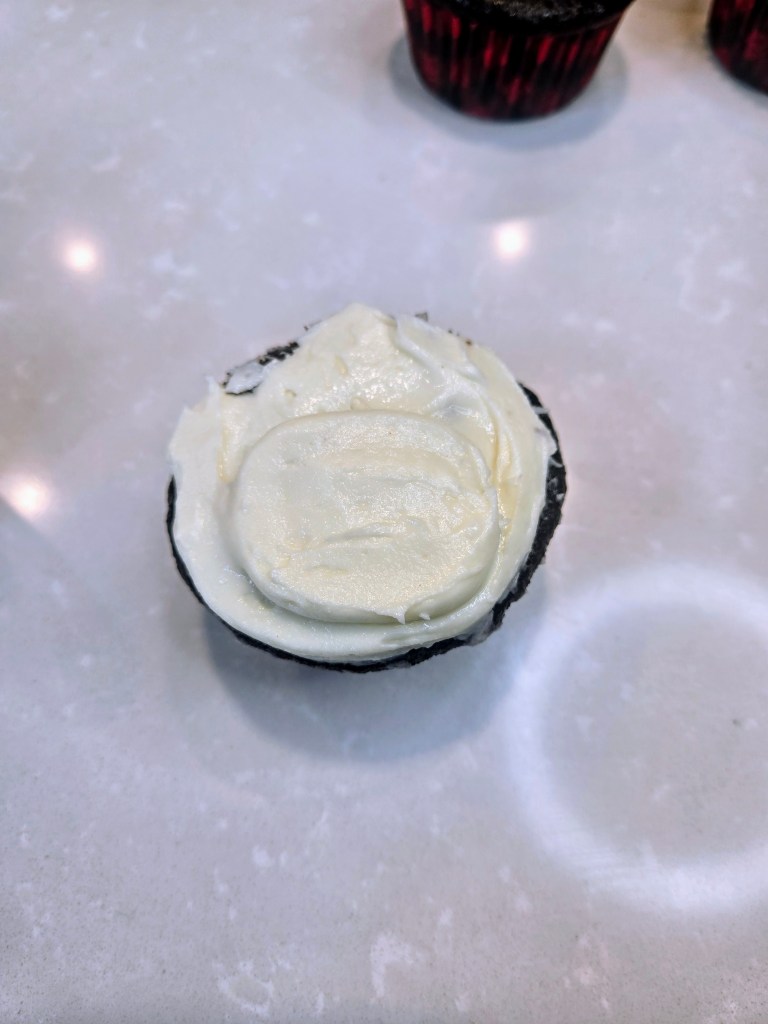
Smooth out with your angled spatula. 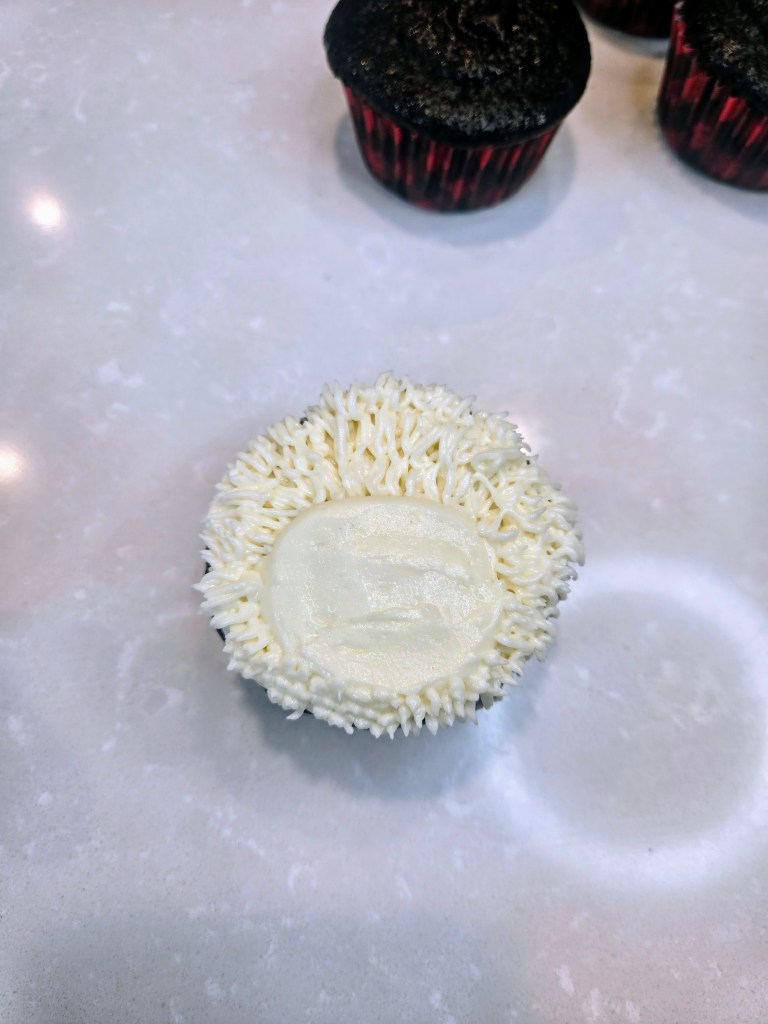
Use the grass tip to pipe fur by pulling out and away; leave muzzle plain. 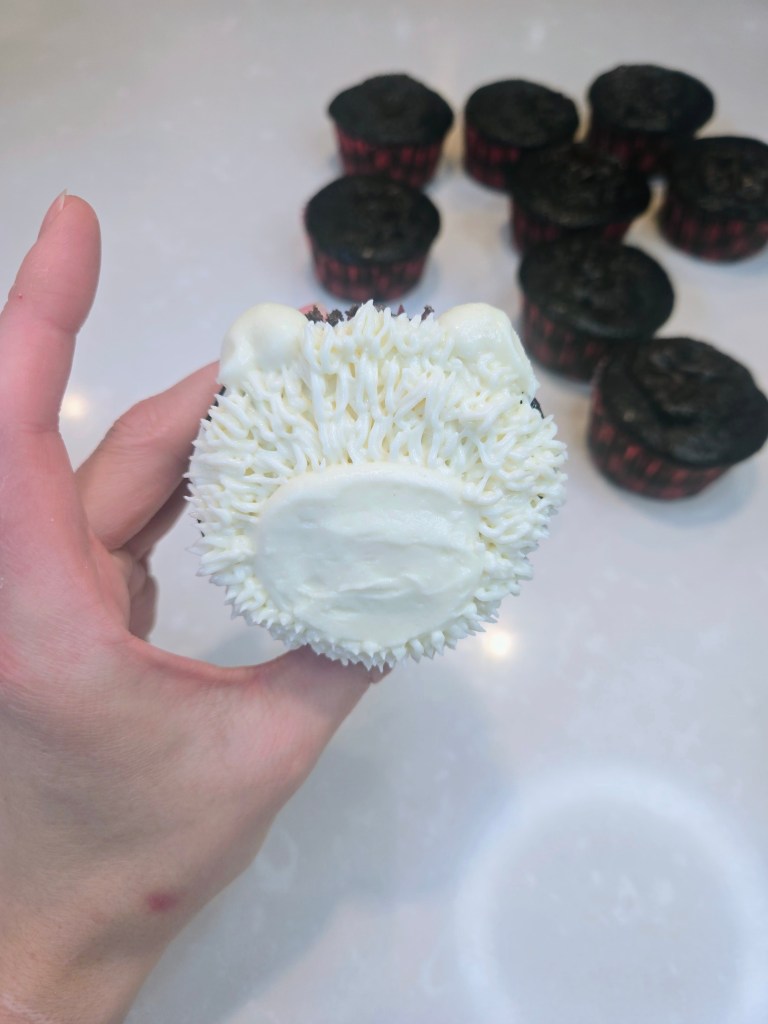
Use the #12 tip to pipe a half circle for ears at the top. 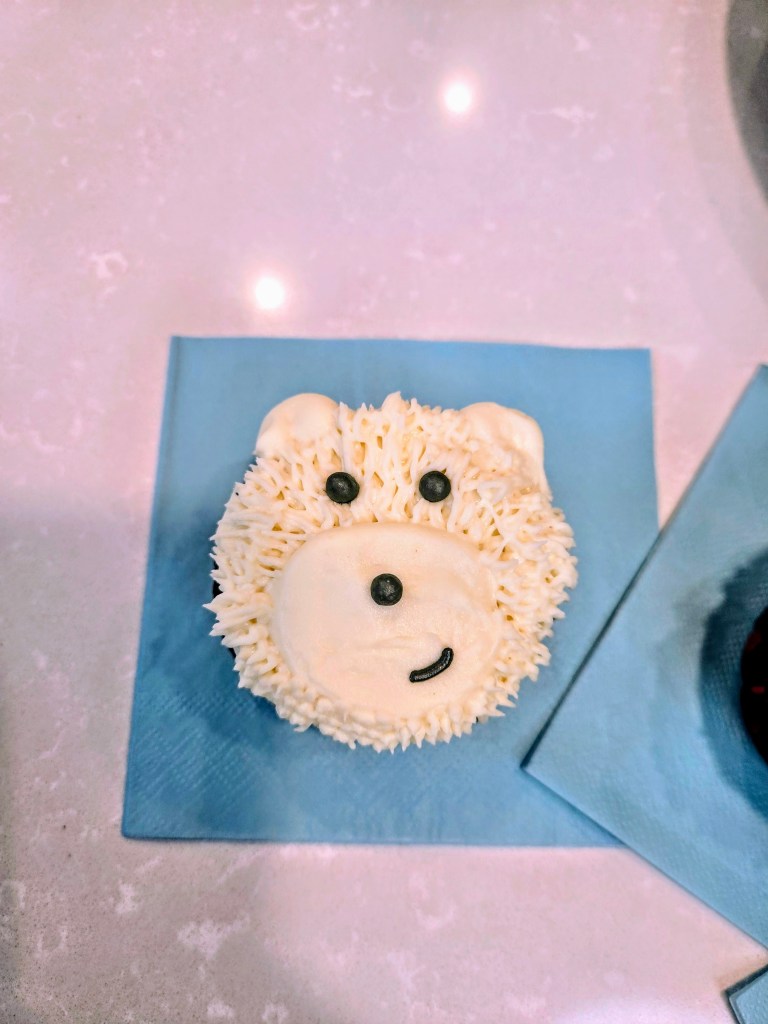
Finish by adding sprinkles! Ice to meet ya, bud. Chill out and watch this tutorial! Recipe and Instructions
Gluten free chocolate orange cupcakes with protein orange cream cheese frosting
A beary cute cupcake collection!
If not gluten free, use any kind of chocolate cake mix. Monkfruit can also be replaced with regular powdered sugar for frosting.
Ingredients
CUPCAKES
*1 box of gluten free chocolate cake mix (I used King Arthur)
*1 1/3 cups fat free milk
*1 tsp orange extract
*2/3 cup (152 g) fat free Greek yogurt
*4 eggs
FROSTING
*226 g (1 cup) vanilla Greek yogurt, strained overnight
*8 ounces 1/3 the fat cream cheese at room temp
*12 ounces Lakanto powdered monkfruit
*4 ounces Quest vanilla milkshake protein powder (cuts the sweetness of the monkfruit and makes a nice, stiff, spreadable frosting; omit and use all monkfruit if desired)
*2 tsp clear vanilla
*1/2-1 tsp orange extract
*1/4 cup milk
*1/4 tsp citric acid if you like less sweet frosting
Directions
- Preheat oven to 350 and line muffin tin with cupcake wrappers.
- Whisk cake ingredients together in a stand mixer on low for 60 seconds before switching to medium-high for two minutes.
- Pour batter evenly into tins and bake for 20-24 minutes, or until a toothpick comes out mostly clean from the center.
- Allow cupcakes to cool fully before frosting.
- To make frosting, whisk cream cheese and yogurt for 3 minutes before adding in half the powdered monkfruit, protein powder, extracts, citric acid, and milk.
- Add in remaining monkfruit mix fully.
- You will need to crumb coat your cupcakes with plain white frosting before piping.
- To decorate cupcakes, follow along with the photo gallery or video tutorial above, and view recommended products at the top of the blog.
- Keep cupcakes covered and in the fridge. They are best served at room temp, so remove from fridge 30 minutes before eating. Enjoy!
Nutrition
Macros
22 servings
173.5 cal/23.9 c/4.3 f/9.8 p per slice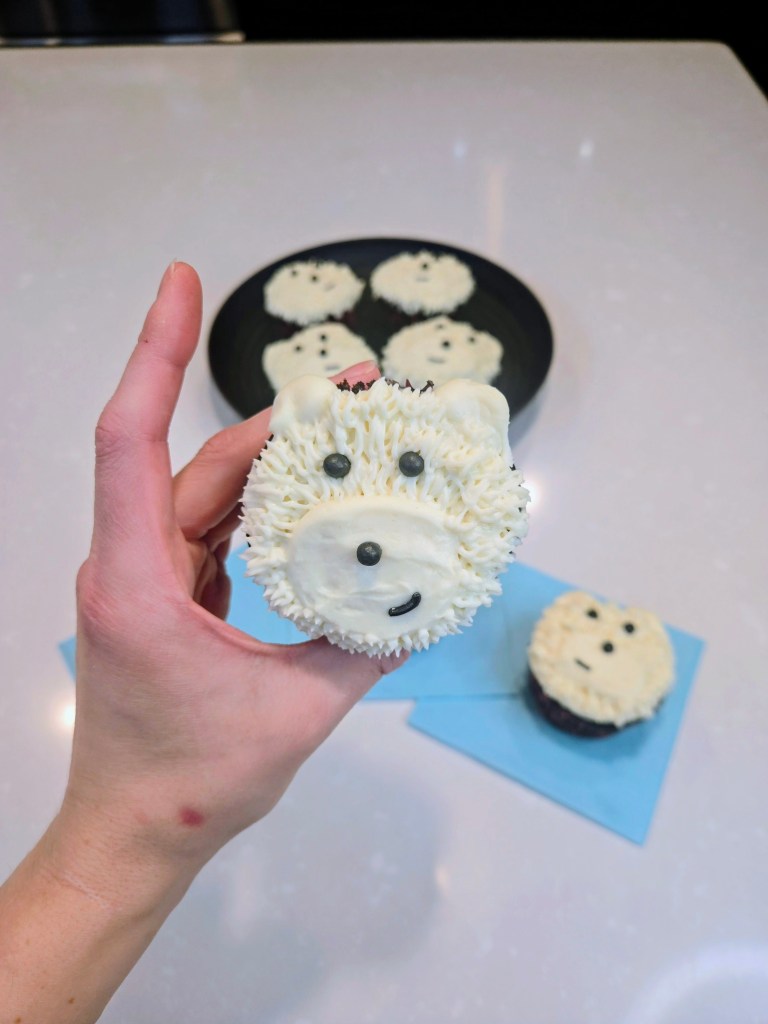
Snow problem when you’ve got a batch of these waiting in the fridge(id) tundra! 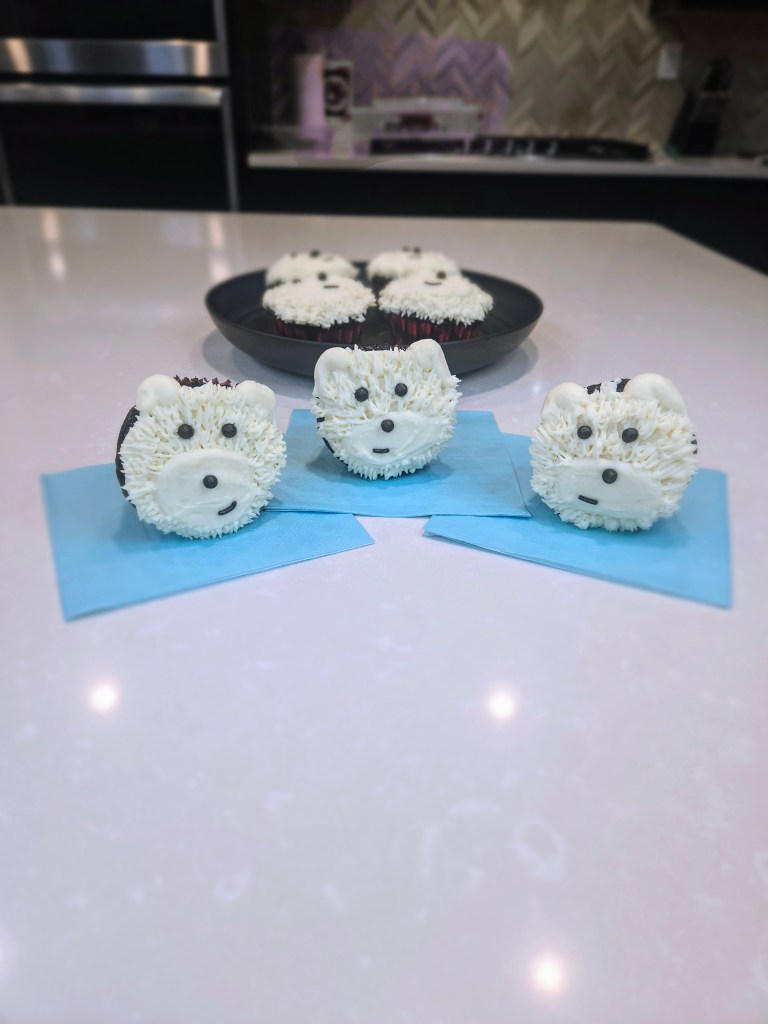
Just chillin’ with my homies. -
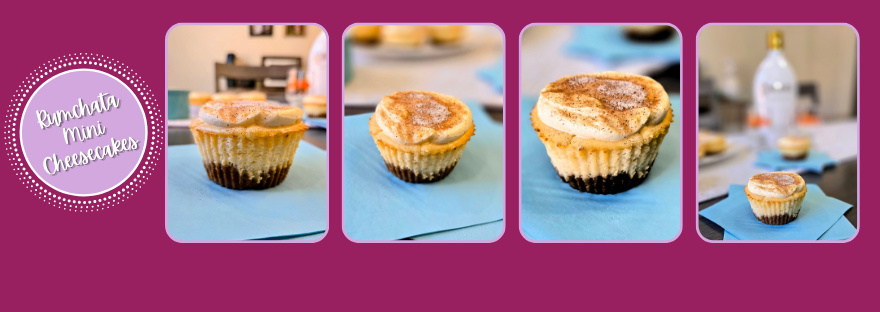
Rumchata Mini Cheesecakes
Well, it’s been a roller coaster of emotions over here this weekend…with Tiktok one minute, without it the next, then with it again. As a content creator, you know what that means? Yep, it was feelings eating time this weekend, so I whipped up a batch of Rumchata mini cheesecakes, because boozy baking is an elite activity to participate in. Never heard of Rumchata before? It’s a creamy liqueur with cinnamon, sugar, and vanilla, and it essentially feels like a cozy hug for your insides. I highly recommend grabbing a bottle and whipping up a batch of these cheesecakes to get through (gestures wildly) all of this. I will mainly be posting on TikTok, Pinterest, and may look into Youtube shorts soon since Instagram keeps trying to ban me for using their social media app to be social. It’s rum-believably ridiculous.
Big ups to the fine, normally inebriated folks of Wisconsin for creating this liqueur. Rumchata Mini Cheesecakes
Lush, creamy Rumchata cheesecake with gf crust and whipped Rumchata topping dusted with cinnamon and sugar
Use can your preferred whey-casein blend protein powder; allulose can also be replaced with regular sugar, but this will change the macros. Feel free to use regular graham crackers or shortbread if not gluten free.
Ingredients
CRUST
*110 g gluten free graham crackers (this was about 8 Pamela’s graham crackers)
*30 mL (2 TBS) sugar free syryup
CHEESECAKE
*150 g (5.33 ounces) 1/3 the fat cream cheese at room temp
*150 g (5.33 ounces) nonfat Greek yogurt
*2 TBS Rumchata
*1 tsp vanilla extract
*20 g Quest vanilla milkshake protein powder
*96 g (1/2 cup) Madhava allulose sweetener
*1 egg
TOPPING
*2 TBS Rumchata
*1/4 cup heavy whipping cream
*138 g sugar free whipped cream
*2 TBS sugar free vanilla pudding mix
*1 TBS allulose mixed with 1/4 tsp cinnamon
Directions
- Line muffin tin with 8 silicone cupcake liners and preheat oven to 350.
- In a food processor, process grahams and syrup until sticky.
- Place about 2 tsp of crust into each liner and press to even out (it helps to spray your fingers with cooking spray).
- Bake for 5-6 minutes, until golden and puffy; place in freezer while you make filling.
- Whisk the cream cheese and yogurt on high for 2-3 minutes before adding the vanilla, Rumchata, protein powder, and allulose, mixing until smooth.
- Switch to a paddle attachment and add the egg, blending on low speed until completely mixed in.
- Distribute batter evenly on top of each crust.
- Bake at 350 for 15-20 minutes, until cheesecakes are mostly set.
- Then turn off the oven and crack the door, leaving the cheesecakes in the oven for an additional 5-10 minutes to finish baking (centers should have barely any jiggle).
- Place cheesecakes on a cooling rack (to speed up, place this in the fridge for 1 hour or freezer for 30 minutes).
- Once the cheesecakes are totally cool and set, remove from silicone liners.
- In a stand mixer, whisk Cool Whip, whipping cream, Rumchata, and pudding mix until stiff (~2-3 minutes on low).
- Use the back of a spoon or angled spatula to spread frosting on top of cooled cheesecakes.
- Sprinkle cinnamon sugar mix on top.
- Keep leftovers in fridge in an airtight container, and enjoy!
Nutrition
Macros
8 servings
205.8 cal/11.4 f/19.4 c/6.4 p per cheesecake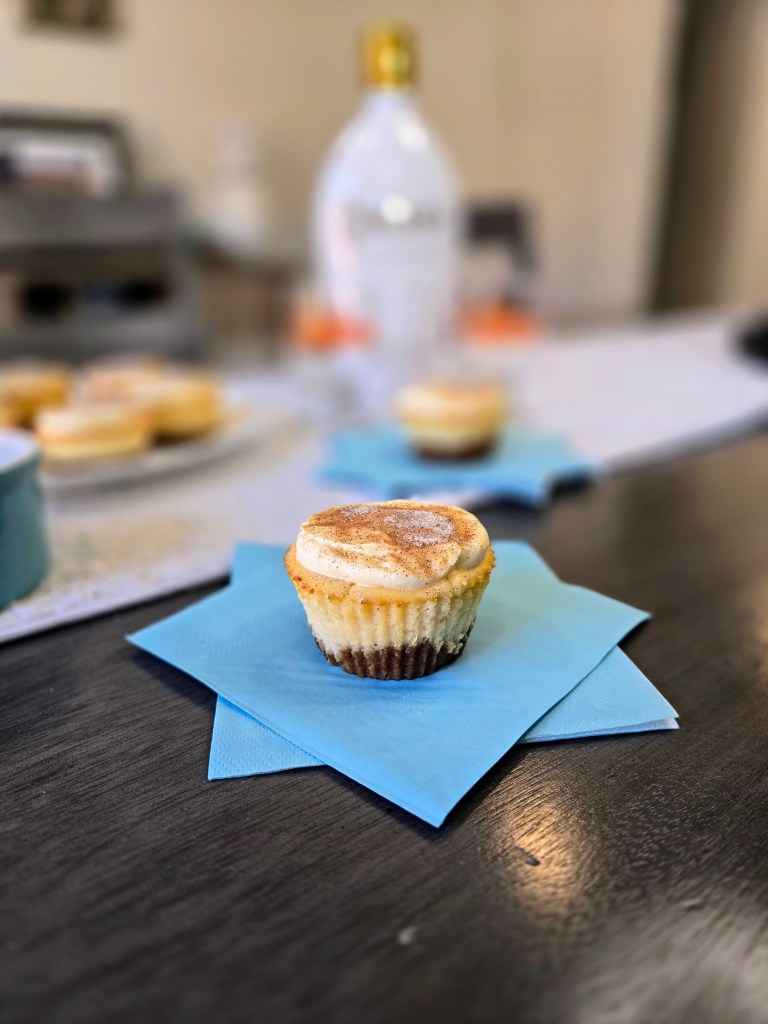
(D)rum up some good times with these babies! 
Rum like your life depends on it! - Line muffin tin with 8 silicone cupcake liners and preheat oven to 350.
-
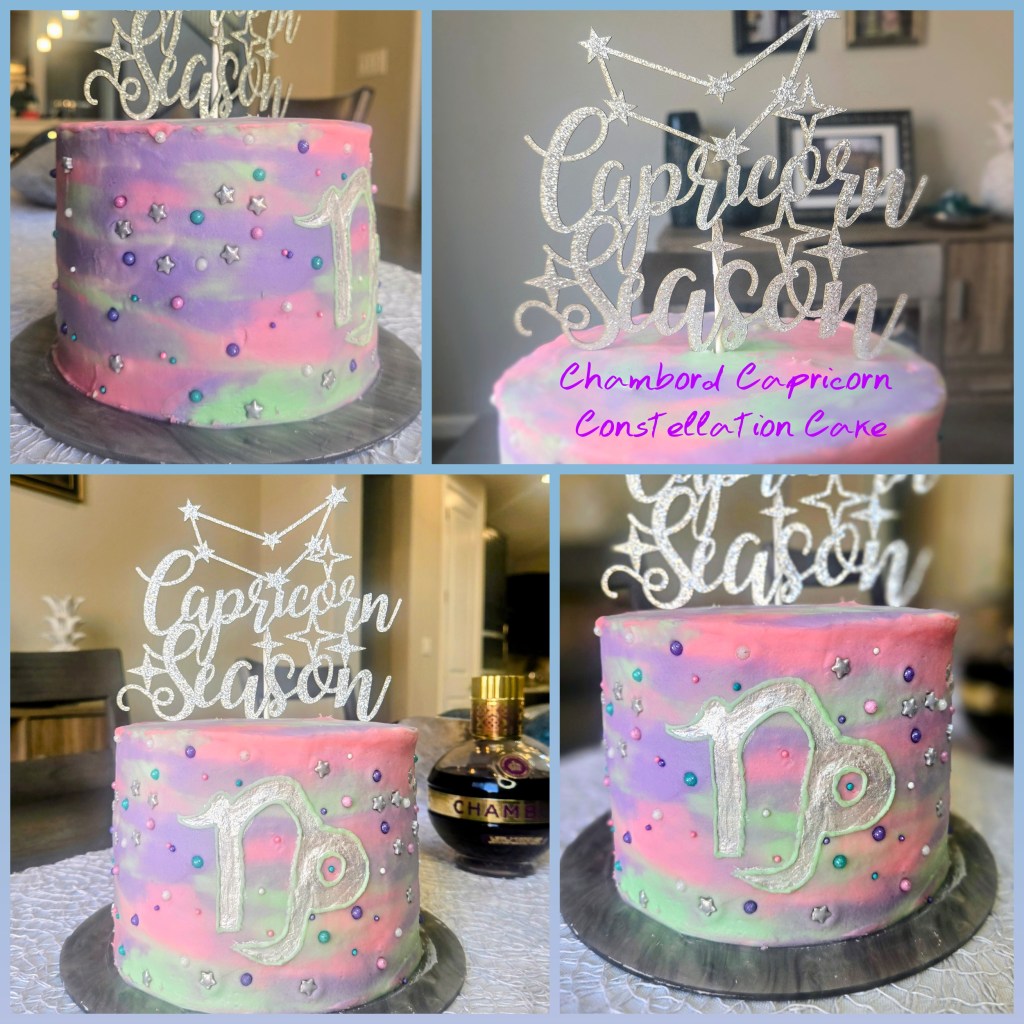
A Cake Fit for the GOAT

It’s my birthday today! To celebrate, I wanted a boozy cake that also screamed, “HI, I’M A CAPRICORN,” so I decided to make a Chambord-flavored cake (because us Caps love opulence, and a Chambord bottle is about as boujee and luxurious as it gets), but I also wanted to make a nebula-style cake that featured the constellation. I didn’t want to use bright, splashy colors because Capricorns are not bright, splashy people…we’re the ones behind the curtain making sure the show goes on. I wanted to use softer, more muted tones; you know, very mindful, very demure. I had to incorporate green in there since we are THE Cardinal Earth sign, so I went with a soft shade of mint complemented by light pink and regal purple. If you’re surprised someone as logical and rational as me is into astrology, that makes two of us.
I make no apologies on my birthday for being Capricorn-y. In hindsight, I definitely should not have attempted to freehand that Capricorn symbol, but since my totally non-astrologically-inclined husband (a Cancer, naturally), knew what it was on first glance, this stubborn old goat is definitely calling this cake a win. The fact that I feel like a hundred angels are singing every time I take a bite of this cake also certainly doesn’t hurt. Since Capricorns are 100% “if you want something done right, do it yourself,” kinda people, it should not come as much of a surprise that I ALWAYS make my own birthday cake…I’d rather spend the day at the dentist than ask for help, and that is how I know I’m a true Capricorn (plus, the idea of spending an efficient day improving my dental health also excites me, but that could also be because I’m very shy of turning 40).
I also really, really love making lists, so here’s a list of everything you need to decorate this cake (full recipe in the glorious, printable, well-maintained recipe box below. Being organized is the sexiest thing about me, thank you for noticing.
- Silver star sprinkles
- Mint, purple, and pink sprinkles (found at Michaels)
- Capricorn cake topper (found on Amazon)
- Americolor regal purple, mint, and soft pink gel dyes
- Luster dust in silver or white (I ended up going with white)
I have a video tutorial below, but since Capricorns are nothing if not thorough, here is a step-by-step photo tutorial as well. I swear I have some whimsy in me somewhere, hence all the terrible puns…
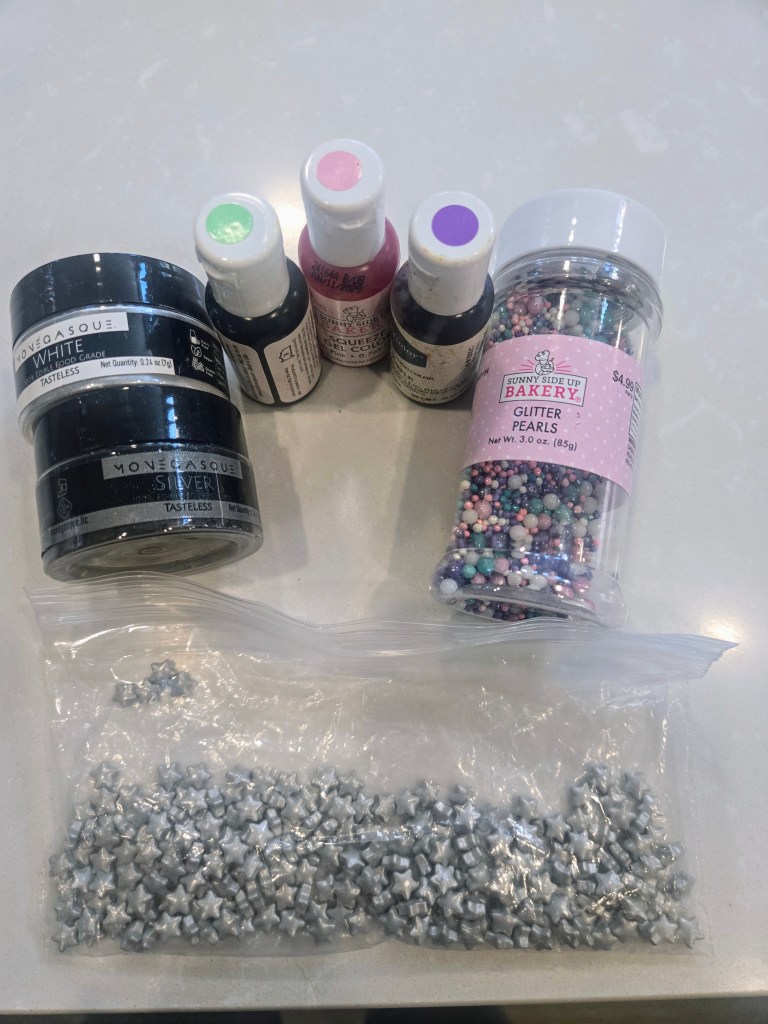
The loot you need! 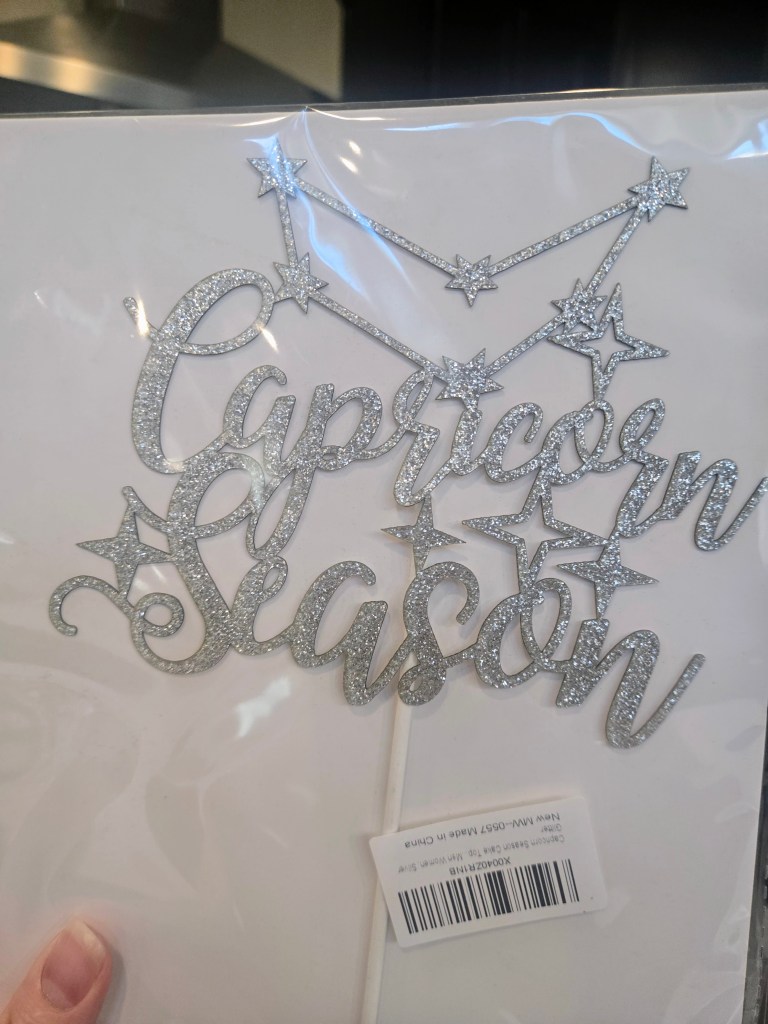
So shiny, so chrome… 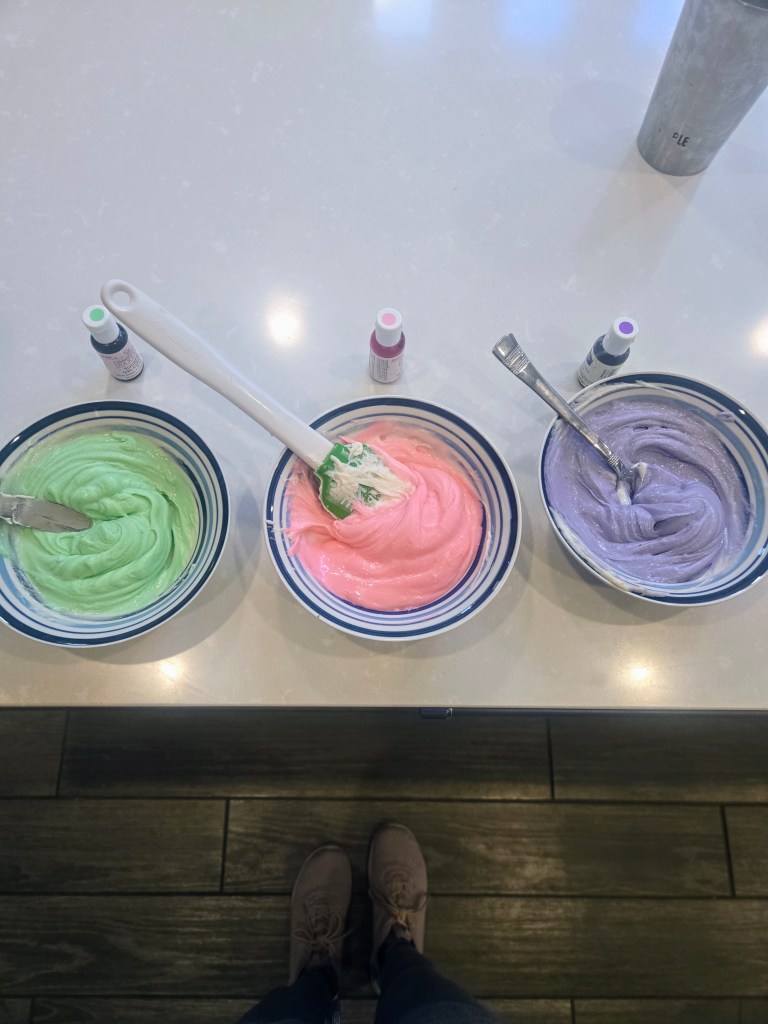
The new Earth sign color palette just dropped. 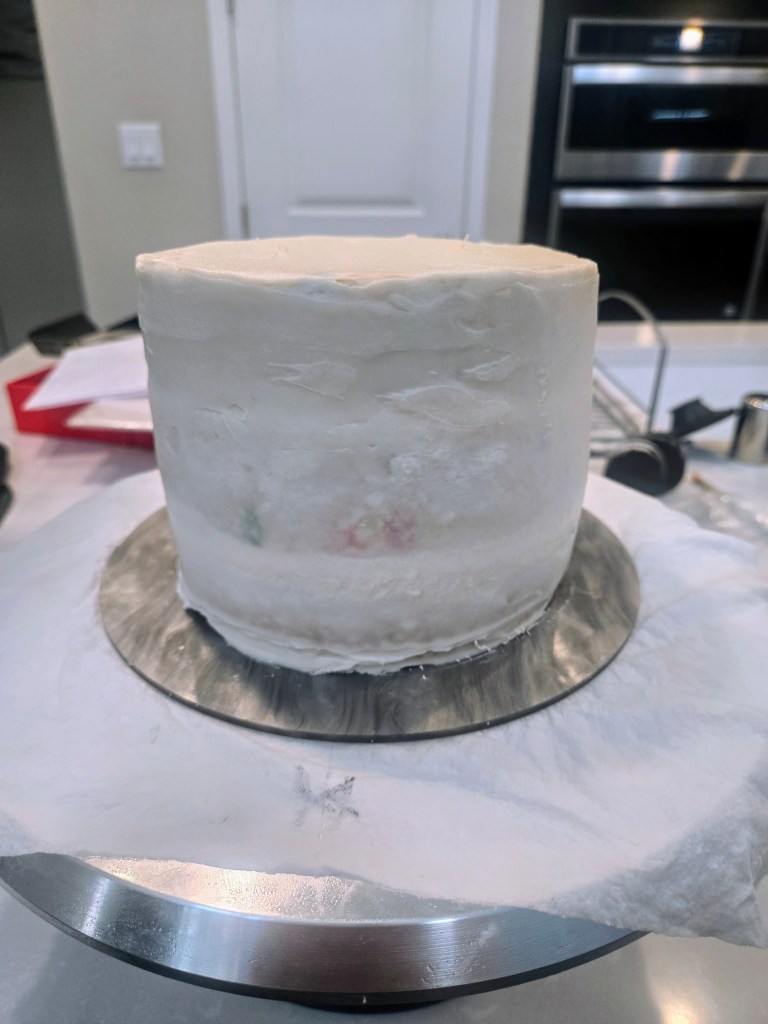
Start with a crumb-coated cake, frozen for 30 minutes. This will help make your colors POP. 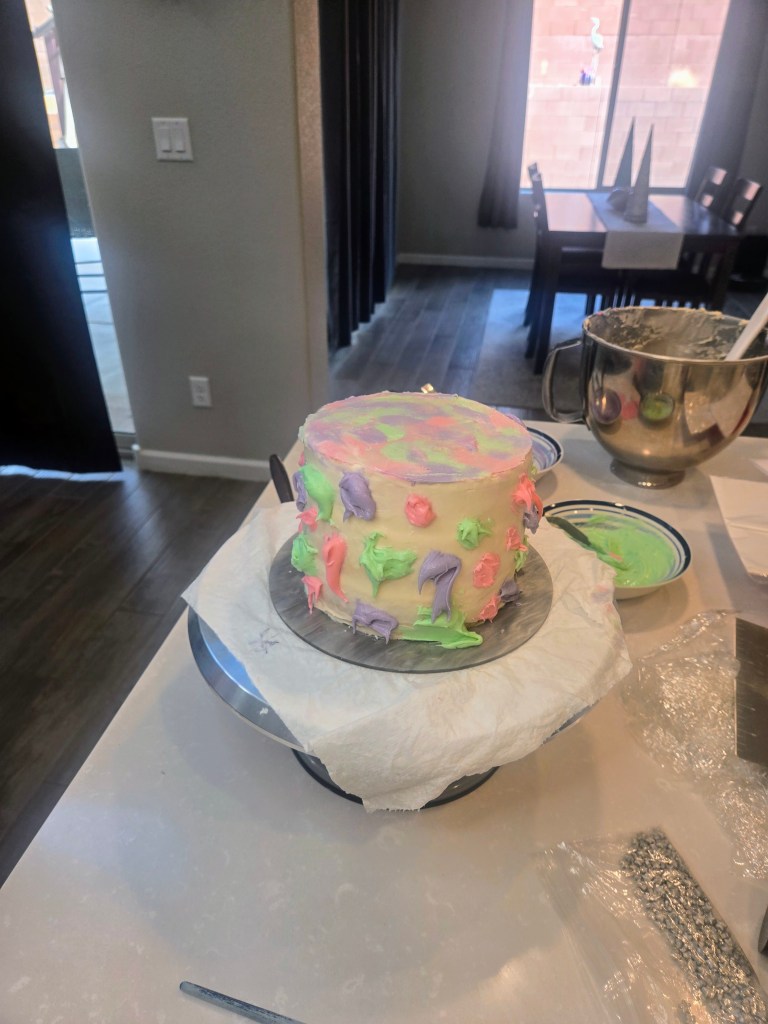
I swear, this WILL come together. Dollop various colors all over the cake. 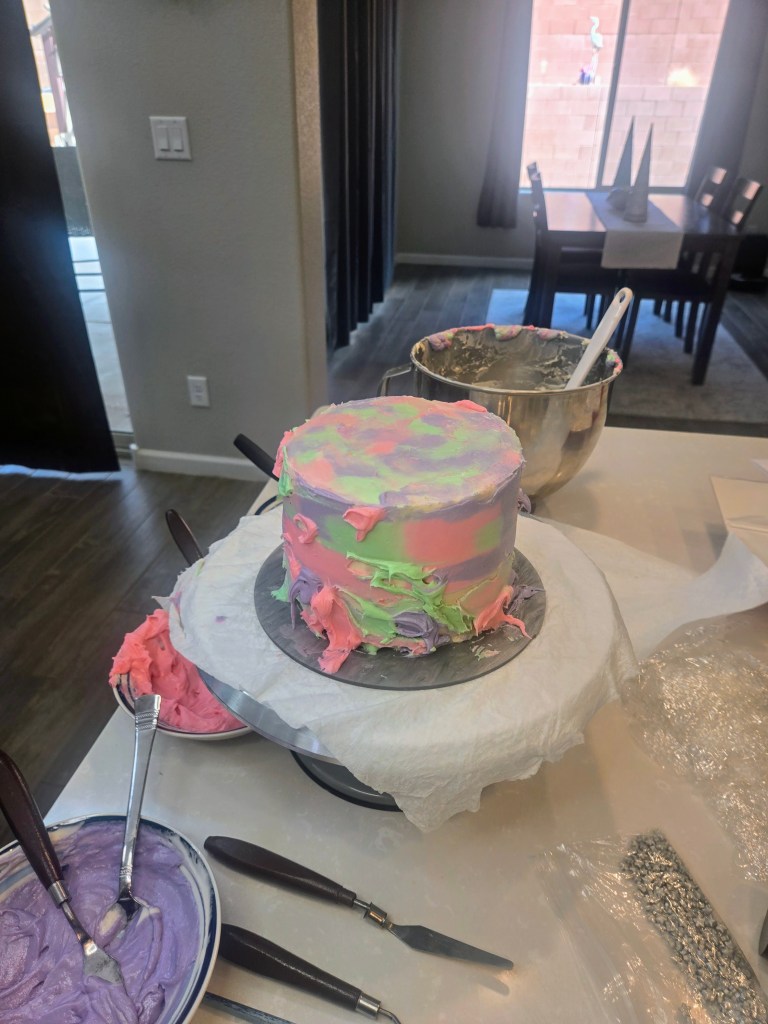
If you see some nekkie spots, just add more! This is a VERY forgiving design. 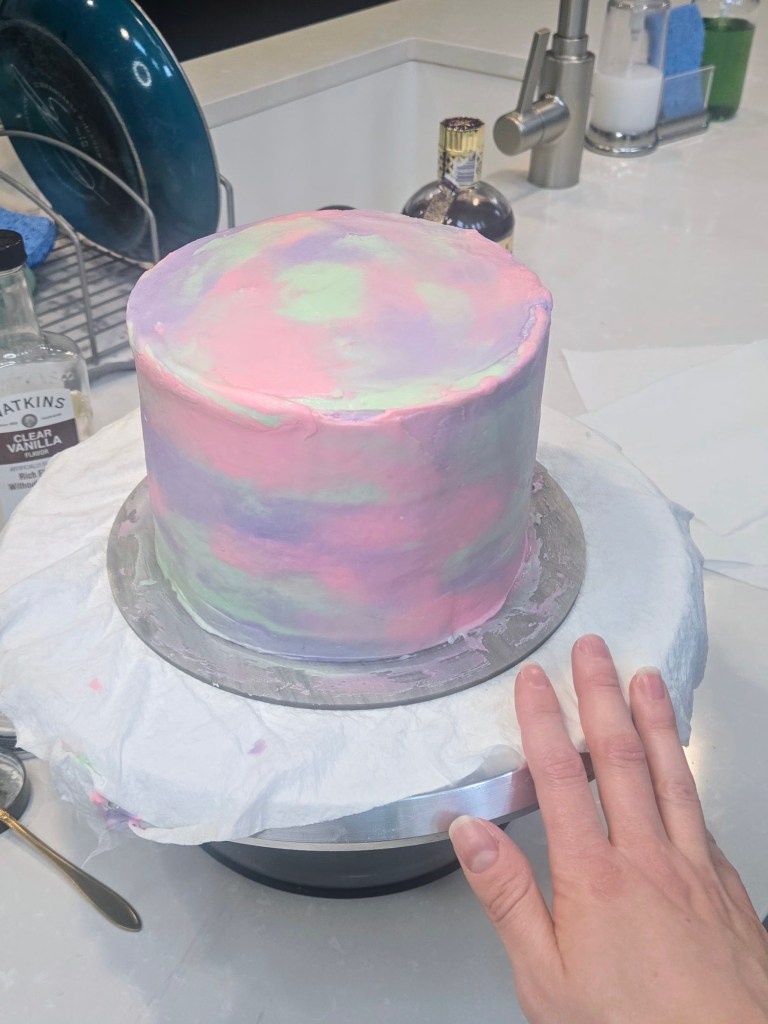
Make passes with a scraper to blend the colors together. **CLEAN OFF THE SCRAPER AFTER EACH PASS** 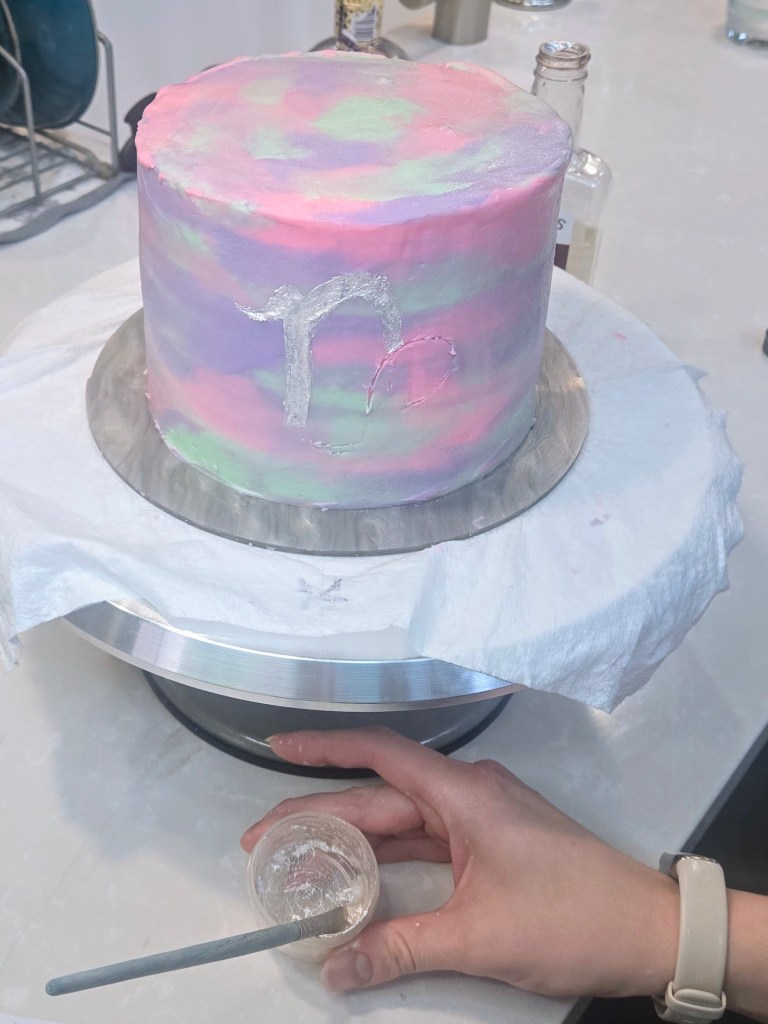
I suggest a cutout template or toothpick to trace the symbol 1st so it won’t end up crooked like mine. 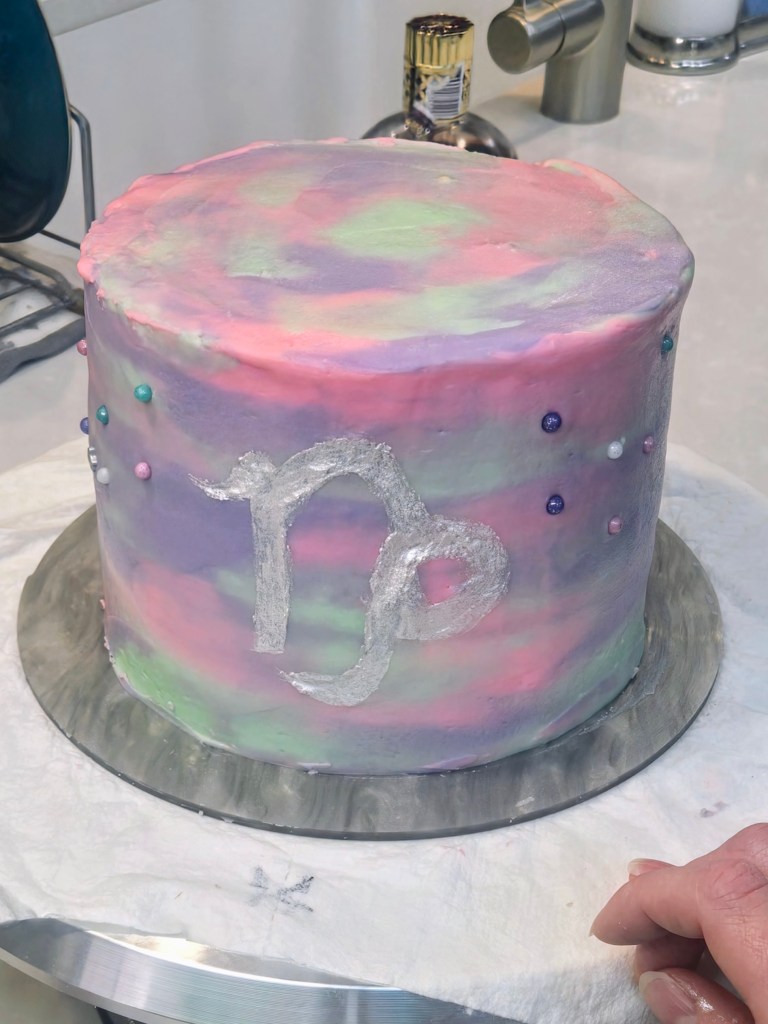
Use a dash of clear vanilla in a small container with a tsp or two of luster, mixed until it’s thick enough to paint with. 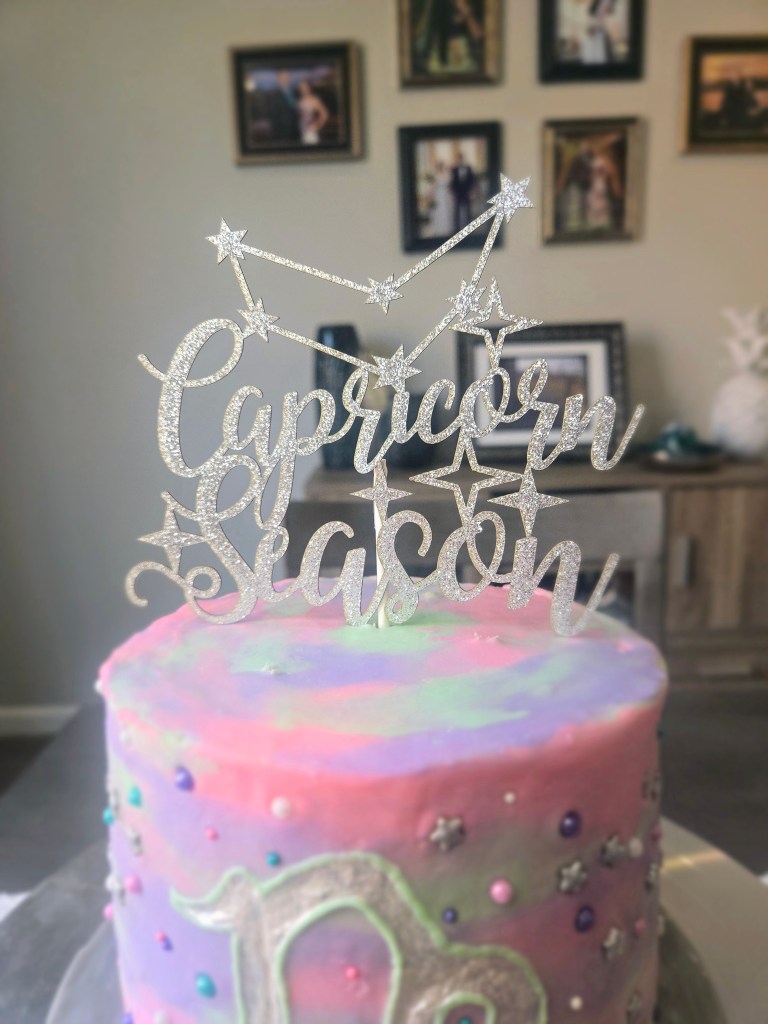
Gently insert the cake topper on top. 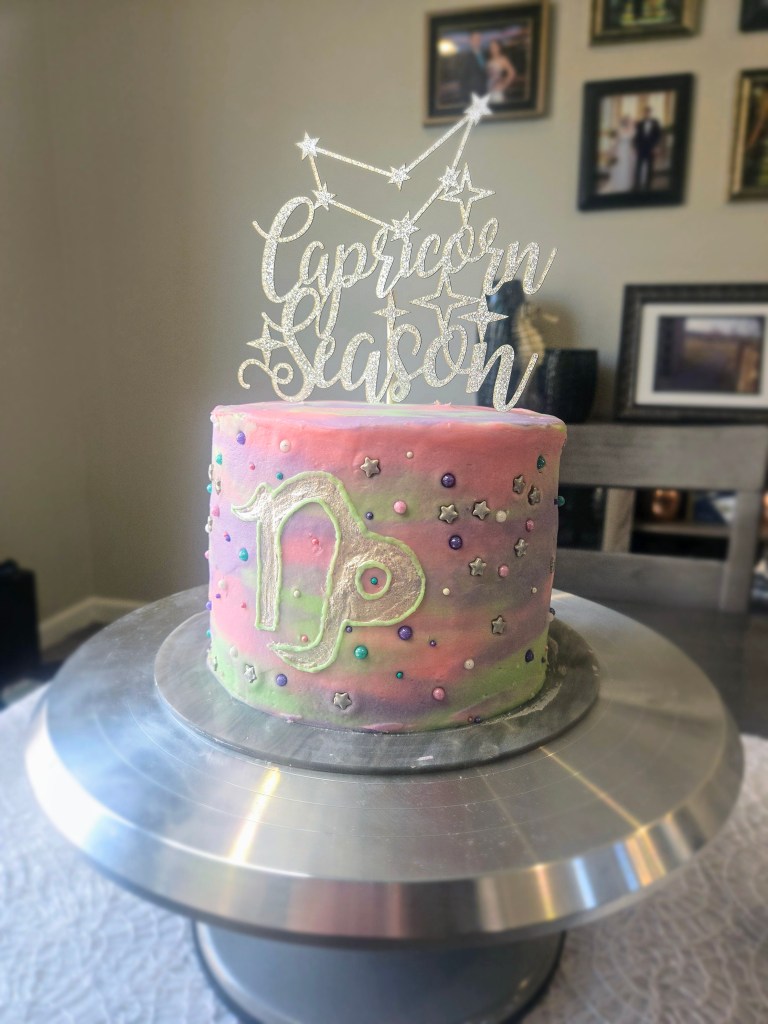
Add your Capricorn constellation in sprinkles and stars. I did one of each side of cake beside the Capricorn symbol, then, obviously, went wild with stars and sprinkles all over…see, WHIMSY! Video tutorial is for all the Geminis out there because, well, you know…shiny things and distractions. Recipe and Instructions
Gluten free Chambord raspberry cake with protein cream cheese frosting
An out-of-this-world cake for Capricorn birthday celebrations
If you want to omit the alcohol, add another tsp raspberry extract and use one cup of milk. If not gluten free, use any kind of white or yellow cake mix. Monkfruit can also be replaced with regular powdered sugar for frosting.
Ingredients
CAKE
*1 box of gluten free yellow cake mix (I used Pillsbury Funfetti)
*2.5 ounces Chambord or other raspberry liqueur
*5.5 ounces fat free or skim milk
*75g (1/3 cup) unsweetened applesauce
*3 eggs
*2 tsp raspberry extract
FROSTING
*226 g (1 cup) vanilla Greek yogurt, strained overnight
*8 ounces 1/3 the fat cream cheese at room temp
*12 ounces Lakanto powdered monkfruit
*4 ounces Quest vanilla milkshake protein powder (cuts the sweetness of the monkfruit and makes a nice, stiff, spreadable frosting; omit and use all monkfruit if desired)
*1 TBS clear vanilla
*3 Chambord (or milk)
*1 TBS milk
*1/4 tsp citric acid if you like less sweet frosting
Directions
- Preheat oven to 350 and grease three 6-inch pans.
- Whisk cake ingredients together in a stand mixer on low for 60 seconds before switching to medium-high for two minutes.
- Pour batter evenly into pan and bake for 30-35 minutes, or until a toothpick comes out mostly clean from the center.
- Allow cake to cool fully before frosting.
- To make frosting, whisk cream cheese and yogurt for 3 minutes before adding in half the powdered monkfruit, protein powder, extract, citric acid, Chambord, and milk.
- Add in remaining monkfruit mix fully.
- You will need to crumb coat your cake in plain white frosting before dividing remaining frosting in three bowls: one mint, one soft pink, and one regal purple.
- To decorate cake, follow along with the photo gallery or video tutorial above, and view recommended products at the top of the blog.
- Keep cake covered and in the fridge. It is best served at room temp, so remove from fridge 30 minutes before eating. Enjoy!
Nutrition
Macros
12 servings
237.6 cal/37.5 c/5.2 f/10.2 p per slice
Like any Capricorn, my eyes are on the prize…in this case, the prize is a slice of cake. 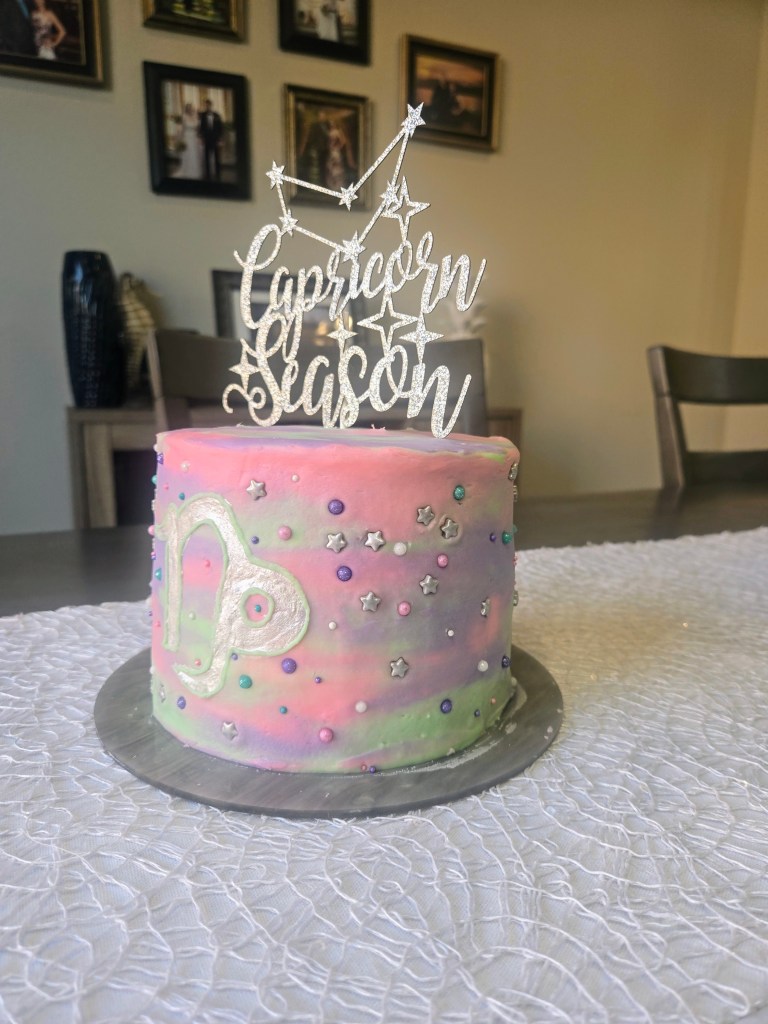
I’m starry-eyed thinking of another year of conquering the planet, in true Cap fashion. -
Peppermint Hot Cocoa Cheesecake
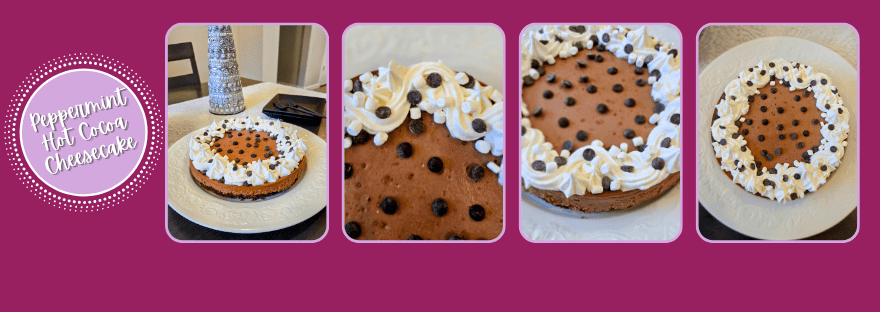
Sometimes you just need a warm mug of hot cocoa topped with an alarming amount of marshmallows to make it through the holiday (Baileys optional, but strongly recommended). Since hot cocoa is the secret ingredient to a warm heart, I wanted to test this theory out by partaking in one of my favorite past times: turning delicious seasonal beverages into dessert. I will say making a cheesecake with actual hot chocolate in it requires a level of patience I do not possess…I could not wait long enough for my peppermint hot cocoa to cool off before mixing in, and, as a result, had quite a few burst bubbles on the top of my cheesecake. So she doesn’t have buttery smooth skin–she’s still delicious. And now I can live out my pre-New-Year’s-Eve feasting plans by having a balanced diet of a mug of peppermint hot chocolate in one hand and a giant slice of peppermint hot cocoa cheesecake in the other. It’s the perfect blend…
Sip happens, especially with hot cocoa. Recipe and Instructions
Peppermint Hot Cocoa Cheesecake
A peppermint and chocolate cheesecake on a mint chocolate crust topped with mini marshmallows and whipped cream
If not gluten free, use any kind of graham cracker crumbs for the crust. Greek yogurt can be replaced with an additional 8 ounces of cream cheese, and allulose can also be replaced with regular sugar. I have not tested this recipe with any other protein powders, so I recommend a whey-based protein.
Ingredients
CRUST
*150 g (a little over 1 box) Simple Mill’s gluten free mint chocolate sweet thins
*3 TBS sugar free syrup
*If needed, 1 TBS liquid
CHEESECAKE FILLING
*224 g (8 ounces) 1/3 the fat cream cheese at room temp
*48 g (1/4 cup) allulose
*226 g (1 cup) nonfat Greek yogurt, strained overnight
*60 g (1/2 cup) Quest chocolate milkshake protein powder
*6 ounces peppermint hot chocolate, brewed and cooled
*1 tsp vanilla extract
*1/4 tsp peppermint extract
*2 large eggs
TOPPINGS
*Mini freeze-dried marshmallows (I used 10 g)
*Cool Whip Free (I used 54 g or about ~3/4 cup)
*Lily’s sugar free chocolate chips (I used 14 g)
Directions
- Line an 8″ springform pan with Parchment paper and spray with cooking spray.
- Preheat oven to 350.
- Dump the sweet thins and syrup in a food processor and grind until smooth (if mixture is too thick, add additional TBS of liquid).
- Place crust mix into prepared pan and smooth to the edges (I use cooking spray on my hands to make this easier).
- Bake for 10 minutes until golden; remove to cool while making filling.
- Using a whisk attachment, mix the cream cheese and allulose in a stand mixer on medium high for 2-3 minutes until fluffy and smooth.
- Add in the yogurt and protein powder mixing well (it will be thick/chunky).
- Add in hot cocoa, mint, and vanilla, and blend until smooth, 2-3 minutes.
- Switch to a paddle attachment, and on low speed, add eggs, one at a time, mixing until smooth.
- Fill a large roasting pan with 4-5 cups of steaming hot water. Wrap your springform pan in several layers of foil and place into a crockpot liner, tying the edge up, to keep your cheesecake from getting any water into it during the water bath.
- Pour the cheesecake batter into the prepared pan, and put the prepared pan into the roasting pan with water.
- Bake for 55-60 minutes, until the sides have set but the center is still jiggly.
- Turn the oven off, leaving the cheesecake inside, and crack the oven door to allow the cheesecake to finish baking for 1 hour.
- Remove from the oven and place on a cooling rack to cool to room temp; I like to run a sharp knife around the edges after it is cool.
- Refrigerate cheesecake overnight or place in fridge for 4 hours before removing from springform.
- Use a 1M piping tip to decorate stars and swirls around the cheesecake to make a border.
- Sprinkle marshmallows and chocolate chips on top as desired.
- Keep leftover cheesecake covered in the fridge.
Nutrition
Macros
8 servings
258.4 cal/21.1 c/13.2 f/13.8 p per slice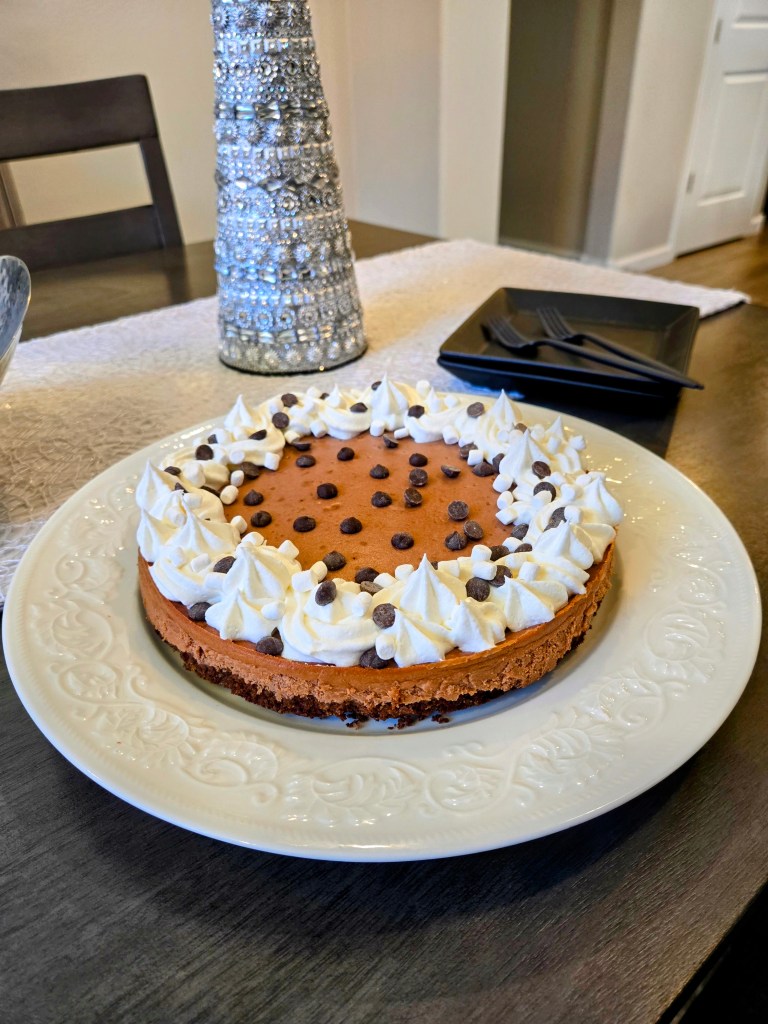
Let’s cocoa-nnect and circle back after the New Year with a slice of this cheesecake… 
Warm up to the cocoa-ssibilities of your favorite winter beverage in dessert form! 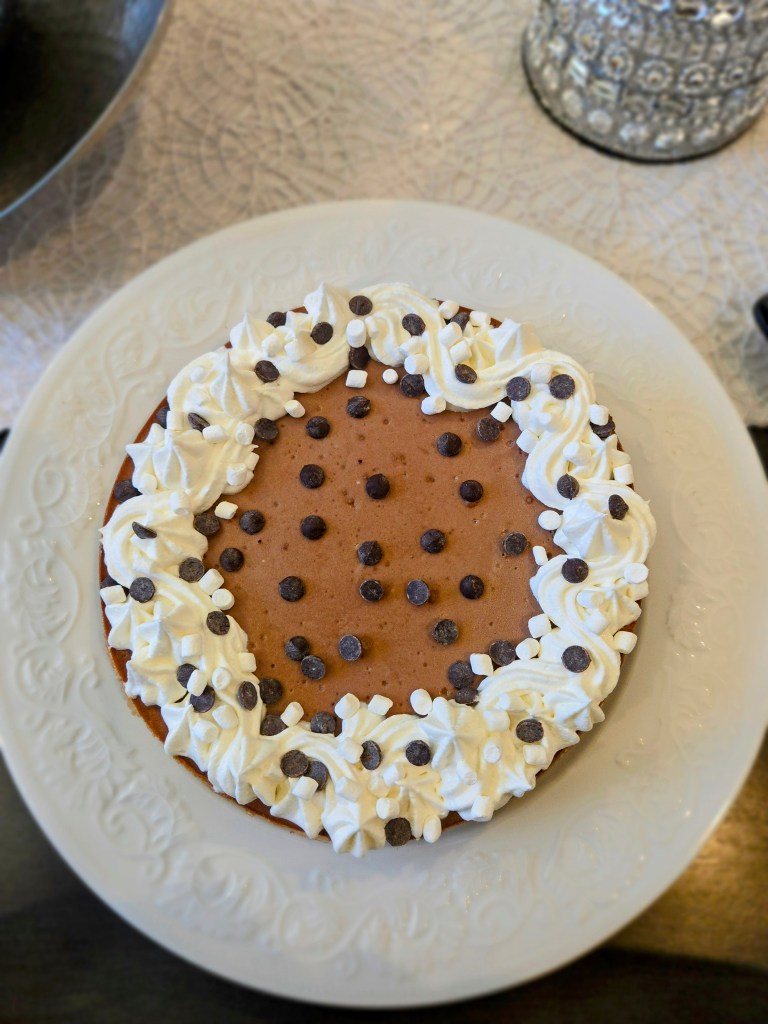
A marshmallow (or 20) a day keeps the cold away…it’s science. - Line an 8″ springform pan with Parchment paper and spray with cooking spray.
-
Merry Grinchmas

A sarcastic creature that looks great in green, has a dog, and despises large crowds? *Swipes right* Look, the Grinch didn’t hate Christmas, he hated people, and quite frankly, that’s not a deal breaker for introverted little ol’ me. I have been dying to make another cartoon cake this year, and I figured what better way to go than my favorite Christmas character of all time?! Sure, he’s creepy, mean, and monster-adjacent, but I have the propensity to somehow always manage to make Christmas spooky (Halloween is the best holiday, not sorry), so instead of being green with envy over another holiday overshadowing my favorite, I embraced the Grinch’s Christmas spirit (I swear I stole no toys from children).

I got 99 problems, but a Grinch ain’t one… He’s a mean one, and a green one, but he’s pretty simple to decorate. You can use any cake and any type of frosting to use as a base for this cake. I used a cream cheese frosting and vanilla cake combo (recipe below). You’re gonna need a few tools (stolen from Whoville, maybe) to make our Mr. Grinch. And when the Grinch asks, “But what would I wear?,” you can readily provide this piped and frosted Santa suit.
-Lime, red, and black gel dyes
-#3 round tip, two #12 round tips, #21 star tip
-Chocolate truffles (I used dairy-free Lindt since those are also GF)
-Edible luster dust in gold, green, and redI have a video tutorial below, but no green thumbs needed to learn how to decorate this cake with the slideshow here. By the time you’re done, you heart will have grown three sizes! You might need to see a cardiologist.
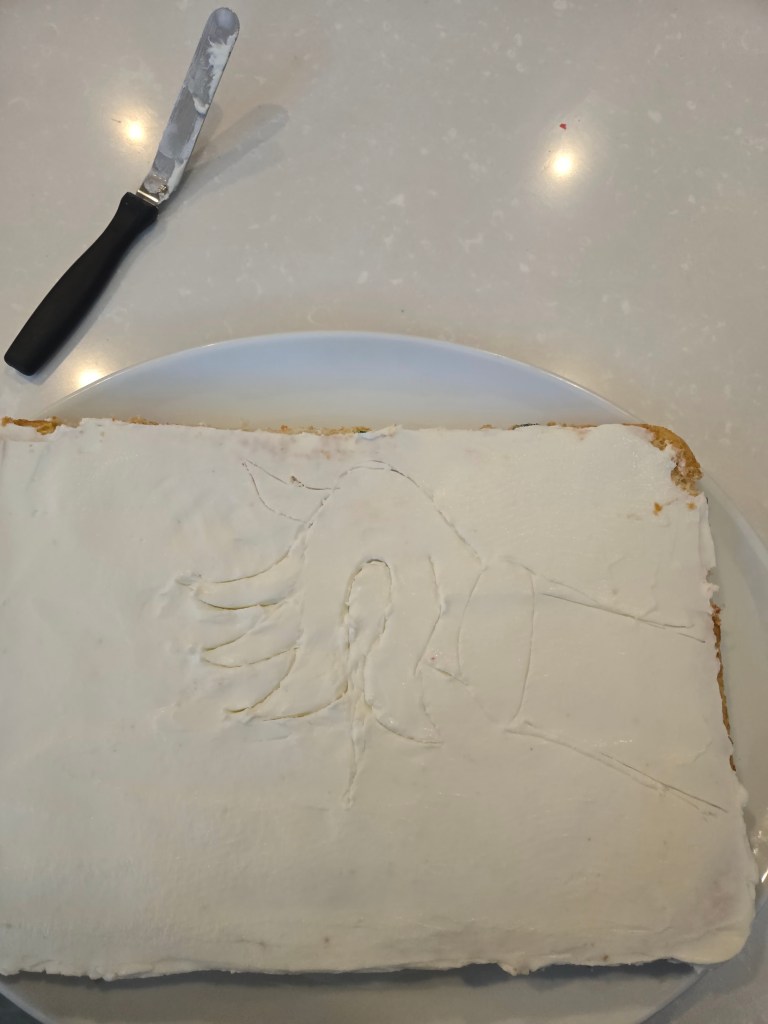
Use a toothpick to draw his hand and arm. 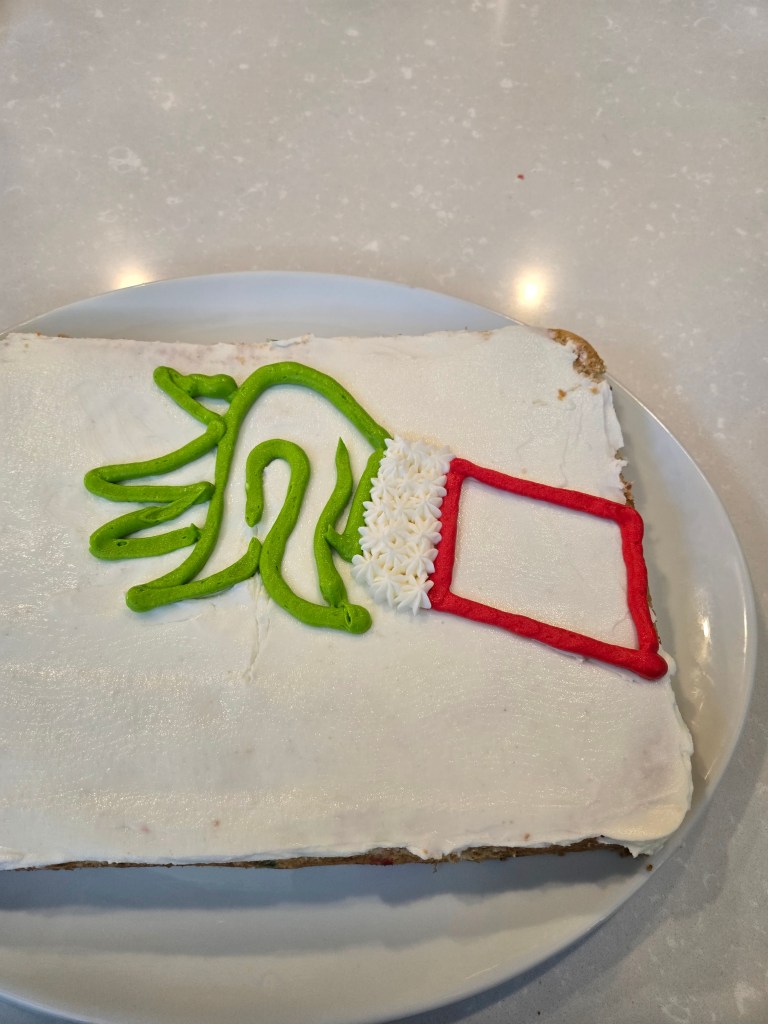
Outline the hand in green, the sleeve in red, and use the star tip to pipe the white cuff. 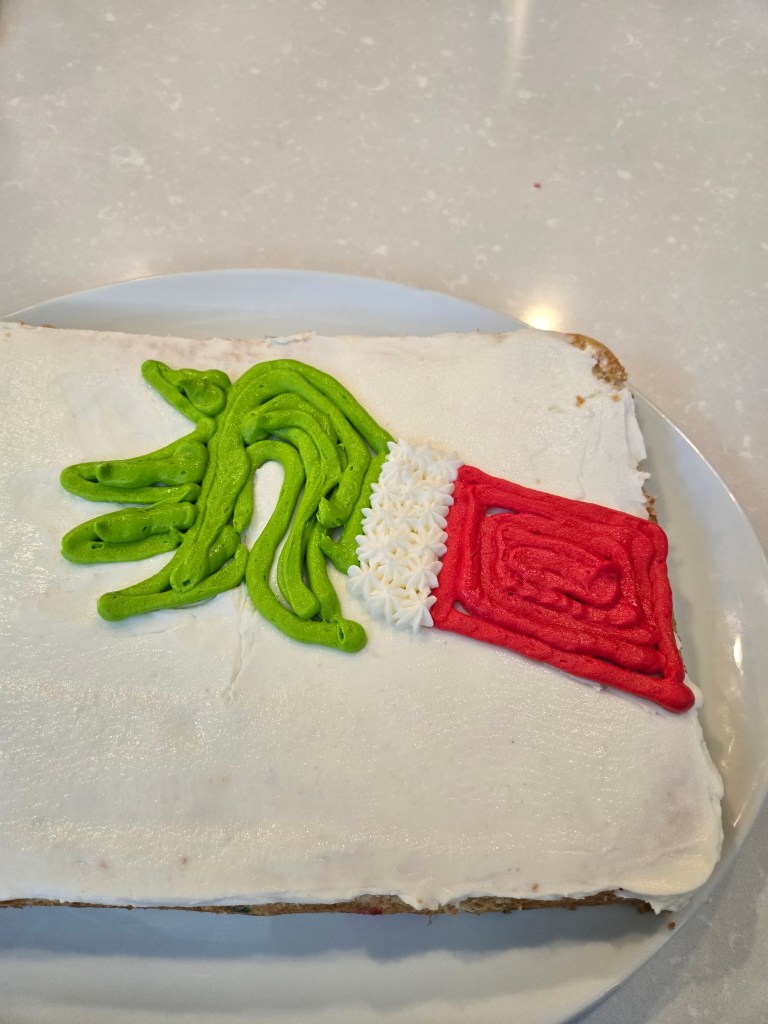
Fill in the red and green. 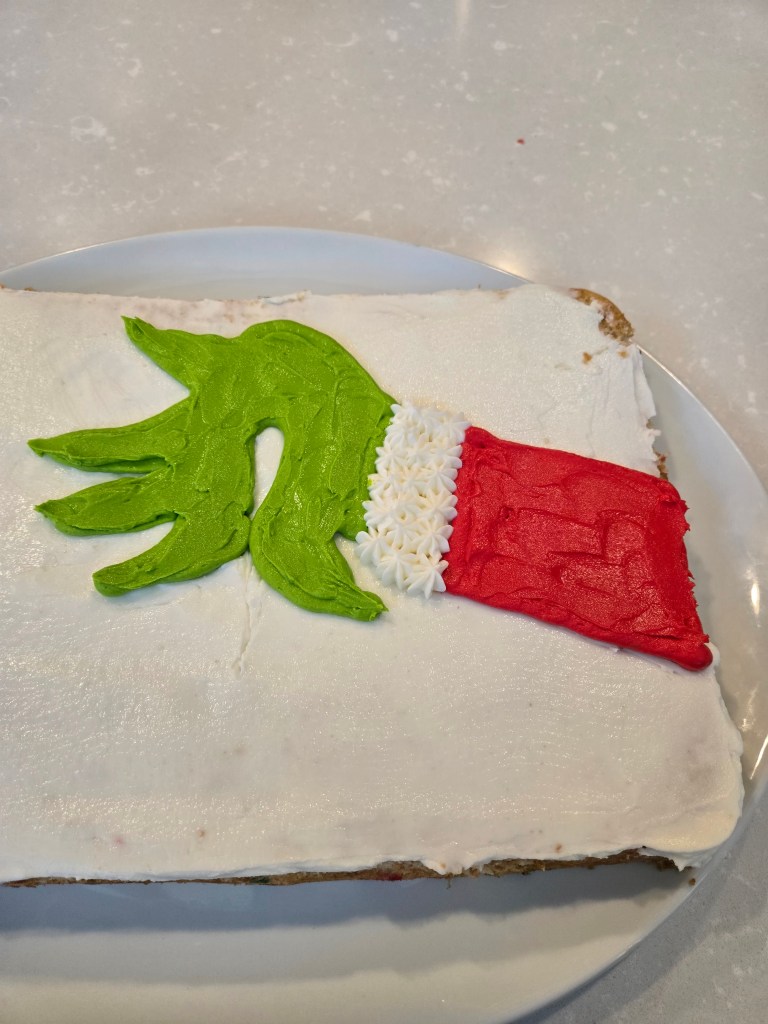
Use an angled spatula to create texture on his fur and sleeve. Clean between use! 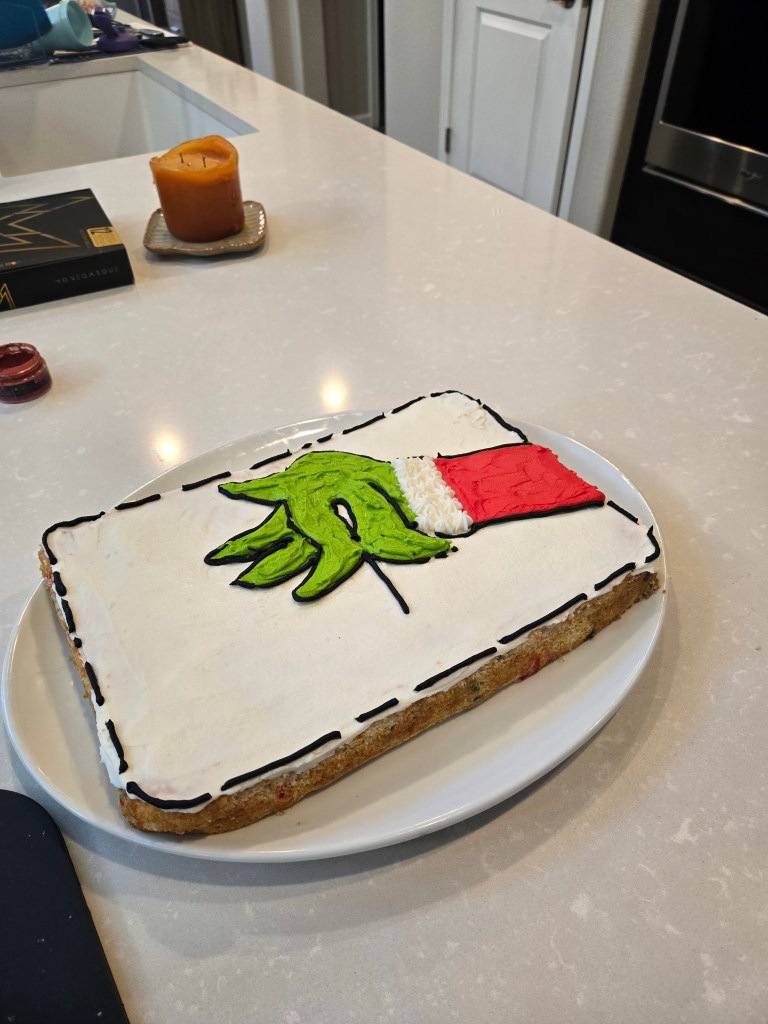
Use the black to outline in bits and pieces to create a cartoon effect. 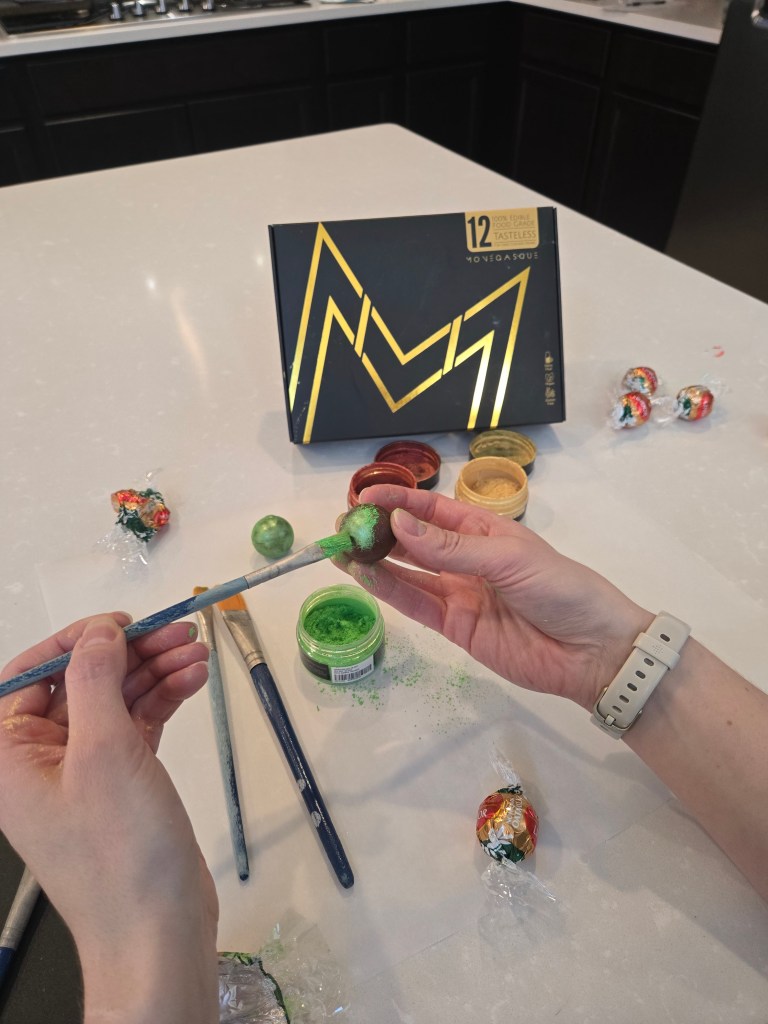
Use a food-safe paintbrush and paint the truffles with luster dust. 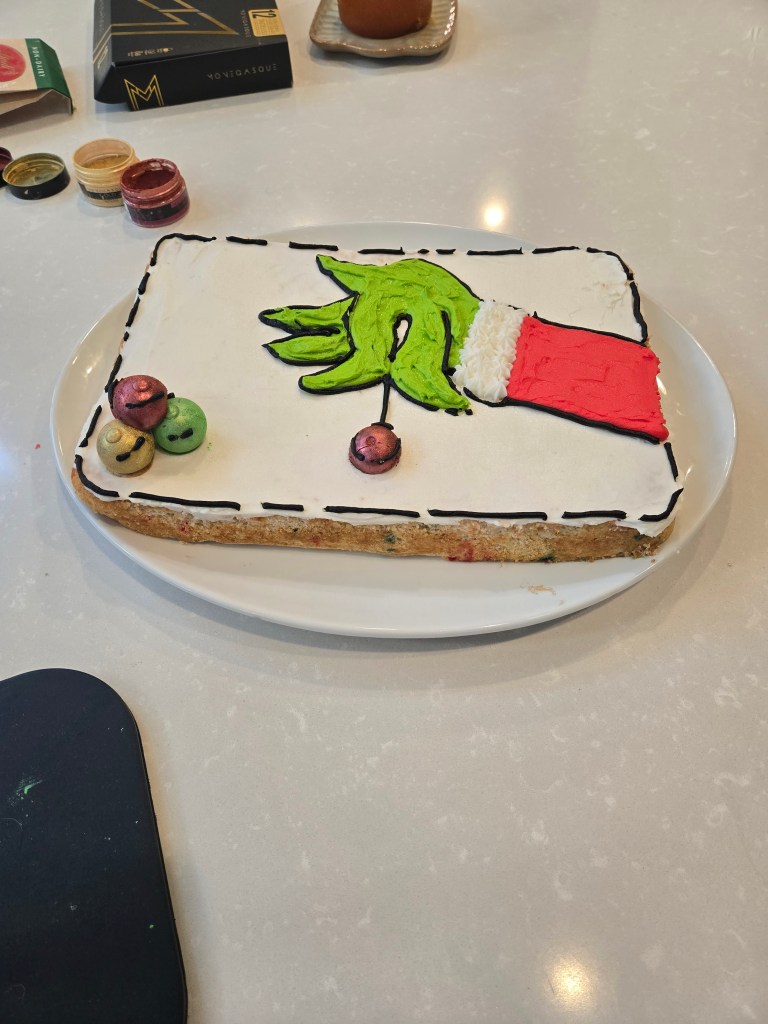
To finish, cut one ornament in half for him to hold, then place remaining ornaments as desired. 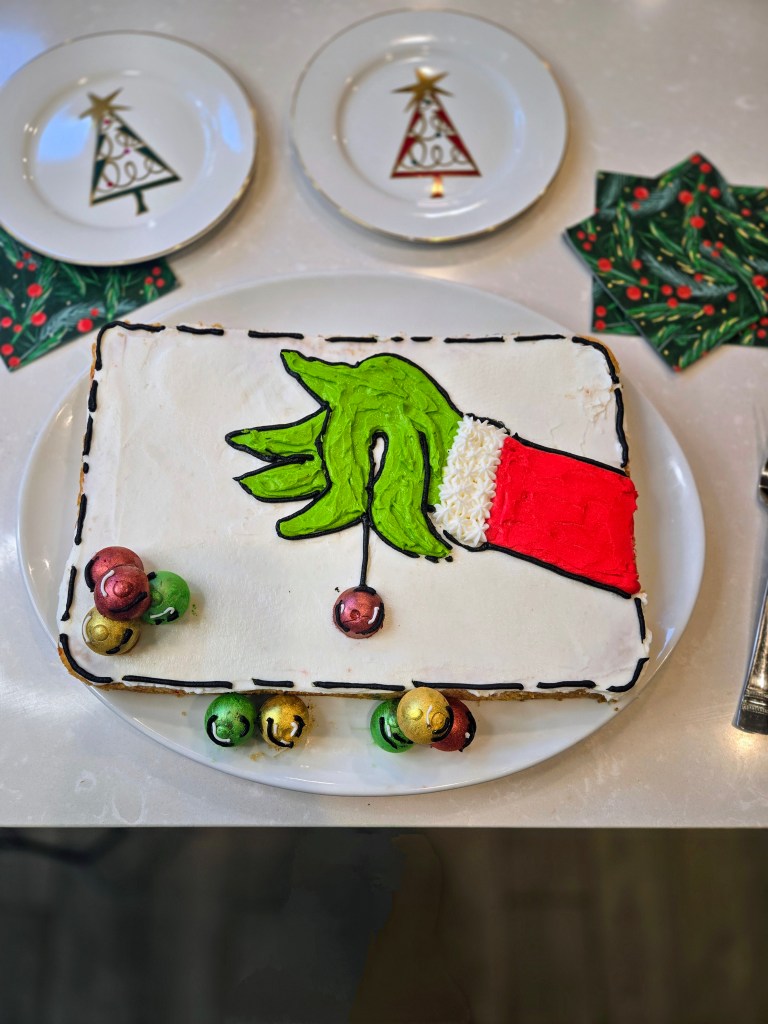
Add black and white dashes and swirls on ornaments to make cartoonish. 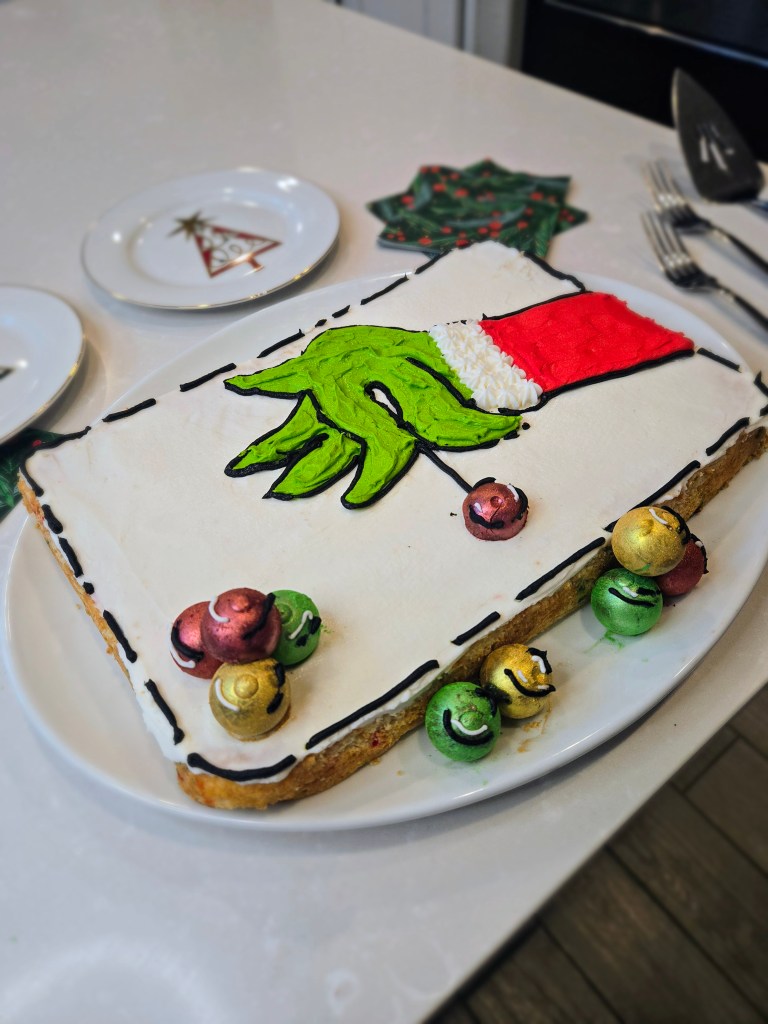
Now he’s ready to break hearts, steal presents, you name it! 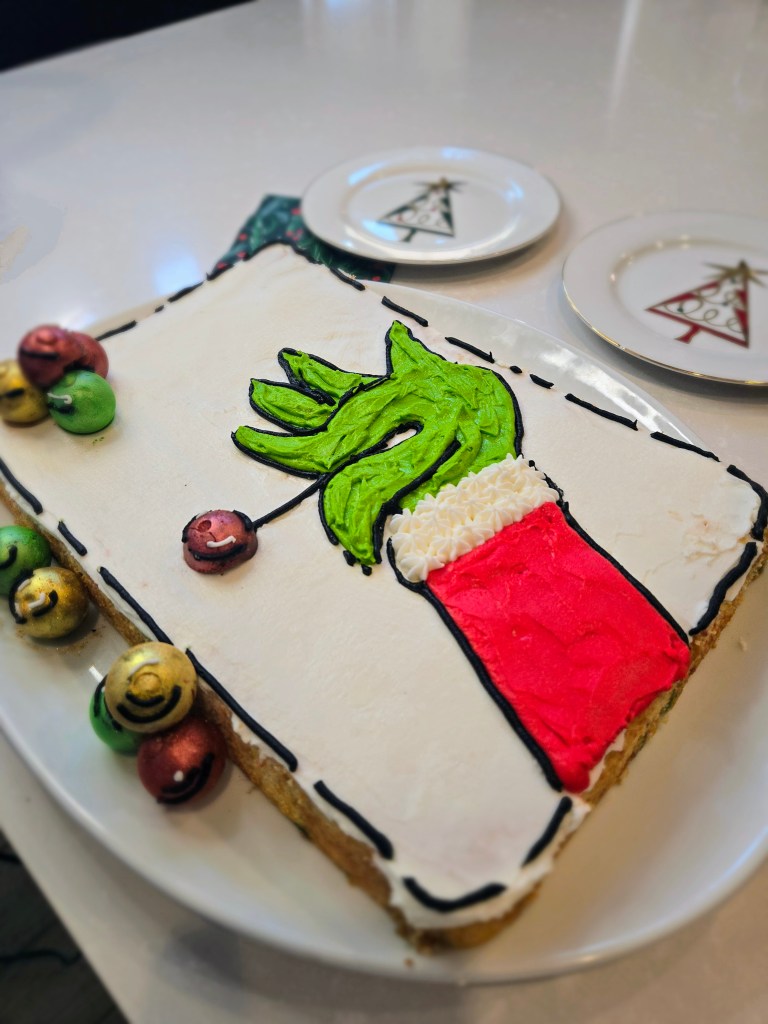
Grinch mode: activated. Watch this video tutorial to bring that thieving, dashing Grinch to life. Recipe and Instructions
Gluten free vanilla cake with yogurt cream cheese frosting
A Grinchy cake perfect for Bah-Humbug Christmas celebrations
If not gluten free, use any kind of white or yellow cake mix. Monkfruit can also be replaced with regular powdered sugar for frosting.
Ingredients
CAKE
*1 box of gluten free yellow cake mix (I used Pillsbury Funfetti)
*1 cup fat free or skim milk
*75g (1/3 cup) unsweetened applesauce
*3 eggs
FROSTING
*226 g (1 cup) vanilla Greek yogurt, strained overnight
*8 ounces 1/3 the fat cream cheese at room temp
*16 ounces Lakanto powdered monkfruit
*1 TBS clear vanilla
*3 TBS fat free or skim milk
*1/4 tsp citric acid if you like less sweet frosting
*Red, green, and black gel dye
Directions
- Preheat oven to 350 and grease a 9×13 pan.
- Whisk cake ingredients together in a stand mixer on low for 60 seconds before switching to medium-high for two minutes.
- Pour batter evenly into pan and bake for 30-35 minutes, or until a toothpick comes out mostly clean from the center.
- Allow cake to cool fully before frosting.
- To make frosting, whisk cream cheese and yogurt for 3 minutes before adding in half the powdered monkfruit, extract, citric acid,and milk.
- Add in remaining monkfruit mix fully.
- You will need to frost the top of your cake in plain white frosting before dividing remaining frosting in three bowls: one red, one black, and one lime.
- To decorate Grinch cake, follow along with the photo gallery or video tutorial above, and view recommended products at the top of the blog.
- Keep cake covered and in the fridge. It is best served at room temp, so remove from fridge 30 minutes before eating. Enjoy!
Nutrition
Macros
12 servings
211 cal/34.1 c/5.5 f/6.2 p per slice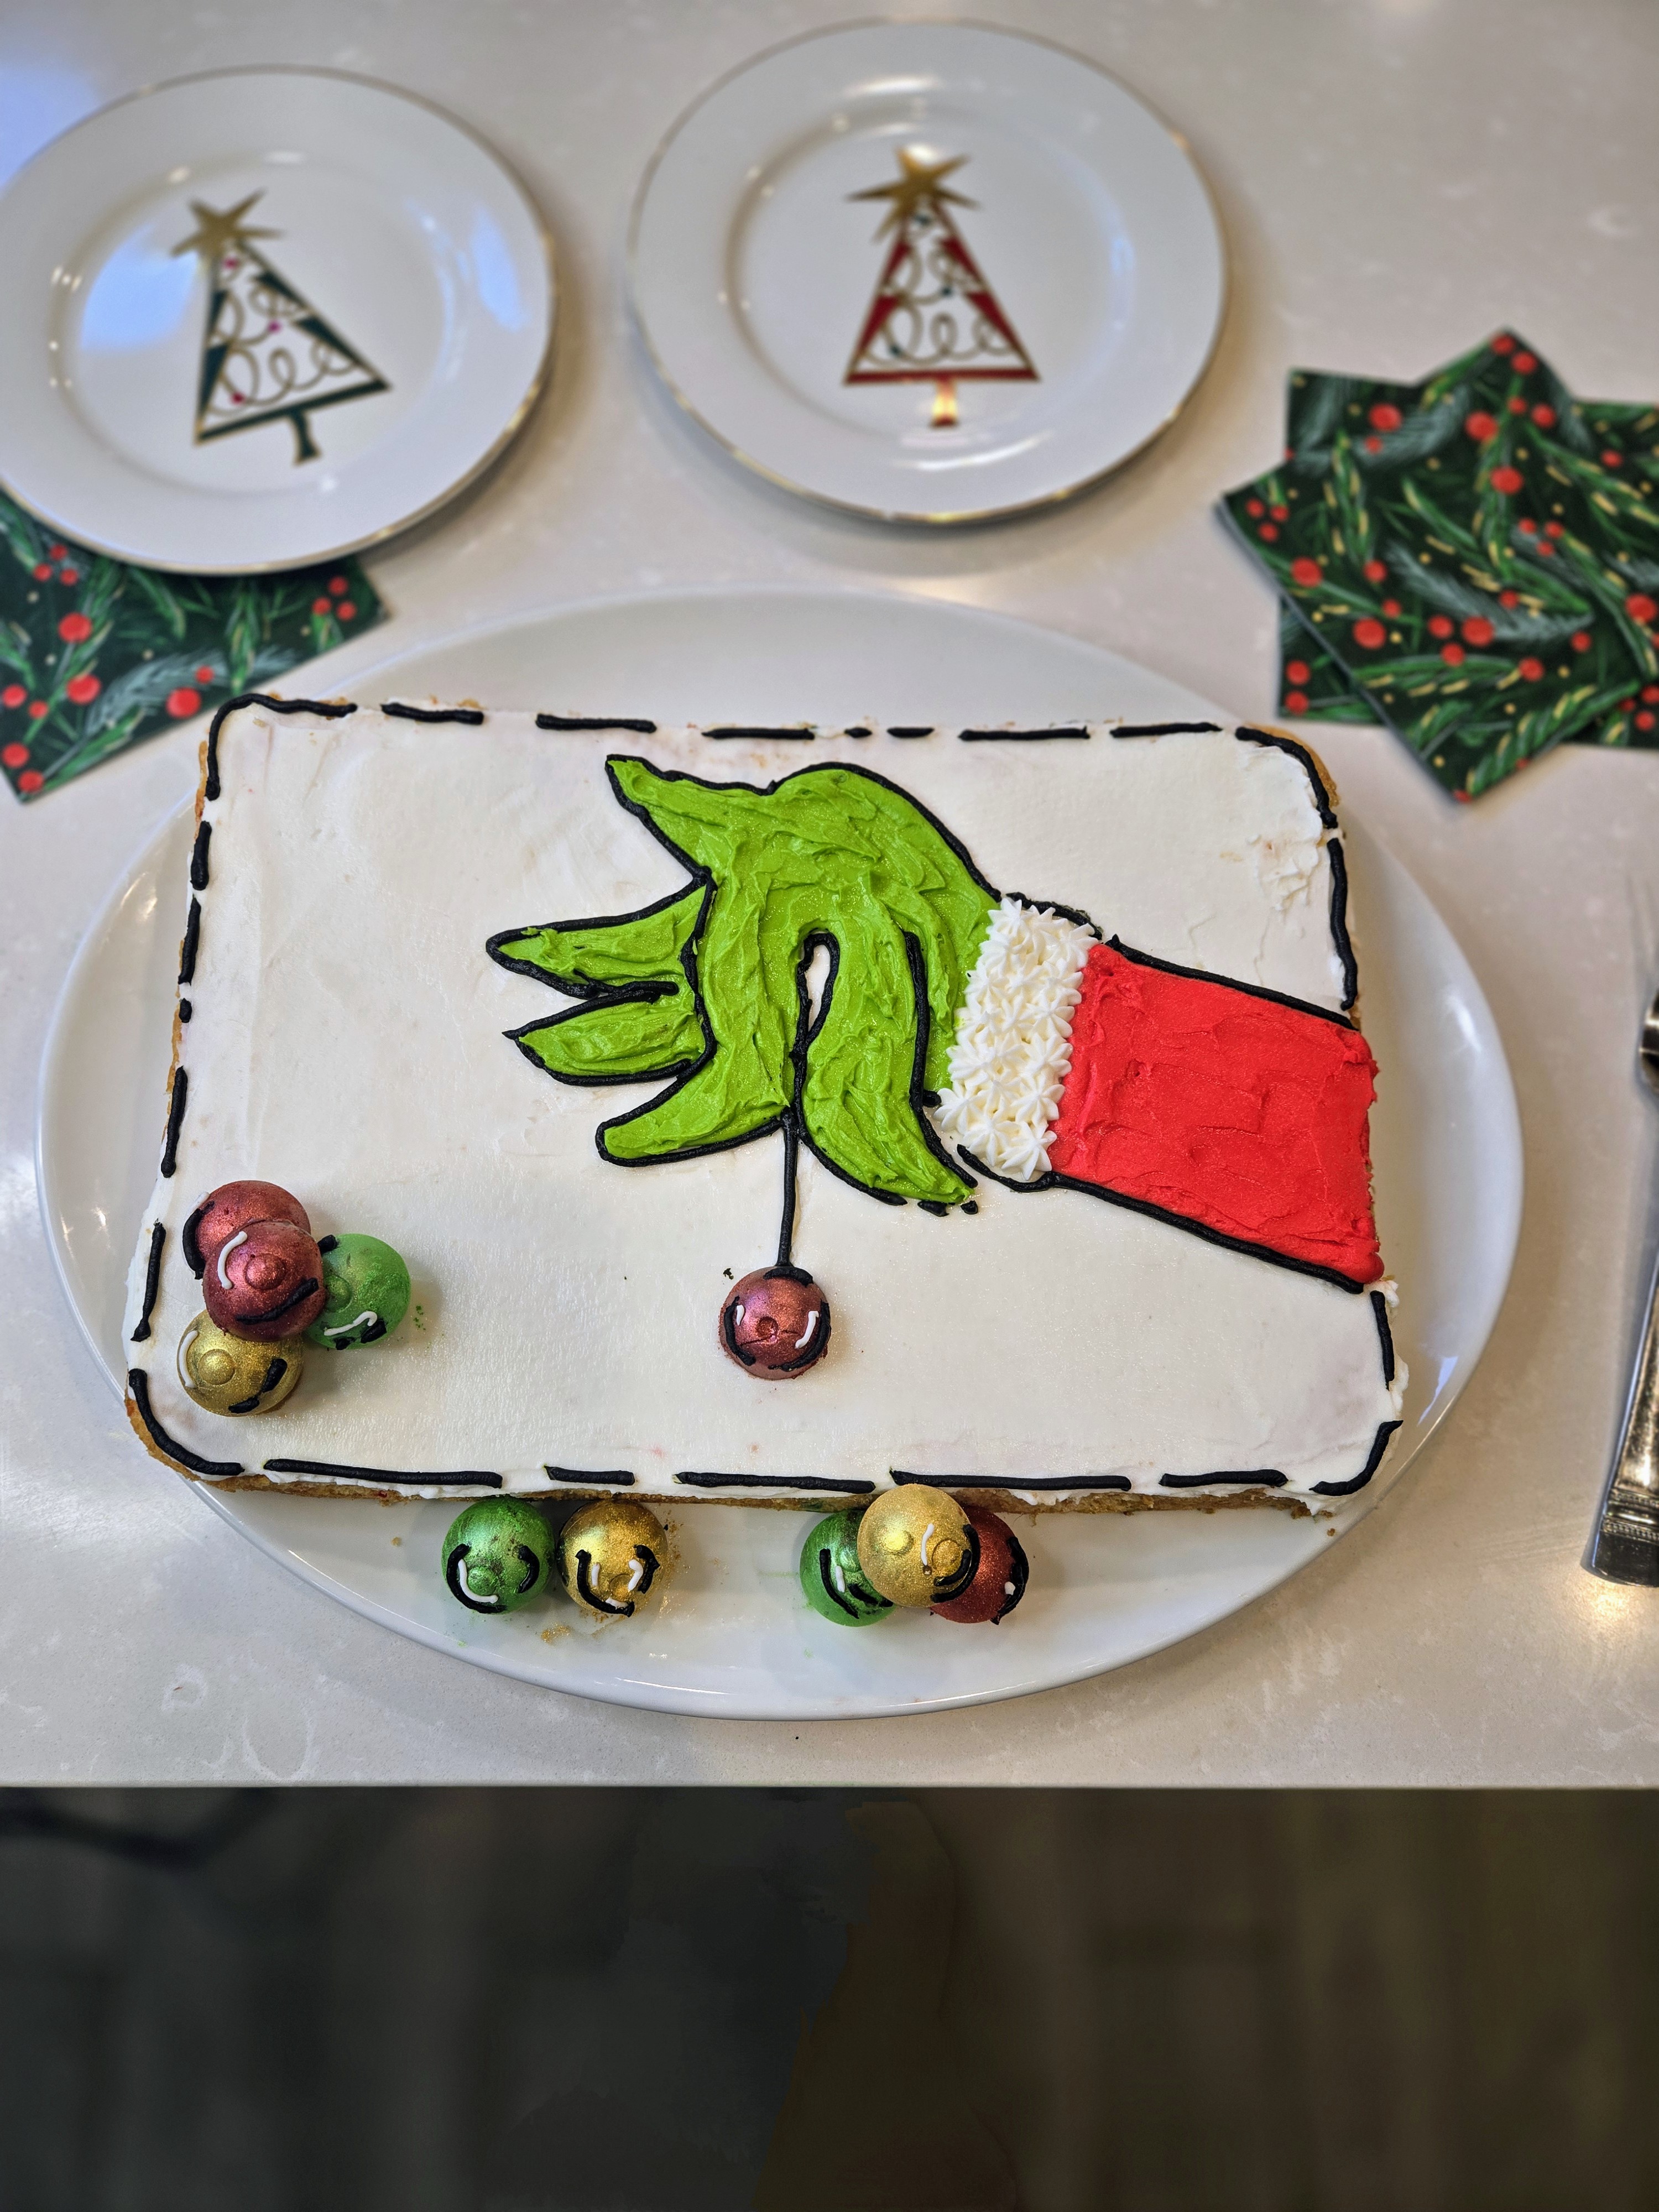
Help me… I’m feeling… 🤢🎄 - Preheat oven to 350 and grease a 9×13 pan.
-
Bone Appétit…
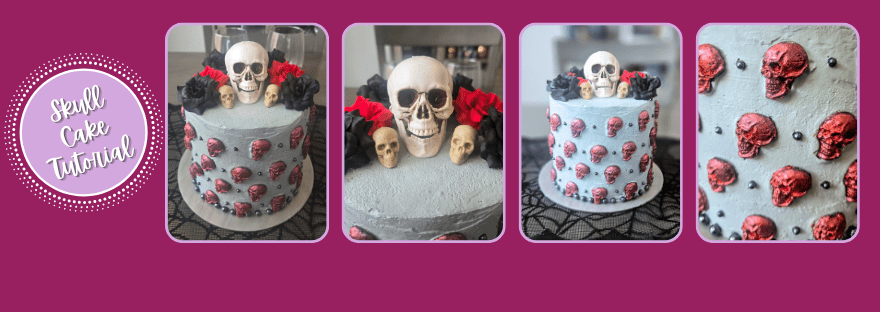
A few years ago, I saw a skull cake floating around somewhere on the corners of the web, and it haunted me for years (like all good spooky things). It was a simplistic but stunning cake with rows of skulls on it, but the skulls were painted with luster dust to be super sparkly…needless to say, this fits in with my brand of preferred Halloween decor, what I call, “Classy Spooky” (things that are terrifying, but also really pretty…ask yourself, would Morticia Addams have this in her home? If the answer is yes, you now know what “Classy Spooky” means). No bones about it, I had to try recreating a sparkly skull cake to keep up my Halloween aesthetic…turns out this cake was quite the bone-anza to make, and I am in love with my sparkly little skeleton army.
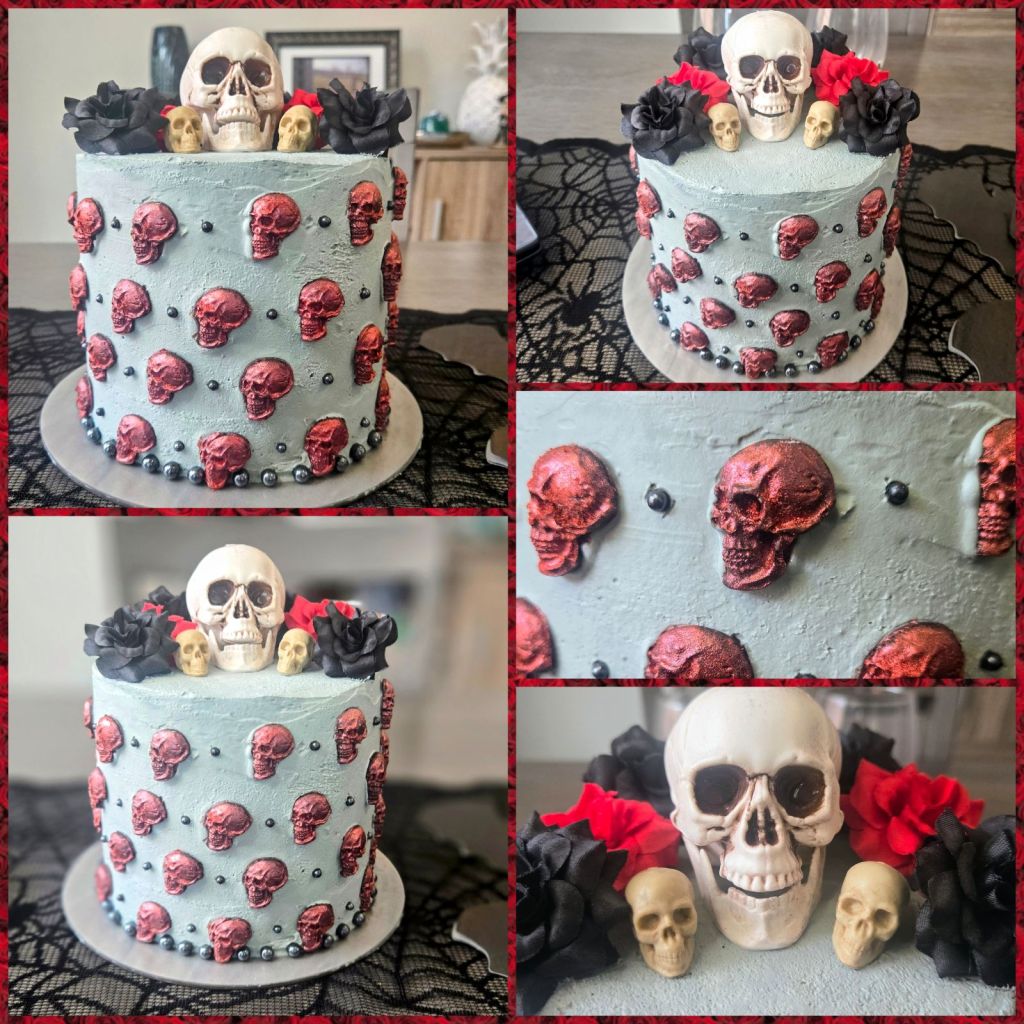
You can’t skele-run from my skele-puns… Time to bone up on those cake decorating skills! You can use any cake and any type of frosting to use as a base for this cake. I used a whipped frosting and vanilla cake combo (recipe below). You’re gonna need a few tools to make a jaw-dropping skull cake of your own. Product recommendations:
-Skull mold
-Luster dust in preferred shade (I used a burgundy shade from Monegasque)
-Halloween sprinkle set with silver pearls in large and small
-Skull and roses cake toppersI have a video tutorial below, but you can also bone up on how to decorate this cake with the slideshow here.
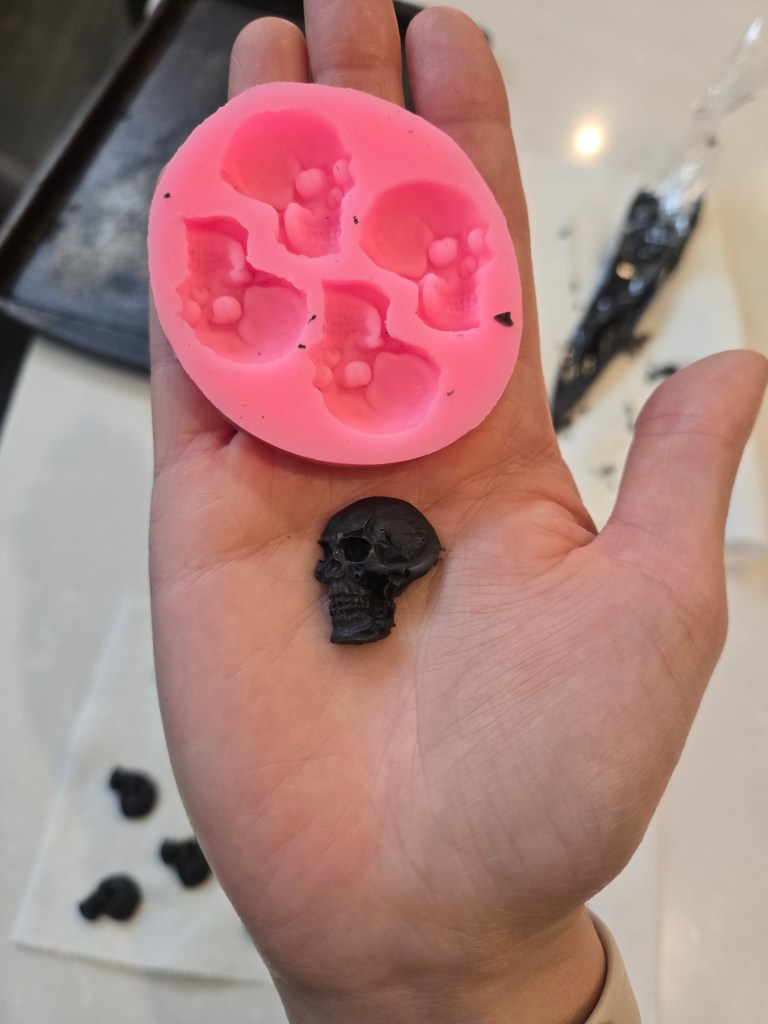
Use chocolate melts in a piping bag to pipe chocolate into mold. Use a toothpick to get into all the grooves before freezing for 15 minutes. 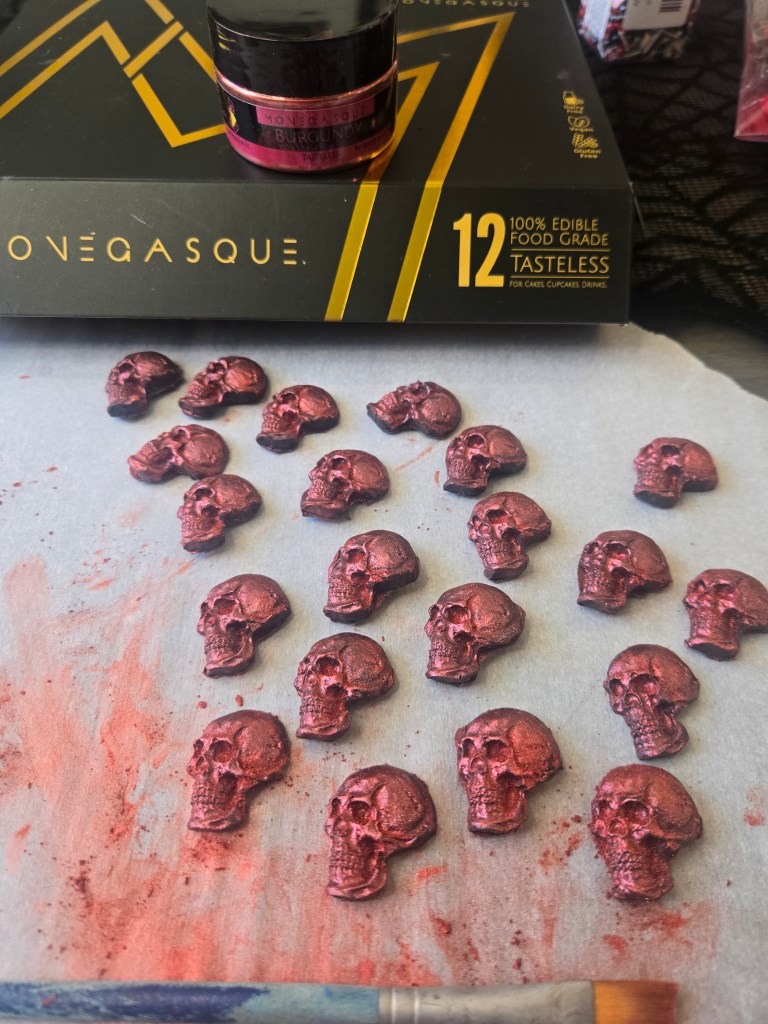
Use a food-safe paintbrush to paint each skull with dry luster dust. 
Coat your cake in a thick layer of gray frosting (I mixed gray + 2 drops black gel dye to achieve this color). 
Start adding painted skulls in a diagonal column. 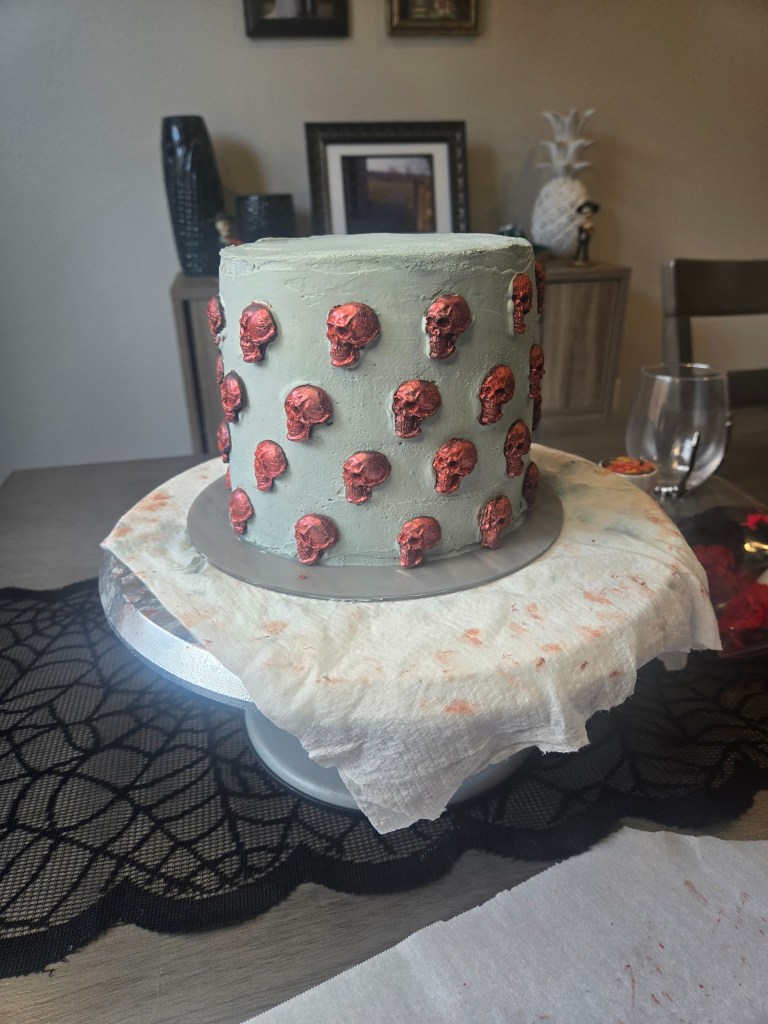
Continue around entire cake. 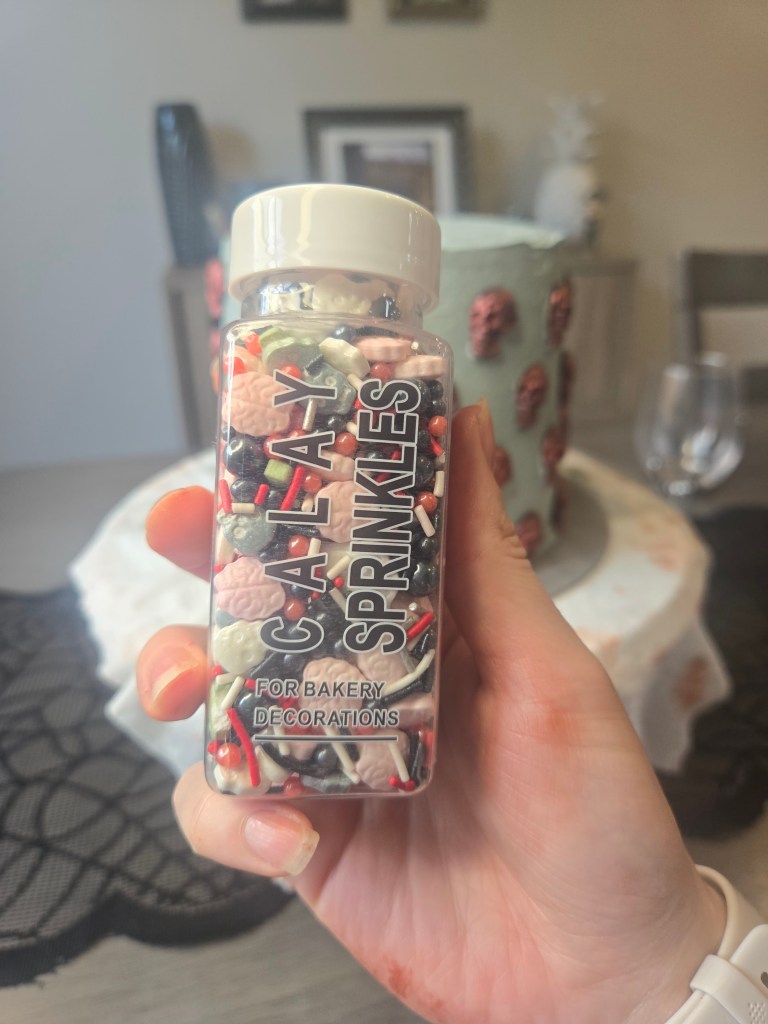
Separate sprinkles so you have small and large pearls ready to grab with tweezers. 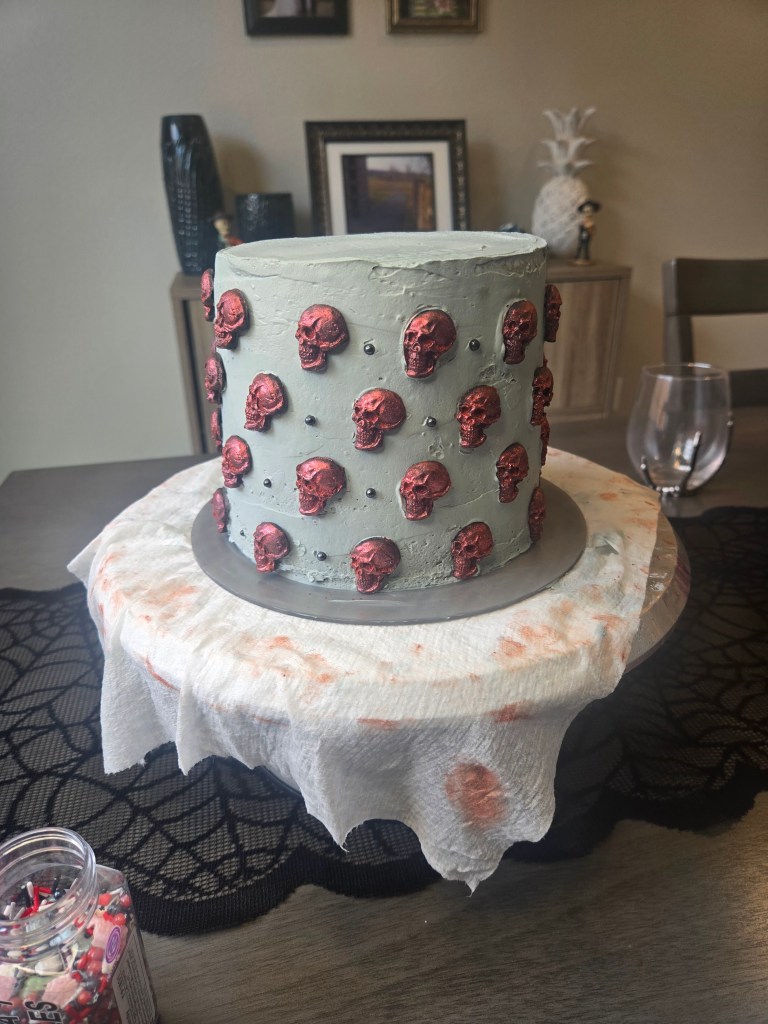
Add small pearls in between each column of skulls. 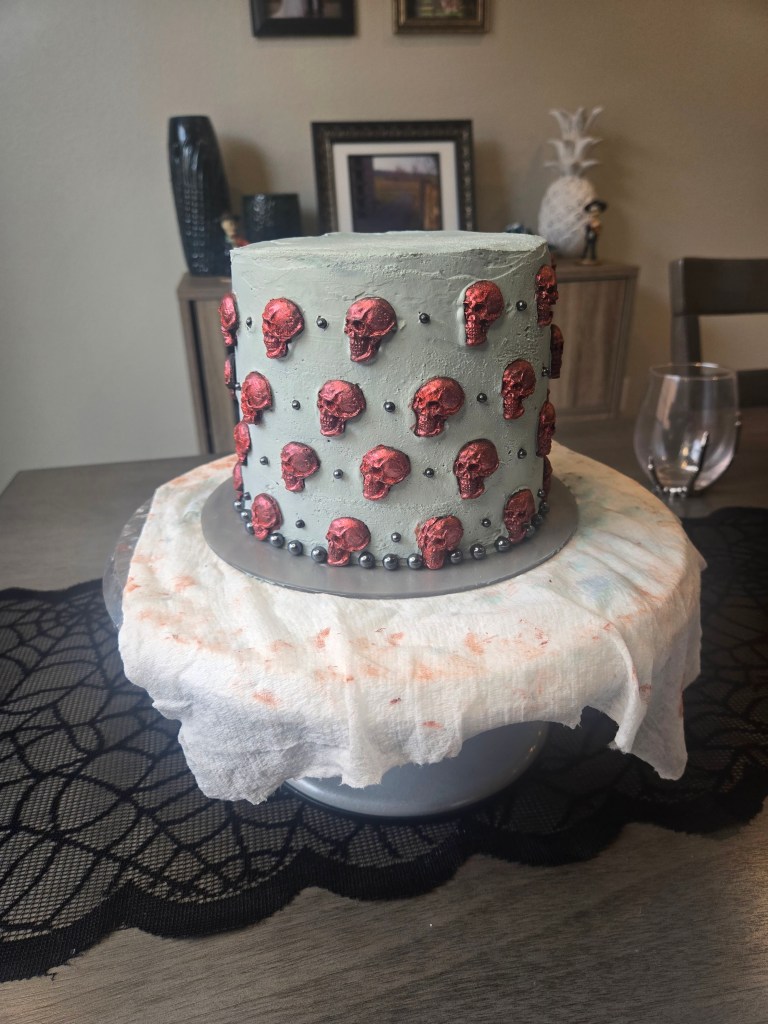
Add large pearls around bottom to make border. 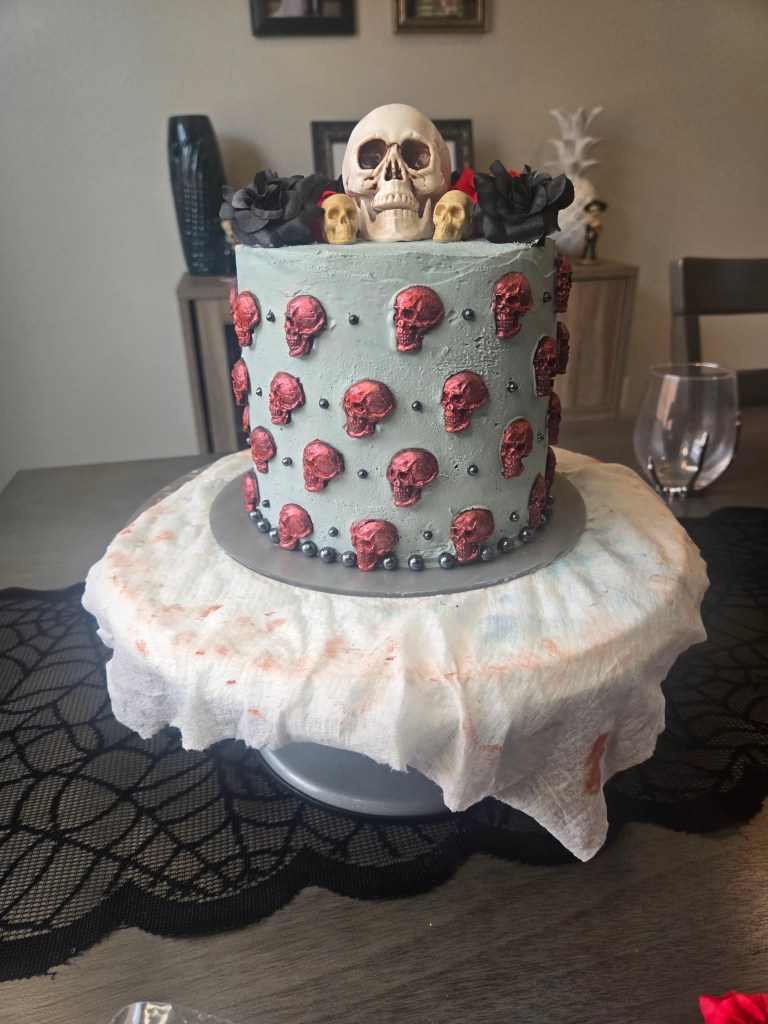
Finish by adding skulls and flowers to the top. 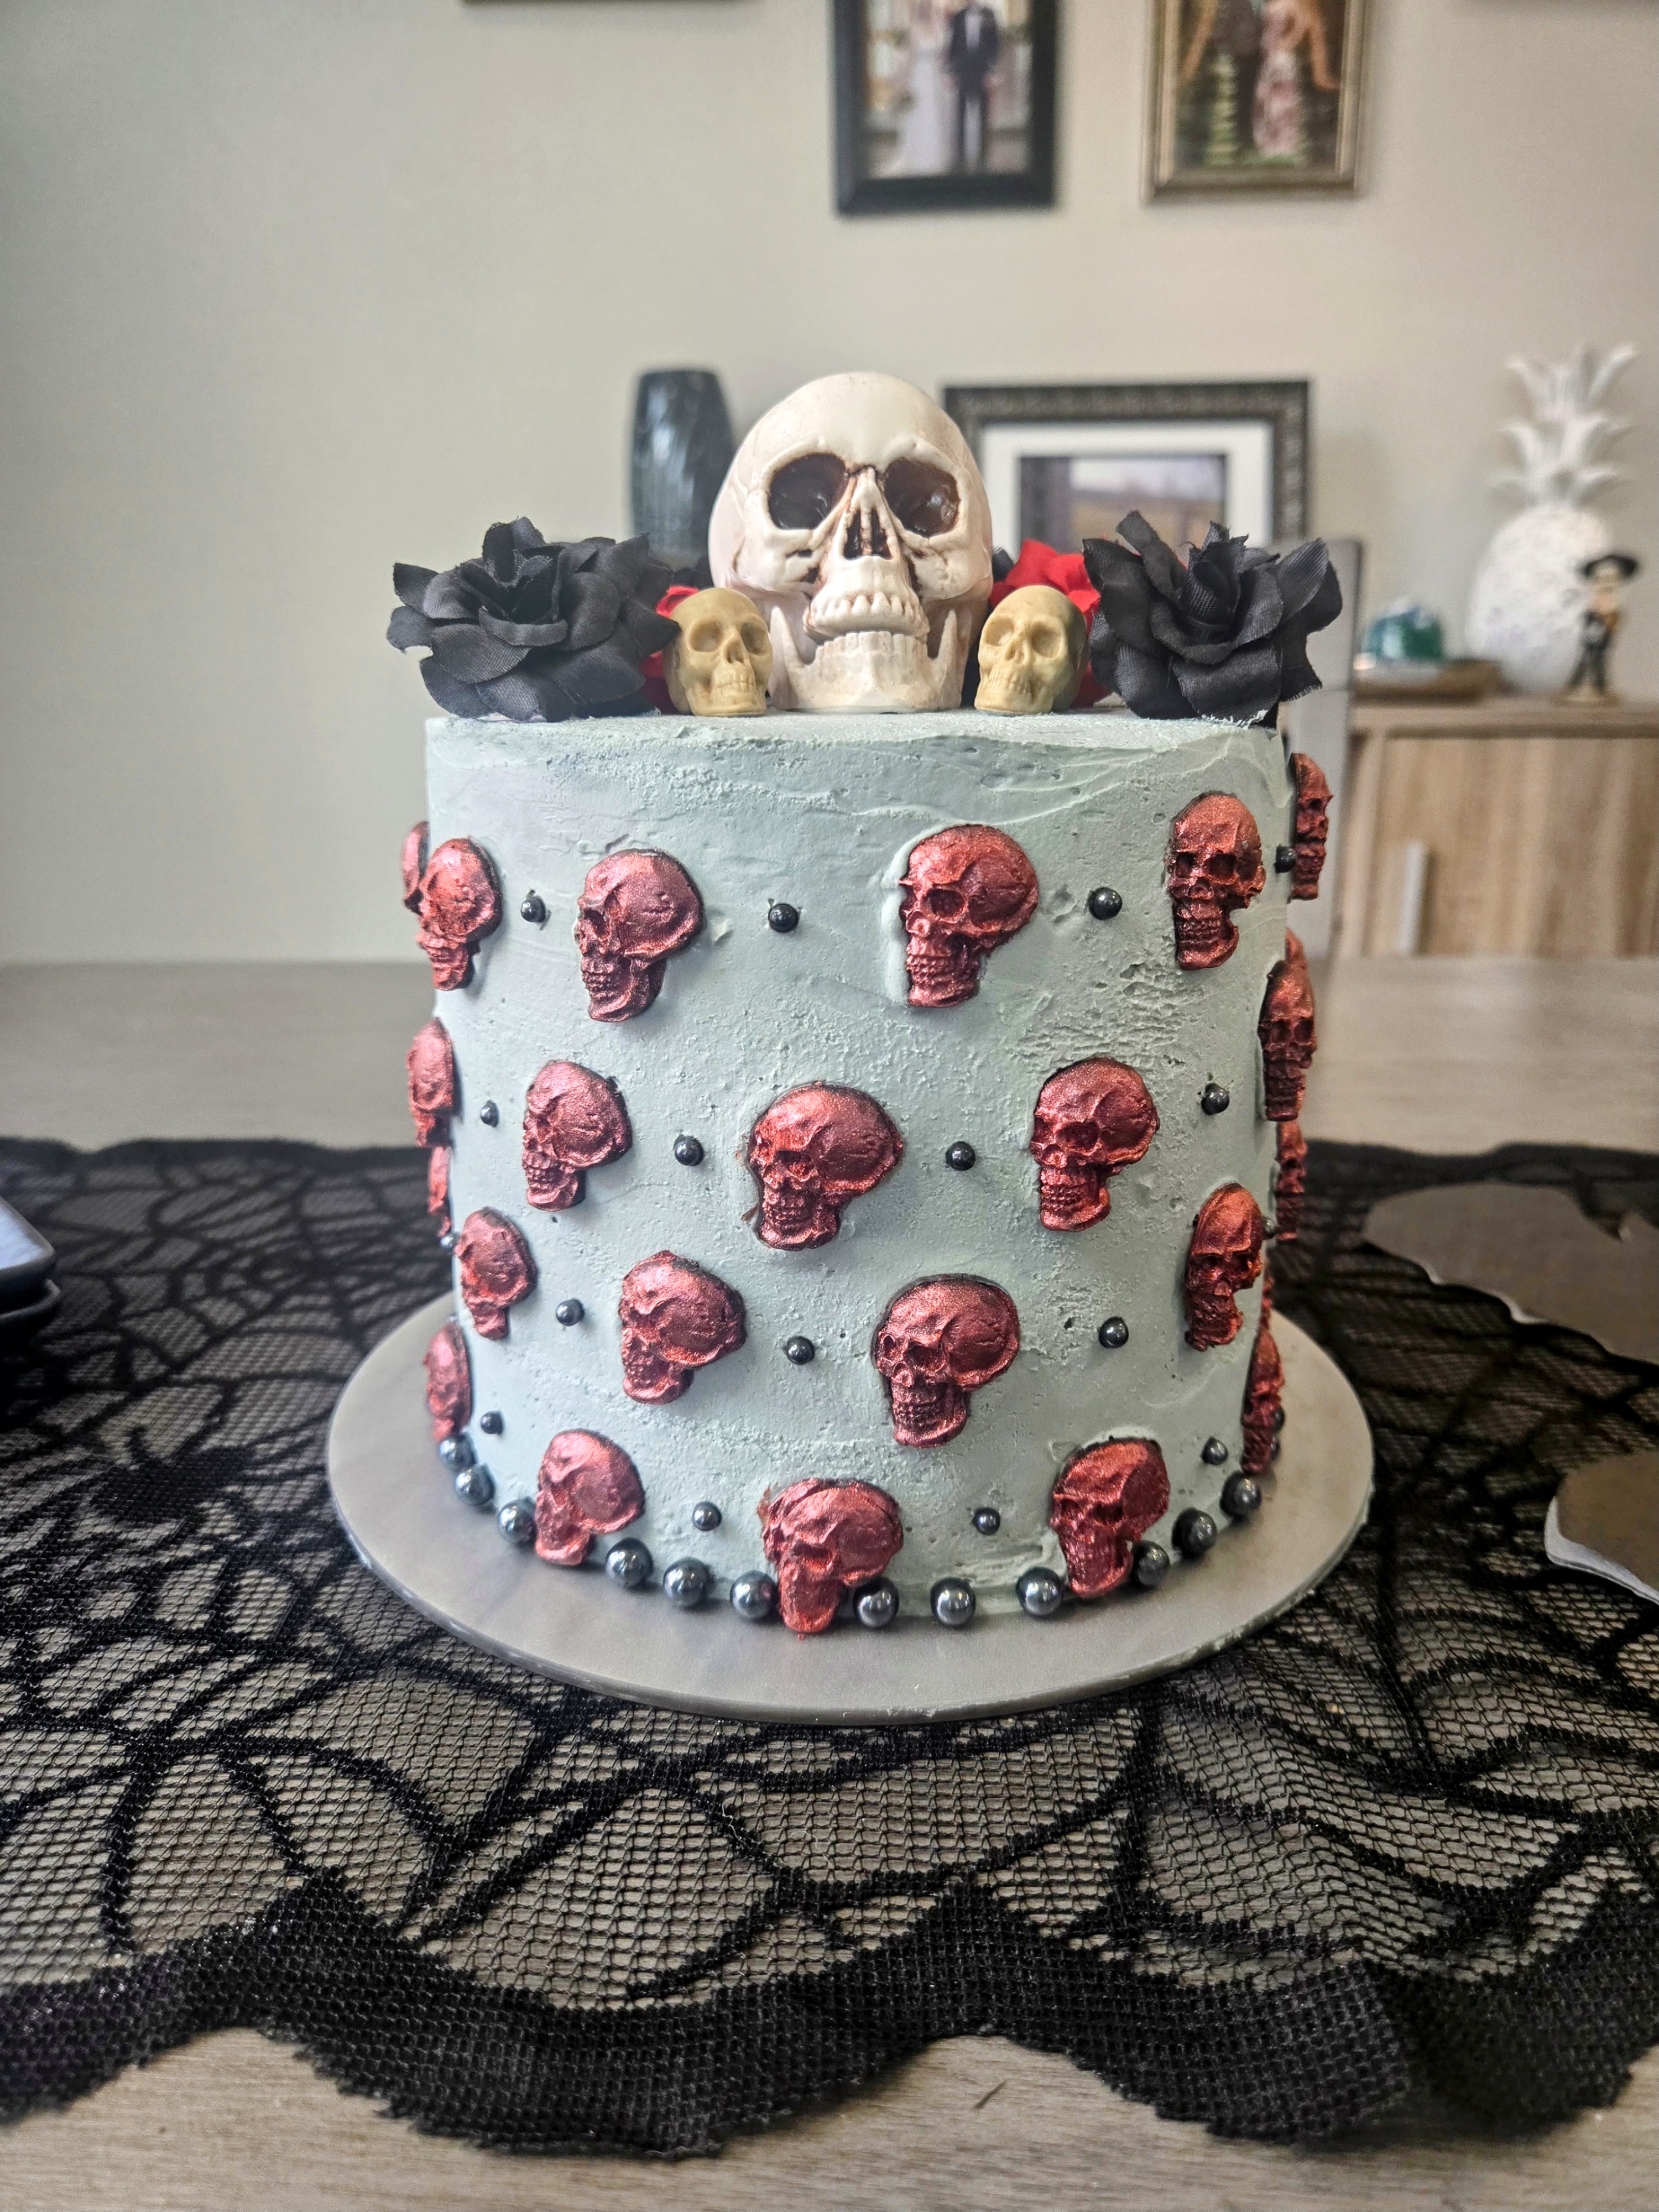
Bone-jour! So many new friends to make (and eat). Don’t be a bonehead…watch this video tutorial to make your own field of screams! Recipe and Instructions
Gluten free vanilla cake with whipped cheesecake-flavored frosting
A sparkly skeleton cake perfect for Halloween celebrations
If not gluten free, use any kind of white or yellow cake mix. Monkfruit can also be replaced with regular powdered sugar for frosting.
Ingredients
CAKE
*1 box of gluten free yellow cake mix (I used King Arthur brand)
*112 grams (1/2 c) fat free Greek yogurt
*2/3 cup fat free or skim milk
*38 g (2 TBS) unsweetened applsauce
*4 eggs
FROSTING
*CHILLED mixing bowl needed (I freeze mine for an hour)
*1 ounce box of sugar free cheesecake pudding mix
*1 quart of cold heavy whipping cream
*1/3 cup of Lakanto powdered monkfruit
*Gray and black gel dye
Directions
- Preheat oven to 350 and grease three 6-inch round pans and add bake even strips.
- Whisk yogurt and applesauce together in a stand mixer on low for 30 seconds before adding half the cake mix.
- Add eggs in, one at a time, on low, before adding milk and remaining batter, mixing on medium-high.
- Pour batter evenly into pans and bake for 30-35 minutes, or until a toothpick comes out mostly clean from the center.
- Allow cakes to cool fully before frosting.
- To make frosting, dump the whipping cream and pudding mix into a stand mixer with a whisk attachment. Whip on medium-high for 3 minutes, or until stiff peaks are forming and frosting sticks to the whisk when the mixer is raised.
- Finally, add in the powdered monkfruit and gel dye, and blend for 30 seconds.
- Place a layer of frosting in between each cake round and frost the entire cake, smoothing as best as you can with an angled spatula and bench scraper.
- To decorate skull cake, follow along with the photo gallery or video tutorial above, and view links to recommended products at the top of the blog.
- Keep cake covered and in the fridge. It is best served at room temp, so remove from fridge 30 minutes before eating. Enjoy!
Nutrition
Macros
12 servings
330 cal/42.9 c/15.5 f/4.6 p per slice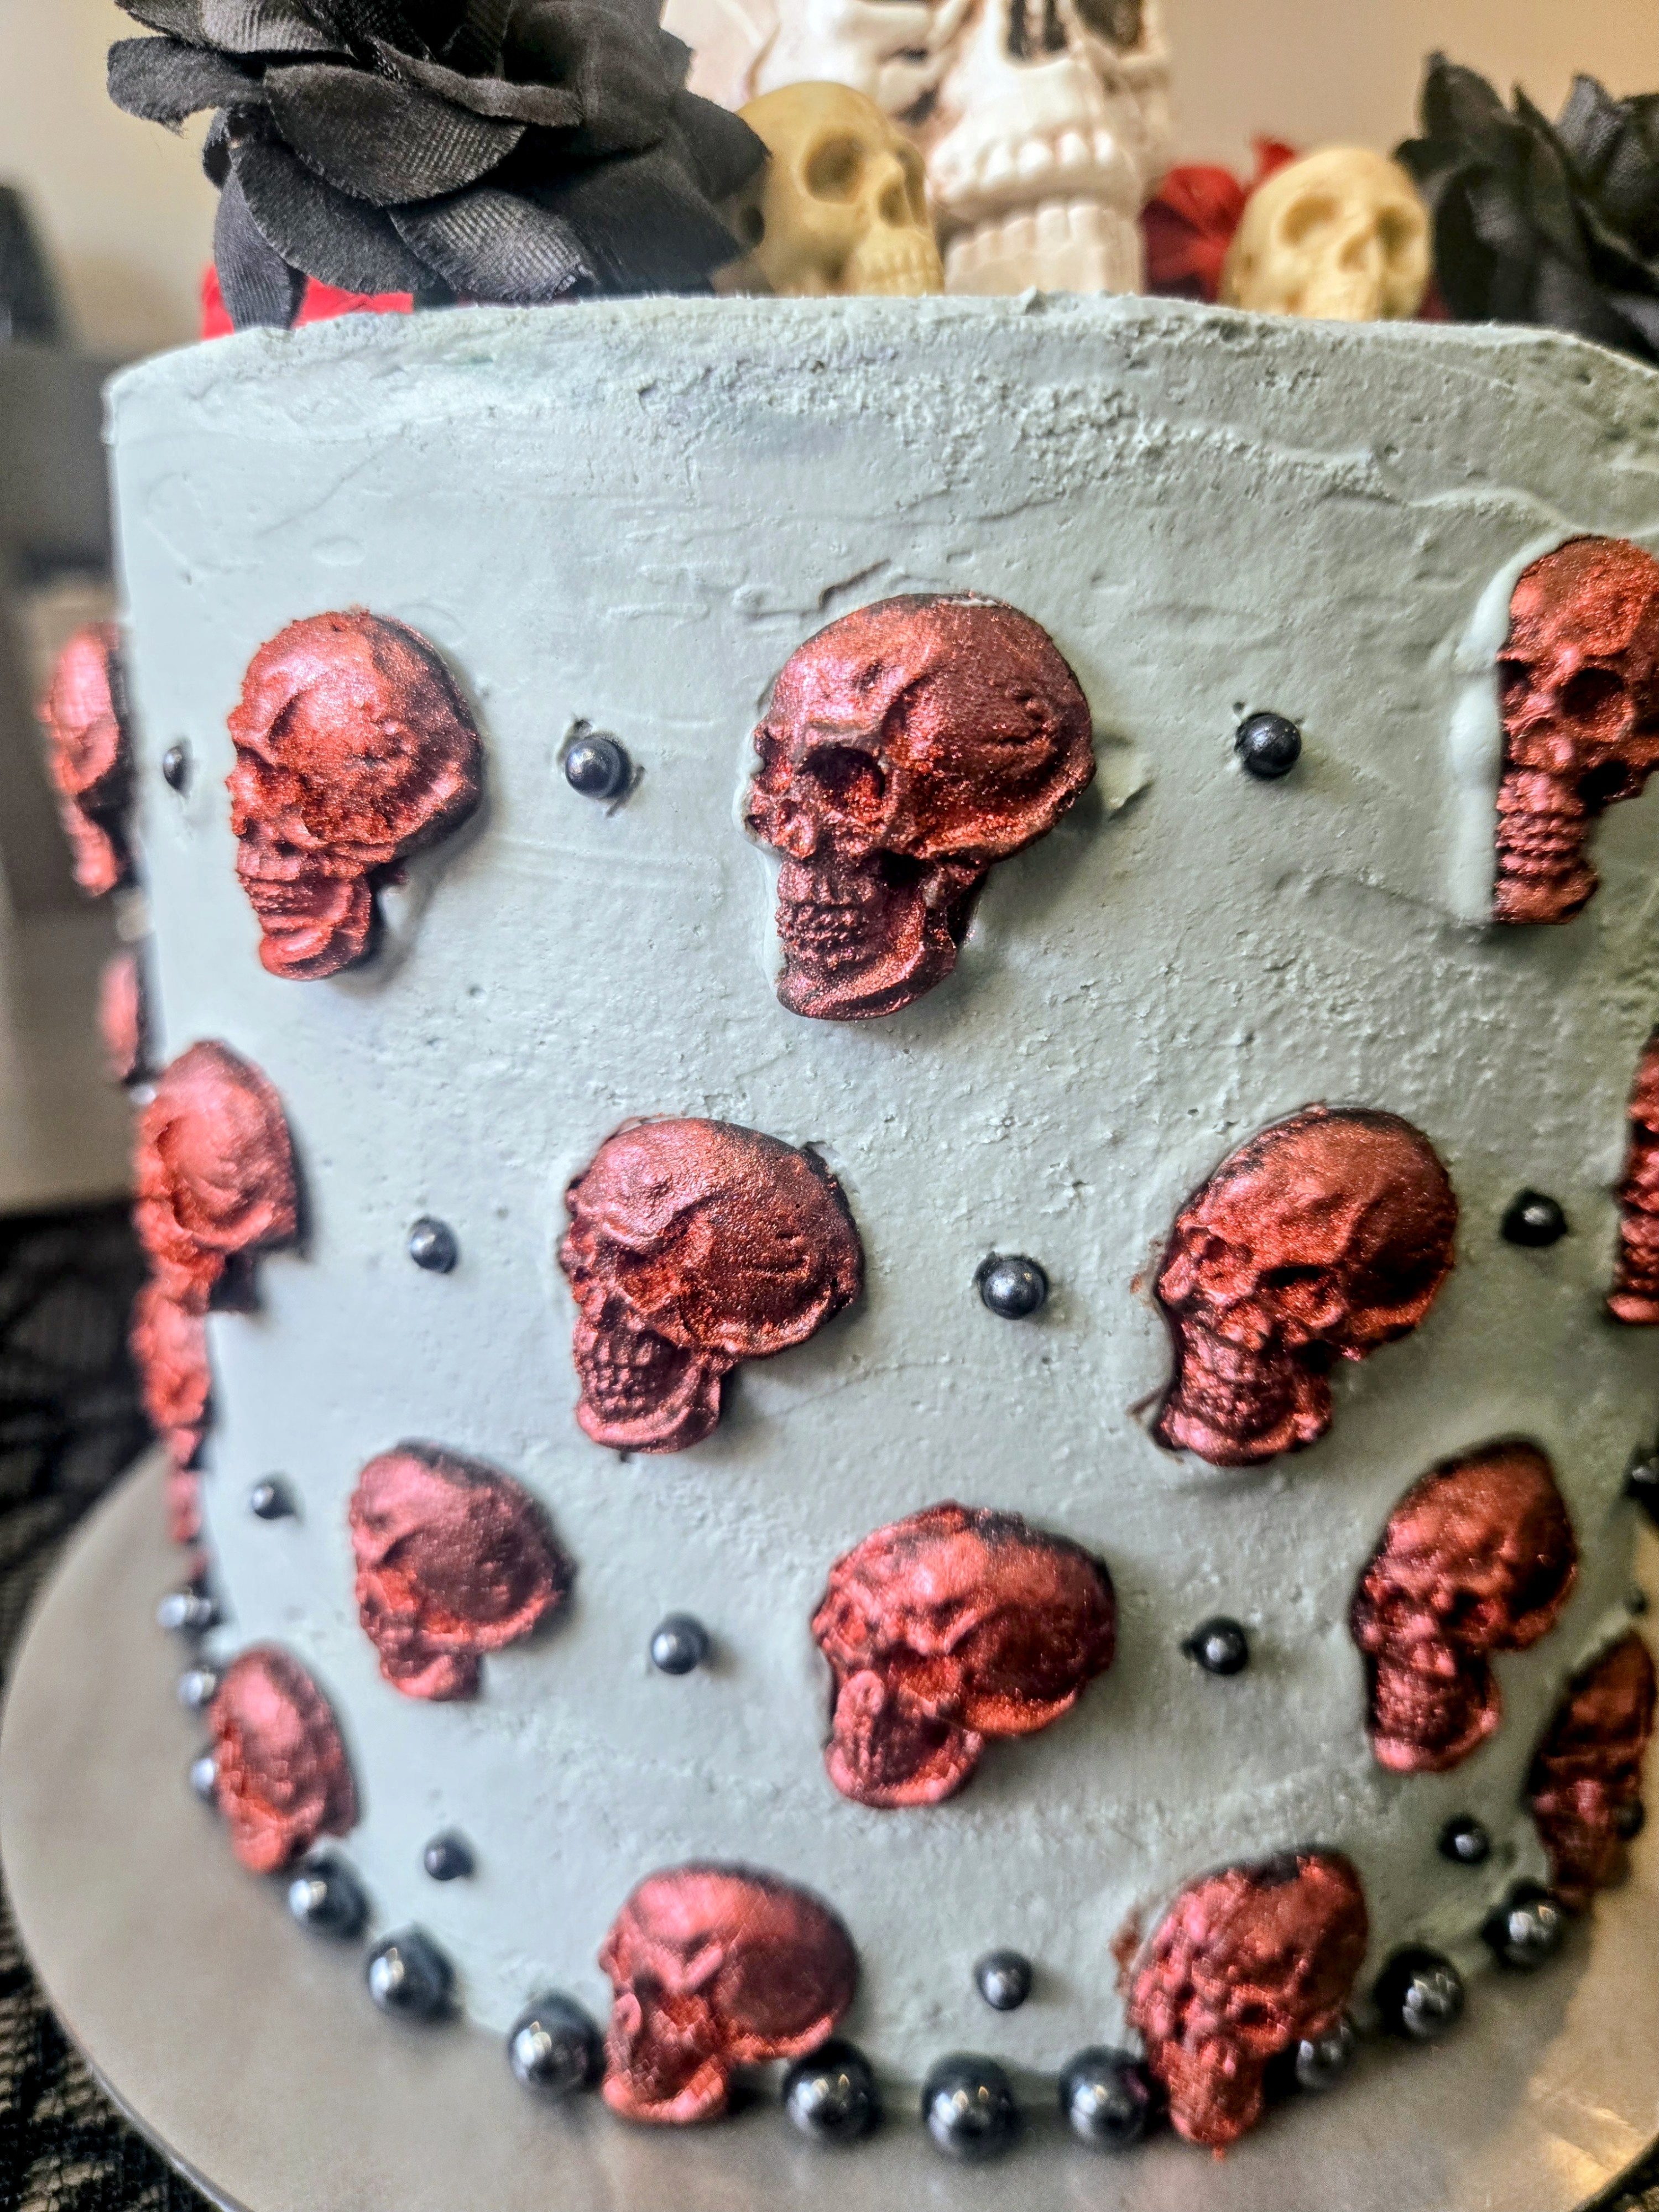
Skulls are the headliners of Halloween. 
Bone-afide, this is one spooktacular bake. - Preheat oven to 350 and grease three 6-inch round pans and add bake even strips.
-
Ice Cream Sundae Mini Cheesecakes
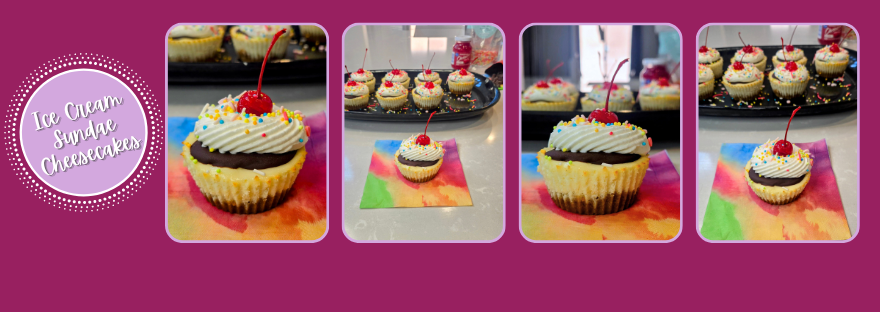
Looking for a Sundae Funday? “YES!,” I scream, you scream, now we’re all screaming, and it’s getting kinda weird…but once we shove some of these ice cream sundae mini cheesecakes in our mouths, the terror can subside, and we can enjoy a dessert with a literal cherry on top because it’s never a rocky road when cheesecake is involved. Lush vanilla cheesecake topped with melted chocolate, whipped cream, cherries, and sprinkles- I’ve got the inside scoop on this tasty dessert mashup up. Can she come up with more terrible ice cream puns? Yes, because I love all ice cream equally–I refuse to play flavorites.
Let’s get straight to the pint, these babies are delish. Ice Cream Sundae Mini Cheesecakes
Lush vanilla cheesecake with all your favorite sundae toppings
Use can your preferred whey-casein blend protein powder; allulose can also be replaced with regular sugar, but this will change the macros. Feel free to use regular graham crackers or shortbread if not gluten free.
Ingredients
CRUST
*96 g gluten free graham crackers (this was about 6 Kinnikinnick grahams)
*30 mL (2 TBS) sugar free syryup
CHEESECAKE
*150 g (5.33 ounces) 1/3 the fat cream cheese at room temp
*150 g (5.33 ounces) nonfat Greek yogurt
*1 tsp vanilla extract
*1/4 tsp almond extract
*20 g Quest vanilla milkshake protein powder
*96 g (1/2 cup) Madhava allulose sweetener
*1 TBS lemon juice (fresh or bottled will work fine!)
*1 egg
TOPPING
*80 g sugar free chocolate chips
*1/4 tsp coconut oil
*60 g sugar free whipped cream
*Fun sprinkles
*8 Maraschino cherries
Directions
- Line muffin tin with 8 silicone cupcake liners and preheat oven to 350.
- In a food processor, process grahams and syrup until sticky.
- Place about 2 tsp of crust into each liner and press to even out (it helps to spray your fingers with cooking spray).
- Bake for 5-6 minutes, until golden and puffy; place in freezer while you make filling.
- Whisk the cream cheese and yogurt on high for 2-3 minutes before adding the vanilla, almond, protein powder, lemon juice, and allulose, mixing until smooth.
- Switch to a paddle attachment and add the egg, blending on low speed until completely mixed in.
- Distribute batter evenly on top of each crust.
- Bake at 350 for 15-20 minutes, until cheesecakes are mostly set.
- Then turn off the oven and crack the door, leaving the cheesecakes in the oven for an additional 5-10 minutes to finish baking (centers should have barely any jiggle).
- Place cheesecakes on a cooling rack (to speed up, place this in the fridge for 1 hour or freezer for 30 minutes).
- Once the cheesecakes are totally cool and set, remove from silicone liners.
- In a bowl, add chocolate chips and coconut oil before melting in microwave for 1 minute.
- Use the back of a spoon or angled spatula to spread melted chocolate on top of cooled cheesecakes.
- Let set and cool in freezer for 5 minutes.
- If using canned whipped cream, spray on top; I used sugar free Cool Whip in a piping bag with a 6B tip into a swirl before topping with sprinkles and a Maraschino cherry.
- Keep leftovers in fridge in an airtight container, and enjoy!
Nutrition
Macros
8 servings
205 cal/10.1 f/22.1 c/6.4 p per cheesecake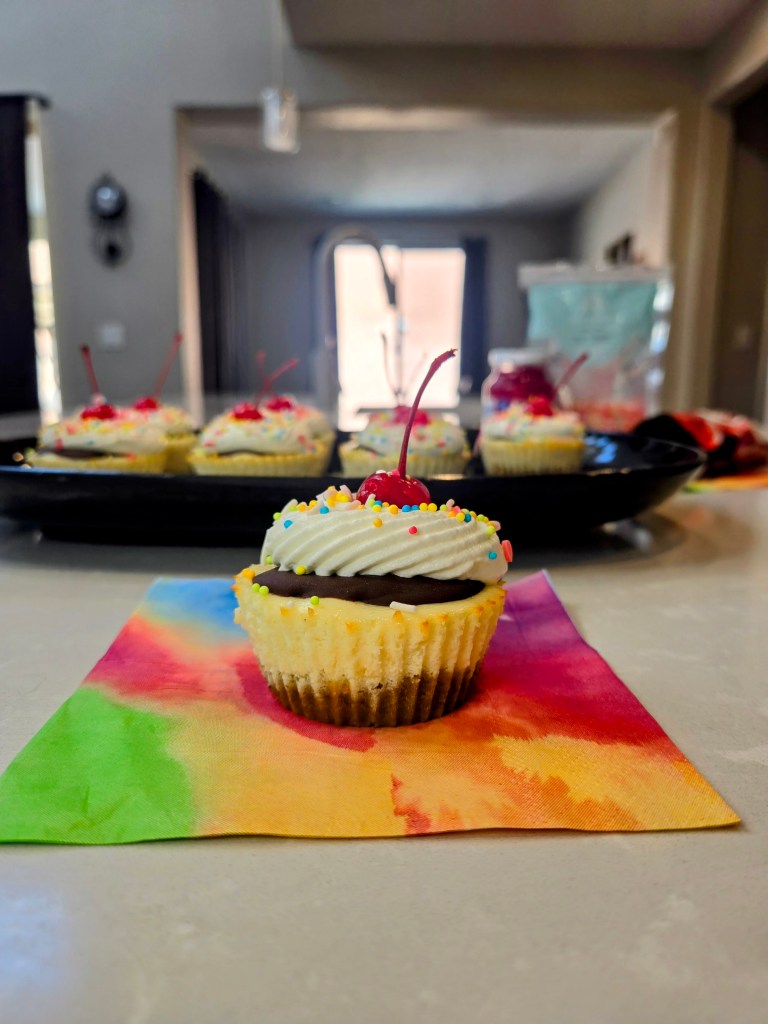
The only Sundae Driver I’m looking for… 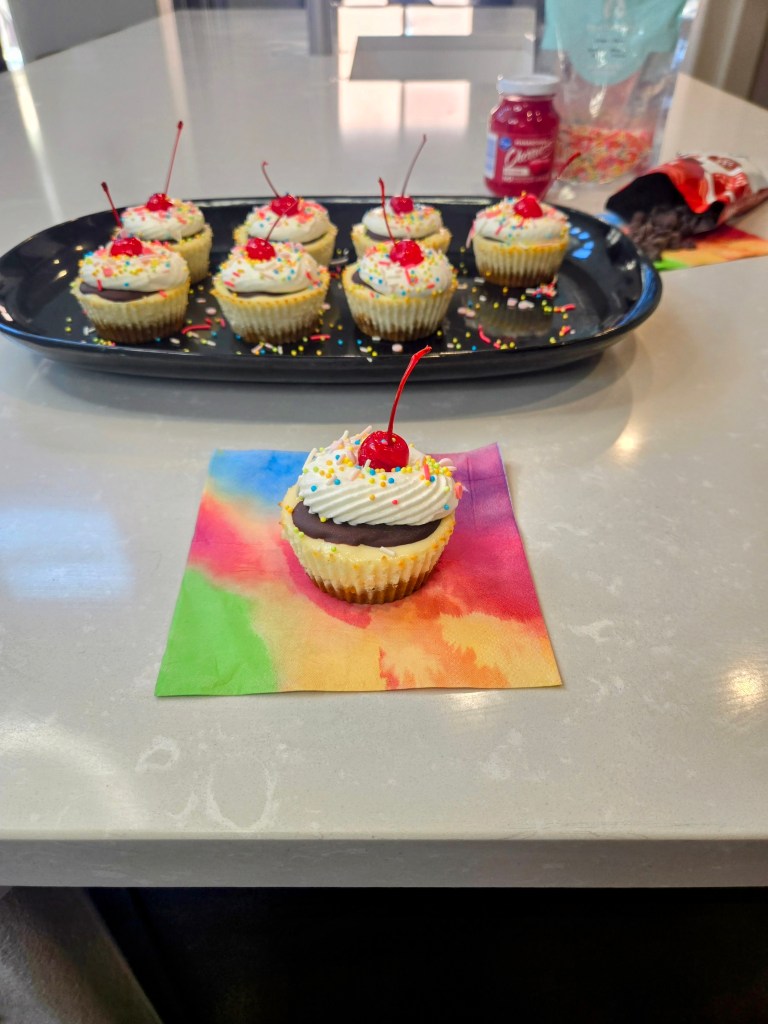
This is the best way to chill out. - Line muffin tin with 8 silicone cupcake liners and preheat oven to 350.
-
Cosmic Brownie Mini Cheesecakes

As a Millennial, it’s my job to remind you that things were definitely better in the 90s…from the music to the clothes to the solar system (we’ll never forget you, Pluto)..but oh my, the food…I could write a novel about my love of 90s food: OG Pizza Hut with the salad bar (those red cups!), Shark Bite Gummies (more specifically, the blue ones), Dunkaroos (don’t even get me started). But my undying love and largest piece of my foodie heart will always belong to Cosmic Brownies. Given I’m an elder millennial with a whole host of food sensitivities now (in hindsight, whatever they colored those blue gummy sharks with might be to blame), it’s up to me to remake Cosmic Brownies in as many gluten free forms as I can, so up next: let’s give a *stellar* welcome to these Cosmic Brownie mini cheesecakes!
I can confirm they’re out of this world… Blue Spirulina Mini Protein Cheesecakes
Cosmic Brownie mini cheesecakes with 10g protein each
Use can your preferred whey-casein blend protein powder; allulose can also be replaced with regular sugar, but this will change the macros. These are crustless, but you can drop an Oreo in the bottom of each cupcake liner if you want an easy crust.
Ingredients
CHEESECAKE
*150 g (5.33 ounces) 1/3 the fat cream cheese at room temp
*150 g (5.33 ounces) nonfat Greek yogurt
*1 egg
*1 tsp vanilla extract
*2 TBS black cocoa powder
*20 g Quest chocolate milkshake protein powder
*48 g (1/4 cup) Madhava allulose sweetener
*1 TBS fat free or skim milk
*1 TBS lemon juice (fresh or bottled will work fine!)
TOPPING
*30 g chocolate protein powder
*1 TBS black cocoa
*30 g monkfruit
*1/4 cup fat free milk or water
*Rainbow chips (I used 24 g)
Directions
- Line muffin tin with 8 silicone cupcake liners and preheat oven to 350.
- Whisk the cream cheese and yogurt on high for 2-3 minutes before adding the vanilla, black cocoa, protein powder, lemon juice, and allulose, mixing until smooth.
- Switch to a paddle attachment and add the egg, blending on low speed until completely mixed in.
- Distribute batter evenly on top of each crust.
- Bake at 350 for 15 minutes, until cheesecakes are mostly set.
- Then turn off the oven and crack the door, leaving the cheesecakes in the oven for an additional 5-10 minutes to finish baking (centers should have barely any jiggle).
- Place cheesecakes on a cooling rack (to speed up, place this in the fridge for 1 hour or freezer for 30 minutes).
- Once the cheesecakes are totally cool and set, remove from silicone liners.
- In a bowl, add all frosting ingredients and mix well.
- Use the back of a spoon or angled spatula to spread frosting on top of cooled cheesecakes.
- Top this with as many rainbow chips as desired.
- Keep leftovers in fridge in an airtight container, and enjoy!
Nutrition
Macros
8 servings
121 cal/5.8 f/7.3 c/9.8 p per cheesecake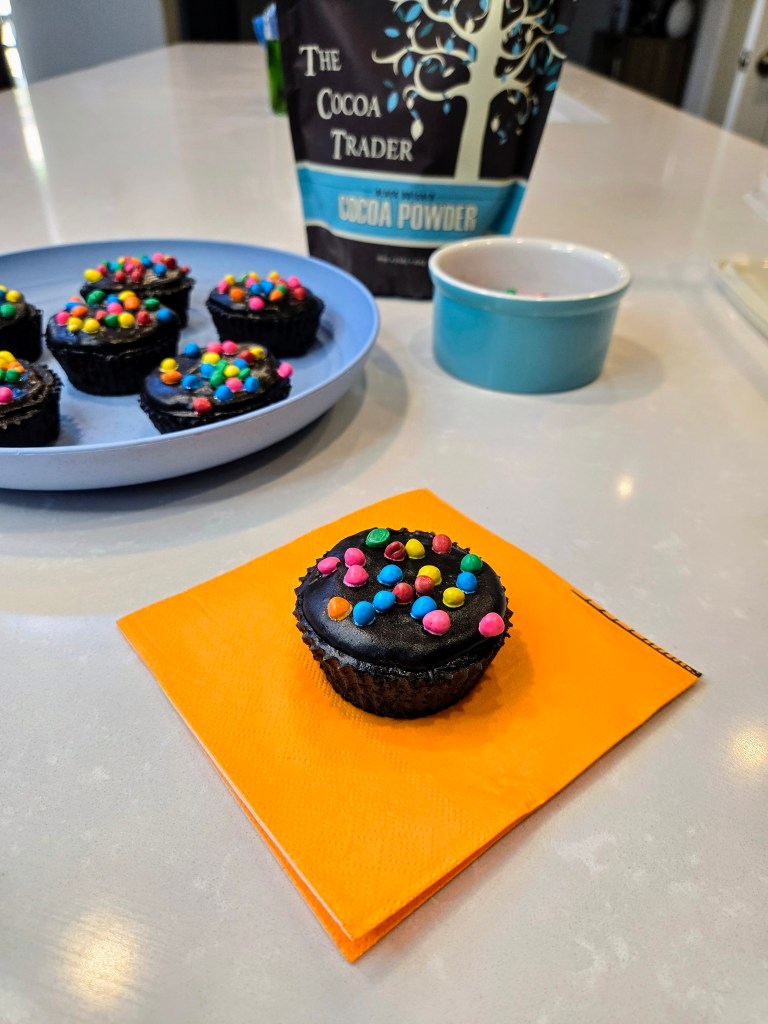
~Brownie~ points to you for putting up with my “back in my day” rant… 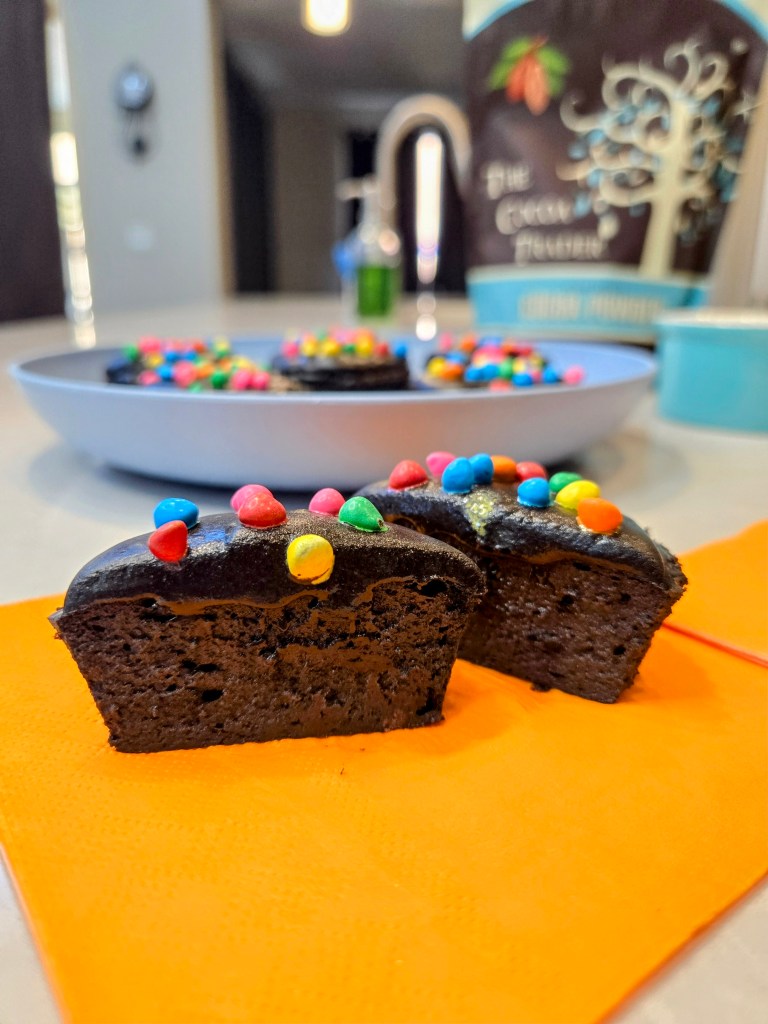
They’re cosmically delicious! - Line muffin tin with 8 silicone cupcake liners and preheat oven to 350.
-
Prickly Pear Cupcakes with Piping Tutorial
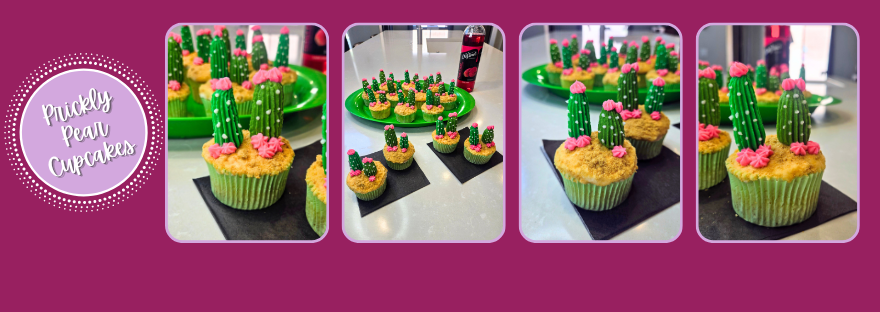
I could never desert my love of dessert, or the desert for that matter…isn’t English fun? I am simply obsessed with all things prickly pear-flavored, including beer (miss that, dang you gluten), prickly pear margs (literally life changing), and now, cupcakes. I’m not sure why it took me so long to try prickly pear syrup in something other than a refreshing adult beverage considering I, too, am very prickly on the outside, and relatively sweet on the inside, much like a prickly pear…have we moved on from spirit animals to spirit plants yet? Because if so, I am 100% picking the cactus.
They really prickle my fancy. These spiky guys are pricktacular when it comes to flavor. Nice and sweet but not overpowering, and really, quite sinchy to decorate. I have a video below as well as a photo gallery, so you, too, can make the sharpest looking cupcakes ever (literally). At only 192 calories a cupcake, these are more beautiful than a mirage in the dessert when it comes to macros. Read on to learn how to make your own and avoid a prickly no-dessert situation.
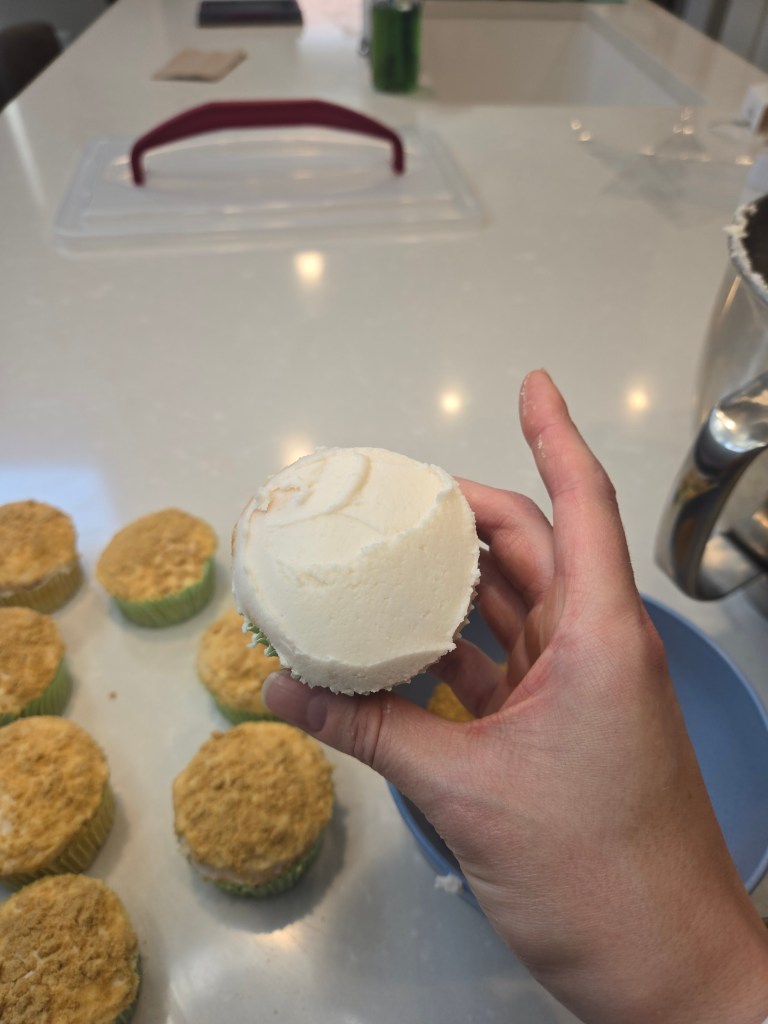
Star with plain frosting and frost the top of each cooled cupcake. 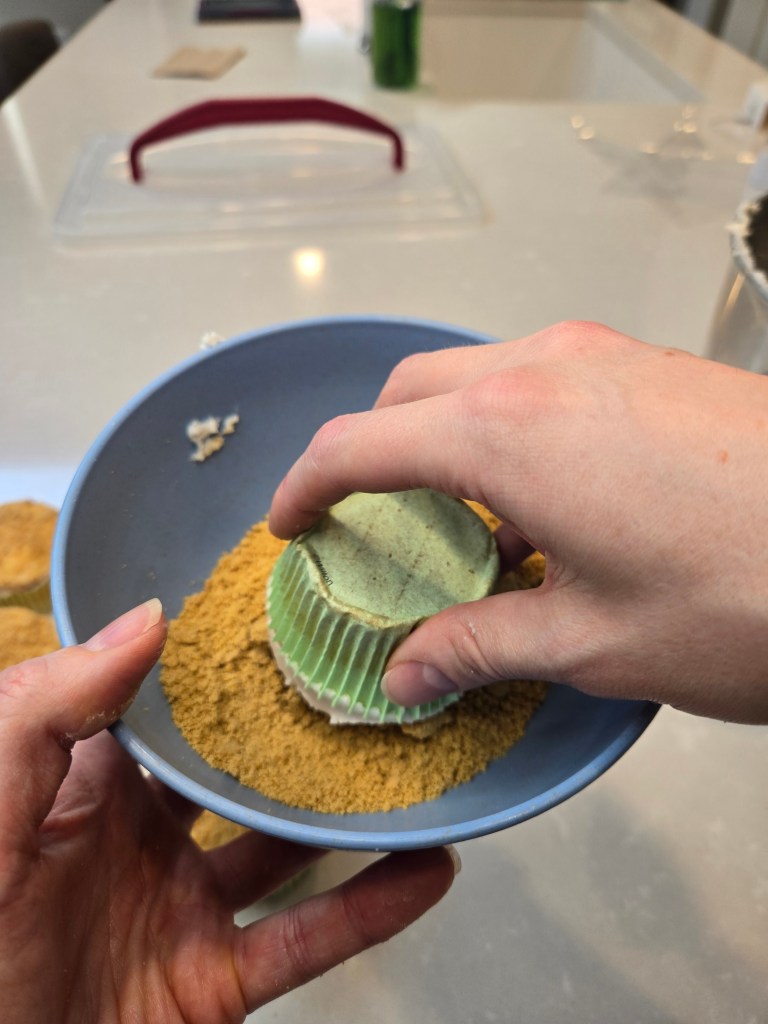
Crush graham crackers and put into a bowl. Gently swirl the top of each cupcake in the crumbs. 
Much like real sand, this will get everywhere. 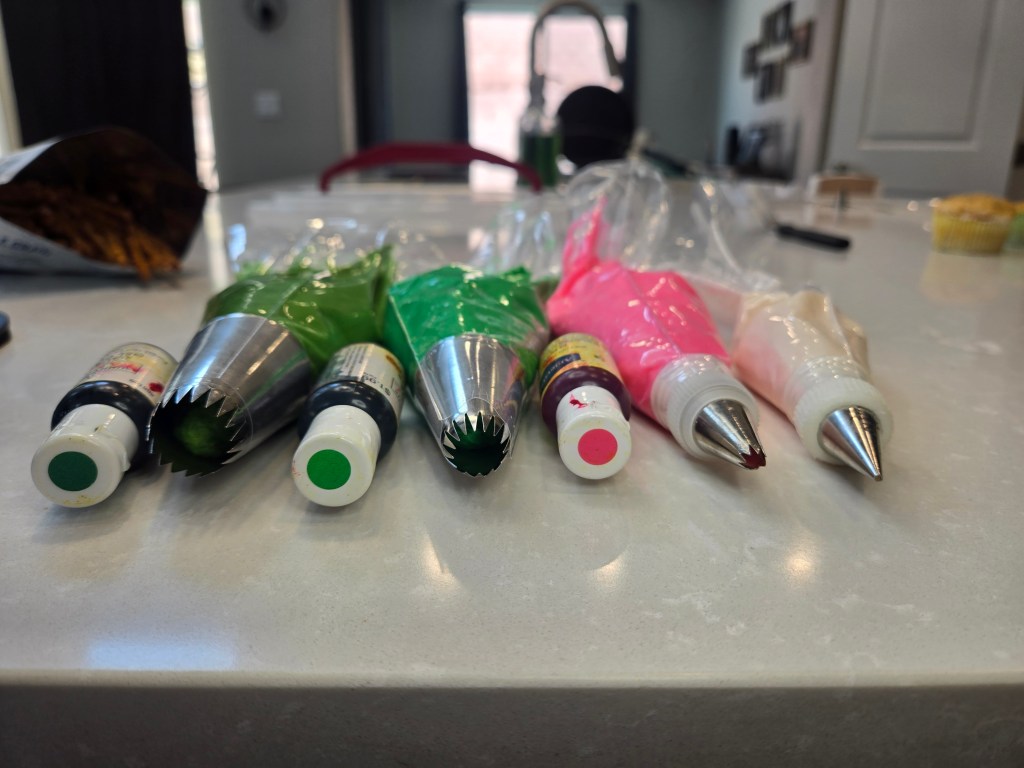
You’ll need 6B, 8B or ATECO 869, #2, and #18 tips as well as light and dark green and hot pink gel dye. 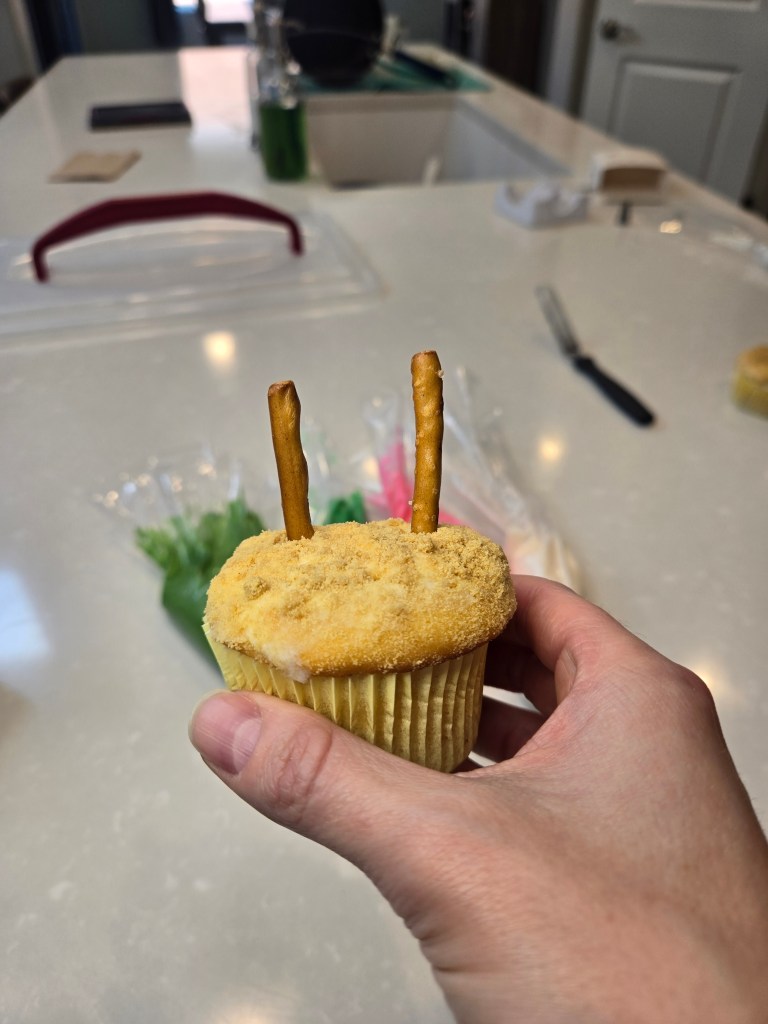
Place two pretzel rods at varying heights and spaces in each cupcake. 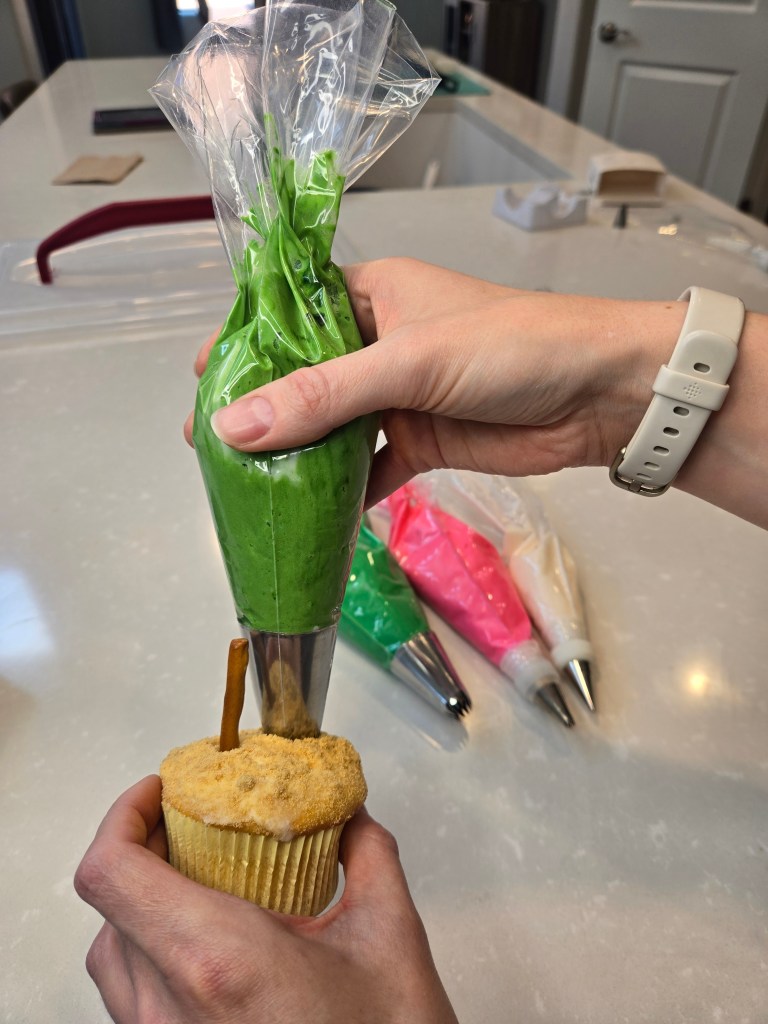
Dye some frosting dark green and use an 8B or ATECO 869 tip positioned on 1 pretzel rod. 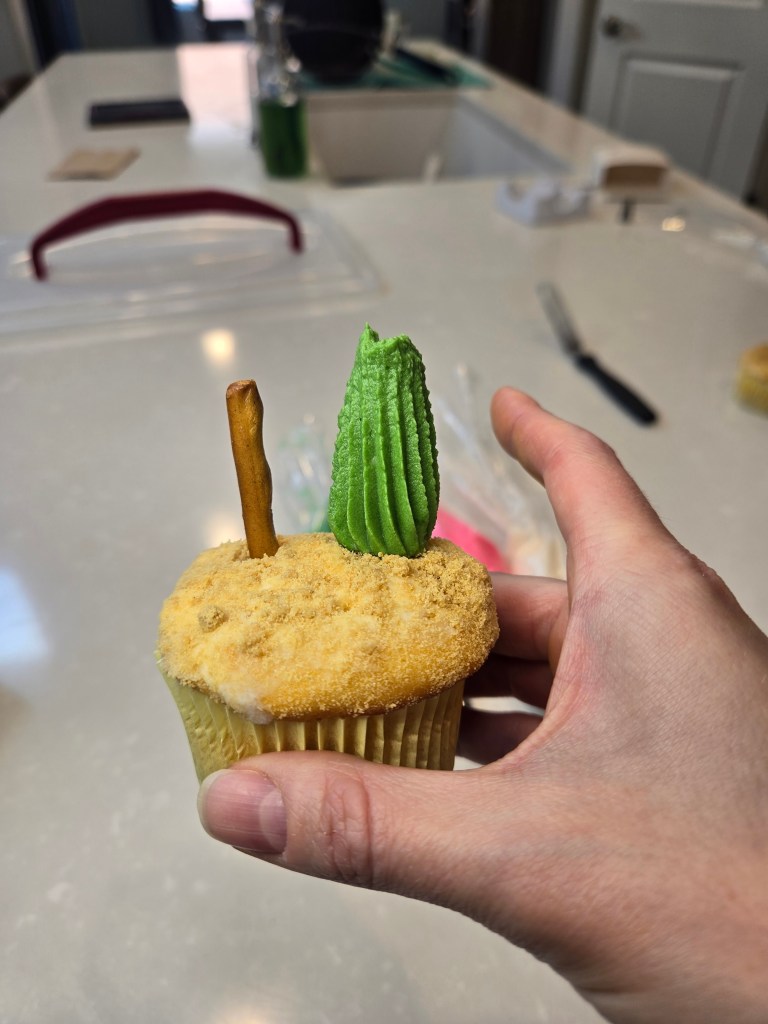
Slowly pipe up and away until you’ve reached the top of the pretzel rod. 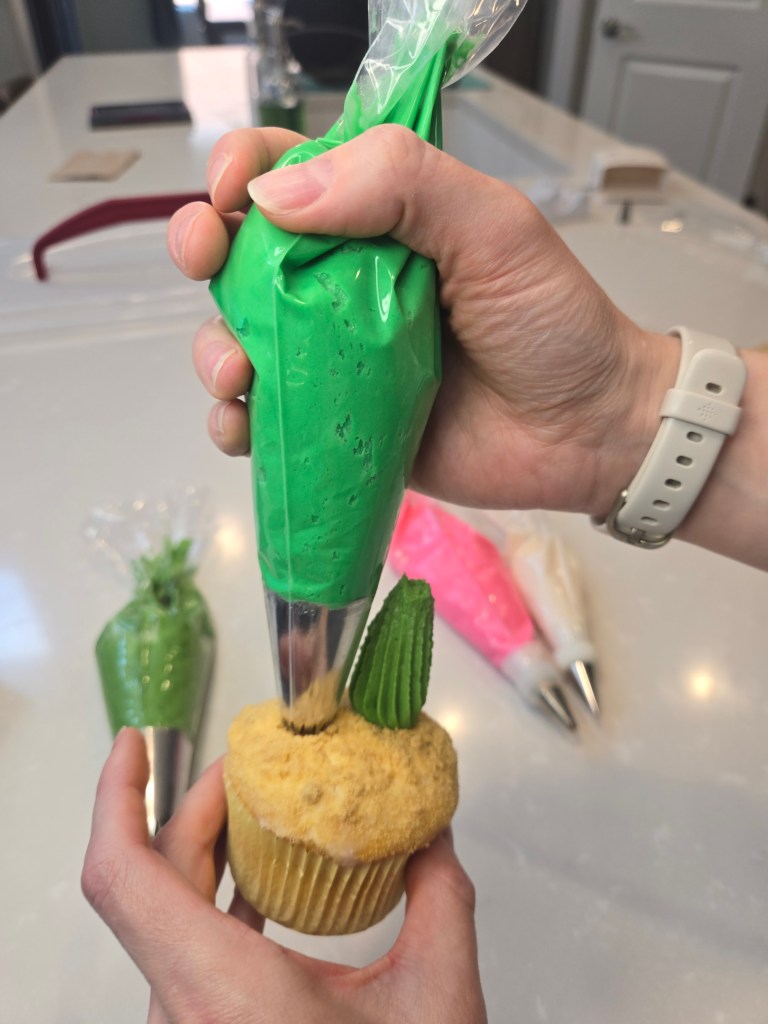
Repeat with lighter green frosting and the 6B tip on the second pretzel rod. 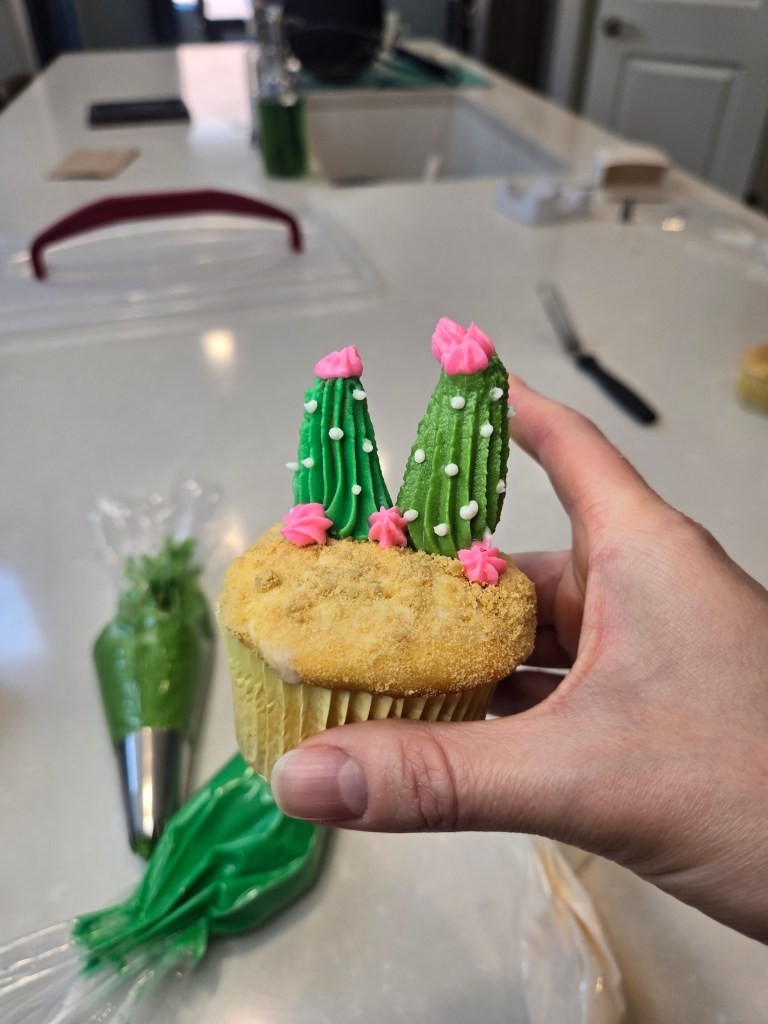
To finish, use a #2 tip to dot white spikes and a #18 tip with hot pink dye to add flowers. 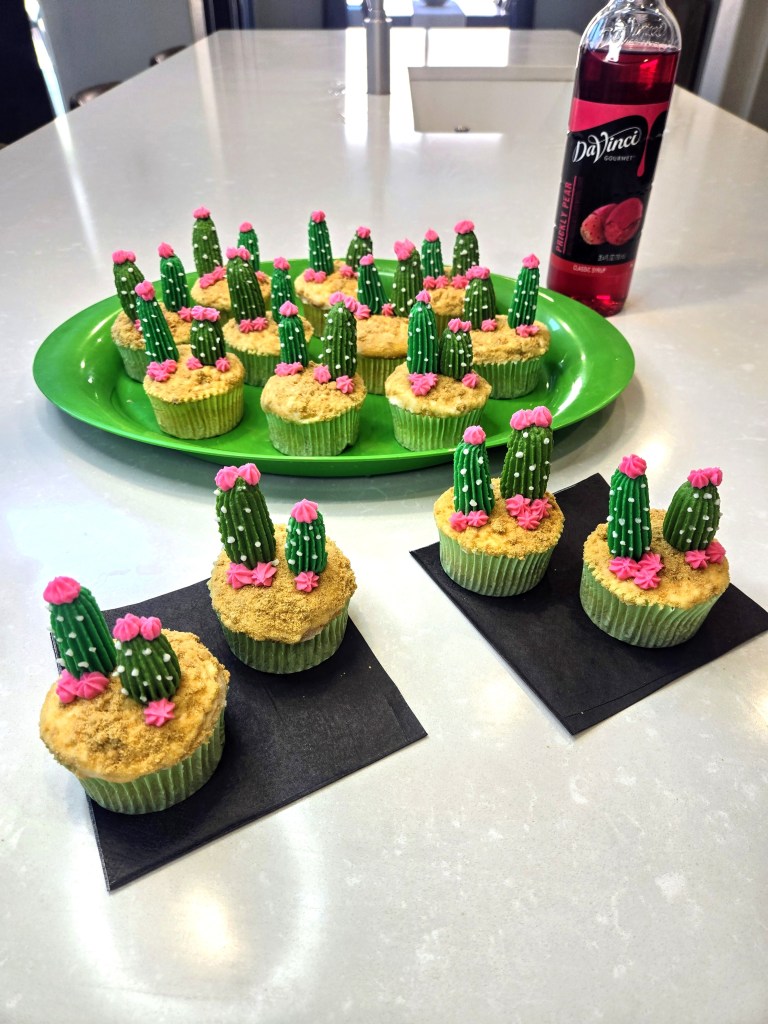
Vary up the placement of the flowers to make each cupcake unique! Check out the video for a play-by-play of each step. Cactus makes perfect, after all. Recipe and Instructions
Gluten free prickly pear cupcakes with prickly pear buttercream
A sweet cupcake with creamy prickly pear frosting
If not gluten free, use any kind of white or yellow cake mix. Monkfruit can also be replaced with regular powdered sugar for frosting.
Ingredients
CAKE
*1 box of gluten free yellow cake mix (I used Whole Foods brand)
*111 grams (1/2 c) unsweetened applesauce or fat free Greek yogurt
*1/2 cup fat free or skim milk
*1/4 cup (60 mL) prickly pear syrup
*2 eggs
FROSTING
*224 grams (8 ounces) of 1/3 the fat cream cheese, softened
*112 grams (1/2 cup) of butter, softened
*16 oz Lakanto powdered monkfruit
*1/4 tsp citric acid
*2 TBS (30 mL) prickly pear syrup
*2 TBS milk
*Leaf green, forest green, and hot pink gel dye
*6B, 8B or ATECO 869, #2, and #18 tips
*Crushed gluten free graham crackers (I used 4 sheets/~60 g)
*Gluten free pretzel rods, 2 for each cupcake
Directions
- Preheat oven to 350 and place cupcake liners in muffin tin.
- Whisk cake ingredients together in a stand mixer on low for 30 seconds before switching to medium-high for two minutes.
- Fill each cupcake liner 3/4 full.
- Bake for 18-20 minutes, and allow cupcakes to cool fully before frosting.
- To make frosting, whisk cream cheese and butter for 3 minutes before adding in half the powdered monkfruit, extract, citric acid, prickly pear syrup, and milk.
- Add in remaining monkfruit mix fully.
- Take a small amount of frosting out of the mixing bowl and put into a medium bowl; dye this pink; take a tiny bit of plain white frosting and set aside; divide remaining frosting and dye one bowl forest green and the other leaf green.
- In one bag with a 8B or ATECO 869 tip, place the darkest green frosting.
- In another bag with the 6B tip, place the lighter green frosting.
- In another bag, place the plain white frosting with a #2 tip.
- In the final bag, use the #18 tip with hot pink frosting.
- To pipe cacti, follow along with the photo gallery or video tutorial above.
- Keep cupcakes covered and in the fridge. They are best served at room temp, so remove from fridge 30 minutes before eating. Enjoy!
Nutrition
Macros
18 servings
192 cal/31 c/6.3 f/2.7 p per cupcake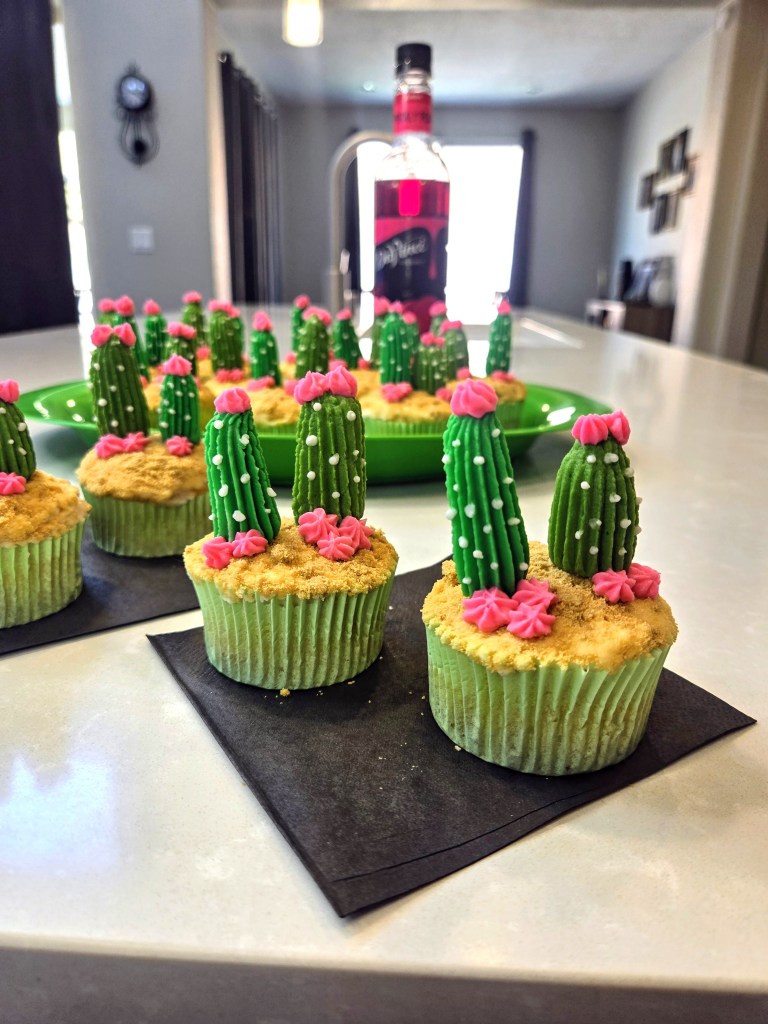
Let’s stick together… 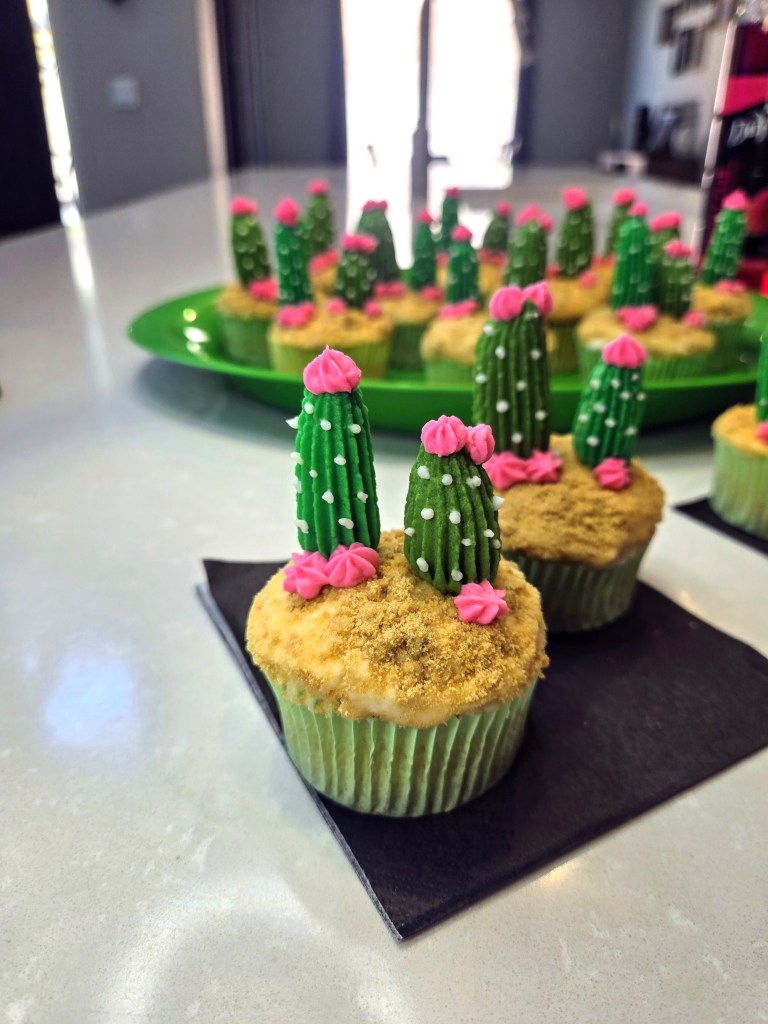
Looking sharp, my lil’ delicous babies! - Preheat oven to 350 and place cupcake liners in muffin tin.

Healthy-ish cake, cupcakes, pie, and cheesecake recipes and decorating tips
