-
Baklava Bundt Cake
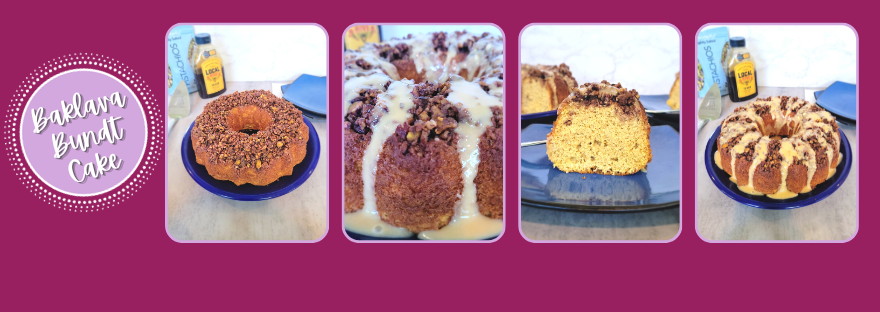
Baklava is a dessert I sincerely miss since entering my gluten free journey the last 4 years. I’ve looked high and low (and even at Trader Joe’s), for gluten free phyllo dough, but no such luck. I also don’t miss anything enough to try to make gluten free phyllo dough from scratch considering I can’t even master a gluten free pie crust, which is supposedly ~easy~, but somehow still impossible for me to master. SO, I decided to start making a pistachio-walnut-spiced-sugary baklava topping, and just throw it on top of everything. The first iteration was baklava baked oats. And oh those baklava oats walked so this bakalava bundt cake (topped with a honey glaze) could run.
Dessert fit for a queen (bee). Recipe and Instructions
Baklava bundt cake
Spiced, gluten free bundt cake topped with baklava filling and honey glaze
If not gluten free, use any kind of yellow or spice cake mix. Greek yogurt can be replaced with applesauce or oil, and monkfruit can also be replaced with regular powdered sugar.
Ingredients
CAKE
*1 box of gluten free yellow cake mix (I like Pillsbury)
*1/3 cup (75 g) fat free Greek yogurt
*1 cup + 2 TBS fat free or skim milk
*3 eggs
*1 tsp cinnamon
*2 tsp cardamom BAKLAVA TOPPING
*1/4 cup (56 g) light butter, melted
*1/2 cup (60 grams) walnuts, chopped
*1/2 cup (56 g) pistachios, shelled and chopped
*1/3 cup (64 g) golden monkfruit or brown sugar
*1 TBS maple syrup
*1/2 tsp cinnamon
HONEY GLAZE
*1/4 cup (84 g) honey
*1 tsp lemon juice
*1 TBS water
*1 cup (120 g) Lakanto powdered monkfruit
Directions
- Spray a bundt pan with cooking spray and use a brush to ensure oil is in every crevice.
- Preheat oven to 350.
- Mix all the topping ingredients together before pouring into the bottom of the bundt pan and evenly spreading.
- In a stand mixer, mix all cake ingredients together on medium high for 2 minutes.
- Carefully pour cake batter on top of the baklava topping and smooth out.
- Bake for 30-35 minutes, until a skewer comes cleanly out of the cake (bake longer if needed).
- Remove from the oven and place the bundt pan on a cooling rack for 20 minutes.
- Run an angled spatula or butter knife around the edges and center of the pan to release the cake.
- Place a large plate, upside down, on top of the bundt pan.
- Carefully flip this over so the cake is tipped onto the plate; I leave the pan on top of the cake for 5-10 minutes to allow it to gently release.
- Some baklava mix may stick to the pan, but just use a spoon to scoop it out and place it on top of the cake.
- Let the cake cool fully while mixing all glaze ingredients together.
- Use a spoon to drizzle glaze on top of the cooled cake before serving.
- 23. Keep leftover cake covered in the fridge; remove 45 minutes before serving to soften.
Nutrition
Macros
12 servings
288 cal/10.5 f/42.1 c/6.3 p per slice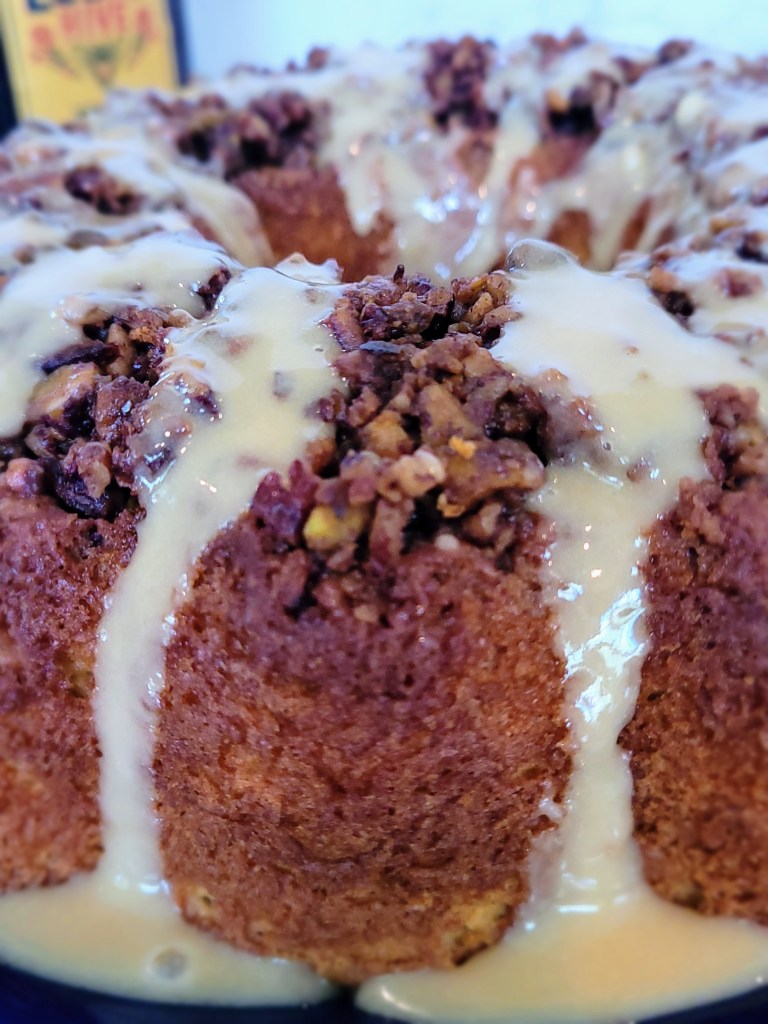
I’d do honey-thing for another slice of this cake. 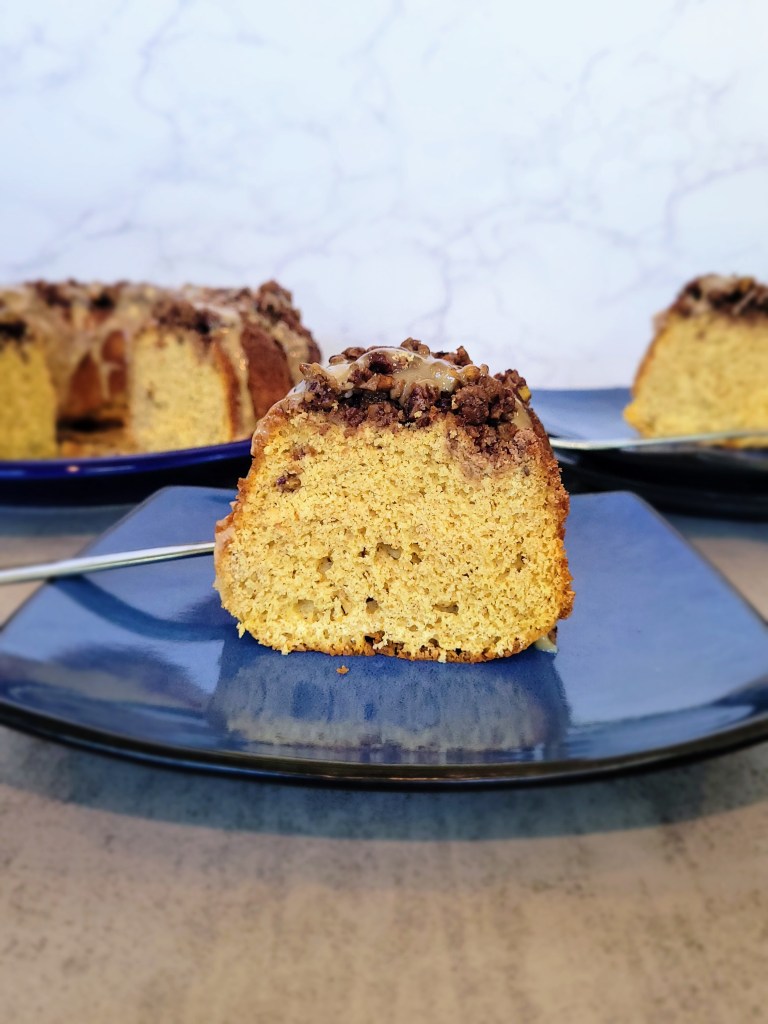
Shell-ebrating the end of summer with pistachios, walnuts, and all the right spices. - Spray a bundt pan with cooking spray and use a brush to ensure oil is in every crevice.
-
Aperol Spritz Cheesecake
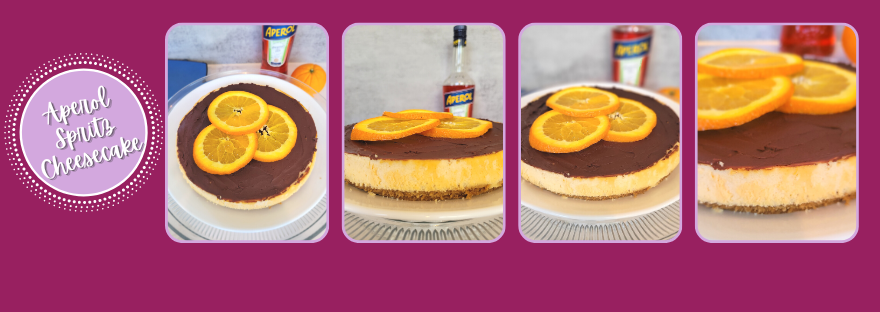
The Aperol Spritz is my second favorite summertime cocktail (Palomas are firmly #1), and since I’m not a big drinker but I am a huge sweet tooth, I decided this cocktail needed to get the cheesecake treatment. Happy to report adding Aperol and Prosecco to a cheesecake is 100% something you need to try. It’s a light, fluffy, citrusy cheesecake that also happens to be adorned with a booze-laden chocolate ganache on top- because go big or go home when you’re trying to send off summer in favor of the best season ever.
This cheesecake is the Aperol of my eye. Recipe and Instructions
Aperol Spritz Cheesecake
Light, citrusy cheesecake on a graham crust topped with Aperol chocolate ganache.
If not gluten free, use any kind of graham cracker crumbs for the crust. Greek yogurt can be replaced with an additional 8 ounces of cream cheese, and Madhava can also be replaced with regular sugar. I have not tested this recipe with any other protein powders, so I recommend a whey-based protein.
Ingredients
CRUST
*134 g (~8 sheets Pamela’s gluten free graham crackers
*3 TBS sugar free syrup
*If needed, 1 TBS liquid (water, milk, Aperol, Prosecco, or OJ)
CHEESECAKE FILLING
*224 g (8 ounces) 1/3 the fat cream cheese at room temp
*48 g (1/4 cup) Madhava sweetener
*226 g (1 cup) nonfat Greek yogurt, strained overnight
*60 g (1/2 cup) Quest vanilla milkshake protein powder
*3 ounces Aperol
*2 ounces Prosecco
*1 ounce no pulp orange juice
*1 tsp vanilla extract
*2 large eggs
APEROL GANACHE
*3/4 cup (100 g) Lily’s semisweet chocolate chips
*1/3 cup (82 g) Aperol
*1/3 cup (82 g) OJ
Directions
- Line an 8″ springform pan with Parchment paper and spray with cooking spray.
- Preheat oven to 350.
- Dump the grahams and syrup in a food processor and grind until smooth (if mixture is too thick, add additional TBS of liquid).
- Place crust mix into prepared pan and smooth to the edges (I use cooking spray on my hands to make this easier).
- Bake for 10 minutes until golden; remove to cool while making filling.
- Using a whisk attachment, mix the cream cheese and Madhava sweetener in a stand mixer on medium high for 2-3 minutes until fluffy and smooth.
- Add in the yogurt and protein powder mixing well (it will be thick/chunky).
- Add in Aperol, Prosecco, OJ, and vanilla, and blend until smooth, 2-3 minutes.
- Switch to a paddle attachment, and on low speed, add eggs, one at a time, mixing until smooth.
- Fill a large roasting pan with 4-5 cups of steaming hot water. Wrap your springform pan in several layers of foil and place into a crockpot liner, tying the edge up, to keep your cheesecake from getting any water into it during the water bath.
- Pour the cheesecake batter into the prepared pan, and put the prepared pan into the roasting pan with water.
- Bake for 40-45 minutes, until the sides have set but the center is still jiggly.
- Turn the oven off, leaving the cheesecake inside, and crack the oven door to allow the cheesecake to finish baking for 1 hour.
- Remove from the oven and place on a cooling rack to cool to room temp; I like to run a sharp knife around the edges after it is cool.
- Refrigerate cheesecake overnight or place in fridge for 4 hours before removing from springform pan and topping with ganache.
- To make the ganache, bring the OJ and Aperol to a boil in a medium sauce pan.
- Once boiling, reduce to a simmer for 5-8 minutes, until about half the liquid remains.
- Place chocolate chips in a large bowl.
- Immediately pour 1/3 cup (35 grams) of the liquid mixture on top of the chocolate chips.
- Let sit for one minute before stirring until no lumps remain (can also heat on 50% power in the microwave for 15-20 seconds if you still have some lumps).
- This ganache thickens quickly, so add to the top of the cheesecake the moment you are done making, using the back of a spoon or an angled spatula to smooth.
- If desired, decorate the top of the cheesecake with orange slices.
- Keep leftover cheesecake covered in the fridge.
Nutrition
Macros
8 servings
282 cal/25.7 c/14.2 f/12.7 p per slice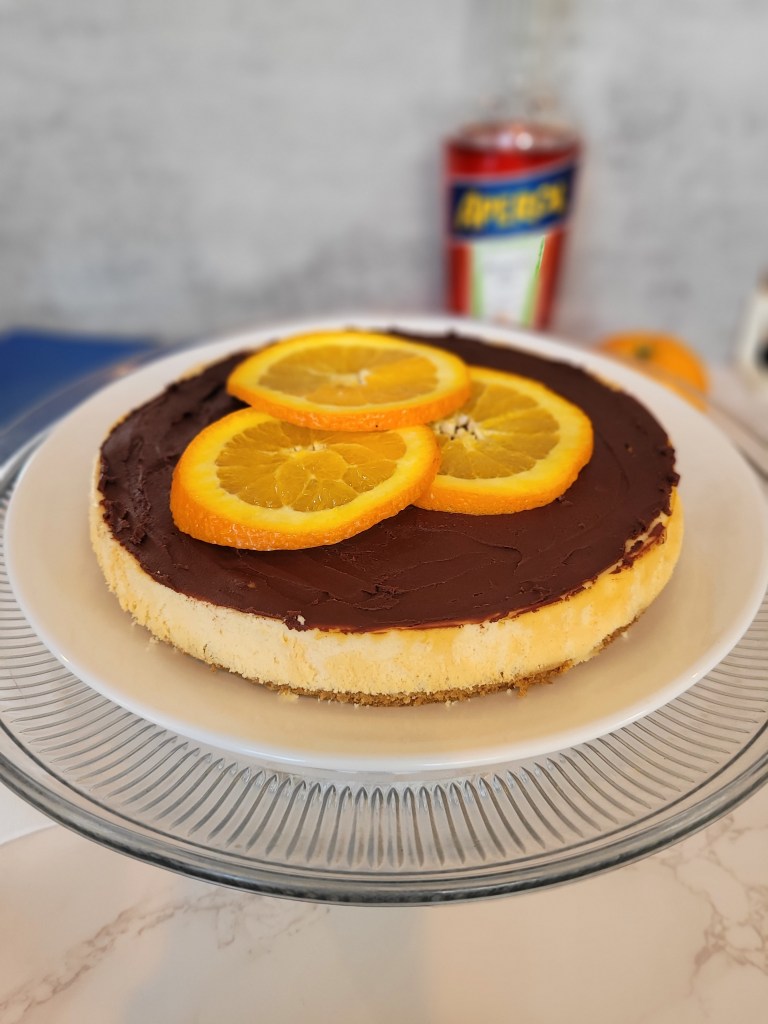
Now, to kill that entire bottle of Aperol, I only need to make 40 more of these cheesecakes. 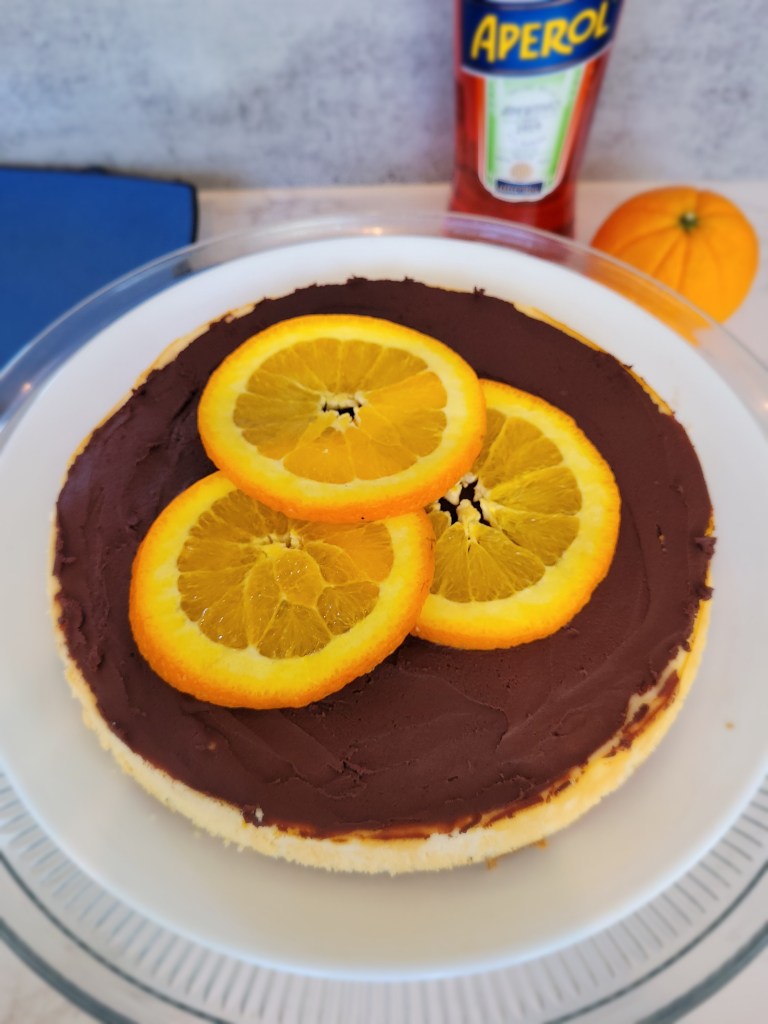
Making summer citrusly more tolerable. - Line an 8″ springform pan with Parchment paper and spray with cooking spray.
-
Apple Pie Cupcakes
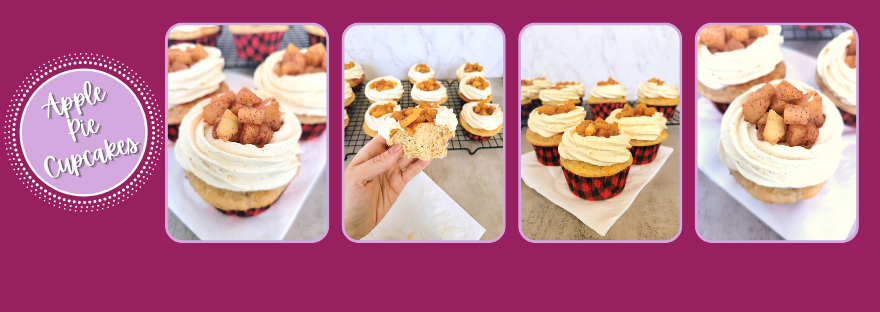
I am all for a good dessert mashup. Brownie bottom cheesecake? Give me three slices. Chocolate chip brookies? I’m in. Basically, if there is a way to turn two desserts into one, I absolutely have to have it. So when I felt like having an apple pie the other day but also kinda wanted cake, I thought, why not both? I didn’t want my diet to get too dicey with this mashup, so I brought in my secret baking weapon: Empowrd Foods gluten free protein pancake mix. Because apple pie pancakes are also something that would be 100% golden delish, I’m sure I’ll be trying that soon, too. Until then, a fluffy, vanilla-flavored cupcake with cinnamon whipped frosting and baked diced apples will just have to do…
They are the apple of my pie, quite literally. Gluten free apple pie protein cupcakes
Soft, fluffy cupcakes with whipped frosting and apple topping
You can use any just add water pancake mix for this recipe. You can use oil in place of the yogurt and regular powdered sugar in place of monkfruit, but this will greatly alter the macros, though.
Ingredients
CUPCAKES
*180 grams (3.4 cups) Empowerd gluten free protein pancake mix
*90 grams (3/4 cup) Quest Vanilla Milkshake protein powder (or other whey-casein blend)
*1/2 tsp apple pie spice (or blend of cinnamon and nutmeg)
*168 grams (3/4 cup) fat free plain Greek yogurt
*1/2 cup + 2 TBS fat free or skim milk
*21 grams (1.5 TBS) reduced fat butter or spread, melted and cooled
*80 g (1/3 cup) unsweetened applesauce
*1 tsp vanilla extract
*1 egg
FROSTING
*35 grams (1 large box) of sugar free vanilla instant Jell-o pudding mix
*226 grams (8 ounces) Cool Whip Free
*30 grams (1/4 cup) Lakanto powdered monkfruit
*3/4 cup cold fat free or skim milk
*1/2 tsp apple pie spice
APPLE FILLING
*1 apple, peeled, cored, and chopped (I used a honeycrisp)
*1 TBS lemon juice
*2 TBS water
*1/2 tsp cinnamon
*1/2 tsp Lakanto golden monkfruit or regular brown sugar
Directions
- Preheat oven to 350 and line a muffin tins with 12 wrappers (I recommend silicone if you have them since this mix is pretty sticky).
- Mix the pancake mix, protein powder, and apple pie spice in a small bowl and set aside.
- In a larger bowl, whisk milk, yogurt, egg, applesauce, butter, and vanilla together until smooth.
- Dump dry mix into wet, and fold gently just until everything comes together.
- Pour batter evenly into liners and bake on the bottom rack (the pancake mix gets browned very easily) of the oven for 15-20 minutes, until a toothpick comes out cleanly from the center.
- Allow cupcakes to cool fully before frosting.
- To make frosting, use a whisk and mix the powdered monkfruit and milk together on low for 30 seconds before adding in the pudding mix and whisking on low for 1 1/2 minutes.
- Let this rest for 3 minutes, then switch to a paddle attachment and dump in Cool Whip and apple pie spice, mixing on low until everything comes together.
- Keep this in the fridge to firm up while you make the apples.
- Add all apple ingredients to a medium saucepan, cooking ad stirring on medium-high heat for 10 minutes until all liquid is evaporated and apples are coated and sticky; set in the fridge to cool.
- Use a 1M tip and piping bag loaded with frosting to pipe a blob of frosting in the middle of a cooled cupcake before piping two overlapping circles around the edge of the cupcake (see video below).
- Fill the center of each cupcake with the cooled appled.
- Repeat on all cupcakes, then devour! You will most likely have quite a bit of leftover frosting; this can be kept in airtight containers and put in the freezer for future use.
- Keep leftovers covered and in the fridge. Cupcakes are best served at room temp, so remove from the fridge 30-45 minutes before eating. Enjoy!
Nutrition
Macros
12 servings
145 cal/17.1 c/2.7 f/13.1 p per cupcakeQuick video piping tutorial above! 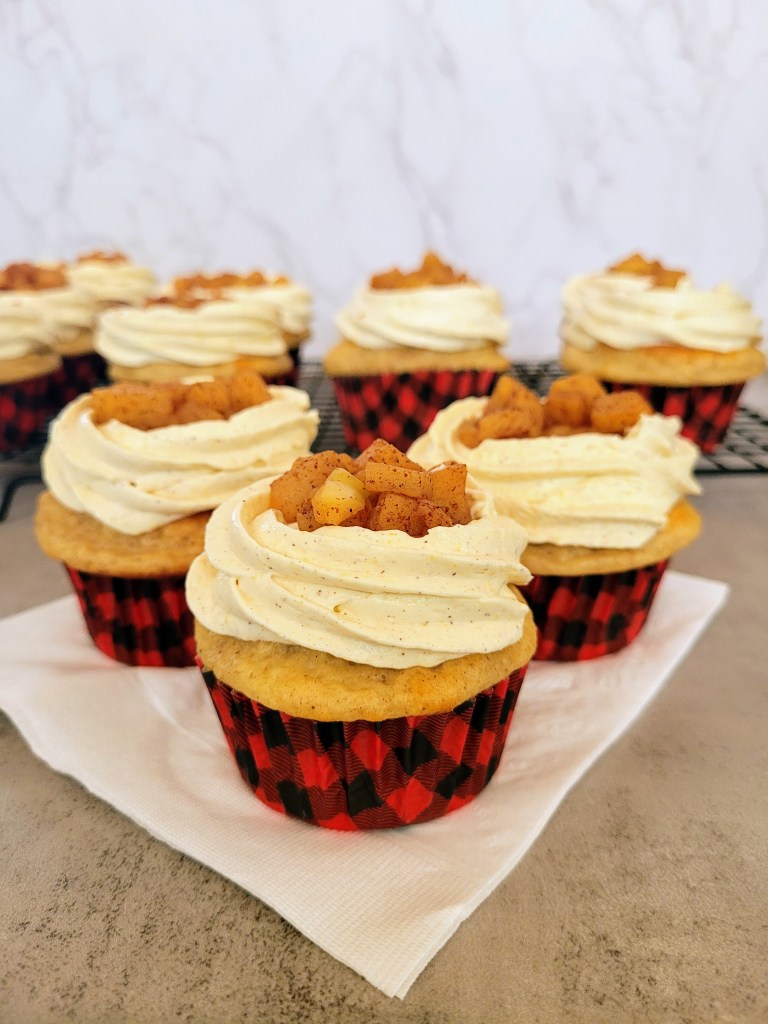
A cupcake a day keeps the doctor away? 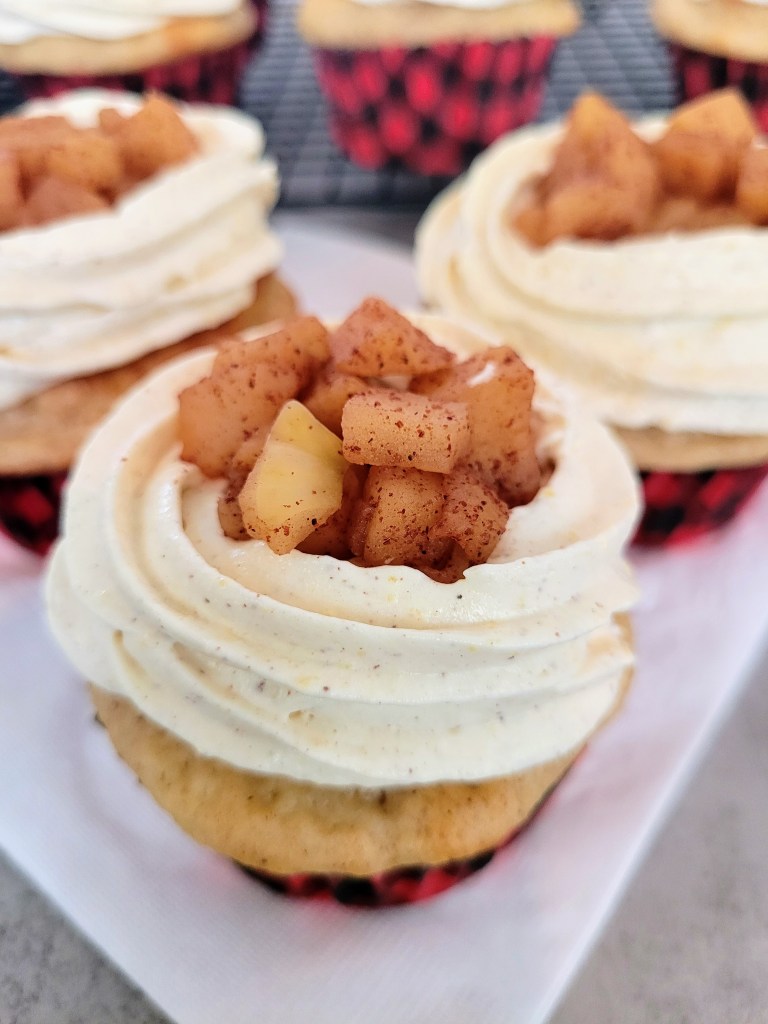
Currently occu-pied by their deliciousness. 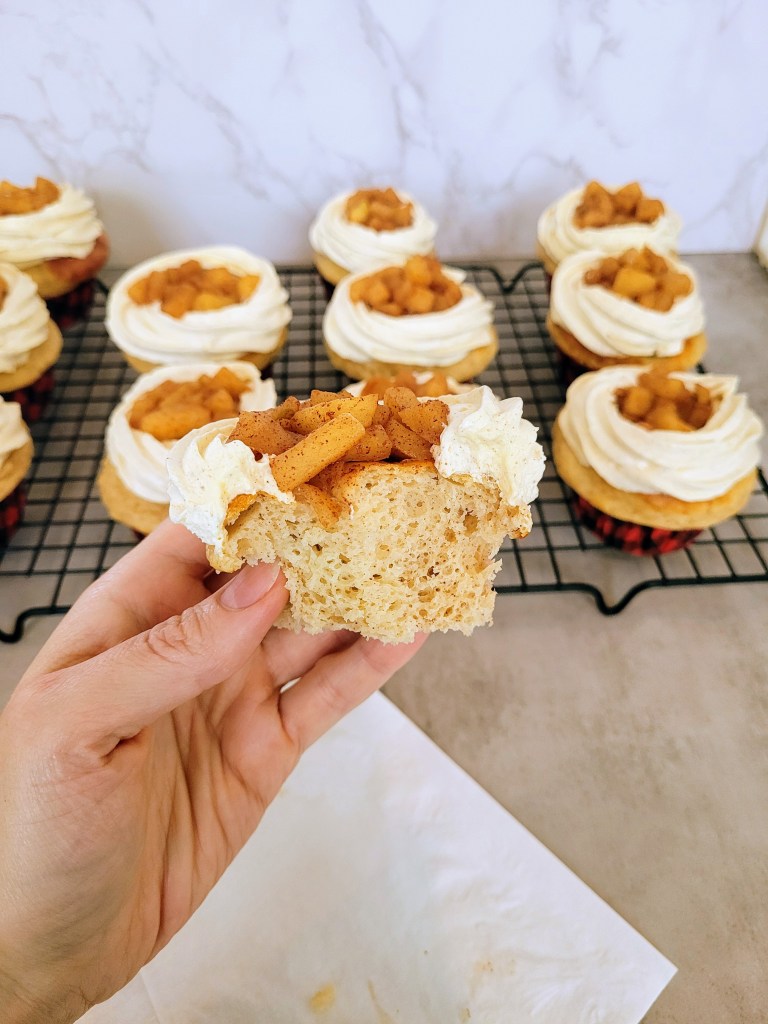
And she lived apply ever after. - Preheat oven to 350 and line a muffin tins with 12 wrappers (I recommend silicone if you have them since this mix is pretty sticky).
-
Shark Week Cheesecake

If you’re new here, I am positively obsessed with Shark Week. It’s like back-to-back Christmas mornings for seven days straight in this house. Being positively jaw-esome apex predators, sharks get misconstrued as being terrible man eaters, but more people die each year from mosquito bites than shark bites…don’t get me started on how evil those little winged devils are. Sharks are fascinating creatures that predate trees and even the dinosaurs. They deserve a whole week to be celebrated…and what better way to celebrate than with cake! Or in this case, a cheesecake. Topped with a Jell-o ocean and a shiver of sharks on top. Yes, a group of sharks is known as a shiver. See, you’re already learning more about how fintastic sharks are.
But let’s go take a bite out of this awesome no-bake cheesecake. Recipe and Instructions
No-Bake Shark Week Cheesecake
Creamy cheesecake topped with a Jell-o ocean.
If not gluten free, use any kind of graham cracker crumbs for the crust. Greek yogurt can be replaced with an additional 8 ounces of cream cheese, and Lakanto can also be replaced with regular sugar.
Ingredients
CRUST
*134 g (6 sheets) Pamela’s gluten free graham crackers
*45 mL (3 TBS) sugar free syrup
*1 TBS water
CHEESECAKE FILLING
*224 g (8 ounces) 1/3 the fat cream cheese at room temp
*226 g (1 cup) nonfat Greek yogurt, strained overnight
*113 g (4 ounces) Cool Whip sugar free
*1 tsp vanilla extract
*1 TBS lemon juice
*96 g (1/2 cup) Lakanto granular monkfruit sweetener
JELL-O TOPPING
*1 3.4 ounce box of any flavor of blue Jell-o
*Shark gummies (I found some at Amazon)
Directions
- Line an 8″ springform pan with Parchment paper and spray with cooking spray.
- Dump the graham crackers in a food processor and grind until smooth.
- Add in the syrup and mix everything together til a wet crumb is formed.
- Place crust mix into prepared pan and smooth to the edges (I use cooking spray on my hands to make this easier).
- Freeze the crust for 30 minutes, or if preferred, bake at 350 degrees for 10-12 minutes; let cool before adding cheesecake mix.
- Whip the cream cheese and yogurt in a stand mixer on medium high for 2-3 minutes until fluffy and smooth.
- Add in the vanilla, lemon juice, and Cool Whip, mixing well.
- Add in the Lakanto or regular sugar and blend until smooth, 1-2 minutes.
- Pour cheesecake batter on top of the crust, making sure to smooth the batter out to the very edges of the springform pan (no leaking Jell-o!), and freeze for 2 hours, until top is set.
- After the cheesecake has been in the freezer one hour, make Jell-o by following box directions; place in the fridge to begin to set.
- Once two hours have passed, save 1/2 cup of Jell-o in a measuring cup before dumping the rest of the Jell-o on top of the frozen cheesecake.
- Add gummy sharks onto the Jell-o layer, pressing into the Jell-o to secure.
- Freeze for 15 minutes; give the remaining Jell-o a few stirs to keep from setting.
- Pour remaining Jell-o on top of the cheesecake and add a few more sharks.
- Refrigerate cheesecake overnight or freeze for 4 hours before serving.
- To get incredibly clean slices for photos, freeze for at least 4 hours and then slice.
- Keep leftovers in fridge or freezer and enjoy!
Nutrition
Macros
8 servings
258 cal/32 c/11.5 f/6.6 p per slice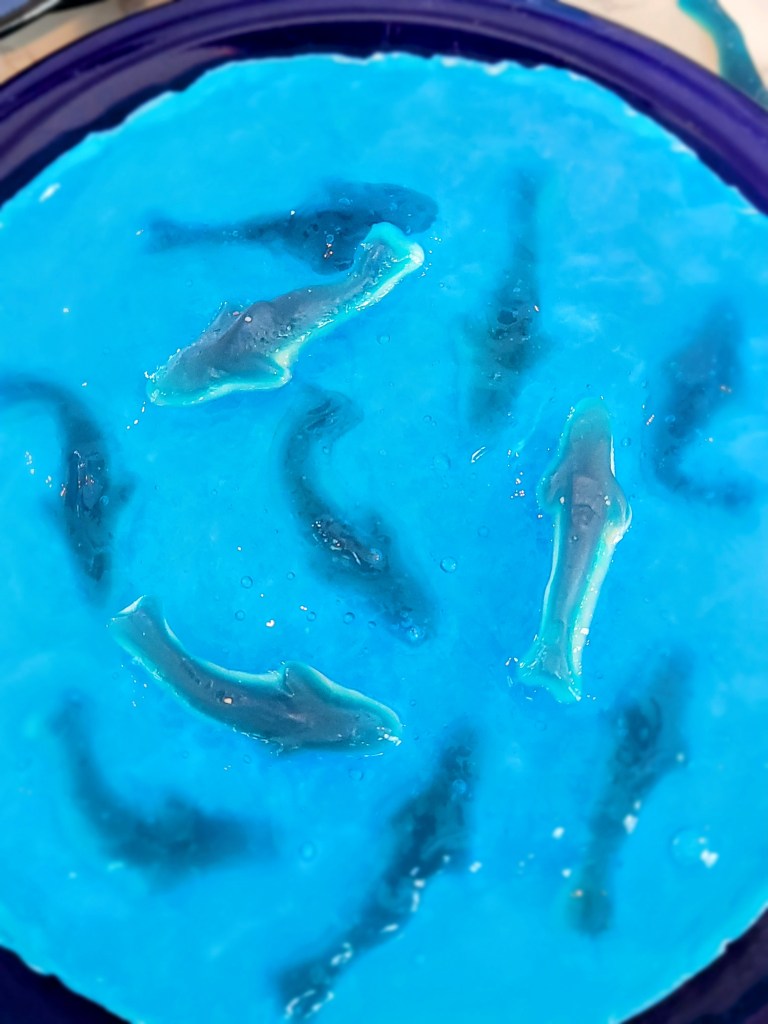
There’s just some-fin about you…. 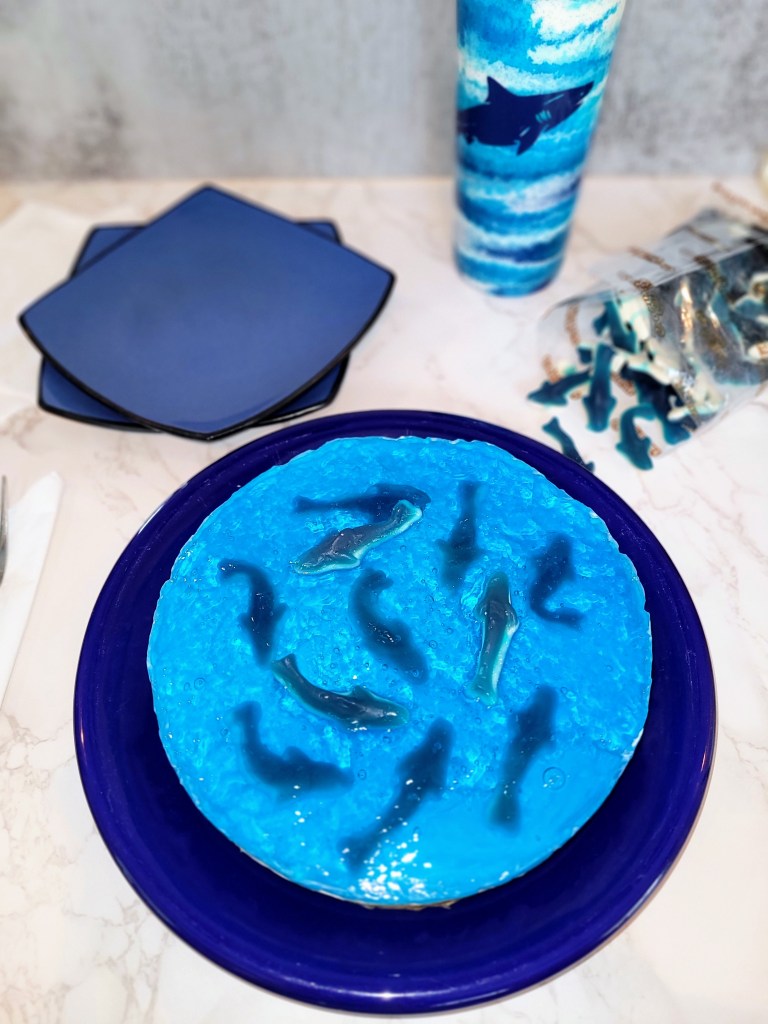
I chews you, every time, cheesecake. - Line an 8″ springform pan with Parchment paper and spray with cooking spray.
-
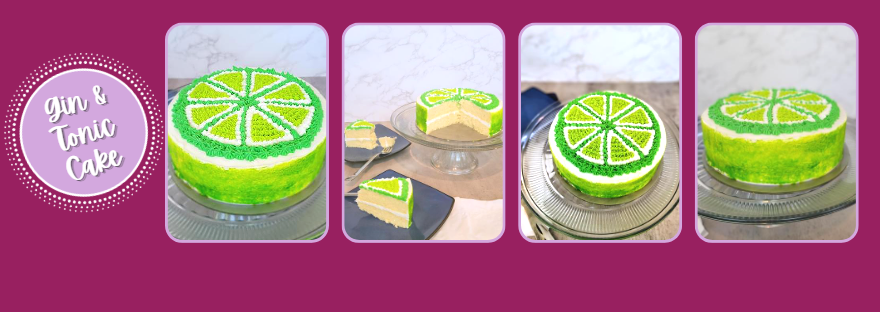
Let the Fun Be Gin.
Jump to recipe and instructions
I know gin is one of those polarizing liquors people either love or hate. In my opinion, if you hate it, you’re just drinking the wrong brand of gin. I’ve had some truly terrible gins that tasted like the hanging tree air fresheners you’d find in a 96 Toyota Corolla, so I get the gin stigma. But when you find a good brand of junipery deliciousness, that, my friends, is when life be-gins. And what better way to have gin than with a splash of tonic and some lime?
Right, this is a cake blog, so the better way to have it is as a cake. I had a moment of gin-ius several weeks ago when I made my husband’s birthday cupcakes gin and tonic flavored, but I hated how the decoration turned out, so I didn’t want to share subpar sprinkles with the world. Instead, I opted to make this recipe again, but as a giant lime slice of a cake. Sure, my husband may be away for work right now, but I am a strong gin-dependent woman who needs no man to help her finish an entire boozy cake (hi, Mom, I know you must be so proud of me right now). Since I’m not a total maniac, it’s a really macro-friendly cake for a boozy cake. A single slice will only set you back 200 calories (12 slices total). I’ll have you know that’s exactly how many calories are in the standard, liquid version of a gin and tonic, but this has twice the comfort and warm tinglies because it’s cake (scienctific fact).
In what I will claim as a moment of gin-sanity, I totally forgot to take ingredient photos… I hadn’t even had a sip of the gin, I swear. But, you need:
- 1 box of gluten free yellow cake mix (or regular if not gluten free)
- 3 eggs
- 113 grams (1/2 cup) fat free Greek yogurt
- 2.5 fl. oz (1/4 cup + 2 TBS; about 3 large limes) of lime juice
- 4 fl. oz (1/2 cup) GOOD gin (Aviation or Botanist are both very smooth)
- 2.5 fl. oz (1/4 cup + 2 TBS) Zevia tonic or preferred brand of tonic water (Zevia is sugar free)
Preheat your oven to 350 and prepare two 8-inch round cake pans with cooking spray and bake even strips. Add all eggs, yogurt, and liquids into a stand mixer, whisking on low for one minute before switching to the paddle attachment and adding the cake mix. Blend on medium high for two minutes. Pour batter evenly into each pan and bake for 25-30 minutes. A toothpick should come out of the center of the cake with a few crumbs. Let rest in the pan for 10 minutes before turning out to cool completely on a cooling rack before frosting.
Gin-evitably, I remembered to take photos of my cake again. Let cakes cool completely before frosting unless you’re 5 G&Ts deep and don’t care if things look messy (no judgement). To make the yogurt cream cheese frosting, you need:
- 225 grams (8 ounces) of 1/3 the fat cream cheese, softened
- 226 grams (1 cup) of fat free Greek yogurt, strained overnight to remove moisture
- 16 ounces (4 cups) Lakanto powdered monkfruit or regular powdered sugar
- 1 tsp vanilla extract
- 1/4 tsp citric acid (helps balance out the sweetness)
- 1-2 TBS gin
- 1/2 TBS tonic water
- 1-2 TBS lime juice
- Lime and leaf green gel dyes
- Unused sponges
- Three #16 or #18 piping tips

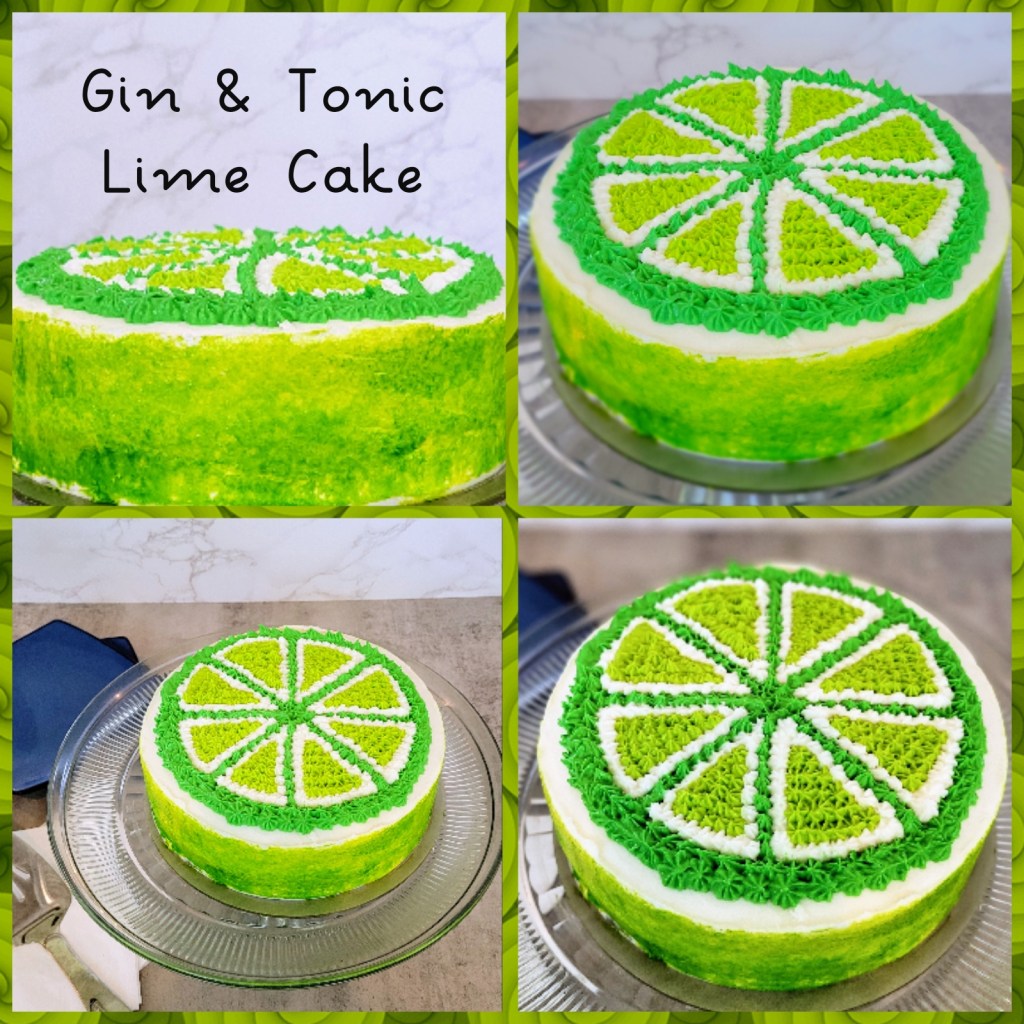
In the limelight. Whip the cream cheese and yogurt with a paddle attachment in your stand mixer until fluffy, about three minutes. Add in half the monkfruit, citric acid, one tablespoon of gin, and the extract. Blend well, then scrape the bowl before adding the remaining monkfruit, lime, and tonic; mix at this point and then taste test. If you want a stronger gin flavor, add another TBS of gin; if you want a stronger lime flavor, add a TBS of lime juice.
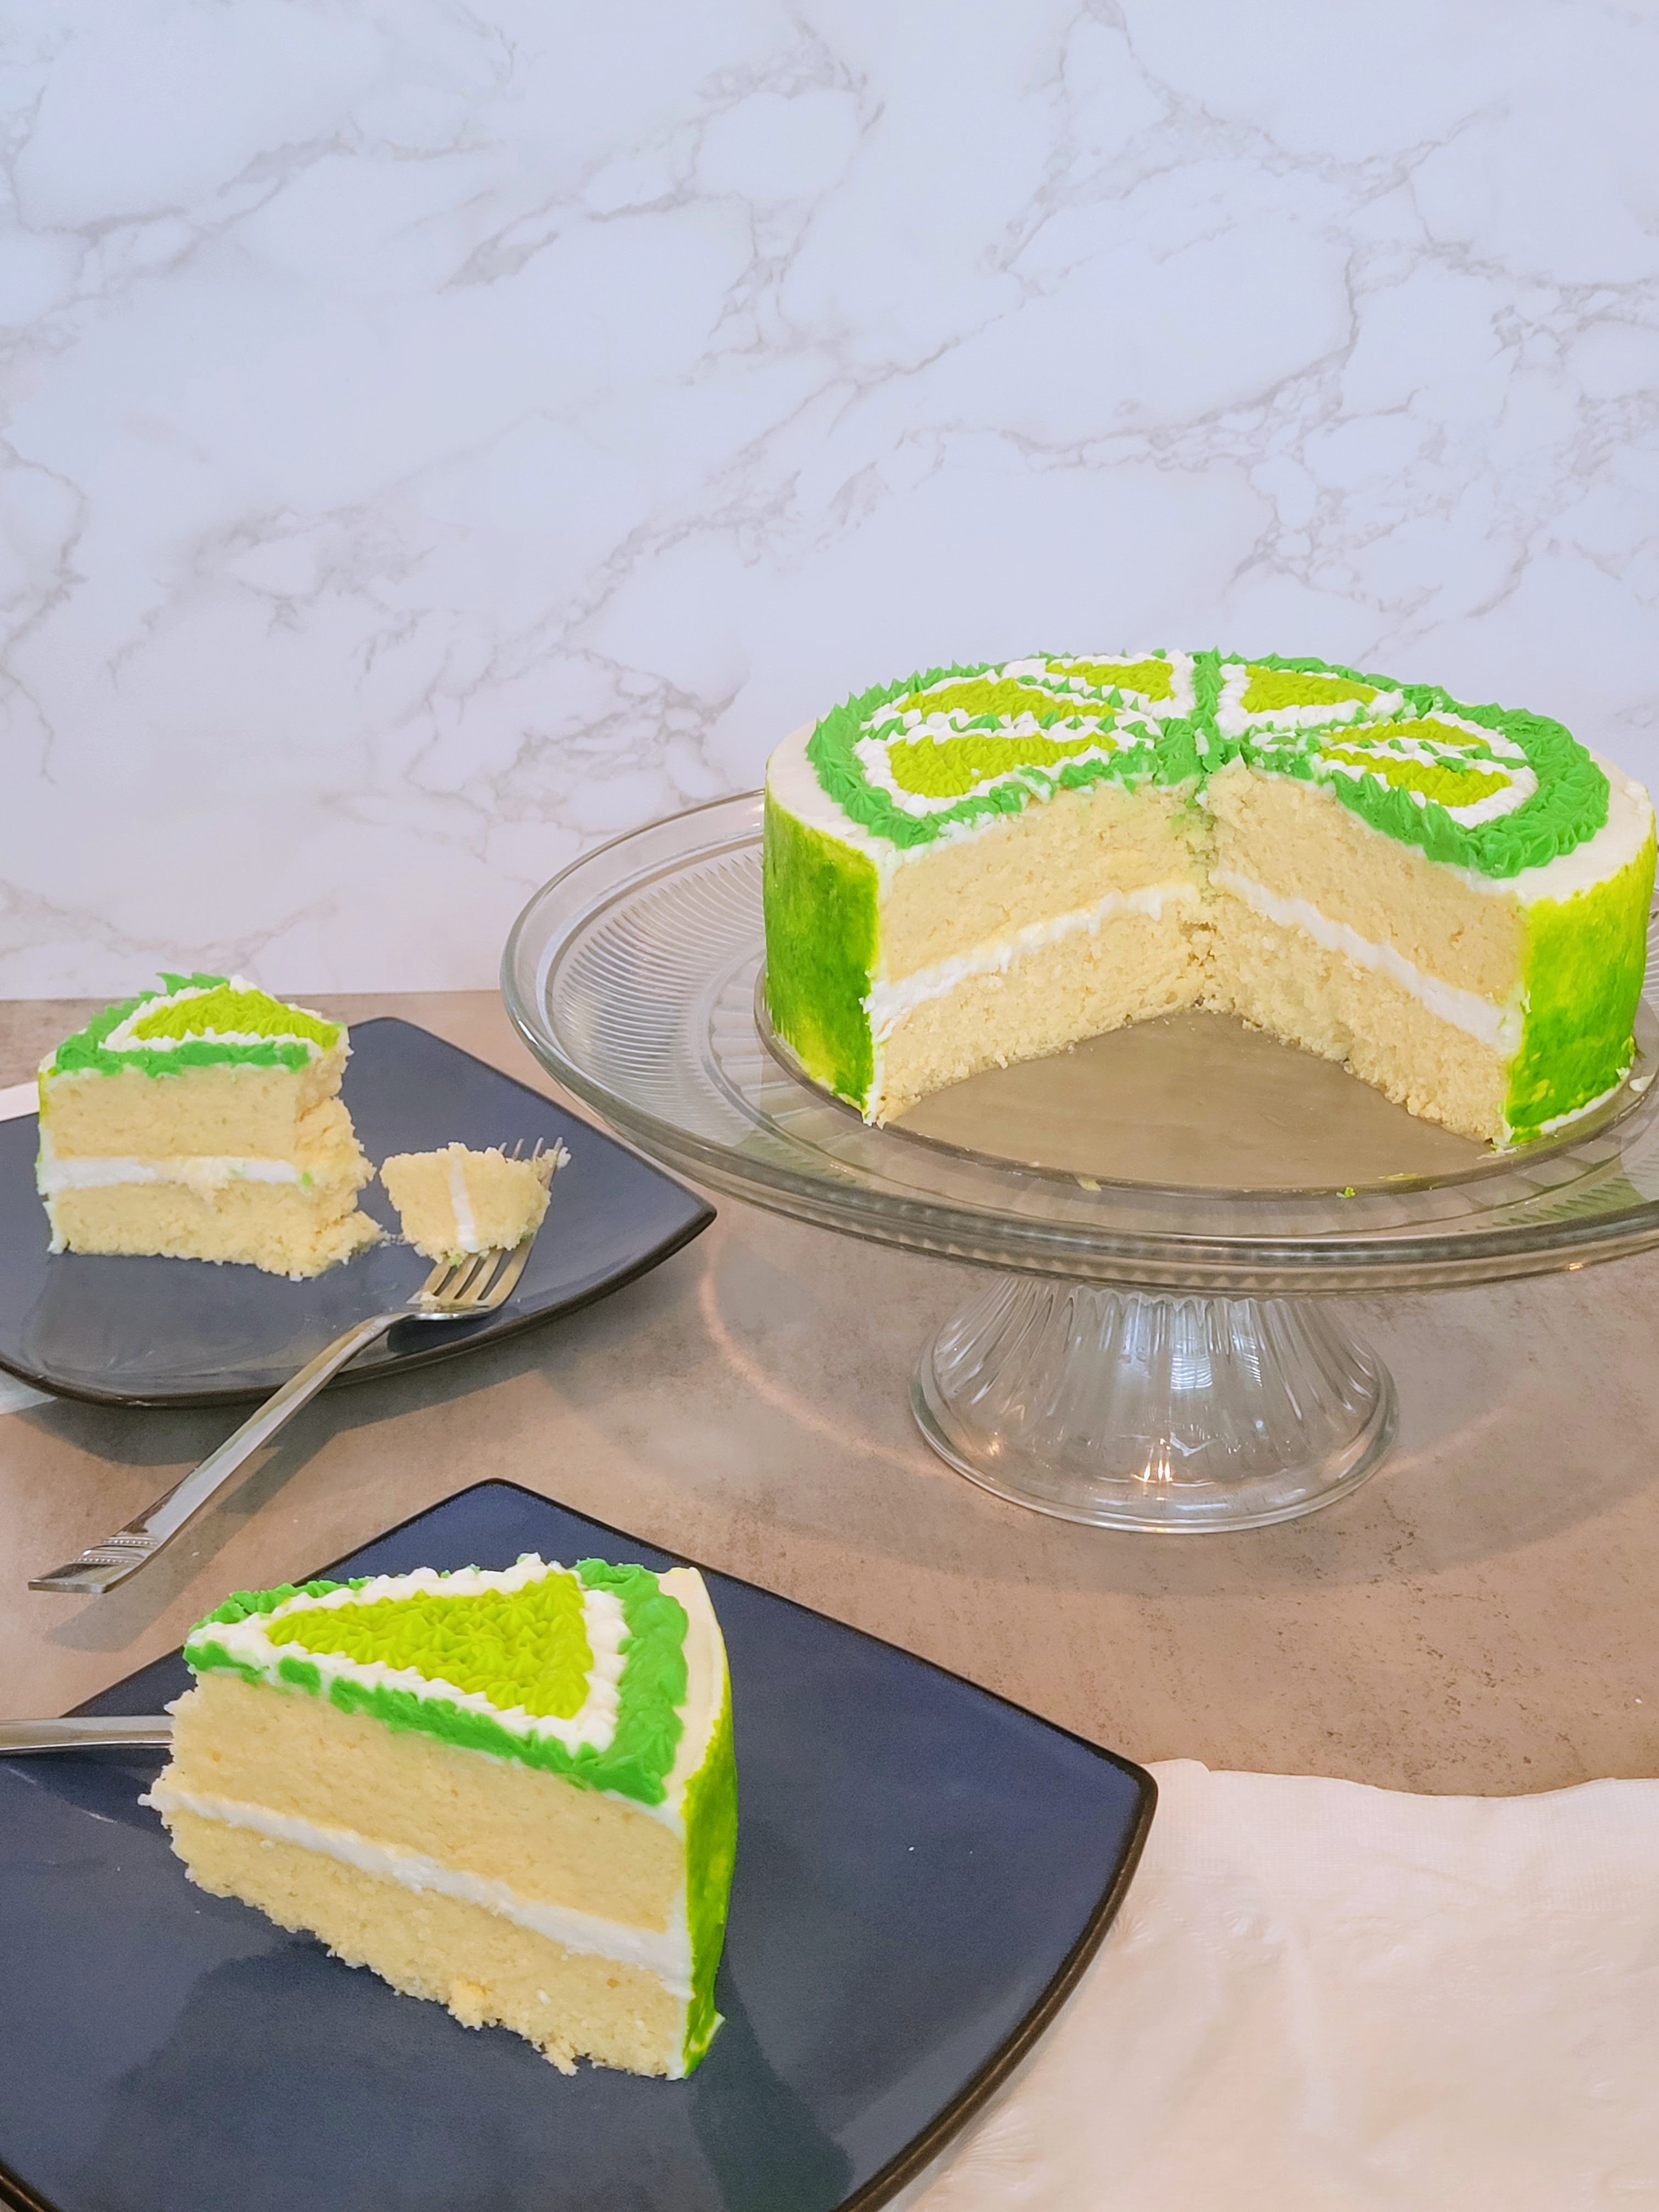
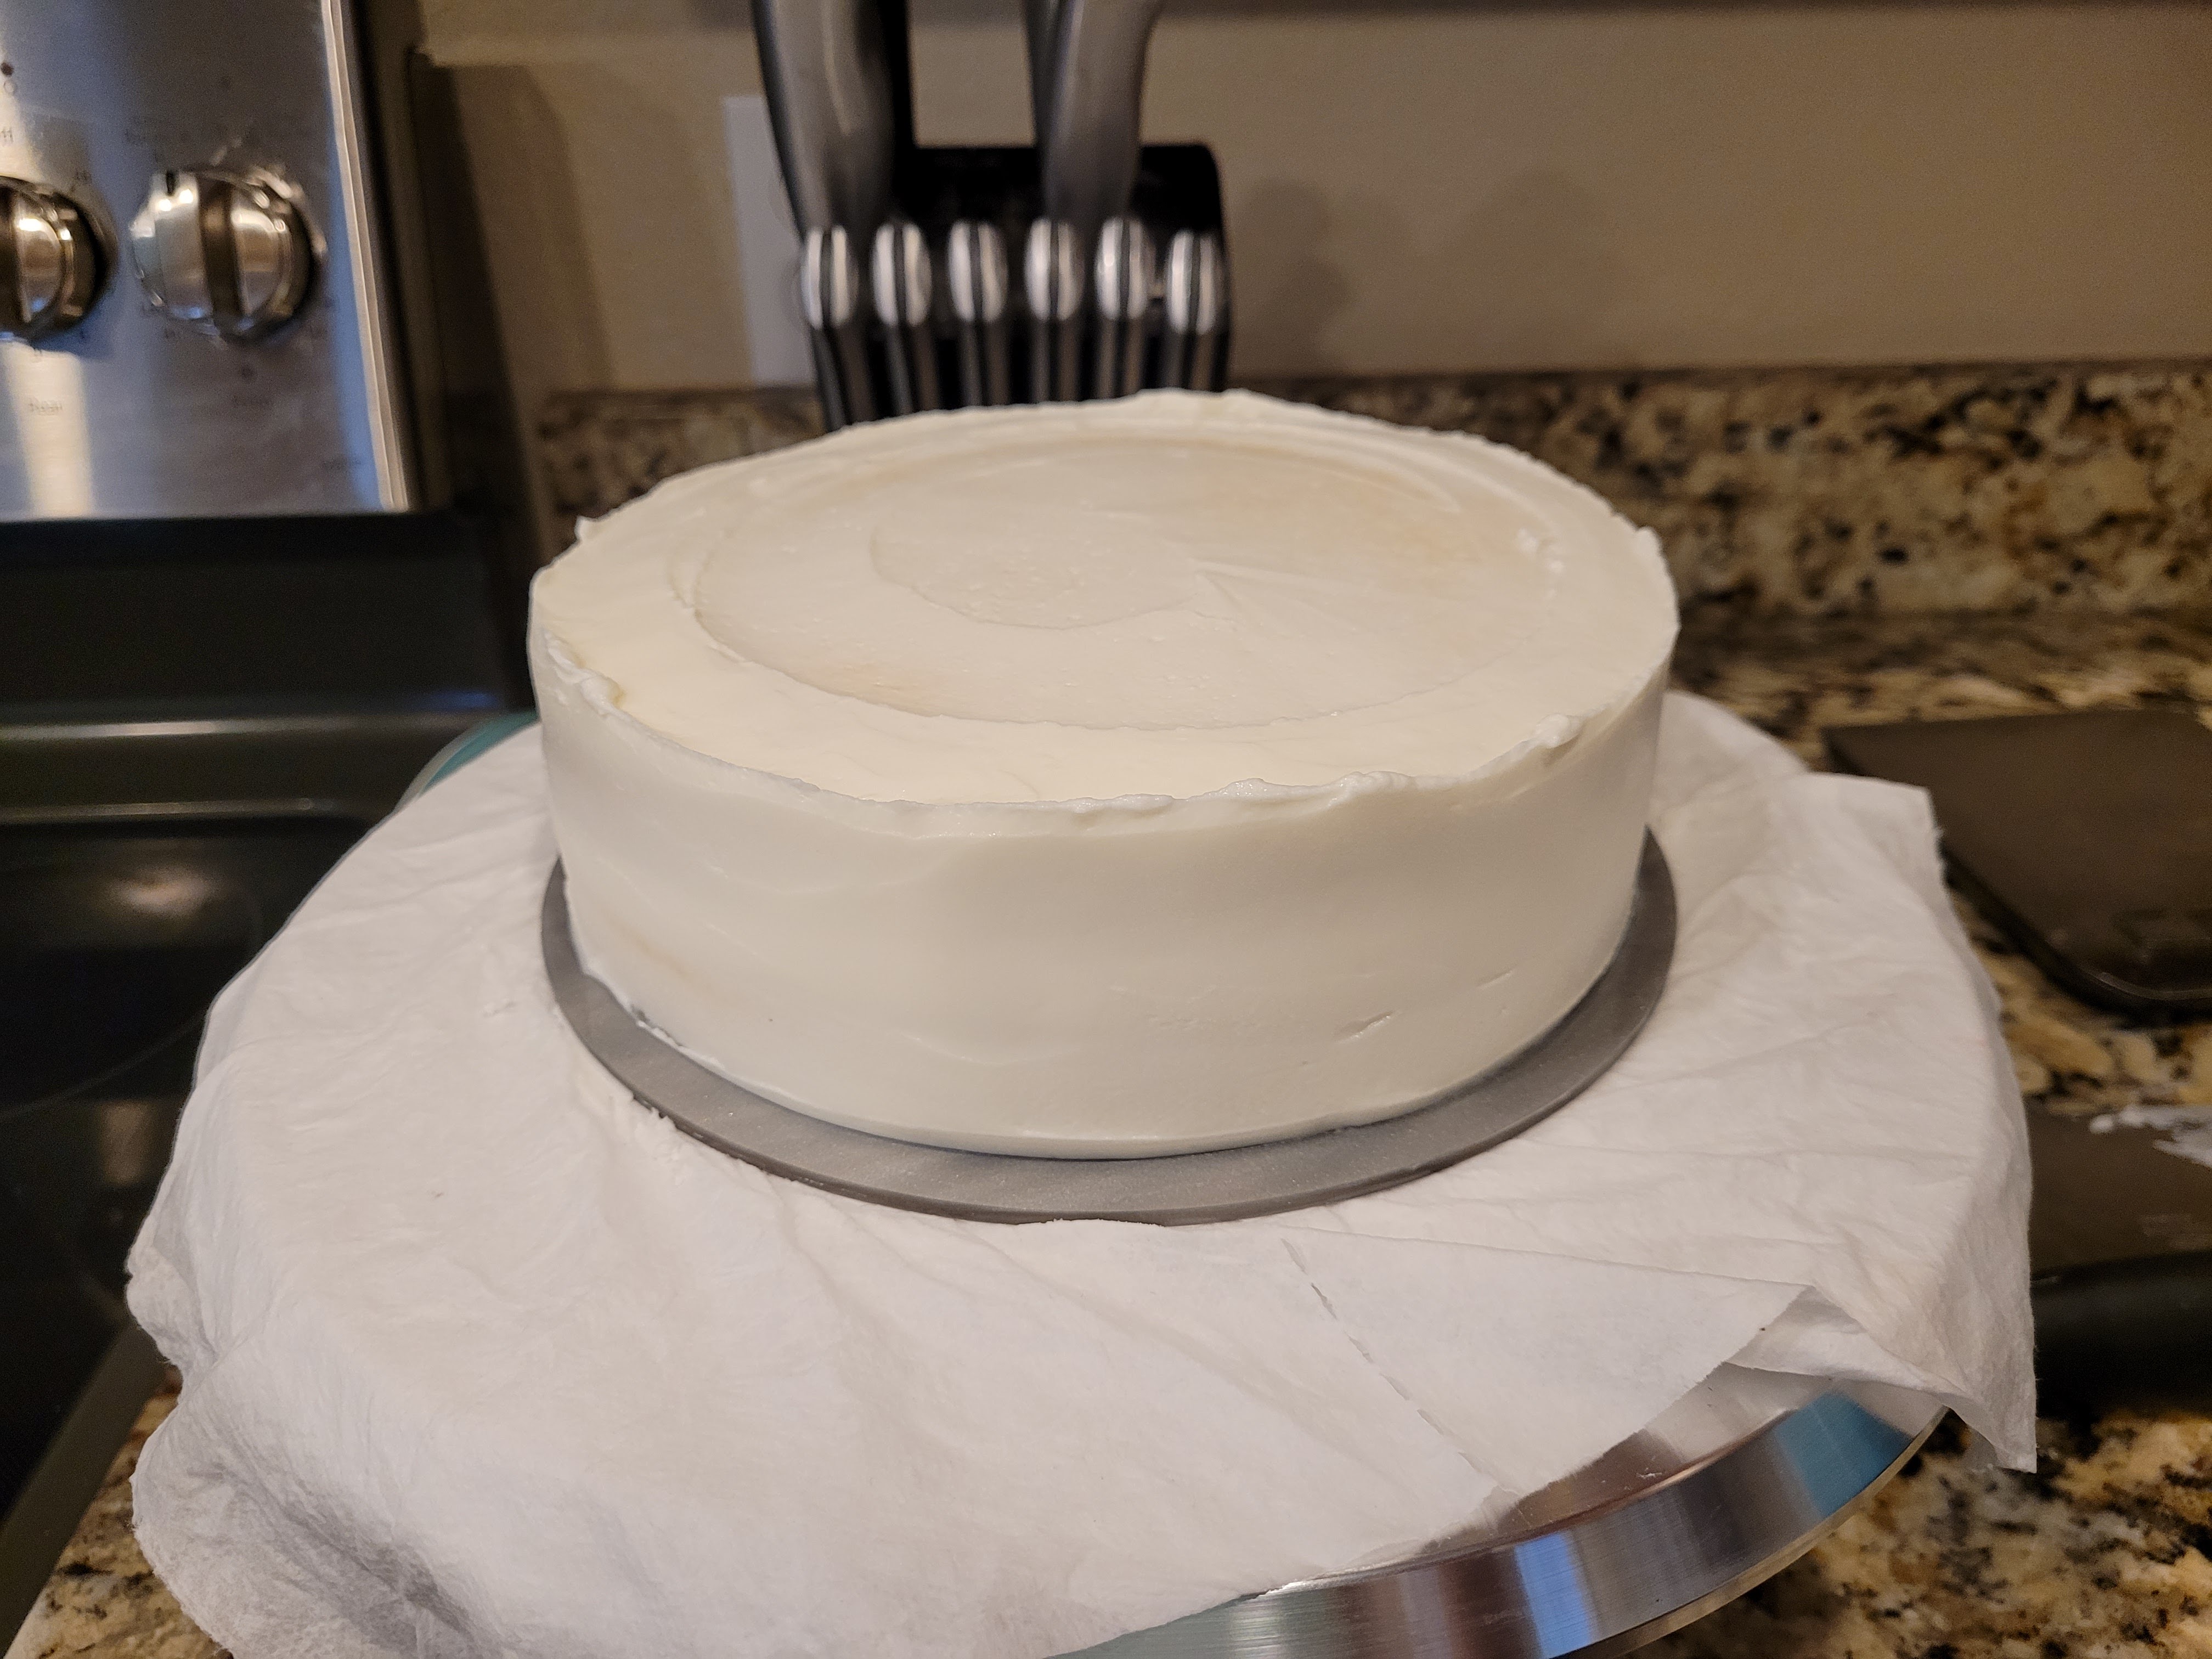
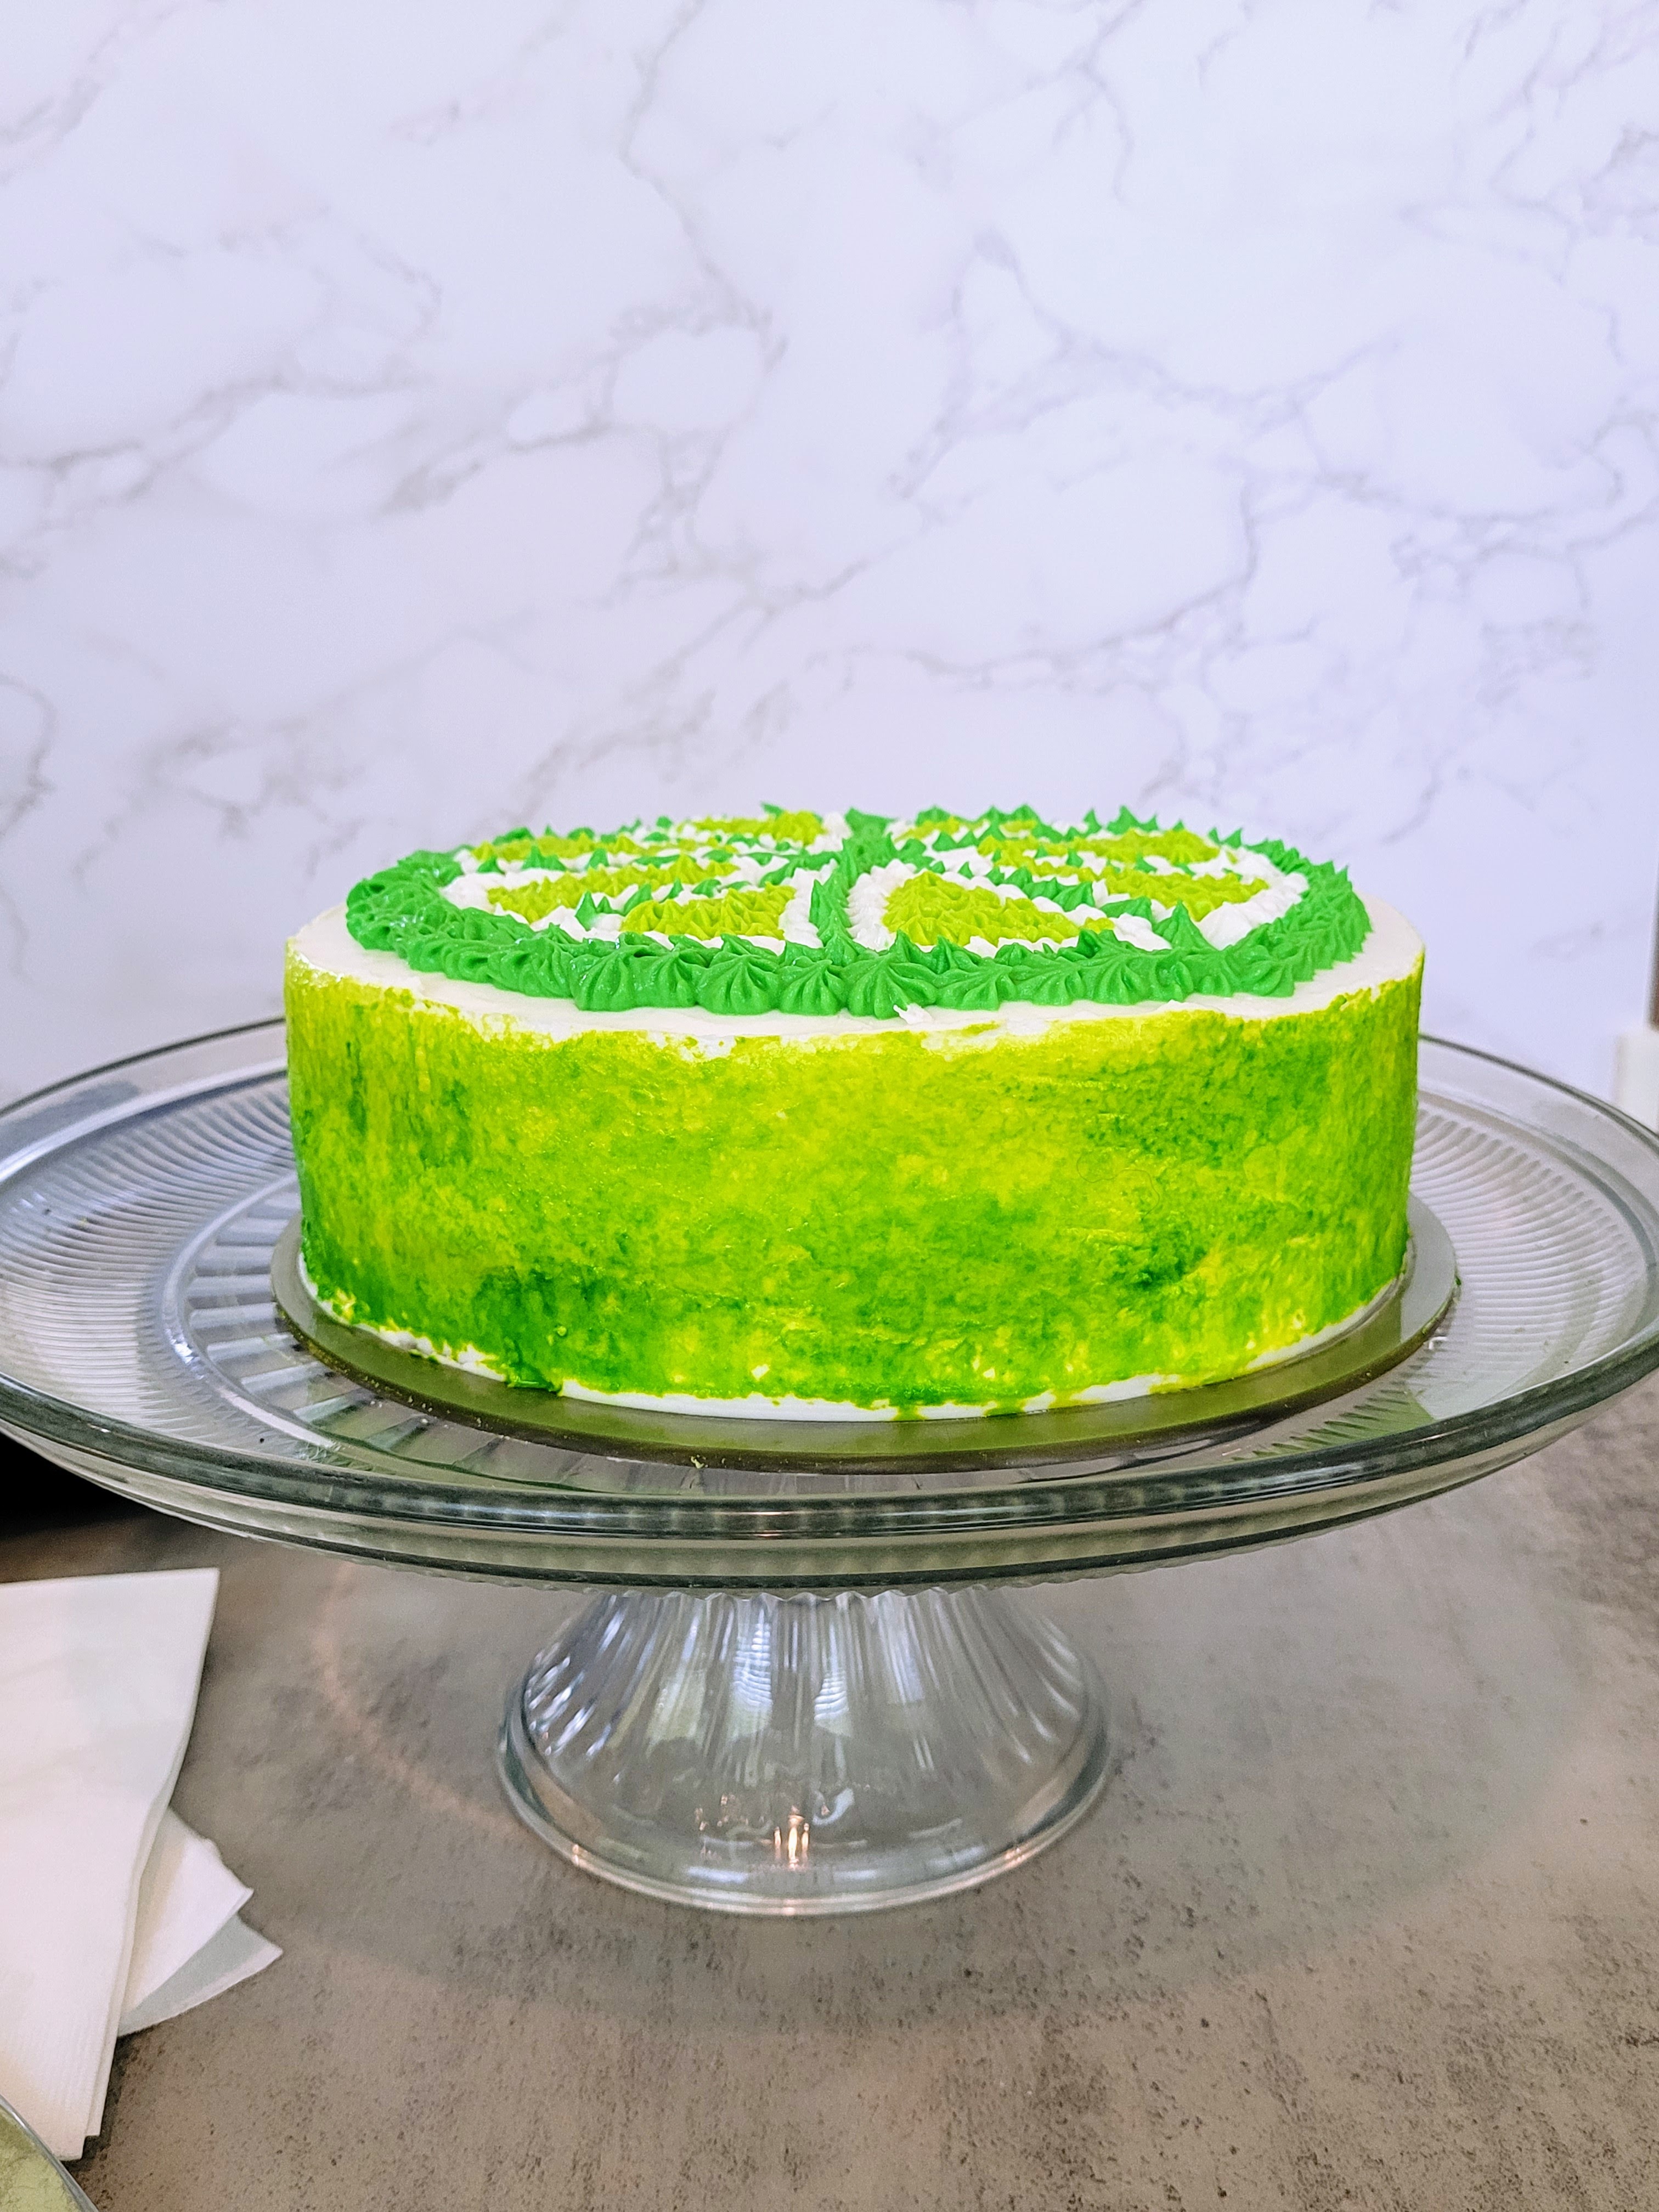
To assemble, you just need to slather a layer of plain white frosting on top of a cooled cake layer, then add the second layer (I always place them face down so the smooth surface on the bottom of the cake is now on top). Smooth out any excess that pops out of the sides before slathering the top and sides with white frosting. Pop this in the freezer to set for 15 minutes while you finish dying frosting. Take your remaining frosting and divide up. You will need one bag of plain white frosting with a #16 or #18 tip, and then split the remaining frosting in half. Dye one half lime green and the other half leaf green. I know a #21 tip is pictured above, but it was way too big. I ended up using #18 tips for the white and leaf green and a #16 tip for the lime green.

Gin or lose, I was going to make sure this cake got decorated exactly as I wanted, unlike my last G&T cupcake attempt. I took a toothpick to the top of my chilled cake and divided the top into 8 sections/lime wedges. Then I came in with the darker green and outlined each wedge.
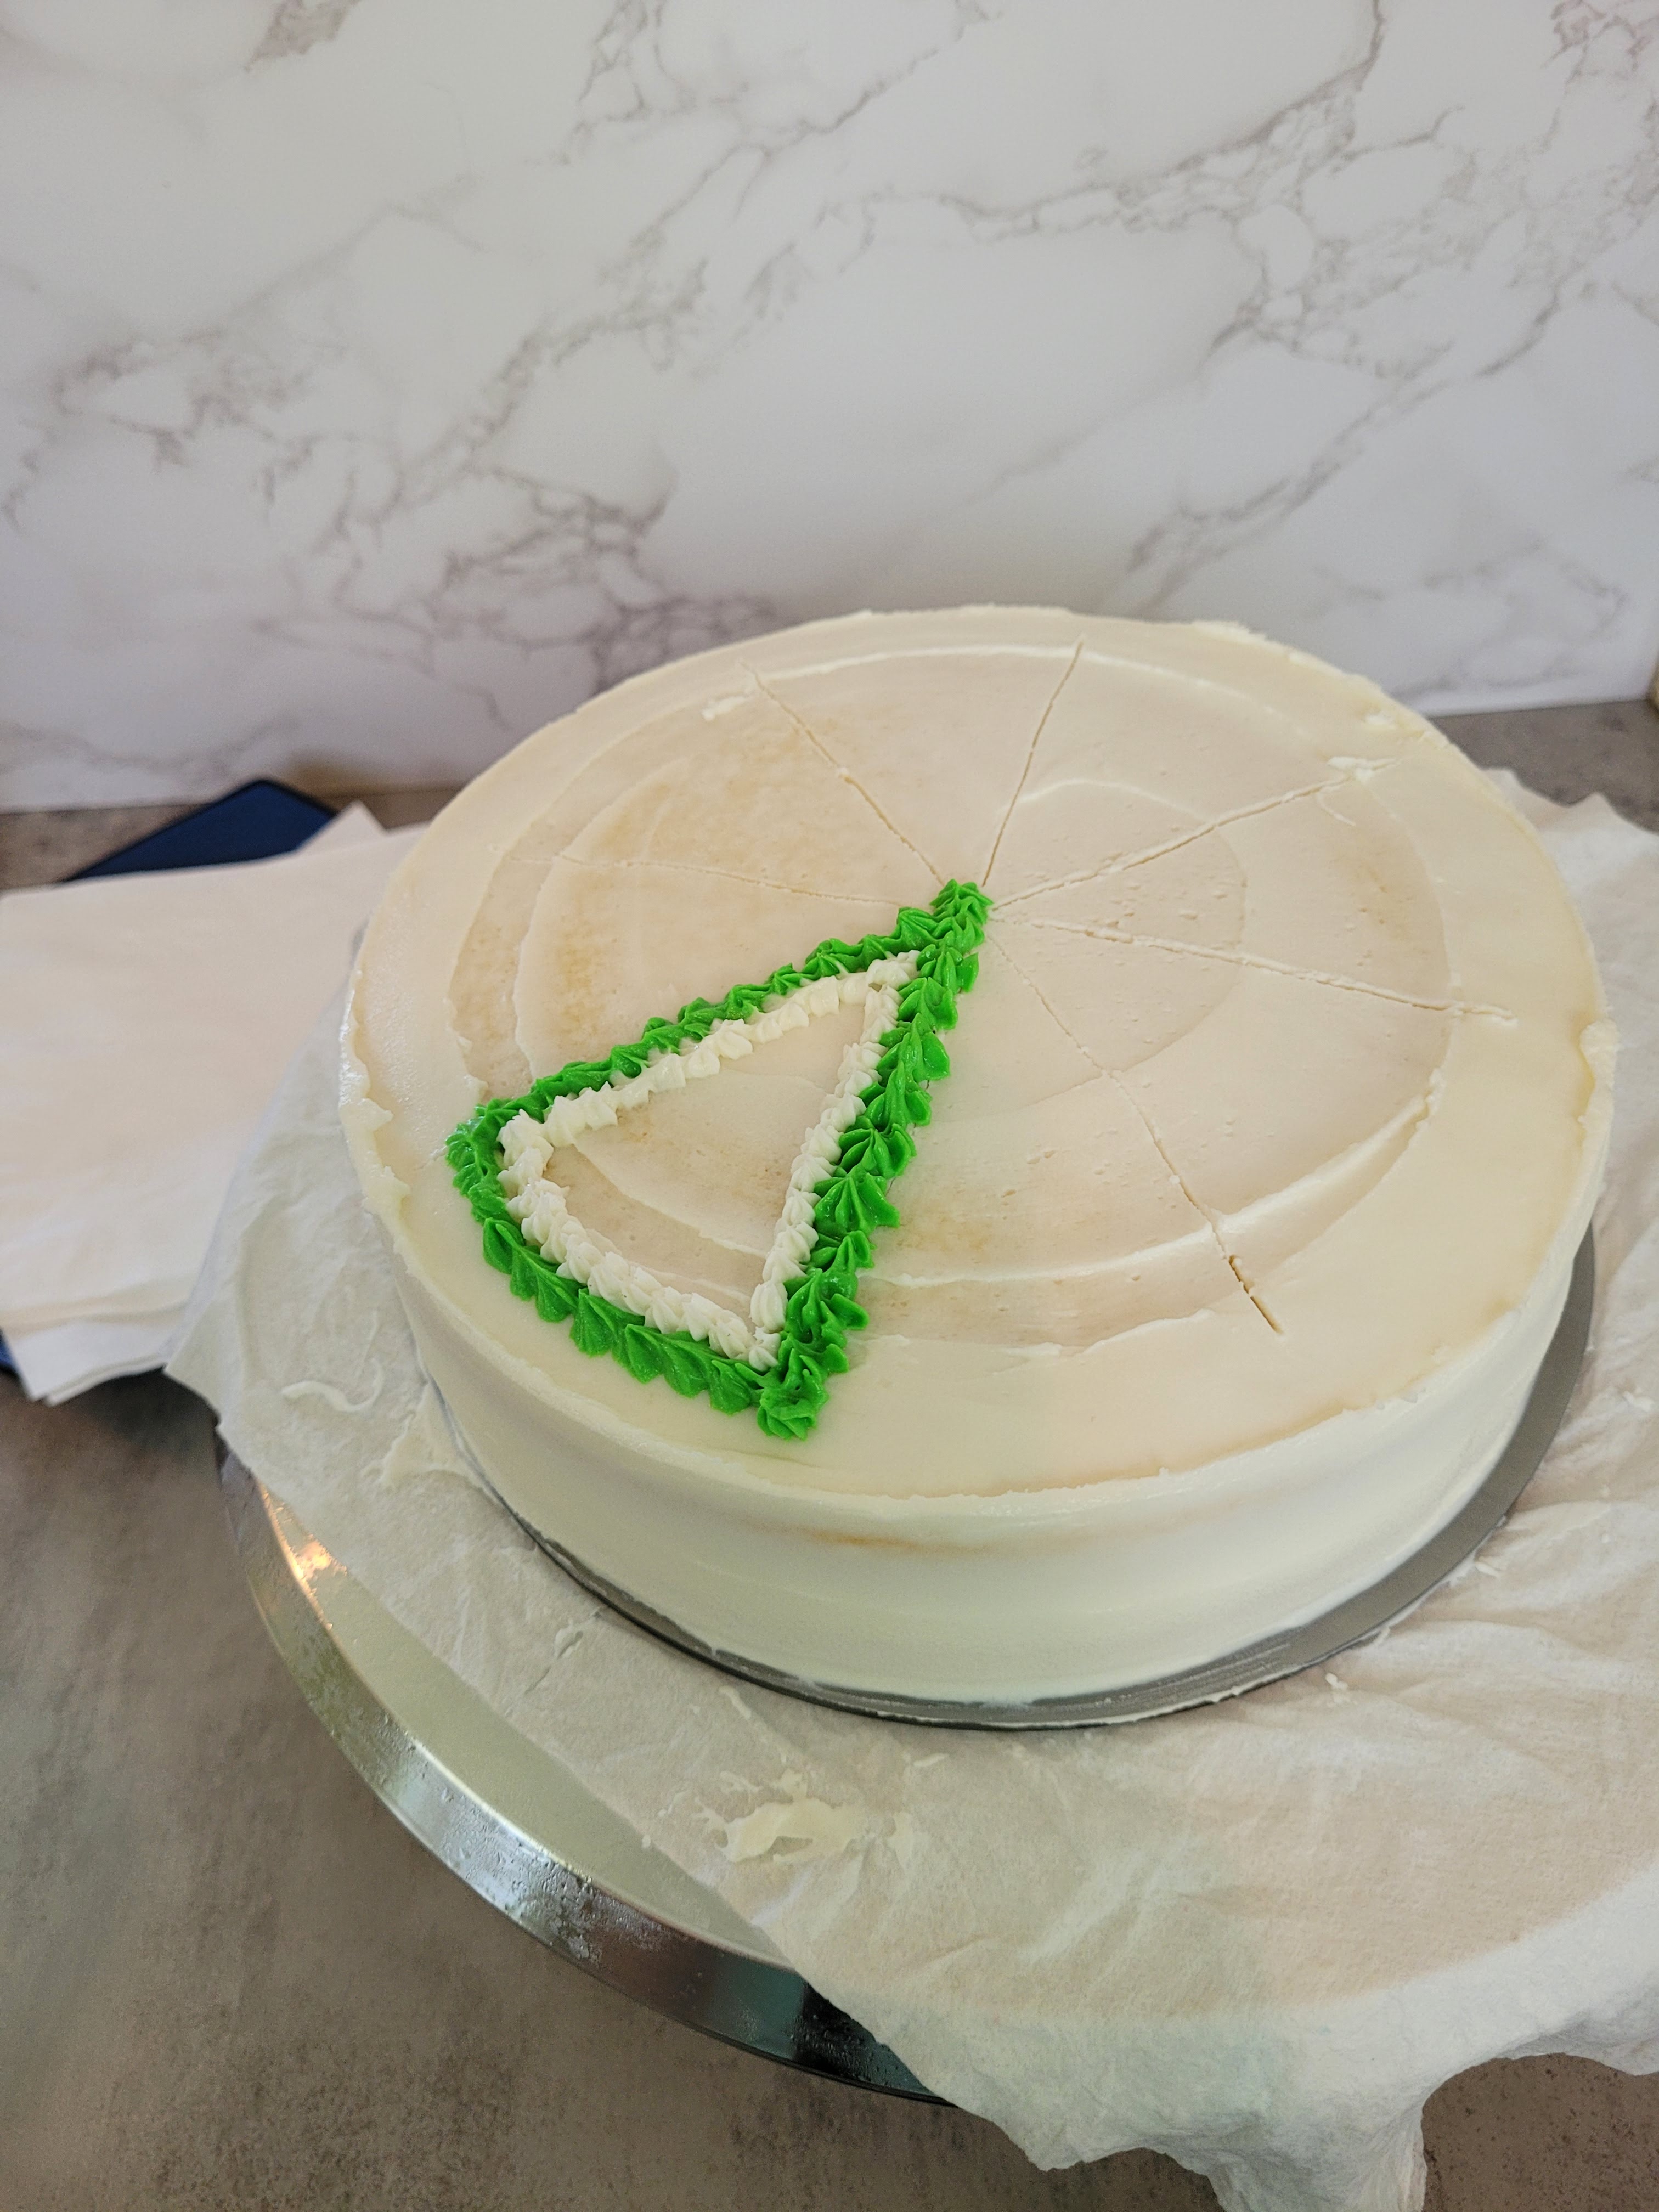
I was feeling gin-spired at this point, and I hadn’t had a single G&T! Then I came in and piped white stars inside of this dark green border.

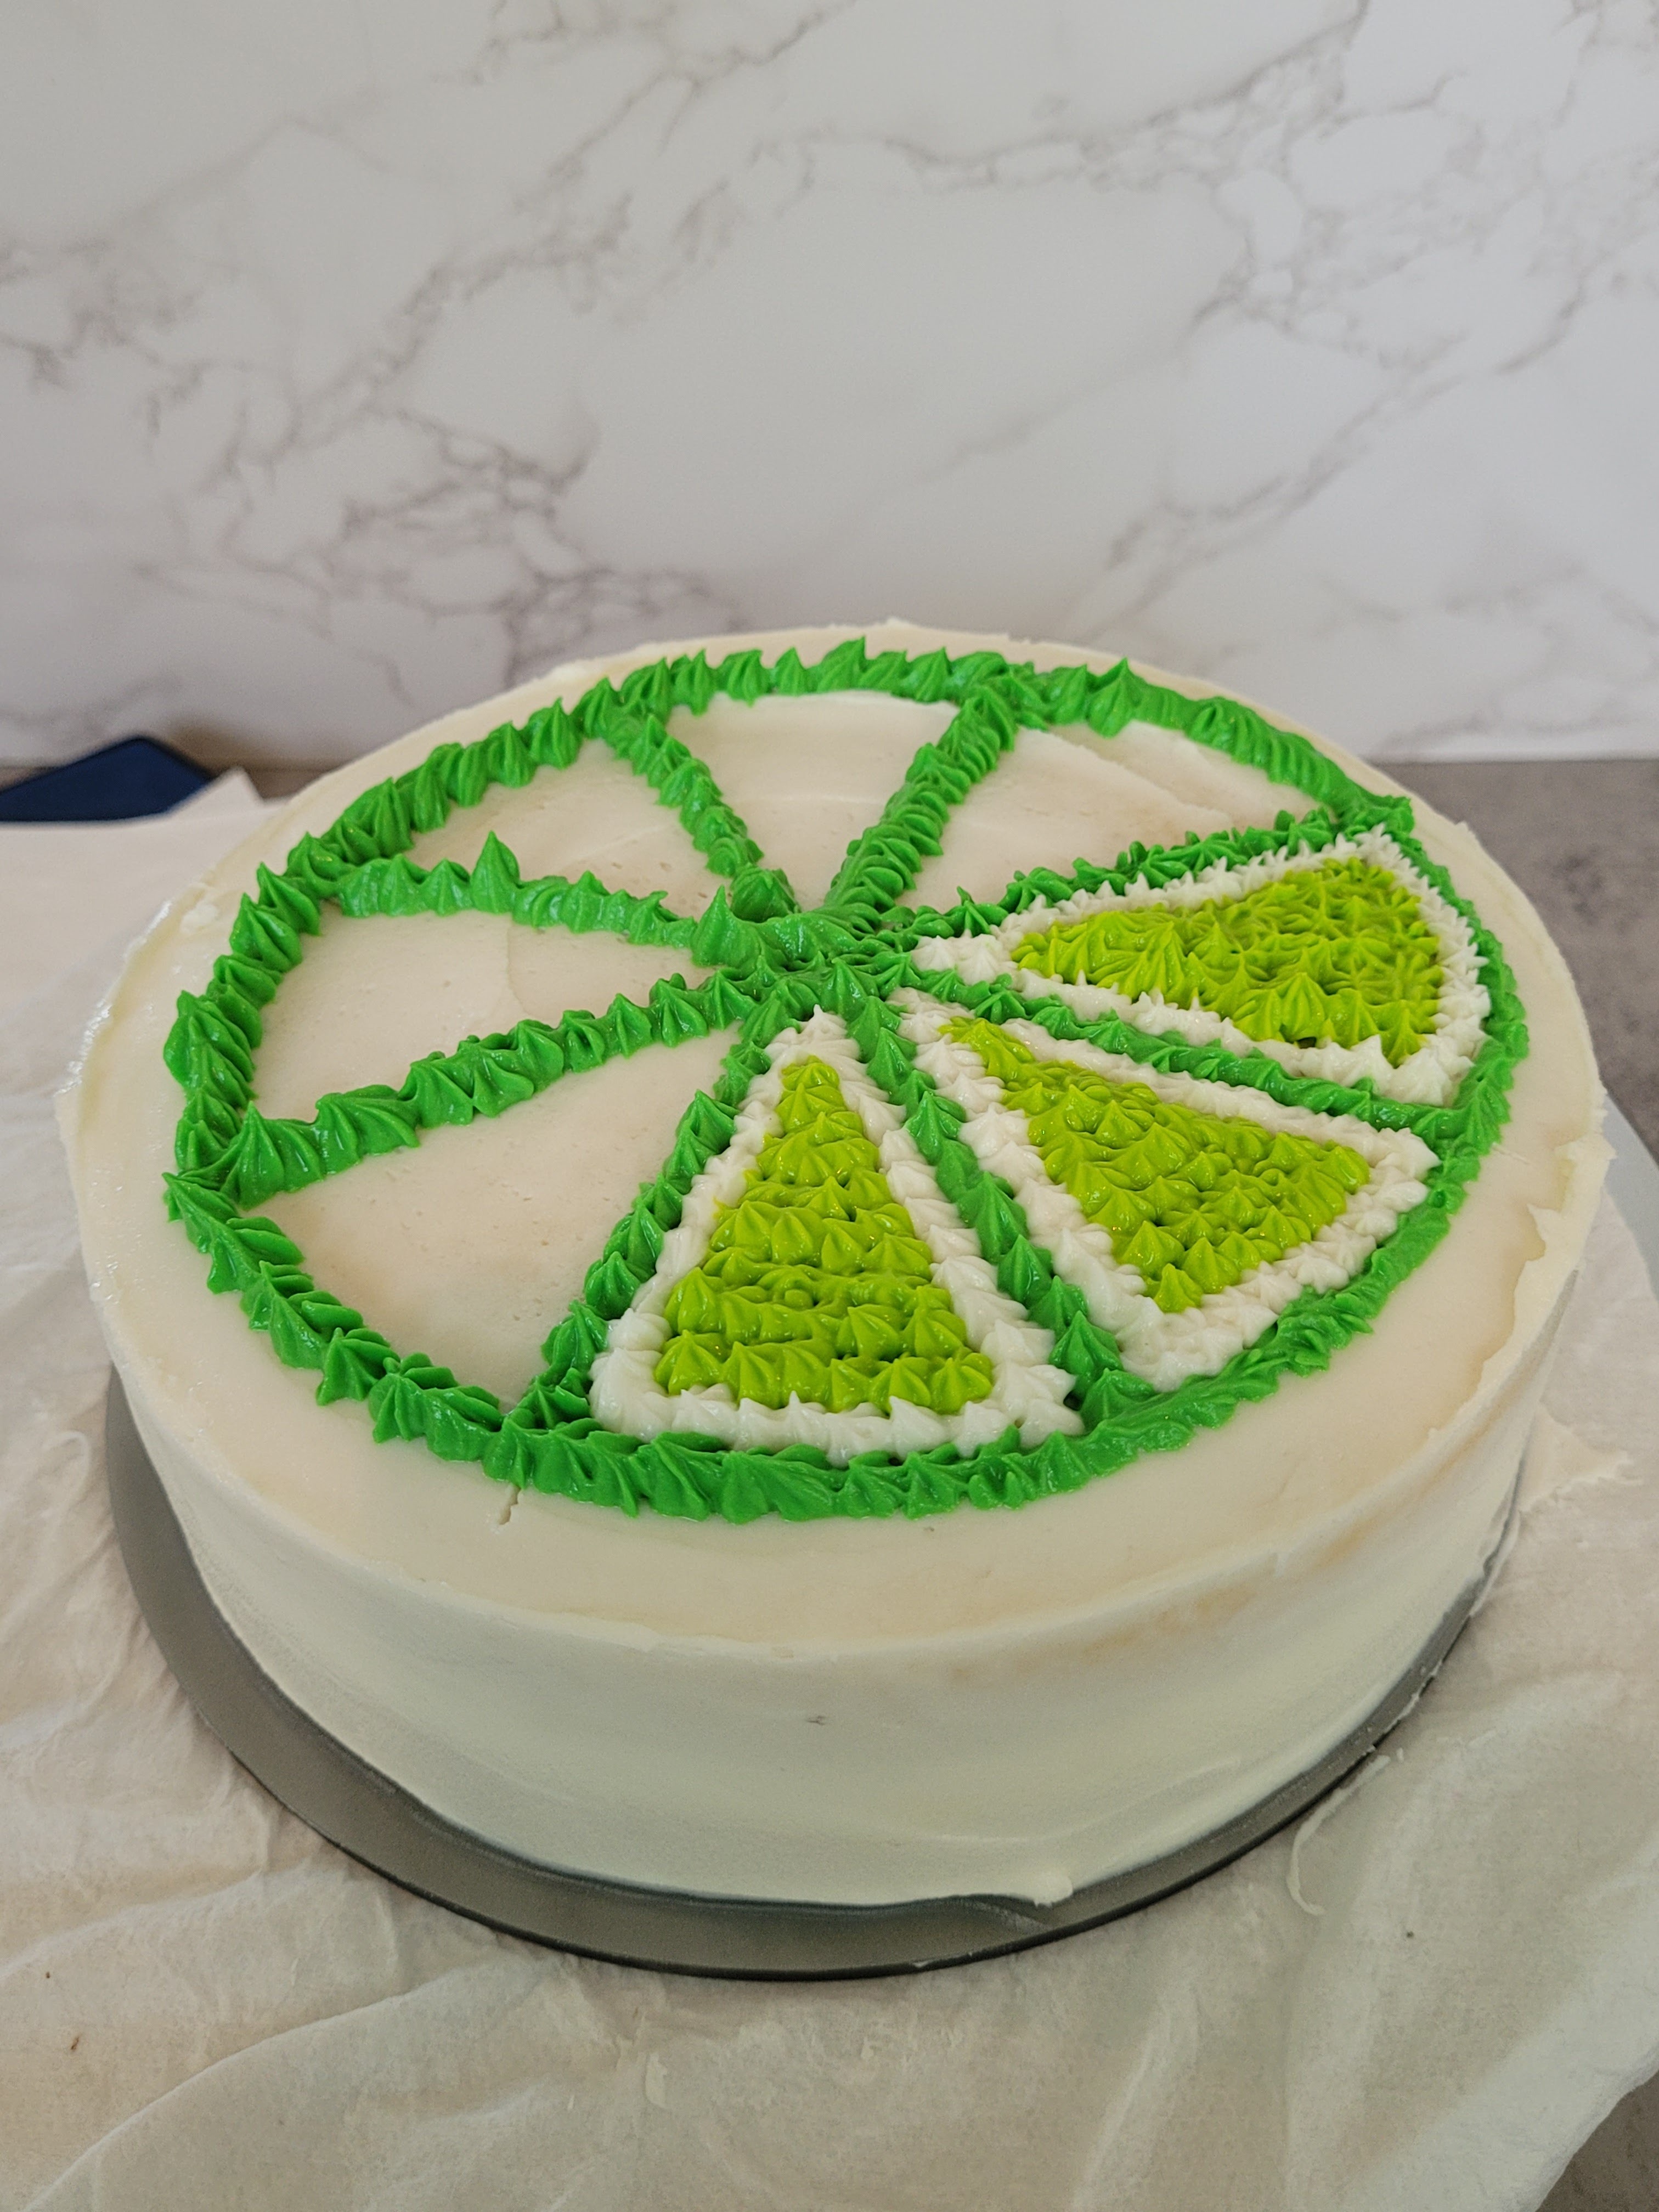
Oh, it’s all coming together. Then I finished by piping the lime green in the middle of the segment. Just repeat this around the rest of the top to finish your lime slice look.
This lime is almost blinding in person. It’s perfect. Once you finish with the lime topper, now comes the hard part. Waiting. You want the side of the cake to be close to frozen before you paint on it. I popped my cake in the freezer for an hour and half. You could pass the time with a liquid G&T if so inclined, because the painting can 100% be done sloppy.
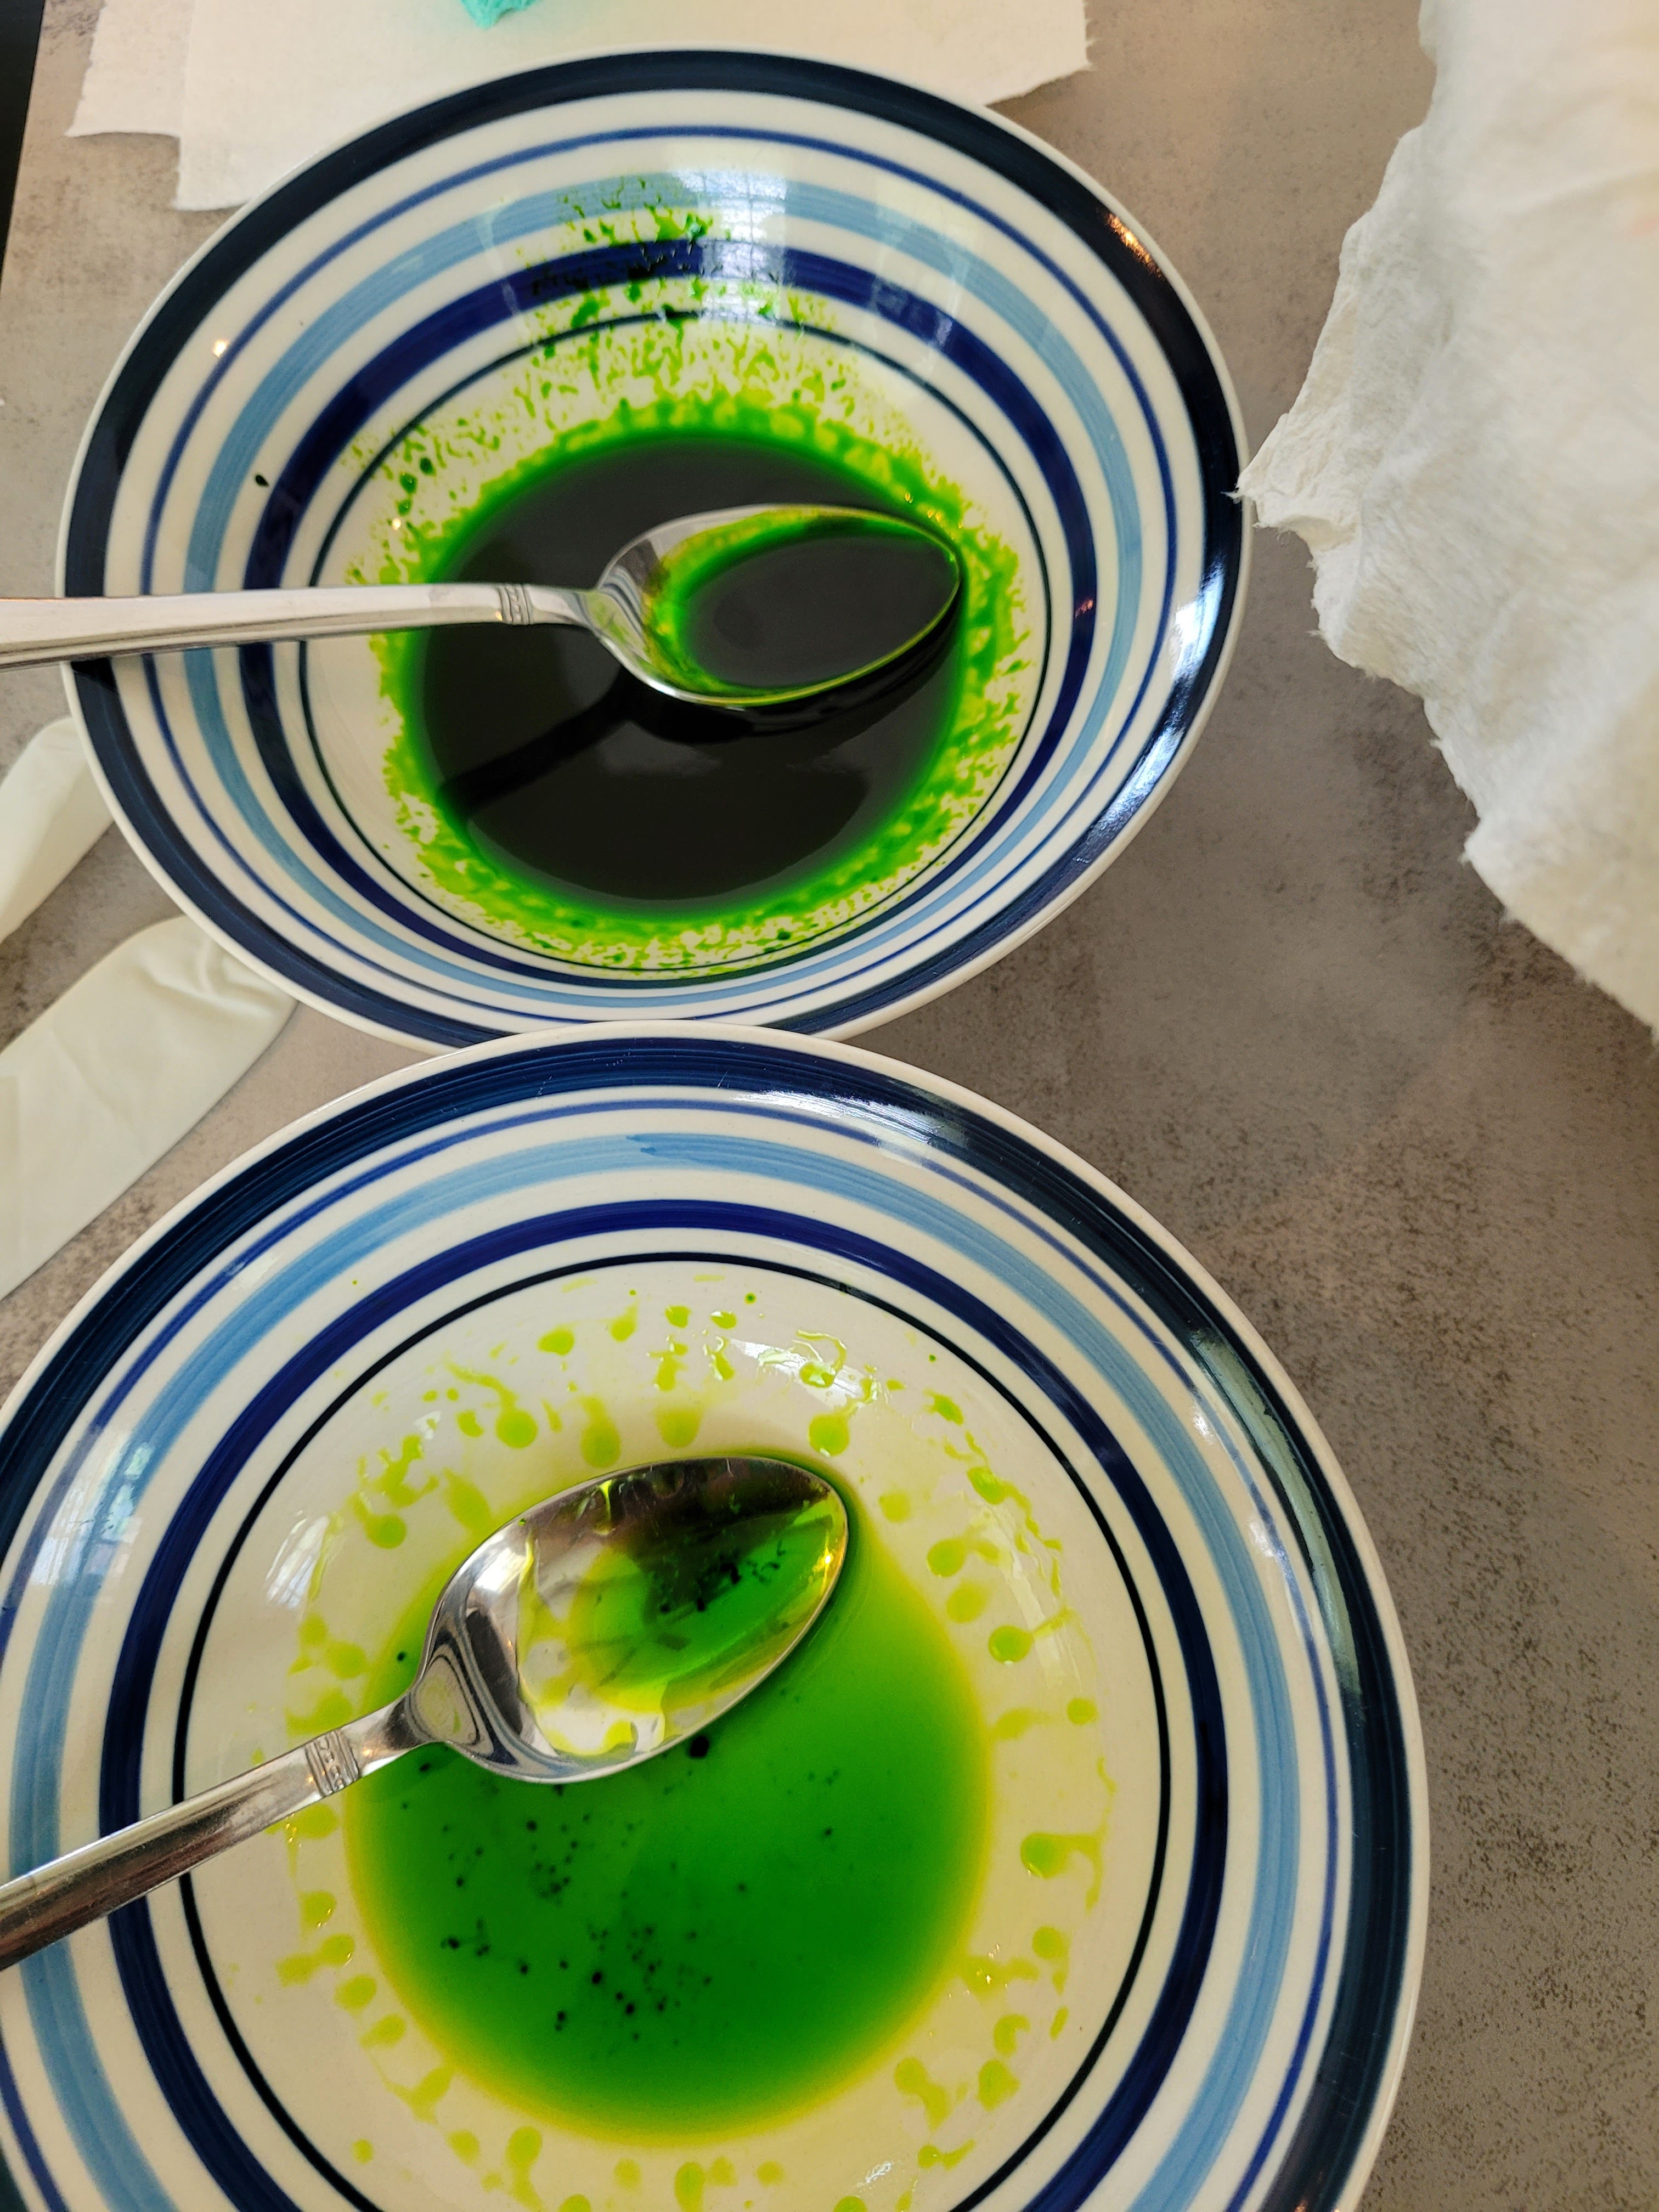
Prepare to be gin-spired. To paint the rind, you’ll need another clear liquor that doesn’t disappoint: vodka! Yeah, we’re kinda turning it into a martini at this point, but the vodka will evaporate off, so you won’t be able to taste it. Not sure if this would work with more gin, but be my guest. In two small bowls, pour a tablespoon of vodka in each. In one bowl, drop one teeny drop of lime gel dye and mix. In the second bowl, drop a few drops of lime gel dye and mix. Grab some brand new, never before touched, never seen the inside of a cup sponges and cut into small squares.
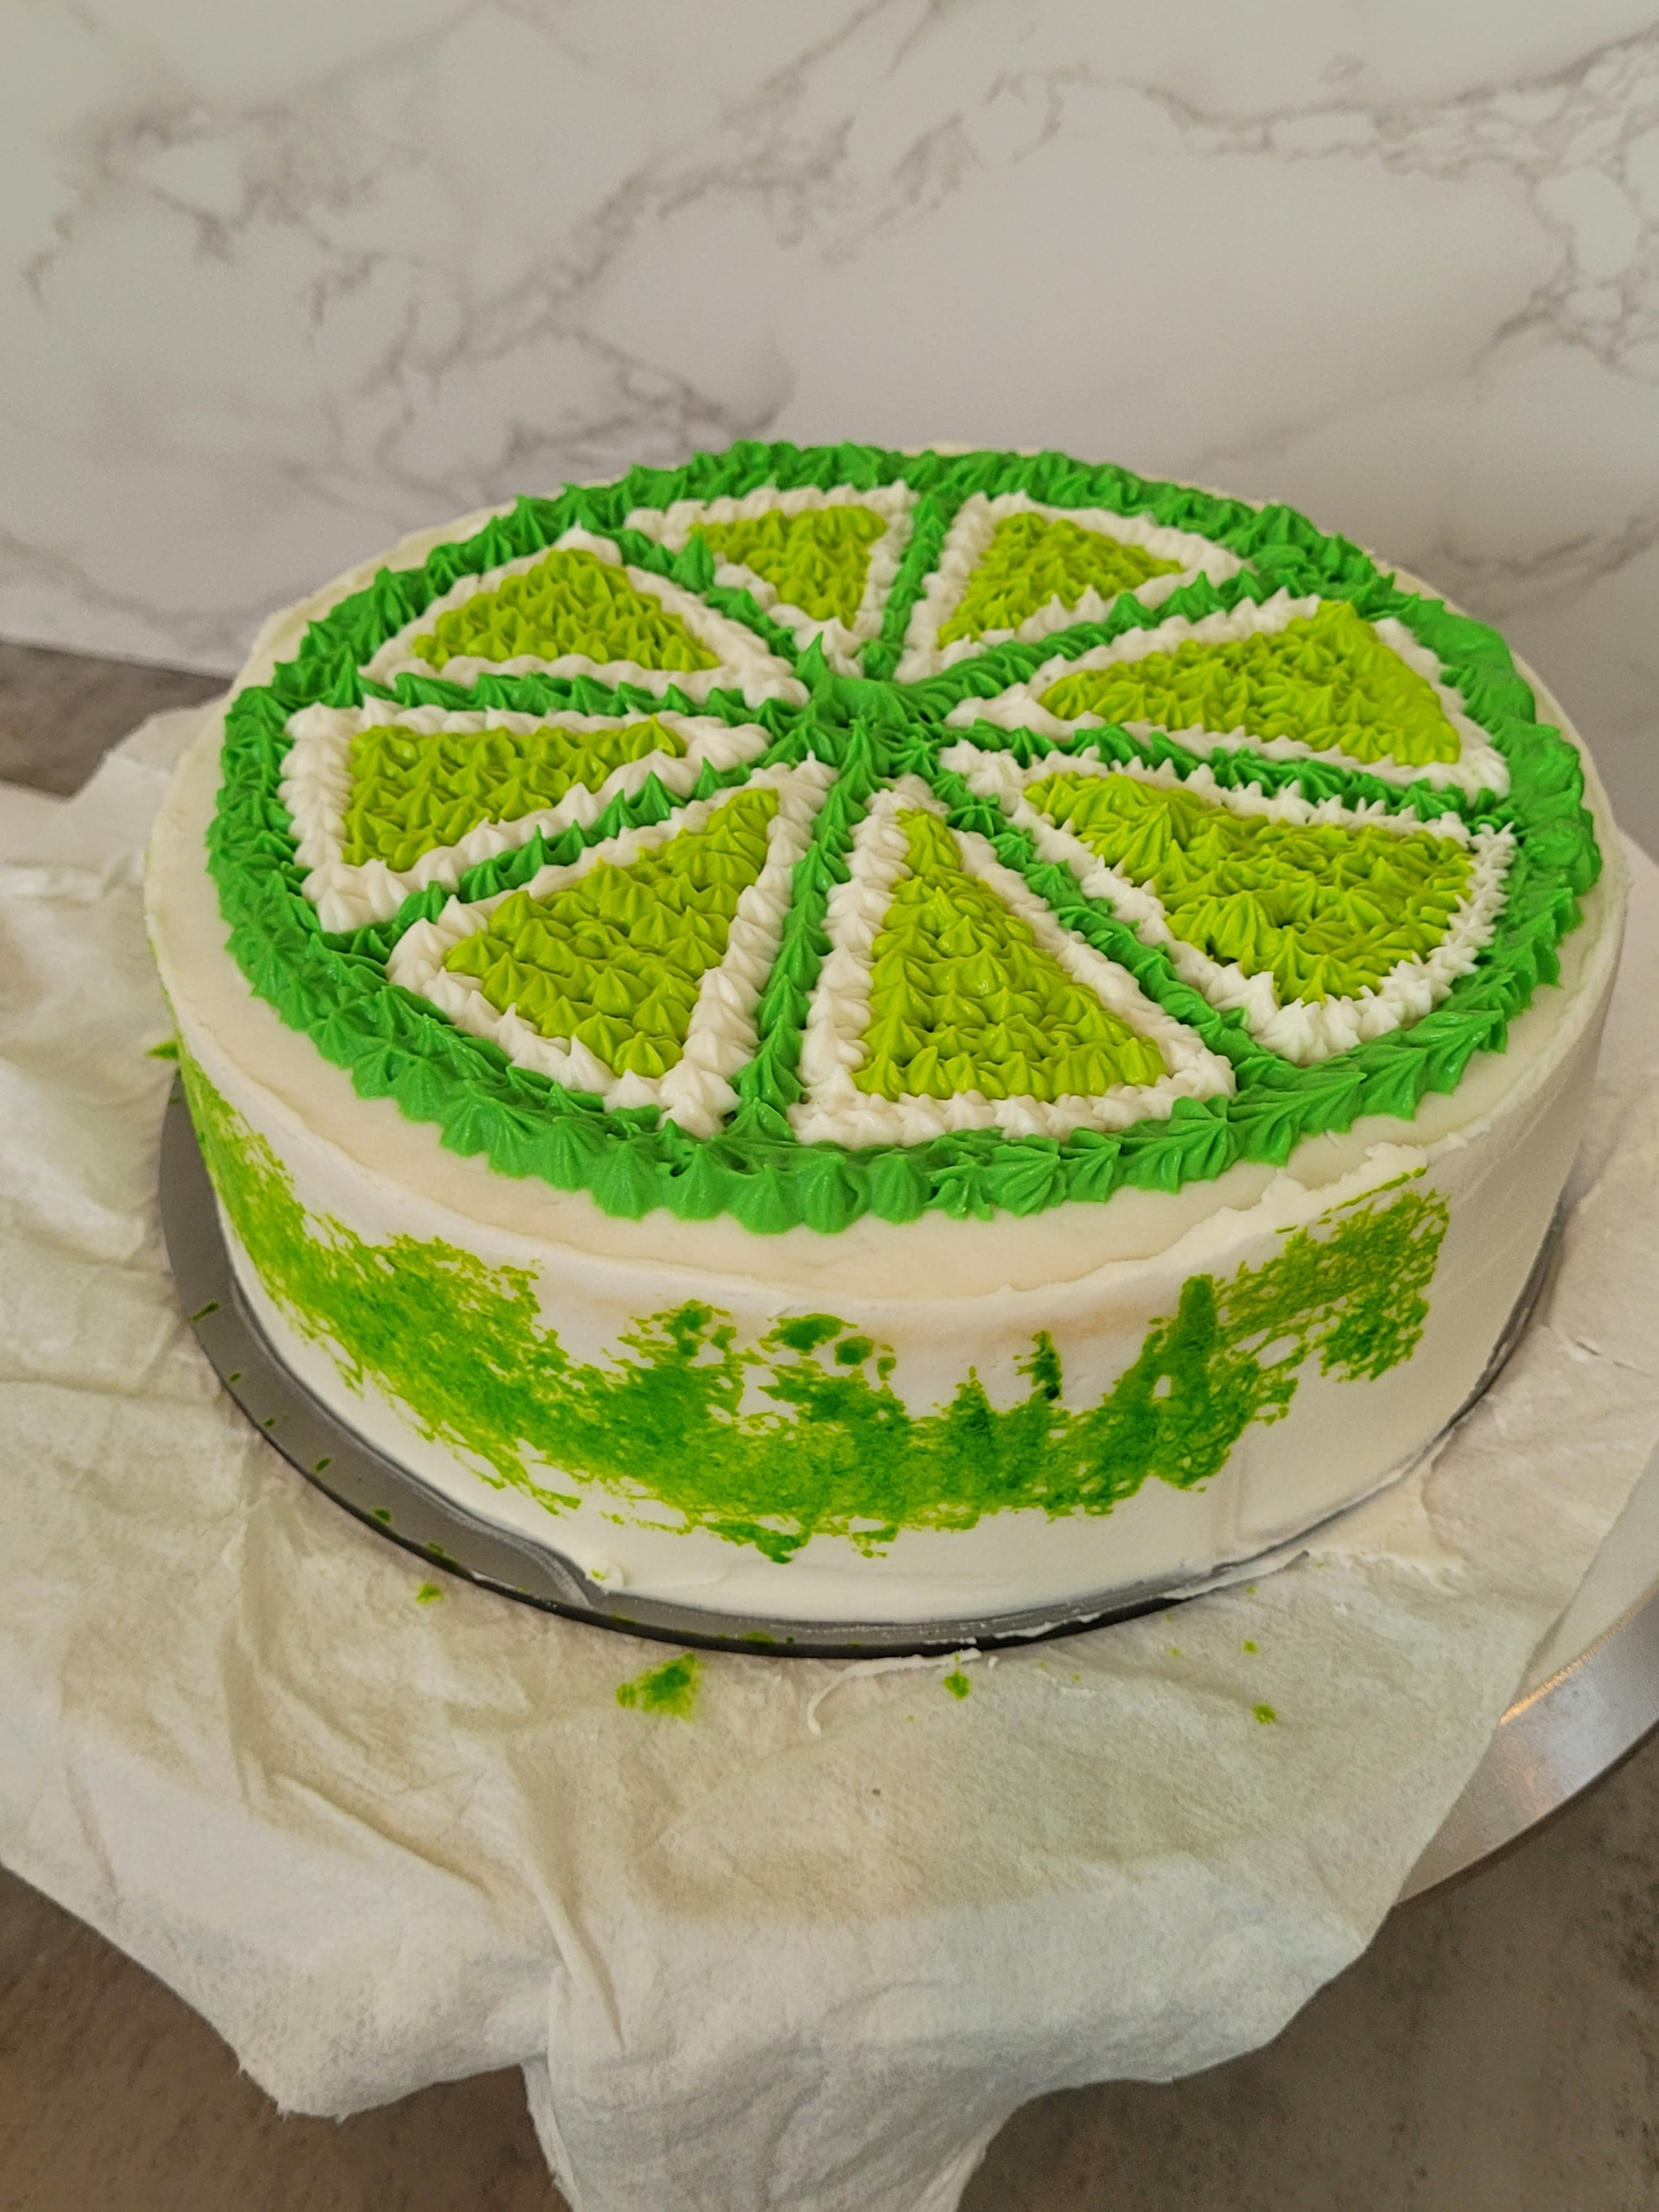
Remember when we used to sponge paint everything in the early 2000s? Yeah, same vibe. I highly recommend grabbing some latex or kitchen gloves you don’t mind dying green. You could forgo the gloves–gin and bear it, if you will–but you will 100% look like you strangled Shrek for at least a week. Dip a clean sponge into the darker green, wring out, then gently pat the sponge on the side of the cold cake. Make a few passes; doesn’t have to be pretty. Then come back in with a new section of sponge dipped in the lighter green, and pat over the darker color and into any places without color. This will give a bumpy texture like the outside of an actual lime.
Which, unlike my cupcakes, 100% turned out exactly as I had hoped. Now, place this into the fridge for at least an hour before serving to allow the dye to set and the vodka to evaporate into thin air, like my hopes of making it through the summer without getting too sweaty.

Thought you’d make it through an entire blog without me complaining about how evil summer is? You must be new here. Okay, truly, I am trying to keep my gin up, but it’s SO HOT. Thankfully, this cake is INCREDIBLY REFRESHING. I can’t have more than one actual G&T at a time, but I can eat this cake for days. It is sooo soft; the fizz of the tonic gives the sponge a lighter than air texture, the lime a nice bit of tartness, and then gin…so smooth. It comes last of all the flavors when taking a bite, but it is worth the wait. Even if you’re not a gin fan, you’d probably still love this cake. It isn’t overpowered with “Christmas tree” flavor, I promise. Much like my gin-credible wit, I do realize gin is typically an acquired taste, but in cake form, it is truly for the masses as a refreshing summer treat. ‘Til next time, my fellow eaters!
Recipe & Instructions
Gin and Tonic Cake
A light summer cake bursting with zesty flavor and smooth gin finish
If not gluten free, use any kind of yellow cake mix. Monkfruit can also be replaced with regular powdered sugar.
Ingredients
CAKE
*One box of gluten free yellow cake mix
*113 grams (1/2 c) fat free Greek yogurt
*3 eggs
*4 fl. oz good gin (Aviation, Botanist)
*2.5 fl. oz preferred tonic water
*2.5 fl. oz freshly squeezed lime juice
FROSTING
*224 grams (8 ounces) of 1/3 the fat cream cheese, softened
*225 grams (1 cup) of fat free Greek yogurt, strained overnight
*16 ounces (4 cups) Lakanto powdered monkfruit
*1/4 tsp citric acid
*1-2 TBS gin
*1-2 TBS lime juice
*1/2 TBS tonic
Directions
- Preheat oven to 350 and grease two 8-inch round pans and add bake even strips.
- Whisk yogurt, liquids, and eggs ingredients together in a stand mixer on low for 60 seconds before switching to a paddle attachment and adding the cake mix; mix on medium-high for two minutes.
- Pour batter evenly into pans and bake for 25-30 minutes, until a toothpick comes out mostly clean from the center.
- Allow cakes to cool fully before frosting.
- To make frosting, whisk cream cheese and yogurt for 3 minutes before adding in half the powdered monkfruit and 1 TBS gin, mixing well.
- Add in remaining monkfruit and 1 TBS lime and 1/2 TBS tonic, mixing well. Taste here to see if you’d rather add 1 additional TBS of gin or of lime juice.
- Frost the cooled cake as desired; to make the lime cake, please see detailed decorating instructions above or video on my Instagram page.
- Keep leftovers covered and in the fridge. Cake slices best served at room temp, so remove and slice 30-45 minutes before eating. Enjoy!
Nutrition
Macros
12 servings
200 cal/39 c/2.9 f/3.8 p per slice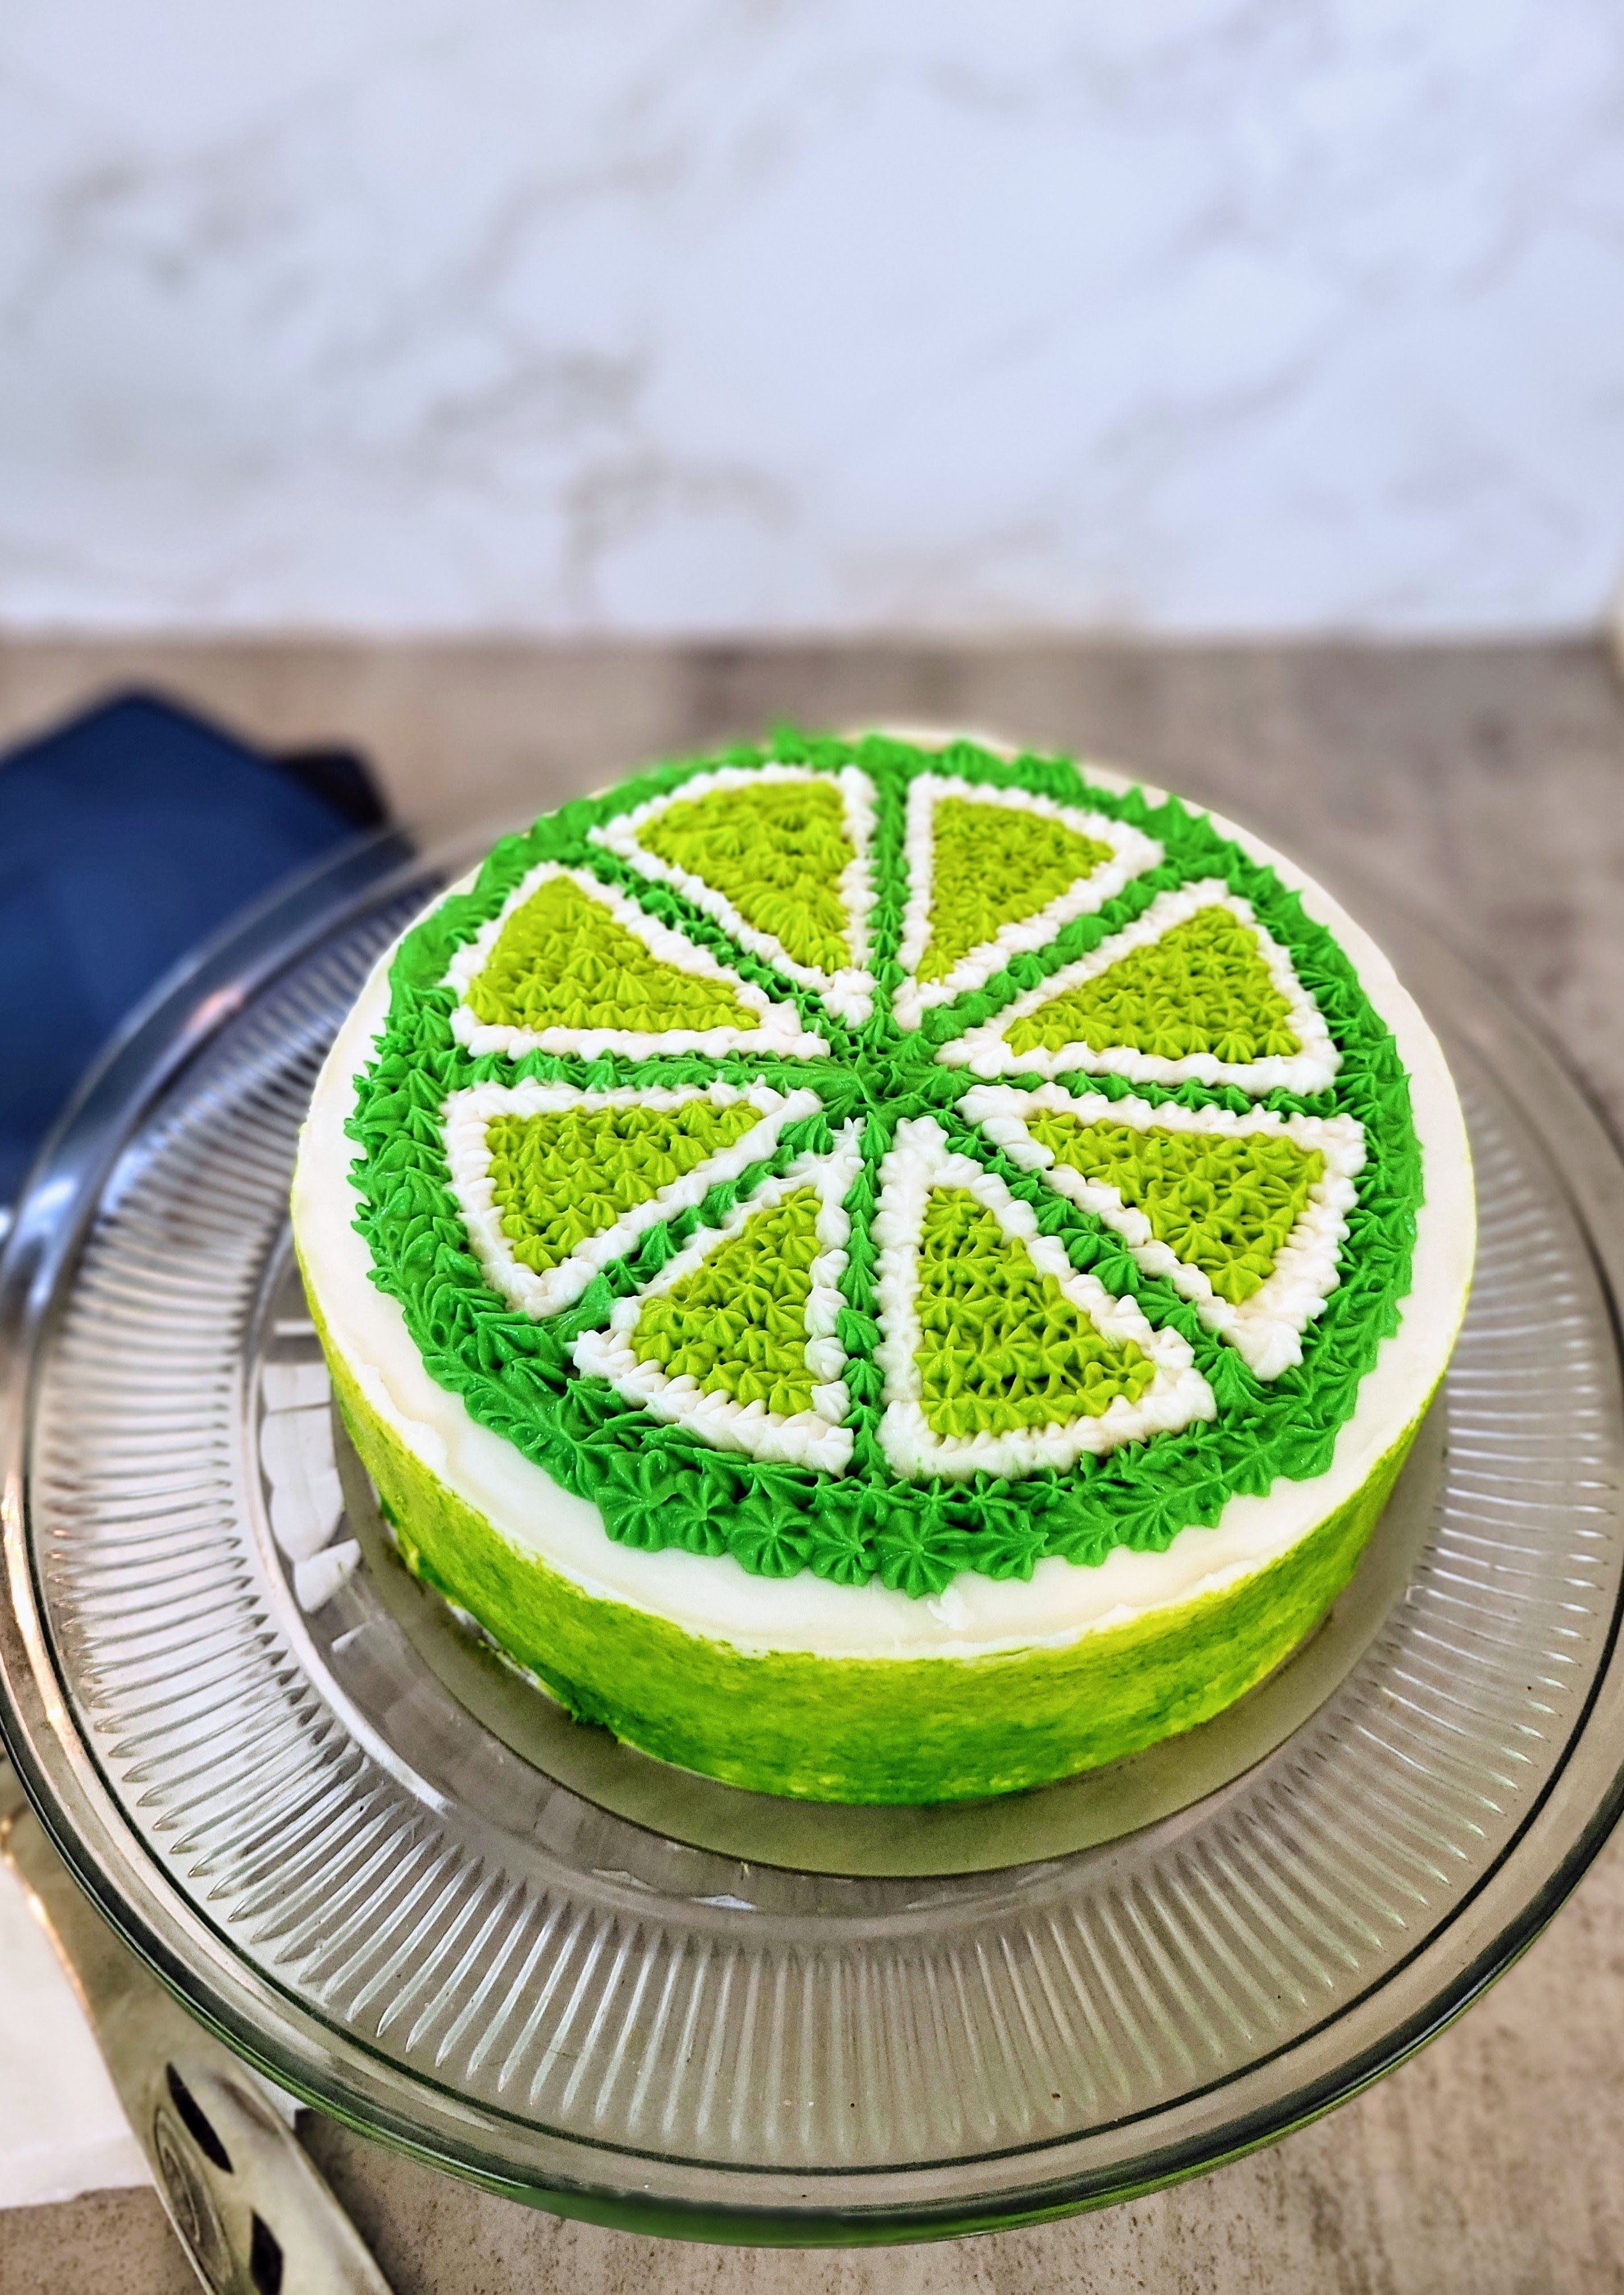
Eatin’ on gin and tonic…laid back, with my mind on my money and my money on my mind. Right, Snoop? -
Current Mood: Cue the Sparklers.
Jump to recipe and instructions
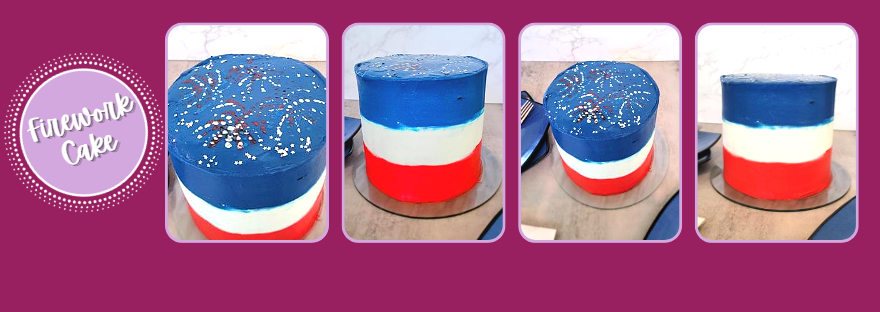
June is almost over already? Julyin! Usually, I’m making a birthday cake for my husband this weekend since he’s an end of June baby, but he decided (read: work made him) he’d rather go hang out in the Southern Hemisphere for his birthday, so I was left with no birthday to bake for…except for America’s! It’s been a few years since I’ve busted out the red, white, and blue luster dust, and well, since I have an absolute sprinkle addiction and was probably a sparkler in a previous life, I knew it was time to shine….
Baby, you’re a firework (Literally. This is a firework cake). I do hate when the hubs has to be away for work, but I try to look for the silver linings: I can binge watch six seasons of The Great British Bake Off in two days, I can go to bed at 8 p.m., and I can make and eat so, SO much chocolate cake (he’s not a fan). So this red, white, and blue cake painted with luster dust fireworks on top is quite literally the fudgiest chocolate cake of all time. And I don’t even have to share…so it’s a good thing each slice is only 281 calories a *pop.* It’s more like the Fork of July in my house…I realize it’s still June, but when you’re content creating for Instagram and Pinterest, you live life several delicious weeks in advance.
Stand back- I have just begun to get lit with these firework puns. To make a fudgy cake that anyone who hates chocolate would never dare go near you need:
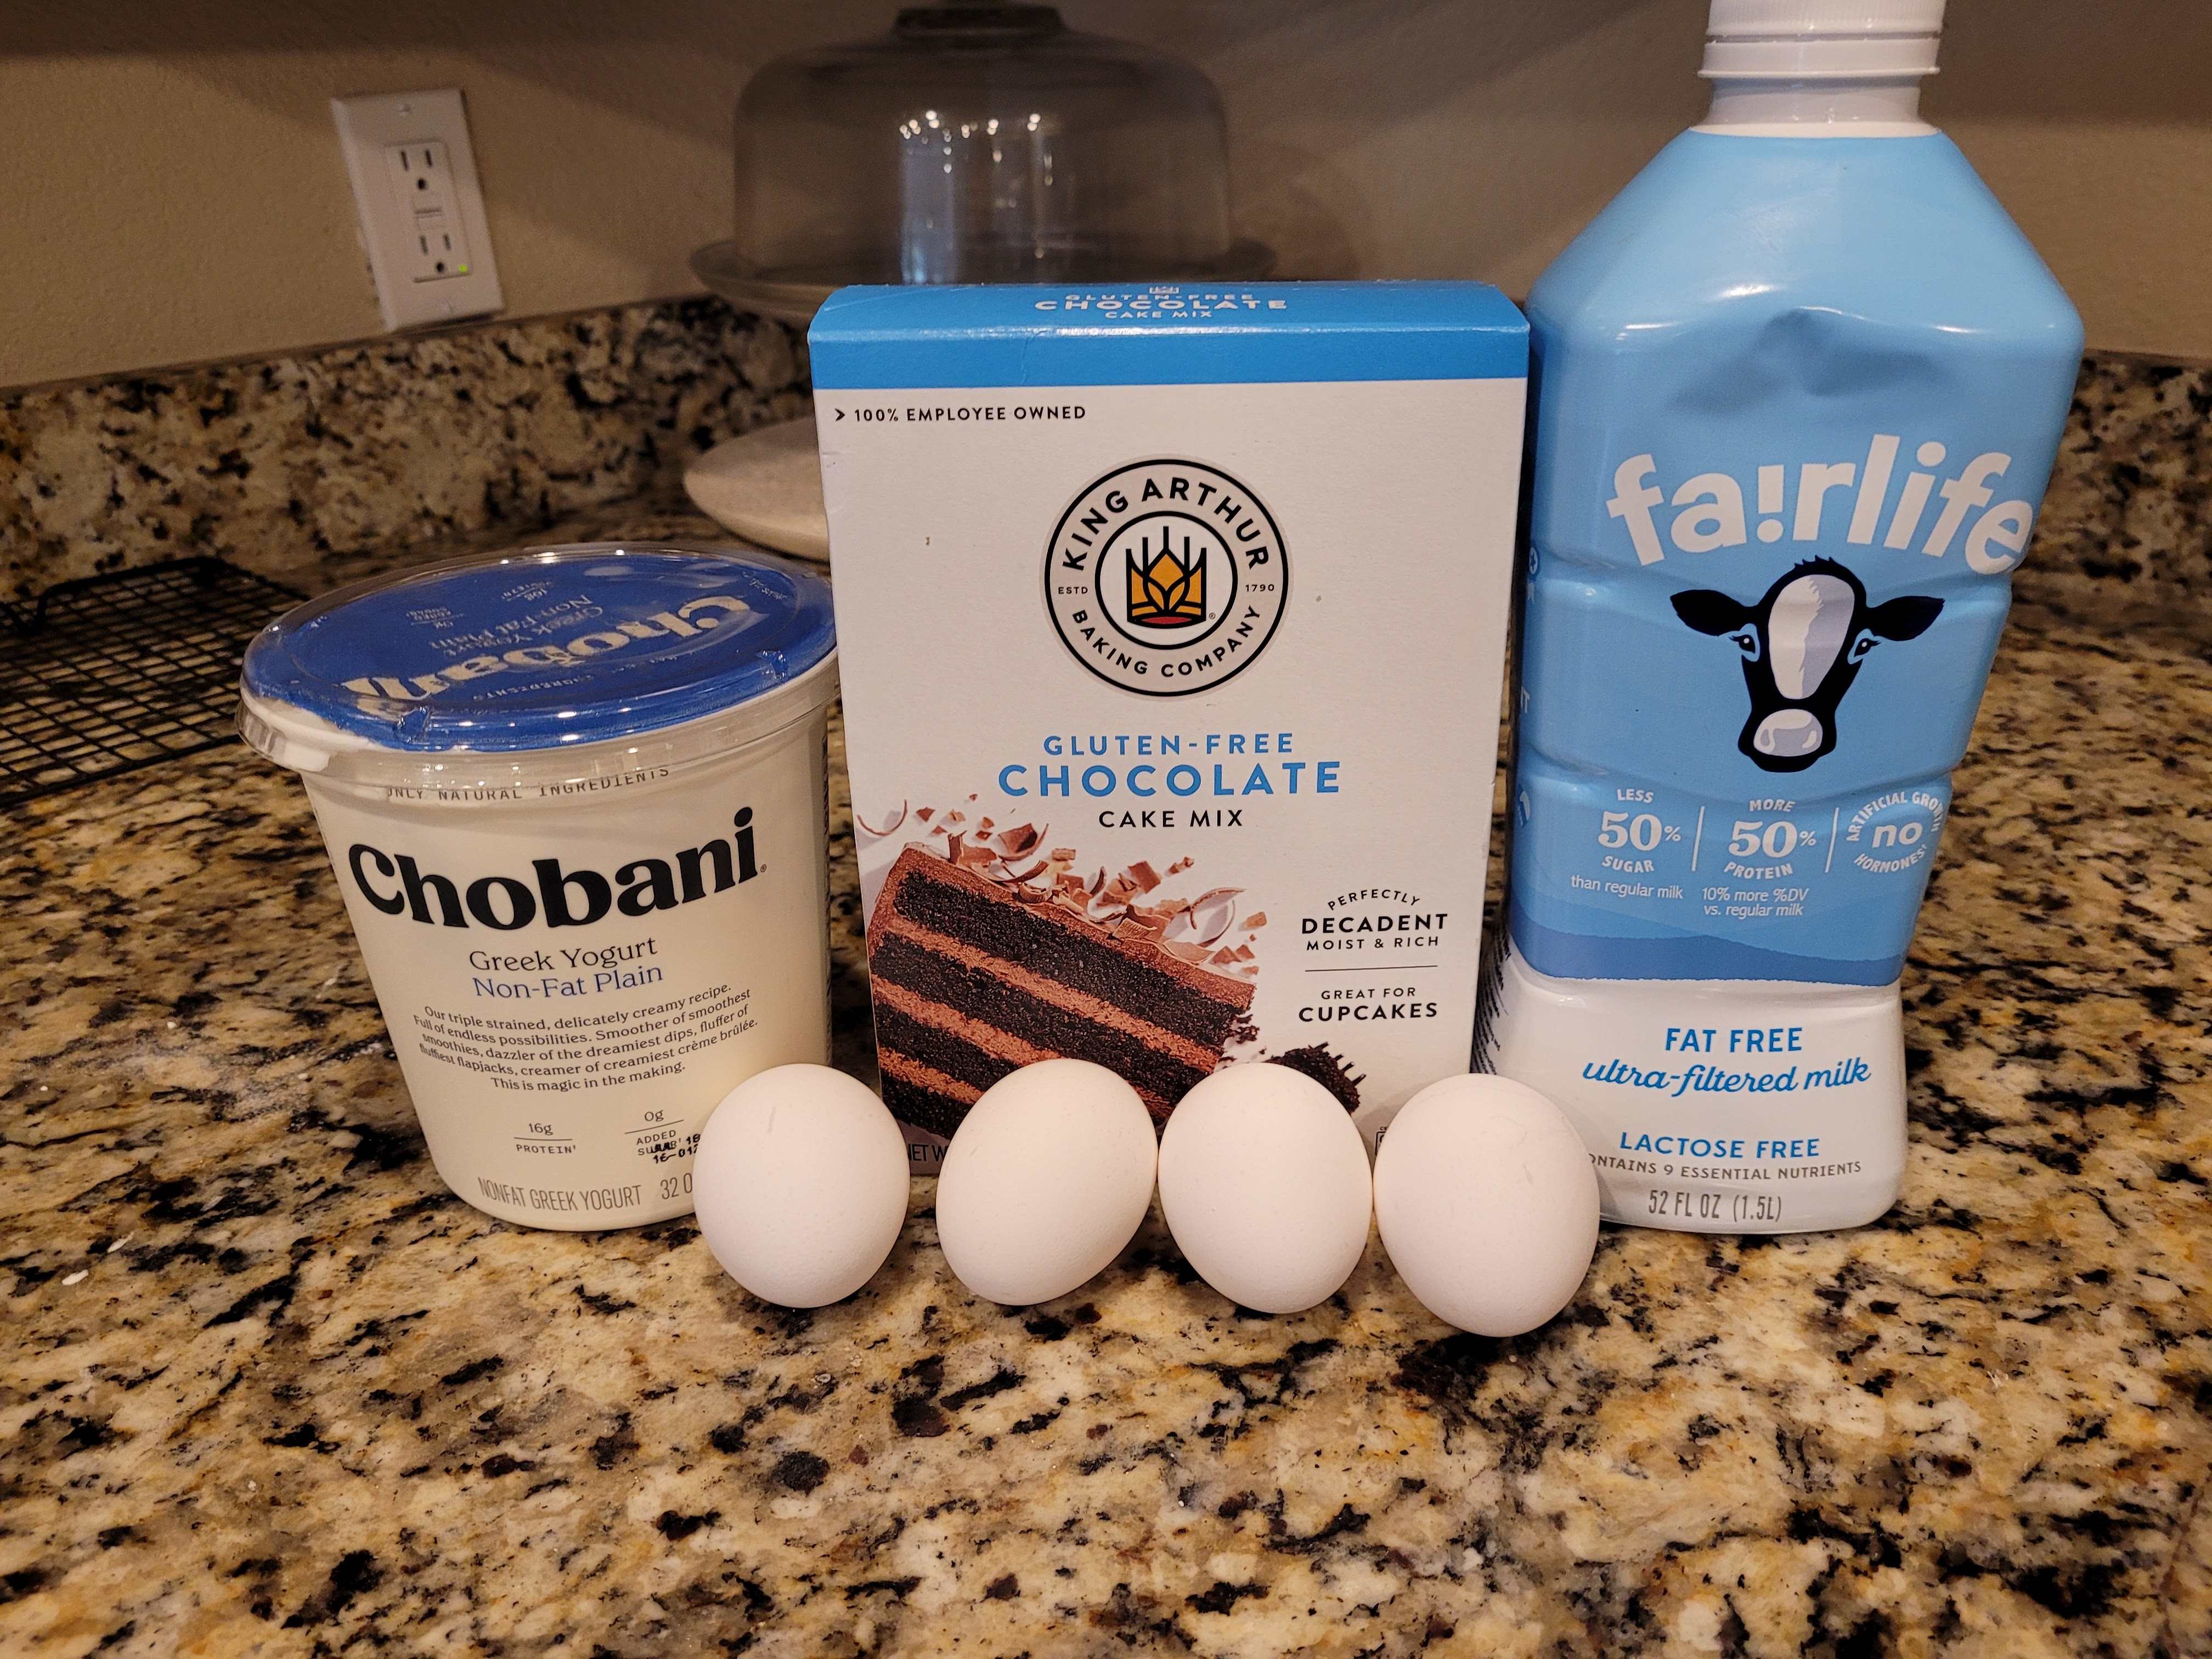
- 1 box of King Arthur’s gluten free chocolate cake mix (or regular chocolate ke mix if not gluten free)
- 4 eggs
- 152 grams (2/3 cup) fat free Greek yogurt (this is what makes the fudge factor)
- 1 1/3 cup skim or fat free milk
Preheat your oven to 350 and prepare three 6-inch round cake pans with cooking spray and bake even strips. Add all eggs, yogurt, and milk into a stand mixer, whisking on low for one minute before switching to the paddle attachment and adding the cake mix. Blend on medium high for two minutes. Pour batter evenly into each pan and bake for 35-40 minutes. A toothpick should come out of the center of the cake with a few crumbs. Let rest in the pan for 10 minutes before turning out to cool completely on a cooling rack before frosting.

P.S., this makes extremely huge, pillowy rounds of chocolate bliss. Absolutely perfect. I went with my usual yogurt cream cheese frosting to save on calories, but a traditional American Buttercream would be perfect (and, well, patriotic) with this chocolate cake. To make the yogurt cream cheese frosting, you need:
- 225 grams (8 ounces) of 1/3 the fat cream cheese, softened
- 226 grams (1 cup) of fat free Greek yogurt, strained overnight to remove moisture
- 16 ounces (4 cups) Lakanto powdered monkfruit or regular powdered sugar
- 1 tsp vanilla extract
- 1/4 tsp citric acid (helps balance out the sweetness)
- 1-2 TBS milk
- Red and navy gel dyes
- Silver or gold star sprinkles
- Red, white or silver, and bright blue luster dust
- Food safe paint brushes
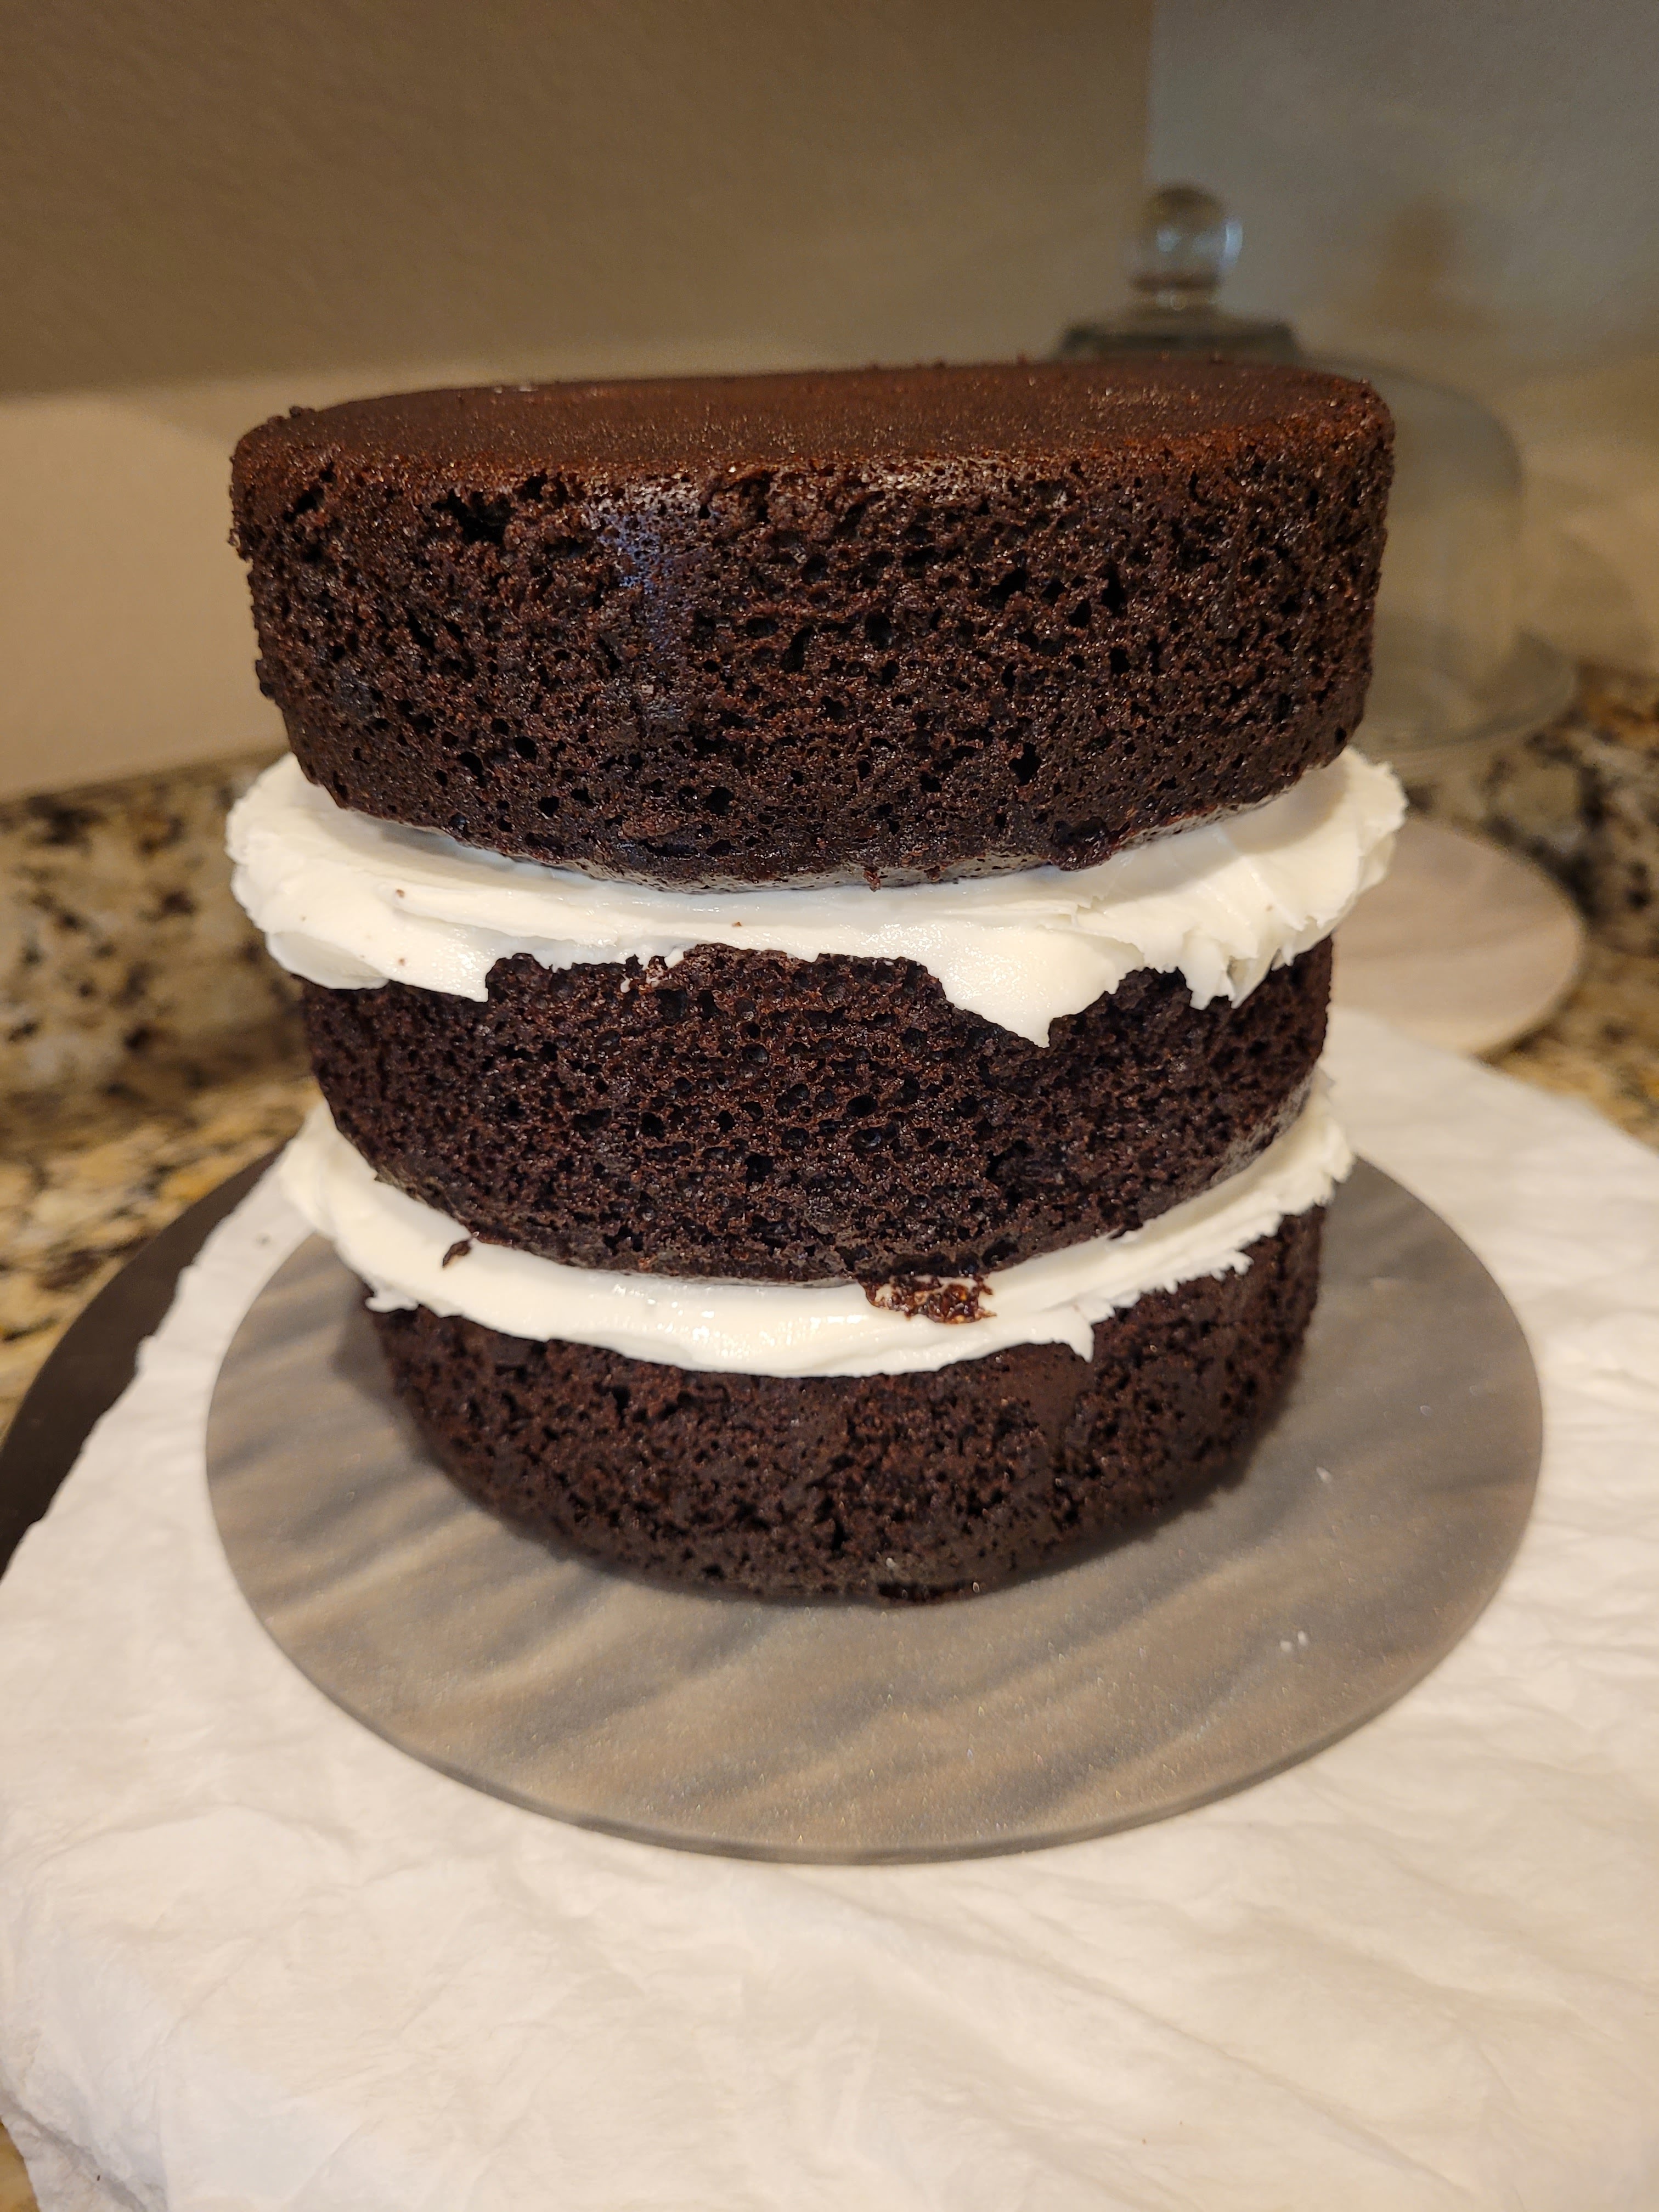
I had such a hard time not diving right into this Chocolate Tower. Whip the cream cheese and yogurt with a paddle attachment in your stand mixer until fluffy, about three minutes. Add in half the monkfruit, citric acid, one tablespoon of milk, and the extract. Blend well, then scrape the bowl before adding the remaining monkfruit and one more tablespoon of milk. To assemble, you just need to slather a layer of buttercream on top of a cooled cake layer, then add another layer (I always place them face down so the smooth surface on the bottom of the cake is now on top), then place the final layer on top. Smooth out any excess that pops out of the sides.
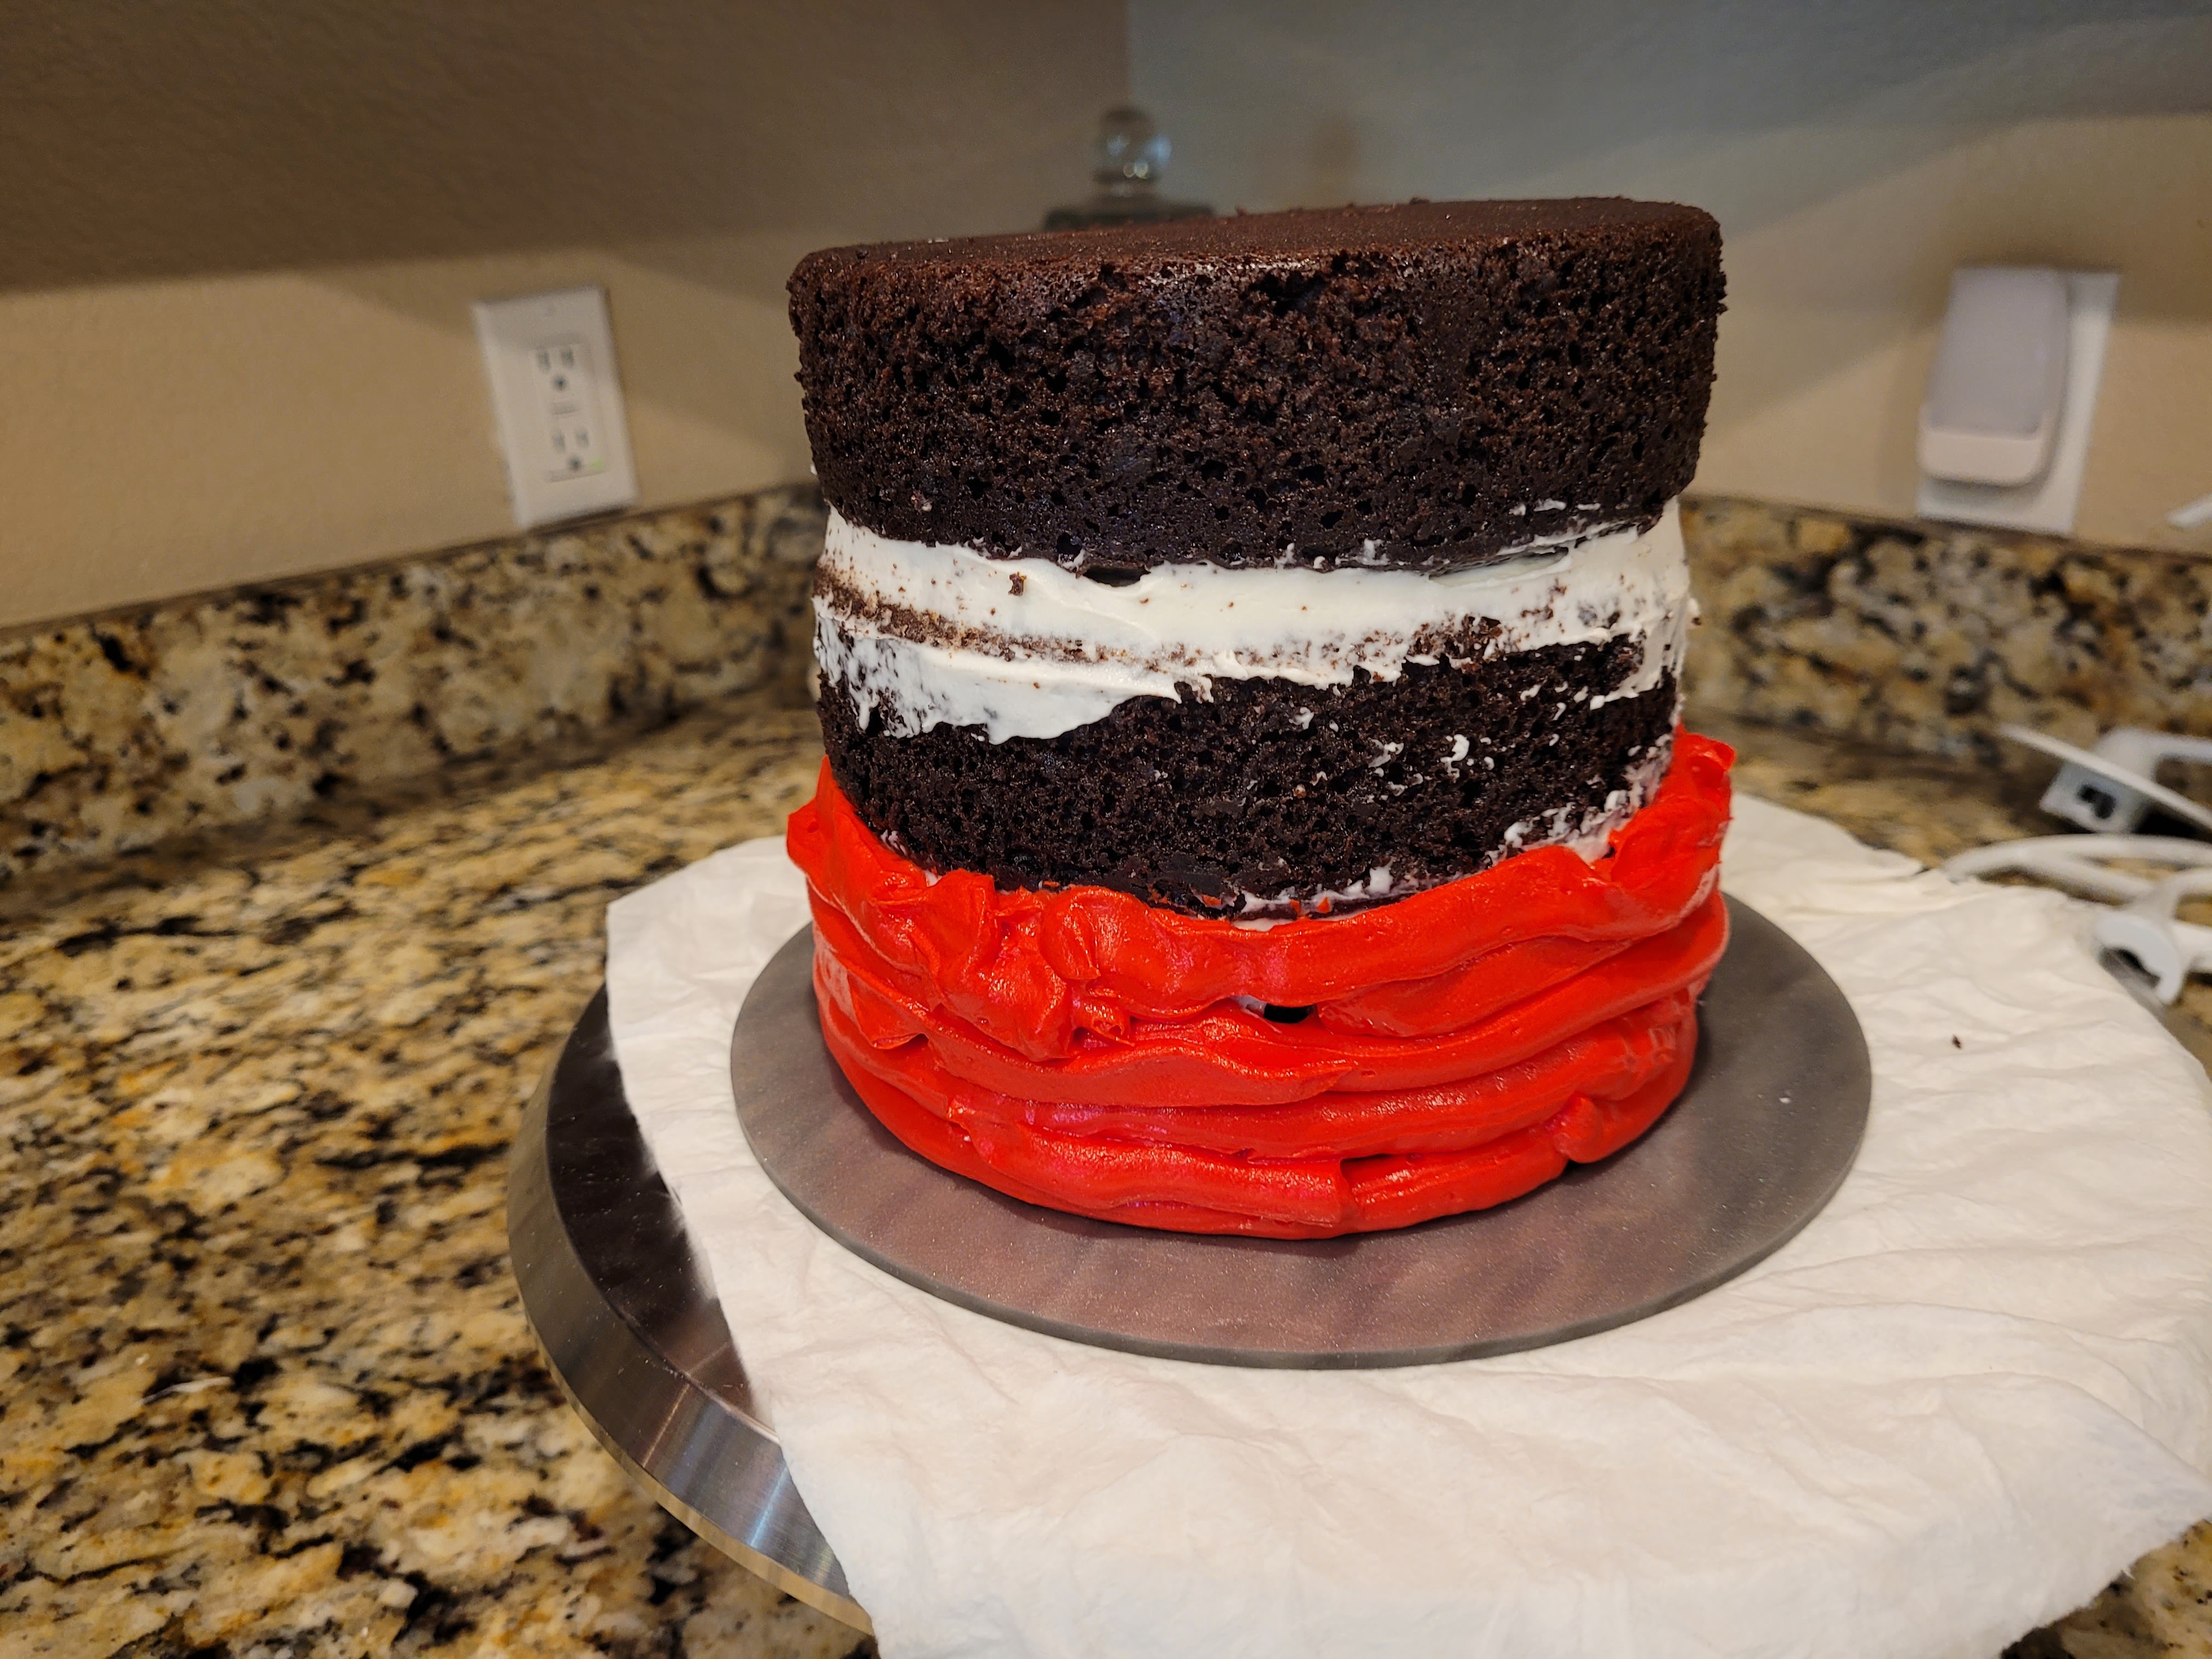
And let the patriotism begin… Now, divide your remaining frosting. Put a third of the plain white frosting into a piping bag and set aside. Split the remaining frosting into two bowls; dye one red and the other navy. Place each into their own piping bags as well; no tips needed. I wanted the top of the cake to be a dark night sky, so I started on the bottom of my cake with the bag filled with red frosting. I snipped the tip and drew red circles around the cake up to the end of the first layer of cake.
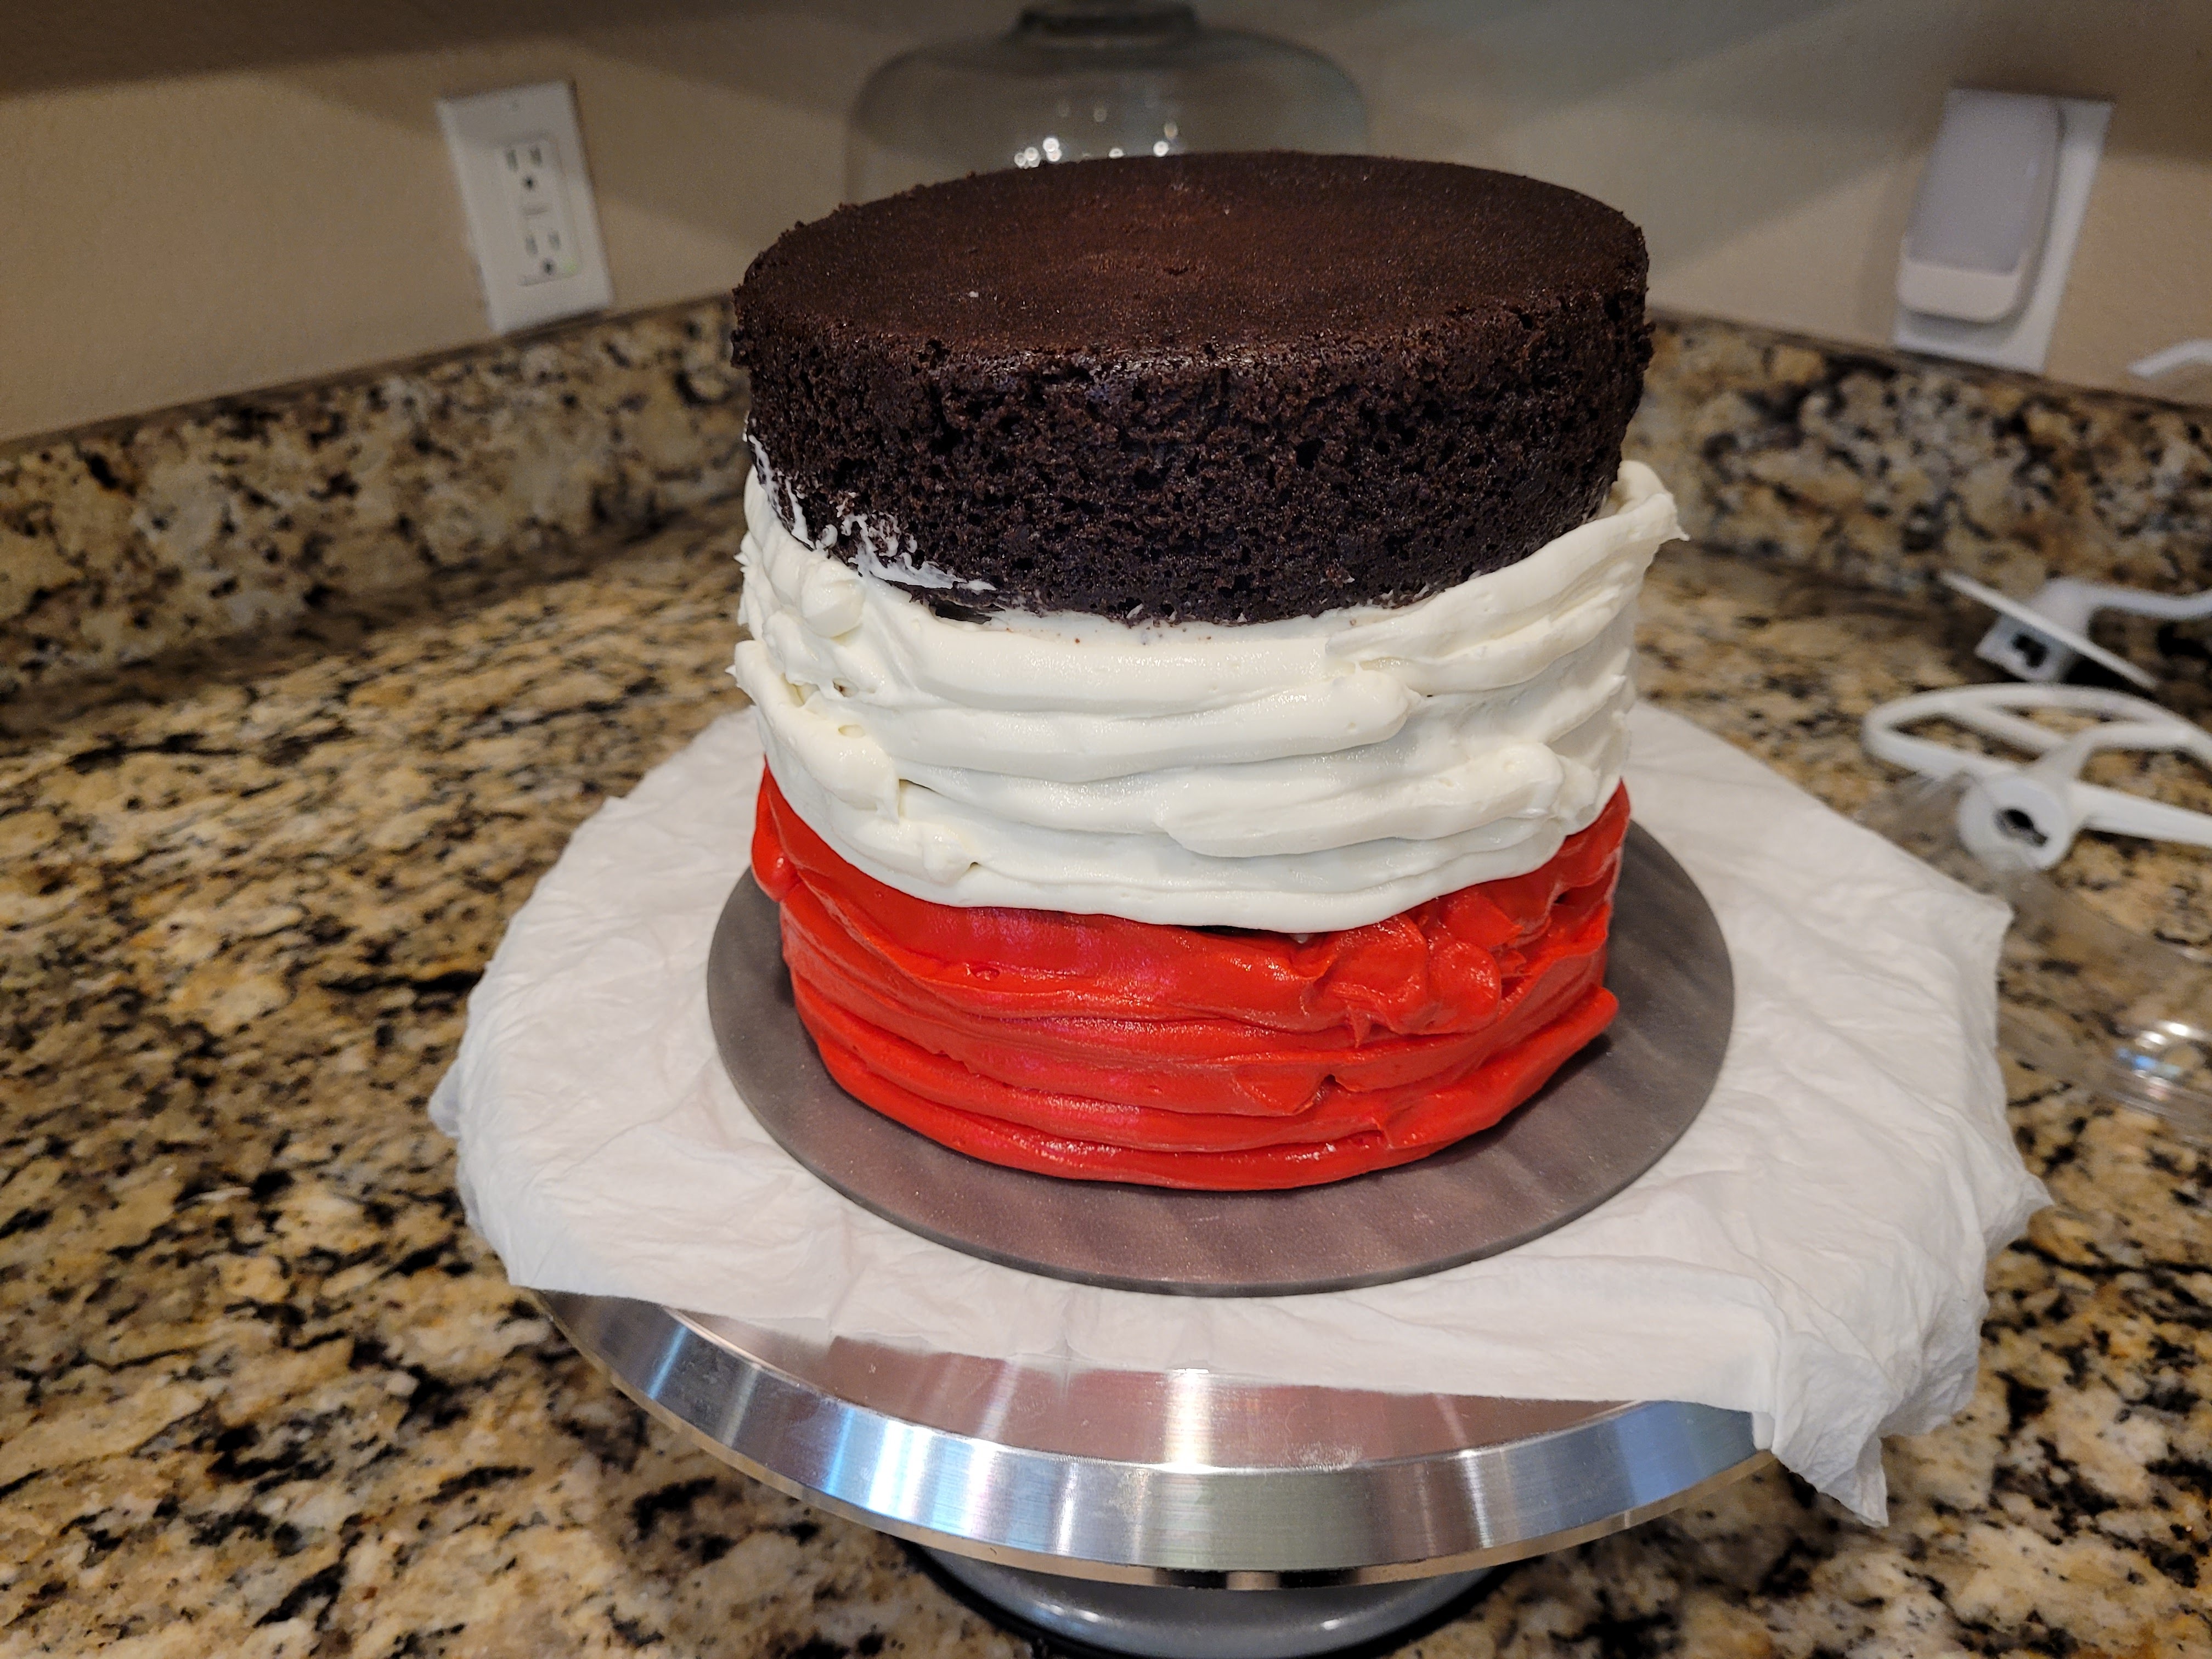
Red, white, and messy… Now, I realize this looks like a disaster, but I promise things will get cleaned up. Take the white frosting bag, and draw circles around the middle layer of the cake.
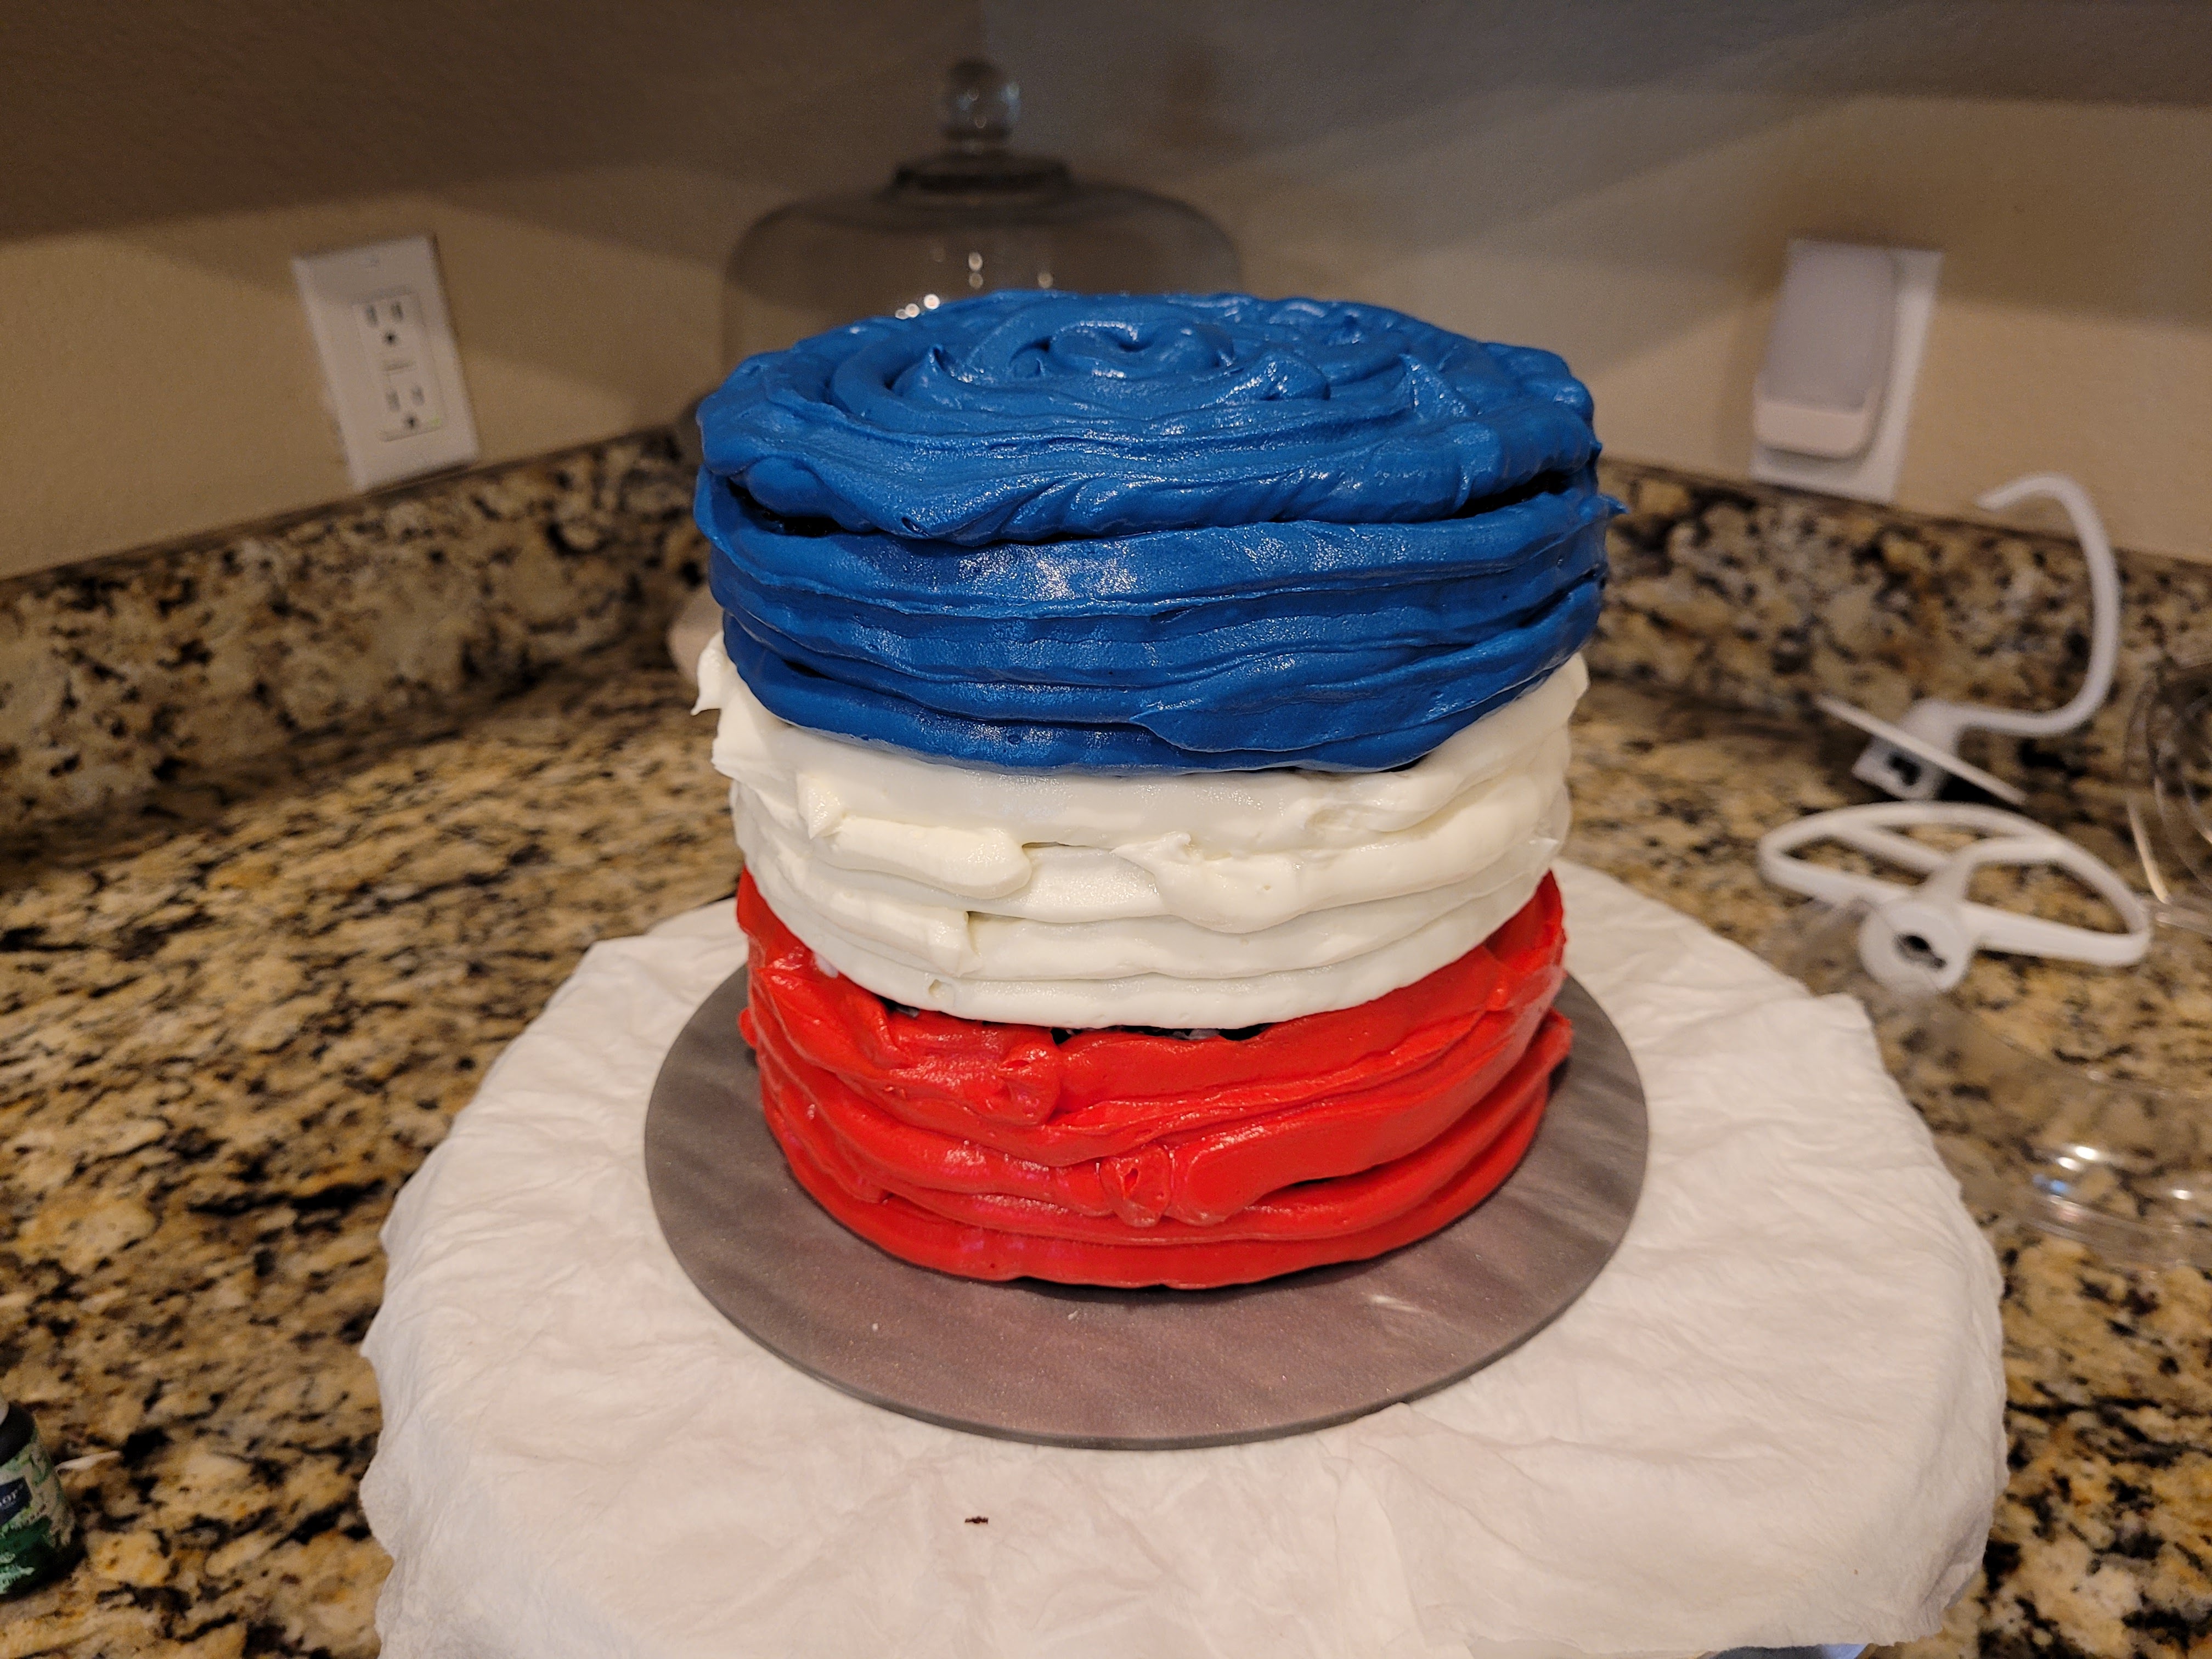
We’re getting ready to have a glow up, I swear. Take the navy bag of frosting, and pipe around the top layer and on the top of the actual cake. You will want to make sure your cake is on a turn table at this point if it isn’t already. Grab your bench scraper, plastic scraper, any device that can make big, clean passes around the cake.

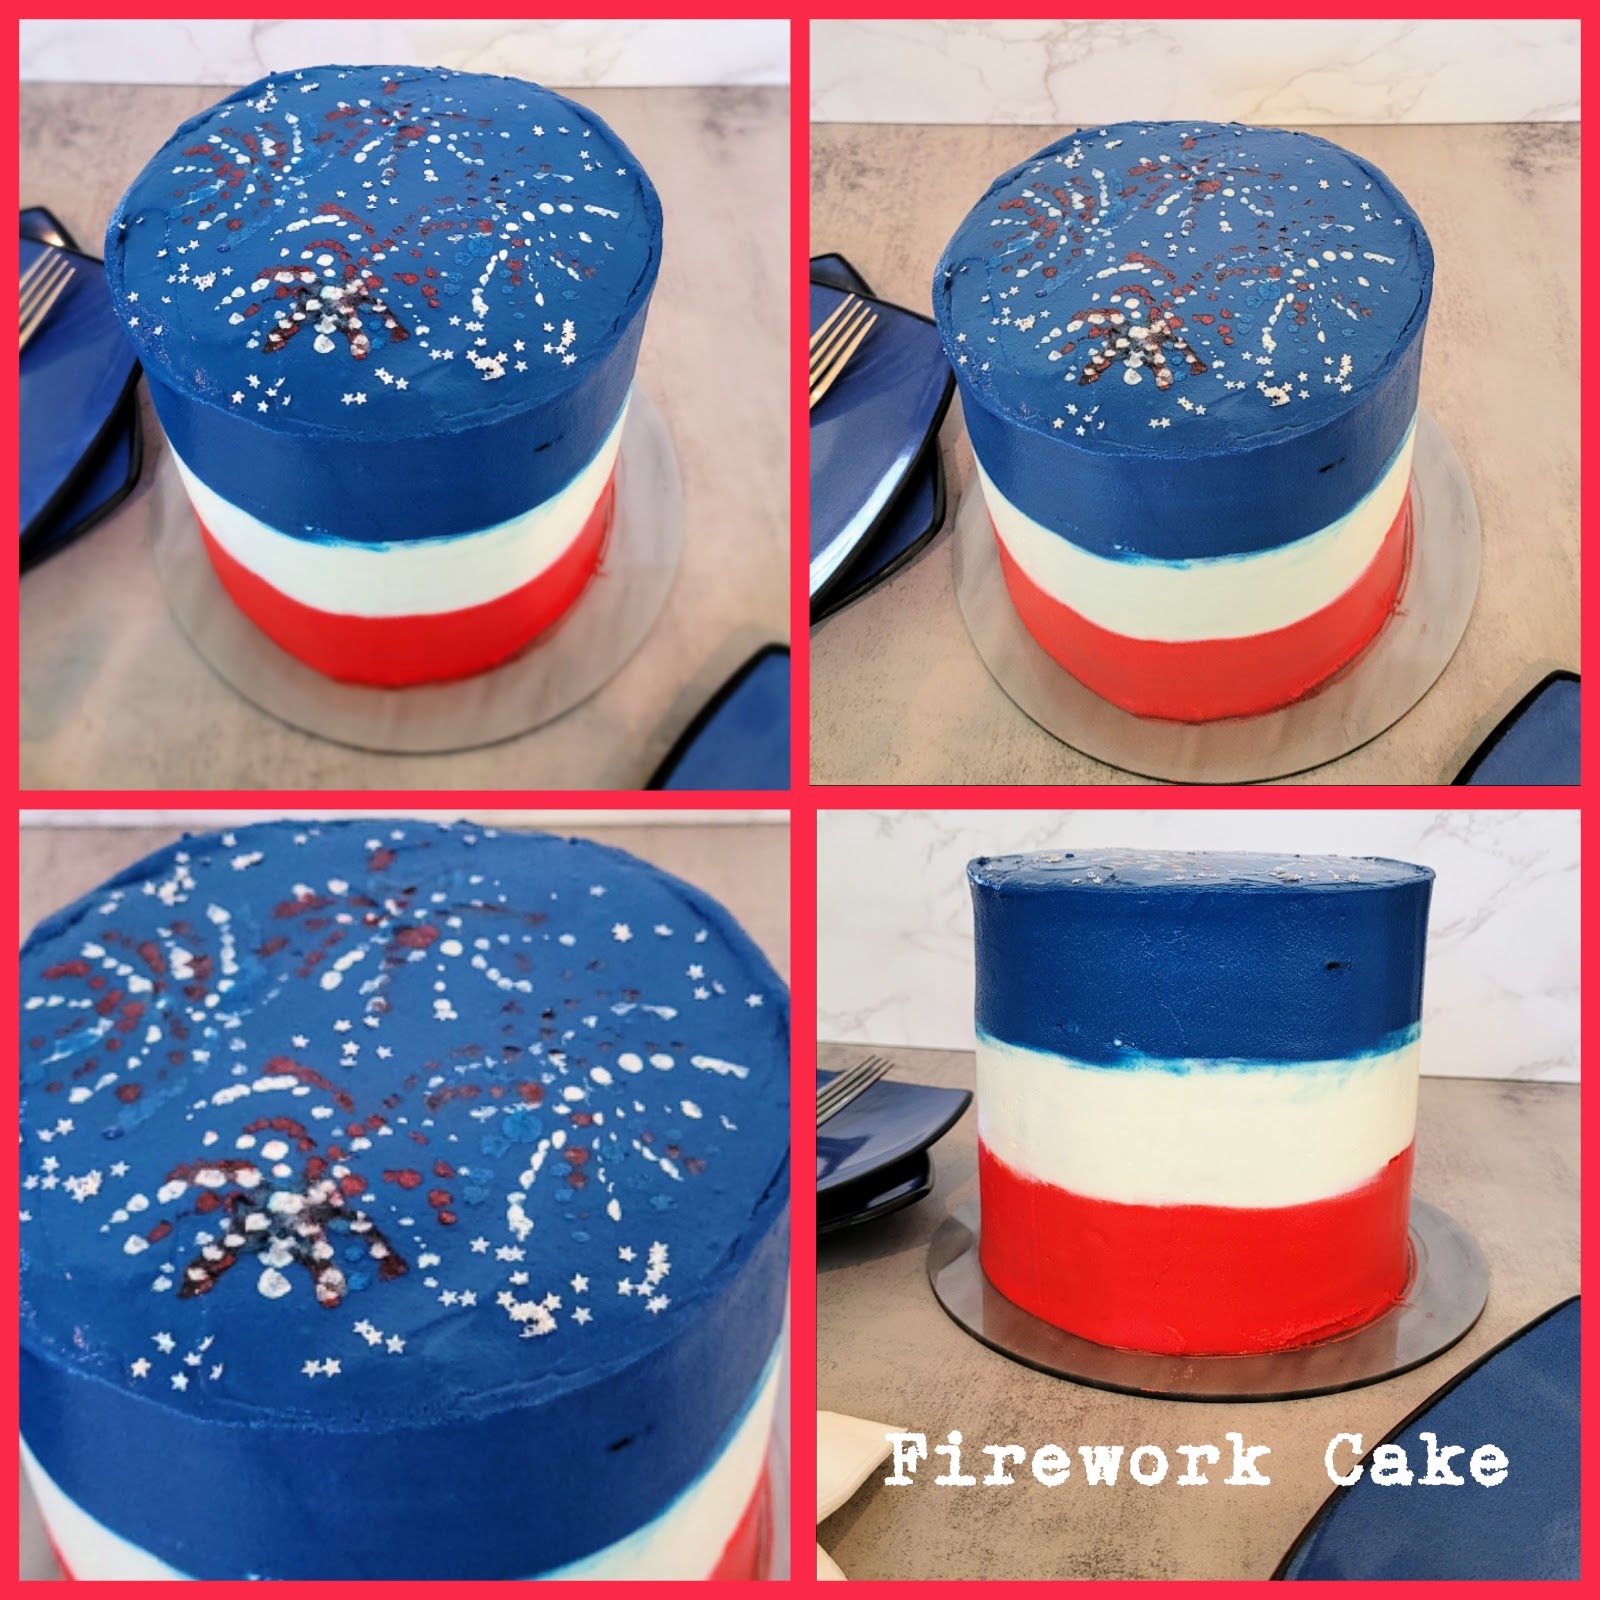
Red, white, and blue me away! P.S., how do we feel about my new photo backdrop? Simply make a pass around the cake with the scraper pressed closely to the side while turning the cake table. Once you’ve gone fully around the cake once, stop, and clean off your scraper. Make another pass, clean off the scraper again, and continue this process until you’ve smoothed out your frosting and your three color layers have come together. There will be a little bleeding onto the white, but it gives off a ~vintage vibe~ that our Founding Fathers would have probably been super into, so it’s all good. Now, place your cake in the freezer for 45-60 minutes. Once the frosting has firmed up a little, you can come in with a Viva paper towel pressed gently on the sides of the cake and use your hand to smooth any weird bumps. Repeat with a new towel each time you need to do this so more color doesn’t transfer. You can also do this on the top of the cake.
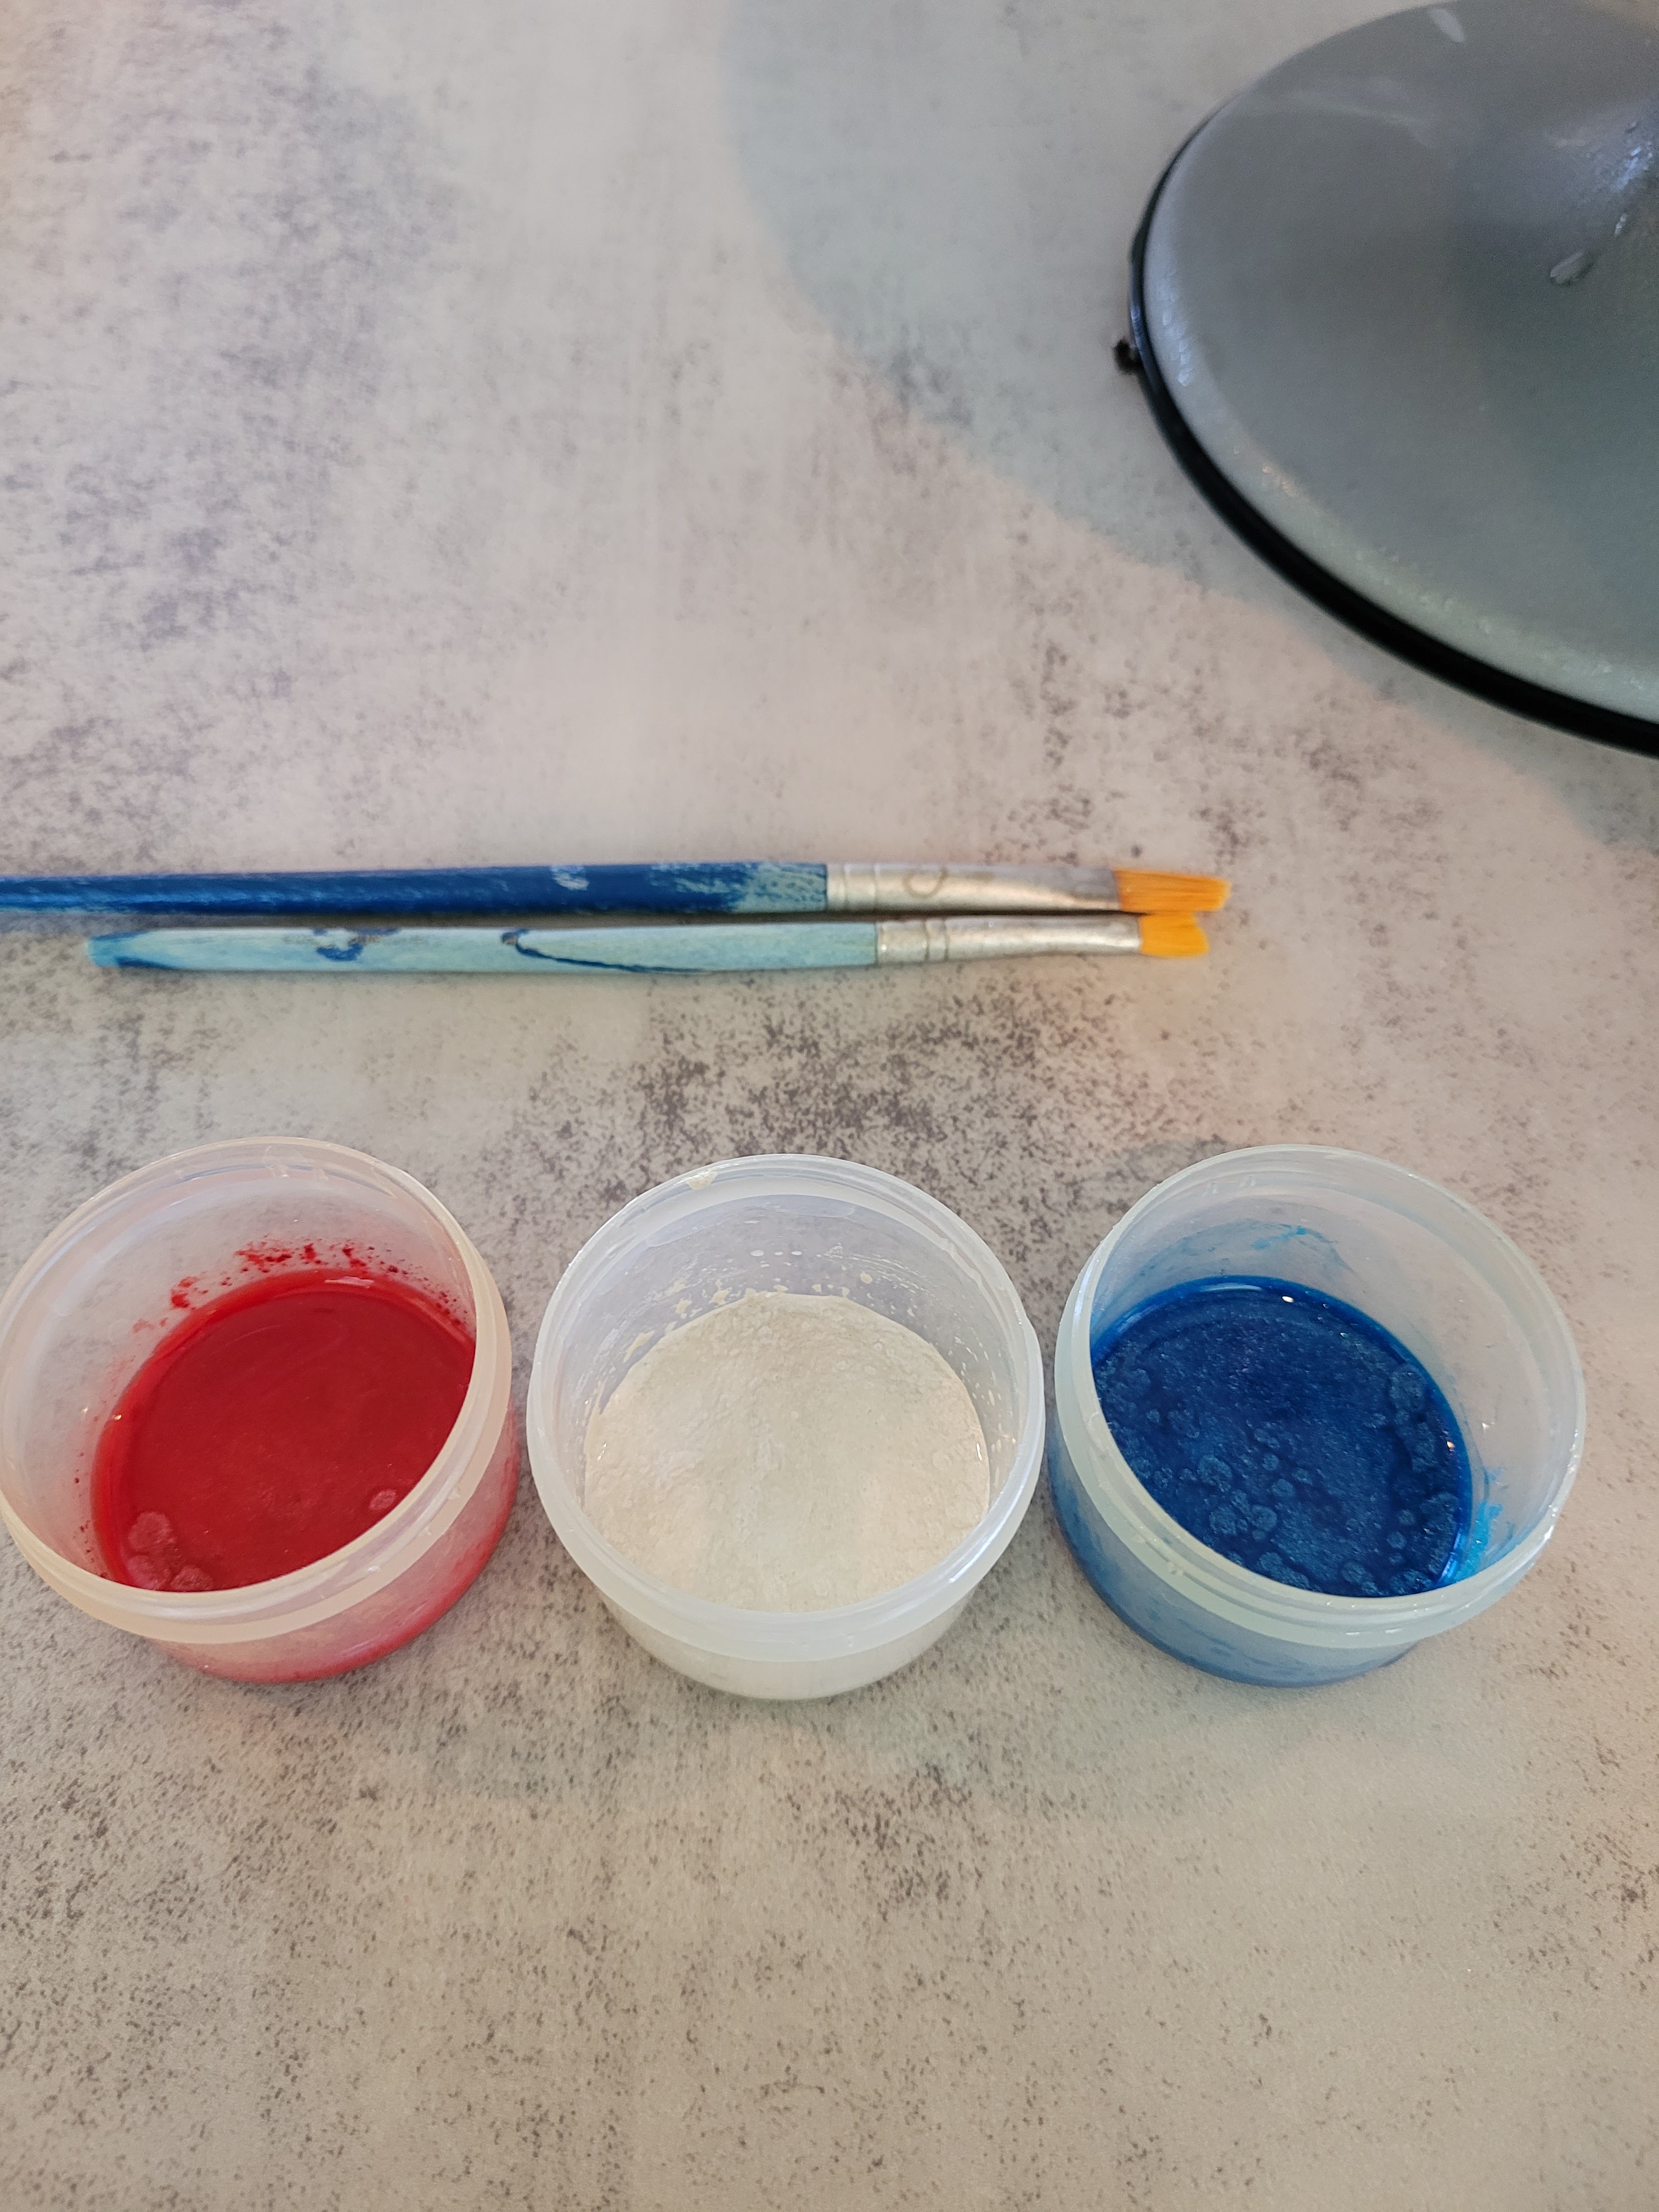
My ins-pyro-tion for fireworks… To paint the fireworks, you need to take 1/2 a teaspoon of luster in a small bowl (I have these little sauce-sized containers that were perfect), and then mix in 1/2 a teaspoon of clear vanilla extract; the mixture should be thick like syrup, so add more luster if needed. You can use any clear extract, really, just make sure the flavor compliments the frosting and cake. You can also use vodka (it evaporates), but in what I will now refer to as The Great Mystery of 2023, we somehow have not a drop of vodka to be found anywhere in this house, and I swear, I had nothing to do with it.
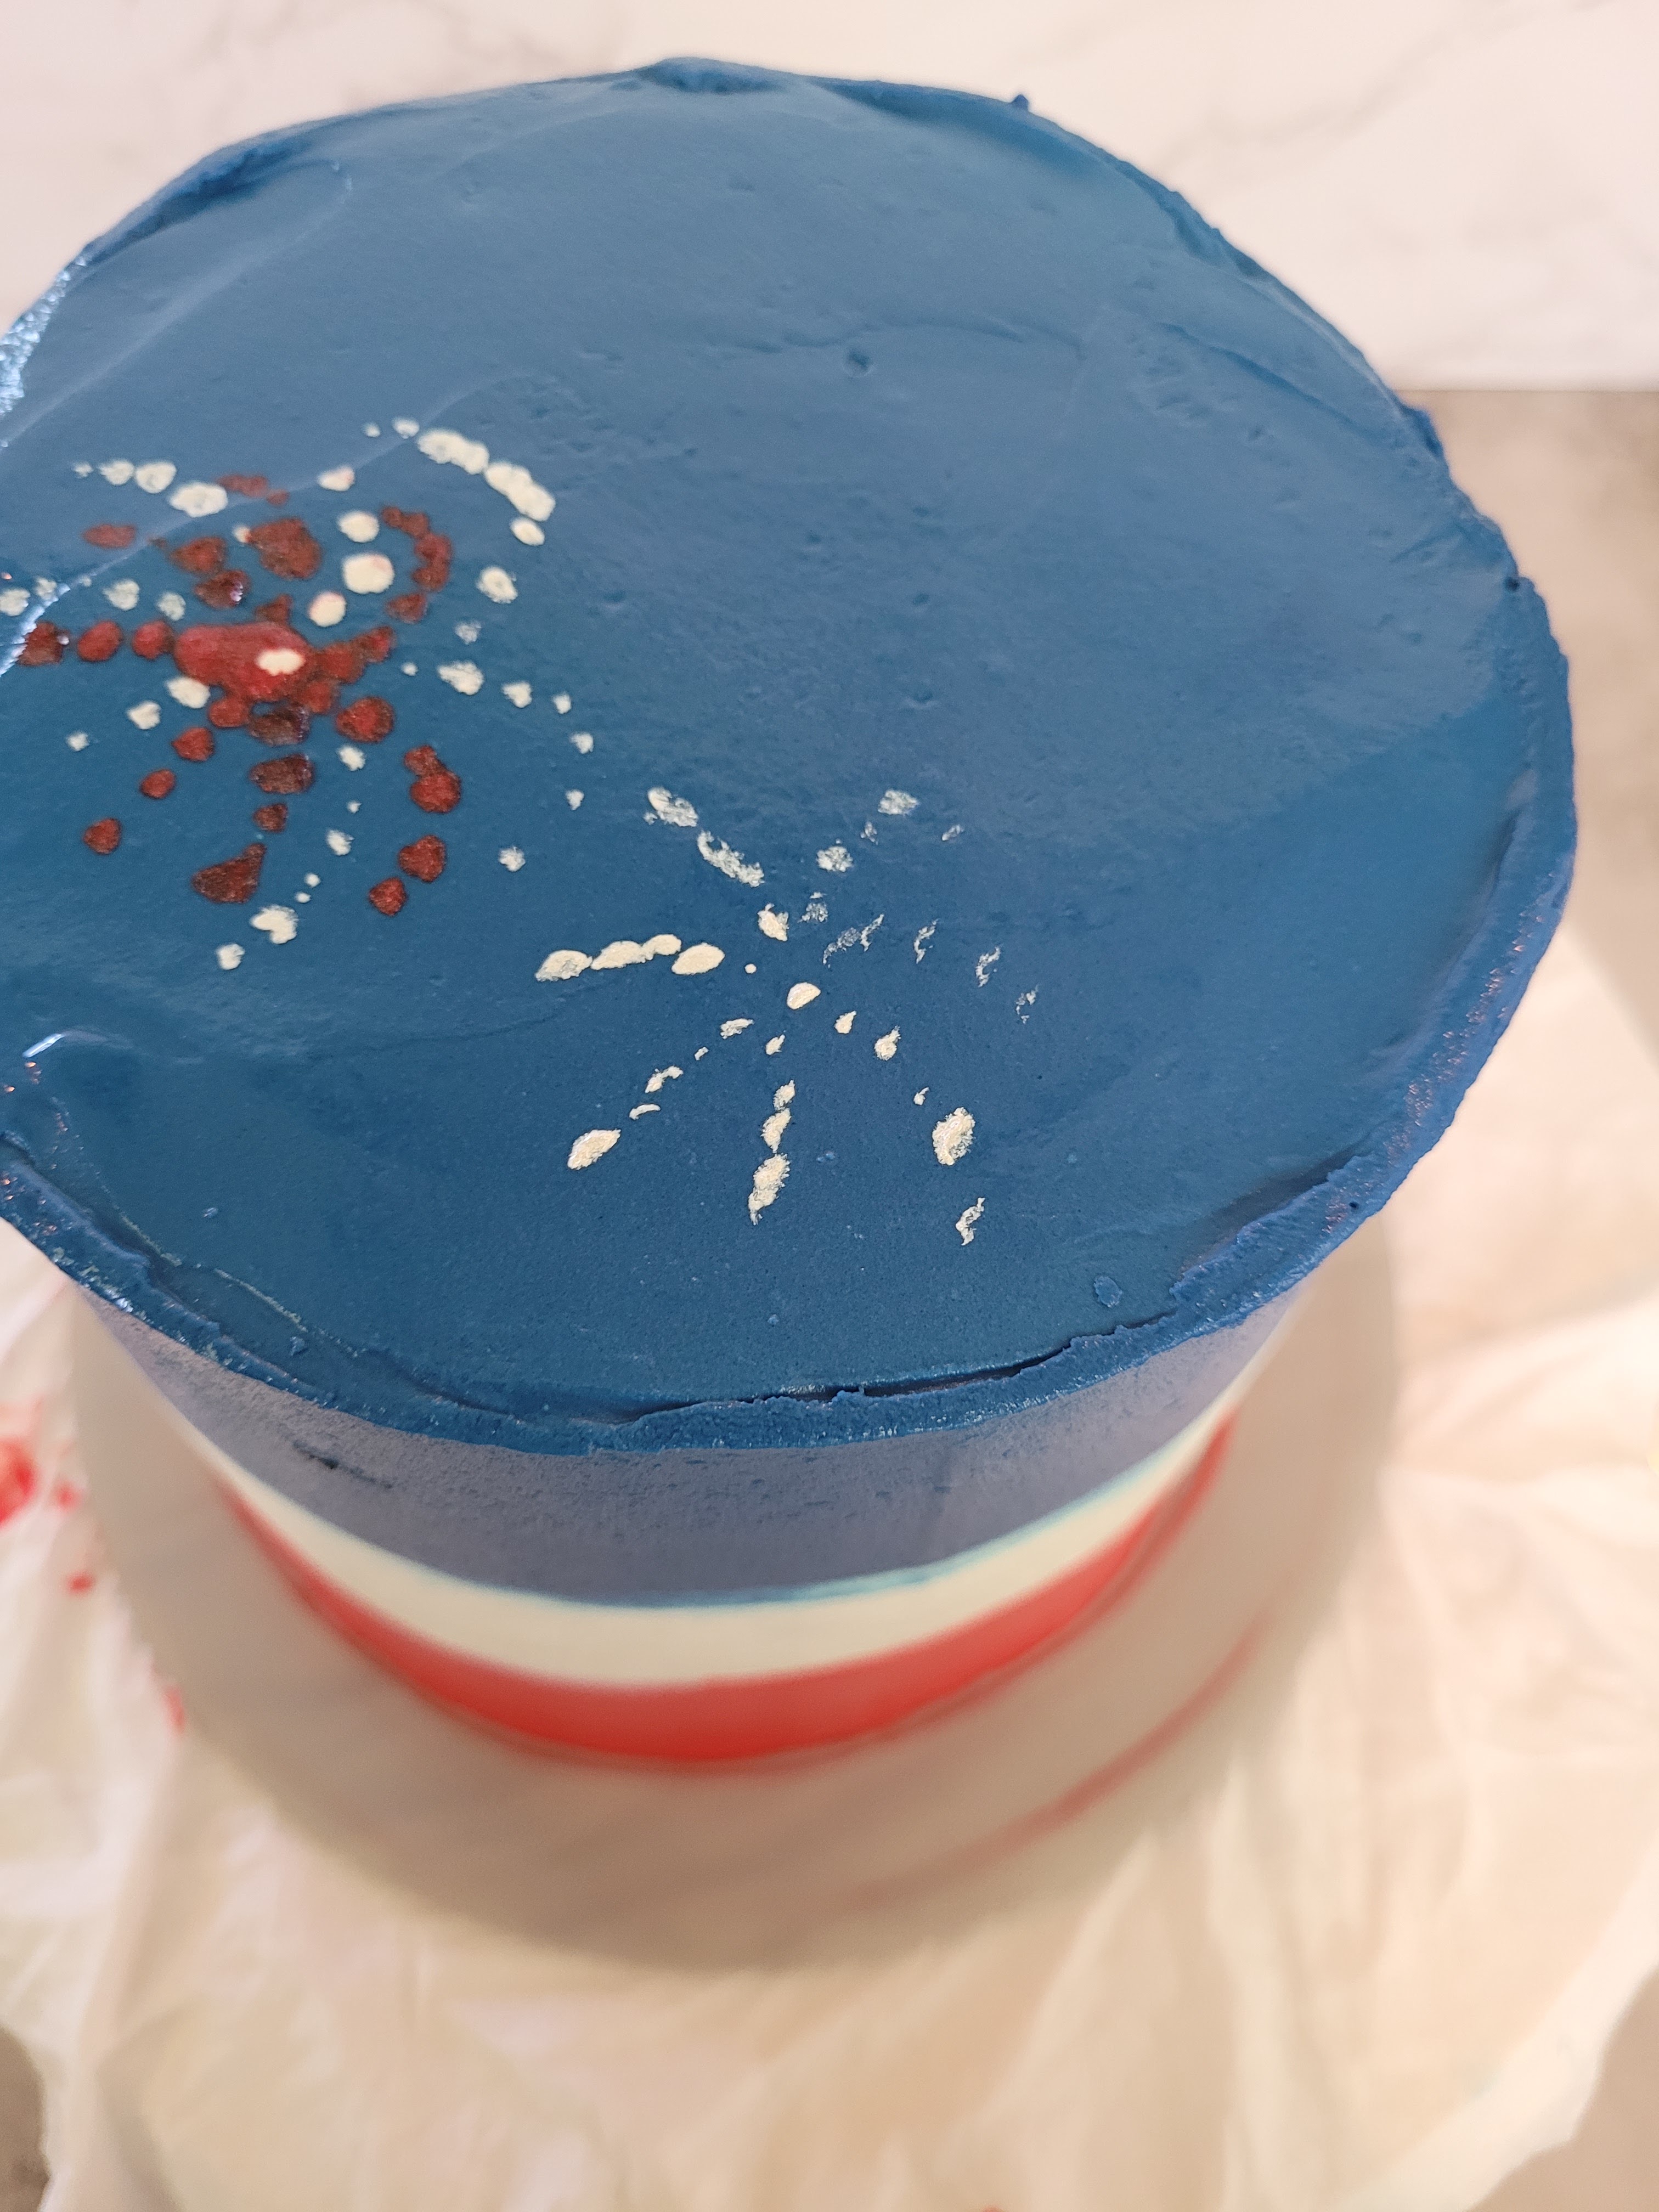
Come on baby, light my fire… To make the fireworks, just take a clean paintbrush, dip it into one color of luster mix, and dot little explosions on the cake top. Then come in with another paintbrush dipped into another color of luster mix, and accent with little dots between the original color. I will say my paintbrushes were nowhere near small enough, so the top of the cake is kind of a “We accidentally set off all the fireworks at once,” explosion and not a “Oohhh, ahhhh,” experience. I finished off with a dusting of silver star sprinkles.
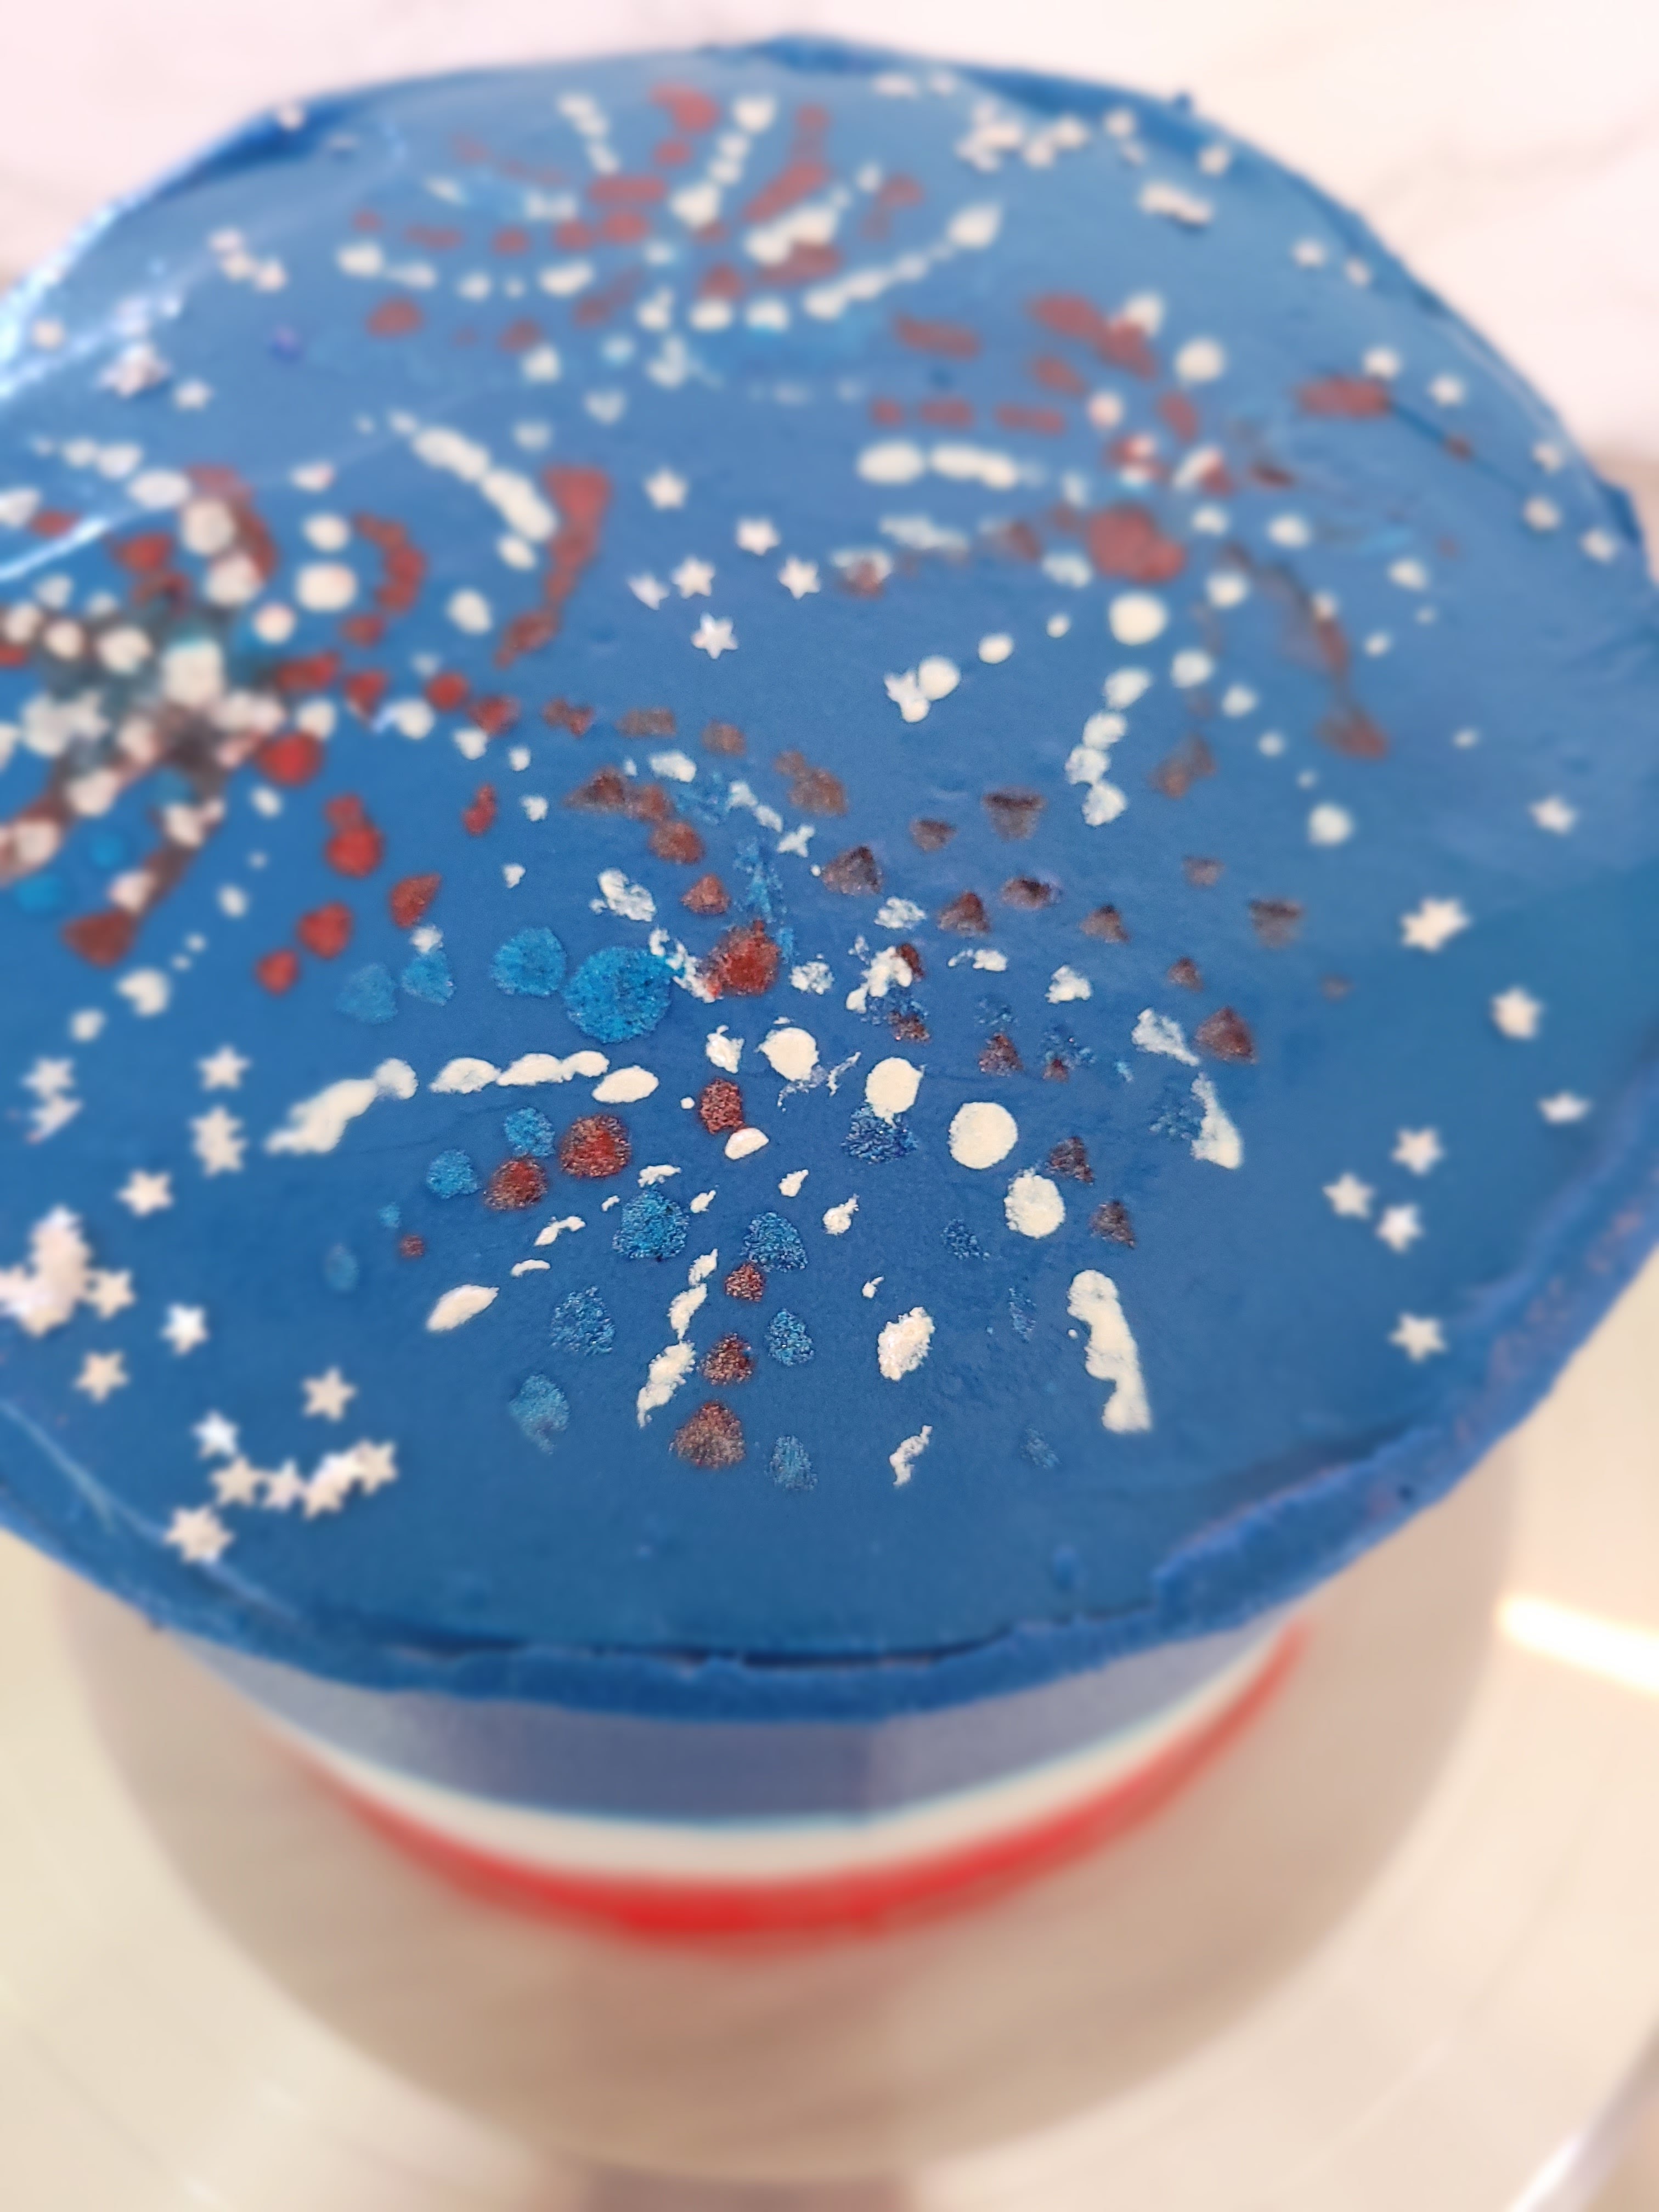
You know, because I have a *flare* for the dramatic. It is perfect? No. Is it cake? Yes. So you better believe it’s getting eaten.

We didn’t start the fire(works)! Look, this cake lights up my life. It took all of 30 minutes to go from blank canvas to completely decorated minus the time it needs to chill in the freezer. It would make any and all sparklers look foolish at your 4th of July backyard BBQs. It’s heavenly chocolate fudge and tangy cream cheese frosting. It’s so decadent and sweet, the Brits would totally hate it, so essentially, it’s the perfect cake to celebrate the most American of holidays. Bonus- if you’re busy eating this cake, there’s way less of a chance of losing a digit to firework accidents…unless you’re trying to steal the last bite from someone else’s plate, then you’re 100% bound to be spending time in the ER due to fork-related hand injuries. ‘Til next time, my fellow eaters!
Recipe & Instructions
Fudgy Chocolate Cake
Chocolate cake bursting with fudgy flavor and delicious frosting
If not gluten free, use any kind of chocolate cake mix. Monkfruit can also be replaced with regular powdered sugar.
Ingredients
CAKE
*One box of gluten free chocolate cake mix
*152 grams (2/3 c) fat free Greek yogurt
*1 1/3 cup fat free or skim milk
*4 eggs
FROSTING
*224 grams (8 ounces) of 1/3 the fat cream cheese, softened
*225 grams (1 cup) of fat free Greek yogurt, strained overnight
*16 ounces (4 cups) Lakanto powdered monkfruit
*1 tsp vanilla extract
*1/4 tsp citric acid
*2 TBS milk
Directions
- Preheat oven to 350 and grease three 6-inch round pans and add bake even strips.
- Whisk yogurt, milk, and eggs ingredients together in a stand mixer on low for 60 seconds before switching to a paddle attachment and adding the cake mix; mix on medium-high for two minutes.
- Pour batter evenly into pans and bake for 35-40 minutes, until a toothpick comes out mostly clean from the center.
- Allow cakes to cool fully before frosting.
- To make frosting, whisk cream cheese and yogurt for 3 minutes before adding in half the powdered monkfruit, 1 TBS milk, and the extract, mixing well.
- Add in remaining monkfruit and 1 TBS milk, mixing well.
- Frost the cooled cake as desired; to make a red, white, and blue cake, please see detailed decorating instructions above.
- Keep leftovers covered and in the fridge. Cake slices best served at room temp, so remove and slice 30-45 minutes before eating. Enjoy!
Nutrition
Macros
12 servings
281 cal/45 c/7 f/9.6 p per slice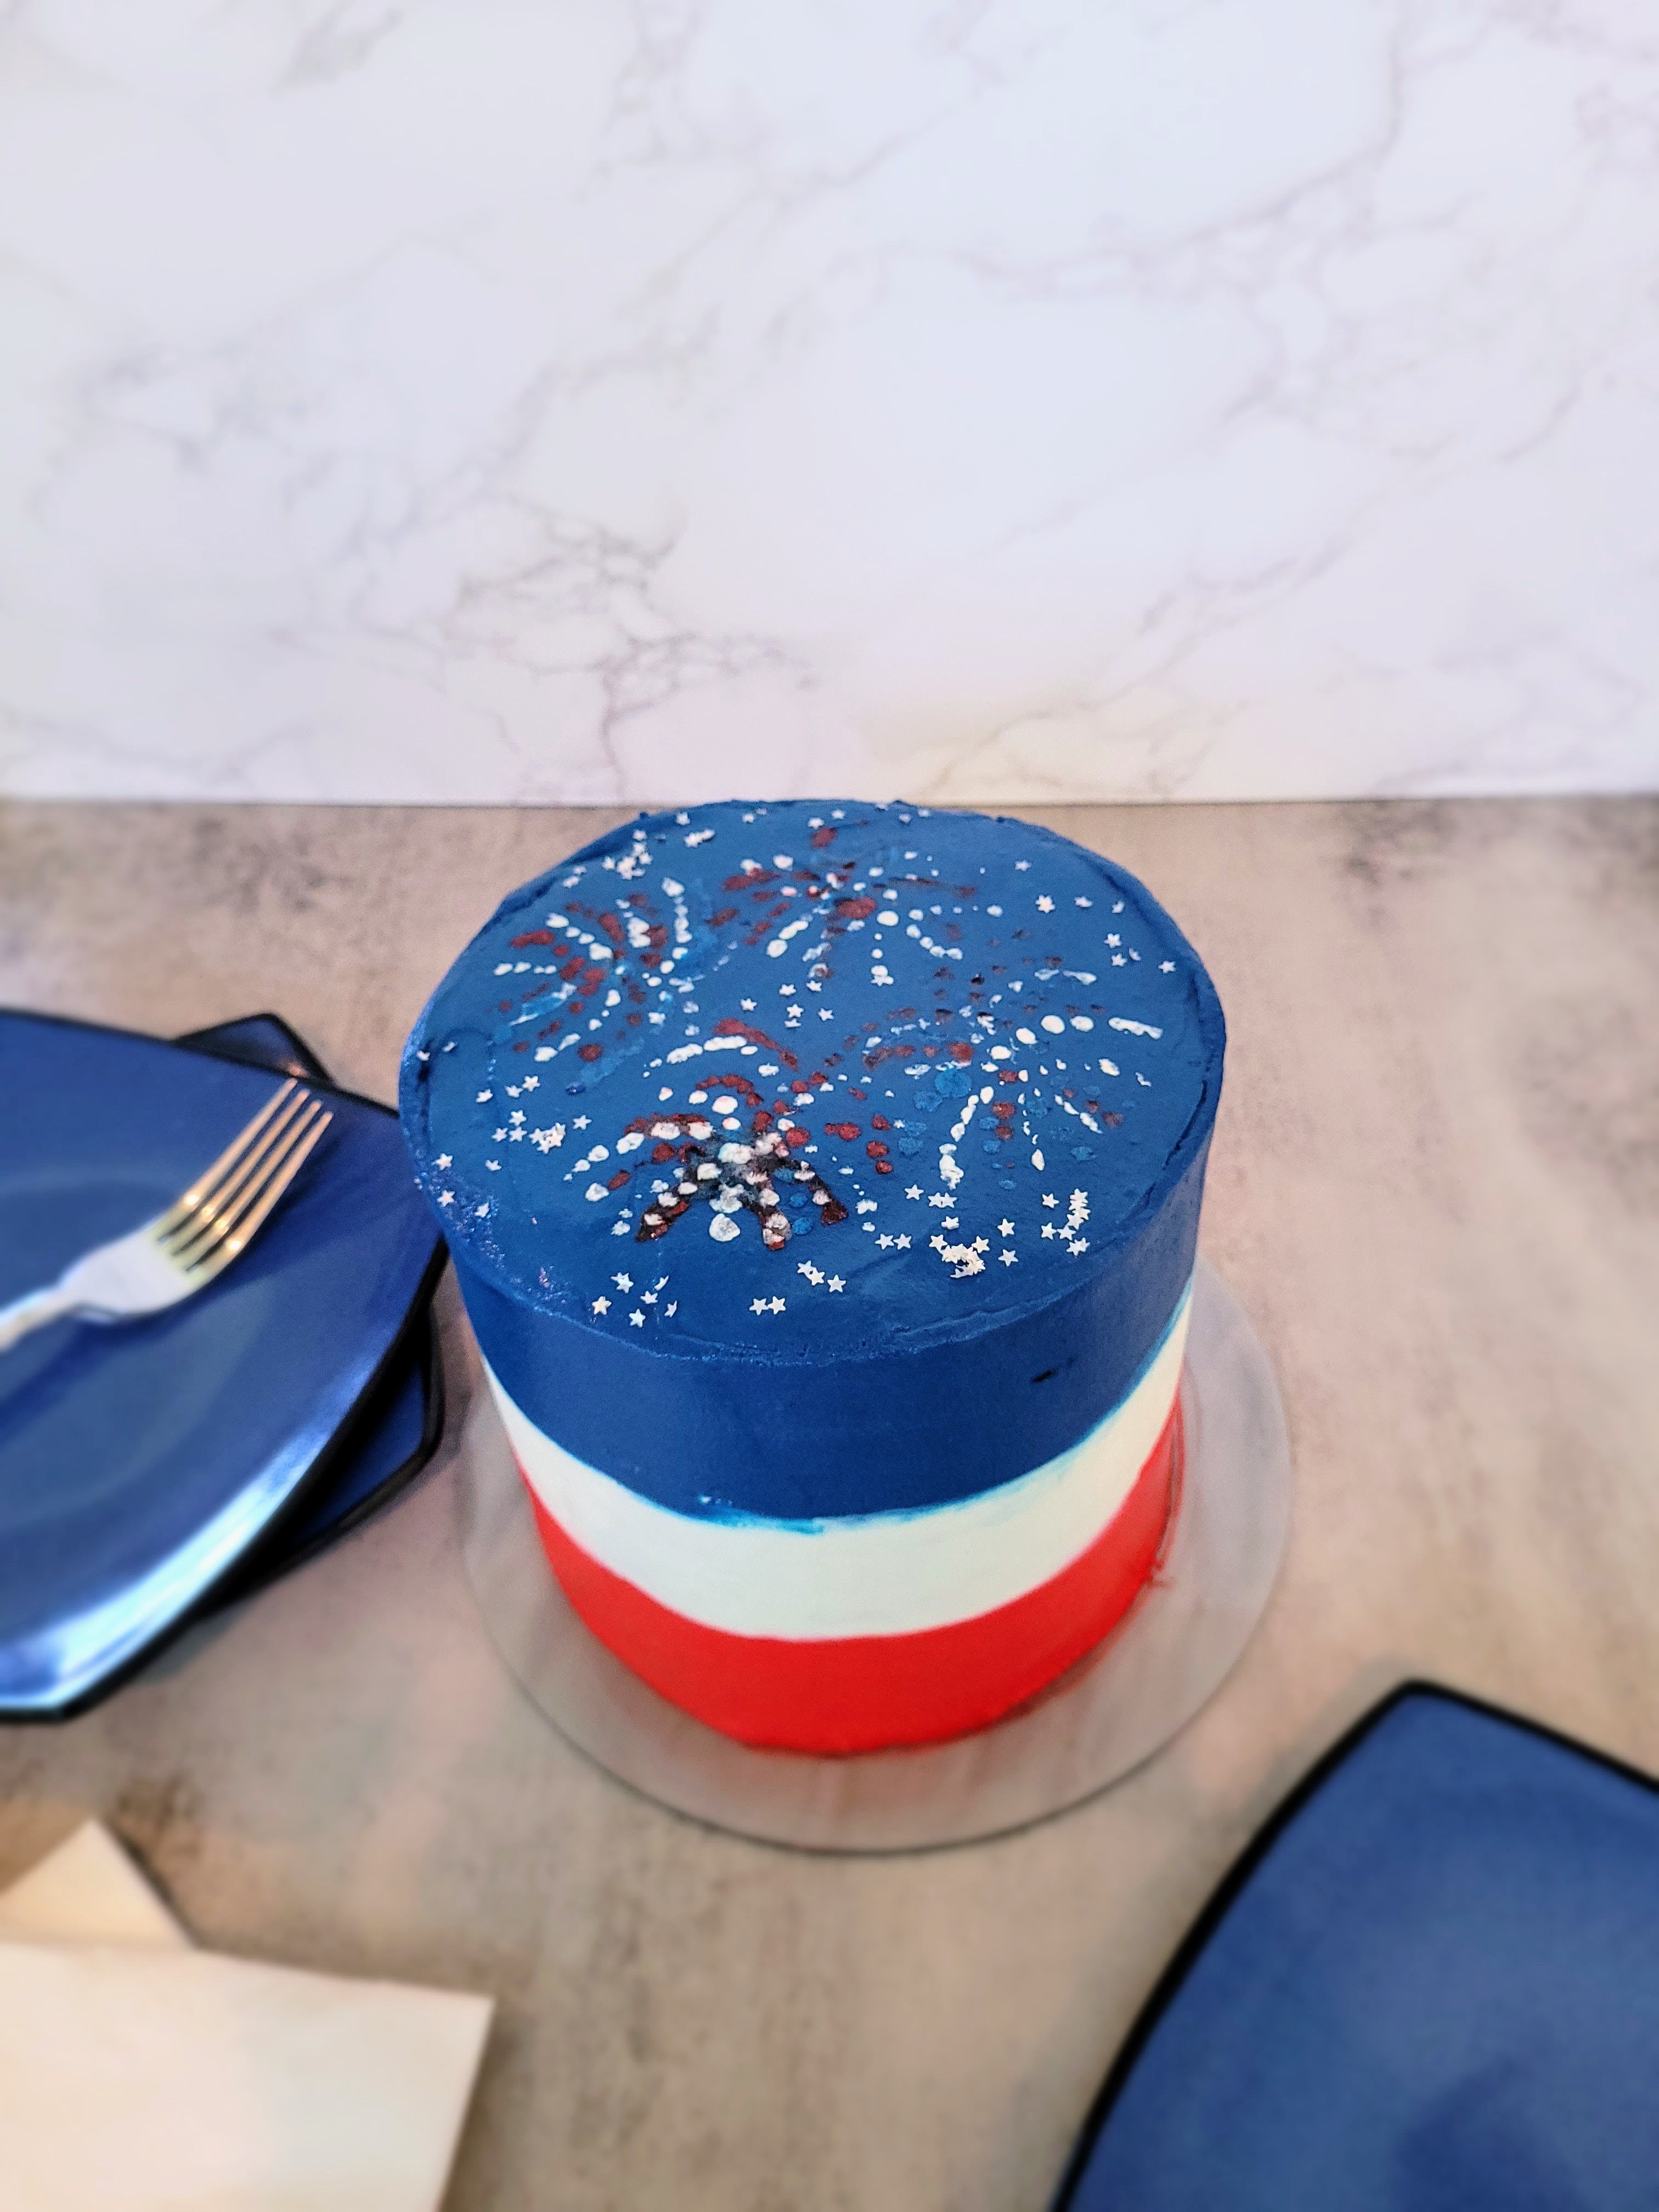
Independence Bae 😍 -
No Bake Pistachio Pie
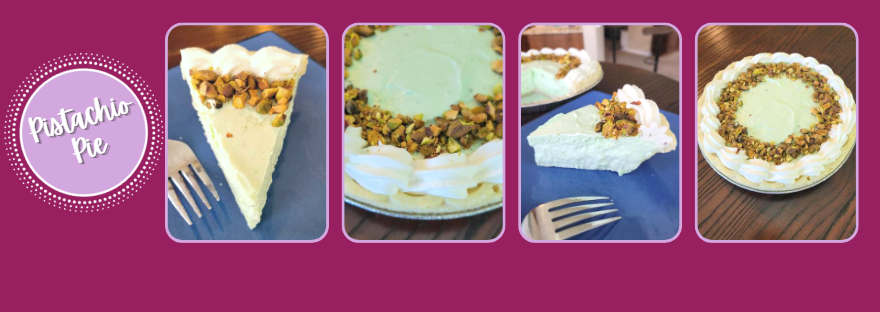
Bust out of your shell and try this absolutely divine pistachio pie. Perfect for summer- it’s light, airy, and just the right amount of sweet. An absolutely refreshing treat to rival even ice cream…yeah, I went there (nuts, I know, but really, it’s a great pie). It takes about 5 minutes to put together, and if you use a premade pie crust, it’s also a no-bake option…and a no-brainer to bring to all your summer gatherings.
In a nutshell, it’s a must serve at your next backyard BBQ. Pistachio pie
A light and air pistachio pie that is gluten free and low sugar
-If not gluten free, use any kind of premade pie crust-buttery or graham cracker crusts would go great with this recipe. If you use a regular premade pie shell, you will need to bake according to package instructions, but this is the only thing you’d need the oven for.
-The pie crust is really the only element containing sugar (2 grams per slice), so if you need it completely sugar free, I would recommend making your own crust with sugar free digestive biscuits or graham crackers.
Ingredients
*1 gluten free, premade pie crust (follow instructions on the crust packaging if it needs to be baked)
*1 1/3 cup skim or fat free milk
*1 ounce package sugar free pistachio pudding mix
*1 tsp vanilla extract
*5.5 ounces (160 g) of Cool Whip Free + additional for piping border if desired
*42 g pistachios, shelled and crushed
Directions
- With a whisk attachment, beat milk, extract, and pudding mix for 2 minutes, until thick.
- Fold in Cool Whip by hand, gently.
- Pour the pie filling into your premade pie crust and smooth.
- Let this set in the freezer for 30 minutes.
- To add the shell border, fit a piping bag with a 1M tip and add in a few dollops of Cool Whip and pipe border–see a video of this on my Instagram: http://instagram.com/katebakescakes87
- Gently spread crushed pistachios inside of the shell border.
- Place in the fridge to set overnight or for at least 4 hours before serving.
- To get super-clean slices, you can freeze this for 2 hours before serving as well.
- Slice and enjoy! Keep leftovers in the fridge.
Nutrition
Macros
8 servings
263 cal/30 c/14 f/4.2 p per slice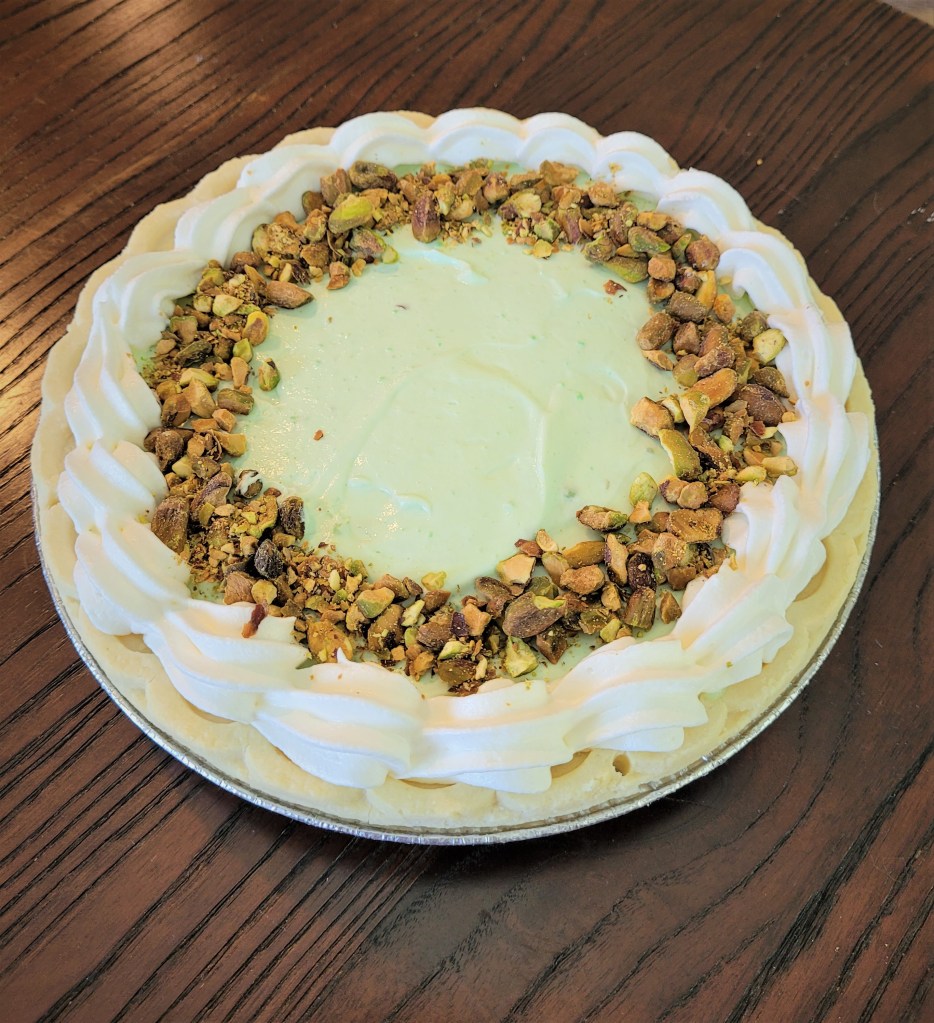
Really don’t want to share it’s so good. Call me shell-fish. 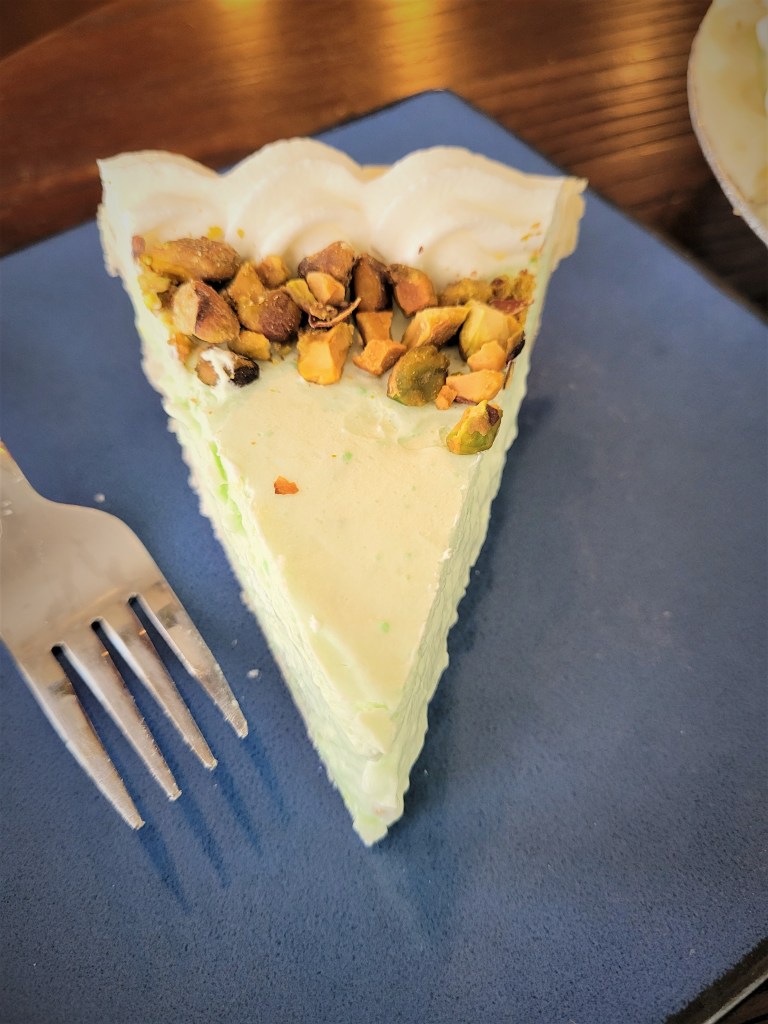
Don’t be salty…just whip up a pie and you, too, can have a crack at a slice! - With a whisk attachment, beat milk, extract, and pudding mix for 2 minutes, until thick.
-
Lemon Mini Cheesecakes
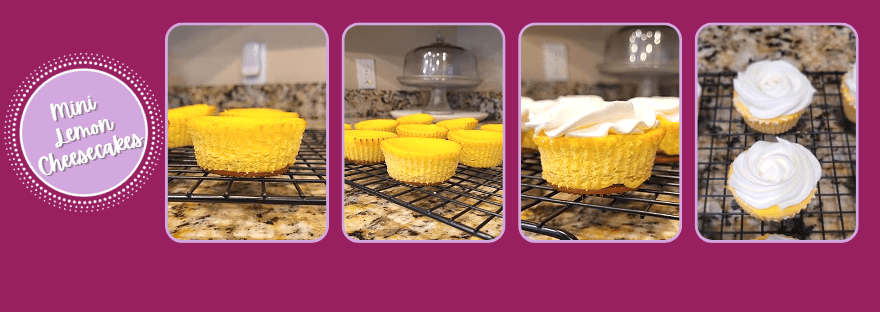
Don’t get me tarted on how much I hate warm weather. I’d rather be layered in flannel, dashing through the snow, and enjoying ambient temperatures as cold as my heart. But here we are, early in May, with the sun trying to strike me down at every opportunity. But when life gives you lemons (or heat exhaustion) and all…it’s time to juice them and turn them into the world’s most refreshing, heat-beating dessert ever: mini lemon cheesecakes! Squeeze the day with this amazing recipe- tart and sweet cheesecake with dreamy cookie crust.
You’re my main squeeze. Mini Lemon Cheesecakes
Citrusy lemon cheesecakes with lemon creme cookie crusts
Use can your preferred whey protein; Madhava can also be replaced with regular sugar, but this will change the macros.
Ingredients
CRUST
*9 Catalina Crunch lemon creme sandwich cookies or preferred lemon or vanilla sandwich cookie
CHEESECAKE FILLING
*150 g (5.33 ounces) 1/3 the fat cream cheese at room temp
*150 g (5.33 ounces) nonfat Greek yogurt
*1 egg
*1 tsp vanilla extract
*20 g Quest vanilla milkshake protein powder
*48 g (1/4 cup) Madhava allulose sweetener
*7 g (1 tsp) sugar free lemon Jell-o
*2 TBS lemon juice (fresh squeezed is better, but bottled will work)
Directions
- Line muffin tin with 9 silicone cupcake liners and preheat oven to 350.
- Place a single cookie into each cupcake liner to act as the crust.
- Whisk all cheesecake ingredients together in a large bowl until smooth.
- Distribute batter evenly on top of each crust.
- Bake at 350 for 20 minutes.
- After 20 minutes, turn off the oven and crack the door, leaving the cheesecakes in the oven for an additional 10 minutes to finish baking.
- Place cheesecakes on a cooling rack (to speed up, place this in the fridge for 1 hour or freezer for 30 minutes).
- Once the cheesecakes are totally cool and set, remove from silicone liners.
- If desired, top each cheesecake with 2 TBS of Cool Whip (included in macros); I used a 2D tip to swirl roses on top of each cheesecake.
- Keep leftovers in fridge in an airtight container, and enjoy!
Nutrition
Macros
9 servings
146 cal/8 f/11 c/7.4 p per cheesecake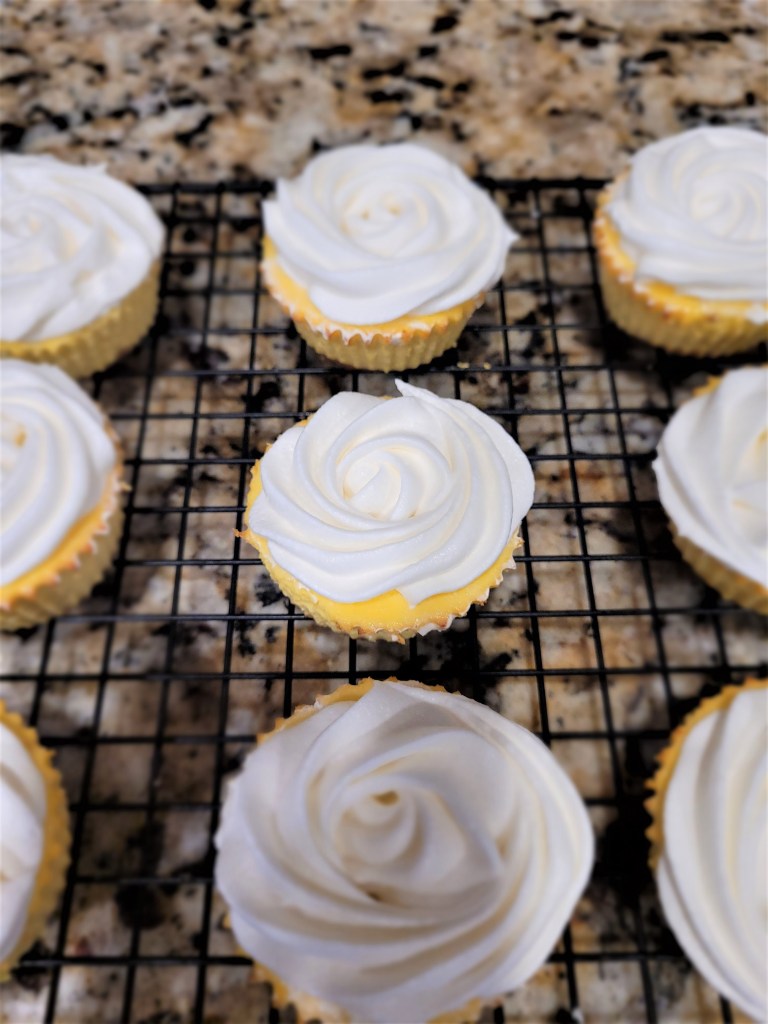
You’ll always be in my tart. 
The peel good factor after eating one of these is unreal. - Line muffin tin with 9 silicone cupcake liners and preheat oven to 350.
-
Key Lime Cupcakes

I ain’t dandy-lyin’ when I say I have a new favorite springtime cupcake flavor: gluten free key lime. They are light, springy, and full of lime flavor. Between the fresh squeezed lime juice in the cupcakes and also in the cream cheese frosting, these are some of the most refreshing cupcakes I’ve ever tried. I wanted a vibrant color palette to go along with my lime-colored cakes, so I decided to pipe some fun and super colorful flowers on top with a different technique than a standard petal tip. Sometimes I am all oopsie and no daisy, but luckily, these cupcakes turned out exactly how I’d hoped…which is great because I’ve been known to have a violet streak when things don’t go as planned. However, everything is a-bouquet, and these cupcakes are truly sublime. Read on to get the quick recipe and piping tutorial video!
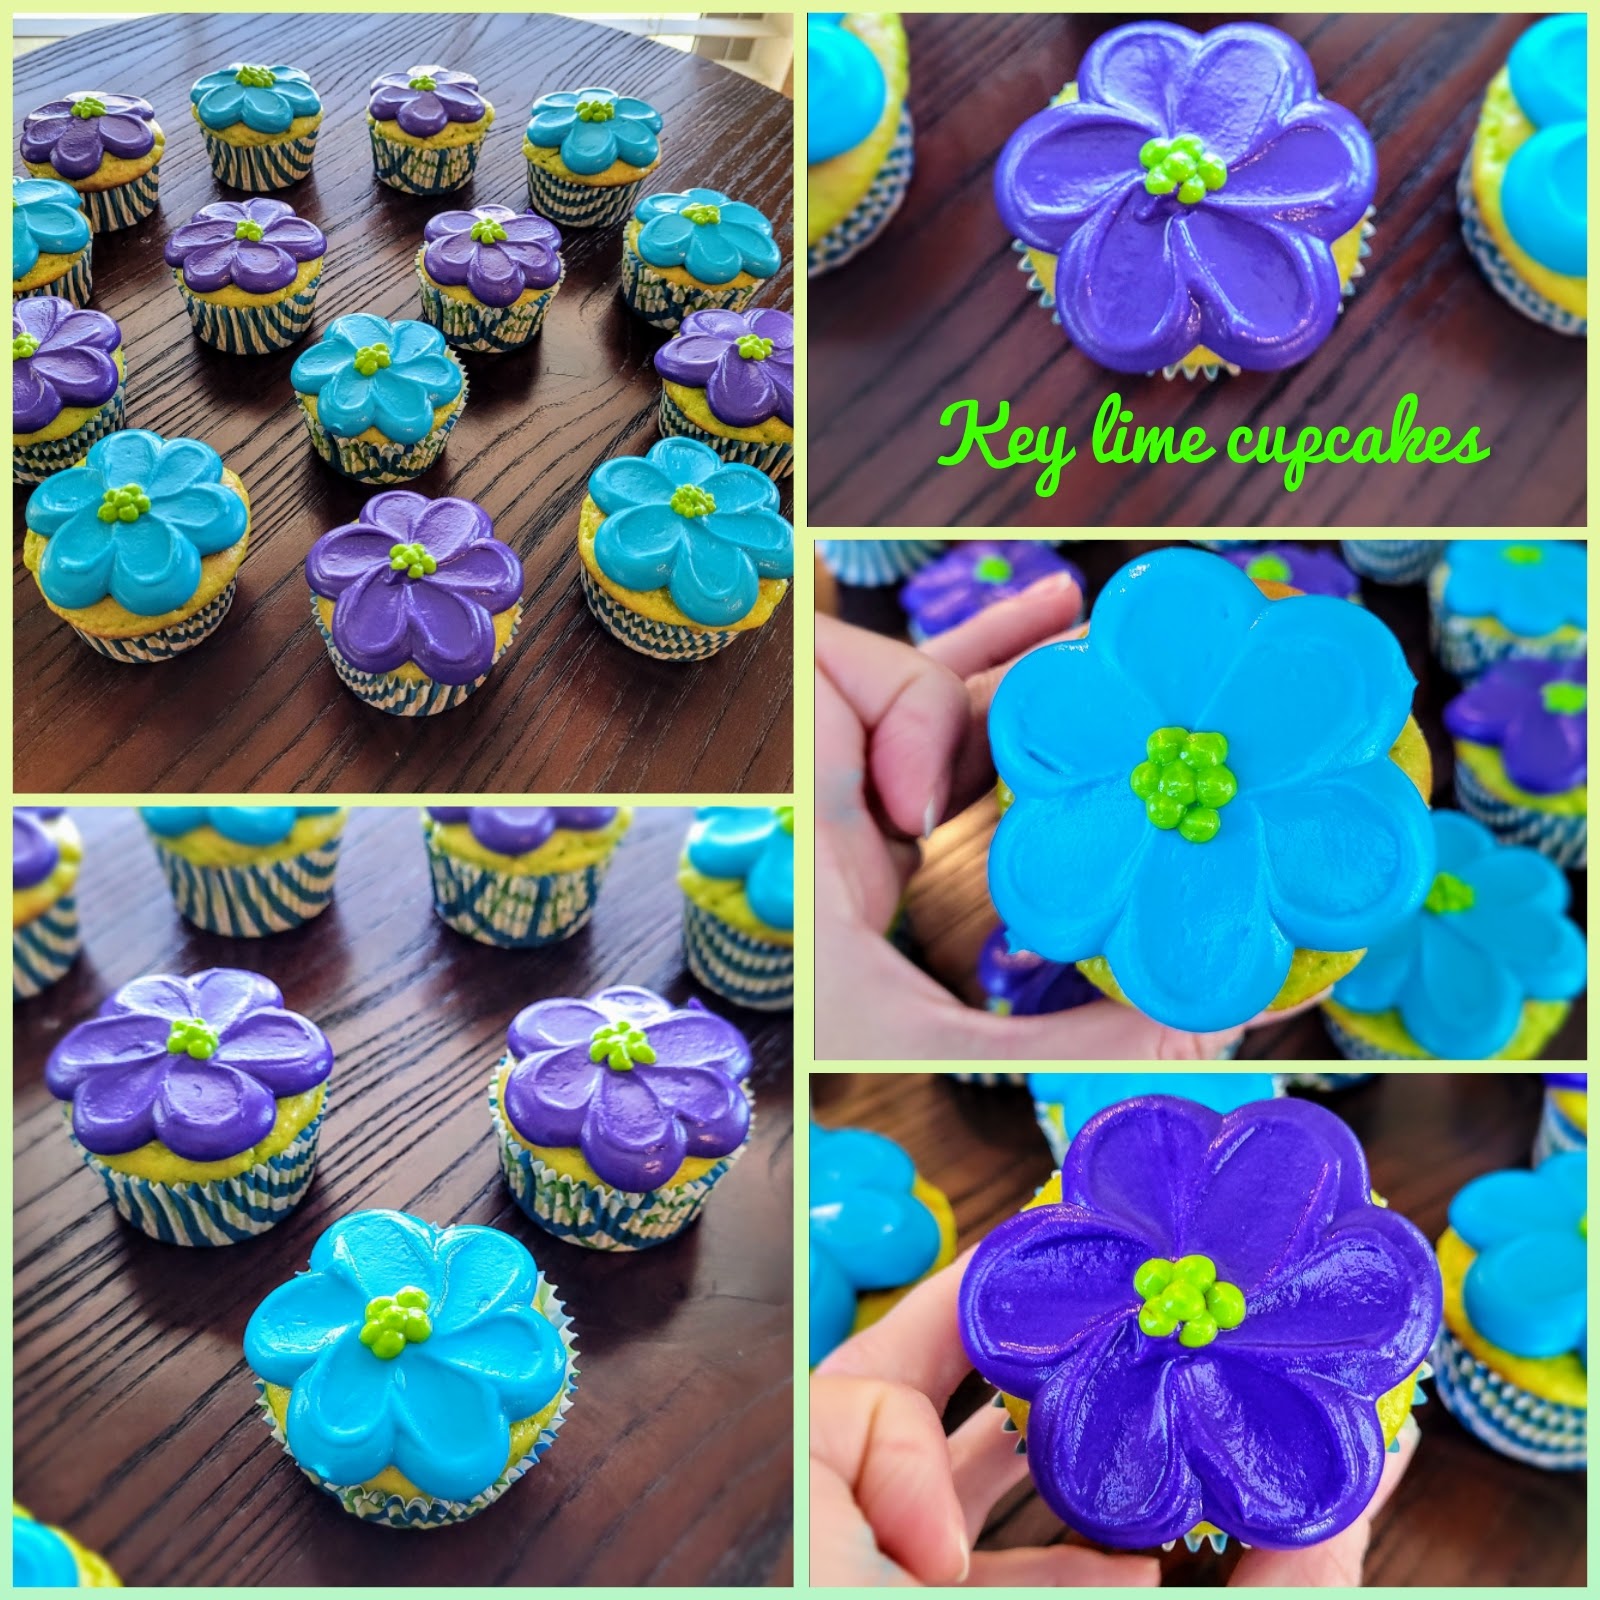
I’ll say it once and floral…flower power never looked better. Gluten free key lime cupcakes
Soft, zesty lime cupcakes with lime cream cheese frosting
You can use a regular yellow or white cake mix if not gluten free. You can use butter or oil in place of the yogurt. Monkfruit can be replaced with regular powdered sugar in the frosting. Both of these swaps will greatly alter the macros, though.
Ingredients
CAKE
*One box of Krusteaz gluten free yellow cake mix
*113 g (1/2 cup) fat free plain Greek yogurt
*1 cup fat free or skim milk
*1/4 cup freshly squeezed lime juice (about 3 large limes)
*1 tsp lime zest
*3 eggs
*Lime gel dye
FROSTING
*224 grams (8 ounces) of 1/3 the fat cream cheese, softened
*225 grams (1 cup) of fat free Greek yogurt, strained overnight
*16 ounces (4 cups) Lakanto powdered monkfruit
*1 tsp vanilla extract
*1/4 tsp citric acid
*2 TBS freshly squeezed lime juice
*1 TBS milk, if needed
Directions
- Preheat oven to 350 and line two muffin tins with 18 wrappers.
- Mix the eggs, lime zest, lime juice, yogurt, and milk in a stand mixer on medium with the whisk attachment until the mixture gets frothy.
- Add the cake mix and a few drops of lime gel dye and switch to the paddle attachment; blend on medium until everything comes together.
- Pour batter evenly into liners and bake for 23-25 minutes, until a toothpick comes out cleanly from the center.
- Allow cupcakes to cool fully before frosting.
- To make frosting, whip cream cheese and yogurt with a paddle attachment on medium-high for 3 minutes before adding in half the powdered monkfruit, 1 TBS lime juice, and the extract, mixing well.
- Add in remaining monkfruit and 1 TBS lime juice, mixing well. If frosting is too stiff, add 1 TBS milk.
- To pipe the flowers, you will need to split the frosting up into three bowls: dye one bowl lime, another purple, and another sky blue (you can choose whatever colors you’d like, really! Bright and fun are the way to go.).
- Place the colors you want to use for the petals into piping bags fitted with #12 round tips; place the lime green frosting into a bag with a #1, 2, or 3 round tip.
- Pipe six blobs/mounds of one color on top of one cupcake in a circle, close to the edges of the cupcake.
- Using the back of a small spoon or angled spatula, push into the top of one blob, pulling down into the center of the cupcake to create a petal; repeat on the remaining 5 mounds of frosting on the cupcake; wipe the back of the spoon or spatula clean with a paper towel in between each cupcake, especially if changing petal colors.
- Once you’ve piped the petals, take the lime green frosting and pipe little dots in the center of the flower for the stamen.
- Repeat on all cupcakes, then devour! You will most likely have quite a bit of leftover frosting; this can be kept in airtight containers and put in the freezer for future use.
- Keep leftovers covered and in the fridge. Cupcakes are best served at room temp, so remove from the fridge 30-45 minutes before eating. Enjoy!
Nutrition
Macros
18 servings
142 cal/27 c/2.2 f/3.5 p per cupcakeWatch a quick video to see how I piped the flowers on each of these cupcakes! It’s super simple with minimal piping tips and tools needed. 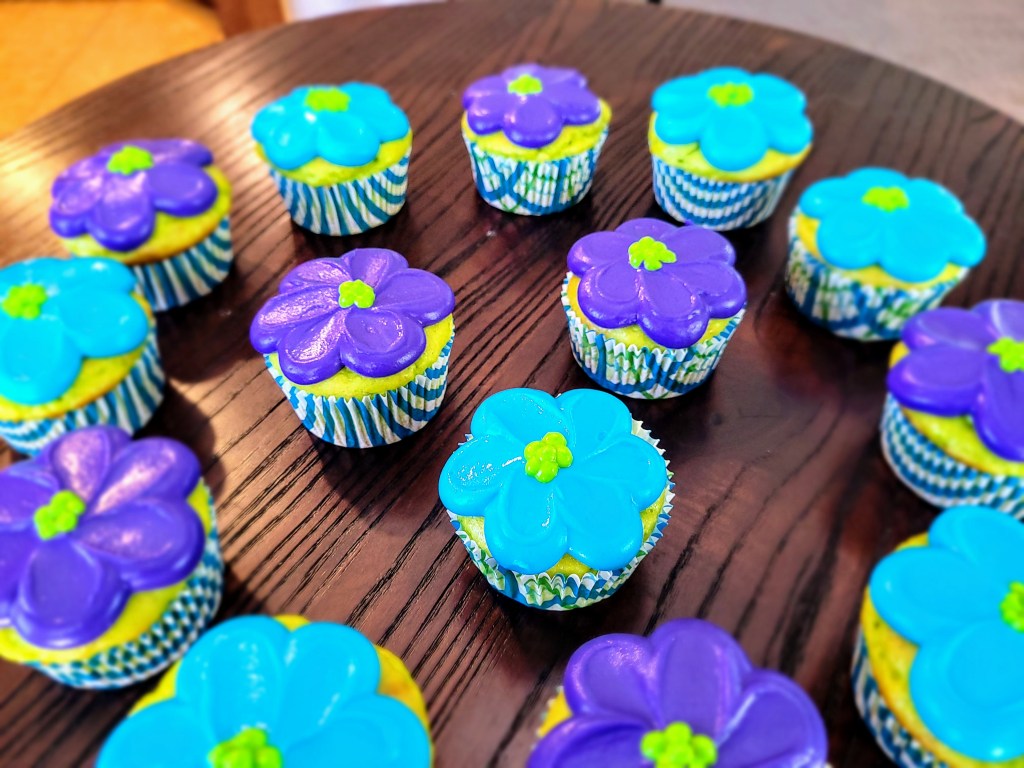
Every daisy is better because of you, cupcake. 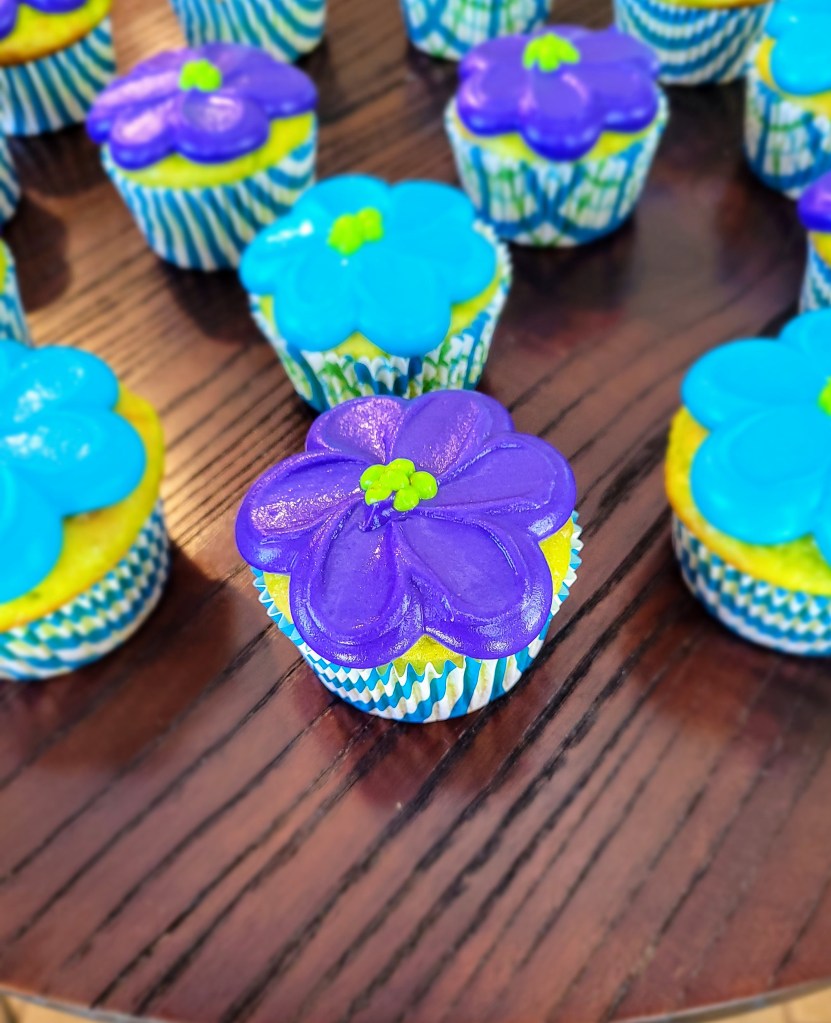
Definitely have a budding romance between my stomach and these blooming beauties. - Preheat oven to 350 and line two muffin tins with 18 wrappers.
-
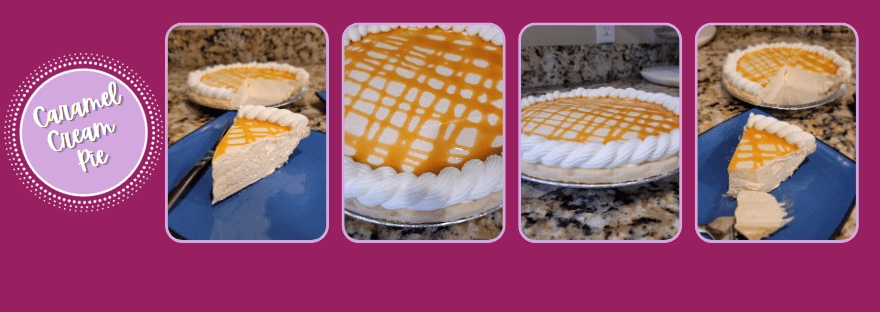
GF/SF Caramel Cream Pie
Pied like to thank the phrase, “Where there’s a will, there’s a way,” for making this sugar free, gluten free caramel cream pie possible. I absolutely adore caramel, but hate consuming a ton of sugar, which is essentially 90% of what makes up caramel (the other 10% belong to butter and heavy whipping cream, so truly, no redeeming factors in caramel). I try to eat a lower sugar diet to keep my cholesterol level in check (aging is so much fun), so I wanted to try out my sugar free caramel recipe in a cream pie. I was hoping it would work out okay, and I am very happy to report it’s so okay, I might eat this pie every day for the rest of my life. It is light, it is airy, and its caramely. If every pie could taste this good without any added sugar, the world would be a better place.
Not salty at all about how this turned out. Caramel cream pie
Homemade sugar free caramel sauce takes center stage in this delightfully light pie
-If not gluten free, use any kind of premade pie crust-buttery or graham cracker crusts would go great with this recipe. If you use a regular premade pie shell, you will need to bake according to package instructions, but this is the only thing you’d need the oven for.
-The pie crust is really the only element containing sugar (2 grams per slice), so if you need it completely sugar free, I would recommend making your own crust with sugar free digestive biscuits or graham crackers.
Ingredients
*1 gluten free, premade pie crust (follow instructions on the crust packaging if it needs to be baked)
*1/2 C (145 g) homemade sugar free caramel sauce, plus more for drizzling
*8 ounces (225 g) 1/3 the fat cream cheese, softened
*1/4 C (30 g) Lakanto powdered monkfruit
*1 tsp vanilla extract
*8 ounces/1 tub of Cool Whip Free + additional 40 grams for piping rope border if desired
CARAMEL SAUCE makes 1 1/4 cup sauce
*1 C (200 g) Madhava allulose sweenter
*6 TBS (86 g) light butter
*1/2 C (120 mL) heavy whipping cream
*1/4-3/4 tsp salt depending on your taste preferences
Directions
- To make the caramel, place allulose in a medium sauce pan and heat on medium-high heat while stirring continuously with a wooden spoon until amber in color, 6-9 minutes.
- Switch to a whisk, lower to medium heat, and add in the butter, whisking for 2-3 minutes until totally melted.
- Slowly pour the heavy whipping cream into the saucepan while whisking; let boil for one minute.
- Remove from heat and whisk in salt.
- Let caramel cool completely to room temp before using in the pie (you can place in fridge to speed this up).
- Mix the cream cheese, vanilla, and powdered monkfruit in a stand mixer for 3 minutes.
- Add in 1/2 cup of caramel and the Cool Whip and whisk on medium just until everything comes together.
- Pour the pie filling into your premade pie crust and smooth.
- Drizzle an additional 1/8 cup of caramel on top of the pie with a spoon or in a piping bag.
- To add the rope border, fit a piping bag with a #32 tip and add in 40 grams of Cool Whip and pipe border–see a video of this on my Instagram: http://instagram.com/katebakescakes87
- Place in the fridge to set overnight or for at least 4 hours before serving.
- To get super-clean slices, you can freeze this for 2 hours before serving as well.
- Slice and enjoy! Keep leftovers in the fridge.
Nutrition
Macros
8 servings
331 cal/28 c/23 f/3 p per slice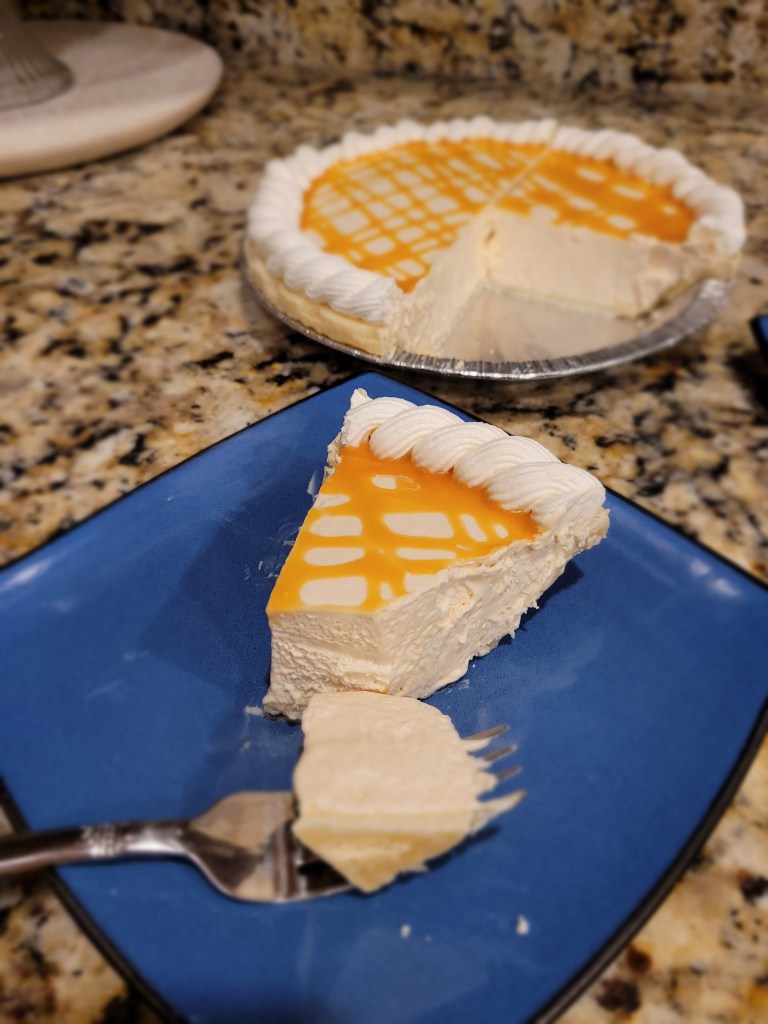
Pour some (not really) sugar on me! 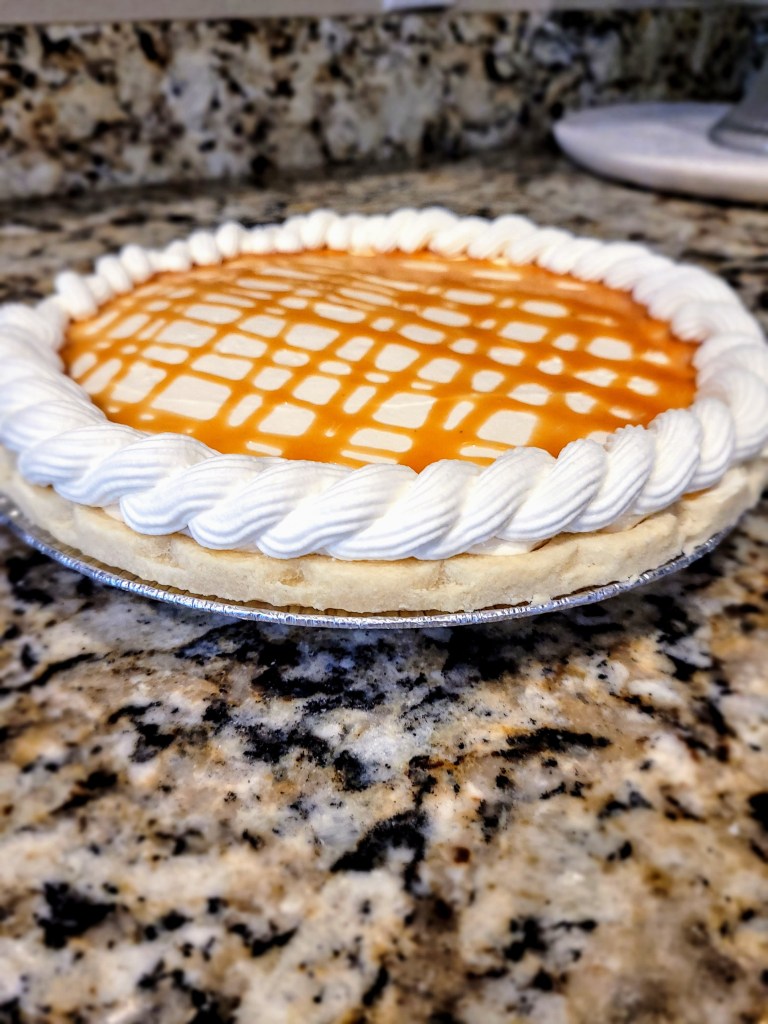
Pie love you so much. - To make the caramel, place allulose in a medium sauce pan and heat on medium-high heat while stirring continuously with a wooden spoon until amber in color, 6-9 minutes.

Healthy-ish cake, cupcakes, pie, and cheesecake recipes and decorating tips
