-
Glazed Pumpkin Protein Donuts
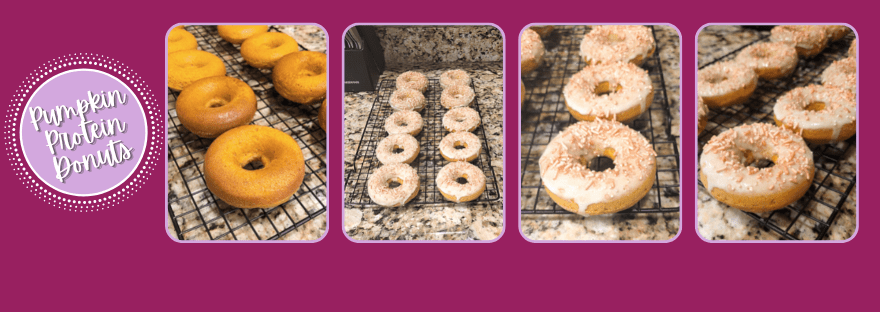
Back again with another Empowrd’s gluten free donut mix spin. Naturally, now that it’s only 90 degrees out every day and not 95, the whisper of fall has thrown me into full-on pumpkinpalooza. You know, pumpkin spice and everything nice season. These pumpkin donuts are the right way to start every day a few degrees cooler than the last. They’re soft, the right amount of sweet, covered in vanilla glaze, and topped with sprinkles. They aren’t overwhelmingly pumpkin-y in flavor (you know, no pumpkin spice latte slap in the mouth). It’s the less basic white girl’s (hi!) answer to the perfect fall treat. And at only 97 calories a donut, I also consider them magically delicious.
You can keep those Lucky Charms in the pantry; grab one of these beauties instead. Recipe and Instructions
Glazed Pumpkin Protein Donuts
Soft, pumpkin donuts with a high protein glaze
I have not tested this recipe with any other protein powders or mixes, so I cannot guarantee the same results without using the ingredients listed below.
Ingredients
FOR THE DONUTS
*1 bag of Empowrd gluten free protein donut mix
*1 large egg
*1 tsp pumpkin pie spice
*1/4 cup Libby’s pure pumpkin
*1/2 tsp cinnamon extract
*1/2 tsp vanilla extract
*1/2 c water
FOR THE GLAZE
*30 grams Quest vanilla milkshake protein powder
*30 grams Lakanto powdered monkfruit
*Water to get a drizzly consistency (about 4 TBS)
*Optional: sprinkles
Directions
- Preheat oven to 350 and grease a donut pan with cooking spray (can use a muffin tin if you don’t have a pan)
- Mix all donut ingredients well
- Carefully pour batter into the pan until each cavity is 3/4 full (I used a piping bag with the tip snipped to make this easier)
- Bake for 10-12 minutes, until golden and springy
- Let donuts cool on a cooling rack for 5 minutes while you make the glaze
- Mix Quest vanilla milkshake protein powder with Lakanto monkfruit. Add water to get a drizzly consistency (about 4 TBS)
- Once donuts have cooled 5 minutes, dip into glaze and top with sprinkles
Nutrition
Macros
10 servings
97 cal/12 c/1.4 f/9.1 p per donut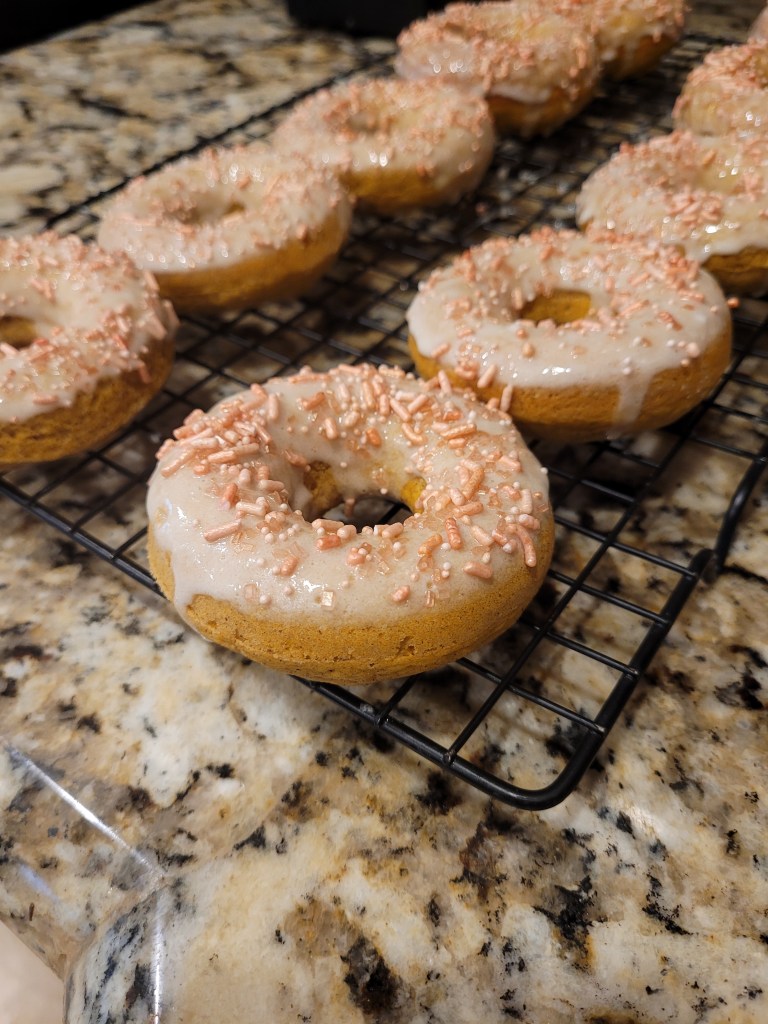
Feeling pump(kin)ed for fall! - Preheat oven to 350 and grease a donut pan with cooking spray (can use a muffin tin if you don’t have a pan)
-
Pumpkin Protein Loaf With Cinnamon Glaze

Pumpkin season starts NOW! What? Orange you glad fall is coming? I, for one, am shocked I made it a whole week into August before busting out the canned pumpkin. This loaf is super simple to make, absolutely hits all the fall flavor notes, and best of all, it won’t make you plump-kin because it’s high protein, low calorie. Don’t even get me started on that drizzly cinnamon glaze…
You could say I’m pumpkin spicing things up. Recipe and Instructions
Pumpkin Protein Loaf With Cinnamon Glaze
A simple quick bread with perfect fall flavors.
You can sub any “just add water” pancake mix if you don’t need to be gluten free.
Ingredients
FOR THE BREAD
*200 grams (1 1/4 cup) Orgain GF protein pancake mix
*45 grams Quest vanilla or cinnamon crunch protein powder
*1 TBS pumpkin pie spice
*2 large eggs
*1 tsp vanilla extract
*122 grams (1/2 cup) Libby’s pure pumpkin
*2/3 cup Fairlife fat free milk (skim also works)
*1 TBS sugar free syrup
FOR THE GLAZE
*1/2 cup Lakanto powdered monkfruit or regular powdered sugar
*1 tsp cinnamon *2 TBS fat free or skim milk
Directions
- Preheat oven to 350 and spray an 8×4 (I used this size) or 9×5 loaf pan with cooking spray
- In a medium bowl, whisk together the pancake mix, protein powder, and pumpkin pie spice; set aside
- In a large bowl, whisk together the eggs, pumpkin, vanilla, syrup, and milk until smooth
- Dump dry mix into the wet mix and whisk just until everything comes together
- Pour batter into prepared pan and smooth out
- Bake for 30-35 minutes, or until a toothpick comes out cleanly from the center of the loaf; if you use a 9×5 pan, it will cook faster
- Let loaf cool in pan for 10 minutes before turning out to a cooling rack to cool completely
- Once bread has cooled, mix the powdered monkfruit, cinnamon, and milk to create a thick glaze
- Pour glaze on top of loaf and use the back of a spoon to force some of the glaze over the sides
- Slice into 6 servings; keep in fridge
- To warm, wrap in damp paper towel and microwave for 30 seconds or place in a toaster for a minute
Nutrition
Macros for 1 slice using monkfruit and fat free milk
131 calories/15 c/2.1 f/13 p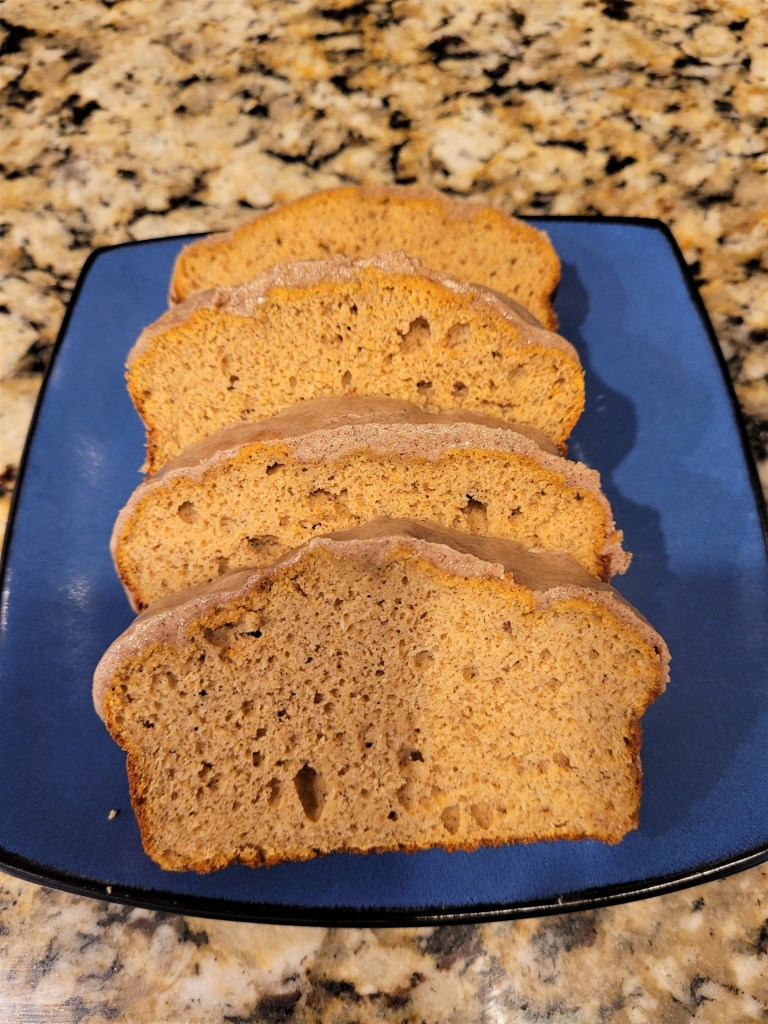
Oh my gourdness, this is just so moist and amazing. - Preheat oven to 350 and spray an 8×4 (I used this size) or 9×5 loaf pan with cooking spray
-
Cinnamon Roll Protein Loaf
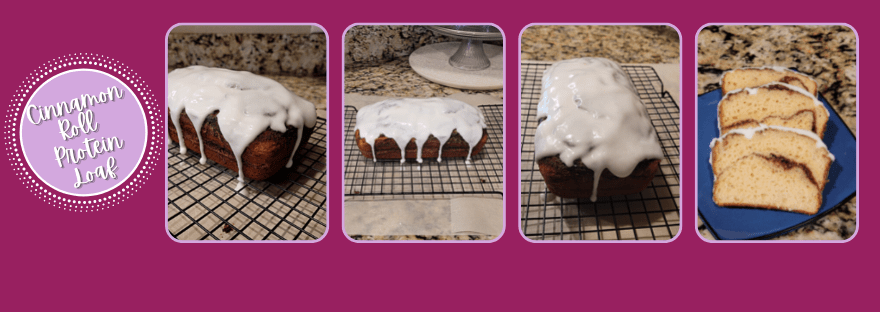
Have a loafly breakfast or dessert with this easy, quick cinnamon roll protein loaf. Sorry, terrible puns are how I roll. I know bad jokes can get stale quite quickly, but thankfully this bread recipe doesn’t! I have been craving cinnamon rolls like crazy the past month, but I am too lazy to make a gluten free recipe from scratch and too afraid to eat a Cinnabon with gluten in it, so my middle ground: quick bread with a cinnamon sugar layer inside and cinnamon roll glaze on top. And because I’m extra, it’s also low in calories and high in protein.
A labor of loaf. Recipe and Instructions
Cinnamon Roll Protein Loaf
A simple way to indulge that cinnamon roll craving with a healthy option.
You can sub any “just add water” pancake mix if you don’t need to be gluten free.
Ingredients
FOR THE BREAD
*227 grams (2 1/4 cups) Kodiak Cakes gluten free flapjack mix
*45 grams Quest vanilla or cinnamon crunch protein powder
*2 large eggs
*1 tsp vanilla extract
*112 grams (1/2 cup) fat free Greek yogurt
*3/4 cup Fairlife fat free milk (skim also works)
FOR THE FILLING
*1/4 cup of Lakanto granular monkfruit or regular sugar
*2 TBS cinnamon
FOR THE GLAZE
*1/2 cup Lakanto powdered monkfruit or regular powdered sugar
*2-3 TBS fat free or skim milk
Directions
- Preheat oven to 350 and spray an 8×4 (I used this size) or 9×5 loaf pan with cooking spray
- In a medium bowl, whisk together the flapjack mix and protein powder; set aside
- In a large bowl, whisk together the eggs, yogurt, vanilla, and milk until smooth
- Dump dry mix into the wet mix and whisk just until everything comes together
- Mix together the cinnamon and granular monkfruit
- Pour half the batter into the prepared loaf pan, then top with the cinnamon-sugar mixture
- Cover this layer with the remaining batter and smooth out
- Bake for 25-30 minutes, or until a toothpick comes out cleanly from the center of the loaf; if you use a 9×5 pan, it will cook faster
- Let loaf cool in pan for 10 minutes before turning out to a cooling rack to cool completely
- Once bread has cooled, mix the powdered monkfruit and milk to create a thick glaze
- Pour glaze on top of loaf and use the back of a spoon to force some of the glaze over the sides
- Slice into 8 servings; keep in fridge
- To warm, wrap in damp paper towel and microwave for 30 seconds or place in a toaster for a minute
Nutrition
Macros for 1 slice using monkfruit and fat free milk
156 calories/21 c/1.8 f/14 p
That cinnamon sugar layer, dough…the true MVP. 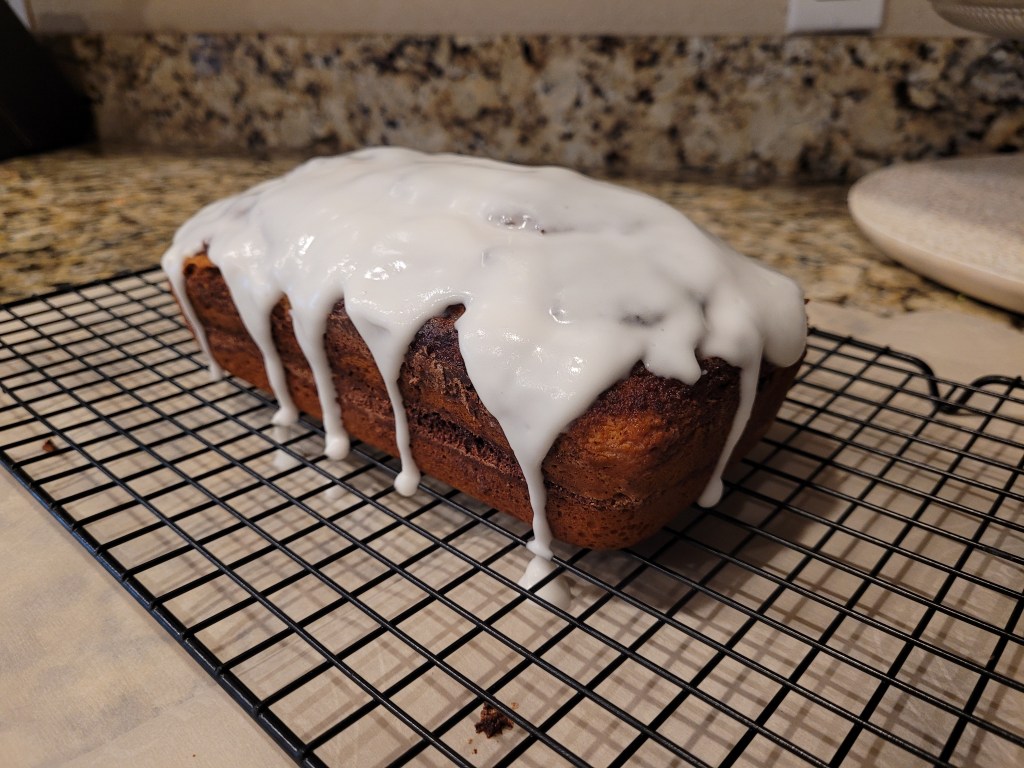
All you knead is loaf. - Preheat oven to 350 and spray an 8×4 (I used this size) or 9×5 loaf pan with cooking spray
-
Shark Week = Shark Eats

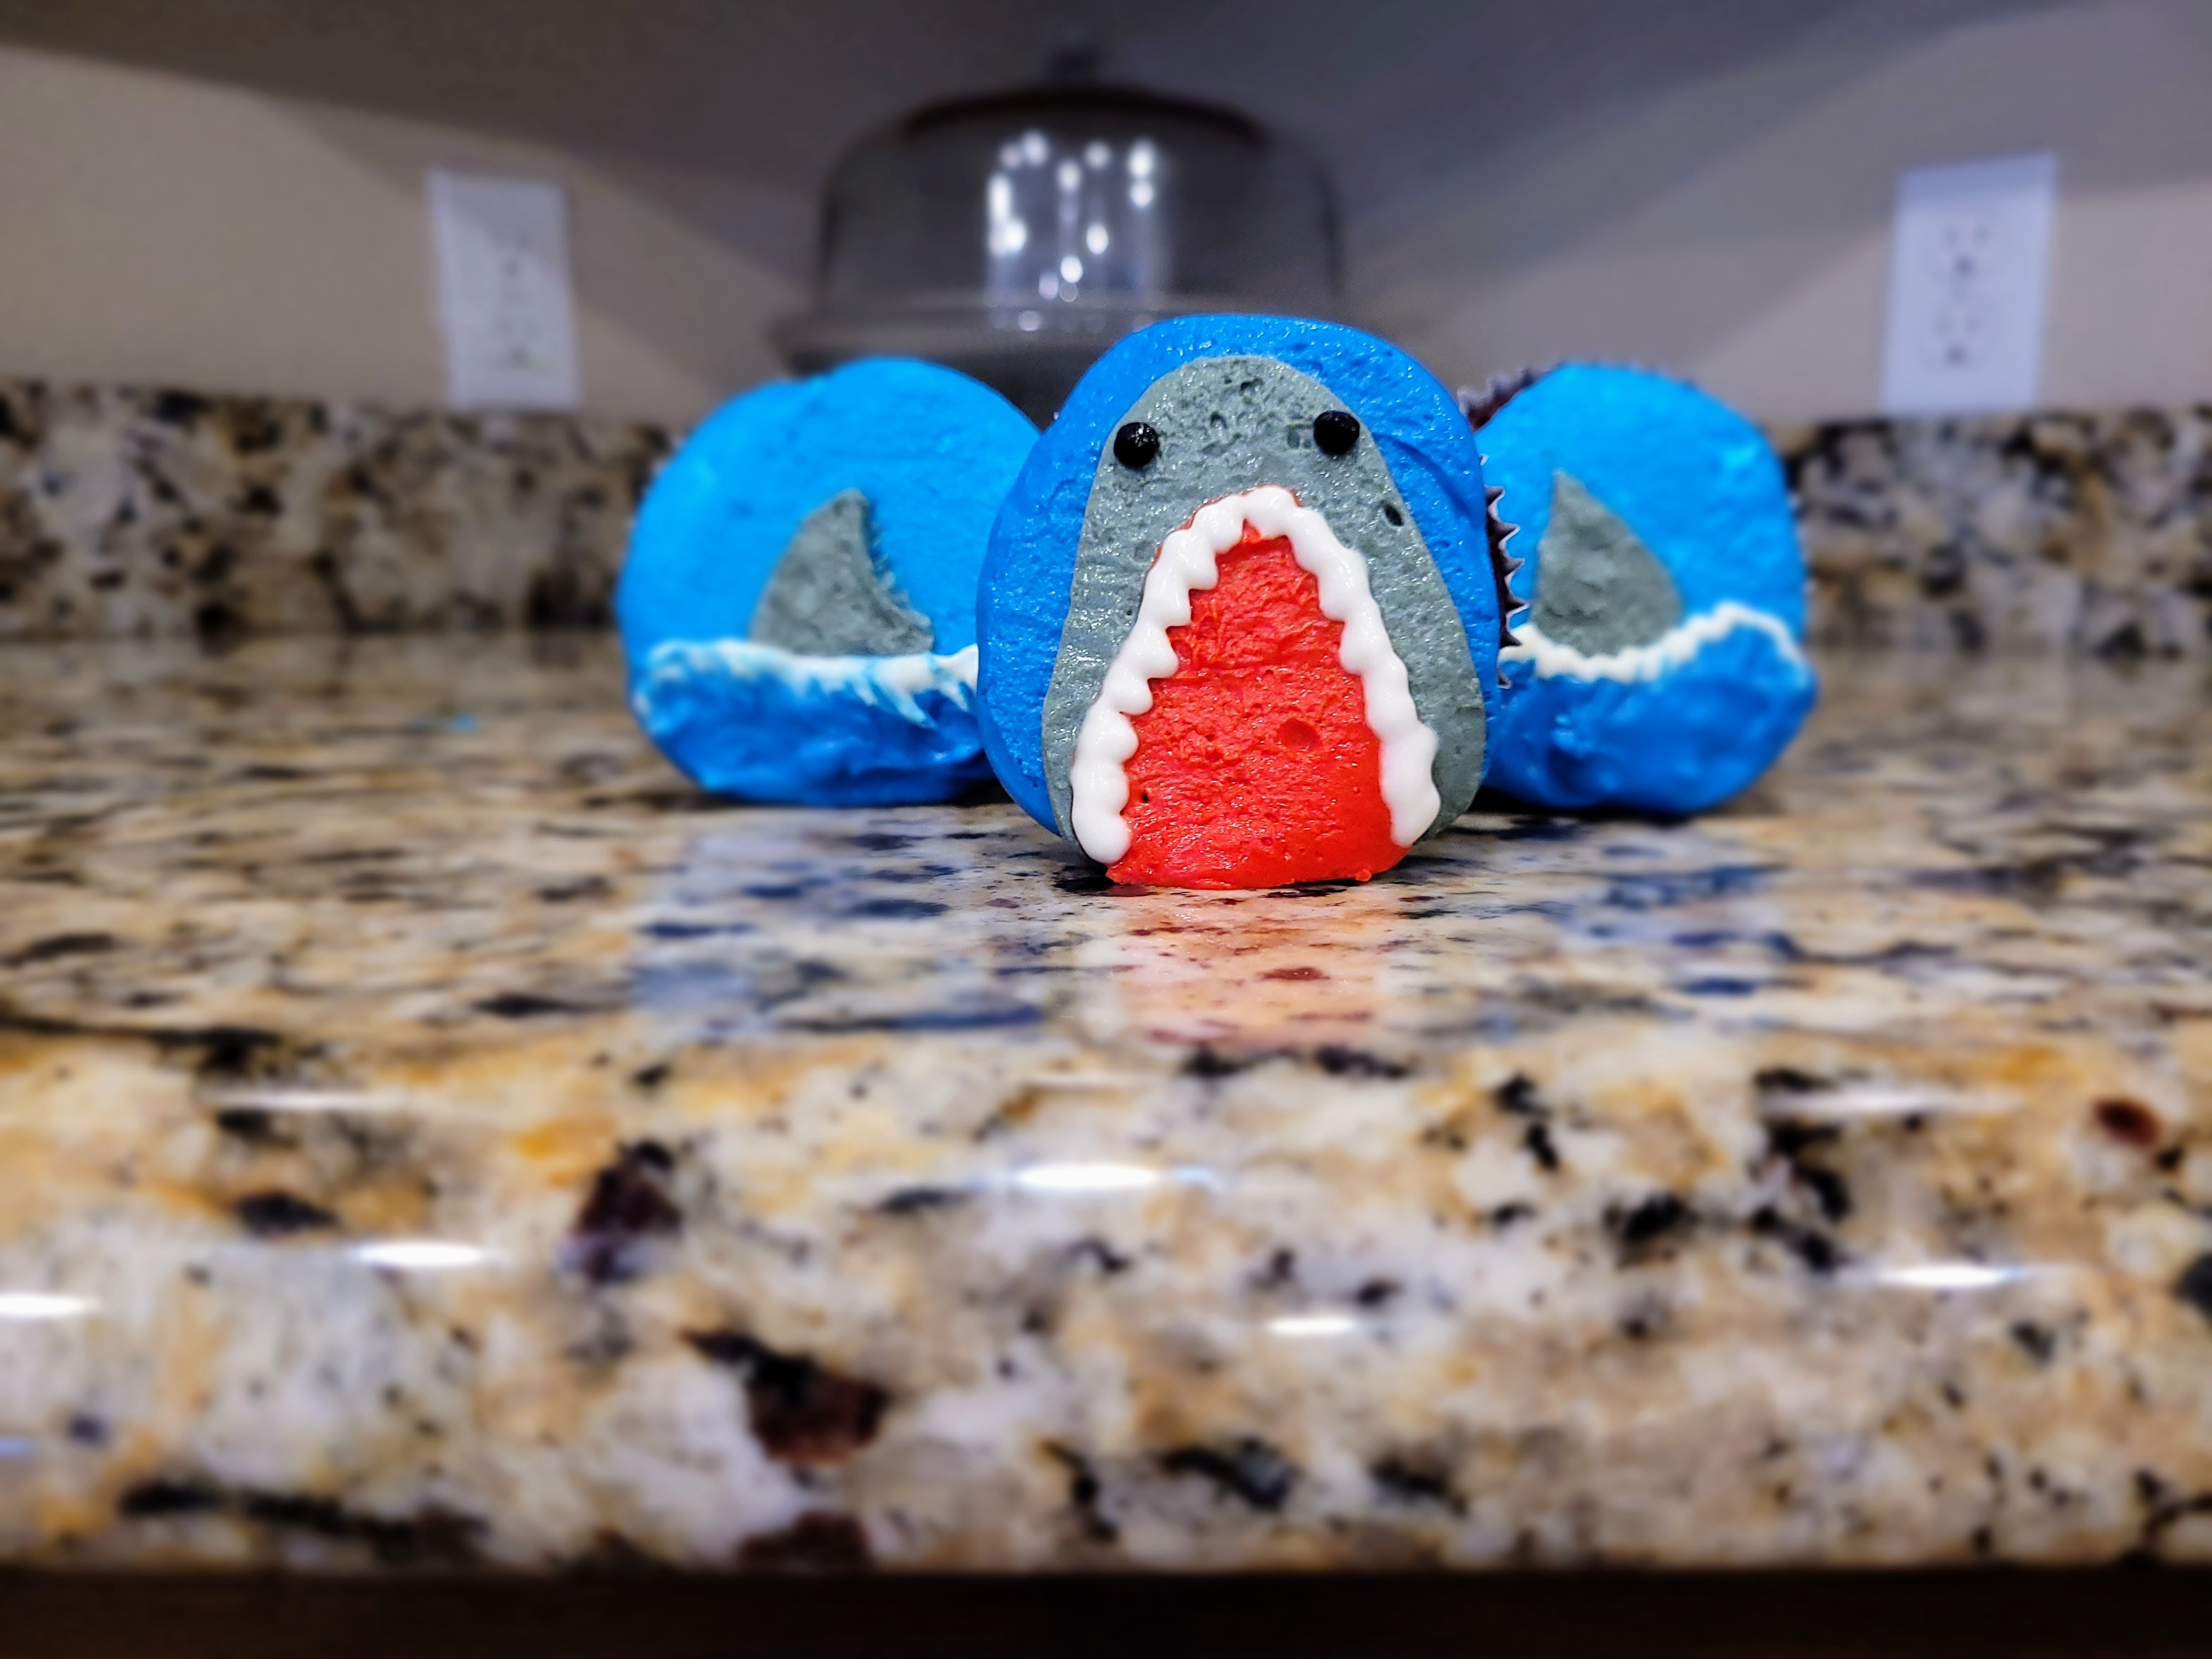
It’s the most wonderful week of the year! I’m obsessed with Shark Week, and not just because it came to life the same year I did back in 1987 (please don’t do the math). I can empathize with sharks because I, too, suffer from resting bitch face and feel the need to eat my body weight in meat at every meal. I had such a blast making my Shark Week cake last year, I knew I wanted to take a bite out of another challenge and make some red velvet Shark Week cupcakes.
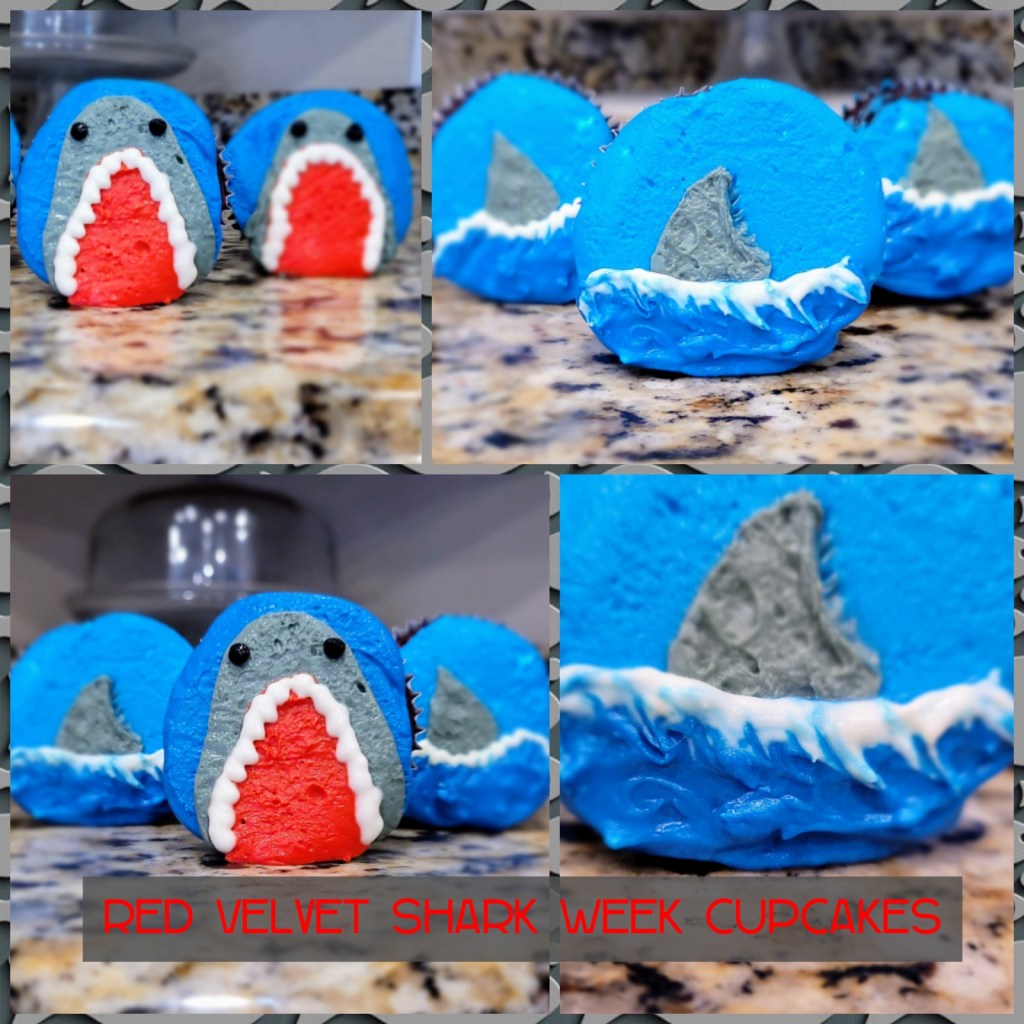
These look positively jawesome. While I love how these turned out visually, the fishue here ended up being a gluten free red velvet recipe that turned out to be a flavorless disaster. Needless to say, I am still on the hunt for a red velvet recipe that is gluten free and tastes like actual cake. The recipe I tried ended up very tough, dry, and tasted only like a whisper of cake…I probably just perfected a new La Croix flavor. I’m not even sure I’d feed these to a bull shark, and they will literally eat anything. So no recipe in this blog, just a tutorial on how to make your own shark and shark fin cupcakes. Use whatever flavor or cake recipe you’d like! Hopefully yours will be edible and not just a really delightful reminder of your failure every time you open your fridge. I can’t bring myself to throw these away because they’re so cute. Yes, sharks can be cute. Have you seen an angel shark? ADORABLE.
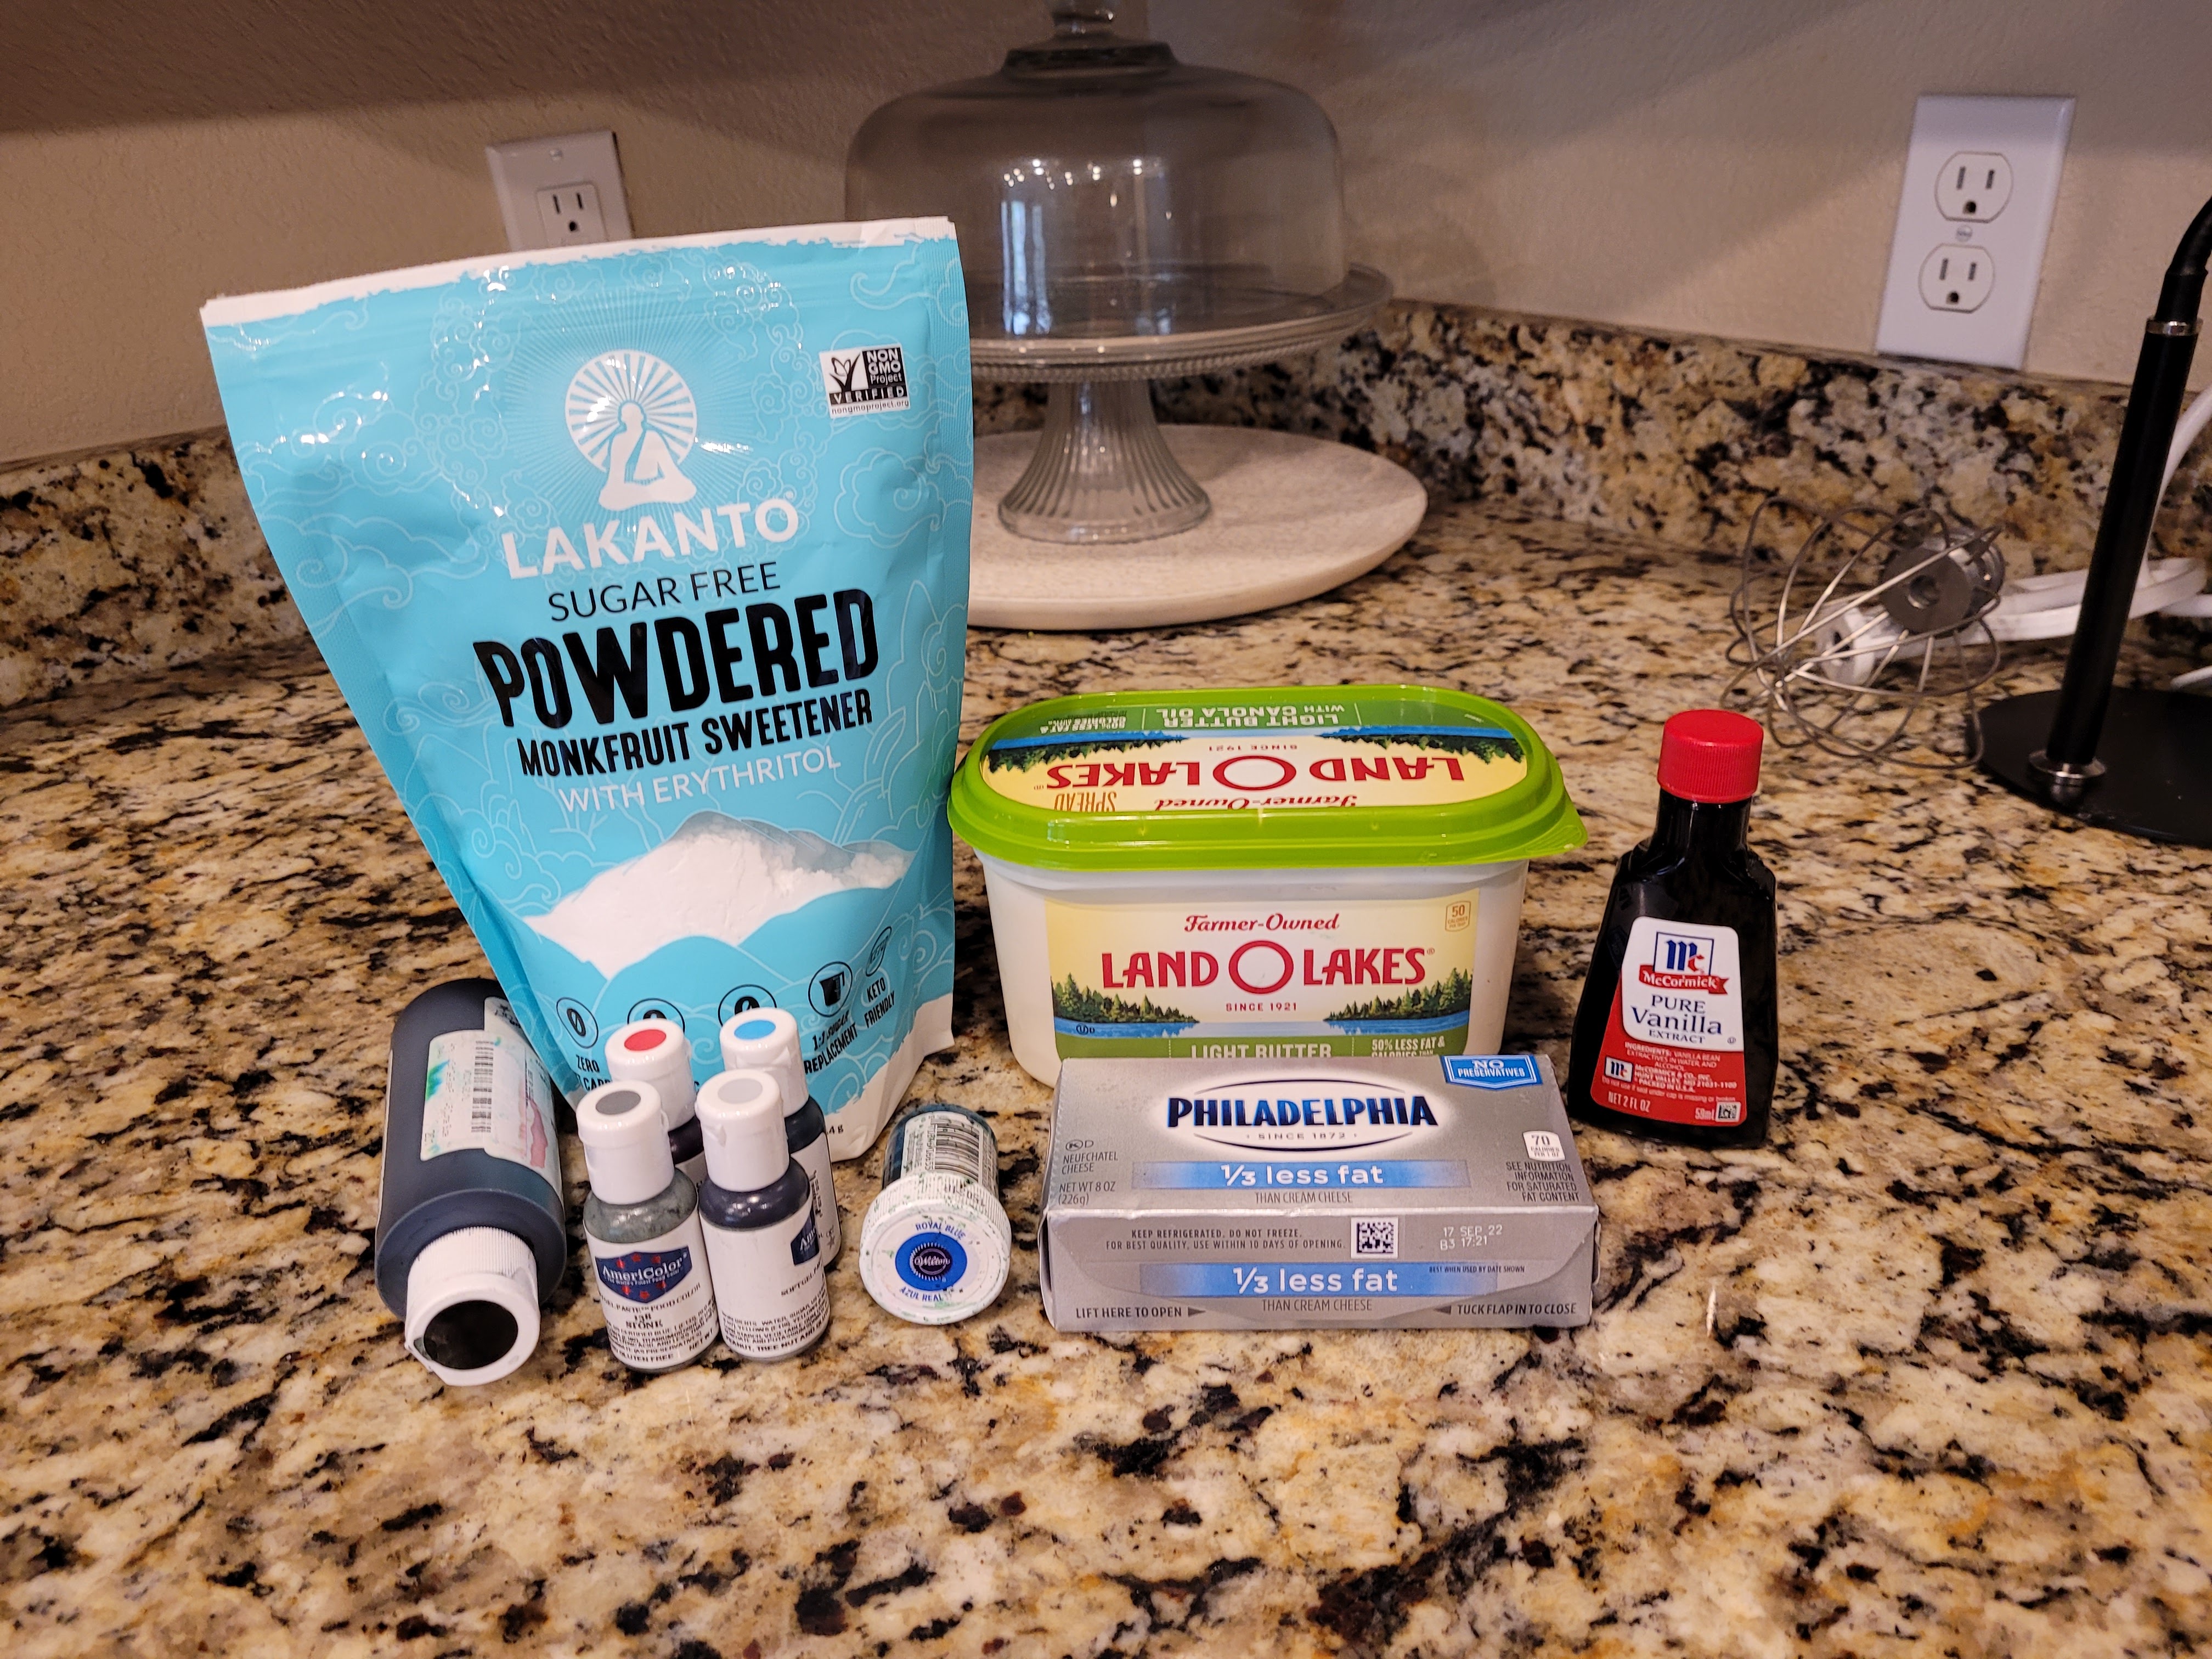
The zebra shark comes in a very close second because it looks like its always smiling on account of being high as a kite. So these cupcakes use the flip/smush/freeze technique I did with my bee cupcakes. I used a stiff cream cheese frosting for those, but I wanted to try using light butter this time to see if it was thick enough to work with this method. Happy to report, yes, you can cut the calories in half and still smush cupcakes to your heart’s content. For the lightened up cream cheese frosting, you need:
- 112 grams (1/2 cup) light butter, cold
- 224 grams (8 ounces) 1/3 the fat cream cheese at room temp
- 4 cups Lakanto powdered monkfruit (regular powdered sugar also works)
- 1 TBS vanilla extract
- 1-2 TBS milk if needed to thin frosting out a bit
- Grey, red, black, blue, and sky blue gel dyes
- Round tips (I used numbers 2 and 12)
A fintastic color palette, really. Start by whipping the cream cheese and butter in a stand mixer for 2 minutes. Then add in the vanilla extract, half the powdered monkfruit, and mix well. Scrape the bowl and add in remaining monkfruit. If your frosting is too stiff, add in a tablespoon of milk at a time, until you get a smoother consistency. I did not need any milk since the light butter is more liquid-y than full fat butter.
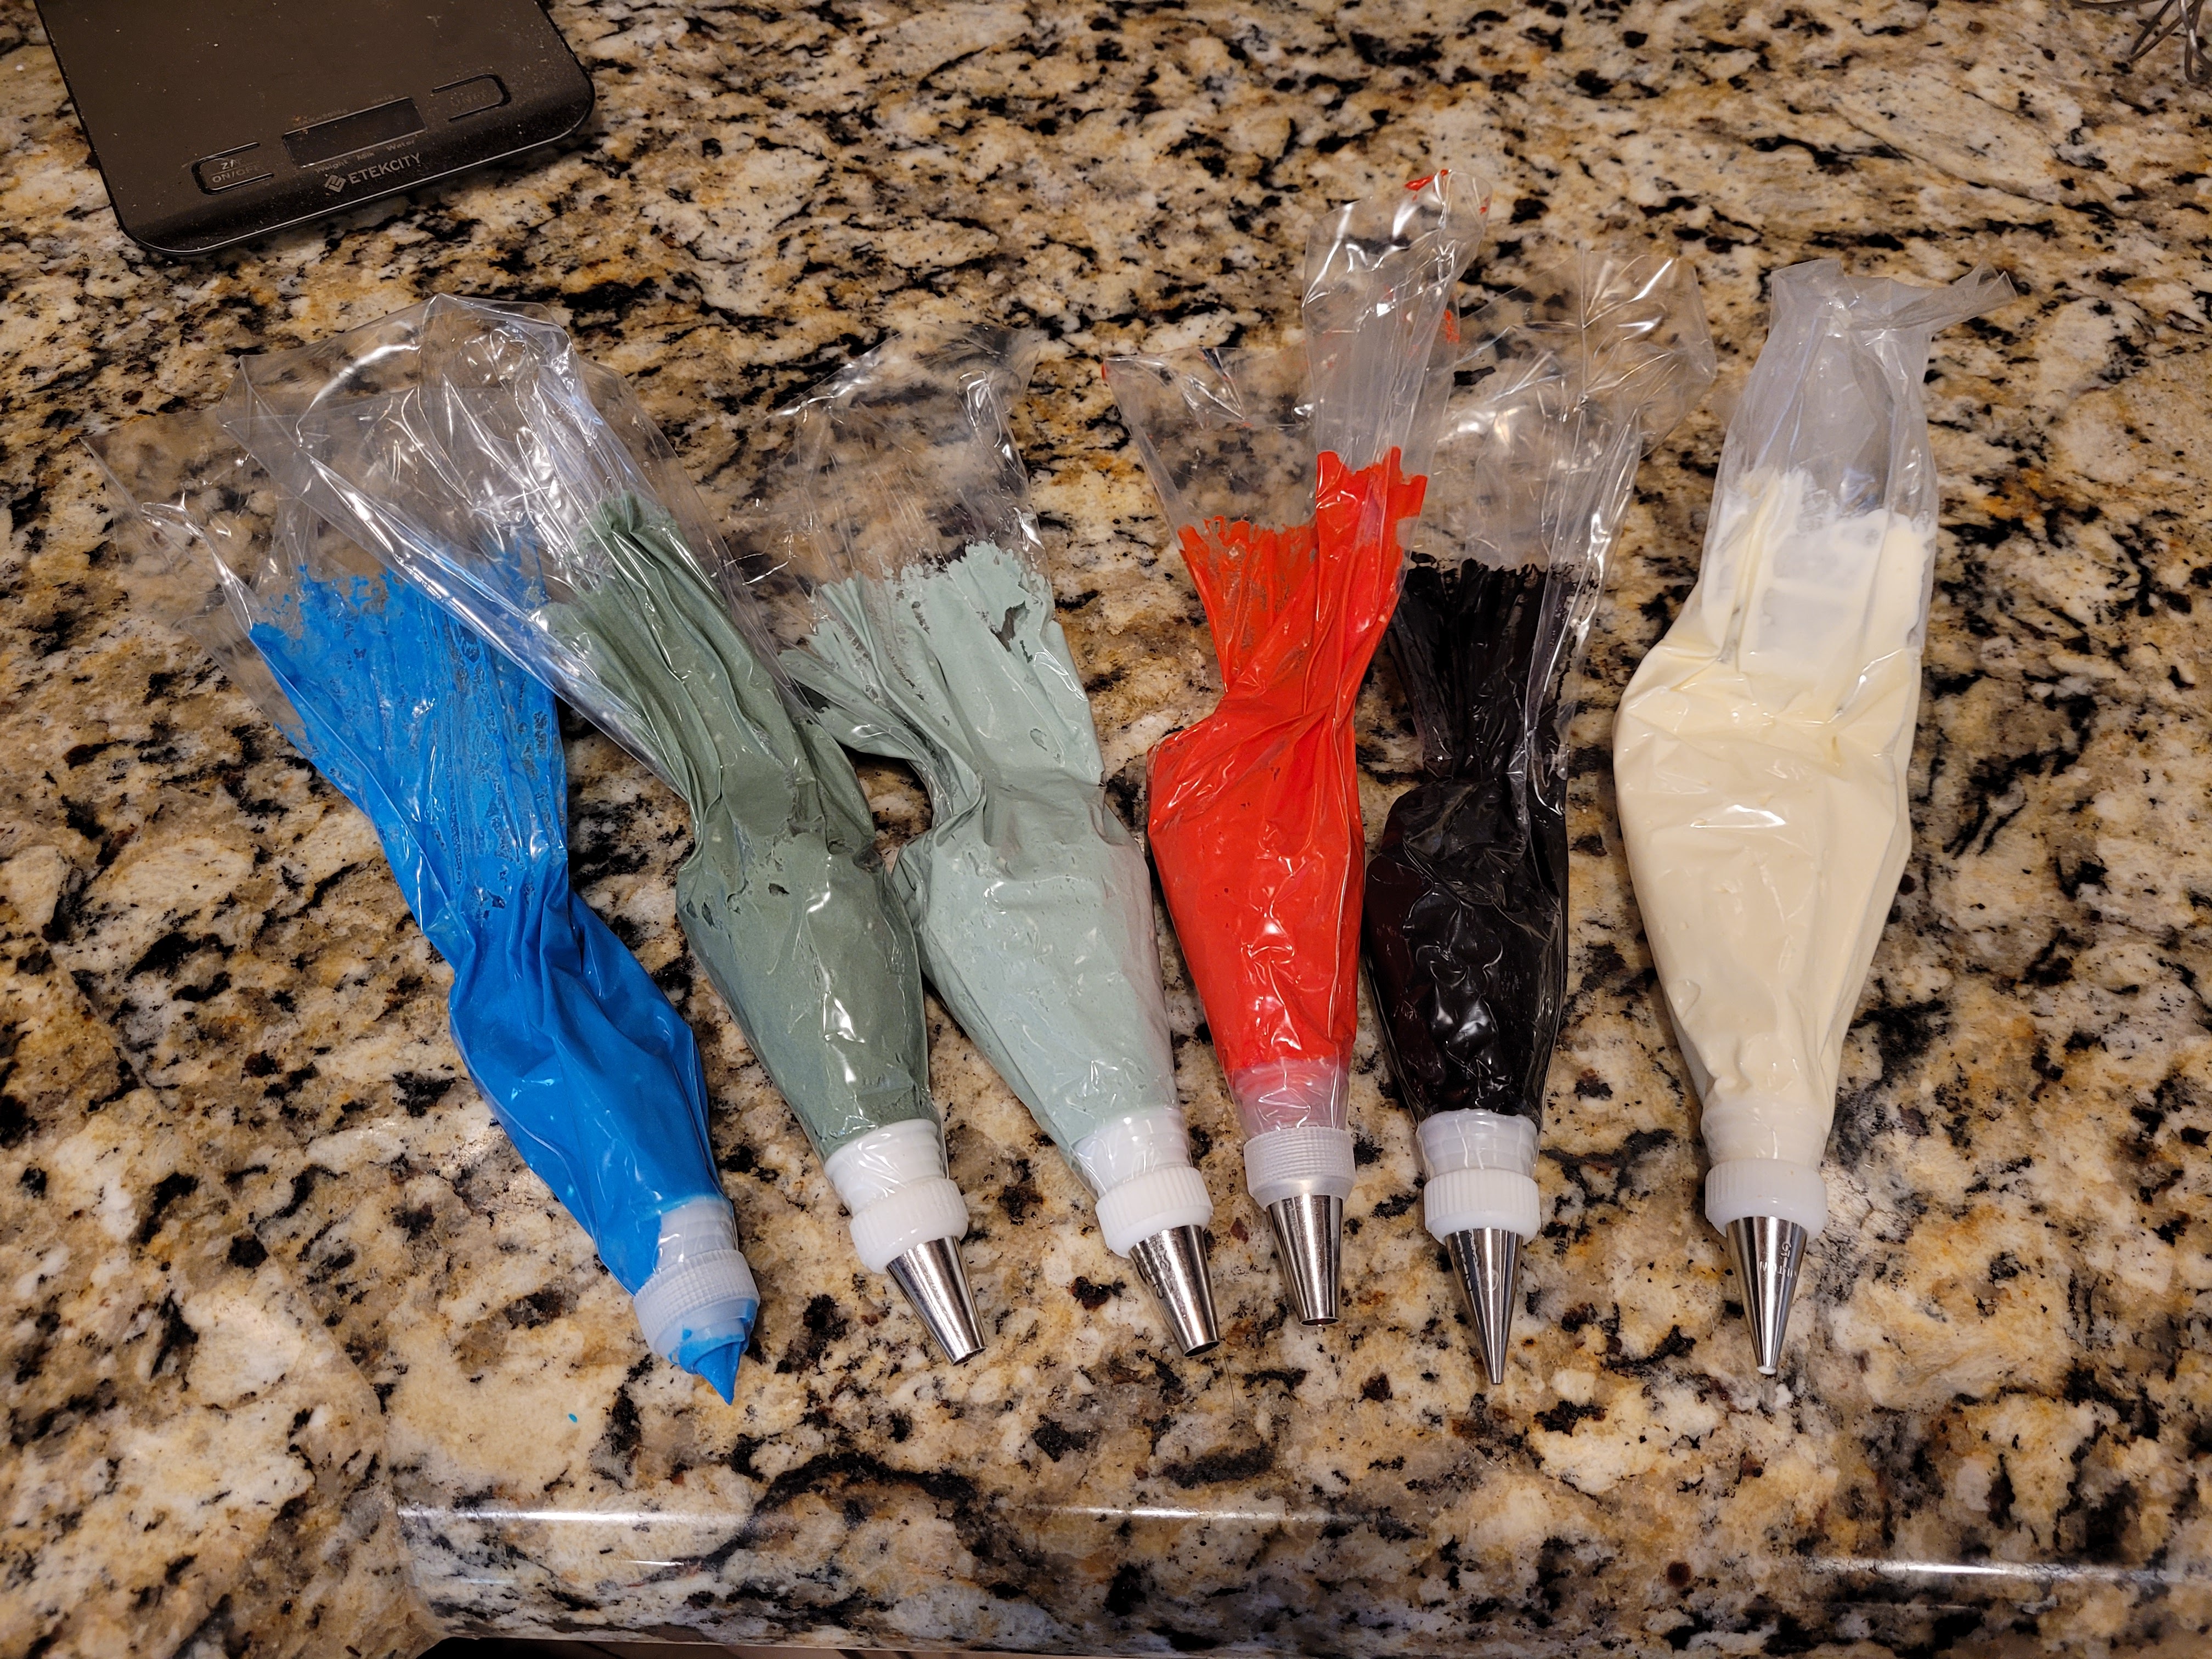
Divide your frosting:
- Put a small amount of plain white in a piping bag with a #2 tip to make the teeth and waves
- Mix a small amount of frosting with black dye and put in a piping bag with a #2 tip for the eyes
- Mix a small amount of frosting with red dye and load into a bag with a #12 tip for the shark mouth
- Mix a medium amount of frosting with gray dye and load into a bag with a #12 tip for the shark fin and body (I dyed two different shades of gray frosting, but only ended up using one for both cupcakes)
- Split the remaining frosting in half, dying one half blue and the other half sky blue. Load each into bags with a #12 tip or snip a larger opening. This will be water and sky.
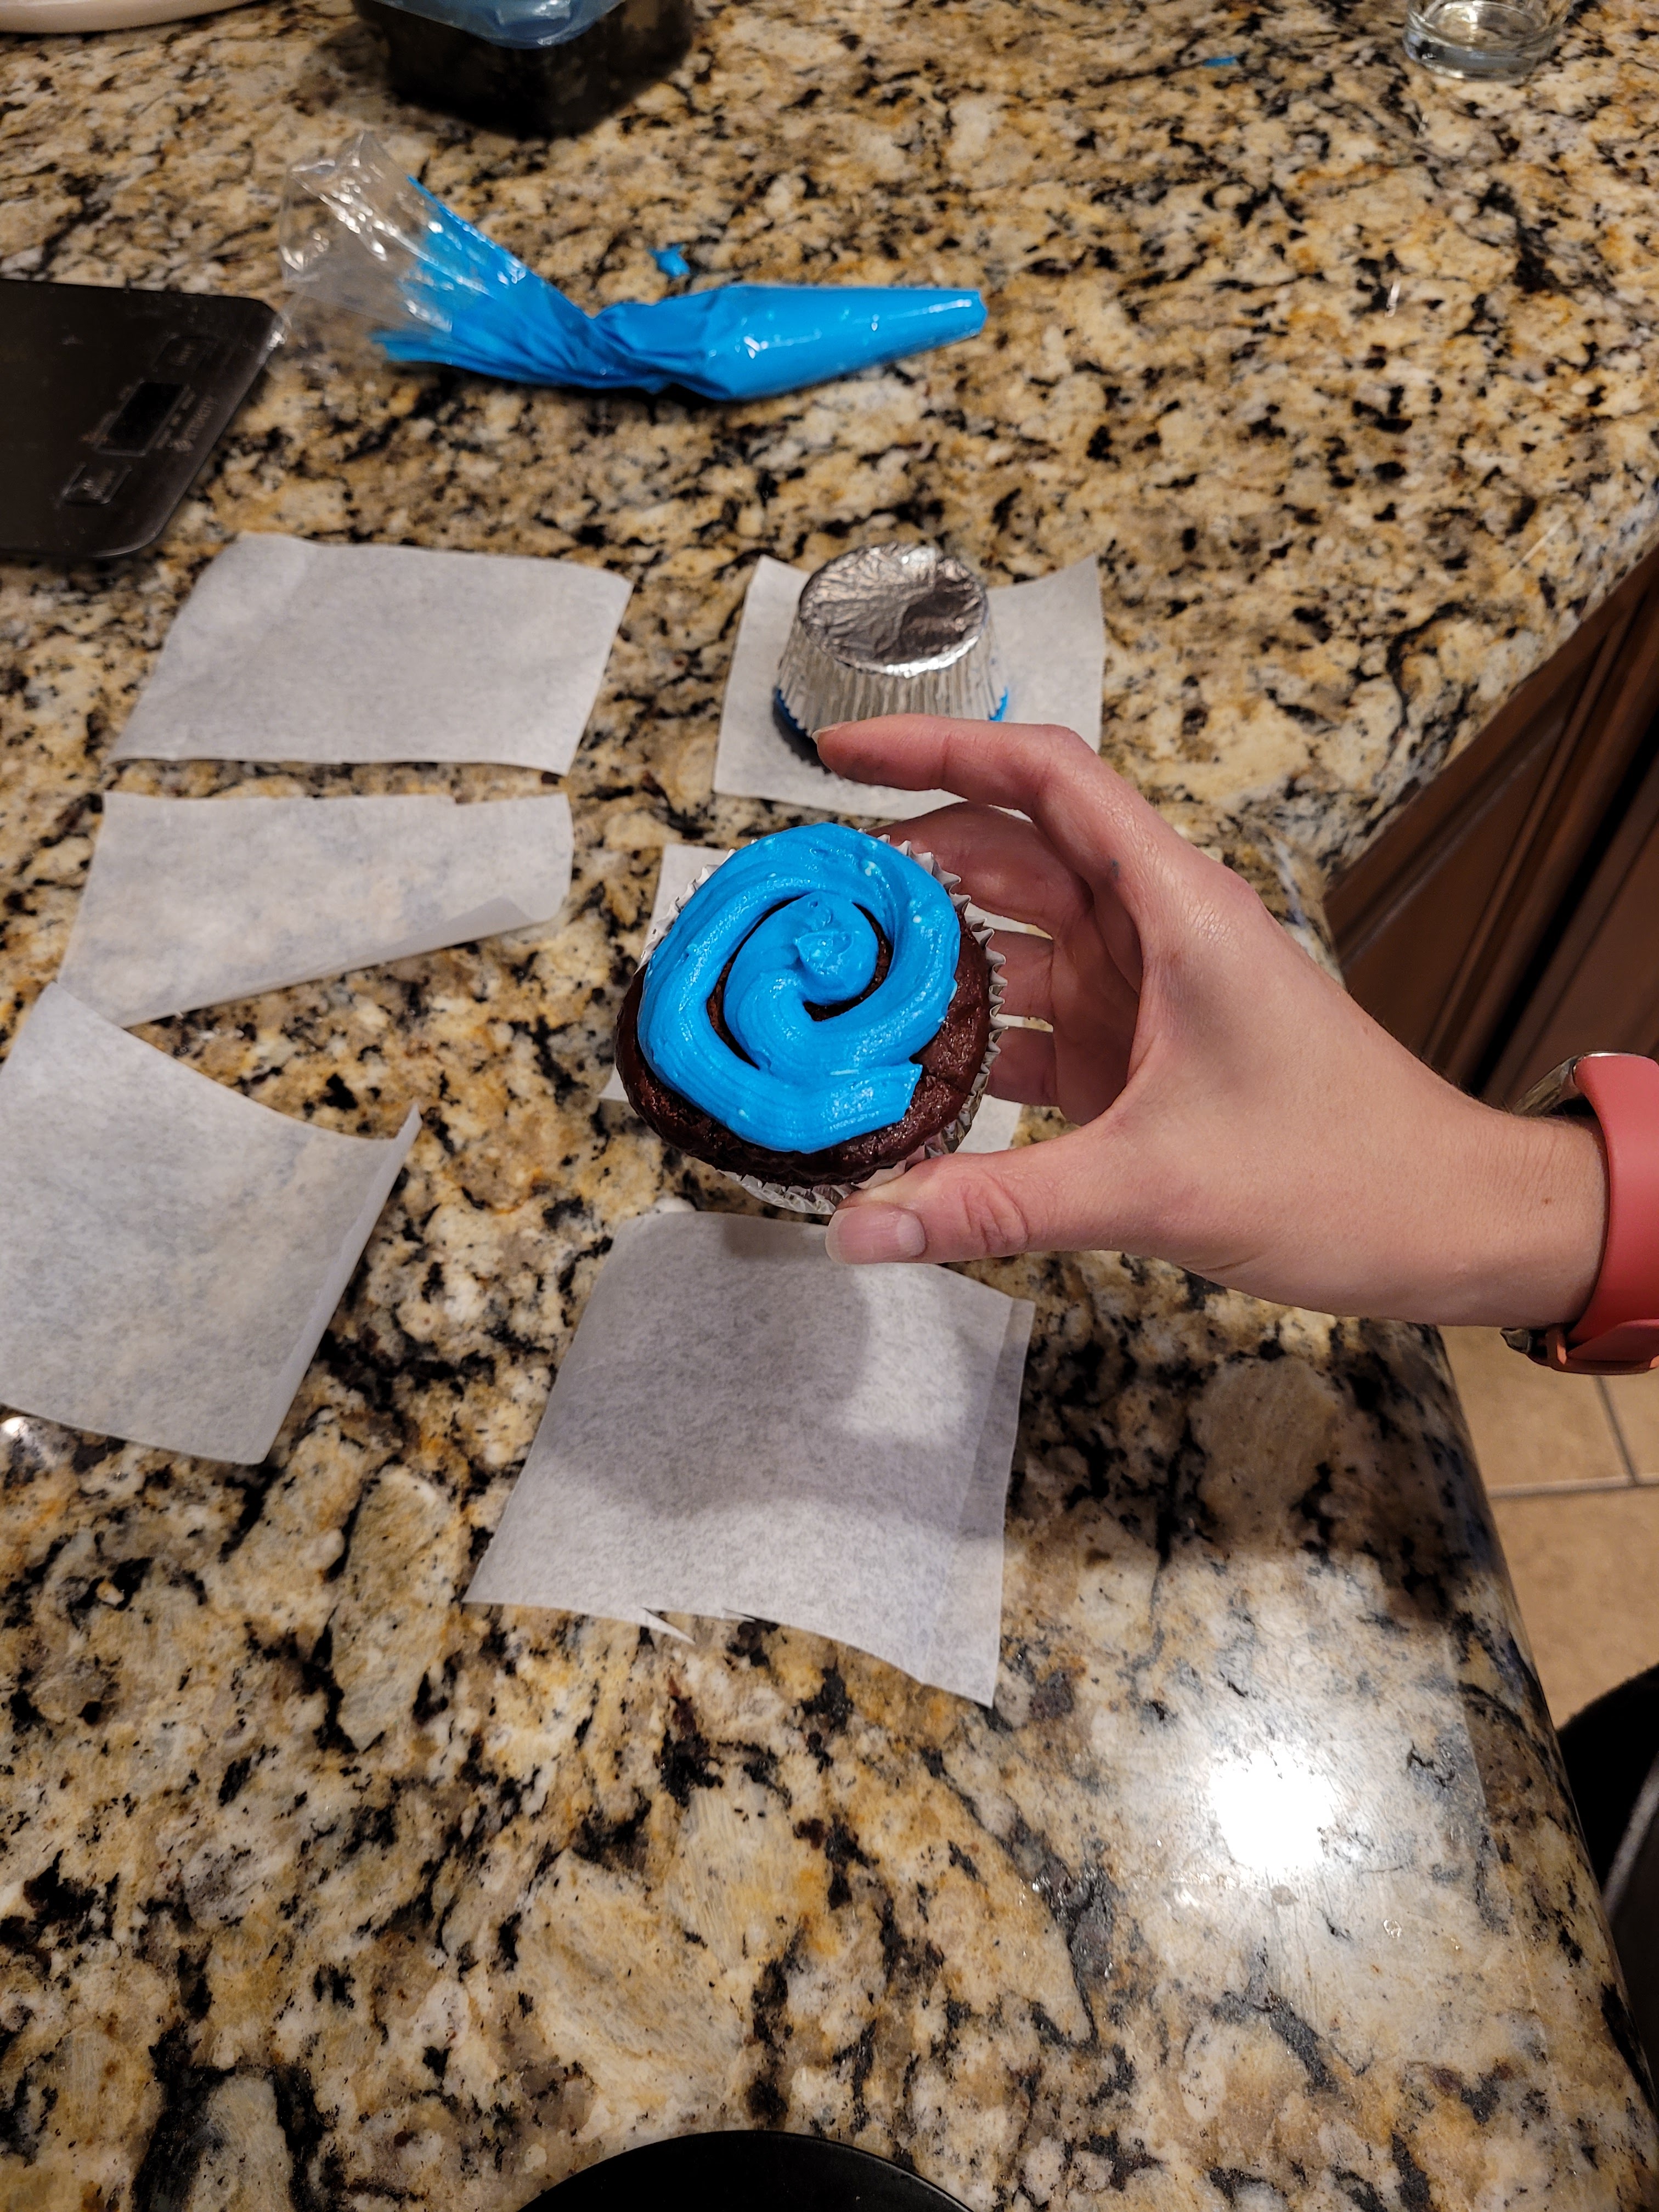
Take a completely cooled cupcake and pipe a few circles of the darker blue on half of your cupcakes. These will be the shark face cupcakes. 
Smooth out a little with an angled spatula. 
Cut up squares of Parchment or wax paper, and then place your cupcake face-down on the paper. Gently smush down to flatten. 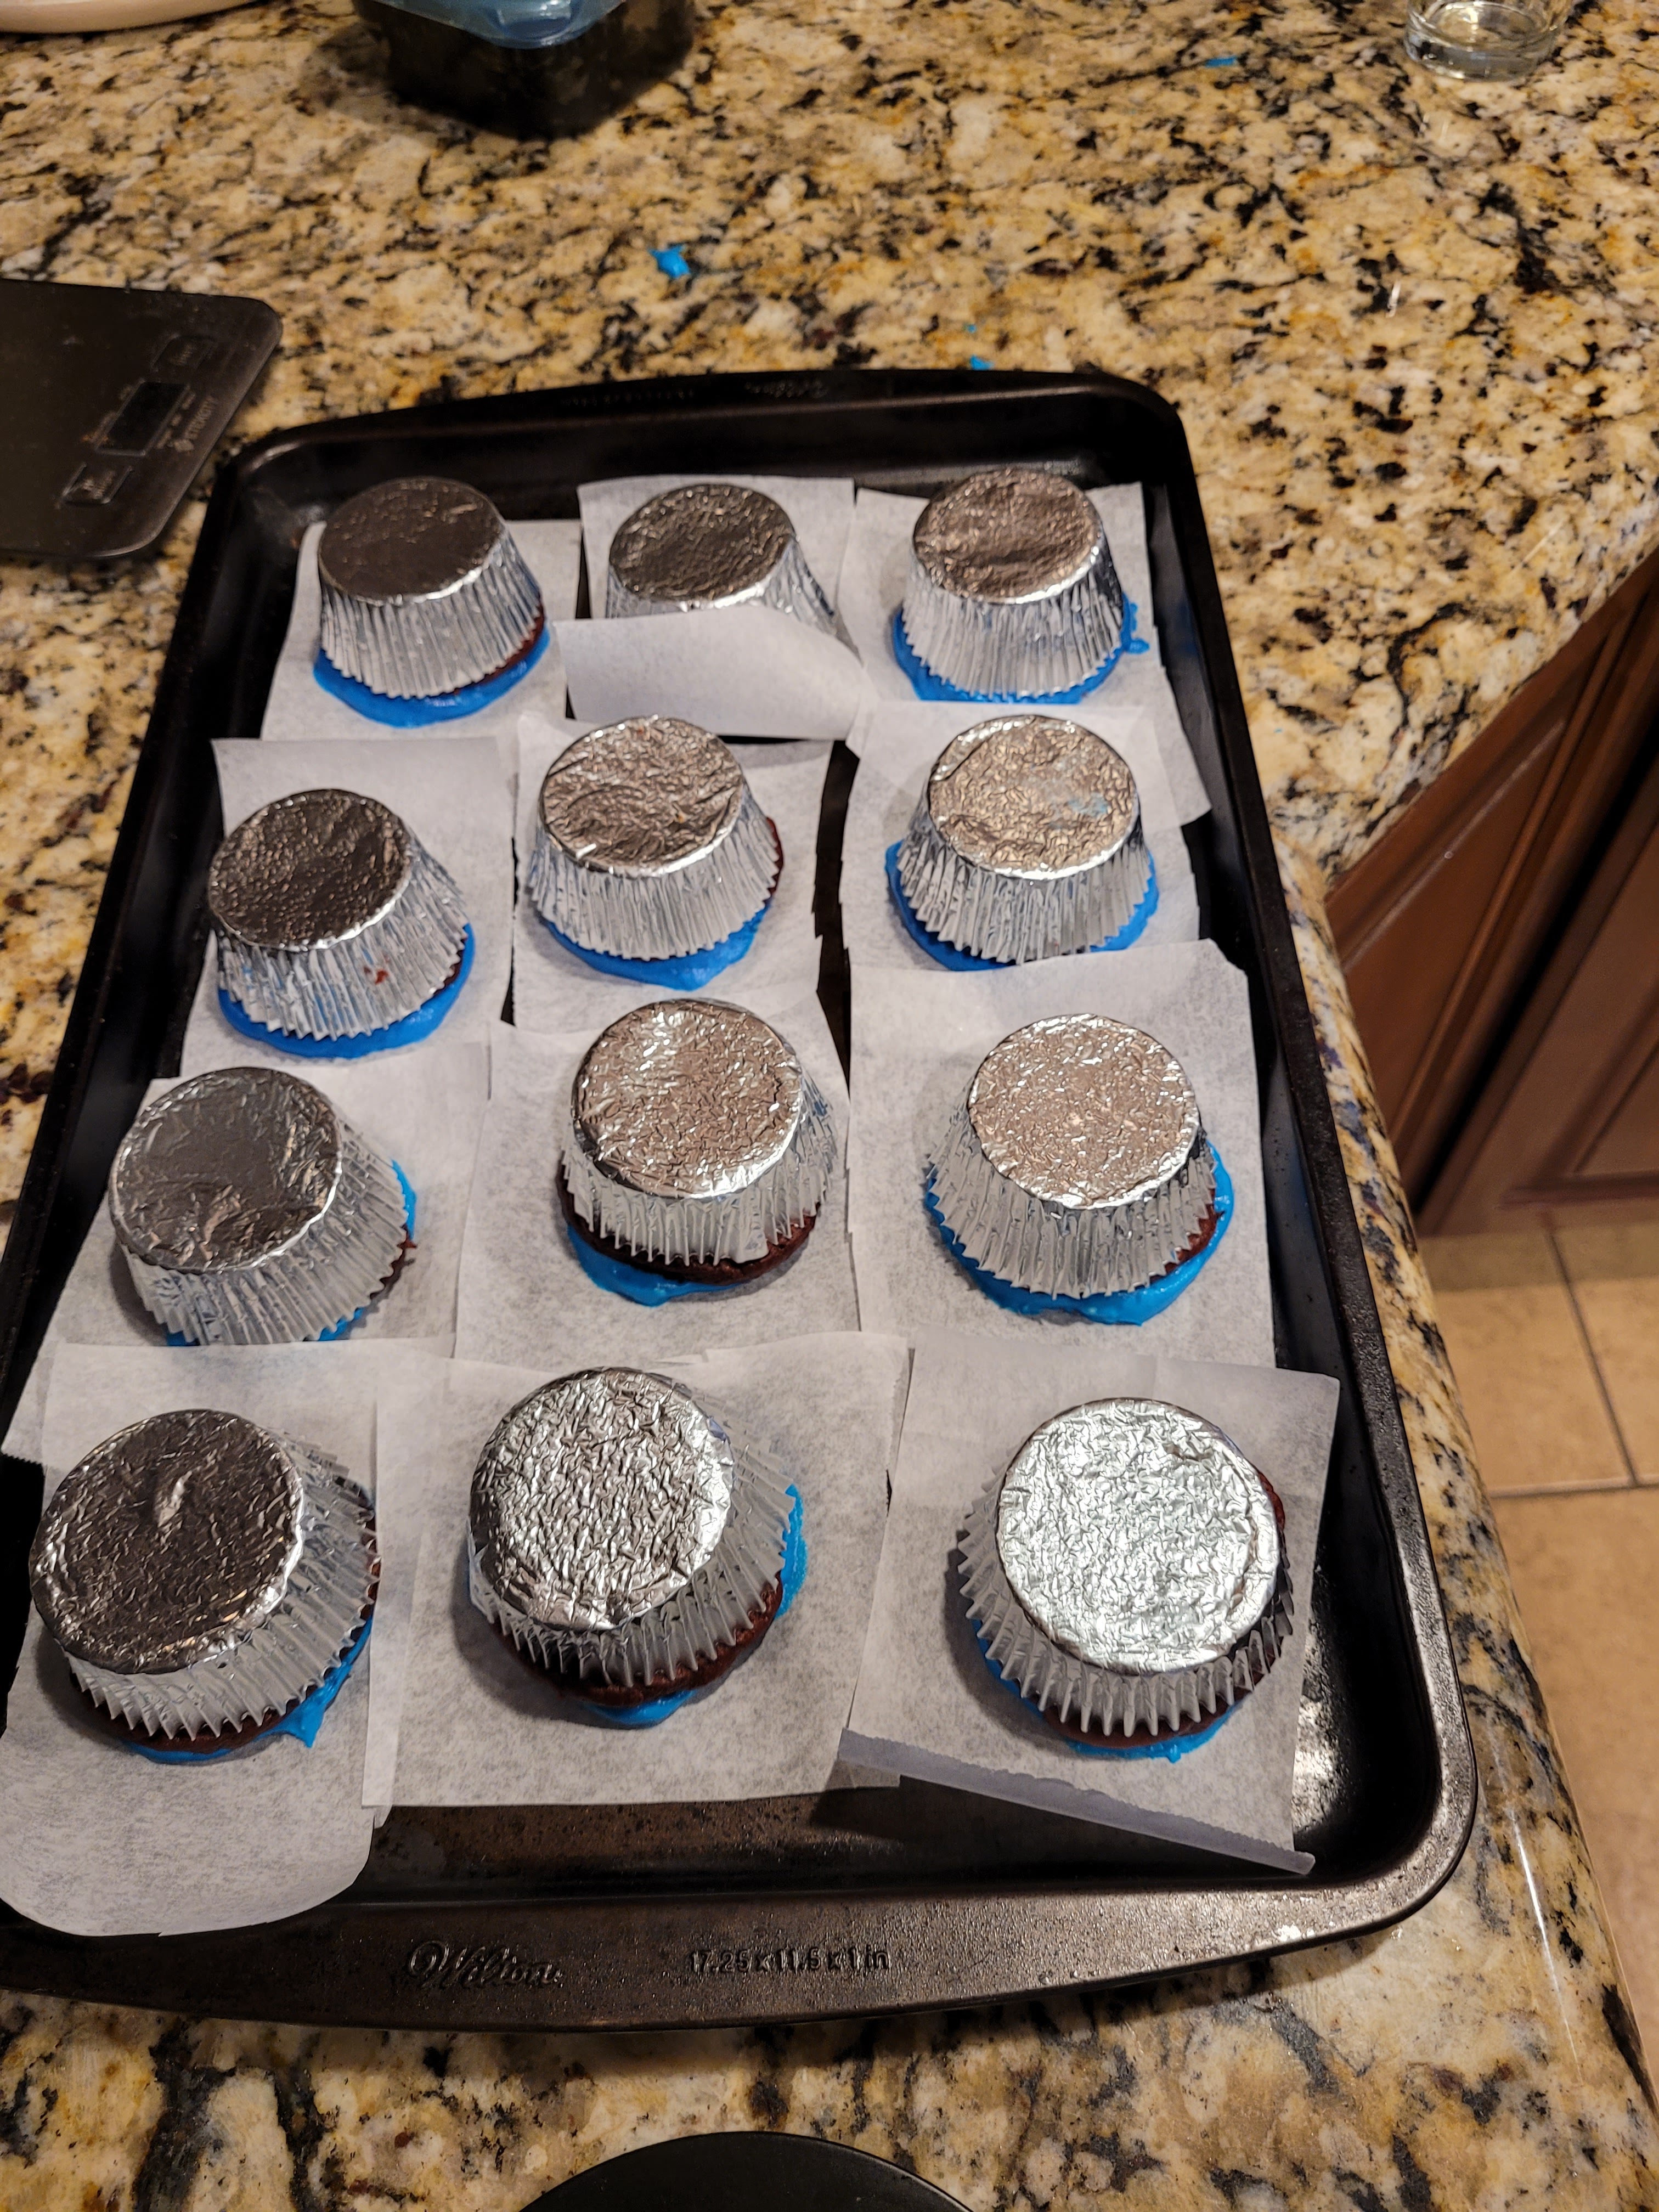
Repeat on however many other shark face cupcakes you want to make. Put the cupcakes all face-down on a large cookie sheet. Then transfer this to your freezer to set for 30 minutes. Now, save the rest of this dark blue frosting to use for ocean water with the shark fin cupcakes. You can repeat this background-making process using the lighter blue for the remaining cupcakes to make the sky while your dark blue cupcakes freeze.
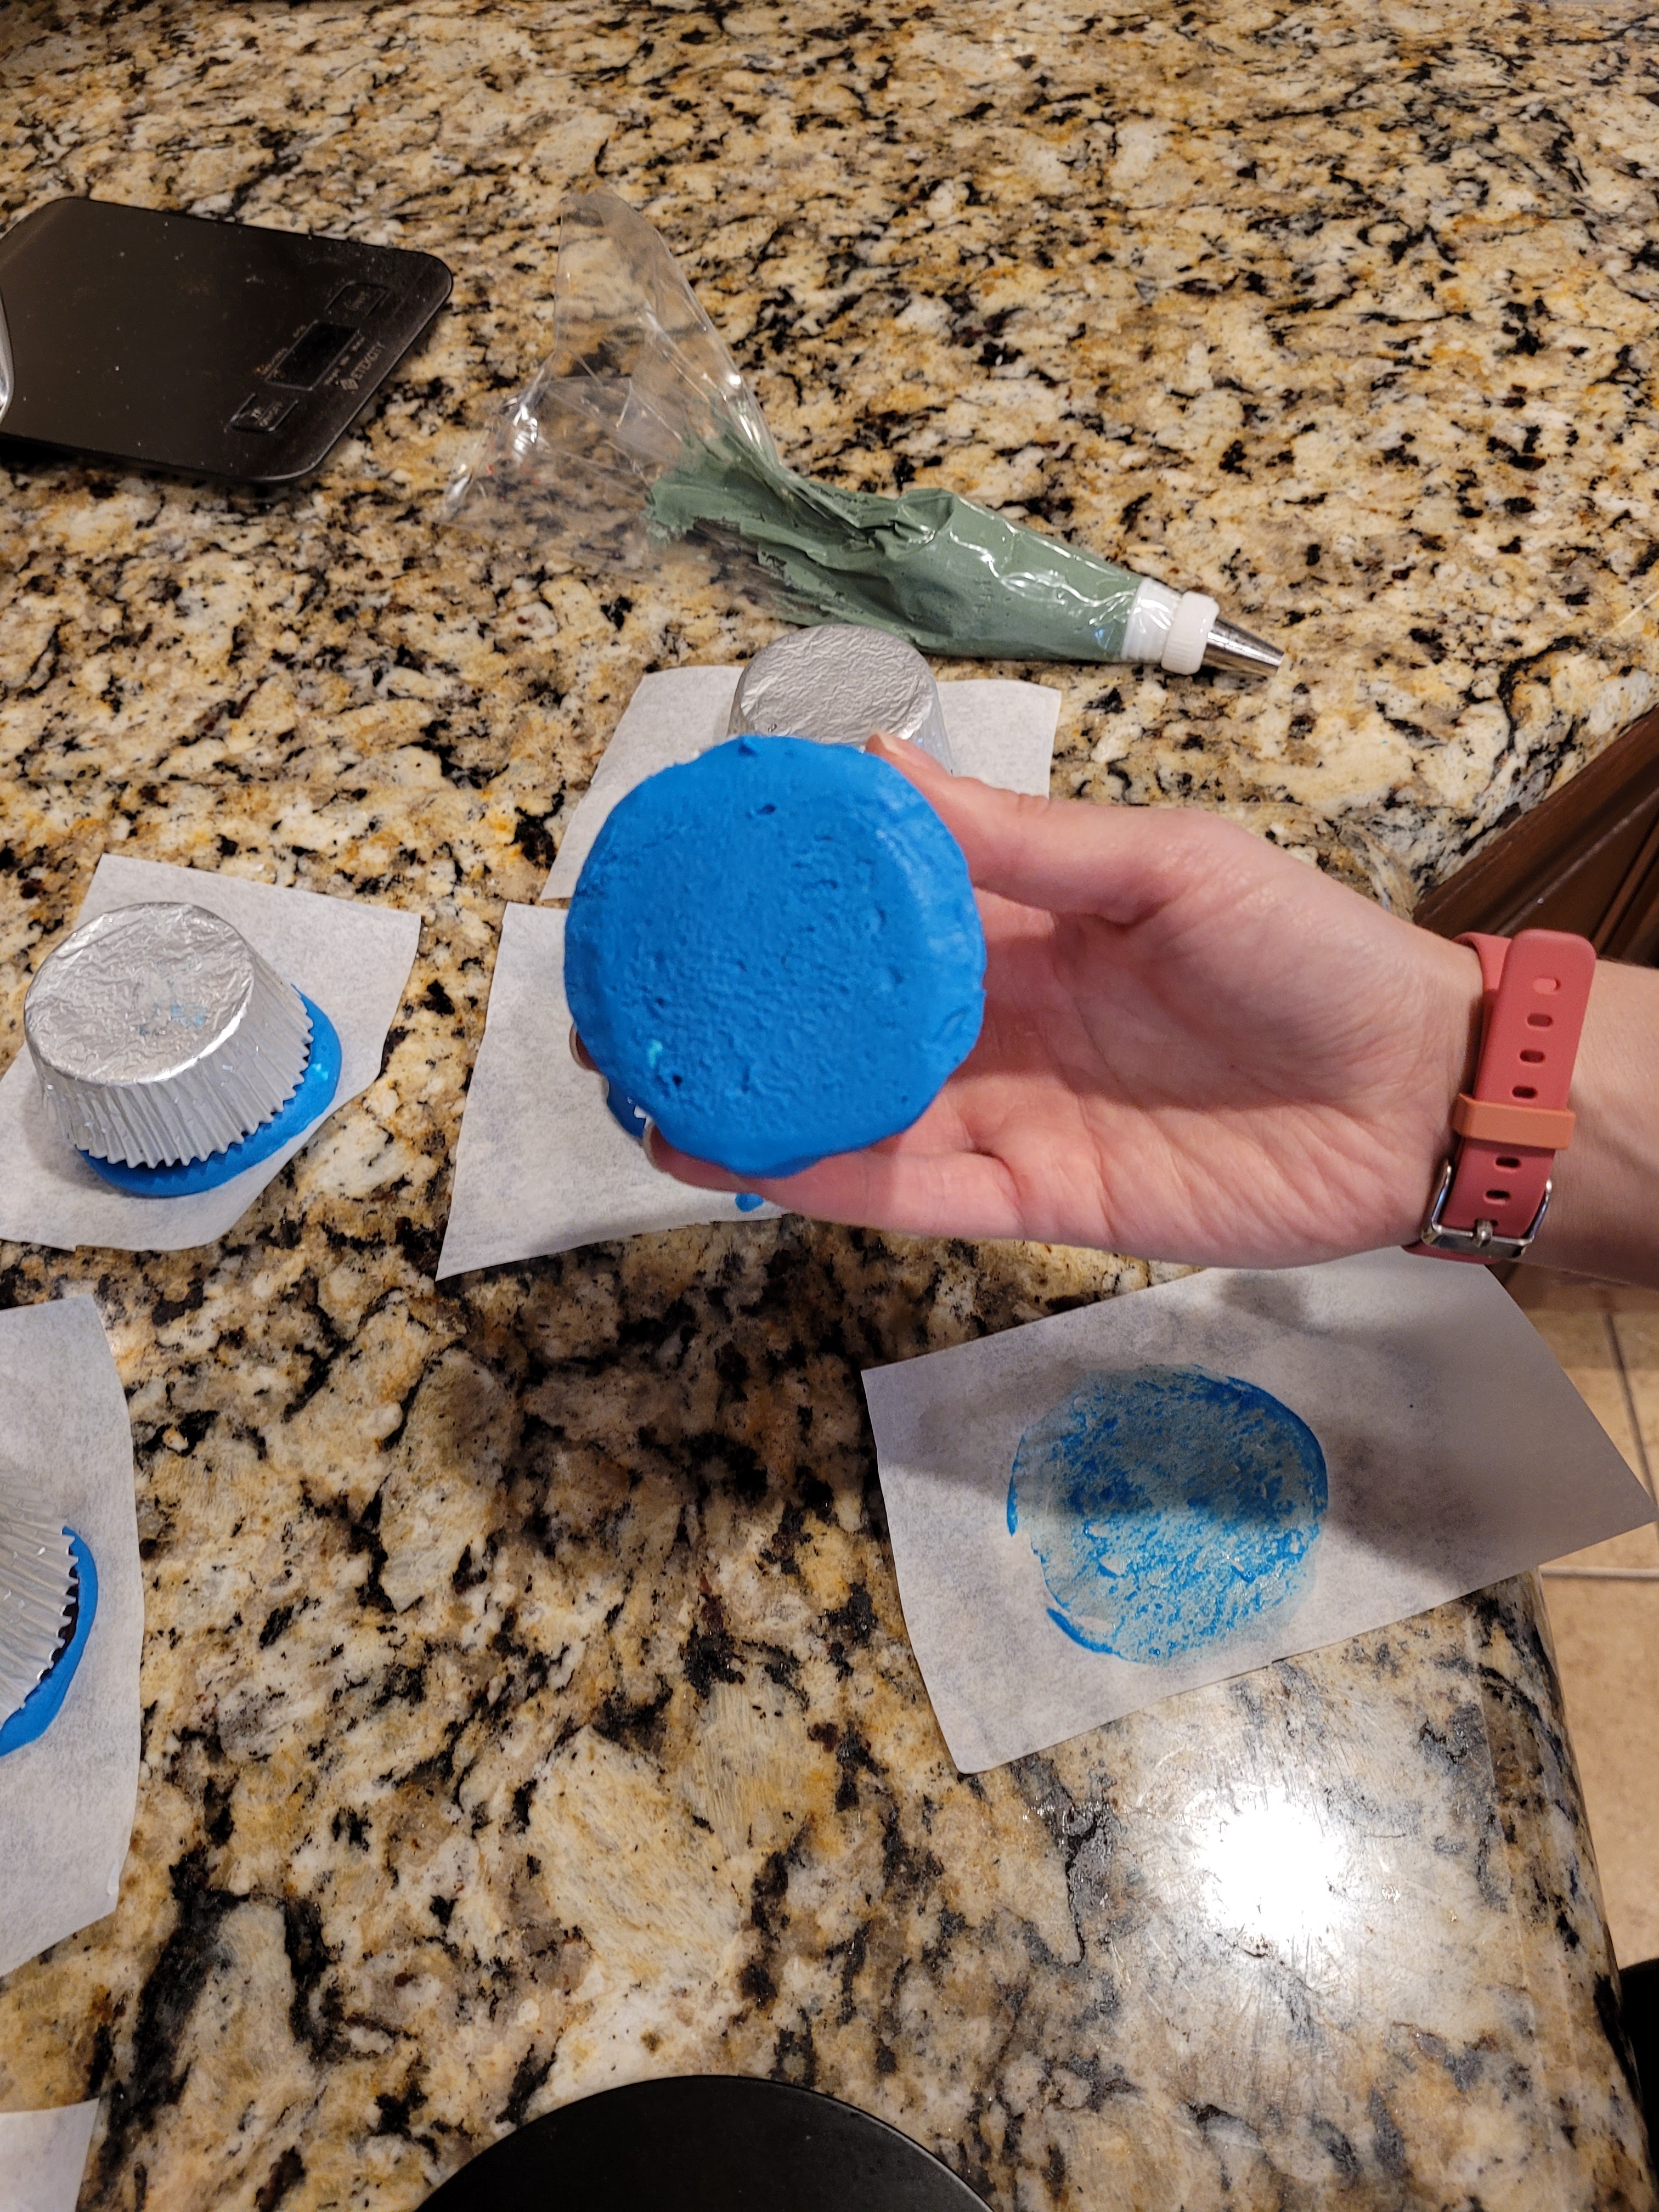
Peeling away that Parchment paper is more satisfying than peeling a sunburn… What? Too gross? OK, peeling the Parchment paper away from the frozen cupcake is more satisfying than peeling the protective film off of a new electronic. There, I’ve classed things up a bit for you. Once you’ve let those cupcakes freeze for a half an hour, the Parchment peels off easily to reveal a jawsdropping flat, smooth cupcake background.
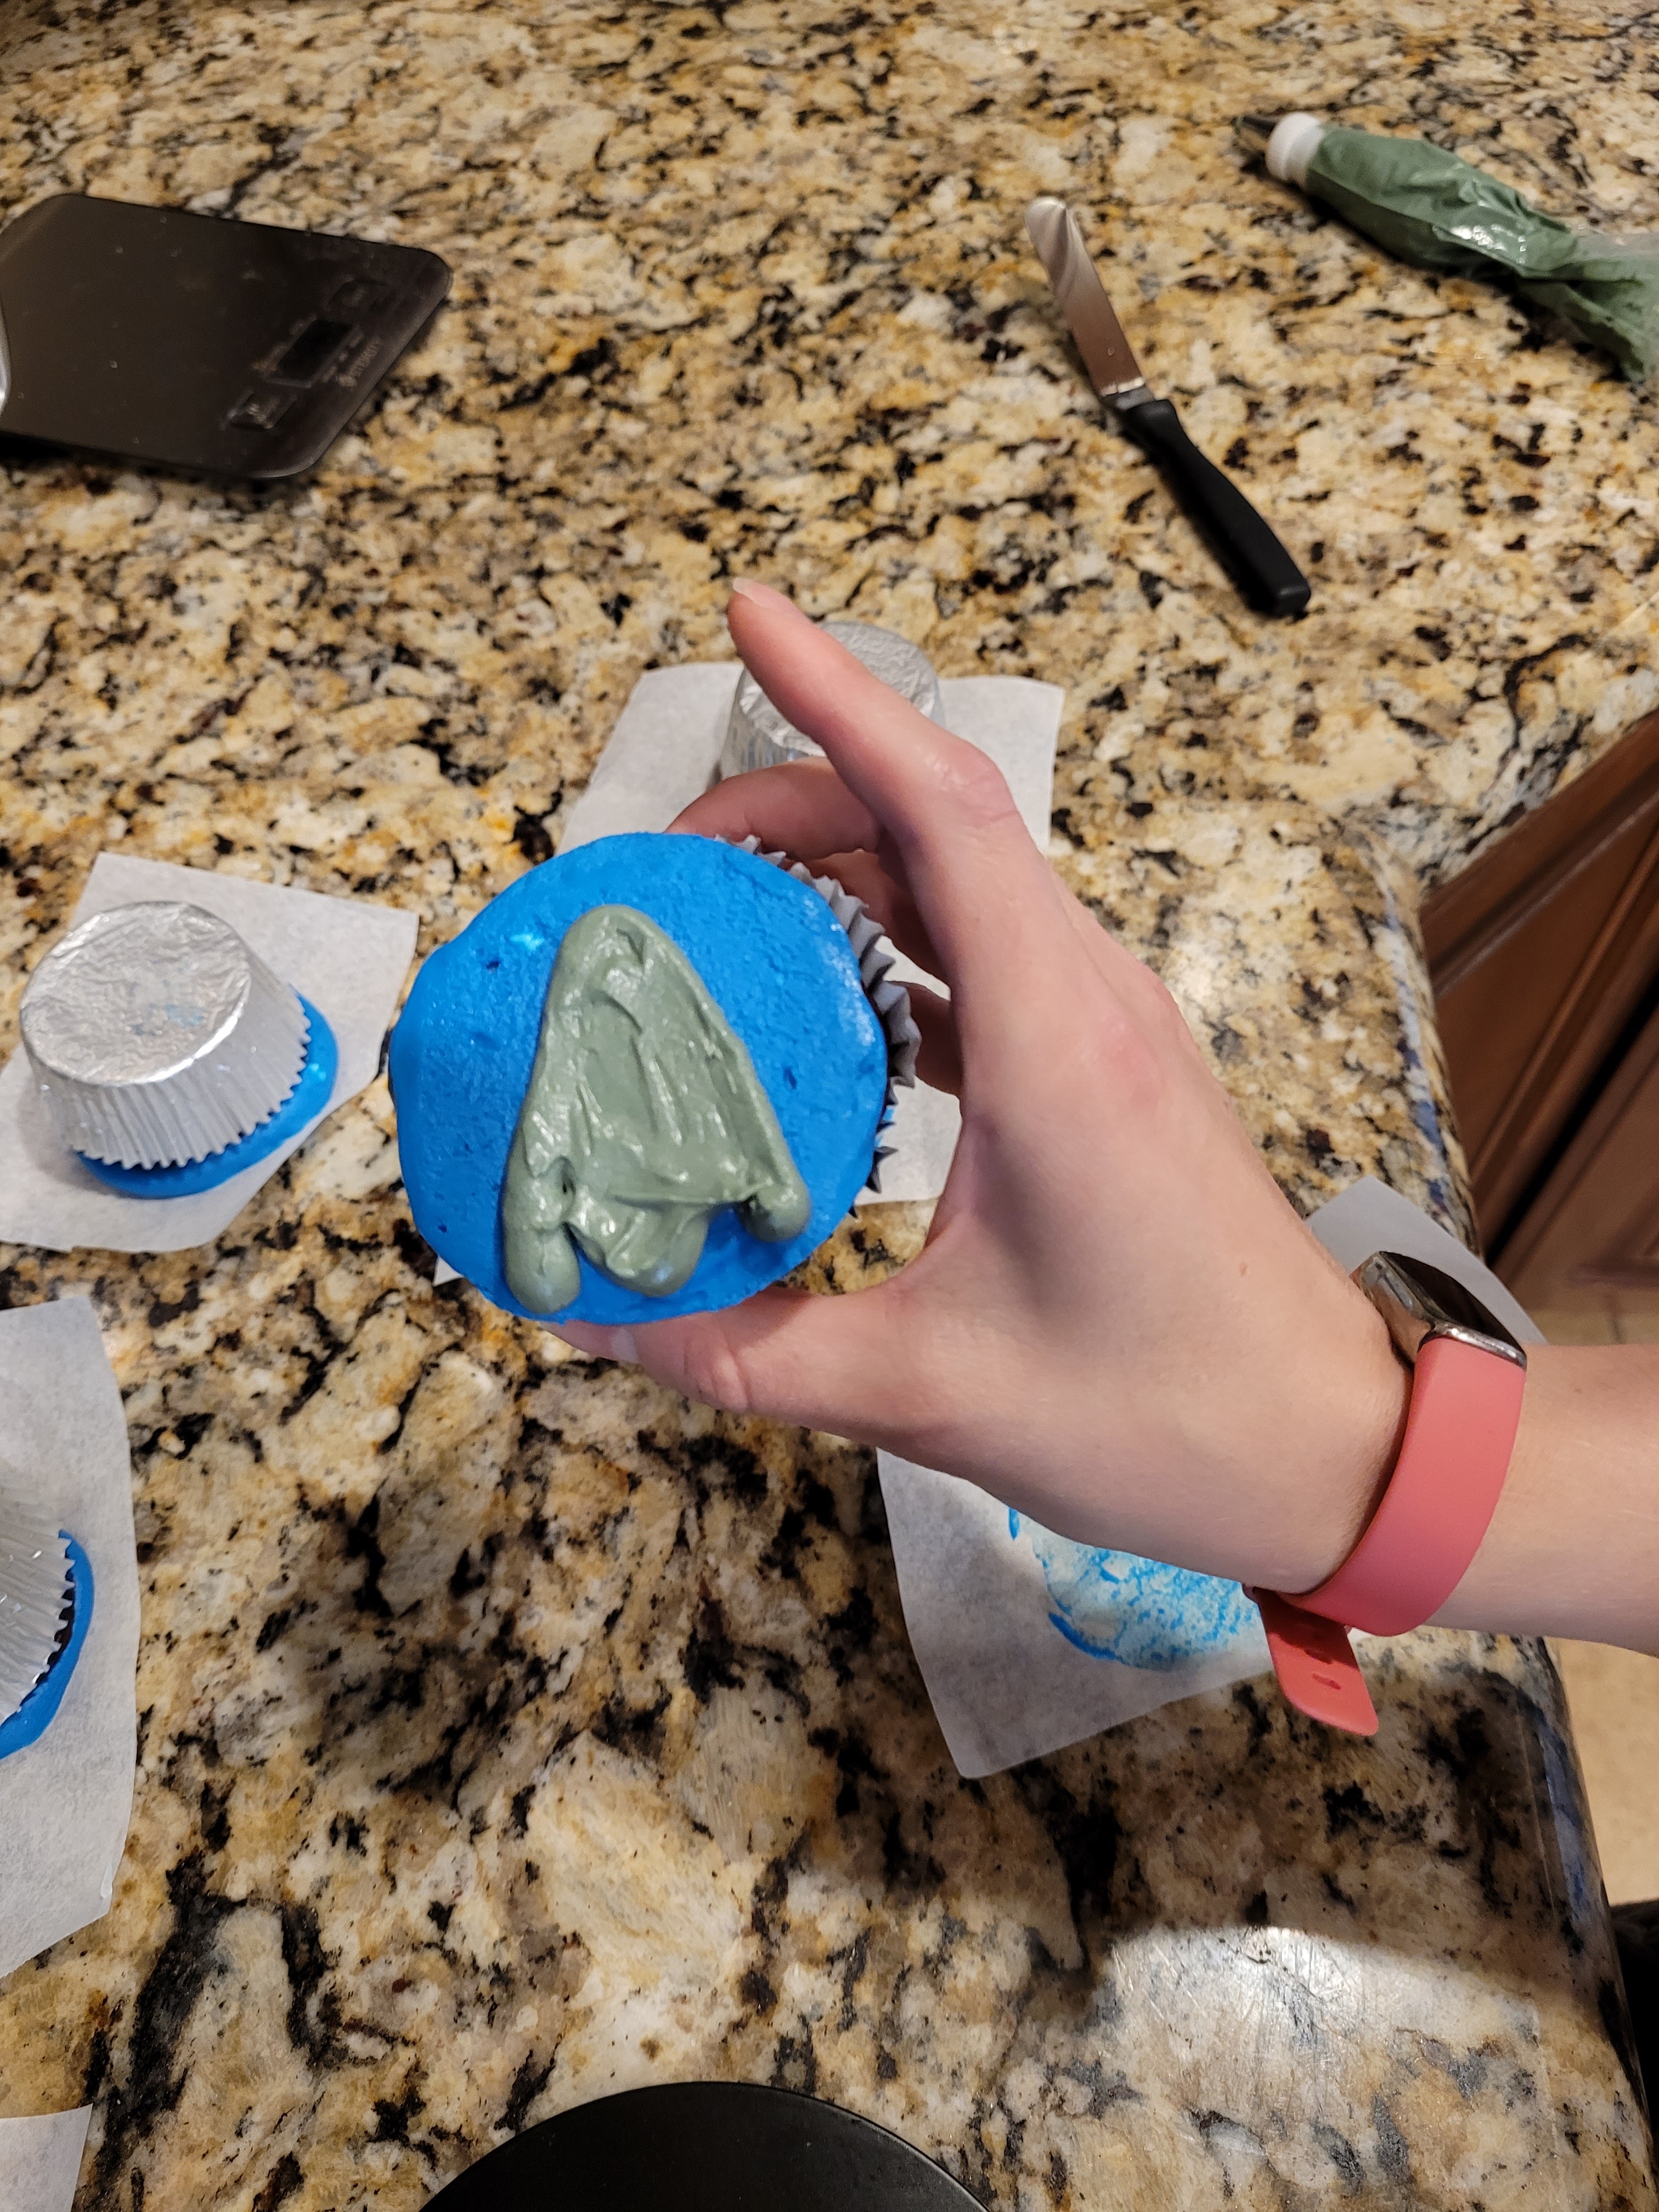
Now grab that gorgeous gray and get to mako-ing your shark! With your dark blue background cupcakes, pipe an oblong/oval shape with a flat bottom and pointy top for the nose. Fill in with more frosting, use an angled spatula to smooth a bit, then take your old Parchment paper, flipped over to the clean side, and smush your cupcake back down gently. Repeat with however many shark face (oh ha ha!) cupcakes you want to make. Freeze these again another 30 minutes. I know, a lot of down time here–but think of it this way: pipe a bit, watch half a Shark Week episode, pipe a bit more, finish the episode, and voila! Back-to-back-to-back shark-related activities like the Discovery Channel (probably) intended.
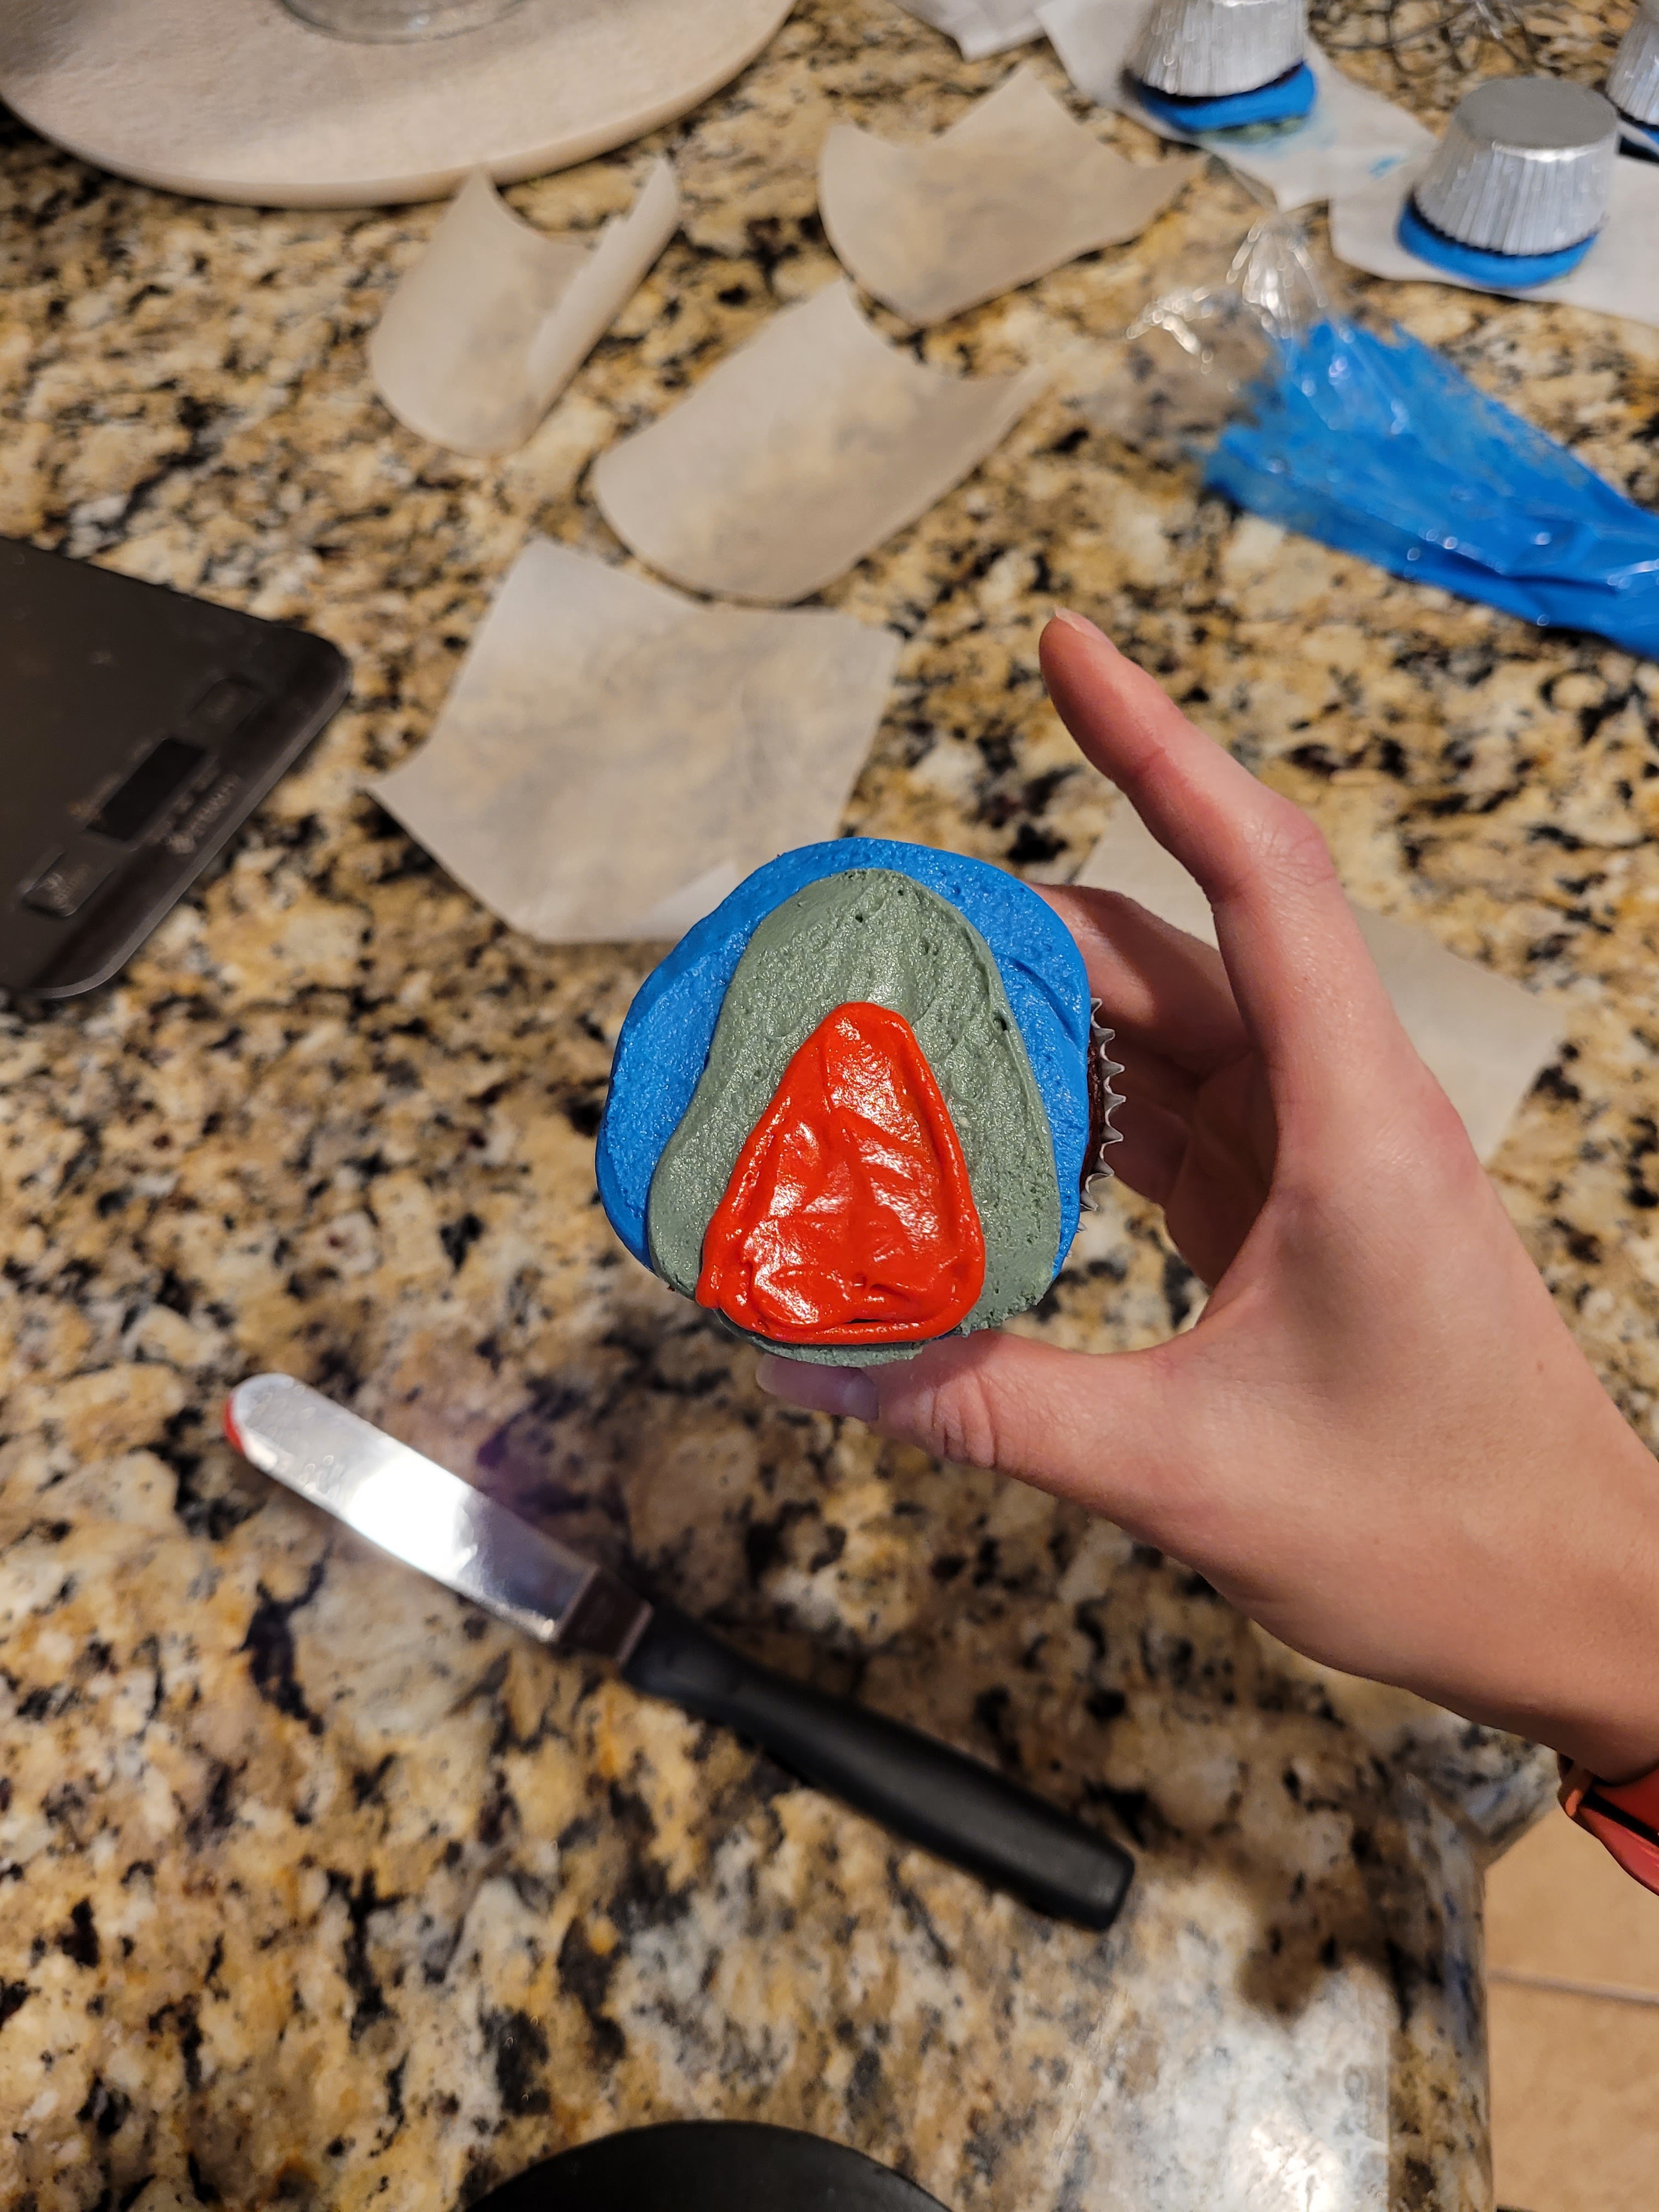
Just cramming their shark agenda down your throat, like a Great White eating a seal… What? Too gross again? A shark’s gotta eat! OK, I promise this is the last flip and freeze for the shark face cupcakes. Peel off the Parchment paper, grab your red frosting, and pipe a big ol’ shark mouth on top of the grey body. The ratio of head-to-mouth can be pretty close to 60-40 here. I’m fairly certain some sharks are 90% mouth (looking at you, basking shark), so bigger is better. Now, cut some clean sheets of Parchment to flip and freeze these on for another 30 minutes.
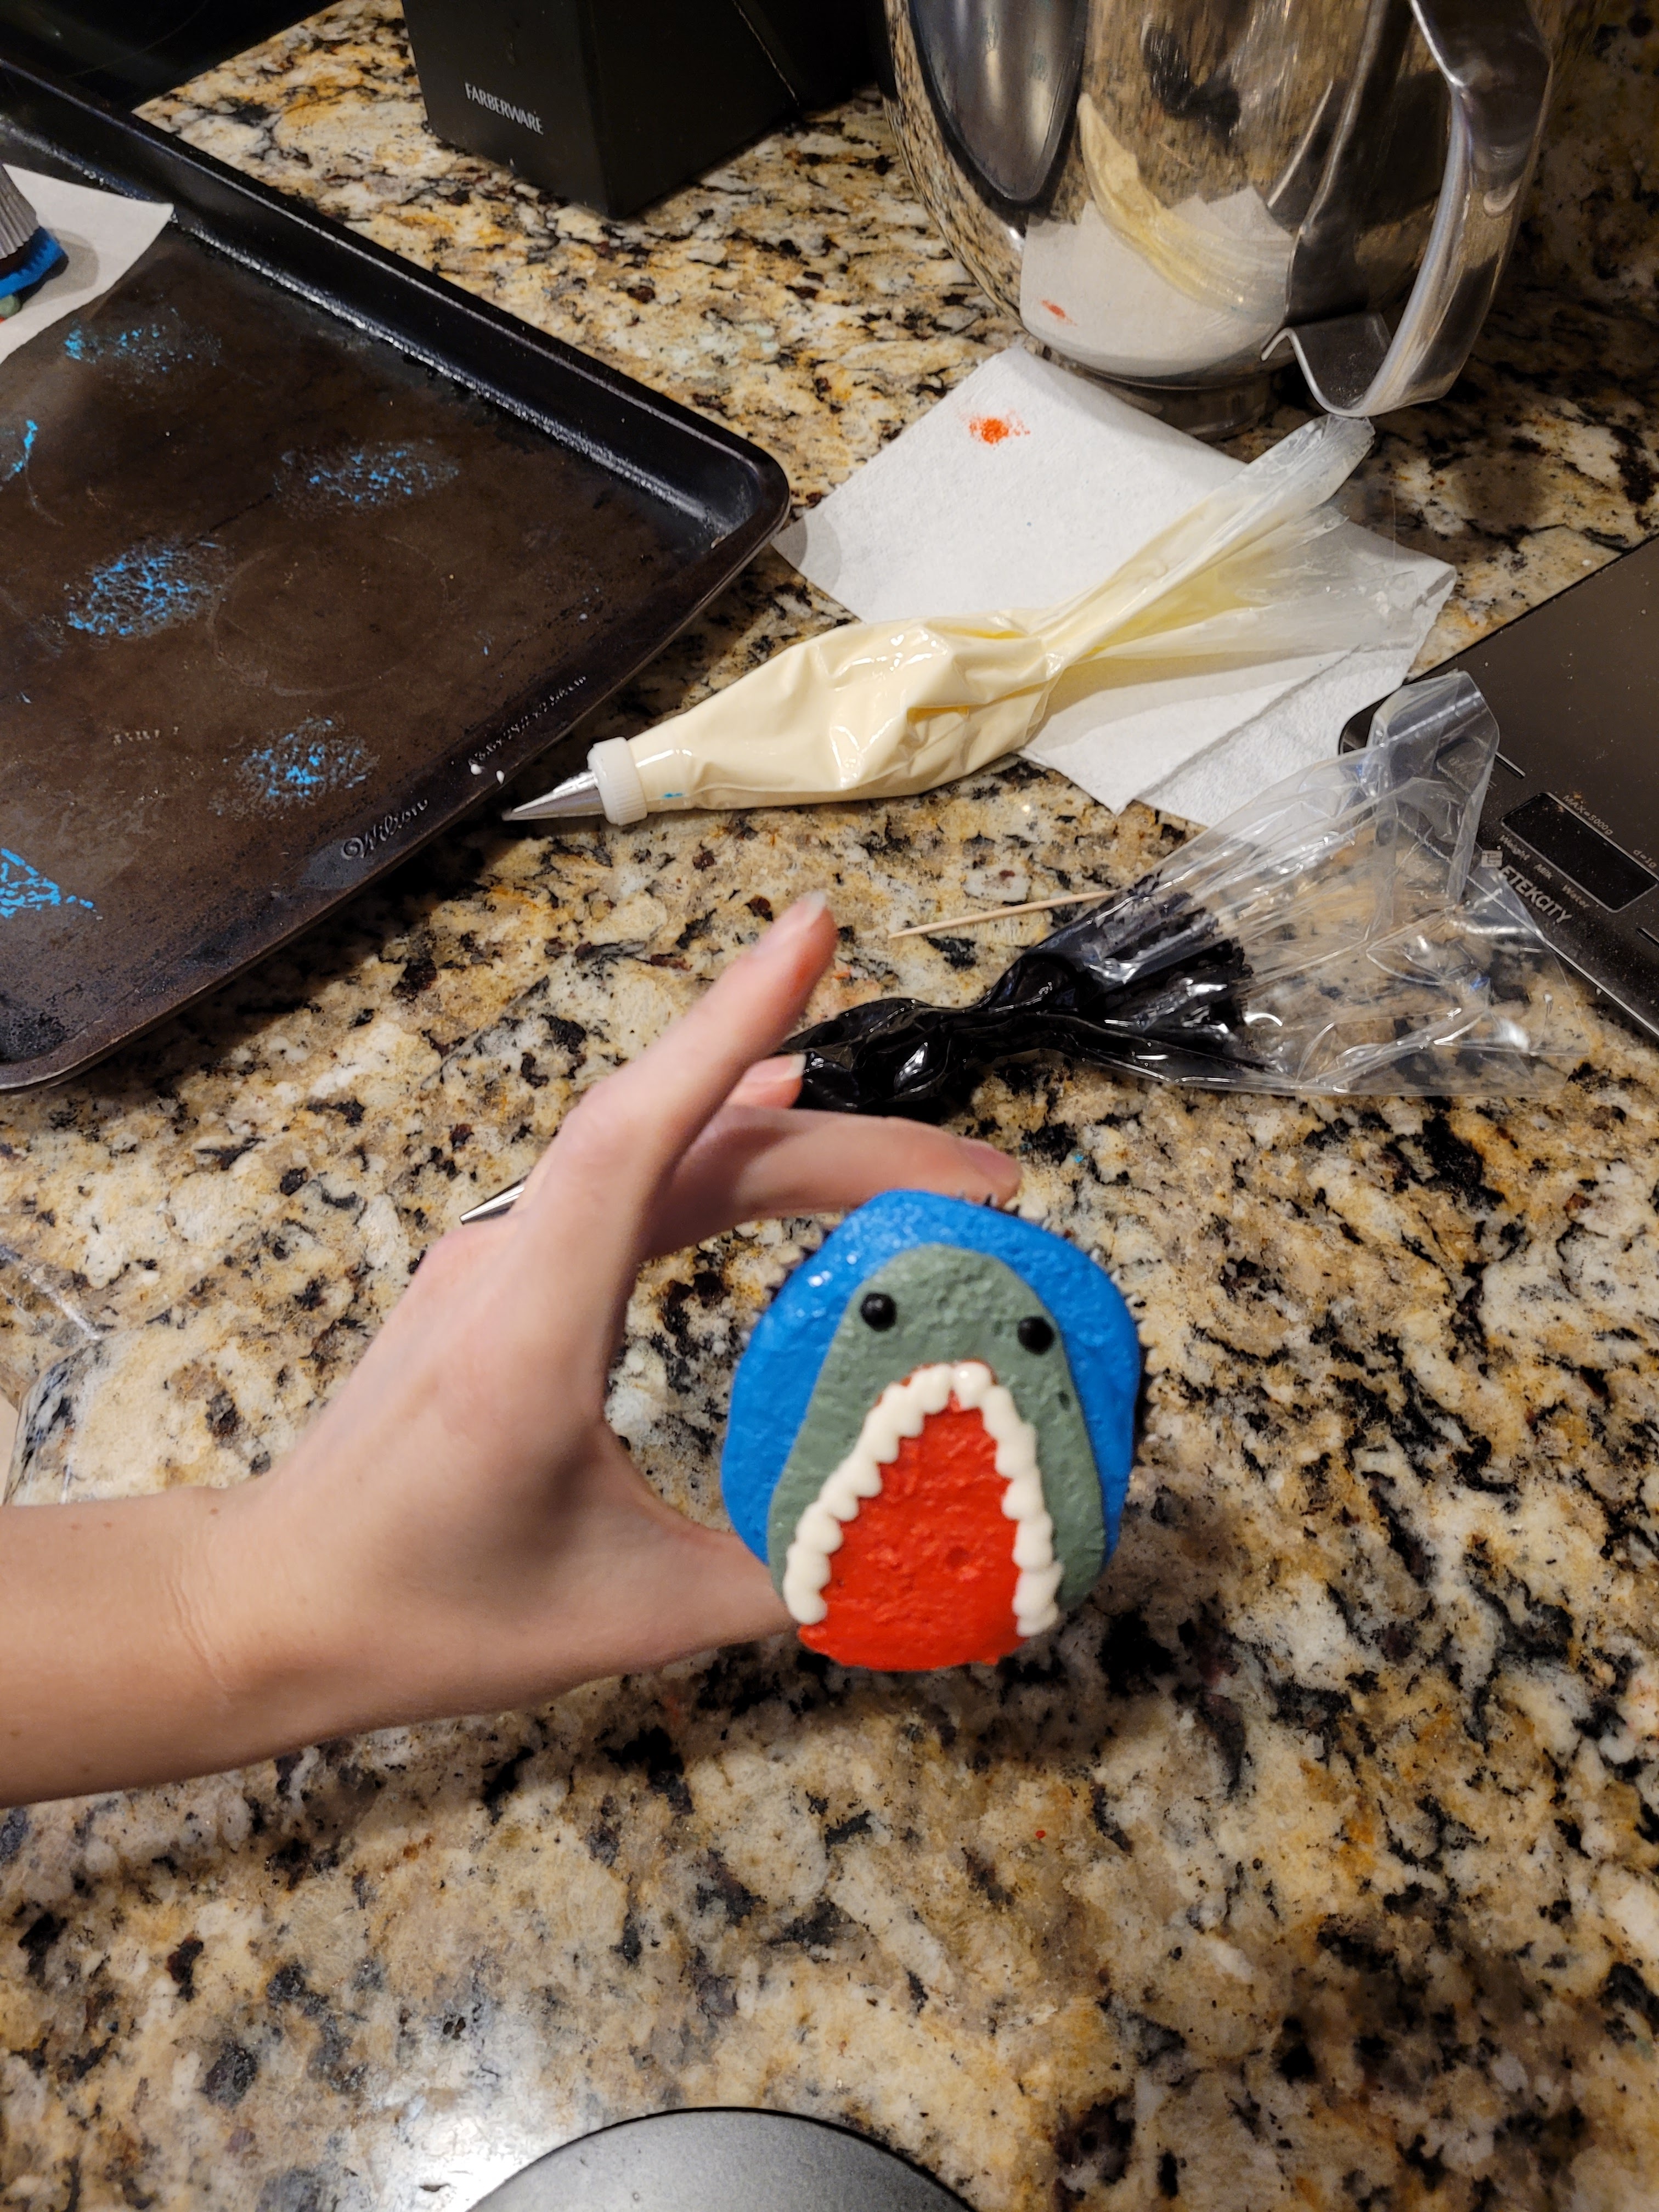
Fun fact! A great white shark can have up to 300 teeth in its mouth to gnaw on you with. Needless to say, my shark here is less than great when it comes to the number of teeth he has, but he’s more than great when it comes to how charming he is. I feel like he’s popping up out of the water to tell me an terrible joke, and I’m here for it.
To pipe the teeth, I took my white frosting and drew little triangles all over his mouth. Then I took my black frosting and made two little dots for eyes. If they look like black, tiny, soulless little eyes staring off into the abyss…they’re perfect.
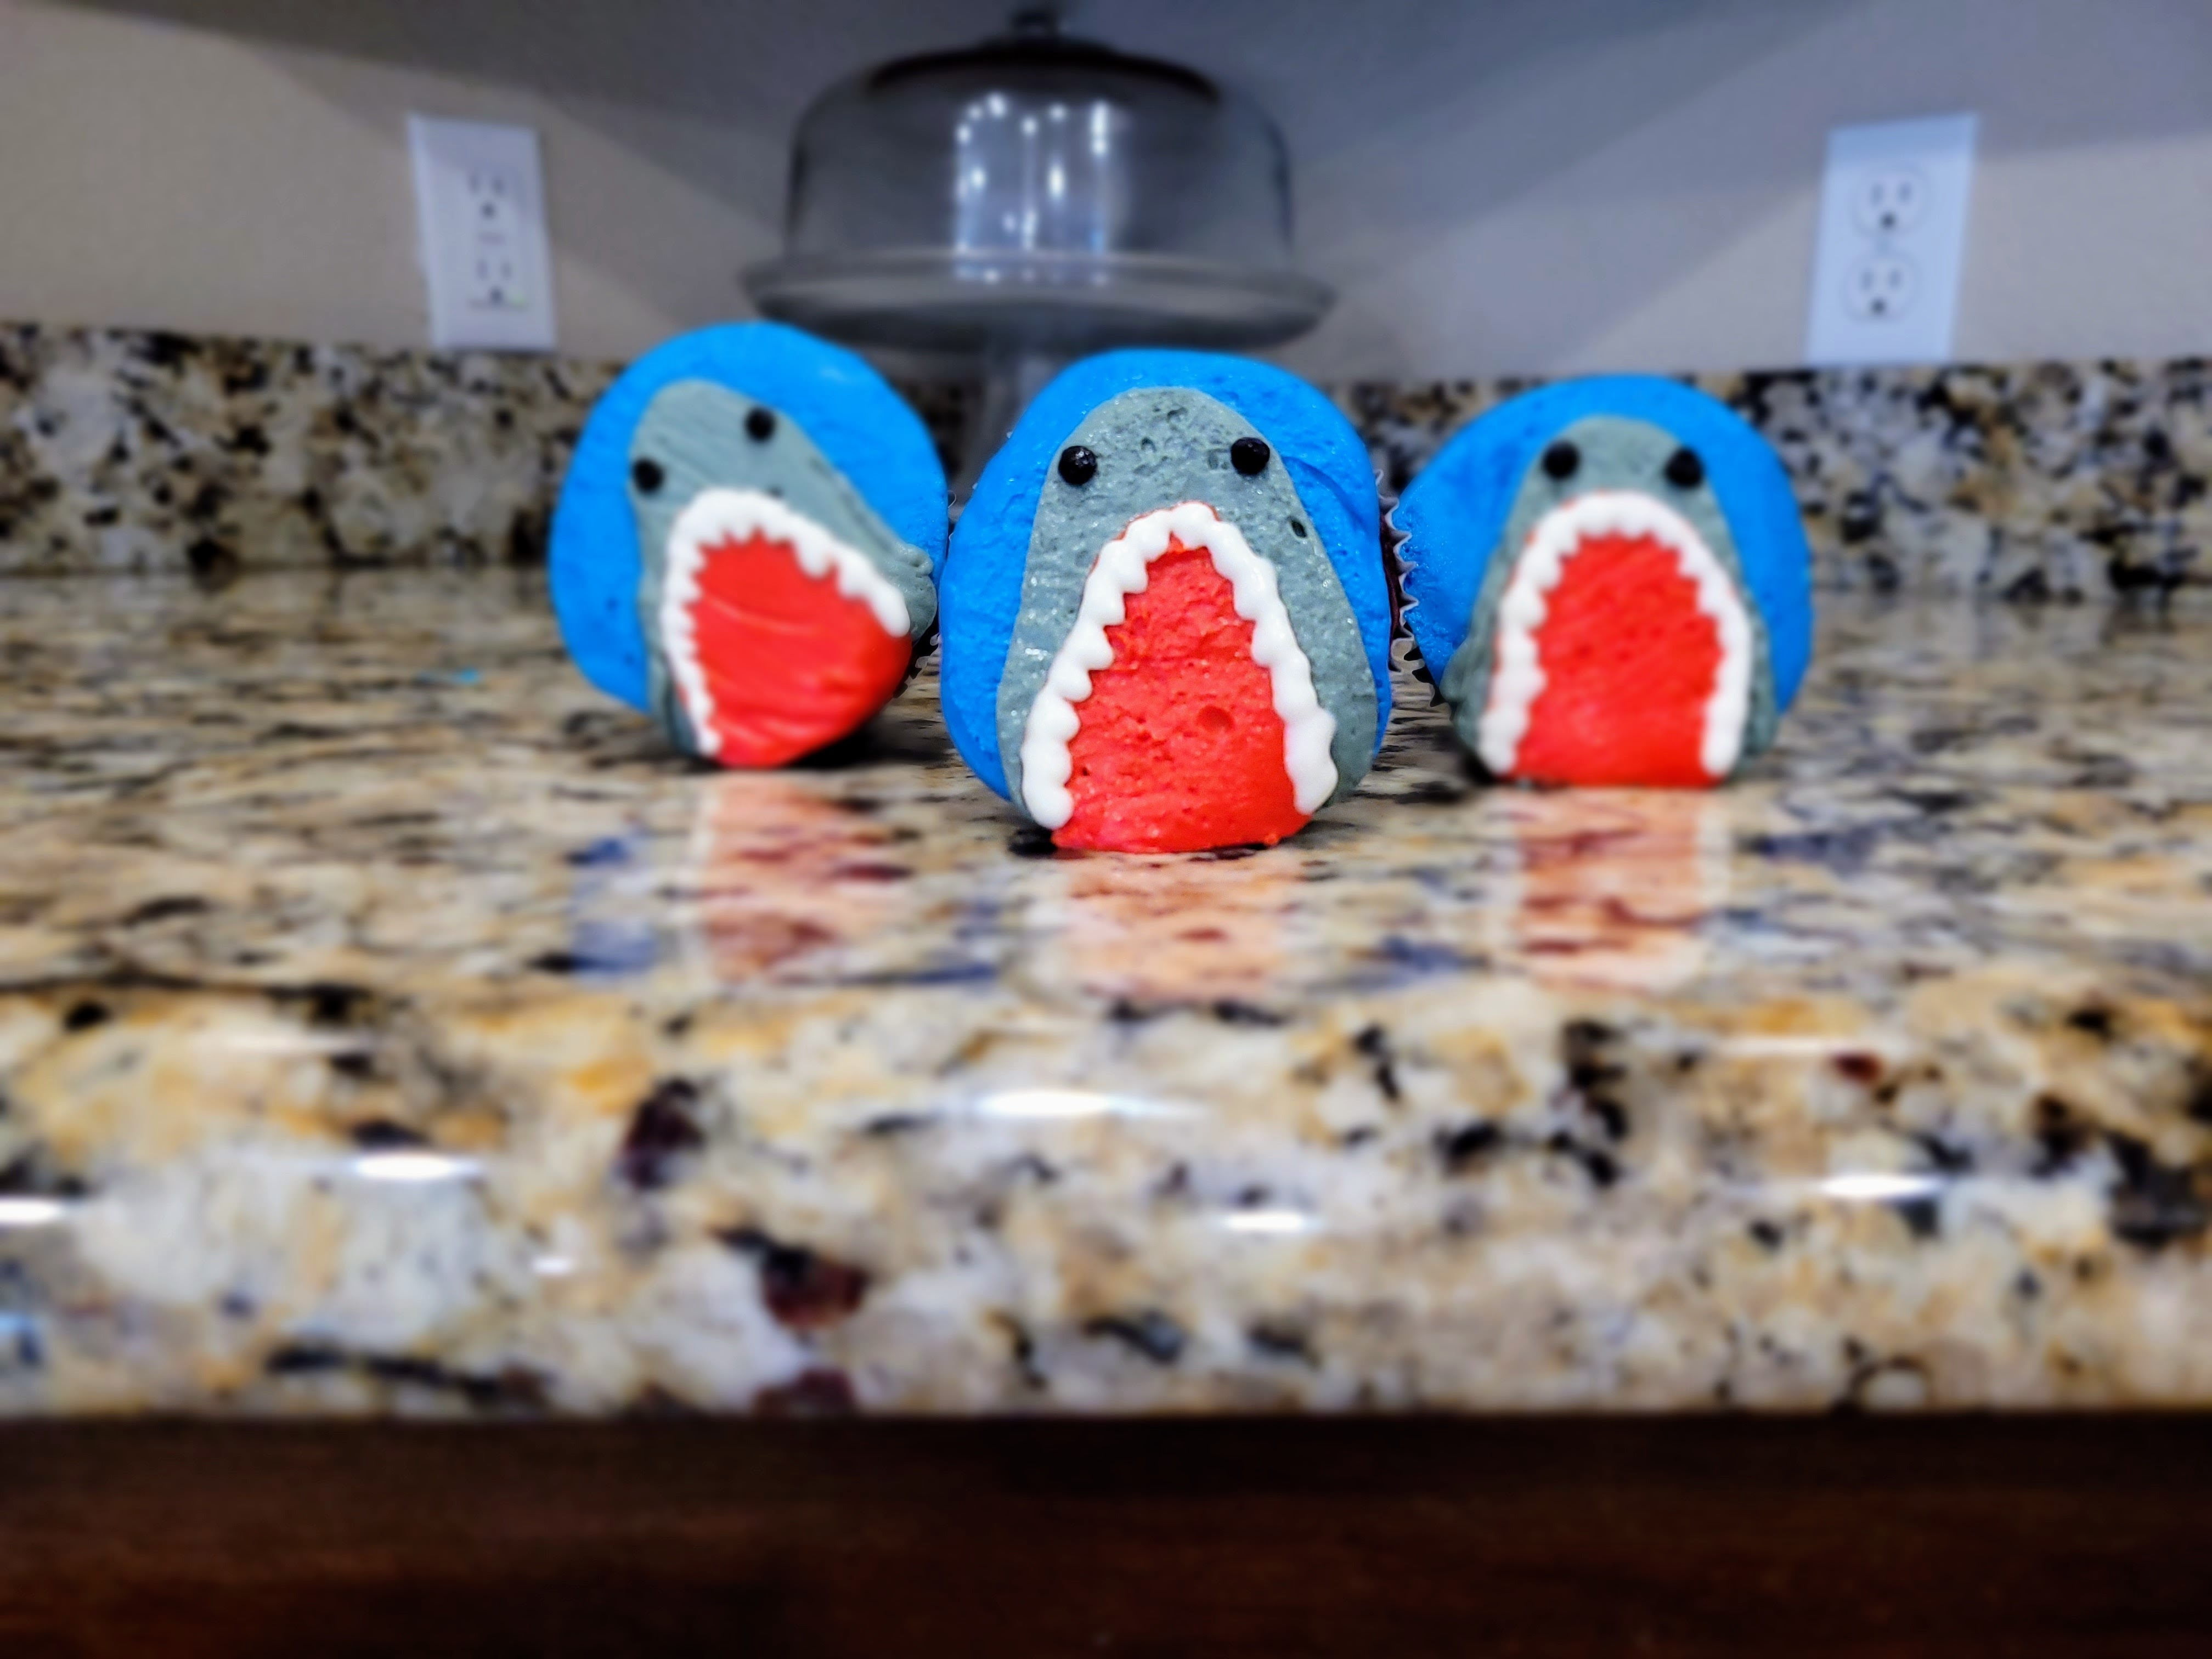
Are they singing? Laughing? Breaching on an unexpected sea turtle? They’ll never tell. Repeat the teeth and eyes on your remaining shark face cupcakes and revel in your work…it’s kind of a big gill.
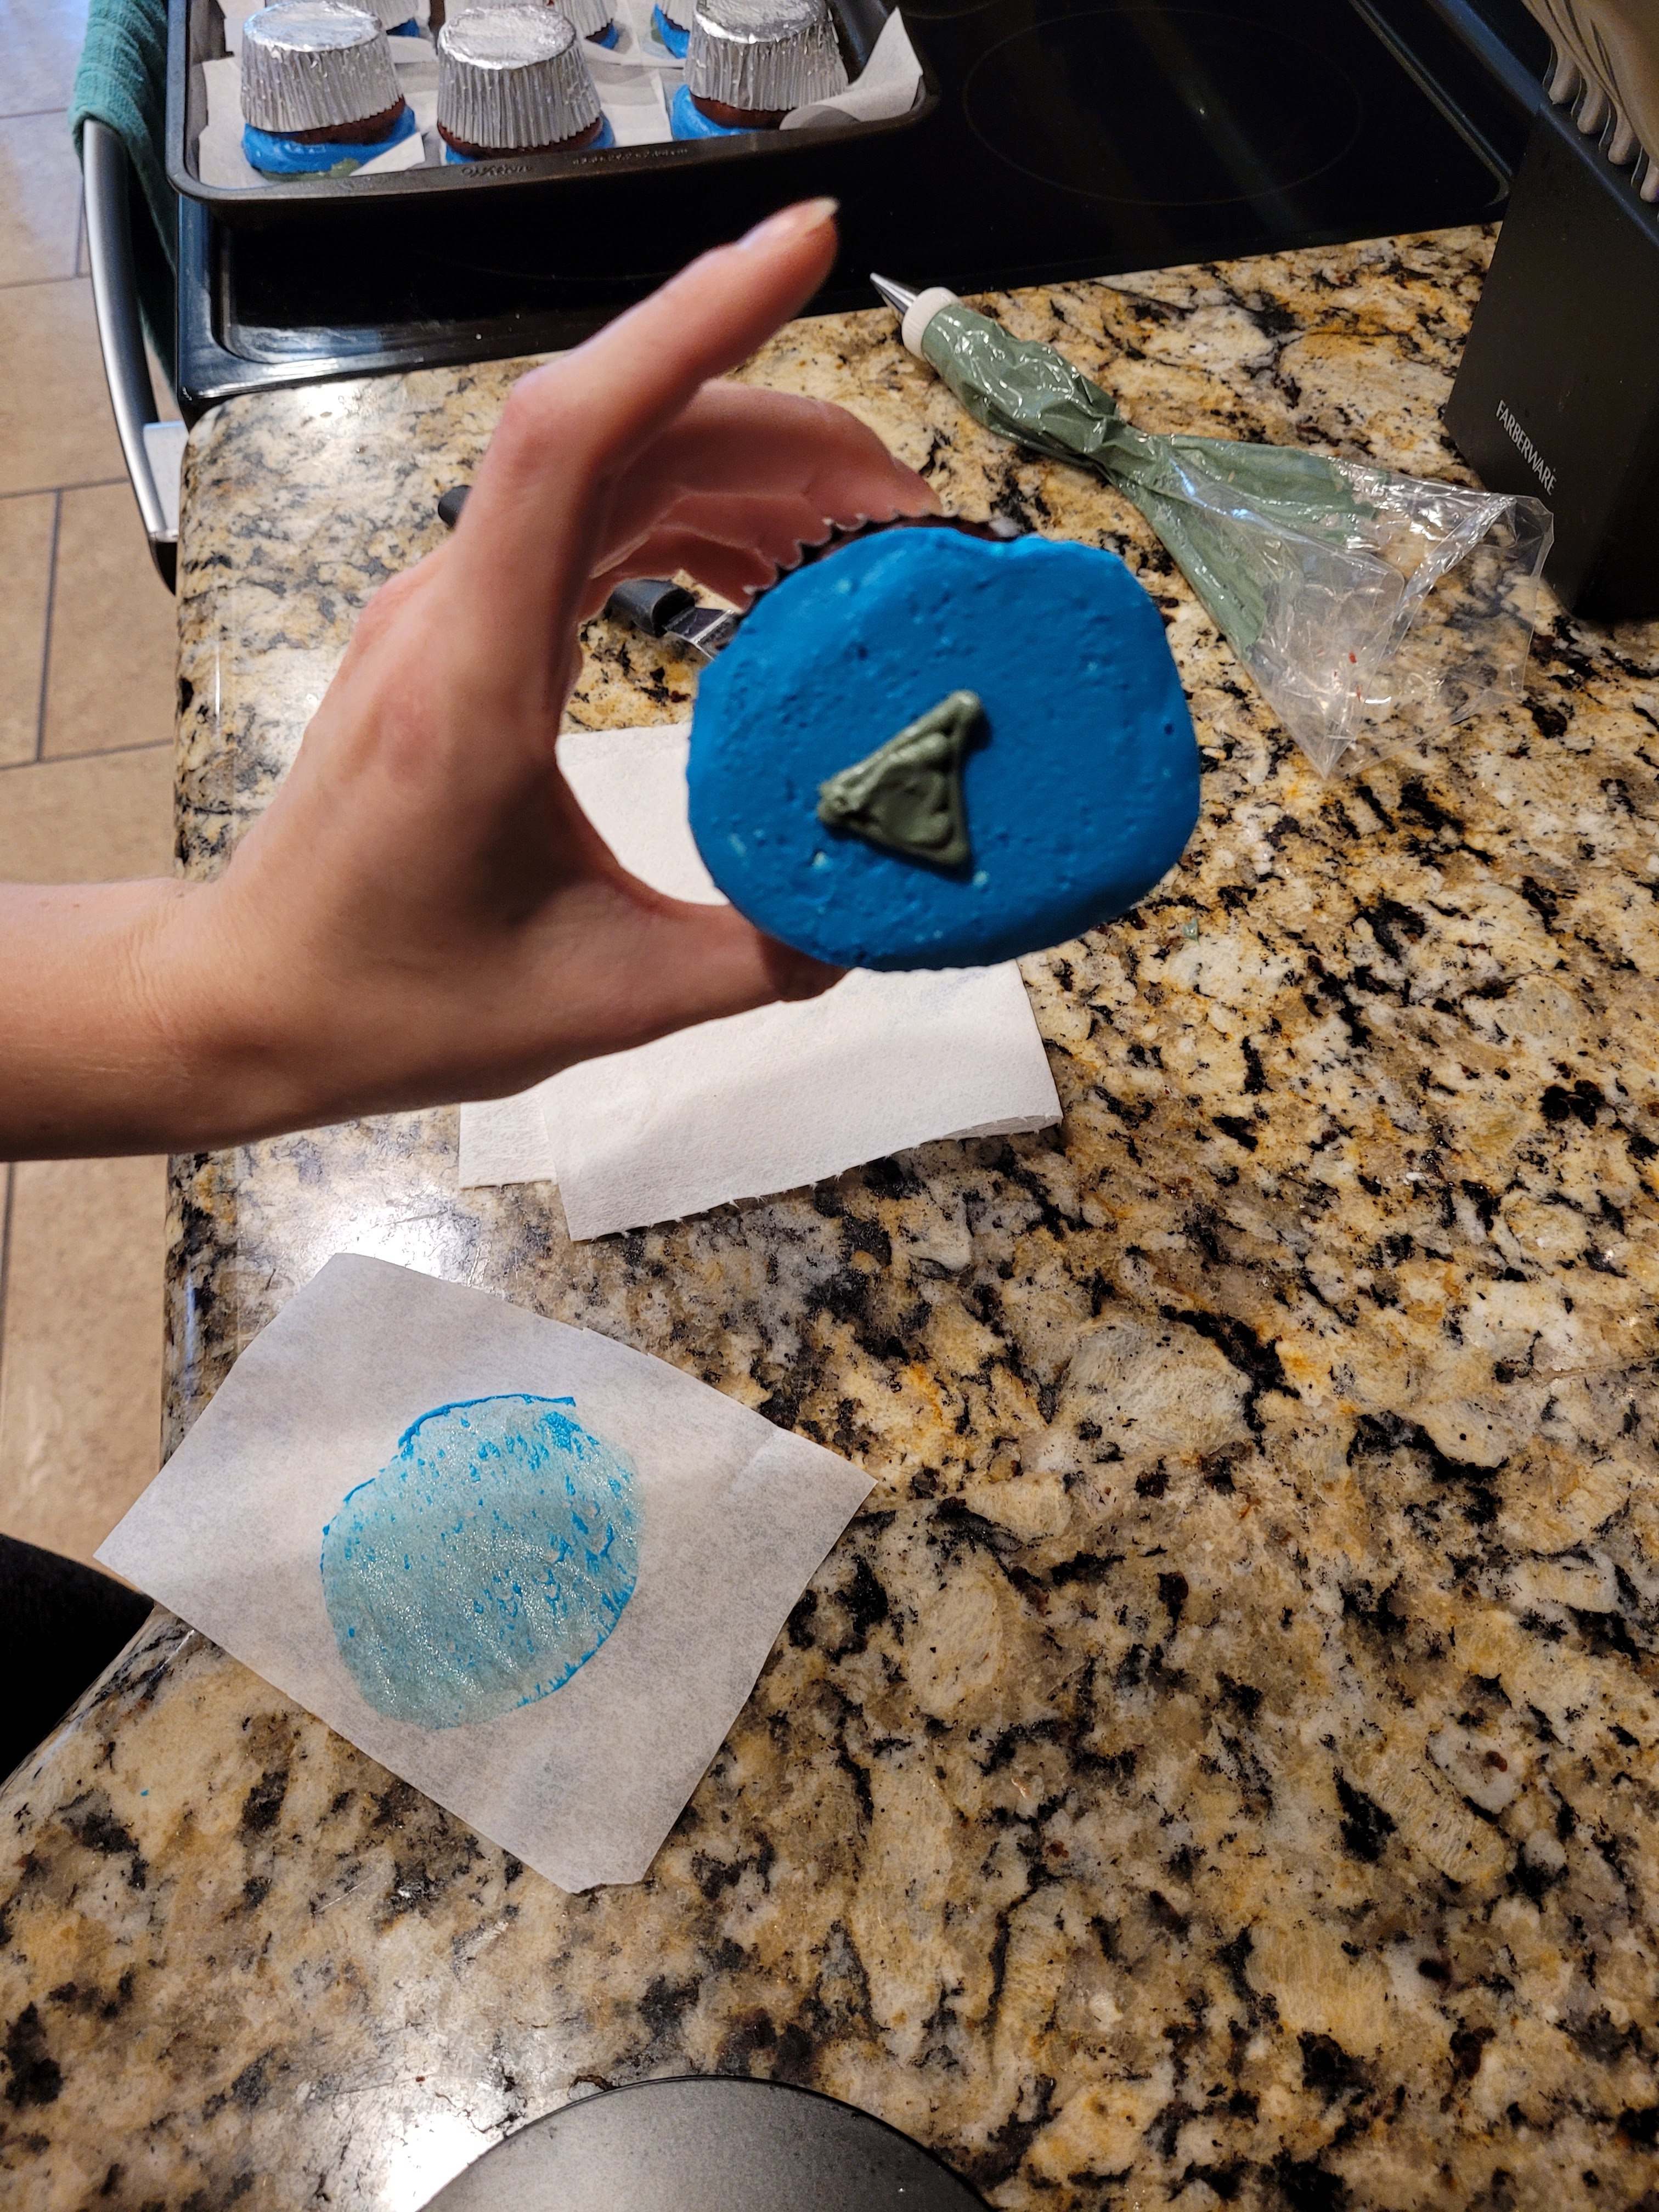
Not to be confused with the sixgill shark, who is also kind of a big gill because it has six of them. Once you’ve done the flip and freeze for your sky background on your shark fin cupcakes, rejoice, the flipping and freezing has come to an end. Take your gray frosting and draw a little triangle in the middle of each of these cupcakes. Smooth slightly with an angled spatula, but keeping some texture here really does look cool. I tried to flip and freeze one or two, but it turned the fin into a pyramid, and to my knowledge, there are not any shark-headed Egyptian gods, so this was not the vibe I was going for.

*Alexa, cue Jaws theme.* Now, take your dark blue and pipe on the bottom half of your cupcake, below your shark fin. Again, use an angled spatula to create texture for the waves. Take your white frosting and make wave caps at the top of the dark blue. I flipped my cupcakes on the side so I could pipe on the front and on the top of the blue waves. Then I took a toothpick and drew downward swipes to mix the white into the blue.

There’s just some-fin about these cupcakes… Absolutely love the look and texture on the water. I will use this technique again in the future, or when I’m feeling wistful and want to be reminded of the good old Shark Week days.
I chews you. You can say I’m hooked on how these cupcakes look. While I can’t sink my teeth into them because they taste like tough cardboard flavored with vanilla extract, at least they’re visually appealing. While a great white shark can go weeks without eating, I can’t even go more than two days without dessert, so I’ll be back in the kitchen after this to make “safe” cupcakes from a gluten free mix. Maybe if I freeze these cupcakes for the 65th time, I can peel the tops off and place on the new cupcakes…because that cream cheese frosting is definitely worth taking a chunk out of…enjoy the greatest week of the year! ‘Til next time, my fellow
sharkseaters! -
No-Bake Margarita Pie
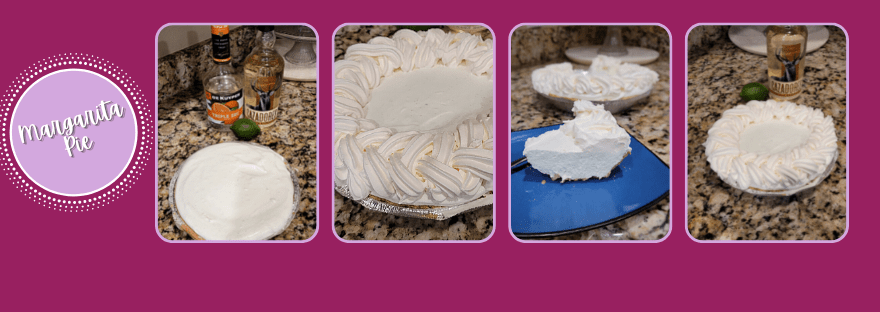
Give this recipe a shot (or two), and I promise it’ll change your outlook on summer heat, and this is coming from someone who hates both summer and heat. But this pie is so unbelievably refreshing that it makes all that pesky heat just melt away, like any good margarita should. It’s sweet, sour, cool, and full of booze. I’ve yet to find a dessert that I can’t improve with an ounce or two of the good stuff. Just be sure to think carefully, and avoid making pour decisions. Use a really good tequila in this recipe since it’s no bake, and you will get tequila flavor shining through with every mouth-watering bite. This is now my favorite pie of all time, because anything that can help make me hate summer heat less is truly a miracle.
Marg my words: this is the best pie for summer. Recipe and Instructions
No Bake Margarita Pie
Easy, super refeshing and gluten free pie with tequila and Triple Sec
You can sub any premade pie crust if not worried about gluten. I recommend using a smooth tequila like Cazadores (nothing from a plastic bottle, y’all…)
Ingredients
*1 Midel gluten free pie crust
*225 g (8 ounces) reduced fat cream cheese at room temp
*96 g (1/2 c) Lakanto granular monkfruit sweetener
*3-6 g (1/2-1 tsp) sugar free line Jell-O (use more for greener pie color)
*80 g (1/4 c lime juice ~2.5 large limes)
*1 1/2 ounces Cazadores reposado tequila
*1 ounce Triple Sec
*365 g (1 1/2 containers) Cool Whip sugar free
Directions
- Beat cream cheese and sugar until smooth
- Add in Jell-O, lime juice, tequila, and Triple Sec, blending well
- Fold in 1 tub of Cool Whip until totally mixed
- Pour into pie crust and freeze one hour before typing topping pie with remaining Cool Whip (I used a 1M tip to decorate a border)
- Freeze 4 hours or until set, then cut into 8 slices
- Keep leftovers in freezer, thaw slices for 15-20 minutes before serving
- Serve with a margarita on the rocks for a divine experience
Nutrition
Macros for 1 slice
325 calories/40 c/17 f/3.1 p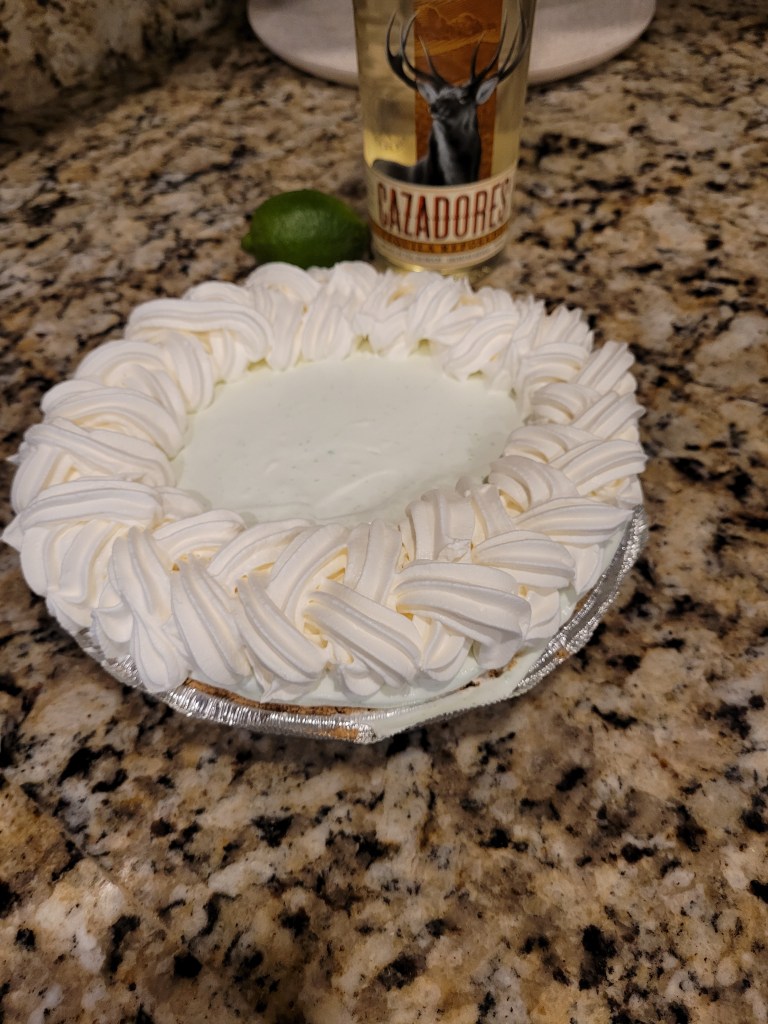
I mean, it’s a kind of healthy pie…several servings of fruit, and alcohol has antibacterial properties, so… - Beat cream cheese and sugar until smooth
-
Mini Pistachio Protein Cheesecakes

If I could eat cheesecake for every meal, I would. But typically, cheesecakes are absolutely the most time-consuming dessert to make, so I’d pretty much never leave my kitchen. Enter these mini pistachio cheesecakes that are an absolute sinch to throw together. I’ve know cupcakes that were more demanding than these little pillowy bites of pistachio bliss. Added benefit? Absolutely amazing macros. Eat as a post-workout reward with zero guilt. Because I am super into fitness. Fit’ness cheesecake in my mouth.

Life is batter with cheesecake. Recipe and Instructions (see various flavor substitutions below the recipe card)
Mini Pistachio Protein Cheesecakes
Easy, super creamy mini cheesecakes with pistachio flavor and gluten free crust
You can sub any flavor of instant Jell-o pudding to change the flavor of the cheesecake. You can also use regular graham crumbs if you’re not worried about gluten.
Ingredients
*45 grams (1/4 c + 2 TBS) Kinnikinnik gluten free graham crumbs
*30 mL (2 TBS) sugar free syrup
*113 grams (4 oz) 1/3 the fat cream cheese at room temp
*170 g (3/4 c) fat free plain Greek yogurt
*30 g Quest vanilla milkshake protein powder
*14 grams Jell-o sugar free pistachio instant pudding
*1 tsp lemon juice
*1 tsp vanilla extract
*1 egg
Directions
- Preheat oven to 300 and line a muffin tin with 6 silicone cupcake liners
- Mix syrup and graham crumbs together, then evenly distribute in the 6 liners
- Bake for 5 minutes
- Beat the cream cheese and yogurt in a mixer until smooth (use paddle attachment)
- Add the protein powder, Jell-o, lemon, and vanilla, mixing on medium-high
- Scrape the bowl then add the egg, mixing on low speed until fully incorporated
- Add batter on top of the crust and bake for 20 minutes. Center should jiggle just a tad
- Cool in tin on top of a cooling rack in fridge for 4 hours, then enjoy! Keep leftovers in the fridge.
Nutrition
Macros for 1 mini cheesecake
144 cal/12 c/6.6 f/9.2 pYou can adapt this recipe into many different flavors:
-Sub cheesecake or vanilla pudding mix and add an additional teaspoon of cake batter extract and a heaping handful of sprinkles to make cake batter protein cheesecakes
-Sub lemon Jell-o mix and replace vanilla extract with lemon extract for lemon protein cheesecakes
-Sub orange Jell-o mix and replace vanilla extract with orange extract for orange protein cheesecakes
-Sub chocolate pudding mix and add a few chocolate chips for a decadent protein cheesecake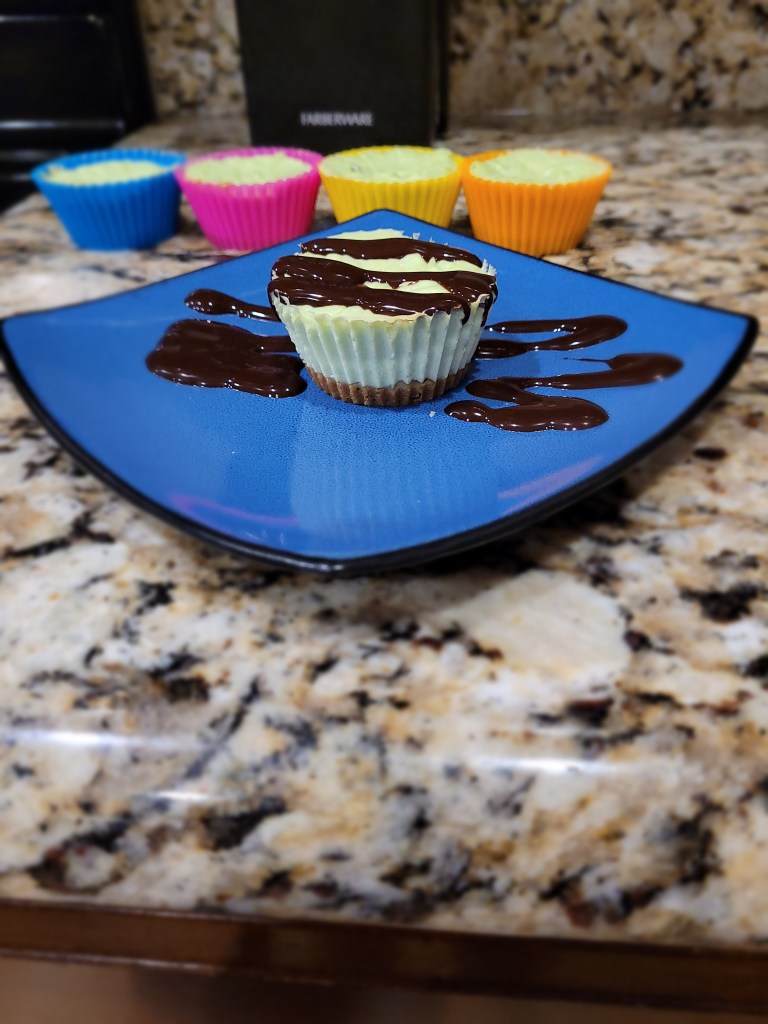
So easy to bake, you could say it’s a piece of (cheese)cake. - Preheat oven to 300 and line a muffin tin with 6 silicone cupcake liners
-
Protein Donuts with Peanut Butter Chocolate Glaze
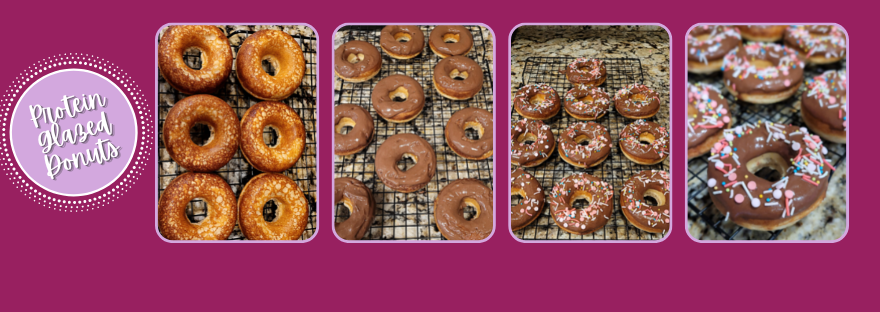
Perhaps the thing I was saddest to give up when I had to go gluten free was a really good donut. Most donut joints only offer plain glazed gluten free donuts (still better than NO donut), but my heart belongs to a good cake donut with a chocolate glaze and sprinkles. I was SO happy to find Empowrd’s gluten free donut mix so I could make my own donuts at home. This recipe is deceptively easy–it took me about 15 minutes total to make/bake/glaze/sprinkle. These are soft, cakey, and topped with peanut butter chocolate glaze. What more could you need? …other than a second donut. Also, macro friendly at only 109 calories a donut. Check out my reel on Instagram for a step-by-step look at how these were made.

Because a donut a day keeps the sadness away. Recipe and Instructions
Protein Donuts with Peanut Butter Chocolate Glaze
Soft, cakey donuts with a high protein glaze
I have not tested this recipe with any other protein powders or mixes, so I cannot guarantee the same results without using the ingredients listed below.
Ingredients
FOR THE DONUTS
*1 bag of @Empowrd gluten free protein donut mix
*1 large egg
*7 g Tasty shakes oatmeal mix ins in any flavor
*115 g unsweetened applesauce
*1 tsp butter extract
*1 tsp vanilla extract
*1/2 c water
FOR THE GLAZE
*30 grams Quest chocolate milkshake protein powder
*16 grams PBFit
*Water to get a drizzly consistency (about 6-7 TBS)
*Optional: sprinkles
Directions
- Preheat oven to 350 and grease a donut pan with cooking spray (can use a muffin tin if you don’t have a pan)
- Mix all donut ingredients well
- Carefully pour batter into the pan until each cavity is 3/4 full (I used a piping bag with the tip snipped to make this easier)
- Bake for 10-12 minutes, until golden and springy
- Let donuts cool on a cooling rack for 5 minutes while you make the glaze
- Mix Quest chocolate milkshake protein powder with PBFit. Add water to get a drizzly consistency (about 6-7 TBS)
- Once donuts have cooled 5 minutes, dip into glaze and top with sprinkles
Nutrition
Macros
10 servings
109 cal/14 c/1.6f/9.6p per donut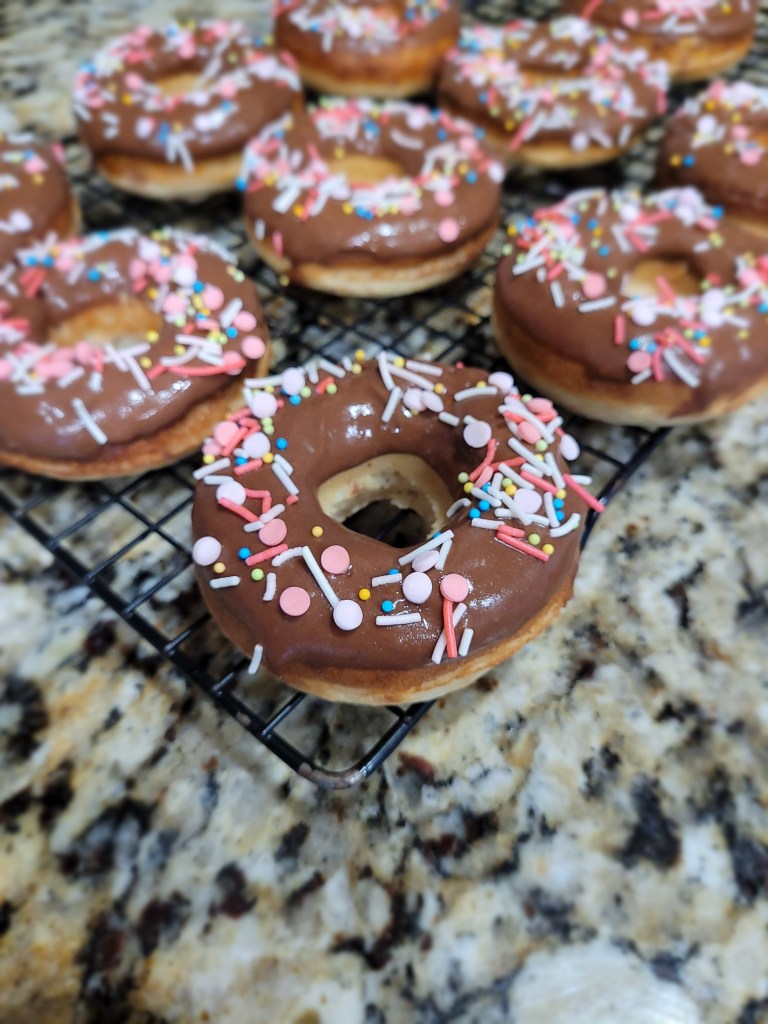
Homer Simpson would approve - Preheat oven to 350 and grease a donut pan with cooking spray (can use a muffin tin if you don’t have a pan)
-
No-Bake Butterscotch Pie
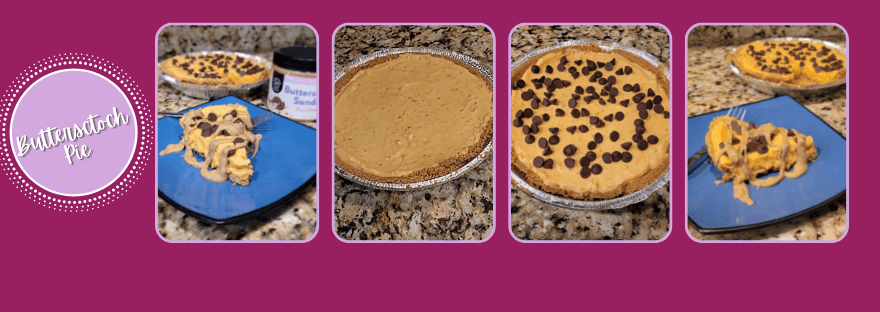
This no-bake butterscotch pie is low in calories but high in flavor! Made with protein shakes and sugar-free Jell-o, it’s also incredibly macro-friendly. You know, so have a slice or three to beat the heat. You can throw this together in under five minutes, but it will need a few hours to set. Perfect to take to your next backyard BBQ! View my Instagram reel to see how quickly this pie comes together.
Nothing like a simple no-bake recipe to survive summer’s eternal rage. Recipe and Instructions
No-bake Butterscotch Pie
Easy butterscotch pie with premade crust
You can definitely use any type of premade pie crust if not concerned with gluten.
Ingredients
*1 Mi-del gluten free pie crust
*1 3/4 cups Fairlife salted caramel protein shake (almost 2 bottles)
*1 ounce package sugar free Jell-o butterscotch pudding
*Lily’s sugar free salted caramel baking chips for topping
*American Dream butterscotch sundae peanut butter for drizzle
Directions
- Whisk the protein shake and pudding mix for two minutes
- Spread onto the pie crust
- Top with as many baking chips as desired (macros below calculated with 42g chips)
- Leave in fridge to set for at least 4 hours or overnight
- Slice, drizzle with peanut butter, DEVOUR!
- Keep leftovers refrigerated (while they last!)
Nutrition
Macros per slice without peanut butter drizzle
177 calories
23 c/7.7 f/4.7 p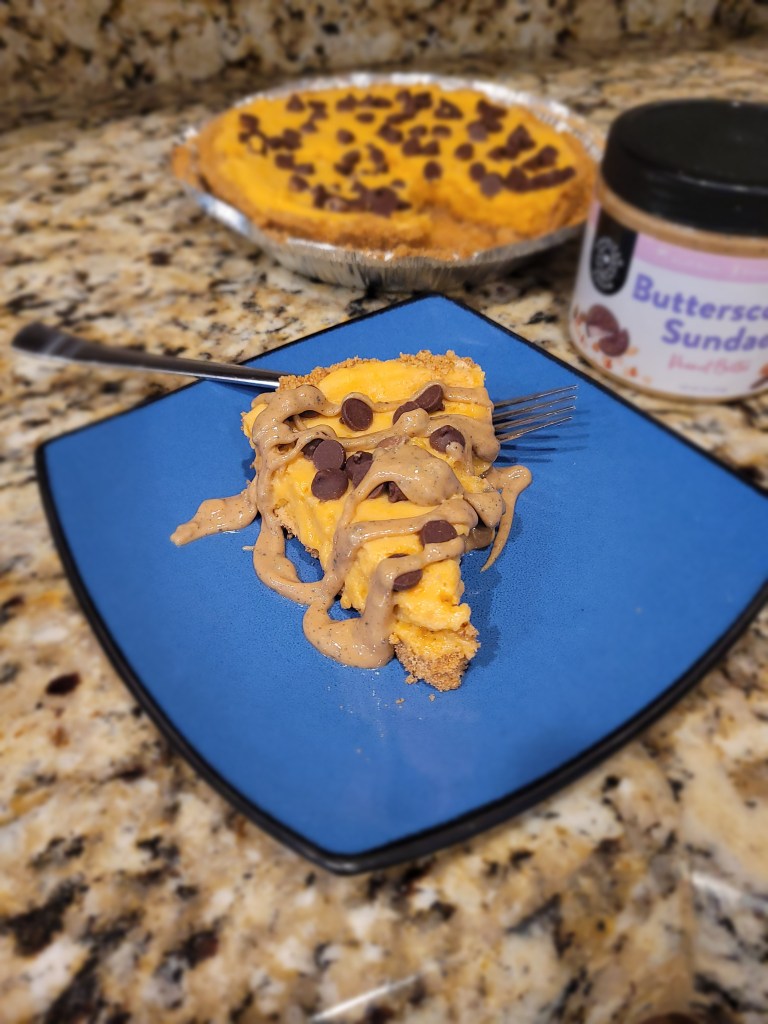
Did I buy this peanut butter specifically to make this pie? Or did I make this pie specifically because I had this peanut butter. It’s a paradox. A really tasty paradox. - Whisk the protein shake and pudding mix for two minutes
-
A Batch Made in Heaven
My husband is not a dessert person, which is ironic, considering my main hobby includes churning out dessert at an alarming rate. However, bless him, he still tries every dessert I make because he knows how much it means to me. I usually do a pretty epic bake for his birthday cake (or cheesecake) every year, but we were traveling the weekend prior, so his dessert request was for an easy and quick batch of birthday cookies. I was happy to oblige, and since I hope his birthday rocks, I knew I needed to add whiskey.
And also much like whiskey, he’s neat and gets better with age. I like to think of myself as a pretty smart cookie, so it was about time I figured out how to add booze into a cookie recipe. Sure, sugar cookies are great, but have you ever tried adding Skrewball peanut butter whiskey to them? I’m betting the answer is, “No, since I’m a normal human,” and I’m here to change that. You know, bake the world a butter place, one dessert at a time. The base sugar cookie recipe isn’t too terribly sweet so my husband would like them, but they are so soft and buttery (think Lofthouse cookie minus frosting with a hint of smooth peanut butter flavor from the Skrewball). The chocolate drizzle on half gives a nice little boost of sweetness without being over the top. But let’s talk about the Skrewball whiskey glaze on the other half. Was I licking the leftover drizzle out of the bowl when done? Yes. Was I maybe a little tipsy after? Also yes. Was I glad no one was there to witness this? Again, yes. But it was SO GOOD. It packs a little punch, but it absolutely makes the cookie in my opinion. It’s sweet, the whiskey is smooth and rich, and you end up with a perfect balance of sugar cookie to peanut butter flavor. The chocolate drizzle cookies are good, but the whiskey glaze cookies are divine. This recipe makes a whopping 48 cookies at only 70 calories a cookie (because a cookie in each hand is a balanced diet).
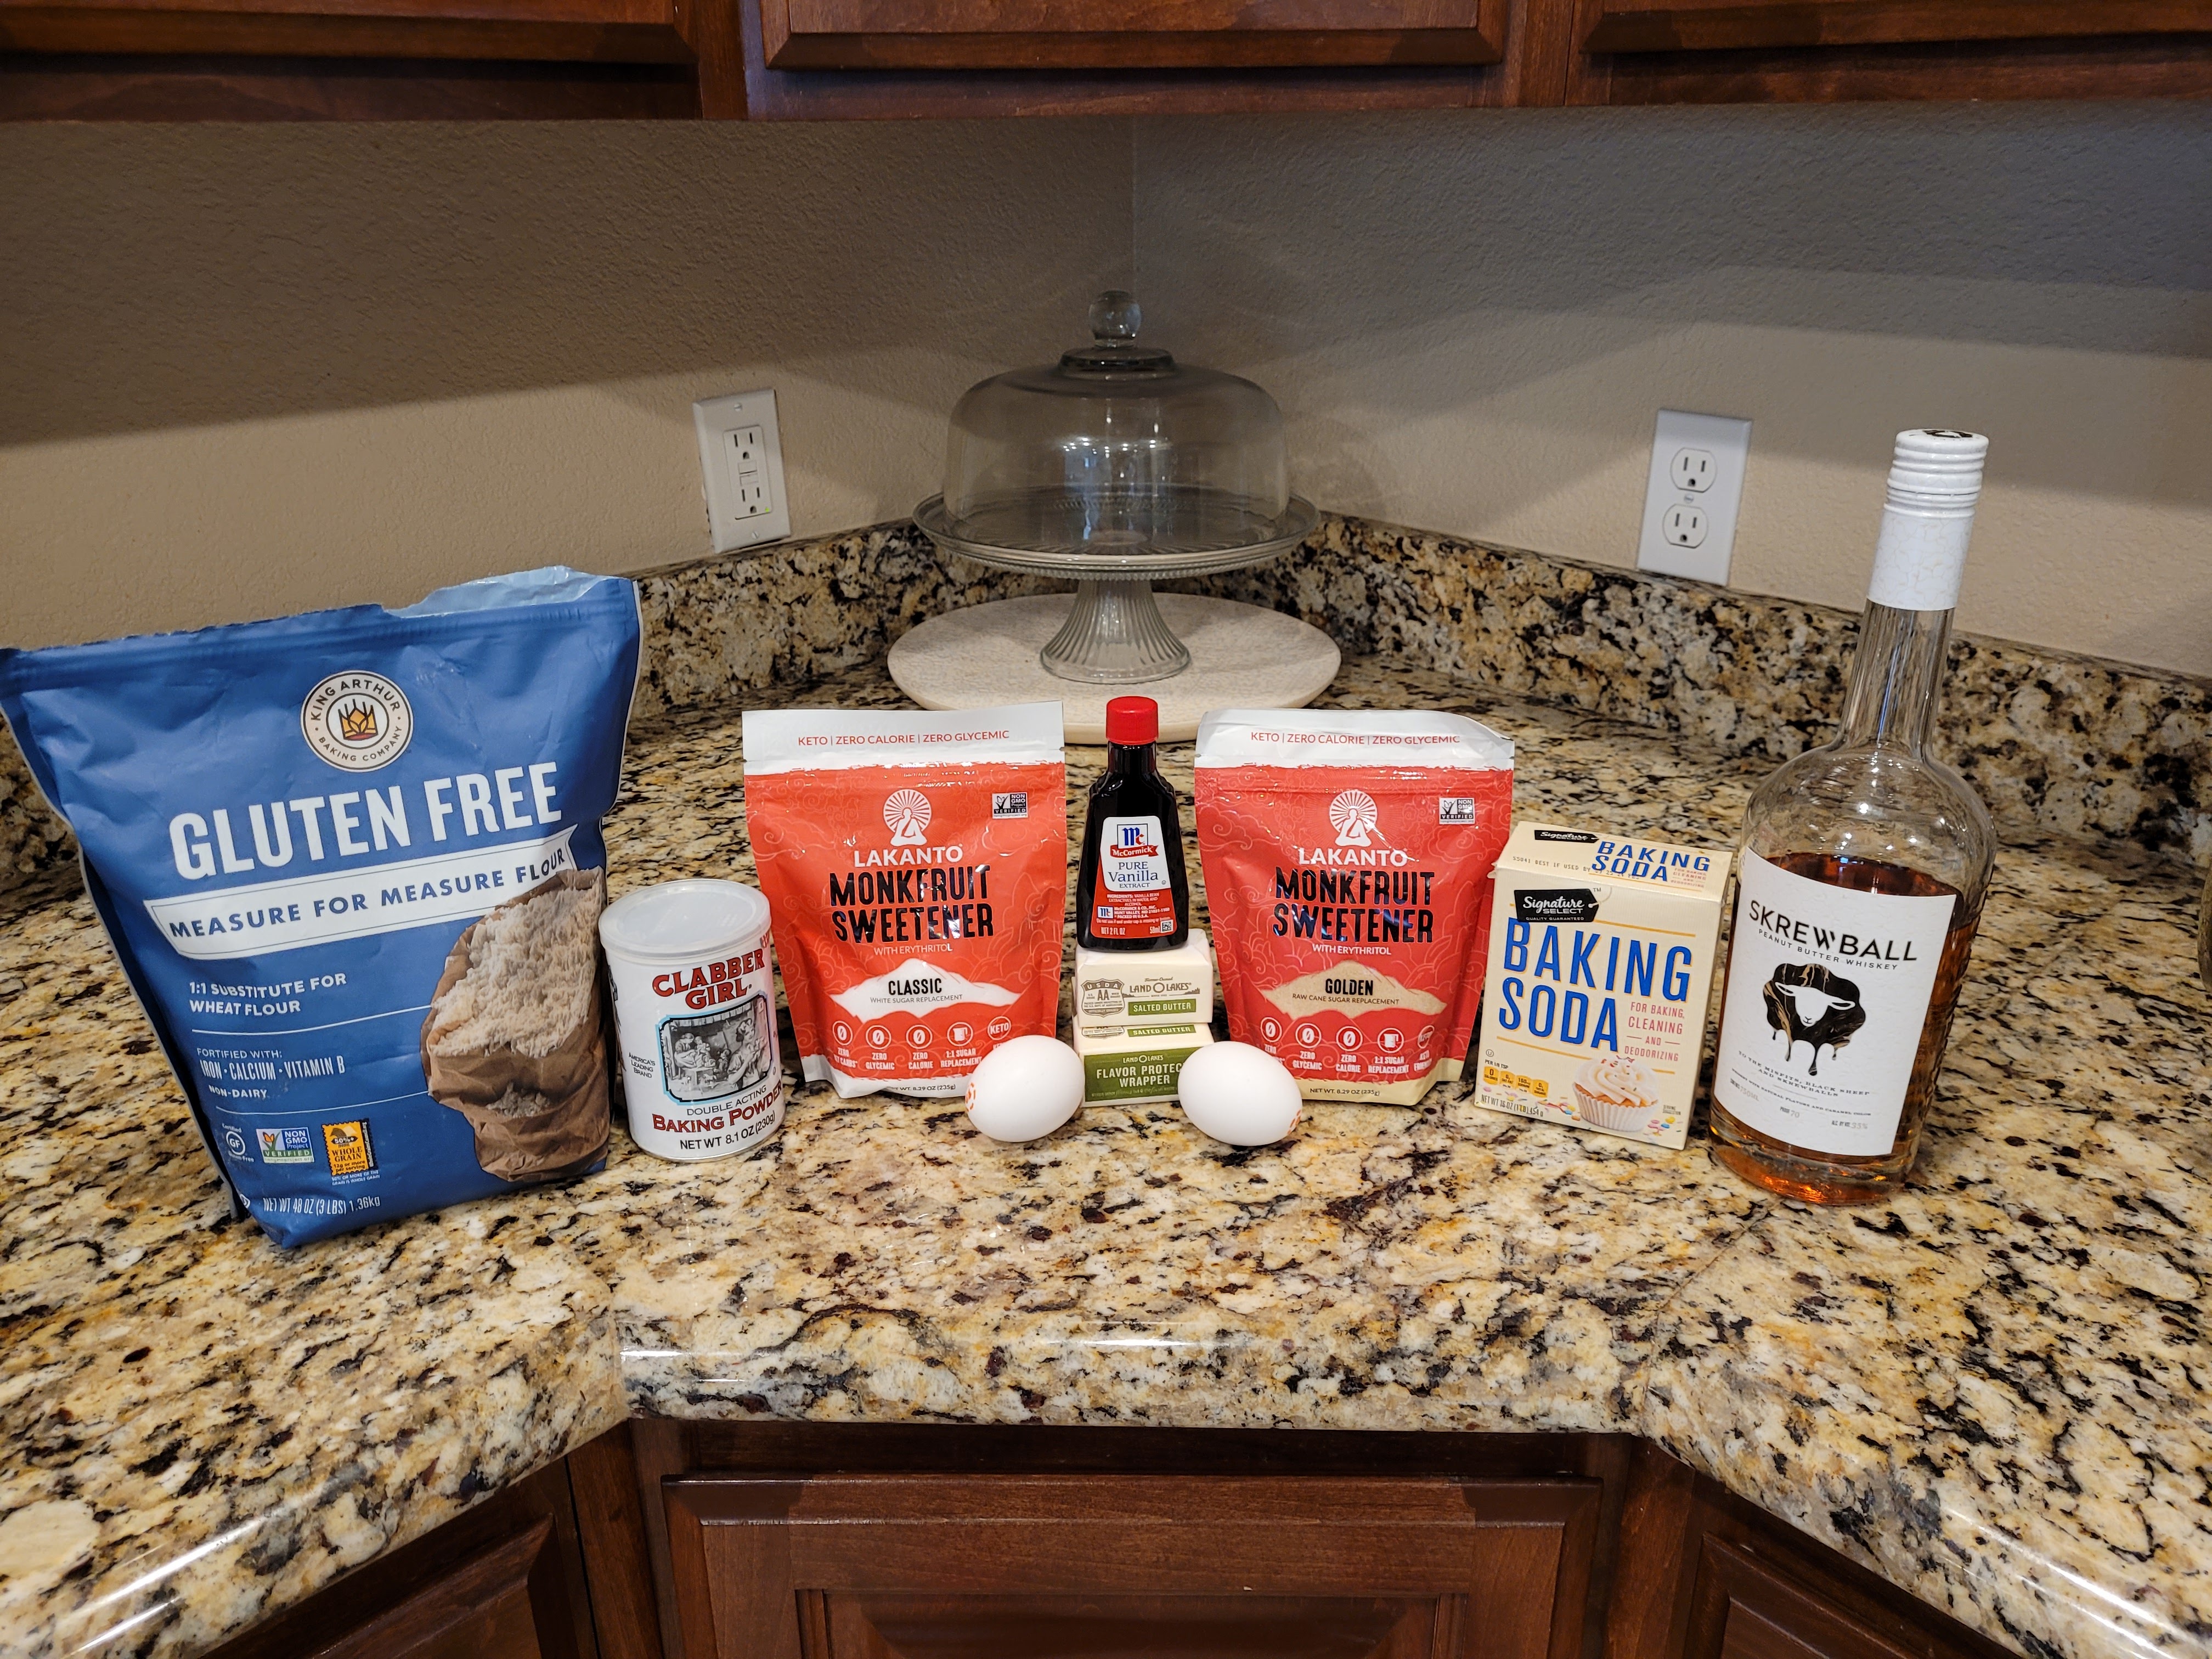
So get ready for cookie over-dough-se. These are gluten free but you can definitely sub regular flour if your body doesn’t hate wheat (consider me very jealous). To make, you’ll need:
- 3/4 cup of butter at room temp
- 1 1/2 cups of Lakanto golden monkfruit sweetener
- 2 large eggs at room temp
- 3 TBS Skrewball peanut butter whiskey or other alcohol of choice (Kahlua or Baileys would be great)
- 2 tsp vanilla extract
- 3 1/3 cups gluten free measure-for-measure flour or all purpose flour
- 1 tsp baking powder
- 1/2 tsp baking soda

My rolling pin is deceptively large; this is actually a large lump of cookie dough. Mix the butter and golden sugar together for 3 minutes in your stand mixer on medium-high; it should be light yellow in color and a little fluffy. Then add in the eggs, Skrewball, and vanilla, blending well on medium. Scrape the bowl, then add the baking powder, baking soda, and 1/3 of the flour. Blend, scrape the bowl, add another 1/3 of the flour, mix, and add in the final bit of flour.
Turn out your dough onto a large sheet of plastic wrap. Roll your dough into a ball and chill in the fridge for 30 minutes.
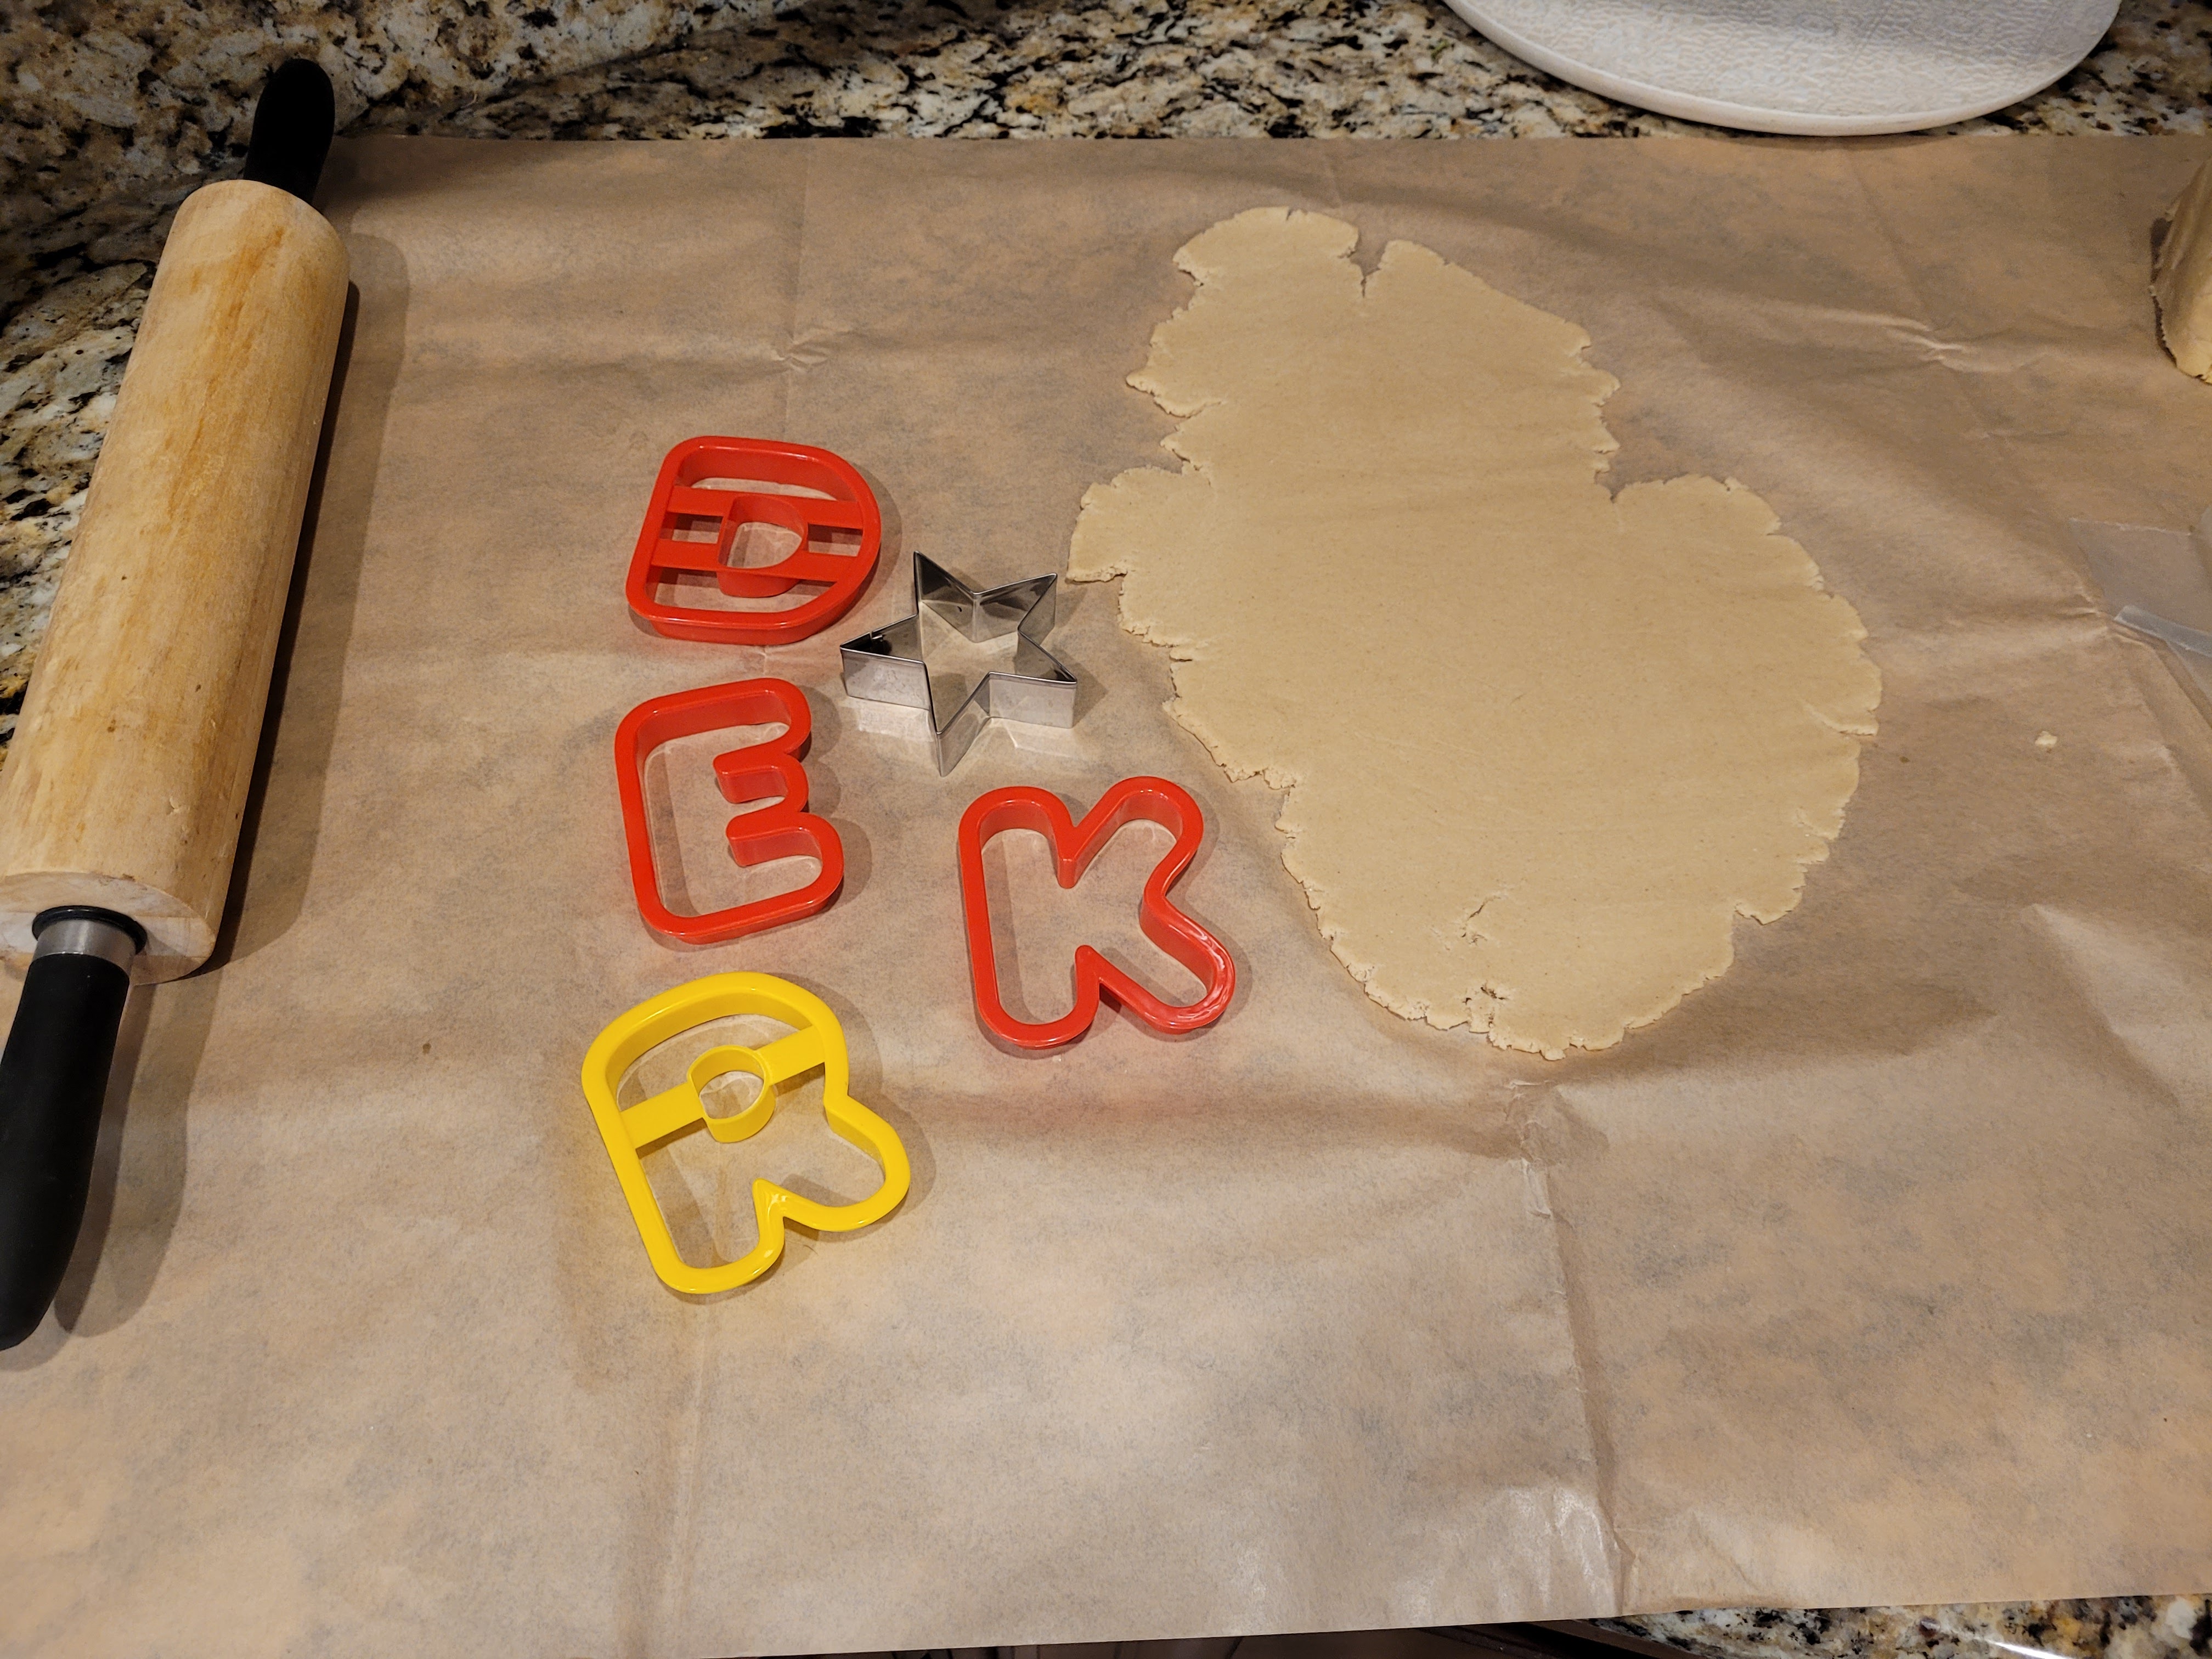
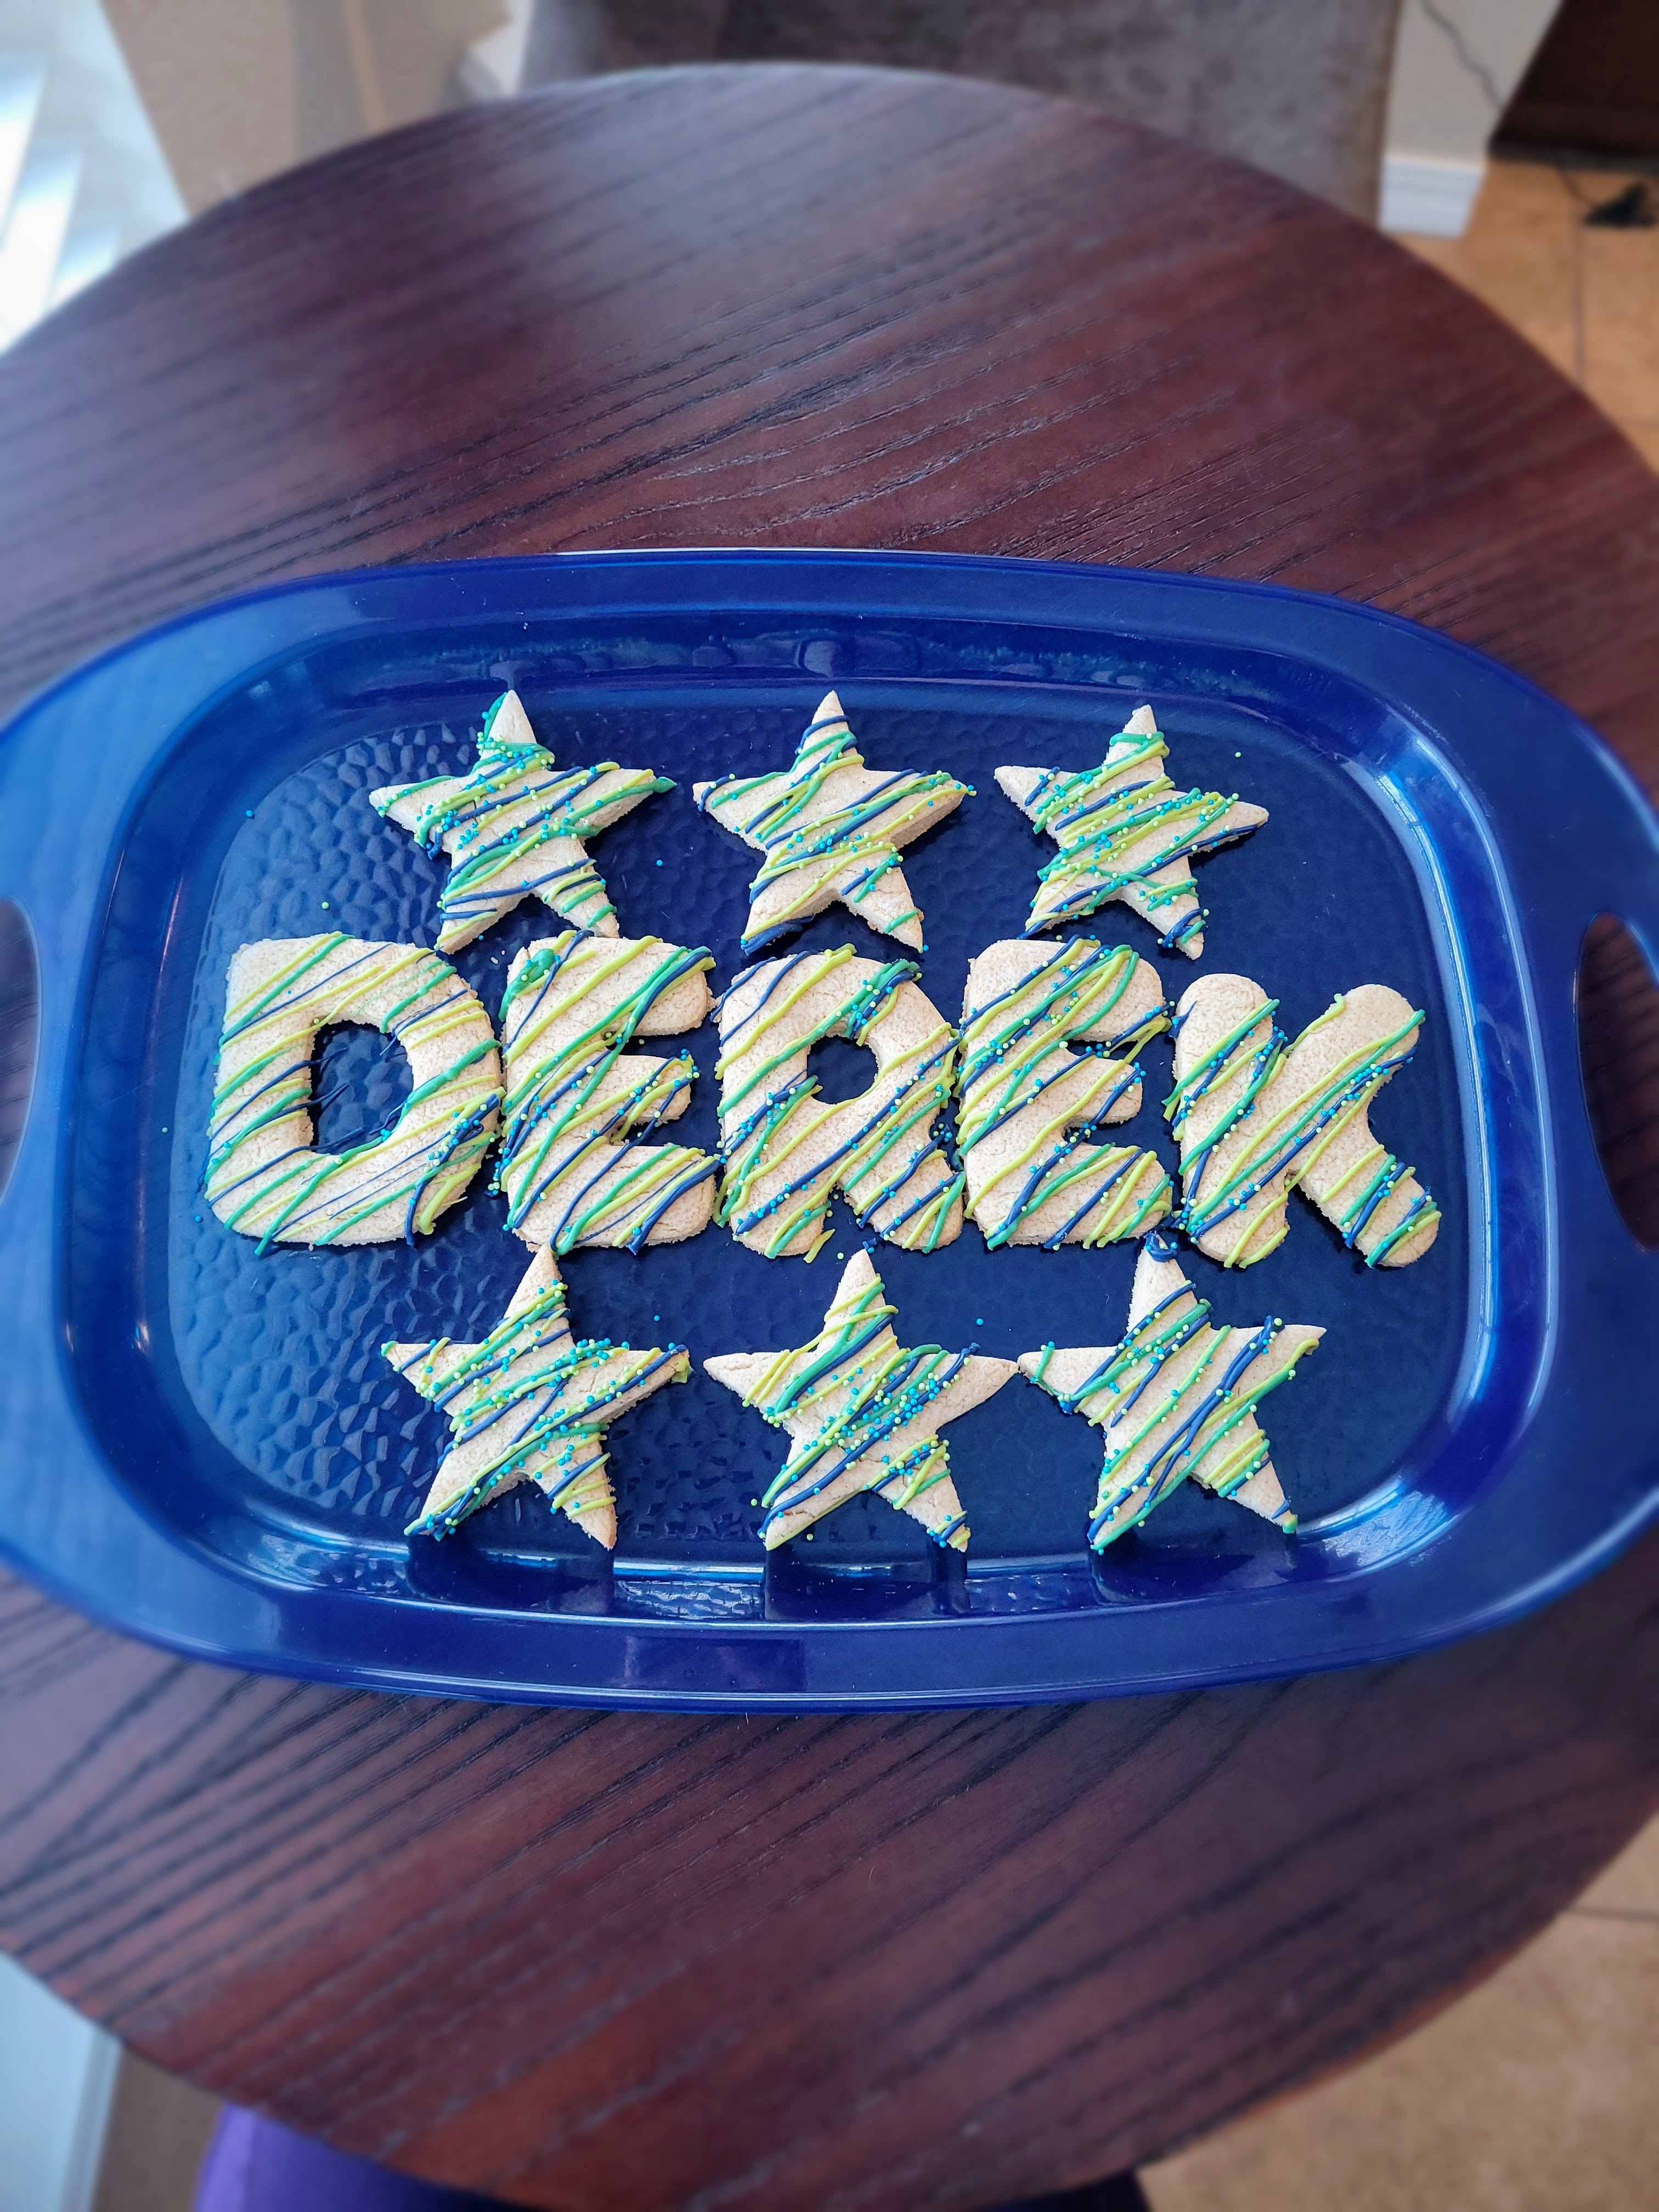
And get ready for a solid arm workout. I wanted to make my husband’s name and then a bunch of stars for the rest of the cookies, so I gathered up some cookie cutters. Any shape will work with these. I took half of my dough ball and rolled it flat with my rolling pin. You can flour your pin or use plastic wrap on top of the dough (my preferred method) to get these to about a 1/4″ thickness. You will be rolling a lot, so maybe do some shoulder stretching first. Then cut out with the shapes of your liking. You can reshape the leftover pieces into a new ball of dough and repeat until you’ve used everything up.
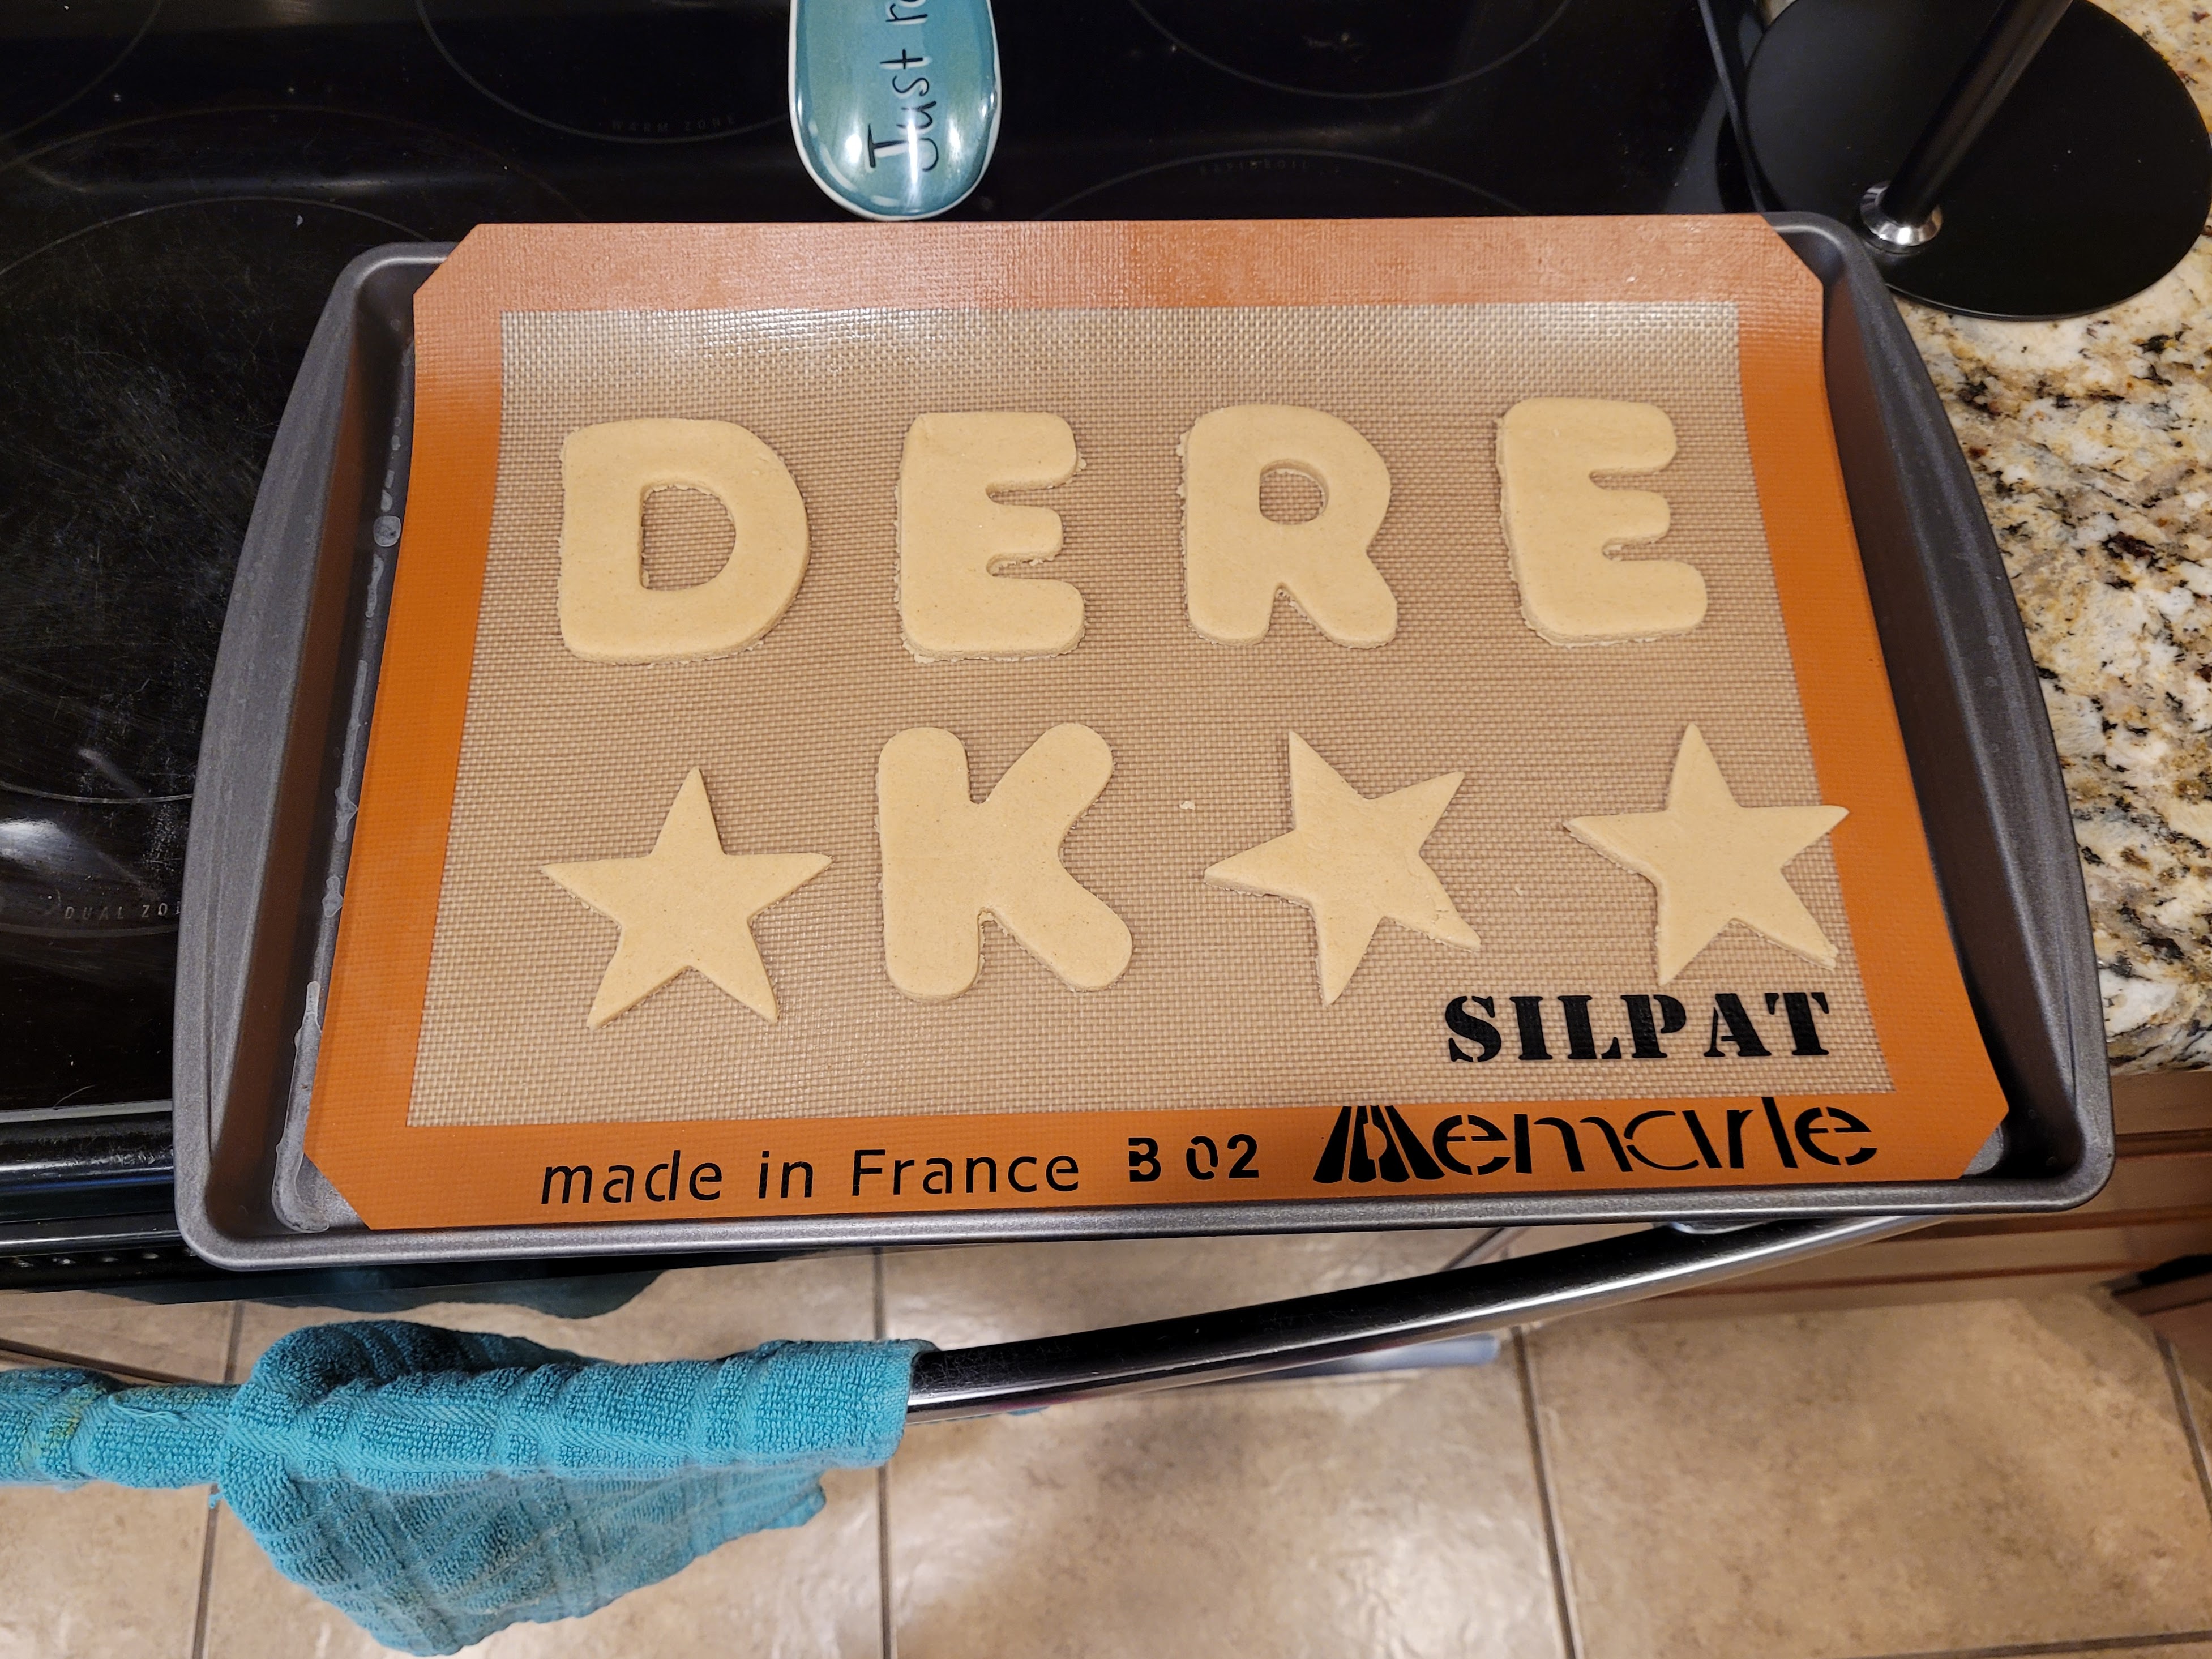
Bake me up before you dough, dough… Preheat your oven to 350 and line several baking sheets with Parchment paper sprayed with cooking spray or use silicone baking mats. VERY IMPORTANT, don’t make a cookie mistake…once you’ve got your shapes cut out and placed on your baking sheet, put this in the freezer for 10-15 minutes. This will keep your cookies from spreading out, puffing up, and just generally ruin the shapes you worked hard to cut out. When your oven has finished preheating, place cookies into the oven and bake for 6-10 minutes, depending on your desired level of done-ness. I like a very soft, still slightly doughy cookie, so I baked for 6-8 minutes depending on how long each tray was in the freezer. If they had only been in the freezer for 10 minutes, I baked for 6 minutes; if they had been in the freezer for 15 minutes, I baked for 8 minutes. Just be careful not to overbake because that is quite literally how the cookie crumbles. The cookies should be a nice blonde color throughout. If the edges are turning golden or brown, when they cool they will be tiny little hockey pucks…taking out teeth with each chew.
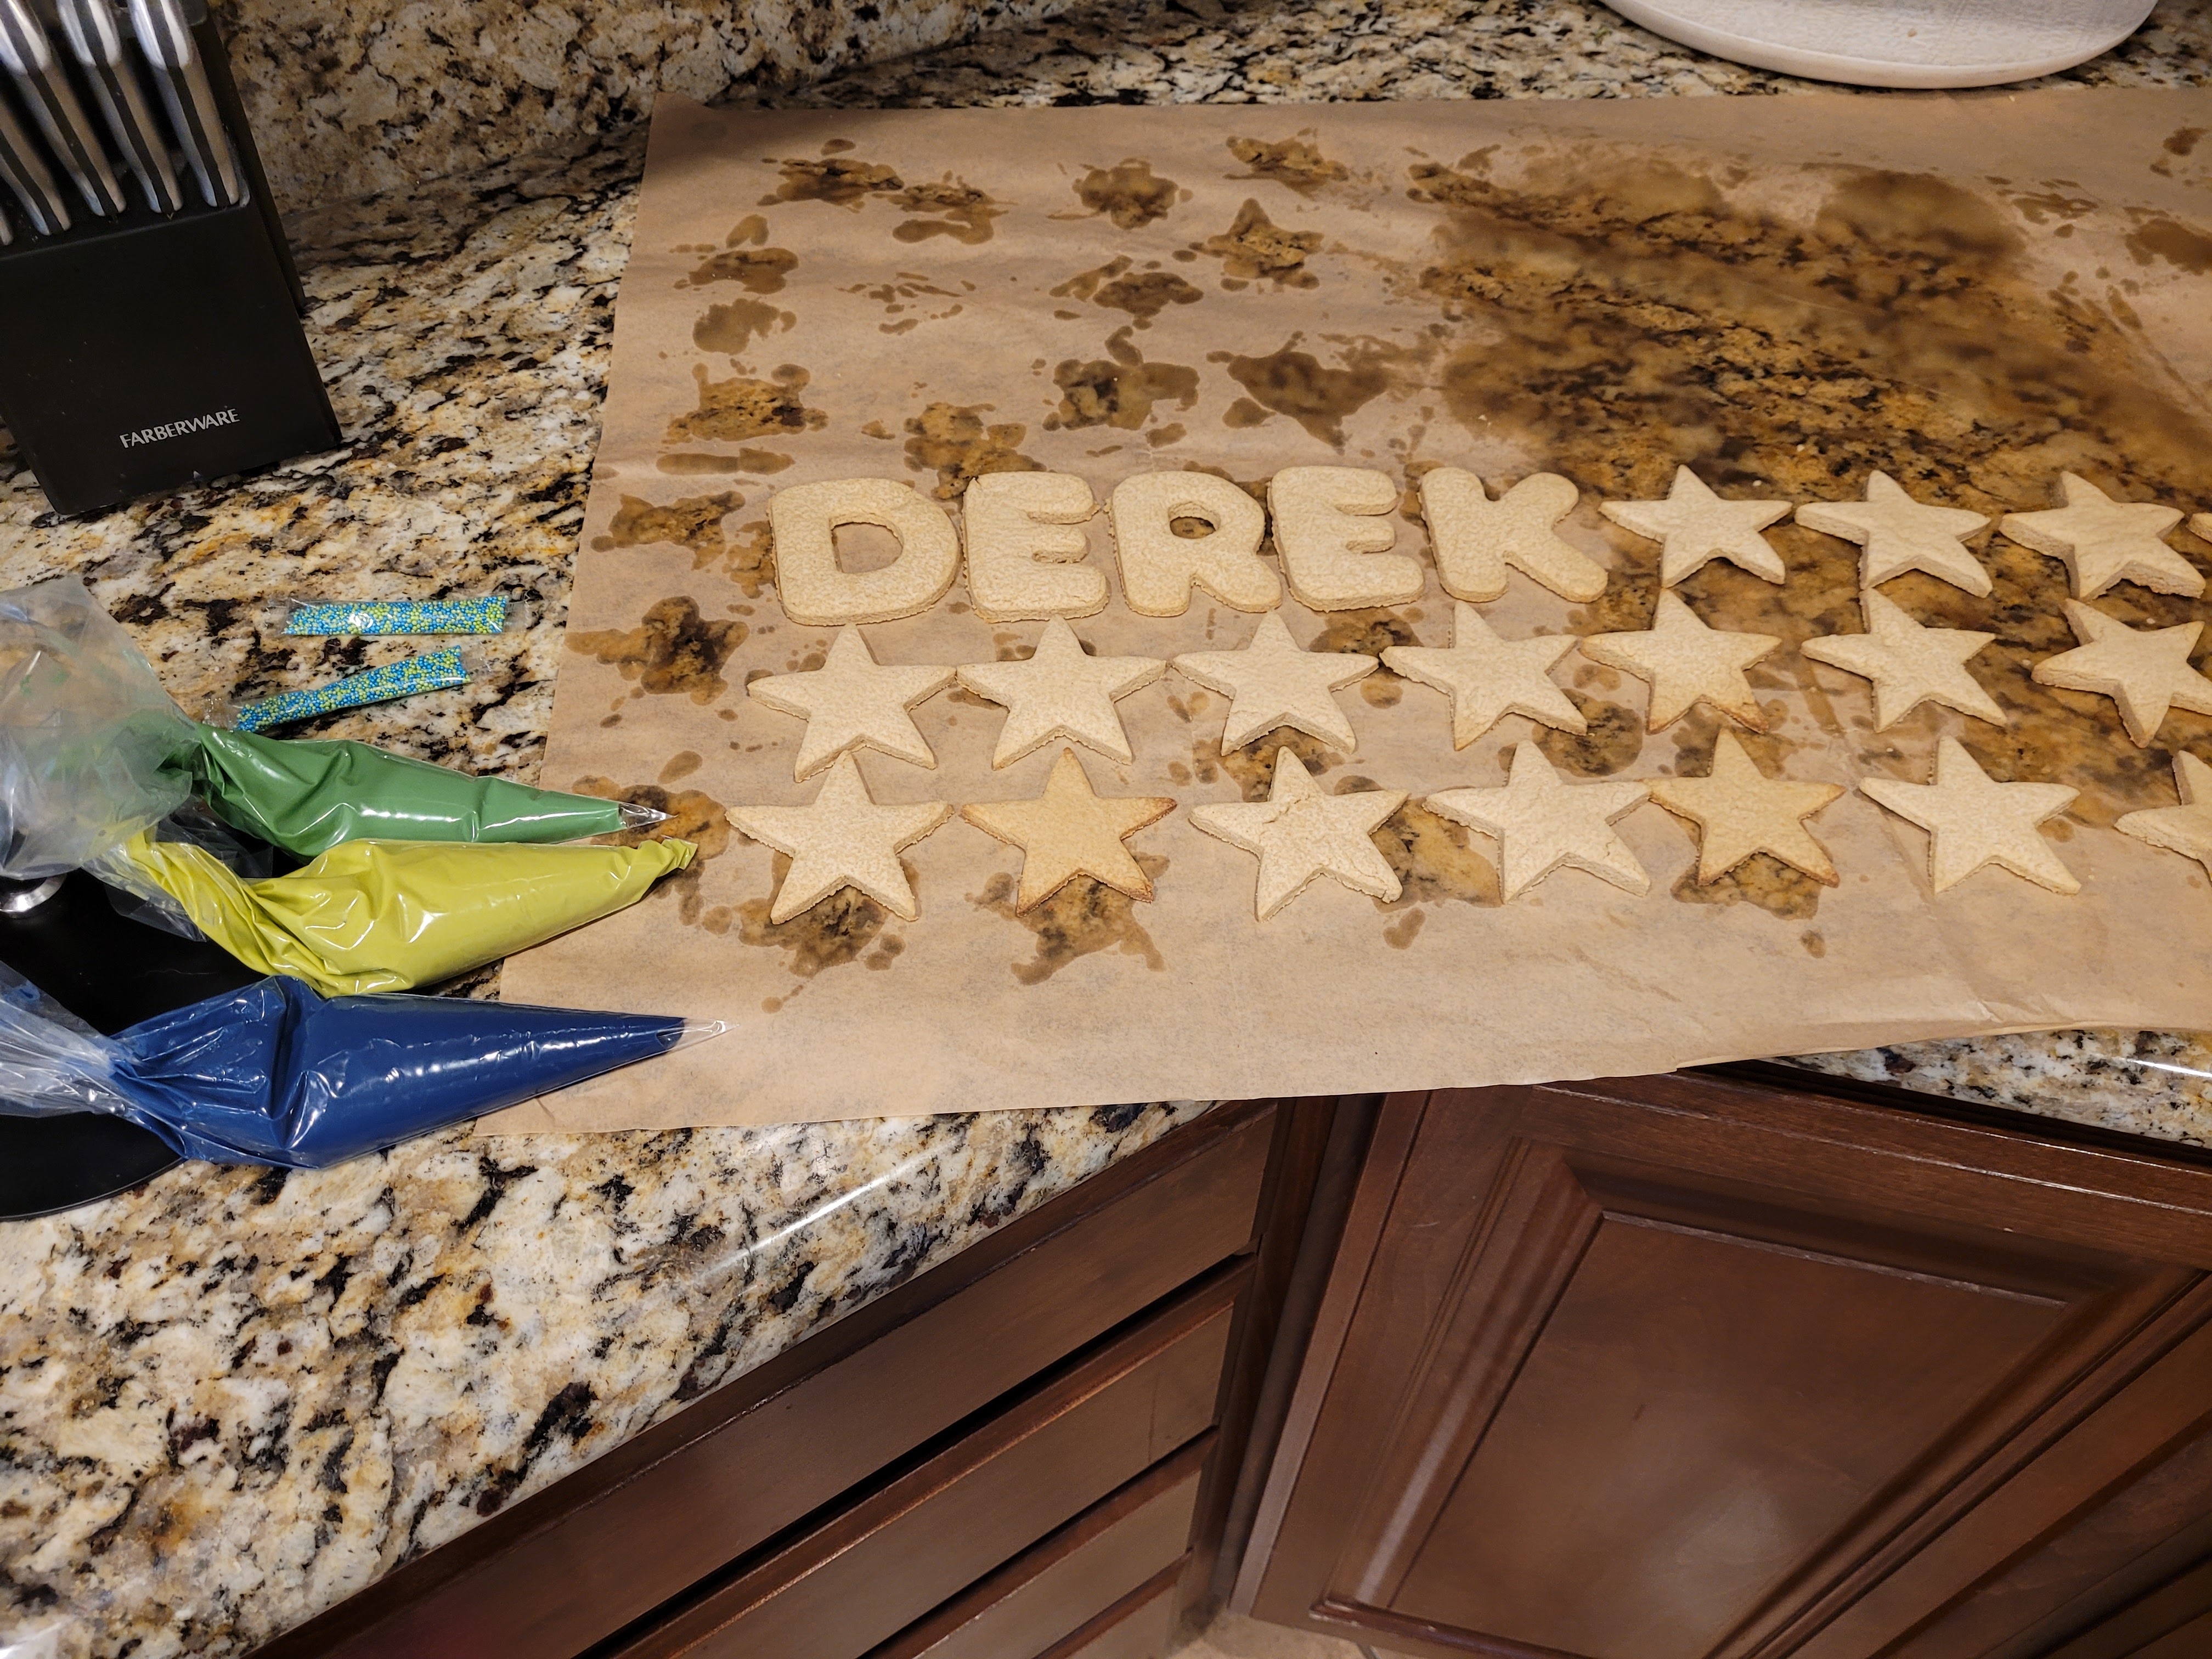
This isn’t an easy crumb, easy go situation, Birthday cookies have to be baked to absolute perfection. No pressure. I repeated the above process 4 times because I could fit 12 cookies on one large baking sheet at a time. So one sheet would chill in the freezer while the other baked, alternating out. I left my cookies to cool on the sheet for 5 minutes after baking before placing on a cooling rack to cool completely.
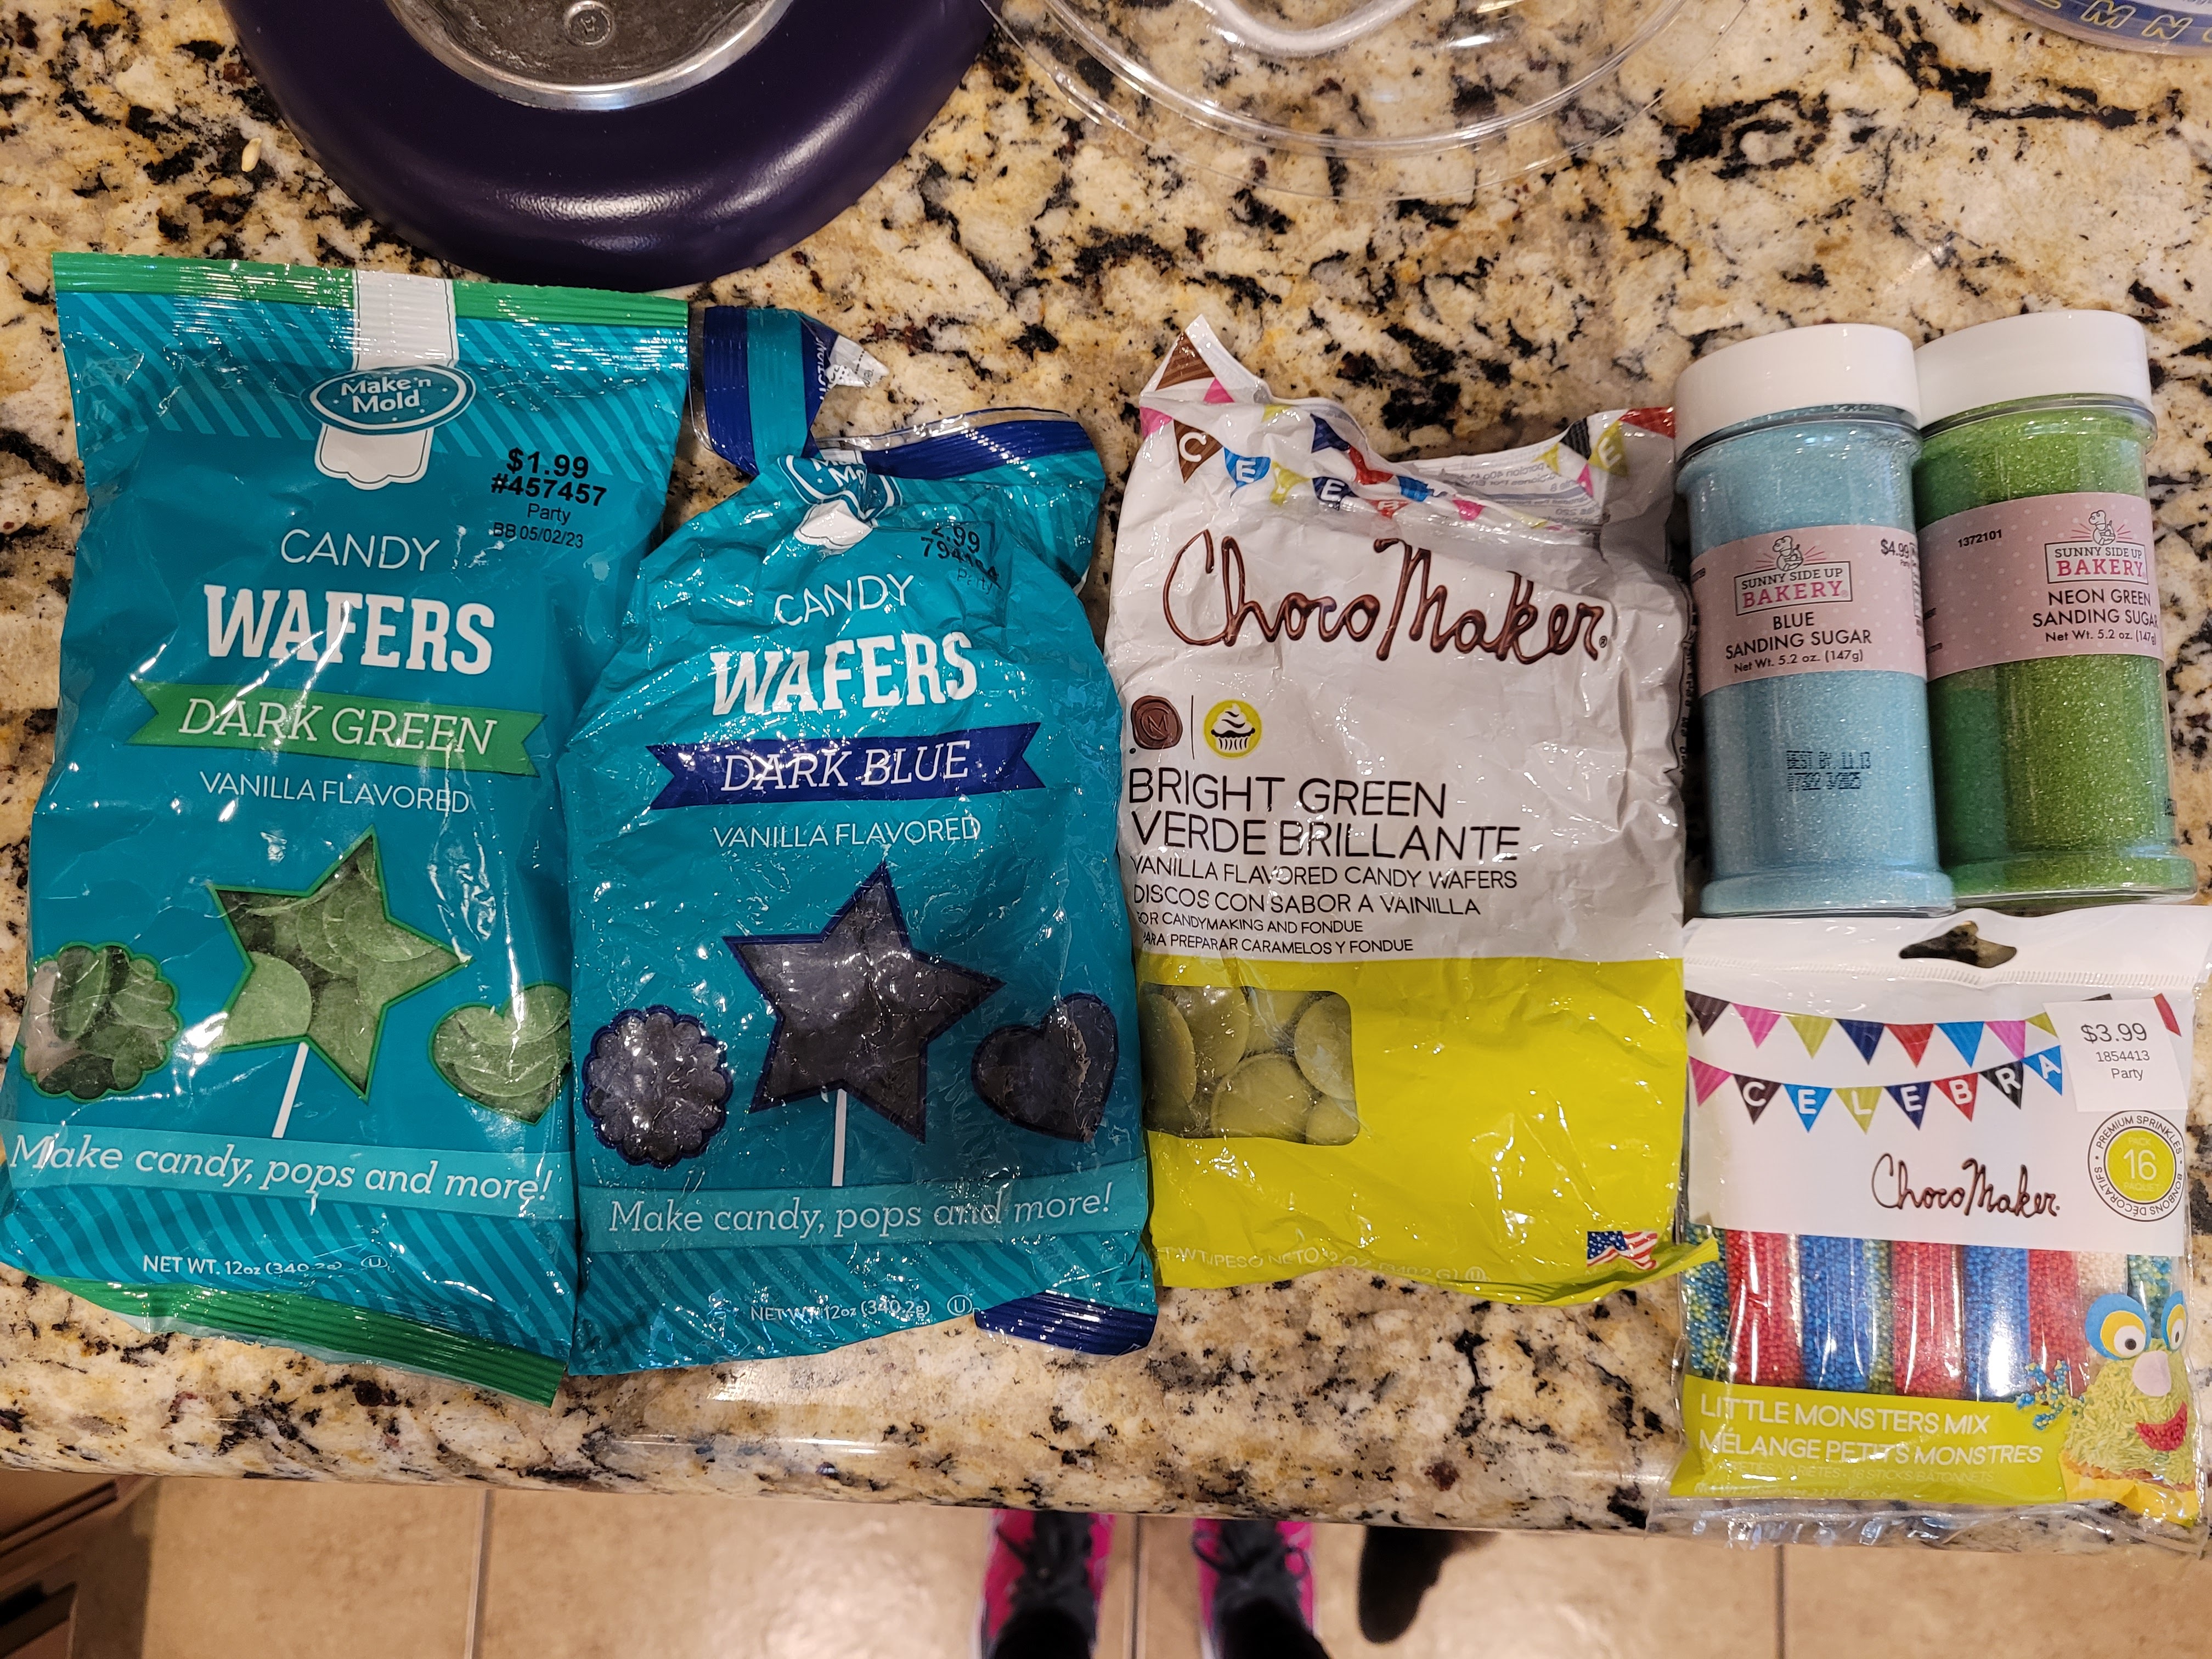
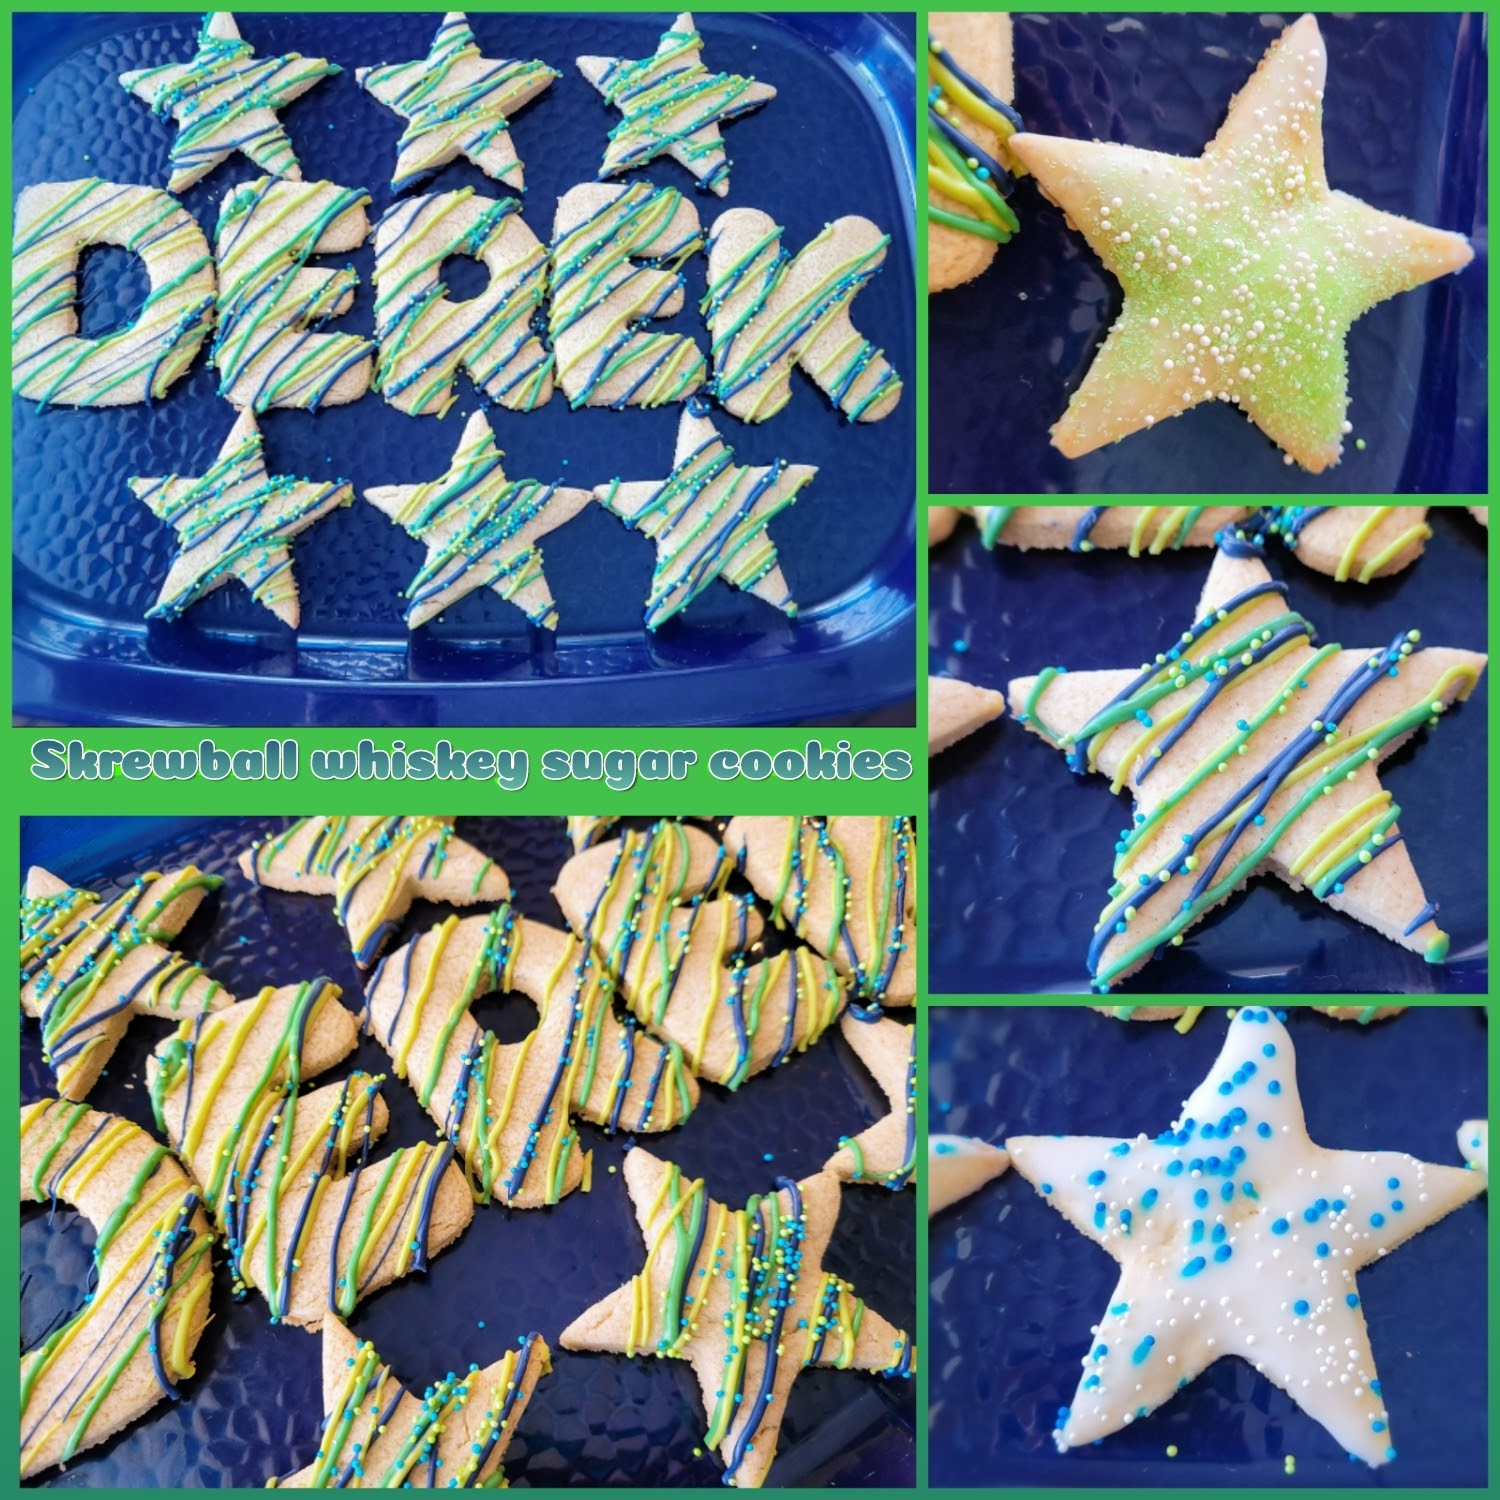
No whiskey business yet… For the chocolate drizzle, I used green, blue, and lime chocolate melts. You could also just use melted chocolate chips. Or melted Reese’s peanut butter chips to make that Skrewball peanut butter whiskey flavor really shine. I also had an assortment of sprinkles on hand because nothing is finished if it hasn’t been topped with sprinkles. THERE HAS TO BE A SPARKLE! You can’t really put a candle in a birthday cookie, so light these babies up with glittery sanding sugar.
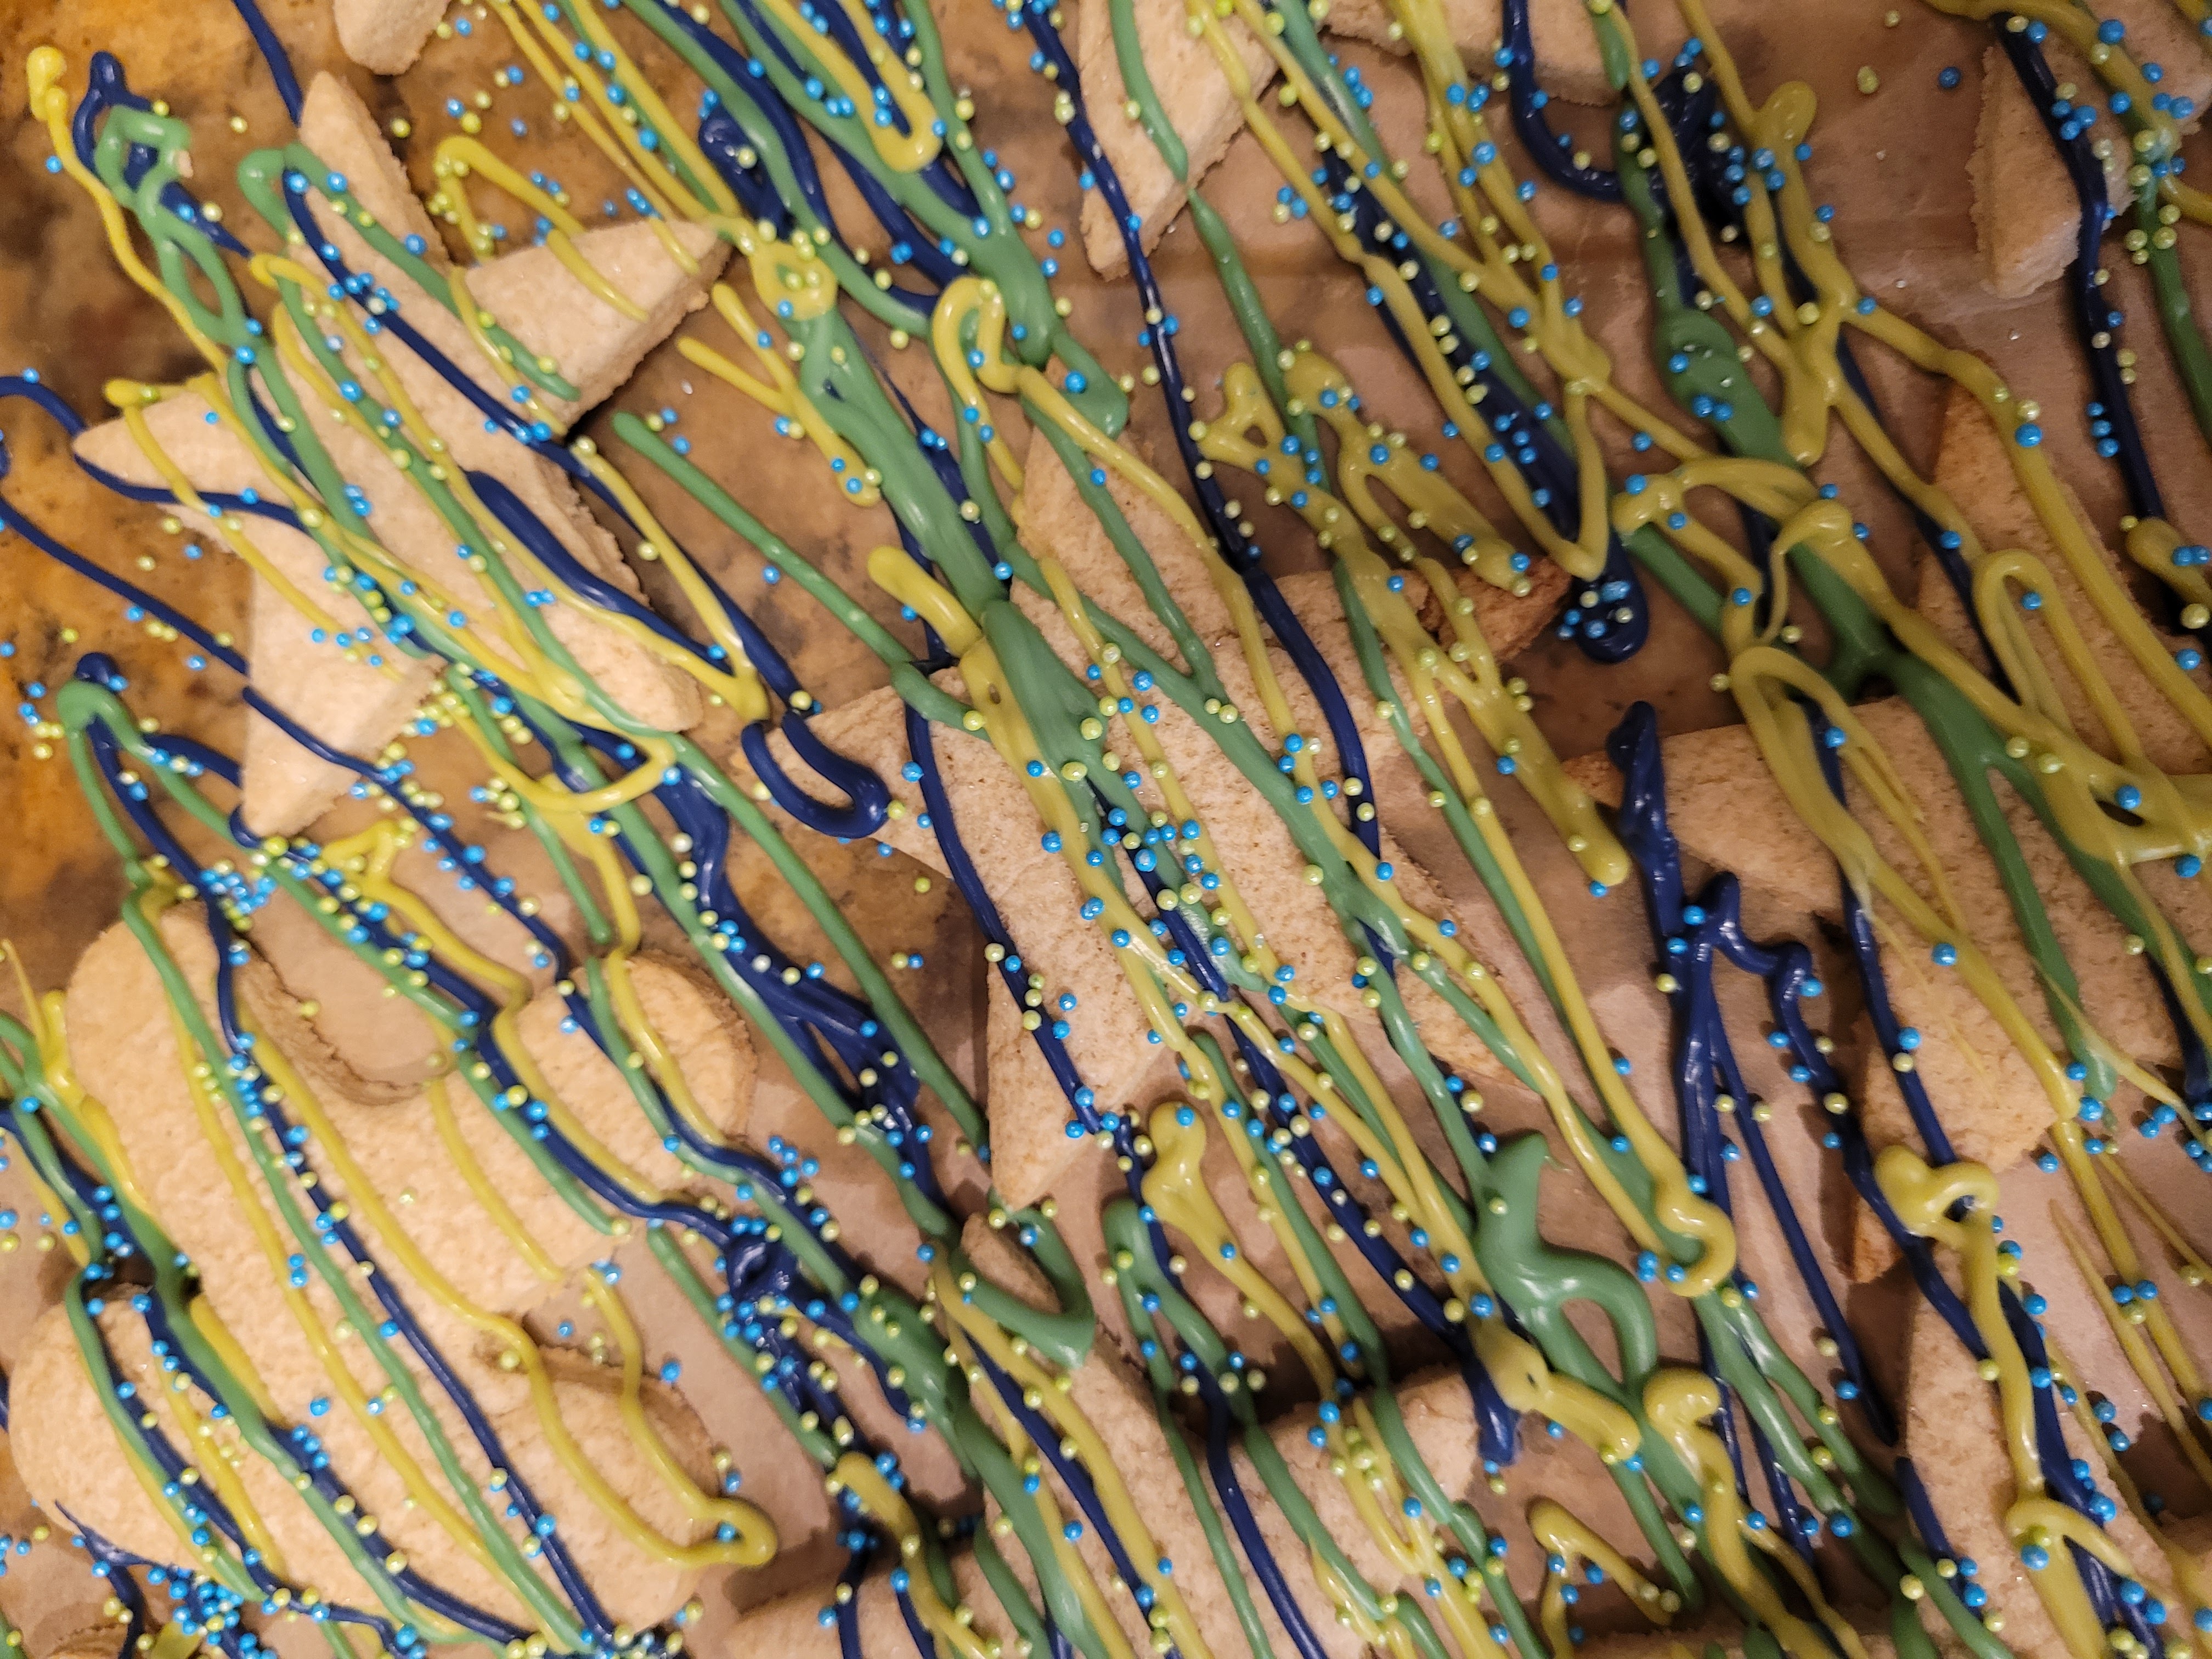
And get ready to get messy. Will I be cleaning up nonpareils in my kitchen for the next 6-8 months? Potentially even until my husband’s next birthday? Yes. But worth it. I took my chocolate melts, melting each color in its own bowl following package directions. I put the melted chocolate into piping bags and cut a very small snip off the tip of each bag. Then I drizzled like a mad woman (my arms still hurt from rolling all that dough out) over half of my cookies, quickly topping with sprinkles while the chocolate was still wet. I highly recommend putting down a ton of Parchment paper to contain the mess. Now, don’t touch these for a good half hour so the chocolate can set. Prepare another layer of Parchment paper further down your counter and get ready for that WHISKEY GLAZE!

I apologize for the all caps, but I have to emphasize how good this glaze is somehow. Just be happy you can’t hear me yelling, “WHISKEY GLAZE!” out loud every time I type it. Hi, I truly hate whiskey, but Skrewball is the exception to the rule. My love of peanut butter outweighs my hatred of whiskey. It also helps that Skrewball doesn’t taste like my mouth is full of nail polish remover. It’s smooth, oaky, and peanutty. There’s no turpentine-y, “Will this burn a hole in my esophagus?” flavor given off by most whiskeys. So it makes an exceptionally delicious glaze. And you only need 1 cup of Lakanto powdered monkfruit mixed in a bowl with 2 tablespoons of Skrewball and 3 tablespoons of water to make a drizzly glaze. That’s it. So easy a toddler could do it. But maybe keep them away from the liquor. I know next to nothing about children other than they have a very low alcohol tolerance.
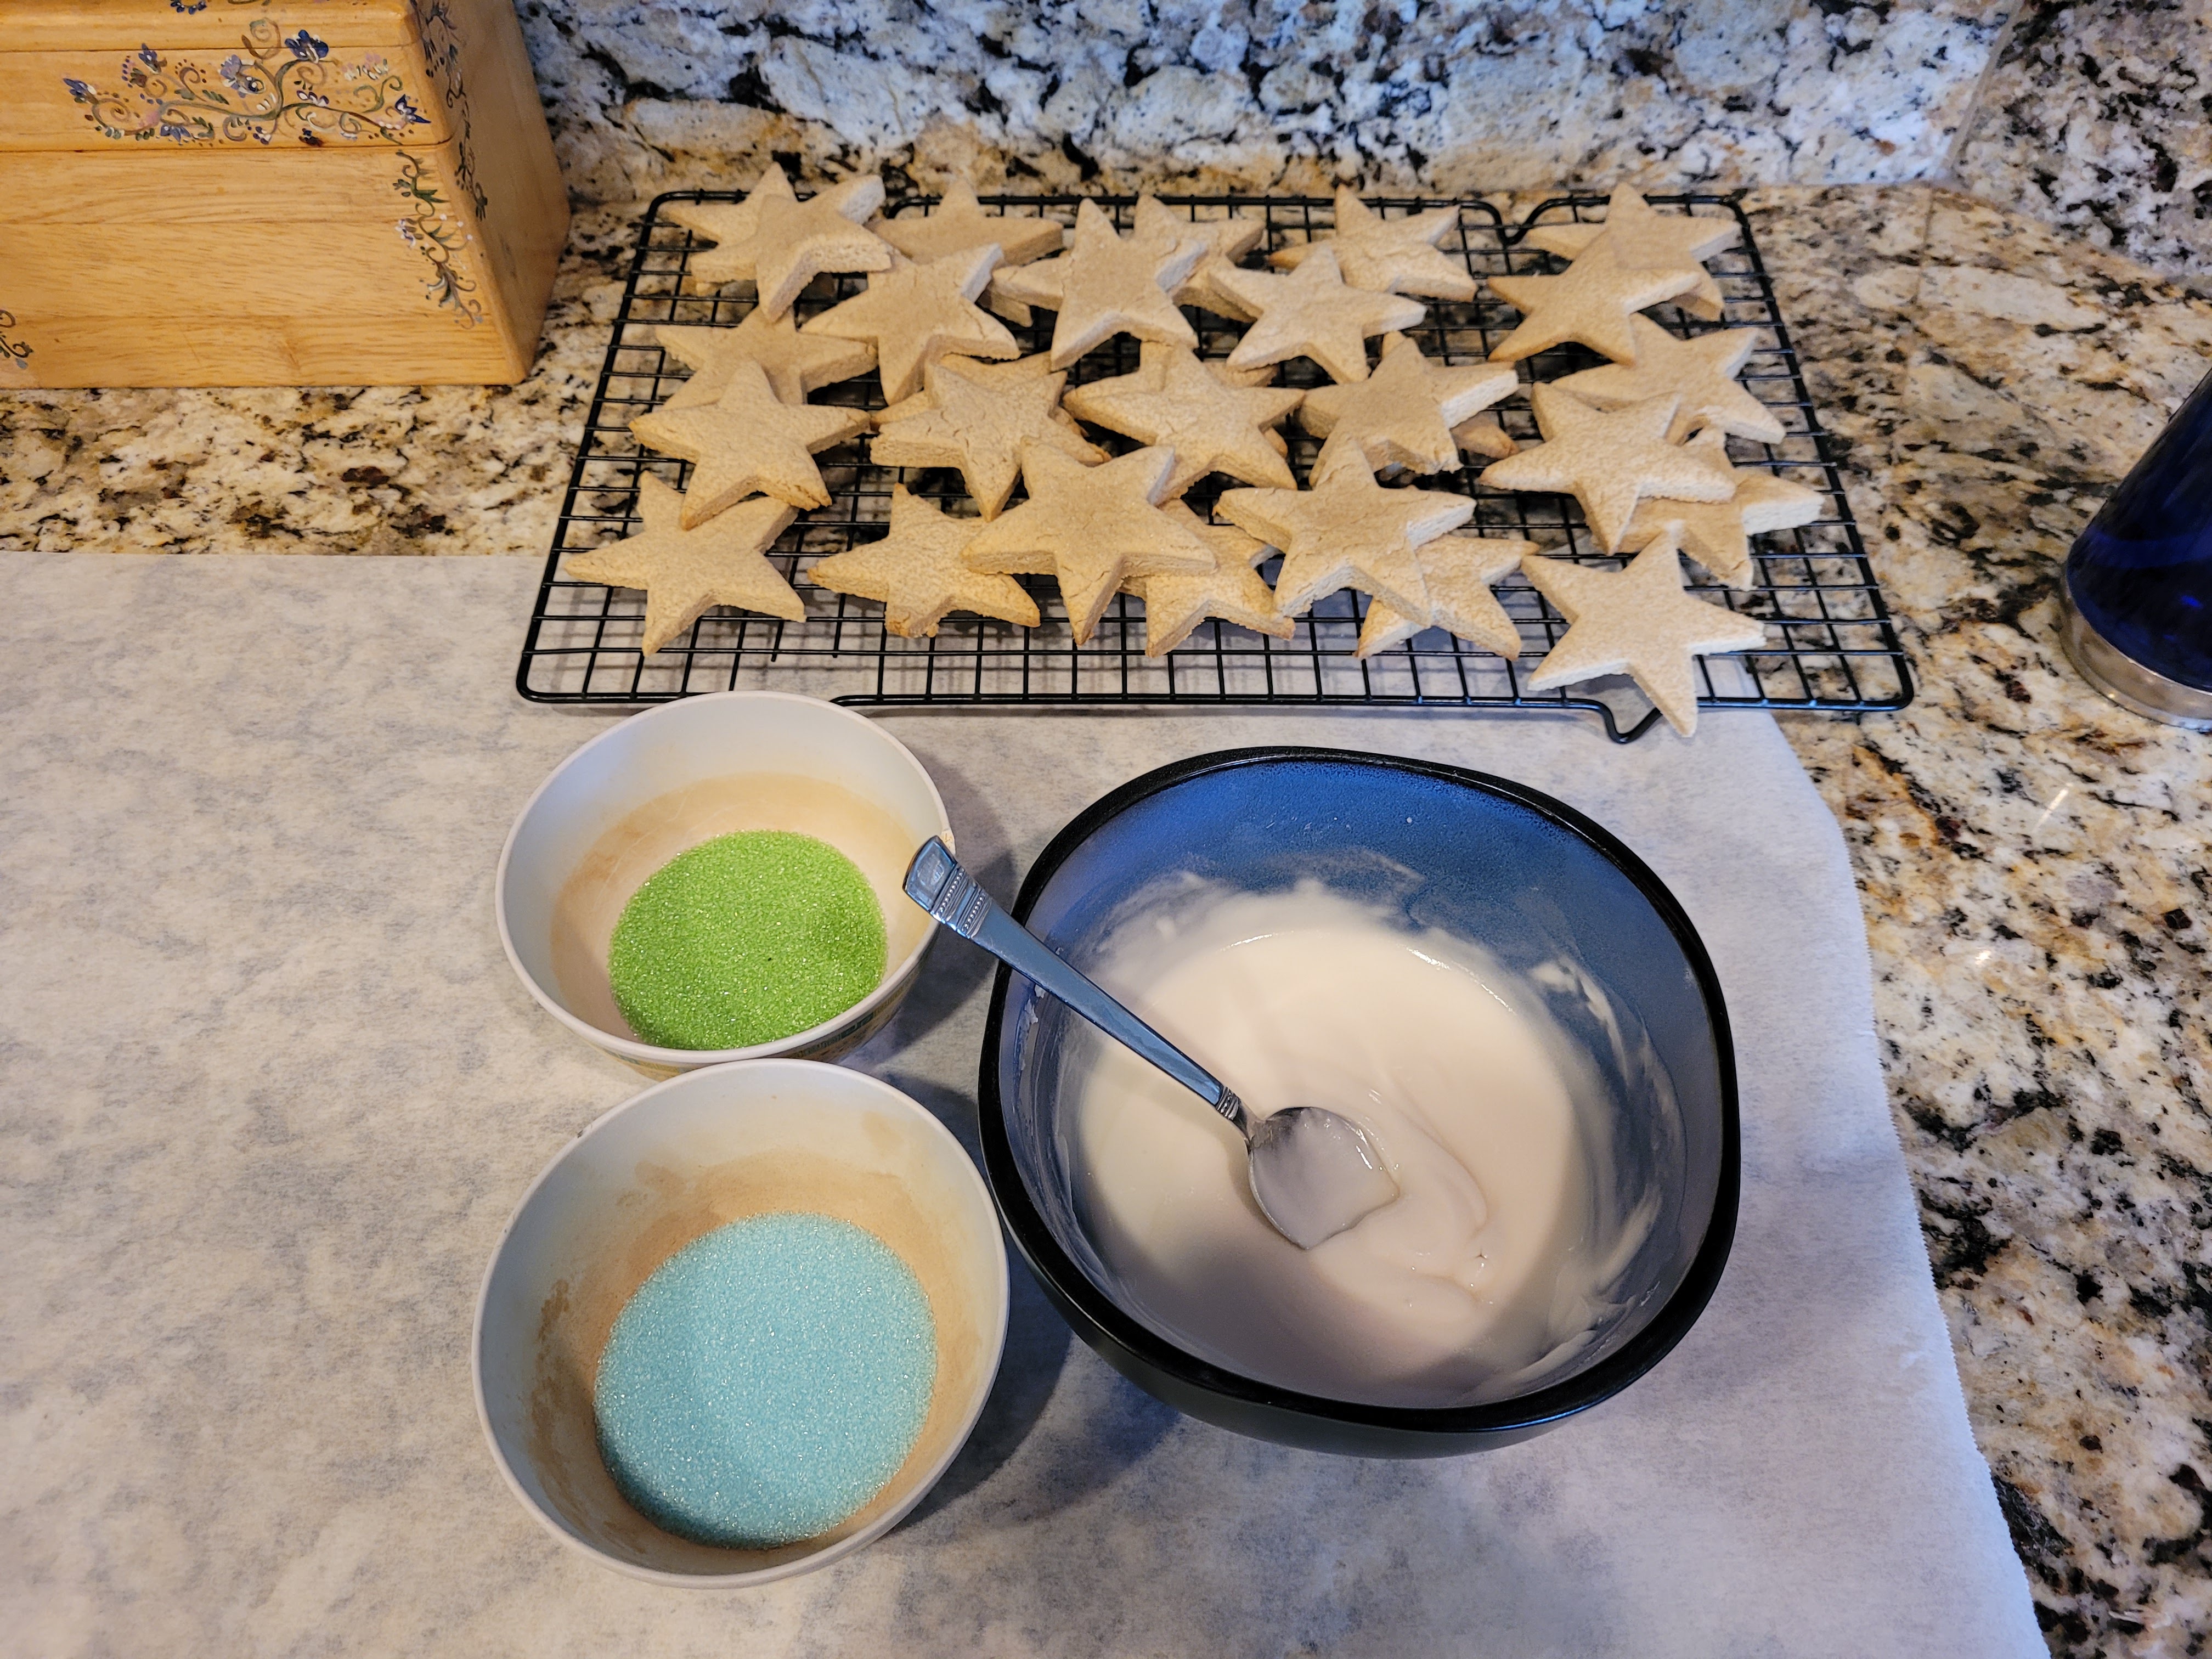
I know, I’m a weir-dough. Once you’ve got your glaze thrown together, you can add some sanding sugar to small bowls and get your other sprinkles ready.
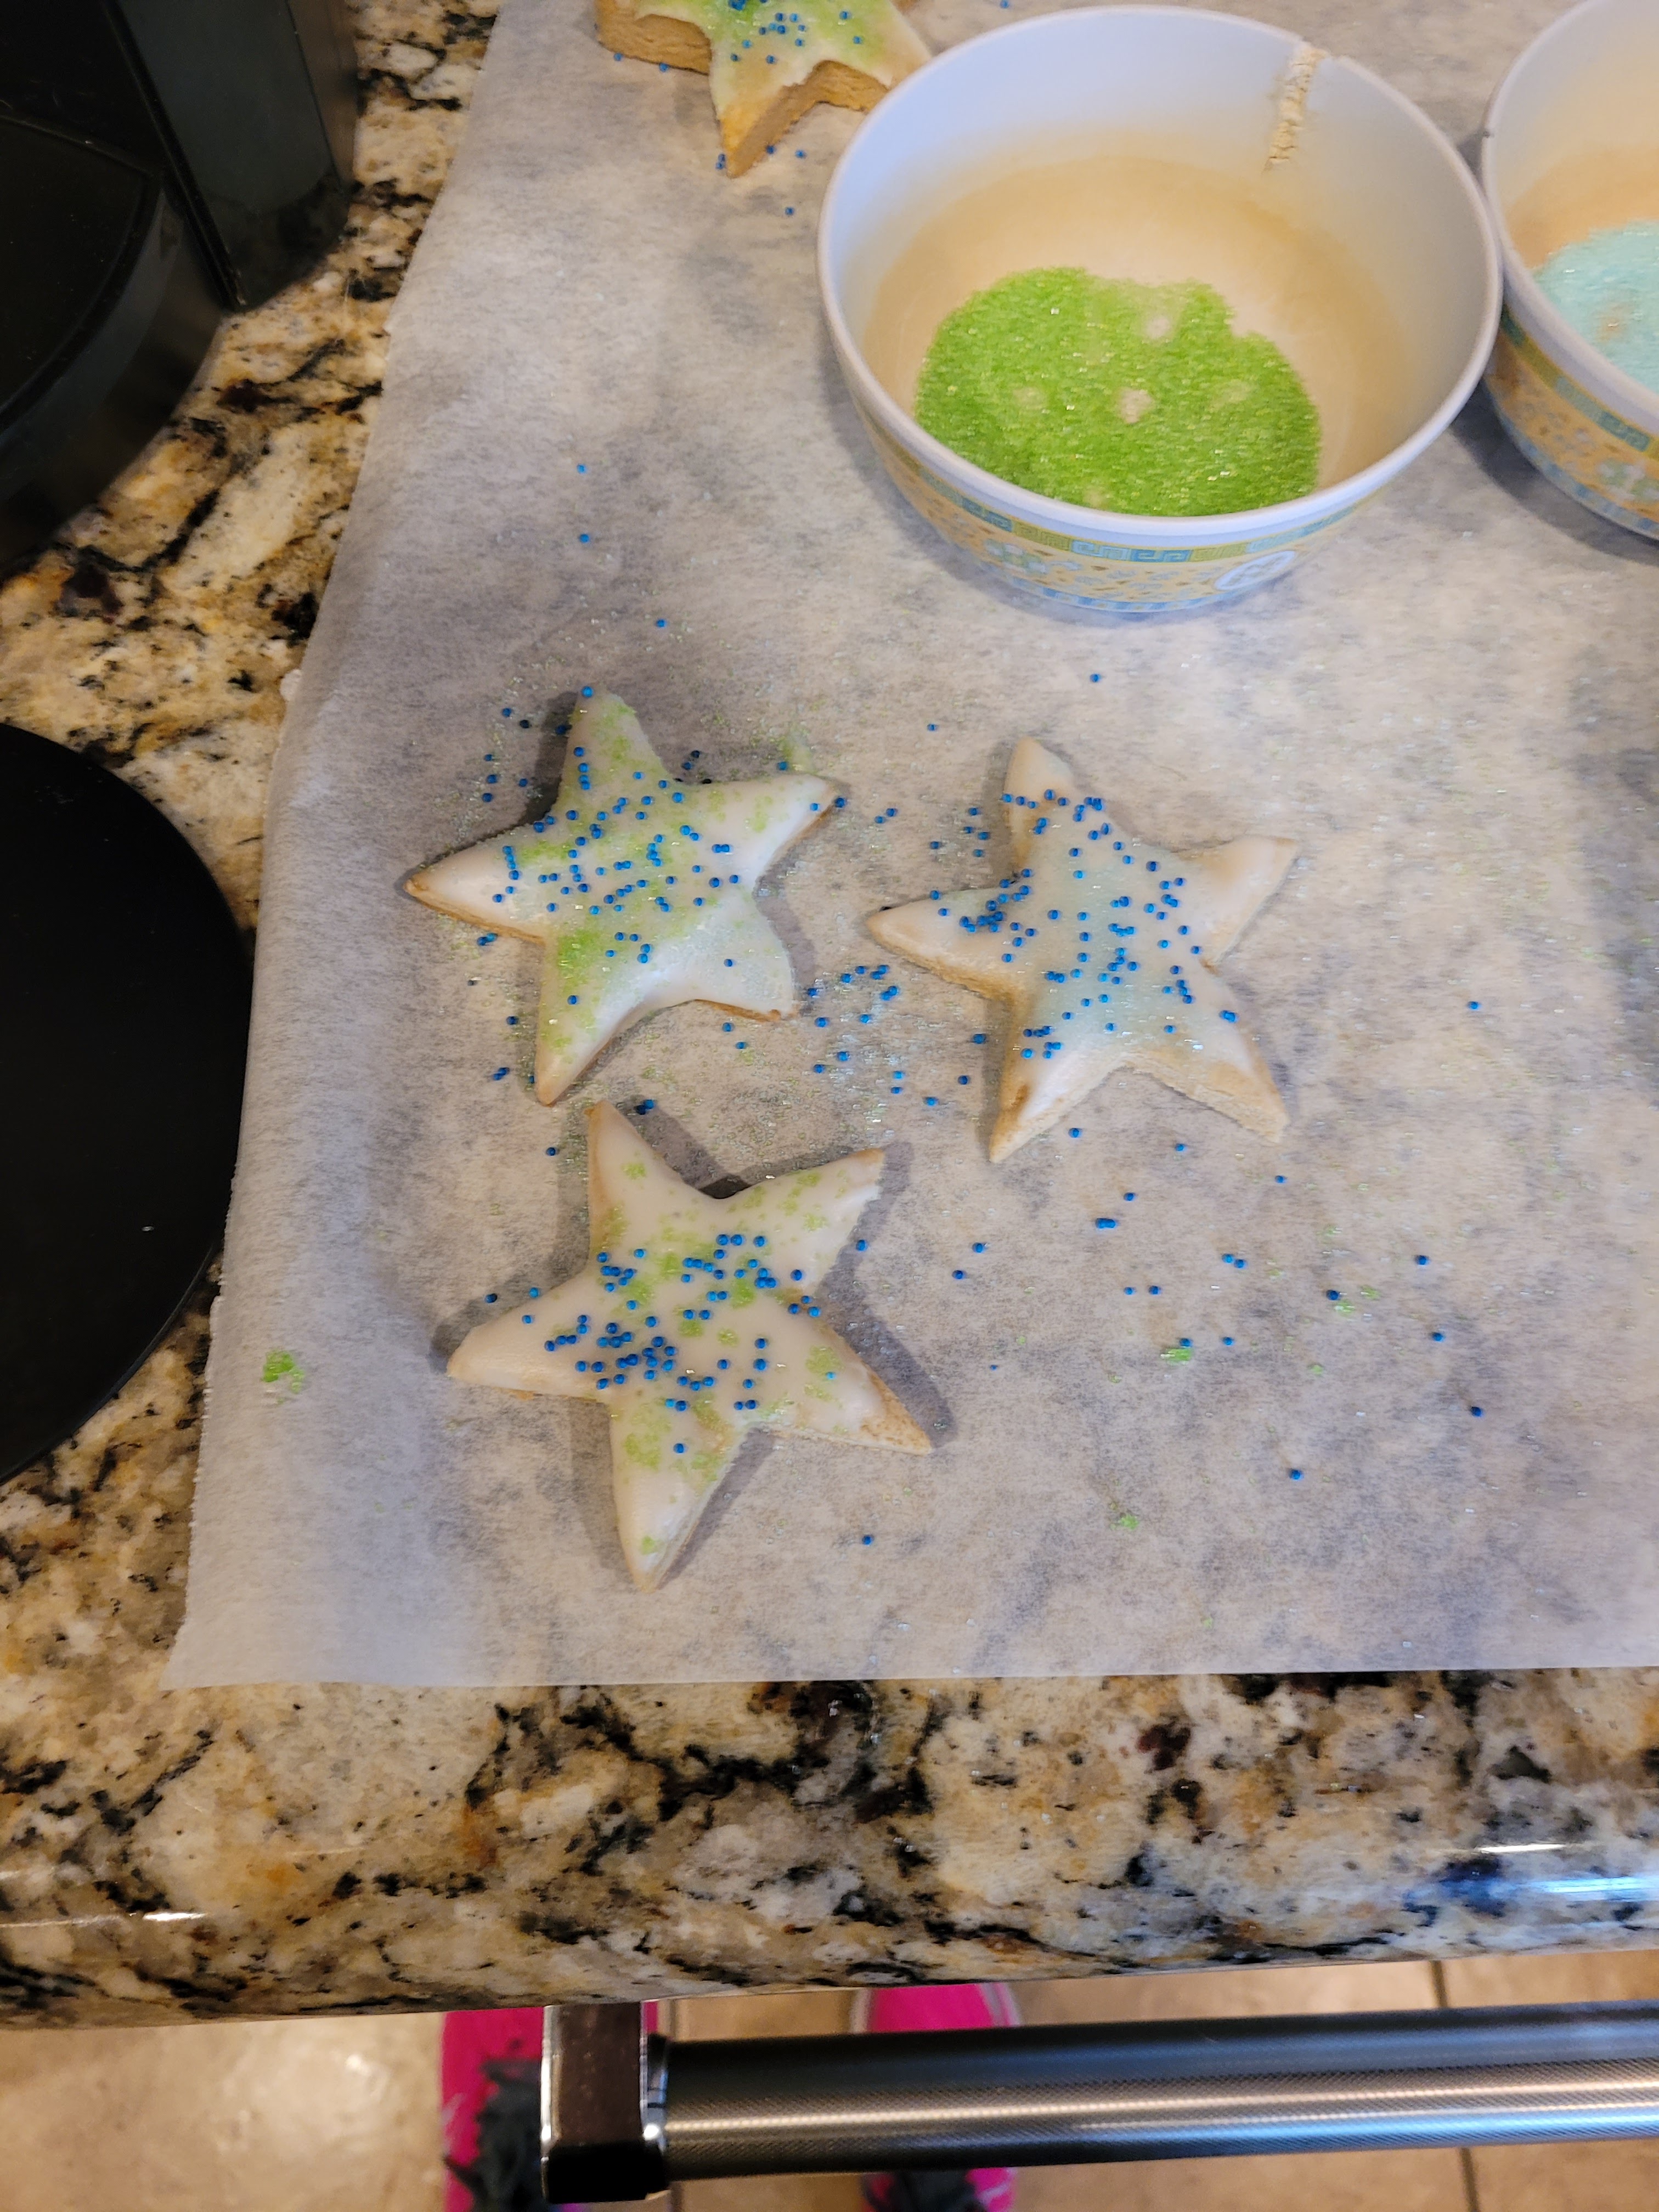
A-dough-rable! I took a star, placed it face down in the bowl of glaze, swirled around, flipped over, and tapped on the side of the bowl to get excess glaze off. Then I dusted with sanding sugar and sprinkles. Once you’ve glazed the remaining two dozen cookies, let these set and harden for 30 minutes. Plenty of time to lick that glaze bowl clean and get a little day drunk on when you do.
I chews you, boozy cookie. You can keep these in a Tupperware container and leave them on the kitchen counter. Placing in the fridge will make the glaze and melted chocolate get kinda weird, so leave these at room temp and devour accordingly. I play a dangerous game of, “Have I earned a cookie?” Every time I walk by these in the kitchen (spoiler alert: I have not, but I will eat one anyway).

Glazed with love and happiness. Love and happiness = peanut butter whiskey. As my mom told me, these boozy beauties are what Girl Scout cookies grow up to be. She isn’t wrong. These are adult Tagalongs, absolutely no doubt about it.
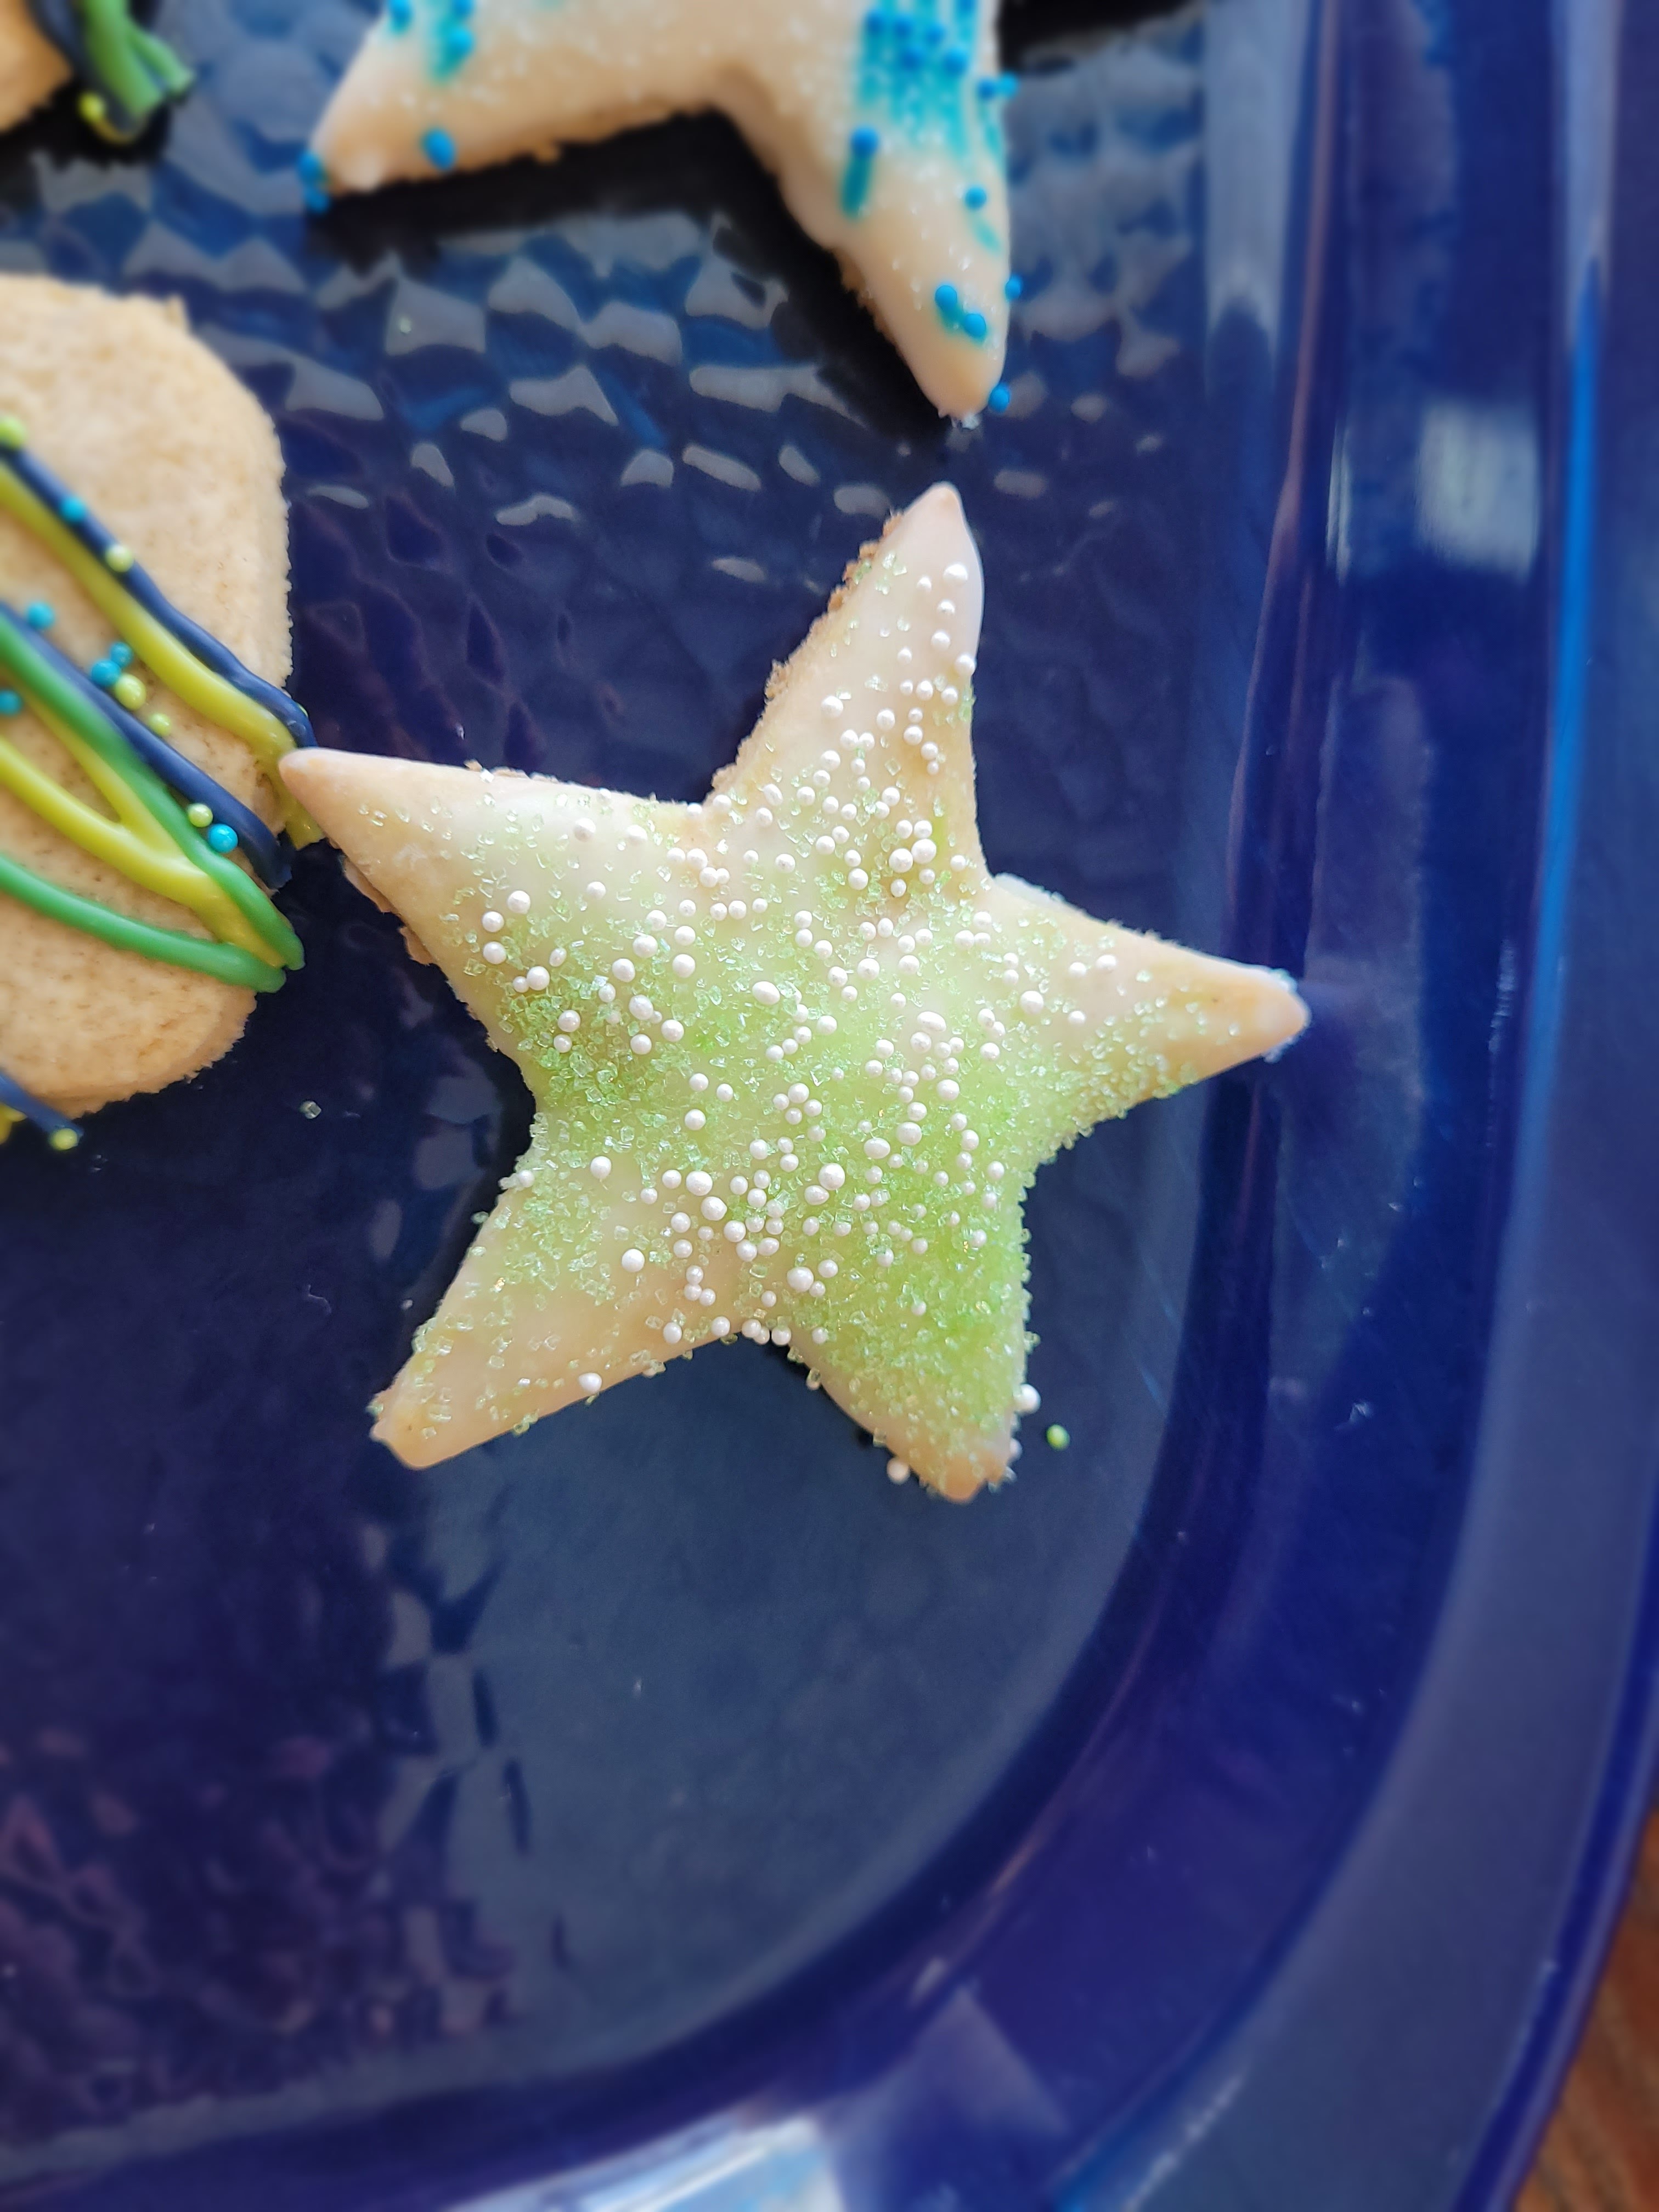
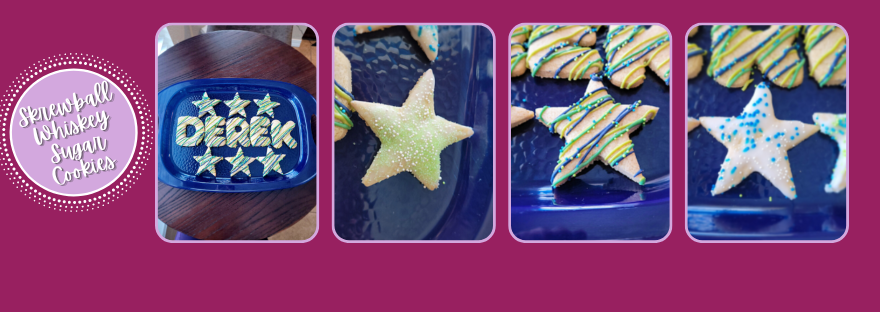
I realize making the glaze green and blue made these look more like starfish than stars, but I was two tablespoons deep into the whiskey glaze at this point, so caring was out the window. We have really been enjoying these little blissful boozy birthday bites. He may not be a sweets fan, but my husband has no problem knocking back a few Skrewball whiskey cookies, neat (seriously, leave them at room temp). The whiskey is by no means overwhelming in flavor; it gives a subtle hint of peanut butter with a deep richness in the chocolate drizzled cookies. Overall, these are very adult-tasting sugar cookies. Not too sweet, nice and soft, and mellow in whiskey flavor. The whiskey glaze obviously provides more of a bite since it contains more alcohol, but again, it isn’t offensively overpowering like most whiskeys. It’s smooth and sweet, much like the birthday boy himself. So here’s to another year around the sun to my wonderful husband. I will toast to that (with a cookie). Because without him, I’d crumble–we’re a batch made in heaven. ‘Til next time, my fellow eaters!

All good things must crumb to an end. Recipe and Instructions
Skrewball whiskey sugar cookies
Adult sugar cookies with a nice bite of peanut butter whiskey and buttery flavor
You can definitely use all purpose flour if not gluten free. You can also substitute alcohol with the flavor of your choosing.
Ingredients
- FOR COOKIES
- 3/4 cup of butter at room temp
- 1 1/2 cups of Lakanto golden monkfruit sweetener
- 2 large eggs at room temp
- 3 TBS Skrewball peanut butter whiskey
- 2 tsp vanilla extract
- 3 1/3 cups gluten free measure-for-measure flour
- 1 tsp baking powder
- 1/2 tsp baking soda
- Choclate melts in lime green, green, and blue
- For glaze, 3 TBS Skrewball whiskey
- 1 cup Lakanto powdered monkfruit
- 3 TBS water
FOR CHOCOLATE DRIZZLE & WHISKEY GLAZE
Directions
- Mix butter and sugar until light and fluffy.
- Add eggs, extract, and whiskey, mixing well.
- Add baking soda, baking powder, and 1/3 of the flour, mixing well.
- Add remaining flour in 1/3s, mixing well.
- Roll dough into a large ball, wrap with cling wrap, and place in fridge for 30 minutes.
- Once chilled, roll out half of the dough with a rolling pin dusted with flour, or cover the ball with more plastic wrap. Roll to about 1/4″-1/2″ thickness.
- Cut out into desired shapes; repeat with remaining dough.
- Place Parchment paper or silicone mats on large baking trays. Put 12 cookies on each tray, placing in the freezer to firm for 10-15 minutes before baking.
- Preheat oven to 350 while dough chills.
- Bake one sheet of cookies at a time to desired doneness. For softer cookies, bake 6-7 minutes. For crunchier cookies, bake 9-10 minutes.
- Let cookies cool on the sheet for 5 minutes before removing to a cooling rack to cool completely.
- Melt chocolate melts according to package directions, place into piping bags, and decorate half the cooled cookies. Top with sprinkles.
- Make the whiskey glaze by combining all ingredients into a medium bowl.
- Dip a cookie face down into the bowl and swirl to coat; flip over and gently tap the cookie on the side of the bowl to remove excess glaze. Top with sprinkles.
- Let all cookies harden for 30 minutes before placing in airtight container to save.
Nutrition
Per Serving: 70 calories per cookie
3 fat/9 carbs/1 protein -
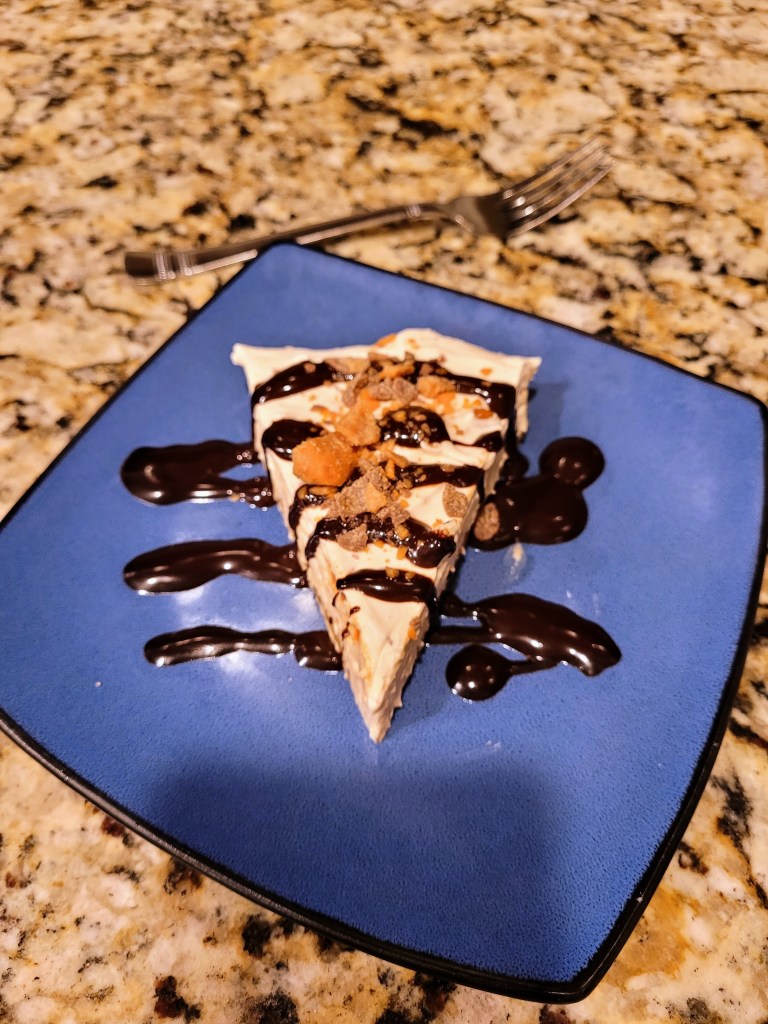
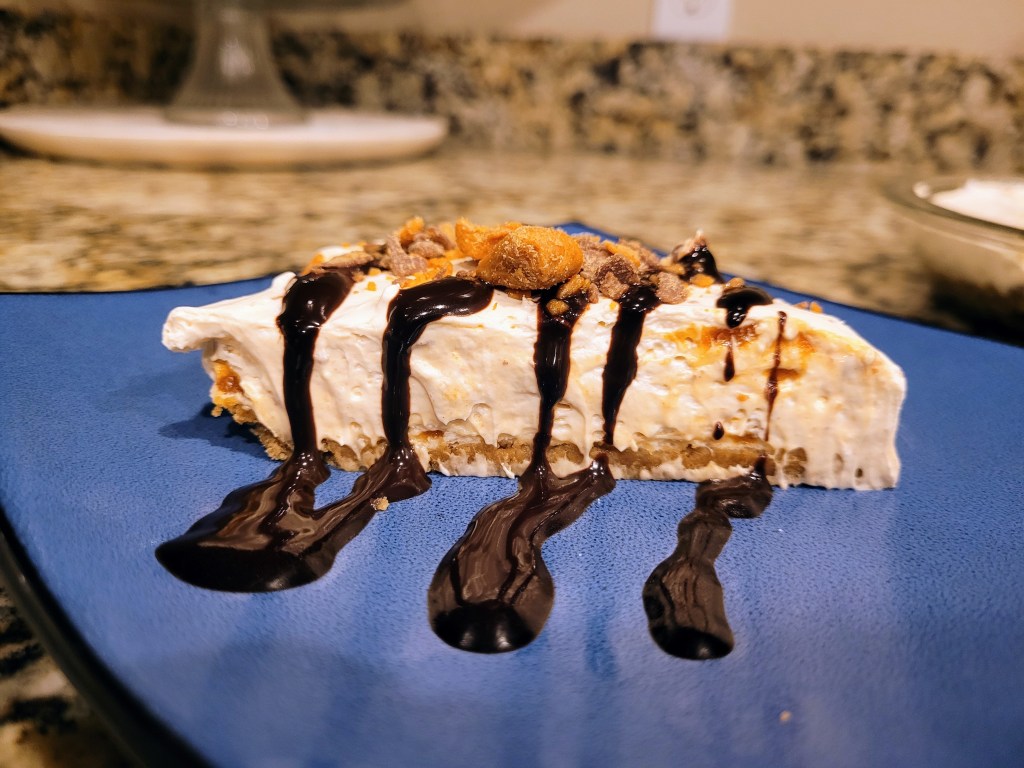
Nobody Better Lay a Finger on My Butterfinger (Pie)
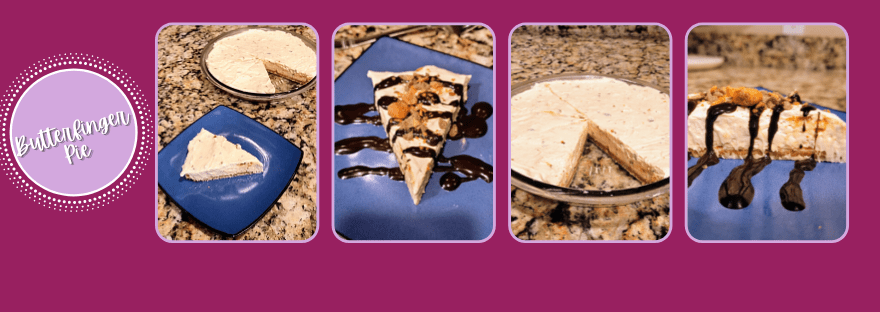
I only have pies for you… Keep your eyes on the pie…because this Butterfinger pie will not last more than 5 minutes in your fridge if left unattended. This is honestly one of my most frequently made recipes because it is not only super easy, but it is also super delicious. Creamy, peanut buttery, and so, so smooth. Like smoother than Morgan Freeman’s voice smooth. It isn’t overwhelmingly sweet, and it’s not terribly high in calories. If you want a no-bake option, you can even use a premade crust, but that will definitely change my macros listed below. Either way, in pie we crust. Sorry, let me get you to the actual recipe. I am occu-pied by all these terrible puns.
You wanna piece of me?! Butterfinger pie
Macro-friendly and gluten free creamy pie with Butterfinger bits
You can use a premade pie crust to make this a no-bake recipe. Macros will be higher, though.
Ingredients
Crust:
-1 cup Kinnikinnick GF graham crumbs
-3 TBS light butter (cold)
-2 TBS Lakanto granular
Pie Filling:
-8 ounces Cool Whip sugar free
-8 ounces 1/3 fat cream cheese at room temp
-1 tsp vanilla -150 grams Butterfinger baking bits
Directions
-Preheat oven to 375F.
-Combine all crust ingredients into a food processor or blender and mix until wet.
-Spray 8″ pie pan with non-stick spray.
-Add in crust (I grease my hands to make this easier).
-Bake for 10 minutes, until crust is golden.
-While baking, combine all filling ingredients into stand mixer, blending well.
-Once crust is completely cool after baking, add in filling.
-Refrigerate for at least 4 hours or overnight before serving.
Nutrition
282 cal/slice
31 carb/16 fat/3 grams protein per sliceYou can also choose to jazz this pie up a bit if you’d like. Top with more Cool Whip, using a 1M or 2D piping tip to create stars, swirls, rosettes, etc. You can also top with additional Butterfinger pieces, chocolate sauce, caramel, or even a peanut butter drizzle. The pie’s the limit, here. Just be sure to keep any leftovers (ha) in the fridge.
Pie puns put me in a good a la mood. What can I say…

Healthy-ish cake, cupcakes, pie, and cheesecake recipes and decorating tips
