-
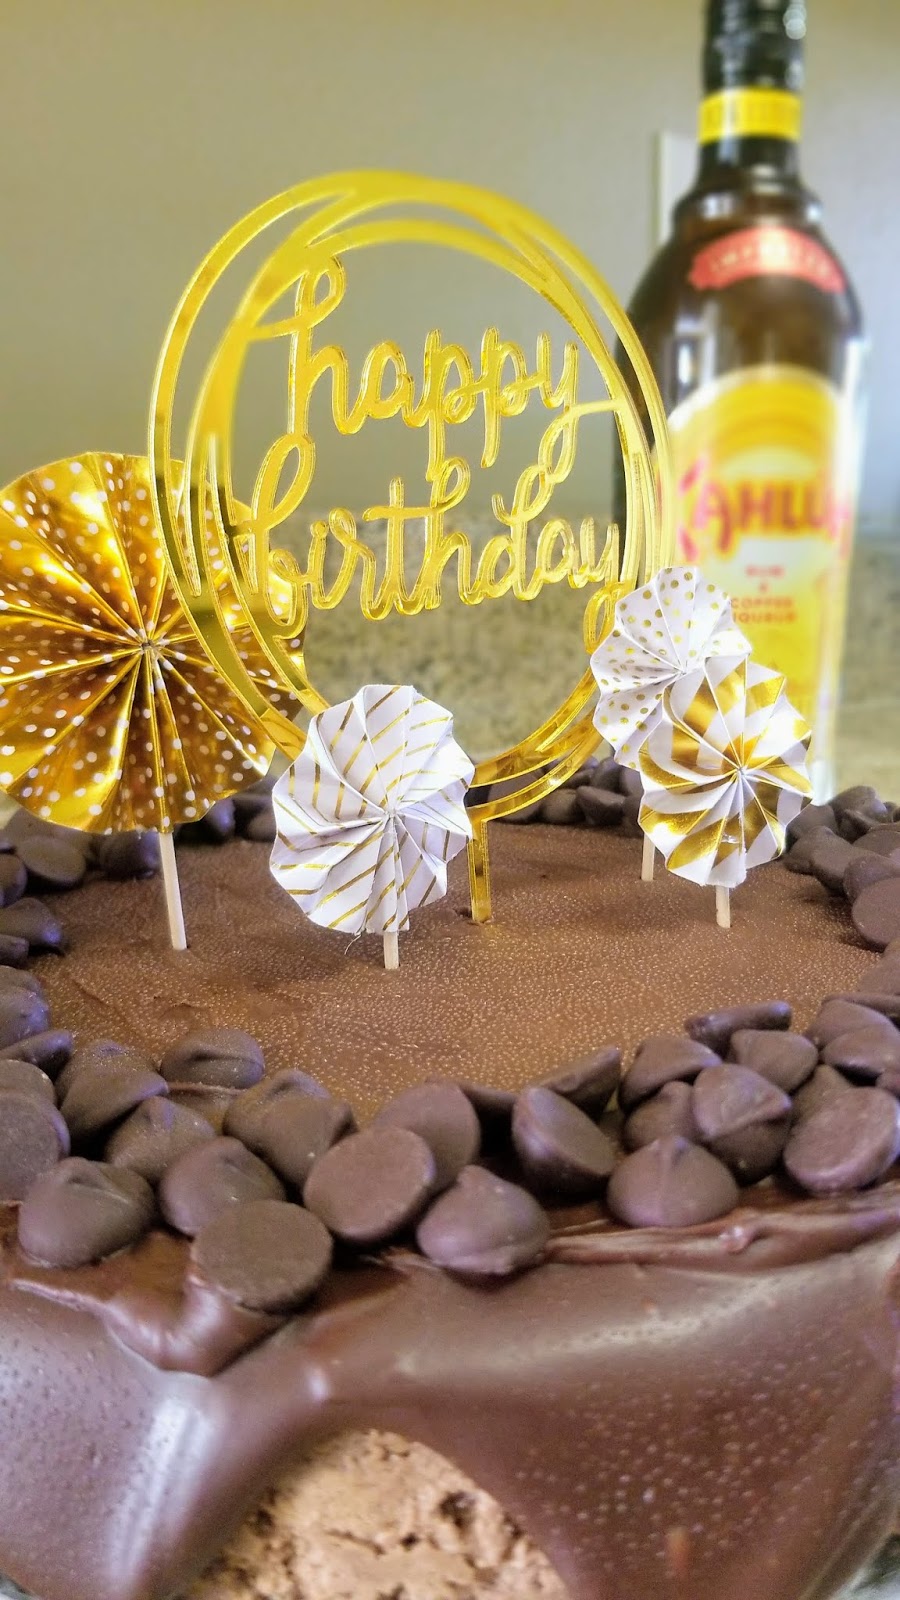
Because It's a Feelings-Eating Weekend
It’s been *a week*… between having to leave the chilly, gorgeous Smoky Mountains of Tennessee to come back to flat, sweaty Florida, to then get home and caught up in the tail end of a police standoff during a dog walk, to then find out my husband’s deployment was slightly extended, to finally watching the Vikings go down in flames yesterday, this was a week made for feelings-eating (did I also mention I turned another year older? C’mon!!). I was looking for one sliver of hope, and it came in the form of a cupcake. A cranberry-filled vanilla cupcake with whipped cream cheese frosting. Because it’s still winter everywhere else, just not here where it’s 75 degrees.

Finally, a winter scene in Florida. I had a lot of feelings to eat, so these had to be low in calories and sugar. At only 200 calories a cupcake, I can be seen with a cupcake in each hand quite frequently! The cranberry filling is so nice and tart, the vanilla cupcakes are a wonderfully sweet offset to this, and I would be willing to fight a bear to get more of that whipped cream cheese frosting. I stumbled upon this frosting recipe on a Keto website, and since I’m pretty much sugar-free as can be (but you’ll have to take carbs out my cold dead hands), I decided it was worth a shot. I know we’re only 12 days into the new year, but this frosting recipe is probably my greatest discovery of 2020. It is so airy and light since it is whipped, but still tangy thanks to the cream cheese and has a nice finish with a hint of sweetness thanks to Swerve. I am going to try it with various extracts and cocoas, and well, boozes, because, why not? It’s the 2020’s, not the 1920’s, so prohibition need not apply.

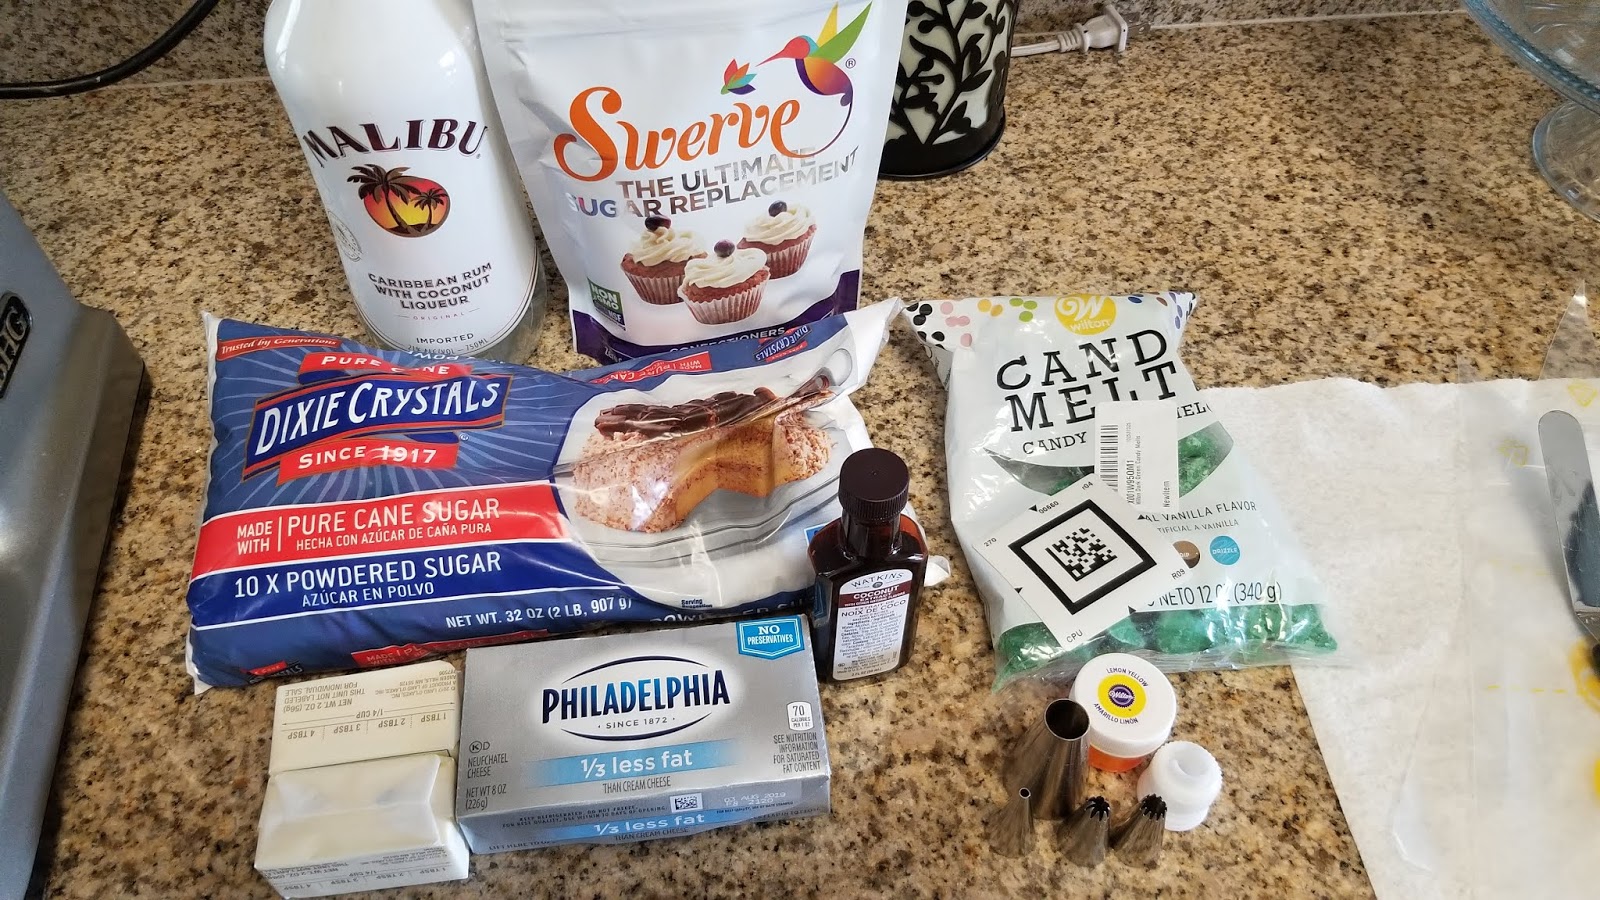
Easy ingredients to boot! I knew it was just me, and me with a full two-dozen cupcakes is a recipe for disaster, so I made only 12 cupcakes for this recipe. If you want a full 24 cupcakes, simply double the ingredients. To make a dozen, you need:
- 1/2 box of white/vanilla cake mix
- 2 egg whites
- 1/4 cup of unsweetened applesauce
- 1/2 cup + 2 TBS skim milk
Preheat your oven to 350 and line a muffin tin with cupcake liners. Mix all ingredients on low for 30 seconds, then turn to medium-high for 2 minutes. Use a cookie scoop to put 1.5 scoops of batter into each cupcake liner. Bake at 350 for 18 minutes. Let cupcakes cool in the pan on a cooling rack for 10 minutes before removing from the pan to finish cooling completely.

Soooo pretty…found those red foil liners on Amazon, so I now have a lifetime supply of 500 liners. 
The things I had to do to find cranberries after December. So, in hindsight, I SHOULD have made these in November when you can’t even walk into any grocery store without getting hit in the face by a ton of cranberries. I had to go to several stores before I found cranberries, albeit frozen ones, to make this recipe possible. WORTH IT. The filling is insanely good. To make, get:- 1/4 cup Swerve granular (if you want a sweeter and less tart filling, add a tablespoon or two more)
- 1/4 cup water
- 1 cup of frozen cranberries
- 1/2 tsp vanilla
- 1 tsp corn starch
- 1 tsp water
Dump the 1/4 cup of water, Swerve, vanilla, and cranberries into a small pan on medium-high heat. Stir everything together frequently and bring to a low boil. Cook for 3 minutes until the cranberries start to get mushy as you stir. Then in a small bowl, mix the final teaspoon of water and cornstarch together before pouring into the cranberry mix. Stir until everything thickens, another minute or so. Take this off heat and let cool fully before using.
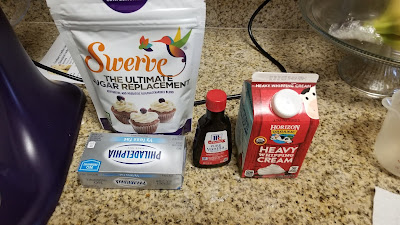
Heavy whipping cream is the MVP of this recipe. While cupcakes and cranberry filling finish cooling, make your frosting. You need:
- 4 oz reduced fat cream cheese, softened
- 1/2 cup of Swerve confectioners
- 1 tsp vanilla
- 1 1/4 cup + 2 TBS heavy whipping cream, COLD
With a paddle attachment, beat the cream cheese until fluffy, 2-3 minutes. Then add in the sugar and extract, blending well. Scrape the bowl and change to a whisk attachment. With the blender on low, VERY slowly pour in the COLD heavy whipping cream. Once all the cream is incorporated, turn the mixer to high and whip the frosting for 2-3 minutes until stiff peaks form. Once stiff peaks form STOP mixing so you don’t deflate the frosting. If you wanted to add color, fold it in by hand. Keep this frosting cold until you’re ready to pipe. If you’re worried about things being cold enough for the heavy whipping cream to work, chill your mixing bowl in the freezer before you get started on the frosting.

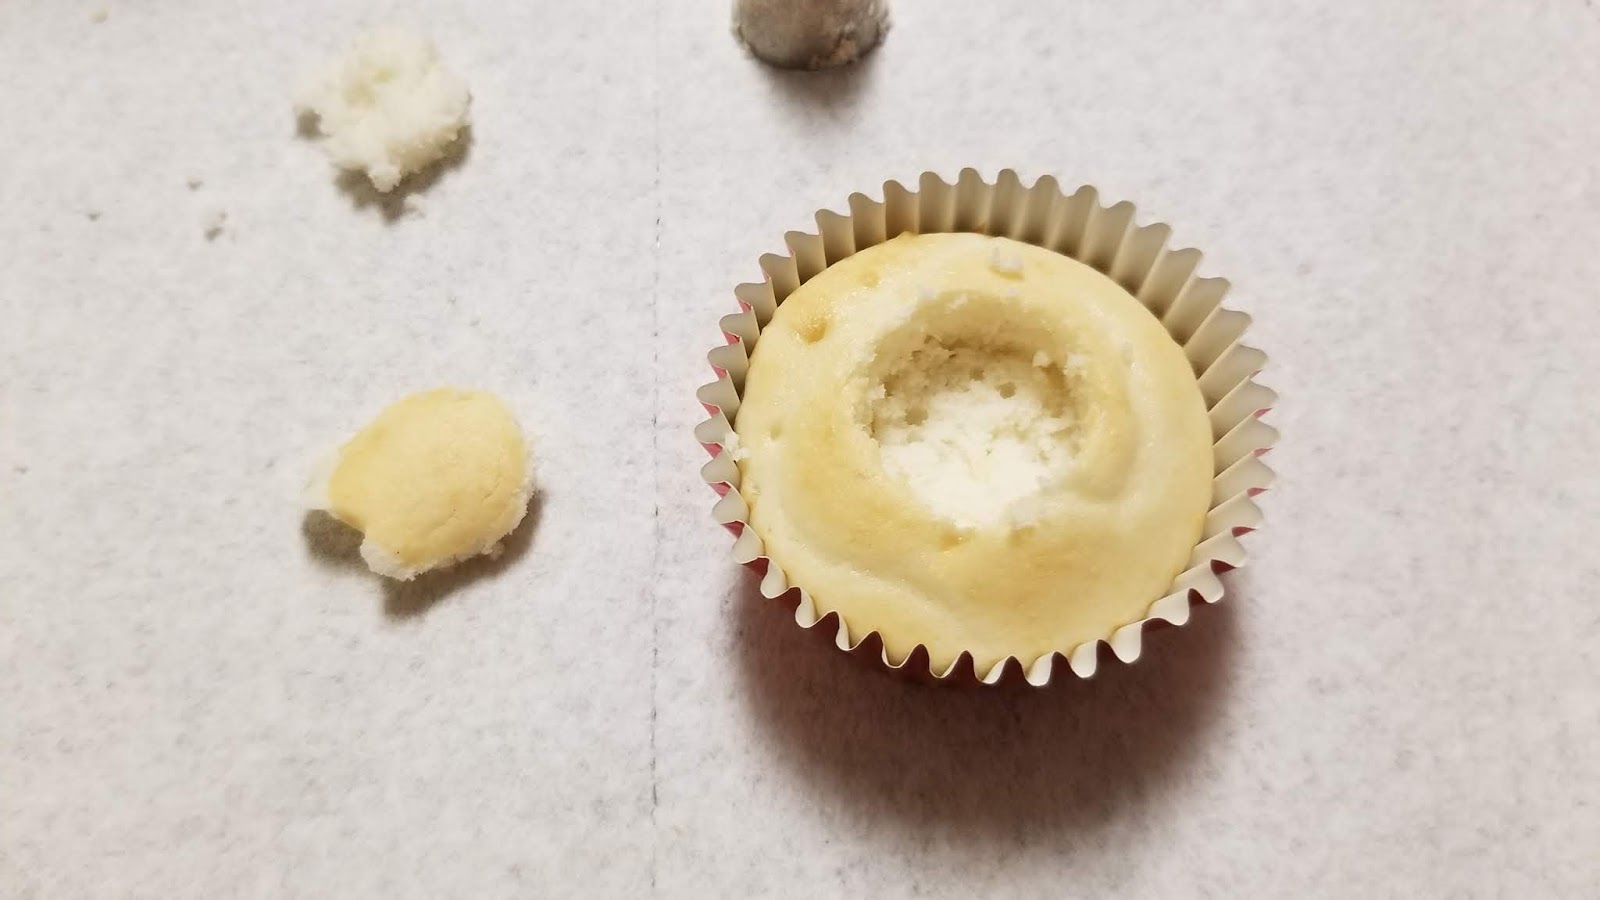
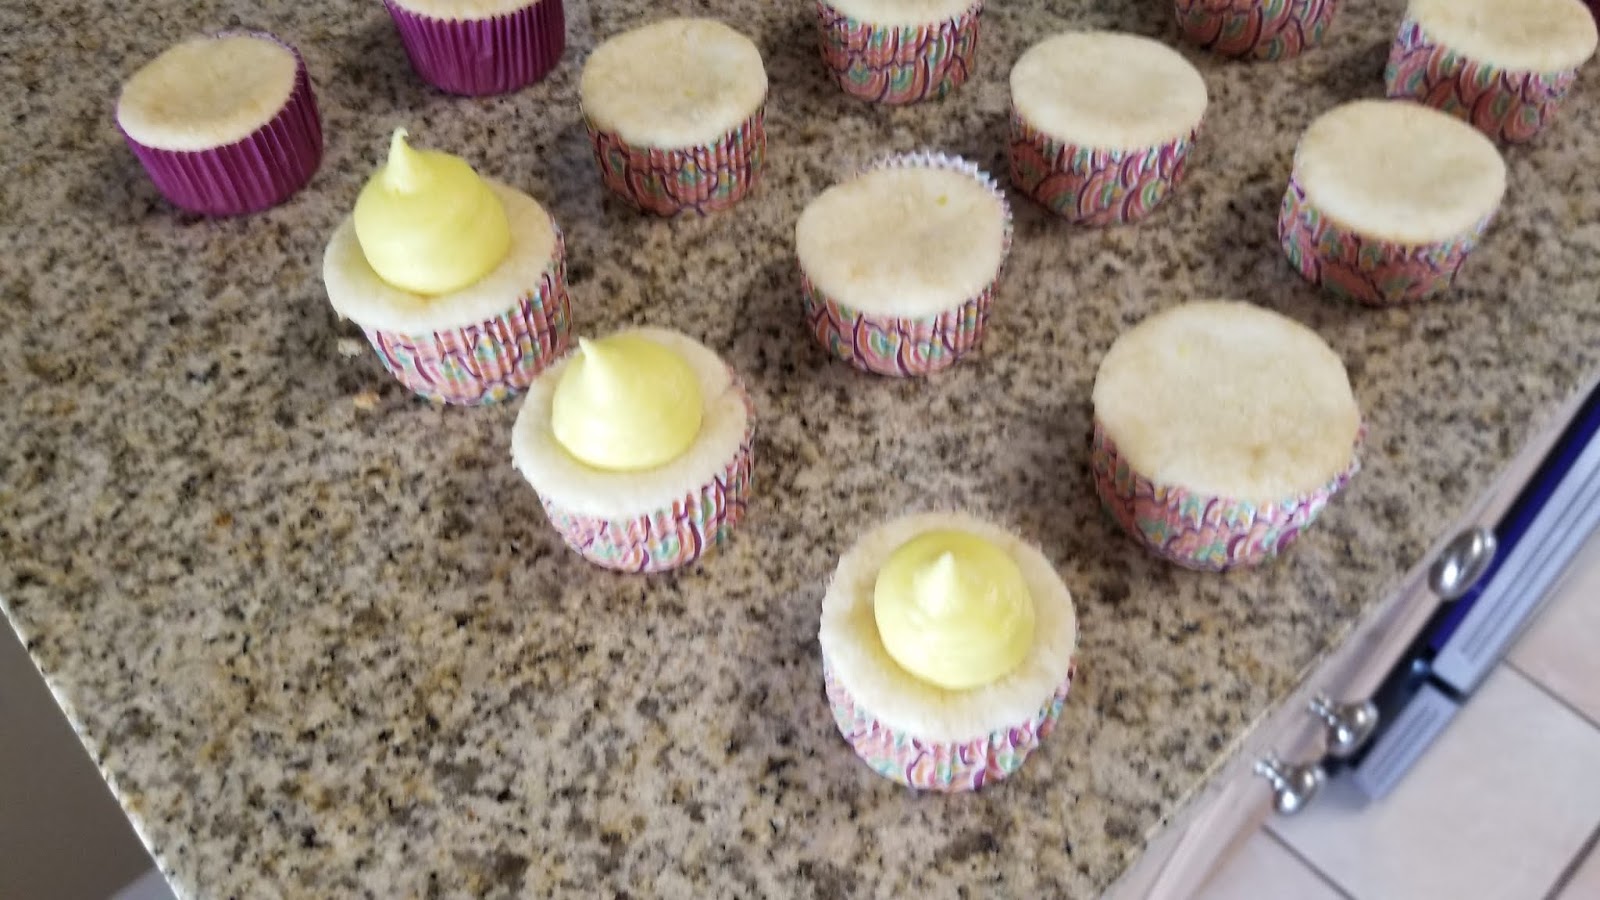
Now, back to those beautiful blonde cupcakes. When totally cooled, take a large piping tip (I used a 2D), and gently wiggle it into the top of each cupcake until the tip is about half into the cake, then gently take the piping tip out of the cupcake.

I hate destroying something so pretty. But it’s for a good, tasty cause! Remove the cupcake filling from the center of the piping tip and wipe any crumbs from the tip’s base. Save a bit of the cupcake filling (eat the rest, obviously).
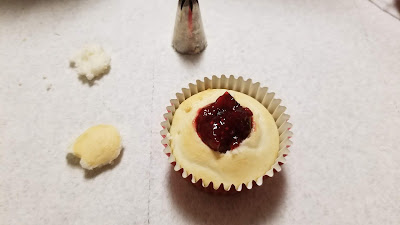
Mmm, jelly-filled like a donut. Take a heaping teaspoon of the cooled cranberry filling and place into the hole. You will have a little filling leftover, and I can tell you it goes excellently on an English muffin at breakfast (I can’t live life without carbs, sorry, Keto people. Carbs are joy.).
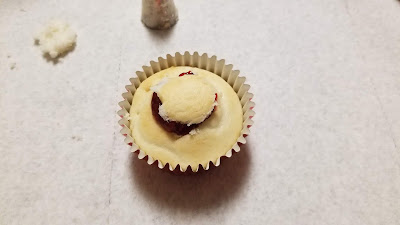
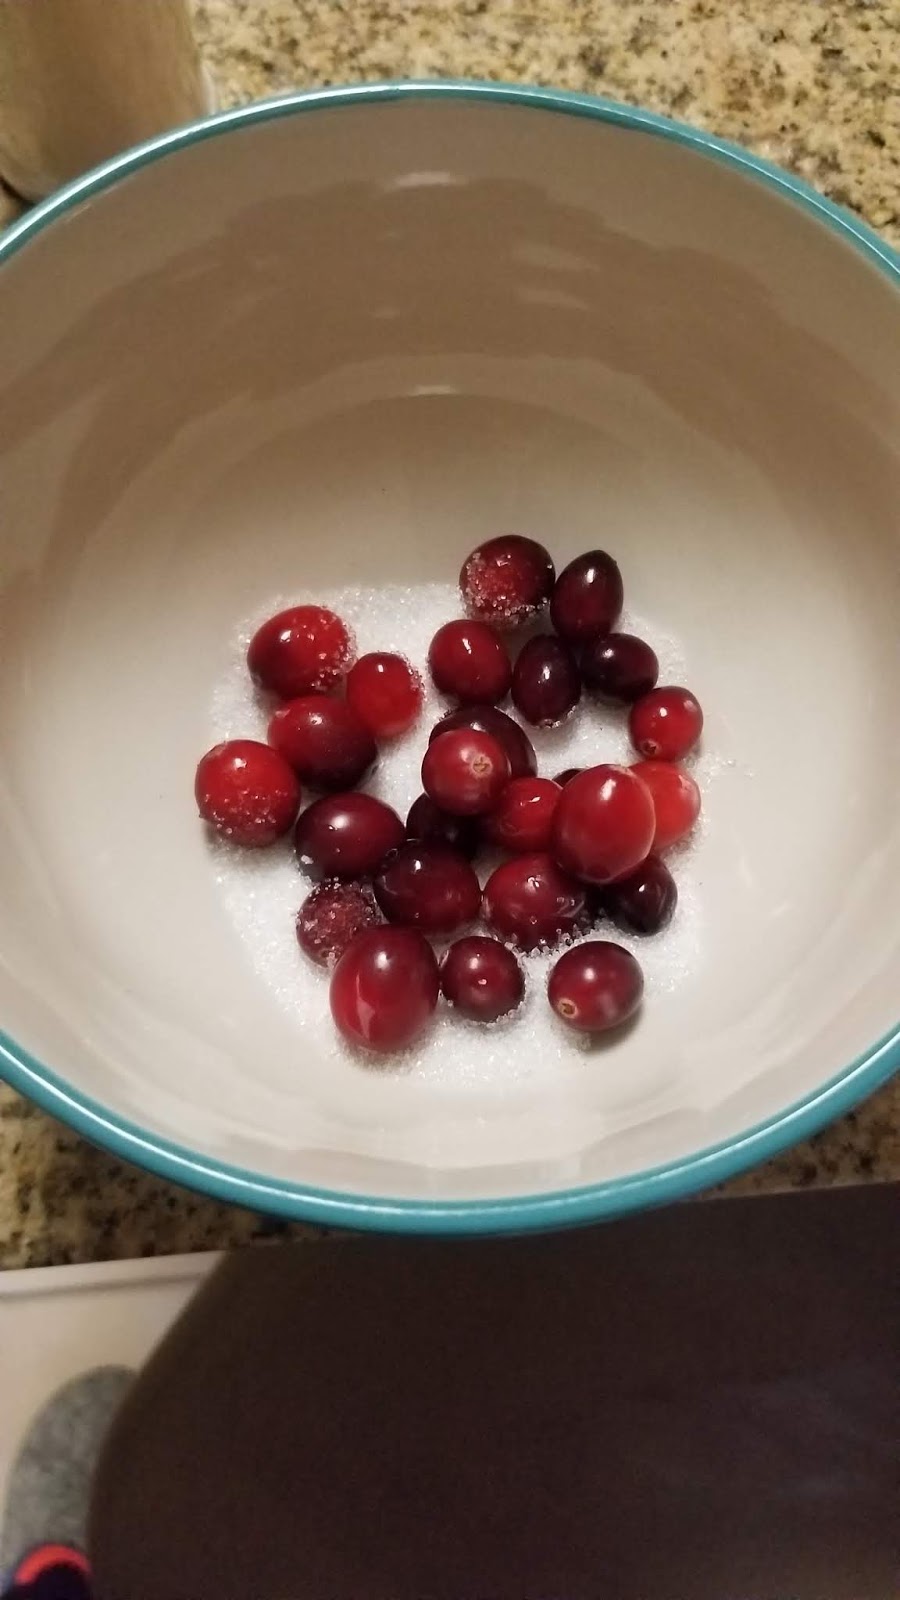
And necessary to complete our baking! Take a tiny bit of leftover cupcake scrap and place on top of the filling to keep things anchored in and to keep any bleeds in the frosting layer. Repeat for all remaining cupcakes, then grab a bowl, some sanding or granular sugar, and a handful of frozen cranberries. I put 36 frozen cranberries on a paper towel while I piped all my frosting. By the time I was finished piping, they had thawed out a bit, leaving water and some of their juices on the outside of the berries.

So I dumped these wet cranberries into a bowl with sanding sugar. 
And I rolled them around like crazy until coated. Now, let me backtrack a moment for the piping instructions!
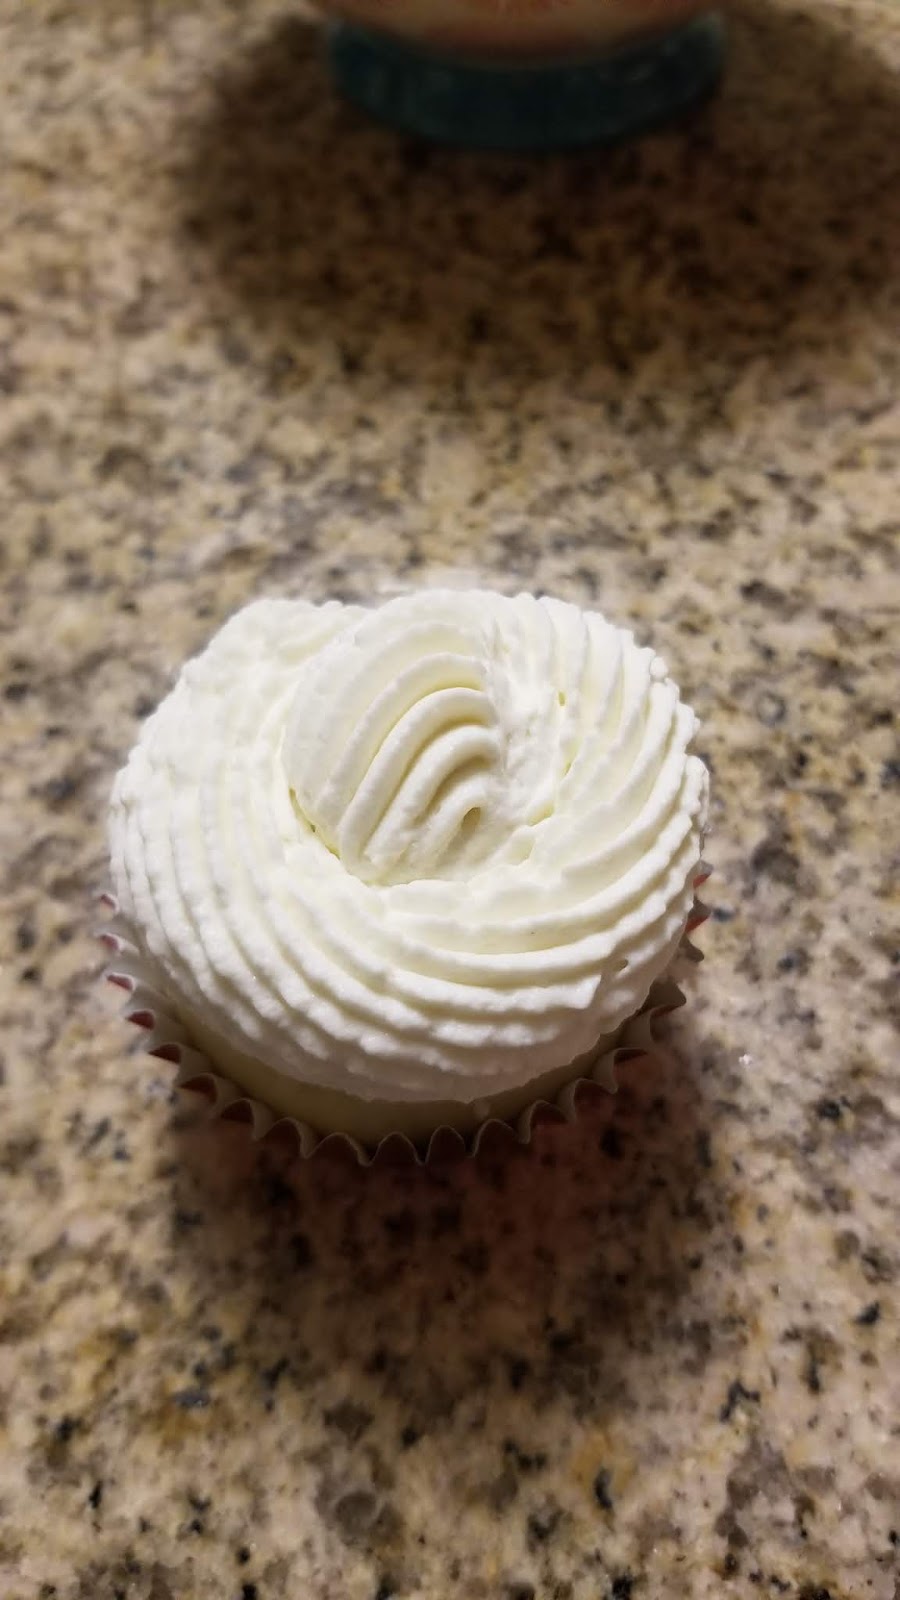
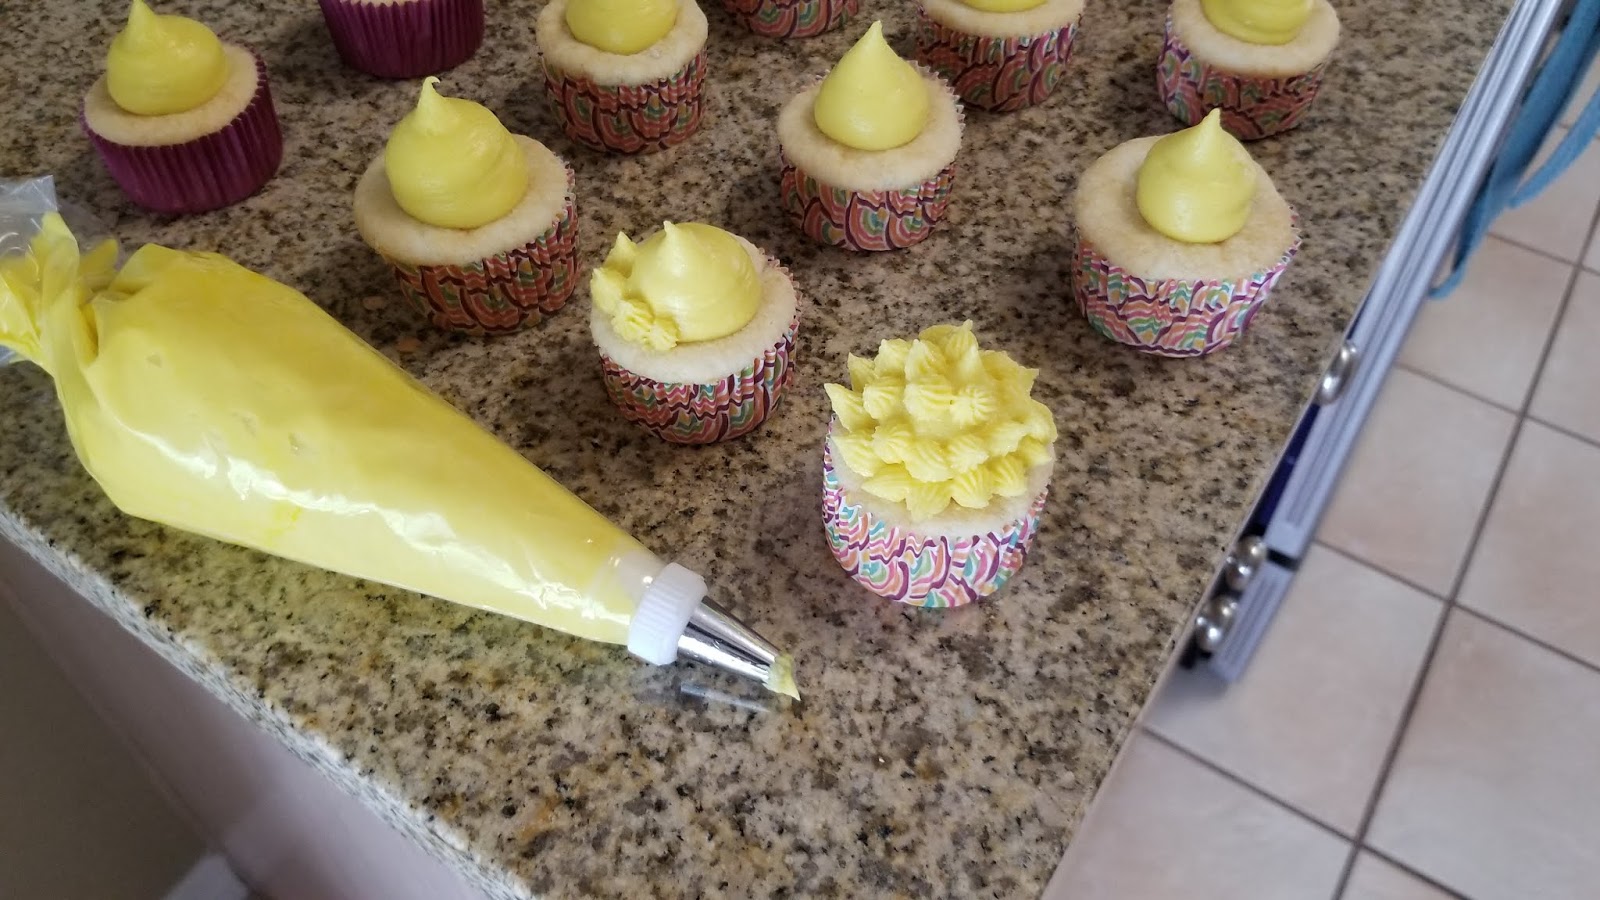
Swirly! I used a large French tip, the Ateco #869, to make these pretty swirls. I loaded up a piping bag with HALF the cold whipped cream cheese frosting, keeping the other half in the fridge while I worked. I simply started in the middle of the cupcake and piped clockwise down and around (as a lefty, I do everything backwards…righties might find up and around counterclockwise easier).

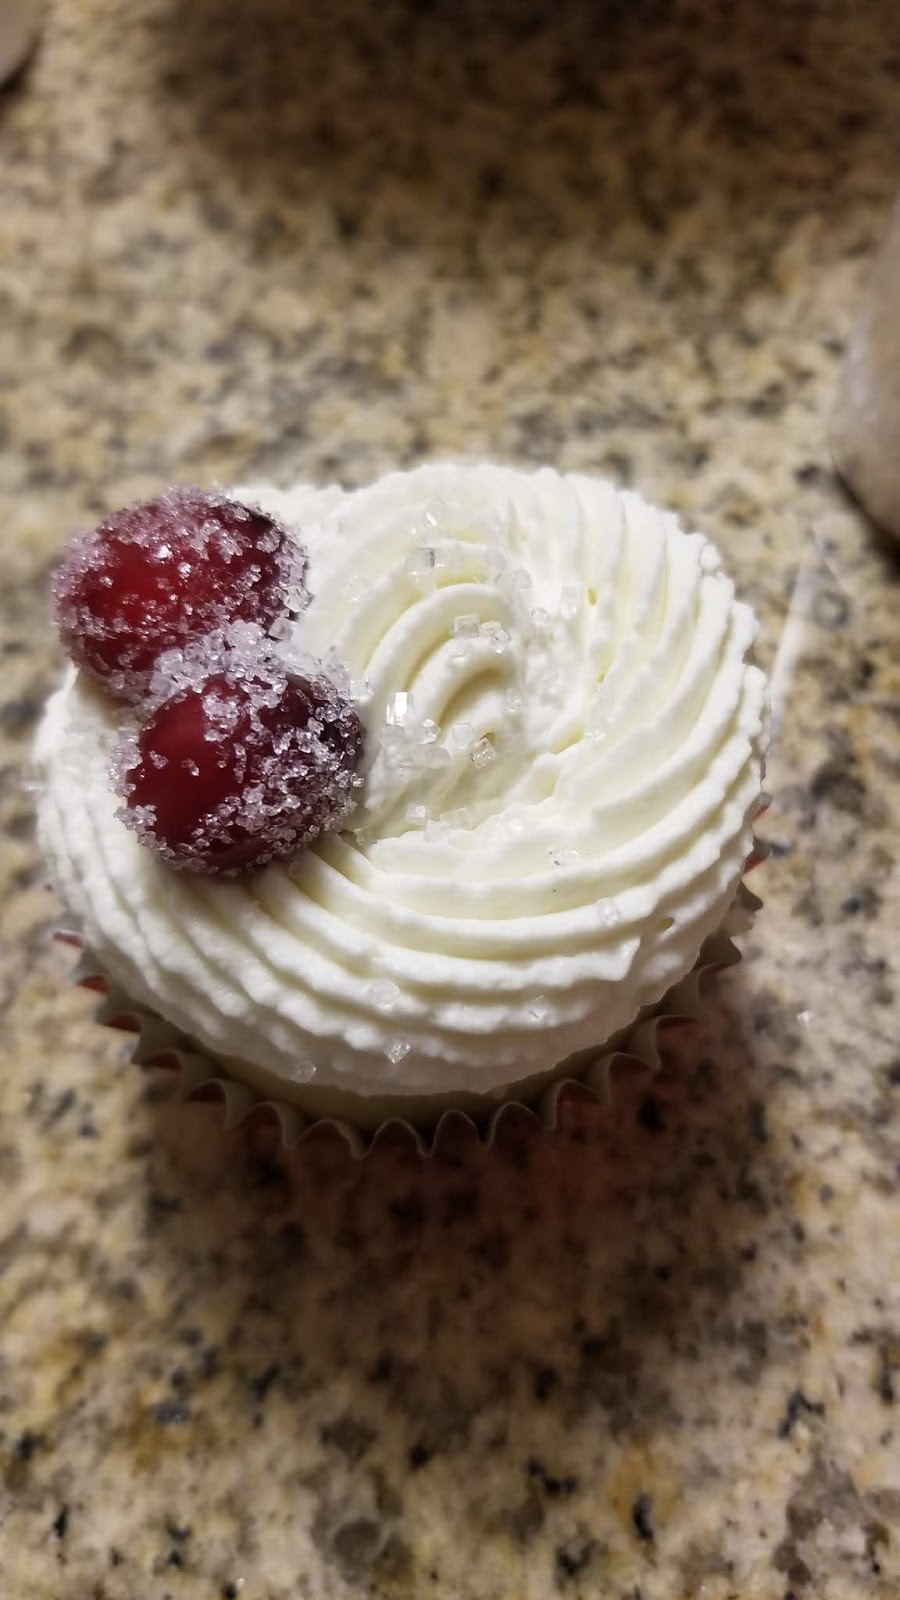
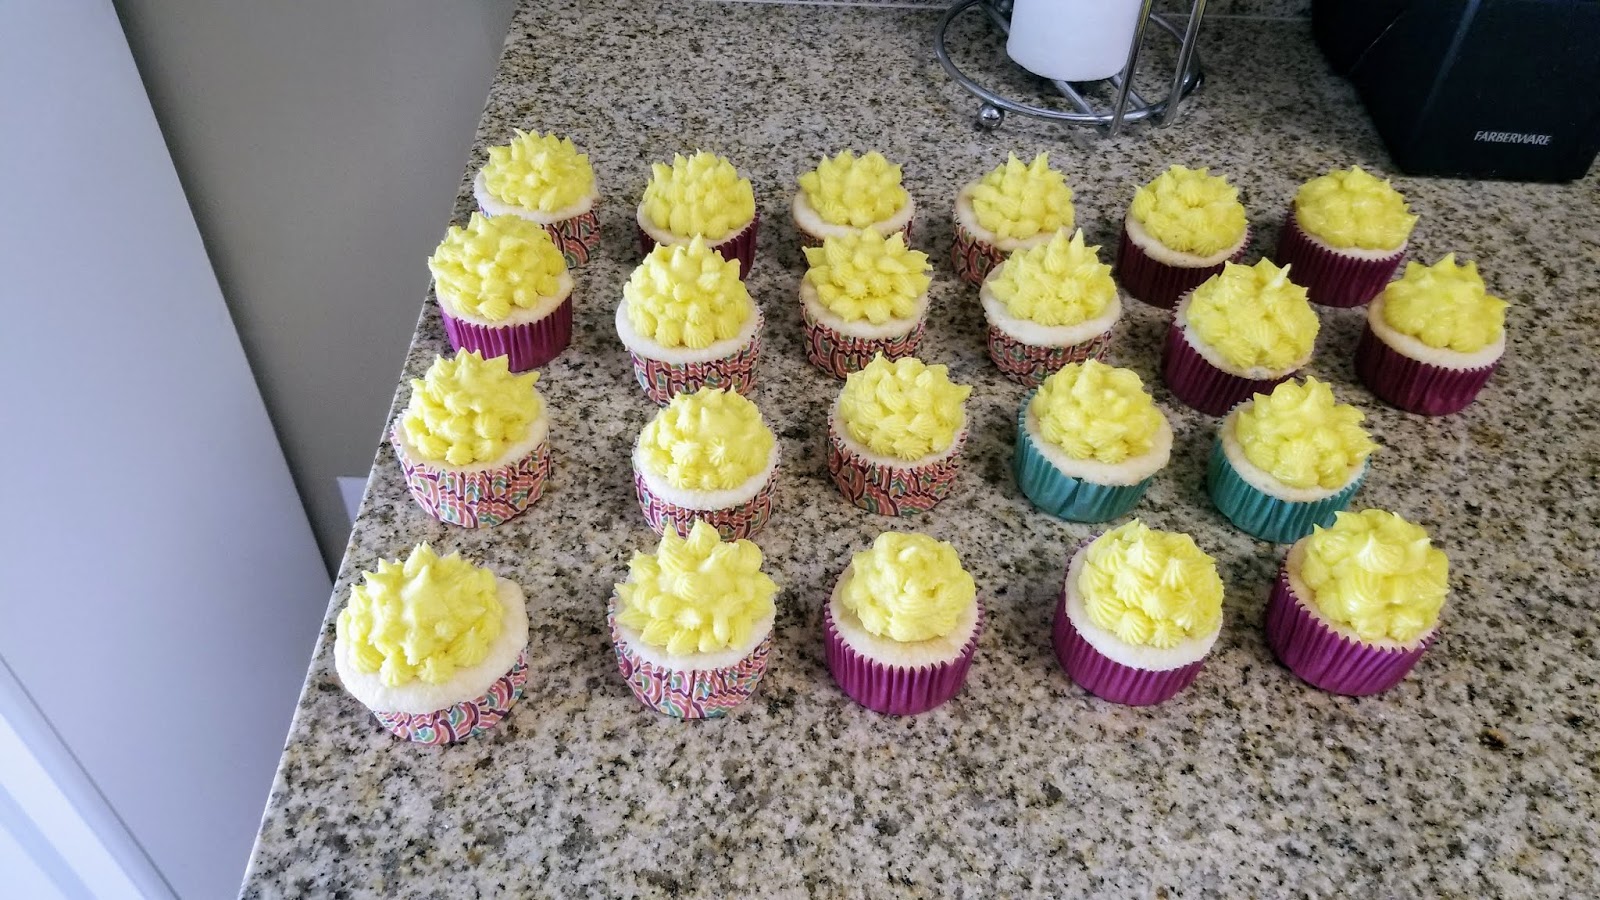
Then I gently put a few cranberries on top. I had a ton of cranberries though, so I decided to use the rule of three here, and I think these turned out absolutely darling:
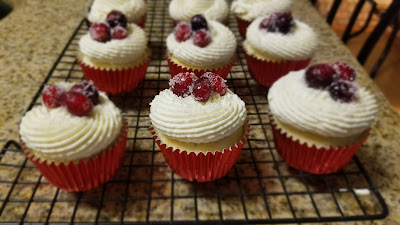
So, so wintery. Sigh. While we were going through a short monsoon season yesterday that left me with VERY large hair (thanks, 90% humidity), I at least had these cupcakes to give me the winter vibes I so desperately desire.

Inside AND out. The filling takes these to the next level. And while, yes, they are more appropriate for a Thanksgiving or Christmas dessert, I am a grown woman, and I bake what I want when I want. Sort of. If I REALLY baked whatever I want whenever I wanted, you’d be getting a spooky Halloween dessert 12 months out of the year. So at least these are seasonally appropriate? And they’re so delicious, I almost forget about the intense level of sadness I feel today as a Minnesota Vikings fan. Excellent job covering the depression, cupcakes! I think it’s the whipped cream cheese frosting. It is so incredibly delicious that it gives me reason to believe in miracles, like making it to a Super Bowl once in my lifetime. As Marge Simpson once said, “My greatest sin is that I dare to hope,” and I feel that in my Vikings-loving soul.

The best therapy sessions should always end in cupcakes. -
Happy Little Trees
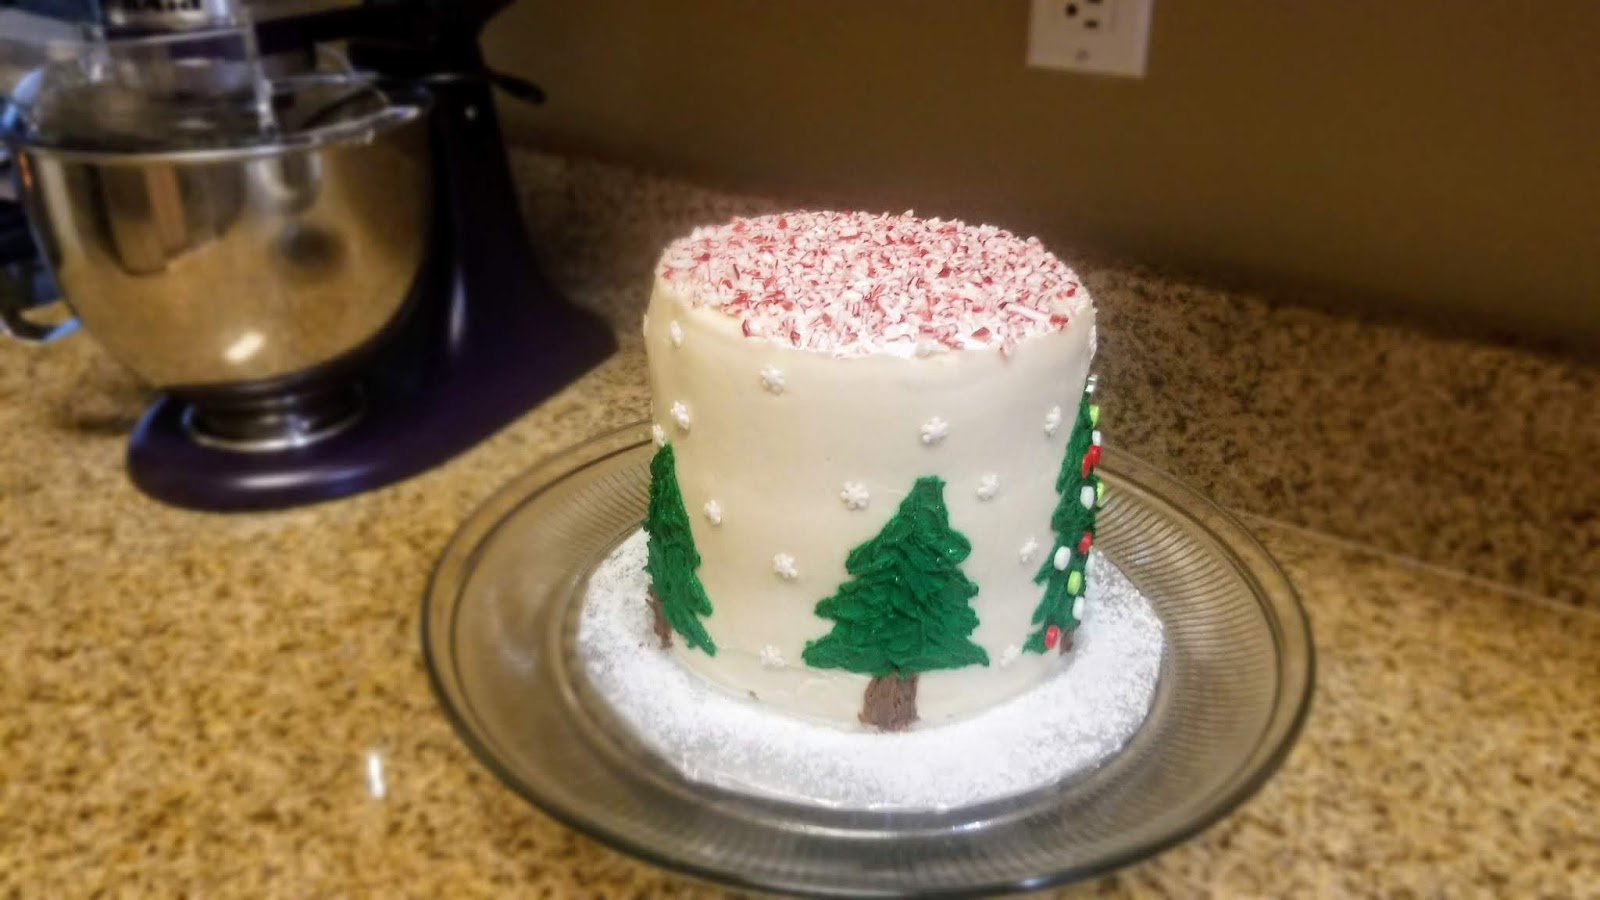
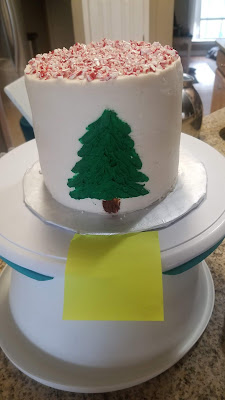
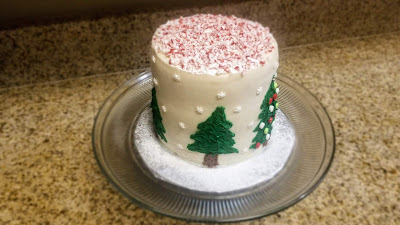
Due to the Black Friday sales gods, my husband was able to gift me a gorgeous matte purple KitchenAid mixer without selling any organs. I was beyond thrilled to test it out this weekend (I logged about 12 hours on the mixer alone yesterday for holiday baking). How was it compared to my old Walmart mixer, you may or may not have asked? Let me explain it to you like this: it’s like that moment when you go to the optometrist and put on glasses for the first time and have that, “Wait, so THIS is what sight is supposed to be like?” moment. Clarity mixed with magic. I didn’t realize it wasn’t supposed to sound like a freight train was coming through my house when the mixer was on, or that I shouldn’t have to hand mix a bit after I turn off the mixer. I’m so happy I could cry. Now, if only I could get into the holiday spirit. Tis the season to be sweaty down here in Florida. I put up Christmas lights last week in shorts and a tank top and still came in drenched in sweat. I felt more like a margarita than an eggnog for sure. I was feeling extra Grinchy since I have jury duty tomorrow, so I thought about scrapping baking altogether, but like any adult around the holidays, I forced myself to pretend to enjoy Christmas until I actually did…all thanks to this classic hand-painted Christmas tree snowscape cake.

Well now that’s just adorable. This cute little cake that in no way represents winter in Florida is a vanilla peppermint cake with peppermint buttercream. It tastes like a candy cane, and it’s absolutely perfect. I haven’t done too much baking since D deployed, and if you’re wondering whether one grown woman can eat an entire cake by herself, I can assure you with no one around to judge me, I eat breakfast cake regularly. Needless to say, this had to be a low-cal bake since I take a slice out of it pretty much every time I walk by the fridge. This recipe will only set you back 289 calories for 12 slices.

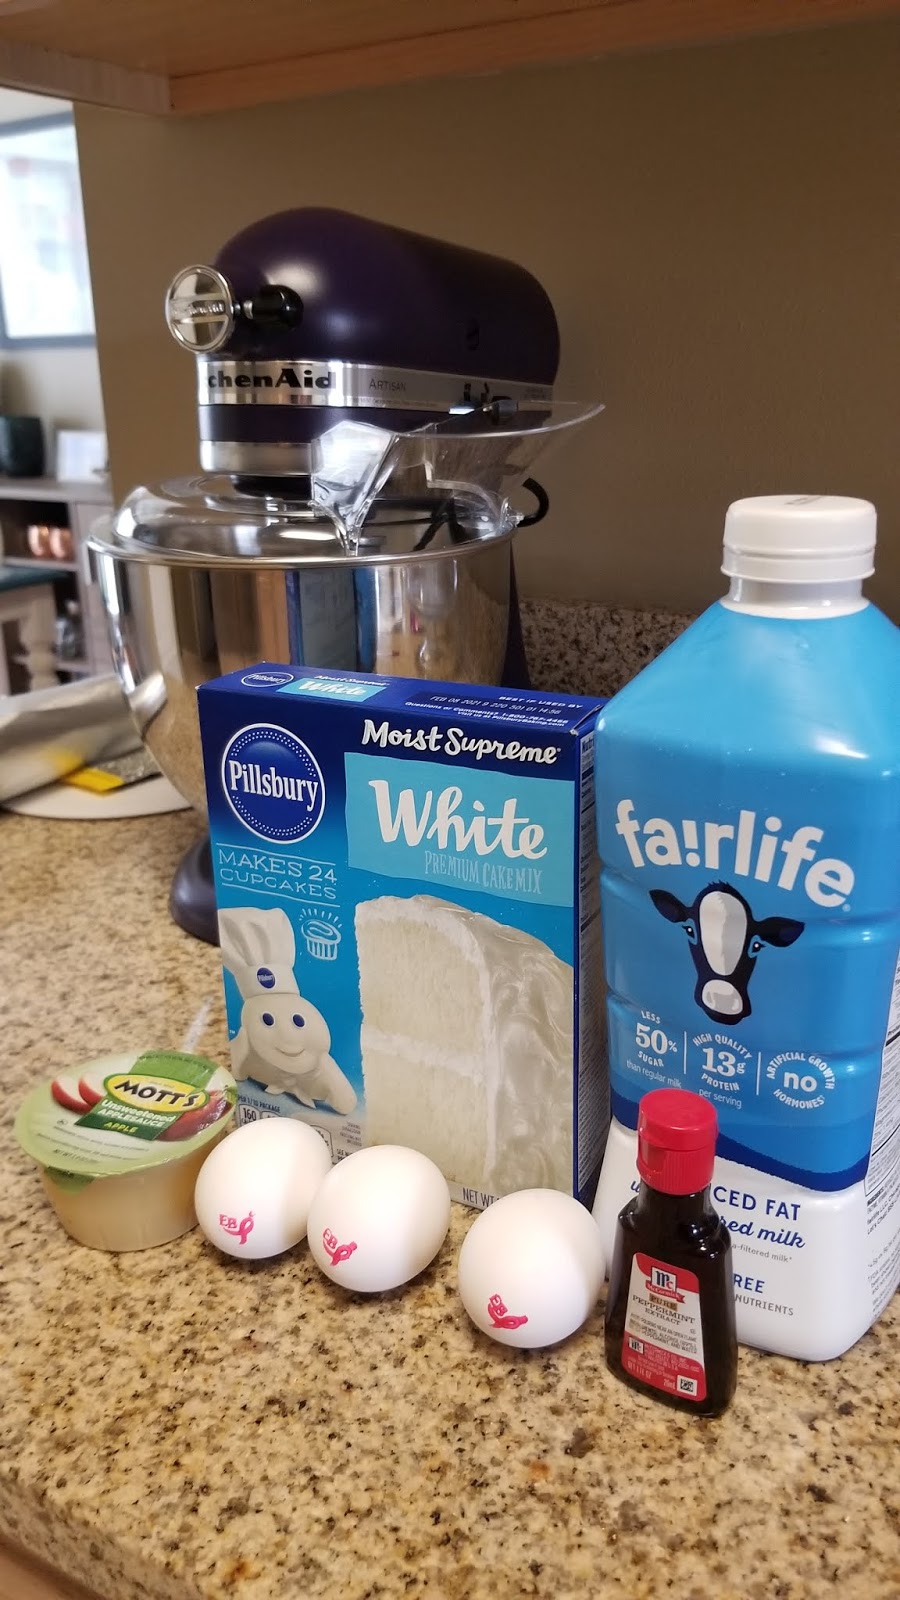
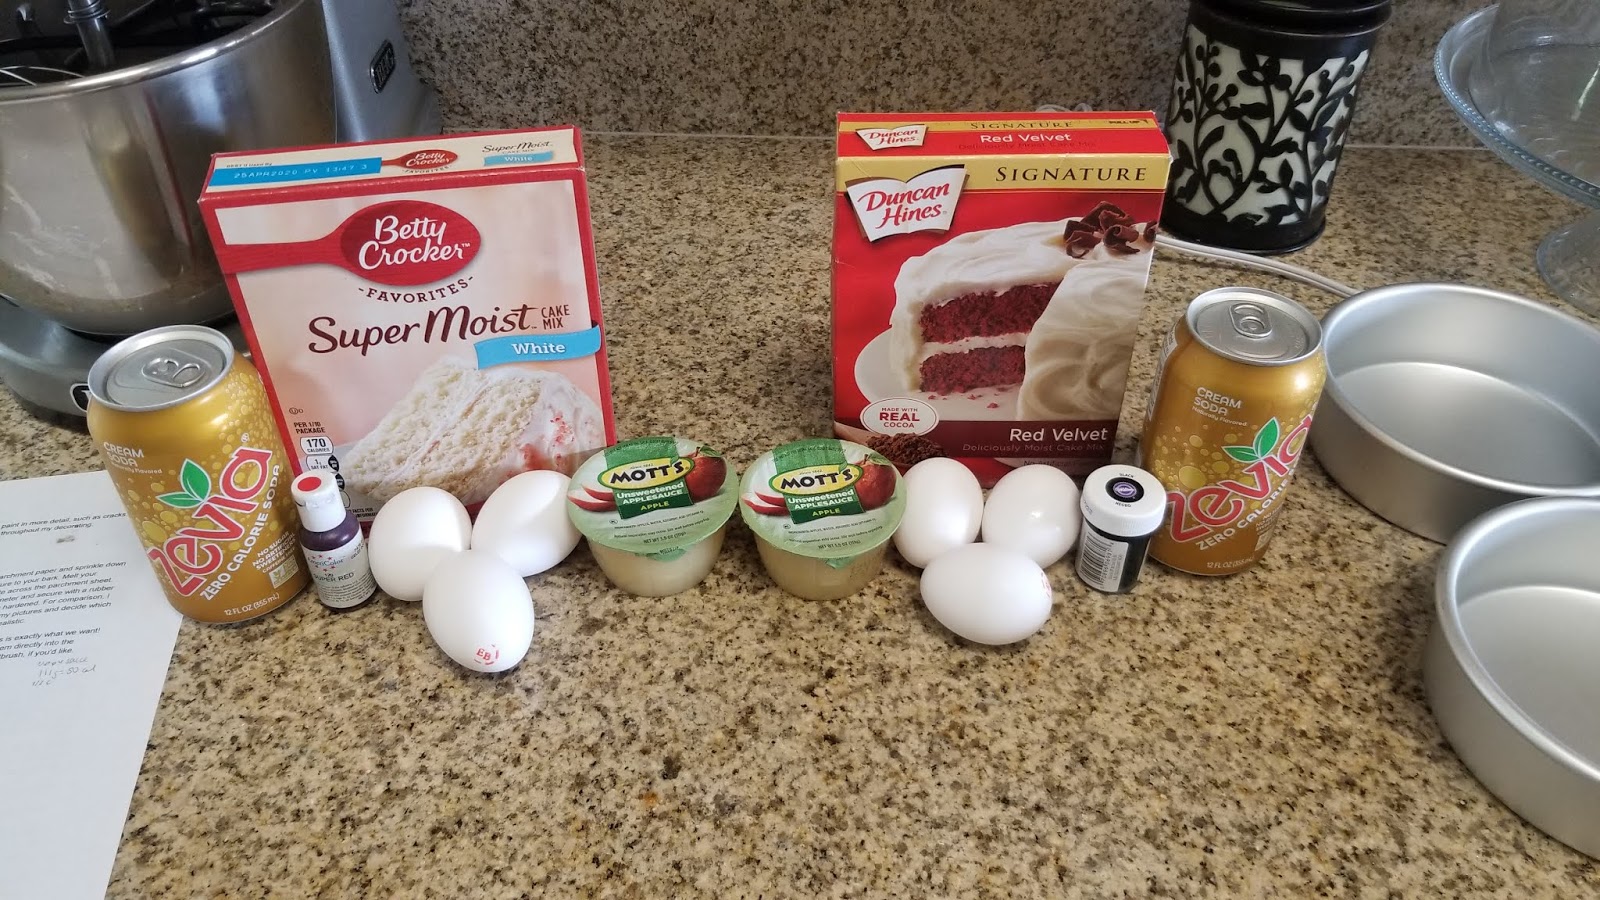
Oh hey, super sexy KitchenAid mixer. I see you. It’s a truly simple recipe, and the cakes themselves can be made and frosted in like three hours tops including bake time, even with the hand-painted treescape. To make, you need:
- White cake mix
- 4 egg whites (I am missing an egg in the photo)
- 1/2 cup unsweetened applesauce
- 1 cup of skim milk
- 1/4 cup of water (or you can use more milk)
- 1 tsp of peppermint extract (trust me, a little goes a long way)
Preheat the oven to 350 and prepare three 6-inch baking pans with cooking spray and bake even strips. Mix all the ingredients above in a stand mixer (I am sorry for you if you don’t have a KitchenAid because they are glorious) for 2 minutes on medium high. Evenly pour batter into your prepared pans. I had 275 grams of batter in each pan. Bake for 30 minutes or until the rounds pass the toothpick test. Let cool in the pan for 10 minutes then turnout onto a cooling rack to fully cool. Be sure you level your cakes before frosting so everything is nice and flat. Bonus, you can eat the cake scraps to tide you over! Small Christmas miracles!

I mean, that mixer looks good from every angle. The frosting is also very quick to make and surprisingly, booze free. But go ahead and replace the milk with peppermint schnapps if you can’t survive the holidays without alcohol in some form. No one will blame you. For the frosting:
- 4 cups of Swerve confectioner’s
- 1 cup of butter at room temp
- 3 TBS skim milk or your peppermint booze of choice
- 1 tsp peppermint extract (omit if using peppermint booze)
Ready? Mix it all together until smooth in your awesome, super quiet, luxurious KitchenAid (I am not being paid by the company to say this, but I probably should be). Now, get those painting tools ready so you can get your inner Bob Ross on and paint tons of happy little trees.

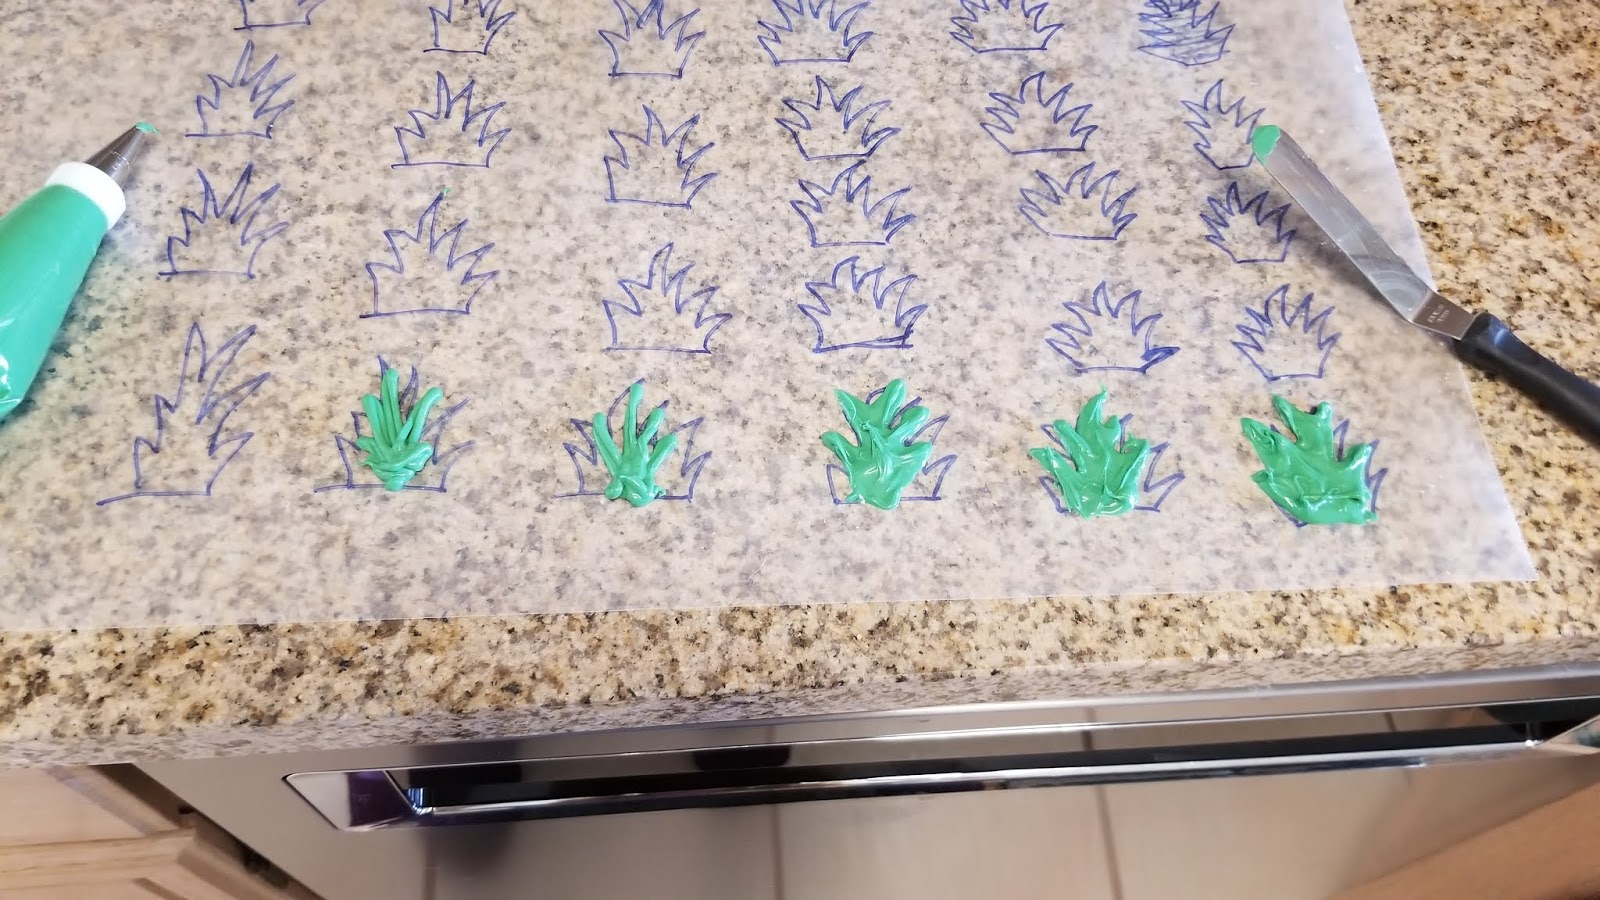
Don’t forget the sprinkles. I have a feeling Mr. Ross also loved a good sprinkle. I picked up star sprinkles, red, white, and green circle sprinkles, and snowflake sprinkles from A.C. Moore because it’s going out of business so I figured everything would be on sale. Everything was on sale. Except for the baking tools and accessories. This is my level of luck or lack there of (I am so getting picked for jury duty tomorrow because of it). I also used a Kelly green and a brown gel dye (I didn’t use the red, but you can if you want to pipe a border…I was unsure if I had enough frosting to do so). Not pictured but definitely needed are crushed candy canes or peppermint crunch. Last but not least, you will need palette knives to paint.
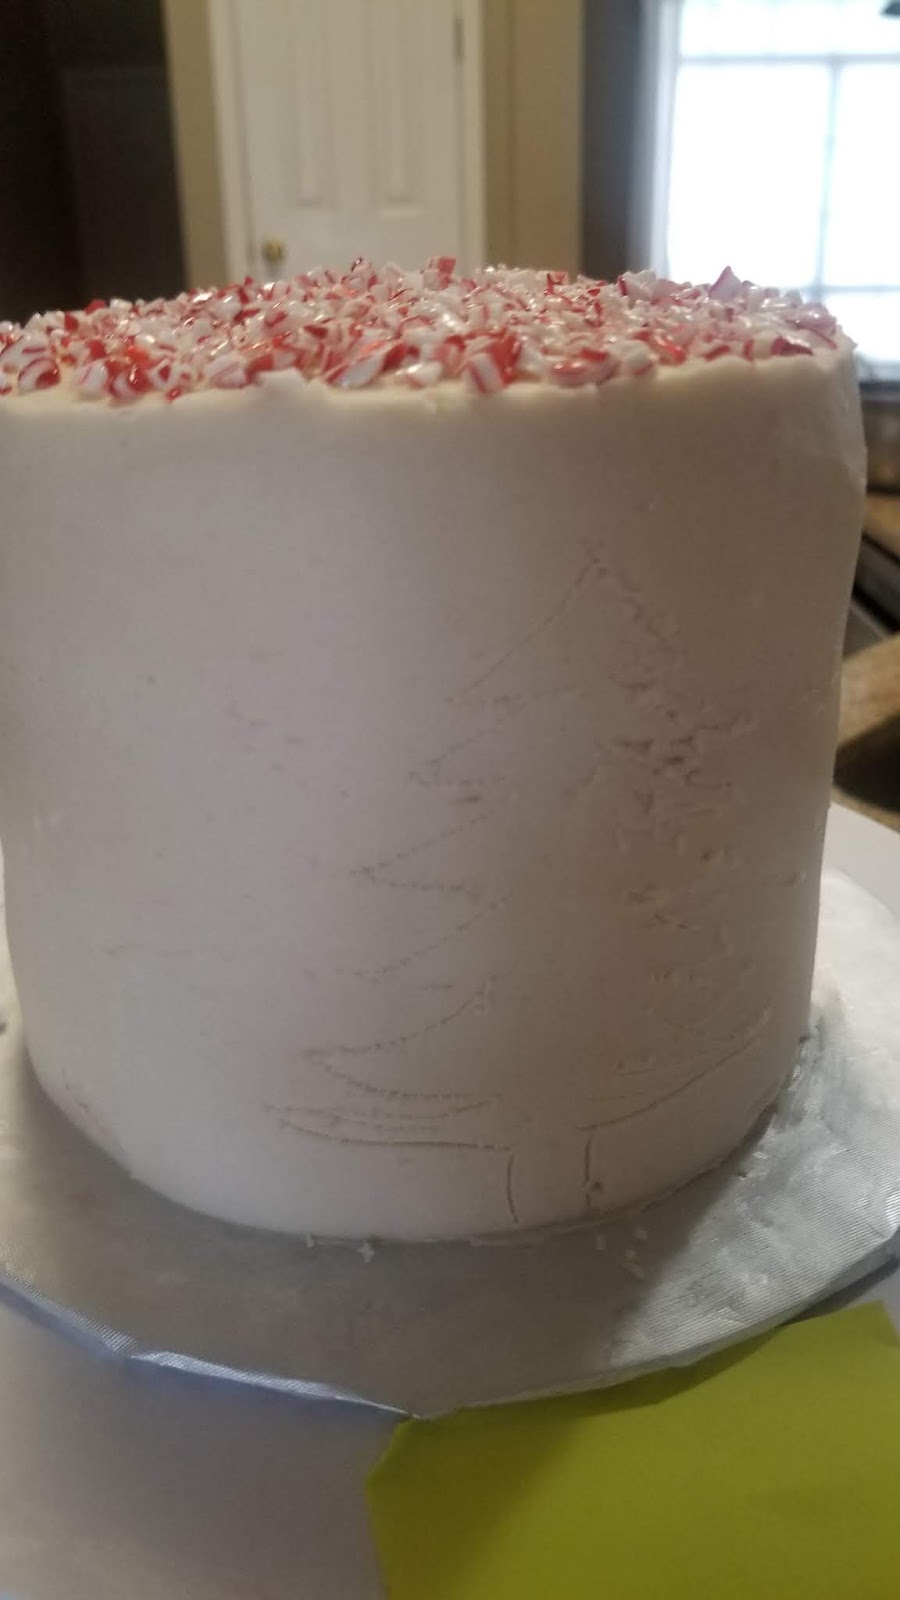
I always put a hefty amount of frosting into a large bag with a #12 round tip, pictured on the right above, and pipe rounds of frosting in between my layers while assembling my cakes. I didn’t take any photos of this since I was delirious on hour 8 of baking, and because I am pretty sure if you’re here, you know how to stack a cake. I did, however, take pictures of the fully assembled cake with peppermint crunch sprinkled on top as seen below. Once you have completely covered your cake in frosting, get a little wild and sprinkle that peppermint crunch on top, pressing gently into the frosting. Freeze your cake for 30-45 minutes before painting on it.

I received my third wind after this and was super ready to paint. 
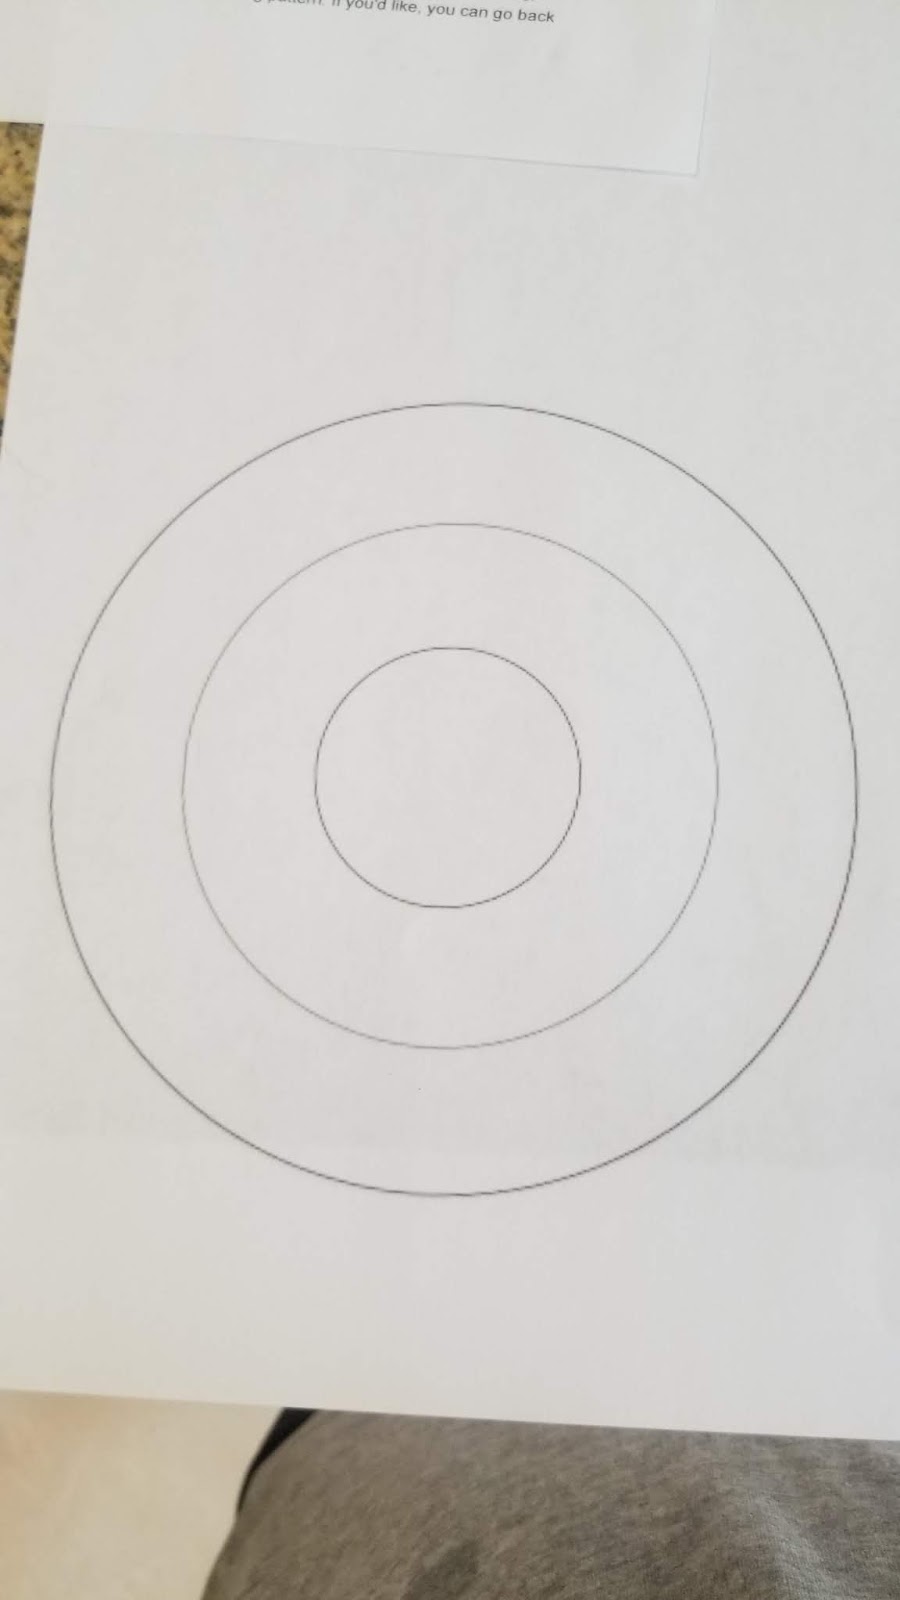
I draw like a three year old. Unlike my buttercream mountain cake, I didn’t think freehand Christmas trees were really going to work out too well for me, so I used a toothpick to draw tiny trees on my cake. I had to look outside a few times to be reminded what a proper pine tree looks like because A. I cannot draw and because B. Northwest Florida is absolutely covered in pine trees (yet it’s still summer in December anyway).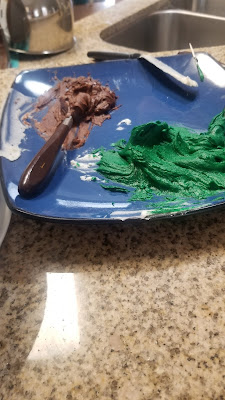
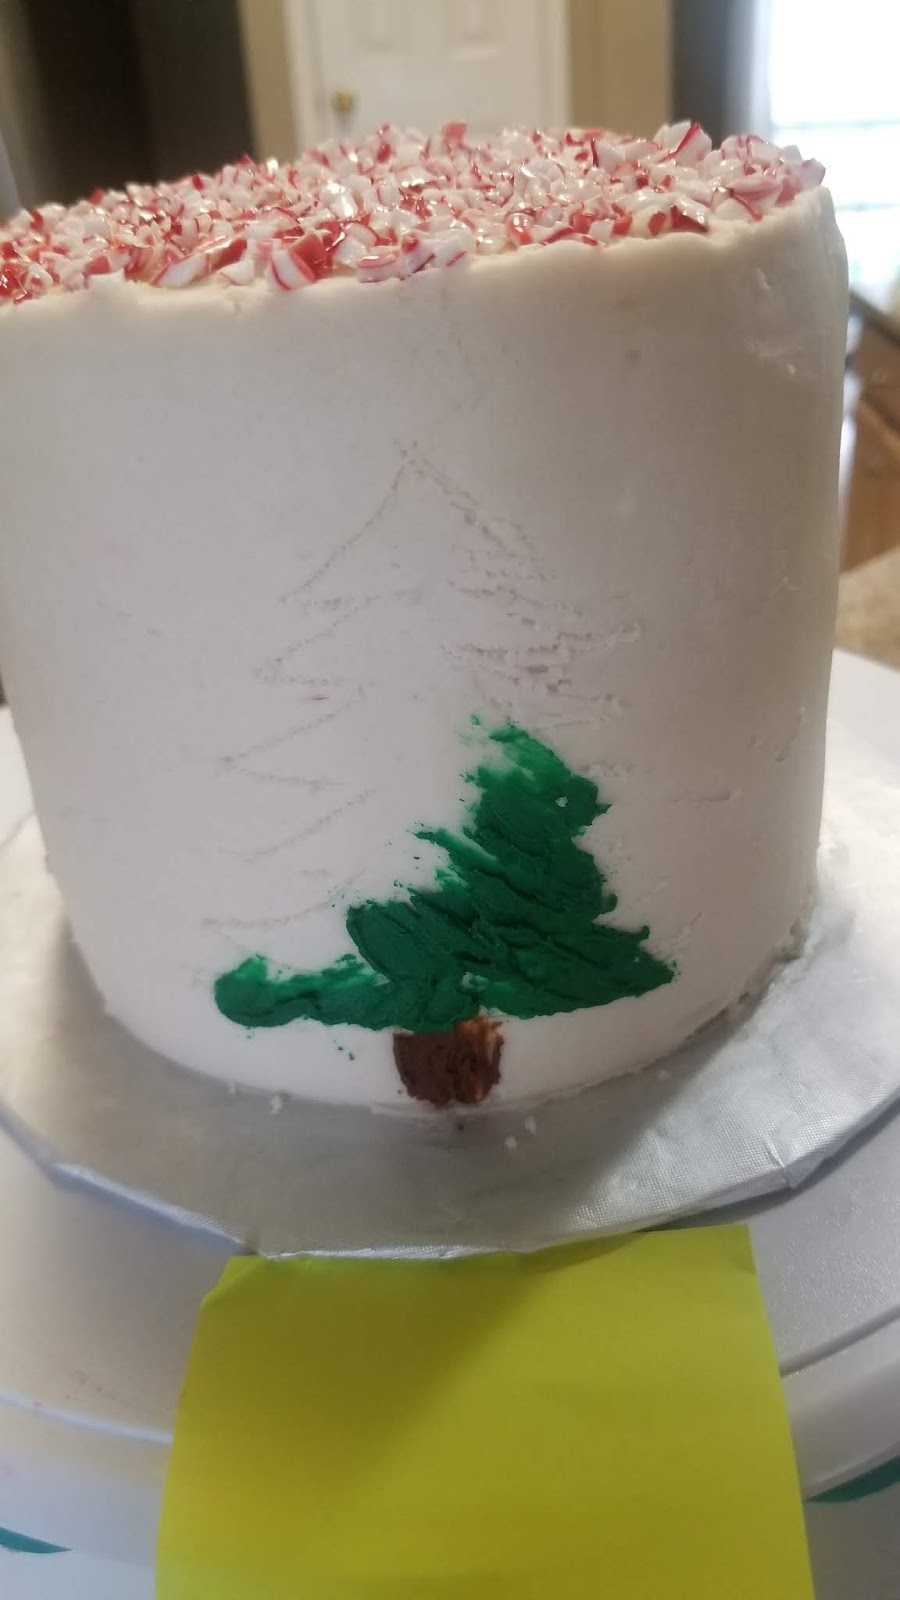
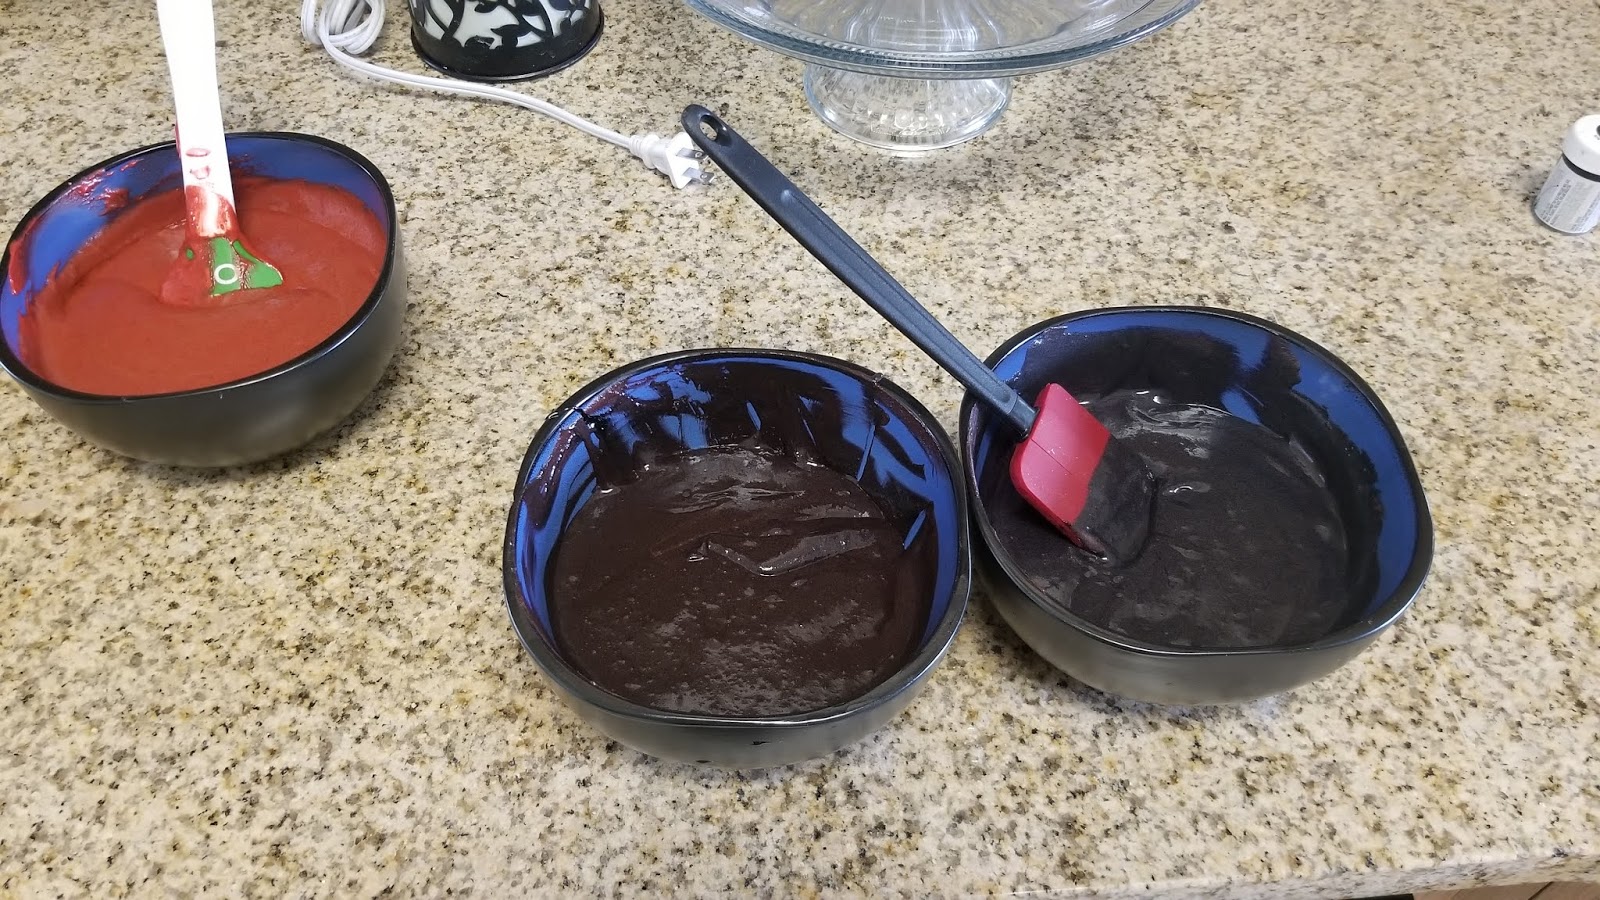
My painting palette. After covering my cake in the white buttercream and freezing for half an hour, I took a glob of frosting, plopped it on a plate, and dyed it brown, mixing with a palette knife. I took a larger glob of frosting and dyed that Kelly green. I ended up having quite a lot of both colors leftover, so I definitely could have done a border around the top of the cake since I ended up throwing this and some leftover plain frosting out (after I ate most of it with an unused palette knife…I told you, with no one around to judge, it’s like a “Cathy” comic in this house).

I really need adult supervision. I started by using my smallest palette knife to swipe on a brown tree stump, then I used the next size up to swipe on green for my pine trees. I swiped up and to the left to make the right side of the tree, coming back in after each swipe to add more frosting to the back of my palette knife.
I mean, it’s definitely a tree, so mission accomplished. I swiped up and to the right to complete the left side of the tree. I found it way easier to paint when I put my cake stand on top of a large, flat mixing bowl so it was eye level but stable.

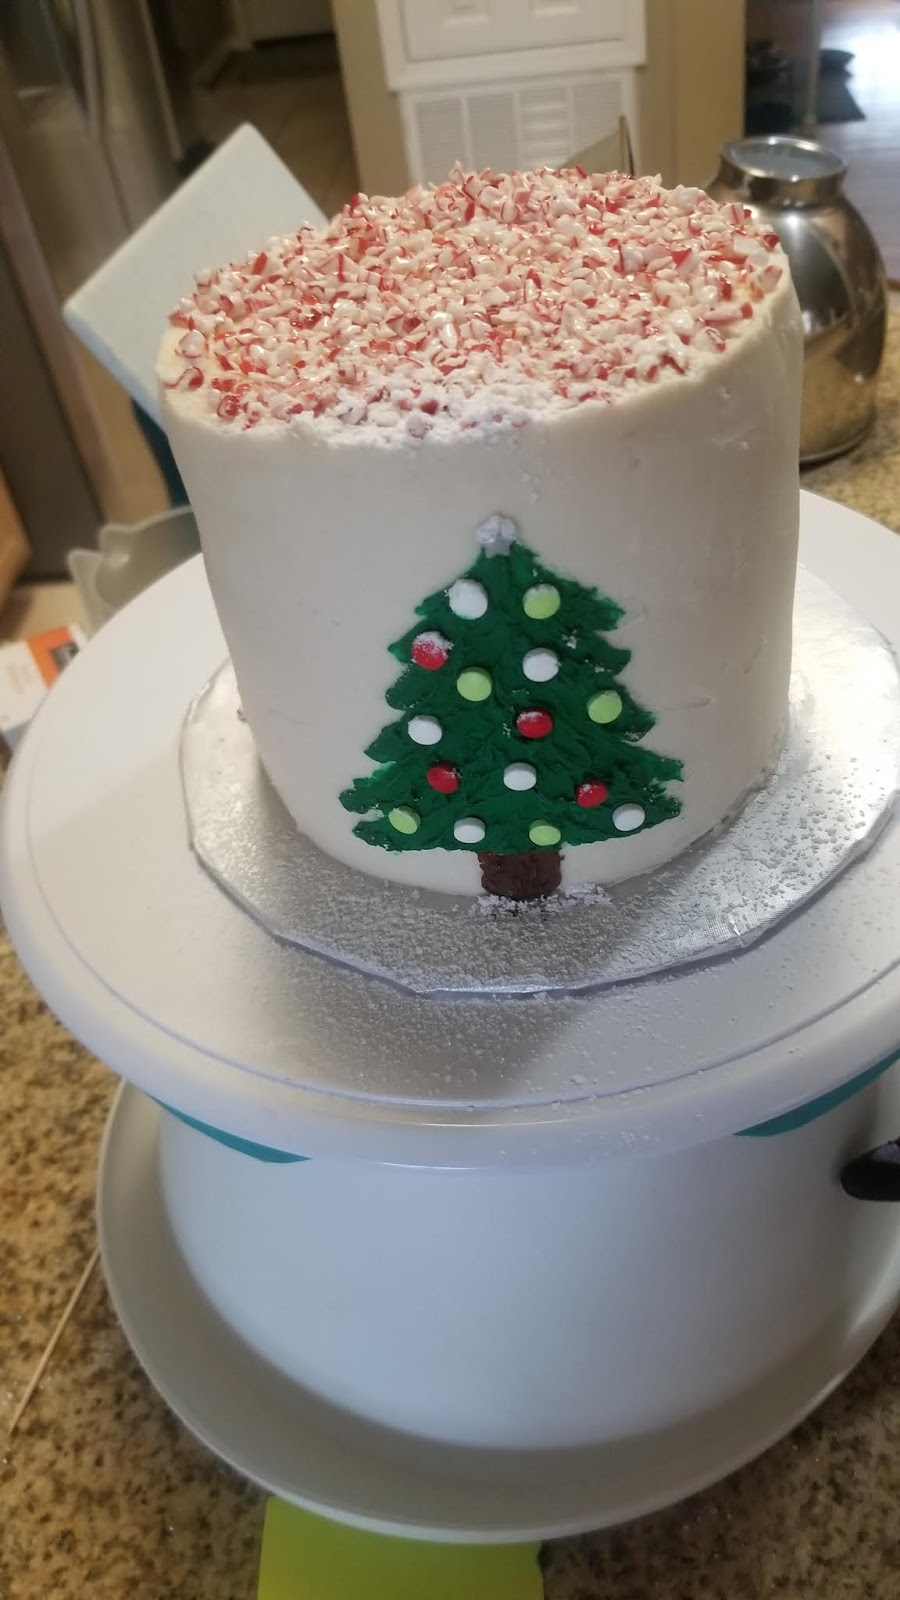
SPRINKLES! To finish this tree, I added round sprinkles for ornaments and a silver star on top. I lightly dusted the base of the cake board with powdered sugar to look like snow. This will be the only snowfall I experience this winter…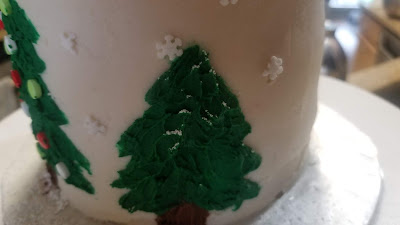
I really miss snow. The real stuff. Powdered sugar’s great though. I ended up painting several more trees, most of them a lot smaller and shorter and dusted with “snow.” I only did one other larger tree with Christmas ornaments on it on the opposite side of the cake from the first tree.

So darling it almost makes my Grinch heart grow. Remember what I said about freehanding trees earlier? This PERFECT example of a pine tree was the LAST tree I made and the ONLY ONE I freehanded. So, go figure. Now I know to just go freehand when it comes to painting with buttercream.
It really makes me feel like the holidays are near when I look at this cake. But then I step outside and get very confused because it feels like it’s September. To finish, I added tiny little snowflake sprinkles all around the cake (a great way to cover up any errant green paint). Fun fact! Living the heat-soaked South, this cake is the closest I will get to walking through a winter wonderland this holiday season!
Oh Christmas tree, oh Christmas tree, you are so very yummy. I am really digging how this turned out. It’s simple but it’s cute. It’s also extremely delicious. I had never done plain peppermint cake before because I am hugely obsessed with peppermint mixed with chocolate, so I am happy I branched out and tried something different says the woman who lives her life with the assistance of three different planners. The peppermint vanilla cake is very light but packs a good amount of peppermint flavor. It’s nice to be able to eat a dessert at Christmas time that doesn’t weigh as much as a small child or a fruitcake. I could (and did) eat that peppermint buttercream all on its own and be perfectly satisfied, but pairing it with that airy peppermint vanilla cake is positively divine, so happy birthday, Baby Jesus! I will really use any reason to bake a cake around here… I hope you all have a wonderful holiday season, and I’ll see you back here in 2020. ‘Til next time, my fellow eaters!

Bold move, putting a cake in front of a mixer that visually stunning… -
A Cake That's Dying to be Eaten
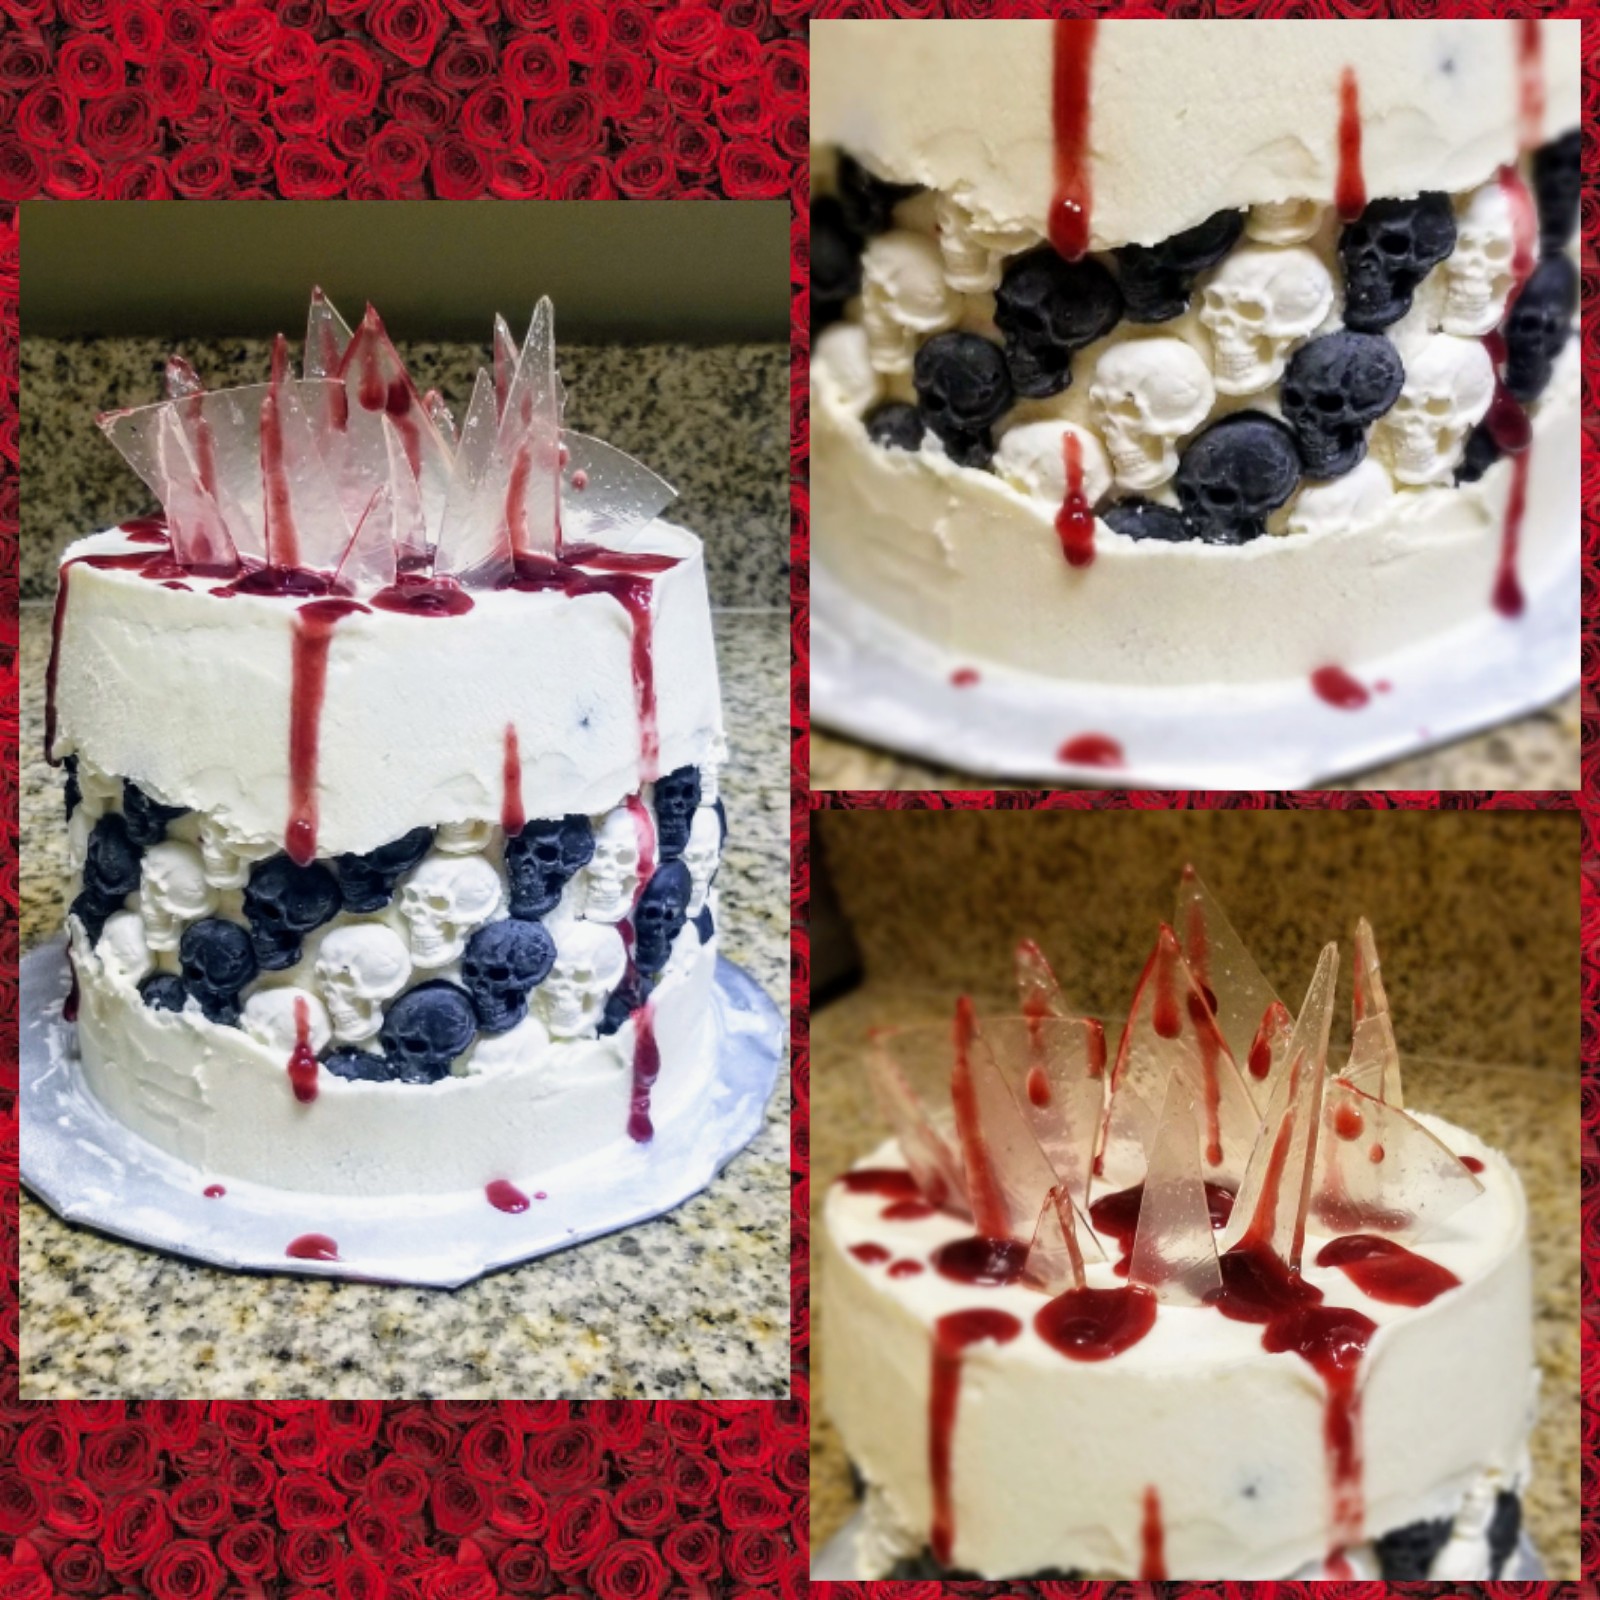
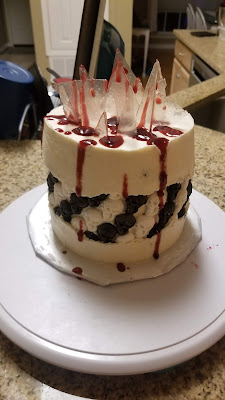
I love October. It’s the one month of the year I can let my inner Wednesday Addams out, and no one bats an eye because it’s totally okay to be a spooky weirdo during Halloween festivities. Needless to say, I wanted to go full on gore and make a cake that was both shocking to look at but also really, really delicious at the same time. Because if you’re bold enough to eat something that looks like evidence from a crime scene, you should be rewarded for that level of bravery. I came up with a design last month for my big Halloween week bake that tried out another new decorating technique: the fault line cake (“Fault line cakes. So hot right now.” -Mugatu, probably). But it’s gotta be a creepy fault line cake because this is me we’re talking about here, so the shock bar was set high…

Nothing a little blood and broken glass couldn’t help achieve. Was someone murdered in my kitchen? I’ll never tell. Was a cake that was the essence of macbre created in the process? Definitely. Was the evidence eaten? Without a doubt. I hand made those little skulls poking out of my fault line, and both the blood and the glass shards are totally edible. Since I knew this would be my last bake before my husband takes one of his annual government-mandated vacations for a few months, I wanted to make a strawberry cake since that’s his favorite. Sweet flavoring aside, I also made the inside of this cake look like a bloody nightmare with the help of some very dark raspberry jam (you could use strawberry instead, it just won’t look as creepy, and that’s really important to someone who’s obsessed with Halloween). What with the jam and the cake, I wanted a subtle frosting, so I made an Ermine frosting. This is by NO means a low cal bake at 415 calories a slice for 12 slices total…those little chocolate skulls are dead last in the low calorie department, and well, every other department because they’re skeletons. I am going to break this blog down into a few parts: how to make chocolate skulls, how to make sugar glass, the cake and Ermine frosting recipe, and assembly/decoration. Turn back now if you’re afraid of reading. Be warned…

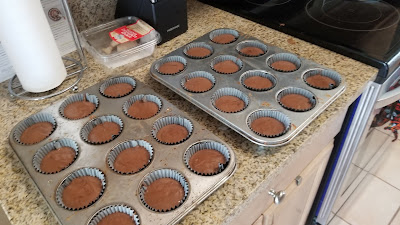
I will use this mold as often as possible. So the skulls are actually VERY simple. You just need to find a silicone skull mold from Amazon or a craft store and black and white chocolate melts. Melt half a bag of white chocolate melts according to package directions and pour into a squeeze bottle.

You will want a small pan for this. Now pipe in the middle of the skull indentation until the cavity is about 3/4 full. Repeat until all 3 little cavities are filled, then very gently tap your silicone mold on top of a baking sheet until the melted chocolate has been distributed evenly and the skull cavities are all covered. Place this in the freezer for 15 minutes.

Spooky synchronicity: an OCD Halloween lover’s paradise. Once set, take a sheet of Parchment paper and grab a mold. Carefully peel the chocolate out of the mold, placing on the paper, and that’s it! Repeat until you have enough to cover your fault line in each color. I made 36 white skulls and 48 black skulls, but had 12 black skulls leftover. I made these like a month ago and placed into a single layer in a Tupperware, added wax paper, then added another layer, etc., until I ran out of skulls. These store great at room temp in a cupboard for months.
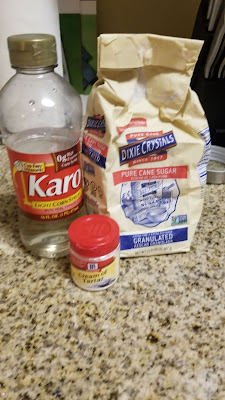
The glass is pretty much all sugar which is terrifying. I made my glass shards two days ahead of time because I had never made my own candy before and wanted plenty of time to screw up. The good news here is that this is pretty much foolproof. You take one cup of water, one cup of sugar (I used real sugar since I knew I was probably not going to eat this part with the rest of the cake), 1/2 cup of corn syrup, and 1/8 teaspoon cream of tartar, dump it into a medium sauce pan, and whisk until your arm falls off (seasonally appropriate). Seriously though, you need to bring it to a boil on medium-high heat while whisking pretty continuously until a candy thermometer reaches 300 degrees. This takes about 10-12 minutes, so grab a chair and get comfy. Things will get really, really thick when this magical transition from 260 degrees to 300 degrees takes place in a matter of seconds around the 10 minute mark.

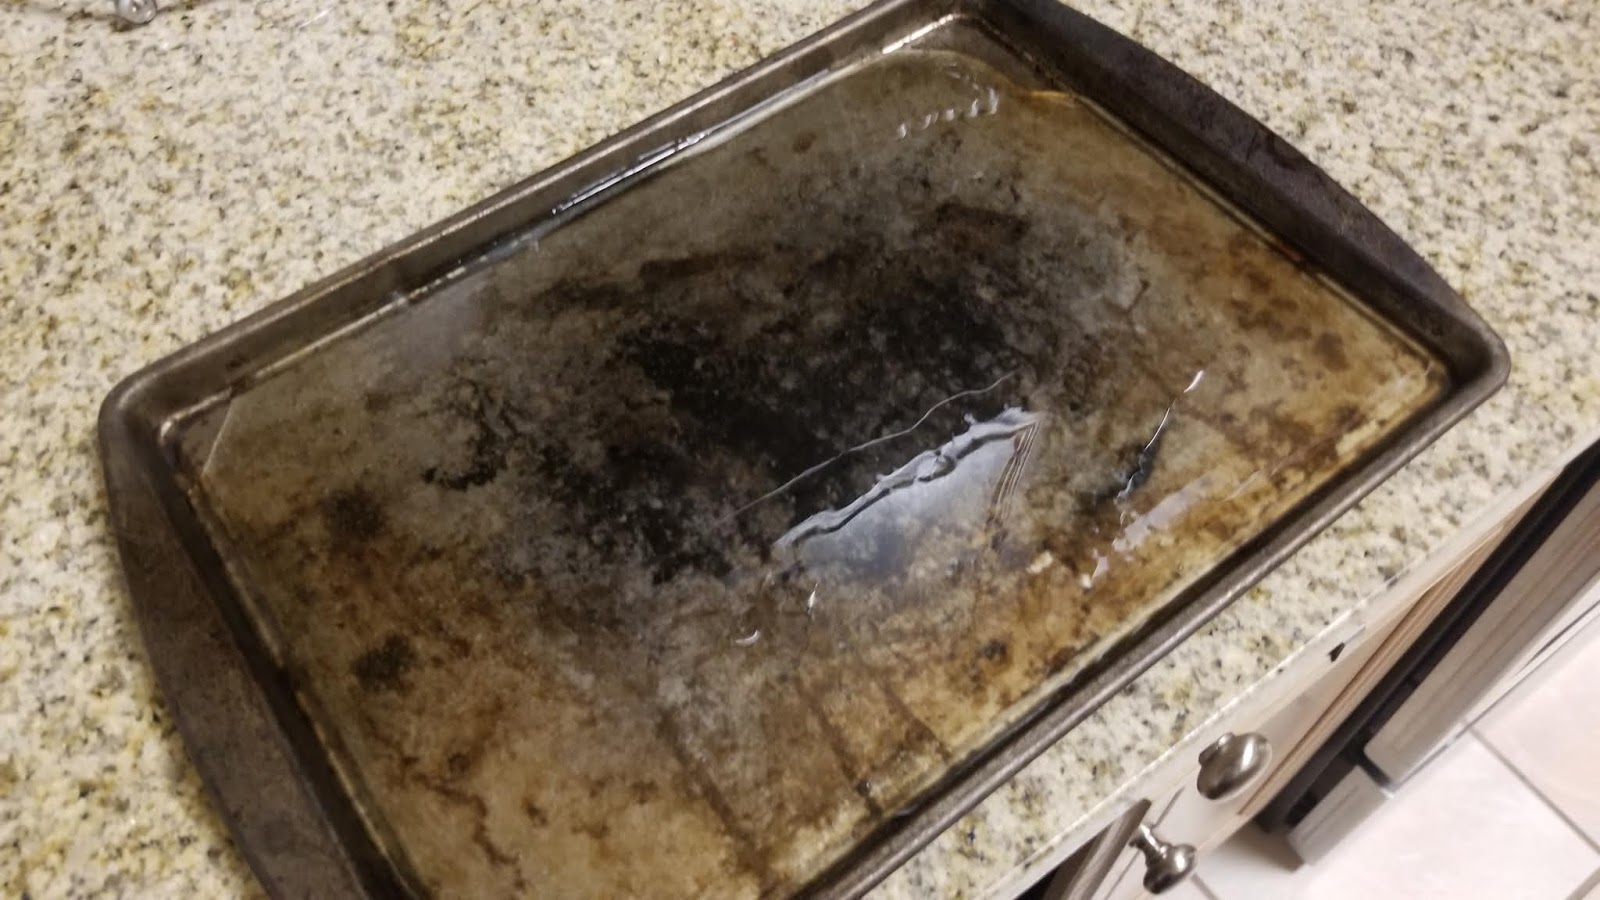
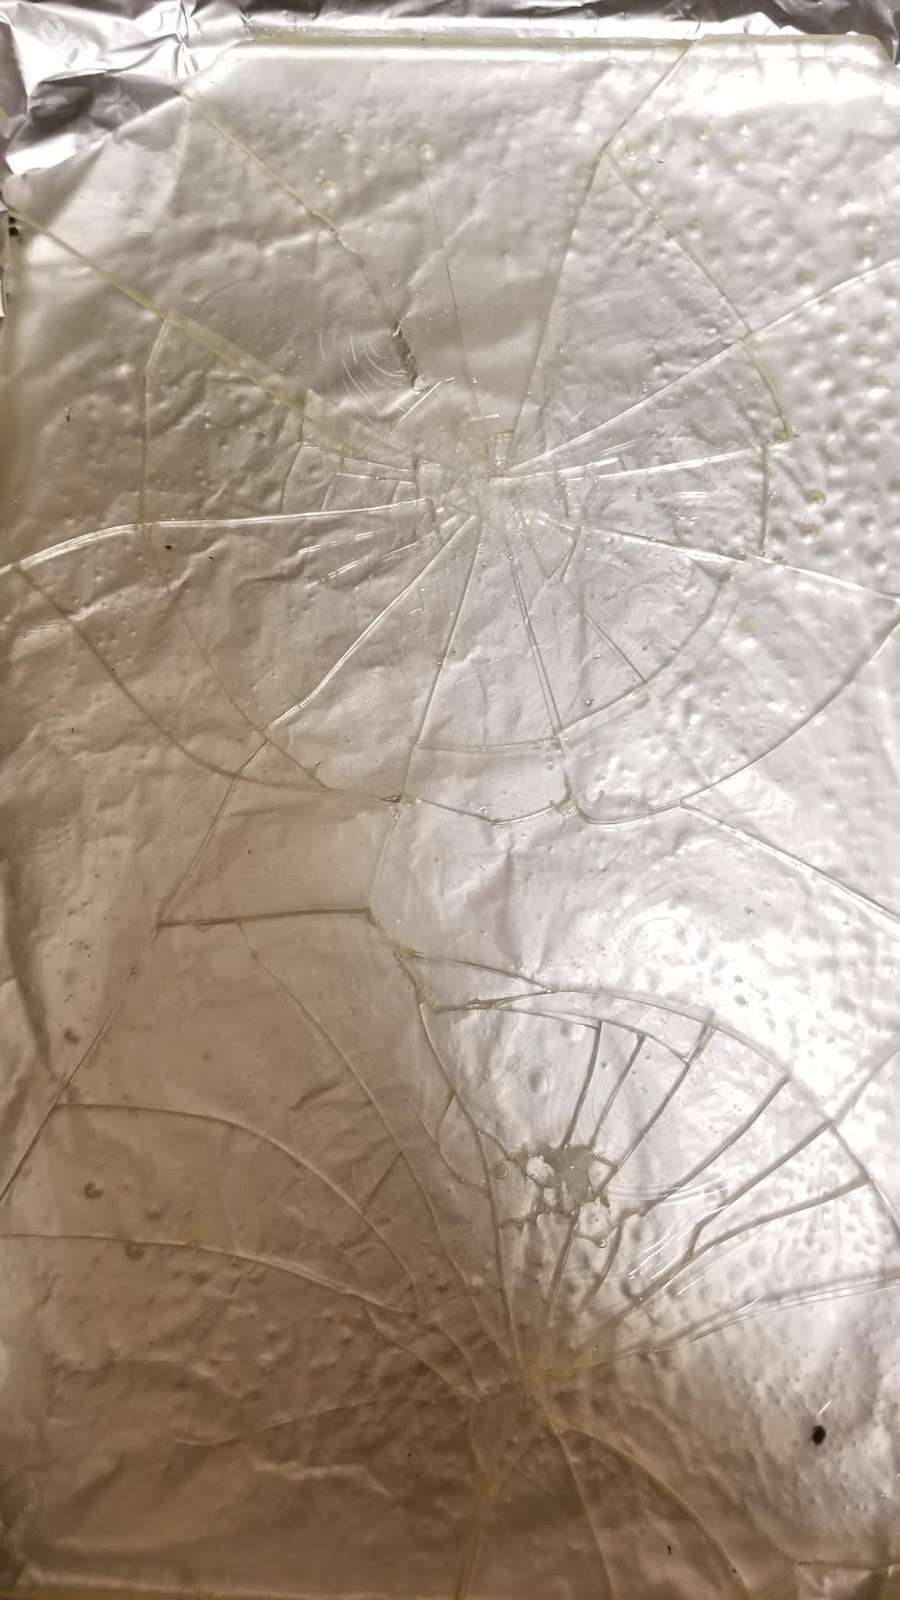
So shiny and clear you can only see the “well-seasoned” pan I’ve had for 12 years. Generously spray a small baking sheet with cooking spray, then pour your candy mixture into the pan and tilt the pan around to spread the candy evenly. Set this aside to harden at room temp for an hour, then gently cover with foil and place in the fridge until you’re ready to use it.

THEN SMASH IT WITH A HAMMER! When you’re ready to break it apart, I used a small meat tenderizing mallet to break at random. But I would not break it up until you’re actually about to throw it into the cake since the more you handle it, the meltier and stickier it gets. Now that we’ve got the main decorating components complete, time to get to the good part: the cake.

I actually find the color pink pretty scary, but don’t worry, we’re dying this blood red. You can make a raspberry or a red velvet cake if you’d prefer, and it would definitely be the right color and flavor pairing with raspberry jam. I used:
- 1 box strawberry cake mix
- 3 egg whites
- 1/2 cup unsweetened applesauce
- 1 cup of skim milk
- Maroon gel dye
- 3 TBS raspberry jam
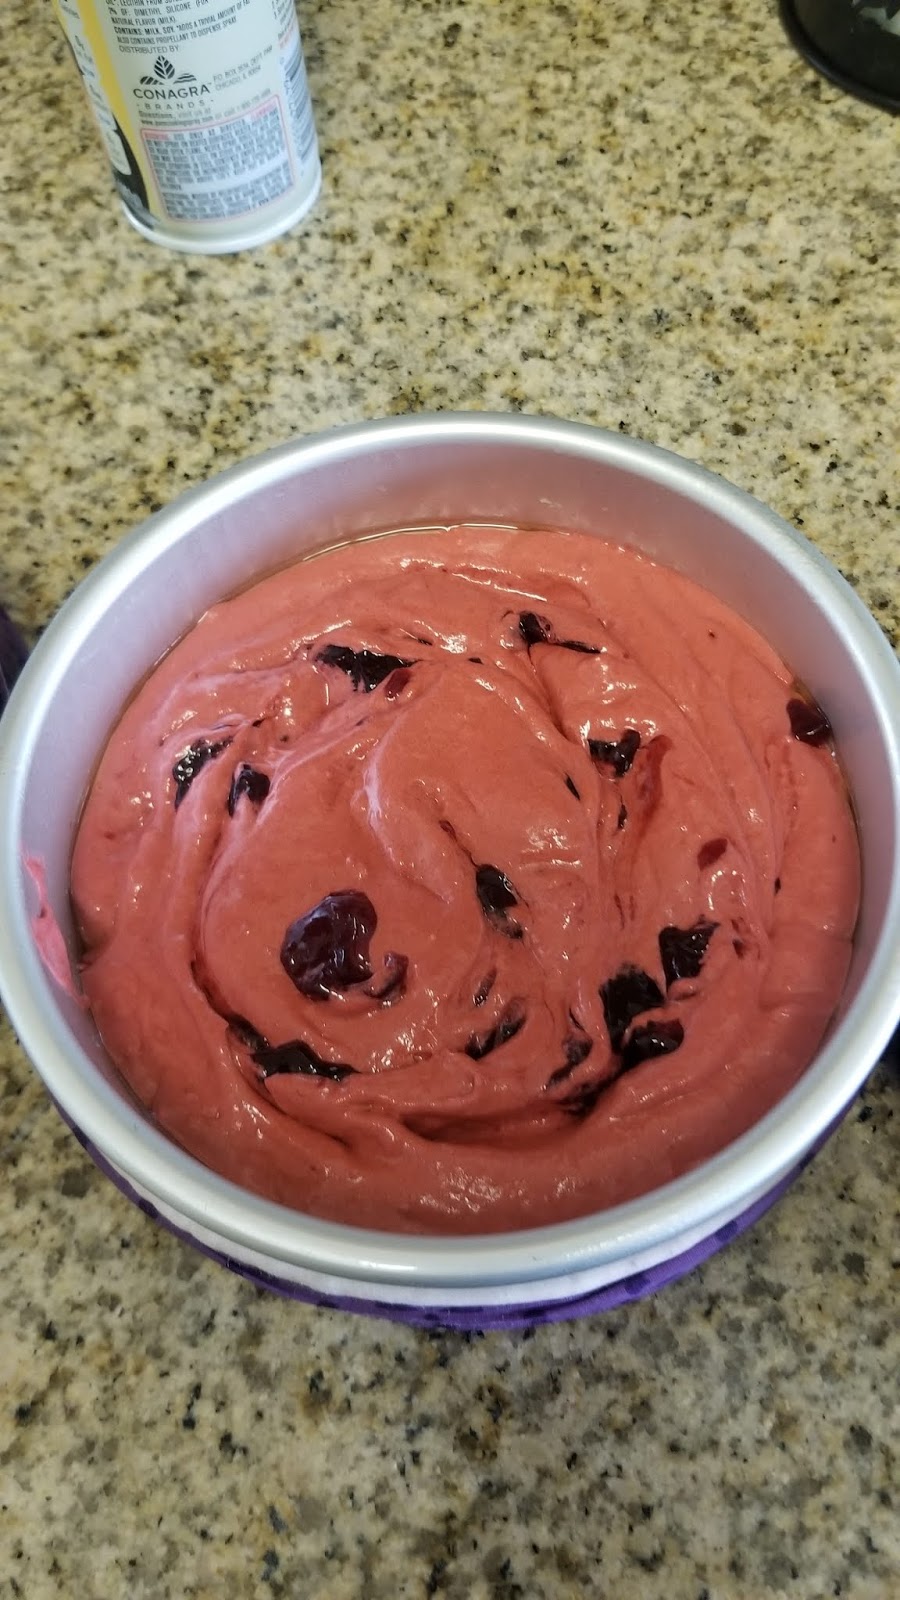
Mix the cake, egg whites, applesauce, and skim milk in a stand mixer for 2 minutes on medium-high. Prepare 3 six-inch cake pans with cooking spray and bake even strips and preheat the oven to 350. Once mixed, add in gel dye until you get a deep red. Pour your batter evenly into the prepared pans.

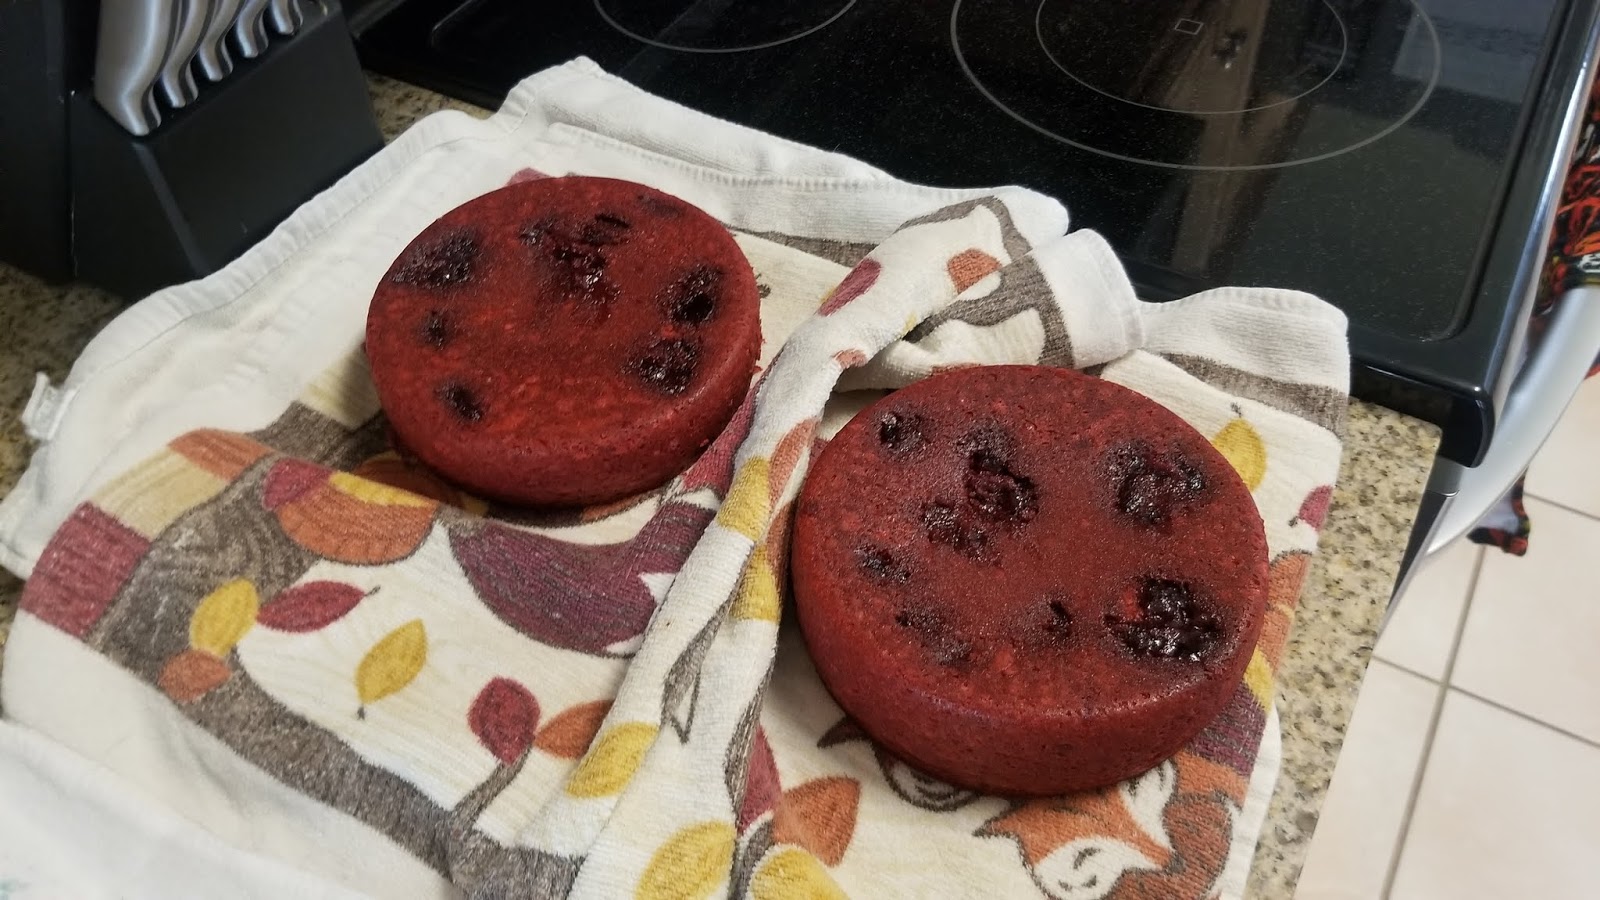
Of course this cake has blood clots. It’s HALLOWEEN. Take a heaping tablespoon of raspberry or strawberry jam and place a few chunks randomly throughout one pan with cake mix in it. Use a knife to swirl around and break up to look like blood clots because both the inside and outside of a Halloween cake should make you question your sanity and general safety upon consumption. Repeat with the other two pans and bake your cakes at 350 for 25 minutes. When done, keep the cakes in the pan and place on a cooling rack for 10 minutes. Then use an angled spatula to ensure no edges are sticking to the sides of the pan before turning each cake round out onto a cooling rack to completely cool off.

It will look like your cake has been shot repeatedly, so you’re on your way to achieving maximum gross-out factor. Be sure to level your cakes once they are cool. I then wrapped mine up in plastic wrap, put into a freezer bag, and froze for a few days before I could get back to work on them. I definitely spent the better part of a few evenings bringing this cake together, but I will sacrifice time for my evil baking proclivities.

Yep, that’s flour. And yep, it’s going in the frosting. So Ermine frosting is like the complete flavor opposite of a traditional American buttercream. Where American buttercream is so sweet it’s trying to ensure total cavity destruction of your teeth, Ermine frosting is smooth and refined with a hint of sweetness. Ermine frosting knows you’re saving the cavities for Trick-or-Treating, and it’s fine with that. It has a nice buttery flavor that’s complimented with just a slight sweet aftertaste. It’s my new favorite frosting because it’s not nearly as fickle to make as Swiss meringue buttercream, tastes better, and is super easy to work with when it comes to decorating. Ermine is the traditional red velvet cake frosting, so you’ve probably had it at some point. It doesn’t come together as quickly as an American buttercream, but like most good things, it is worth the effort. To make, you need:
- 1 cup of skim milk
- 5 TBS flour
- 1 cup of Swerve granular
- 1 cup of butter at room temp
- 1 TBS CLEAR vanilla
- Splash of almond extract
In a medium saucepan, whisk together the milk, flour, and sugar on medium heat until it starts to come to a boil. You will need to whisk continuously, so between this and the glass shards, my biceps look fabulous. Cake baking exercises are a thing. After about 5-7 minutes of whisking, things will REALLY start to thicken up…like a paste consistency. At this point, pour your pudding mixture into a large bowl and cover with plastic wrap, making sure the plastic wrap is touching the top of the mixture to keep a skin from forming. Place in the fridge and let cool for 90 minutes.
Once this mix has cooled down, whip your butter in a stand mixer with a paddle attachment until fluffy, 3-4 minutes. Add in the extracts and about 1/3 of the pudding mix, blending well until total incorporated before adding in another 1/3 of the pudding mix, repeating until all the mix has been added.
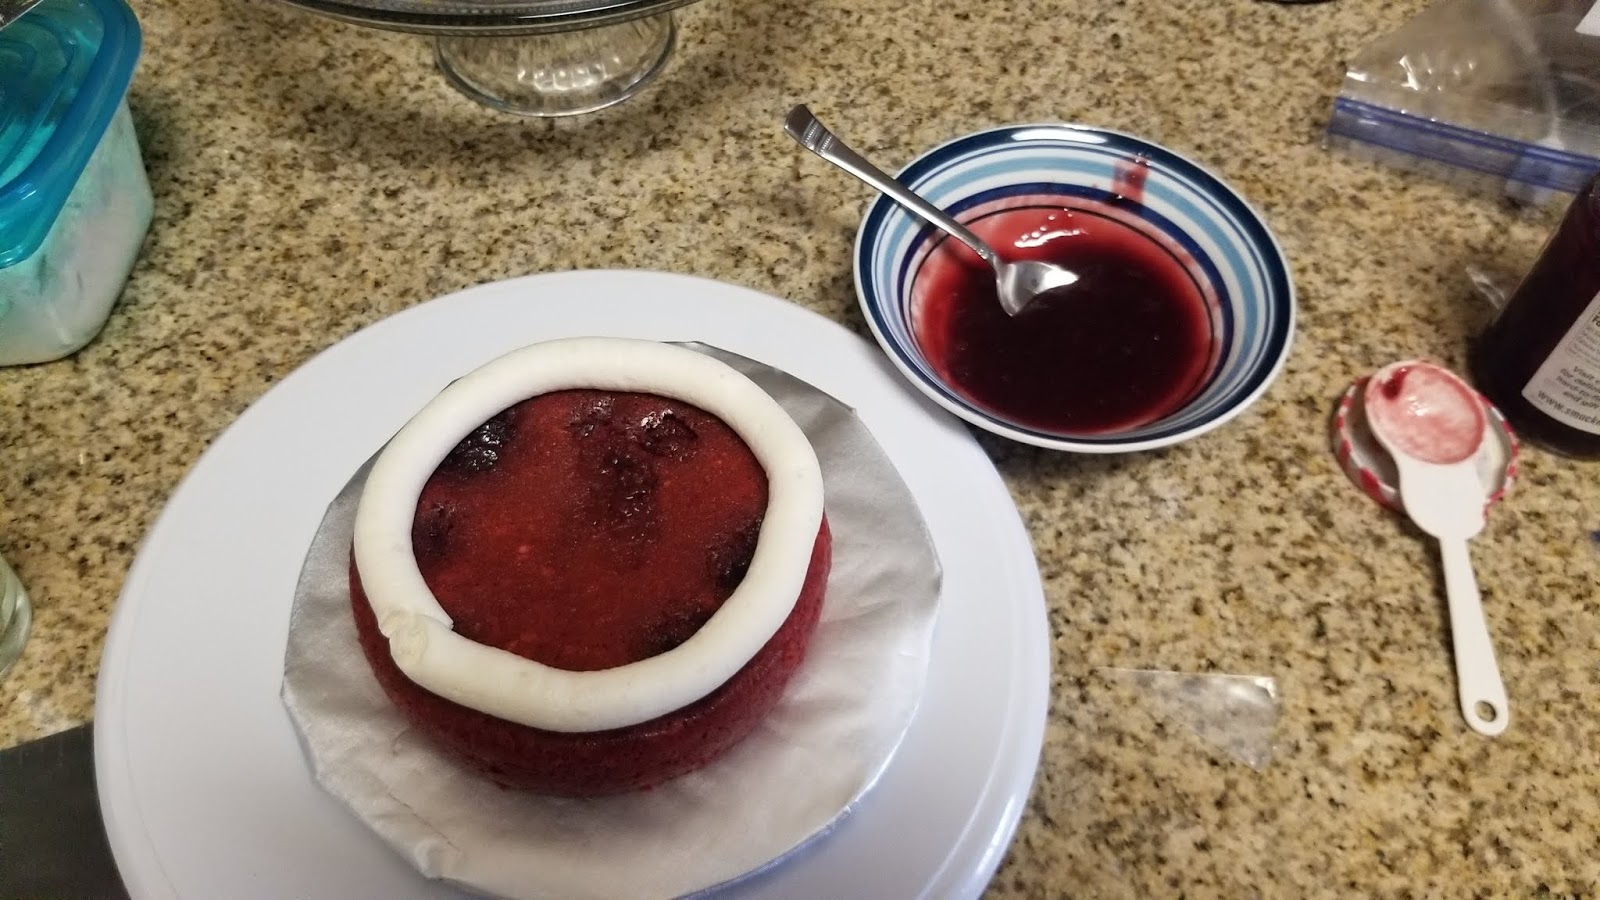
Now, switch to a whisk attachment, crank up to medium-high, and let the frosting whip up for about 3-5 minutes. It will get very large and very fluffy, and that’s when it’s ready to roll. If it seems too thin for piping, place it into the freezer for a few minutes to thicken back up. Place 1/3 of the frosting into a piping bag fitted with a large round tip (I used a #1A) and get ready to make spooky, murdery magic happen.

Pipe a circle around the outside edge of the cake. Then place a tablespoon of jam into a small bowl and mix until runny. 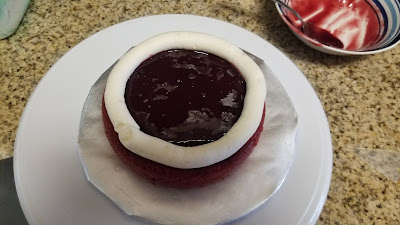
Pour the jam into the circle and spread out evenly. 
Then sandwich another cake layer on top of this to make what looks to be the world’s most murdery Oreo. Creepy clowns everywhere will be proud. 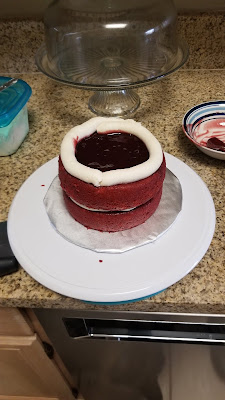
Repeat with the next layer because “Go big or go home.” is also a mentality that works for murder cakes. 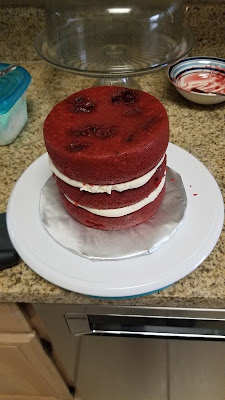
Then place the final cake layer on top. I mean, this would work great as a spooky naked cake with the glass shards and more jam blood dripping off the top. But I had big, Winifred Sanderson levels of dark magic I wanted to make happen here, so I carried on with my evil doings. 
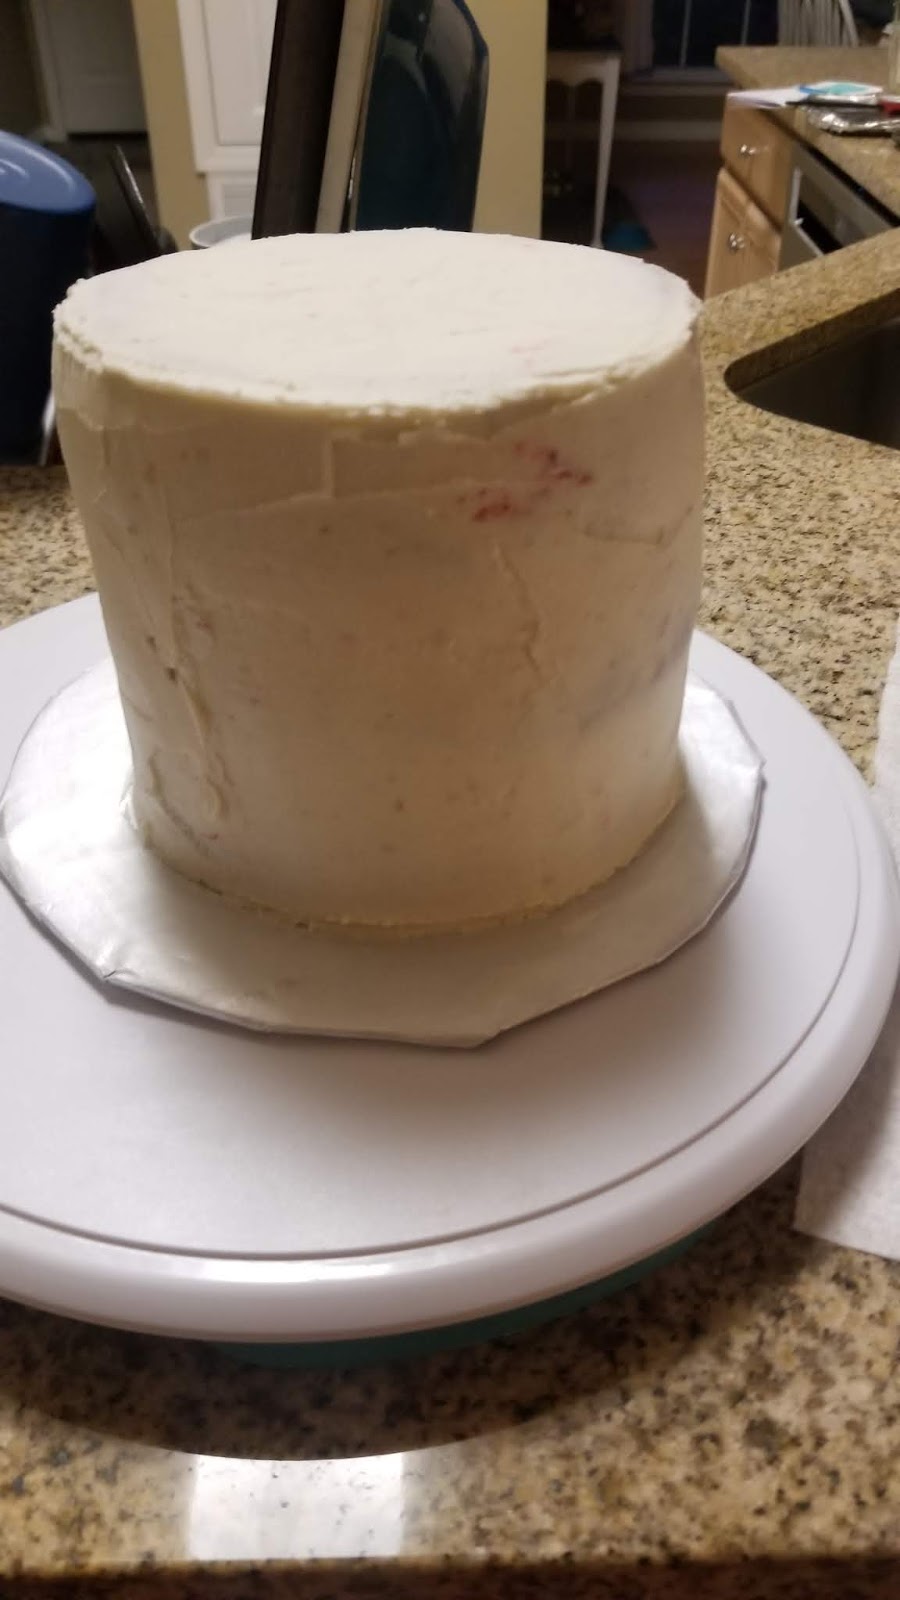
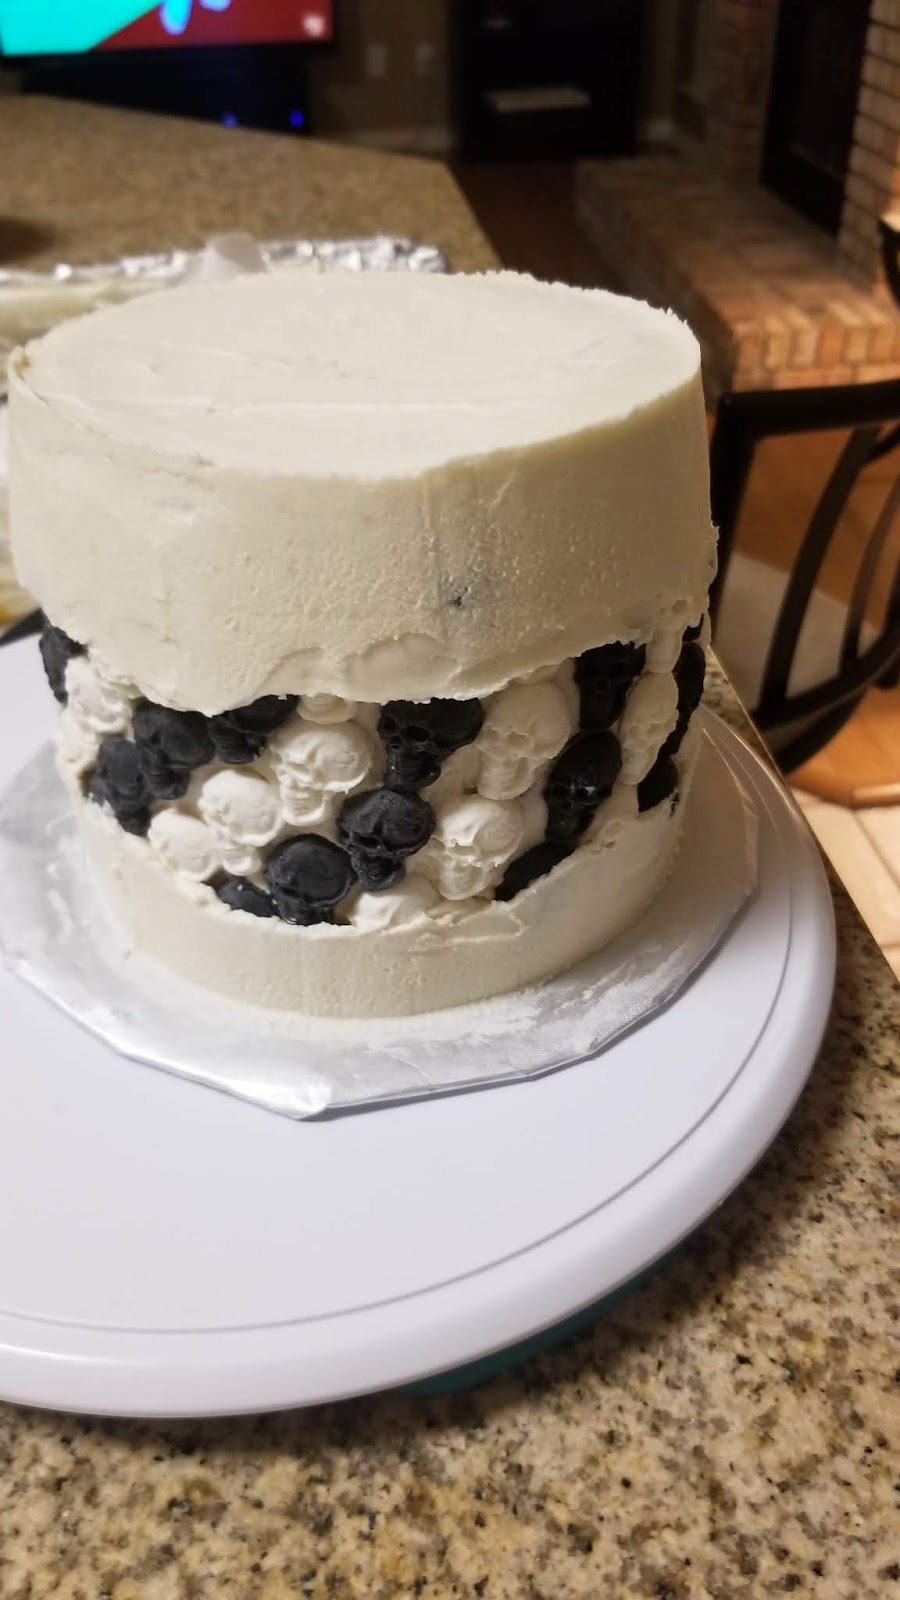
It all seems so innocent now…Take another 1/3 of the frosting and cover up your crime scene. Now, gather up your skulls and get ready to make Jack Skellington proud. Crumb coat your cake with 1/3 of the frosting, and assemble your fault line accents.
I did an alternating pattern of 3 skulls of black then 3 skulls of white. 
In some places, a fourth skull might be necessary. 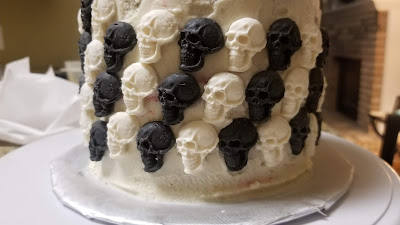
Complete your pattern until you’ve gone all around the entire cake. Now, very important witchy magic needs to happen: freeze your cake for 20 minutes. Place the final 1/3 of the frosting into a piping bag fitted with a small round tip (I used a #12) and put into the fridge to stay firm while your crumb coat freezes.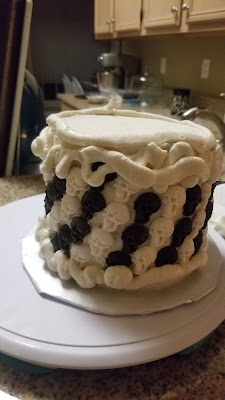
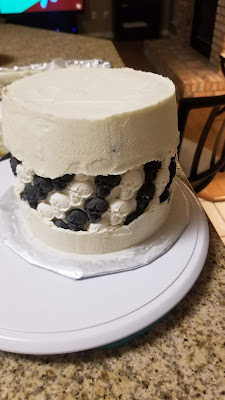
The blob! To finish the fault line, take the piping bag and pipe globs of frosting around the top and bottom edges of the cake, slightly overlapping the skulls. Use a bench scraper to pass around the outside edges of the cake until totally smooth. Congrats, you’ve done a fault line cake! Some people paint the edges with gold or silver luster dust, but I saved the sparkly since I wanted a murdery vibe and not a heavenly one.
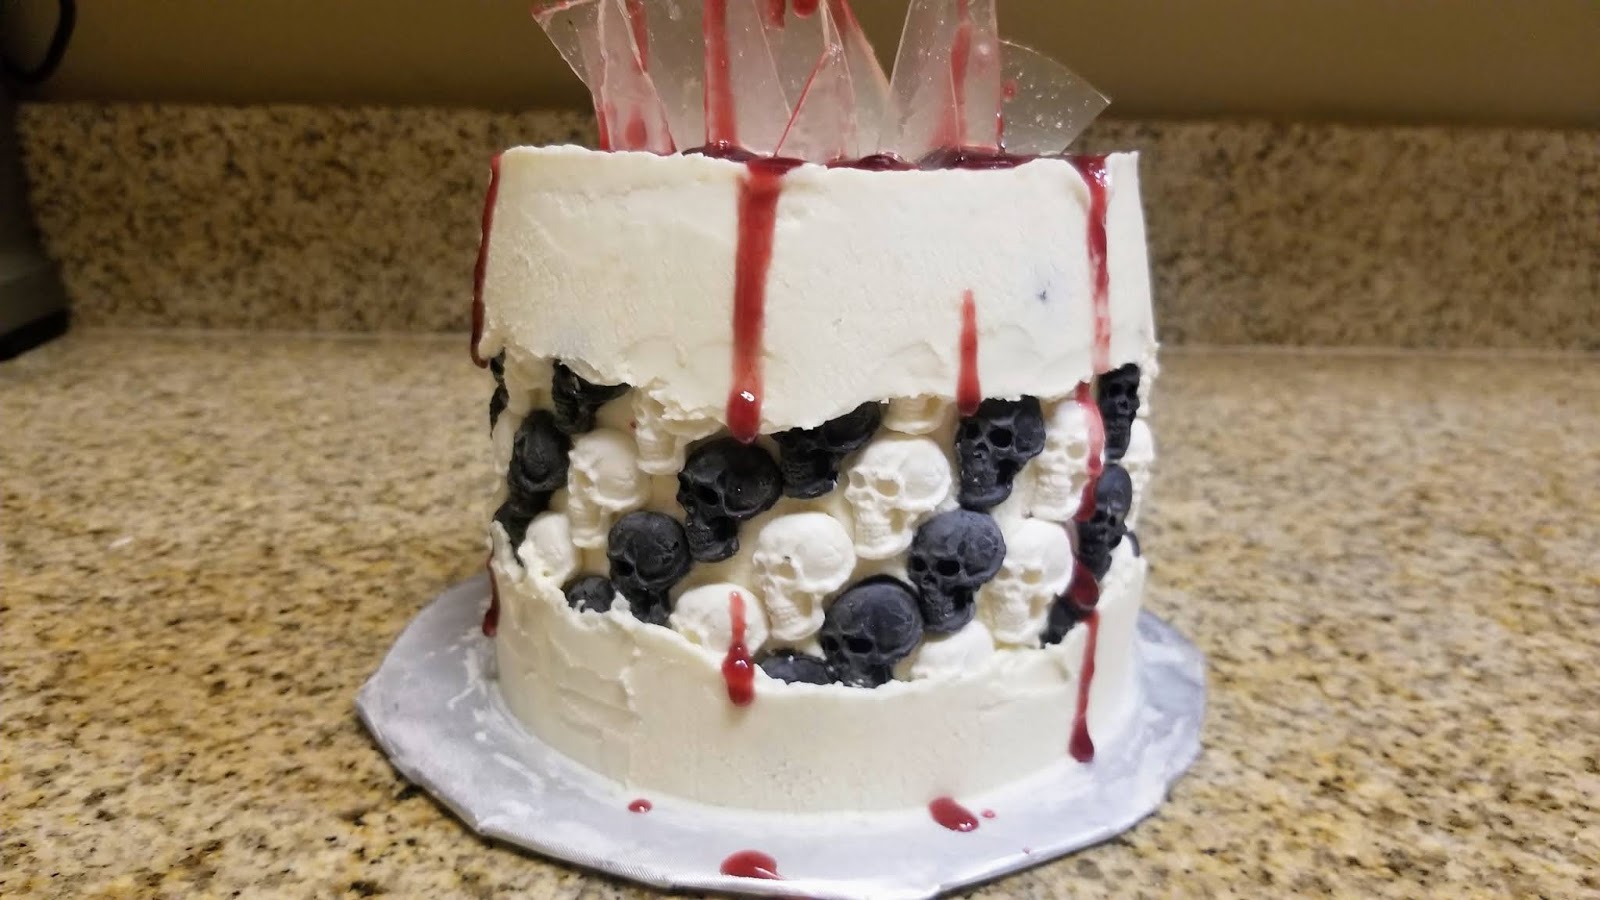
Just the right amount of skull-popping action. Now, it’s time to smash the glass and stab your cake! Sorry, I’m not a psychopath, I swear, I’m just really excited about this cake.

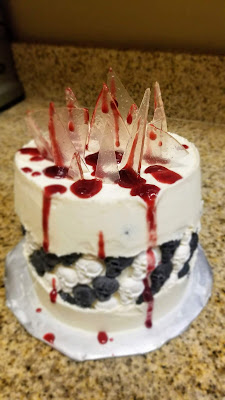
Aw yes, optimal spooky almost achieved. Do be careful when placing your candy shards into the cake, as they are shards, and they are pointy. I just randomly placed them into the top of my cake before grabbing one final tablespoon of raspberry jam, heating for 15 seconds in the microwave, stirring, and then going full Patrick Bates with the blood splatter.
I think the Addams Family would be big fans. Use a small spoon to drip on top of the shards and down the sides of the cake.

This is where raspberry jam works better than strawberry. Check that blood-red action. 
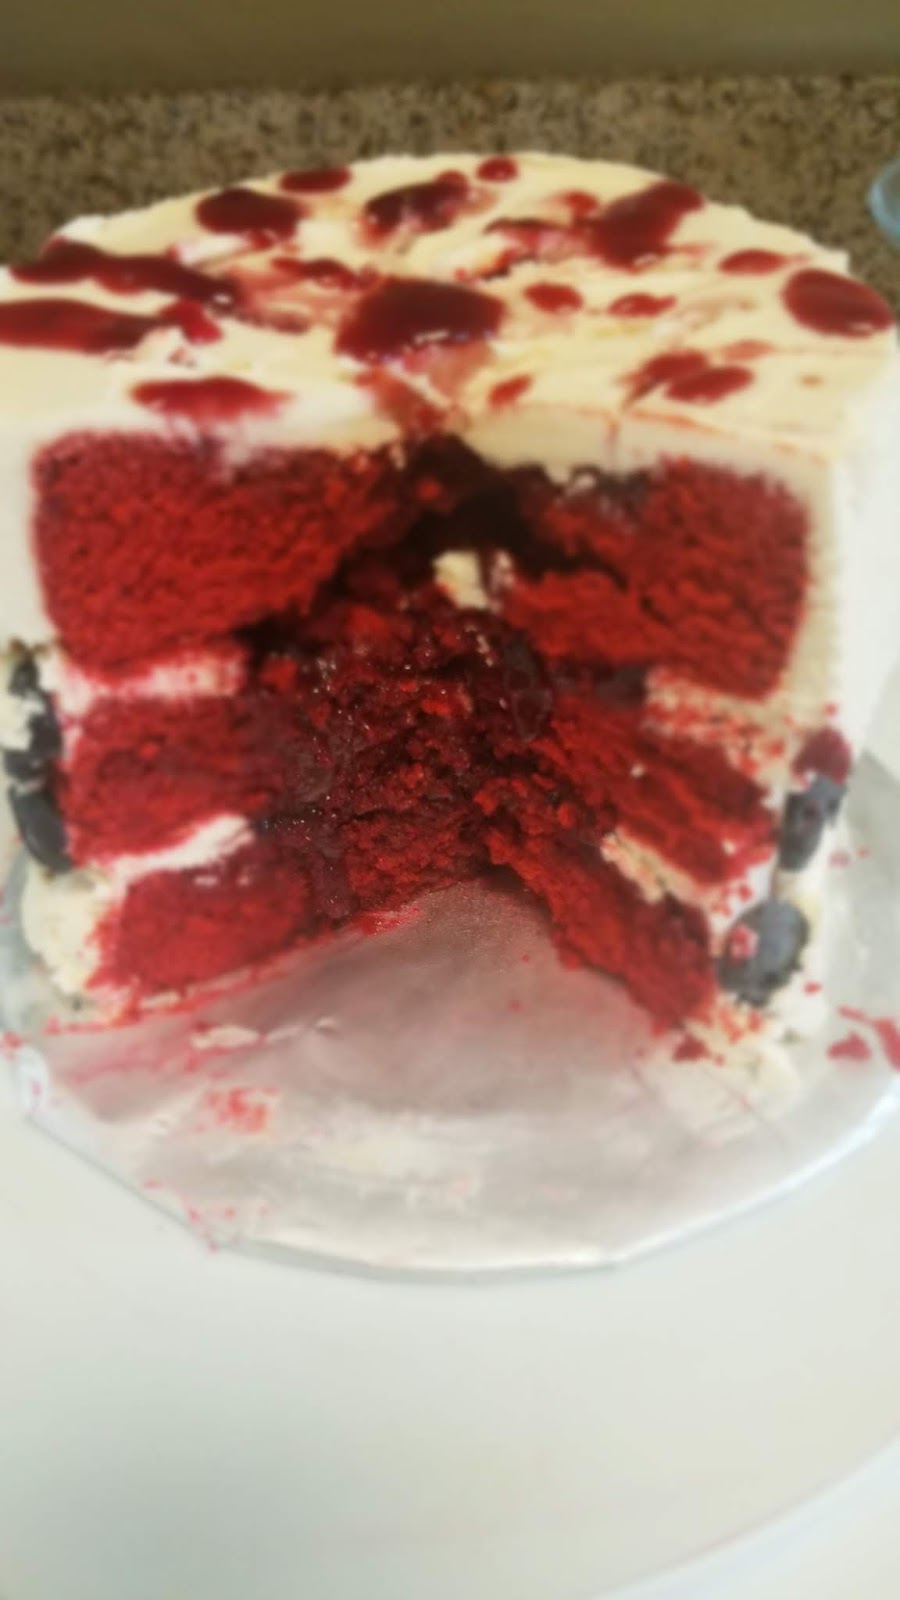
A cake buried with secrets… Only thing about the skulls that aren’t awesome is that they make cutting perfect cake slices virtually impossible, so I wasn’t able to get a good photo of the blood clots on the inside of each slice, but when you cut into the cake and the raspberry jam starts to ooze out, it’s pure Halloween spooky bliss:
Why yes, I do eat the blood of my enemies. I am SO happy with how absolutely grotesque this cake turned out to be. I had envisioned it in my head months ago, so to see it turn out exactly like I had pictured was a huge victory for me. But let’s talk about the TASTE. Strawberry cake + raspberry jam = why have I never paired these before?! Strawberries are so nice and sweet but those raspberries come in with the tart flavor that really balances everything out. The Ermine frosting really holds it all together by giving a nice buttery aftertaste to everything. And those bites with the skulls in them? Fantastic. It’s a whole lot of flavors coming together in this cake, but they all work together extremely well. Not too sweet, not too sour, definitely just right, especially on the spooky scale. While my favorite month of the year winds down, I am going to enjoy this week fully thanks to this murderous little beauty of a cake! Hocus Pocus on Freeform every day doesn’t hurt either, and thanks to the Food Network’s nonstop Halloween baking shows, I’m already planning for next October. It’s the most wonderful(ly creepy) time of the year! ‘Til next time, my fellow eaters.
Stay spooky, friends. -
Witchy Woman Bakes Spooky Cupcakes
Let me set the scene for you..it was the sixth day of October, and almost a full week of spooky Halloween excitement filled the kitchen. “Witchy Woman” played in the background while I was cloaked in black, throwing ingredients into my cauldron, getting ready to put on one heck of a spell. Okay, so the cauldron was my stand mixer’s bowl, but everything else is accurately on point. I love getting spooky during October, and I knew like any good (or bad) witch, I needed to concoct a brew that would leave its eaters speechless. And so, witches’ brew cupcakes made of sinful devil’s food chocolate Guinness Stout with poisoned Baileys buttercream frosting were conjured into existence with the help of a little black magic (read: booze).

It’s an “eww” to “aww” situation here. It’s okay be be both slightly repulsed while simultaneously charmed by these cauldron cupcakes. I mean, there’s bones and eyeballs floating around…no eye of newt or virgin’s blood, so the comic elements bring a unique creepy cuteness into play. I had SO MUCH FUN decorating these (full disclosure: I had the Hocus Pocus rendition of “I Put a Spell on You” pretty much on repeat, and there’s no way to have a bad time listening to that). It’s actually a truly simple bake from start to finish. I knocked these out in under 2 hours on a Sunday afternoon, where the only thing truly terrifying taking place was the tanking of my fantasy football scores. Thankfully I had these delicious cupcakes, rich with chocolate flavor in a way only Guinness can make possible with the sweet bite of Baileys in the buttercream to soothe the pain. It has been a LONG time since I’ve made my Guinness chocolate cake recipe, so I had to health-ify it and have the updated recipe below. This makes 24 cupcakes for a mere 194 calories a piece, so you’re welcome in advance because this is the best chocolate cake recipe to ever exist, and you can’t eat just one of these at a time. It’s simply not possible.

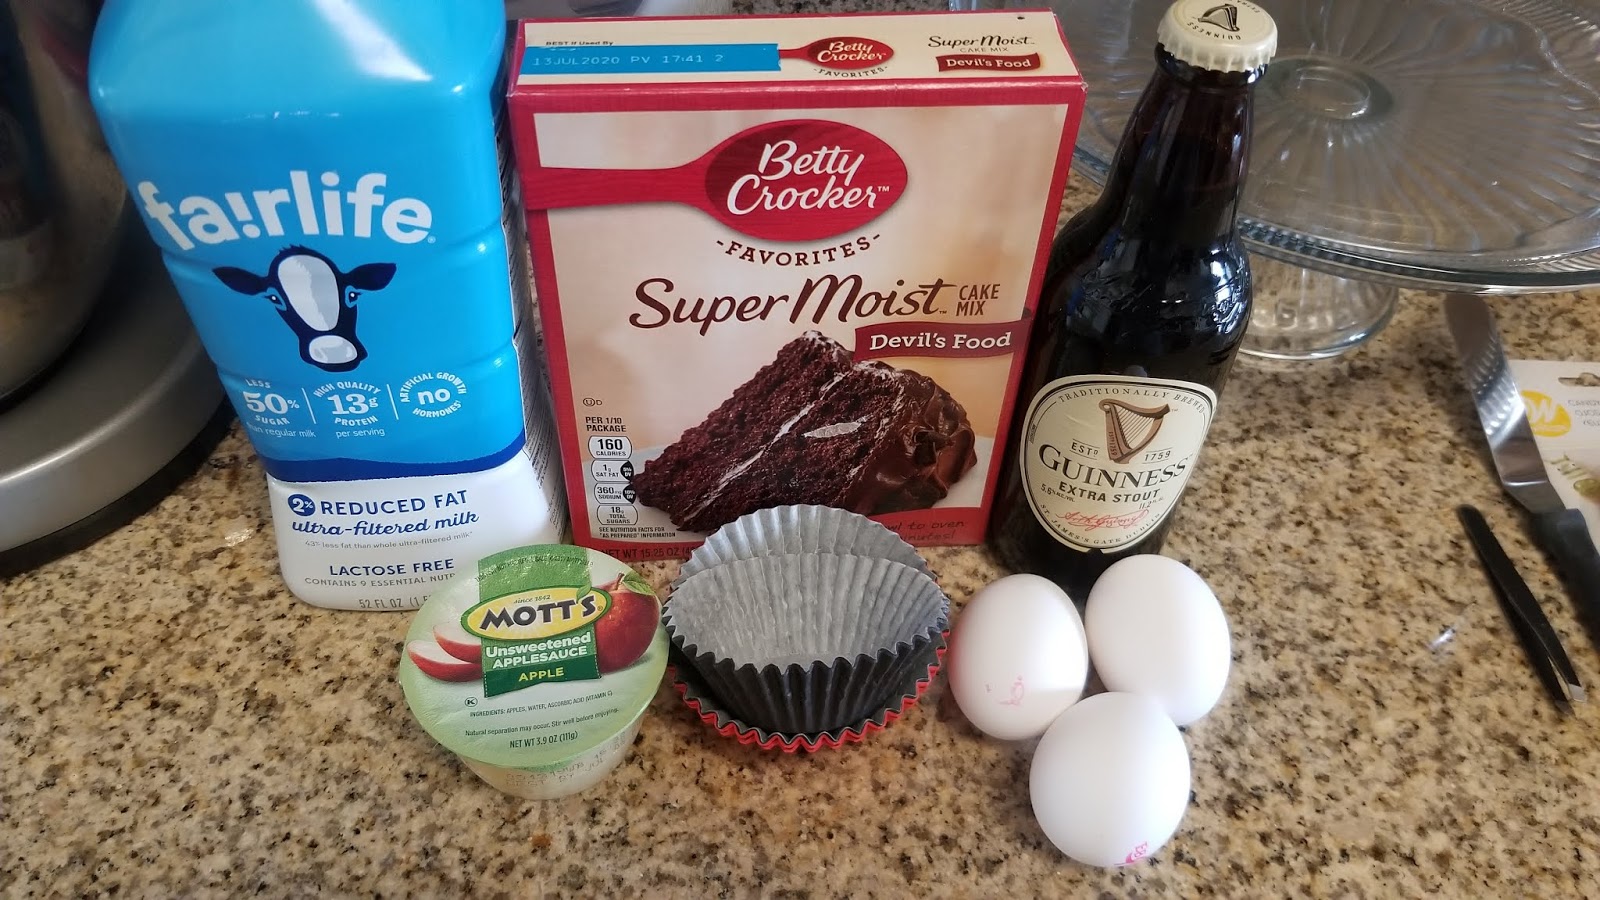
The only way I’m ingesting Guinness is via dessert. I loathe, abhor, detest how Guinness tastes on its own…but in a cake, divine intervention occurs. Trust the baking witch on this one. To make, you need:
- Devil’s food cake mix
- 1/2 cup unsweetened apple sauce
- 3 egg whites
- 1 cup of Guinness Stout
- 1/4 cup of skim milk
- Black cupcake liners
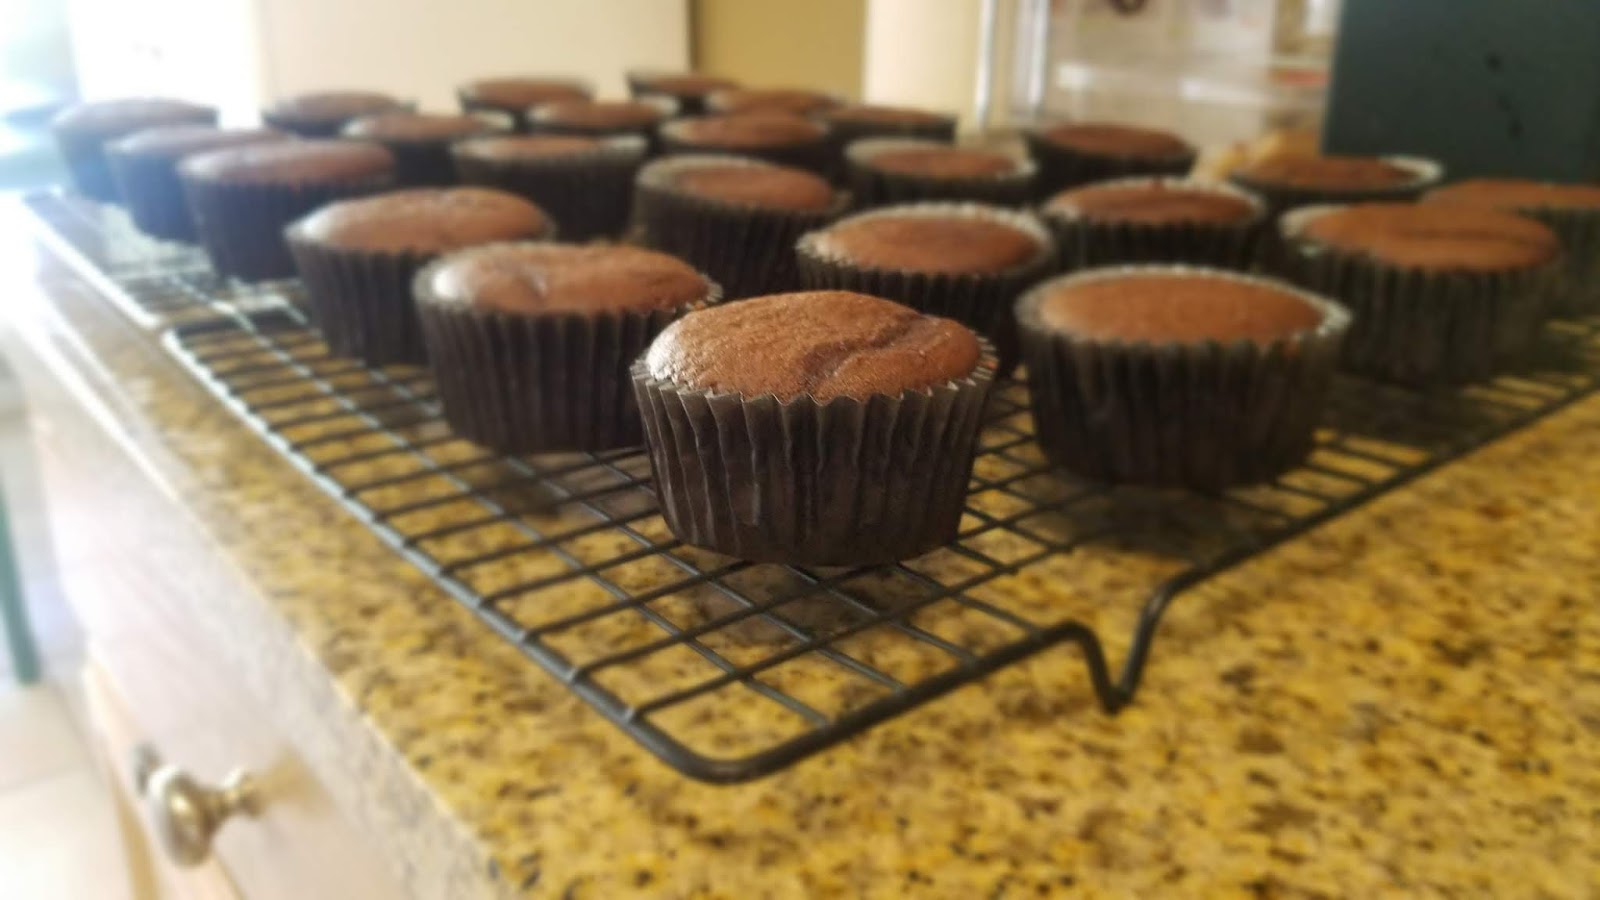
Preheat your oven to 350 and mix all your cake ingredients together in a stand mixer on medium high for two minutes while you line two muffin trays with cupcake liners (black is a must because it’s simply spookier).
And spooky is the name of the game this month. I use a cookie scoop to scoop one and a half scoops of batter into each cupcake liner. Liners will be a little over halfway full. Be sure to tap the pans on the counter to even out the batter and release air bubbles. Bake for 16 minutes at 350 or until a toothpick comes out *mostly* clean. This is a very moist recipe, so some crumbs are fine. Let rest in the pan on top of a cooling rack for 10 minutes.

Oh yes, you look devilishly delish. Remove from the pan and finish cooling completely before frosting. Cupcakes only take about 20 minutes to cool off, so start on your frosting about 15 minutes after you set them out to cool.

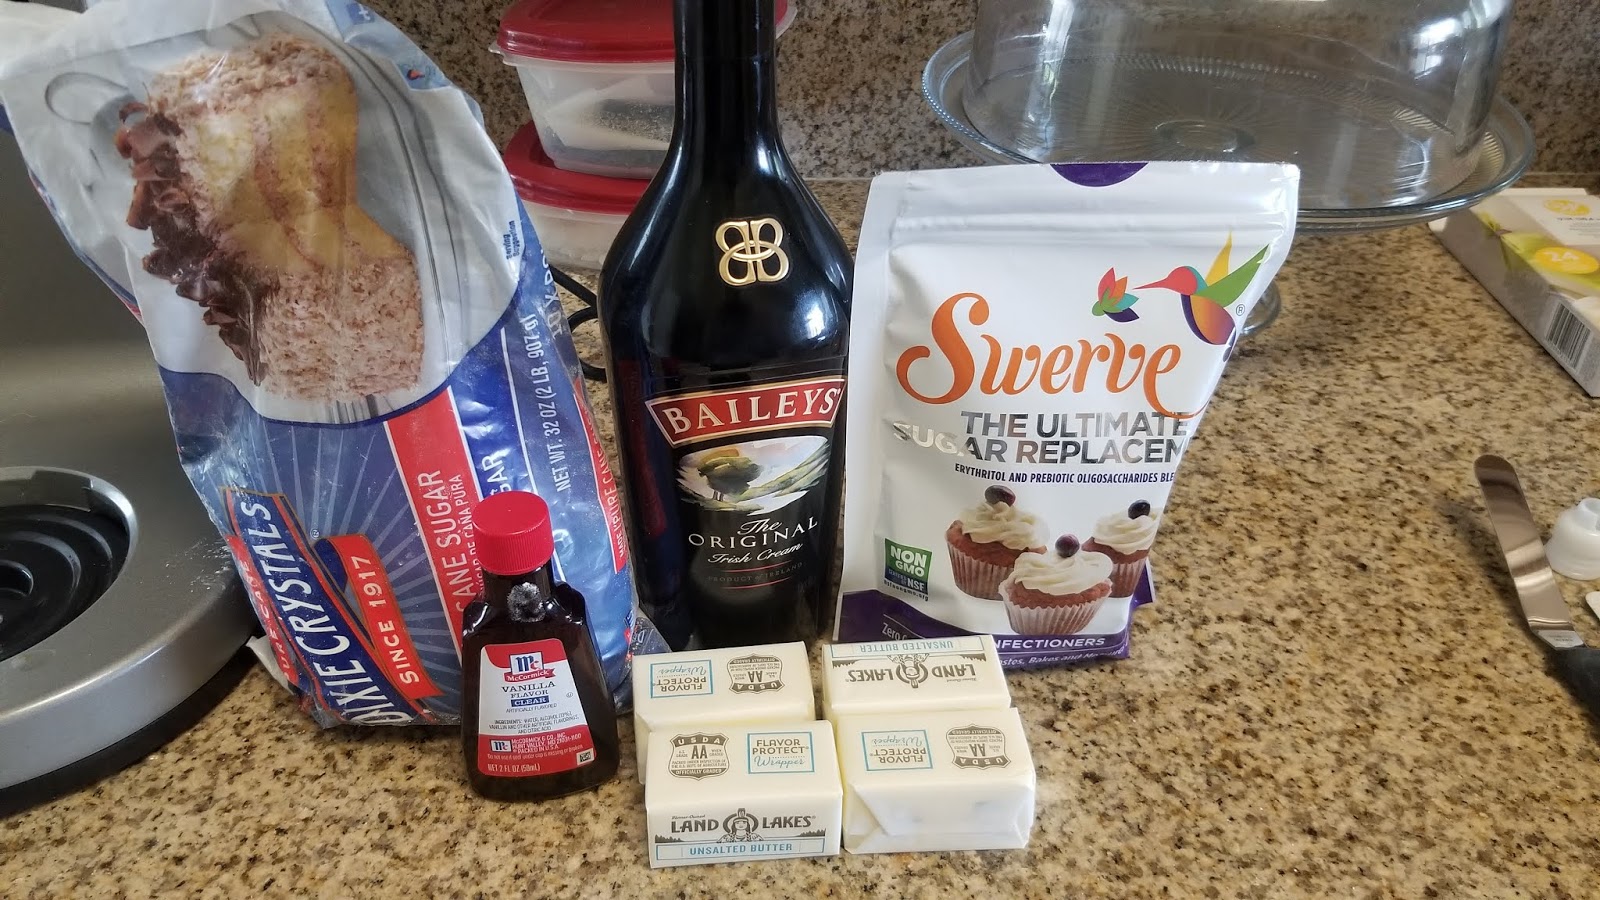
My baking Baileys got a workout this weekend. Now, this frosting recipe is simple enough, unless you accidentally have an over-generous pour over the mixer and get a bit *too much* Baileys in the mix. I swear this was completely accidental. I was grooving too hard to the music and my tablespoon couldn’t handle it. Baileys. Everywhere. To make:
- 1 cup of butter at room temp
- 1 cup of Swerve confectioners
- 3 cups of powdered sugar
- 1 TBS CLEAR vanilla
- 5 actual TBS of Baileys
- Lime green gel dye
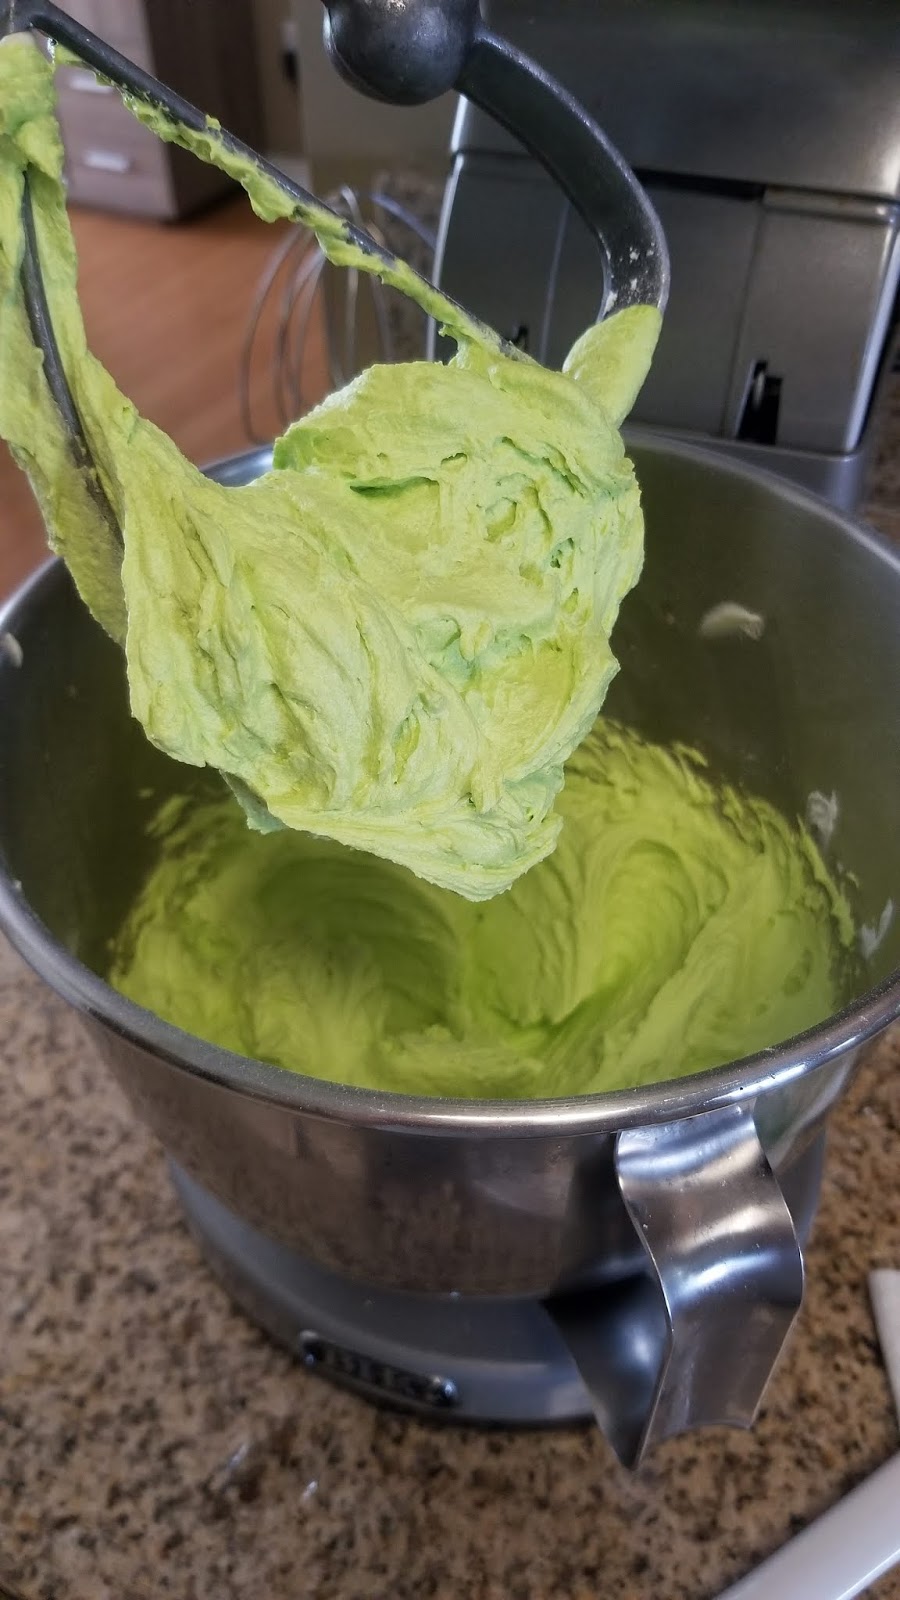
I used less Swerve this time since it was such a small amount of frosting going onto the cupcakes; I find Swerve actually tastes WAY sweeter than regular powdered sugar (another example of strange black magic), so I wanted to trim calories but not too much at the expense of my taste buds that have started to revolt from overly sweet flavors.
Whip the butter for a couple minutes until fluffy then add in the vanilla, two tablespoons of Baileys, and half the sugars. Blend on low until well mixed, then up the speed a bit. Scrape the bowl before adding in the rest of the sugar and three tablespoons of Baileys. Blend and finish up the frosting by adding in a decent amount of lime green gel dye to get a bright, vivid green.

You know, “Wicked Witch of the West” green. It was about this time during the frosting mix I noticed something odd out of the corner of my eye. Above the blender floated the head of a werewolf…anxiously trying to claw her way to the counter to steal my witches’ brew…
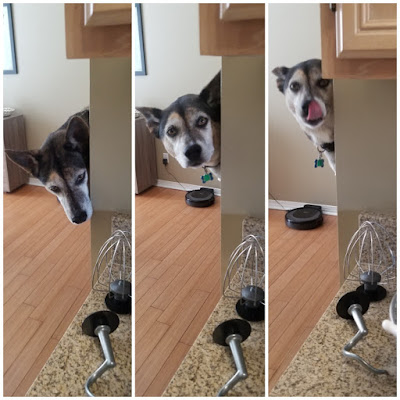
Oh hey there, hell hound. The back of our couch is just beyond the kitchen wall, and apparently, Freyja really liked the way all that boozy Baileys frosting smelled, so she had to jump up there to peek around the corner and check it out for herself. I’m glad I already had my camera out, or I would have been laughing too hard to capture this before she got down (back of the couch is a no-fly zone for the dogs).
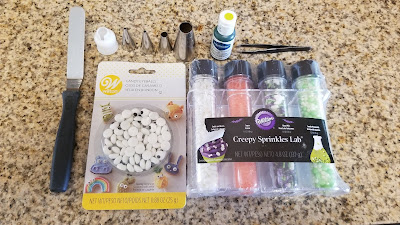
My other witching elements. I also grabbed eye ball sprinkles and a creepy sprinkles mix (both by Wilton and on their website or Amazon or at most craft stores–our A.C. Moore had them). The tips I used for decoration were all round tips: a #12, #5, and #3. I placed half my frosting into a bag fitted with the #12 tip and the other half into a bag with a coupler so I could switch between the #5 and #3 tips as needed.

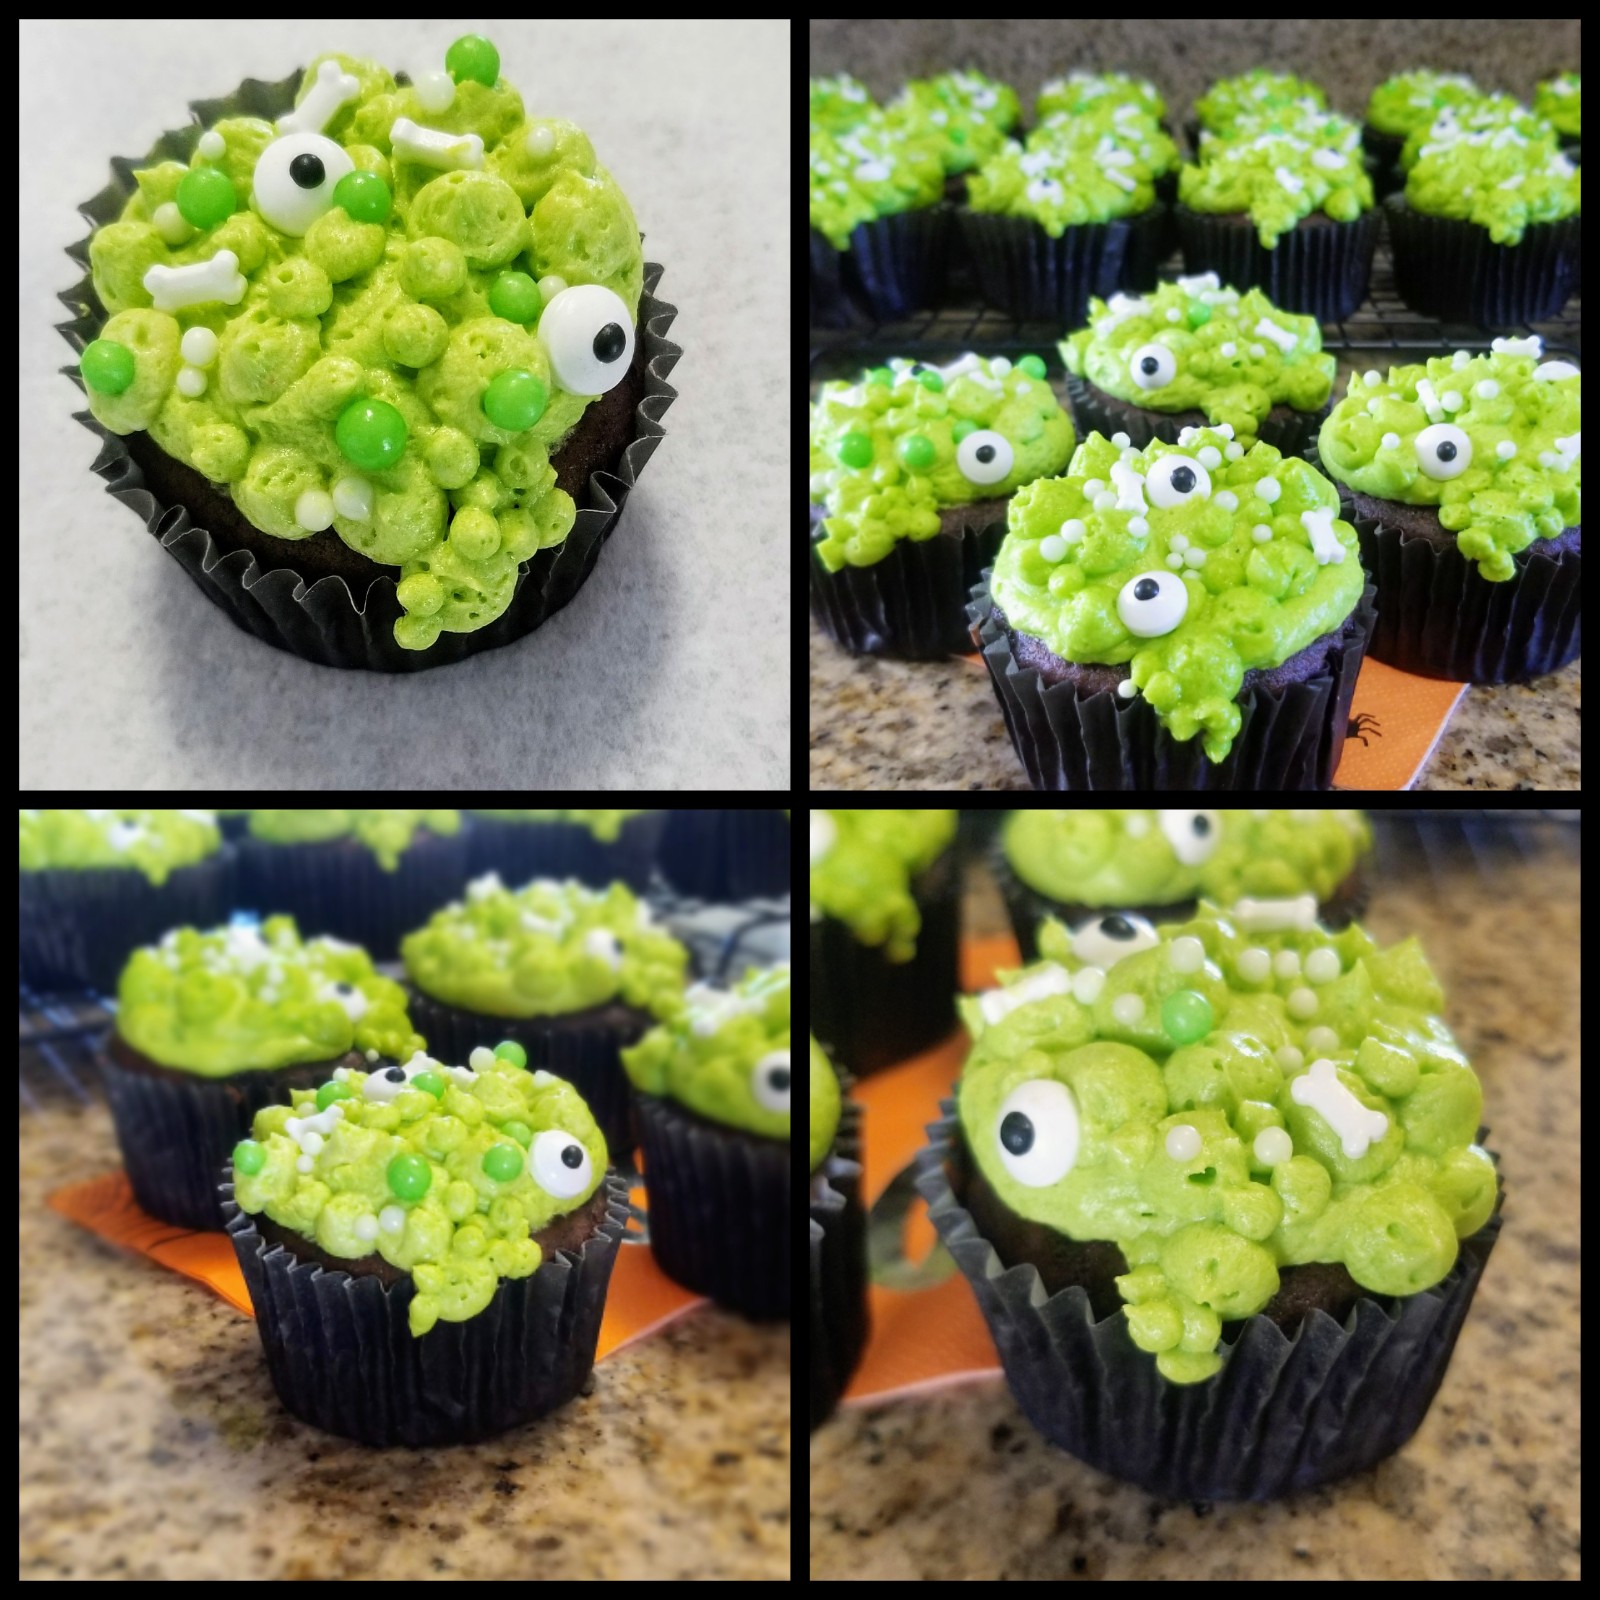
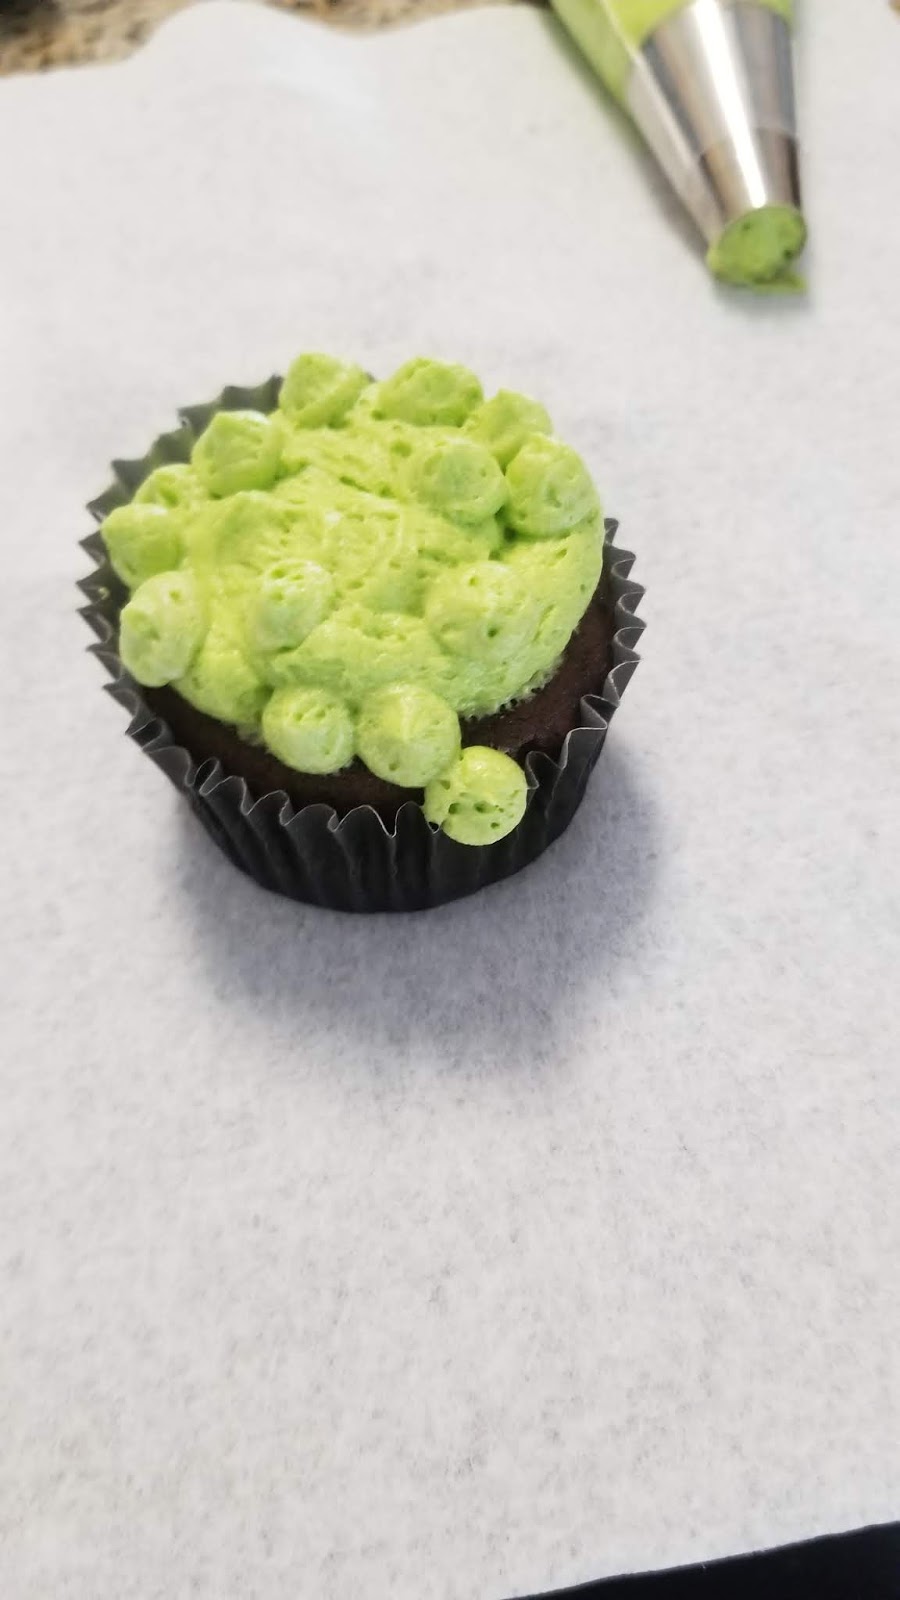
I started off by piping a small circle of frosting as the base with my #12 tip. 
Then I came in with the #5 tip and placed random dots all over the top of this to make large-looking bubbles. 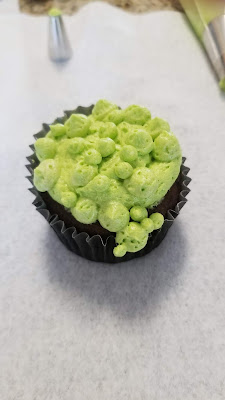
Then I switched out tips on my coupler to the #3 to make tiny little bubbles overlapping the bigger bubbles and cascading down the side of the cupcake/out of the cauldron. 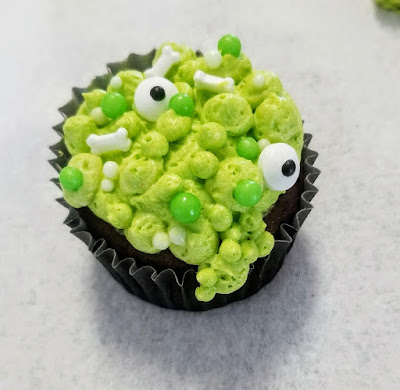
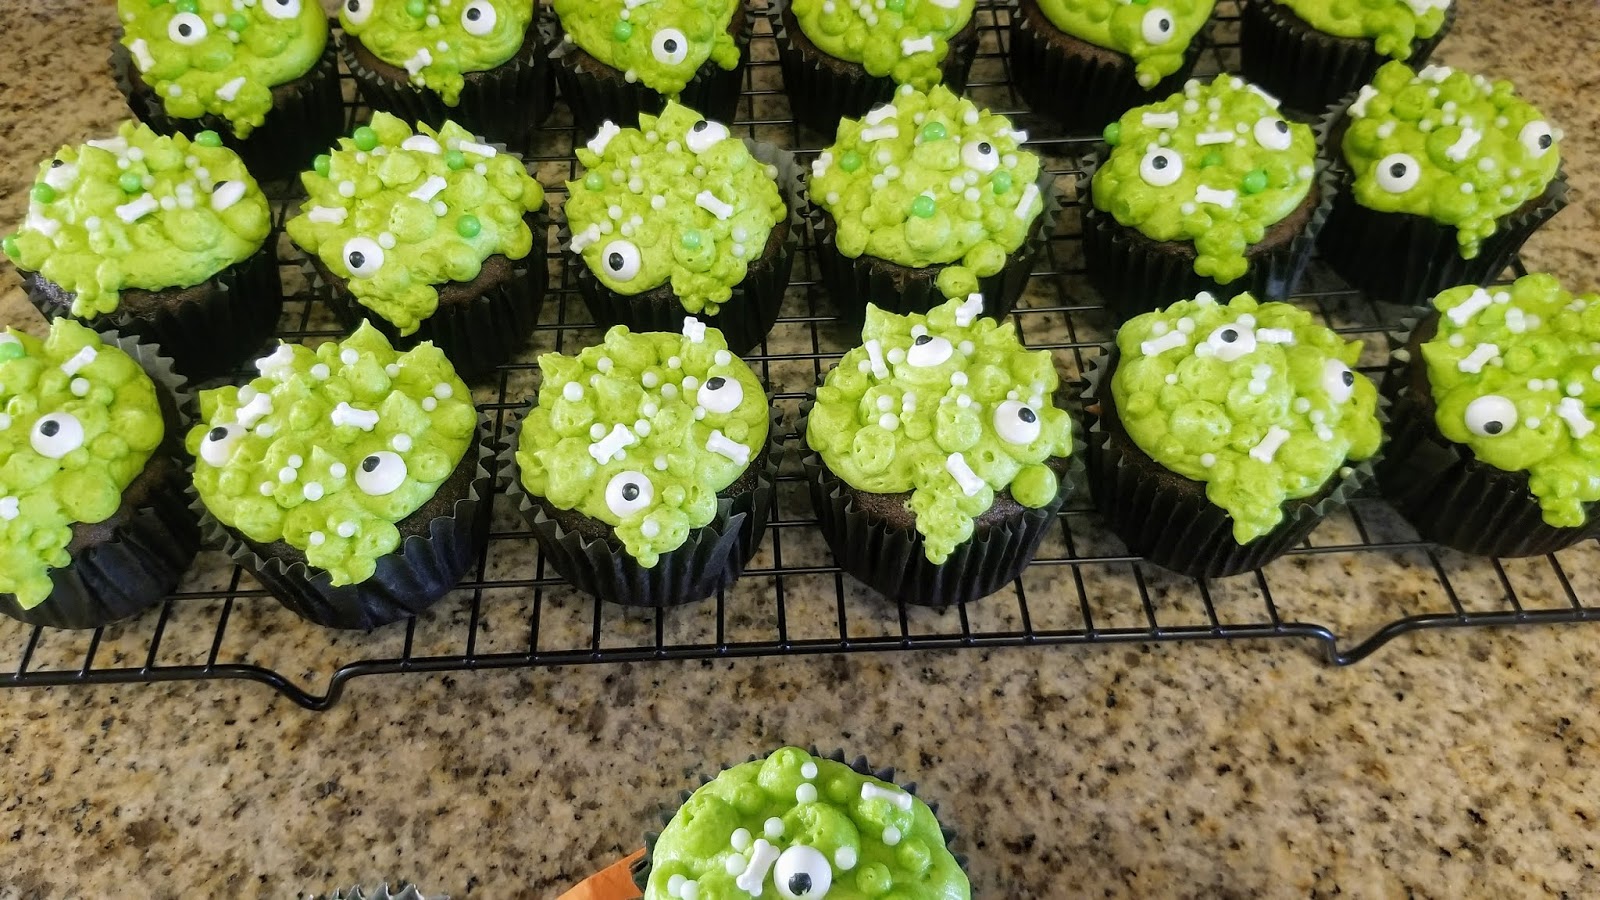
Then I used my food tweezers to place bones, eyeballs, and green sprinkles on top of the cakes for a finishing touch. 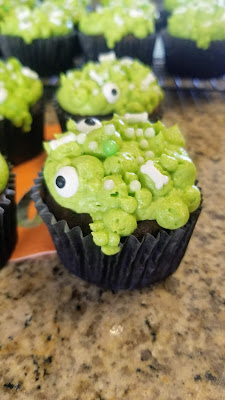
NOTHING is finished without sprinkles, people. It’s a magical element all baking witches use. Guys, these are so stinkin’ grossly cute and so unbelievably easy to make, that you just HAVE to try it out for yourself to add to the Halloween party dessert table. I would say school Fall Festival, but only if you can share with the teachers and not the students. Those teachers need that Baileys frosting in a way you’ll never truly understand unless you yourself are also an educator.
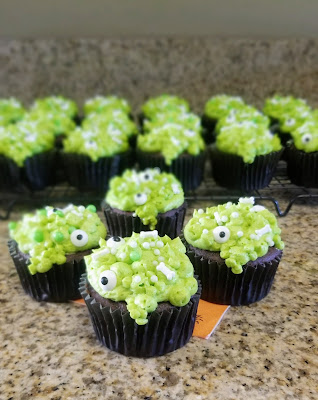
I have an *eye* for decorating. I am having a blast with these Halloween bakes. I’ll be back with one more to top them all before the end of the month. Until then, I froze half of these cupcakes to savor at a later date. I’d keep these chilled in the fridge until about 30 minutes before you’re ready to eat, then set out on the counter to soften up just a bit. Something insane happens at close to room temp with that Guinness chocolate cake and that Baileys buttercream frosting. These are my favorite two alcohols to pair together for that reason. The Guinness brings out the chocolate and the Baileys compliments this so well that it’s practically, well, magic. The fact that these little babies also look like creepy cauldrons full of evil, bubbling potion is literally the icing on the (cup)cake. Stay spooky, my friends. ‘Til next time, my fellow eaters!

Ever get the feeling you’re being watched? -
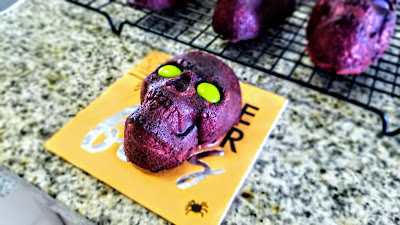
Time to Get Spooky
I spent Sunday morning putting up Halloween decorations outside the house while sweating profusely because it was 90 degrees with over 75% humidity at 9:30 a.m. I was determined to at least make the house look spooky even if it doesn’t feel spooky outside…really, it feels *terrifying* outside because it should not still be over 90, even in Florida, when it’s October. Shortly after I finished putting up outside Halloween decor, I went for a swim in our pool…Fall is weird in the South. But heat be damned (seriously), I was in the spooky spirit, so I decided it was time for the first creepy Halloween bake as well. Derek bought me a mini skull cake pan for my birthday back in JANUARY, and in what I consider to be the greatest restraint I have ever shown in my life, I waited until September 30 to use it. I honestly couldn’t come up with another holiday where skull cakes would be an appropriate bake before October, but know I was tempted to try leprechaun skulls for St. Patrick’s Day or Founding Father’s president skulls for July 4th. Be glad I opted to wait until October.
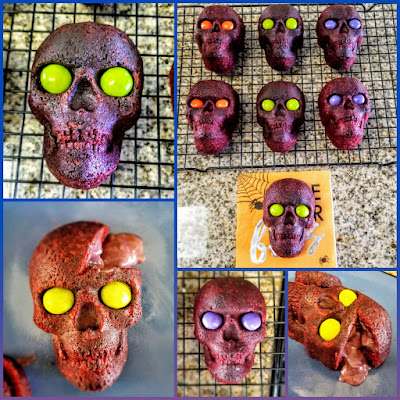
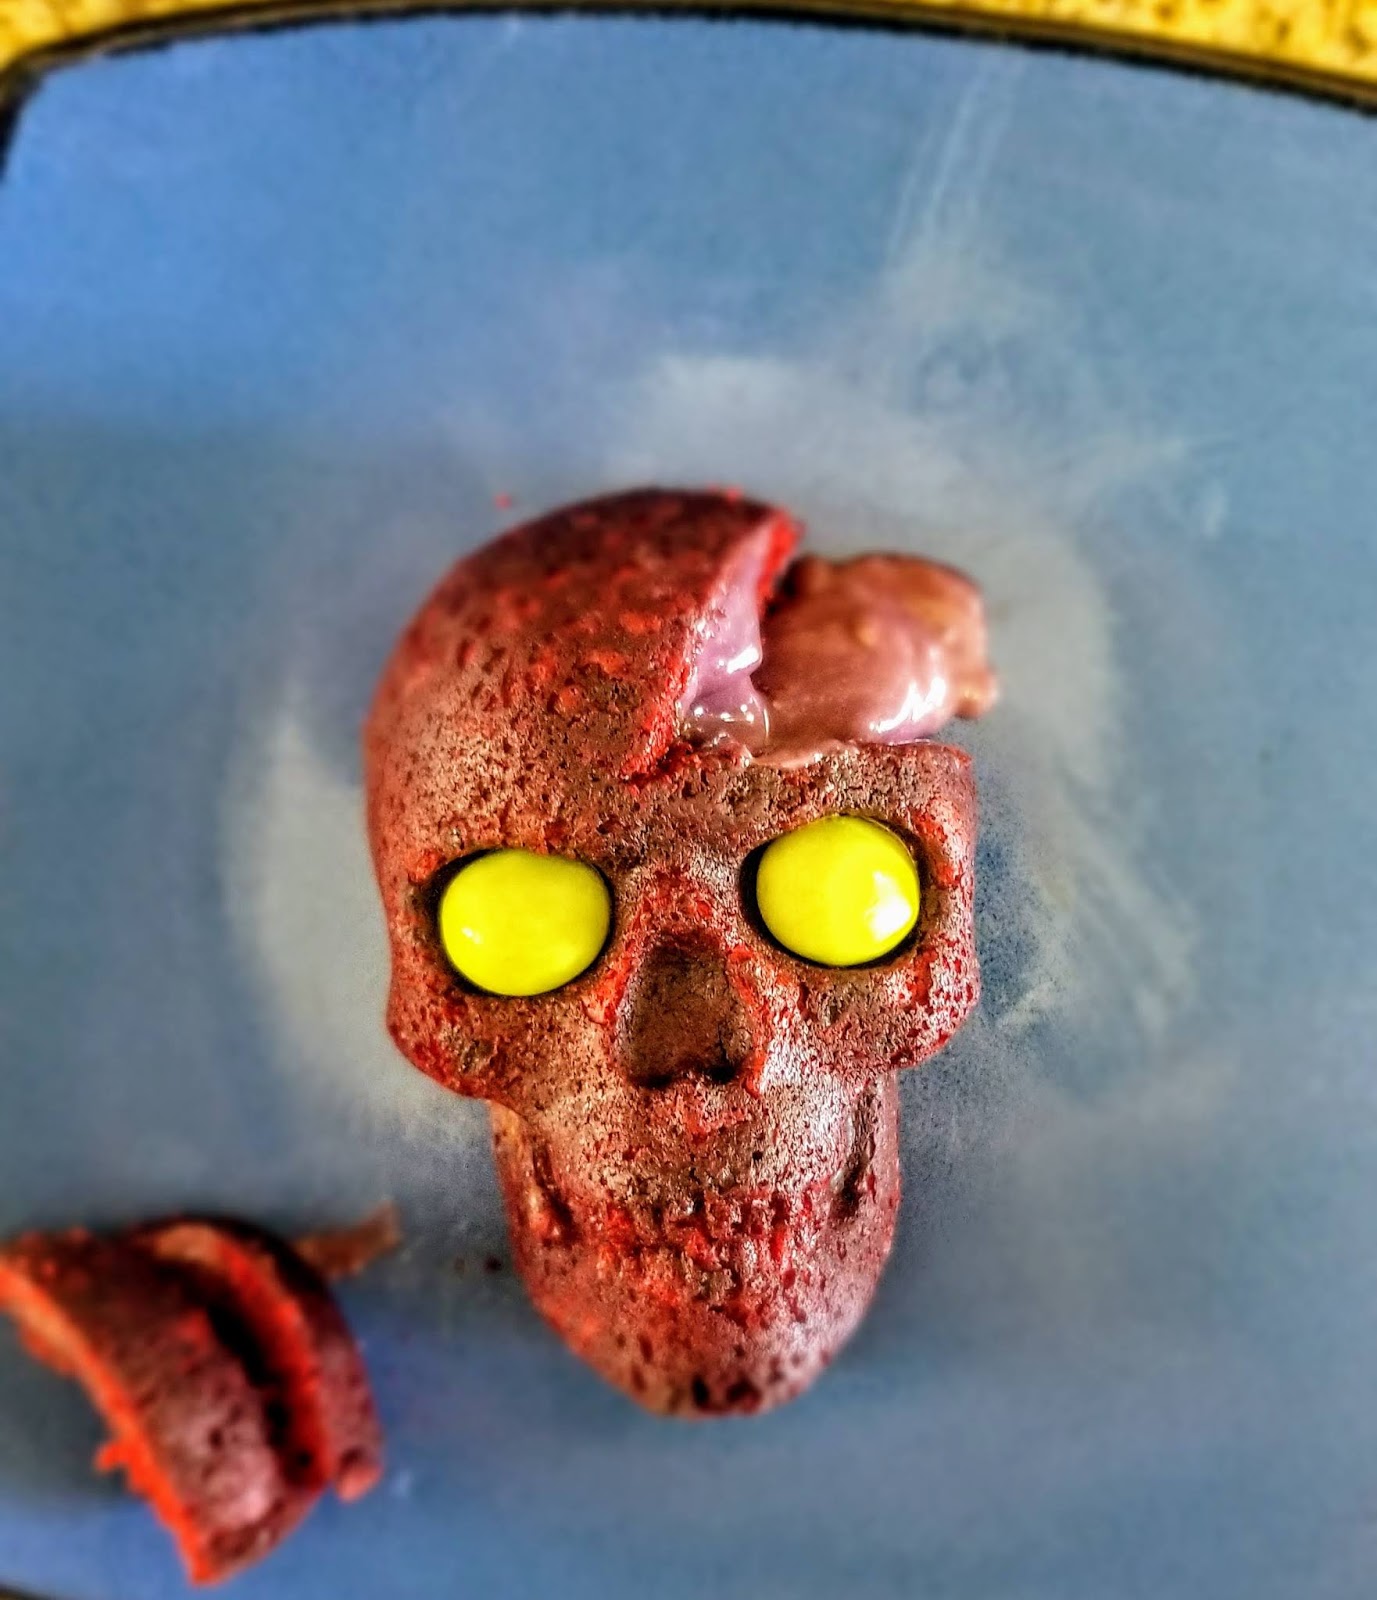
Especially since there’s an oozing brain aspect. Oh yes, I should probably warn anyone with a weak gag reflex that these are red velvet skull cakes oozing with bloody brains cheesecake filling and the most adorably creepy M&M eyes. My bad…the spooky spirit just carries me away. I am a sucker for a good lava cake, and I had never attempted a no-bake cheesecake filling as my lava, but I am extremely happy to report that it works excellently as a lava ooze. And red velvet + cream cheese anything = transcendental dessert experience. I am glad these were not the exception to that rule because even as grotesquely awesome as they look, I need my cake to taste like heaven, not hell. I ended up with 10 mini skulls and leftover cheesecake bombs (a flavor explosion), and one delightfully macabre little skull will only set you back 250 calories. All things are possible when you’re filled with the Spirit of Halloween.

And sugar-free everything. This is an INSANELY easy recipe, you just need to make the cheesecake filling several hours ahead of time so it can freeze. So start by putting together:
- 8 ounces 1/3 fat cream cheese, softened
- 1/2 cup of Swerve granular
- 2 tsp vanilla extract
- 4 ounces Cool Whip Free
- Red and black gel dyes
Mix together the cream cheese and Swerve until completely blended, 2 minutes. Add in the extract and Cool Whip and fold in on low. Now, because I forgot I used twelve bottles of red gel dye for Derek’s lumberjack birthday cake, I had to use a combo of red food coloring and black gel dye to achieve a maroon-purple brain matter combo color. Mix in on low then set your mixing bowl in the freezer for 10 minutes to firm up the batter.

The leftover cheesecake bombs have been making snack time a real joy this week. Now, line a small tray with nonstick paper and grab a cookie scoop. Scoop little mounds of the filling onto the sheet until you have 12 bombs. I only needed 9 but this was because I used too much batter in my first round of cakes…I had never used this pan before and wasn’t totally sure how full it needed to be, so some of my skulls are huge (must have had large egos in their mortal life). Now, place these in the freezer until completely frozen. I left these covered in plastic wrap overnight.
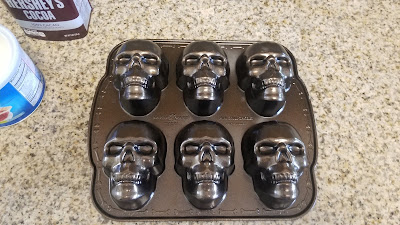
Also could be Terminator skulls. THIS PAN has made my spookiest baking dreams come true. Hefty price tag, but it is a solid piece of construction and will probably outlive me.
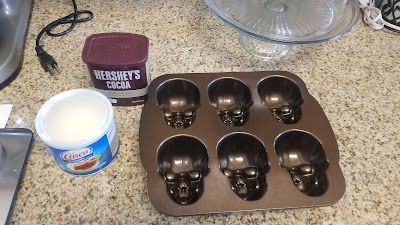
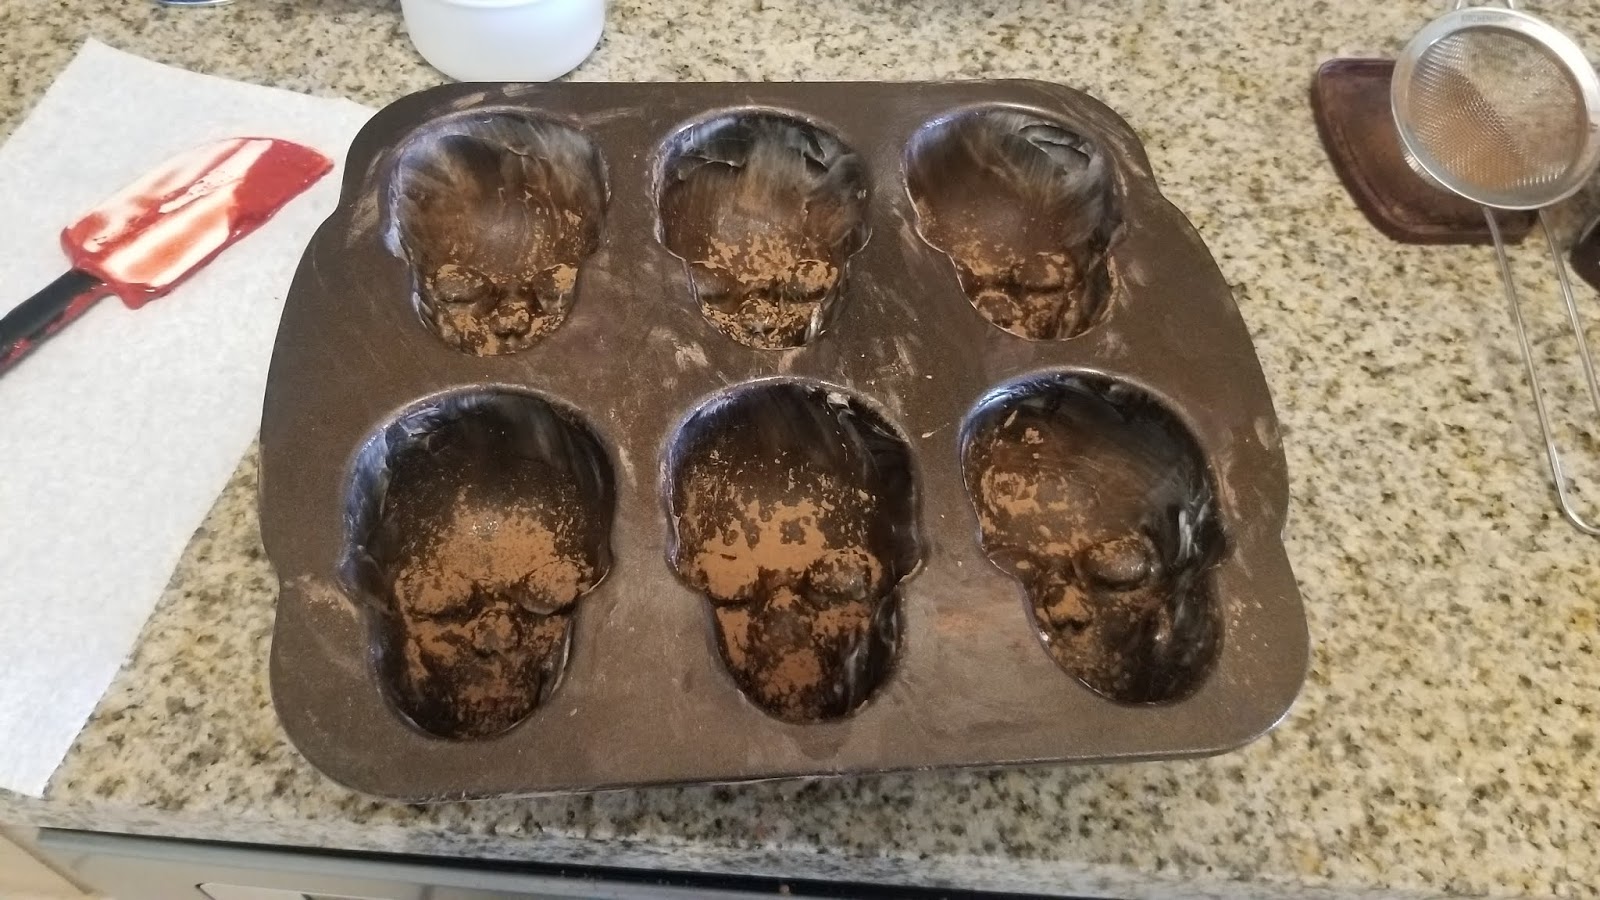
Prepping it takes the longest time out of any other aspect of this recipe. The instructions that came with the pan specifically state regular Pam won’t do for these details, so either a cooking spray with flour in it or prep the pan the old fashioned way: with so much Crisco or butter it’ll never truly be grease-free again. I used one of my food-designated paint brushes to get into all the nooks and crannies of the pan, ensuring each little crevice had more Crisco than it could possibly really need.

Not dirt. I’m not that authentically creepy. Then I dusted this with cocoa. You could use flour, but that would lighten the cakes. So if you want a white cake + extra white coating, using flour. I opted for cocoa powder on some and dark cocoa powder on another batch to have super deep shades of reddish black. Now, on to the cake!
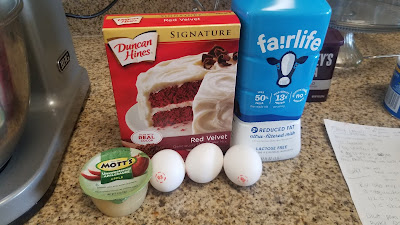
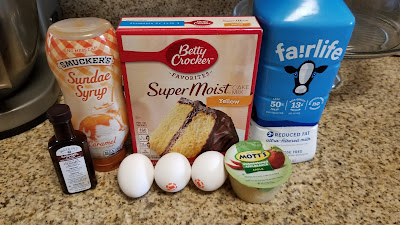
I had to settle for Duncan. Betty was missing on the grocery shelf. For the cake, you need:
- 1 box red velvet mix
- 3 egg whites
- 1/2 cup unsweetened applesauce
- 1 cup of skim milk
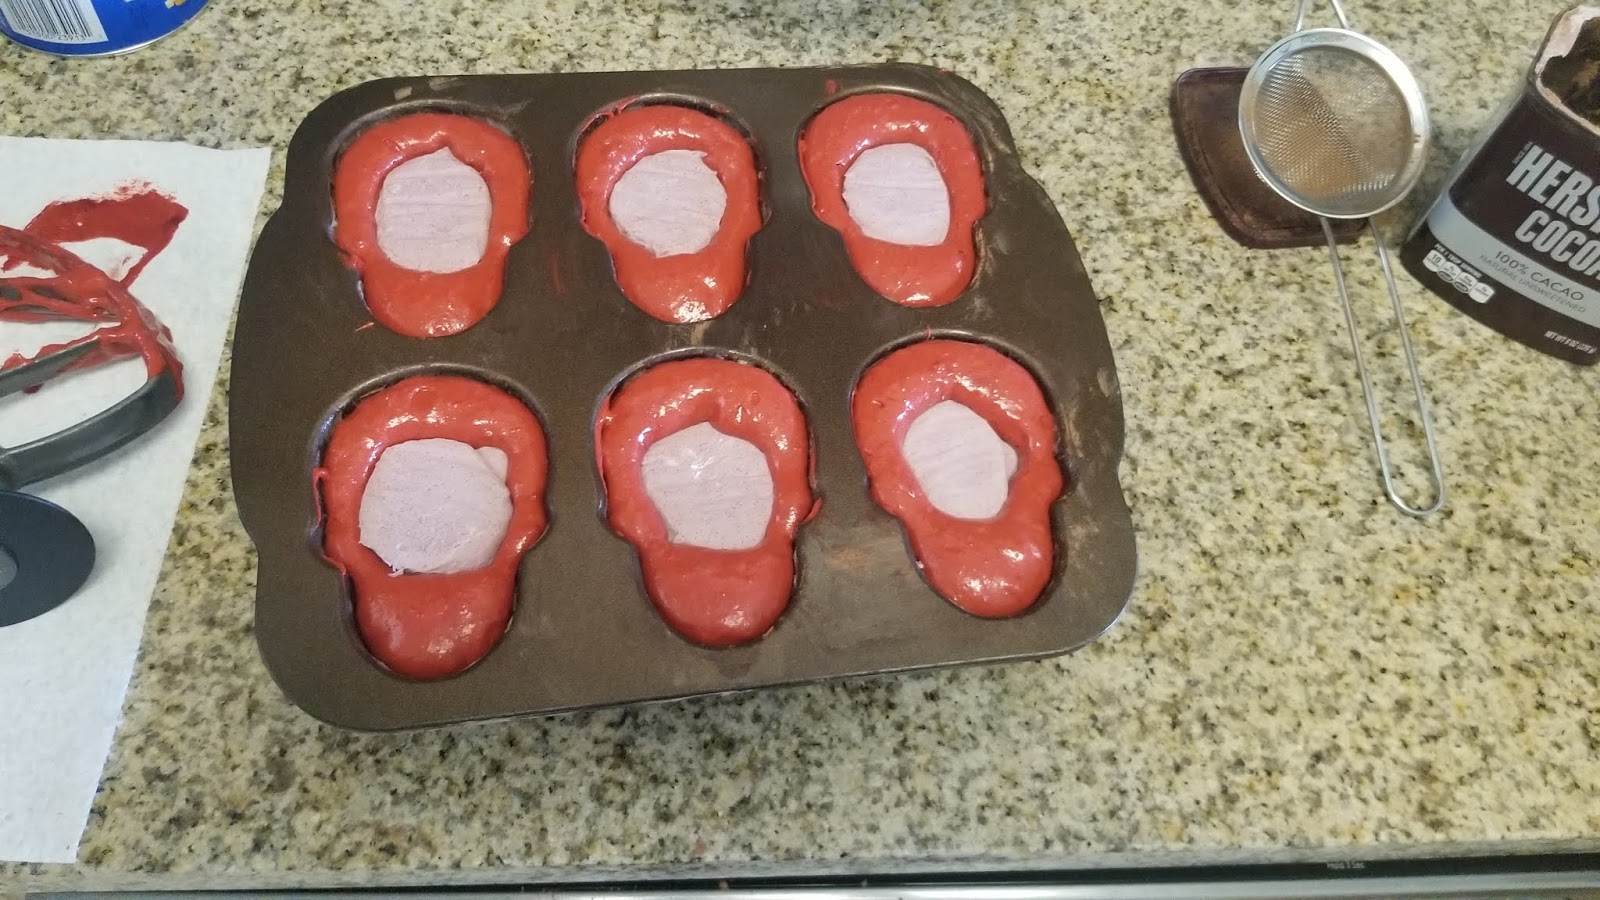
Preheat your oven to 350 and dump your ingredients in a stand mixer. Blend on low for 30 seconds then switch to medium-high for 2 minutes. Once everything is gelled together, grab a liquid measuring cup and pour some of the batter into it. Fill each skull a little over halfway full, then go grab those frozen cheesecake bombs.

Carefully place into the center of the skull. 
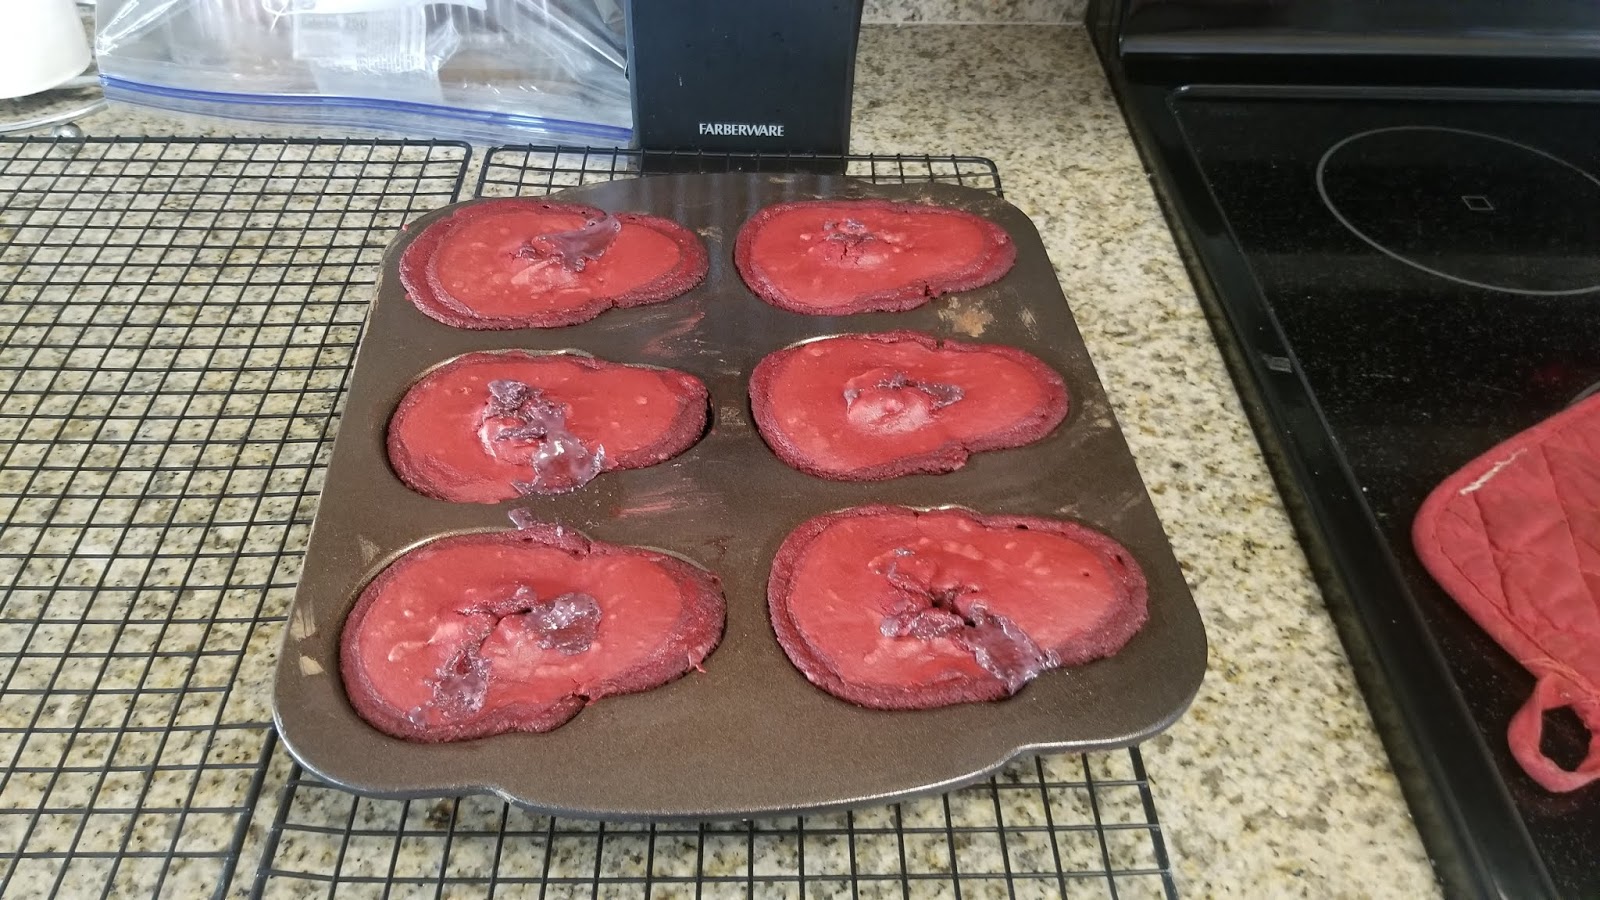
Then use a small spatula to cover up the filling completely. I baked these for 25 minutes and they were cooked to perfection. This first batch was wayyyyy too full, so my cheesecake filling oozed out a bit and some skulls were quite large.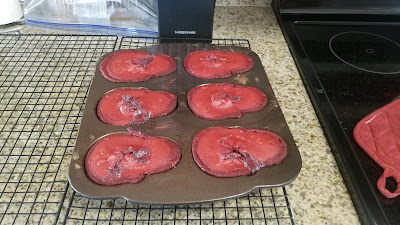
Ugh, but it still looked like it was going to be nightmare fuel when I took them out of the pan (I mean that in a good way). I let them rest in the pan for 10 minutes before placing a cooling rack on top of them and inverting the pan. I left everything like this for another 5 minutes to let things cool, de-puff, and release from the pan on their own.
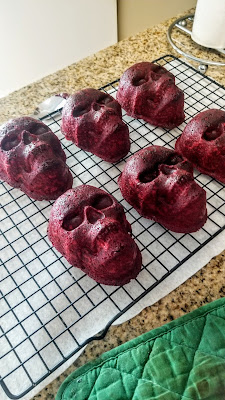
I was squealing with glee at this point while chanting, “So spooky,” repeatedly. This is probably the most jovial I’ve been since, well, last Halloween. 
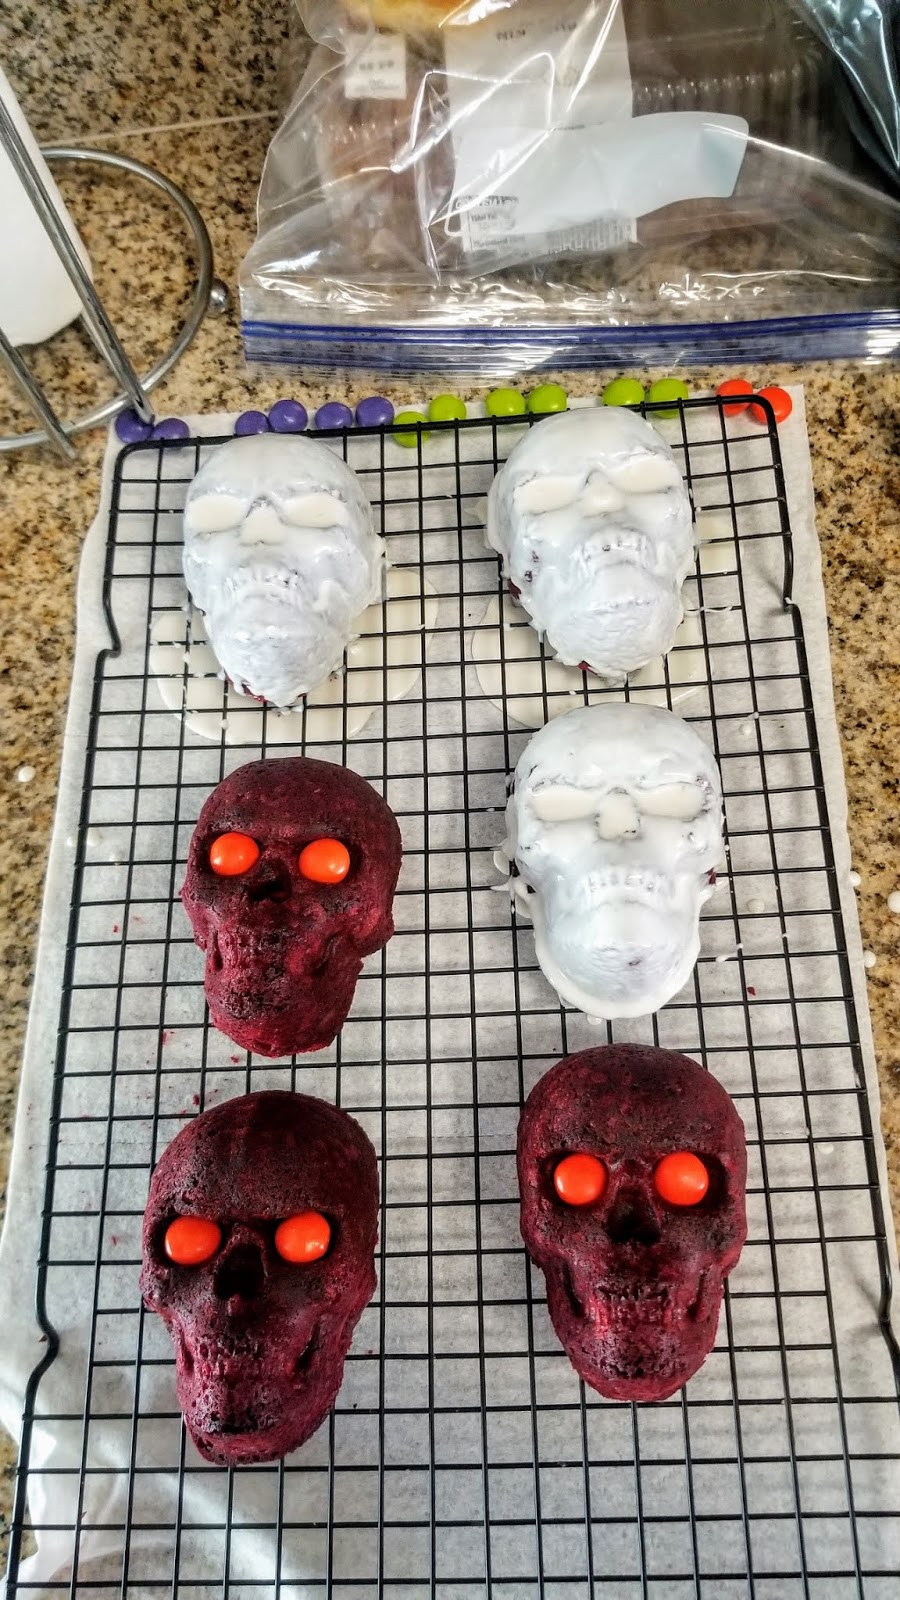
Pre-double-chin trimming. I let these cool completely on cooling racks while I washed out my pan, greased and added cocoa again, and then used the rest of my cake batter and cheesecake bombs to cook the next batch. Once cooled, I trimmed the little excess borders to thin out the skulls. I had originally intended to use candy melts to coat some of these white and others black, but I didn’t like how much detail got lost under the candy melts, so I only made three with coating.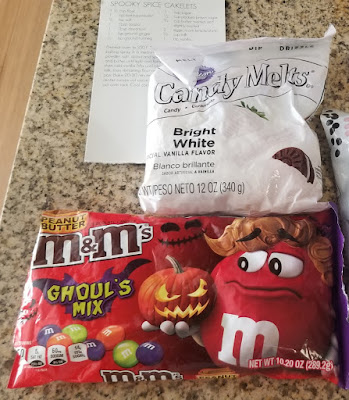
Peanut butter M&M’s are my new obsession, btw. If you want to coat them anyway, I used about half a cup of white candy melts with 2 TBS of skim milk melted together for 1 minute in the microwave on 50% power. I whisked like crazy until smooth and let it rest 5 minutes before dumping into a liquid measuring cup and pouring ganache over the skulls.

Meh. It doesn’t look terrible, but it doesn’t look scary enough either. Maybe if I hadn’t thinned out the ganache with milk and just used the candy melts, but that’s a problem for next year. The eyes and nose sockets held on to way too much ganache as well, so the M&M’s wouldnt really fit into the eye sockets, ruining my plans to make things creepy.
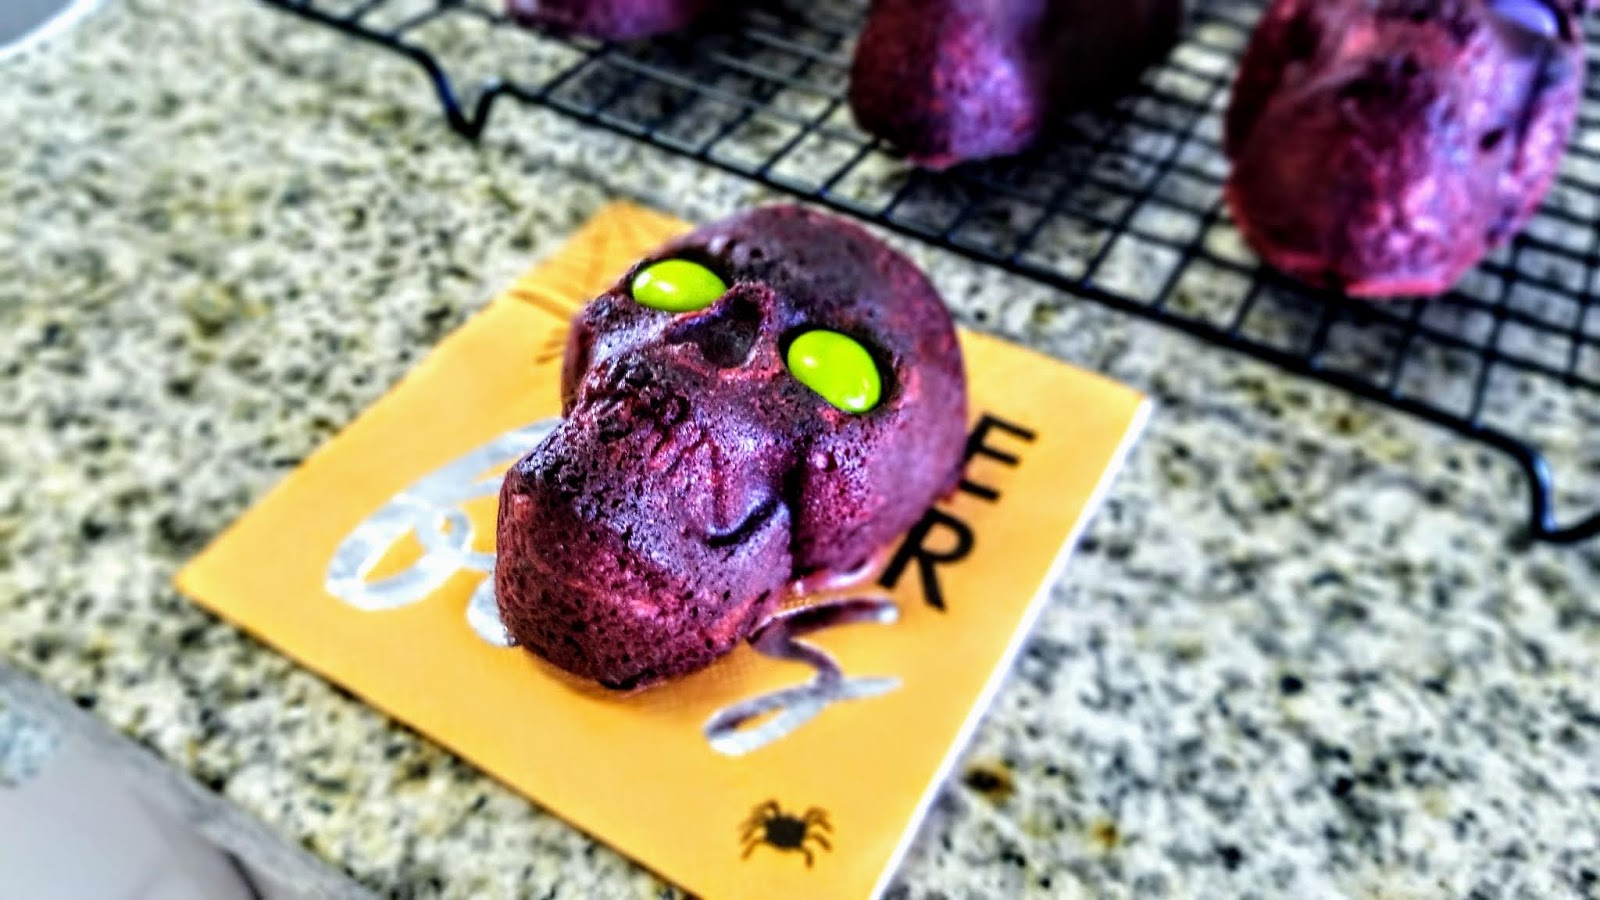
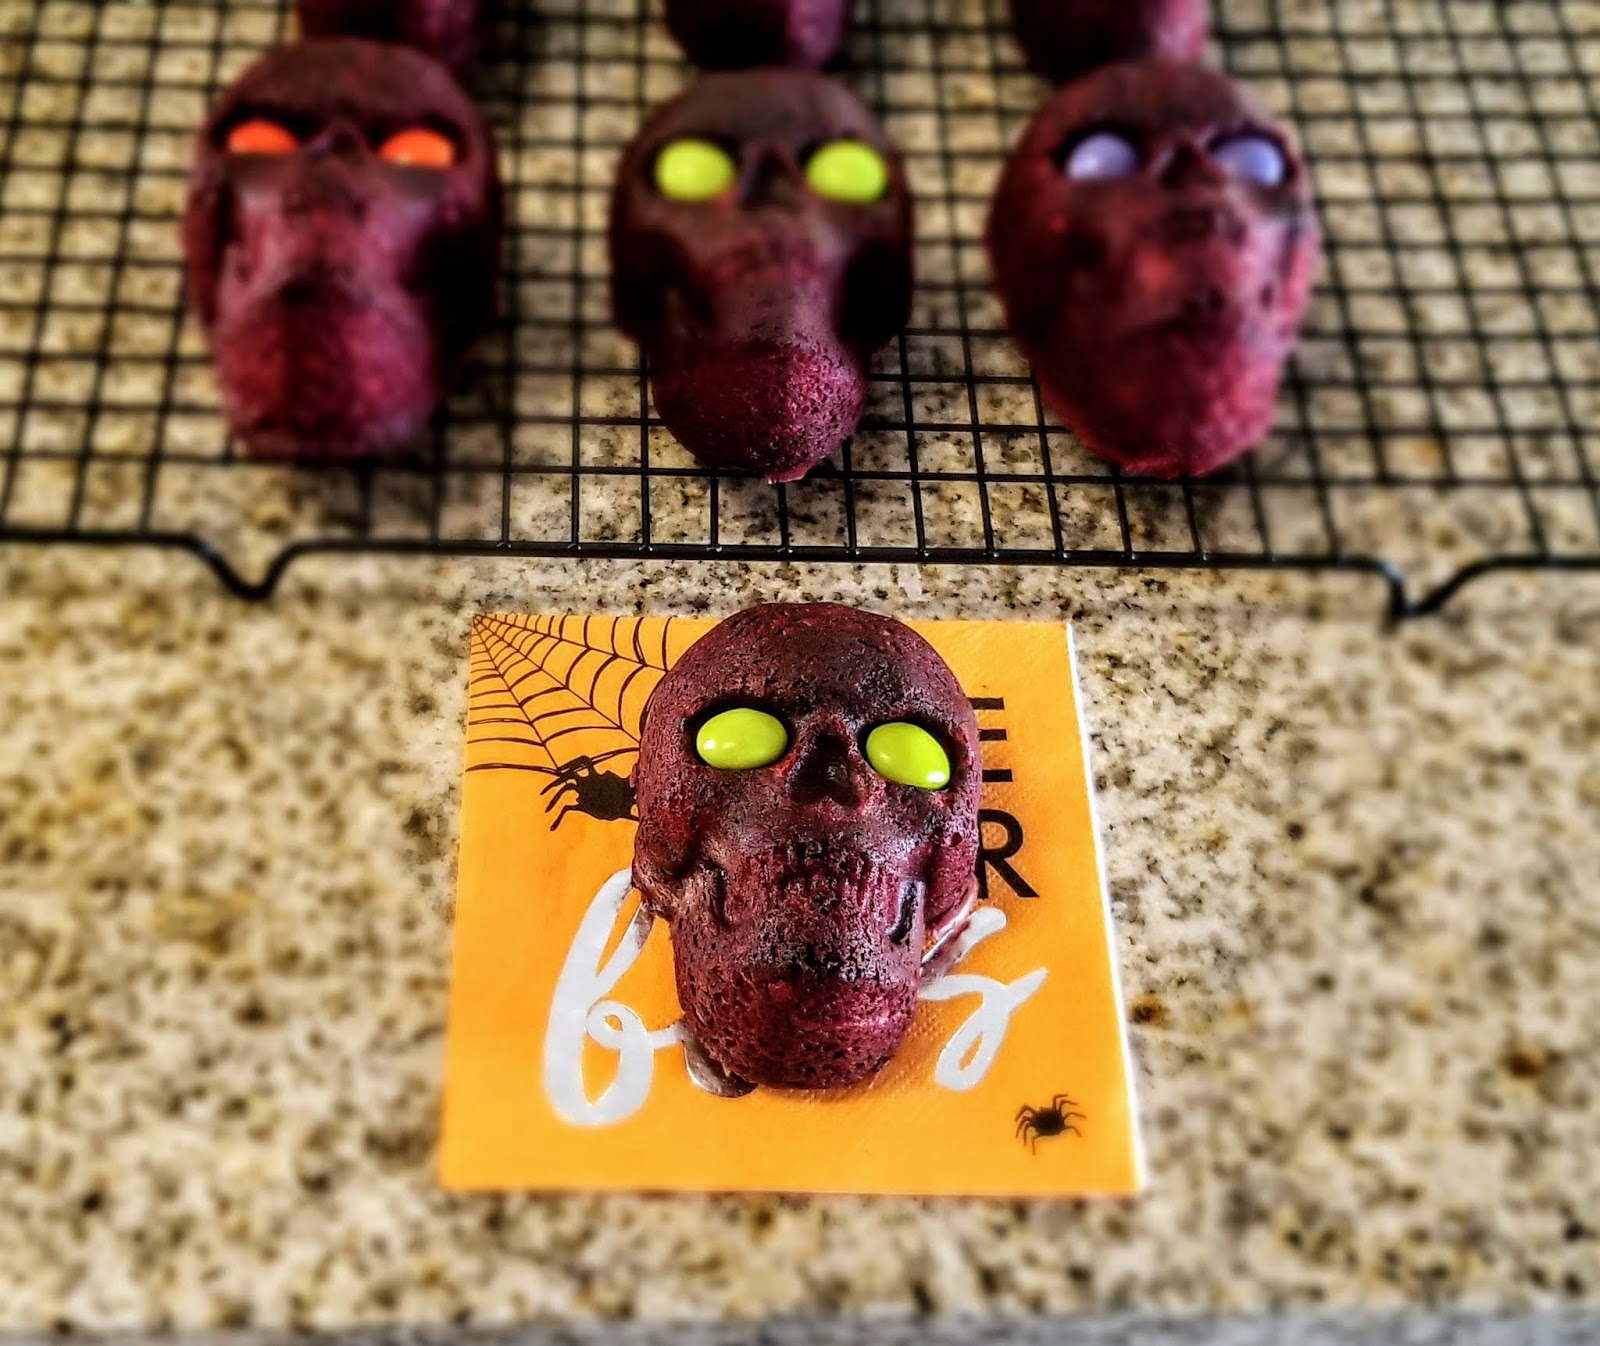
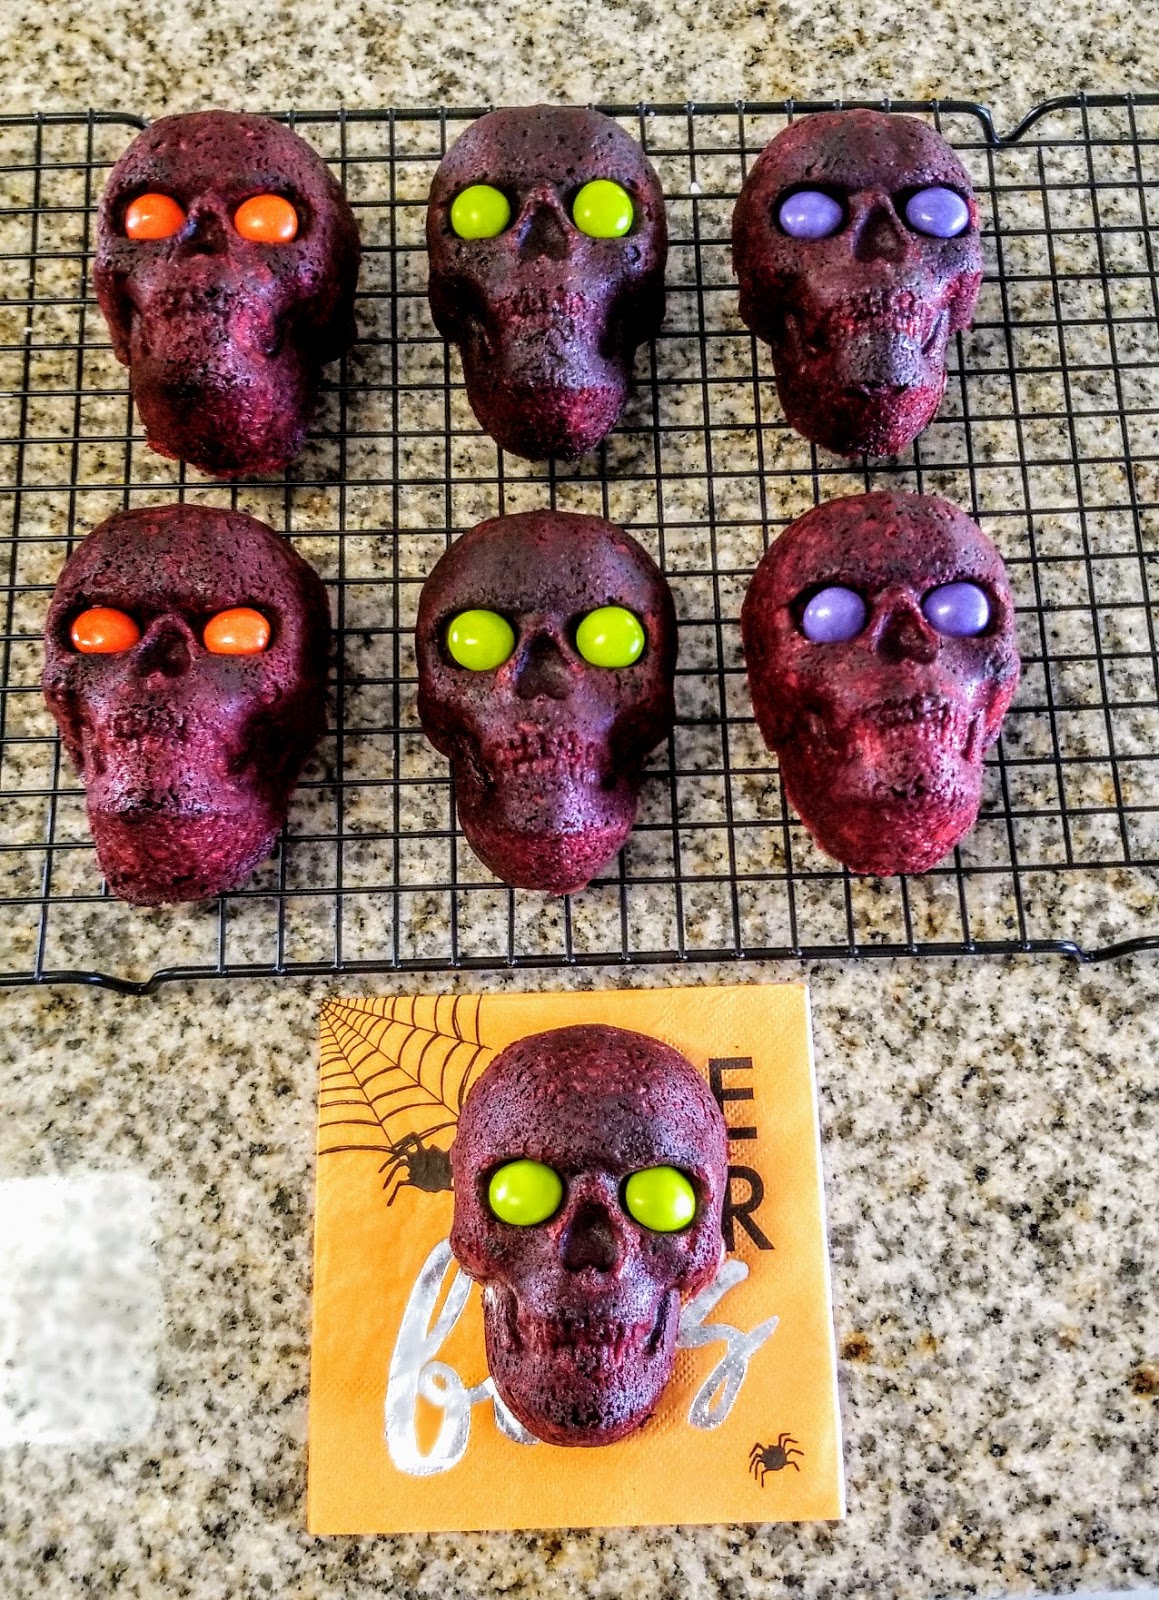
No worries though, they’re perfectly ghastly without ganache. I placed different colors of M&M’s special Ghoul Mix into each skull’s eye sockets, and presto, cakes that would scare small children! A crowning achievement in my opinion.

I thought about naming them, but then I wouldn’t want to eat them. Ideally, you want to serve these right away while the cheesecake filling inside is still hot and liquid. If you need to, simply pop them into the microwave for 20 seconds to heat the cheesecake bombs back up into lava status. You can also forgo the M&M’s and just dust with powdered sugar to serve quickly as well. I went with M&M’s because I’m told they only melt in your mouth, and not in your skull cake’s eye sockets. This was indeed factual.

The best brains I’ve ever eaten. I am so giddy these all came out of the pan in one piece, and even happier the lava action is so ghoulish and ghastly. The gross-out factor is something I go full tilt with during Halloween, so it’s the one time of the year pretty gorgeous gets the boot for pretty gnarly. Since we’re not huge fans of super sweet frosting in my house, having these plain red velvet cakes filled with cheesecake bombs is absolutely the proper amount of sweetness. The cake is nice and mildly chocolatey and the cheesecake is smooth and creamy. It’s going to be tricky not to eat three of these at a time, but I’ll manage…mostly because I still have a full bag of peanut butter M&M’s which I did not know were a thing, and now I can’t live my life without them. I am looking forward to fall temps EVENTUALLY showing up in Florida, but until then, my kitchen is ground zero for all things terrifying and delicious. ‘Til next time, my fellow eaters!

Stare long enough,and they’ll steal your soul… -
A Mountain of a Cake
I live in a state full of beautiful sandy beaches (I also live in a state of denial, but that’s a whole different blog post)…the ocean is a gorgeous shade of emerald, and the sand is pure white. Sounds like paradise, right? Well, I’m sure it is, if you’re a beach person (I refer to them as ‘basic beaches’). I, however, am a mountain person. I have a body made for flannel and awkwardly long feet that only appear normal in size in boots. I love to watch the sun cascade over the mountains in the morning for a few moments of what feels like magical, limitless possibilities. The air is crisp, the outdoor adventures are awesome, and being in the mountains is the only place I can truly consider myself optimistic (see, without all that humidity, I have *great* hair days, and that makes any woman happier than usual). After our August trip to Portland, trekking through the Columbia River Gorge and generally enjoying an active, significantly cooler paradise, I was inspired to try something new. I know, me, true lover of routine. See, the mountains really do make me an adventurous little thrill seeker. I had been studying Instagram and YouTube videos of cakes decorated with palette knives and painted buttercream for ages. I knew it was finally time to go for it and create a buttercream painted cake as an homage to my preferred outdoor scenery. I mean, most of the planet’s surface is covered in water. Beaches-schmeaches. Gimme those mountains!

I was bear-y excited how this turned out. Sorry. I made an edible chocolate bear, so this pun was going to happen eventually. I mean, you can tell they’re mountains, so I feel like for my first attempt, not too bad. I’m certainly no Bob Ross. I wasn’t painting happy little trees…more like demented little shrubs, but still. The cake itself was also another foray into adventure, and what a delicious treat that ended up being. It’s a caramel cake with caramel buttercream because fall is close, but not “pumpkin everything” close. It’s the right amount of sweet caramel notes paired with buttery yellow cake, and it leaves a nice lingering taste that makes me think of Michigan cider mills and delicious caramel apple cider. Then I remember it’s still 95 degrees outside and the dream shatters, but in that moment, I am in pure Autumnal bliss. And for only 324 calories a slice for 12 slices, no guilt to be found anywhere!
And super easy to throw together. As always, doctoring a box cake mix and turning it into something bakery-counter worthy is not difficult. For this scrumptious caramel cake, you need:
- 1 box yellow cake mix
- 3 egg whites
- 1/2 cup of unsweetened applesauce
- 1 cup of skim milk
- 3 TBS caramel sauce (could also use dulce de leche, trying this next time)
- 1 tsp caramel extract
I made a maple cake not long ago that required, obviously, maple syrup; however, this much stickiness made the cake very delicate. It was a 9×13 sheet cake, so I didn’t need it to be strong enough to hold up several layers. But this cake needed to be able to withstand the weight of multiple layers, so instead of using a 1/2 a cup of caramel sauce, I swapped in caramel extract to taste to get the right amount of caramel flavor while keeping the cake dense enough for stacking.

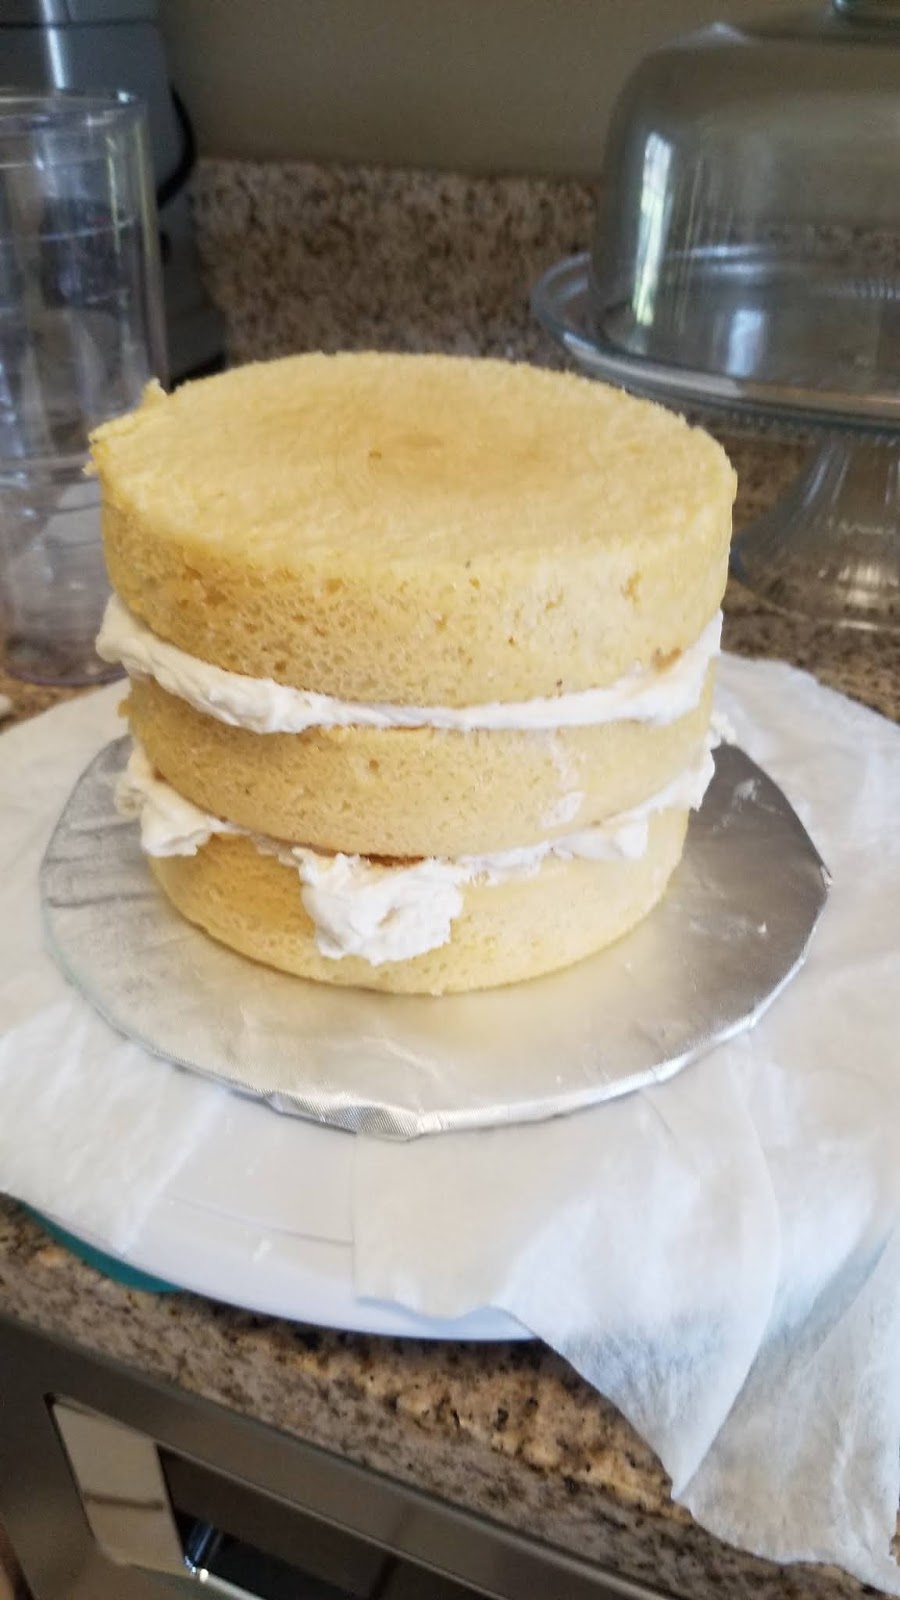
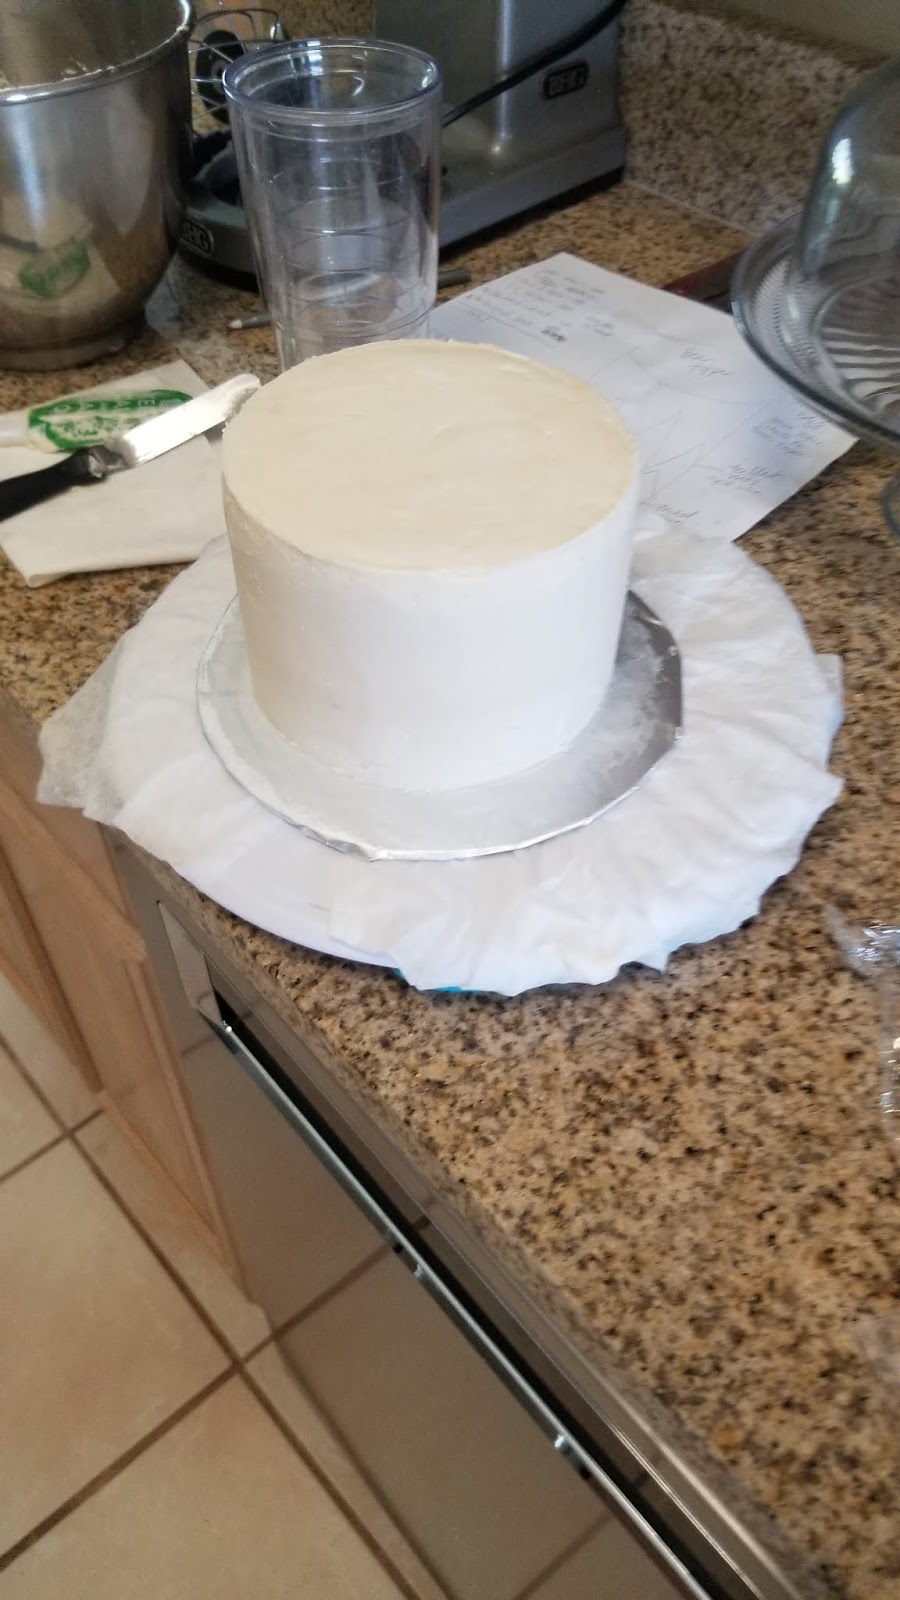
She’s a tall one, alright. Preheat your oven to 350, add all ingredients to your stand mixer, and blend on medium-high for 2 minutes. Turn batter into three 6-inch rounds that have been well greased with cooking spray. Bake for 28 minutes or until a toothpick comes out clean. Let these rest in the pans on a cooling rack for 10 minutes before turning out on to the racks to cool completely. Level your cakes and freeze for a few hours. I wrapped mine in plastic wrap, placed in a Ziplock, and froze overnight.

Ah butter, basic element of all things delicious. The frosting is incredibly simple to throw together as well. Once your cakes are frozen, you’ll need the following for frosting:
- 1 cup of butter at room temp
- 2 cups of powdered sugar
- 2 cups of Swerve confectioners
- 1.5 TBS of caramel extract
- 1 tsp vanilla
- 3 TBS skim milk (could totally go for Baileys Salted Caramel here if you do NOT need a pure white frosting, but I did, so..sadly Baileys free)
Blend the butter until fluffy and silky looking, then add in 2 cups of powdered sugar, the extract, and the vanilla. Blend, scrape the bowl, and add in the Swerve and milk. Mix well until everything is incorporated. I ended up with 26 ounces of frosting, but painting with buttercream surprisingly doesn’t use much frosting, so I had a little over 8 ounces leftover (totes putting the leftovers on top of a waffle at some point this week).
Smoooooth. I place my cake layers face down, use a piping bag full of frosting with a #12 round tip, slather a few circles on top of a layer, smooth, add another layer, and repeat until all my cake rounds are assembled and the top of the cake is frosted. I refill my bag and pipe around the cake to create a nice thick layer that I then smooth out with a small angled spatula first, then come in with a bench scraper for about 7-8 passes, removing excess frosting with each pass, cleaning my bench scraper, and going again until I have a completely smooth surface. It sounds like way more work than it is, and you don’t even have to freeze for 15 minutes and come back in and smooth out with the paper towel trick because the thick layer of frosting you pipe on first helps cover up any weird or uneveness, and the scraper takes care of the rest. Now, freeze this for at least an hour. Painting on the buttercream will tear the frosting layer up if it isn’t frozen. I froze for 3 hours (the cake. Not me. I melted in Florida heat while waiting).
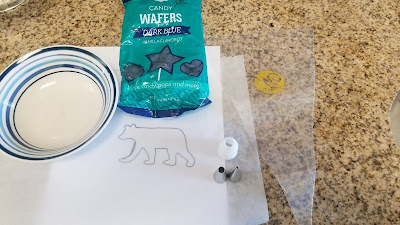
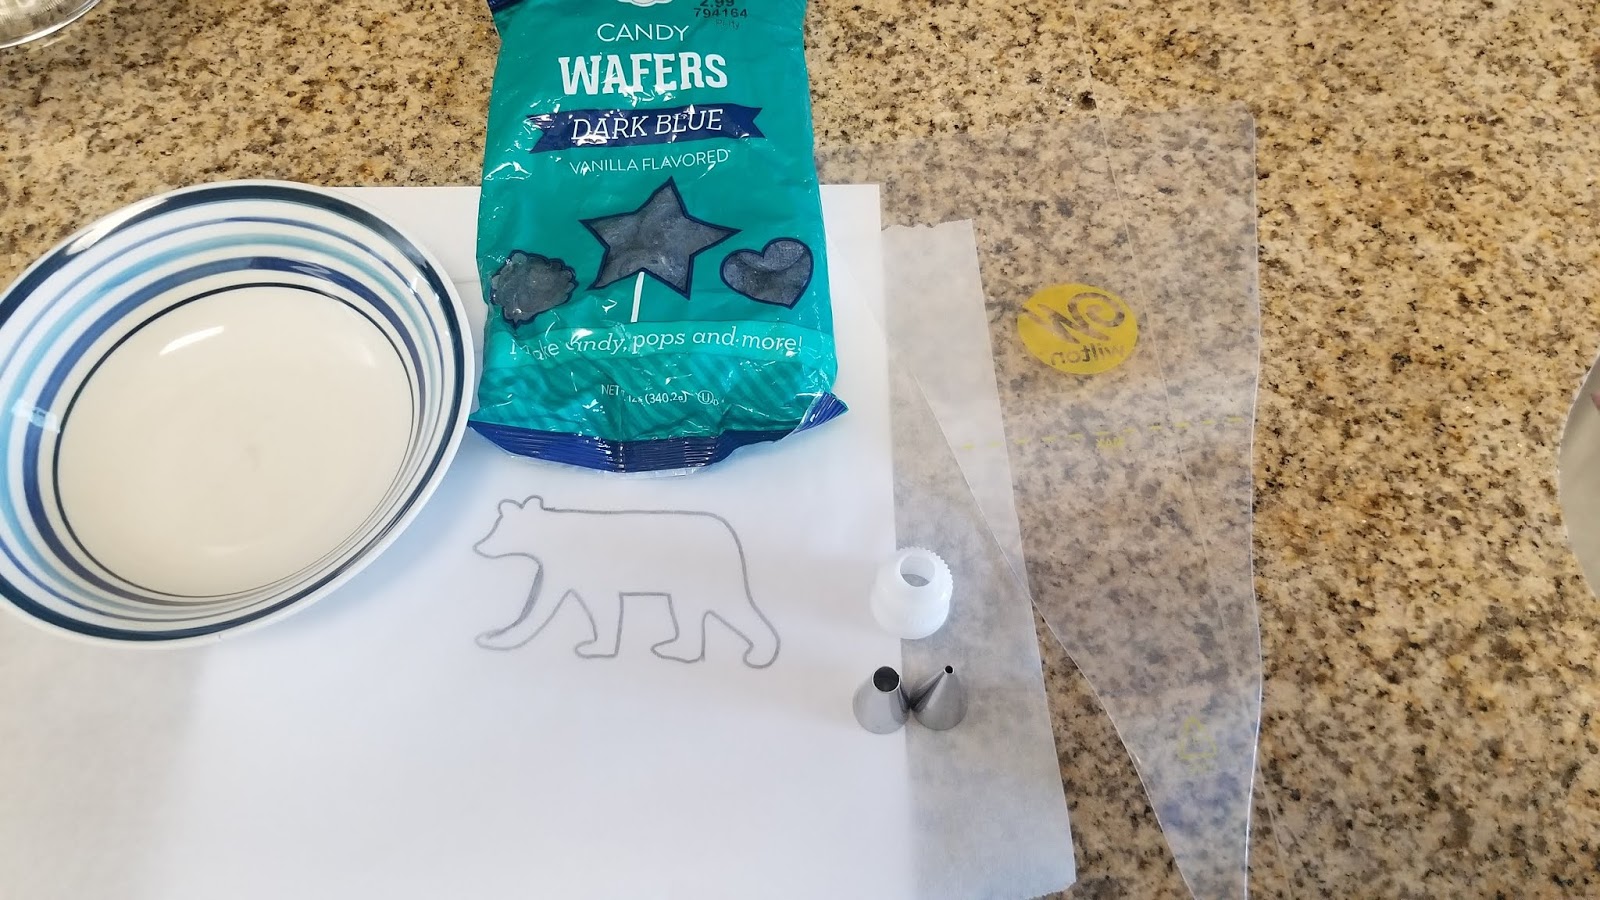
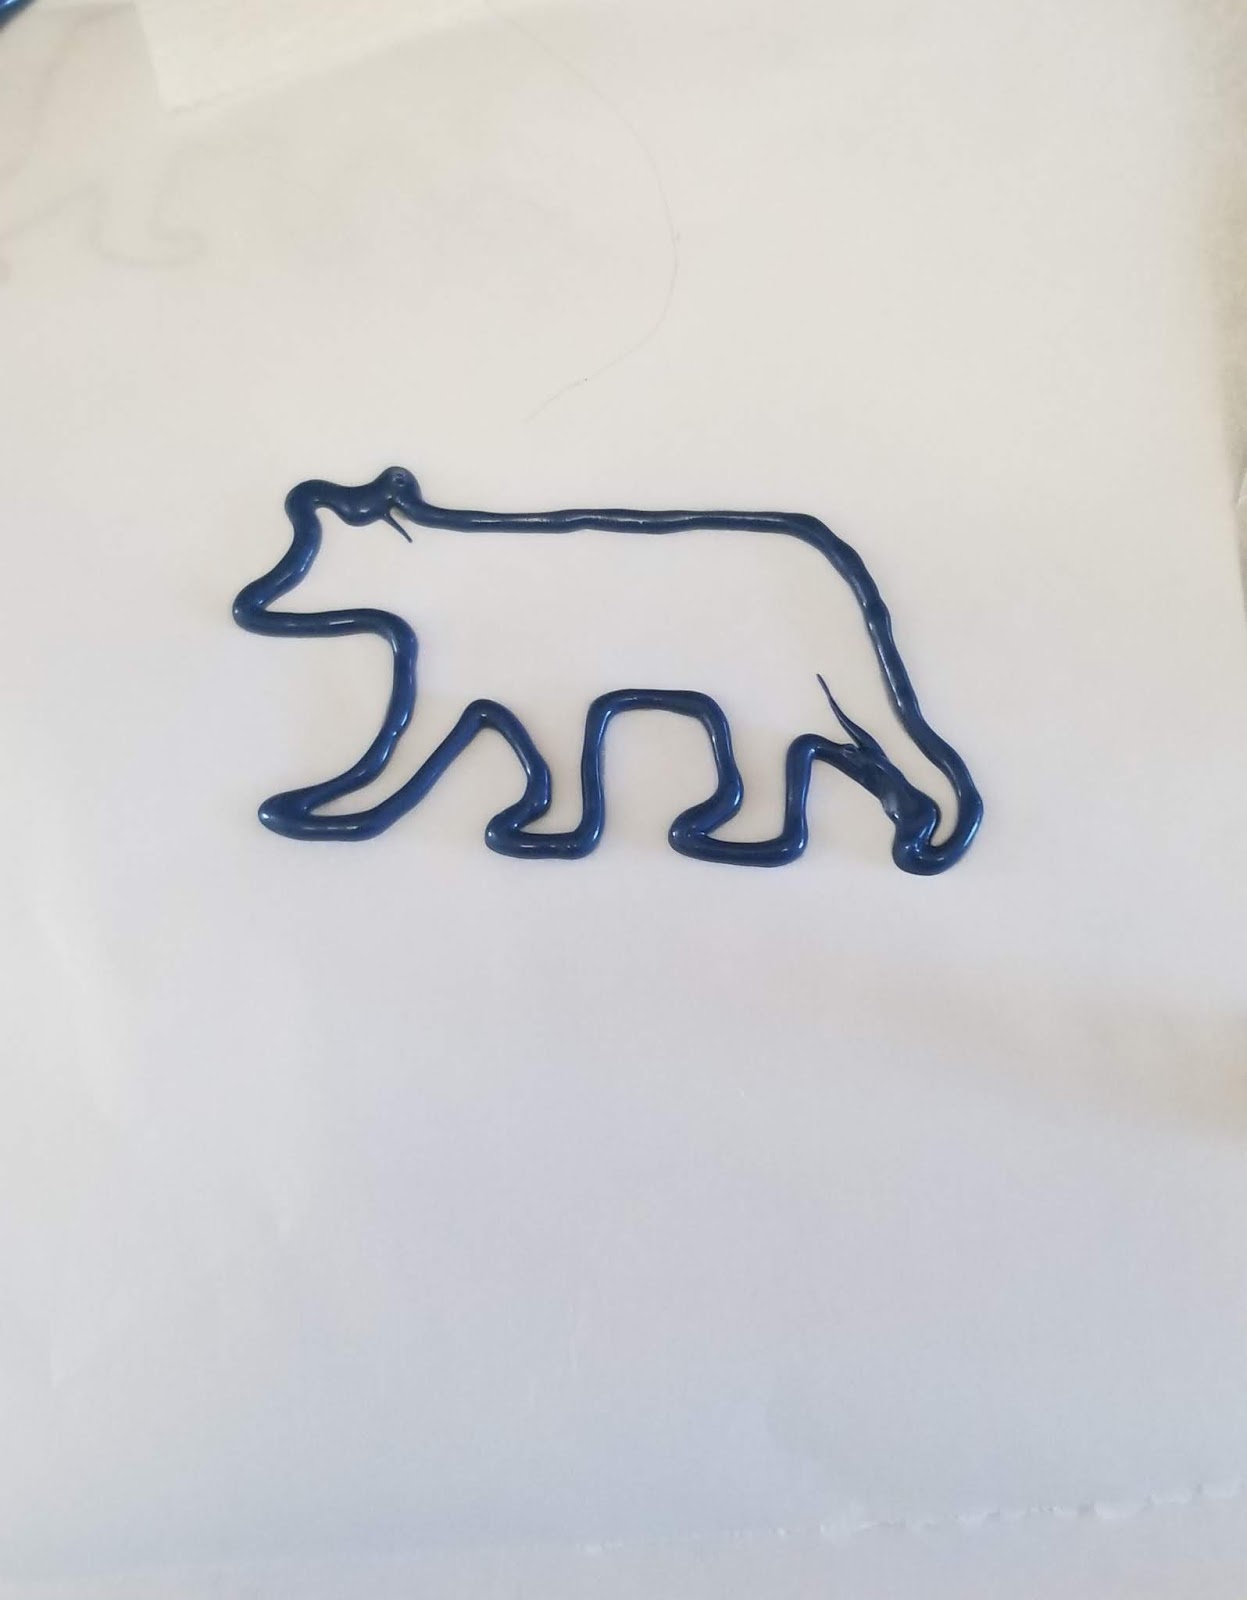
And I made a tiny bear friend. While the cake is freezing, you can make your bear topper by tracing out an outline of a bear on Parchment paper, flipping it over, and melting a few chocolate melts in your preferred color by following package instructions. Place your melts into a piping bag fitted with a small round tip and let cool for 5 minutes.
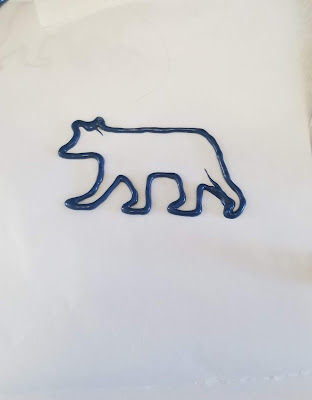
I used a #3 tip to trace my outline. 
And then a #5 tip to flood/fill in the rest. I used a toothpick to blend everything together. I set him aside to firm up for a half hour on the counter. Then I got even artsy-ier.

Behold, my palette knives! I ordered a set of palette knives off Amazon. Was not remotely sure what I was looking for, but I went for it, and these worked out decently. I only used #1 and #3, and honestly, I needed one that was even smaller than #1 in some places. I knew I wanted light blue mountains, blue mountains, dark navy mountains, green trees, and rock candy accents, but not surprisingly, I have amassed all these things thanks to this never-ending sweet tooth and desire to bake.

My painter’s palette was tasty. I dropped a few dollops of frosting onto a large plate and mixed my colors with the palette knife. One drop sky blue in one, several drops blue in another, and several drops navy in a third. I also kept some plain white for snow, and later on I added green to that to create trees. I practiced maneuvering the knives on some Parchment for a bit before going for broke on the cake. They’re pretty easy to handle, but since the cake was frozen, I had to work quickly to paint because the buttercream I was using to paint chilled and firmed up very quickly on the cold cake.
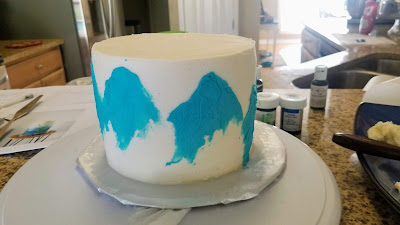
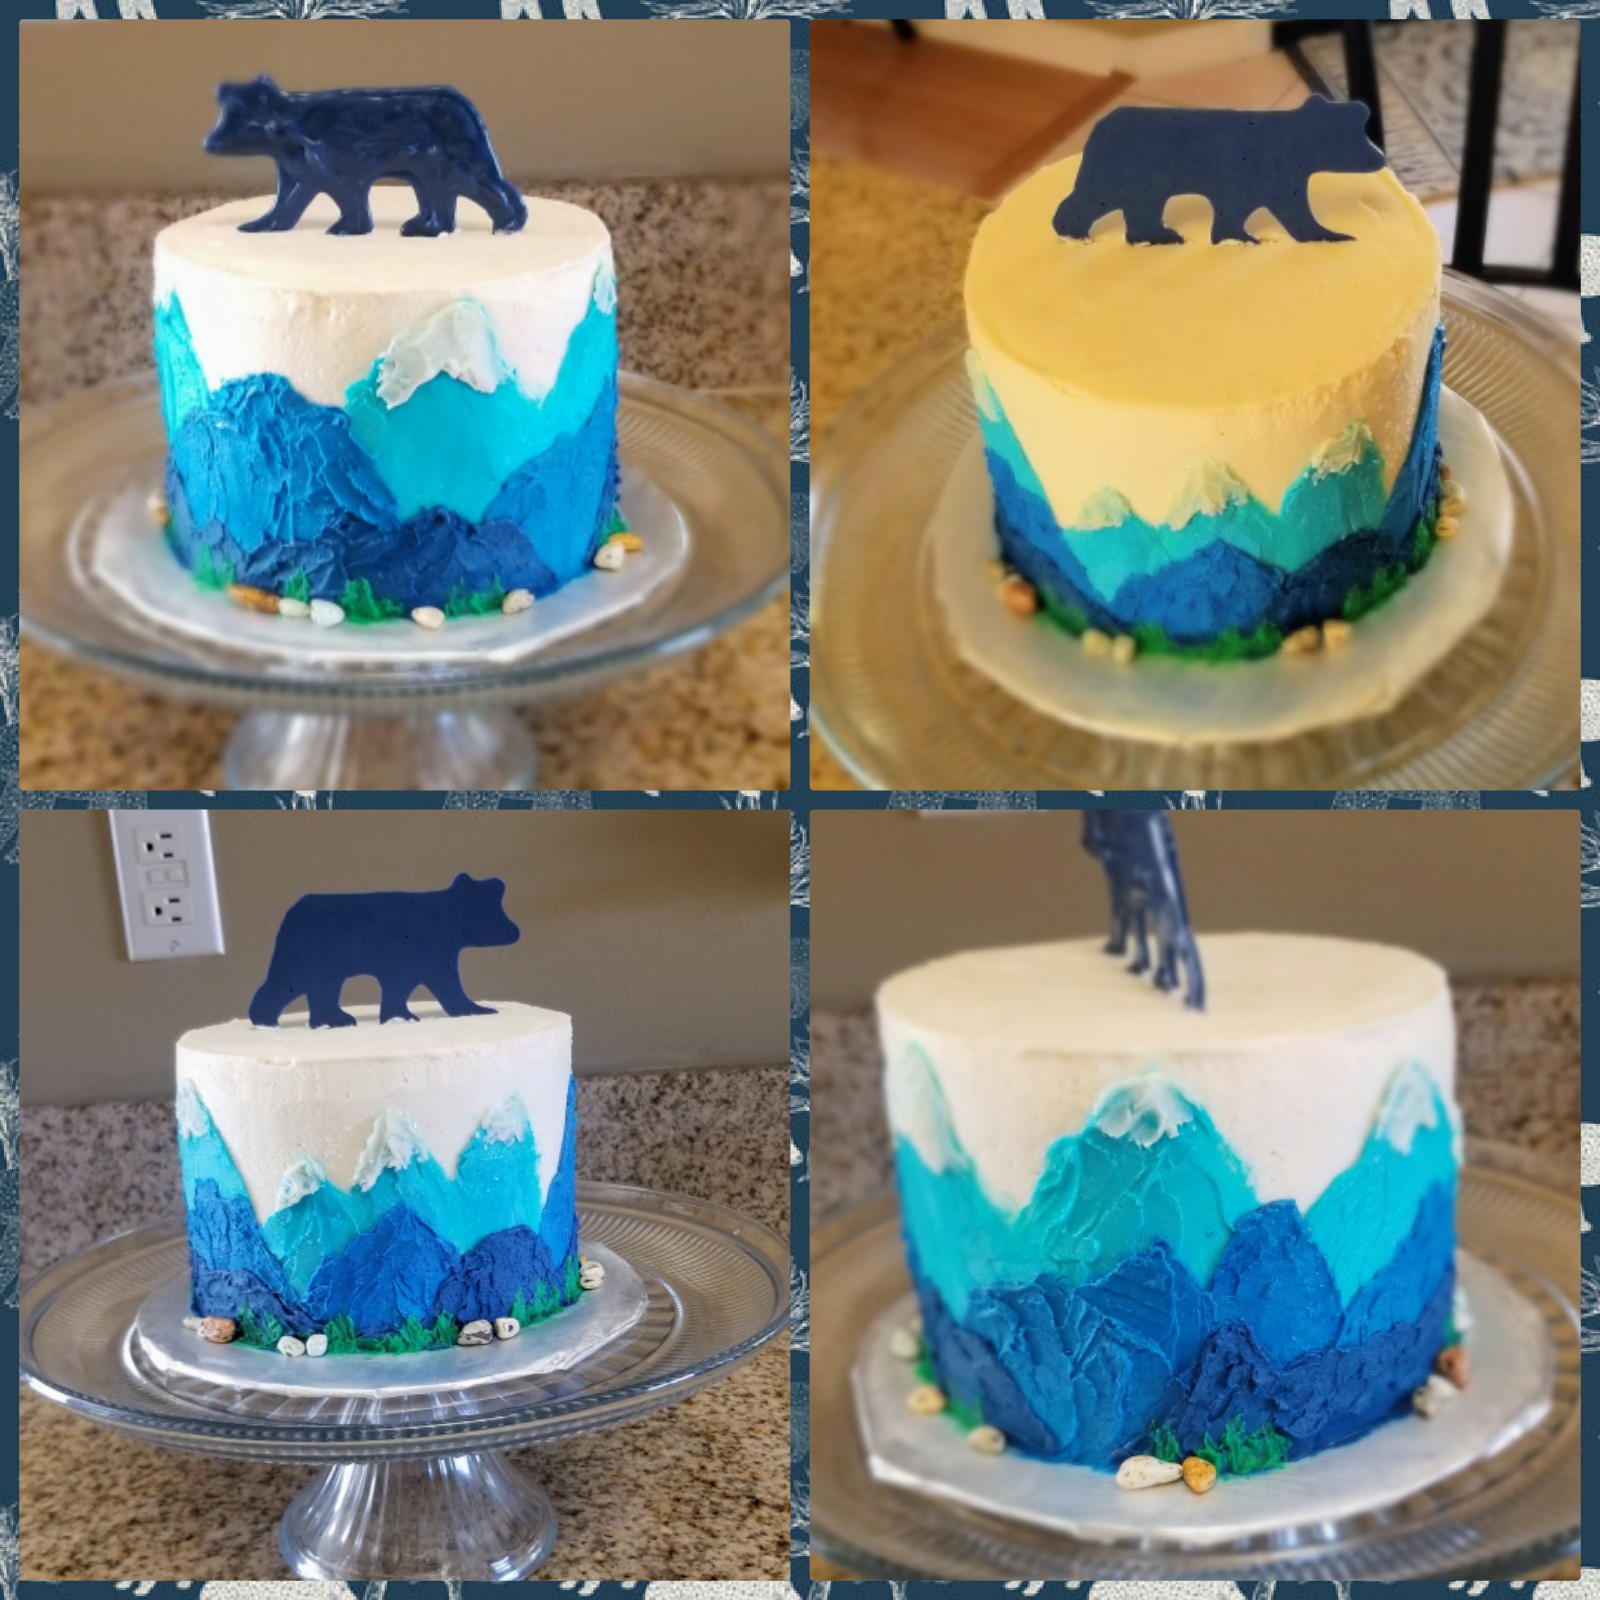
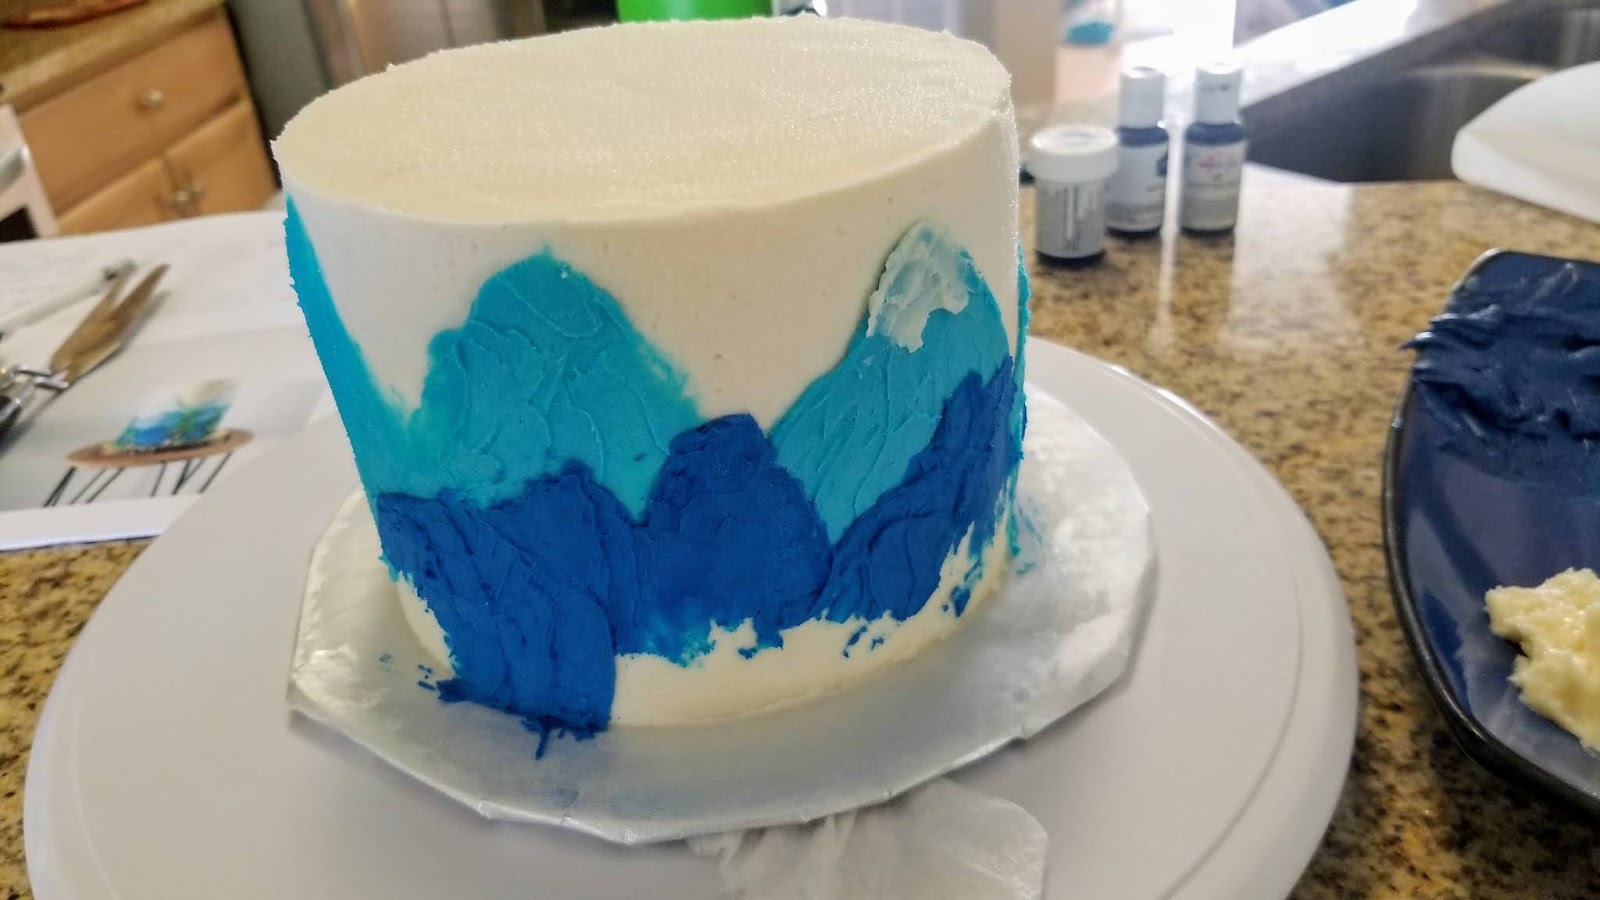
I started with the light blue and made my tallest mountains first. You just need to apply a smattering of buttercream to the back of the palette knife and softly paint it on the side of the cake. I used the larger knife for these mountains. I went with mountains for my first attempt because they’re large, not uniformly shaped, and easier than flowers for sure. Once I had randomly smattered my first range of mountains, I froze the cake for 30 minutes.

Then I came back in with my blue buttercream. I used the smallest knife for my next range, and once finished with that, I cleaned my knife and came back in to paint snow caps on my tallest mountains with the white buttercream. I froze this for another 30 minutes.

I finished my mountain-scape with navy blue. The thing I liked best about this (aside from the fact that I was seated comfortably the whole time and not on my feet like most cake decorating techniques) was that there was huge room for error. If I saw a spot where I had a gap or something needed to be filled in, everything was frozen so I could come back in with the right color and paint in any holes. It was also neat to just let my mind wander and see where a mountain would end up. I froze the cake for another 30 minutes after my last range.

Teeny-tiny trees. For my trees, I used a small paintbrush and quick little strokes to just dot the bottom of the cake with trees in random places.

Makes me miss the Pacific NW! I finished off by placing random rock candy around the bottom of the cake and gently securing my bear to the top of the cake.

Getting photos was time consuming because each angle had a new look. 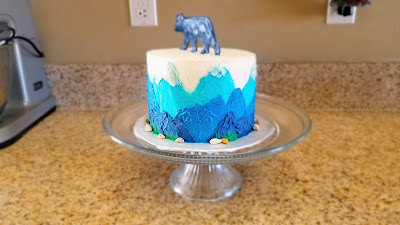
But I beared with it. 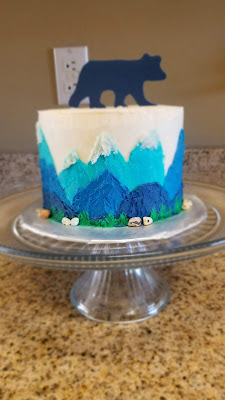
And it was worth it to try something new. I really enjoyed learning and executing this technique, and I will definitely be trying to paint new cakes in the future. It really has a great learning curve, and as long as it looks cool, you’ve done it right in my book. For now, I’m enjoying this delicious mountain of a cake in all its caramel, fall-adjacent glory. Football is back on TV, the sun isn’t bothering me until 9 p.m., and Publix bakery has pumpkin donuts out now. It’s happening people! Fall is upon us…which means October isn’t far off, so I’ll be back soon with spooky Halloween bakes that are to die for…’Til next time, my fellow eaters!

Gotta love a good adventure. 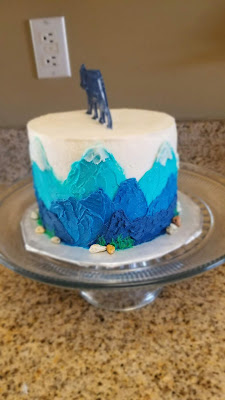
Take me back to the mountains! -
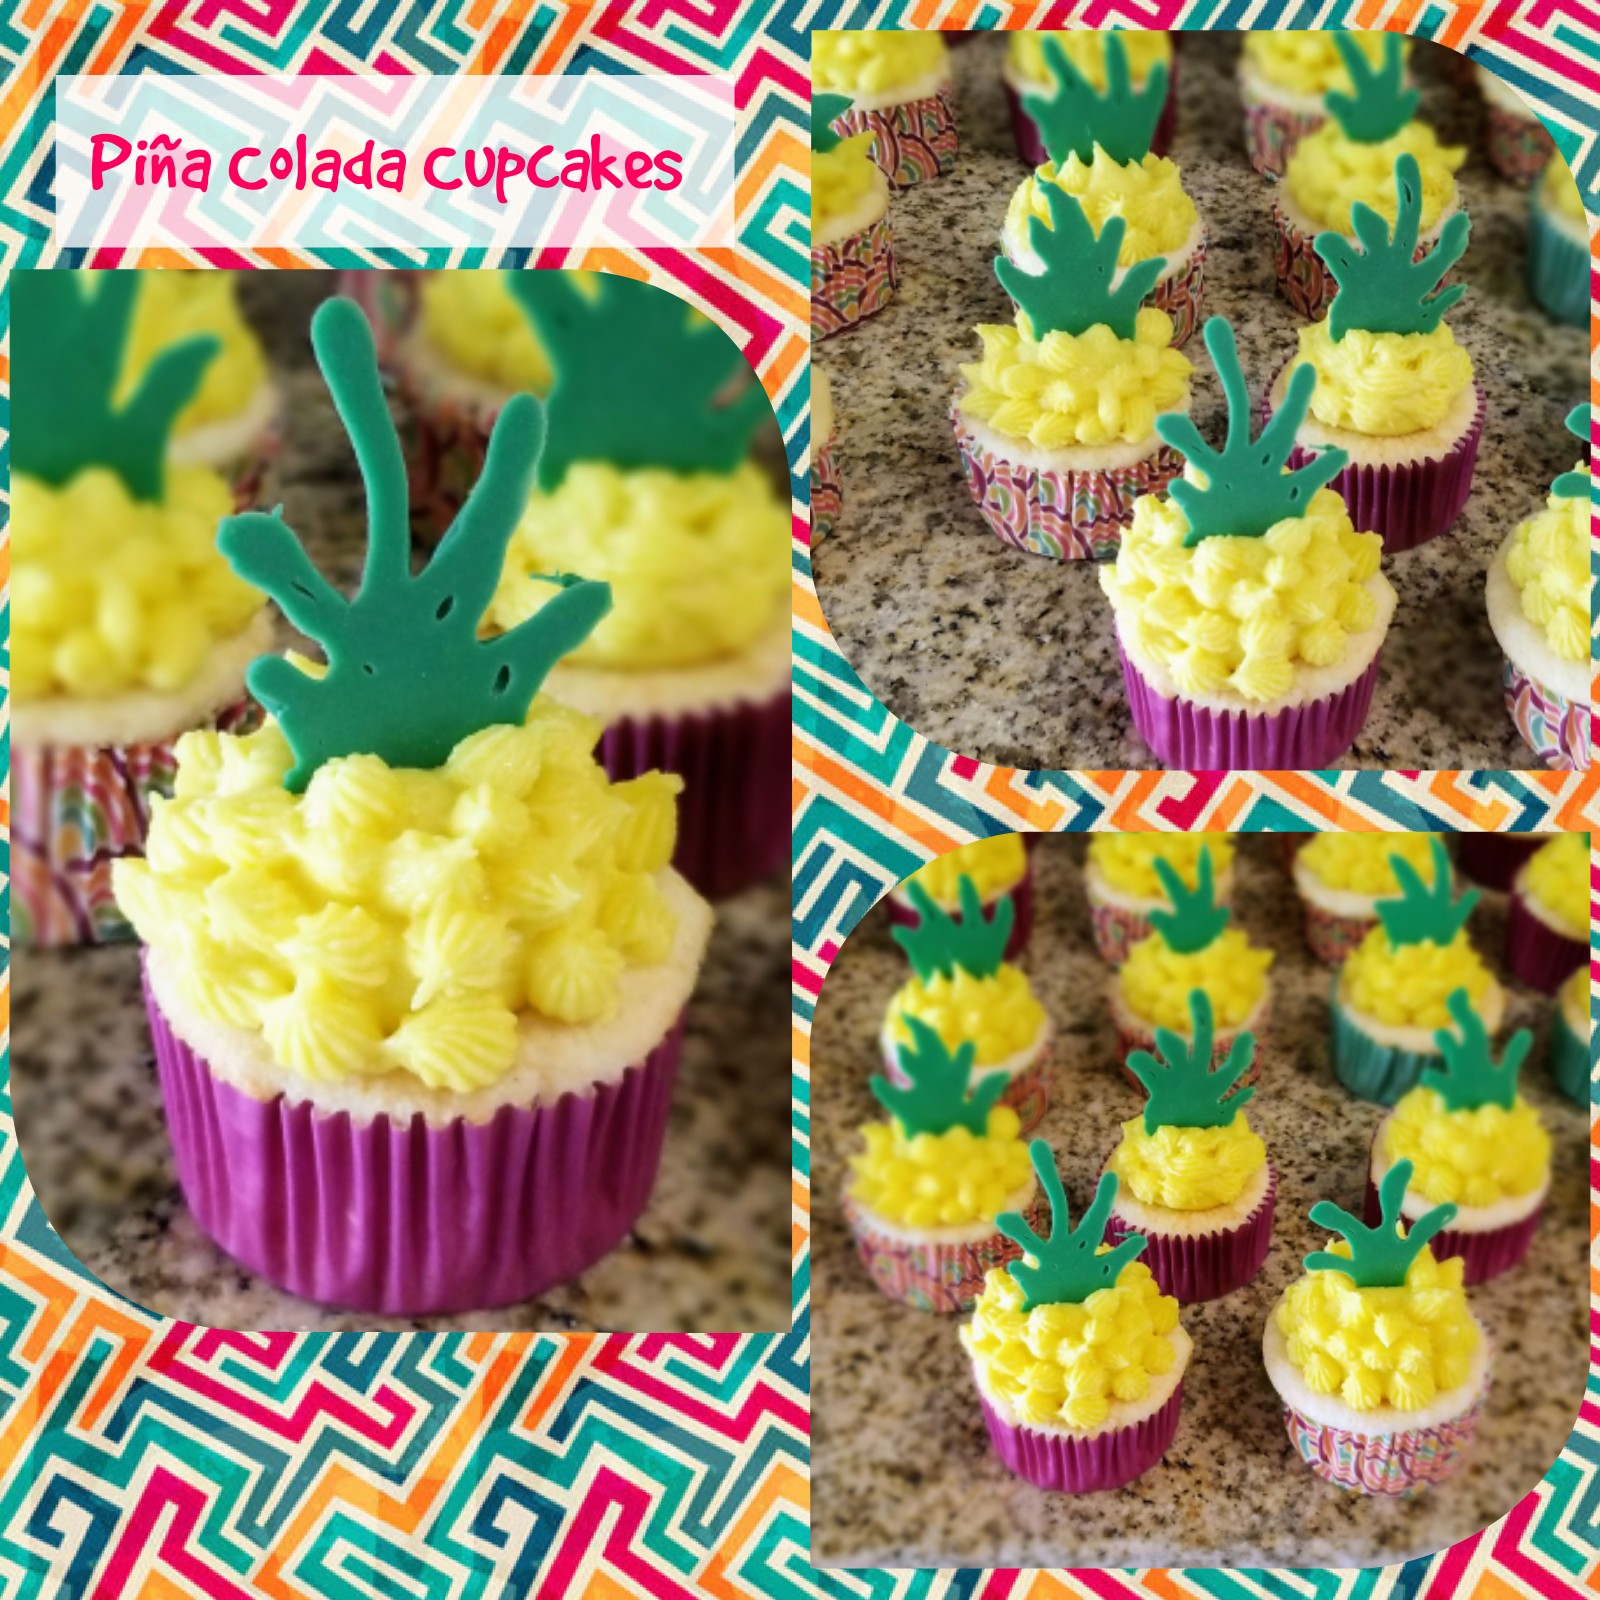
Pina Colada Paradise
It’s July, and it’s so hot and humid outside here, walking feels more like wading through syrup. By about 11 a.m., it’s too gross to even use the pool (think warm bathwater), and that makes me sweaty and upsetty. I know when people think ‘Florida!,’ it’s usually palm trees, beaches, and umbrella drinks. The actuality is it’s gridlocked traffic, oppressive humidity, and a laundry list of things actively trying to kill you (see: hurricanes, sink holes, alligators, and other Floridians). I needed to find a way to cope with the temps, fast. Since my body handles heat with the same level of fortitude as a Popsicle sitting in the sun, I knew this was a job for cupcakes. Specifically, Piña Colada cupcakes full of rum, coconut, and pineapple.
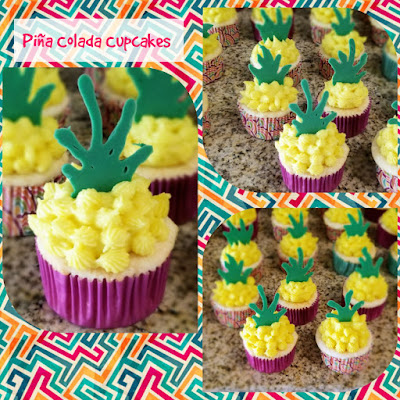
They’re so adorable, I *almost* forget how miserable it is outside. Why not just drink a Piña Colada, you ask? If I have more than one frozen cocktail in a 24-hour span, I will get a brain-freeze + hangover combo for the ages (your 30s are a magical time to be alive). However, I do like Piña Coladas, and I’d be thrilled about getting caught in the rain if it meant heat relief, so I crafted up these little cuties meant to look like bite-sized pineapples (what, you can’t fit an entire cupcake in your mouth at once?). I somehow managed to cram them FULL of rum and still have them amount to a mere 210 calories per cupcake for 24 cupcakes. I’ll have you know a frozen Piña Colada runs anywhere from 475-650 calories, so by comparison, I can eat like two or three of these with no guilt or hangover. Adulting win!

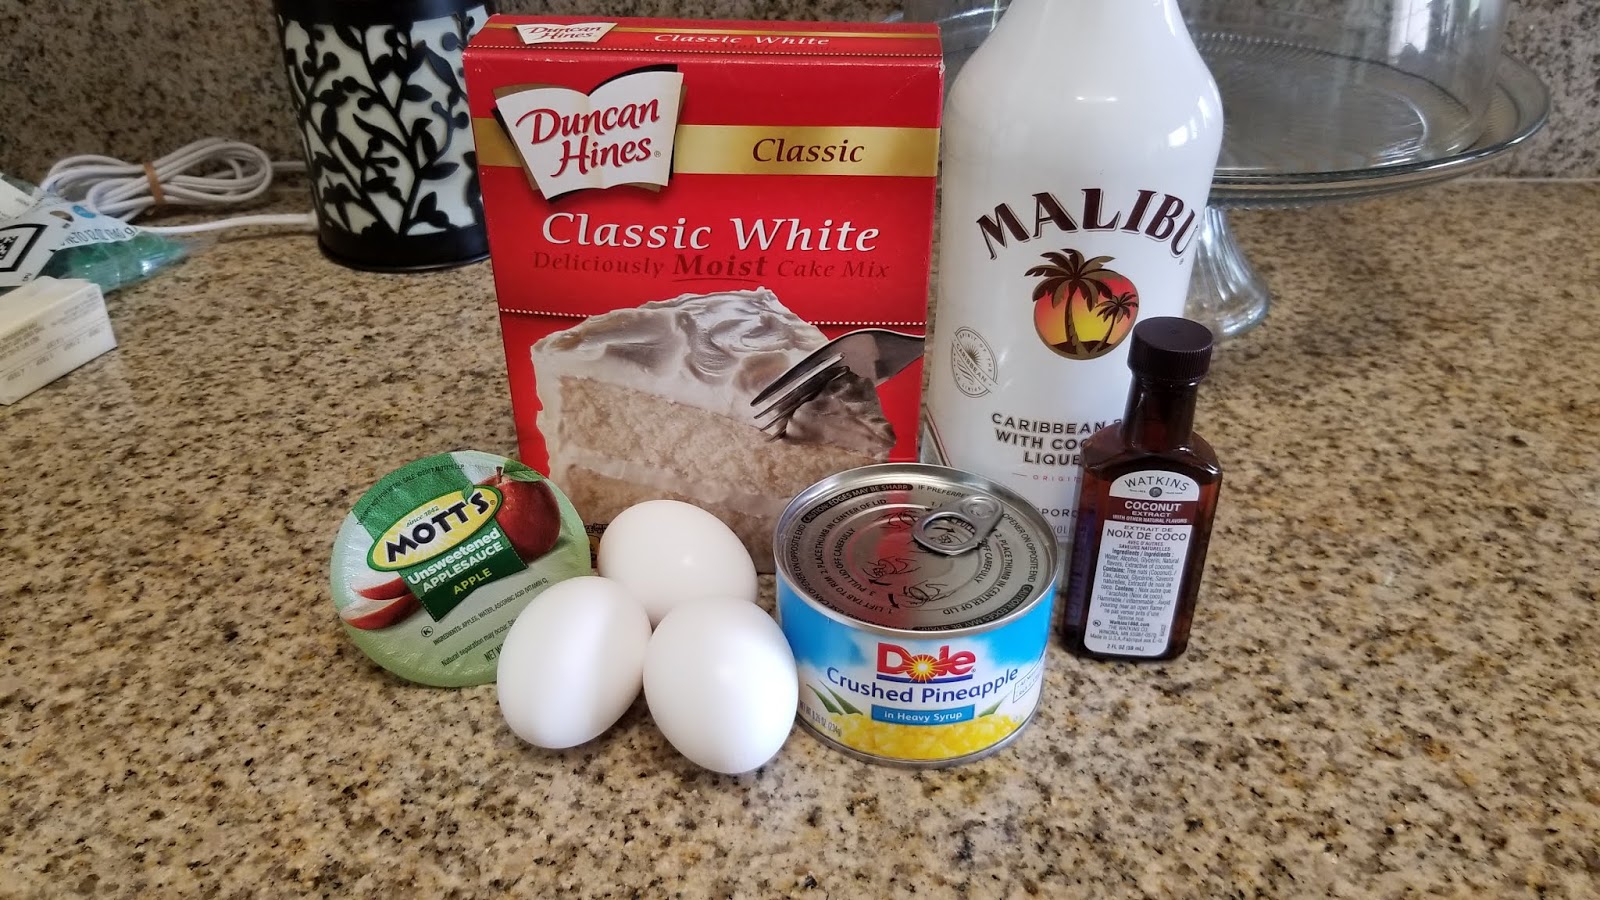
They also only take two hours to make, start to completely finished and in my stomach. Since I took 72 hours to make my last cake and it was no one’s birthday this week, I wanted an extremely easy dessert I could whip up in a moment while I awaited Hurricane Barry’s potential arrival. He may have missed us, but I did not miss the mark with these cupcakes. To make, you’ll need:
- 1 white cake mix
- 3 egg whites
- 1/3 cup unsweetened applesauce
- 1/2 cup of canned pineapple juice
- 3/4 cup of Malibu coconut rum
- 1 tsp coconut extract
- 8 ounces of crushed pineapple, drained (you can use the juice for the ingredient above as well)
- Optional: coconut flakes…I skip this since coconut flakes give me a “let’s eat floss” texture to food
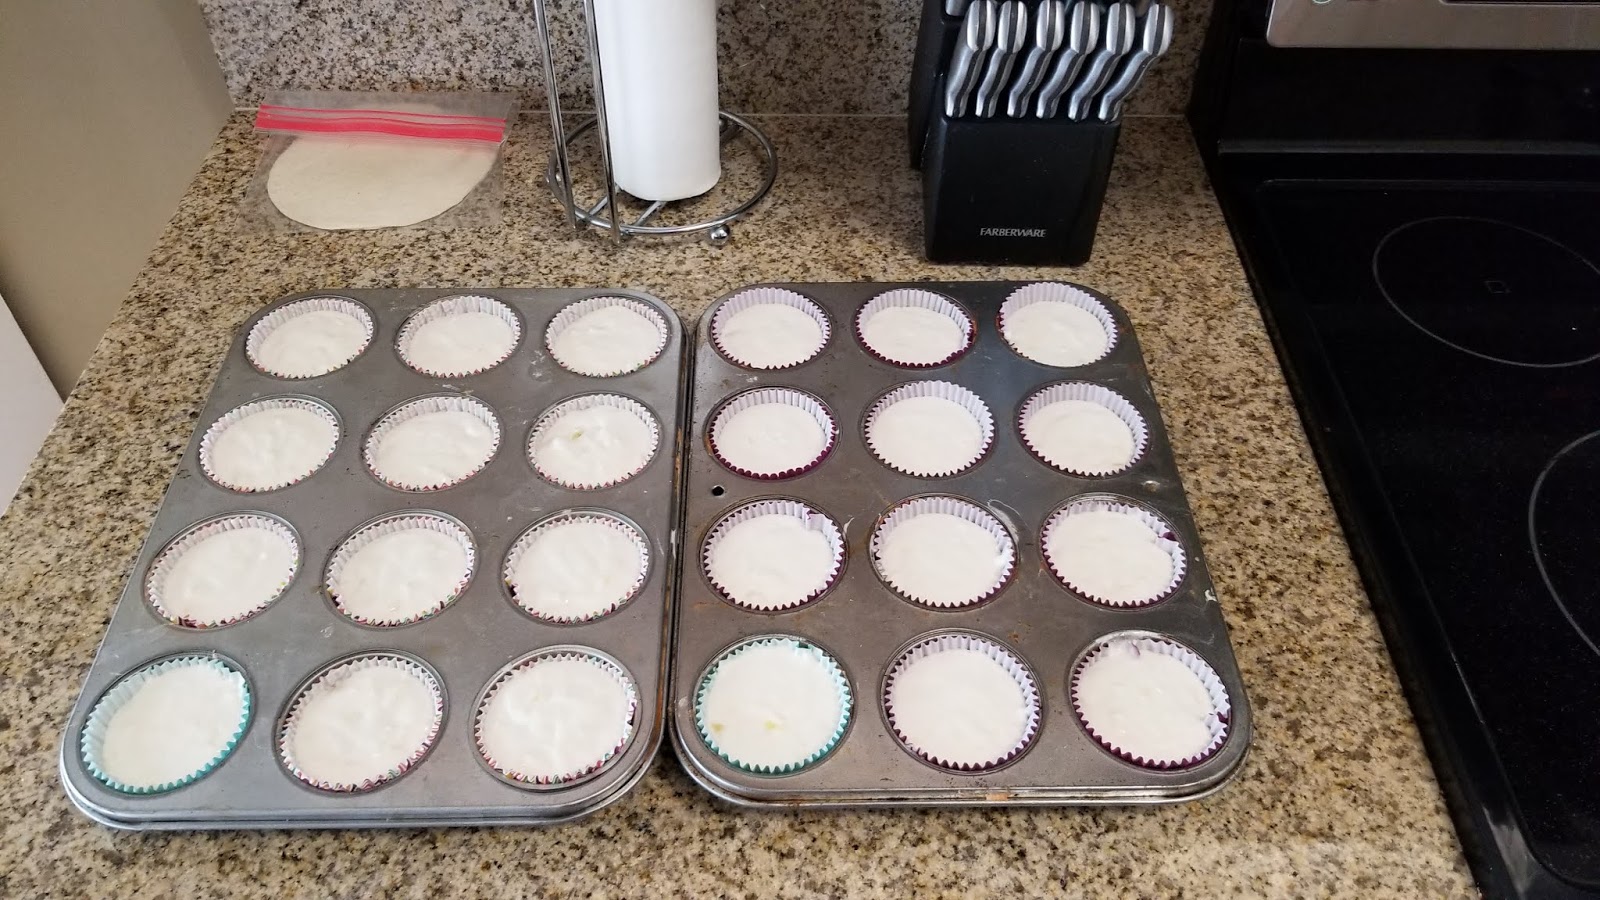
Preheat your oven to 350 and line two muffin trays with cupcake liners. Mix together cake mix, whites, applesauce, pineapple juice, rum, and extract for 2 minutes on medium high. Fold in the crushed pineapple by hand.

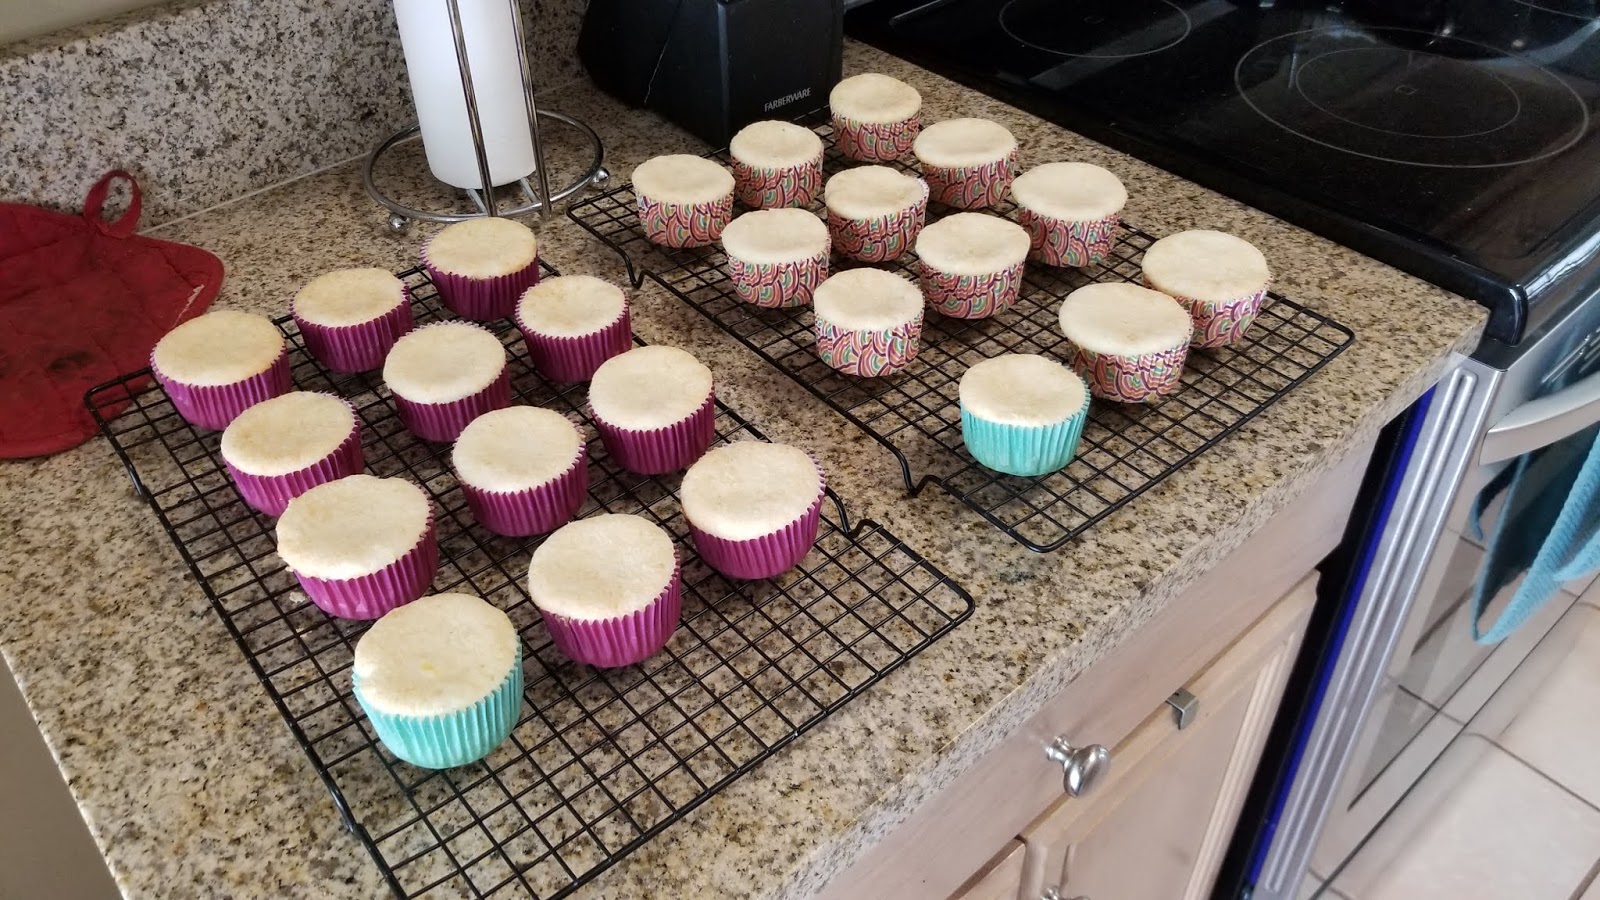
Drink more rum as needed. I used a cookie scoop and placed two scoops of batter into each cupcake liner. I baked these for 20 minutes, until they had a nice white but slightly golden top. Place your trays on top of cooling racks and let cool for 10 minutes, until you can handle the pan by touch.

This is so, so very close to the same color as my pale, fragile body. Remove from the pans and let finish cooling on the racks while you make your frosting and chocolate pineapple toppers.
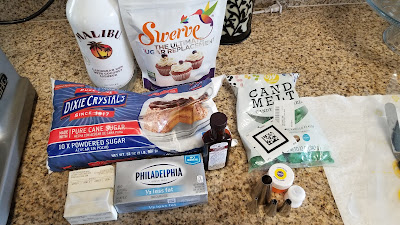
Not gonna lie, I’m running super low on rum now. This coconut cream cheese frosting is absolutely to DIE for…and not a heatstroke related death due to the fiery inferno happening outside, but a total bliss, so happy you died from deliciousness related death. To make, you need:
- 8 ounces of 1/3 less fat cream cheese, softened
- 1/2 cup of butter, softened
- 2 cups of Swerve confectioners
- 2 cups of powdered sugar
- 1 TBS coconut extract
- 1-2 TBS of Malibu coconut rum
- Yellow gel dye
- Feel free to top these with pineapple chunks, cherries, coconut flakes, whatever Piña Colada drink garnishes you like. I, however, wanted to turn these bad boys into tiny little pineapples…more on how to do that in a moment.
Mix together the cream cheese and butter for 1-2 minutes until well combined. Then add 2 cups of Swerve and the coconut extract, blending well. Add in the 2 cups of powdered sugar, 1 TBS of rum, and yellow gel dye. Blend well. If you want a stiff piping consistency, DO NOT add more rum. Full disclosure, I made these back in May and added 3 total TBS of rum to my frosting, and it was way too runny to pipe with, so I just smattered them in frosting and ate them anyway. I knew I wanted to share this recipe because it was way too good not to, and I was most definitely ready to eat them again based on taste memory alone, so, here we are.

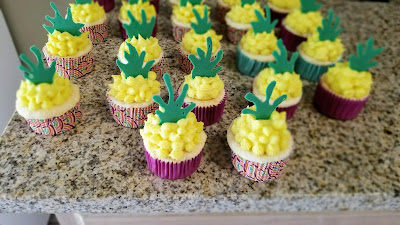
I promise they get cuter. Fill a piping bag fitted with a large open circle tip (I used a Wilton #12). Place the rest of the frosting into the fridge to stay firm…cream cheese frosting is delicious, but much like me, it does not stand up to any amount of warmth. Pipe a large mound of frosting onto the center of each completely cooled cupcake.

Now we’re getting there. Once you’ve done this for all 24 cupcakes, load the rest of your frosting into another piping bag fitted with an open star tip (I used a Wilton #32). Starting at the bottom of the large mound of frosting, pipe little pokey stars by applying pressure to the bag and pulling straight up and away quickly. Go all the way around the bottom of the mound, then work your way up one level at a time. I had about 3-4 levels of stars on each cupcake. If you’re finding that your frosting is getting too runny due to the heat from your hand, put the bag into the fridge for 30 minutes to firm back up.

A field of blonde hedgehogs… Put your hedgehogs/pineapples into the fridge so the frosting stays firm, and now get to work on those pineapple tops. No one wants a topless cupcake. I used 1/3 of a bag of green chocolate melts, melted according to package directions and placed into a piping bag with a #5 round tip. I let this sit for a minute so I wouldn’t burn my hand off piping hot chocolate.

Pictured: the hellfire flames of Florida summer. Or pineapple tops. I free-handed about 30 little pineapple tops onto a sheet of wax paper with a Sharpie while my chocolate cooled. I’m no artist when it comes to drawing, so use a template if you’re feeling antsy. I flipped over my wax paper so it was Sharpie-side down.

I just didn’t want them to accidentally look like pot.. I piped about 4 toppers at a time, tracing the outside lines and flooding the inside. I came back in with an angled spatula and spread the chocolate out evenly. I used the tip of the spatula to drag chocolate out and create the pointy ends of the leaves.

Plenty leftover to eat… I ended up with way more leaf toppers than I needed, but, they were yummy after a “hard” hour and a half of baking…Let your leaf toppers set up for 30 minutes before gently peeling off the wax paper and placing into the top of each cupcake.

Full cuteness: achieved. These are as delicious as they are summery (in a good way, not a sweaty one). The rum and the pineapple mixing with the coconut is sheer perfection. The coconut cream cheese, well, it’s life changing. DEFINITELY keep these in the fridge to ensure your frosting stays nice and firm. We all know it’s hot, but we don’t need a runny, dripping cupcake on the counter to remind us just *how* hot it is this summer. I’ve made these twice, and both times I have enjoyed the flavor tribute to summer. They take me away to a Piña Colada paradise, where the temp is a balmy 72, the pool never feels like warm bathwater, and humidity is absolutely nonexistent (my hair always looks so good in Piña Colada paradise). I’m glad I still have several evenings worth of this paradise awaiting in the fridge, because I might actually burst into flame if I didn’t, so, in your face, Florida. ‘Til next time, my fellow eaters!
Can’t you just hear the Jimmy Buffet music? -
The Manliest of Cakes
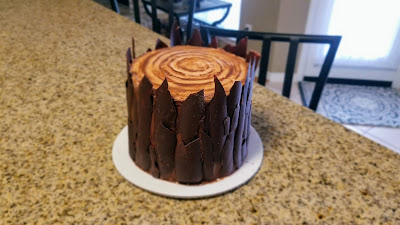
Every year, I try to make my husband a birthday cake that is cooler, better, and crazier than the last. Months ago, I saw a really awesome lumberjack cake on Pinterest, and I thought to myself, “It’s so incredibly Canadian. It’s absolutely perfect.” Derek just happened to look over at my screen (or I shoved my Kindle in his face, who’s to say at this point, it was months ago), and he thought it rocked. So back in February, I committed to memory that this was *the cake* for his June birthday. When it comes to cakes, my memory is a steel trap, but I honestly couldn’t tell you the name of someone I met 35 seconds ago, so my priorities are exactly where they should be. Anyway, my husband and I love Canada (our happy place), and I ADORE plaid (75% of my wardrobe are plaid shirts that sadly get no use in Florida), so much so that I even buy Derek plaid button-up shirts because 1. They make him look like a Canadian lumberjack, and 2. I find that to be incredibly attractive. I also figured a cake that looked like a tree stump and was extremely plaid on the inside was also possibly the manliest of cakes to ever exist, and I am happy to report, this is a concrete fact:
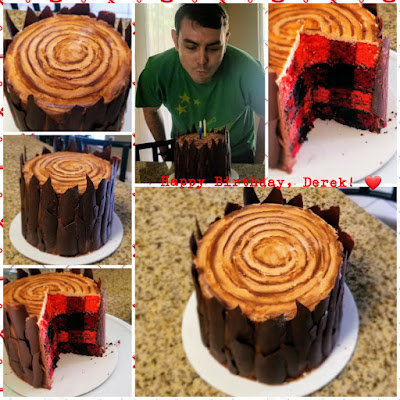
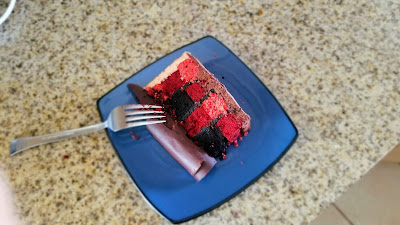
Behold, a cake fit for a rugged outdoorsman! My husband loves being outside, hiking, camping, soaking up nature, and he ended up with a wife who, while she enjoys hiking and being outside, enjoys indoor plumbing and air conditioning way more. At least she knows how to bake? …I tell myself that this and my own ability to also look incredibly attractive in plaid button-ups make up for these other shortcomings. At least I can *appear* like someone who is outdoorsy. This nature-themed cake is made up of 4 six-inch round red velvet cakes with chocolate Baileys buttercream frosting. How I had never thought to make chocolate Baileys buttercream before is absolutely beyond me because dear sweet Mother Nature, this is hands down the best frosting mashup I have ever had the pleasure of eating. The words “life-altering” were thrown around (in my own head), but the birthday boy absolutely enjoyed this cake, and he’s not even a huge chocolate lover. But the flavor of the frosting combined with the red velvet cake was the perfect amount of decadence. Add to the fact that each little plaid square inside is the perfect fork-sized bite, and you’ve got a recipe for a birthday cake even people who hate nature would love. At 339 calories a slice (12 slices total), it is worth every second of walking, hiking, and forcing yourself to be outside in the summer heat to work off.

Although it will take like three solid days to make. I made the actual cakes a week ahead of time and froze them, and it took me most of Saturday to do so since you’re making 8 cake rounds essentially. The baking and cake assembly definitely take the longest–frosting and turning everything into a tree actually takes less time, so, your move, nature. To make, you need:
- 1 white cake mix
- 10 ounces diet creme soda
- 1/3 cup unsweetened applesauce
- 3 egg whites
- 1 red velvet cake mix
- 10 ounces diet creme soda
- 1/3 cup unsweetened applesauce
- 3 egg whites
- Red gel dye, black gel dye
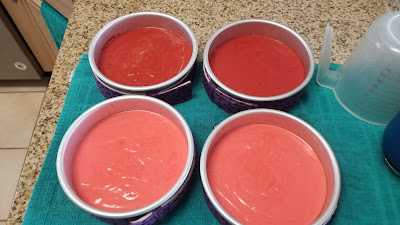
Start by making the white cake mix by combining all ingredients and blending well. Add in several drops of red gel dye until the cakes are bright red. Pour 8 ounces of cake batter into one greased 6-inch round cake pan. Pour another 8 ounces of cake batter into another greased 6-inch cake round. You’ll have half of this cake mix leftover..set aside because you will need it later. Clean out your mixing bowl and make your red velvet cake. I added a drop or two of red and a drop or two of black gel dye to make these rounds maroon. Then I repeated, 8 ounces of batter into a prepared 6-inch round, and 8 more ounces of batter into a fourth prepared 6-inch round. I baked all four of these rounds at 350 for 24 minutes.
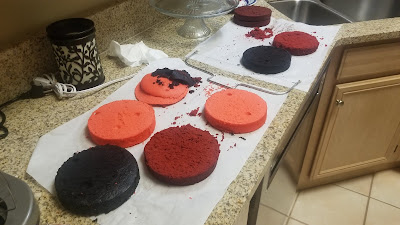
Colors for reference! 
Soooo much black gel dye… While these four bake, head back over to your leftover batter. Take 8 ounces of the red velvet cake and dye it BLACK AS MY SOUL. You probably will only have about 5 ounces of red velvet batter left by now, so you can either add 3 ounces of the white cake mix we dyed red to get 8 ounces of cake or just use 8 ounces of the white cake mix, but in either case, you will also want to dye these black as night, could be none blacker level of darkness. Set aside and check on the cakes in the oven. Once those four are done, let rest in the pan on a cooling rack for 10 minutes before you turn the cakes out on the cooling rack to finish cooling completely. My red velvet cakes dyed maroon–the ones that make up MOST of the cake, decided to come out of the pan super wonky. I’m not even sure how it was possible with how religiously I used Pam, so I assume this only happened because they were the two layers I needed the most, and that is how my life works.
But I digress. I then re-prepared 4 six-inch cake pans, pouring 8 ounces of black cake into one pan, 8 ounces of black cake into another pan, and split the remaining/leftover cake batter between two pans because I desperately needed something to feelings eat after my red velvet cakes betrayed me. Bake these for another 24 minutes and follow the steps above for cooling.

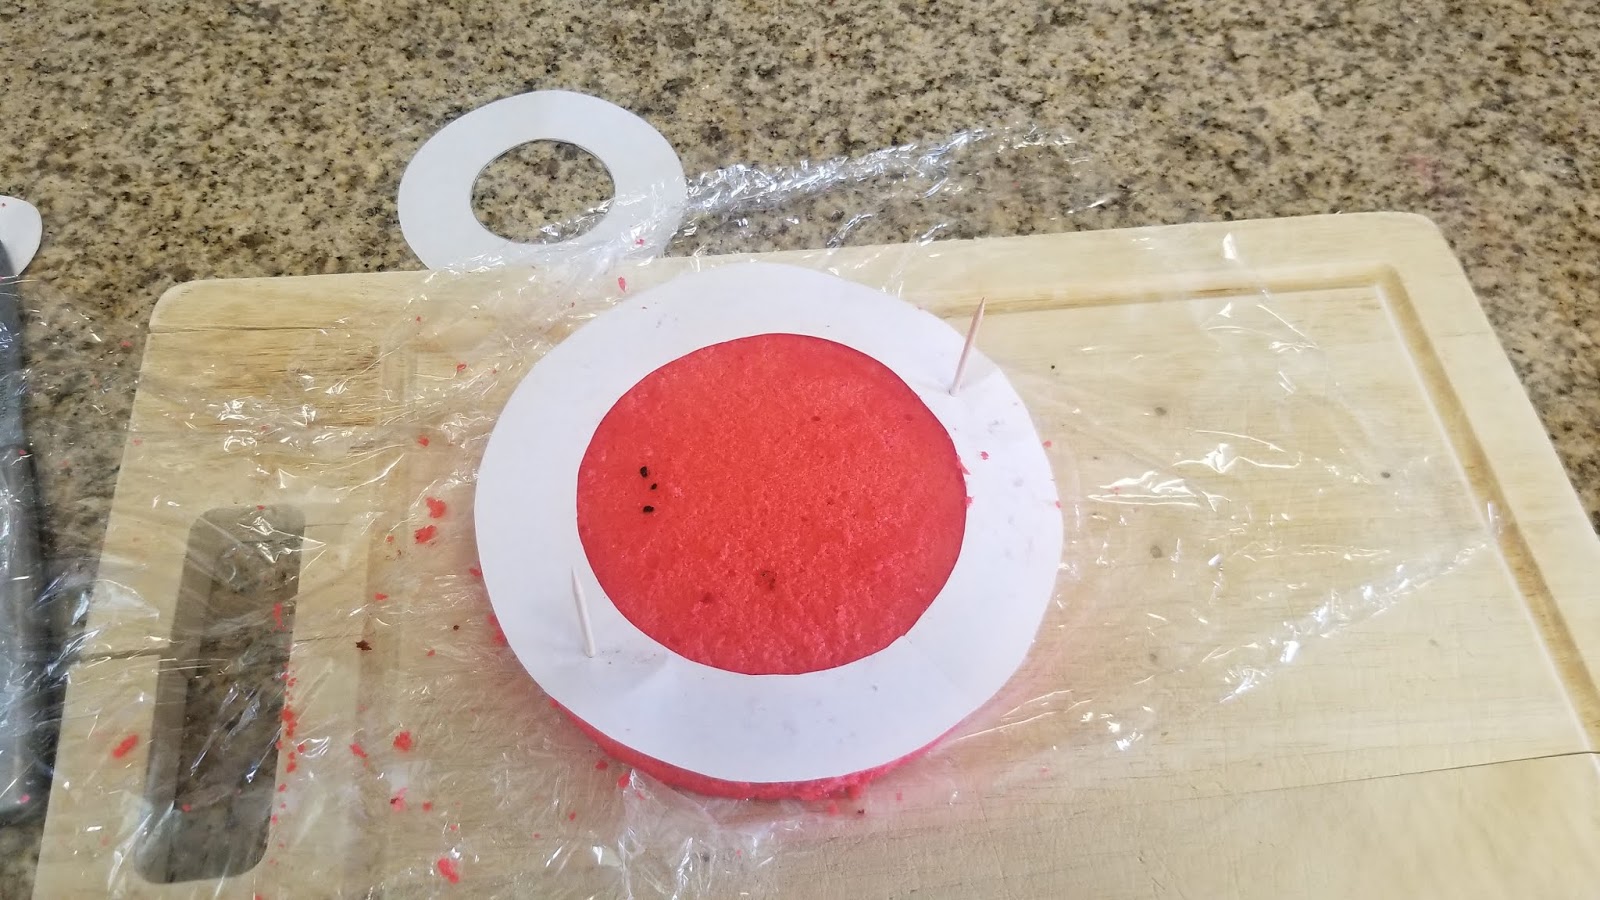
This is not the bullseye on my head, life, so keep on walking! I did some Google searching–if you make 8-inch rounds, Wilton’s round cookie cutters are perfectly sized to cut the cake into the layers you need. If you use 6-inch rounds, they do not. So instead, you have to Google checkerboard cake templates until you find one with 3 circle layers and print it out to fit a 6-inch round cake. Good times. Once all of your cakes have cooled, be sure to level them all so things will fit together nicely and freeze for at least two hours (I wrapped mine in plastic wrap and froze them overnight so they would hold up when I cut them into circles). I had to chop mine down a bit since my red velvet maroon cakes left behind their bottoms in the cake pan. Now hold on to your bottoms, because here comes a photo montage!
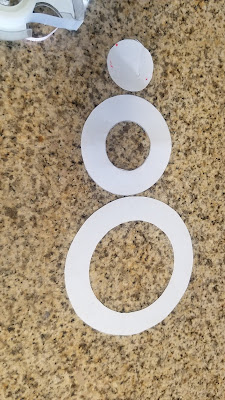
Cut out each circle, and grab some toothpicks and a cutting board. 
Take the largest circle, and place it on your cake, securing with toothpicks so it doesn’t move. Again, I recommend doing this on frozen cakes so they don’t fall apart. 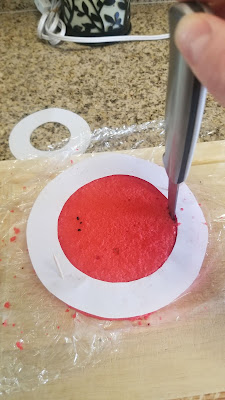
With a sharp knife, cut along the edge of the circle template as a guide. 
Then add the medium circle template on top, securing with toothpicks and using a sharp knife to cut out the center. You will not use the middle/center template circle. Repeat for all of your cakes (6 times total). 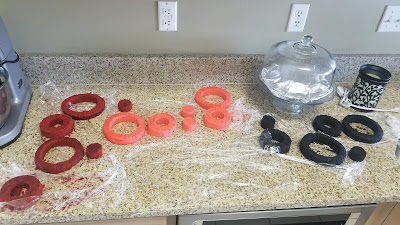
Very carefully and with the dexterity of a cat on Adderall, slide your hands under each cake and carefully remove the inner circle. Set aside on plastic wrap. Then try to remove the middle circle piece. I had some outer pieces that completely tore or broke during this process, but, don’t worry, freezing and frosting WILL ensure this does not matter in the end. You should have a ton of circles like the photo above at this point. 
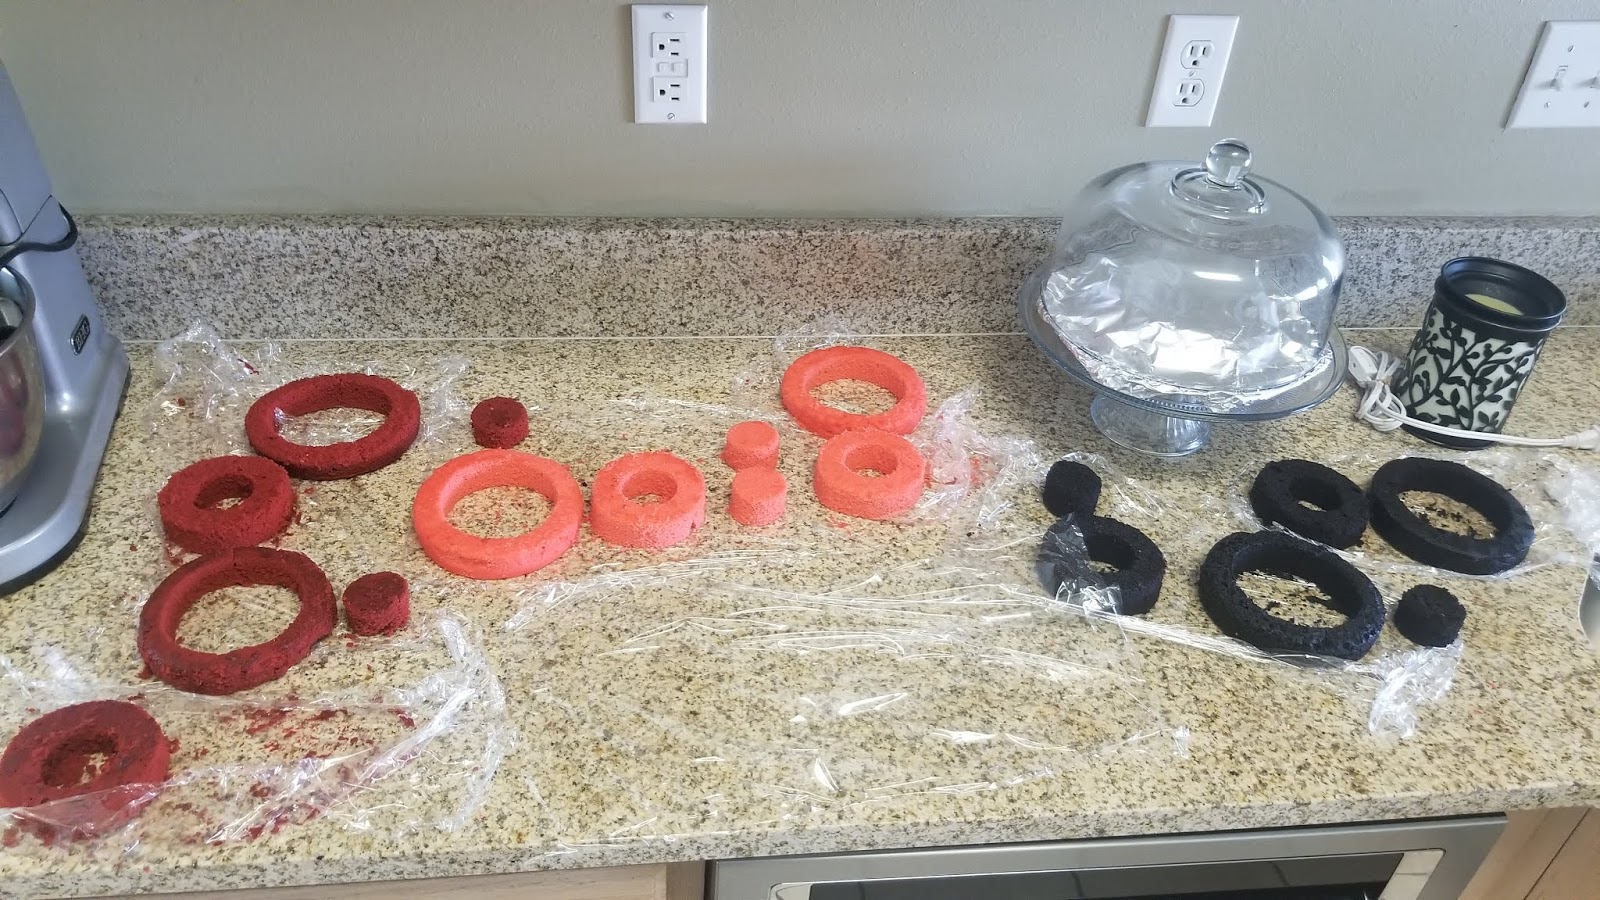
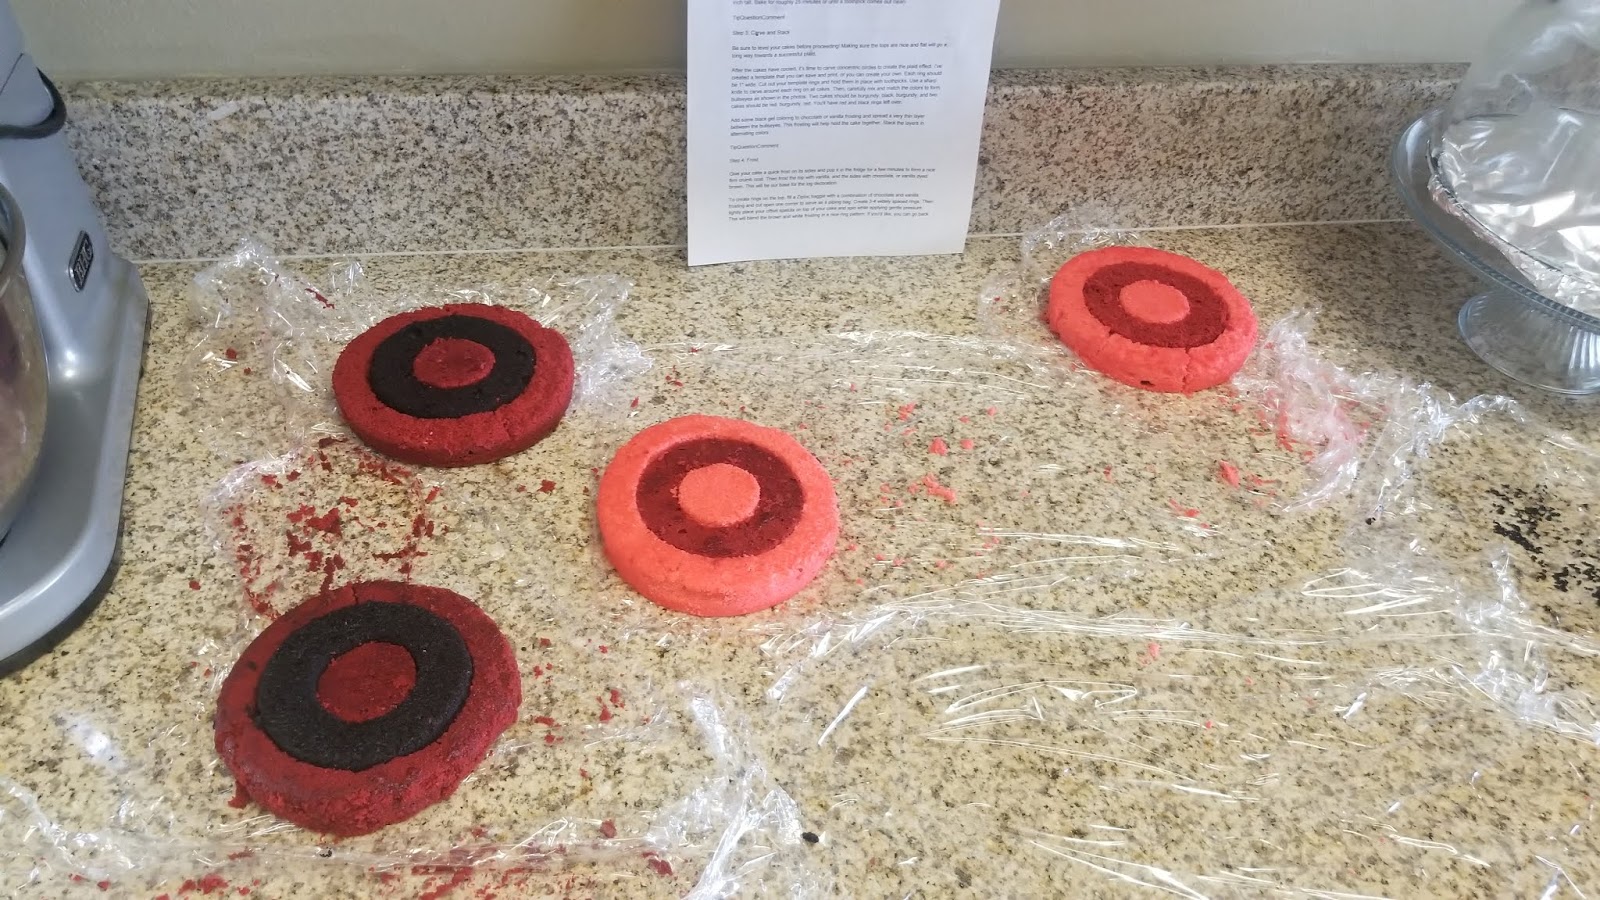
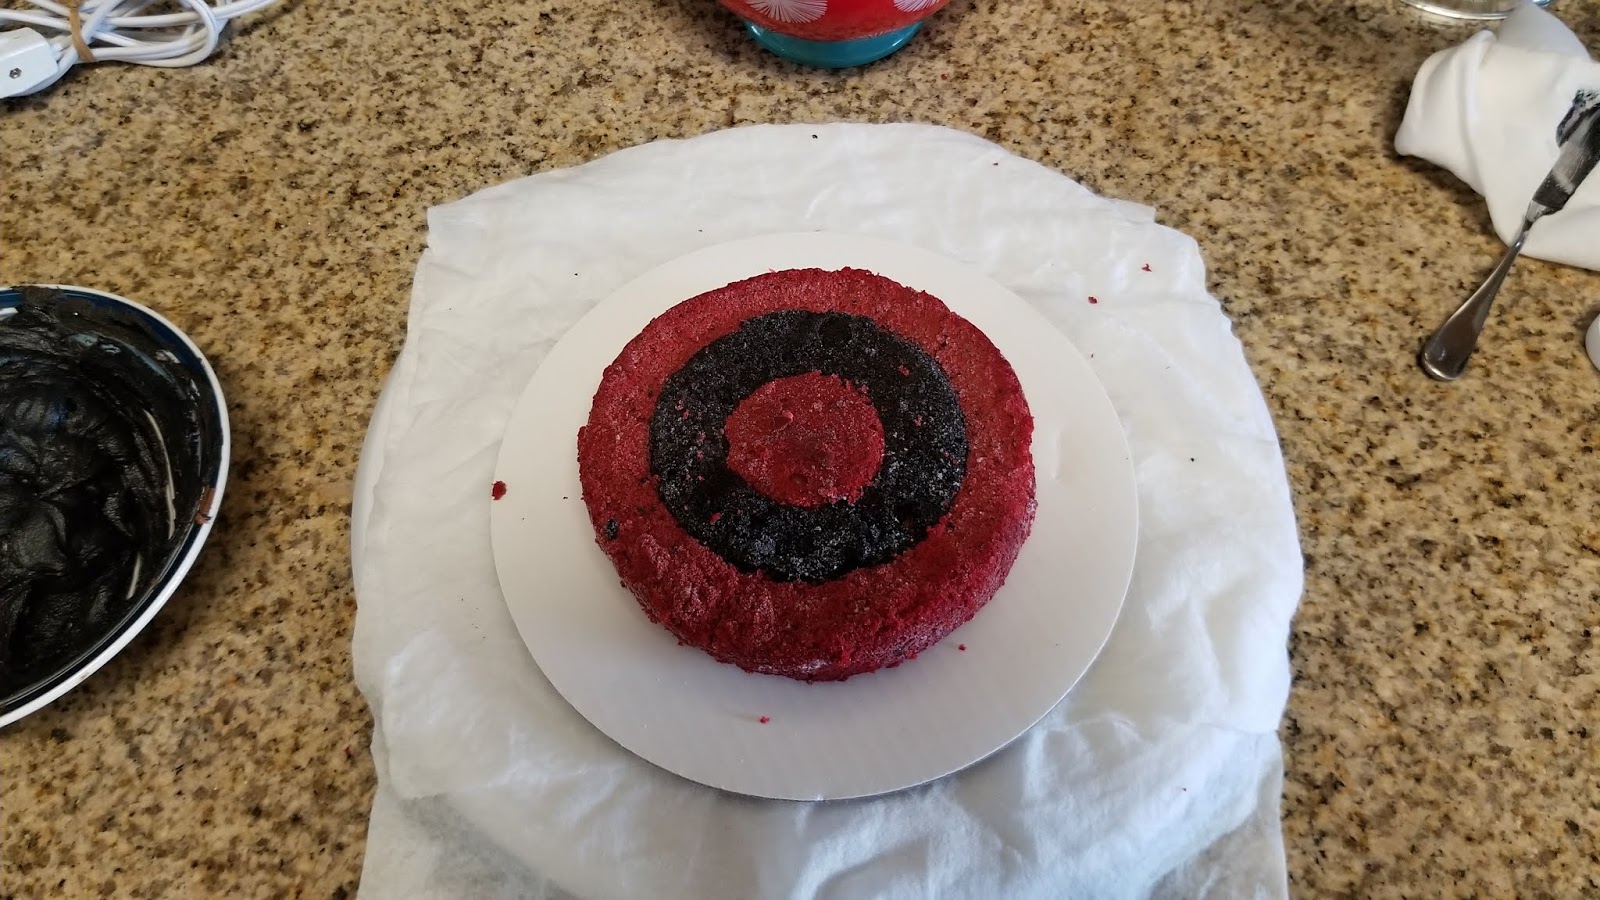
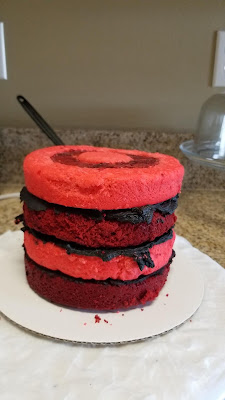
Now, take a large outer maroon circle, place a medium black circle inside, and then place a maroon center inside of that. Repeat one more time. Then take a bright red outer circle, place a medium maroon circle inside, and place a bright red circle inside of that. Repeat once more until you have what’s going on in that magical photo above. ALL of your maroon cakes will be used. 
Oh look, even more leftover cake! So while you make 8 cake rounds total, you only end up using four once everything is cut up. You’ll have black outer and center circles and red inner circles leftover. I wrapped all of my cake rounds in two layers of plastic wrap and placed each into a freezer bag. These were frozen for 5 days before I got to frosting. Freezing helped any pieces that had torn or broken apart kind of glom back together. Small miracles.

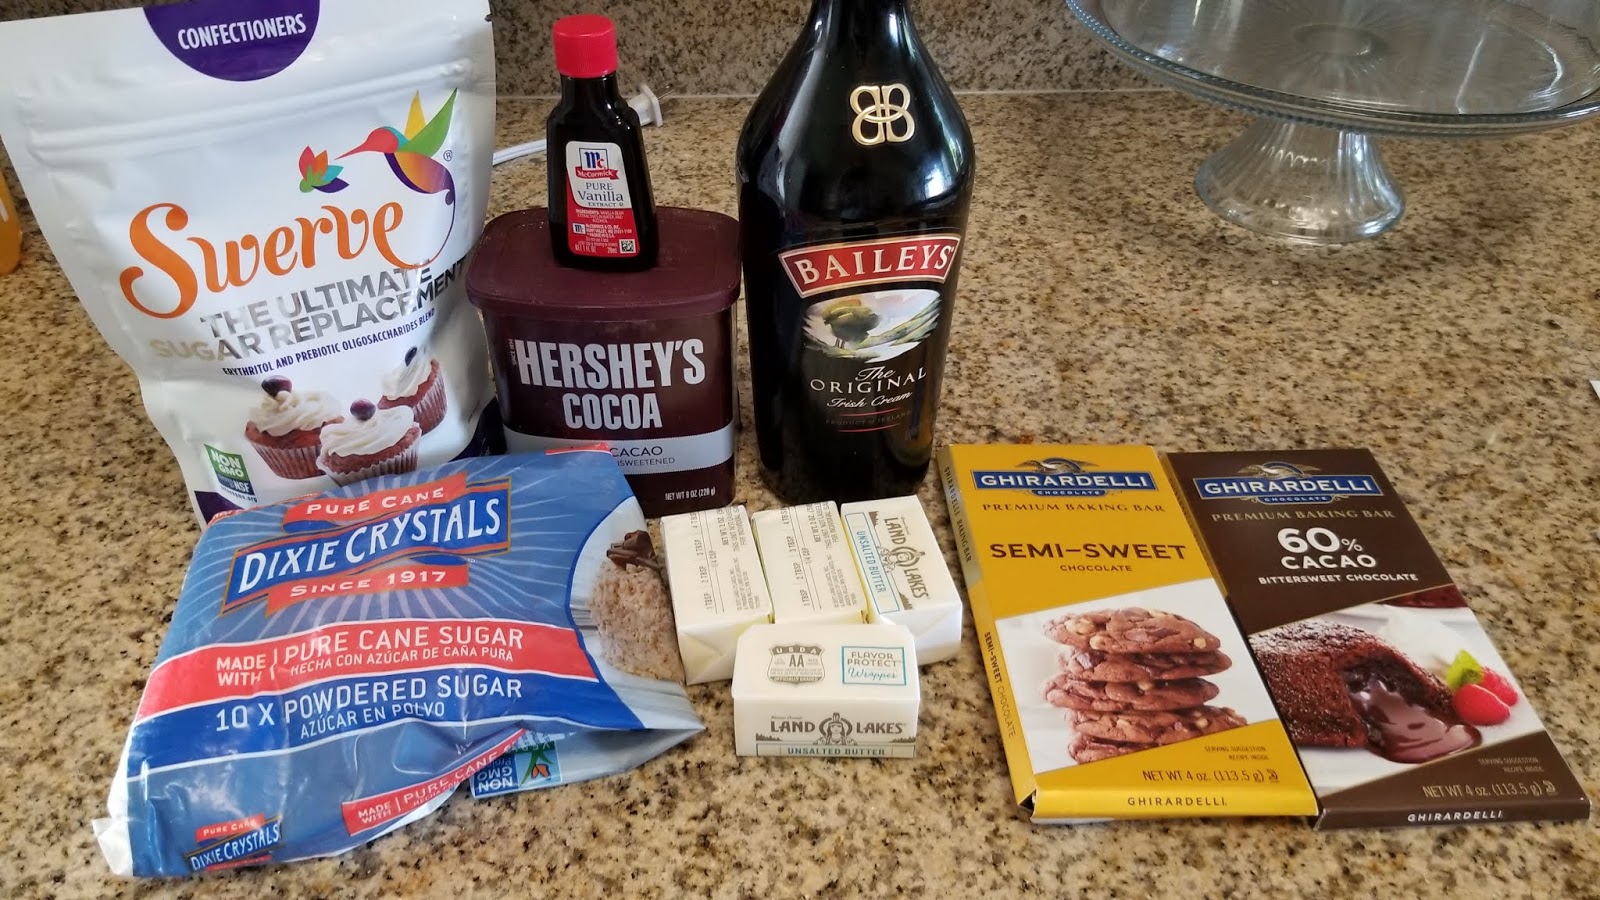
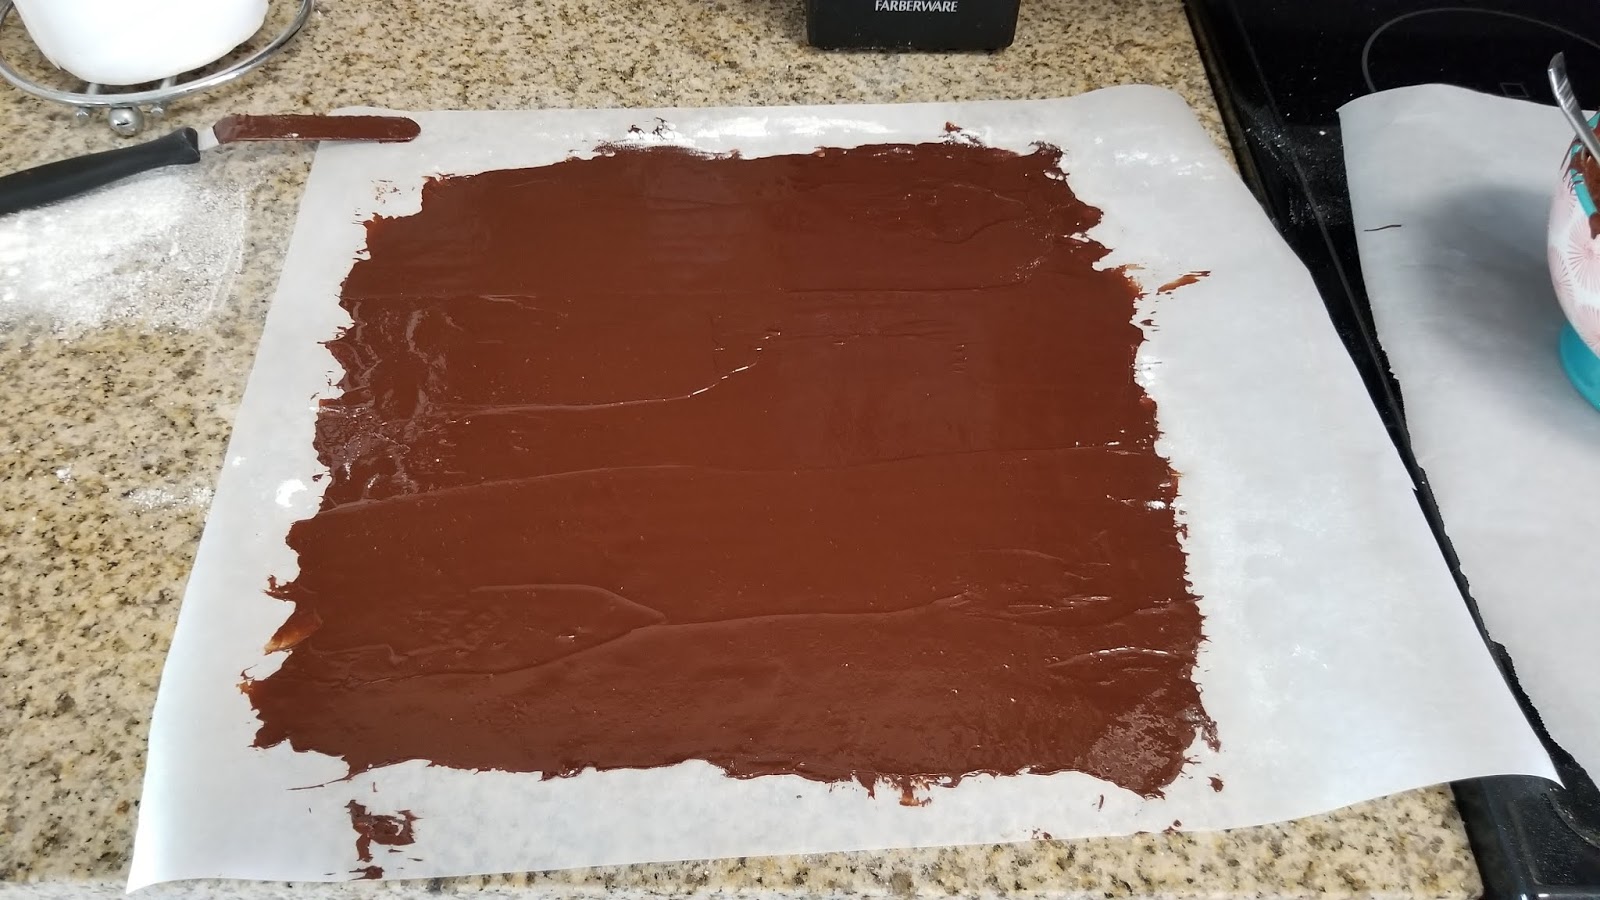
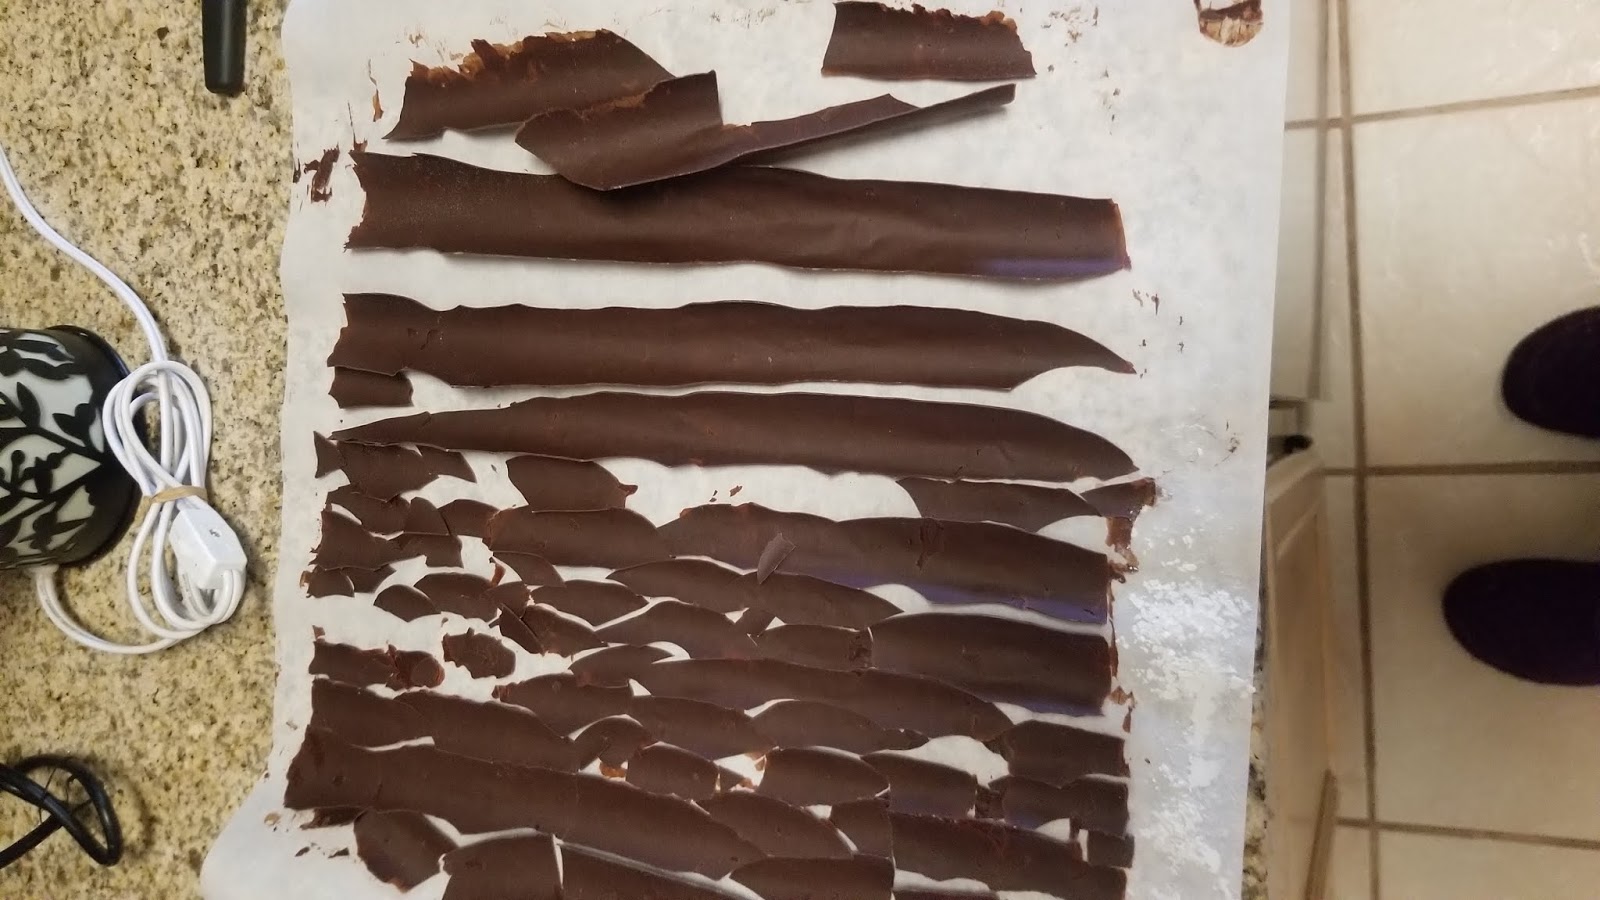
And by small miracles, I mean, thanks, Baileys! Now is *finally* the easy part: making frosting and tree bark. For the bark, you simply need 4 ounces of dark chocolate and 4 ounces of semisweet chocolate.
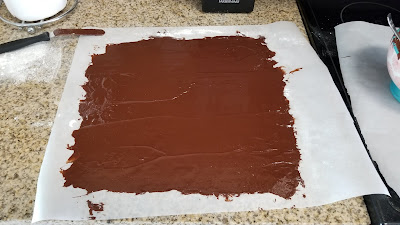
Melt according to package directions, and spread out on a large square of Parchment paper with an angled spatula. 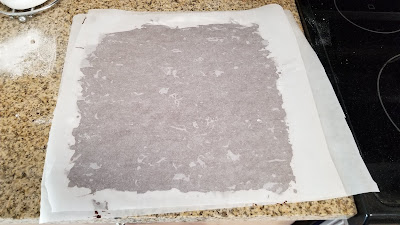
Place another sheet on top and smooth out the melted chocolate. 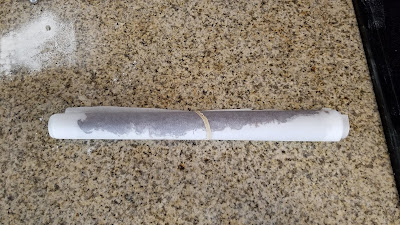
Roll up into a tube and secure with a rubber band. Place in the fridge to harden for 2 hours. While this settles, make your frosting. You need:- 1 cup of butter at room temp
- 1 TBS vanilla
- 3 cups Swerve confectioner’s sugar
- 1 cup powdered sugar
- 6 TBS Baileys
- 2 TBS skim milk
- 3/4 cup of cocoa powder
- Tan and black gel dyes
Whip the butter in the bowl of your stand mixer until fluffy, then add in the vanilla, two cups of Swerve, and 3 TBS of Baileys. Mix well, scrape the bowl, then add in the last cup of Swerve and one cup of powdered sugar. Add in the last 3 TBS of Baileys and mix well. Take out enough of your plain white Baileys frosting to top your cake with and set into a small bowl and dye a lighter tan shade. Now back at your mixing bowl with the rest of the frosting, add in the cocoa and 2 TBS of skim milk and blend well. Remove a small amount of this frosting into a bowl and dye it jet black. This is what will fill your inside layers, so you don’t need a lot of frosting since the plaid “stripe” is thin. Lumberjacks, assemble!

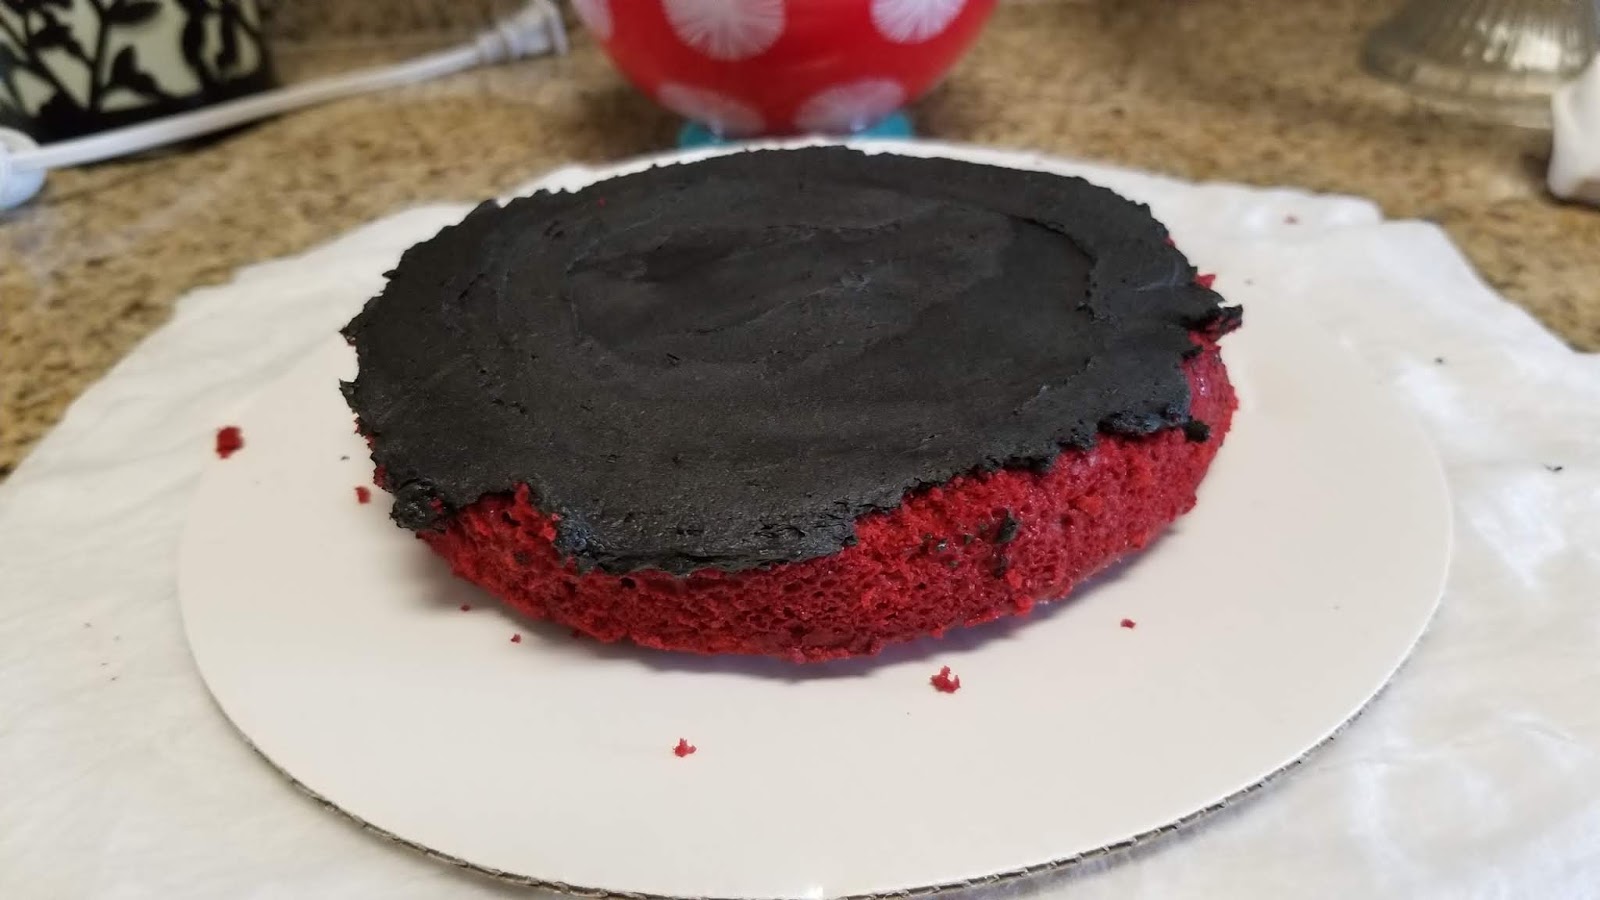
Is what I assume lumberjacks say. Take a maroon/black/maroon cake round, place on a cake plate, and spread a thin layer of black frosting on top:

So thin an Oreo Thin would be jealous. Now, top with a red/maroon/red round, spread another layer of thin black frosting, then top this with the other maroon/black/maroon cake round, giving one final layer of thin black frosting a swipe. You will top your cake with the last red/maroon/red cake.
Check that this is what you have going on or you won’t be lumberjack plaid. You’ll get drunken plaid instead. Or maybe tartan kilt. 
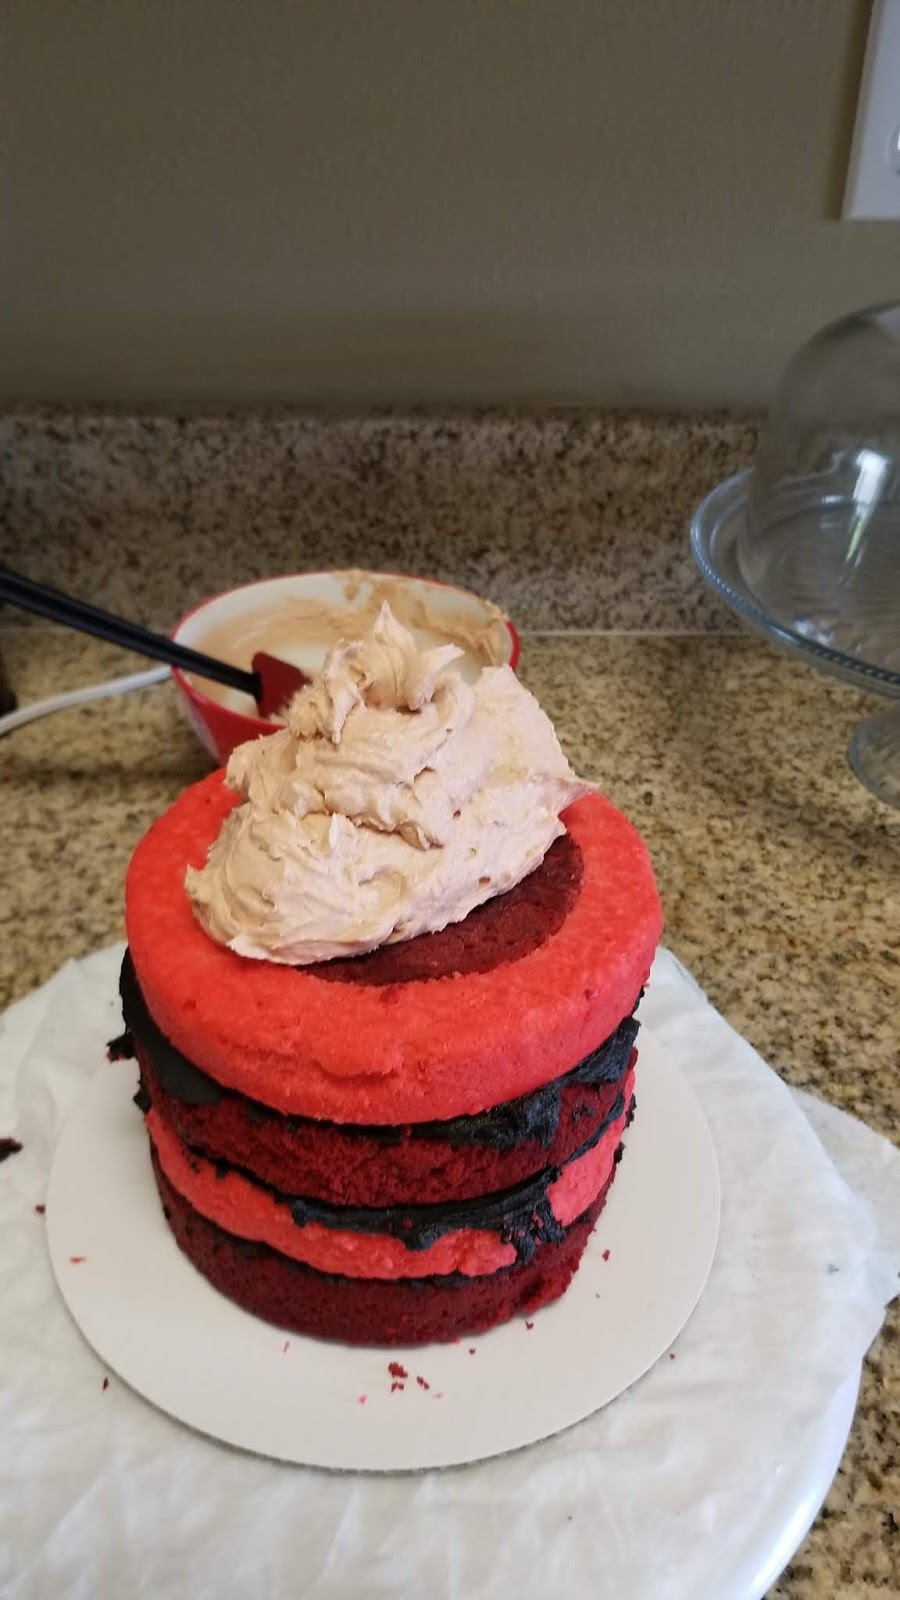
Take the tan frosting, and spread a generous, thick layer of frosting on top of your cake. 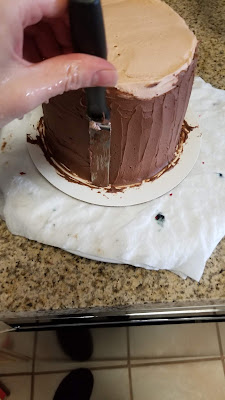
Set aside a small piping bag fitted with a #3 round tip and a small amount of the plain chocolate frosting for later. Then slather a ton of chocolate frosting on the sides of your cake, smoothing out. To complete the tree look, I swiped my angled spatula up the sides of the chocolate frosting. 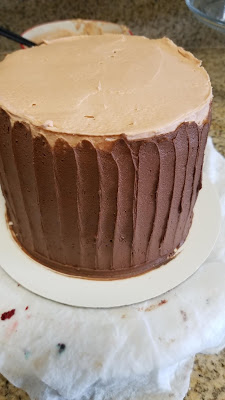
So anything that pokes out under your chocolate bark later looks nifty! 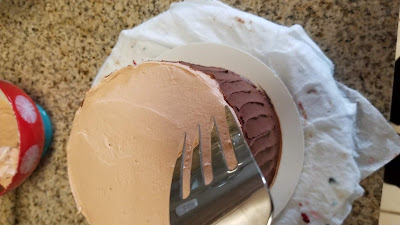
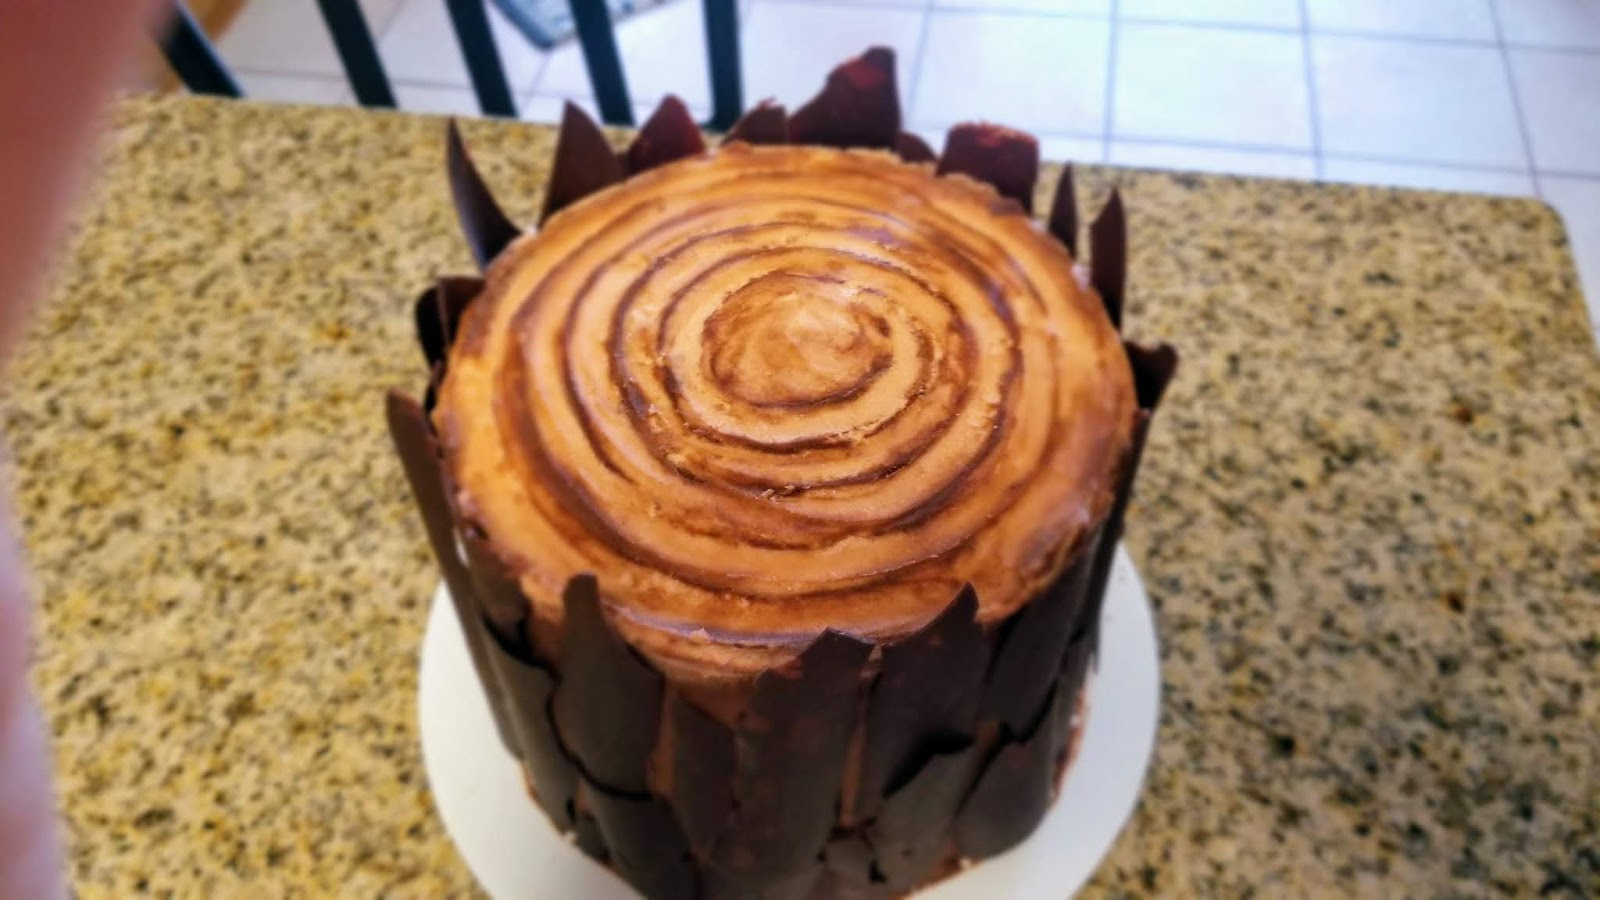
Then I took the world’s largest serving fork and traced circles on top of my cake to give my tree stump rings. 
Ah yes, making a ginormous mess. 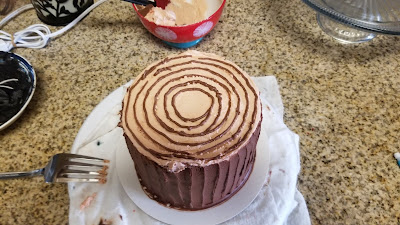
Grab the piping bag you set aside and pipe chocolate into the divots left behind by the serving fork. 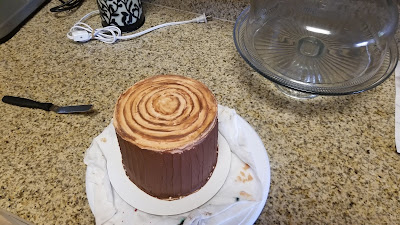
Take your angled spatula and then smooth this out repeatedly to achieve the final look of a tree’s rings. 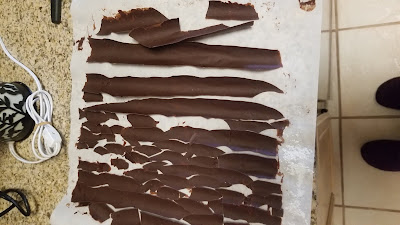
Gonna level with you, I ate about half of this. Take your tube of chocolate and unroll. Things will break apart like they should. You can dust this with cocoa or powdered sugar to give some texture to your bark. Then simply place onto the sides of the cake so the round/curved sides are facing into the frosting. I used about 50% of my bark, so depending on your cake round size, you could be safe with 4 ounces of melted chocolate.
Either way, it looked awesome. 
Pardon my thumb, I was really excited about how cool this looked. Dead ringer for a dead tree! Place this into a cake safe and keep in the fridge so the chocolate doesn’t get melty and the cake stays chilled and easier to slice until you’re ready to devour it all like a good lumberjack should.
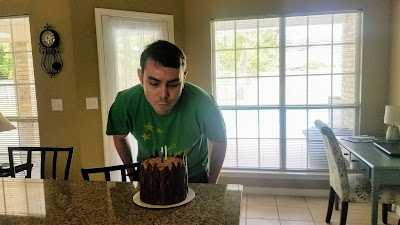
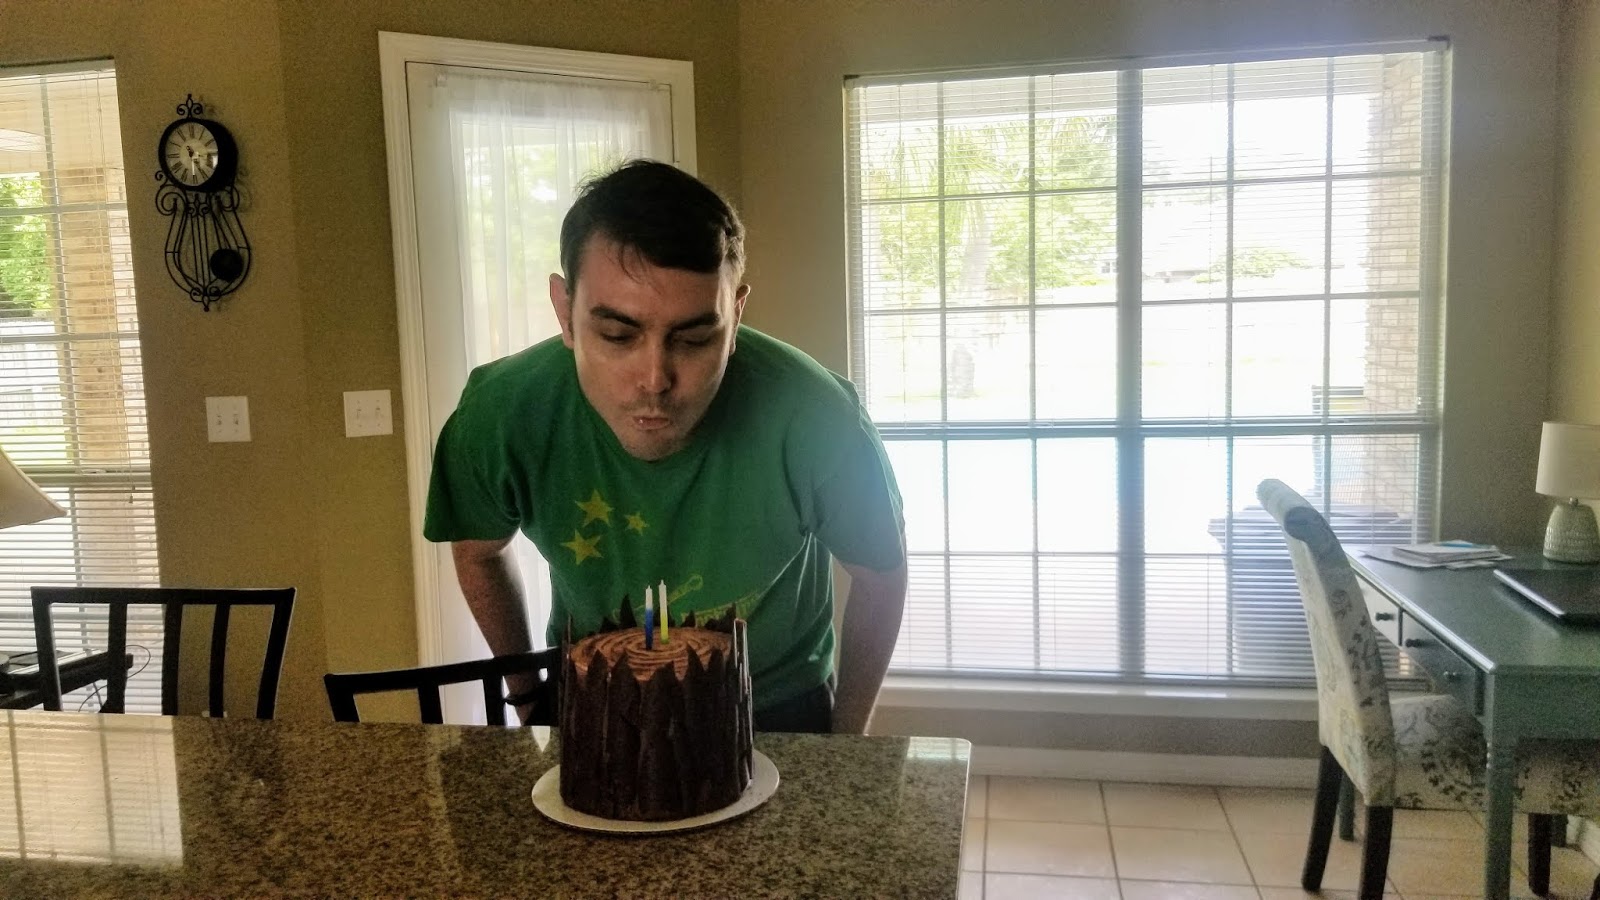
Birthday songs were sung. Finally, the moment of truth came–blowing out candles and cutting into the cake. The whole time in my head I was thinking, “Please be plaid, please be plaid, please be plaid,” and as it turns out, I was actually saying this out loud because I am nothing if not a crazy ball of anxiety.
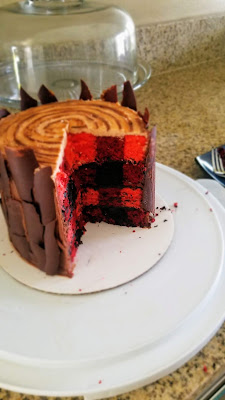
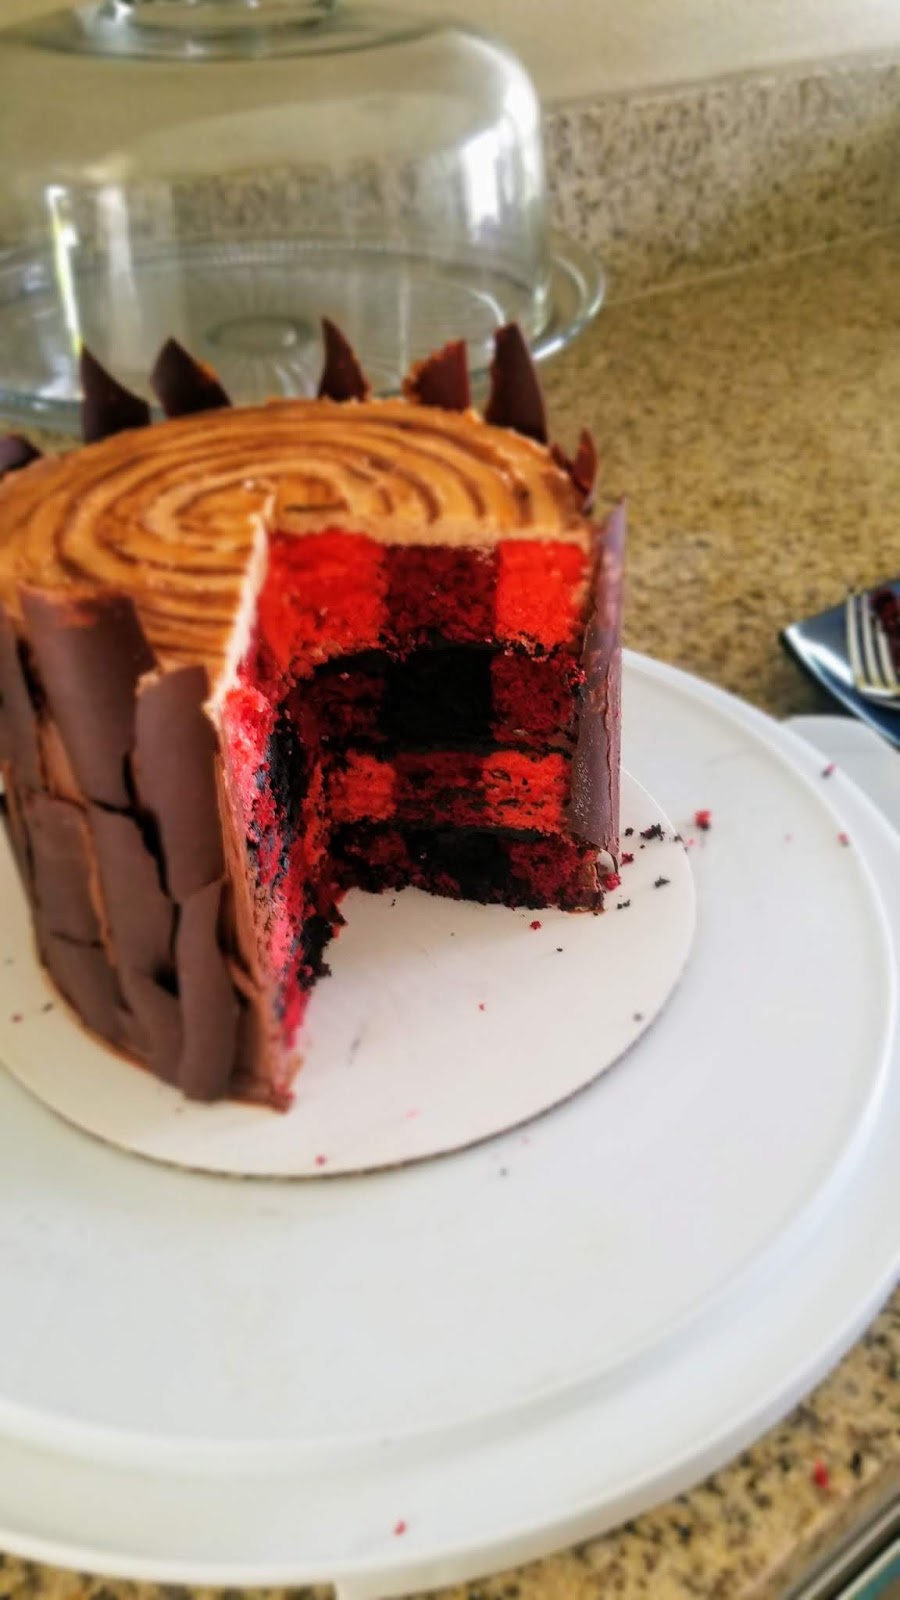
Thank the lumberjack gods. It’s plaid! I figured if all else failed, we’d still have a really yummy cake, but I am so happy at how obnoxiously plaid this cake is inside. It’s a crowning achievement in my love of Canadian-related food items (poutine is always first), but more importantly, my husband thought it was flippin’ perfect. We’re excitedly awaiting cake time this evening for round 2. Because although I feel like eating cake for breakfast is a perfectly reasonable thing to do on your birthday weekend, my husband is the grown adult in this situation, and since he’s older, it’s only appropriate. I guess I’ll just go ensconce myself in plaid and wait by the fridge…this cake is definitely worth biding time for between that chocolate Baileys frosting oozing with silky deliciousness and red velvet cake that is a perfect flavor compliment to it. I could never cut it as a real lumberjack, but I can cut a lumberjack cake, so I’ve got that going for me. ‘Til next time, my fellow eaters!
I really need to visit Canada again soon. -
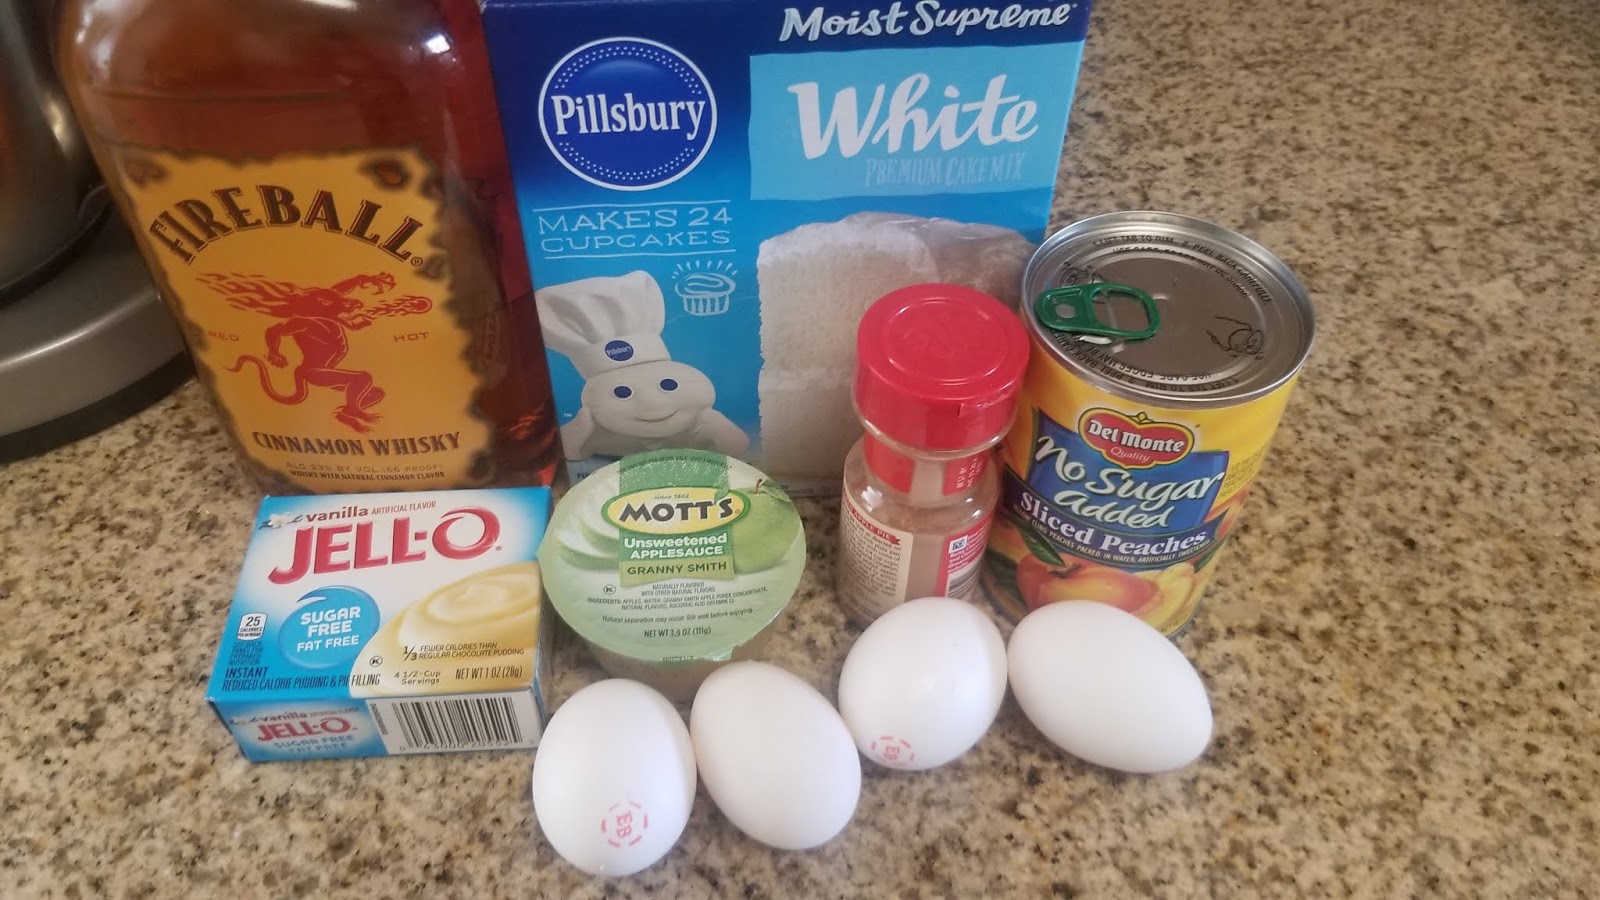
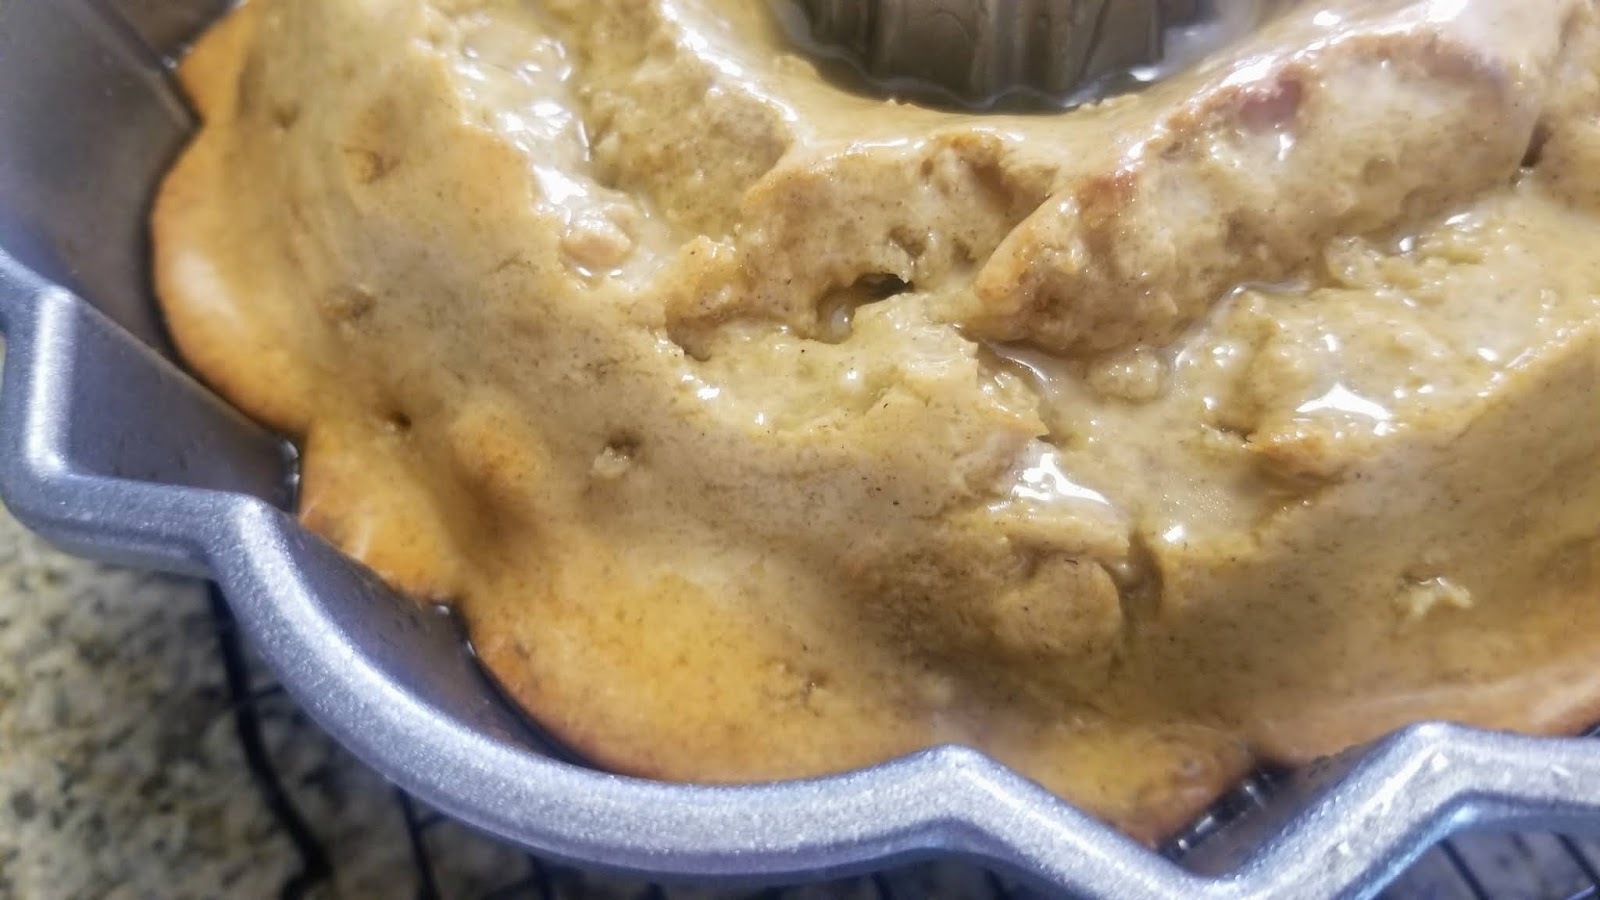
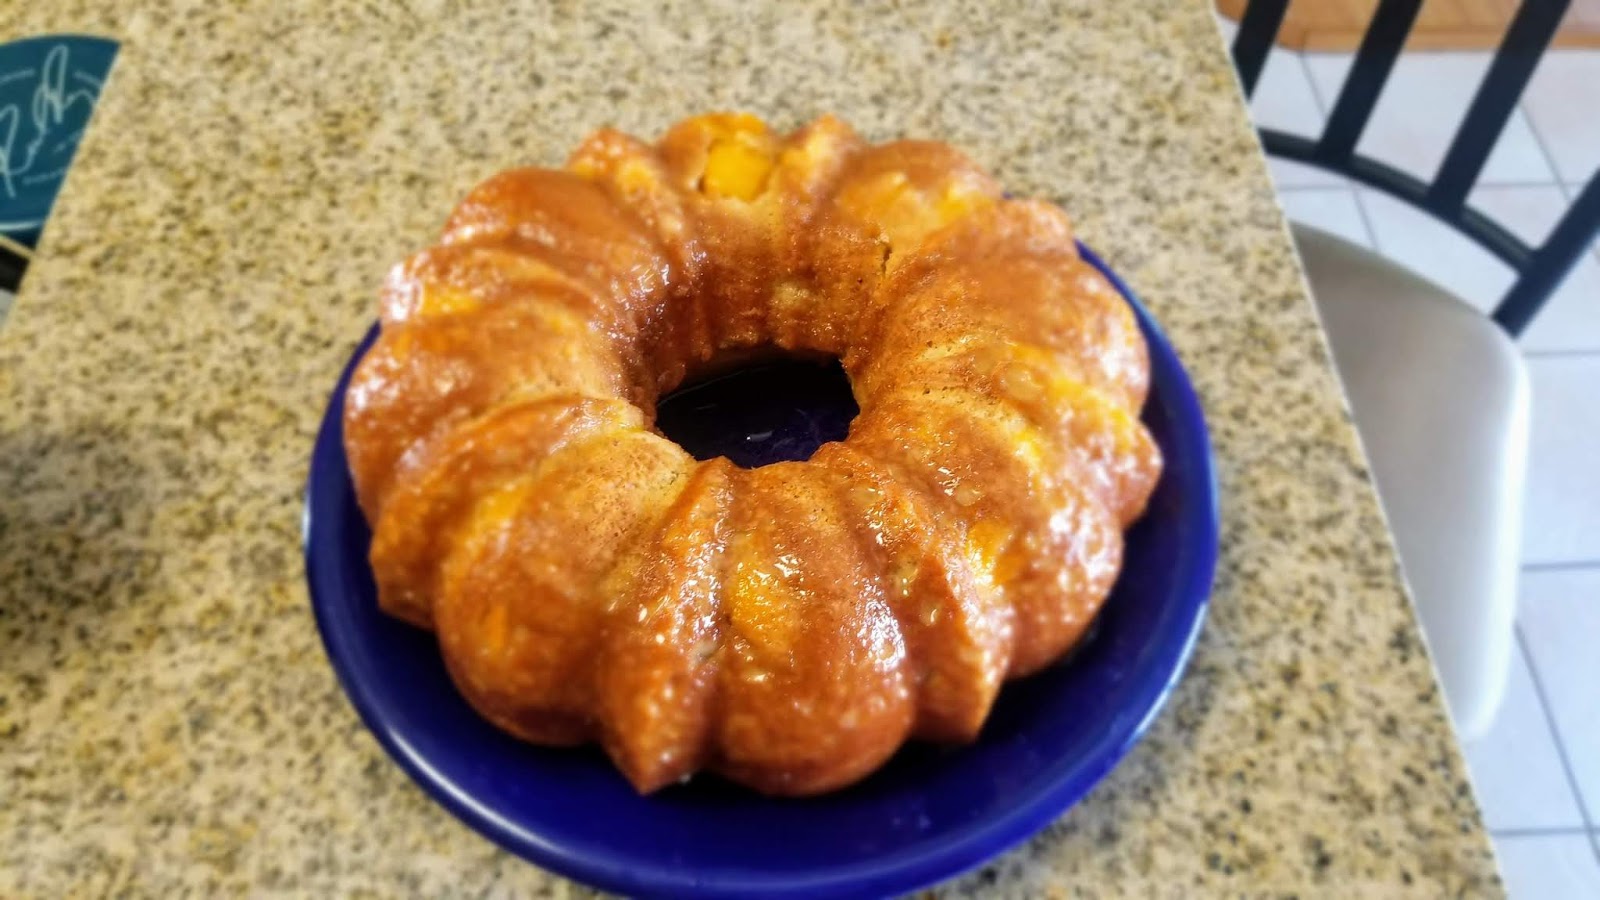
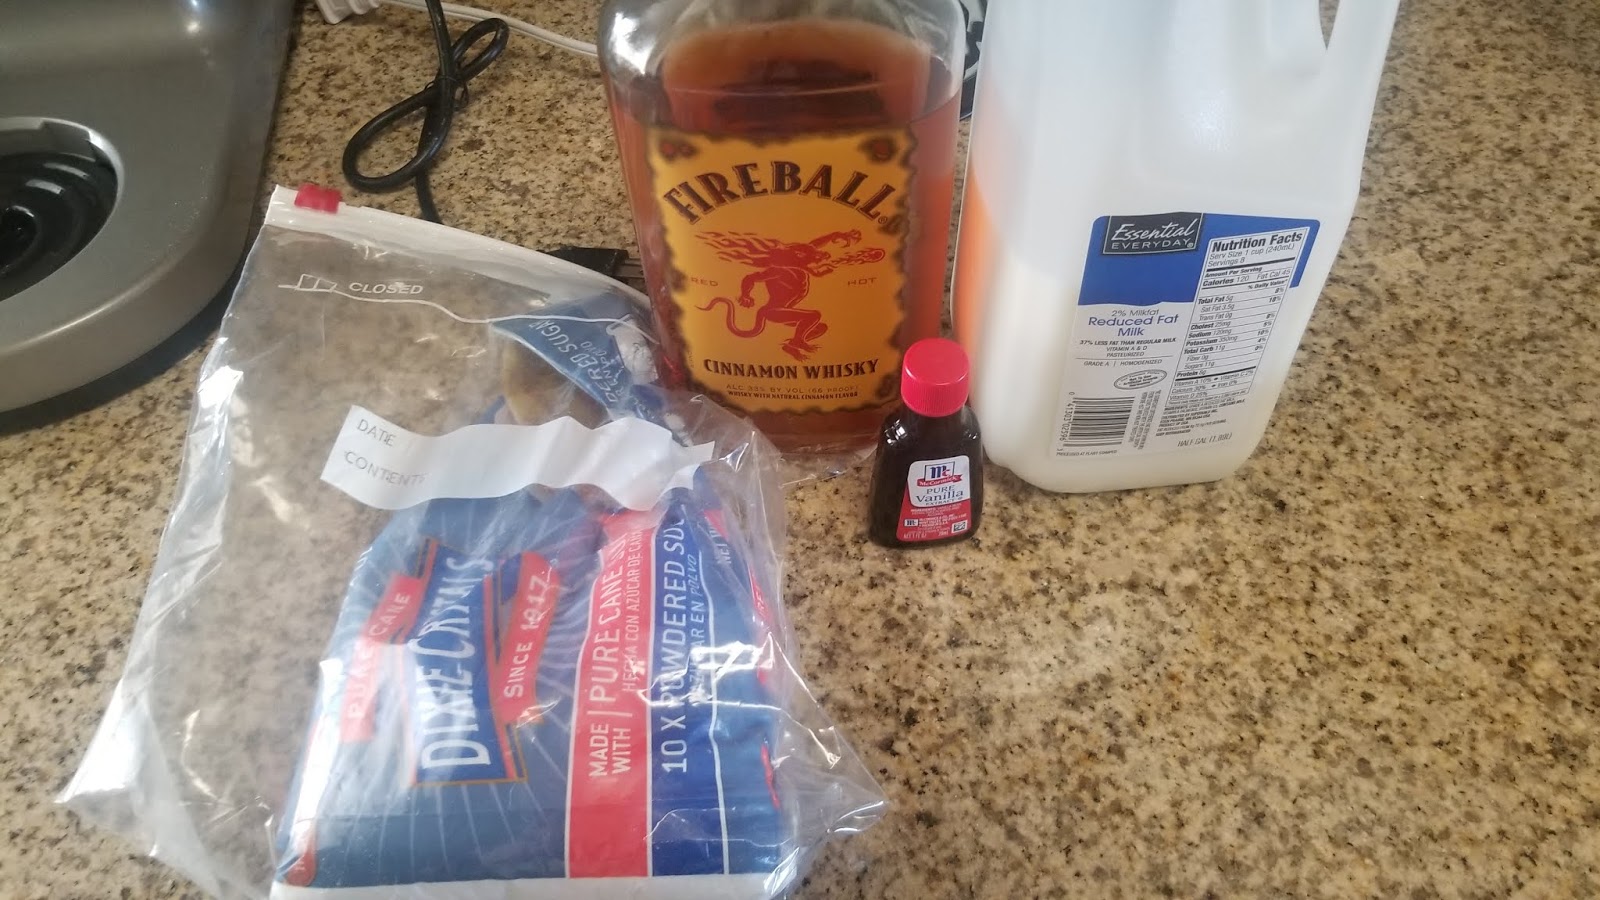
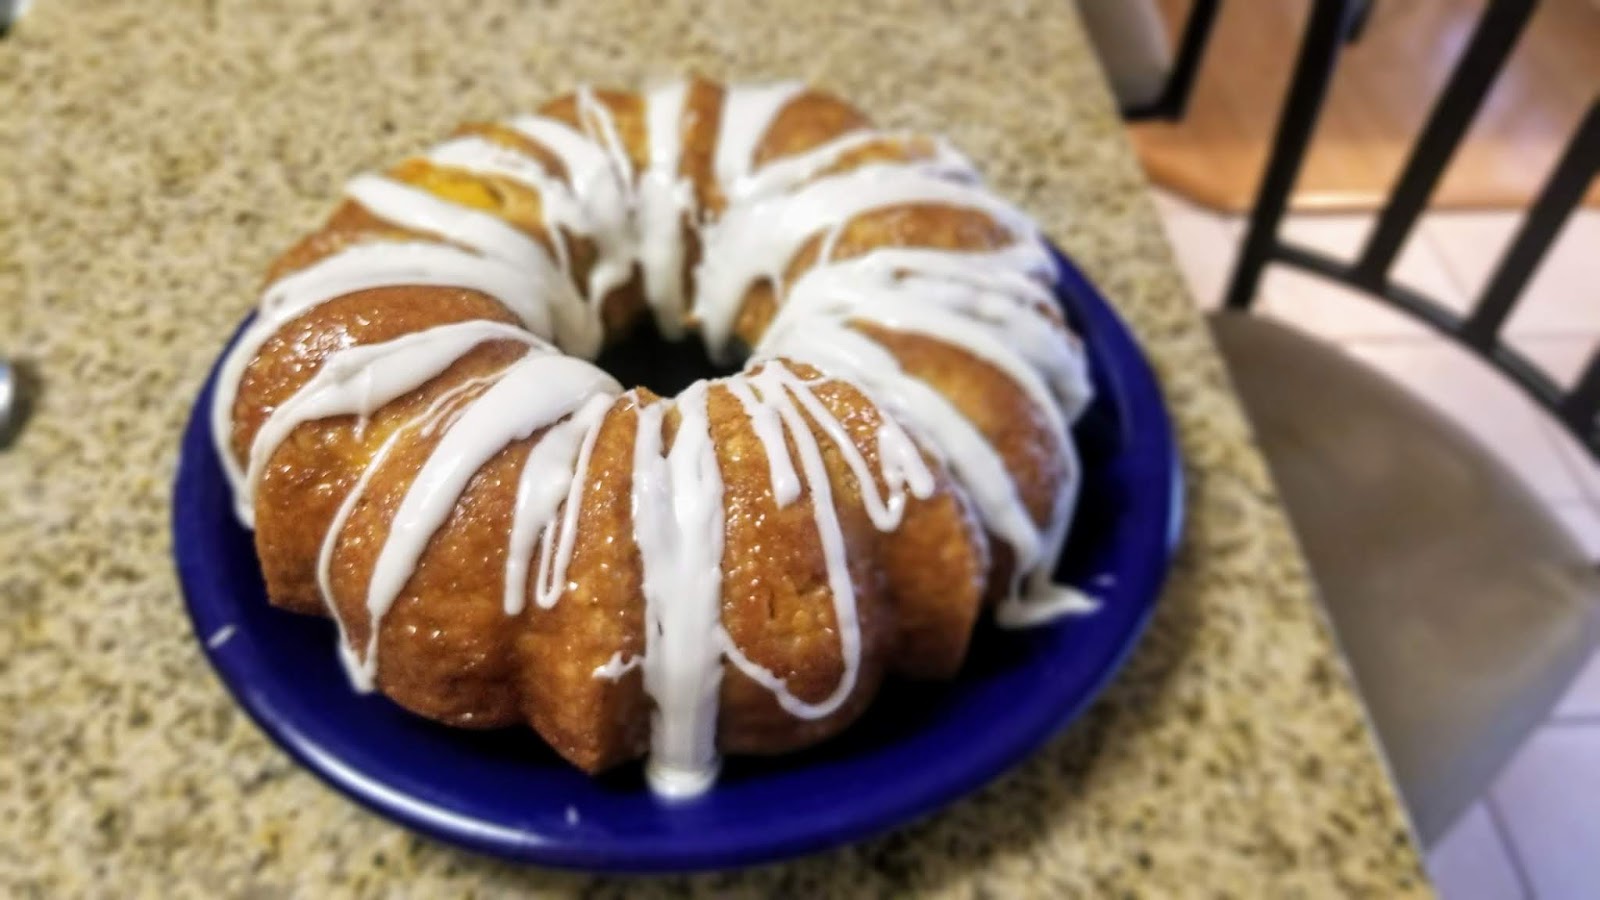
A Whiskey Revelation
To me, whiskey has always tasted like burnt motor oil. The smell alone makes me gag instantly and induces a face I make that is an exact replication of an angry toddler spitting out food. But you know what? Most people love whiskey. Honey whiskey, Irish whiskey, there’s like a zillion flavor varieties, all of which I steer clear of…unless I am baking a cake for a loved one that is crazy for the stuff. My stepdad adores Fireball whiskey, so I decided to make him a Father’s Day dessert to show my true appreciation for everything he has helped me learn in life (with the obvious exception of teaching me how to become a whiskey connoisseur, he’s been guiding me correctly since I was four). So, a peach Fireball bundt cake with Fireball butter sauce and Fireball glaze came into existence because daughters going above and beyond to make sure their fathers know how much they are loved should always begin with a booze-soaked cake. I was taught by my stepdad that dessert should be eaten often and with gusto. I am fairly certain if he had a motto, it would be, “Salad is what my food eats,” so combining whiskey, butter, cake, and more whiskey seemed like the most appropriate approach to a memorable Father’s Day for a man uninterested in rabbit food.

Silly rabbit, cakes are for dads! Upon eating my first slice of this cake, I discovered that I friggin’ love Fireball whiskey, so along with my superior sense of sarcasm and ability to work smarter and not harder, it appears I have also inherited this whiskey preference from my stepdad. I have never had a drop of it to drink in my entire life, but dear sweet spirit of Father’s Day blessings is this stuff delicious to eat. Between the whiskey in the peach and cinnamon bundt cake, the whiskey in the peach whiskey butter, and the whiskey in the glaze, there’s not an iota of this cake that isn’t bursting with the flavor of Fireball, and I gotta say, it’s quite a feat. The butter makes the cake insanely soft and, well, buttery, and the chunks of peach in the cake just take this over the top. Since the words “low calorie” and “sugar free” are virtually in no way synonymous with how dads eat their cake, I went with real sugar and still managed to make this bad boy for 352 calories for 12 slices. If you go with the substitutions I list below, you could knock that down to under 300 calories for 12 slices.

Ahem, I did, however, cut calorie corners in other sneaky ways. I love a good bundt cake recipe because they are so easy to put together. Waiting for something to come out of the oven should be the hardest part of a recipe, and this definitely attests to that. To make, you need:
- 1 box of white cake mix
- 1 large box of sugar free vanilla pudding
- 1 tsp of cinnamon
- 4 eggs
- 1/2 cup of unsweetened applesauce (replaces oil)
- 3/4 cup of Fireball
- 1/4 cup of water
- 1 can of no sugar added peaches, save the juice for the sauce
- 1 TBS of flour
Start by preheating your oven to 325 and greasing a bundt pan with like a gallon of cooking spray. Mix the cake mix, pudding, cinnamon, eggs, applesauce, Fireball, and water together in a stand mixer on medium high for 2 minutes. Prepare your peaches while this is mixing.

Drain those babies over a bowl! Once drained, set the juice aside for later. Cut the peaches into bite-sized pieces, then toss then in a large plastic baggie with one TBS of flour. This keeps them from sinking to the bottom of the cake.
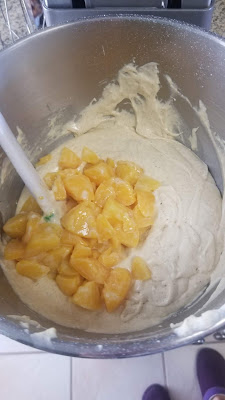
10/10 would eat like this with a spoon. Then, by hand, fold the diced peaches into the mixed cake batter. Once everything is nice and evenly folded, you’re ready to do battle with that bundt pan.

A hint of peach! Pour your batter into the prepared pan, smack the pan on the counter to get out any air bubbles and even out the batter. Bake for 45 minutes at 325 until a toothpick comes out of the deeper parts of the cake clean. When there’s about 10 minutes left on the oven timer, it’s time to make the buttery glaze. Be sure to put your cake on a cooling rack when it’s done in the oven, leaving it in the pan.
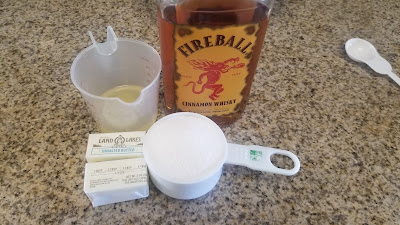
Oh look, more whiskey! The sauce comes together with:
- 1/2 cup of butter
- 1/2 cup of sugar (use 1/2 cup of Swerve granular for lower calories/sugar-free version)
- 1/4 cup of Fireball
- 1/4 cup of reserved peach juice
Melt the butter in a medium sauce pan and then whisk in the sugar, Fireball, and peach juice. Let it come to a boil, then whisk constantly for 5 minutes, until sugar is completely dissolved. I stopped whisking for 0.002 seconds to turn around and sneeze, and my sauce boiled over, creating a lovely round of “World’s most sensitive smoke detector goes wild,” so really pay close attention to ensure you’re whisking fast enough to prevent spillage…sneeze contamination protection be damned, I guess. Now, back to that cake!

No dessert for a father should ever be considered complete if it doesn’t involve tools at some point in the creation process. Once the butter sauce has been made, take a long shish kabob skewer and stab the cake all over to give the sauce channels to run into. You will be pouring the sauce onto a hot cake, so work carefully.

The most underappreciated tool in the entire kitchen is a silicone basting brush. I dare you to disprove that. Take a basting brush and brush the butter sauce all over the cake, ensuring it spills into all the little holes you’ve poked over the cake until you’ve run out of all of the sauce. I poured a bit, swept it with the brush, let it soak, and repeated a few times until the sauce was all gone.

Leaving a buttery wake in its path. Do not lick the cake. You will be tempted. Let this rest for 15 minutes before taking an angled spatula and running it around the edges and center of the cake to release it from the pan.

It has a hat! Like all dads! Take your serving plate, place it on top of the cake pan, and carefully, with pot holders or oven mits since the pan will still be warm, flip everything over so the cake is released from the pan and on to the serving plate.

Glorious. I mean, whiskey and peach cake with whiskey and peach butter sauce…you could call it a day here because this was GORGEOUS to look at with that buttery shine, but, I asked myself, “Could you add more booze somehow?”

The answer is always yes. The glaze really is the final touch…it had been a long time since I had used pure powdered sugar, so I honestly found it to be too sweet for my “healthyish” taste buds. For my personal cake eating, I would use half Swerve confectioner’s and half powdered sugar for this glaze, but this cake was about more than me and what I like, it was about a man that has been ensuring I have everything I like and need for almost the last 30 years, so the least I could do is go full powdered sugar inferno to make the best Father’s Day cake possible! For glaze:
- 2 TBS skim milk
- 1 tsp Fireball
- 1/4 tsp vanilla
- 1 cup powdered sugar
Once the cake is COMPLETELY COOL, whisk everything for the glaze together (there’s both a lot of whisking and whiskey involved with this recipe, ironically) until you have a nice, smooth glaze. Take a spoon and drizzle glaze all over the cake.

Now it’s boozy enough. Store your cake in the fridge so the butter sauce stays thicker and the glaze doesn’t get runny. You have now prepared the most whiskey-laden cake in the history of time. But trust me, it’s good. Like, you’re gonna go for seconds good (yep, this definitely happened). I have zero guilt because sharing a good slice of cake with a man who put up with me when I was no longer a cute child but a champion eye-rolling teenager was a good way to ensure those sanity-testing moments weren’t for nothing: a daughter’s love is amplified tenfold with the gifting of a good cake. ‘Til next time, my fellow eaters!

Take your Fireball peach bundt cake to the next level by enjoying with a glass of actual Fireball. It will change your life. -
Death by Chocolate Cheesecake
I know of only one person in this entire world that loves a good dessert more than I do–my boss. I take the opportunity to try to out-bake myself for her birthday every year because she deserves a really good birthday treat, and unlike me, she does share dessert. She’s a fan of boozy baked goods, specifically Kahlua-based ones, so I came up with what might be my crowning birthday treat achievement: a chocolate Kahlua cheesecake with dark chocolate crust and a Kahlua ganache. That’s it. I’ll never do one better, so I either need to find a new job or prepare my office for disappointment on her next birthday. This cheesecake is rich–like Royal Family or Bugatti Owner level of richness. You only need a tiny sliver to sate the old sweet tooth for sure…and this is coming from someone with a sweet tooth the size of a grizzly bear.

And, like most rich things, it is both beautiful and demanding. I’ve gotta warn you, it’s so hot outside that my sense of humor has burst into flames and died in humid, Florida-laden misery, so remembering this cheesecake fondly is the one thing bringing me joy today. Like most cheesecakes, this is definitely a two-day event to make, so keep in mind if you’re giving this recipe a go. I have a 10″ springform pan, and this cheesecake is TALL, so I’d say it’d easily yield 20 servings due to how rich it is. You really don’t need a large slice to be food-coma ready, and for 20 servings, each slice amounts to 365 calories. Definitely on the higher end of the scale, but most things covered in booze-drizzled chocolate aren’t going to be good for your waistline, just your sanity.

Hi, so, dark chocolate Oreos are the greatest thing to be invented since A/C. The crust recipe for this cheesecake is, in my opinion, the best part of the entire cheesecake. I did not know Oreo made a dark chocolate cookie with dark chocolate filling, and discovering this when I was grocery shopping was like “Columbus discovering the Americas” level of mind blowing for me. I got loads of compliments on the crust–something usually completely overlooked in a cheesecake–so take heed and use these and only these Oreos. To make everything, you need:
- Crust:
- 1 whole package of dark chocolate Oreos (keep the filling in!), crushed in a food processor
- 1/4 cup of melted butter
- Filling:
- 2-3* 8 ounce bricks of 1/3 fat cream cheese, softened
- 1 cup of light sour cream
- 3 eggs + 2 egg yolks
- 1 1/2 cups of Swerve granular
- 3 TBS Hershey’s cocoa powder
- 1 1/2 tsp vanilla
- 1/2 tsp cinnamon
- 1/4 cup Kahlua
- 8 ounces melted semisweet chocolate chips
- Ganache:
- 4 ounces semisweet chocolate chips
- 4 ounces dark chocolate chips
- 2 TBS skim milk
- 2 TBS Kahlua
- Optional: additional chips for decorative topping
*I am not the hugest fan of cream cheese, so if I were to make this for myself, I would only use 2 bricks of cream cheese. I think this would take the level of richness from “Give me one more forkful and I might explode” to “Oh yeah, I can totally finish that slice if you don’t want it.” Just a personal preference! This was borderline ridiculously decadent, so pairing down the cream cheese would help.
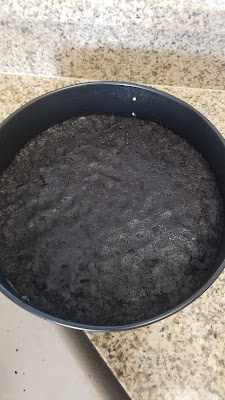
Altering nothing in the crust though, cause that bad boy is perfect. Preheat your oven to 325, make sure your racks are adjusted to fit a large roasting pan, and line a springform pan with Parchment paper before spraying heavily with Pam. Set this aside and mix your crushed Oreos and melted butter together in a food processor or blender. Turn out into your prepared pan, using a glass or the bottom of a measuring cup to smooth out evenly.

No soggy bottoms! The first time I made a Real, Fancy Cheesecake™, my bottom got soggy in the water bath. To combat this, this time I used a crockpot liner wrapped around my pan with the end secured in a small knot. THIS WORKED. Crust was perfectly dry after baking. Use this genius hack with fervor, friends.
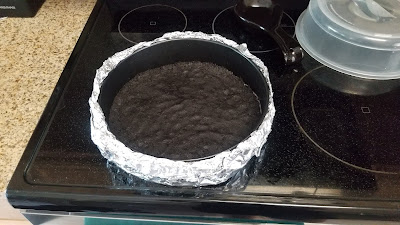
Don’t forget the foil. Still, as a precaution, wrap in a few layers of foil on top of the crockpot liner. Set this aside and make your filling. With the paddle attachment, beat the cream cheese and sour cream together until light and fluffy on medium speed, about three minutes. Add in the sugar, cinnamon, cocoa, and vanilla, and beat on medium speed another 2-3 minutes. Scrape the bowl and then add in the egg and egg yolks, one a time, mixing on low until each one has been completely incorporated to keep excess air from mixing into your batter that could cause it to crack later. While this is going on, melt your 8 ounces of semisweet chips on 60% power for 1 minute. Whisk until completely smooth and set aside to cool for a minute or two. After all the eggs are mixed in, pour in the Kahlua and melted chocolate. Mix slowly until the chocolate has been totally mixed in.

Water bath time! Now, place that absolutely amazing crust you prepared earlier into a large roasting pan. Pour your cheesecake batter into the springform pan and then add about 4 cups of very hot water into the sides of the roasting pan. Now, place into your oven and bake for 90 minutes, until the top of the cheesecake is still barely jiggly. Yours truly accidentally shut off her oven timer and over-baked the top of the cheesecake, so thank god for ganache. Once your cheesecake has baked for 90 minutes, turn off the oven, slightly crack the door, and leave it in the oven for another hour to finish baking.
Fun story! I’m all thumbs, literally. When I was pulling my finished cheesecake out of the oven, I didn’t realize my thumbs in my oven mits were touching the top of the cheesecake because I was trying so hard not to drop the heavy roasting pan. I went from perfectly smooth top to two large cracks because of my gargantuan thumbs (great for thumb wars, terrible for moments like this). And once more I shall say: thank god for ganache–the airbrushing of desserts.
Now, remove your cheesecake from the roasting pan and set on a towel to cool off. While it’s cooling, run a sharp knife around the edges of the cheesecake to ensure nothing is sticking to the sides of your pan. Let cool for an hour then wrap with plastic wrap and place in the fridge overnight. I actually ended up putting this in the freezer since I knew I wanted to pour hot ganache on top of it, so you can definitely bake this ahead and freeze it until you’re ready to serve or ganache.

It would have been perfect, if not for those damn thumbs. You don’t need to ganache this cheesecake, but trust me when I say you’re really gonna miss out on some magic if you don’t. Once your cheesecake has rested overnight in the fridge or freezer, remove from the springform pan. I also froze this cheesecake so it would be easy to remove it from the bottom of the springform pan and transfer to a cake round I wouldn’t need back.
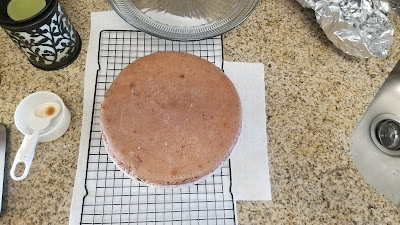
Prepare for chocolate-palooza! The next day, set your cheesecake on top of a cooling rack, and be sure there are plenty of paper towels underneath that to catch any spills. Make your ganache by putting 4 ounces semisweet chocolate, 4 ounces dark chocolate, 2 TBS Kahlua, and 2 TBS skim milk in a large bowl. Microwave at 60% power for one minute, then whisk until completely smooth. Pour this into a liquid measuring cup and let rest 3-4 minutes.
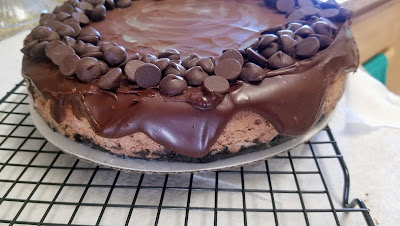
And pour, baby, pour! Pour your ganache all over the top of the cheesecake, using an angled spatula to even it on the top of your cheesecake and push ganache down the sides. Since my cheesecake was frozen, this set VERY FAST, so work quickly. Hindsight–a fridge-chilled or slightly thawed cheesecake would give you a better drip appearance. I was working quickly, so I took a few handfuls of additional chocolate chips and placed a border around the edge of the cheesecake:

A good finishing touch if you’re not celebrating a birthday! This was a pretty accent for sure, but nothing compared to these gorgeous birthday cake toppers I found on Amazon (because they really do have everything).

Consider this my “Everything needs sprinkles on top” moment. These took the appearance to the next level. I placed this in a cake box and let it chill in the fridge overnight until it was ready to make it’s debut for my boss’s birthday.

There were actual ooh’s and ahh’s. Definitely keep your cheesecake refrigerated until ready to serve! My cake box was way too big to fit in our work fridge, so by lunch time, the cheesecake was softened to a point where pretty, evenly-cut servings were not even remotely possible. The birthday girl may or may not have dug into it with a spoon the moment she opened the box, so there was no reason for the pomp and circumstance of pretty cheesecake slices anyway. I was happy she was happy, and we were all really, really happy to have boozy cheesecake on a Friday after what felt like the longest week ever. I’ve told you it’s supremely filling and that the crust is hands down my favorite crust ever, but let’s not forget the unsung, thumb-damage-hiding hero of this dessert: Kahlua ganache. That was the best way to add more booze and really finish off this cheesecake for sure. Servings were had, people. It’s a good thing I have another year to try to figure out how to top this extremely rich, incredibly decadent cheesecake…cause I’m gonna be thinking about how yummy it was for a long, long time. ‘Til next time, my fellow eaters!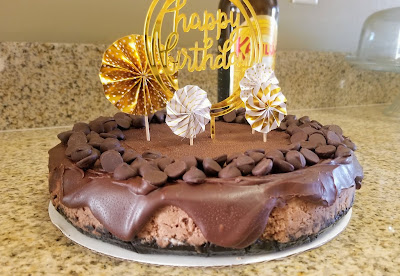
It screams “for chocoholics only,” and I am here for that.

Healthy-ish cake, cupcakes, pie, and cheesecake recipes and decorating tips