-
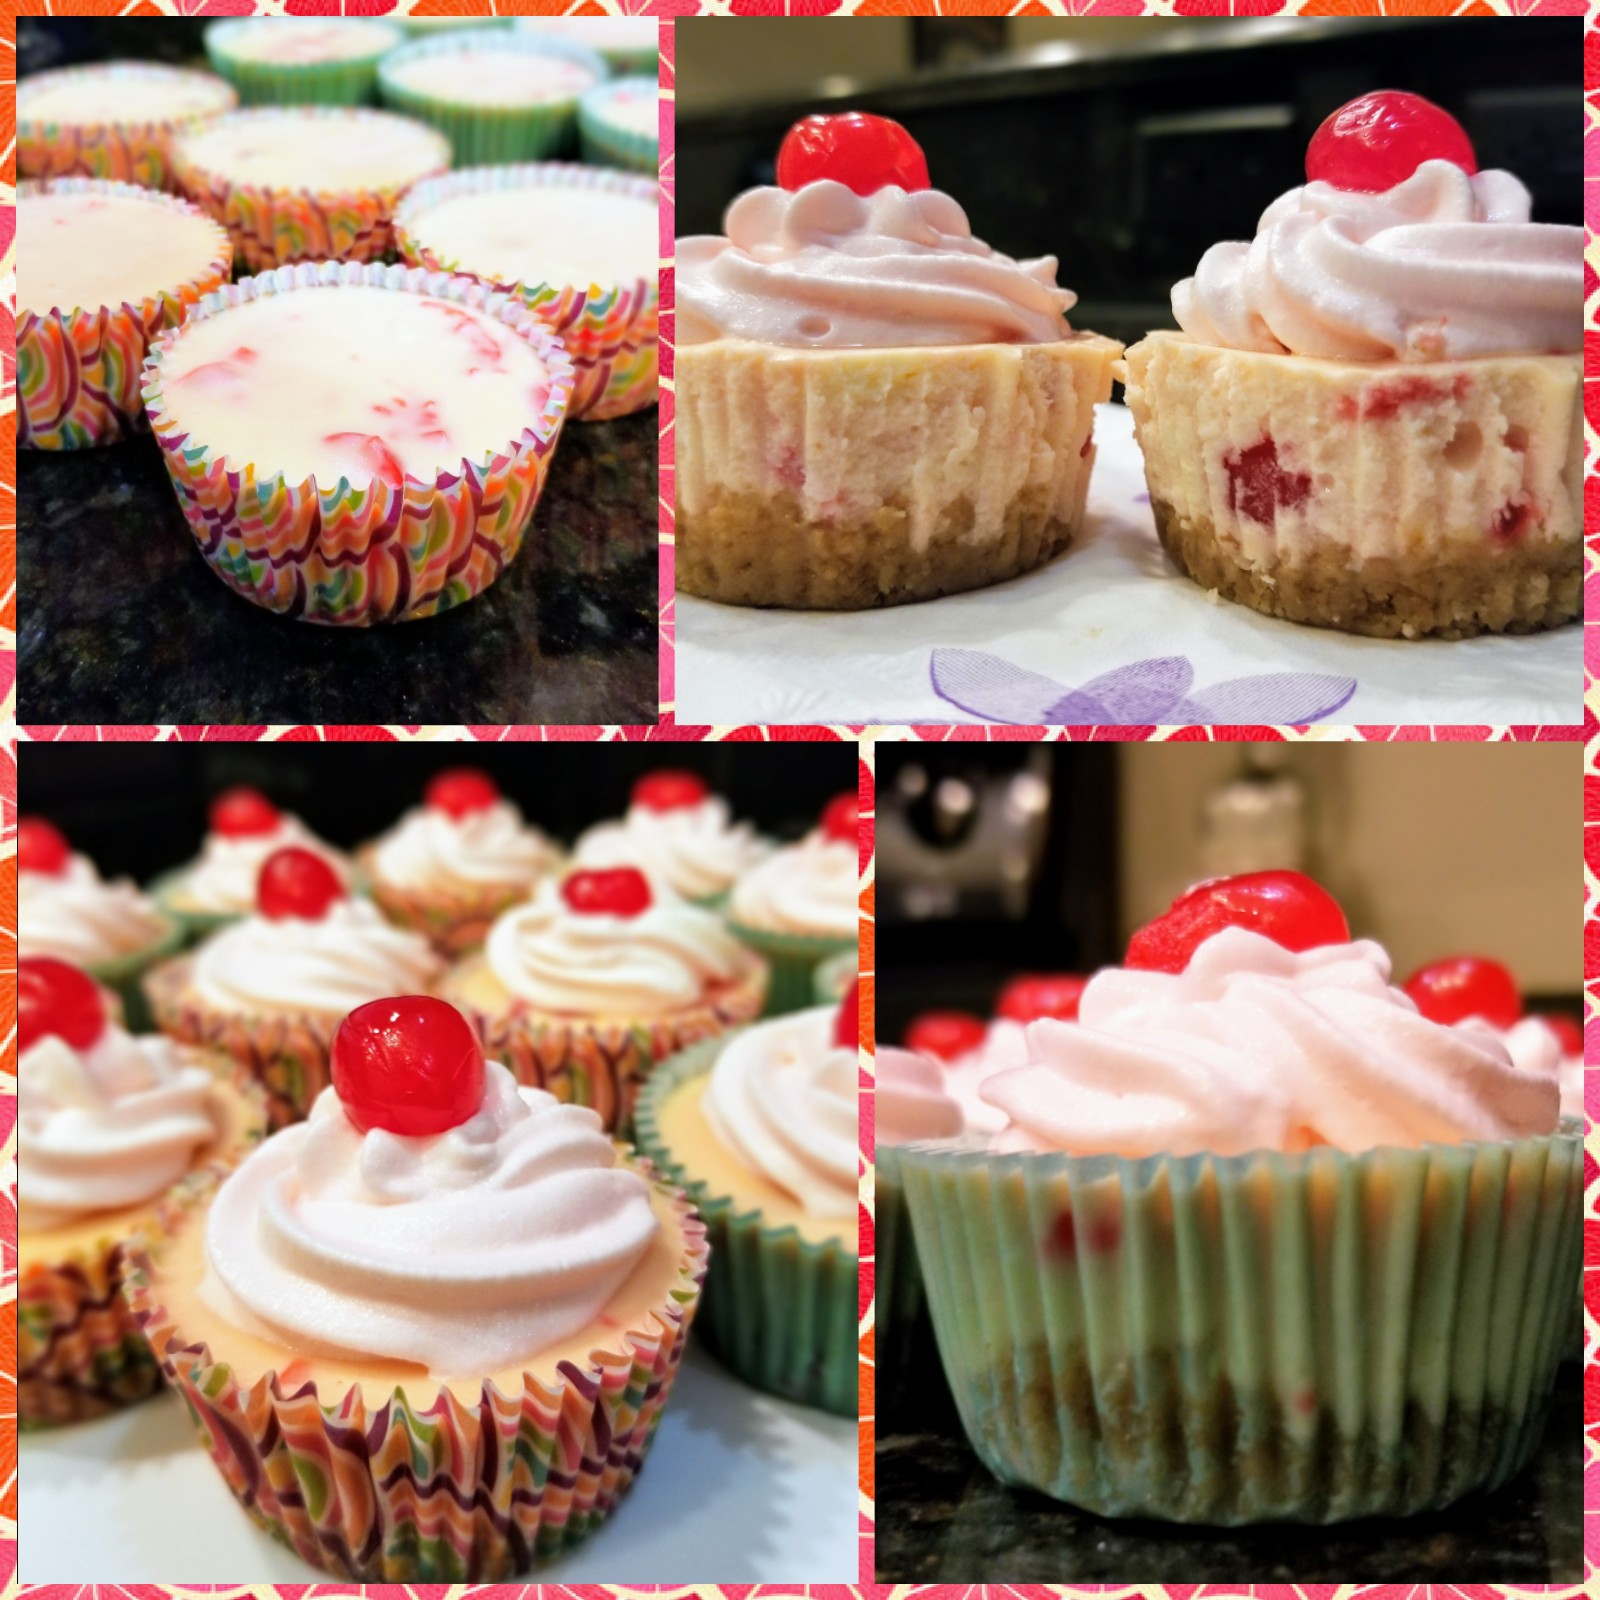
Cool as a Cherry Cheesecake
Well, it’s that time of the year again in Florida. The time when I step outside each morning to walk my dogs and my glasses instantly fog up from humidity only for me to wipe them off and realize it wasn’t my glasses–that’s just how thick the air is outside. I know it’s going to be a particularly trying day when I open my blinds to discover even my windows are thick with moisture, you know, like they’re crying about how humid it is. I don’t enjoy living where there’s only two seasons: summer lite and summer oppression. I have tried so hard, but I’m not mentally or physically prepared to suffer through another Florida summer. Since shipping myself off to Alaska isn’t possible, instead I’m back to eating through the pain. I decided a handheld dessert would be most beneficial since my husband, the normal eater, finds the portion sizes perfect, and I, the one eating through the pain, of which there is so, so much of, can have a dessert for each hand. In those temporary moments of desserty bliss, I forget all about the UV index, lack of breeze (this is the flippin’ coast, seriously?), and small fortune spent on sunscreen. That, my dear friend, is the power of a damn good cheesecake:

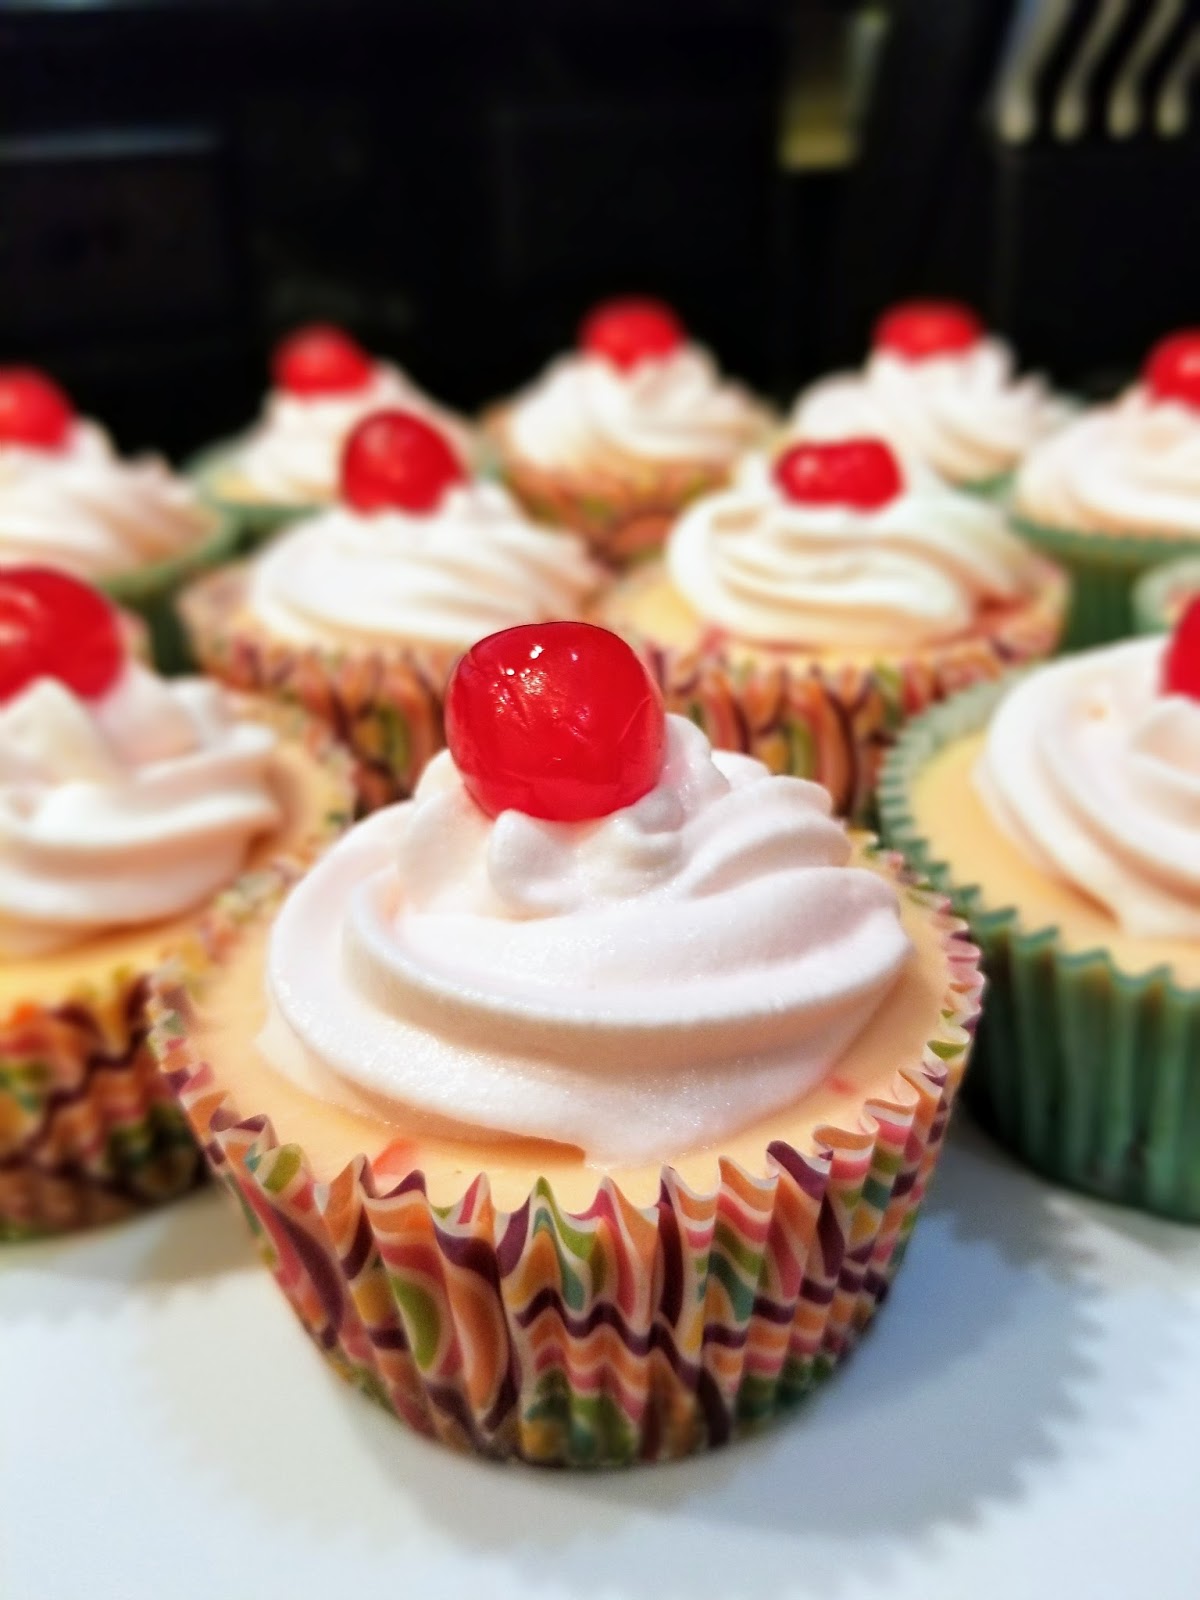
The cherry on top of an otherwise miserable season! These cherry almond cheesecake cups…where do I even begin? The amazingly rich, creamy almond cheesecake? The buttery vanilla crust? The sweet pieces of Maraschino cherries swimming throughout? The cherry whipped topping? I suppose I could start with any of them, but the end result is still the same: a perfect, delicious cheesecake served up in just the right amount with absolutely no need for a fork. I told you last week, I eat like a bear because I may or may not be one. But seriously, you don’t need a fork for these little beauties. You’ll eat them faster than you could find utensils anyway. But go forth and eat with reckless abandon because one cheesecake is only 208 calories! I channeled my rage-filled abhorrence of summer toward clever calorie cutting because it’s pretty much necessary that I live in a bikini for the next six months or risk spontaneous combustion every time I crack open the front door. I may feel miserable, but I certainly don’t have to look it! Ahh, vanity.

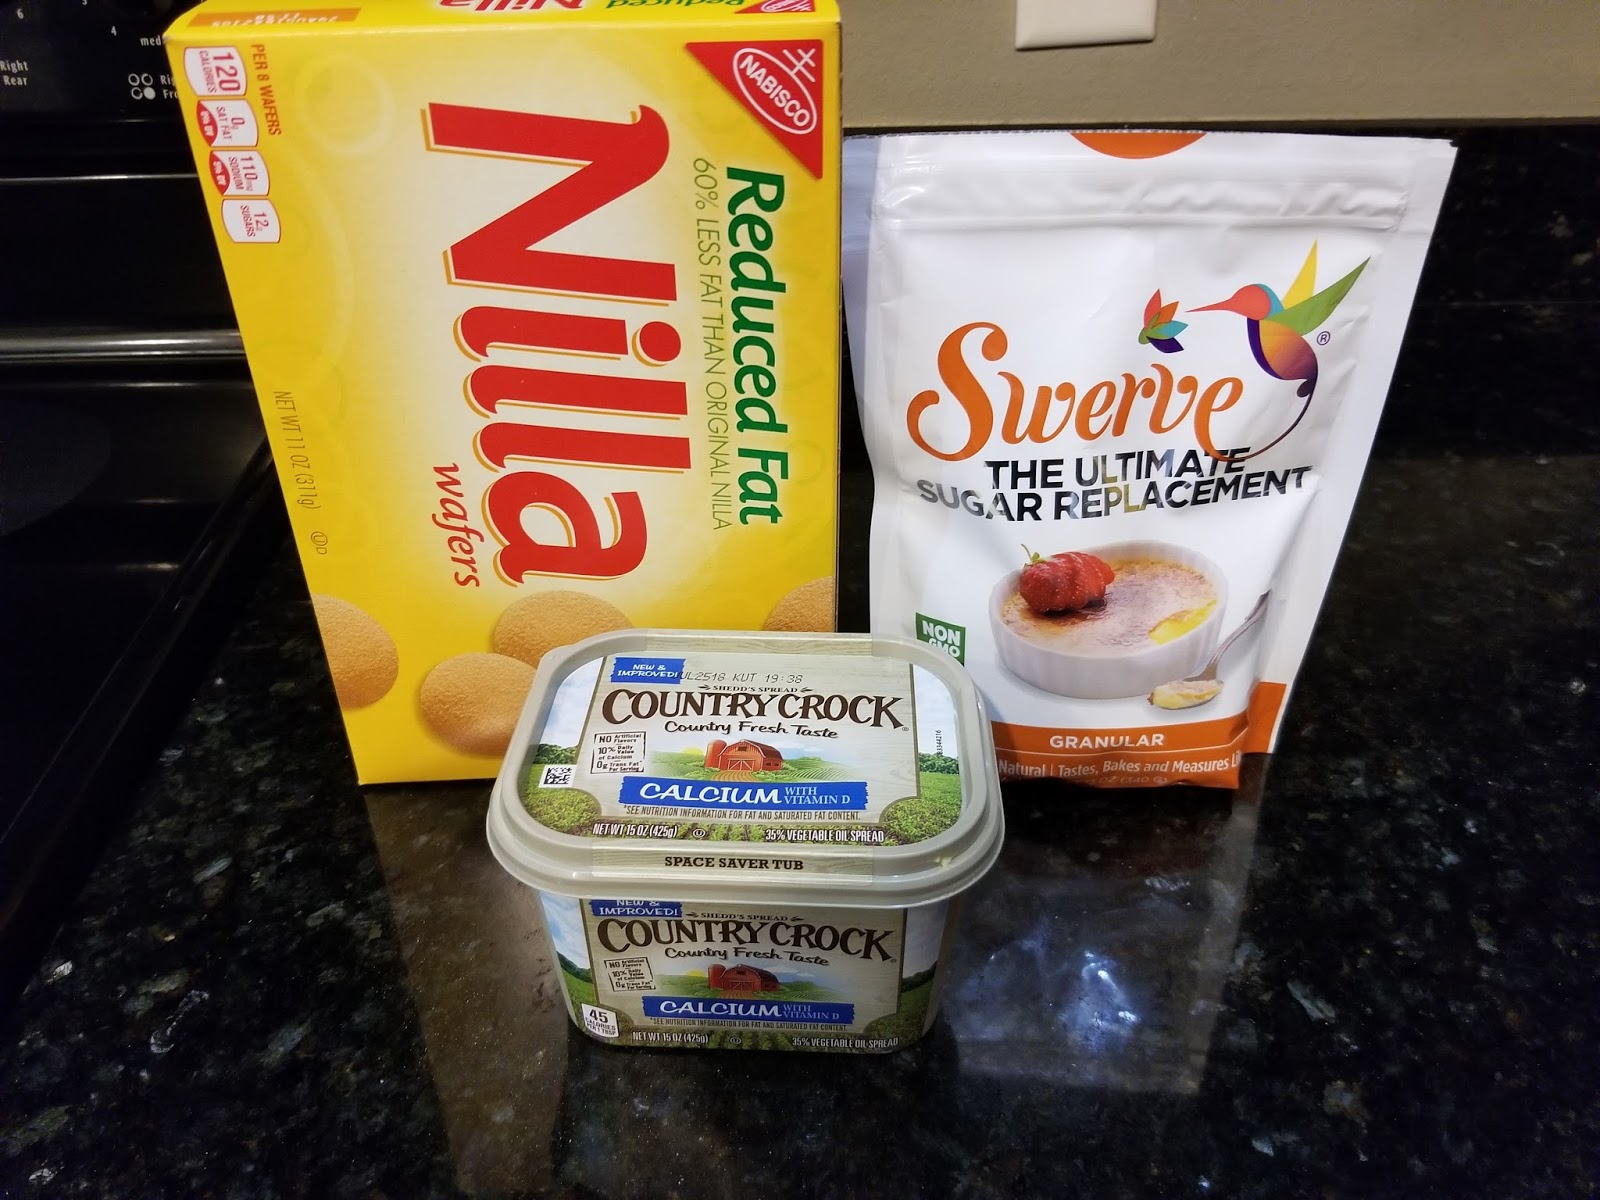
And yet, there’s cookies involved. I always felt like Nilla Wafers never got a fair shake. In a world where there’s over 75 types of Oreo’s alone, these plain vanilla cookies never stood a chance. Maybe I relate on some level because I, too, happen to be a plain vanilla wafer of a person: bland in appearance, but steadfast and reliable! And much like the Nilla Wafer cheesecake crust, I’m also a surprisingly good addition to most ensembles. To make the crust, gather:
- 32 Reduced Fat Nilla Wafers, crushed (this makes 1 cup of crushed wafers)
- 3 TBS of butter or butter spread, melted (I used spread)
- 2 TBS of Swerve granular

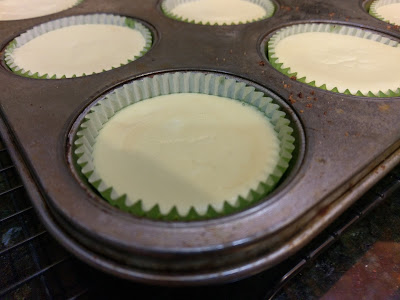
I love any opportunity that allows me to use my food processor. Feel the power! Once you’ve crushed all of your Nilla Wafers in a food processor, add in the melted butter and the sugar, and blend until the mixture is wet. Preheat your oven to 325 and line a muffin tin with 12 cupcake liners.

A strong foundation is necessary for all that cheesecakey goodness. Use a tablespoon, and scoop one tablespoon of crust mix into each cupcake liner. Then use something small, like a shot glass (pictured one photo above) to smooth your crust down into the cupcake liners. Bake these for 5-7 minutes, or until slightly golden. Remove from the oven and set on a cooling rack while you make your filling. At this point, you also need to lower the oven temp to 300, or risk burning your beautiful, cherry-filled cheesecakes and letting summer win in all it’s overheated evilness…summer, the Taylor Swift of seasons. Innocent and sunny in appearance, but totally loves it when you’re miserable.

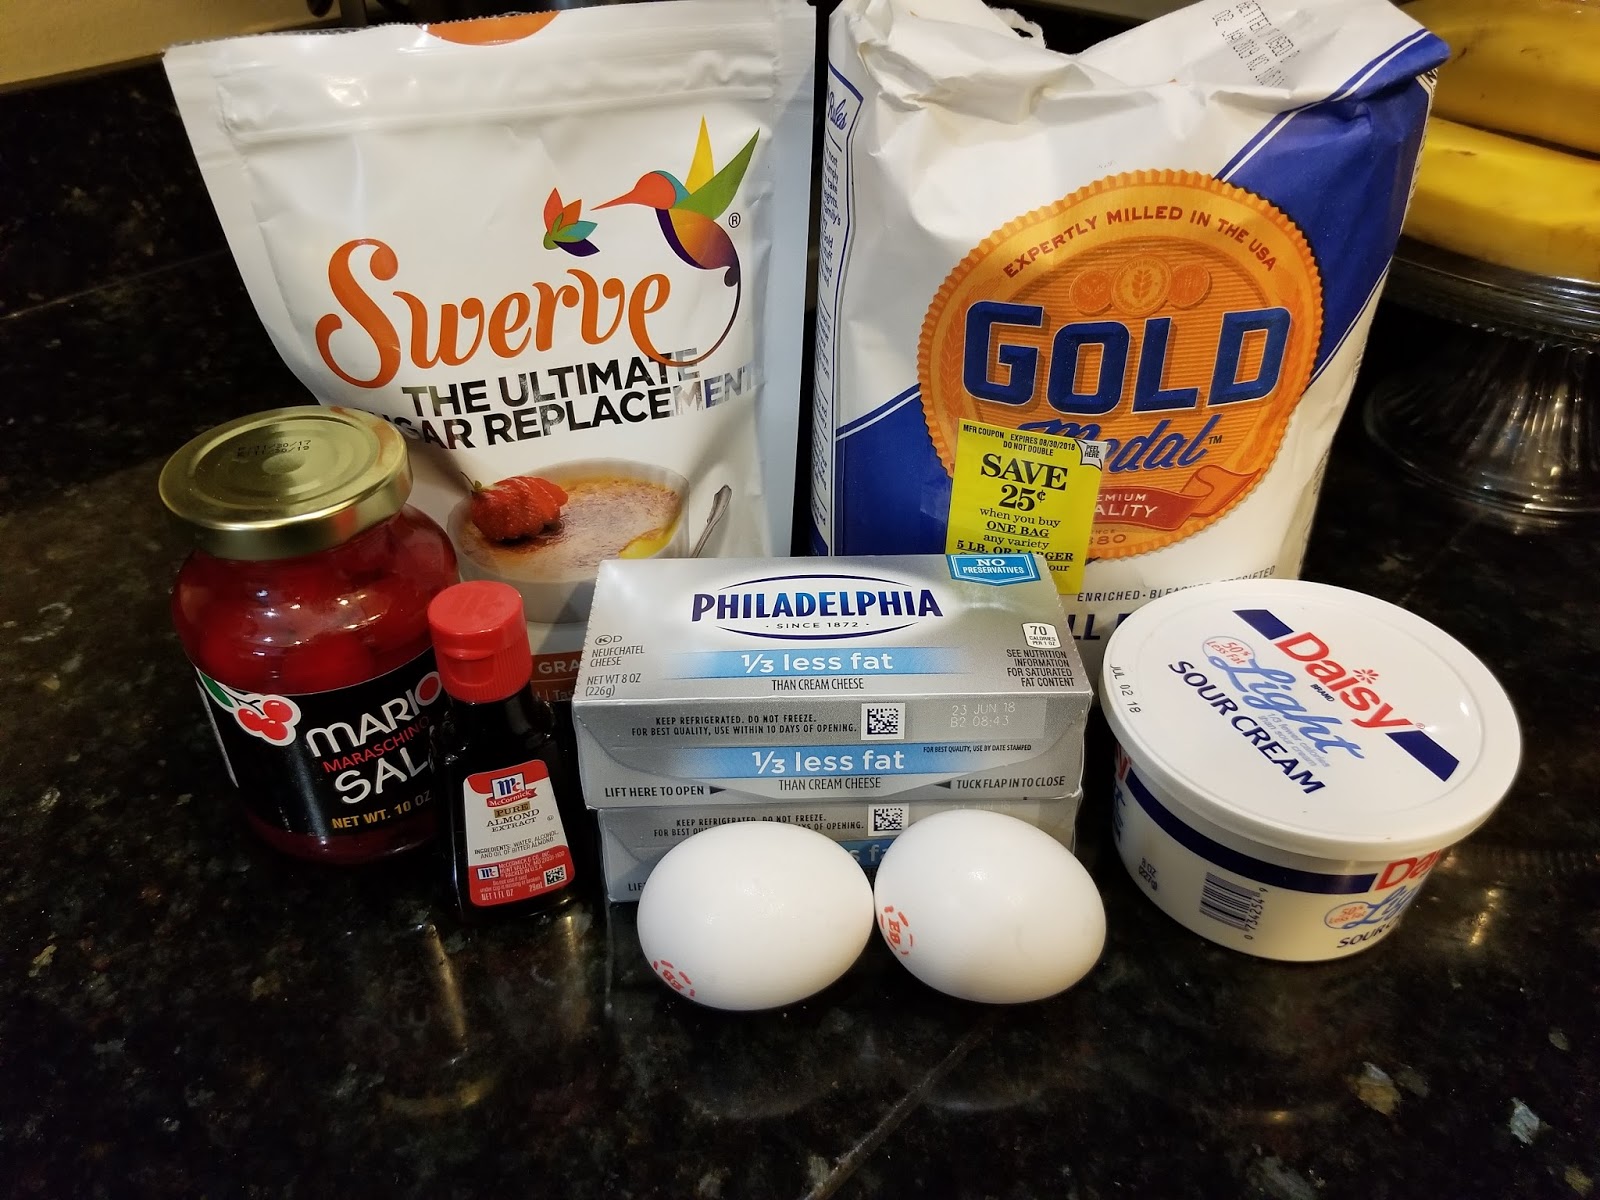
I ate a lot of cherries that day. Literally the hardest part about making these cheesecakes was chopping the Maraschino cherries. Those delicious little jerks are slippery and somehow ended up flying off the plate and into my mouth on accident on several occasions. To make the cheesecake filling, you’ll need:
- 12 ounces of 1/3 fat cream cheese at room temp
- 1/2 cup Swerve granular
- 3 TBS All Purpose flour
- 1/2 cup of light sour cream (I might try 1/4 cup next time and add 4 more ounces of cream cheese instead just because I felt like the sour cream covered up the flavor of the almond extract just a little bit too much)
- 1 1/2 tsp almond extract (alternatively, if you want to keep a 1/2 cup of sour cream, try adding 2 tsp of almond extract so the flavor shines through. I’m obsessed with almond extract flavoring)
- 2 eggs
- 34 Maraschino cherries, chopped (this makes about 3/4 cup)
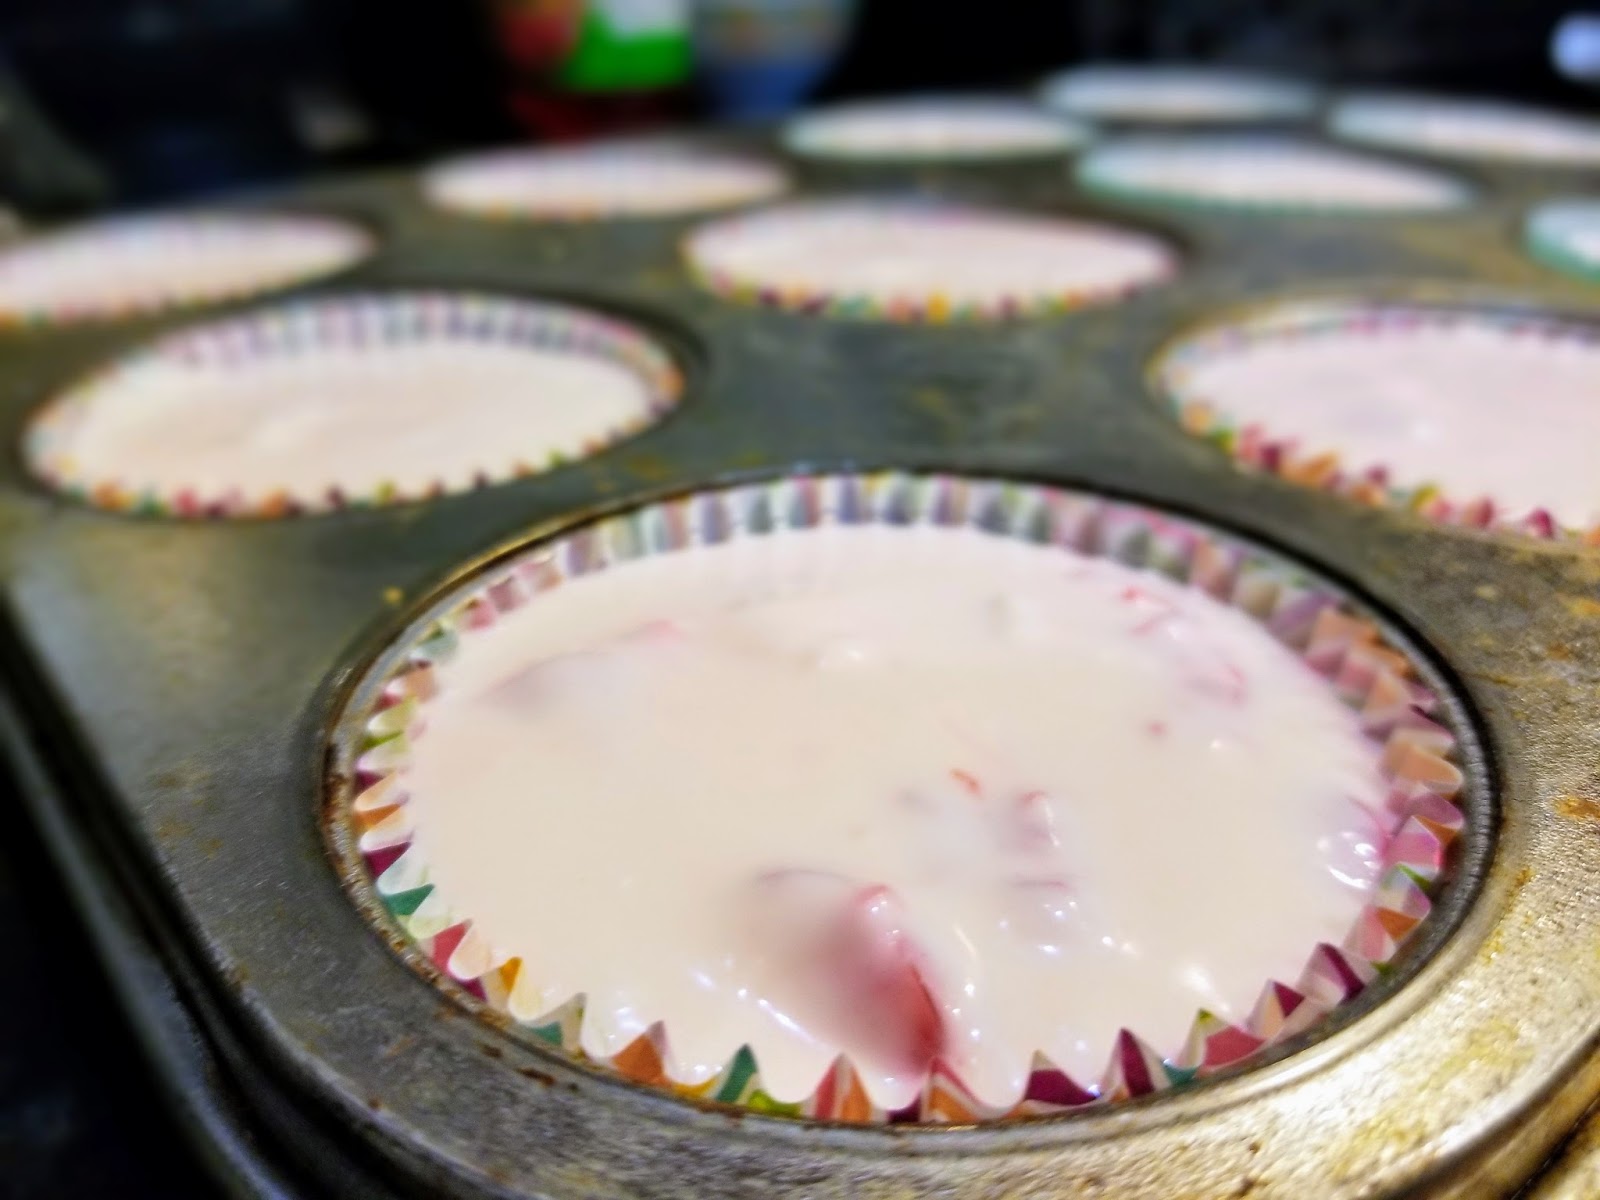
Blend the cream cheese, flour, and Swerve in your stand mixer on medium until well blended, scraping the bowl after a minute or so. Then add in the sour cream and almond extract and mix on medium for a minute. Scrape the bowl again before adding in the eggs. Blend on medium until everything is silky smooth in appearance. Fold in the chopped cherries by hand.

I was prepared to drink this with a straw. Take your tablespoon from earlier and plop two heaping tablespoons into each cupcake liner with your baked crust. Cups should be filled almost completely to the top! Bake for 18 minutes at 300. Once 18 minutes are up, turn off the oven, but leave the cheesecakes inside with the door completely closed for 10 more minutes. Finally, crack open the oven door and let your cheesecakes rest inside for another 15 minutes. The cheesecakes will cook a bit more this way without burning or sinking. I know, this seems like a random yet oddly specific process to follow, but the original recipe did not steer me wrong here. Take the muffin tin out of the oven and place on a cooling rack in your fridge to completely chill for 3 hours.

Worth the wait! They’re honestly really pretty cheesecakes without any topping, but the potential to add more cherries to something is not an idea I’ve ever been able to turn down. Just ask my husband about how irrationally angry I get when I order a Cherry Vanilla Coke Zero from Sonic, and they don’t put a Maraschino cherry in it. It’s got “cherry” in the title–I have no time for these egregious errors, Sonic! What you lack in Maraschino cherries, you do make up for in the greatest mozzarella sticks of all time, but c’mon. Sorry, things have gone completely off the rails here, but I really like Maraschino cherries.
And their juice! To finish off these cherry-filled cups of deliciousness, take 2 cups of Cool Whip Free and plop into a medium bowl. Drain 2 tablespoons of Maraschino cherry juice from the jar and mix in with the Cool Whip Free gently. Place into the fridge for an hour or freezer for 15 minutes to let the Cool Whip Free firm back up before decorating your cheesecakes.
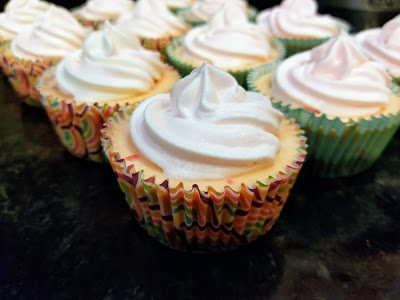
The perfect swirl. I loaded up my Cool Whip mixture in a piping bag with a 1M tip and just did a simple swirl on each cheesecake. Remember, cheesecakes should be TOTALLY cool before you decorate them. If there’s one thing I enjoy (because I’m a terrible person), it is looking at other people’s dessert fails where 98% of the time, they just needed to let things cool fully before frosting. As a baker, this is a simple concept I often forget other people don’t even realize. So here I am, spreading the word. Fighting the good fight. Trying to keep your cake fails off the internet because I care. And because pretty desserts make me happy. This goes back to that vanity issue, clearly.
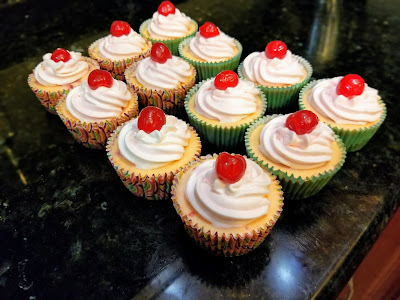
Definitely don’t forget to add a cherry on top. Cherries in and on the cheesecake! 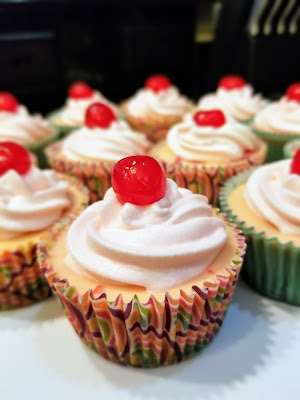
I did resist the urge to add sprinkles, so give me some credit. Once frosted and topped with a cherry, set back into the fridge until you’re ready to serve. This would be an excellent dessert for a cookout or just for your general sense of sanity during extremely hot, humid summer months. There’s a ton of cherry flavor in these cheesecakes, and it is extremely refreshing and definitely seasonally appropriate. I often forget there’s more than just citrus when it comes to summer dessert flavor, and these cheery cherry cheesecakes (I adore alliteration) are going to be on my mind for ages to come. The crust is a nice, simple vanilla complement to the creamy richness of the cheesecake. Seriously, a tad bit more almond extract and this might very well have been the greatest cheesecake creation of all time. But the cherry whipped topping and actual cherry on top finish off the flavor for absolute perfection. I may (definitely) or may not save tiny little individual bites of the cheesecake that have Maraschino cherry chunks in them for last. Savor the flavor, people. ‘Til next time, my fellow eaters!
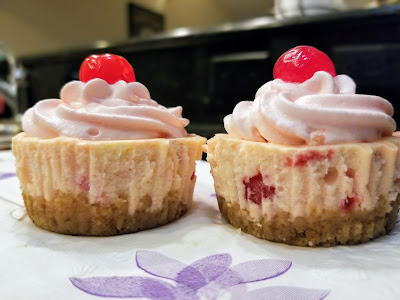
Yeah, look at that cherry chunk action. -
Nothing Bundt Delicious
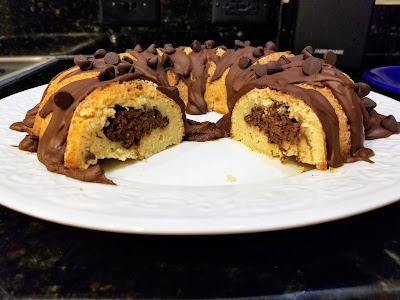
Oh, hey there. I know, it’s been a while. I’m sure you’ve been longing for my witticism to grace your device screens since my last blog a month ago. Trust me when I tell you that I have definitely not gone without dessert the past four weeks (I’d literally rather die). I made some Reese’s blondies and thumbprint cookies filled with jam–both yummy, but the recipes need perfecting before I release them into the world to ensure they’re ready for mass consumption; then there were the Piña Colada cookie cups–I totally burnt my cookie cups, which is why you should never bake while sleep deprived. But I will make these again this summer and share their epic deliciousness when I can take pretty, unburnt cookie photos after a solid eight hours of sleep; finally, there was a lightened up version of my Dulce de Leche pie for Cinco de Mayo–find the updated recipe here. So, it definitely wasn’t for a lack of baking, but I like to reserve the blog for recipes that have the show-stopping photo factor AND taste like they were made by angels…of which I am most definitely not. More like a quasi-evil baking genius. And by quasi-evil I actually mean I could double as a Disney Villain with little to no change in my daily routine. I wanted to return to blogging with a recipe that would make even the strictest dietician say, “Damn…I need to eat that.” And thus I bring you a fudge-filled vanilla bundt cake with fudge ganache.
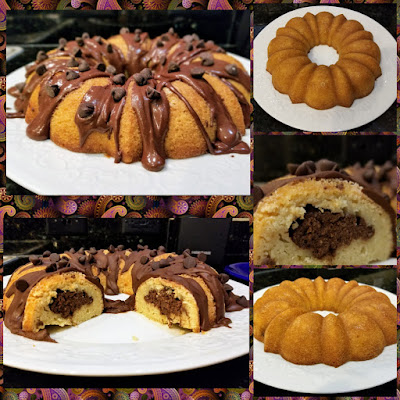
More like, “Daaaaaaaamnnnnn I need to eat that.” “Surprise inside” cakes are usually filled with shapes or brightly colored layers, but I can think of nothing better than cutting into a cake to find it is both frosted on the outside and the inside with thick layers of chocolatey goodness. Fill just about anything with chocolate: pie, cake, donut, other chocolate, and I’m going to fight you to the death for it. So it’s a good thing I’m sharing the recipe, and this way, no one gets hurt. I’m legally obligated to share this with my husband since I’m pretty sure ‘in sickness and dessert’ was a vow. But he does have to put up with all of this (gesturing wildly around my entire being), so it’s the least I can do. I may be bordering on insane, but at least I’m health conscious (pick your battles–I have the anxiety level of a restrained grizzly bear, but like, a grizzly bear in really great shape). This lovely little bundle of chocolate fudgy goodness will only set you back 274 calories for 12 slices. You could easily adjust to 16 servings for even fewer calories, but I also eat like a grizzly bear fresh out of hibernation, so if my cake plate isn’t heavy when I lift it, then there’s not enough cake on it.

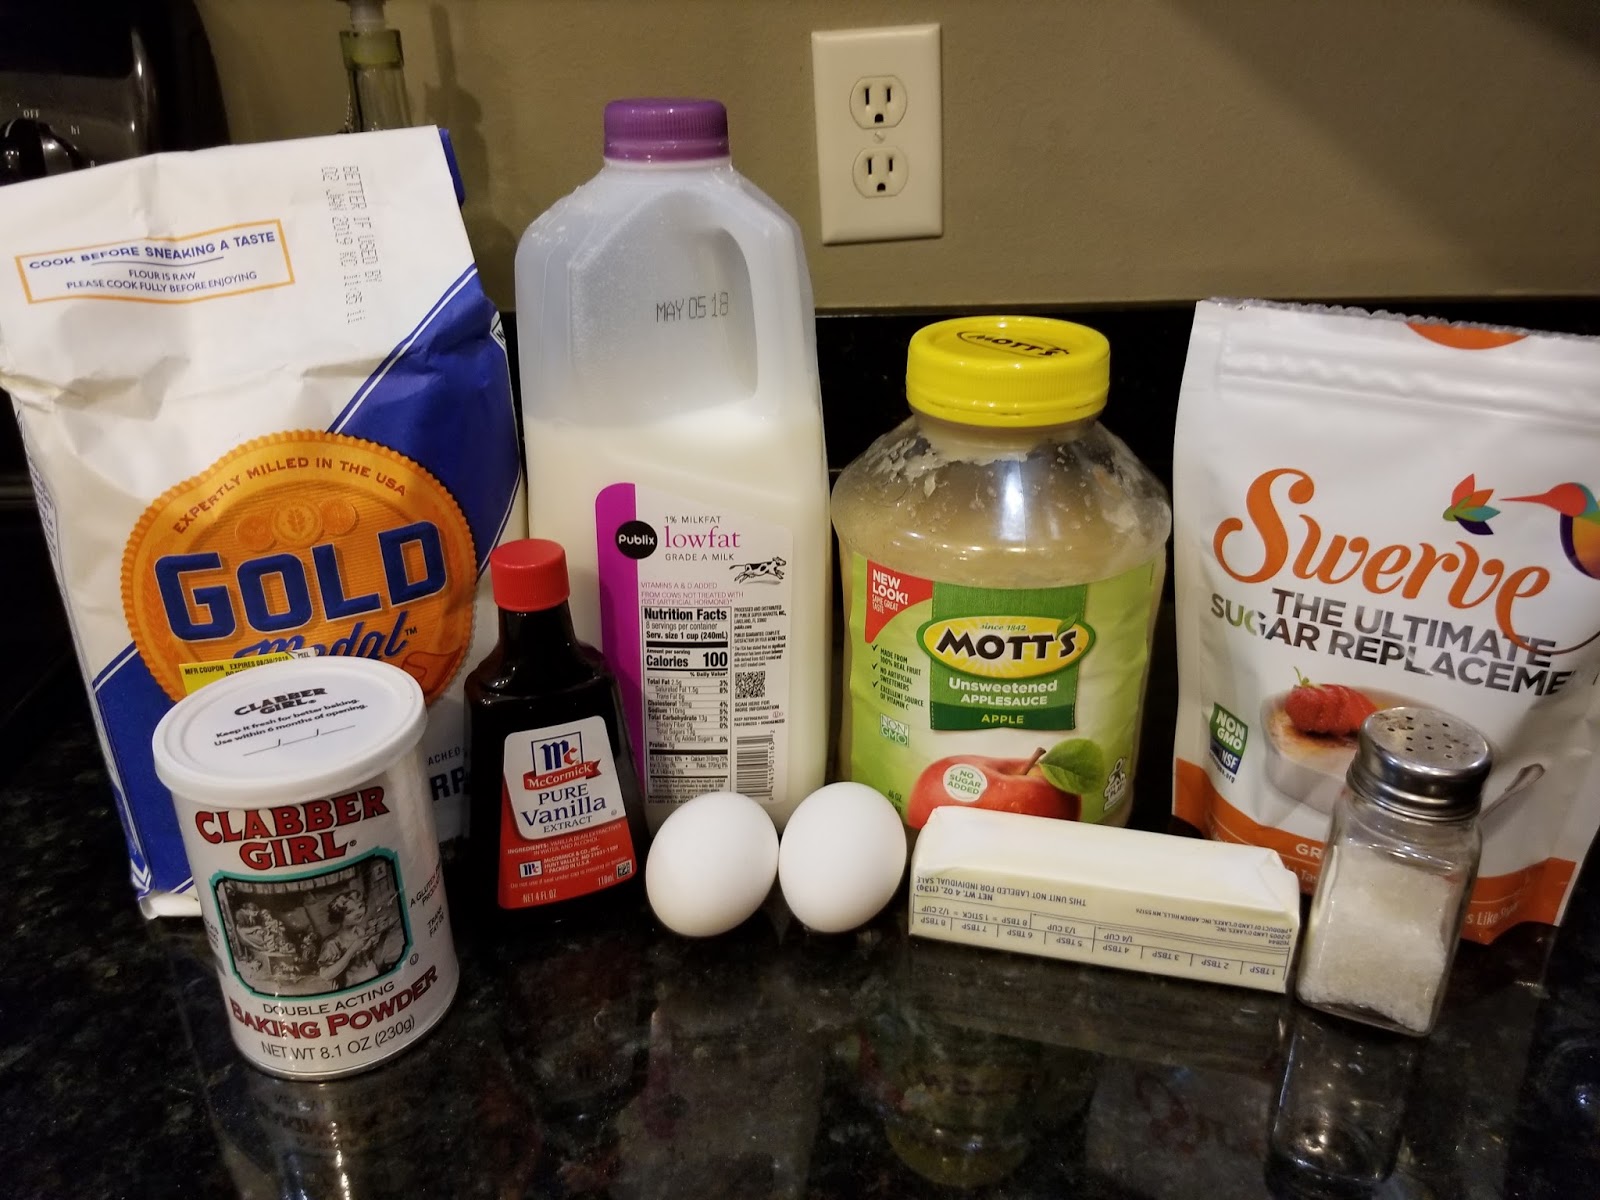
Can you curl a cake plate? Asking for a friend. The cake recipe itself is from scratch, but I assume you could probably try to do this with a box of vanilla cake mix, but the cake needs to be dense to hold the fudge layer in place, so just keep that in mind. To make the vanilla bundt cake, gather:
- 1/2 cup butter at room temp
- 1/2 cup unsweetened applesauce (you can use another 1/2 cup of butter, but this trims soooo many calories, and makes a dense bundt to hold the fudge in place. I think 3/4 cup butter + 1/4 cup applesauce would suffice in firmness with a richer, more buttery flavor if you’re not worried about calories)
- 1 cup of Swerve granulated sweetner (this isn’t a particularly “sugary” tasting cake since it is more of a sponge cake, so if you like sweeter cakes, try upping the amount of sugar, but adjust the ratio of butter and applesauce to match)
- 2 eggs at room temp
- 1 TBS vanilla extract
- 2 tsp baking powder
- 1/2 tsp salt
- 1/2 cup of skim milk
- 1 1/2 cups of All Purpose flour
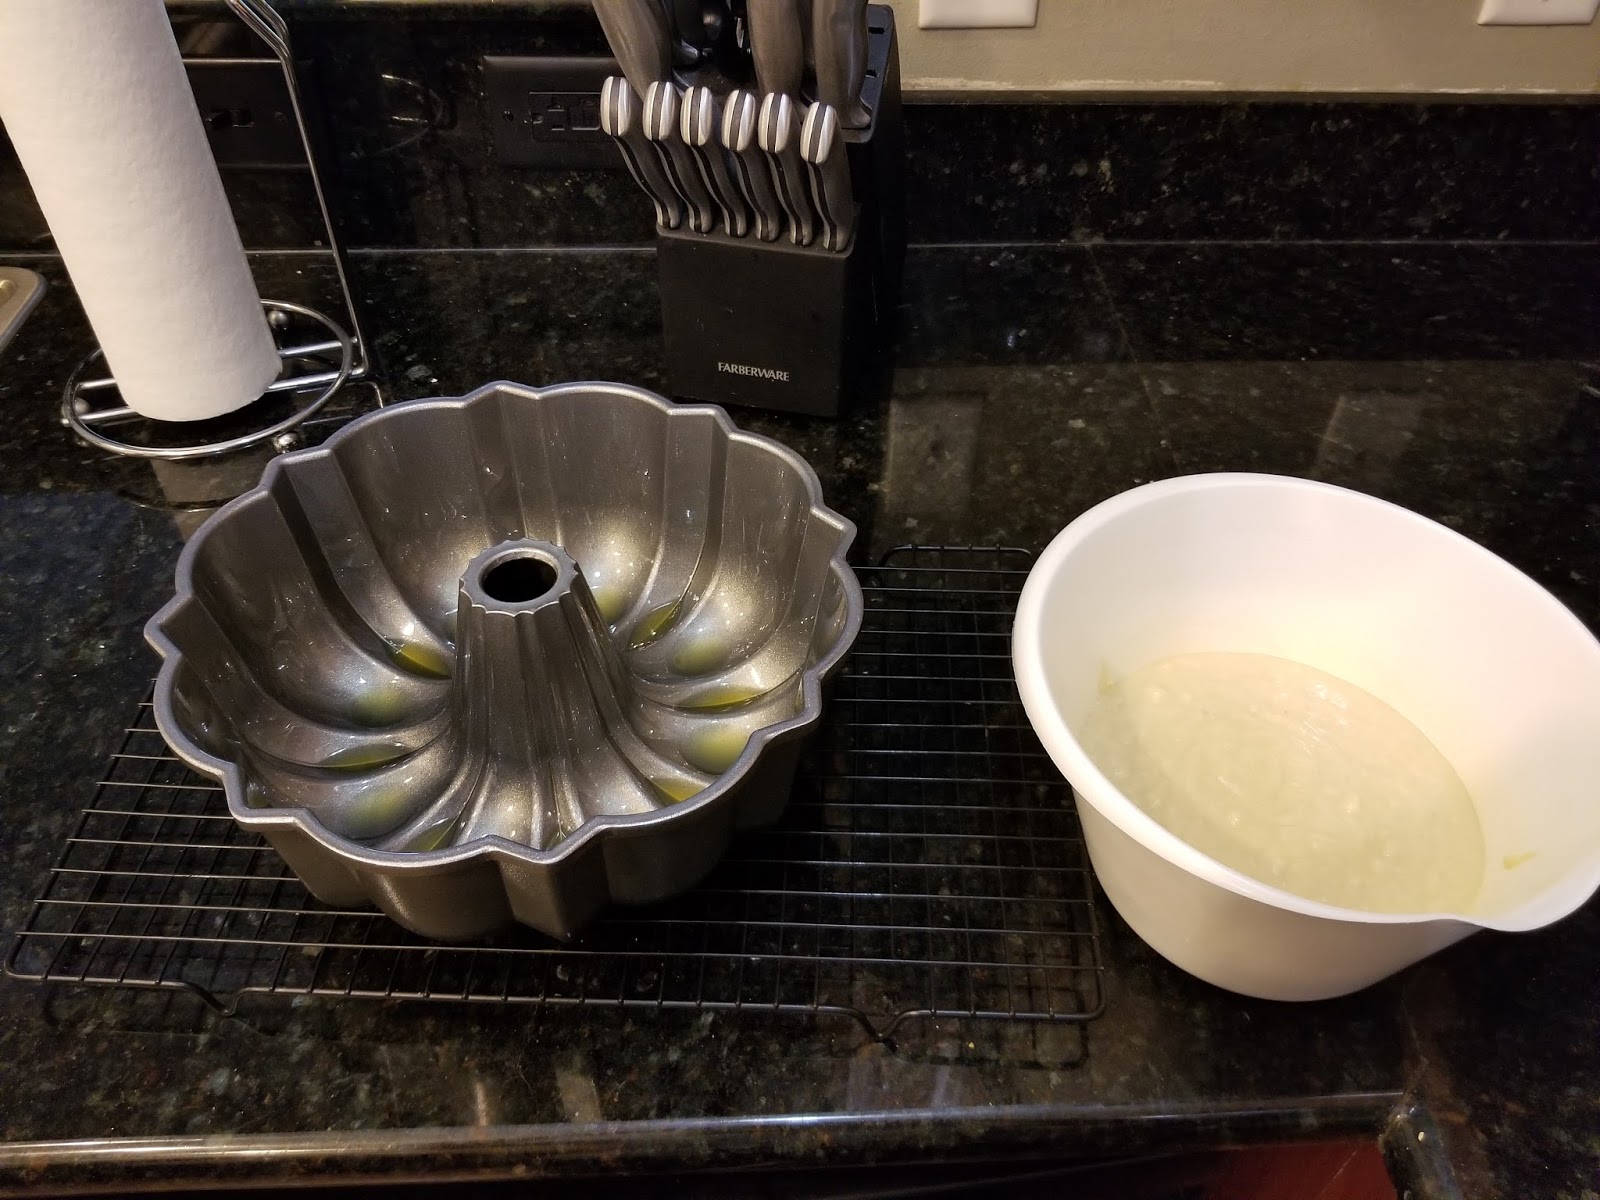
Start by preheating your oven to 325 and creaming the butter and Swerve until fluffy. Then add in the applesauce, eggs, and vanilla, and blend well for two minutes on medium-high. While this is mixing, spray the ever-loving bejesus out of a bundt cake pan with cooking spray. Just when you think you’ve sprayed enough Pam to cause potential combustion issues in your kitchen, spray with one more layer for good measure and then return to your cake batter. Add in the baking powder, salt, and 1/2 cup of flour. Blend on low, then add in 1/4 cup of milk, blend on low some more, then add in another 1/2 cup of flour. Stop to scrape the bowl as needed before adding in the remaining 1/4 cup of milk followed by the last 1/2 cup of flour. Don’t over mix–things should be slightly lumpy thanks to the applesauce, but otherwise, everything should be mixed until just incorporated.

Pictured: half a can of Pam and the cake batter. Pour your cake batter into a medium bowl and set aside. Clean out your mixing bowl and paddle attachment, and get ready to make magic. And by magic, I mean fudge.

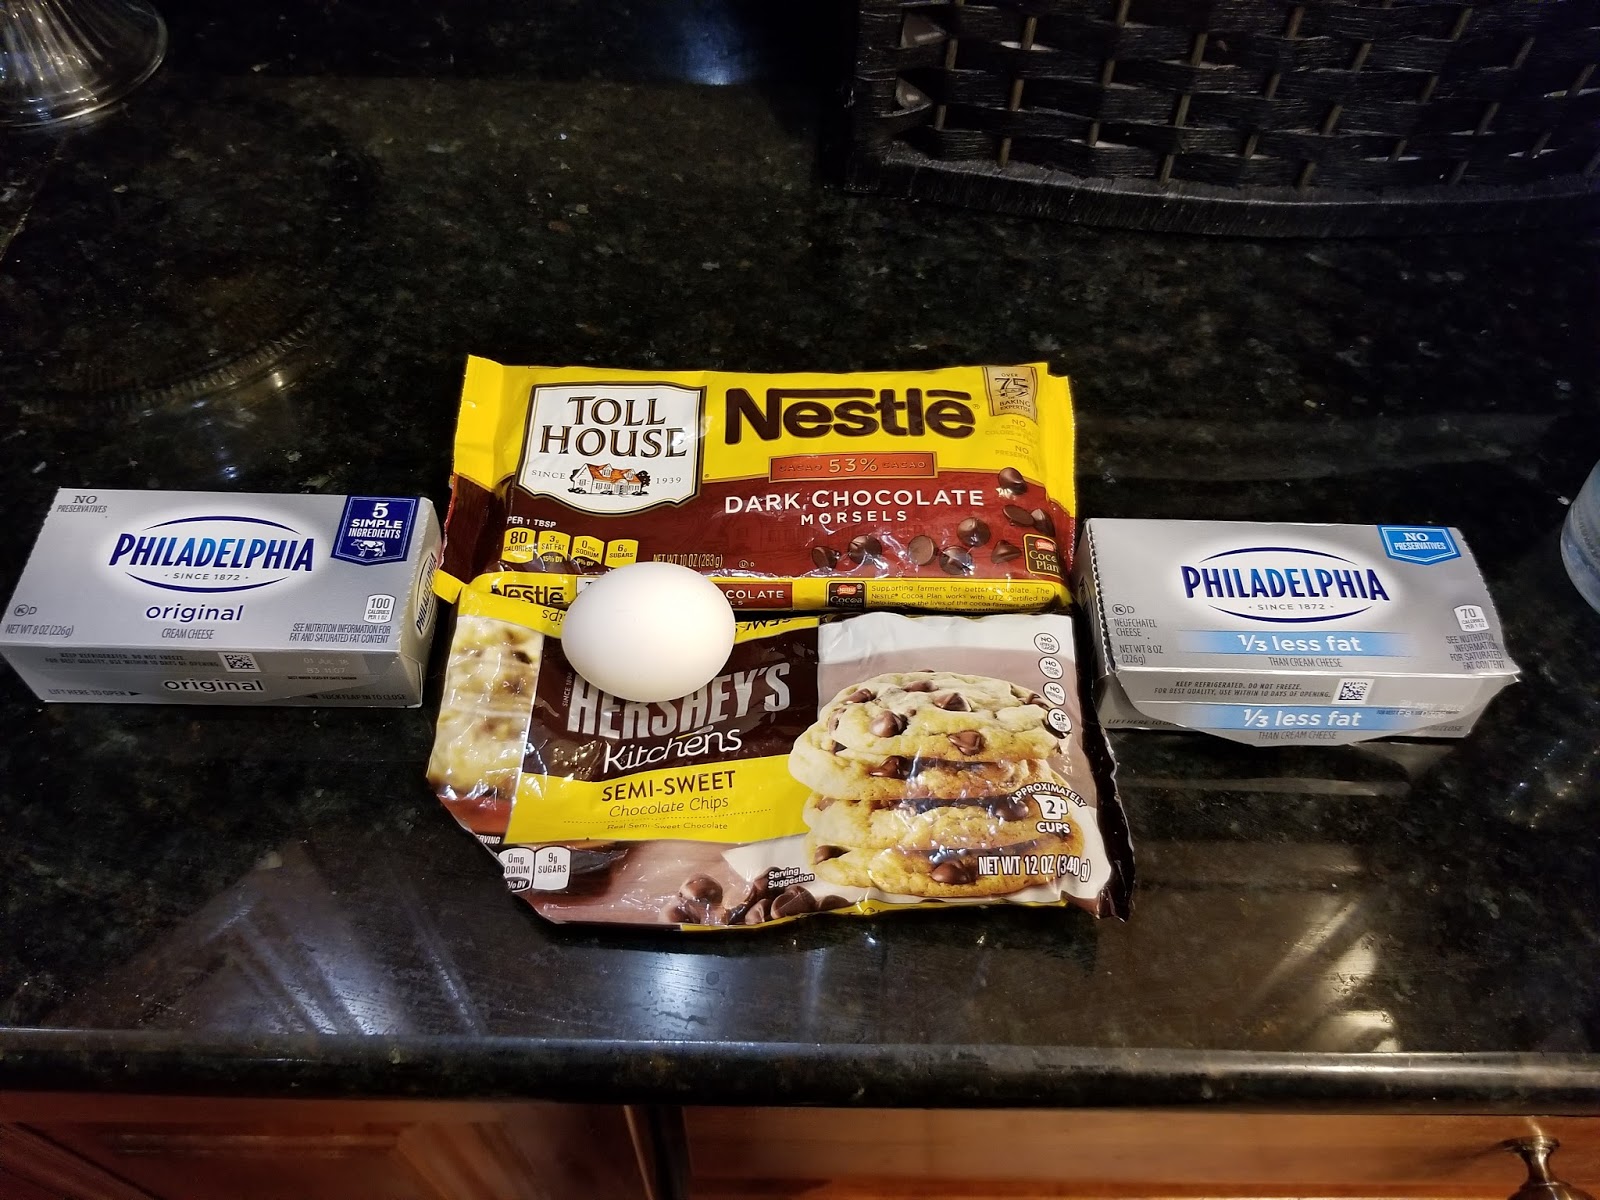
This recipe is a great way to use up miscellaneous cream cheeses. For the fudge layer, you need:
- 5 ounces of cream cheese at room temp (I used 2 ounces 1/3 fat and 3 ounces regular fat cream cheese. No method to my madness here, it’s just what I had on hand in the fridge)
- 3/4 cup of semisweet chocolate chips*
- 1 egg at room temp
*If you want a darker chocolate fudge, try 1/2 cup semisweet and 1/4 cup dark chocolate chips. I got my dark chocolate chips out because I wasn’t sure I had enough semisweet chips, but in a rare instance of my luck not being terrible, I had the perfect amount to make my cake and decorate it with semisweet chips.

Small miracles. Blend your cream cheese on medium-high for a minute to get light and fluffy while you nuke your chocolate chips in a microwave safe bowl for a minute and a half, then stir until all chips are melted. Dump your melted chocolate into your stand mixer and blend with the cream cheese. When things have come together completely, add in the egg and blend until things look nice and silky smooth. Pour your fudge filling into a piping bag fitted with a large open tip or a Ziplock baggy with a chunk snipped out of the corner, and prepare yourself for a terrible photo montage.
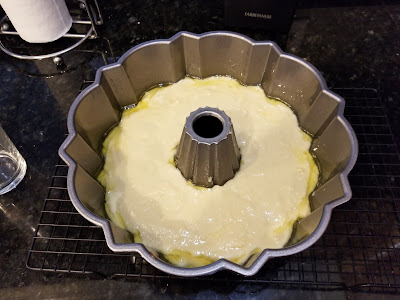
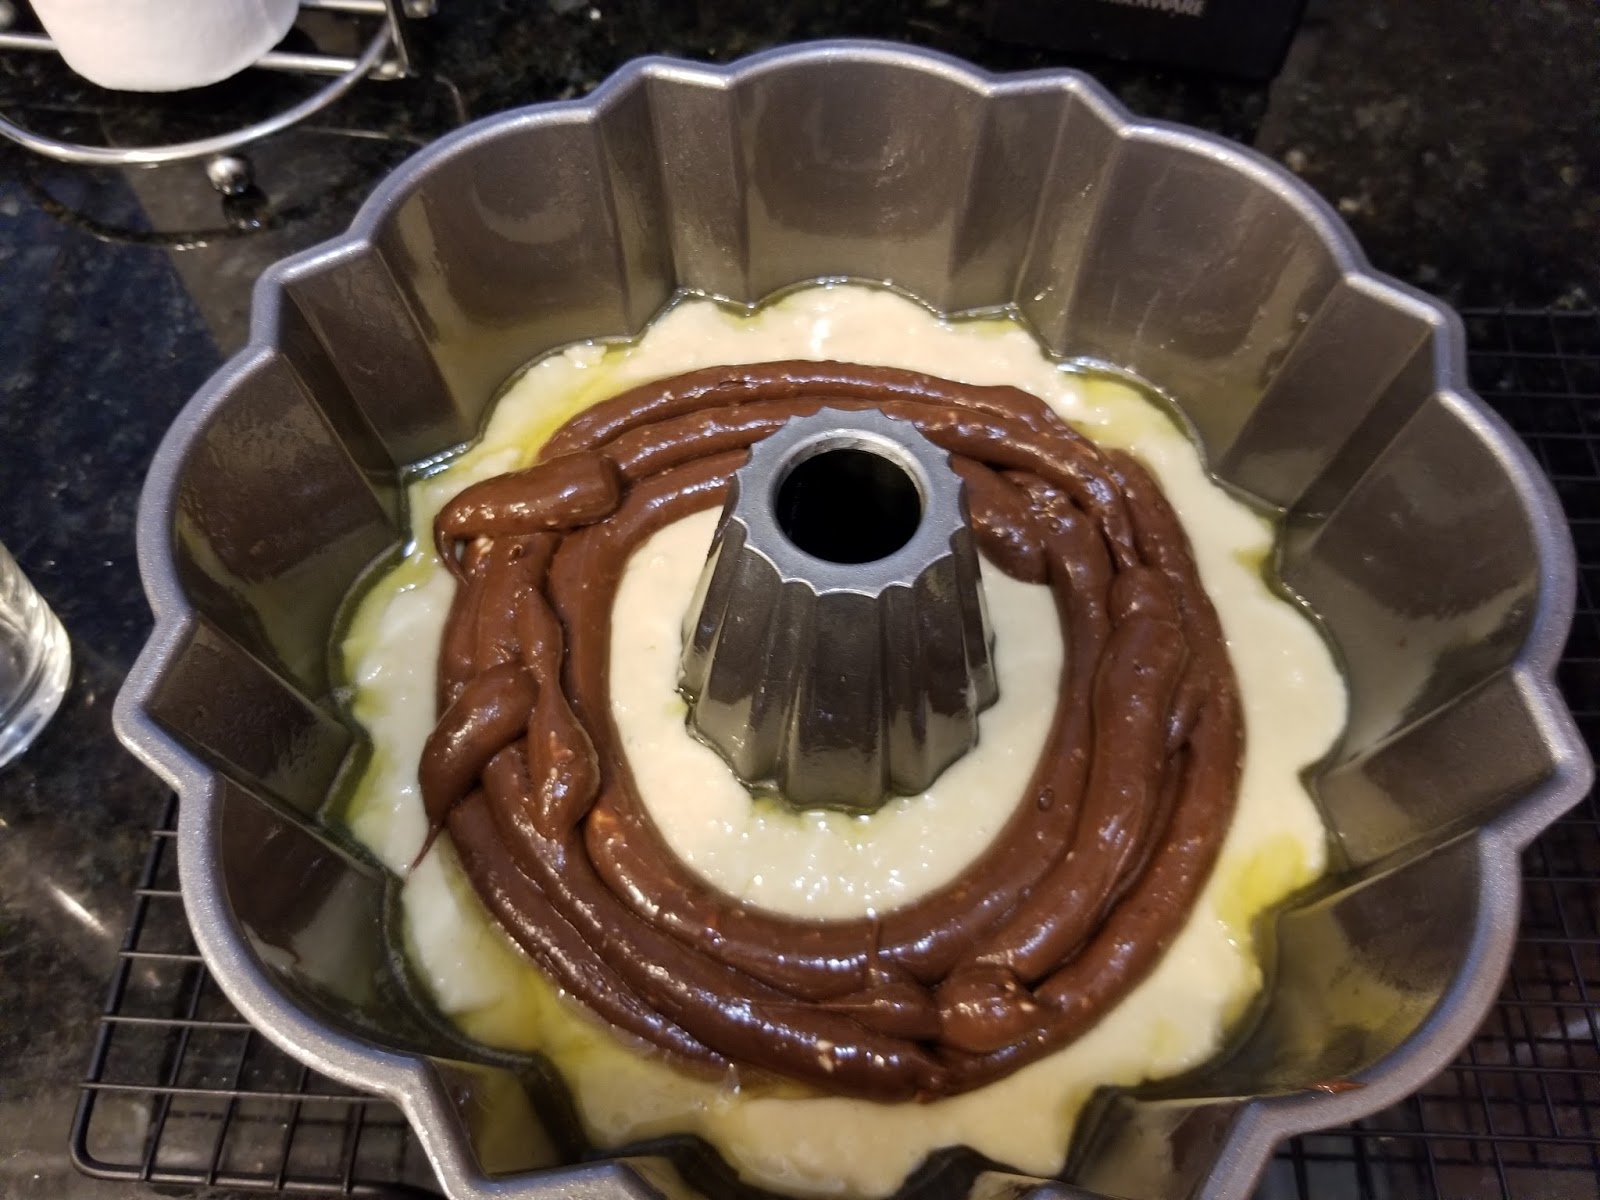
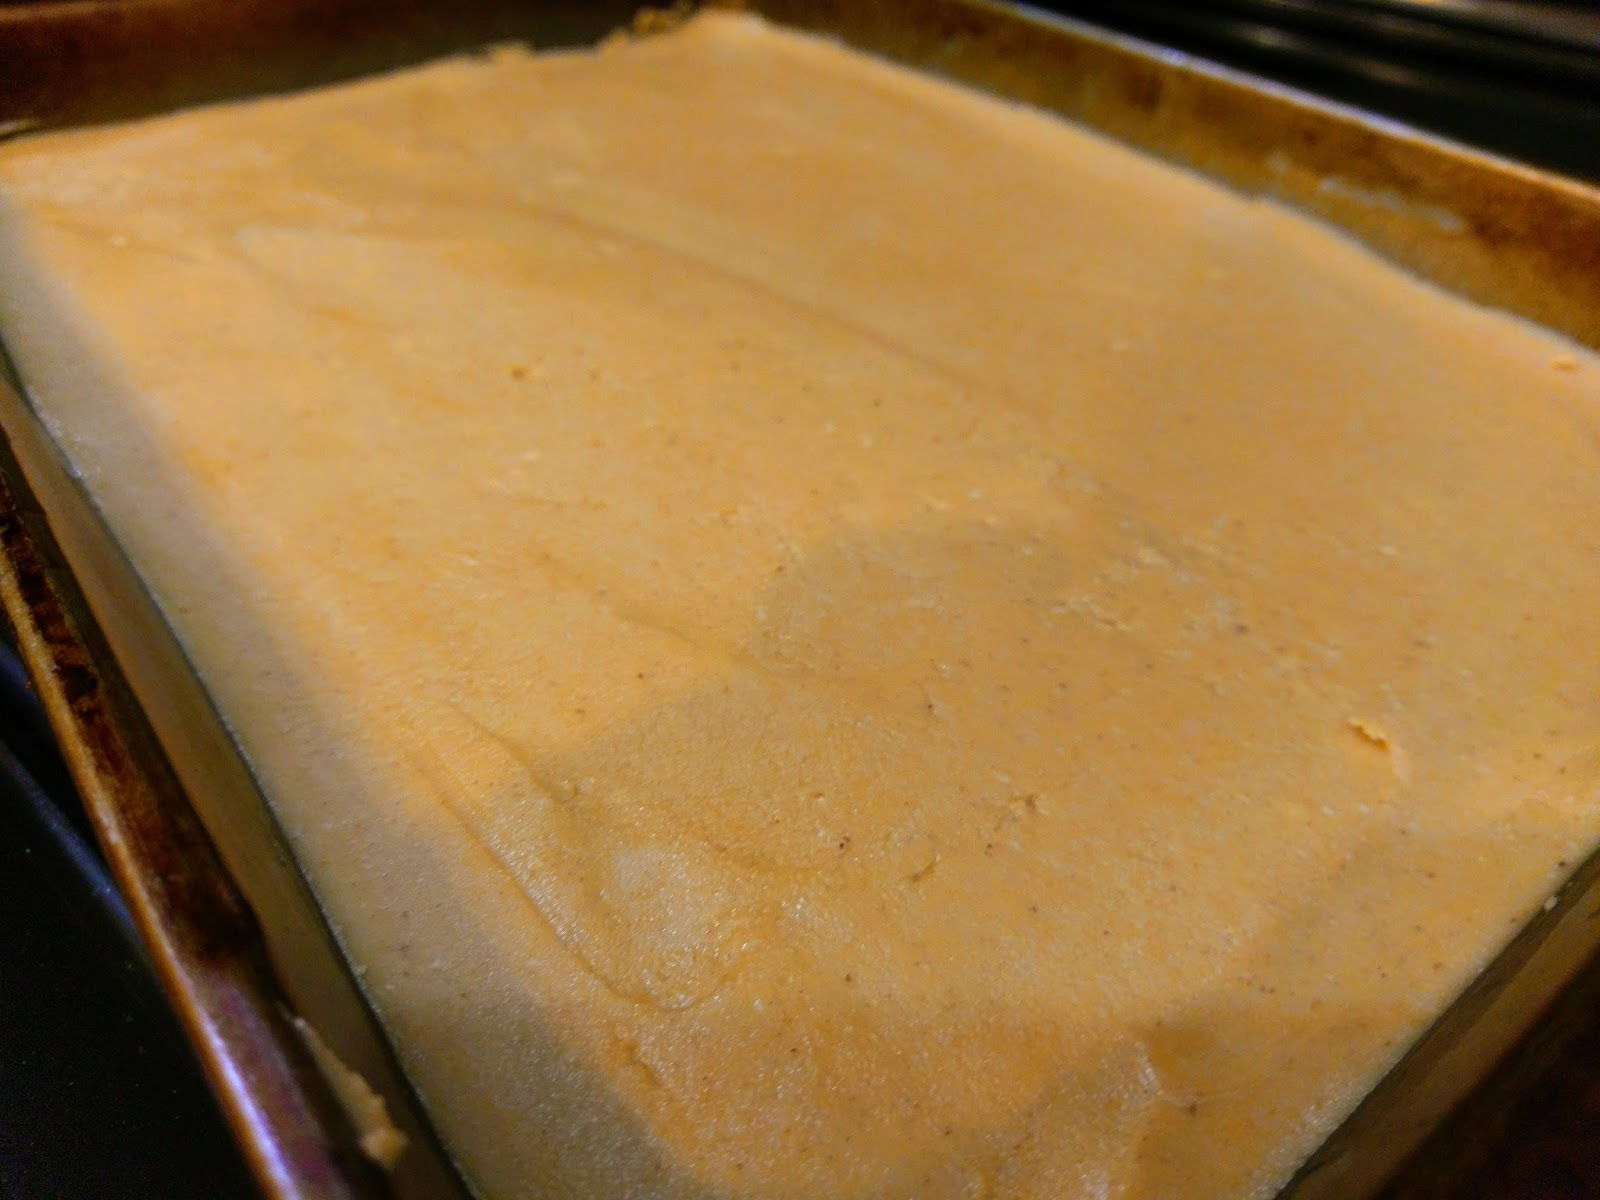
Now, take 2/3 of the cake batter and place it in your “so greased it could cause a kitchen fire” cake pan. 
Then pipe a few circles of fudge in the middle of the cake. Make sure it isn’t touching any edges of the pan. This does not look appetizing. This is a bad “daaaaaamnnnnn.” 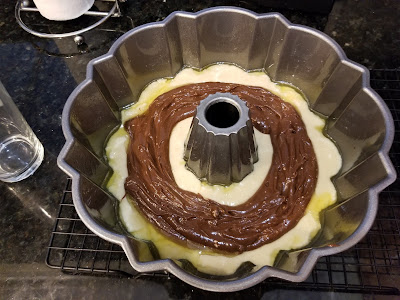
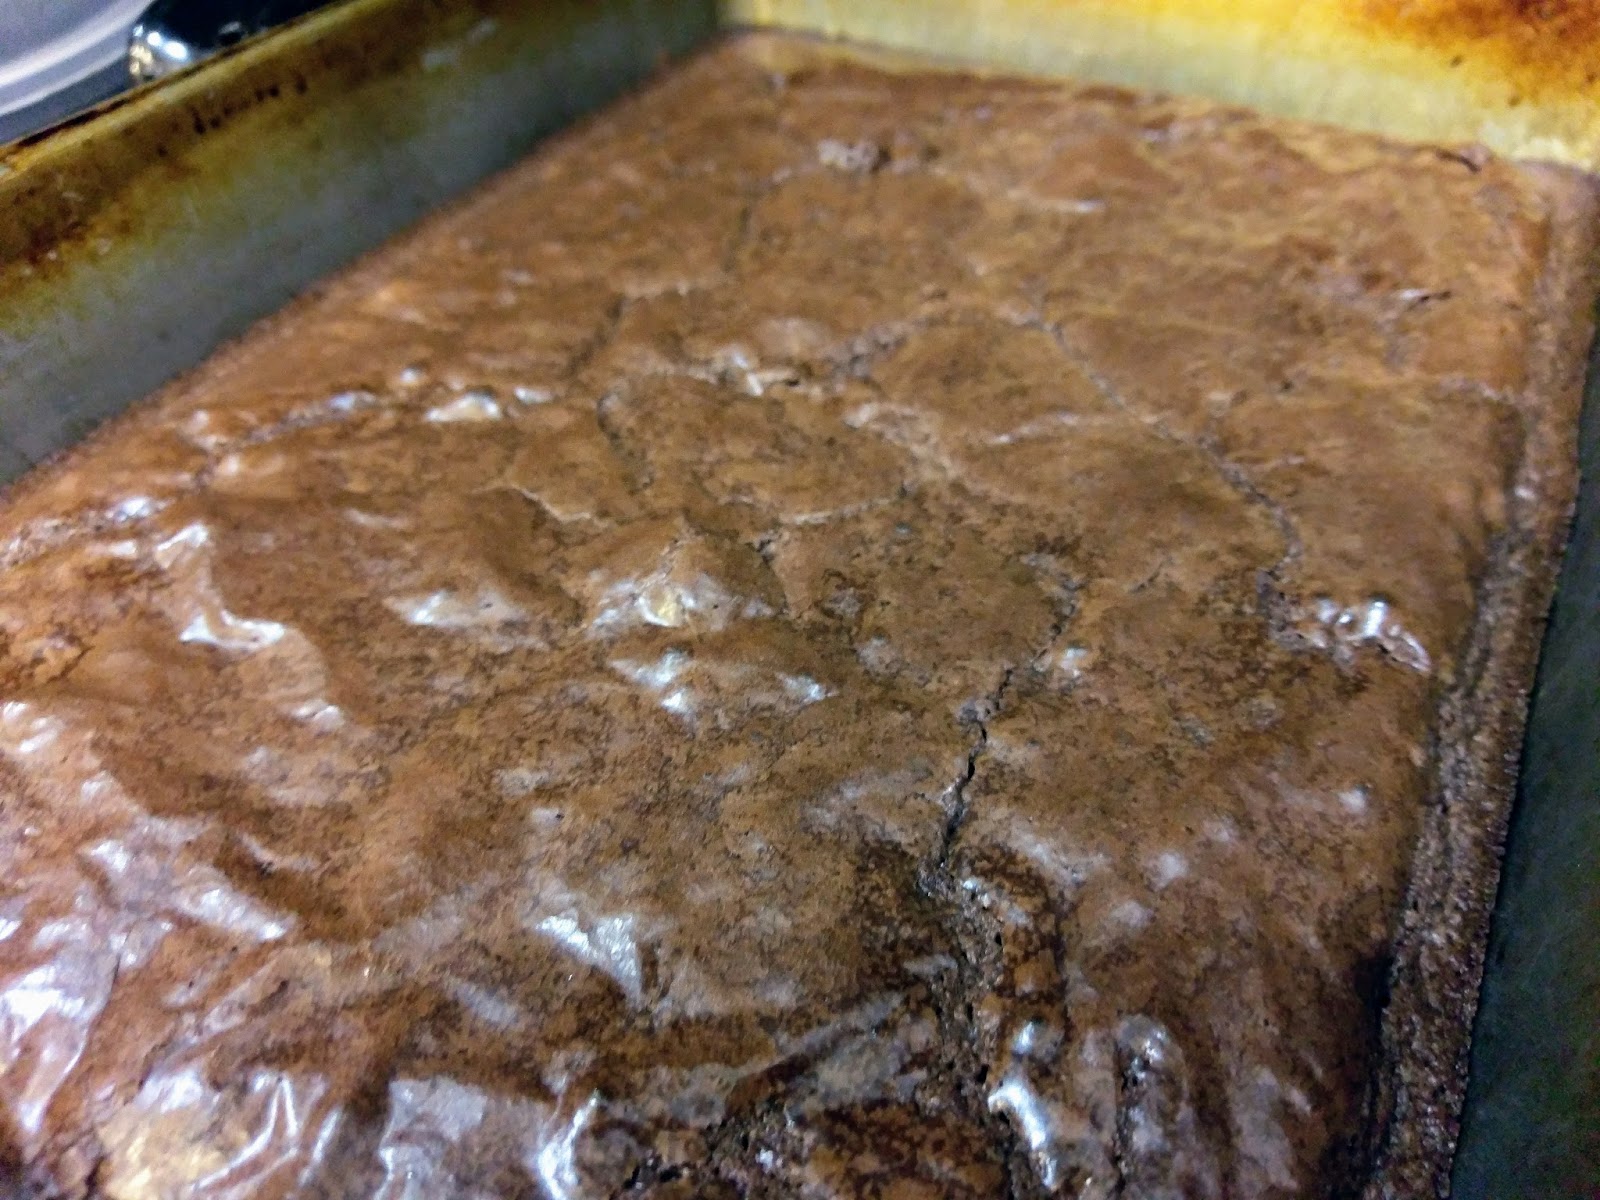
But once you smooth it out with a small spatula, it’s decidedly less uh, “dog poo” like, in consistency. Trust me–it definitely looks better after it’s cooked. Finish up by adding the remaining 1/3 of your cake batter. I spooned the batter gently on top of the chocolate layer, and then I used the back of my spoon to gingerly spread the top layer out without disturbing the chocolate layer inside. Make sure the chocolate layer is completely covered. Then bake your cake at 325 for 45-50 minutes. Your cake should have a nice golden coloring when it’s finished, and a toothpick inserted on the center edge and outside edge should come out of the cake clean. Let it rest on a cooling rack **while still in the pan** for 10-15 minutes. I cooked mine for 50 minutes, but it probably would’ve been wise to take out of the oven at 45. *Slightly over baked,* but still delicious.
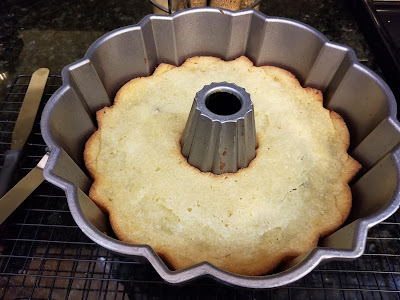
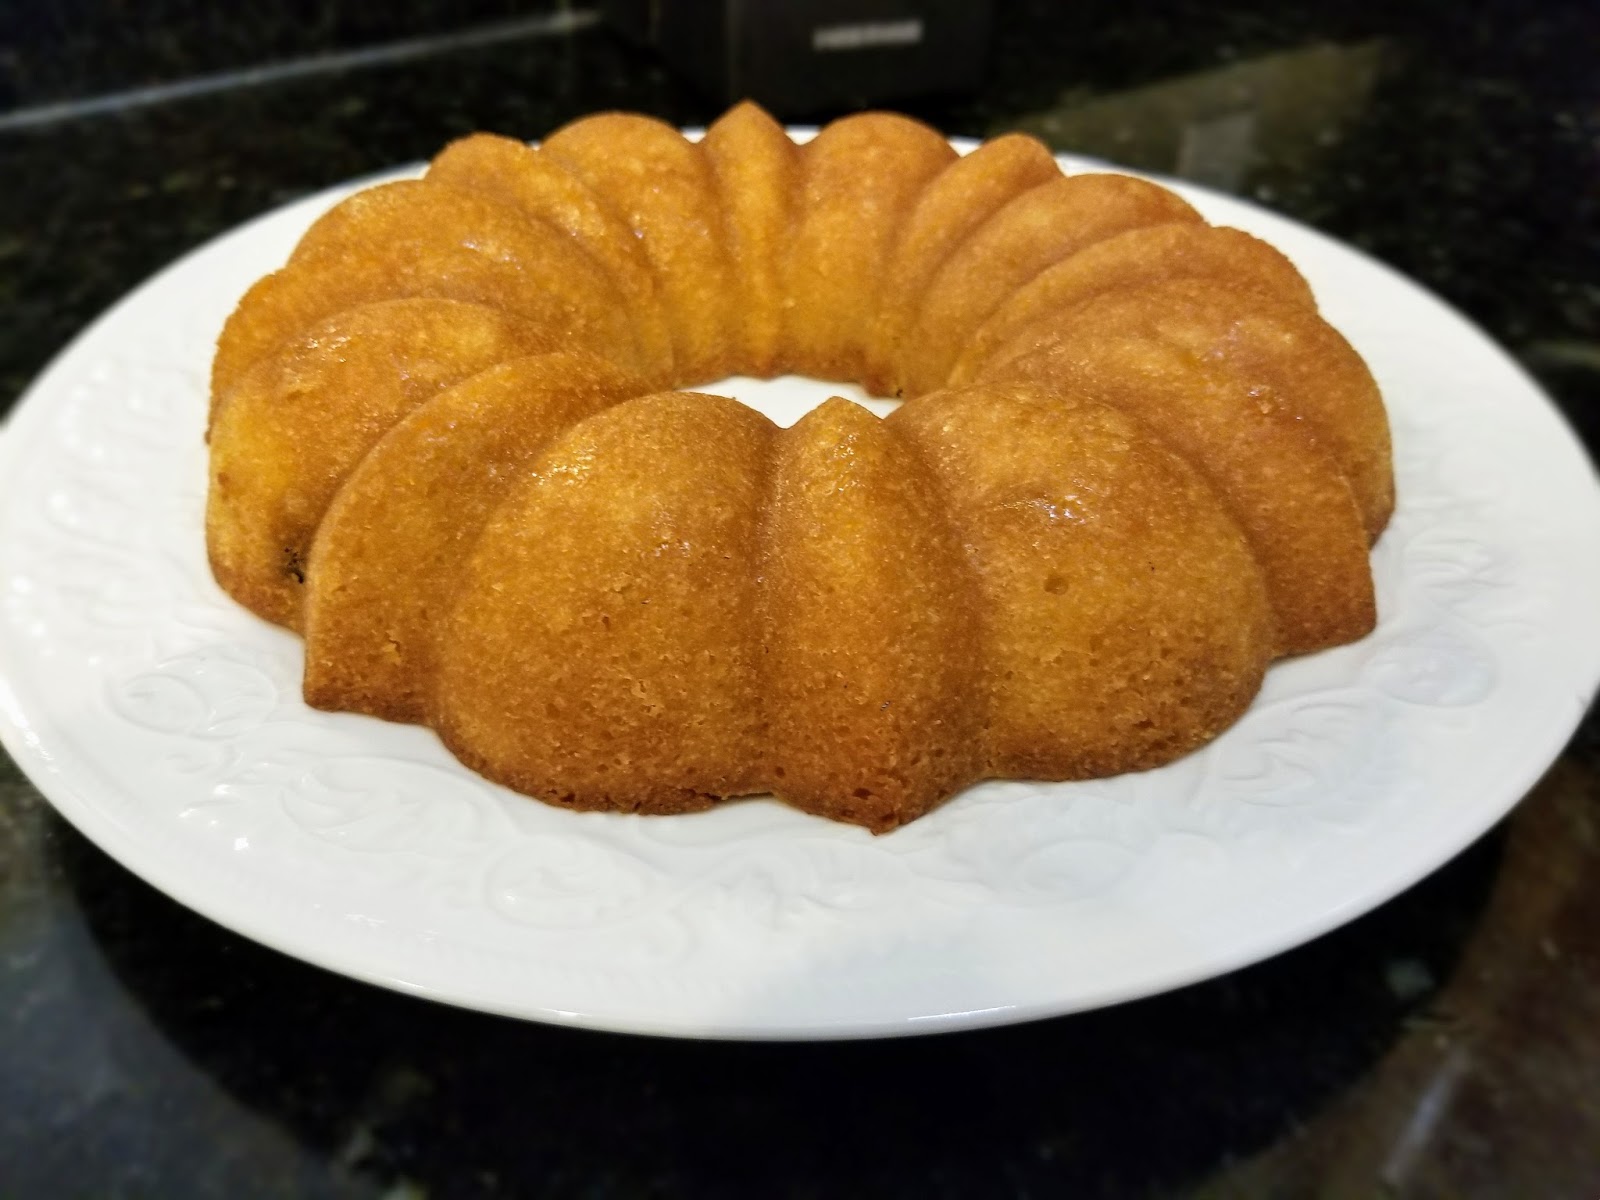
During those 10-15 minutes, pray to whatever deity you believe in that you can remove this from the pan without incident. I always take a small angled spatula and run it around the edges of my bundt cakes, very gently lifting to ensure nothing it sticking to the pan. I also carefully do this around the center circle of my bundt pan. Then I place an upside down plate on top of the pan, and I flip it over slowly and extremely carefully, all the while cursing my “all thumbs” approach to life and general grace akin to that of a bear freshly woken from hibernation…maybe I really am a grizzly bear? The are some strong parallels…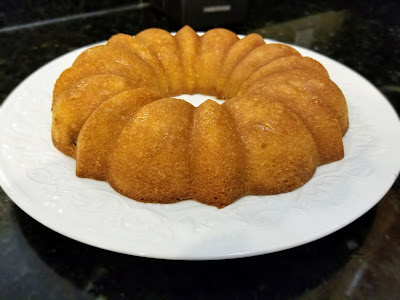
At this point, I also remind myself to breathe, because it’s been a hot minute. I then thank the makers of cooking spray; through them, all things are possible. Place your cake in the fridge for 2 hours to cool before ganaching.
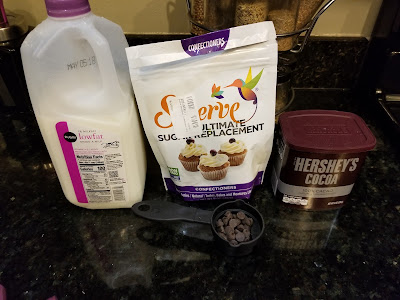
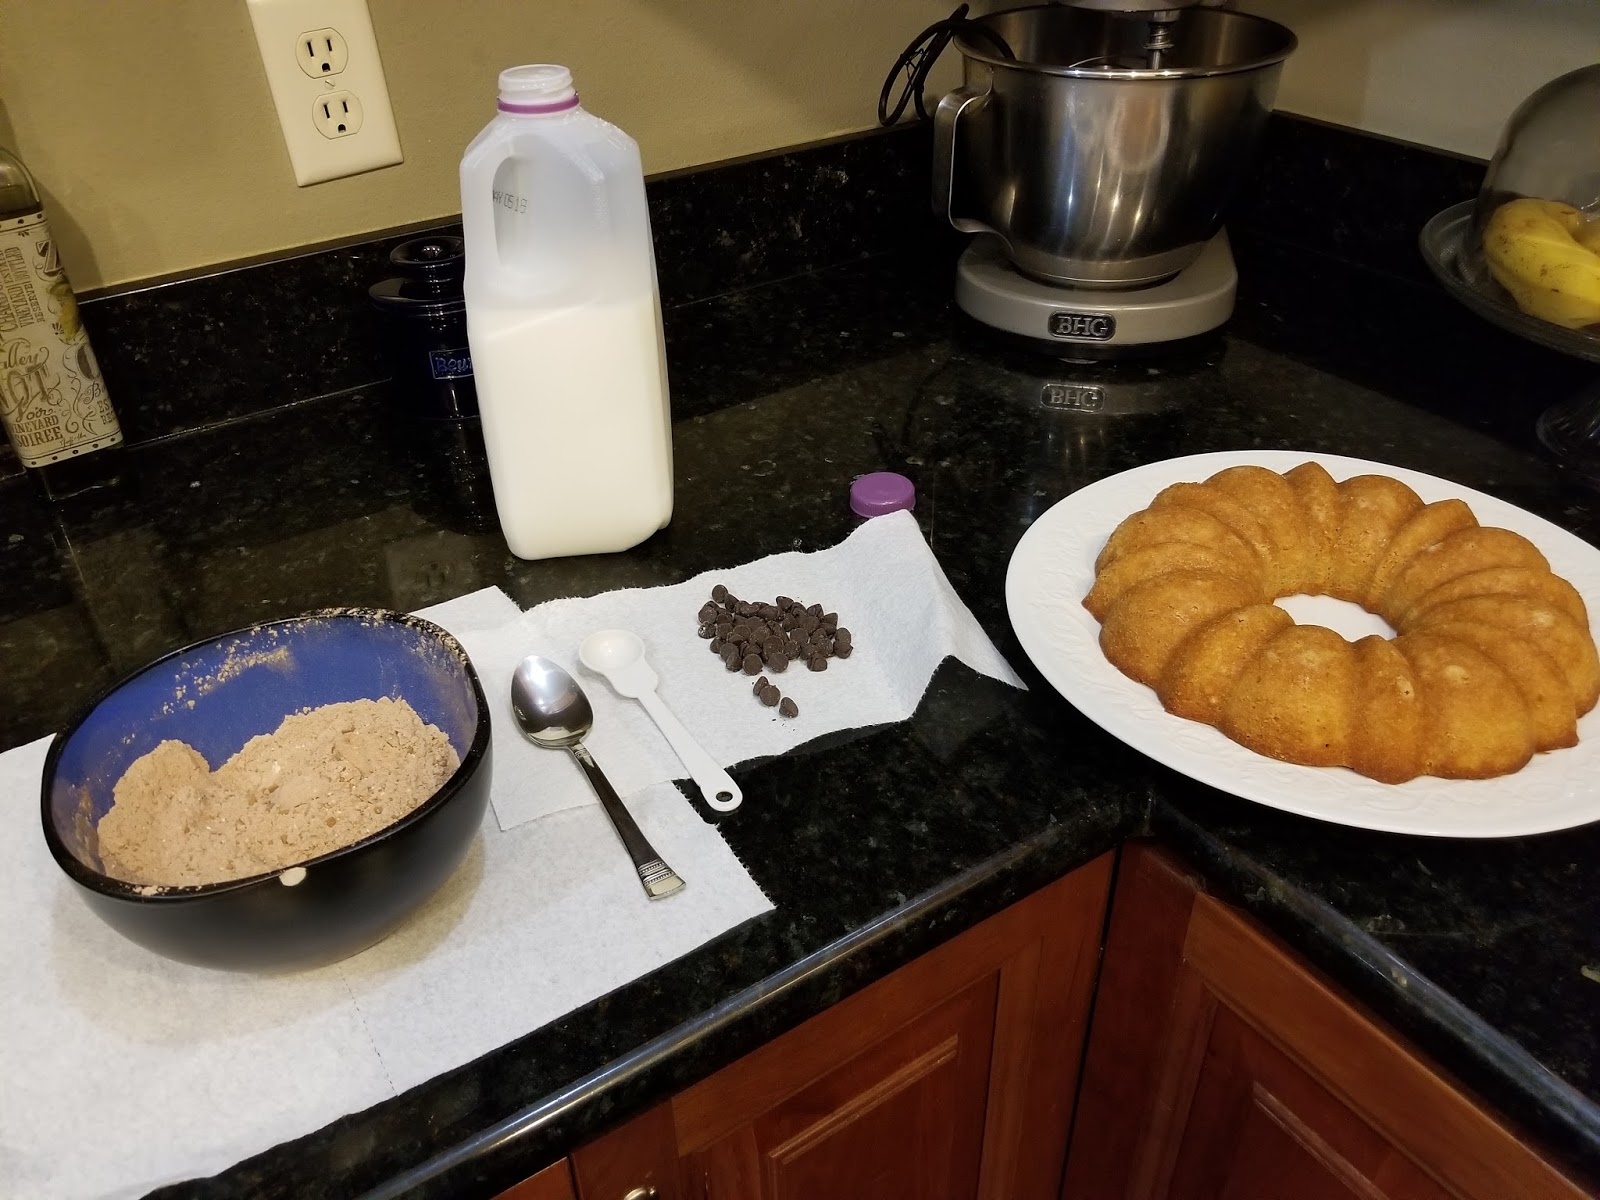
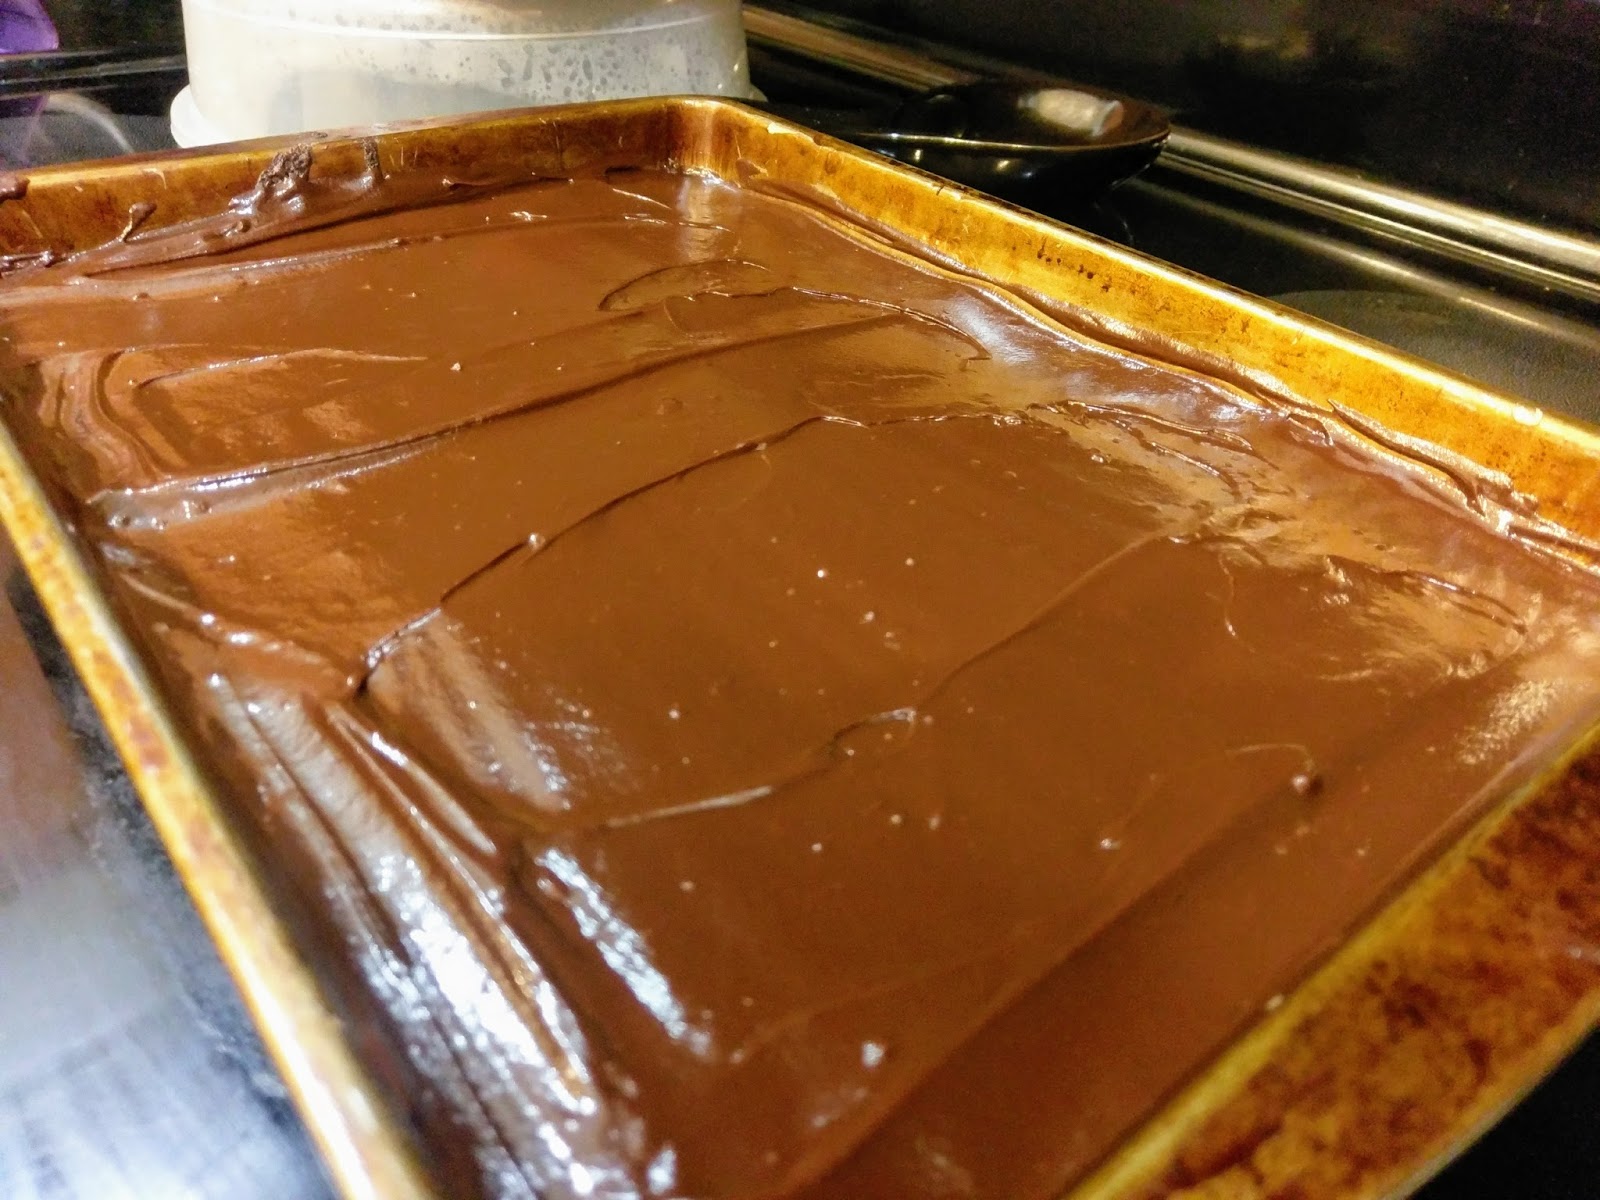
Now you know what an 1/8th cup of chocolate chips looks like. The ganache is nice and low cal thanks to cocoa powder and Swerve. To make, dump 1/4 cup of unsweetened cocoa powder and 3/4 cup of Swerve confectioner’s sugar into a medium bowl and blend well. Add in 4 tablespoons of milk, and blend slowly. If the mixture is still too thick for glazing, add in more milk until you reach your desired consistency. I ended up using 6 tablespoons of milk. Optional, but a great way to add even more chocolate, is to set aside a few tablespoons of chocolate chips to top your ganache with. You should have a ganache thin enough to drizzle with a spoon, but still thick enough that it sticks to the cake.

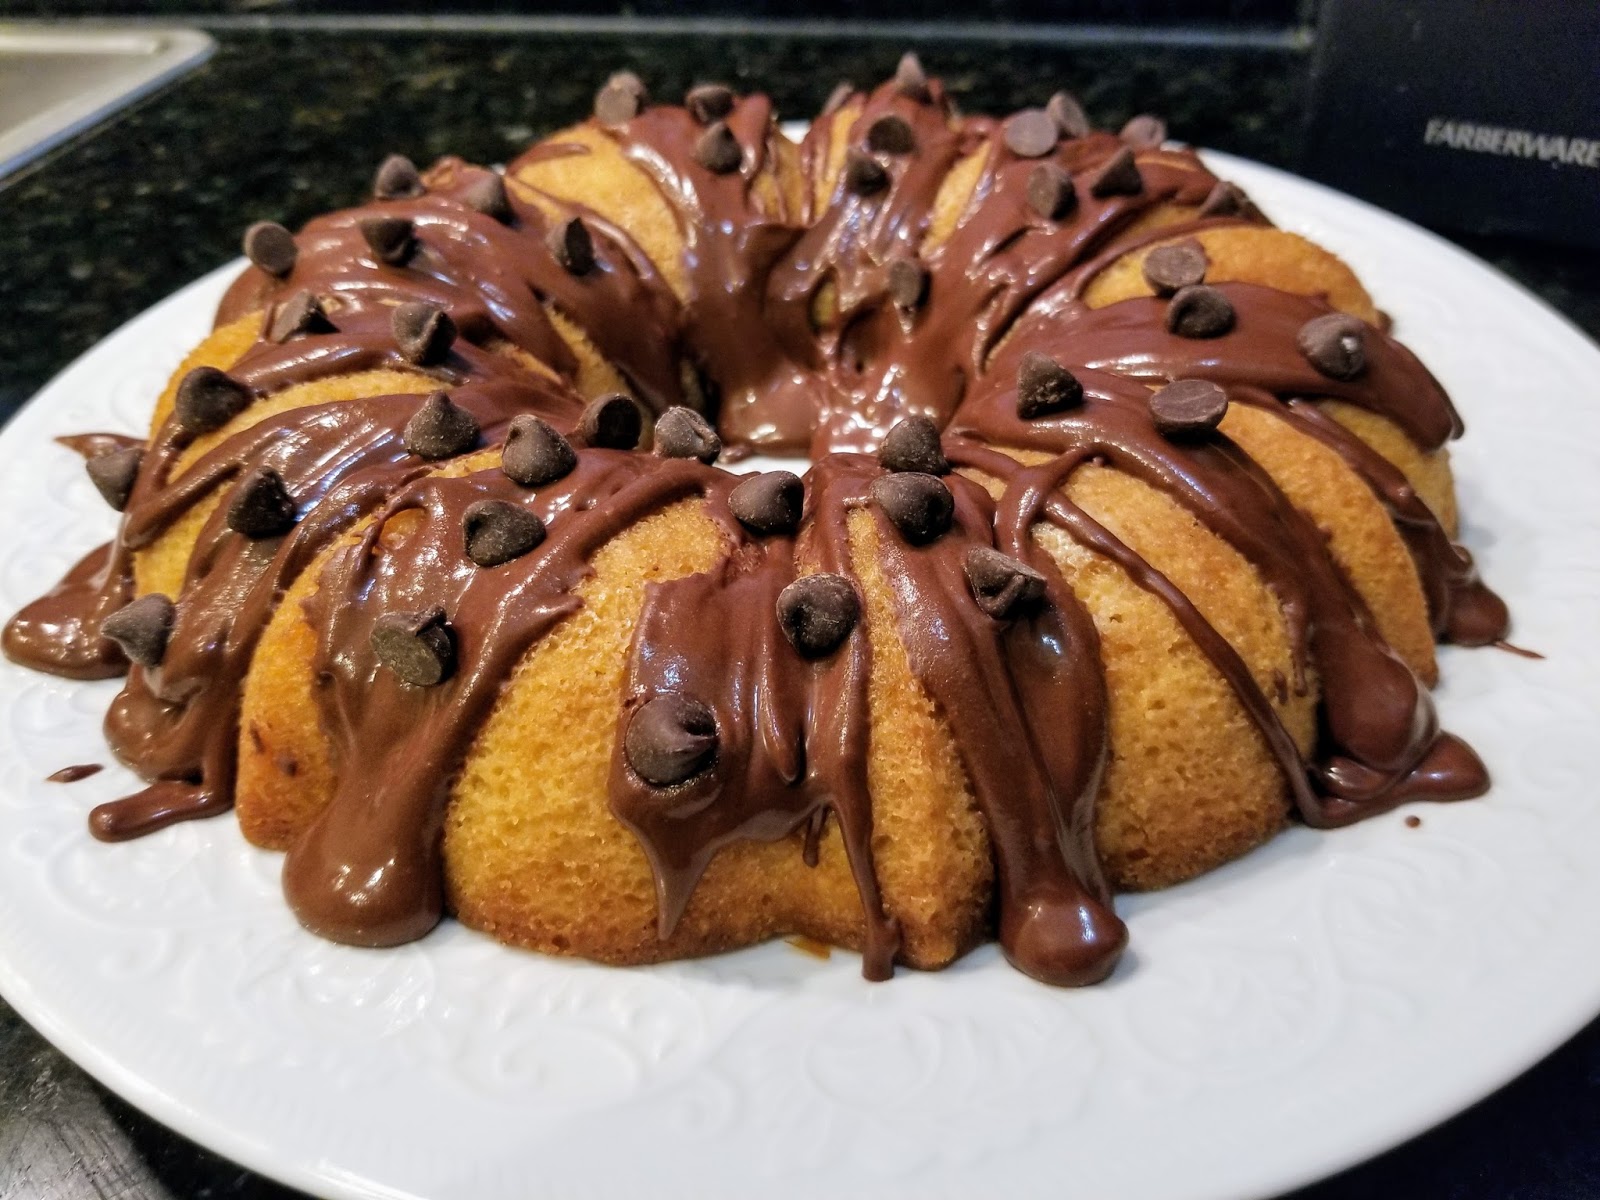
Can we take a minute to admire the sheer willpower that removing a perfect bundt cake from a pan requires? When you’re done patting yourself on the back, take a spoon and drizzle ganache back and forth over the top of your cooled cake.

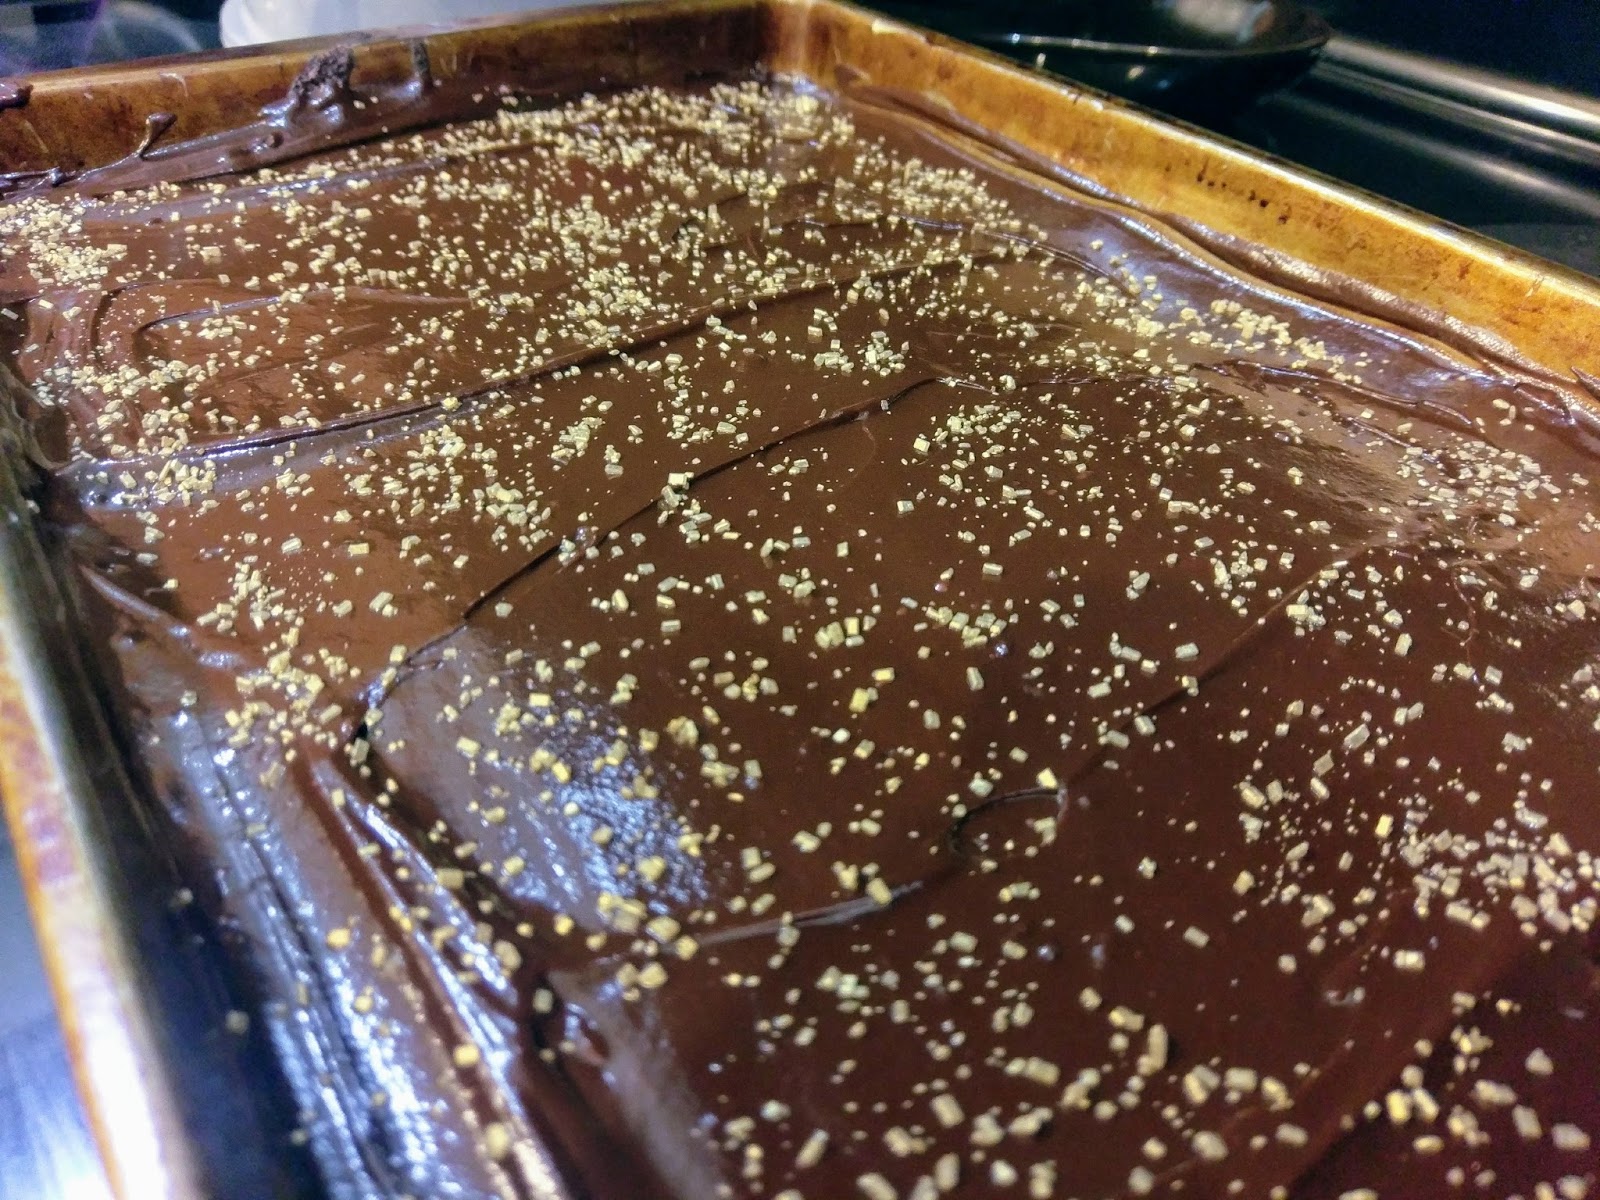
Mmmm, ganache-y. Finish up by placing the chocolate chips onto the ganache, and you’ve got nothing bundt deliciousness on your hands. See what I did there? Yeah, a terrible pun becomes funnier with age. Otherwise, Dad Jokes wouldn’t exist. This cake does have cream cheese in it, so keep it in the fridge until you’re ready to serve. I highly recommend warming up your slices in the microwave for a few seconds so that fudge layer gets all melty and delicious…
Mmm, fudge. Filling a cake with fudge might seem like a cop out. I mean, of course it’s going to be delicious. All things filled with chocolate are delicious. Even Oreo caught on to that theory. The vanilla cake is a dense sponge cake, so it is mild in sweetness, but paired with the silky chocolate fudge filling it is the perfect amount of decadence, and the ganache topping just takes this to the next level (next, next level could occur with a scoop of vanilla ice cream. I’ll try this. For research). I may have taken a blogging absence, but I made it worth the wait. This is quick to make, simpler to decorate, and way too easy to inhale in one sitting (thank goodness it’s a health conscious fudge-filled cake. If that’s a thing, anyway). I’d also like to mention I made it through an entire blog without complaining about Florida summer. It’s here, but this cake is so incredibly good I completely forgot about it. The power of cake. *cue the choir* I promise to be back very soon with some fun summertime desserts that are also capable of making heat and humidity a forgotten nuisance. Dessert–my sanity saver. ‘Til next time, my fellow eaters!
Dipping things in chocolate may only temporarily solve a problem, so I recommend multiple servings. -
From Russia with Love
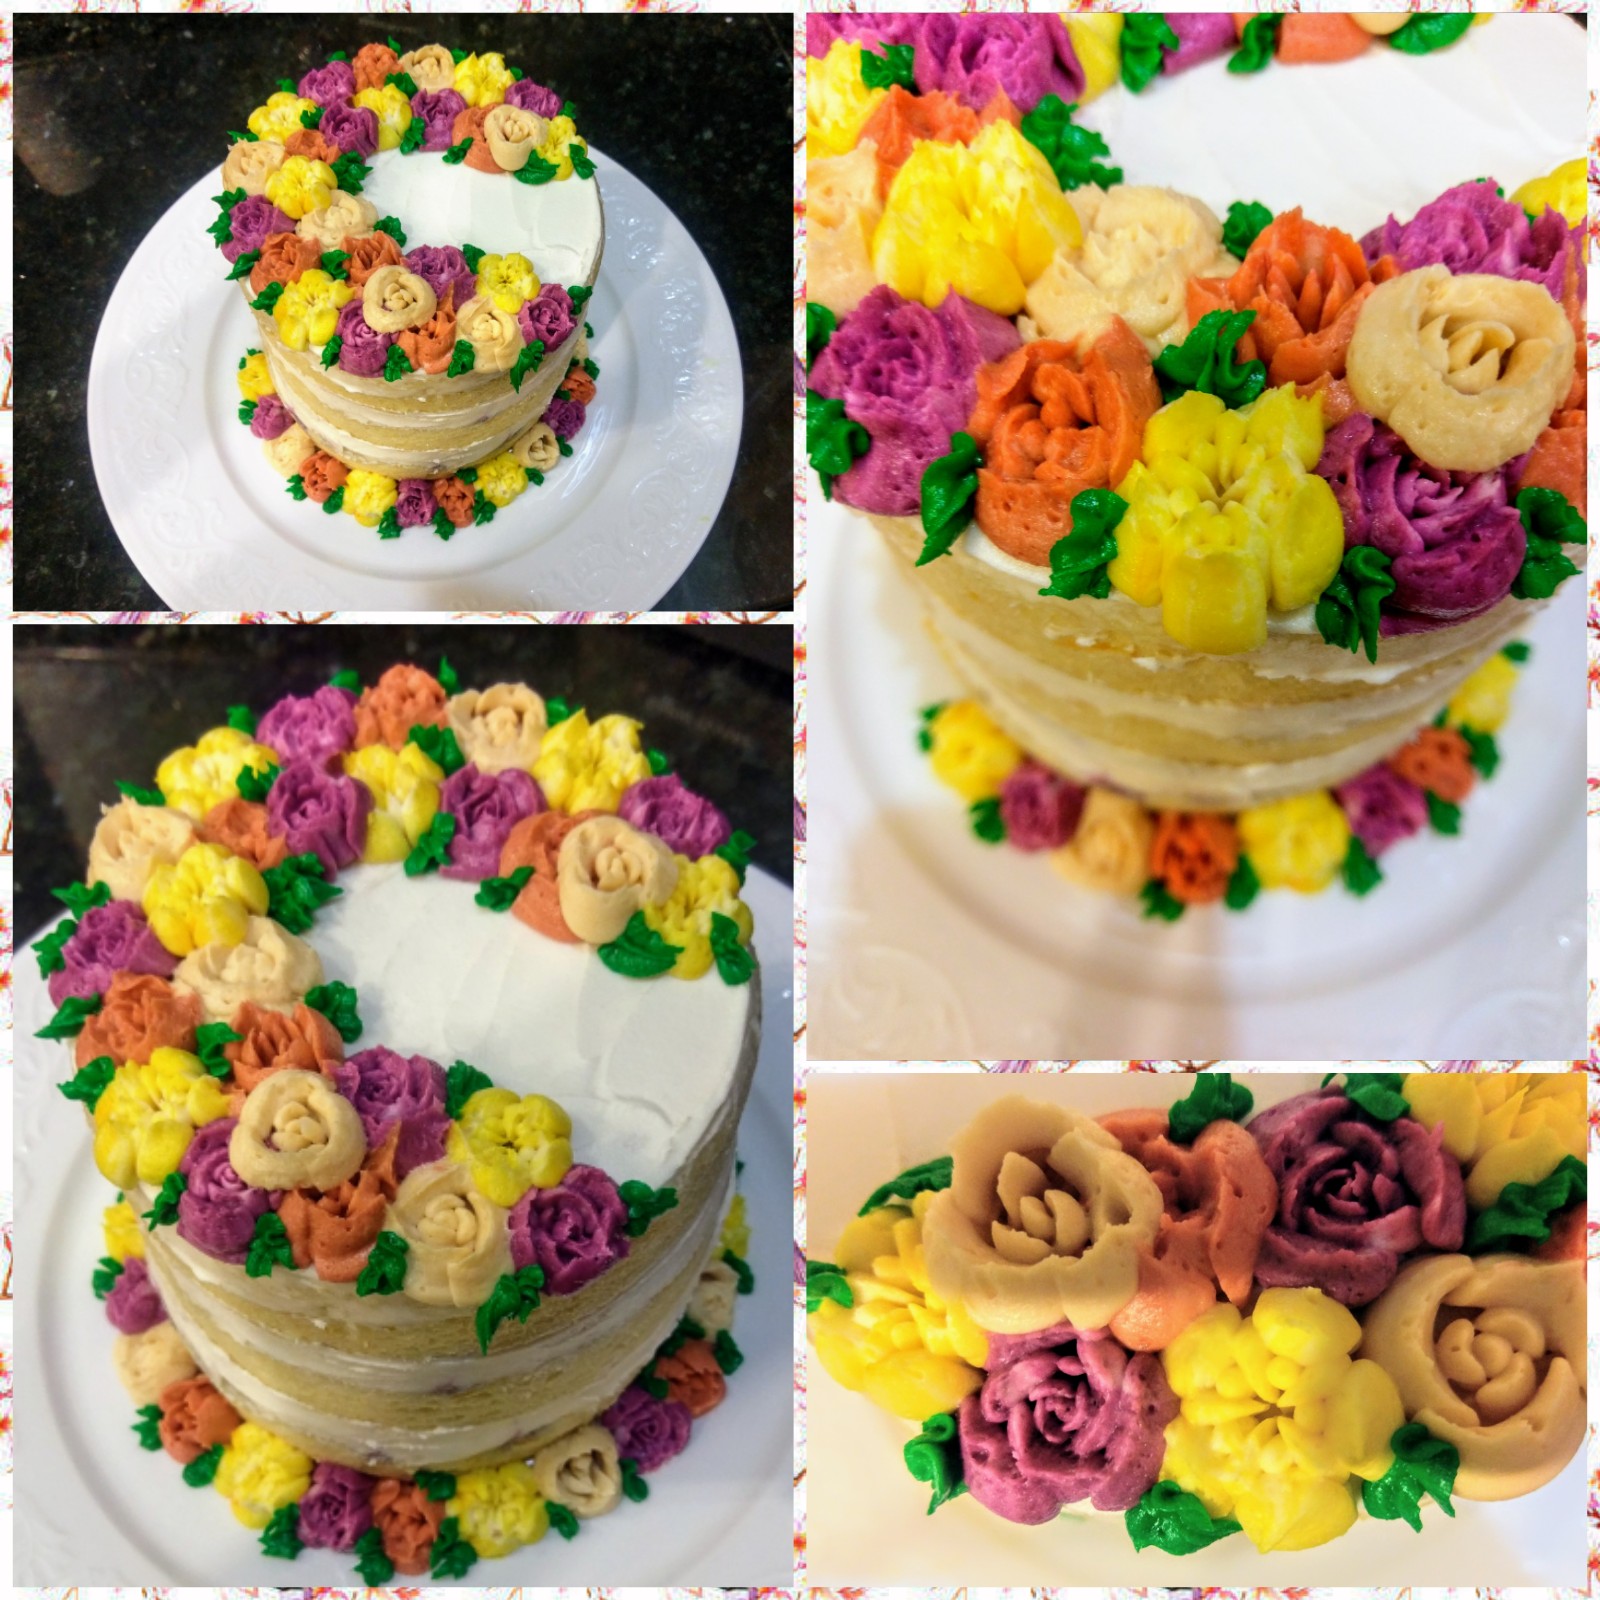
No, this isn’t a blog post about a James Bond movie starring the best Bond ever (fight me). It’s a post about Russian piping tips, and my epic love/hate relationship with them. I was cautious about making another “important event” cake with Russian piping tips after how terribly they failed me (or I them, depending on who you ask) with my birthday cake. But my husband, whom I have an epic love/love relationship with, deserved an anniversary cake that showcased the tremendous lengths I am willing to go to to make sure he feels appreciated and loved. A normal person could just use their words to accomplish this, but I’m a small bundle of awkwardness that generally only feels comfortable expressing how tired or hungry I am. Outside of those two emotions (don’t tell me hungry isn’t an emotion…I feel it in my soul), I’m more of a “grand gesture” type of person. If you’re wondering how I feel about you, think about whether I’ve ever baked for you or sent you baked goods. If the answer is yes, know that I like you, and that makes you special…because I hate everyone. But boy do I ever love cake–specifically, ones full of boozy goodness. I wanted to go over the top with my piping techniques and cake flavors to celebrate our sixth (technically 6.5) wedding anniversary. The traditional gift for the sixth anniversary is iron, so I gifted my husband with my iron-clad will to make a kick ass cake with this Grand Marnier orange cake with blueberry filling and Grand Marnier orange buttercream:

Because being married to a predominantly French woman isn’t enough, my husband is also forced to eat French booze cake. I had never had Grand Marnier on its own, so besides being a complete failure to my French heritage, I wasn’t sure if I would actually like it. I bought a bottle, hoping that the cognac aspect wouldn’t make my tongue recoil in horror. In my drinking days, I stuck with vodka with a side of vodka or occasionally tequila because I’m a respectable Texan, and I never veered far from clear liquor. Cognac, although fun to say, was nothing something I ever drank. I’d like to think my taste buds needed time to reach their full potential because quite frankly, Grand Marnier is friggin’ yummy, but it’s definitely not something vodka-swilling college Kate would’ve liked. This cognac makes for one hell of an orange cake/frosting combo, and it gives a sticky sweetness to compliment the tartness of the blueberry filling. This is now my favorite cake combination I’ve ever made, and I find myself wanting it for breakfast because it’s like eating a really boozy blueberry orange muffin. Thank God I remembered to make it low cal so that I can eat it whenever I want (judge all you want, but I’m the one with the cake). At only 260 calories a slice for 12 slices, this sets you back less than an actual muffin. Winner, me!
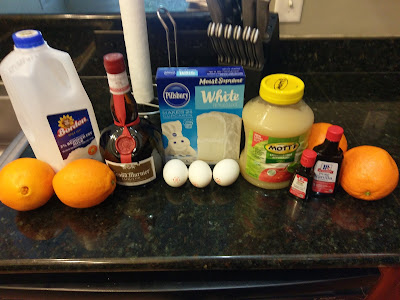
(and that’s not just the Grand Marnier talking) I started this cake off simply enough with a box cake mix, but I took extreme liberties to make the flavor come to full fruition (see what I did there) with fresh oranges and other delectable ingredients. To make three six-inch rounds or two nine-inch rounds, you’ll need:
- One box white cake mix
- 1/3 cup unsweetened applesauce
- 1 tsp vanilla extract
- 1 tsp orange extract
- 2 TBS fresh orange zest (about 1/2-3/4 of one orange)
- 3 egg whites
- 1/4 cup of Grand Marnier
- 1/2 cup of fresh-squeezed orange juice (I needed two large oranges)
- 1/2 cup of skim milk
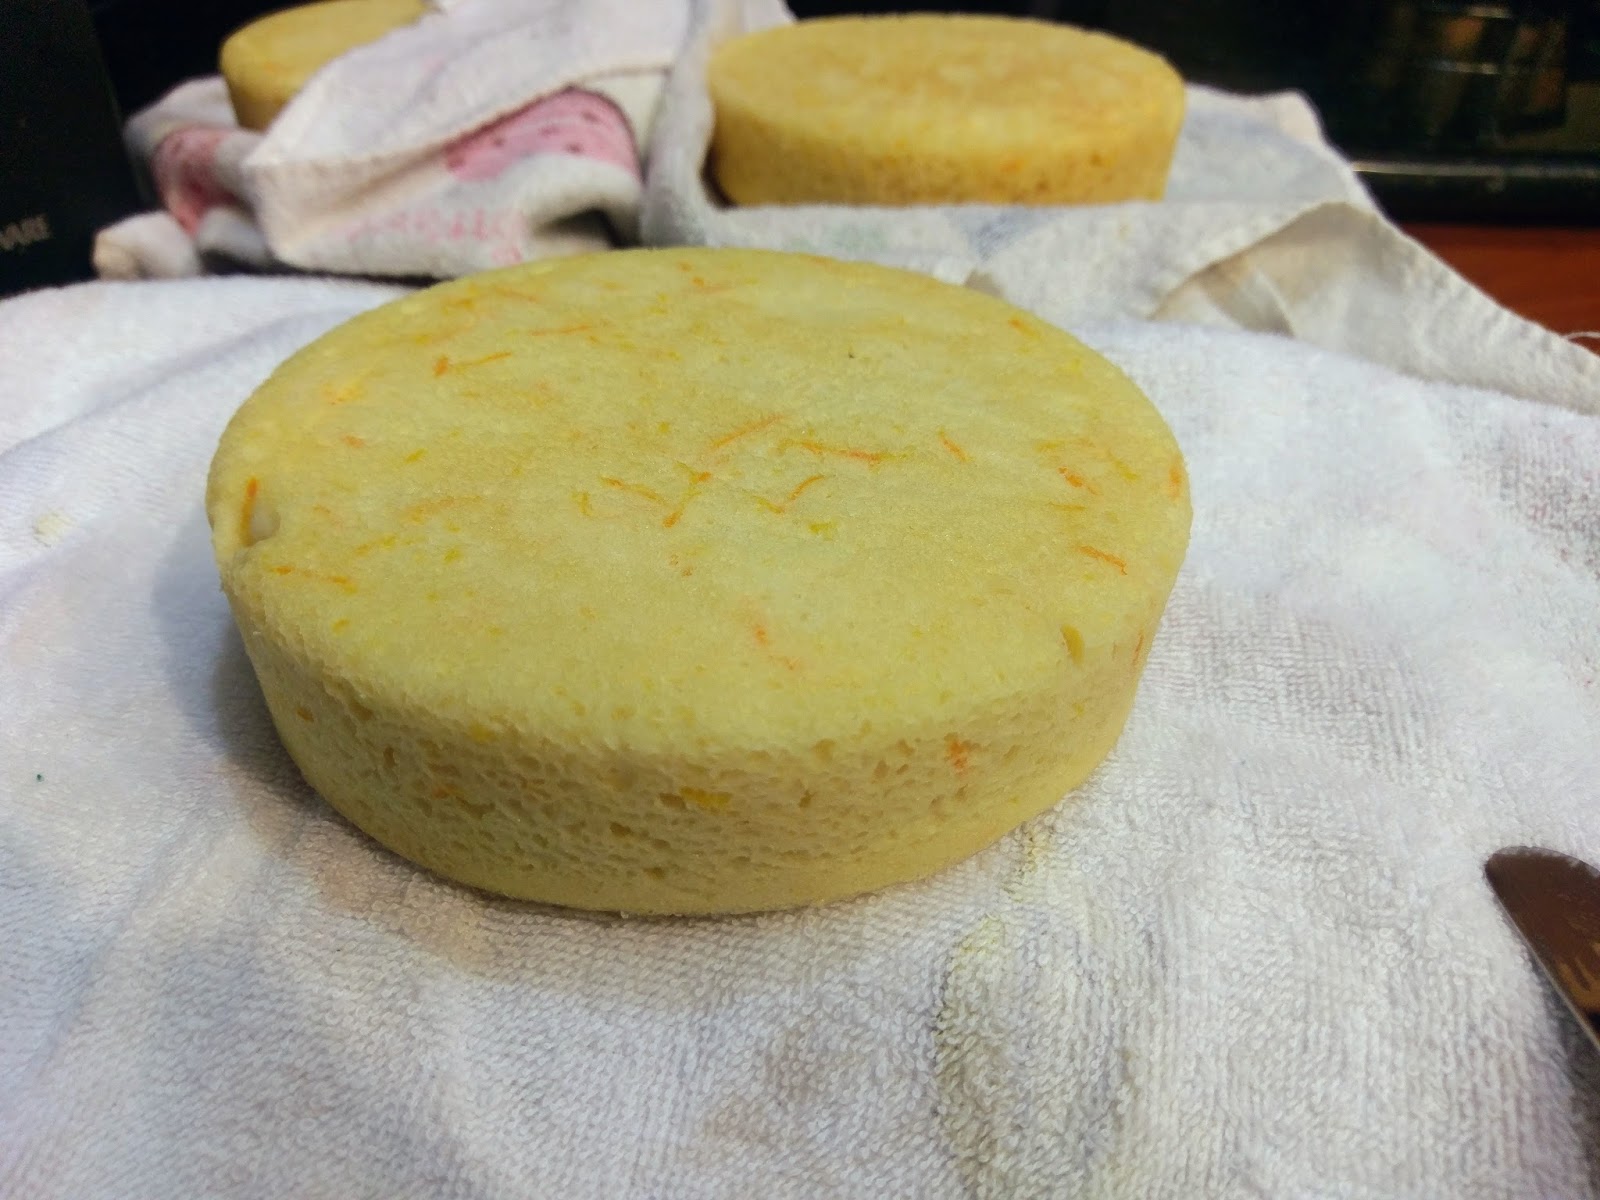
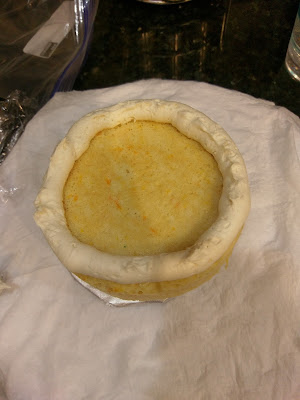
Preheat your oven to 350 and grease your pans and line them with Parchment paper (don’t forget the bake even strips. Lifesavers!). Blend together the cake mix, applesauce, extracts, zest, and egg whites on low for about 30 seconds. Add in the cognac, O.J., and milk and blend well for 2 minutes. Pour into your prepared pans and bake for 22-25 minutes (add more time if you’re baking in 9-inch rounds) or until your rounds pass the toothpick test. Let your cakes cool in the pan for 10 minutes before removing to a cooling rack.

Your house will smell like the citrusy parts of Florida…I assume. I live in the non-citrusy part of the state. I made my cakes the weekend before our anniversary, so I let them cool fully before leveling…even with bake even strips, a naked cake requires completely level surfaces, and how else was I going to get to try a sample?! Then I wrapped them up securely for freezing following my previously tested and successful wrap and bag approach.
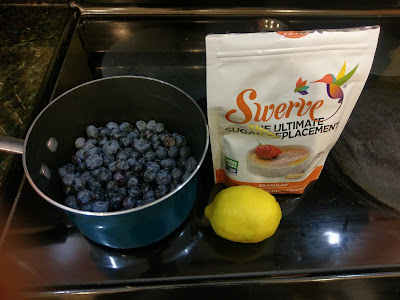
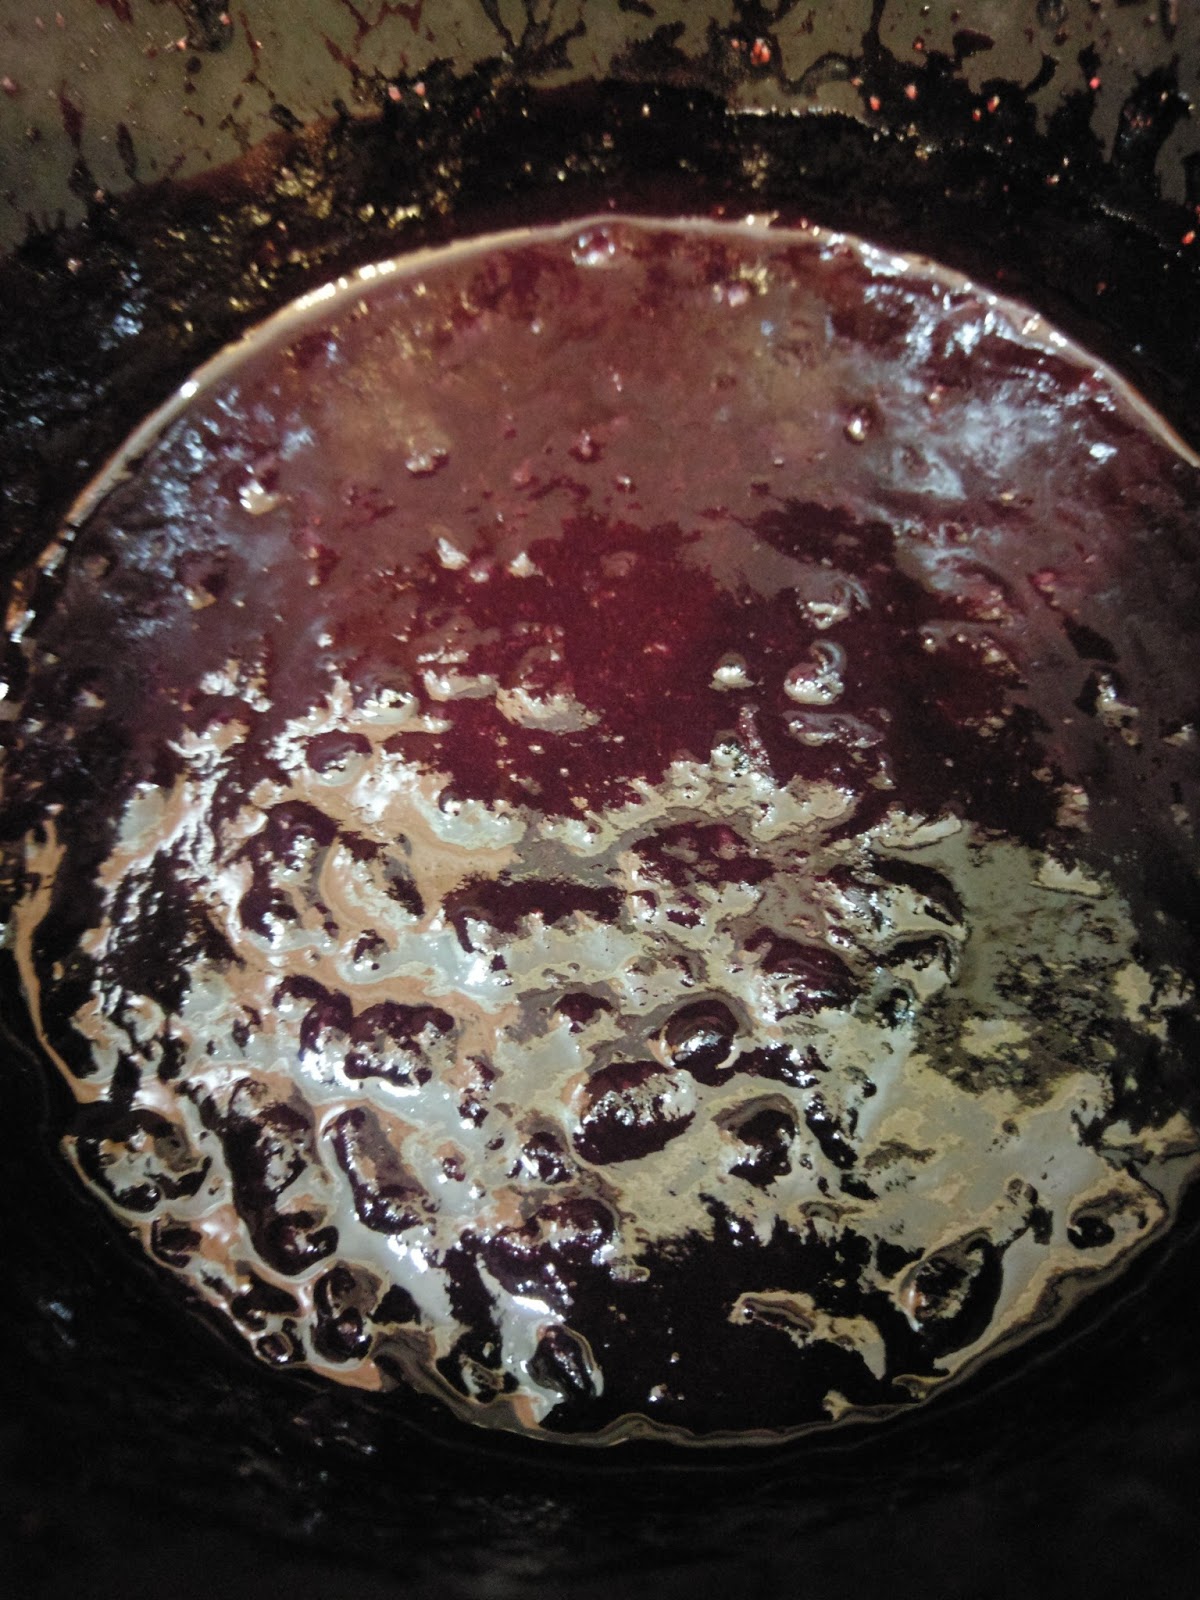
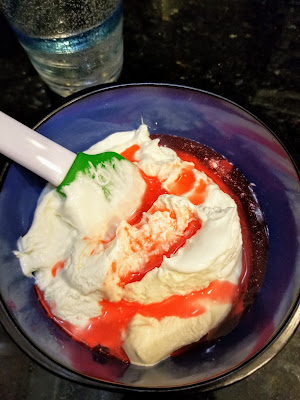
Berry nice to meet you… I still had approximately sixty lemons (scurvy free!) leftover from my lemon cream pie, so making my filling was a sinch. I mixed two pints of blueberries with two tablespoons of granular swerve and one tablespoon of fresh lemon juice in a medium sauce pan. I brought this to a boil over medium-high heat while mashing my blueberries with a potato masher and stirring with a spoon until thick, about 5-7 minutes. I had a lot of filling leftover, so you probably could get by with cutting this portion of the recipe in half.

It made a purple mess. Much like the end of my Minnesota Viking’s last season. I took my saucepan and placed it in the freezer to set for thirty minutes. During that time, I found my Grand Marnier, miraculously not all gone, and got my frosting ingredients out.

Butter, my oldest friend. This is a full buttercream (no Crisco anywhere) because I wanted to ensure I had the proper consistency for piping with my Russian piping tips. I’ll tell you precisely how I made this frosting, followed shortly thereafter by what I will do next time for even better piping. Live, learn, and eat the cake anyway. You need:
- 1 cup of butter at room temp
- 2 1/2 cups of powdered sugar
- 2 1/2 cups of Swerve confectioners sugar
- 1 tsp vanilla extract
- 1 tsp orange extract
- 6 TBS Grand Marnier…which was one tablespoon too many for piping. Only use 5 if you want a *perfect* piping consistency frosting. Use 6 if you don’t care and just really, really like Grand Marnier.
Cream the butter in your stand mixer until fluffy, three or so minutes. Add in the 2 1/2 cups of powdered sugar, extracts, and 3 TBS Grand Marnier, mixing on low until incorporated. Then blend in the 2 1/2 cups of Swerve and 2 TBS of Grand Marnier. I was trying to use half powdered sugar and half Swerve to see if this would allow my booze flavor to shine through without getting that cooling effect from Swerve…and it totally worked. Will be using a 1:1 ratio from here on out to make things way healthier but still taste exactly as it should…sugary and amazing.
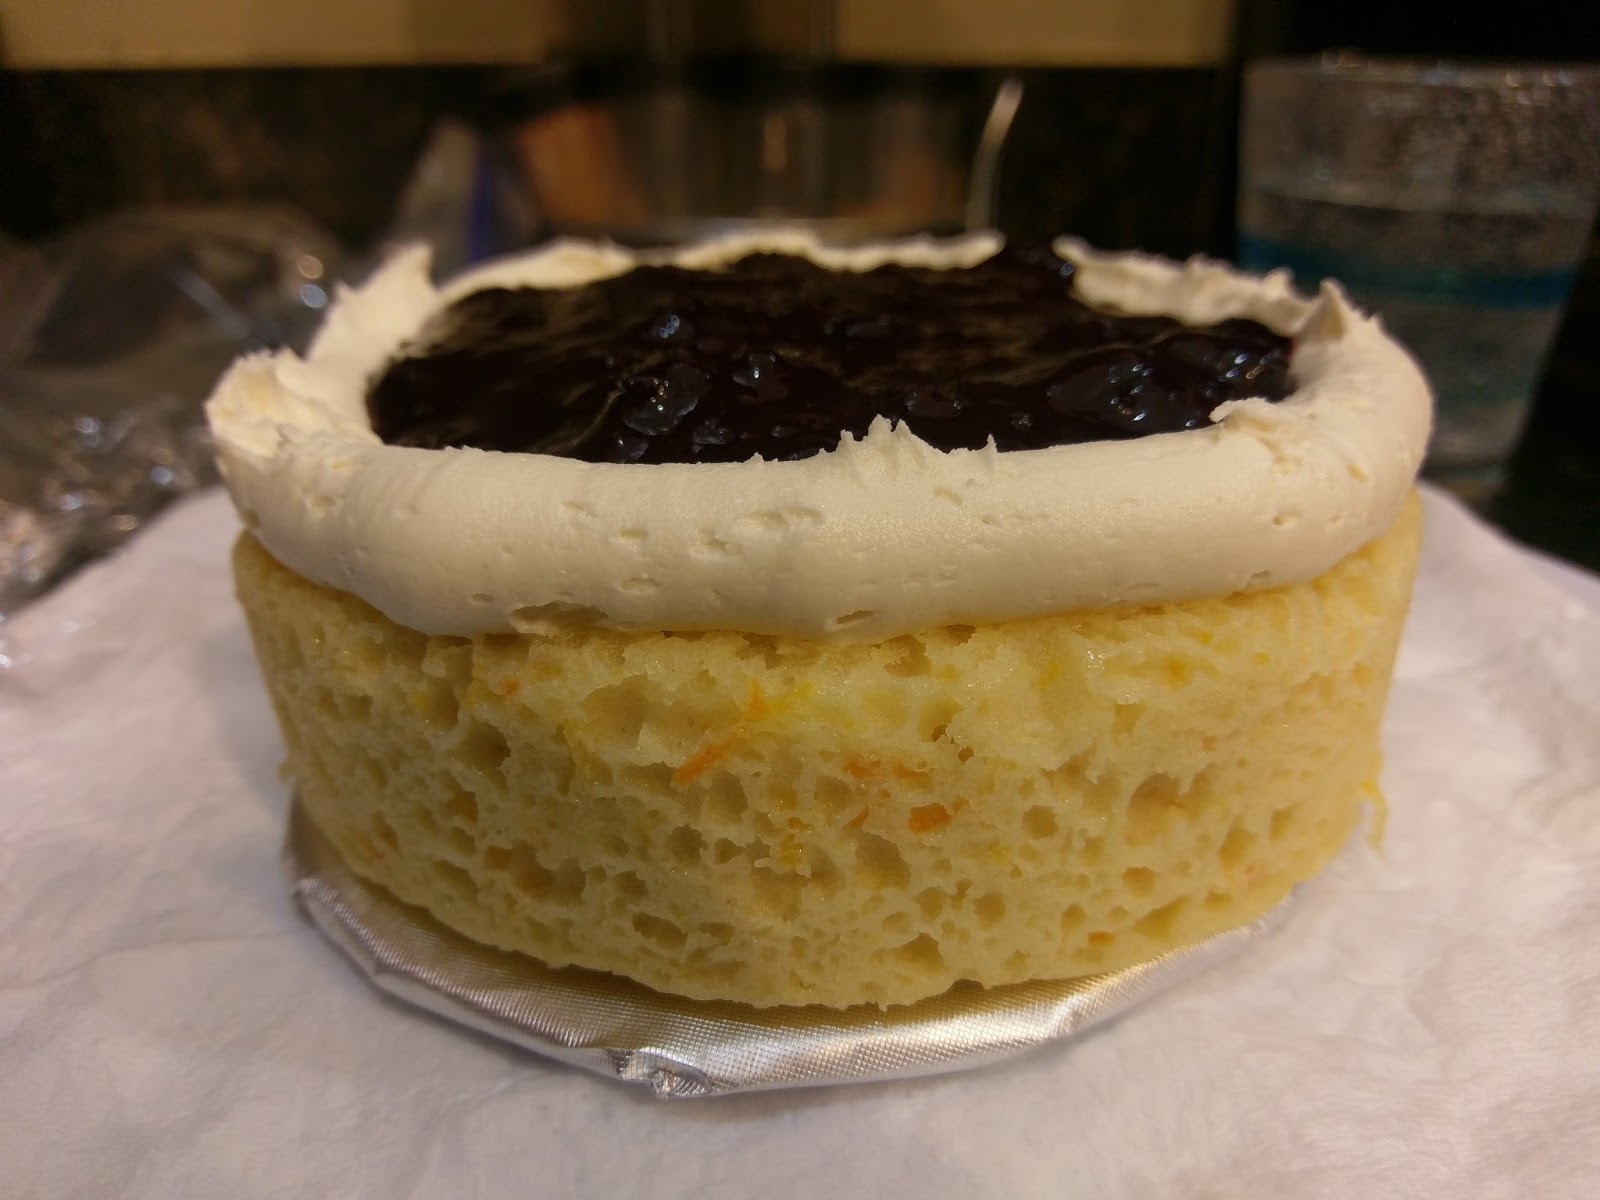
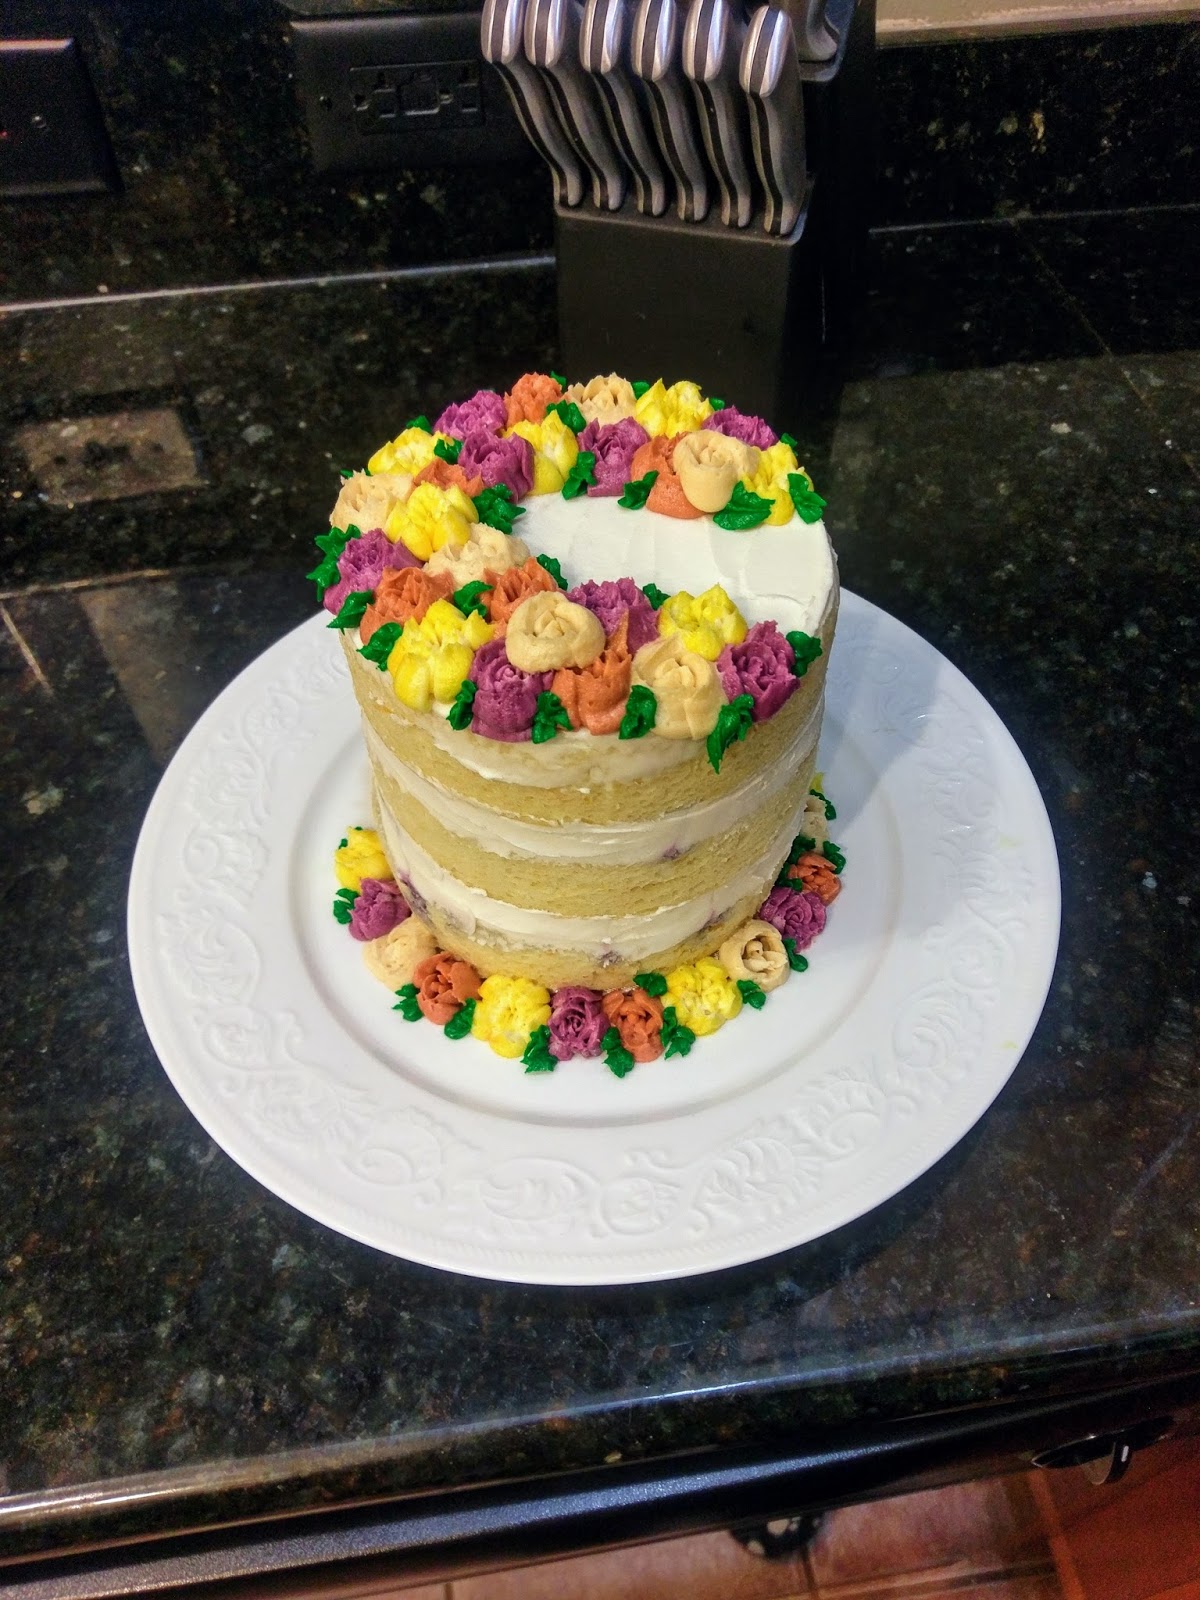
The circle of life. Once you’ve made your frosting, load up a frosting bag with a large round tip (1A is what I use). Get all your cake layers ready for frosting. Place your first layer top-side down on a cake board (a.k.a., the bottom of the cake is facing up to create a perfectly flat, even surface). Pipe a thick border around the edge.
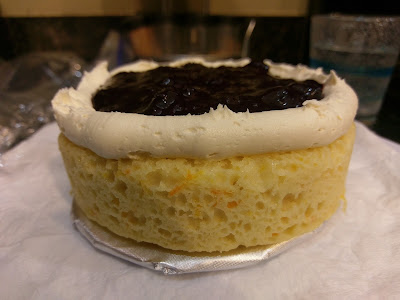
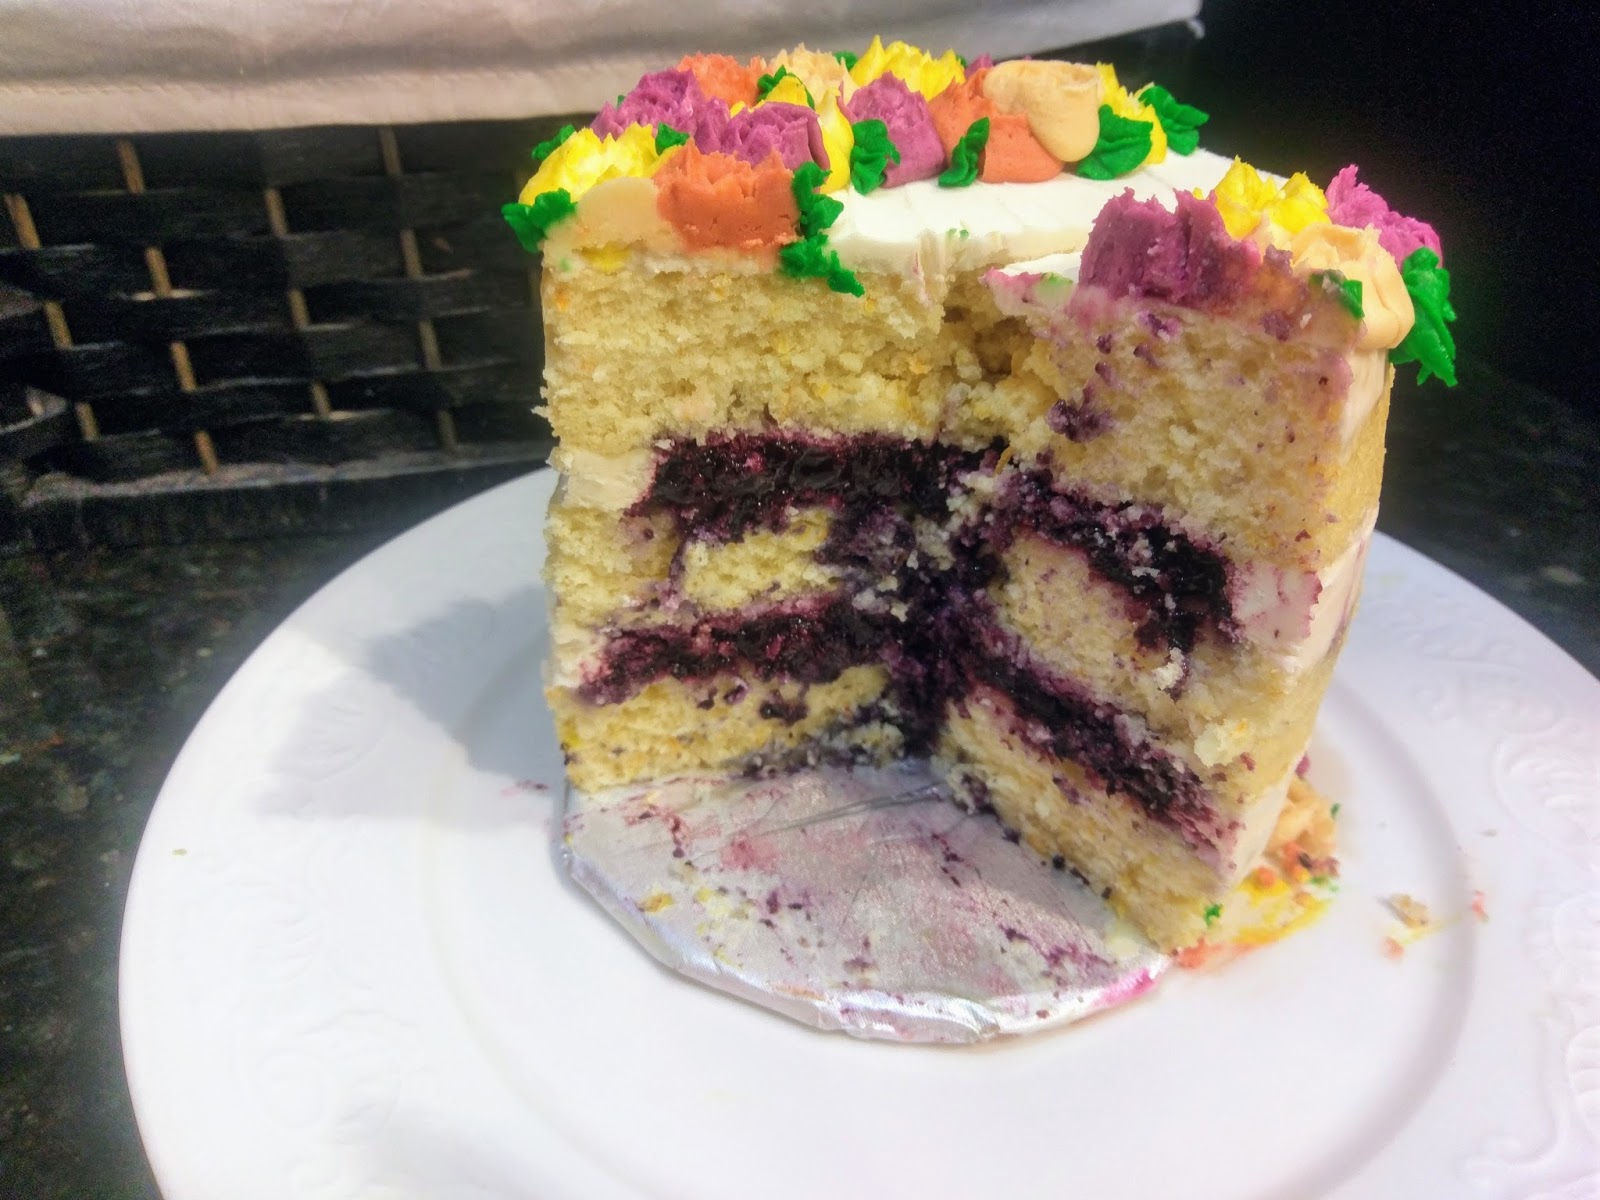
Mmm, blueberry filling. Now, you can scoop your cooled and set blueberry filling inside of your circular border. I did not top with more frosting, but in the future, I would. Without the support of the extra frosting over the filling, the cake does collapse in on itself when you cut it, so you get messy, albeit it still delicious, slices. Repeat piping and filling with your next layer. I had about 2/3 of my blueberry mixture leftover, so you can save this for toast, sandwiches, mix it in with oatmeal, throw it at Green Bay Packers fans to turn them purple, etc.
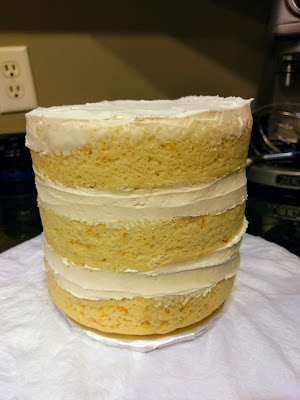
Tres chic! I finished by smoothing a small layer of frosting on the top of my cake, using an angled spatula to create a rustic-looking swirl on top, which I promptly did not photograph. My bad. The side of the cake just looked so pretty…I was distracted by it’s elegance. Like the Helen Mirren of cakes.
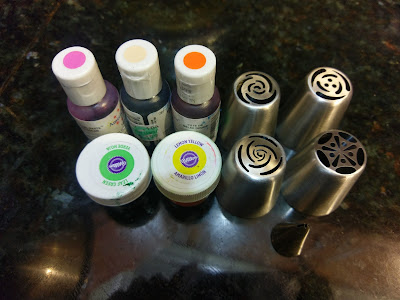
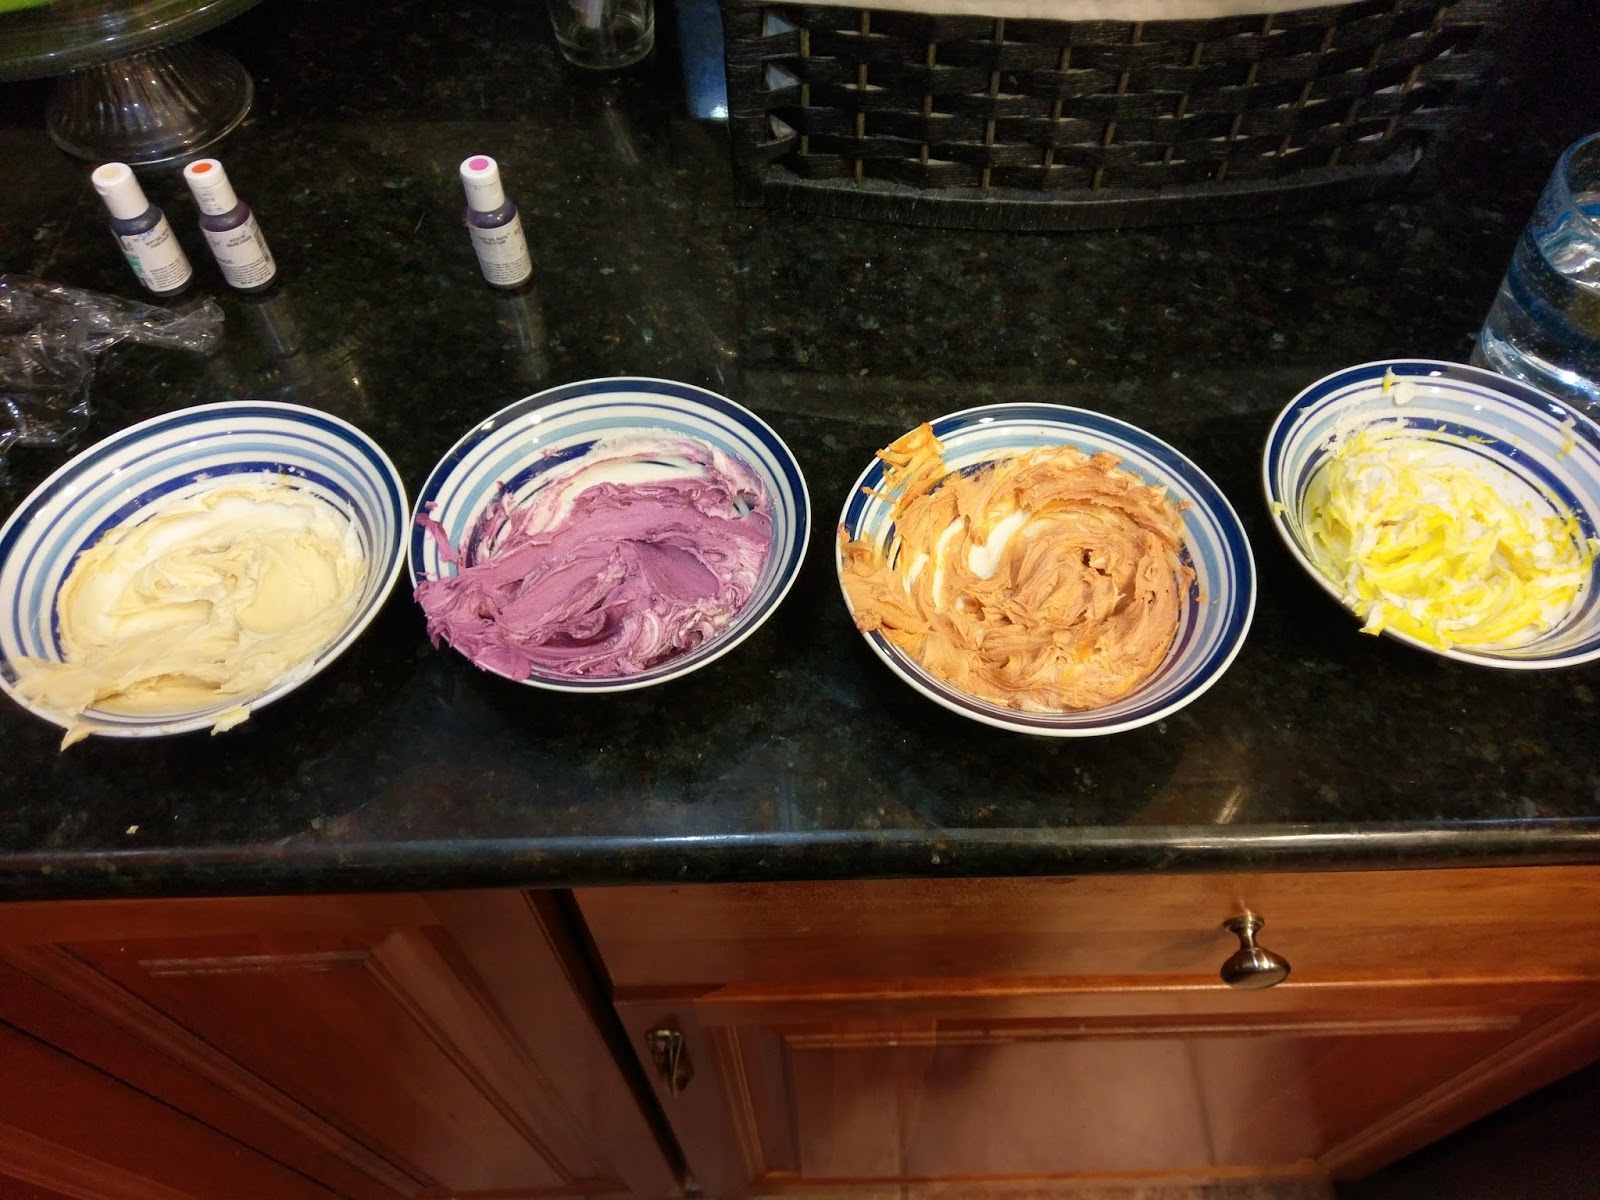
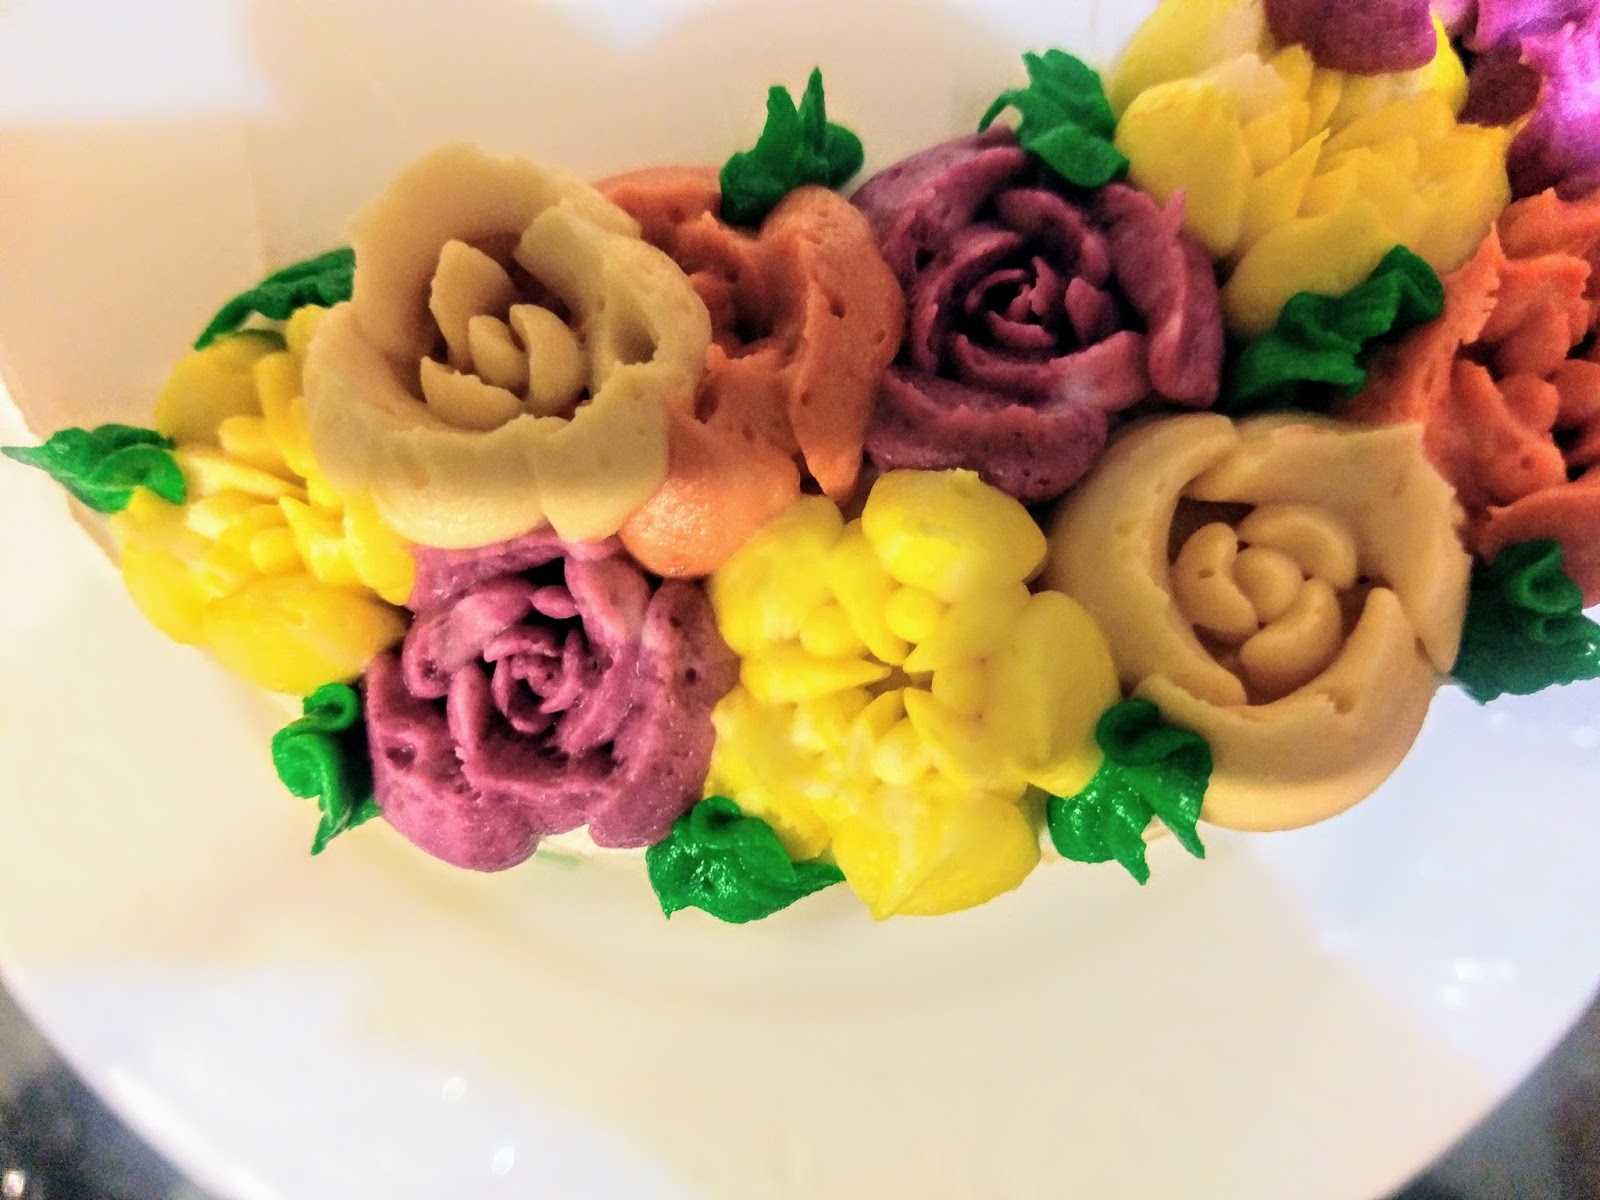
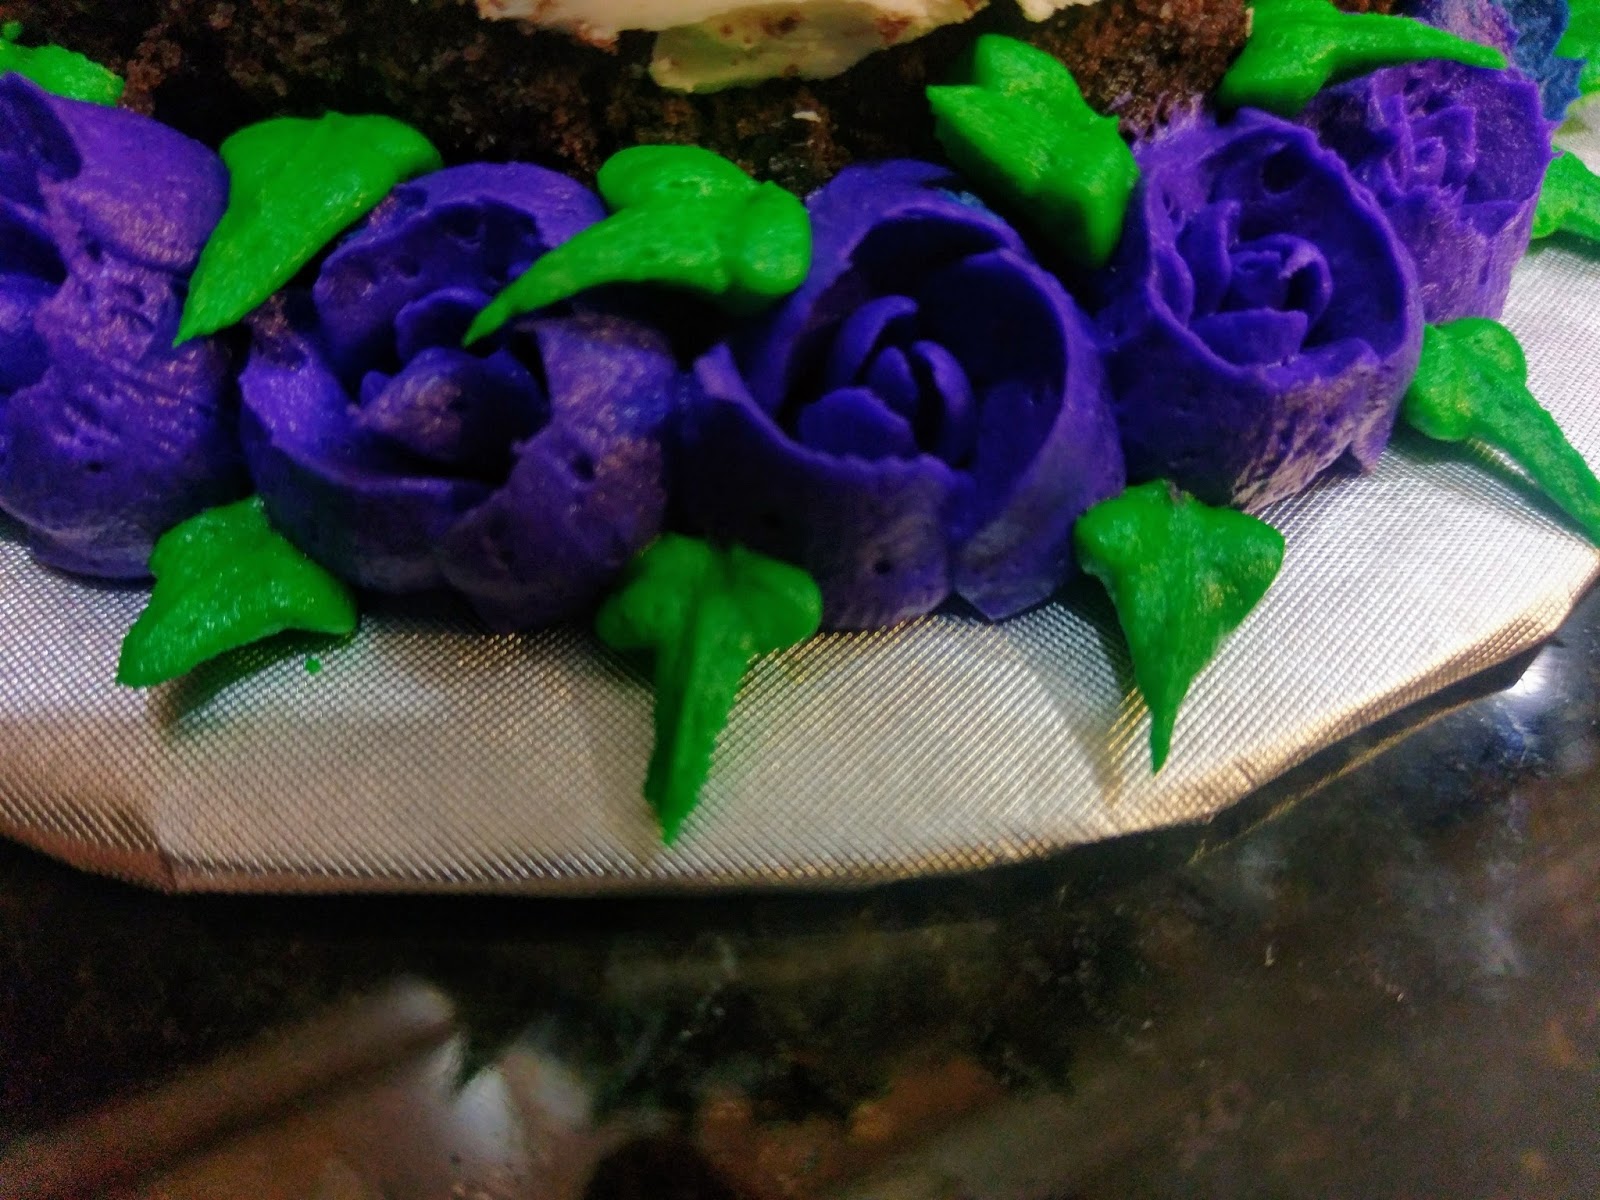
We meet again, comrades. I wanted a color palette that would compliment my orange cakes, so I went with pink, yellow, beige, and coral flowers. These are the tips I used. They don’t have numbers on the side like most piping tips, so I honestly have no idea what does what. It’s some Russian conspiracy or something. If this is how they plan on world domination, we’ve got plenty of time.

I washed a lot of dishes that day. I wanted to give you some tips on achieving pretty flowers with Russian piping tips. For starters, don’t fully mix your dye with the frosting. Leave it streaky, so you get more natural coloring. For example, instead of *PINK* flowers, you get pink flowers with varying shades and richness this way. I took my remaining frosting, dropping a large dollop into each bowl and slightly mixing to achieve the color I wanted. I added a few drops of yellow with one drop of orange to one bowl, a few drops of orange with one drop of pink to another, a drop of beige to another, and a few drops of pink into another bowl. I took a tiny amount of frosting, dyed it green, and loaded it into a piping bag with a leaf tip. I was now ready to conquer Russia.

Or so I dared hope. With my cake on a turn table, I loaded up the random piping tips with my frostings. I now realize I was playing a much safer, less deadly version of Russian Roulette with my un-numbered piping tips. The gift of iron(y).

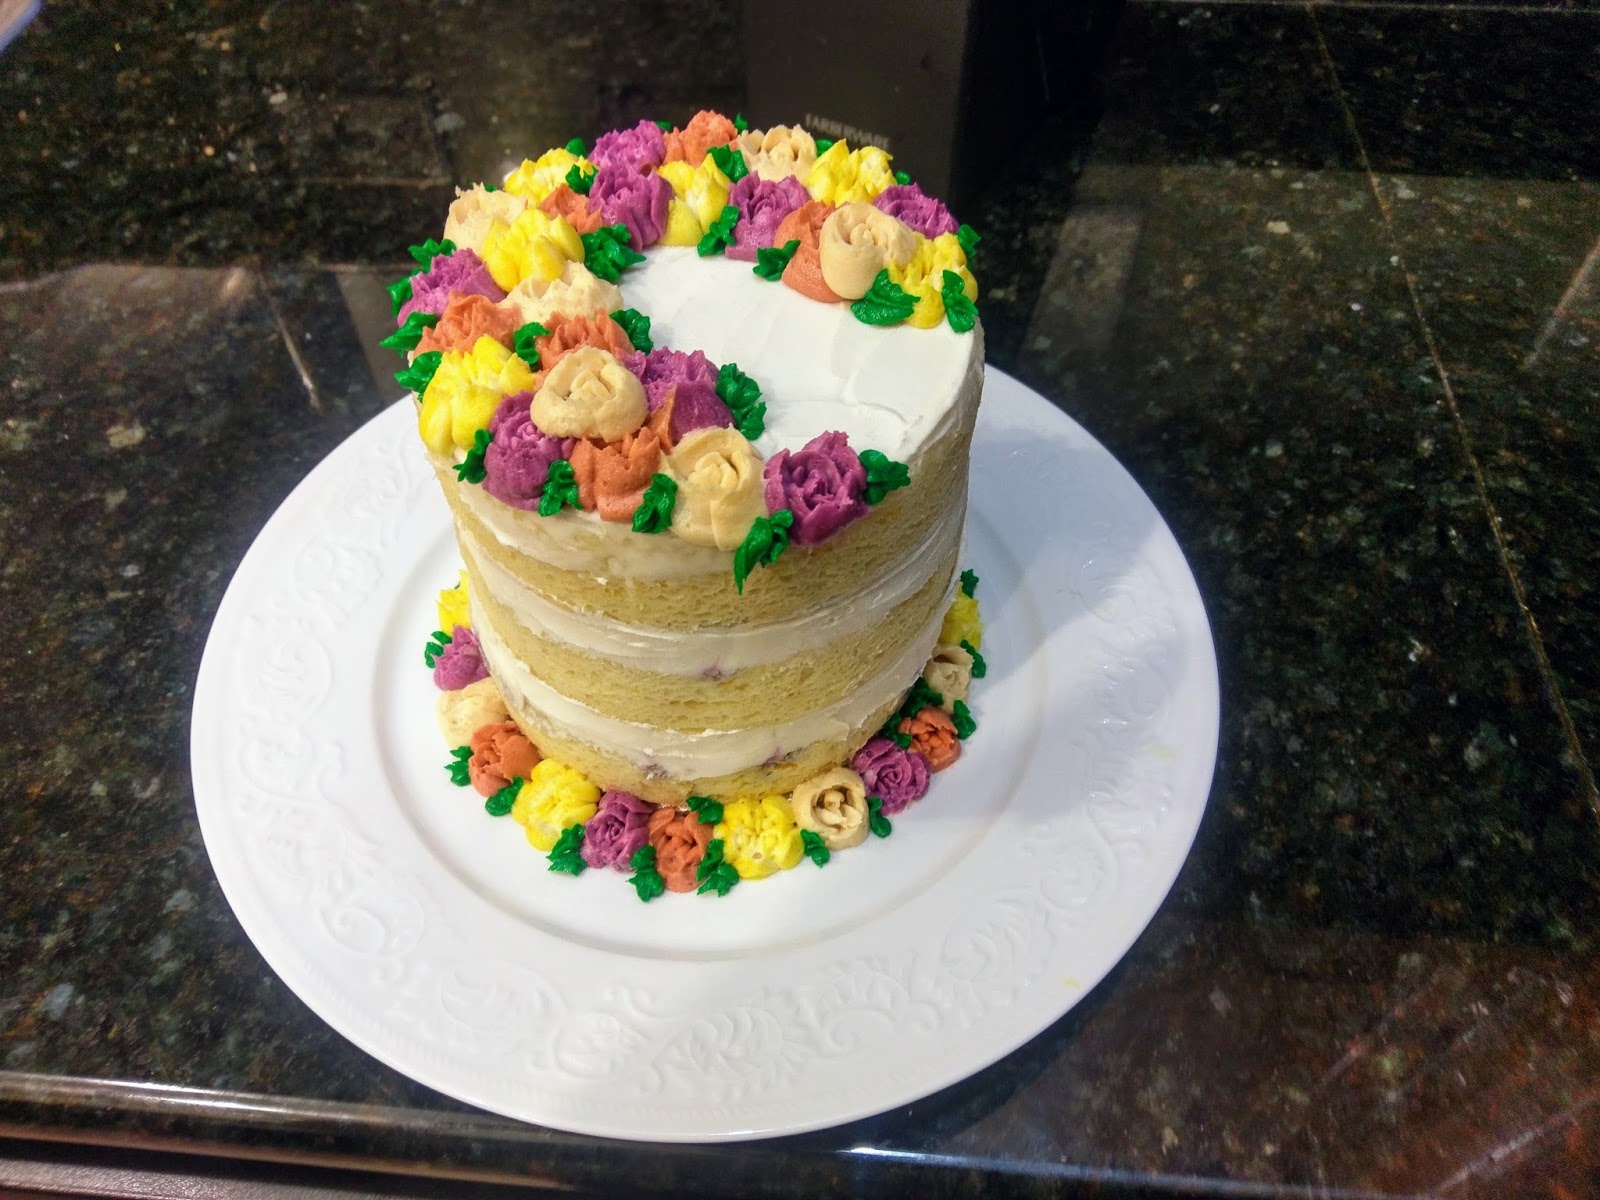
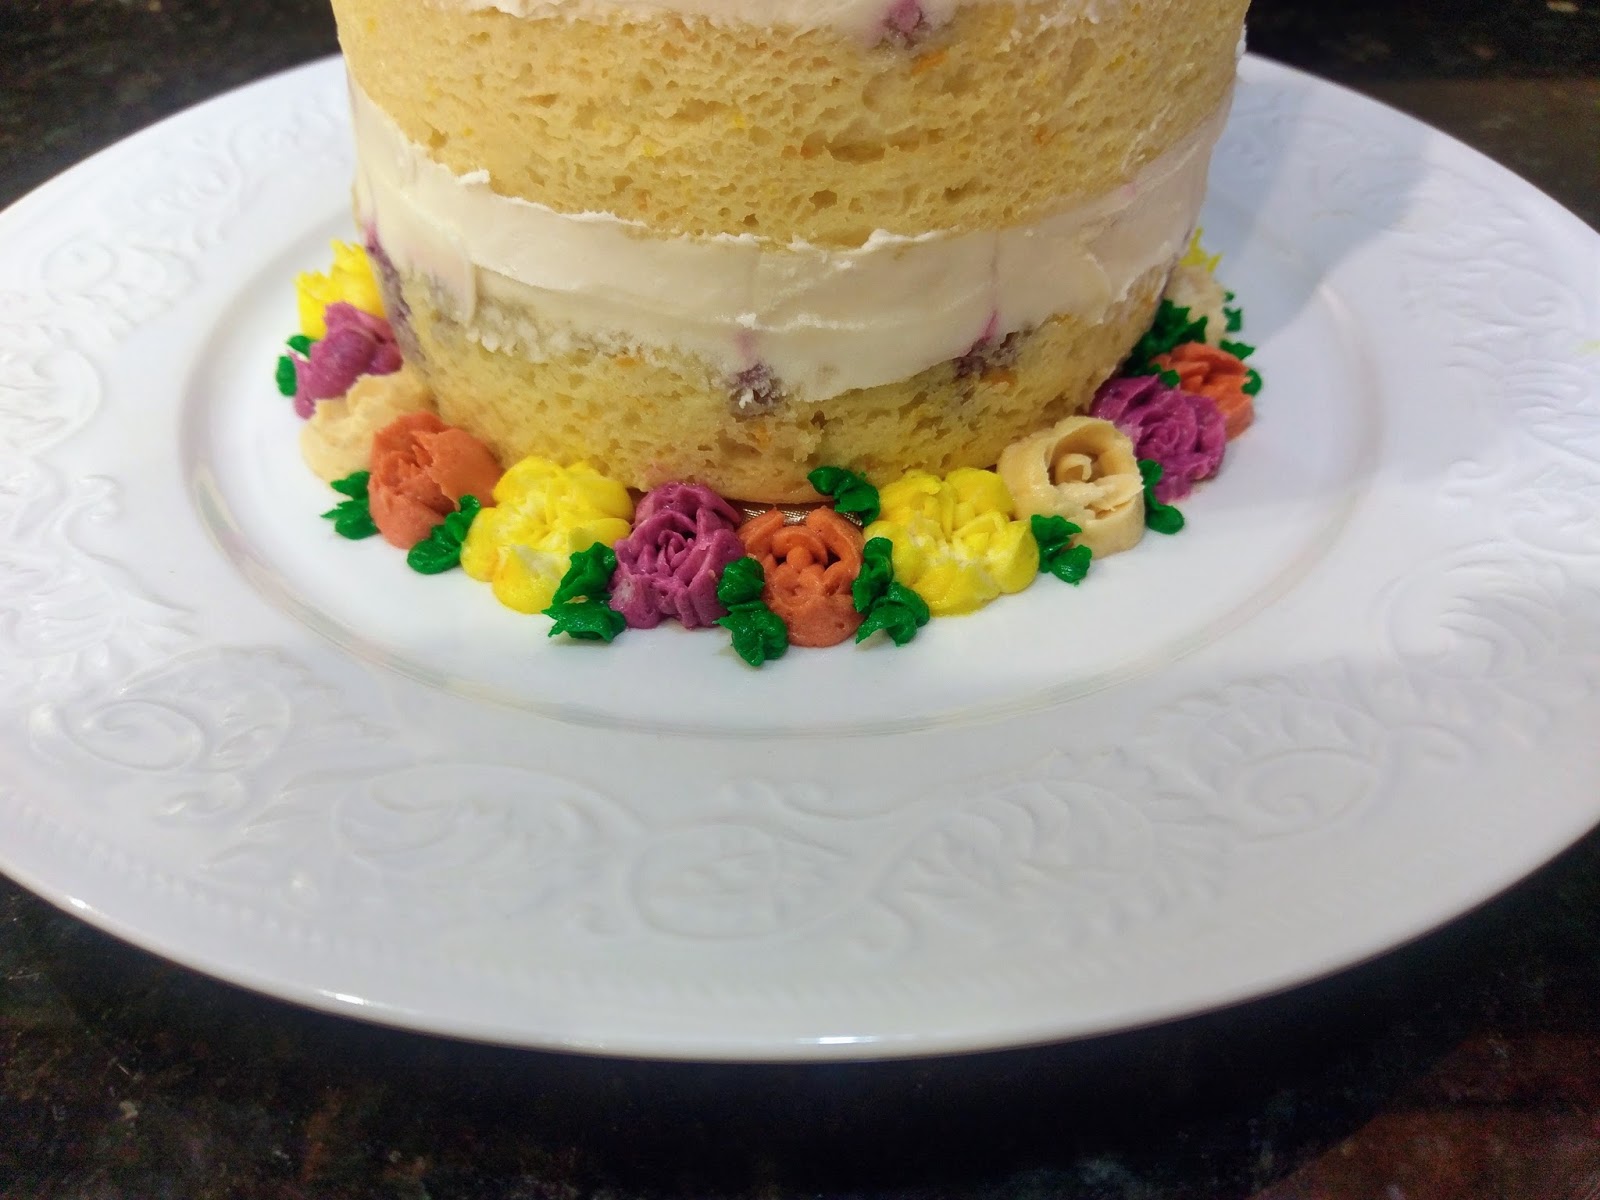
And somehow, this happened. I piped with even pressure, and made sure to clean the nozzle off of each tip with a paper towel after each flower was piped. I created a semicircle bouquet around my cake. With a softer consistency, some flowers didn’t take shape as well. Placing the frosting in the fridge to firm up with help with this.

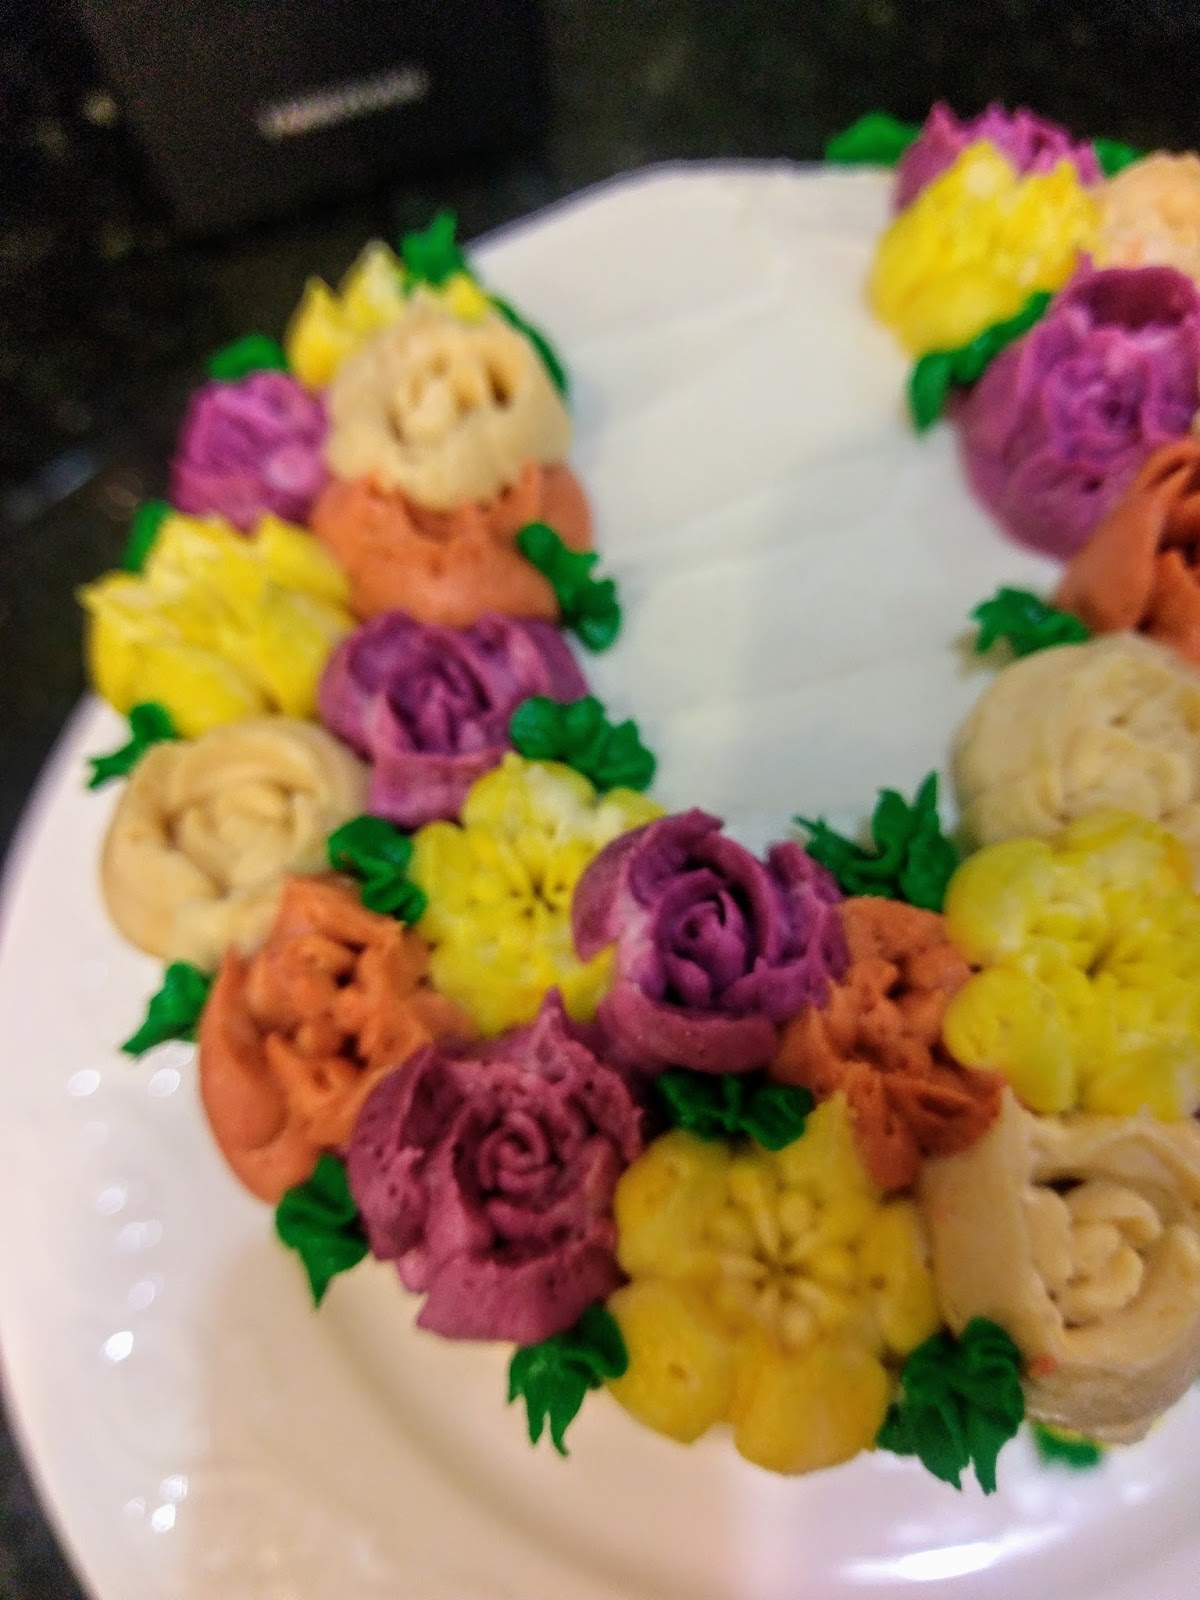
I still have no idea what form of sorcery made this work. I do know the tips that formed roses were the easiest (the tips with just the round lines on them above). They piped evenly and kept shape the best. I could pipe a little or a lot, and no matter what, it formed a rose. The pink and beige flowers all looked wonderful.

Coral, you failed me. The yellow flowers also looked really cool. This was the tip above with the three dots in the center and the round lines. The coral flowers looked like someone threw up a half-eaten flower (hi, I have dogs, this is an accurate description). They were mushy and would not hold shape even after cooling the frosting to firm it up. I wasn’t sure if I should pipe a little or a lot, and neither worked out for me.

Don’t forget the leaf tip, the real MVP. Once I practiced, piped, cleaned nozzles, and piped some more, I finished off the cake with my leaf tip, placing leaves sporadically around flowers, trying my best to cover up any ugly coral flower abominations. I suppose a 75% success rate with Russian piping tips is nothing to scoff at, but I’m at a 100% success rate with my American tips, so yeah, much like the 2016 Olympic gymnastics showdown, Team USA wins.

And when we win, we eat cake. I’m definitely going to keep at it with the Russian tips, though. They do yield amazingly gorgeous flowers with the right frosting, so, consistency, unfortunately, still key. I’d like to try mixing two different colored frostings into one bag to create insanely cool-looking flowers as well, so I’m still coming up with ideas for these tips. But back to cake–THE cake, I should say. If you even remotely like Grand Marnier, you will love this cake. The blueberry filling adds a pop of tartness to the overall flavor, which is surprisingly sweet for being an orange base. The Grand Marnier orange buttercream is a thing of legend, and it might possibly be the yummiest frosting to date that I have ever made. The plain cake with filling is like the most delectable muffin you’ve ever eaten, but adding a forkful of that buttercream turns this into an absolutely divine dessert experience. I am so glad life handed me oranges instead of lemons, and even happier to have a husband to help me eat all of this cake…and also, to enjoy life and adventure with. We had a wonderful anniversary, and now, we have this delicious cake to remind us how sweet life is together. ‘Til next time, my fellow eaters!

You know you love someone when you’re willing to share dessert. -
I'm Told People Like Pie.
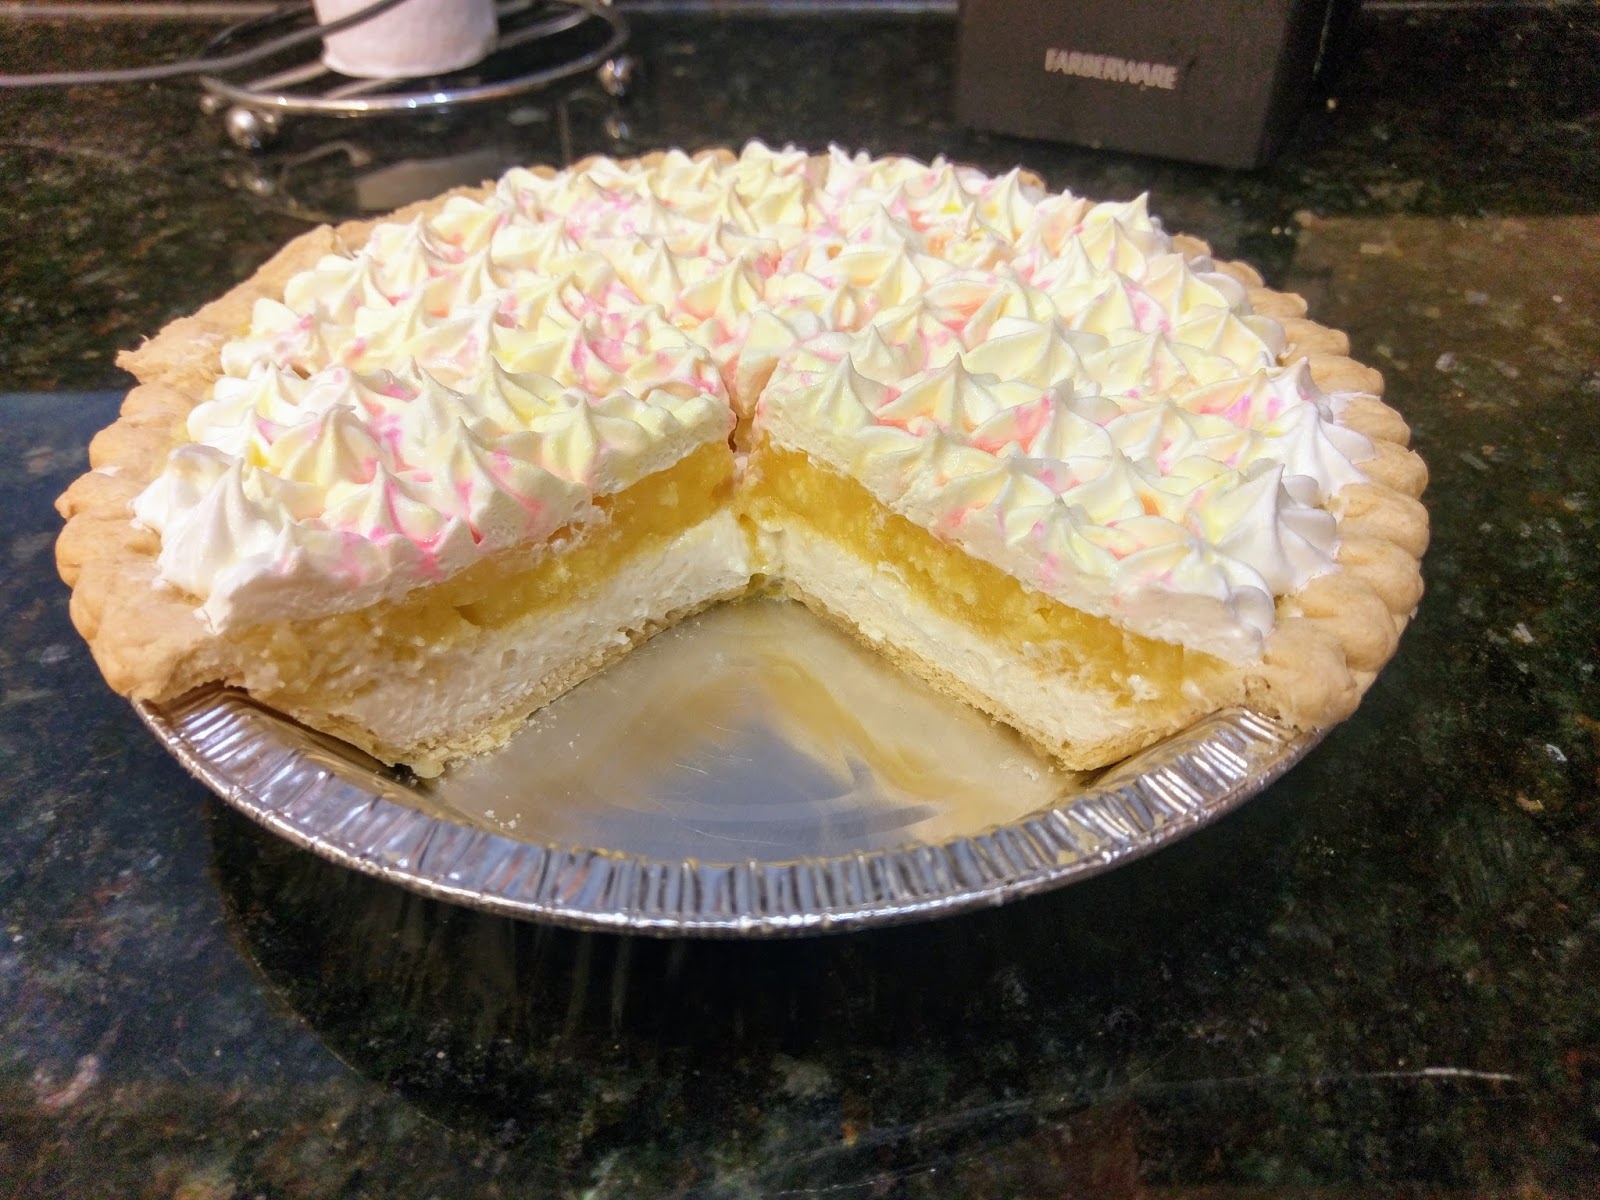
I’ve been uncomfortably sweaty for several days in a row now, so I guess Florida has gone straight from sorta winter to regularly scheduled summer grossness. This state makes up seasons and time zones like an episode of Whose Line Is It Anyway? I’m told it is supposed to be spring, but my taste buds were hankering for something appropriate for this level of humidity and…stickiness. Clearly this was a job for a light, fruity pie. I typically abide by the motto that “These feelings would go great with pie,” so I eat it pretty regularly. What with Easter coming up on Sunday, I also wanted something a little festive. Considering I’m a grown adult (I think?), I didn’t want jelly beans or Peeps coming anywhere near this pie. Does anyone actually eat Peeps? Unless you’re crazy about getting cavities (hot dentist?), I just don’t see the appeal. So I decided to do the adult thing…you know, juice so many lemons I could cure even the worst case of scurvy and throw them into a tart lemon cream pie. Did I say adult thing? Because it could also be a pirate thing.
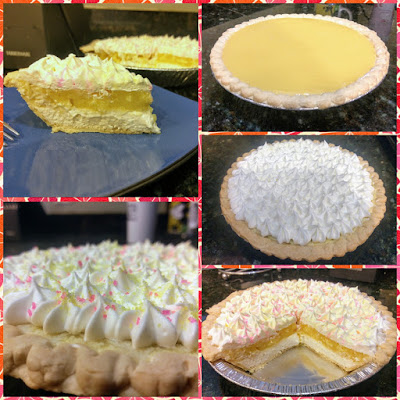
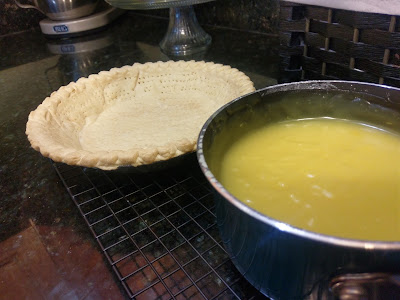
Tharrr be piiiieeee. Okay, so my pink and yellow sprinkles were inspired by Peeps, but the similarities definitely end there. This is a *perfect* Easter pie for all my fellow Catholics out there because it is completely guilt-free. How is that possible? Was it blessed by the Pope? Nope, just a little thing I call Swerve with a dash of potential blasphemy! The original Taste of Home recipe was 735 calories for one slice of pie. Even just reiterating that fact gave me a small heart attack. With some super simple tweaking, I can consume almost an entire pie for the same amount of calories. One slice will only set you back 230 calories (8 servings total). It’s an Easter miracle! Yeah, I’m booking a first-class ticket to you-know-where with this blog, but considering my levity, I think this post might just give the man upstairs a good-natured chuckle. Please be benevolent… Seriously though, this pie is a heavenly balance of tart lemon and sweet cream cheese filling. It is light, airy, and packs some seriously ah-mazing flavor. It may be my new favorite way to eat my feelings.

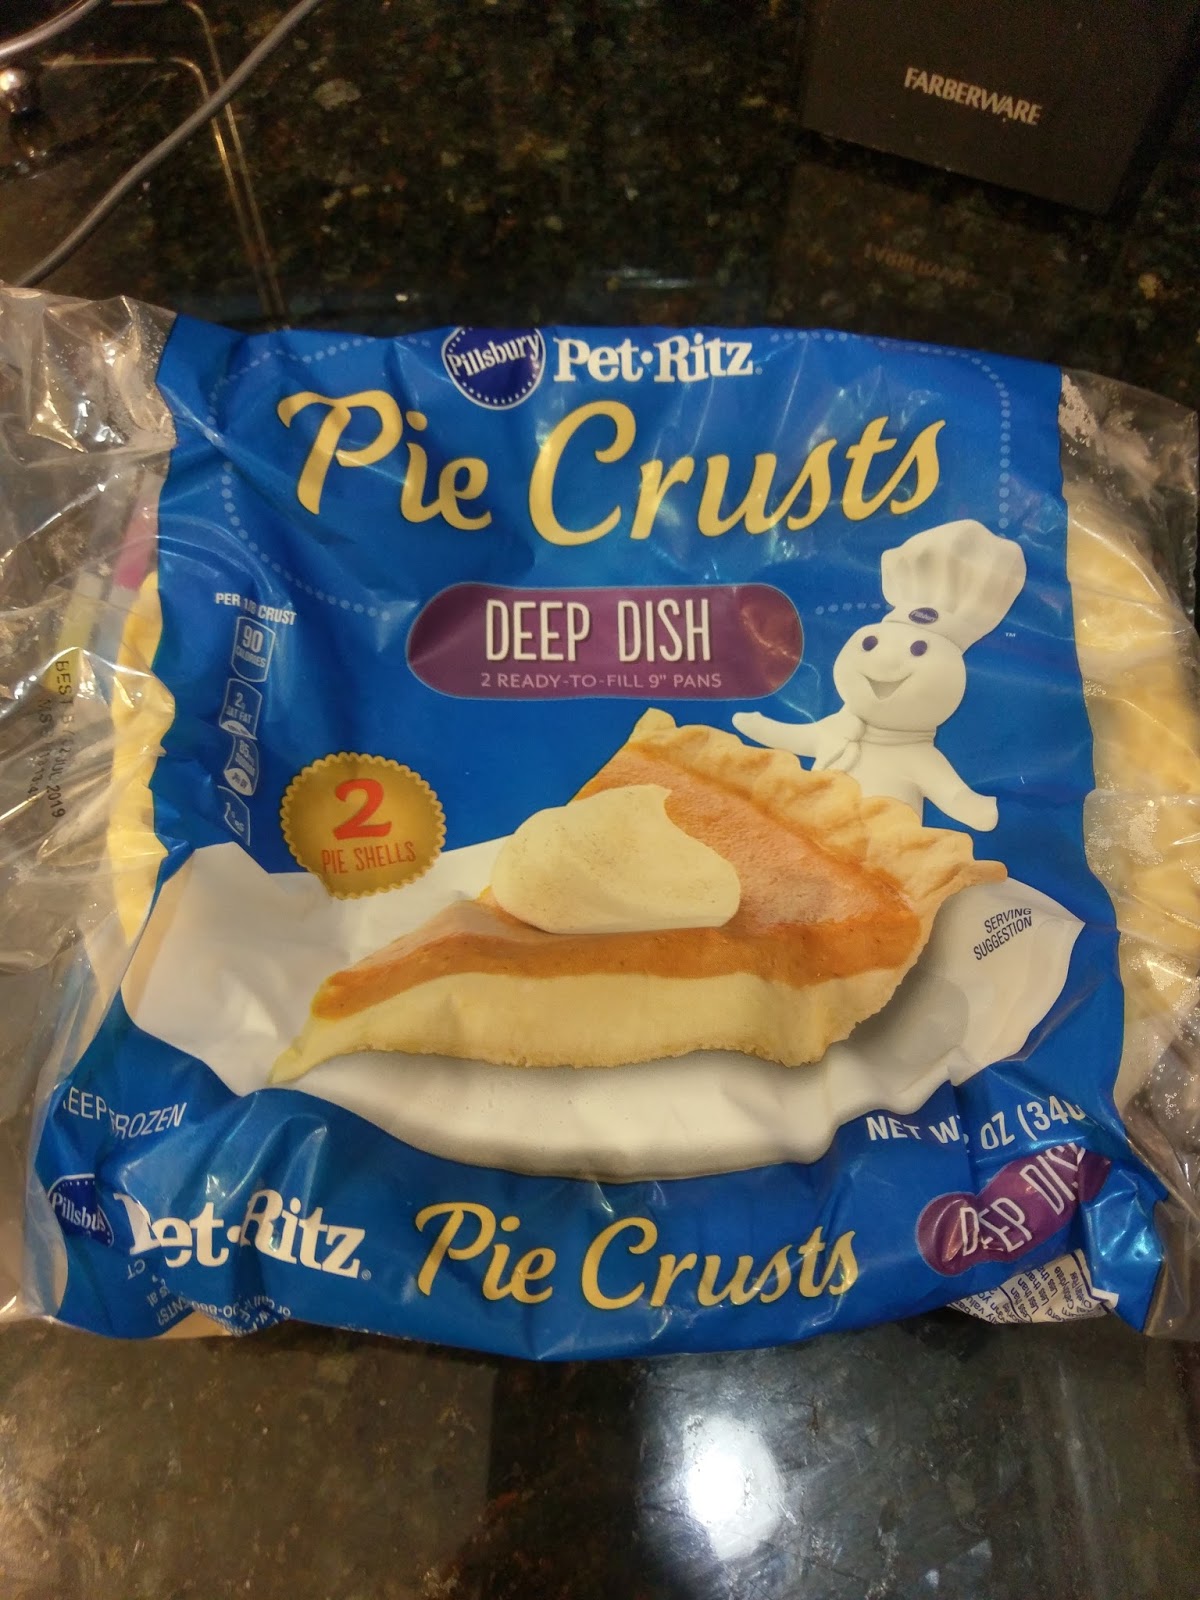
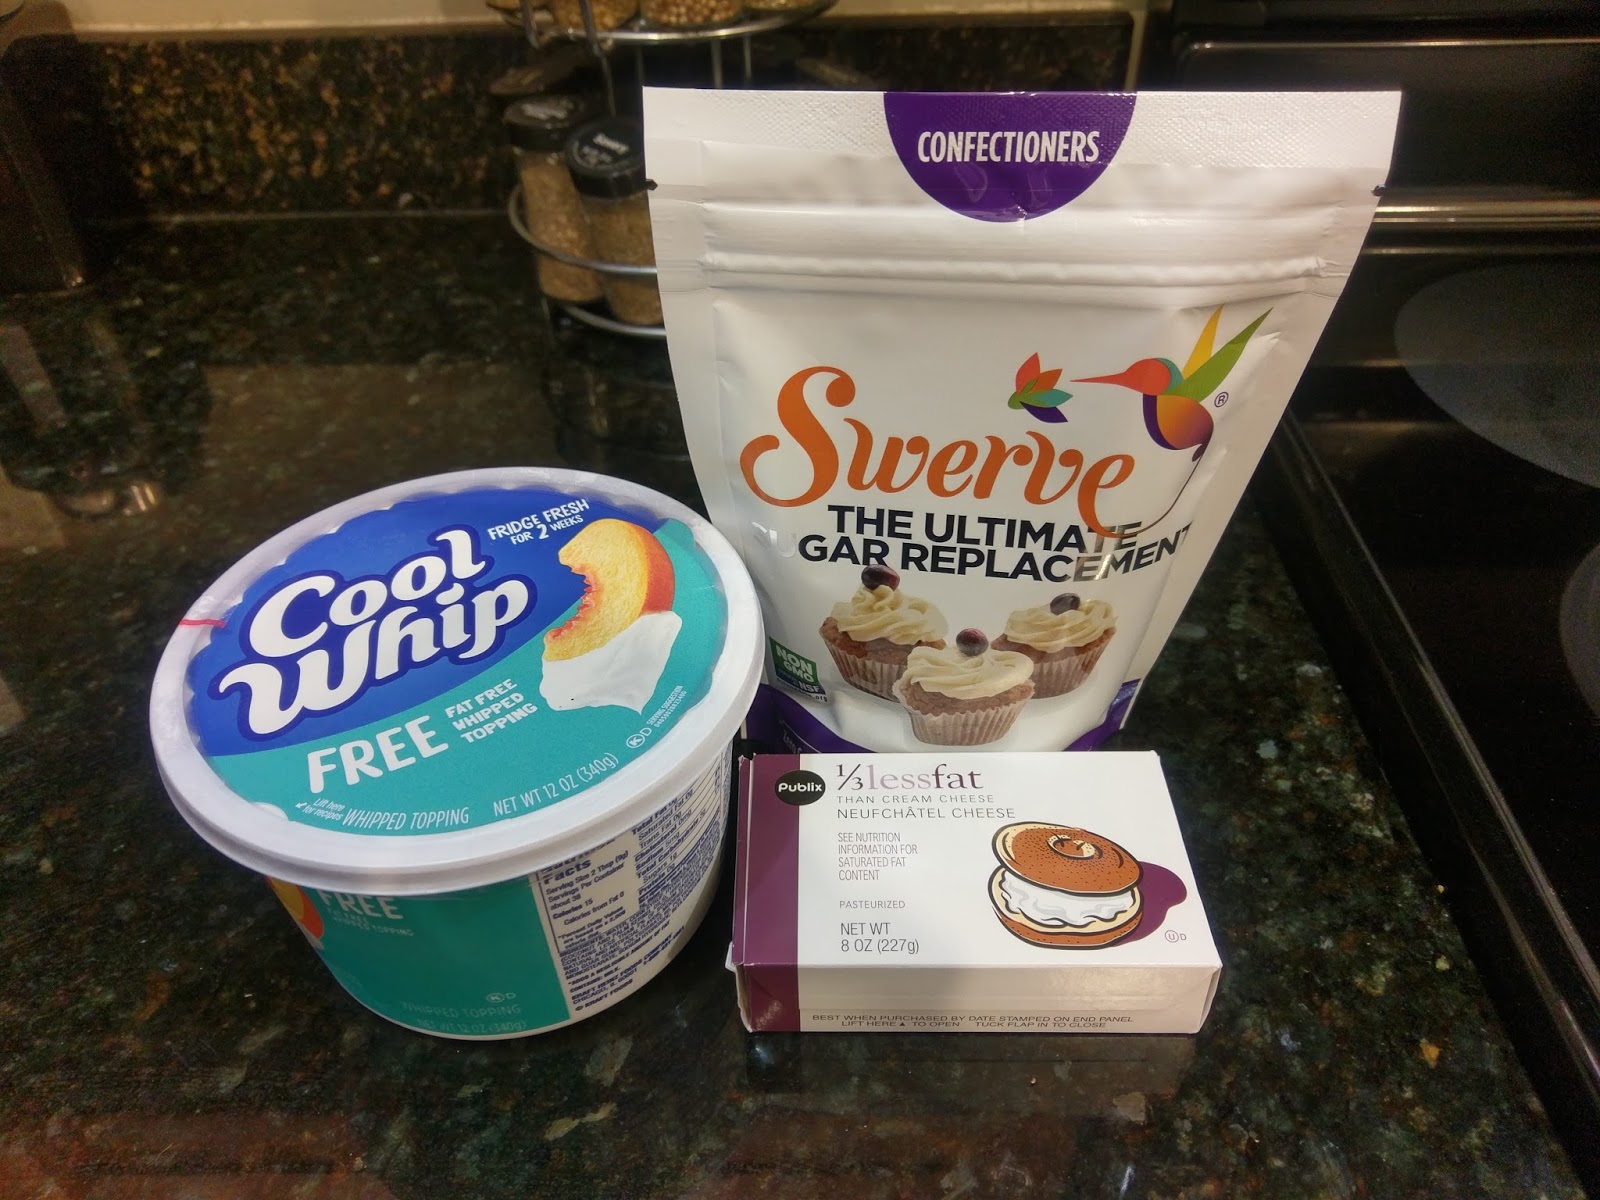
But I am trying my best not to look like the Dough Boy. Yep, starts with a premade crust. The lemon filling is a little labor intense, so I cut a corner here. I don’t have a deep dish pie tin because no one has bought me one yet (Hi, Mom, Christmas, maybe? 😀 ), and this pie definitely requires a deep dish. To prepare your crust, simply follow package directions on thawing and bake time/temp. Once cooked to your liking, set on a cooling rack to *completely* cool before putting filling anywhere near it. I’m watching you. Like Roz from Monsters, Inc. Always watching…

I just realized Mickey is blowing a raspberry at my lemon filling ingredients. Happiest mouse my a… …ssuming you have a juicer or lemon squeezer, making this filling is easy. I have neither, so I juiced lemons by the half for so long I figured my fingerprints might have acid erosion, and I could finally pull the trigger on that diamond heist I’ve been planning. To make the filling, I suggest a juicer and the following ingredients:
- 1 1/4 cups of Swerve (granular), divided
- 5 TBS cornstarch
- 1/2 tsp salt
- 1 1/4 cups water
- 2 TBS margarine
- 2 tsp lemon zest (about half a lemon)
- 3-4 drops yellow food coloring
- 1/2 cup fresh-squeezed lemon juice (about 3 LARGE lemons or 4 regular-sized lemons)
Start by dumping 3/4 cup of Swerve, the cornstarch, and salt into a medium saucepan. Slowly whisk in the water until nothing is clumpy or weird. Bring to a boil over medium-high heat, then reduce to medium heat and add the remaining 1/2 cup of Swerve. Constantly whisk until thick, about 2-3 minutes…a solid bicep workout. Remove from heat and add in the margarine, lemon zest, and food coloring. Slowly add in the lemon juice, a bit at a time, and whisk until incorporated.
Do not drink with a straw…as tempting as it may be. Set your sauce pan on a cooling rack and give at least an hour to cool off a bit. Go read a book or research the healing power of citrus fruits over nautical diseases online. Let this get to room temp, and then make your cream cheese filling.
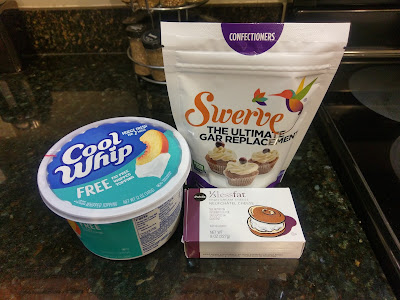
I also believe in the healing power of Cool Whip. The original recipe called for 11! 11! ounces of cream cheese. I reduced this to 8 ounces, and still had about 1/3 of the cream cheese filling left over (it is resting safely in the freezer, for now, until I finish this pie and come after it with some graham crackers). If you make a deeper pie crust somehow, you might be able to use all 8 ounces and such, but here’s what I recommend for your filling:
- 6 ounces of 1/3 less fat cream cheese
- 3/4 cup Swerve (confectioners)
- 1 1/2 cups of Cool Whip Free
- 1 TBS lemon juice
- Optional: an additional 1 1/2 cups Cool Whip Free to top the pie
Start by blending the lemon juice, cream cheese, and sugar together until a bit fluffy, 2-3 minutes. Then fold in the Cool Whip Free by hand so you don’t over mix.
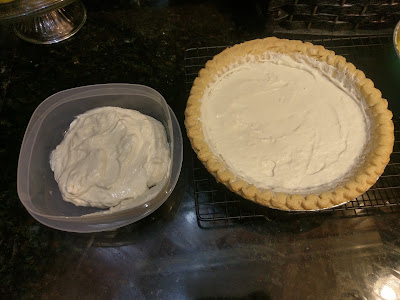
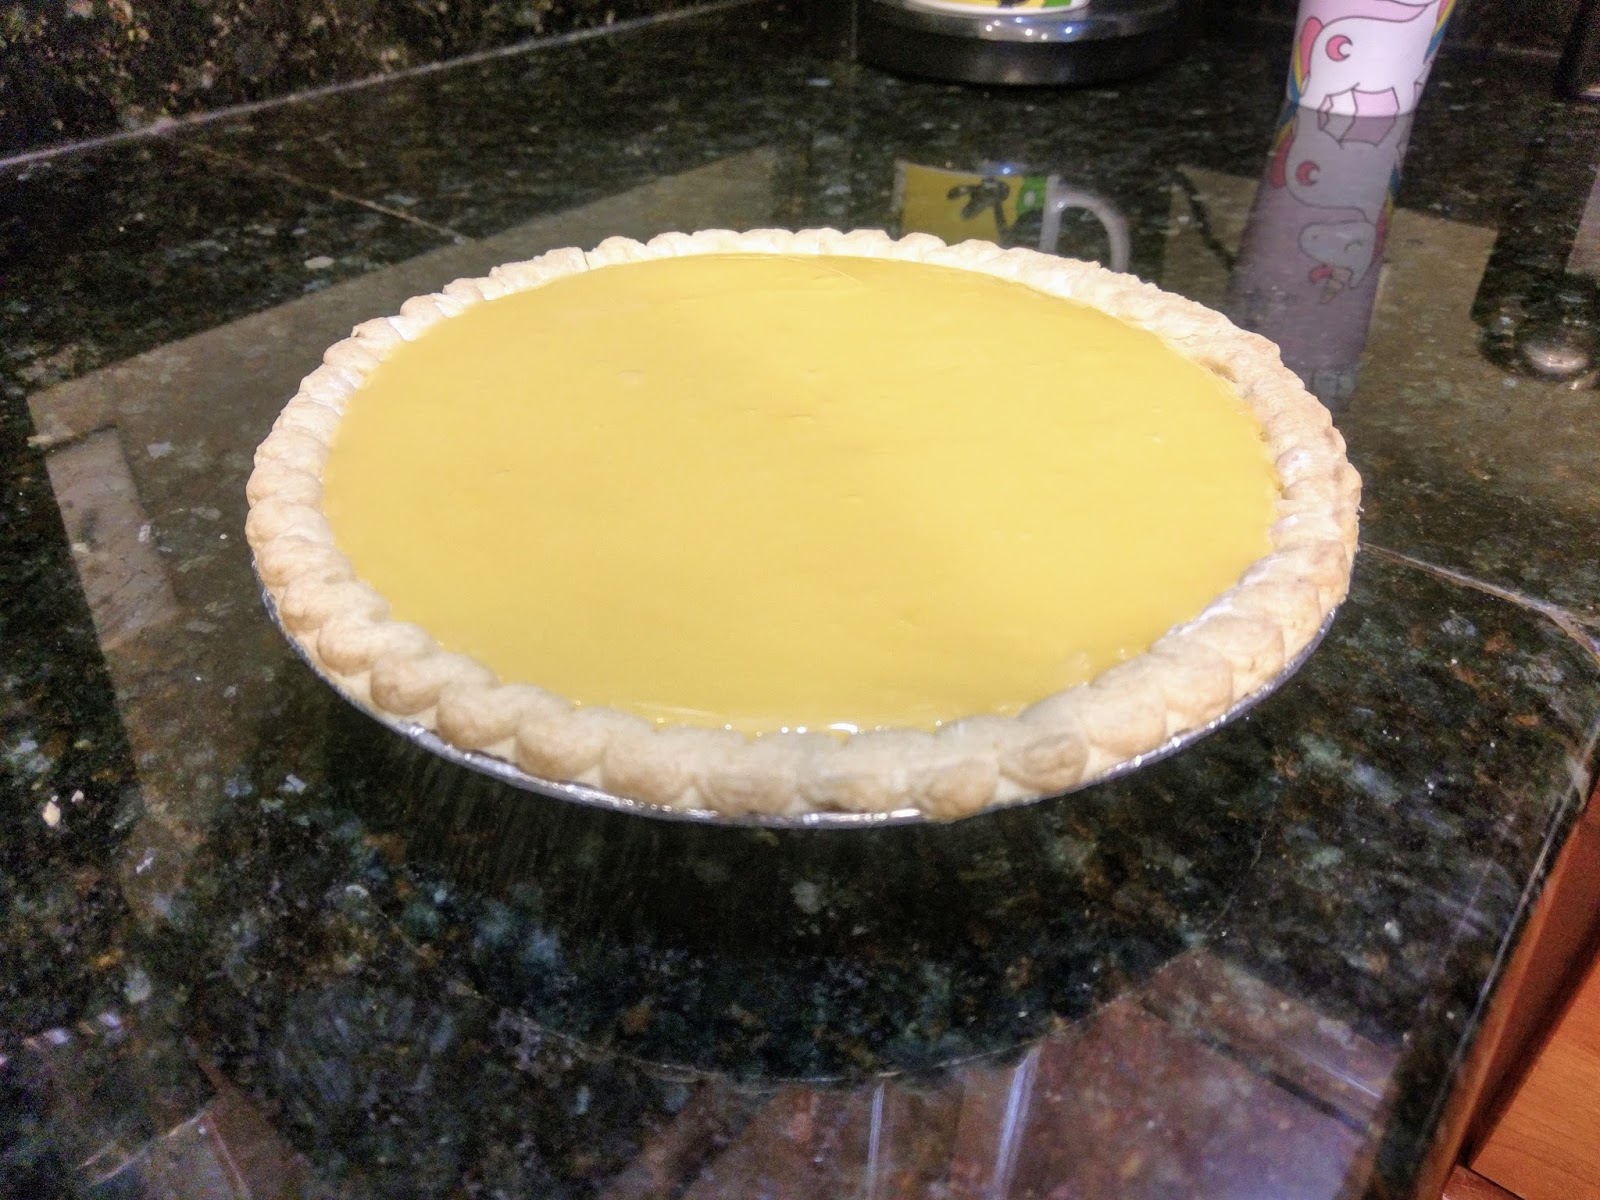
Pictured: photographic evidence of way too much (is this a thing?) pie filling. Now, take your totally cooler than cool (ice cold!) pie crust and spread your cream cheese filling in it. Smooth out, but don’t worry, this is getting topped. I placed into the freezer for about 15 minutes to set up because my lemon filling was still just a wee bit warm after an hour.

Smoooooooooth. Once the cream cheese filling has set, pour the lemon filling on top. Use an angled spatula to smooth out. I tapped on the counter gently a couple times to release air bubbles. Put your pie in a cake safe and place into the fridge to completely set overnight. Waiting, the hardest part. I had a 3-day waiting/resurrection joke for this, but I’m worried I might get smited? smote? at this rate.

Maybe even smitten? 
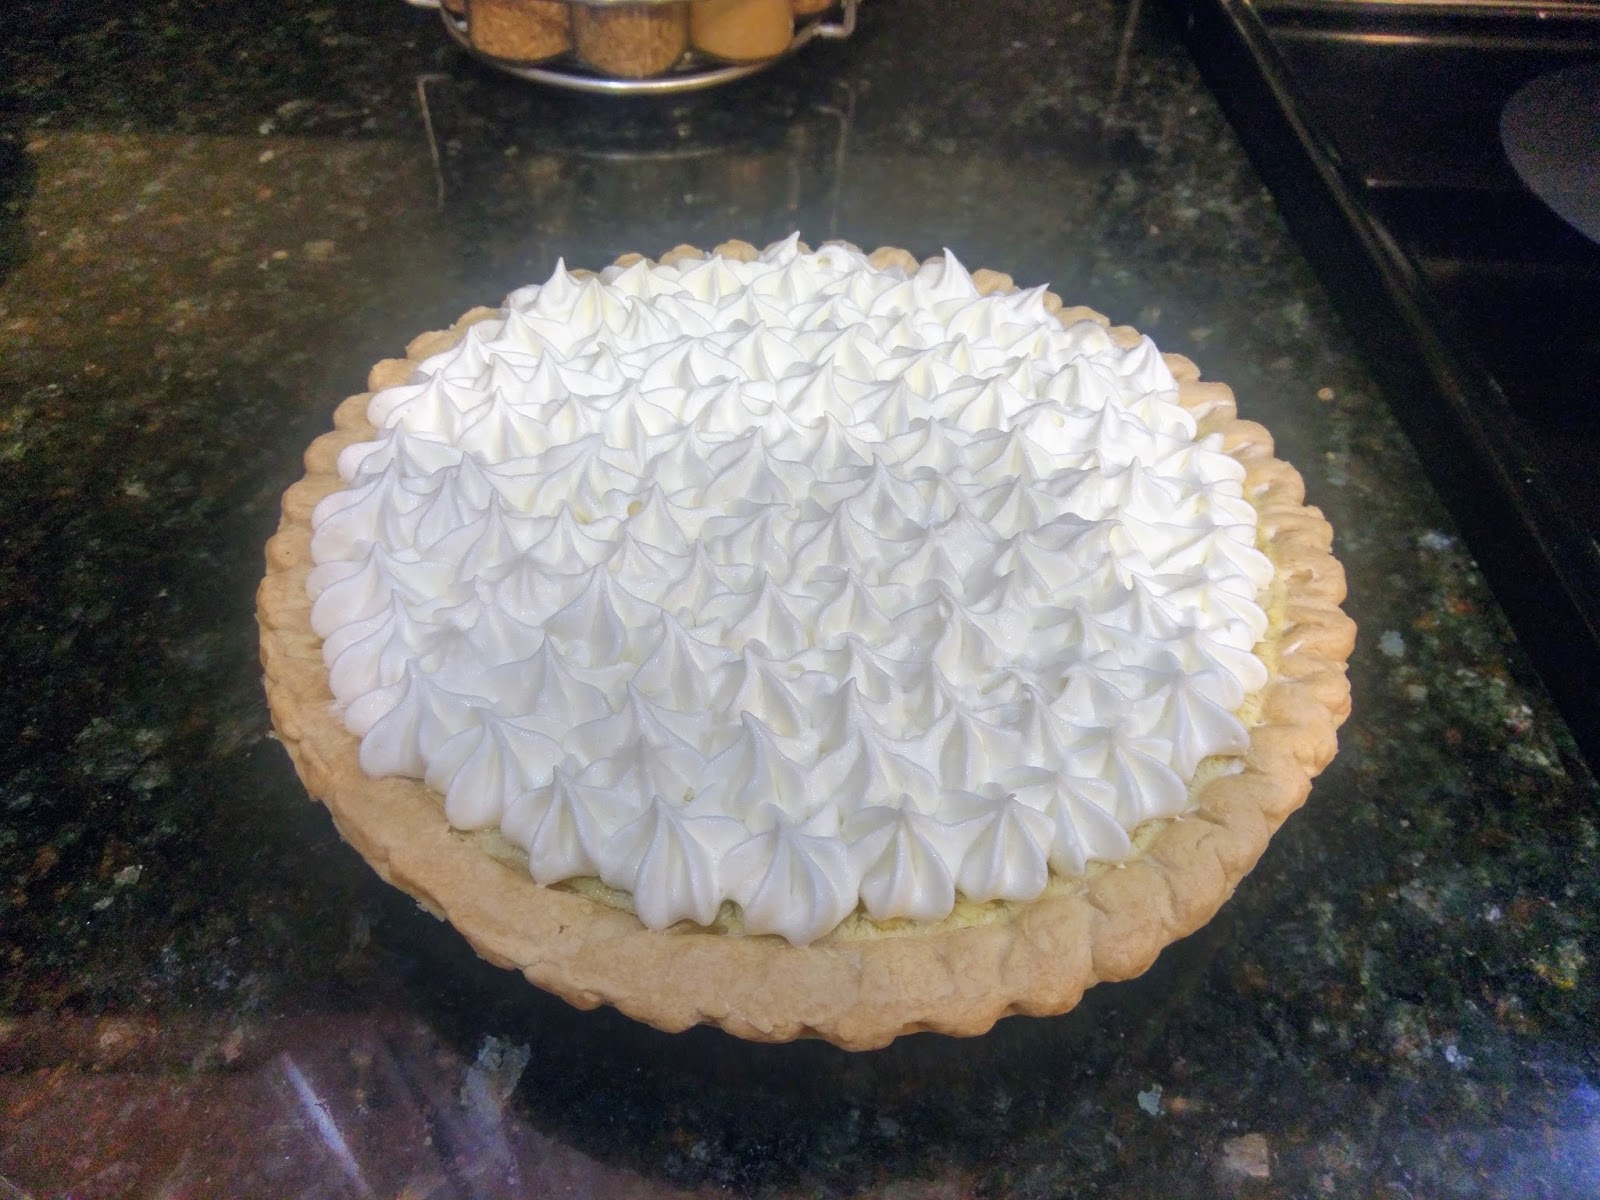
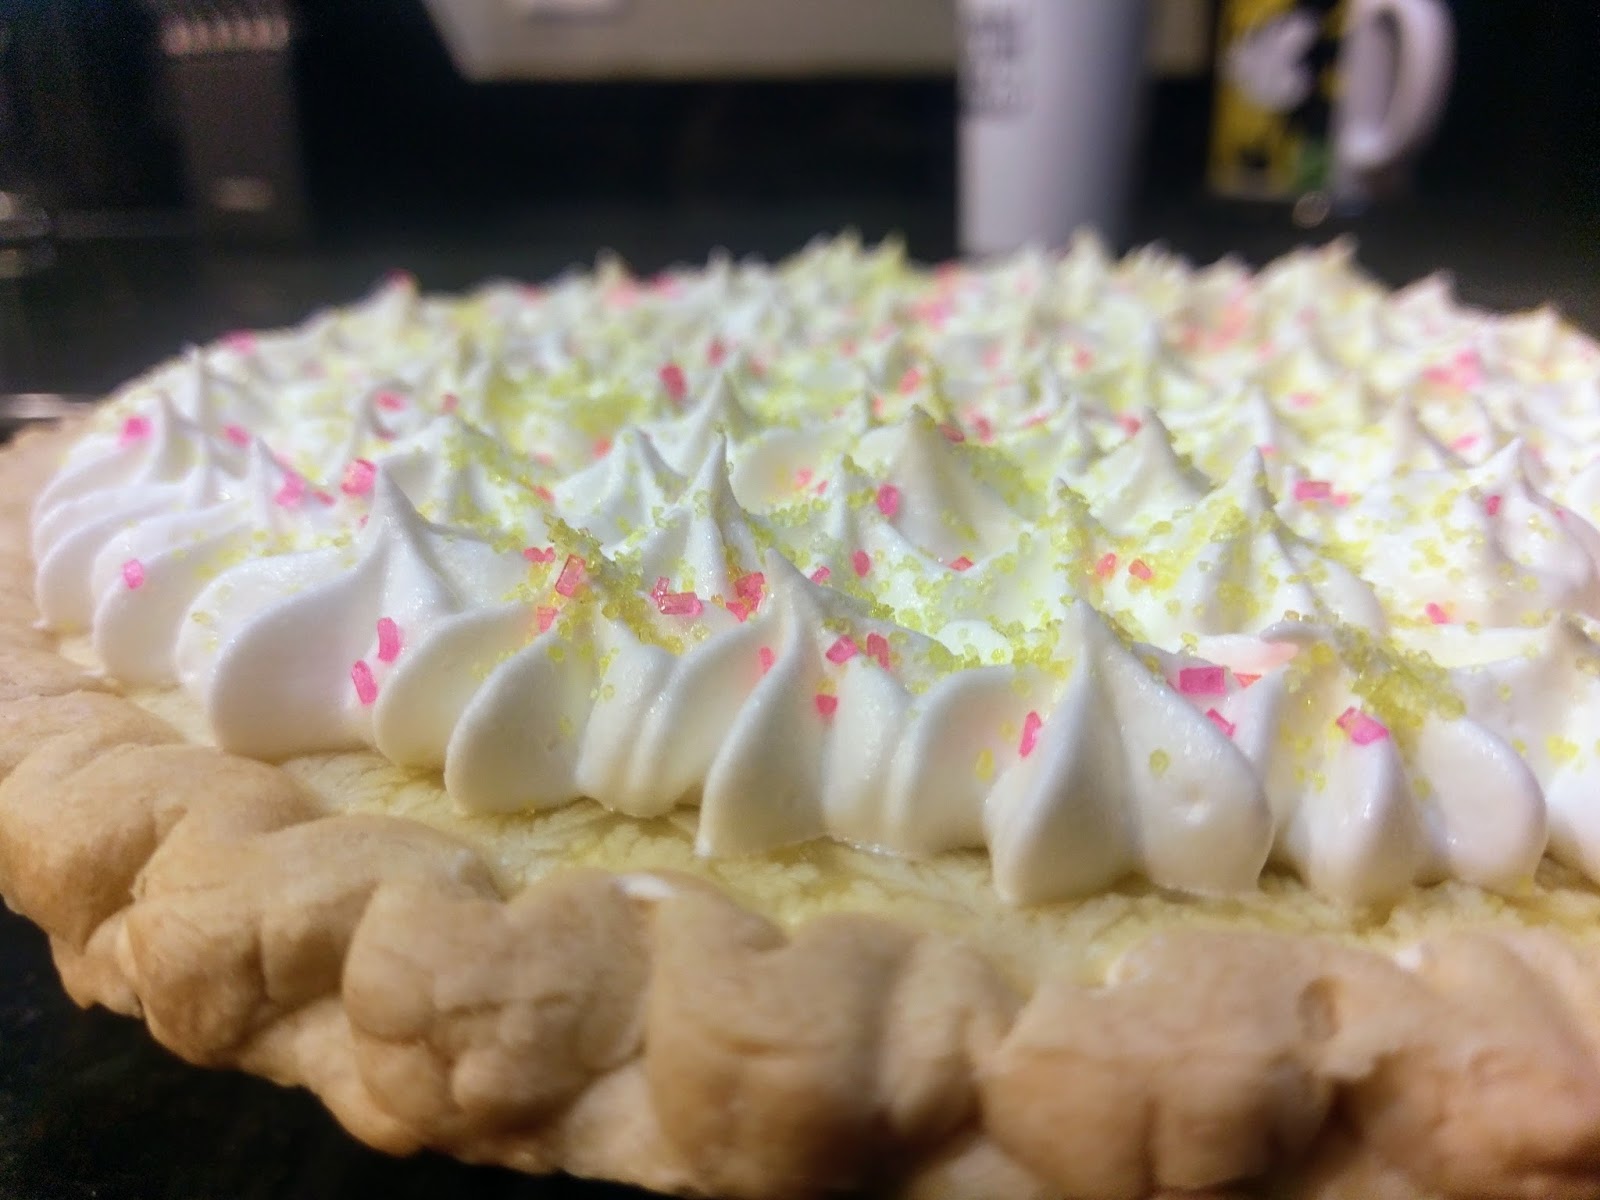
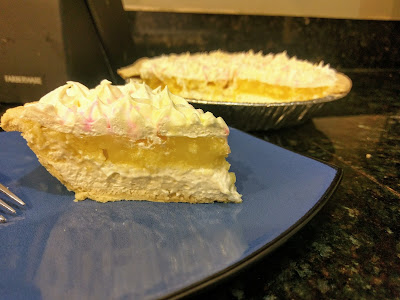
Ahhhh, sprinkles. Nothing is ever finished without sprinkles. After waiting overnight, my lemon filling froze in the fridge because I didn’t cover it properly and put it in the very back of the fridge, where apparently a Yeti that likes it extra cold lives. So, definitely place your pie in an airtight container and not in the back of the fridge. I topped my pie with 1 1/2 cups of Cool Whip Free with a 1M star tip, and of course, sprinkles. I friggin love sprinkles. I don’t have a sparkly personality, so this might be how I vicariously shine.

Lemon-y fresh! To. Die. For. Worth every ounce of lemon juice that seeped into the paper cut on my hand while preparing filling (love hurts). The cream cheese layer doesn’t suffer from the weird Swerve confectioner’s sugar cooling effect since this is kept in the fridge and served cool. The filling is seriously the perfect complement to the zest of the lemon layer. Eating this pie made me forget all about the premature grossness of summer in Florida…a testament to how truly light and delicious it is. It’s definitely a must-have at any Easter dessert tables, so plan accordingly. You literally have three days to make this pie before Easter Sunday. I am still refraining from my resurrection joke, so I better quit before I blaspheme my way right off the internet. ‘Til next time, my fellow eaters!
Enjoy your Easter. One slice at a time! -
Baileys: Socially Acceptable after Saint Patrick's
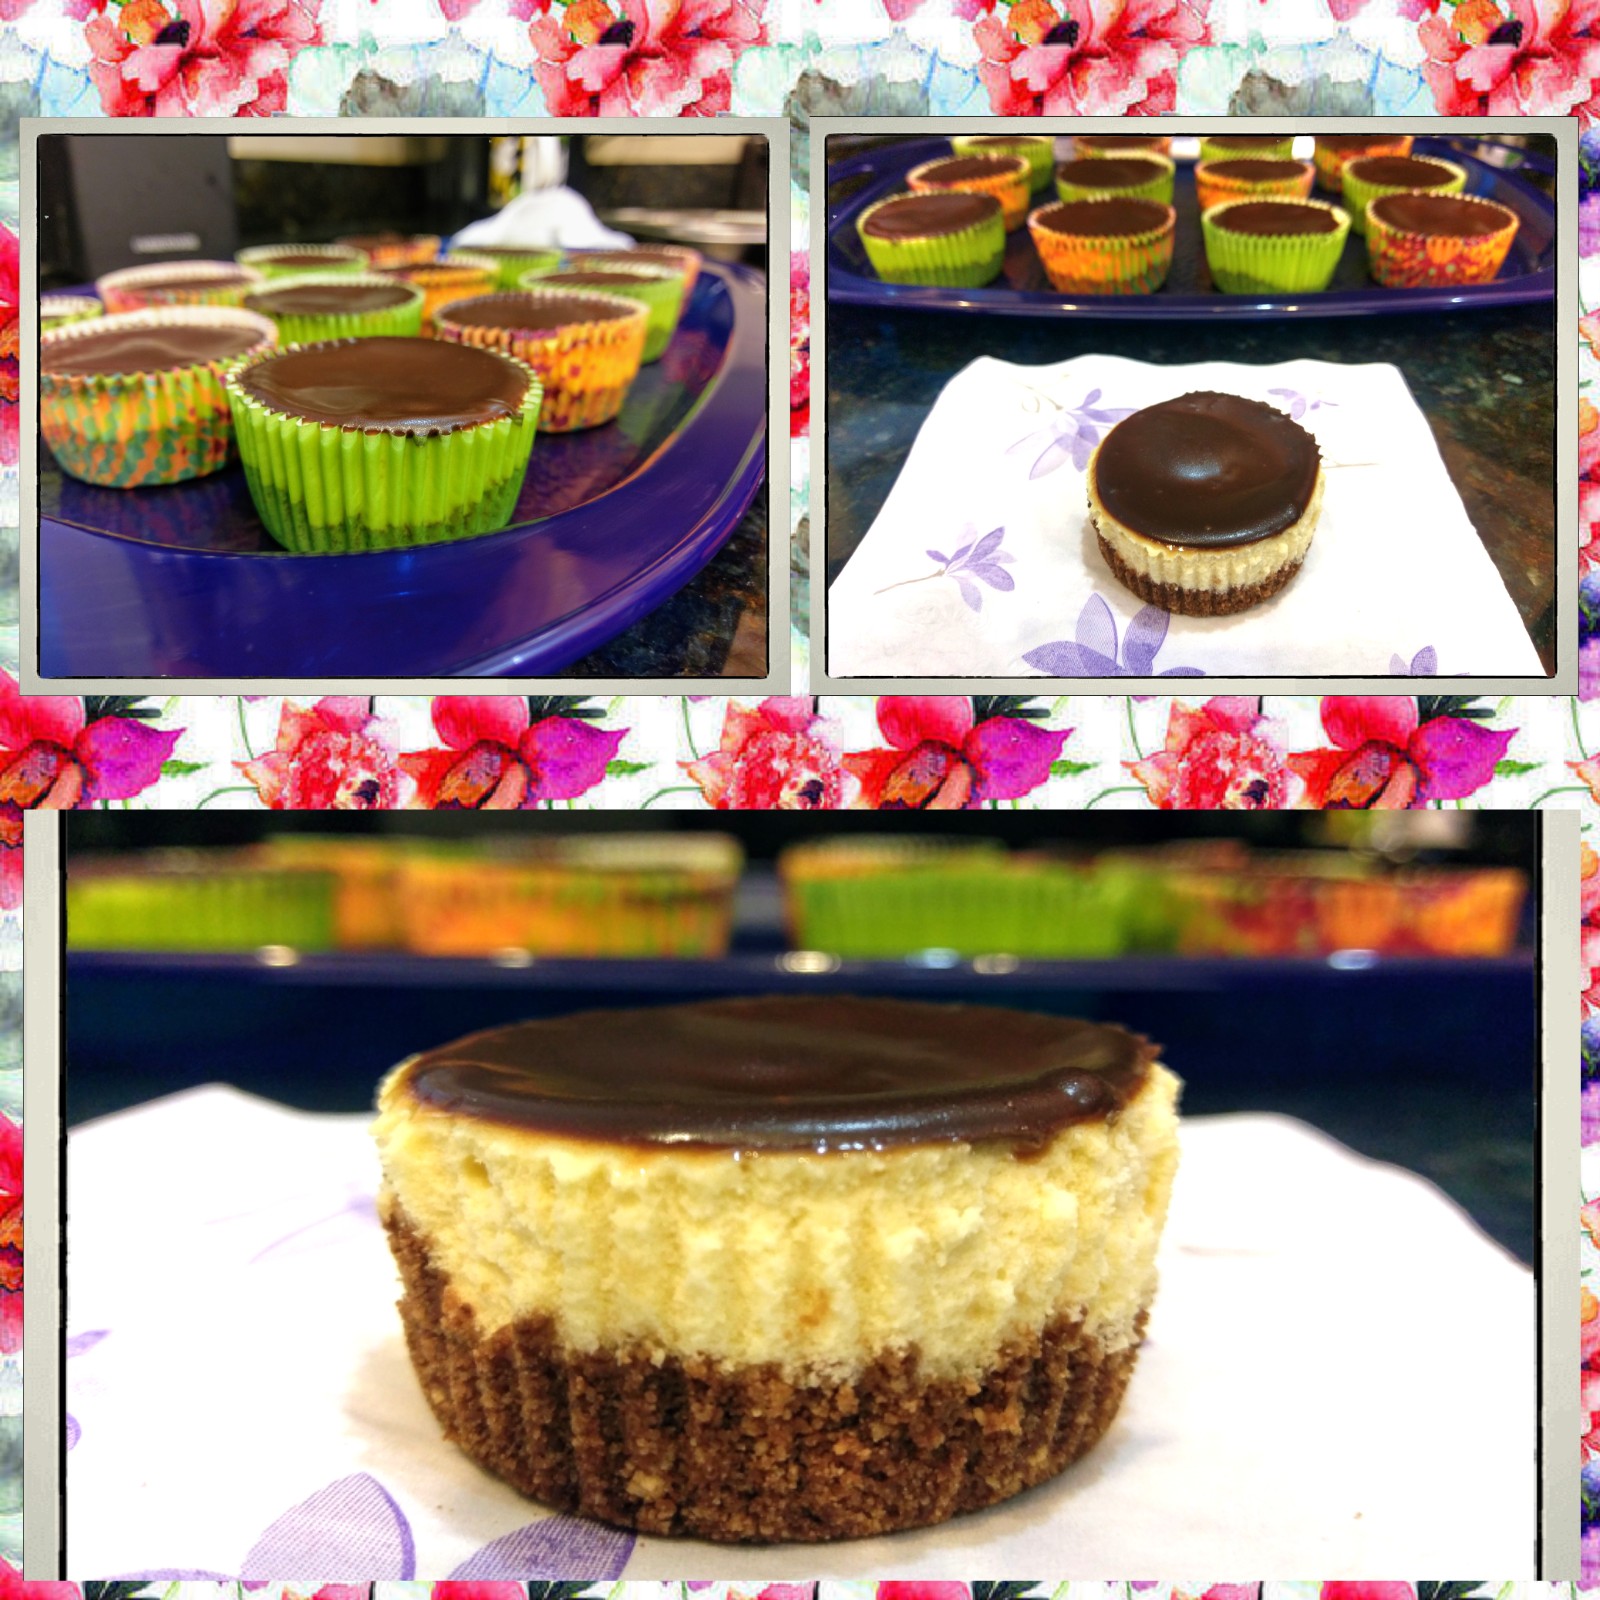
While Saint Patrick’s Day might have passed, I’m not done celebrating it because I’m still pretending to be Irish and consuming all of the Baileys. This can be a bit difficult since I don’t drink anything other than a glass of white wine every Friday (how Catholic of me), so I tend to get pretty creative with my baked goods. If I can turn anything into a boozy dessert concoction that’s relatively low-cal, the guilt regarding empty calories and alcohol melts away (much like my cognitive motor functions after more than one glass of wine). If you’re supposed to grow out of a sweet tooth, no one told me. So I’ll continue to party on, Saint Patrick’s Day style, with this week’s marvelous recipe: a cheesecake. But not just any cheesecake. A Baileys Salted Carmel cheesecake. And not just any Baileys Salted Caramel cheesecake. But mini Baileys Salted Caramel cheesecakes. Individual little servings of boozy perfection. Because at the end of the day, aren’t we always celebrating something? It may not be Saint Patrick’s Day. Maybe you’re celebrating a birthday. An anniversary. The sheer fact you made it through the day without throat punching anyone (this is typically why I reward myself with dessert). Whatever the reason, it’s always dessert season.
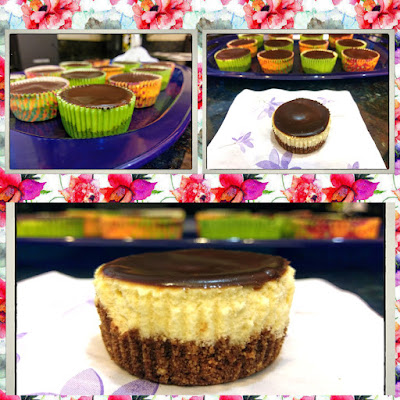
Small, adorable, and full of Baileys. Just like me. These tasty little handheld cheesecakes are positively simple to make, and, wait for it…under 250 calories. I made 20 mini cheesecakes at 214 calories a piece. Technically, you could eat two and still be eating fewer calories than a slice of any other kind of regular cheesecake. I am nothing if not steadfast in my conviction to make dessert taste amazing and not require an extra hour of Jillian Michaels workouts. In the case of these cheesecakes though, the suffering would be totally worth it. These beauties are beyond decadent. I thought I’d have a hard time not eating them five at a time, but they are super rich, silky, and one will satisfy your cheesecake and/or Salted Caramel Baileys lust (even if you are extremely Irish). I found and adapted this recipe to fit a cupcake pan…because seriously, who has four mini spring form pans? I don’t even have one regular-sized spring form pan. Rich people and cheesecake enthusiasts. Geesh.

Wait, there’s definitely more. I broke the instruction portion of this blog into three parts: crust, filling, and ganache. Let me take you on a magical journey with my words, people. To make the crust, you’ll need:
- 10 low fat graham crackers (I used cinnamon…it was delightful). Pulverize these to a fine crumb with a food processor or the tried and true plastic bag/rolling pin combo
- 2 TBS cocoa powder
- 3 TBS Swerve granular sugar replacement (there’s zero cooling effect with this type of Swerve, unlike the confectioner’s variety)
- 3 TBS butter, melted
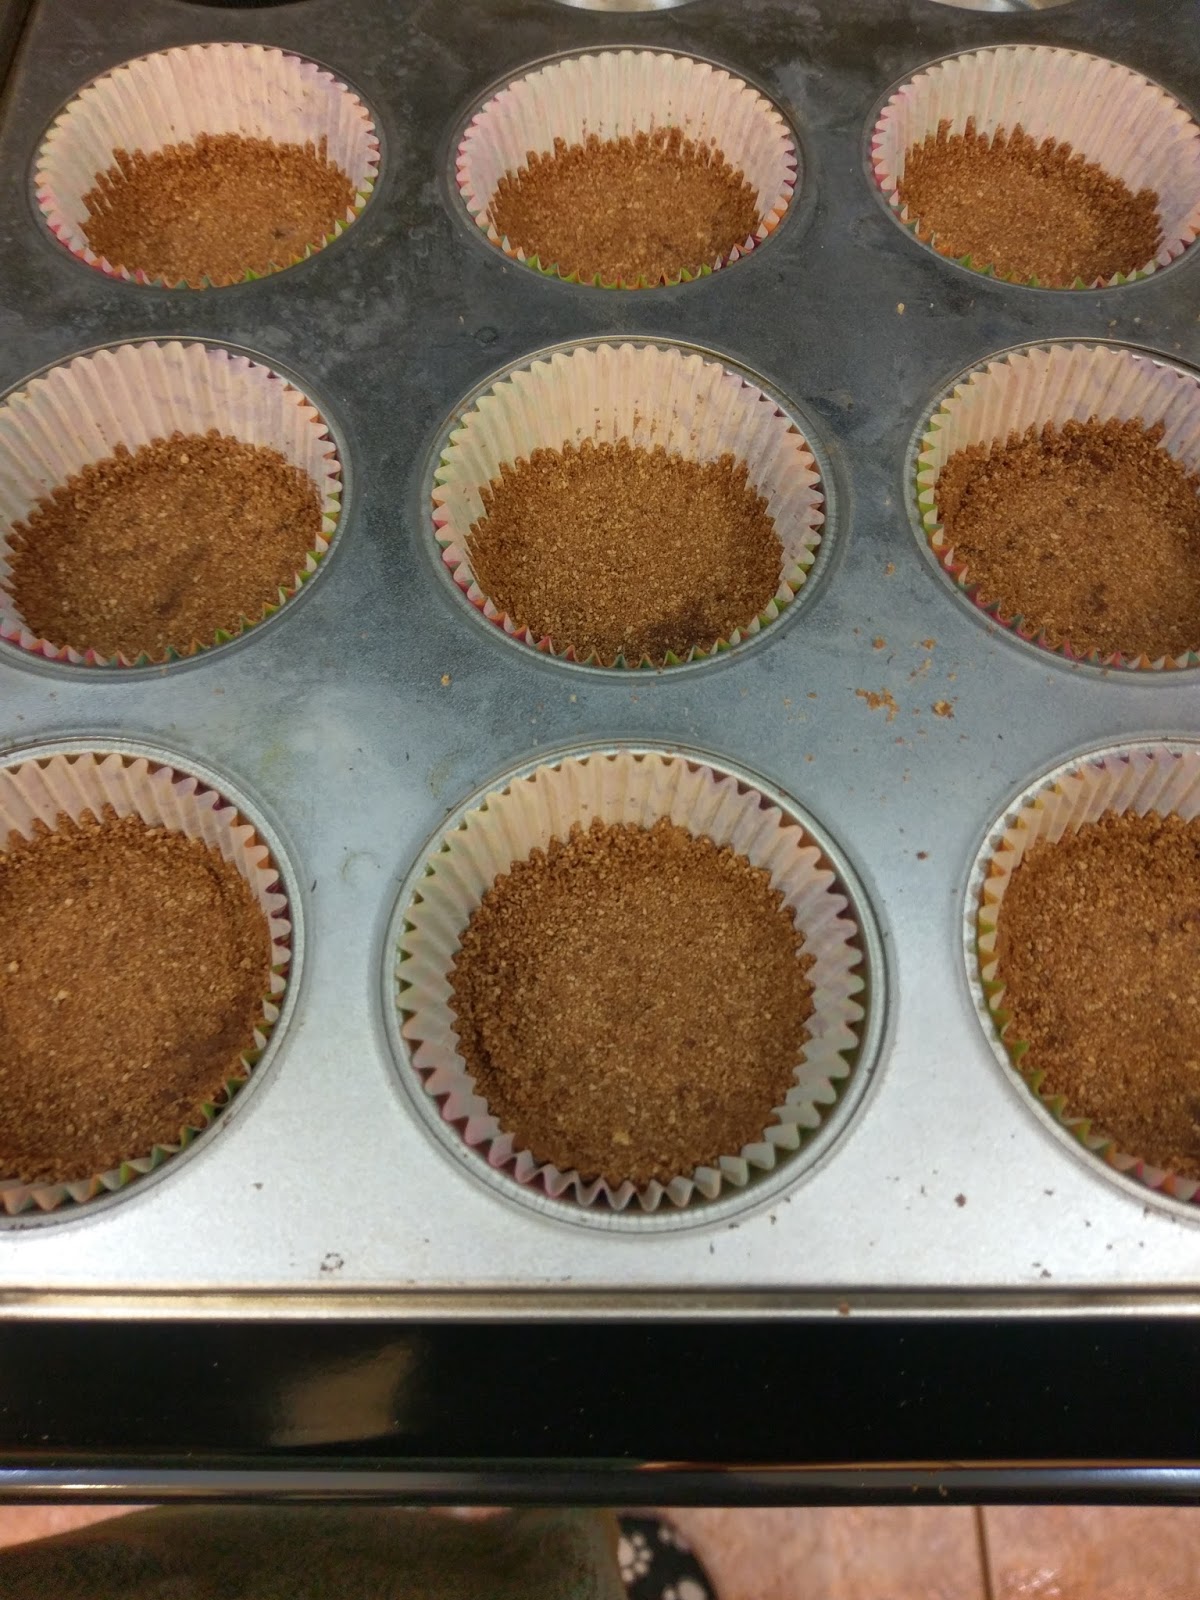
I made the crusts in my mini food processor (rich people, geesh). I turned the graham crackers into a fine pulp (power!!) and then added in the cocoa and Swerve, giving a good mix. I finished off by adding in the melted butter until the crust mixture was completely wet.
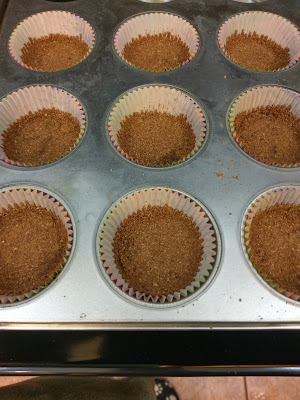
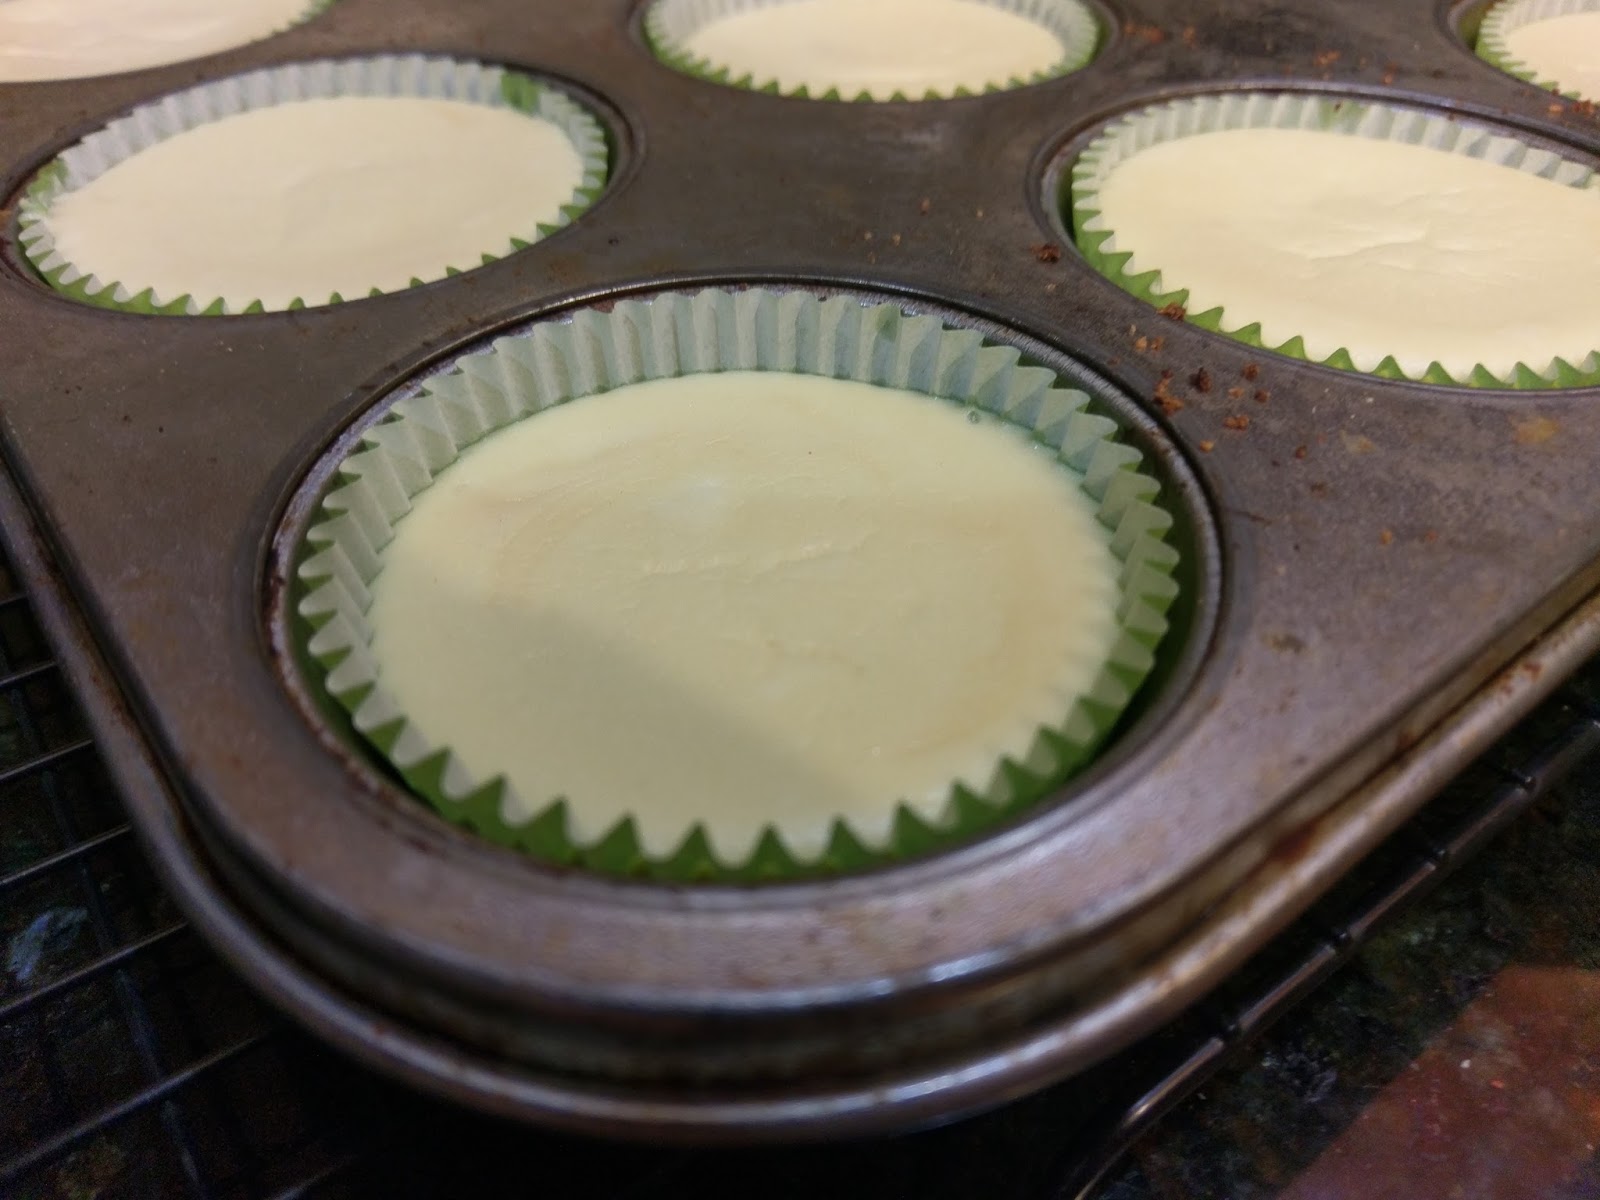
The color of these crusts makes me wish I could tan. Not Irish, just super pale. Preheat your oven to 350 and line two muffin tins with 20 cupcake liners. Take about 1.5-2 TBS of the crust and dump into each liner. I used a shot glass (fitting) to smoosh the crust down and even it out. Bake your crusts for 8-10 minutes until tanned but not burnt (the exact opposite of what happens to my skin after 8-10 minutes in the sun). Let these rest on a cooling rack and lower your oven temp to 325.
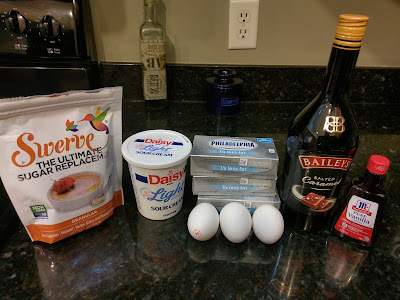
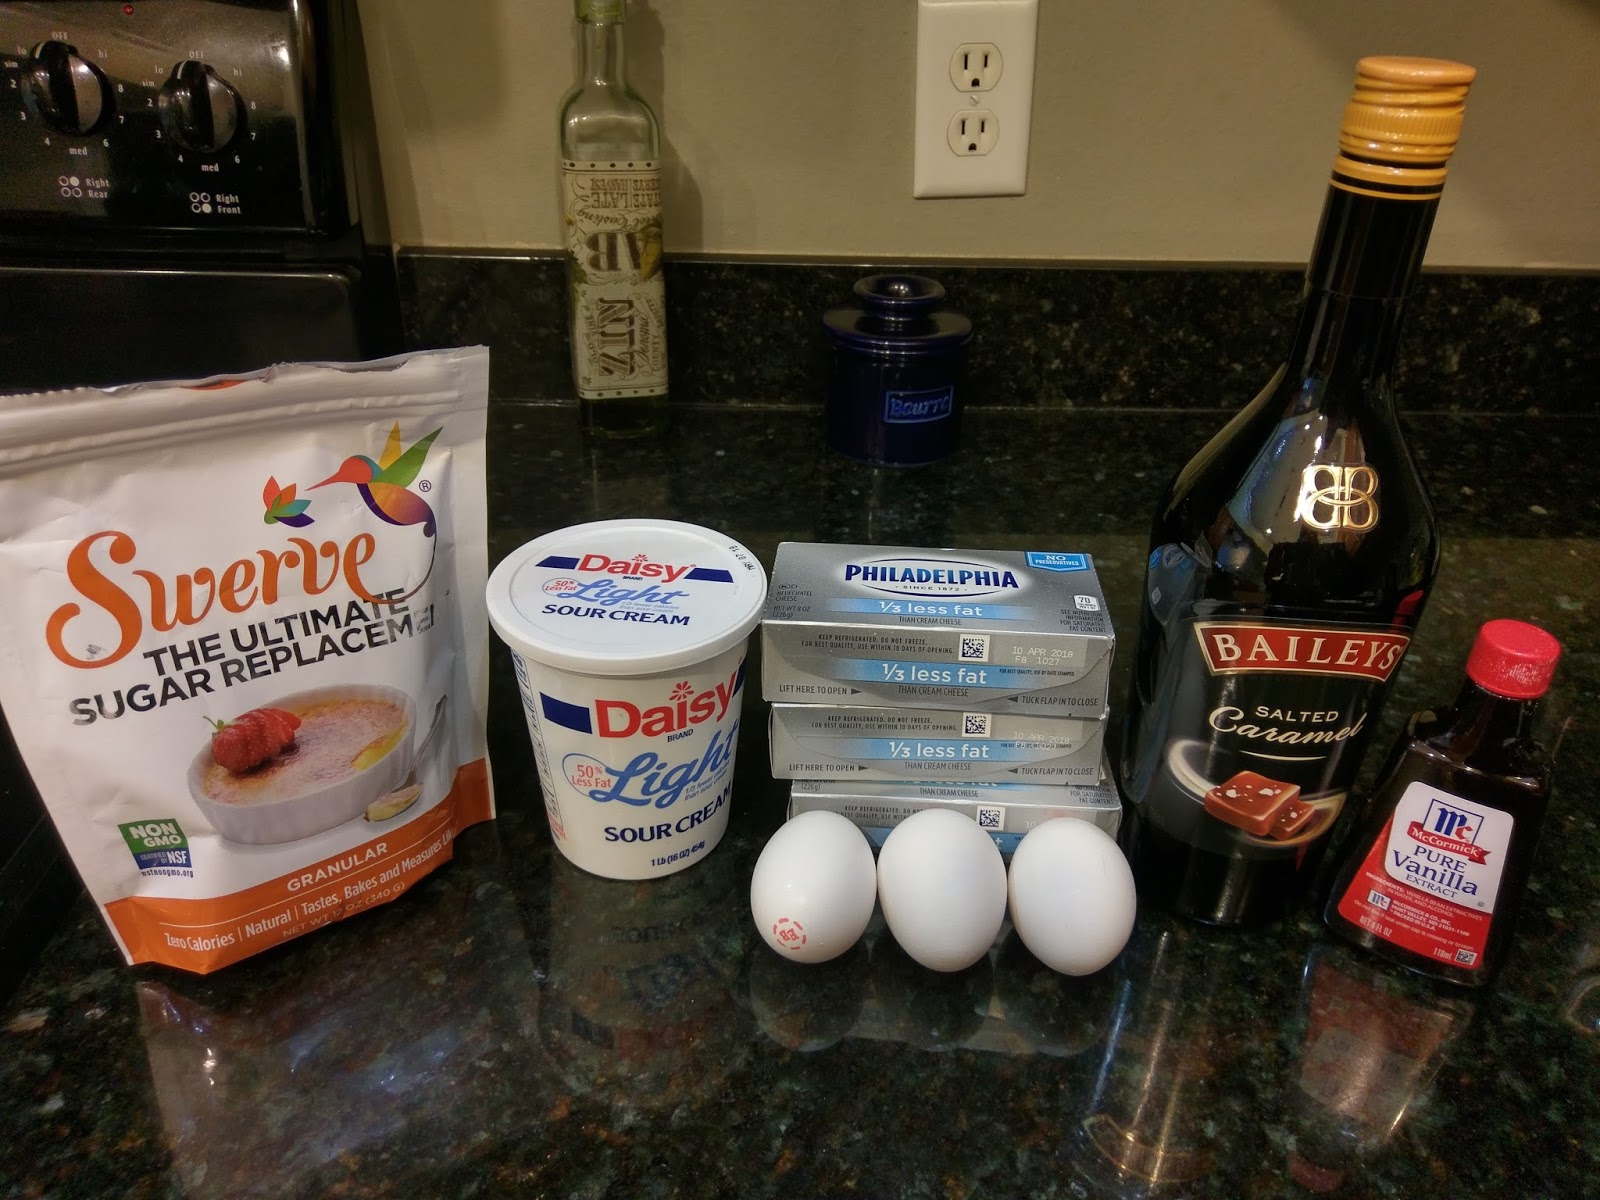
Mmm, Baileys. I’m not sure how you’re supposed to drink it since I hate coffee, but boy do I love eating it! To make the filling, you need:
- 3-8 ounce packages of 1/3 fat cream cheese
- 3/4 cup granular Swerve
- 3 eggs
- 1/2 tsp vanilla
- 1/4 cup light sour cream
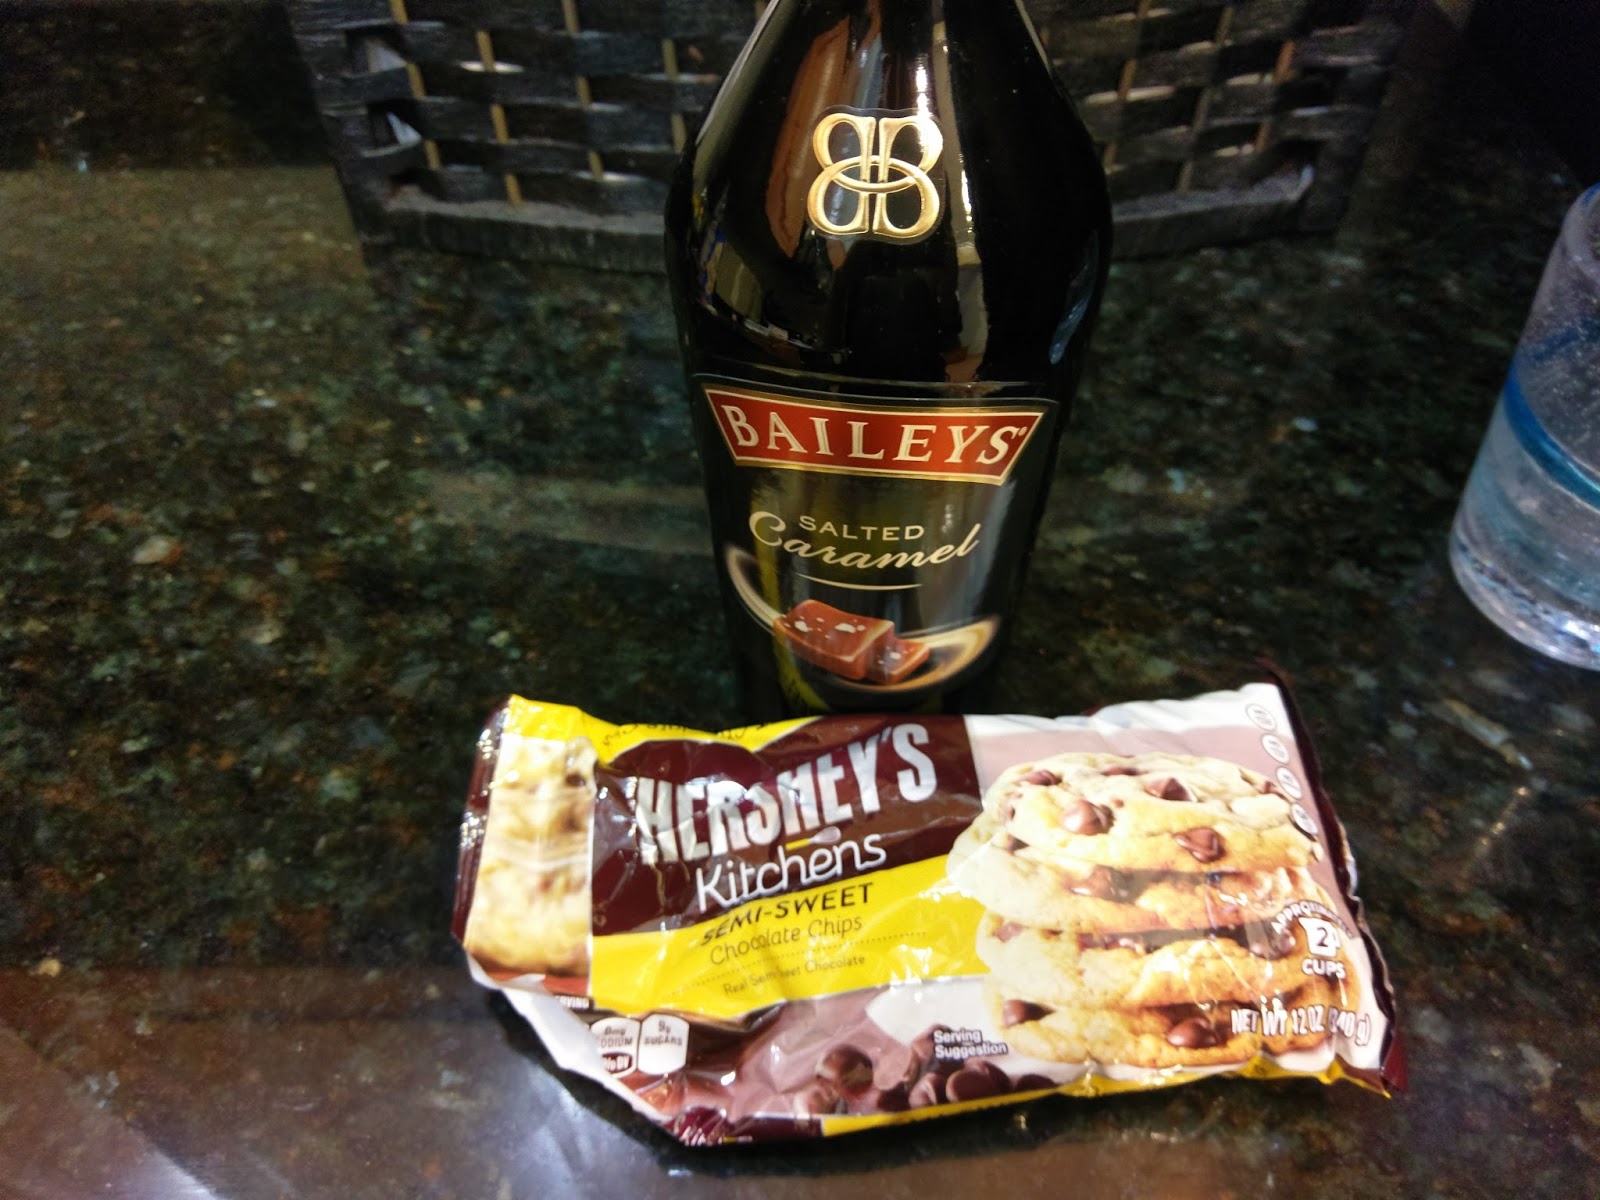
- 1/4 cup Salted Caramel Baileys (I promise, we’ll add more booze in phase three)
Start by mixing the cream cheese and sugar together until fluffy. Add in each egg, one at a time, blending well between each addition. I scraped the bowl between each. Then add in the vanilla, sour cream, and sweet, sweet boozy goodness. Mix well. I used a tablespoon to scoop about 3 tablespoons of filling into each crust cup.
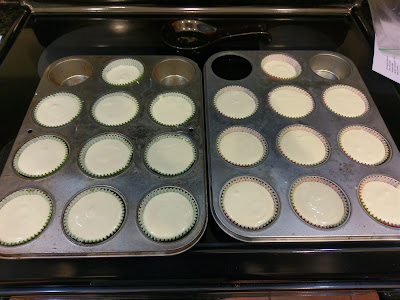
Can you guess which pan was purchased at Walmart? Bet you can… Fill most of the way full and smooth out the batter a bit with the back of the tablespoon. Bake for 18-22 minutes, until the tops are set but not tanned (I have no reference to my paleness here. Just don’t burn the cheesecakes).
I need a foundation in this shade. Seriously. Let your cooked cheesecakes cool on a cooling rack COMPLETELY before even thinking about the ganache. Pour yourself a glass? of Baileys and whatever Baileys goes with when it isn’t in food, savor, bide your time, sing karaoke, whatever. Just don’t touch these until they’re room temp. Leave them in the muffin tins!

As promised: more Baileys. Finally, take 1/2 cup of semisweet chocolate chips, and set aside. Bring 1/2 cup of Baileys to a boil in a small saucepan. Remove from heat and whisk in the chocolate chips until completely smooth. Don’t burn your chocolate. Take it off the burner or face the consequences of bitter, bumpy chocolate. Boo. Not cool.
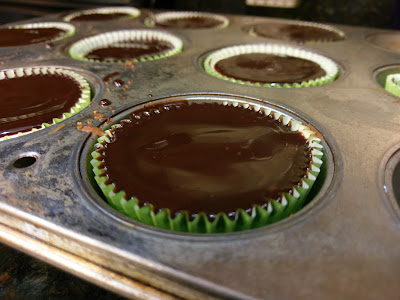
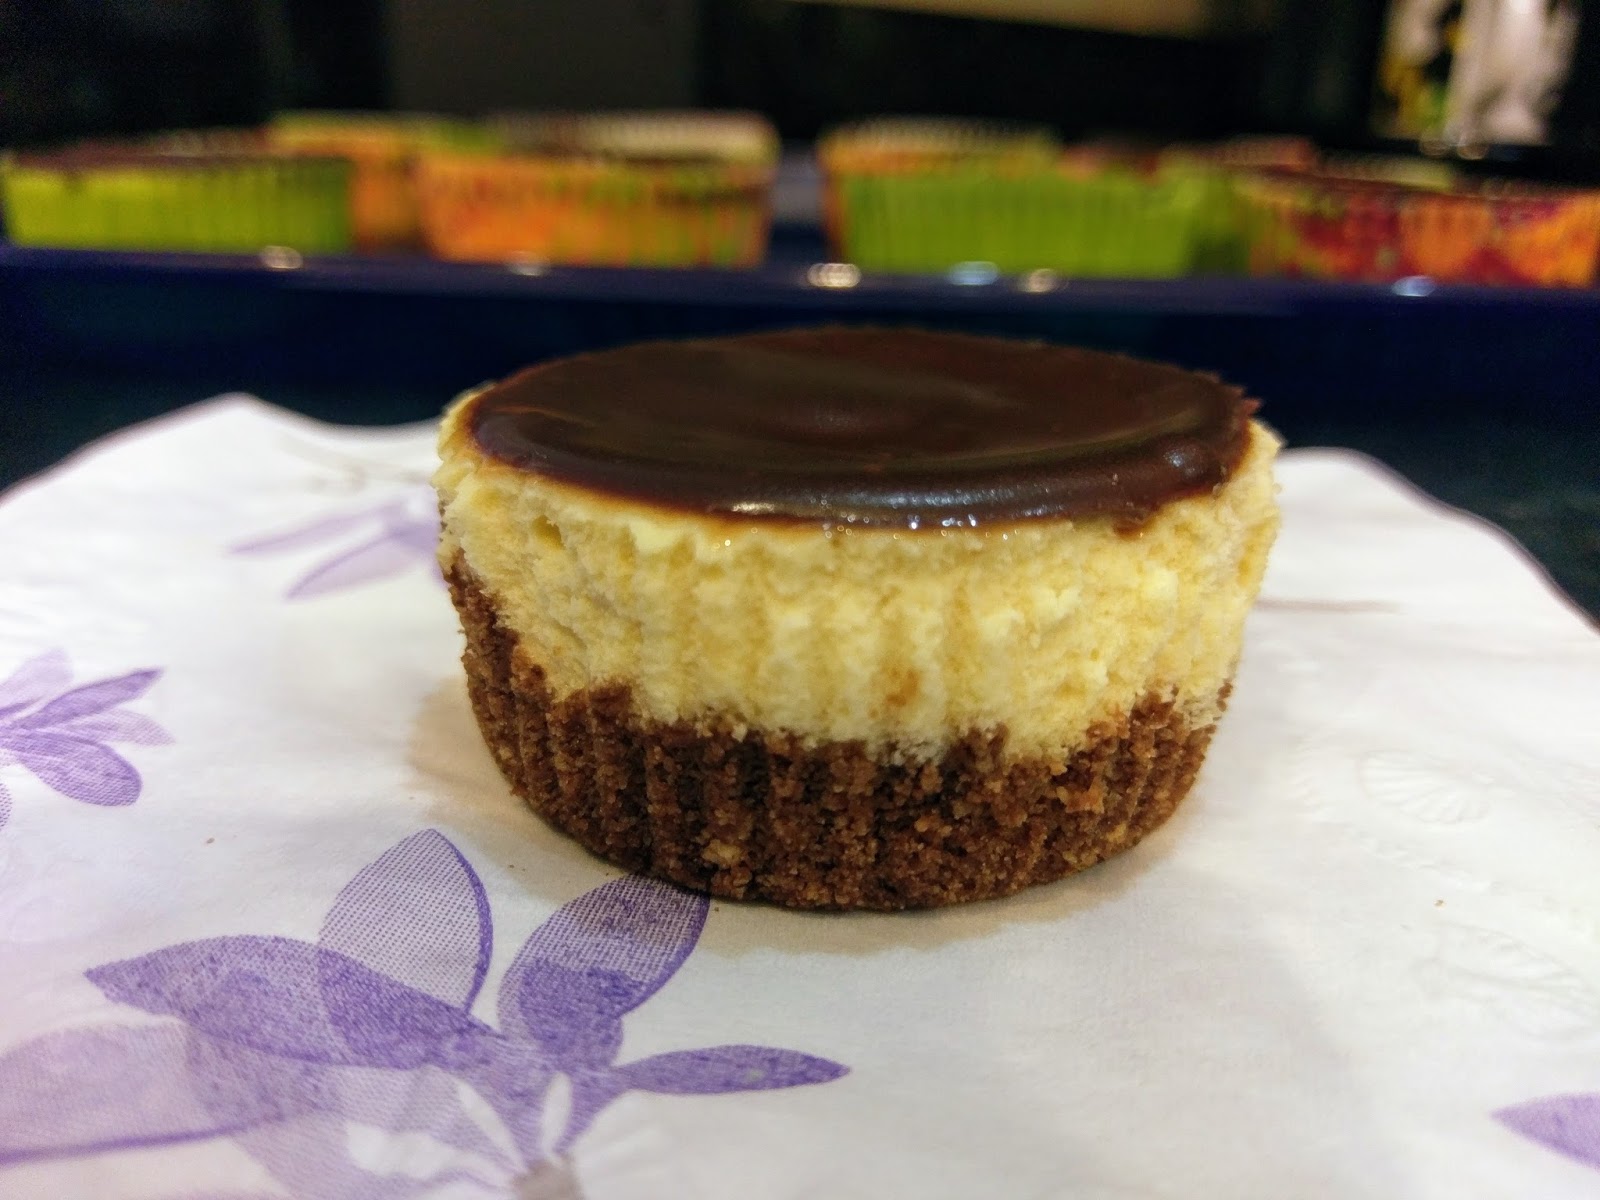
Chocolate, like my writing, should be smooth. Or something close to that. Take a regular spoon, dollop one heap on top of your completely cooled (seriously, have I driven this point home?) cheesecake, and spread out to form a nice thin layer of ganache. Repeat for the remaining cheesecakes.
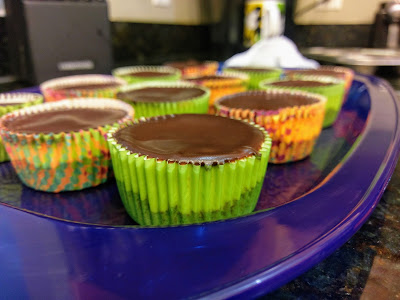
And now, we wait. Waiting is, quite frankly, always the hardest part of baking anything. I actually put my ganached cheesecakes (still in the muffin tin) into the fridge to set overnight. The ganache sets up quite nicely, with just a minimal amount of tackiness to it, so don’t stack these when you store them. I placed mine into two ziplock baggies and laid flat in the fridge to keep. One of those ziplock baggies went to work with me, 1. Because it’s spring break, and at museum, you need to imbibe booze to survive travel seasons somehow. And 2. Because I would definitely eat all 20 of these without any form of guilt. I was saving myself from…myself.

You can see why that was necessary. I enjoyed these immensely. My biggest complaints about cheesecakes are there usually aren’t enough servings (problem solved) and that I can’t just dig in and eat it with my hands (this problem occurs more frequently than you’d think). By revolutionizing cheesecakes to mini handheld forms loaded with tons of booze, I’m giving the Cheesecake Factory a run for its money. These really are delicious. The cheesecake filling is light with a nice hint of Baileys and caramel, the crust boasts excellent texture and smooth flavoring, and the piece de resistance–the ganache–is to die for. It balances rich chocolate and a bite of Baileys beautifully. I was silent for a full two minutes after I finished eating one because I wanted my taste buds to remain locked in flavor heaven. Irish or not, these are a dessert you have to experience, any time of the year. Or day for that matter. You can totally have Baileys for breakfast. In coffee. Or with cheesecake muffins. Dream big. ‘Til next time, my fellow eaters!
-
Time to Eat Your Greens
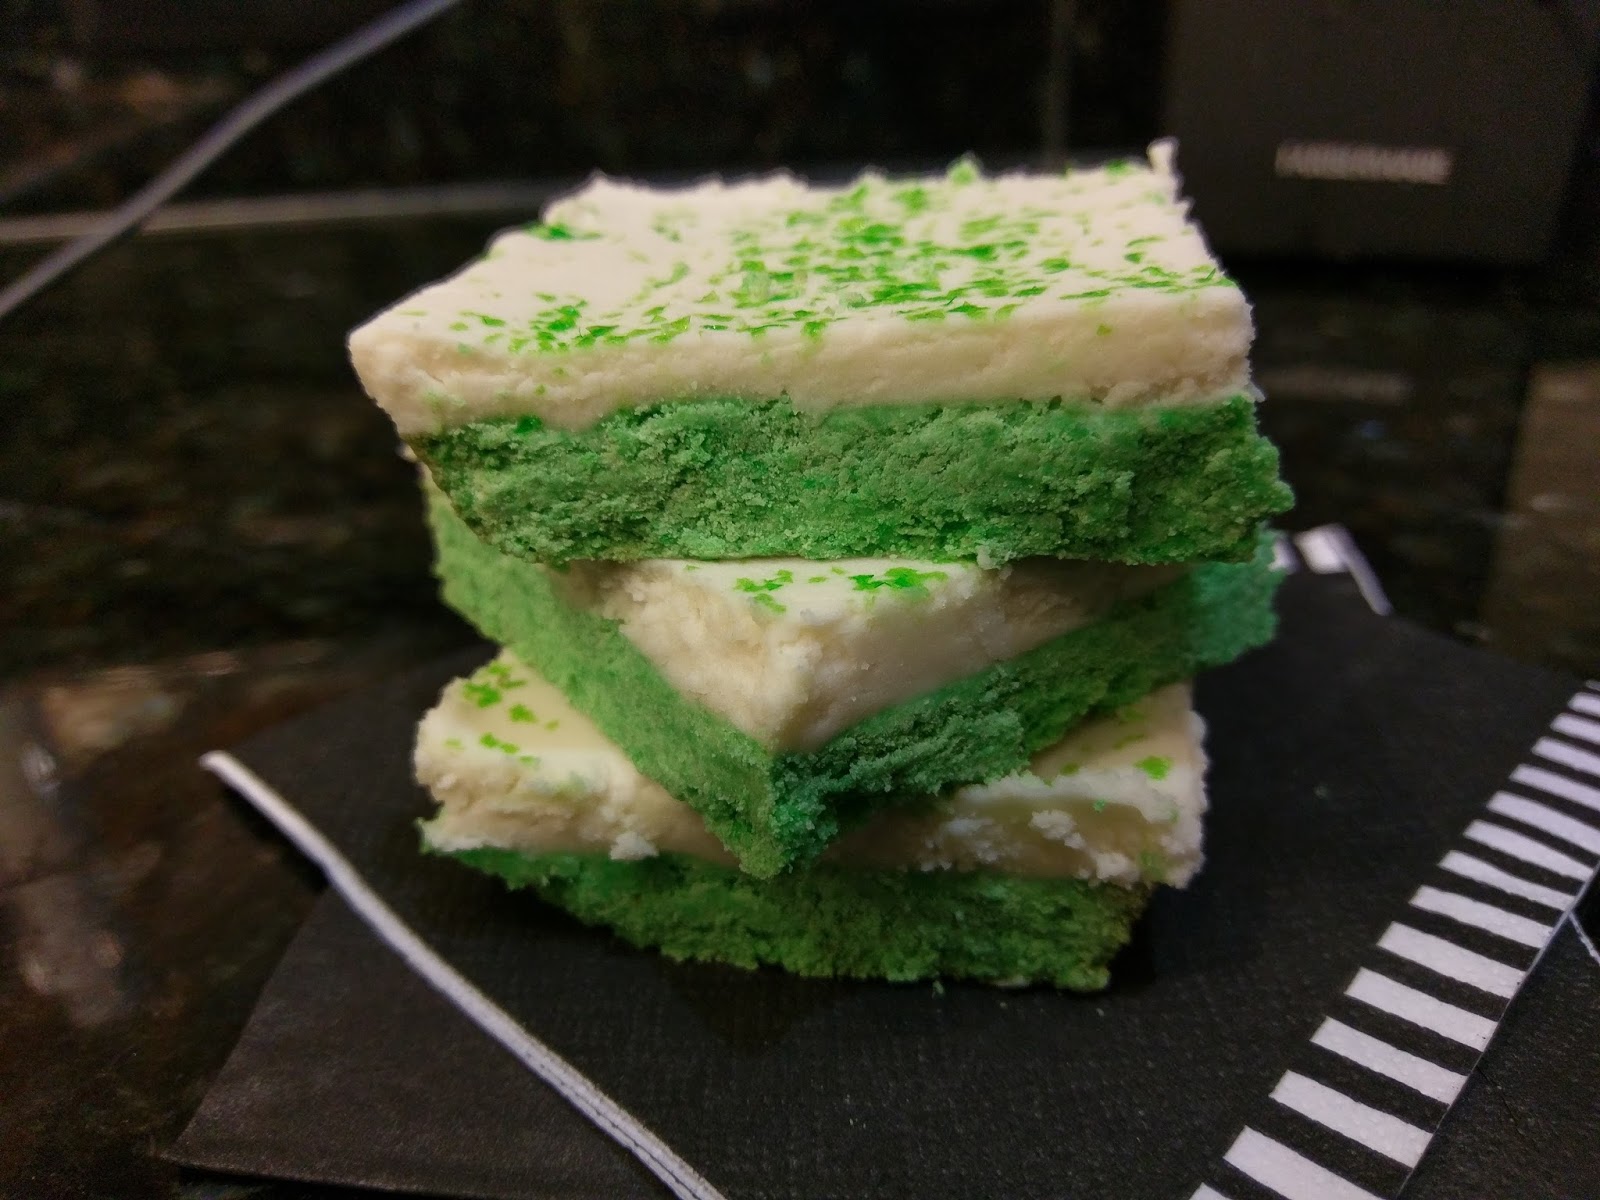
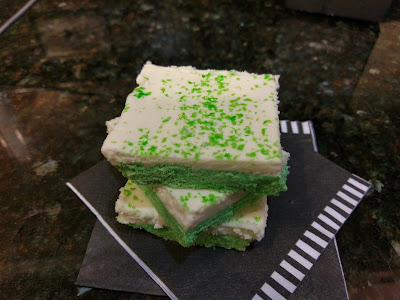
Not gonna lie, y’all…Saint Patrick’s Day totally snuck up on me this year. Usually I’ve already baked and digested so much green food by this time in March I feel honorarily Irish. I was ill-prepared for how short February was, and I totally fell off my game because of it. Then I was a little occupied with all things purple last week for bonafide reasons, and due to my inherited preference for said color, I kind of forgot things were supposed to be turning green. I’ll take this moment to also blame Florida (it’s what I do) because the entire region has been green since January, so it threw off my groove. Beware the groove. I wanted to make it up to my extremely (proven by 23andMe) Irish husband, so I came up with a dessert we actually hadn’t eaten yet for Saint Patrick’s Day…which between my 8,000 Guinness, Baileys, and Shamrock Shake variations was no small task. I wonder if kissing the Blarney Stone would provide me with the gift of new dessert ideas instead of the gift of the gab, which, let’s face it, I am totally already shamrocking. Running quickly away from that terrible joke, let me debut my first of two 2018 Saint Patrick’s Day dessert entries: pistachio sugar cookie bars with cream cheese frosting!
May you live as long as you want and never without dessert -An extremely (proven by 23andMe) French take on an Irish proverb by yours truly. Oh yes, they’re green. They’re so green, they make most green vegetables embarrassed to be the same color. While I did lighten these up to make them healthier, I can promise you it’s not through zucchini or kale trickery. As if enchanted by the magical properties of a leprechaun (god, I’m so sorry, but I’m filled to the brim with terrible Saint Patrick’s Day puns this close to the holiday with no other outlet), a 9×13 pan of these will only set you back 219 calories for one ample-sized bar (15 servings total). I must admit the magical properties that made this possible were Swerve’s two varieties of sugar replacement. And butter. All of the butter.

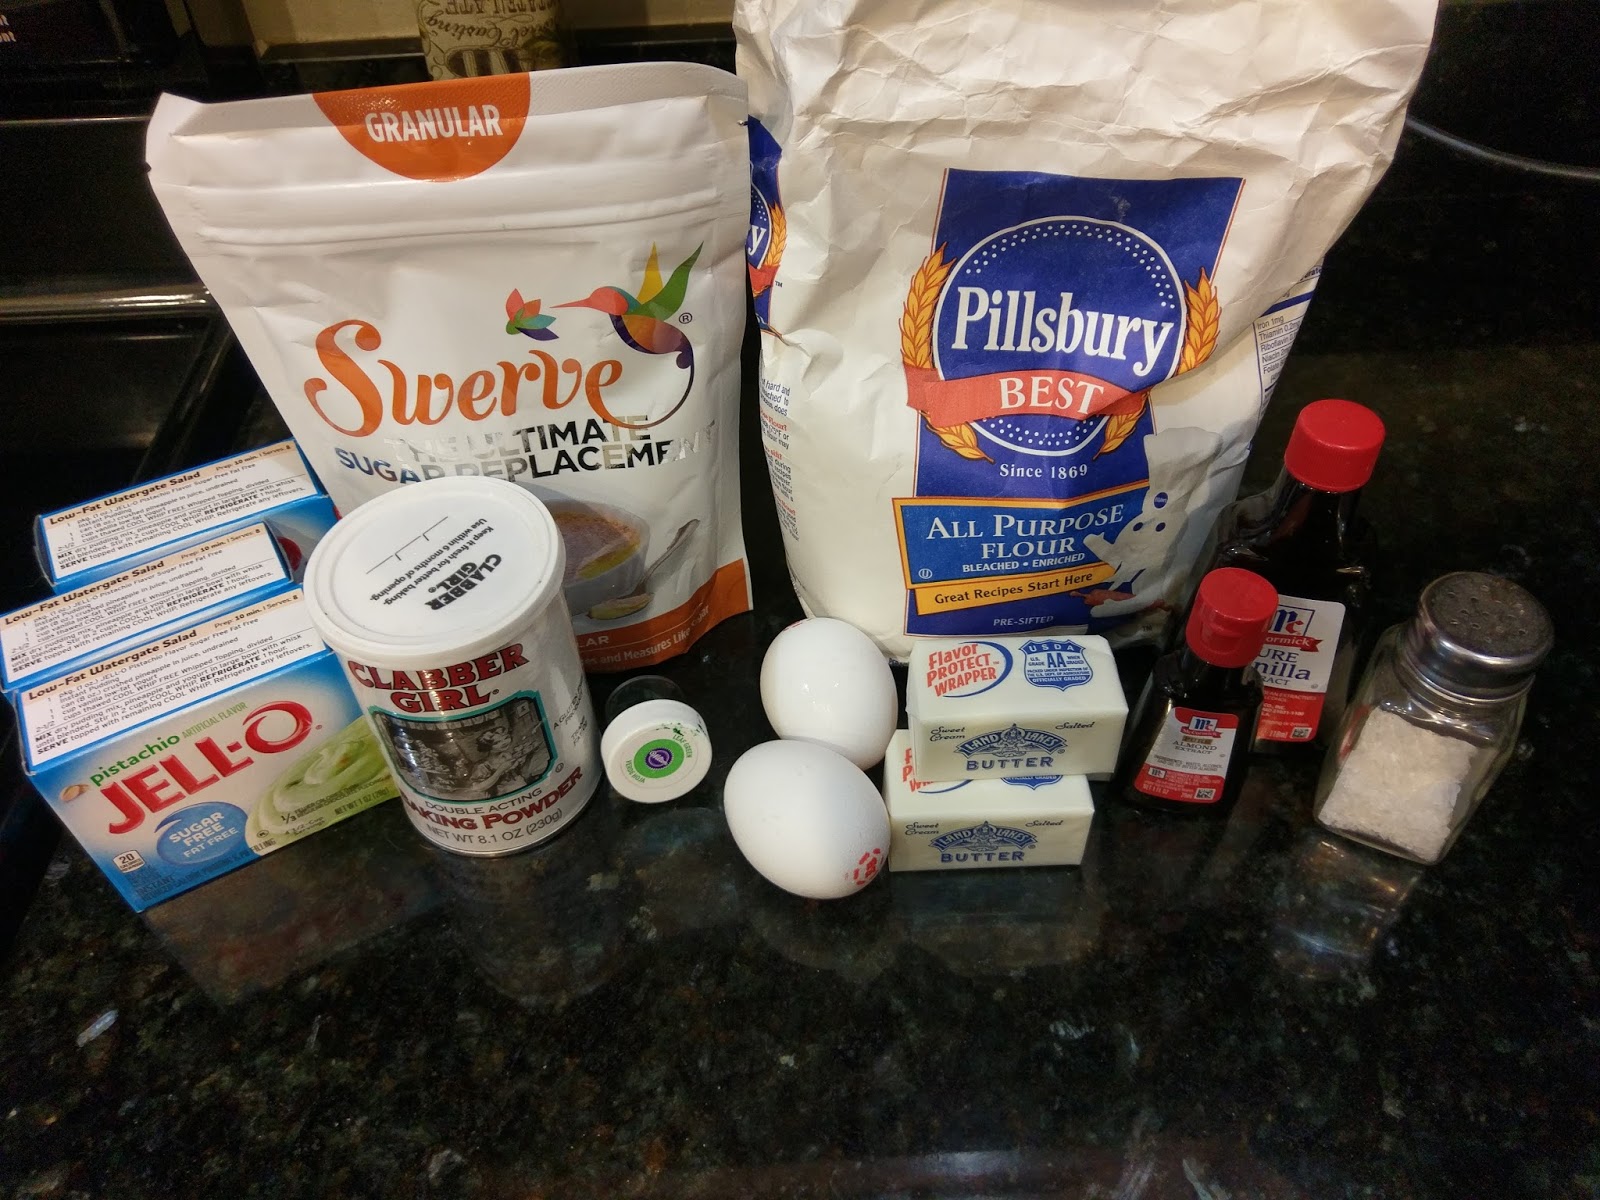
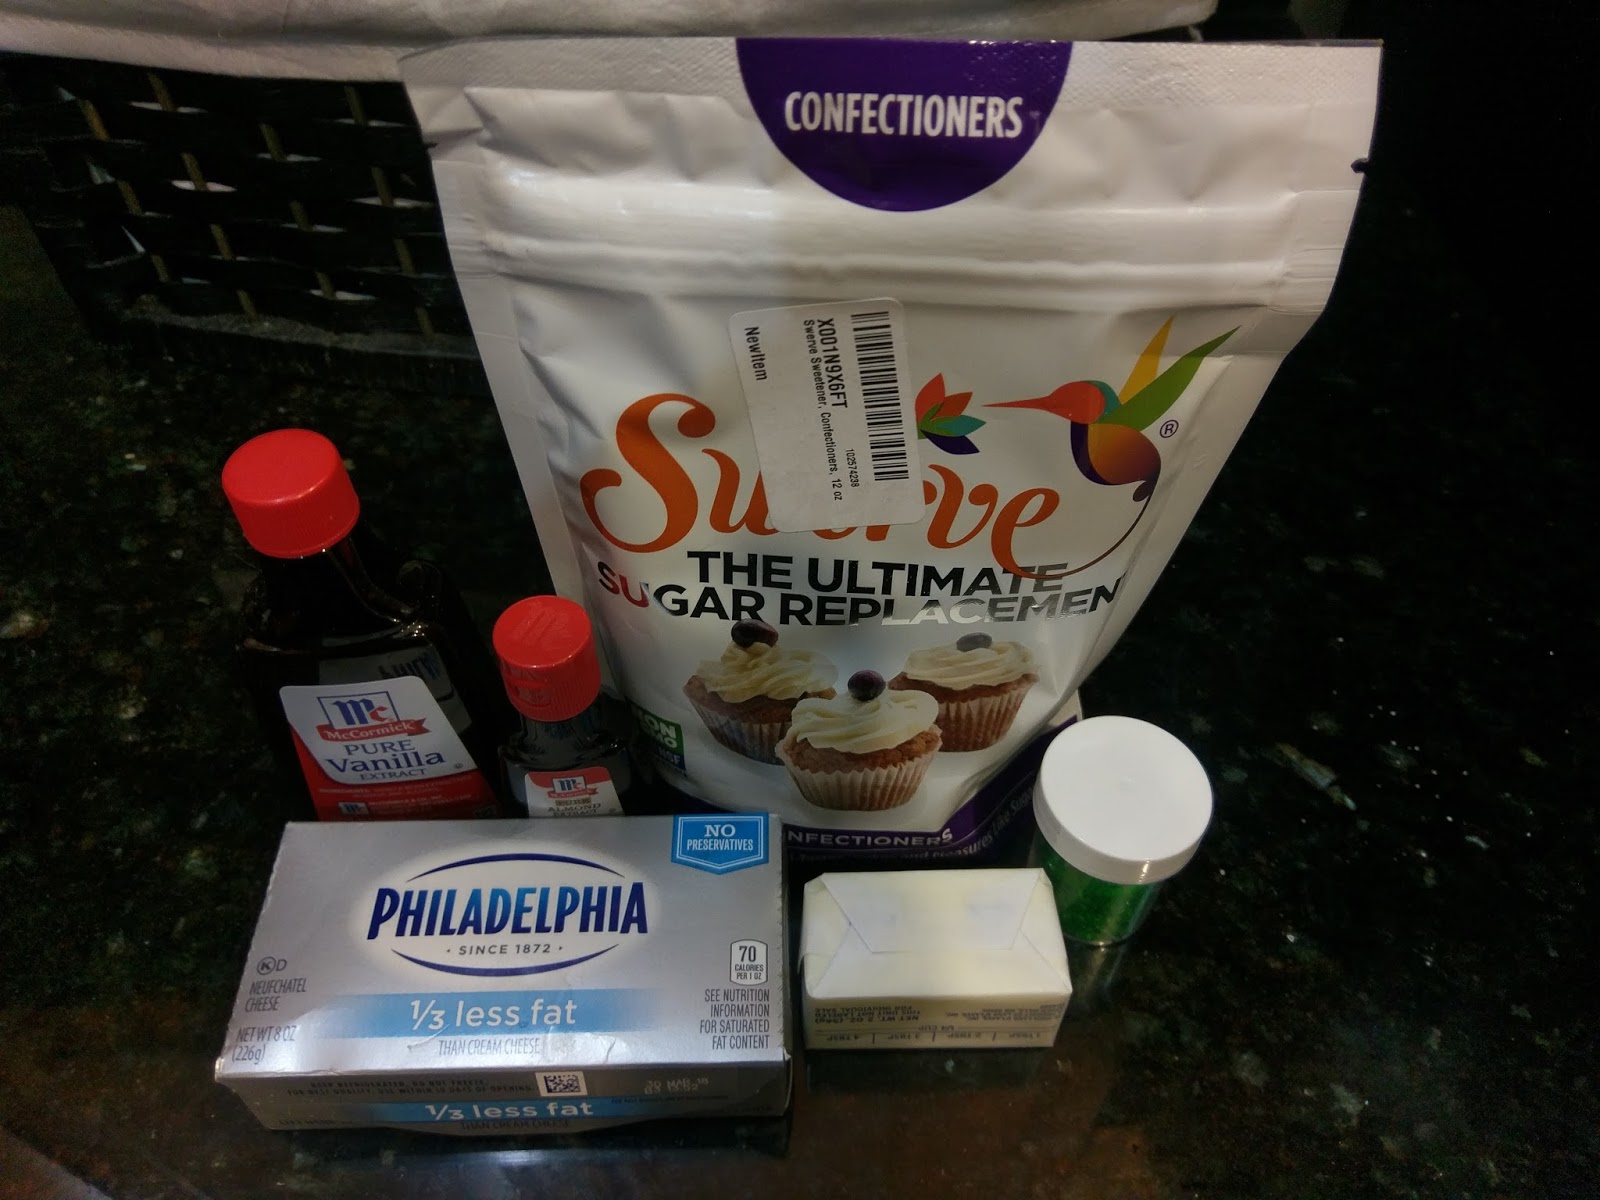
And a significant amount of pudding. I found this recipe and adapted it to play around with Swerve’s granular variety after testing out the confectioner’s variety last week. To make these bars, I used:
- 3/4 cup butter at room temp (to reduce calories even more, replace with unsweetened applesauce)
- 3- 1 oz. boxes of Jell-o sugar free pistachio pudding mix (mix only)
- 1/2 cup Swerve granular sugar replacement
- 2 eggs
- 1 1/2 tsp vanilla
- 1/4 tsp almond extract
- 2 cups flour
- 1/4 tsp baking powder
- 1/8 tsp salt
- Optional (but festive!): green gel dye
Preheat your oven to 350 and line a 9×13 tray with Parchment and spray with cooking spray. In a stand mixer, blend your butter and Swerve together until fluffy (3 minutes). Add in each box of pudding mix, one at a time, mixing well before each addition. Add in your eggs, extracts, a few drops of gel dye, and blend well. In a small bowl, blend the flour, baking powder, and salt together. Dump half the mix into the wet ingredients and blend. Add the rest of the dry mix until just incorporated. The dough will be stiff since this is a cookie batter.
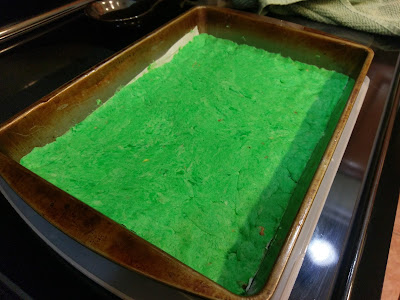
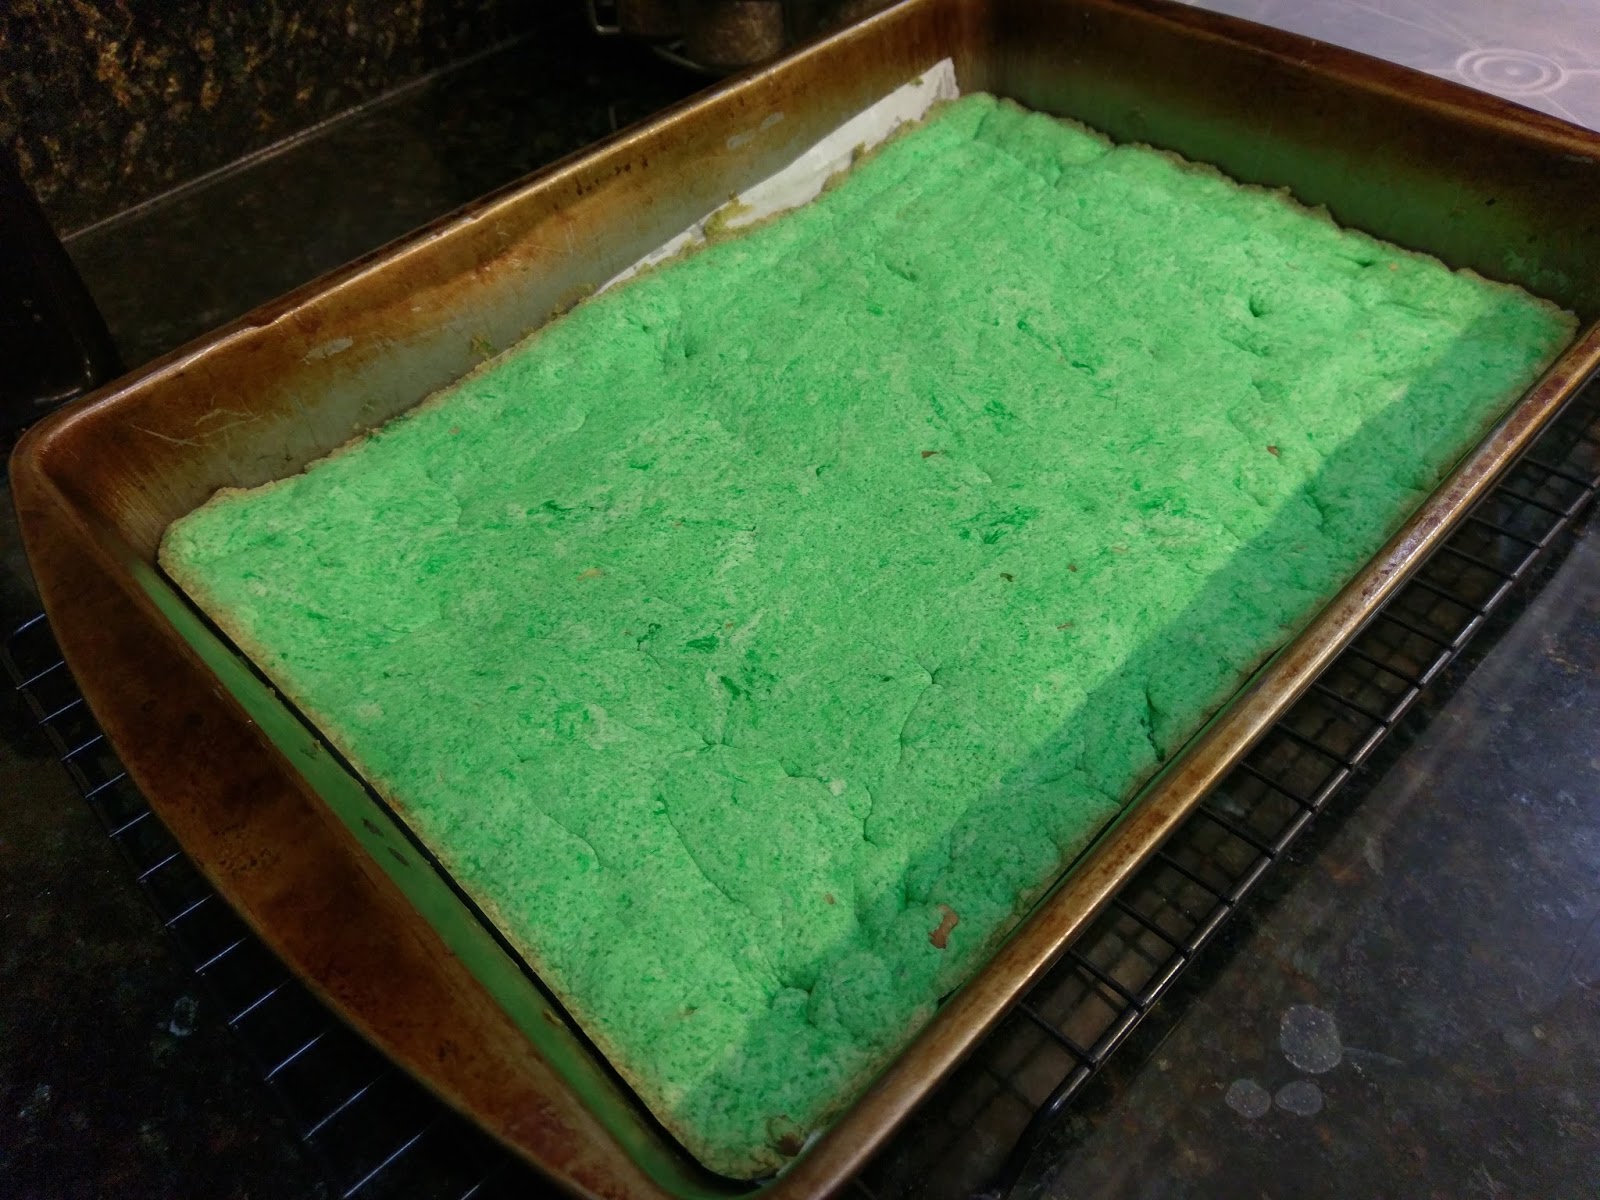
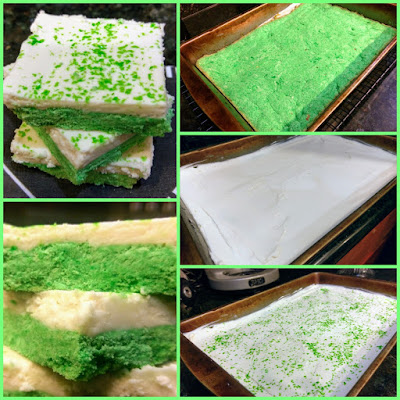
And green. Did I mention it would be green? Turn the dough out into your prepared pan and use your hands to press out evenly. I finished up by rolling a glass around the pan a few times to smooth things out. Bake at 350 for 15-20 minutes. I was in the middle of doing other things (read: not paying attention) and let these bake for a full 20. They were definitely overcooked in my opinion. I prefer a soft cookie, and these were rather firm. Nothing a little microwave action couldn’t fix (more on that later), but these bars should definitely be soft, so err on the side of less time. I’d say no more than 18 minutes max if you like a firmer cookie bar. My oven is possessed by an evil spirit that lies about what temperature the oven really is, so things cook much faster than they might in your normal, non-demonic oven. Do the Winchester brothers make house calls for oven exorcisms?
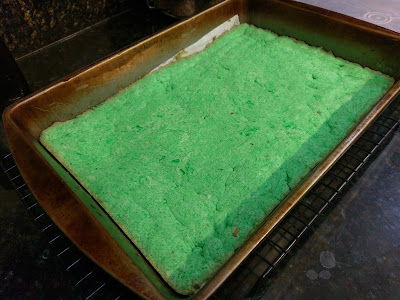
A little less green and “Angry Hulk” in appearance after baking. Once finished baking, let your cookie bar cool completely in the pan on top of a cooling rack before even thinking about frosting. Did you know that 99% of cooking fails could be prevented if people allowed their baked goods to cool before frosting? That legitimate fact that I totally did not just make up should convince you it’s worth the wait to frost these babies.

Ahh yes, Philadelphia, city of brotherly love and cream cheese. To make your frosting, gather up:
- 4 oz. 1/3 less fat cream cheese
- 1/4 cup room temp butter
- 2 1/2 cups Swerve confectioner’s sugar replacement
- 1 tsp vanilla
- 1/2 tsp almond extract
- 2 TBS skim milk
- Optional, but again, fessssstiiiivvveeeee: green sprinkles
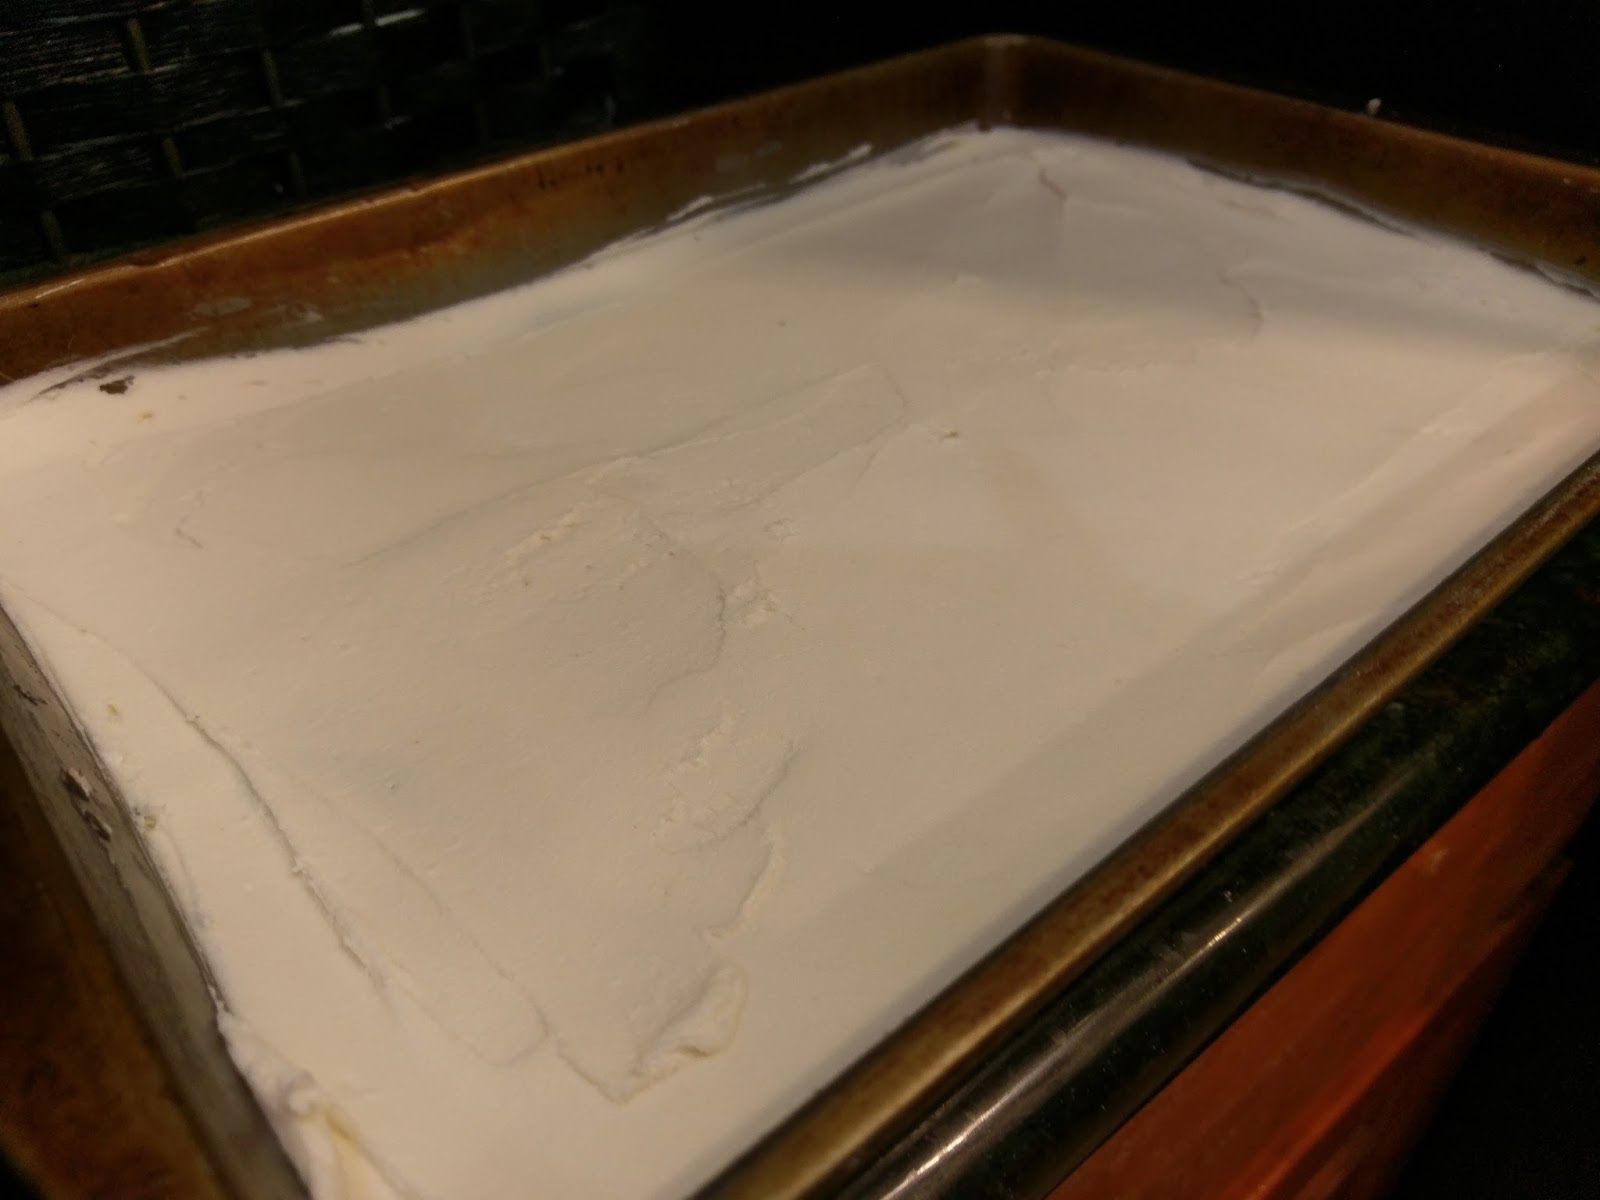
Start by blending the cream cheese and butter until fluffy. Add in half the Swerve, the extracts, and one tablespoon of skim milk. Blend well, then add in the remaining Swerve and last tablespoon of skim milk. Frosting will be thick, but still easy to spread.
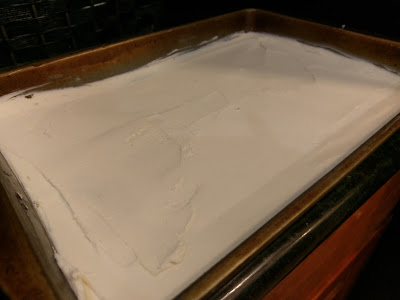
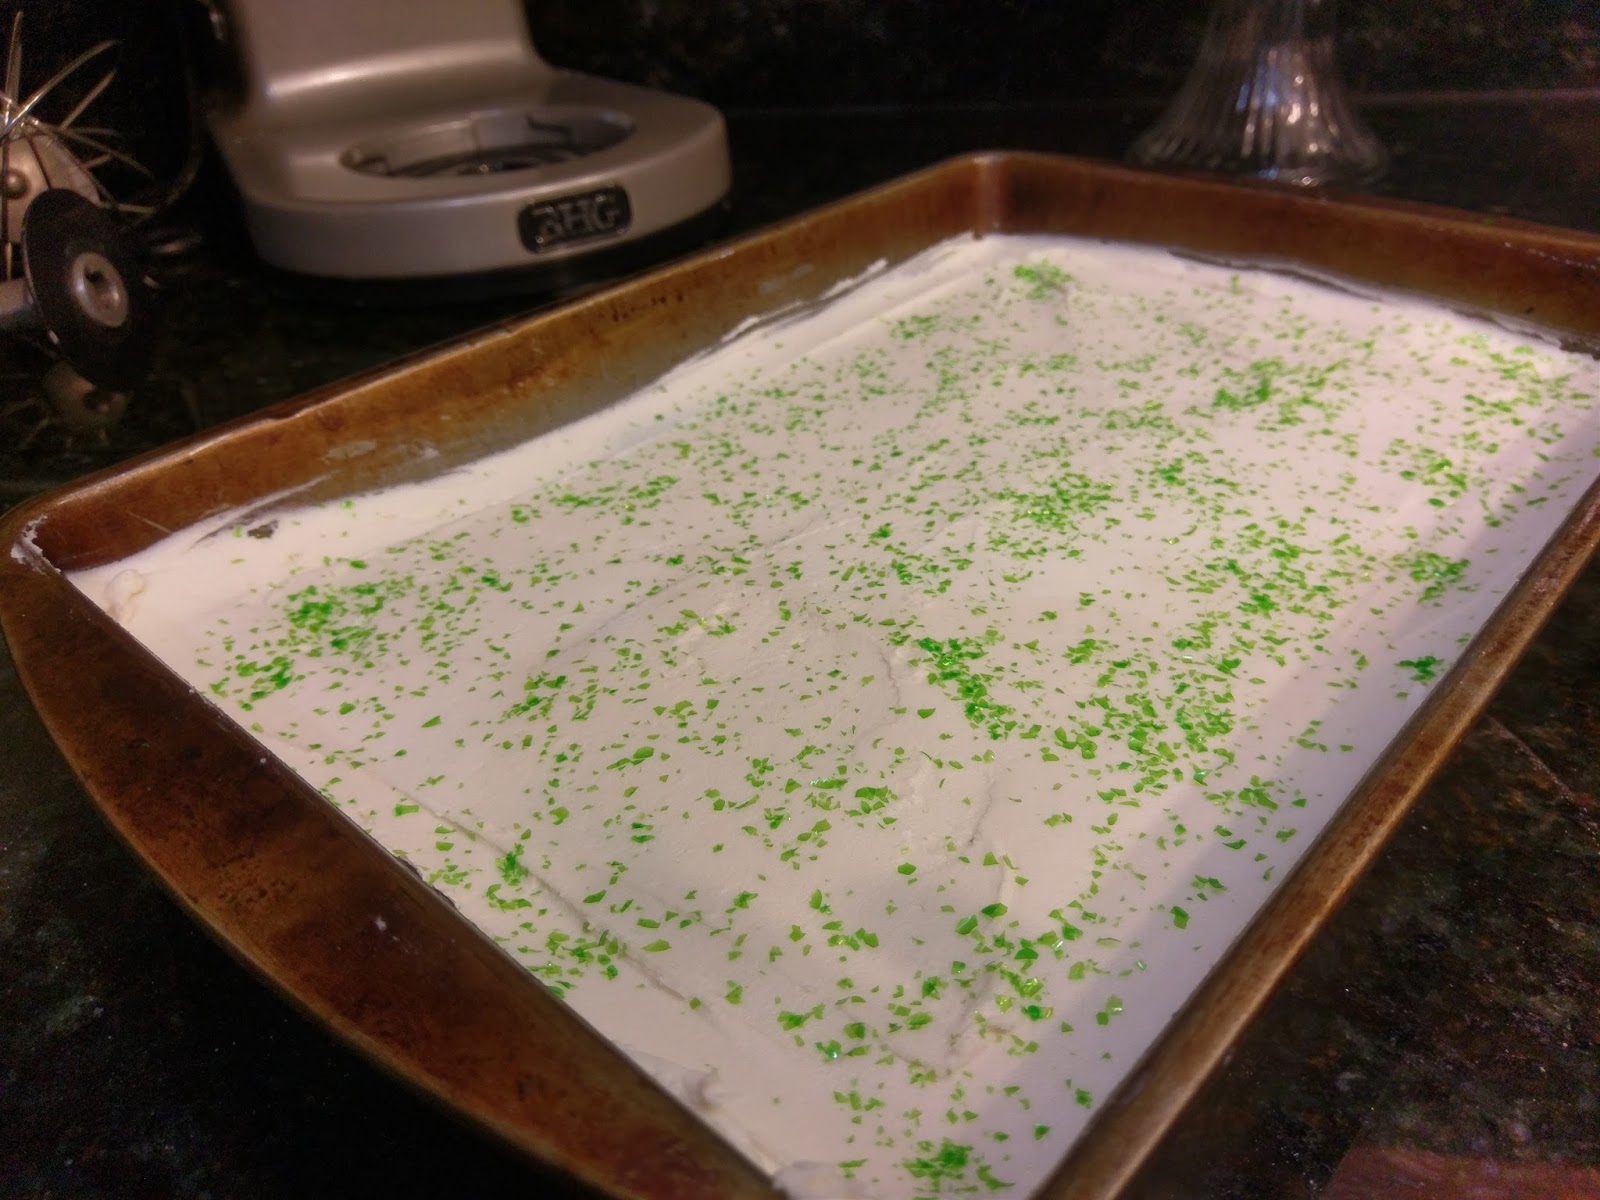
Like buttah. You can call it a day here if you’re thinking there’s too much green on these bars already, but at this point, just take it the extra mile and garnish with pretty green sprinkles:
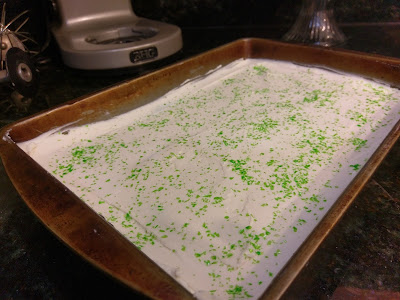
It could be none more green. Be sure to add the sprinkles quickly after you’ve frosted, before things start to set. Since these have cream cheese in them, I made them live in the fridge to help firm up the frosting before cutting into 15 squares.
Square…ish. This. Frosting. Dear sweet Lucky Charms this frosting is yummy. I talked last blog about the “cooling” York Peppermint Patty feeling after eating frosting with Swerve in it. I since read their blog, tried a few things, and we’ve greatly reduced this sensation. I want my cookie bars warm, so I heat them in the microwave for 30 seconds to soften the cookie base–in doing so, heating up the bars cuts the cooling sensation down significantly. Since I wanted to use butter and not applesauce for the bars, I opted not to use half Swerve/half powdered sugar for calorie count. But in the future, I think this would almost completely erase that sensation. Again, it doesn’t taste bad or weird, it’s just not something you’re expecting when you take a bite of a non-mint dessert.
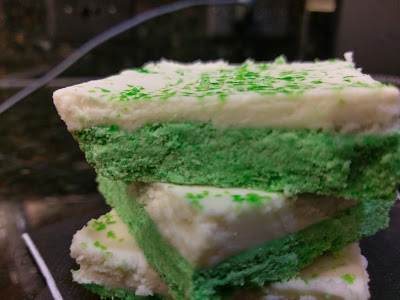
Look at that frosting-to-bar ratio. Mmmm. The pistachio cookie flavor mixed with the cream cheese frosting is savory meeting sweet in all the right ways. Warmed up, these bars are positively irresistible. You could probably keep these covered at room temp to keep the cookie bar soft, but I think everything is trying to kill me, so I opt to keep a cream cheese frosting in the fridge. My idea of living dangerously is using milk one day past its expiration date. What I lack in edginess, I make up for in baking and sass. My Irish husband is super pleased with these bars, and that’s what matters most. I won’t be drinking any green beer Saturday because I’ll be too busy double-fisting these pistachio cookie bars. There’s simply no room for beer when I’m busy turning the contents of my stomach green with delicious, pistachio-laden sweets. I can’t drink like the Irish, but I will eat most green things (except for you, peas–tiny little orbs of nastiness). I promise to bring a booze-filled, totally not in any way green dessert to you next week. Enjoy your Saint Patrick’s Day! ‘Til next time, my fellow eaters!

I mean, I’ve definitely made greener desserts. -
A Cake Fit for a Viking
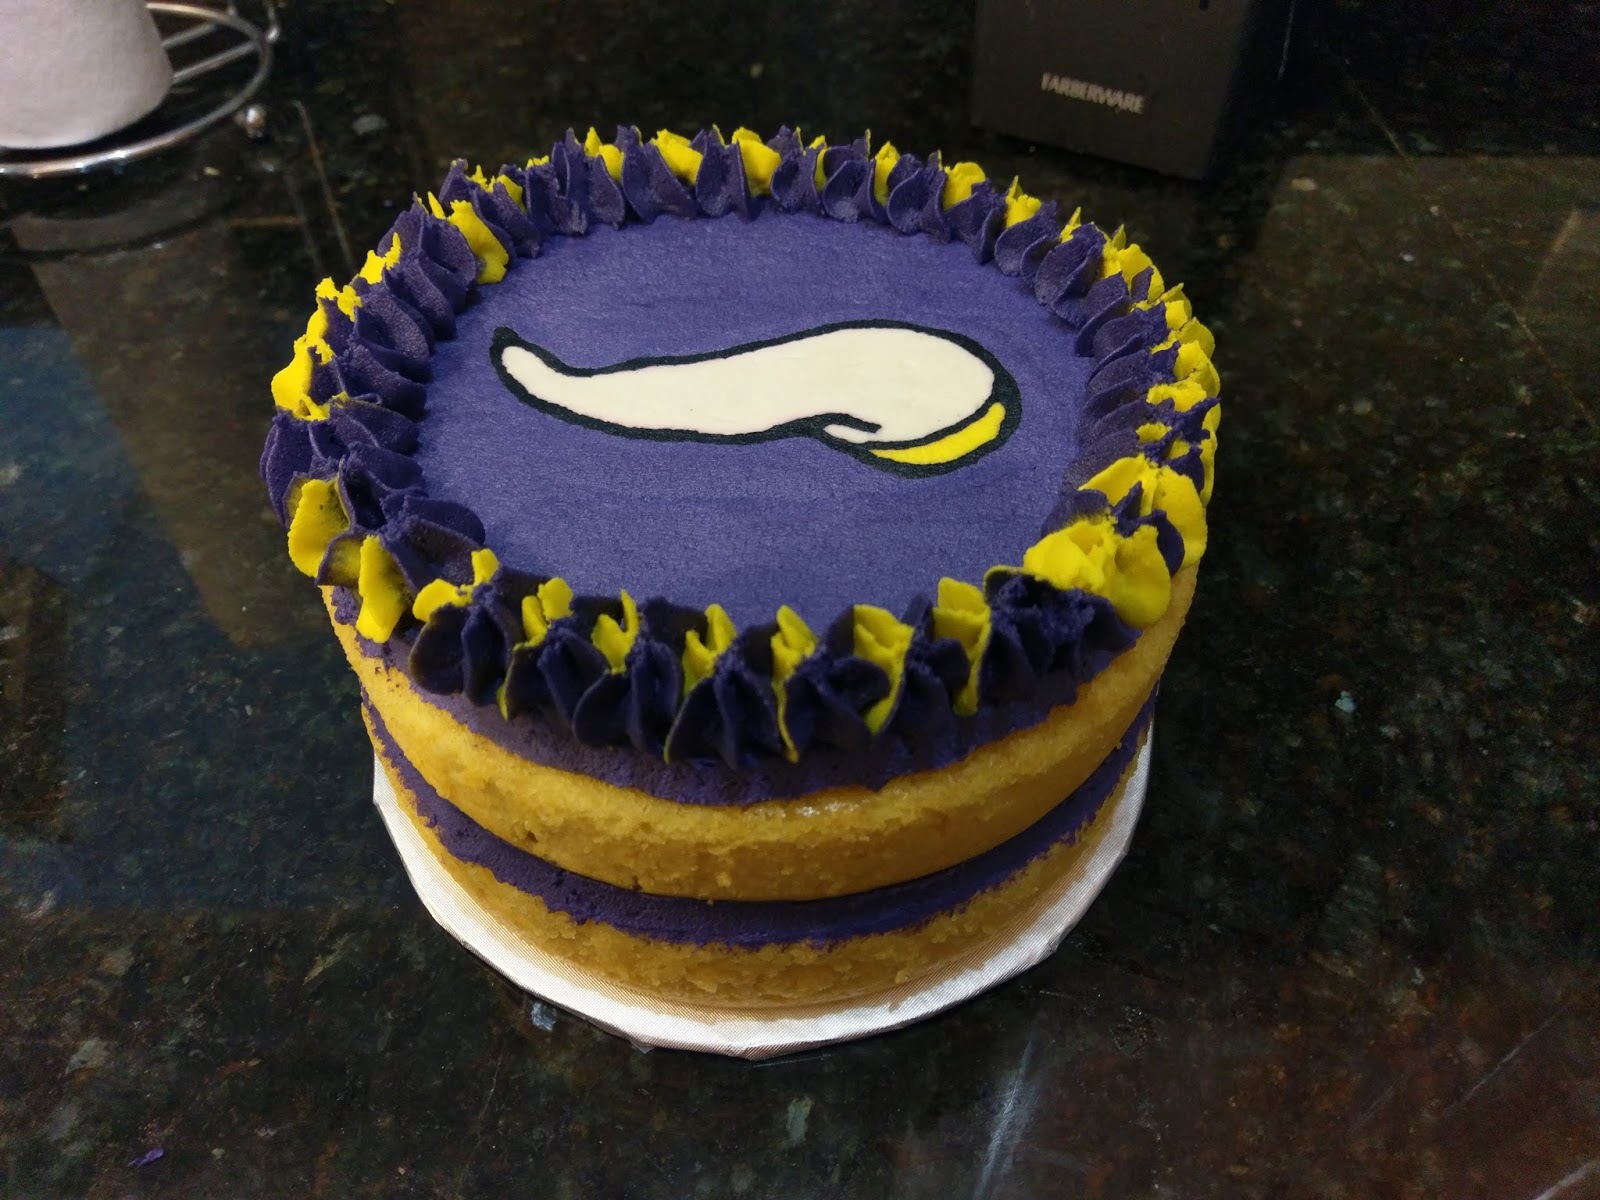
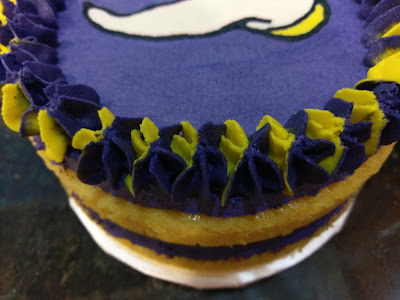
Fathers teach their daughters many important lessons in life: how to change a flat tire, why you should never date a musician, and the importance of rooting for your sports team, among many, many other things. As someone who comes from a long line of Vikings fans that bleed purple and gold, by proxy, I also learned how to cope with loss, sadness, anger, and bargaining thanks to the birthright passed down to me by my father. While being a Minnesota Vikings fan has its ups and mostly crushing downs, more than anything, we appreciate being a part of an extremely fervent fan base. Since my dad and stepmom were coming down for a visit just a week shy of his birthday, I knew exactly what I needed to do: bake a birthday cake fit for a Viking. And thus, this extremely purple and yellow beauty was born…
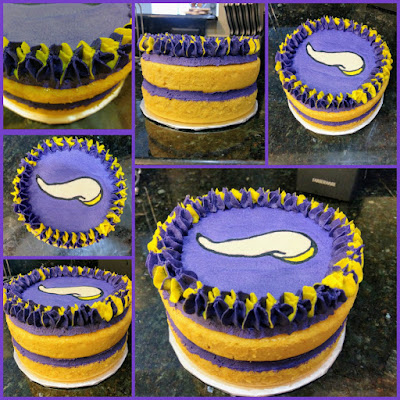
Skol, baby! It had been a while since I made a buttercream transfer (like almost two years), so I am pretty proud of how this cake turned out. Most importantly, my dad positively loved it, and while he usually grins when encountered with any kind of cake (it runs in the family), the look of sheer joy when he saw this was merit enough. I had to work ahead of time, so I also mastered the art of freezing and preserving cake rounds, buttercream transfers, and frosting–tips and tricks I shall gladly share with you on this blogging adventure today. I also tried a brand new sugar substitute in my frosting: Swerve. This powdered sugar replacement cut one slice of cake down from well over 650 calories to a mere 373 calories (14 servings total). I added most of a bottle of Disaronno to the cake and frosting, so this accounts for the majority of the calories. I’m obsessed with yellow amaretto cake and matching buttercream frosting. I’d apologize, but I’m not even remotely sorry.
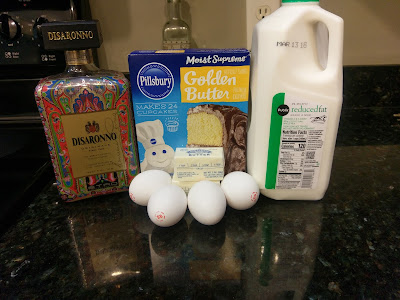
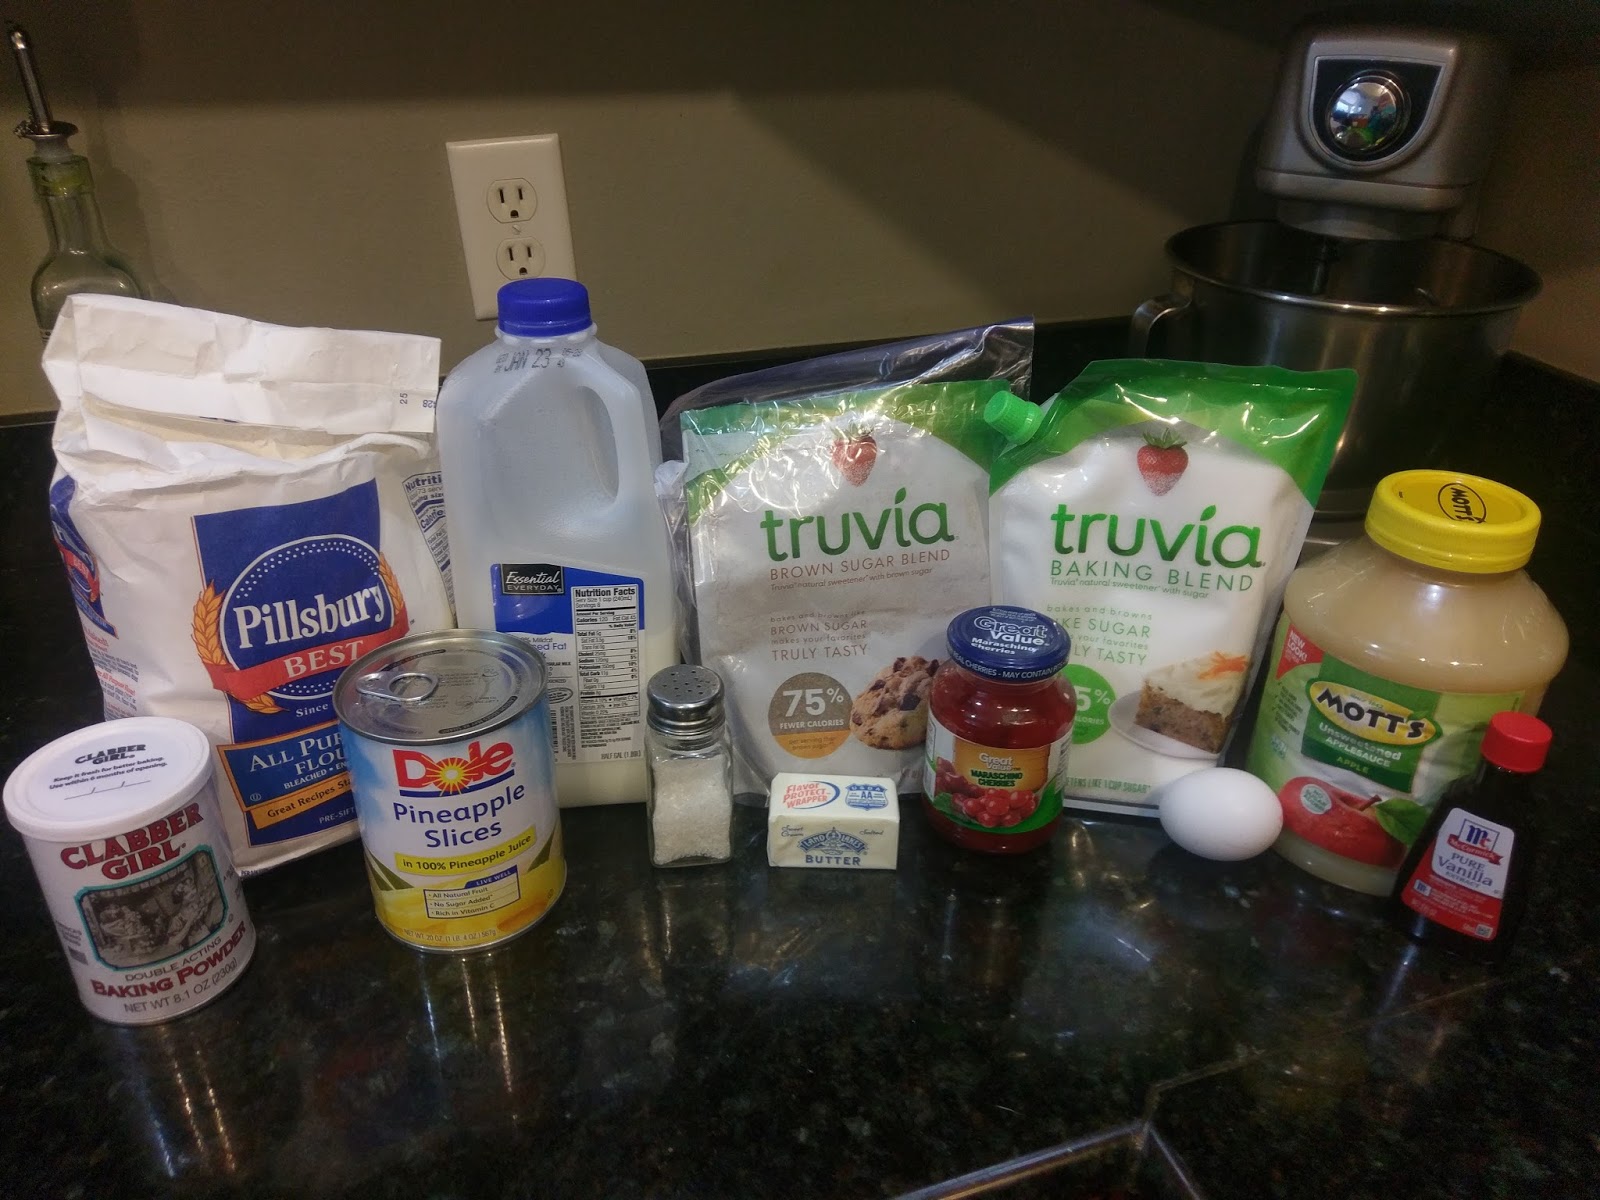
Pictured: the holiday bottle of Disaronno from 2016 that finally met its end. I did my usual method of hijacking a box cake mix to make it decadent and bakery-level yummy (we all agreed I could’ve lied and claimed this was made from scratch because it was so decadent, but I’m a notoriously terrible liar…I’m lazy and lying requires way too much effort and energy). To make the cake alone, you need:- Yellow cake mix
- Eggs called for on the back of the box plus one additional egg
- Substitute the oil for butter, double the amount, and melt it
- 1/2 cup of milk
- 1/2 cup of Disaronno
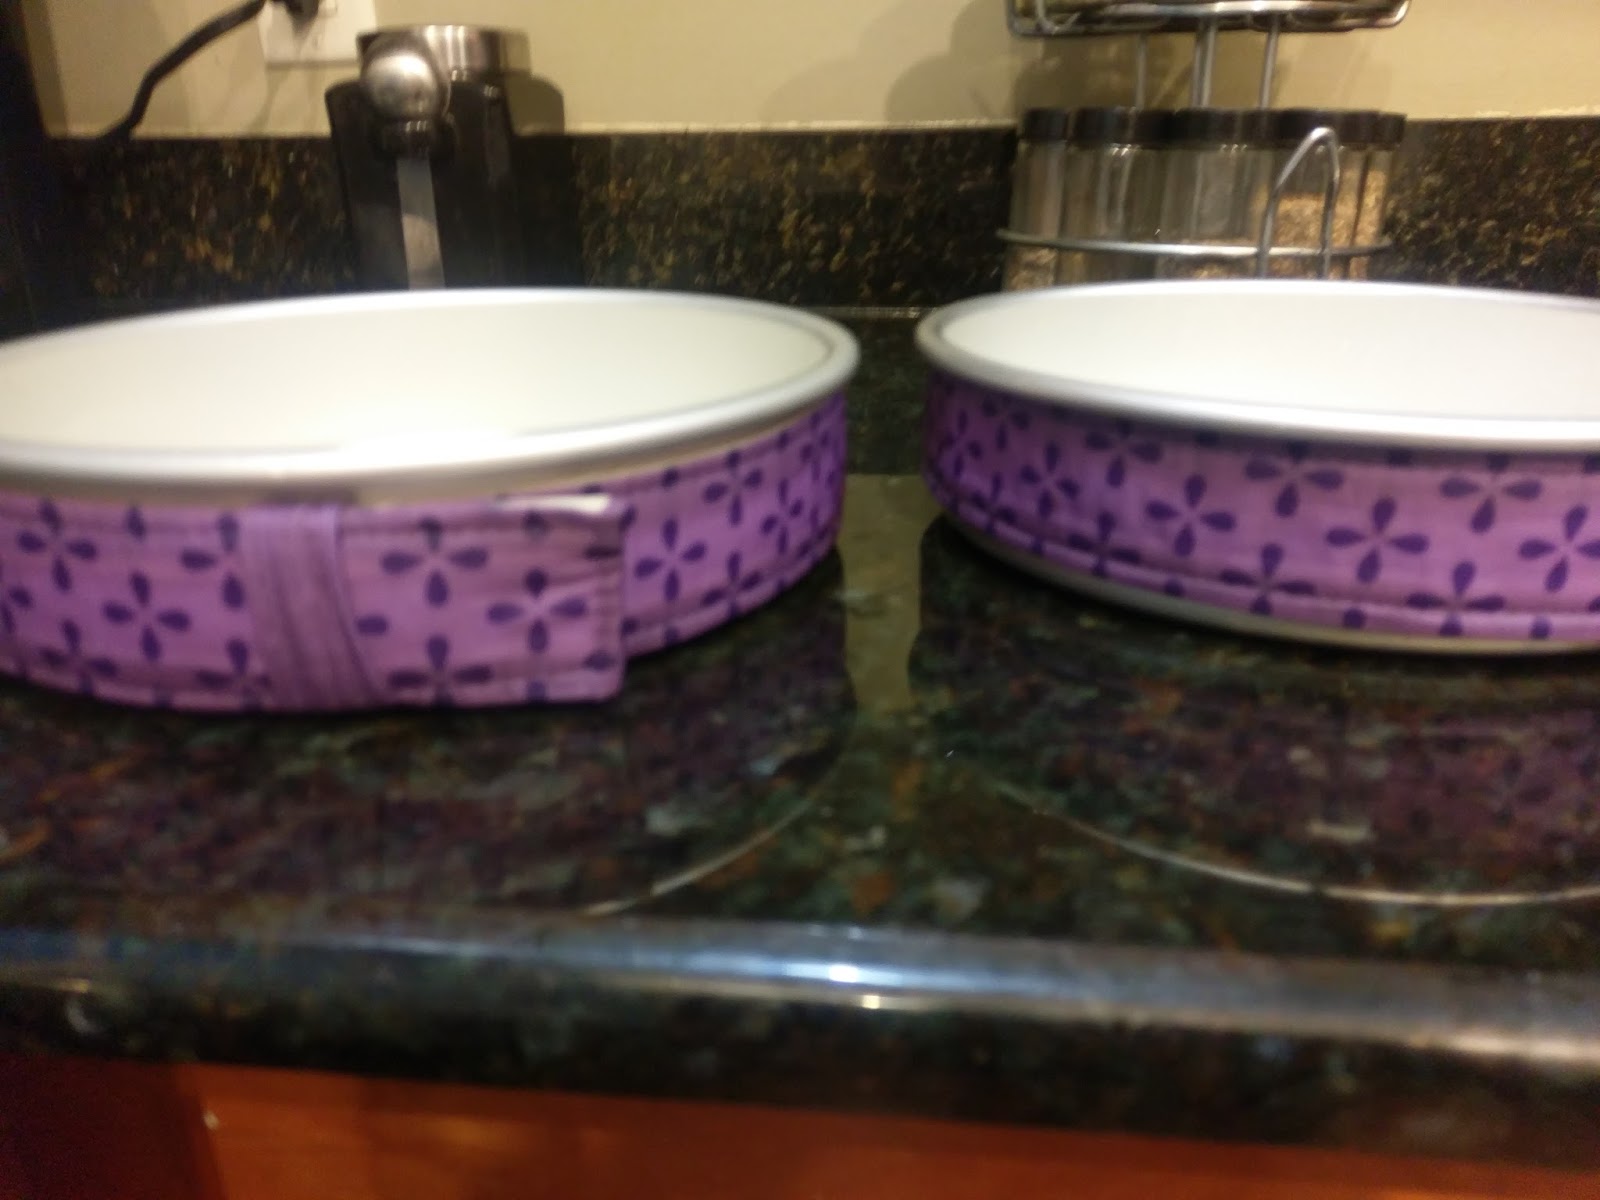
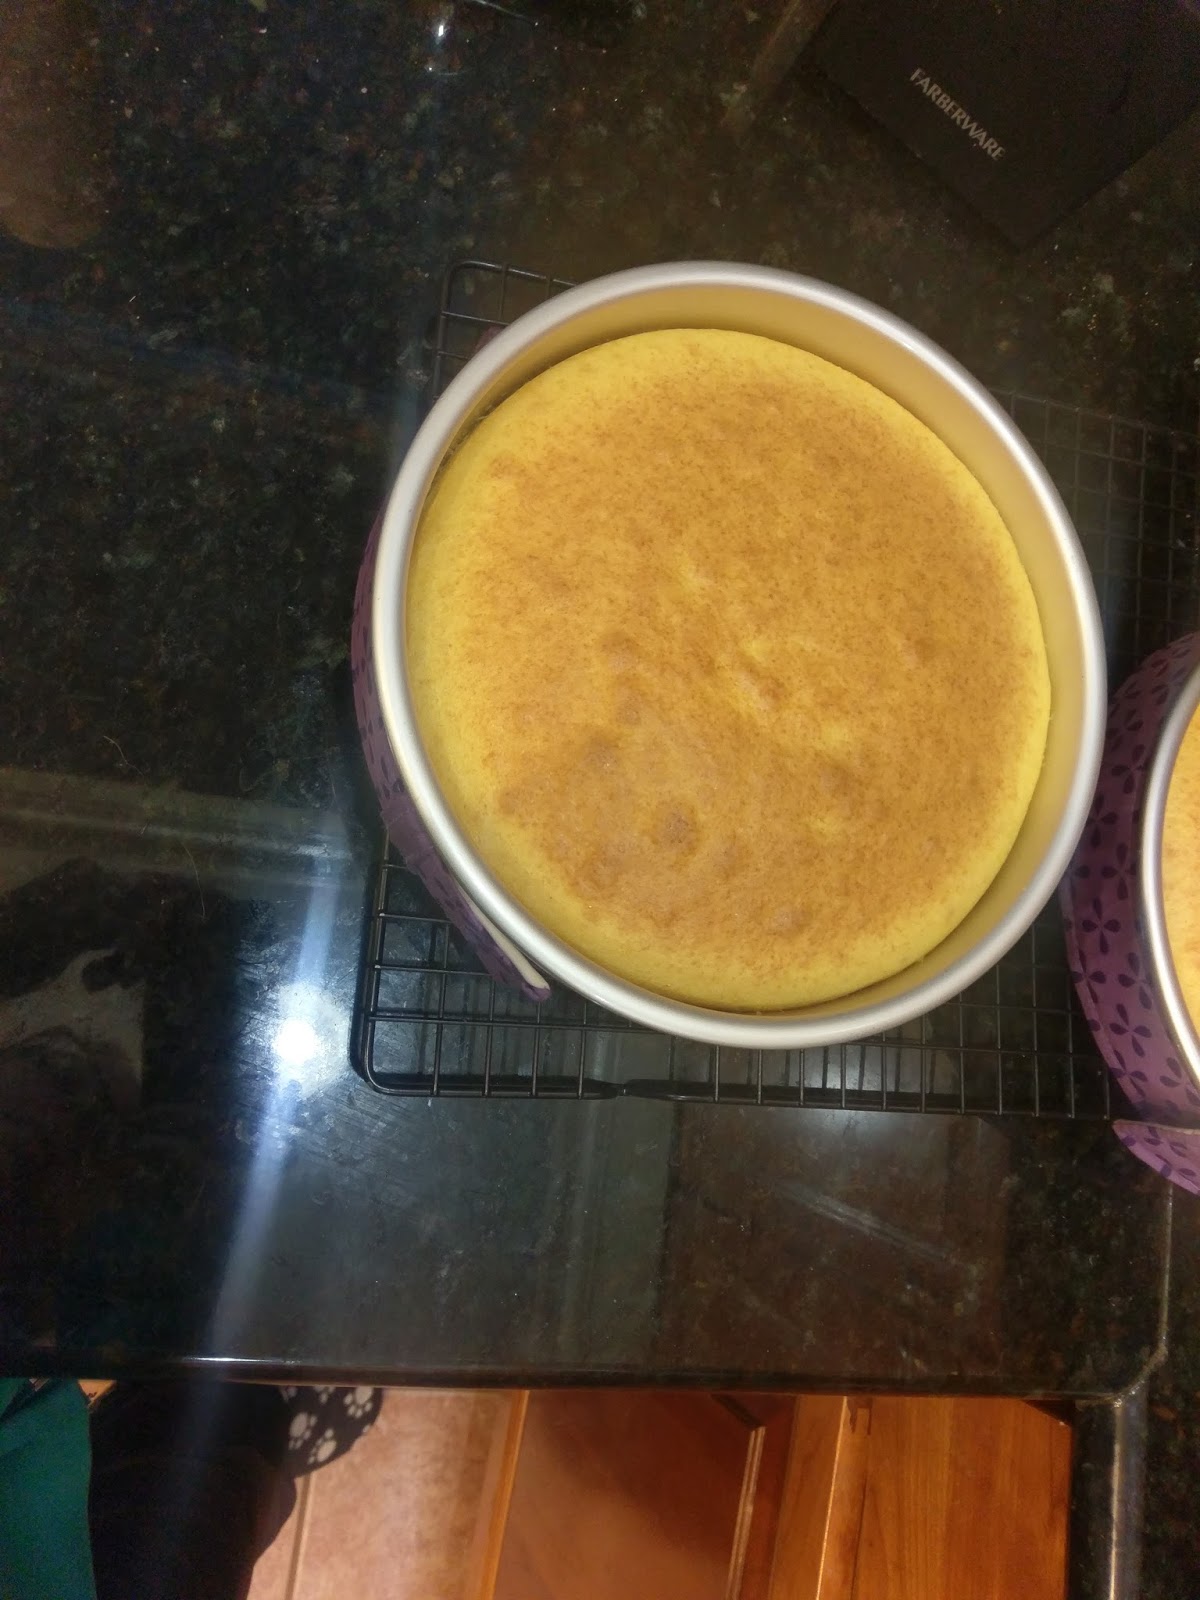
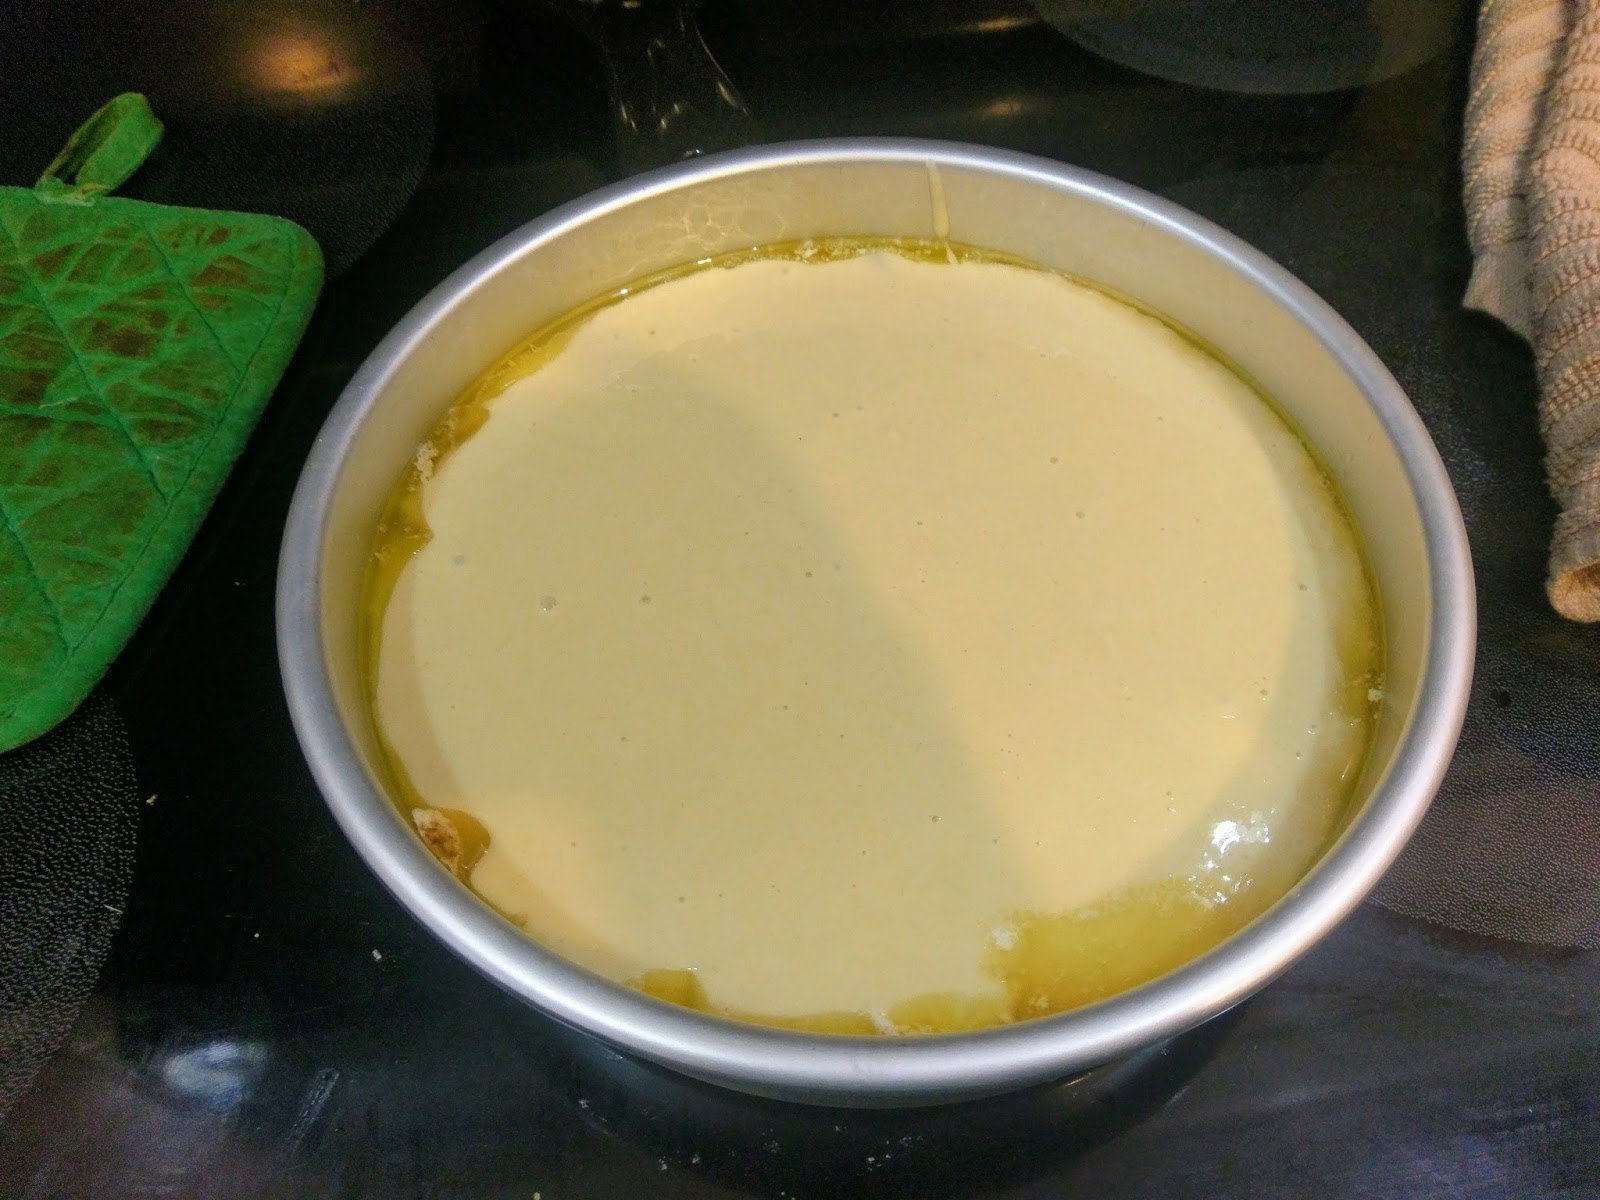
The recipe called for 1 cup of water, so I used half milk and half Disaronno to substitute and yield a denser, moister cake. I preheated my oven according to package directions and prepared two 8-inch rounds with Parchment paper, cooking spray, and bake-even strips.

They’re even purple. I’ve been using these for a few cakes now, and I absolutely love them. They really do help even out the cake batter. I hardly had to level these cakes because of the bake-even strips. I soak them in cold water for 10 minutes, wring them out a bit, then fit them to my pans. I pour my batter in, bake my cakes in the middle rack of the oven for 30 minutes, and bam, golden, even bake.

Thank you, Wilton. Once finished baking, let your cakes rest in the pan on a cooling rack for 10 minutes. Then gently remove from the pan and allow plenty of time to COMPLETELY cool on the cooling rack. Like to room temp or below. I then leveled my cakes to ensure they’d fit together perfectly since this was going to be a naked cake, and frosting couldn’t hide much of anything (as a woman who 1. Appreciates a good cover-up, and 2. Is incredibly clumsy, this technique is still slightly terrifying in concept). I wrapped each round separately in three layers of plastic wrap and placed each round into a Ziplock freezer bag. These lived in the freezer for five days before we ate them, and no one even knew. Until now, I guess. Still completely soft and melt-in-your-mouth amazing. I will definitely use this technique to freeze cakes again.

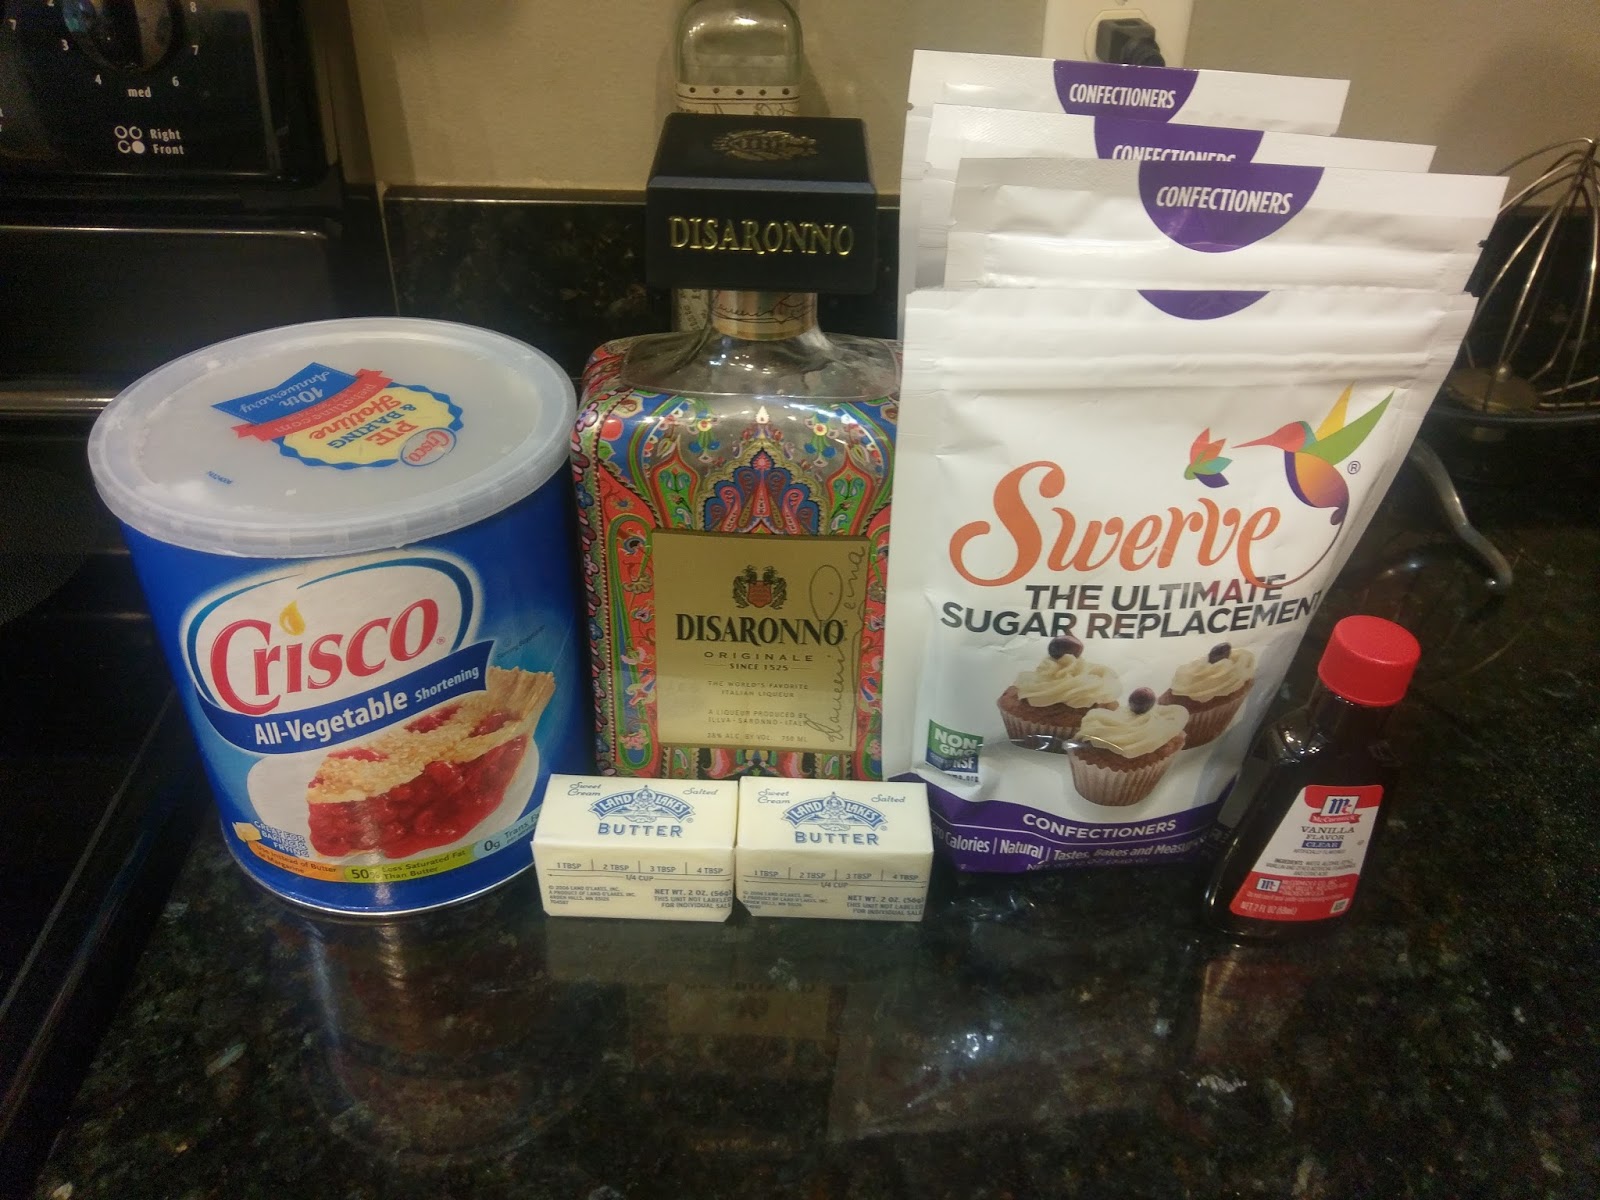
This Crisco is also probably from 2016. To make a buttercream transfer you can smooth out, you need a lot of Crisco. Crisco is positively terrible for you, but damned if it doesn’t make a pretty crusting buttercream. I ended up making WAY more frosting than I needed by like twenty ounces, but if you wanted to crumb coat a cake and frost it completely, this would’ve been the perfect amount. For a naked cake with a small buttercream transfer, I could’ve cut it down by half. I used:
- 1 stick of room temp butter
- 1 1/2 cups of Crisco
- 3 12-once bags of Swerve powdered sugar
- 1 tablespoon of CLEAR vanilla extract
- 5-6 tablespoons of Disaronno
Blend together the Crisco and butter until soft and fluffy. Add in one bag of Swerve, the vanilla, and a tablespoon of Disaronno. Blend on low until mostly mixed. Add in another bag of Swerve, three tablespoons of Disaronno, and blend until mixed. Add the final bag of Swerve and remaining two tablespoons of Disaronno. The frosting will be very thick, so feel free to add in more Disaronno if you want an easier to pipe frosting and/or just really love Disaronno (definitely both). I split up my frosting, dying one large bowl purple, a tiny glob black, and split the remaining frosting, dying one bowl yellow and leaving the final bowl white. Then I gathered up Wilton 2, 3, 5, and 12 round tips fitted to piping bags with couplers to easily change out tips as needed. I outline a very detailed step-by-step with buttercream transfers, setting up images on Parchment paper, tips, tricks, and more here, so excuse me while I cruise through these instructions without reinventing the buttercream transfer wheel extensively.
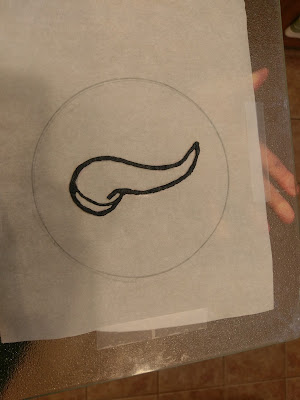
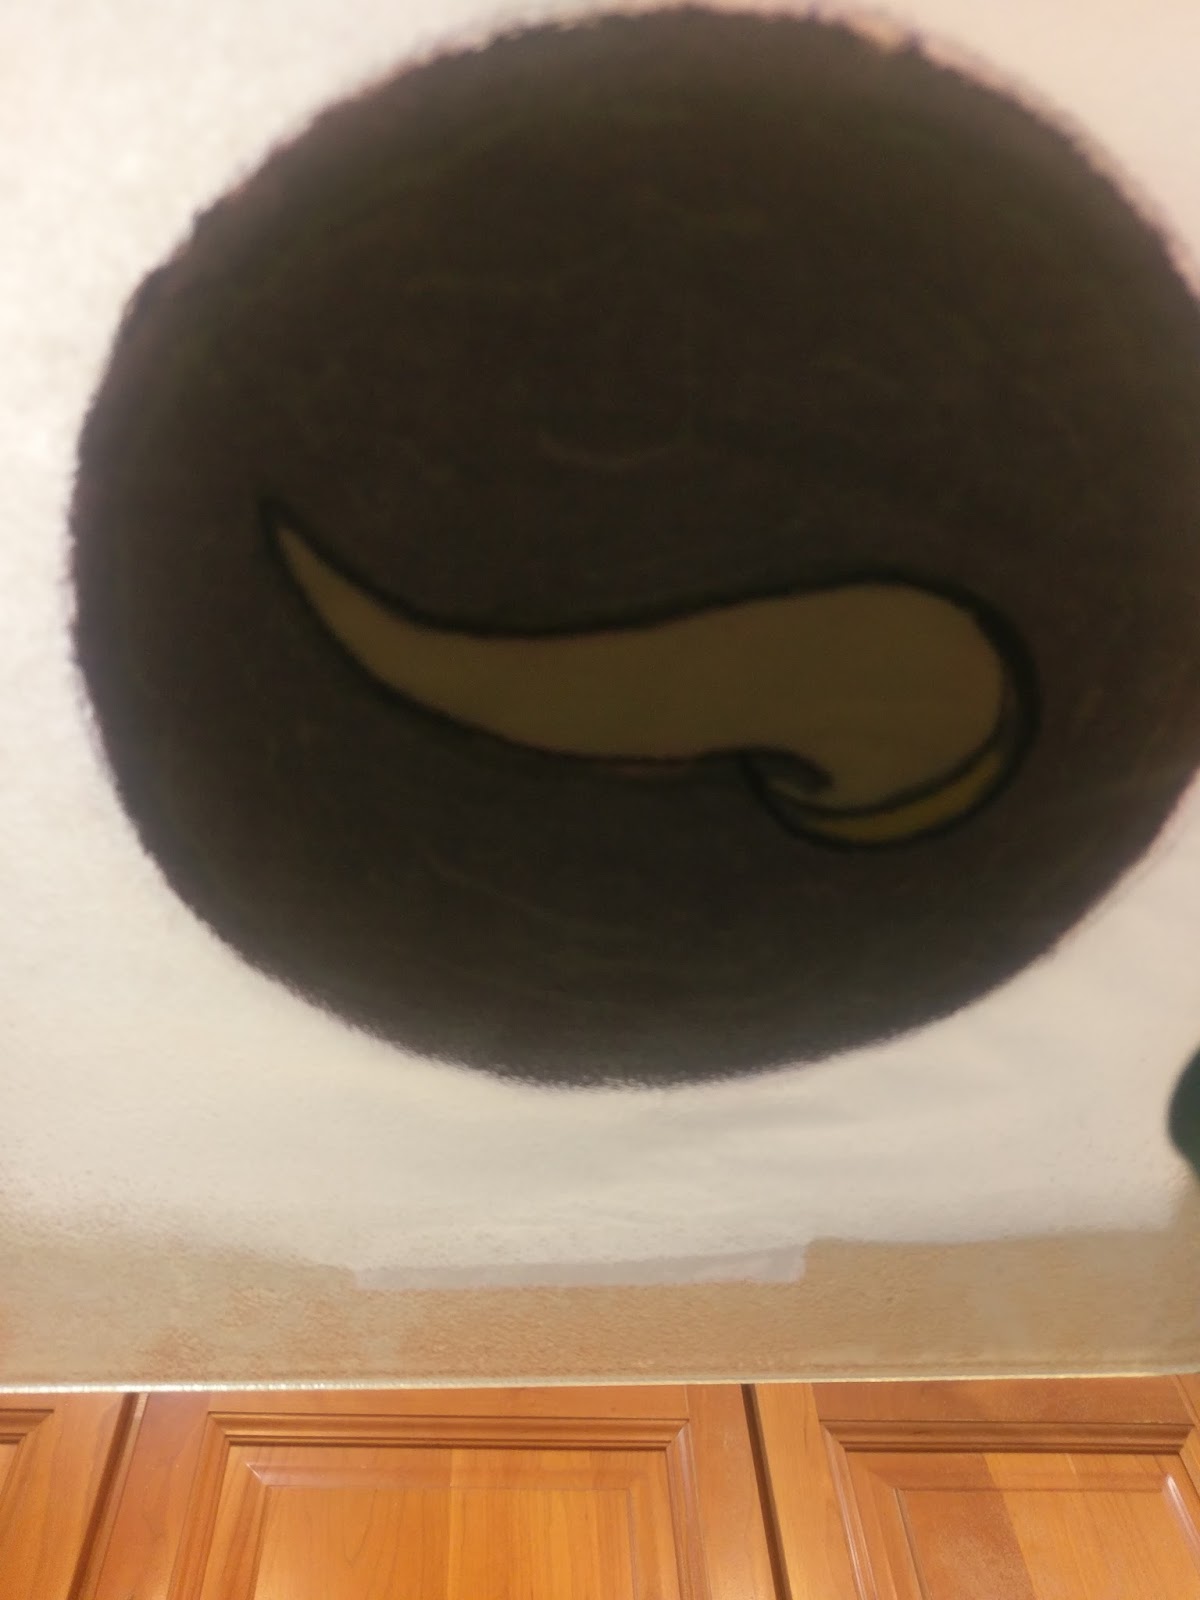
After affixing my stenciled image onto a clear cutting board with some tape, I used my black frosting with a #5 tip to outline my viking horn. I used a small paintbrush as needed to smoosh down the frosting and ensure everything was connected, there were no gaps in the frosting, etc. I froze this for one hour, which was not long enough. It budged around on me a bit in the following steps, so in hindsight, should’ve frozen it for several hours. 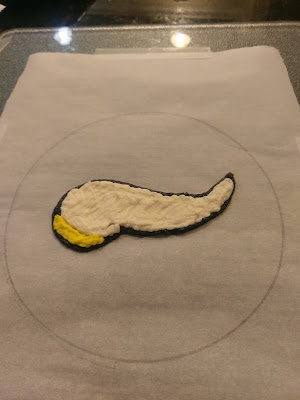
I came in with my yellow frosting coupled with a #2 tip to fill in the very narrow yellow band. I used a #12 tip to fill in the white, switching to a #3 tip in the smaller grooves. Once again, I used a paintbrush to push the frosting down and rid and areas of gaps. In doing so, my black frosting moved a bit, so definitely take your time to freeze between colors. 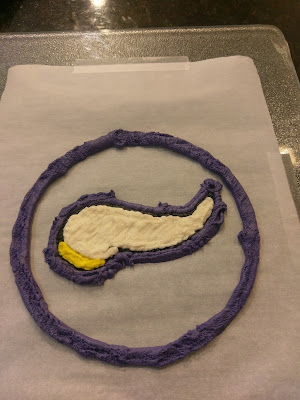
Then I took a #12 tip on a bag of purple frosting and slowly traced my circle outline and around the viking horn, coming back in with a paintbrush to smooth any gaps. 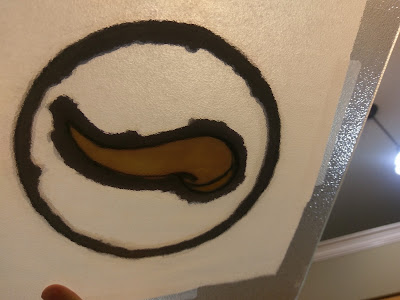
After each round of frosting, I held my transfer up to the light. Any areas that appeared thin or I could see through directly needed help with more frosting and the paintbrush to smooth it in. 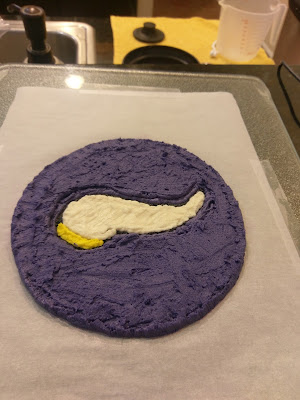
I finished my purple border, and carefully smoothed as much as I could to even the layer out before freezing this for three hours. 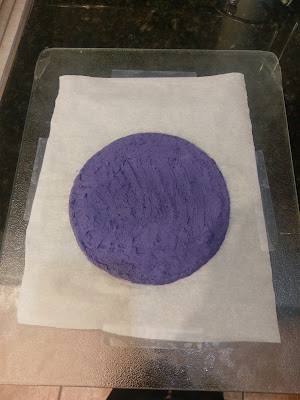
Then I came in for the final touch and covered the horn with a thin layer of purple frosting so that my transfer would sit evenly on my cake and not sink in anywhere. I froze this for 5 days with it double-bagged in Ziplock freezer bags. I removed the tips from all of my frosting bags and placed them into a large Ziplock and into the fridge. My leftover purple frosting fit into a Tupperware and also lived in the fridge. 
But not before admiring my handy work, of course. 
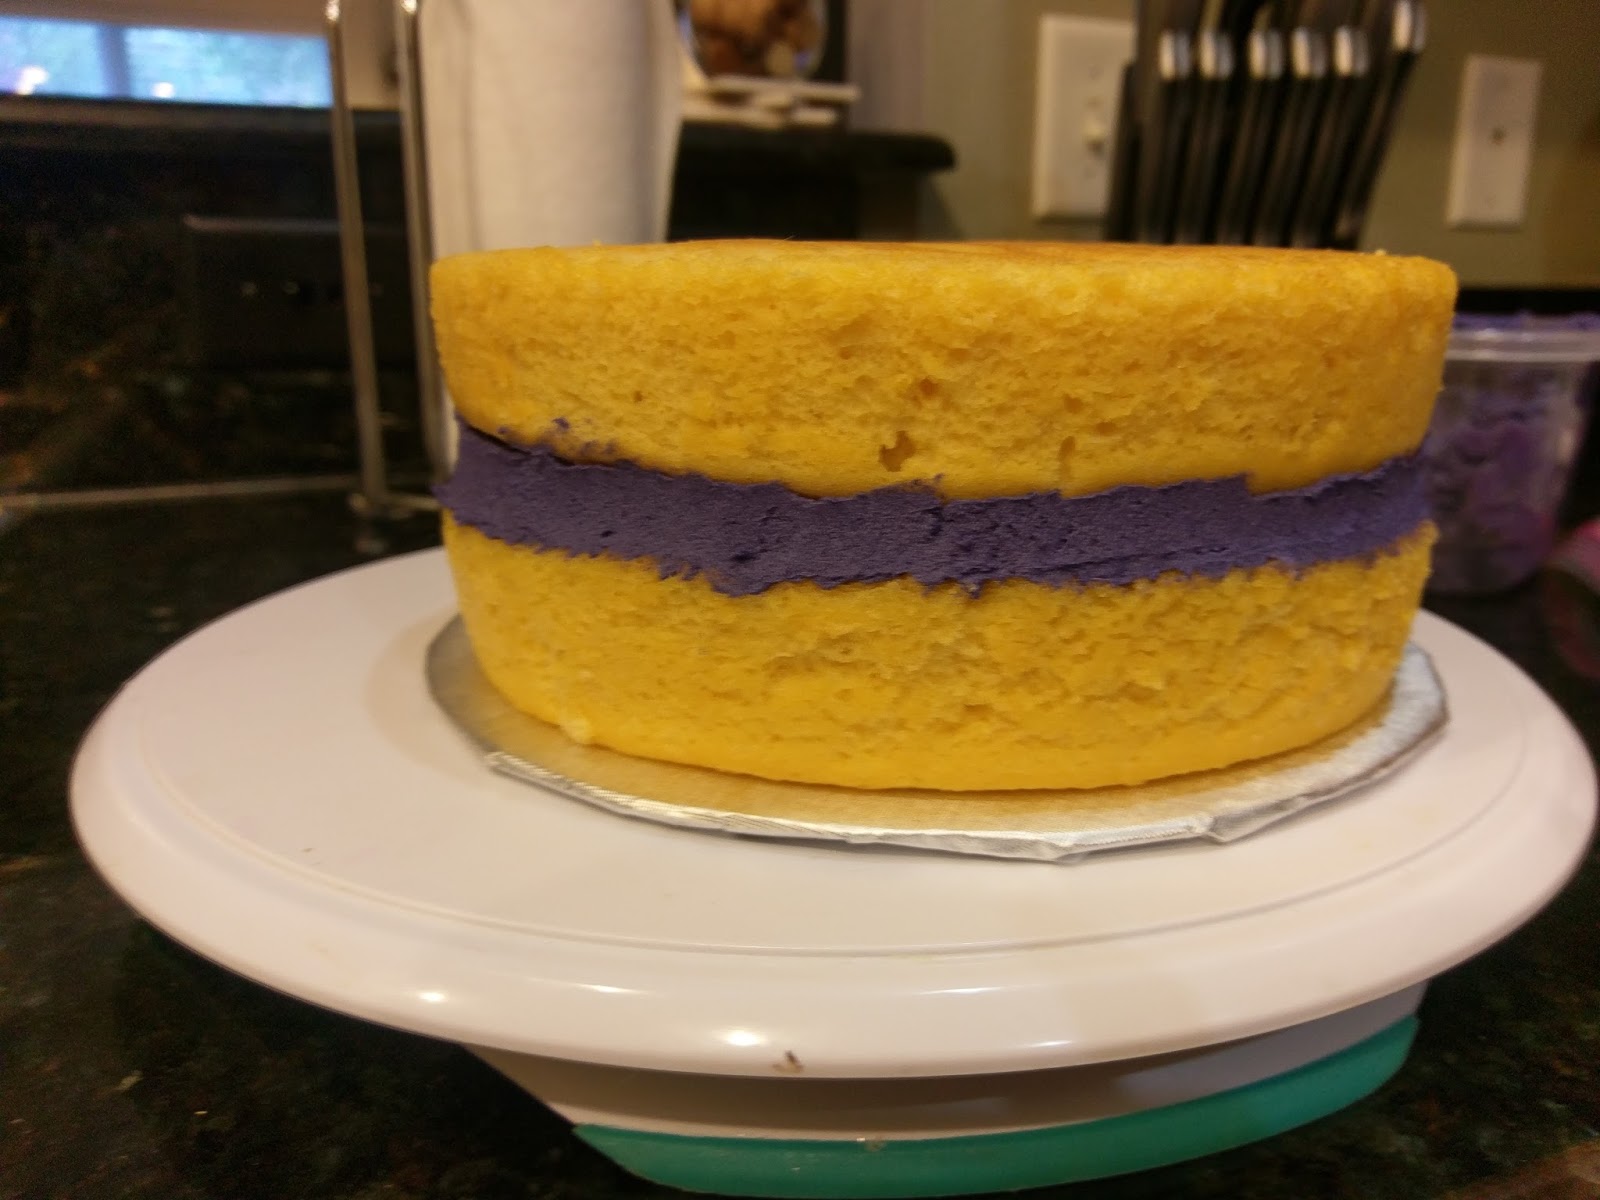
Fast forward five days… I successfully managed to unwrap all three layers of cling wrap from each cake round without (entirely) losing my mind! I removed all my frosting from the fridge that morning to make my cake that afternoon. I prepared an 8-inch cake round with a small glob of purple frosting in the middle, and flipped one cake round upside down and placed it centered on top of this frosting glob so it wouldn’t budge. I filled a piping bag with purple frosting and a 1A tip and created a border around the outside edge of my cake. I came back and swirled in frosting in the middle, and used a hot angled spatula (I just ran it under hot water and wiped it dry) to smooth out the frosting layer without applying too much pressure or causing the frosting to spill over the edge/border I had created.

Like a giant Vikings Oreo. I took my second round and placed it (also upside down) gently on top of my frosting layer without applying too much pressure. I used my angled spatula to create a crisp, smooth line of frosting in the middle by placing it horizontally on the frosting line and spinning my cake table around without moving the spatula at all.
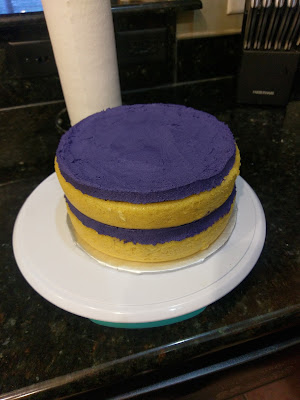
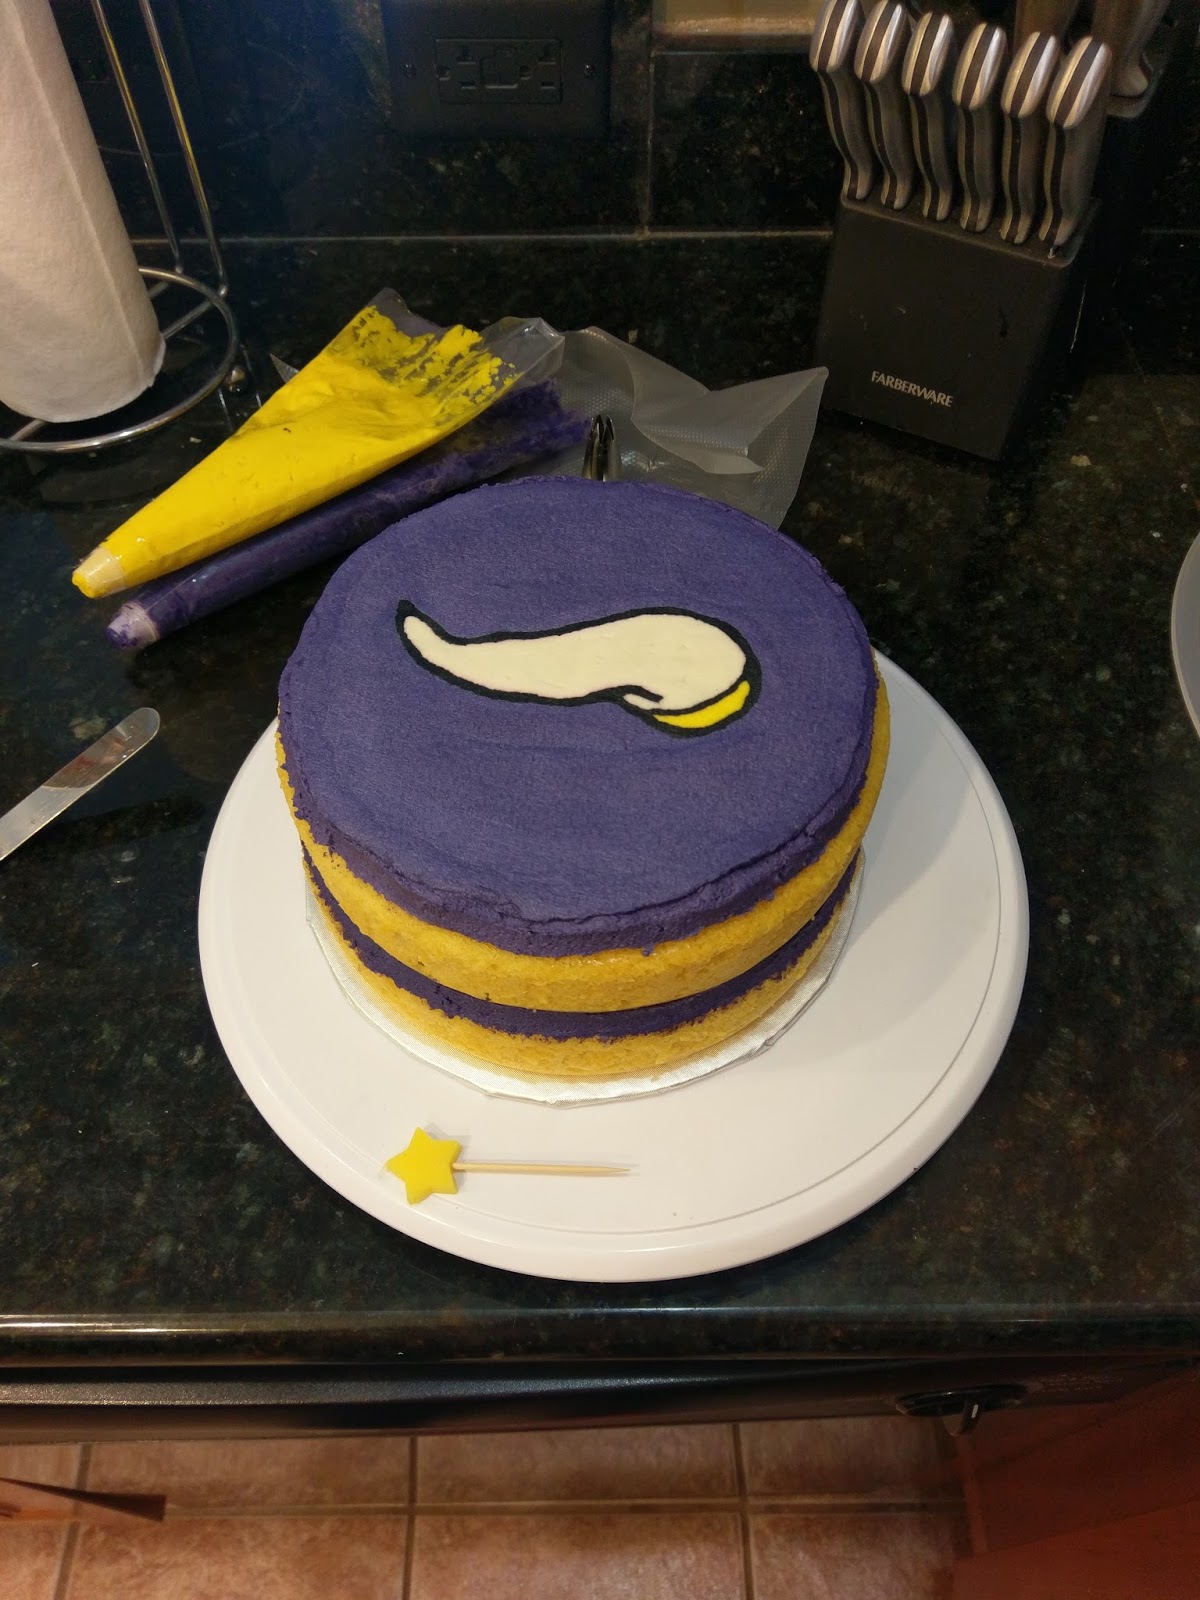
Super clean lines for the win! I refilled my #1A bag with purple frosting and repeated for the top layer so my buttercream transfer had something to adhere to. Speaking of, I nabbed my transfer out of the freezer at this point, and centered it on top of my cake before removing the Parchment paper. Things will look very rough and bumpy at this point. For once in your life, this is actually normal. Let your transfer sit out for 15 minutes before coming back in and smoothing out with the Viva paper towel trick. This is like giving your cake a 20-year age rewind (if only this worked on people, too).

But I’ll take that it works for cakes amazingly. 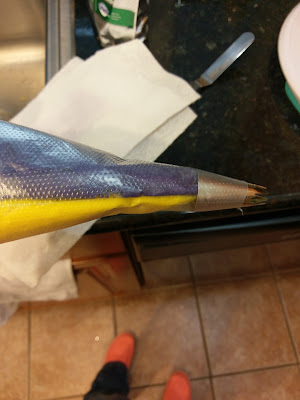
Could be frosting, could be a bag of my blood. A true Viking fan never tells. I wanted a border to finalize things after smoothing my transfer out, so I fitted a large piping bag with a #1M tip and placed my remaining yellow bag of frosting and purple bag of frosting in it together. I piped out a bit of frosting on a paper towel until both purple and yellow came out at the same time.
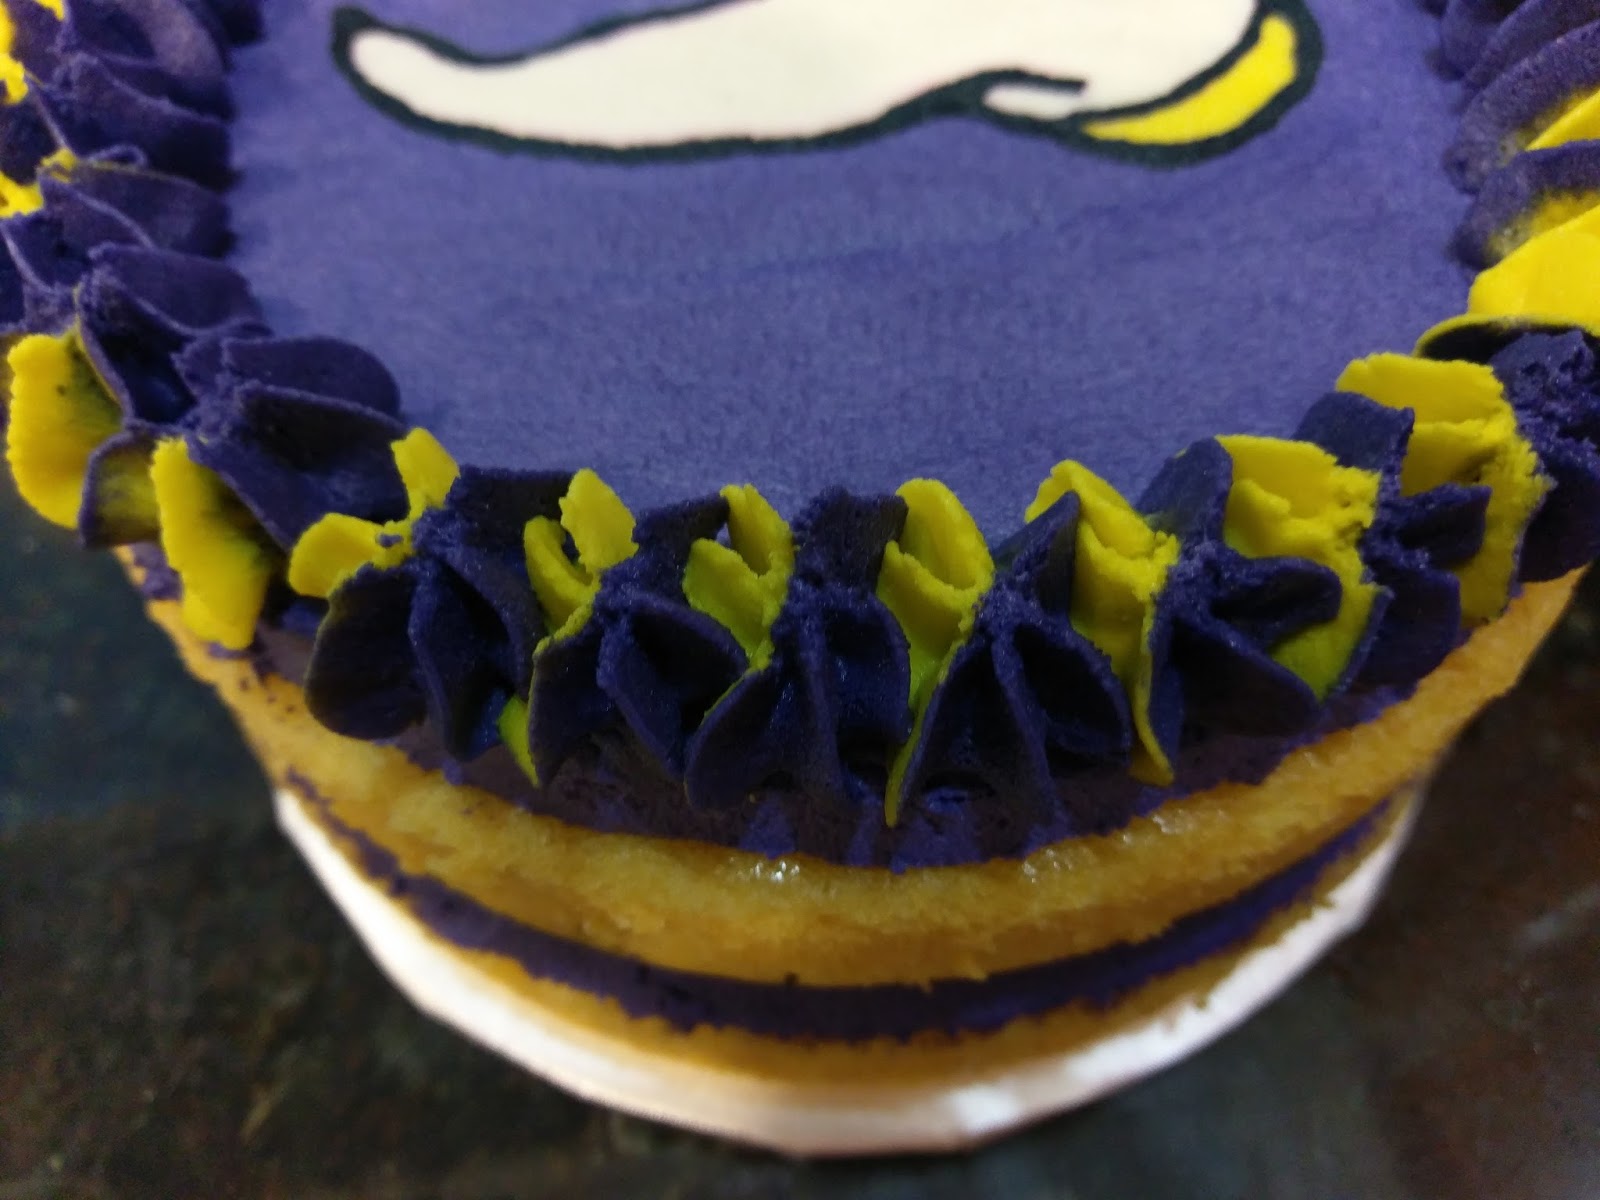
I then piped simple stars around the edge of the cake. 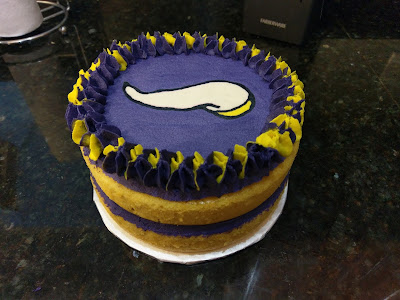
Which was fun, festive, and left me with a ton of frosting. May have piped some out of the bag and into my mouth, but again, a Viking fan never tells. I kept my cake in a cake safe at room temp. The cake itself tasted flippin’ amazing, because yellow amaretto cake is still my jam. Now, let’s discuss the Swerve frosting. Swerve does this weird thing after you take a bite when things taste perfectly sweet and just right…then along comes this cooling sensation (think: biting into a York Peppermint Patty). It didn’t really bother anyone, and we certainly ate the hell out of this cake, but I did think it bore mentioning. I guess because what Swerve derives its sweetness from has this property when it is not dissolved in liquid or heated up that causes a cooling sensation on your taste buds. I think this would go perfectly with a chocolate cake with peppermint or mint frosting, to be honest. However, the cooling covered up the Disaronno flavor in my frosting too much, so that was disappointing. But I was also able to eat a boatload of cake because of how much it lowered the calories, so I’d say all is fair in love and baking and eating said baked goods. I definitely will use Swerve again, but I will cut it in a ratio with regular powdered sugar. Using it in an actual cake or pie where it will get dissolved in liquid will negate that effect anyway, so really this would just be for frosting purposes. Bottom line: Swerve is delightfully strange and a great replacement for regular powdered sugar in small amounts. Other bottom line: my dad loved his cake, and we had an amazing weekend showing them around Floribama. I mean Northwest Florida. It really is the same thing though.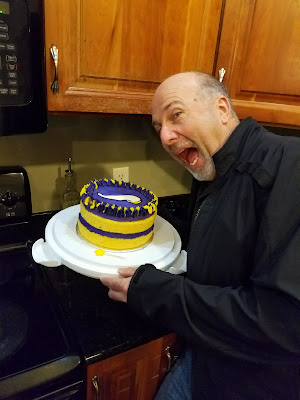
Pictured: my dad about to apply the family principle of licking things to claim them as your own. My sister’s favorite method. As with all family trips, it went by too quickly, and so did the cake. Only two slices remain, and they both look equally terrified their existence will end each time I walk into the kitchen. They’re not wrong. But I was incredibly happy to be able to provide my dad with a birthday cake that was next-level Viking decorated. Perhaps one of the greatest lessons I’ve ever learned from my father was that actions definitely speak louder than words, and being able to give him this cake was one of the best ways I could think of to say “thank you.”..for everything. ‘Til next time, my fellow eaters. And, SKOL!
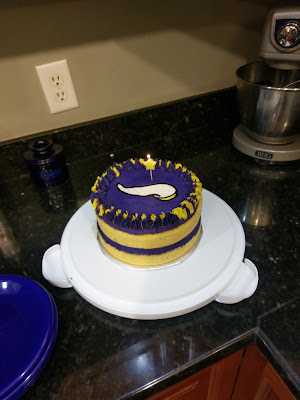
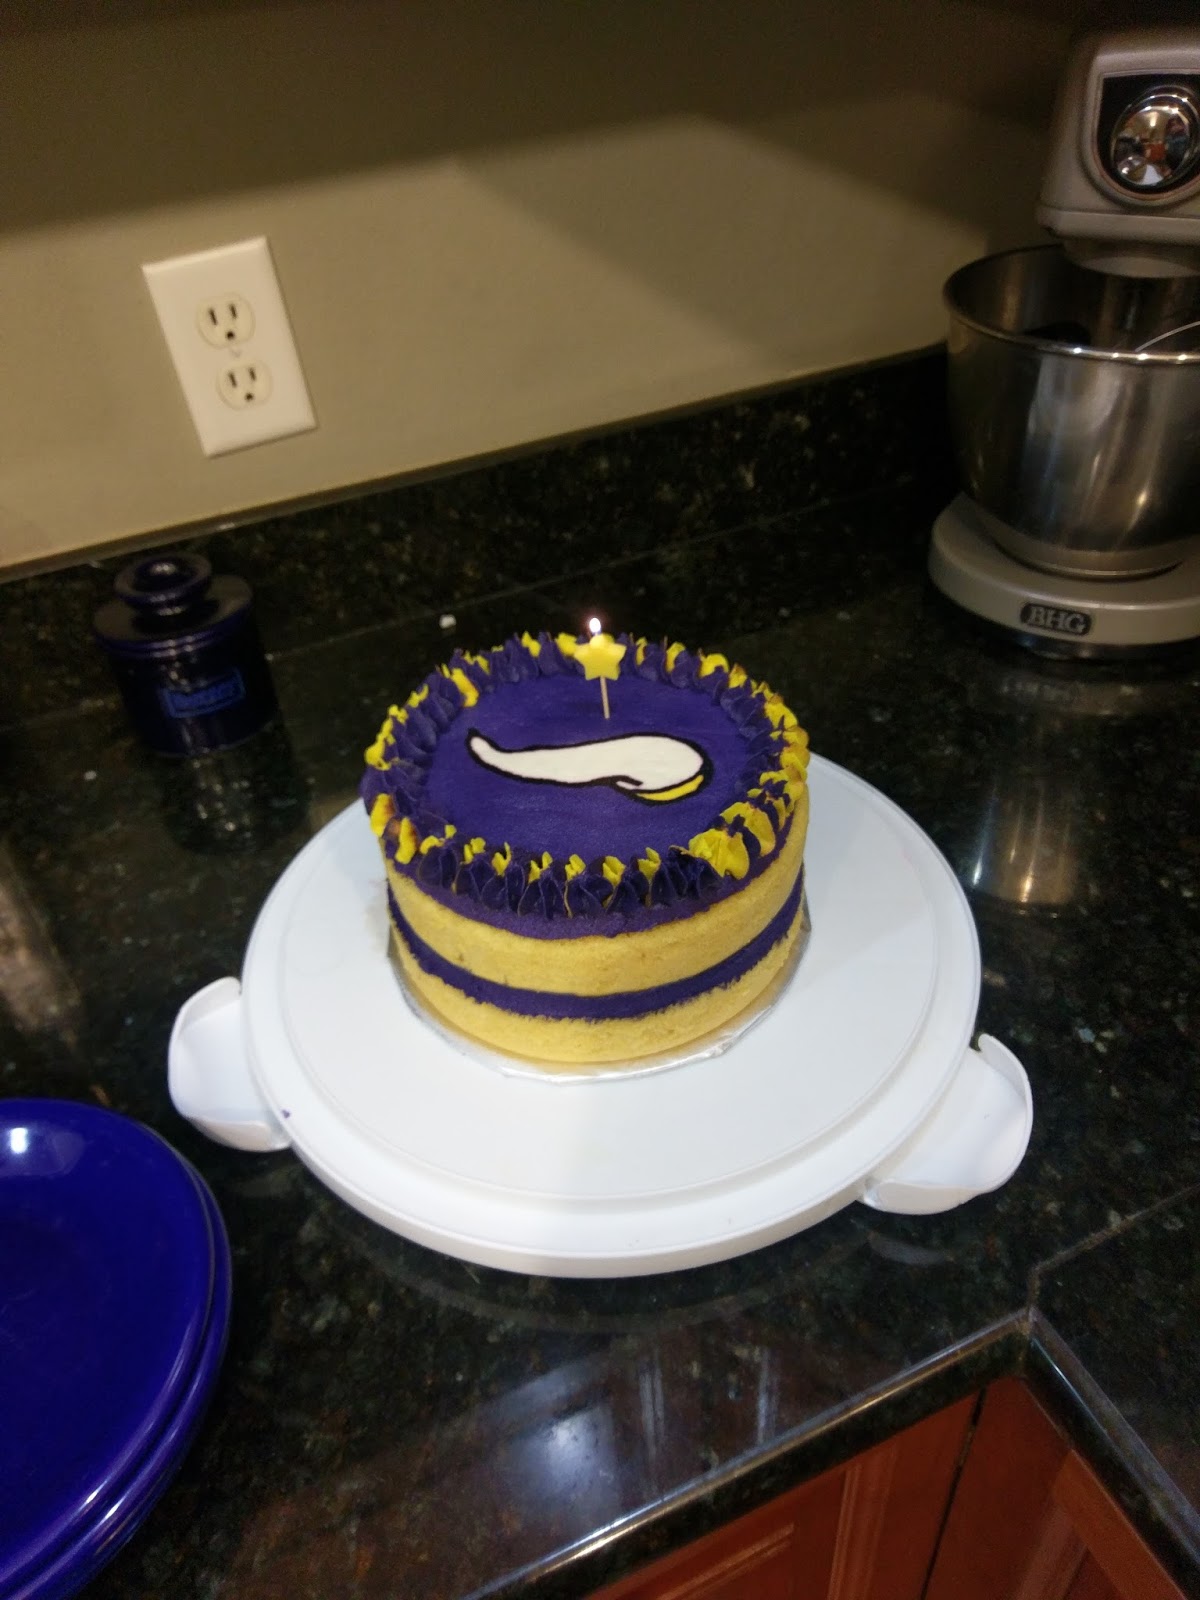
Yes, I even have yellow candles. The fandom is strong. And pretty. Could you imagine how ugly a Packers cake must look? 😉 -
Pineapple Belongs on Everything
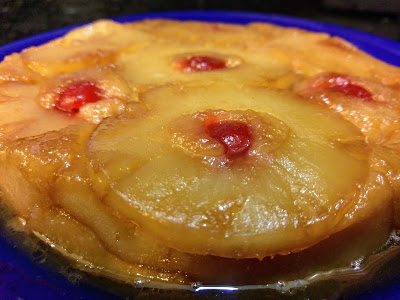
I happen to be a lover of all things pineapple. I am not a pizza purist who has no time for a slice of Hawaiian pizza. In fact, it’s one of my favorites, and I refuse to let anyone judge me for trying to put fruit on pizza (side note–dessert fruit pizzas are amazing, and I need to make one soon). Even though I adore the tangy sweetness of pineapple, before last weekend, I had never made a pineapple upside down cake. I don’t even think I had eaten a slice of one in at least fifteen years. Back then, my taste buds cared less about pineapple and more about McDonald’s and Coke Icee’s. Well, they still do, but thankfully, they’ve also branched out and make me try daring things on occasion. Not that I’d consider pineapple daring, but you’re talking to a woman who didn’t eat avocados until two years ago. I’m maturing, y’all.
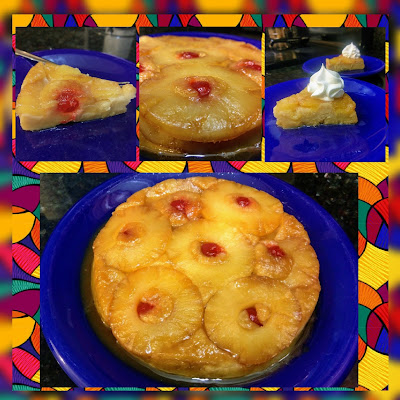
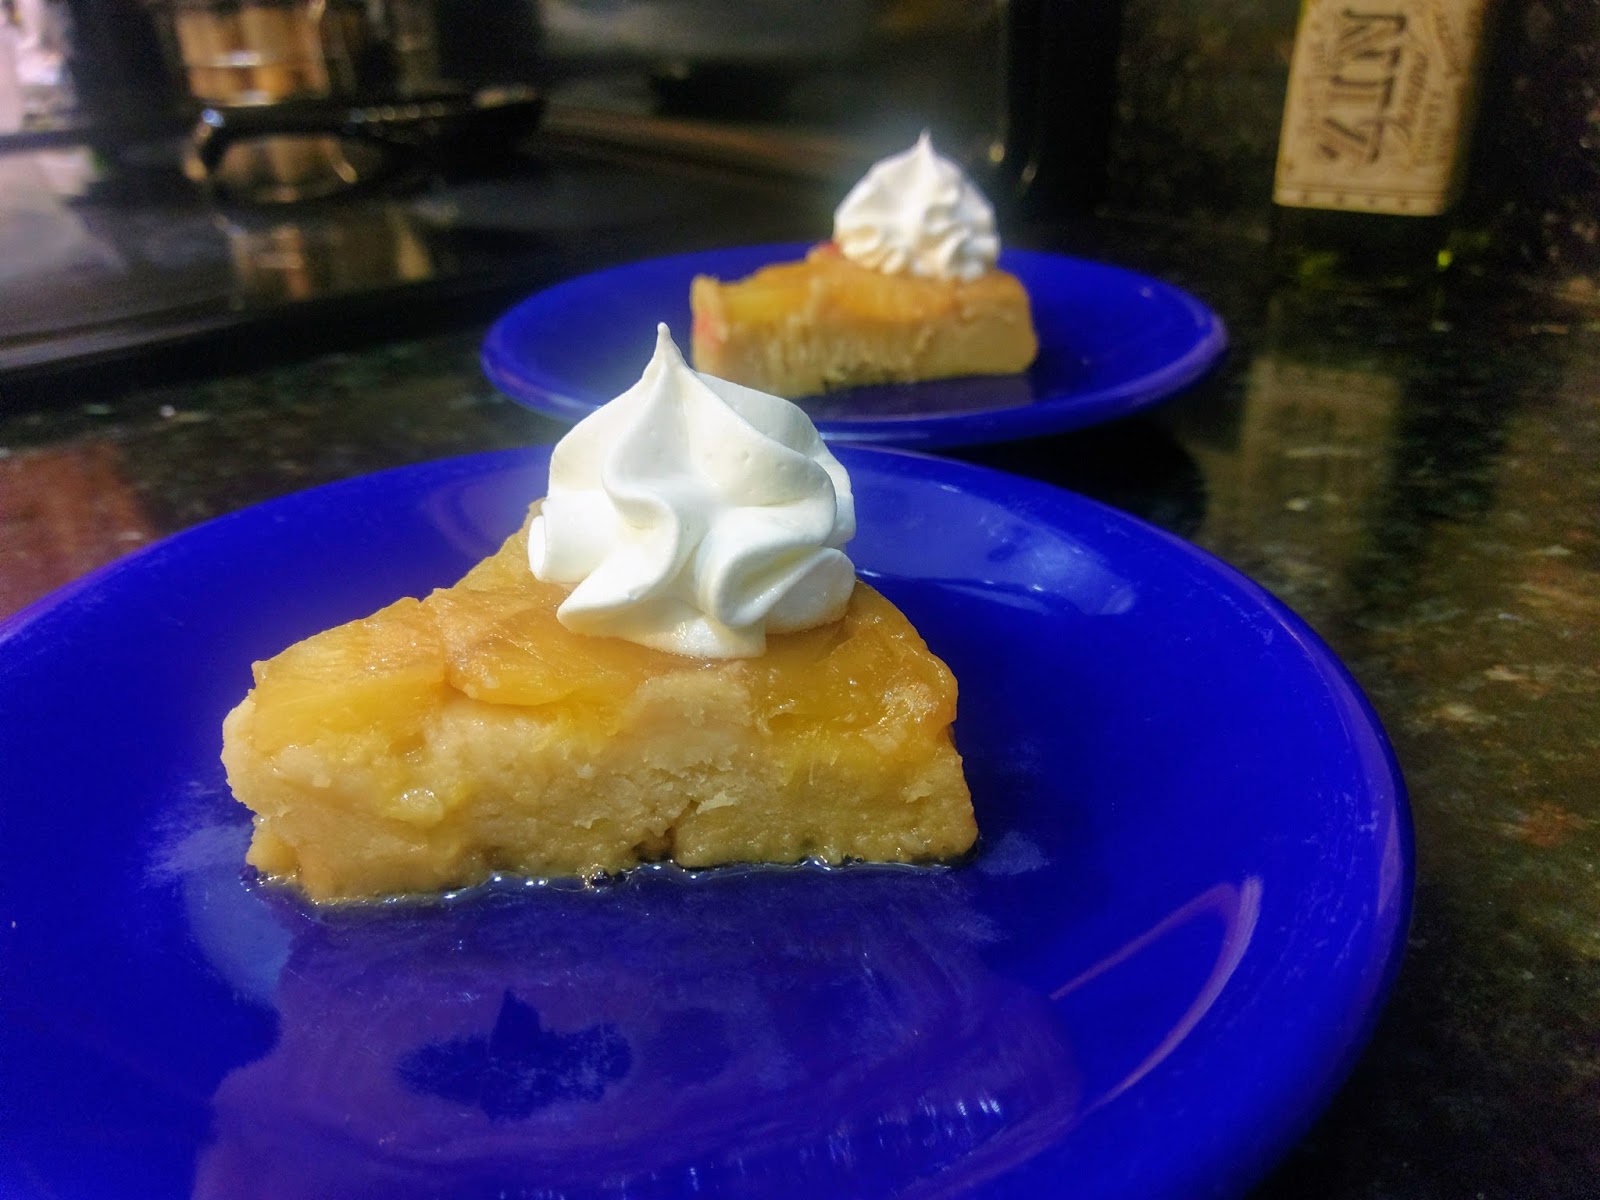
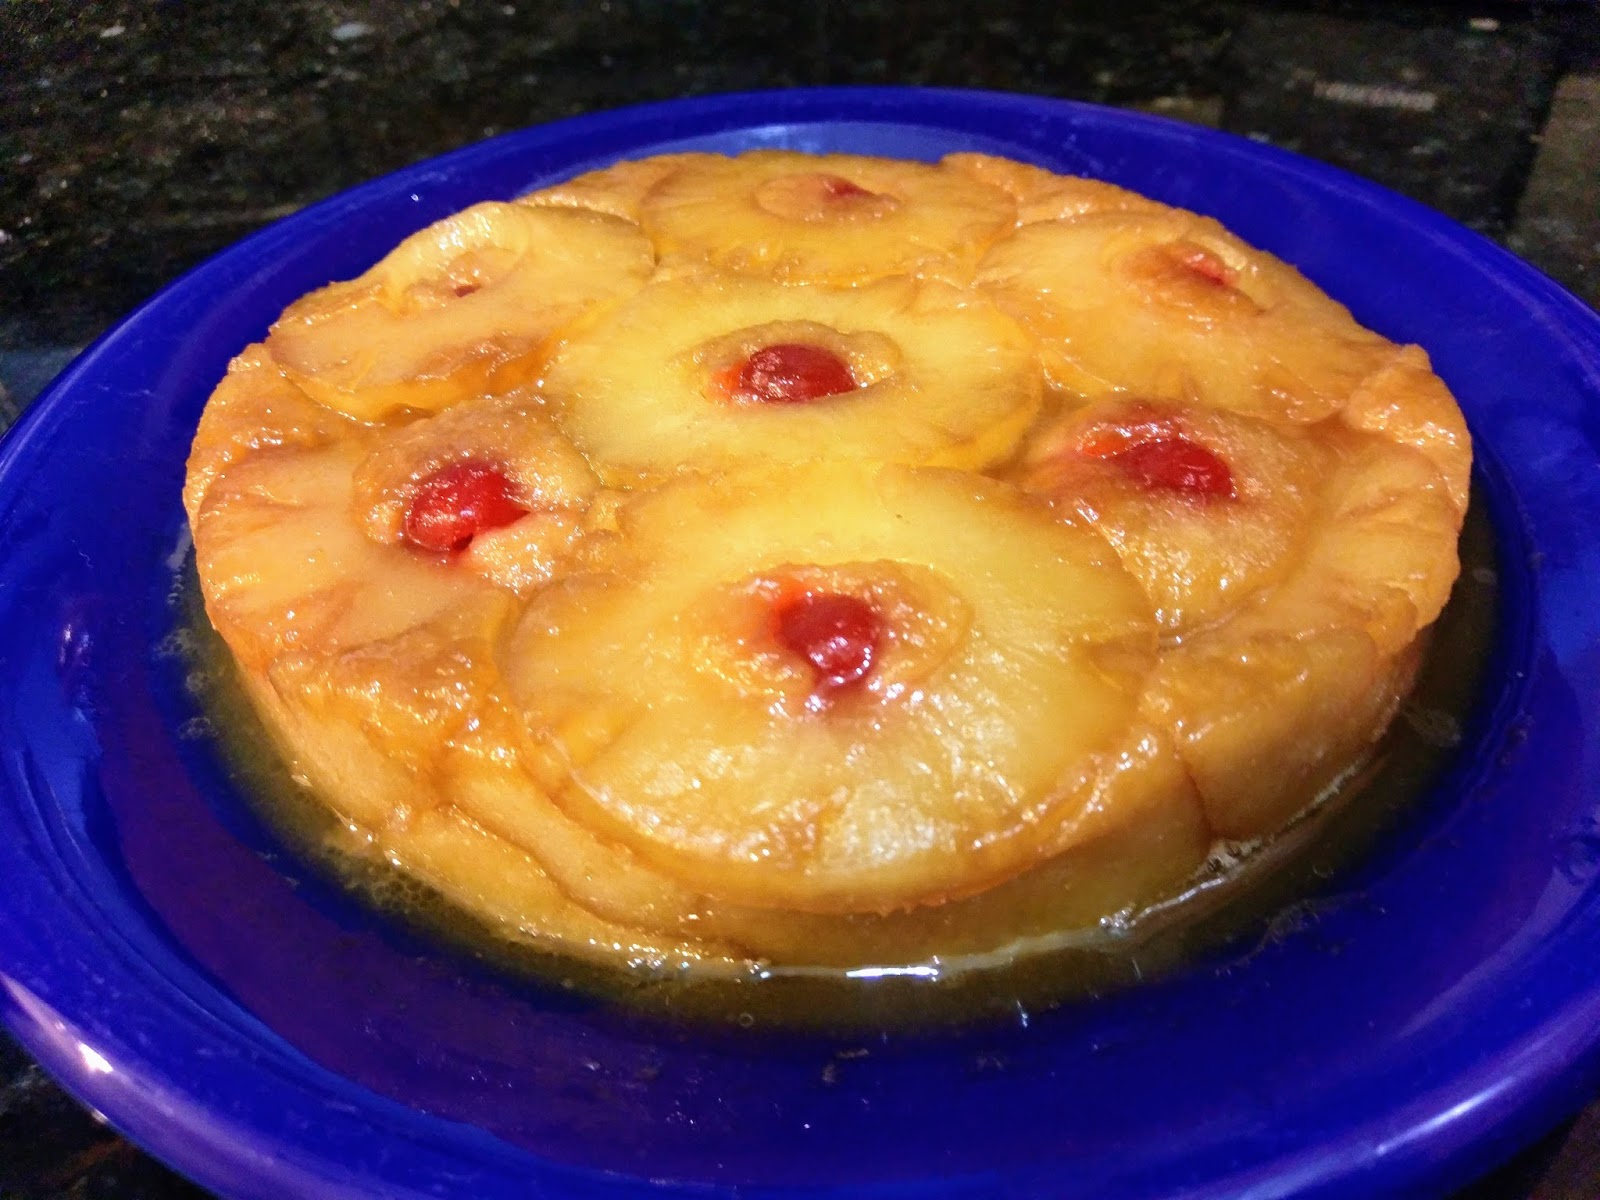
And it tastes way more delicious than I ever figured it would. Best part about that ooey-gooey, pineapple-y goodness pictured above? I adapted it from a Truvia recipe–so eating it is a transcendentally guilt-free, delicious moment. At a mere 214 calories a slice (8 slices total), you can even add what some might call a “ridiculous” amount of Cool Whip Free on top just to take it that extra mile for few extra calories. I had it with or without, and while I preferred my slice with Cool Whip Free (I have an obsession), this was a damn good cake either way. Something magical happens when butter and brown sugar come together in an oven to form glazed goodness, and I love any recipe that tastes best fresh out of the oven with zero wait time from pan to plate to mouth.

Truvia should just sponsor my blog at this point. I promise you that this is in no way difficult to make from scratch. I think this maybe took all of ten minutes to throw together, but last weekend was a blur of sadness thanks to my ever-waffling, normally soul-crushing Minnesota Vikings. I will say this cake and the support of my Eagle’s-loving husband (seriously, he didn’t gloat once) somehow managed to pull me out of the depressing abyss that comes with our annual playoff shortcomings. Crushed hopes and dreams aside, a day in sweats and a slice of pineapple upside down cake had me just right again (with my usual dash of sass and sarcasm). To make, gather:
- 3 TBS butter
- 1/3 cup Truvia Brown Sugar Blend
- 7 fresh pineapple slices, drained
- 7 maraschino cherries, drained, without stems
- 1/3 cup unsweetened applesauce (or you can use oil, but this will up the calorie content a lot)
- 1/2 cup Truvia Baking Blend
- 1/2 tsp salt
- 3/4 cup skim milk
- 1 tsp vanilla extract
- 1 egg
- 2 tsp baking powder
- 1 1/3 cups flour
Optional: Cool Whip Free for topping
Start by preheating your oven to 350 and placing the 3 TBS butter into an 8″ pan. Throw this into the oven so the butter gets nice and melty, like it’s on a fresh stack of pancakes. Mmm, pancakes. I bet pancakes with pineapple would be amazing. Sorry, I’m easily distracted by the endless taste possibilities pineapple can provide.
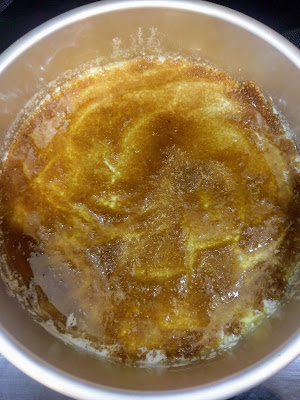
Mmmm buttery brown sugar. While your butter is melting, drain and set aside 7 slices of pineapple, 7 cherries without stems, and then dump the applesauce, Truvia Baking Blend, milk, vanilla, and egg into a stand mixer bowl. Give a blend on low for about 30 seconds, then dump in the flour, salt, and baking powder in and blend for 2 minutes on medium-high. While this is blending, pull your pan out of the oven and swirl the butter around so it evenly coats the bottom of the entire pan. Then take the Truvia Brown Sugar Blend and sprinkle on top of the butter. I used a rubber spatula to press the sugar down and ensure it mixed with the butter.
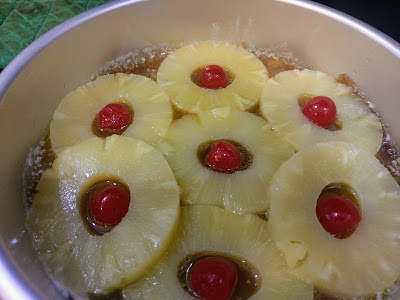
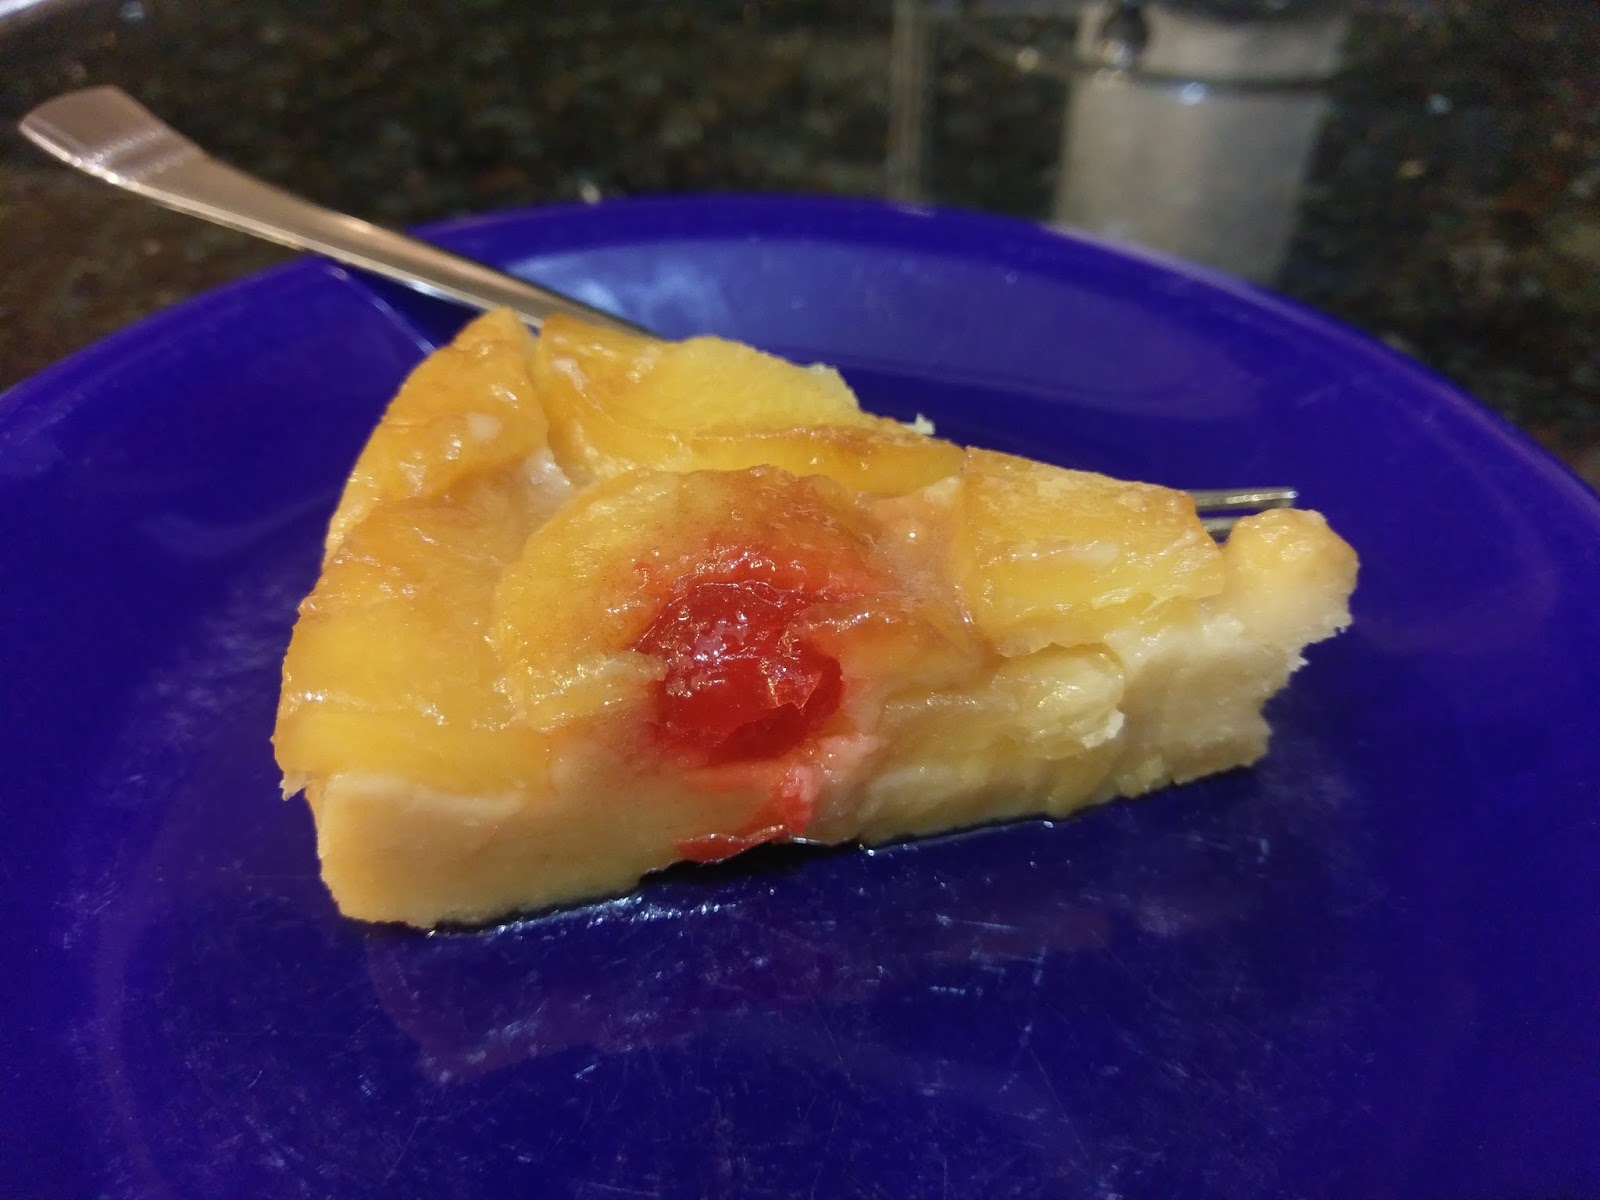
Who lives in a pineapple under a cake? Not Spongebob Squarepants, that’s for sure. Your pan will still be hot at this point, so carefully lay out the 7 slices of pineapple. There will be some overlap, but they shrink as they bake, so it’ll look fine, I promise. Place a cherry on top (which is actually the bottom–mind, blown) of each pineapple slice’s center.

Oh yes, look at that naughty butter, seeping all over the place and breaking the rules in the tastiest way possible. Gently pour your cake batter on top of the pineapple and cherries, and bake on the middle rack of your oven at 350 for 35 minutes. A toothpick should come out cleanly from the cake when fully cooked.
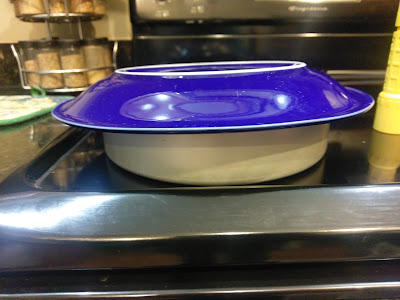
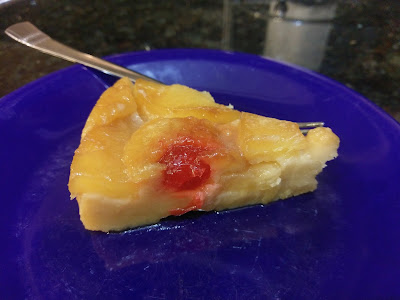
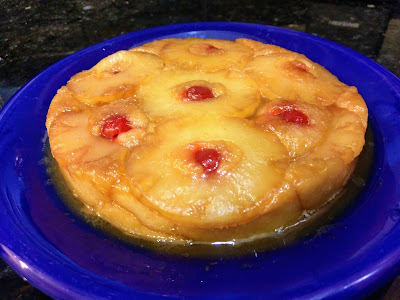
I literally have the perfect plates for upside down cake. The moment you remove your cake from the oven, place a large plate on top of your cake pan. Carefully (definitely wear oven mitts or pay the price) invert plate and pan so plate is on the bottom and pan is on the top. Let the cake set in the pan as the buttery glaze distributes itself evenly over the top of the cake. Thankfully, this is a short period of time, perhaps 5 minutes in total.
Worth it. Look at that distribution, baby. You should be able to slowly but very easily remove the pan from the cake without fear of ruining your cake. Butter is a magical thing, people. Pineapple upside down cake is amazing straight from the oven, and you can definitely slice into this and serve it while warm–in fact, I recommend it.
But don’t forget the Cool Whip Free. In my haste/football shame spiral, I didn’t serve our first round of pineapple upside down cake with any, but it was still definitely yummy enough to give me a reason to go on and keep living despite the game results. Behold, the power of cake.

But you better believe I didn’t forget it any other time. I kept this cake in a cake safe in the fridge, reheating our slices for about 30 seconds a pop before topping with Cool Whip. It is a nice and dense cake layer bottom with the perfect amount of sweetness; not too overwhelming since the pineapples and cherries do a nice job of providing plenty of sweetness on their own. The additional sweetness from the Cool Whip Free was the perfect finishing touch. Speaking of finishes, we inhaled this cake, and I miss it terribly. I can relate to a cake that isn’t right side up because when you’re as clumsy as I am, upside down is a natural resting state. It’s nice to know when you’ve got two left feet and raging seasonal football depression that pineapple has the power to make everything seem right in the world. Now tell me again why people don’t like it on pizza? Because unless you’re a Patriots fan, I can guarantee on any given Sunday, you’re gonna need something to cheer you up. ‘Til next time, my fellow eaters!
I mean, I might have to make another one of these just to survive watching the Super Bowl take place in our home stadium without us. The commercials this year better be frickin’ hilarious. -
Boozy Baking Supernova
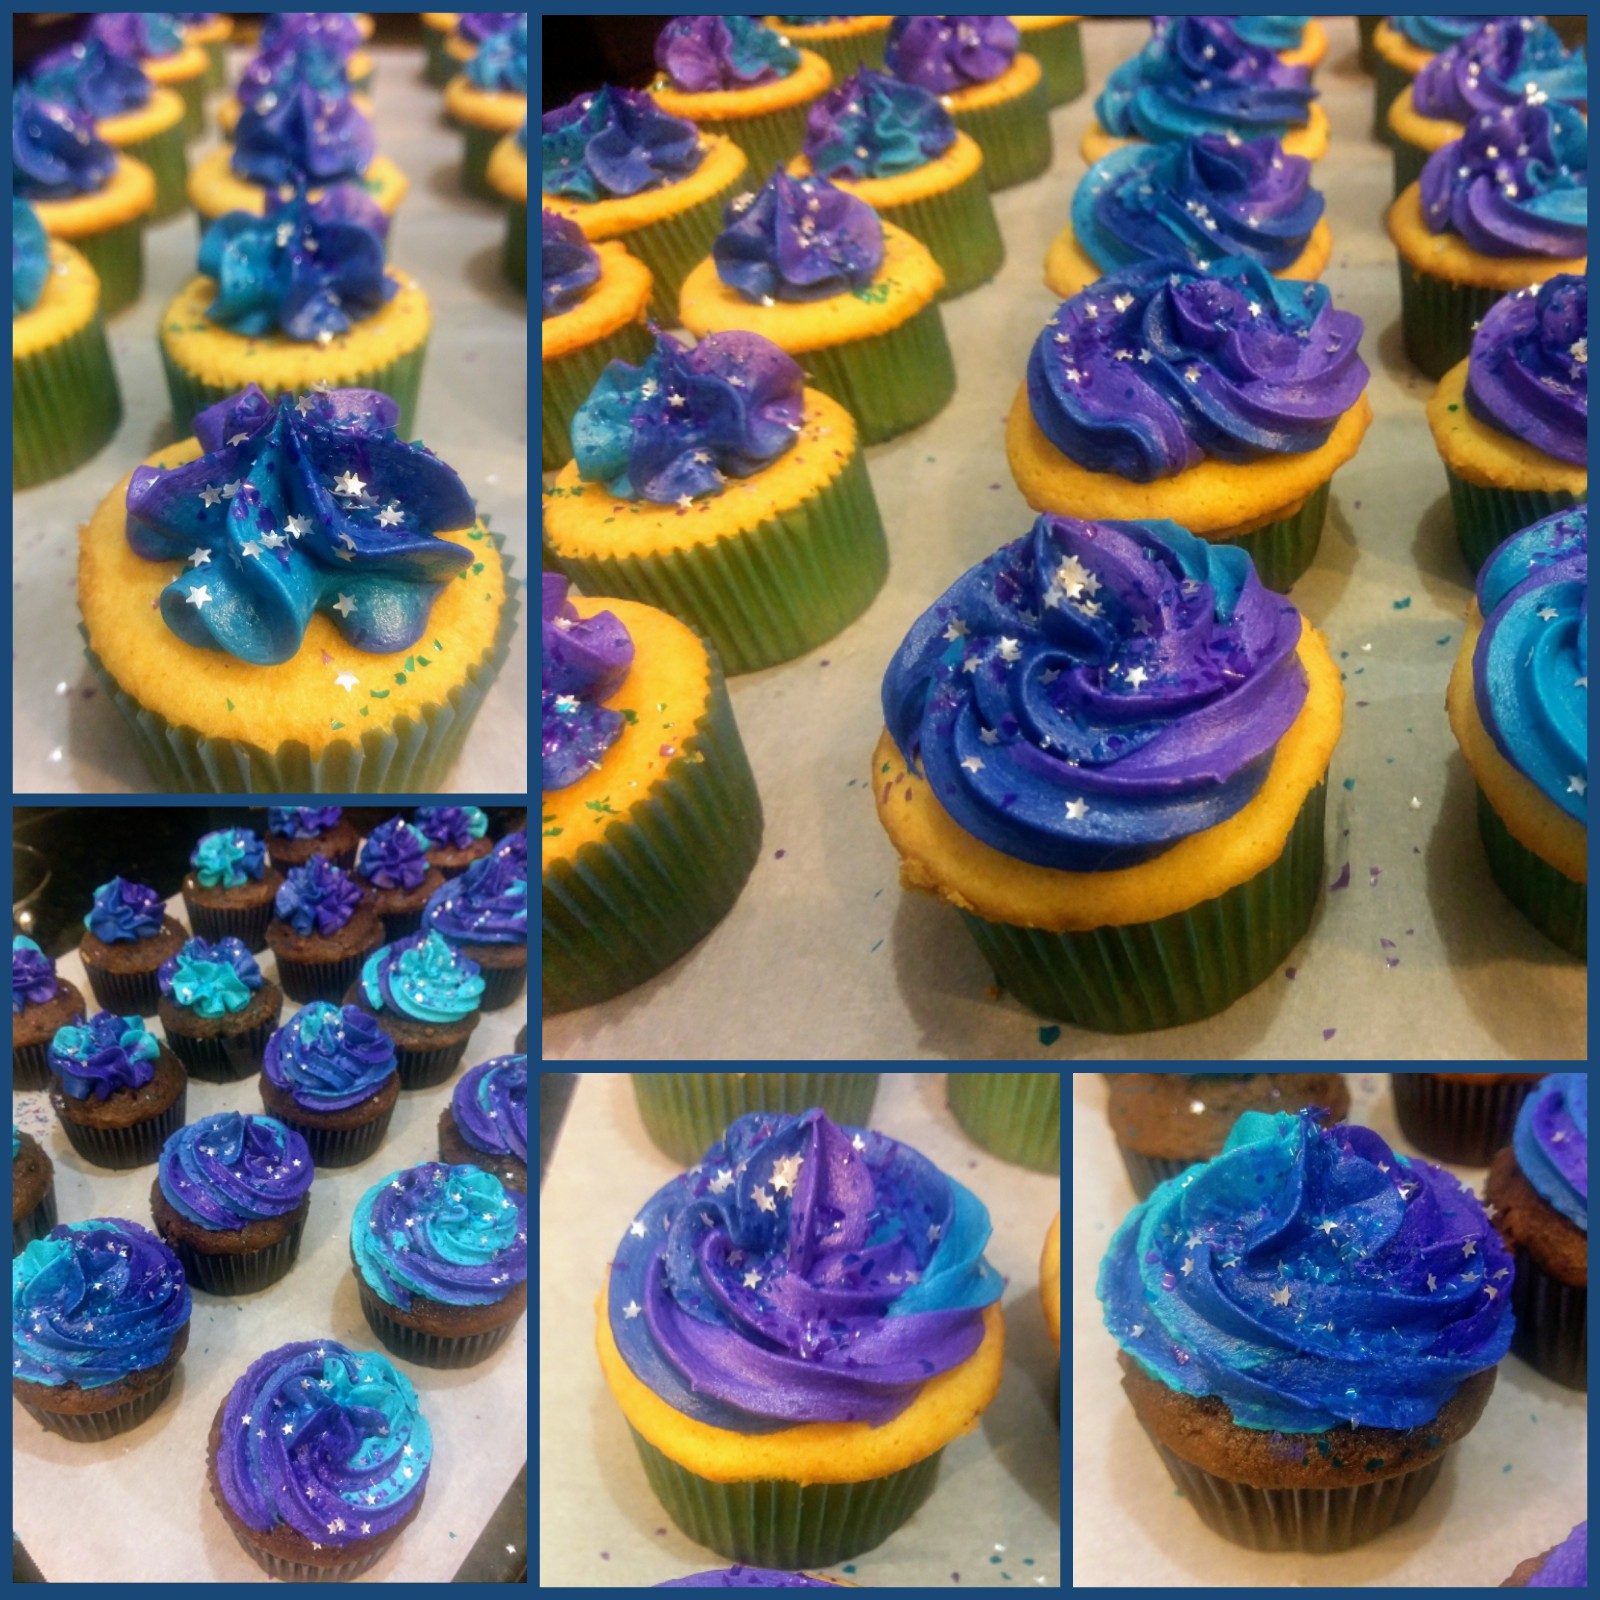
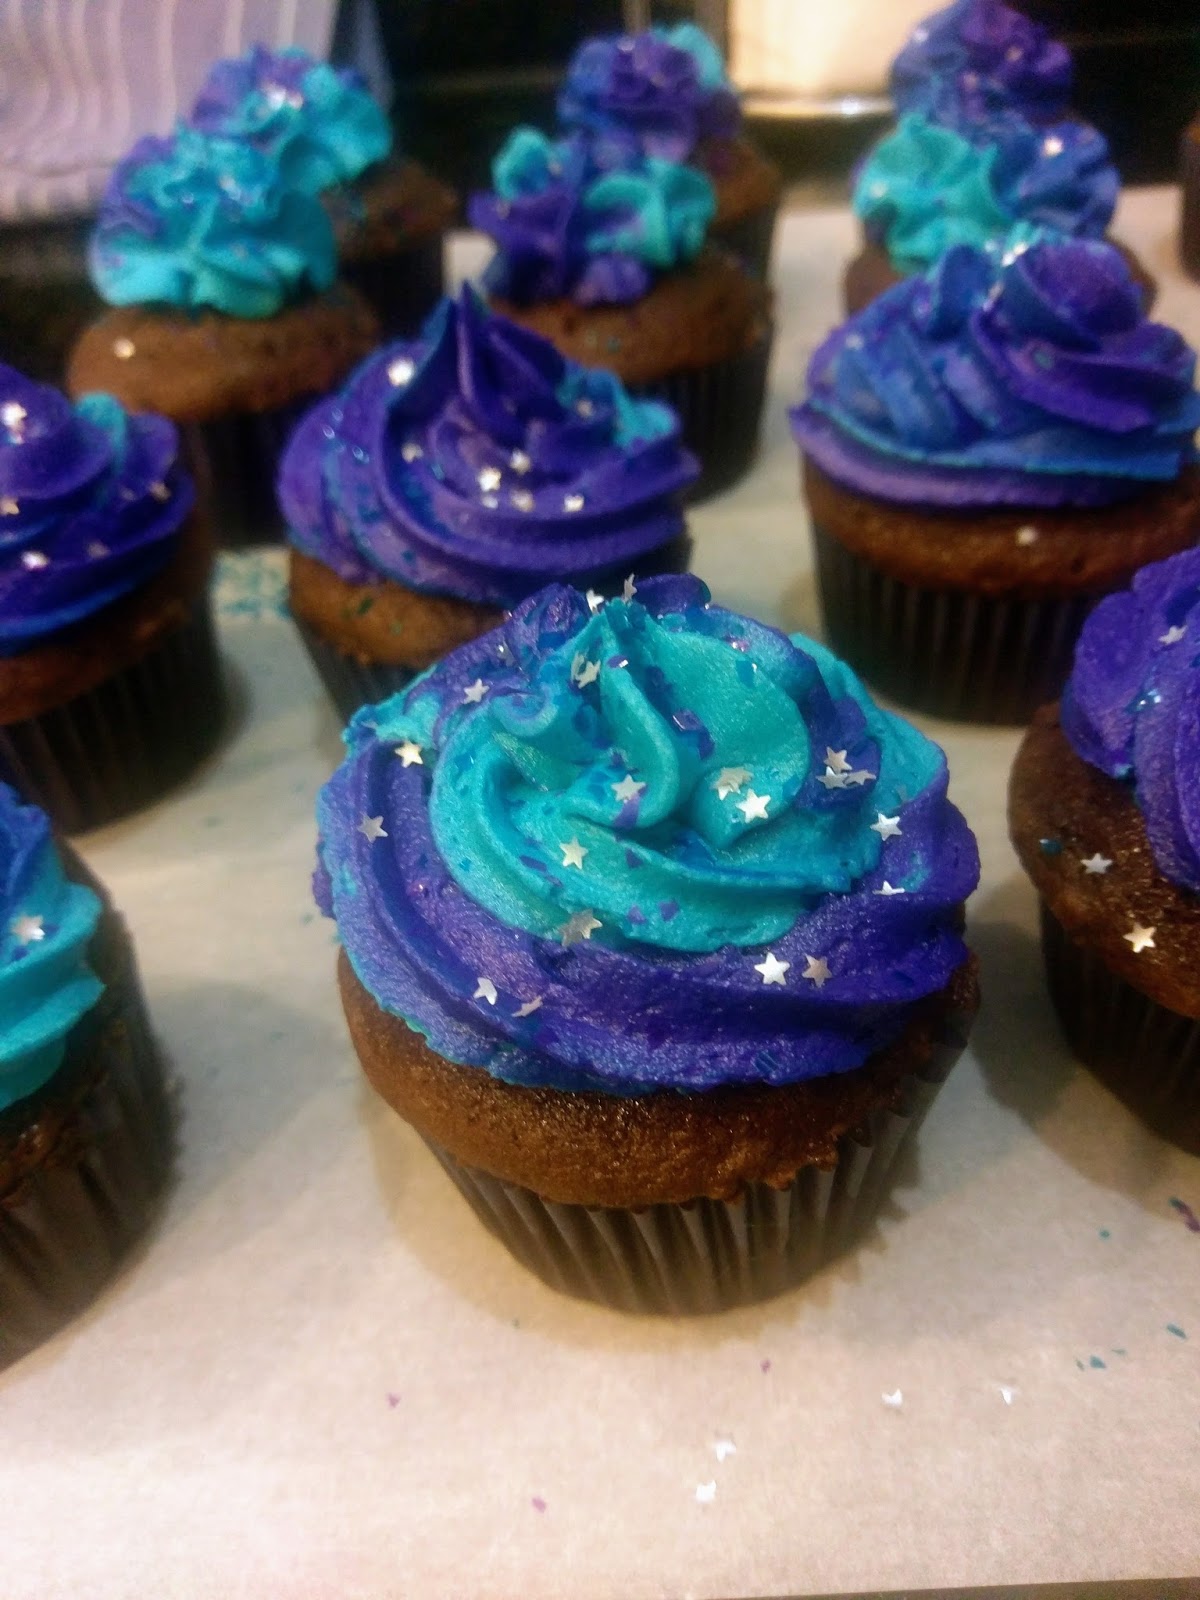
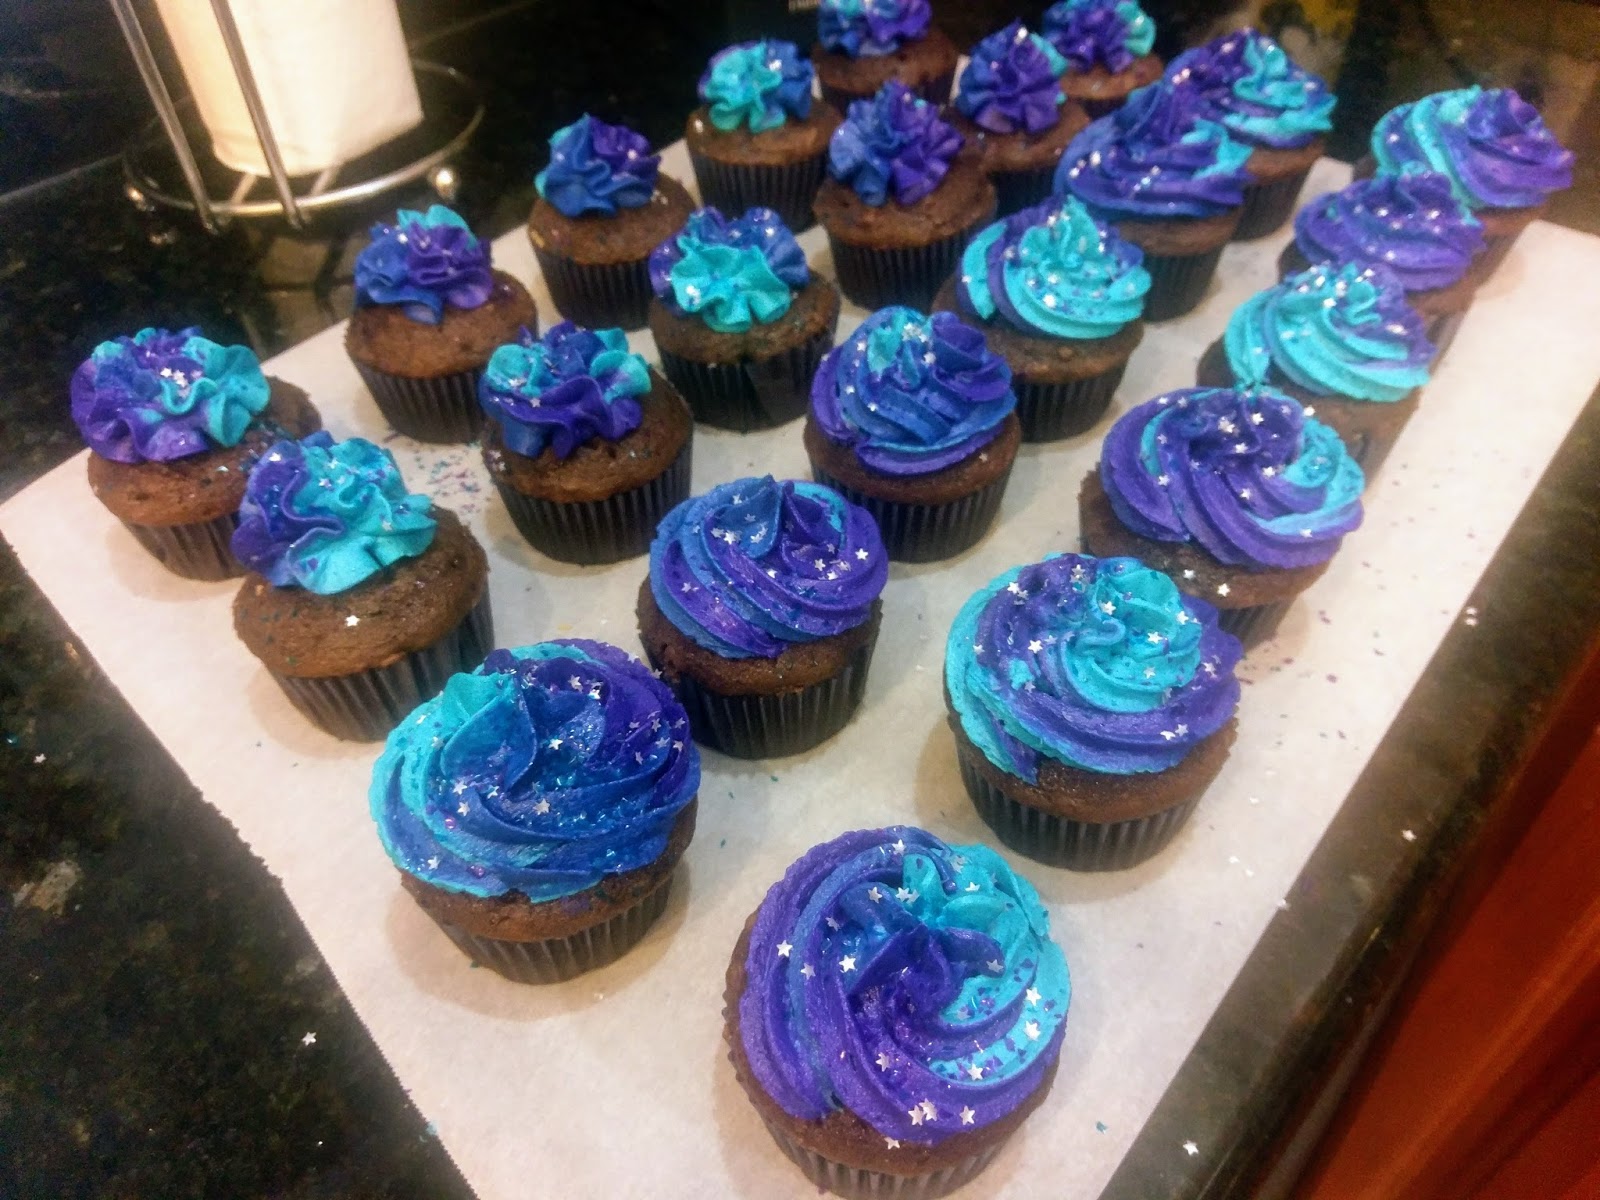
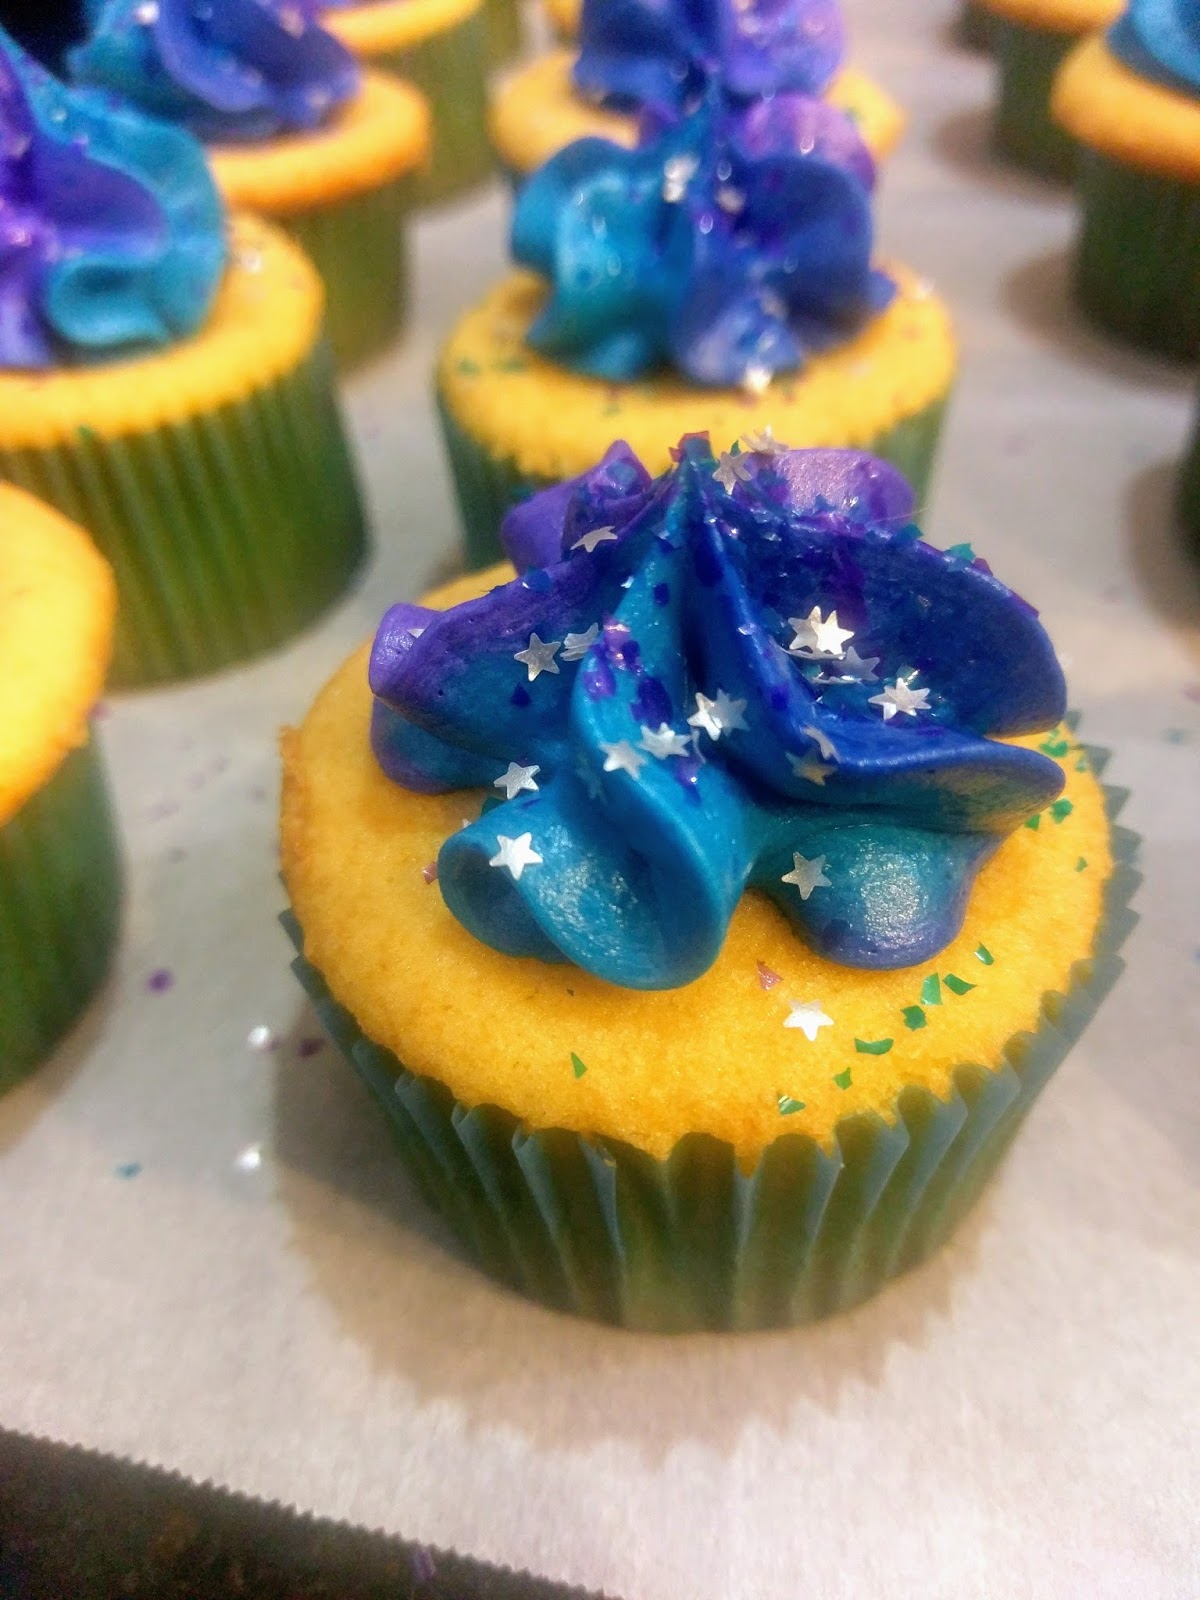
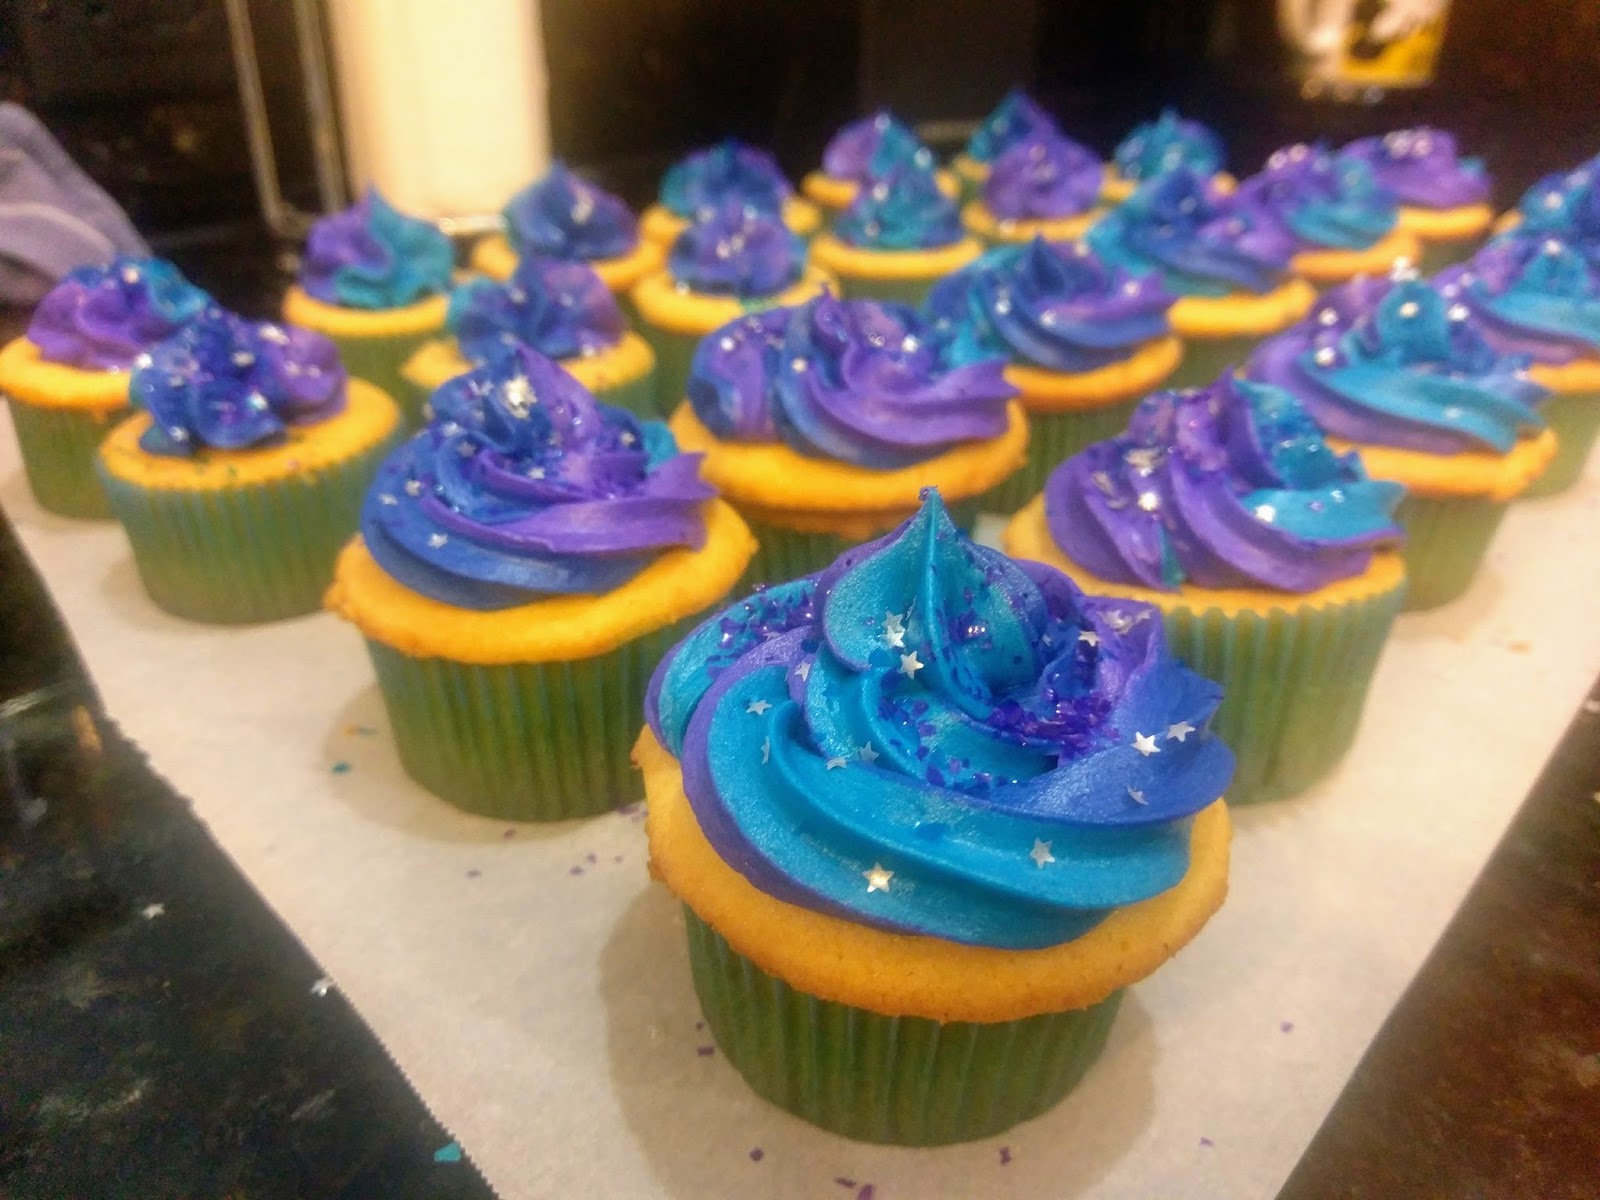
Baking with booze is not for the faint of heart. Luckily, my heart is tiny and afraid of very few things (looking at you, spiders and wrinkles), so it is something I do with frequency. I’ve got my go-to’s: the Guinness chocolate anything, Baileys buttercream frosting, margarita cupcakes, etc., but recently, my motto has been Disaronno or bust when it comes to baking (and drinking). When I volunteered my services as the boozy baker for a big event at work, I knew I had to try a recipe that was lingering in the back of my mind. It was either going to be out-of-this-world amazing or quite possibly the worst thing ever to happen to cupcakes in the history of time and space. I live my life based on the extremes, and if you haven’t picked up on it, themed desserts. I work for a science museum, so I figured it was only appropriate to have a galaxy/space decorating motif with these cupcakes. Sometimes it’s better to think inside the box than out of it, I suppose. Safe theme, daring flavor: the galaxy swirl cupcakes in Baileys chocolate flavor, and, drum roll please: Disaronno yellow flavor.
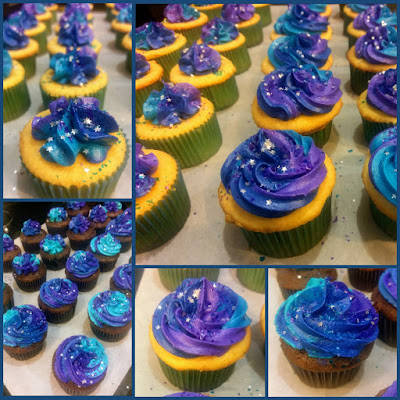
Literally the greatest flavor in the cosmos. In space, no one can hear you scream. Or eat. While there still may be calories in space, I’m pretty sure that zero gravity business and relaxed-fit space suit would help hide a cupcake addiction. That being said, let’s get to the bad news: these are in no way shape or form low cal. But dear sweet baby space Jesus are they delicious. Each recipe makes 24 cupcakes. The Baileys chocolate cupcake (no frosting) is 165 calories. About two tablespoons of Baileys buttercream is 150 calories. This totals 315 calories per cupcake (yet you won’t care when you’re eating it, I can promise that). The Disaronno yellow cupcake is 145 calories sans frosting. About two tablespoons of Disaronno buttercream is 140 calories. Together, this totals 285 calories per cake. Not only are they even better tasting than the Baileys cupcakes, they’re much kinder in the calorie department. I know a chocolate buttercream with amaretto is fantastic, but just a plain amaretto buttercream is positively divine–and the cupcake itself is my new favorite thing in the entire solar system (sorry, Pluto, you’ve been ousted once more). Added bonus? You can make them from a box mix…

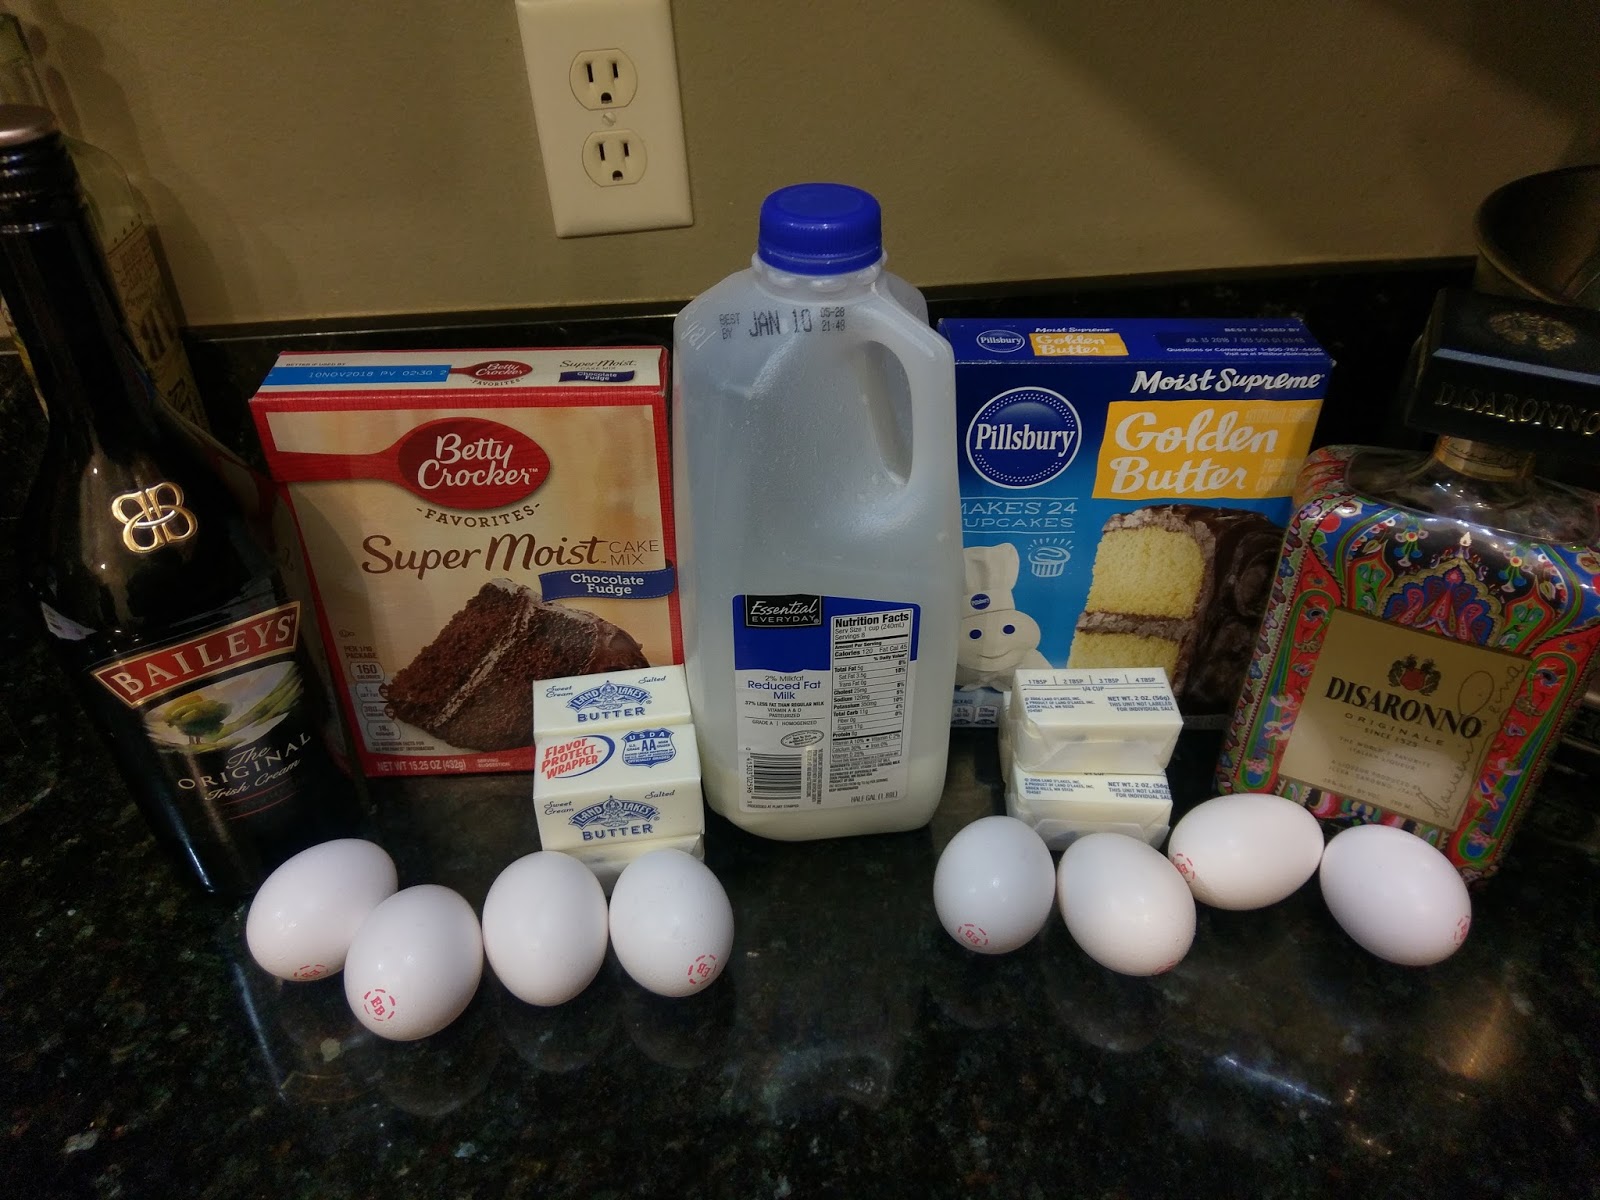
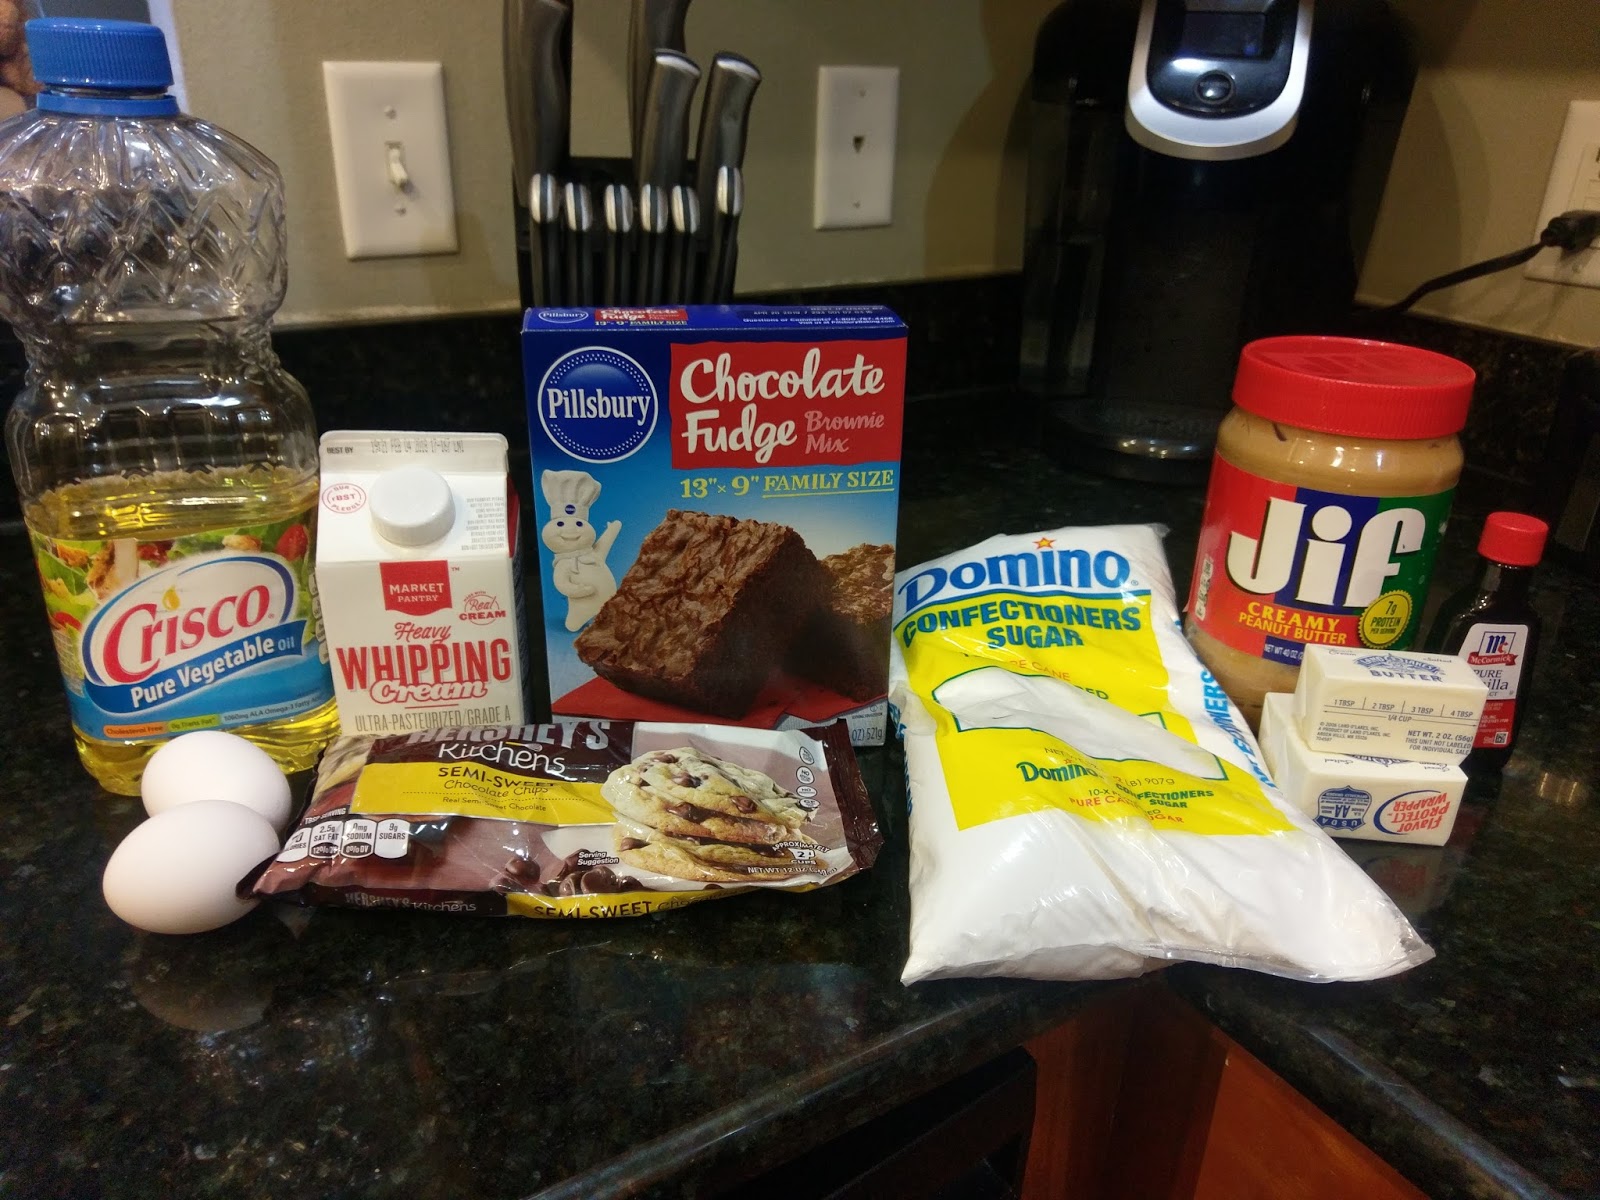
Corner Cutting Champion of 2018. I wanted to make this easy on myself …it had been a long time since I’d baked in mass quantity, so to make the chocolate Baileys flavor:
- 1 box of chocolate cake mix
- The amount of eggs the box mix called for PLUS an additional egg for richer flavor (4 total)
- Nixed the oil and instead used melted butter, with the amount of butter doubled for a silkier batter (it called for 1/2 cup of oil, so I used 1 cup of melted butter).
- Nixed the 1 cup of water it called for and instead used:
- 1/2 cup of Baileys
- 1/2 cup of milk
- Dump all ingredients together and blend on medium-high for two minutes. Line your cupcake tins with liners and bake according to package directions.
- After letting your cupcakes cool in the tin for 5 minutes, remove to a cooling rack to COMPLETELY cool before frosting.
For the Disaronno flavor:
- 1 box yellow cake mix
- Followed my cake jacking method and added an extra egg, subbed melted butter for oil and doubled the amount, and nixed the water, instead using half milk and half Disaronno to total the amount of water the box mix required (I think it was like 1 1/4 cup. I can’t remember specifically, so I can’t give you an exact amount. Just use half booze and half milk for whatever your box mix requires as a water replacement to really make the flavor shine).
- Dump all ingredients together and blend on high for two minutes. Line your cupcake tins with liners and bake according to package directions.
- After letting your cupcakes cool in the tin for 5 minutes, remove to a cooling rack to COMPLETELY cool before frosting.
Cake jacking a box mix is super easy, and it does result in an insanely rich, flavorful cupcake. Using alcohol to bake with also brings out some great flavor, so you really can’t tell these are from a box, and that is all that matters when you’re insane and want to bake almost fifty cupcakes in one day while also writing a grant because you’re Type A or bust. I think we all just figured out why I eat my feelings. Stress goes great with sugar. And butter.

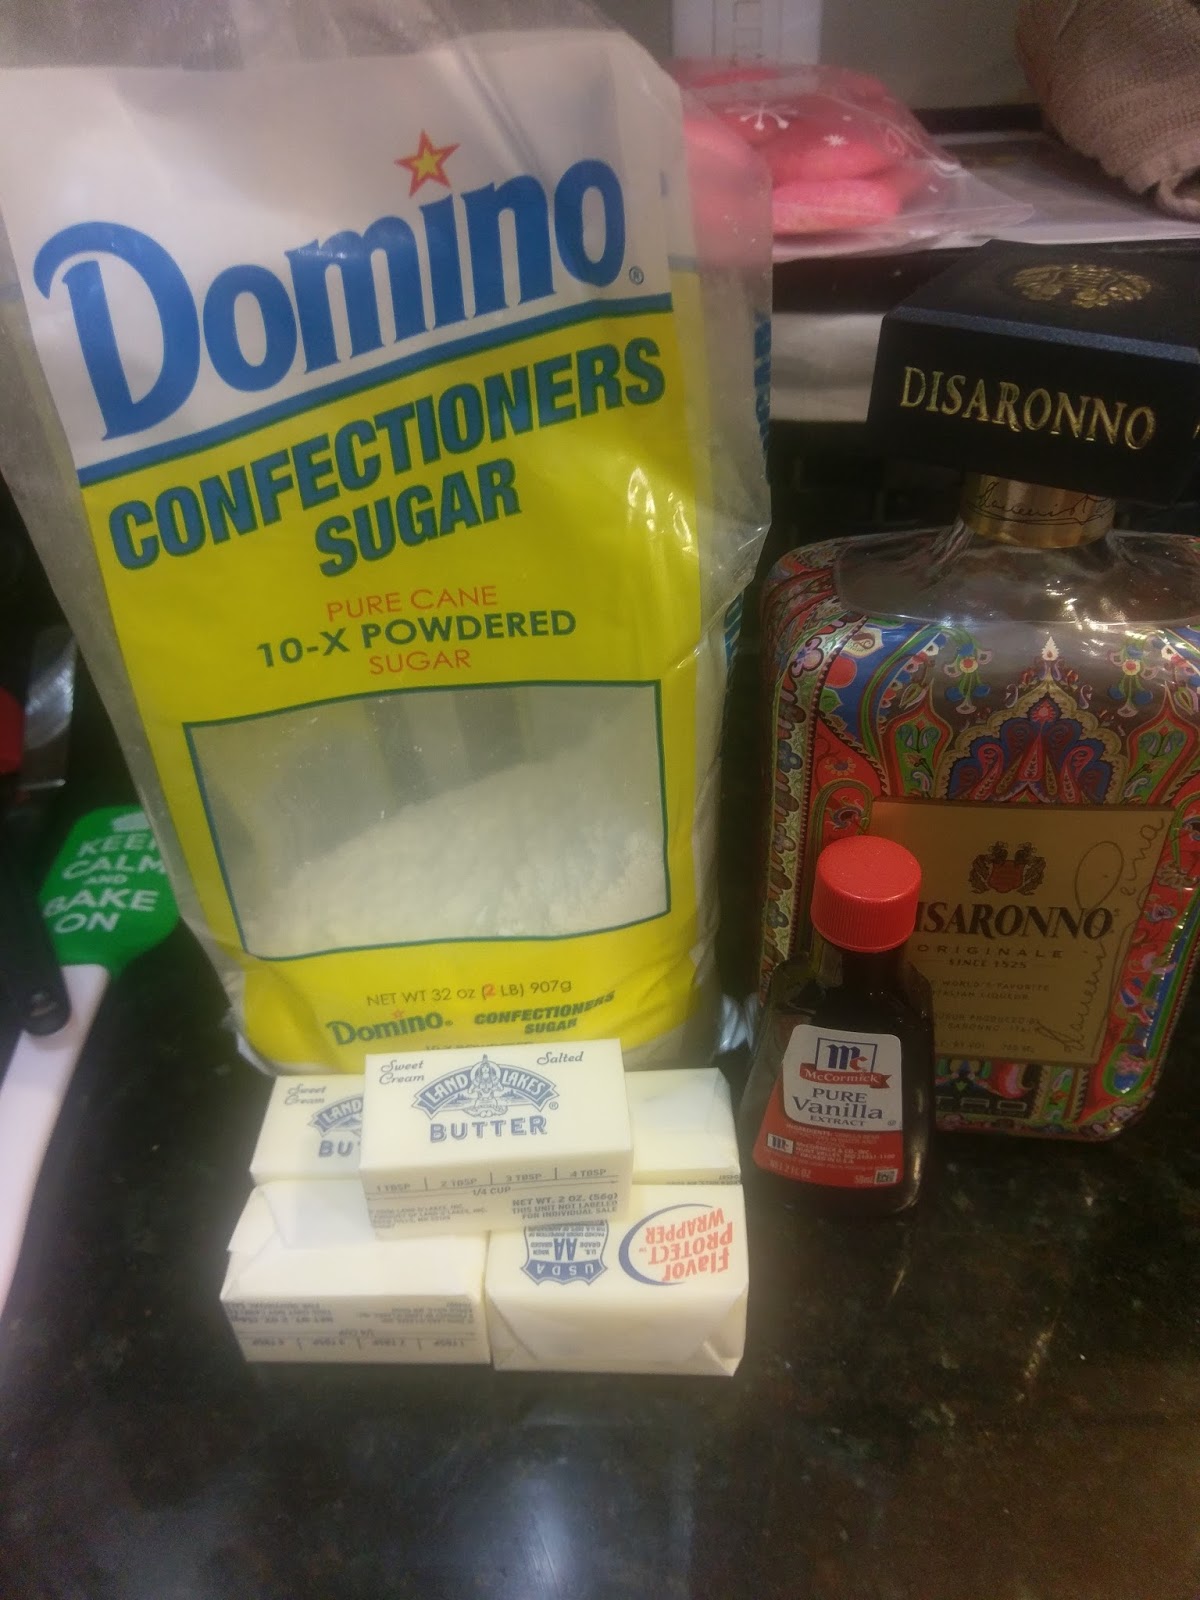
So. much. butter. I used my old Baileys buttercream frosting recipe, but I wish I would’ve used all butter instead of half butter and half Crisco. I find Crisco can sometimes leave a weird after taste when mixed with gel dyes. So instead of linking to my old recipe, here’s the full buttercream version of my Baileys buttercream (live and learn and eat the frosting):
- 1 1/2 cups of butter at room temp
- 1 tablespoon of vanilla extract
- 5 cups of powdered sugar
- 5 tablespoons of Baileys
Now, Future Kate will thank me the next time she wants to use this recipe. I used full butter in the Disaronno frosting and it was leaps and bounds better in taste and a bajillion times easier to pipe with. By the time I finished piping the Baileys cupcakes, I may have acquired early onset arthritis. I may never be able to play video games again. The horror. Before I go into mixing and piping, let’s get to that amaretto buttercream. I still have some leftover in my freezer in the event of an emergency. My definition of emergency ranges from, “House is on fire to remembered something awkward I did 15 years ago,” so I’m banking on busting into that bag sometime within the next 72 hours because my backlog of embarrassing moments is rather impressive. For the best frosting you’ll ever eat in your life, get:
- 1 1/2 cups of butter at room temp
- 1 tablespoon of vanilla extract
- 5 cups of powdered sugar
- 5 tablespoons of Disaronno
For either frosting, start by creaming the butter for 2 minutes until fluffy. Then add in the vanilla extract, two cups of powdered sugar, and two tablespoons of booze. Blend on low until the mixture is sticky, then blend on medium-high until things mostly come together. Turn off the mixer, add in the remaining three cups of powdered sugar and three tablespoons of booze. Blend on low, then turn to high and fully incorporate everything.
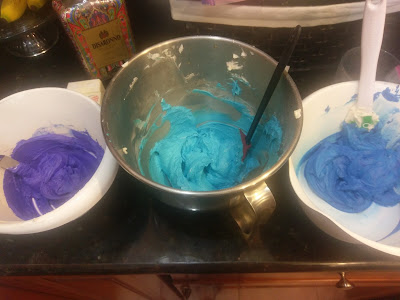
Fun with frosting! Ever since I baked Derek’s galaxy swirl mirror birthday cake last June, I have not been able to get over how gorgeous all those colors looked together, and I’ve been dying for a reason to visit space (theme) again. Space…so hot right now. Zoolander references aside, galaxy swirl is still all the rage, so I’m happy to add my two cents on getting the style to your liking. I’m also available to provide my two cents on why 90s music is still the best, what things ketchup should and should not go on, and the merits of using your blinker. Book me for your next speaking engagement!
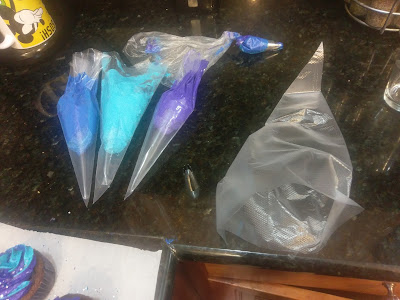
But beware, I have the mouth of a well-educated sailor. For my galaxy swirl cupcakes, I used Americolor’s electric blue and royal blue, and Wilton’s violet dye. I put equal amounts of frosting into three separate bowls, and then used the following combination in one bowl: 6 drops of electric blue plus 2-3 drops of royal blue and mixed well to achieve a bright blue hue. In another bowl, I mixed 6 drops of royal blue and 2-3 drops of violet to achieve a deep navy (photos don’t do it justice) and mixed well. Finally, I used 6 drops of violet and 2-3 drops of royal blue for what I call “Vikings purple” (but don’t worry, it won’t choke when you need it to work most). I got out three piping bags, and I added half of the electric blue to one bag, half of the navy blue to another bag, and half of the purple to a final bag. I snipped the tip off of each of these three bags and then fit a HUGE (see that trash bag on the right above) piping bag with a 1M tip and gently loaded each bag of frosting inside as evenly as I could:

My veins are bulging because this weighed more than a small dog. You’ll want to pipe out a bit of frosting until all three colors are coming out at once. Then, design however you’d like. I did a traditional swirl on half and a star mound on the other half (these are easy, start in the middle of the cupcake and just pipe a mound of frosting until it’s nice and poofy). To swirl, start on the outside edge of the cupcake and pipe in a circular motion, slowly working your way to the inside of the cupcake, overlapping as needed, until you get to the middle. Pipe a small start in the center and pull away the tip:

Space! A tasty frontier! Oh yes, don’t forget the sprinkles (or it really will be a tragedy because space is sparkly whether you like it or not):
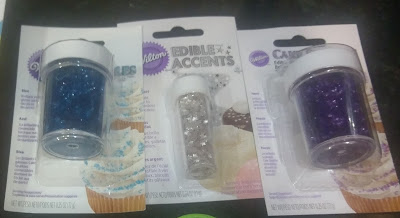
Its like Wilton knows… Wilton has adorable gold or silver stars and edible flakes in a million colors, so find colors that compliment whatever dyes you chose for your galaxy swirl. I pipe about 4 cupcakes, stop, and add sprinkles while the frosting is still “wet” and not set.

My kitchen was so colorful! These really were so, so pretty. I did the same style for the Disaronno cupcakes as well, mounds on half, swirls on the other:

Shinnnnyyyyy. The mounds were super adorable, but the swirls did a better job of mixing the colors together to form a gorgeous space-themed treat. While I definitely had one of each, I’m still drooling over how good those Disaronno yellow cupcakes were, and this event was last Thursday. The amaretto and yellow cake flavors together are absolute bliss. Not to knock the Baileys chocolate cupcakes, a traditional flavor pairing, but these Disaronno cupcakes had a bold, sweet flavor, and it will definitely be a repeat recipe for years to come in my boozy baking adventures. You still can’t go wrong with how rich Baileys makes any chocolate recipe, so if you’re ever in the market to make a borderline ridiculous amount of cupcakes, try both! People will happily sample one of each, especially if you’ve done the galaxy swirl frosting–just tell them its for market research and space exploration. I’ve searched the universe for some of the best desserts, and these will not disappoint. ‘Til next time, my fellow eaters!

You’ll fall into a black hole of flavor. Okay, I promise…no more space puns. This isn’t Space Balls: the Blog. Yet. -
Brownies Are Not Made for Resolutions…
I made it to 31! Another year closer to getting to yell at kids to get off my lawn without anyone thinking anything out of the ordinary (I get terrible looks when I do it now, so come on late sixties!). Since 31 isn’t really anything spectacular and my week was insanely busy, I didn’t make a big fuss about my birthday cake this year like I usually do. I just made a simple chocolate cake with my Salted Bailey’s buttercream frosting and tested out some Russian piping tips I got for Christmas (photo at end of blog, but really, nothing special). So why are we here, you ask? Because the week prior, I made sure all of my friends got in as many calories as possible before New Year’s resolutions began. I made a giant pan of Buckeye brownies to bring to a friend’s house. She’s from Ohio, so she’s definitely “in the know” when it comes to all things Buckeye–football, trees, candy, you name it. So she and her peanut butter and chocolate loving husband were big fans. As someone who spent a lot of time visiting and living in Michigan, it was a little painful to have to admit something to do with Buckeyes was positively amazing. With chocolate, anything is possible.
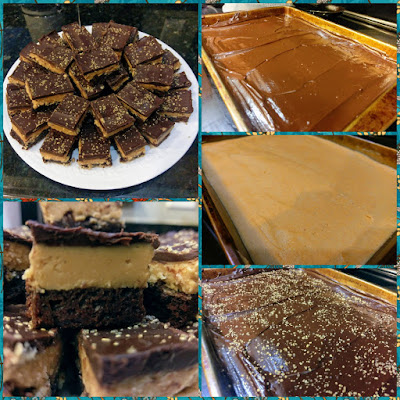
Worth every calorie. Honestly, these are terrible for you. HOWEVER, they are also extremely rich and decadent, so you could get away with slicing these even smaller than I did. I made a 9×13 pan and cut them into 36 brownies for 320 calories a brownie. I ended up cutting a piece in half when I ate it because they were so rich and positively the perfect amalgamation of peanut butter and chocolate (so naturally, I had seconds). You could easily cut these into 48 squares to get them under 250 calories a serving. While they may not be New Year’s resolution friendly, if you ever have a terrible week and need to eat your feelings, might I recommend this recipe. I’d let someone punch me in the face if it meant I could have one of these right after–they’re really that good and great at lifting one’s spirit. Behold, the magic of PB&C. Those crazy Ohioans are really onto something with Buckeyes (but only in the realm of food. Not football. Never.).

While they may be loaded with all of the calories, it is so insanely easy to make these brownies. I actually found the recipe on a Tasty video, and for once, it gave enough detail that even a novice baker would be able to handle this recipe swiftly and easily. Gather up:
- A 9×13 size box brownie mix (plus the ingredients required on the box)
- 3/4 cup butter, melted
- 1 1/2 cups of Jif (there is no better peanut butter)
- 1 tsp vanilla extract
- 3 cups powdered sugar
- 10 ounces semisweet chocolate chips
- 6 TBS heavy cream
- Optional (but not to me): sprinkles
You could try to make these healthier by replacing the oil in the brownie mix with unsweetened applesauce, and reduce the amount of peanut butter and powdered sugar (I’d say 1 cup PB and 2 cups sugar). The PB layer is super thick, so reducing these amounts would just provide a thinner layer.
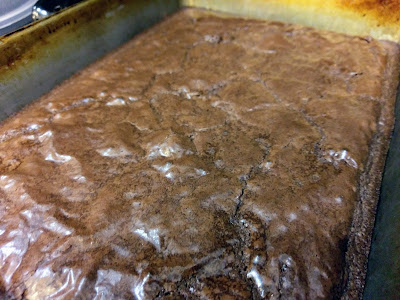
Fact: a perfect way to begin any dessert is with a brownie base. Make your brownies according to box directions–definitely do not forget to grease the pan before pouring in the brownie mix though! When your brownies are almost done in the oven, mix together the melted butter, Jif, vanilla, and powdered sugar in your stand mixer for a few minutes until completely smooth.

Try not to take a fork to this and begin shoveling into your mouth with reckless abandon. Now, the moment those brownies come out of the oven, take your peanut butter mixture and spread it on top of the warm brownie layer using an angled spatula. I heated my spatula up under warm water, dried it off, and then spread out the PB layer. Worked like a smooth, delicious dream. Set this aside and get ready to ganache, baby.

Getting a Homer Simpson level of drool going here. To make your ganache, dump the chocolate chips and heavy cream into a microwave safe bowl. Nuke in the microwave for one minute, and then stir together until totally smooth. Pour the warm ganache on top of the peanut butter layer and use your angled spatula to smooth things out.

The finishing touches! I took some gold glitter sprinkles and added a light dusting to the ganache before it set. It was New Year’s Eve, after all, so I wanted to get super festive and sparkly. I’m always super festive and sparkly when it comes to dessert decor. Now, cover your pan and pop these bad boys in the fridge. I let mine set overnight before cutting into squares, but you’d probably be safe after refrigerating for 3-4 hours or freezing for 2.

This was a very heavy plate. These brownies weigh about a ton thanks to all that layered goodness, but they’re simple to cut and serve. I did notice that some of my peanut butter layers wanted to separate from the brownie, but since peanut butter is so nice and malleable, I just squished those pieces back together. Remember–alcohol is served at parties, so no one will notice a few smooshed in pieces thanks to this, and to the fact that they’ll get inhaled before anyone can look at them for longer than a second or two.
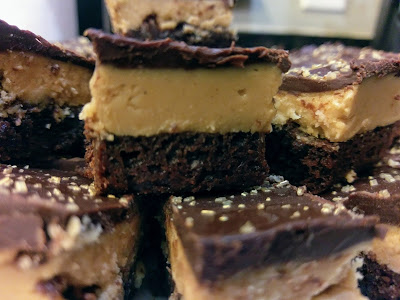
The plate was gone very, very quickly. I mean, just look at that layer action. These were positively a hit, and I’m really glad there weren’t any leftovers for me to take home and end up eating all at once. Small miracles. No matter how you feel about Buckeyes and Ohio, I can promise you if you even remotely like chocolate and peanut butter together, these brownies will blow your mind. Now, on to that boring birthday cake…
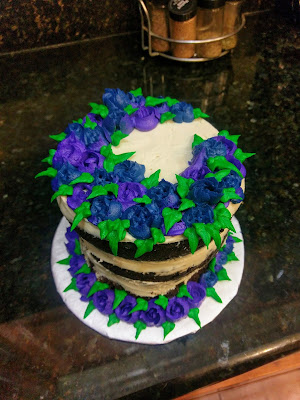
Just florals and boozy frosting, NBD. I was super frustrated by these Russian piping tips. “It’s so easy–anyone can use them.” In comes the baker with several years of piping and decorating experience under her belt, and no, anyone cannot use them. I wanted to do two-toned flowers in whites, blues, and purples, and followed directions on several Russian piping tip tutorial videos to do so and used a technique I had never done before and had zero luck with. I will stick to painting the inside of my piping bags with gel dye like I knew I should have because this actually works. I was also told to use extremely stiff frosting, but then only half my decorations were coming out of the piping tips at a time. It’s a miracle I got any of them to work at all, so lesson learned–just use regular consistency buttercream. At least my leaf game is on point:

Yeah, you go Wilton leaf tips. Making life easy. The concept is cool, so I’ll definitely revisit these Russian piping tips. My biggest complaint is that the tips aren’t numbered, so I have to use the guide that came with them and the tiny little pictures on it in order to figure out what each one does. I’d even have taken Russian symbols or something. I mean, really. First world problems indeed, but I’ll be back soon after I’ve had more practice showing these tips who’s the boss. ‘Til next time, my fellow eaters!

Healthy-ish cake, cupcakes, pie, and cheesecake recipes and decorating tips