-
Gingerbread: the Pumpkin Spice of Christmas
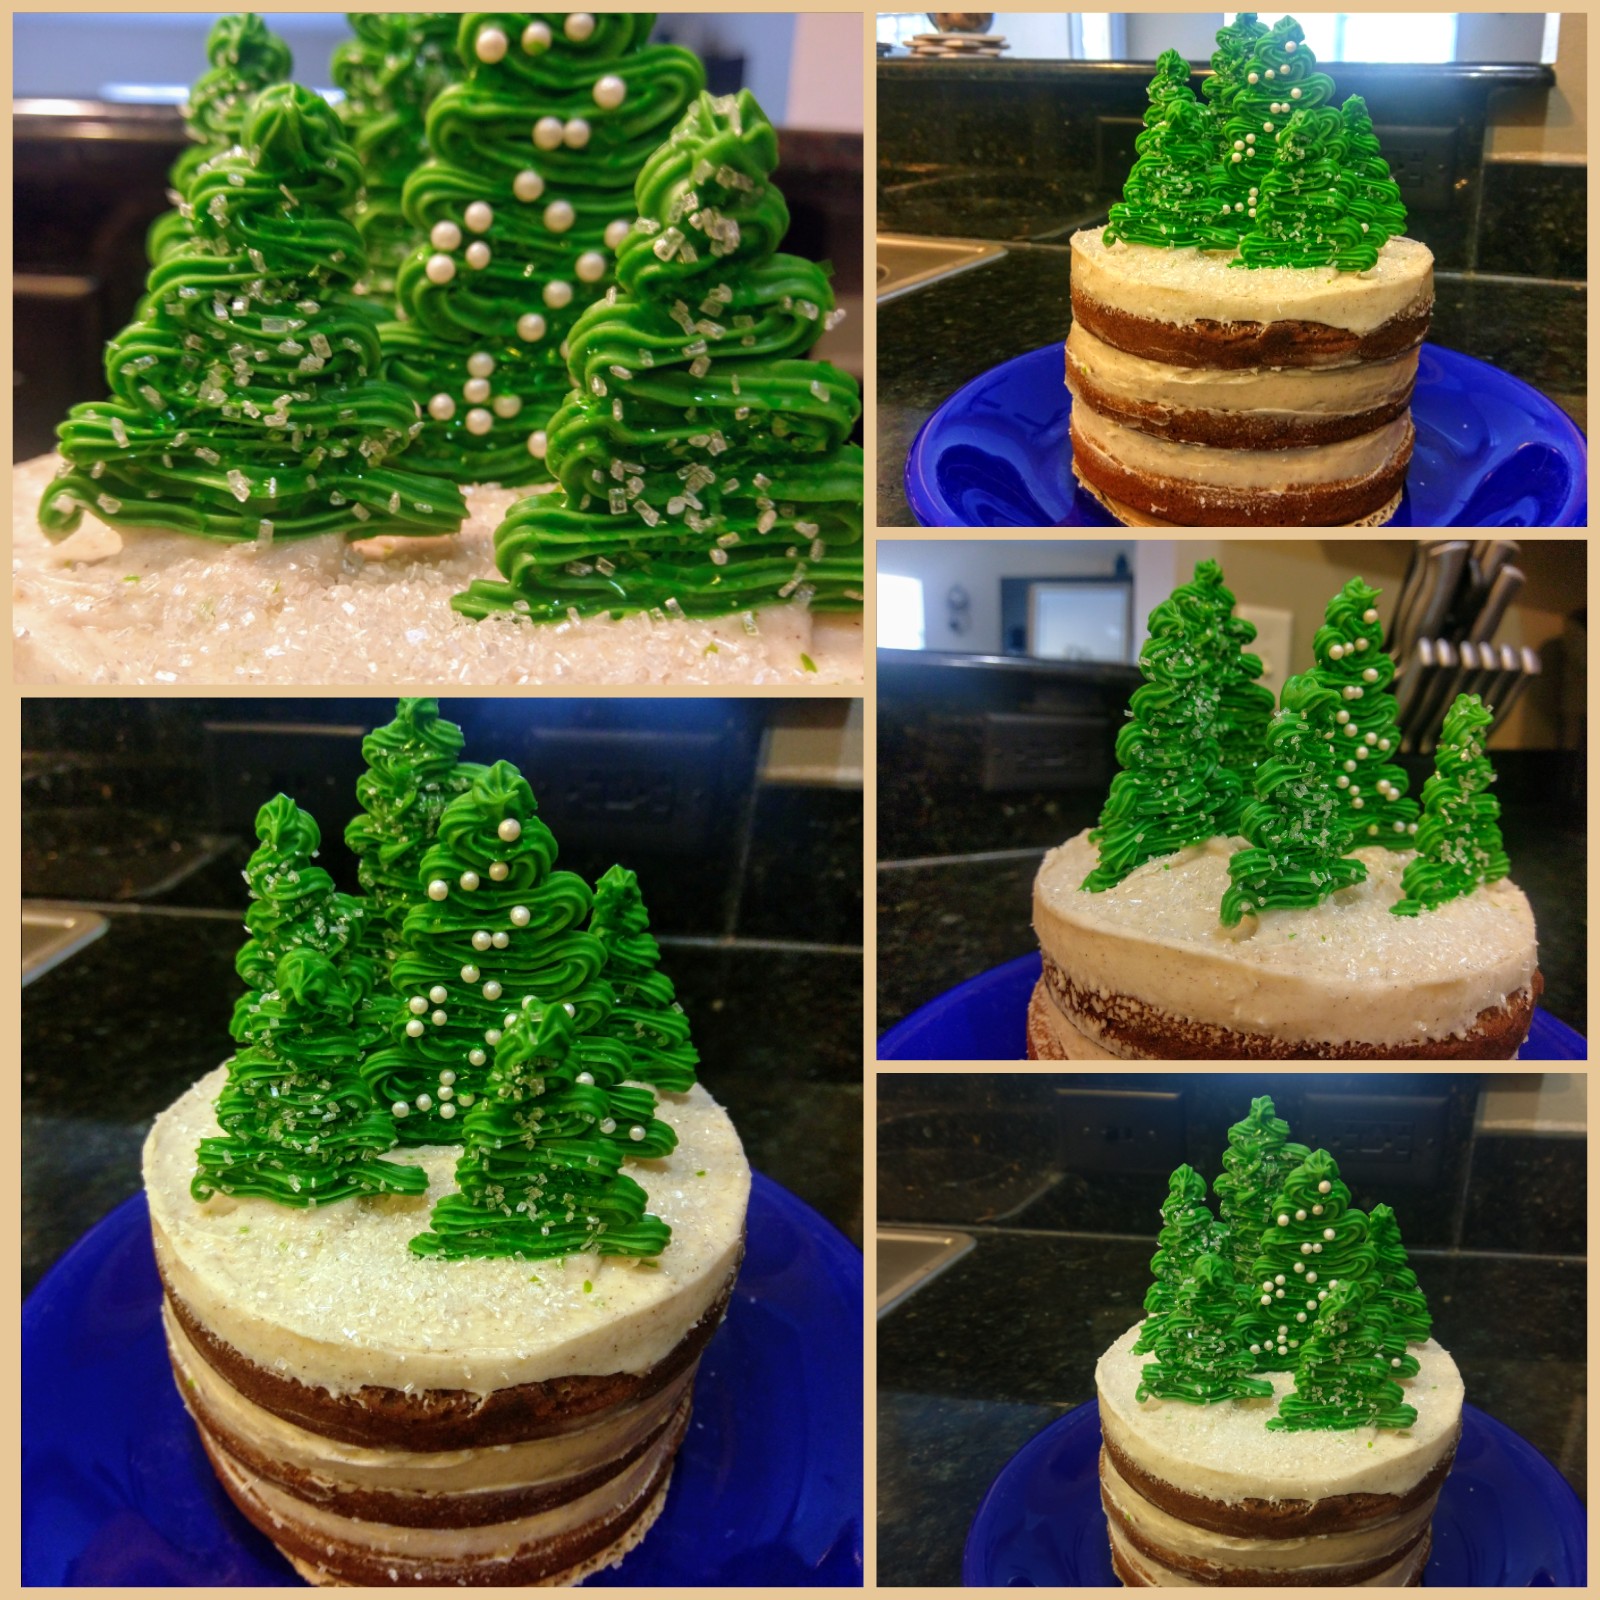
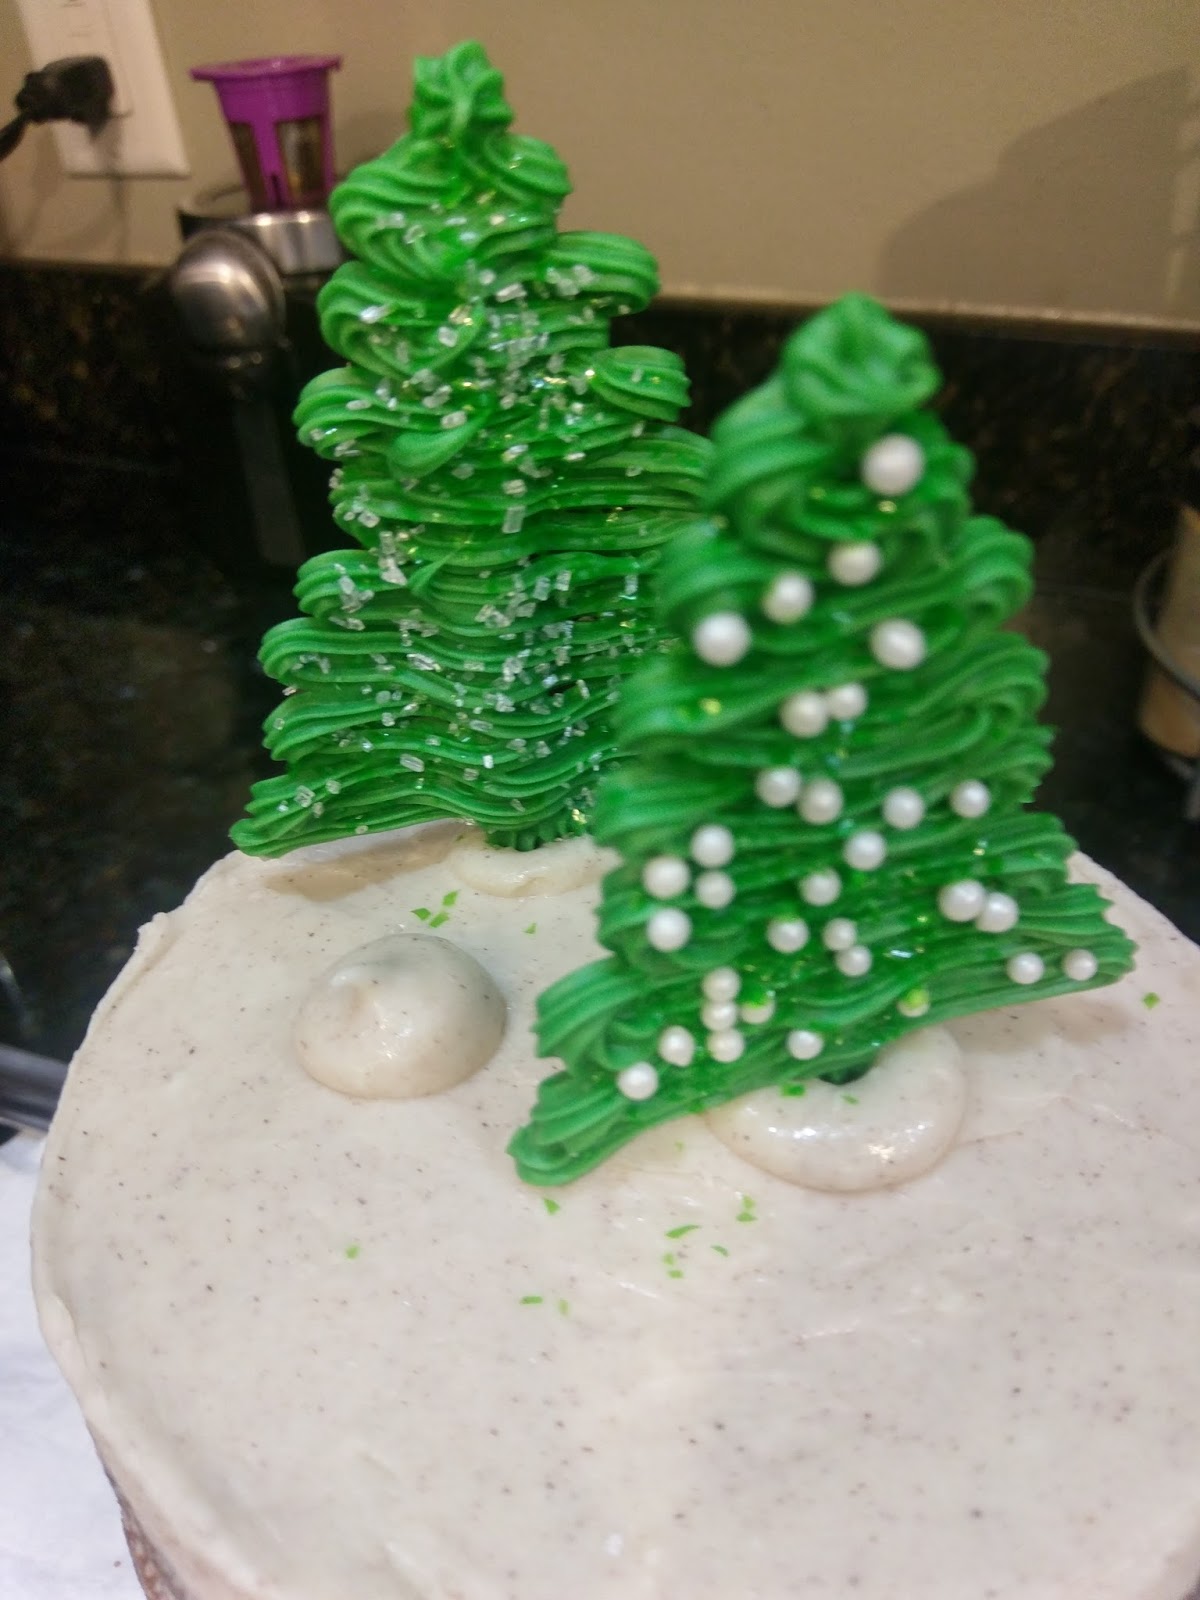
Hell has finally frozen over–at 4:30 a.m. last Saturday morning, it snowed for like thirty seconds in Northwest Florida. That day I believe I went through about four wardrobe changes so I could cycle through all my favorite boots because I literally had no idea if the opportunity would present itself again, and after spending a week in the sweaty nightmare that is Orlando, I nearly wept at the sight of frosty lawns while walking the dogs. It was so cold I couldn’t feel my face, and it was fantastic. It finally feels like Christmastime, so it was only appropriate that I commenced with all of the Christmas baking this past weekend. My family traditions are stacked high with Spritz cookies, caramel bars, lemon squares, fudge, literally everything under the sun except gingerbread. I decided I needed to change that this year and baked this super cute naked gingerbread cake with cinnamon cream cheese frosting and edible chocolate trees (because there should be chocolate in every dessert):

Squee! So wintery! I had so much fun decorating this cake. It was a pleasant, spirit-lifting experience after watching my Vikings winning streak get snapped. It took everything in me not to sit down and eat the entire pan of caramel bars I just baked to get over it. But sadness coupled with stomach ache was not how I wanted to spend my Sunday, and my sports-related depression was stopped dead in its tracks the second I took a bite of this cake. Why did I wait almost 31 years to bake a gingerbread cake? This stuff packs a punch. It’s like the pumpkin spice of Christmas!! That jolt of ginger and cloves followed by the smooth sweetness of the cinnamon cream cheese frosting transported me to snowy, cold lands (you know, like Minnesota or inexplicably the entire South last weekend). What I’m trying to say is, I’m super late to the gingerbread party, but I’m trying to live my best basic white girl life, so I’m putting this into regular holiday rotation, stat. I adapted a recipe that was almost 550 calories for one slice of cake and Kated it up (I’m using my name as a verb now, deal with it) to cut the calorie content down to a much more respectable 330 calories a slice. You know, so you can have your cake, cookies, and fudge and eat it, too.

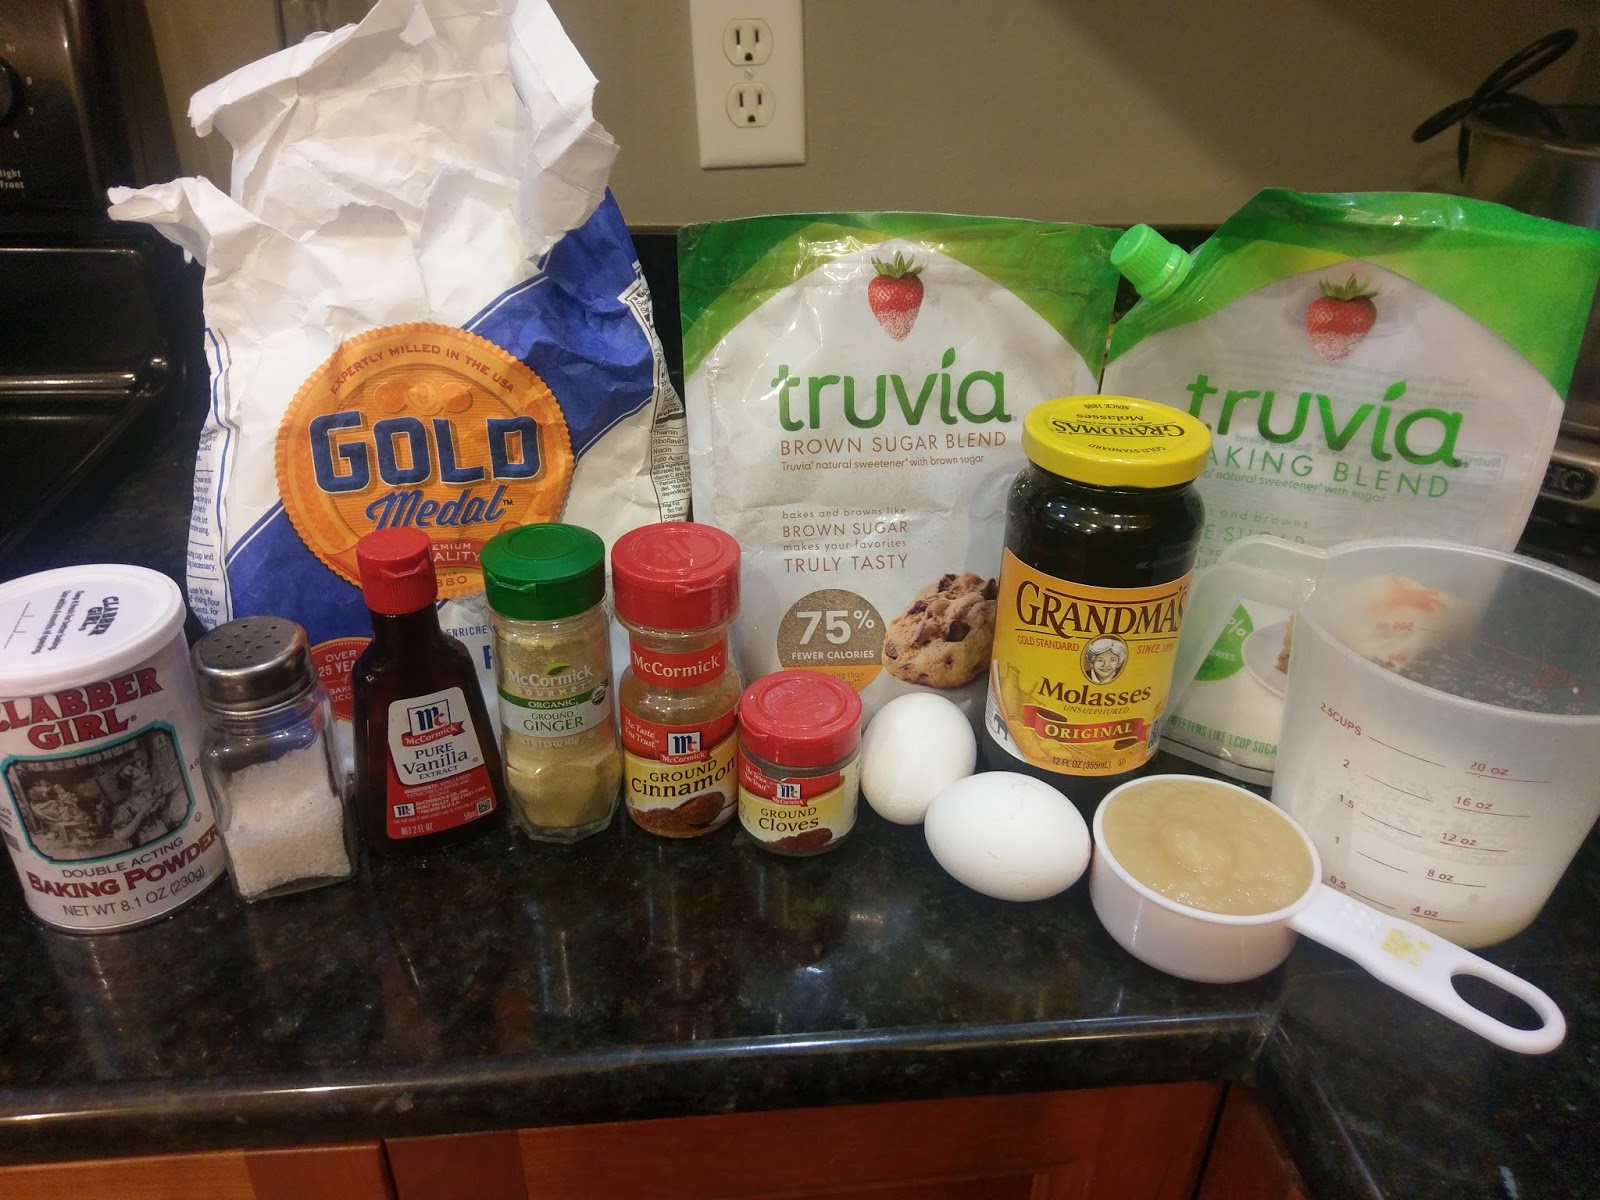
Praise be to Truvia, for making holiday binge eating possible. Legitimately the hardest part of making this cake was tracking down a bottle of molasses. Apparently gingerbread is super popular during the month of December (Who knew? What? Everyone but me? That checks). It took us a few store runs, but eventually we found molasses and that moment will be what I consider “Katy’s Christmas Miracle 2017.” This recipe makes three thin 6-inch rounds, and you’ll need:
- 1 1/2 cups All Purpose flour
- 2 tsp baking powder
- 1 tsp ground ginger
- 1 tsp cinnamon
- 1/2 tsp ground cloves (or use 1/4 for less of a “jolt”)
- 1/2 cup unsweetened applesauce*
- 1/4 cup Truvia Baking Blend
- 2 TBS plus 2 tsp Truvia Brown Sugar Blend
- 2 eggs
- 1/2 cup molasses
- 1 tsp vanilla
- 1/2 cup low-fat buttermilk
*Subbing applesauce in place of butter will make a super dense, bread-like cake. If you’d rather have it light and fluffy, use 1/2 cup of butter at room temp. The next time I make this, I am going to use 1/4 cup of applesauce and 1/4 cup of butter to even things out.

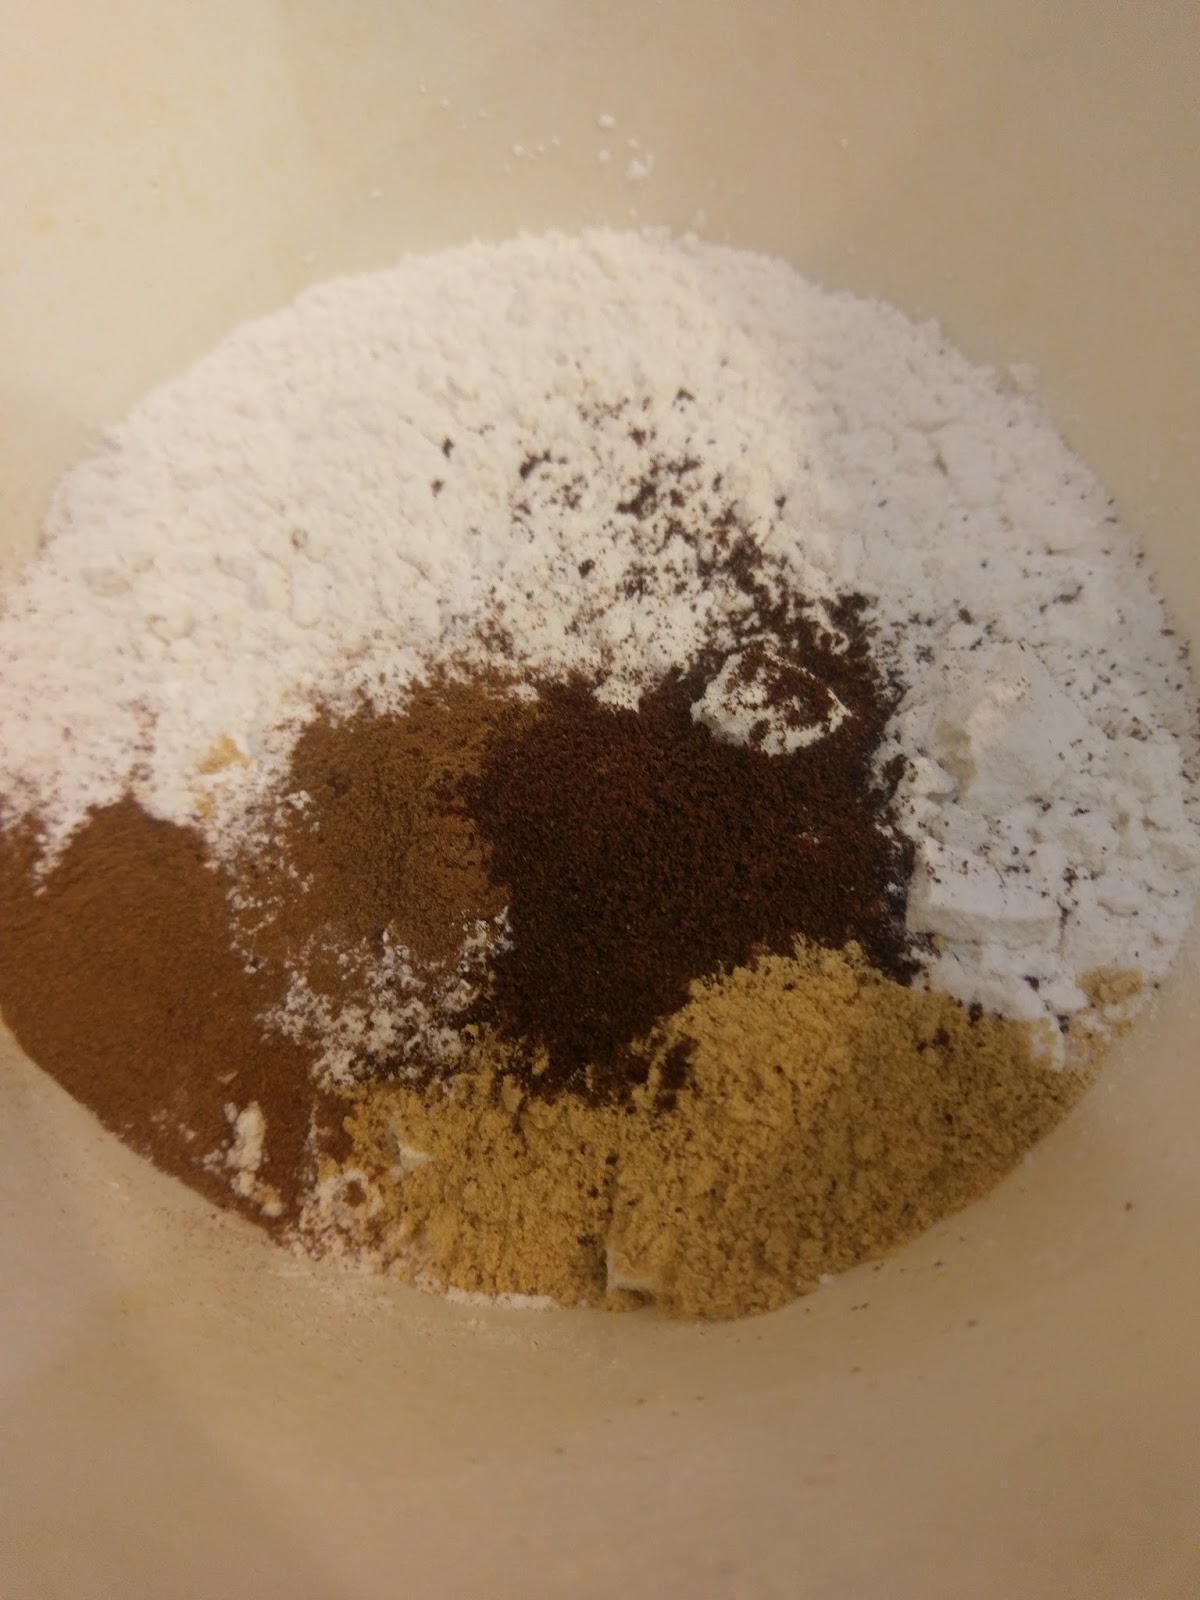
Ah, ginger. Color of my hair. Soother of my stomach. You know, Ginger was my favorite Spice Girl, too. Start by preheating your oven to 350 and line your pans with Parchment paper and spray with cooking spray. Dump the flour, baking powder, salt, ginger, cinnamon, and cloves in a medium bowl and whisk together. In your stand mixing bowl, blend the applesauce/butter and both Truvias until mixed. Things will be sloshy if you’re using all applesauce, so blend on low (if using any butter, mix this with the sugars first until fluffy before adding applesauce). Add in the eggs, one at a time, mixing well. Then add in that mythical, elusive molasses and the vanilla extract. Blend well. Now, take turns adding in a third of the dry mix, blend well, then add in half of the buttermilk. Repeat until you’ve used all of your dry mix (you’ll end with this) and the other half of the buttermilk.
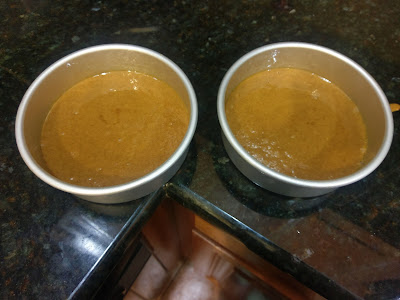
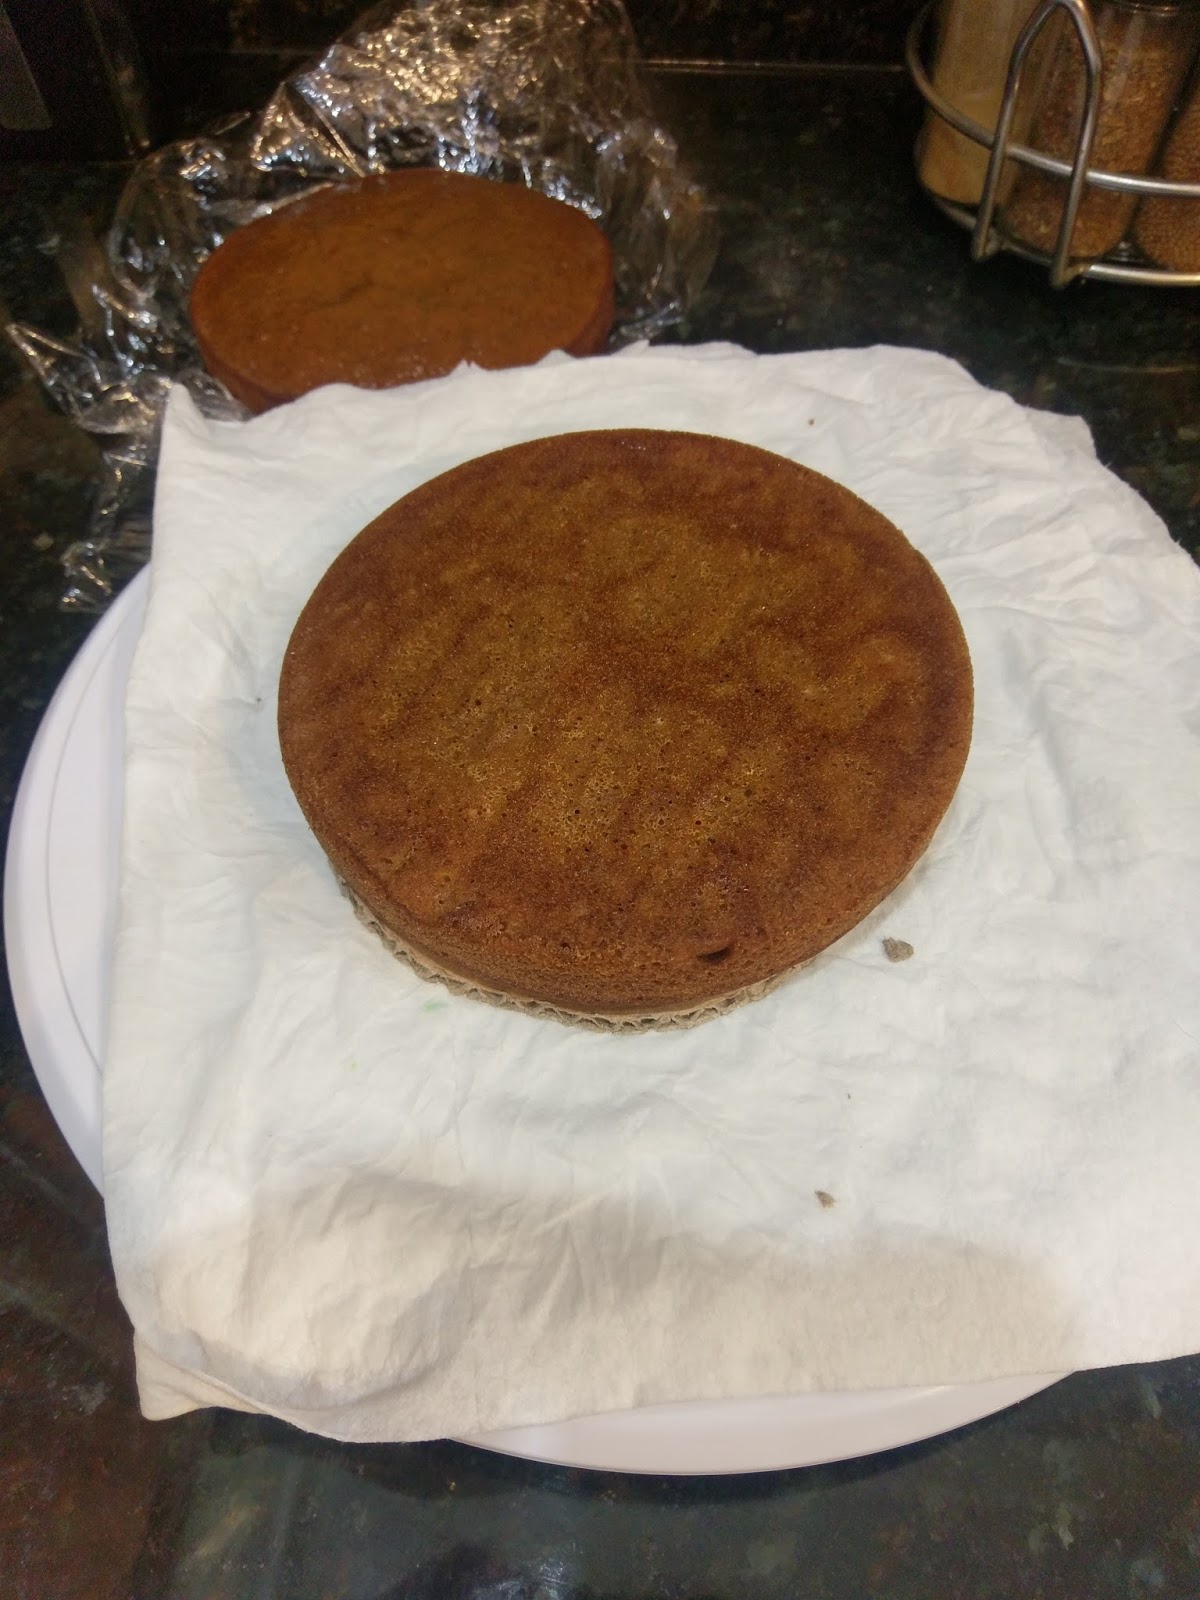
I still only have 2 6-inch pans… Dump your batter evenly into your prepared pans. Tap on your kitchen counter to release any air bubbles and even out your batter. Bake at 350 for 25 minutes or until a toothpick comes out clean.

Your house will smell like Santa’s dreams. Let these rest in the pan on top of a cooling rack for 10 minutes before removing from the pan and allowing them to finish cooling on the rack. Now, for a naked cake, it is super helpful to freeze your cake rounds to ensure they don’t get crumbly while you scrape down frosting (but don’t forget to level your cakes so they’re all even before you freeze them. You know, like I did. More on that later.). I wrapped all three of my rounds into individual cling wrap pouches and froze overnight. I also made my chocolate Christmas trees the night before to allow them time to set in the fridge. Because is it really Christmas baking if it doesn’t take up your entire weekend? Exactly.
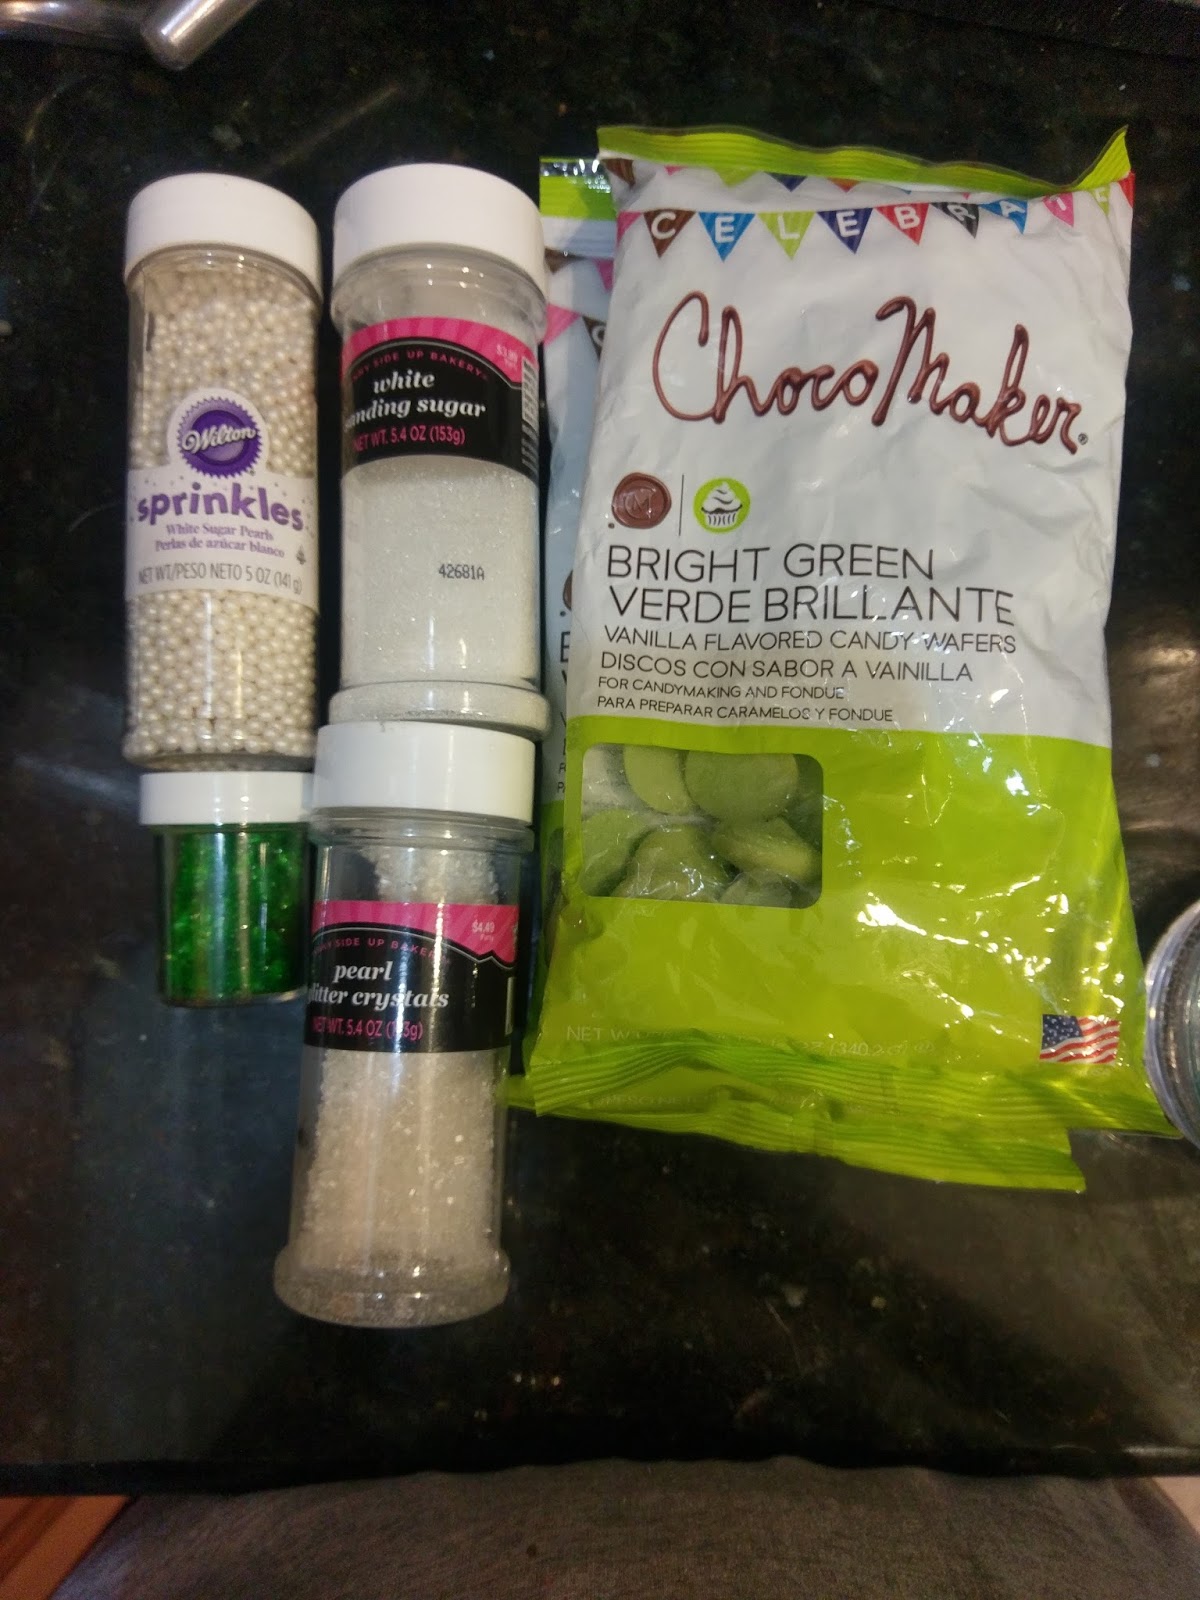
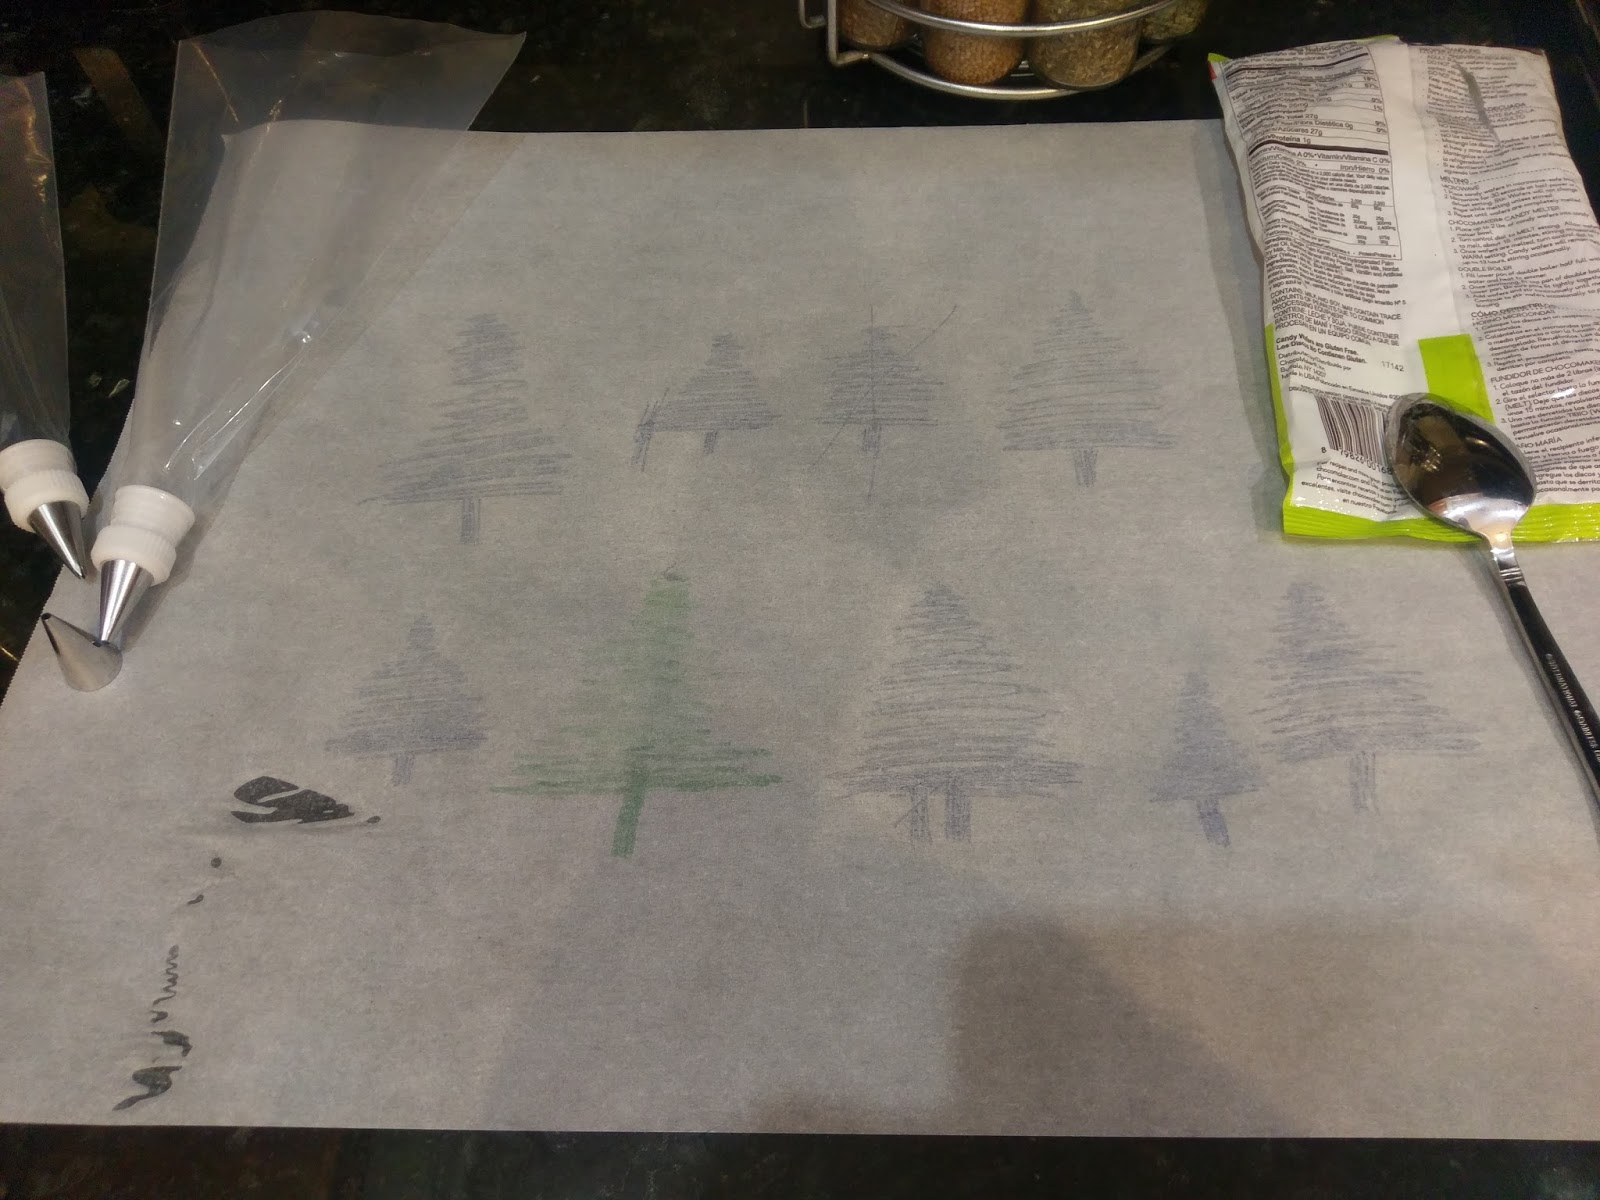
You should also hate yourself a little for eating way too many baking scraps. To make my Christmas trees, I used green chocolate melts, green and white sanding sprinkles, and white pearl sprinkles. I really like this brand of chocolate melts (found at A.C. Moore) because I wasn’t too keen on the shade of green after I melted them, but I was able to add green gel dye to it to achieve the color I wanted without it seizing up which is practically unheard of in chocolate decorating. Small miracles. While I was melting my chocolate according to package directions, I sketched out some trees on a sheet of Parchment paper to act as a guide:

Don’t forget to flip this over before you pipe chocolate or it’ll taste like Sharpie…some lessons are hard learned from the past and never forgotten. I fitted two piping bags with a #16 Wilton tip (star tip) and another with a #5 Wilton tip (round open tip). I tried piping a tree with the #5 tip, but it looked really boring. The star tip definitely wins out here because it gives a nice texture. I piped over the outlines I had drawn by first piping one line the height of the tree to act as the backbone and then piped waves back and forth to create my trees (very slowly to ensure they didn’t have large gaps in them).

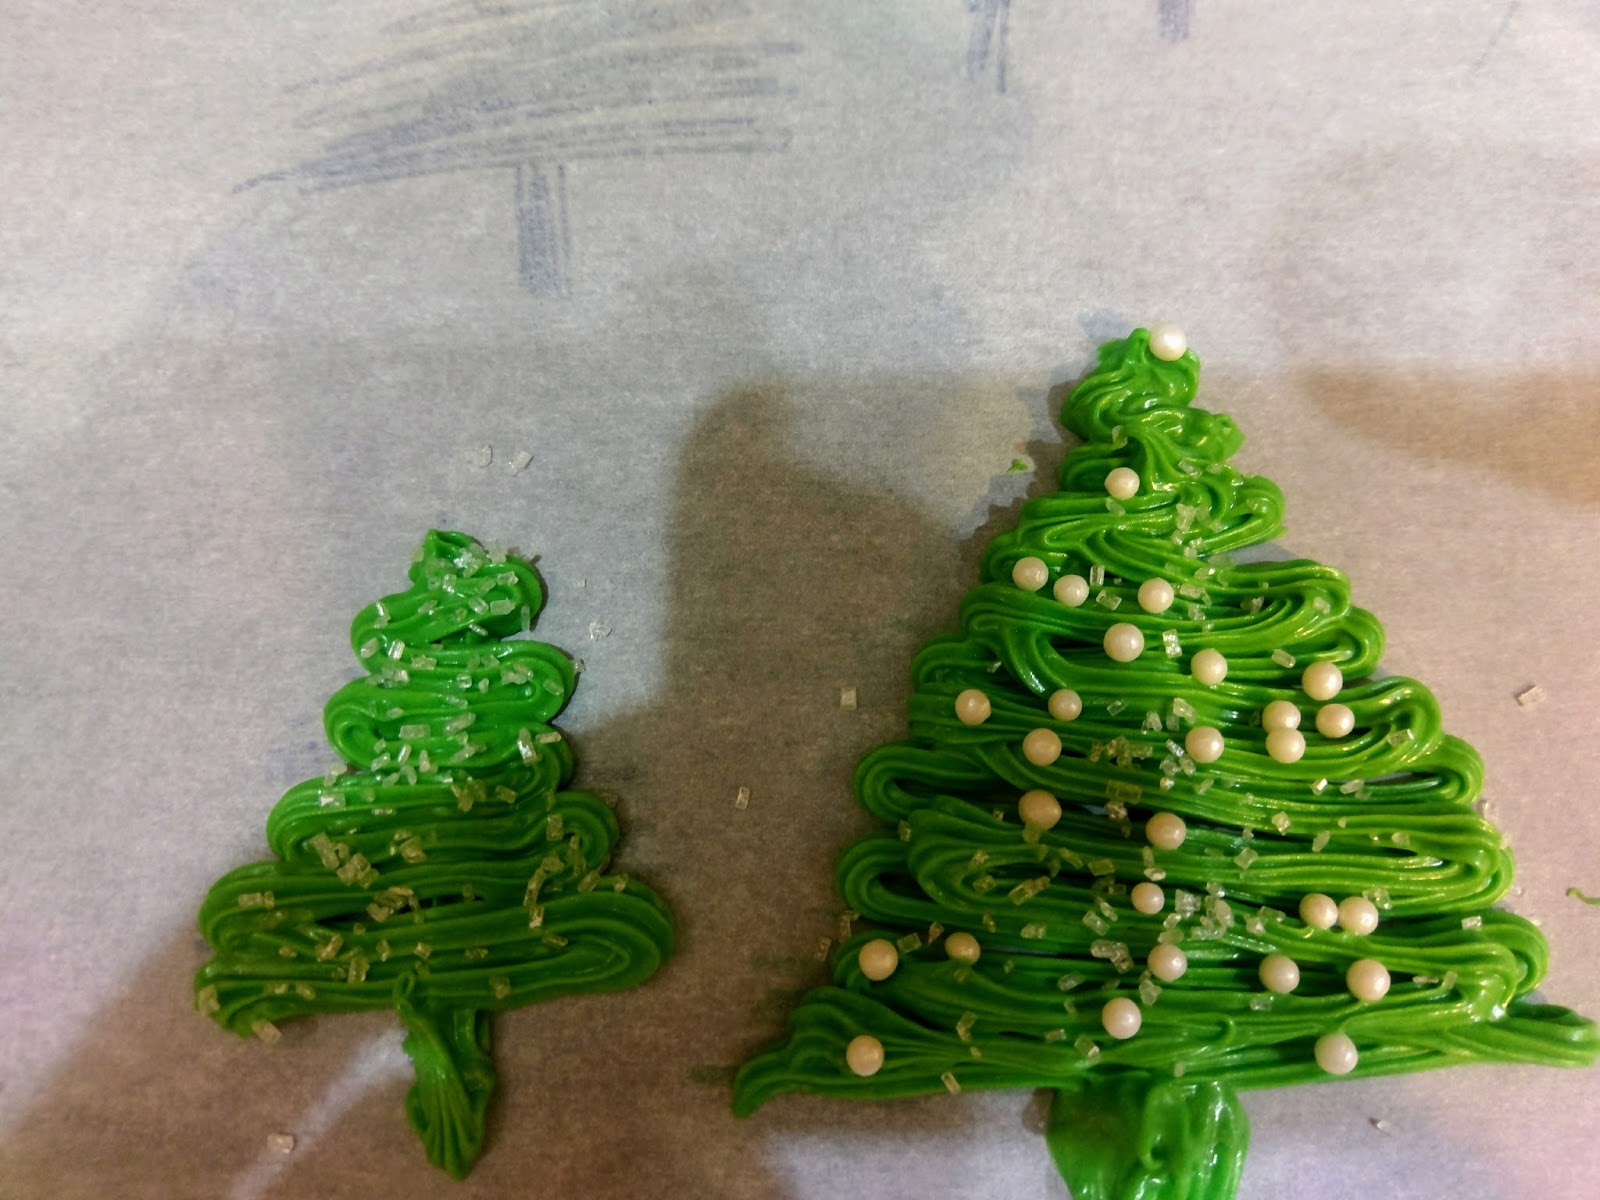
It’s quick and easy, promise. You can eat any you don’t like. Win-win. I piped two at a time and then decorated with various sprinkles while the chocolate was still soft.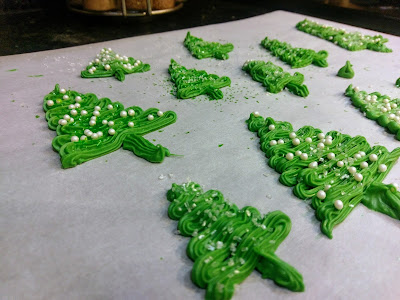
I went a little overboard on the number of trees I decorated. …but since our current house has no place for our Christmas tree, I knew this would be my one shot at tree decorating this Christmas, so I made my own tiny Christmas tree farm. And then I ate several of them because I cannot be trusted around chocolate. I let these sit out on the counter for about an hour before carefully and gently placing them in a Tupperware: one layer topped with Parchment paper followed by another layer. I closed the lid and hid them from myself in the fridge overnight. Just because they are tiny green trees does not mean they have the nutritional content of broccoli.
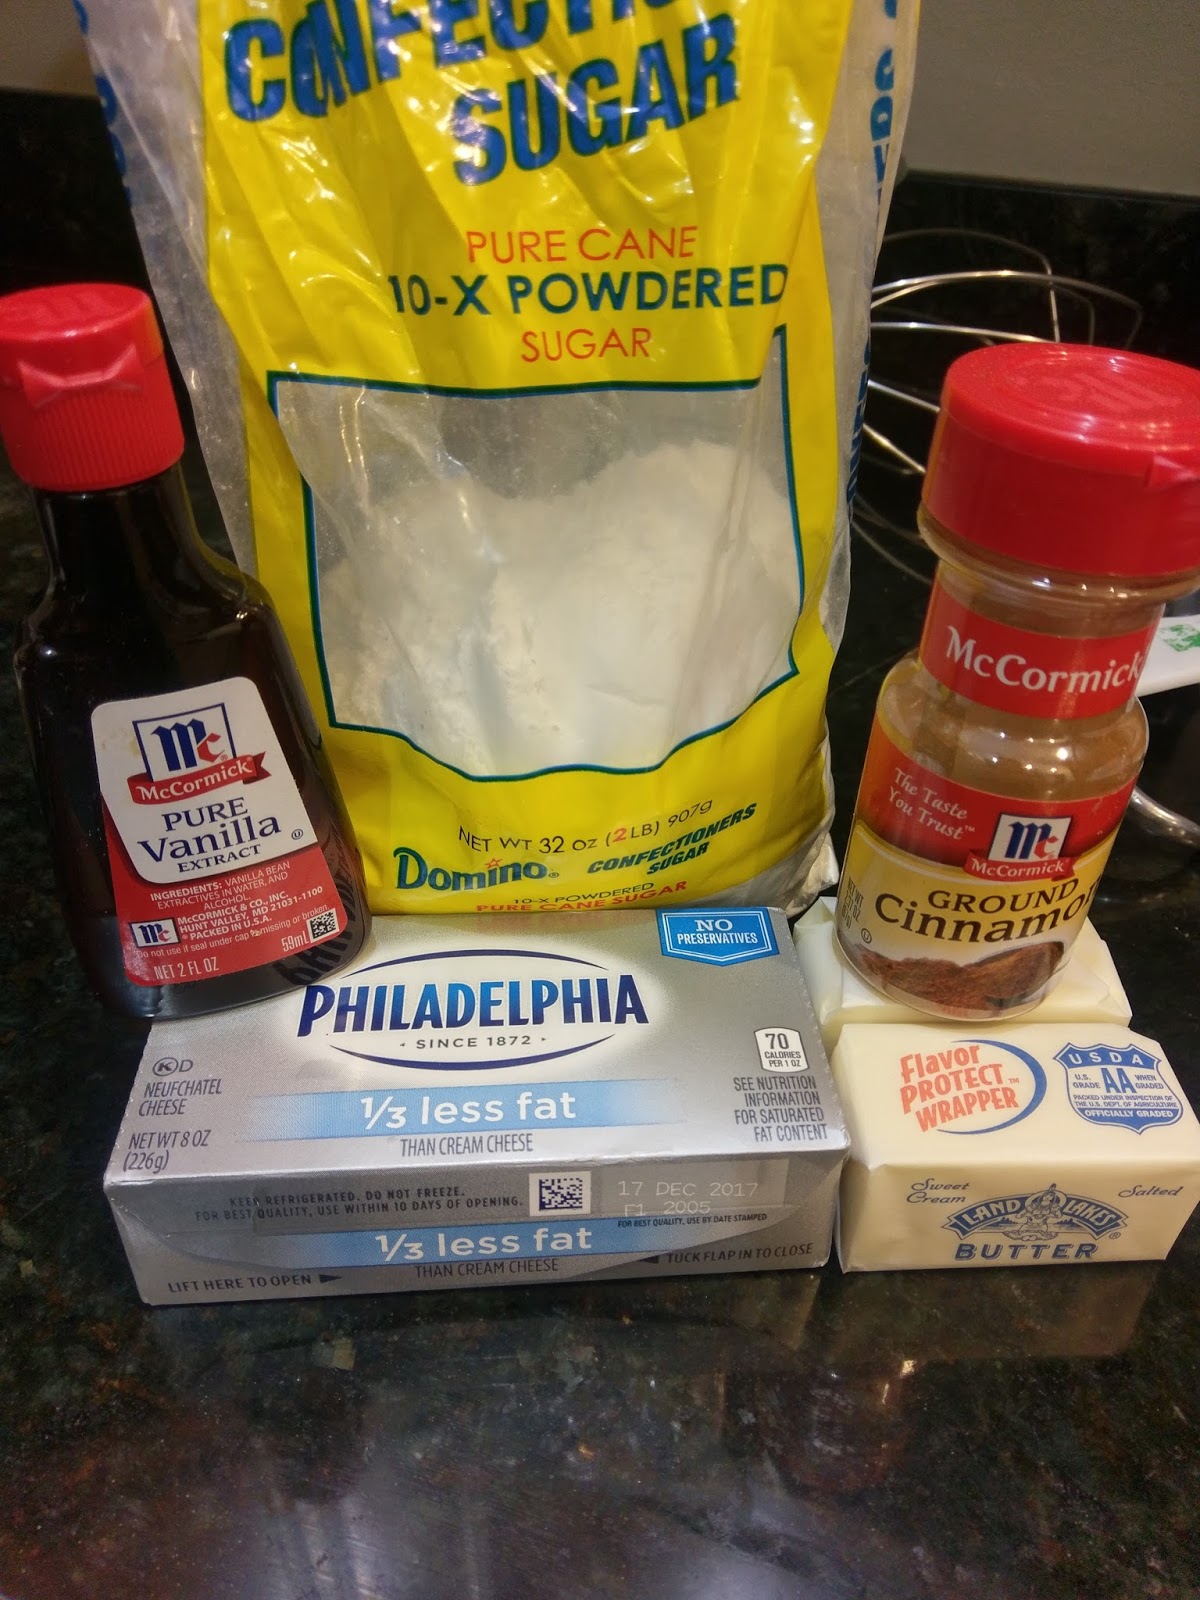
Don’t ever read the nutritional content of powdered sugar, either. The next day, I made my frosting. I knew I wanted a cinnamon cream cheese frosting, but if you want that “Whiter than a Canadian after a long winter” look about your frosting, you’ll want to skip the cinnamon as it does add color to the frosting. And by color I mean “Tan as a Canadian after a brief summer.” My color comparisons are distinctly channeling my heritage…Gingerbread men are tanner than I am. To make the frosting you’ll need:- 8 ounces of 1/3 less fat cream cheese at room temp
- 1/2 cup of butter at room temp
- 1 tsp vanilla
- 1 tsp cinnamon
- 3- 3 1/2 cups of powdered sugar (I used 3 1/2 but had a decent amount leftover, so 3 is safe for a naked cake)
Blend the cream cheese and butter in your stand mixer until fluffy, about 3-4 minutes. Then add in the vanilla, cinnamon, and powdered sugar. Blend on low until the sugar has been well incorporated, then blend on high until everything is smooth.

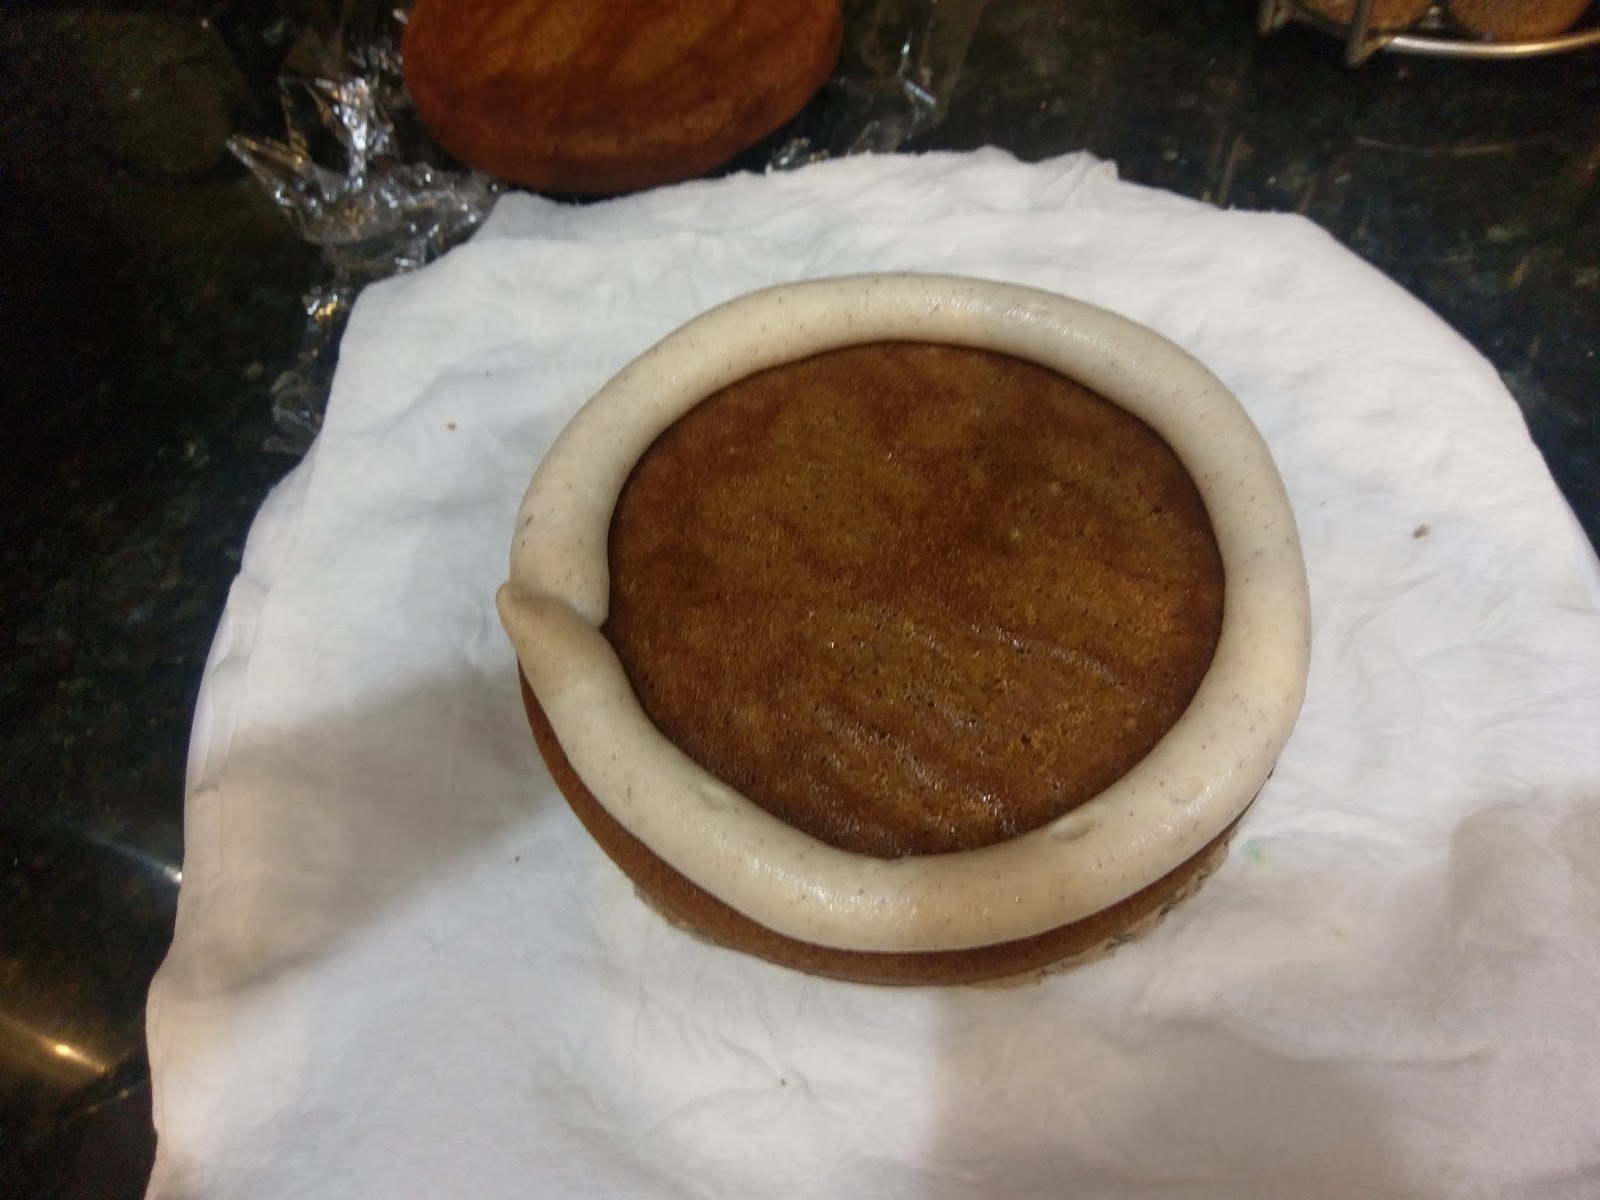
Hi cakes I forgot to torte… Before I froze my cakes, I completely forgot to level them. This is why baking and Benadryl don’t mix. I would probably have a better chance of remembering to level my cakes while just straight up sleep walking than I would when Benadryl is introduced to my system and that sweet, sweet numbness overtakes my sinuses. Since this wasn’t for anyone’s birthday or consumption other than mine and my husband’s, I didn’t have too much of a meltdown (I did all my melting in Orlando…86 degrees in December, really?!). But I highly recommend leveling your cakes before freezing them so you can assemble layers without things getting wonky. Unwrap all your cake layers and load up a piping bag with a large round tip (Wilton 1A is my go-to) and a plop a heaping dollop of frosting inside it.

The circle of life. With naked cakes, remember to flip them upside down so the bottom of the cake is now facing up. This allows an even surface for you to stack your layers! I place my cake on a cake round and pipe a large circle of frosting around the edge of my cake first.

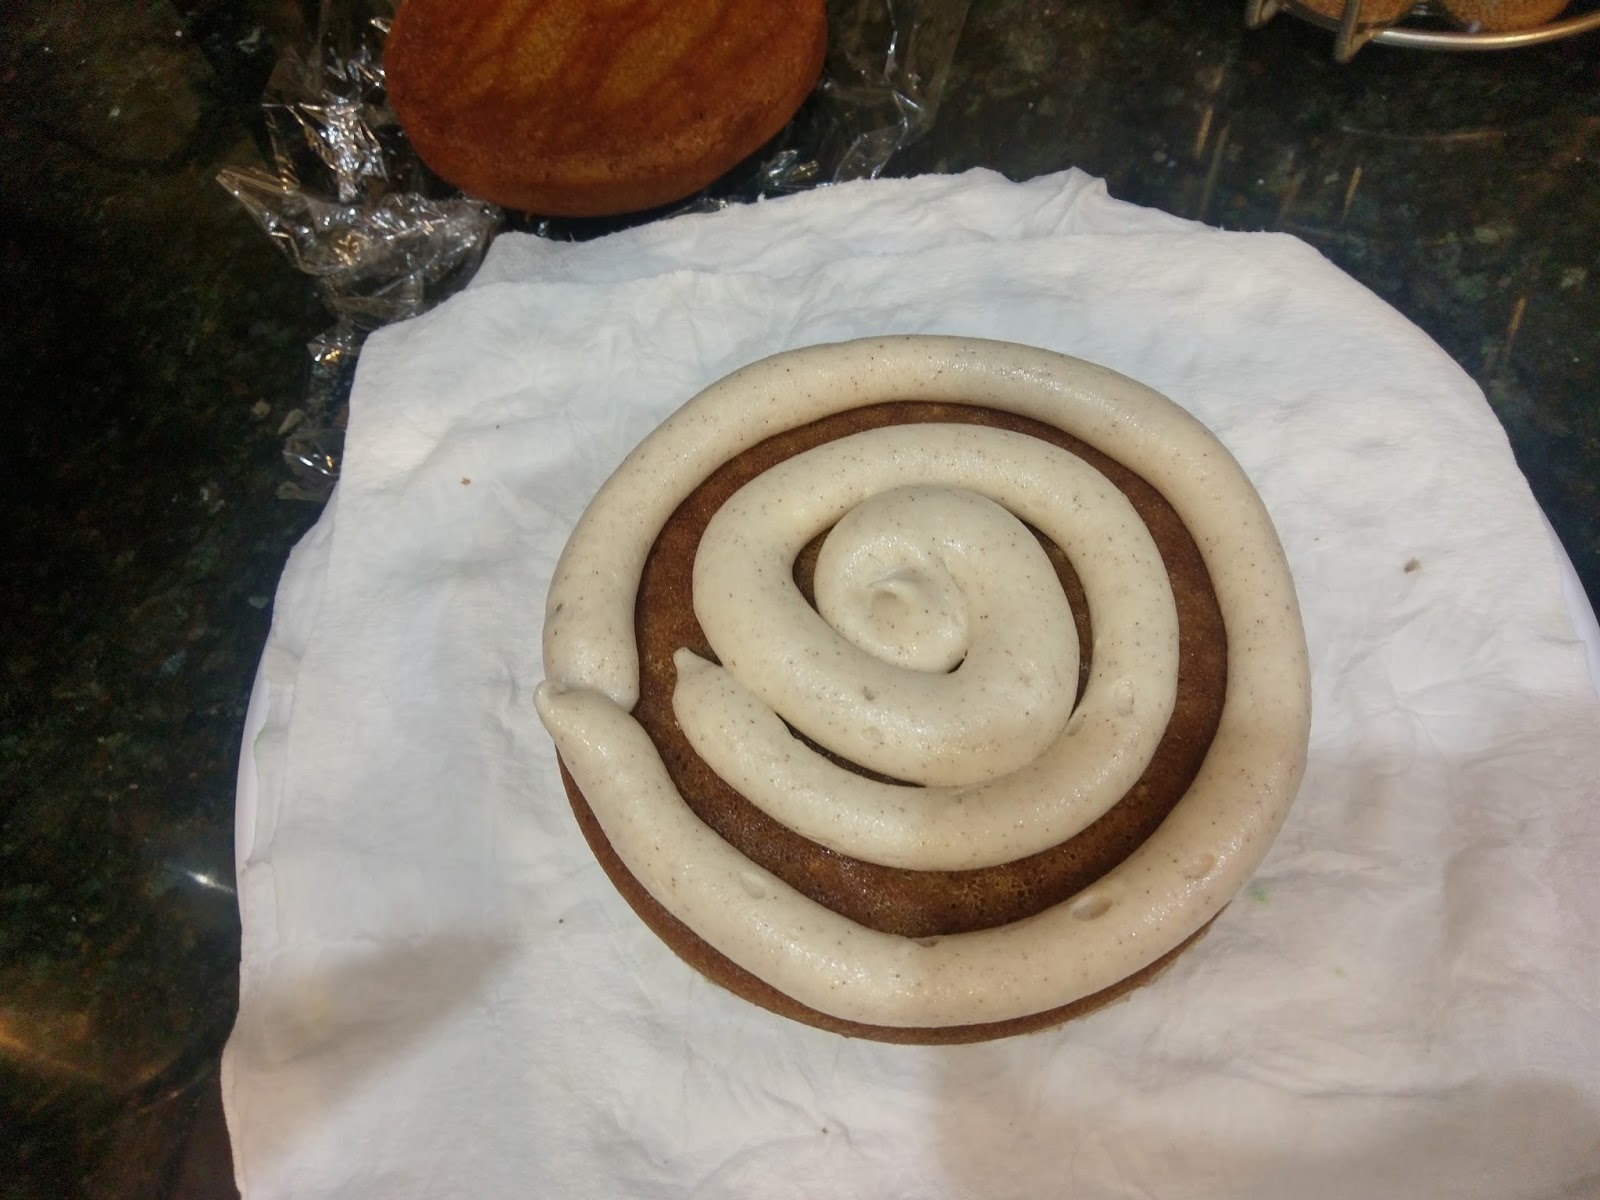
You’re getting very sleeeeepppyyy…. Then I spiral in a decent amount of frosting in the middle.

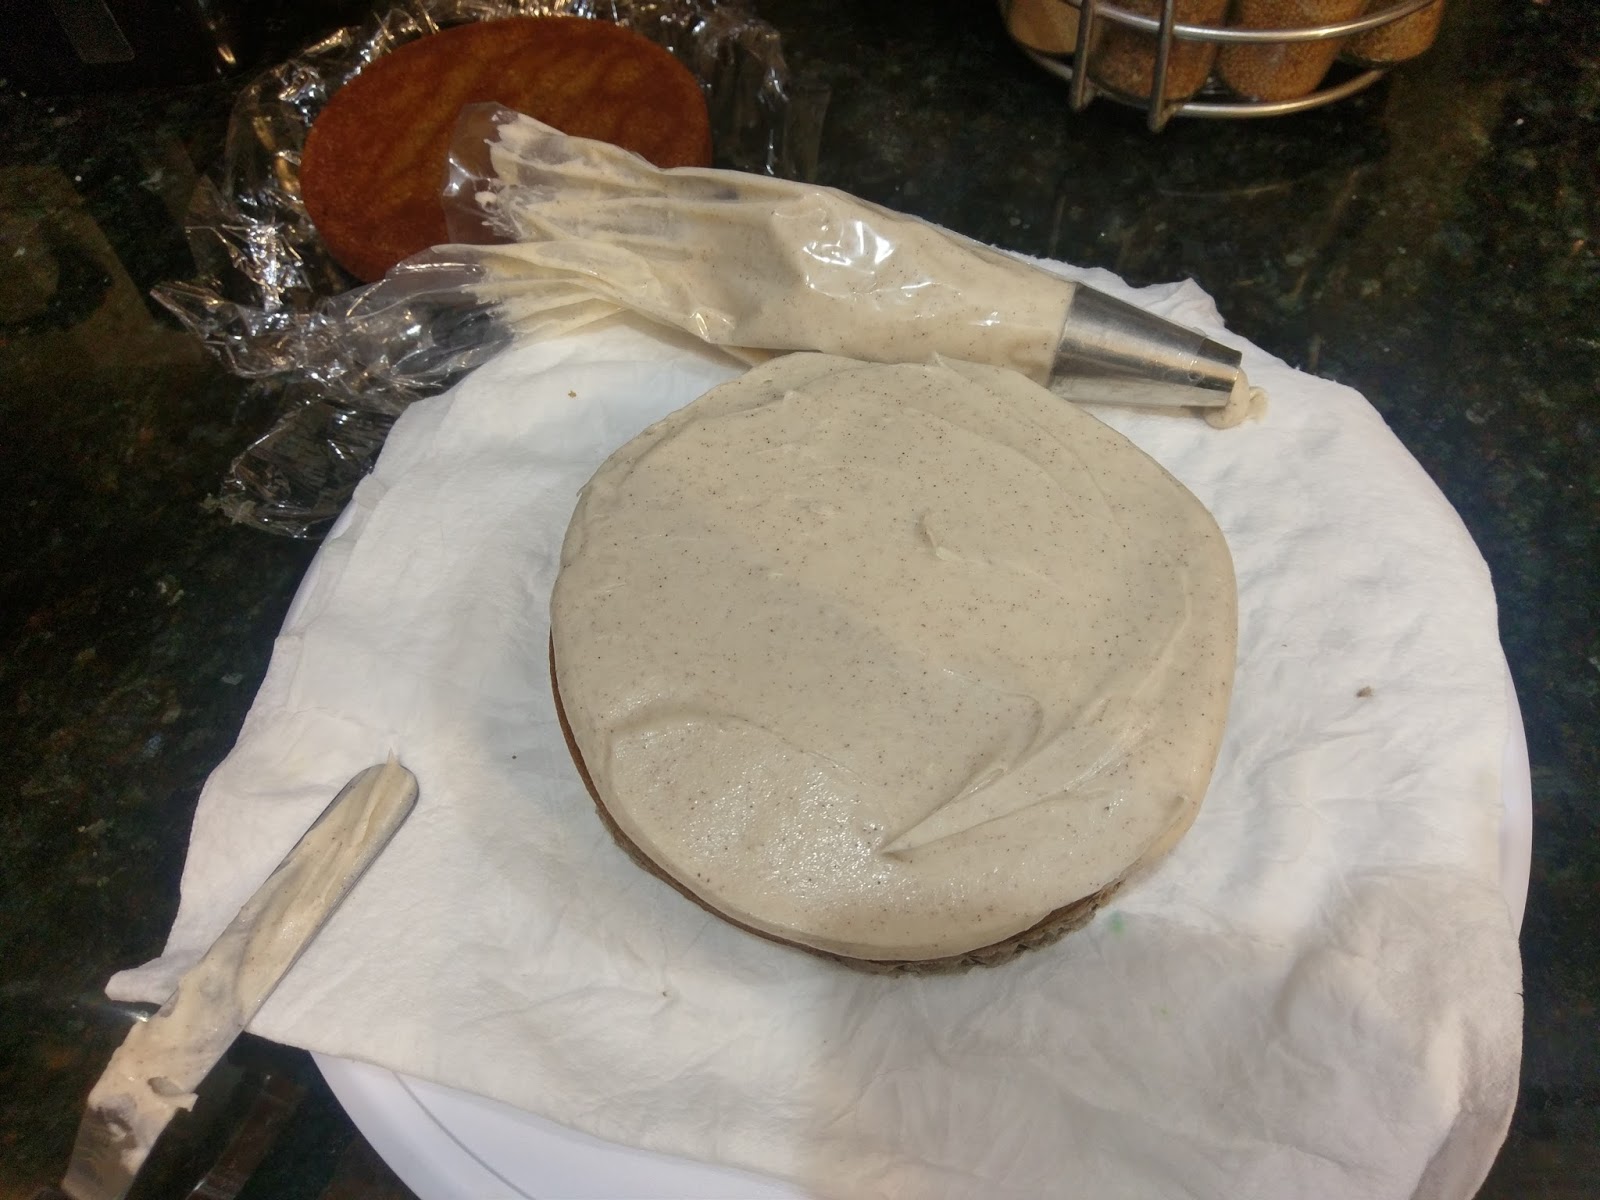
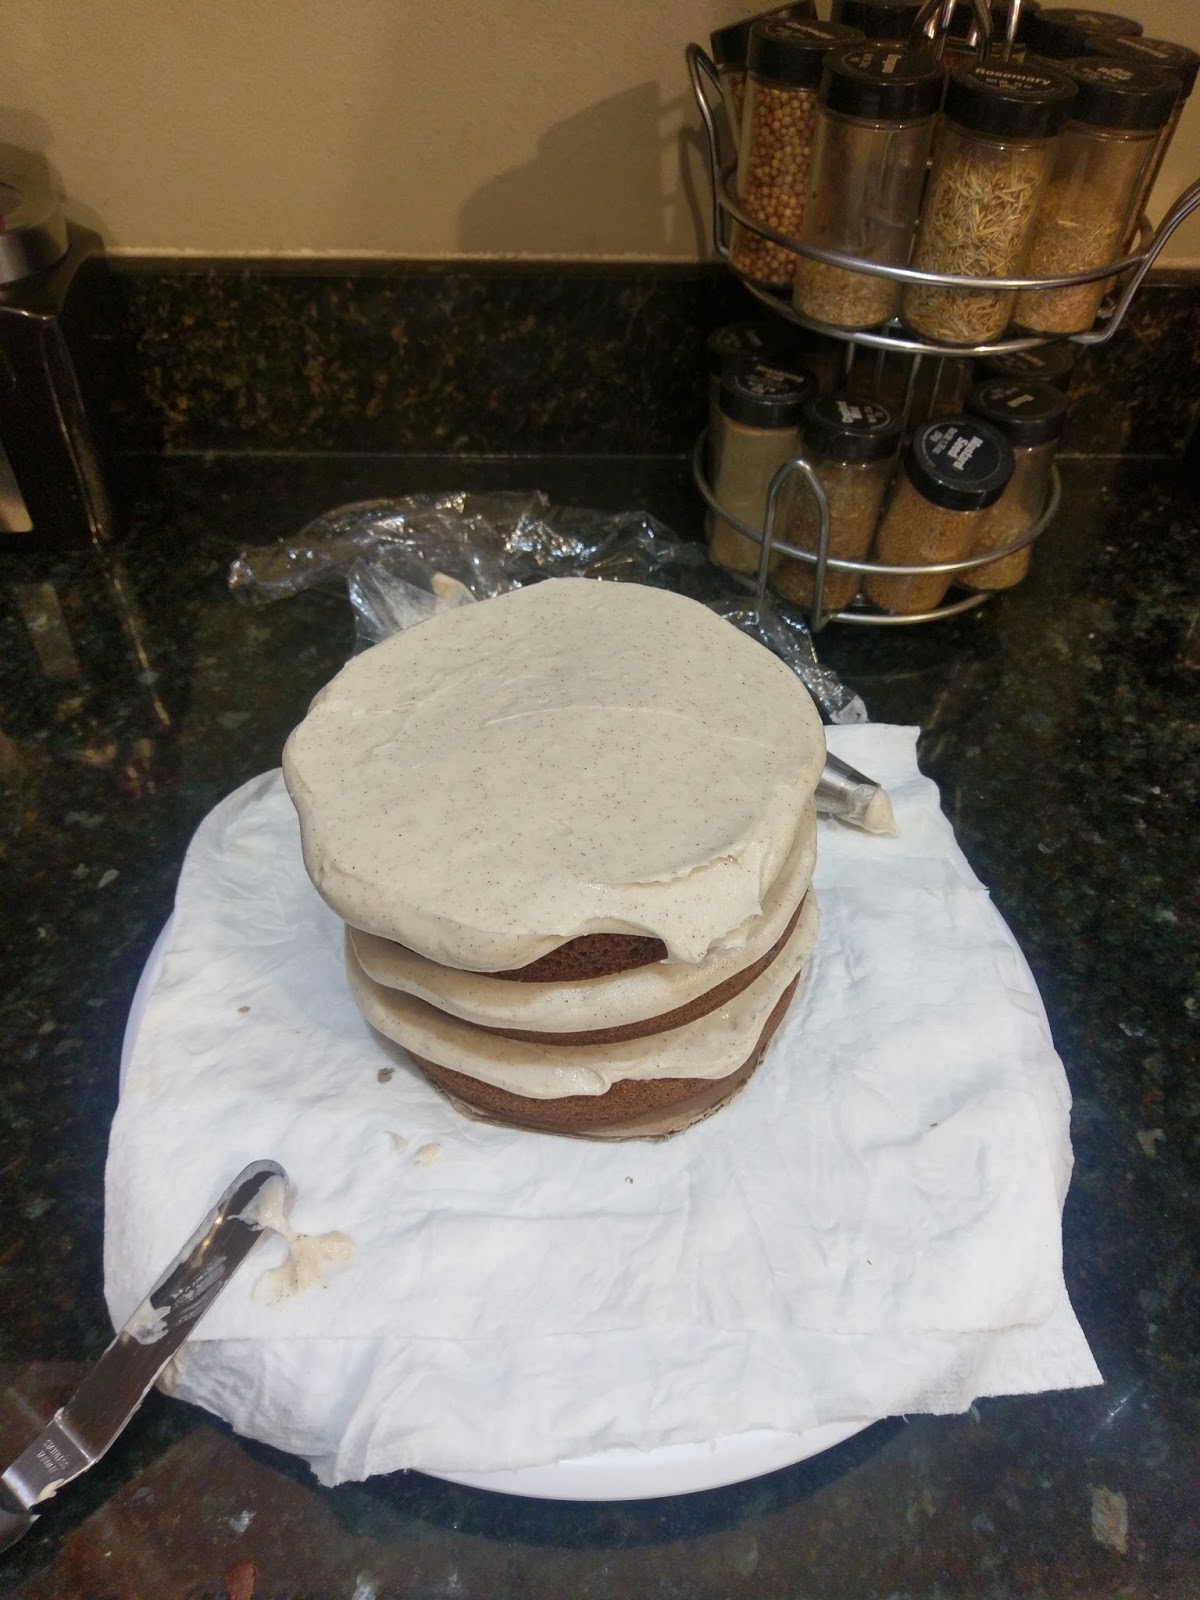
And I finish up by smoothing with an angled spatula. Repeat this process until you have used all of your layers. Smooth the top layer of frosting out nicely. There will be some overhang, which is good:

Especially if you forgot to level your cake and need to cleverly disguise that fact. I took my leftover frosting and angled spatula and filled in any areas where it was obvious that my cakes weren’t totally level (then I ate a few spoonfuls of frosting because I’m excellent at coping with problems). Then I went around the cake a few times with my bench scraper to pull any excess frosting off the cake. I didn’t have to do this much, as I didn’t use a ton of frosting between layers. I wanted this to be a mostly naked cake, so less is more here.

I’m going to be obsessed with naked cakes forever because they are pretty and easy. This is like the no-makeup look but for a cake. Once I finished my frosting, I transferred my cake onto a large plate. Then I gathered up my not-broccoli trees.

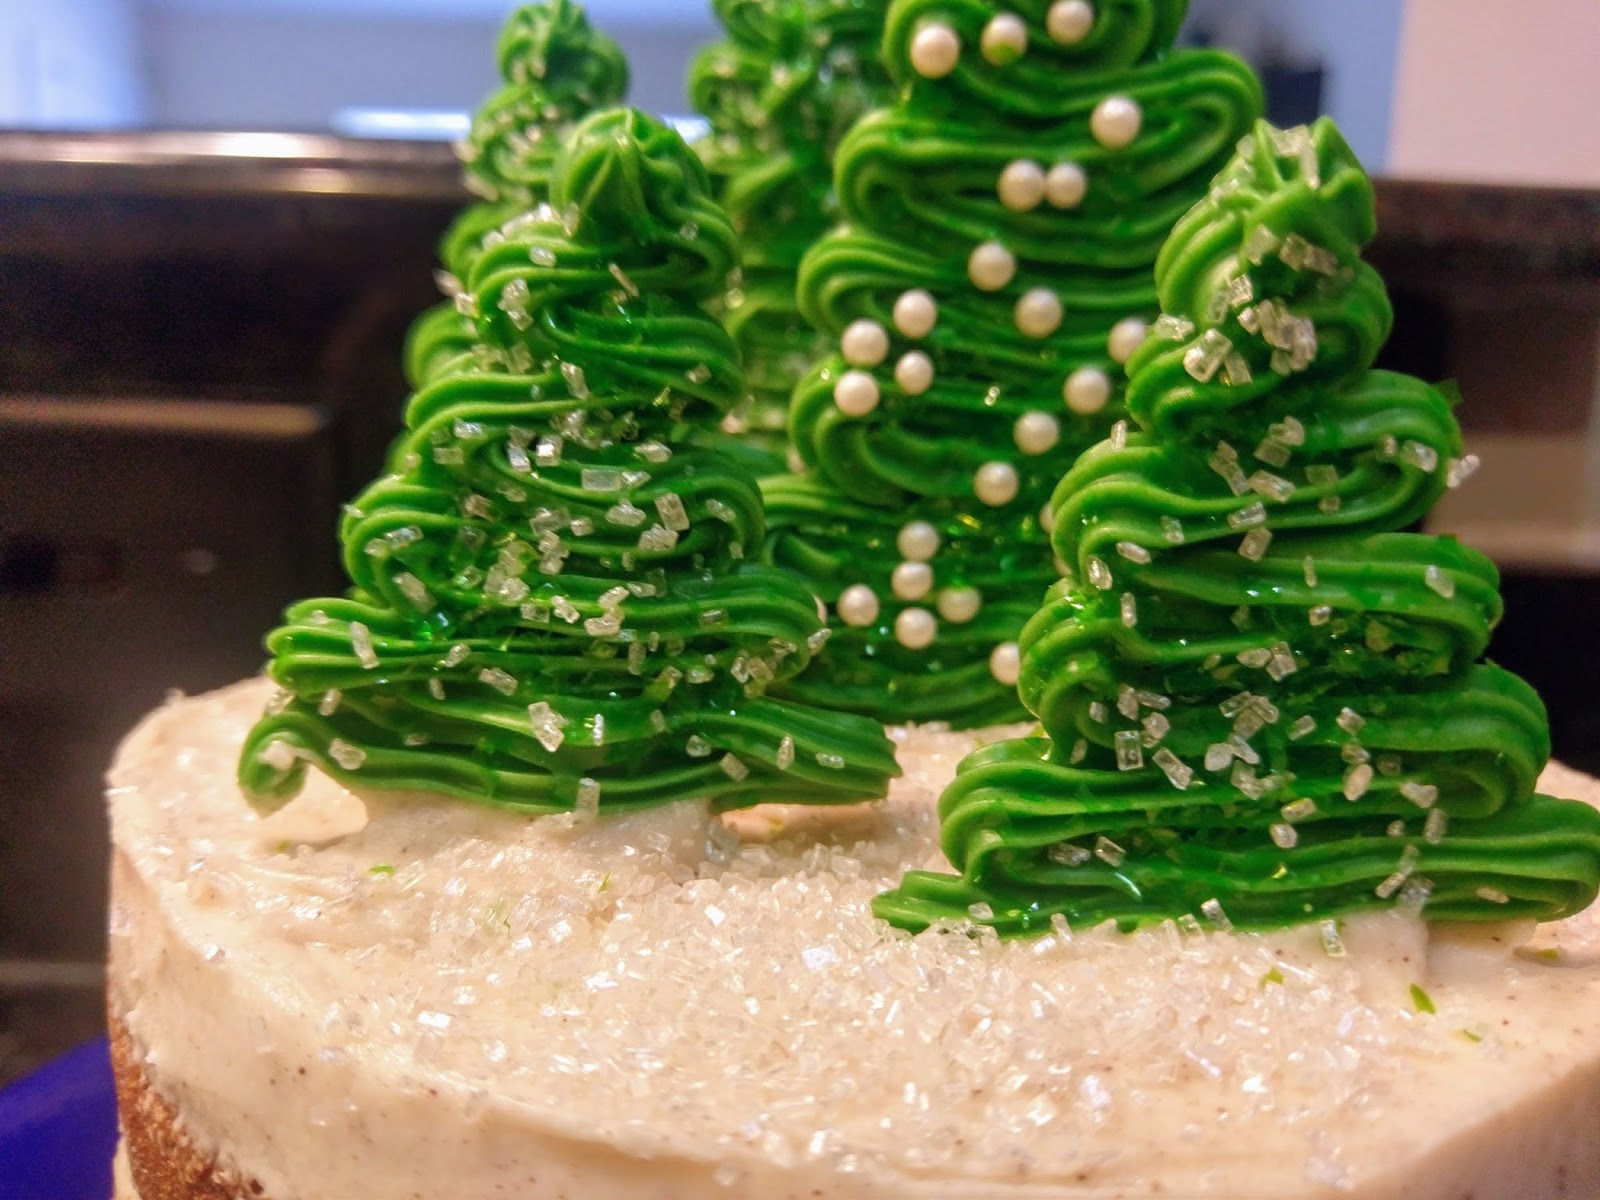
I piped a gob of frosting down where I wanted to anchor any trees in place. Then, with a touch more gentle than I knew I possessed, I gingerly (ha!) placed each tree into the frosting glob until it had sunk into the actual cake. I am happy to report not a single tree broke during this process. I made like ten trees for emergency breakage and only used six because chocolate always crumbles on me (Kate Hulk Smash). More leftover eating trees for me!
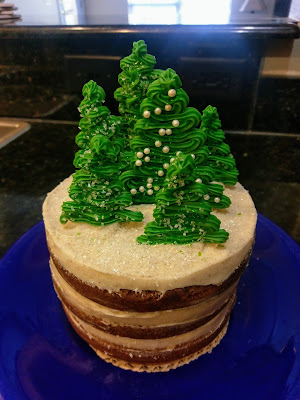
So much Christmas in a tiny, adorable, yummy package! As you can see, I finished up by adding a large sprinkling of white sugar crystals to give it that wintery feel. I know with the cinnamon cream cheese frosting it looks more like the beach than snow, but I live in Florida, so this totally works here. Let me have this moment, people.

I just needed to see some snow, okay? This cake really helped boost my Christmas spirit. I mean, I still avoid stores I know for certain are playing Christmas music, but I’m less angry when I walk by the inflatable beach snowman down the street (for reference, this guy. I can’t stand his smugness or his sunglasses.). It might stay “coldish” around here, and I am super grateful for that because I have one hell of a boot collection and not enough reasons to change outfits more times in one day than Beyonce. After finally getting to experience the magic of Disney World at Christmastime (minus the heat, which I am told Mickey can do nothing about), I’m ready for hall-decking and whatnot. A slice of this cake just puts me over the top. Of course, my “over the top” Christmas spirit simply means I might smile for 30 seconds longer a day. Baby steps. But when this gingerbread cake hits my tongue, I believe in Christmas miracles! Cinnamon cream cheese frosting is probably the best thing ever–the right amounts of sweet and tang meet with that unmistakable spiced, gingerbread goodness for literally the perfect balance. And since it is gingerbread with cream cheese icing on top, you can feel completely guilt-free about having a slice for breakfast. It’s like a really fancy bagel with enough sugar to power you through even the earliest of Christmas mornings. Happy Holidays! ‘Til next time, my fellow eaters!

Pictured: my Christmas joy. -
You Had Me at Pumpkin
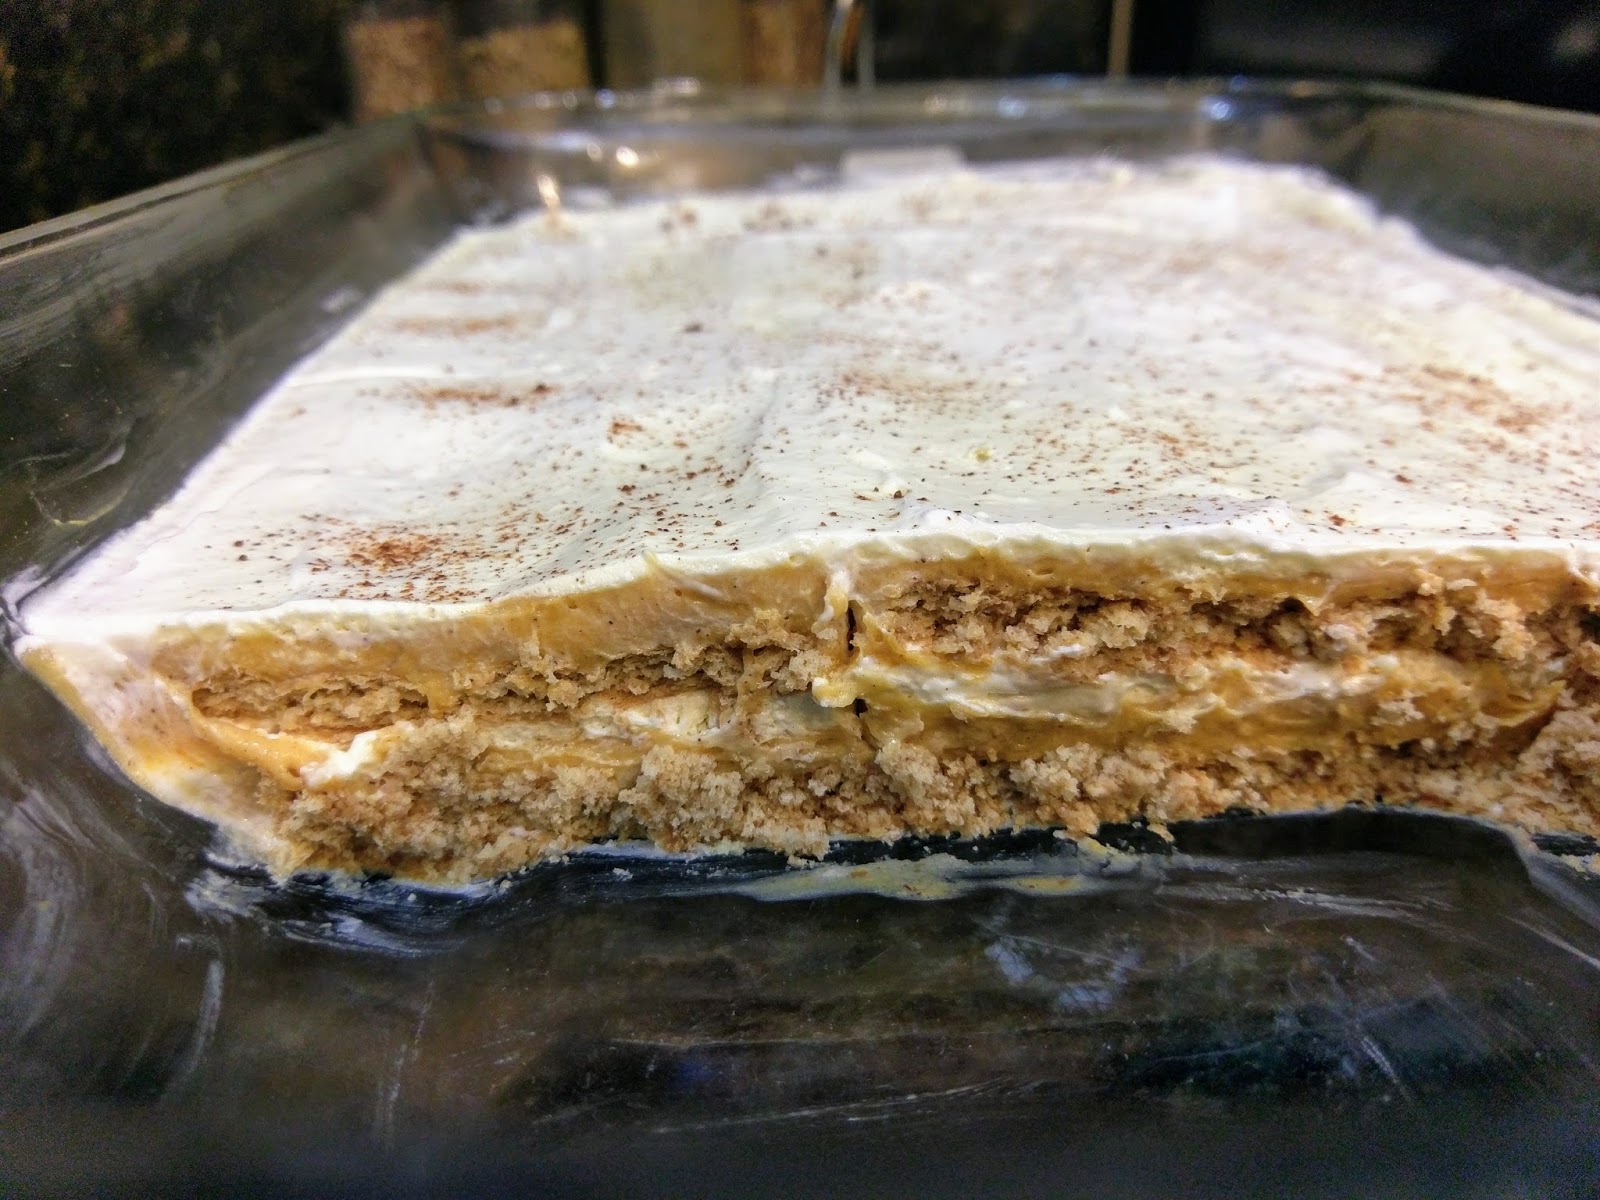
Well, it’s time to face reality–Thanksgiving is almost here, and once it’s passed, the season of pumpkin will come to a close. I’m a seasonal flavor baker…citrus belongs in the summer, pumpkin in the fall, peppermint in the winter, and everything green in the month of March. Literally the only thing I eat year round dessert-wise is ice cream. I love the stuff so much that if I could only eat one dessert for the rest of my life, that would be it. And considering how much I eat dessert, my calcium intake would be off the charts. Bones so strong they’re indestructible! …thus fulfilling my lifelong dream of becoming a Terminator. But, luckily for you guys, that’ll never happen. And also luckily for my husband, the final pumpkin dessert of the season is here. If I baked with pumpkin as often as I wanted to, I’m fairly certain he’d have left me a long time ago, citing irreconcilable differences (a.k.a., my wife uses an obscene amount of pumpkin spice). I definitely wanted this baking season to go out with a bang, so I came up with a low-cal dessert guaranteed to wow everyone at your Thanksgiving festivities next week: pumpkin cheesecake lasagna.
Epic taste lies within! All the best things have layers. Fall outfits, ice cream cakes, my personality…so this pumpkin cheesecake lasagna fits the bill in both the scrumptious and seasonally appropriate categories. Considering the original Tasty recipe was full of all of the fats, I knew I had to come up with a way to make this low cal. There was no way I was going to be able to write off something called pumpkin cheesecake lasagna. Those are three of my favorite things all combined into one blissful dessert experience. I was able to get clever and managed to bring the calorie count down to a respectable 205 calories a slice for 12 slices. If you went for smaller slices, you could go for 15 slices at 164 calories a pop. No pumpkin pie in the world can say the same, and they don’t even have layers. Amateurs. Considering I am all about the “bake ahead” when it comes to Thanksgiving, this dessert demands it! It’s best if you make it the night before you want to serve it, so this definitely frees up space in the kitchen on Turkey Day.
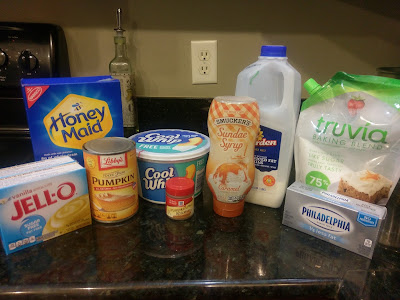
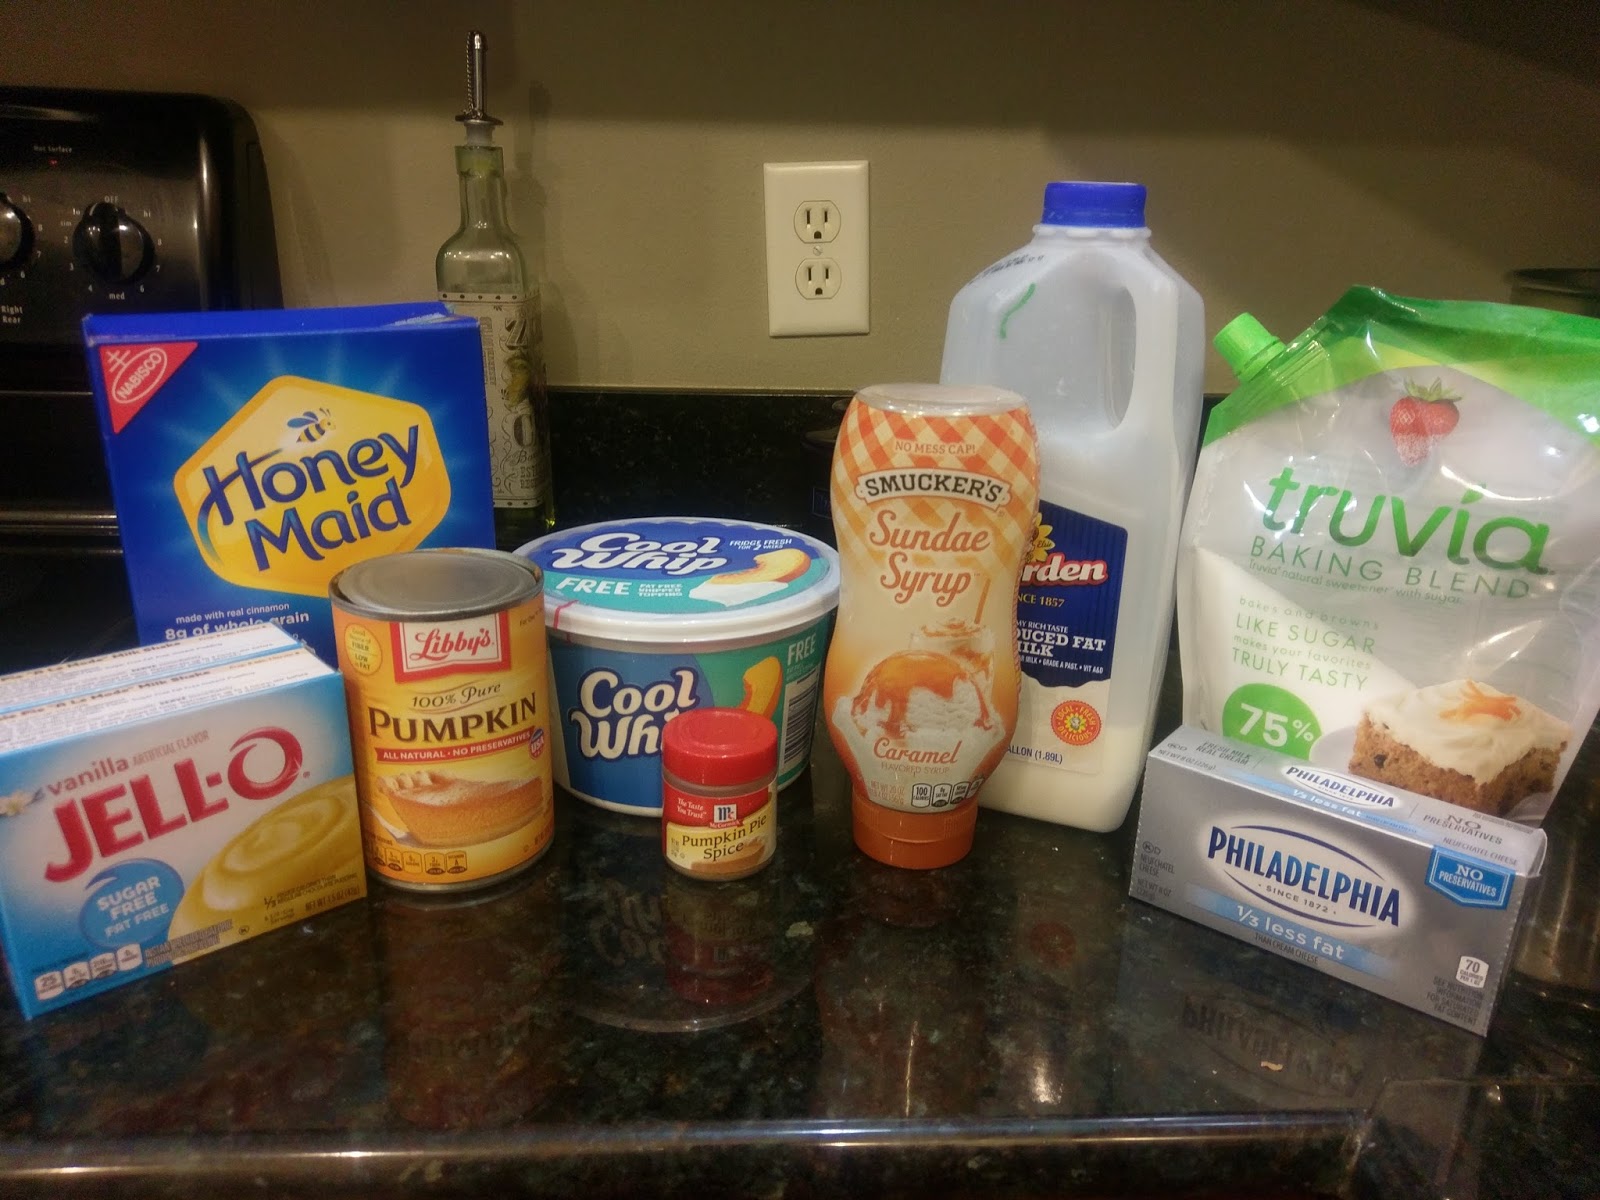
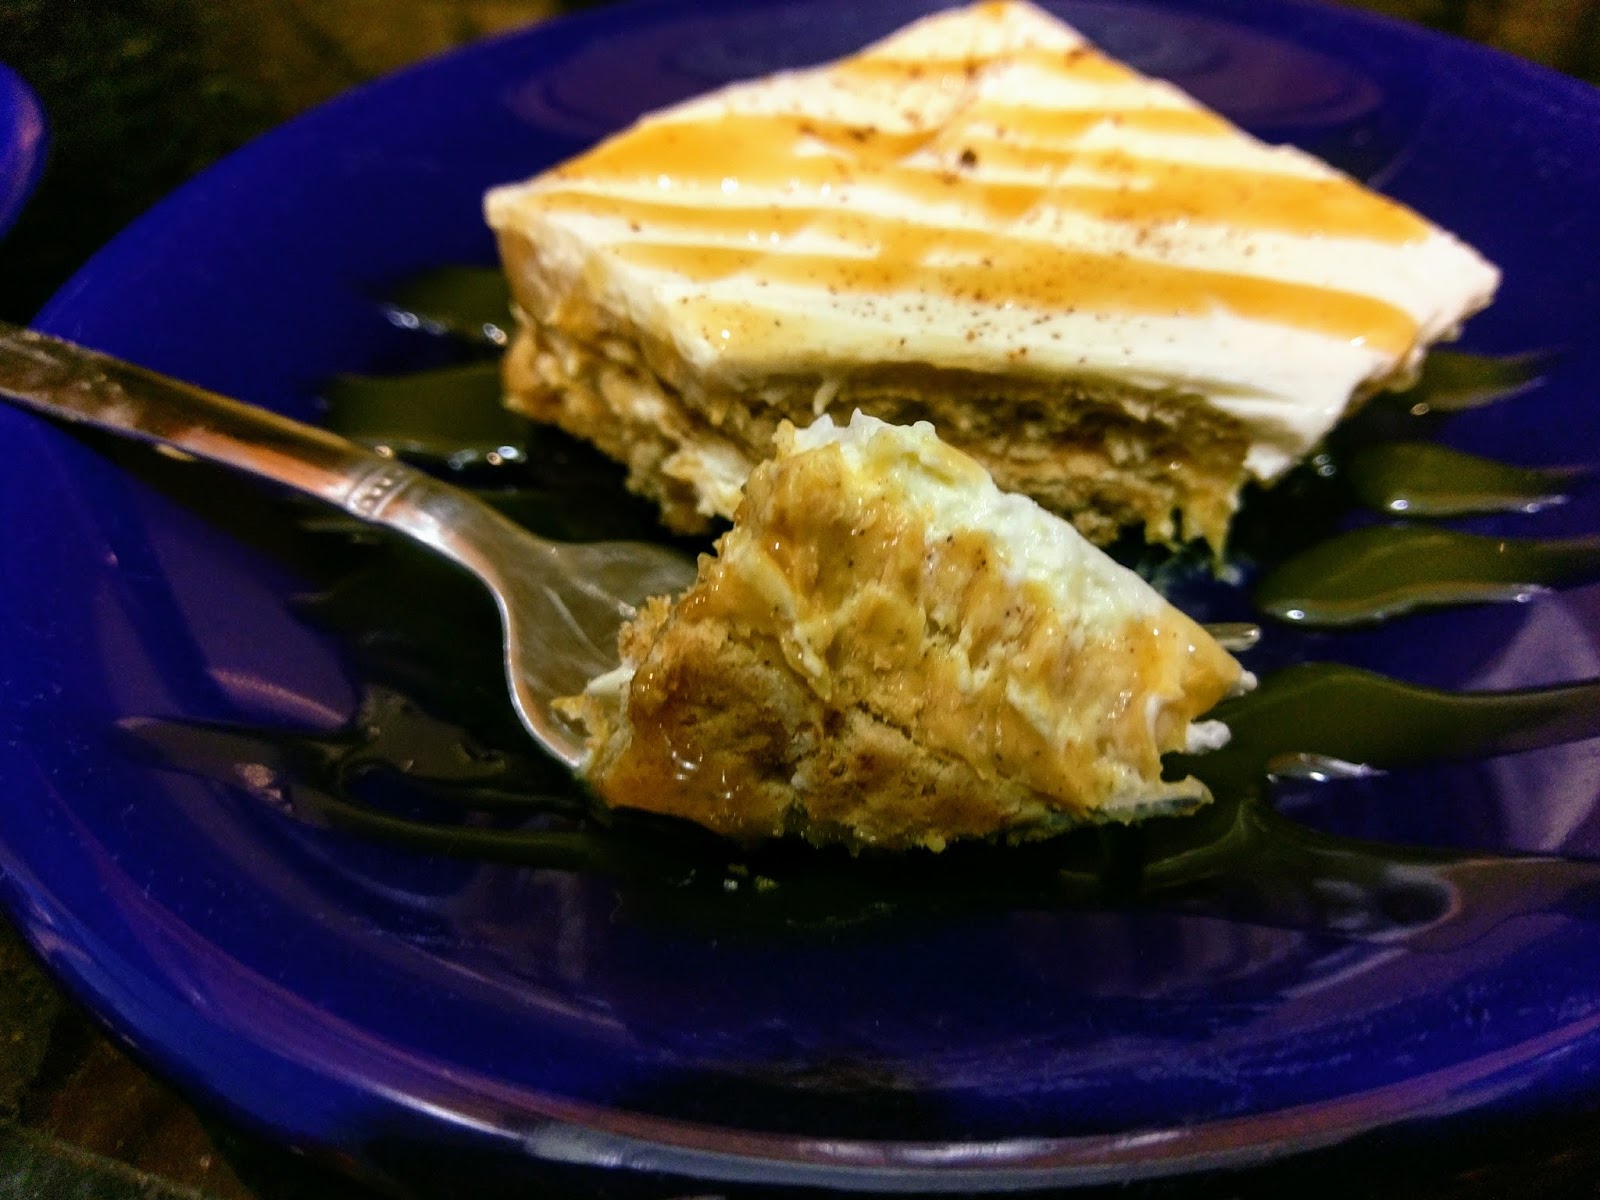
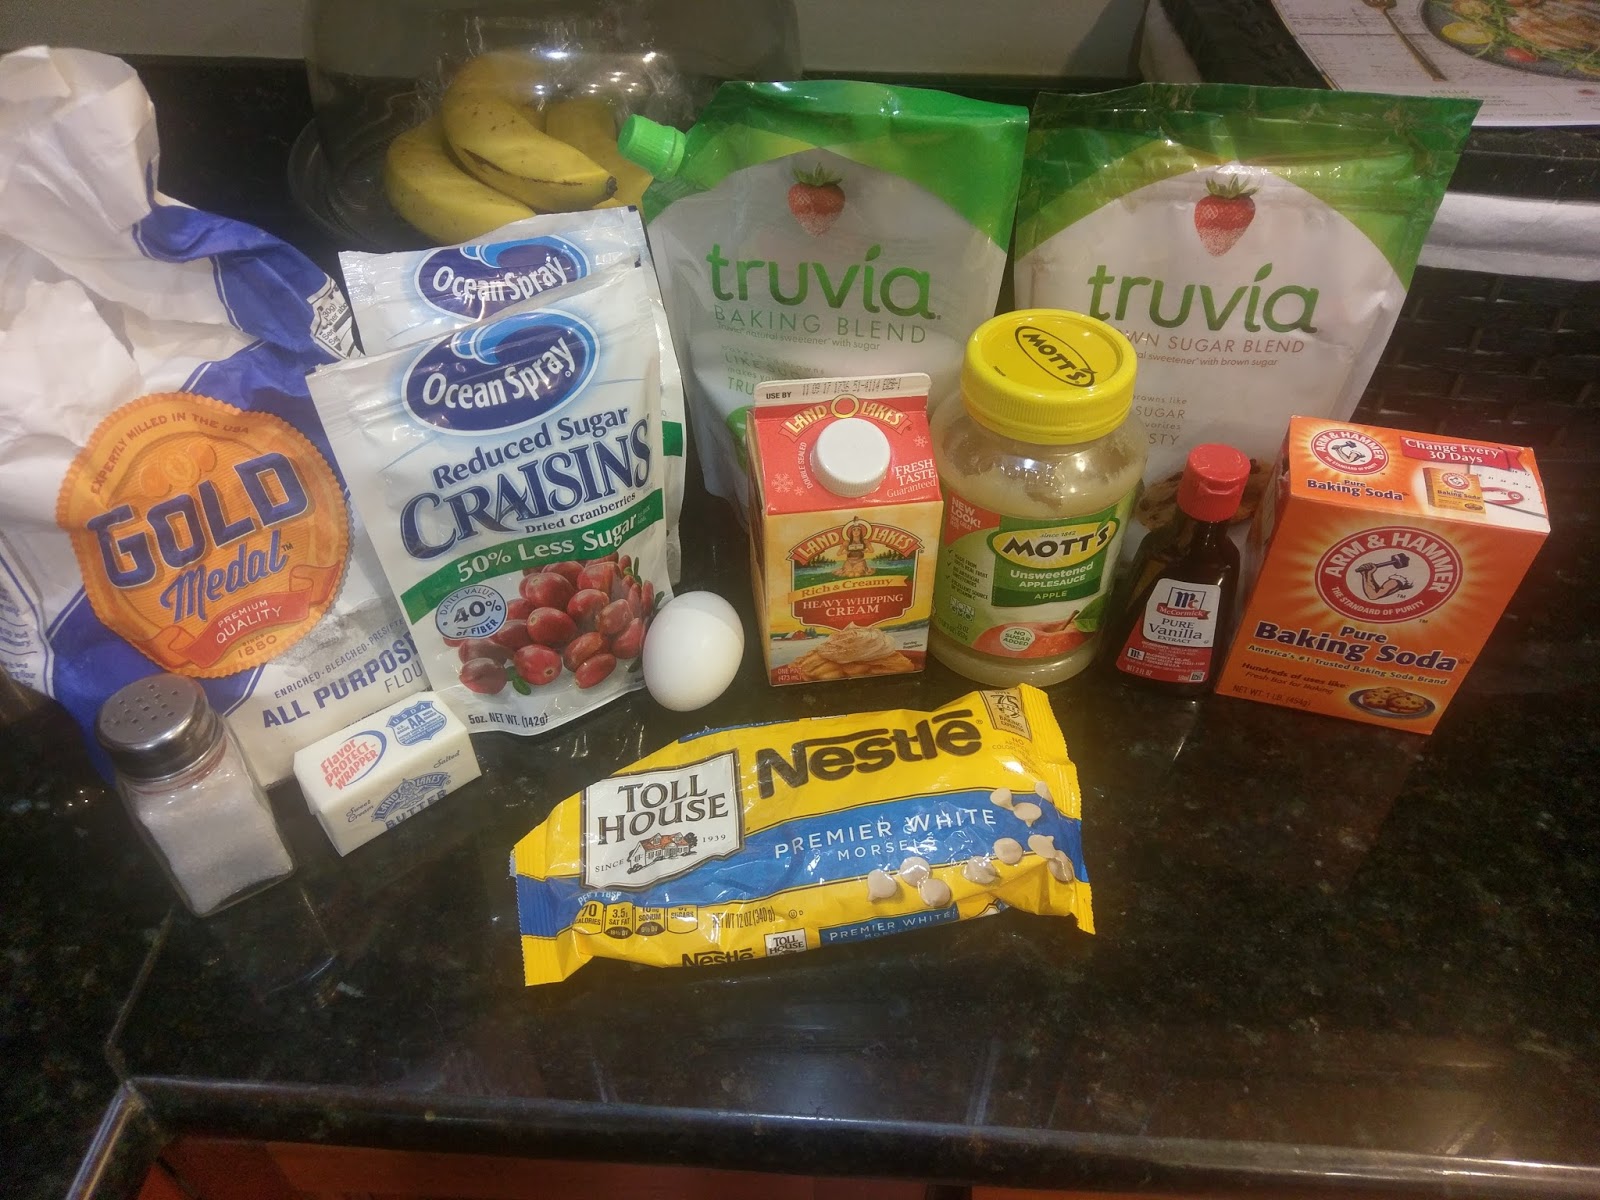
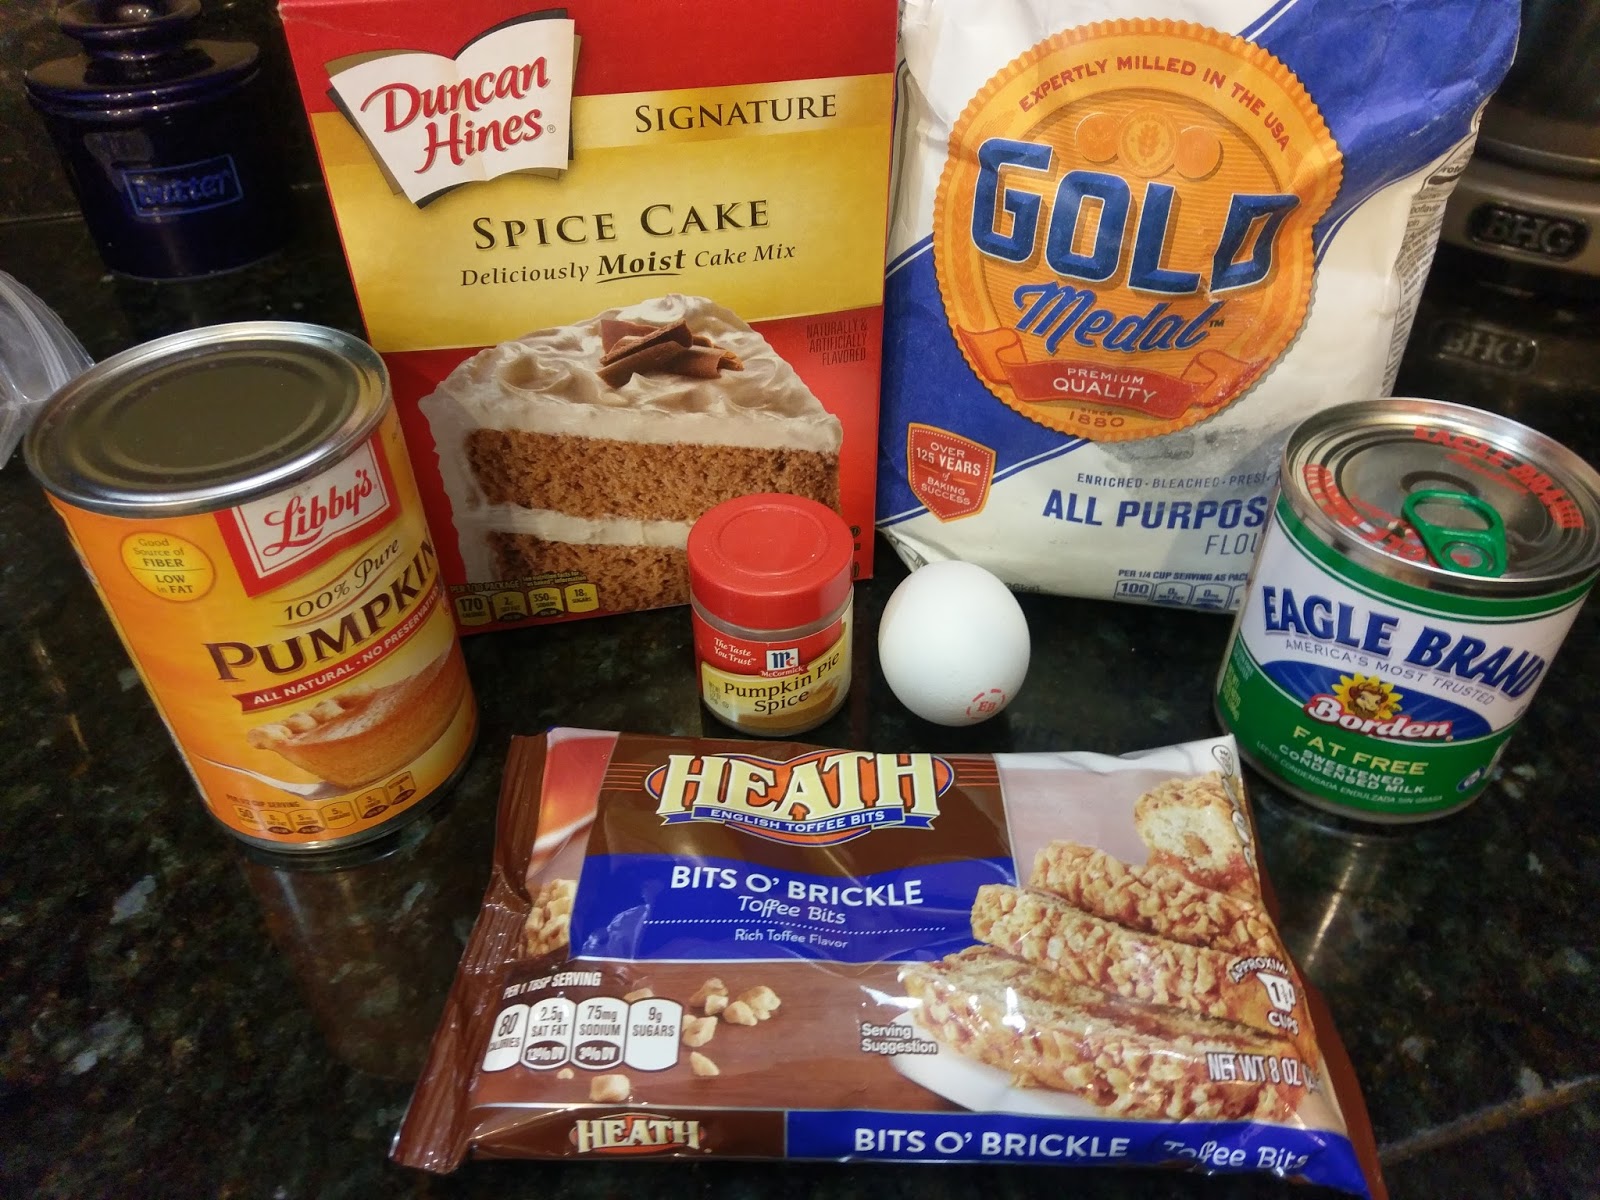
Just don’t forget the caramel. Because I have for like two nights in a row, but we didn’t even notice because this is just that good. The ingredients are also incredibly simple. You don’t have to beg a health food store to sell you specialty ingredients for less than fifty bucks a pound or anything. All you need is:
- 1 brick of 1/3 less fat cream cheese at room temp
- 2 heaping TBS of Truvia Baking Blend
- 1 1/2 cups of Cool Whip Free
- 2 cups of skim milk
- 2 large (1.5 ounce each) packages of sugar free instant vanilla pudding
- 1 tsp of pumpkin pie spice
- 3/4-1 cup pumpkin puree(I used 3/4 cup because it was what I had left in the fridge, but it was definitely plenty)
- Reduced fat cinnamon graham cracker sheets (14 1/2 sheets total)
- Optional: caramel for drizzle, pecans for topping
Start by mixing the cream cheese and Truvia in a stand mixer for a few minutes until fluffy. Then spoon in the Cool Whip Free and blend on low until well mixed. Set this aside.
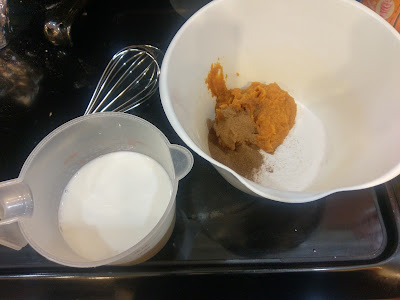
Oh pumpkin, I shall miss you most of all. In a medium mixing bowl, dump the pumpkin spice, pumpkin puree, and both instant pudding packages. Then add in all of the milk–this will be very stiff (perhaps less so if you use the full cup of pumpkin), so mix until everything is incorporated:
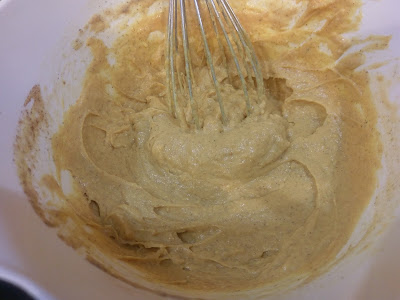
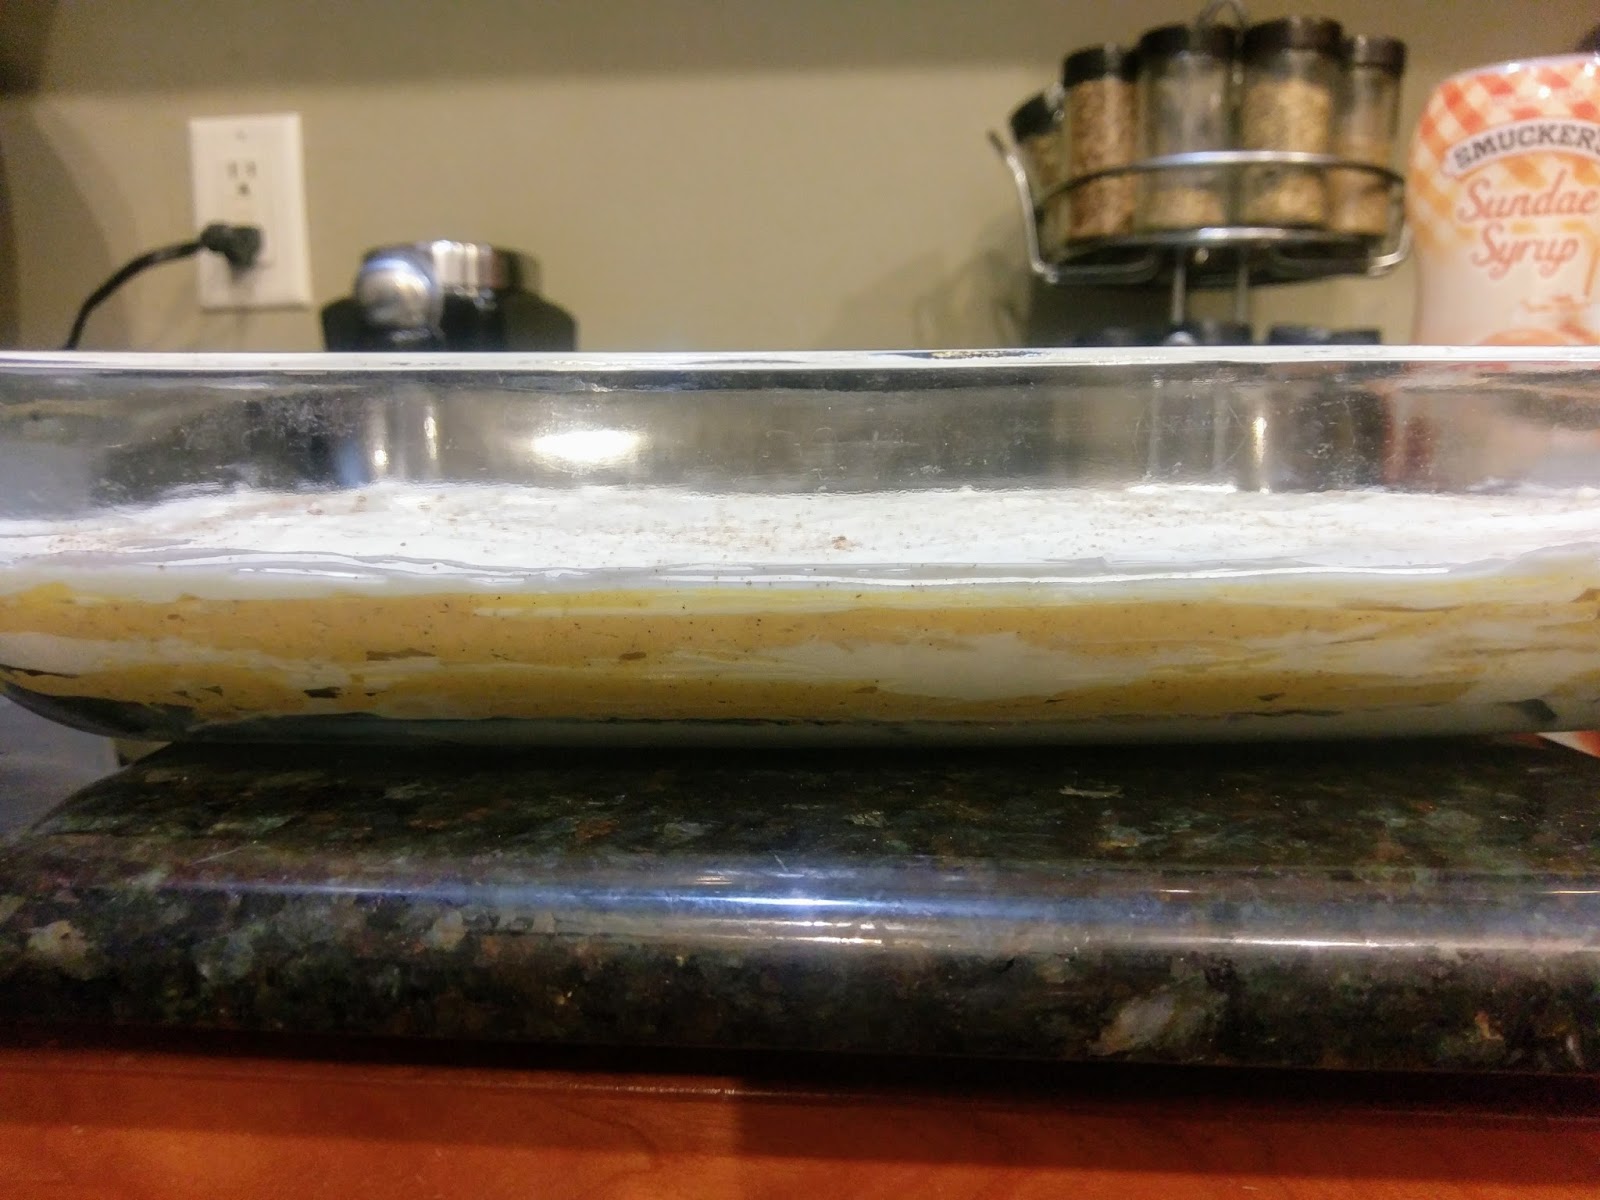
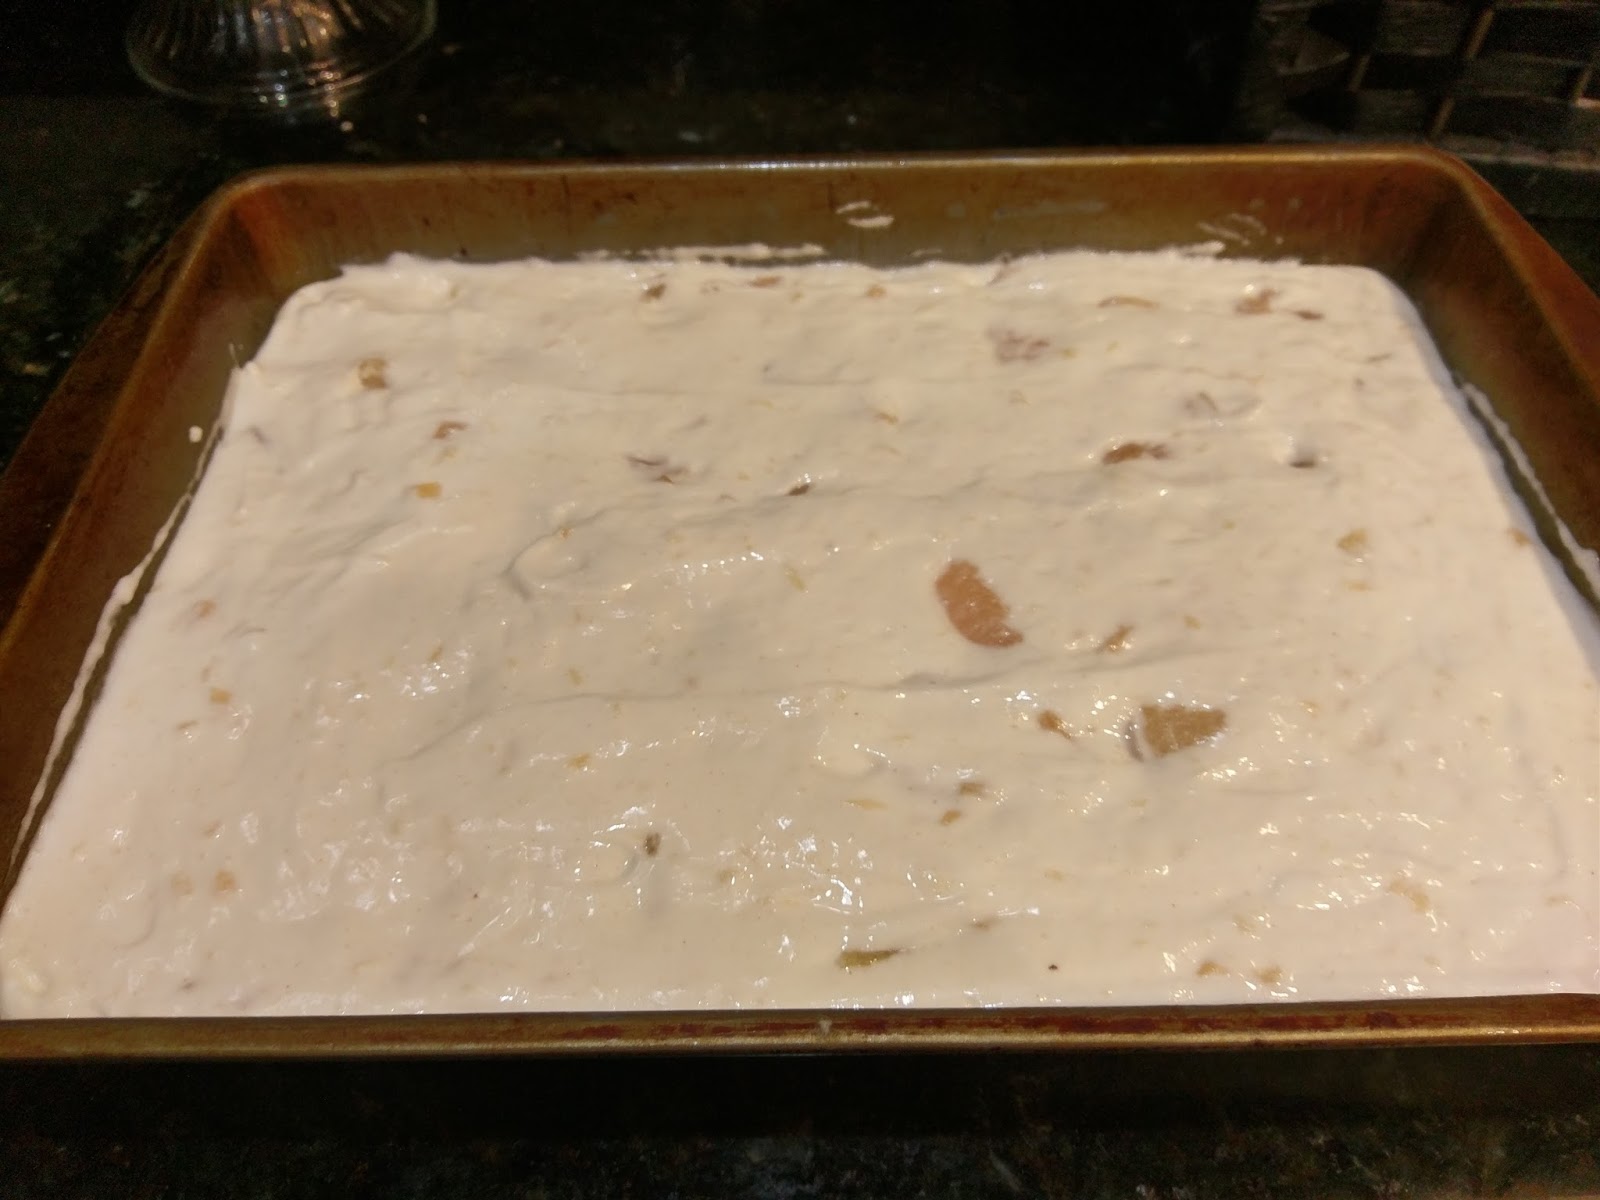
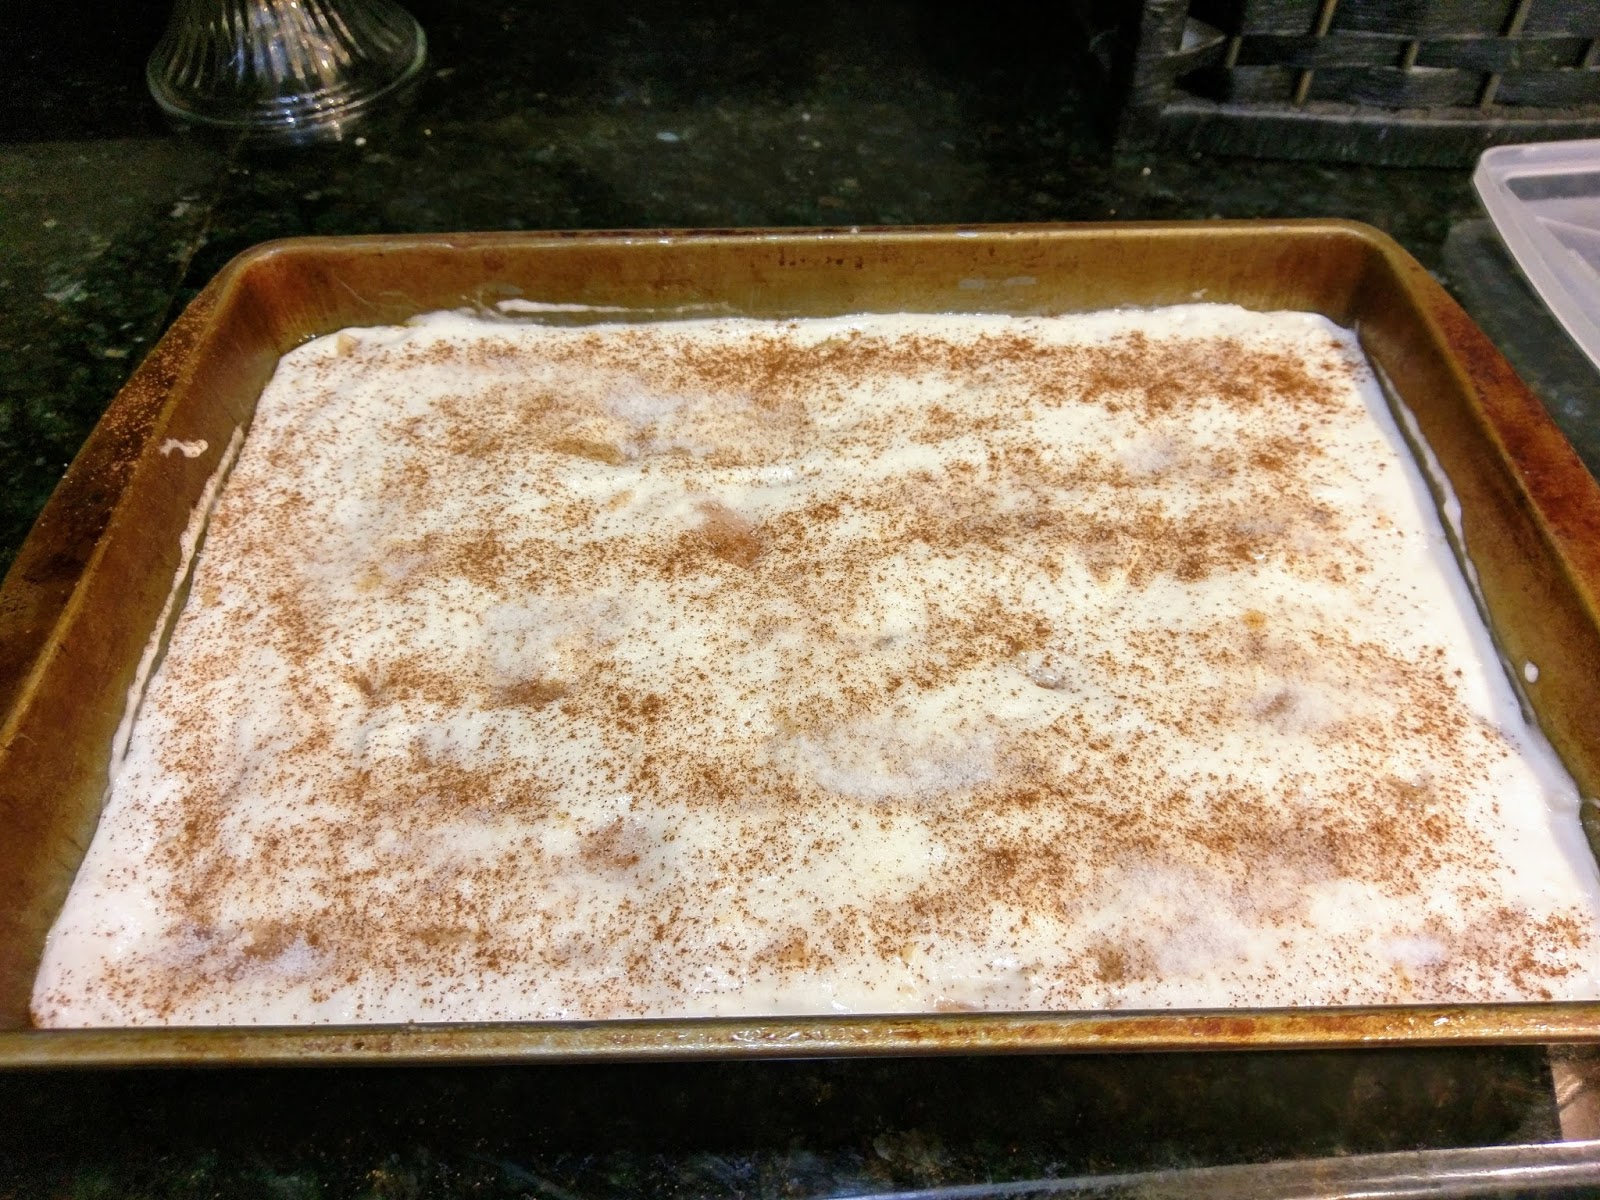
And definitely looks of pumpkiny goodness. Now, get a glass 9×13 baking pan. I say glass because you want to be able to ooh and ahh at your lasagna layers. Hold on to your butts–it’s time for a crappy photo montage!
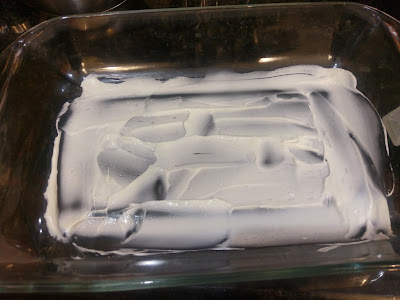
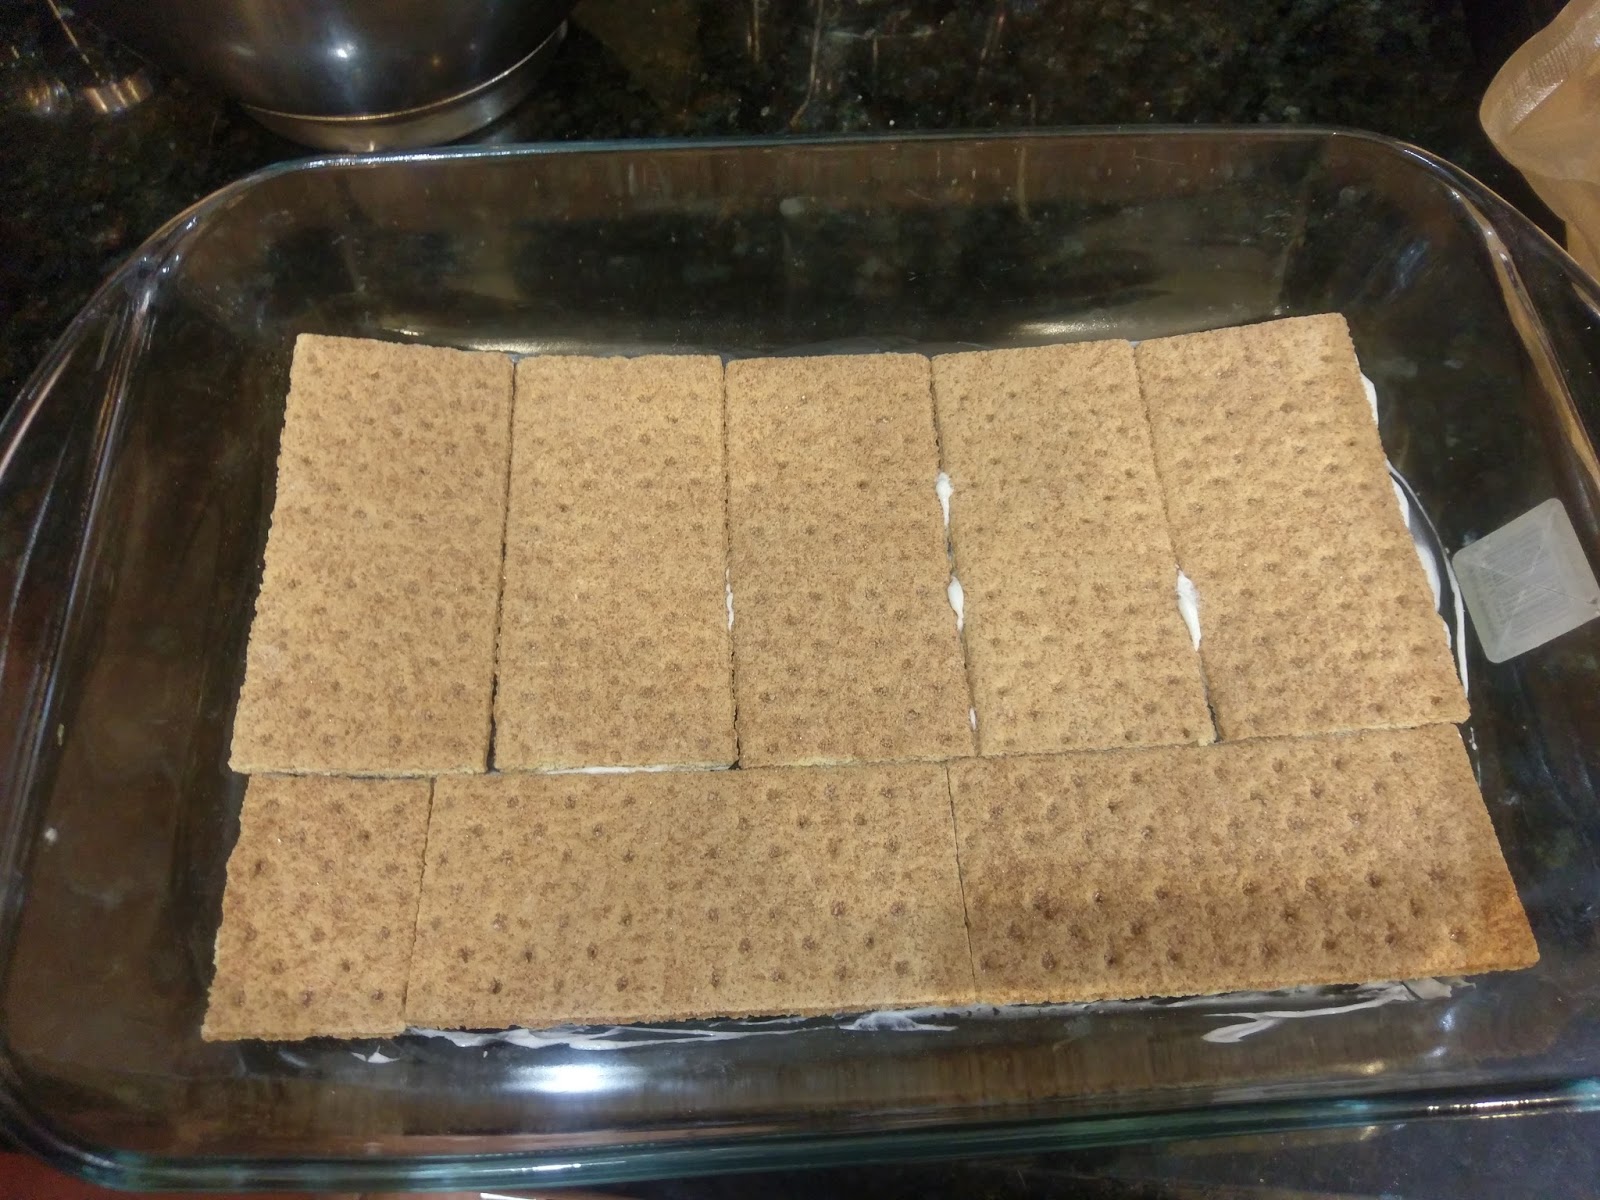
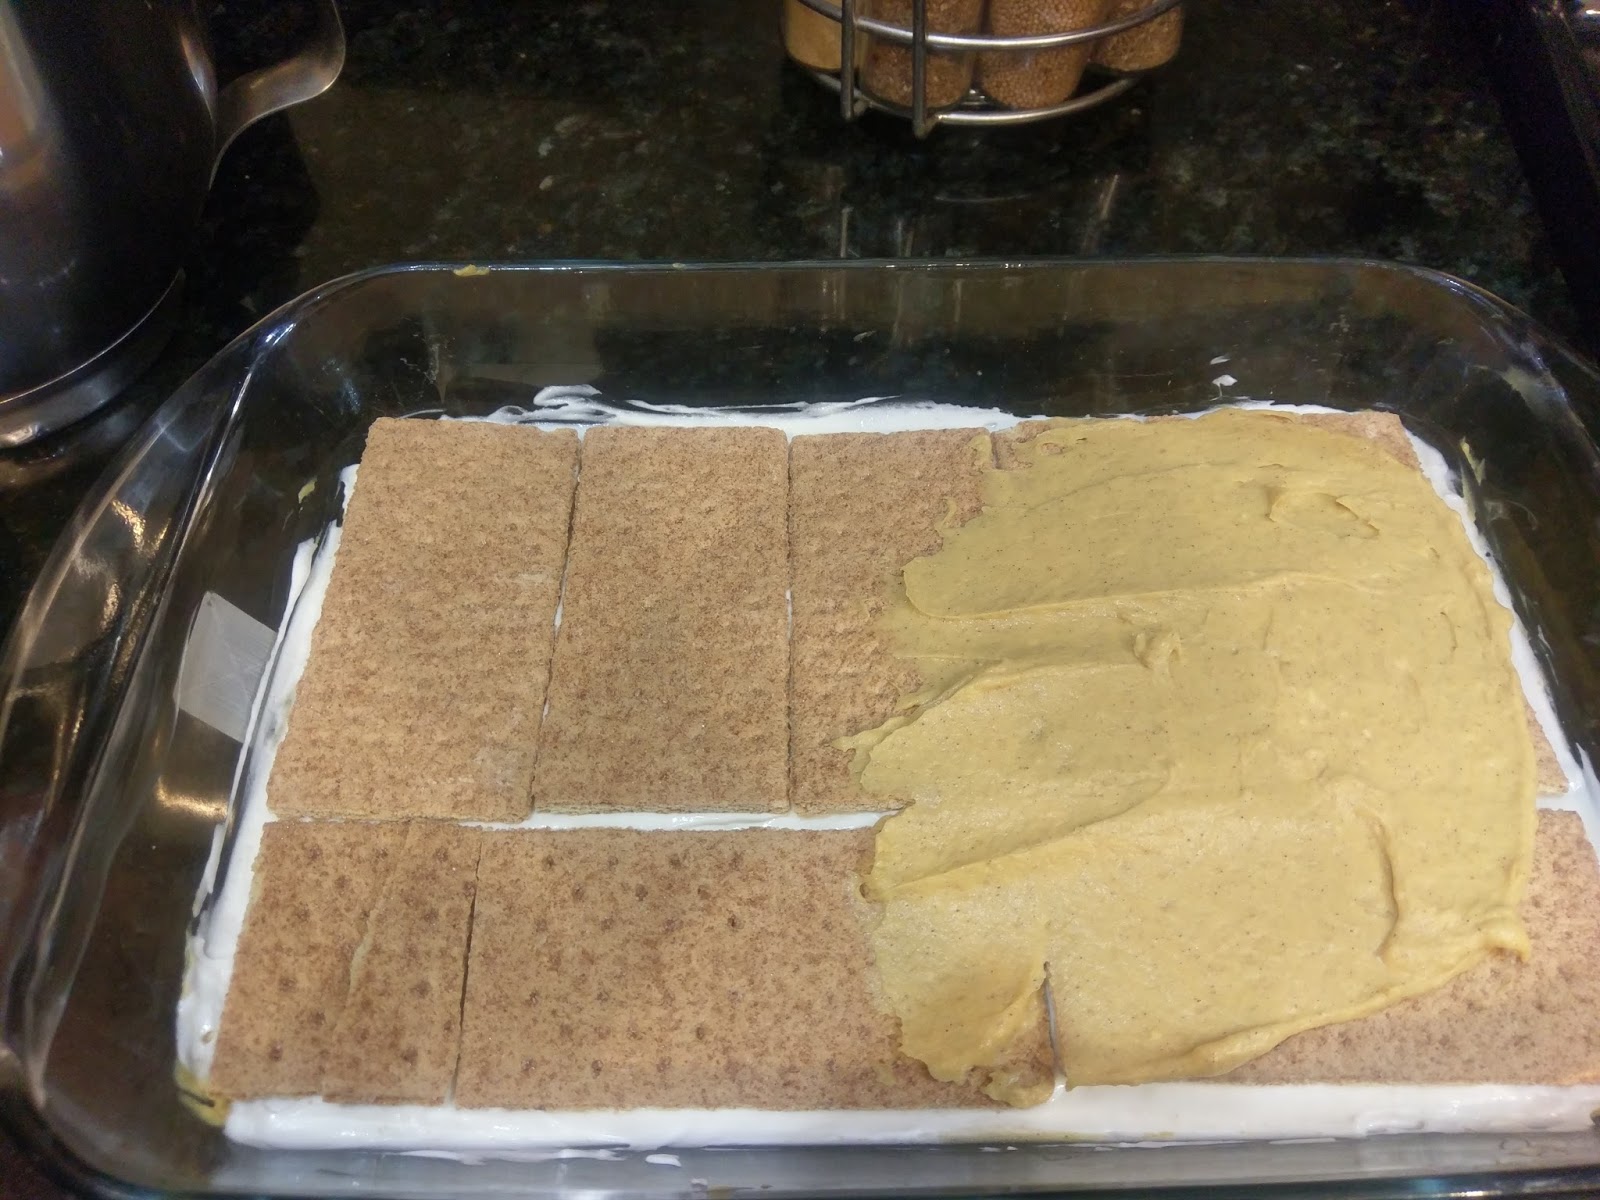
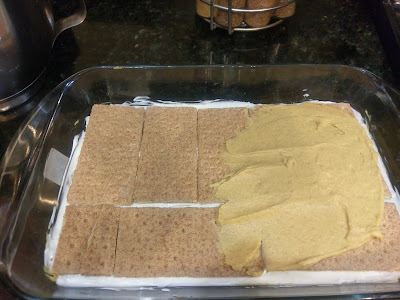
To secure your graham crackers, put a thin layer of the cream cheese mixture on the bottom of your pan. 
Then lay out your graham crackers. I fit 7 and 1/4 sheets on my bottom layer. I am nothing if not precise. 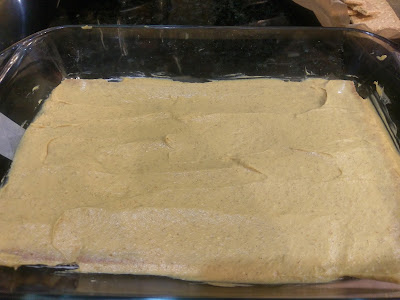
You stiff, delicious bastard. I wasn’t kidding when I said the pumpkin mixture was stiff. I had to hold down my graham crackers while I initially spread the pumpkin mixture over them to keep them from flying around everywhere. You can try heating things up in the microwave to thin them out, but this didn’t make a huge difference to me. Had I had a full cup of pumpkin puree leftover, this probably would’ve been way easier, but I couldn’t justify opening a new can to only use a 1/4 cup and then get thrown away due to pumpkin season termination. You only want to use HALF of your pumpkin mixture at this point. Spread it as evenly as you can with a rubber spatula…perhaps a heated metal/angled spatula might make this process easier.

Thankfully, the cheesecake layer is much nicer. On top of the pumpkin layer, add a layer of HALF of the cheesecake mixture. Smooth out as best as you can. I used a separate rubber spatula for this so I wouldn’t have to wash my pumpkin spatula over and over because I am insanely lazy. I’ve been known to buy everything in twos because of this. Cost effective? Nope. Super efficient? Yep.
Not pictured: the break I needed to take from smoothing out pumpkin mixture to give my arm some rest. On top of the cheesecake layer, add the remaining graham crackers. Top the graham crackers with the rest of the pumpkin mix:
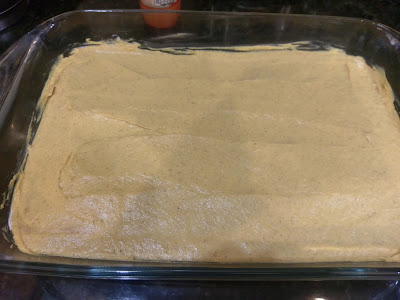
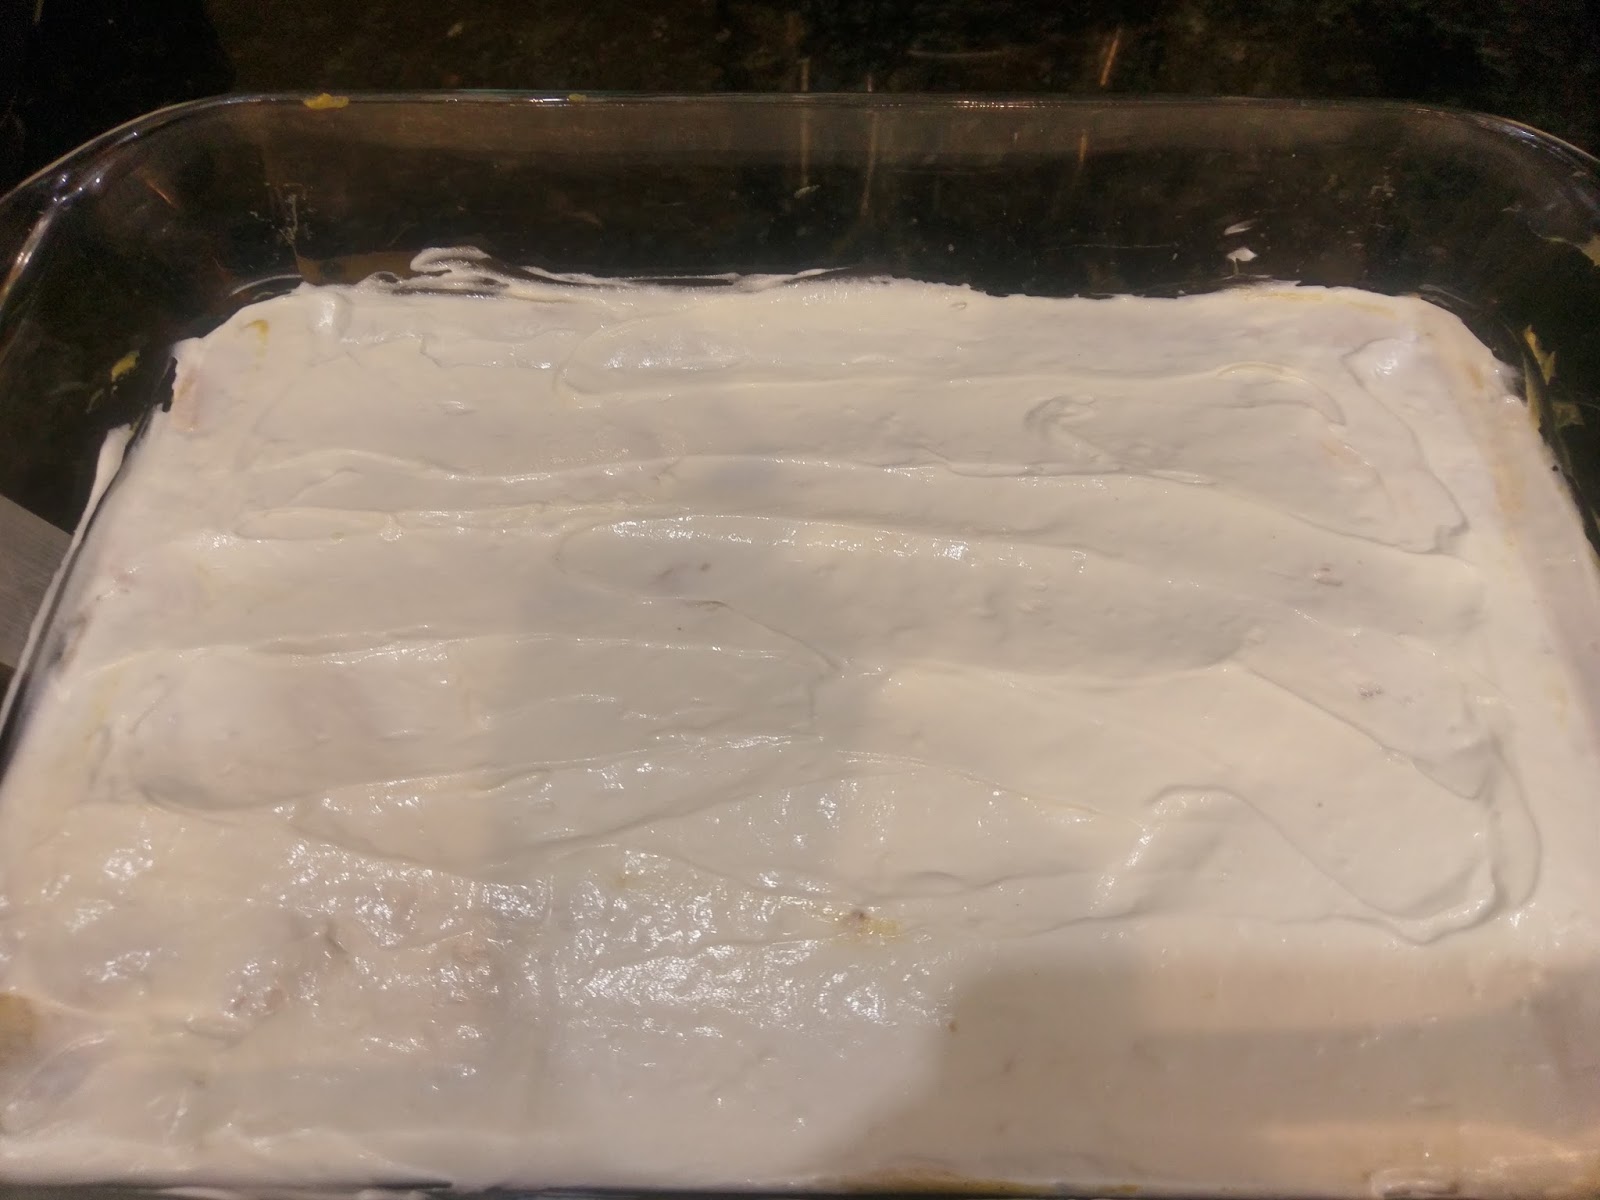
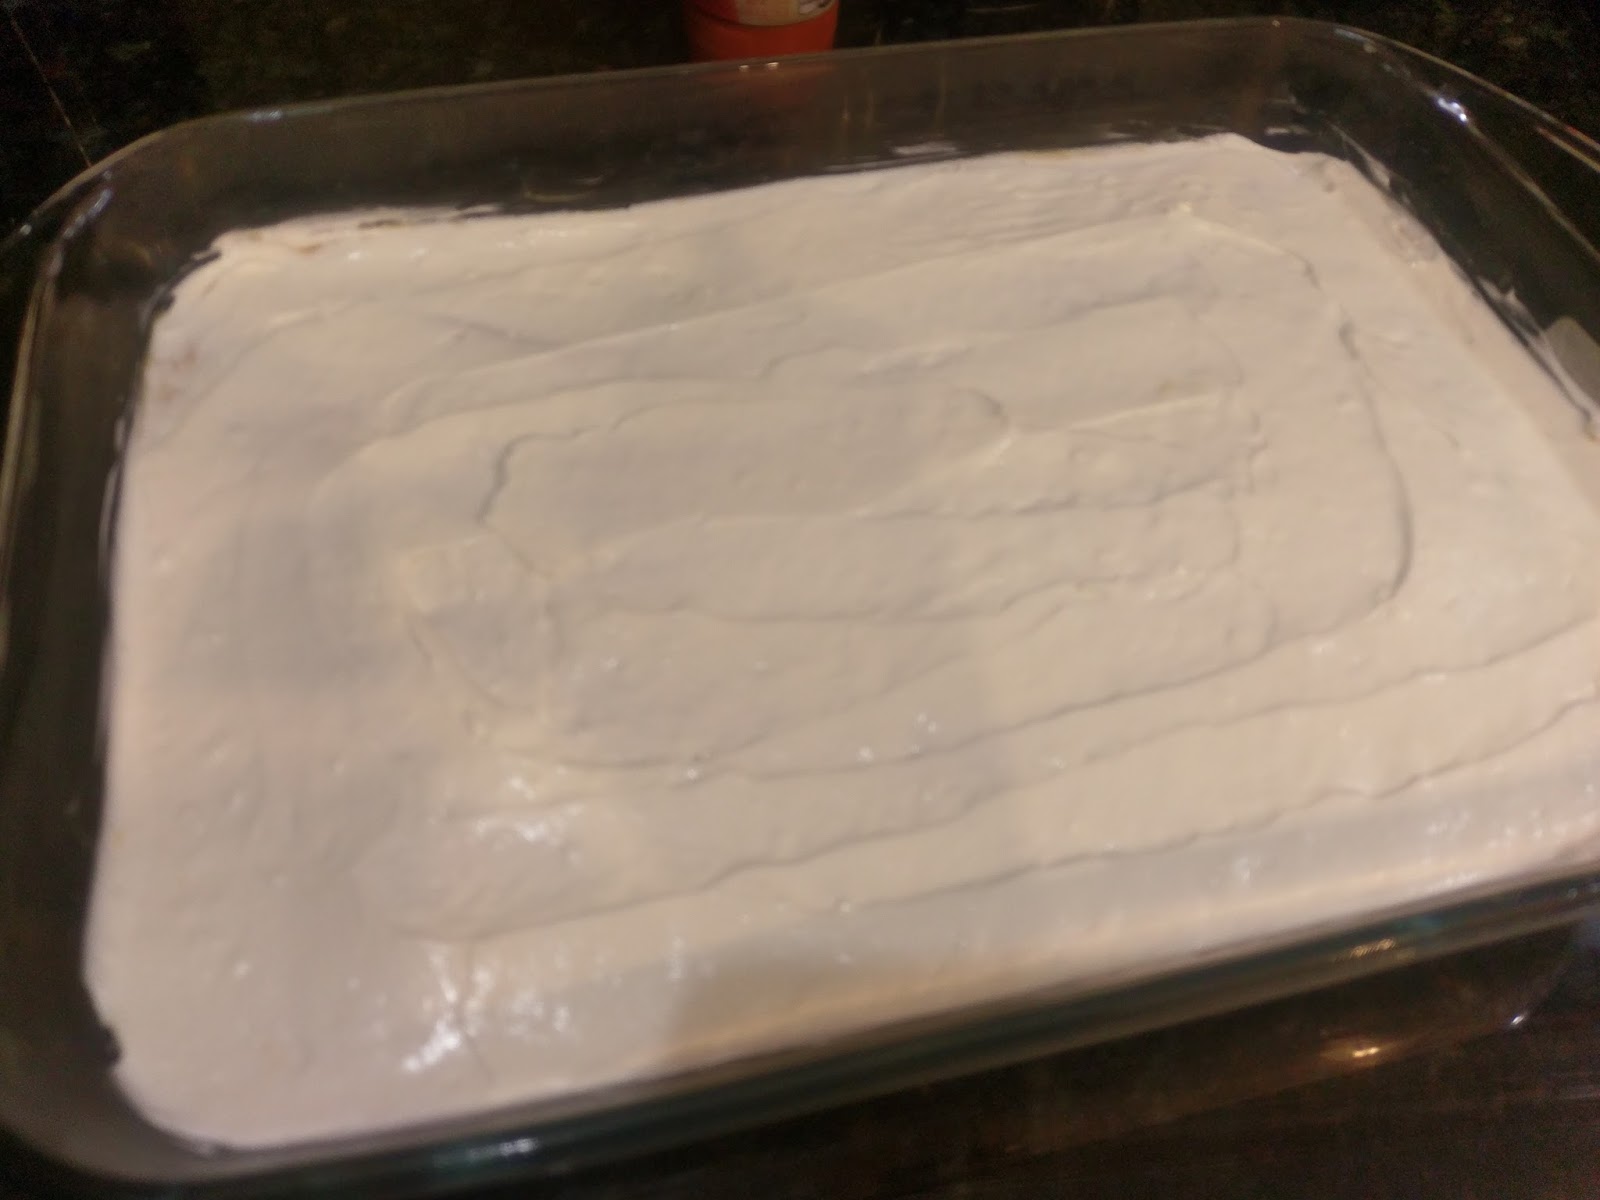
After this, you get to lick the spatula! And finish off your lasagna layers with the last of the cheesecake mixture:
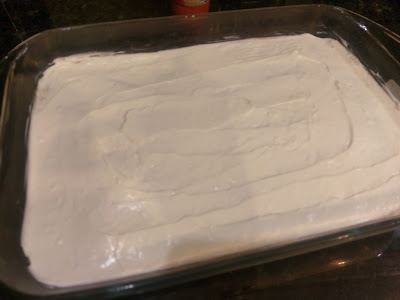
After this, you get to lick the OTHER spatula! Laziness has its benefits. Two spatulas equals twice the taste testing. I sprinkled some additional pumpkin spice on top of my cheesecake layer because a) I like sprinkles and b) I have a pumpkin spice problem.

But it’s a pretty way to finish off the lasagna. Think of it like the sprinkling of oregano on top of a regular lasagna. +1 for presentation! 
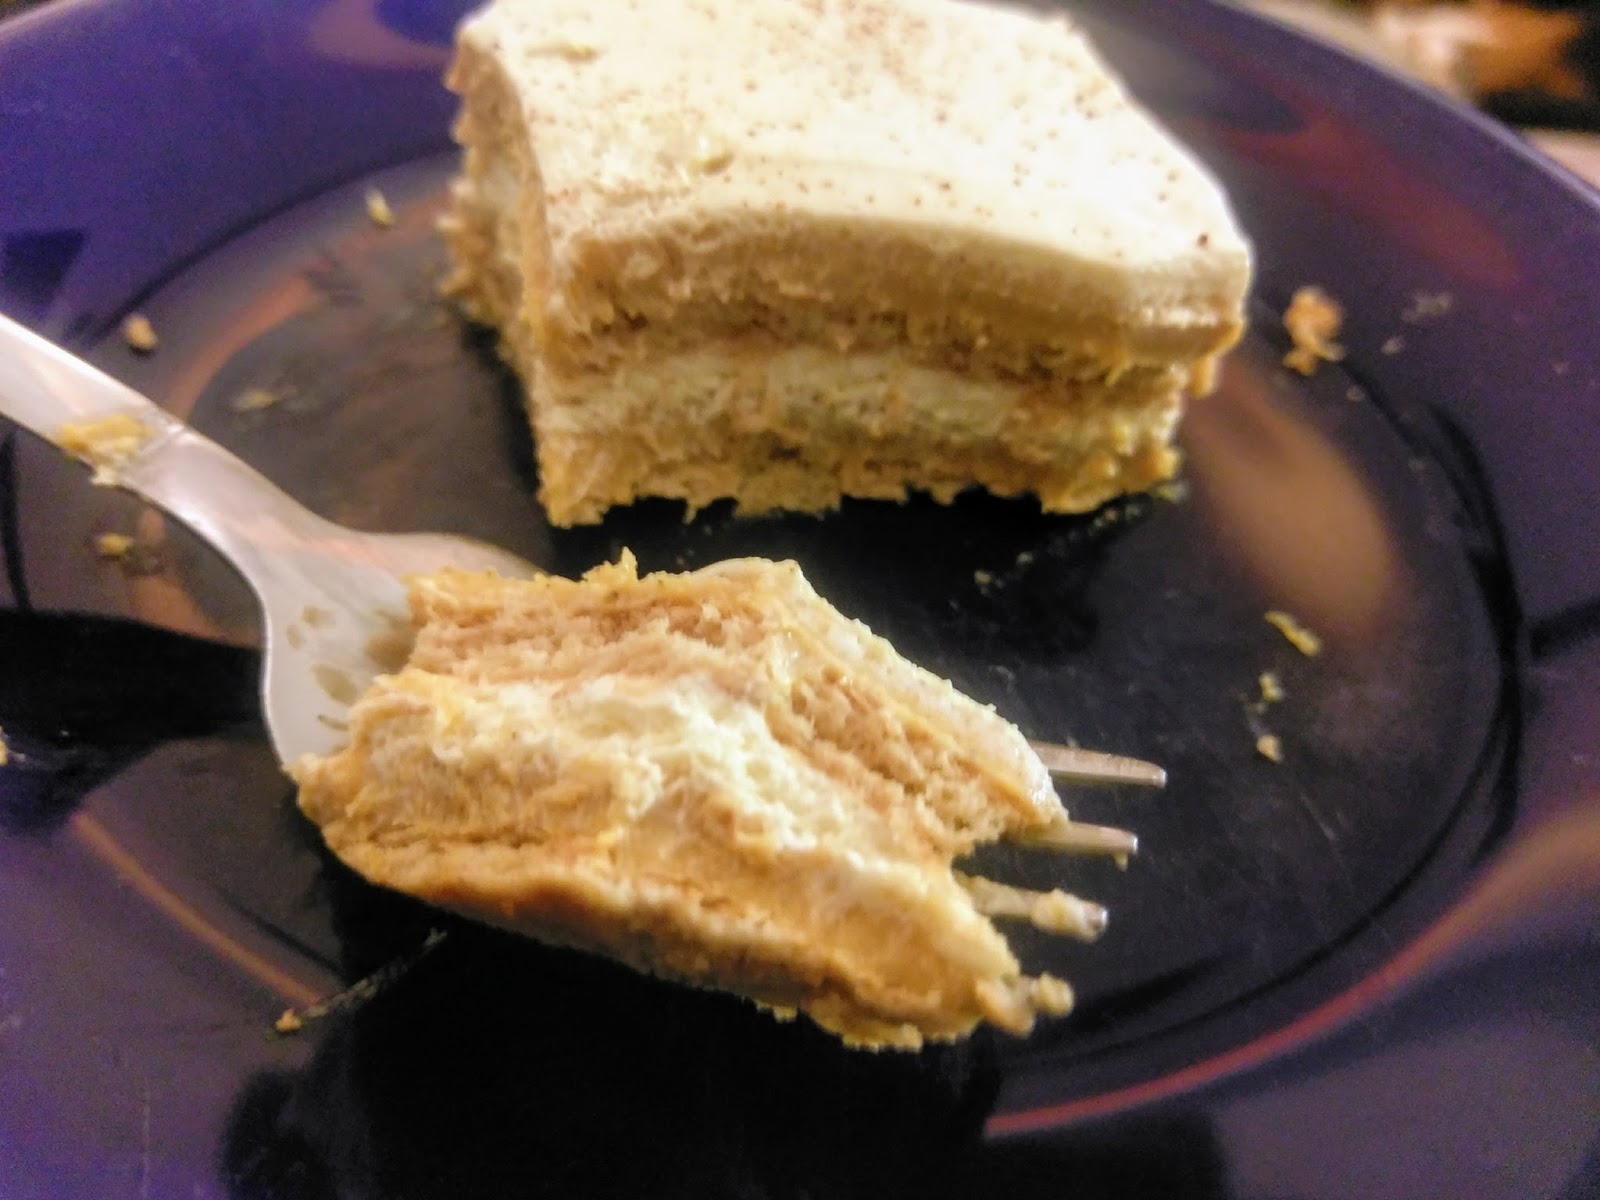
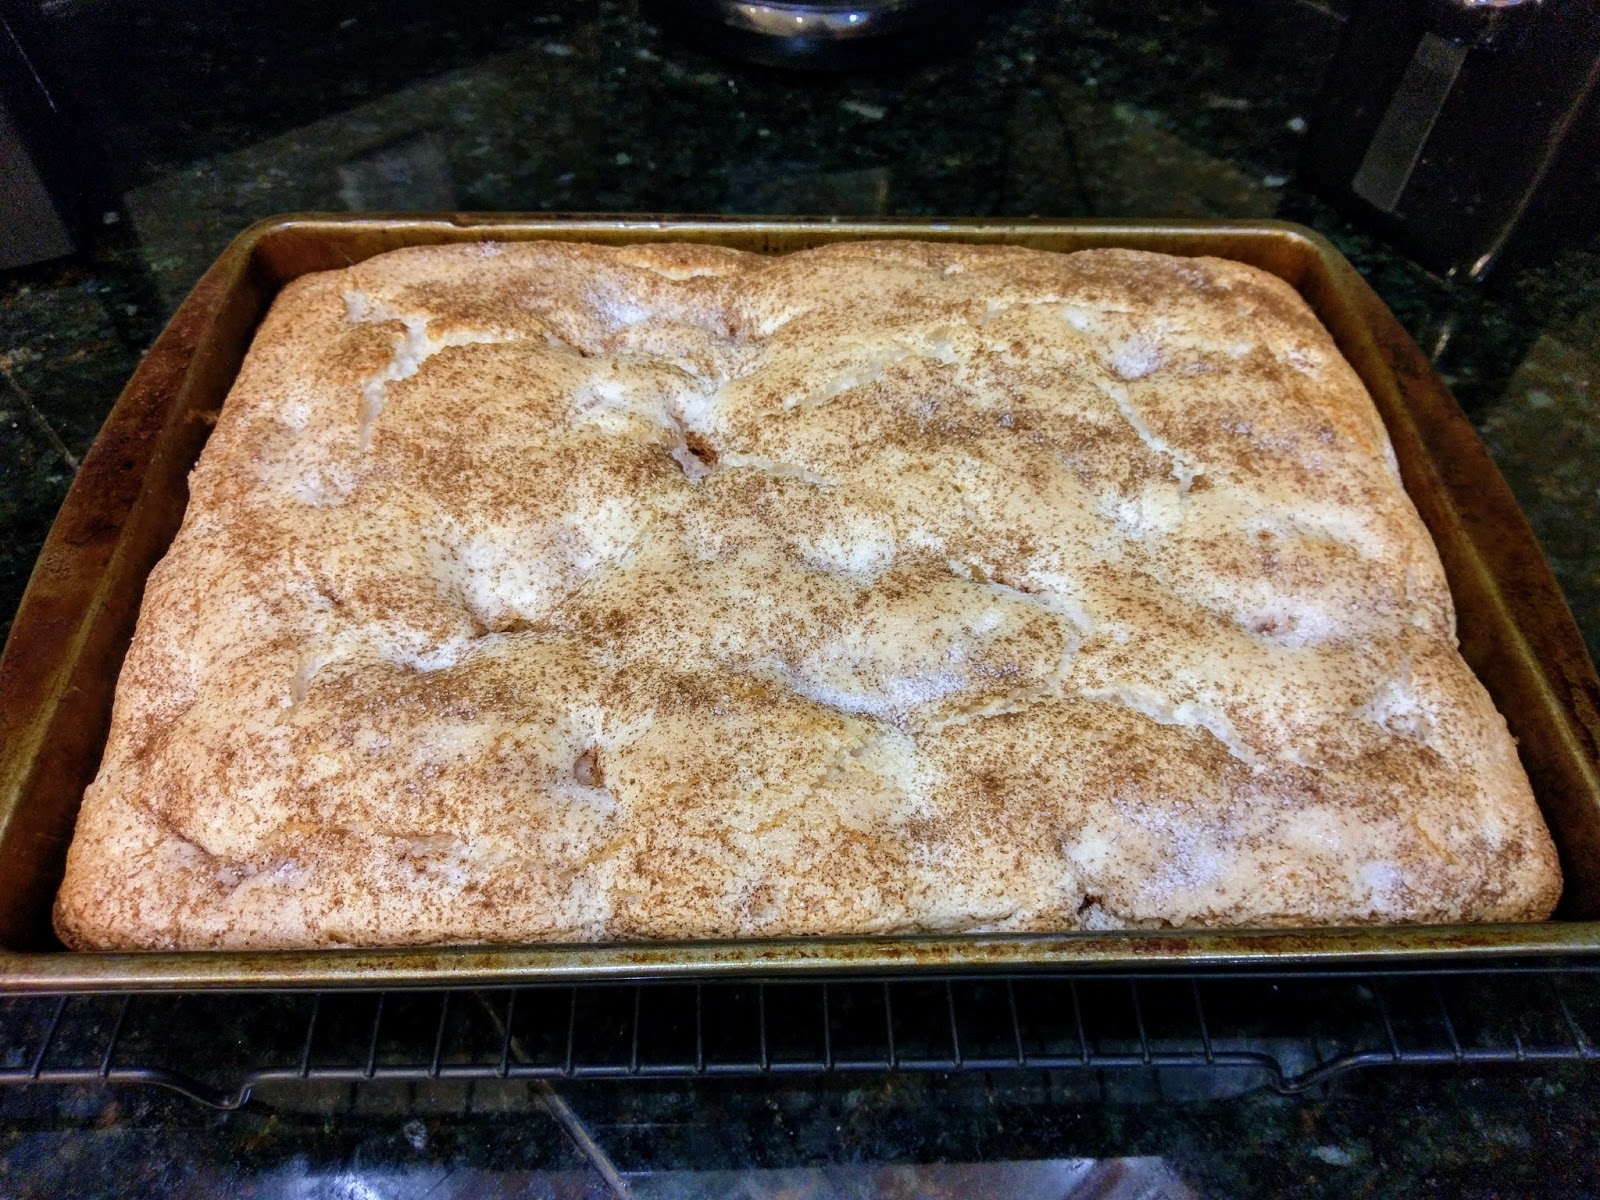
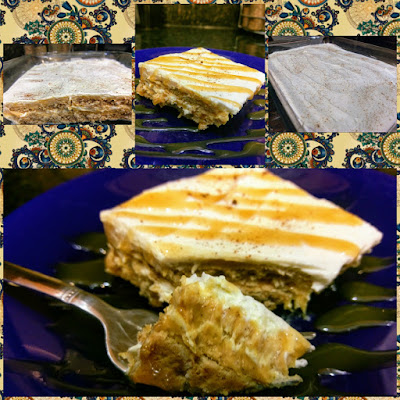
Smooshed layers are still delicious! Cover your pumpkin cheesecake lasagna with foil and place in the fridge to set overnight. If you licked your spatulas clean, you already know what greatness will await you for Thanksgiving dessert. You may even want to start a new tradition where you eat dessert first and then pick at the bird. I’m not judging you–I think it’s the best idea I’ve ever had. I say, make it the cheatiest of cheat days! Of course, you’re not really cheating when dessert has fewer calories than your sweet potato casserole.
But it is still pretty orange either way. After you’ve let your dessert set overnight, keep it in the fridge until you’re ready to serve. You don’t want soupy cheesecake lasagna. I’m sure there’s a lasagna soup recipe out there, but I can guarantee you it doesn’t belong in the dessert category. Serve with a drizzle of caramel sauce, and if you love pecans, throw some of those on top, too! Dream big! It’s the best eating day of the year.

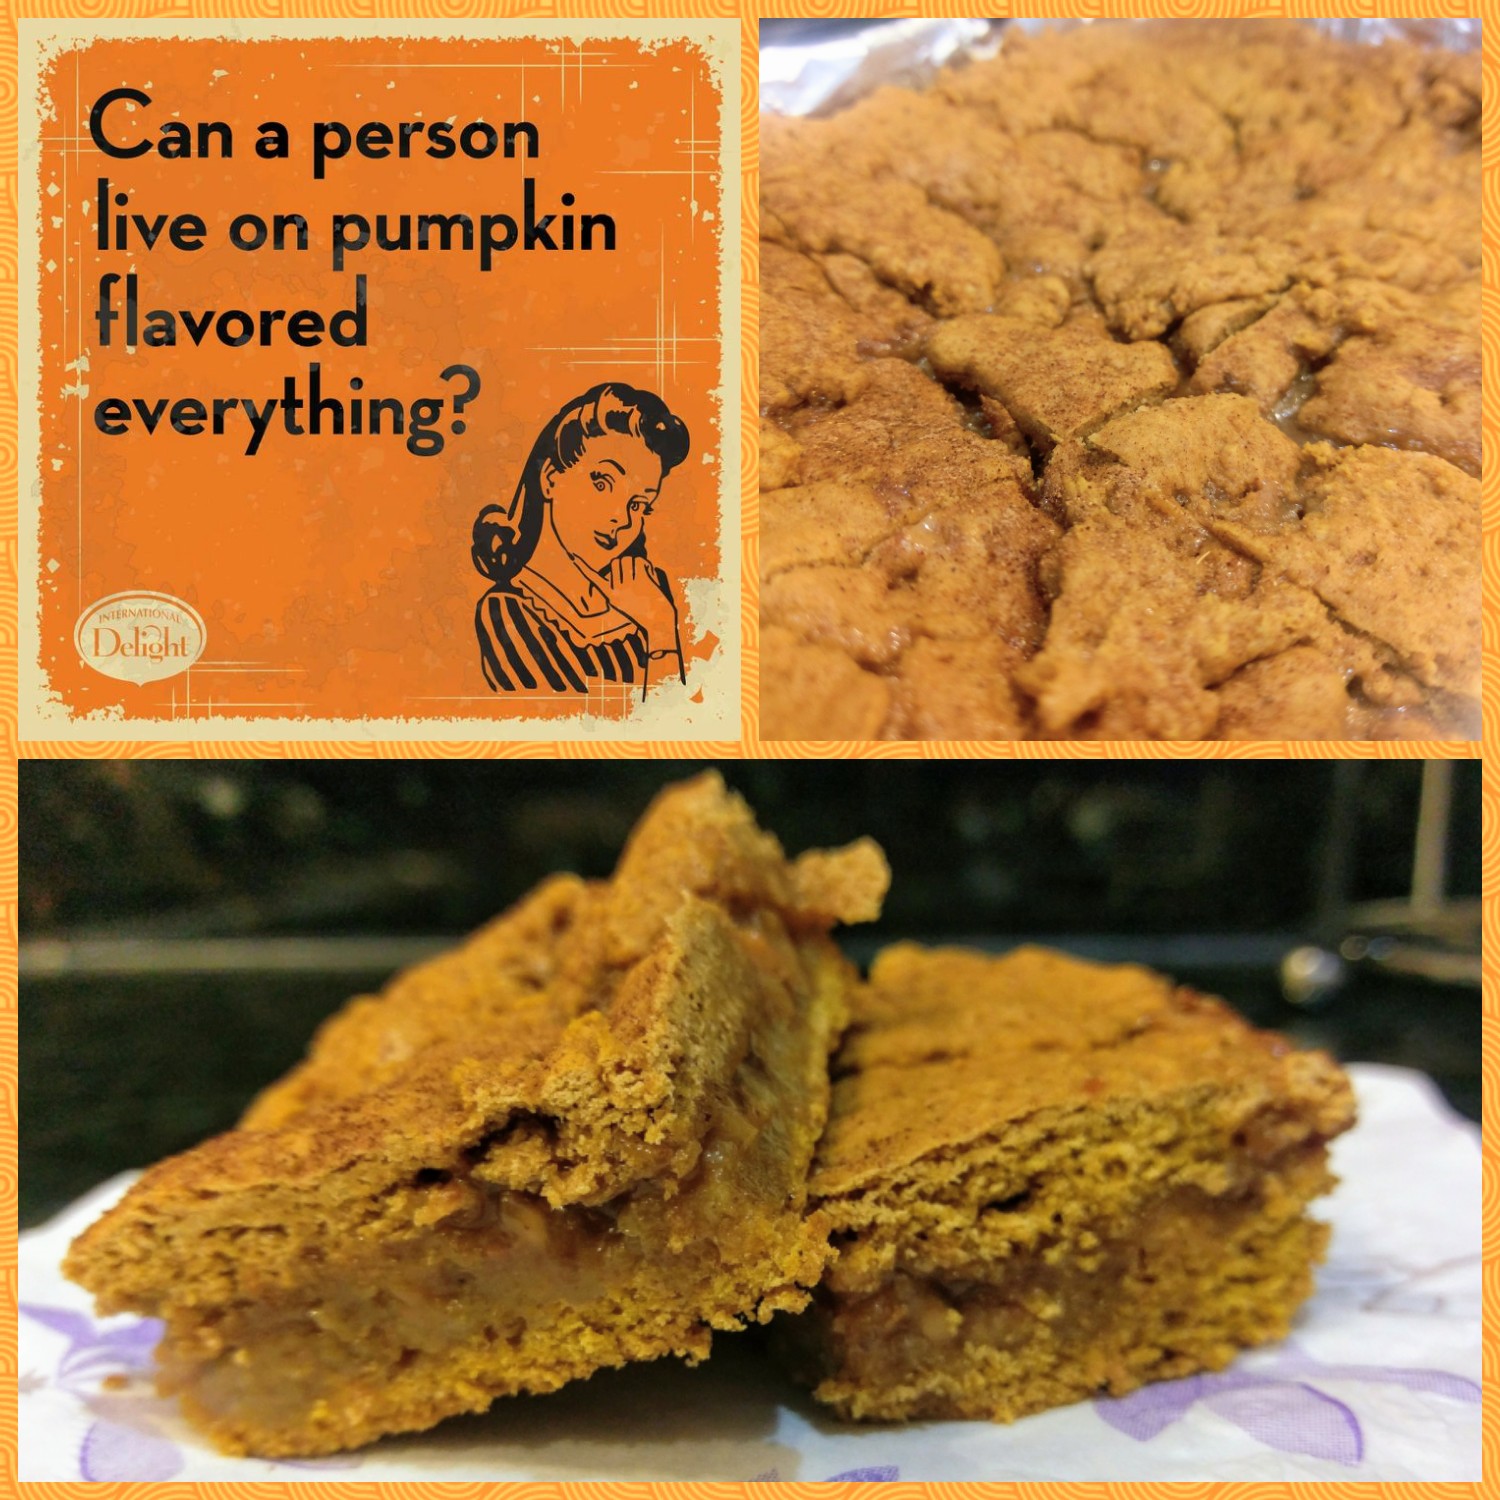
Thank you for being you, Thanksgiving. When my husband has the rare opportunity to take a bite of a dessert before I do (hi, I’m a glutton and inhale my food) and his first reaction is that “yum” noise (you know the one), I know it’s a great dessert. So imagine my surprise when this totally pumpkin concoction elicited said “yum” noise from my husband–whose feelings about pumpkin spice are just “meh.” He loved it. I’m trying to come up with a new word for how I feel about this dessert because the word “love” simply doesn’t suffice. I would eat the entire pan in one sitting if given the opportunity. Whatever the combination of love and obsession is, that’s how I feel about this pumpkin cheesecake lasagna. Each layer really stands out–you get the smooth cheesecake mixing with that nice, thick layer of pumpkin spice pudding, and the graham crackers add a nice cinnamon zip. Not to mention the few times I have remembered to add caramel on top, it perfectly encapsulated the flavor that most of us associate with fall. While I’m incredibly sad pumpkin season has ended in this house, I’m ecstatic that fudge and peppermint season is almost upon us. I hope everyone has an amazing Thanksgiving. Take time to appreciate the Big Four F’s: family, friends, food, and football. ‘Til next time, my fellow eaters!

Less than 12 months until you’re back in my life, pumpkin spice! -
A Cookie Should Be Two Things: Simple and Tasty.
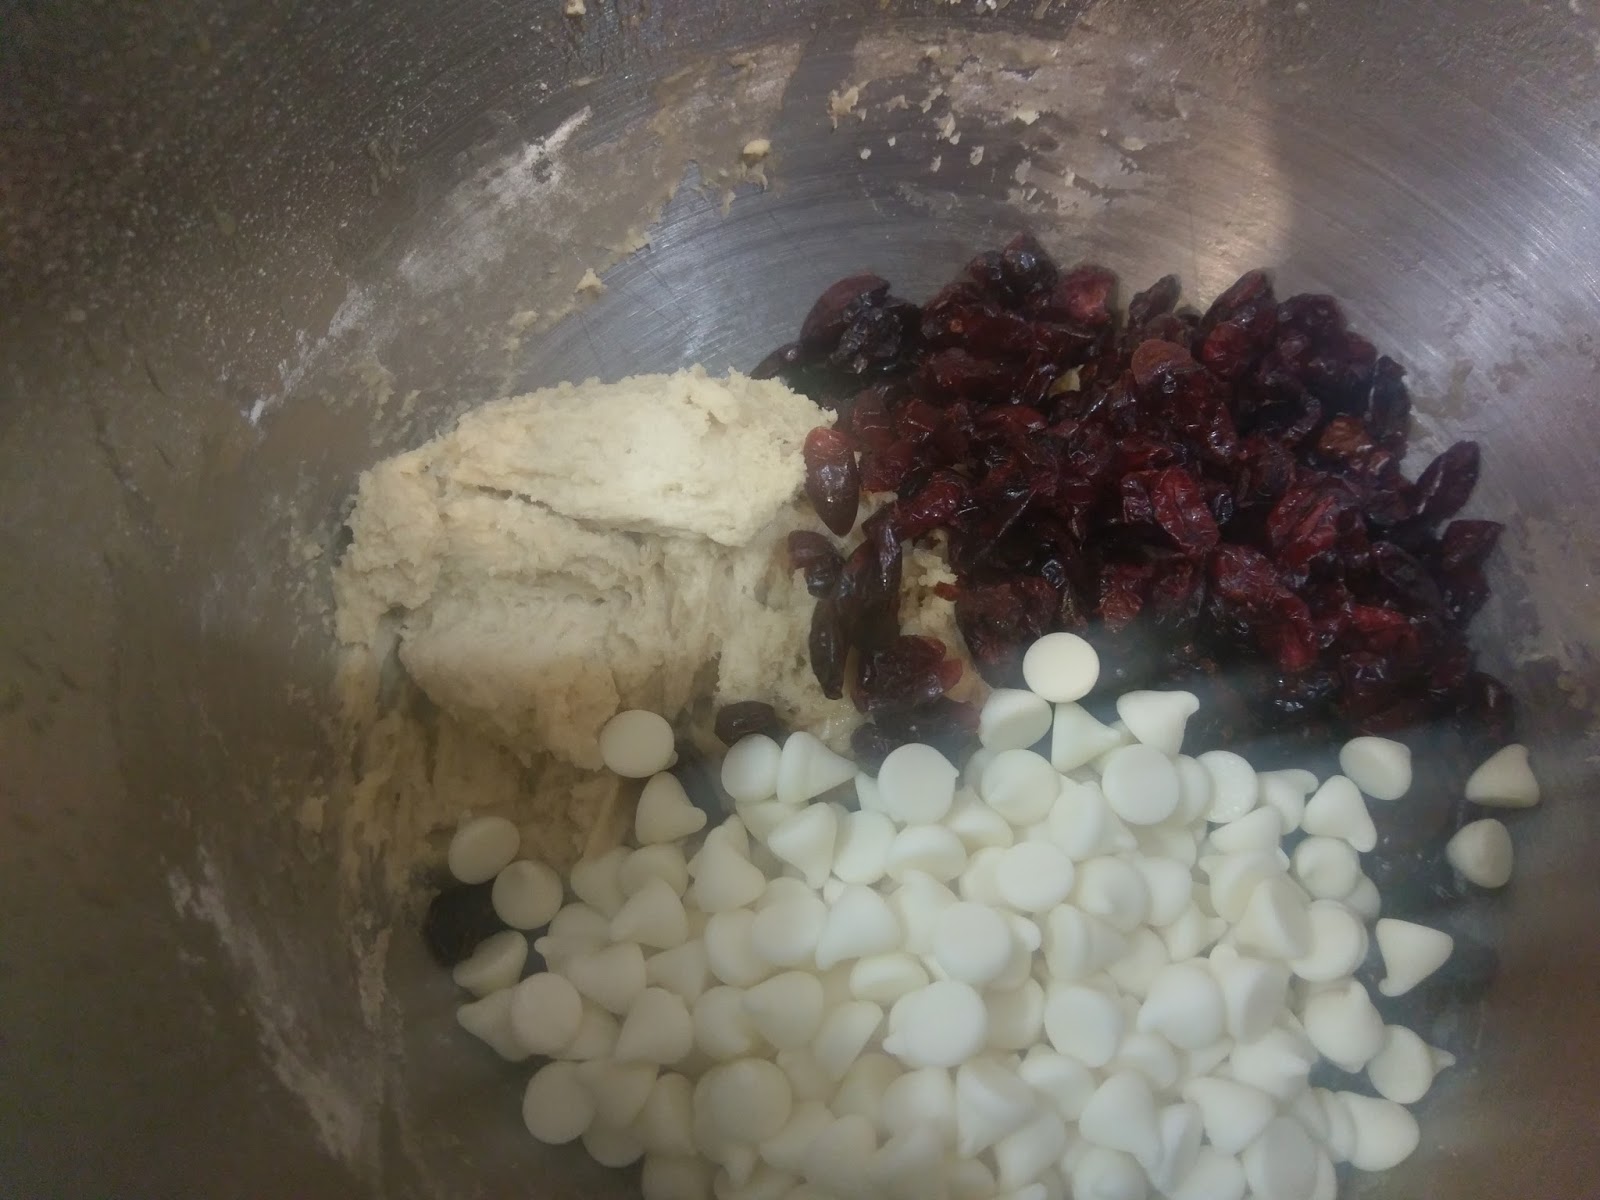
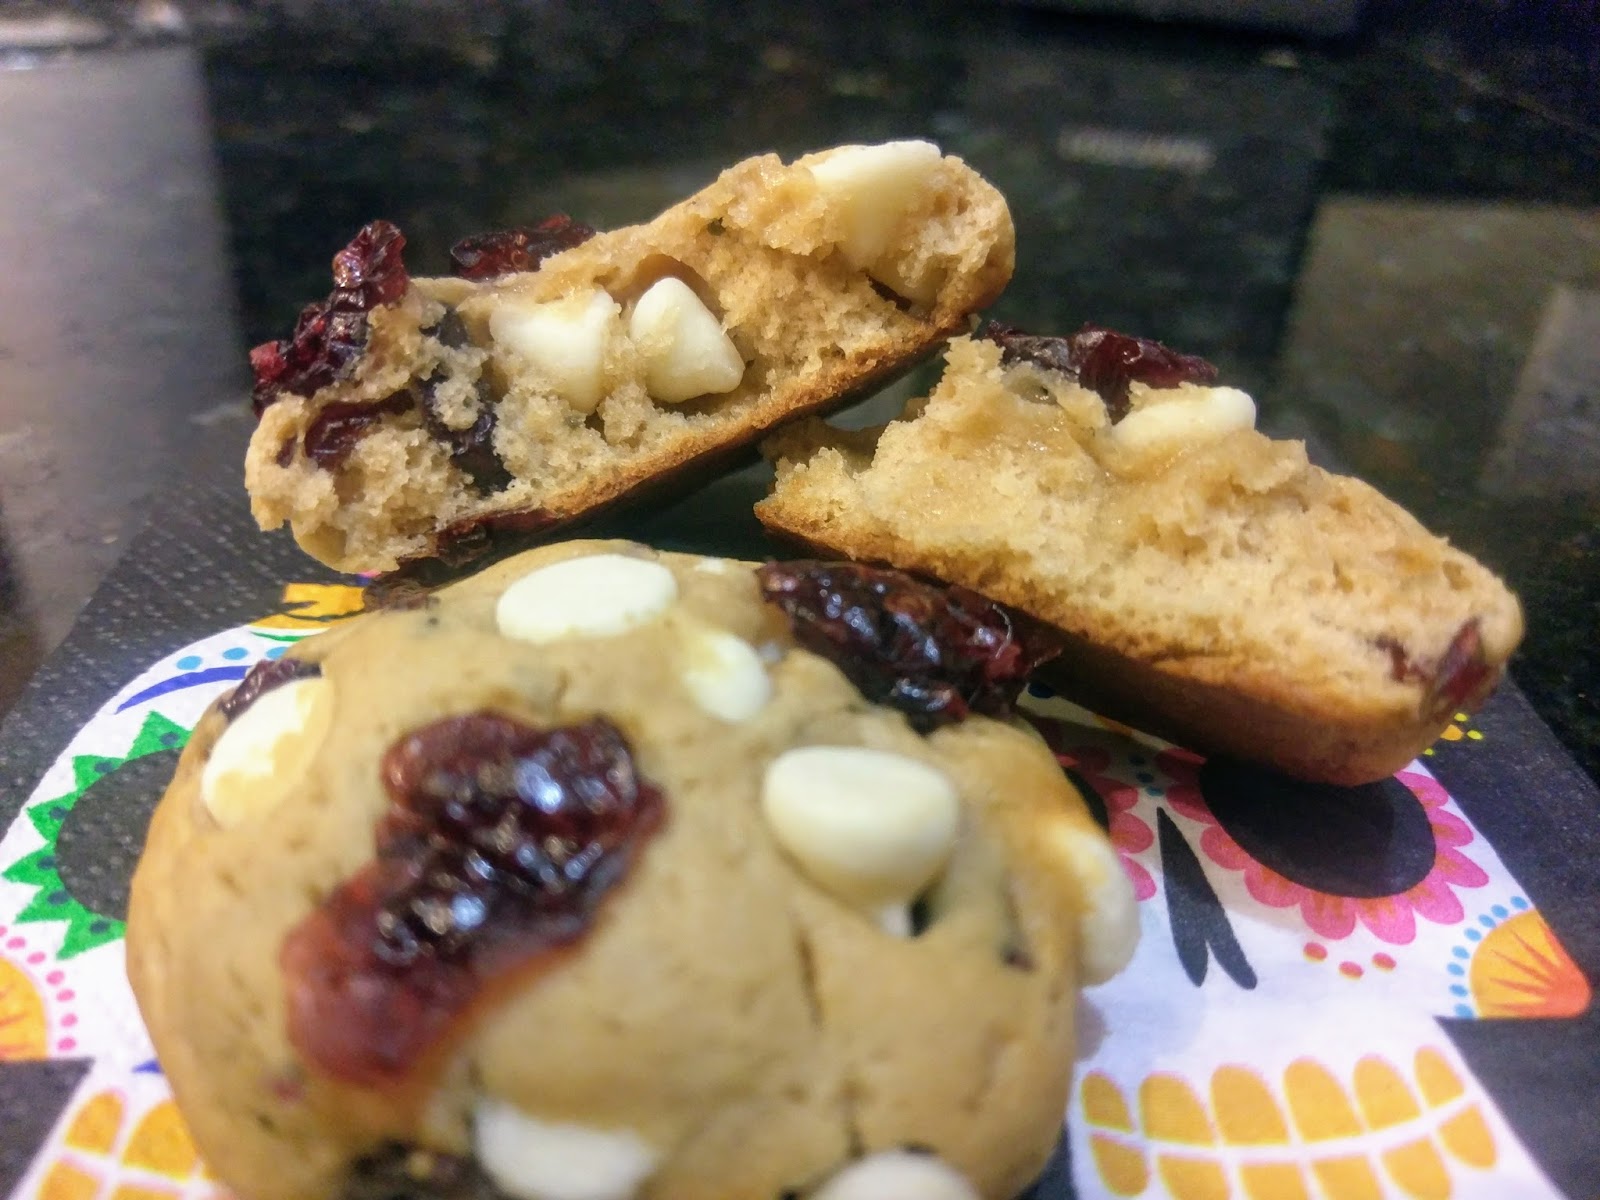
I haven’t made cookies since I spent an entire day working on those bewitching swirl Halloween cookies on October 1. It took forever, and quite frankly, my brand of perfectionism is of the lazy variety. I won’t have a tombstone one day, but if I did, it would read, “Worked Smarter, Not Harder.” I won’t be lacking in the tombstone department because I’ve found the secret to immortality; I just want to be cremated, thus bringing my work smarter, not harder mantra full circle. Anyway, spending ten hours baking cookies just isn’t something I was interested in doing again anytime soon. And I’m not gonna lie, when I think hand-held desserts, I typically go immediately to cupcakes. Taking a full-scale cake and bringing it down to bite-sized deliciousness without the need for a fork? Yep…once more, working smarter. So I needed a dessert that was quick, worked with staple pantry items, and for the sake of my husband’s sanity, didn’t involve an ounce of pumpkin spice (don’t worry, it’ll be back in the next blog). Along came a cookie I thought I’d ground test for holiday baking season: the cranberry white chocolate chip cookie.

It’s a perfect “After Food Coma” cookie for Thanksgiving or Christmas! Don’t worry, I kept burgeoning waistlines in mind. Because when you sit down to eat a cookie, this weird thing always happens where five minutes later you’ve suddenly realized you ate six cookies at once. The original recipe I found had insanely high calorie content…over 200 calories for one cookie. That’s a hearty slice of delicious roasted bird and some! Naturally, when I want to make something happen, I find a way. I adapted the pants off of the original recipe using some tried and true (and super easy) calorie-cutting methods. Did I mention I like working smarter and not harder? I may have. In this case, I lowered the calorie content to 95 calories a cookie (more than halved the original amount!) so I wouldn’t have to work harder with a Jillian Michael’s boot camp. Never underestimate the power of a fit girl who wants dessert.

May or may not be buying my Craisins in bulk and adding them to literally everything this month. Now, I know some people love fluffy, soft cookies and others love crunchy, flatter cookies. I’m Team Fluffy (there’s definitely a missed joke opportunity in that), but I am going to divulge how to make these if you’re Team Crunchy, too. Sorry, the only thing I like crunchy is my pizza crust, so you’re never going to convert me. But in either case, you’ll need:
- 1/4 cup butter at room temp
- 1/4 cup of unsweetened applesauce
- 1/4 cup Truvia Baking Blend
- 1/4 cup Truvia Brown Sugar Blend
- 2 tsp vanilla
- 1 egg
- 2 TBS heavy cream (you can use skim milk to cut more calories, but I had heavy cream leftover I needed to use!)
- 1 3/4 cup all-purpose flour
- 1 1/2 tsp baking soda
- A pinch of salt
- 1 cup of white chocolate chips
- 1 cup of 50% less sugar Craisins
- Optional:
- I felt like a tsp or two of orange zest would’ve taken these cookies to the next level and complemented the cranberries so, so well. Definitely trying this next time!
- If you hate white chocolate: replace with dark chocolate, semisweet chocolate, or cinnamon chips…all these flavors complement cranberry, so dealer’s choice!
Now, if you’re on Team Crunchy, preheat your oven to 350 and line a few baking sheets with Parchment paper lightly misted with cooking spray. My fellow Team Fluffy folks, don’t preheat your oven yet. Regardless of your cookie texture preference, start by creaming the butter, both Truvias, and the applesauce for a few minutes in your stand mixer (use the paddle!). Scrape down the bowl before adding anything else. Things are going to look a lot like oatmeal when they’re all mixed:
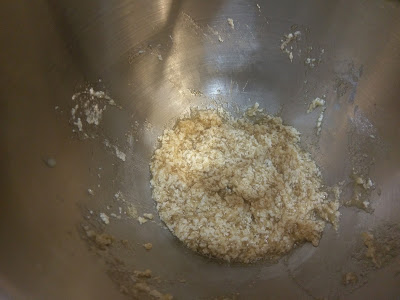
I promise you, it doesn’t stay like this. Next, add in the egg, vanilla, and heavy cream/milk. Blend well, scraping down the bowl once mixed. Once well mixed, add in the flour, baking soda, and salt. Blend on low so as not to cause an explosion of flour all over your kitchen. Fun times.
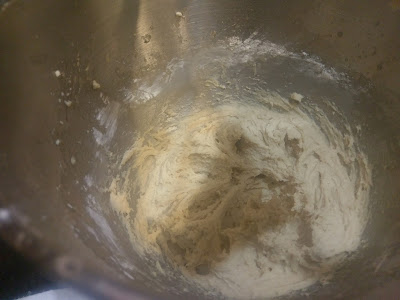
I didn’t lie–it looks like perfectly normal cookie dough now! At this point, I definitely sampled the wares. I had yet to bake with the brown sugar Truvia, so I was sampling in the name of science. Things tasted perfectly normal to me, and I haven’t grown a third arm or anything weird, so I say, use it.
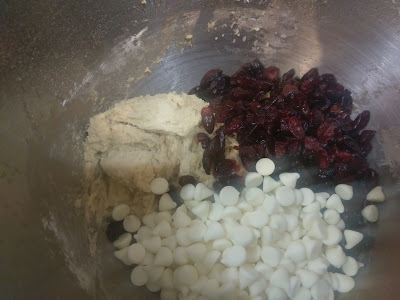
Mmm, Craisins. I won’t lie–not the biggest fan of white chocolate. I really only like it in cookies. I once had a white chocolate macadamia nut cookie so good, it converted me into both a white chocolate chip and a macadamia nut lover. But my personal eating history aside, now you’ll want to add in the cup of chips and the cup of dried cranberries. Blend on low. Your mixer will sound like it’s either dying or trying to become sentient to kill you for making it mix so many chips. I may have watched Maximum Overdrive recently.

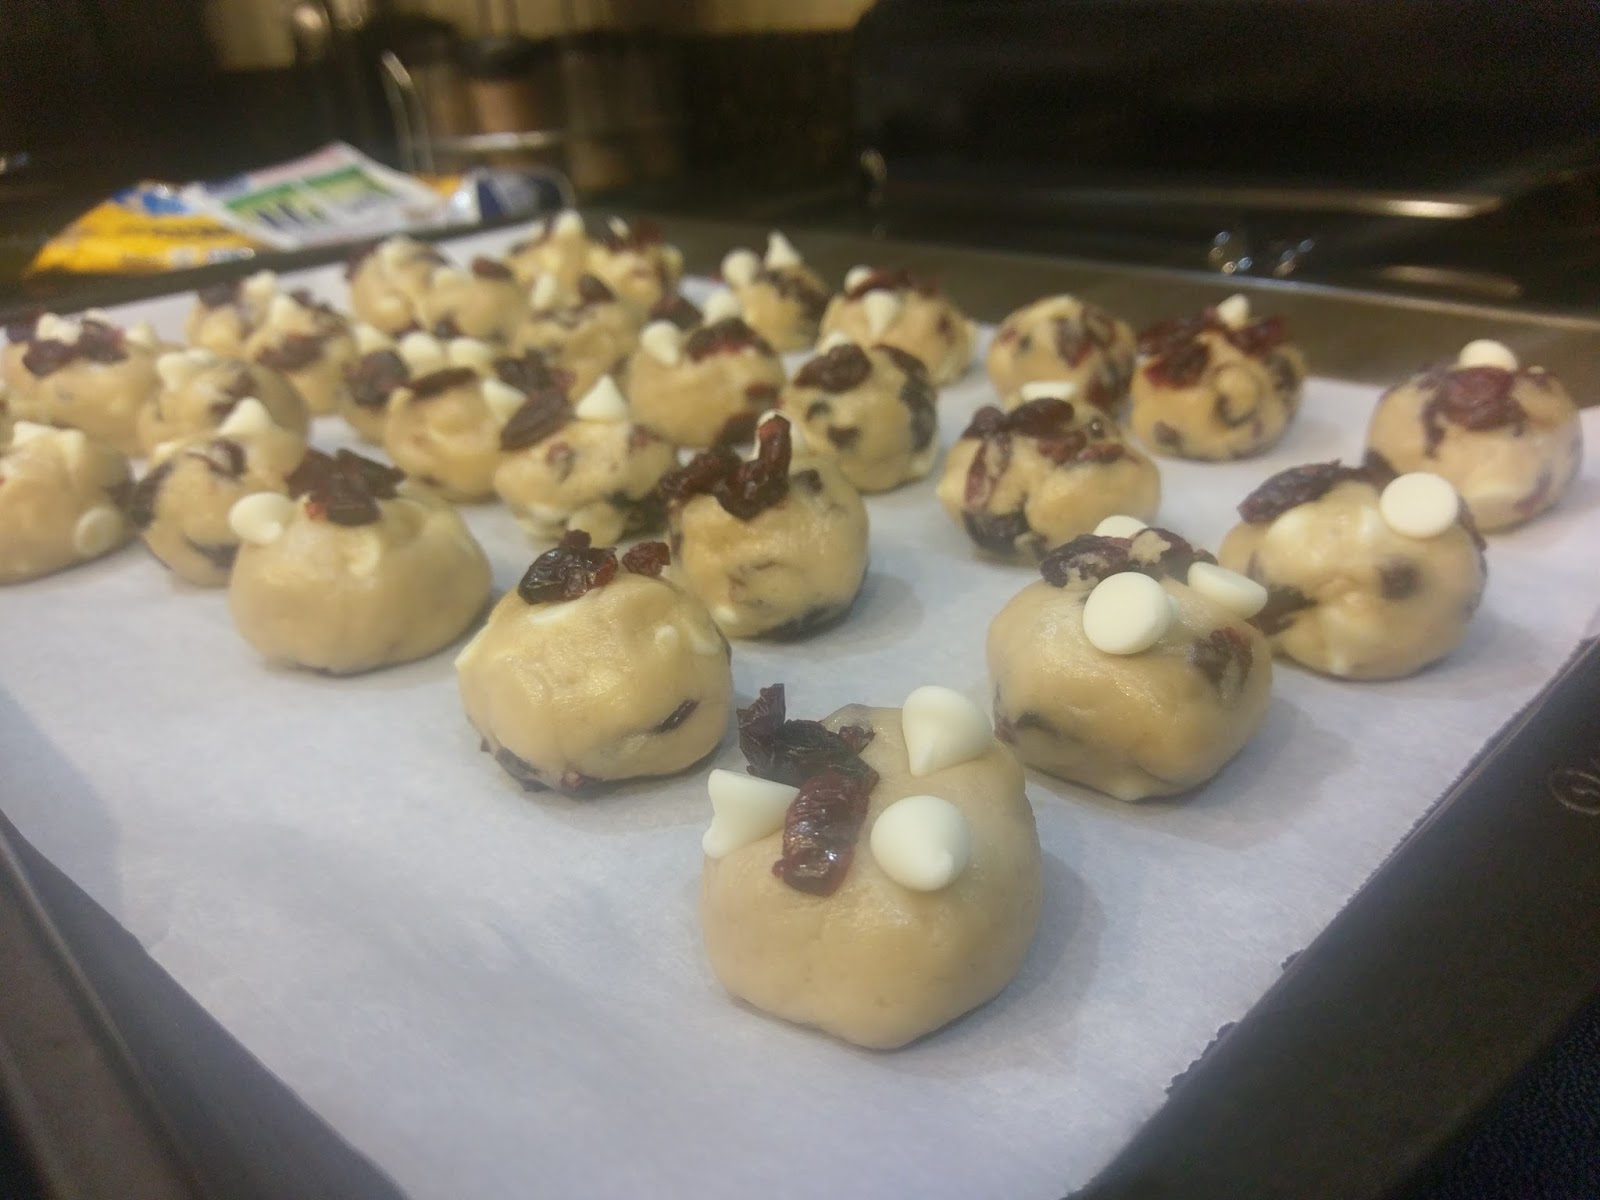
Resisted the urge to eat a dough ball. Once mixed, grease a tablespoon or a cookie scoop. This recipe should yield you 32 little balls of cookie dough, so scoop away and place on the prepared baking trays. To make them look even more delicious, add a few chips and cranberries on top (baker’s secret…I do this with all my chip-based cookies). Okay Team Crunchy: at this point, you will want to bake your cookies 8-12 at a time on your prepared baking tray at 350 for 10-11 minutes or until golden on the top rack of the oven. By not freezing your dough, it will flatten out a lot during baking, so leave plenty of space between cookies. Let your cookies cool on the sheet for 5 minutes before removing to a cooling rack. Team Fluffy: cover your cookies with plastic wrap and place in the freezer for 30-45 minutes.
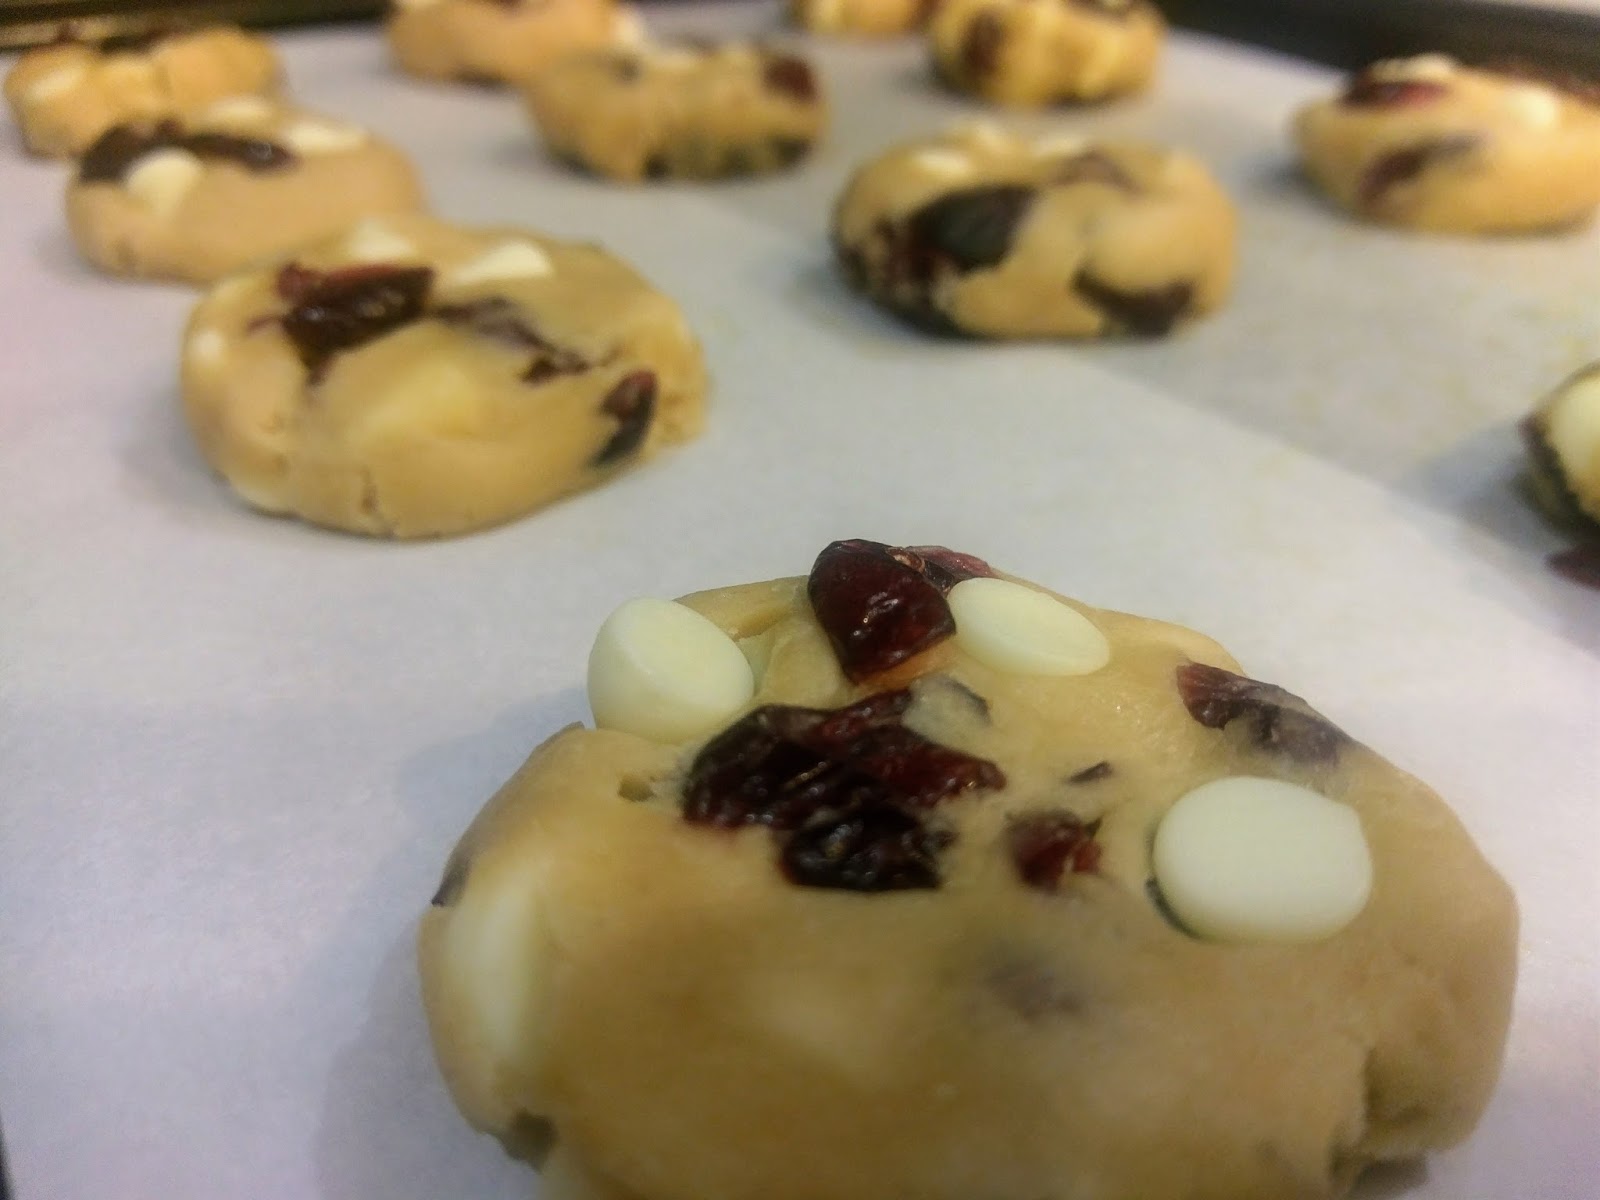
Partially frozen little disks of Heaven. Like a CPK freezer pizza. By freezing the dough, you’re preventing the cookies from getting thin. Take your dough out of the freezer, and slightly flatten them from ball to disk like pictured above. You will cook your cookies at 350 for 9-10 minutes on the top rack of the oven (no burning bottoms this way! I have dark baking sheets). I under bake a tad to ensure my cookies are super soft in the middle once they’ve cooled. Am I worried about Salmonella, you ask? I live life dangerously. Well, danger adjacent. Sigh…this is probably the most dangerous thing I do these days. Bake your cookies 8-12 at a time; they won’t expand too much, but do leave space between cookies. They’ll be done when they’re just barely turning golden.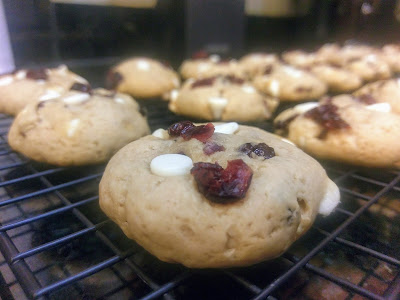
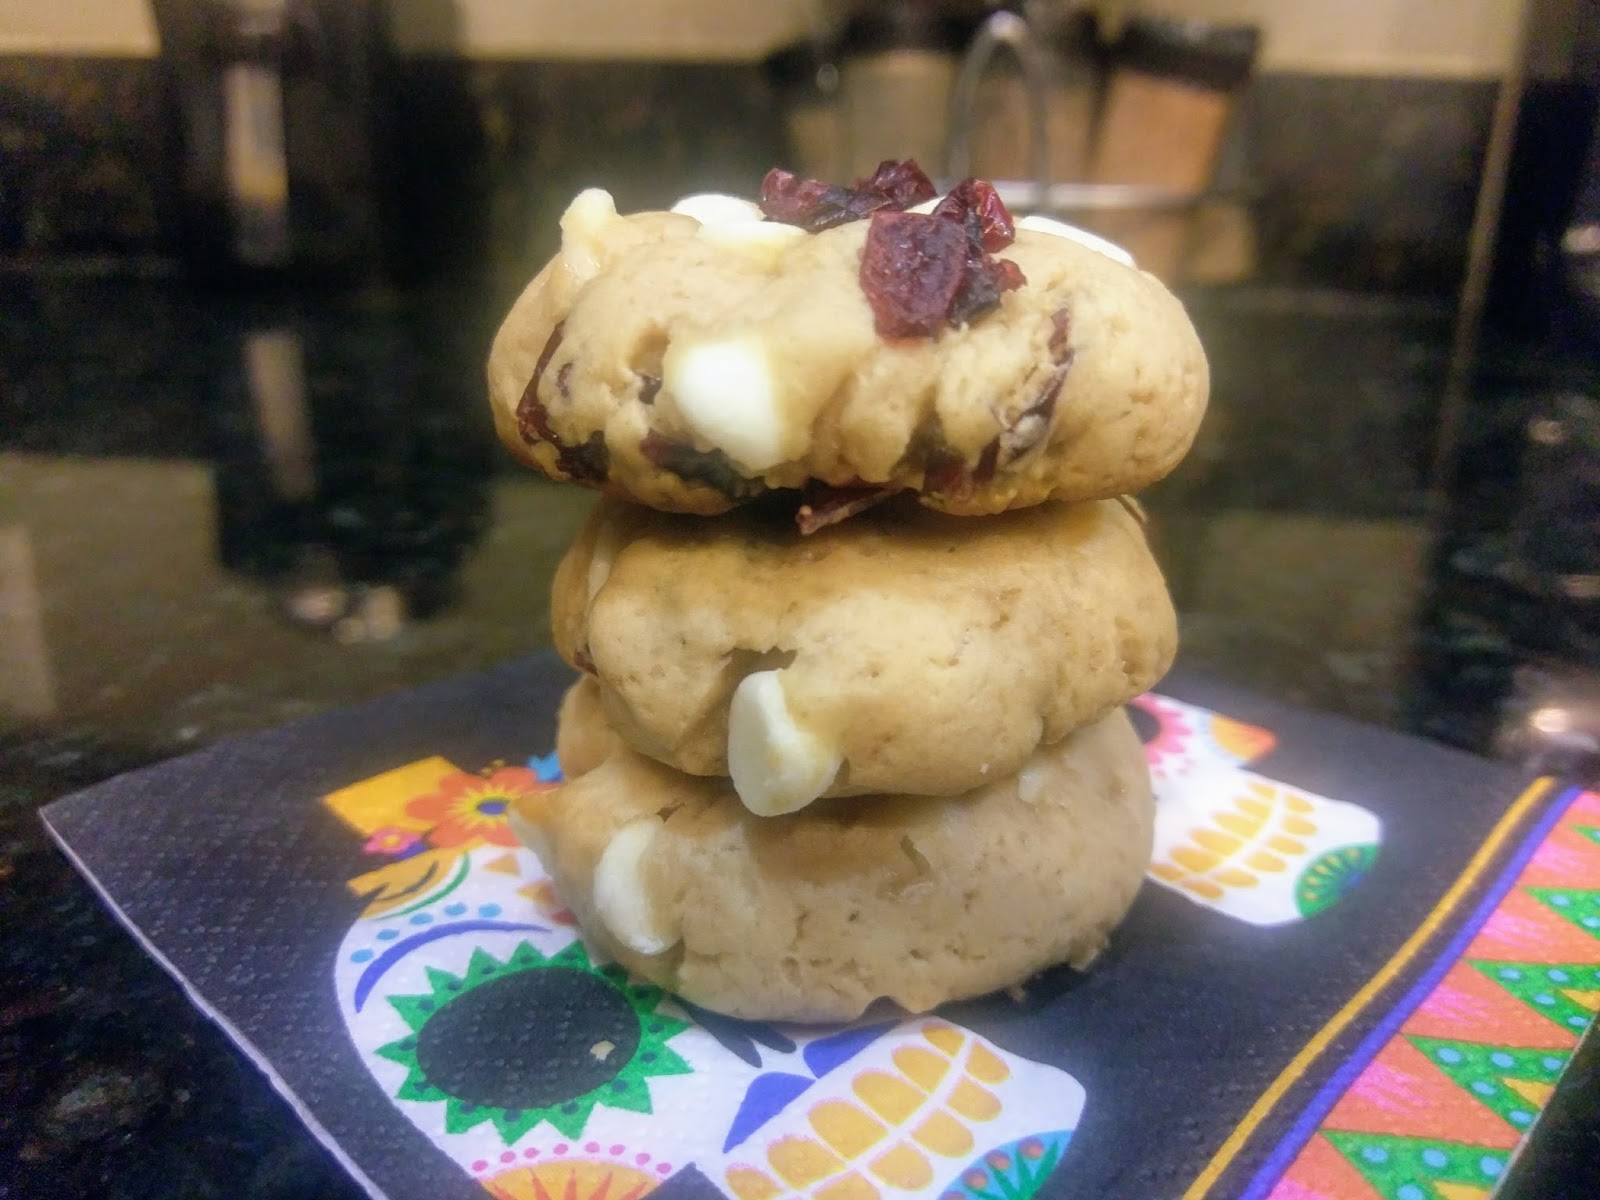
My middle name is Cautious. Let your cookies cool on the sheet for 5 minutes before removing to a cooling rack for your viewing pleasure.
Stackable! Portable! Edible! Aren’t they cute? They’re also scrumptious. They are so sweet and so soft…pillowy even. I feel like they simply melt on my tongue when I eat them. They’re packed with tart cranberries, smooth white chocolate chips, and they took no time at all to make–this is everything I’m looking for in a cookie. It’s always wonderful when I can bake something that both looks and tastes amazing in the amount of time it takes me to watch one baking show on Food Network. Yeah, I’m one of those people. I’m addicted to baking shows. But luckily for you guys, I’m not so full of myself that I started naming things in French or using super complex terminology. I mean, I admit I still eat cookie dough out of the bowl. If that’s not relatable, I don’t know what is. Just make the cookies and tell me you don’t eat half the dough along the way. If you can hold out though, the end results are positively perfect for your next holiday bake off. ‘Til next time, my fellow eaters!
Yep, still using Halloween napkins. Bring it on, Christmas! -
Your Next Thanksgiving Dessert has Arrived!
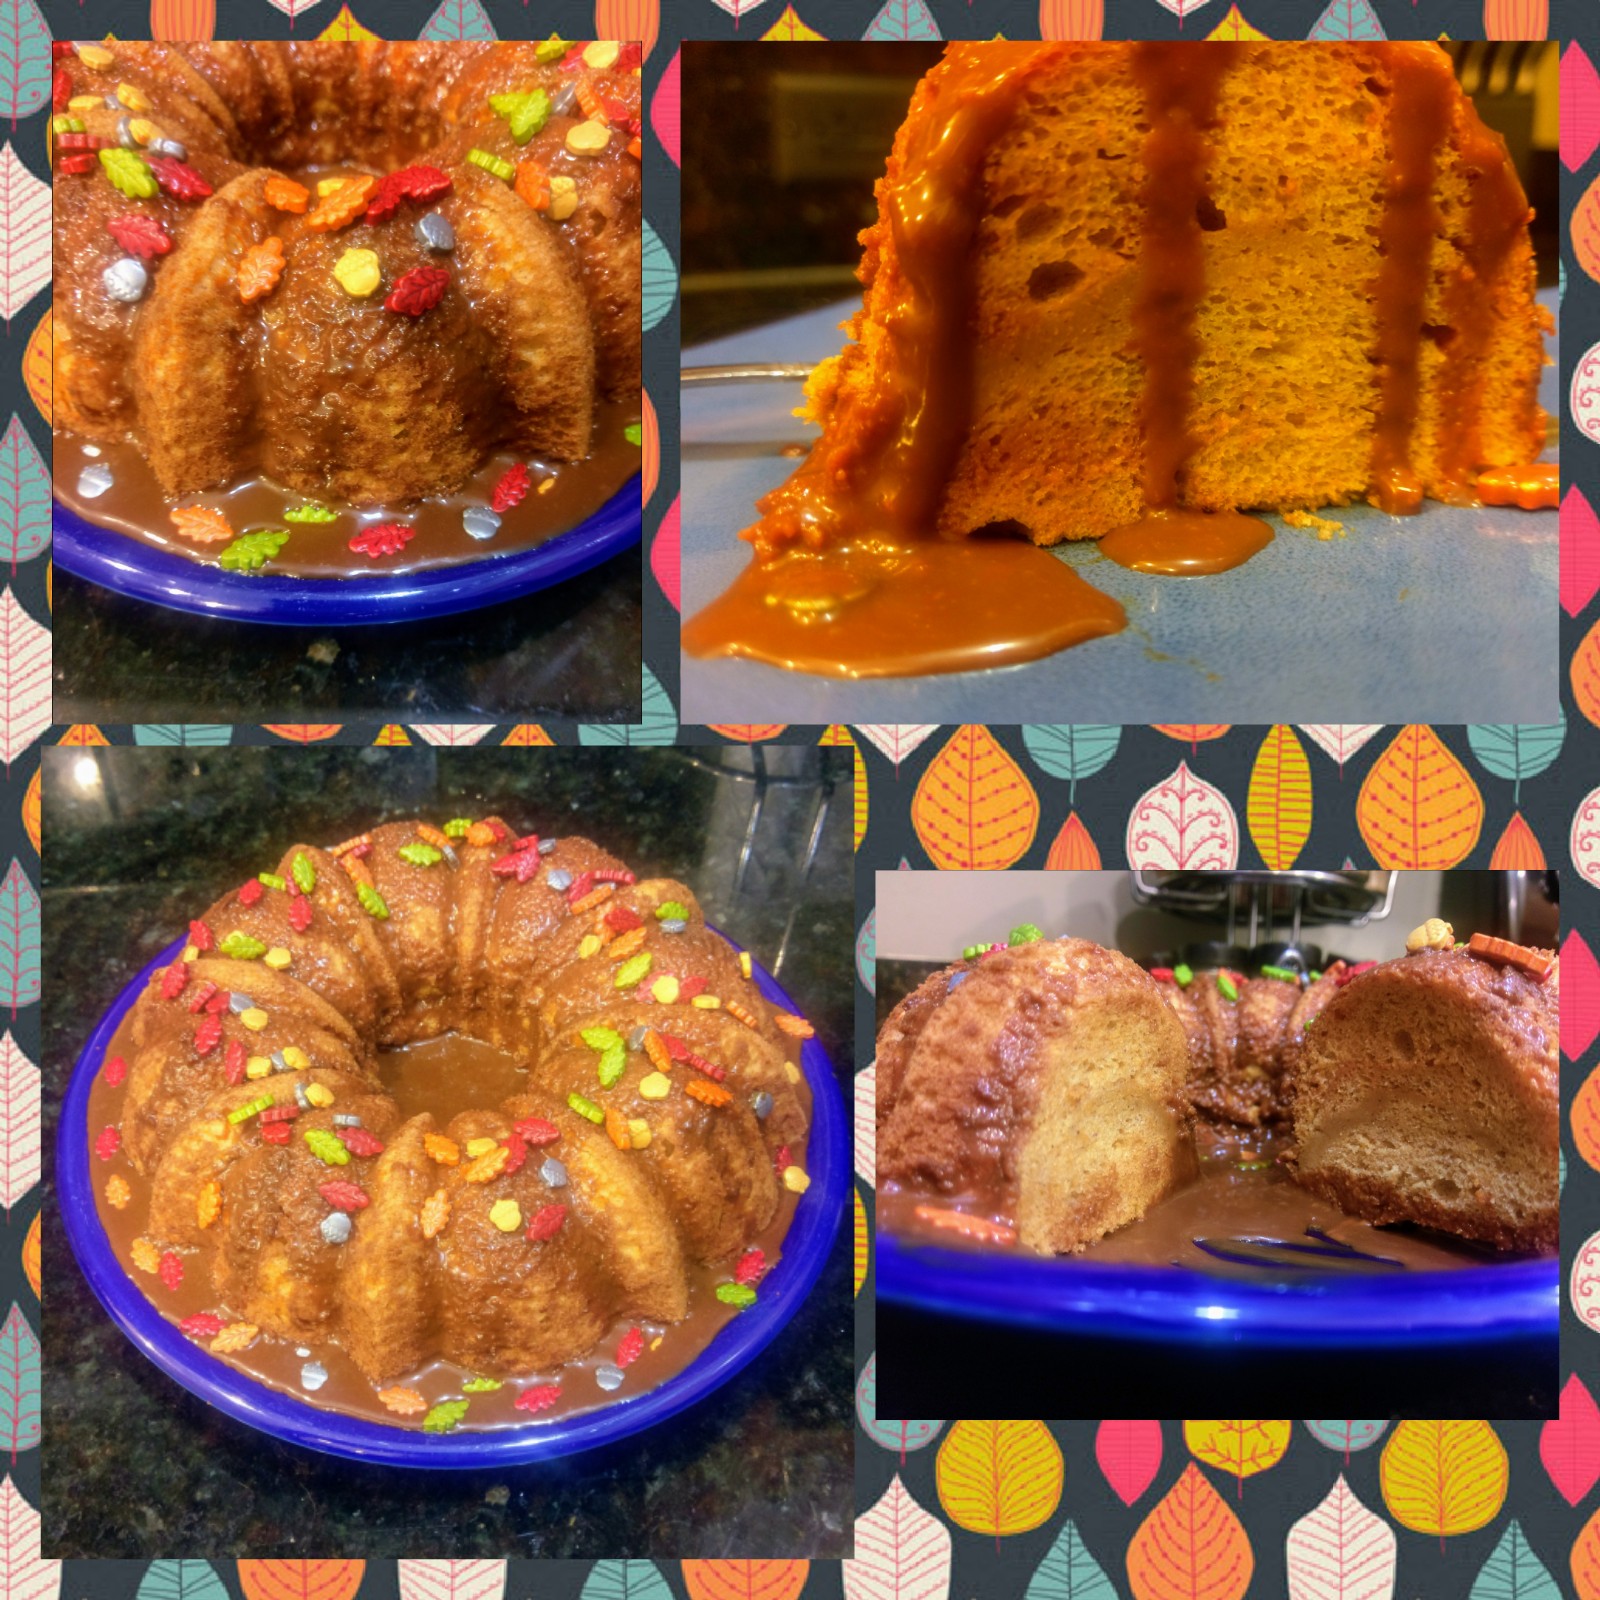
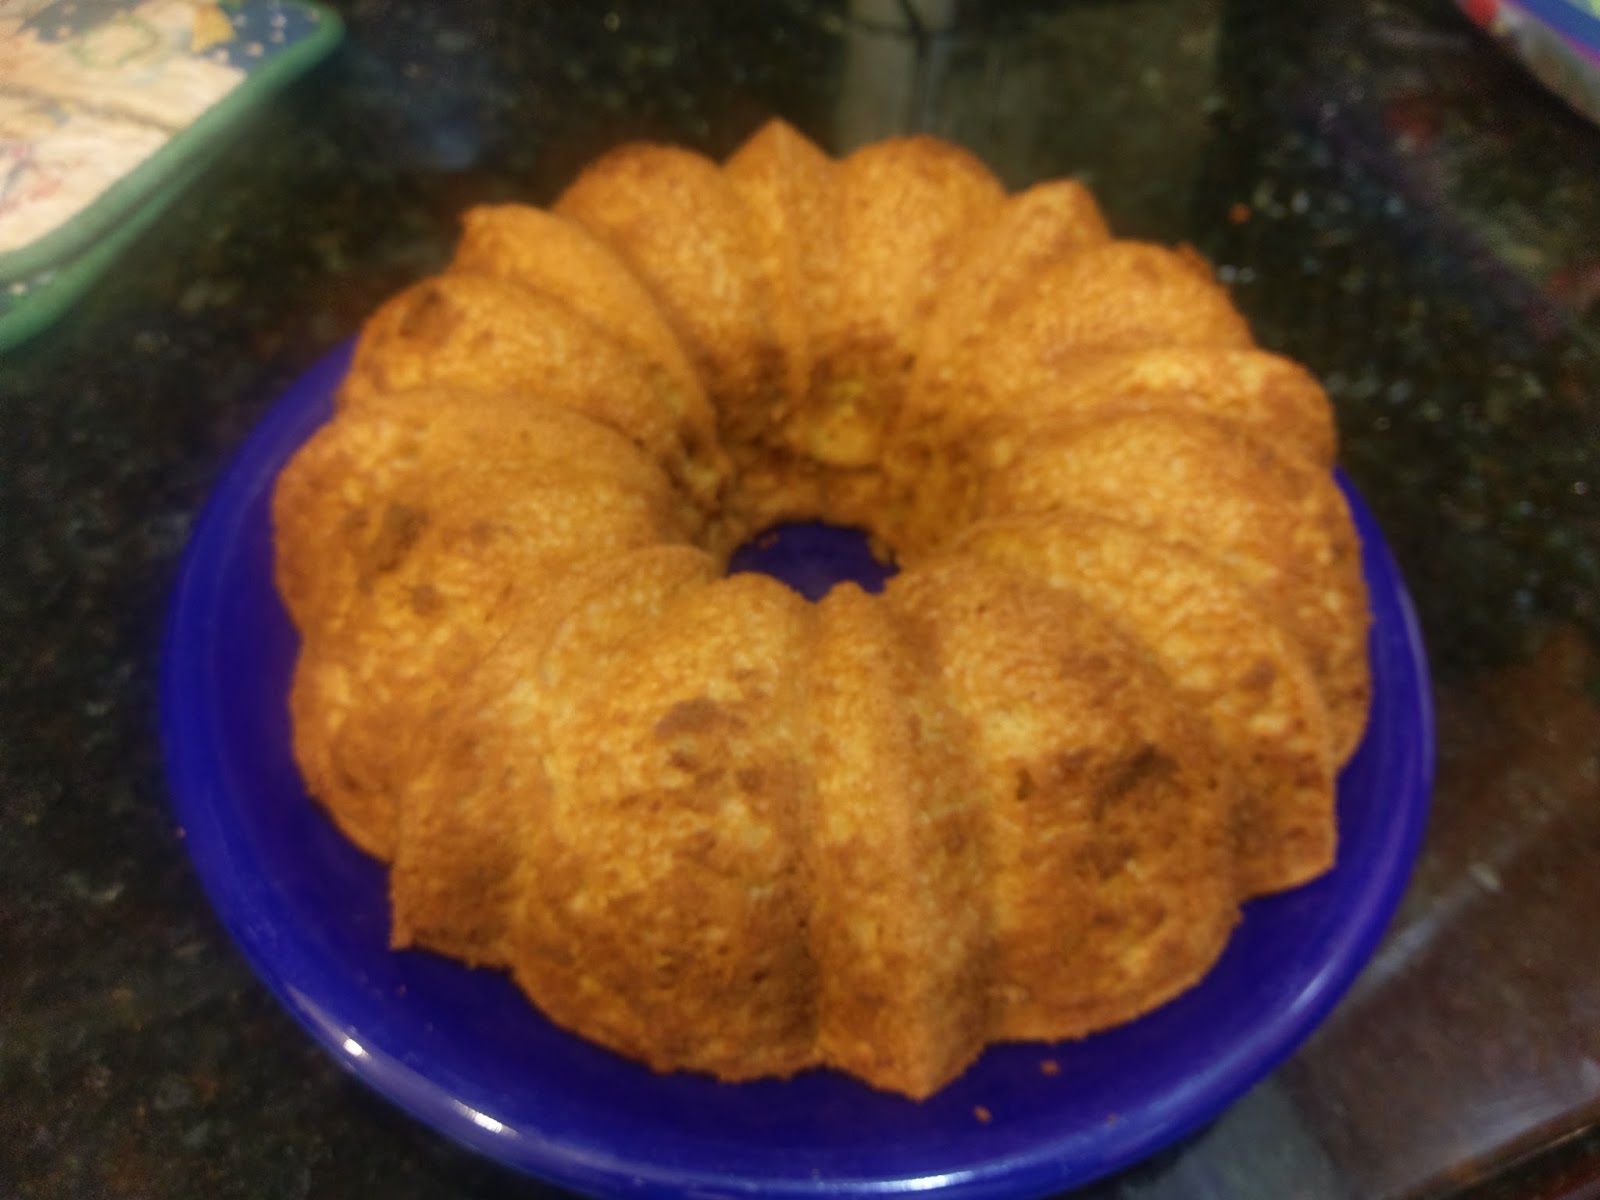
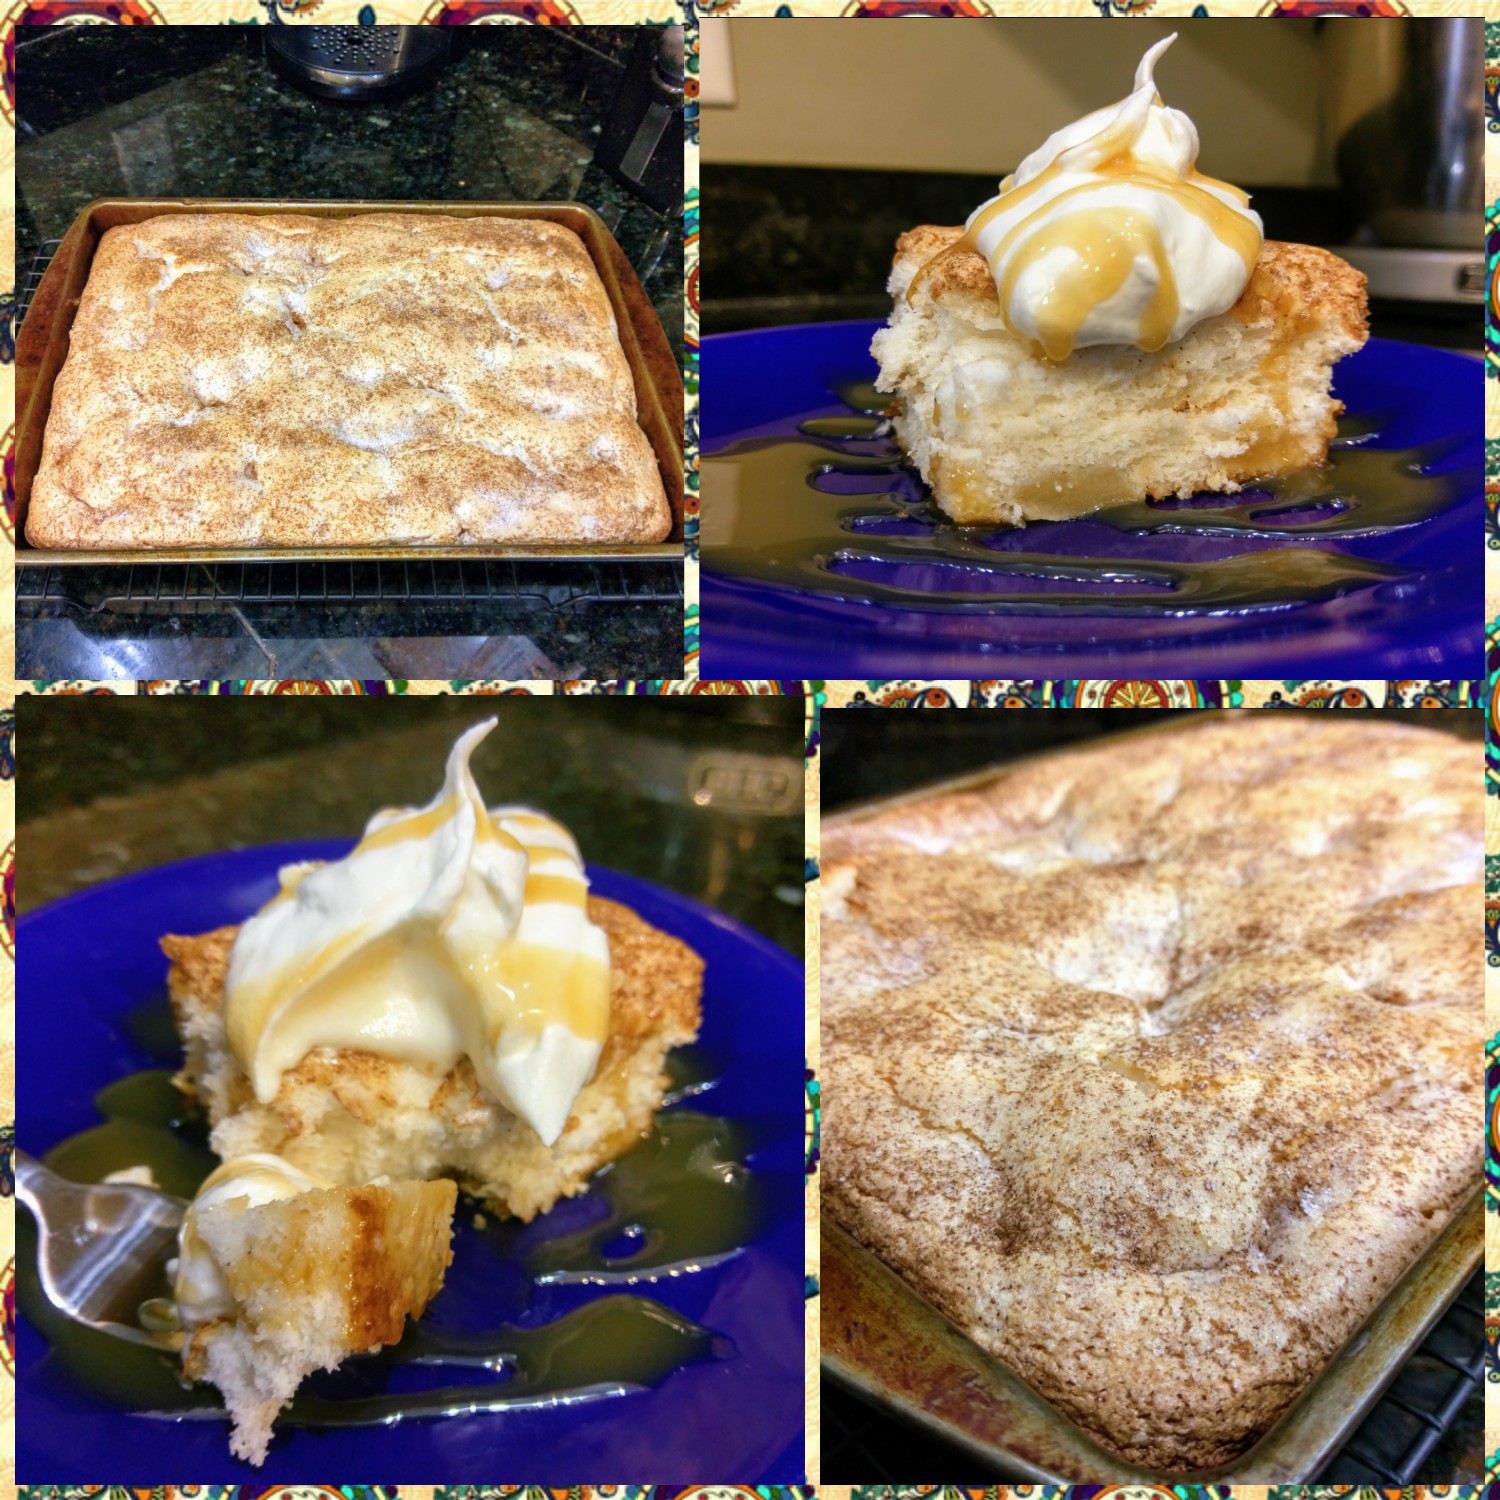
Sigh…my favorite month of the year has come to a close, and I’m back to my usual ho-hum self. Well, slightly ho-hum because I do still have all my Halloween decorations up to fill me with dark and spooky glee (cue evil laughter). I’d like to become the anti-Hobby Lobby and keep them up for months on end, really. I’m willing to bet Hobby Lobby doesn’t even wait until November 1 to start decking the halls in store anymore. It’s like there’s not a single holiday in between Halloween and Christmas. You know, except Dia de los Muertos, Veteran’s Day, and that pesky little thing called Thanksgiving that no one ever celebrates. But speaking of Turkey Day and reasons to be thankful–we’re two days in to November, and you know what that means? PUMPKIN EVERYTHING! Well, some of us basic white girls have been adding our drug of choice, pumpkin spice, to anything we can get our hands on since September (Hi, I’m Kate, and I have a pumpkin spice problem). But now that it’s November, it’s a socially acceptable addiction. I defy you to find someone who doesn’t partake in some form of pumpkin goodness this month. In fact, I’m here to shake things up with a non-pie-related dessert that’s perfect for the Thanksgiving dessert table: pumpkin angel food cake with cinnamon chip glaze.

Also, it is kind to your turkey and stuffing rations by being low cal! Look, I’m pretty sure even men will eventually start donning yoga pants on Thanksgiving as a means to allow optimum eating and comfort levels. I wanted to try a pumpkin angel food cake on for size (see what I did there) because angel food cake is so nice and light. After eating ham, sweet potatoes, and enough stuffing for two turkeys, I sometimes completely skip dessert on Thanksgiving because pies are so heavy. Also, I absolutely hate pumpkin pie. I know, I’m a walking contradiction, but even though it is full of pumpkin, it just has a gross texture to me. But since D and I are riding out Thanksgiving solo, I’m thinking of focusing more on dessert and less on the bird. I make fantastic life choices. In all seriousness, this makes 12 slices of cake at only 230 calories a slice–even just looking at a dish of Thanksgiving eats is even more calories than that.
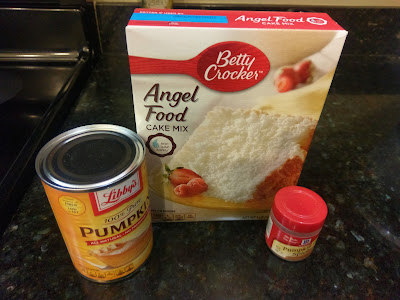
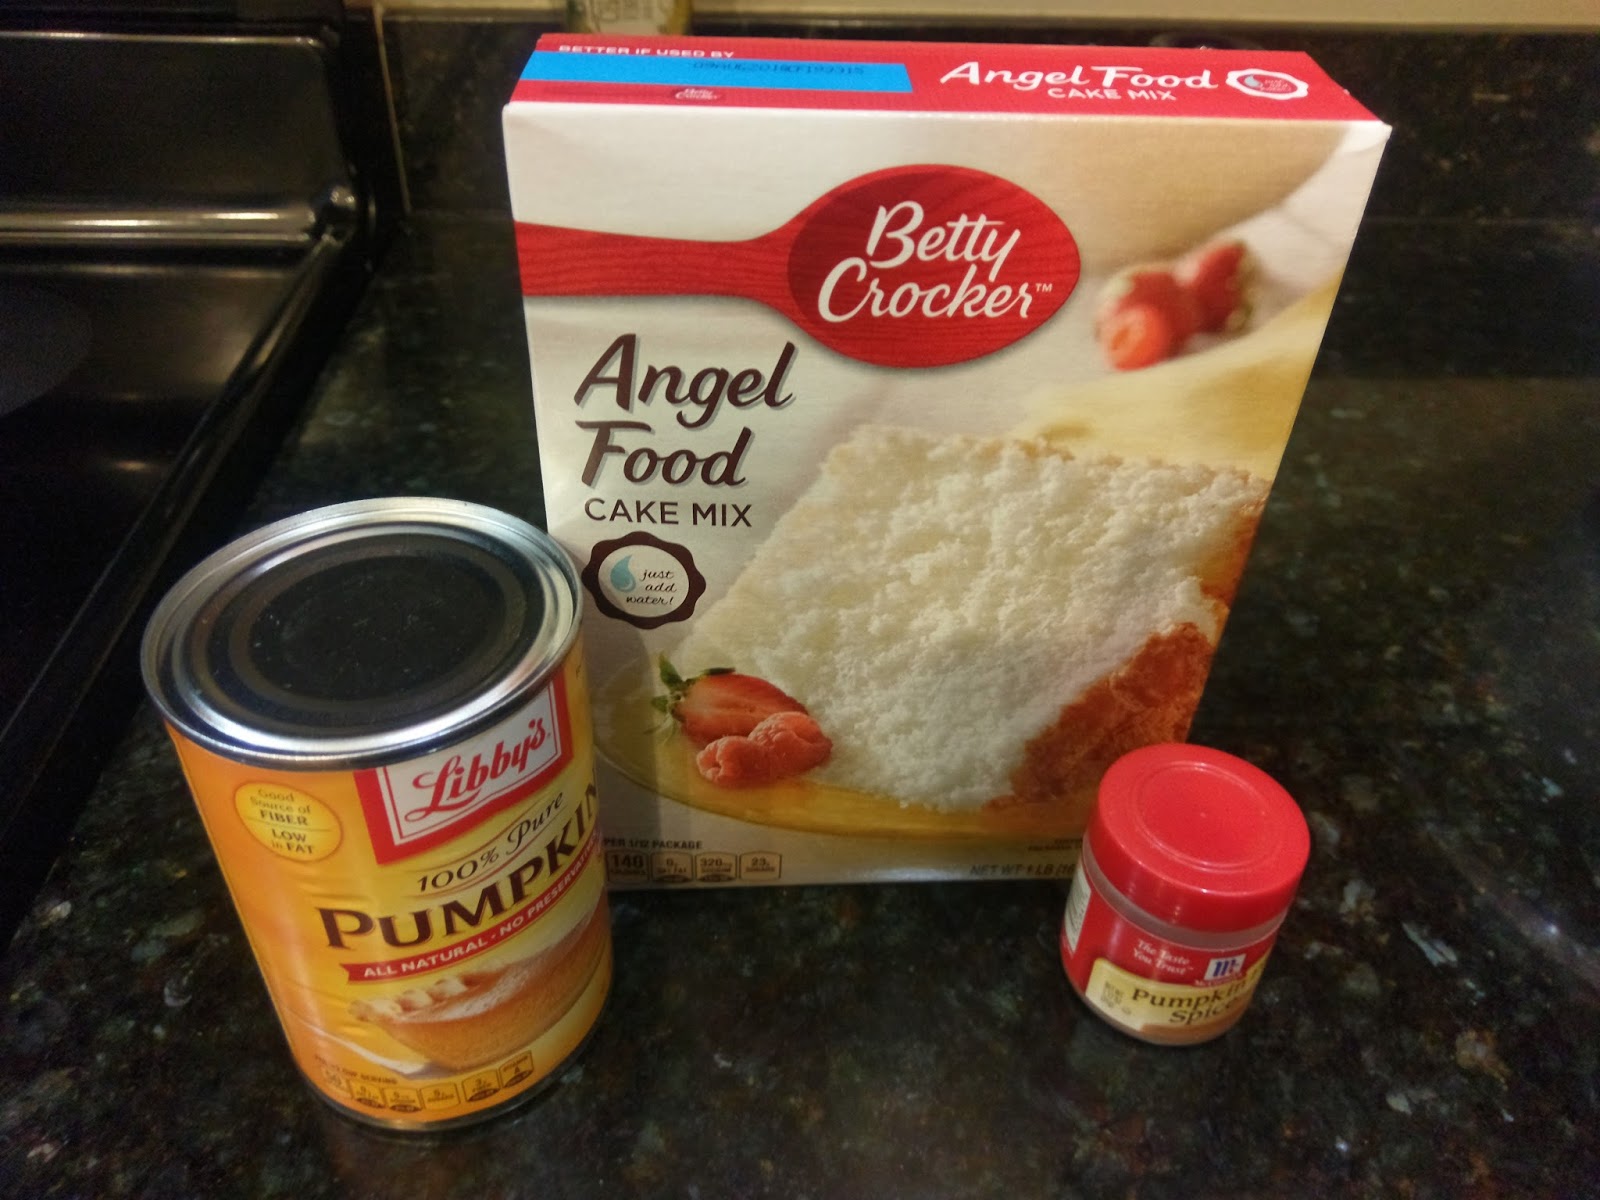
Another blog, another time I forgot to picture the vanilla extract. This recipe is also insanely simple. Mix it and forget about it simple. The hardest part is getting your angel food cake out of your bundt pan because you don’t have anymore kitchen space for an actual angel food cake pan. If you do have an angel food cake pan, you’re in even better shape than I am. Gather up:
- 1 box of angel food cake plus the water it calls for on the back of the box
- 2 tsp pumpkin pie spice
- 1 tsp vanilla extract
- 1 cup of canned pumpkin
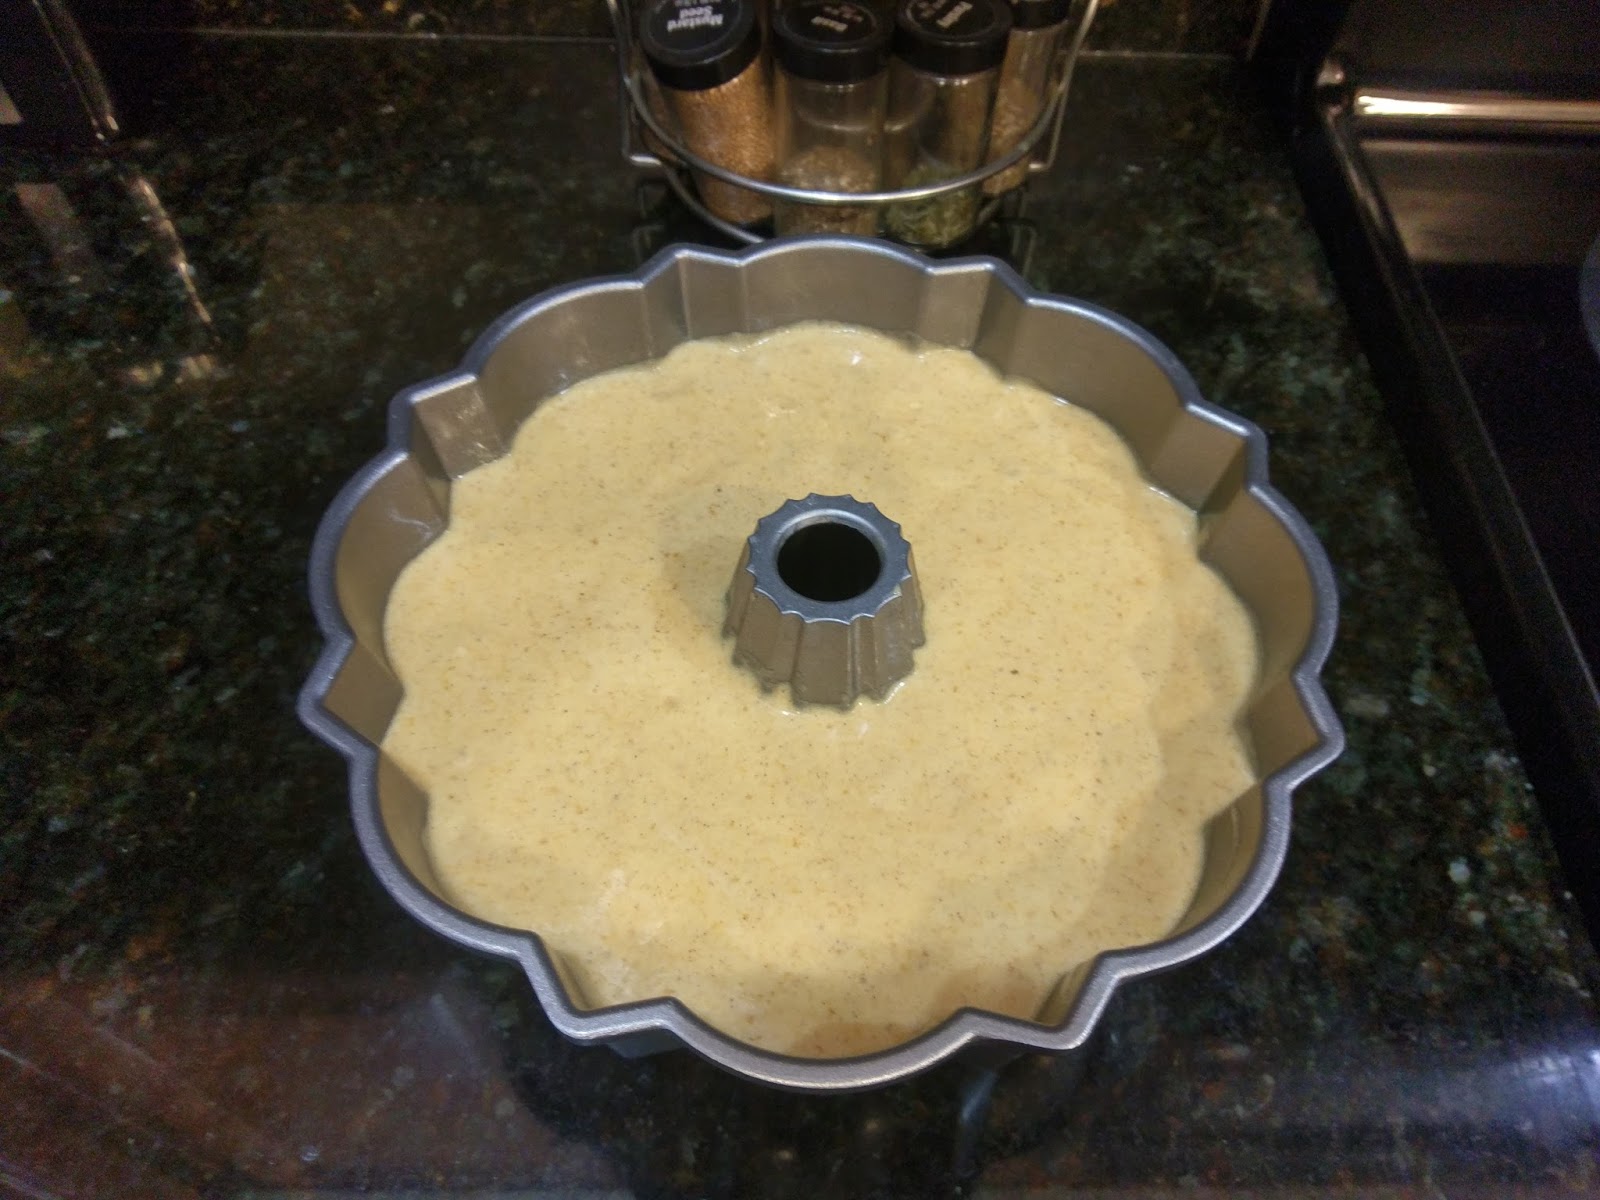
Start by preheating your oven to 350 and placing a rack on the lowest level of your oven. If you have a bundt pan, fold a paper towel into quarters and spray it with cooking spray. Rub the inside of the pan with this a few times until things are slightly greasy, but no so greasy that the angel food cake won’t be able to “climb” the sides of the pan while baking. In a stand mixer, mix the water, angel food cake mix, pumpkin spice, and vanilla extract for about 90 seconds. Once mixed, slowly fold in the cup of pumpkin with a rubber spatula by hand.

10 of 10 could, would, and did taste test batter. Pour into your angel food cake or bundt pan. Place into the oven on the lowest rack and bake for 35-45 minutes. A toothpick should come out clean, and your cake should have a gorgeous tan. Seriously:

Not even of my best of days have I ever been able to achieve this color. Once your cake is finished baking, place on a rack while still in the pan to cool for an hour. Come back in with a long angled spatula or long butter knife and gently loosen the cake from the sides and the middle of your pan. Place a plate on top of your pan and invert your pan so the plate is back on the bottom where it should be. Gently tap until you feel the cake release from the pan. I had to come in three or four times with my angled spatula until the cake was completely loose. Place this in the freezer for at least 30 minutes so the cake is not only cooled, but chilled, for your glaze.
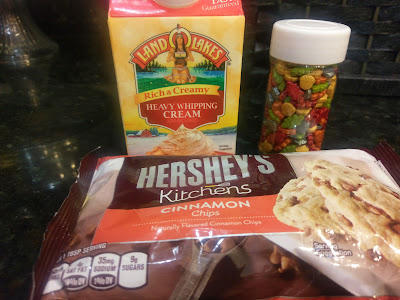
Queen of Sprinkles! I had every intention of making my glaze an actual ganache, but I didn’t have time to let it set long enough before risking forgetting about it completely while we tended to trick-or-treaters since I made this on Halloween night. I knew I was going to need cake to cope with my post-Halloween sadness. To make the glaze or the ganache you need:
- 1/2 cup of cinnamon baking chips
- 4-6 TBS of heavy cream
- Optional but potentially necessary due to the season: Wilton leaf and acorn sprinkle mix
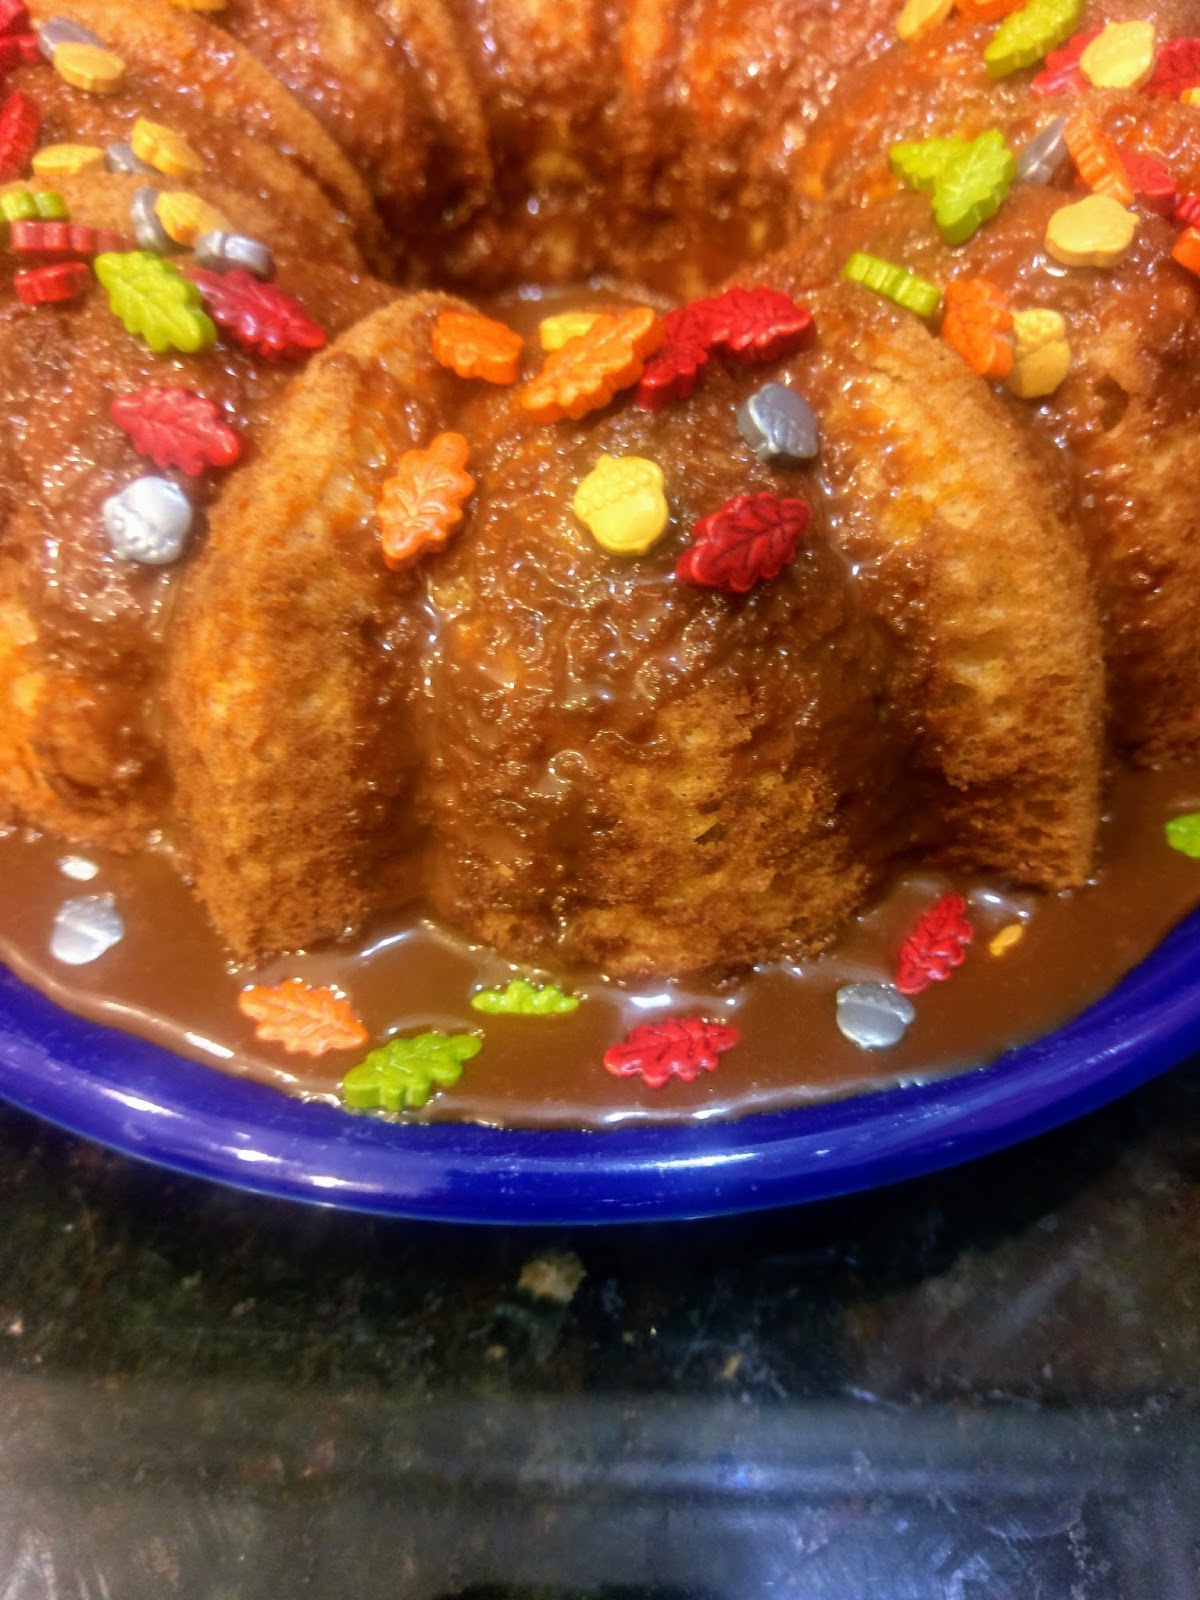
If you want a thin glaze, use all 6 tablespoons of heavy cream. If you want a thicker ganache, use 4 or 5 tablespoons of heavy cream. Bring your heavy cream to a boil over medium-high heat in a small sauce pan. Simultaneously, melt your cinnamon chips in a bowl in the microwave. Nuke for 30 seconds at a time on 50% power. Once the chips are melted and the cream is boiling, slowly pour in a third of the heavy cream into the bowl with the melted chips. Stir away; things will get a little thick and weird, and then it’s time to add in another third of the heavy cream. Stir again until things get smooth, then stir in the last of the cream. Remove your cake from the freezer at this point. If you’re going for a ganache, let it rest and thicken up for a few minutes before you pour it on the cake. If you want a glaze, pour it on top of the cake while it is still thin in consistency.
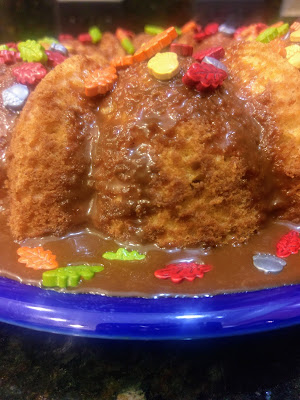
Thin, but soooo full of flavory goodnees. 
I seriously can’t get over these sprinkles. Sprinkles for every season! I own a massive amount of decorative sprinkles, from skulls for Halloween, shamrocks for St. Patty’s, peppermint chips for Christmas, bubble pearls for New Year’s, and practically every color of the rainbow. This is potentially why I don’t have room for an angel food cake pan. Worth it. Especially with the addition of these fall sprinkles. Thanks, Amazon!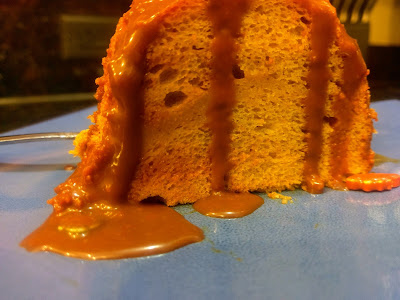
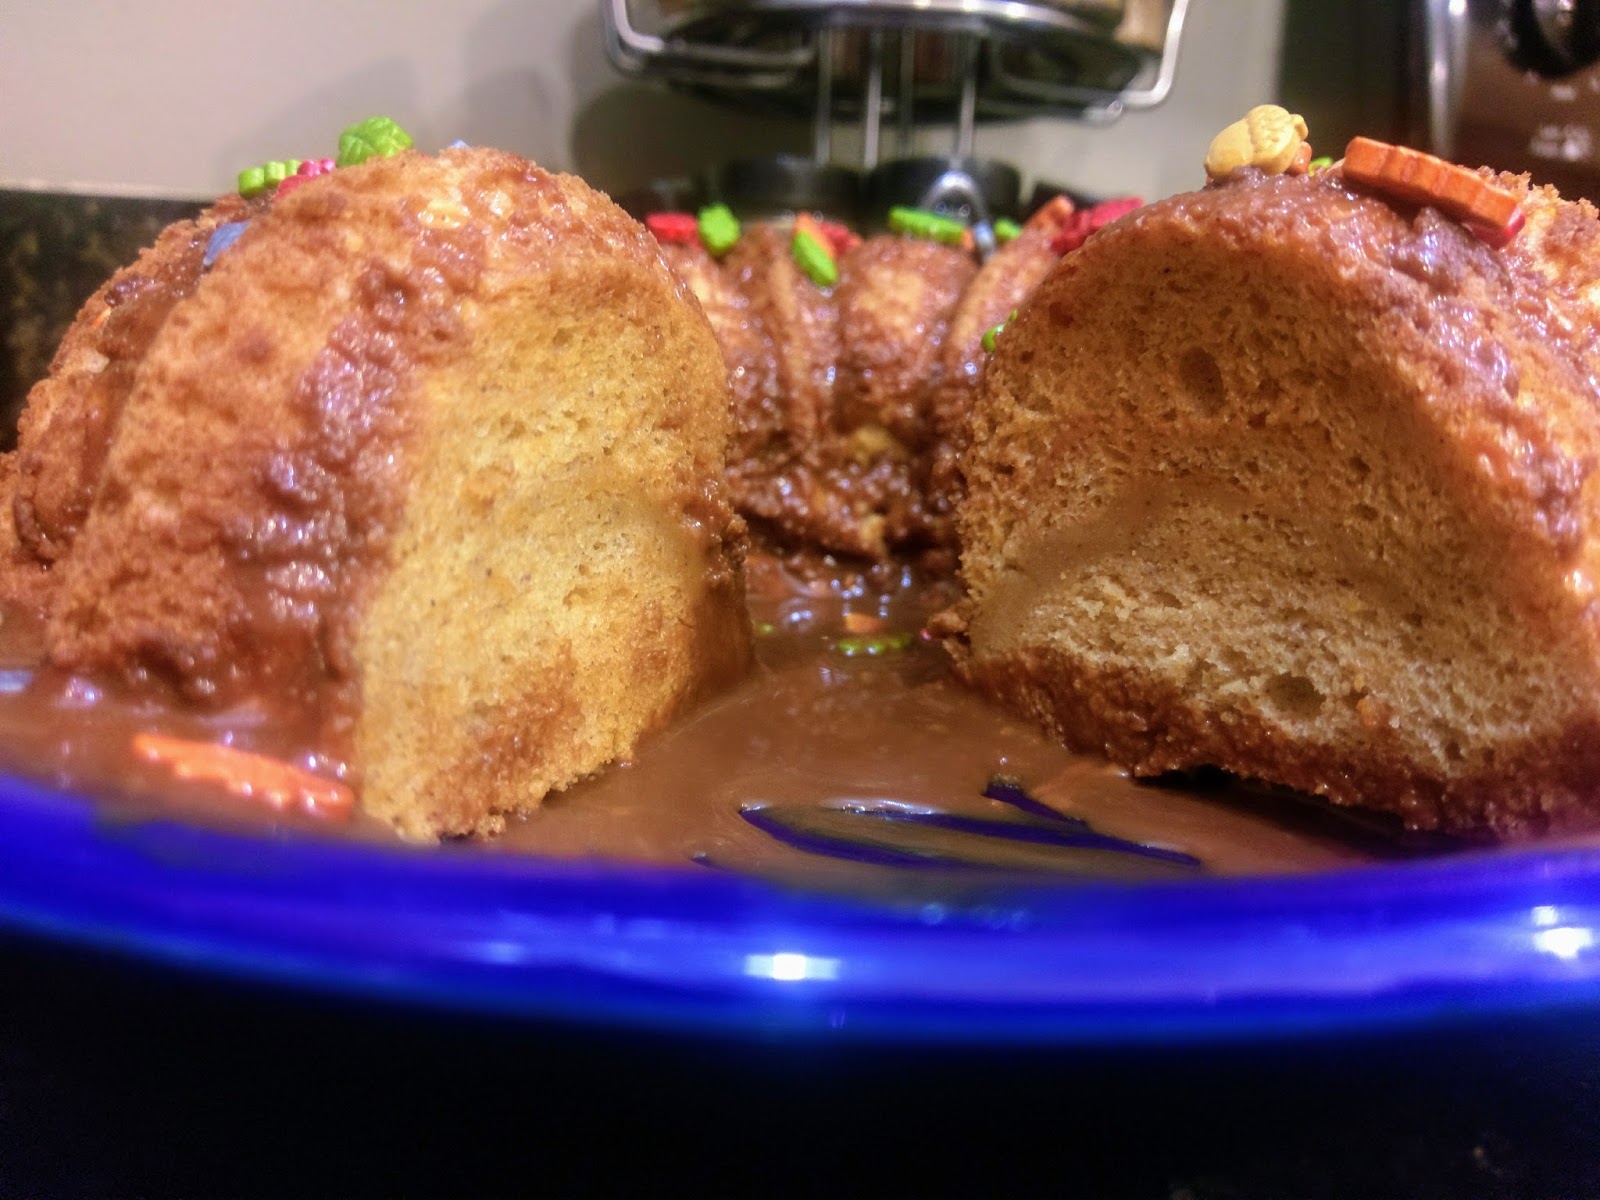
And thank you, cinnamon glaze. I have a new favorite dessert as I am completely addicted to this cake. It is so light and airy, but it packs a nice, smooth pumpkin flavor without it being overwhelmingly pumpkin-spicy. And the cinnamon chip glaze…Dear Lord. This is practically a transcendental dessert experience if there ever was one, and minus the frantic hoping and bargaining with the baking gods that my cake would come out of the pan, probably the easiest thing I’ve baked in over a month. This perfects the problem I have with pumpkin pie. The texture here is perfect, and the flavors all balance out so well. If anything could take on the Thanksgiving dessert table and win, it is definitely this cake. Don’t believe me? You’re just going to have to bake it yourself to find out. Because I am soooo not sharing any of mine. Except with my husband since I am trying recipe by recipe to turn him into a pumpkin addict, too. ‘Til next time, my fellow eaters!
I wish we still had this much cake left. -
Bewitching Brownies with Captivating Cream Cheese Swirls!
I am positively atwitter with excitement as Halloween festivities are in full swing at Casa de Crazy Foxes (or Casa de Zorros Locos si habla español). Last night, Derek and I continued the tradition of couple’s costumes that don’t make you want to barf as we donned creepy skeleton makeup and spooked unsuspecting piano bar patrons with our friends. I sincerely enjoy that my husband is becoming quite the costume aficionado (I mean, he let me paint his face with makeup, if that’s not commitment, I don’t know what is). We’re looking forward to scaring small neighborhood children together on Tuesday night, and yes, we have already decided what we’re going to be for Halloween next year. I enjoy this season so much not just because my macabre attitude goes along with it perfectly but also because the creative side really comes out of everyone when they construct clever costumes (read: not just slutty “insert generic costume here” or bed sheet ghost). It’s fun, it’s creepy, and it truly makes me happy. As a creative mad genius, I simply shine during the month of October into Dia de los Muertos. But as with all good things, they will soon come to an end. So it’s only fitting I have one last ghastly dessert to help me cope:
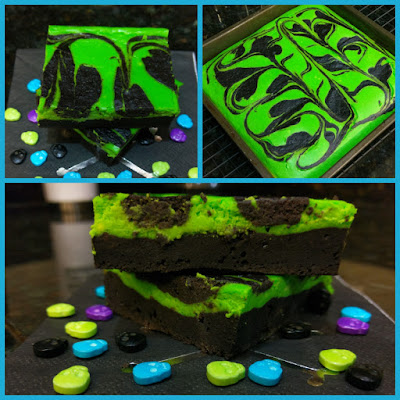
Naturally, it’s full of cocoa. These sinfully chocolatey brownies with a heavenly cream cheese swirl are so fudgy and so delicious that you’ll hardly believe their secret: they’re only 150 calories a piece for a pan of 9 brownies, or to cut down calories even further, 112 calories a piece for 12 brownies. I didn’t have to summon a demon and sell my soul or anything supernaturally devious to make it happen (I’m saving that for eternal youth, obviously). With Truvia Baking Blend, all things are possible. After baking that massive chocolate cake for my mom’s birthday, I wanted to see how Truvia would hold up in a fudge brownie recipe alongside some other healthier swaps. Turns out, absolutely fantastic. I’m not sure how long this stuff has been around, but it is now a must-have as far as I’m concerned. It may seem counter intuitive, but you really can trust the skinny baker on this one. I’m all about having my cake and eating it, too. Except in this case, it’s a brownie. And it’s so low cal that I also get to top it with ice cream. I always did dream big, and by dream big, I mean dare to try to eat ice cream daily.
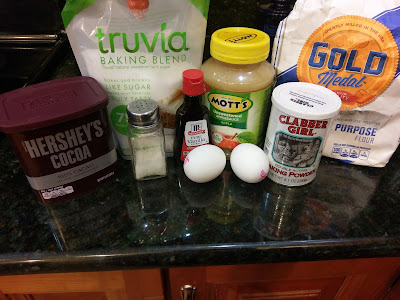
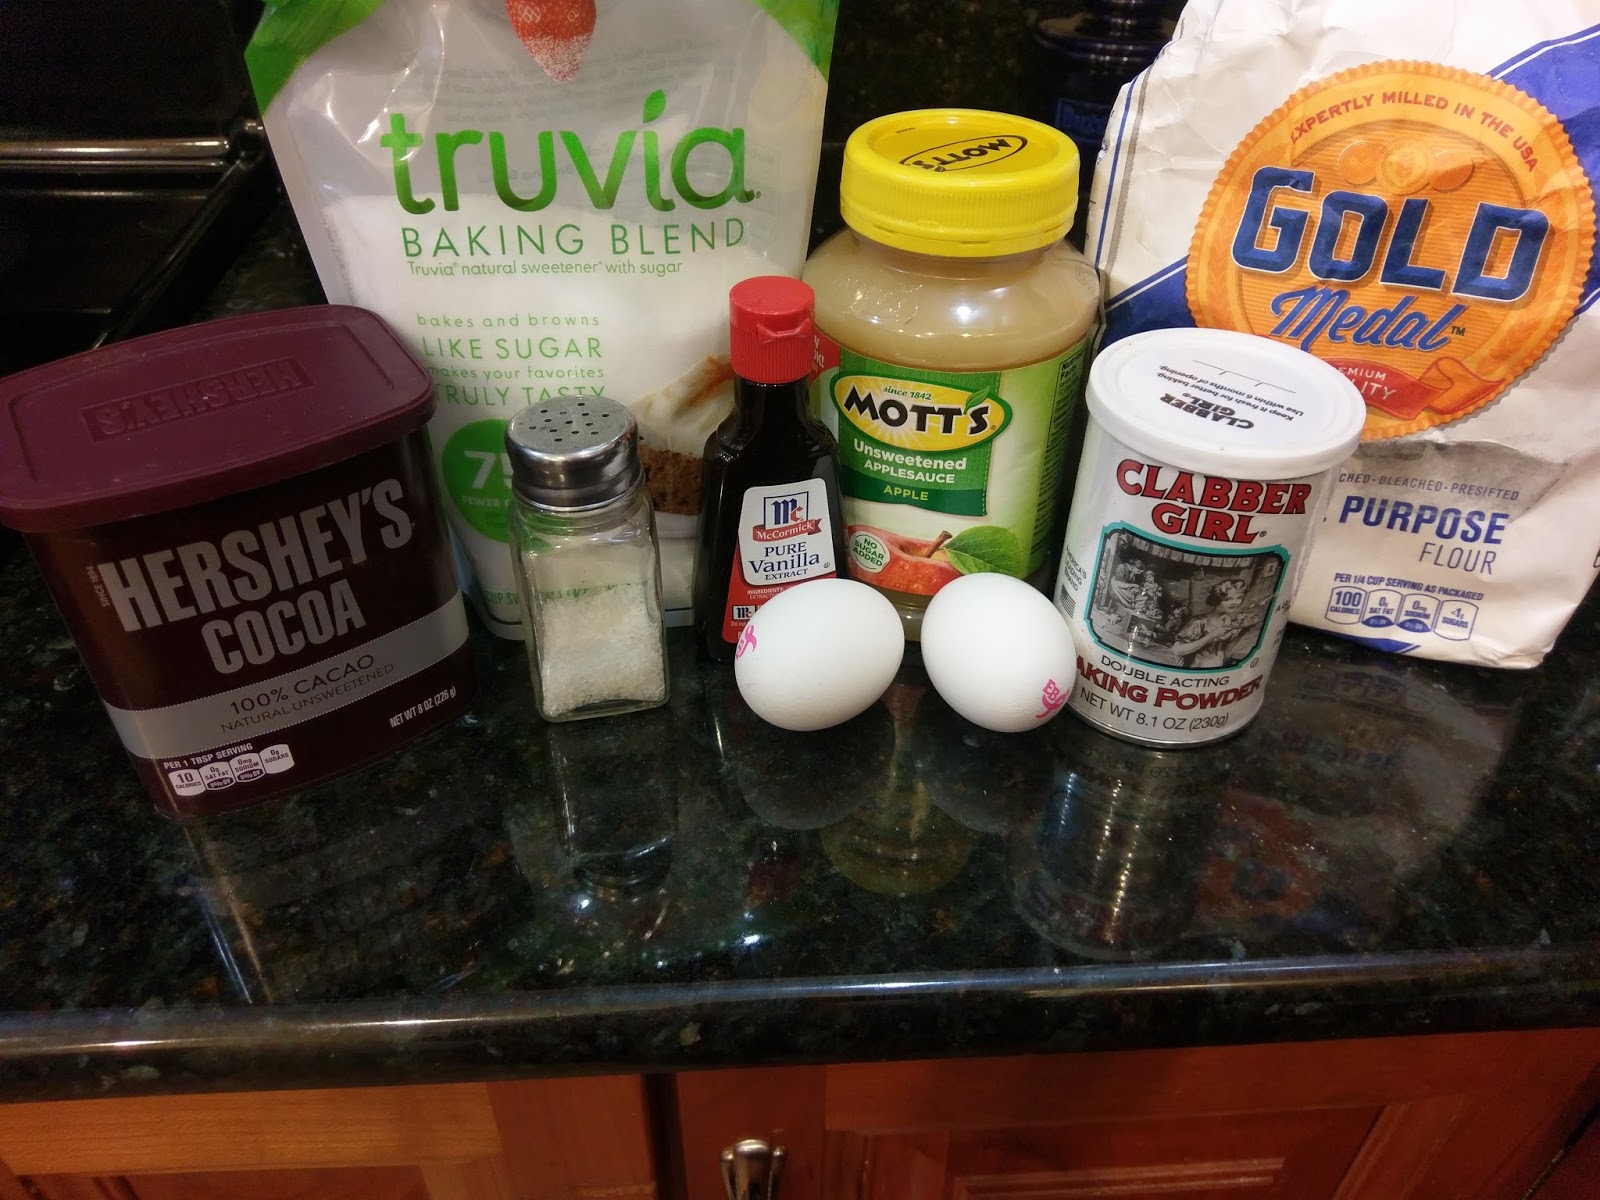
It’s fall, the applesauce switch seemed appropriate. I’ve adapted these from an old tried and true brownie recipe that makes a nice 8×8 pan of seriously fudgy brownies, so if you like dry, cake-style brownies, these are not going to be what you’re looking for. If I can’t taste all of the chocolate melting on my tongue when I take a bite, what’s the point of having a brownie? A fudge brownie is as close to a hug in food form as it gets, so to make these spectacular (and spooky!) swirled brownies, gather up:
- 1/2 cup of Truvia Baking Blend
- 1/2 cup of All Purpose flour
- 1/2 cup of unsweetened cocoa powder
- 1/2 tsp of baking powder
- 2 eggs
- 1/2 cup of unsweetened applesauce (used in lieu of vegetable oil)
- 1 tsp vanilla extract
- Black gel dye
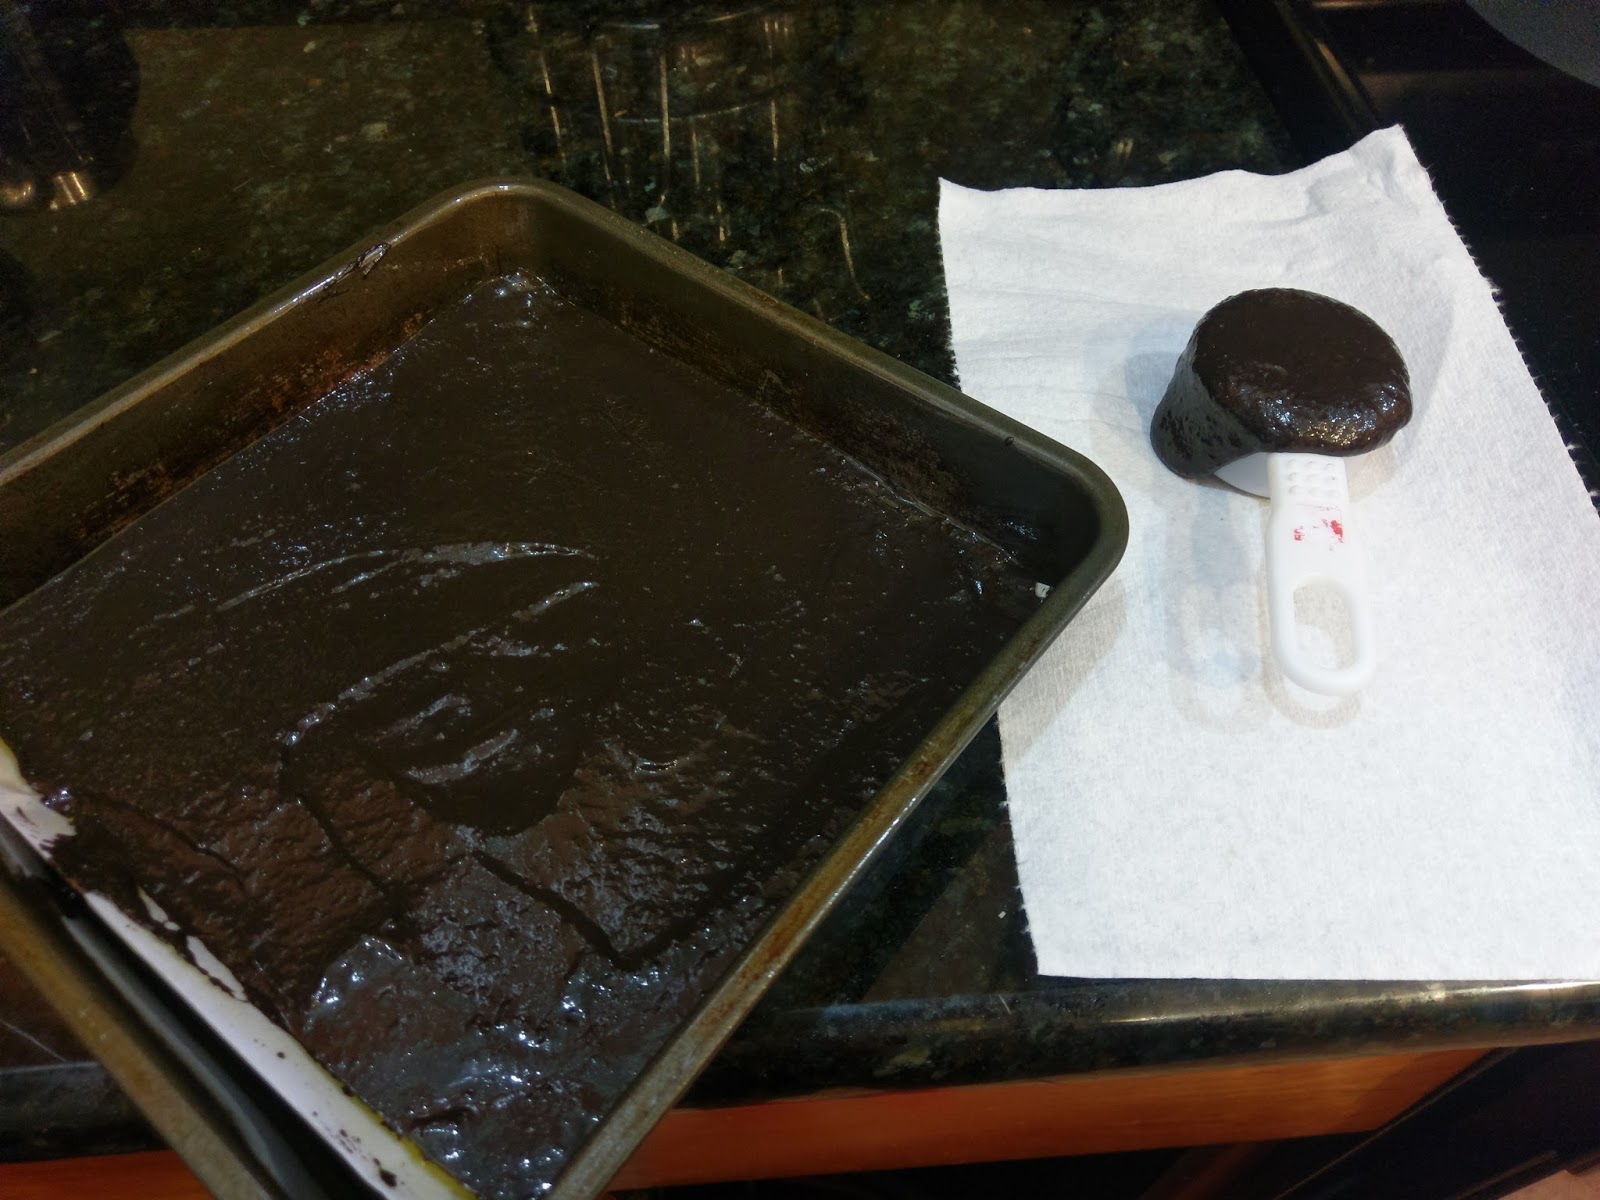
Start by preheating your oven to 350 and lining an 8×8 pan with Parchment paper or foil (spray lightly with cooking spray). In a large bowl, mix the Truvia, flour, cocoa powder, and baking powder with a whisk until combined. Then, add in the eggs, unsweetened applesauce, and vanilla extract. Whisk until just combined. Batter will be very thick (and very delicious). If you’re making spooky Halloween brownies, be sure to add in a little black gel dye to get things to optimum creepy level–so black Spinal Tap members would be satisfied.

Could be none more black. Reserve 1/4 cup of brownie batter, and then smooth your brownie batter out into your prepared baking pan. Set this aside, and get ready to make cream cheese magic.
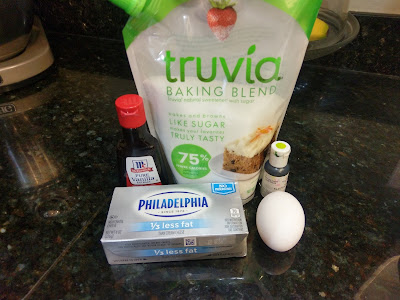
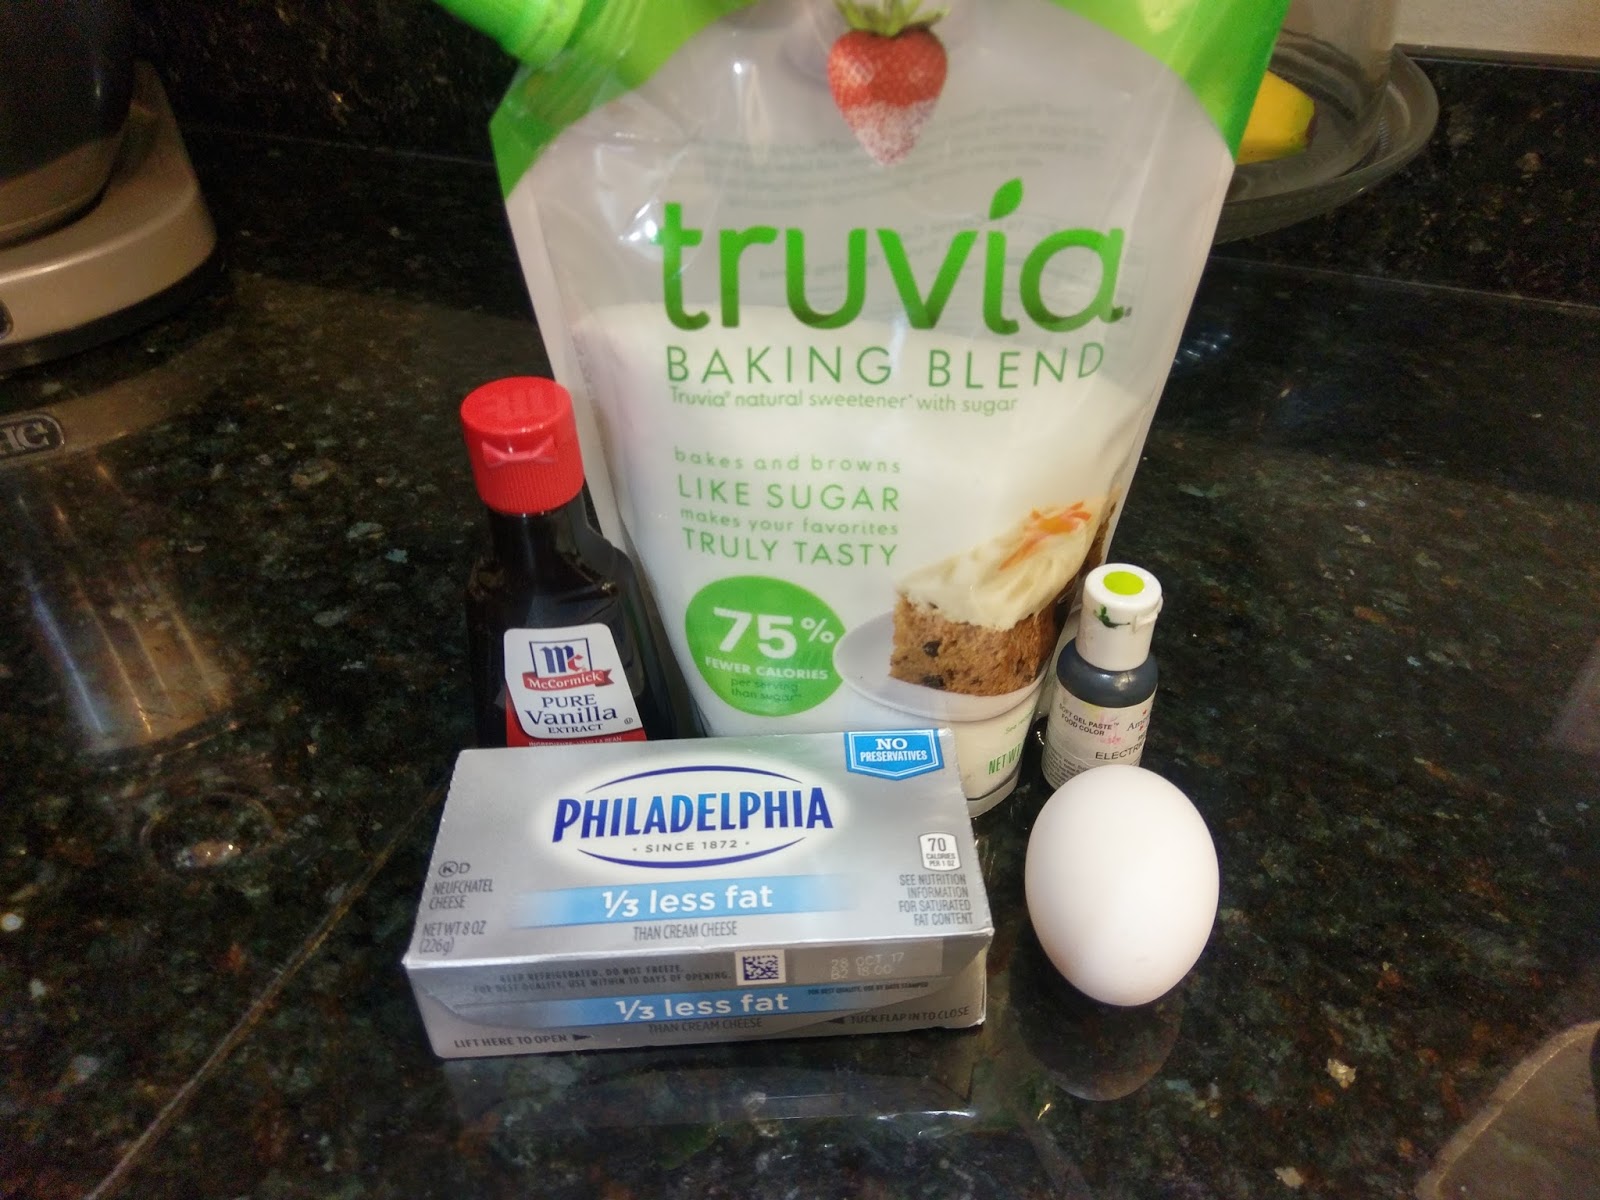
It is sweet, and it is tangy. With the Truvia Baking Blend, this cream cheese layer is definitely more on the tangy, tart side, but it does pair nicely with how rich the brownie layer is. If you want a sweeter cream cheese layer, add more Truvia and vanilla at small increments. I used:
- 8 ounces of 1/3 less fat cream cheese at room temp
- 2 TBS of Truvia Baking Blend
- 1 egg
- 1 tsp of vanilla
- Green gel dye
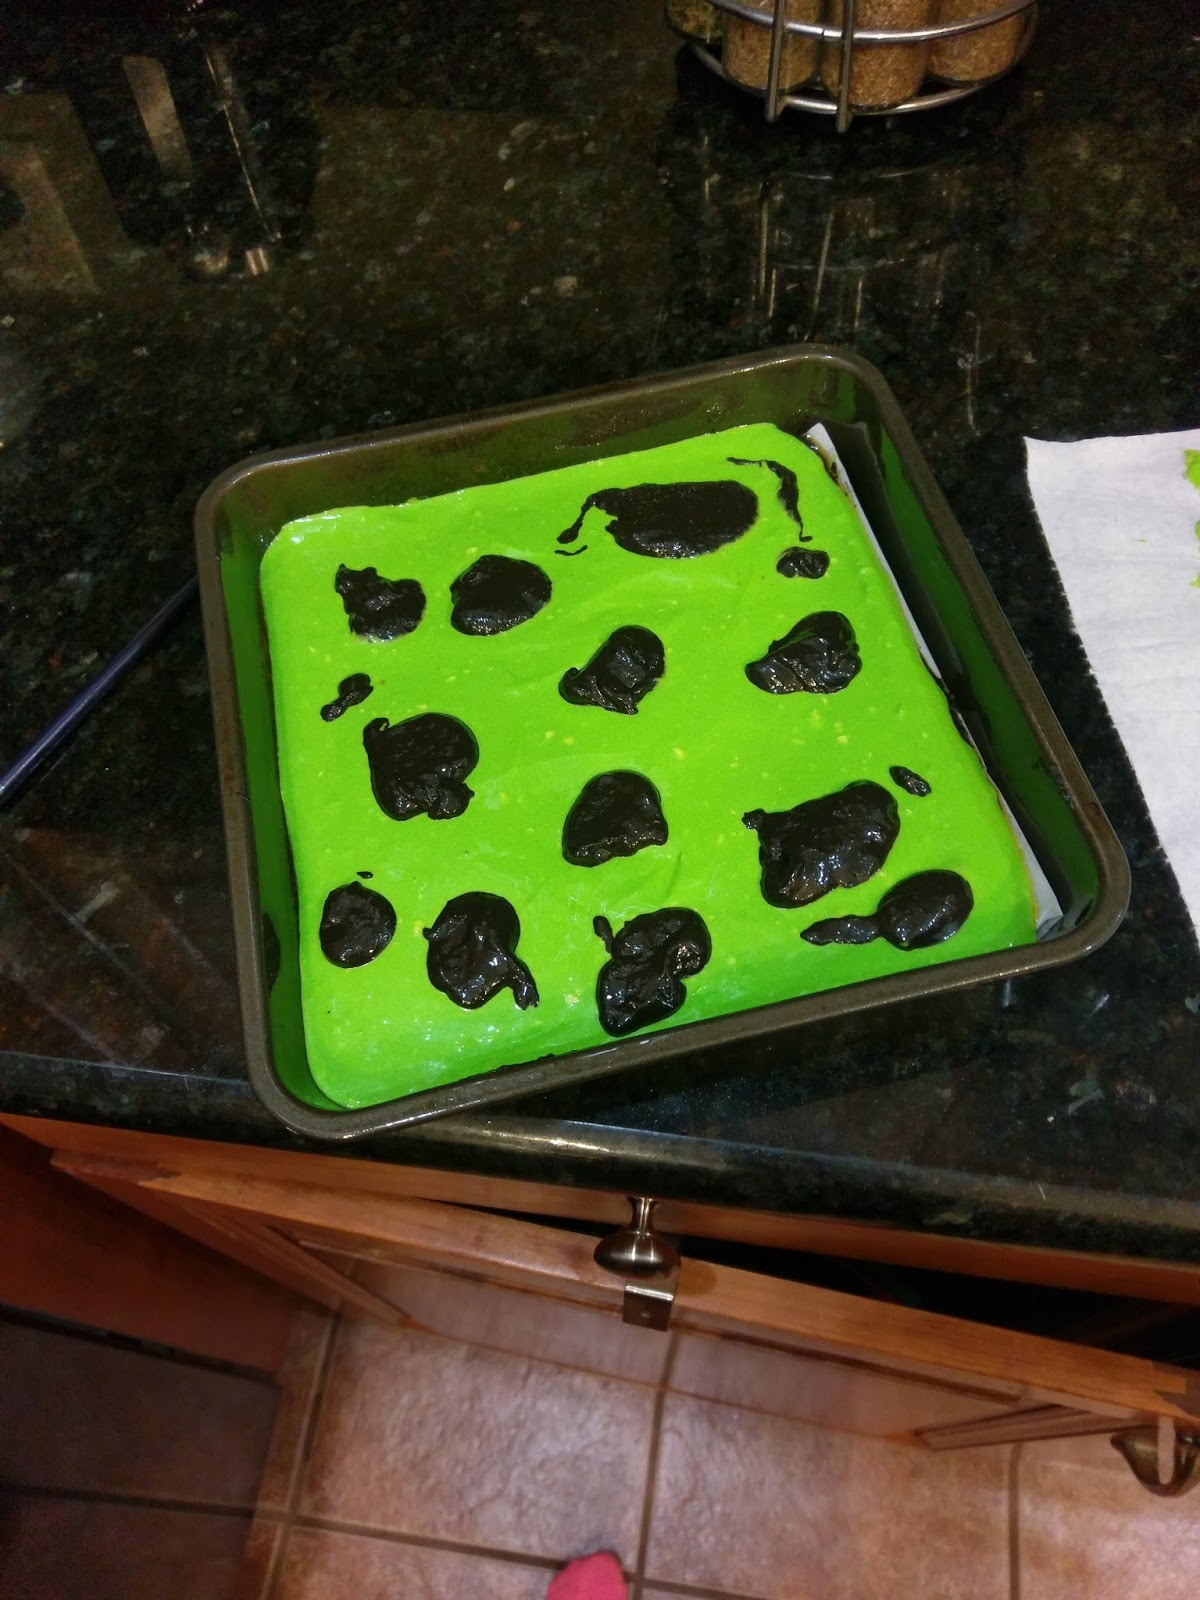
Whip the cream cheese in the bowl of a stand mixer until smooth, then add in the Truvia, egg, vanilla, and gel dye. Mix on medium high until everything is smooth.
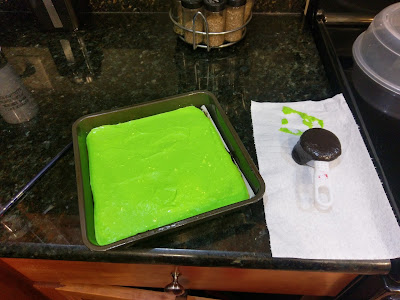
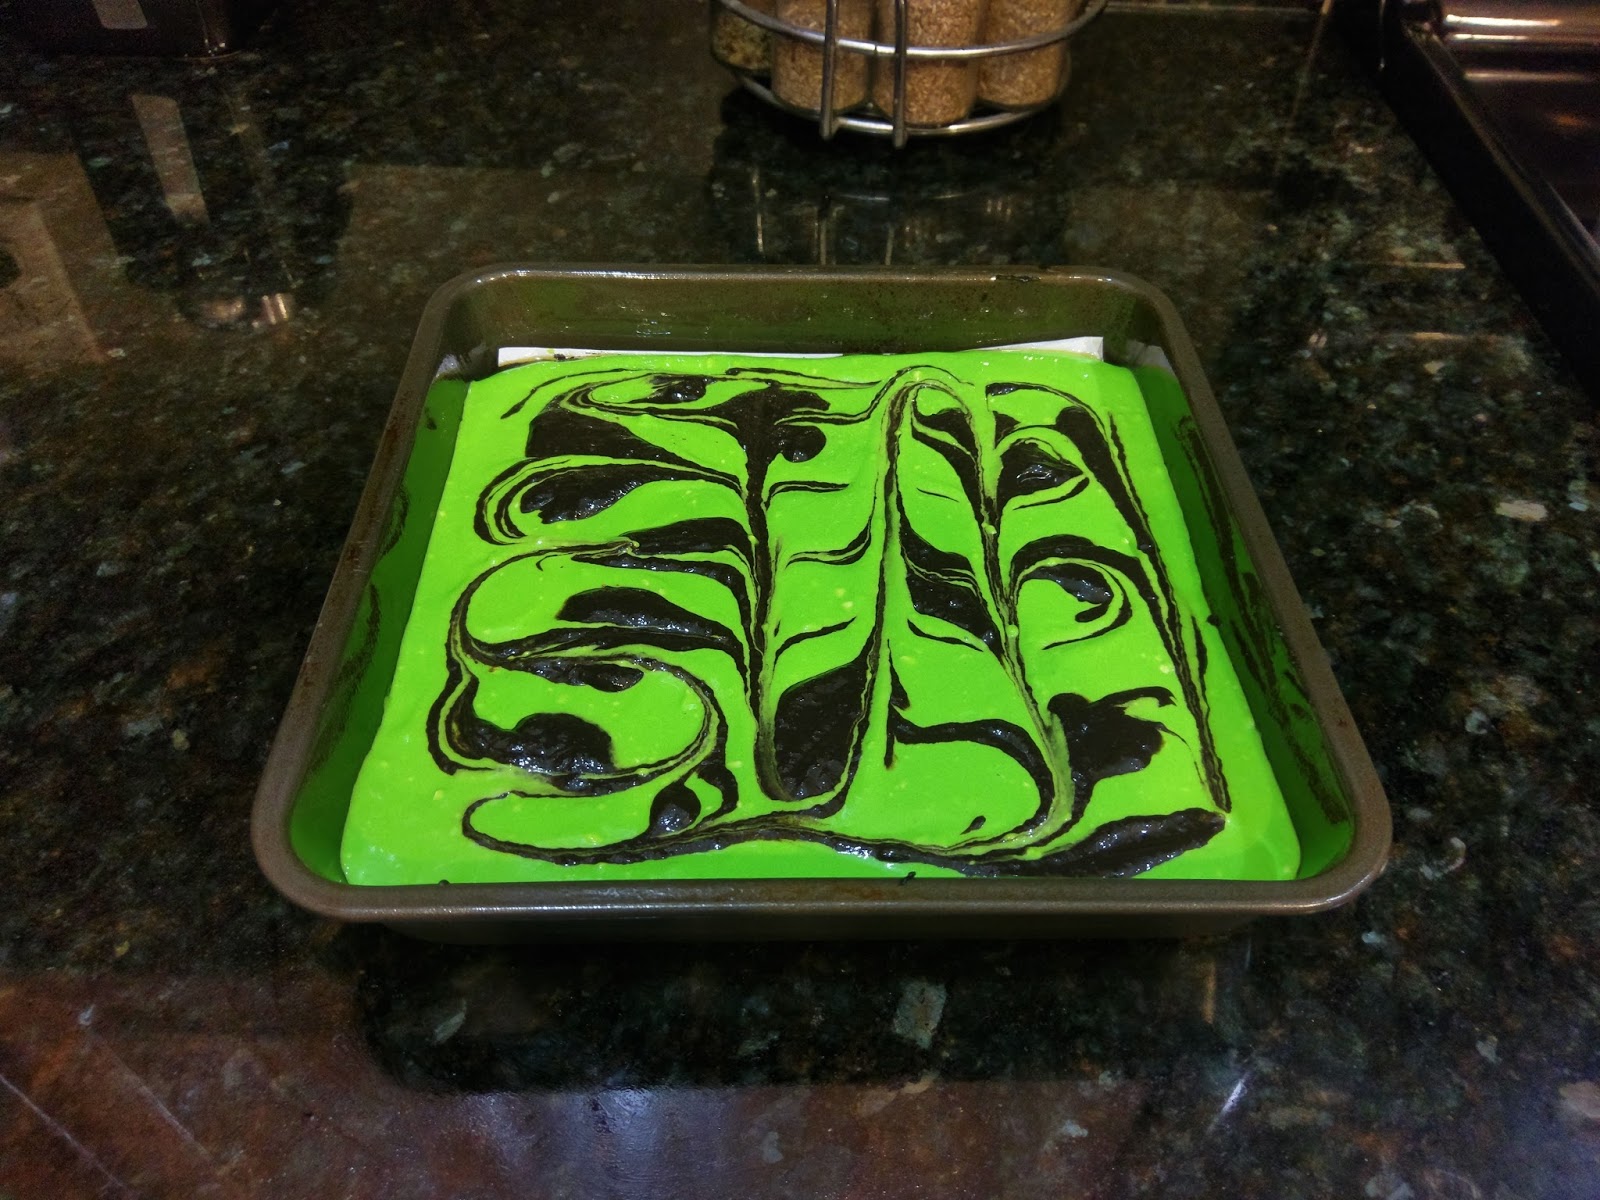
And greener than a neon highlighter. Very carefully smooth your cream cheese layer on top of your brownie layer. Then take a small spoon and drop dollops of the 1/4 cup of reserved brownie batter randomly over your cream cheese layer:

At this point, it looks like an unfortunate lab culture gone wrong. To make the swirls, take a chopstick or butter knife and carefully draw S shapes back and forth over your batter:
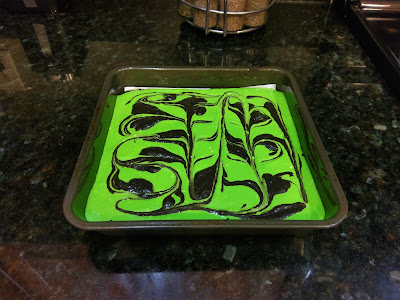
I was going for a melted Wicked Witch of the West look. Once swirled, bake at 350 for 35 minutes, or until a toothpick comes out of your layers mostly clean (there will be a little build up of batter since the brownies are fudgy).
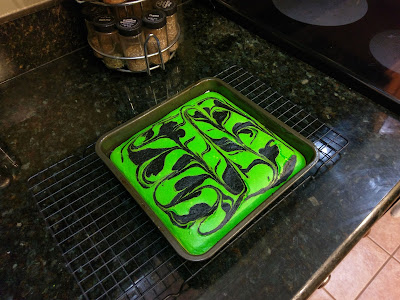
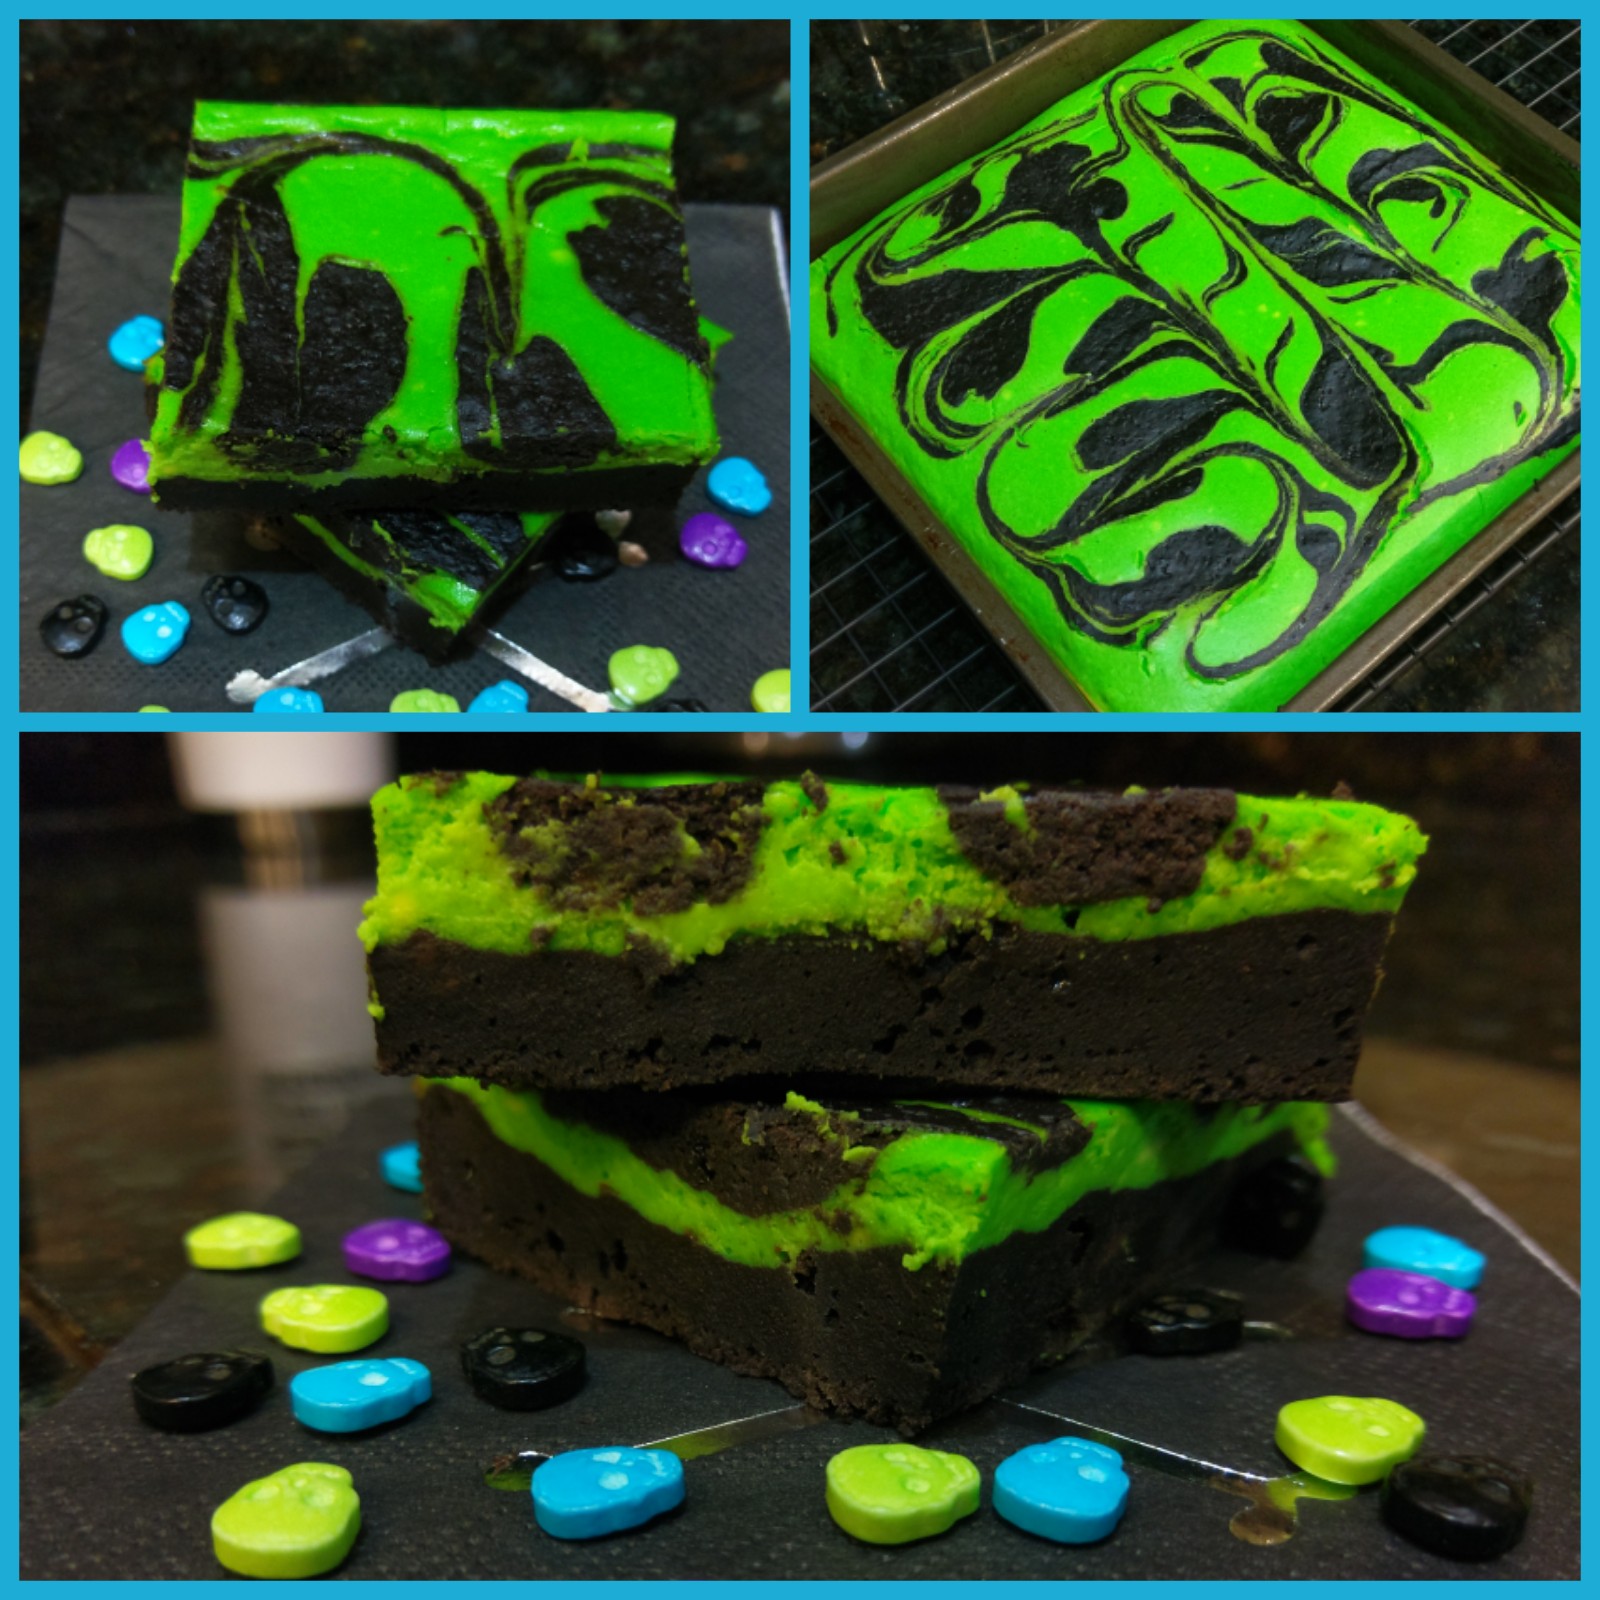
You’ll know they’re done when they look even greener than you thought possible. These were so vivid and vibrant they almost hurt to look at directly. To me, this means they’d be the best addition to a Halloween dessert table because they’re like a flashing neon sign of deliciousness. Let your brownies cool for an hour or two before slicing.
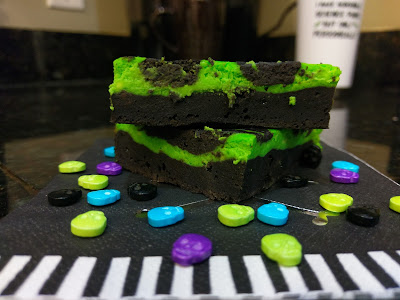
What, of course I have skull sprinkles. Do you see that fudginess? It is mouth watering. We have positively chowed our way through these brownies because they are such a satisfying mix of dense chocolate and light cream cheese topping. And they’re super festive. You could always go orange instead of green or split the cream cheese and dye half green, half purple, and mix in the brownie batter swirls for an impressively insane Halloween trifecta. Either way, they will get eaten, and they will get eaten fast. Be sure to keep these in the fridge (if they last that long) and reheat for 30 seconds in the microwave to get that straight-from-the-oven goodness that fudge brownies are known for…

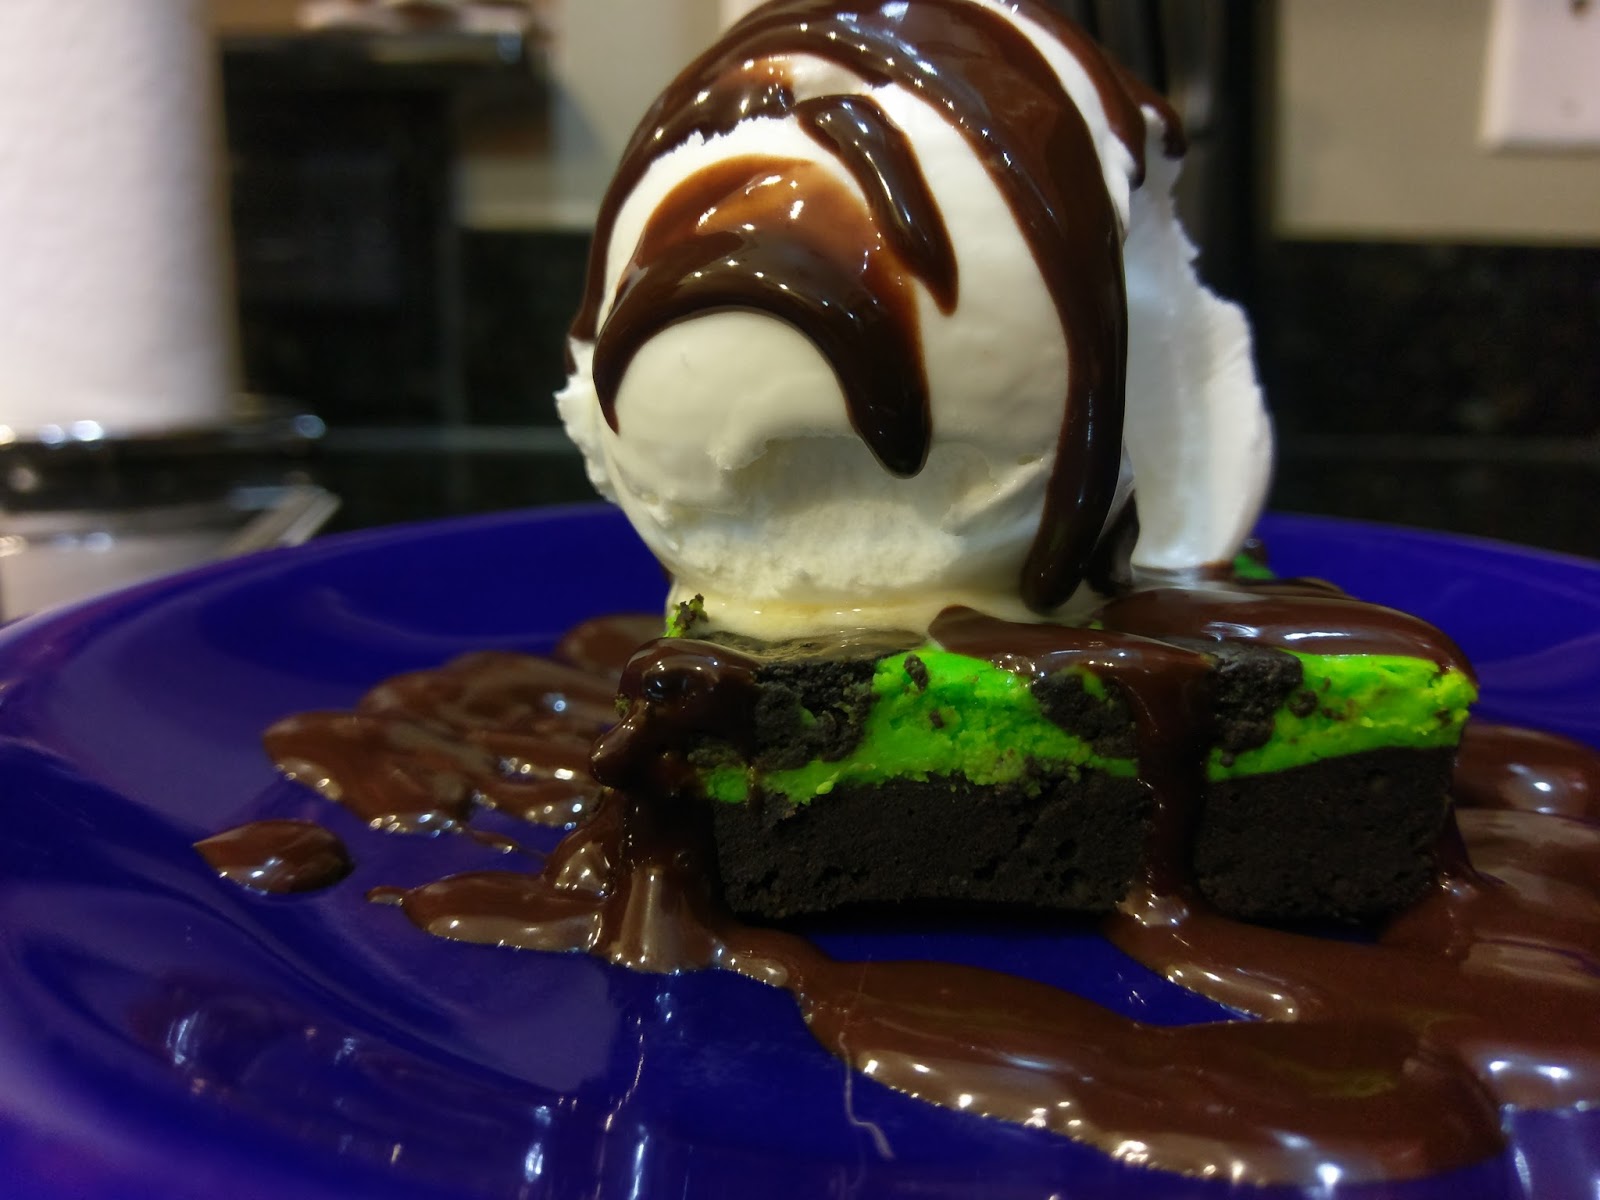
They also make a really good ice cream plate. When they’re only 150 calories, you can make all of the ice cream happen on top of these for minimal guilt or potential gut-bomb hauntings. We like Breyer’s No Sugar Added Vanilla with a (large) drizzle of sugar free chocolate syrup. Still under 300 calories for a massive amount of dessert, so those Halloween costumes will still fit like a glove. Was a little jealous of a guy I saw in a blow up Sumo Wrestler costume last night, because that would be an excellent way to hide the fact that I’d like to eat an entire pan of these brownies all at once. Either way, enjoy your Halloween, and know that I’m already coming up with ideas for next year’s baking extravaganza. See you back here soon with your regularly scheduled pumpkin-filled desserts. ‘Til next time, my fellow eaters.

I’m dying for some pumpkin spice… -
A Birthday Cake Fit for the Queen of Halloween
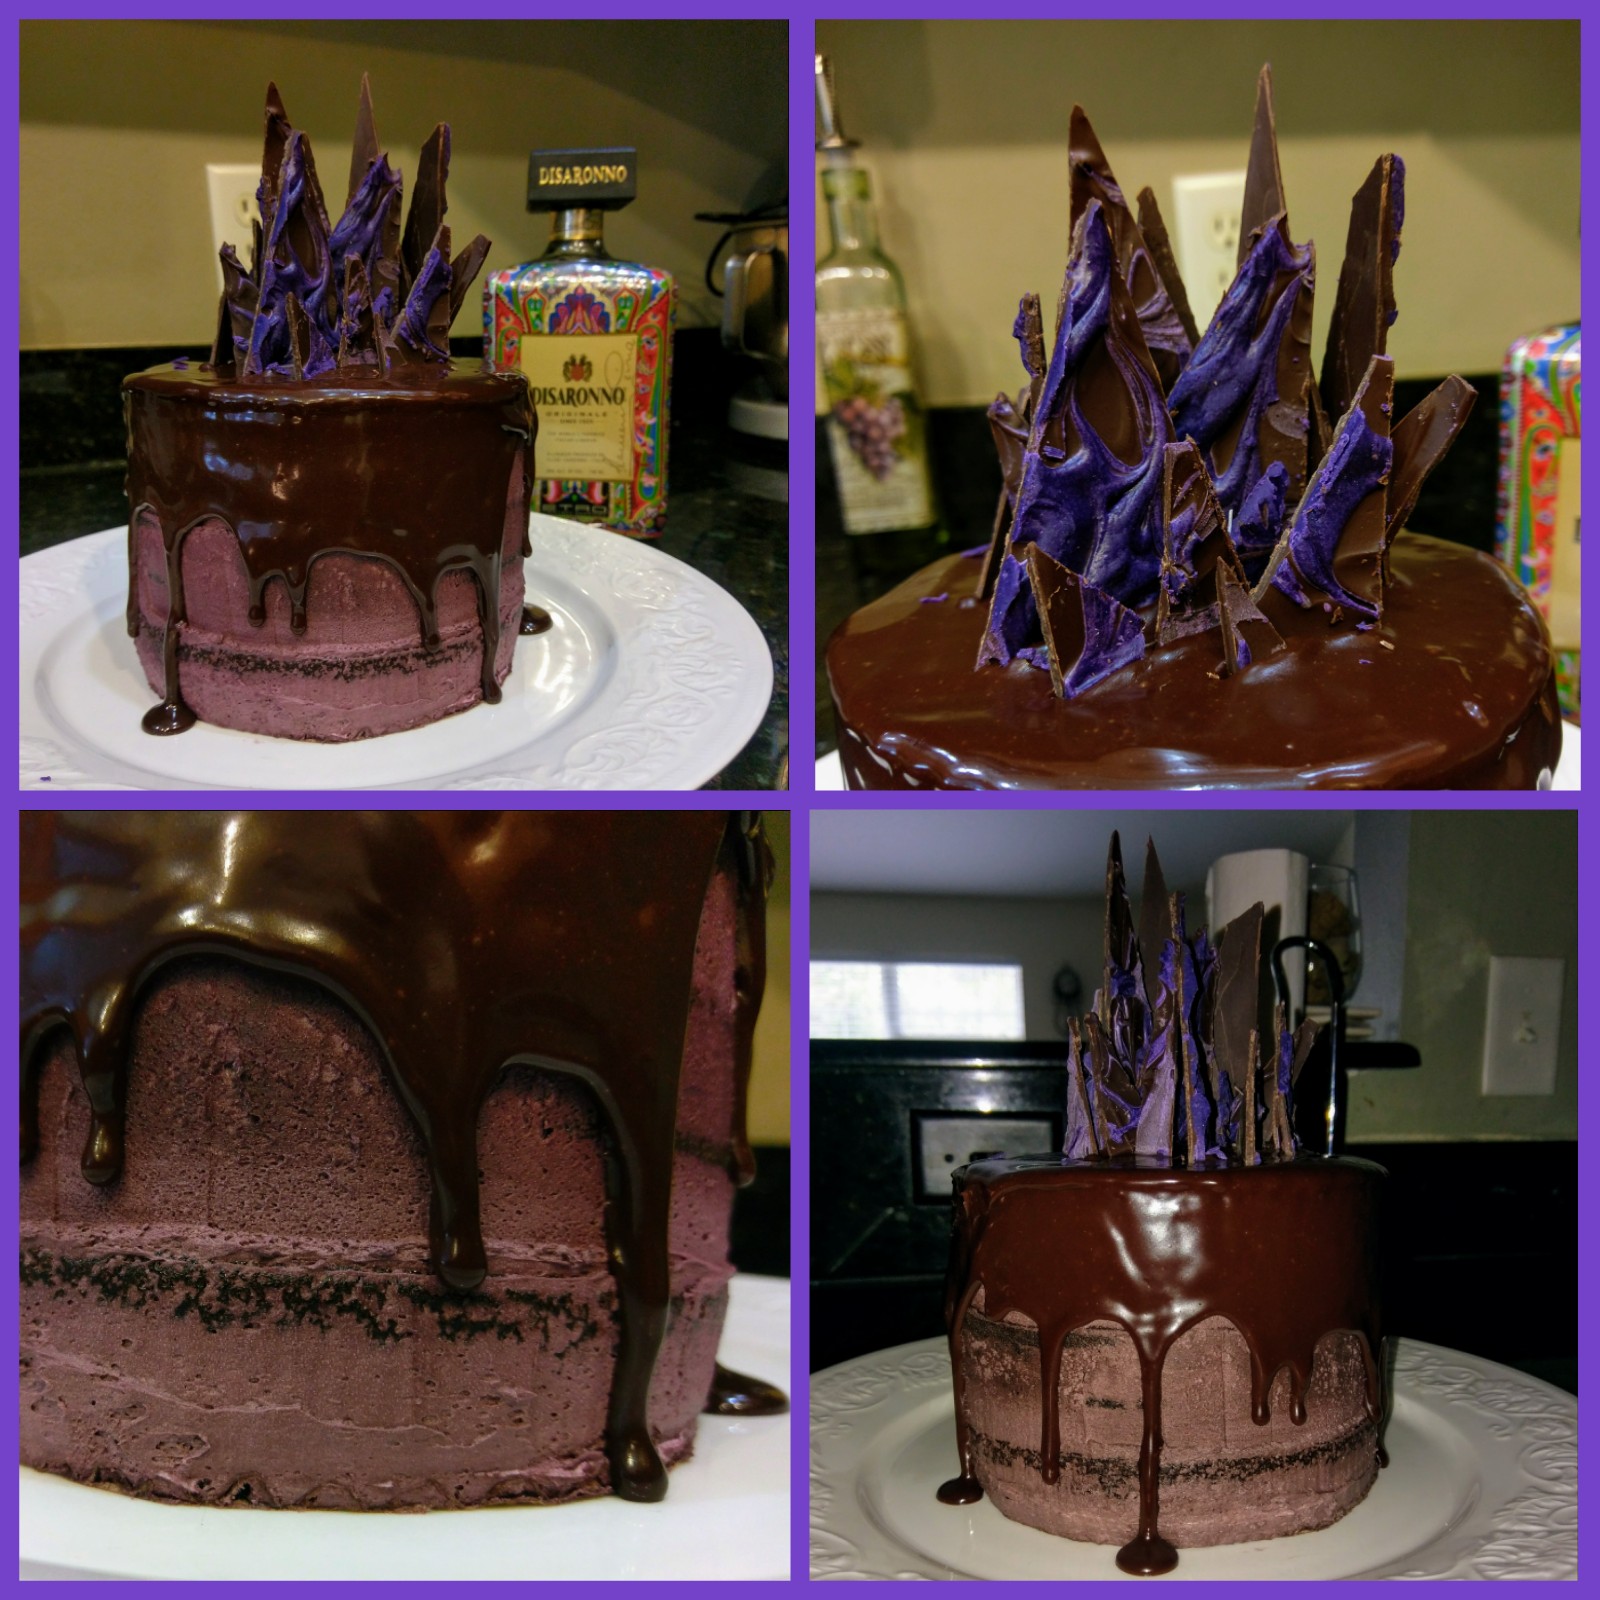
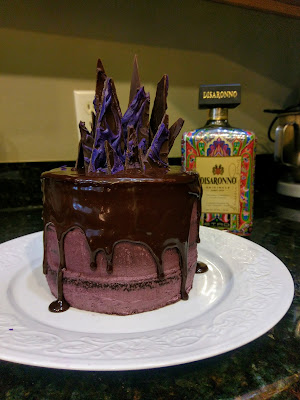
We just spent a wonderful weekend with my parents to celebrate my mom’s birthday. We took them to the traveling Cirque du Soleil show, Crystal, yesterday. I was in absolute awe of the talent and performance of the entire cast, while simultaneously being very much so aware of the fact that I have difficulty communicating with my left foot what my right foot is doing at the same time. I may never be able to perform acrobatics while suspended from the air (or the ground) or be able to complete a triple axle on ice (or even in my imagination), but what I can do is bake and decorate cakes so good they’ll leave you speechless. I may be a little sad that as a baker no one ever gives me a standing ovation for my creation/performance, but I’m also extremely introverted and turn into a statue when a group of more than 5 people are paying attention to me directly, so I suppose it’s all for the best. But I knew I had to make my mom a birthday cake fit for the Queen of Halloween and the woman who spent countless hours always ensuring my birthday cakes were absolutely perfect. I am fortunate that both her creativity and attention to detail were passed on to me, as well as that flair for the dramatic where Halloween is concerned. This meant my cake needed to be as scrumptious as it was spooky, and I thought it the perfect chance to test out two styles I’ve been dying to use: a semi-naked cake oozing with ganache dripping down the sides.
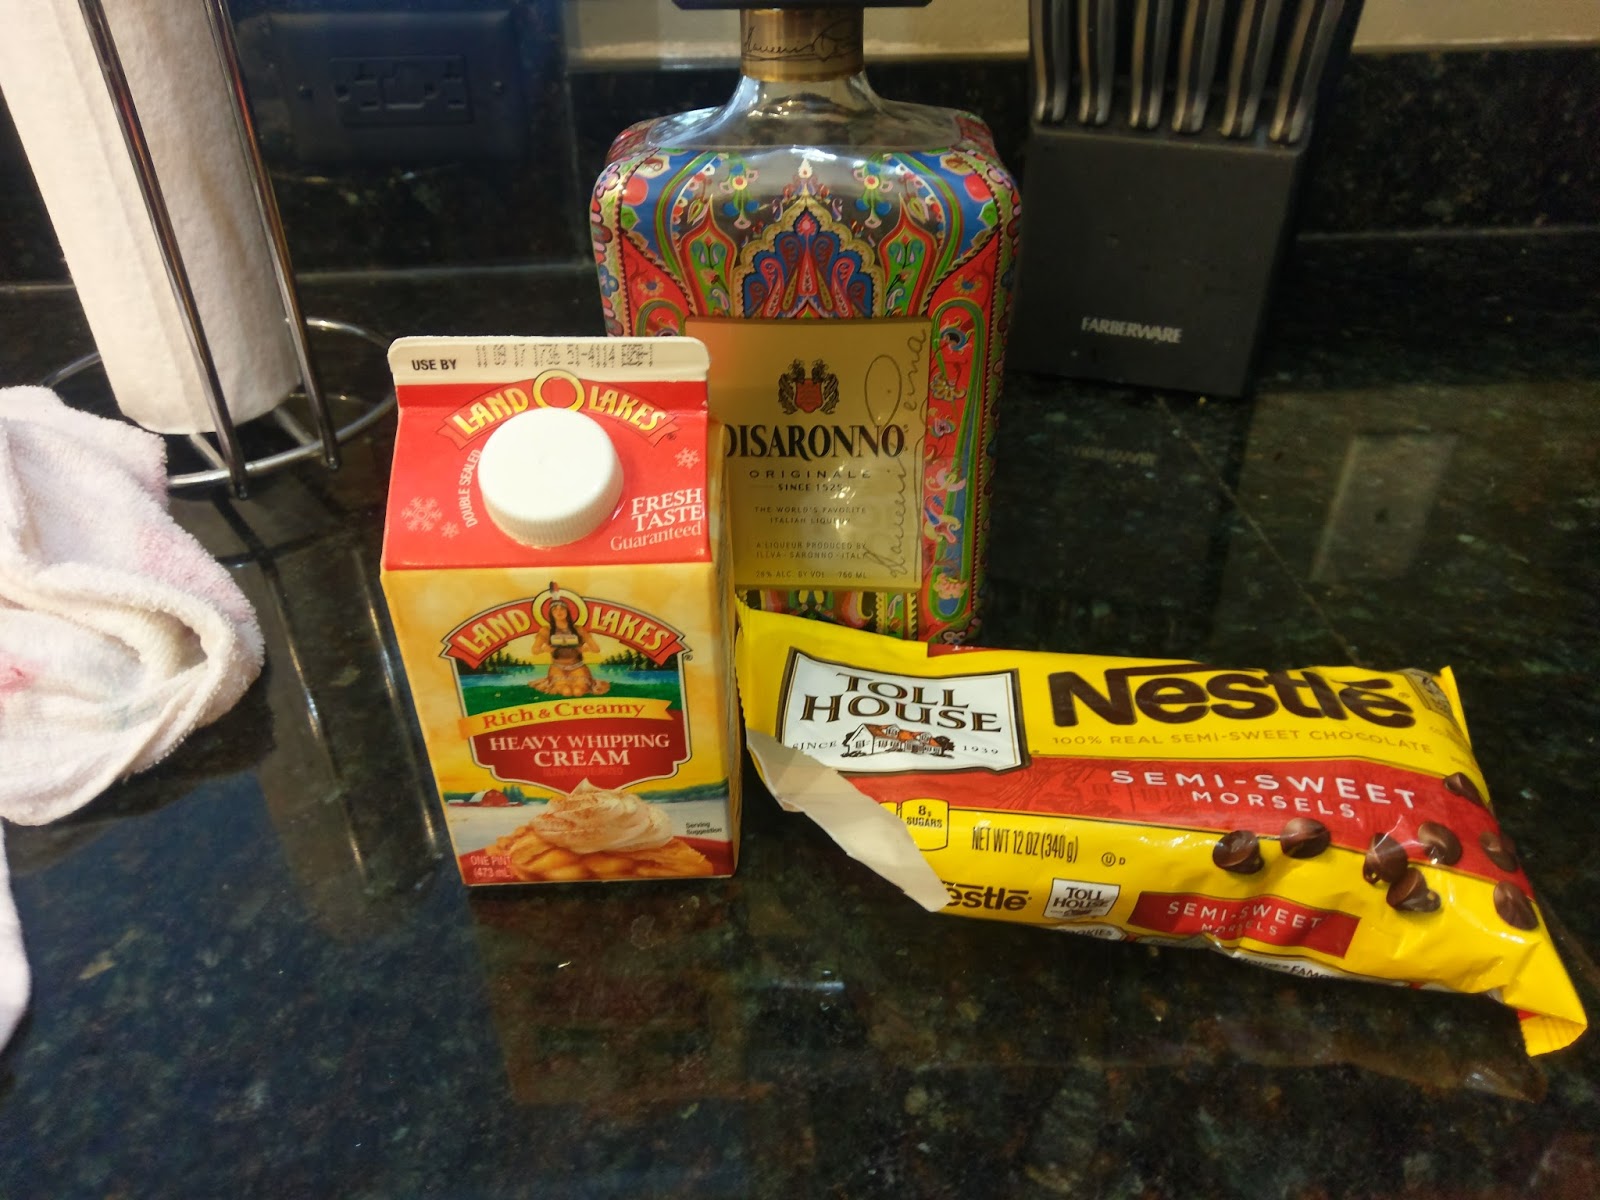
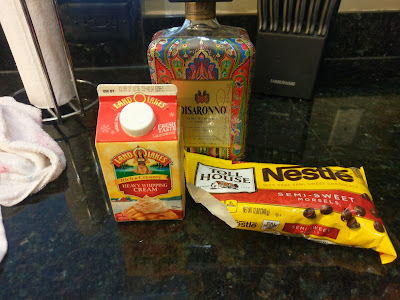
I was also pretty stoked to make my own swirled chocolate bark. This is a variation of my dark chocolate cake recipe with a chocolate amaretto buttercream frosting, a chocolate amaretto ganache, and swirled chocolate bark. It was gothic but chic and delectable while full of Disaronno. For those of you looking for calorie content, I will say that this 3-tier, 6-inch cake yields 12 servings at about 312 calories a serving, and that does include all of the full-sugary goodness that is buttercream frosting. I ended up barely using any frosting save for in between layers, and I used less than half of the ganache I made, so this helped. Knowing I have a large Tupperware full of amaretto buttercream in my freezer is both tempting and terrifying, but I’ll find another use for it (read: will eat it by the spoonful when I’m bored). I was actually able to cut a veritable buttload of calories by trying out what I shall now refer to as Kate’s little helper: Truvia baking blend.

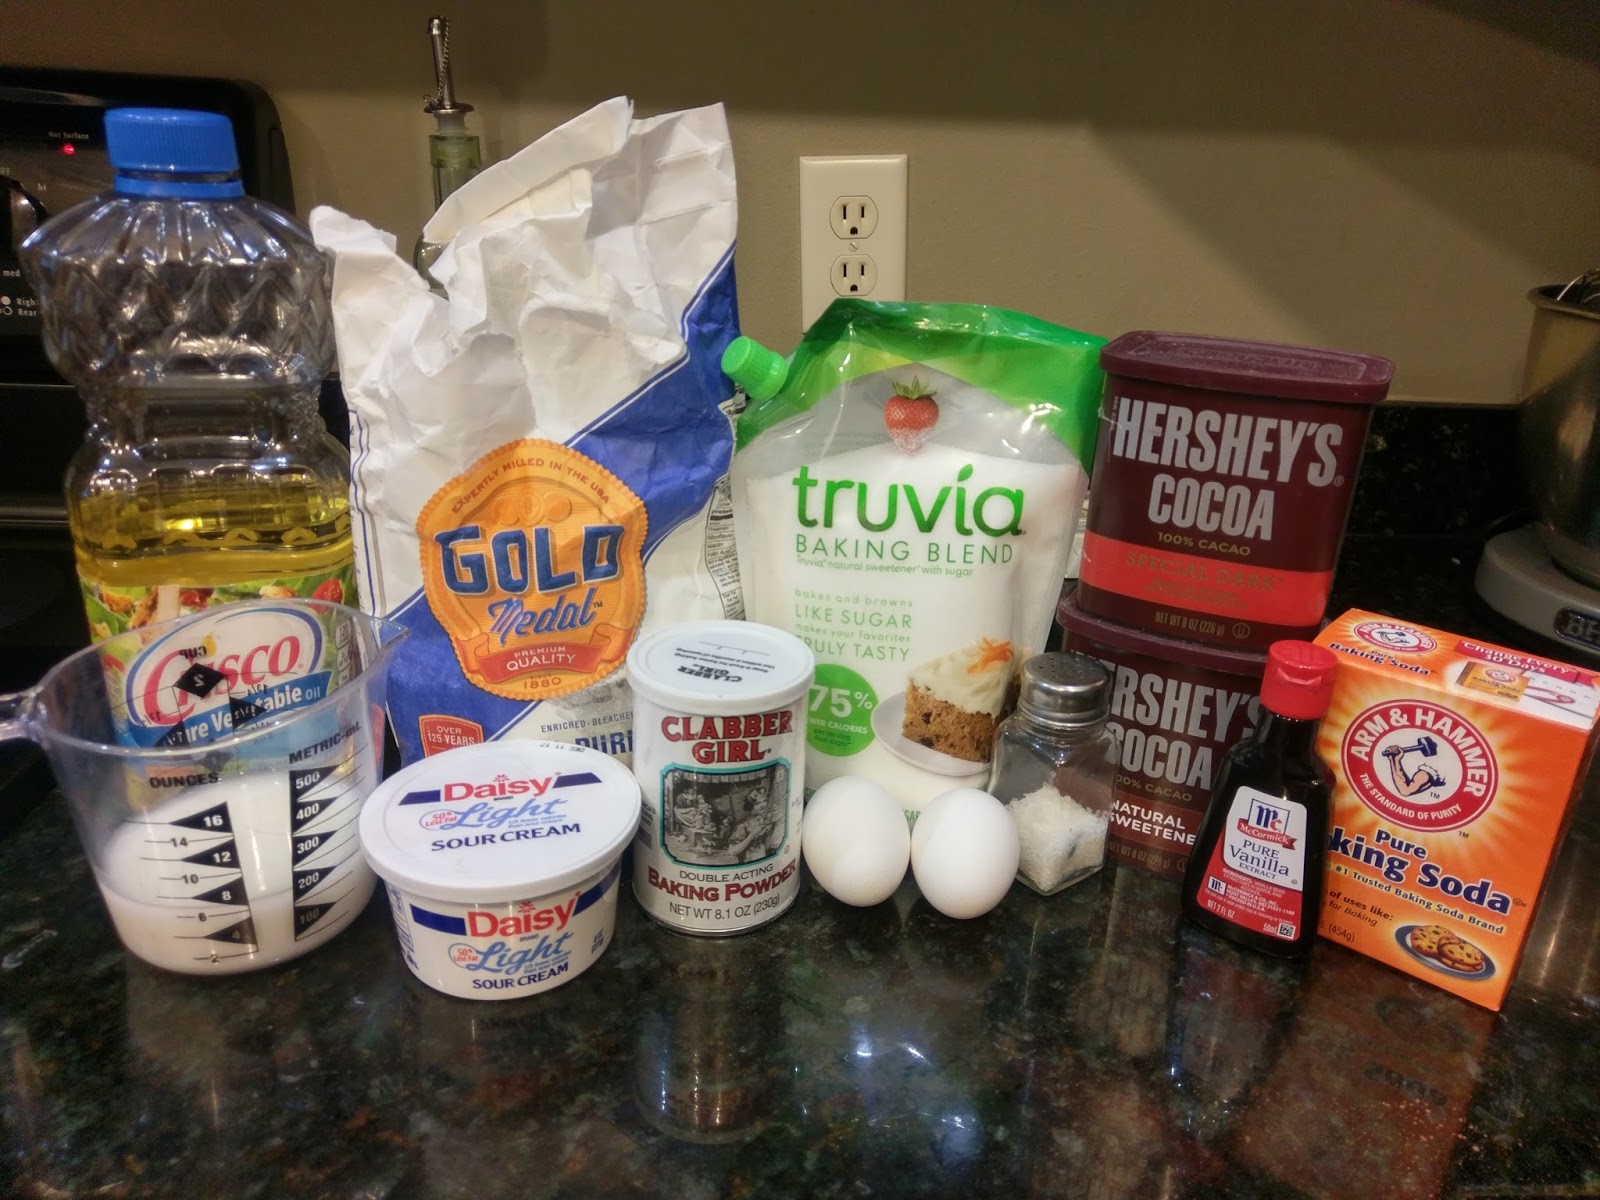
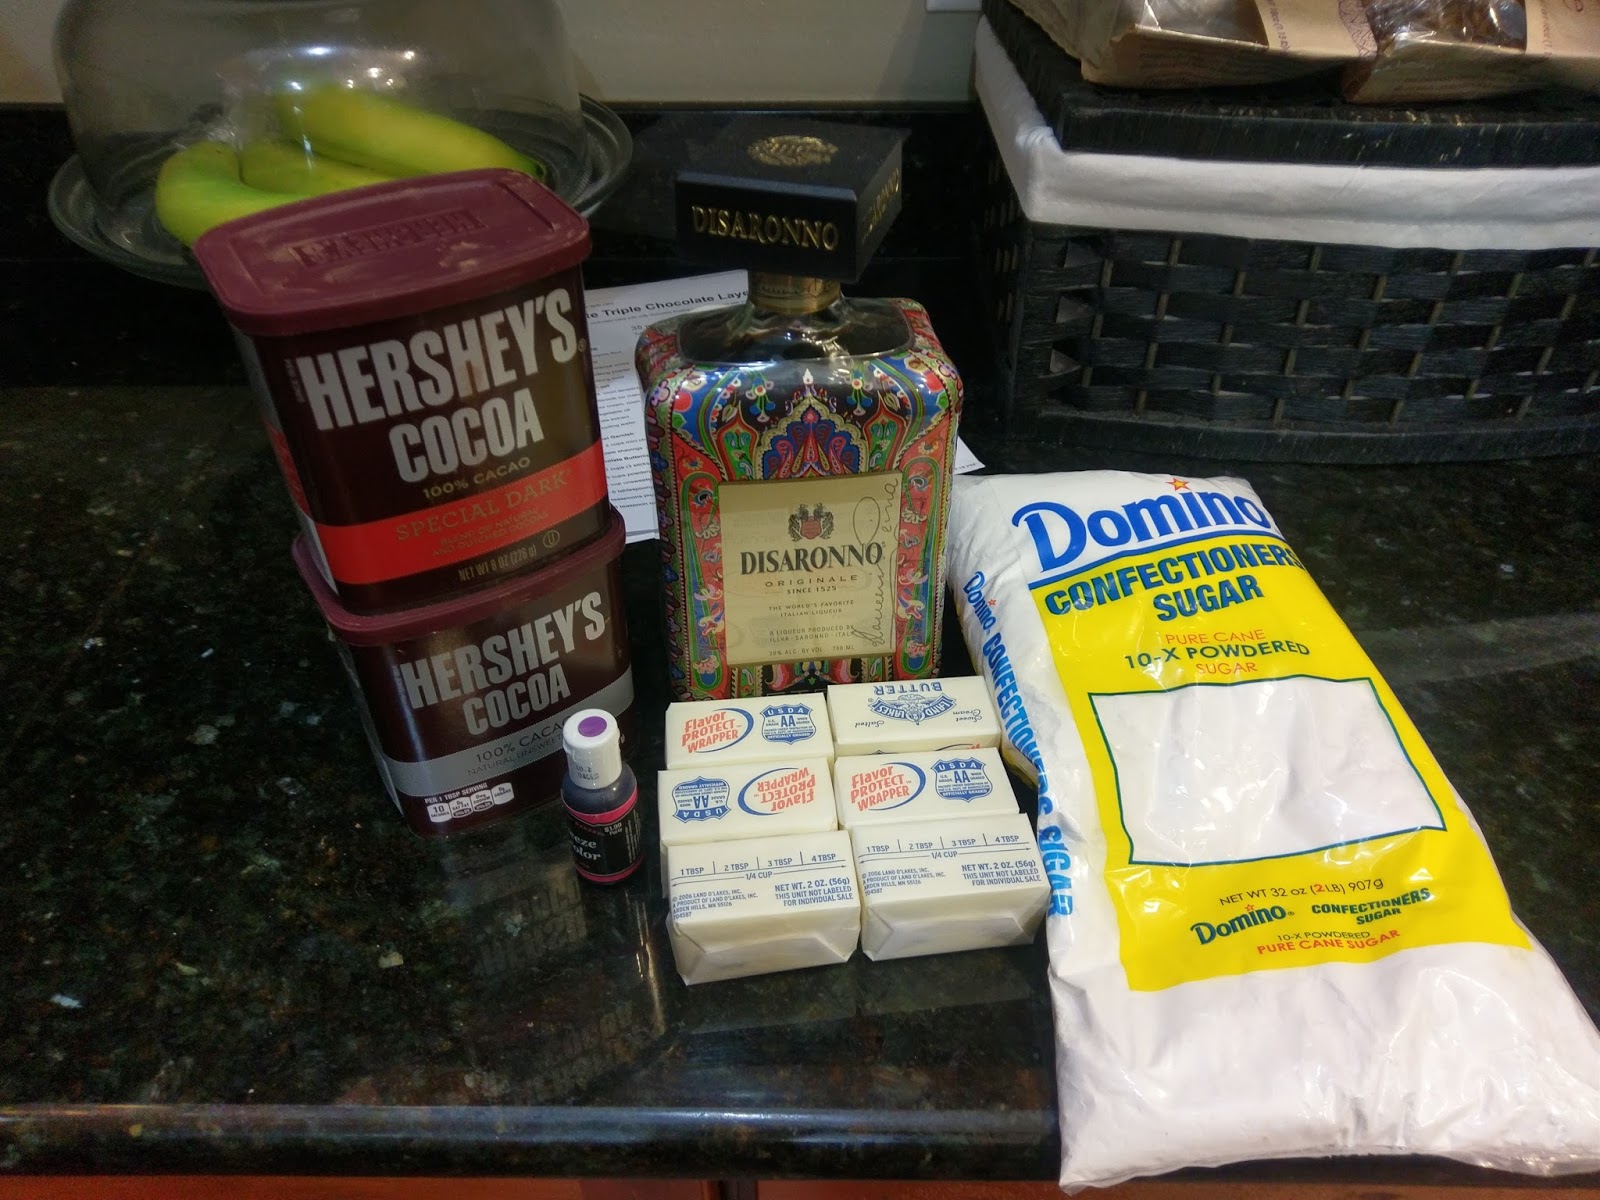
Yes, I used my family as guinea pigs, but I trust their opinions on dessert more than anyone else. I ate a small amount of Truvia baking blend all by itself to make sure it had no weird aftertaste or wouldn’t make me die of dysentery or sadness. It tasted fine, and I am obviously not dead (although I will probably find a way to blog in the afterlife because I am delightfully weird). I will offer you a few tips about using this stuff: you will need to add more baking soda (1/4-1/2 tsp) so that things bake evenly. I did not know this until after I was horribly shocked by how uneven and domed my cakes became in baking (don’t worry, I leveled them and ate the remaining evidence). You also lose some bulk, but since this was a 3-tiered, 6-inch round cake, I didn’t require a ton of bulk to my recipe. If you wanted to yield two 8-inch cakes at full size, swap out some or all of your recipe’s butter for vegetable oil or applesauce instead. Applesauce will make it wayyyy healthier, but sometimes you just need to go calorie crazy to yield a cake worthy of applause (I’m still angling for the standing ovation). To make this version of my dark chocolate cake, gather:- 1 3/4 cups all-purpose flour
- 3/4 cup + 2 TBS Truvia baking blend
- 1/4 cup Hershey’s dark cocoa powder
- 1/2 cup Hershey’s regular cocoa powder
- 2 1/2 teaspoons baking powder
- 1 teaspoon baking soda
- 1/4 teaspoon salt
- 2 eggs at room temp
- 3/4 cup buttermilk at room temp
- 1/4 cup sour cream at room temp
- 1/3 cup vegetable oil
- 2 tsp vanilla extract
- 3/4 cup boiling water
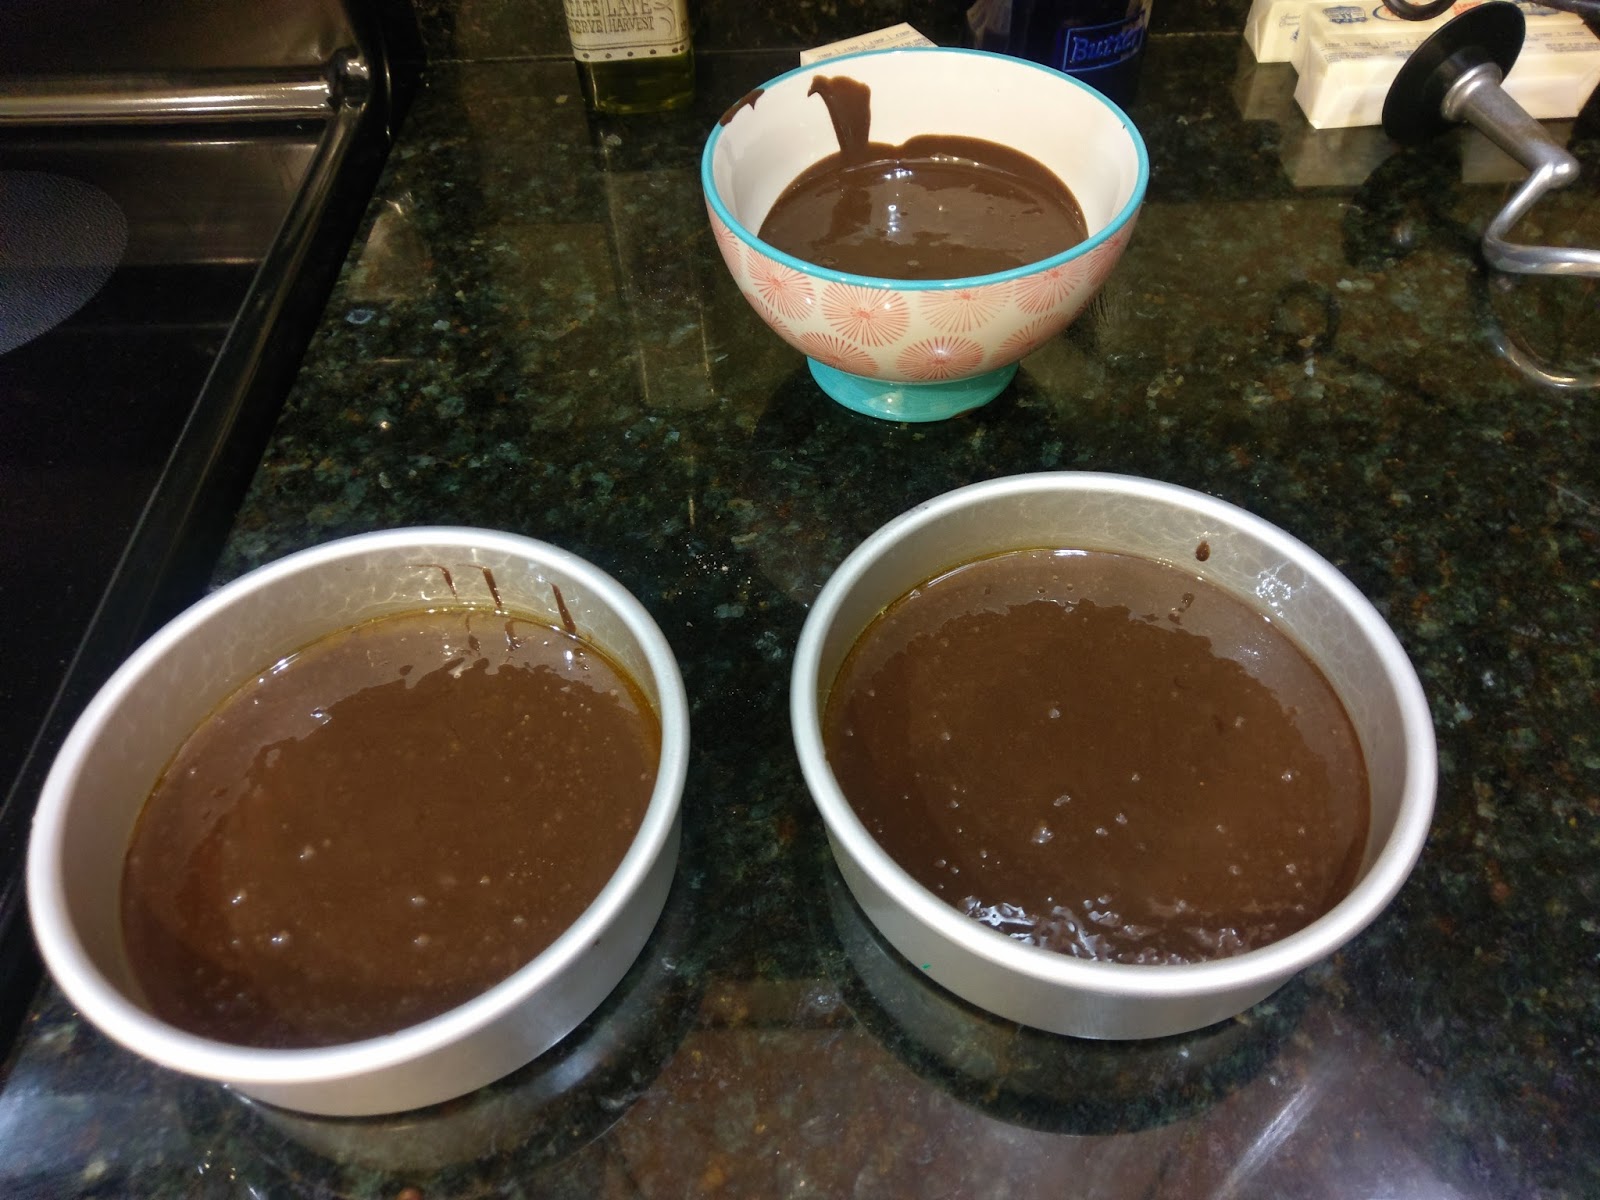
Super important that your buttermilk, eggs, and sour cream are at room temp so they don’t cook and curdle respectively when you add boiling water to them later. Start by preheating your oven to 350 and greasing three 6-inch pans. I only had two, so I had to bake my last layer after I was done using my pans the first time around.

It was very hard not to eat the batter from the cake layer that got left behind. Mix together the flour, Truvia, cocoa powders, baking powder, baking soda, and salt on low in your stand mixer until blended. Then add your eggs, buttermilk, sour cream, vegetable oil, and vanilla extract. Blend on medium-high for about two minutes, until things have come together nicely. While this is mixing, boil 3/4 cup of water. Turn your mixer off and add the boiling water. Blend slowly and carefully until fully mixed. I turned out about a cup and a half of batter into each prepared pan and baked for 35 minutes.

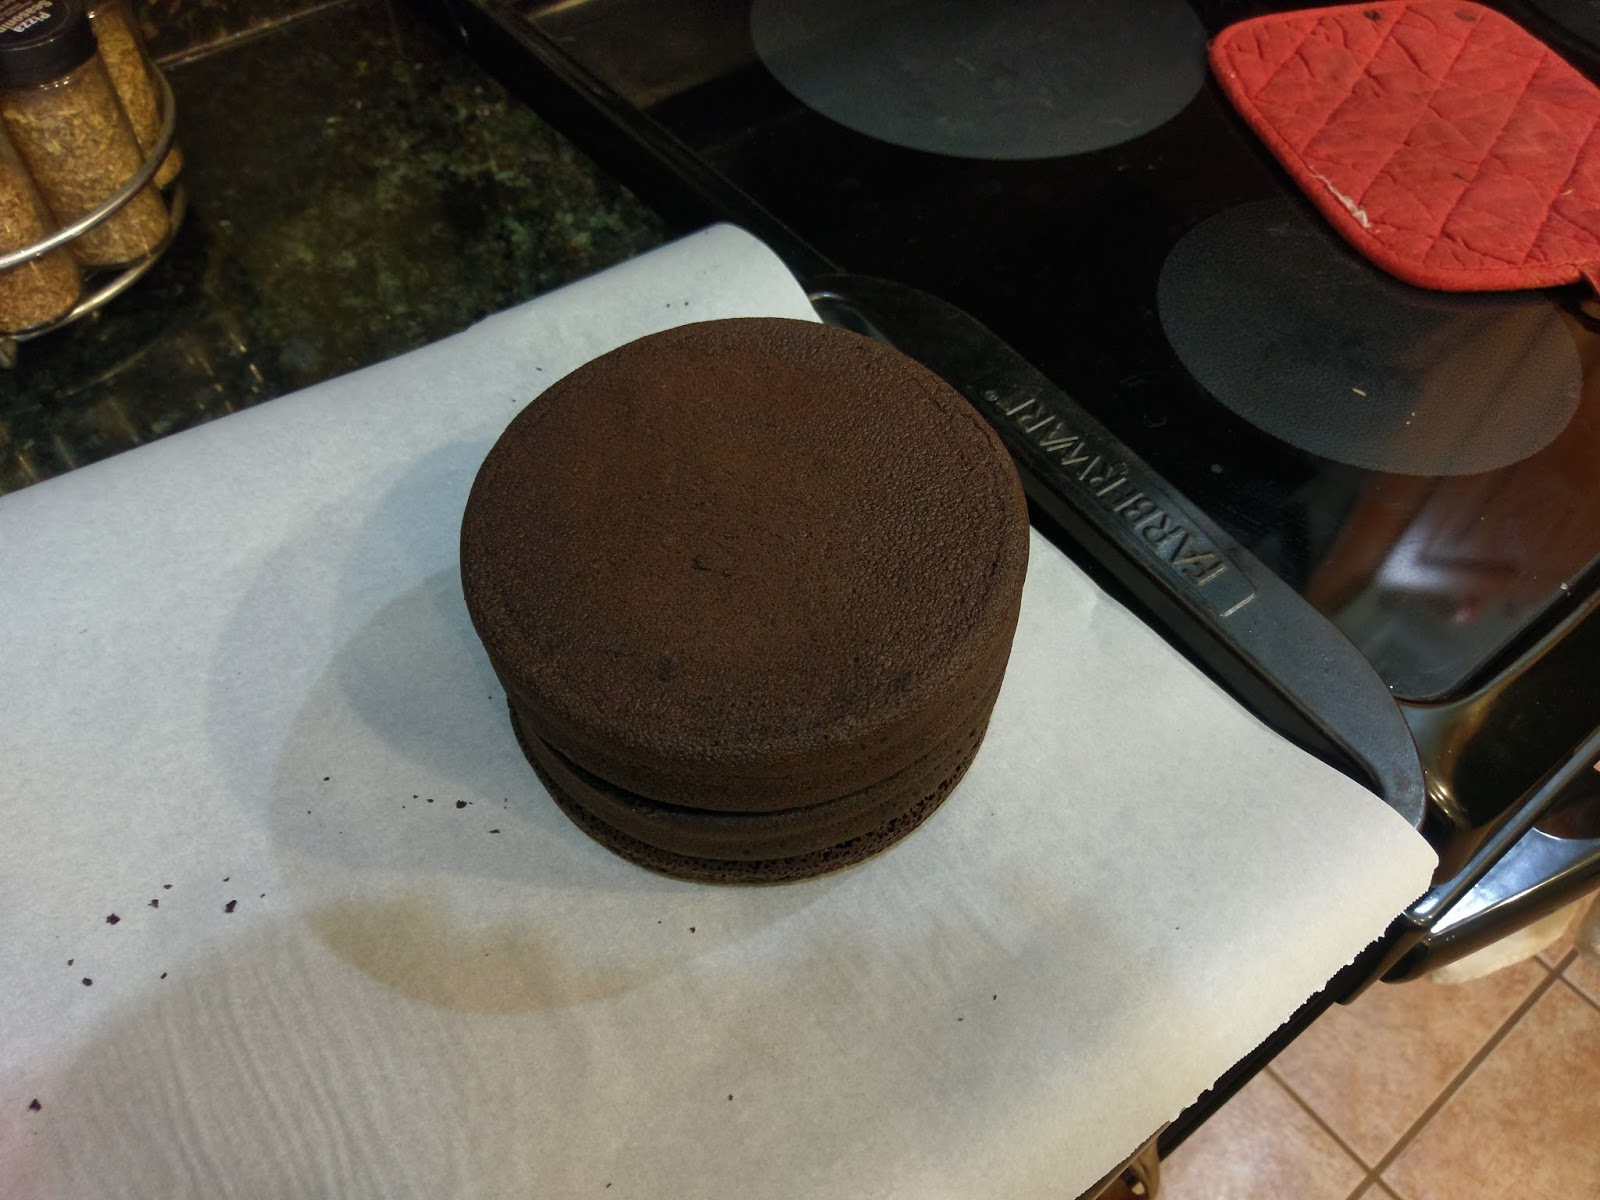
Not pictured: the evidence I ate. Let your cakes cool in the pan for 10 minutes and then remove to a cooling rack to finish cooling. If you have uneven tops, wait until your cakes are mostly cooled and then use a cake leveler to even out the tops of your cakes. You want each layer to sit perfectly on top of one another with a naked cake because all flaws aren’t easily covered by frosting with this technique, so don’t skip on leveling. Once cooled and leveled, wrap in plastic wrap and let freeze overnight or at least for a few hours. Scraping frosting down for the naked cake technique is hard on your cake, so you want it to be a dense cake recipe (a.k.a., no box mixes need apply) and you want it to be mostly frozen (like my demeanor).
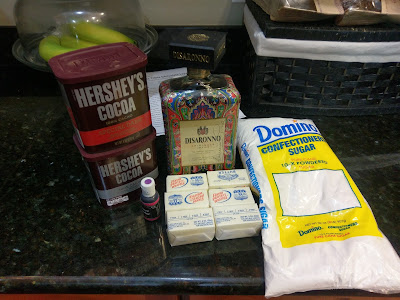
Yes, I have a holiday bottle of Disaronno that has lasted since before Christmas 2016. Disaronno is my beverage of choice when I run out of wine. But since I never run out of wine (the horror), this stuff tends to last me for the better part of a decade. I did a lot of adding and experimenting with this frosting, so keep in mind what I used, you only need about 1/4-1/3 of for a semi-naked cake. If you’re frosting a full 2-tier 8-inch or 9-inch cake, you will need about the full recipe (with several spoonfuls leftover for “taste testing”):
- 1 1/2 cups of butter at room temp
- 1/4 cup Hershey’s dark cocoa powder
- 1/2 cup Hershey’s regular cocoa powder
- 6 cups of powdered sugar
- 2 teaspoons of vanilla extract (I literally never remember to take a photo of this ingredient)
- 6-8* tablespoons of Disaronno
- Dark purple gel dye
*For a naked cake, you want a thinner consistency frosting that is easier to swipe off the cake, so use more Disaronno. For a thicker frosting you can smooth and pipe with, use less Disaronno.
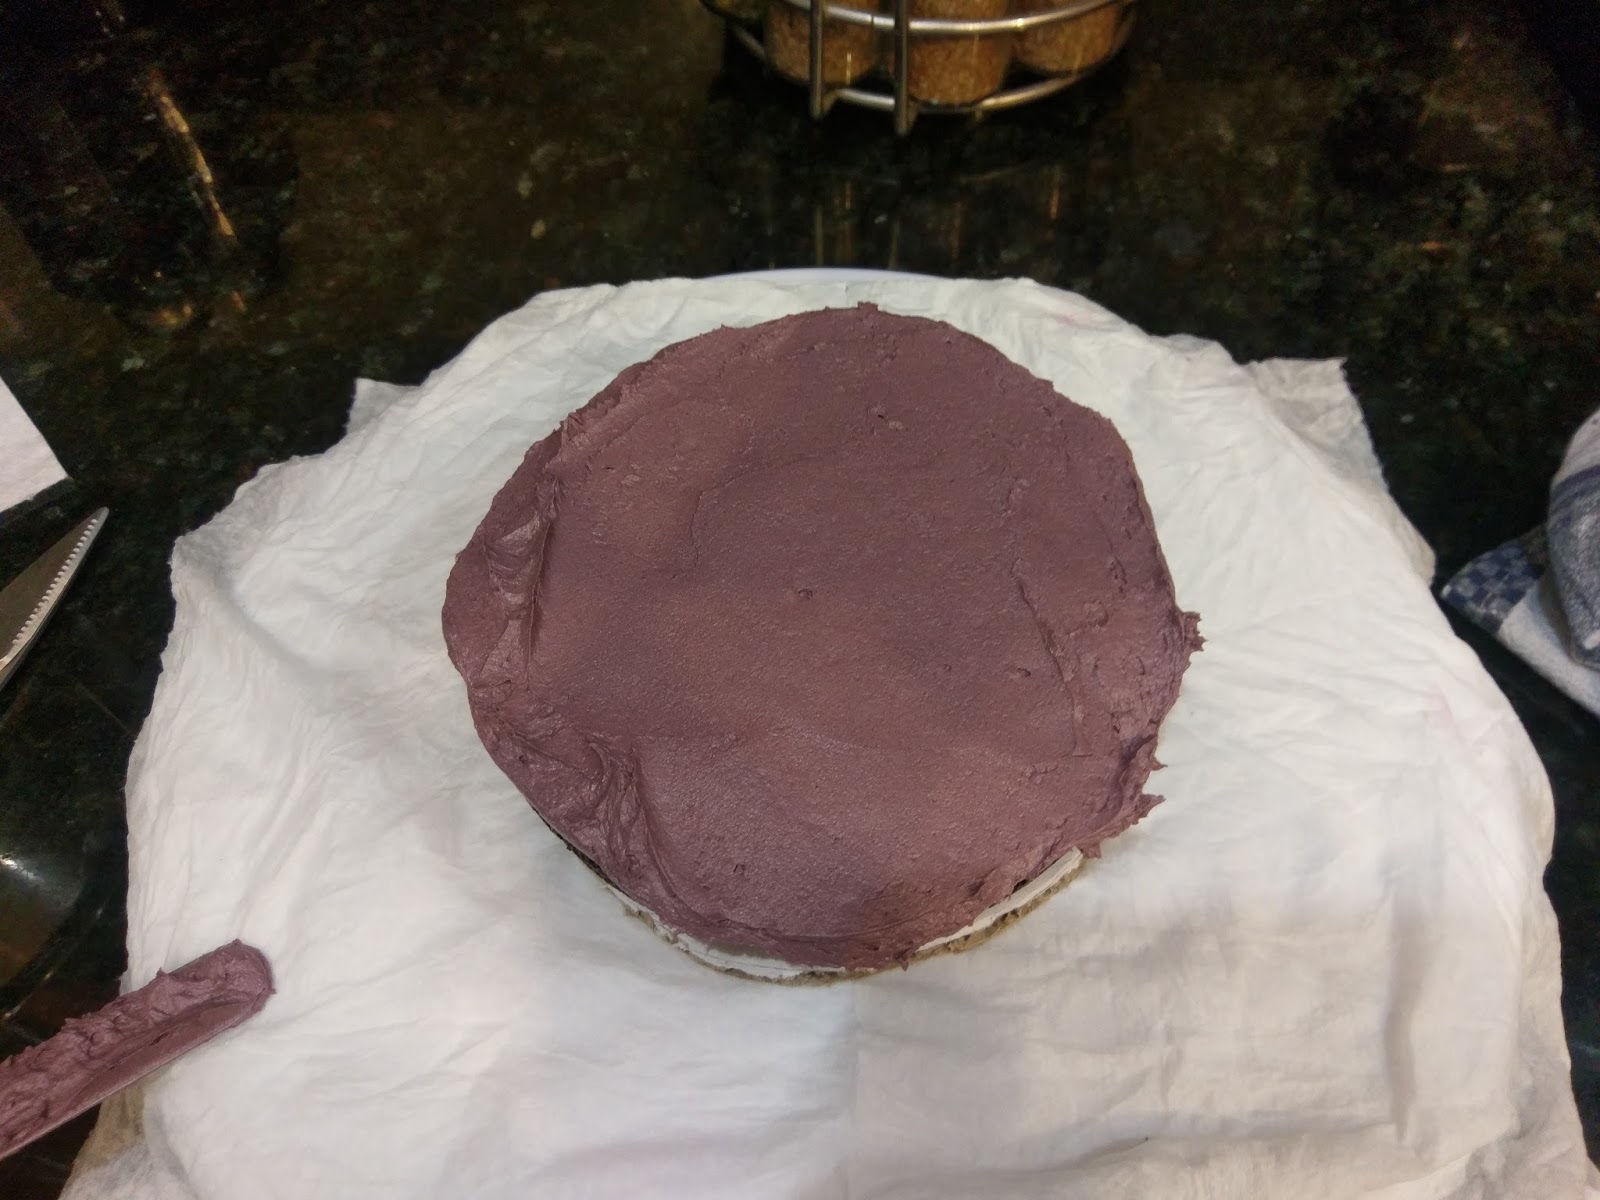
Whip the butter in your stand mixer for a few minutes until fluffy, then add in the cocoa powders, vanilla extract, 2 TBS of Disaronno, and 2 cups of powdered sugar. Blend slowly until mixed, then add in 2 more TBS of Disaronno, 2 more cups of powdered sugar, blend, and repeat this step until you’ve used all the sugar and Disaronno you need for the right consistency of frosting. If you’re dying your frosting (it will be a light brown shade), add in a darker gel dye. I wanted my color to be a chocolate cherry hue, so I used quite a bit of dark purple gel dye to achieve this.
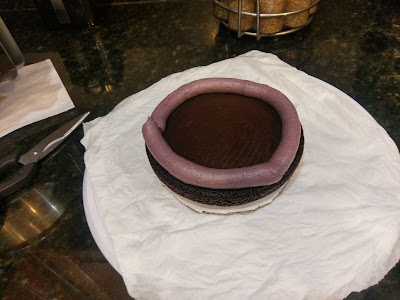
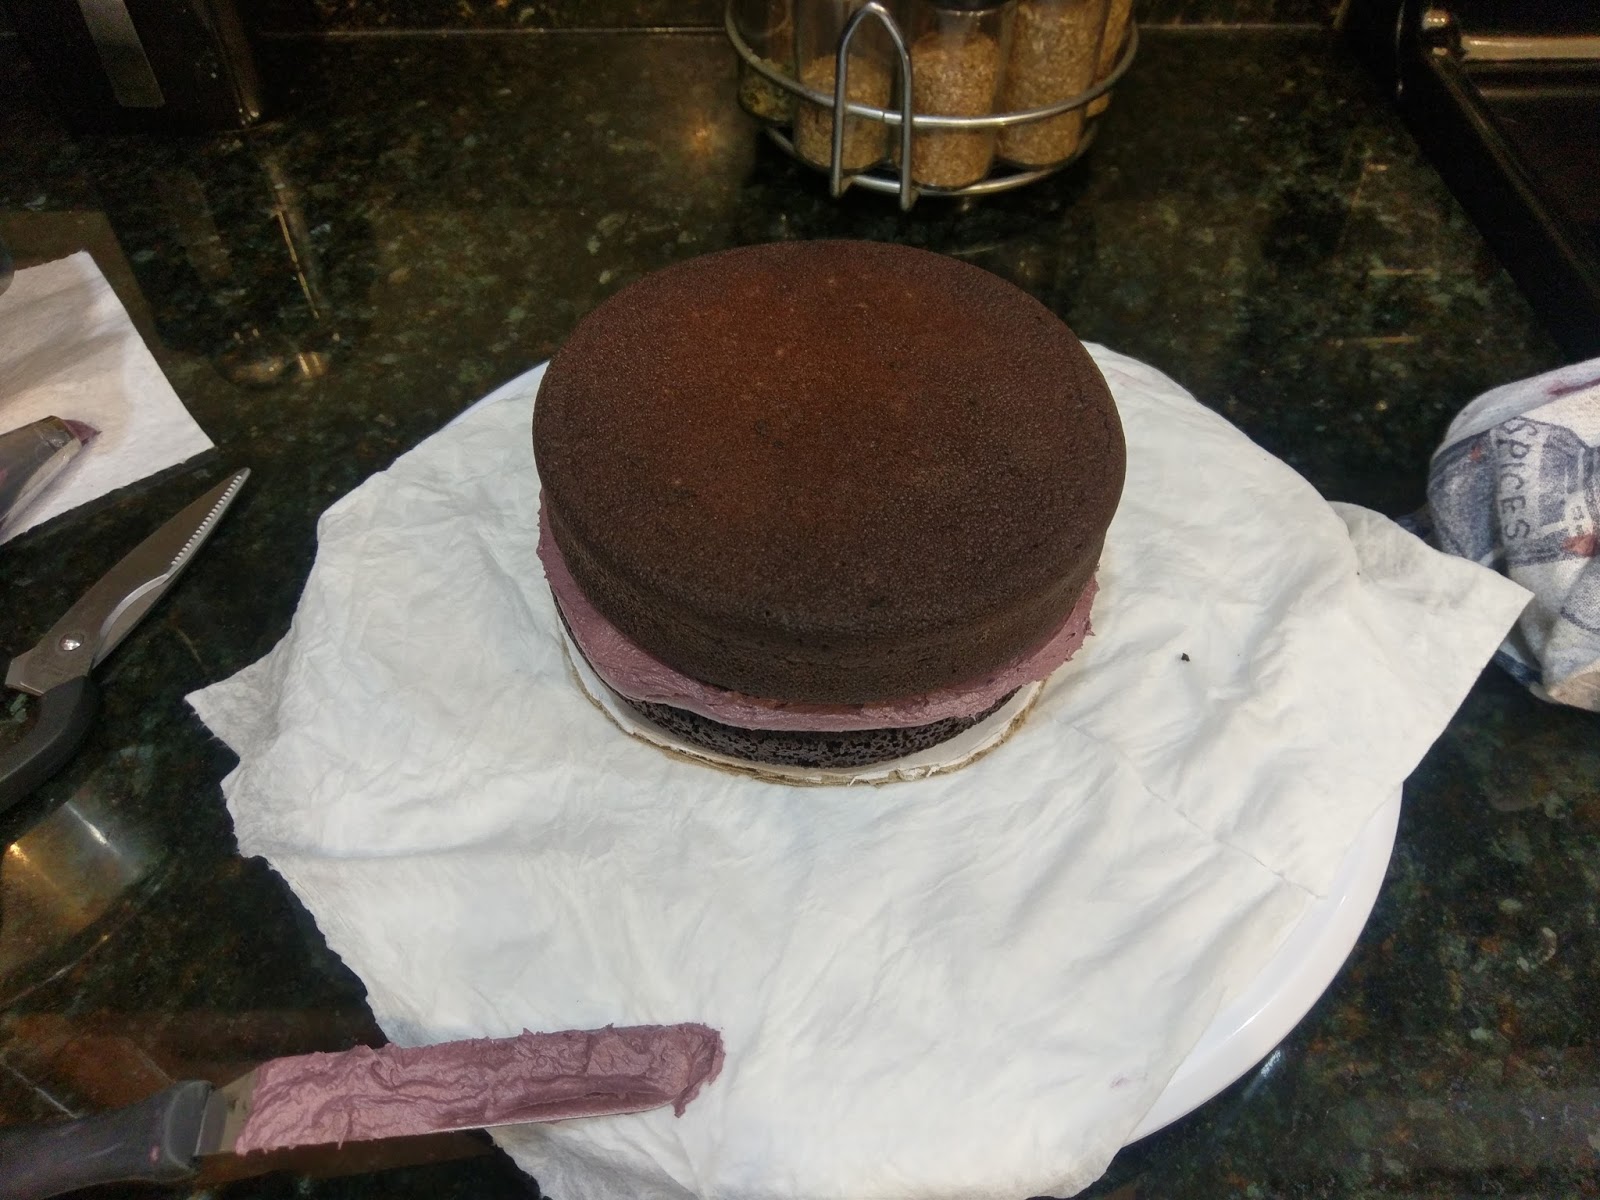
The circle of life. Remove your cakes from the freezer, unwrap, and place the first layer on top of a prepared cake round (place it upside down so the top of the cake is facing the cake board). I always pipe a little frosting on my cake board so my bottom layer stays put. For a naked cake and even layers in between each tier, I used a large round tip (Wilton 1A) and piped a circle around the outer edge of my bottom layer. I then piped inside of this circle and smoothed things out with an angled spatula:
There will be overhang, and this is good. Now, take your next layer, and once again, place it face down on top of your first cake layer:

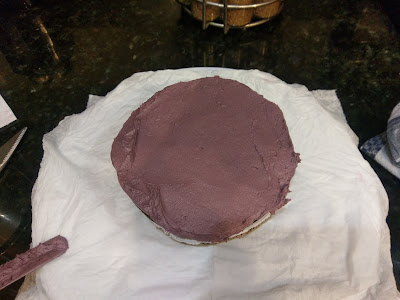
Like a giant, delicious Oreo. By putting your layers upside down, you’re ensuring each layer has an even and flat surface. Remember, much like when you’re naked, it’s pretty difficult to hide flaws sans clothing, and this cake follows that same principle without a lot of frosting to cover it up. Repeat the outer-circle with your piping bag of buttercream, fill it in, and smooth. Then place your final layer (upside down again) on top:
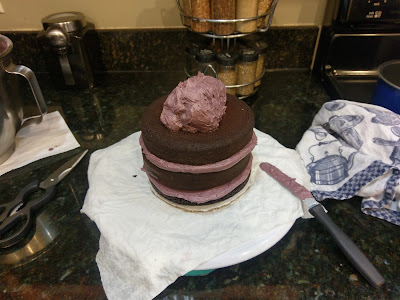
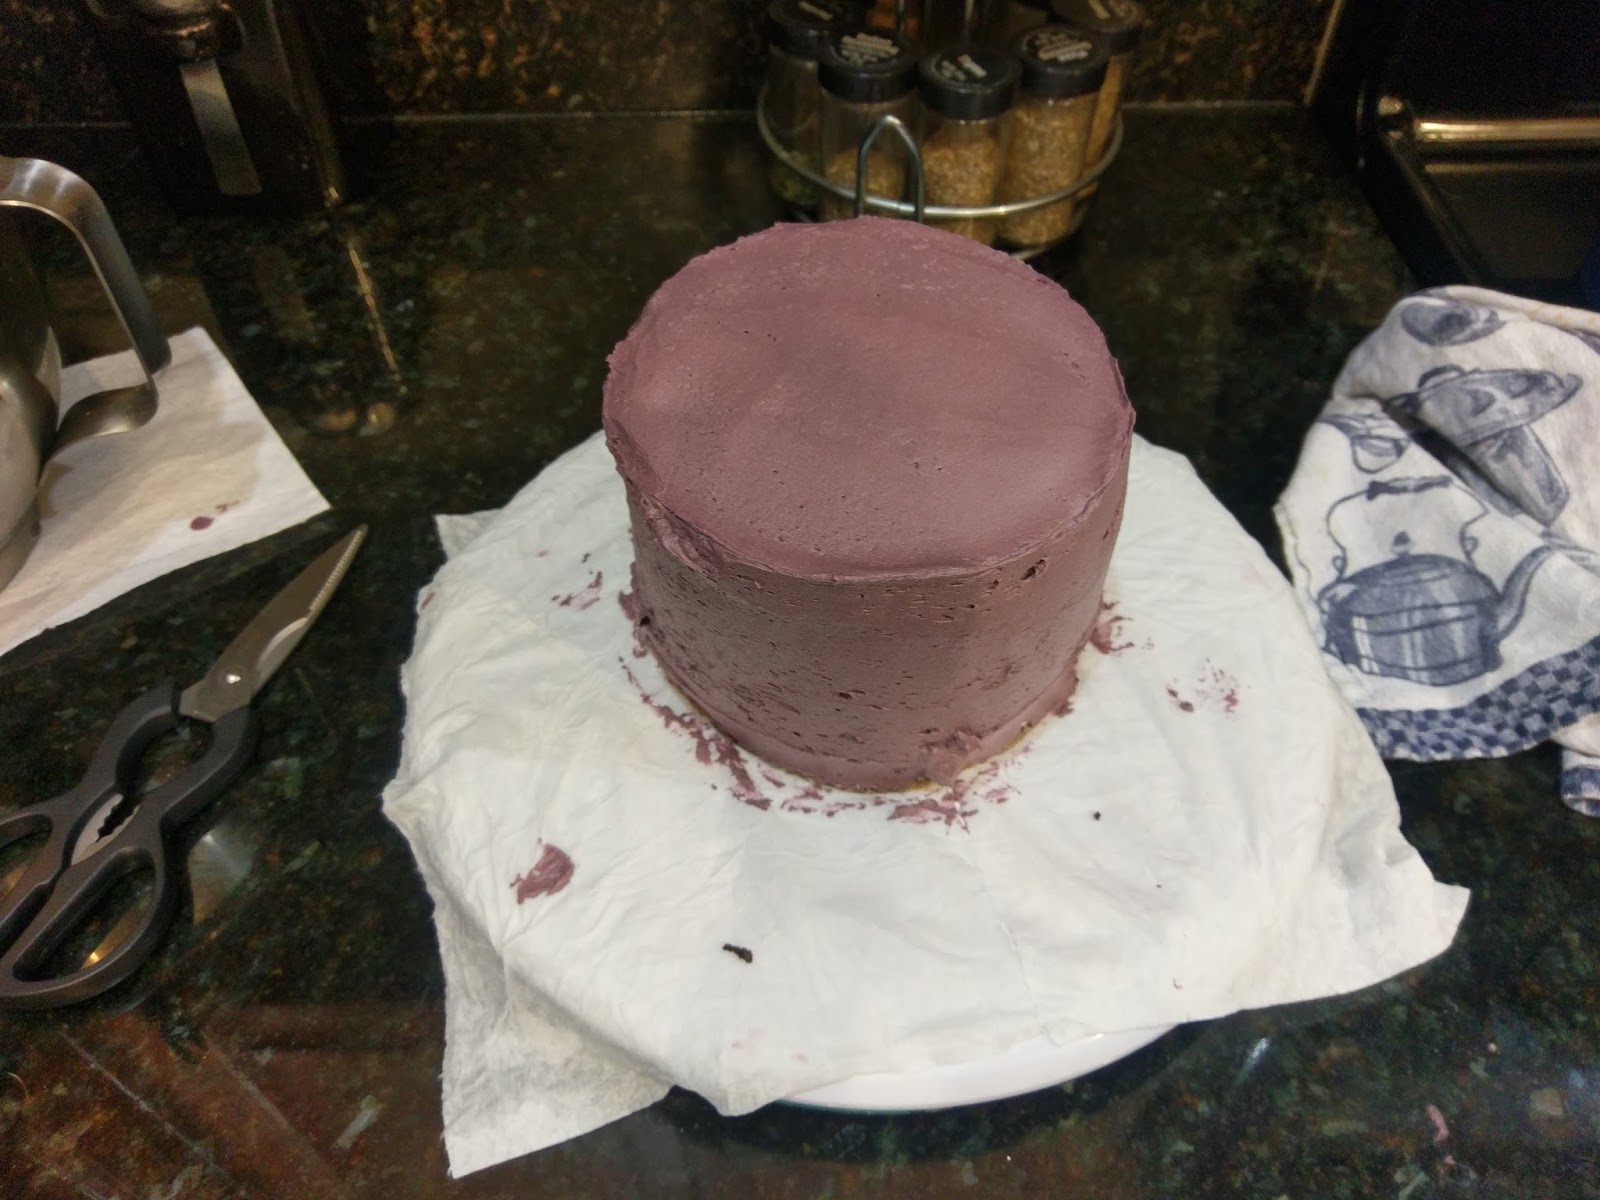
Is a triple-stuffed Oreo a thing yet or should I patent that? Place a large blob of frosting on top of the final layer and smooth out with an angled spatula. You will have lots of overhang, and again, this is good. Take more frosting and spread it in varying thickness all over your cake. It should be pretty much covered for a semi-naked cake. For a mostly naked cake, don’t use as much frosting on the sides.

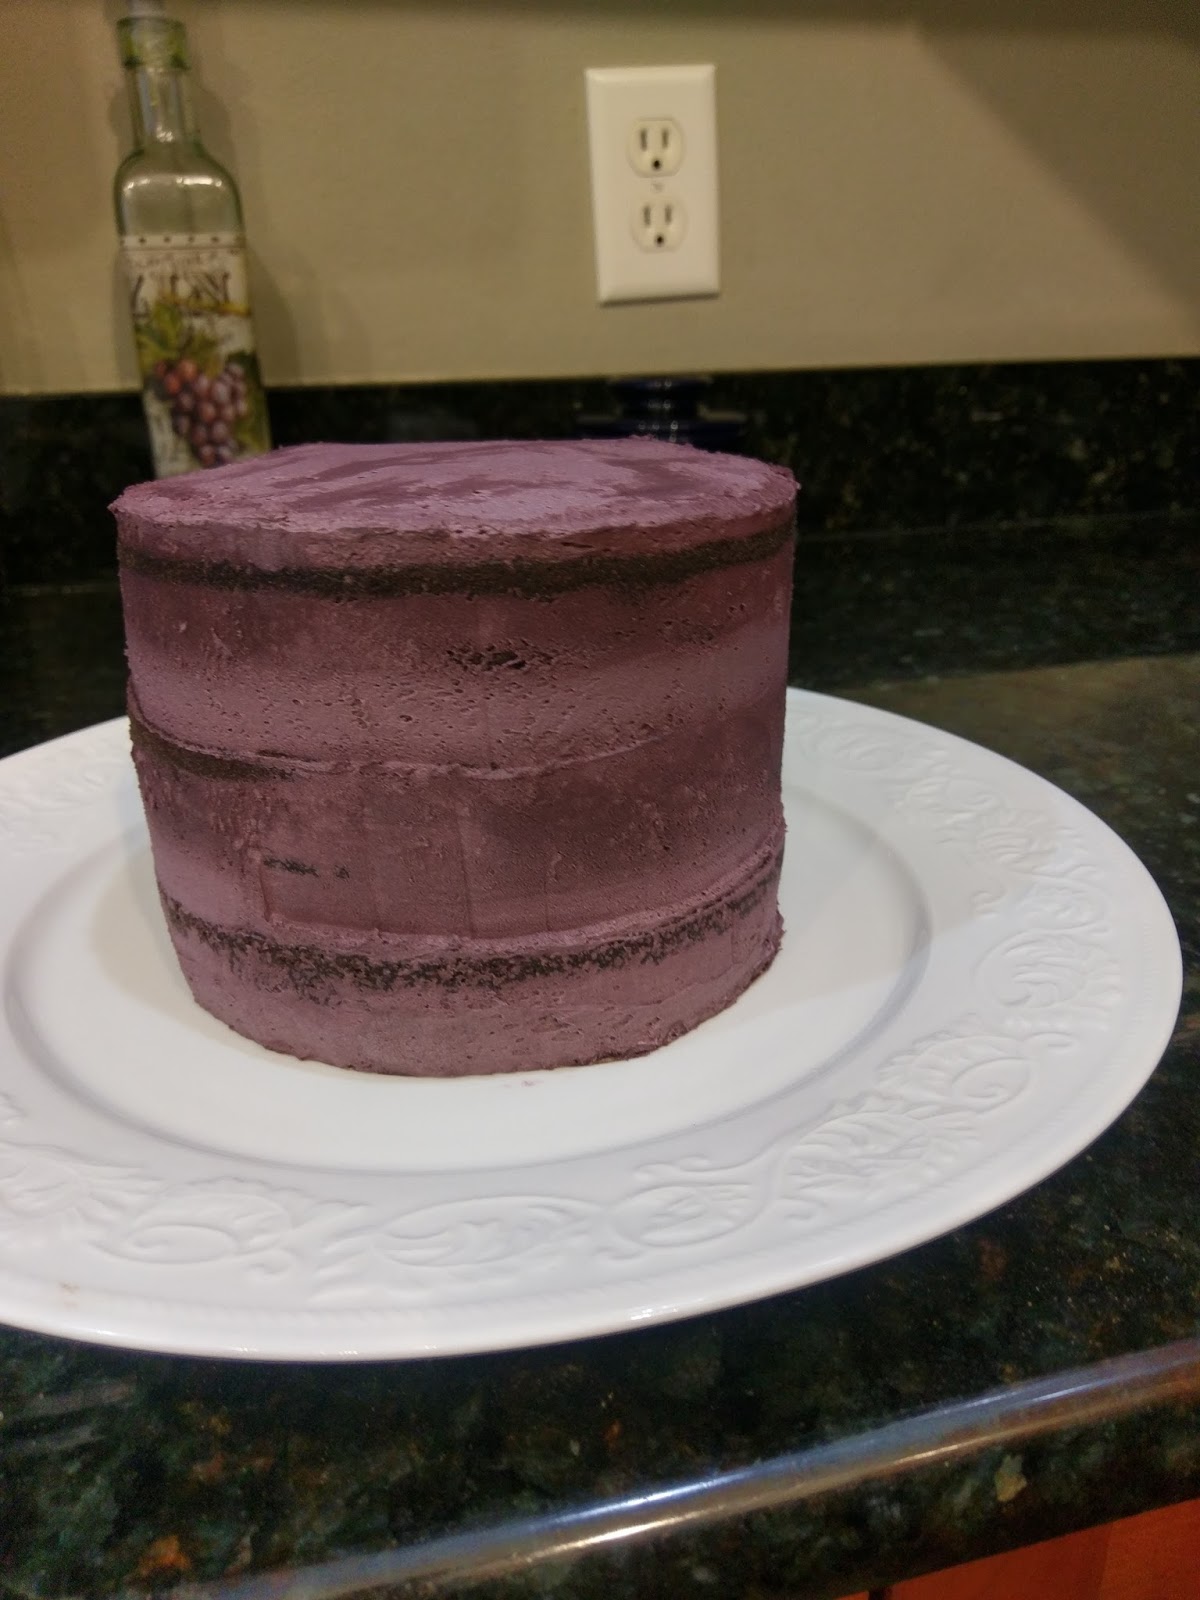
Got a few spots poking through, but this was mostly covered. Now, take a bench scraper and run it around the sides of your cake like this video shows you at the 4:00 minute mark. Clean off your bench scraper after each pass, and continue scraping frosting off the sides of your cake until you have it as naked as you want.
I loved the amount of dark chocolate peeking through here, so I stopped. Do whatever you want with copious amounts of leftover frosting that you’ve scraped off, like eating it with a shovel or using it for another baked good. Use an angled spatula to even out any weirdness you see on the top of your cake after scraping. If you’re ganaching the top of the cake, freeze it for a few hours so your buttercream stays firm. While it’s setting up, you can make your chocolate bark.

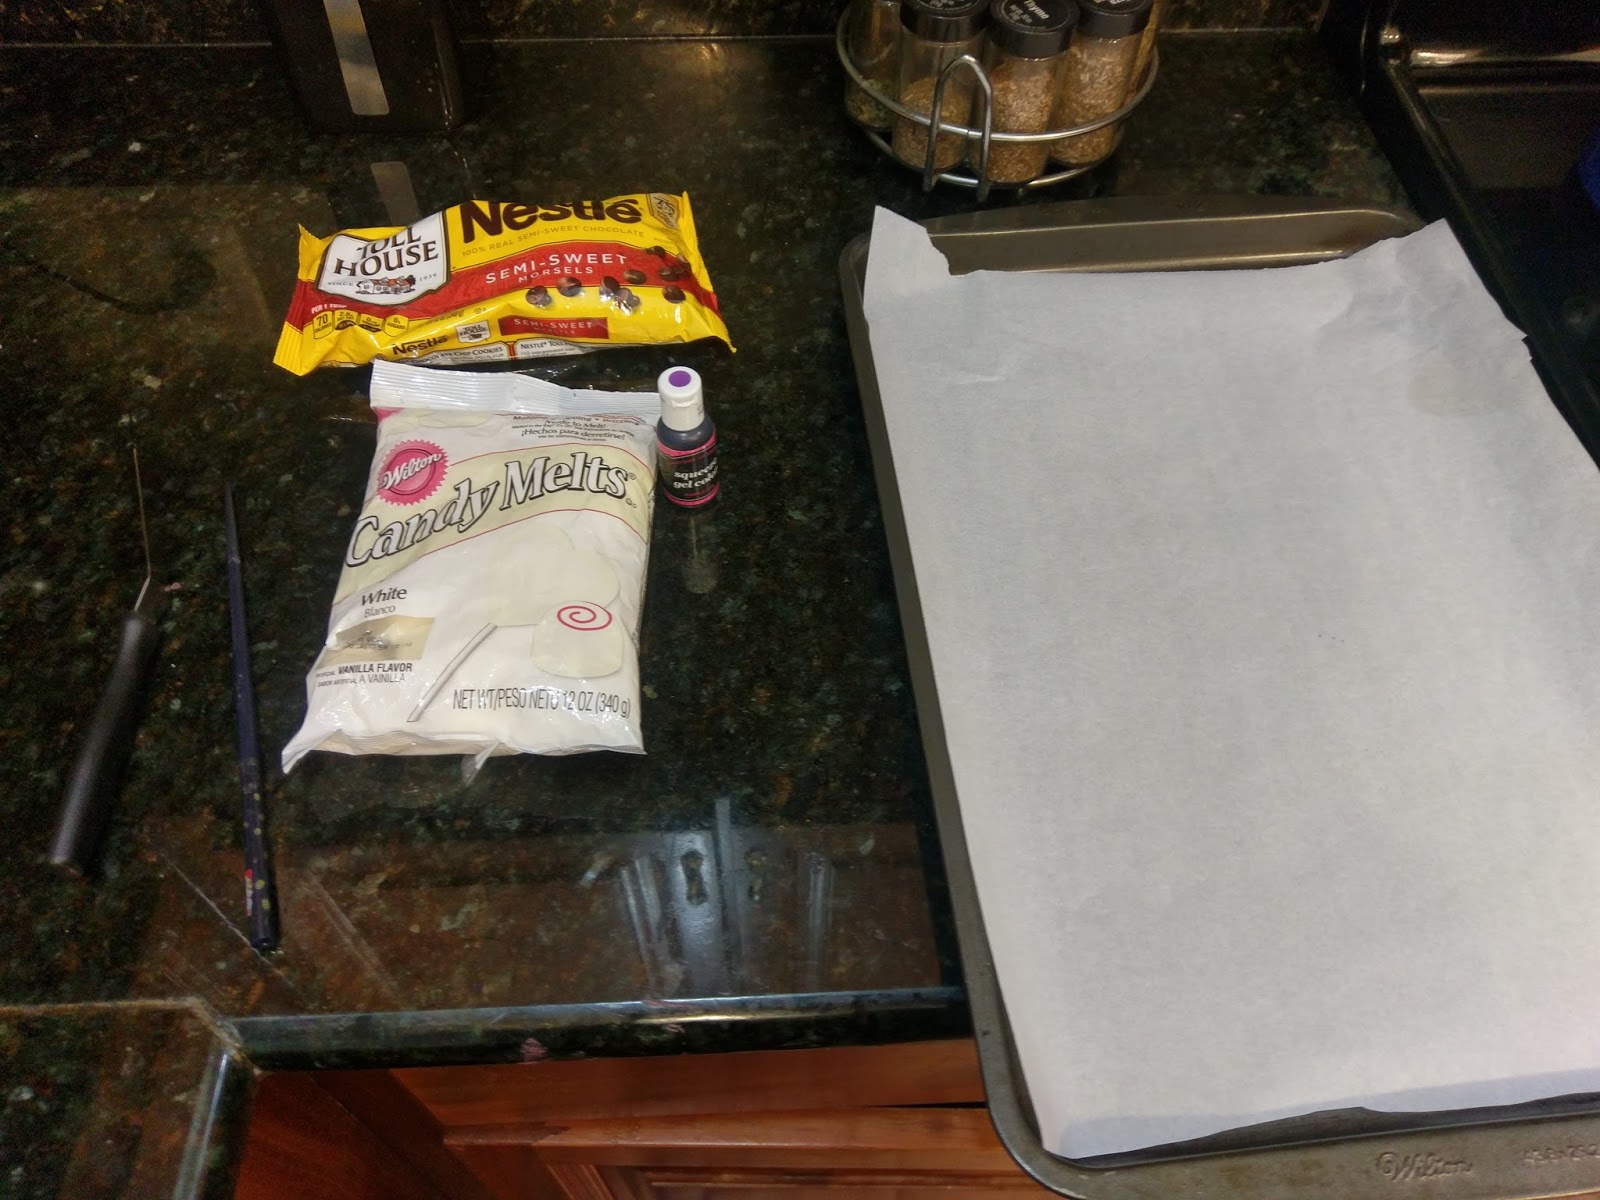
Not pictured: the vegetable oil you will definitely need. Melted chocolate is a fickle nightmare. It seizes up at the slightest sign of moisture, so when you’re trying to dye it a different color, you’re gonna need vegetable oil. I recommend making life easier for yourself by buying chocolate melts in whatever color you want your swirled bark to be. If I had purple chocolate melts, my bark would’ve turned out better because I wouldn’t have spent precious time adding oil into my dyed chocolate to get it smooth again, all the while my dark chocolate was firming up to the point where swirling the two colors together was a small nightmare. The things we do for our mothers… 😉
For the bark:
- 2/3 cup semisweet chocolate chips
- 1/3 cup white chocolate
- Dark purple gel dye
- 1-2 teaspoons of vegetable oil
Place Parchment paper down on a baking tray. Melt your semisweet chips following package directions (usually 30 seconds at a time on 50% power in the microwave, stirring after each time). Using an angled spatula, smooth out the melted chocolate onto the Parchment paper to form a large rectangle:
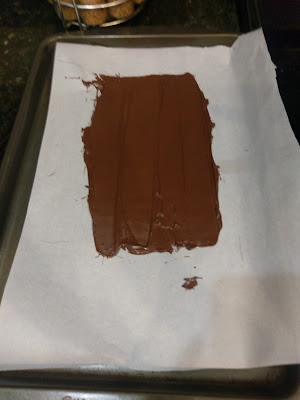
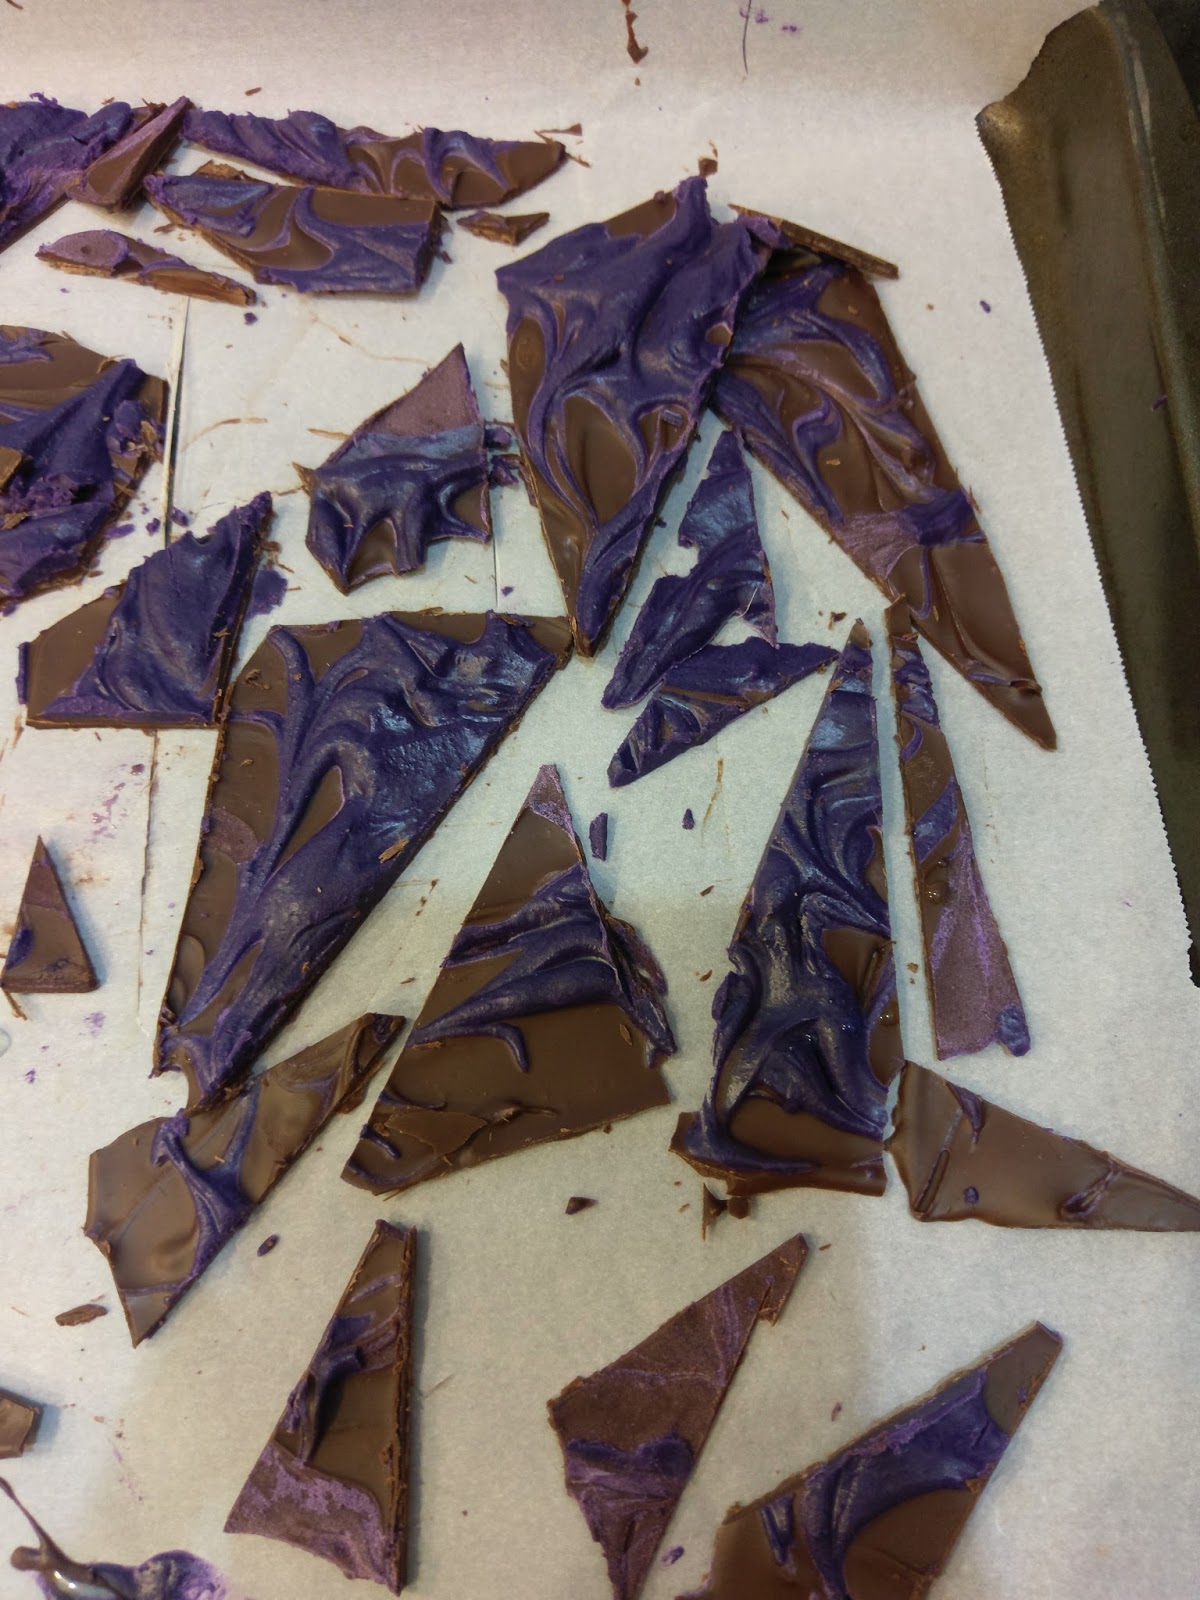
Like so. Then, melt your white chocolate melts and add in the purple dye and vegetable oil. Stir well, then drop dollops on top of the semisweet chocolate layer:
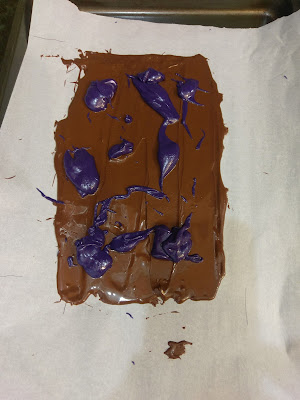
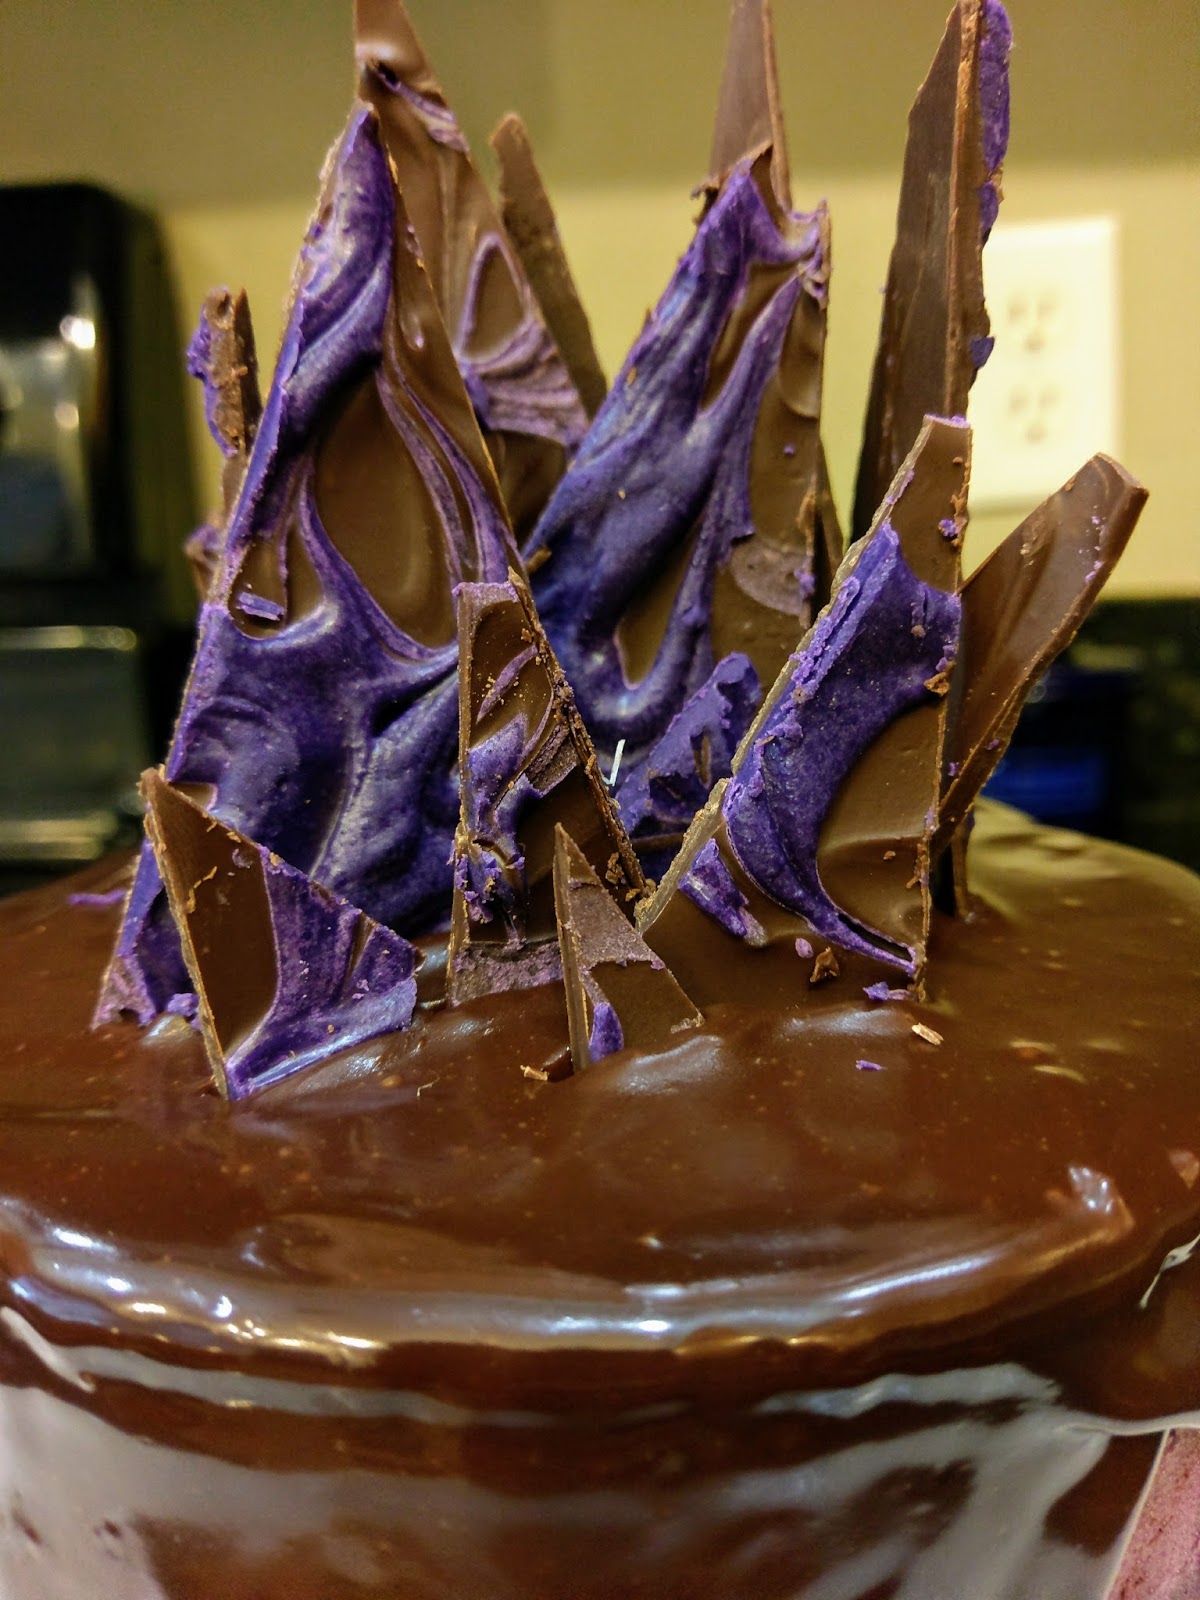
Not much rhyme or reason to my dolloping. Had I used purple chocolate melts, things would’ve swirled together better since my semisweet layer was hardening fast by the time I finished mixing my white chocolate, dye, and oil. I was able to swirl with a chopstick somewhat, but it didn’t mix as well as I had hoped. Moral of the story: colored chocolate melts are your best friend here. Set your tray in the fridge to firm up for a half an hour. Then simply chop into triangles:
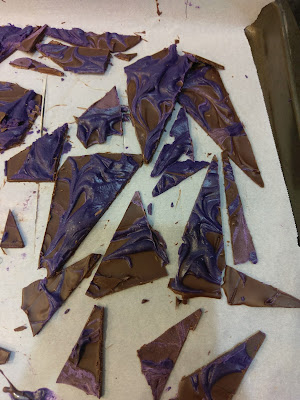
Nice, stabby, pointy triangles. Set this back in the fridge until you’re ready to ganache the top of your cake. I did a lot of reading to test out adding booze to a ganache after the nightmare that was adding gel dye to melted chocolate earlier. I was determined to make adding liquid to a melted chocolate work, rules be damned!
Otherwise this Disaronno wasn’t going to see any action again until like 2019. To make the amaretto ganache, you need:
- 1 cup of semisweet chocolate chips
- 3/4 cup of heavy whipping cream, with 1 tablespoon removed
- 1 tablespoon of Disaronno
Basically, when you want to add booze, you need to keep the liquid level at the same amount. So if you wanted two tablespoons of Disaronno, remove two tablespoons of heavy cream from your 3/4 cup. Melt your chocolate using the method described above while bringing your heavy whipping cream to a boil over medium-high heat. Once the chocolate is melted, pour the the heavy whipping cream on top of it 1/4 cup at a time, blending very, very well in between additions. Once completely smooth, add in the tablespoon of Disaronno and blend well again. I used a strainer to remove any air bubbles from my ganache.

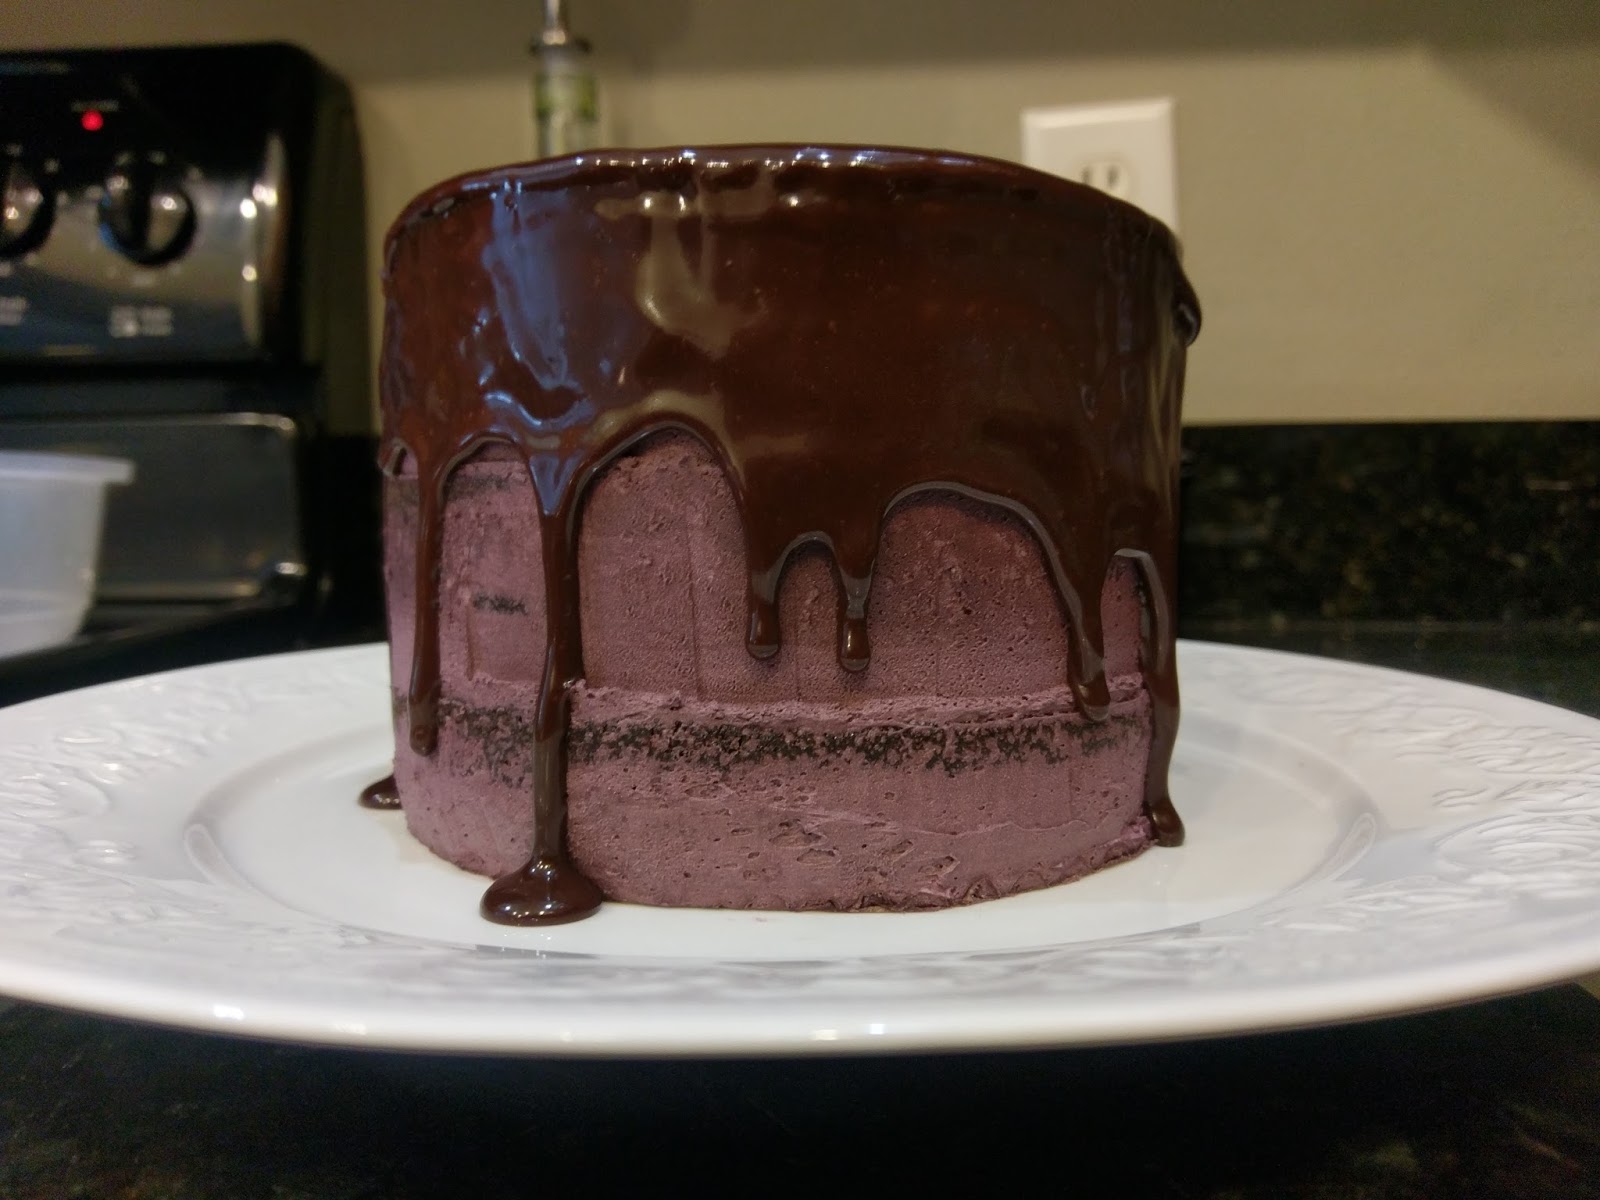
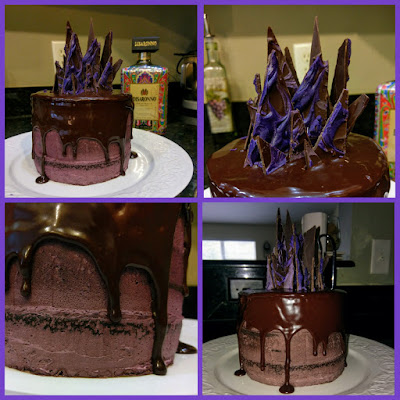
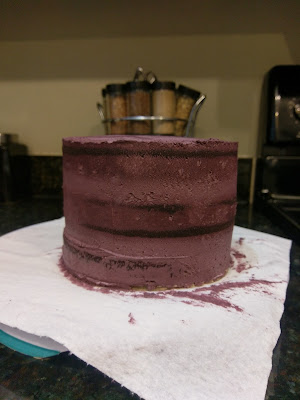
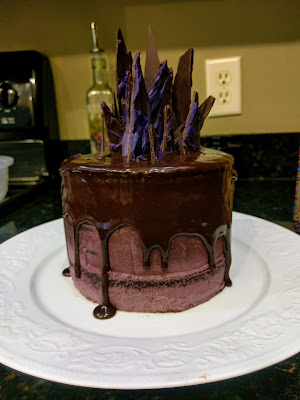
Hello, gorgeous. Remove your cake from the freezer, place it on a cake plate, and then spoon ganache on top of your cake. Use an angled spatula to smooth out and allow the ganache to run down the sides of your cake:

This moment was positively divine. So if you don’t want as much of a drip, don’t use as much ganache on top. I only used about half of my ganache. While the ganache is still soft, remove your bark shards from the fridge and gently secure them in the top of your cake with a bit of pressure.

Arrange however you like–I was going for “Halloween crown.” Place everything into the fridge at this point so your ganache can set up for a few hours.
It will be hard to take your eyes off this beauty, but no one wants to eat an unset ganache. It’s pretty much like just eating chocolate syrup straight out of the bottle at this point, so give it time. I also found some glittery purple candles to complete the look:
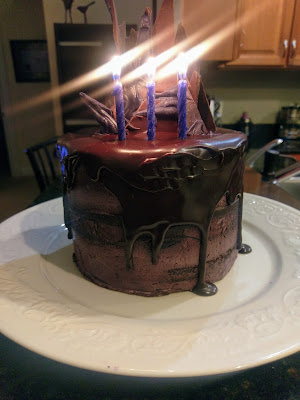
I didn’t put them in until after the ganache had firmed, so this was an interesting experience. Birthday song was sung, presents were opened, and cake was had. And oh how gloriously delicious it was. I didn’t tell anyone until after we were done drooling over it that I used the Truvia. Everyone agreed it still tasted exactly like dark chocolate cake should. And since it was covered in booze-laden frosting and ganache, it was still plenty sweet all around. The first bite hits your taste buds with chocolate and finishes with that sweet cherry flavor from the Disaronno. This chocolate amaretto buttercream is probably the craziest frosting combination I’ve concocted to date, but it works oh. so. well.
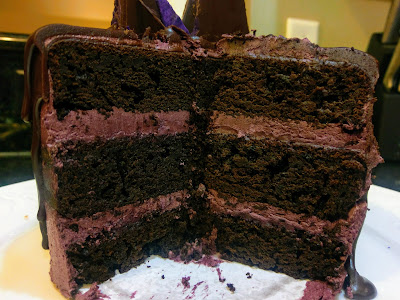
Seriously, you just have to try it. Most importantly of all, my mother loved it. It was wonderful to give her a cake that is probably only half as good as anything she’s ever baked for me, but to know how much she enjoyed it and appreciated my efforts made all the tiny heart attacks that occurred during baking and chocolate melting worth it. I may not ever be a Cirq performer with my two left feet and an intense avoidance of the spotlight, but I know how to say “I love you” with cake and the steely determination only a Type-A introvert can have. So happiest of birthdays to my biggest fan and best friend–love you, Mom! I’ll be back this weekend with one final Halloween delight. ‘Til next time, my fellow eaters!
P.S., I’m bringing the bottle of Disaronno with to Christmas, or it’ll never get finished. -
The Number One Hurricane Survival Item
Well, Florida threw us another curve ball in the form of Hurricane Nate this past weekend. I’ve been slowly amassing my hurricane preparedness kit since Irma couldn’t make up her mind last month. Battery-powered lanterns? Check. Tons of flashlights? Check. Enough bottled water to bench press my weight in? Check. So much ramen in my pantry it looks like six college students live here? Check. I had literally everything I thought I needed, down to extra dog food (…for the dogs, not me). I had a lingering feeling I was forgetting something, so I hearkened back to the last several insane winter storms that trapped us in our house for a few days (Clovis was a magical mix of Narnia meets Antarctica during winter). It was then that I remembered the number one item I need in my survival kit: cake. I was still pretty miffed that after spending several hours putting up my Halloween decorations on Monday (and getting sunburned because Florida is just that out of line) that I had to take them all down for this stupid hurricane. This was my first official foray into “spite baking,” so naturally my cake needed to be extremely Halloweeny to compensate for my favorite month of the year failing to live up to my expectations down here. And so, out of repugnance and macabre, this ghastly slime cake was brought to life. Or death, really, since it’s a ghost cake.
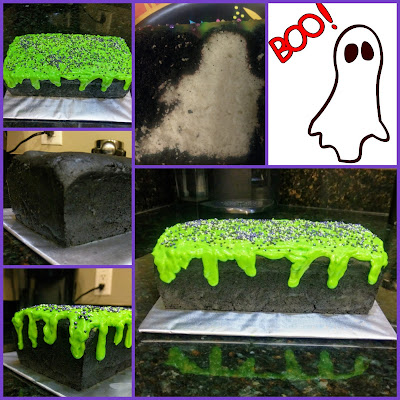
The horror…my poor ghost has a broken arm. Remember the last time I made a surprise inside cake? When it almost failed terribly and I then decided that making these types of cakes are way too stress-inducing and absolutely ridiculous? Yeah, well, apparently I didn’t. I’m told time heals all wounds, and I suppose this applies to cakes that make you want to cry while baking them. I did quickly remember my shortcomings last time and tried my best to overcome them only to be met by different obstacles with this cake. I mean, clearly we can all see it turned out okayish, but it was touch and go there for awhile. I was really glad that baking a cake within a cake at least yields a ton of cake scraps for me to eat my feelings aplenty during baking. But in the end, this creepy, wonderfully Halloweeny cake is a yummy mix of chocolate and white cake with a vanilla pudding topping. And since I went the low-cal route, each slice is only 209 calories for a total of 12 slices. It’s nice when the shock and horror is related to the spooktacular decoration and not the calorie count.
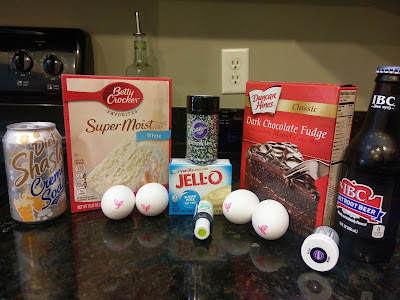
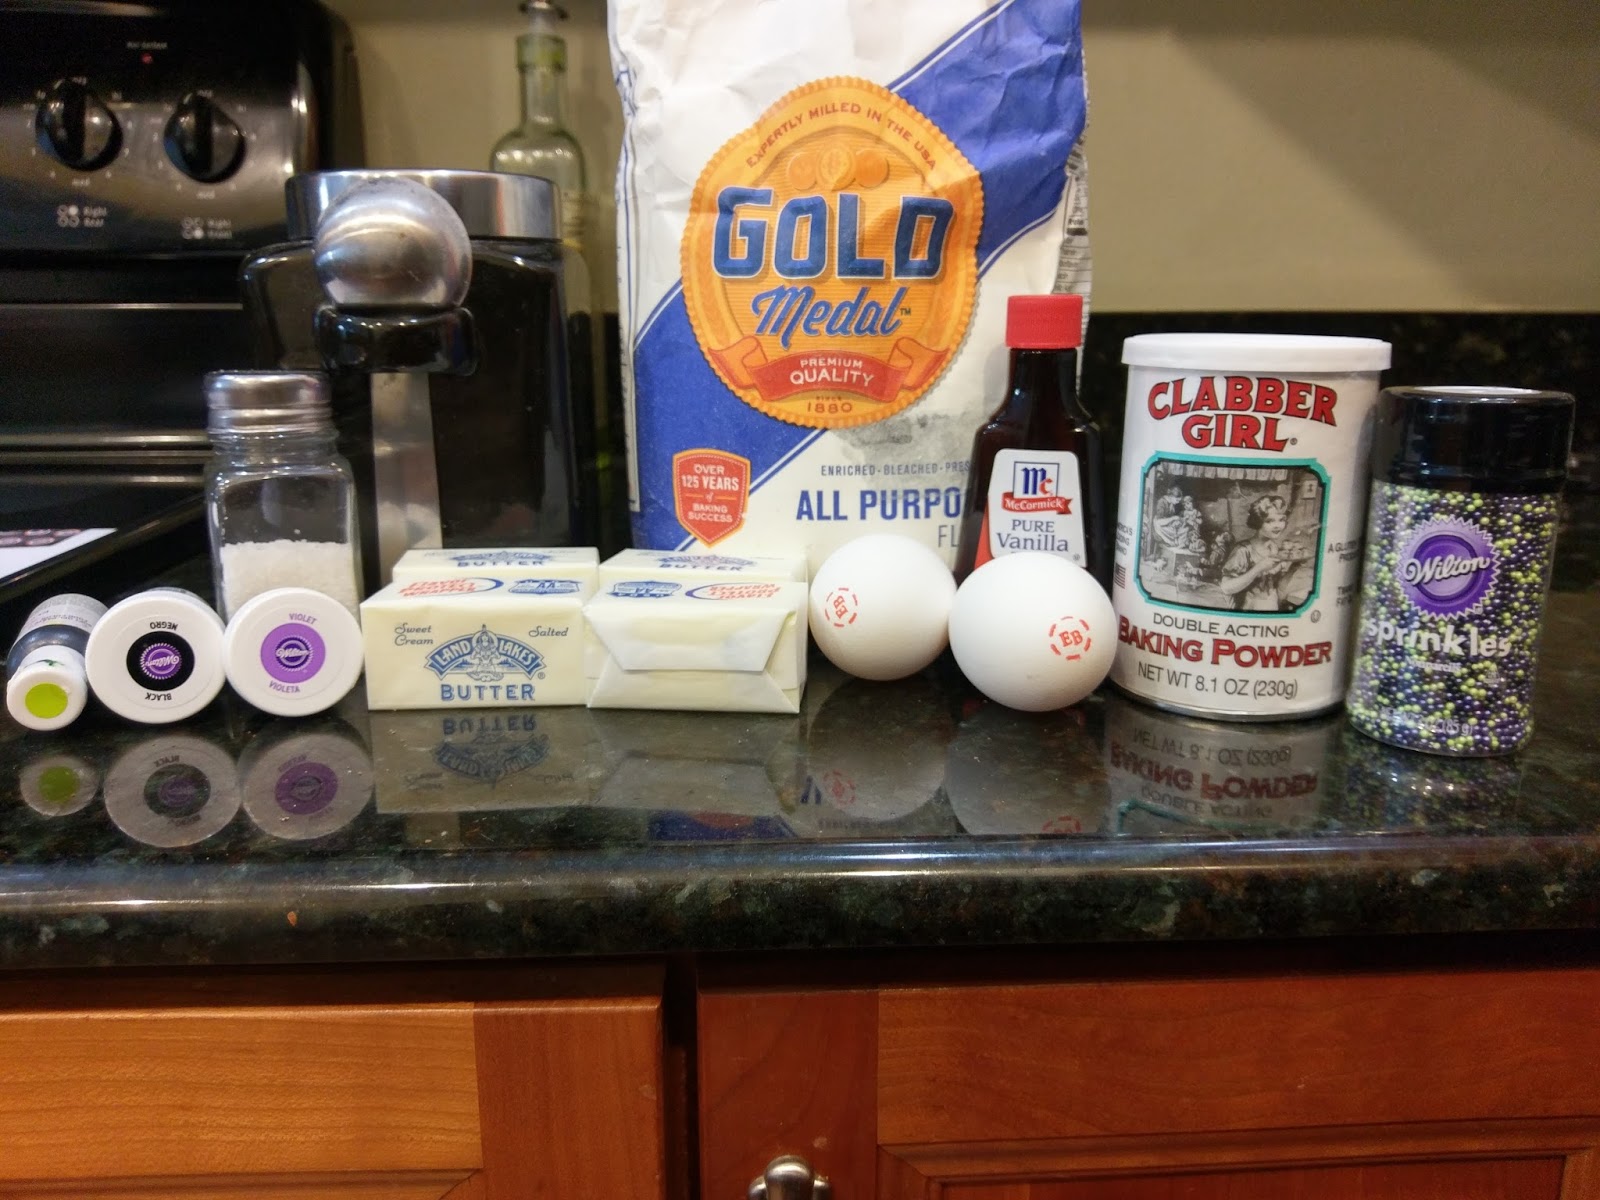
I buy my black gel dye in bulk during this time of the year. To make both cakes, you will need to scoop up the following:
- 1 box of white cake mix
- 10 ounces of diet creme soda
- 2 egg whites
- 1 box of chocolate cake mix
- 10 ounces of diet root beer
- 2 egg whites
- Black gel dye
To make the slime topping you’ll need:
- 1 box of sugar free vanilla instant pudding
- 2 cups cold skim milk
- Lime green gel dye
- Optional: spooky sprinkles for topping
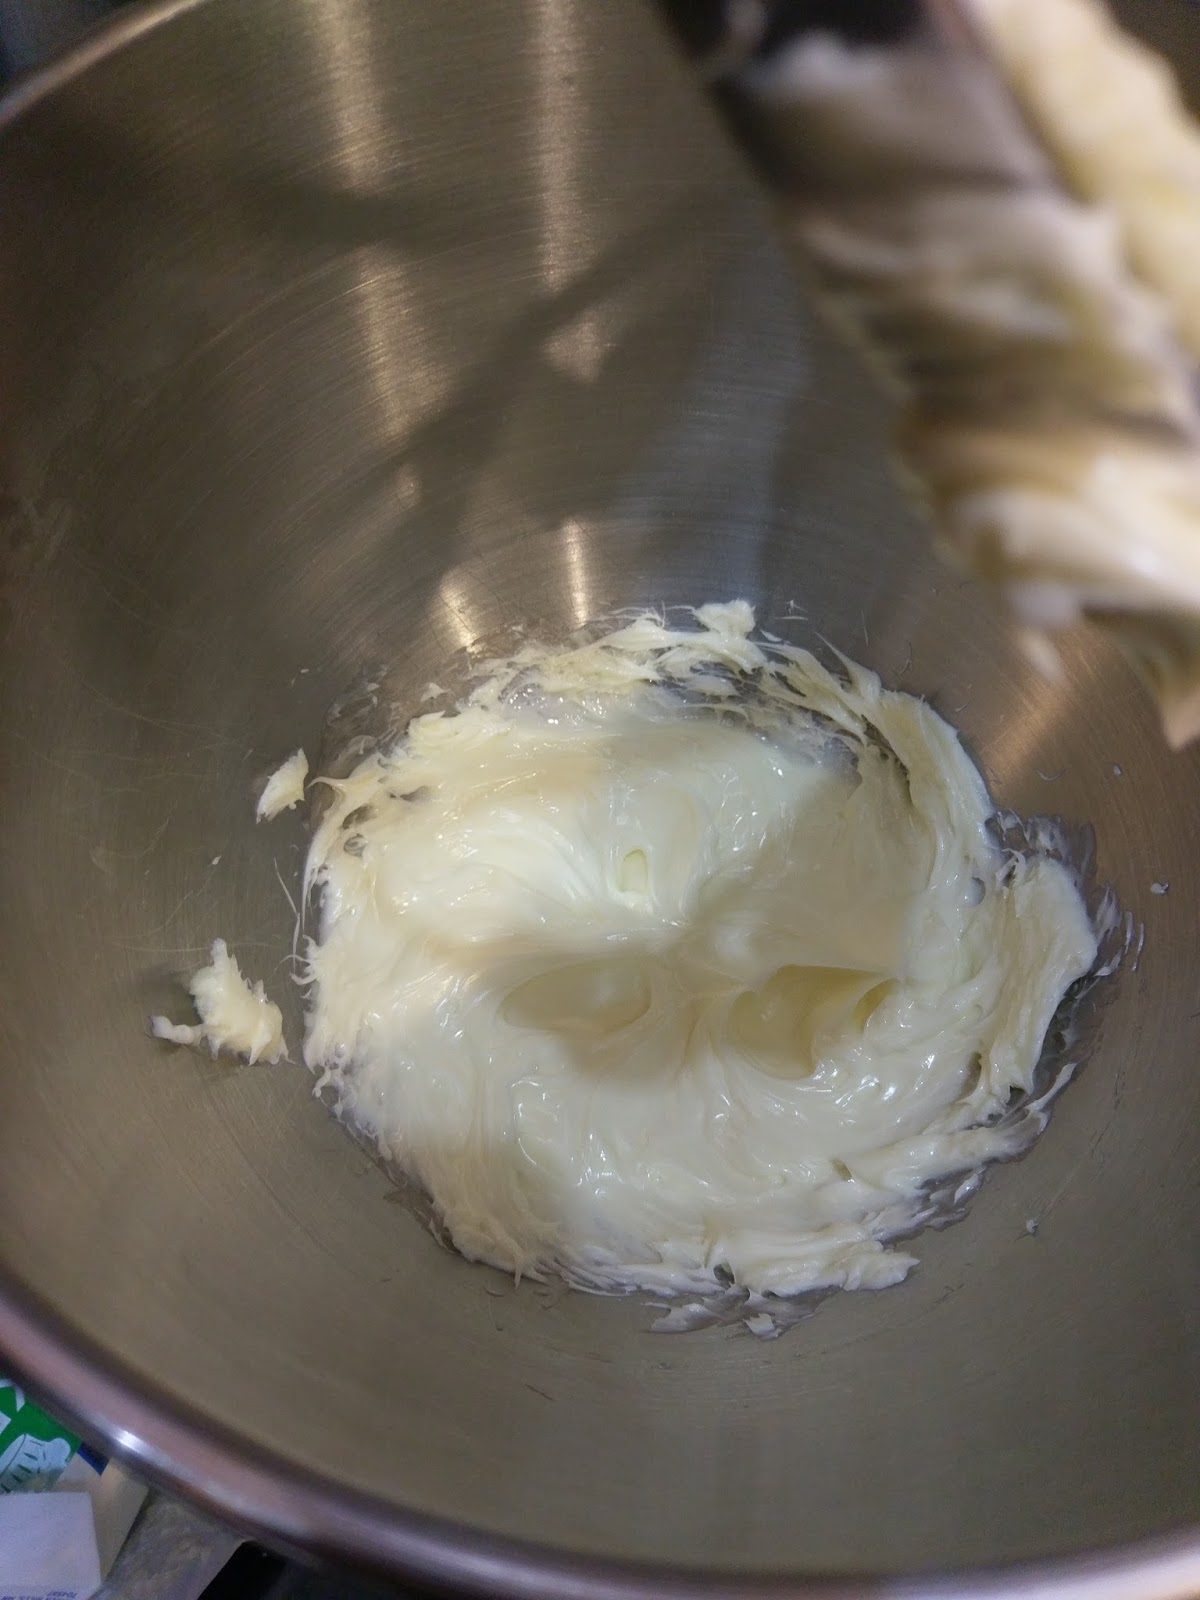
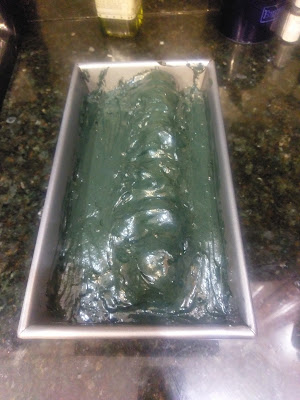
Now, this is a cake that comes together over the course of 24 hours because you’ll need to do some freezing. Start by baking your white cake. Mix together the creme soda, two egg whites, and white cake mix for 2 minutes on medium-high in your stand mixer. Grease a 9×13 pan very, very well (especially if your humidity is a balmy “we’re on the bad side of a hurricane” level). Pour into the pan and bake at 350 for 20-25 minutes. Cakes will always cook quicker when you use soda, so keep that in mind.
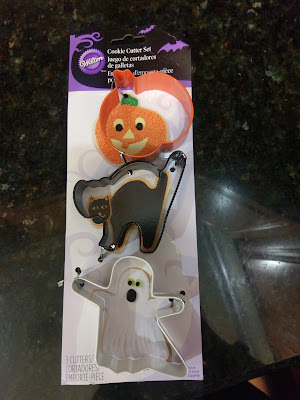
Hindsight: literally the pumpkin or the cat would’ve been a better choice. Once your white cake has baked, let it cool in the pan for 10 minutes and then turn it out onto a cooling rack. Place this in the freezer. Your cake needs to be mostly frozen to cut out the ghosties. I got an absolutely adorable set of three Halloween-themed cookie cutters from Amazon because even though I live within 10 miles of a Walmart to both my east and west, I simply refuse to go there because it’s bad for my incarceration-free lifestyle to deal with other people once inside of one.
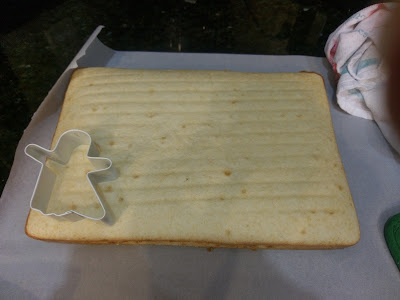
Sigh, I still thought I knew what I was doing… Here is where all my plans began to fall apart. See those tiny little cute arms waving in adorable terror? Yeah, they’re a reallllll pain to cut out of a soft cake and keep intact. I knew I would need 6 perfectly-shaped ghosts to fill the inside of my cake, and I also knew I would be able to cut out 8 total. I considered the first two practice ghosts. My cake was not frozen enough for practice ghost number one, and he looked like he had died of some sort of wood chipper incident. While my cake was frozen enough for ghost number two, he lost both his arms in an unfortunate out of body experience because my cake was just too moist to pry him out of the cookie cutter. Should you choose to use the ghost with his delicate little birdlike arms (clearly he never hit the gym when he was alive), spray your cookie cutter with so much cooking spray you can taste it in the air. This is the only way to cut out a ghost and allow him to not be a double amputee.
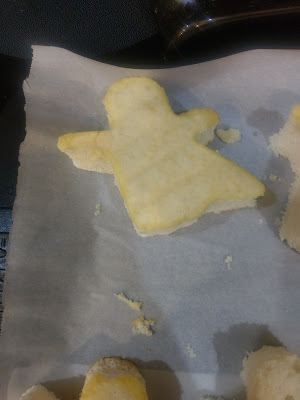
He seems appreciative because he can still high-five you with either hand. You’ll only end up using about a third of your white cake to get six ghosties, but you will completely demolish it, so you can either toss the rest out or save your scraps. We had some scraps with a little bit of lemon curd on top, and it was delightful. Put your six ghosts onto a sheet lined with Parchment paper and leave to freeze overnight. After about 8-12 hours (I literally baked this first thing Sunday morning because I have a real problem with age-appropriate responsibilities), the ghosts are frozen enough to handle being baked again. Mix the chocolate cake mix, 10 ounces of root beer, 2 egg whites, and a large dollop of black gel dye on medium-high for two minutes. Side note, 10 a.m. is way too early to drink the leftover root beer if you’ve just consumed an apple cider donut.
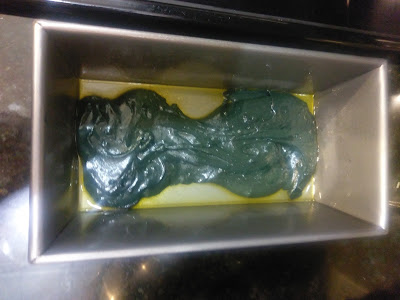
Ahh the loaf pan, my worst enemy. Preheat your oven to 350 and grease a 10×6 loaf pan with all of the cooking spray. Seriously. It’s a heavy cake, don’t leave it to chance! Take half a cup of cake batter and ladle it into the bottom of the loaf pan. Spread out a bit, and then go grab your ghosts (unlike skeletons, we won’t keep these hidden somewhere for long).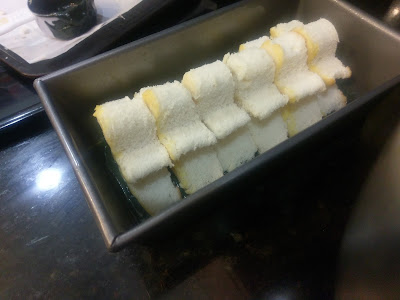
They mostly have all their arms! Gently place each ghost into the cake batter at the bottom of the pan. Stack them close together. There will be a small gap on each end, and you need it so the ghosts can get completely covered up. It’s not really a surprise inside cake if you can see the surprise from, well, the outside.
It turns out prettier, I promise. Now, continue using a half cup scoop and gently plop batter into the cake pan, working to cover up all the ghosts. I had a few ghosts lose an arm during this process, so take your time and work as gingerly as possible, or in hindsight, just use the pumpkin because it is round and easier to deal with. But if you’re a crazy person who loves to defy logic, try pouring batter under the arms before you pour it on top. Use a spatula to smooth out the batter as best as you can when you’re done covering up your ghosts. Tap gently on the counter to get rid of any bubbles, and then bake at 350 for 50 minutes.

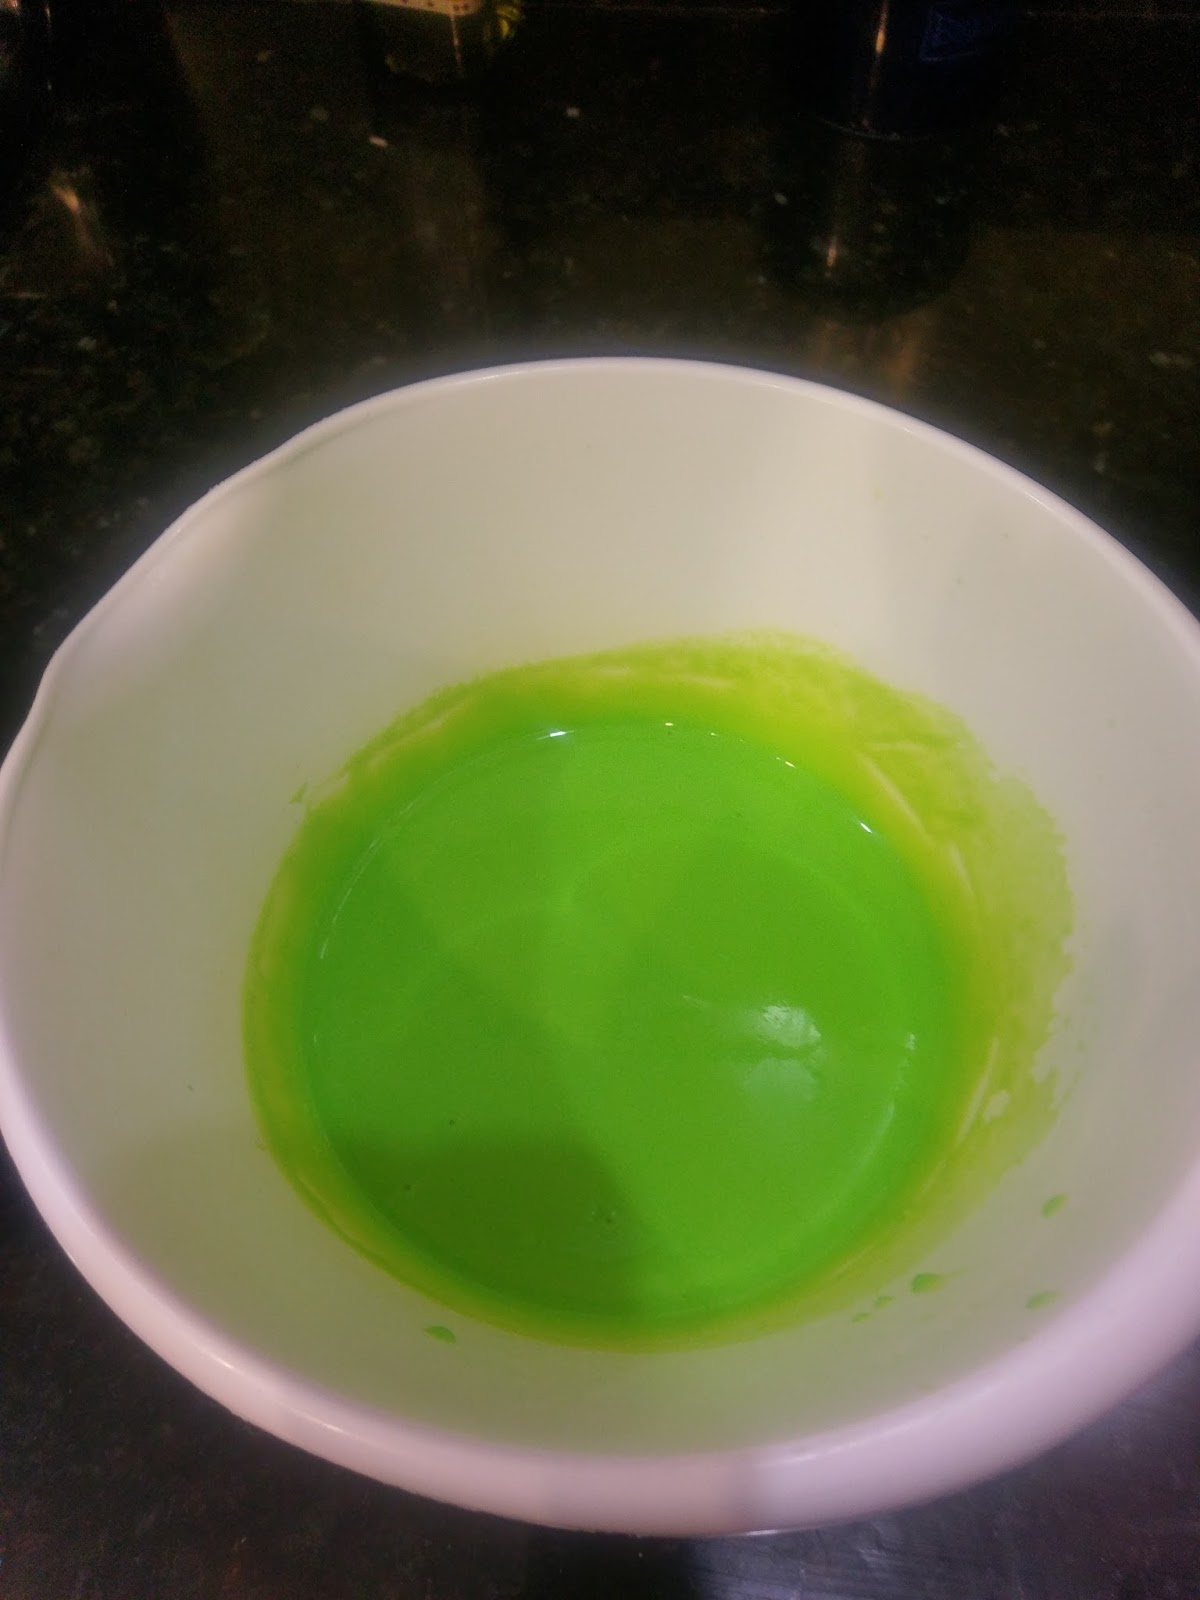
Not a giant bowl of boogers. While your cake is baking, get out a medium bowl and dump in the pudding mix, 2 cups of cold milk, and a squeeze of lime gel dye. Whisk for two minutes, cover with plastic wrap, and let set in the fridge for a few hours so your slime can firm up. No one wants runny slime…this isn’t the Nickelodeon Kid’s Choice Awards, after all.
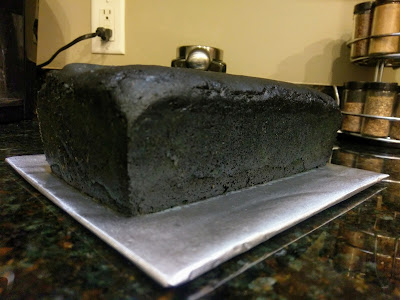
Ahh yes, a perfect black void made of cake. Once your cake has baked, leave it in the pan and place on a cooling rack for 10-20 minutes (or the amount of time it takes you to get completely soaked while taking your dogs for a walk during the tail end of a hurricane because they are super annoying when they don’t get one. Judging by how wet we were, I assume we were gone for 15 minutes). Take a butter knife and gently run it around the edges of your pan to ensure no sides are sticking. Lay a towel out on top of your cooling rack, and place this on top of the cake. Flip everything over carefully, and gently slide the loaf cake out of the pan. It will be upside down at this point, so prepare a cake board or large platter and place this on the bottom of the cake that’s facing up at this point. Quickly flip everything over so your cake is right side up. Transfer your cake to the freezer for several hours so it is completely cooled.
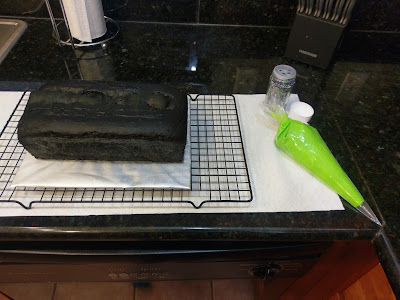
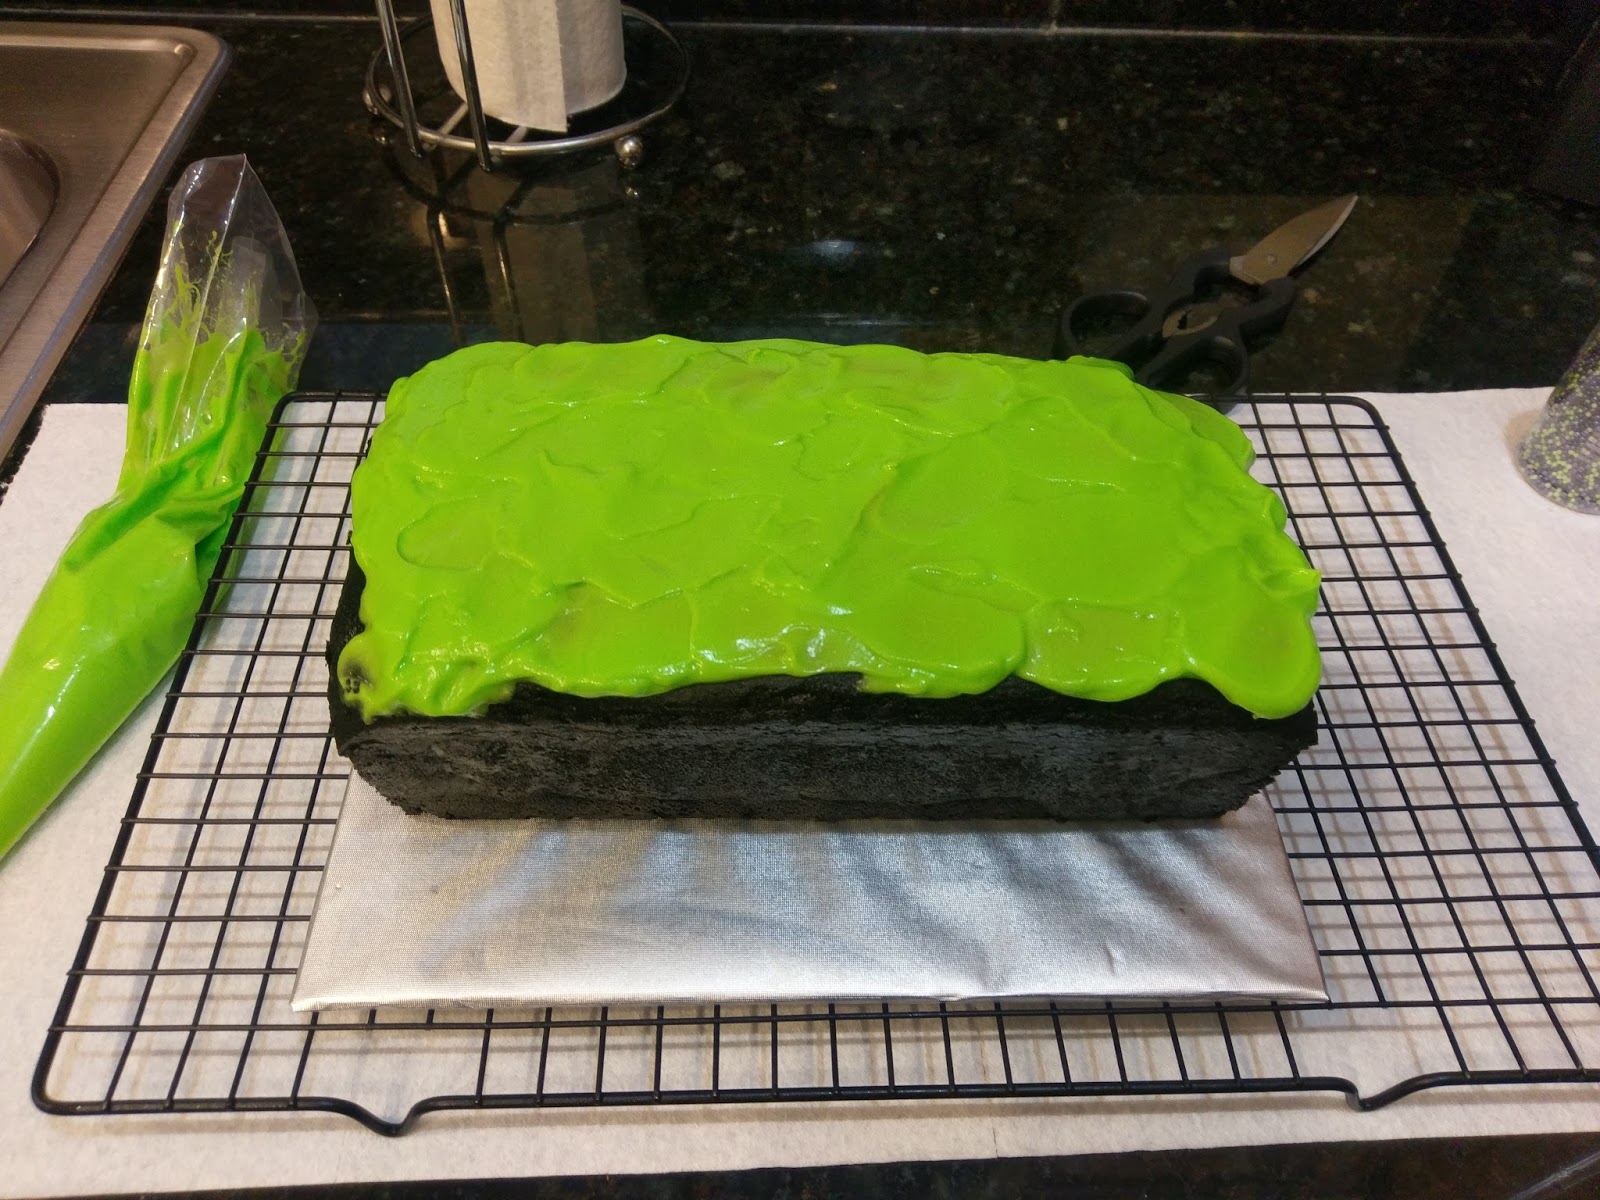
Basically, make sure in the end your cake looks like this when its on a prepared surface. Otherwise your ghosts will be upside down, and it’s probably not as easy to haunt people if you’re not right side up. Once your cake is totally cooled, remove your pudding mix from the fridge. Load up a piping bag or plastic baggy with half of the pudding. Save the other half to eat later, torment people with by acting like you sneezed out a booger, whatever your heart desires. Snip the tip off of the bag, and pipe a layer on top of the cake:

Greener than Shrek! Smooth out a bit with an angled spatula. Once topped, take your piping bag and drag it up and down the sides of your cake to create slimy drips:
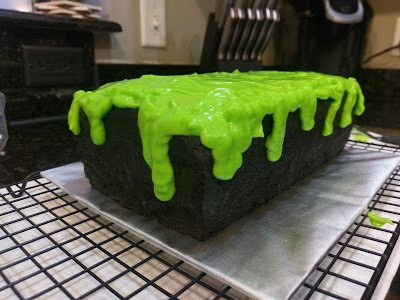
It should look oozy and gross. Bonus, the grosser and oozier it looks, the less like you will have to share your cake with anyone else!
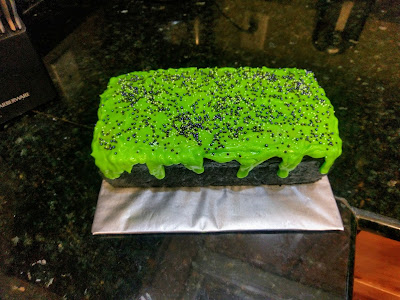
Sprinkles: because everything deserves to feel a little pretty. I finished by smattering some Halloweeny sprinkles on top (the colors bled into the slime, but it looked even cooler) and then set into the fridge to finish thawing out from the trip to the freezer earlier. You will want to keep this cake refrigerated since it is topped with pudding. This will also keep any potential hauntings relegated to the inside of your fridge and not your entire kitchen. Fact.

What horrors lie beneath the surface… I’m always really worried when I cut into a surprise inside cake that the surprise inside the cake will be that I completely screwed it up. Have we talked about my low level of self-esteem lately? No? Well, too bad, because this is a cake blog, so self-loathing must remain relegated to said cakes.

He’s more like a spectral blob. Well, you can tell they’re ghosts, sort of. My arms broke off in a few places causing my ghosties to look more like ethereal shapeless figures, but it still works. In all seriousness, surprise inside cakes are a bit of work, but the end result is always a lot of
anxietyfun. At this point, I’m running out of new ways to bake Halloween-themed desserts after blogging for several years, so I have to go for broke. But does broke ever taste delicious! This cake tastes like a marble cake thanks to the combination of vanilla ghosts and chocolate cake. I’m really late to the party when it comes to pudding…I hated the texture until my late twenties, so naturally I’m eating it as much as possible to make up for lost time. It’s a nice sweet addition to the cake, and it does help to keep things from getting dry or stale. But what I love best is that the combo of chocolate cake and vanilla pudding make it taste like you’re eating a giant Oreo. Since I spent half of the baking process in sheer terror, I feel it’s definitely an appropriate Halloween dessert, blobby ghosts or not (seriously, just go with the pumpkin shape). Don’t worry, I’ve still got another one up my sleeve to celebrate the season, so as long as Florida stops actively trying to kill me, I’ll be back with hauntingly awesome desserts soon. ‘Til next time, my fellow eaters!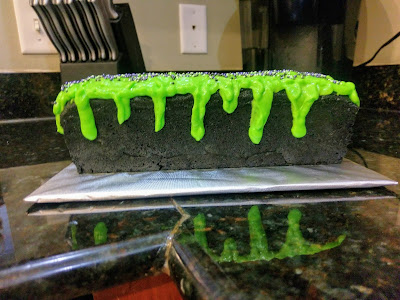
I’ just ooooozing with anticipation… -
A Tasty Trance
It’s here! October 1st! The day the switch gets flipped and I go from slightly resembling Wednesday Addams to full blown Winifred Sanderson mode. This is my Christmas morning, but for 31 days straight. This might be why I’m usually sarcastic and mundane the rest of the year because feeling this overjoyed is positively exhausting. Naturally, I have a list of the the creepy items I’m making this month all set and ready to go, and the baking commenced this morning. I’ve been alternating between rewatching old episodes of the first few seasons of True Blood (you know, when it was still really good and creepy) and Nightmare Before Christmas (I won’t be friends with a person that can’t admit this is as much as Halloween movie as it is a Christmas one). Even the weather in Florida has decided it’s finally going to be fall. Like the moment the calendar page turned, it got cloudy, the breeze got cool, and the temperature felt less like “I think I might be roasting myself right now” outside. My tiny, dark little soul is filled with glee–and cookies. Spooky, trance-inducing cookies. Because everything is bewitching in October.
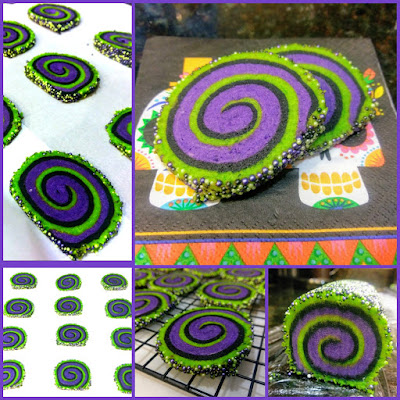
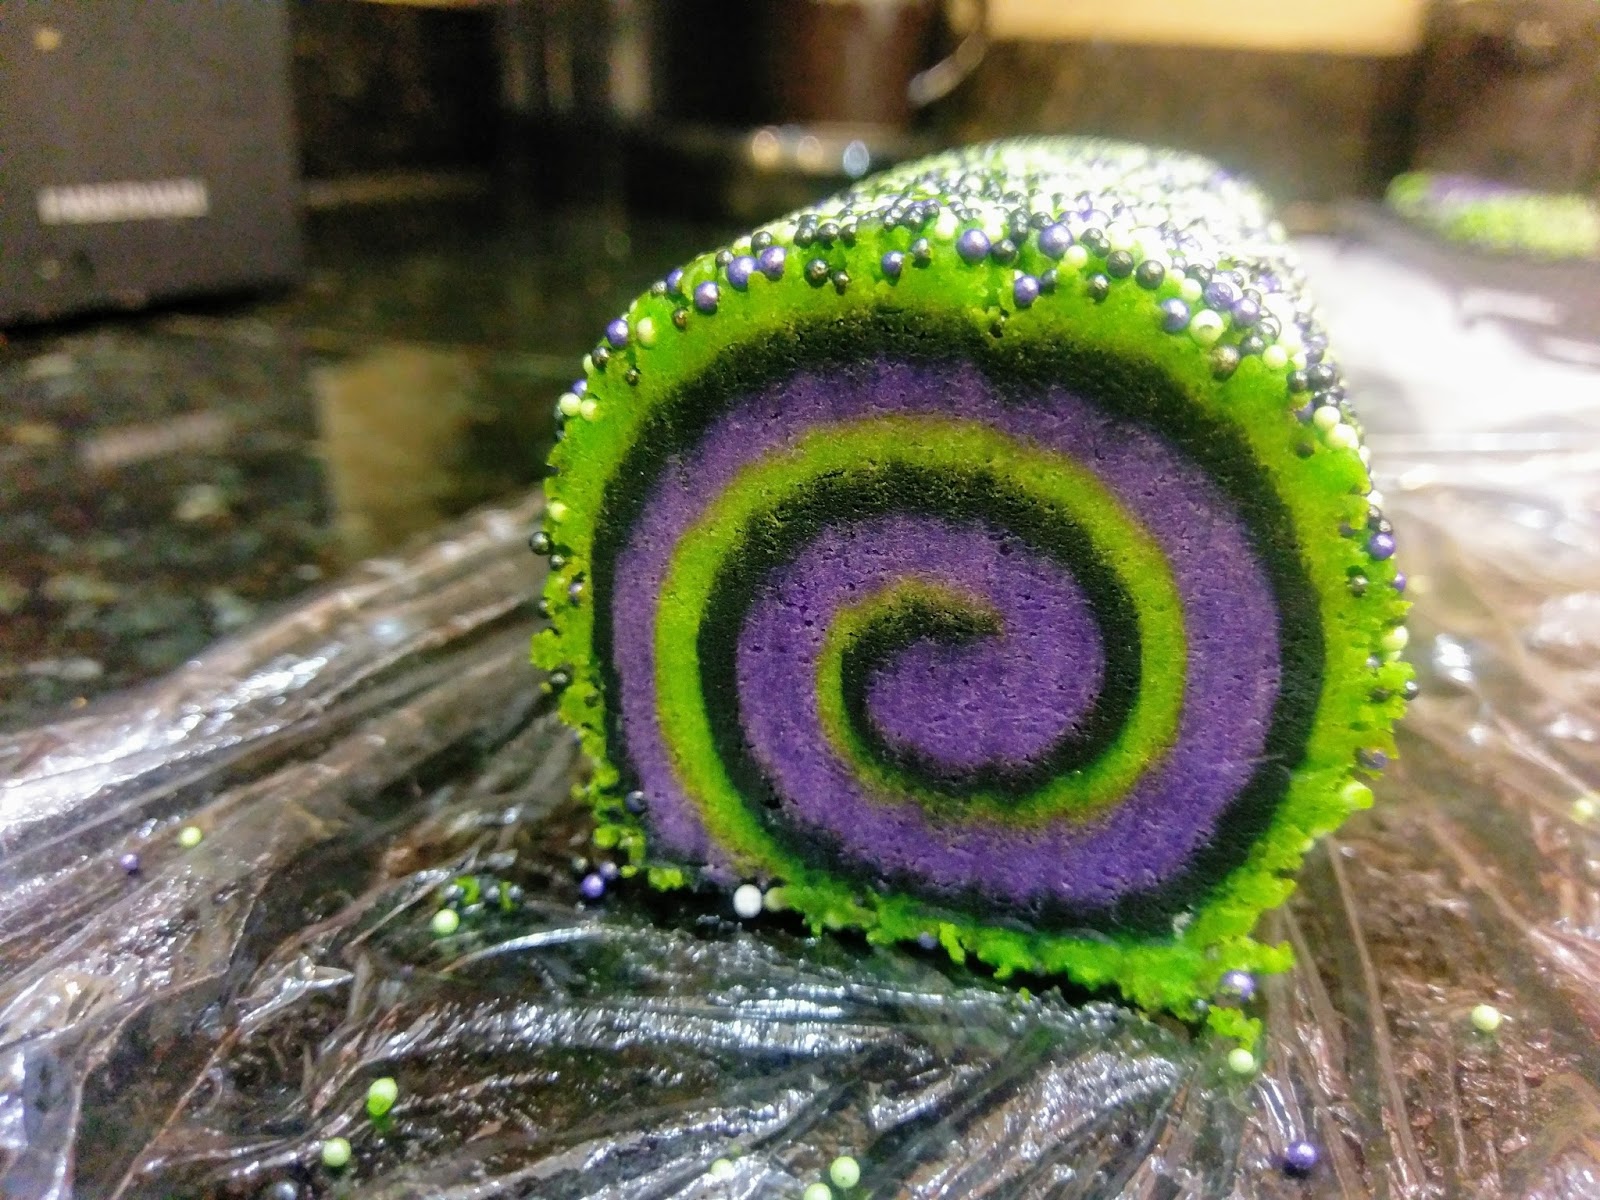
I put a spell on you… I’m not going to lie to you–making pinwheel cookies, even when they’re bewitching pinwheel cookies, is a giant pain in the ass. They are time consuming in that you have to do a few steps, let dough set, do a few more steps, let the dough set, etc., etc. I am not a patient person. It’s my downfall as a baker because I can picture the way I want something to look in my head and get antsy when I can’t make it magically appear before me. I realize that makes me sound like I wish I was a witch (I do). But maybe you’re not as Type A and can stand taking the time to make something positively amazing and cool. If so, these cookies are definitely for you. And if you slice them thin enough to make 48 cookies (plus 6 made from dough scraps), they’re only 74 calories an entrancing pinwheel! But look, they are mostly sugar and butter, so definitely do not leave the lid off the Tupperware for too long, or you’re gonna eat them 15 at a time.

I haven’t had this much butter out in the open in months. You’re gonna want to peruse the Halloween baking aisle at your local craft store and/or Target to make these spooktacular cookies a reality. Otherwise, the ingredients are fairly simple. Gather up:
- 3 cups of All Purpose Flour
- 1/2 tsp baking powder
- 1/4 tsp salt
- 1 cup of butter at room temp
- 1 1/3 cups granulated sugar
- 2 eggs
- 2 tsp vanilla extract
- 1/2 tsp almond extract
- Gel food coloring in black, electric green, and violet
- 1 tube of Halloween-y sprinkles (I got mine at Target)
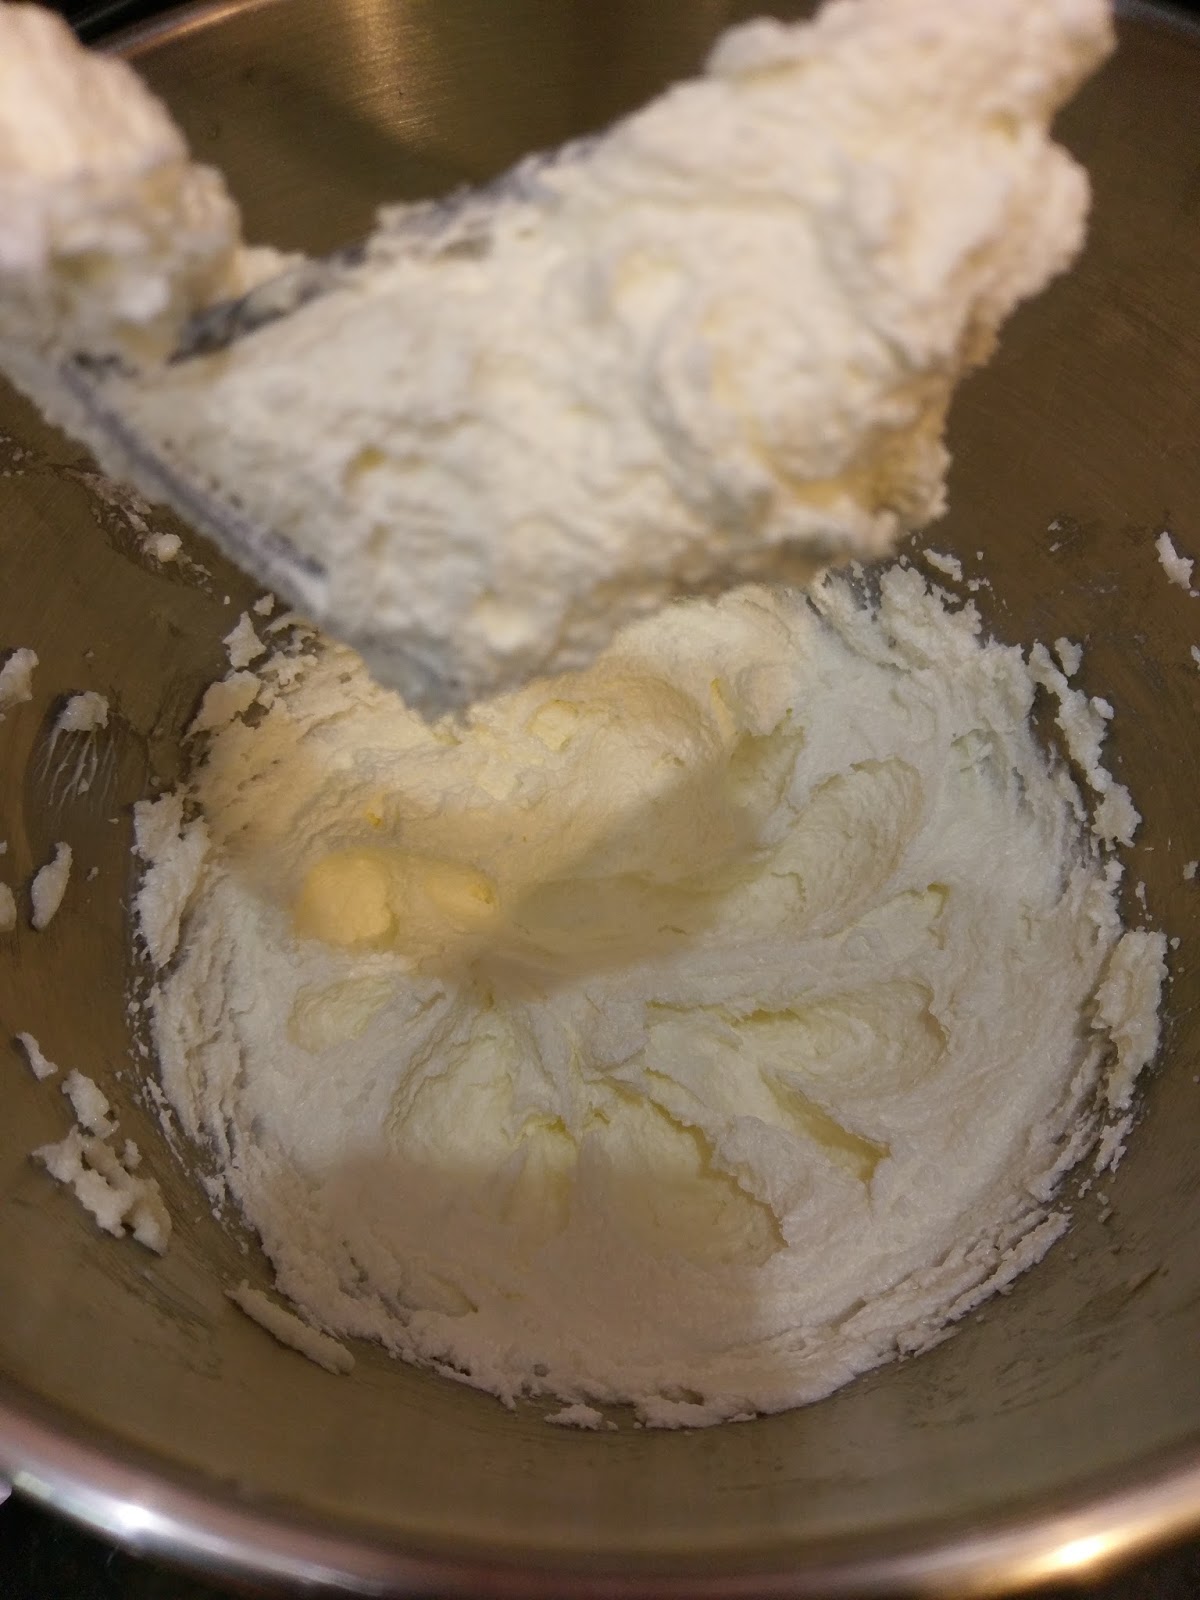
Start by plopping that soft, delicious butter into the bowl of your stand mixer and blend until smooth for a few minutes. Be sure to use the paddle attachment for your mixer.

God I missed you, butter. Then add in the sugar and blend on high for 3-4 minutes until everything gets light and fluffy:
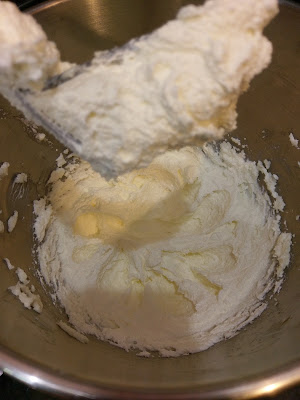
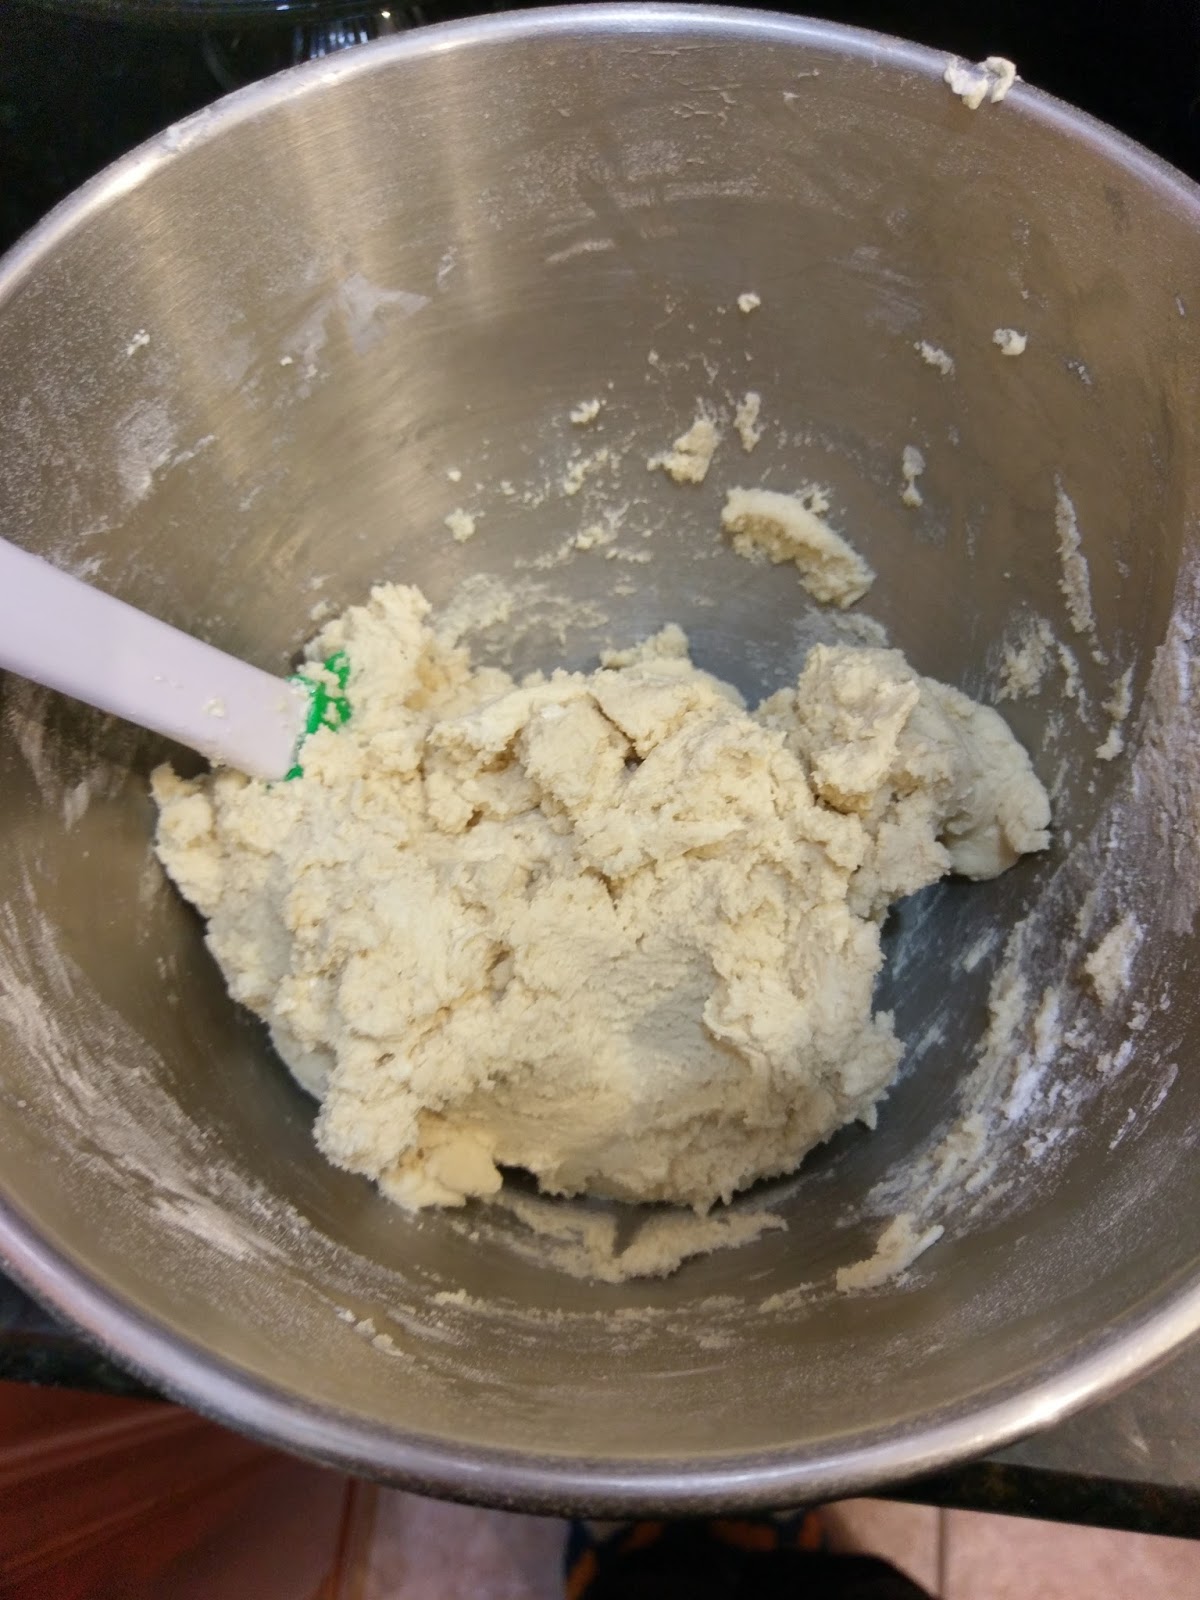
Butter + sugar = drool While the butter and sugar goodness is getting fluffy, get a medium bowl and mix the flour, baking powder, and salt; set aside. Once the butter mixture is done, add in both eggs, the vanilla, the almond extract, and blend well. Once mixed, add in half of the dry mixture and give a stir on medium/low until mostly blended. Add in the rest of the dry mix and blend until just incorporated:

Things may look a little piece-y, but we’re not done yet. Now, split the dough into thirds. Keep one third in the stand mixing bowl. Wipe out the bowl that had the flour mix, and then plop in the remaining dough, split into two equal parts:

Like so. Magic! Now, plop a bunch of green dye in with the dough still in the stand mixer bowl. Blend on low until everything is the most obnoxiously bright shade of green in the world.
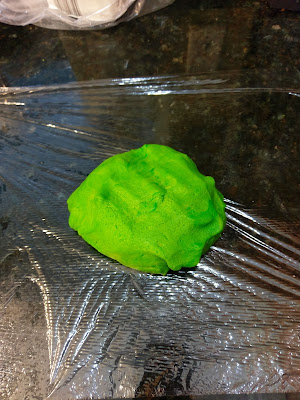
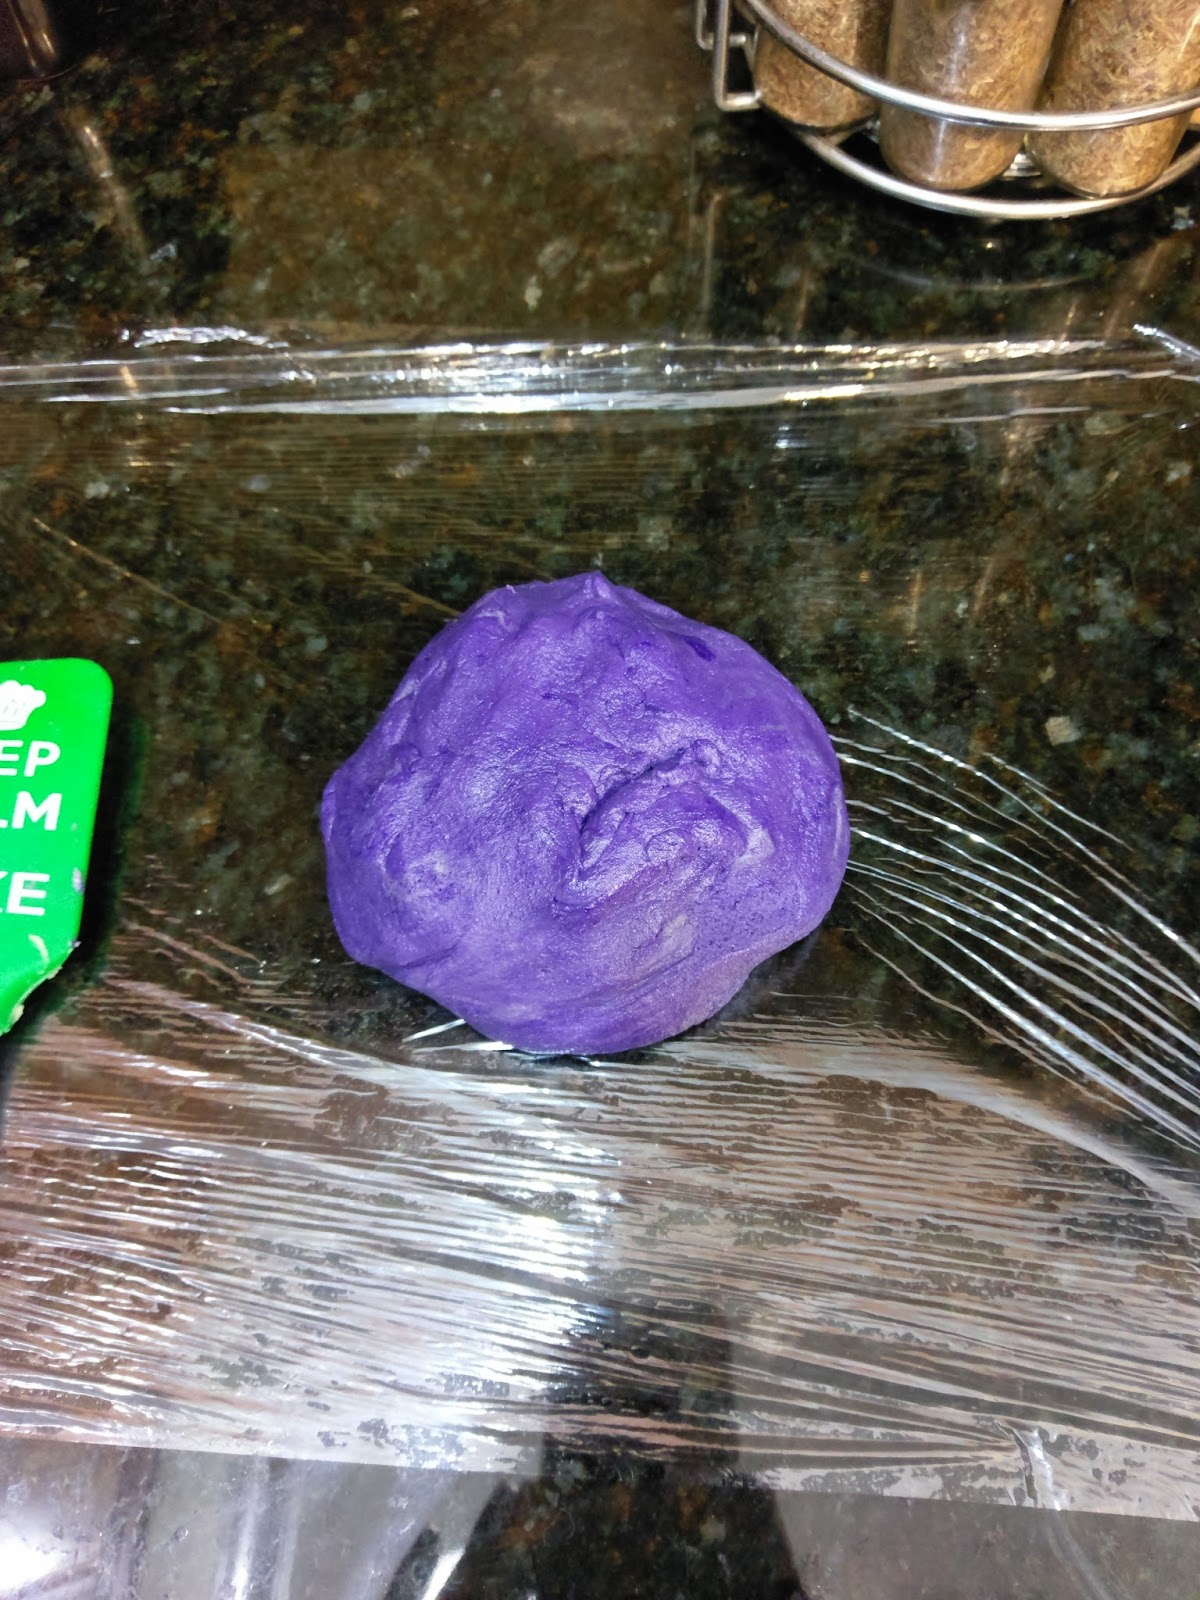
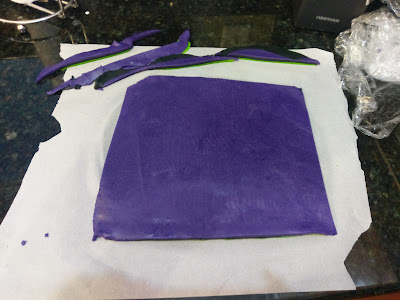
I wasn’t kidding. Turn this out onto a large piece of plastic wrap. Wash out the mixer bowl and paddle attachment. Take another ball of dough, add it to the mixer, and plop a bunch of purple gel dye on it and mix. For these darker colors, after mixing I used my hands to roll the dough around and really ensure there weren’t any spots missing gel dye.

Purple–the color of royalty. Take the purple dough and turn it out onto a separate sheet of plastic wrap. Finally, wash out the bowl one last time, add the last dough ball, and dye this one black. It’ll need its own sheet of plastic wrap.

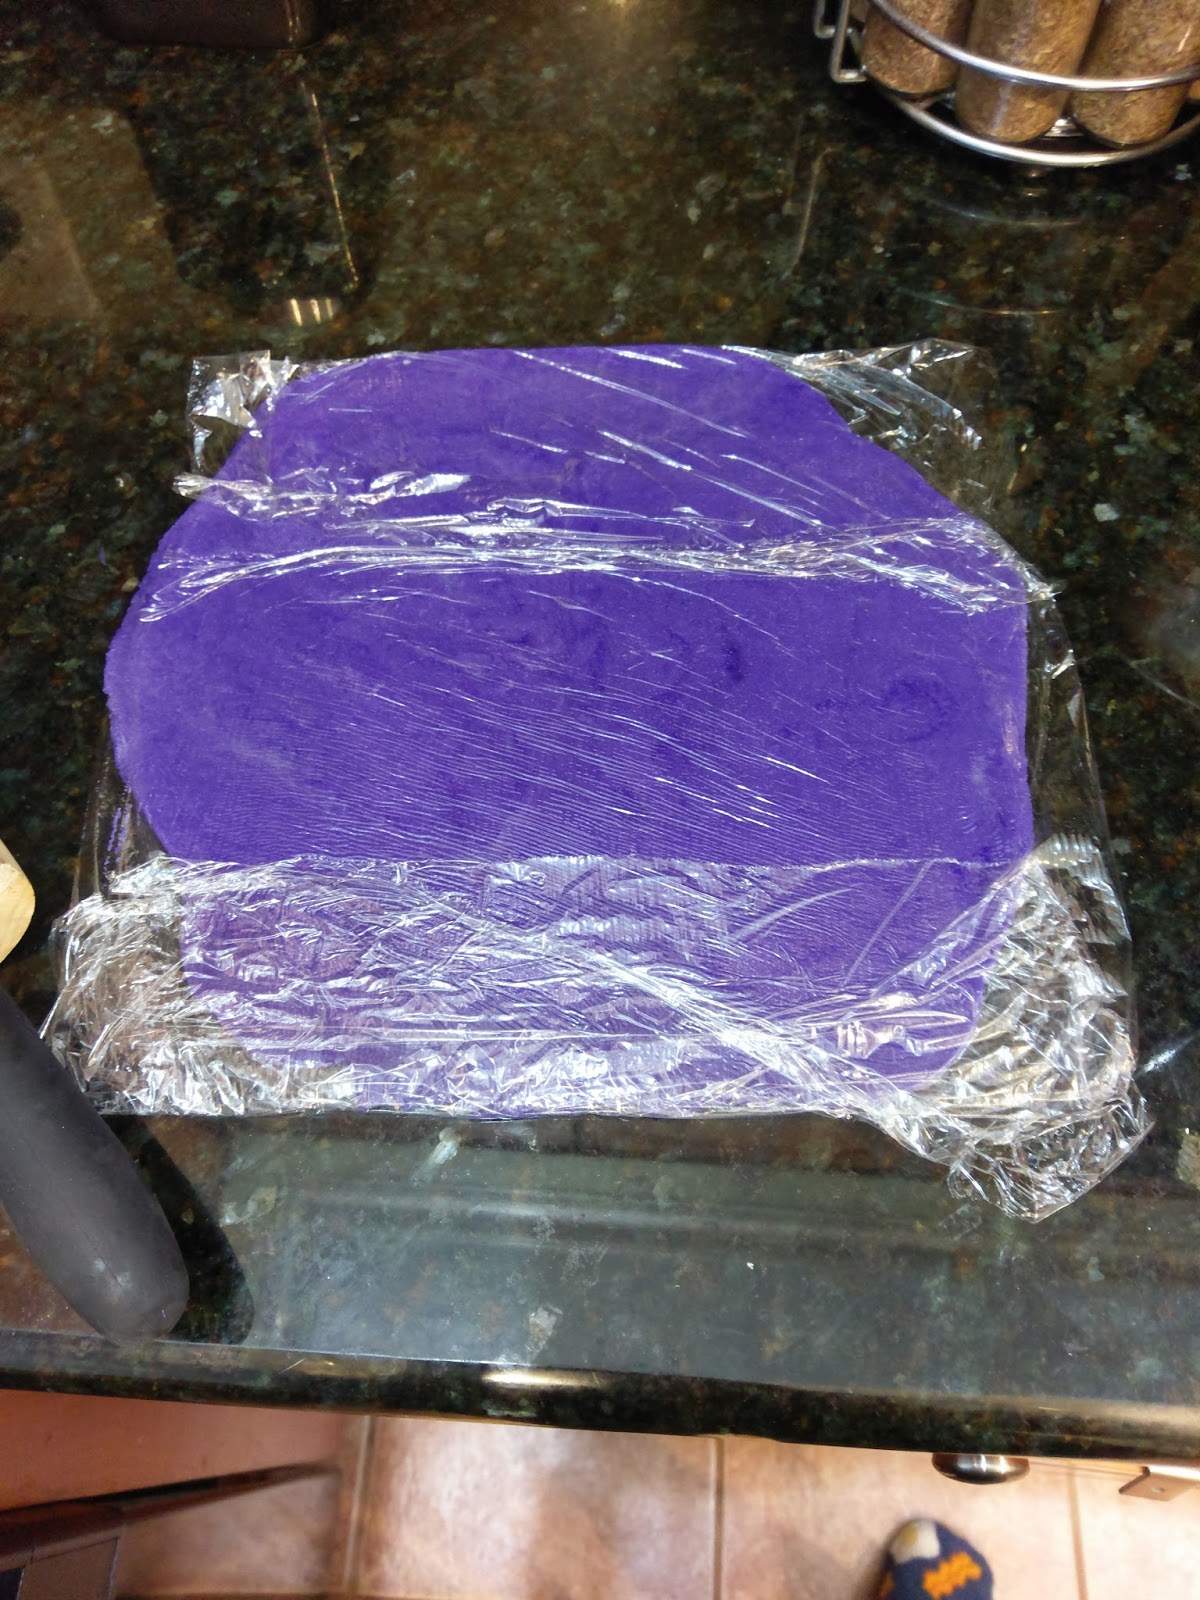
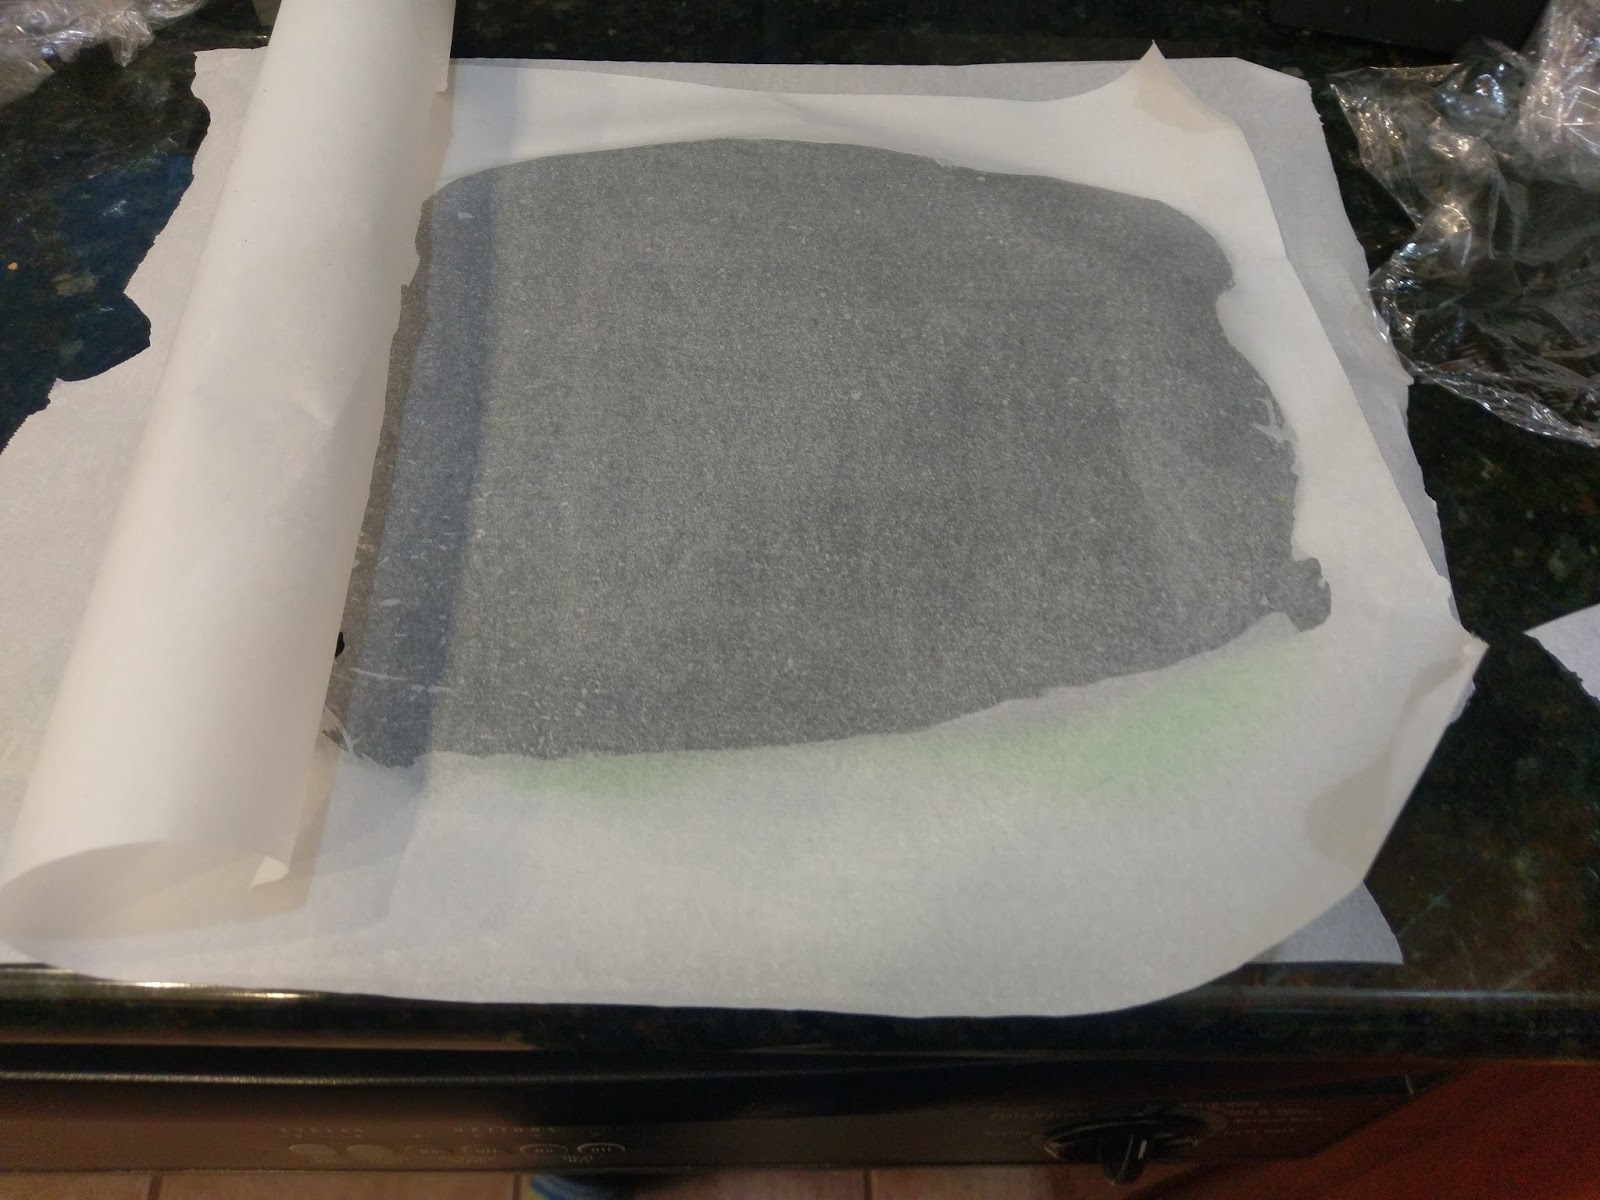
Pictured: the color of my soul. Now, place another sheet of plastic wrap on top of each ball of dough. You’ll want to flatten each dough ball out with a rolling pin to about the size and shape of a piece of 8 1/2 x 11 paper. I hadn’t beaten
anyoneanything with my rolling pin in awhile, so this was a great exercise in stress relief.
Aim for something that looks like this. Now, ensure each sheet of dough is completely covered in plastic wrap. I placed each sheet on top of some wax paper to make it easier to move to the fridge. Now comes the hurry up and wait part–place each sheet of dough into the fridge and let them set for about 2 hours. I placed each sheet one on top of the other since they were all covered in wax paper and plastic wrap. You can speed up the process by freezing for an hour, but this might make it more difficult to roll up.

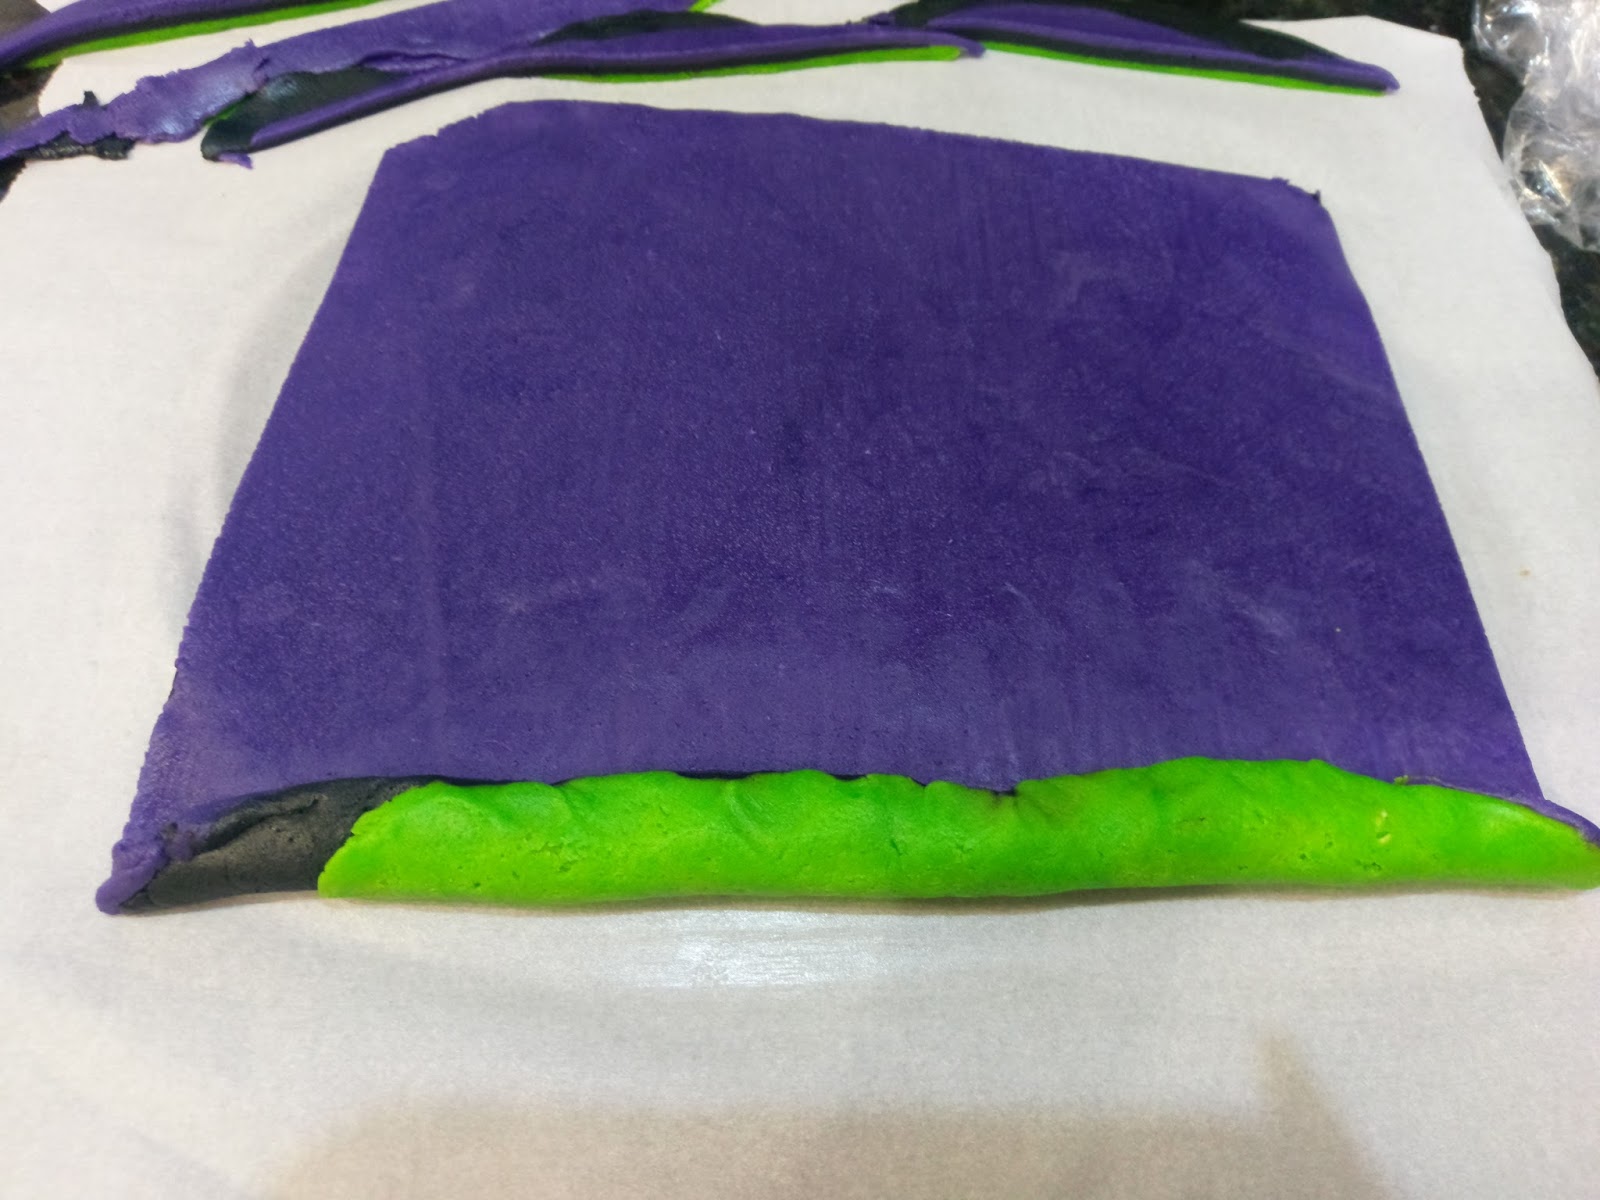
So many layers. Like me, in cookie form! Now, once the dough has firmed up, take the green layer and remove it from all its plastic wrap. Plop it down on a sheet of wax paper. Take the black dough and remove one side of the plastic wrap. Plop the side without any plastic wrap face down on top of the green dough. Then remove the other side of plastic wrap/wax paper. Finally, repeat this process by layering the purple dough on top of the black. I covered this final sheet with wax paper and smoothed the layers together by rolling over them a few times with my rolling pin.
Then I took a sharp knife and cut any overlapping edges so I was left with a rectangle. Save your scraps! You can roll them up and bake them for 10 minutes at 350 for a few extra cookies. 
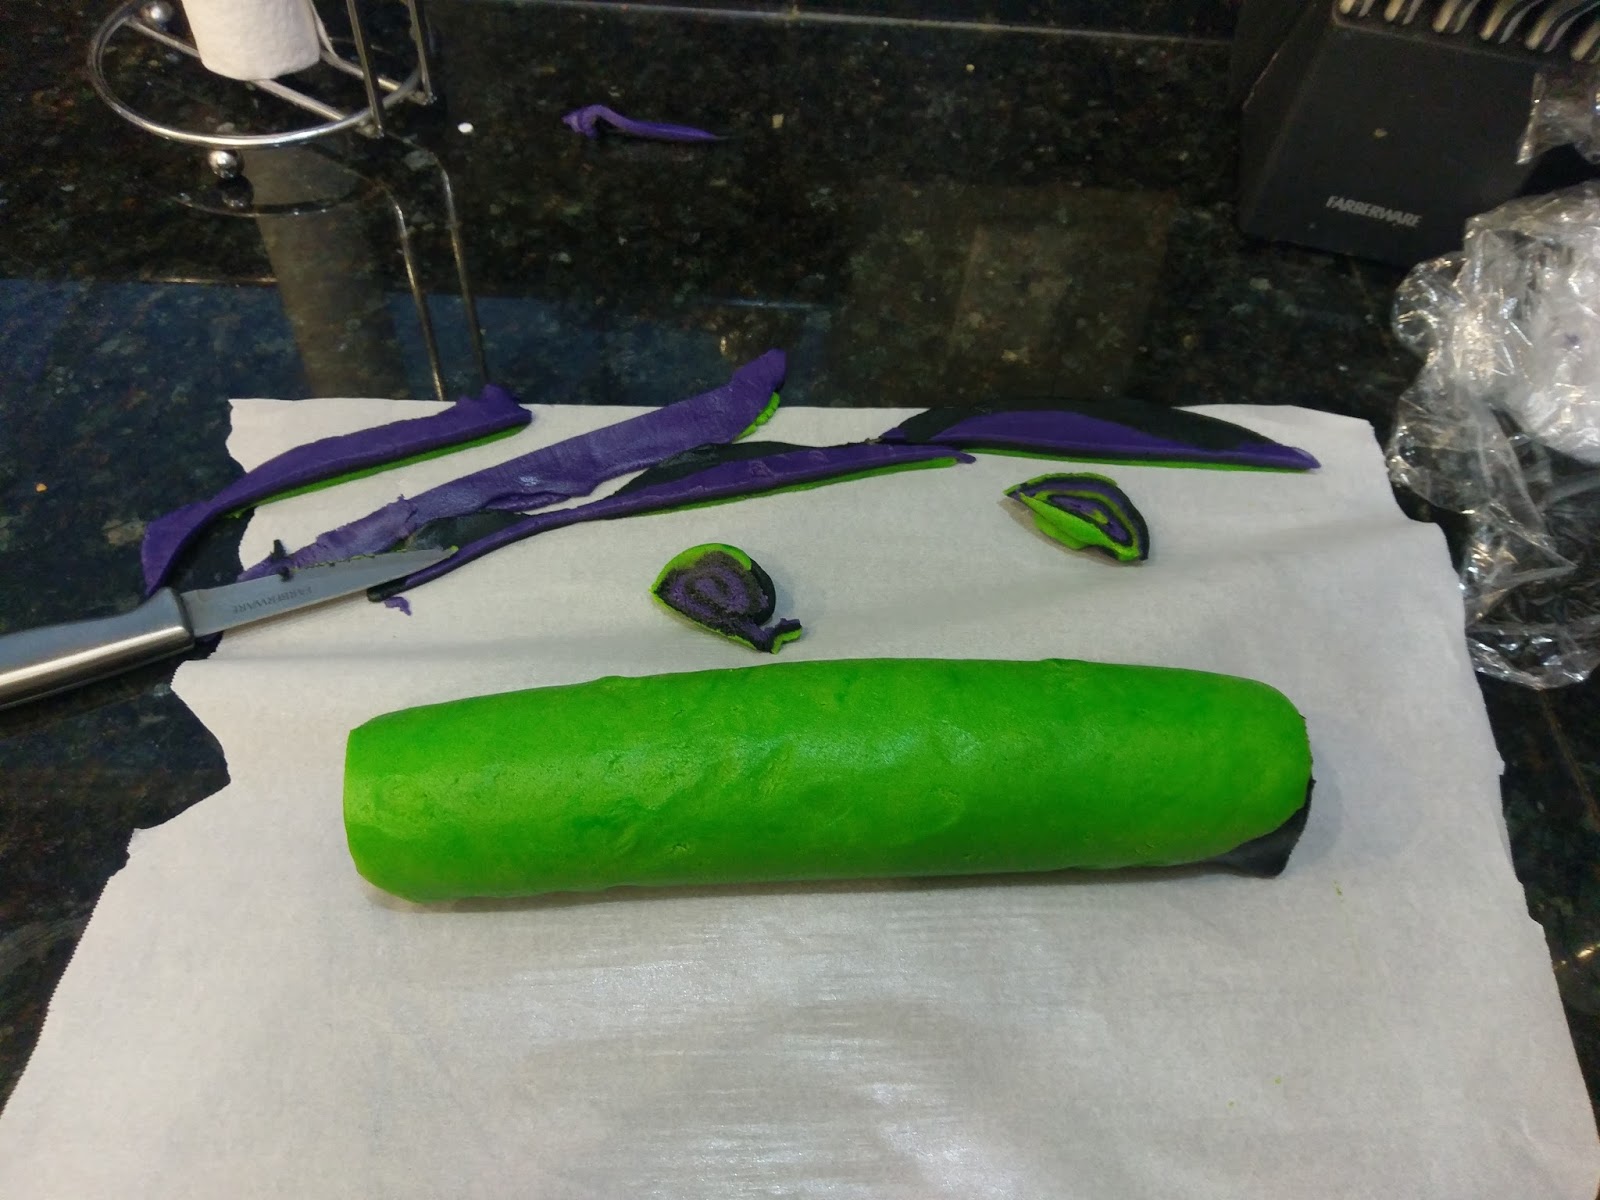
Very gingerly and gently, start to roll up your dough into a jelly roll shape, a.k.a., a log. 
Then I trimmed off my ends so everything was even. 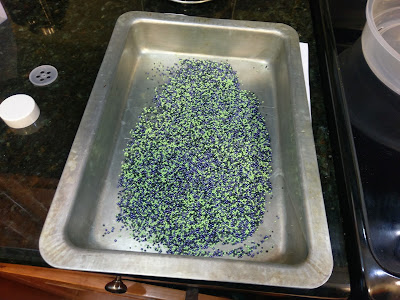
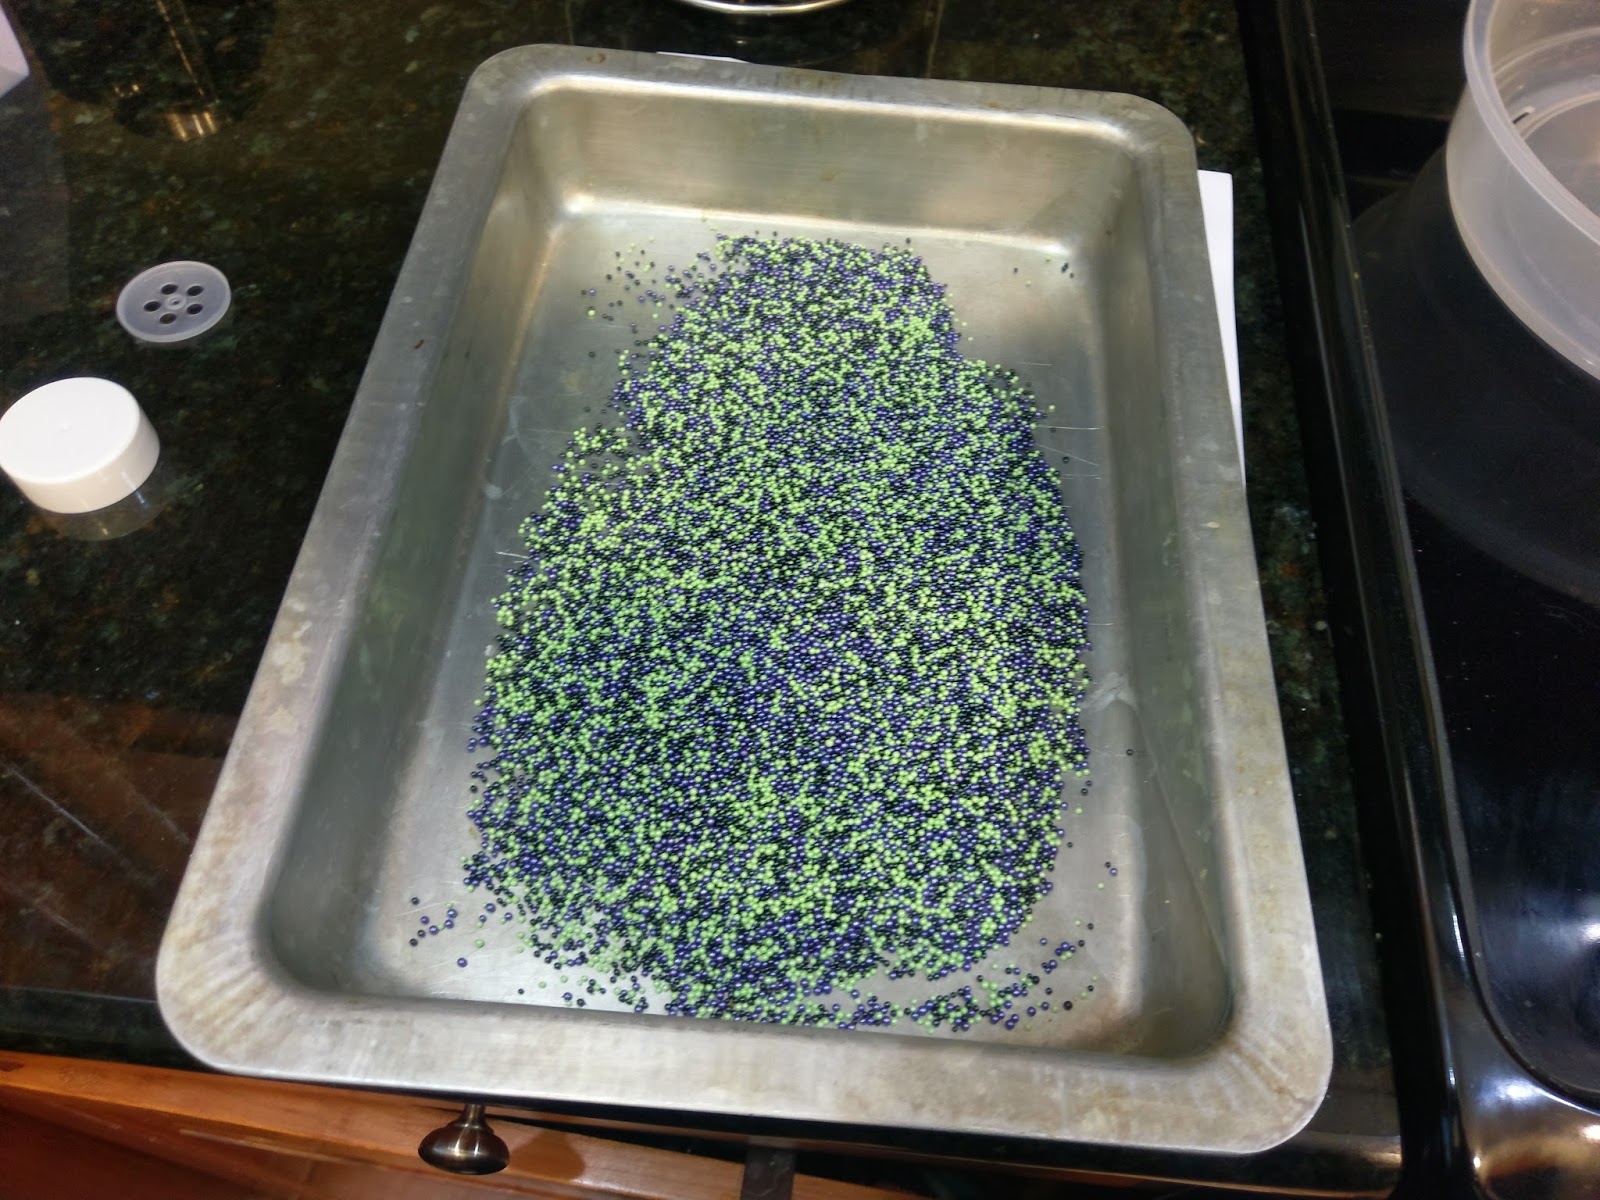
Now comes the fun part! Dump ALL OF THE SPRINKLES into a 9×13 pan. 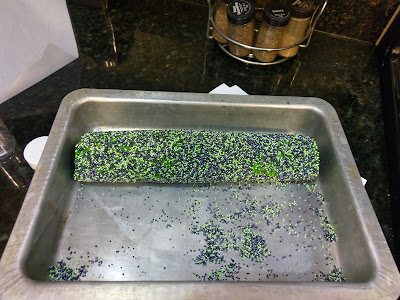
Then roll your log of dough around, pressing in sprinkles where you need to. 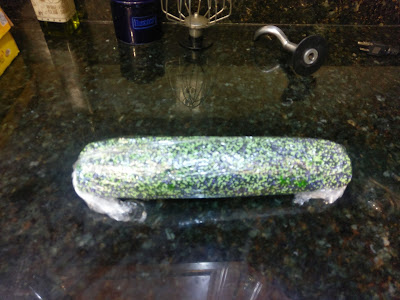
Once fully covered in gloriously spooky sprinkles, wrap tightly in plastic wrap and place in the freezer for 30 minutes. Now, after 30 minutes, take the dough log out of the freezer and roll it around on the counter to get rid of the flat bottom that formed while the dough was firming up in the freezer. Once rounded again, place back into the freezer for another 30 minutes. I told you…it takes forever.
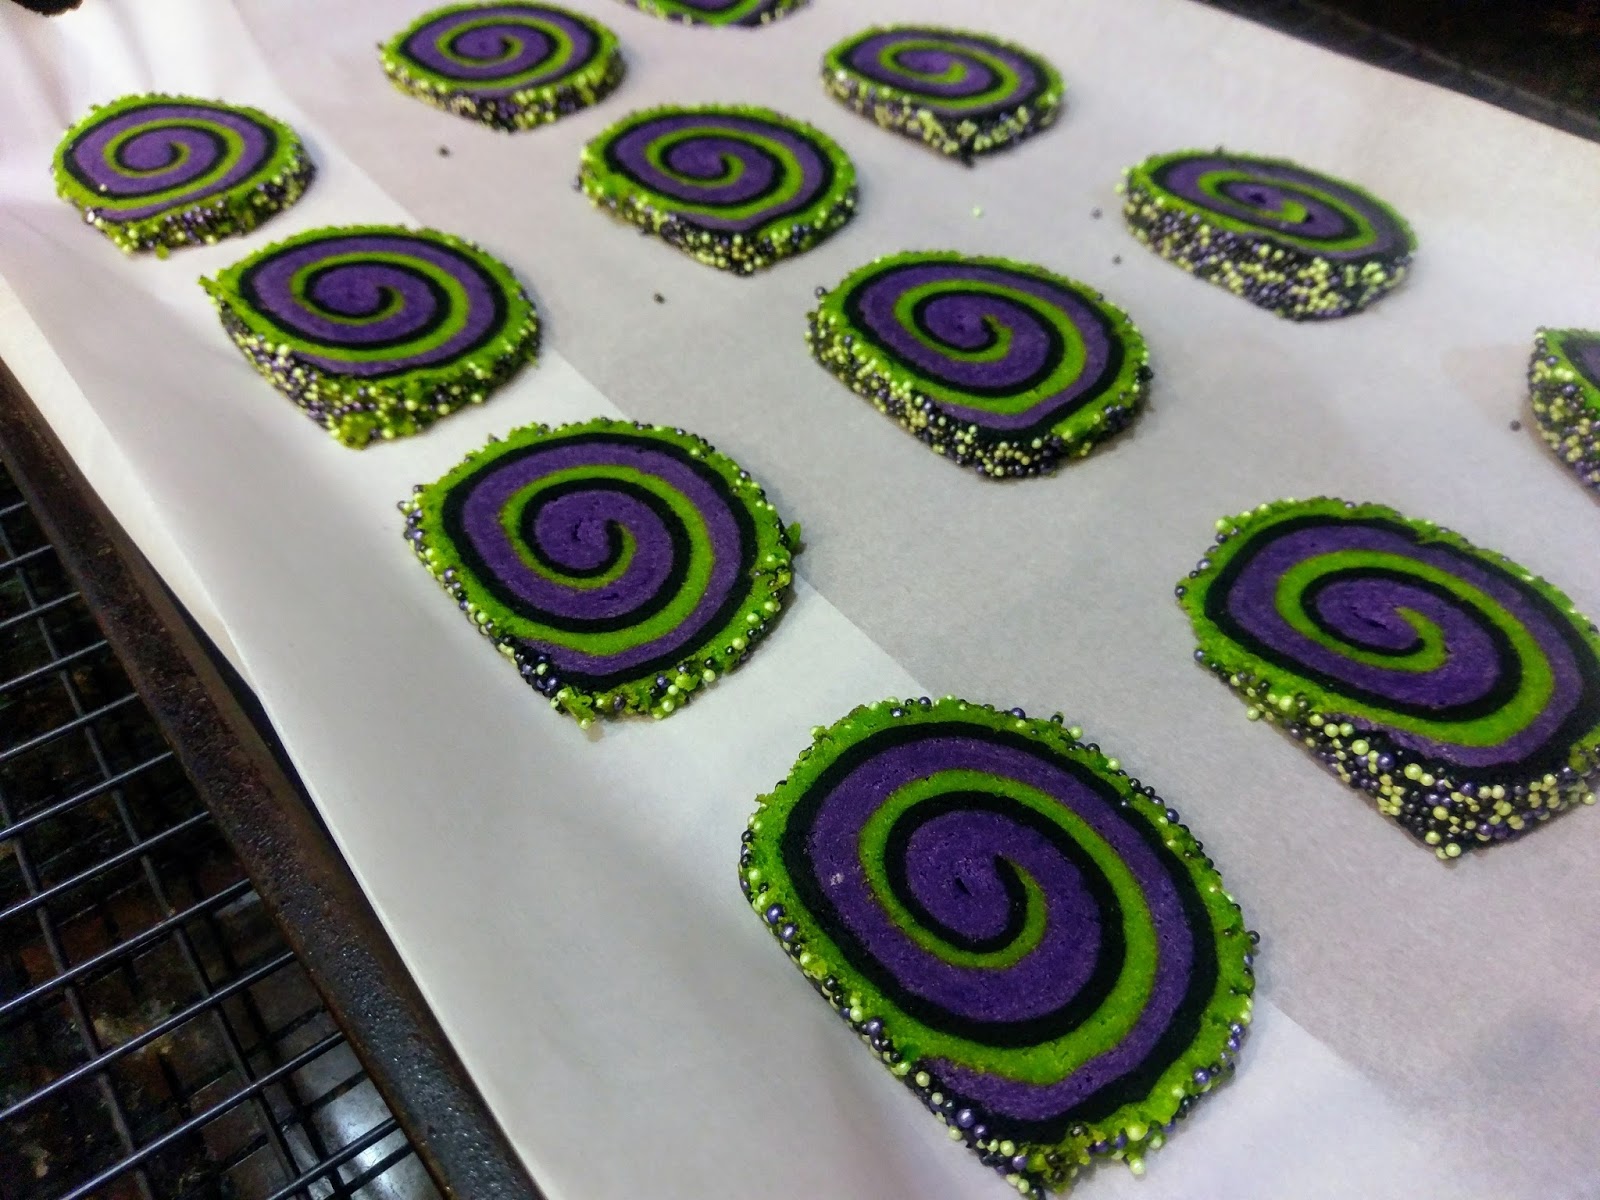
But I’ll admit it, they really look awesome. Preheat your oven to 350 a few minutes before it’s time to get the dough out of the freezer. Once somewhat frozen, take a very sharp knife and cut quickly into 1/4″ thick slices. Don’t saw–the colors will bleed. Cut straight down with a decent amount of pressure. Not so hard that you’ll misshape the log, but firm enough that you can cut cookies into shape quickly. Place Parchment paper down on a cookie sheet and load up with cookie slices.

This is one of my all-time favorite color trios. Bake 12 at a time, spaced a part a bit since they expand, for 10-11 minutes at 350. While one sheet is baking, prepare another cookie sheet with Parchment paper and slice 12 more rounds of dough. Put your remaining dough log into the fridge to stay firm while both your baking sheets are in use.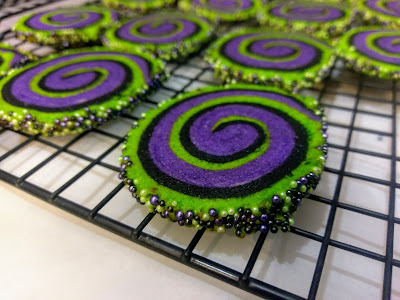
Soooo swiiirrrrlllyyyy. Once cooked, things will look firm but still a tiny bit shiny. Let the cookies rest on the cooking sheet for 5 minutes, then remove to a cooling rack. Continue baking for 10-11 minutes until you’ve sliced up and baked all your dough. Let completely cool until storing in an airtight container with a slice of bread (keeps the cookies fresh). These really are the perfect way to welcome you and your loved ones to the best month of the entire year. They’re bewitching, and by bewitching, I mean super buttery. Like the Halloween equivalent of a Spritz cookie. Not too sweet, but certainly very rich. And they just look awesome. I giggle with evil delight every time I walk by them in the kitchen. I’m beyond ready to show our neighborhood just how weird I am when I put our outside decorations up tomorrow. Lookout world, I’m here to scare the living crap out of you! While enjoying some bewitching pinwheel cookies. On sugar skull napkins. Because I wholeheartedly throw myself into Halloween like a member of the Addams family. I never had a butler growing up, but otherwise, the similarities between my family and theirs is pretty astounding. A family that scares together, stays together! ‘Til next time, my fellow eaters!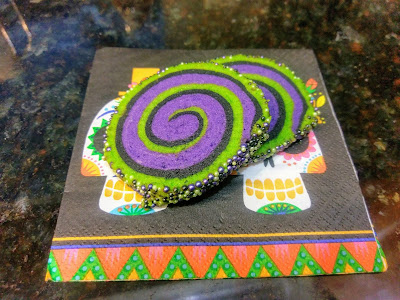
You’re getting very hungry… -
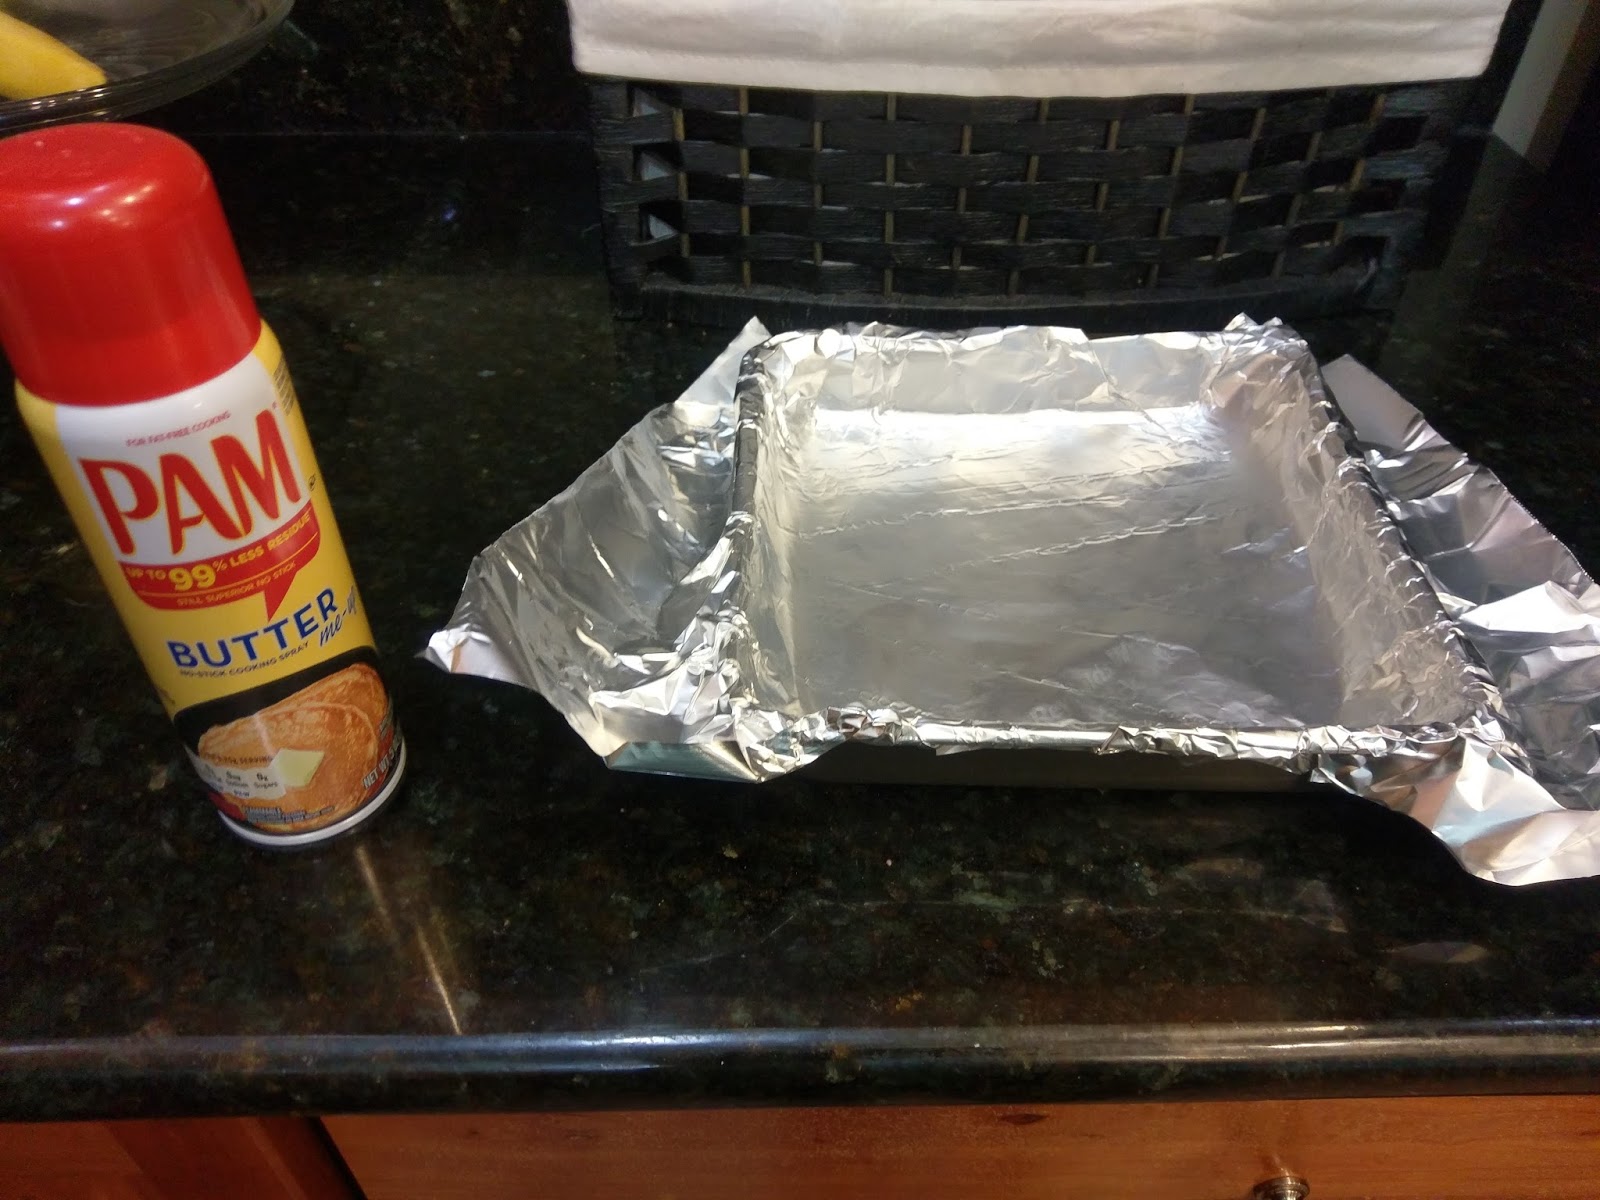
Easier Than Pie
Trust me, there’s no one more surprised than I am that this isn’t another pumpkin dessert blog. We finished up the pumpkin toffee bars earlier in the weekend, and I was immediately ready to go for round two of pumpkin spice madness, but I actually don’t buy my canned pumpkin in bulk. Shocking, I know. Instead I decided to give my husband a break and bake something else. I know, poor guy, having to put up with my baking all the time. But in all seriousness, I wanted something that was quick and easy. It’s still 90 every day with over 85% humidity and the thought of having the oven on for longer than 30 minutes is well, sweltering and makes me want to cry a little. I mean, it’s raining right now, and true to my Garbage-loving musical inclinations, I really am only happy when it rains. But much less so when the rain somehow makes it even more hot and humid than it was before it started. Florida even ruins rain for me, so I clearly am harboring some feelings that need to be eaten. And since my usual motto is that “These feelings would go great with pie,” I wanted to whip up something that would satisfy my lust for fall foods but take literally no effort on my part. And thus, the apple pie dump cake was created.

It was still hot out, but I felt so much better about it. The beauty of the dump cake is that you literally just dump your two ingredients in a pan and shove it in the oven. But since I am both complicated and a perfectionist, I used more than two ingredients and employed the use of my stand mixer. But I still promise it’s easy. And it’s actually super low-cal. My entire cake makes 15 servings at only 126 calories a slice (sans toppings). It’s a bit more than that after I pile the Cool Whip Free and caramel sauce on top, but what’s an extra 80 calories when I burn that many simply standing outside and sweating in the Florida heat for five minutes. Florida summer: nature’s natural weight loss remedy. You can definitely eat this without toppings. Honestly, without the toppings, this would make a great brunch staple. Fluffy angel food cake meets tart and sweet apple filling and a sprinkling of delicious cinnamon-sugar on top. Drooling yet? You should be. And if you think caramel sauce and Cool Whip can be eaten at any time of day, I both applaud you and recommend this can be eaten with any meal at any time.
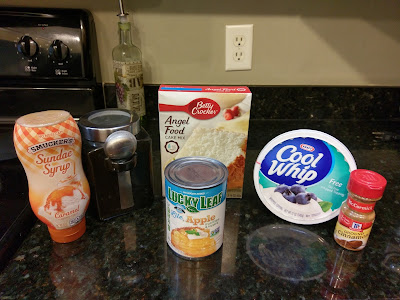
Six ingredients to pure crisp, apple-y fall bliss. Six ingredients?! I know, downright absurd for a dump cake. But when you consider I’m calling this an apple pie dump cake, thus fusing together pie and cake, I think you can forgive me for asking you to find six very simple ingredients instead of two. After all, I’m just trying to make the world a better place via dessert. I think we’d all be a lot happier (or at least less inclined to talk) with our mouths full of cake. Gather up:
- 1 box of angel food cake (the just add water kind)
- 1 can of apple pie filling (I used lite for lower cal and sugar content)
- Cinnamon and sugar
- Caramel Sauce
- Cool Whip Free
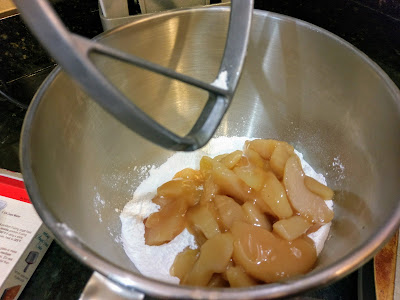
This is literally the hardest step. Start by preheating your oven to 350 and greasing a 9×13 pan with cooking spray. Now bear with me, here’s where things get extremely complicated. Dump your cake mix and can of pie filling into a bowl and mix on low until ingredients are blended. Whew. Thanks for coming with me on that wild ride.
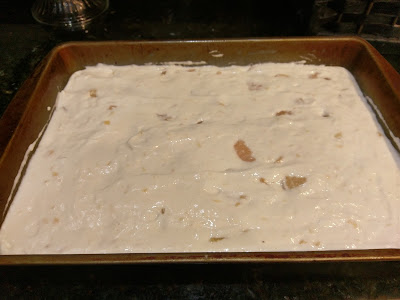
Did I mention I’m serving this cake with a heavy side of sarcasm? Plop your batter into your pan and smooth out with a rubber spatula. Tap on the counter to release air bubbles.
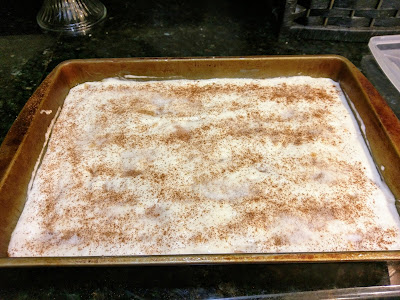
And also serving it with a side of cinnamon sugar. Then sprinkle a little bit of sugar and a lotta bit of cinnamon on top of your batter. Apple + cinnamon = the other great fall comfort food. Bake your cake at 350 for 25-30 minutes. The top should be slightly firm (not completely hard) and golden:

I wanted to dive in with a shovel. 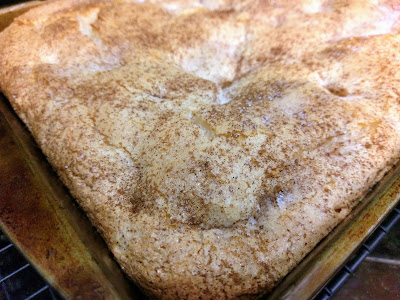
Mmmm cinnamon sugar is like crack to me. I refrained from licking the entire cake though, so I’m getting better with my addiction. Once cooked, set on a cooling rack and let it cool off a bit before serving. I let it cool all afternoon and reheated in the microwave for a few seconds to get the apples nice and gooey again and just because I feel like anything apple cinnamon should be served warmed.

And then this yummy melty Cool Whip happens. And I was not wrong…topped with a dollop of Cool Whip Free and some warm caramel drizzle, this transported me to one of my favorite cider mills in Rochester Hills, Michigan, where we could watch them press the apples to make cider while eating a fresh apple cinnamon donut. And yes, I do have a favorite cider mill. If you don’t, go find one that can bring you into a state of childlike glee that fall has arrived (in most of the United States). You can bide the time with this cake though because it is the perfect amalgamation of apple pie and angel food cake. Sweet and tart with that melt-in-your-mouth consistency of angel food cake and a slight crunch from the cinnamon sugar topping. The metaphorical icing on the cake is that its done in a whopping 35 minutes from start to finish. It will make your house smell like fresh cinnamon donuts and turn even the staunchest of summer lovers into a fall fanatic. I mean, you might want to top theirs with ice cream though. Baby steps. With October just around the corner, you can bet I’ll be back soon with a plethora of spooky treats. ‘Til next time, my fellow eaters!
-
Brace Yourselves…Fall is Coming
…or so I’m told. After threats of a giant hurricane quickly brought us out of our post-Alaskan adventure bliss, we’re left with 88 degree temps in the middle of September here in Northwest Florida. While it may be so hot and humid it fogs up my glasses when I step foot outside, I have total climate (and decorative) control over the interior of my house. Since it’s halfway through September, the fall decor is in full swing. I am greeted by Dia de los Muertos skeletons every time I walk in the door, and I am positively twitchy to get Halloween fully rolled out. But since I’m afraid some of my outside decor might actually melt in this heat, instead I decided to fill the inside of my home with a scent I had been longing for since last fall. That’s right–pumpkin flavored everything has now begun rolling out of the oven. Florida’s ridiculously hot weather better get with it, because I’m cranking the A/C, wrapping myself in a soft blanket, and willing crisp mornings to get here stat. Hell hath no fury like a Kate craving fall weather.

My biggest sin is that I dare to hope. These mouthwatering pumpkin toffee bars have thankfully taken me to my happy place. Coincidentally, my happy place is just being on my couch surrounded by my dogs, but this time with fall-flavored desserts. I’m hard pressed to decide what I like best about these bars–the pumpkin, the toffee, the fact that my entire living room smells like a giant Yankee candle, or the low-calorie goodness that baking with pumpkin provides. Why yes, I am pretty happy with myself for baking these. Thank you for noticing. What you won’t notice is an expanding waistline because an 8×8 pan makes 16 servings at only 164 calories a bar. I mean, you could even pig out a little and cut them into 12 servings for 220 calories. I’m not here to judge your pumpkin intake. In fact, I’m here to encourage it. I will say bars are best served while watching something Halloween-y.
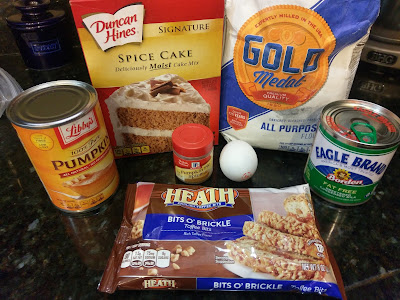
All the ingredients you need to make your very own white girl catnip. I found this recipe and decided to make a few modifications. Literally the hardest part about all of this was finding Heath toffee pieces at a grocery store (Target saved the day). Usually I keep my pantry stocked with toffee bits (my toffee cravings are the only thing more powerful than my pumpkin ones), but I had since devoured the last of my toffee during hurricane prepping. Nothing brings out my sweet tooth faster than imminent doom! I’ve been successfully eating all my feeling since 1987. To make these bars, you’ll need:
- 1 box of spice cake mix
- 1/2 cup of flour
- 3/4 heaping cup of pumpkin puree
- 1 egg
- 1/2 heaping cup of Heath toffee bits
- 1/2 cup of fat free sweetened condensed milk
- Optional: pumpkin pie spice

You will need ALL of the cooking spray. Start by preheating your oven to 350 and lining an 8×8 pan with foil. Heavily spray the foil–this dough is stickier than a jar of honey but equally sweet and delicious. Mix together the cake mix, pumpkin puree, egg, and flour. Spray your hands with cooking spray, and line the bottom of the pan with the dough mix. I used less than half of the dough mix and just gently pressed it into my pan and partially up the edges.
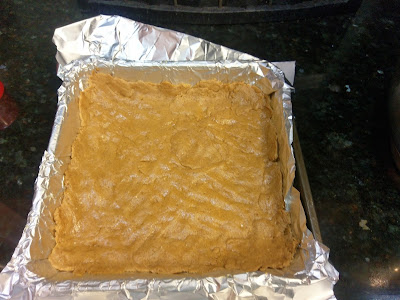
Like really bad finger paint art. Now, measure out your heaping half a cup of scrumptious toffee bits and sprinkle, sprinkle away, my friend!
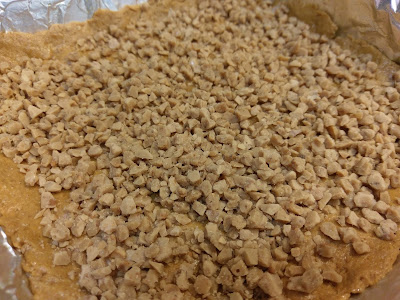
Like tiny little bits of heaven. What? I’m not drooling right now. You are. 
Then top your toffee bits with the 1/2 cup of sweetened condensed milk. Now, spray your hands with more cooking spray and take small chunks of the leftover dough mix. Flatten it out in your hands and top the condensed milk/toffee goodness until you’ve either used up the dough or have your bars completely covered. I sprinkled the top of my dough with pumpkin pie spice for some pizzazz and extra pumpkiny goodness. I am not ashamed of how basic my love of pumpkin spice makes me. I only get to enjoy this for three months a year, and then I go back to being Wednesday Addams the other nine months. Once I finished topping my bars, I had about 1/4 of my dough mix leftover.

Doesn’t have to look spectacular. You’re going to eat the entire pan faster than you can look at it, trust me. I took my remaining 1/4 of dough mix, greased a 6″ cake pan, flattened the dough into it, and topped it with chopped pecans and a dusting of cinnamon. I baked both my bars and my tiny pumpkin creation at 350 for 20-24 minutes. My 6″ pumpkin pecan cake was done at 20 minutes, and my pumpkin toffee bars were done around the 23-24 minute mark.
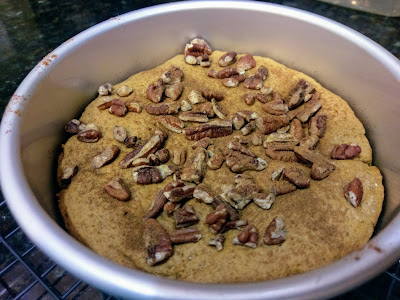
And the smell made me happier than a bird with a french fry. 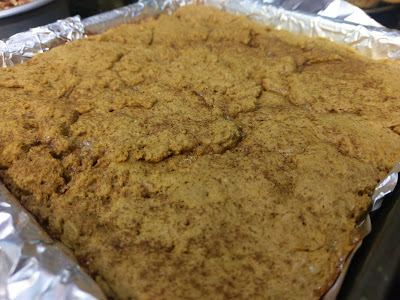
Must resist urge to dive in face first. Let your dreamy pumpkin goodness cool on a cooling rack until completely set. Give this at least four or five hours at room temp or pop into the fridge for two or three hours. These are worth the wait, I swear.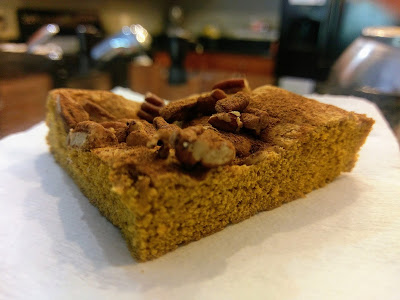
If you make a small cake with the leftover batter, it’s cooled in a half an hour. I know this because I had a slice with lunch, 30 minutes after I took everything out of the oven. The cake itself is bursting with that spiced pumpkin flavor so quintessentially tied to Autumn. It isn’t too sweet, but the cinnamon and pecans on top made it a perfect thing to have with brunch or as a means to tide you over before actual dessert time after dinner.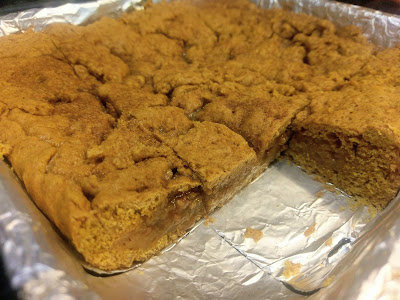
Pictured: Dessert part deux Yeah, I had dessert twice in one day. Is this surprising? No. It would honestly be more surprising if I had waited the entire day to get my hands and taste buds on some pumpkin. While the little cake was a good way to keep me from eating the entire pan of pumpkin toffee bars before my husband got home, the main course was so tasty I was transported to a time and place where the wind is cooler, the smell of fall is in the air, and the humidity levels are hovering somewhere around “You can totally have straight hair today” amounts. These pumpkin toffee bars blend two of my favorite treats together into one perfect amalgamation of everything I ever wanted in a dessert. They are sweet, they are spiced, they are laden with toffee. If I could only eat one dessert for the rest of my life…but thankfully I don’t have to make that choice because there’s like 65 different ways to incorporate pumpkin into dessert, and I’m just getting started. ‘Til next time, my fellow eaters!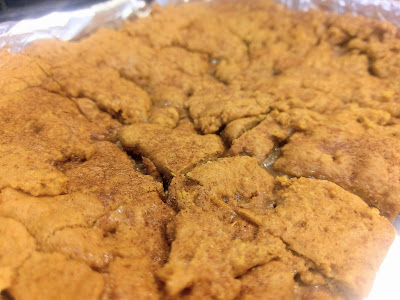
You are the first in a long line of your kind.

Healthy-ish cake, cupcakes, pie, and cheesecake recipes and decorating tips