-
Cranberry Orange Champagne Cheesecake
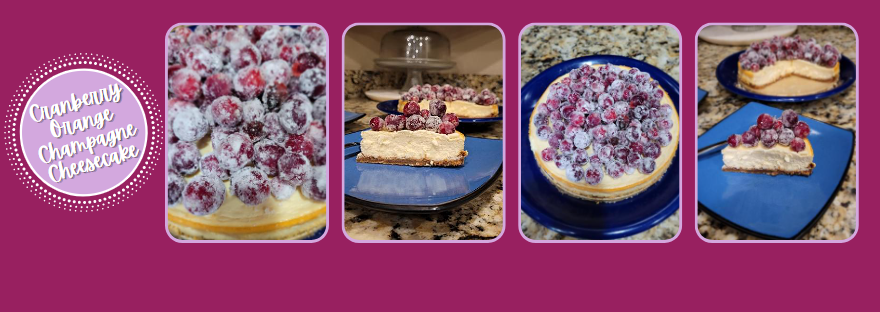
A mouthful to say and an even better mouthful to eat–if you’ve got a leftover bottle of champagne hanging out from New Years and half a bag of cranberries taking up space in your freezer, you’re well on your way to one of the tastiest cheesecakes I’ve ever dreamed up. Follow the recipe below to make a show-stopping, mouth-watering cheesecake to give your dessert lovin’ self in 2023…it’s low calorie and high protein, so those resolutions still stick! You cran do it.
Citrusly the best bake of the year (so far). Recipe and Instructions
Cranberry Orange Champagne Cheesecake
Bubbly, citrusy cheesecake on a Biscoff crust topped with sugared cranberries.
If not gluten free, use any kind of graham cracker crumbs or regular Biscoff/Speculoos for the crust. Greek yogurt can be replaced with an additional 8 ounces of cream cheese, and Madhava can also be replaced with regular sugar. To make non-alcoholic, replace champagne with sparkling apple juice or more orange juice. I have not tested this recipe with any other protein powders, so I recommend a whey-based protein.
Ingredients
CRUST
*120 g (1 box) Schar’s gluten free Speculoos
*24 g (2 TBS) Madhava allulose sweetener
*42 g (3 TBS) cold light butter
CHEESECAKE FILLING
*224 g (8 ounces) 1/3 the fat cream cheese at room temp
*48 g (1/4 cup) Madhava sweetener
*226 g (1 cup) nonfat Greek yogurt, strained overnight
*60 g (1/2 cup) Quest vanilla milkshake protein powder
*4 ounces (1/2 cup) extra dry or Brut champage
*2 ounces (1/4 cup) no pulp orange juice
*1 tsp vanilla extract
*2 large eggs
SUGARED CRANBERRIES
*4 ounces (1/2 cup) water
*4 ounces (1/2 cup) no pulp orange juice
*192 g (1 cup) Madhava sweetener
*200 grams cranberries
*96 g (1/2 cup) Madhava sweetener
*1/4 cup sanding sugar
Directions
- Line an 8″ springform pan with Parchment paper and spray with cooking spray.
- Preheat oven to 375.
- Dump the butter, 2 TBS Madhava, and Speculoos/Biscoff in a food processor and grind until smooth.
- Place crust mix into prepared pan and smooth to the edges (I use cooking spray on my hands to make this easier).
- Bake for 10-12 minutes until golden; remove to cool while making filling and lower oven temp to 350.
- Using a whisk attachment, mix the cream cheese and Madhava sweetener in a stand mixer on medium high for 2-3 minutes until fluffy and smooth.
- Add in the yogurt and protein powder mixing well (it will be thick/chunky).
- Add in champagne, OJ, and vanilla, and blend until smooth, 2-3 minutes.
- Switch to a paddle attachment, and on low speed, add eggs, one at a time, mixing until smooth.
- Fill a large roasting pan with 4-5 cups of steaming hot water. Wrap your springform pan in several layers of foil and place into a crockpot liner, tying the edge up, to keep your cheesecake from getting any water into it during the water bath.
- Pour the cheesecake batter into the prepared pan, and put the prepared pan into the roasting pan with water.
- Bake for 45-60 minutes, until the sides have set but the center is still jiggly.
- Turn the oven off, leaving the cheesecake inside, and crack the oven door to allow the cheesecake to finish baking for 1 hour.
- Remove from the oven and place on a cooling rack to cool to room temp; I like to run a sharp knife around the edges after it is cool.
- Refrigerate cheesecake overnight or place in fridge for 4 hours before serving.
- To make the candied cranberries, bring the OJ and water to a boil in a medium sauce pan.
- Once boiling, reduce to a simmer for 5-8 minutes, until sugar is completely dissolved and syrup is slightly thickened.
- Allow this mixture to cool for 10 minutes.
- Place cranberries in a large bowl, and pour syrup mix on top.
- Allow this to mix overnight or for at least 4 hours to get the cranberries tacky.
- Strain the mixture with a sieve over a large bowl (the remaining syrup is GREAT for cocktails).
- Let the cranberries dry in the bowl for 30 minutes and get sticky.
- Place sanding sugar and Madhava on a large baking sheet; roll the cranberries in this mix to coat completely.
- Let the cranberries set for 2-3 hours, until the sugar on the outside has hardened into a shell.
- Remove cheesecake from pan and top with cranberries.* Enjoy!
- Keep leftover cheesecake covered in the fridge.
Nutrition
Macros
8 servings
236 cal/19 c/12 f/13 p per slice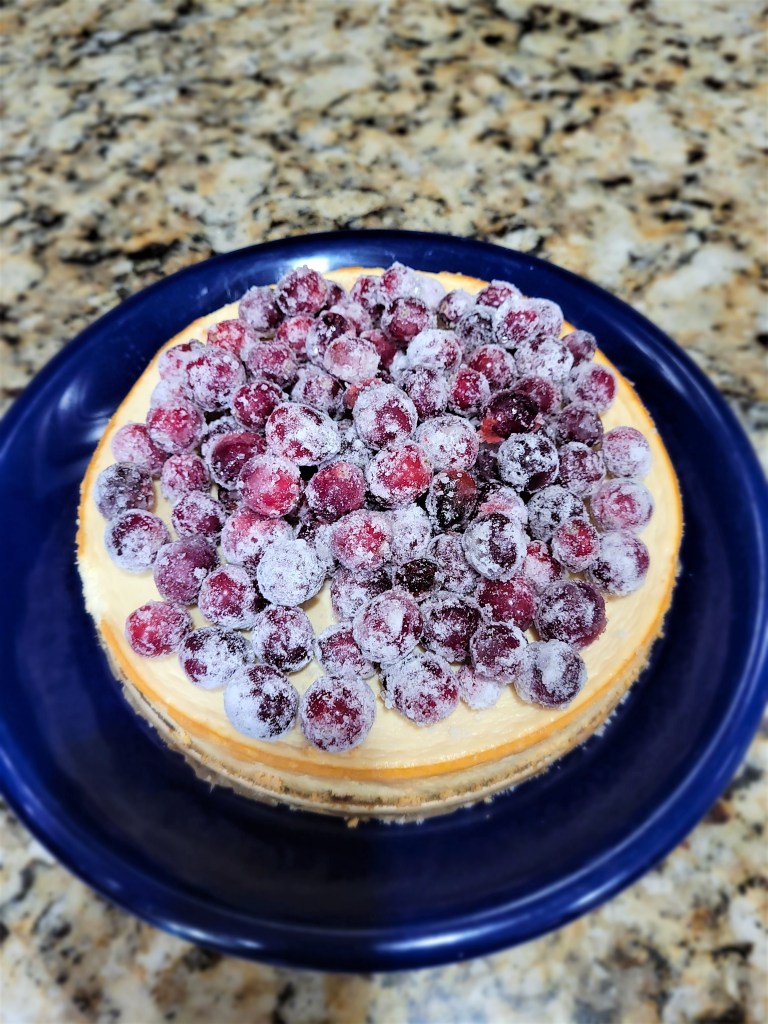
Yes we cran! 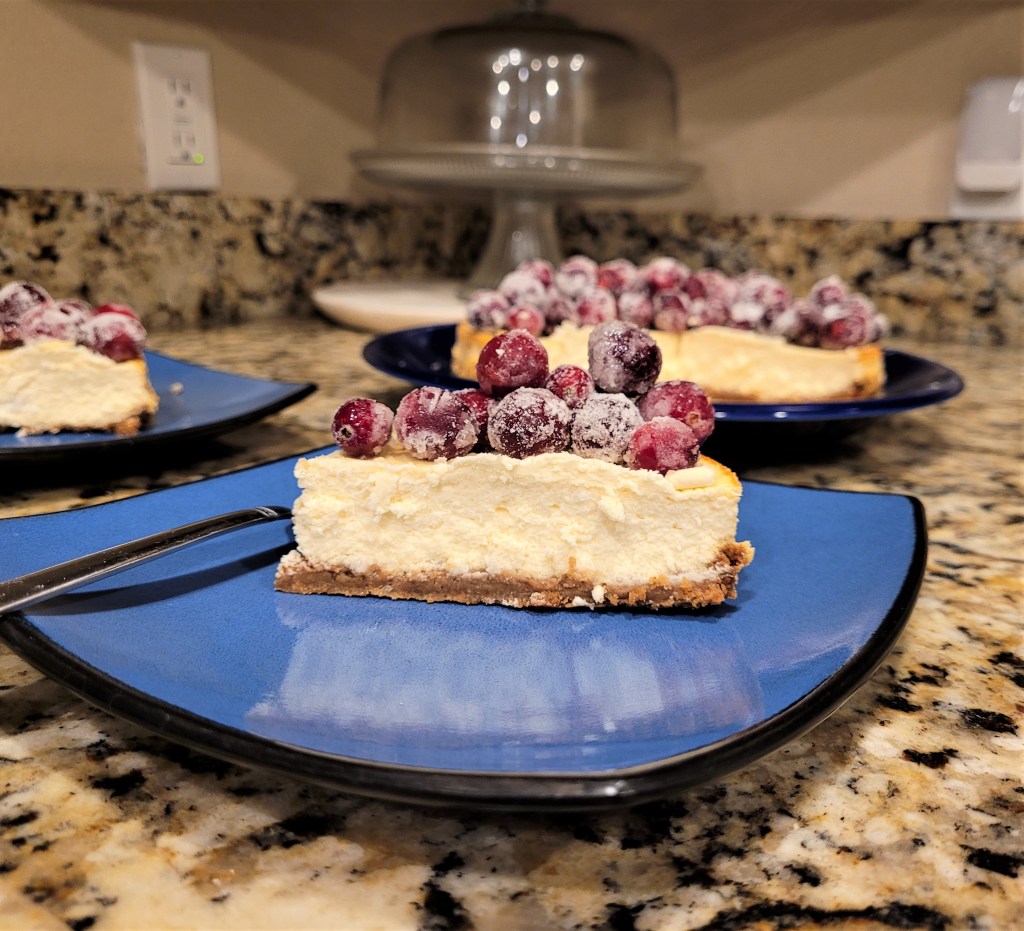
Heavy on the champagne, light on the OJ, the perfect slice of mimosa. - Line an 8″ springform pan with Parchment paper and spray with cooking spray.
-
Birthday Cake Calories Don’t Count
Jump to recipe and instructions
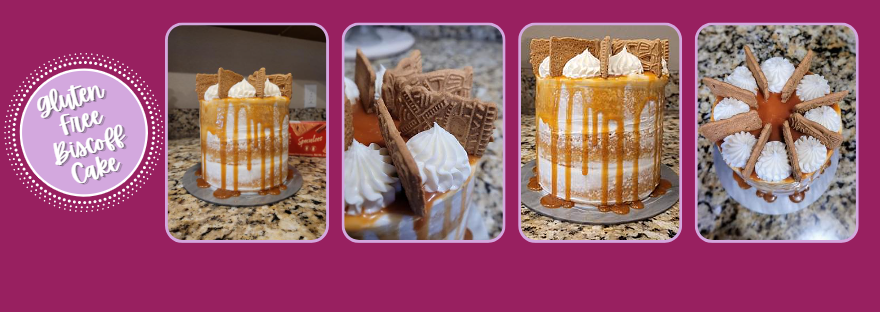
Having a birthday so close to several major holidays used to be kind of a bummer as a child. People would roll Christmas and birthday presents together or forget about my birthday entirely, friends would always be out of town, or it would be the first week back to school. Now that I’ve gotten older, I am actually quite thankful my birthday is so close to Christmas and New Year’s because it’s very easy to pretend it doesn’t exist…you know, just let another year go quietly into the night. Or I mean, it would be, if my hobby wasn’t cake baking. Each year the cake turns into a bigger fire hazard, so we skip candles now and just get to the good part.
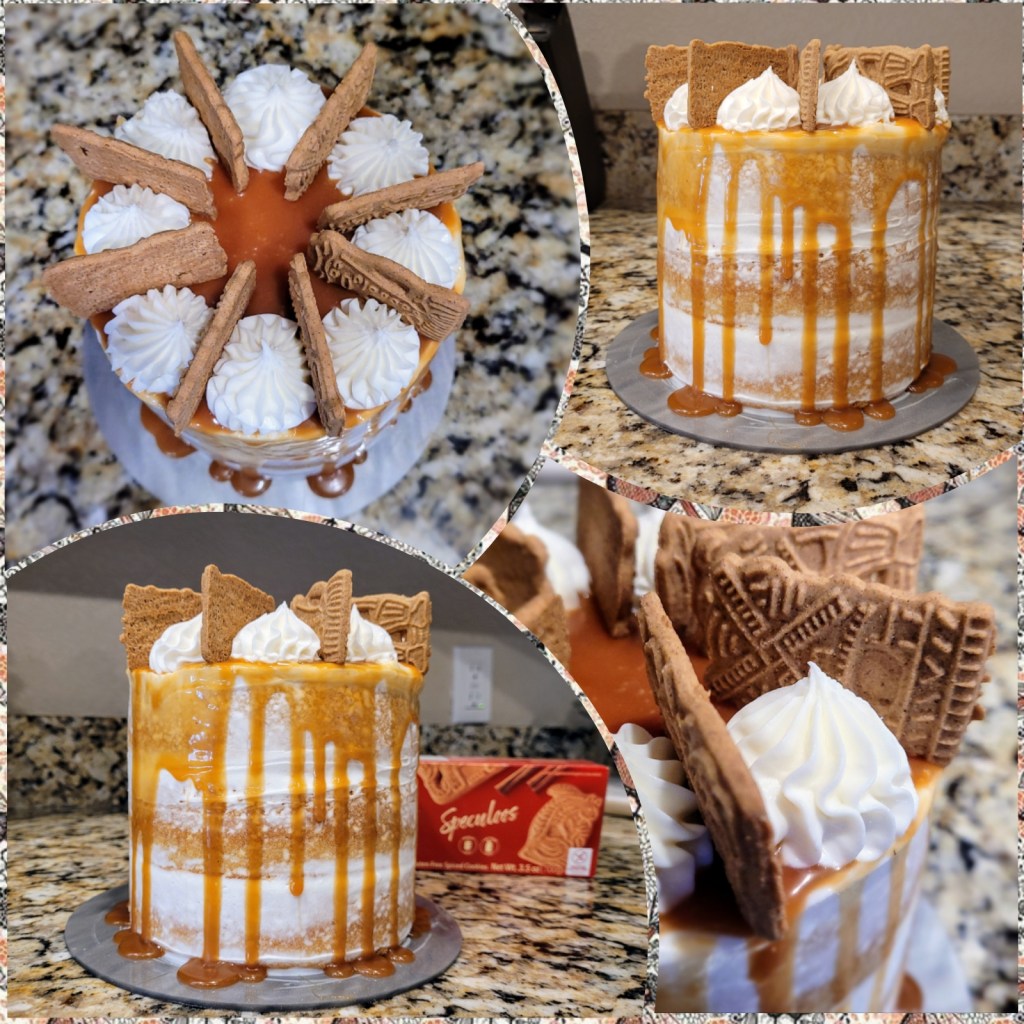
Getting older sometimes is a piece of cake. This semi-naked cake is an early birthday wish come true: someone finally found it in their hearts to make gluten free Speculoos cookies, so after four long years, I can once again eat Biscoff-flavored cookies to my heart’s content (and my heart is very content on crushing a box as often as possible). Biscoff cake with caramel cream cheese frosting sandwiched between layers, topped with sugar free homemade caramel sauce, and cookies on top…in a word, this cake is everything I hope my 36th year on this planet cracks up to be: epic (close second runner-up: rich). Something magical happens every time I take bite, and I’m whisked away to a Biscoff-flavor-induced dreamland where everything tastes phenomenal and a river of caramel takes me swiftly to nirvana. Basically, this birthday cake is so dang good I don’t even care that I’m almost another year older. Because we’re going out of town for my actual birthday (and because I’m a Type-A, plan-making, definition of a Capricorn), I made this early. Birthdays turn into birthweeks in this house. And since birthday cake calories don’t count for me, I’ll let you know this recipe is 323 calories a slice for 10 slices total for anyone having an unbirthday. Which still isn’t bad, all things considered, and can definitely fit into any New Year’s resolutions.

Big ups to the people of Schar for making delicious gluten free Speculoos and for not sending me a concerned email about potential numerical mistake when I order six boxes at a time. If they ever start making actual gluten free cookie butter, that’s it…my days of eating mindfully and healthy are OVER. Back to eating like we’re 22! To make this spectacular Speculoos cake, you’ll need:
- 1 box of gluten free yellow cake mix (or regular yellow or white cake mix if not gluten free, you cookie-butter-having jerk)
- 4 eggs
- 4 ounces (1/2 cup) unsweetened applesauce
- 1 1/4 cups skim or fat free milk
- 100 grams (about 14 Schar Biscoff cookies or one package) of gluten free Speculoos, ground into a fine powder in your food processor (or Lotus Biscoff if you’re once again gluten free. Jerk.)
Preheat your oven to 350 and prepare three 6-inch round cake pans with cooking spray and bake even strips. Add all cake ingredients into a stand mixer, blending on low for 30 seconds before switching to medium high for one and half minutes. Pour batter evenly into each pan and bake for 35 minutes. A toothpick should come out of the center of the cake clean. Let rest in the pan for 10 minutes before turning out to cool completely on a cooling rack before frosting.
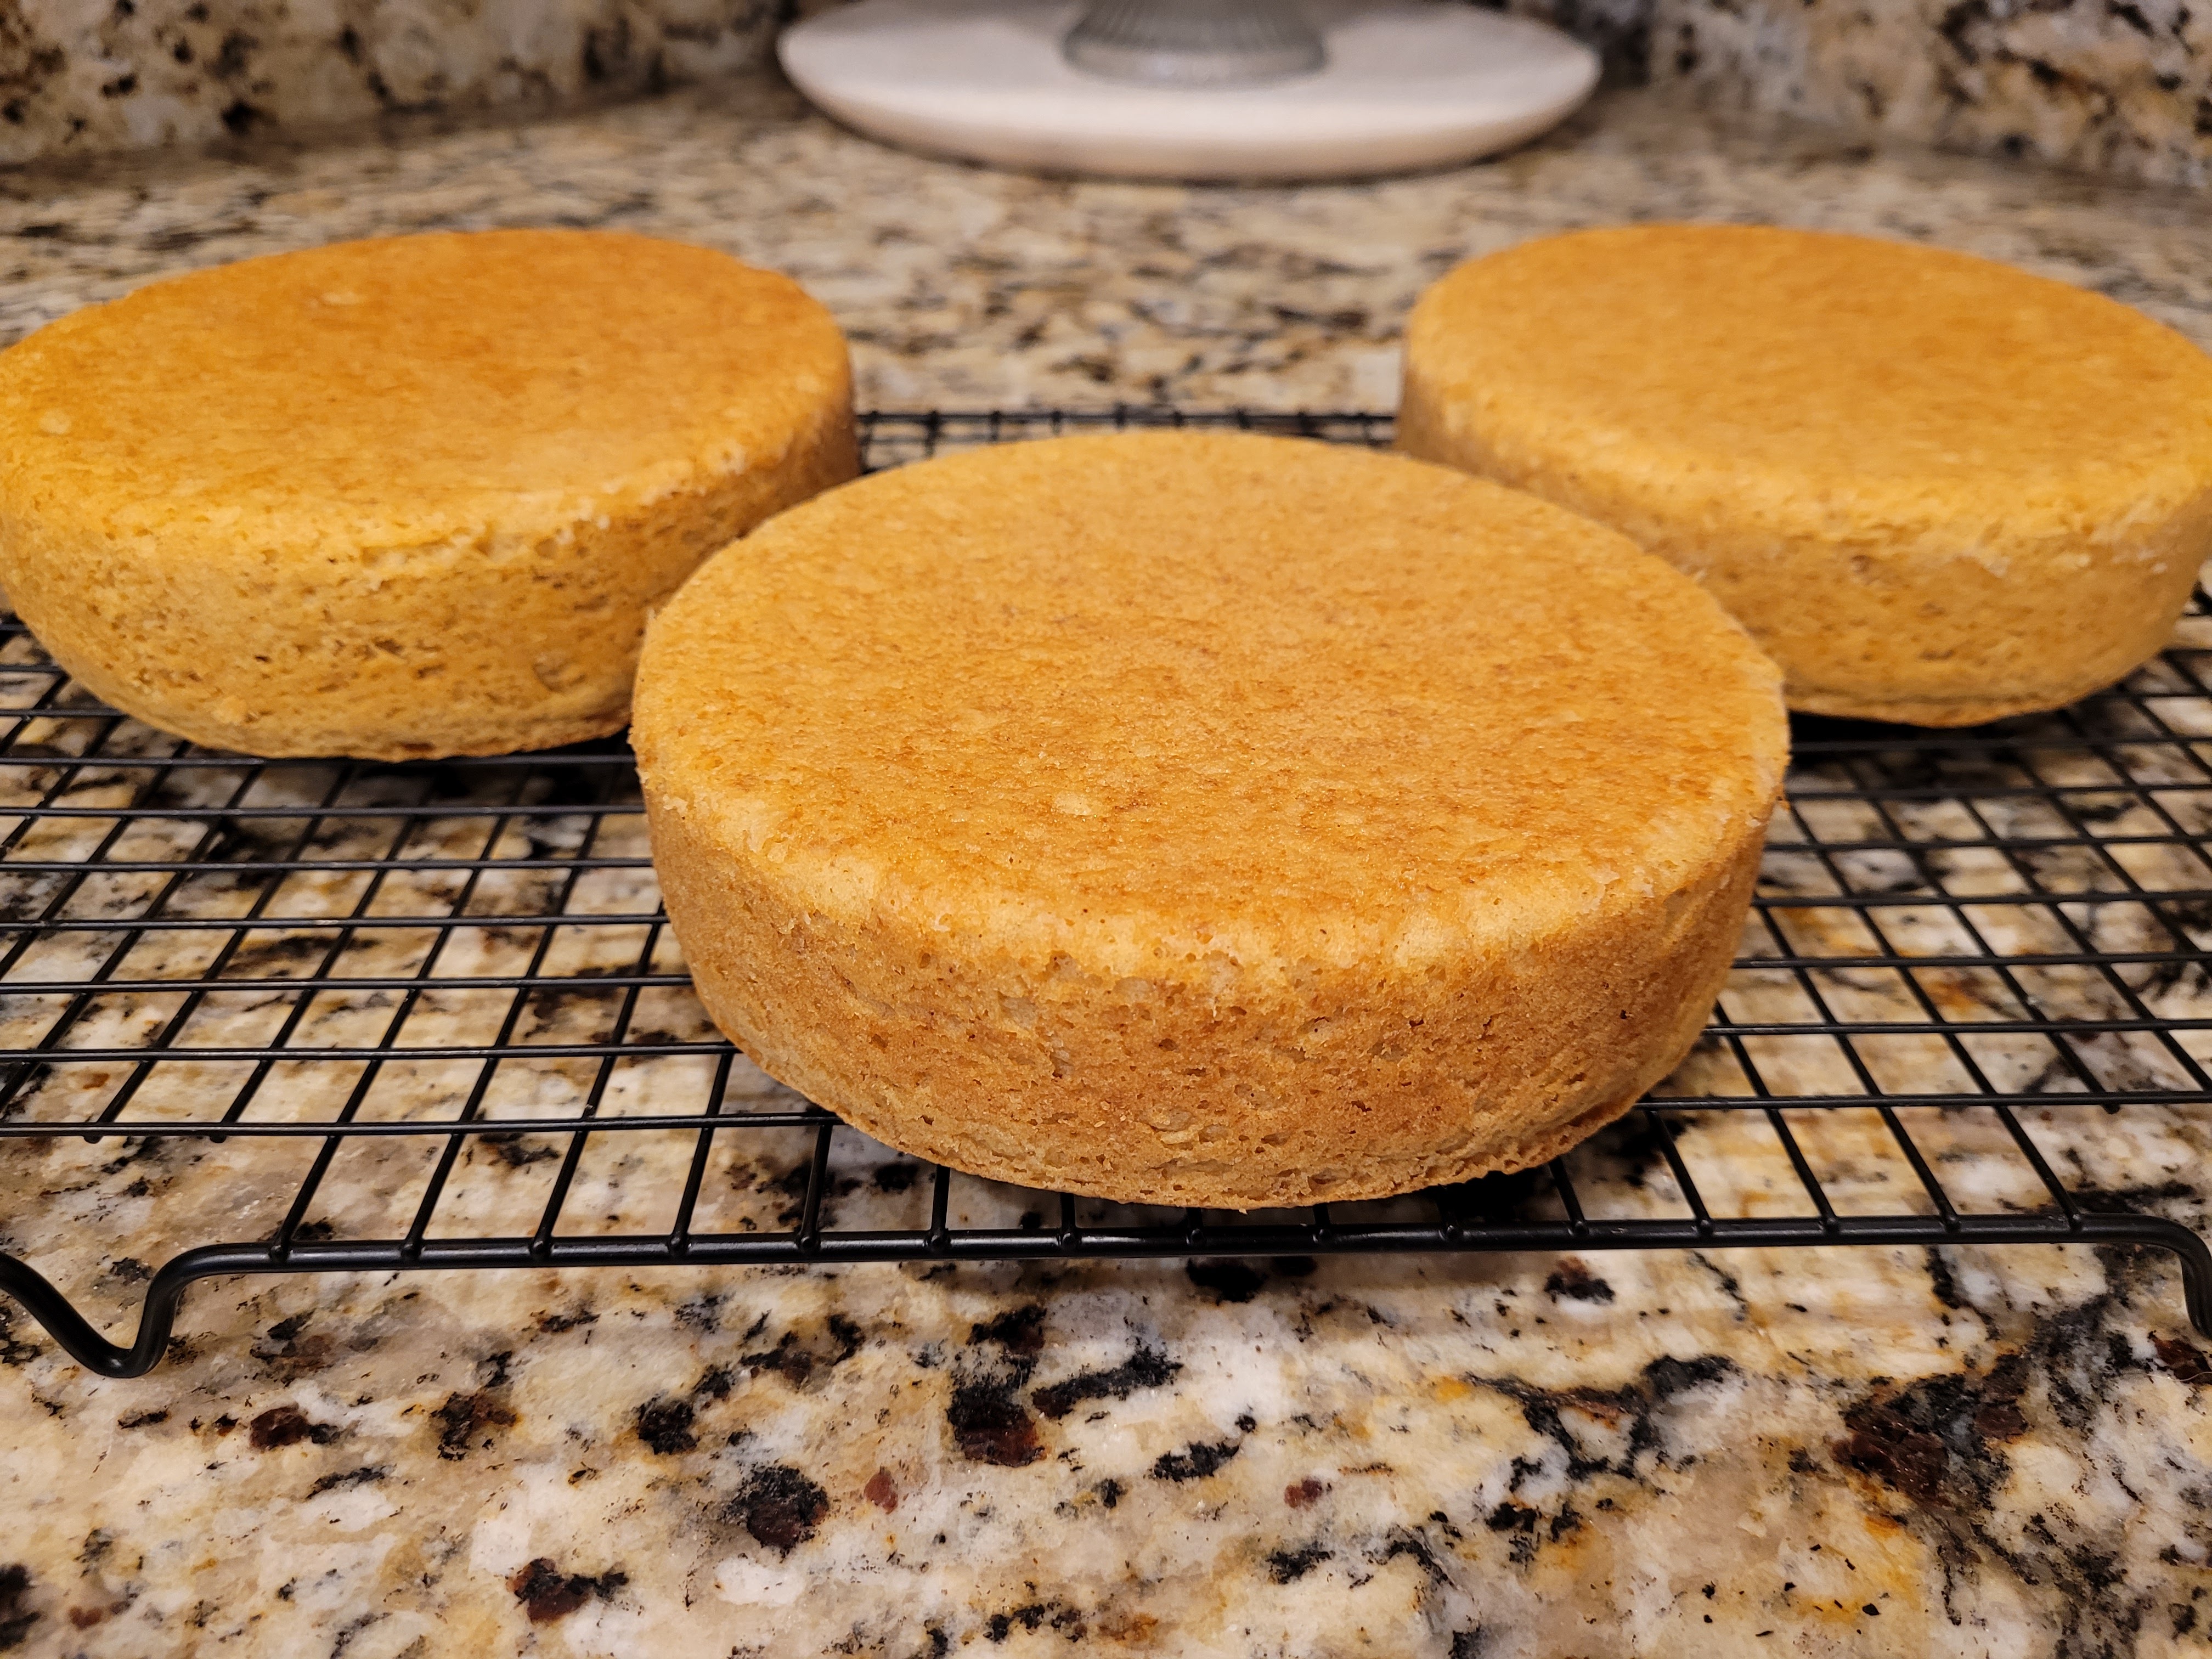
Proof that it’s not just bad things that come in threes… While your cakes cool, you can make the caramel sauce for the drip. You’ll need:
- 200 grams (1 cup) of Allulose or regular sugar; I used Madhava brand allulose, picked up at my Albertson’s
- 86 grams (6 TBS) light butter
- 120 mL (1/2 cup) heavy whipping cream
- 1/4-1 tsp salt (depending on your taste preferences; I used 1/4 tsp)
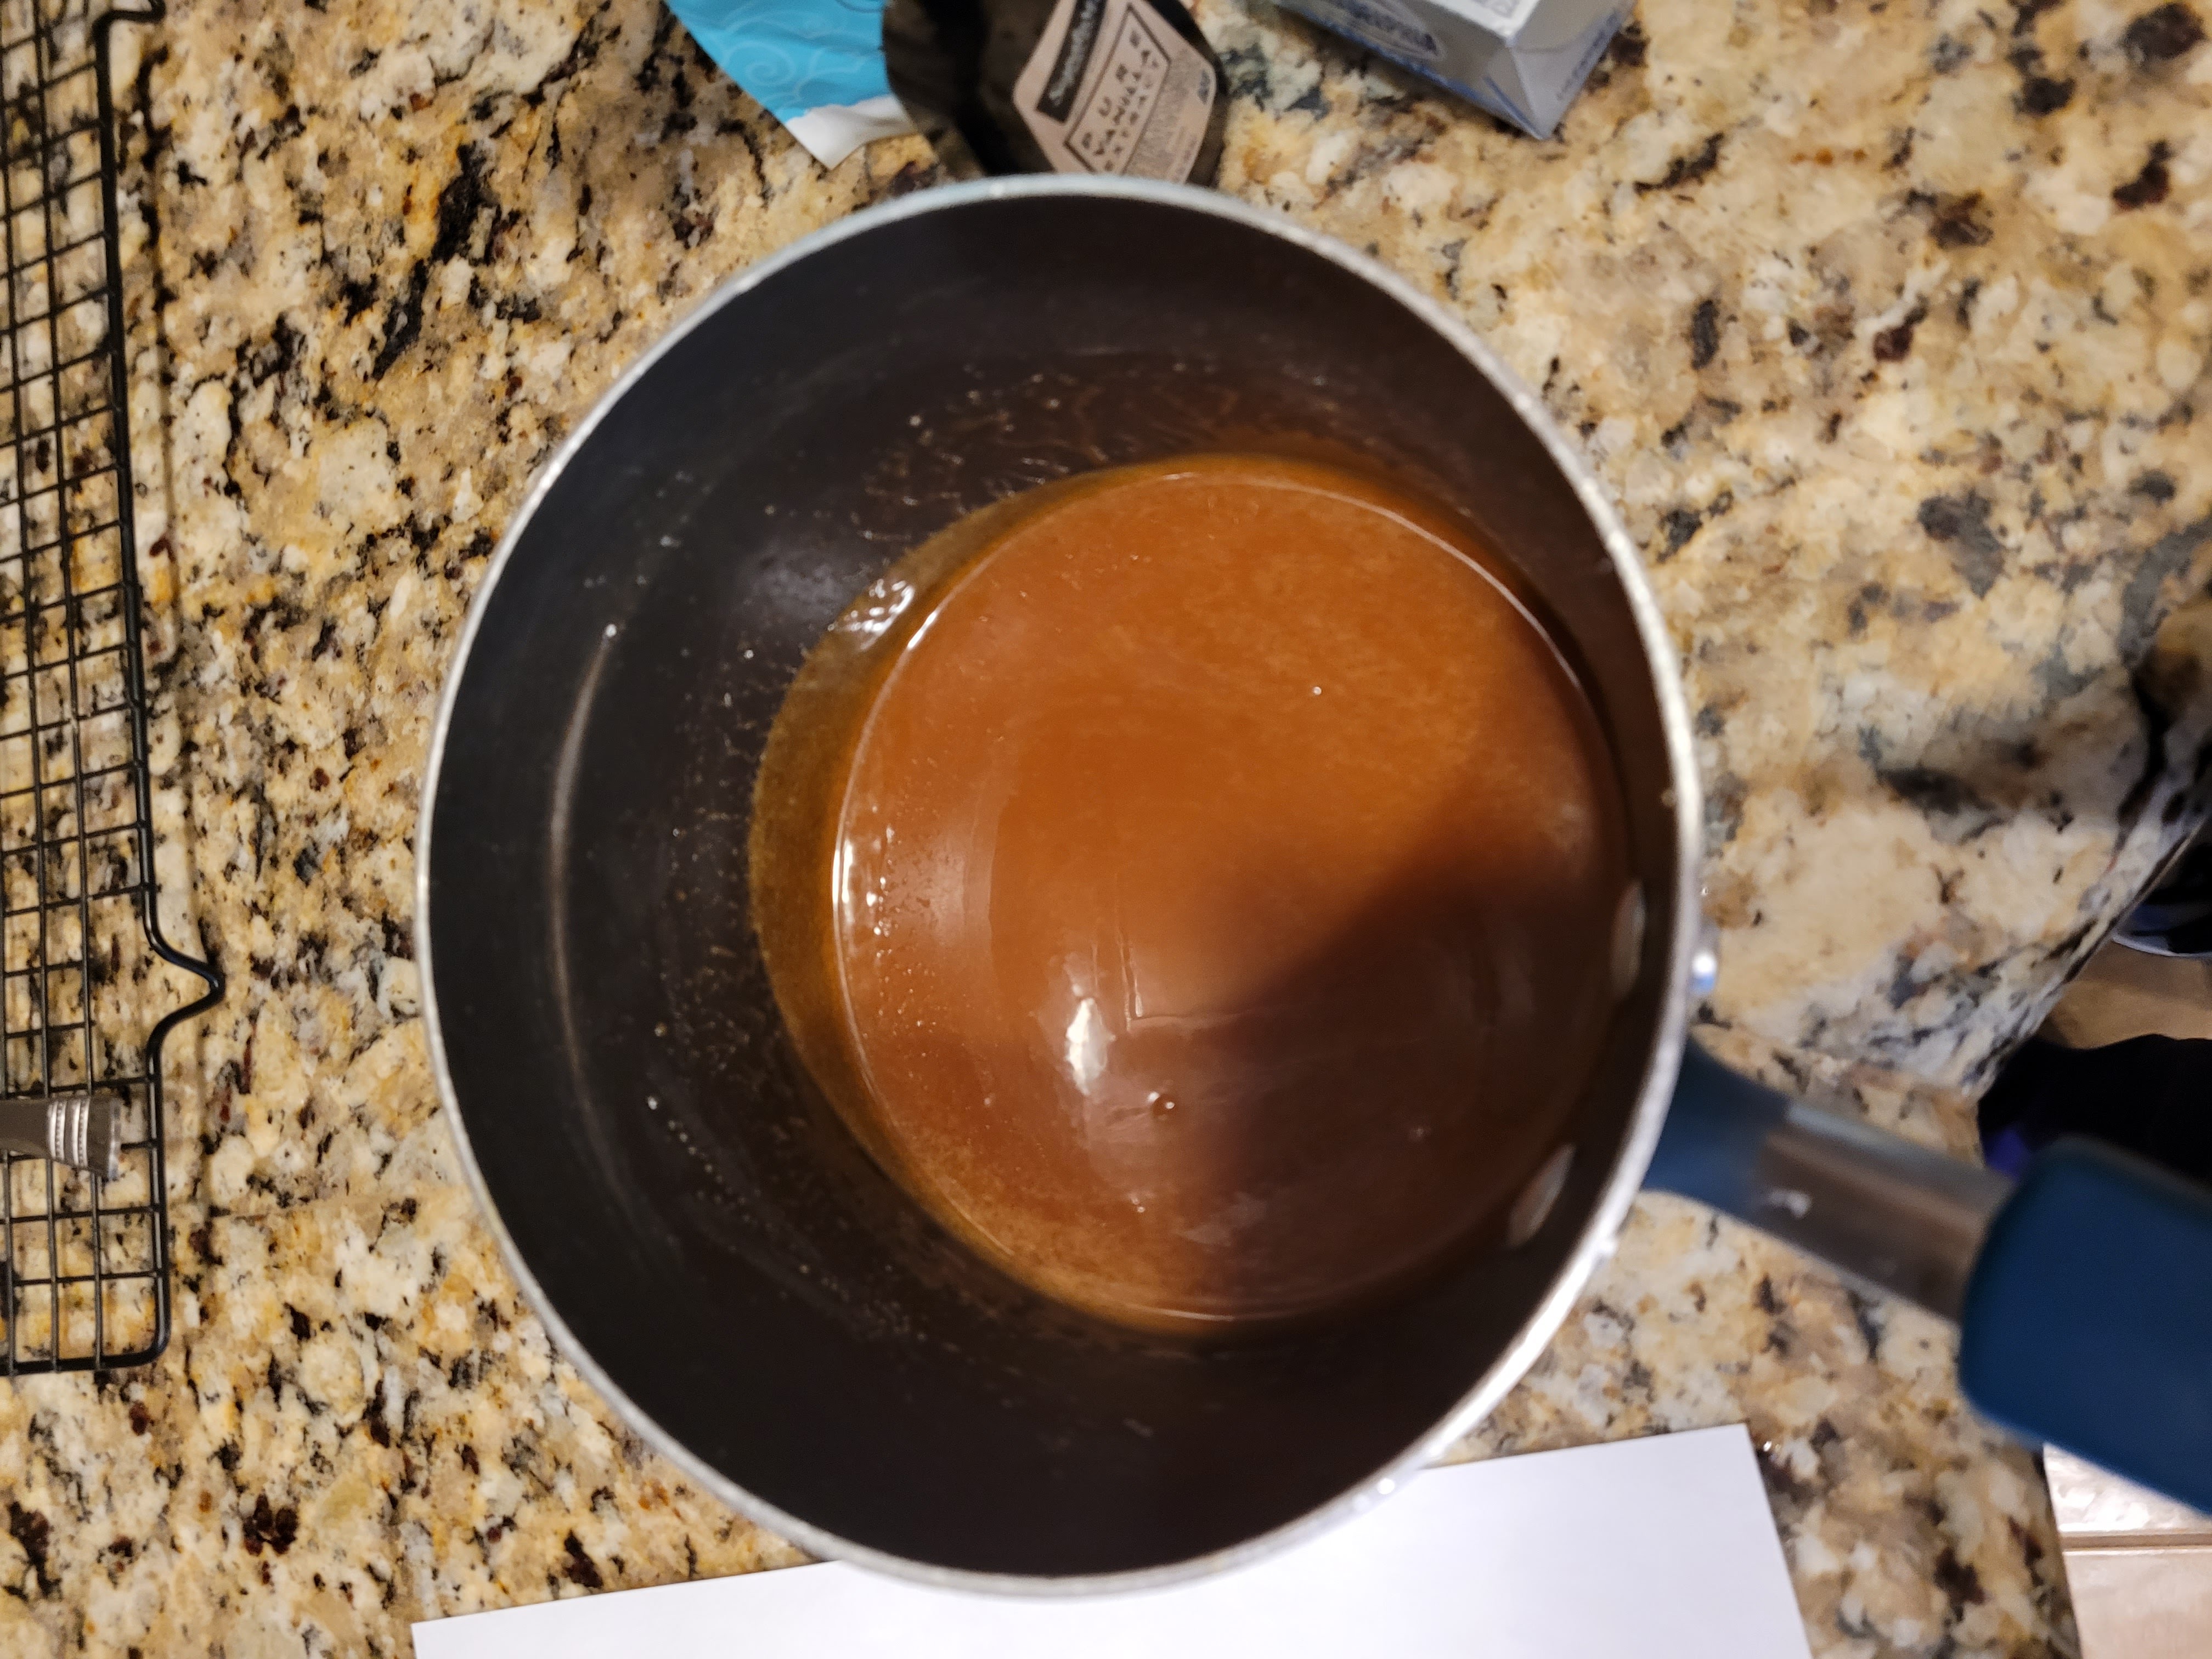
It was at this point, I wondered if I should have made birthday flan. I recommend premeasuring everything you need because you’ll have to constantly stir to make the caramel. Start by adding the Allulose or regular sugar to a medium saucepan; on medium-high heat, continuously stir (use a wooden spoon) the Allulose for 5-6 minutes, until it has turned into a liquid and is a beautiful shade of amber (see above). Now, lower heat to medium, switch to a whisk, and add in the butter. Things will get very bubbly and very dangerous (like me after a glass of champagne!), so be careful while you whisk for 2-3 minutes until the butter is completely melted to keep from getting liquid hot magma splattered on your arms. Once you’ve passed this, the most treacherous of caramel making stages (it isn’t for the weak), slowly whisk in the heavy whipping cream until completely absorbed. Let this boil for a minute before removing from heat and whisking in the salt. You will need to let this come to room temp over about an hour before using.
But that’s okay, because you’ve got a cake to kind of frost… To make the caramel cream cheese frosting, you’ll need:
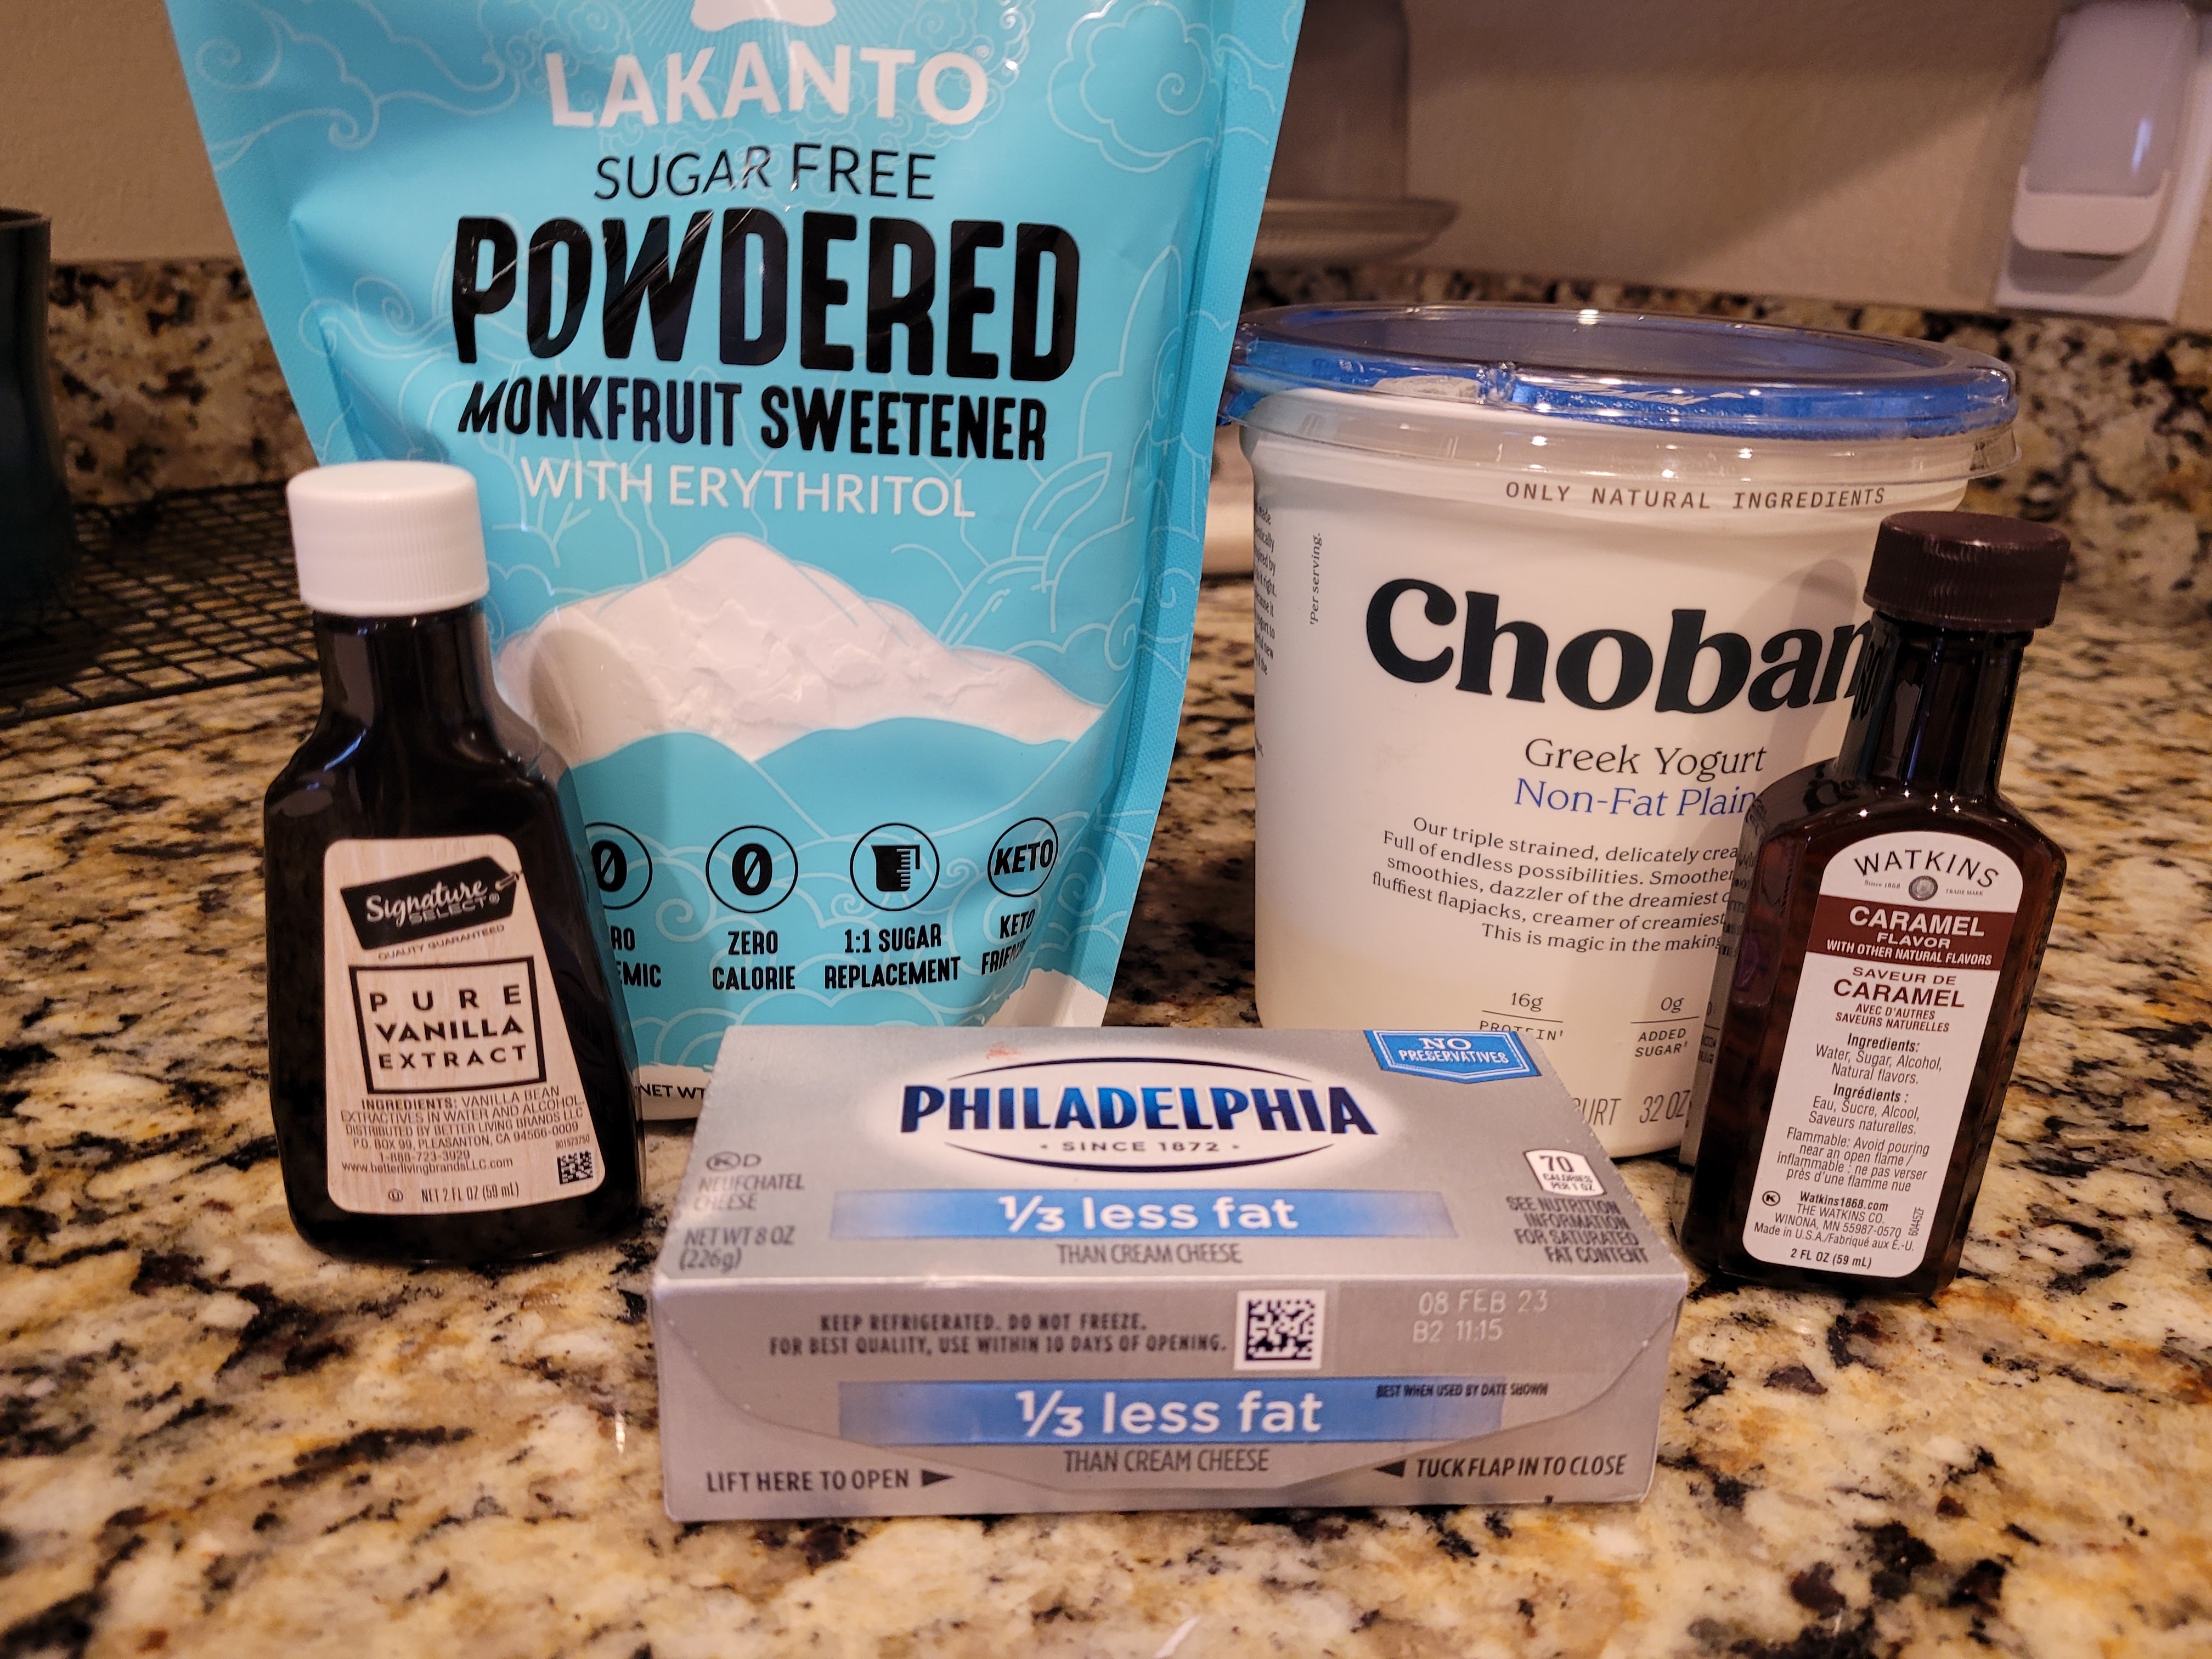
- 225 grams (8 ounces) of 1/3 the fat cream cheese, softened
- 226 grams (1 cup) of fat free Greek yogurt, strained overnight to remove moisture
- 16 ounces (4 cups) Lakanto powdered monkfruit or regular powdered sugar
- 1 tsp caramel extract
- 1 tsp vanilla extract
- 1 TBS milk
Whip the cream cheese and yogurt with a paddle attachment in your stand mixer until fluffy, about three minutes. Add in half the monkfruit, and both extracts. Blend well, then scrape the bowl before adding the remaining monkfruit and 1 TBS milk; if the frosting is too stiff, add another TBS milk.
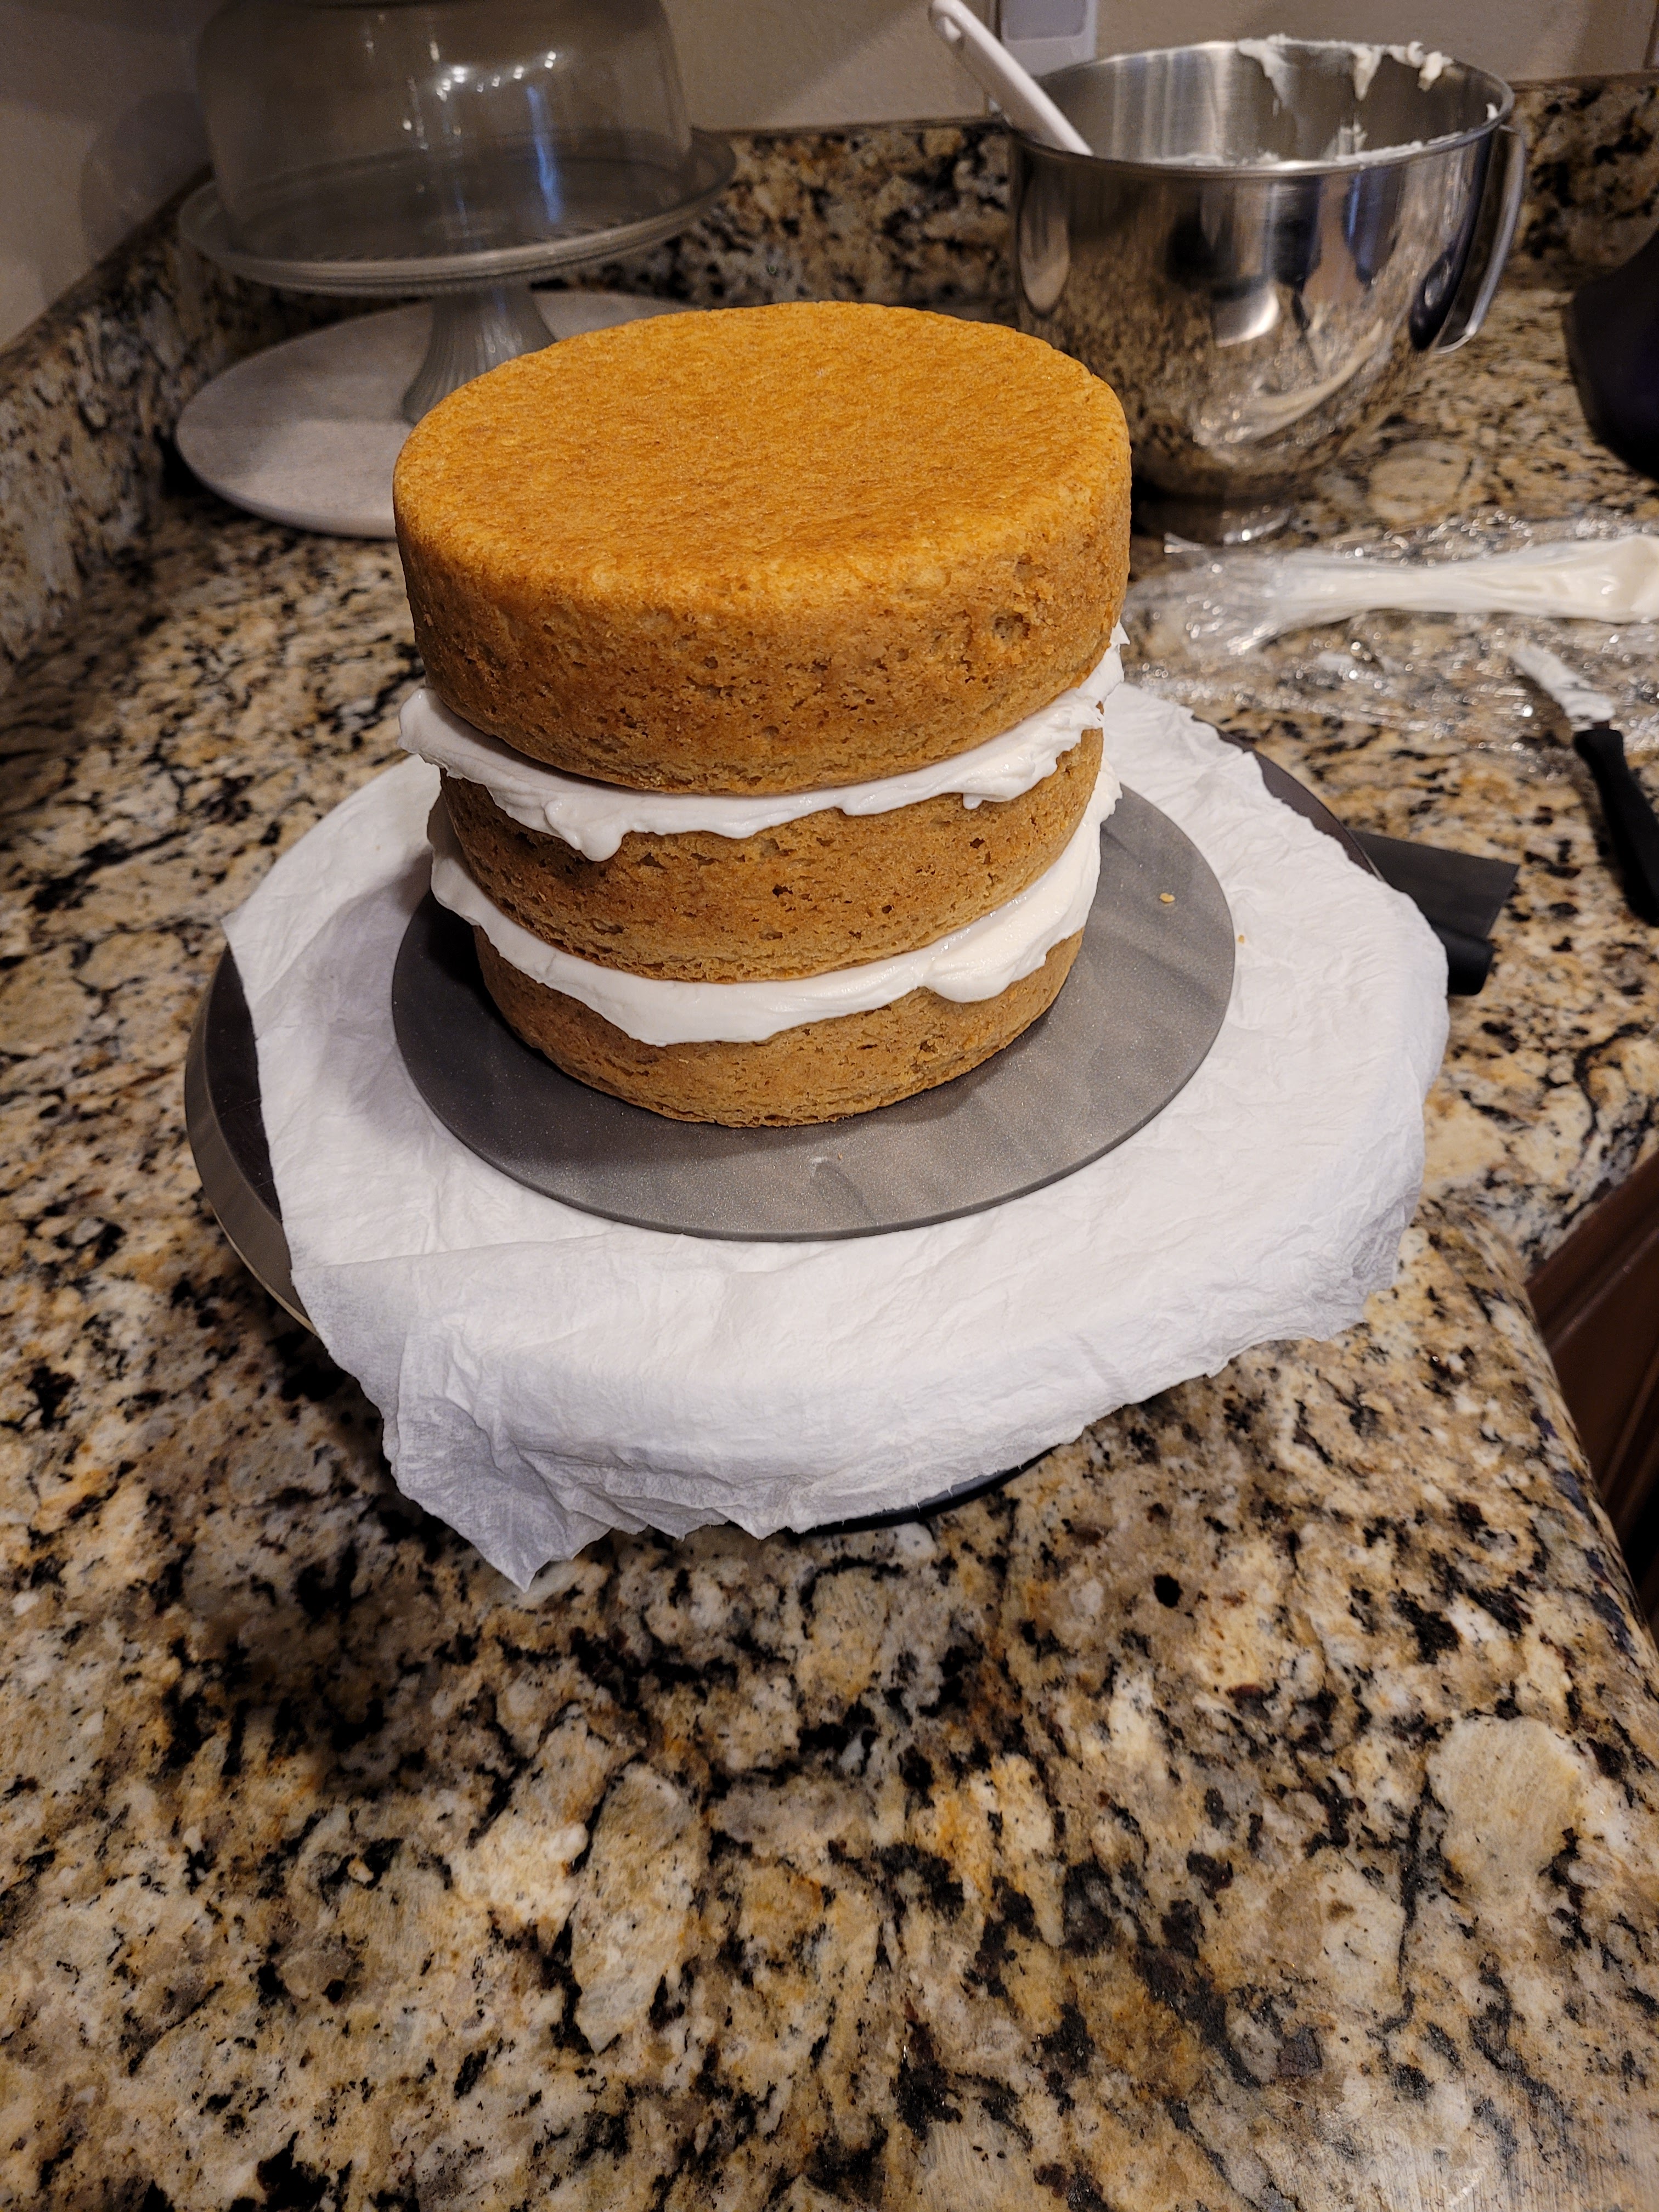
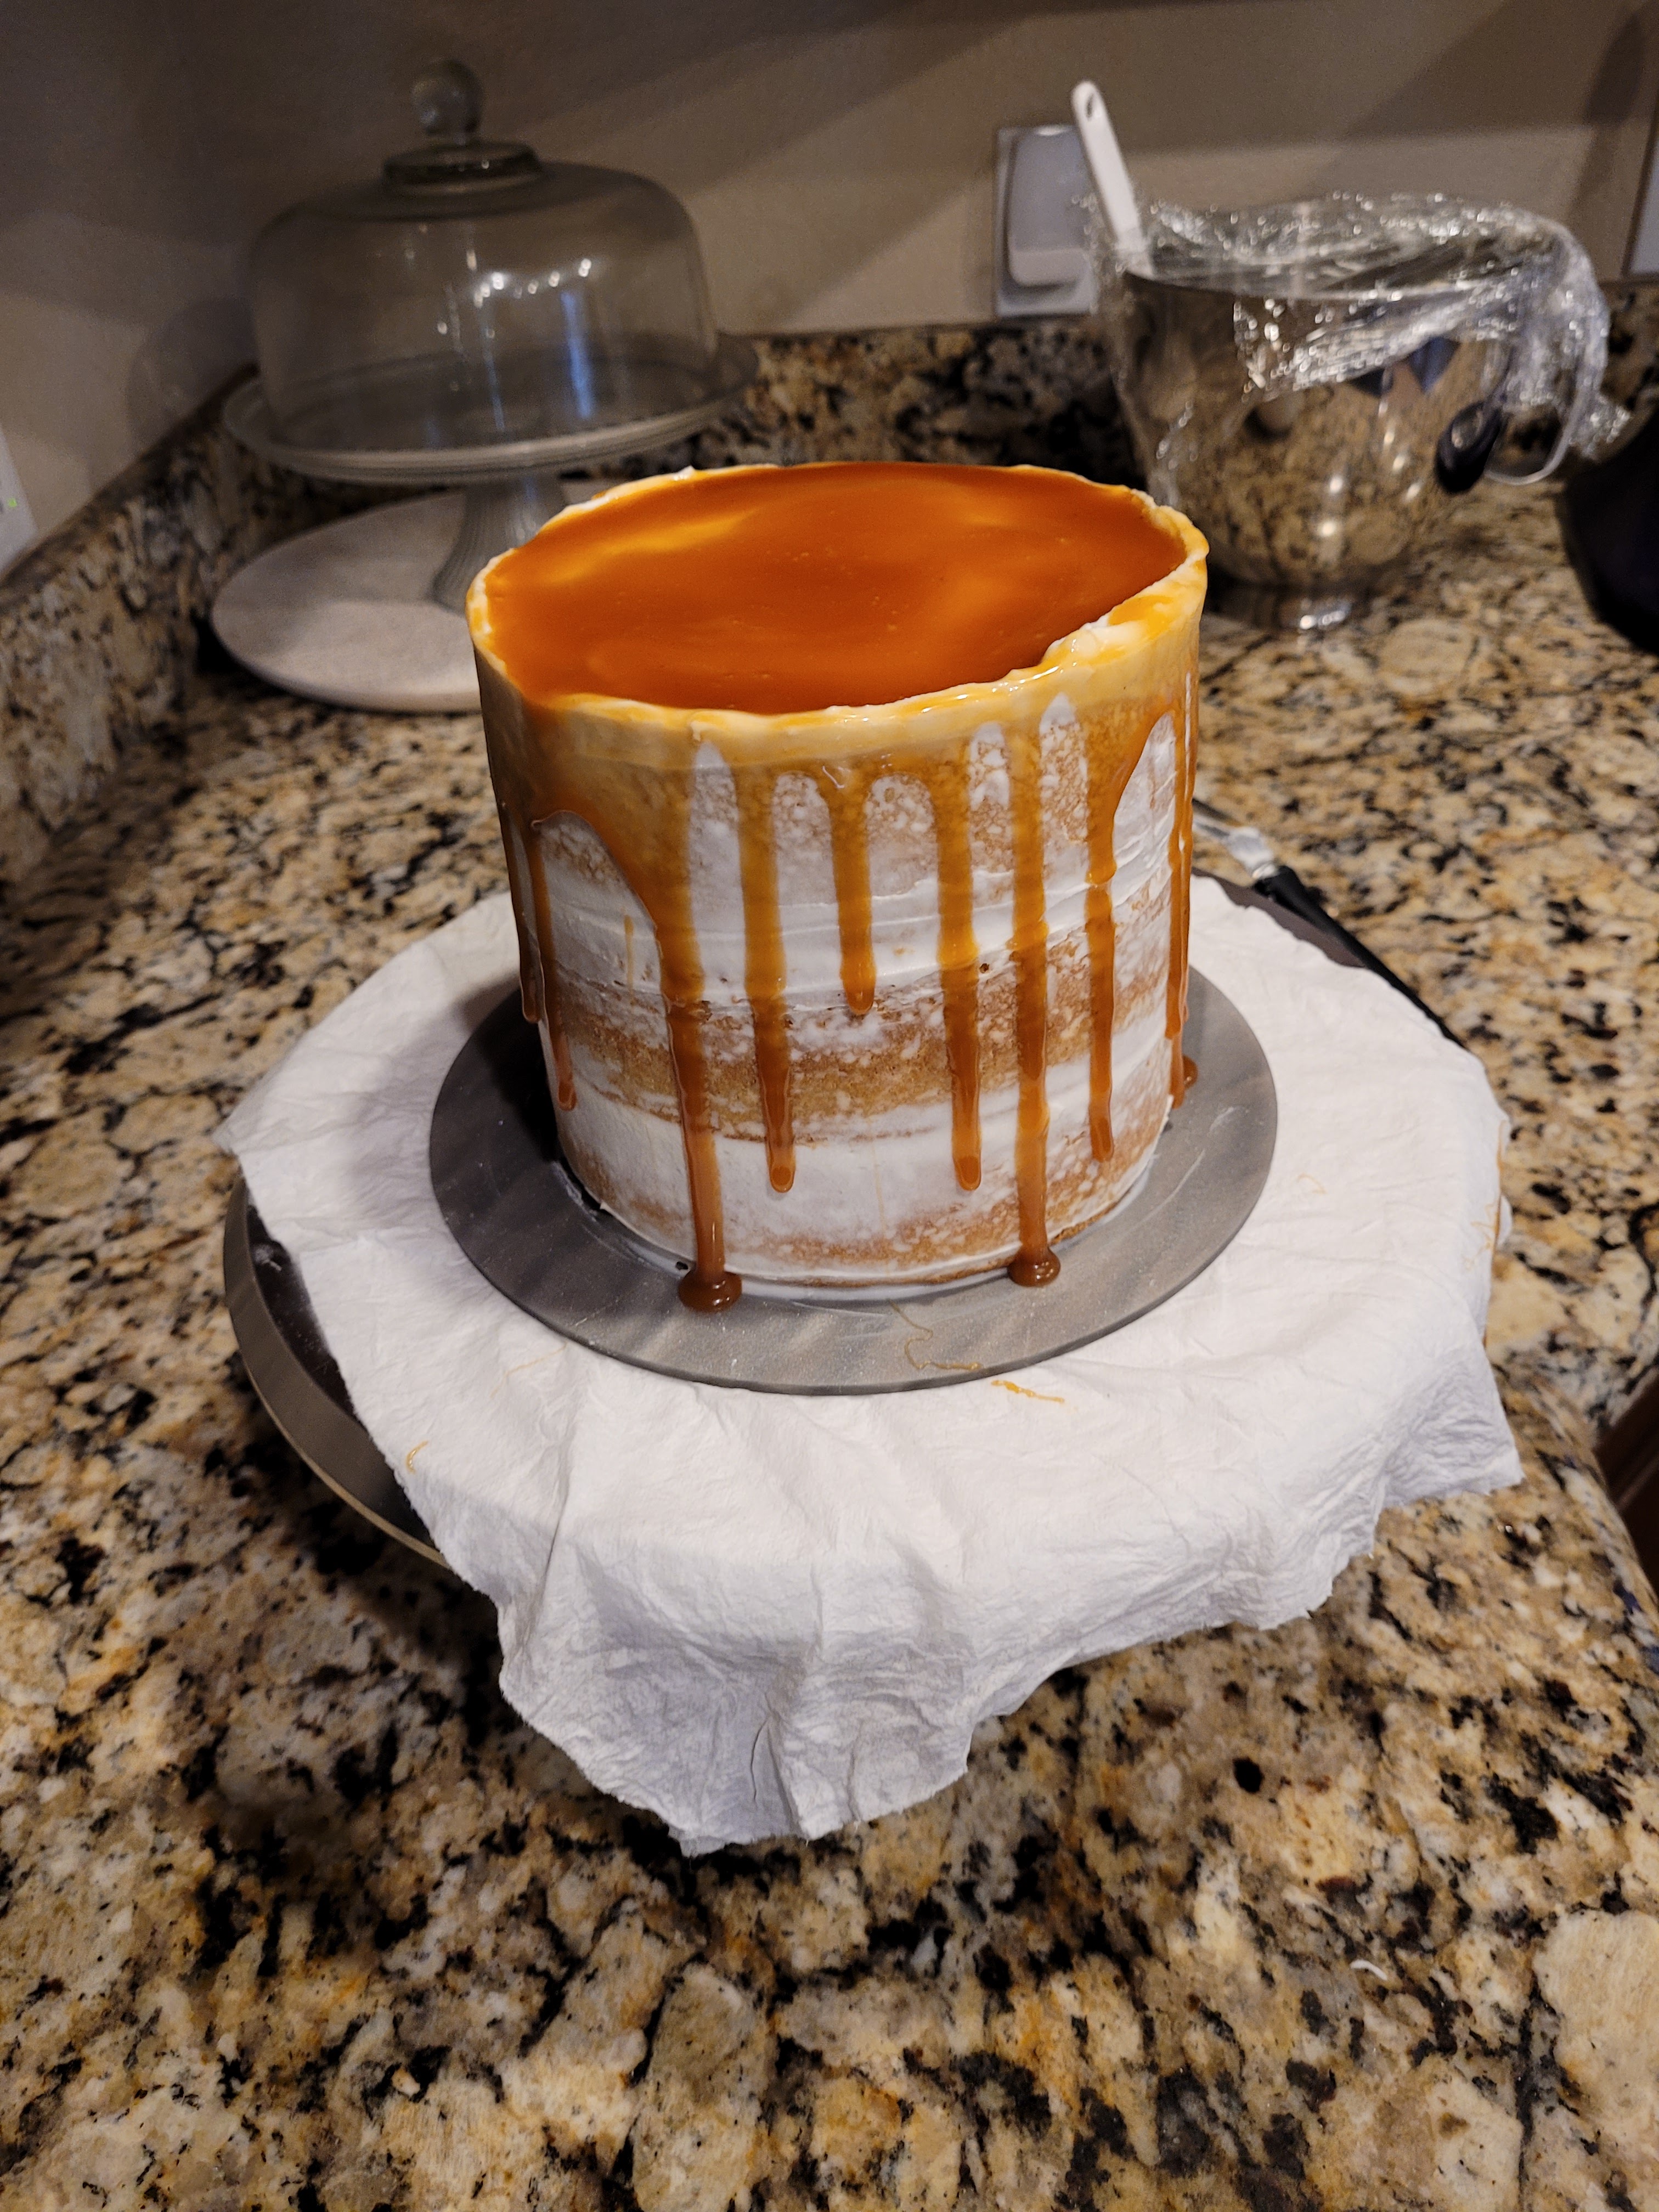
I somehow resisted the urge to take a giant shovel to this and start eating. To assemble, you just need to slather a layer of buttercream on top of a cooled cake layer, then add another layer (I always place them face down so the smooth surface on the bottom of the cake is now on top), and repeat. I wanted to make this a semi-naked cake, you know, so it would be the one wearing the birthday suit, so I did not use all of my frosting.
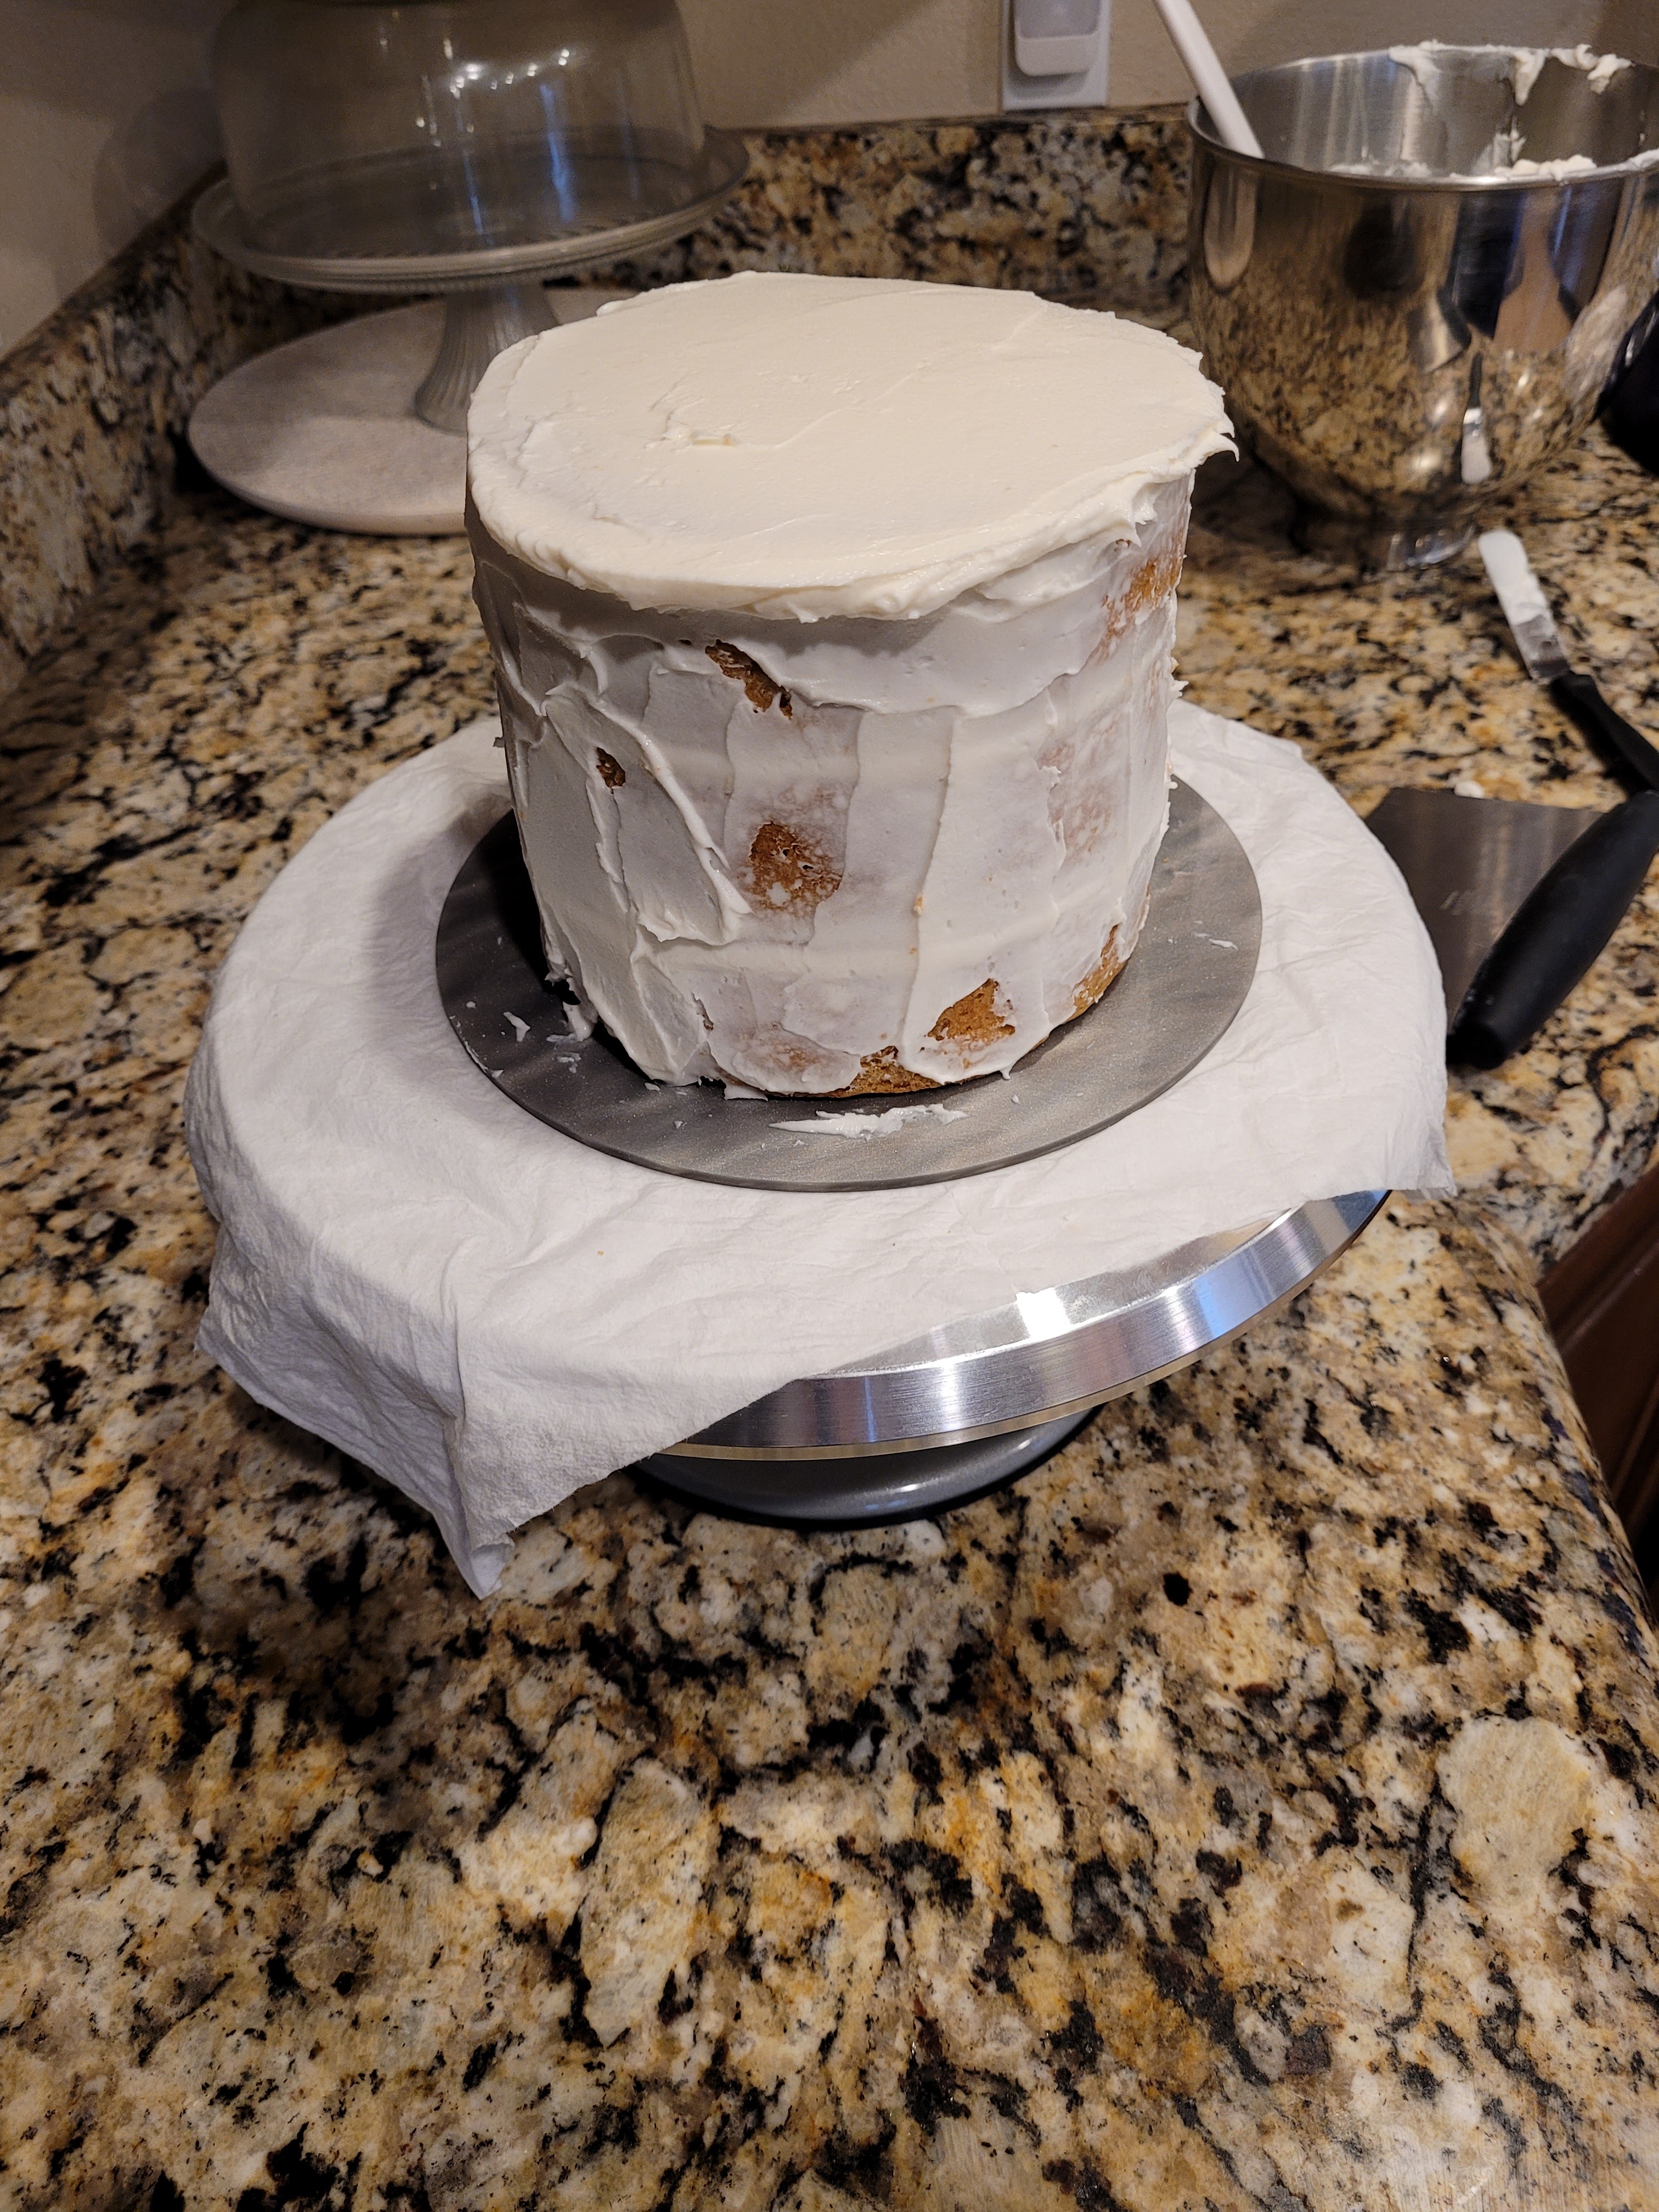
Kinda looks like a hot mess right now, but I promise she cleans up okay (another potential autobiography title). You can place a hefty amount of frosting on top of the cake, and while smoothing that out, push excess down the sides of the cake. Dollop on a little frosting anywhere that is completely bare, then come in and make a pass with a cake scraper around the whole cake. Wipe off any frosting, and come back through and make another pass all over the cake with your scraper to remove more frosting. Keep repeating this process until you have your cake with just a thin layer of frosting covering the sides.
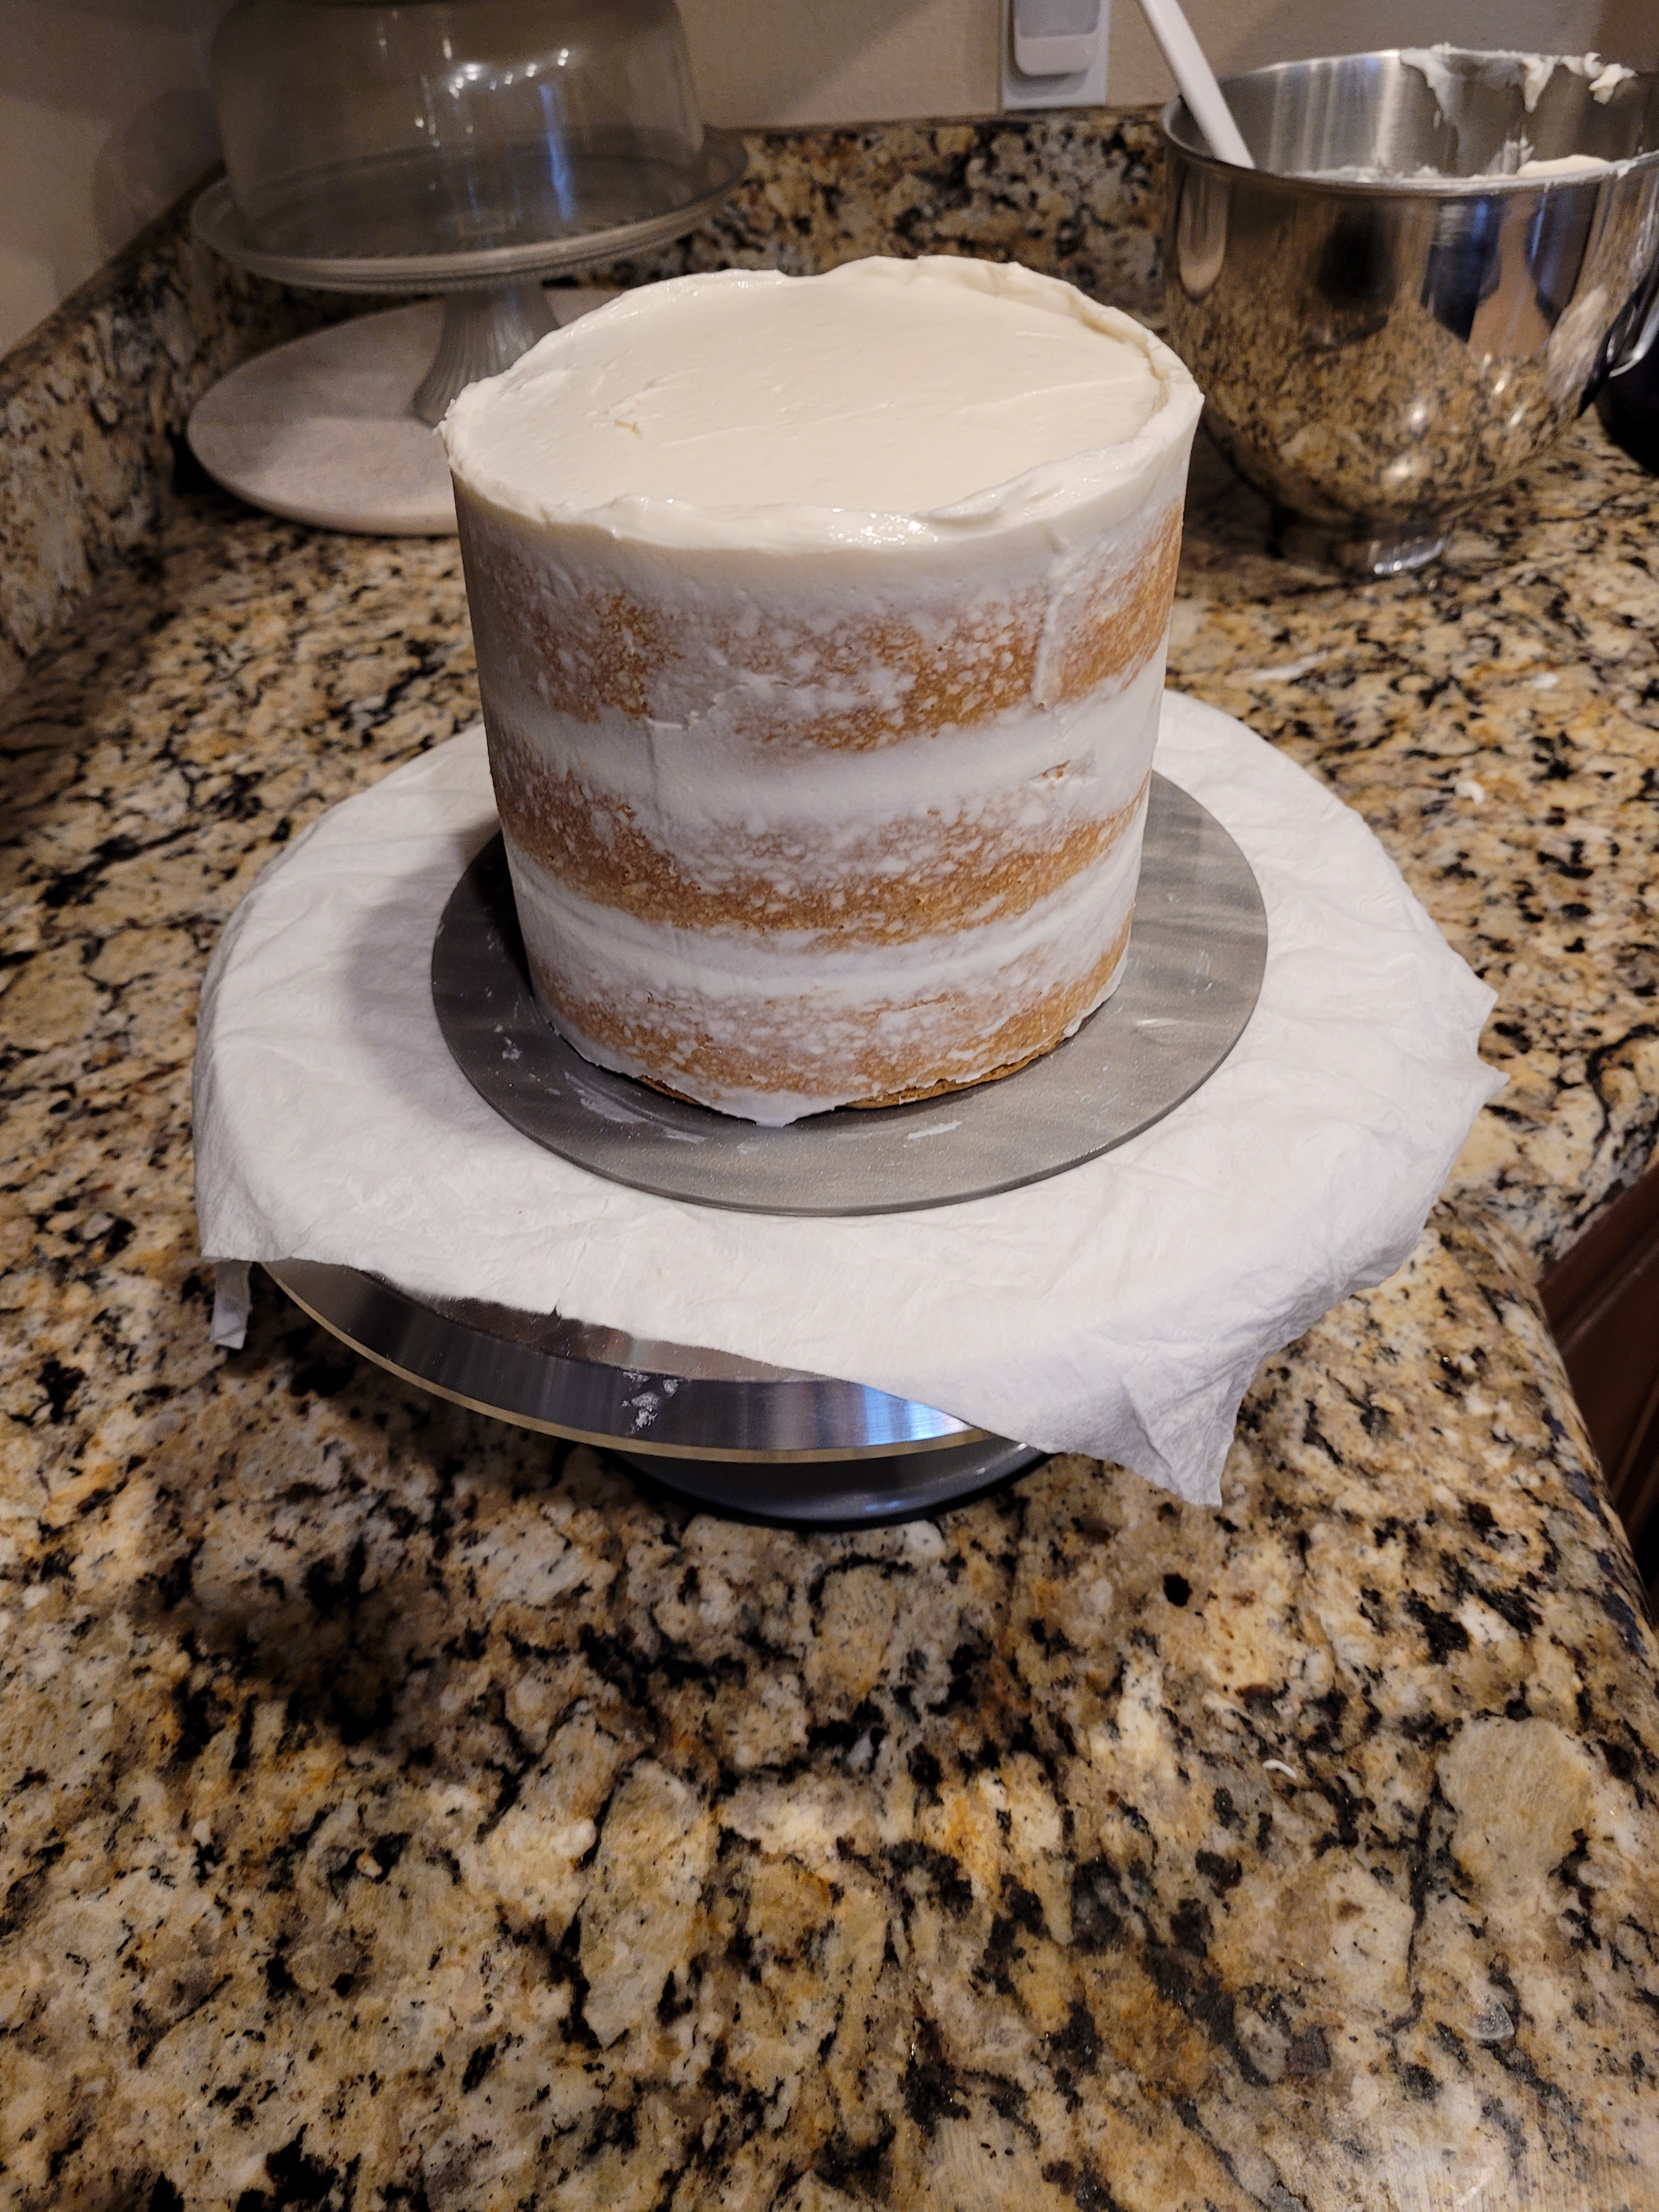
See, sometimes less really is more. Now, place this in the freezer to firm up for at least 15 minutes to help slow down the drip of the caramel.
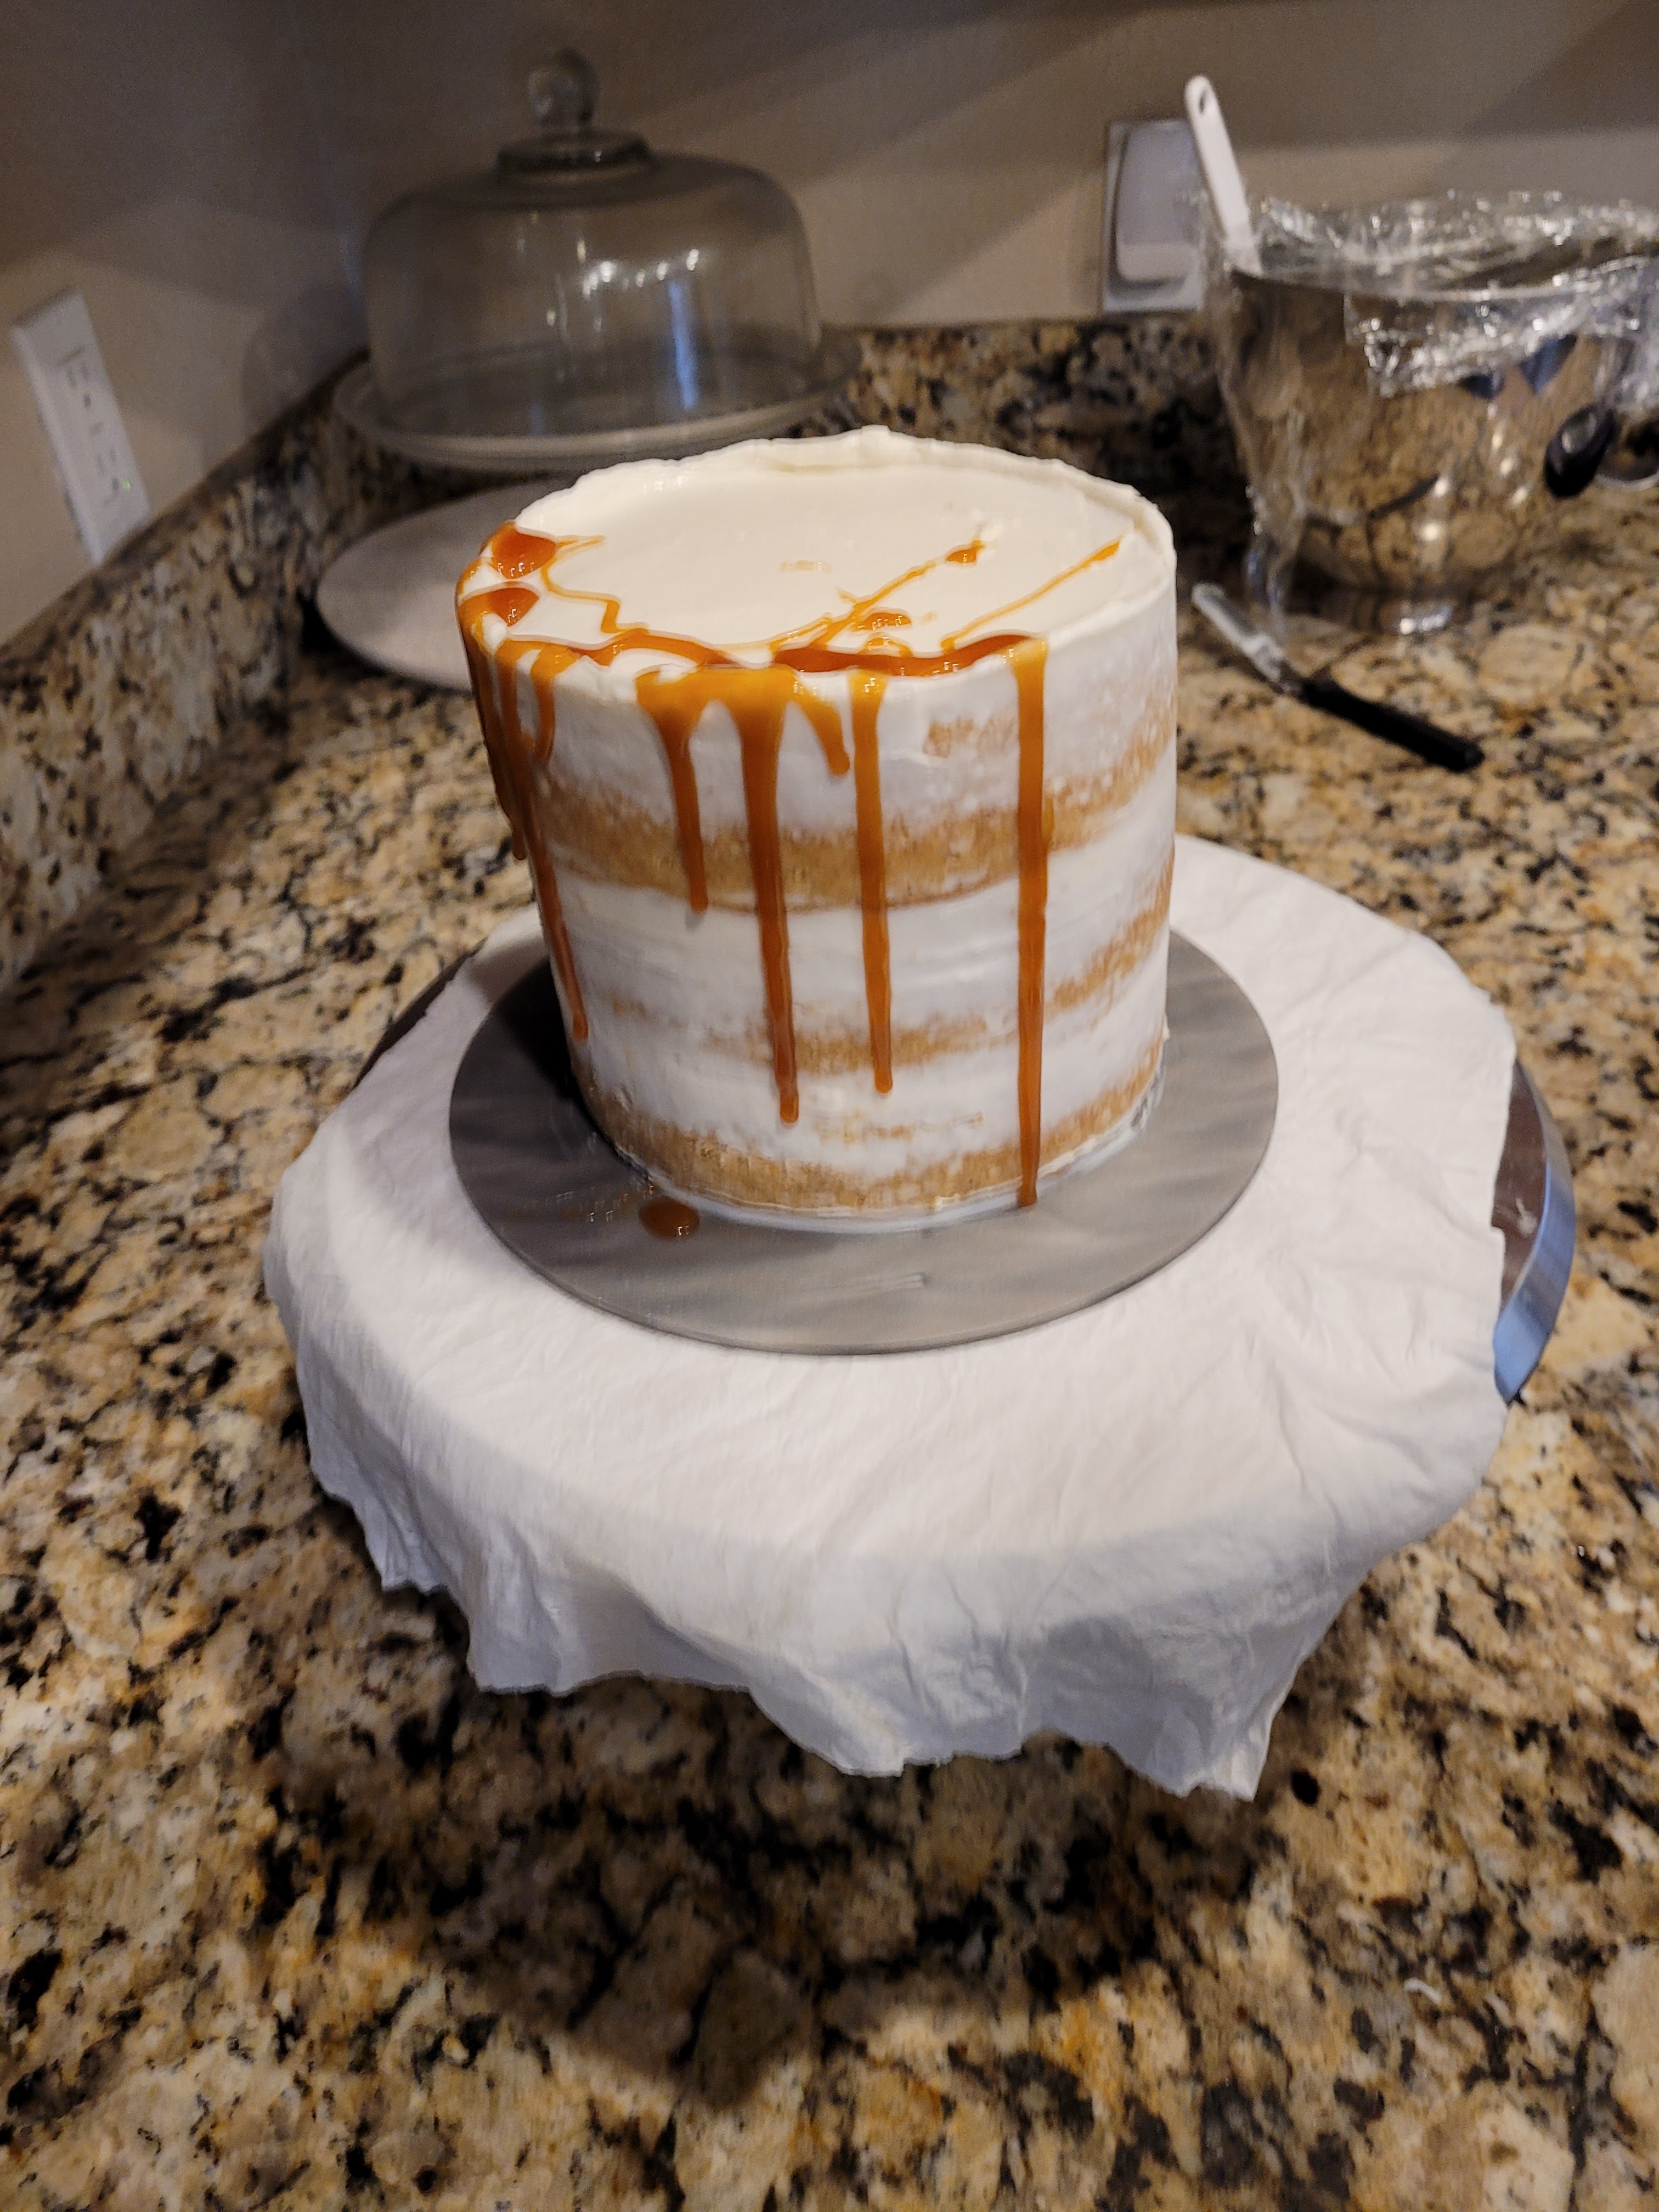
Adding a drip to a cake is the female equivalent of winging your eyeliner, I swear. Once your cake frosting is set and your caramel is cooled to room temp, you can use a spoon to drizzle drips down the side of the cake at your liking. Finish by adding a bit of caramel to the top as well. I only used 1/3 of the caramel sauce I made, so I am keeping the rest in an airtight container in the fridge to use on ice cream, waffles, ice cream with waffles…you get the idea.
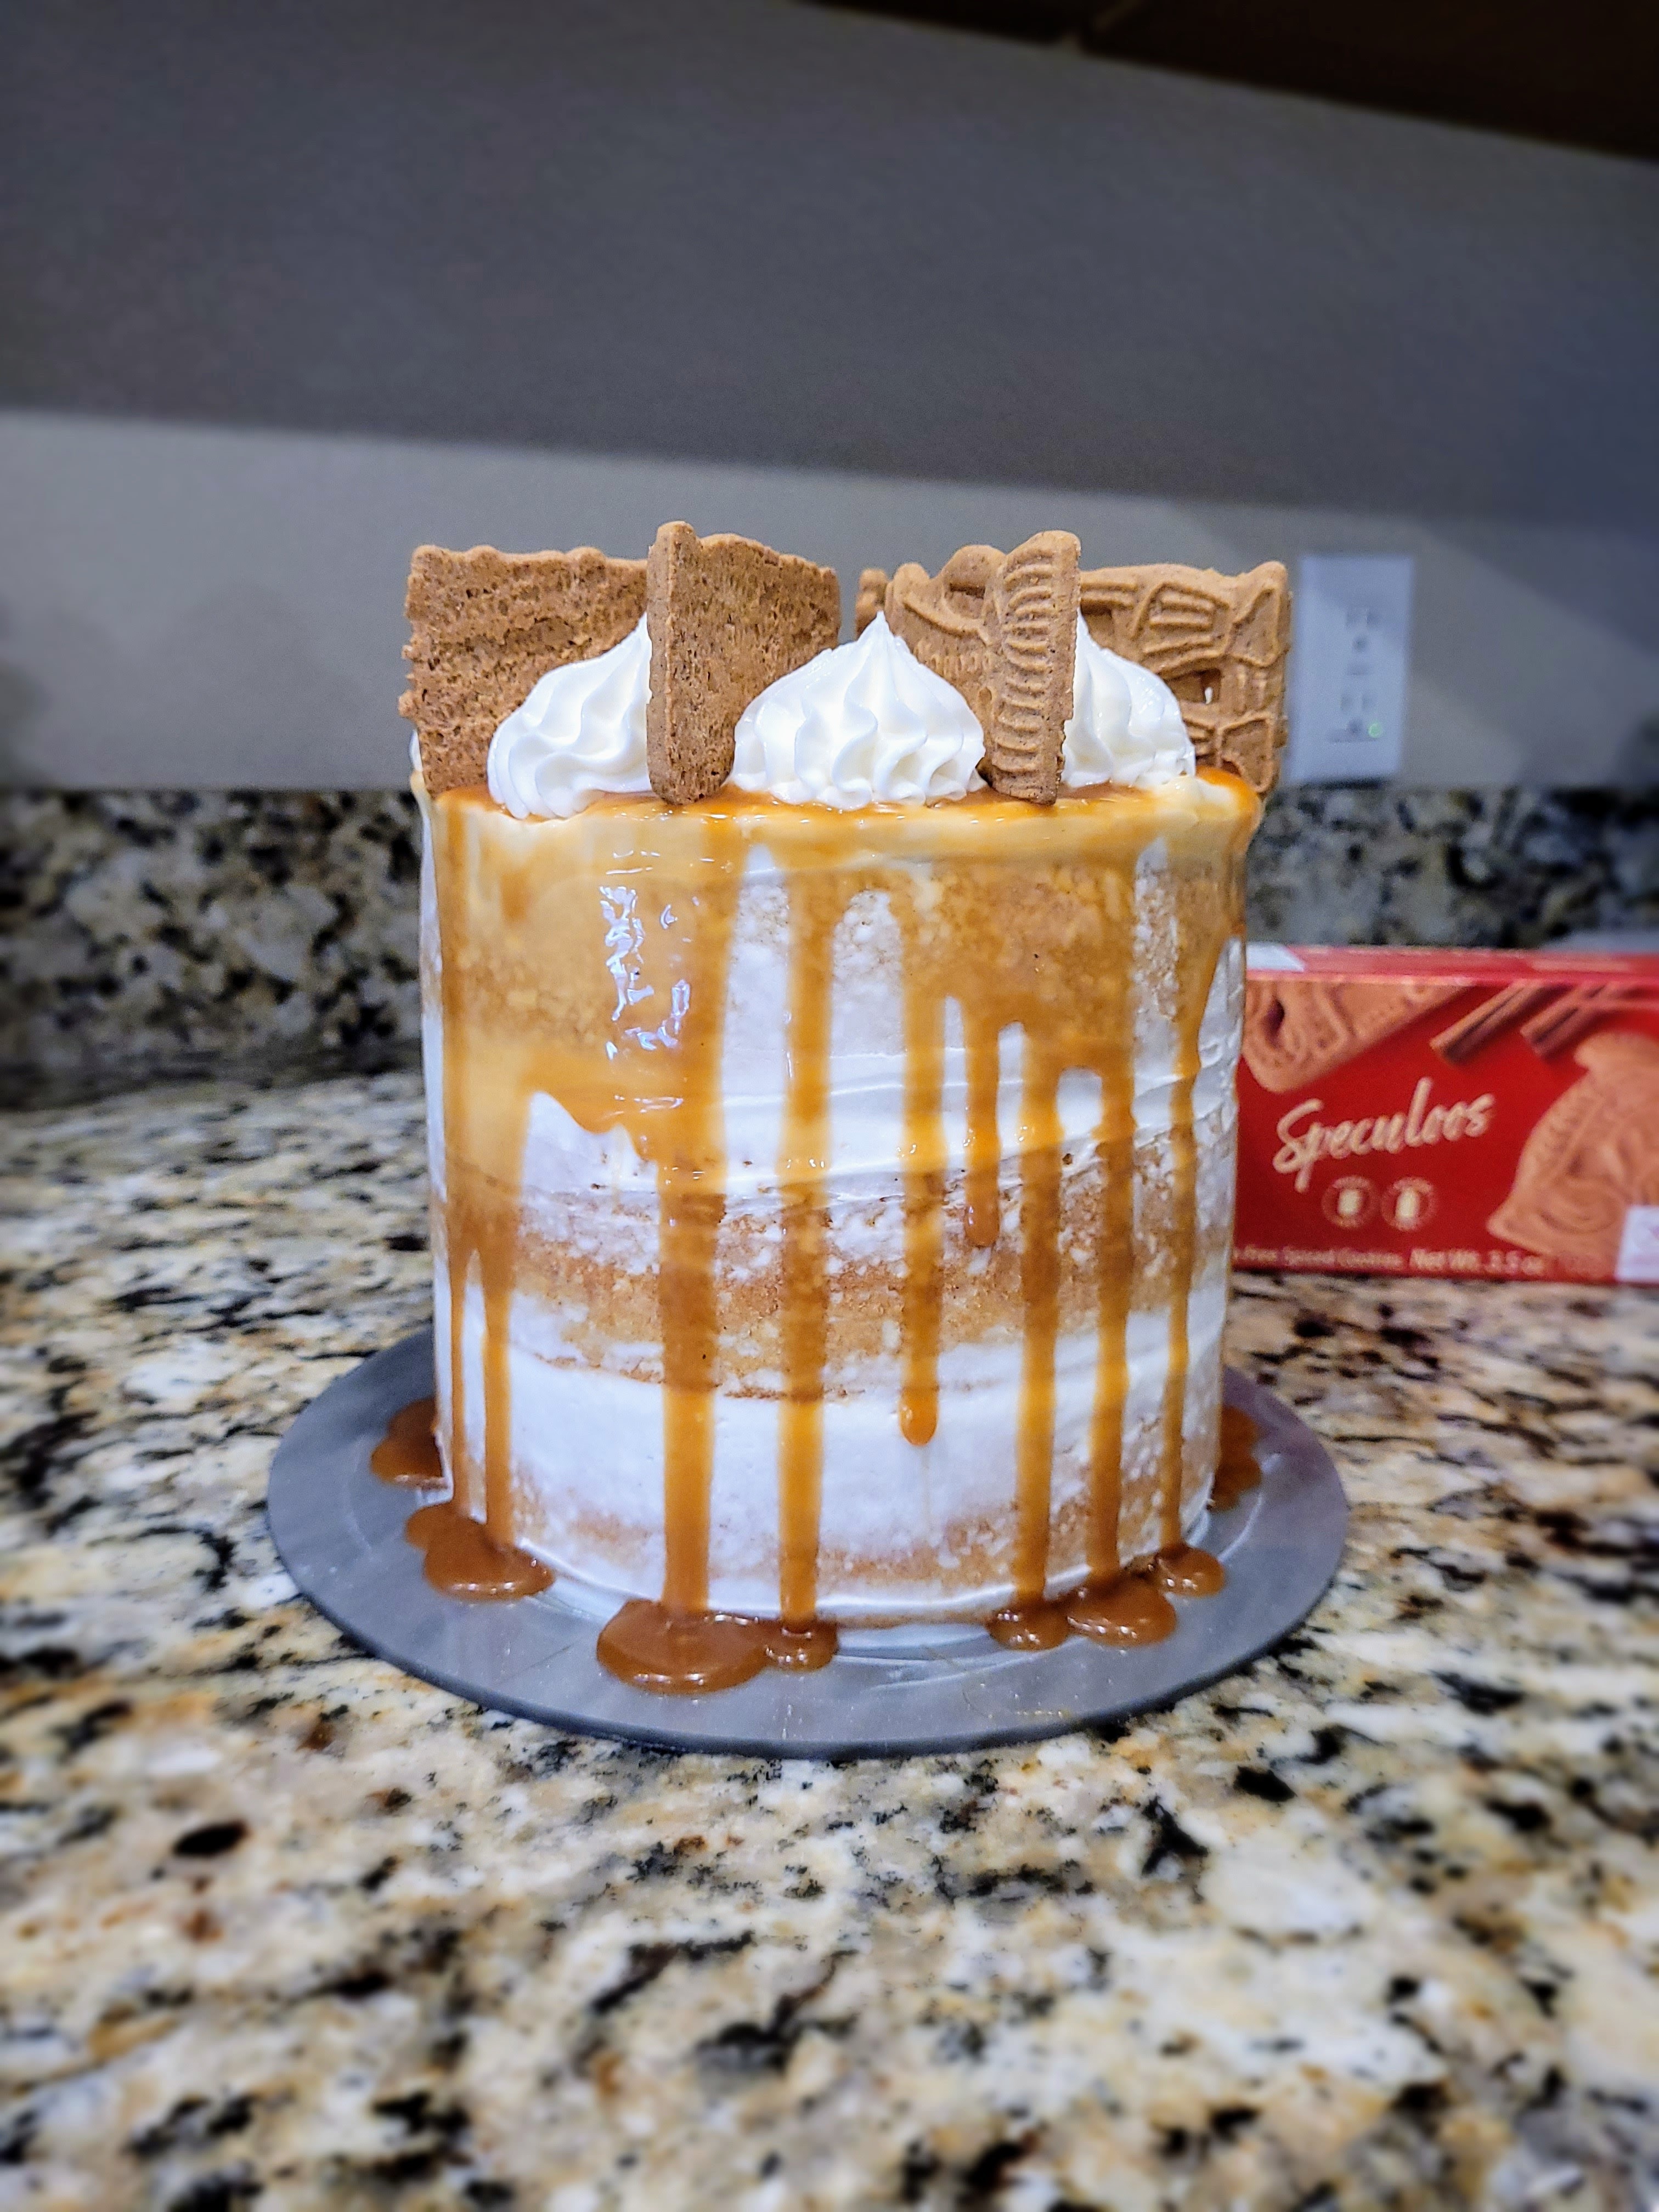
You cake my breath away… Once I had my drip the way I wanted it (or rather, the way gravity wanted it), I loaded some frosting into a piping bag with a 6B tip, but any large open star tip will work- 2D, 1M, etc.
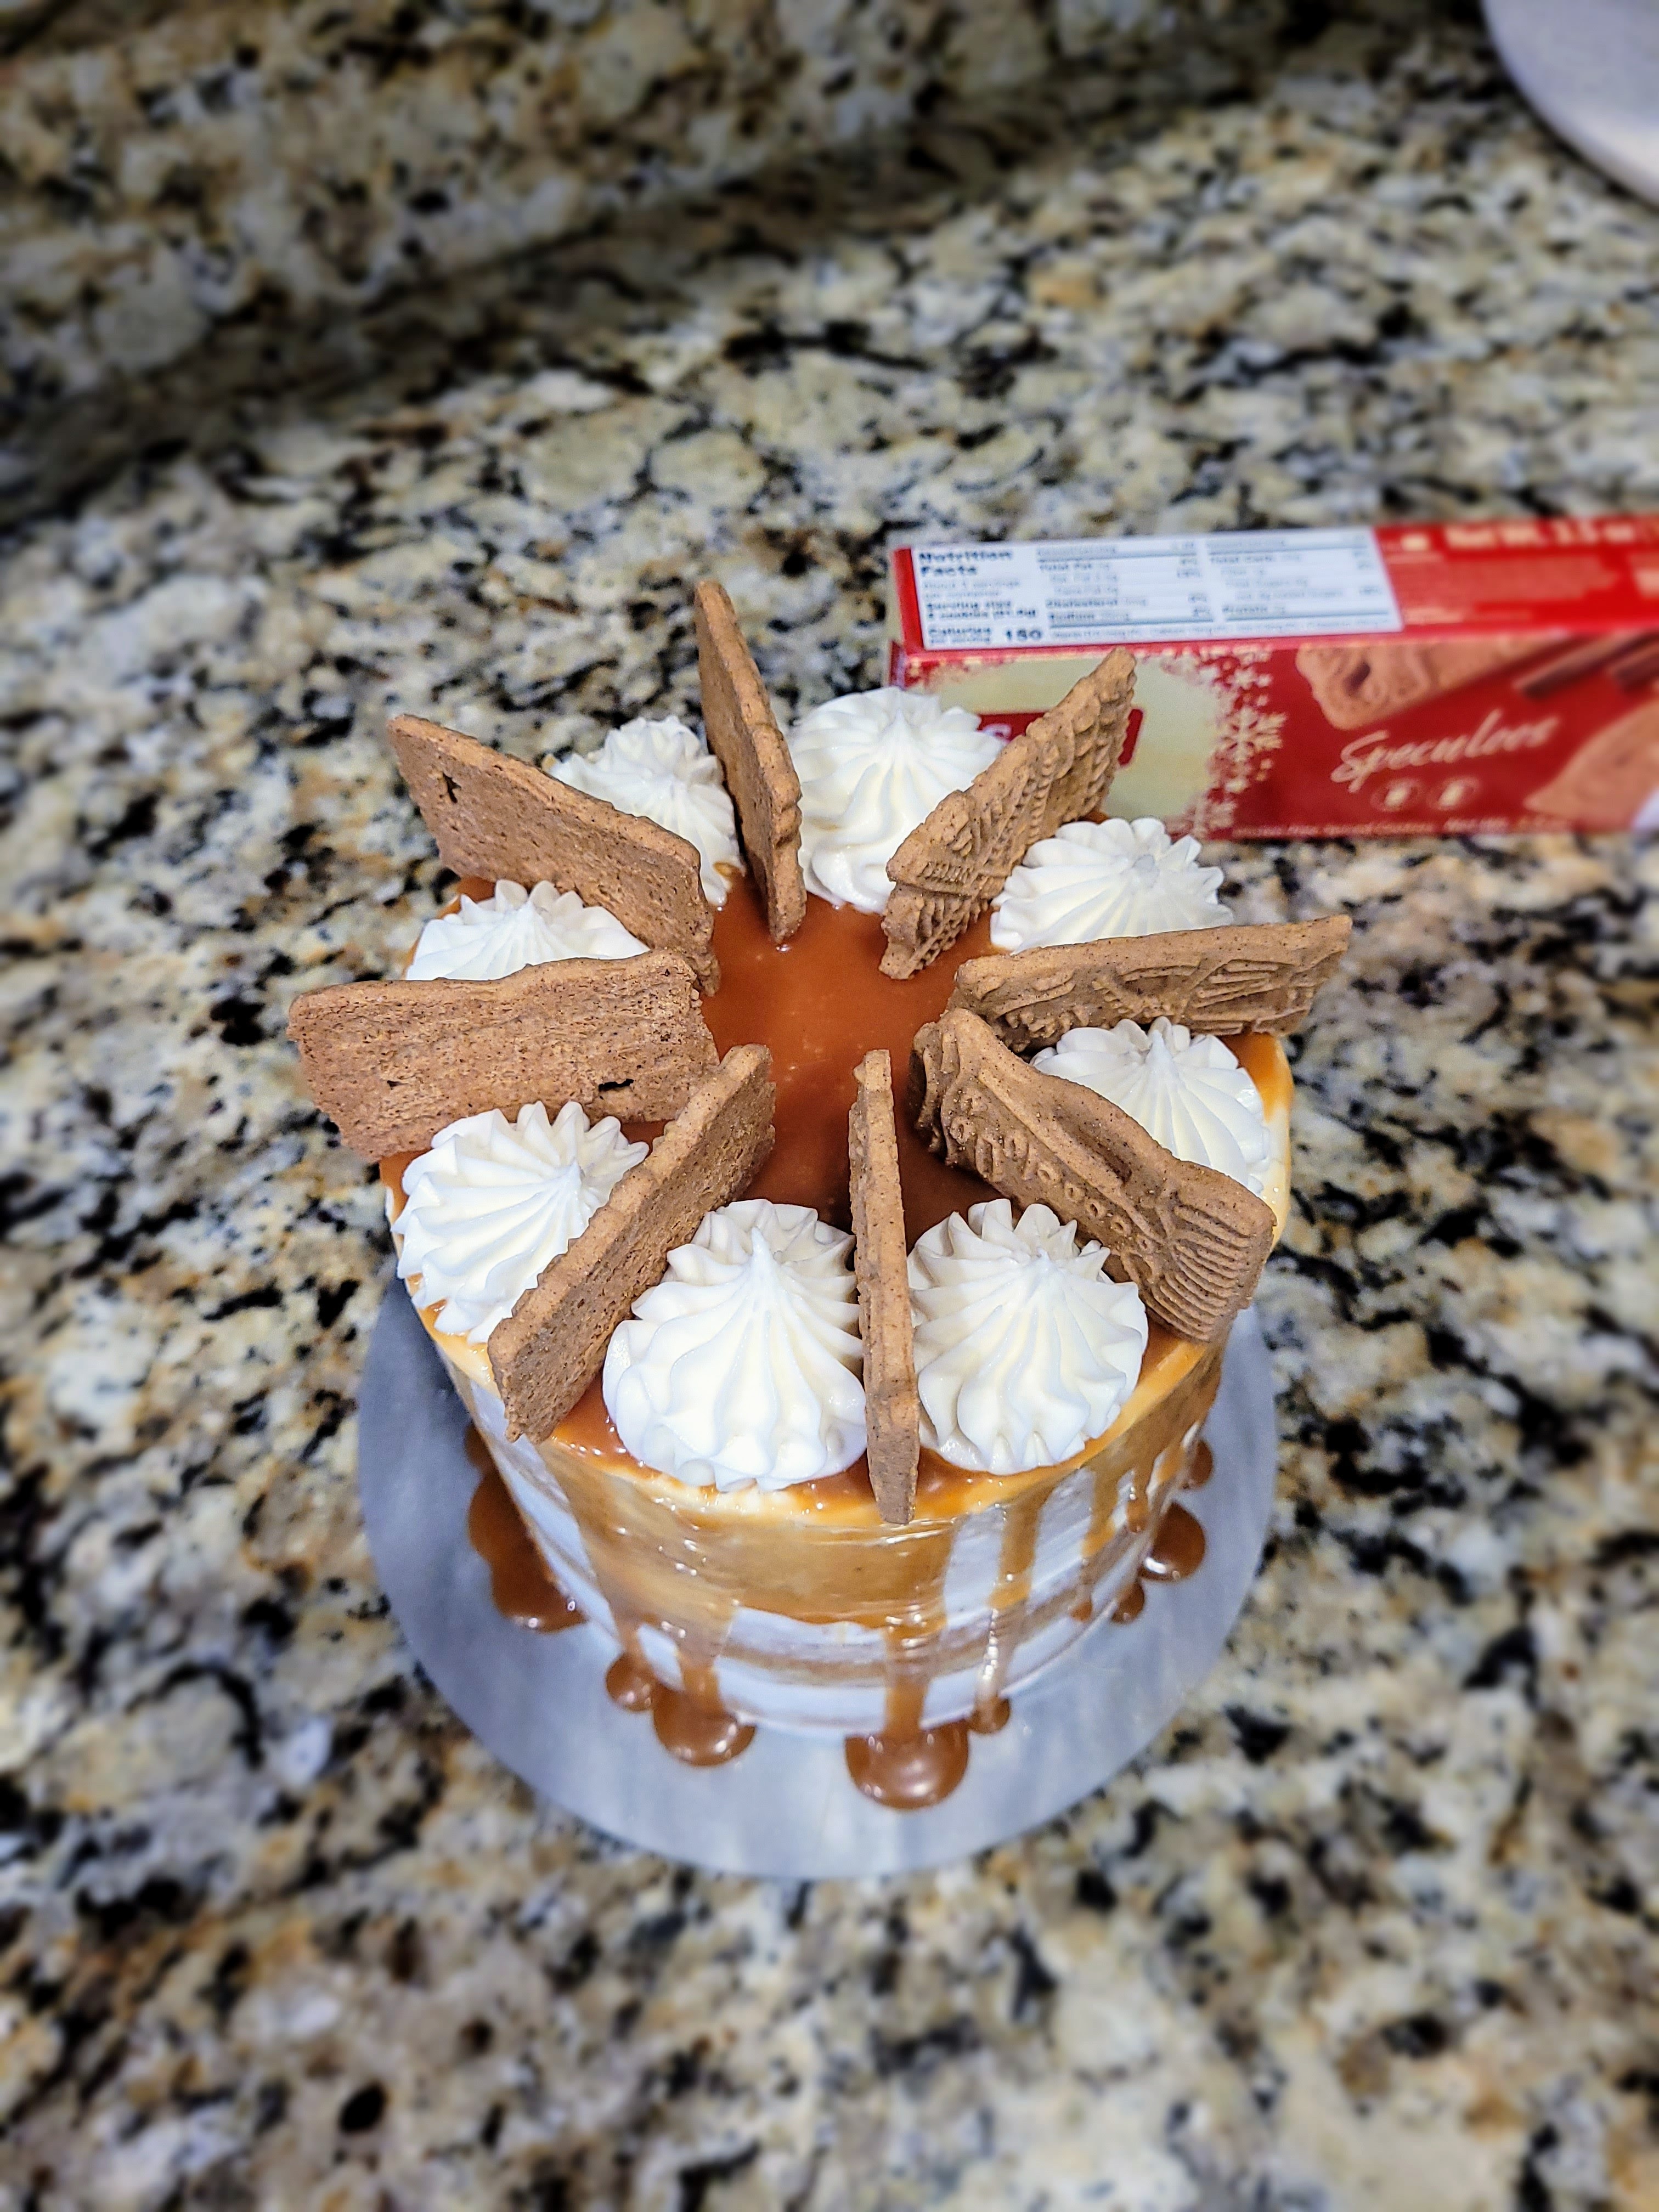
Nothing holds a candle to this cake. Nor will there be any candles on this cake because I don’t want to burn my house down. I piped large frosting mounds around the top of the cake, then sandwiched these mounds between delicious Schar Biscoff cookies…I have no idea why they’re in the shape of elephants, windmills, and horseys, but as long as I can keep buying 10-20 boxes every winter to last me through the year, they could be in the shape of cockroaches and dog poo, and I’d still buy them. That’s how much I missed Speculoos flavor.
Nothing like a little product placement. People of Schar, I will be a brand ambassador. I’m very sassy though. More like a brand amsassador. 
Also, I think these windmills are beautiful. 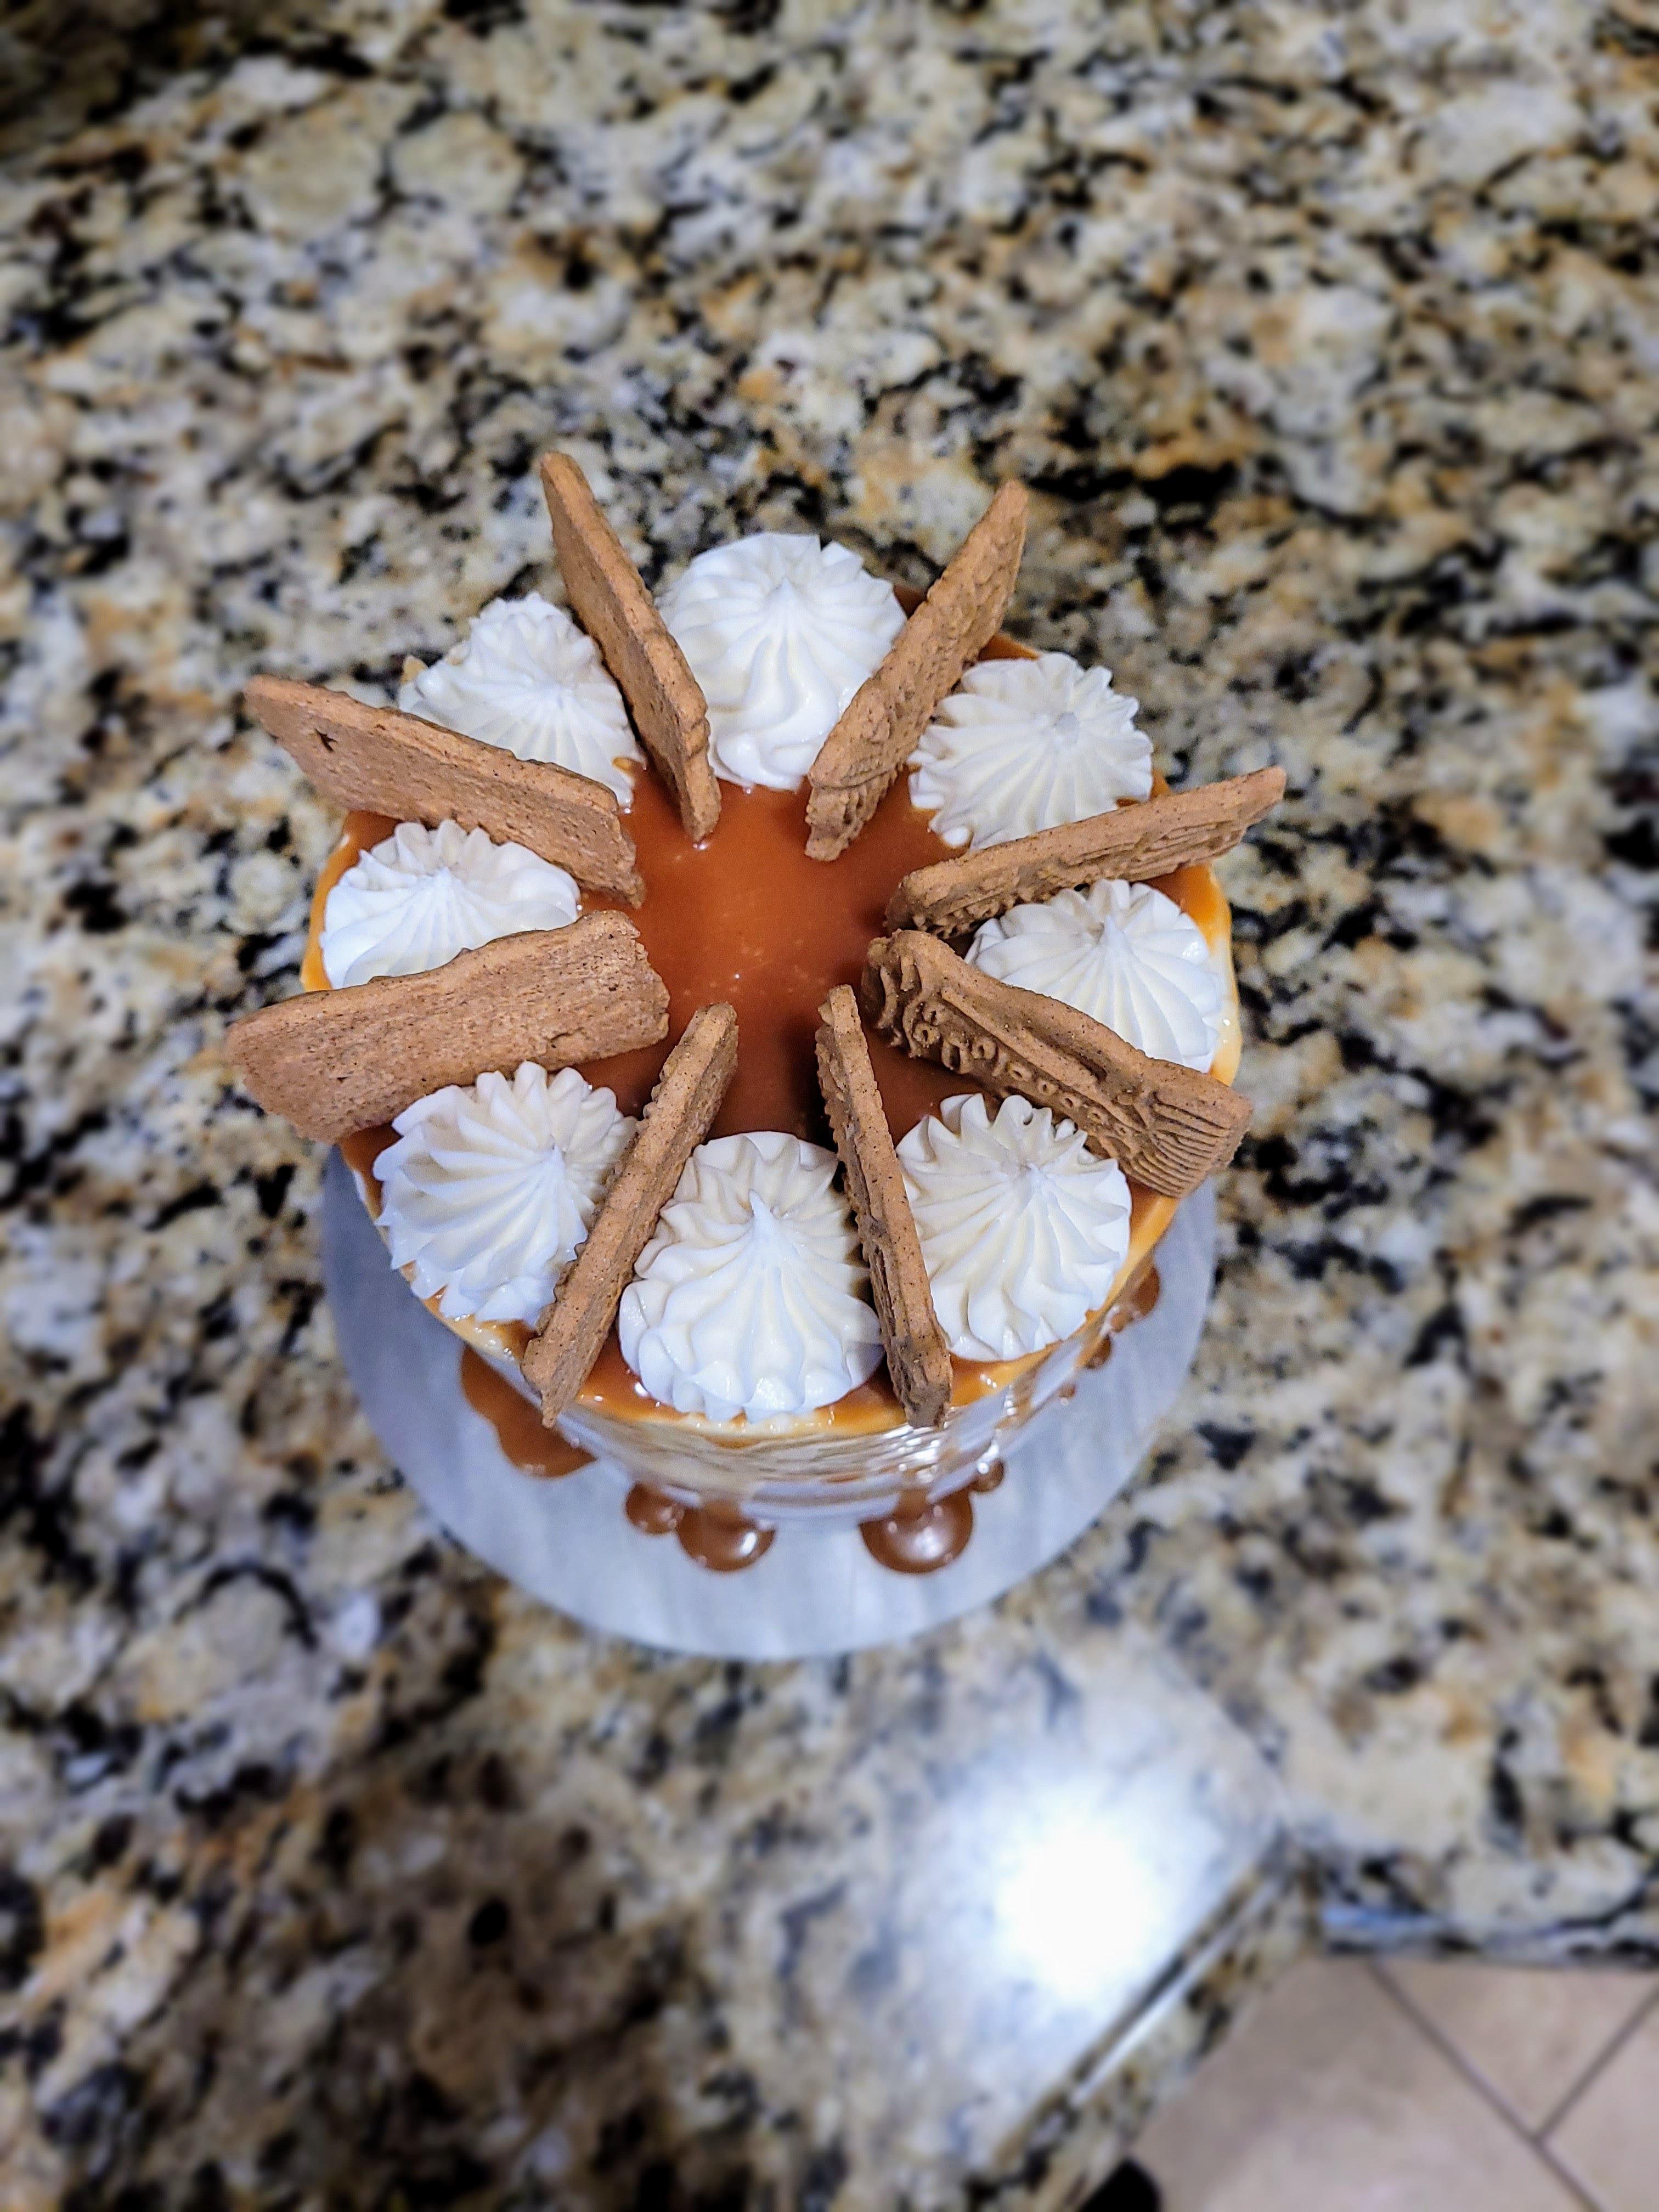
I mean, 2023 is gonna be okay if this cake has anything to do with it. I mean, I’m still alive and cake-ing, so I can’t really complain. All my fellow close to Christmas babies, just do yourself a favor and make sure someone makes this cake for you (or like a true Capricorn, do it yourself because asking for favors is icky, and we refuse to make anyone help us even when they want to!). I am SO delighted with the spice from the Speculoos in the cake, and the caramel frosting is next-level cream cheese goodness. But honestly? To me, the star of the show is the caramel sauce. Allulose isn’t quite as sweet as regular sugar, so I can finally make a caramel sauce that doesn’t make my teeth feel like they’re gonna fall out. Because I’m turning 36 and not six, so I have acquired a more advanced taste palette (says the woman who still eats gluten free chicken tendies and mac and cheese every week). Growing up is optional, I guess! As we start another year, and I prepare to celebrate another trip around the sun, thanks to each and every one of you who make my life great and inspire me to keep baking. ‘Til next time my fellow eaters!
Recipe and Instructions
Biscoff semi-naked cake with sugar free caramel drip and caramel cream cheese frosting
Spiced cookie-butter flavored cake with caramel toppings
If not gluten free, use any kind of cake mix and regular Lotus Biscoff cookies or Speculoos. Allulose can also be replaced with regular sugar.
Ingredients
CAKE
*One box of gluten free yellow cake mix
*4 ounces (1/2 c) unsweetened applesauce
*1 1/4 cups fat free or skim milk
*4 eggs
*100 grams (14 cookies) Schar Speculoos, ground to a fine powder
FROSTING
*224 grams (1 cup) of 1/3 the fat cream cheese, softened
*225 grams (1 cup) of fat free Greek yogurt, strained overnight
*16 ounces (4 cups) Lakanto powdered monkfruit
*1 tsp caramel extract
*1 tsp vanilla extract
*1 TBS milk
CARAMEL
*200 grams (1 cup) allulose (I used Madhava brand)
*86 grams (6 TBS) light butter
*120 mL (1/2 cup) heavy whipping cream
*1/4-1 tsp salt (depending on your taste preferences; I used 1/4 tsp)
Directions
- Preheat oven to 350 and grease three 6-inch round pans and add bake even strips.
- Mix all cake ingredients together in a stand mixer on low for 30 seconds before turning to medium-high for a minute and a half.
- Pour batter evenly into pans and bake for 30-35 minutes, until a toothpick comes out cleanly from the center.
- Allow cakes to cool fully before frosting.
- To make the caramel, place allulose in a medium sauce pan and heat on medium-high heat while stirring continuously with a wooden spoon until amber in color, 5-6 minutes.
- Switch to a whisk, lower to medium heat, and add in the butter, whisking for 2-3 minutes until totally melted.
- Slowly pour the heavy whipping cream into the saucepan while whisking; let boil for one minute.
- Remove from heat and whisk in salt.
- Let caramel cool completely to room temp before using on cake.
- To make frosting, whisk cream cheese and yogurt for 3 minutes before adding in half the powdered monkfruit and the extracts, mixing well.
- Add in remaining monkfruit and 1 TBS milk, mixing well. If frosting is too thick, add another TBS of milk.
- Frost the cooled cake as desired; to make the semi-naked drip cake, please see detailed decorating instructions above.
- Keep leftovers covered and in the fridge. Leftover caramel sauce can be kept in the fridge in an airtight container and used on other desserts. Enjoy!
Nutrition
Macros
10 servings
323 cal/50 c/10 f/8.3 p per slice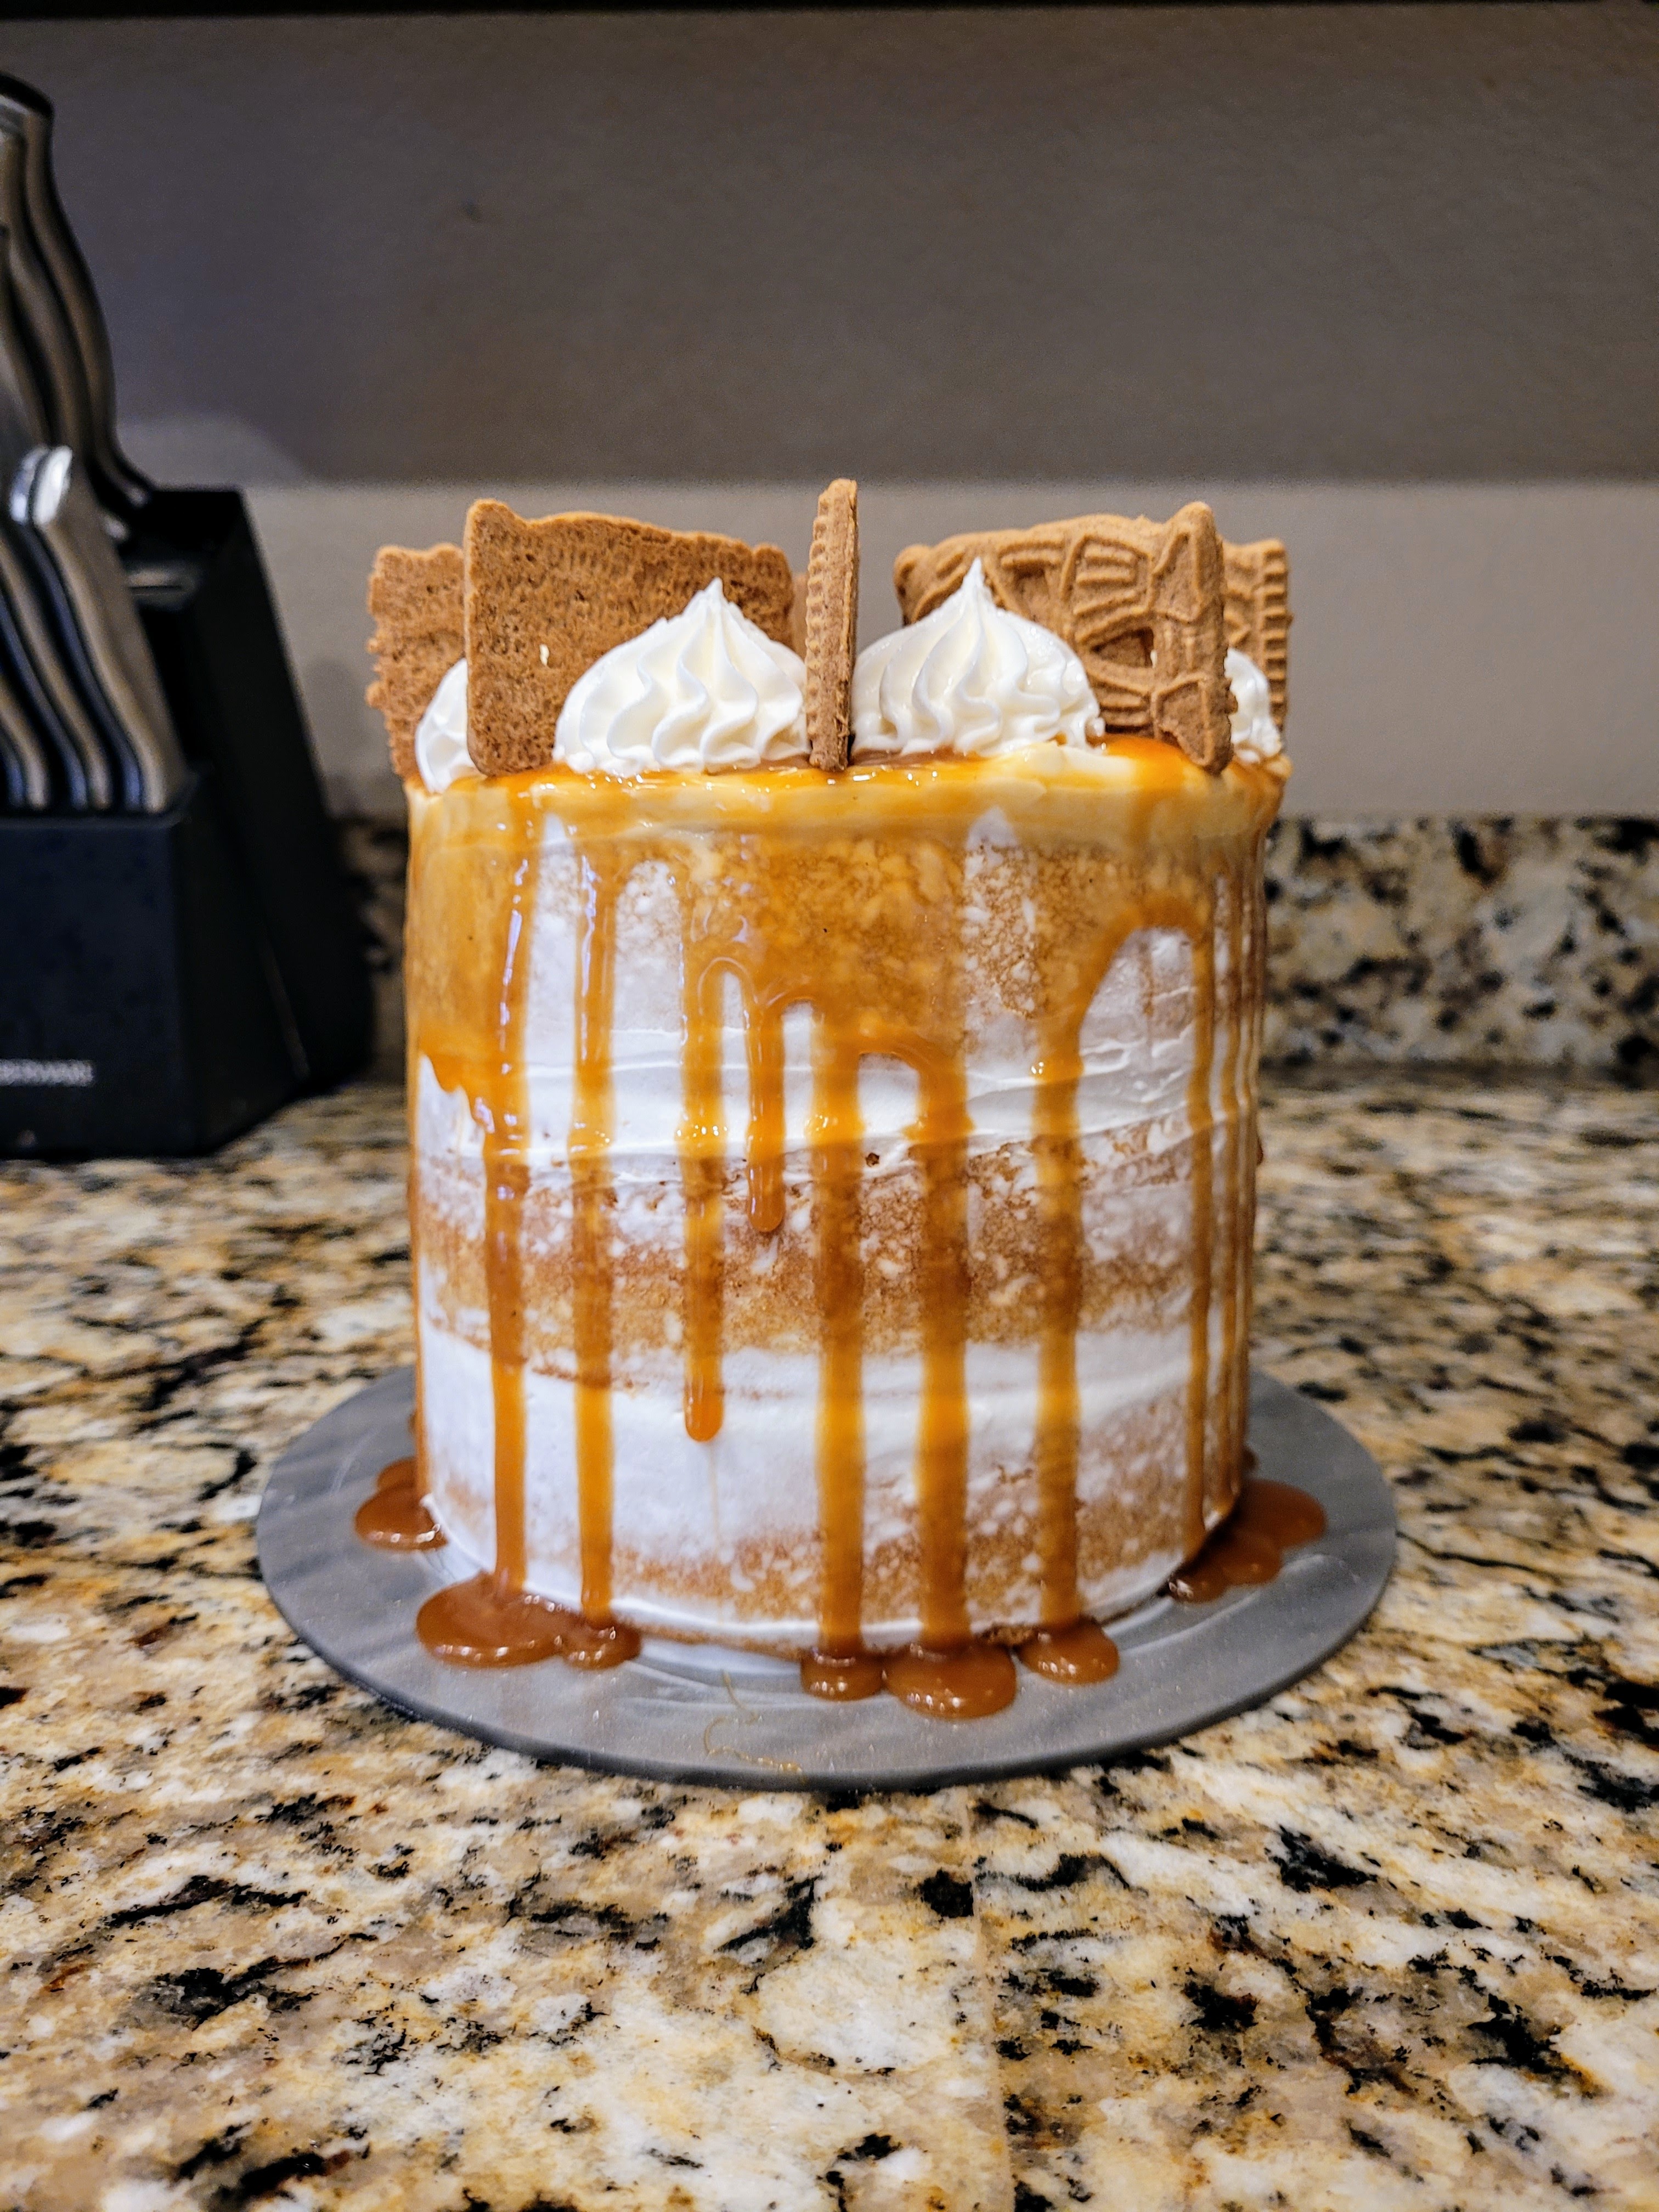
Do you have to share the cake when it’s your own birthday? Asking for a very greedy friend. -
Cranberry Orange Protein Donuts
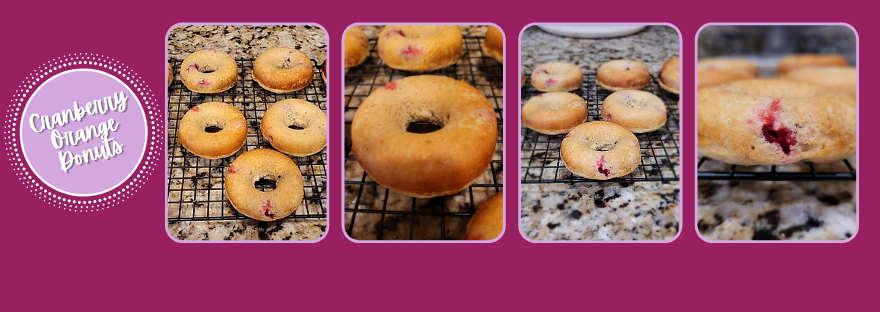
I realize I’ve gone mostly peppermint madness this month, and not once have I given cranberries a chance to take center stage. I wanted to make a fun and festive breakfast, so I opted to make a batch of cranberry orange protein donuts. I didn’t glaze them since I wanted to be able to taste the tartness of the baked cranberries, but you can 100% use my normal glaze recipe if you’d like to make them sweeter. Orange you glad I give you options? These take all of five minutes to whip up, 10 minutes to bake, and two seconds to devour. Santa might even appreciate a tray of these more than Christmas cookies, just sayin’.
You cran do it! Recipe and Instructions
Cranberry Orange Protein Donuts
Soft, orange donuts bursting with cranberries
I have not tested this recipe with any other protein powders or mixes, so I cannot guarantee the same results without using the ingredients listed below.
Ingredients
FOR THE DONUTS
*1 bag of Empowrd gluten free protein donut mix
*1 large egg
*4 ounces (1/2 c) unsweetened applesauce
*1 tsp vanilla extract
*1 TBS orange zest
*1/2 c + 1 TBS pulp free orange juice
FOR THE CRANBERRIES
*100 grams (1 cup) of fresh or frozen cranberries
*2 tsp flour (gluten free or regular)
Directions
- Preheat oven to 350 and grease a donut pan with cooking spray (can use a muffin tin if you don’t have a pan)
- Mix all donut ingredients well
- Carefully pour batter into the pan until each cavity is 3/4 full (I used a piping bag with the tip snipped to make this easier)
- Mix the cranberries together with the flour; this will keep them from sinking in the batter
- Gently plop a few cranberries into each donut batter
- Bake for 10-12 minutes, until set and springy
- Let donuts cool in the pan on a cooling rack for 5 minutes before turning out and ENJOYING!
- Donuts are best eaten warm; reheat in a damp paper towel for 10-15 seconds and keep leftovers in the fridge
Nutrition
Macros
9 servings
108 cal/16 c/1.5 f/7.5 p per donut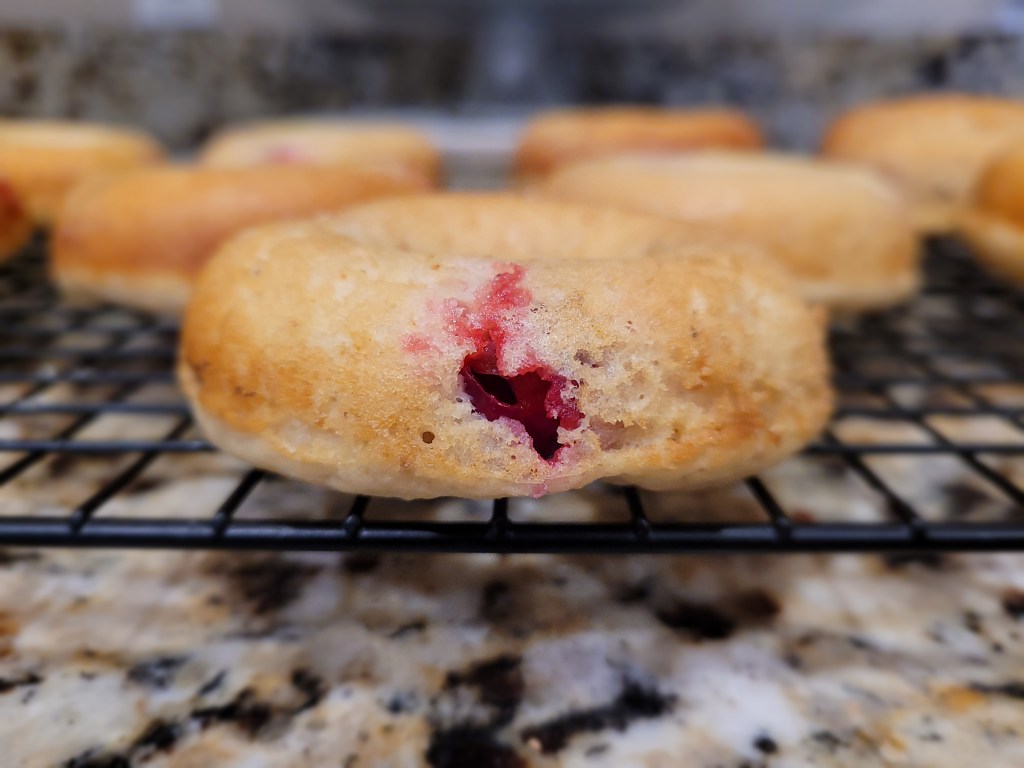
Eat, drink, and cranberry. - Preheat oven to 350 and grease a donut pan with cooking spray (can use a muffin tin if you don’t have a pan)
-
Time Waits for Snowmen
Jump to recipe and instructions
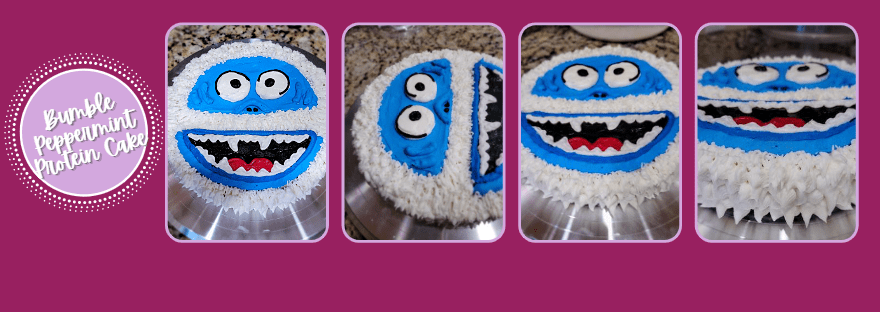
I think we’re all pretty familiar with the classic TV special Rudolph the Red-Nosed Reindeer. My Cliff Notes version for anyone under the age of 35: dejected red-nosed reindeer meets misfit elf who’s really into dental work, and both also eventually meet a greedy prospector looking for gold (but somehow misses the goldmine that is a red-nosed reindeer. Brilliant.). They get caught up beefin’ over turf with the Bumble, a.k.a., the Abominable Snowman, who seems to have a really bad case of hunger anger. There are escapades, hella weird toys on an island, and it’s all really kind of a Christmas-LSD-induced fever dream. I happen to have a very soft spot in my chilly little heart for the Bumble because I, too, often experience hanger, love the cold, and generally enjoy terrifying anyone that comes near me. I decided this holiday, I did not want to build a snowman; I wanted to build a terrifying yeti.

And it was love at frost sight. My boy Bumble here is a peppermint white cake with peppermint cream cheese frosting; I only made a single layer cake since my husband is really getting tired of me force-feeding him sweets, and I have zero self-control around cake. It’s snow secret that I am always trying to bake macro-friendly bites, and even with frosting, this cake comes to 156 calories a slice for eight slices total. And every bite is HEAVEN. I’m normally a huge fan of chocolate and peppermint, but letting the peppermint take center stage here was a snow-brainer. This cake is fluffy and light, minty, and tastes so perfect with a cream cheese frosting. It’s a scratch recipe and not from a box, but it really is simple to put together. You can double the recipe to make two 8-inch rounds or three 6-inch rounds if you’re not tired of eating dessert yet this season and actually have willpower (congrats, you’re as rare as a unicorn or the Bumble himself!).
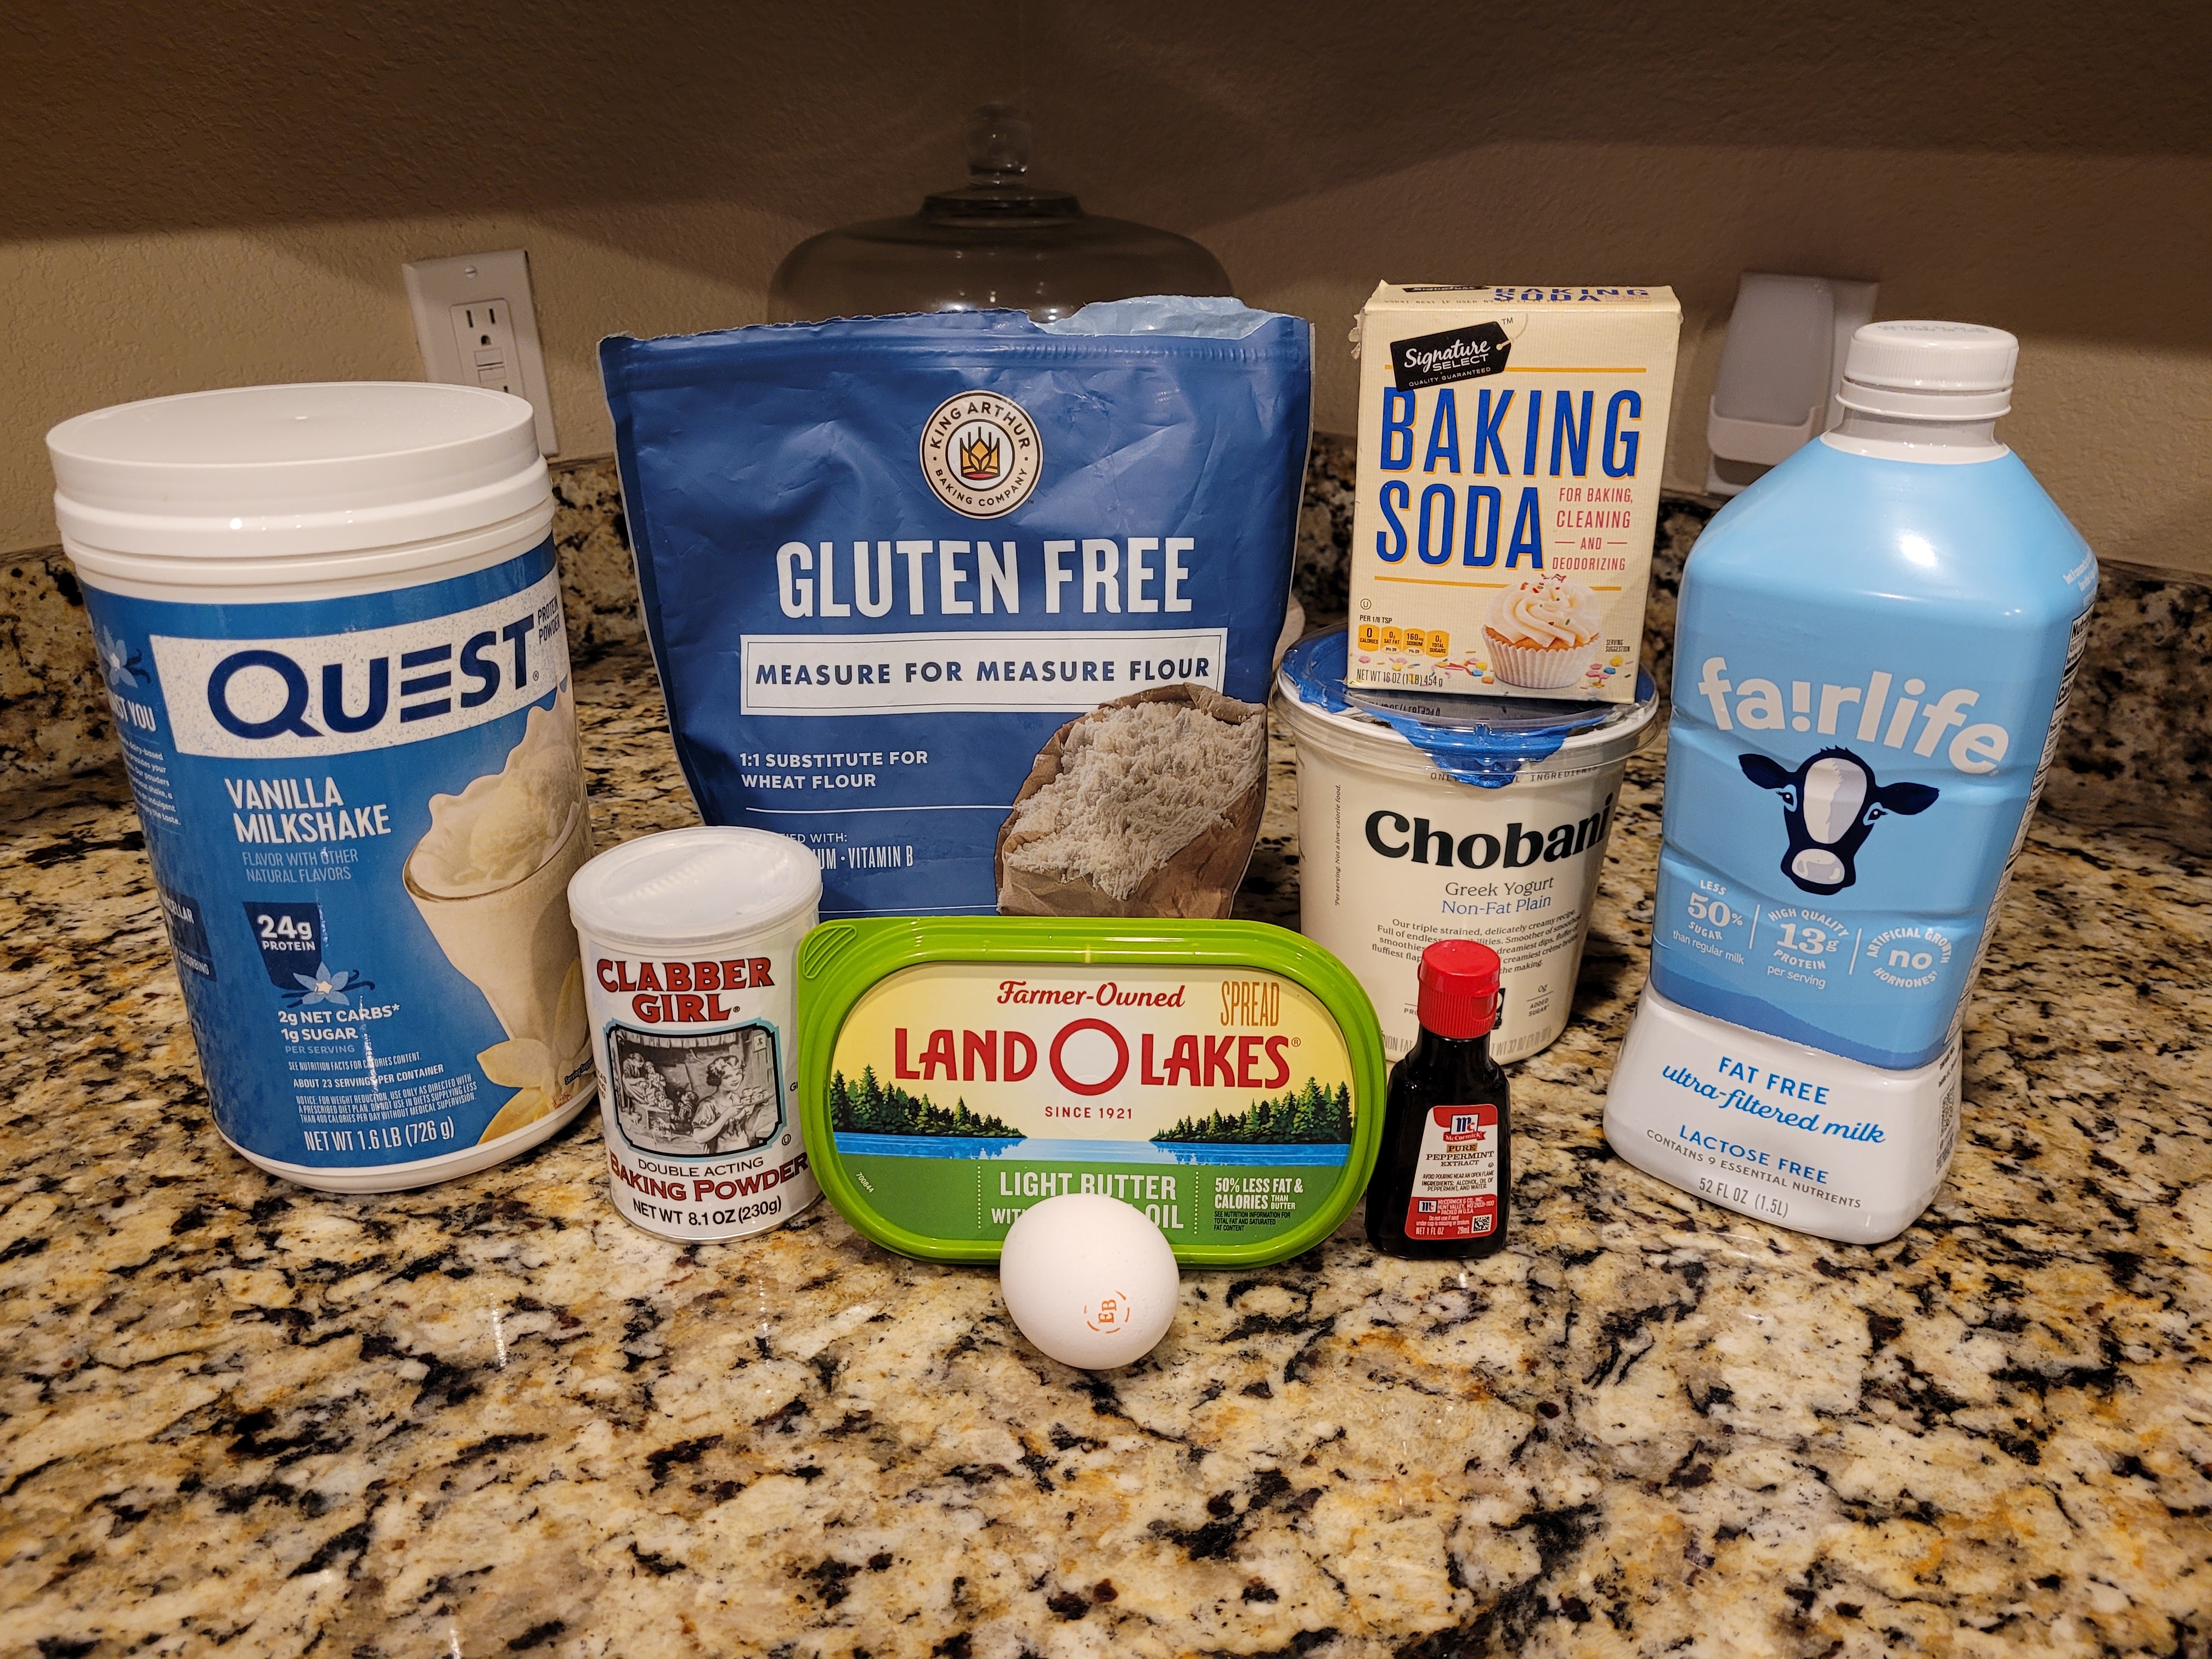
Recipe adapted from a Hayl’s Kitchen bake! To make this, all things considered, very healthy but somehow still tasty peppermint cake, you need:
- 124 grams (1 cup) gluten free flour (can use regular flour if not gluten free)
- 45 grams protein powder, divided (I swear by baking with Quest protein powders)
- 1/2 tsp baking soda
- 1/2 tsp baking powder
- 42 grams (3 TBS) light butter (light butter is pretty soft already, so you can usually use this straight from the fridge; if you’re using full-fat butter, soften it first)
- 113 grams (1/2 cup) fat free plain Greek yogurt
- 1/2 cup + 2 TBS fat free or skim milk
- 1 egg
- 1 tsp peppermint extract
I used convection bake at 350 degrees to make this, but 350 on regular bake setting will also work; it just might take a few minutes longer to fully cook. Start by whisking together the flour, half of the protein powder, baking soda, and baking powder together in a medium bowl; set this aside. In your stand mixing bowl, blend the butter and other half of the protein powder until smooth and fluffy; about 1-2 minutes. Then add in the yogurt, milk, egg, and extract, blending on medium until everything has come together, another minute or so. Dump the dry mix into the wet mix, and mix on medium for 1 minute, just until everything has come together. Prepare an 8″ round pan with cooking spray, and pour batter into the pan. Bake for 20 minutes. A toothpick should come out of the center of the cake clean. Let rest in the pan for 10 minutes before turning out to cool completely on a cooling rack before frosting.
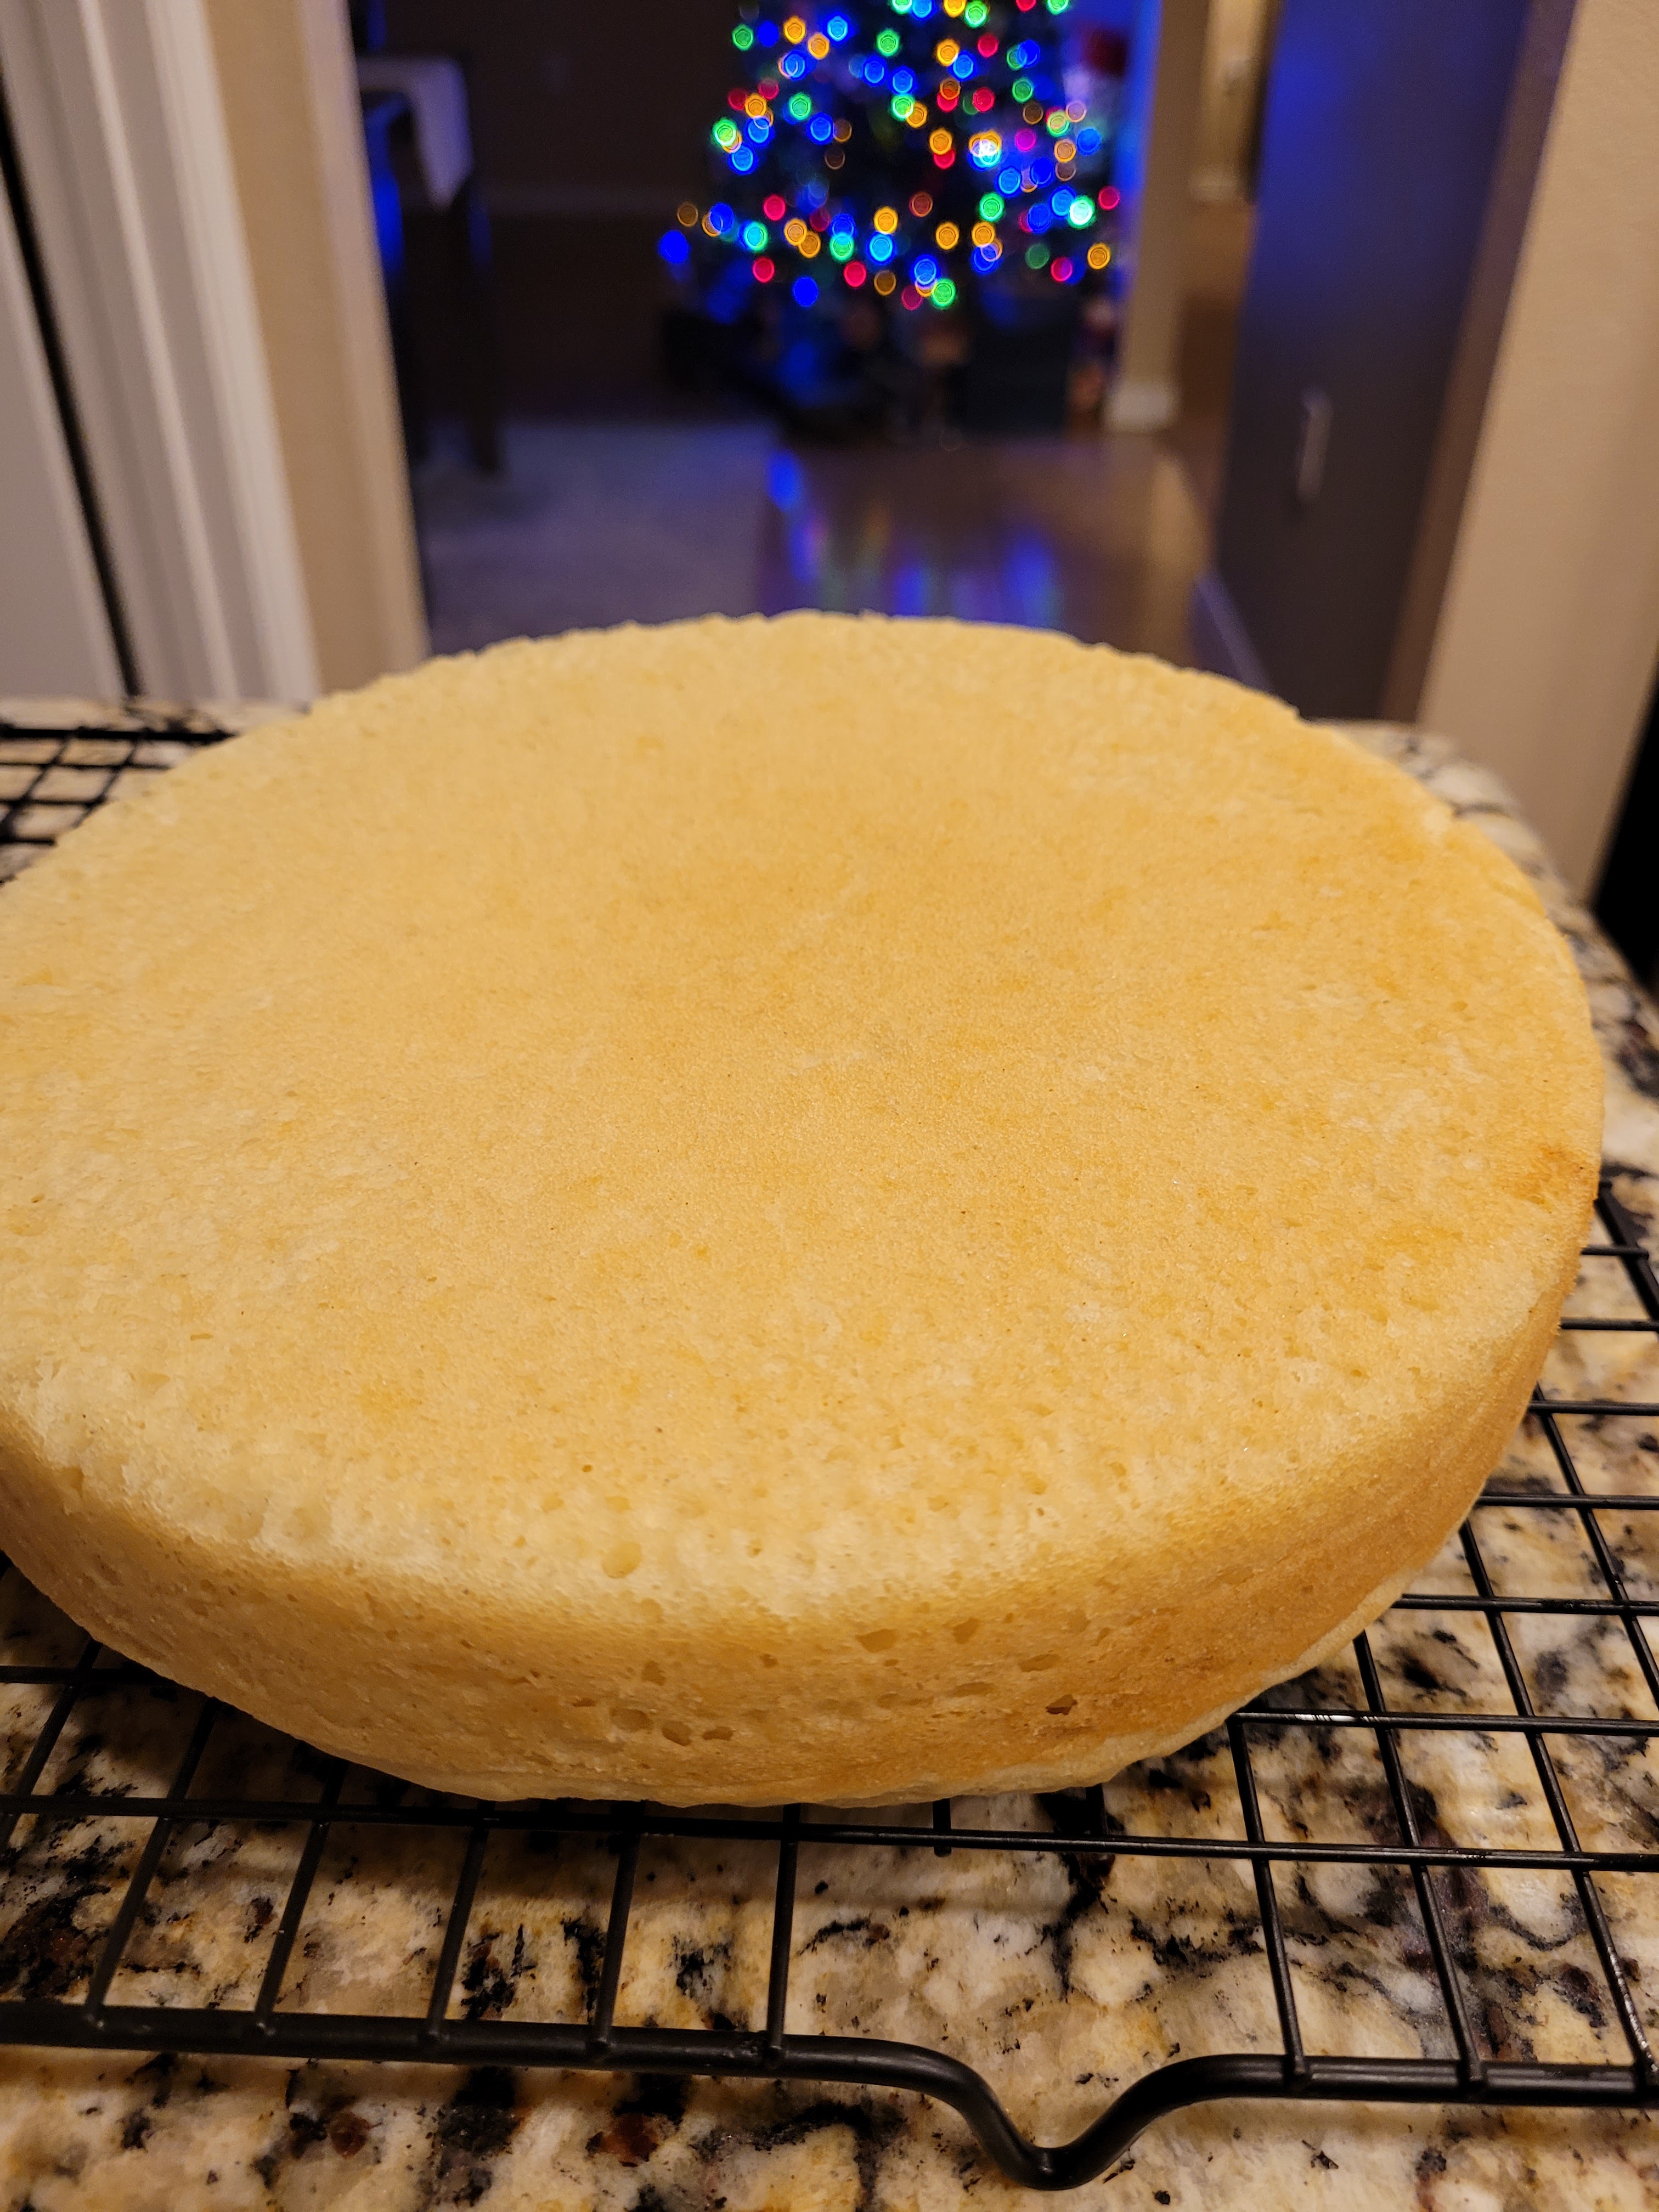
I mean, I even got the Christmas tree in this shot. To make the cream cheese frosting, you’ll need:
- 225 grams (8 ounces) of 1/3 the fat cream cheese, softened
- 226 grams (1 cup) of fat free Greek yogurt, strained overnight to remove moisture
- 16 ounces (4 cups) Lakanto powdered monkfruit or regular powdered sugar
- 1 tsp peppermint extract
- 1 tsp vanilla extract
- 1 TBS milk
- Gel dyes in red, black, light blue, and dark blue
Whip the cream cheese and yogurt with a paddle attachment in your stand mixer until fluffy, about 2 minutes. Add in half the monkfruit, and both extracts. Blend well, then scrape the bowl before adding the remaining monkfruit and 1 TBS milk; if the frosting is too stiff, add another TBS milk.
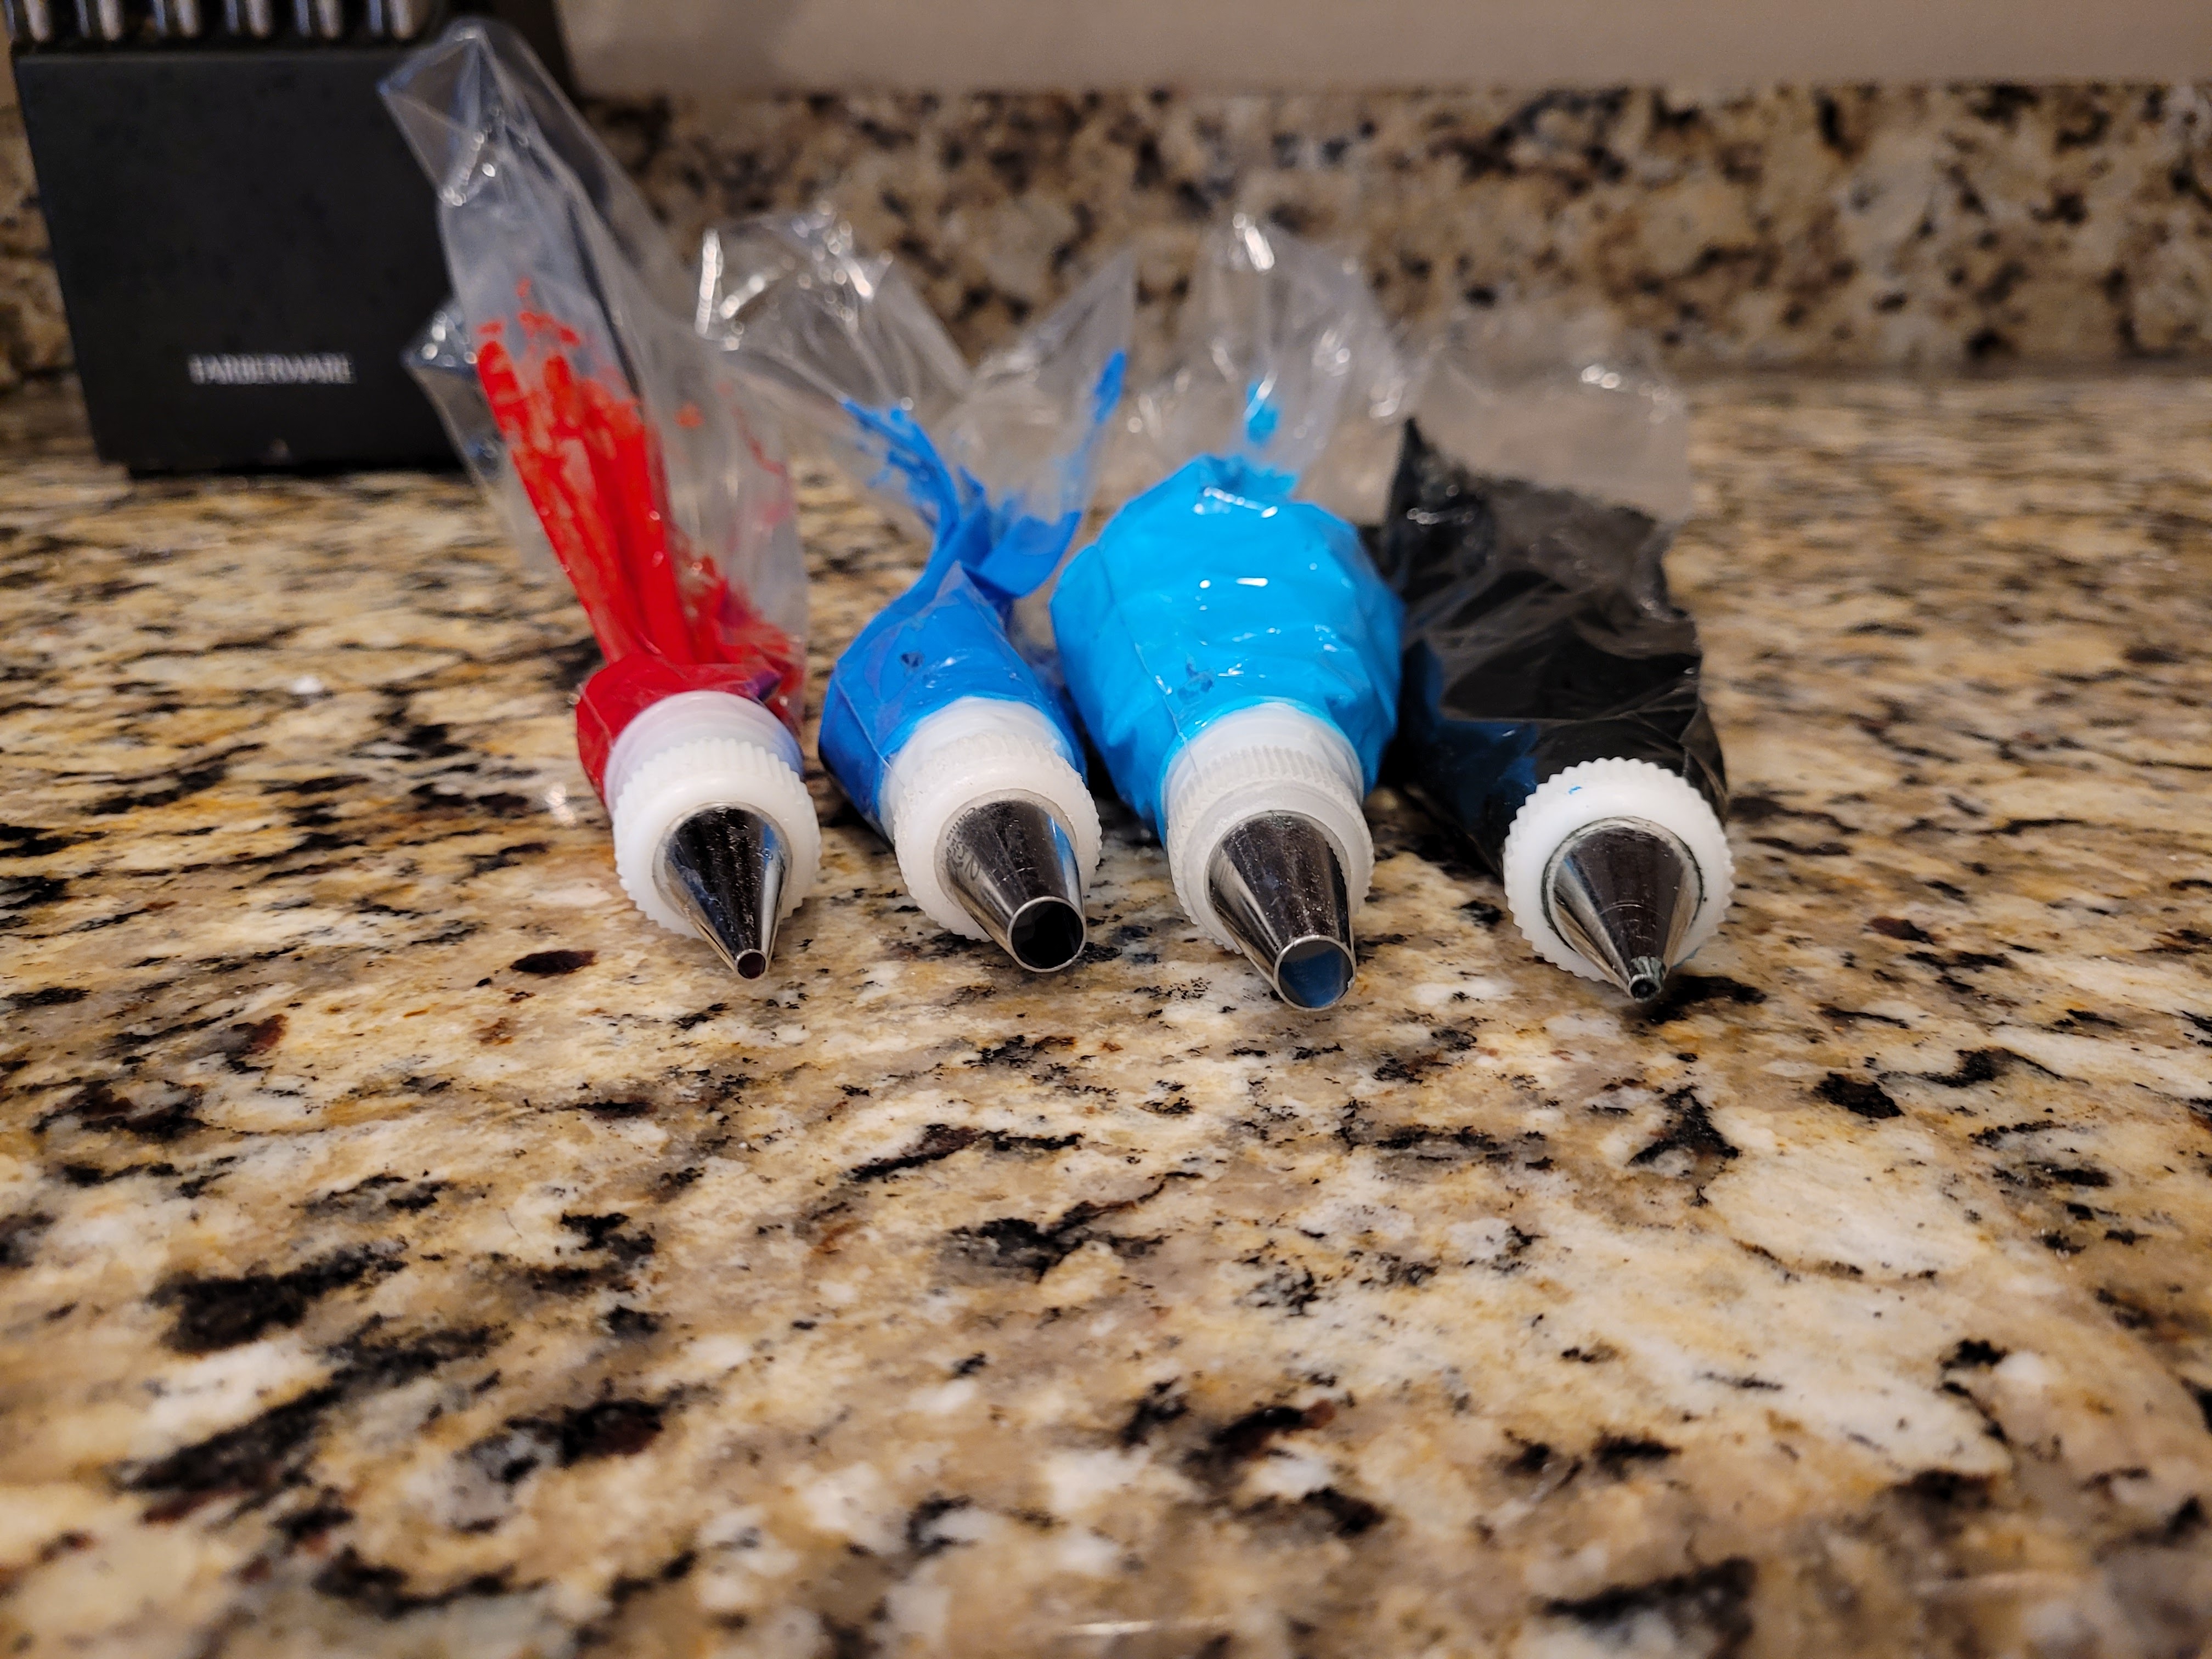
Tools of the snow trade. Now, you can do a whole crumb coat of frosting if you’d like, but I only added a tiny layer to the top of the cake because I am a work smarter not harder person, if you catch my (snow)drift, and I knew the sides would be completely piped over. Grab a few small bowls and plop some frosting into each. You will need the following:
- A small amount of black for the eyes, mouth, and nose
- A small amount of light blue for the top half of Bumble’s face
- A small amount of dark blue for the bottom half of Bumble’s face
- A tiny amount of red for Bumble’s tongue
- A bunch of white for his hair, eyes, and teeth
- Hair/grass tip (#233), some small round tips (#3, #5, for finer details, #12 for larger sections), and an open star tip for the sides (#32 or #199)
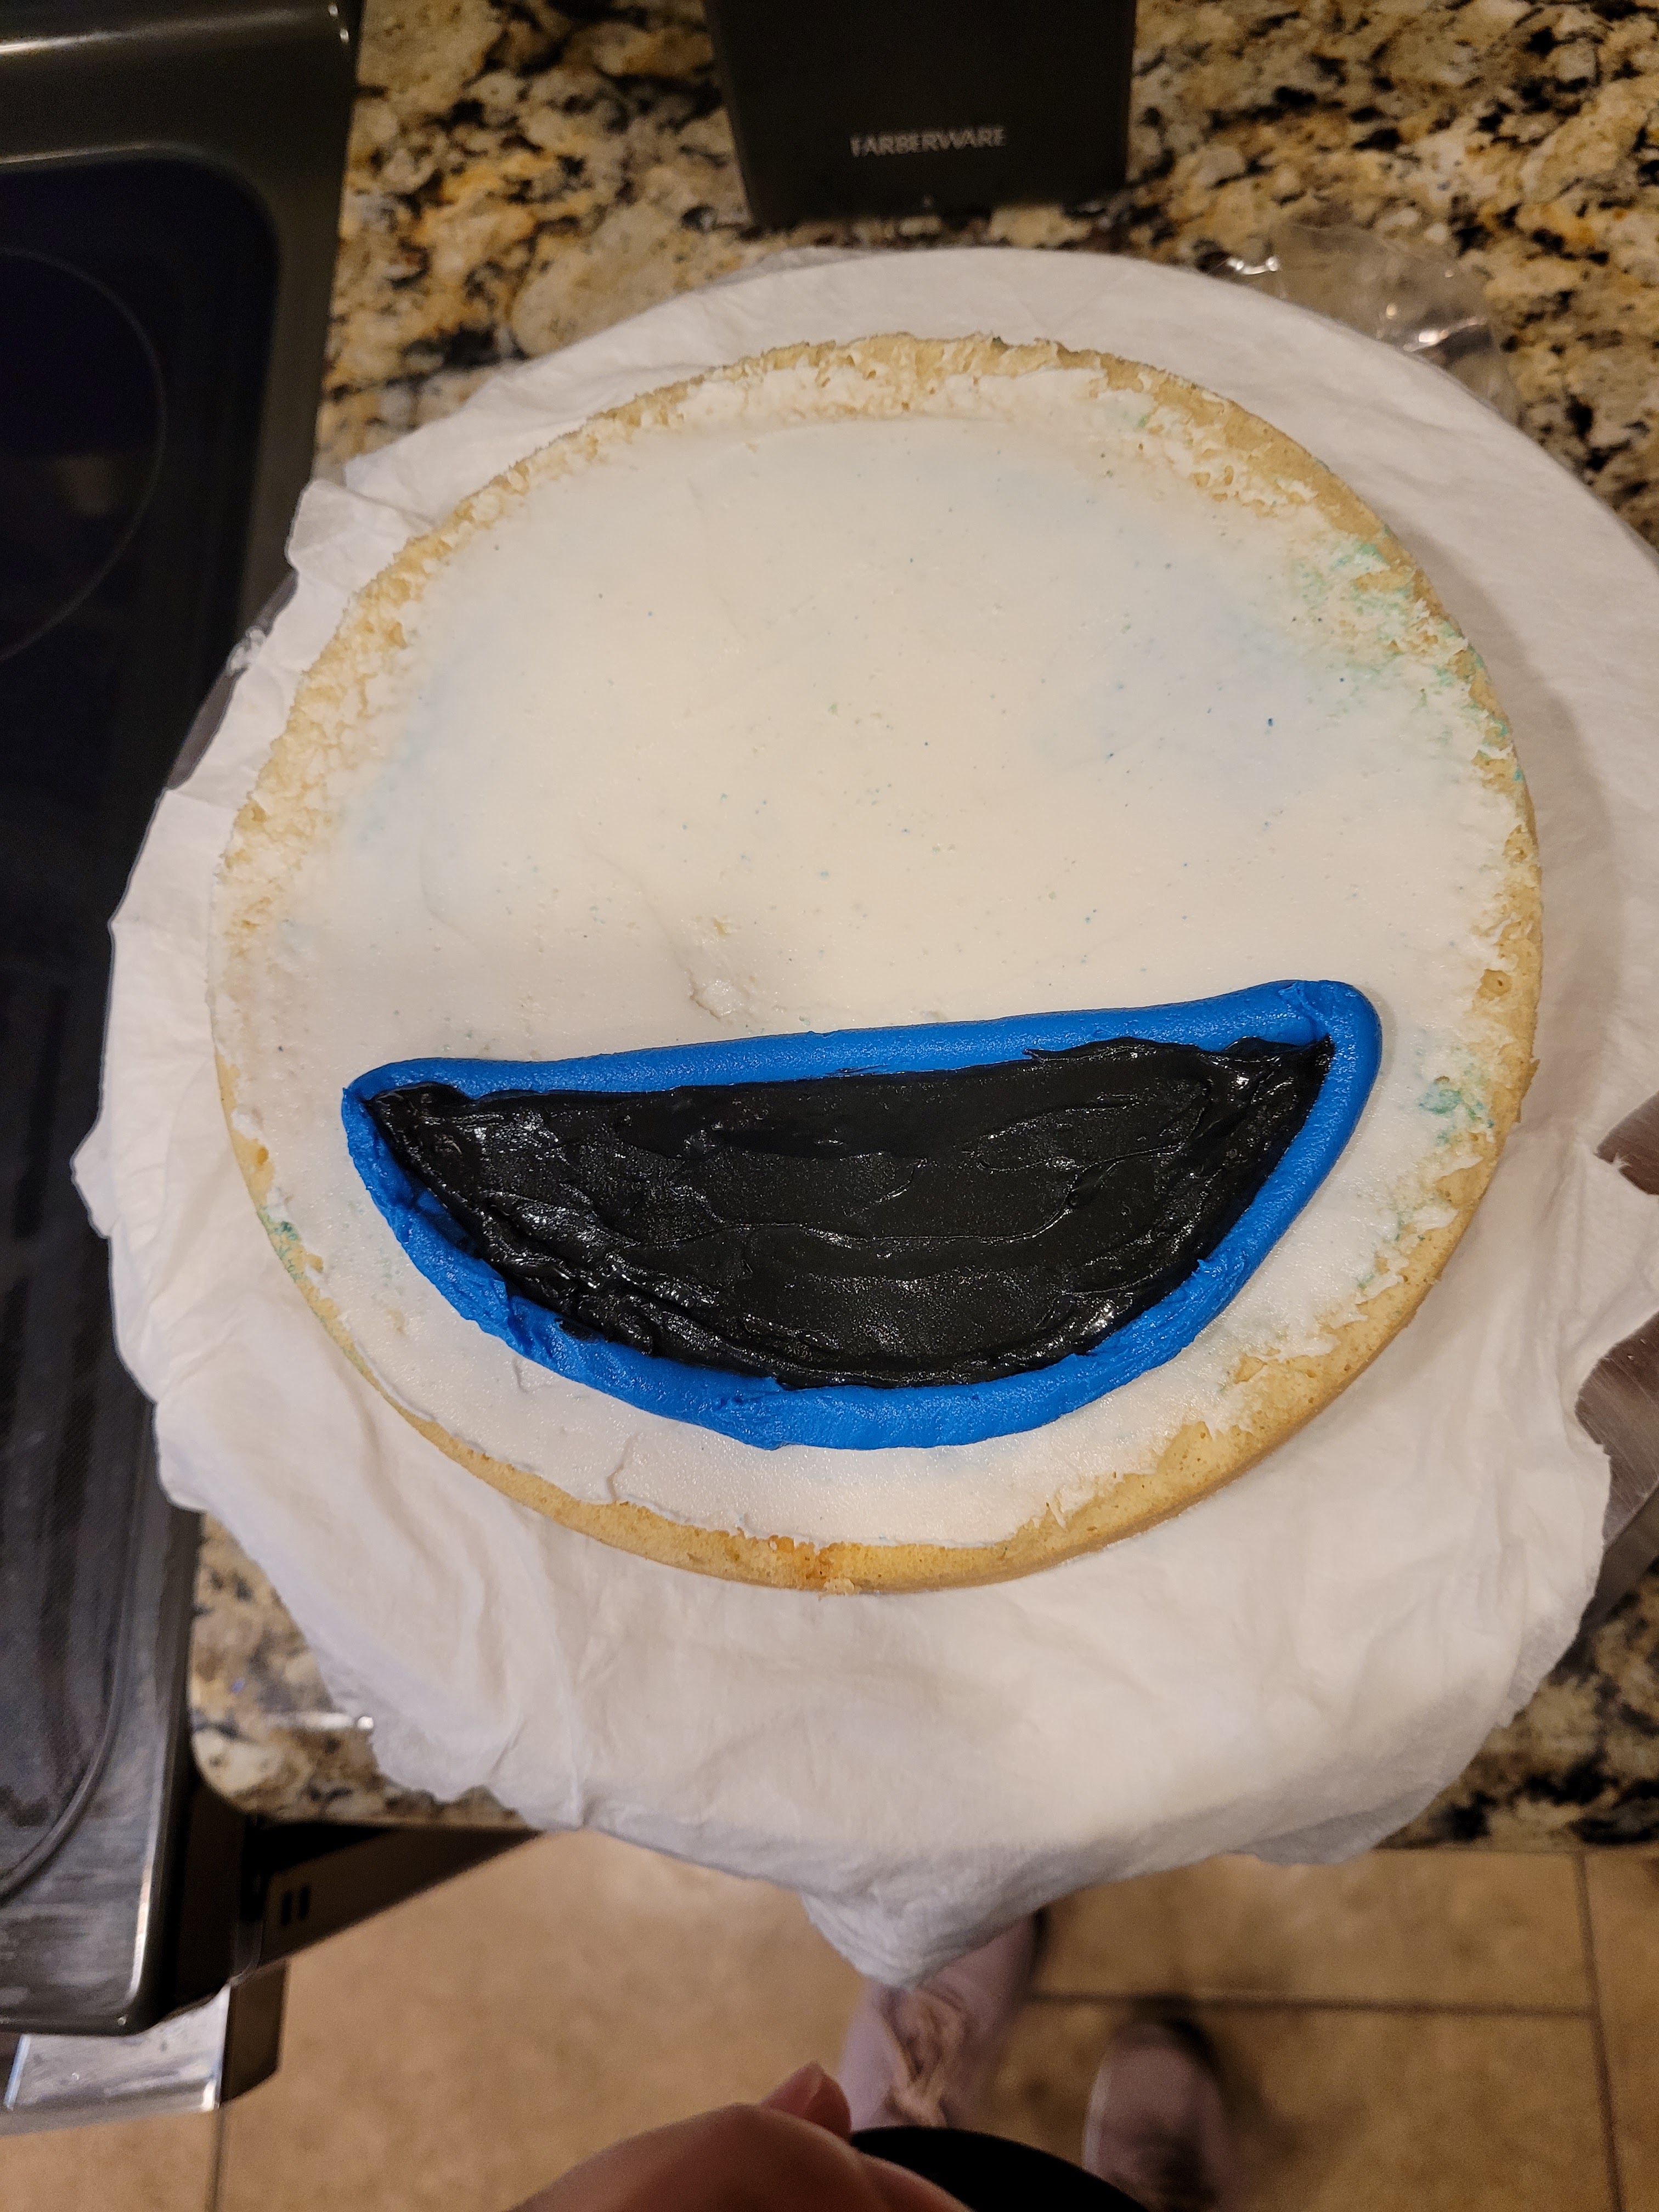
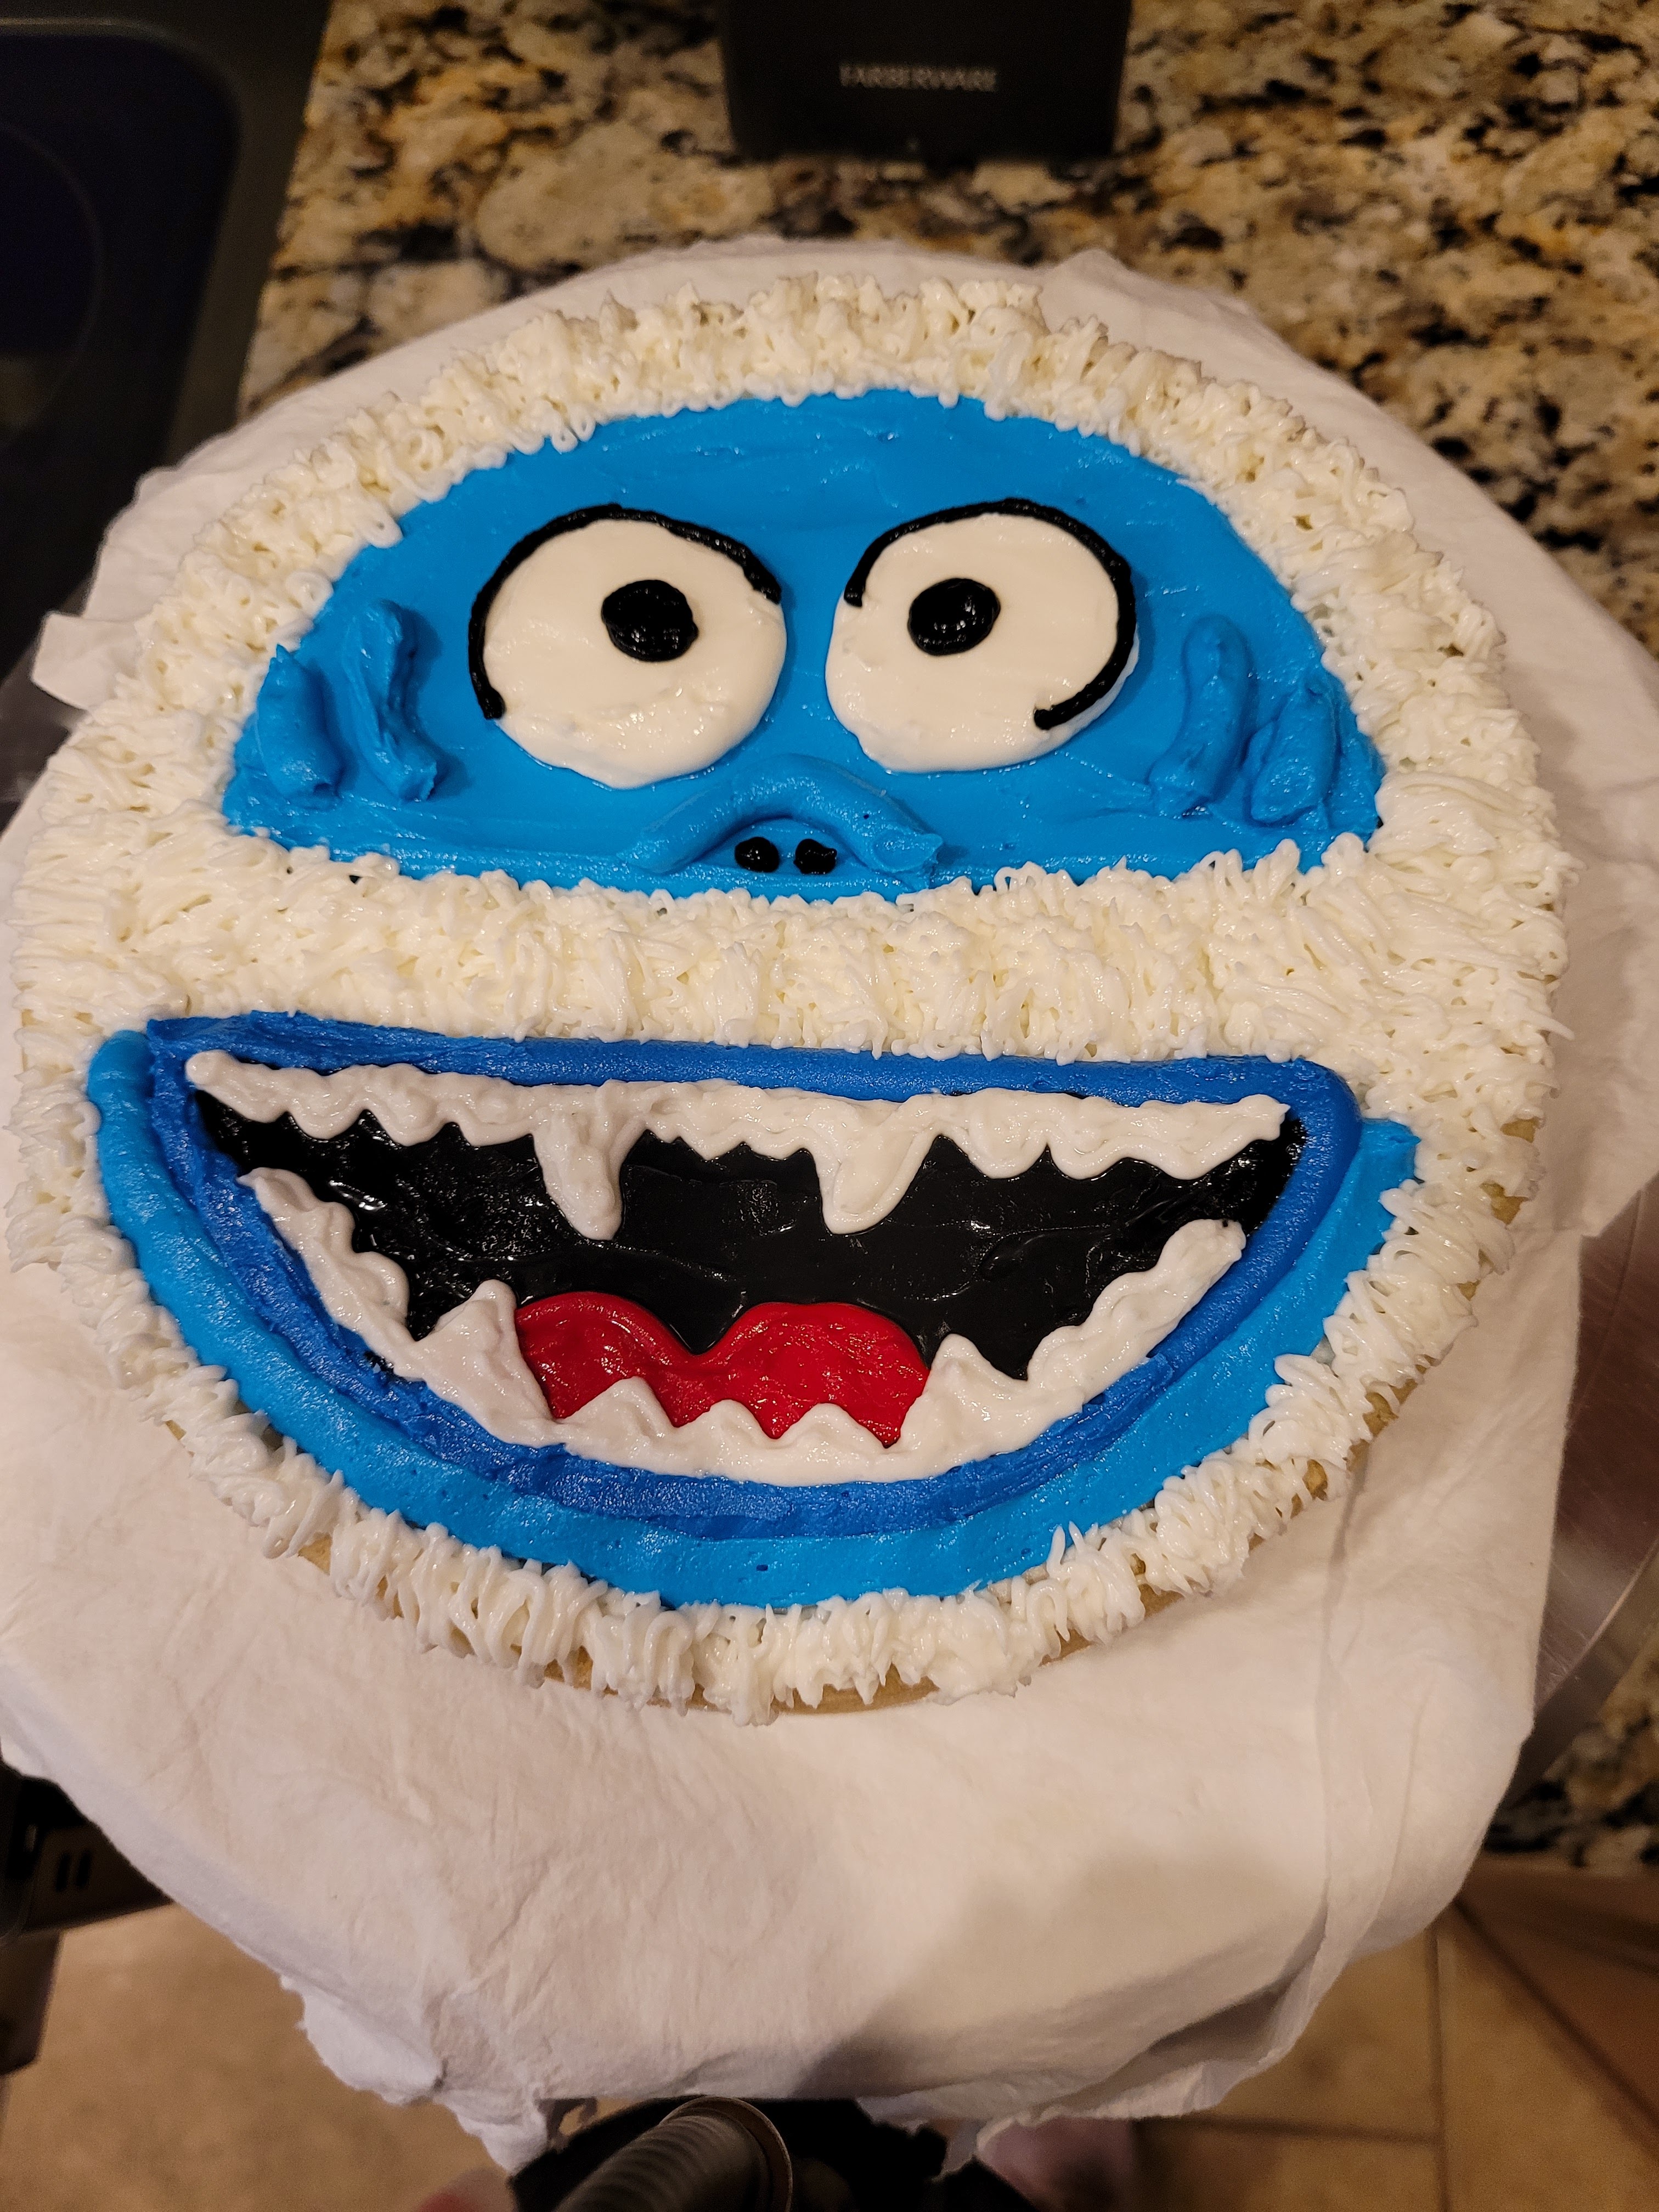
Cookie Monster…is that you? Can someone tell me if Bumble and Cookie monster a related? Because that would definitely check out. I used the dark blue frosting fitted with a #12 tip to draw the outline of his mouth…don’t worry, the best is yeti to come. Then I filled this in with the black frosting in a piping bag fitted with a #12 tip. I used an angled spatula to smooth out the line around his mouth, and after wiping clean, smoothed out the inside of the mouth as well.
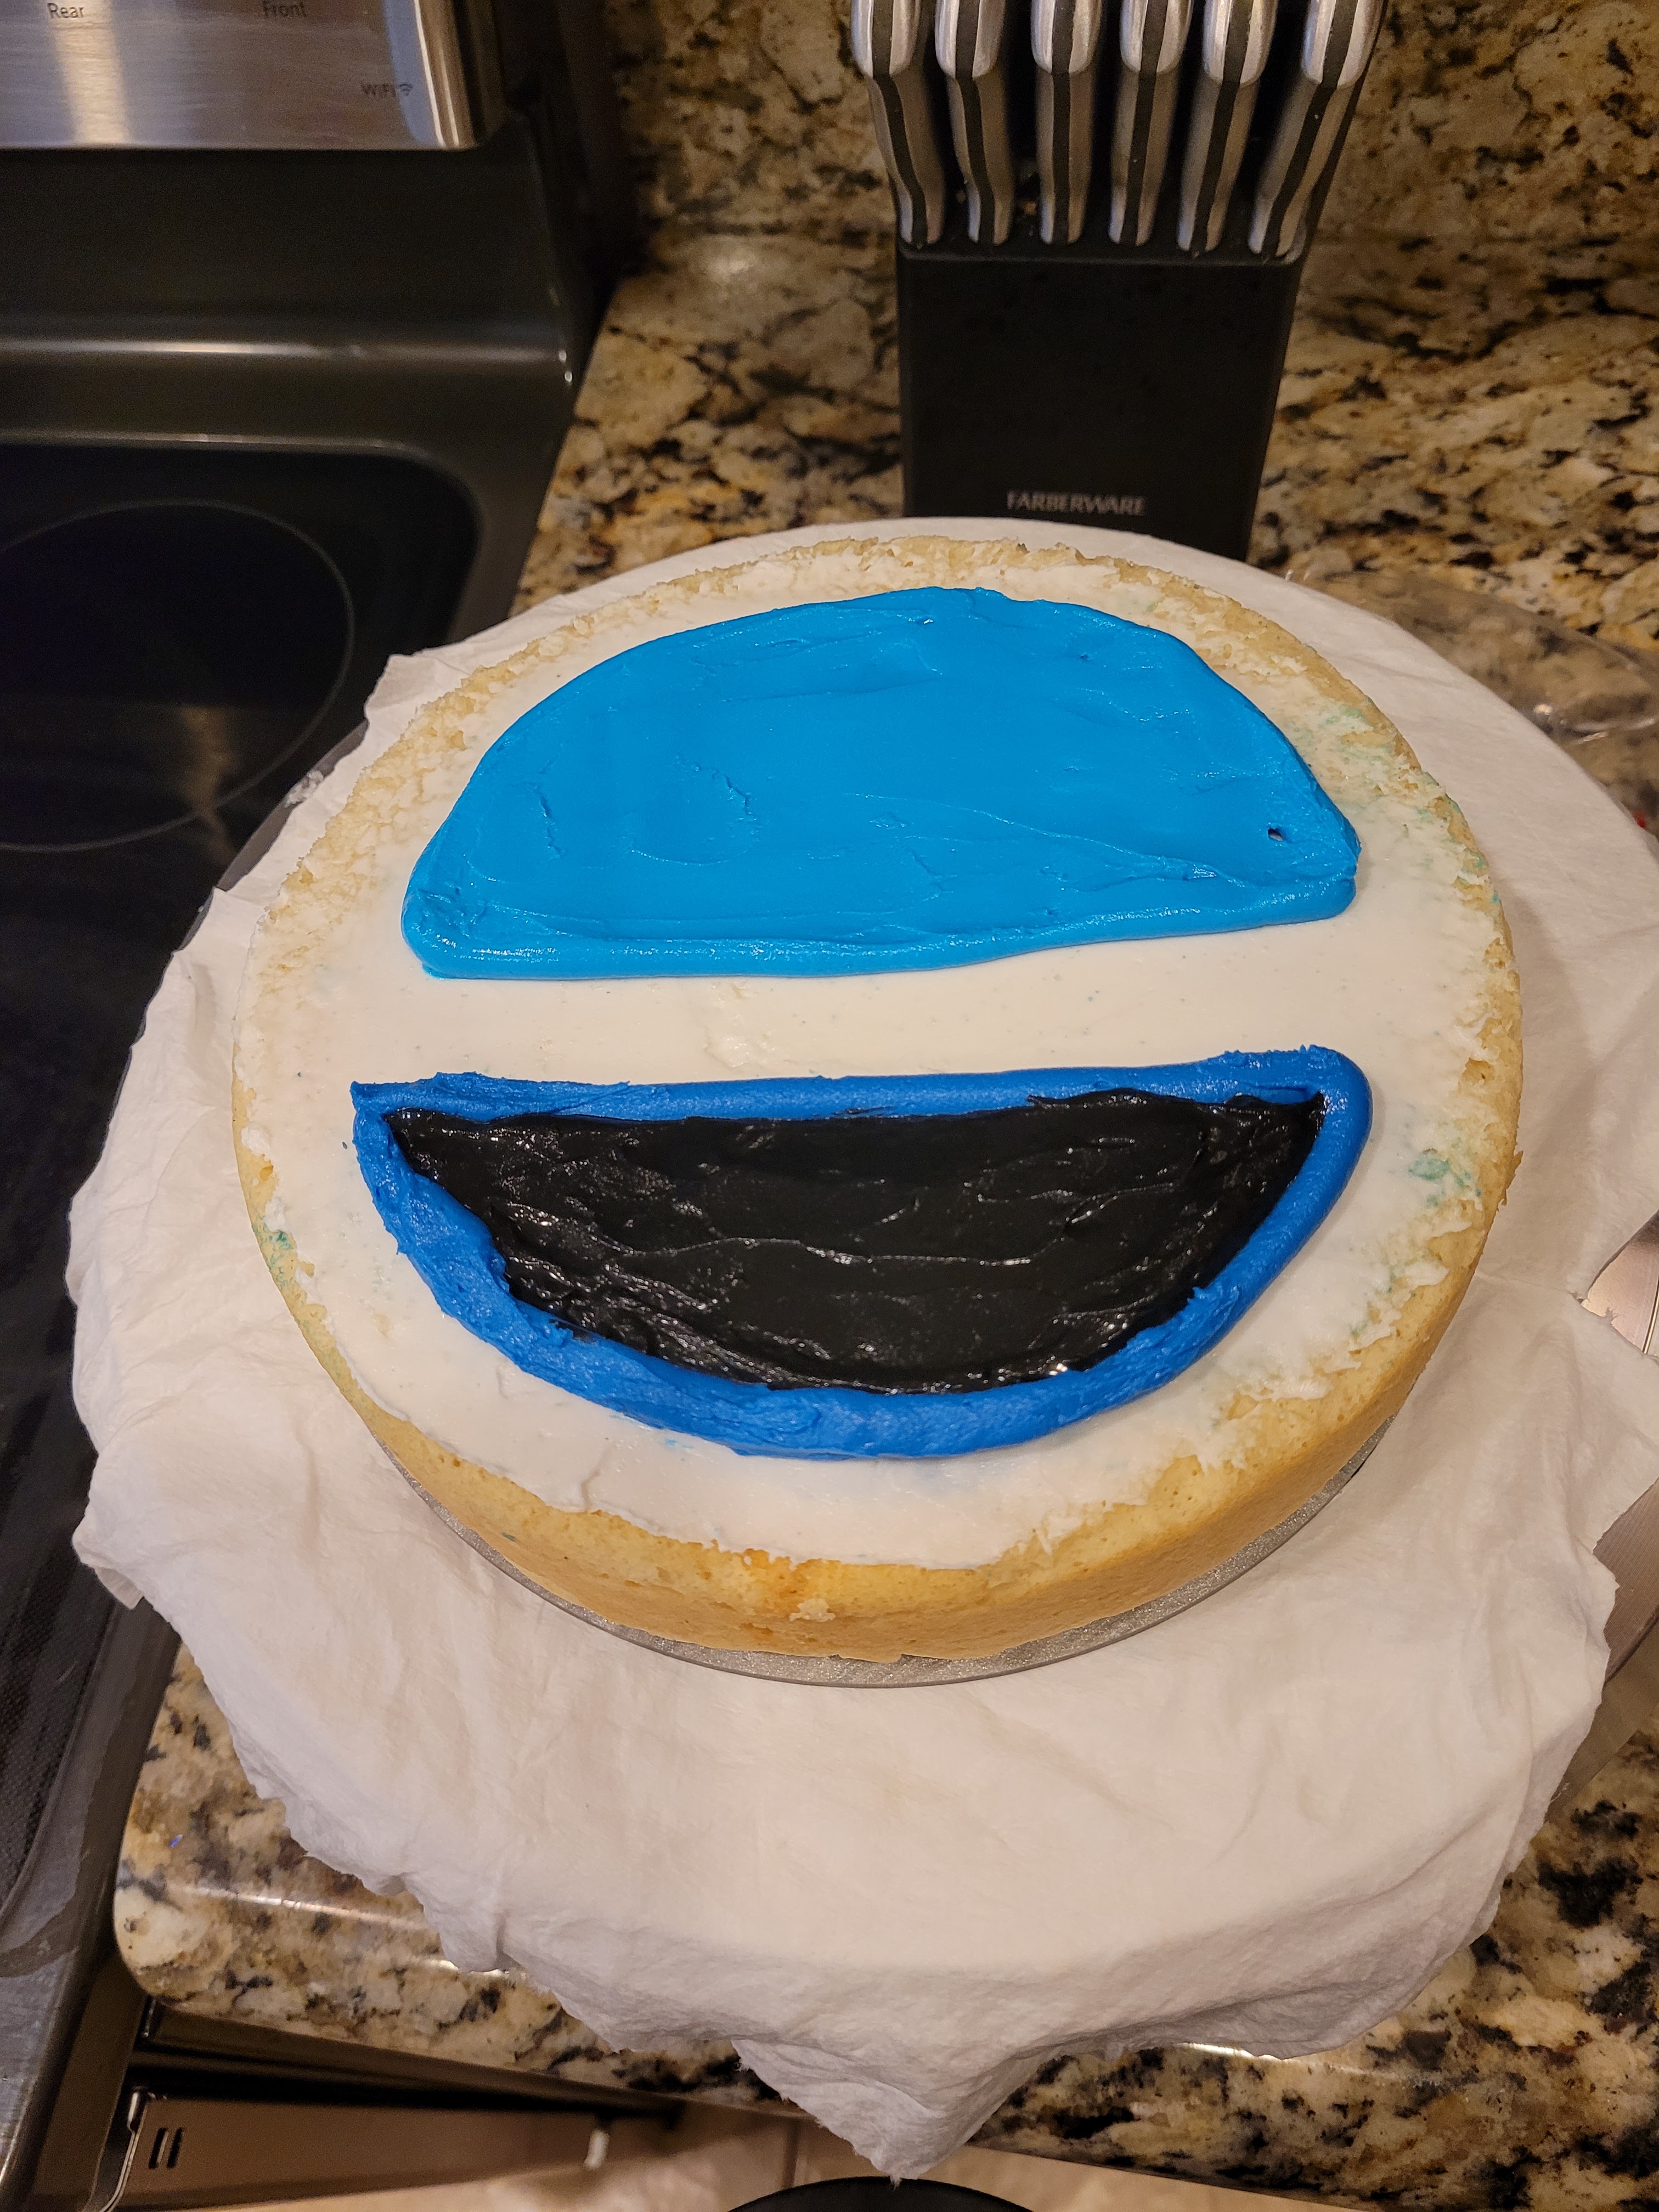
Don’t have a meltdown…he’ll look better in a minute, I swear. With a #12 tip and my light blue frosting, I piped the top half of his face. I outlined first like I did with the mouth, then filled in and smoothed with my angled spatula.

He looks so happy. So not bitey at all. Now, take the tiny bit of red frosting and put into a piping bag with a #5 tip. Draw a tongue on the bottom of his mouth in the black. Think of piping something that’s the same shape as the top half of a drawn heart. I smoothed out the tongue with my angled spatula (this thing put in overtime for this cake), and plopped ol’ Bumble in the freezer to set for 30 minutes to firm (and because he likes the cold).
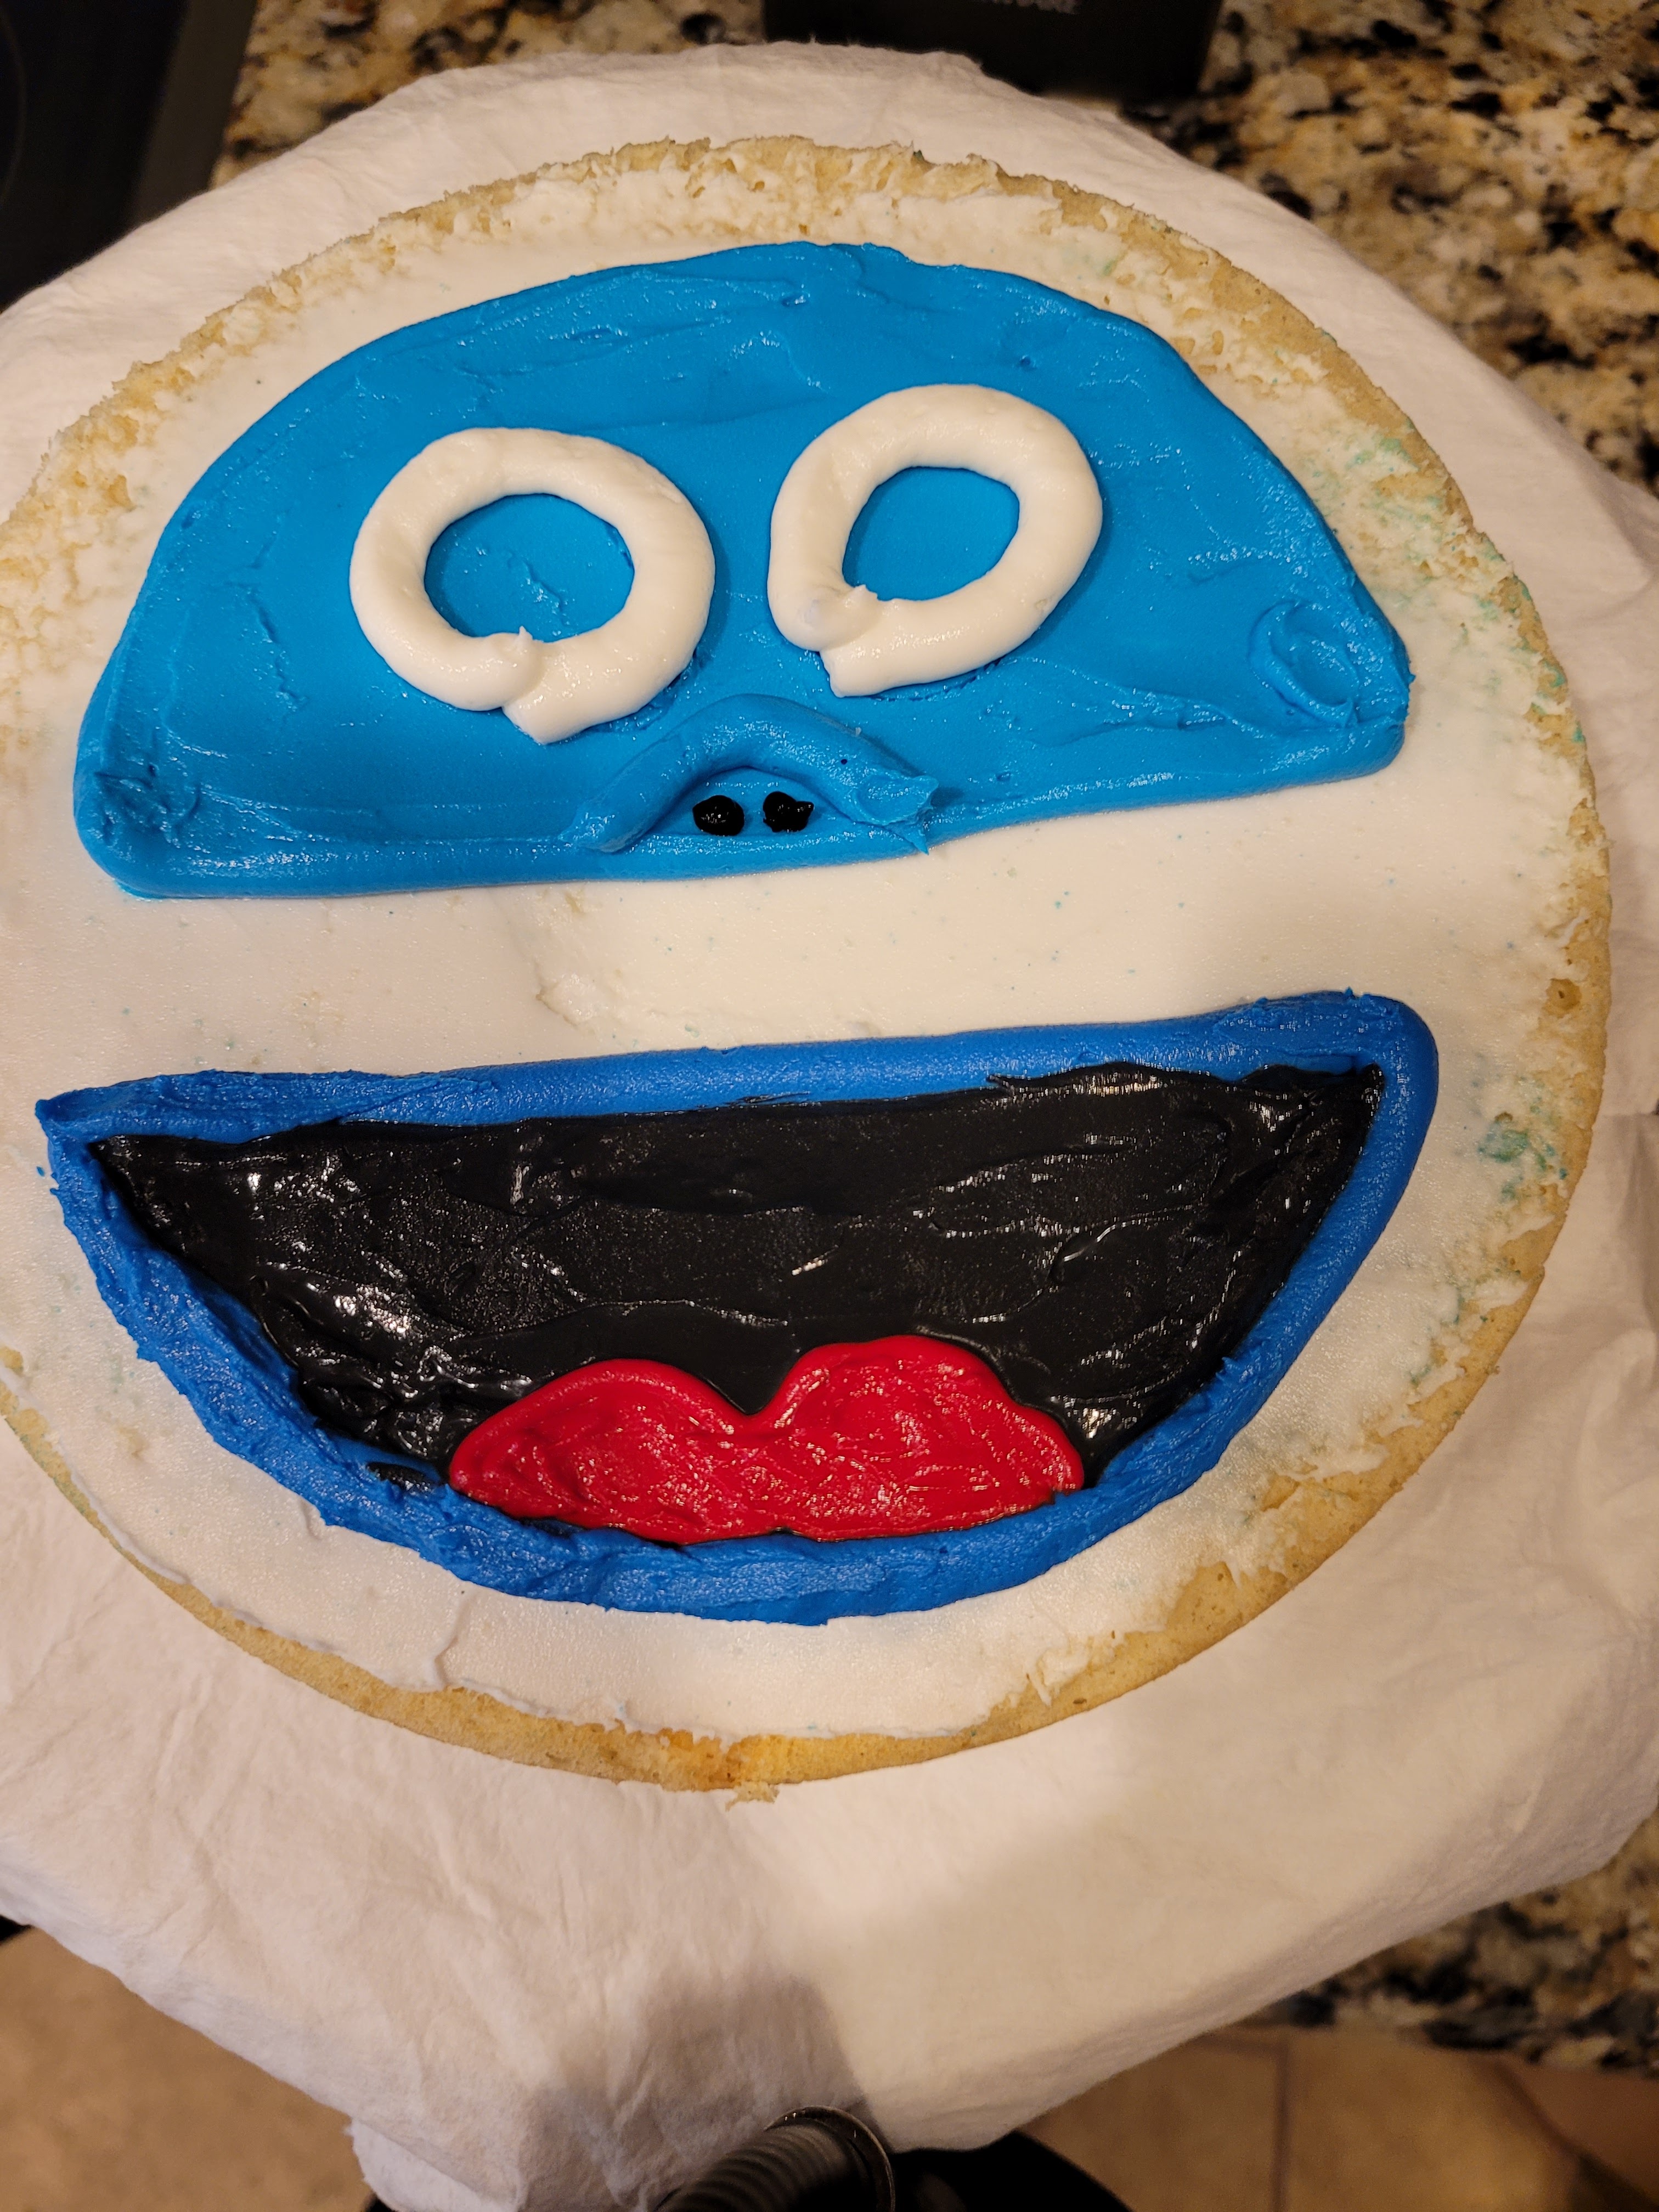
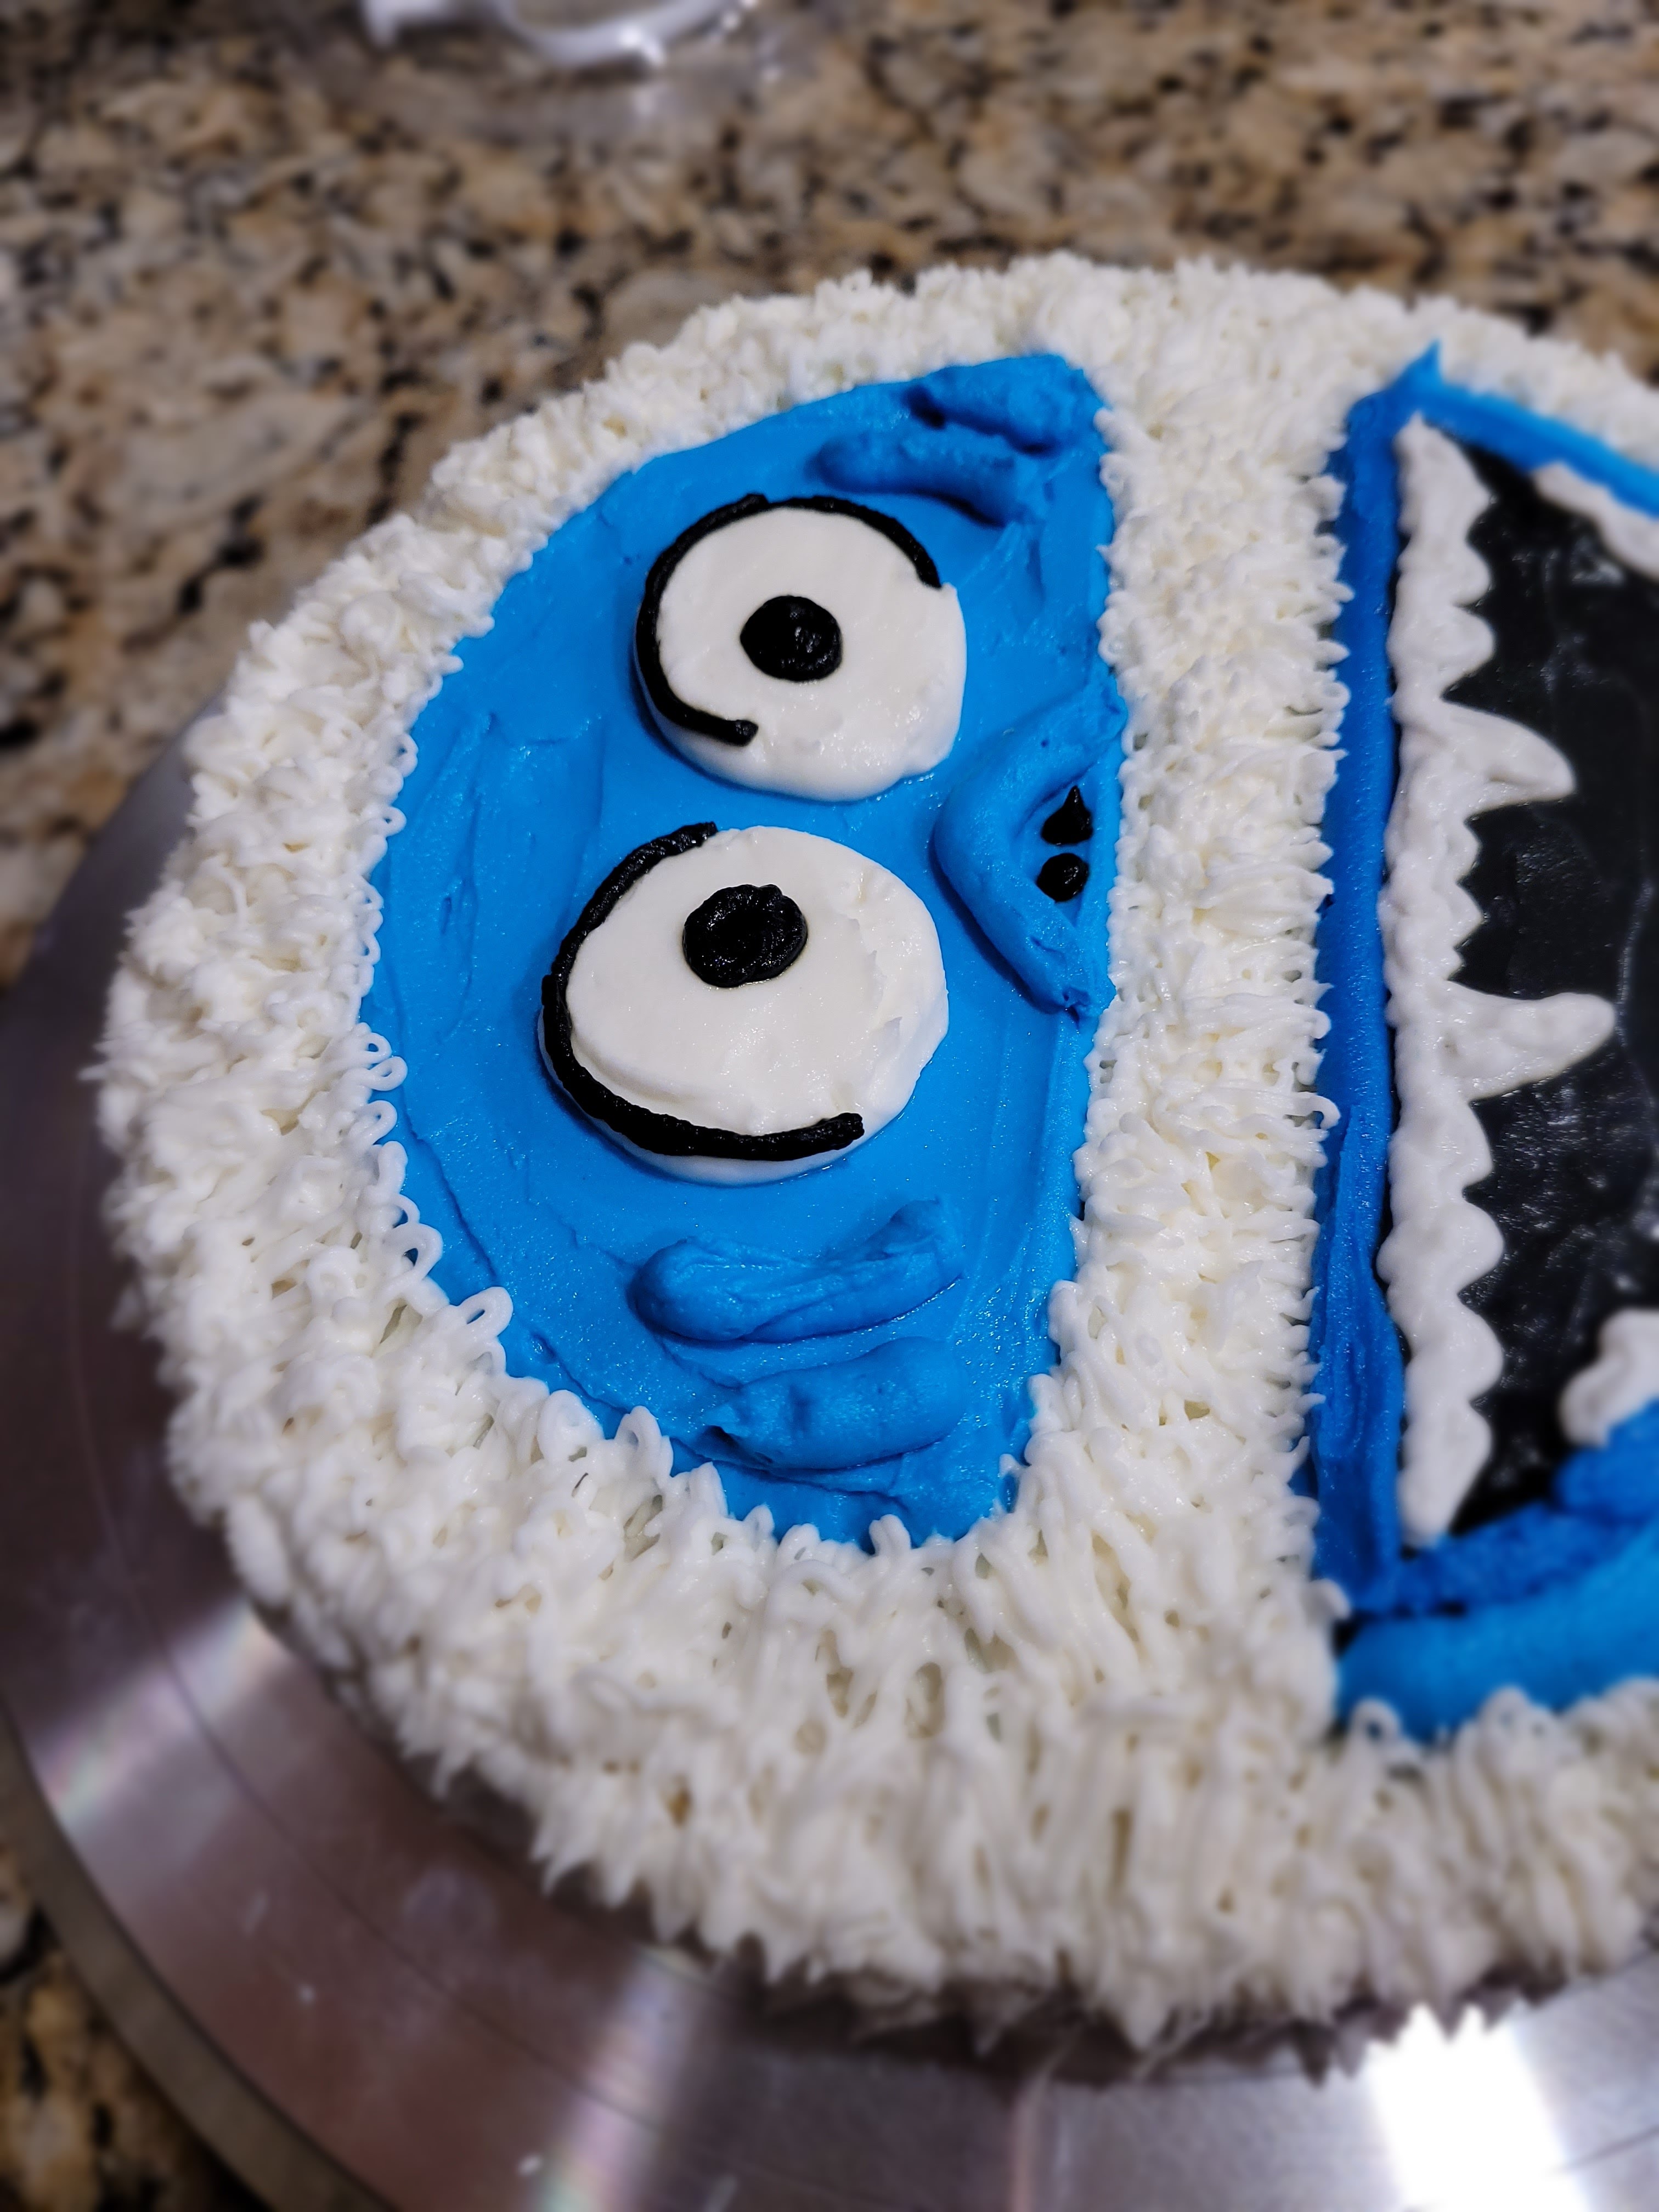
He sees nothing and everything all at the same time… Sorry, he is ABSOLUTELY terrifying to look at like this; even though he’s a monster and all, so very quickly, use a #12 tip to pipe the outline of his eyes. I used a toothpick to draw the circles where I wanted them to be so it was easy to trace with my piping bag.
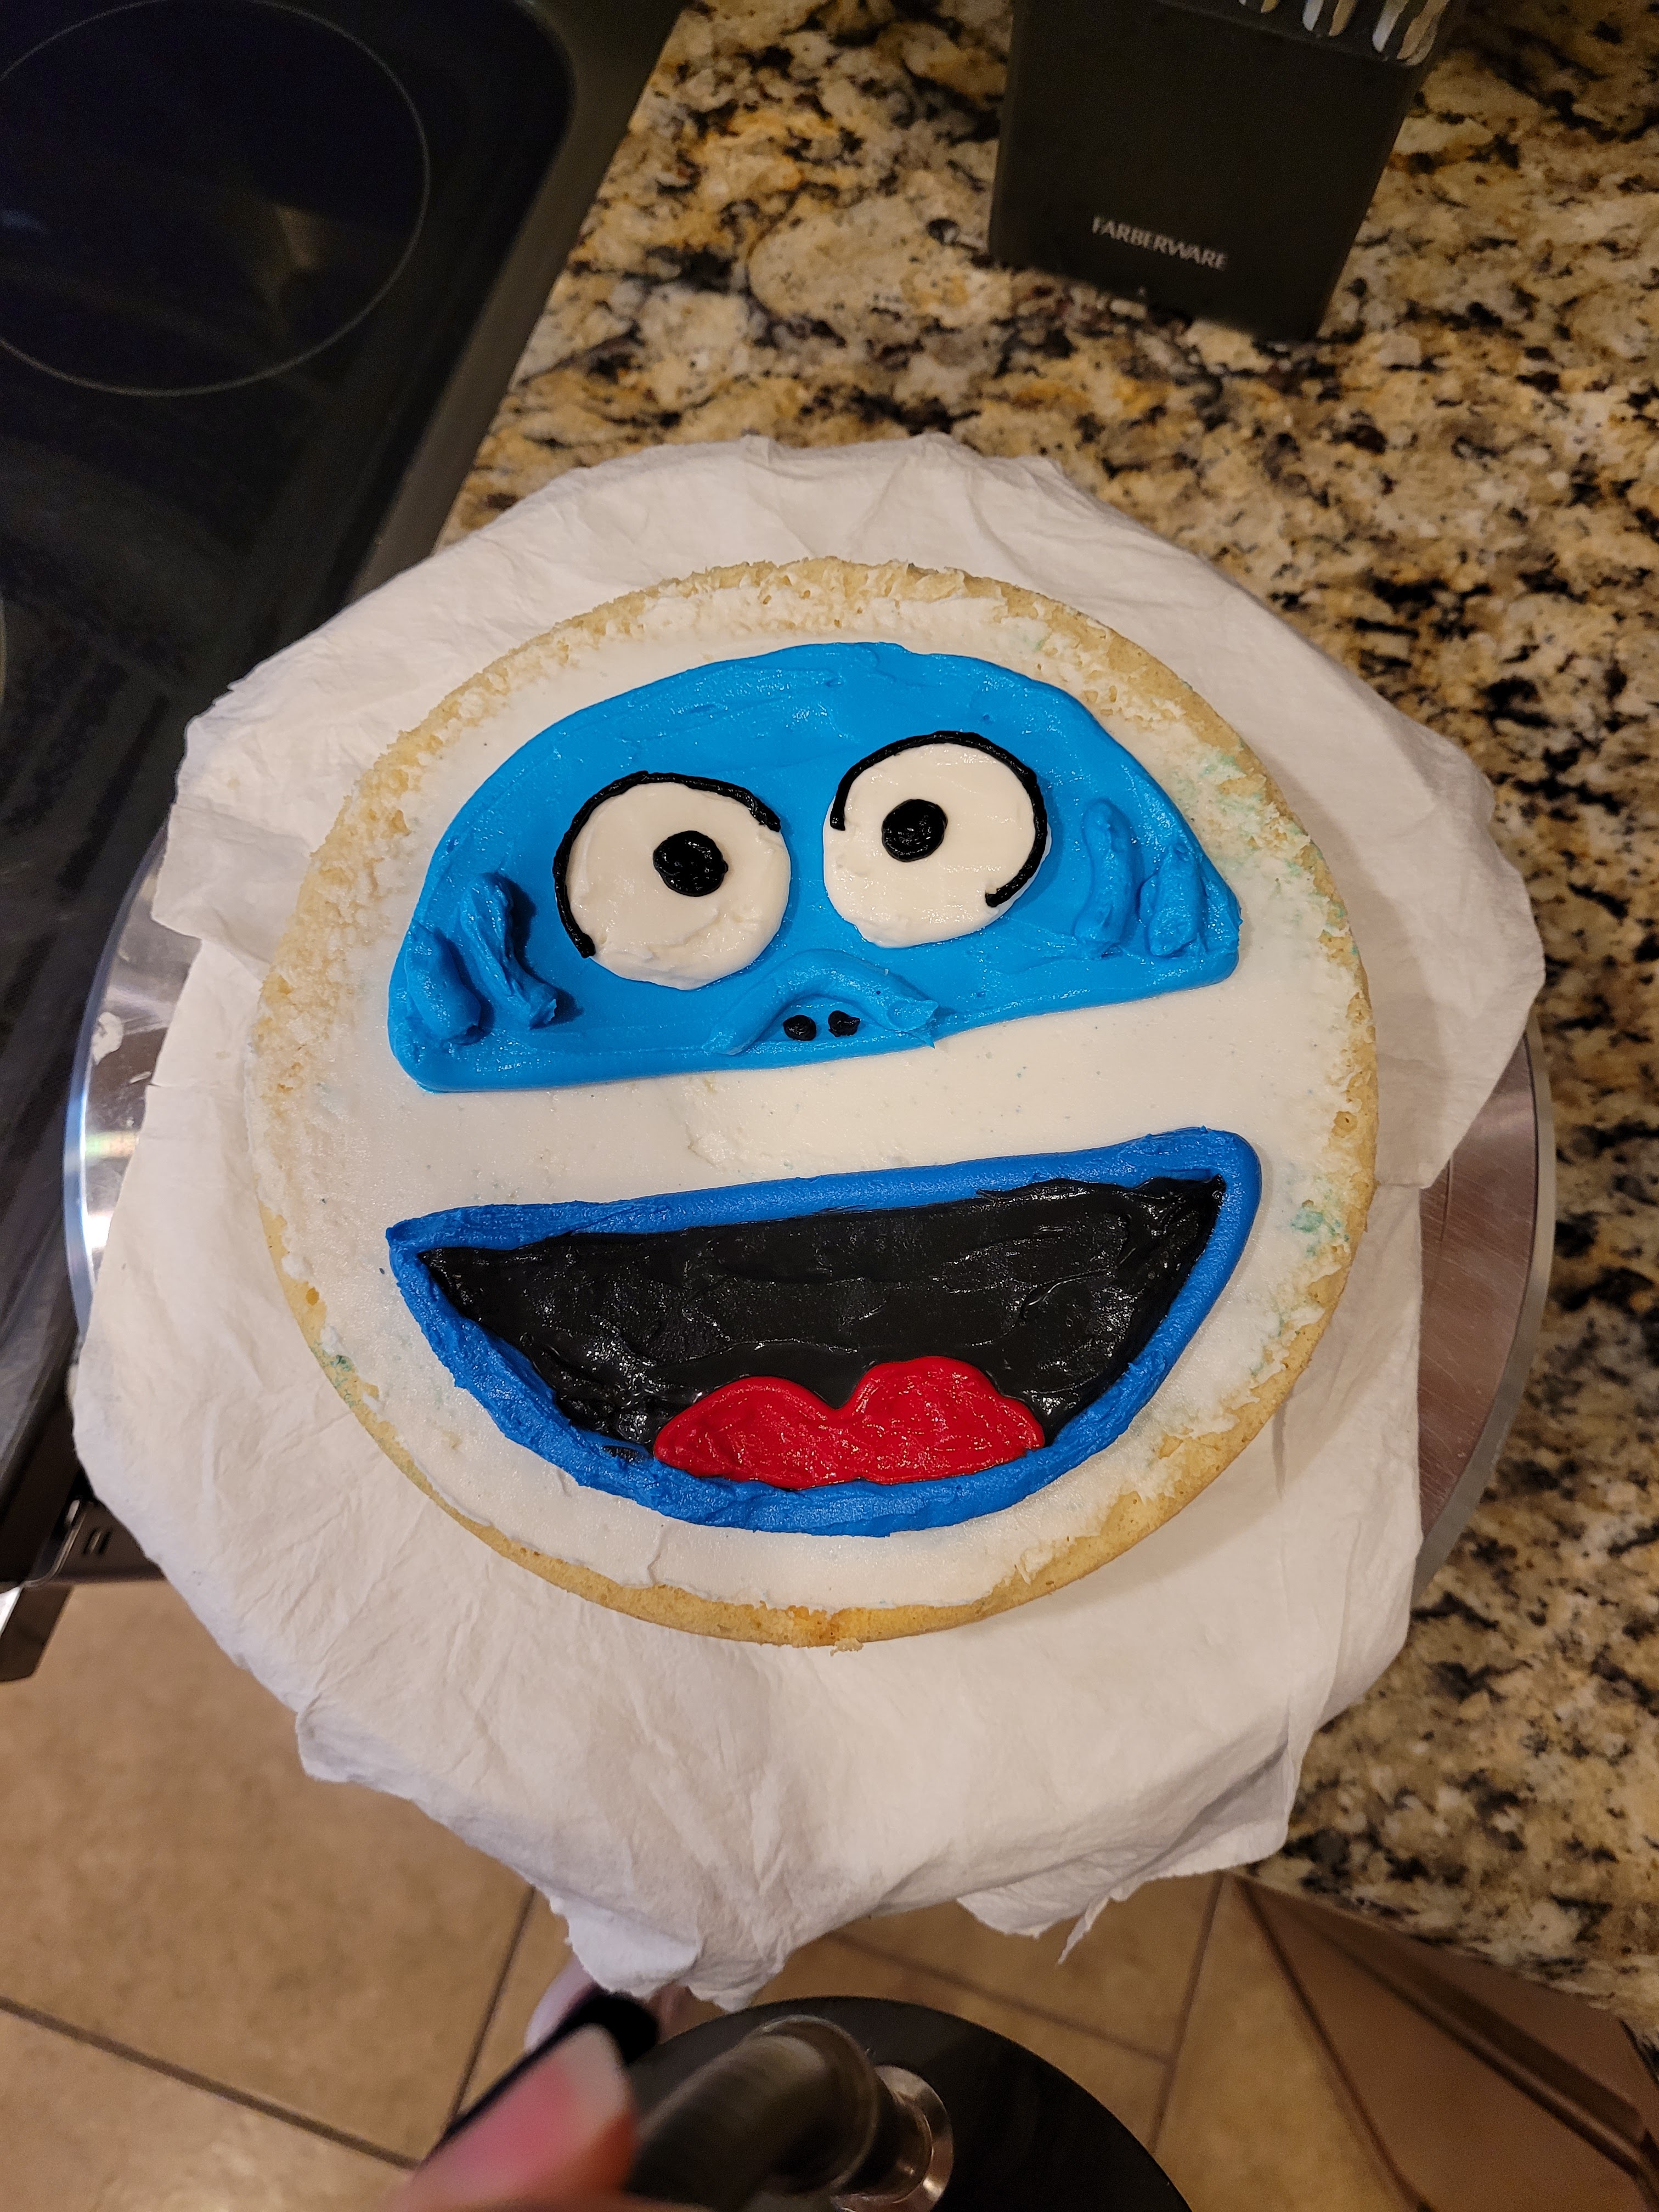
I only have *ice* for youuuuu Yes, much less nightmare fuel with eyes. So once I filled in and smoothed out his eyes with, yes, you guessed it, my angled spatula, I took my black frosting, switching to a #3 tip, and drew in his pupils, outlined his eyes, and piped nostrils. I outlined his nose and added lines (clearly there’s no Botox available at the North Pole) around his eyes with my light blue frosting and #12 tip.
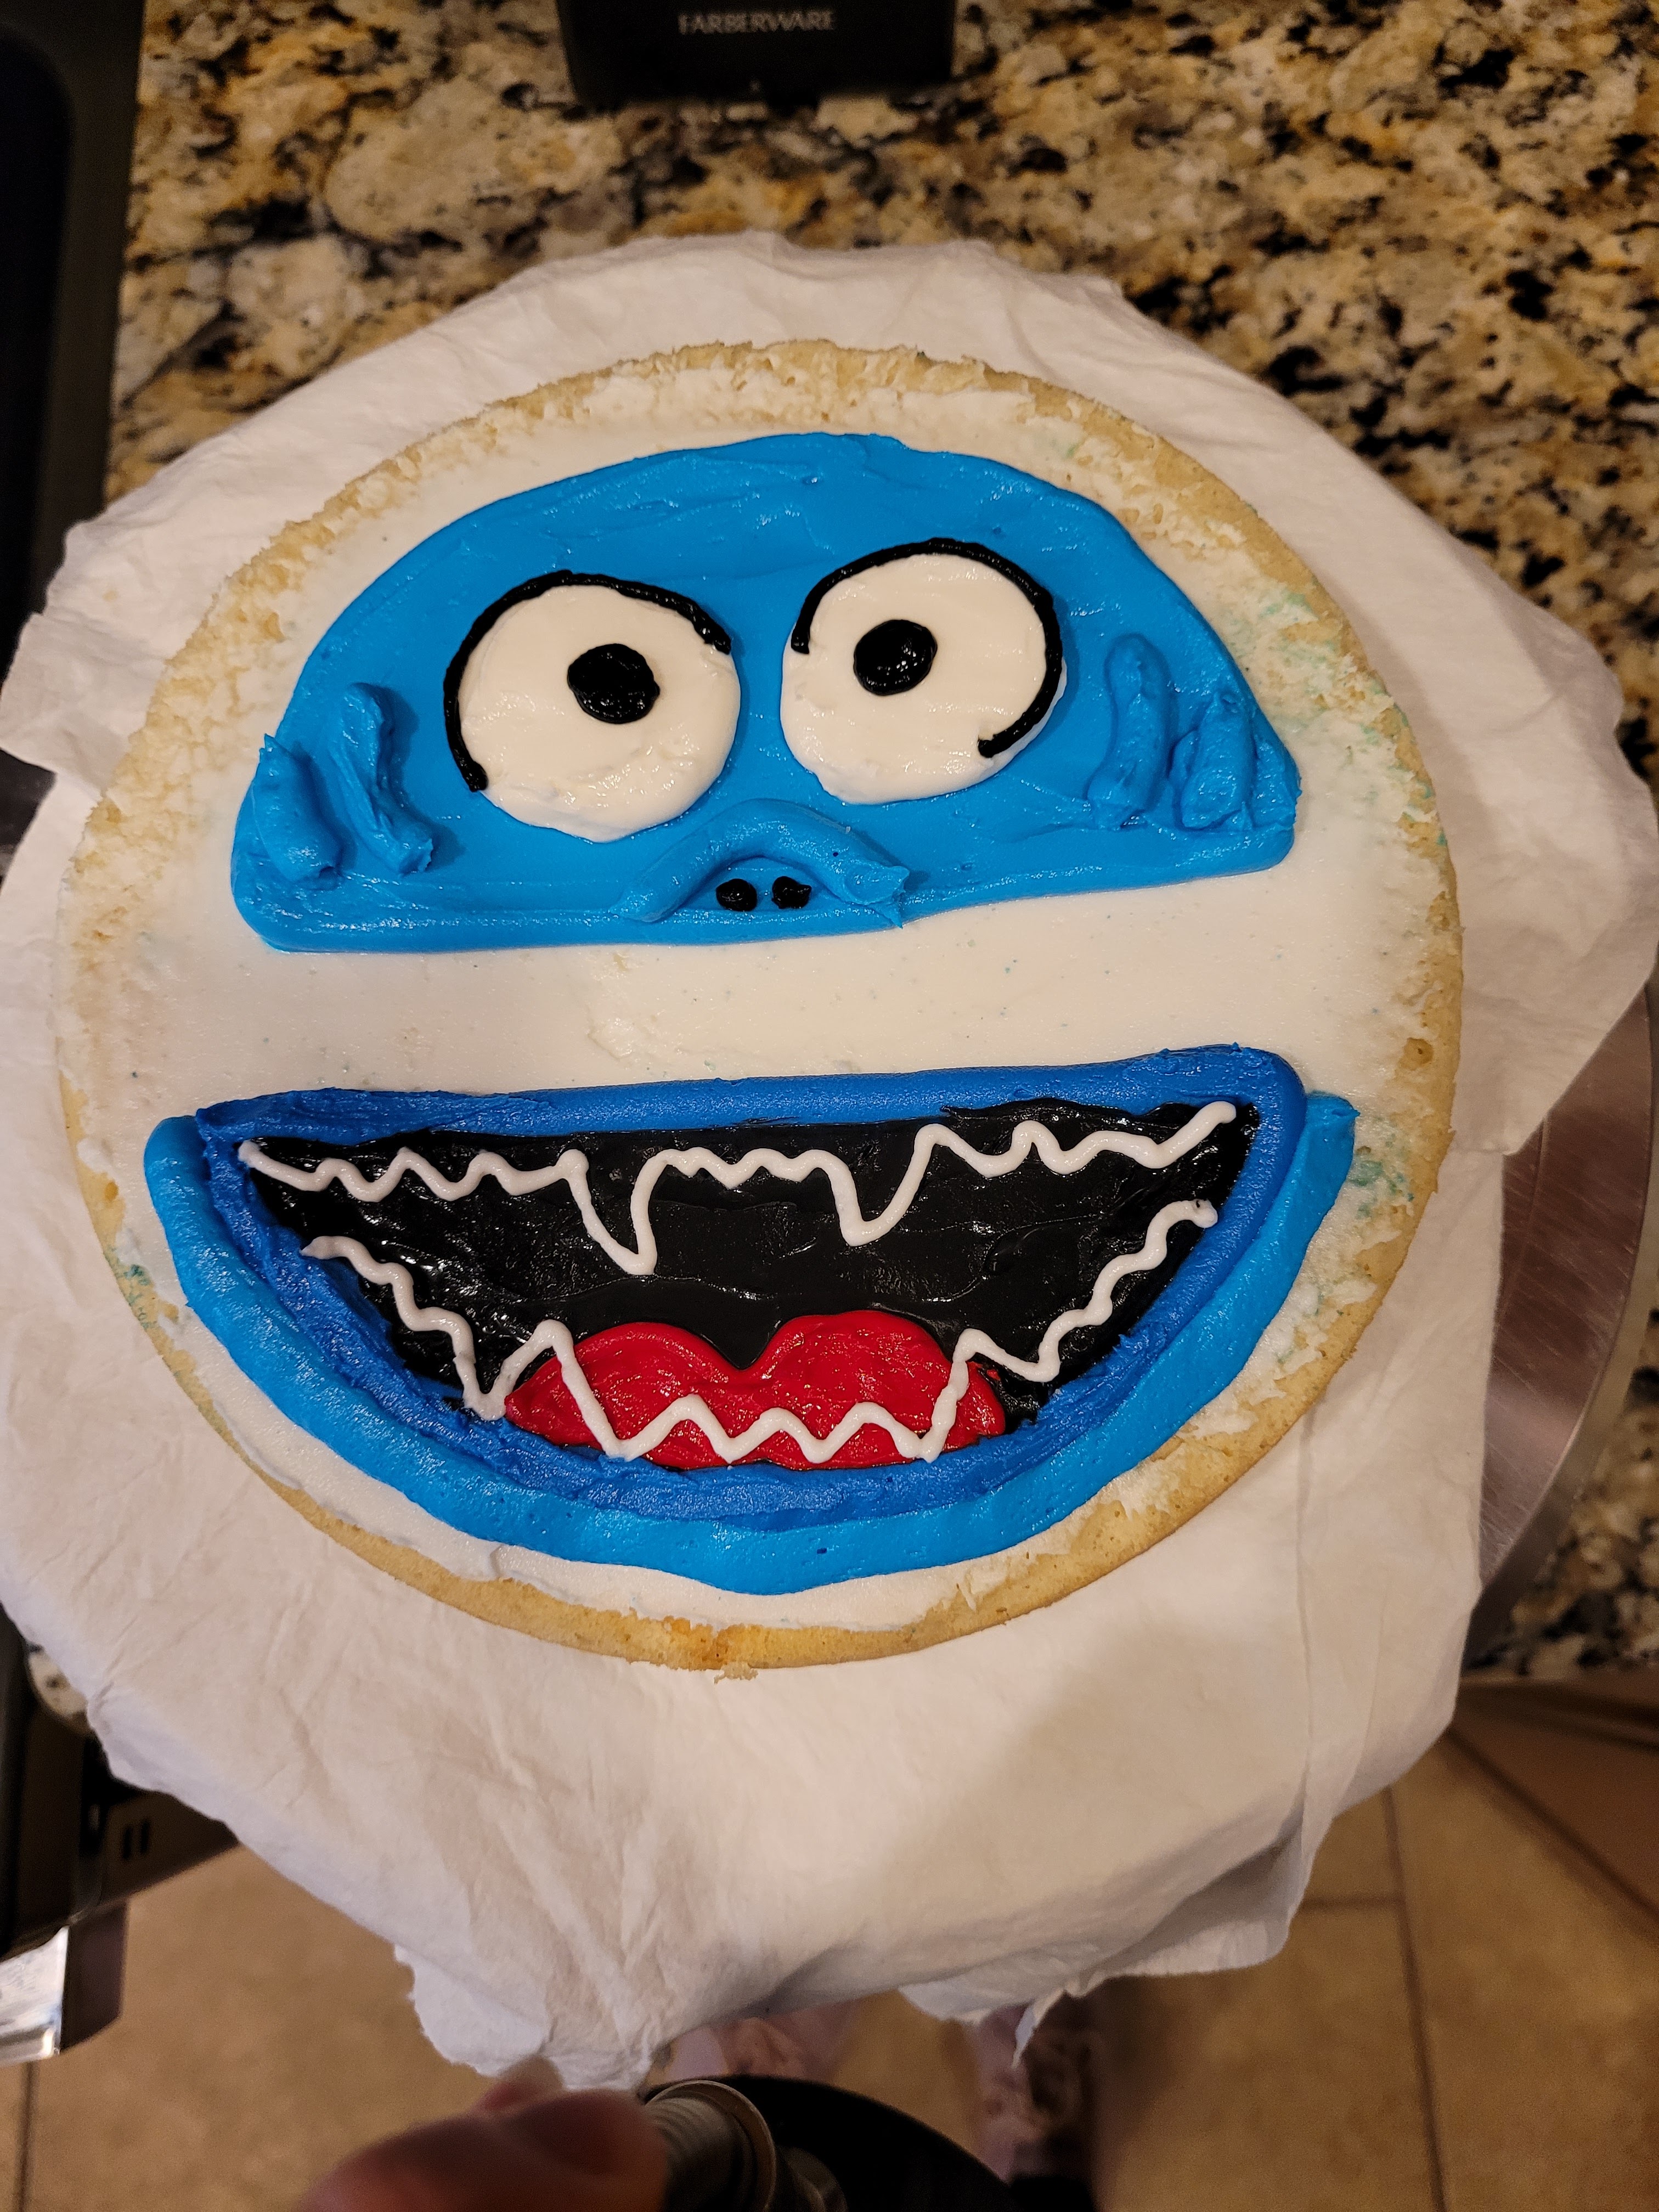
I realize he’s just going to lose his teeth later if this cake stays canon with the TV show… Using my white frosting with a #3 tip, I outlined his fierce fangs before filling them in. You can use a toothpick here to outline where you want his teeth to go as well before you pipe.

Tooth decay is snow laughing matter though, for real. Clearly, Bumble is still brushing his teeth twice a day because look at those pearly whites! I used a toothpick and a tiny painter’s knife to smooth out his teeth and give my angled spatula some rest. Now, time to make a yeti fur coat!
He’s so winterful. I switched my piping tip on my white frosting to a grass/hair tip, and piped a few layers of hair all over the top of the cake, starting by framing his face and mouth, then working outward. Use a bit of pressure and pull out and away to make strands of hair.
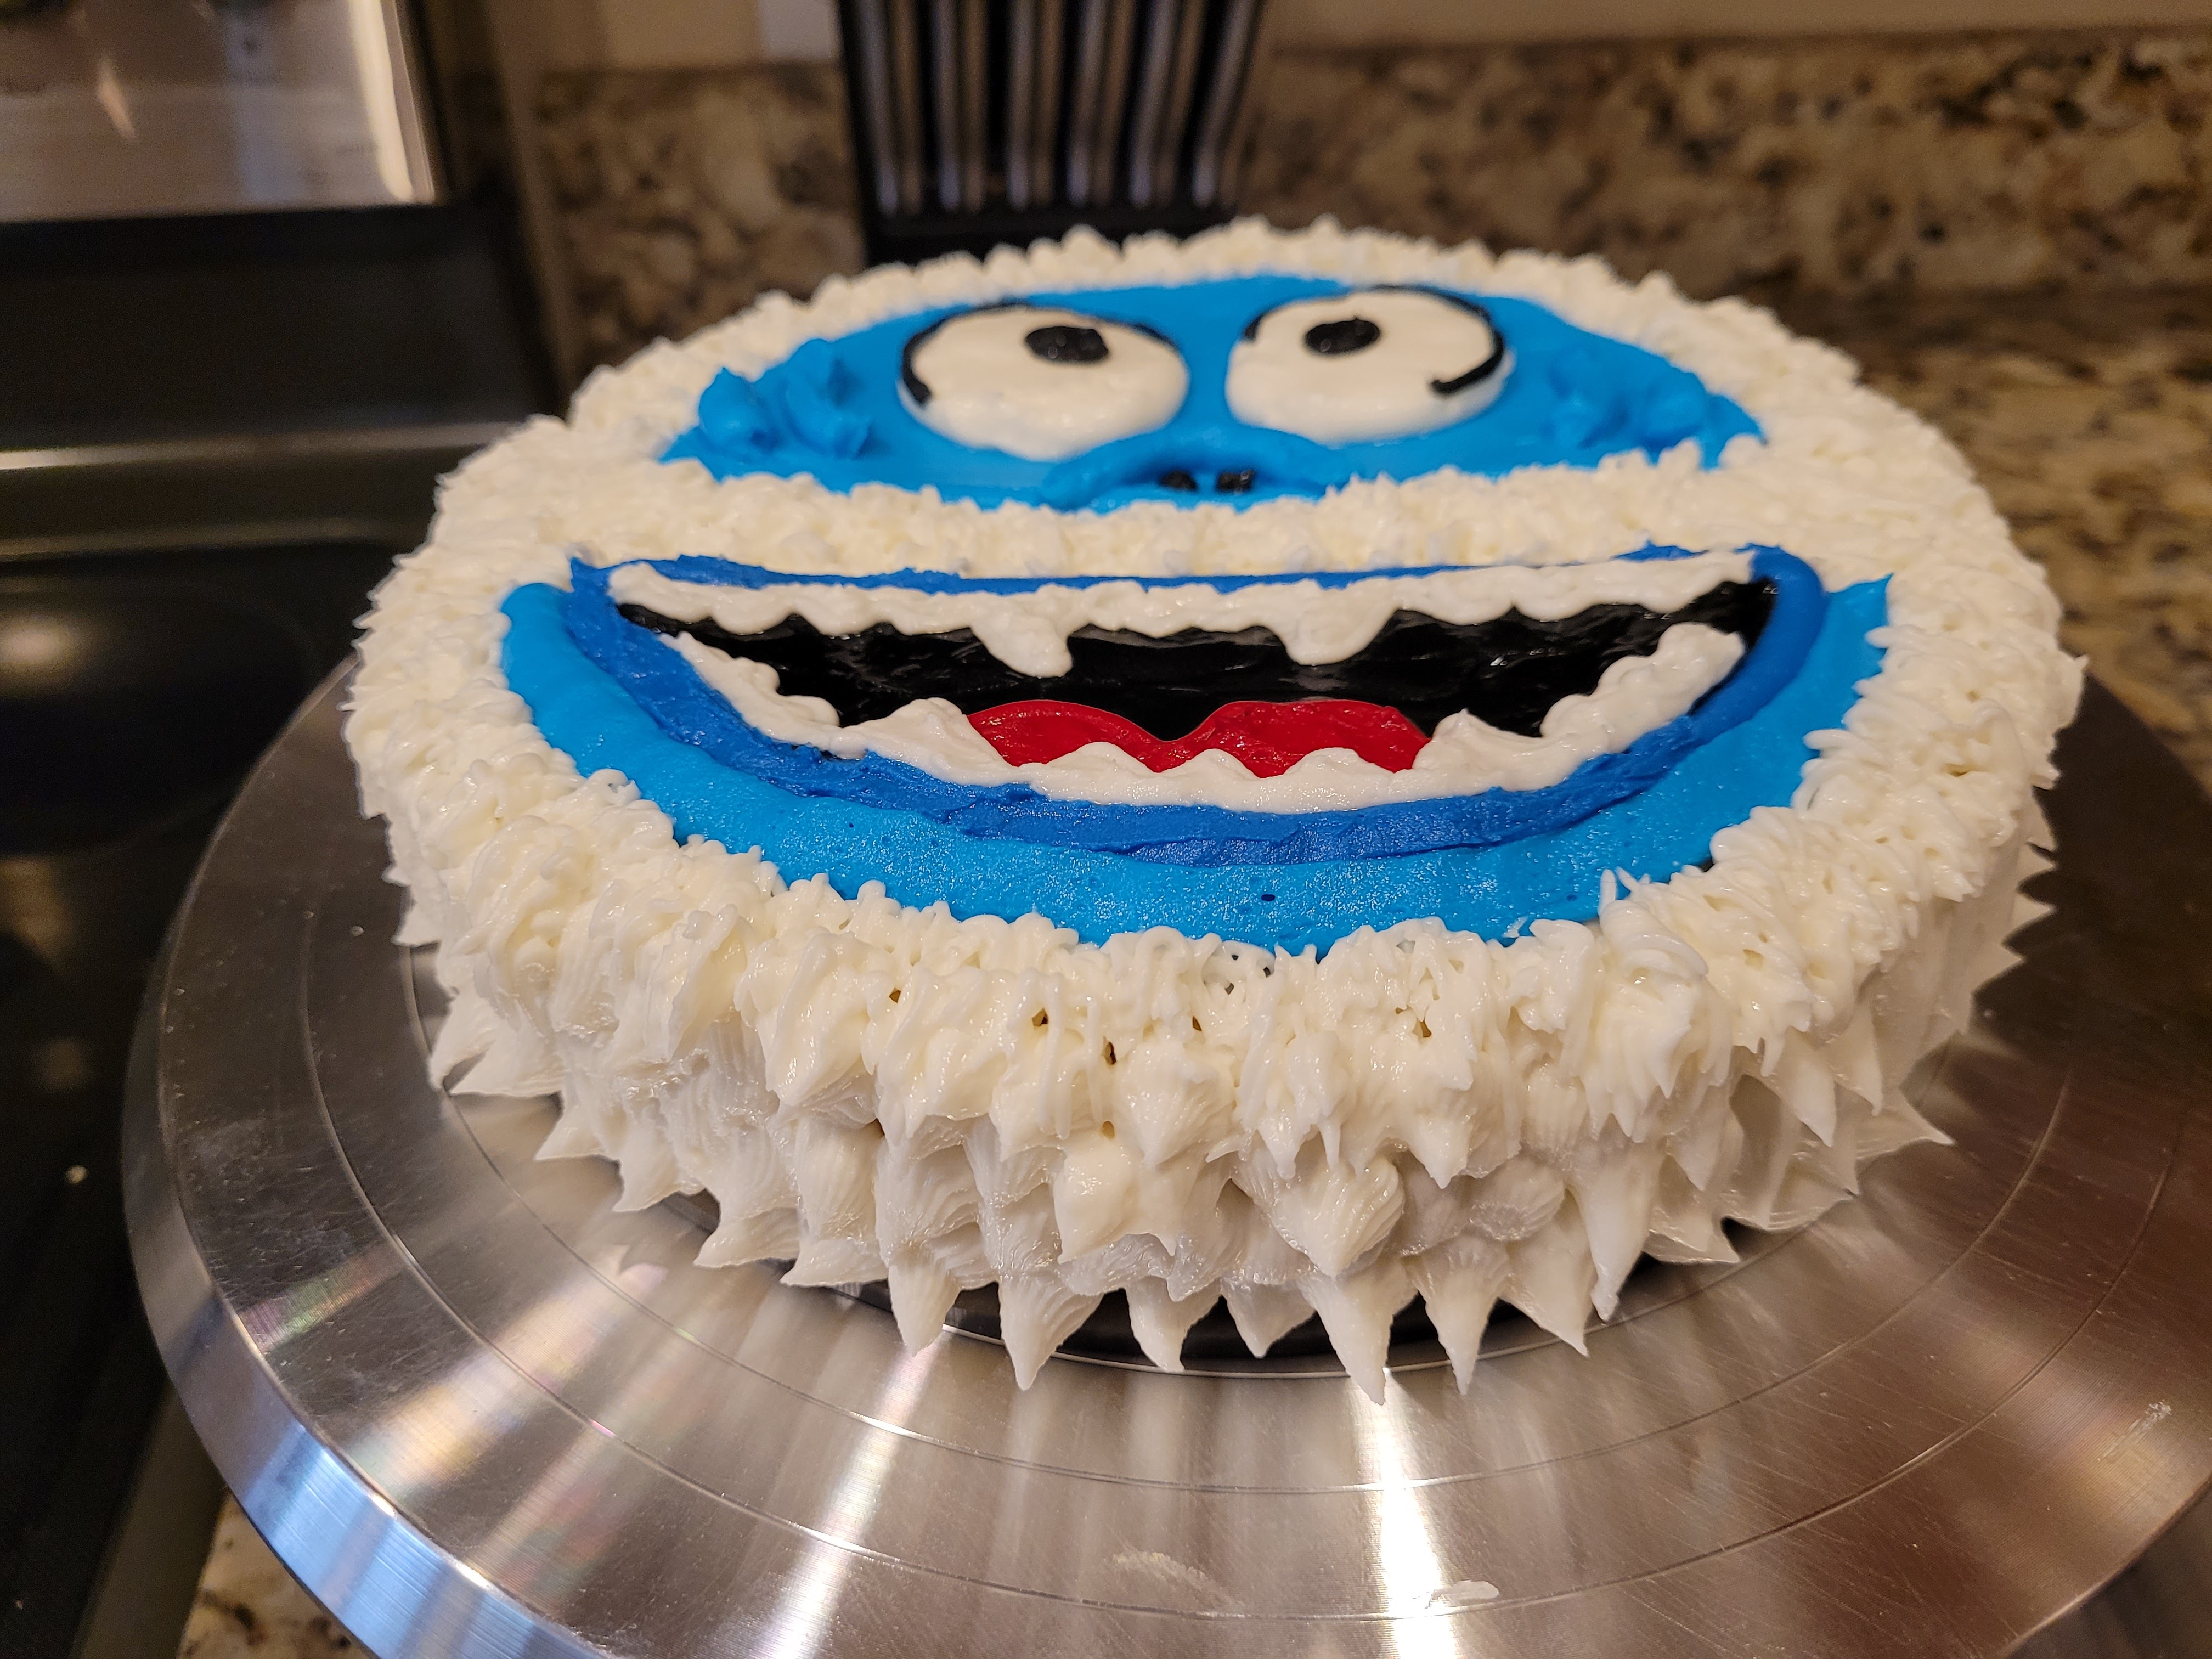
I’ll bumble for ya. Because piping with a grass tip is tedious at best, I switched to a #199 open star tip to pipe thicker fur around the sides of the cake. I pulled out and down to get this texture, making 3 rows around the sides of the cake to finish Mr. Bumble.
Still slightly terrifying to look him in the eye. 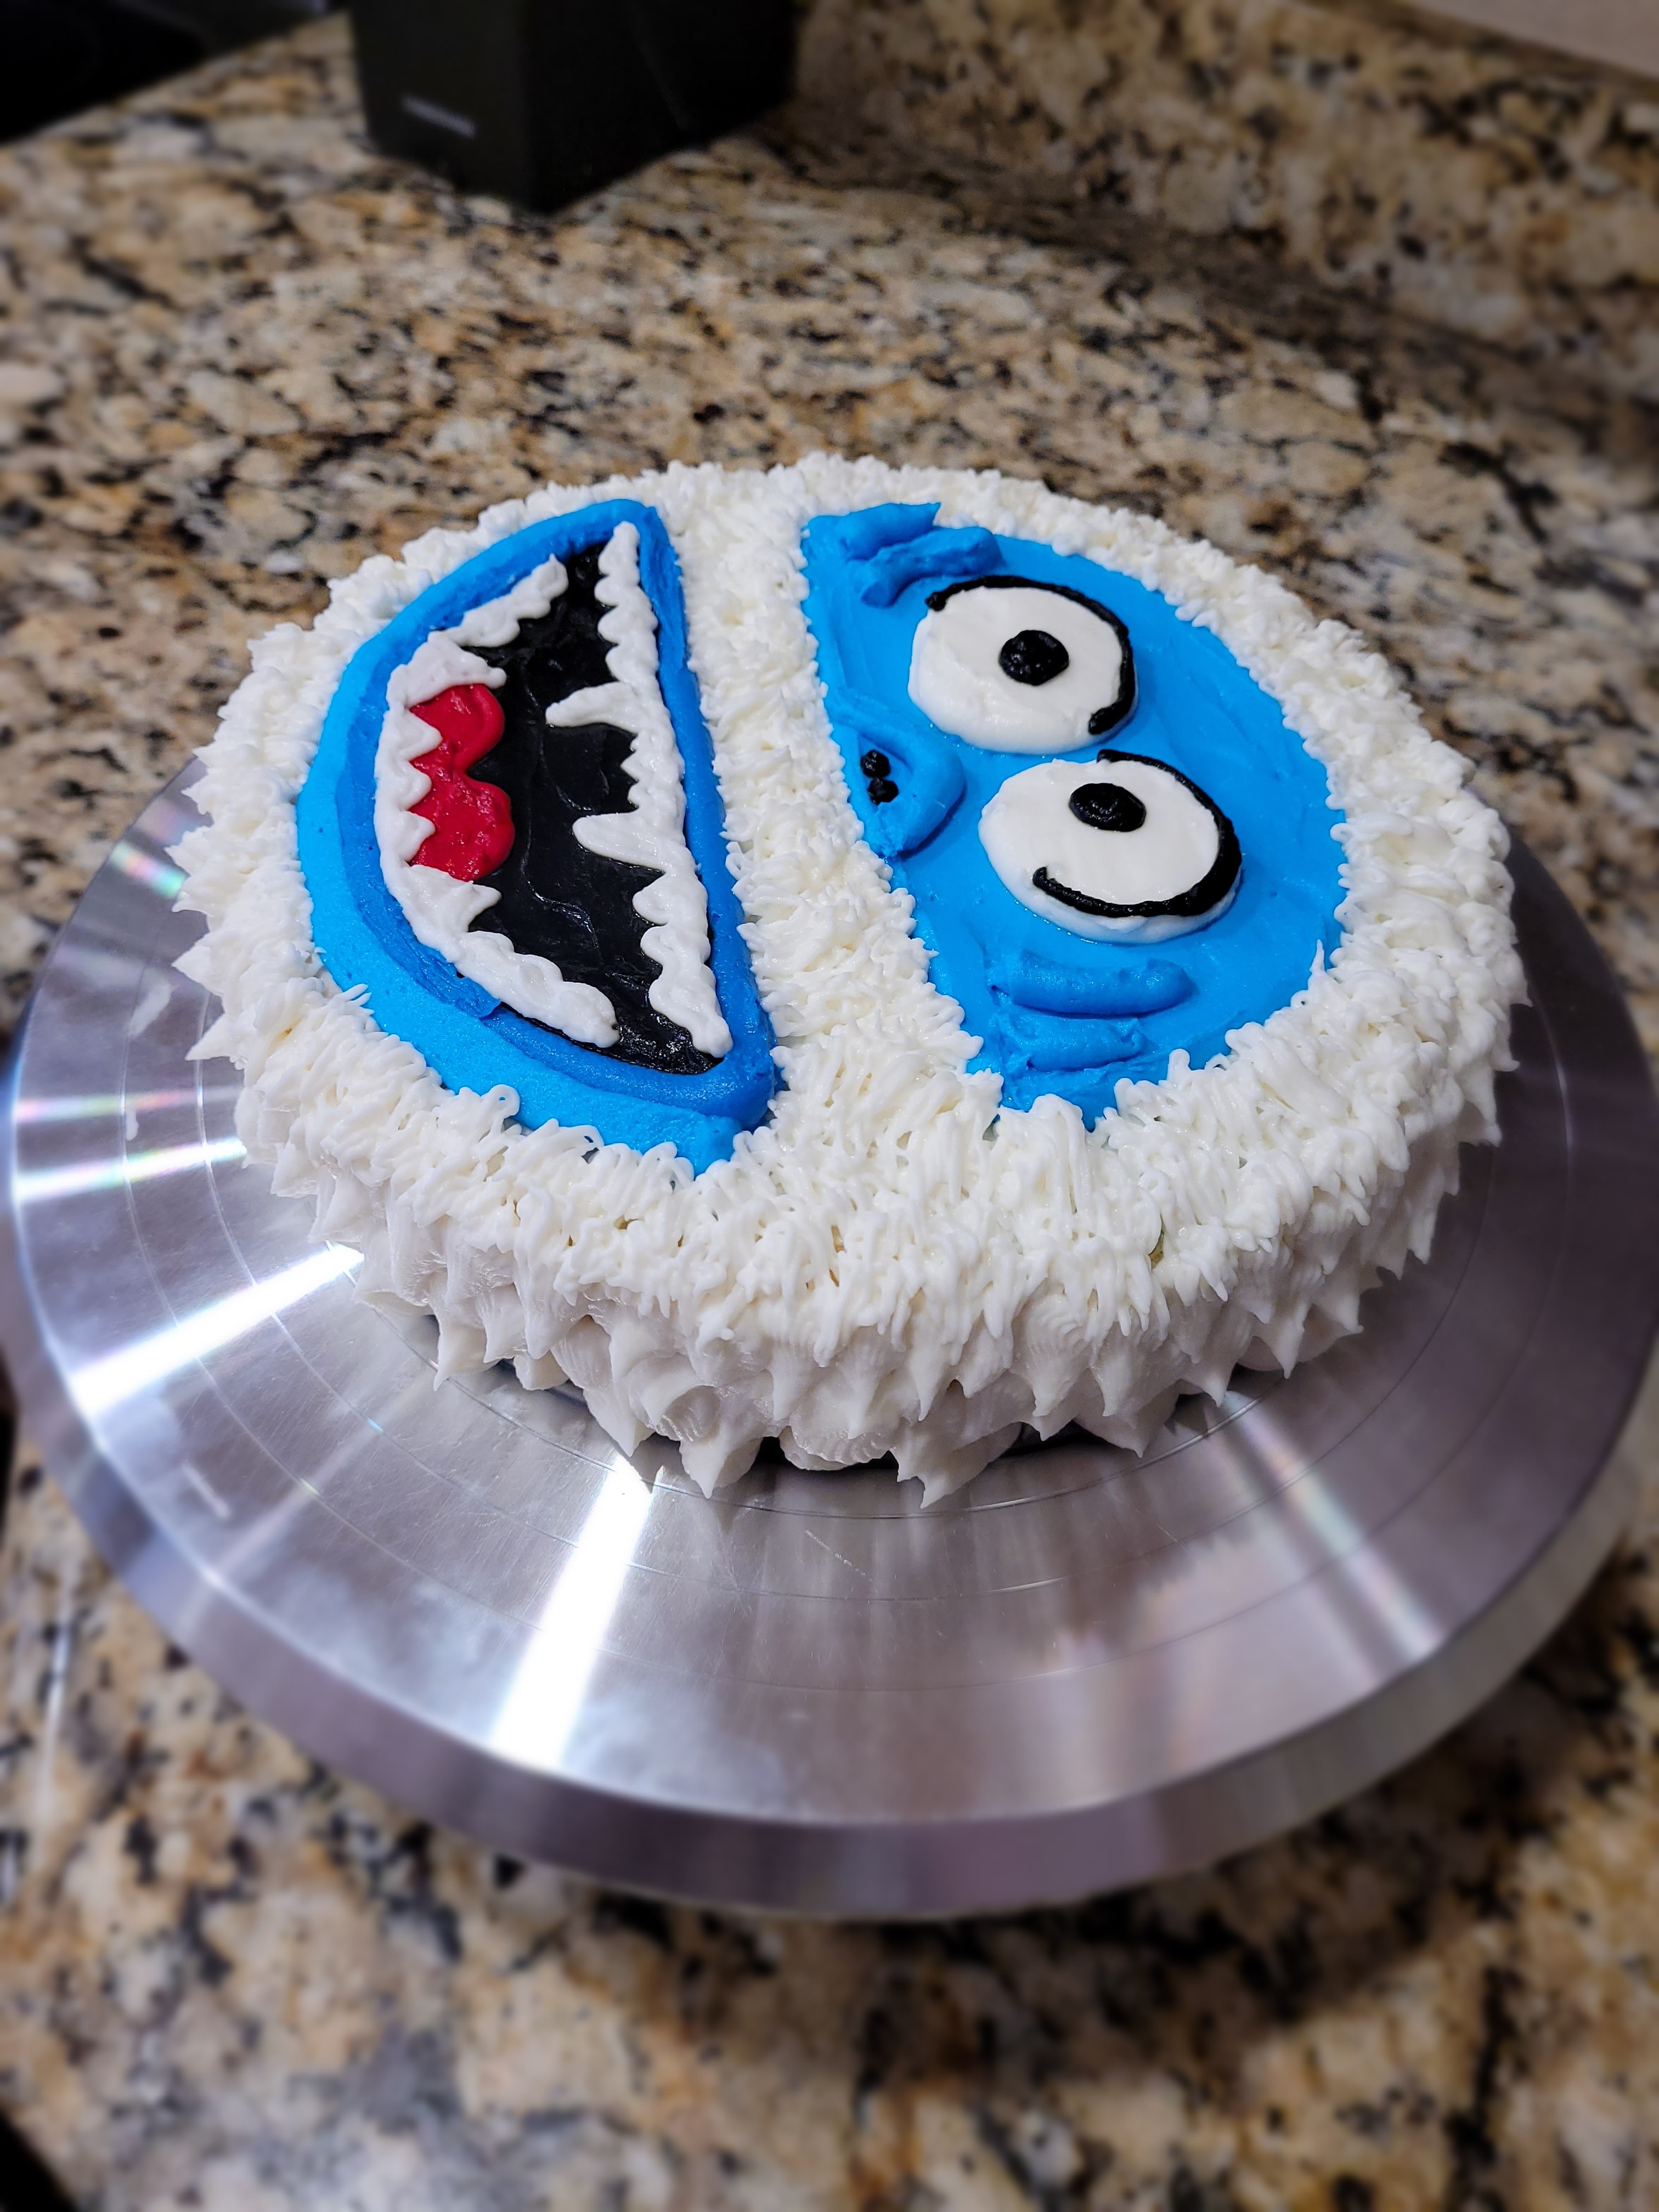
Yeti or not, here he comes. Well, this was an absolutely ridiculous joy to put together. I have wanted to make a Bumble cake or cupcakes for quite some time, given my penchant for loving a misunderstood villain (Hi, Loki…). He is so adorably weird and dorky, and it brings me joy to stand in front of the fridge and see him smile (or snarl? I’m not sure what it is) until eventually I get too cold and have to close the door, but tis the season to be freezin’, so I am happy he’s there to greet my midnight snacking. Also thrilled with how yummy this riff on a protein cake turned out. It is un-brr-lieveablely good…plenty of peppermint taking center stage with the white cake, and the peppermint cream cheese is divine. It’s soft, it’s minty, it’s a Bumble…what more could you ask for for Christmas? I know, world peace would be nice…but I think if everyone had a slice of this cake, they’d be a lot happier, too. ‘Til next time my fellow eaters!
Recipe and Instructions
Peppermint cake with peppermint buttercream frosting
Moist white cake with peppermint flavor and frosting
If not gluten free, use any kind of flour. Lakanto can also be replaced with regular powdered sugar. I have not tried any other kind of protein powder for this, so I recommend Quest or at least a whey protein.
Ingredients
CAKE
*124 grams (1 cup) gluten free flour
*45 grams protein powder, divided
*1/2 tsp baking soda
*1/2 tsp baking powder
*42 grams (3 TBS) light butter
*113 grams (1/2 cup) fat free plain Greek yogurt
*1/2 cup + 2 TBS fat free or skim milk
*1 egg
*1 tsp peppermint extract
FROSTING
*224 grams (1 cup) of 1/3 the fat cream cheese, softened
*225 grams (1 cup) of fat free Greek yogurt, strained overnight
*16 ounces (4 cups) Lakanto powdered monkfruit
*1 tsp peppermint extract
*1 tsp vanilla extract
*1 TBS milk
*Gel dyes in red, black, light blue, and dark blue
Directions
- Preheat oven to 350 and grease an 8-inch round pan.
- Mix flour, half the protein powder, baking soda, and baking powder together in a medium bowl, set aside.
- In a stand mixer with paddle attachment, mix the butter and remaining half of the protein powder for 2-3 minutes until smooth and fluffy.
- Add in the yogurt, extract, milk, and egg. Mix for 1-2 minutes on medium until blended.
- Add in the dry mix, blending on medium for 1 minute until everything comes together.
- Pour into prepared pan and bake for 20 minutes or until a toothpick comes cleanly out of the center of the cake.
- Let cake cool in the pan for 10 minutes before turning out to cool completely on a cooling rack.
- To make the frosting, mix the cream cheese and yogurt in your stand mixer with the paddle attachment until fluffy, 2-3 minutes.
- Add in half the powdered monkfruit and the extracts, mixing well.
- Add in remaining monkfruit and 1 TBS milk, mixing well. If frosting is too thick, add another TBS of milk.
- Frost the cooled cake as desired; to make the Bumble, please see detailed decorating instructions above.
- Keep leftovers covered and in the fridge. Enjoy!
Nutrition
Macros
8 servings
156 cal/14.2 c/6.4 f/10.4 p per slice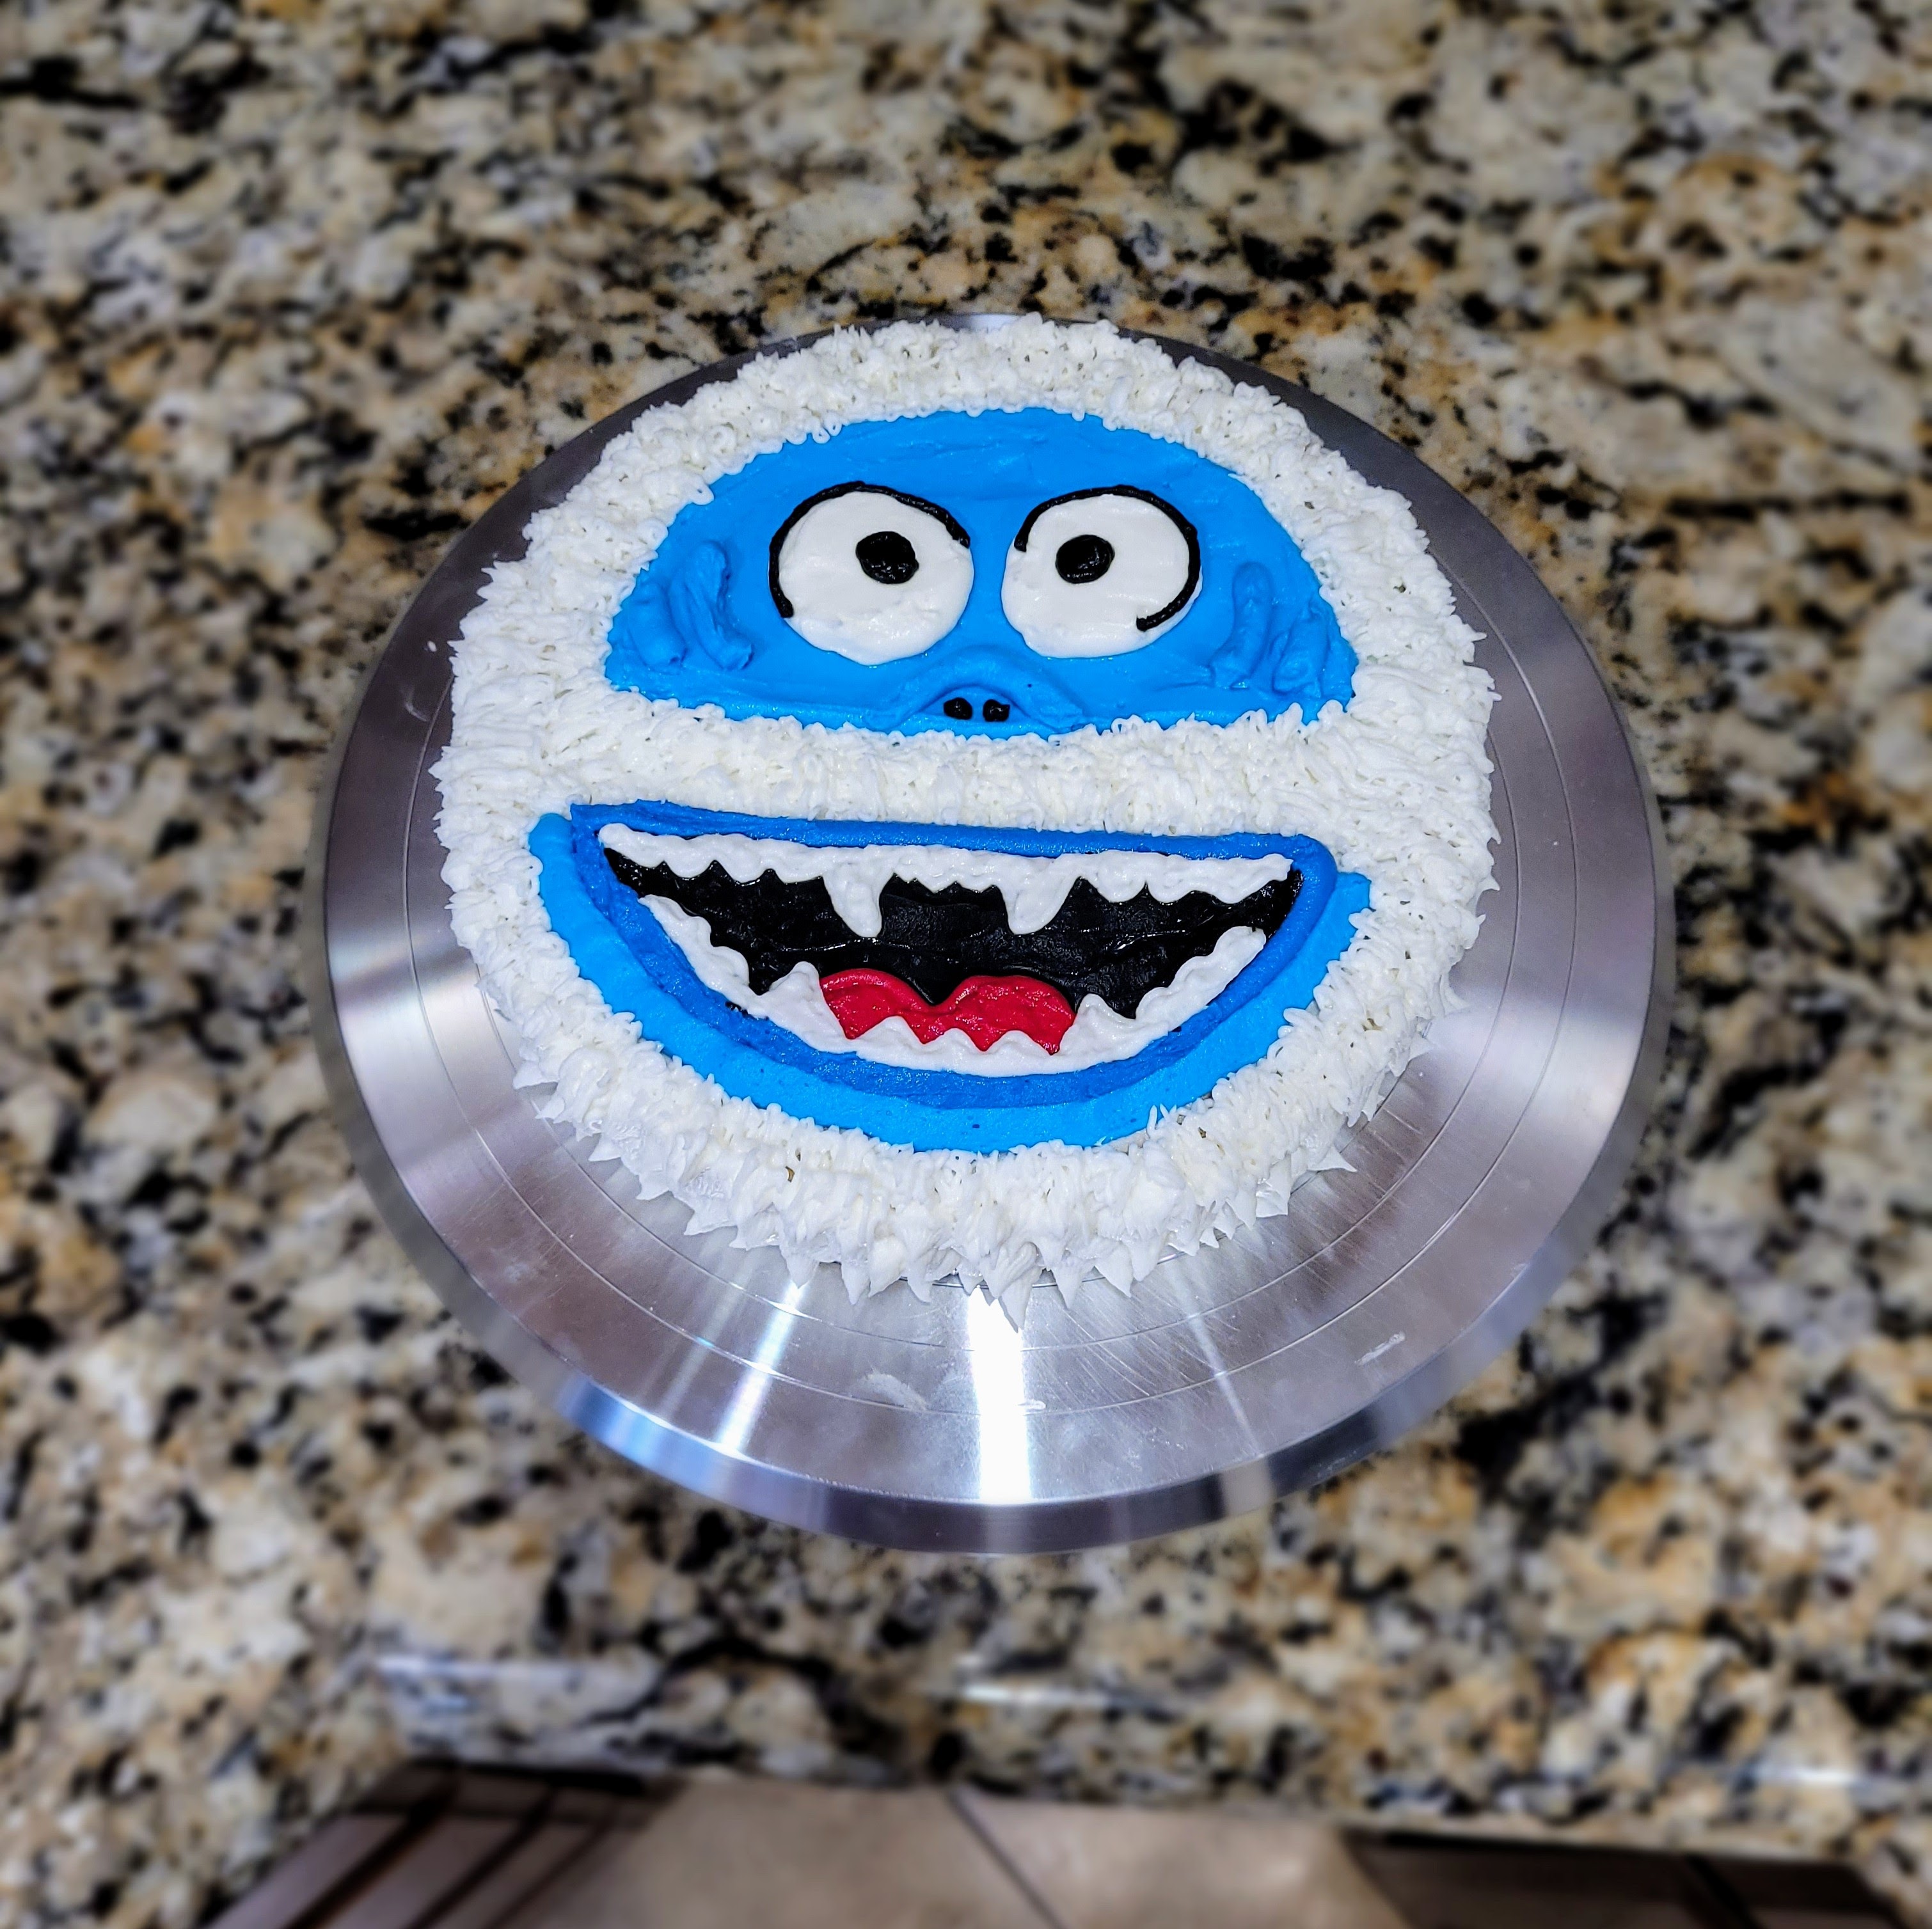
I hope you have a terror-free holiday season. No visits to the elf dentist, no winter storms keeping you grounded, and may you only eat the Bumble and not the other way around. -
Making Life so Much Breader
Jump to recipe and instructions
Okay, we all know I’m like, really into Halloween, super into November because pumpkin everything, but then there’s Christmas…I have a love/hate relationship with this holiday because each year it seems to come earlier and earlier. Hobby Lobby is putting up Christmas decorations in July, Christmas ads start in August/September, and Christmas music is in department stores in October…there are some prime holidays (even one devoted entirely to FOOD) between summer and winter, yet here we are. The only reason I don’t go full Grinch is because Christmas is another prime baking holiday, so, season’s eatings and whatnot. Gingerbready or not, Christmas baking has commenced.
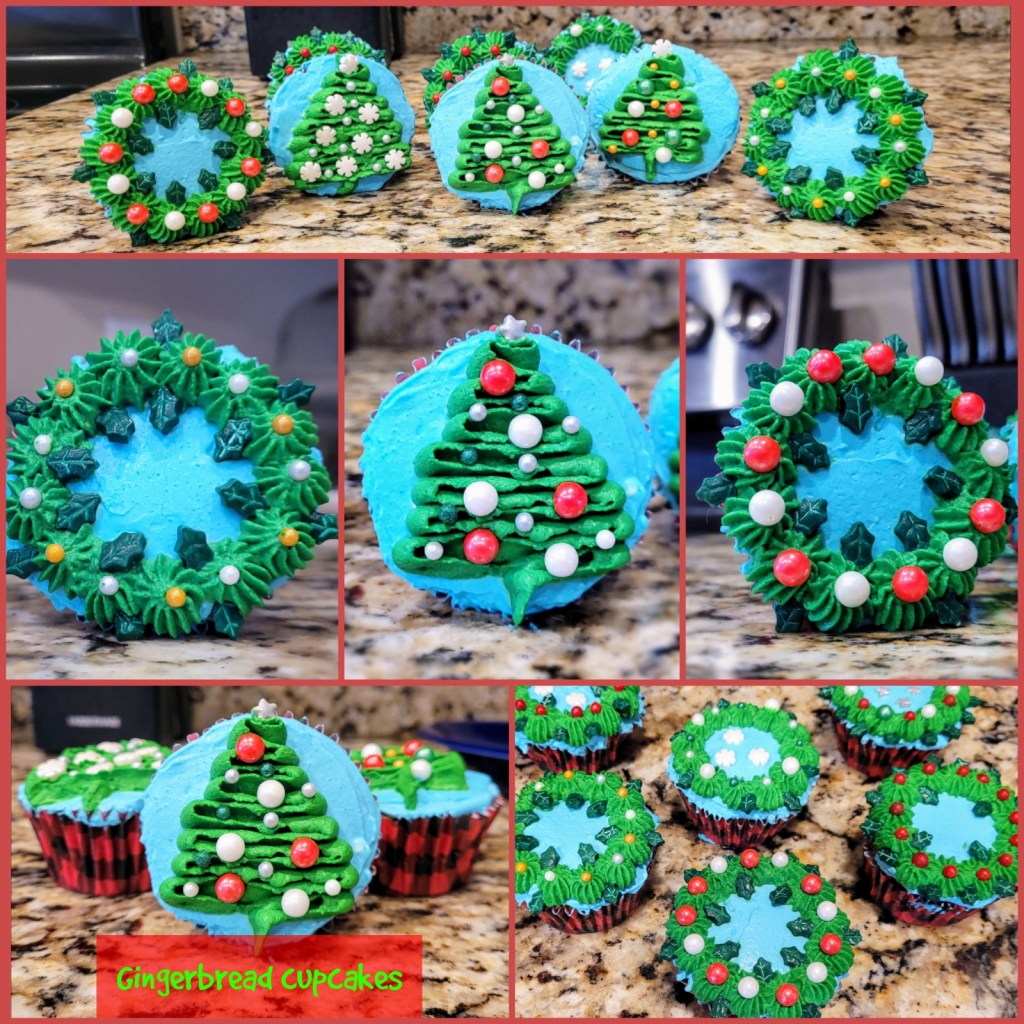
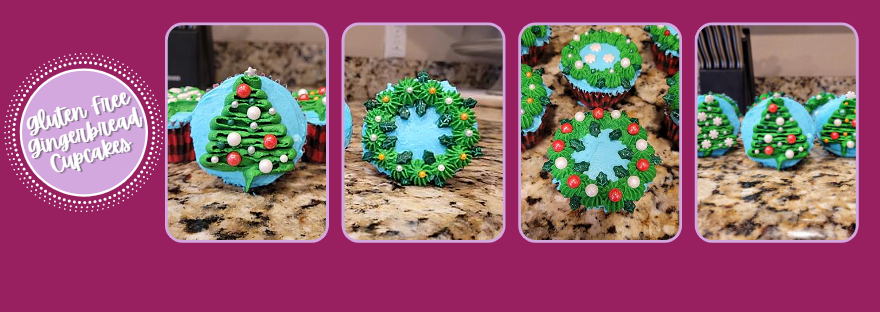
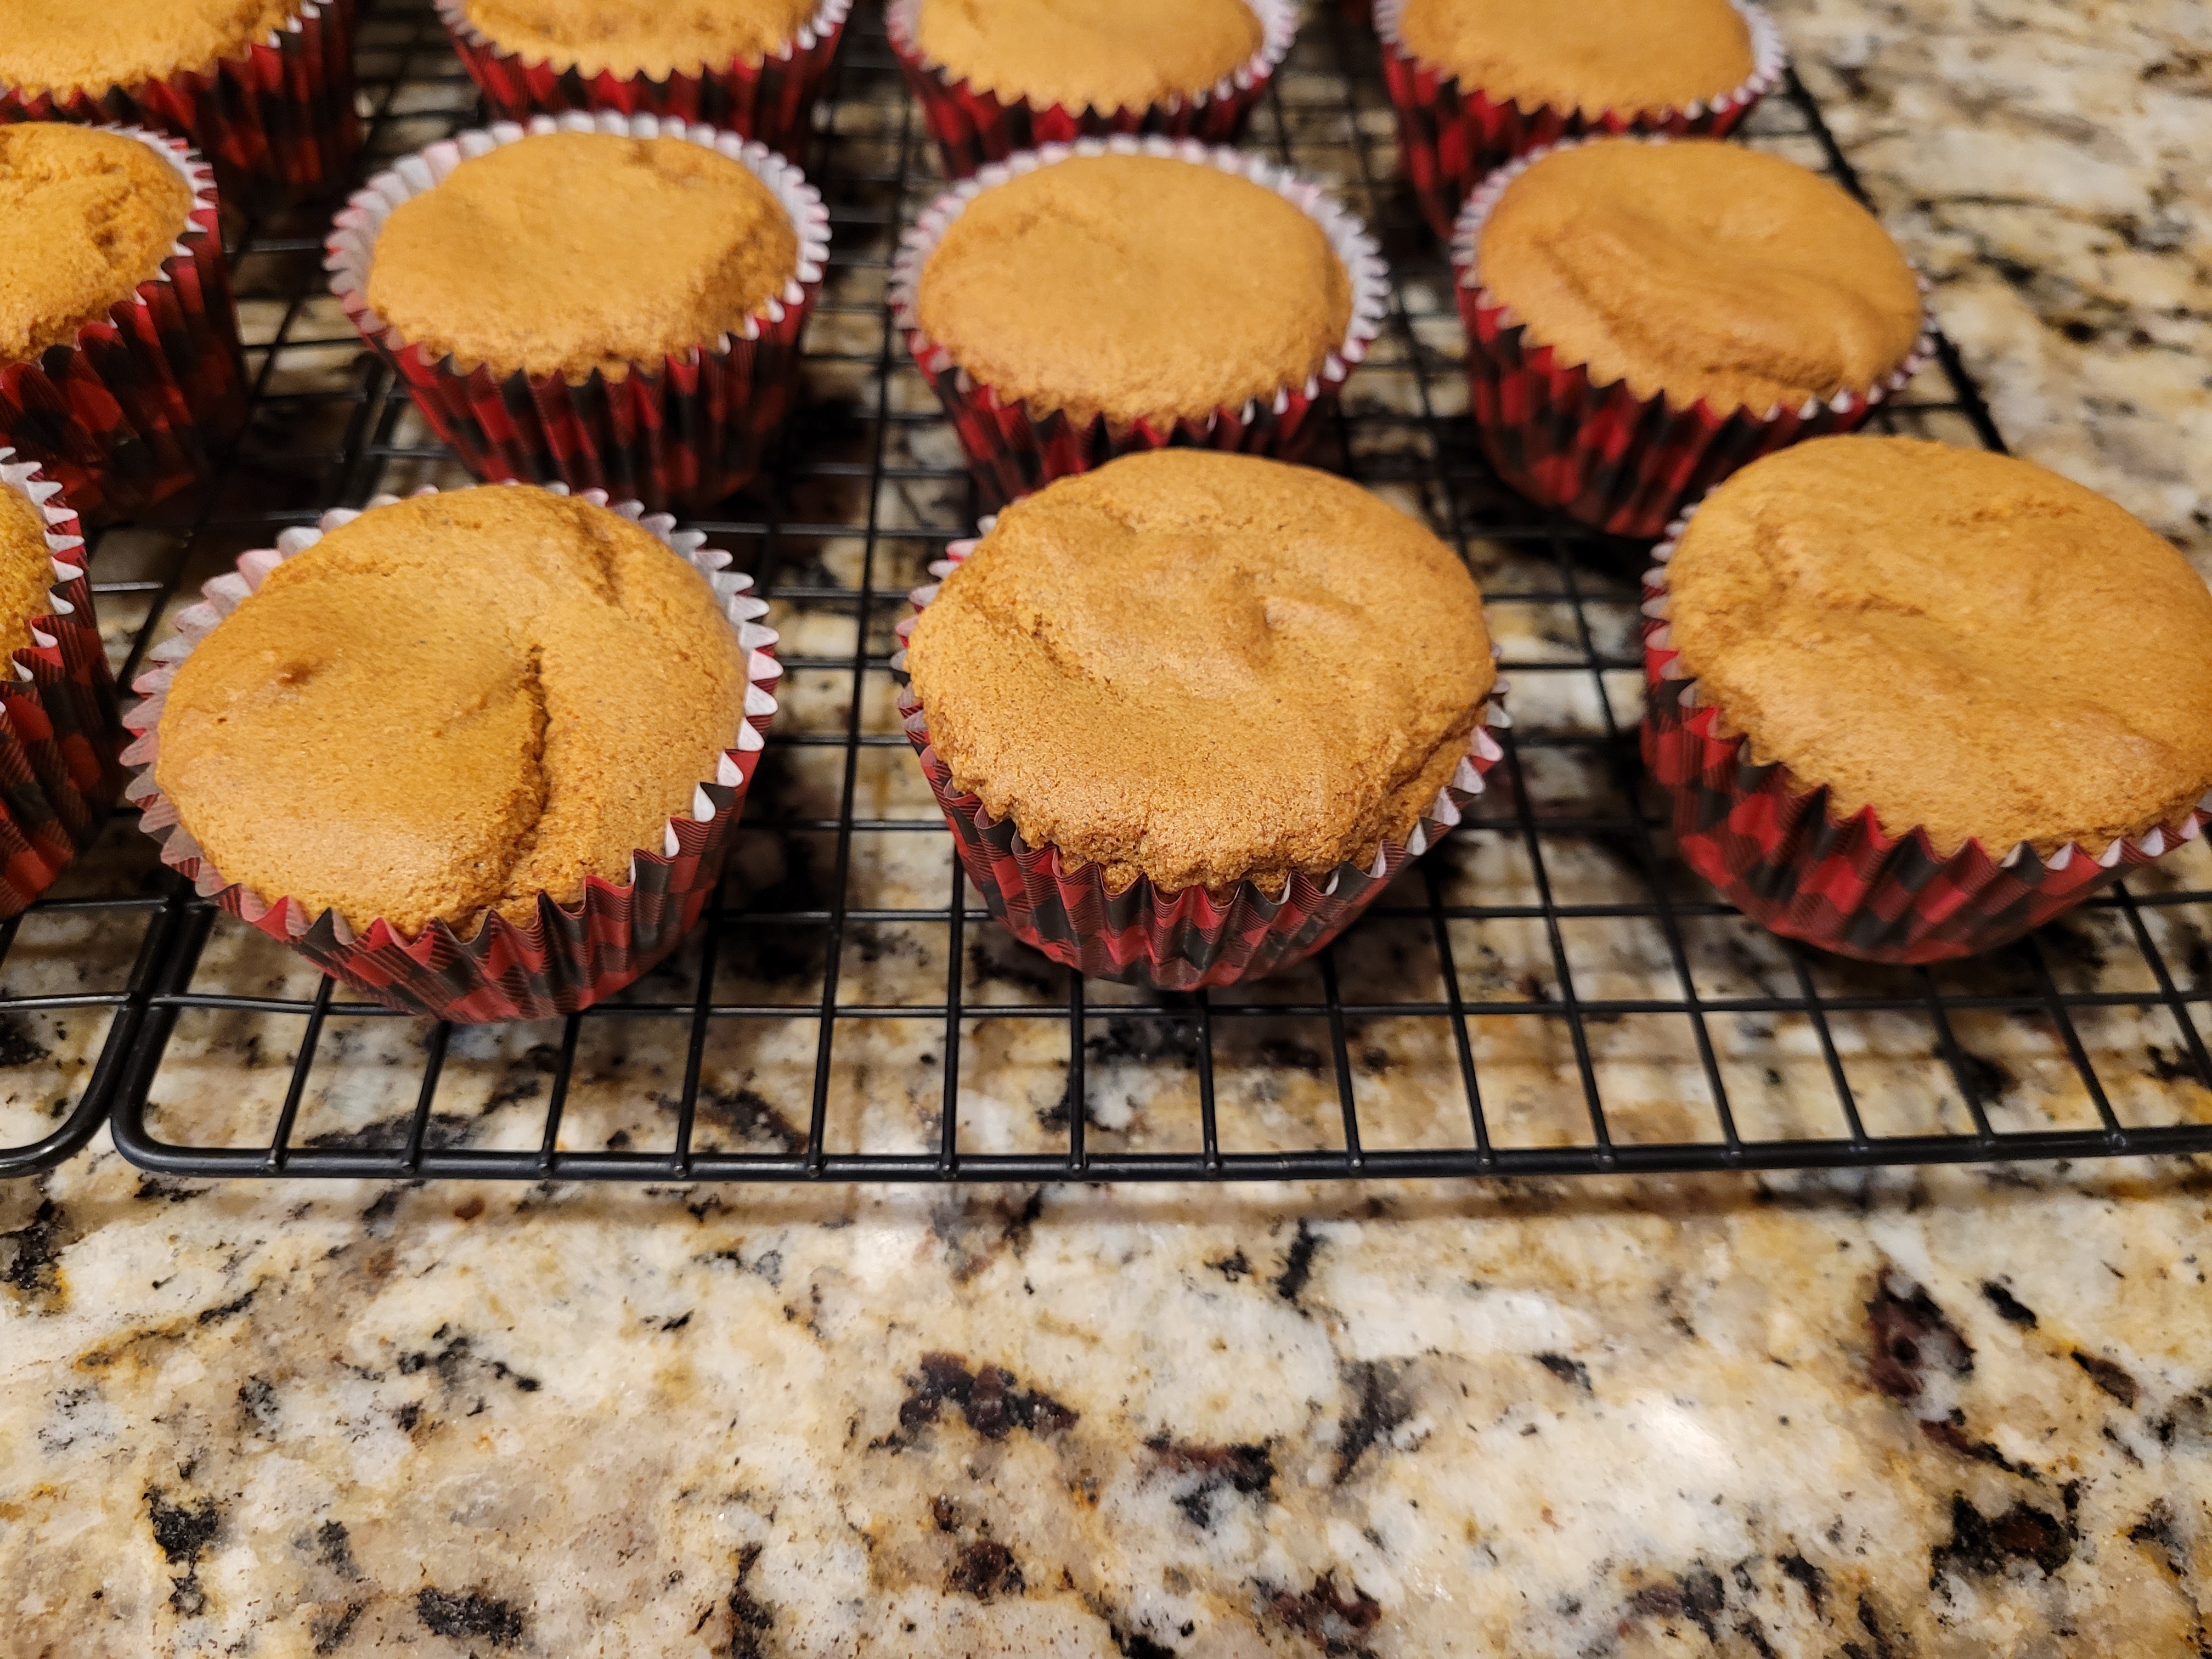
Oh snap! These gingerbread cupcakes better put me on the ‘Nice List.’ I have been longing for gingerbread but trying to figure out an easy, quick, and most importantly, gluten free recipe for a season or two. I am so glad I finally took the polar plunge and made these cupcakes. The ginger gives a nice little bite, the cinnamon and nutmeg give that rich flavor gingerbread is famous for, and oh my gosh these are the SOFTEST, FLUFFIEST cupcakes I have ever made in my life; which is weird because molasses is very thick and heavy, so I was worried they would be little gingerbricks. Happy to report the flavor turned out tree-mendously. These are topped in a whipped cream cheese frosting that is also light and fluffy, and cream cheese just belongs with gingerbread cakes and cupcakes in my humble opinion (just kidding, my opinion is not humble, it’s more Bumble because it is abominable and prone to roaring). Did I also mention these are macro-friendly? Because this is dessert season after all, and the only thing we want fluffy this time of the year is snow. Each cupcake is only 174 calories for 24 cupcakes total.
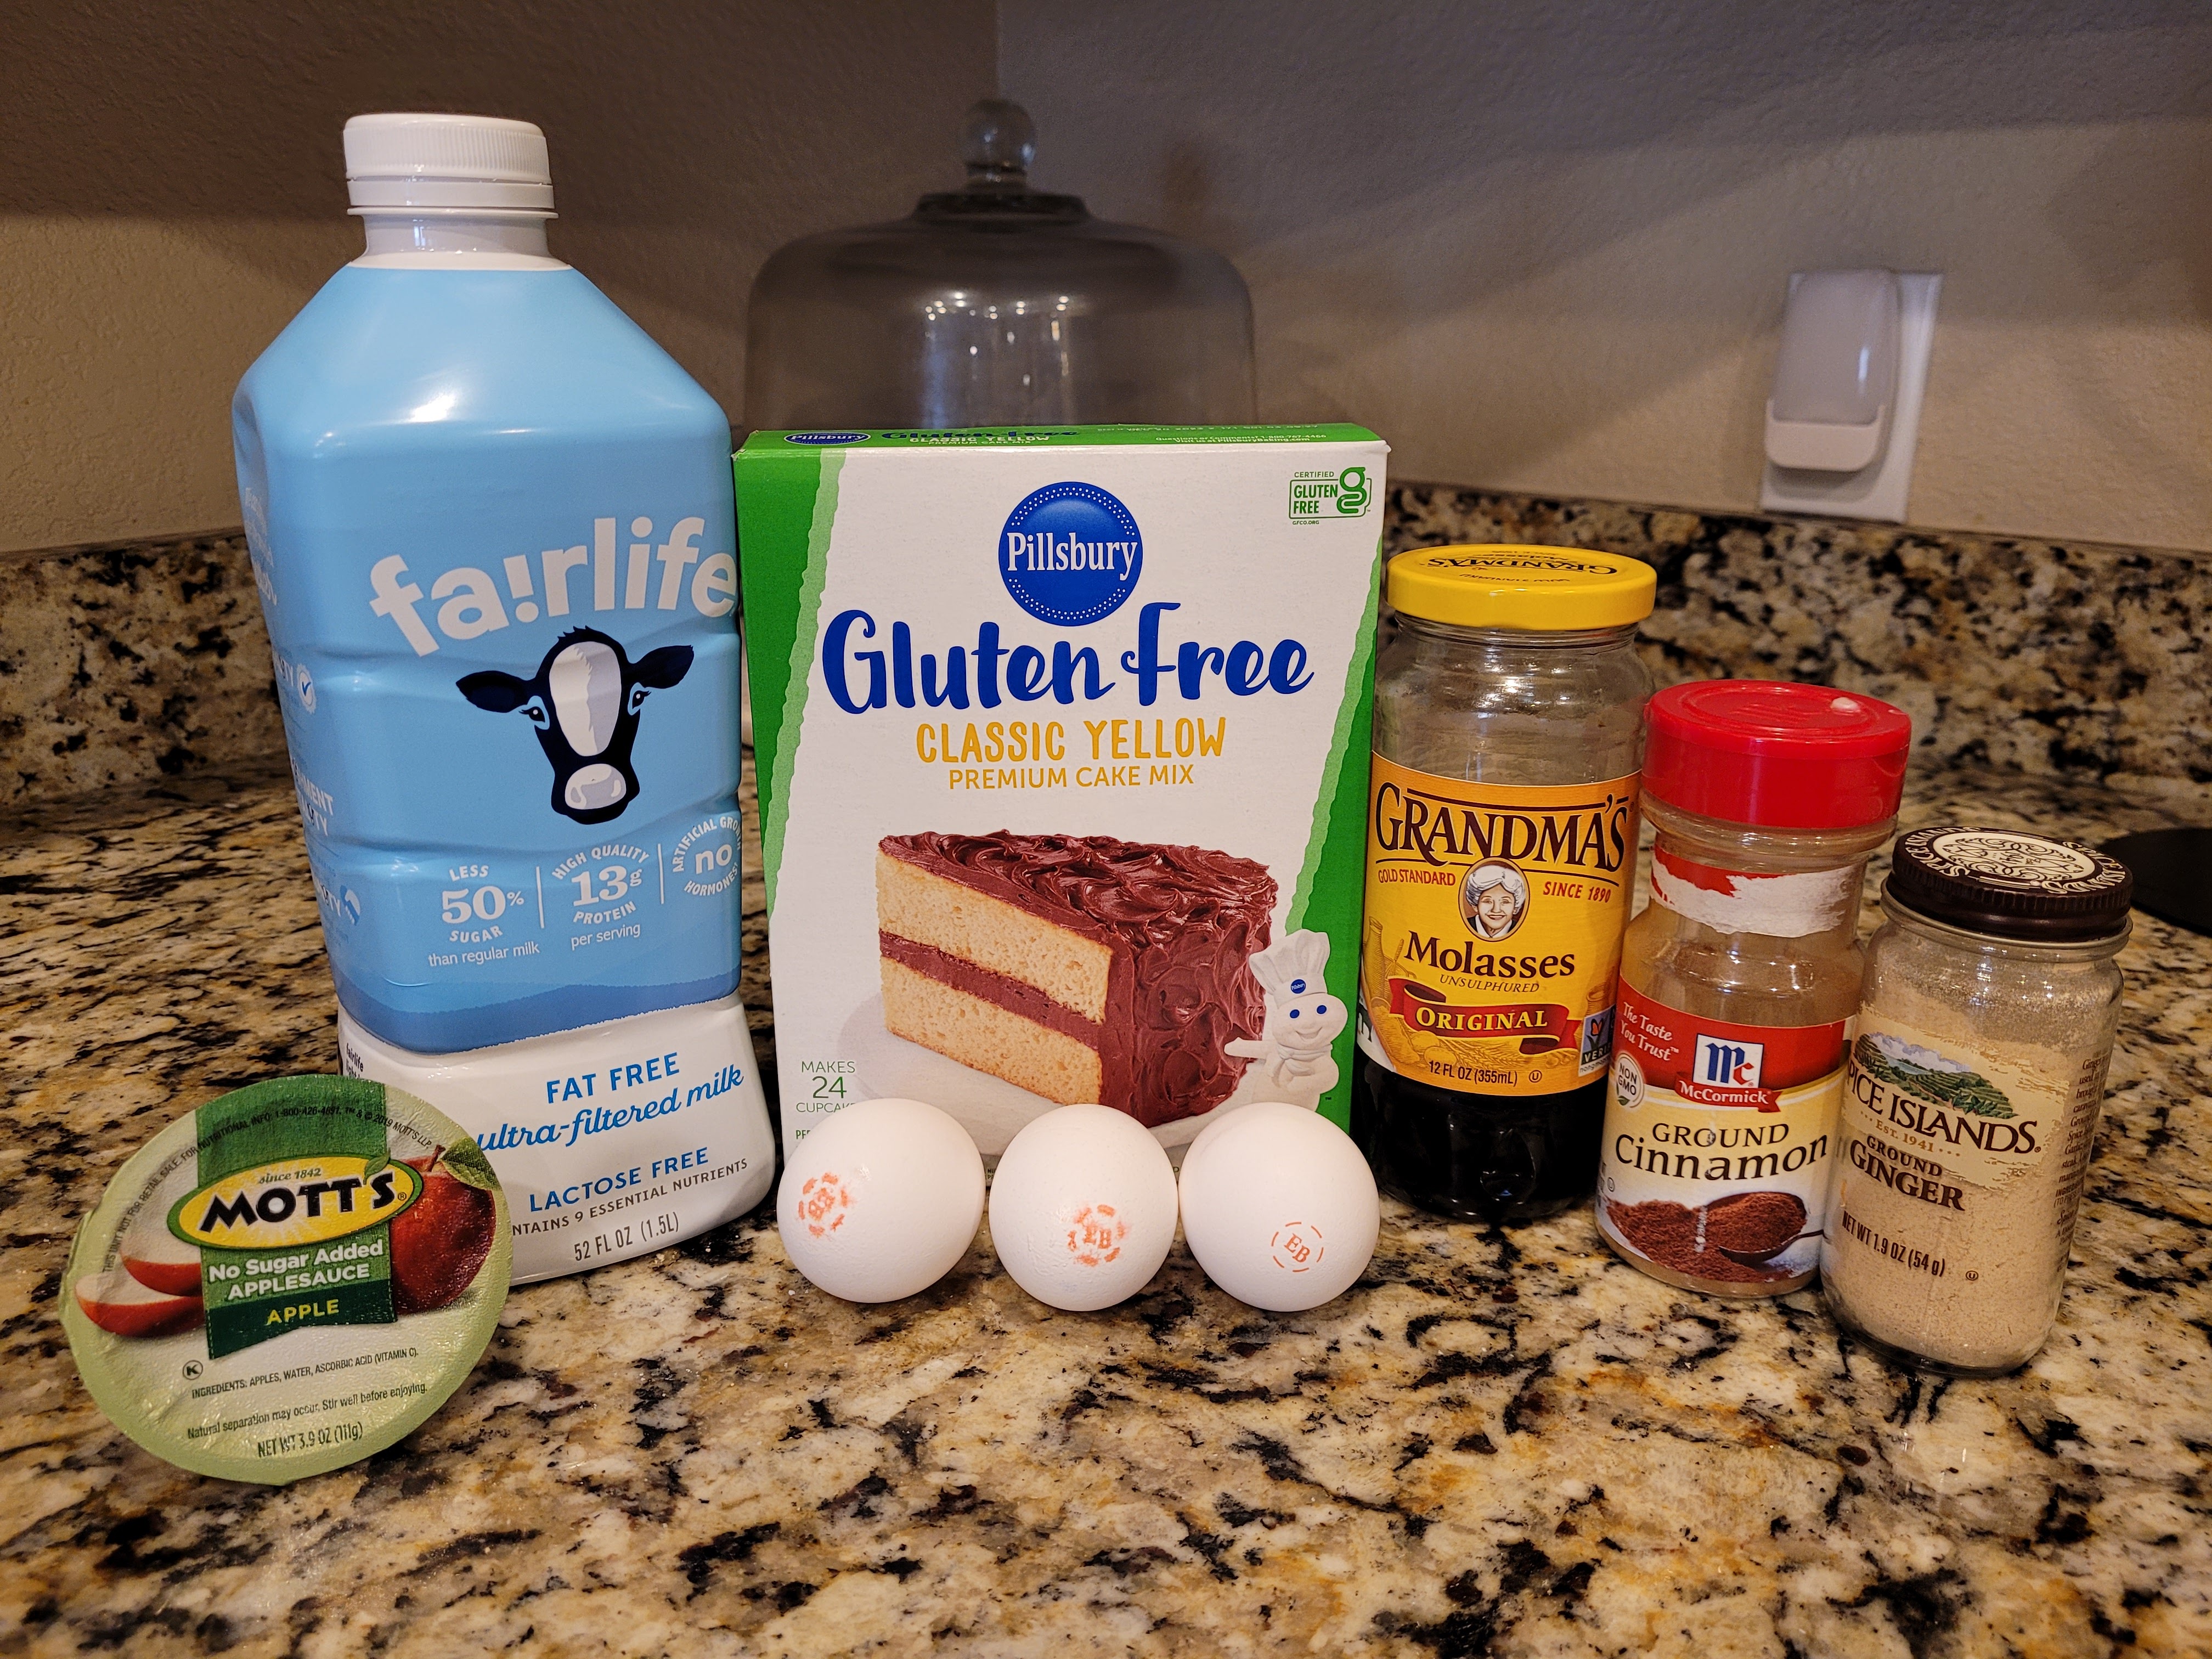
Pretty sure I haven’t touched that molasses since the last time I made gingerbread like three years ago, but it somehow still hadn’t expired…a Christmas miracle! To make these snappy little ginger babies, you need:
- 1 box Pillsbury gluten free yellow cake
- 3 eggs
- 70 grams (1/3 cup) unsweetened applesauce
- 1 tsp ground ginger
- 1/2 tsp cinnamon
- 1/4 tsp nutmeg
- 1/4 tsp cloves
- 1/2 cup molasses
- 1/2 cup of fat free milk
I preheated my brand new oven to 350 (using my phone…I scoffed at having a *smart oven* but knew it was a good resale point when we move, and now I’m obsessed with using my phone to start my oven. Hi, I’m basic). I mixed all my ingredients together on low for 30 seconds before switching to medium-high on my stand mixer for 2 minutes. I put cupcake liners into two muffin tins before evenly distributing the batter and baking at 350 for 19 minutes. Always let your cupcakes rest in the pan for 10 minutes before turning out to cool completely on a cooling rack. I actually froze half of these because try as I might (and oh, she might), I can’t eat two dozen cupcakes before they go stale. They thawed out beautifully!
And plaid cupcake liners? Talk about *sprucing* things up. Now, let’s top these gingery little morsels with fluffy frosting! I recommend chilling your mixing bowl for at least 30 minutes to ensure your frosting whips up properly. To make the frosting, you need:
- 226 grams (8 ounces ) 1/3 the fat cream cheese, COLD
- 192 grams (1 cup) granulated Lakanto
- 1 teaspoon vanilla extract
- 360 mL (1 1/2 cups) heavy whipping cream, COLD
- Gel dyes in light blue and green
- Christmas sprinkle mixes (mine are from Wilton)
Start with the paddle attachment on your stand mixer and mix the cream cheese for a minute until smooth; then add in the Lakanto and vanilla, mixing until things come together for a minute or so. Switch to the whisk attachment, and while the mixer is running on medium-high, slowly pour heavy cream into the bowl (this should take about 1 minute) and mix for 2 minutes until stiff peaks form. Split up the frosting into two bowls, and dye a portion of this frosting light blue to use as the background color. Keep all of the frosting in the fridge until you’re ready to top the cupcakes. This is definitely a frosting that needs to stay cold to keep its shape, so keep that in mind.
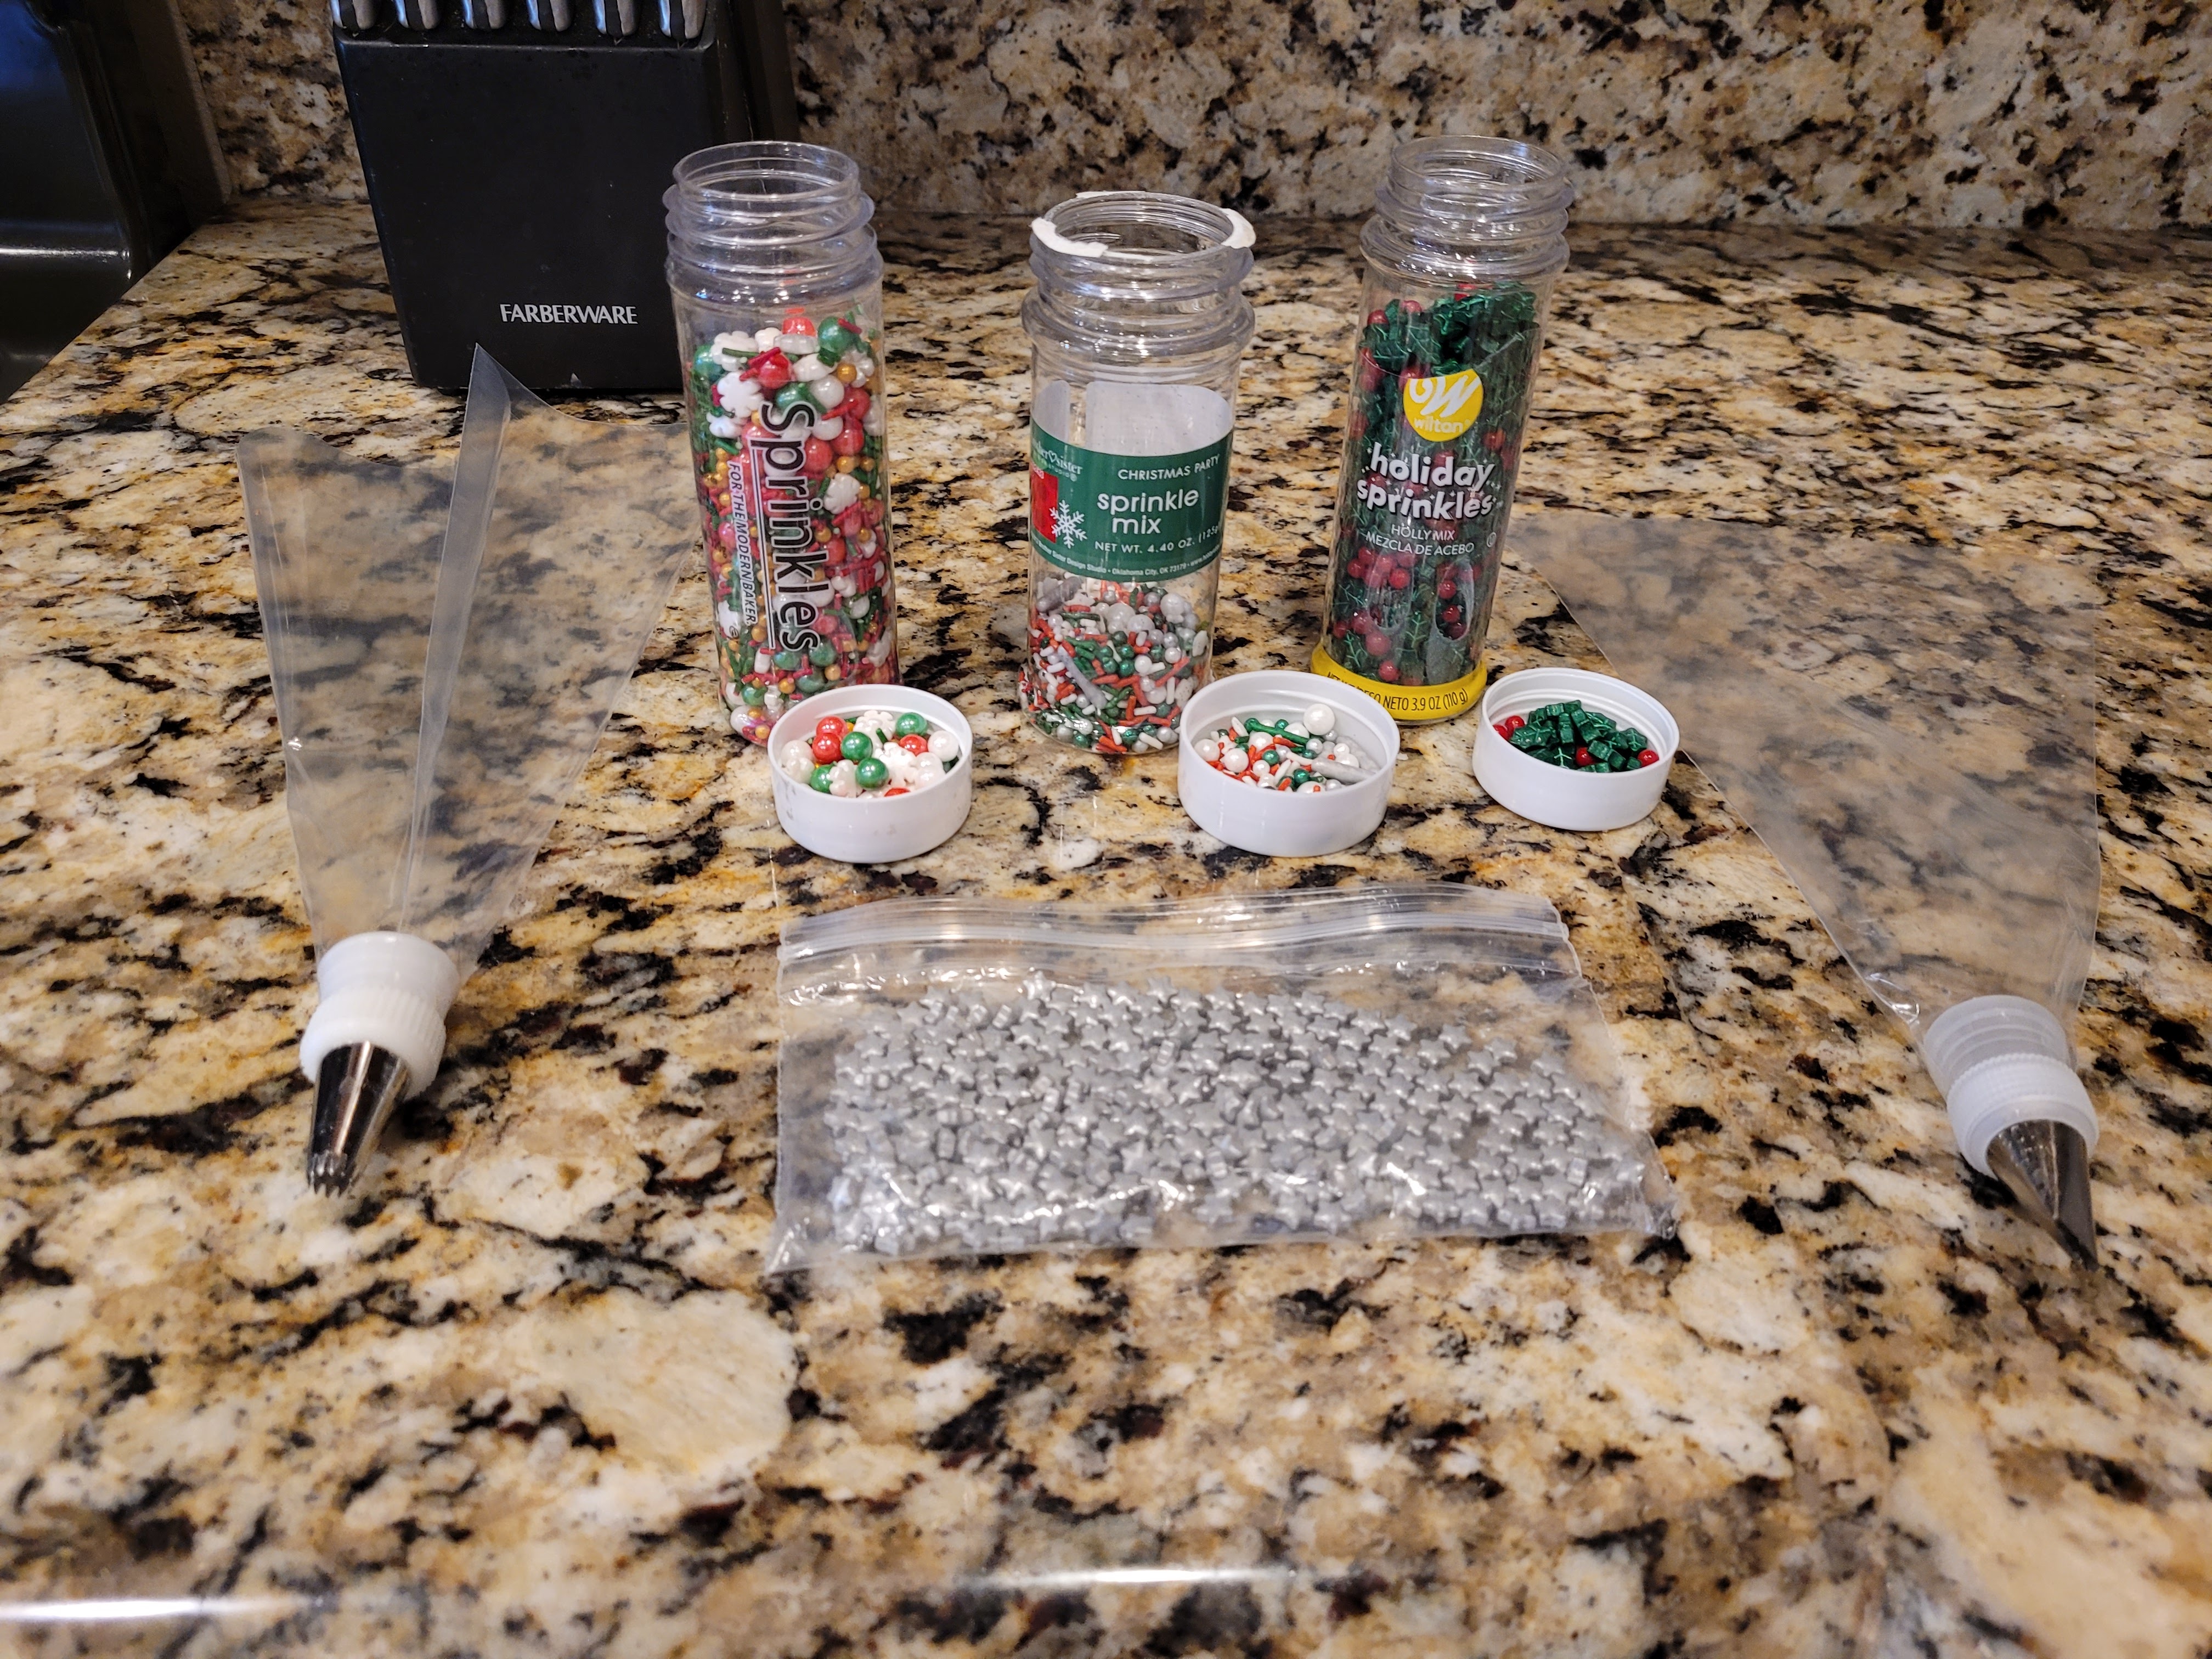
I might have a problem. You can go ahead and apply a thin layer of blue frosting to the top of each cupcake; the flip and freeze method doesn’t really work for this type of frosting, so just get things nice and smooth with an angled spatula. To make the trees, you will need a #103 or #104 petal tip and a whole bunch of really cute sprinkles.
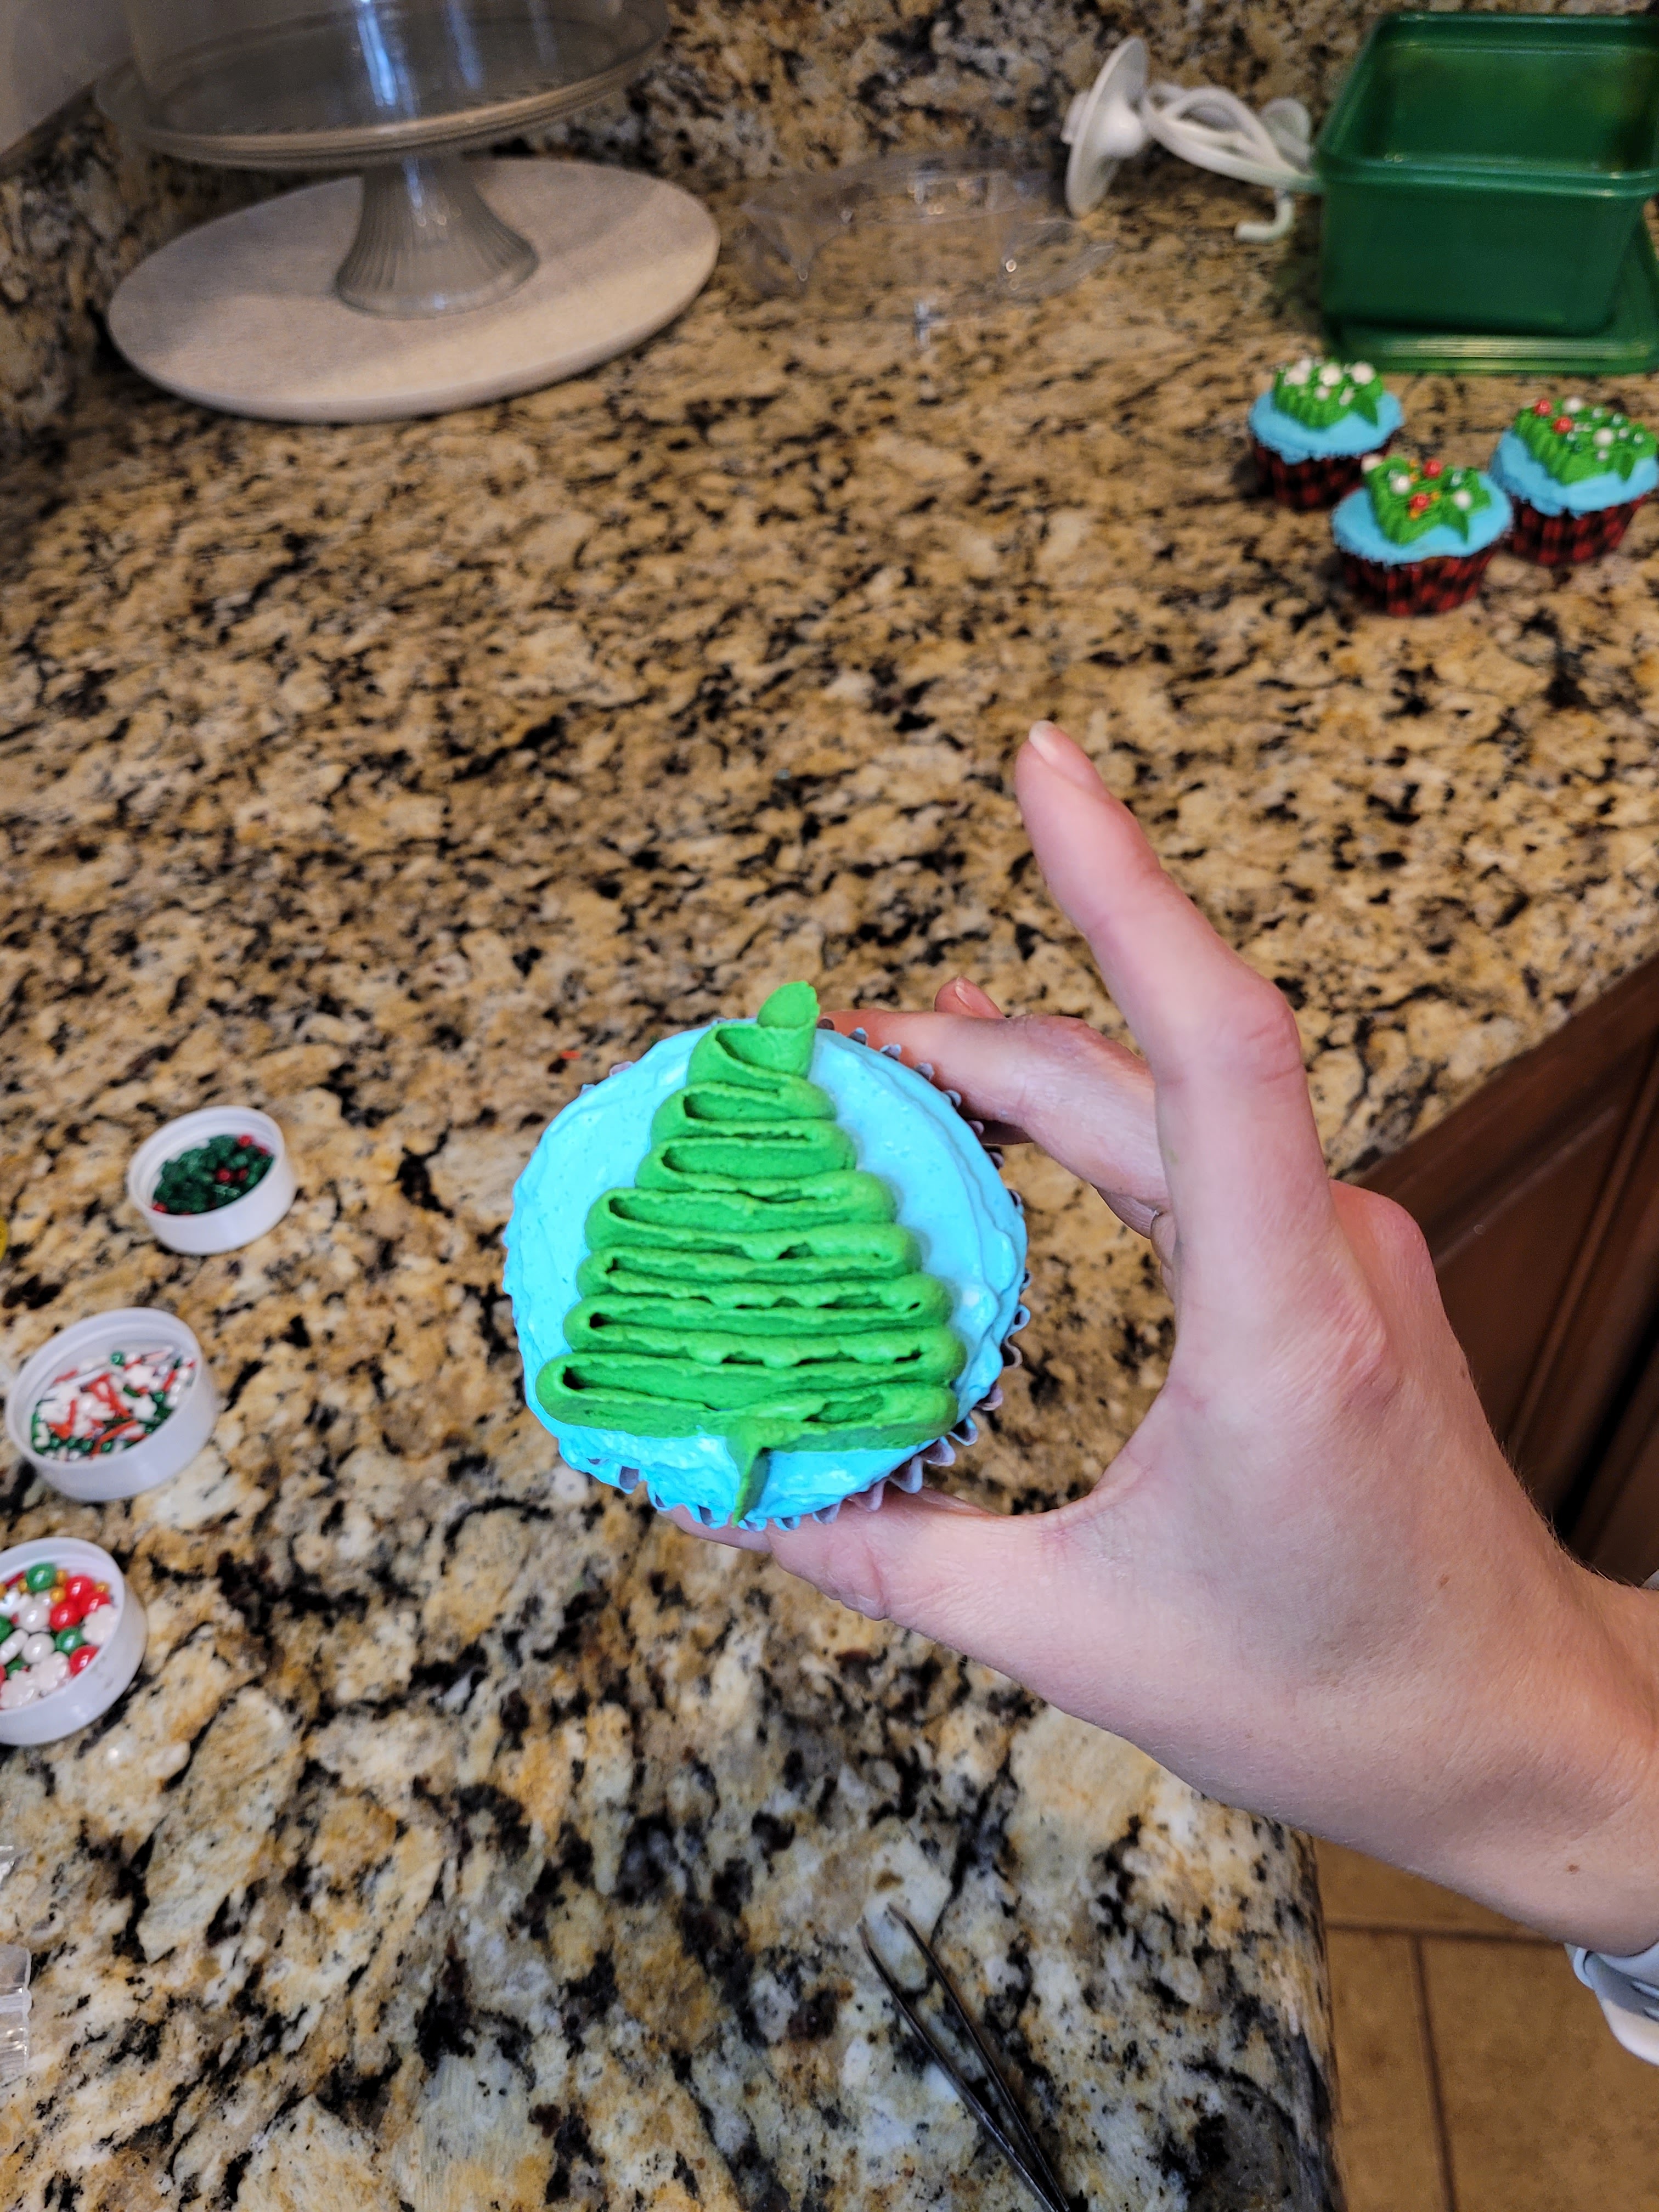
No sprinkles on your Christmas tree? Birch, please. Once you’ve frosted the tops of all your cupcakes, you can dye the remaining frosting green. If you find the frosting is getting thin after you dye it, just pop it back into the fridge to firm back up for 30 minutes. To make the trees, place some green frosting into a piping bag with a petal tip. Take a cupcake, and with the large side of the tip pointing down, drag ribbons slowly back and forth, starting small, and making each ribbon line a little wider as you go down to pipe a tree (so think of piping back in forth in a triangular motion).
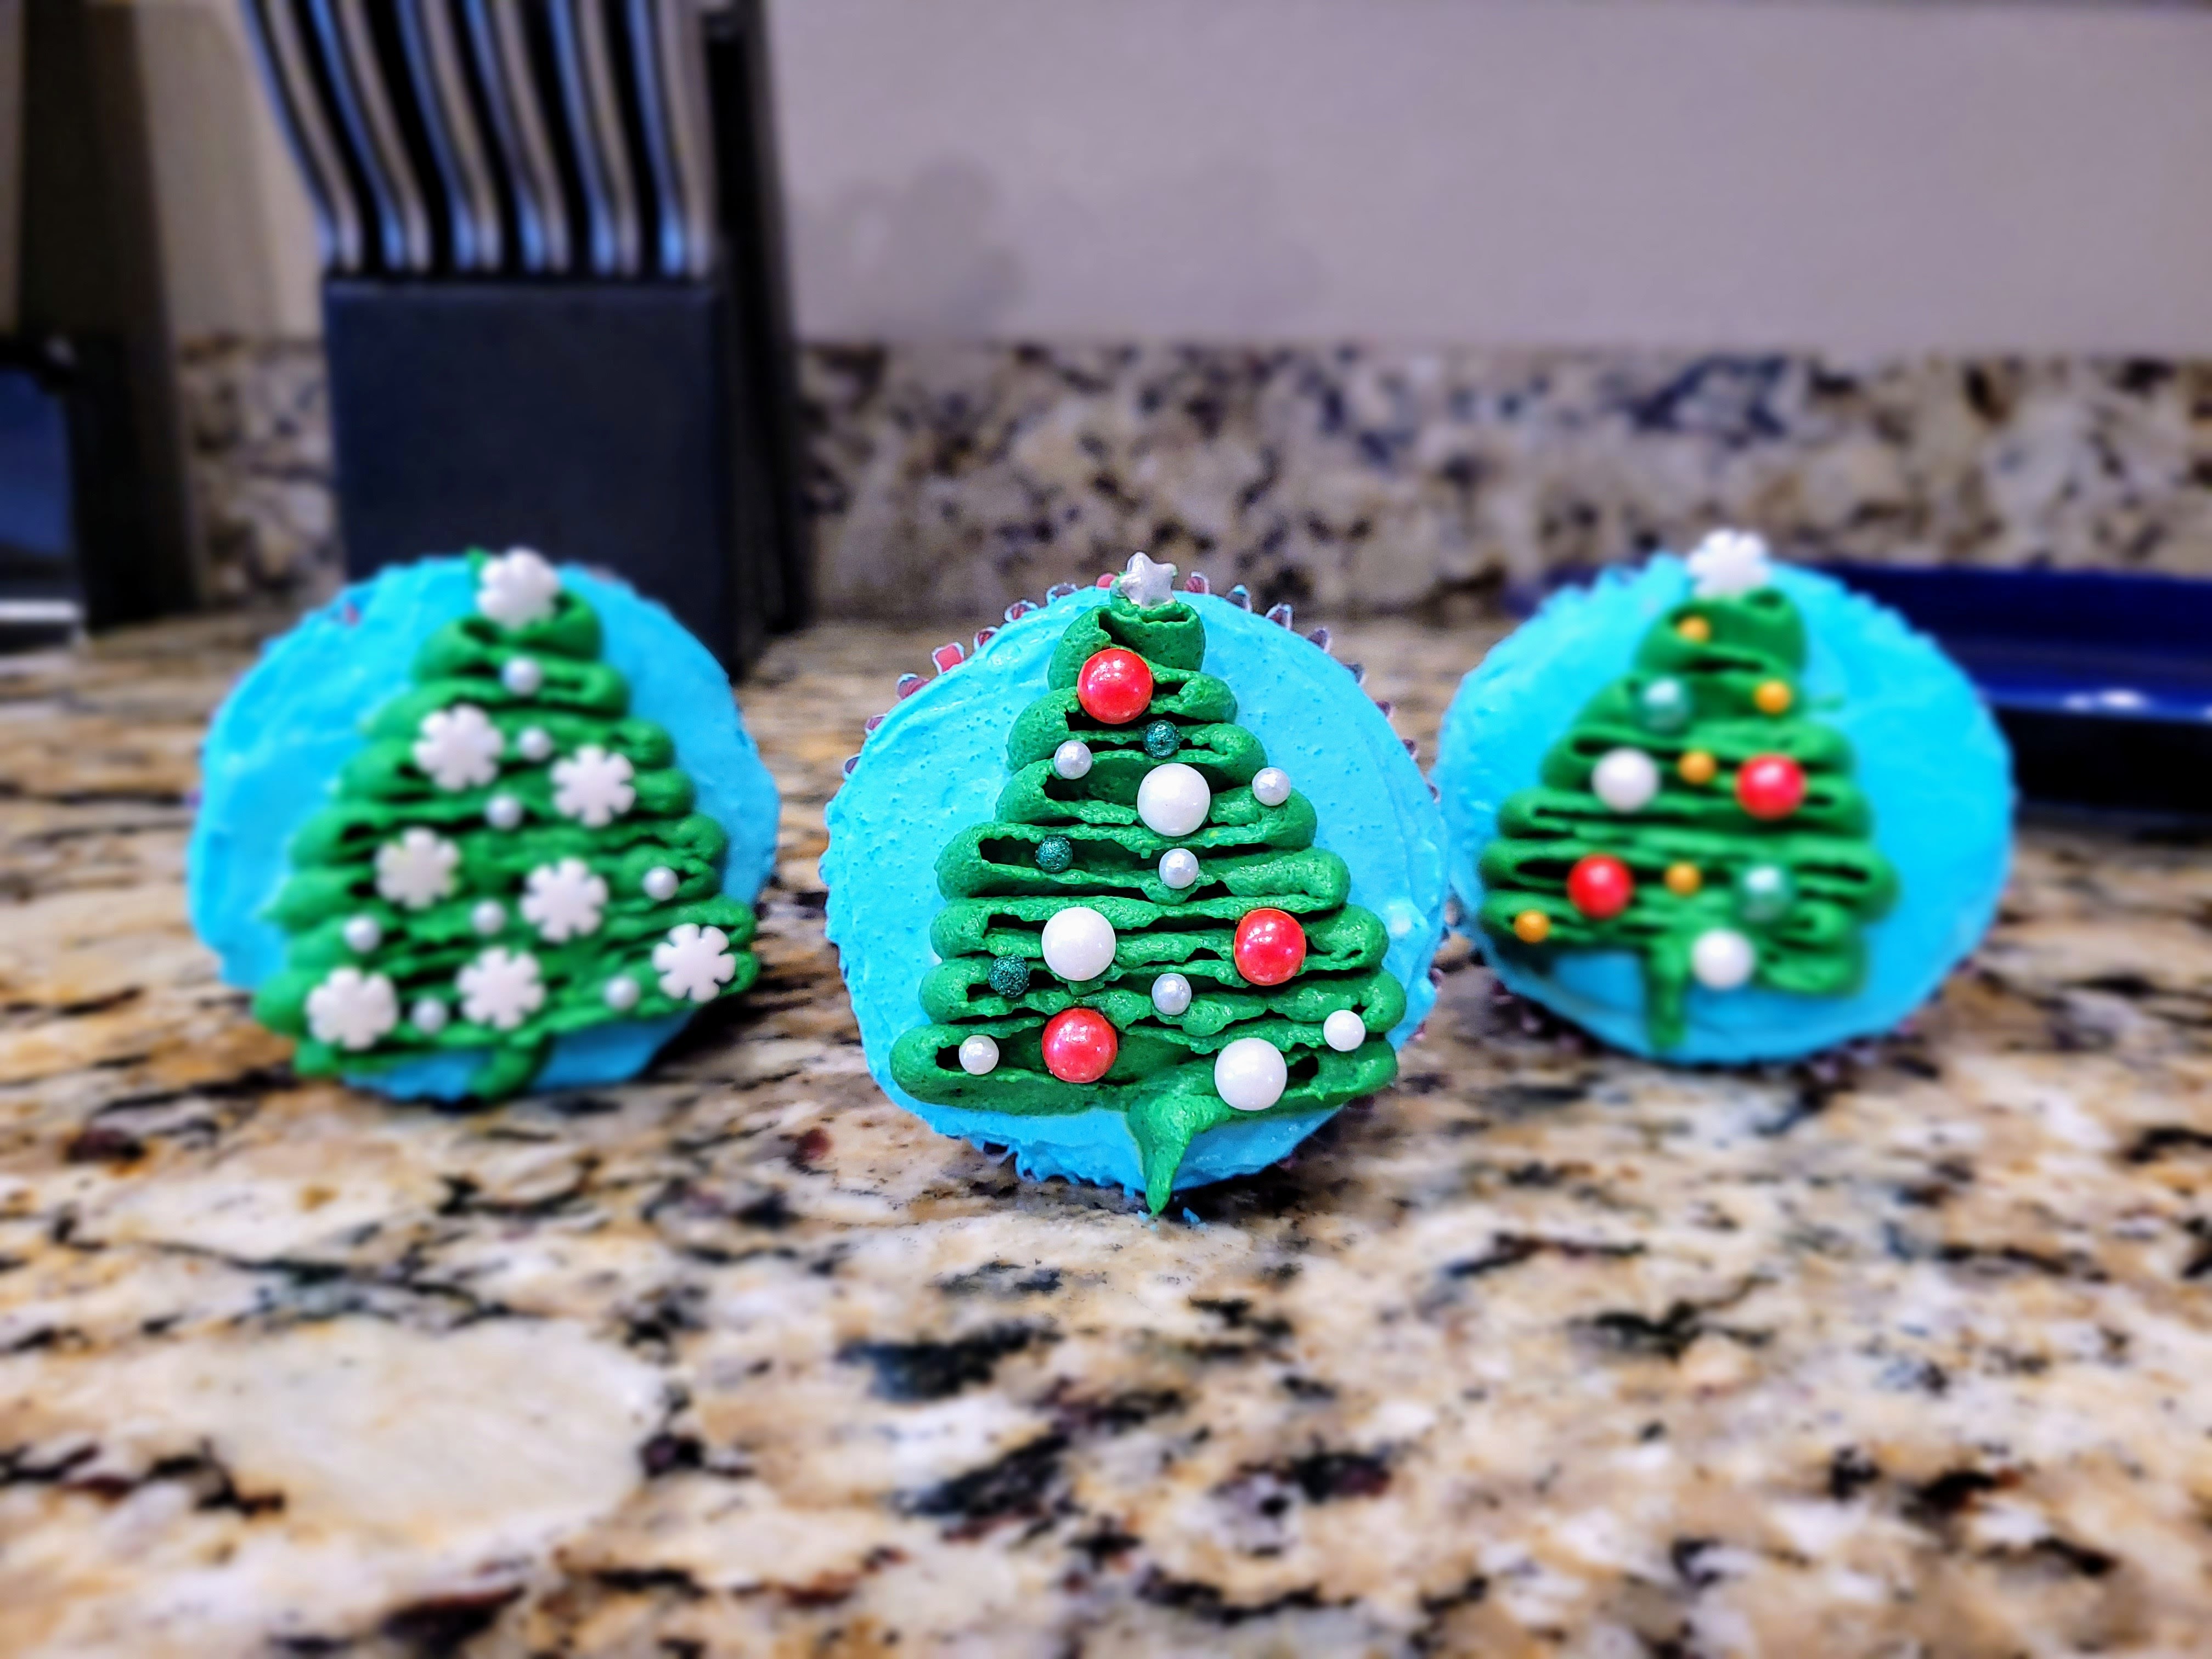
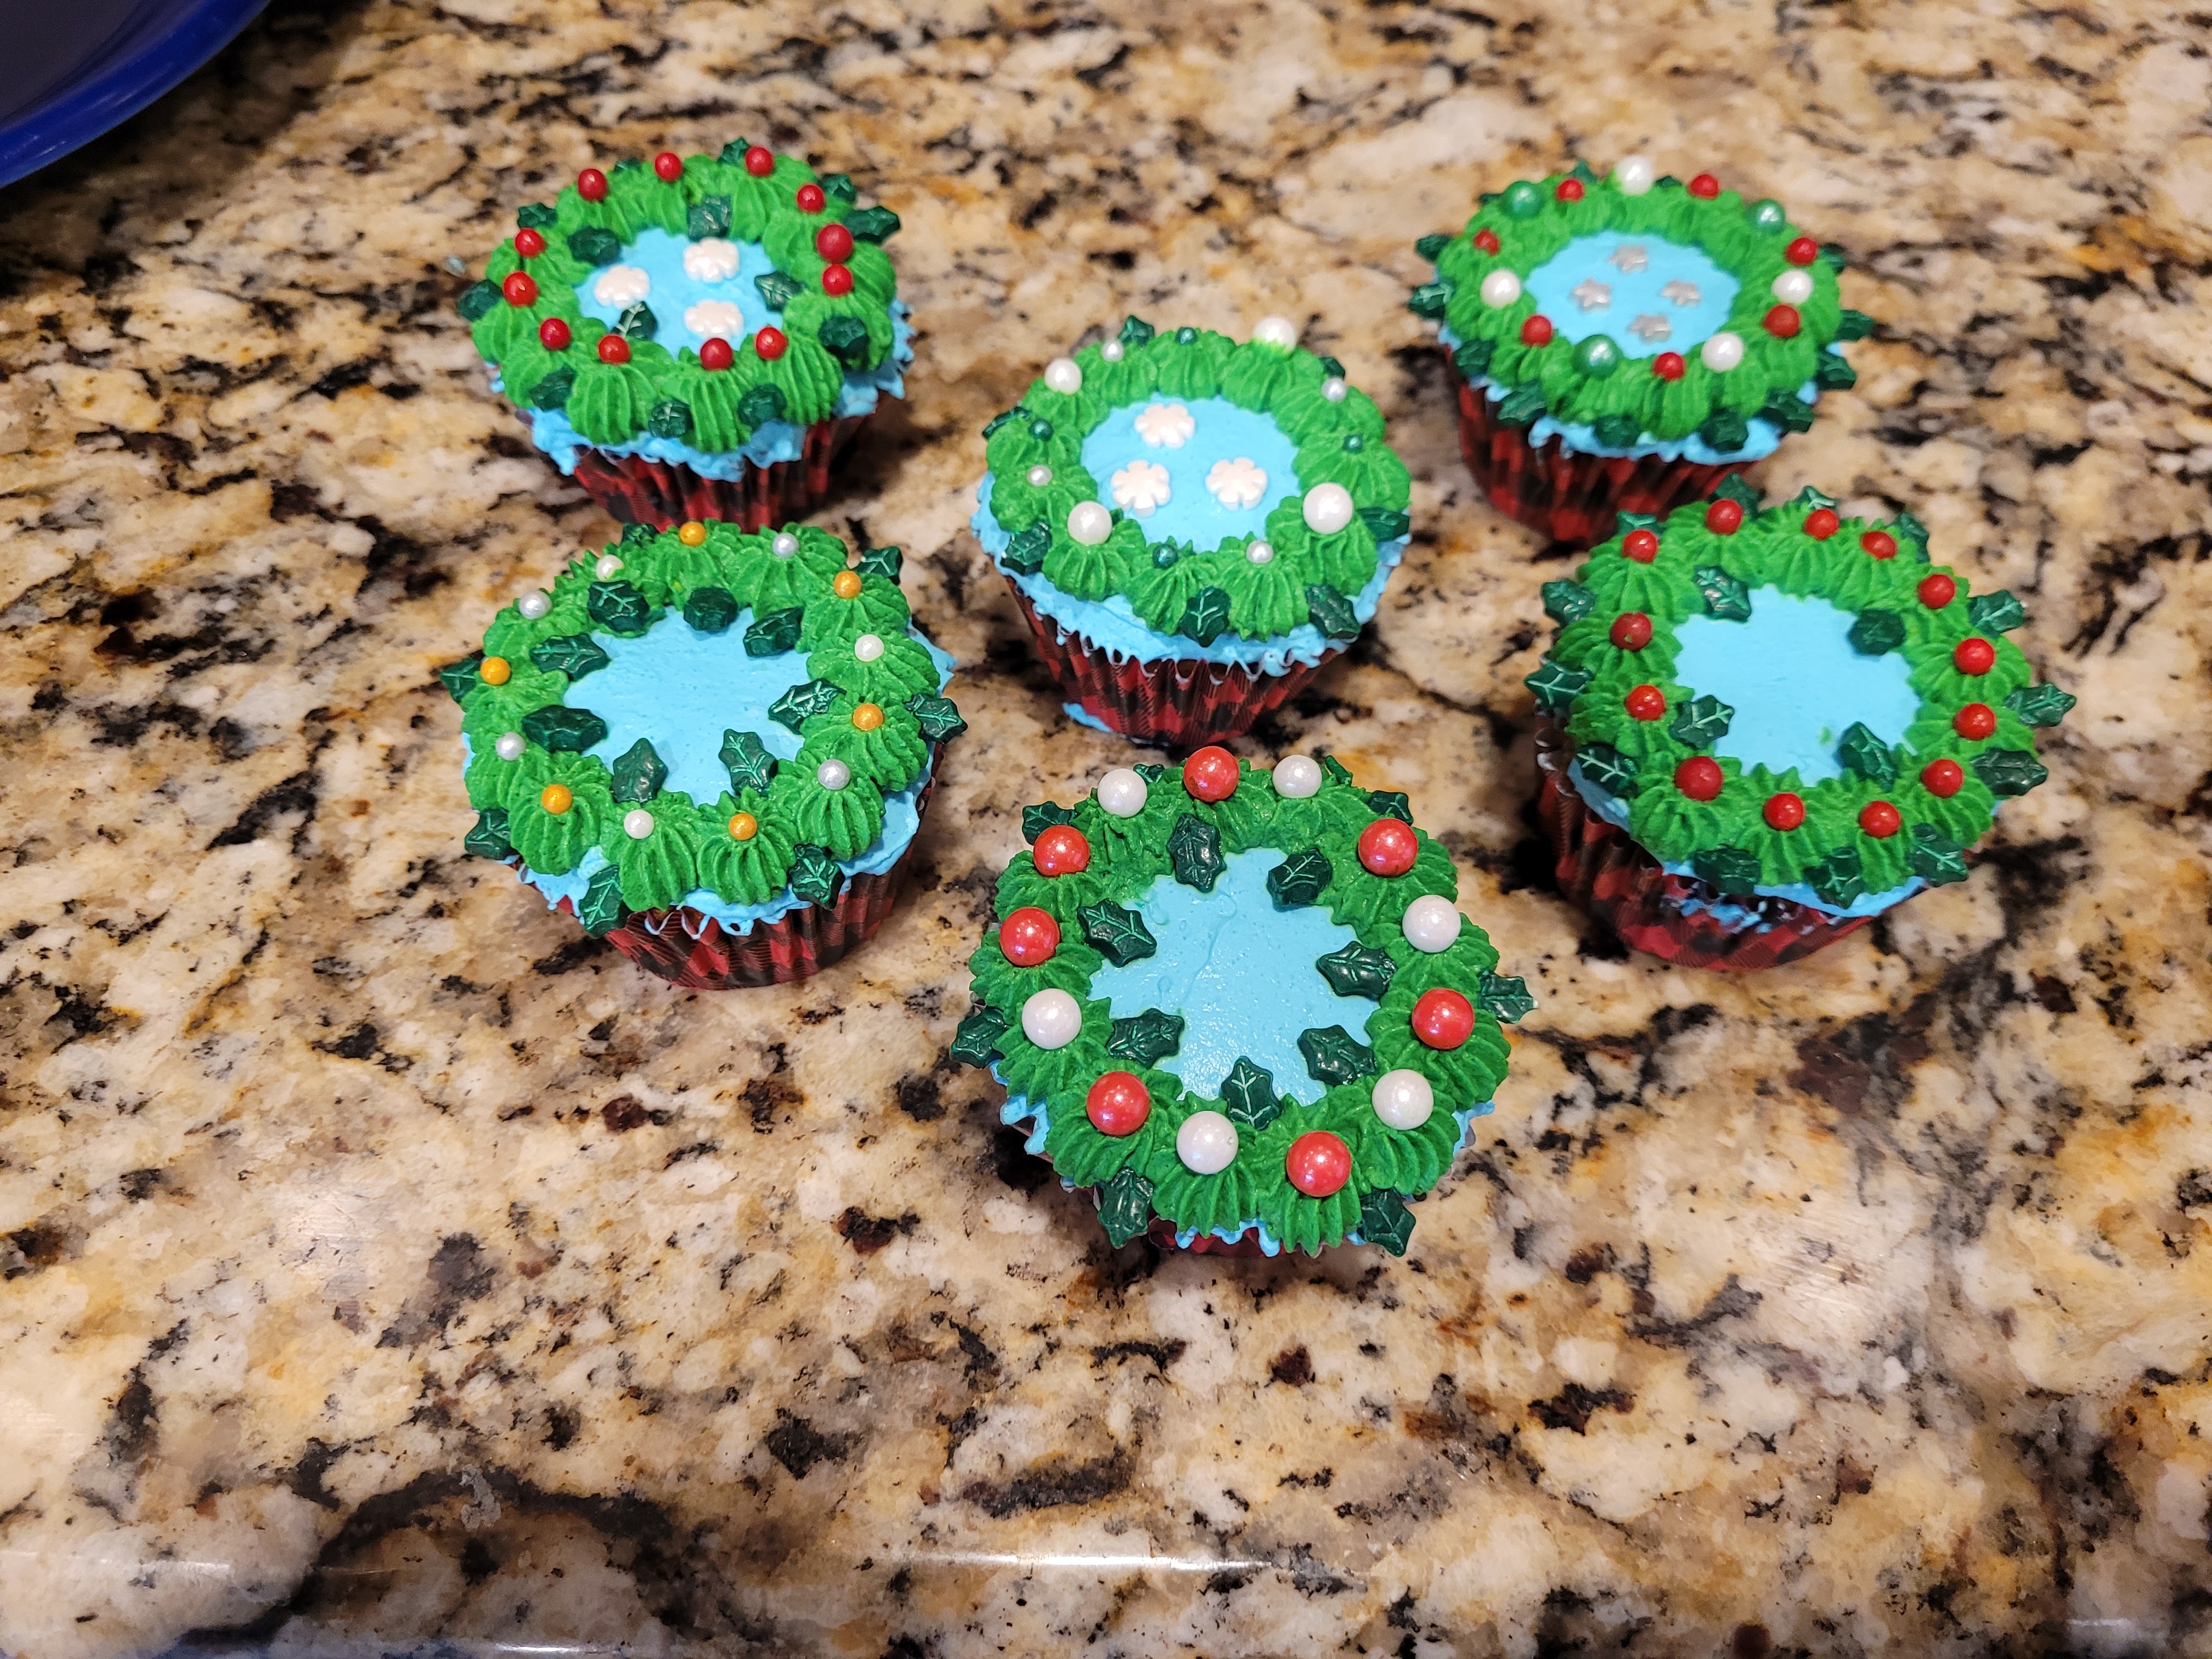
Just the tree of us… Then all you have to do is add sprinkles for ornaments, and don’t forget a star or snowflake sprinkle for a tree topper. You know, adding one on top is super complimen-tree to the overall cupcake aesthetic. I did half my cupcakes decorated as trees, and the other half as very festive Christmas wreaths.
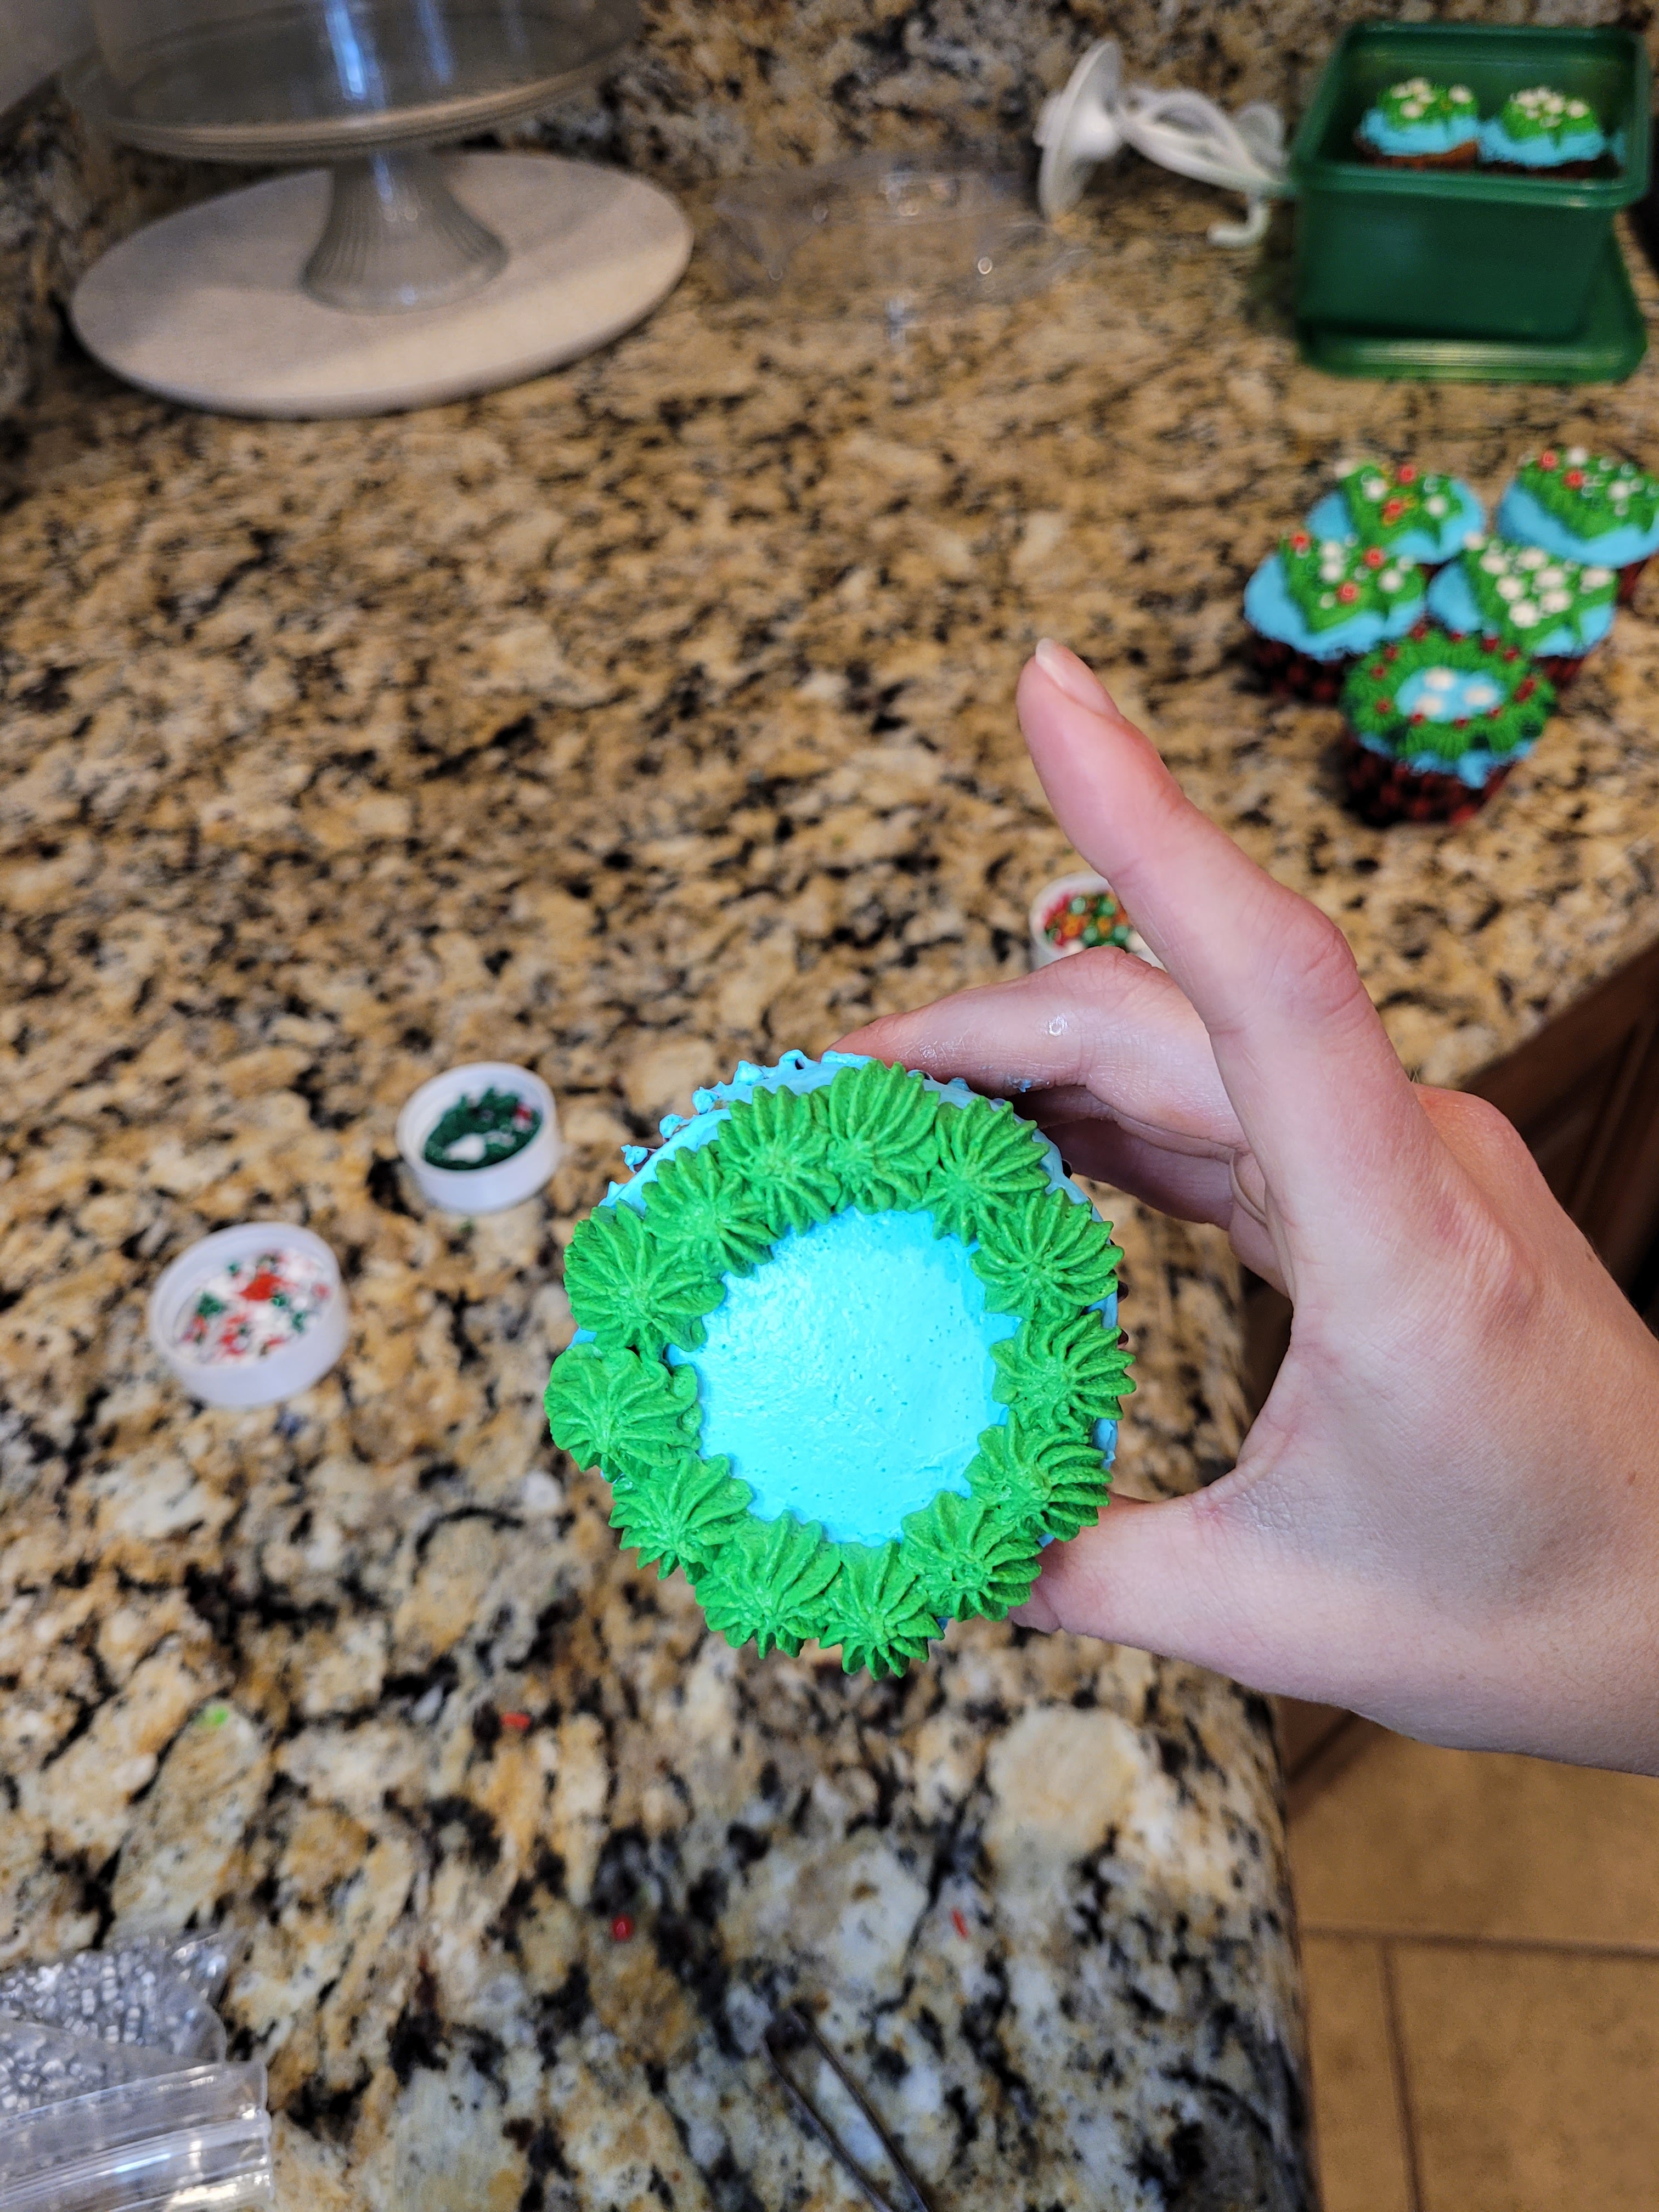
I was on pins and pine needles… These wreaths are probably the easiest way to decorate a cupcake ever. Switch the tip on your piping bag to a #32 open star tip (or another open star tip in close size). Simply pipe little stars all around the edge of the cupcake to make a circle.

See, sprinkles make the magic happen. Then, all you need to do is add in little leaf sprinkles and various other holiday sprinkles to make the wreaths look however you like.
Pine-ing for these cupcakes. 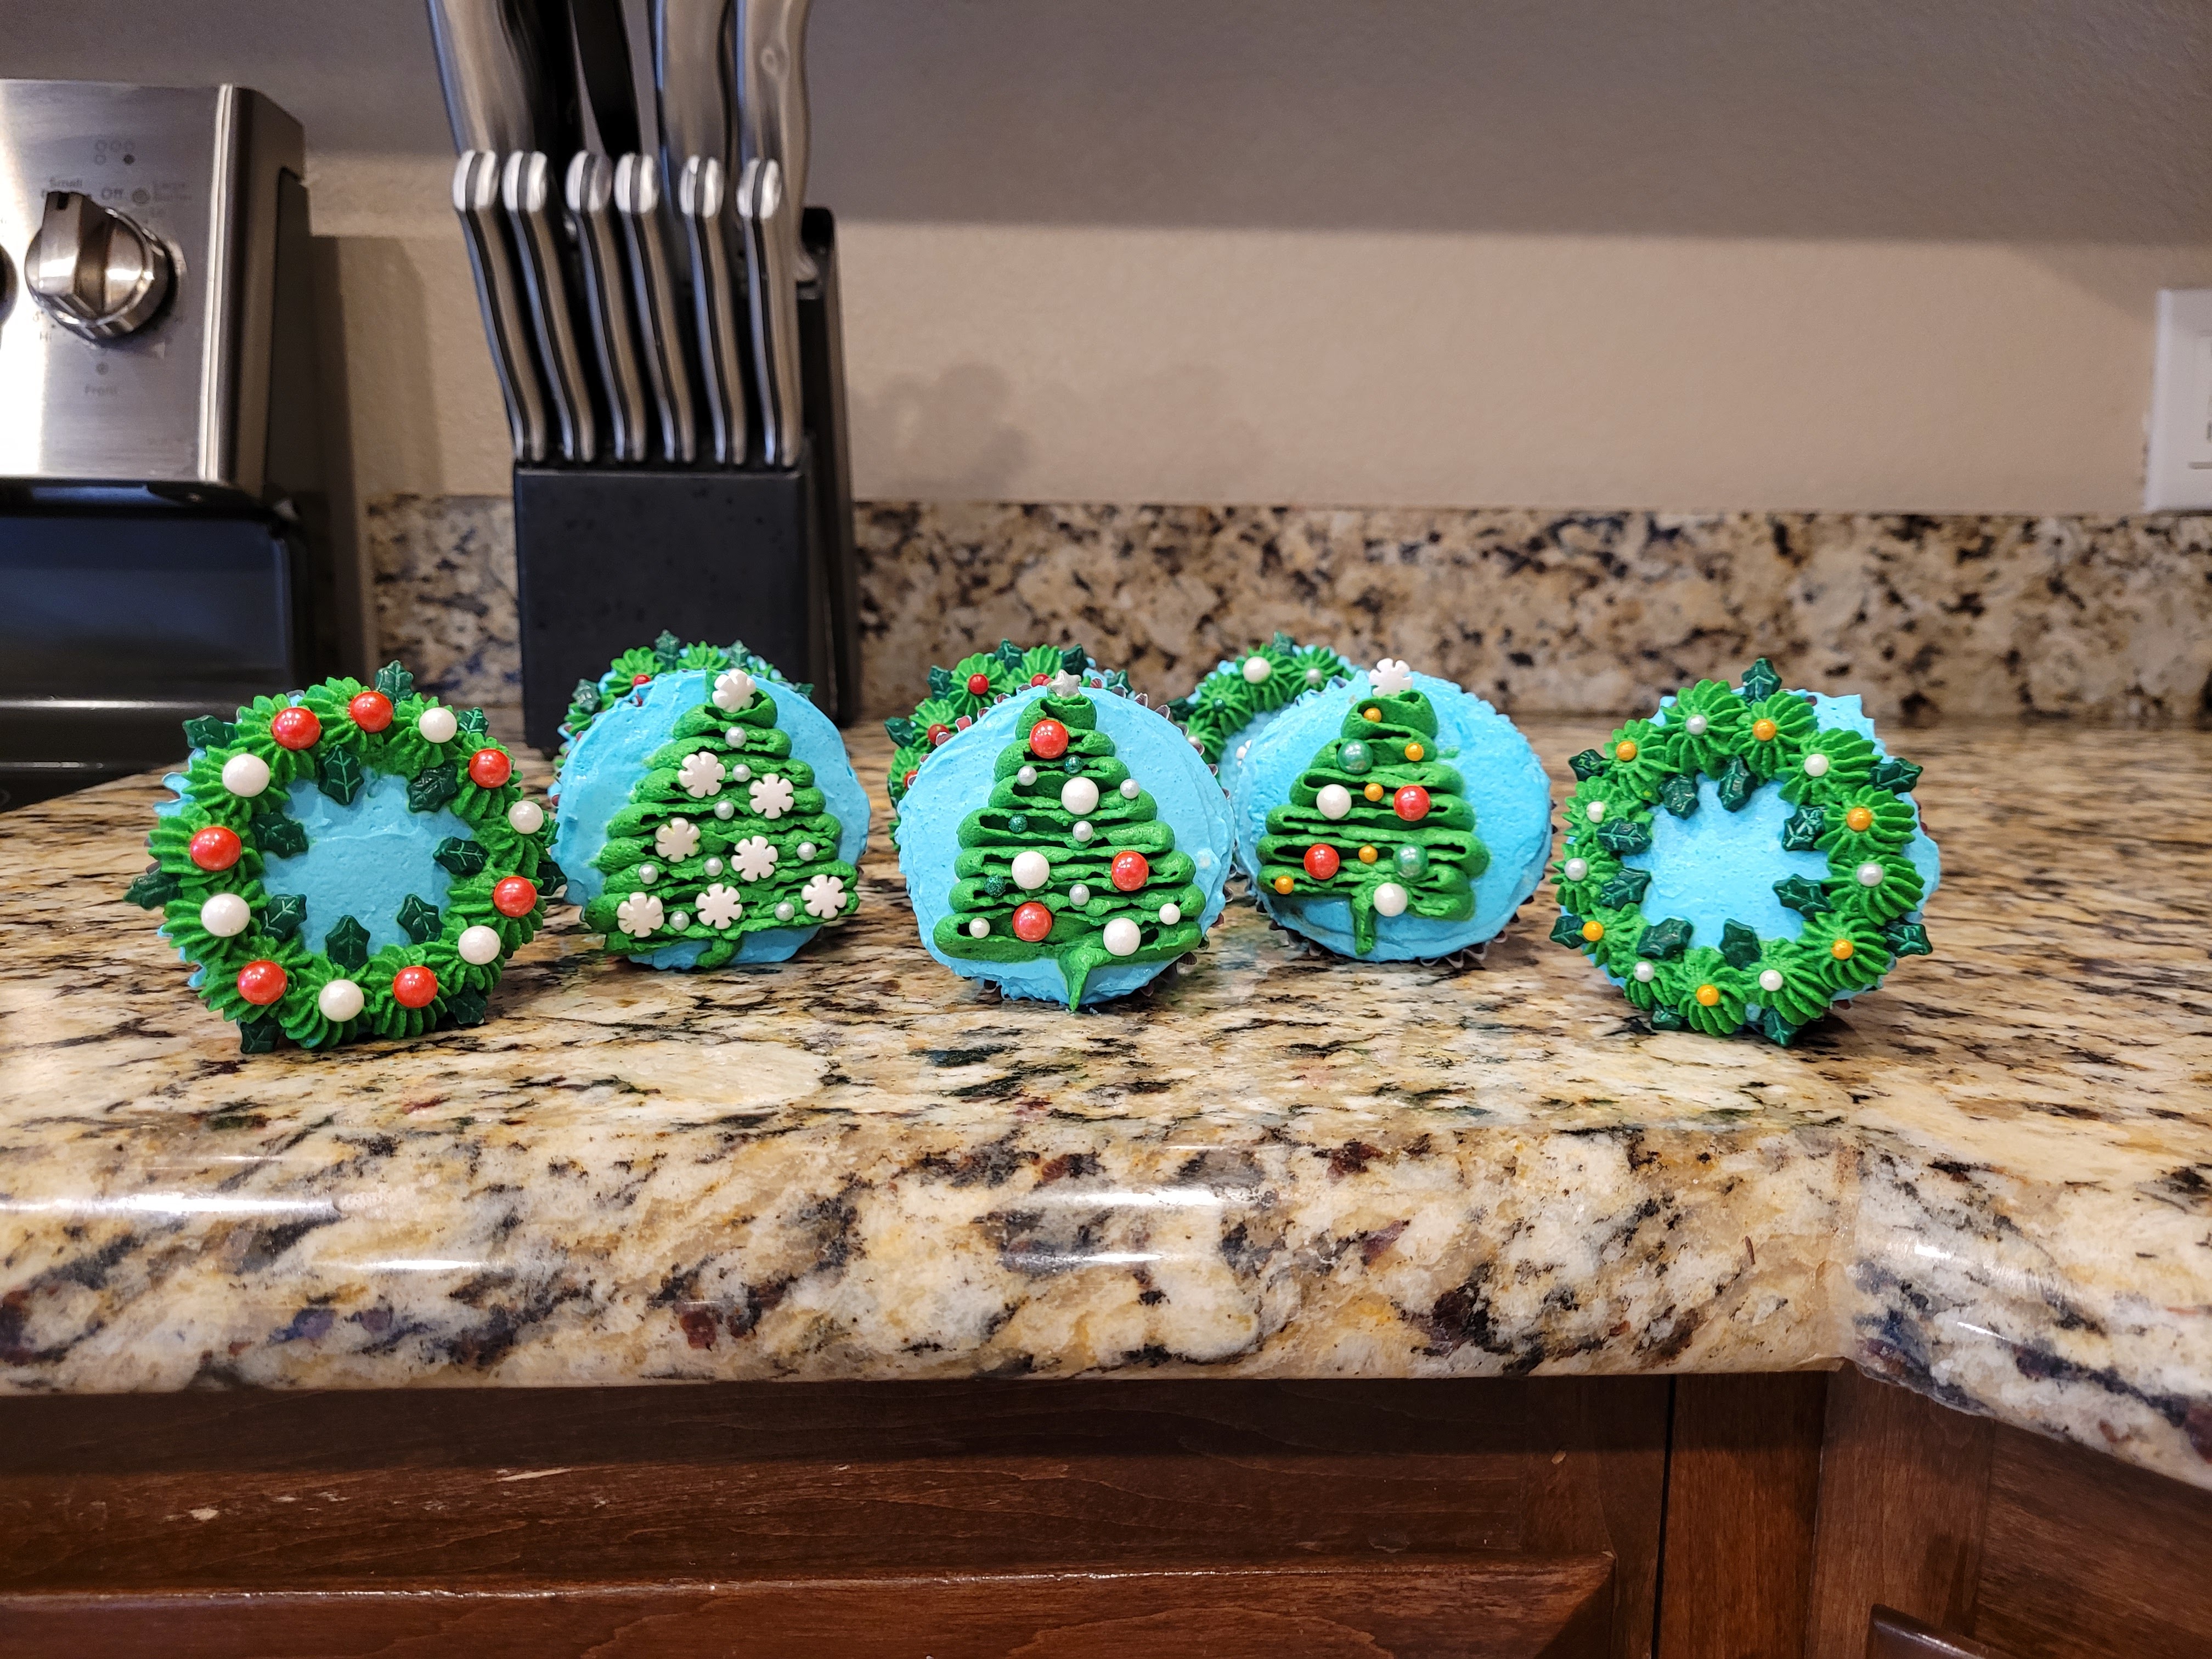
Looking at you is like reading poe-tree. Truly, these are a quick, fun, and easy way to decorate holiday cupcakes. I’ve been feeling way less Grinchy since whipping these beauties up, but it’s hard to hate Christmas when you’re full of gingerbread. It’s like Zoloft in food form. Soft, springy cakes with that gingerbread spice…warms up my insides and defrosts my tiny little heart. I love pairing it with a lighter whipped cream cheese frosting even more than a traditional cream cheese; it isn’t as sweet, so the frosting doesn’t overpower the gingerbread flavor with sweetness. I could go on about how amazing these cupcakes are, ya know, snow on and snow forth. Instead, go whip up a batch to create your own little Christmas baking oasis. You can share…Santa would probably frown upon not sharing, but if you’re old enough to buy your own Christmas presents, you do you. ‘Til next time, my fellow eaters!
Recipe and Instructions
Gingerbread cupcakes with whipped cream cheese frosting
Fluffy, spiced gingerbread cupcakes with whipped cream cheese frosting
If not gluten free, use any kind of yellow cake mix. Lakanto can also be replaced with regular granular sugar.
Ingredients
CUPCAKES
*1 box Pillsbury gluten free yellow cake
*3 eggs
*70 grams (1/3 cup) unsweetened applesauce
*1 tsp ground ginger
*1/2 tsp cinnamon
*1/4 tsp nutmeg
*1/4 tsp ground cloves
*1/2 cup molasses
*1/2 cup of fat free milk
FROSTING
*226 grams (8 ounces) 1/3 the fat cream cheese, COLD
*192 grams (1 cup) granulated Lakanto
*1 teaspoon vanilla extract
*1 1/2 cups heavy whipping cream, COLD
*Gel dyes in light blue and green
Directions
- Place cupcake liners into two muffin tins; preheat oven to 350.
- Mix all cake ingredients on low for 30 seconds before switching to medium-high for 2 minutes.
- Pour into prepared pans and bake for 19 minutes.
- While cupcakes bake, place your mixing bowl into the fridge to chill.
- Let rest in the pan for 10 minutes before removing to cool on a cooling rack completely.
- For the frosting, using the paddle attachments, mix the cream cheese for a minute in your stand mixer before adding the vanilla, and Lakanto and mixing on medium high for 2-3 minutes until fluffy and smooth.
- Switch to the whisk attachment, and while the mixer is running on medium-high, slowly pour the heavy cream into the bowl.
- Beat until stiff peaks form, about 2-3 minutes.
- Once totally cool, dye some frosting light blue and frost the base of the cupcakes light blue.
- Dye remaining frosting green.
- Use a petal tip to draw trees on some, topping with sprinkles, and a 32 star tip to pipe wreaths on others, also topping with sprinkles.
- Keep leftovers covered and in the fridge. Enjoy!
Nutrition
Macros
24 servings
174 cal/24.1 c/7.6 f/2.1 p per slice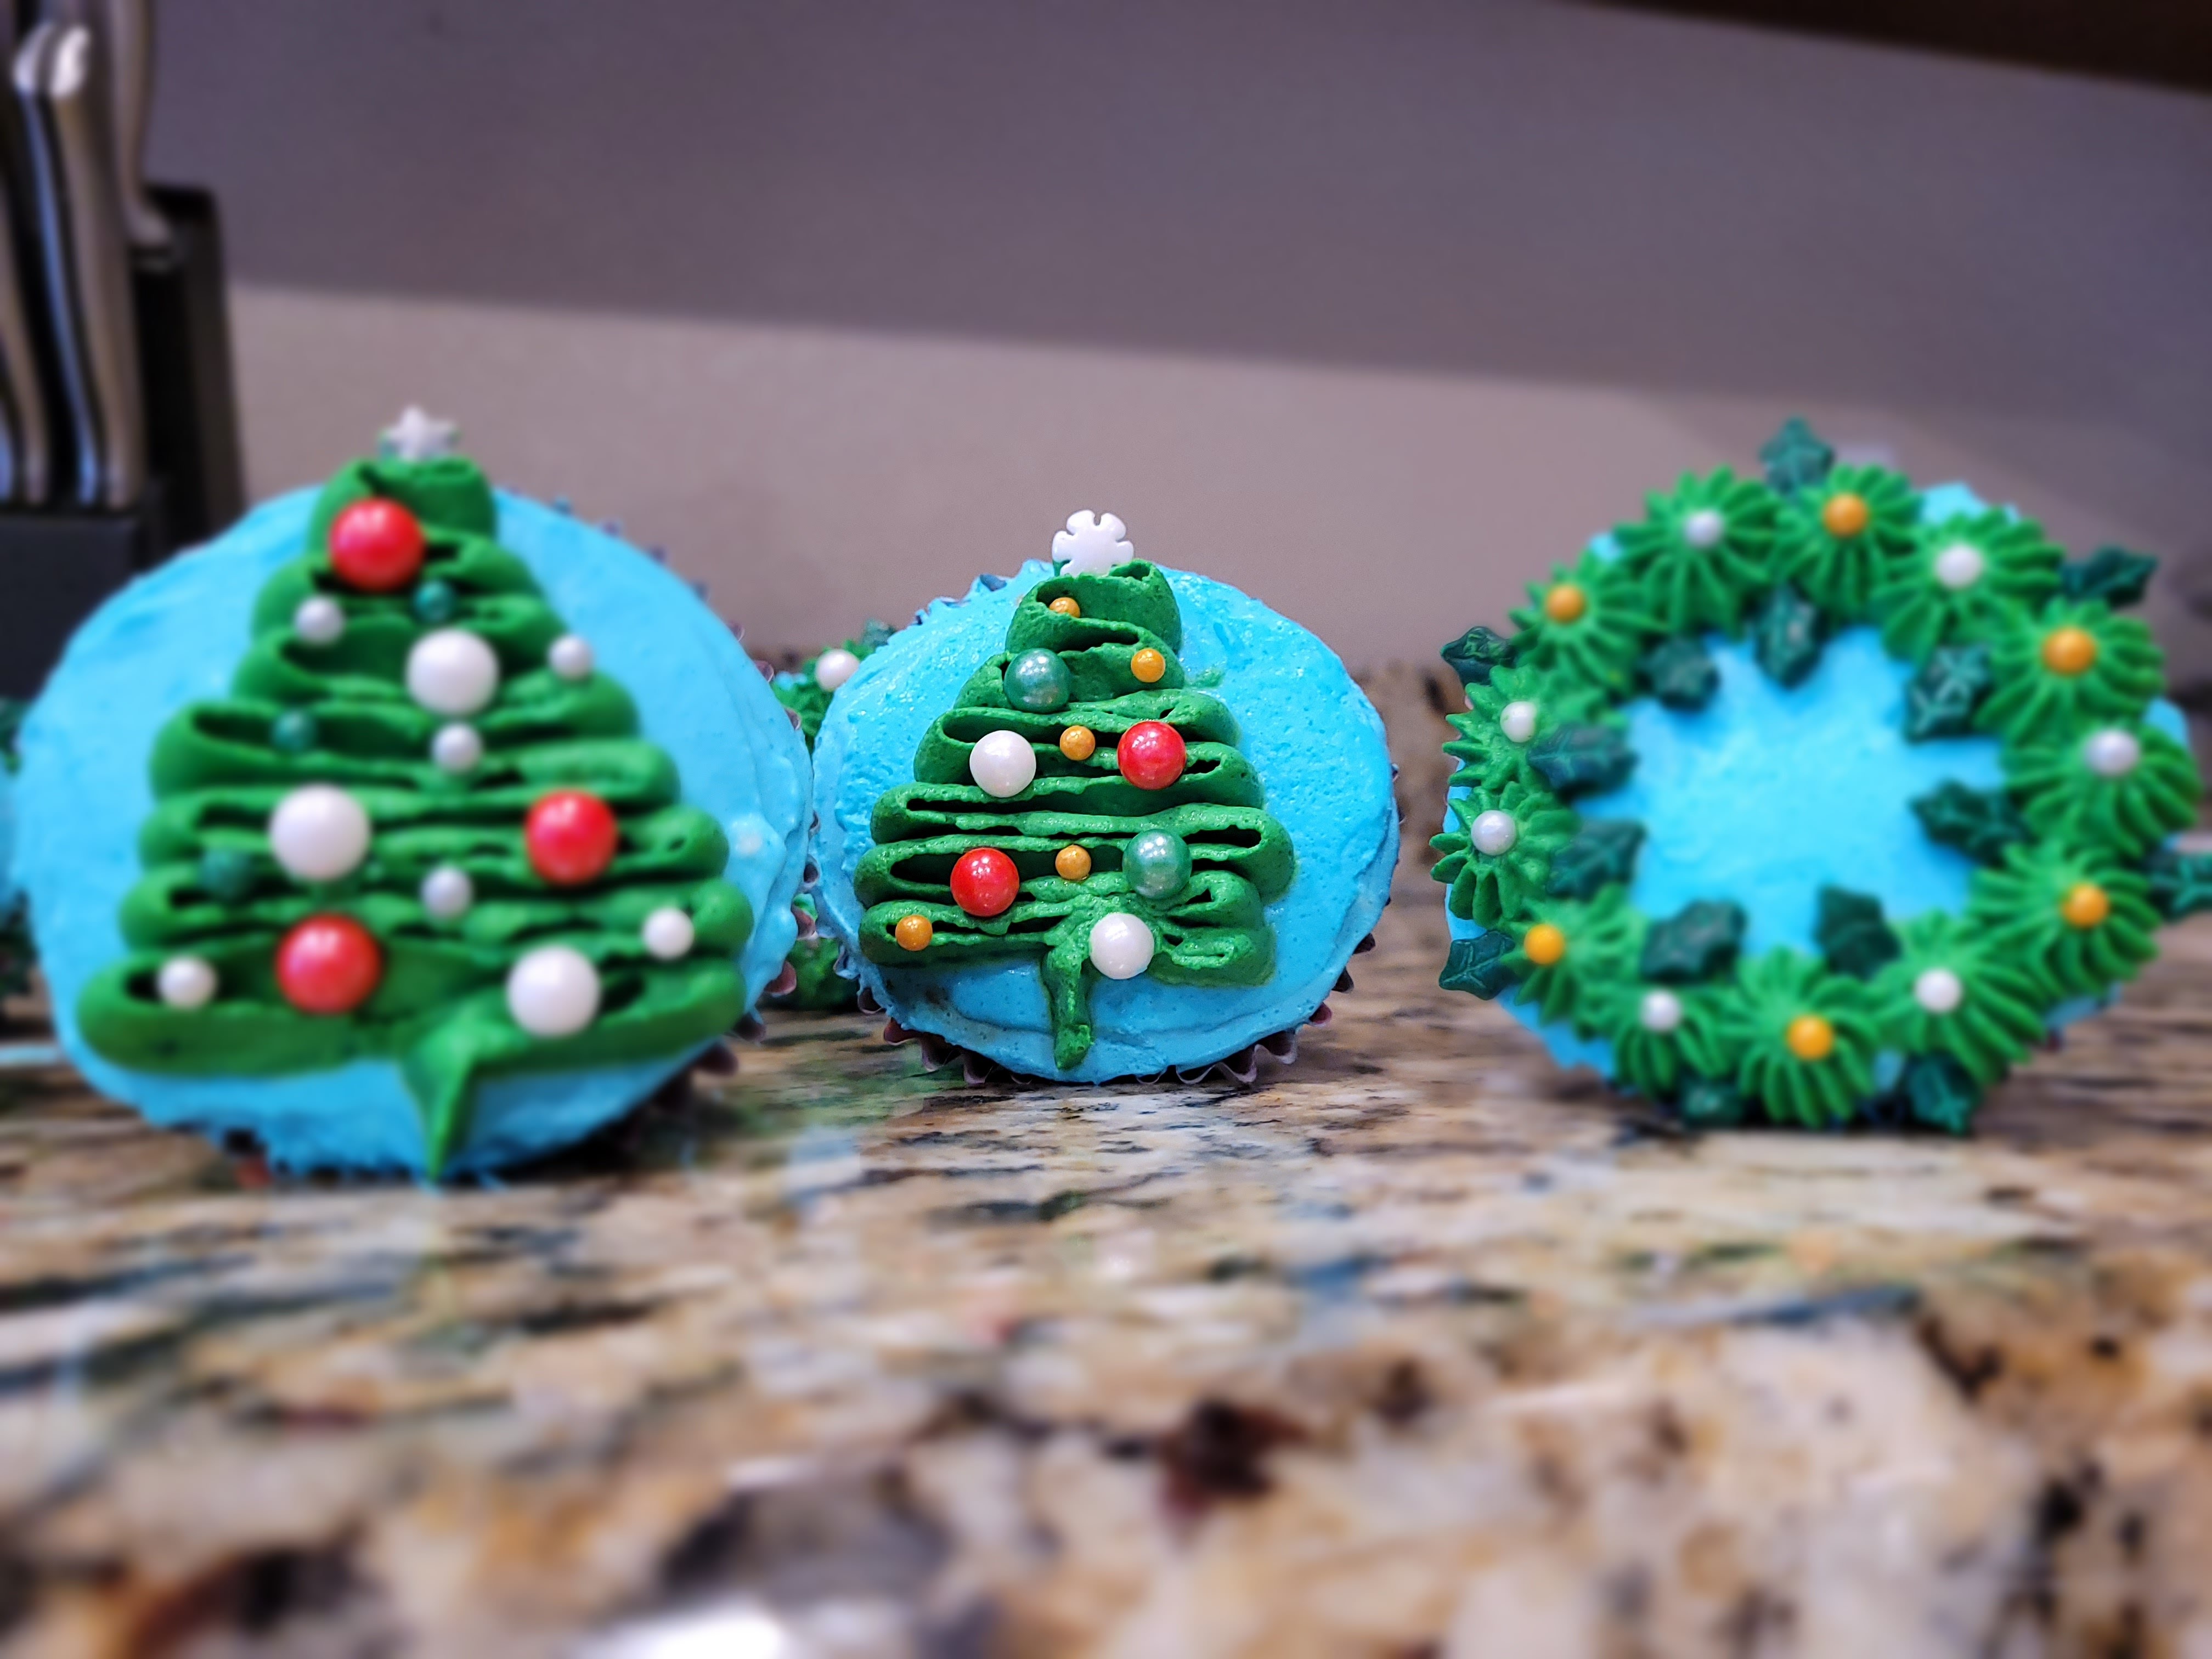
Even better than Bob Ross’s happy little trees, because these are edible. -
Chocolate Peppermint Protein Donuts
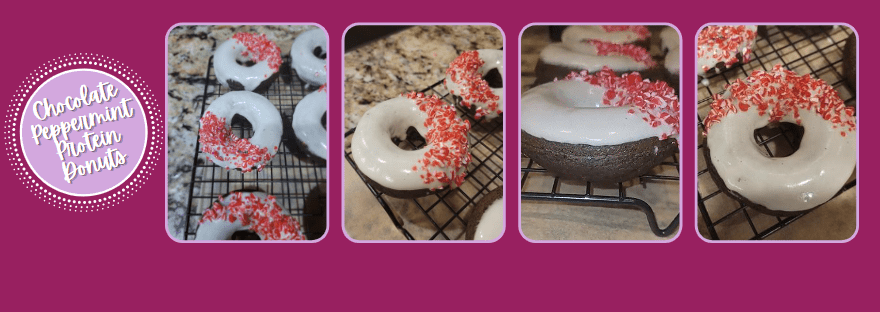
Have you still not tried Empowrd’s gluten free donut mix yet? Because, seriously, just do it. I eat donuts no fewer than two at a time, so having macro-friendly donuts is a must in my world. And tis the season to get pepperminty, so I decided it was time for chocolate peppermint donuts to make their way into this world (and my stomach).
Some things are peppermint to be. Recipe and Instructions
Chocolate Peppermint Protein Donuts
Soft, chocolate donuts with a high protein glaze and peppermint sprinkles
I have not tested this recipe with any other protein powders or mixes, so I cannot guarantee the same results without using the ingredients listed below.
Ingredients
FOR THE DONUTS
*1 bag of Empowrd gluten free protein donut mix
*1 ounce (2 TBS) Hershey’s dark cocoa
*1 large egg
*4 ounces (1/2 c) unsweetened applesauce
*1/2 tsp peppermint extract
*1/2 tsp vanilla extract
*1/2 c + 2 TBS water
FOR THE GLAZE
*30 grams Quest vanilla milkshake protein powder
*30 grams Lakanto powdered monkfruit
*Water to get a drizzly consistency (about 4 TBS)
*40 g peppermint sprinkles/baking chips
Directions
- Preheat oven to 350 and grease a donut pan with cooking spray (can use a muffin tin if you don’t have a pan)
- Mix all donut ingredients well
- Carefully pour batter into the pan until each cavity is 3/4 full (I used a piping bag with the tip snipped to make this easier)
- Bake for 10-12 minutes, until set and springy
- Let donuts cool on a cooling rack for 5 minutes while you make the glaze
- Mix Quest vanilla milkshake protein powder with Lakanto monkfruit. Add water to get a drizzly consistency (about 4 TBS)
- Once donuts have cooled 5 minutes, dip into glaze and top with sprinkles
Nutrition
Macros
10 servings
118 cal/17 c/1.5 f/9.2 p per donut
Enourage-mint in the form of a donut. - Preheat oven to 350 and grease a donut pan with cooking spray (can use a muffin tin if you don’t have a pan)
-
Peanut Butter & Chocolate Mini Protein Cheesecakes
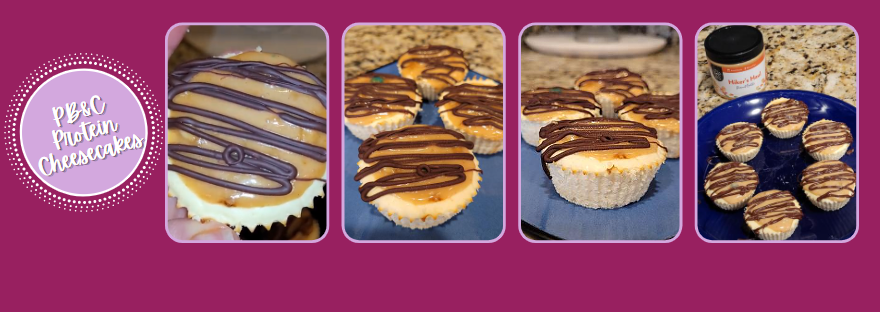
As far as I’m concerned, the time from Thanksgiving through Christmas is a lawless period where anything goes, food-wise (you still need to behave and be a decent human being because, Santa). Since I can eat like a bottomless pit (Only bonus to anxiety? Constant high calorie burn!), I am a big fan of this time of the year. I also still make attempts to eat healthy, so when I want what is essentially a Snickers cheesecake, I gotta figure out how to make that happen for under 800 calories. Enter these mini protein cheesecakes with a peanut butter caramel layer and chocolate drizzle. Through American Dream Nut Butter, all things are possible.
It may not be a Christmas dessert, but you’re gonna want it anyway. Recipe and Instructions
Peanut Butter & Chocolate Protein Cheesecakes
Creamy protein cheesecake meets delicious caramel-peanut-butter topping and chocolate drizzle.
Use can your preferred whey protein and peanut butter; Lakanto can also be replaced with regular sugar, but this will change the macros.
Ingredients
CHEESECAKE FILLING
*150 g (5.33 ounces) 1/3 the fat cream cheese at room temp
*150 g (5.33 ounces) nonfat Greek yogurt
*1 egg
*1 tsp vanilla extract
*20 g Quest vanilla milkshake protein powder
*48 g (1/4 cup) Lakanto granular monkfruit sweetener
PEANUT CARAMEL TOPPING
*28 g (2 TBS) American Dream Hiker’s Haul Peanut Butter (I like this because it has peanut pieces in it, making this like a Snickers bar)
*30 mL (2 TBS) sugar free syrup
*28 g Lily’s semi-sweet sugar free chocolate chips
Directions
- Line muffin tin with 6 silicone cupcake liners and preheat oven to 350.
- Whisk all cheesecake ingredients together in a large bowl until smooth.
- Distribute batter into each cupcake liner and bake for 20 minutes.
- After 20 minutes, turn off the oven and crack the door, leaving the cheesecakes in the oven for an additional 10 minutes to finish baking.
- Place cheesecakes on a cooling rack (to speed up, place this in the fridge for 1 hour or freezer for 30 minutes).
- Once the cheesecakes are totally cool and set, remove from silicone liners.
- Mix the peanut butter and syrup to form the caramel layer, then spread on top of each cheesecake.
- Melt chocolate chips in a clean bowl for 30 seconds at 50% power, stir, and repeat until melted.
- Drizzle chocolate on top of caramel layer with a spoon or in a piping bag.
- Feel free to add peanuts on top! Place in fridge to allow chocolate to set and caramel to firm up.
- Keep leftovers in fridge in an airtight container, and enjoy!
Nutrition
Macros
6 servings
140 cal/6 c/9.2 f/9.1 p per cheesecake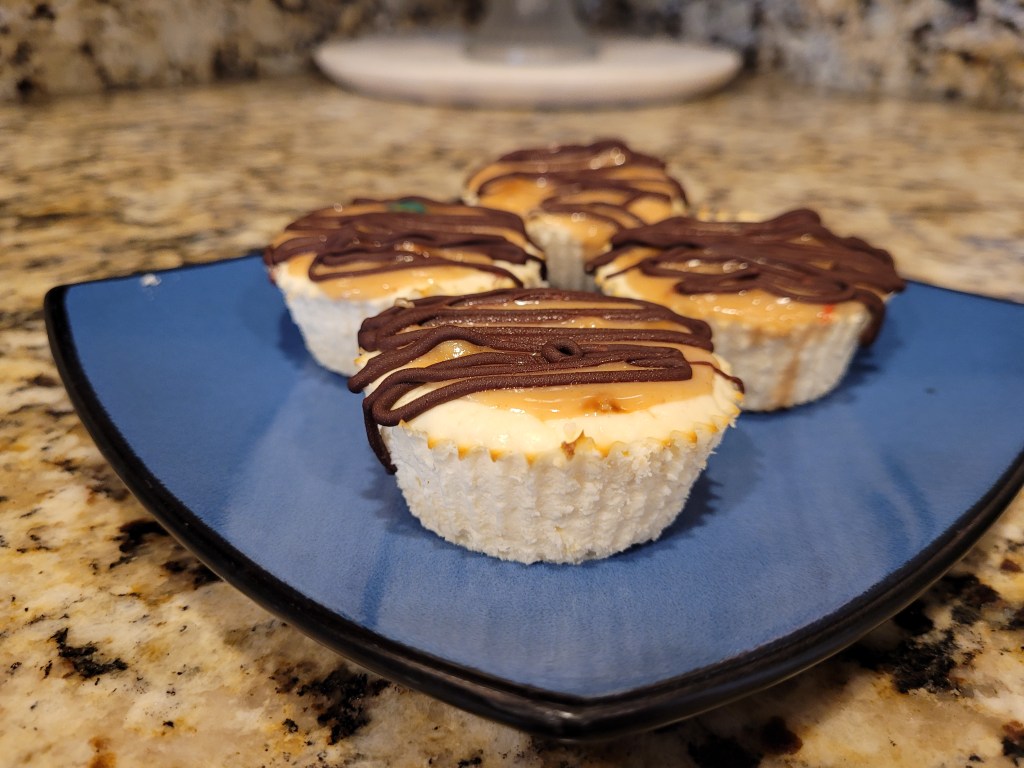
You’re not yourself when you’re hungry; grab a Snickers cheesecake. 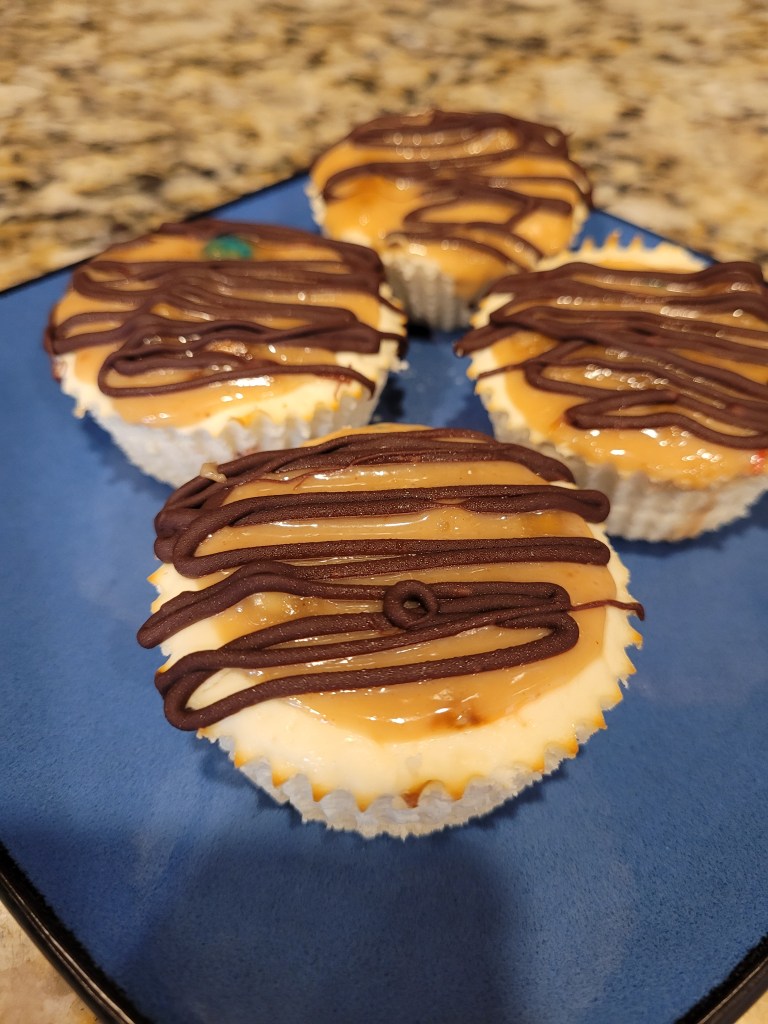
I mean, ’tis the season for awesome desserts. - Line muffin tin with 6 silicone cupcake liners and preheat oven to 350.
-
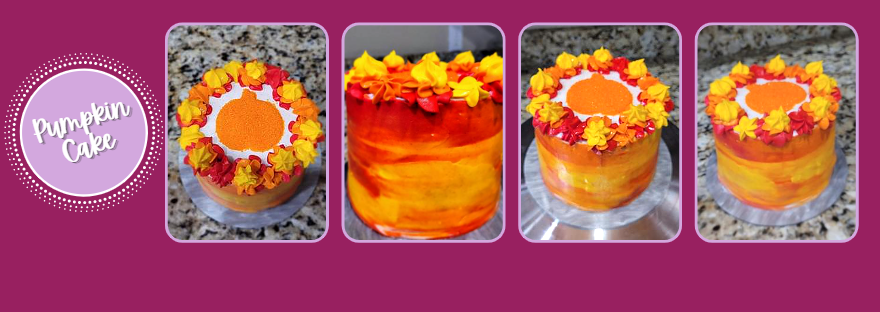
I Pump-can’t Believe It
Jump to recipe and instructions
Let me preface this blog by saying the cake I made this weekend did not at all turn out the way I had envisioned and started it, but we’ll just call it a happy accident because after a quick “PIVOT!” a la Ross Geller, it is still a cake, and it is still edible. My oven has been on the fritz for a few weeks…it does this adorable thing where it randomly switches from bake to broil and tries to burn the house down. The oven we ordered to replace it keeps getting delayed, so I spent a solid 30 minutes parked directly in front of my arson-loving oven, watching it like a very hungry hawk, to make sure my cake didn’t get scorched. Watching a cake bake is about as interesting as watching paint dry, but we made it. I thought I had nowhere to go but up, but as I am still recovering from a bout of Covid that got me a few weeks ago, “Covid brain” has since been a real issue. I now regularly confuse TV remotes, lose track of what I’m doing while I’m doing it, and also forget really important steps in cake decorating. As someone who was blessed with a load of smarts, being dumb is just not something I’m comfortable excelling at, so hopefully my fog clears soon and I’m back to being my witty, sarcastic self soon. Until then, I at least have a really delicious cake to cry into.

Please send me your gourd vibes. This very orange, very fall cake is a pumpkin spice cake with pumpkin spice cream cheese frosting. If you’re thinking, “Isn’t that like…a lot of pumpkin spice, even for a basic white girl?” I can tell you I prefer a subtle pumpkin spice flavor, so this isn’t a ‘PSL punched you in the mouth’ situation. It’s a hint of pumpkin spice, or a whisper of Autumn, if you will. It’s a delicious, soft cake with a nice, zippy cream cheese frosting. Did I mention it is only 239 calories a slice for 10 slices total? I know, I’m not pump-kidding you.
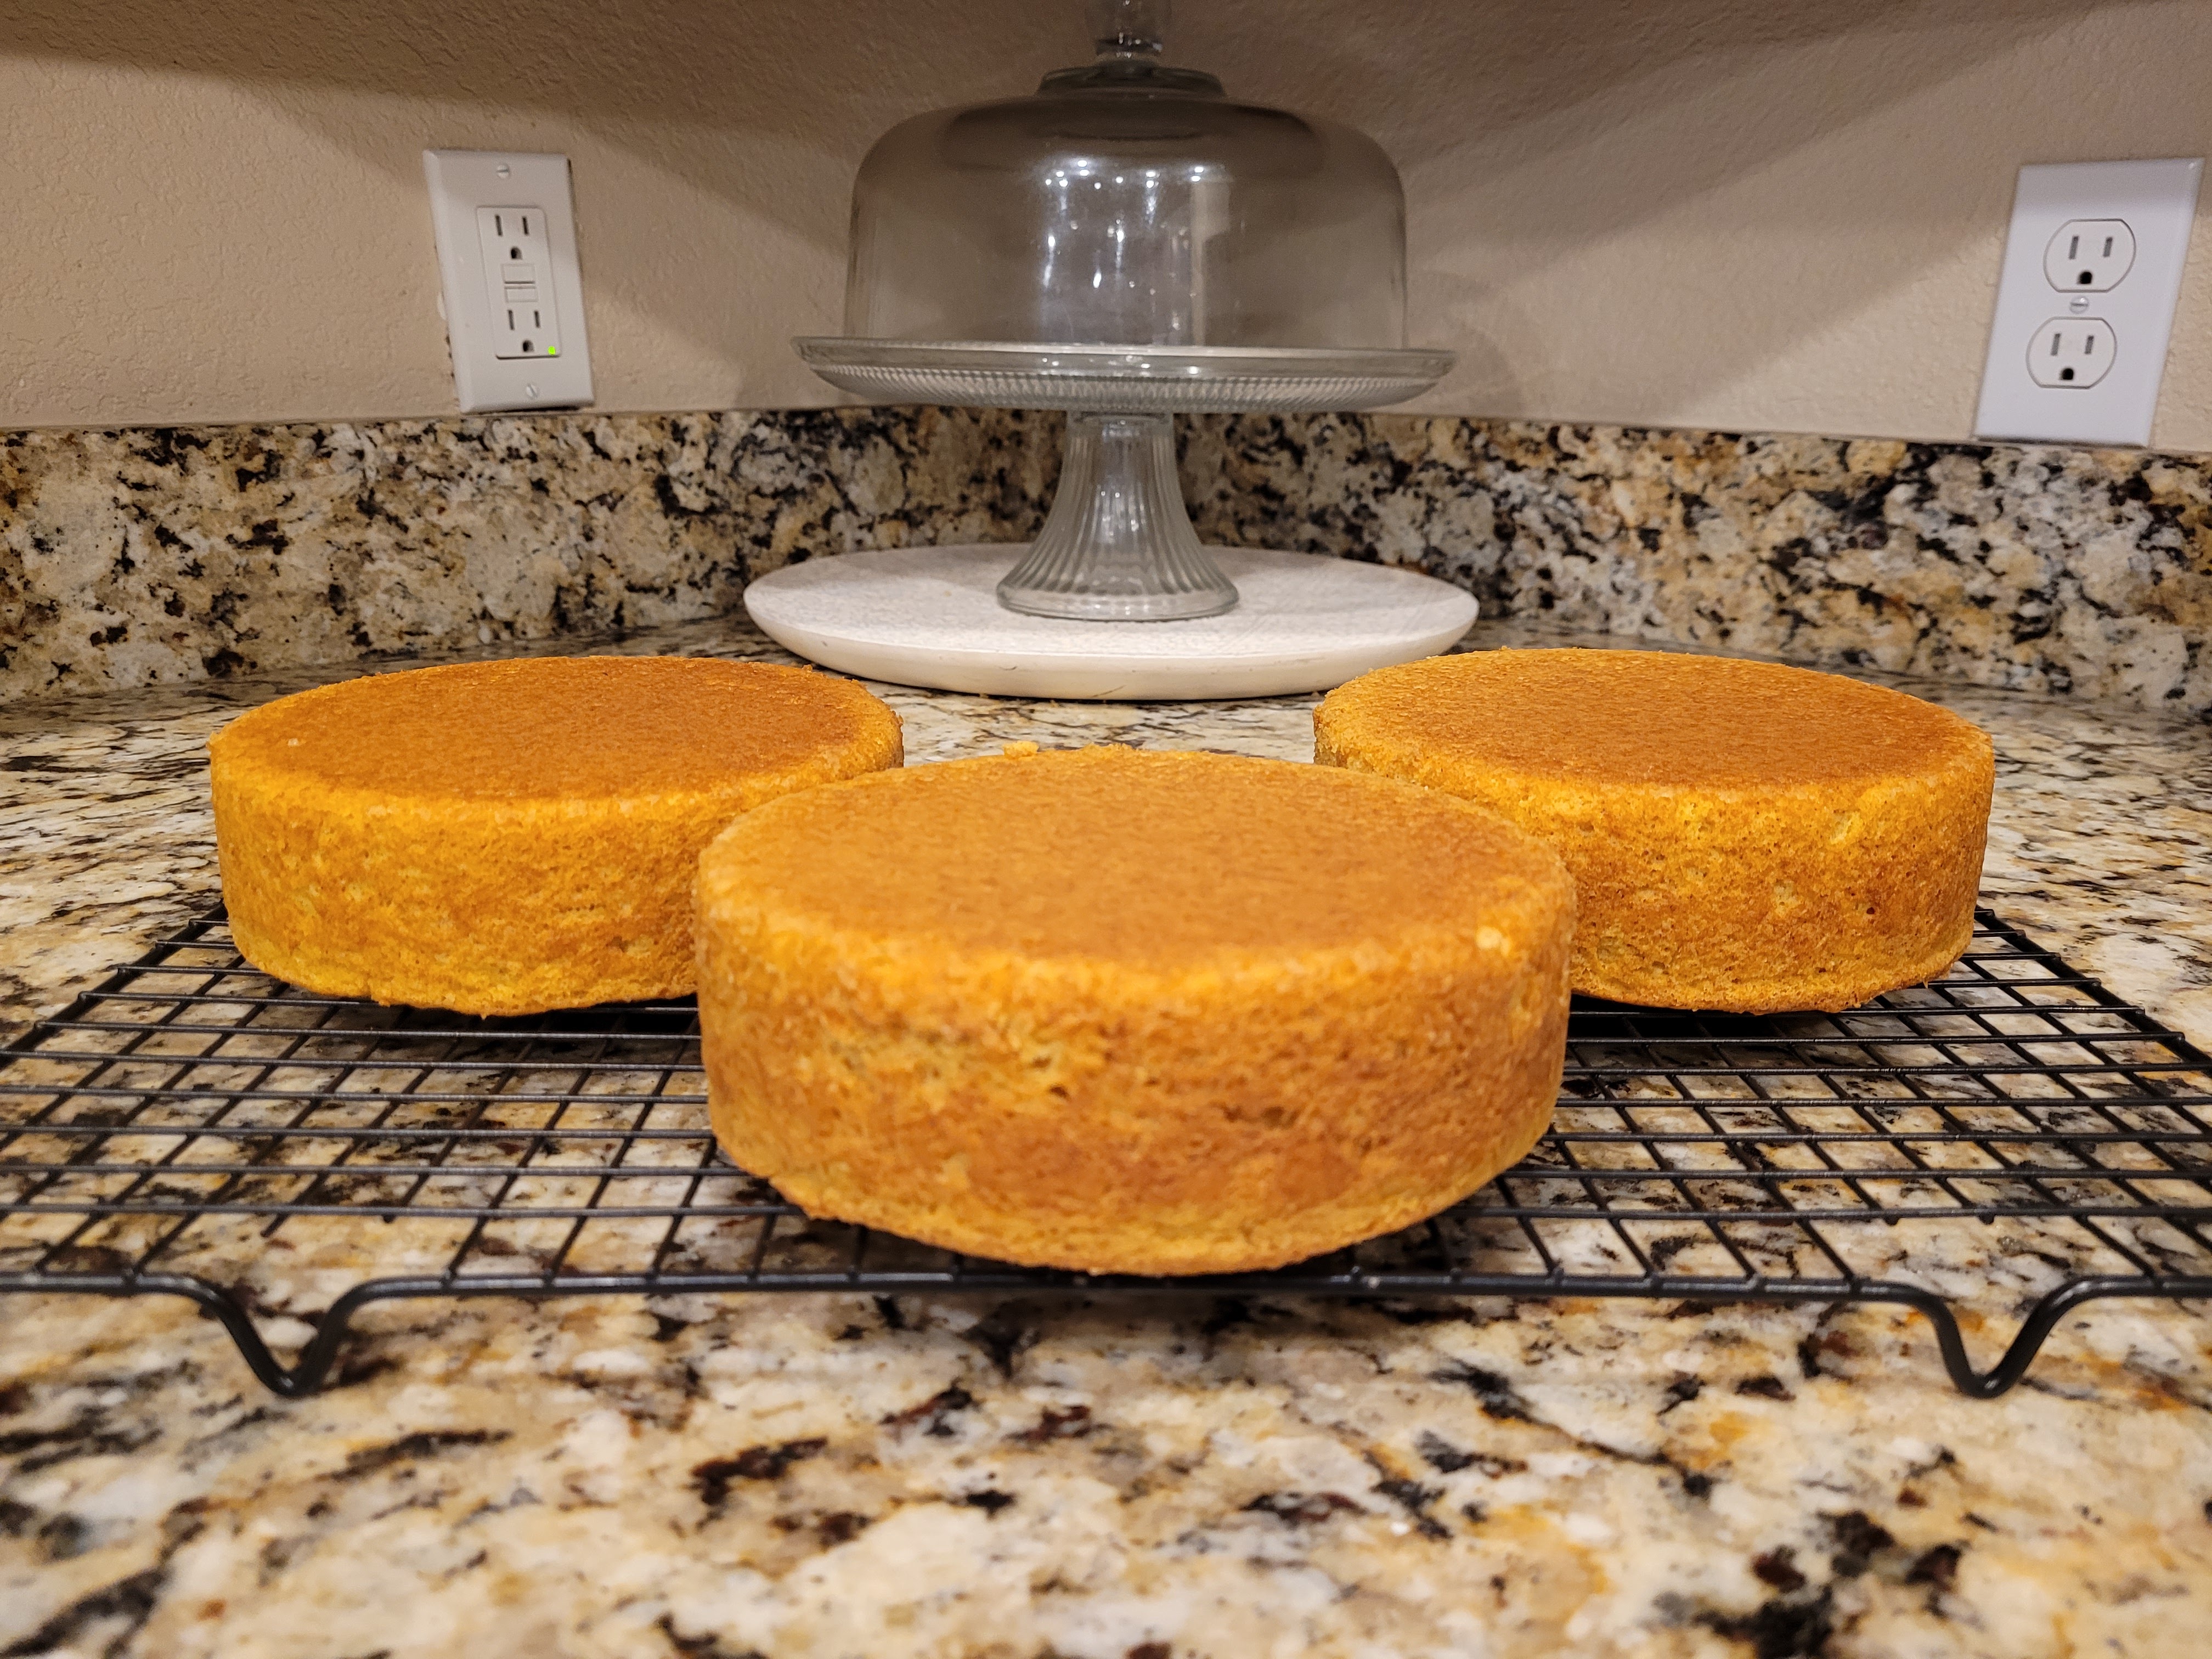
Guys, I think Covid brain has improved my terrible pun game. This cake is so thick, but surprisingly not dense at all. To make this light, fluffy beauty, I used:
- 1 box Pillsbury gluten free yellow cake
- 3 eggs
- 70 grams (1/3 cup) unsweetened applesauce
- 120 grams (1/2 cup) pure pumpkin
- 1.5 tsp pumpkin spice
- 1 cup of fat free milk
The Pillsbury GF cake mix is my new favorite homie. It bakes well with adaptations and doesn’t go stale in under 24 hours. I mixed all my ingredients together on low for 30 seconds before switching to medium-high on my stand mixer for 2 minutes. I prepared three 6-inch round pans with cooking spray and bake even strips before evenly distributing the batter and baking at 350 for 30 minutes whilst sitting directly on my kitchen floor in front of my oven because I am seriously committed to that cake lyfe. Always let your cakes rest in the pan for 10 minutes before turning out to cool completely on a cooling rack. Level them if needed after they have cooled.
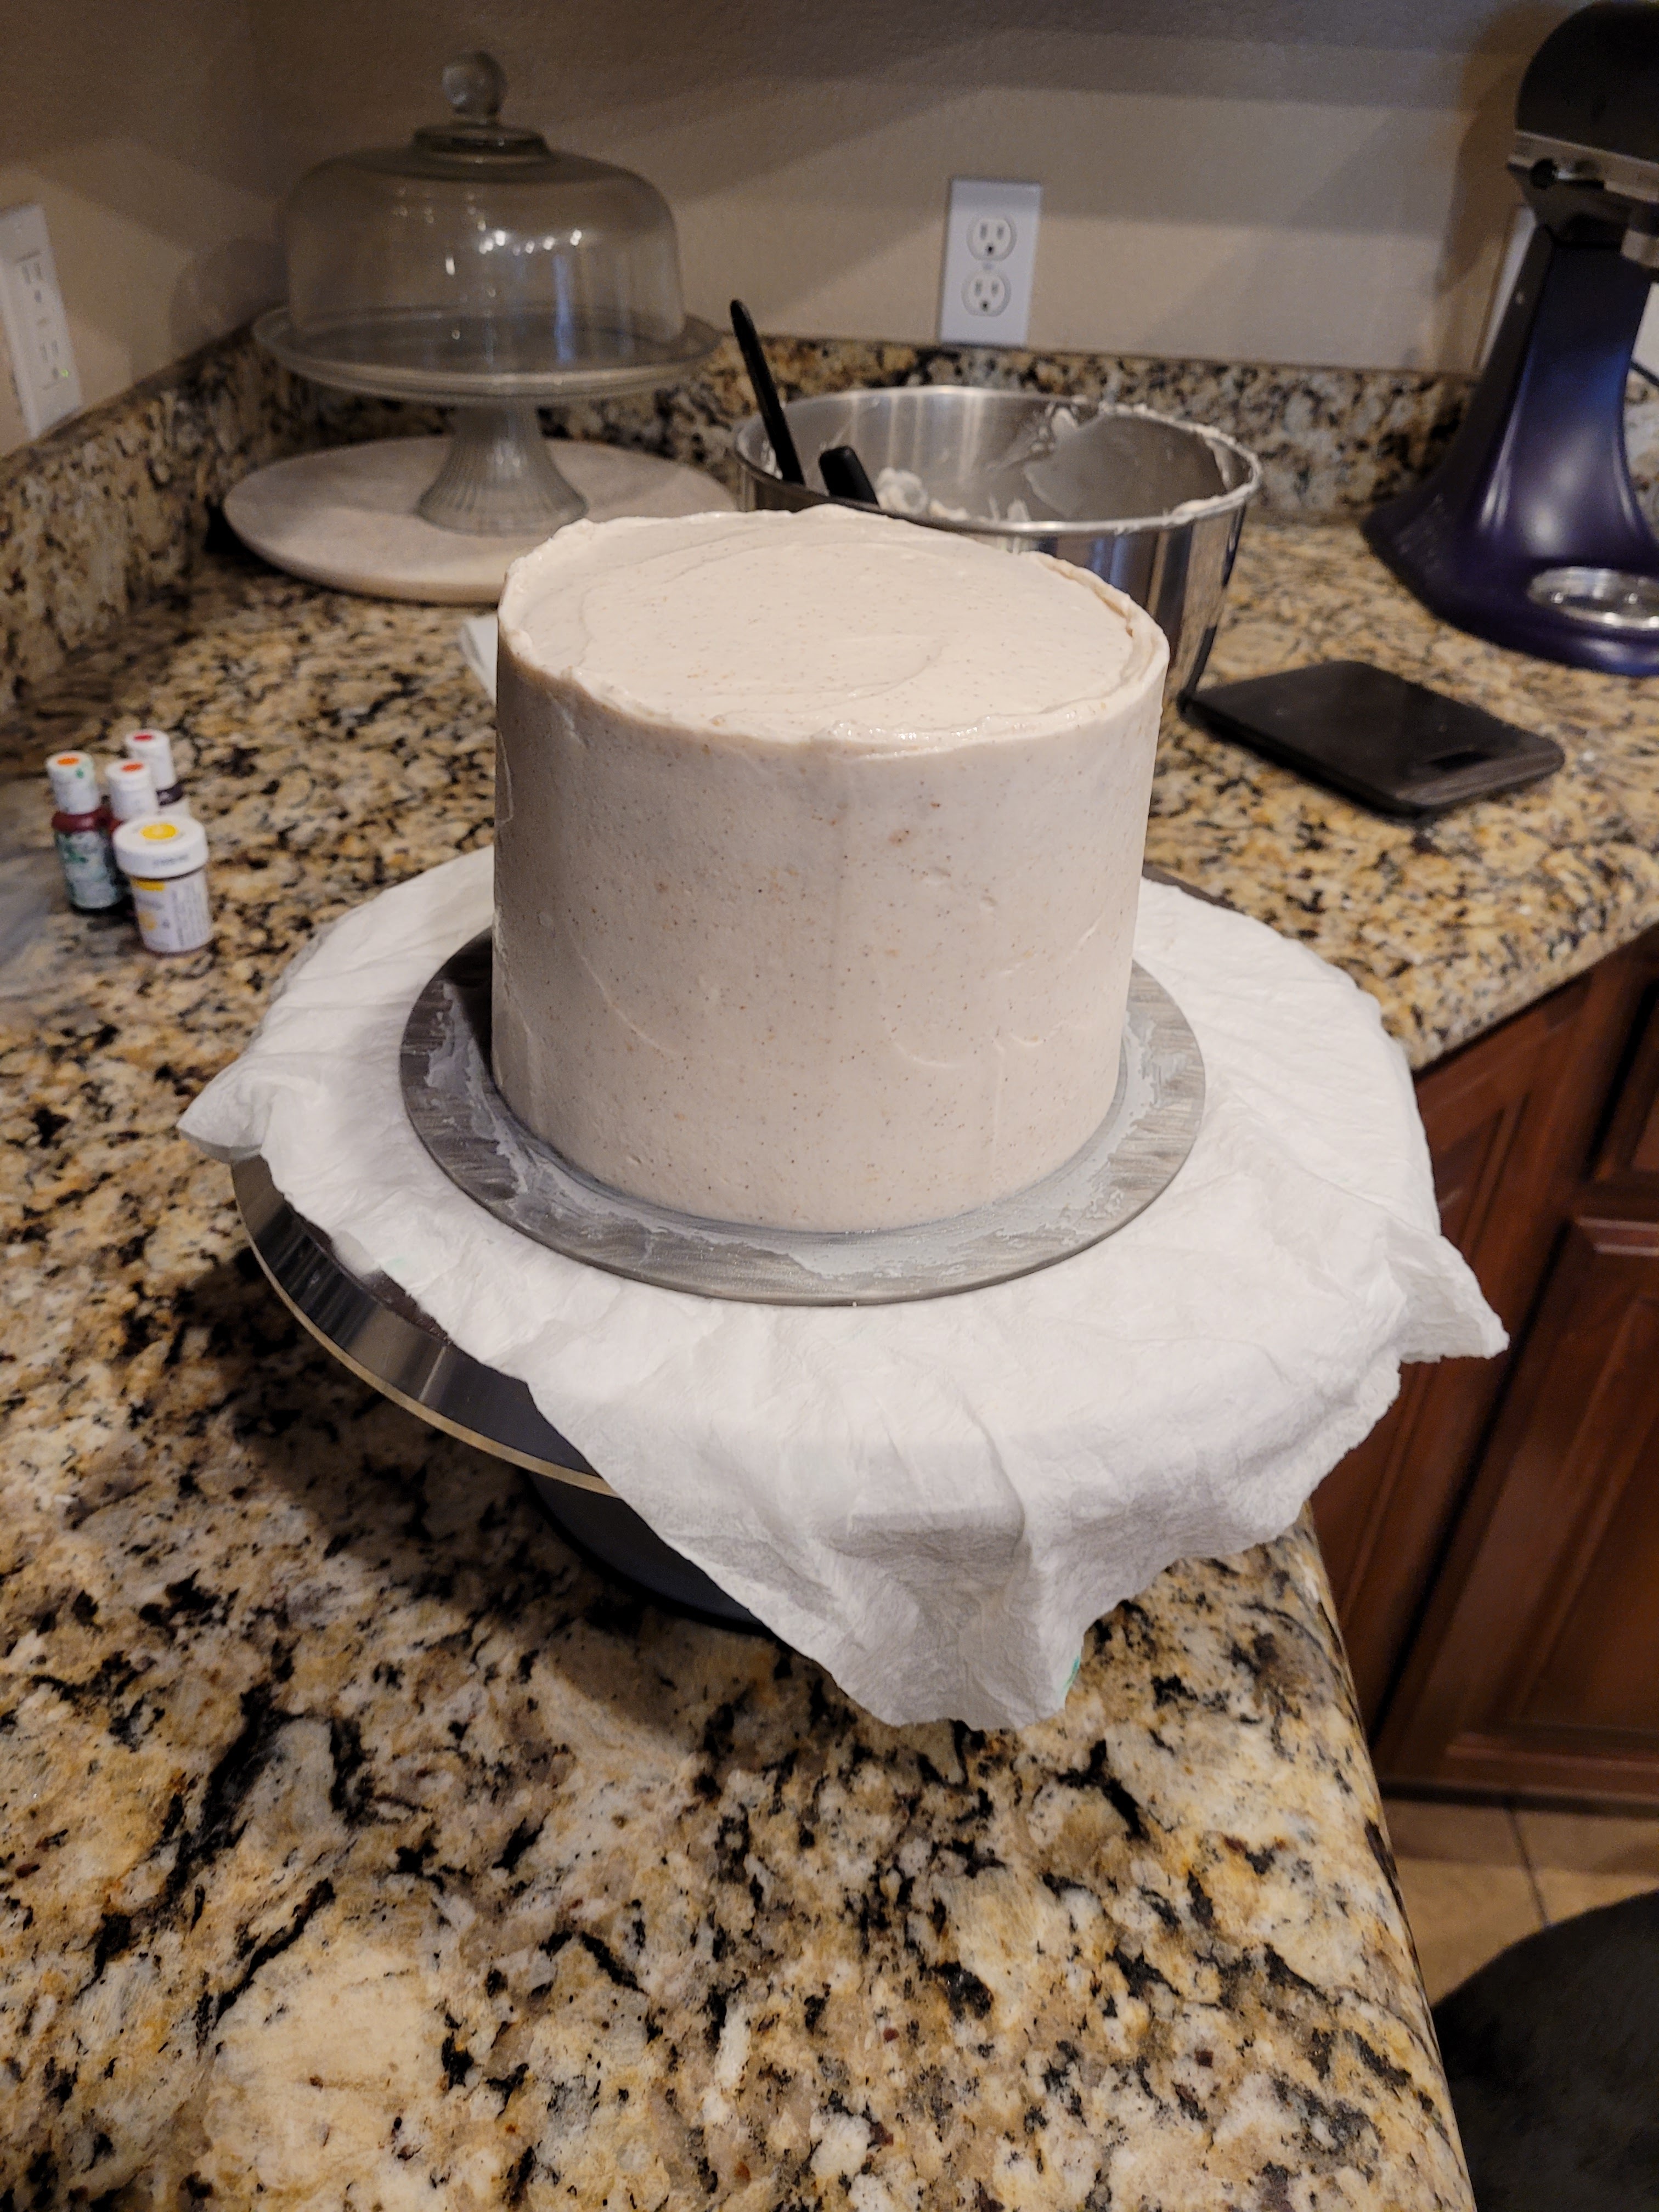
Before things went terribly wrong. This poor, innocent cake. To make the frosting, you need:
- 226 grams (8 ounces ) 1/3 the fat cream cheese, softened
- 282 grams (1 1/4 cups) fat free Greek yogurt, strained overnight
- 16 ounces (4 cups) Lakanto powdered monkfruit sweetener
- 1 tsp clear vanilla extract
- 1/2 tsp pumpkin spice
- 2 TBS fat free milk
- Gel dyes in red, orange, and yellow
Start by mixing cream cheese and yogurt until fully blended, then add in half the monkfruit, vanilla, pumpkin spice, and half the milk. Mix well, then add in remaining monkfruit and milk. Frost your entire cake before you dye any of the frosting. Once you’ve done this, place your cake in the freezer to firm up for 30 minutes and split your remaining frosting into three bowls and dye one bowl red, another orange, and another yellow.
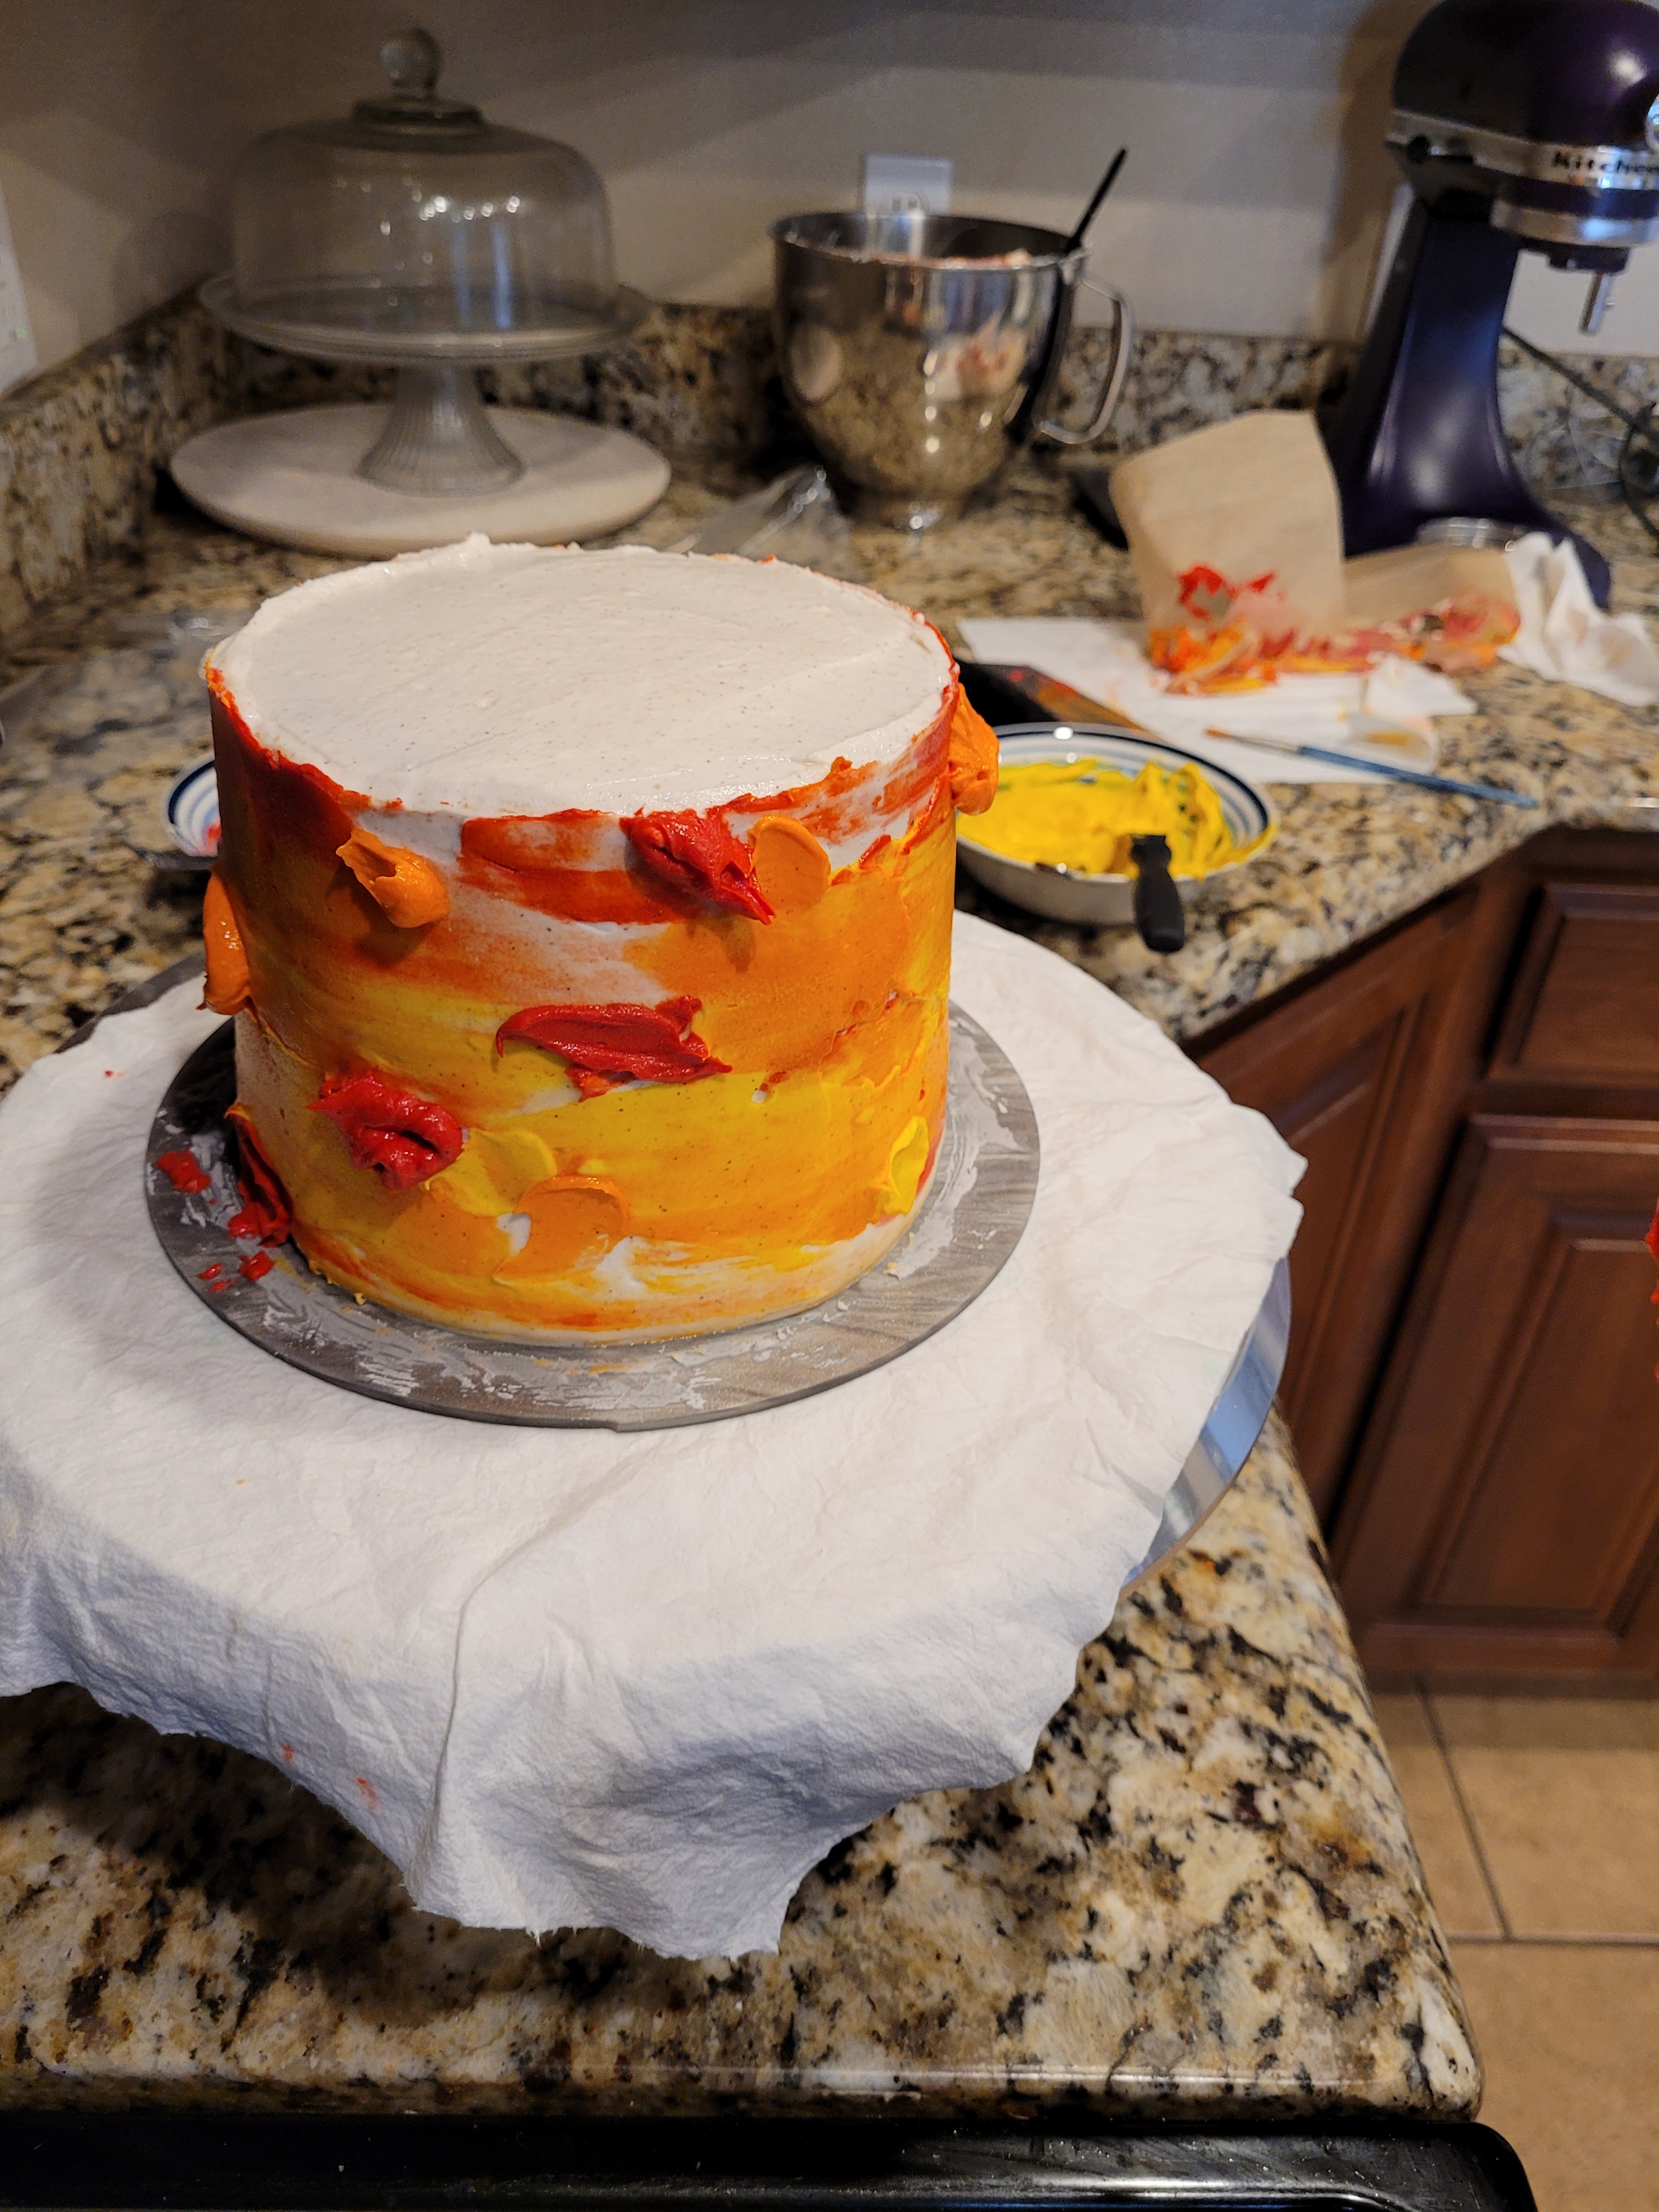
I just want ketchup and mustard, for some reason? I had originally taken time to make and cut out a cute maple leaf template to use on this cake, applied it, frosted it, and PROMPTLY FORGOT TO FREEZE THE DANG CAKE before removing the template, so the base frosting all ripped off my cake when I removed the template because it was too soft. Instead of crying and throwing in the fall-decor towel (okay, maybe there was still some crying), I decided to just turn it into a watercolor cake even though I absolutely hate the colors orange and yellow. I dotted orange, yellow, and red frosting at random all over the sides of the cake using a few angled spatulas, then took my bench scraper to smooth it out and blend the colors.
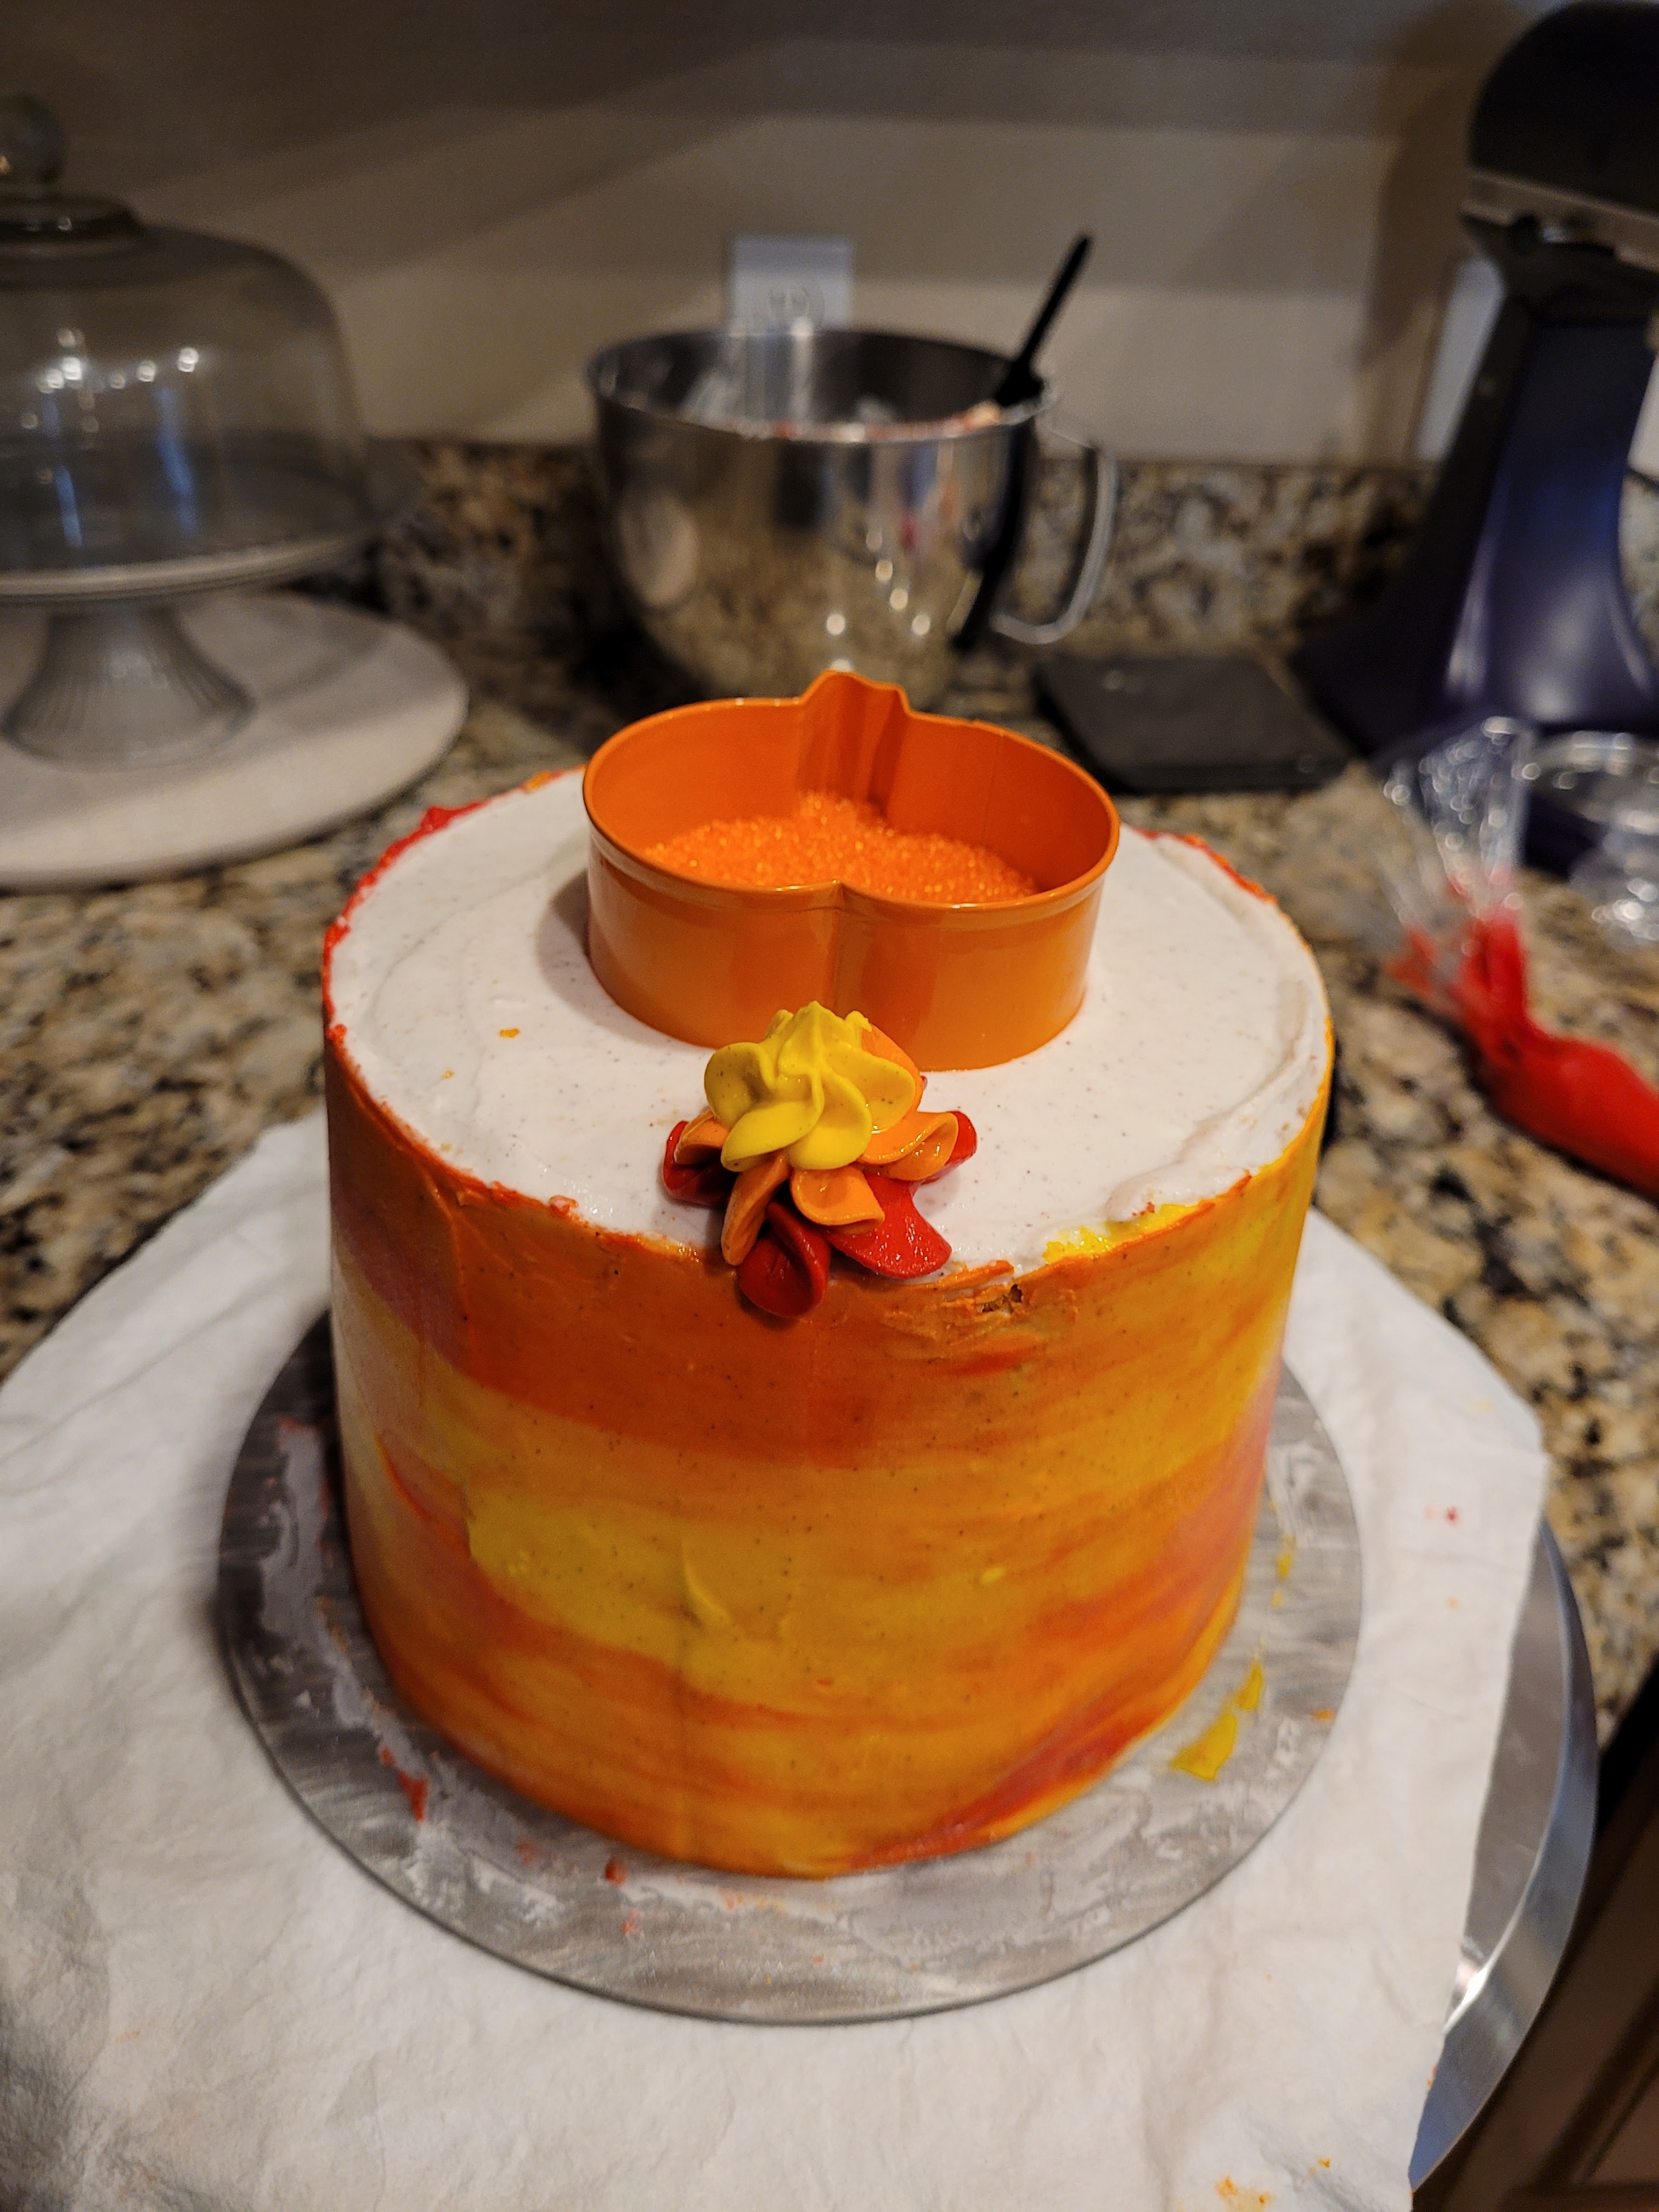
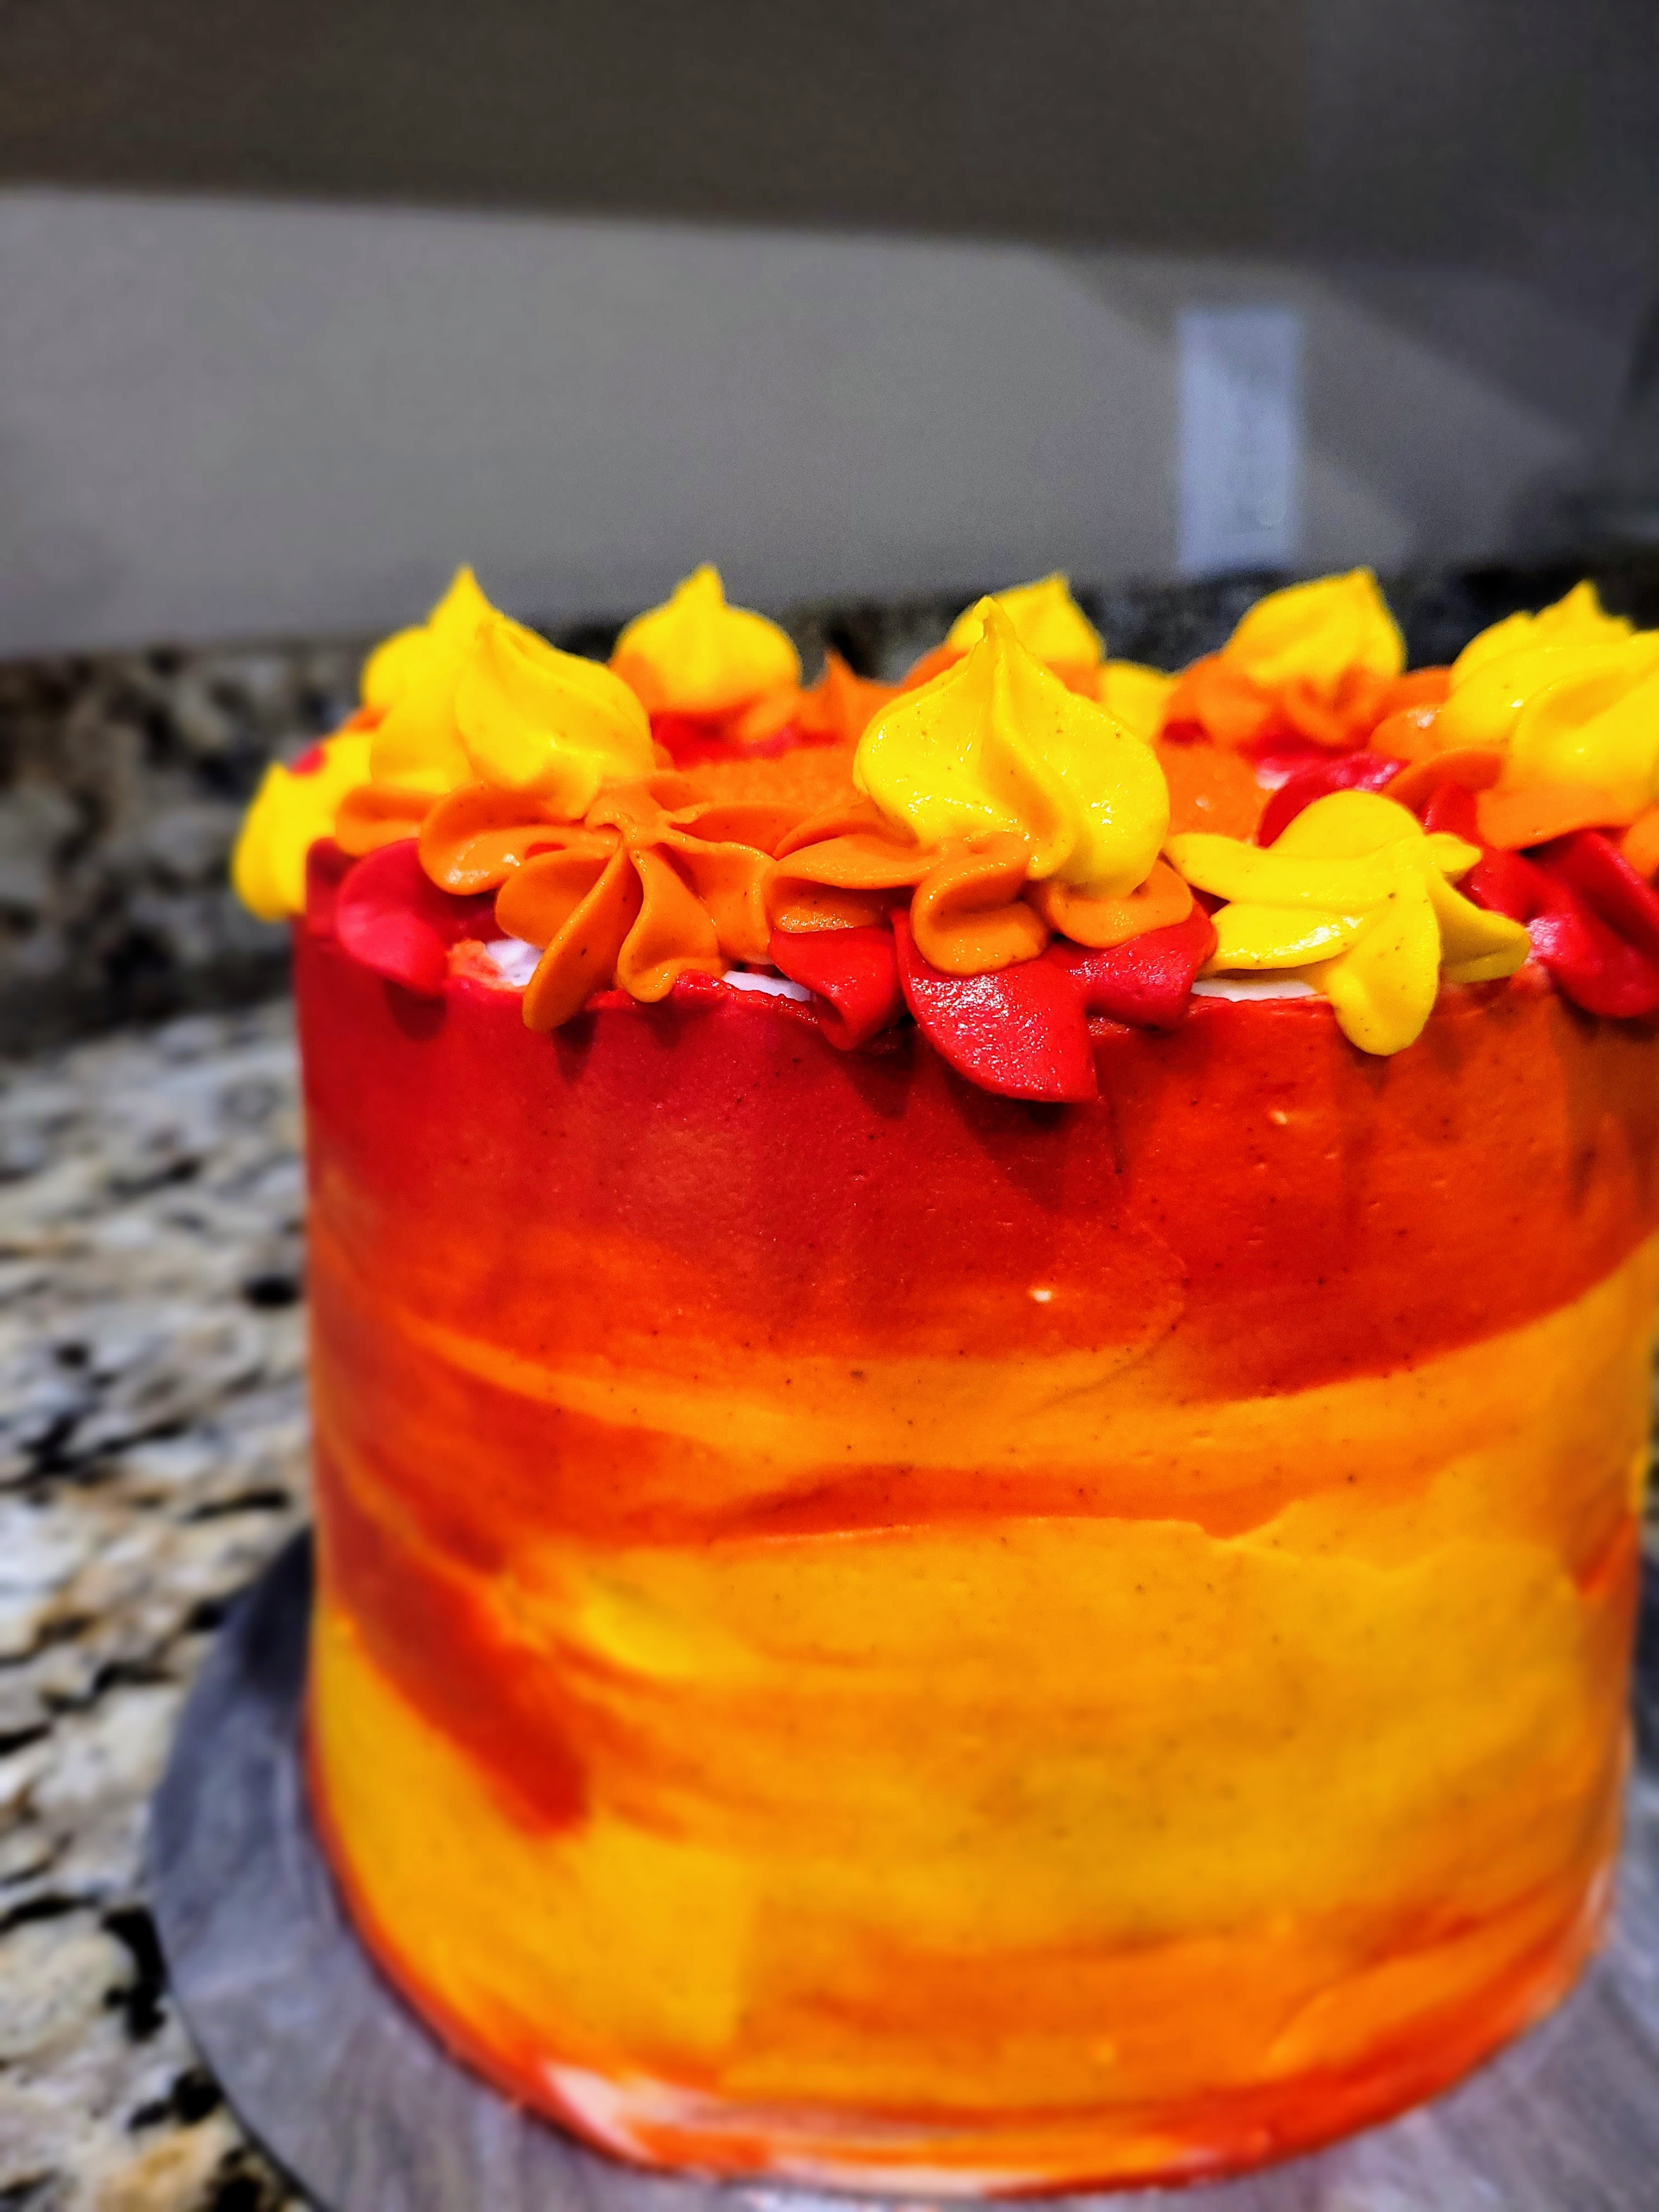
Thanks, I hate it. I knew it was going to take some glitter for me to at least tolerate looking at this cake, which I’ve named “The Gourd, the Bad, and the Ugly,” so I grabbed my pumpkin cookie cutter and affixed it to the center of the cake top. I used gentle pressure to ensure it was firmly into the frosting, then poured orange glitter into the cookie cutter, using a food-safe paintbrush to push the glitter into the frosting and the nooks and crannies at the top of the cookie cutter. I left this in while I worked on my border. I divided my remaining frosting into three piping bags, each fitted with a 1M tip, I piped a large red star, then a medium-sized orange star on top of this, and a small yellow star on top of that to create my triple layer topper. I repeated this all over the cake and filled in little gaps with small stars in different colors.
I at least love how that turned out, but would love it more with a color palette that didn’t scream McDonald’s. I placed my cake in the freezer for 30 minutes to set and firm, then removed the pumpkin cookie cutter to reveal an adorable cake top:
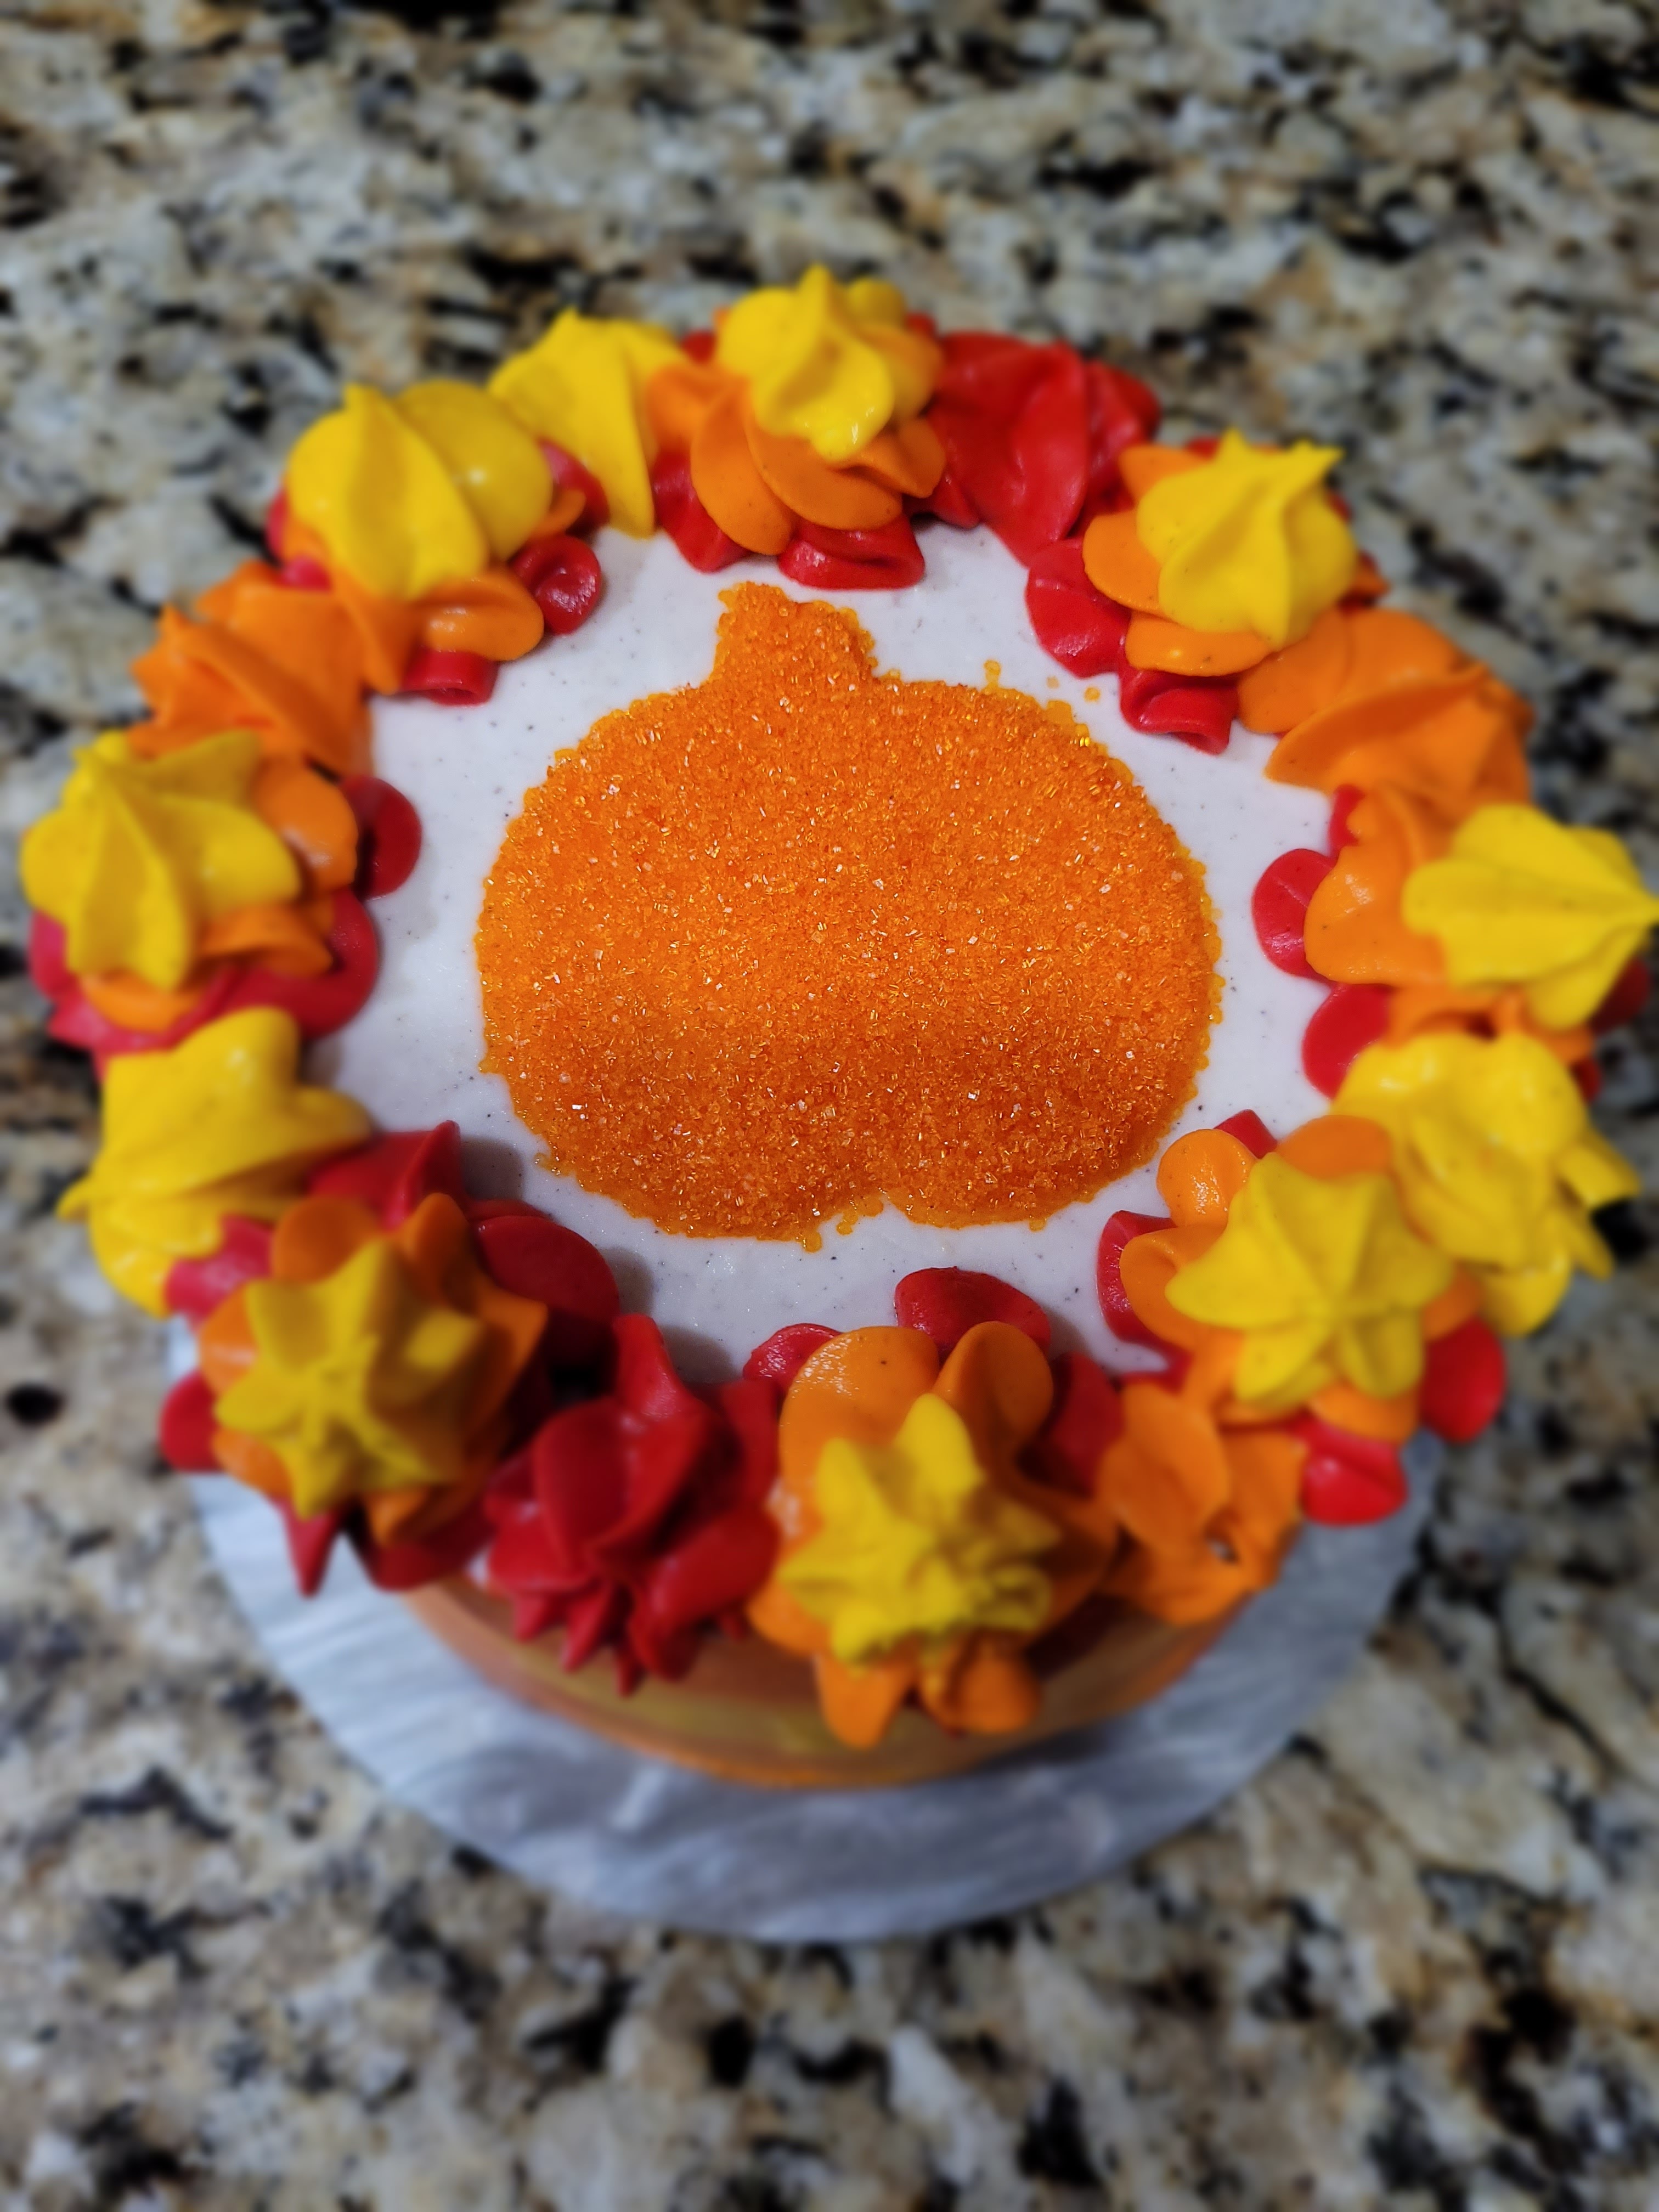
I am gourding every slice because it is that good. Share?! Pft. I may hate that the sides of this cake look like the top of a hamburger bun after you’ve spread ketchup and mustard on it, but I love the top…it turned out 100% as I had originally planned, so Covid didn’t take everything from me (just my ability to think rationally and breathe through my nose). Really glad I did NOT lose my sense of taste because this cake is firing on all fall cylinders. The added pumpkin makes the cake so soft, and the small amount of spice gives it a nice, warm flavor without being too much. It makes me so happy that I momentarily forget I’ve gone stupid, so truly, it’s a miracle worker. Take it to your Thanksgiving family dinner, and you won’t have to answer any ridiculous questions or hear about your uncle’s political leanings because everyone will have a mouthful of cake. You’re welcome. Follow me for more hot tips. ‘Til next time, my fellow eaters!
Recipe and Instructions
Pumpkin cake with cream cheese frosting
Fluffy, pumpkin-spiced cake with tangy cream cheese frosting
If not gluten free, use any kind of yellow cake mix. Greek yogurt can be replaced with 1/2 cup of softened butter, and Lakanto can also be replaced with regular powdered sugar.
Ingredients
CAKE
*1 box Pillsbury gluten free yellow cake
*3 eggs
*70 grams (1/3 cup) unsweetened applesauce
*120 grams (1/2 cup) pure pumpkin
*1.5 tsp pumpkin spice
*1 cup of fat free milk
FROSTING
*226 grams (8 ounces ) 1/3 the fat cream cheese, softened
*282 grams (1 1/4 cups) fat free Greek yogurt, strained overnight
*16 ounces (4 cups) Lakanto powdered monkfruit sweetener
*1 tsp clear vanilla extract
*1/2 tsp pumpkin spice
*2 TBS fat free milk
*Gel dyes in red, orange, and yellow
Directions
- Apply bake even strips to three 6-inch round cake pans and spray with cooking spray; preheat oven to 350.
- Mix all cake ingredients on low for 30 seconds before switching to medium-high for 2 minutes.
- Pour into prepared pans and bake for 30 minutes.
- Let rest in the pan for 10 minutes before removing to cool on a cooling rack completely.
- Whip the cream cheese and yogurt in a stand mixer on medium high for 2-3 minutes until fluffy and smooth.
- Add in half the Lakanto, the vanilla, pumpkin pie spice, and 1 TBS milk, mixing well.
- Add in remaining Lakanto and milk and blend until smooth.
- Place one cake layer face down on a cake plate and top with frosting, smoothing out to the edges of the cake.
- Add a second cake layer face down on top of this and top with frosting, smoothing out to the edges of the cake.
- Add final cake layer face down on the top of this and top with frosting, pushing over to the sides of cake, and completely frost the sides as smooth as you can.
- Freeze the cake for 30 minutes while you mix the remaining frosting red, orange, and yellow.
- Add random dots of each color onto the sides of the cake with an angled spatula, and then smooth out with the sides of an angled spatula or bench scraper.
- Add more color in any areas that need it and smooth.
- Place a pumpkin cookie cutter or pumpkin cut out on wax or Parchment paper on top of the cake and secure gently; pour orange glitter into this and press down with a food-safe paint brush. Leave this on the cake.
- To make the border, place frostings in piping bags fitted with 1M tips.
- Pipe a large red star as the base, a medium orange star on top of this, and small yellow star on top of that, repeating around the top of the cake and filling in any smaller spaces with stars piped in various colors.
- Set cake in freezer for 30 more minutes, then remove the cookie cutter from the top.
- Slice and enjoy! Keep leftovers covered and in the fridge.
Nutrition
Macros
10 servings
239 cal/36.5 c/6.7 f/8.1 p per slice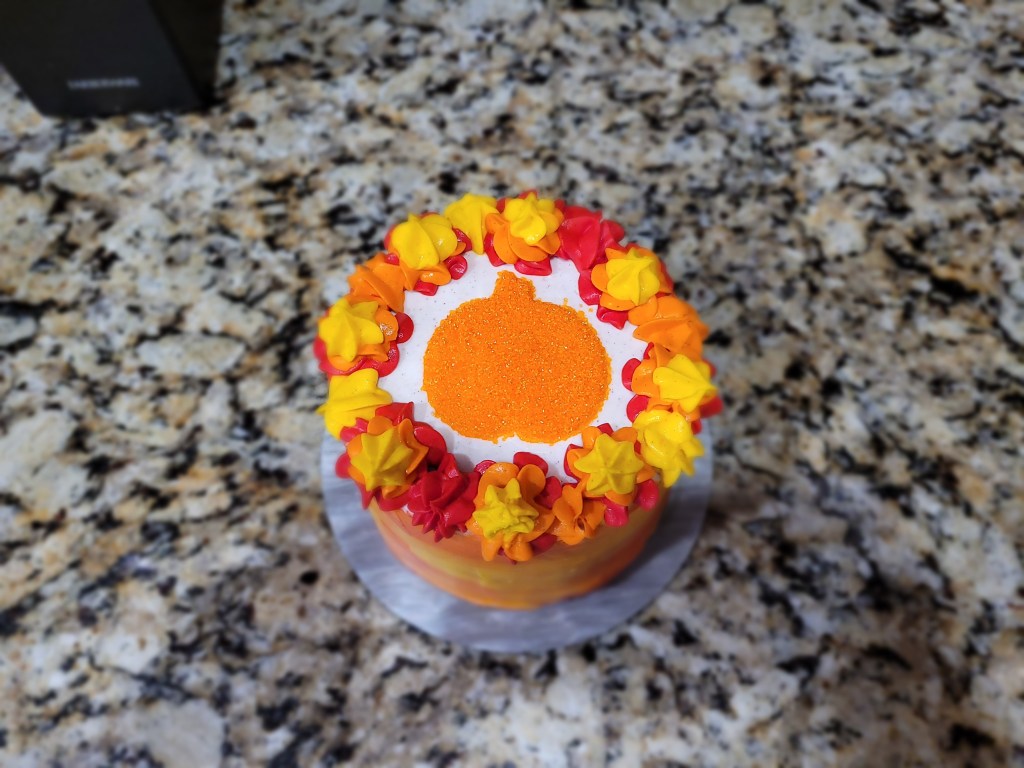
Orange you pumped for Thanksgiving? -
No-Bake Apple Pie Cheesecake
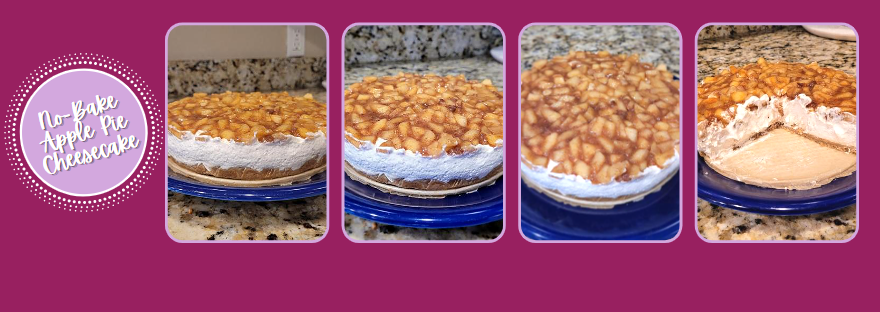
Trying to decide whether to make a pie or cheesecake for Thanksgiving next week? Why not both? This no-bake apple pie cheesecake also doesn’t take up any prime real estate in the oven, making it a win-win in the official “Turkey Day Dessert Table” entries. I must also mention it is super easy to throw together, so while you’re busy getting apple sauced on the holiday, this is a fool-proof (or merlot-proof?) dessert. The cheesecake layer is light, sweet, and fluffier than a float at the Macy’s Day Parade. And that apple pie topping? Delicious to the core. It adds a nice little bit of spice and tartness to balance out the cheesecake, and well, enough of me talking about it since I really want to be eating it. Take this to your holiday festivities and remind everyone why you’re the favorite child.
It’s definitely the apple of my pie. Recipe and Instructions
No-Bake Apple Pie Cheesecake
Creamy cheesecake meets delicious apple pie with this oven-saving no-bake recipe.
If not gluten free, use any kind of graham cracker crumbs for the crust. Greek yogurt can be replaced with an additional 8 ounces of cream cheese, and Lakanto can also be replaced with regular sugar.
Ingredients
CRUST
*134 g (6 sheets) Pamela’s gluten free graham crackers
*24 g (2 TBS) Lakanto granular monkfruit sweetener
*42 g (3 TBS) cold butter
*1 TBS water
CHEESECAKE FILLING
*224 g (8 ounces) 1/3 the fat cream cheese at room temp
*226 g (1 cup) nonfat Greek yogurt, strained overnight
*216 g (8 ounce tub) Cool Whip sugar free
*1 tsp vanilla extract
*1 tsp apple pie spice (can sub 3/4 tsp cinnamon and 1/4 tsp nutmeg)
*96 g (1/2 cup) Lakanto granular monkfruit sweetener
APPLE PIE TOPPING
*2 large honeycrisp apples, peeled, cored, and diced
*48 g (1/4 cup) Lakanto golden monkfruit sweetener or regular brown sugar
*1 tsp apple pie spice (can sub 3/4 tsp cinnamon and 1/4 tsp nutmeg)
*2 teaspoons cornstarch
Directions
- Line an 8″ springform pan with Parchment paper and spray with cooking spray.
- Dump the butter, 2 TBS Lakanto, and graham crackers in a food processor and grind until smooth.
- Add in the tablespoon of water and mix everything together til a wet crumb is formed.
- Place crust mix into prepared pan and smooth to the edges (I use cooking spray on my hands to make this easier).
- Freeze the crust for 30 minutes.
- Whip the cream cheese and yogurt in a stand mixer on medium high for 2-3 minutes until fluffy and smooth.
- Add in the vanilla, apple pie spice, and Cool Whip, mixing well.
- Add in the Lakanto or regular sugar and blend until smooth, 1-2 minutes.
- Pour cheesecake batter on top of the crust and freeze for 2 hours, until top is set.
- After peeling and chopping apples, spray a medium sauce pan with cooking spray and add the apples and golden monkfruit sweetener or brown sugar.
- Cook for 7-8 minutes on medium heat, until apples are soft and juices have been released.
- Add in the apple pie spice and cornstarch.
- Stir for another 2 minutes, until the mixture is nice and thick.
- Pour apples on top of cheesecake and smooth out.
- Refrigerate cheesecake overnight or freeze for 4 hours before serving.
- To get incredibly clean slices for photos, freeze for at least 4 hours and then slice.
- Keep leftovers in fridge or freezer and enjoy!
Nutrition
Macros
8 servings
290 cal/29 c/17 f/5.2 p per slice
You wanna a piece of me?! 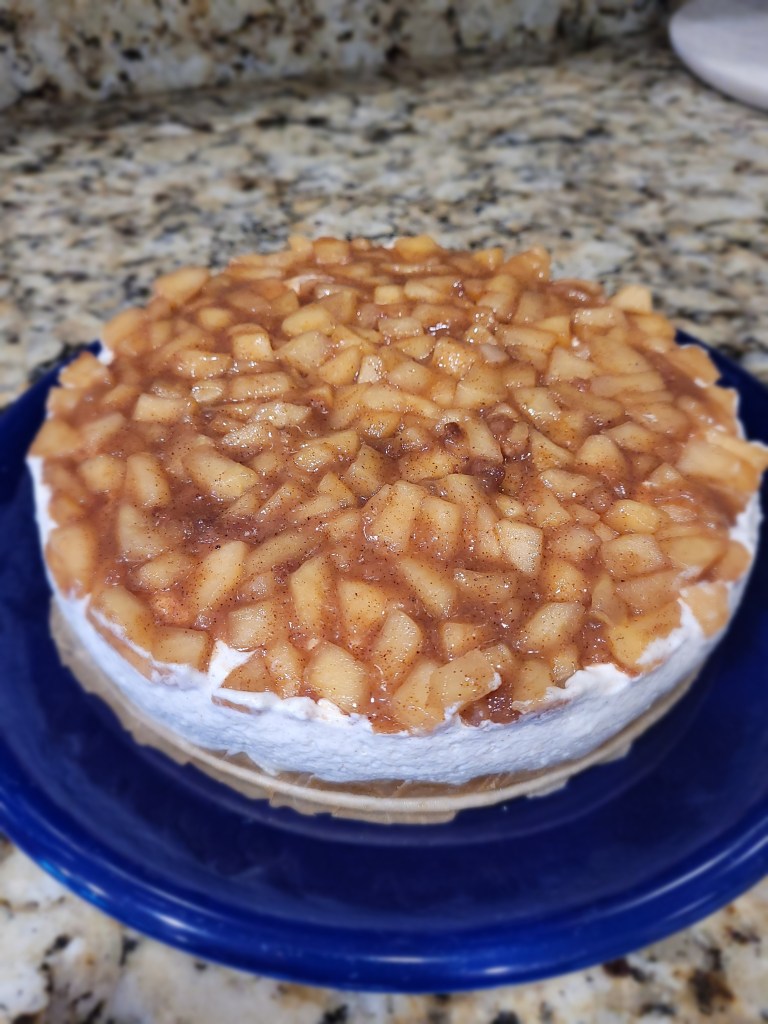
And we all lived appley ever after, thanks to this dessert mashup. - Line an 8″ springform pan with Parchment paper and spray with cooking spray.
-
Maple Sticky Bun Bars
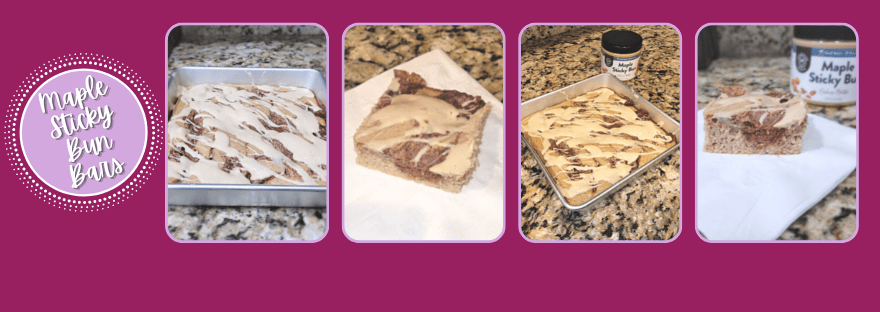
Okay, my love of nut butters knows absolutely no bounds; I pretty much try to have it at every single meal during the day. Breakfast? English muffin with cashew butter. Lunch? Traditional PB&J. Dinner? Pancake bowl topped with one or both nut butters (God, I love bulking season). American Dream Nut Butters did a pretty solid fall launch including some pumpkin flavors, and more importantly, a maple sticky bun cashew butter that’s got candied pecans and brown sugar chunks in a maple-flavored base. I want to bathe in this butter, it’s that good. I made the judgement call that it would be decidedly easier to bake with this butter, so these maple sticky bun bars with cream cheese + cashew butter glaze came to be. Whip up a batch, and you’ll see why. They’re soft, mapley, and decadent without being too sweet or over the top. Butter back off, you won’t want to share.
It’s a sticky situation. Recipe and Instructions
Maple Sticky Bun Bars
Soft, sticky maple bars great for breakfast or dessert (or both)
If not gluten free, use any kind of Kodiak Cakes or just-add water flapjack mix! You can also use your preferred whey protein flavor/brand.
Ingredients
*60 grams (~2 scoops) Quest vanilla milkshake protein powder
*106 grams (1 cup) Kodiak Cakes gluten free flapjack mix
*1 tsp cinnamon
*48 g (1/4 cup) Lakanto golden monkfruit
*1 tsp vanilla
*113 grams (1/2 cup) Greek yogurt
*60 mL (1/4 cup) sugar free syrup
*1/3 cup fat free or skim milk
*56 grams (1/4 cup) American Dream Maple Sticky Bun Cashew Butter
For the swirl
*24 grams (2 TBS) Lakanto golden monkfruit
*1 tsp cinnamon
*15 mL (1 TBS) sugar free syrup
For the glaze
*28 grams (1 ounce) 1/3 the fat cream cheese, softened
*28 grams (2 TBS) Maple Sticky Bun Cashew butter
*15 mL (1 TBS) sugar free syrup
Directions
- Preheat oven to 350 and grease an 8×8 baking pan
- Add in the protein powder, Kodiak Cakes mix, golden monkfruit, and cinnamon, whisking just until everything comes together
- Pour into prepared pan
- In a separate small bowl, mix the golden monkfruit, syrup, and cinnamon for the swirl
- Drop small spoonfuls of the swirl mix on top of the batter in your prepared pan
- Use a knife to trace swirls in the batter
- Bake for 16-18 minutes, until a toothpick comes out mostly clean
- Let your bars cool on a cooling rack in the pan until room temperature
- Mix together the cream cheese, cashew butter, and syrup until smooth; you want a drippy consistency, so add more syrup if needed
- Drizzle over cooled bars
- Slice and enjoy! Keep leftovers in the fridge
Nutrition
Macros
9 servings
149 cal/14 c/5 f/12 p per slice
All tapped out of my cashew butter after this…gonna need another order ASAP! 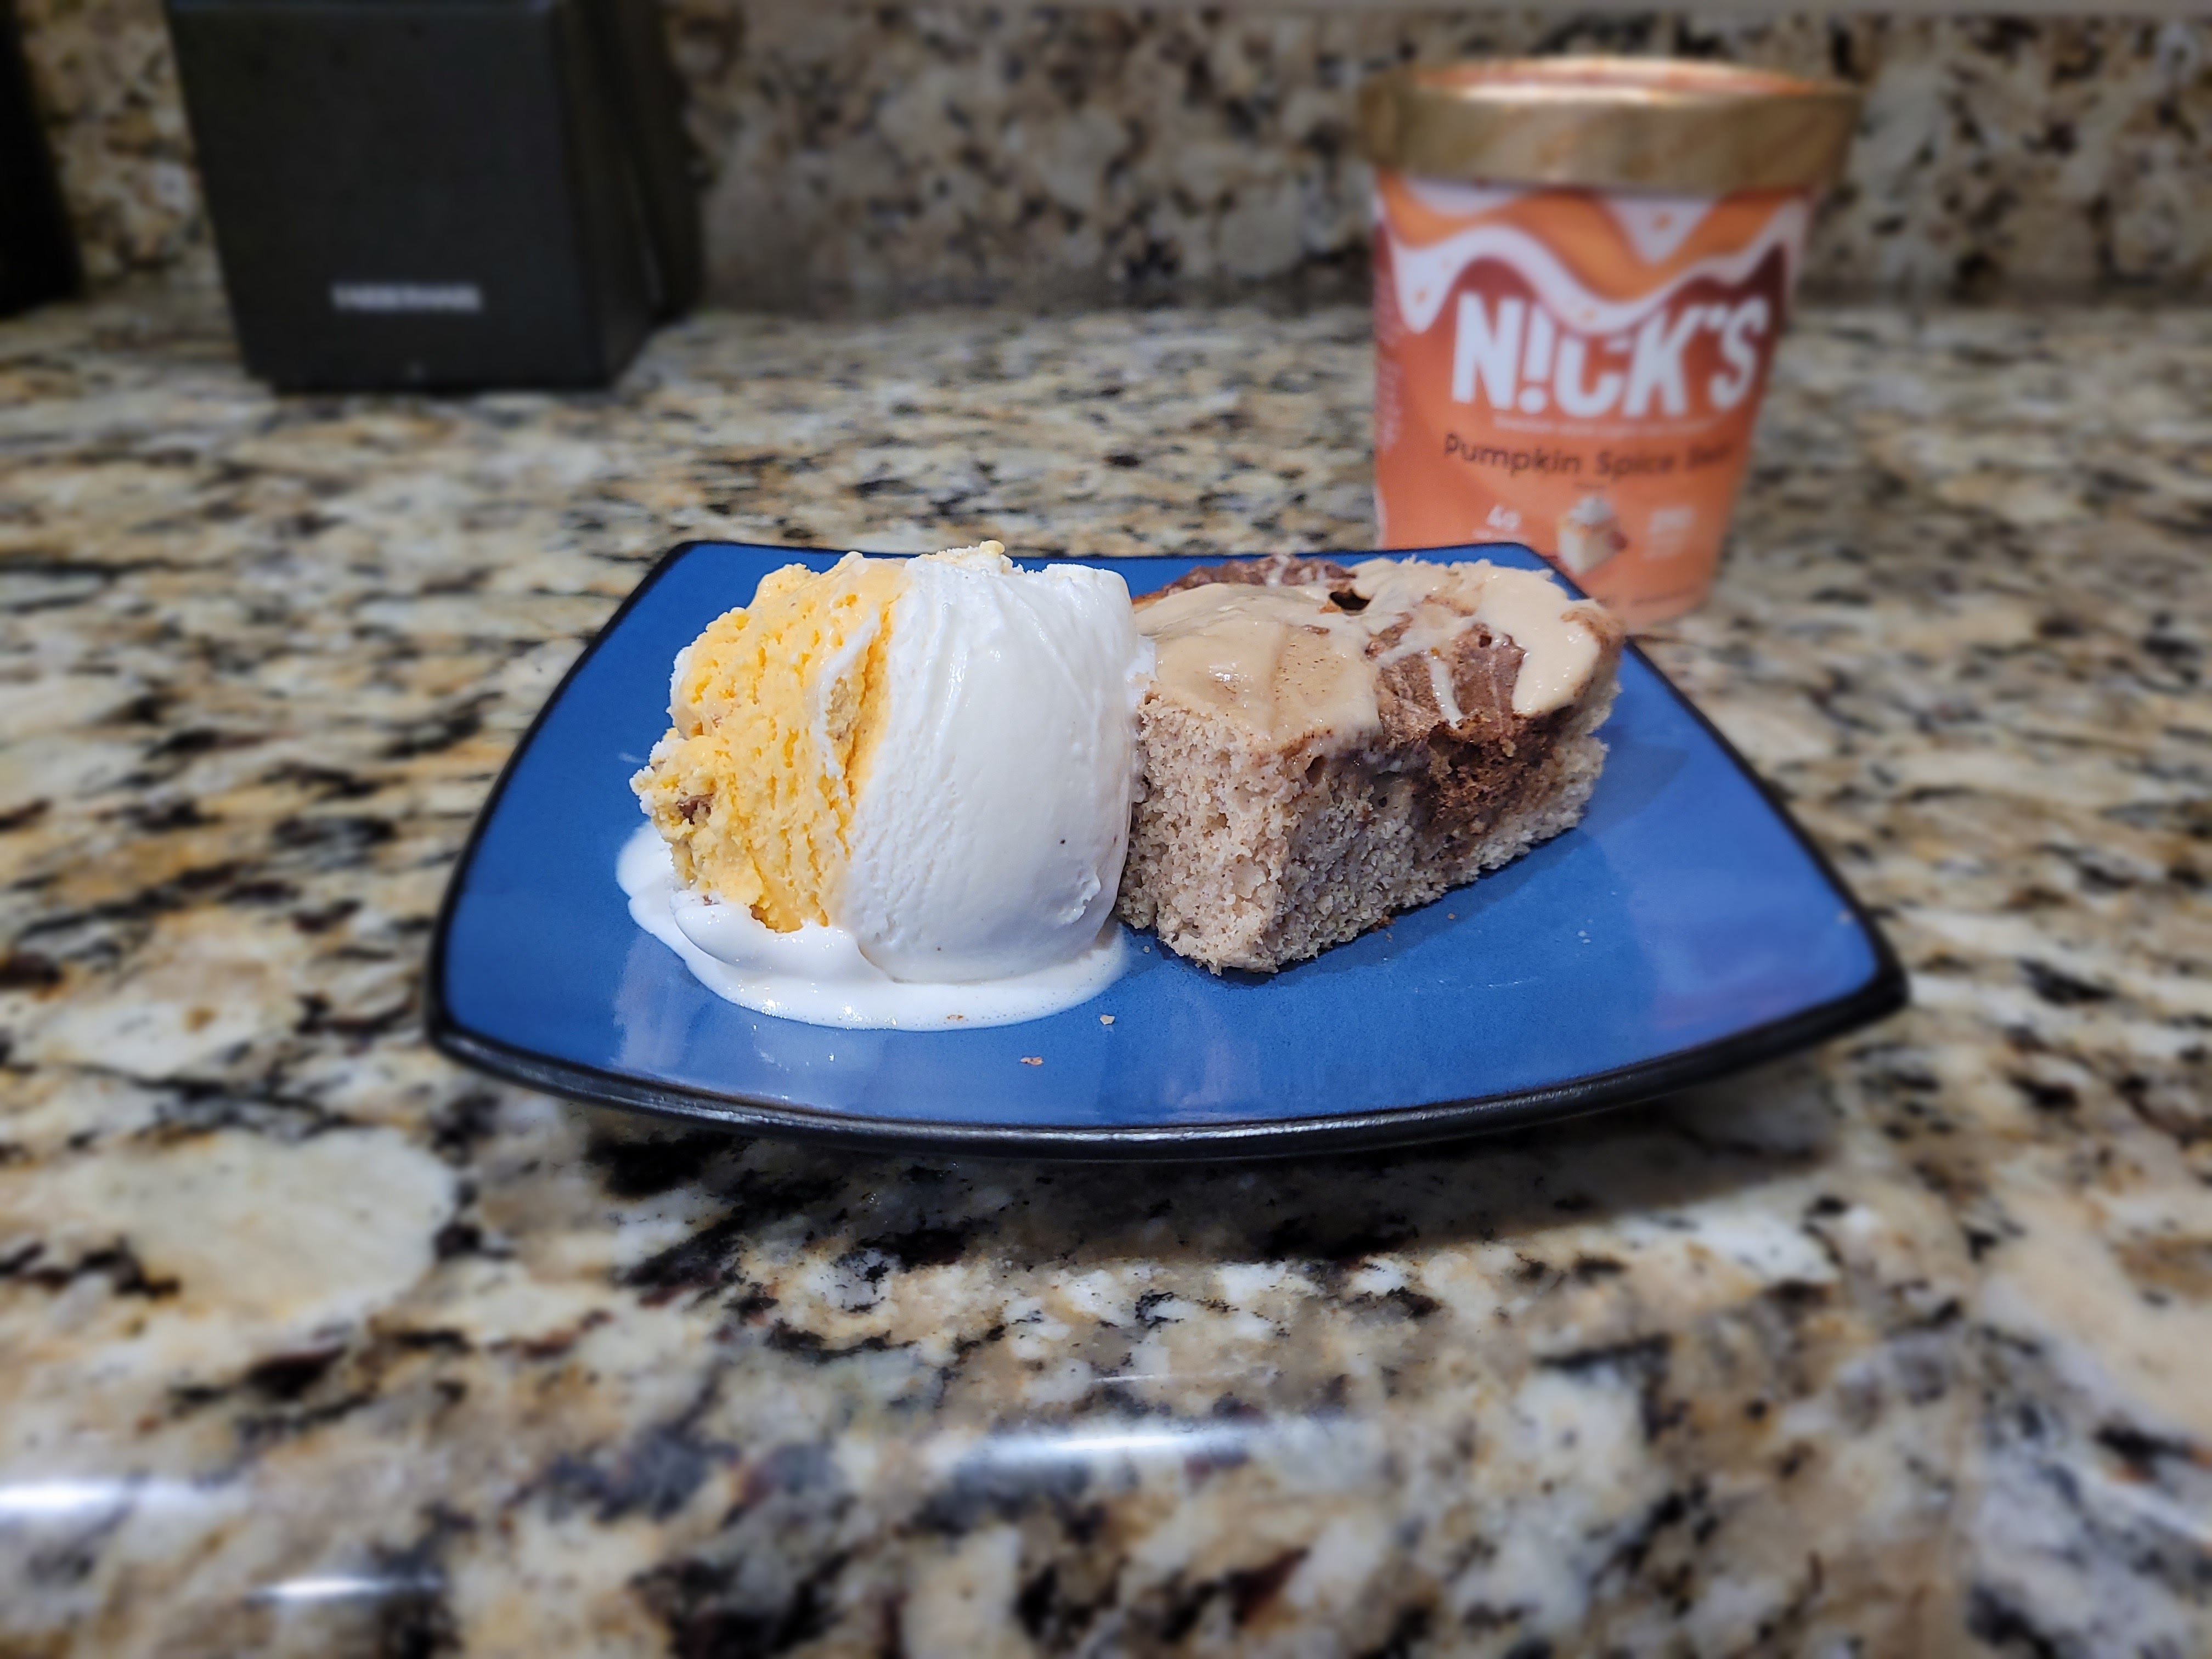
Didn’t think I’d let a fall recipe pass by without SOME addition of pumpkin spice, did ya? This pairs great with Nick’s seasonal pumpkin spice swirl ice cream! - Preheat oven to 350 and grease an 8×8 baking pan

Healthy-ish cake, cupcakes, pie, and cheesecake recipes and decorating tips
